


BANYAN
-
Posts
5,544 -
Joined
-
Last visited
Content Type
Profiles
Forums
Gallery
Events
Posts posted by BANYAN
-
-
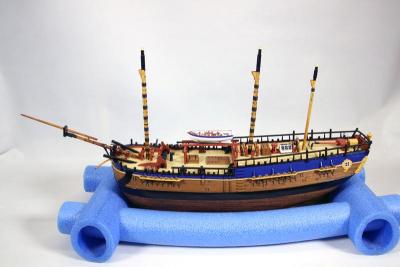
Hi again folks, another small update. I have started to dry assemble the mast components to check for fit, alignment etc. The following photo shows the start of the Fore Mast.
Thanks for looking in Dave and for your most kind comments - still learning quite a bit as I progress


- NMBROOK and avsjerome2003
-
 2
2
-
Hi Jim, have taken a photo and sent it to you, will repost on here when I am home (site was down yesterday and didn't have a chance to post it online). From what I have achieved so far, LH makes up nicely; still having some problems with RH. I should be more specific in that I am attempting to make RH from RH stocvk thread without going throught the interim process of making LH first - call me lazy! If anyone finds a stockist of LH threads please give a holler (as I asked first.....
)cheers
Pat
-
Thanks Mike; just got the Admiral's OK for the bar fridge too - won't be long before I can live in it (Now maybe that's why there's no resistance from the Admiral ........

Mate, the other place I was tryiong to think of was DCC Concepts. try: http://www.dccconcepts.com/
cheers
Pat
-
She looks just as nice second time around Chuck (and is a timely reminder for me to dig out my partial build and complete it
)cheers
Pat
-
That serving is first class Garward, very much to scale also. What is the thread you are using (looks like some form of unit thread for fly-tying?)
cheers
Pat
-
-
Ditto - very very nice work on tose blocks (now, if you are thinking of trashing one or two yoiu are not completely happy with, just send them my way, they'll be better than I could produce right now
)cheers
Pat
-
Hi Cog, I also prefer to Silver Solder, however, I have found for smaller items (such as deadeye straps, closing eyes etc) that a gas powered pencil iron (butane gas ) with solid pointed tip provides sufficient heat (bigger jobs will need a the open flame).
For your jon where you need a bit of strength the silver soder would be better (as Russ has pointed out). Using a tip oon the torch also has better control to mimimise any scorching of the wooden deadeyes if you are soldering anywhere near them.
Good luck
Pat
-
Hi Martin, I have just received a Foredom (Xmas present). Yet to put it to serious work but I am very happy with it; well made, well powered (more than you will need for model decorations unless carving solid hulls), and looks solid
. The only small disappointment is that the flex shaft is just a bitt short, another 200mm would have helped (for me anyway). The flexshaft is considerably heavier in the Foredom (than the dremel) so you need to have the motor high enough to take some of the flex-shaft (plus handgrip/tool) weight. That is where for me at least, that little extra length would have helped balance it a bit more.cheers
Pat
-
I have just had a session on my repaired machine (thanks Jim) - the spool pully belts were loose. It is making up nice LH rope now.
When Jim says to keep the tollerance of the die hole small around the threads, he means TIGHT
When he returned the head, he left some polyester on there for me which was the excess of his tests. I had a LOT of trouble getting all threads through but Jim says that was the die to use. I eventually got it through and away it went first time this time.I think the loading of the spools plays a big part also. I noted that the spools Jim had loaded were not quite as tightly wound as mine had been so I will need to experiment there. I have made up a bit of a jig to assist me in this (I'll take a piccy tomorrow and post it.). I'll need to keep experimenting
The last run I made was with polyester (too stretchy for my liking but I am hardening it to see how it goes). This was a continuous run of about 10metres, and except for a couple of small imperfections when I moved my hand on the tension wheel as I got tired, the rest looks great.
The next test/trial is to try and get RH thread.
cheers
Pat
-
Thanks for looking in and your kind comments, John, Carl, Kevin, Slog and Sherry.
cheers
Pat
-
Thanks for the pics Meredith, can we impose on you to let us know which ones you think work best as you do your trials (I'll to do the same but my range of threads is not as great as yours
)BTW - do you plan a trial of RH lay in the near future?
cheers
Pat
-
Thanks for reposting this build-log Ilhan, it is a very good build, an interesting ship, and I very much enjoy following your work.
cheers
Pat
-
Hi Augie, and why not - it makes "cents" to me
- sorry mate, couldn't help it.John, many thanks.
cheers
Pat
-
Hi Meredith, that is terrific. I note though you have only laid up LH rope to date; have you tried RH?
Most interesting noting you can work several strands on each spool. I had been planning on experimenting with that, but you have saved me the trouble. Thanks for that great feedback.
I am also considering a trial using a core (back fed spool) using a stiffer or larger rope. Just need to get my machine back together before I can progress
Thanks for the superb service there Jim, much appreciated.I also would be very interested in any discussion on the best thread to use as I have experimented with Rayon, poly-cotton and silk. THe Rayon was too weak and kept breaking, but if I could get it to work, I think would make very nice rope. The poly-cotton has worked best so far but is far more susceptable to stretching and needs more hardening
The linen proved very difficult to use and when Jim looked under a sample under a microscope, he said the thread diameter was variable and looked "awful". That said, it may have just been the brand/type I was trying and may not be true of all silk.cheers
Pat
-
Hi Mike, there are plenty of places selling these sorts of products here in Oz. There is a supplier in Perth that used to sell Carrs Brass Black; just can't think of the name at the moment (will need to search through my records). Also many gun shops sell Birchwood Casey "Brass Black" (for repairs to gun barrels). May pay to have a search around.
cheers
Pat
-
Thanks guys, now back to the building board
cheers
Pat
-
That is some very excellent craftsmanship Remco. I just lookked back through your log, and second time round really makes you appreciate how fine a job you are doing. That piccy of the tiny key you made is just .... well puts my efforts to shame
cheers
Pat
-
I think they have to be some of the best canon I have seen made Alex. Did you use a duplicator when turning them? if so, could you show a pic of your set-up?
cheers
Pat
-
Thanks for looking in Brian and Mark; appreciate the comments. Let's hope all the old logs reappear here, there were some wonderful builds.
cheers
Pat
-
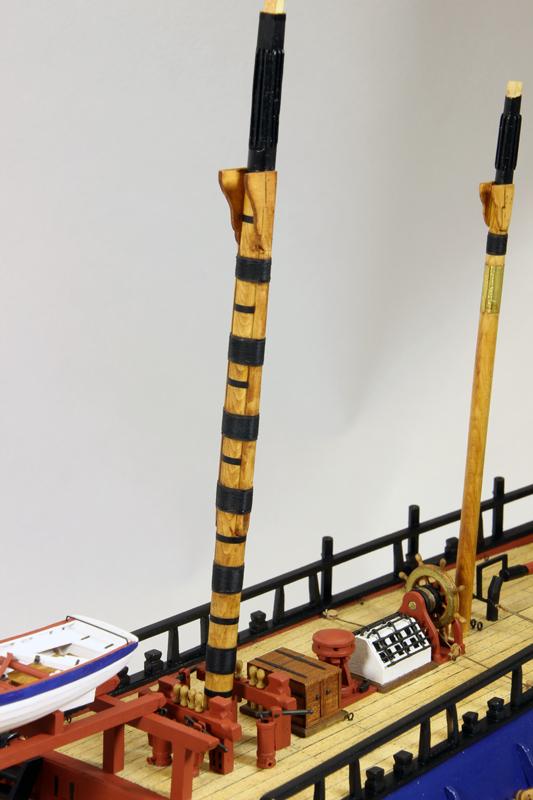
Upper Masts
The upper masts were fashioned much like the process used for the lower masts. I have tried to make these from a single piece so that they are straight and stronger. With one exception I managed this but the Mizzen top mast "got away from me" when I was milling the six-sided conical shapes and I had to cut it out and pin a new one in.
To ensure I had enough 'meat' in the stock for each process, I learned the hard way that I had to leave enough meat (diameter) in the round for the size of the future conical pieces and the masts caps etc and do a double taper design.
Well, that's me caught up folks, I hope you find this log useful.
-
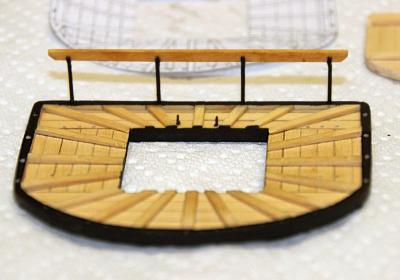
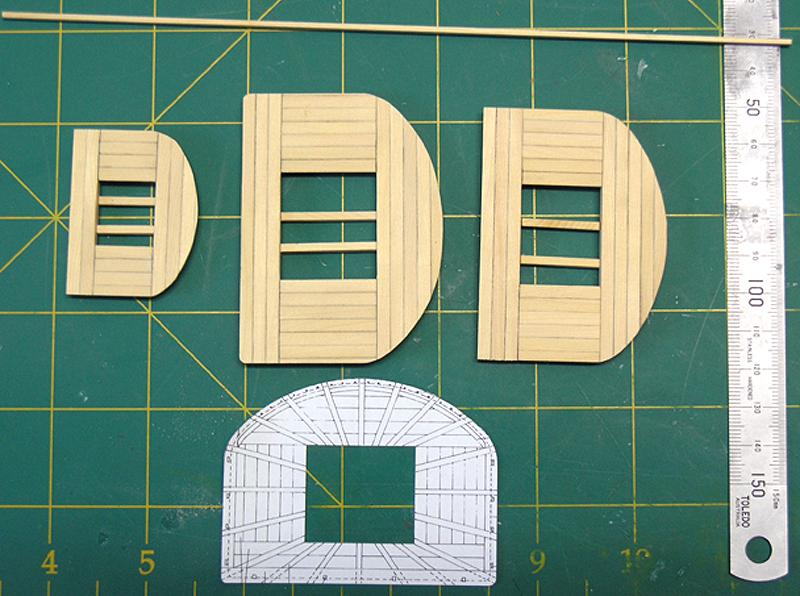
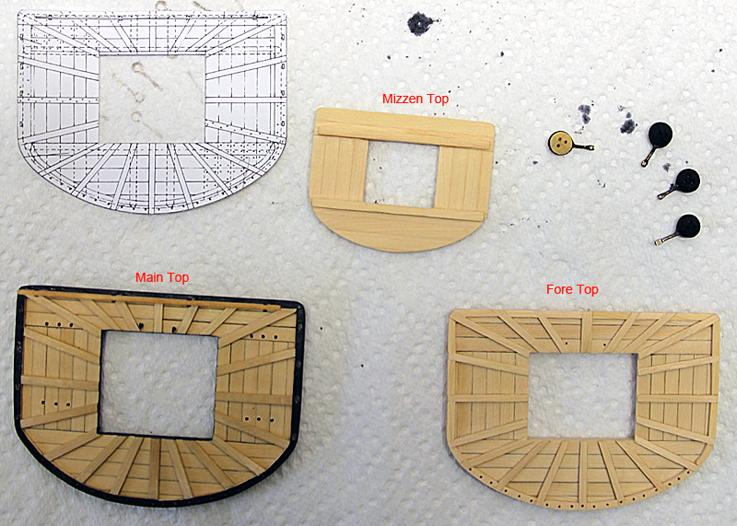
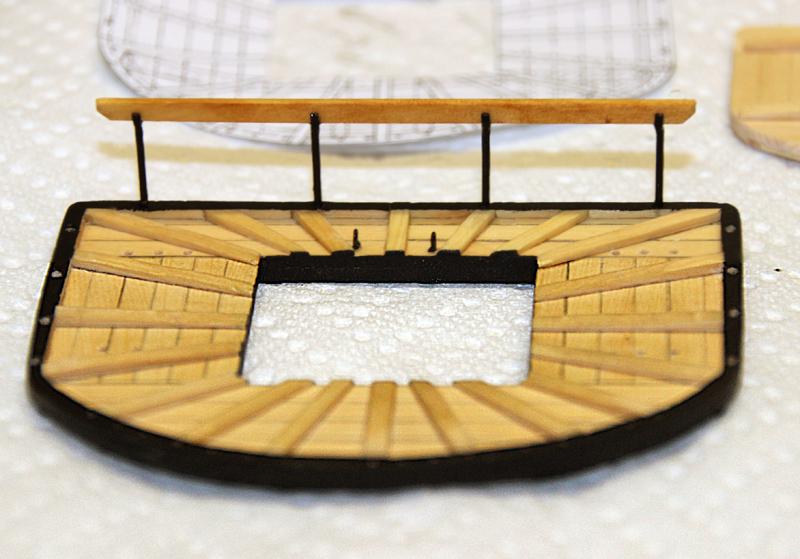
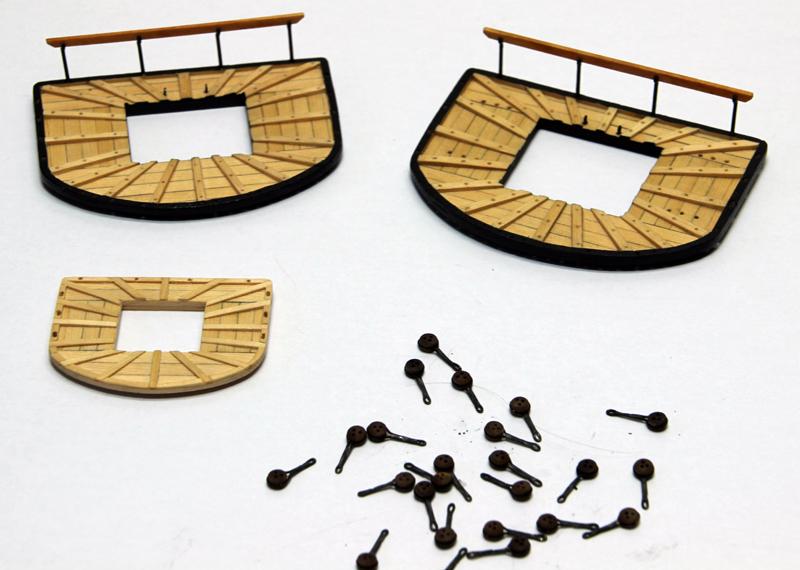
Tops
With the lower masts constructed, I have moved onto the tops and as you can see, my planking technique is improving but I have some way to go yet. I do not intend using plank joint trennels on the tops as the scale is much too small. I have now tried several different ways of simulating the caulking and have settled on using a 2B pencil rubbed along one edge of the plank as the best finish at this scale.

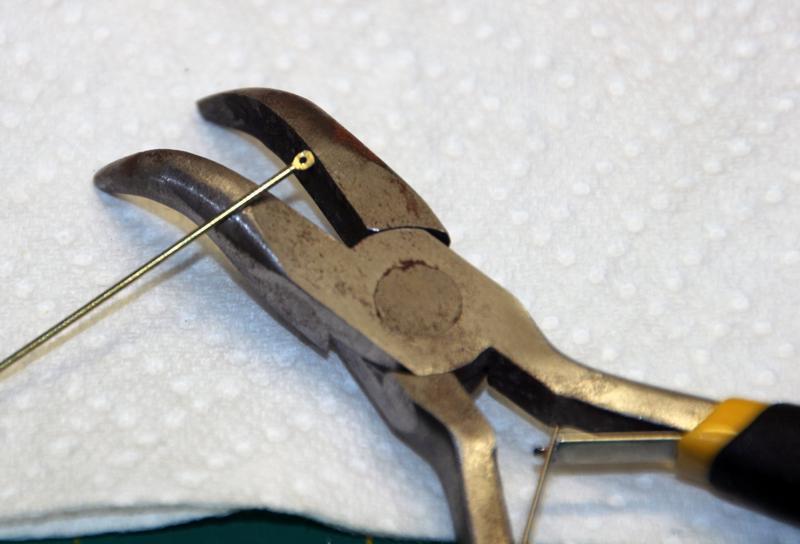
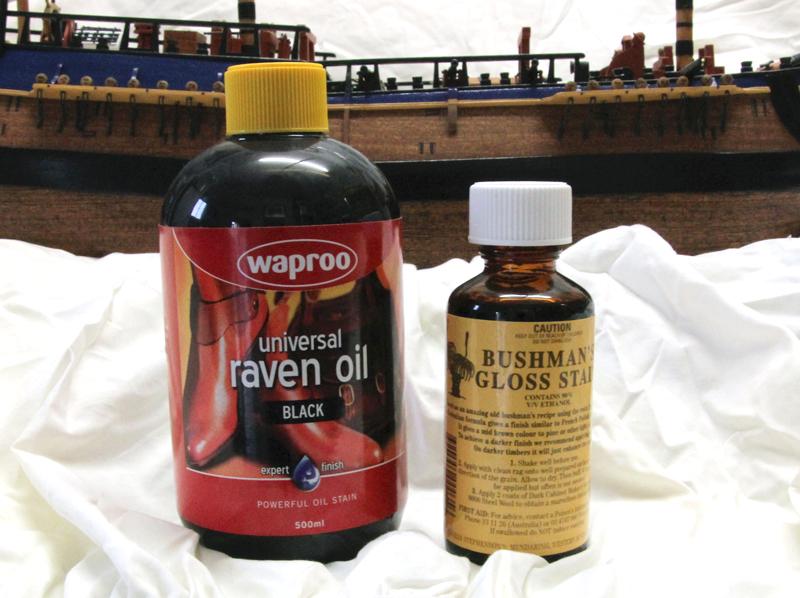
The trestle-trees are just loosely fitted and will be adjusted to their correct position when the tops are fitted to the masts. I have yet to do the trennels for the platforms.It took me a while to determine the best technique to create the futtock deadeyes and straps. Eventually I realised that I could create the eye for the deadeye from brass wire. Soldering this closed is not such a problem as these deadeyes are black, and a coat of Raven Oil soon hides any char/scorch marks. I then flattened the tail using a pair of flat jaw pliers (no grip pattern on the inside of the jaws). Once the tail has been flattened and cut to length I drill a small hole for the hooks that will secure the futtock shrouds.


The completed top platforms are shown below along with the futtock deadeyes ready for mounting when I assemble the masts.

- avsjerome2003, dashi and NMBROOK
-
3
-
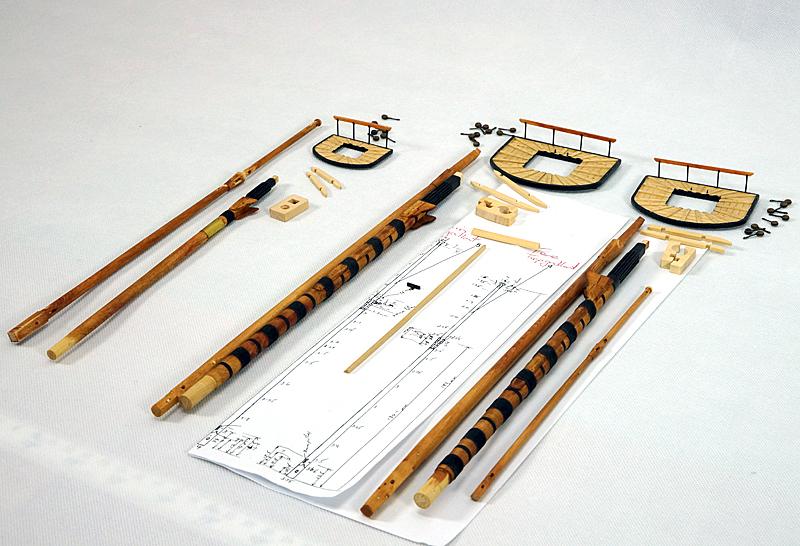
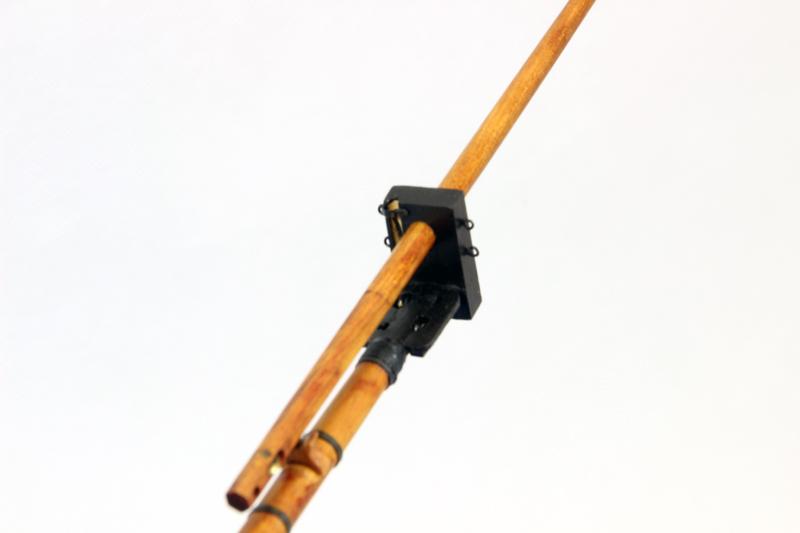
Lower Masts
The next task was to make a start on the masts. Unfortunately, in my early days of construction I did not fit partners. I am currently trying to determine a good way to add these without making them an obviously tacked on afterthought – another valuable lesson learned.
After some experimenting with turning on the lathe etc, I found the best method to create the compound tapers of the masts was:
- Reduce square stock to an octagon, and then to 16 sided, using a v-channel and small jack plane. I put the marked square stock into v-channel which is held in a vice. A small bolt at one end provides a stop for the stock while I shoot; the bolt head is set at a height that will not catch the blade at the smallest dimension of the reduced stock.
- Chuck and spin the reduced stock in the lathe while using various grades of sandpaper to create the round at the appropriate diameters. I used a digital calliper to measure the diameter, stopping more frequently to check measure the closer I arrived to the required dimension.
- I then used the mill to cut the flat faces for the fish and cheeks and upper flats. The angle plate attachment is ideal for adjusting the spar to a angle that when held in a machine vice, produces an even cut along to the tapered angle of the mast, to ensure a level cut.
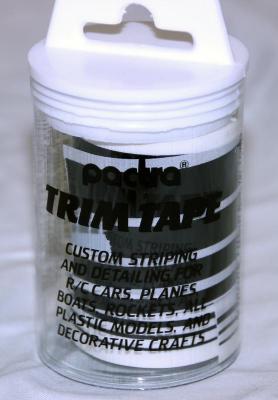
I have used vinyl pin stripe tape (used to simulate racing strips for RC cars) to simulate the recessed steel bands, and thin strips of negative plates (used in the printing industry) to simulate the iron bands where they stand proud. The negative has a flat black finish which looks like blackened brass, and is to handle and glue with CA (gel).

-
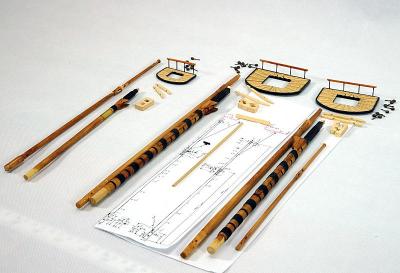
Bowsprit and Jib Boom
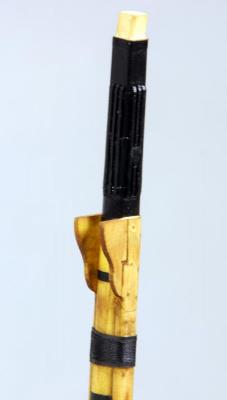
The first spars to be produced were the bowsprit and jib-boom. I have used the design of the solid/joined knightheads found on the Endeavour replica. As this was to be painted I made it as a solid piece rather than constructing the chock between the knightheads.
After dimensioning the bowsprit, I soaked it in boiling water for 20 minutes and left it to dry on a former under clamping pressure. I have used brass sheaves in the bee, and
created a recess with and iron clasp in the bowsprit cap to hold the Jack staff which will be fitted when I have completed the rigging.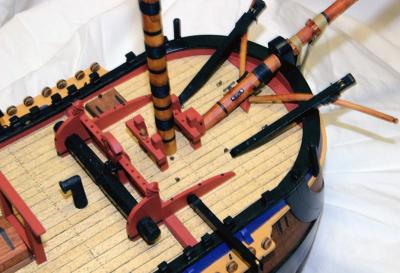
I have used Huon Pine for the jib boom and masts and stained them with Bushman's stain. This is an Australian product made from natural products found in our bush. The resulting finish is very close in appearance to the varnished masts seen on the Endeavour replica.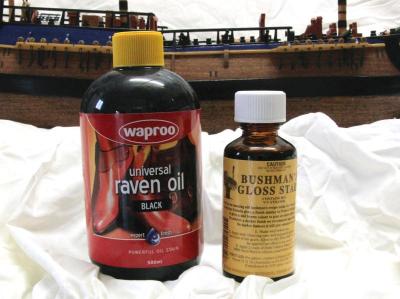


Byrnes Rope Walk
in Modeling tools and Workshop Equipment
Posted · Edited by BANYAN
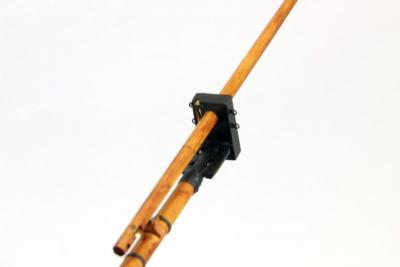
Here you go Jim, a first up photo of LH vs RH rope made on your machine. The LH laid rope is shown on the right. Ther RH laid is formed from RH stock as I have not made up sufficient small stuff yet - just seeing if I could short-cut the process; but, it looks like I have to make up the smaller stock in LH first.
I need to get a macro lens for this type of photo I think - this photo is taken at short notice and really does not 'cut the mustard' so to speak - sorry for the poor quality. Only a bit of each scale rope is in focus, but it shows the uneven lay of the strands in the RH laid rope (to the left) within the circled area.
cheers
Pat