


BANYAN
-
Posts
5,544 -
Joined
-
Last visited
Content Type
Profiles
Forums
Gallery
Events
Posts posted by BANYAN
-
-
Great to see you back Toni, and great news that you will repost your 'edited' log. BUT, please leave some (a selected few maybe) of the attaboys/gals in it just as a motivational thing for the future when it sometimes may seem to be all a bit of a 'slog'. You were (and continue to) doing some very nice work and its good to have some of the positive feedback there. At the same time I cann see the benefits of a 'streamlined' log.
cheers
Pat
-
Hi Gary - Awesome - I was hoping you would repost that magnificent build! I look forward to reaquainting myself with the fine lady.
cheers
Pat
-
Great to see this build-log again Garward; this is an examplary build of a battle station. I especially like the canon which are so finely detailed.
cheers
Pat
-
Great to see you back Alistair along with your repost of this fine build; as you say, a great reference for others building this kit.
You did a great job with her.
cheers
Pat
-
Great to see you back Pop-eye. Now all we need are some M&Ms

cheers
Pat
-
Hi Andy, great job in 'cherry-picking' your photos; that's a great summary of your build. I particularly like your quarter badge window modifications.
cheers
Pat
-
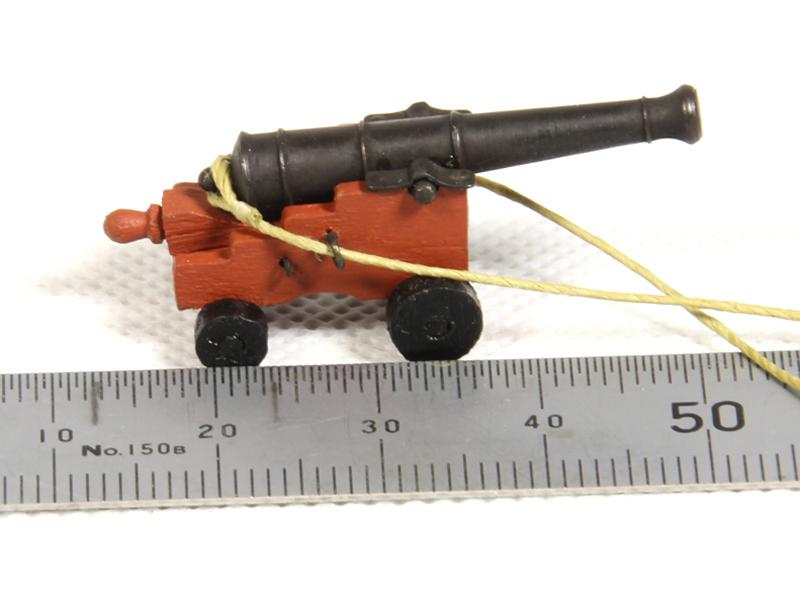
Hey John great to see you and this great build reappear. Could I ask that one of your next posts includes a scaling device or ruler so that newer folks see just how small a scal you work with?
Popeye - we'll look forward to the
 when you are appointed
 cheers
Pat
-
Nice to see this build-log of a very fine model again Ilhan, I hope youu repost some of your other very fine builds also?
cheers
Pat
-
-
Great to see your fine build on dispay again Alex; I have very much enjoyed watching your fine craftsmanship.
cheers
Pat
-
Nice to see this fine lady gracing our build-logs again Russ. Such sweet lines don't deserve to be hidden away on some HDD or the like
cheers
Pat
-
Great to see the log back Greg; this time I haven't missed it until quite late
- will follow this with interest.cheers
Pat
-
Great to see the log being reassembled. Reading for the second time has been instructive as I missed a few great tips the first time through.
cheers
Pat
-
Hi folks,
If you are a scratch builder, or like to make your own stock timber, then Australian Furnture Timbers in Port Melbourne are also helpful and will allow you to purchase 1 meter lengths. You will need to be able to resaw/mill the large planks into billets yourself (or find someone to do this service for you). They have a wide range of timbers and the staff have always been very helpful (no financial interest etc; just a happy customer
)cheers
Pat
-
Hi Meredith, Brian is referring to me
- shoot me a PM and I will pass contact details. It will be interesting to discuss this as I have similar issues.cheers
Pat
-
Anchors
I have made but not fitted two of the anchors. These are made from Caldercraft anchor kits that I have modified to suit. I will fit these after the rigging is complete (another sleeve catcher).
-
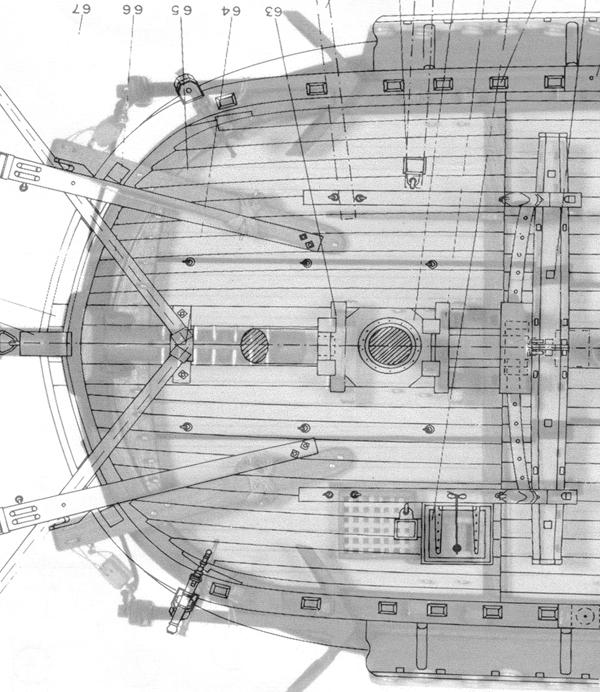
Catheads, Fish Davit and Boomkins
To determine the correct positioning of the catheads and boomkins, I scanned and overlayed then scaled the Marquardt drawings over a scanned copy of the plan from the kit. By resizing these in Photoshop to ensure I was using the correct scale (1:60), I was able to determine their relative position on the forecastle as shown in the graphic. I also tried to ensure the fixings for these aligned with longitudinal beams (strength).
The boomkins are made from Huon Pine that have been reduced to a dowel from square stock, then tapered with sandpaper while spinning the dowel in the lathe. I then bent the completed dowel around a former after soaking in boiling water and leaving to dry under clamping pressure.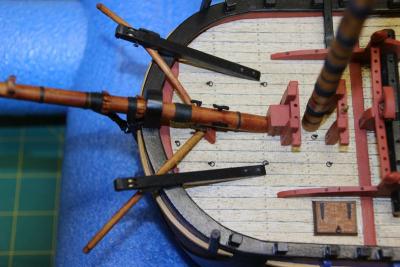
The fish davit is made from 4mm square walnut stock and is fitted with brass sheaves. The difference in the photo colour and brightness is the result of a change in camera and I am still trying to get the white balance right for the new one.
-
-
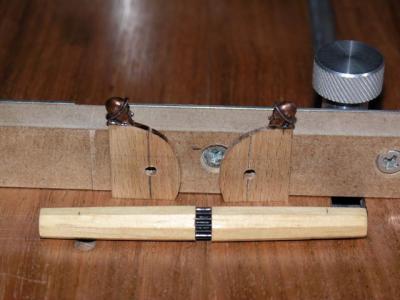
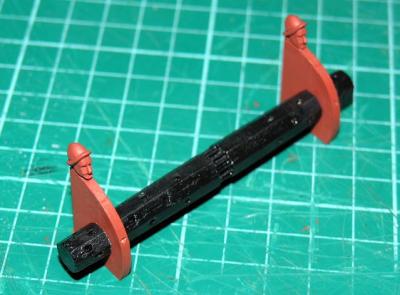
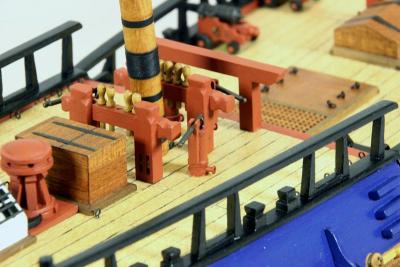
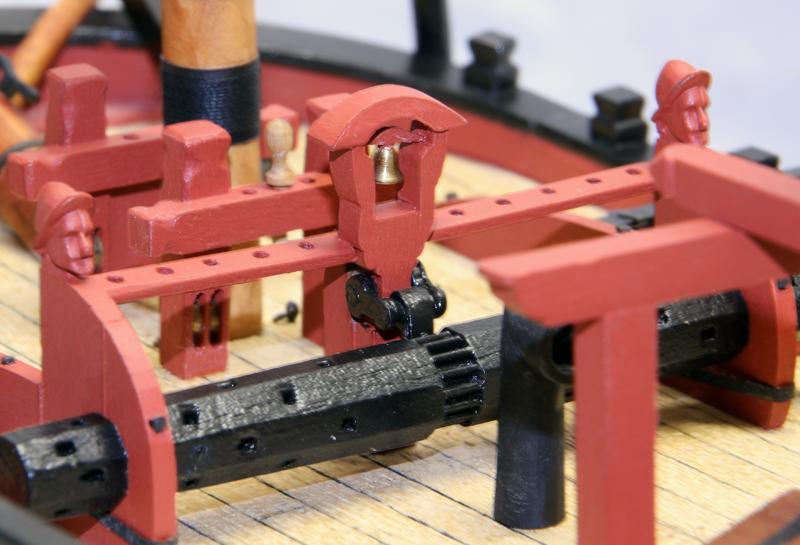
Windlass
This was an interesting exercise that resulted in acceptable (but not great) result. I have learned a lot from this activity, and I will use a harder wood for the barrel in future efforts. The windlass barrel was formed by grinding/sanding flats along the length at an angle to create the camber; next time I will use a cutter. I did this using a mill with angle table attachment to have a level grinding surface but apply the correct degree of bevel. I am also a little unhappy with the alignment of some of the pawl holes in the finished product.
I recut the carrick pieces from wood rather than use the metal versions provided in the kit; however, I did retain the carved heads and refitted them (too lazy to carve them myself). The pawl notches are a small cog taken from an electric cordless drill (thanks Neptune for this idea and for the cog). I have not fitted the cable cleats yet as they will be too delicate and would suffer during the rigging process. They will need to be fitted before I fit the foremast shrouds.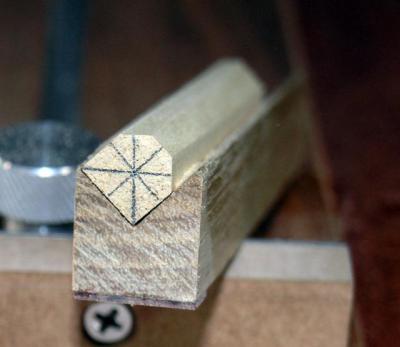
-
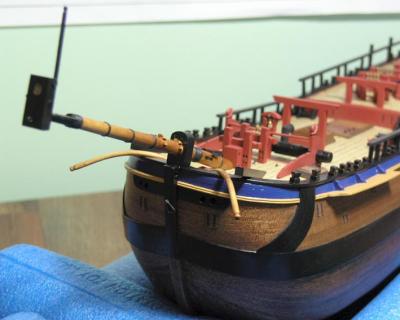
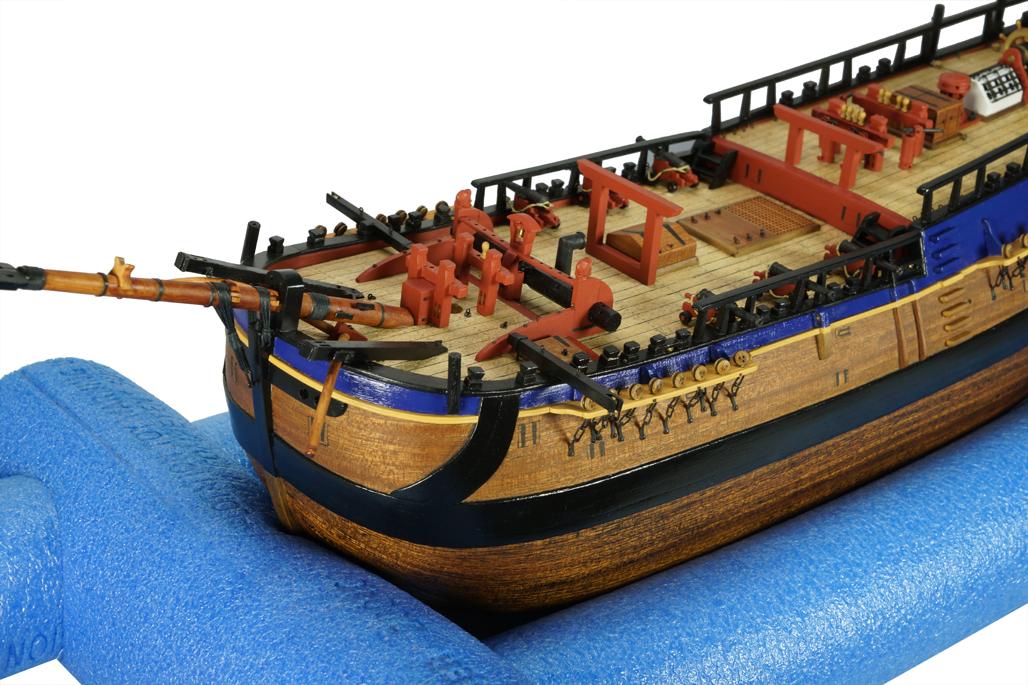
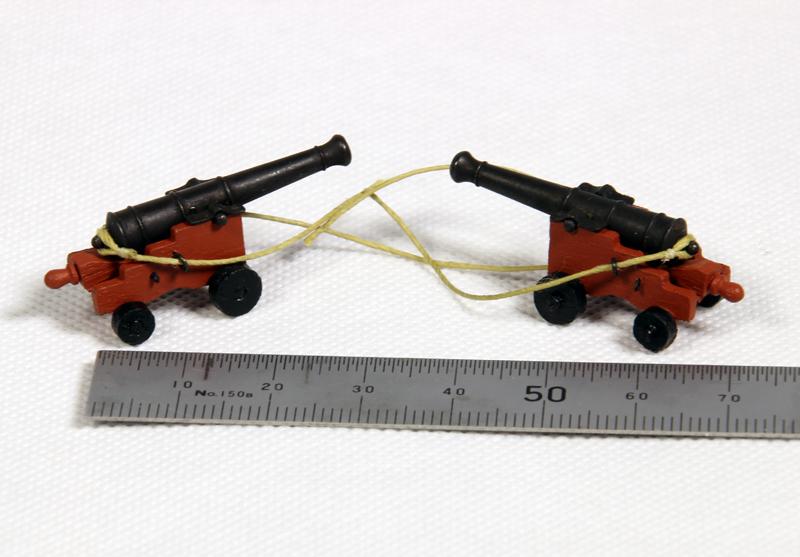
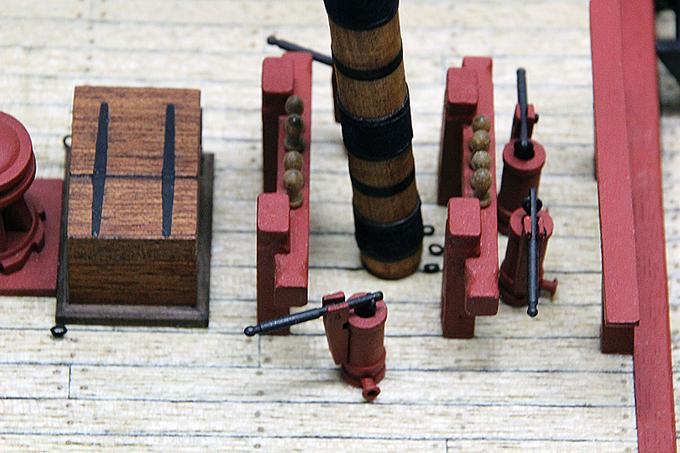
Armaments
Endeavour sailed with 10 x 4-pounder canon, 6 were mounted on deck and four in the hold which were brought up for shore defence when the ship was in Tahiti. The actual positioning of the deck canon is open to conjecture; some depictions have a pair on the quarterdeck. I think this latter configuration unlikely as it would have interfered with the working of the ship, especially during survey.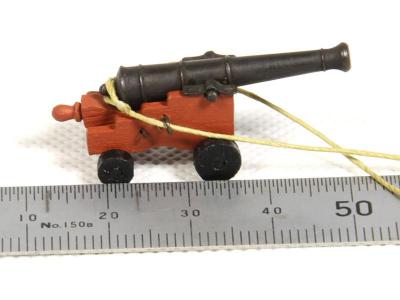
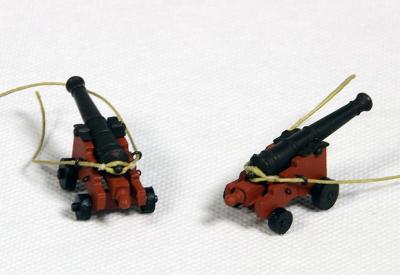

In the following photograph, the canon are shown mounted in-situ with barrels blackened (old photo - before I replaced the breech ropes). Only the breeching ropes have been fitted as fitting the various tackles etc looks a little too 'busy' at this scale. However, I may yet be tempted to have them fitted in a 'stowed-for-sea' configuration.
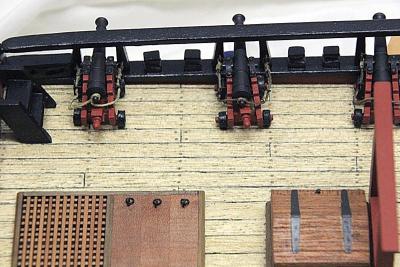
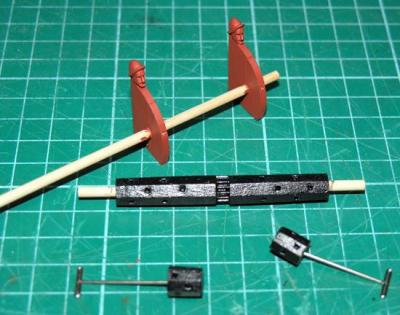
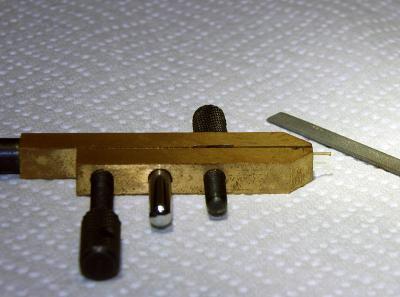
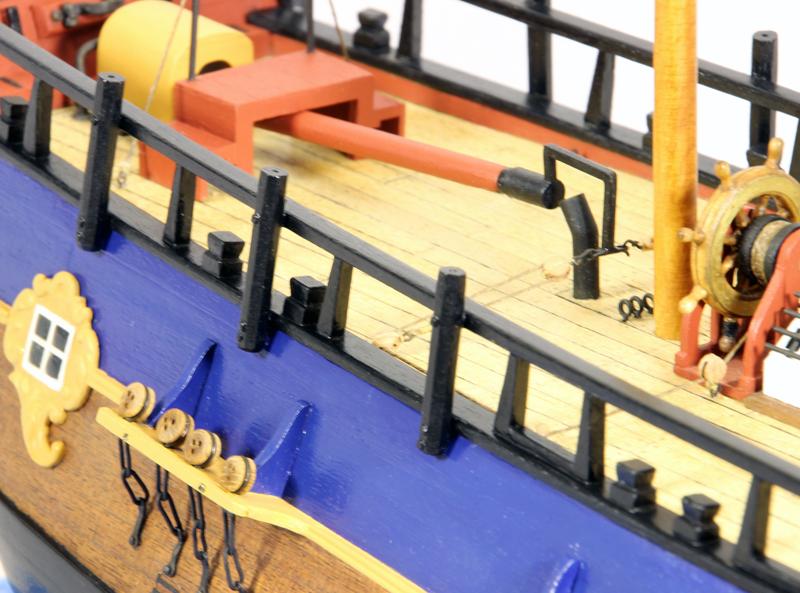
The ship was also fitted with 12 swivel guns, the posts for which I have made from Huon pine and shaped to octagonal before notching to fit against the cap rails, and bolted to the outside of the quarterdeck. I simulated the bolts at the base and cap rails of these posts, and elsewhere, with brass pins for which I had filed the round heads flat and square. I was able to do this using a hand-vice (pictured) and needle files. The swivels will be fitted after completion of the rigging.
-
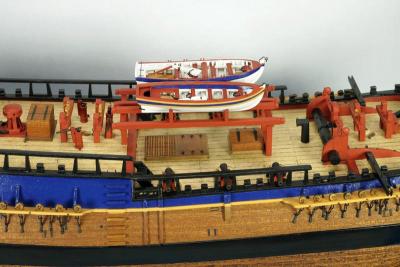
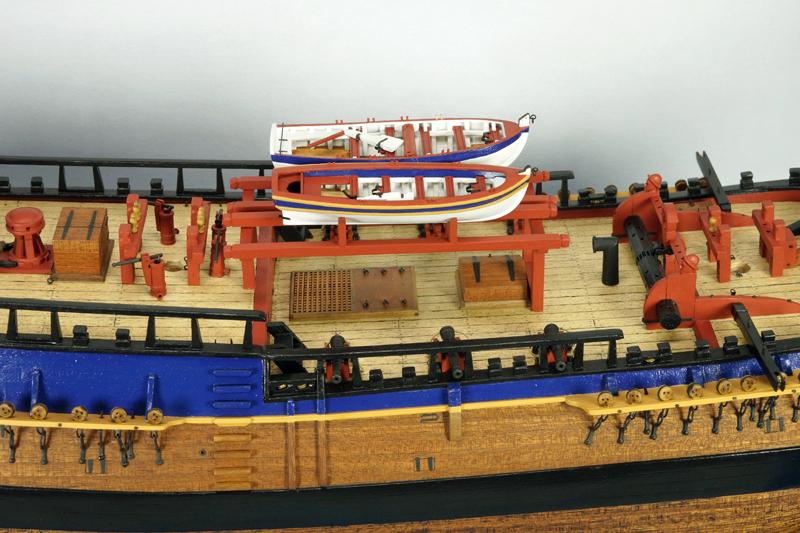
Boat Stowage
The boats are mounted to the gallows rails which are lashed (still to be done) to the spar gallows in the waist, as shown in the following photograph. One of the perils (or advantages depending on how you look at it) of close-up photography is that it shows blemishes much more clearly than viewed by the naked eye under ambient light. One further touch-up job I have is to put another coat of blue on the upper strake of the longboat and then add the yellow ochre rubbing strakes.
The Cutter and the Yawl are yet to be made and will be nested on/within the existing boats using chocks sitting on the thwarts. Gripes and sea lashings will be fitted on completion.
-
Pinnace: The pinnace was made using the more traditional method of a plug (or mould) to build the shell (planking) into which subsequently the ribs were added. Chuck was kind enough to reduce the plans for his pinnace design for me to build from. However,, this tie I was not able to use his construction techniques, as unless the sacrificial bulkheads are cut by laser, they are too fragile to use at this scale.
Chuck's pinnace design with the false/extended transom removed, was an almost identical fit to that proposed by Marquardt, so these plans were a great start to this mini-project.


-
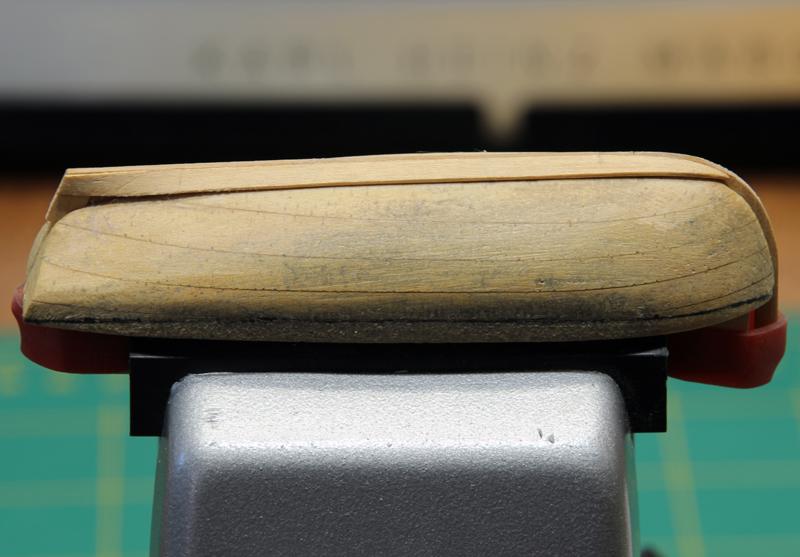
Boats
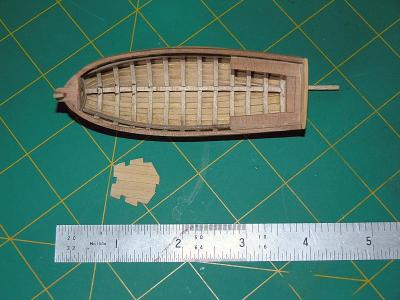
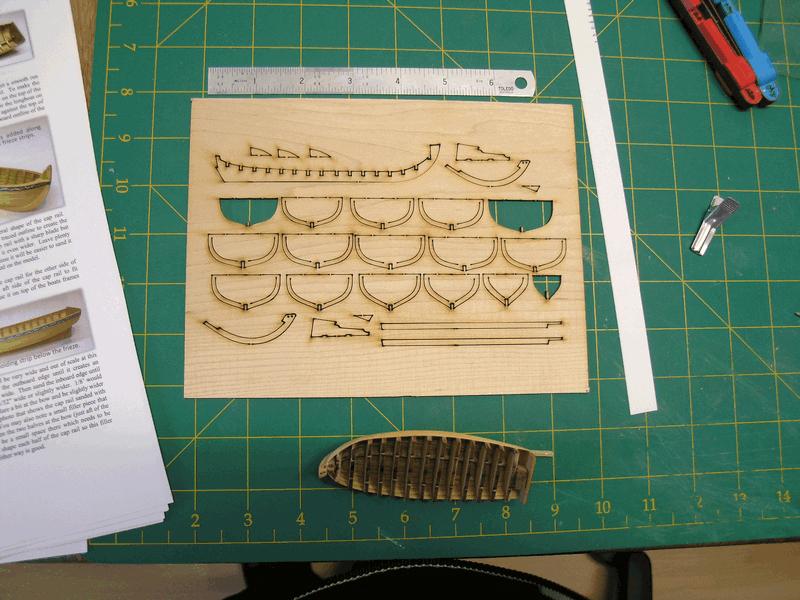
Longboat: After several unsuccessful attempts to build a plug (see picture) on which to build the boats, I was fortunate to be offered a 1/64 scale version of Chuck's 26 longboat templates. I have included photos of some of these plugs which were designed for the cutter; I may still use one of them. These are all sandwich constructed with two of them using vertical slices ('sliced bread loaf') and the other the more tradition 'bread and butter' horizontal slices.
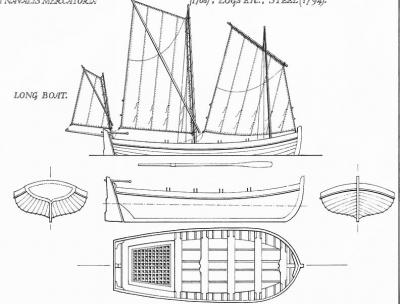
When I received the smaller laser cut template from Chuck (many thanks), I did not have intentions of using it; rather, I was more interested in the larger 1:48 version he had created. However, when I looked more closely at the smaller scale version provided by Chuck, I noted that, with very little modification, it fitted nicely to the dimensions of Endeavour's Longboat as described by both Ray Parkin and Karl Marquardt.
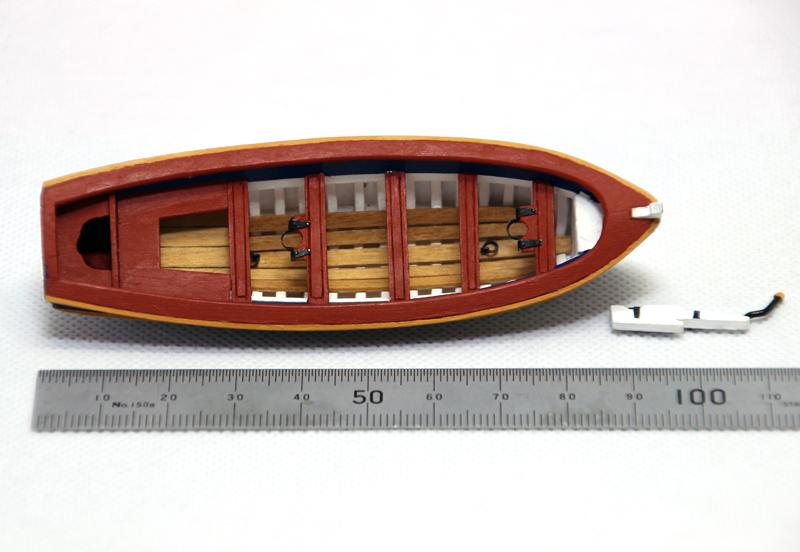
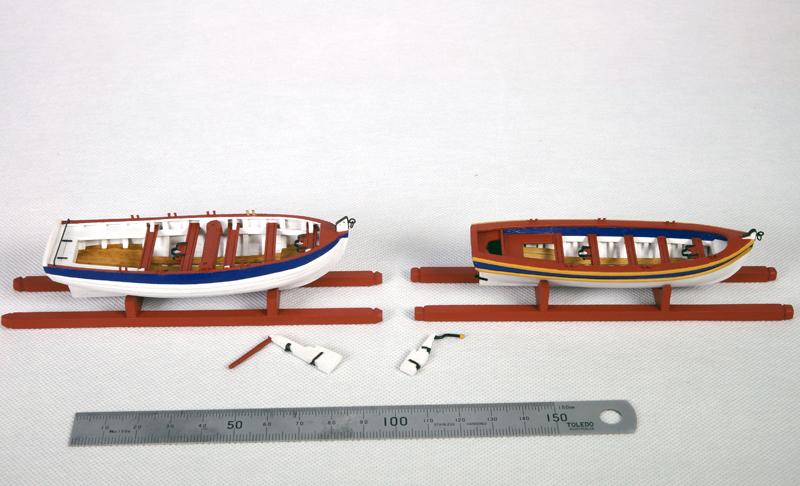
Both authors agree that a shorter and fatter (in the beam) design would have been required, with the shorter length to allow it to be stowed without interfering with the workings of the ship. The wider beam allowed the boat to carry the required cargo, especially water casks. By removing a couple of the middle frames from Chuck's design, the length and beam of the resulting longboat was correct to 1:60 scale for Ray Parkin's version for the construction of the longboat (94 mm x 35mm x 20mm). However, I used Marquardt as the reference for the most likely fitting-out of the boat.
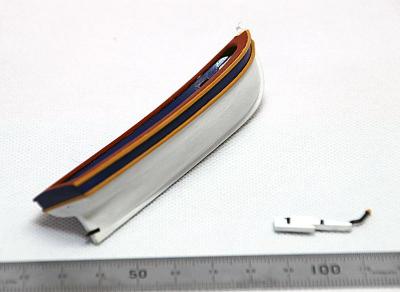
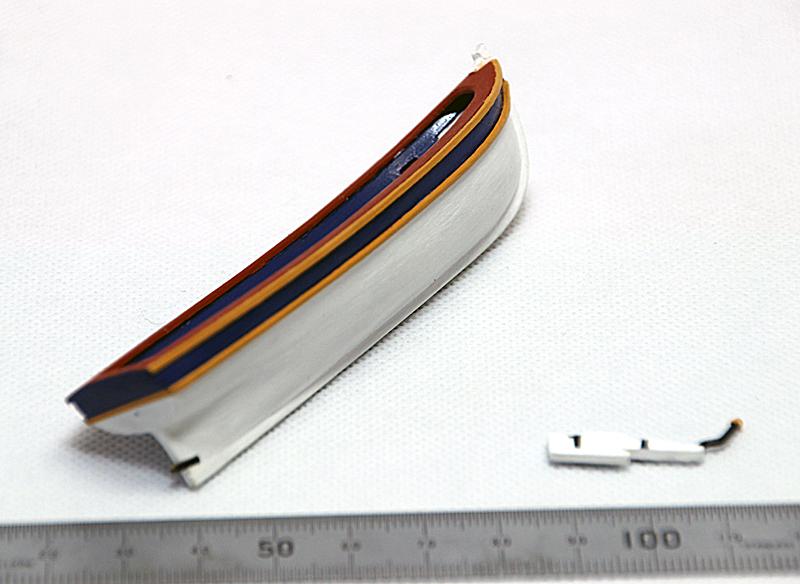
According to Parkin, the longboat would have been clinker built rather than carvel to provide a more robust boat that could be used to conduct the intended close-in coastal surveying (which I am assuming Cook would have wanted). I have also adopted the two mast design with a sliding gunter rig, as this is what was clearly shown by the embarked artist, Sydney Parkinson (expedition artist/illustrator), in his sketches of the ship's boats.

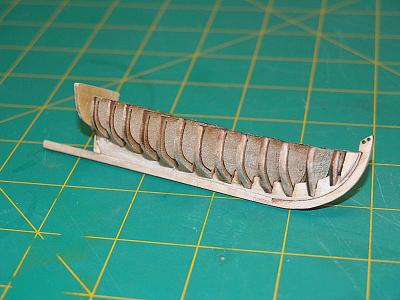
The following photographs show the construction process for the longboat using Chuck's sacrificial bulkhead system to create the
skeleton/ribs of the boat.


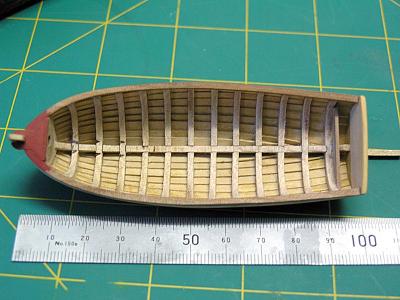
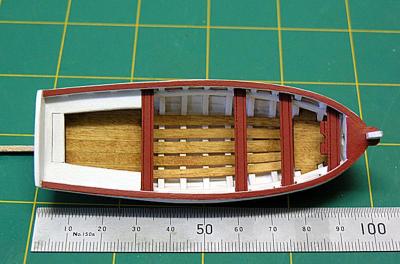
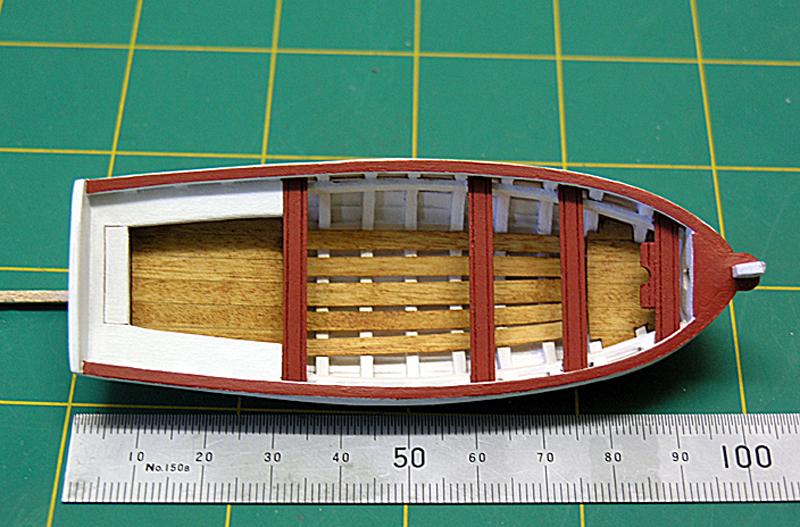
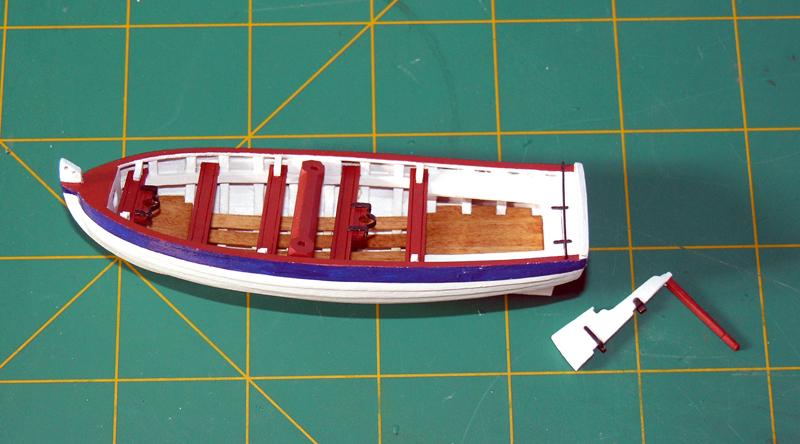
The following photograph shows the near completed longboat; I have still to complete the oars, grapnel, masts etc. I have painted the longboat mainly white as I believe it would have assisted with temperature control in the tropics, and provided higher visibility for the Endeavour's crew to monitor her movements during survey and coastal work.

- AKRYPTO, olliechristo, dashi and 3 others
-
 6
6
-
Pumps and Bitts
The pumps are made from accessories I purchased and modified slightly; overall I am happy with the result. The bits and rails are made from walnut and fitted with after-market belaying pins (walnut). Although not very clearly shown in these shots, I have fitted brass sheaves (2 per riser). I just hope I have fitted all of the deck bolts required as it will be an nightmare trying to place them around the mast in the future.
There is a big colour difference shown in the photos here as I have just bought a new digital SLR camera and I am still trying to get the white balance right.
- DaveRow, PeteB, Mirabell61 and 2 others
-
5


HMS Atalanta 1775 by tlevine - FINISHED - 1:48 scale - from TFFM plans
in - Build logs for subjects built 1751 - 1800
Posted · Edited by Dan Vadas
Hi Toni, a couple of things I have learned (the hard way ) while rebuilding my log that may help compress your log (white space). I hope I am not telling you how to "suck eggs" here, just trying to be helpful but please ignore the post if I am not being helpful
When you import the images they appear as thumbnails at the bottom of the editor. If you look closely there is some text to allow you to delete it or "add to post". if you click the latter it is placed within the post at the location of the cursor (rather than attached as an image) allowing you to select exactly where you wanty it, and in which order (as you can upload in batches (max 10 per post). EDIT That is now 8 per post. (Danny)
Also, I found that the editor adds several returns at the end of the post, and inserts extra line breaks if you cut and paste the text in. I went back through my posts and removed all the linebreaks and additional spaces at the end of the post (I wish that it was possible to make these visible) and it compressed my post sizes considerably.
Just for thought - I can delete this post to remove it from your log thread when you have read it; just PM me and I will get to it as soon as I read the PM.
cheers
Pat