HOLIDAY DONATION DRIVE - SUPPORT MSW - DO YOUR PART TO KEEP THIS GREAT FORUM GOING! (Only 13 donations so far - C'mon guys!)
×


Matrim
-
Posts
1,401 -
Joined
-
Last visited
Content Type
Profiles
Forums
Gallery
Events
Everything posted by Matrim
-
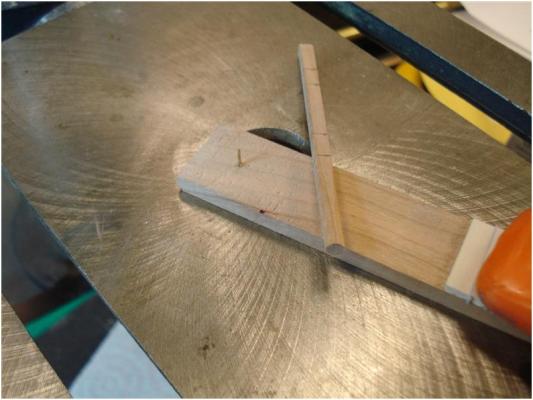
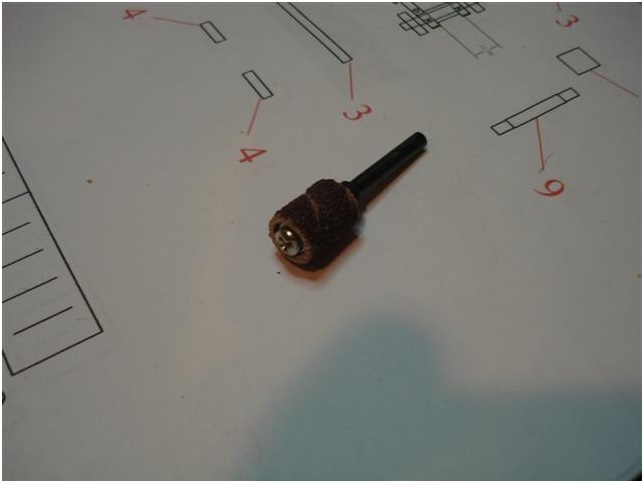
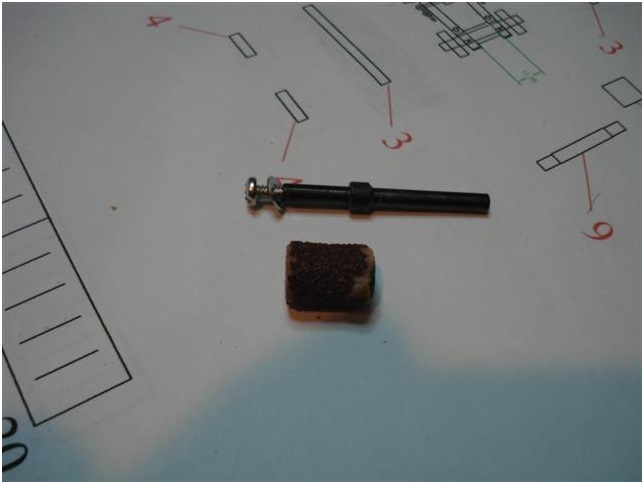
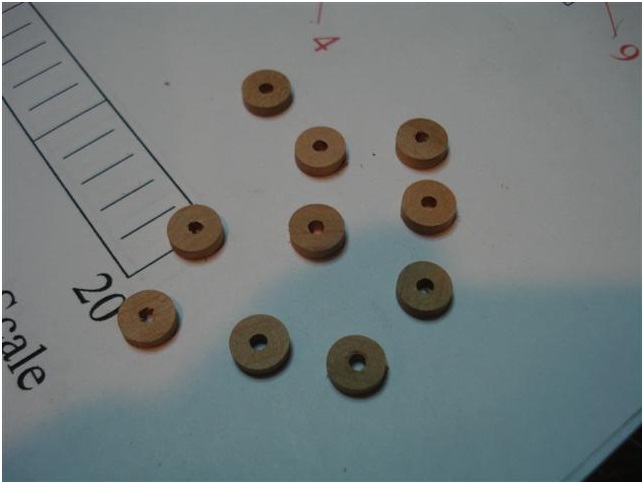
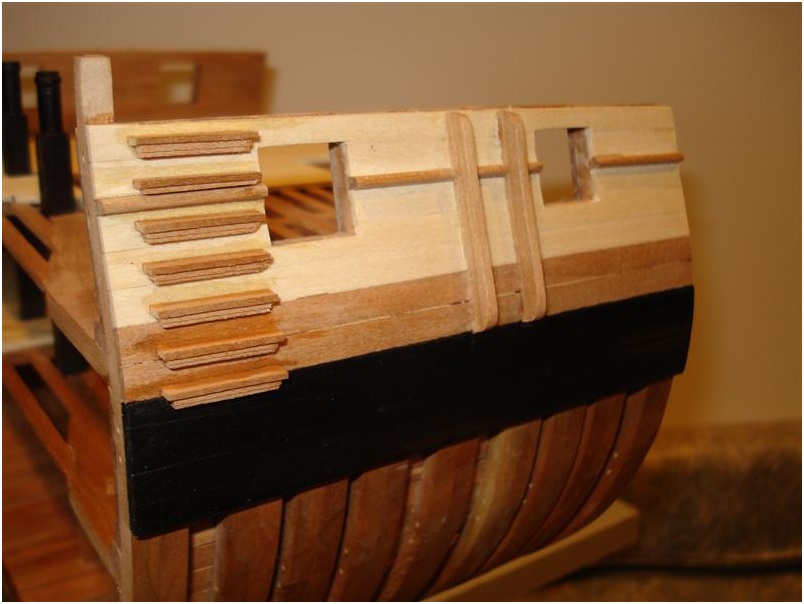
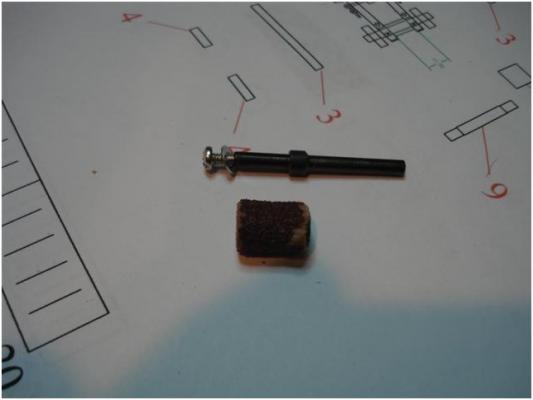
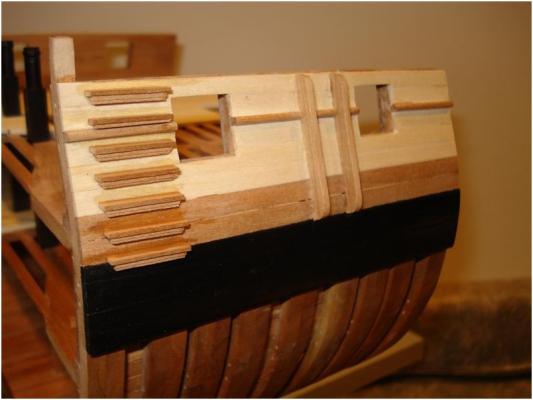
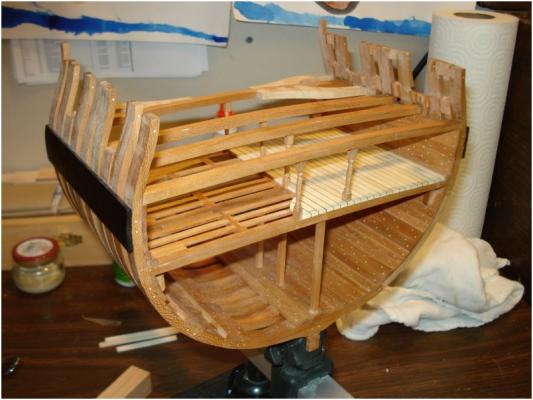
I got a fair amount done this weekend. Here is the way that I made the wheels for the gun carriages. The wheels took less than a couple of minutes to turn, the axles took a bit longer. The chuck on the Dremel left black marks on the wood so I used tape to protect the axle. attachment=41134:s52.jpg] One gun carriage was partially assembled. Here is what the hull looks like now that all of the boarding steps are installed, the wales are fully planked and the rail caps are in place.


-
You are right Uwe! I was hoping no one would notice since I will have to pin them to secure them to the india inked main wales. Last night when I was working on the steps I got them all installed, even and level (they looked great)! I then looked at the drawing that you refer to and noticed that I had installed the steps on the wrong end of the model . I had to remove all of them, clean up the hull and make new ones to replace them. Not a particularly happy time Scott
-
Hallo Scott, your steps are looking really good, all in the same distance and accurate installed... ...there are only two missing at the wales the steps started slightly over the waterline, so also at the wales.... Take a look at the drawing "Cross Section Outboard Works"
-
The fenders and boarding steps have now been added. The steps are a little tricky because the angle of the back side has to be changed with each step to keep the top surfaces parallel. I tried a bunch of different methods and it seems that a sanding block and trials worked best for me.
-
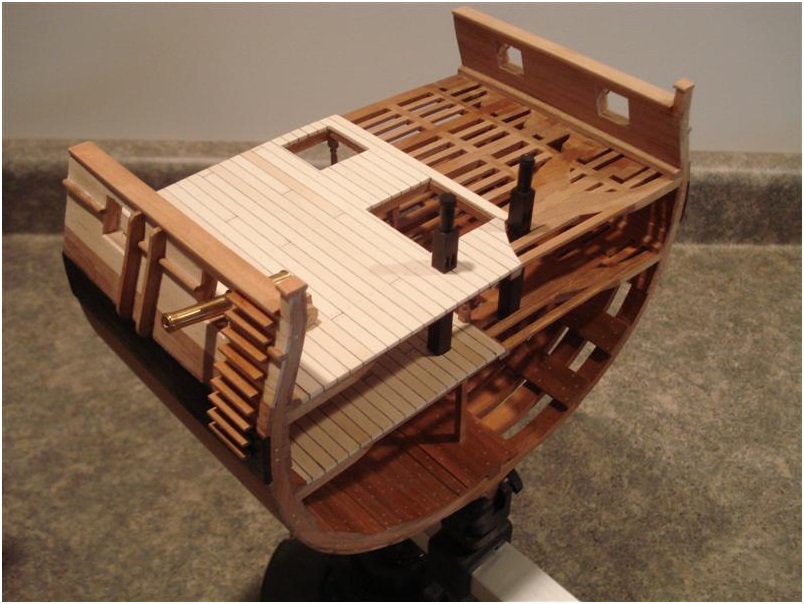
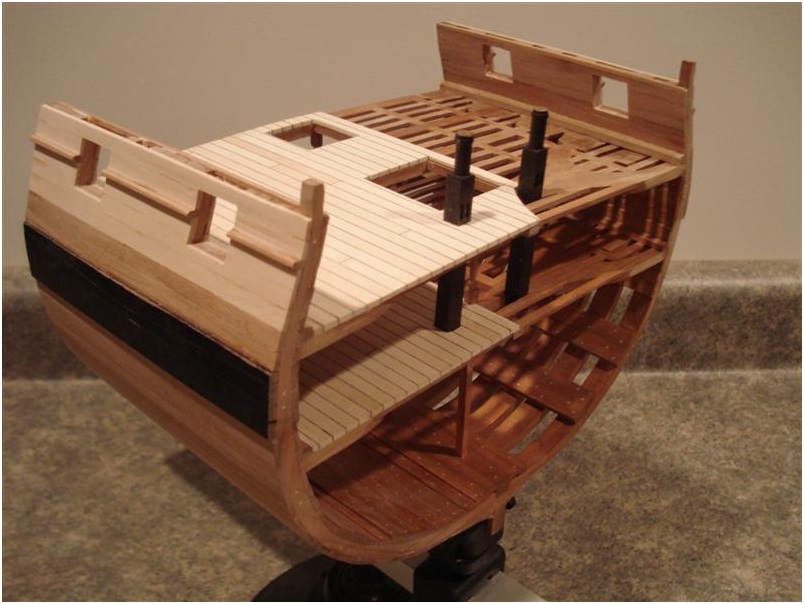
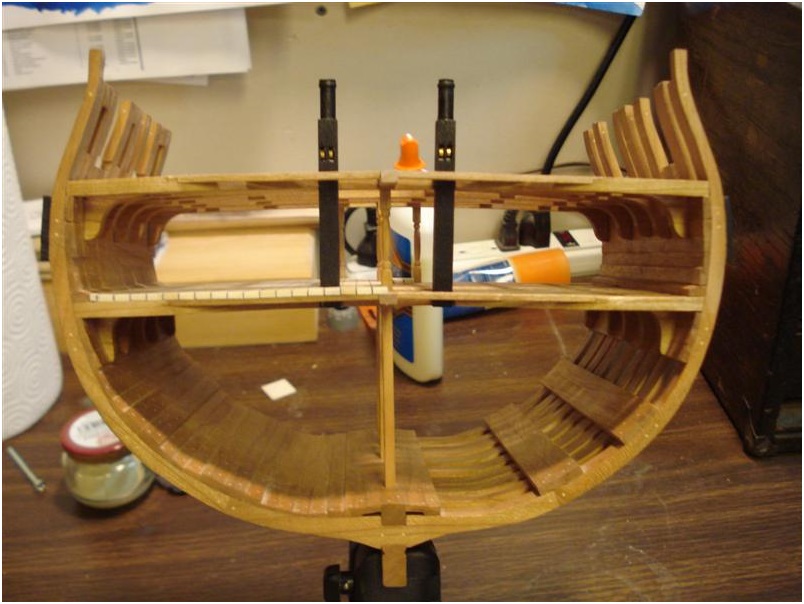
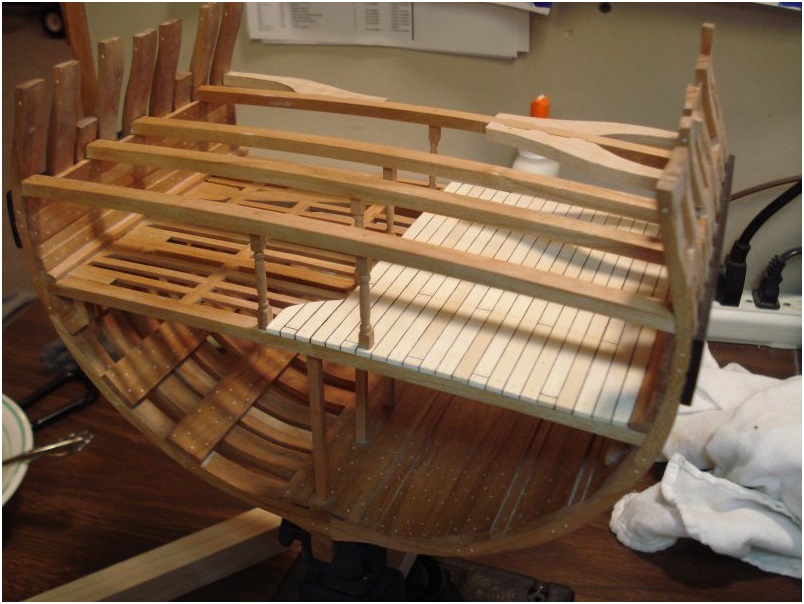
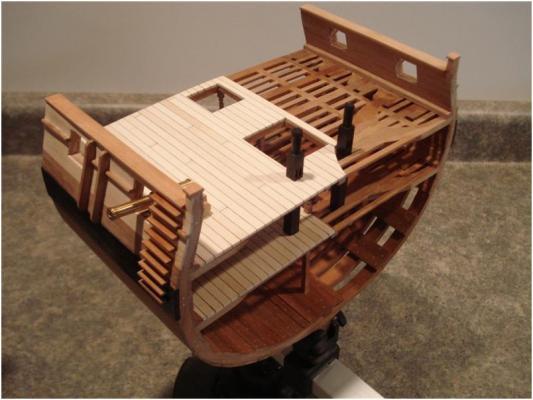
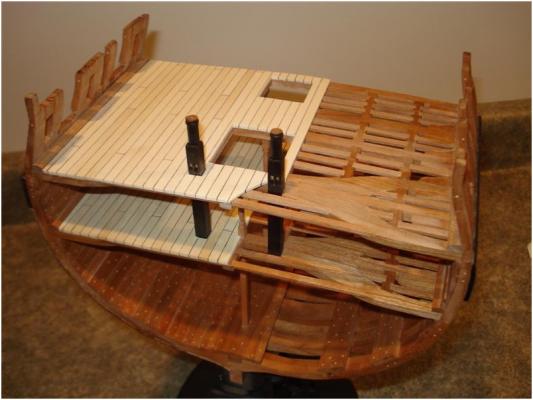
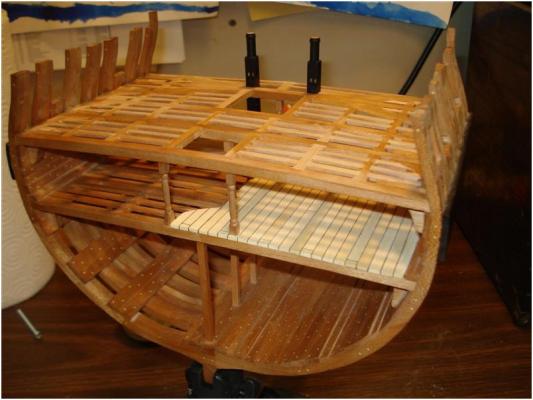
After a week away in Washington DC here is the current status of the build. The one side is planked and the other is left with exposed frames. On both sides the gunwales are planked inside and out (so the skid beams can be placed across the deck. The deck has been treenailed and the end frames and their plank edges have been trued up. I used basswood for the upper portion of the gunwale to add some contrast to the cherry that makes up the vast majority of the model.

-
You know Uwe, I never really thought about hatch construction before. I was planning on making combings and laying them over the opening but that probably isn't right. I doubt that they would have left the end grain of the deck planks exposed to the elements. I assume there were trim boards to finish off the inside of the hatch and cover over the planks and possibly beams? Likewise caulking to seal out the elements makes sense. Thanks for pointing that out. I'll wait to proceed till I hear back from you. Scott
-
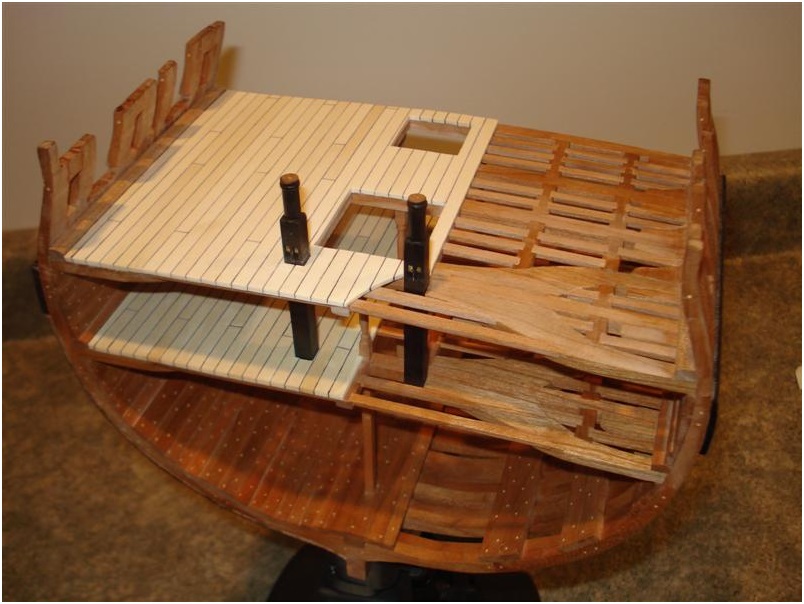
Thanks Uwe and Lee it is good to be back at it although the house work is not finished. It seems that every time I try out something on the house I have a new project on my hands (like the three frost free sillcocks I tried today, they all leak and need their guts replaced ). On a happier note the gun deck is now planked. I'll treenail the planks soon and get the hatch combings made and in place. Thanks Uwe for the post on making gratings. I think that I'll follow in your footsteps.
-
Thanks Raul, I am a big fan of your work so I appreciate your comments! Sorry for the late response but I've been away from the site for a while. The deck is holly but the rest of the model is cherry. The black tar is construction paper which I cannot recommend because it is too flimsy to leave a good sharp edge. Scott
-
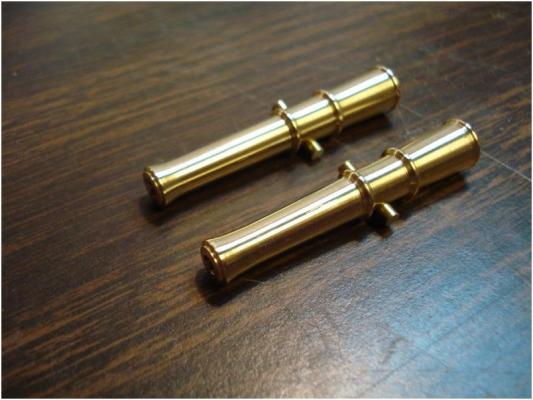
I just finished the cannon for the cross section.
-
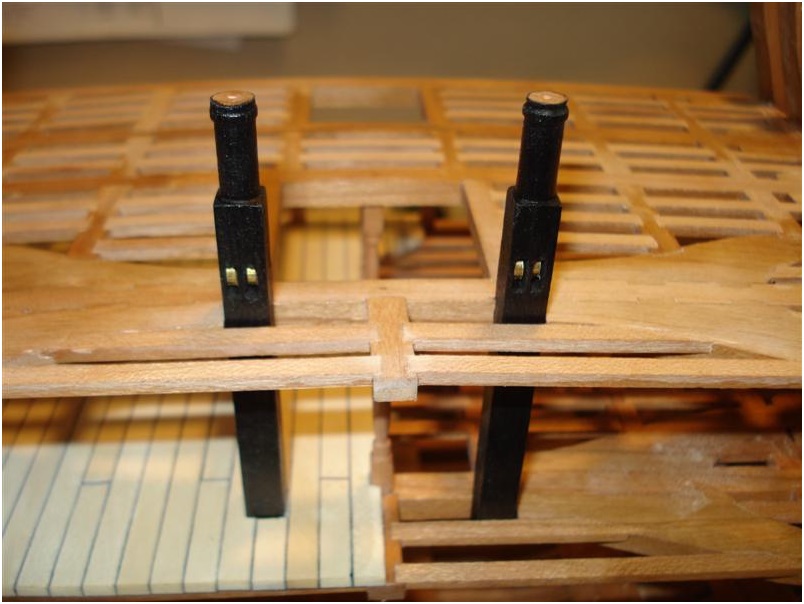
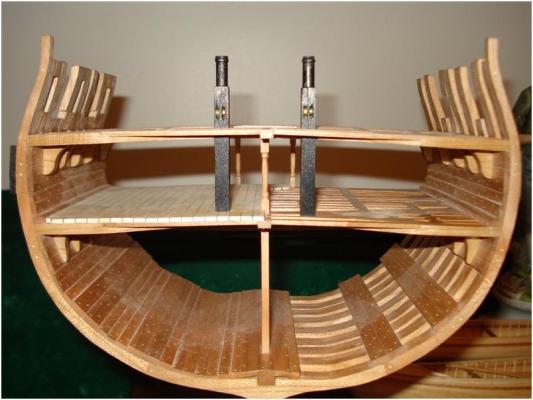
Thanks for the comments. Uwe you are right about the sheet bits. They looked good when I glued them up and I figured it was some sort of paralax error in the photo but measuring showed that the tops were a full mm further apart than the bottom. I broke open the joint on the right and realigned so they are the same distance on the top and bottom. How does this look now before I glue again? The black is India Ink laid down in two layers. Scott
-
Hi Scott, your section is coming along very nice. Especially the Carlings and Ledges are fitting very good inside the notches of the beams ......very clean and exact work Also the dark Sheet bitts are looking great. As I see (on the top it is visible) you painted them, which kind of paint you used? It is a very good contrast which I like very much One other question: Are the uprights of the sheet bitts already finally fixed? It seems that the right one is a little bit out of angle ....the beam arm of the Lower deck seems to be a little bit longer than on the Gun deck ....sand at the Lower deck a little bit and the upright of the sheet bitts will come really upright
-
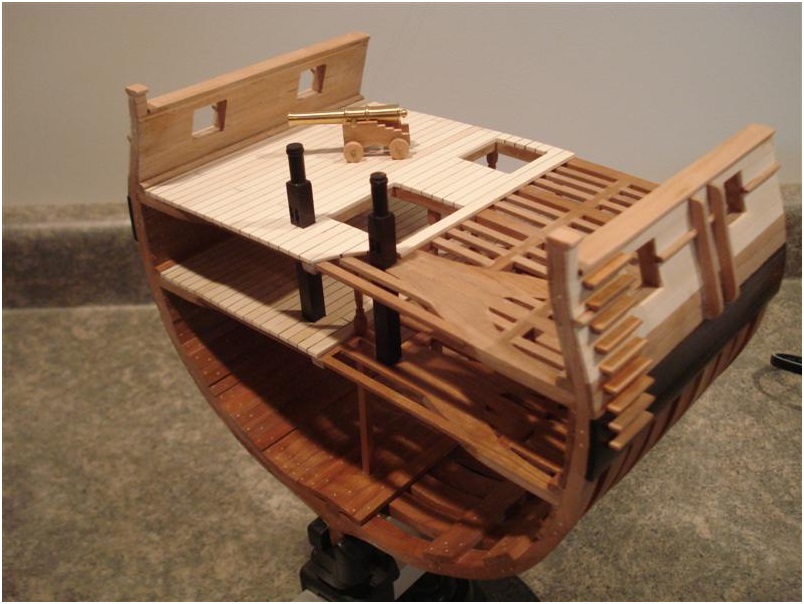
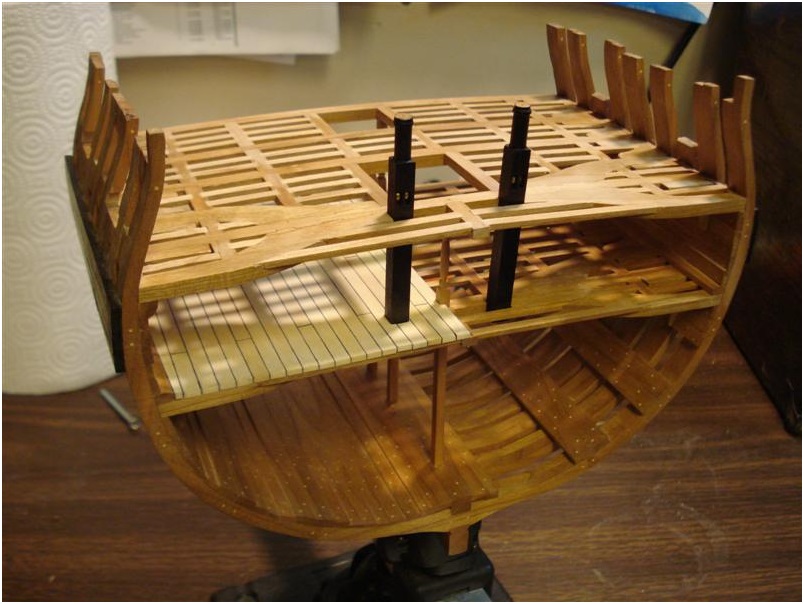
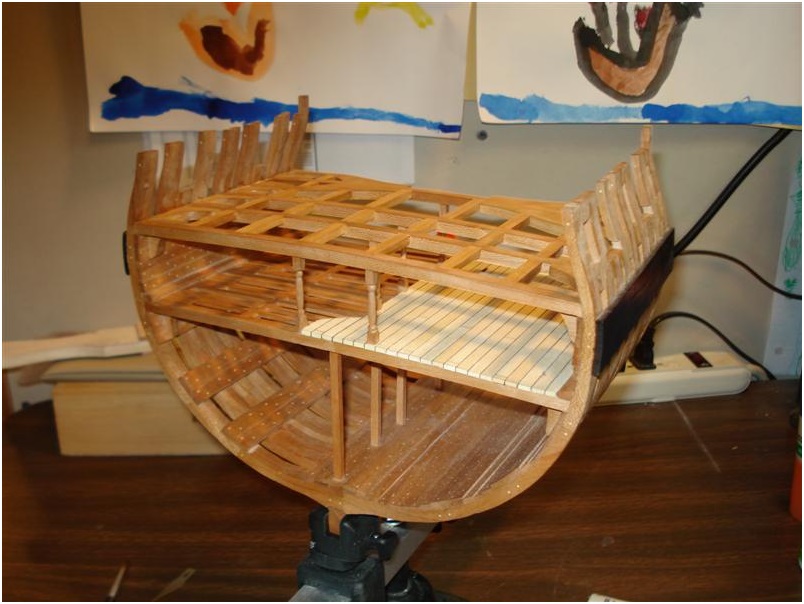
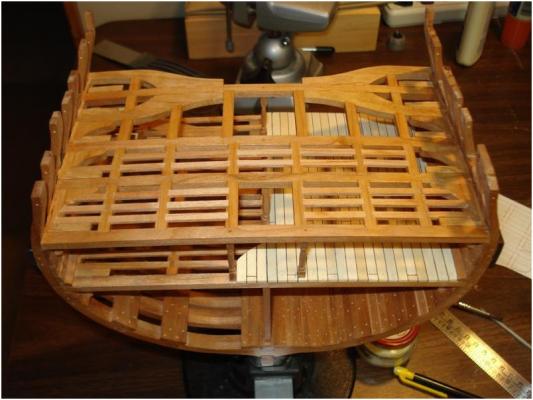
Hi All, Back after a short time away. The carlings and ledges are now complete and the uprights for the sheet bits are in place along with their sheaves.


-
The thing to remember when cutting anything is to cut it on the small side first then adjust the opening and fit, adjust and fit, and so forth until you get a nice fit with a just a breath of friction in the joint. The best wood joints are the ones that take some time to make. Russ
-
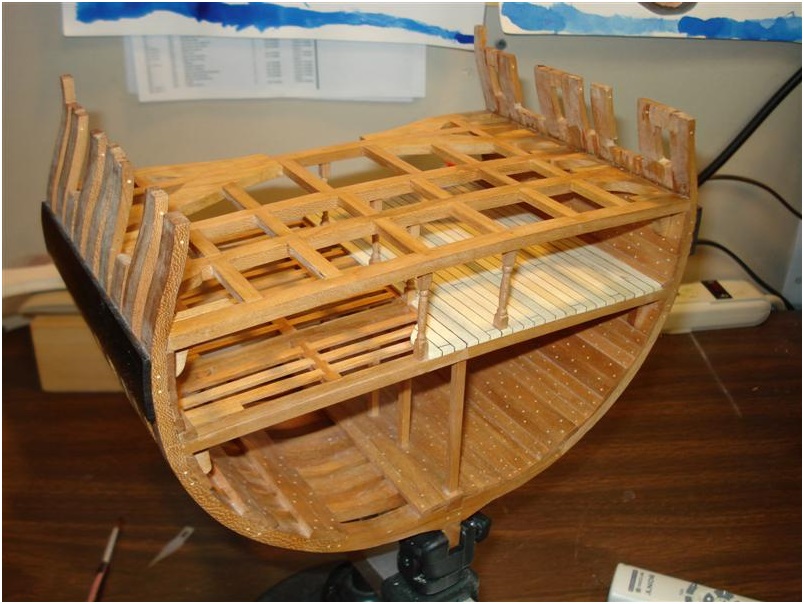
About half way done with the ledges in the upper deck works. Just keep plugging away...
-
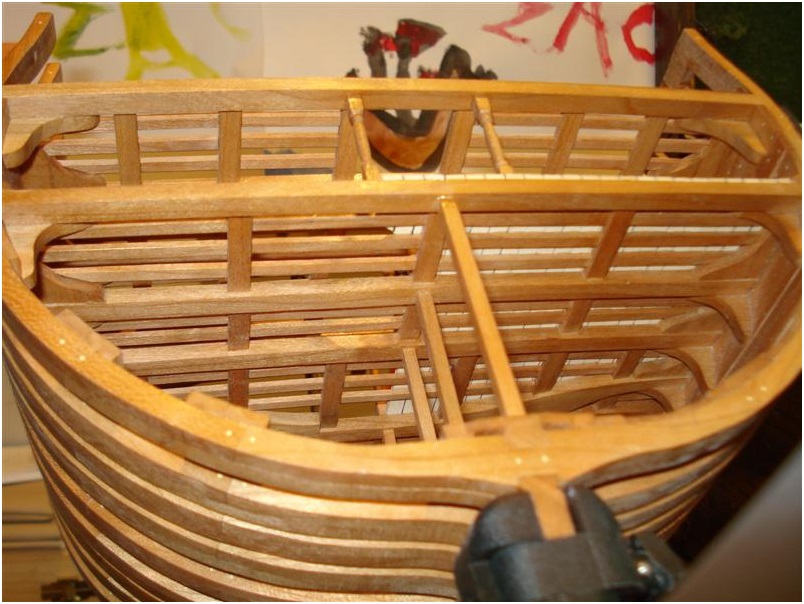
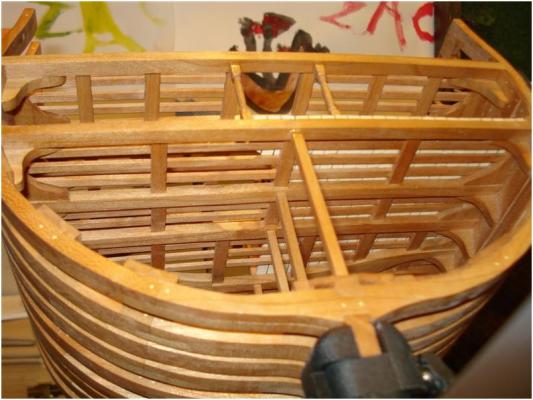
After a week at scout camp (4 inches of rain one night ) I am back to building again . The gun deck beams are installed, the planked landing for the gun deck ladder has been made and several of the beam arms are being fitted. The gun deck knees and carlings are now in place. I got smarter this time around and put a coat of finish on the knees and underside of the carlings before assembly. I found that these were next to impossible to reach and finish on the lower deck once assembled. Just a suggestion to anyone who is at this stage of building. Scott


-
Hi Clark and Russ, Great ideas! Scraping is a very good way to get a fine finish on wood. If you look at the edges of the frames, the finish you see was accomplished by scraping. I tried it on the wale and it still looks pitted. I suppose if there are "voids" in the wood, there is no way around them other than filling. Scott
-
Hi Jim, Unfortunately, these were sanded before inking. It could just be the particular segment of cherry that I used was more open grained. If I sand any more I am afraid that I will only open up new pores so filling looks like my best option for a smooth surface. The ink covers very well so I suppose any filler would blend into the wood. I'll experiment first however! Since the ink covers so well, I suppose you could use just about any species of wood you like and it should turn out black. This would allow better control over the openness of wood grain patterns. Scott
-
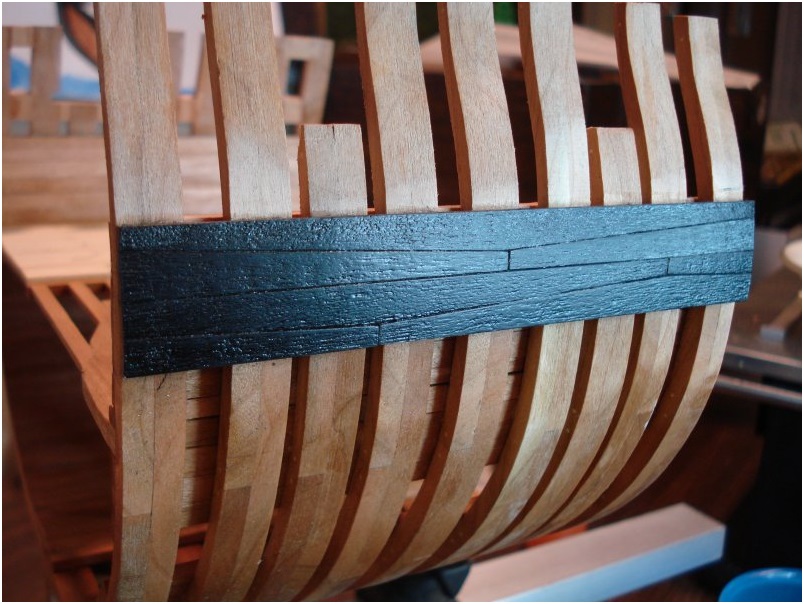
Here are the main wales done in anchor stock pattern. The black is India ink with a coat of shellac over it. The ink covered very well and dried quickly with a slight gloss to it. I think that I read somewhere that they add shellac to the ink which is why it will gum up pens. This shellac might account for the initial gloss of the ink. I added an additional coat of shellac for protection and toned down the gloss with fine steel wool so that it now has a satin finish. I shined the light down the hull to show the pattern and was disappointed at how open the grain of the cherry looks. I might use some filler on it so it looks a little more "ebony-like." Scott

-
Scott: We did not really try and get too picky with the pillars in this cross section. I know everyone wants every little detail set out for them since these are CAD plans, but if anything, I really only wanted to get people to learn how to make them and set them properly. Honestly, this is a detail that I did not think would get much attention at this point since this model is primarily a learning tool for the hull framing and hull planking. There is no need to plank around the pillars if you do not want to. Once they are set in place and properly fastened, it will not matter if they are set into the deck or on top of it. That is not the important factor here. Learn how to make them and set them so they are in proper position and they will not move. That is all that matters. In this case, it is very simple. The pillars should bet set out from the centerline so that they give just enough space to fit the ladder between them. I showed Don (Juanallegro) how to set them in his model and how he placed them is pretty much how they should be set. Again, we will be dealing with these internal details much more in the complete hull build. I want everyone to remember, this cross section is only designed to help modelers learn the basic techniques of hull framing, hull planking, treenailing, some metal work etc. That was my intention. Its all about basic structural techniques really. The deck planking pattern you used is fine. The 4 butt shift would be better, but so long as you know the difference, that is fine. I really did not expect anyone to get that far into the internal details. The hull framing and the hull planking are the most important aspects of this project. That is where I figured the primary interest would be, but we seem to have got away from that. It seems like most of the builders have been spending far more time on the deck planking. Deck planking is something I was not going to hit very hard until the complete hull build. I guess everyone is getting a head start. The ladders go on top of the deck planking. To set them on the beams and then plank round them is nonsense. The ladders need to be removable on board ship ifr necessary. I never open the valve on the torch all the way. Open it so that you get a flame of about 3/8" or so in length, maybe a smidge more if you need it. Just practice making a few joints and you will see very quickly what works for you. Russ
-
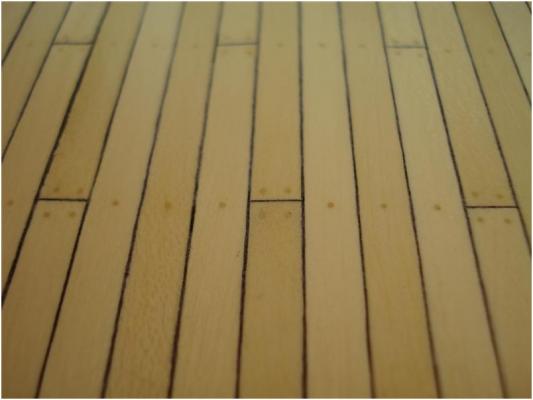
Hi Russ, Two pillars on either side of the ladder? Now that makes sense! Is this shown on the plans somewhere because if so I missed it. The planking is a three butt shift because there are four support beams in the cross section. I would have liked to use a four butt shift but I thought that it might not look good with only four support beams. Do you think that ladders were affixed to the decking or do you think that the ladders were in place first (affixed to the beams) and the decking went around the ladder? BTW my flux/solder and torch came today and once I get a chance I am looking forward to trying them out! Since I bought the same torch that you use I wonder how high do you set your flame? Scott
-
Scott: The deck planking looks very good. Nice treenailing, and the pattern is very good as well. By support brace, do you mean the pillars under the gundeck beams? If so, there are two pillars that go either side of the ladder at that point. As for the deck beam camber, I have always made them out of one piece of timber, shaped to the proper camber, and then ripped the beams off, one at a time, ensuring they all have the same camber. A disc sander works very well for this kind of method. Russ
-
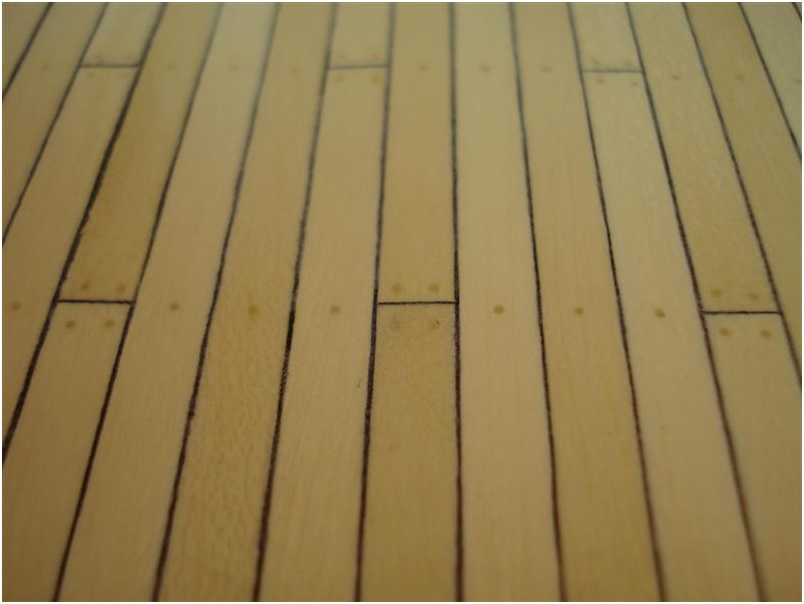
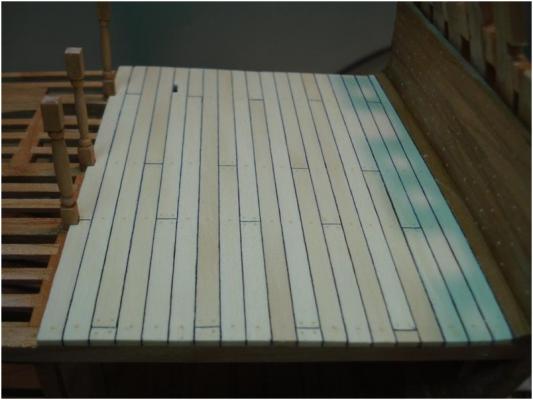
Hi Lee, the paper is nothing more than black construction paper. I would not recommend using construction paper because it is too coarse and fragile. The lines would be sharper if the paper was harder. Live and learn. As far as details are concerned, sanding did not smear the paper dye but did inpregnate white holly dust into the black paper turning it dark grey. Scraping did a better job and left the black dark. The holly does have a coat of clear shellac on it already and I noticed that the paper darkend up when the shellac went on. It might be that the sanded paper would have turned black with shellac. Scott
-
Thanks Uwe, I haven't forgotten but I am a little puzzled about the stairs. Since the stairs land where a support brace should sit, the beam will be unsupported (since I assume the support should be left out). As you can see I did not make a cut out for that support. How did you keep equal camber on all of the beams? Scott
-
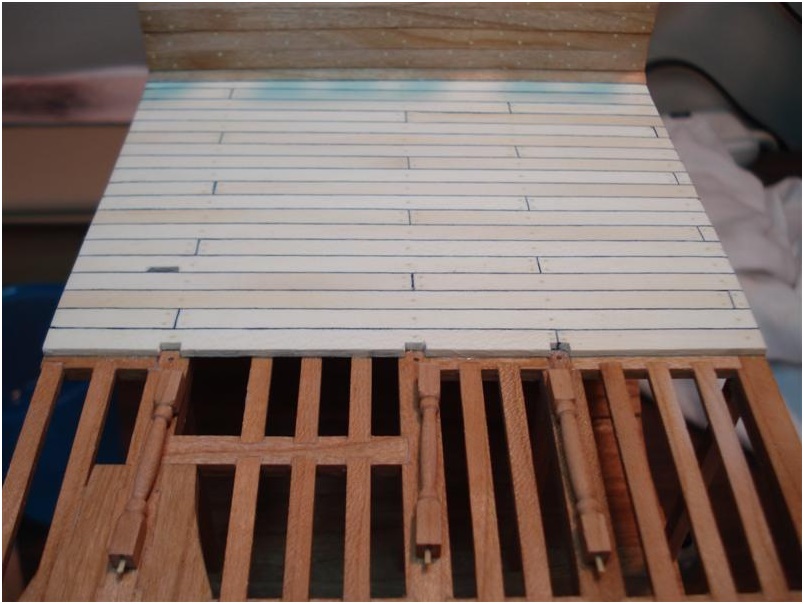
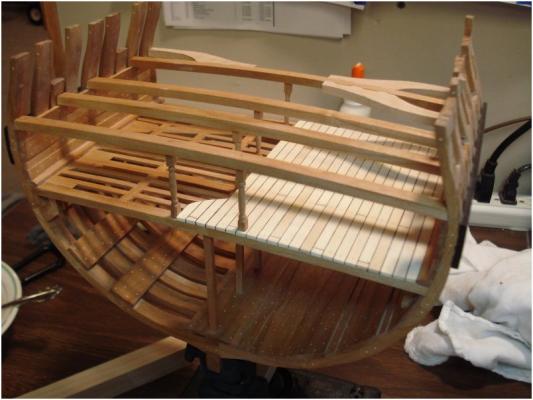
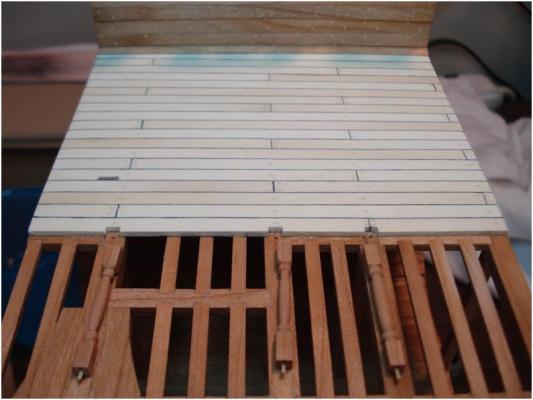
Here is the lower decking done in holly with black paper. The crew just finished with the holystones so I hope it passes the first lieutenant's inspection!
-
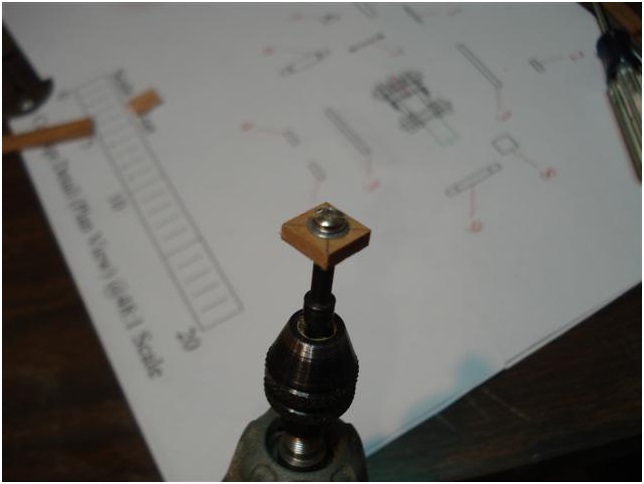
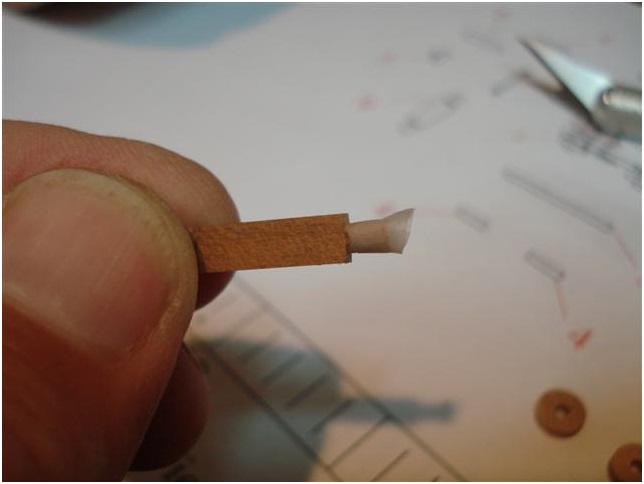
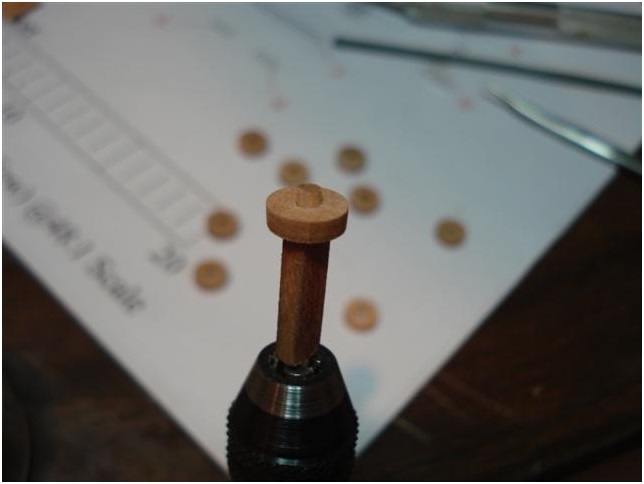
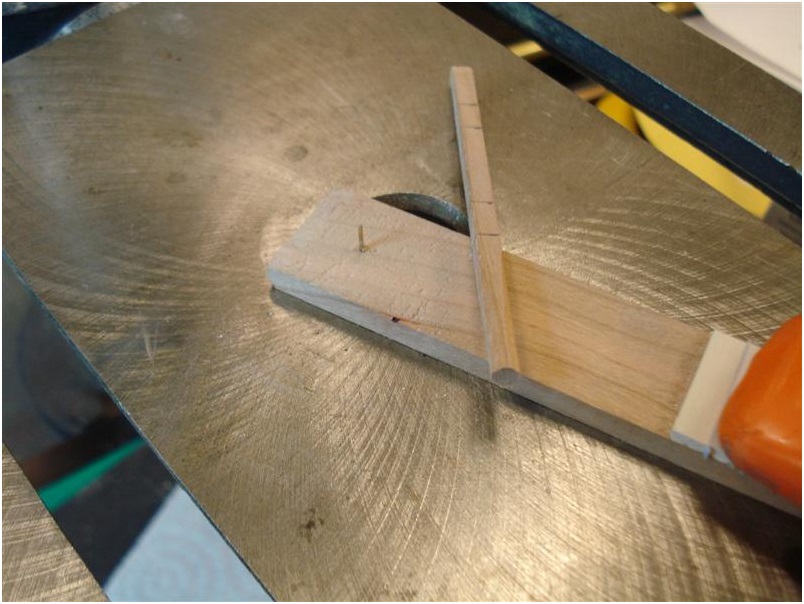
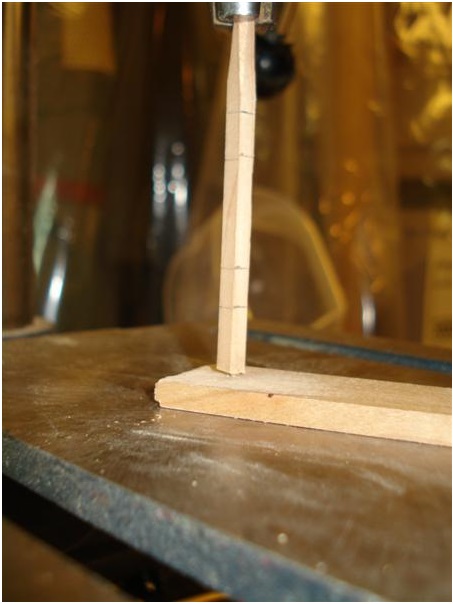
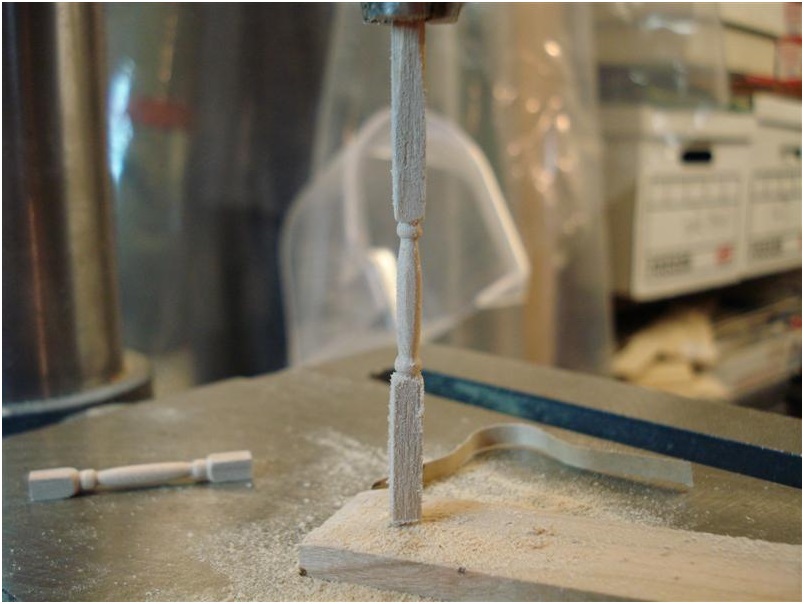
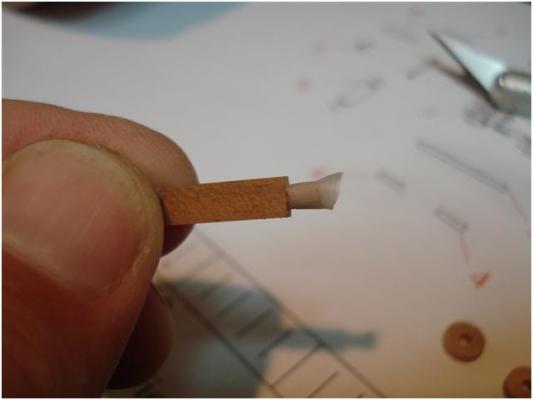
I made the support posts for the gun deck tonight and thought I'd post how I did it in case anyone is interested. I made a dead center using a brass nail in some scrap stock and cut out a piece of square stack that was marked to show where the tapers should be. The top of the stock was carved to fit into the chuck and a hole was drilled into the base to fit into the dead center. Here is everything chucked up with the dead center directly underneath the work piece. Here is everything chucked up with the dead center directly underneath the work piece. The dead center does a great job in keeping the work piece from wobbling while the piece is turned. Scott