HOLIDAY DONATION DRIVE - SUPPORT MSW - DO YOUR PART TO KEEP THIS GREAT FORUM GOING! (Only 20 donations so far - C'mon guys!)
×


Matrim
-
Posts
1,401 -
Joined
-
Last visited
Content Type
Profiles
Forums
Gallery
Events
Everything posted by Matrim
-
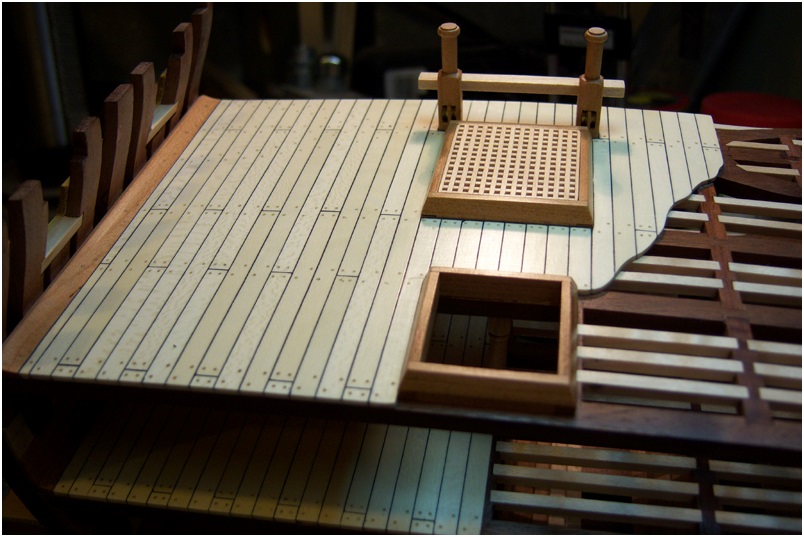
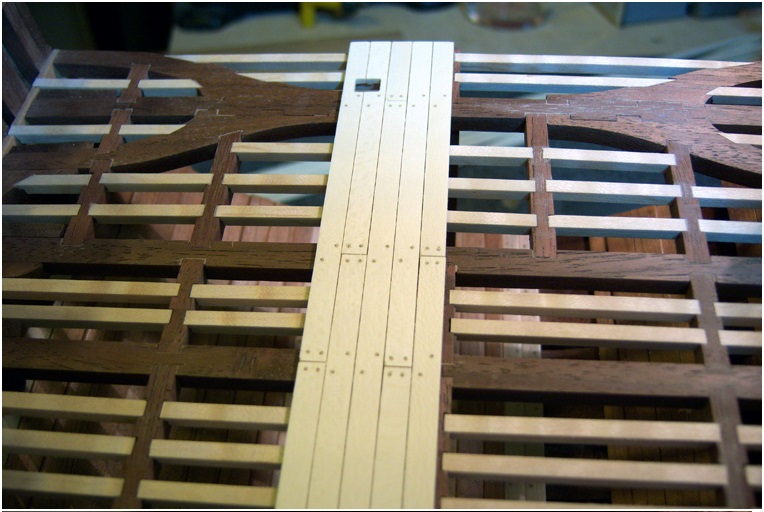
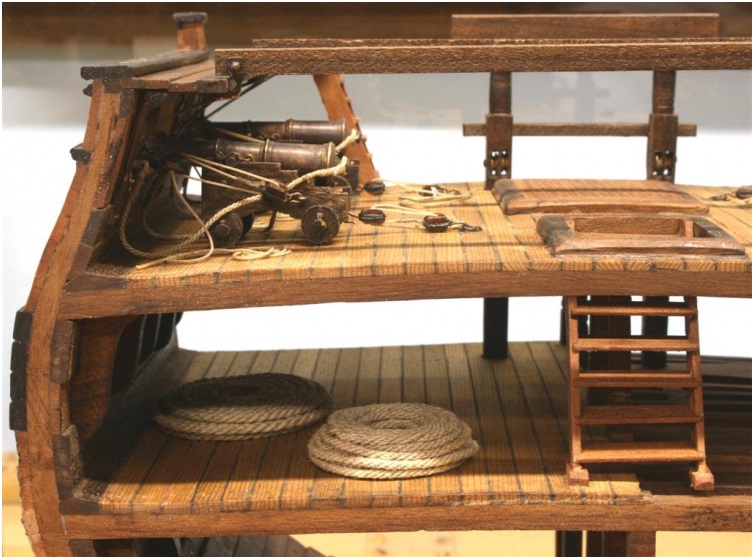
The gun deck is now complete. Once again, I used holly for the decking, and the wax wood filler for caulking. The waterways and coamings are cherry, the sheet bitts are cherry, crosspiece is maple. The sheaves in the sheet bitts came from an old model ship, the first one I had ever built, some 25 years ago. It was not a great model, and had been thru 3 moves since it was built, and was in pretty poor shape. I decided last summer to dismantle it and I kept all the blocks, sheaves, deadeyes and brass fittings just in case I might need them for a future scratch-build, like this one! The sheaves were just the right size, so I've honored my first build by using a part of it in my first scratch build.

-
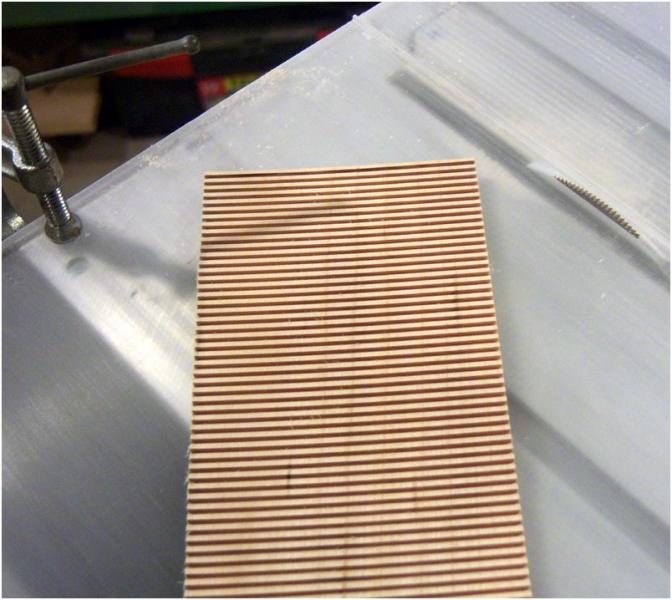
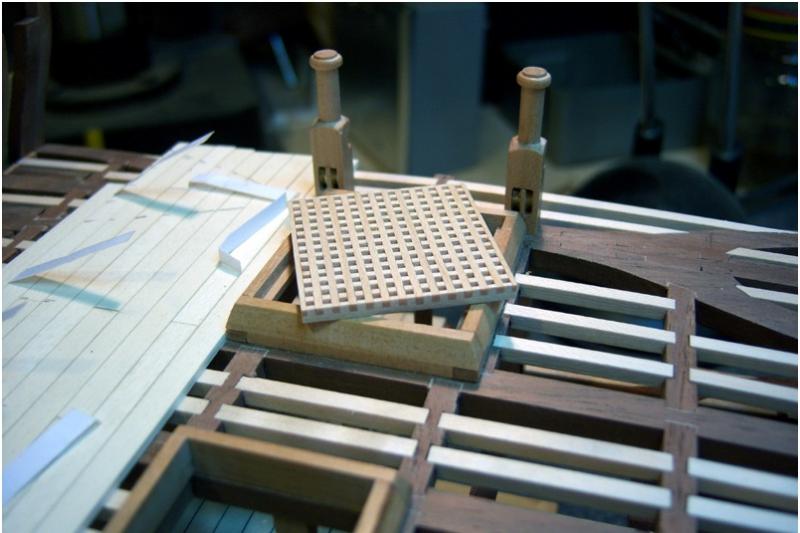
One of the necessary items that I needed to learn to make was gratings. Following some other examples I've seen here on the site, I set up a jig to make a series of cuts on a piece of hard maple about 1/8" thick, cutting halfway thru. I used a piece of clear acrylic to make the jig, clamped to the top of a microlux table saw. using the jig I cut a serie of slots in the underside of the maple board, and then sliced the board into strips on a bandsaw. I tried slicing the strips on the tablesaw, but I was getting too many broken "teeth" on the grating. using a fine tooth blade on a bandsaw worked pretty weel. After that, I fed the strips very carefully thru a my home-built thickness sander (thanks again to this website ) until the strips just fit together to make gratings. After that, just a little sanding and polishing, and it's a nice looking grating. In the process, I've made enough grating of this size to last at least a couple of builds! This was one of the more challenging parts of this build, and one that I've looked forward to completing successfully. You can also see in the bottom picture, the paper shims used to separate the planking to allow space for caulking later on. Cutting the slots on the tablesaw using a .045" jewelers slotting saw blade. The finished grating
-
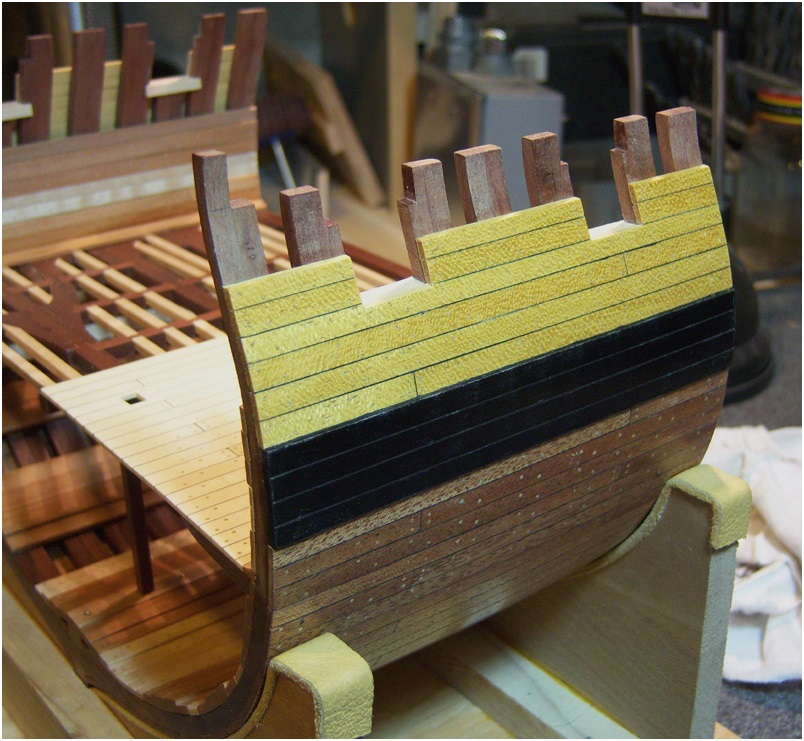
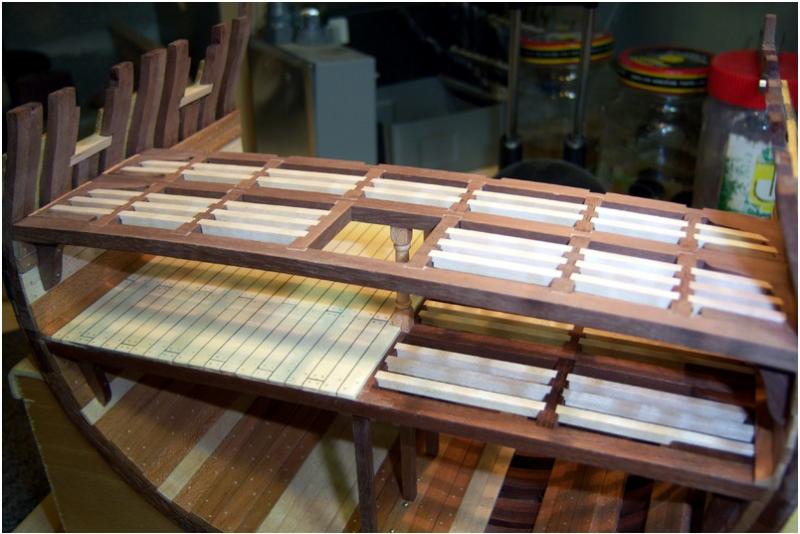
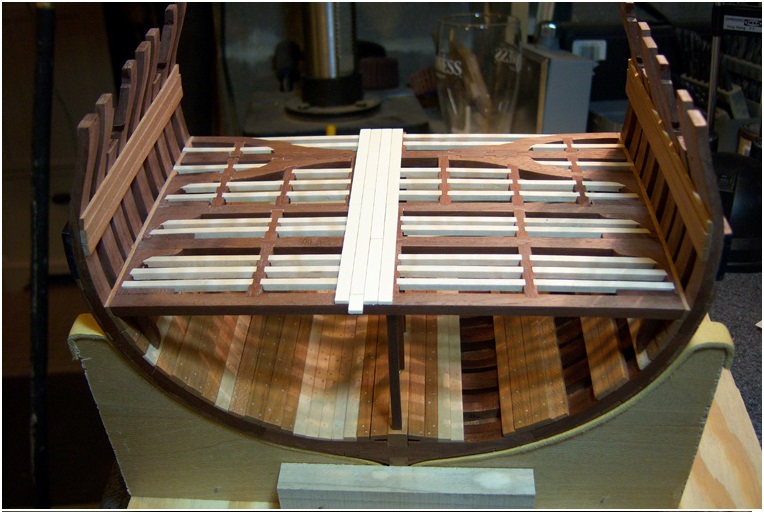
Well, I hope you all a great holiday season. Mine was quite peaceful this year. We didn't have to travel anywhere, and the admiral has been sick with a chest cold this past week, so I've been in the shop avoiding her so I don't get sick! I'm getting very near the end of this build, having accomplished quite a bit over the last few weeks. After complete the lower deck, I moved back out to the exterior planking and brought that up to the level of the gun-ports (the first molding actually). Then I went back in and framed the gundeck and completed planking the interior. The upper exterior of the hull is planked in yellowheart, and the moldings will be painted black, which you will see in a later post.The caulking is completed the same way as the lower planking and the interior decking, using a dark wax wood filler. Exterior hull up to the first molding in yellowheart Gun deck framing in walnut and maple,just as the lower deck was completed Gun deck framing and testing the fit of the bitts and cross piece. These will need to be in place before the last set of ledges are installed.


-
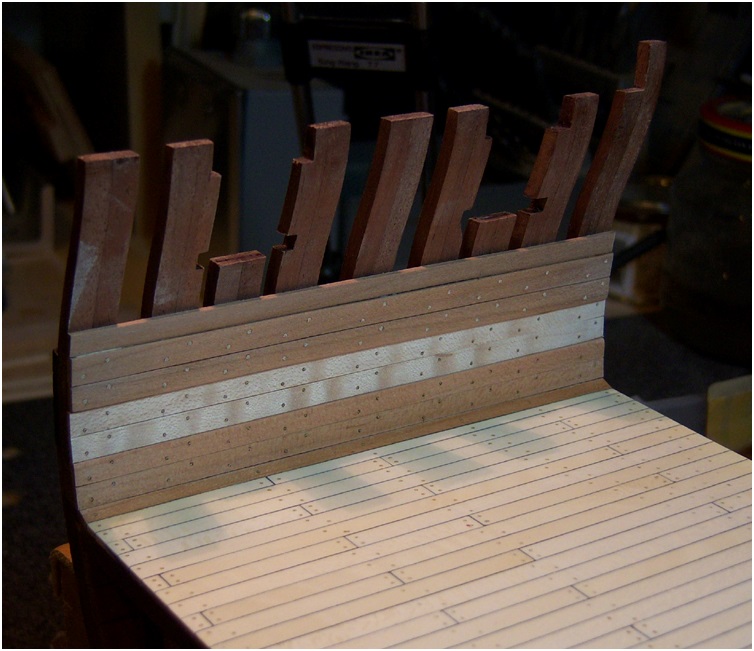
...and the last thing for this week is the inner hull planking between the lower deck and gun deck. Same materials as the inner hull planking used below the lower deck, cherry for the thick stuff, maple for the thin...

-
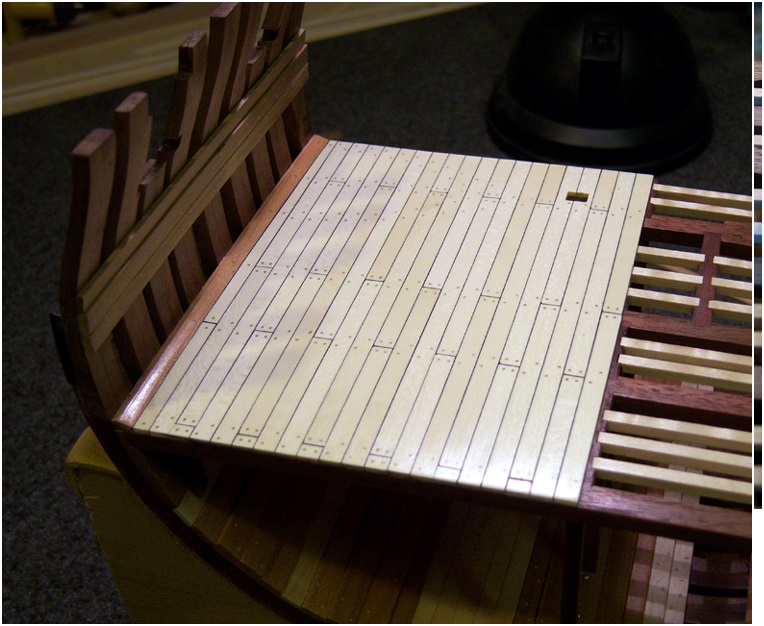
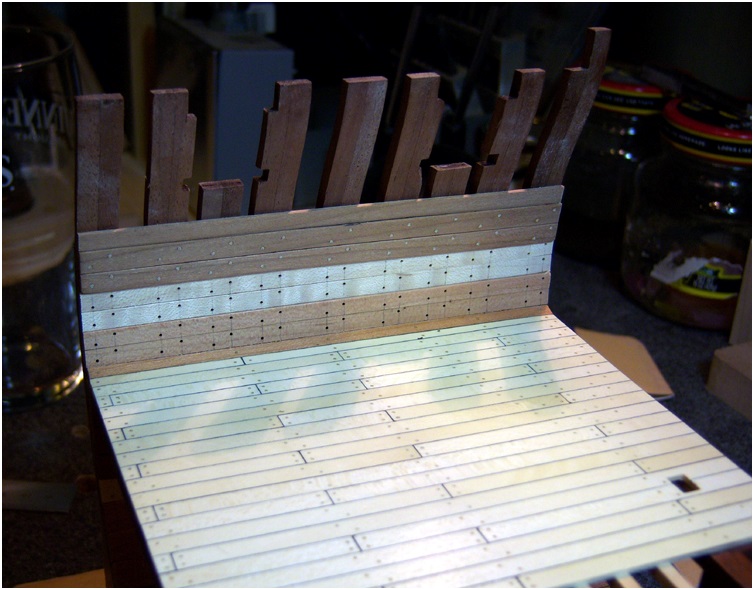
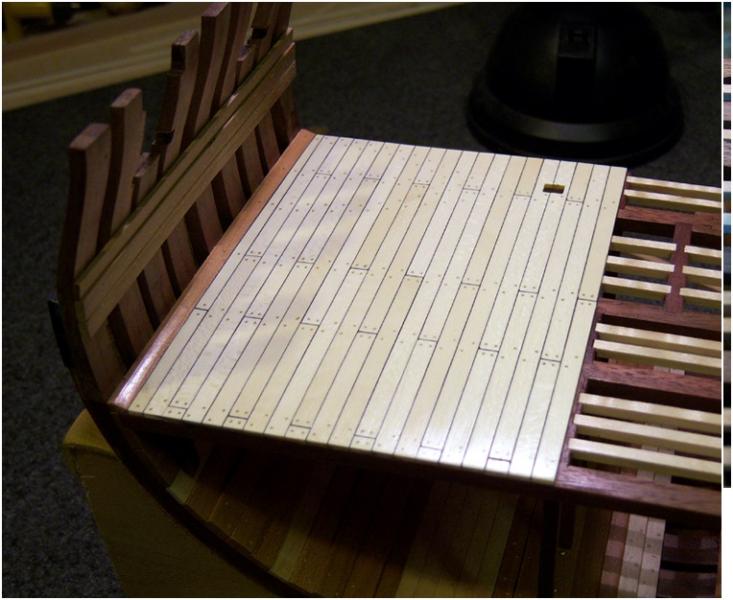
Jim, I threatened to withhold her Guinness ration, and she finally relented and gave it back. You might want to try that with your fairy! The lower deck frames are now complete, and I've started on the decking. I'm using Holly for the decking, and I really love this wood. It's almost pure white, no markings or discolorations, and a very fine grain, with just a bit of tiny flake, like what you see in a quarter sawn white oak, but on a much smaller scale. I'm using bamboo treenails again, sized with the #28 hole in the Byrnes plate. I'm also spacing the planking with a thin sheet of paper between planks as I did on the exterior hull planking, to be caulked later. ... and here is the decking completed on half the deck. I'll leave the other half open to show off the framing. The caulking was done with the walnut/black wood filler that I mixed up for the exterior hull planking. I've finished the planking with a thin coat of lacquer before I caulk to seal the wood, then just work the filler it into the spaces between the planks with a wood stick, tapered on the end like a small putty knife. Scrape the excess off and polish with a soft cloth, and then wax the entire surface with paste wax. With the decking waxed and polished, you can just make out the flake grain in the Holly, Beautiful stuff, and definitely my choice for decking in the future!

-
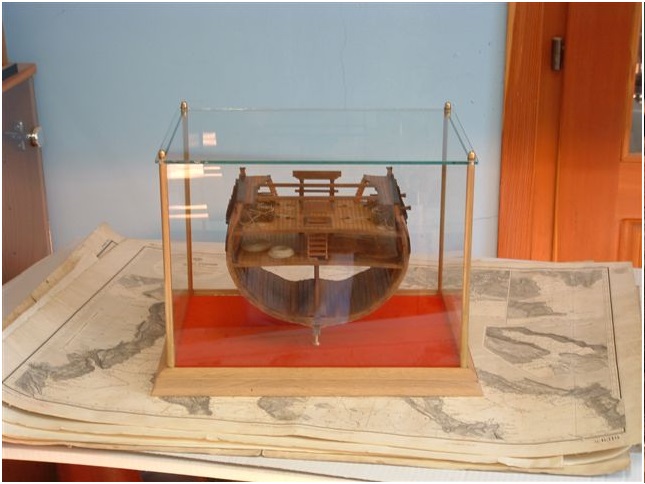
And some more photos .... the last ones and at the last once more my personal favourite photo

-
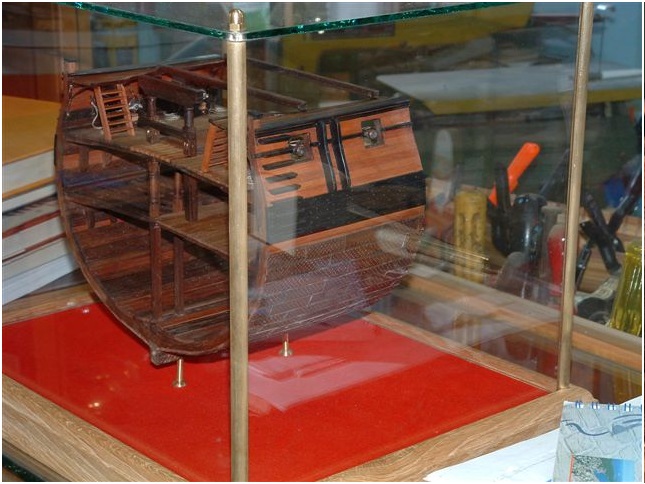
The case of the section......mainly out of glass, the view shall stay at the section

-
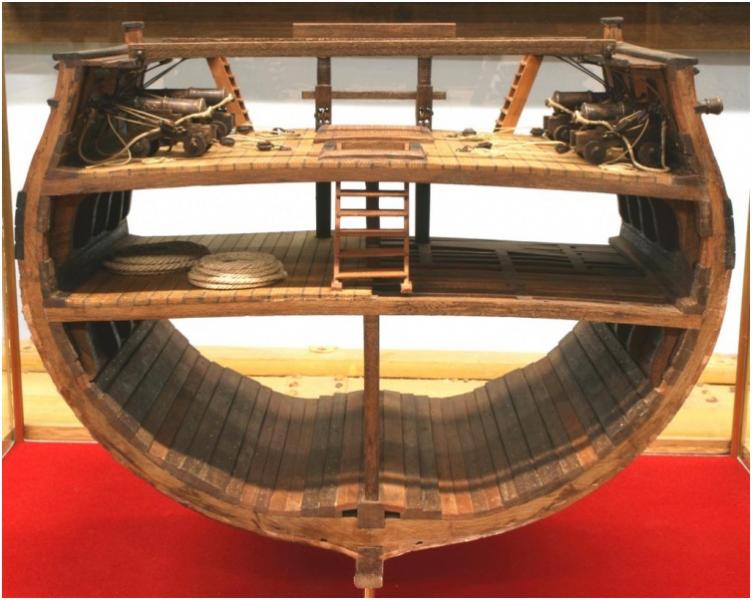
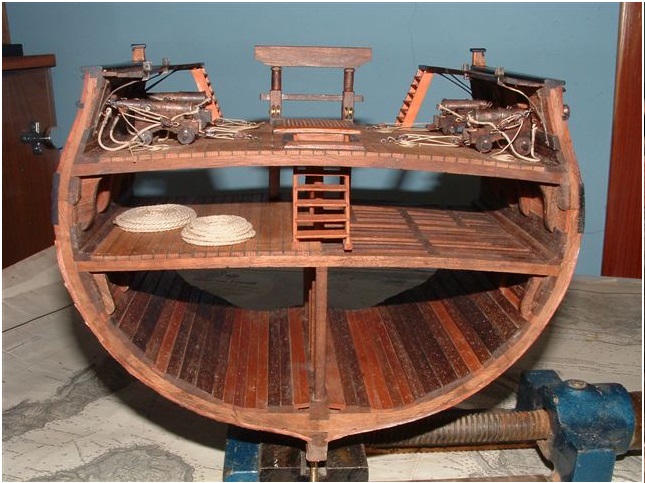
Hallo Christian, I made in my post a small mistake which confused a little bit. I mentioned "class" at the Mermaid, which was incorrect. Thanks Russ for the explanation and the correct information of the different vessels! In this topic Russ made already a good clarification in his post: For everybody interested in frigates this book also written by Robert Gardiner could be also of interest: THE HEAVY FRIGATE - Eighteen-Pounder Frigate: Volume I, 1778 - 1800 Coming back to the Triton Section and as all of you were already expecting the Section is finally finished. I want to say many Thanks to Russ who made this project possible with his preparation of the complete information as well as his continuous assistance and helpful comments during this log, the draftsman Don who prepared here wonderful drawings, very exact and detailed, so everybody could understand and follow. And off course many many thanks to my friend and mentor Zeljko. It was a nice and interesting and sometimes surprising log and I enjoyed all of your comments, remarks, questions as well as all discussions. So therefore also many thanks to all members writing interesting posts in this topic. Many Thanks for your attention during the time and I hope you had fun and some of you found one or two new information, how to make something and / or also how not to make it...... Here are some photos of the finished Section

-
Hallo friends, many thanks for the kind words and your comments for the last post where I was able to show the installed and rigged guns. You are completely right with the impression that such a model is looking totally different when the gun-carriages with the rigging is installed. After these parts you have somehow "Life on board" and a little bit you can smell the gun-powder I would like to find some 3 or 4 gunner-figurines in scale 1:48 to "activate" the model totally! If somebody have a tip for good figurines in this scale please please give me a hint.........
-
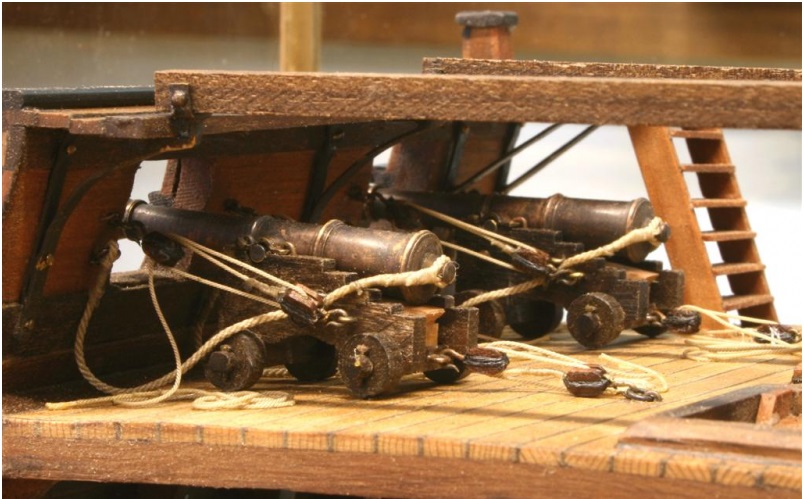
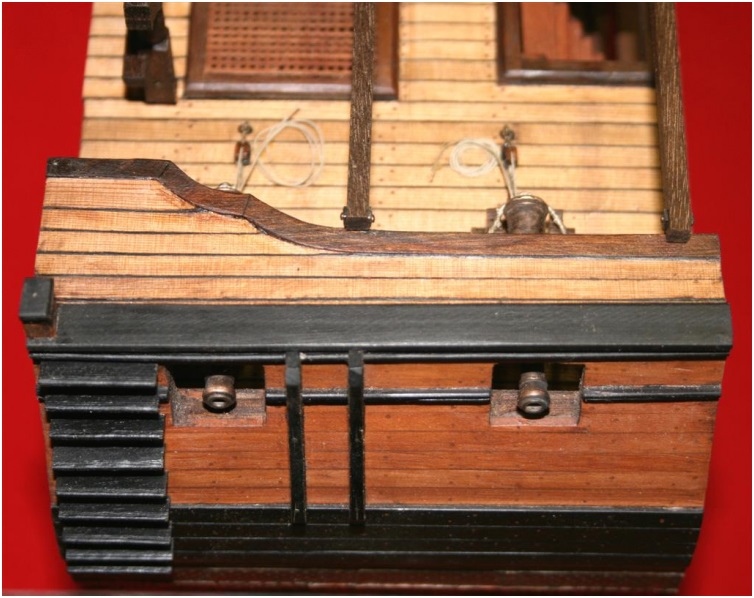
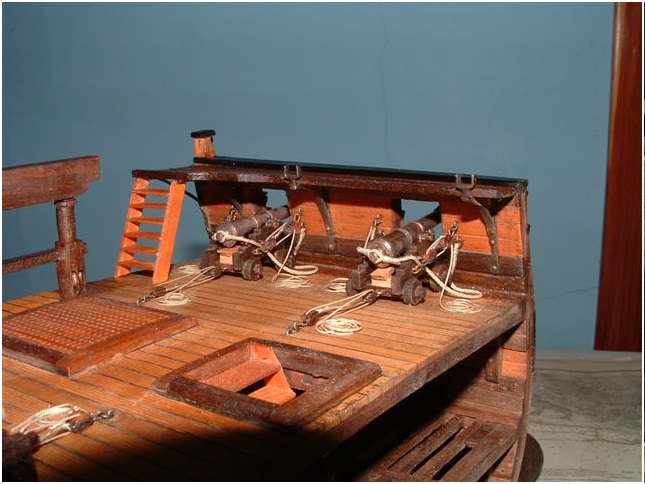
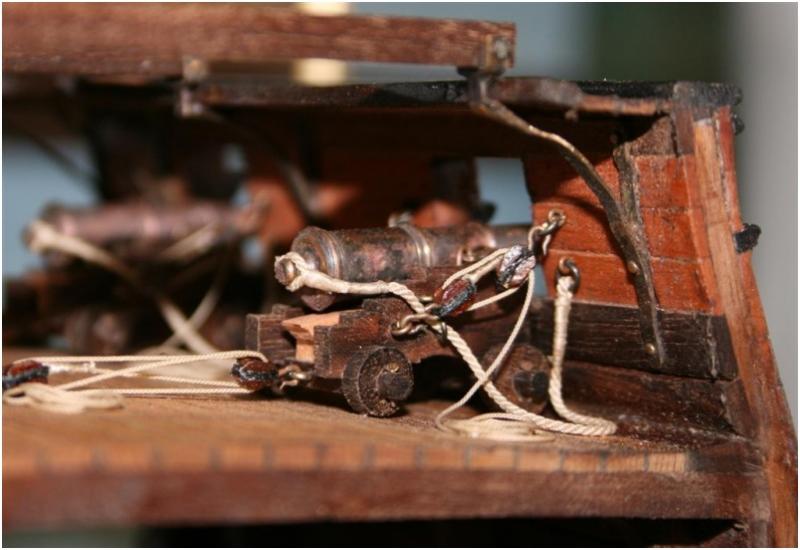
And here some closer look at the guns from the side....... Comments, remarks and questions (as usual) are very welcome............

-
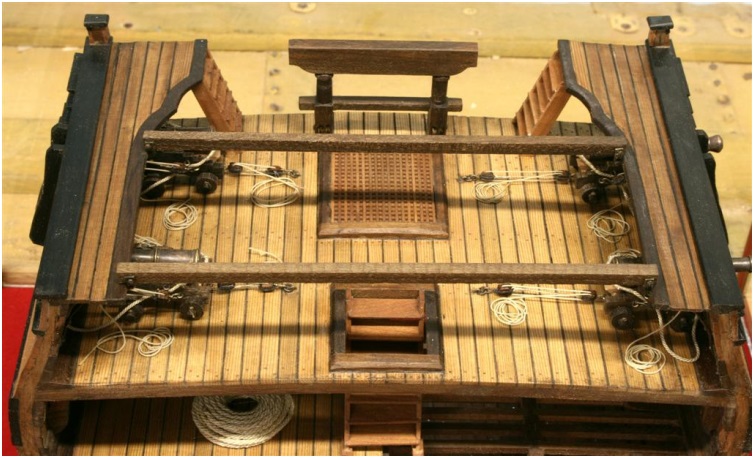
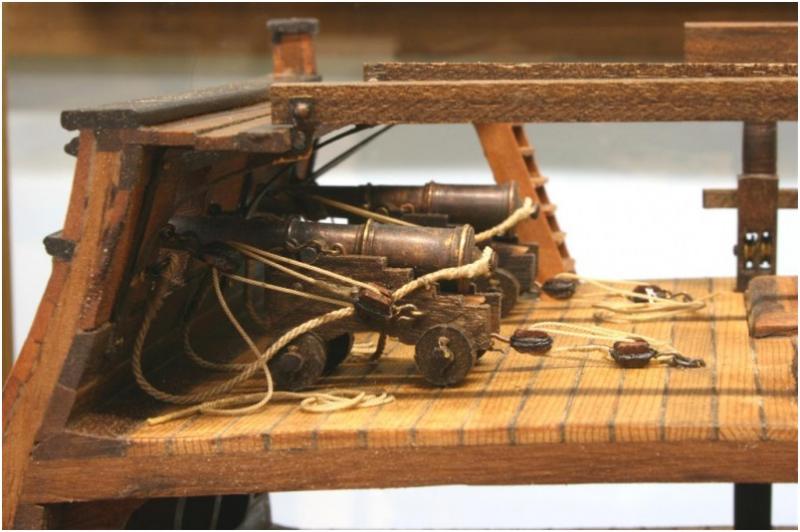
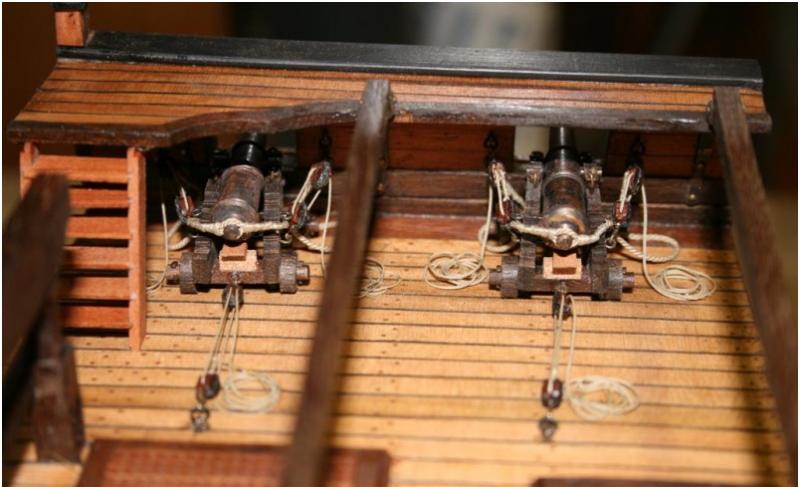
Step by step we are coming to the end of the log........ Here today some photos of the installed gun-carriages fully rigged on the deck.

-
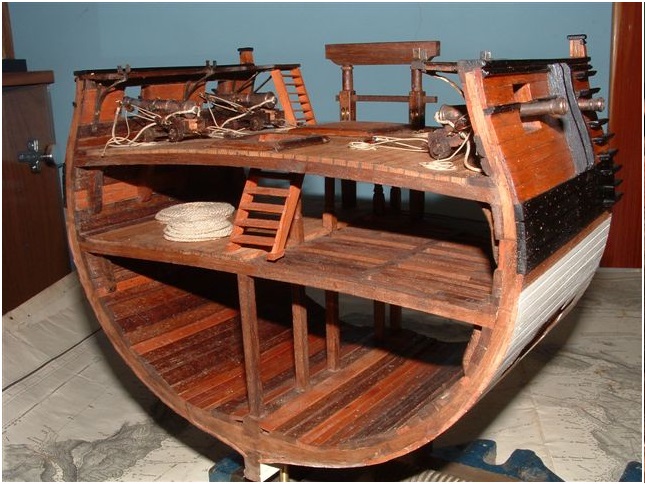
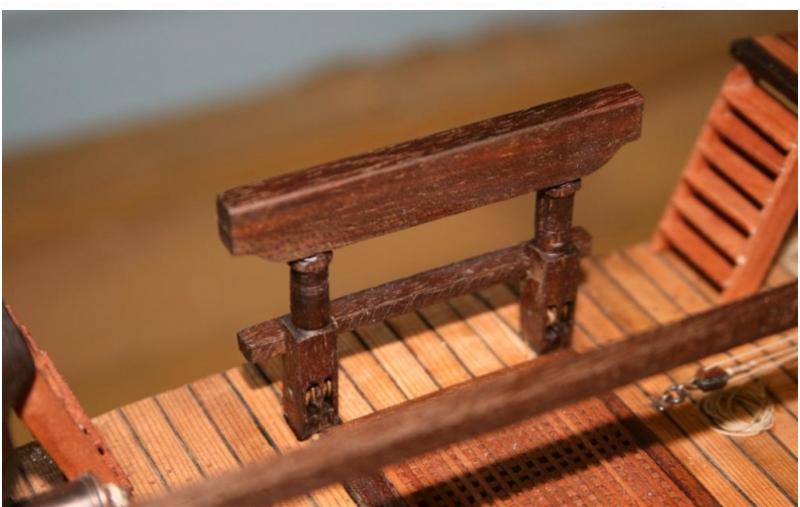
After the last excurses some new photos from the finished and installed Main Topsail Sheet Bitts you can also see the light bow of the grating which is following the bow of the deck at the edges you can see the Gangway ladders.

-
Uwe: My reading suggests that the smaller caliber guns would have used the single/single arrangement, but I will leave this an option for each builder to choose for themselves. Either the single/single arrangement I have shown in the plans or the single/double arrangement will work. If I find anything more concrete for the complete hull build, I will let everyone know. Russ
-
Uwe: I think you misunderstand something. Whether using a single/single arrangement or a double/single arrangement in the gun tackles, both blocks were fitted with hooks, both at the bulwarks and the gun carriage. You seem to indicate in your last reply that the bulwarks block had to be permanently fixed in the single/single arrangement, but that would not be true in a gun tackle. By the by, we should also keep in mind that not all guns used the single/double arrangement. A lot had to do with the size of the gun. Certainly the heavier guns, like a 24 pounder or 32 pounder, used the single/double arrangement, but the smaller calibers, say a 4 pounder, 6 pounder, might have used the single/single arrangement. It is entirely possible that they used the single/single arrangement on 9 pounders as well. Like I said, I will be checking into this further for the complete hull build as we go along. Russ
-
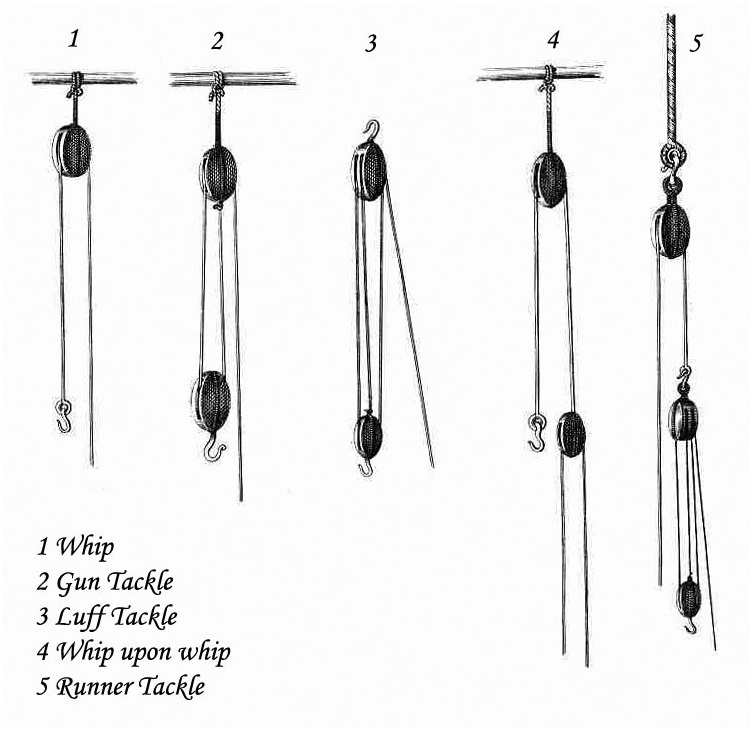
Just for information: a single/double block tackle is a luff tackle. The following info is from The Young Sea Officer's Sheet Anchor Lever, 1819 The gun was rigged as Russ says, so why a tackle with two single blocks should be called a 'gun tackle', I have no idea, other than maybe guns used to be rigged this way until heavier ordnance demanded more pulling power. I'm enjoying the build, Uwe. Top stuff! Rich

-
Uwe: Yes, I think they probably used the gun tackle arrangement. A gun tackle (the name of the tackle) has the single and double block. In that arrangement, the single block is on the gun carriage and has the standing end of the tackle secured to its **** end. The double block is on the bulwark. The tackle goes through the first sheave of the double block, then back through the sheave in the single block, then back through the second sheave in the double block and you haul on that free end back towards the centerline to pull the gun up to its port. That is what I meant in that previous statement. In the single/single arrangement, the standing end of the tackle is secured to the **** end of the block on the bulwark, then rove back through the single block on the carriage, then back through the single block on the bulwark. We used this for the sake of simplicity in block making, but the use of the single/double arrangement is there for those who want to use it. We will revisit this subject when we get to that point in the plans drawing process for the complete hull project. I will probably end up offering both options for the complete build. Right now, we are a few weeks away from releasing the first plans of the building jigs, keel etc for the complete hull. Russ
-
Shadow: The plans call for two single blocks. We used this for simplicity's sake, although you can use the more traditional gun tackle rig with the double and single block. I'll leave that for each builder to decide. The thing to remember is that either way, the tackle is fixed to the **** end of the single block which is mounted on the gun carriage. The other block (double or single) is attached to the bulwarks. The free end of the tackle must come out of the block on the bulwarks so that it can pulled back towards the centerline of the ship. One other thing to make sure of is that you get all of this rigged BEFORE you install the gangways otherwise it will be that much more difficult to rig the guns. I cannot stress this point enough. Rig the guns in place BEFORE you install the gangways. Russ
-
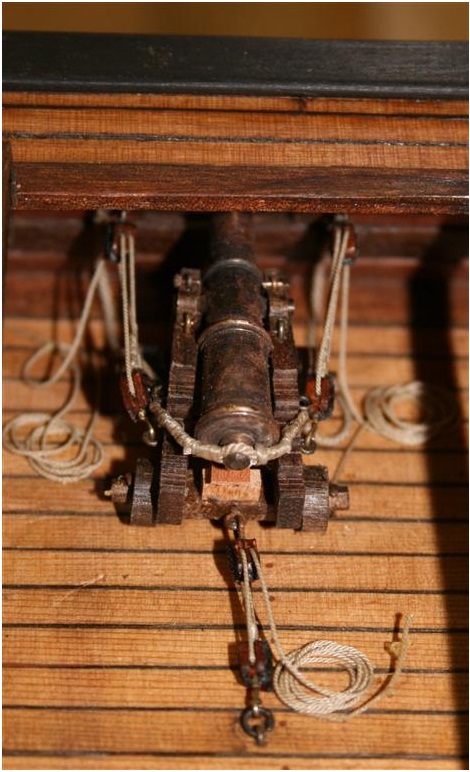
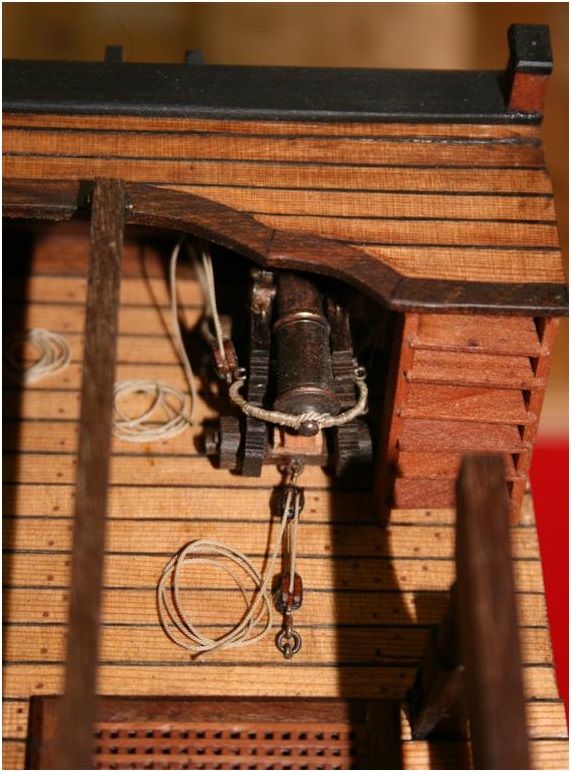
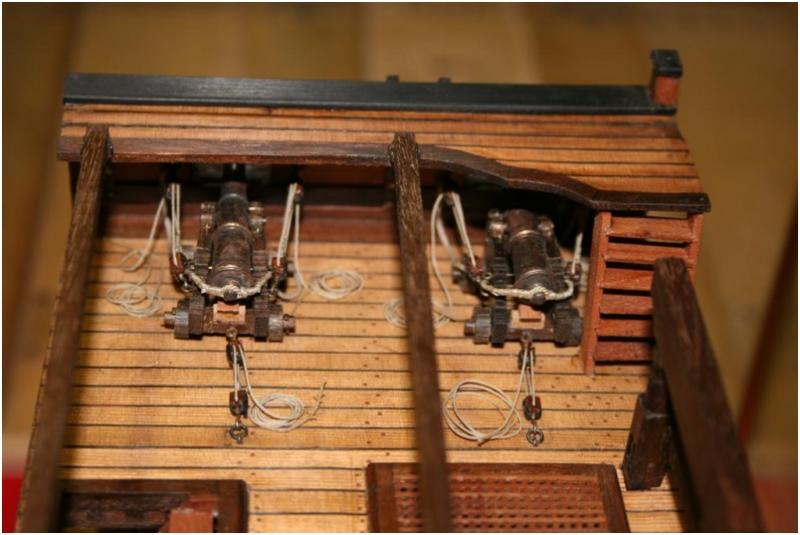
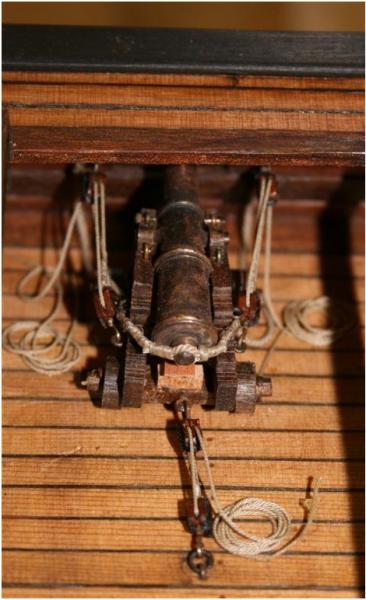
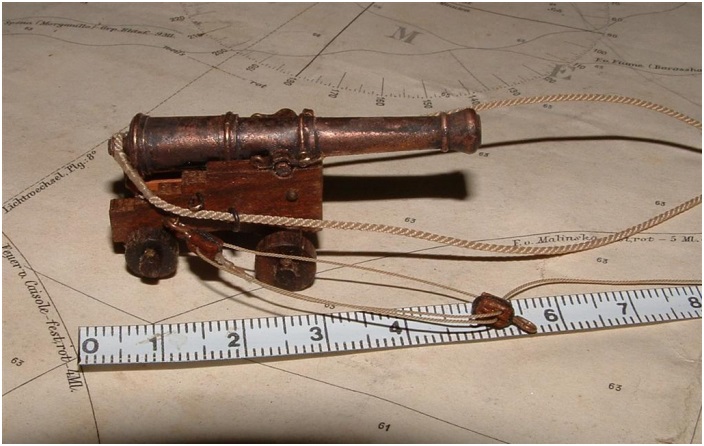
After the excursus of "blackening" the gun-muzzles back to the actual built Here you can see the Port tackles prepared with a single and one double block and the necessary hooks on each block. Referring one question by a member in the past: Such port tackles are installed on both sides, so per gun two! For the size a ruler (with centimeter scale) is attached! The same tackle attached at the gun carriage and additional also the breeching A gun has only one breeching. The details you can find on the drawing "Tackles" in the download forum for the Triton built! For everybody who is not registered for the Section or for the complete model of the Triton -----> why still waiting? ----> A short request to our leader Russ and you are in the Triton group and you can download the detailed drawings! 8) And all of this cost-free!!!! Questions and comments as usual very welcome.........

-
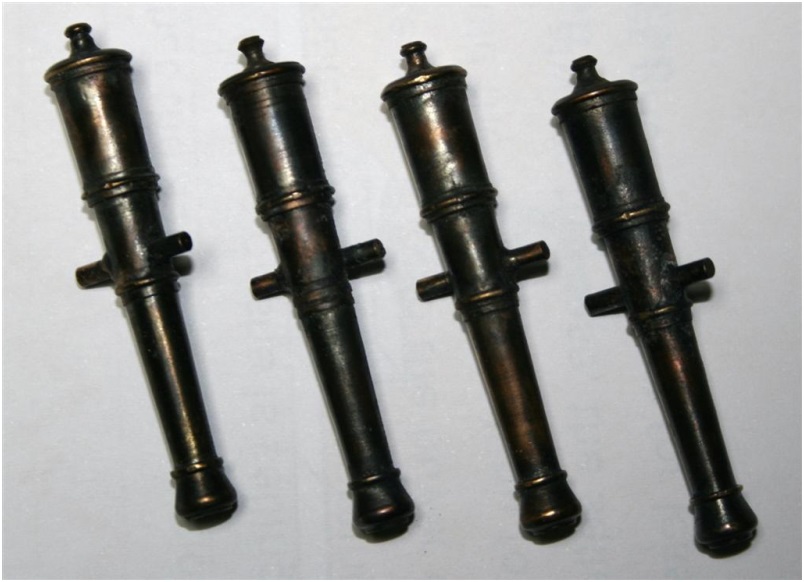
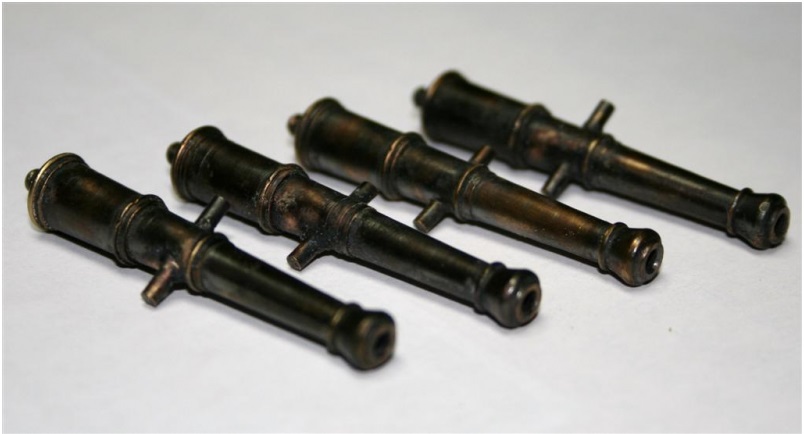
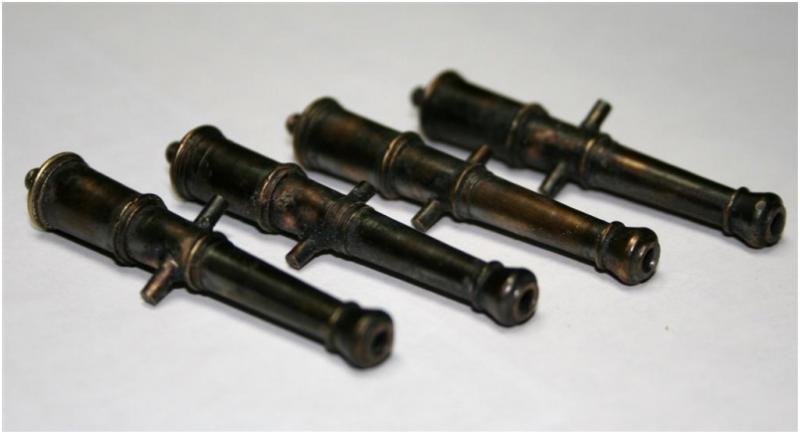
Hallo all, sorry for not earlier reply for the last posts made here in the building log, but I was very busy in the last days (unfortunately in my job )! Turning on a lathe: many thanks for the kind words and I will forward your comments to the producer of the muzzles On my old lathe there I do not have the possibility to copy and to reproduce the same elements (like this identical muzzles several times). A friend here in Croatia (circular saw) has a specialist lathe and he produced the four identical gun-muzzles out of brass on his lathe (many thanks to him) with the help of a kind "reproduction-jig", you maybe know these kinds, where the preliminary form is controlled by a kind of sensors and the steel for the cut (sorry I do not know the technical correct english terms) is following the same form and you can reproduce it so often you want. If I would try it on my own lathe I guess I would have four different calibers, including longguns and cannonades at the end Now to the patina of the muzzles: Like Russ mentioned correctly they are not completely black like they should be on a british active warship of this time. The guns are now looking like weathered bronze guns and not like the more or less dark black iron guns of this time....... There are enough blackening chemicals available on the market which can produce different levels of darkening or blackening. See here fore also our very good Tutorial written by our Pat (Banyan) which you can find here: http://modelshipworld.com/phpBB2/blackintro.php Here the used way like Lee was asking and I try to explain most of it in english (and where necessary in addition in german) : First of all off course cleaning of the brass part so no grease from fingerprints etc. is on the parts. Second the bath, it contents with one part of "copper-blue" (german: Kupferblau) which is used also for spraying (and killing) vermints (german: Schädling) in the garden, melts this in water, and with second part with photographic "Fixer" for black and white photos. The brass-parts which have to be "blackened" can lay inside this fluid-mixture (in a closed glass) for several hours, f.e. over night. Afterwards cleaning with fresh water and ------> finished It is one way of several others possible to reach such a patina.
-
The installed guns ready for rigging

-
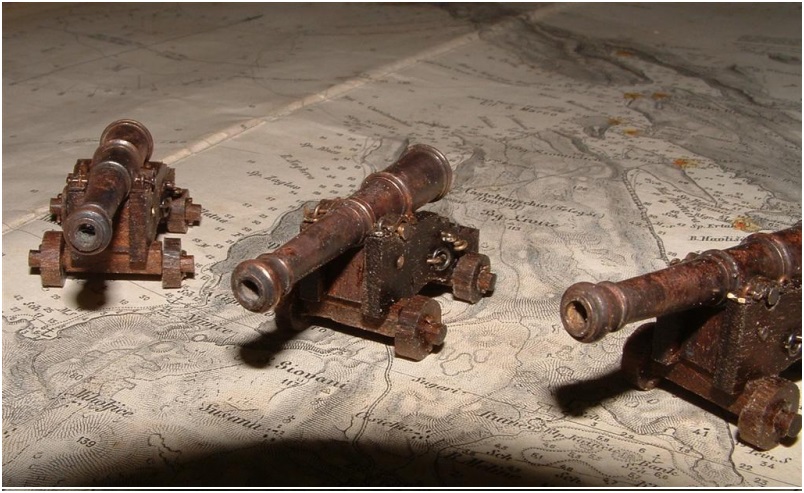
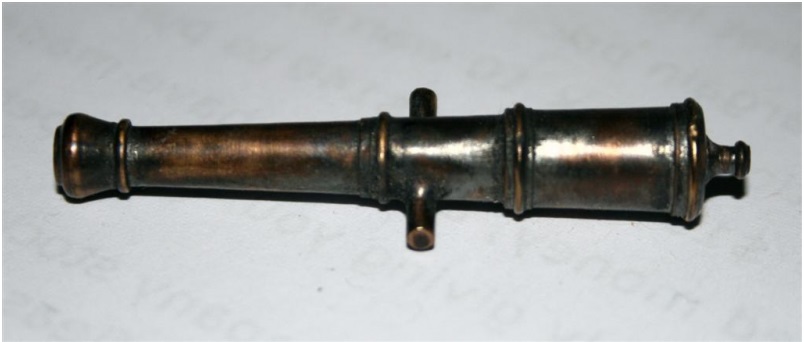
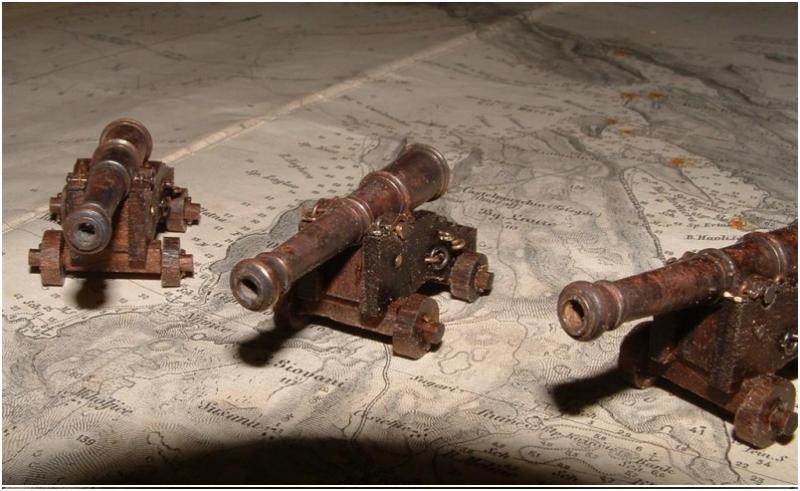
The gun-muzzles turned on the lathe. One in detail, in total ca. 4,80cm long And here all four ready for the installation on the carriages As I mentioned before already when we had the subject of the iron metal brackets of the gangway.......not completely blackened!


-
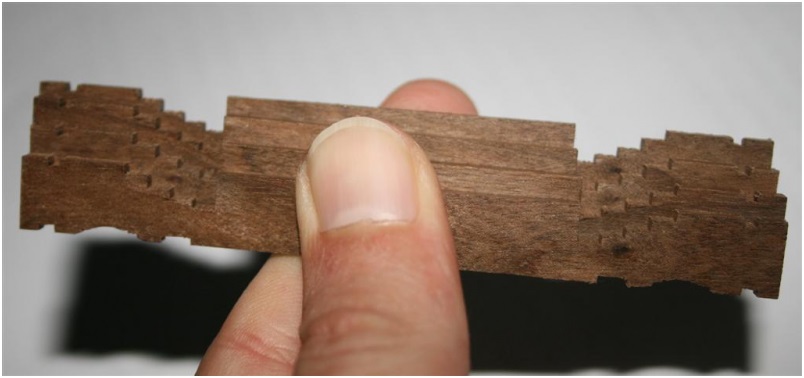
Hallo JIm, you are completely right with your opinion...it is walnut, this one with only light grain! Scott, good to hear that you are also giving this type of jig a try! As I understood Russ is thinking about to prepare such kind of jig also a try for the full hull model of the Triton and will prepare a drawing with the necessary measures. So maybe you could write once about your impressions and experiences with this kind of jig, which can be important for the future builts in our group. In the last posts I was showing the elements and the completed carriages of the Triton guns. Because of one request I am showing today two more photos of the cut brackets, so it will be more clear about the way and sequence of making the brackets. In my opinion it is much easier to receive correct and identical brackets, much better and easier than to cut each bracket with the scroll-saw.

-
Hallo all, first of all many thanks for the kind words about these carriages. Unfortunately I made a mistake in my last description of the above mentioned photo which I want to correct now: Shown is off course on top of the rear "Axeltree" (see the "Gun Carriage Detail"-plan part No. 9) the "Bolster" (No. 5) and on top of this the "Stool Bed" (No. 6) and until now without the wrongly mentioned "Quoin" (No. 1). Therefore also it seems on this photo that the gun-muzzle will not be able lay with backside on the Quoin, because of the eyebolt bar going from one side to another. But with the installed additional Quion the muzzle will lay higher and be not hindered by this eyebolt. The muzzle will lay on top of the quion where it should lay. Only to mention it once more: This installation is not according the drawings and not according the real carriages ...it is an simplification which will be not visible later on! On a english gun carriage of this time you have only two horizontal bolts from one bracket to the other one: the Transom bolt and the Bed bolt, all other rings and eyebolts are installed on each side brackets!
-
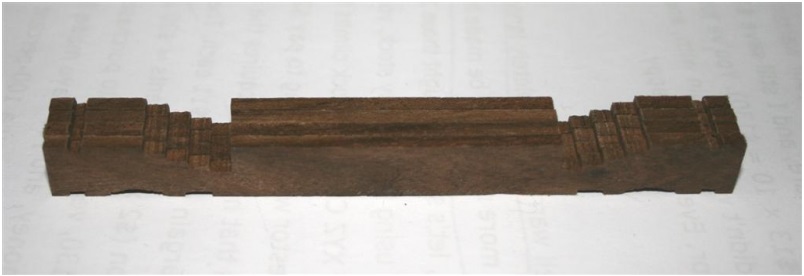
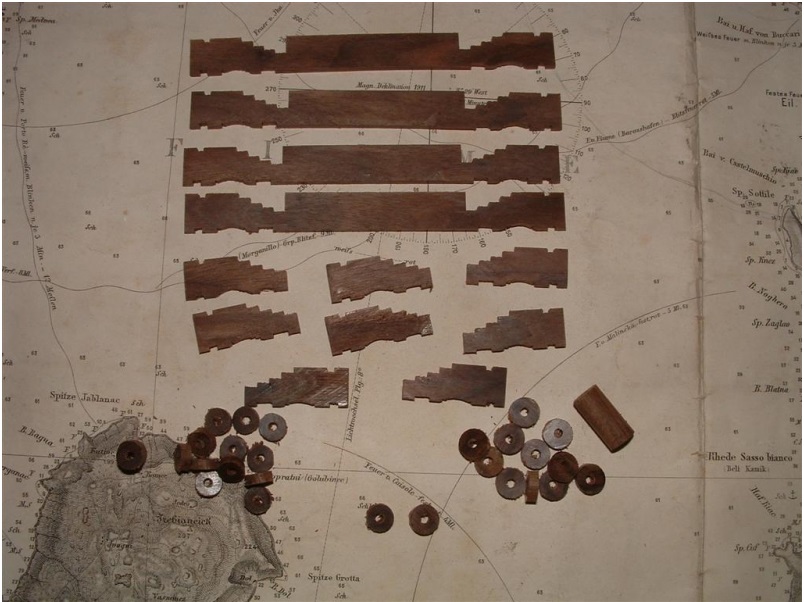
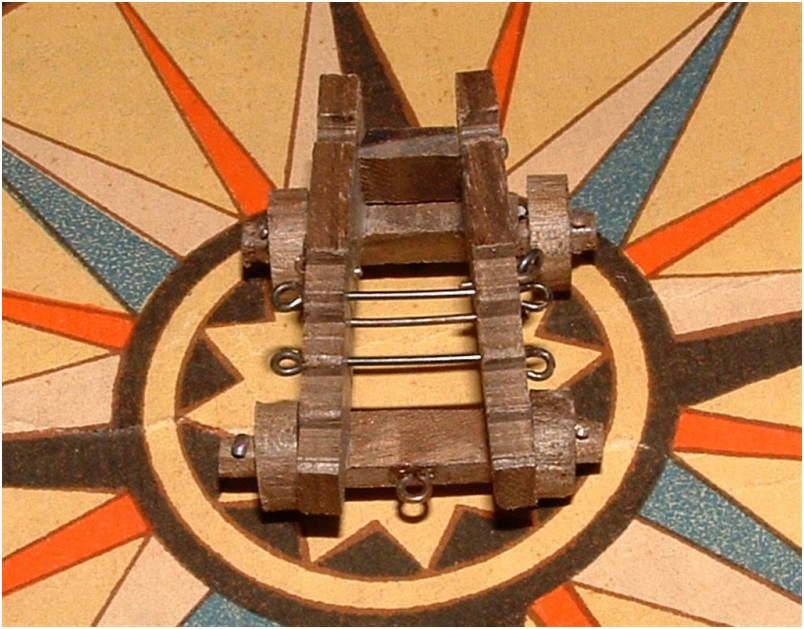
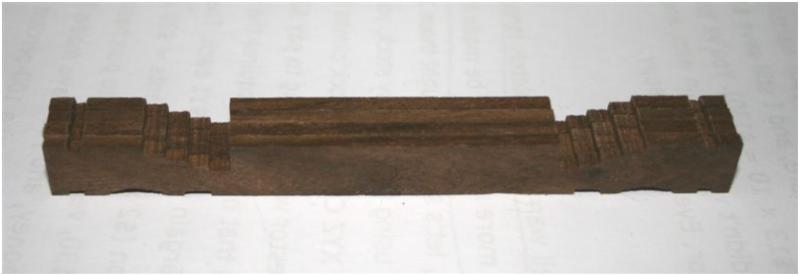
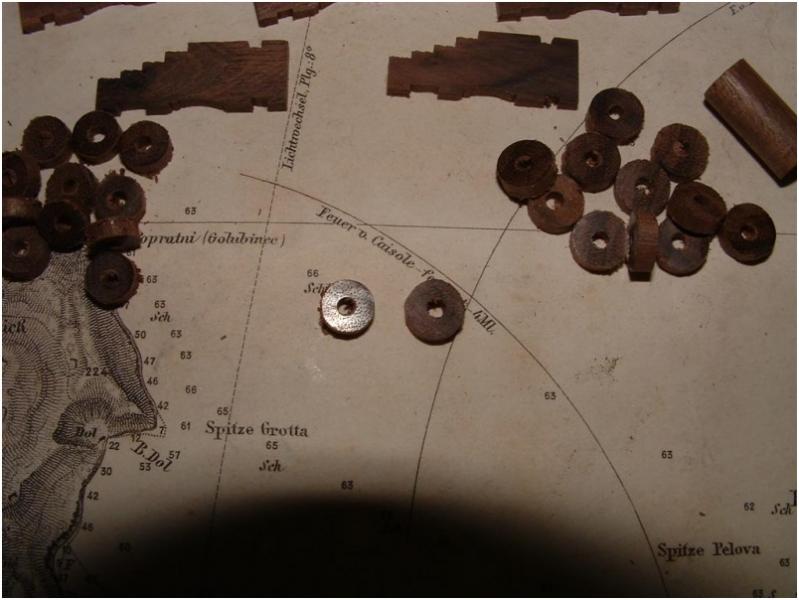
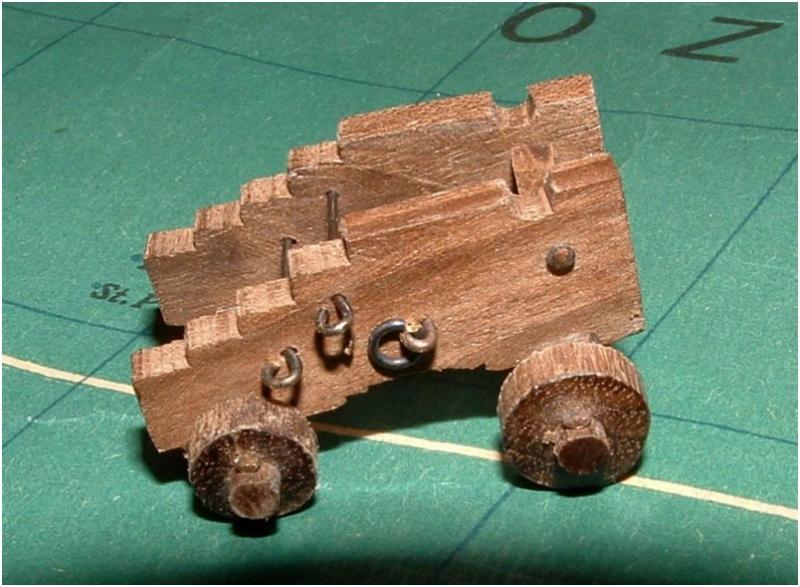
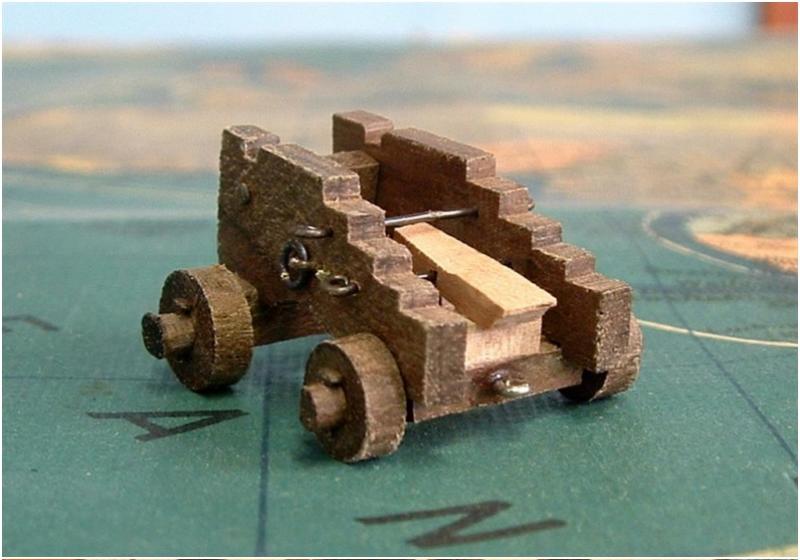
The next photos of the construction: The basis wooden elements of the gun carriages brackets were cut out of a block with the help of the circular saw. So the steps were cut with the different height of the saw-blade. The round lower part was made with the use of a sanding stick with the same round corpus. After cutting of the form of the brackets the several twin-parts were cut (also with the circular saw) in the necessary thickness of the brackets. Here in closer detail the different trucks (two different diameters) A little bit of cleaning and the installation of the gun-carriages can start! The gun carriages are installed inclusive the bed-bolt and the eye-bolts for the later rigging. I made some very closed photos to see all details etc. better. The eye-bolts are made (it is easier) with the wire turned to ring outside of the bracket. If the muzzle is installed it is not visible any more. (this will be proved with the next post) Here with the installed Quoin and Stool bed (in the view from the back)


-
Hallo Jim, don´t be afraid ...I will not take your posts as "too critical".....it is a way of learning and discussing several different techniques and also (what I like) historical data. I take it as critical and that is ok! Although it is very critical ("ruin"!)! But I do not understand your critic in detail? you are writing nail holes, bolt holes and also hole pattern of what? There are no holes! I guess you did not refer to the stairs etc. of the last post, or? If you mention the coppernails....this I agreed here already that inside should be no nails and master-modelers like Frölich are able to do with this technique a (in my opinion) a fabulous job. But I am happy that with the posts of the coppering it started a discussion and we received a huge number of informative posts from different members about coppering, nailing and weathering of the sheets. If you mean treenails of the outside hull I can not agree with you due to the fact that they are exact like f.e. Russ was explaining. The Triton section is a small model were we are able to get into the scratch-building and where we are able to exercise and try the basic techniques so we are prepared for the full hull model. Also we can try some different ways in order to find the best ways and / or the best results. And the best of this Triton section is......if the side with the copper is not so good you can turn it to the "white stuff"-side