HOLIDAY DONATION DRIVE - SUPPORT MSW - DO YOUR PART TO KEEP THIS GREAT FORUM GOING! (Only 20 donations so far - C'mon guys!)
×


Matrim
-
Posts
1,401 -
Joined
-
Last visited
Content Type
Profiles
Forums
Gallery
Events
Everything posted by Matrim
-
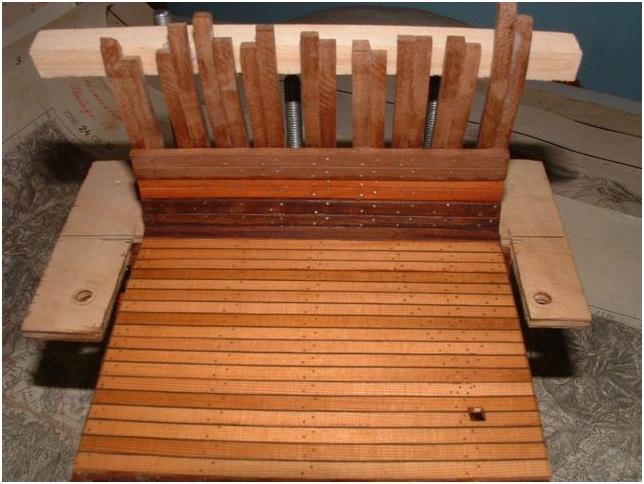
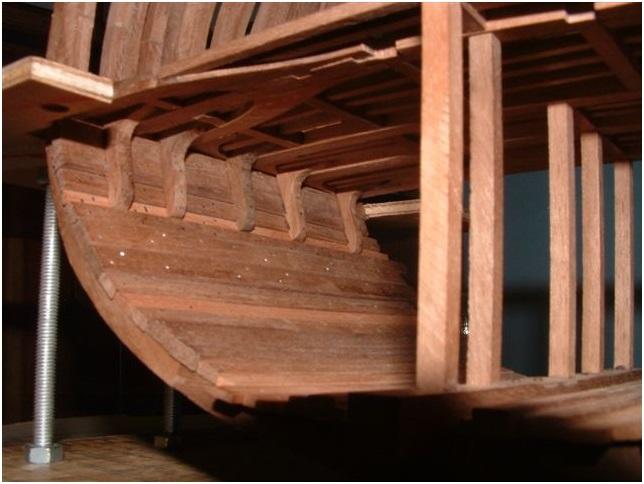
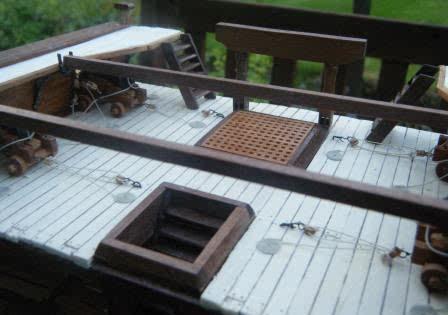
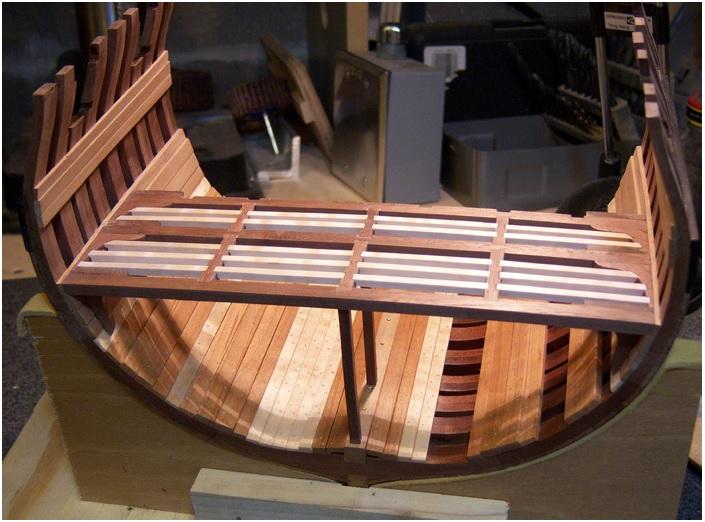
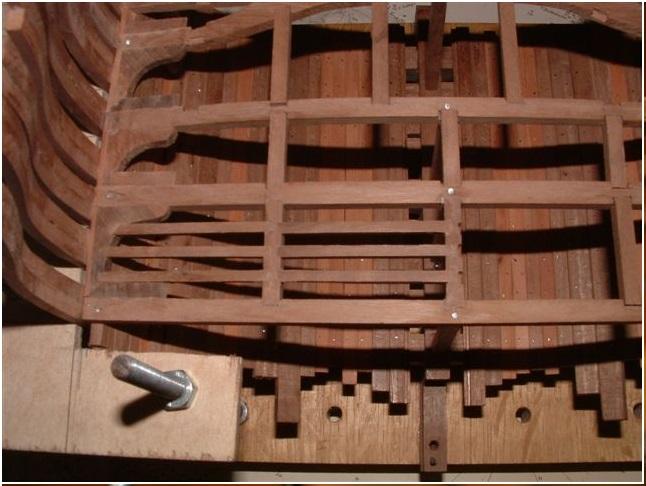
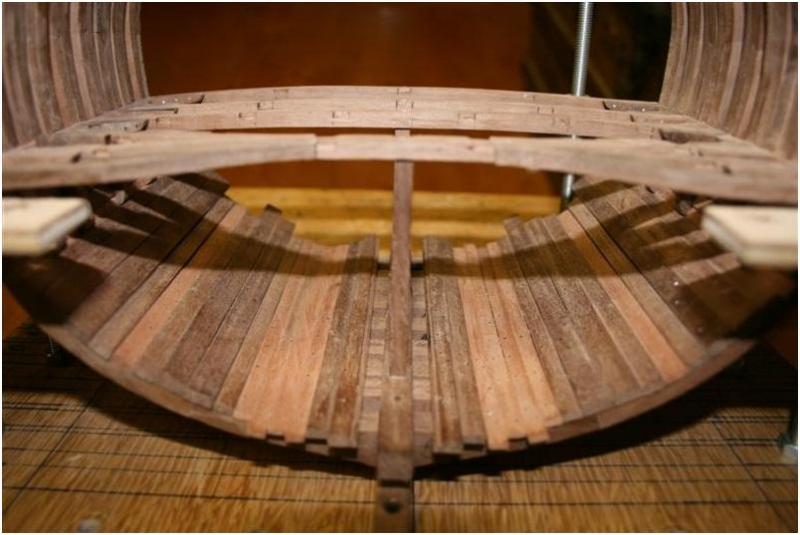
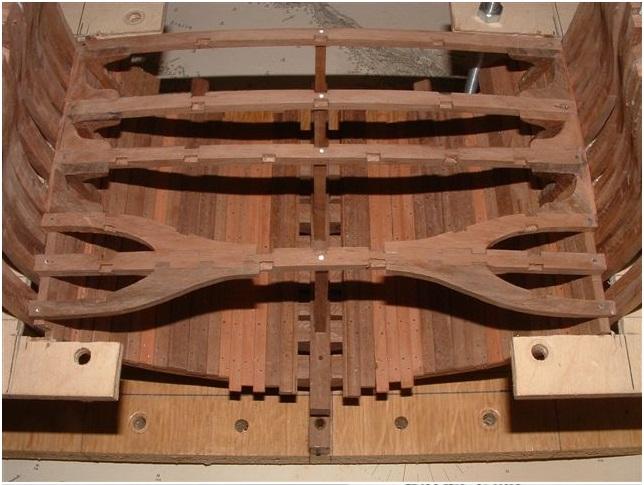
Deck planking of the Lower deck installed. Only one half will be planked so the construction with the deck beams, beam arms, carlings and ledges will be visible. The construction of the frames is in addition temporary stiffened with two profiles at the outside end of the frames. The Lower Deck Spirketting and the Gun Deck Clamps installed

-
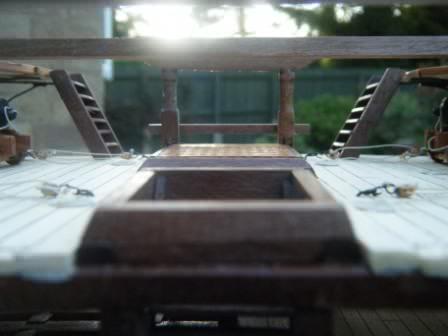
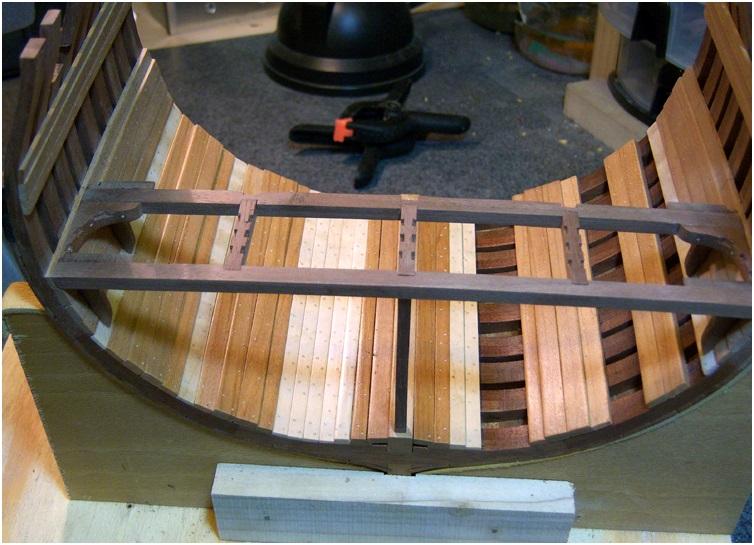
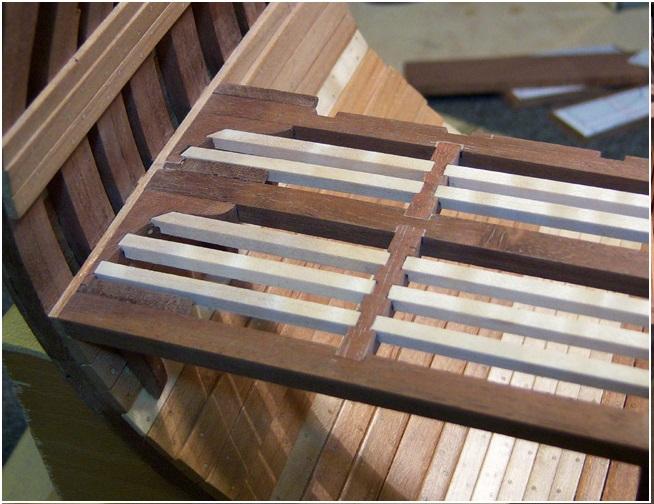
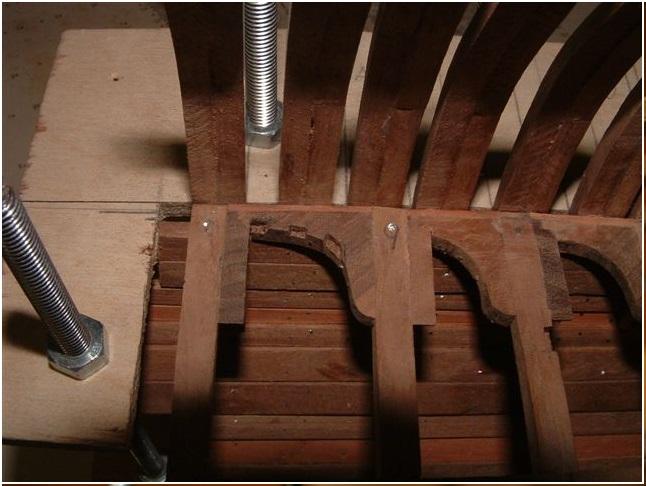
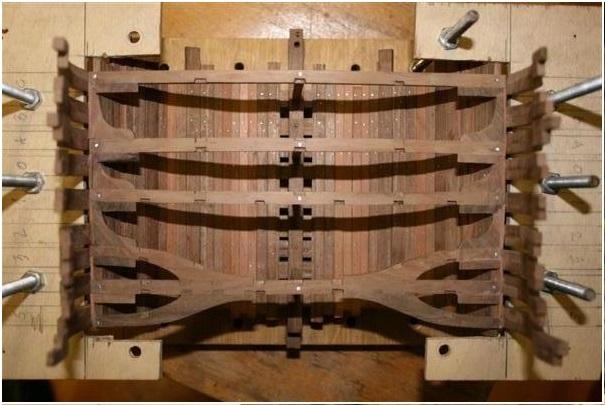
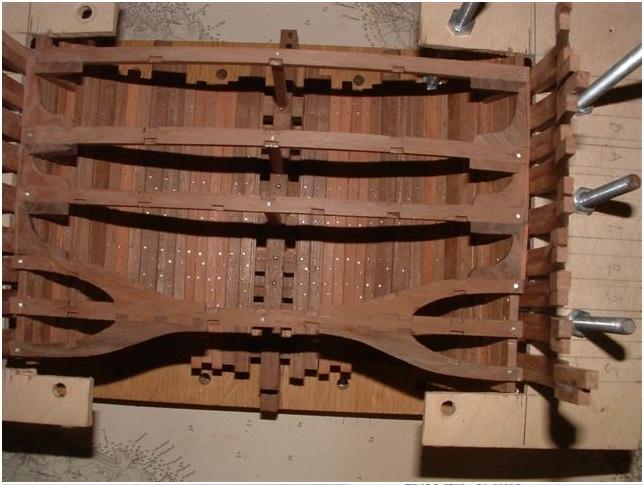
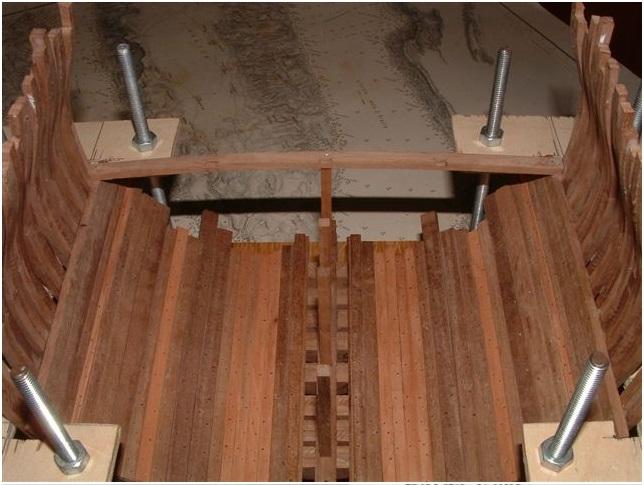
The short Carlings between the Beam arms and the Beam at axis 4 in addition with the Ledges in this area are installed. Here in the top-view and more in detail and the same status with view the other side. Here you can see also the additional pillar at axis 5 under the small Carling in the middle of the vessel
-
The small Carling and the four Ledges between axis 4 and axis 5 are installed. (This time without any drop of blood ) The small Carling exactly in the middle of the ship-section is located on axis 5 on an additional pillar Sheet Bitt in the Deck Beam at axis 4 are prepared.
-
Check out Uweks build as he was the member who put the most detail into how and why - his log is gradually getting reposted up again (and is quite large). That will help out with the order of building. What you tend to find though is that members used to copy what they liked out of individual logs so you might use one persons caulking method but another's method of coppering. If there is no advice covering anything you need to know then ask in your log. The biggest advantage the site still retains is that there are a large number of people who have completed the cross section (and full build plus the Echo build now) - even if their logs have gone. So essentially there are a lot of people who have addressed the very thing you are looking at and should hopefully have an answer. Joss
-
When I get round to it I have another (fullish) old build log that goes into some good detail on how to do the copper.Uweks also has an interesting discussion on it though it I remember correctly he actually plated his. Should be updating the John/Uwek ones again at the weekend. Joss
- 12 replies
-
- 1
-

-
- Triton
- cross-section
- (and 1 more)
-
Don't have a lot from the old log but I did get some of the completed shots on my mobile which are shown below. The quality wont be as good as the originals either. Joss

- 12 replies
-
- 6
-
-
- Triton
- cross-section
- (and 1 more)
-
Good advice and a better job than I did with my cross section Joss
-
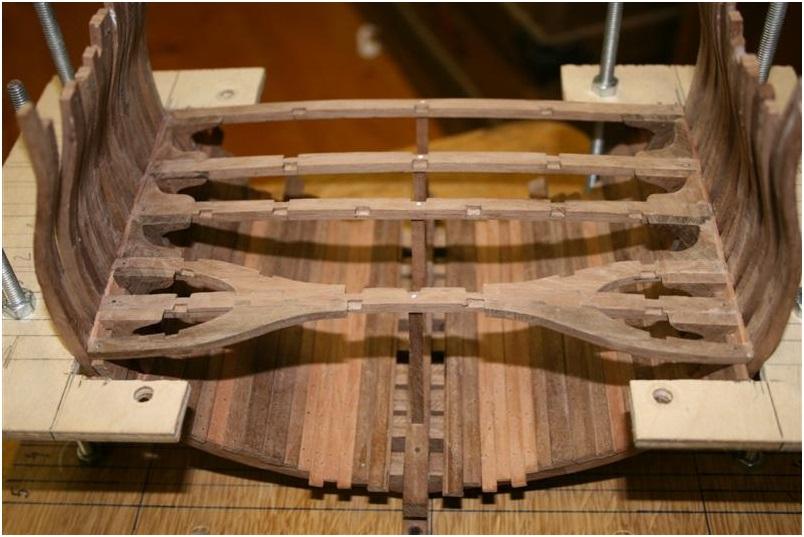
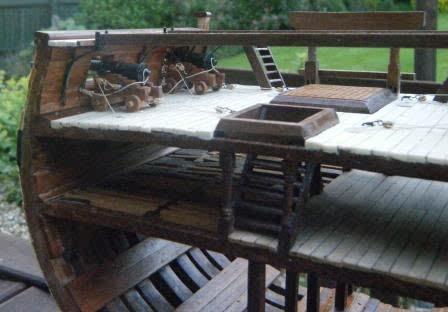
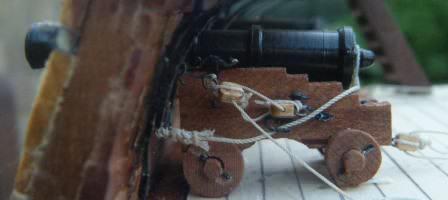
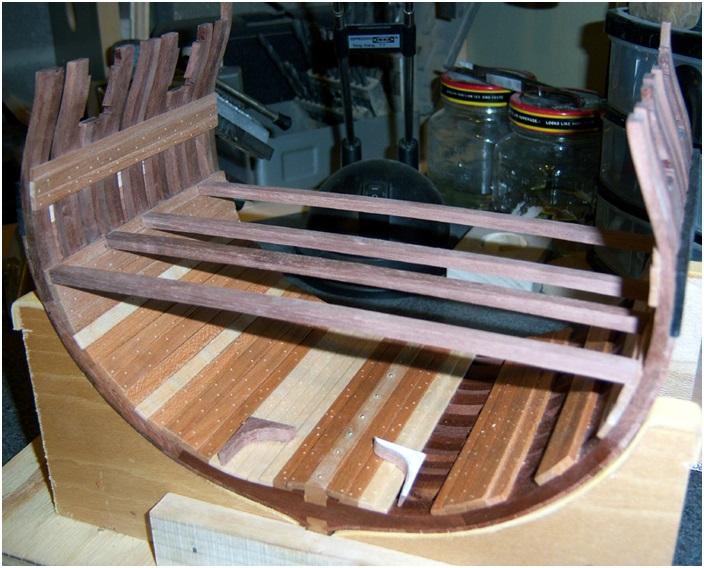
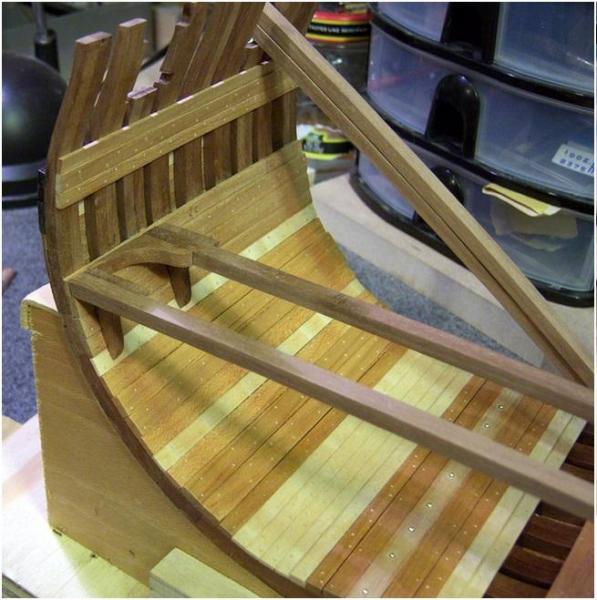
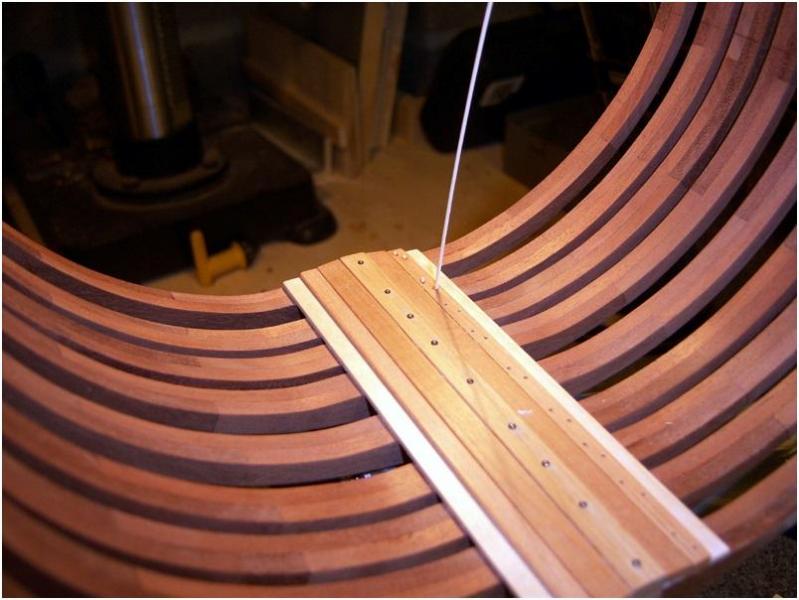
I cut the floor beams from walnut, the same as the hull frames. I have not cut any of the notches yet, I'm just testing the fit here. Same with the knees here, just testing the fit of the parts, temporarily tacking them in place with a small dot of CA glue. So far, it's looking better than I expected. We'll see how it looks after I start notching. Looks like I'm going the have to pick a Ok, it looks like I'm going to need to re-post some notes here. I didn't realize all my comments in the photos were being cut off. I guess there's a limit to the number of characters allowed On the caulking of the hull, I used a mixture of wax based (at least it feels like wax) wood fillers. I mixed about equal amounts of black and walnut to give me a dark brown caulk. When I placed the planks, I used a thin paper spacer to "gap" the planks, and then used the caulk to fill in between . All in all, I'm happy with how this turned out, but there is one thing to note here: make sure you apply a finish to the planking before you caulk, or the filler will get into the pores in the wood. Also, if this is waxed based, I'm not sure how some finishes would react to this waxy film. Oil based finished are probably fine, but I'd bet that a water based acrylic would not work well. I did apply a paste wax finish to the hull after caulking and that worked fine. I also meant to note in one of these pictures of the planking that I had used a #64 drill bit (#37 hole in the Byrnes drawplate) for the treenails, and I think they turned out just a bit too large. When I completed the interior I dropped down to the next smaller drill bit and it looks better. The black leather dye really works well on the maple. It does not have any "thickness" to it when it's dry so it doesn't look like paint applied over the wood. I got a little further with the deck framing over the last few days. Those little notches in the beams are tricky to get just right and make for a good looking joint. I ended up grinding down a small chisel I had to about 1/8" wide to make the smallest notches. At one point my good layout ruler disappeared entirely. I've looked everywhere but it's gone. I don't have children, so I can't blame them! I'm guessing my rigging fairy has stolen it because she's pissed that I haven't finished the rigging on my Bounty Deck beams, carlings and knees are all done in walnut. This particular plank I've been using has a nice tight grain and notches really well. Deck beams, carlings and knees are all done in walnut. This particular plank I've been using has a nice tight grain and notches really well. The next section of framing. These are the easy parts. The beam arms and that 4th deck beam will be the fun part! close-up shot of the joint work. Not a perfect fit, but not too bad for a novice at scratch building.
-
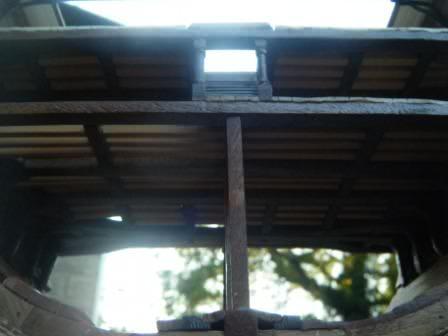
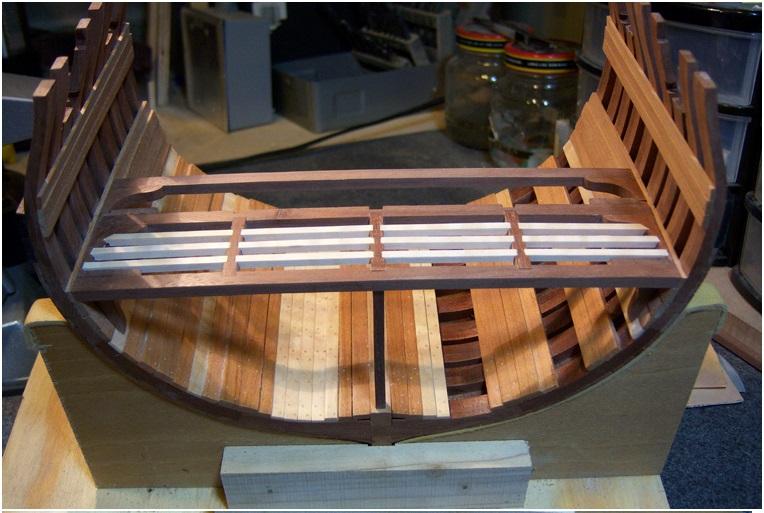
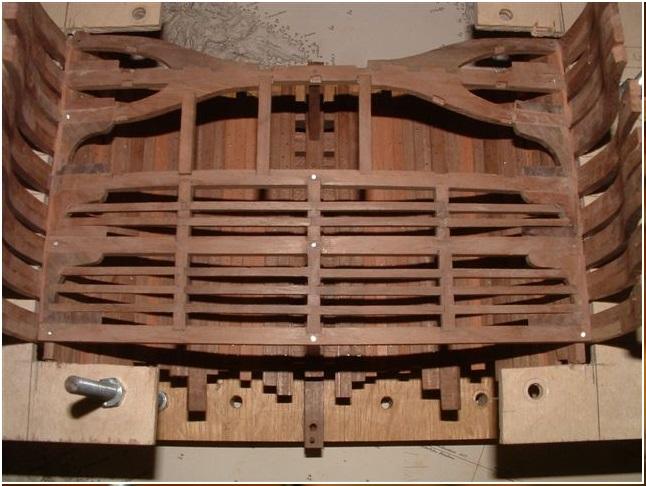
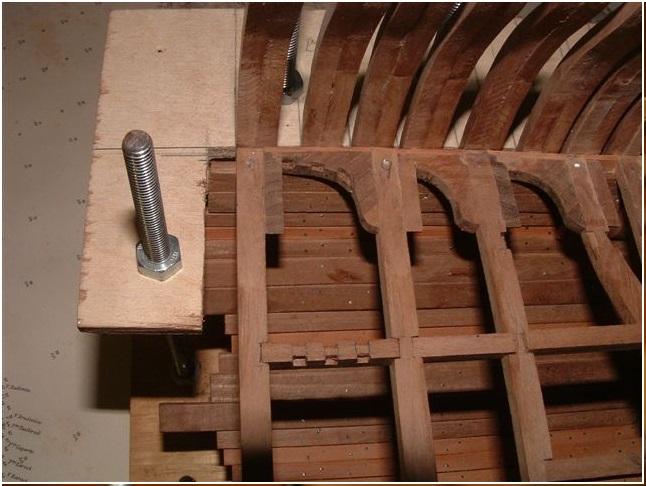
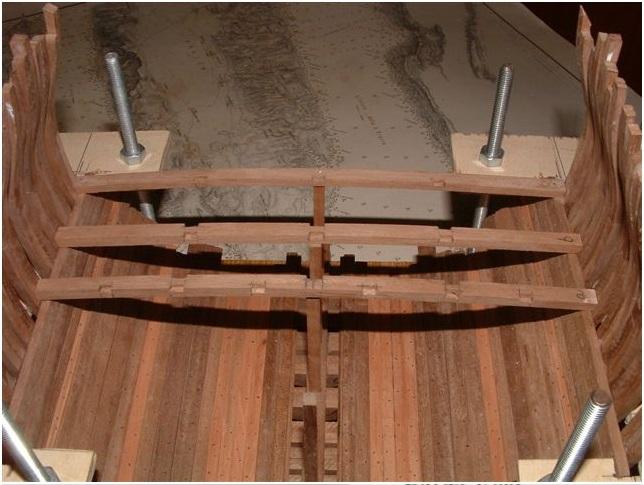
Some further Carlings and Ledges of the Lower Deck are installed, finished between axis C and A as well es between axis A and 1. The three Carlings between beam axis 1 and the beam or beamarms axis 4 are only for dry fit and the mortices in these carlings have to be still made. The same construction phase in the views from "down under"

-
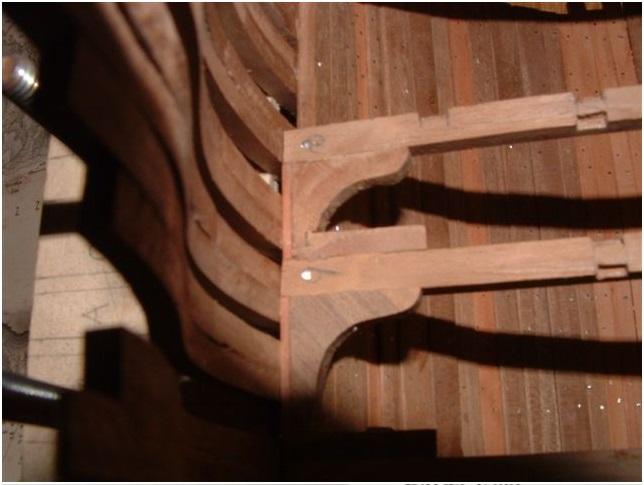
The first mortices / notches in the Lodging knees were made. Here visible the knee between deck beam axis A and C A little bit wider view of the same location inclusive the Carlings, also partly prepared with the necessary mortices for the Ledges. The Carlings are here not glued....dry fit for the last check with the prepared ledges The first area finished with Carlings and Ledges, the rest of the Carlings prepared and dry fitted.
-
Hallo Russ, it was planned in this way....after the beam arms are installed and fixed, the form of the prepared ledges (between Axis 4 and 5) is used for exact marking of the form and location of the mortices, which has to be cut afterwards. At the Triton section model the access to the installed Beam arms is very good, so a later cut out of the mortices is possible without big disadvantages. With the next photos I will be able to show the result. Off course for the normal Beams the mortices should be made before the final installation in the section.
-
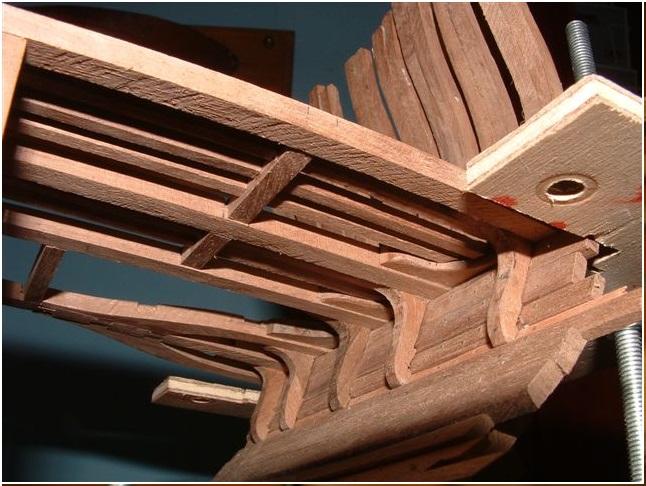
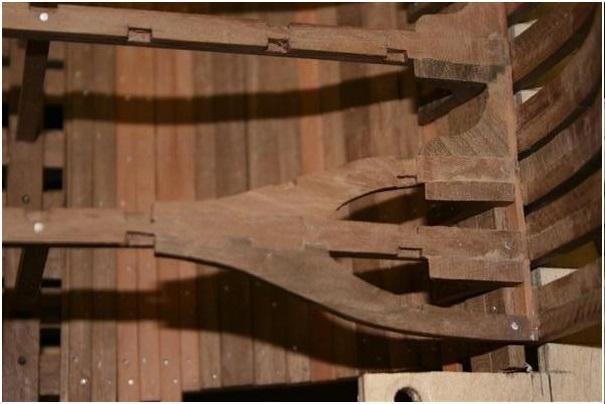
And Some more details of the connections of beams and knees

-
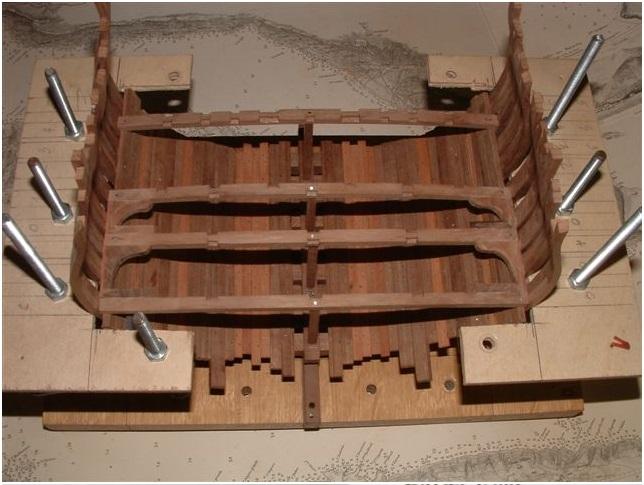
I made some more photos of the construction status with all Lower deck beams and installed Knees Have a look:


-
Welcome to the build..
-
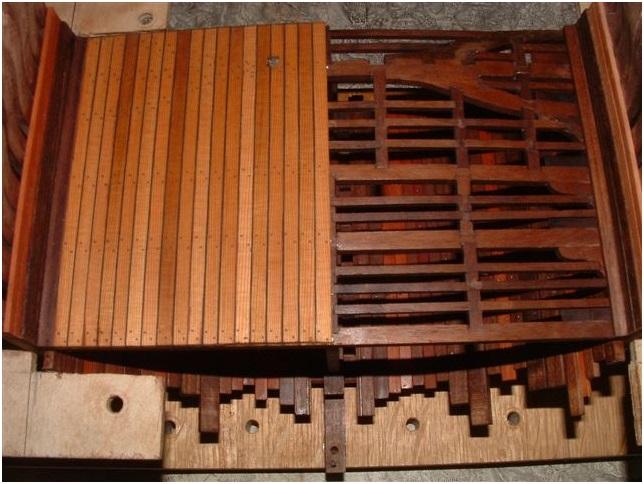
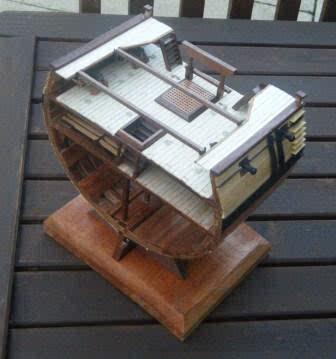
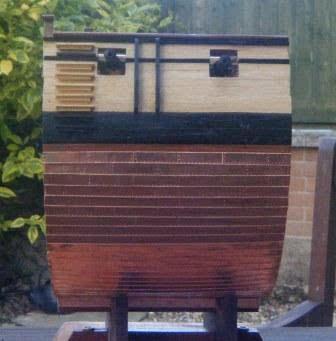
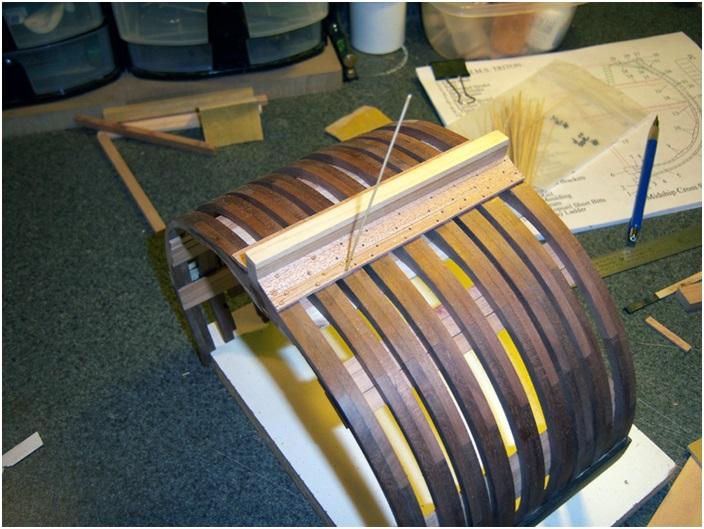
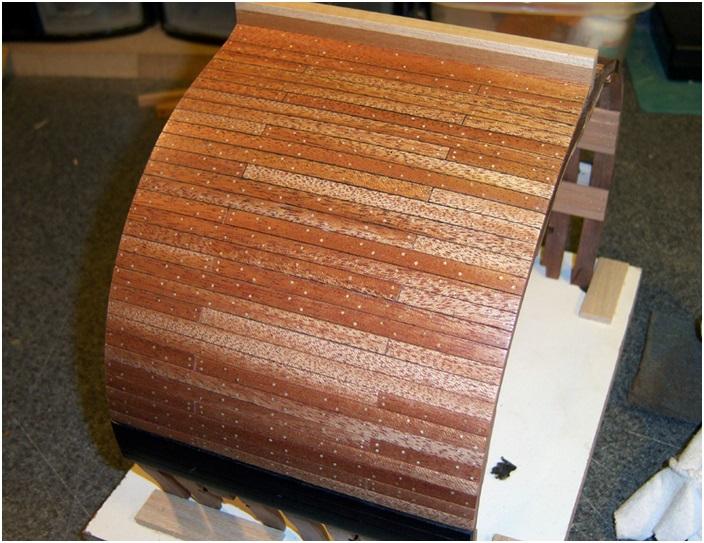
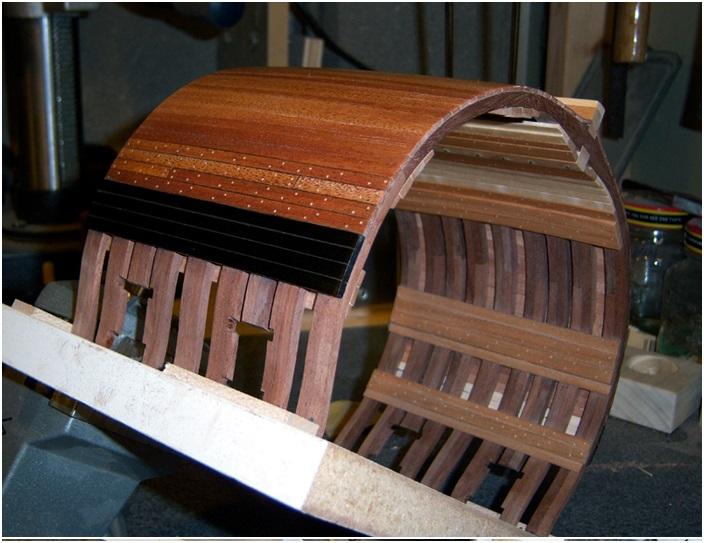
Well, it's been a while since I've been in the shop working, but the weather here has finally turned cold, so I have an excuse to stay inside! I've spent the last week or so finishing up the planking on the exterior and starting on the interior. I started with the wales. These are made from hard maple. I stained the maple with an alcohol based black leather dye. It takes several coats to get a good dark finish, but in the end, it looks very much like ebony. Planking the hull with Sapele. I started the planking at the keel, working up to the wales. You can't see the lines on the frames in this pic, but I carefully measured out 4 lines along the hull frames to help with the spacing and alignment of the planks. The treenails I used are drill Completed planking on one side, with treenails. I didn't take any intermediate pictures here, and I wish I had. When I placed the planks, I used a piece of thin paper shim to space the planks apart, and then when I had finished planking the side,I used a With the hull complete up to the wales, I went back in and completed the planking up to the first deck on one side, and only partially on the opposite side to show off the frames. Cherry planking on the thicker pieces, with hard maple on the thinner pieces. Some of this has been finished with a clear lacquer (the areas that don't have anything being glued to them) so the cherry has turned more reddish orange. The browner cherry is not sure why, but that last comment in the picture of the interior planking cut off the last bit of comment. It should read that unfinished cherry is the browner looking part Anyway, next up is cutting and fitting the parts for the first deck


-
To split bamboo, the trick is that you have to half the piece each time you split it. So first halves, then quarters, eighths and so on. If the piece you are using doesn't split cleanly, as some don't, discard it and try a different piece. Also, strip off that hard, glassy outer layer and any soft inside material that may be on the section of bamboo that you are working. I agree, the Byrnes' drawplate is superior to anything else available. You now owe me that beer. A Guiness will do nicely! Cheers!
-
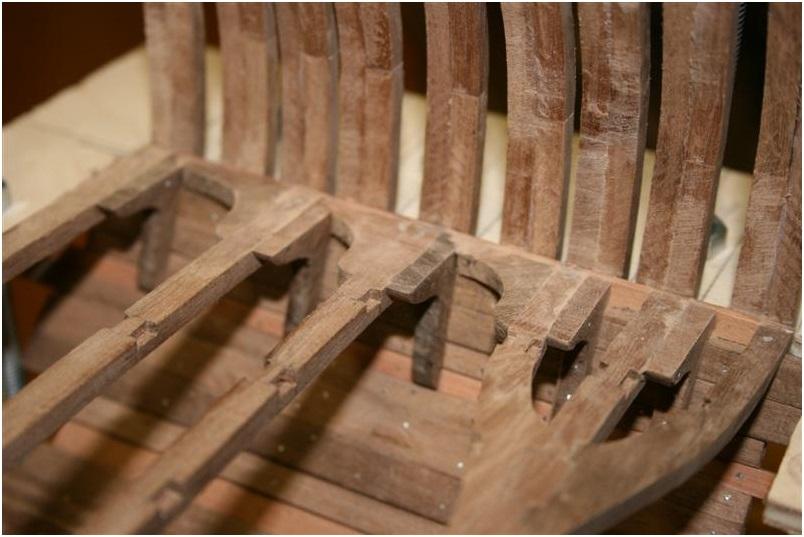
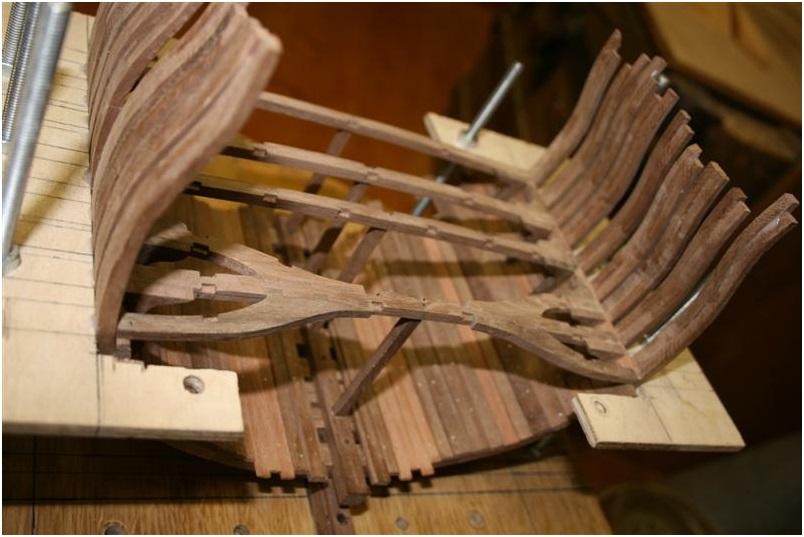
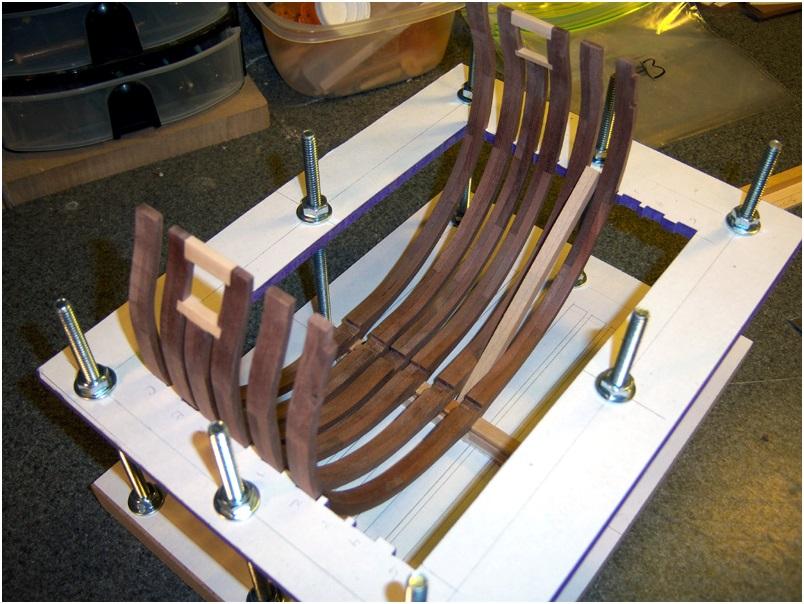
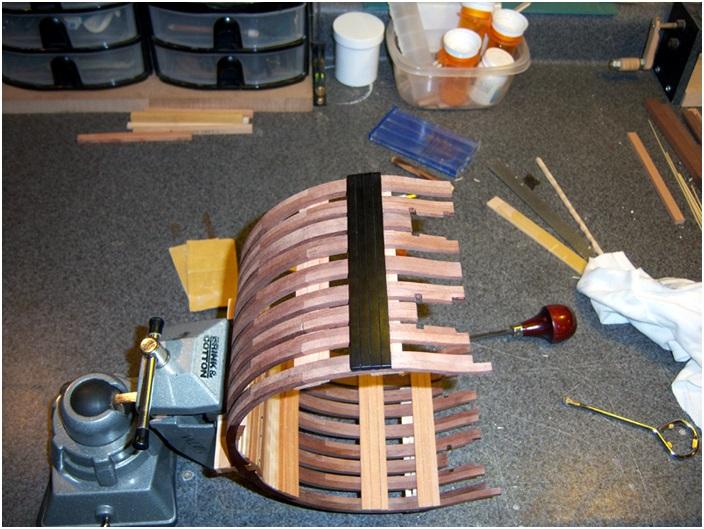
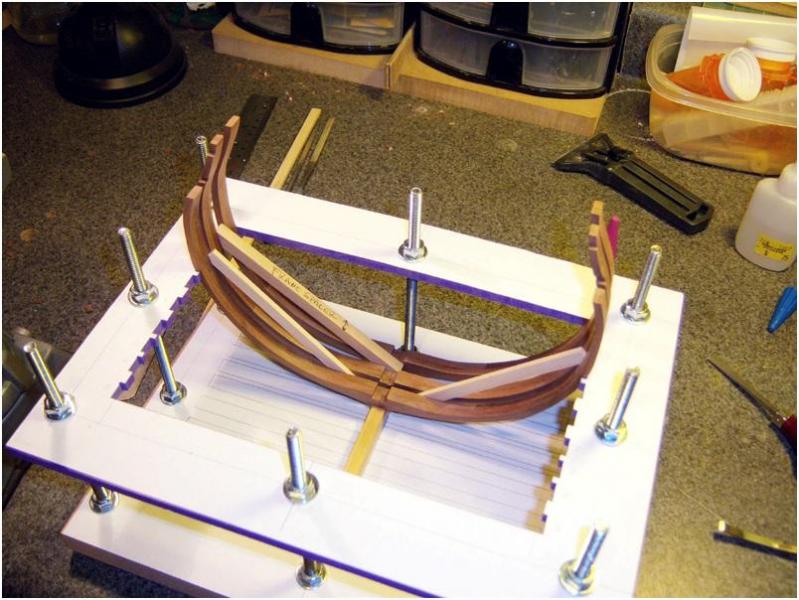
The frames are completed, except for the gun ports, which you still see in these pictures, but I removed them as I started planking. All in all, it went pretty well. A few of the frames are not quite aligned (or shaped) as well as they could be, but it's a good start. I didn't really notice the mis-alignment (or mis-shaping) until I got into the planking, but I seem to be able to hide the bad spots pretty well. I thought I was being pretty careful with checking the alignment of everything as I was installing the frames, so I'm wondering if I'm getting more movement in the wood than I thought I would. It's pretty well seasoned walnut that has been in my shop for, oh, maybe 15 years!! Anyway, it's not too bad, and I can workaround it. I've started the planking along the keelson on the interior. I'll got the limber boards in and a little bit of planking, then moved up to the deck clamps. Next I'll start on the exterior planking. I have pictures of the keelson and limber boards in place, but I haven't gotten any pictures beyond that. This will be my first experience with treenailing! I picked up a Byrnes drawplate, and I must say, this is a great drawplate!! I highly recommend it to anyone who is attempting to draw thier own nails. I tried a cheap one that I had ordered last winter from Amazon, and it was just about impossible to draw anything thru it successfully. With the Byrnes plate, drawing is the easy part. Now if anyone can tell me how to successfully split the bamboo into about 1mm squares to draw them, I'll owe you a beer!
-
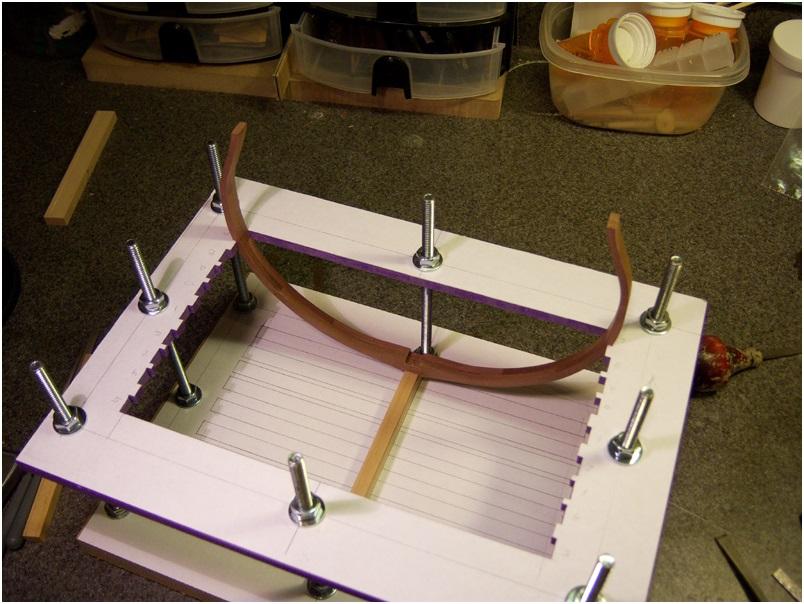
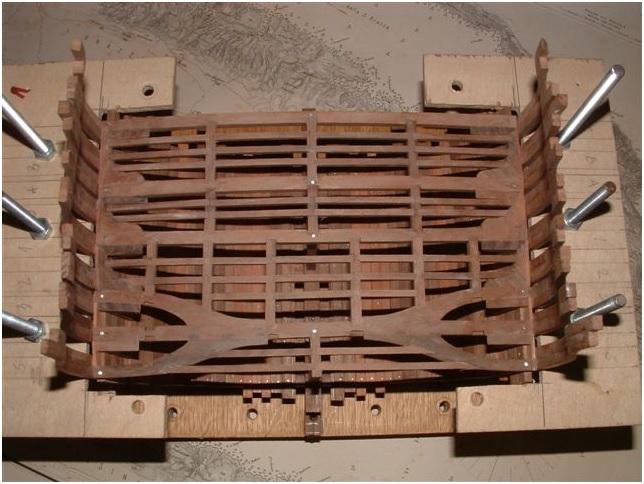
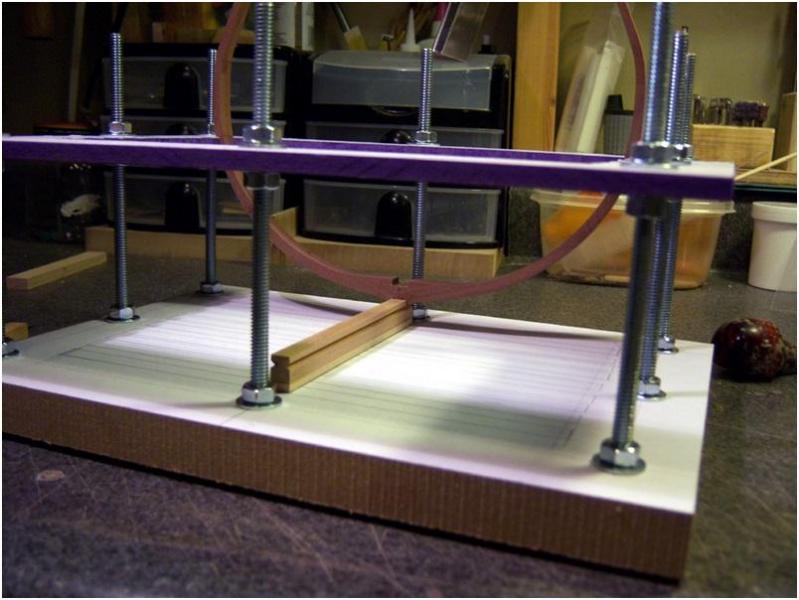
OK, finally, back to work again..... Actually, I've been working steadily on this a few nights a week for the last month, I just haven't gotten around to posting. I'll start with the jig. This is built pretty much like Uwe's jig, but I did add separations in the upper level to keep the frames aligned. All in all, the framing went pretty well. I did frame in the gunports, which turned out to be a mistake. I found out later on as I started planking up on the sides that I needed the flexibility in the frames to get everything aligned. I ended up breaking out the gunport frames, and I'll re-frame them when I get up that high with the exterior planks. Close-up shot of the jig and first frame. The frames are walnut, the keel is pacific maple, and the false keel is hard maple. The first frame in the jig.... The upper level of the jig keeps the frames aligned, and I used carefully planed blocks of wood to keep them aligned at the keel. Just a few more frames to go here...


-
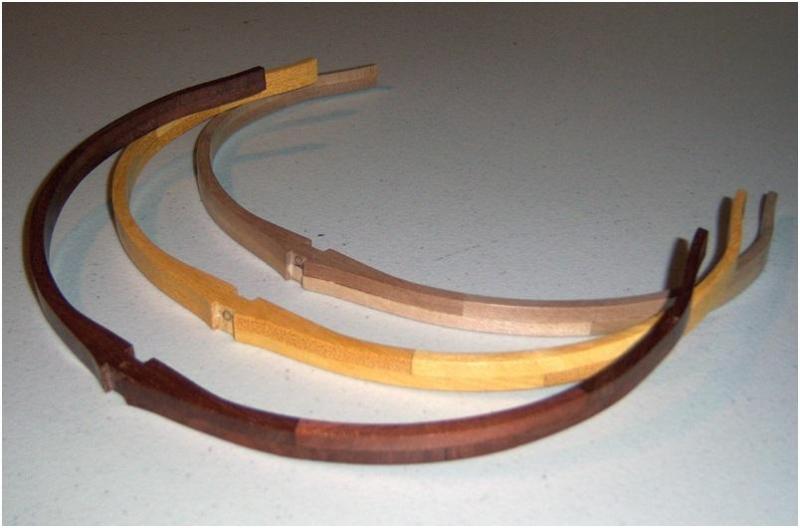
You bet it won't stick! I only waxed these to see what they would look like finished. I wasn't planning to use these first couple of frames in the final model. This is all just practice I have a couple more frames I completed this last week just to try some different woods. the yellow frame here is Yellowheart, which is a great wood for this in terms of it strength and ease of working. It's very straight grained, and takes a great polish with a fine sandpaper. Given all that, I still think it's too yellow for the framing. it may have it's uses later in the build. I also tried a frame with walnut, and I think this one looks great. It's a nice dark wood, straight grained, and easily worked. The admiral approves of the walnut, and we must keep the admiral happy! I think I'm ready to start some frames for the build, which means it's now time to build a jig for the frames. Thankfully, Uwe, you have already done all the hard work for that, and I'm just going to copy your jig! I picked up a small piece of Holly the other day at my local hardwoods store. It will be great for decking as it's a very, very fine grained white wood.
-
Uwe: Do not forget to add that extra deck beam that will fit into the aft pair of beam arms. We did not get this into the original plans, but we talked about it with regard to Don's build of his cross section. Check out Don's build pics and you will see what I mean. He added the extra beam back there on both decks and it looks fine. This won't be an issue with the complete build. Its just that on this cross section, we had to move a few things around in order to get everything to fit within the cross section model. That left us with a section of deck hanging back there with no beam under it. Just add an extra ledge that will be morticed into the beam arms. The ledge should line up with the aft end of the section. You can also put another pillar under that ledge if you like to stifen the structure. the same will need to be done on the gun deck as well. Russ
-
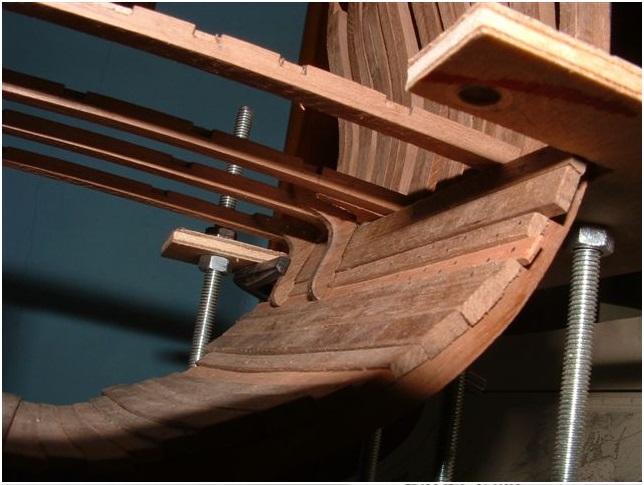
Sorry Christian, I could not make the photos of the jig until now, this will follow in short time nevertheless the next log-photos (which were done already before) of the finished installed Beam Arms including the finished knees of beams axis 1, A and C and the same construction phase from the top view
-
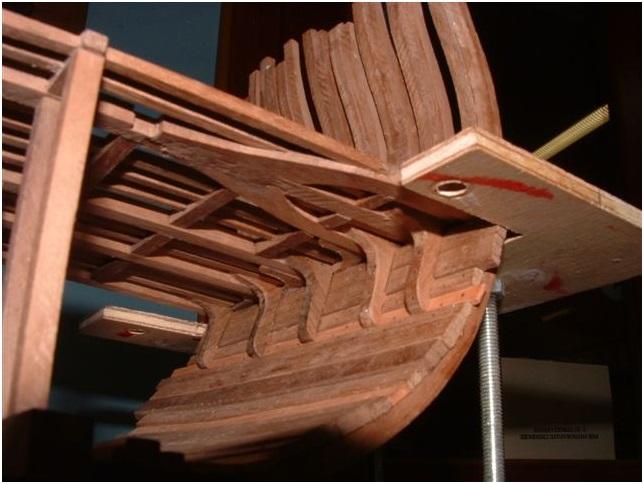
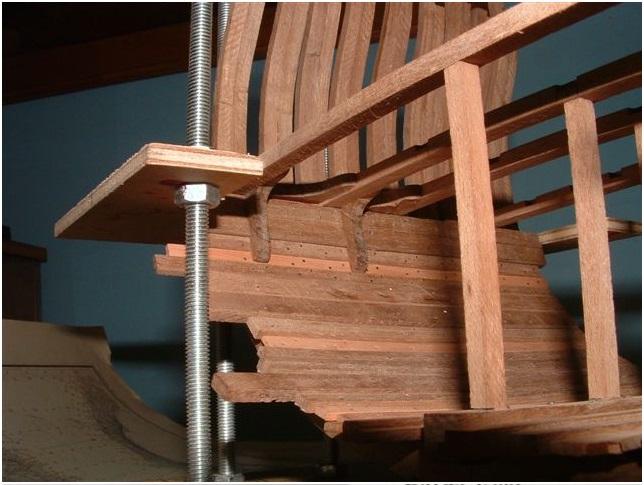
The last missing Lower Deck Beam installed and starting with the knees Knees in detail from the top The hanging knees in detail The hanging knees visible from the other side
-
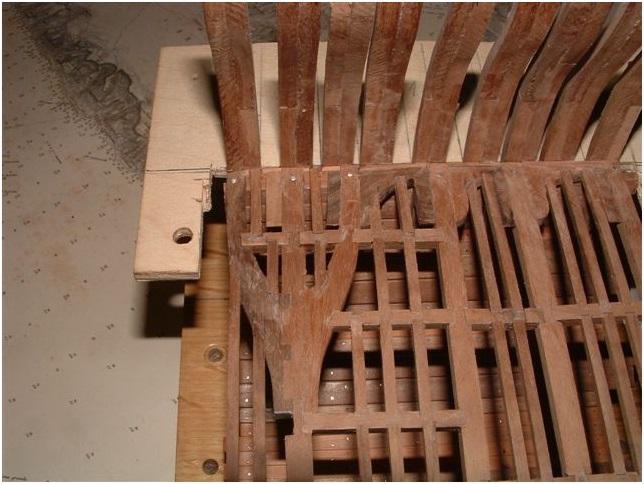
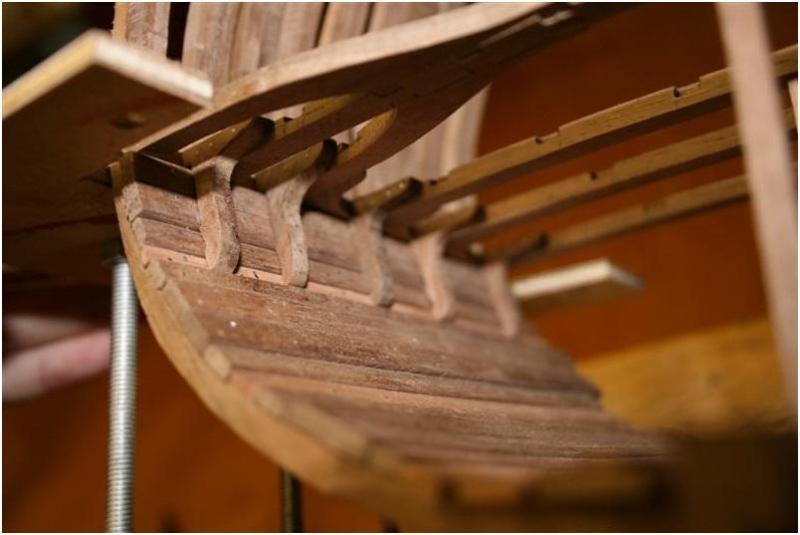
There are the first photos showing the works on the lower deck construction. The first Photo is showing the Lower Deck Beam on axis C installed, with the prepared notches for the Carlings. The notches were made after the beams were bended to the final bow. This is made due to the fact that the width of the notch could get bigger with the bending. The Lower Deck Beams on axis A and 1 installed including the necessary notches for the carlings. At this photo only dry fitted.
-
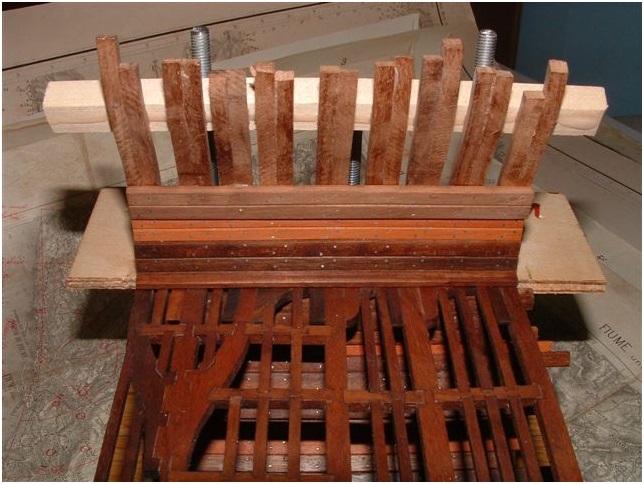
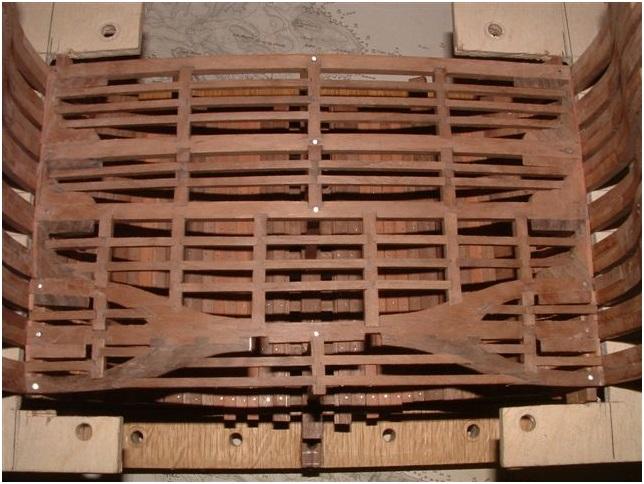
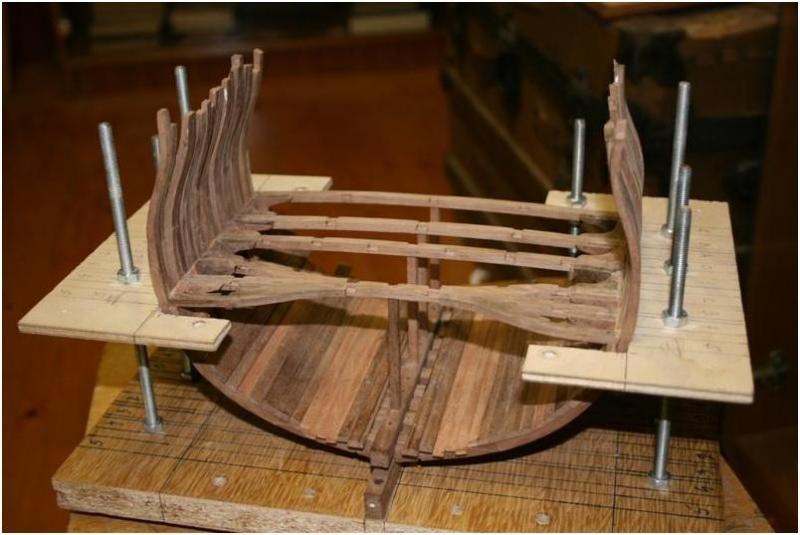
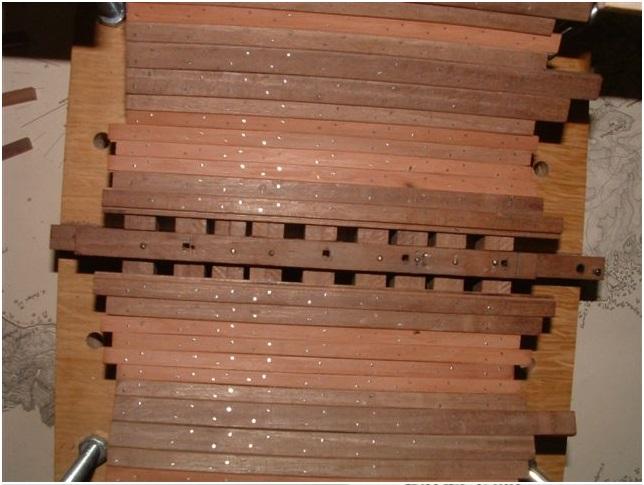
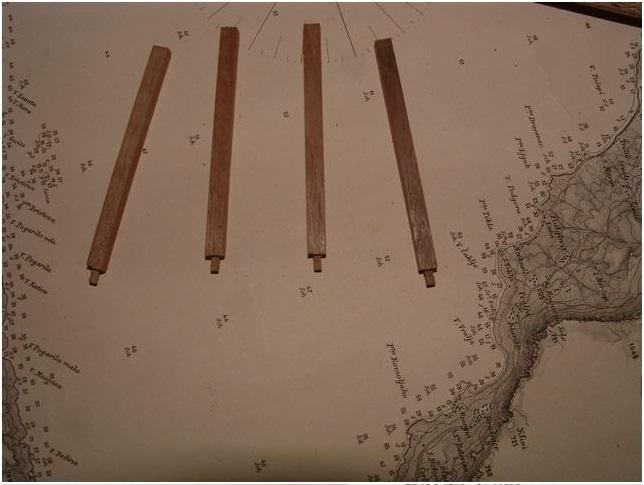
The ceilings and the Thickstuff, as well as the Lower Deck Clamps are installed on both sides. The ceiling boards are installed with additional nails (without head) which should represent the iron bolts. Due to the flash of the camera the nails are partly reflecting the flash-light and look bigger than in reality. On top of the Keelson four rectangle openings (notch) were prepared for the later installation of the Hold Pillars The four prepared Hold Pillars ready for installation. The lower ends are cut with the circular saw (four times turning the Pillars) also with a rectangular square and will fit into the prepared notches at the Keelson The four installed Hold Pillars on top of the Keelson waiting for the Deckbeams

-
Hallo Jürgen, this Section model built is a real interesting work and really a very good experience to start with scratch-building.... Thanks a lot to Russ that he made this possible for us! And the full model will be than a real challenge for us newbies!