HOLIDAY DONATION DRIVE - SUPPORT MSW - DO YOUR PART TO KEEP THIS GREAT FORUM GOING! (Only 66 donations so far out of 49,000 members - Can we at least get100? C'mon guys!)
×


Jerry Berenson
-
Posts
80 -
Joined
-
Last visited
Content Type
Profiles
Forums
Gallery
Events
Everything posted by Jerry Berenson
-
Bob I am currently building the King of the Mississippi…..how did you bend the railings around the stern onto the head posts at the paddle wheel . The 1.5 x 3 mm sapelli continues to snap. Did you soak them in hot water and if so how long? Thanks for any help. Jerry
-
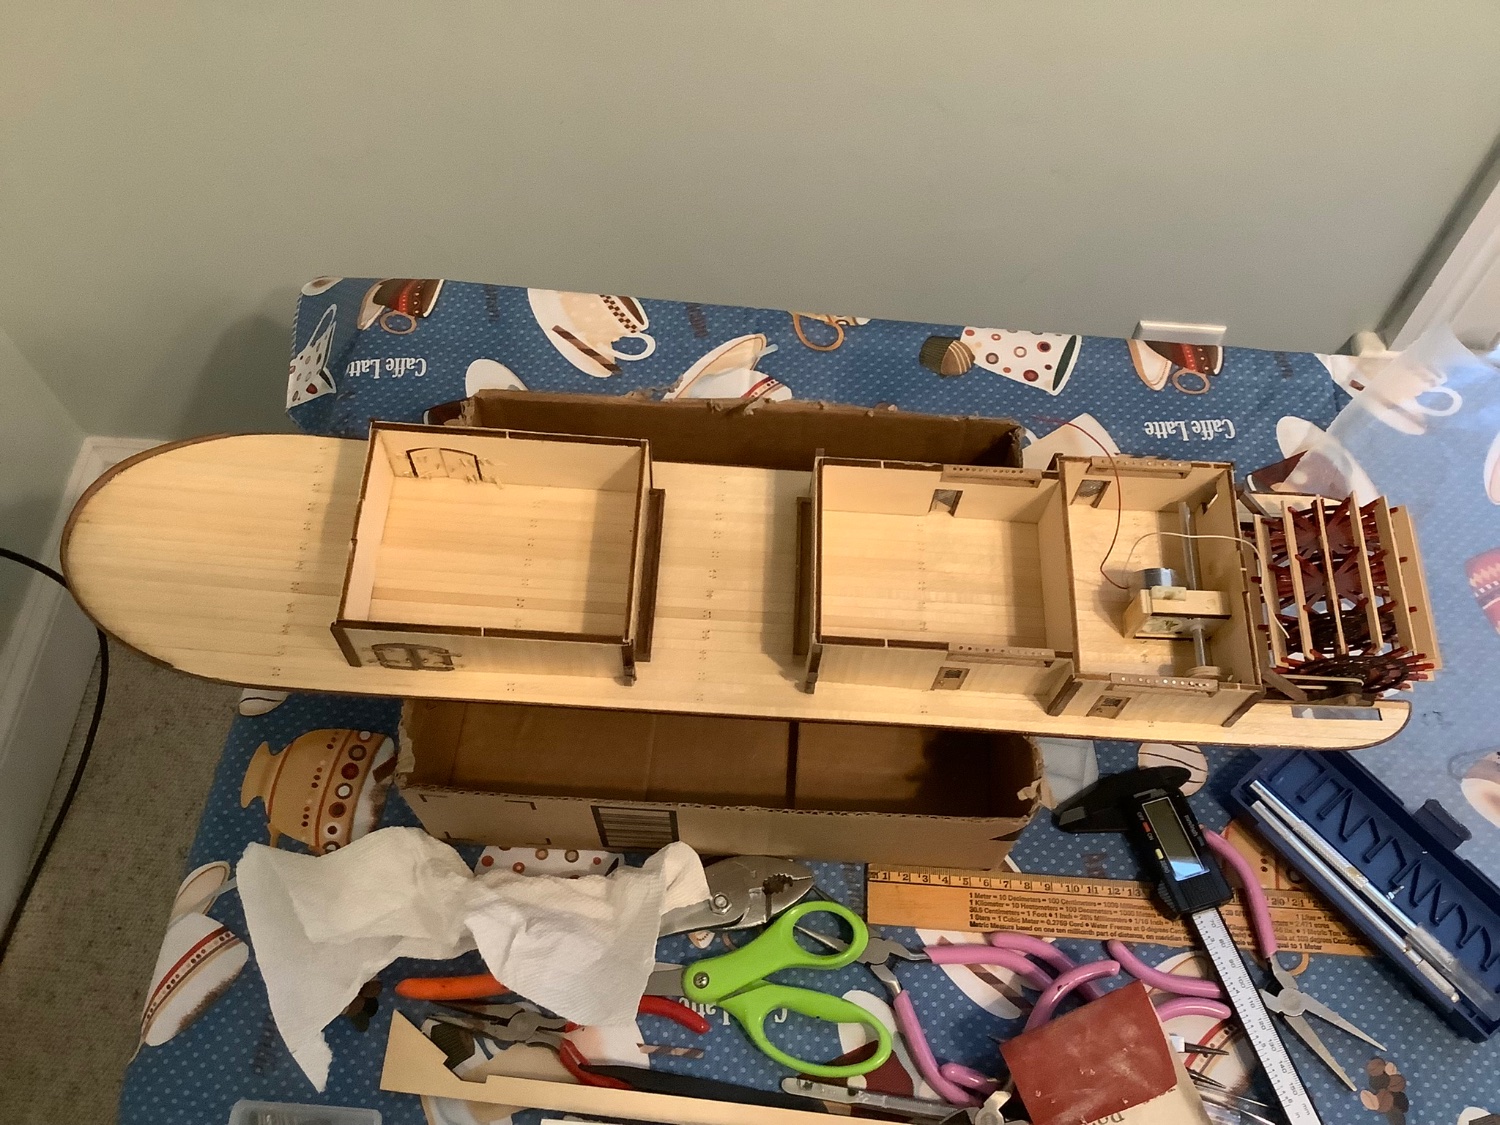
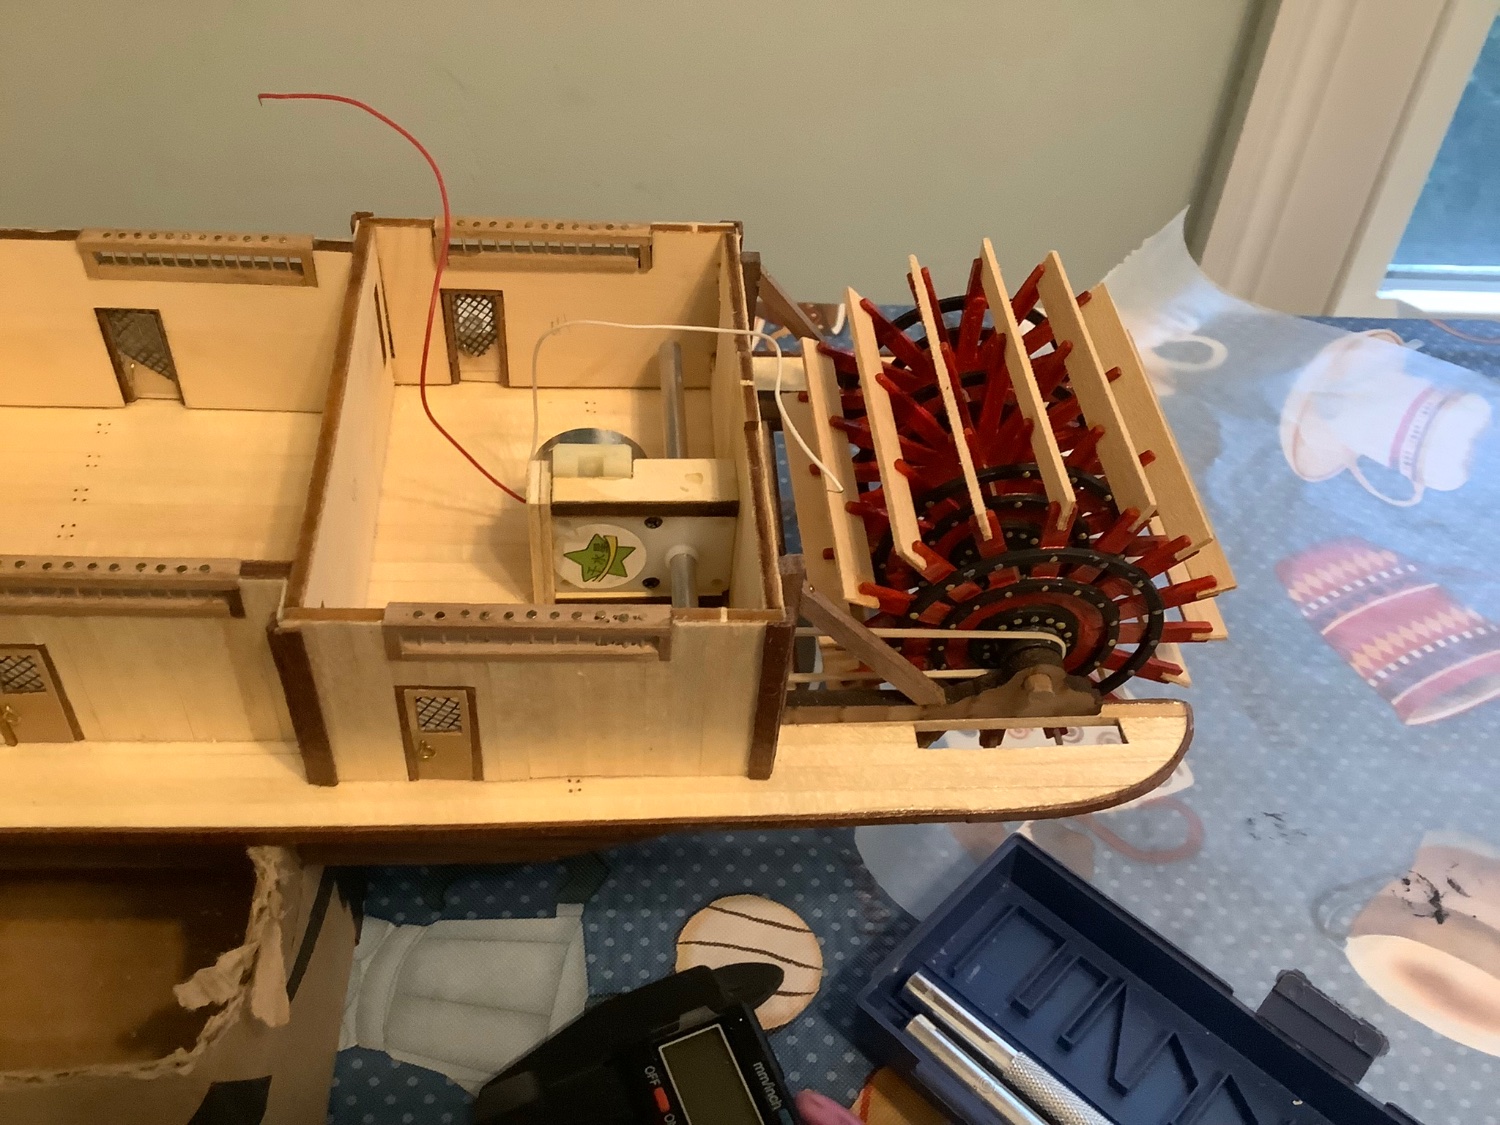
wiring but nothing else. Also how to access the motor if the elastic comes off. Any ideas? I have enclosed a few pictures. Regards. Jerry


- 132 replies
-
- 2
-

-
- King of the Mississippi
- Artesania Latina
- (and 1 more)
-
Hi Cleat, I am also building an older version of your model. Yours is looking great ! I am in the process of planking the second deck. I have also had similar problems like yours along the way. I am using the plans with the model as well as plans on the internet for the new version of the model as I have motorized the paddle wheel and will also light up the ship. The kit has solid metal windows so I am planning to make my own with clear acrylic. My problem is I cannot find where to place the batteries and on/off switch. The new plans show the
-
Thank you Ian! It was fun making it.
- 35 replies
-
- 1
-
-
- Nantucket Lightship
- BlueJacket Shipcrafters
- (and 1 more)
-
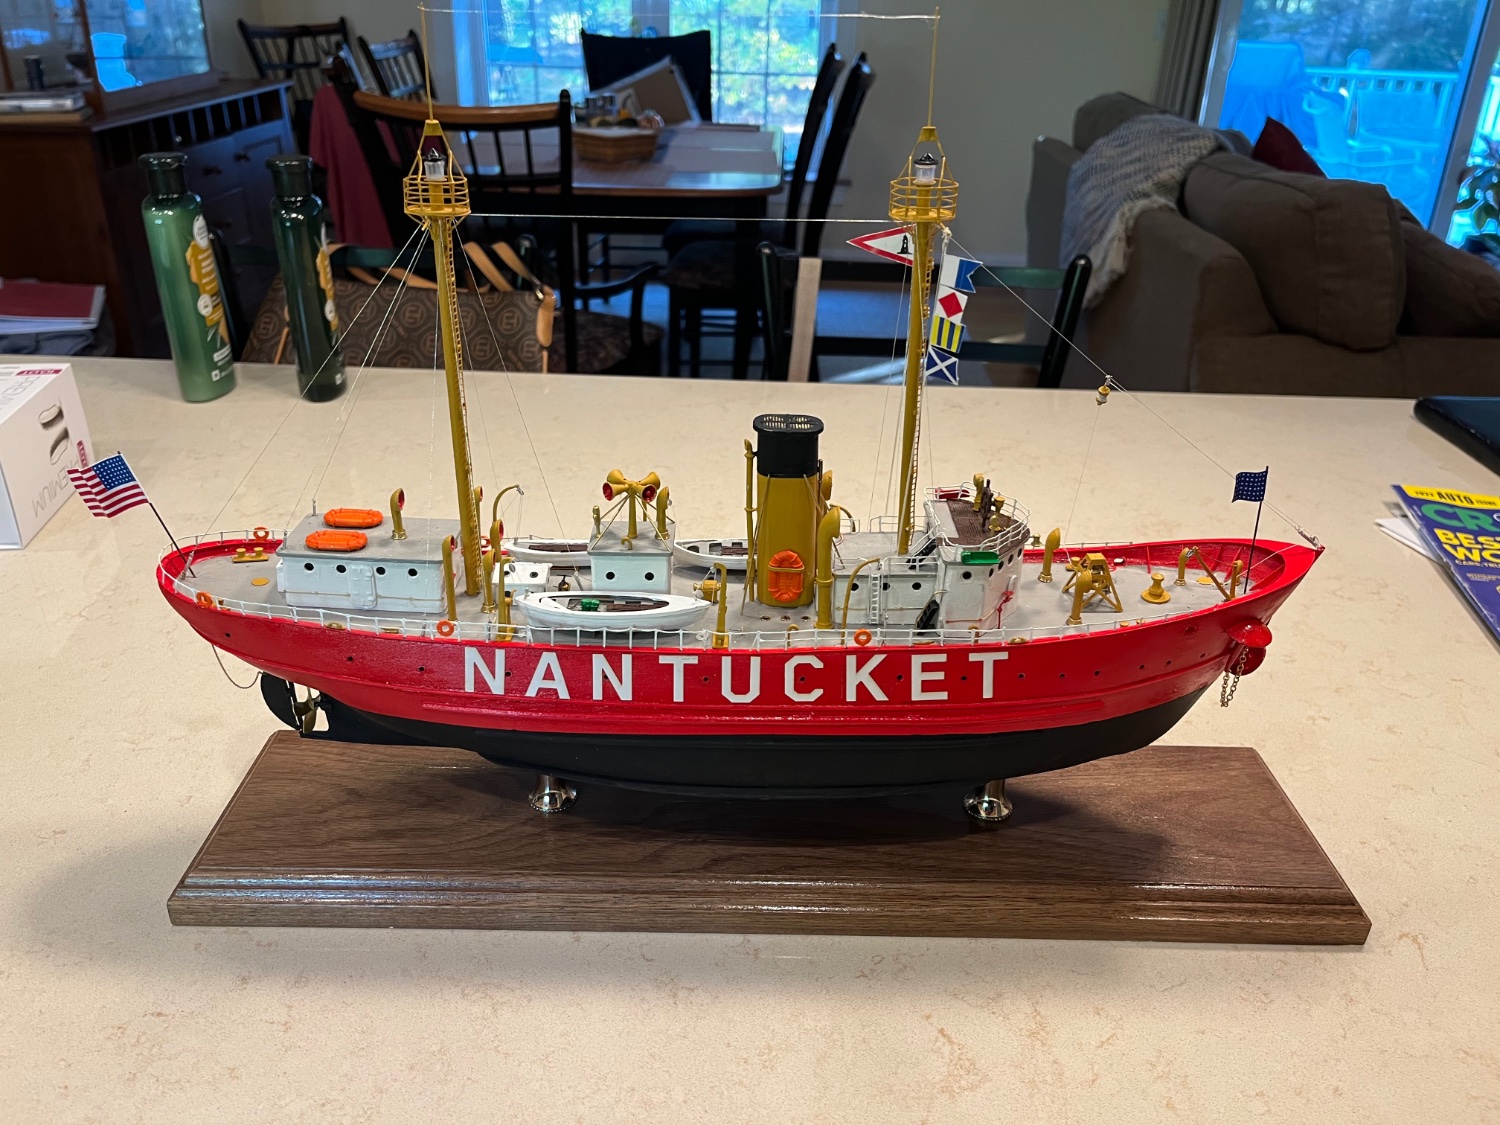
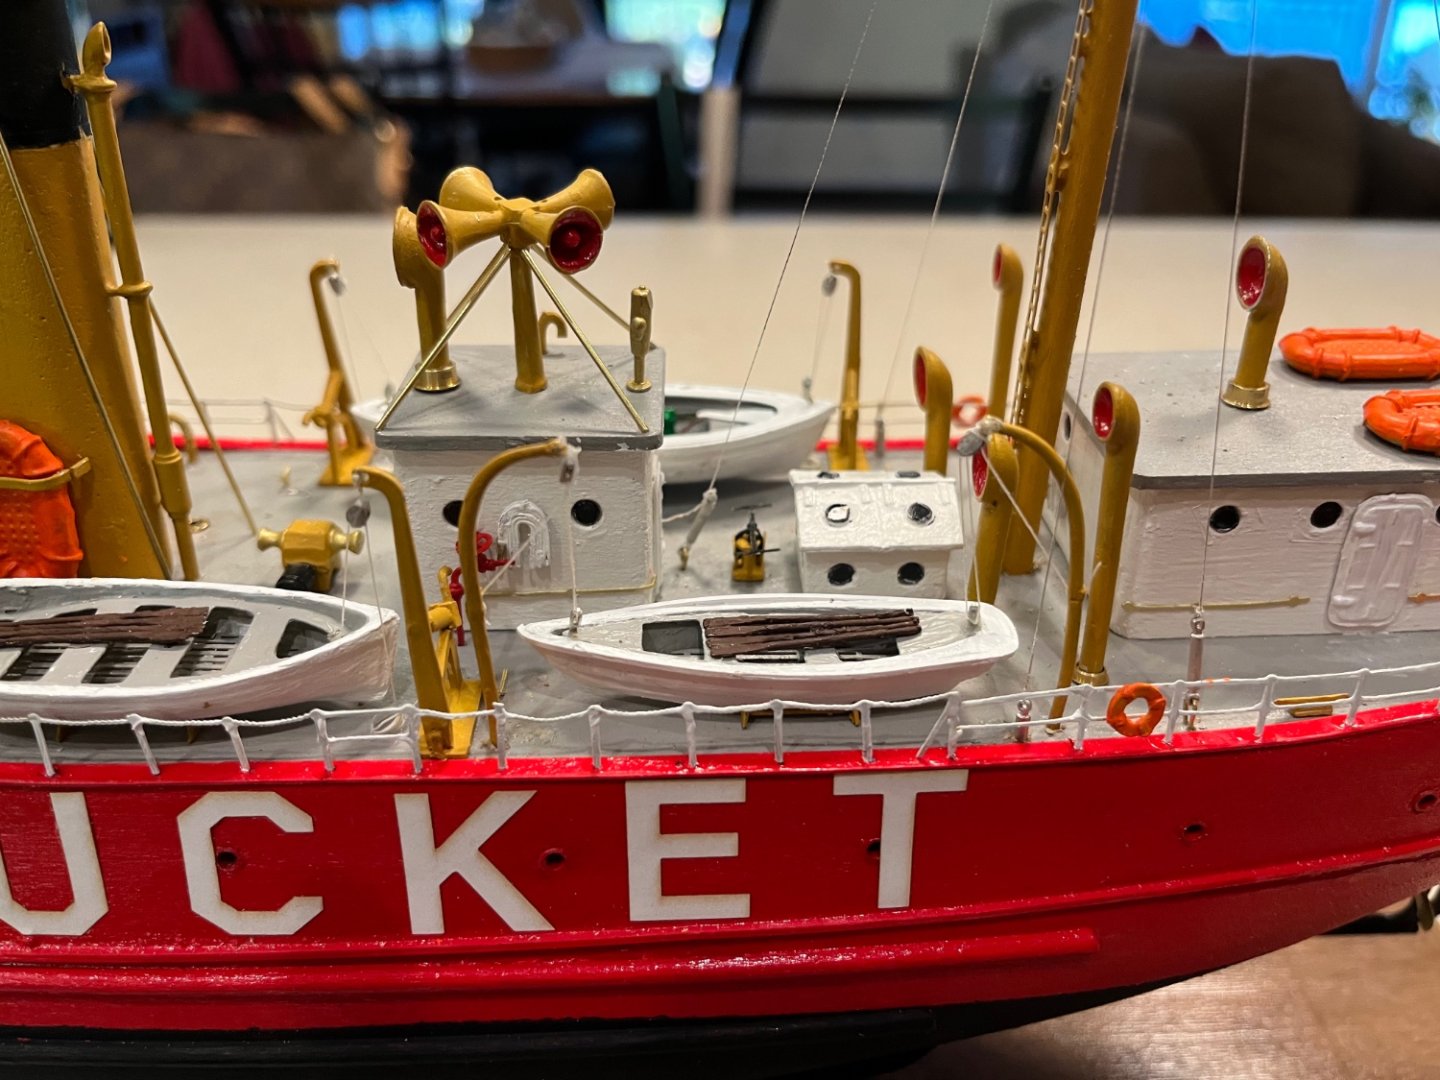
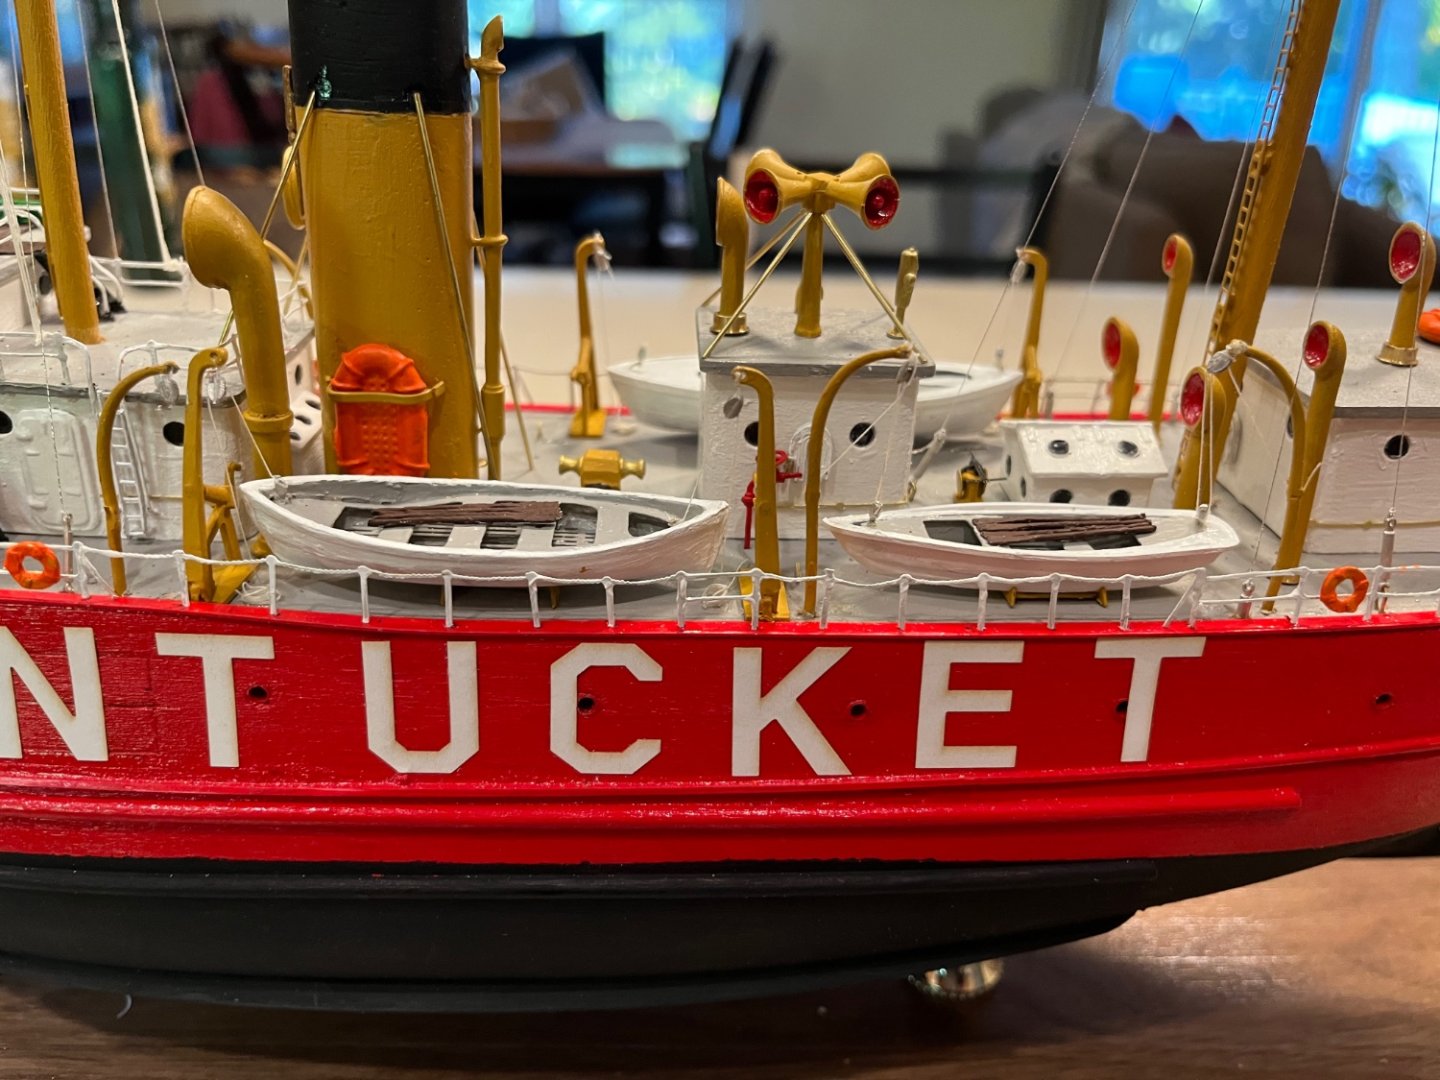
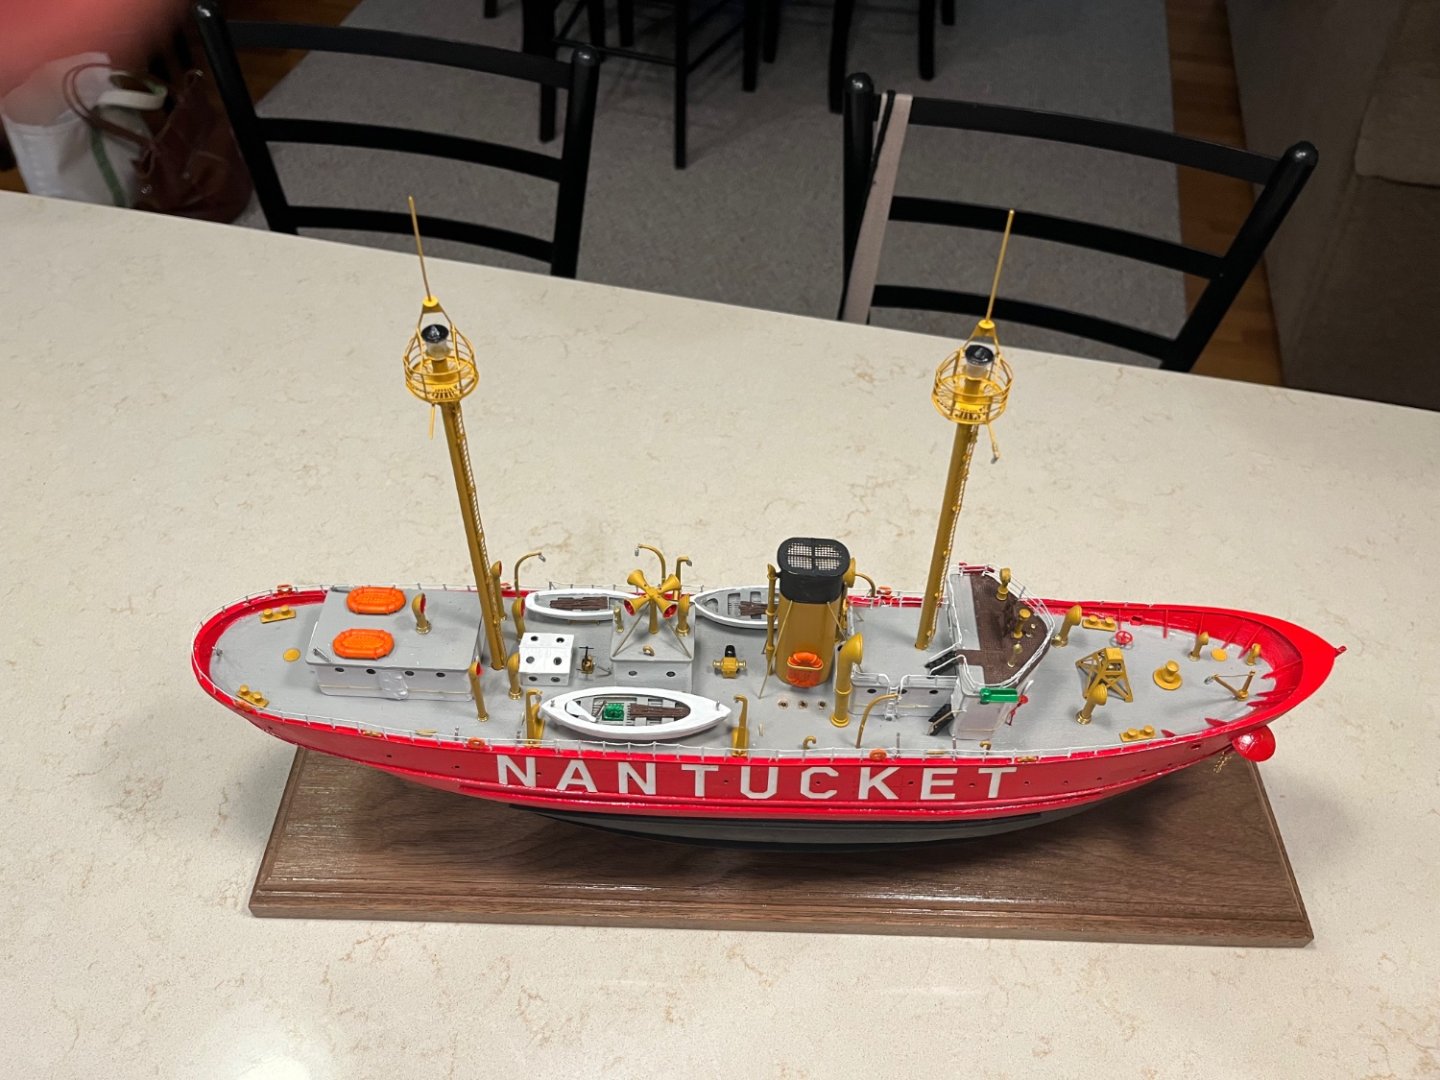
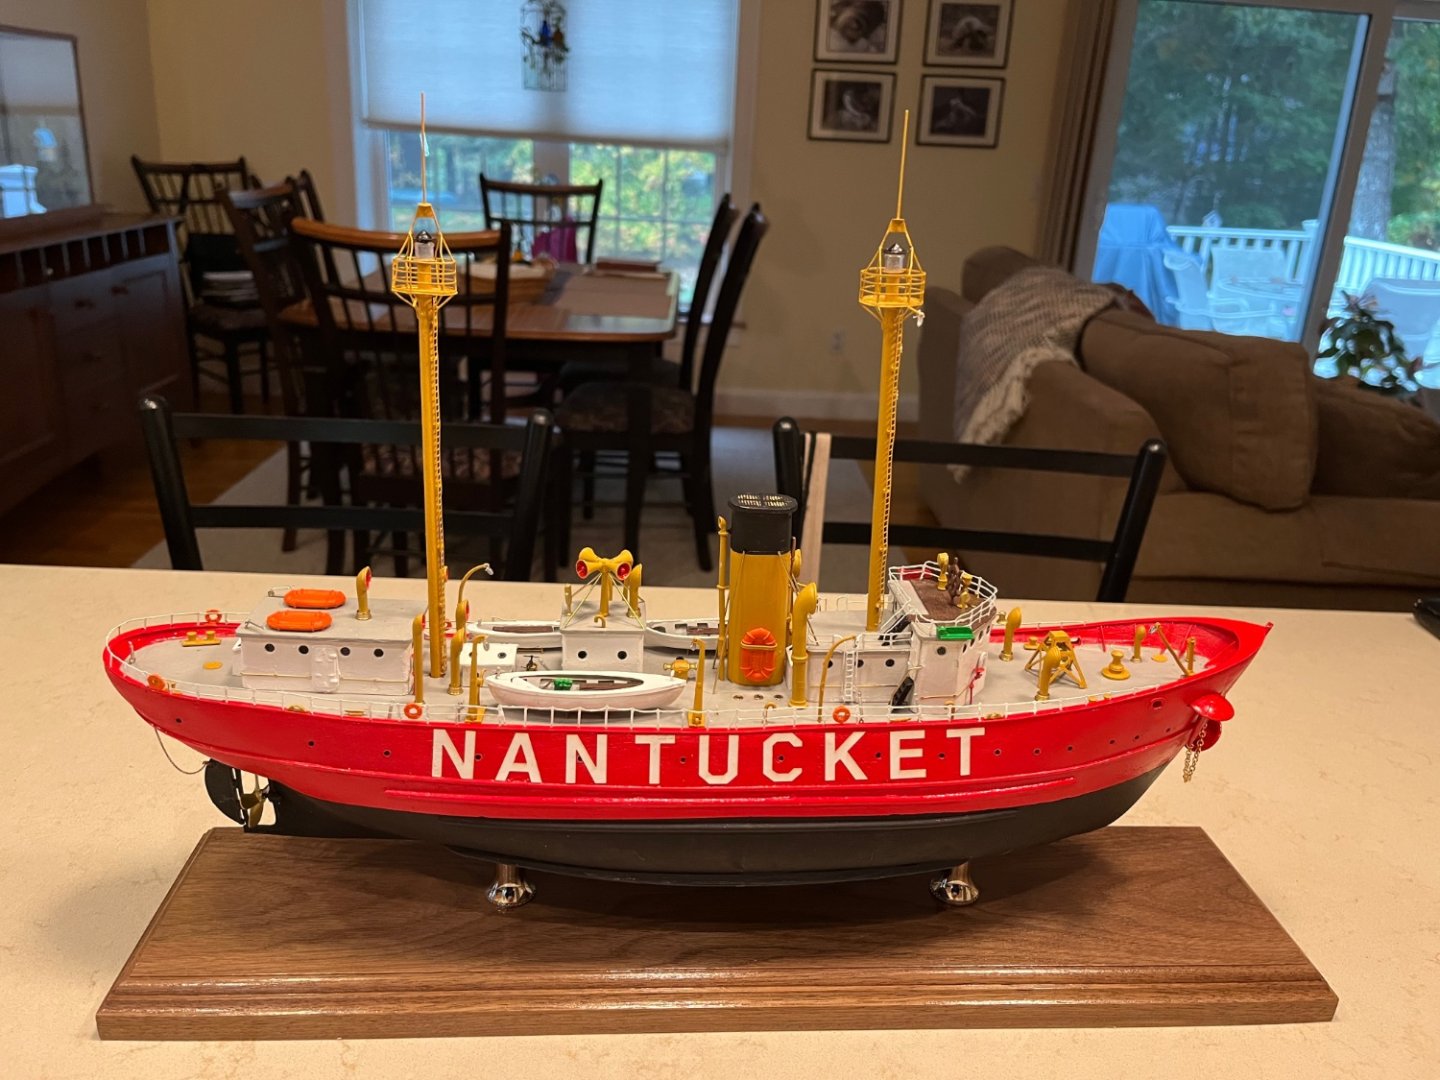
All done!! Finished the model today. Rigging all done and the flags placed on the halliards. I rigged the 3 boats to their corresponding davits. One disclaimer…. Somehow I could not find the 2 remaining open chocks to place on the bow! I searched my working area on hands and knees to no avail. I will either give Bluejacket a call and have them send me a couple of them or wait until next summer when we go up to Maine for our annual vacation. Thanks everyone for following my build as well as your constructive comments. Laxian Key, looking forward to see how your model is going!

- 35 replies
-
- 15
-
-

-
- Nantucket Lightship
- BlueJacket Shipcrafters
- (and 1 more)
-
Lacian key… that seems like a good idea to put spacers under the rails. I did not think to do that, I just glued them on.
-
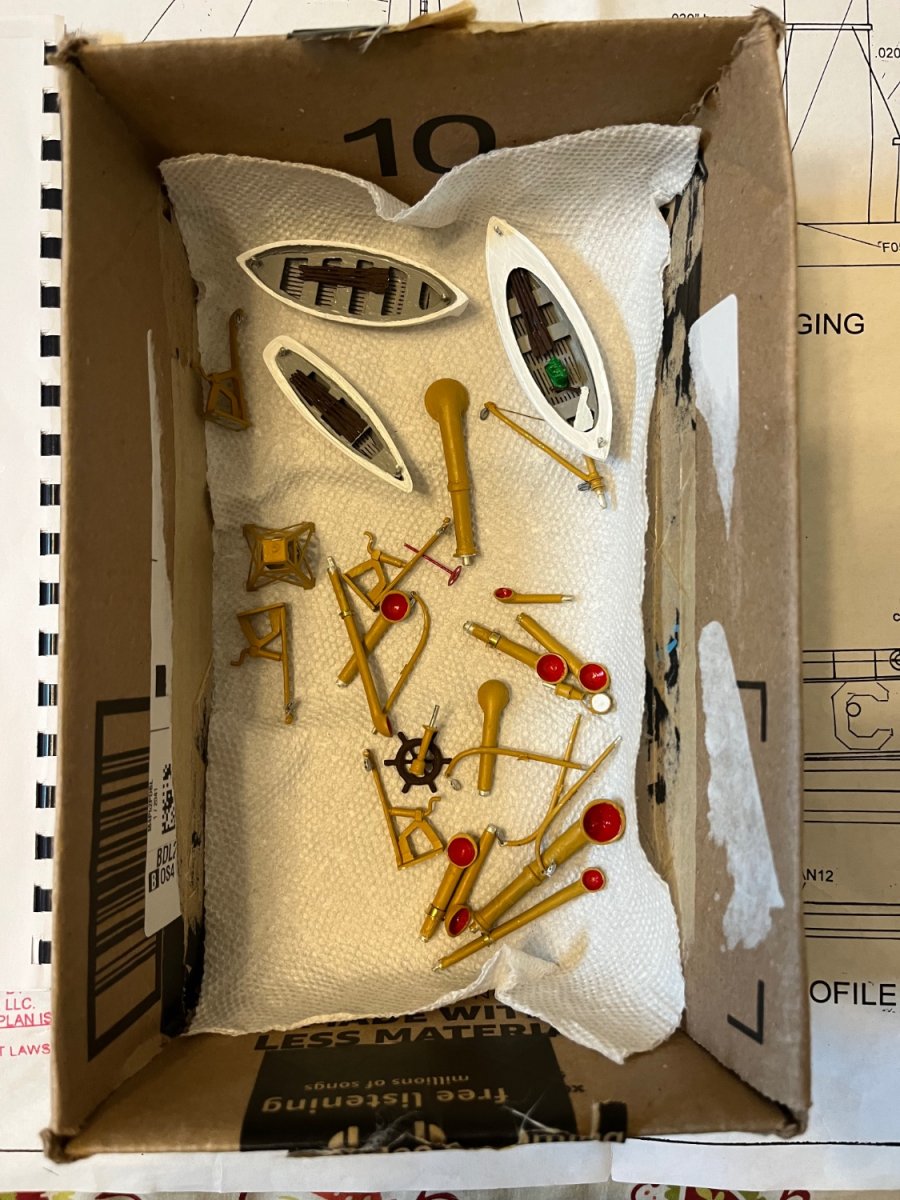
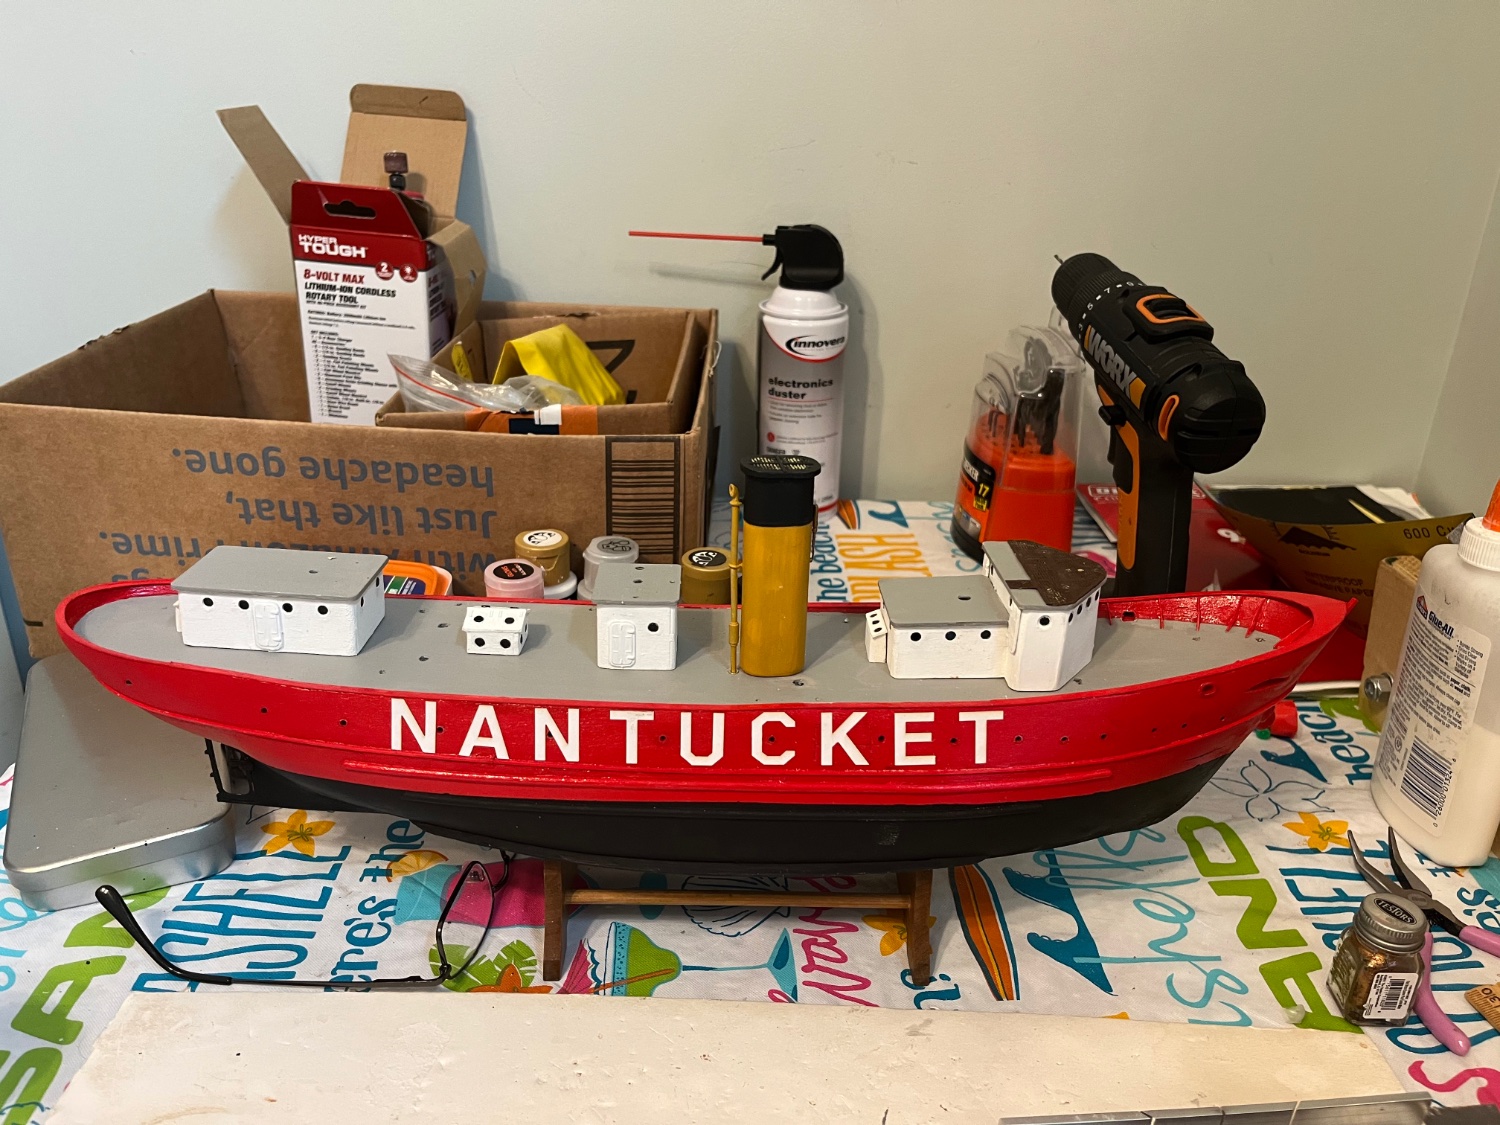
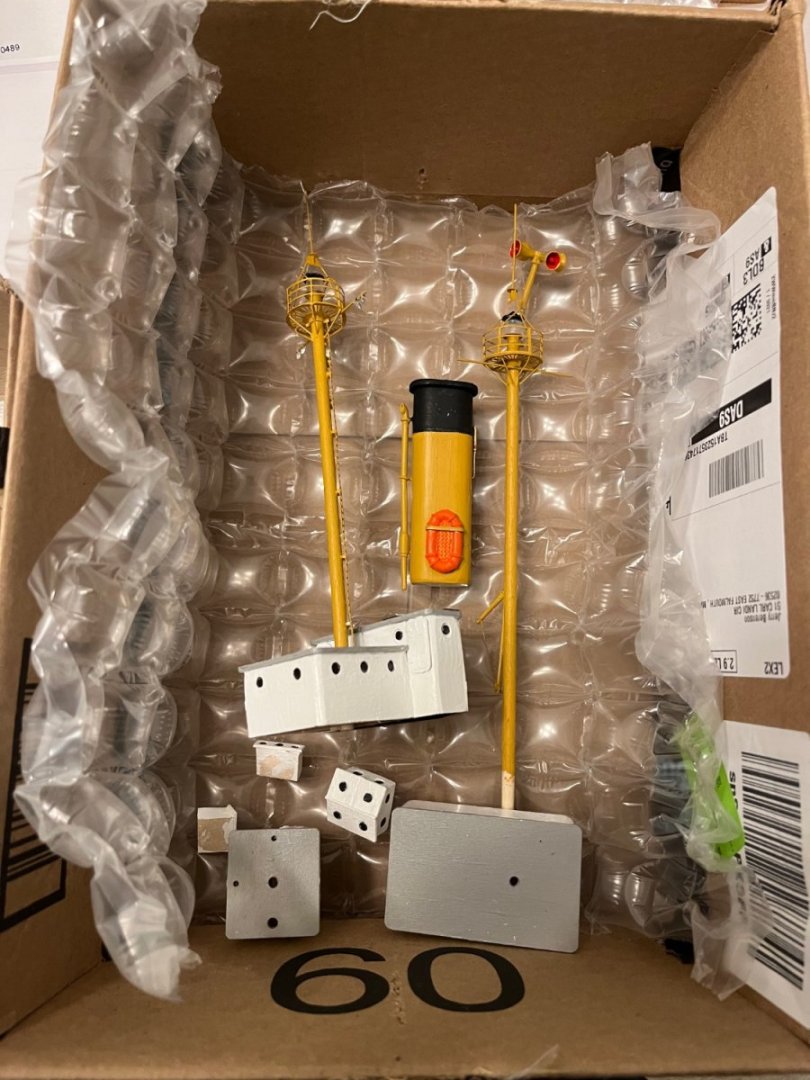
All accessories painted and mounted on the ship. I still have to do the rigging , flags, and poles. After using all the pieces from the brass sheet per the manual, I noticed that the safety railings remained. No where in the manual were the railings mentioned. It is an obvious oversight when the kit was recently updated. The railings are on the plans so I placed them on the houses where indicated on the plans. Also be very careful with the cast Britannia turnbuckles! I fractured one end of 2-3 of them when trying to open up the holes which attach them to the deck with a very small hand drill . I wound up cementing them directly to the deck.
- 35 replies
-
- 11
-
-
- Nantucket Lightship
- BlueJacket Shipcrafters
- (and 1 more)
-
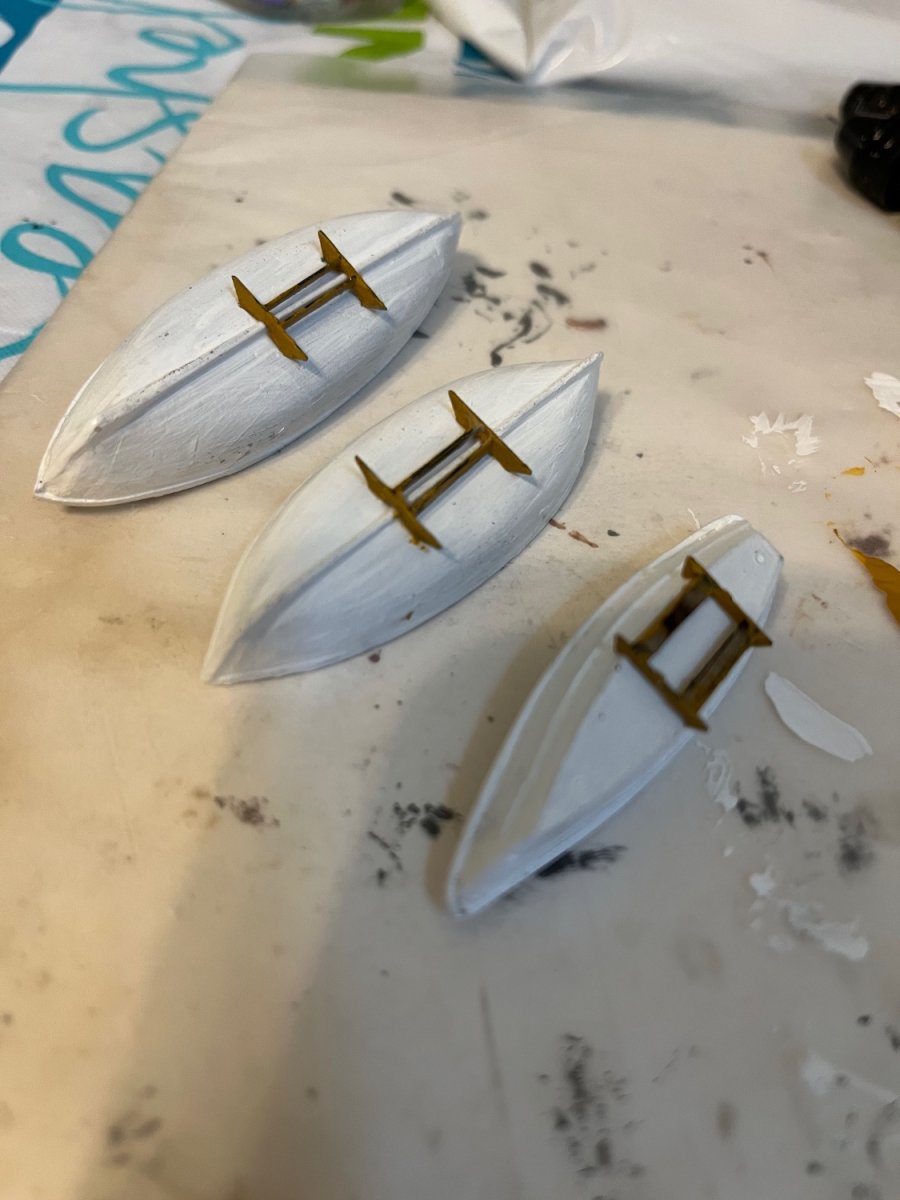
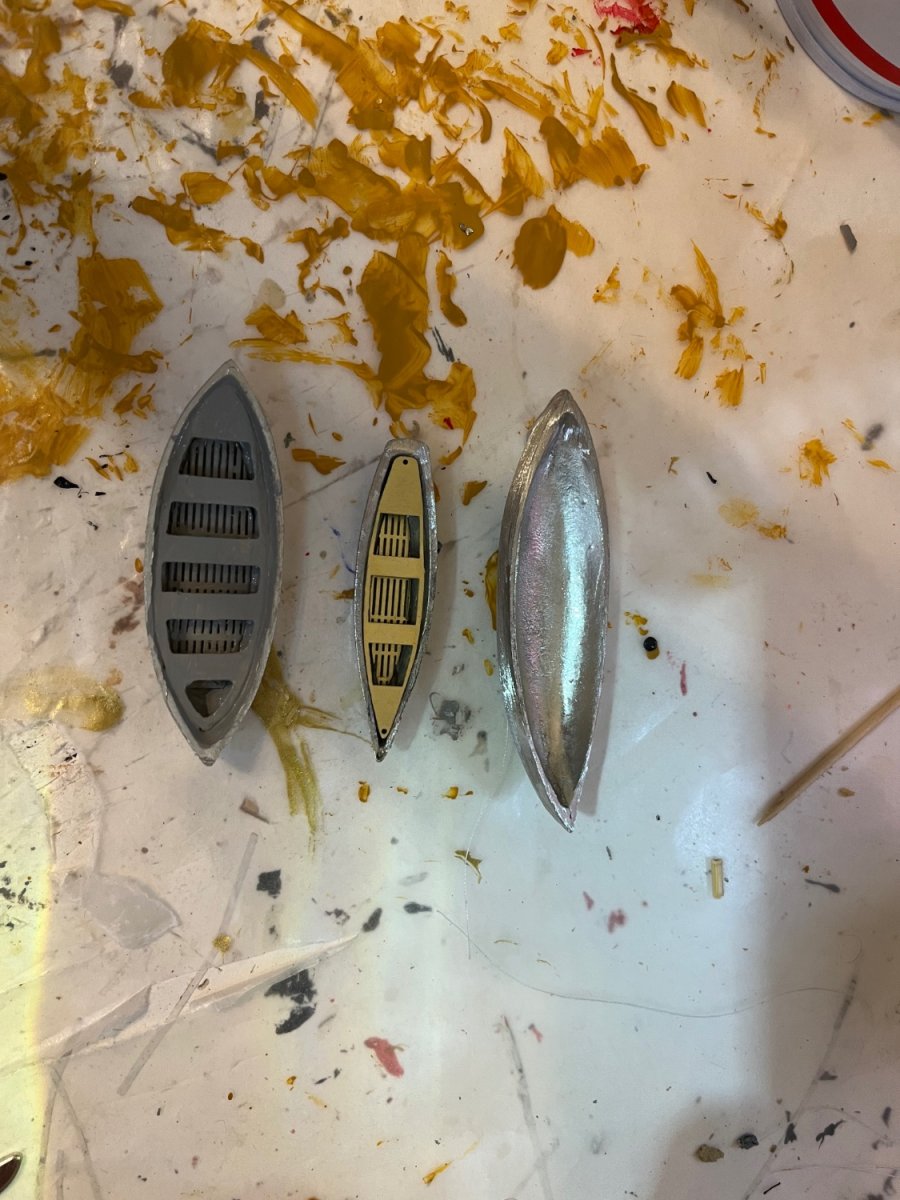
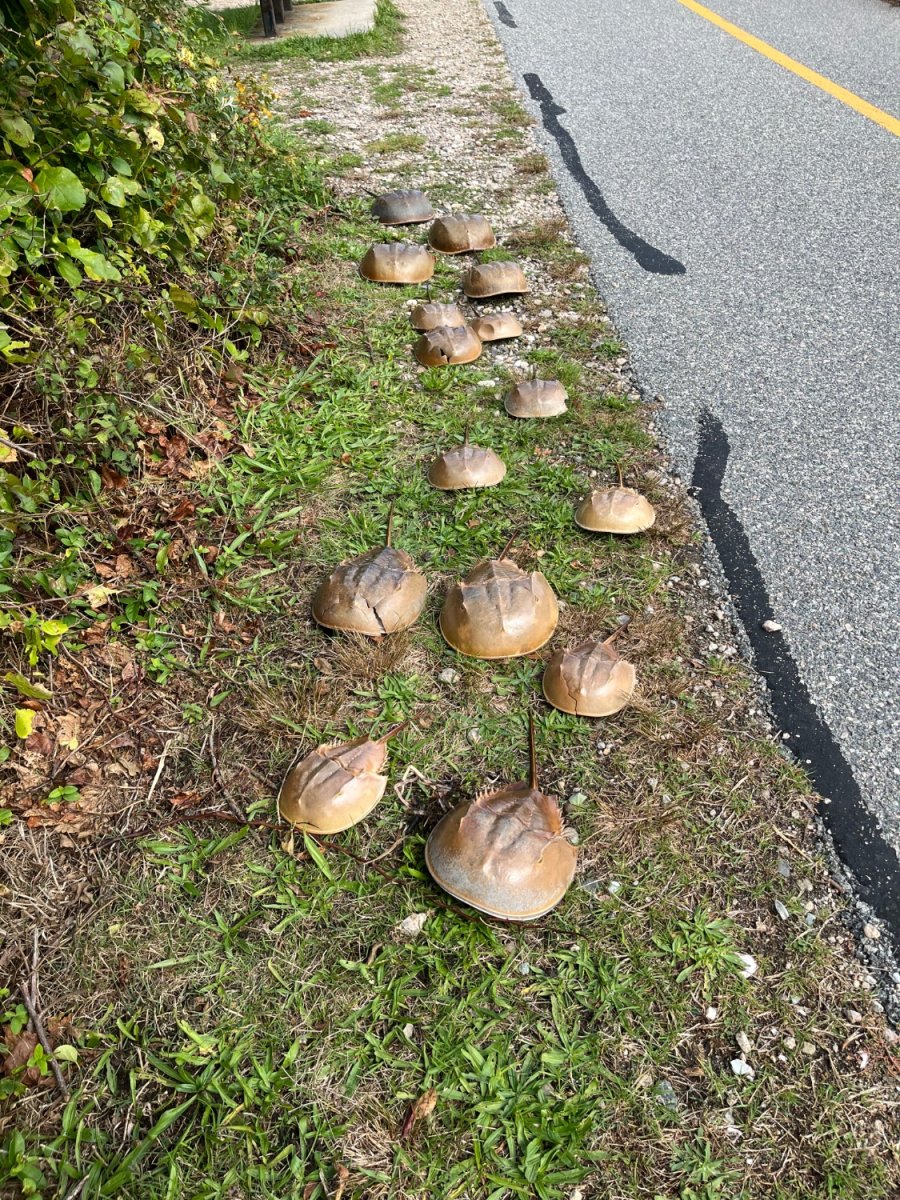
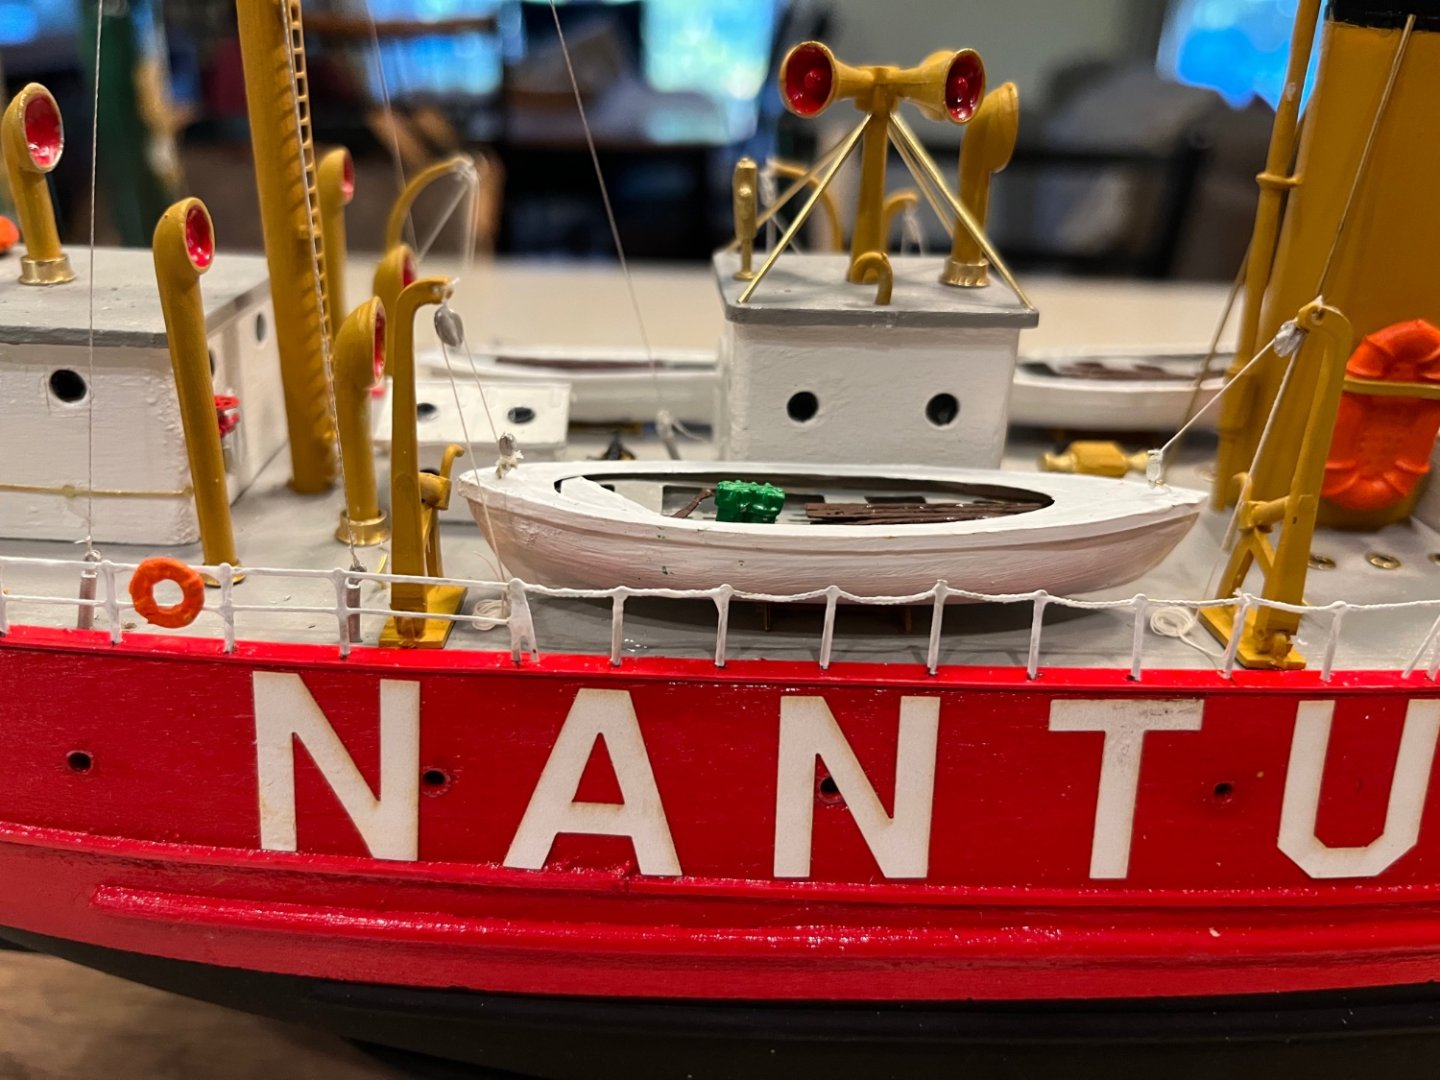
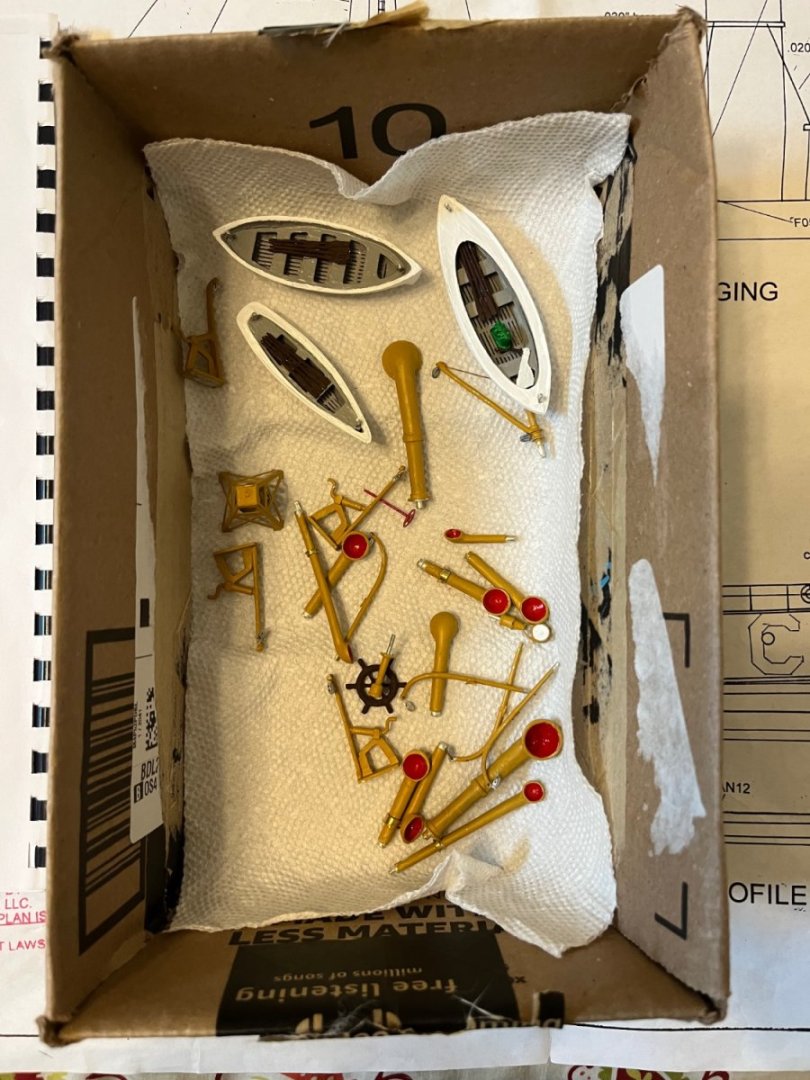
Just completed the 3 boats , cradles as well as the pilot house and forward house railings and ladders. The railings were quite tricky to place and needed a lot of patience. Luckily they are very flexible and not delicate since I accidentally dropped the longer one and stepped on it while looking for it. I thought I would have to order a new one but although mangled it did not break when I reshaped it back to normal. I had to refine the castings of the boats with my dremel . There was a lot of extra material from the castings and I had to smooth down and reshape the hulls to fit the thwarts and especially the deck of the motorized whale boat. The cradles were also tricky since they are so small. Hint…. Micro drills, a digital caliper , tweezers and very fine paint brushes are a necessity for this model. I also highly recommend magnifying lighted glasses. I have enclosed some pictures as well as a picture of many horseshoe crabs on the side of the bike trail I was on last week down here on the Cape.


- 35 replies
-
- 10
-
-
- Nantucket Lightship
- BlueJacket Shipcrafters
- (and 1 more)
-
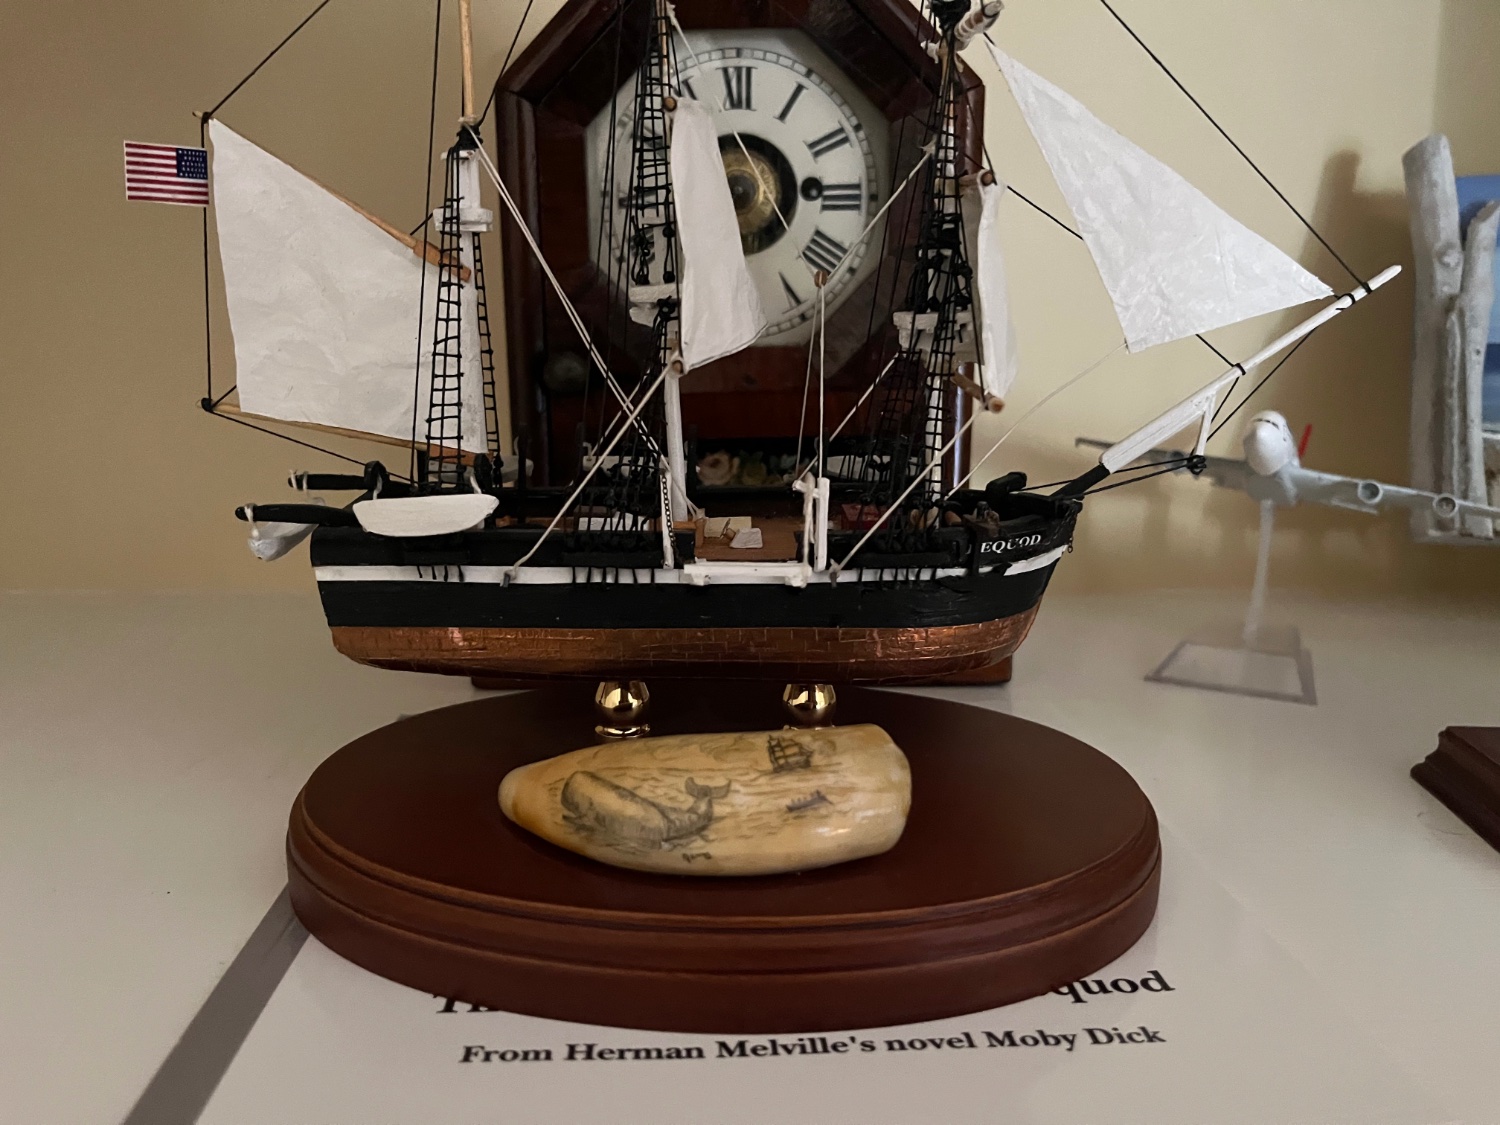
Dan, my name is Jerry Berenson and I am now building a Nantucket lightship after completing Bluejacket’s model of the Constitution. I noticed your blog. I am enclosing pictures of a small model I built ,while recuperating from heart surgery 2 yrs ago , of the fictional Pequod.It is modeled after typical whaling ships of that period. It was a very old kit I had hanging around the cellar. I took some liberties with it. I also mounted it on a baseboard with an old whale’s tooth which I “scrimshawed” many moons ago. Note Queeques’s coffin. BTW I am a member of the New Bedford Whaling Museum since I live about 45 minutes away on Cape Cod. It is a national treasure and a must see. They have a 1/2 scale of an old whale ship to board. If you desire, check out my blog of the Nantucket Lightship I am building. Regards, Jerry


-
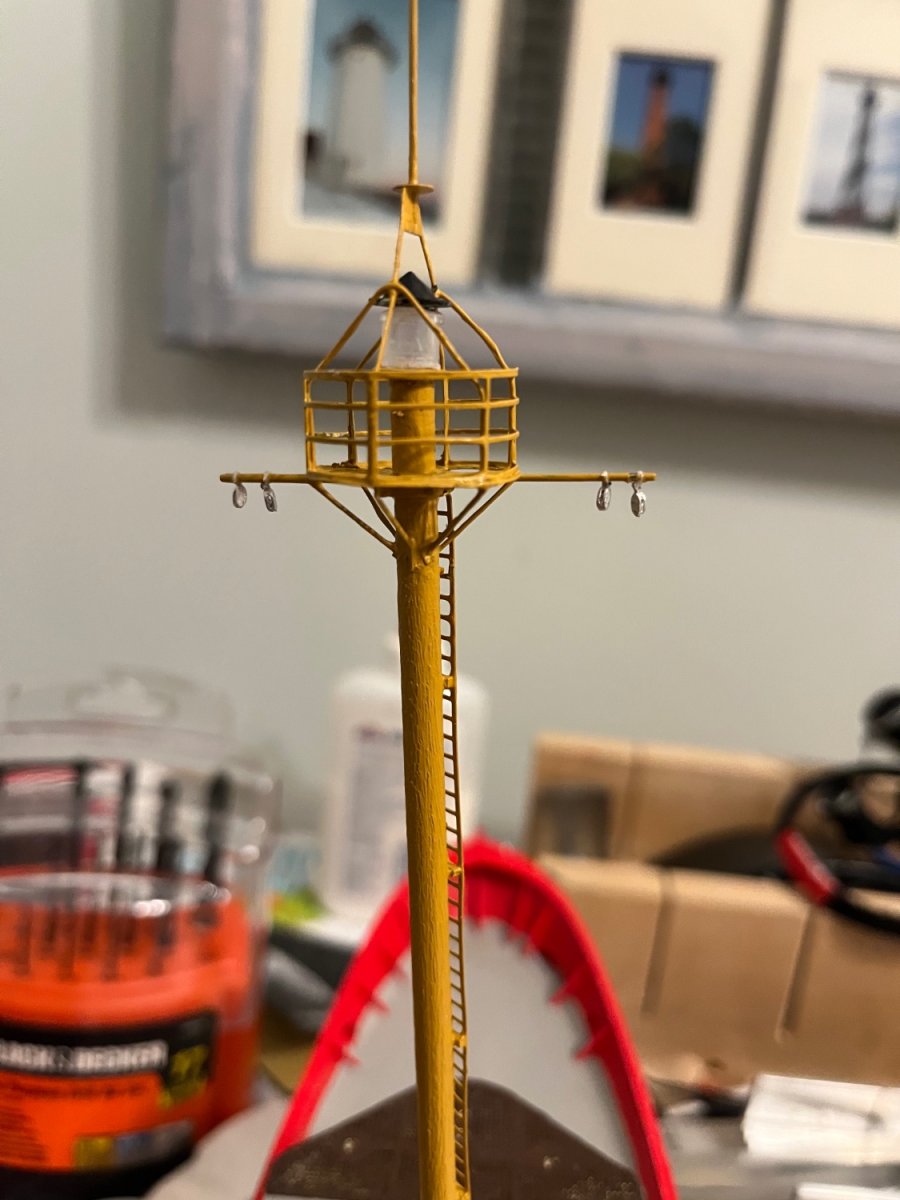
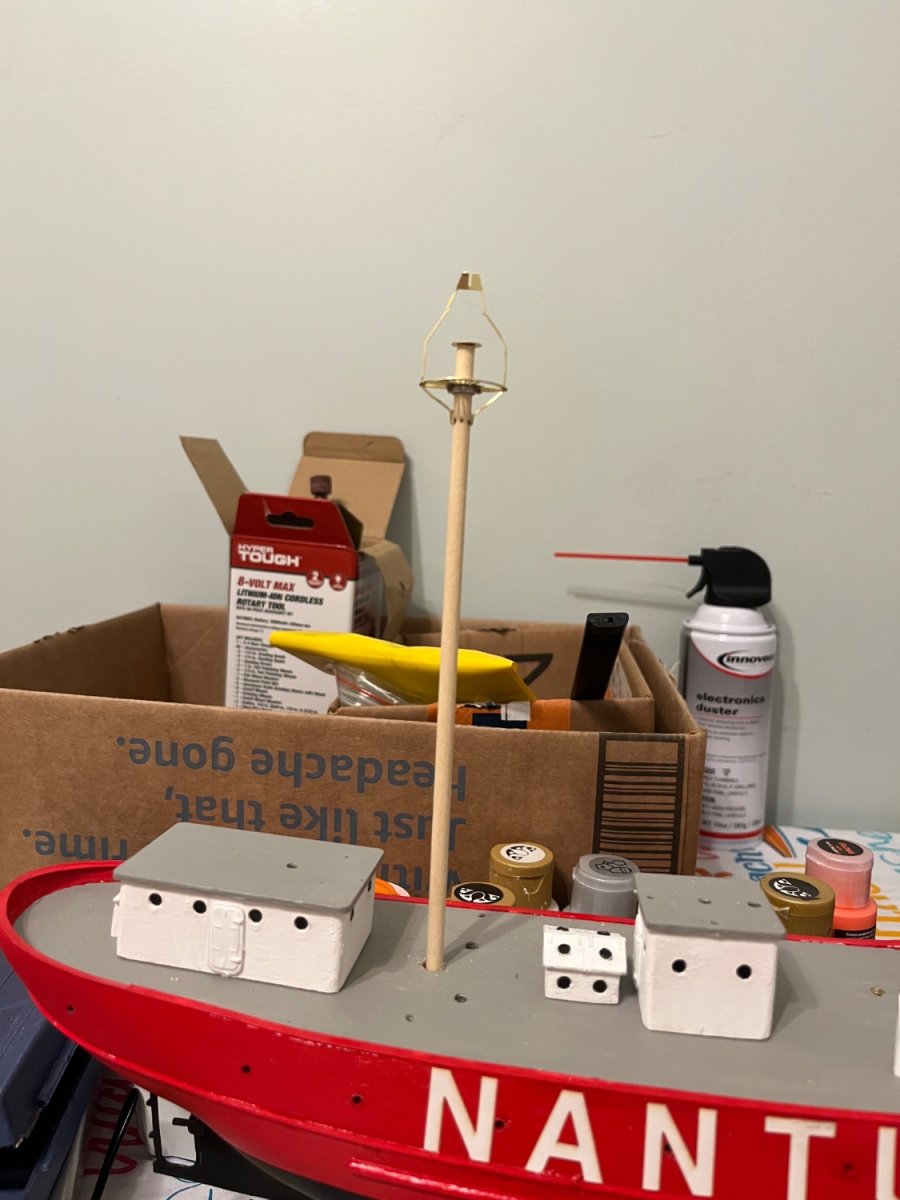
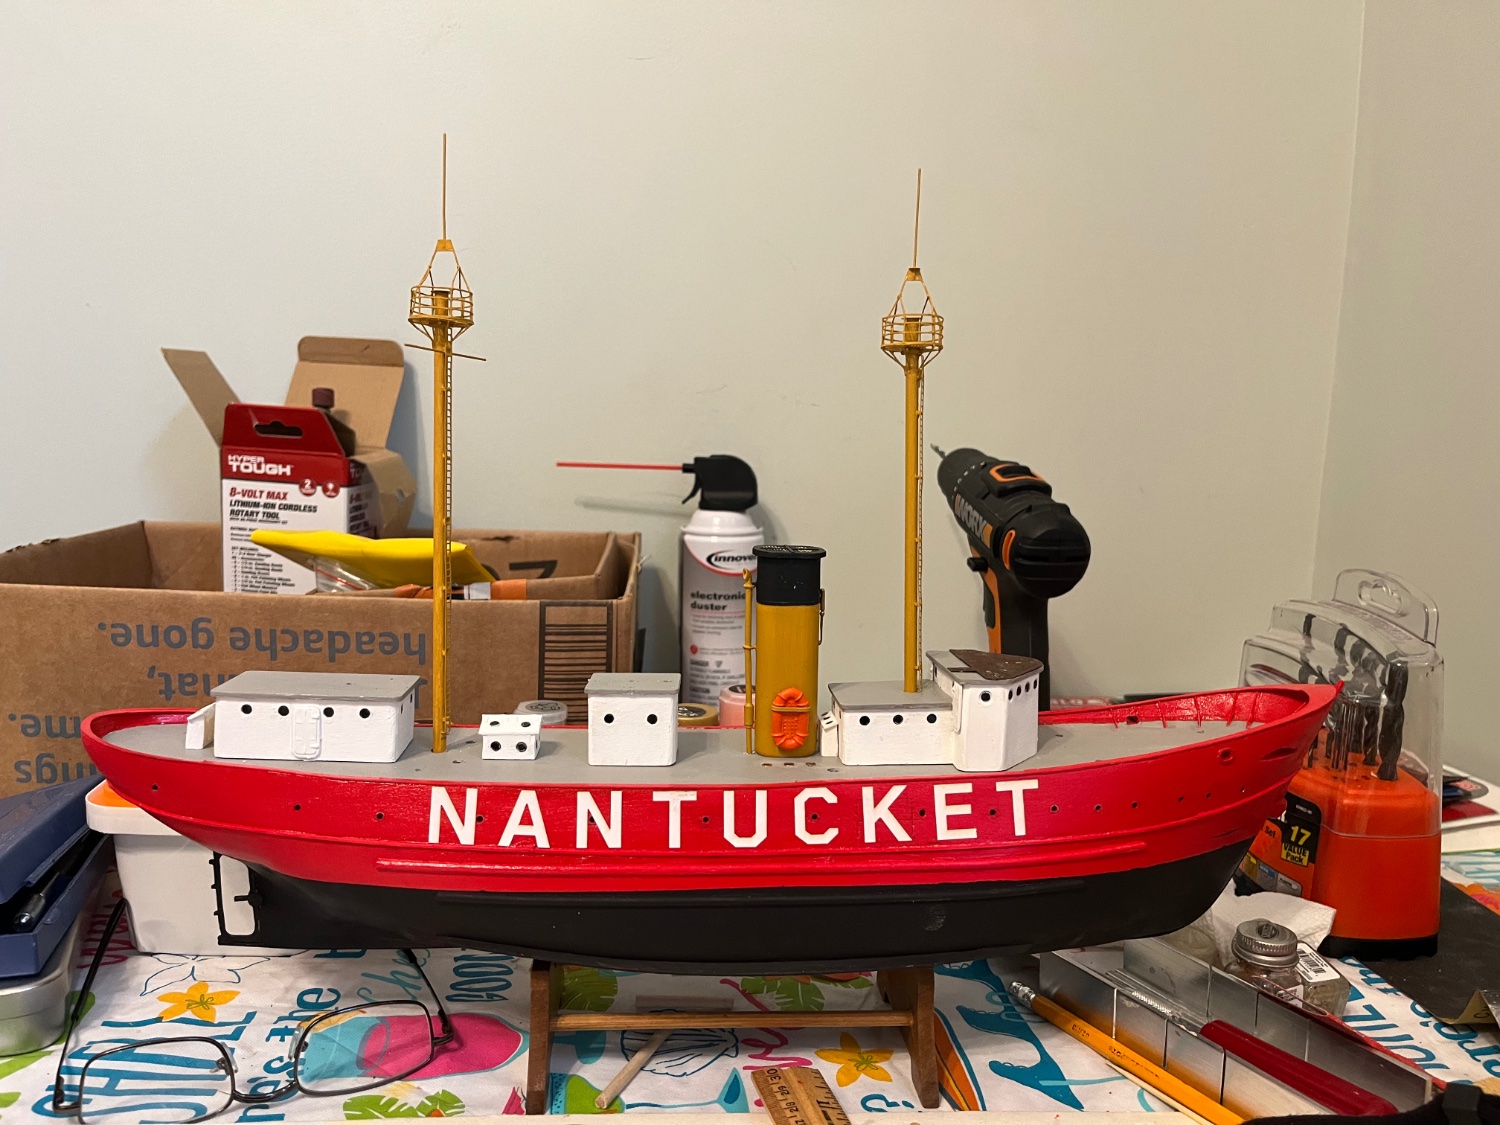
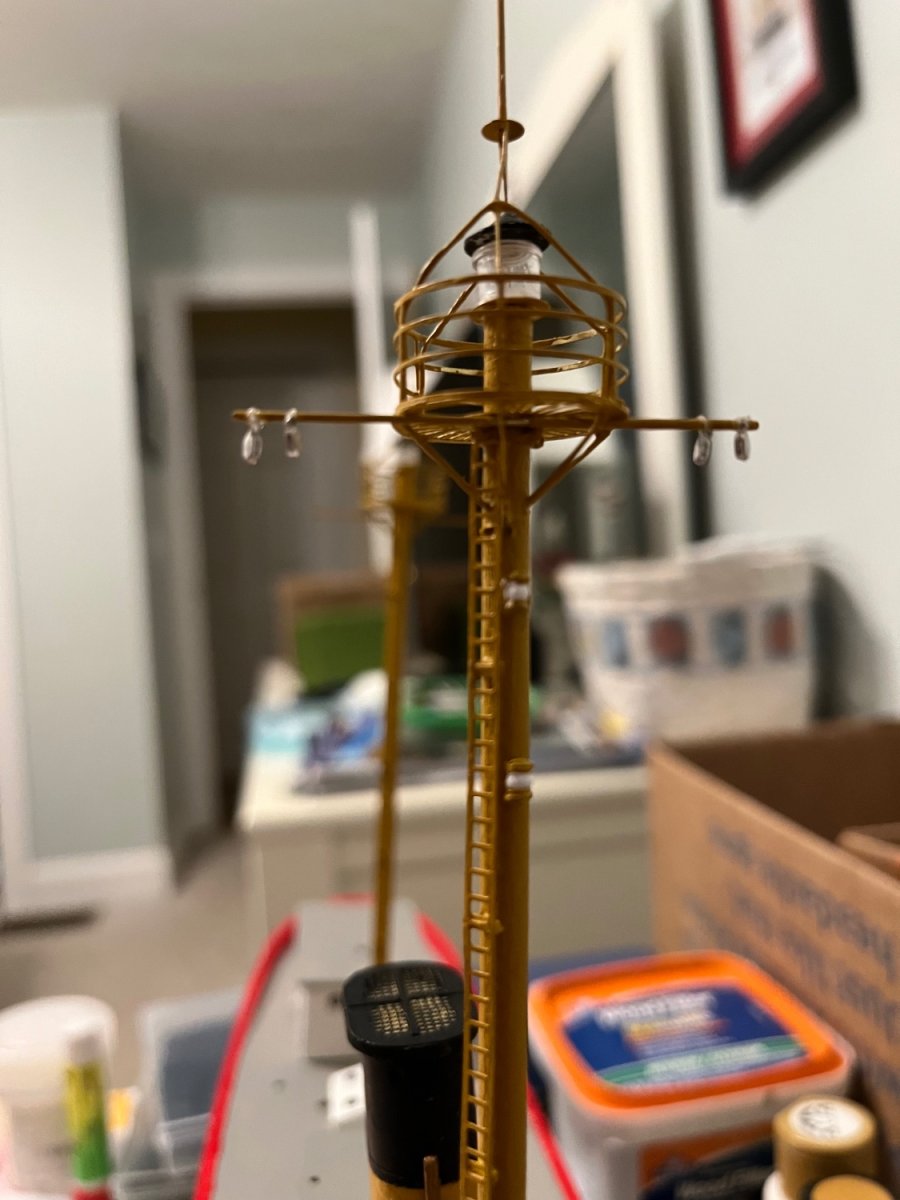
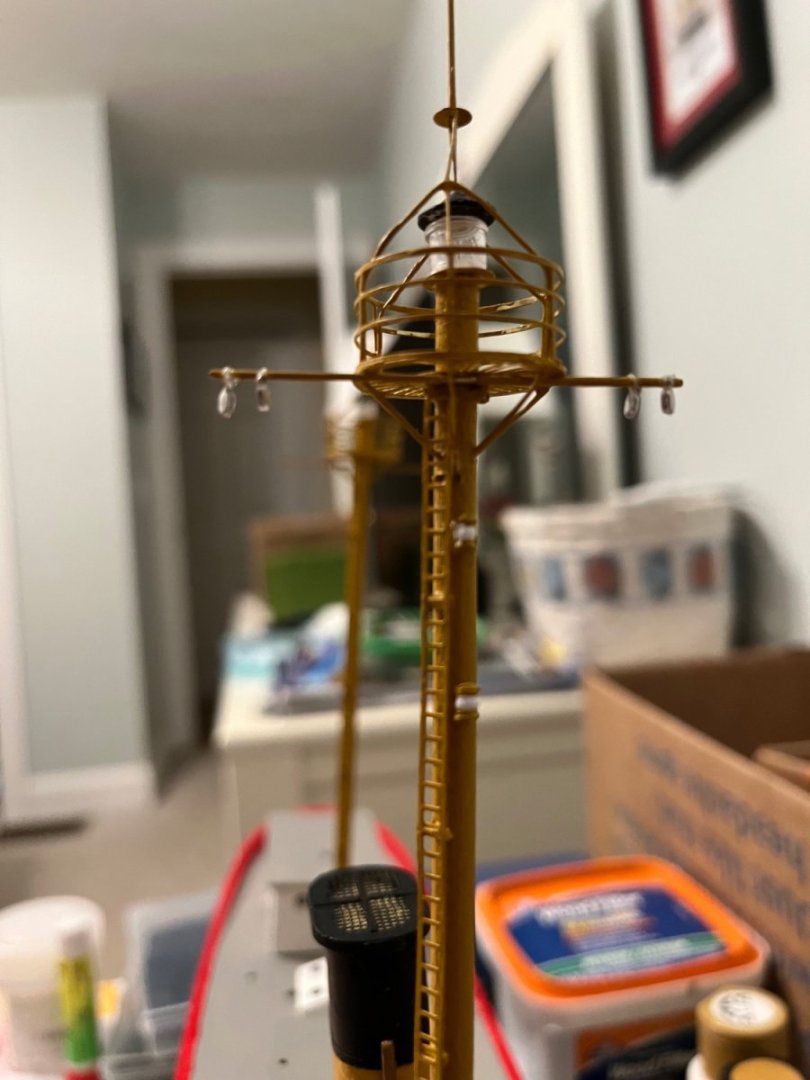
Fully constructed forward and stern masts. (I have not fully seated the stern mast so it is about a 1/2 “ higher). I sanded the masts and painted them an ocre color which is extremely close to the actual color. I also cut and cemented the forward and stern yards. Note the 4 blocks on the forward yard. You need a very small hand drill to open the eye on them to attach them to the yard with some thread and cement. I use a headlight with magnifying loupes which allows me a better view of them. I respect the modelers who constructed their creations prior to the invention of cyanoacrylate (super glue) cement. I cut and attached the ladders to each mast placing spacers every 10 rungs. I finally attached the running lights on the forward mast. I have enclosed several pictures as well as one of the concert I went to last weekend with my son to see Willy Nelson . Not bad for 89 years old!


- 35 replies
-
- 11
-
-
- Nantucket Lightship
- BlueJacket Shipcrafters
- (and 1 more)
-
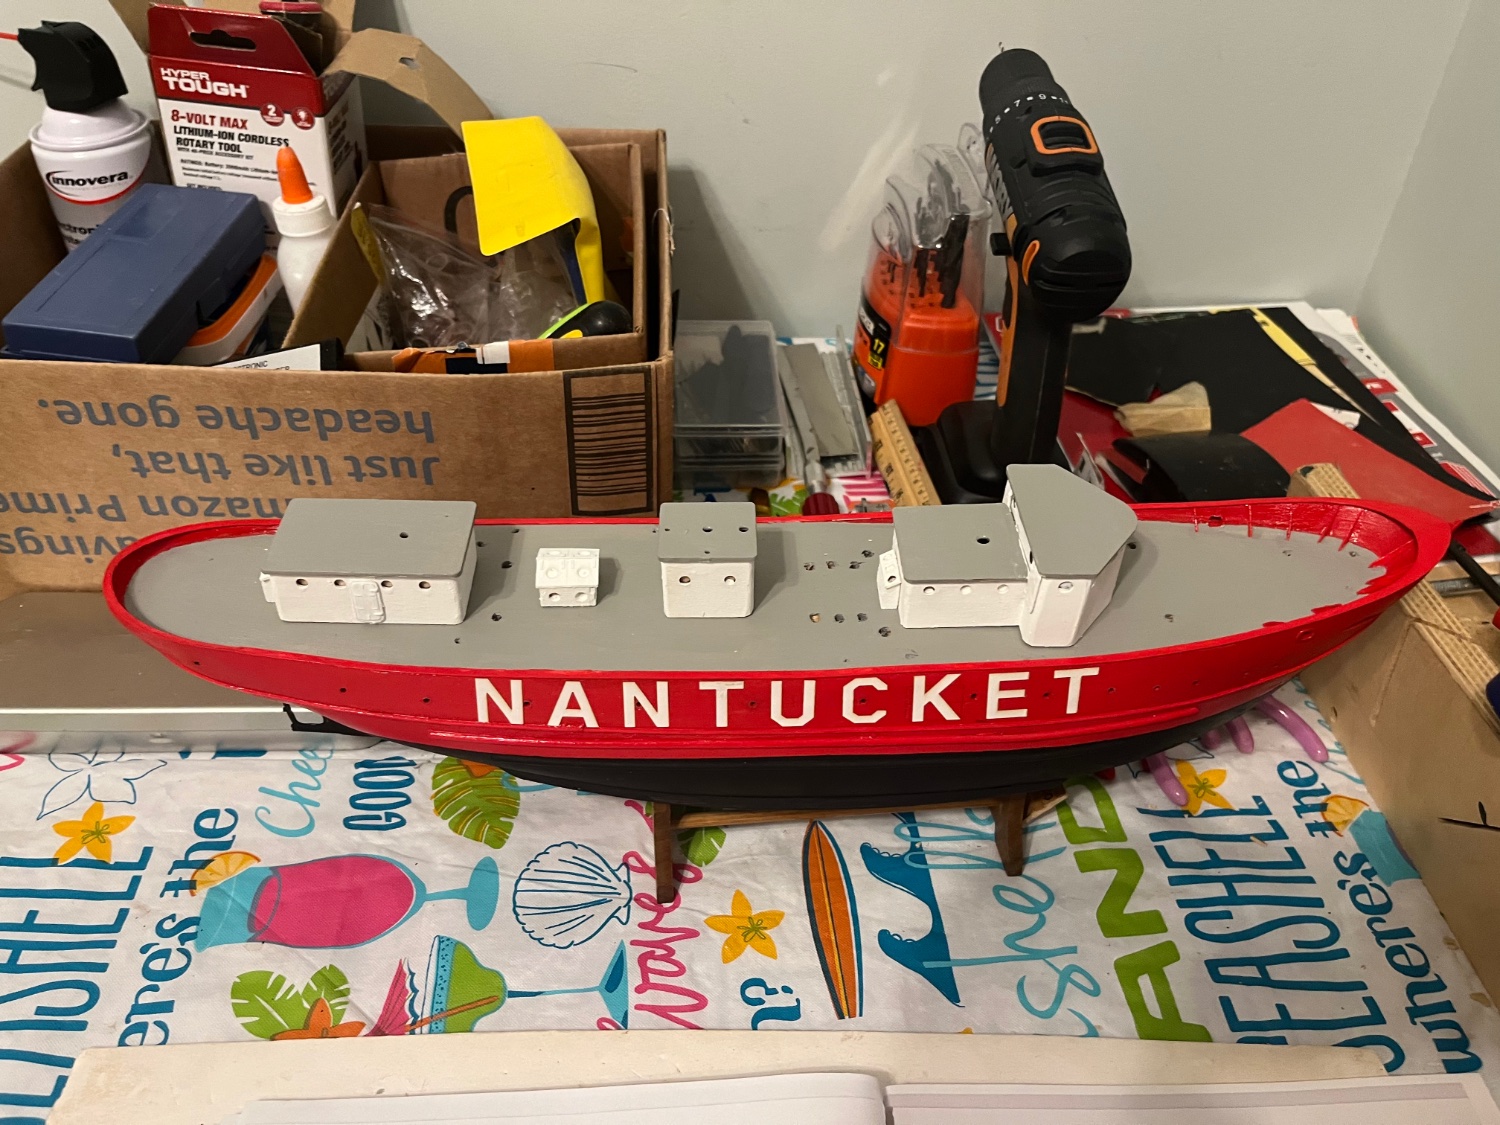
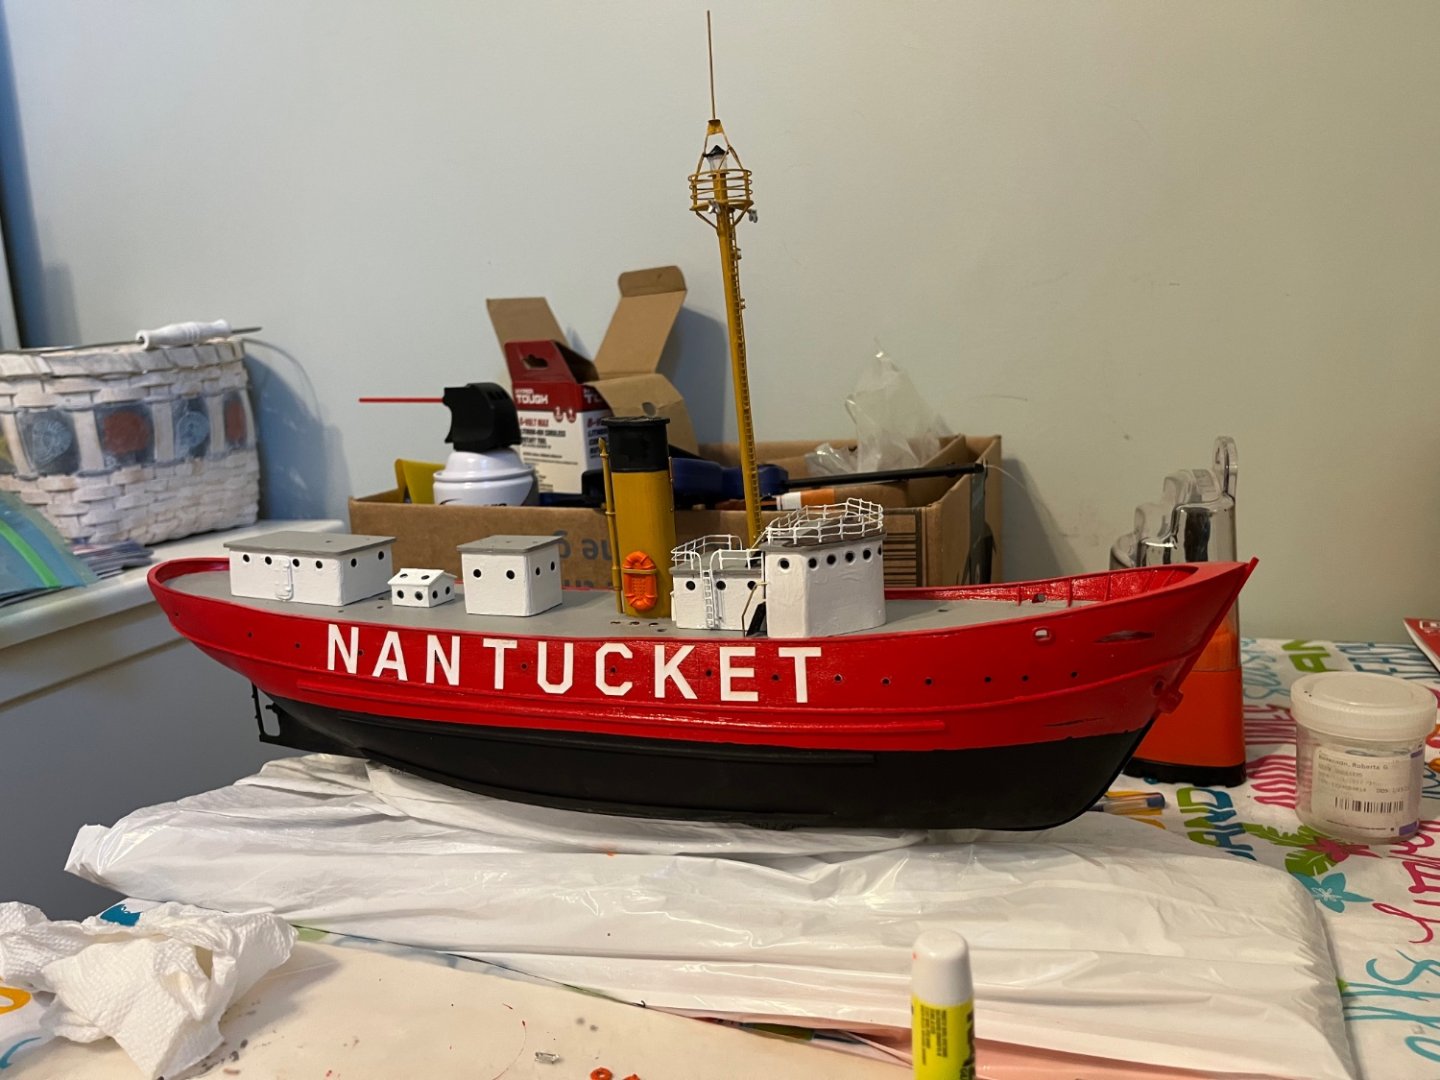
Latest pictures of the ship. I just placed the superstructure cabins on the hull to see how they look. They are not attached. Lenses placed into the openings on them. I assembled and painted the stack.


- 35 replies
-
- 6
-
-
- Nantucket Lightship
- BlueJacket Shipcrafters
- (and 1 more)
-
Nic, LNAN 15A boiler room light glasses are tiny and MUCH smaller than the 15B spacers on the Nantucket. Should I paint the spacers and if so what color… black? (Sketch 10 page 19). Thanks, Jerry
-
Bluejacket’s plans and accompanied manual are very explicit.
- 35 replies
-
- 3
-
-
- Nantucket Lightship
- BlueJacket Shipcrafters
- (and 1 more)
-
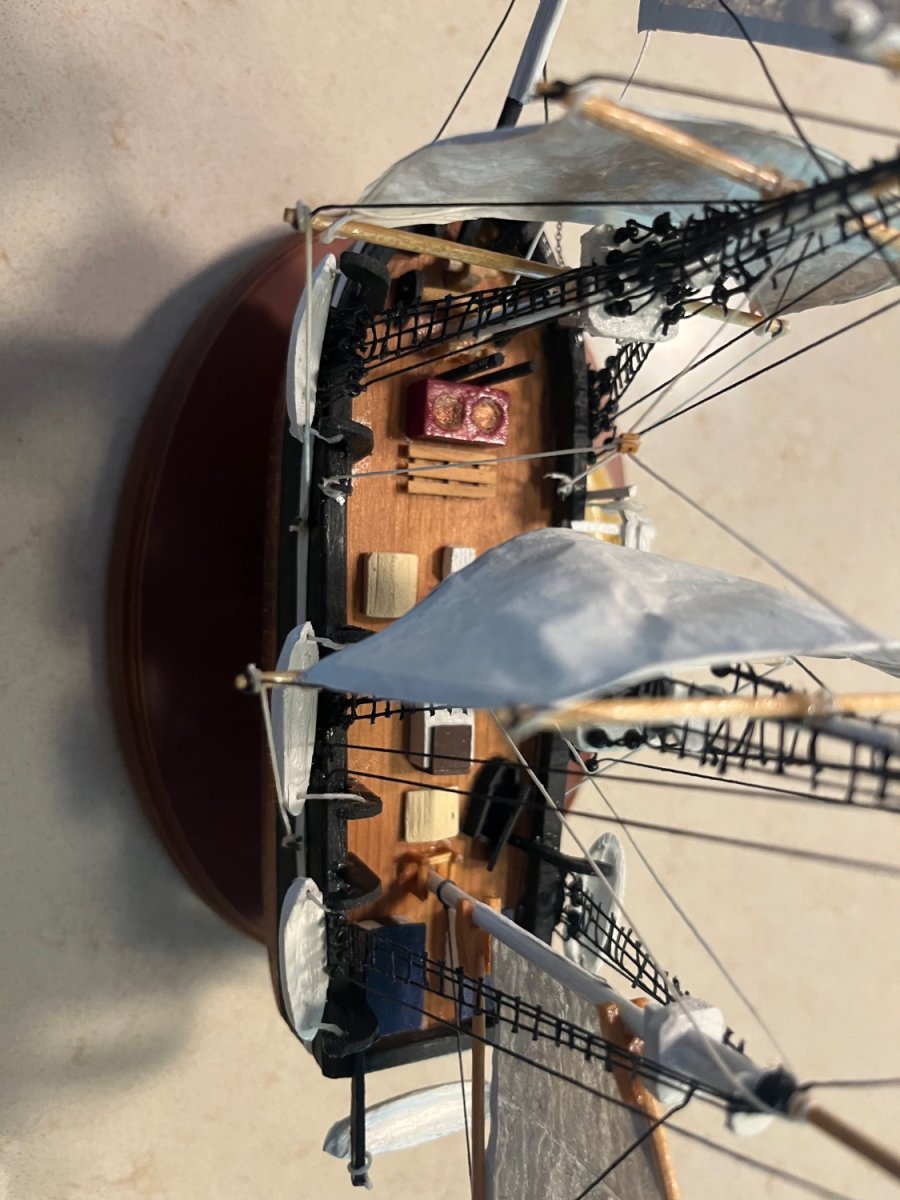
When digging out the hatches going down to the crew’s deck, I chiseled them out, filed them square and flattened the floor down as much as possible. I then cut out extra decking material and covered the base of the hole with the decking.
-
Mike, yes I am enjoying making it! It should be a very attractive ship if I make it correctly!
- 35 replies
-
- 2
-
-
- Nantucket Lightship
- BlueJacket Shipcrafters
- (and 1 more)
-
Avi, go on Amazon and check out “ headband magnifier rechargeable magnifying glasses with light” or “Mighty sight LED magnifying eyewear “. There are many others on Amazon. They are about $25. The ones I use are from my dental practice and are about $2000. I would try the cheaper ones .
-
Both of you (Avi and Kurt) are craftsmen ! Both your Connies will be gorgeous when completed. I was very thankful to have Kurt’s blog to follow while building mine. You must remember that I am a fully retired dentist and am used to working with intricate and detailed small items. I also did not plank my hull and used copper adhesive tape which I vertically scored every 1/2” instead of metal plates. I spent at least 4 -6 hrs daily and many times more on my build during the pandemic. If you do not have optical loupes with a light, invest in them since they make working on the model so much easier. Regards to you both, Jerry. P.S. the Nantucket Lighthouse model is a lot of fun to build.
-
Not to worry, my Flying Cloud clipper ship which was a scratch build took me 53 years ! I started it at age 17.
-
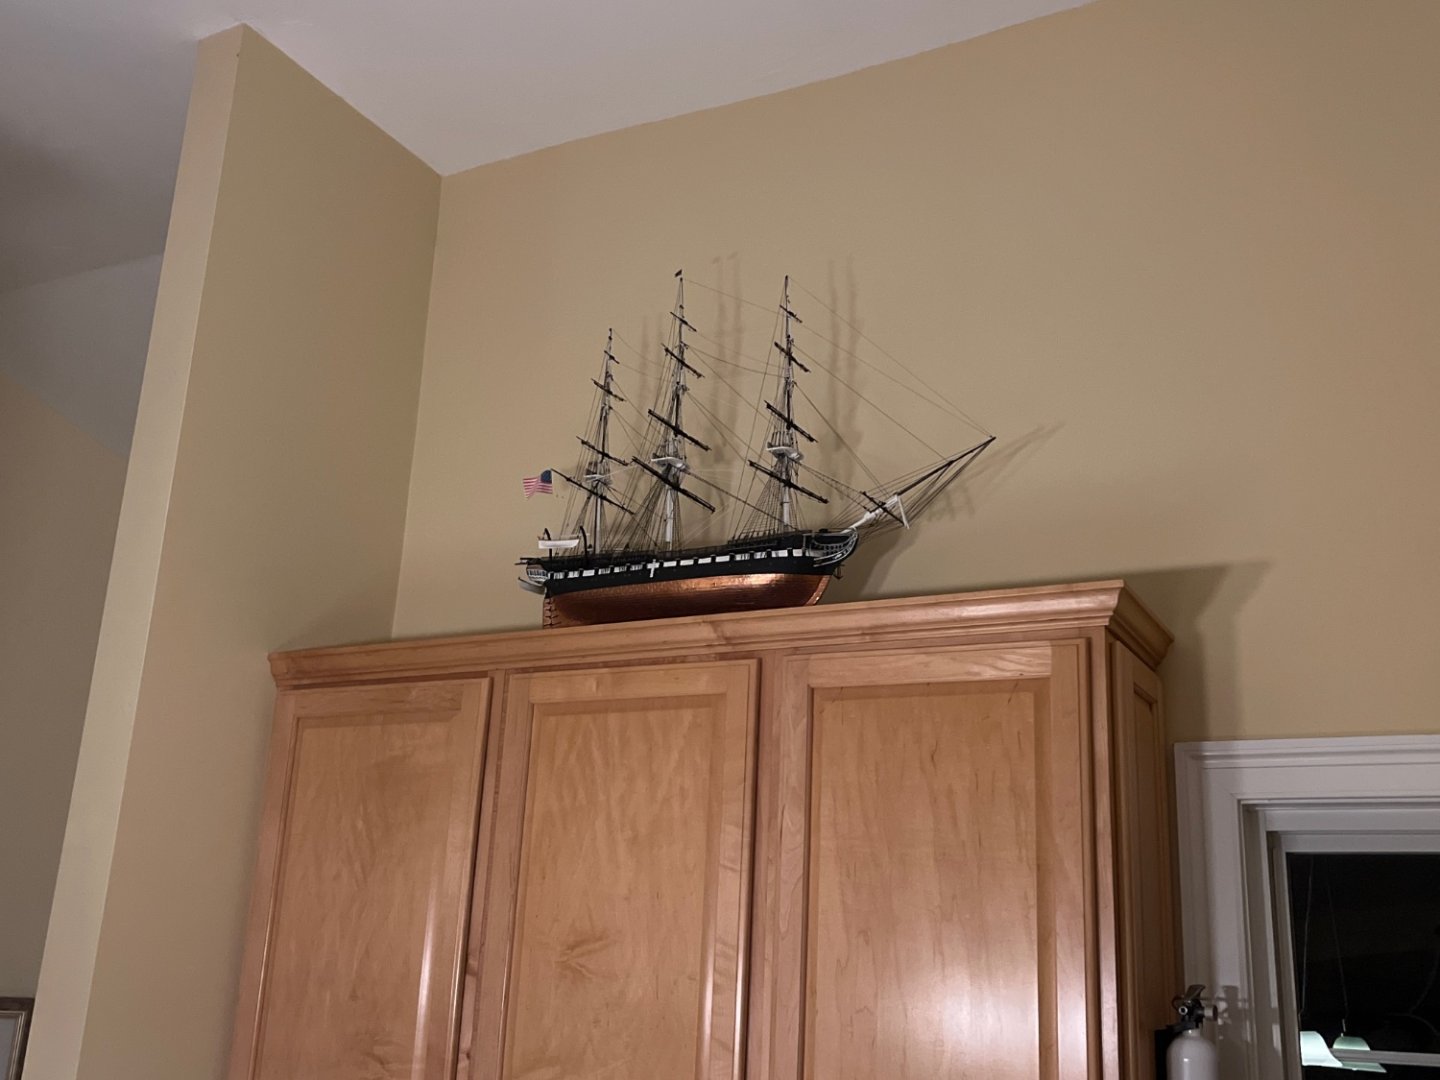
Hi Avi, I am sure your model is keeping you busy. As I stated earlier, I decided to take a break from deadeyes, blocks and rigging. I do not know how to send you a link to see my build but if you type in the key word Nantucket , my blog pops up when you scroll down. I now fully understand the differences and ratings Bluejacket gives to their model kits as my model comes with several pieces which are preformed unlike the Connie. My wife is concerned that we will need a bigger house for my models… not happening 😀Luckily we have high ceilings so my Connie is above the kitchen cabinets.Hope you are well. Regards Jerry
-
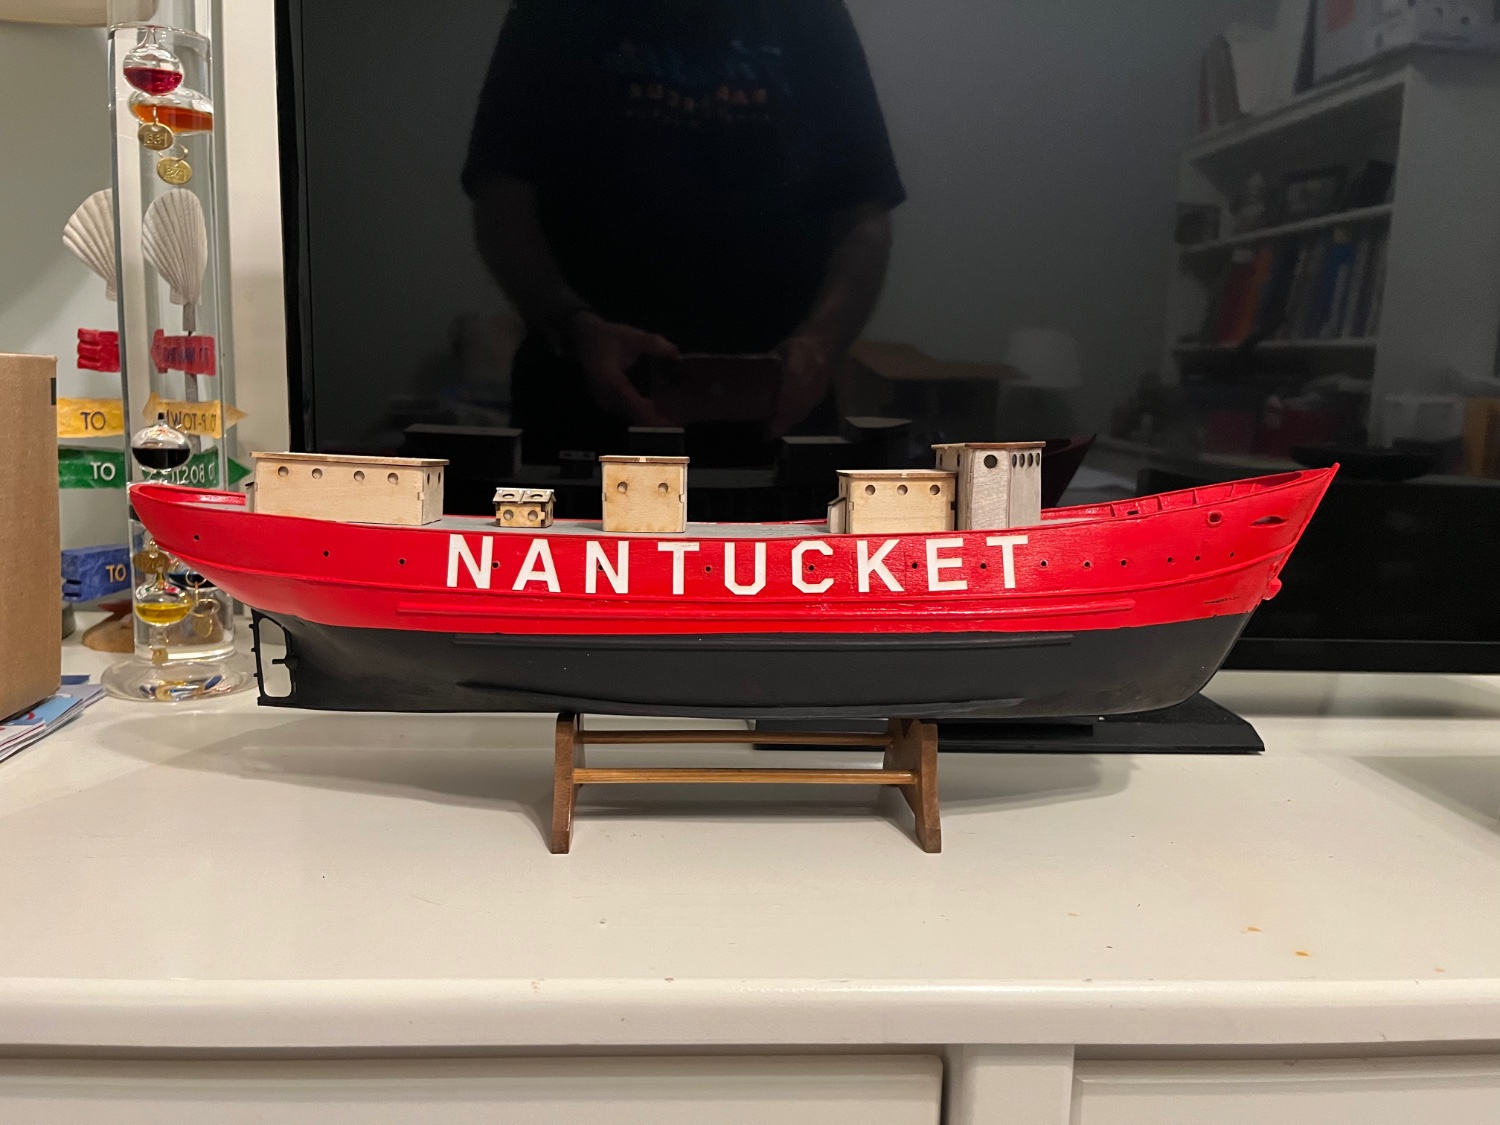
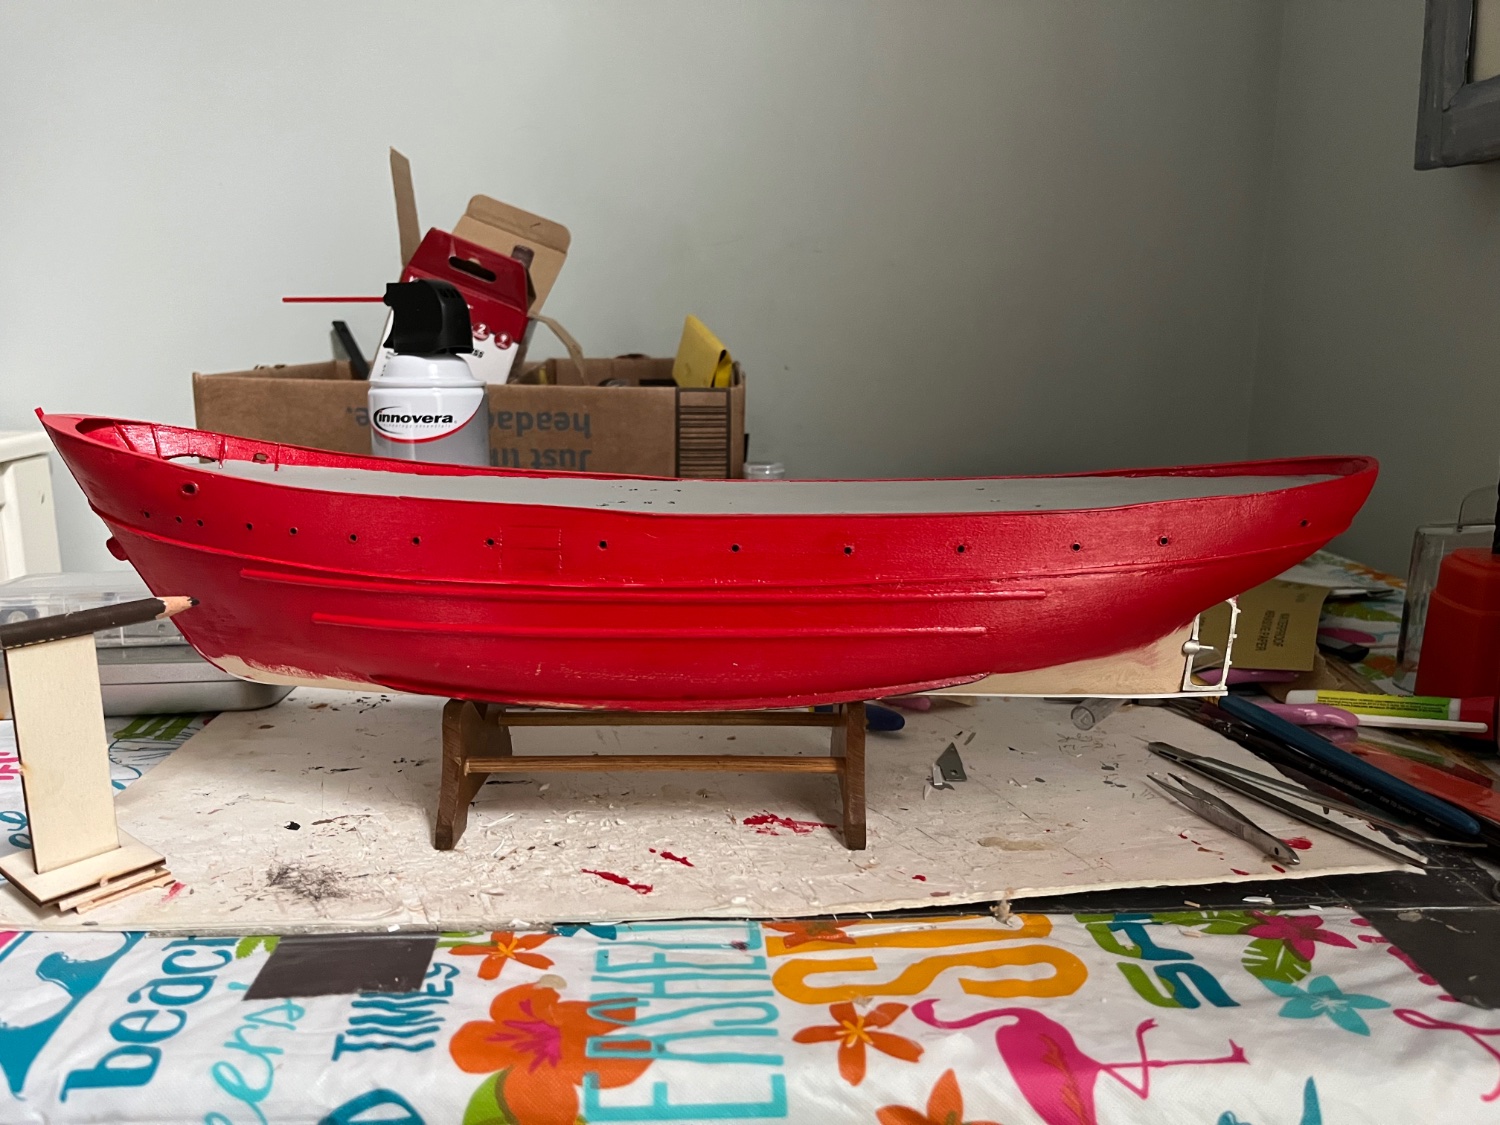
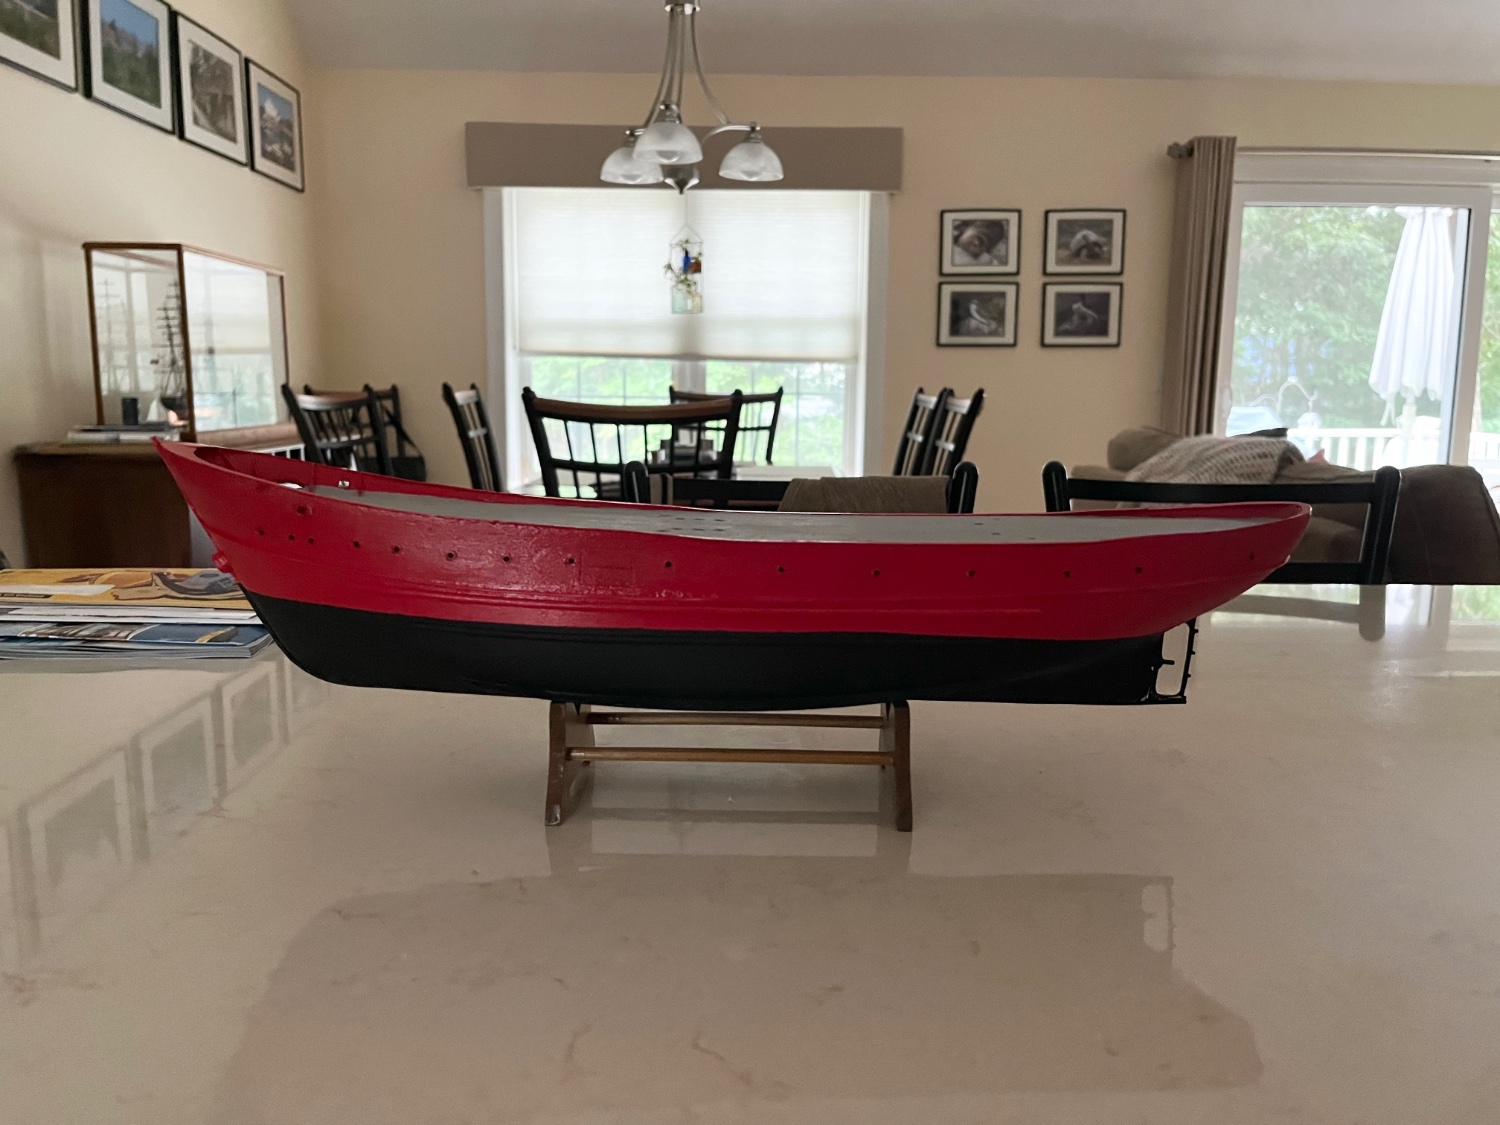
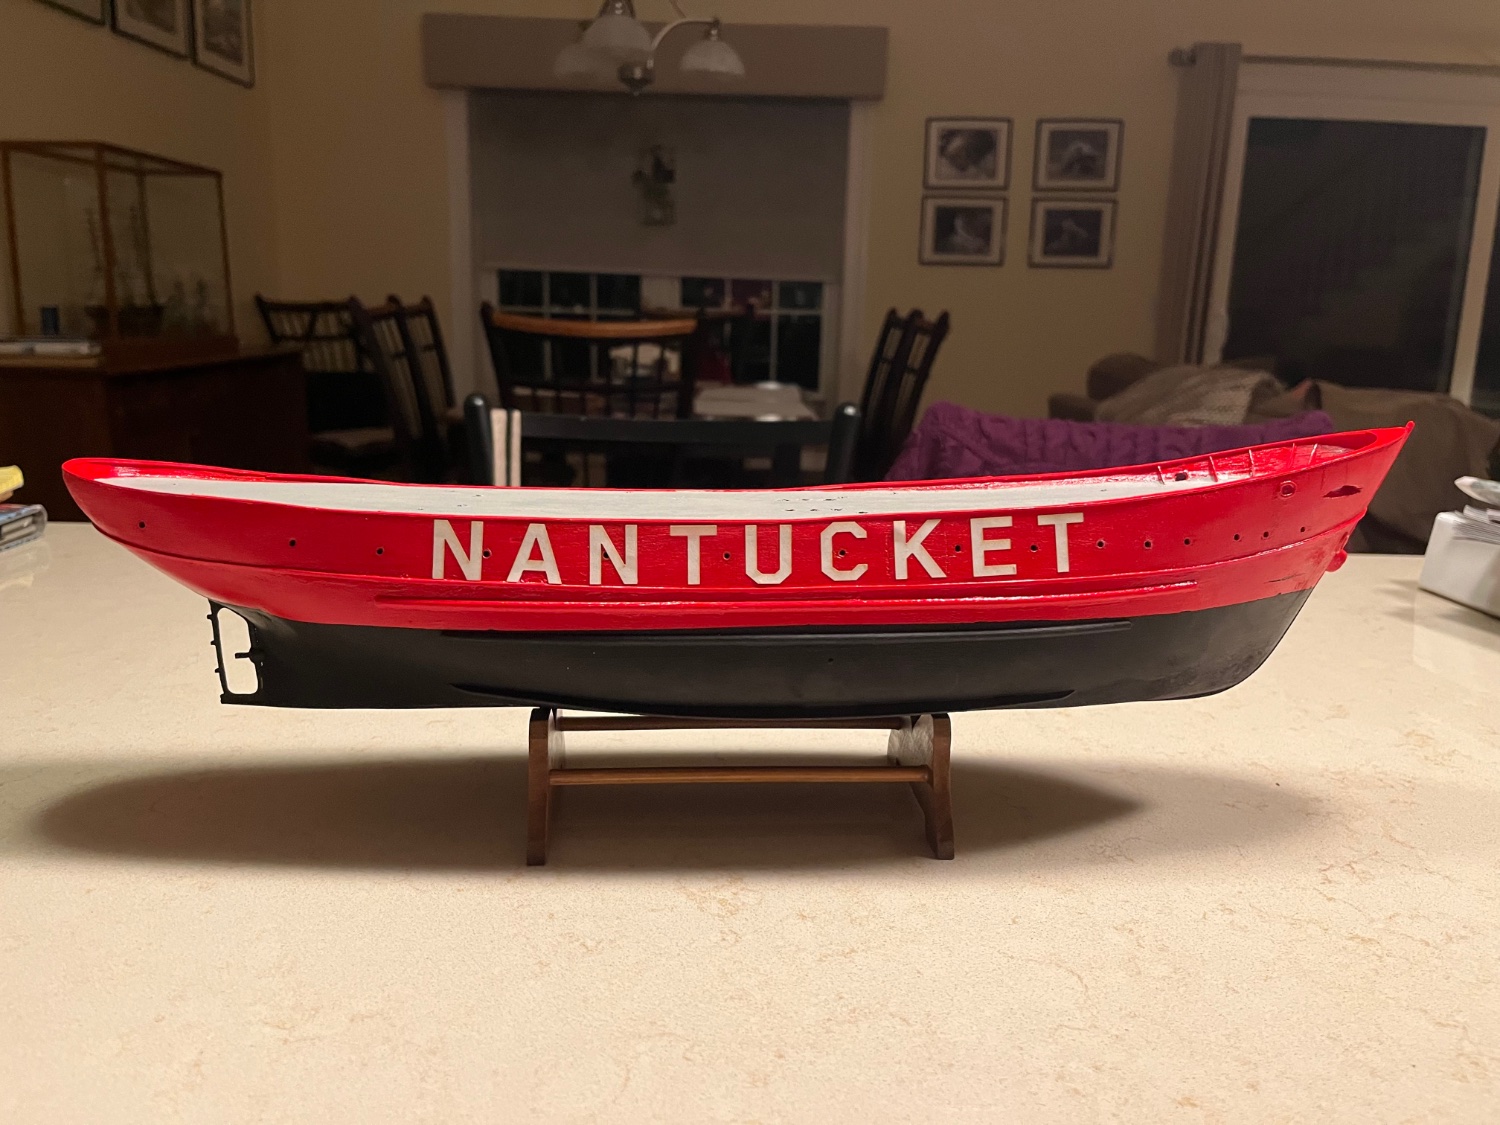
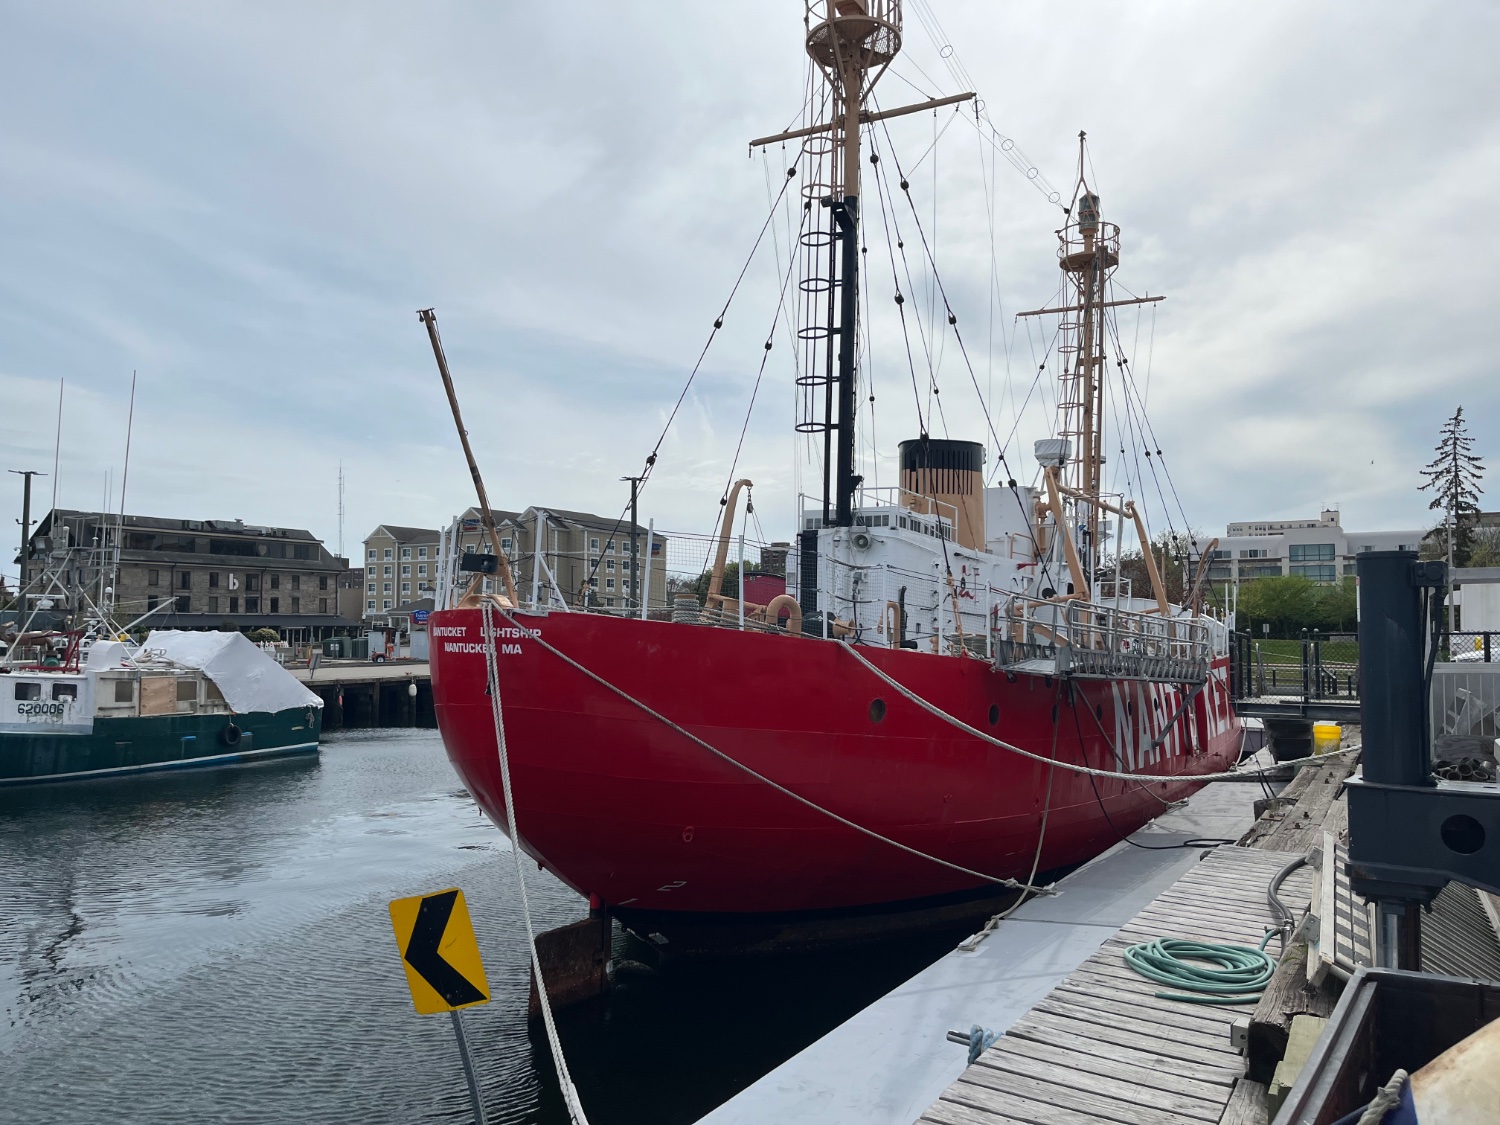
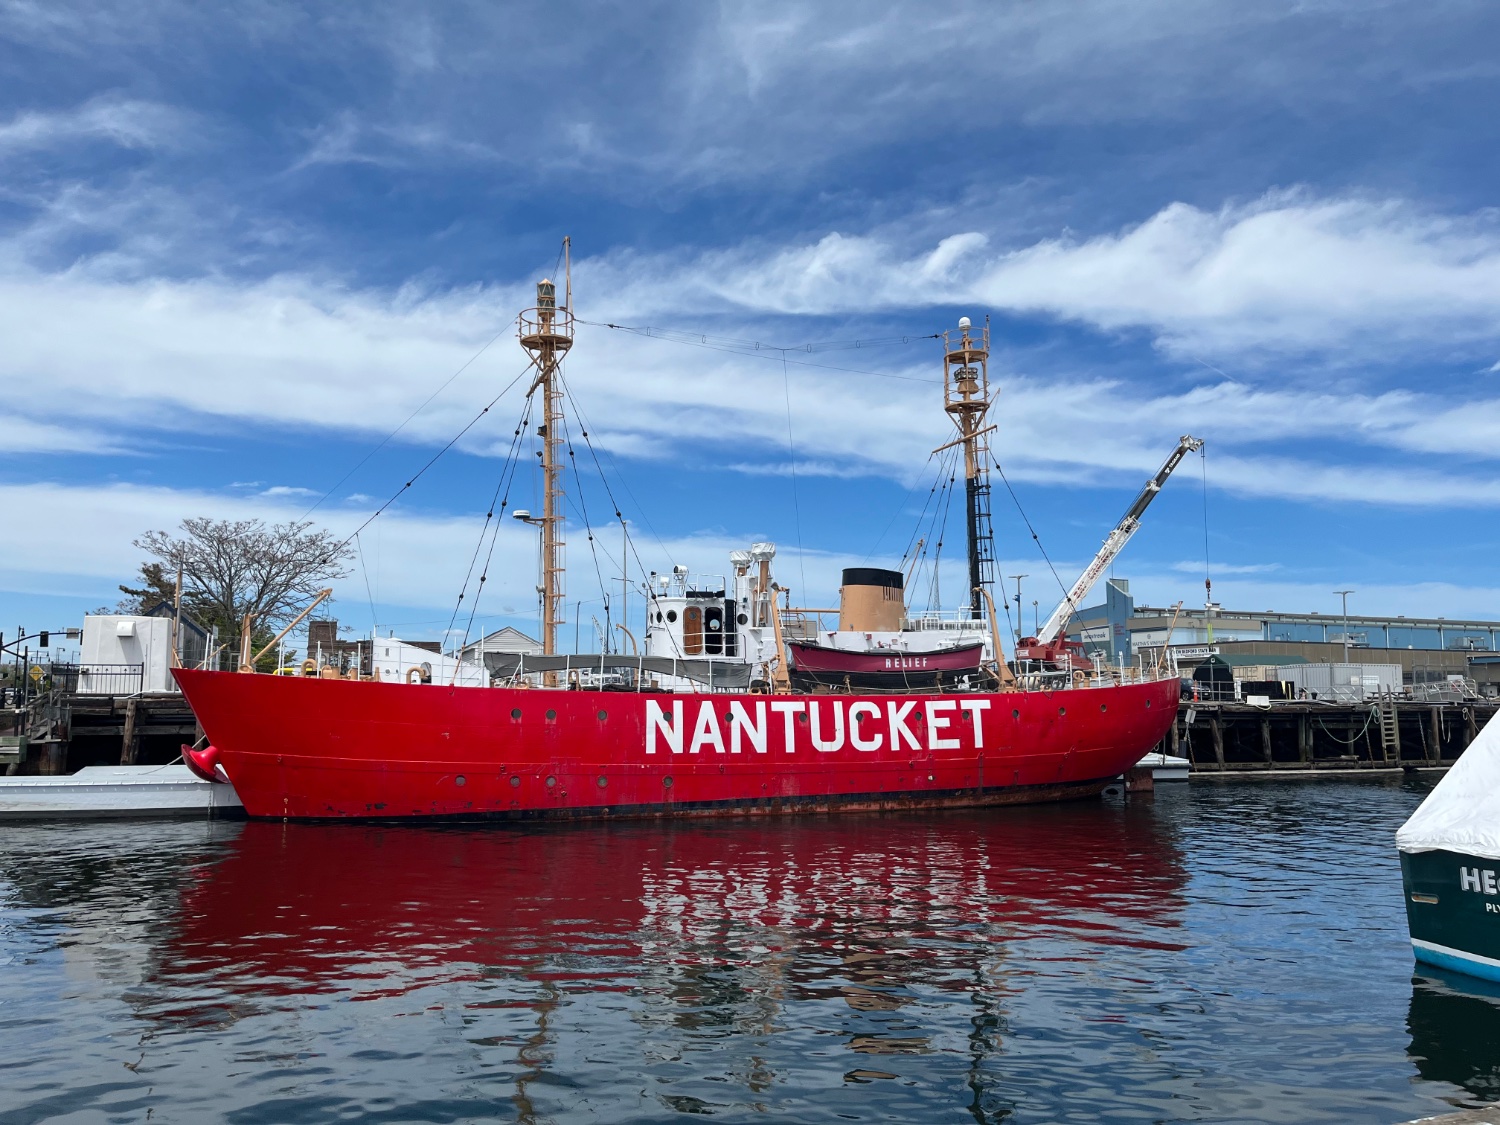
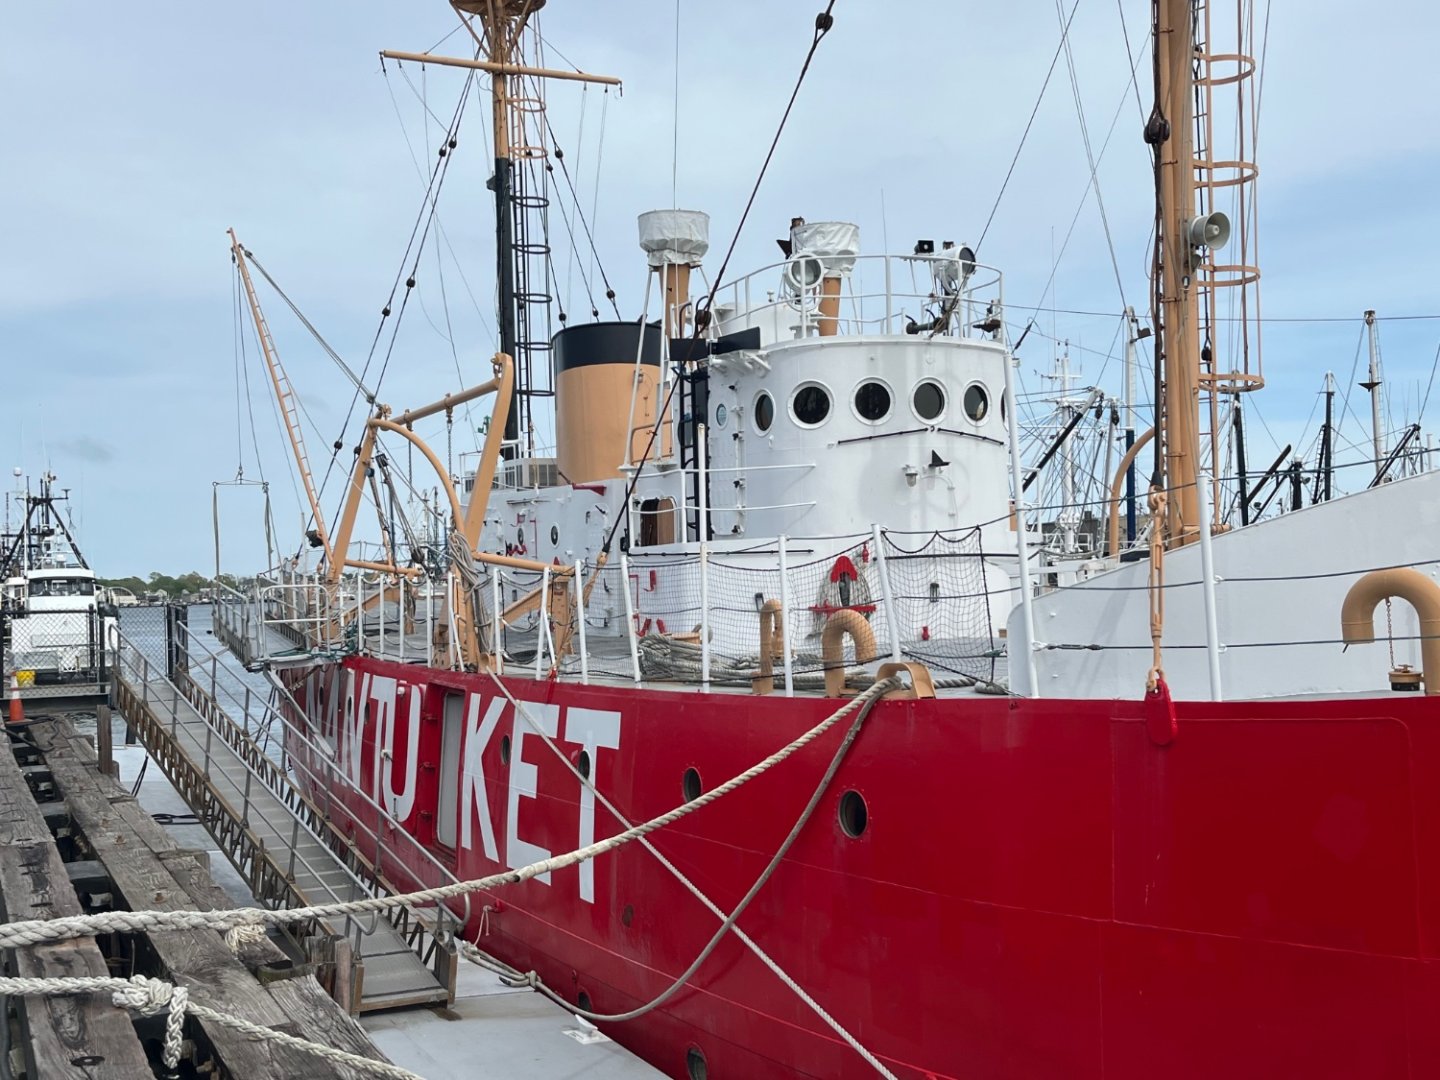
I just completed the hull of Nantucket. Keel and cap rails placed as well as the anchor opening, bulwark stiffeners, freezing ports and Hawse lip. I painted the hull with 3 coats of acrylic red paint sanding between coats. I tried to use a pencil marking around the ship for the waterline but was unable to see the markings on the paint. I measured the waterline from the plans and masked the area and painted the bottom of the ship with flat black acrylic paint. After drying I placed the adhesive letters on both sides. The ship is on a temporary cradle until I buy brass pedestals and a baseboard.


- 35 replies
-
- 14
-
-
- Nantucket Lightship
- BlueJacket Shipcrafters
- (and 1 more)
-
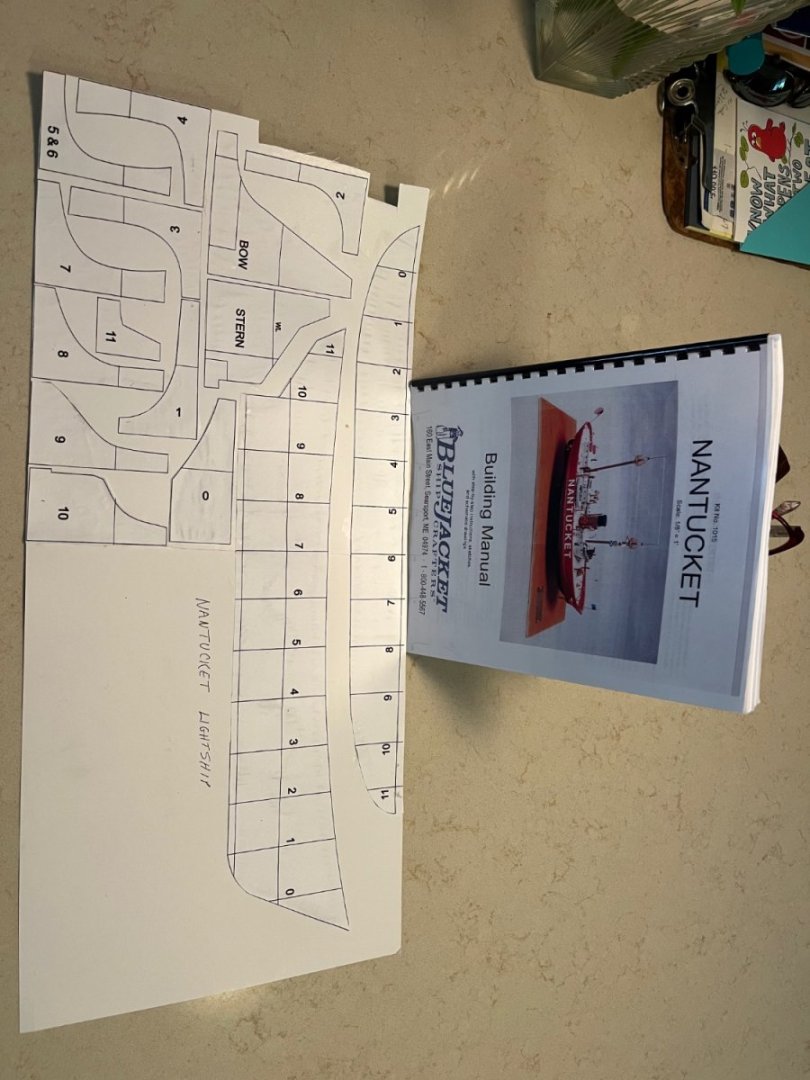
Thanks Roger, the scale is 1/8” per foot. The overall length of the model is approx 19”. Much smaller than the model I just completed of the Constitution which is also 1/8” but is almost 40” in length.
- 35 replies
-
- 2
-
-
- Nantucket Lightship
- BlueJacket Shipcrafters
- (and 1 more)
-
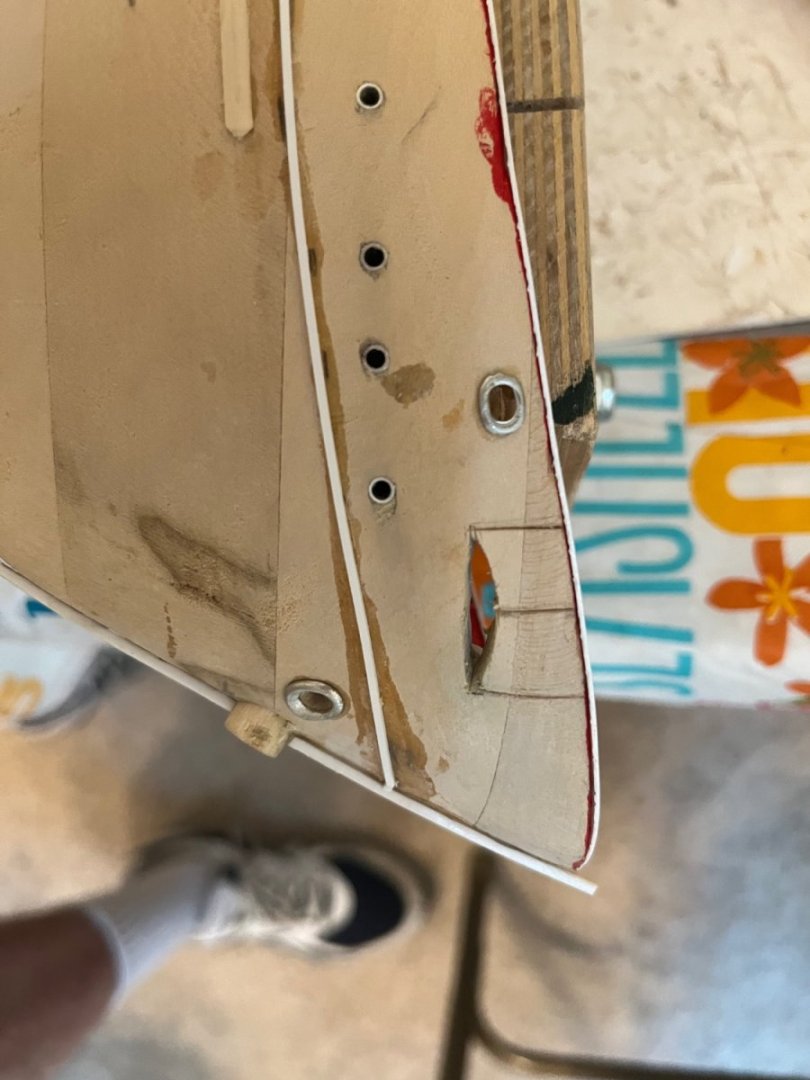
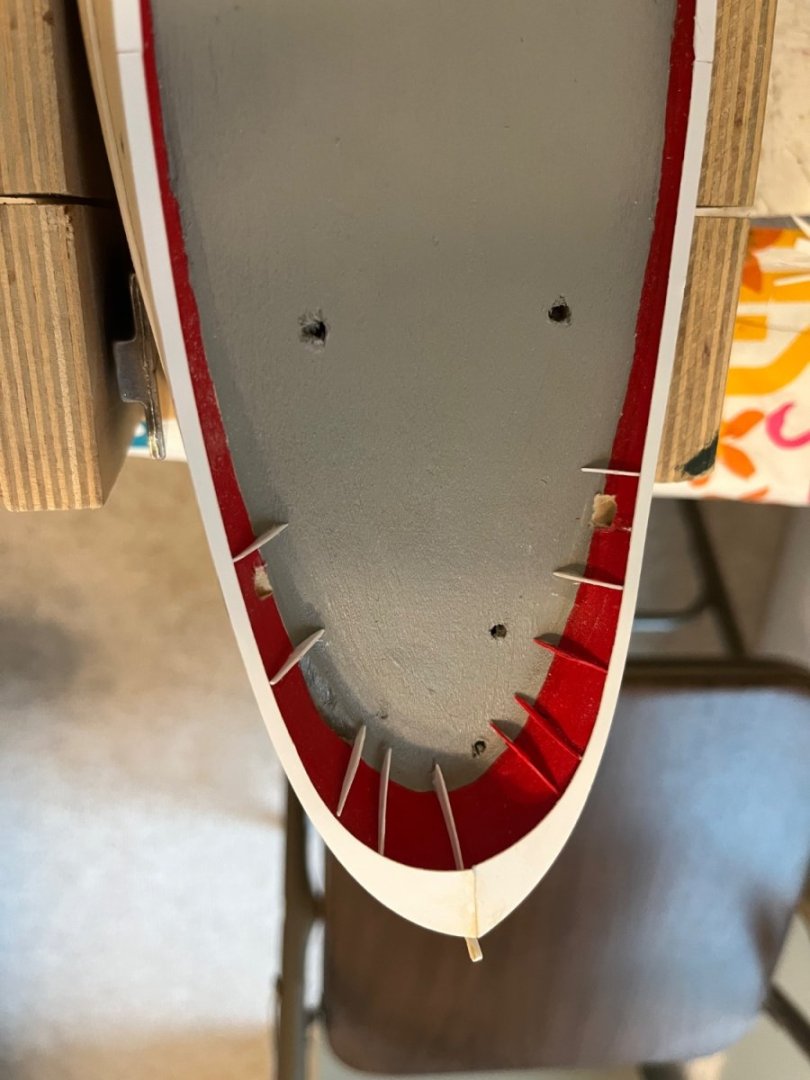
Air ports drilled and metal tubing placed. Sheer strakes and Rub rails placed as well as Bilge keels. I have thinned the bulwark at the stern while learning my lesson to not apply too much pressure on my Dremel . 1/32 of an inch is quite thin and I accidentally fractured off a piece of the bulwark. I recemented it and filled in a couple of defects with wood filler. The thinning requires a lot of patience. I am tempted to leave them on the thicker side. I am awaiting a new set of sharp modeling chisels before I begin the bow section. I also fitted and installed the propeller frame.
- 35 replies
-
- 6
-
-
- Nantucket Lightship
- BlueJacket Shipcrafters
- (and 1 more)
-
Laxian Key, thanks for the info and enjoy your build also. Look forward to any info. Jerry
- 35 replies
-
- 2
-
-
- Nantucket Lightship
- BlueJacket Shipcrafters
- (and 1 more)
-
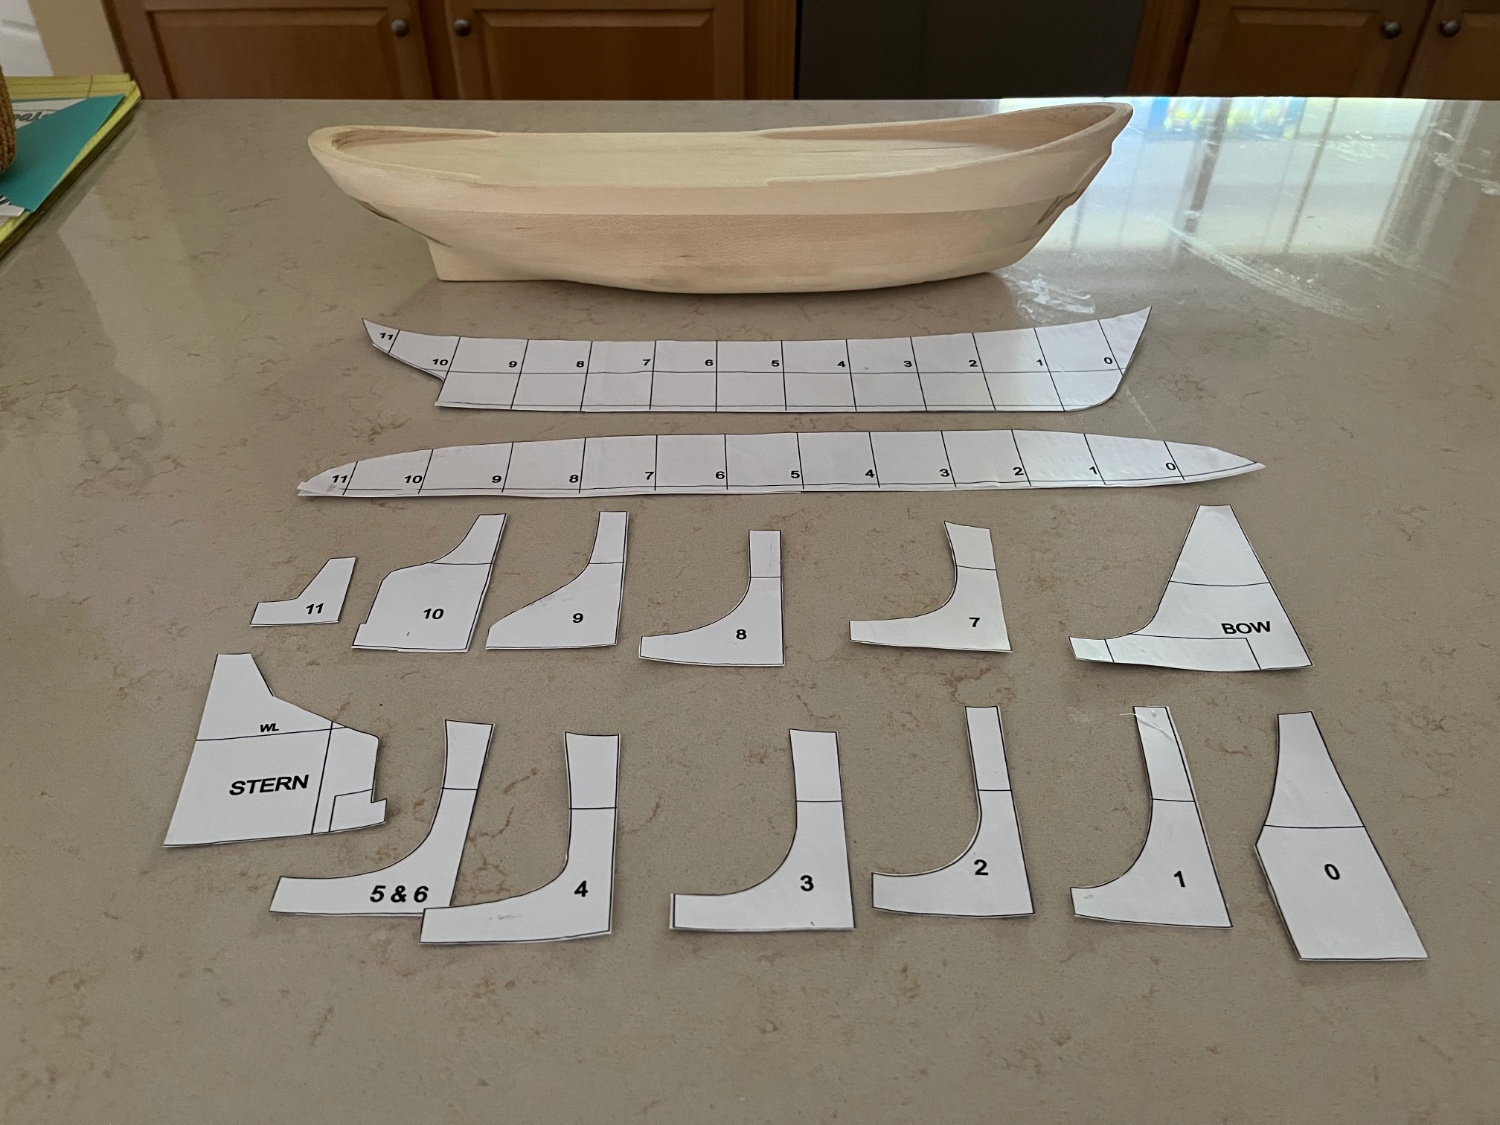
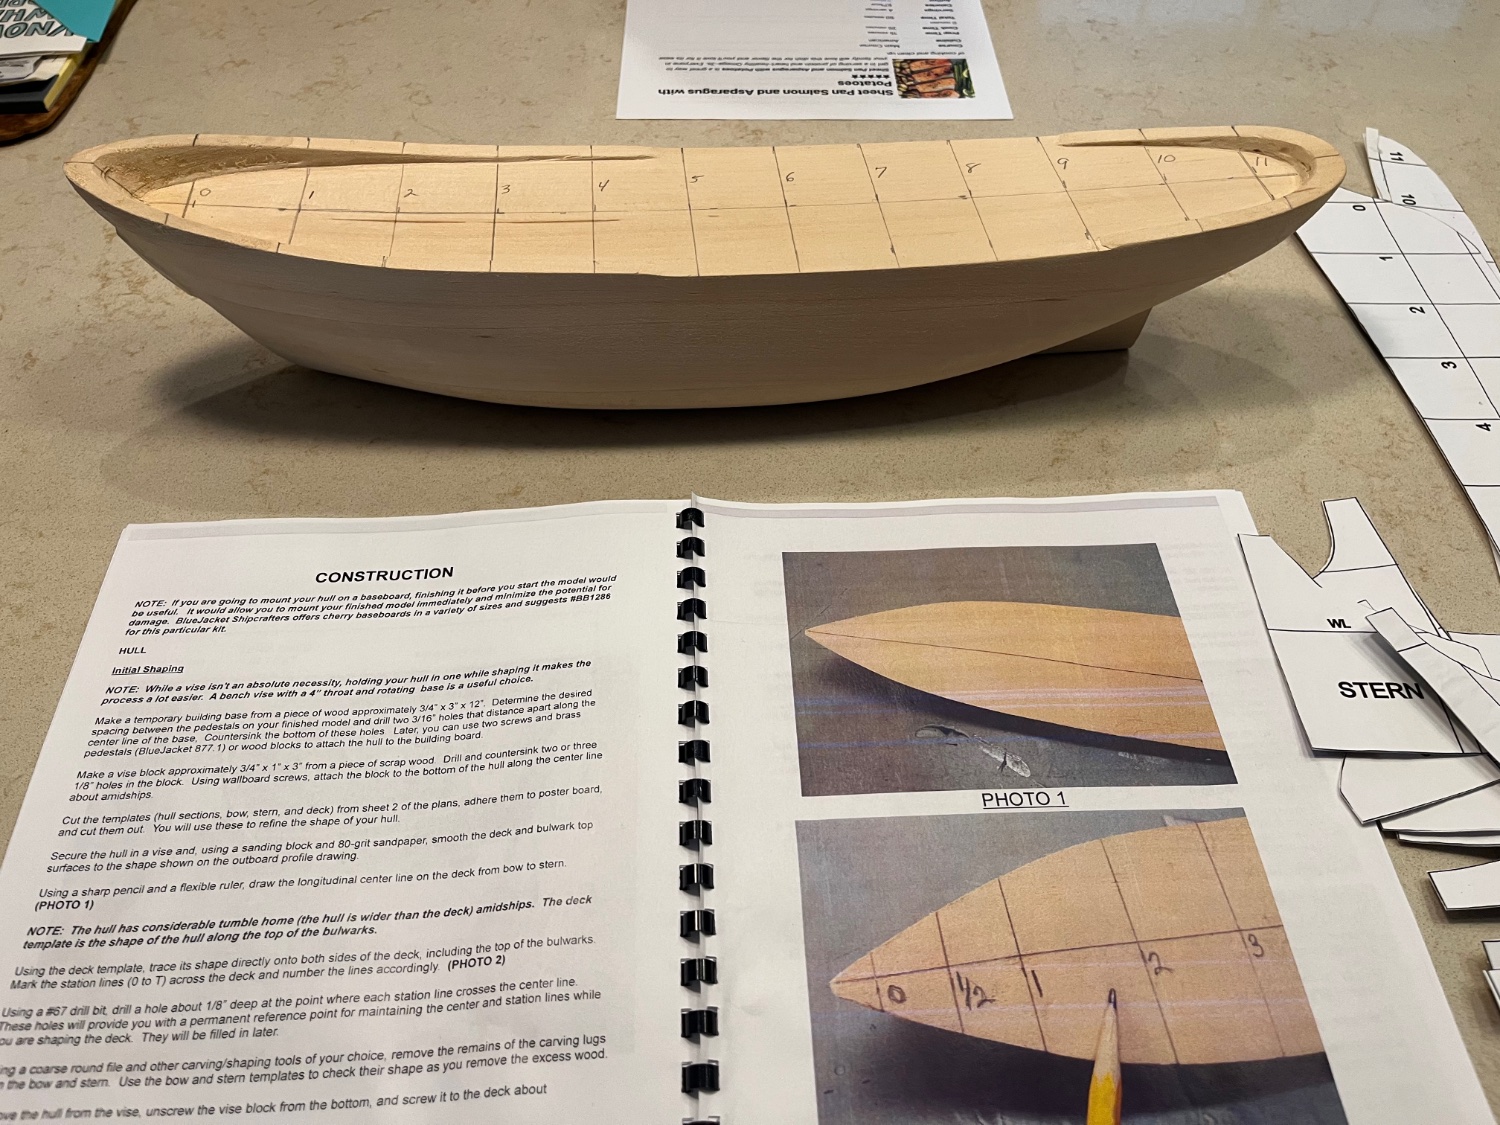
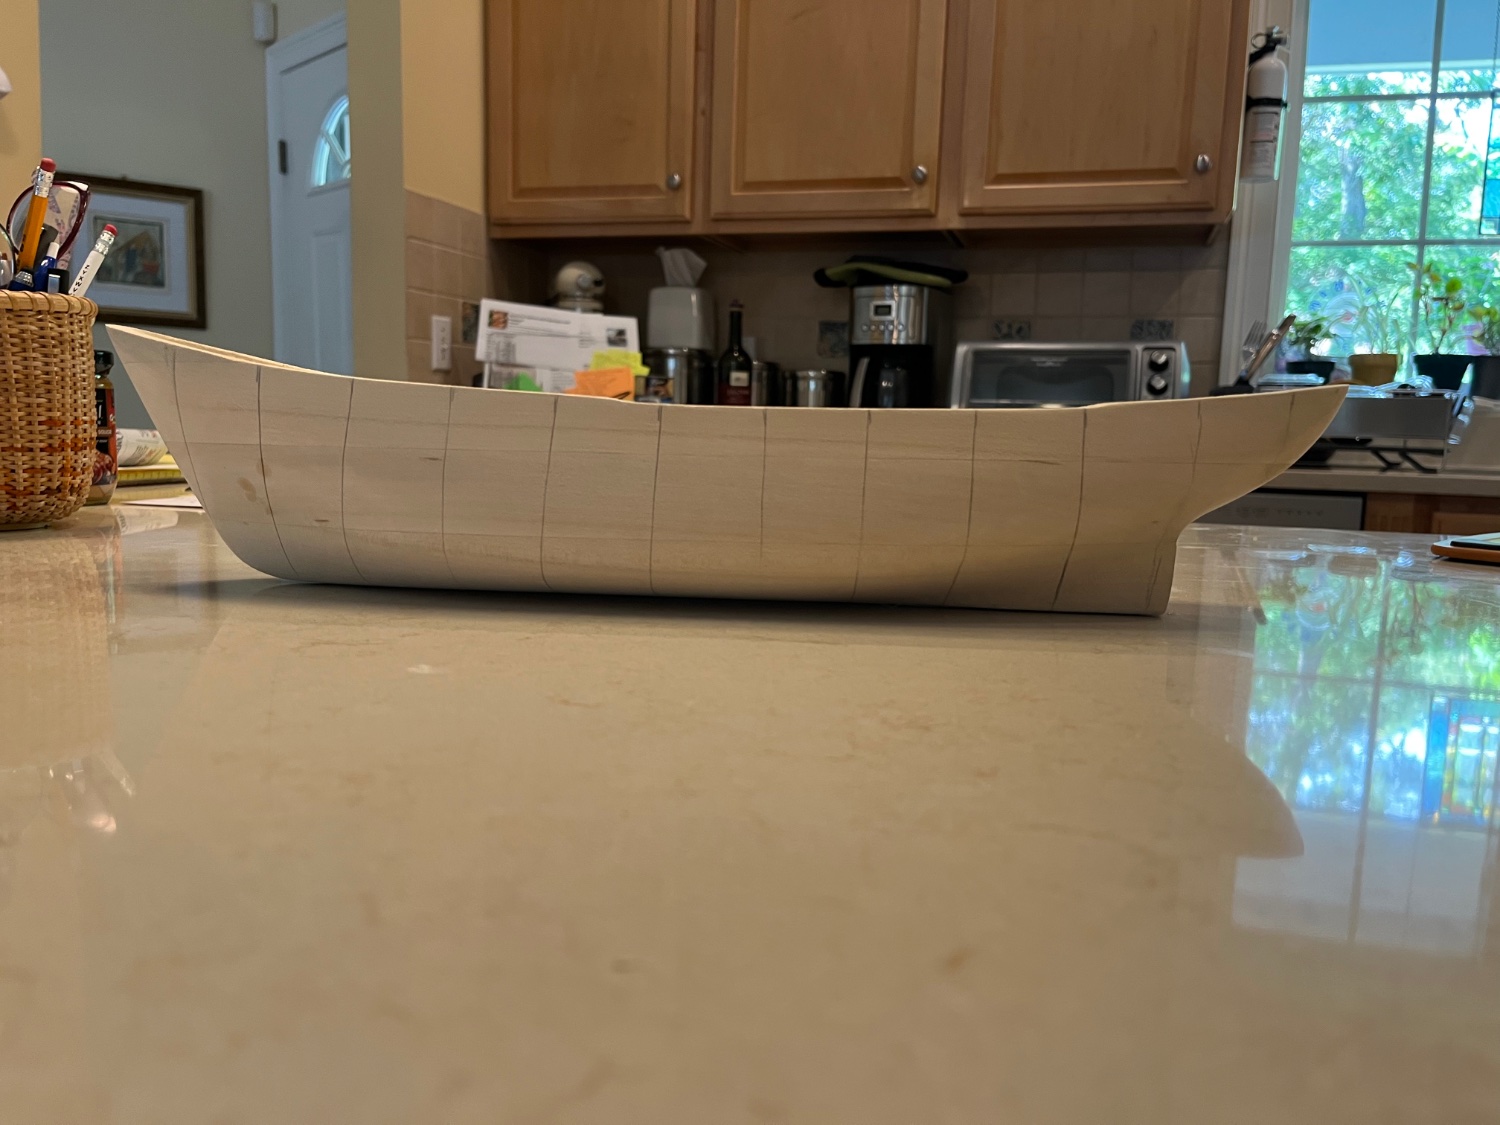
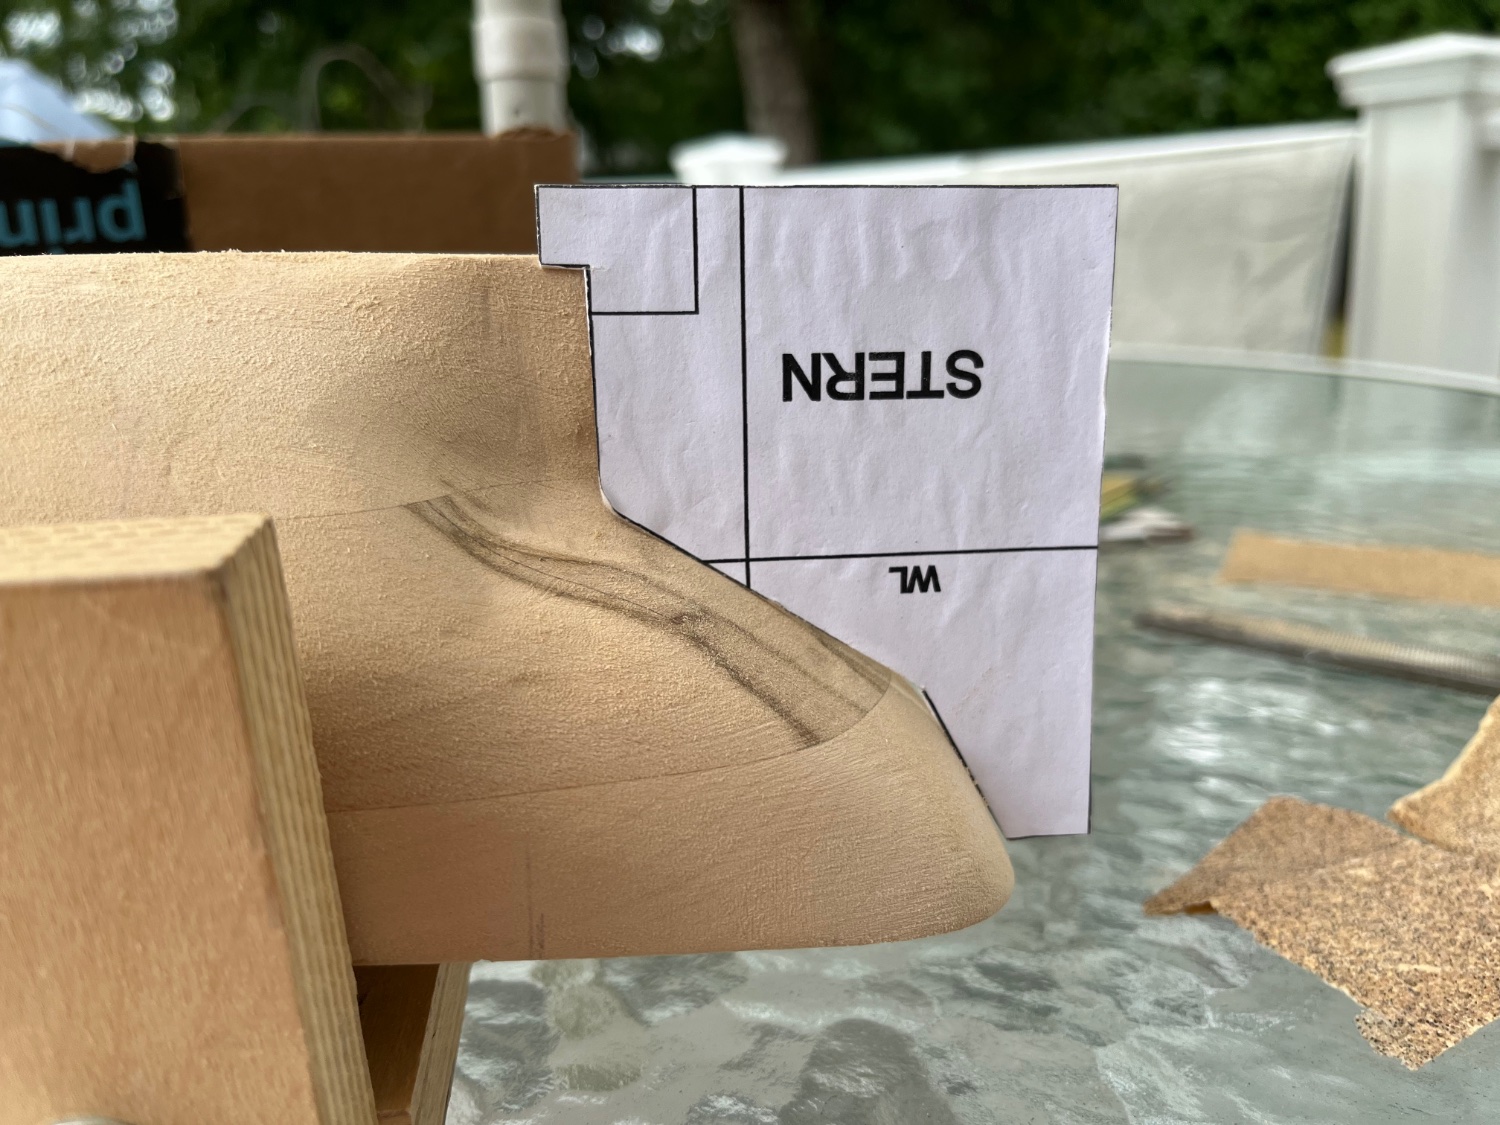
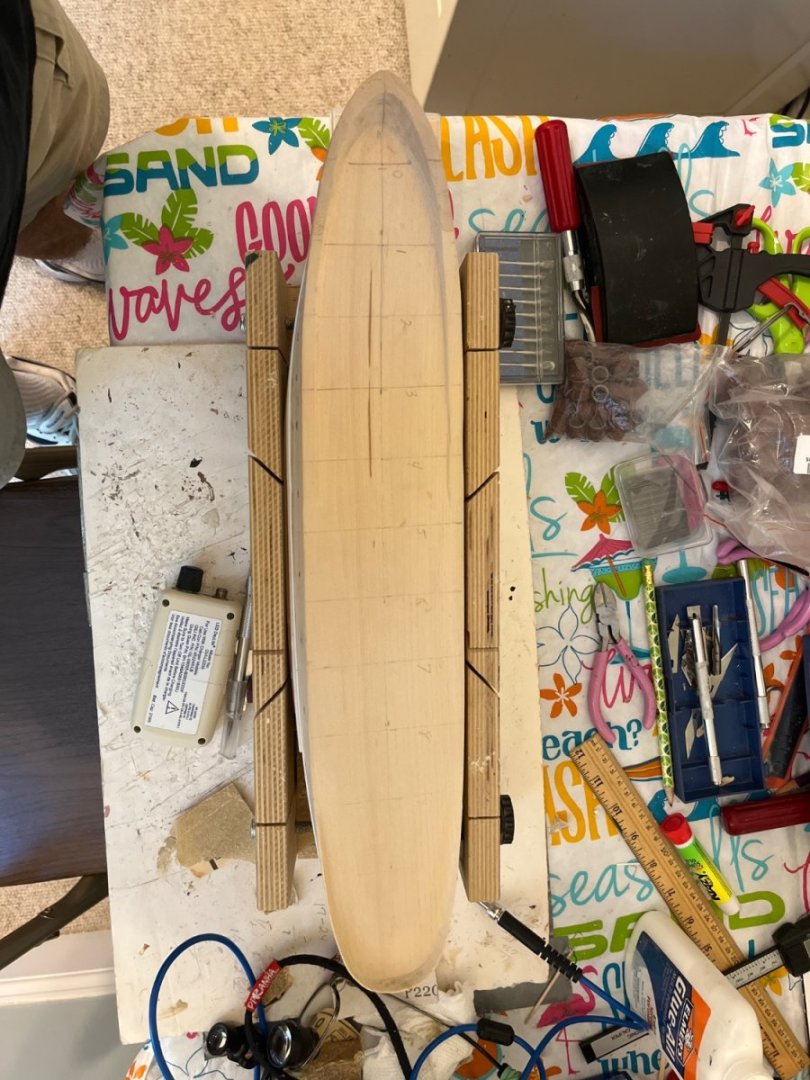
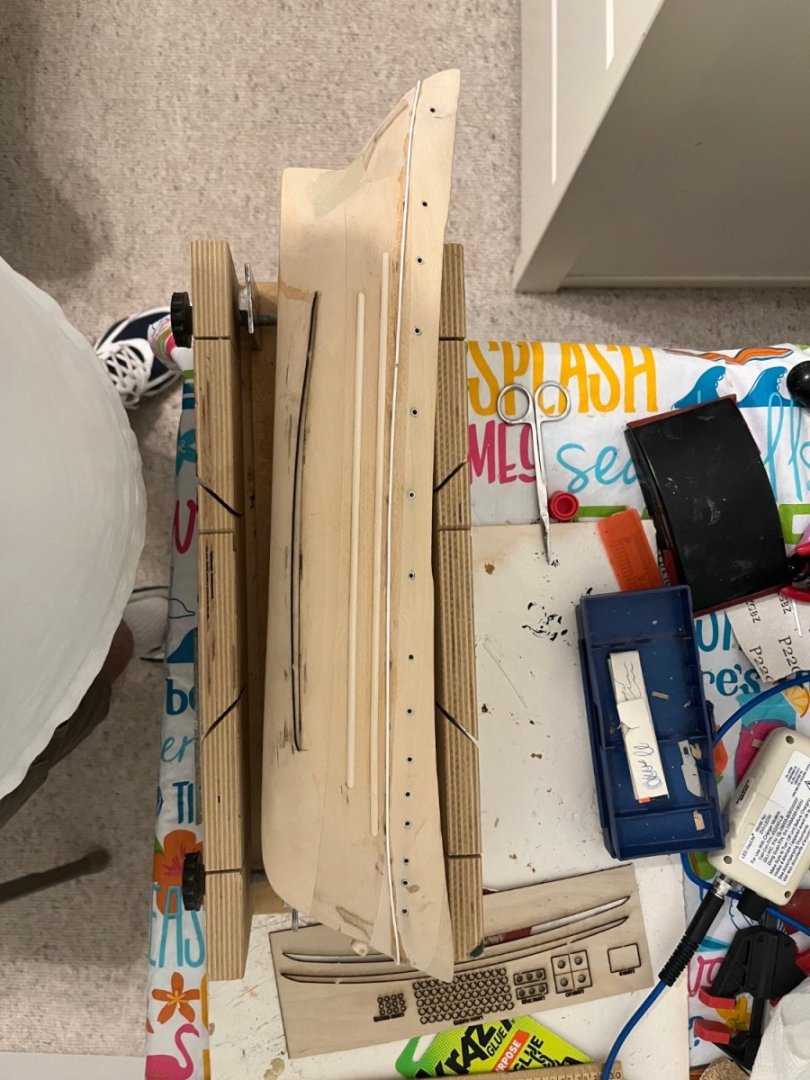
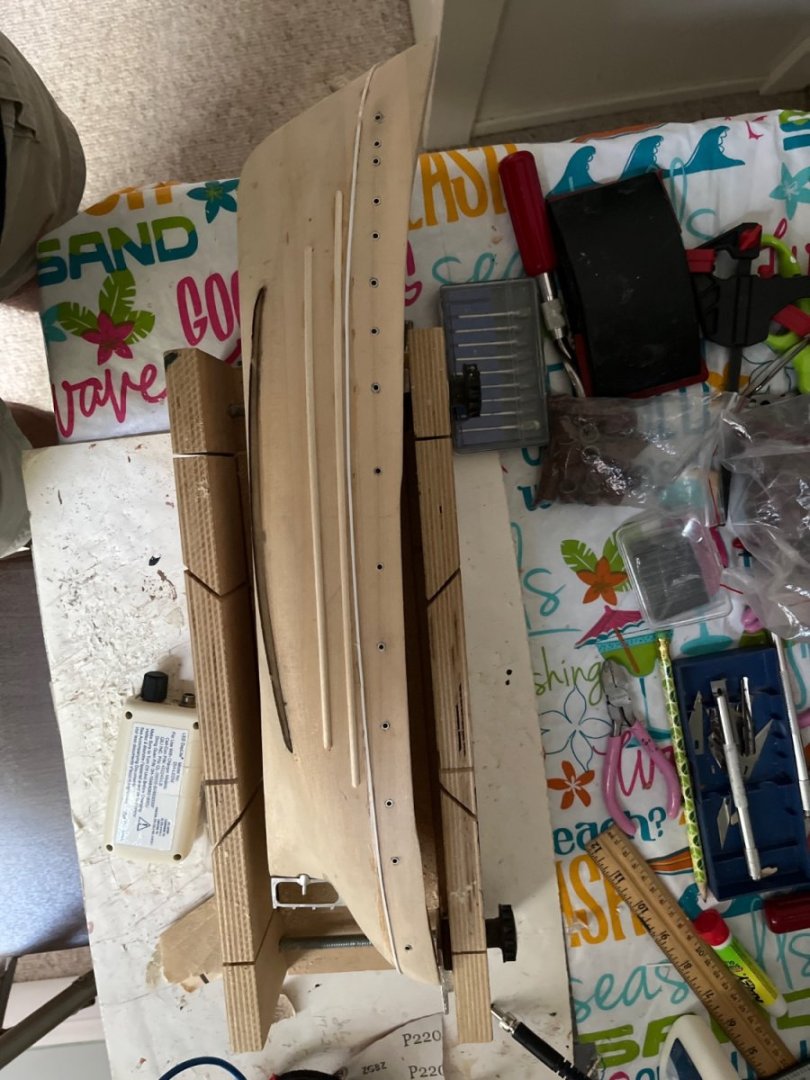
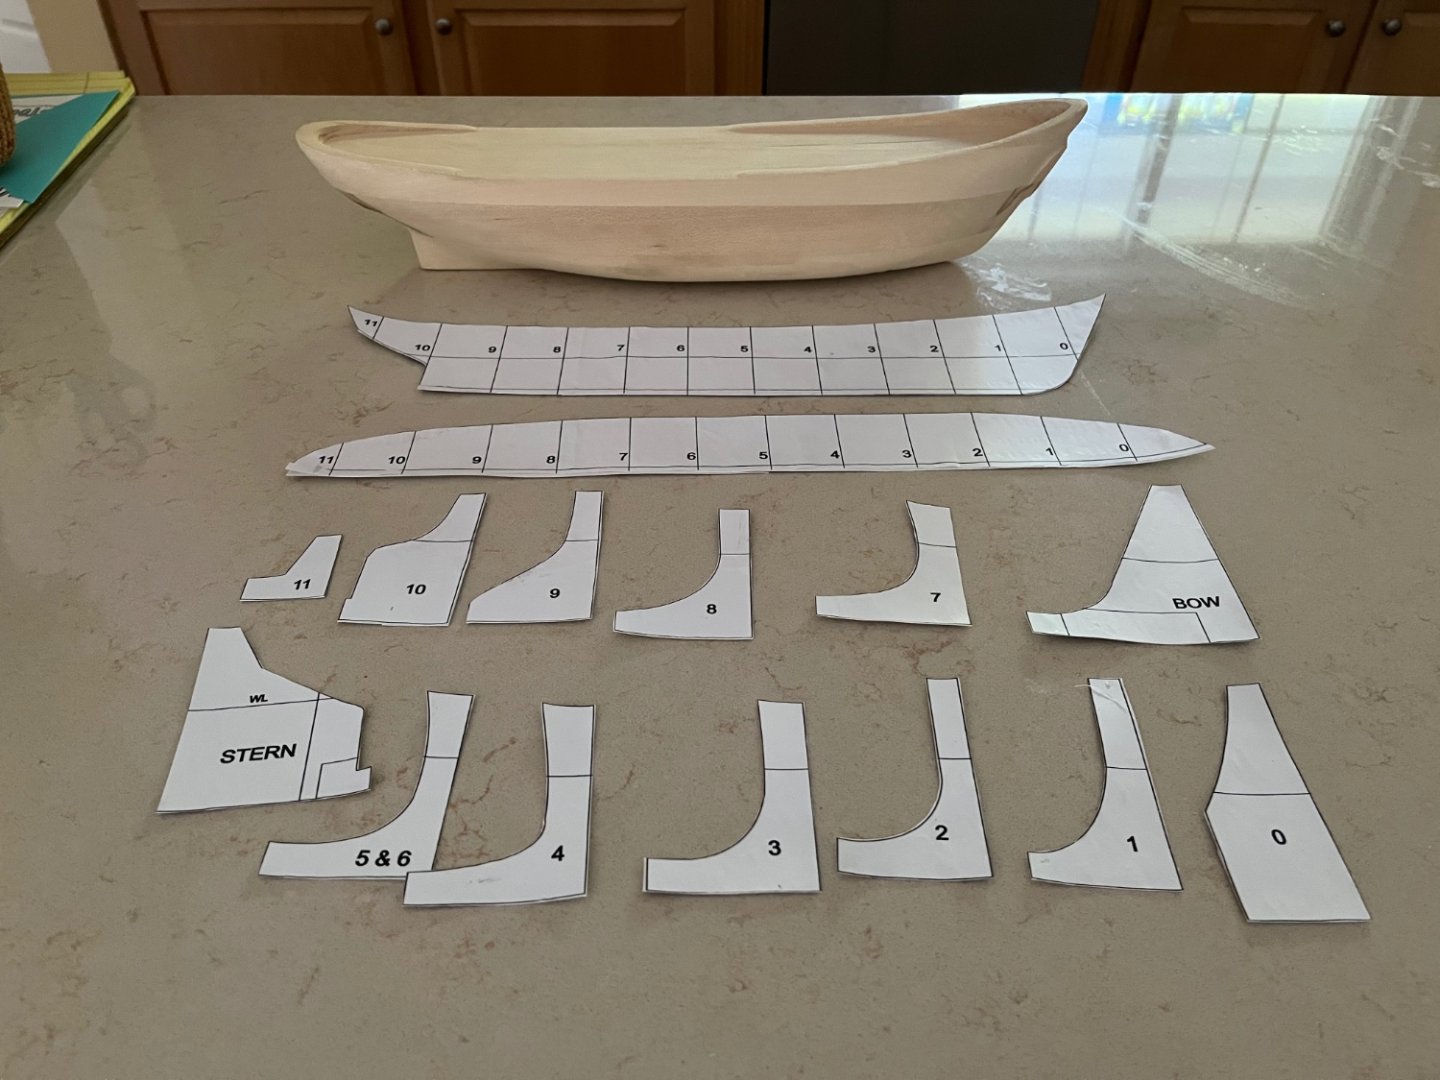
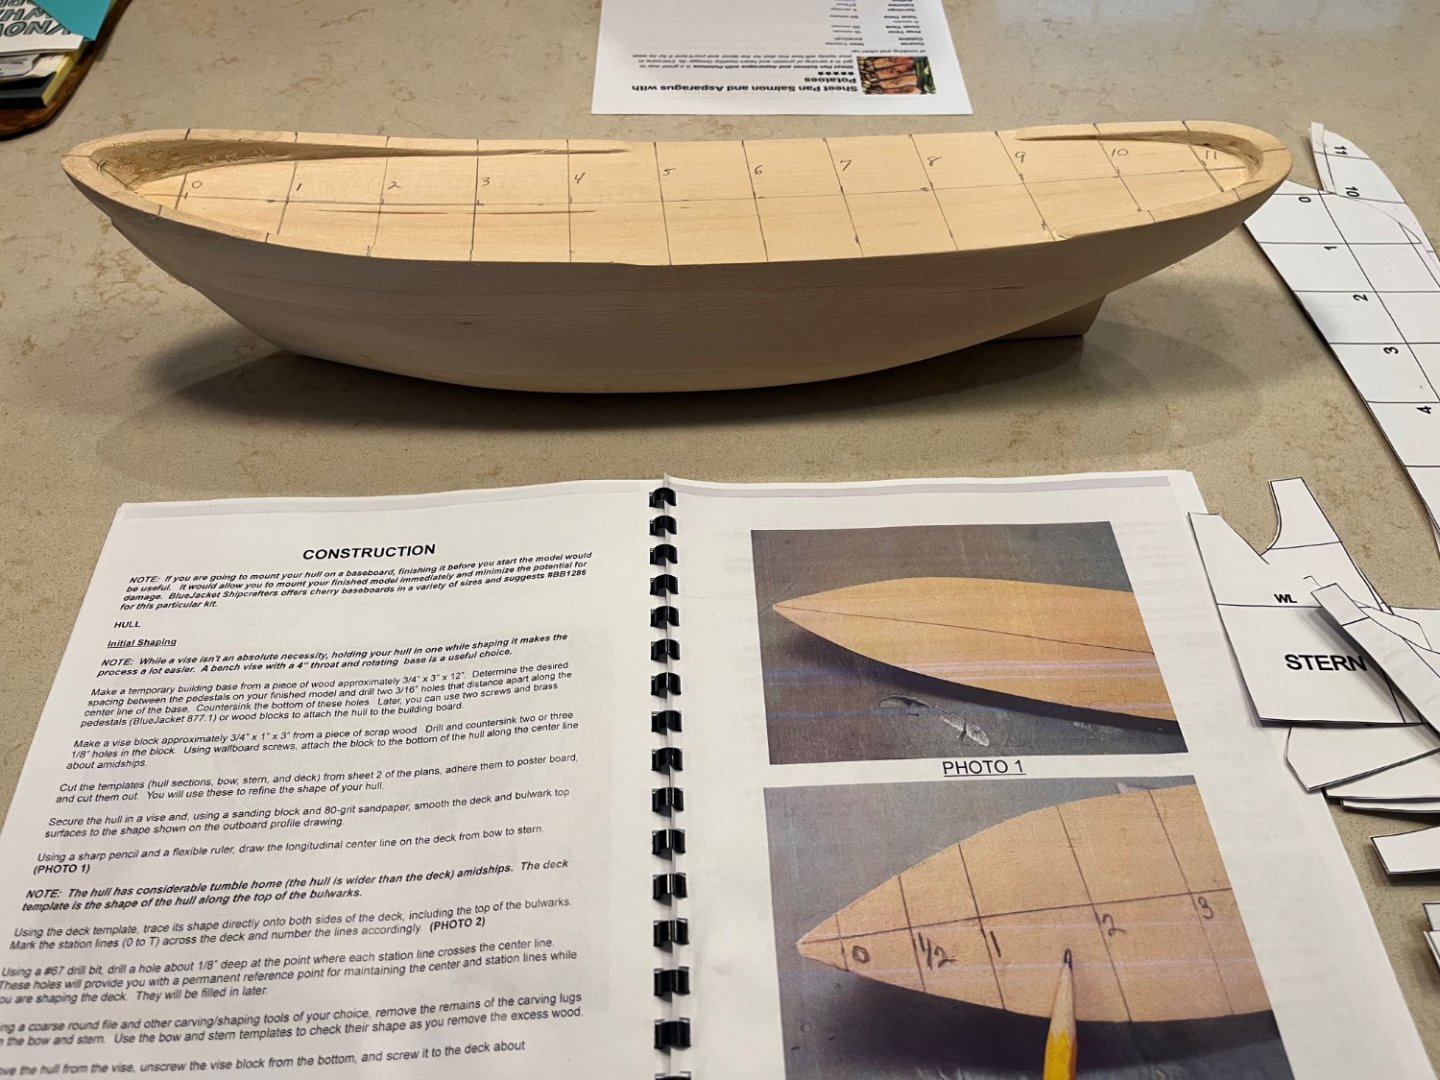
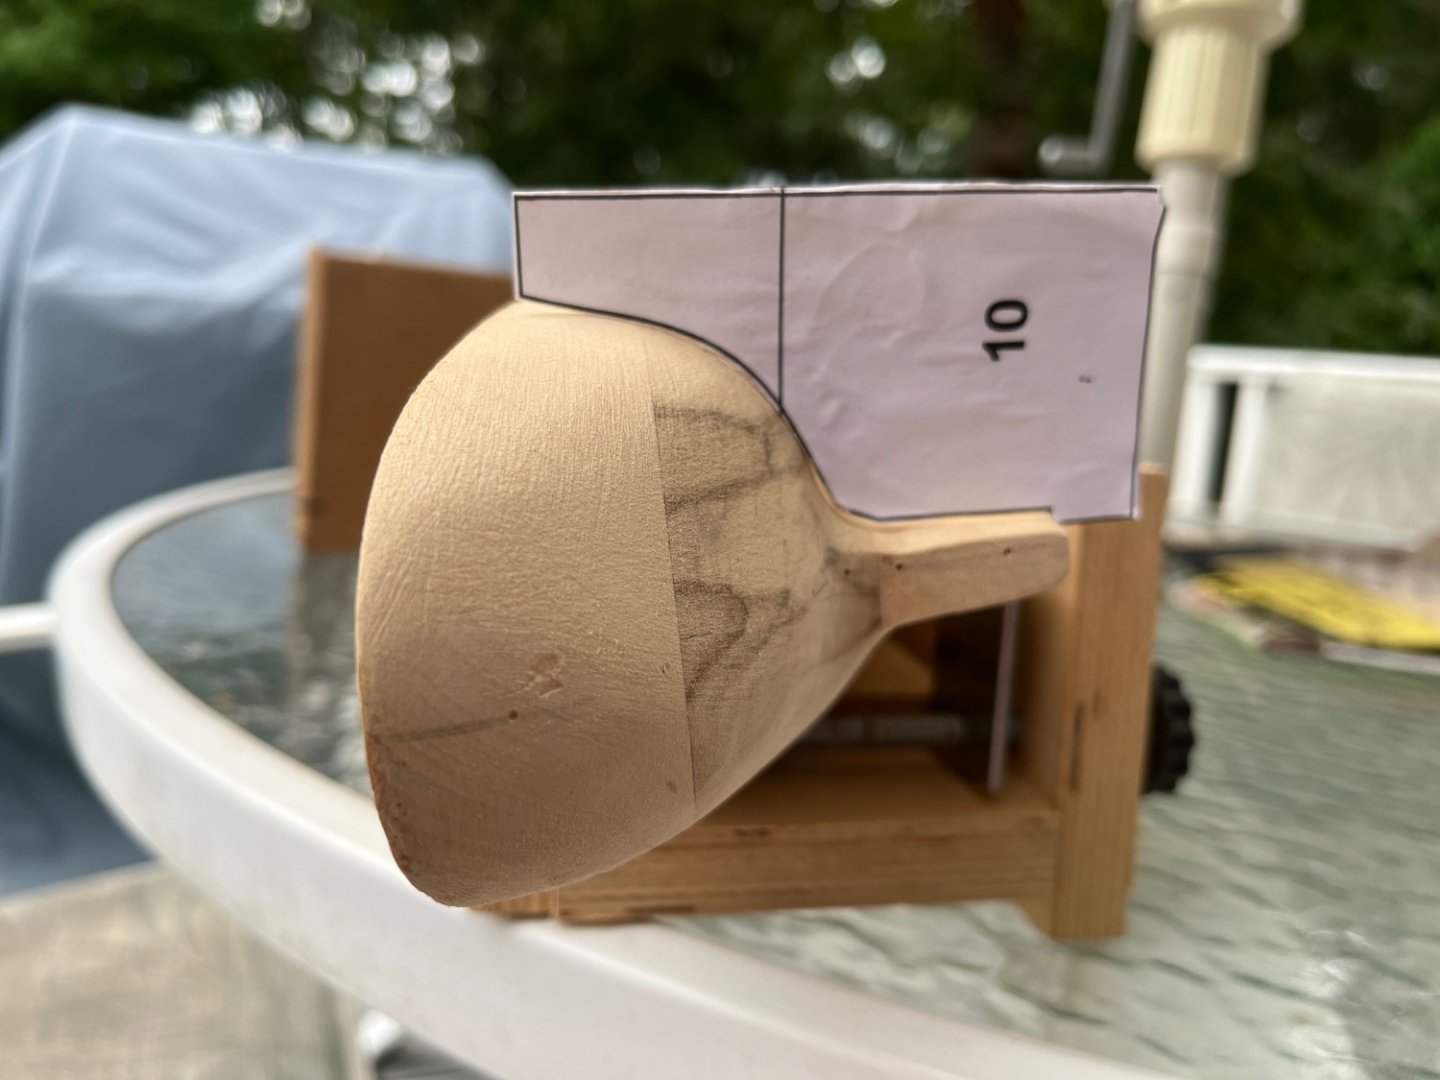
After pencilling in the midline and the perpendicular station lines down the sides I started the shaping of the hull using the templates. I first removed the extra carving lugs from the bow and stern. The most difficult area is around the stern post which has to be reduced from a approx. 1/2 inch to 1/16 inch. The shaping of the starboard side is almost done. You can see the difference to the port side which I have not touched yet.


- 35 replies
-
- 7
-
-
- Nantucket Lightship
- BlueJacket Shipcrafters
- (and 1 more)
-
Thank you !😀