MORE HANDBOOKS ARE ON THEIR WAY! We will let you know when they get here.
×


Sir Charles Edward
-
Posts
67 -
Joined
-
Last visited
Content Type
Profiles
Forums
Gallery
Events
Everything posted by Sir Charles Edward
-
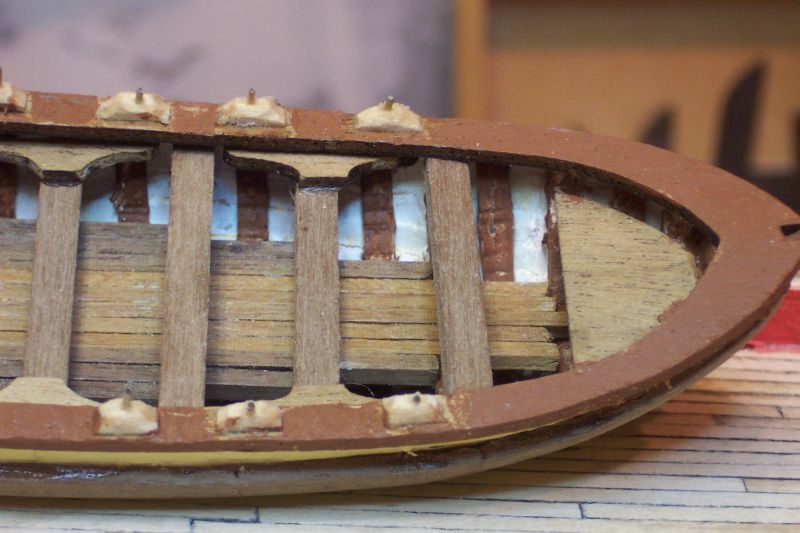
 Excellent detail in the deck beams......wow
 -
Kit looks good, awaiting the assembly now.
-
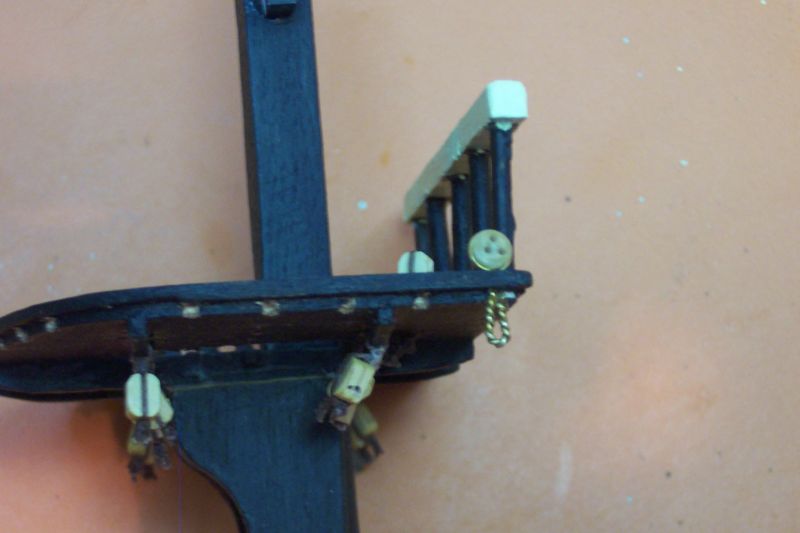
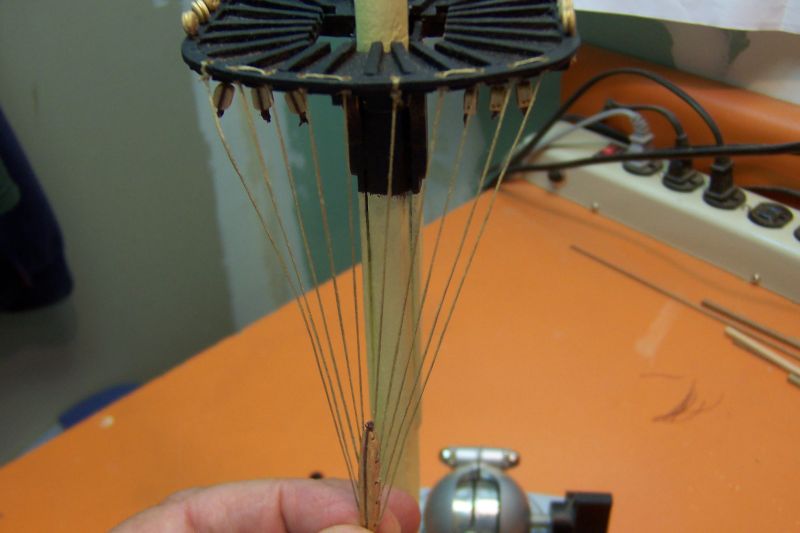
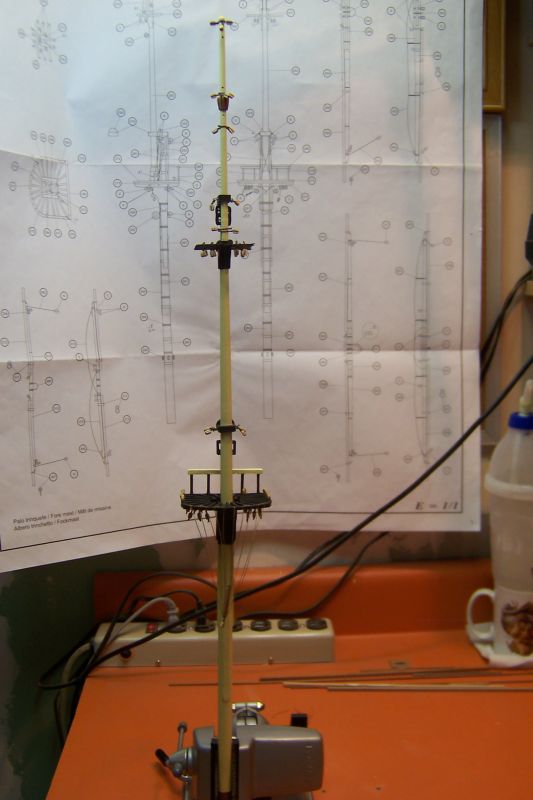
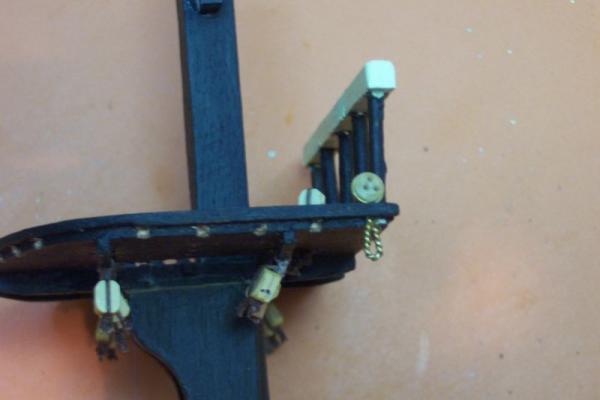
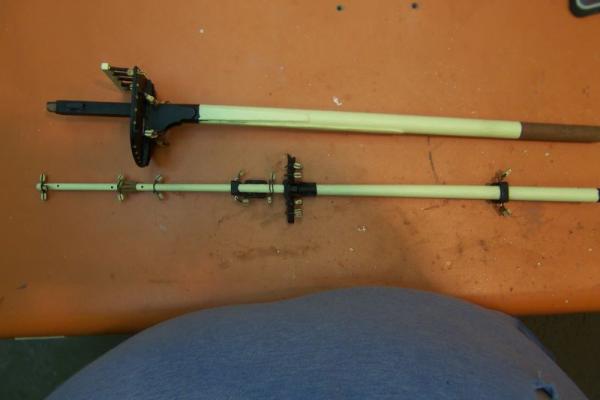
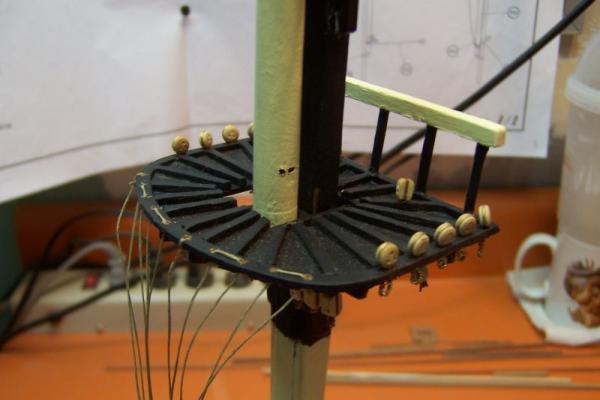
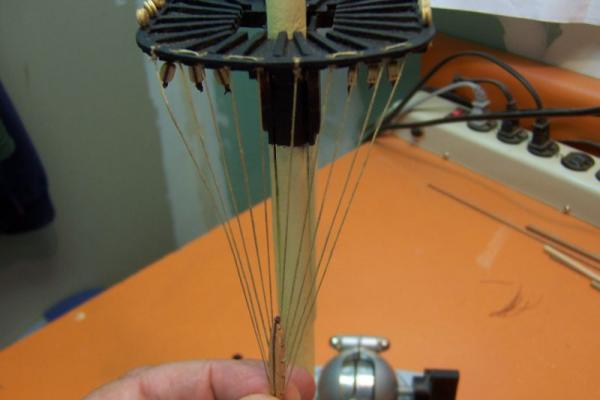
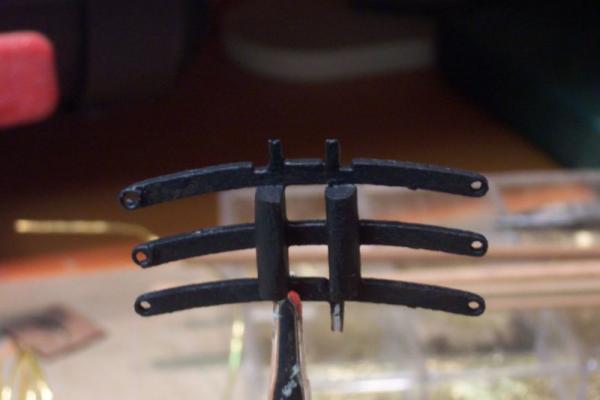
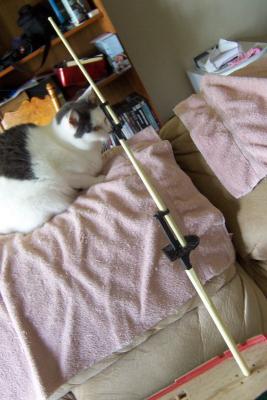
Some additional detail photos of the foremast work. The second picture shows the mast pieces painted a Hull Tallow, which matches the Montanes painting theme used on the hull. The third picture shows the foremast platform with the initial deadeyes all installed but upside down. They have since been removed, reworked and now stand ready to be re-installed once I start the mast turning phase of this build. I also decided to rig the crows feet as it seems much easier to do it now before the entire mast is cemented into the carcass of the Montanes. The last picture is the assembled foremast against the background of the OcCre kit plan sheet for this mast.

-
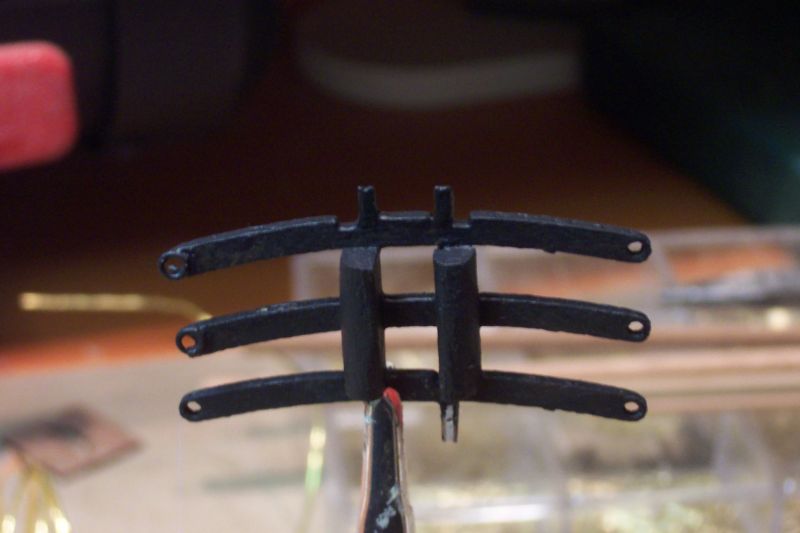
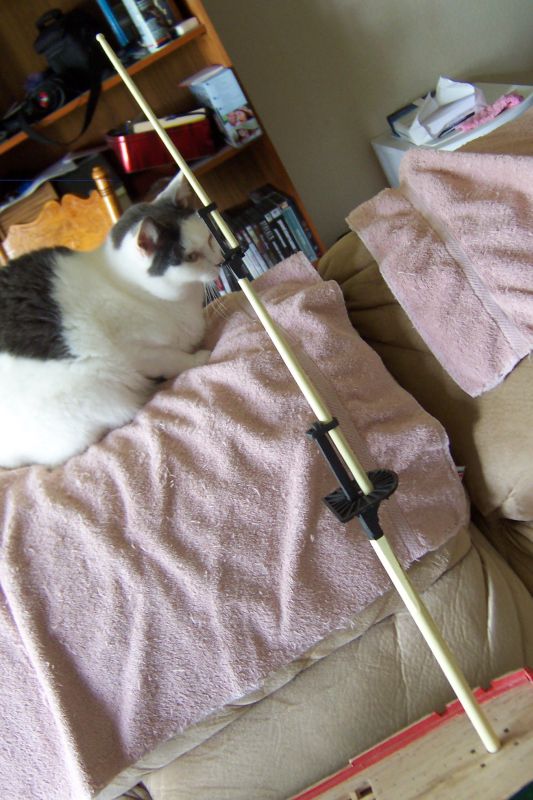
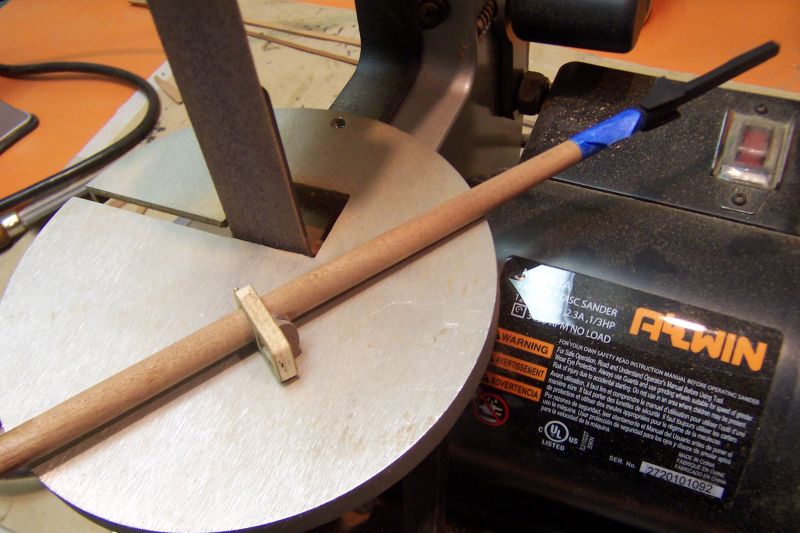
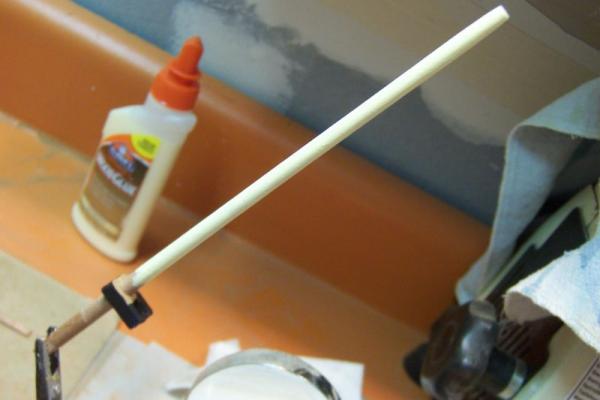
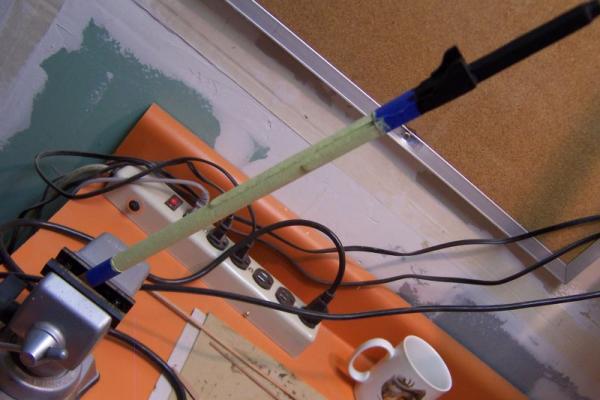
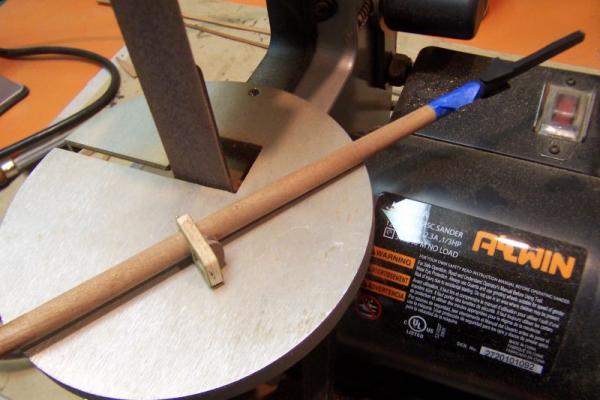
I had ordered and received a new mini-lathe, so I wanted to try it out and decided to make the foremast my first real turning project on my new tool. The basic lathe was about four feet long, but with the head stock and tailstock that left a too small of a working bed area for the Montanes dowel stock included in the kit, and I believe for most of my other model kits, so I also purchased the extension bed which added another 24 inches to the working space. This allowed the foremast lower and middle dowel stock to easily fit and be worked. I tapered the three mast pieces, lower, top gallant and top gallant royal masts, painted them and made the assorted other pieces required to complete the mast. I did not do the yards yet as I decided to turn them and all other masts at the same time at later date. The photos show the progress of the foremast and finally the completed assembly, except for deadeyes. I did attach most of the blocks and etc. getting it ready for rigging. Yes the deadeyes were initially all installed on the platform but it was pointed out to me that they were all upside down, so I had to remove them and rework them. They are ready to be installed but again I will wait until I am doing all of the mast and yards at a later date. The plans show the jeer blocks as 3-hole blocks, but OcCre did not include any in the kit, and they apparently don't make at all, so I had to either buy some or scratch build them myself. Currently the foremast is not 100% complete with all of the rigging blocks, but I will get them installed when I complete all of the turning project. During the sanding and painting the trestle tree, two of the he rigging holes broke and I repaired them using extra eyelets left over from previous completed builds.
-
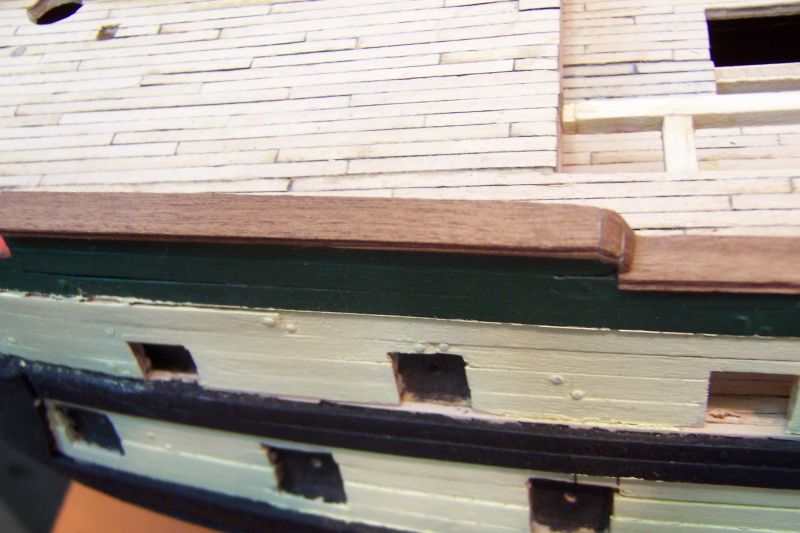
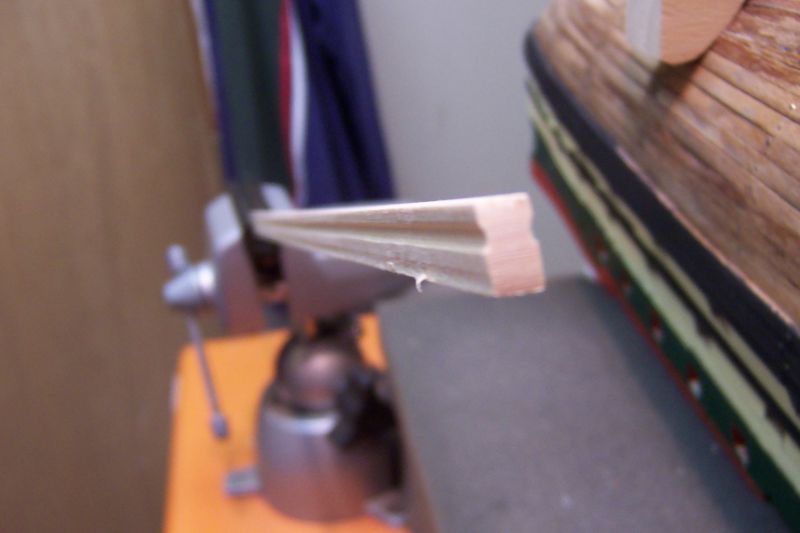
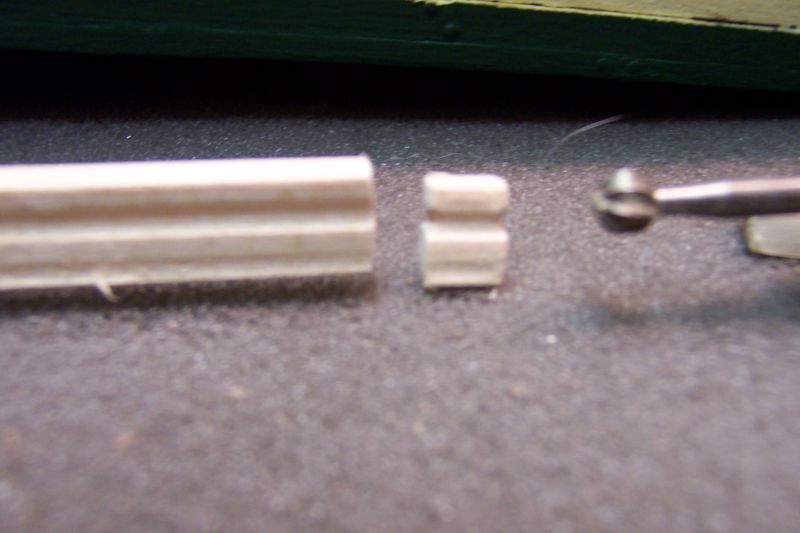
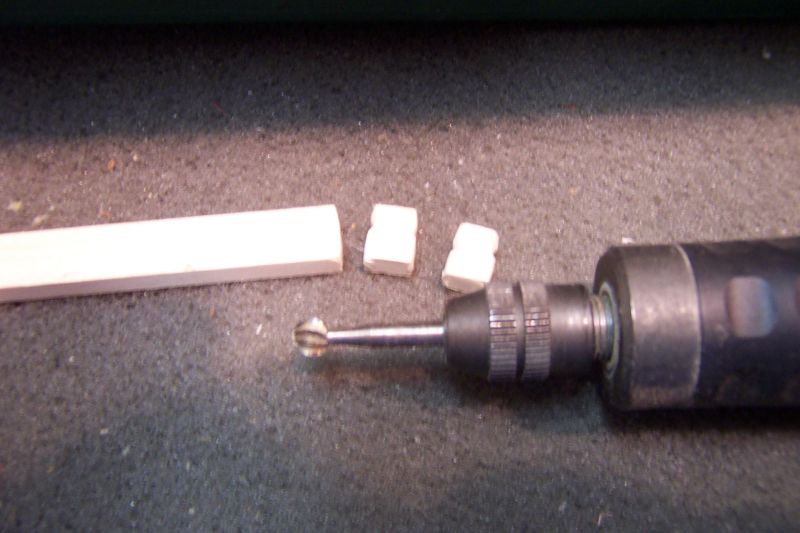
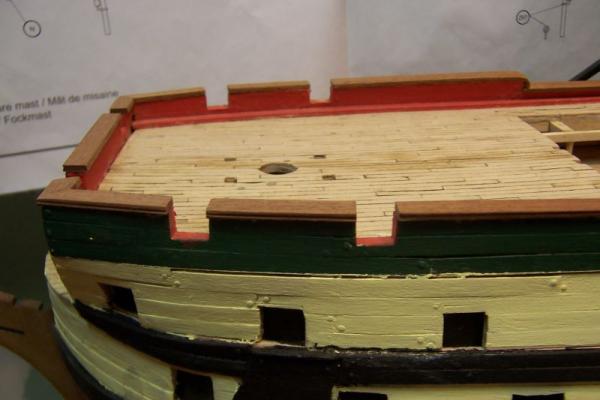
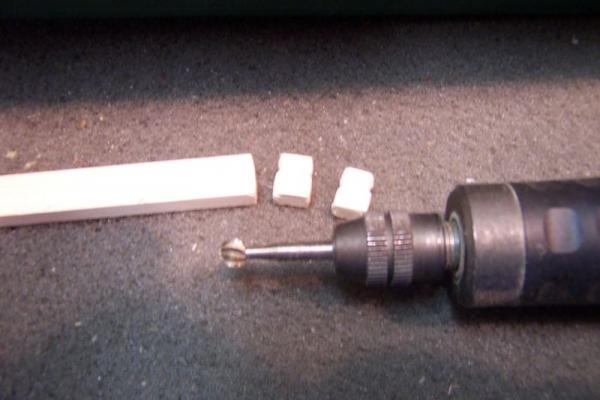
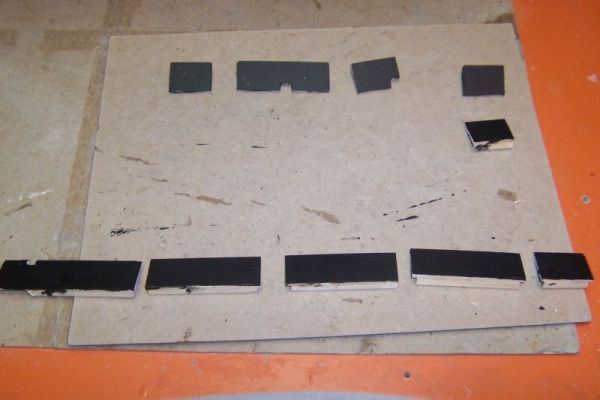
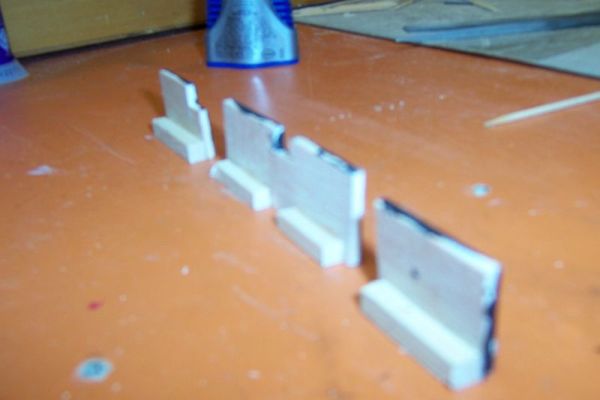
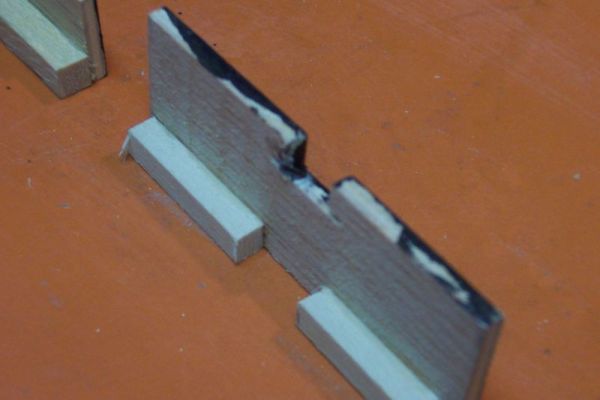
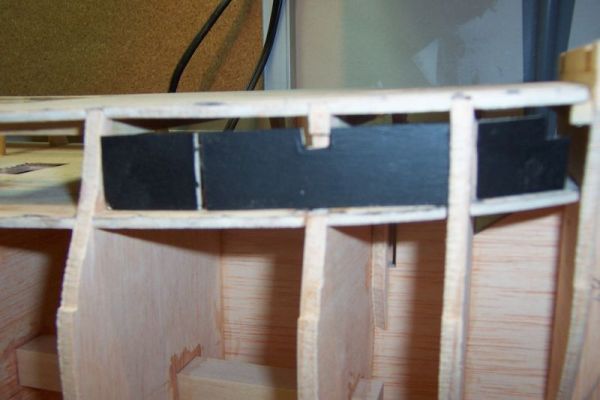
At this point of the build I wanted to try to do the hand rails that were to be installed all along the entire top bulwark. The supplied wood was a 2 x 8 mm board that had to have a very small groove carved into the 2 mm side of the board. I used a combination of small triangle files of various sizes, a cutting wheel, and an engraving rotary cutter. The pieces were cut in various lengths from 400 mm down to 25 mm. The groove cut was done in 2 or 3 inch segments, the size of my mini pan vise.


-
Thank you Robert, they proved to be pretty easy to build and they do look much better.
-
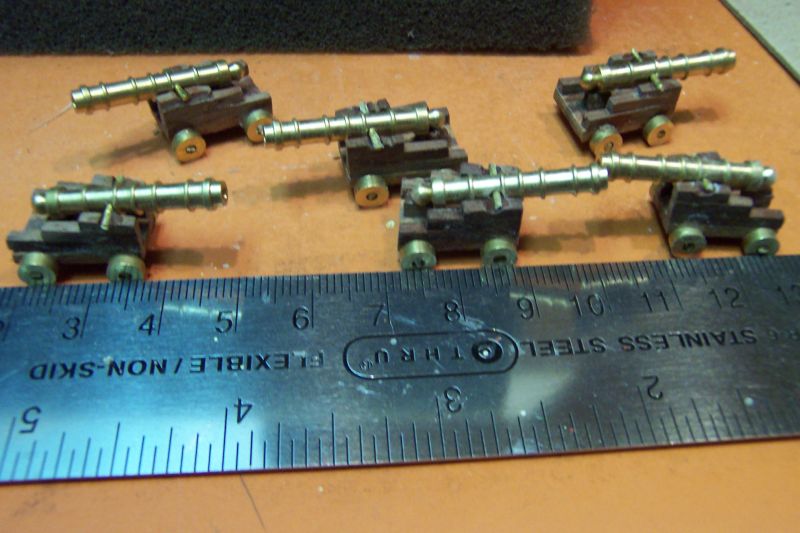
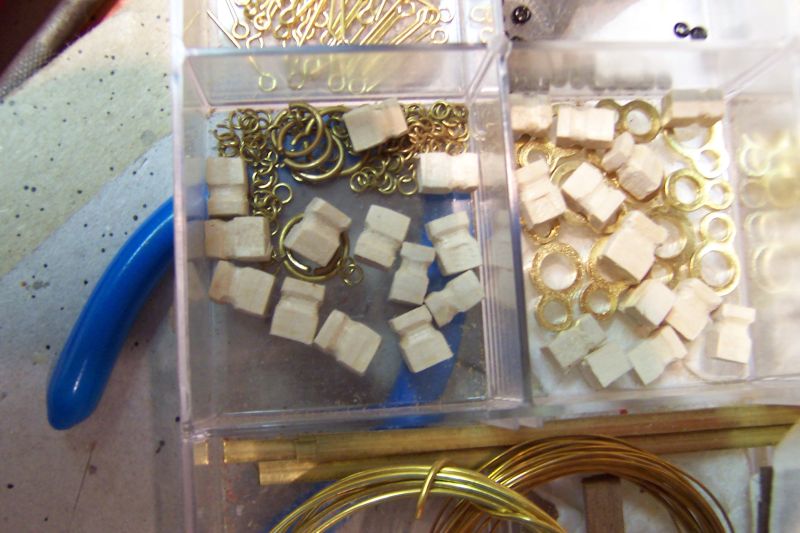
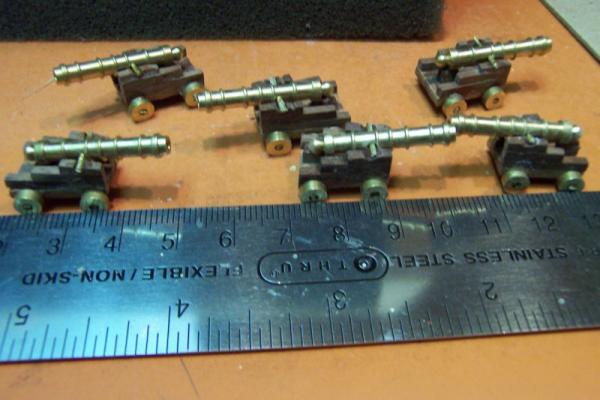
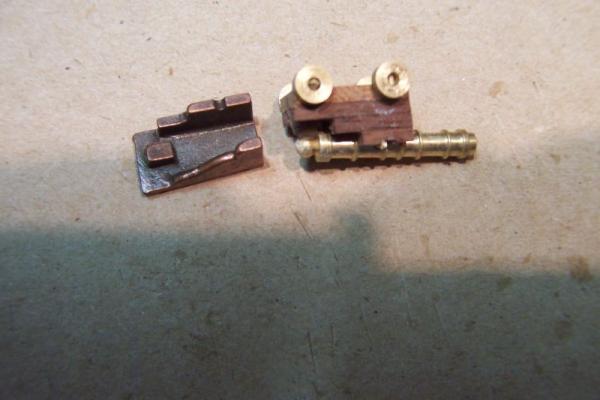
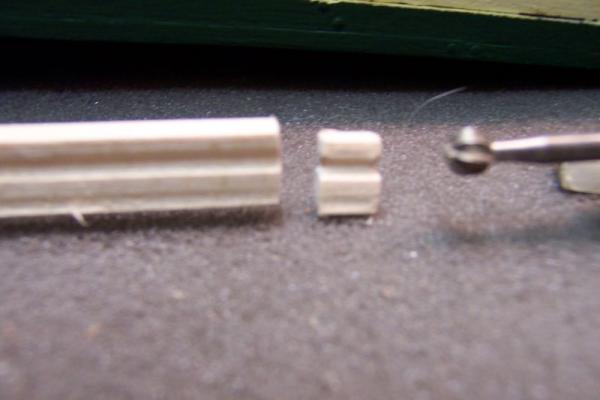
The kit included metal gun port carriages, which I did not like the looks of at all. In fact two or three of them were deformed and were not useable at all. So gaining confidence in my skills I decided to use some of the scrap wood left over from previous completed models to build substitutes for the gun carriages. There were 24 carriages to build and I did use the included brass axles and brass wheels on the twelve or fourteen that actually needed them. There were ten guns that the instructions showed did not need wheels, these would be positioned along the second battery, just under the airways, and the kit only supplied enough for the fourteen visible gun carriages to be used along the top decks. The photos show the finished carriages which, even with minor errors, I was happy with. Another piece that bothered me were the Sampson posts that would be positions all along the foredeck. The instructions only include one or two pictures of these pieces, with measurements, but I worried about the pieces being consistently shaped, since they would be quite visible on the finished model. I was looking at other Montanes builds on this site and happened on the one done by GARWARD, and he showed a different way to make these Sampson posts so that they would be almost identical to each other. I must thank him again for his explanation and help with this method as I would not of thought of it myself. His way was to get additional wood strips n the proper size of around 5 mm x 8 mm, mill the strip along the sides so that it looks like a loaf of bread and then "slice" the bread in the proper width of 5 mm. The photos show the 26 Sampson posts ready to be cleaned up a bit and installed. I also did this for the Nuestra Senora del Pilar, another OcCre kit that I have in the box waiting for me to start after I finish a few more of my six unfinished kits that I have on my bench.


-
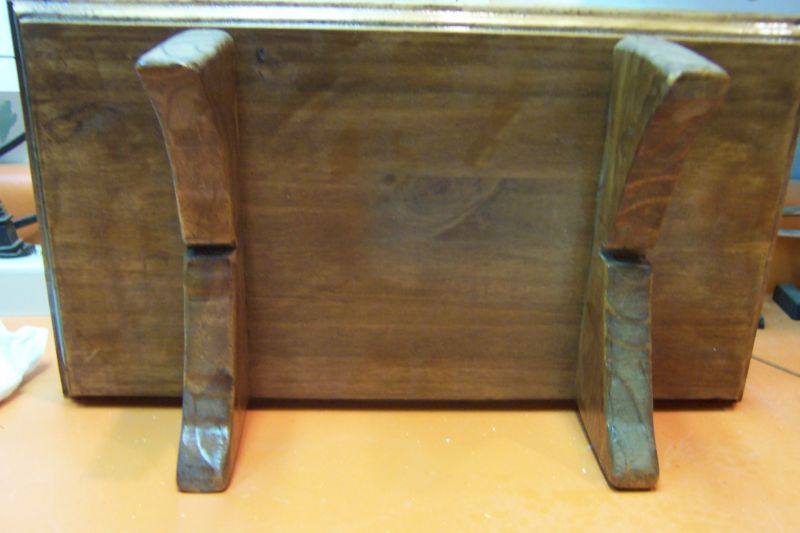
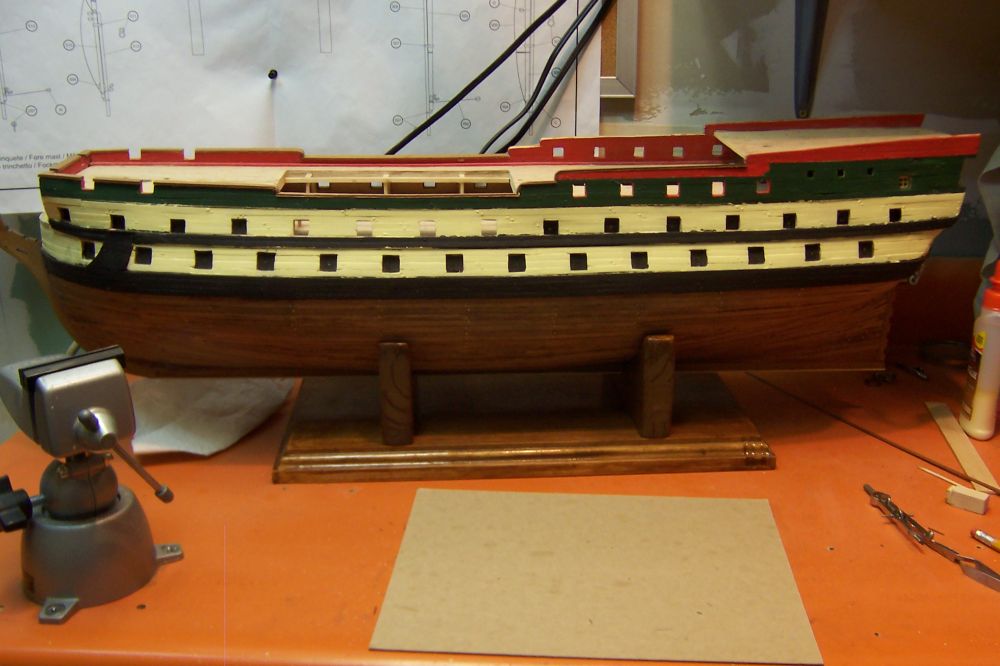
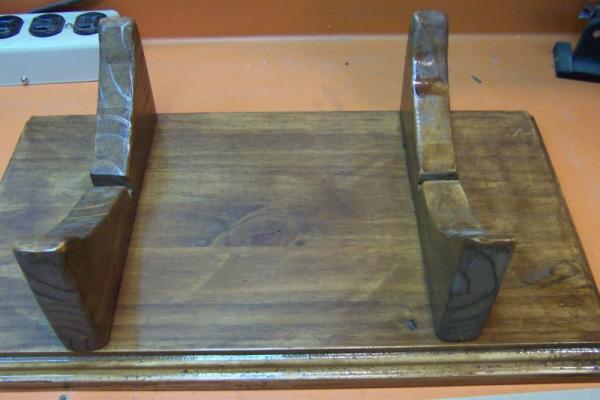
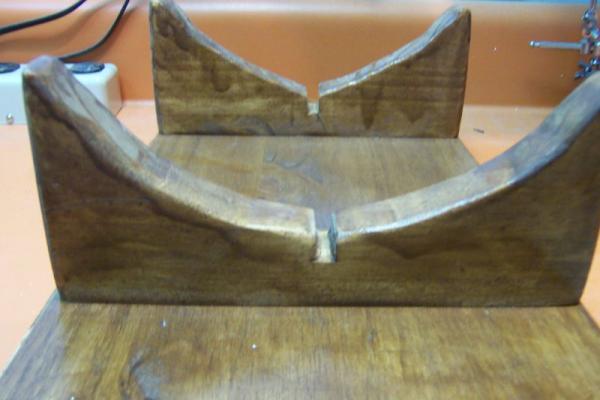
The finished display stand and the fully planked Montanes resting on it safely and proudly. She rests on this cradle to this day and I am using it to complete the model.


-
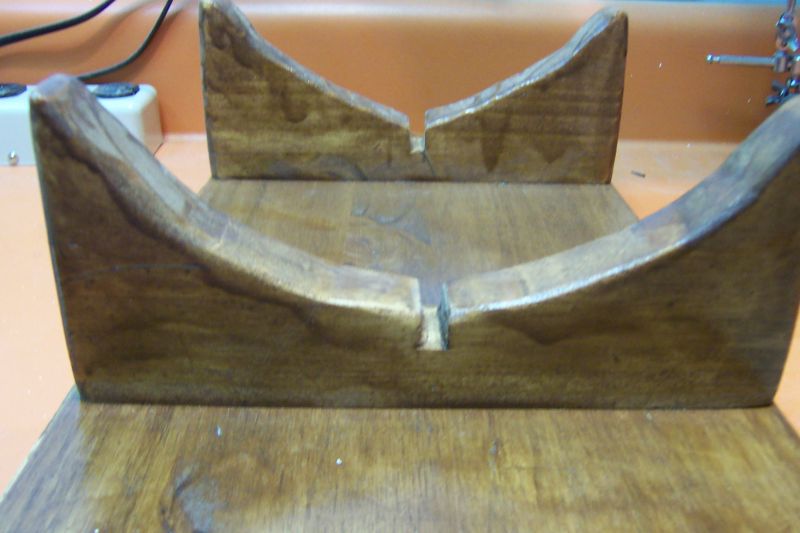
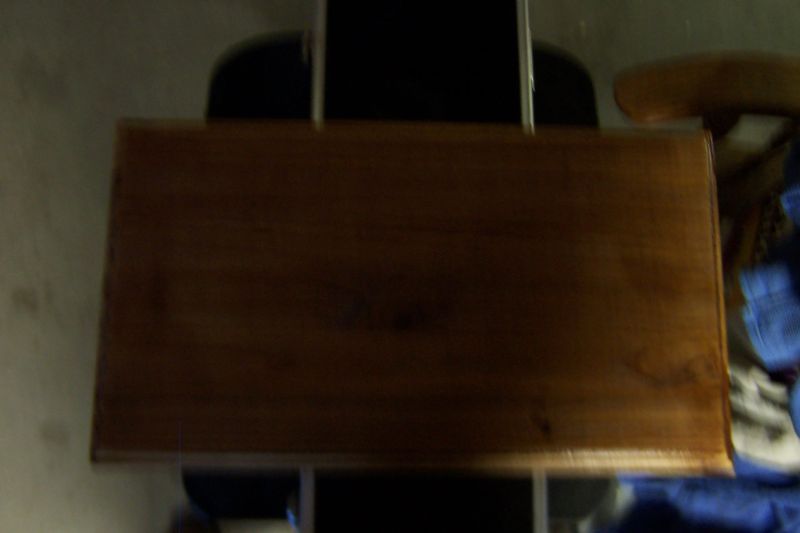
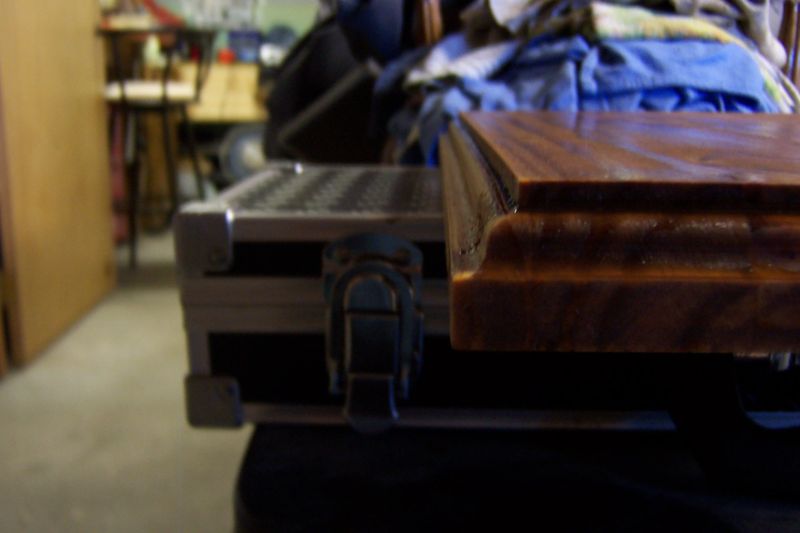
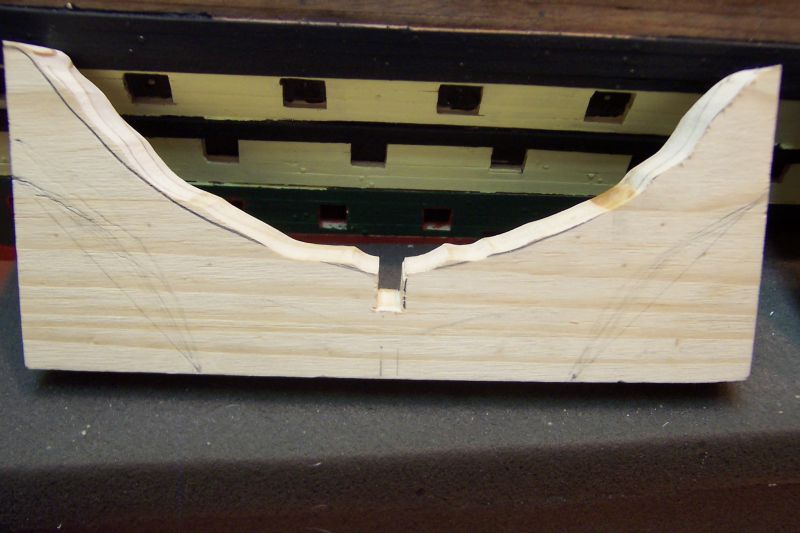
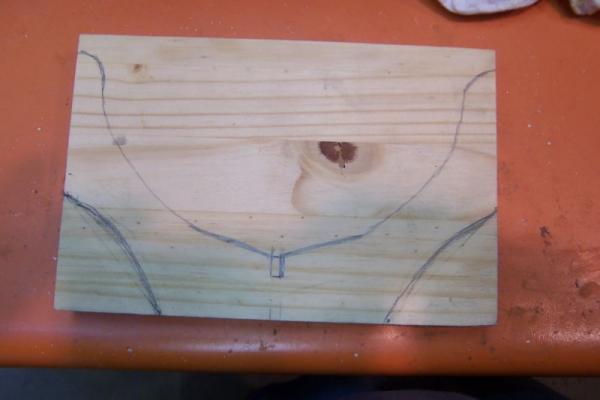
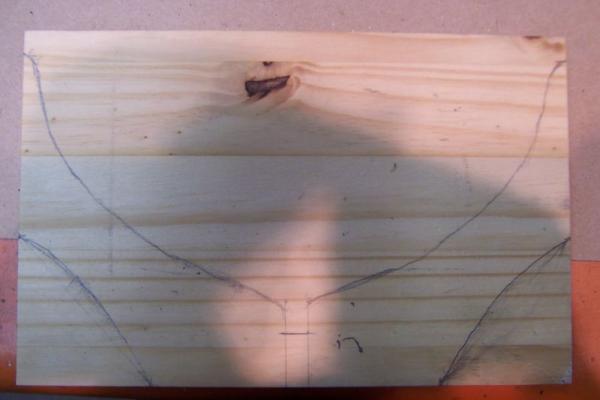
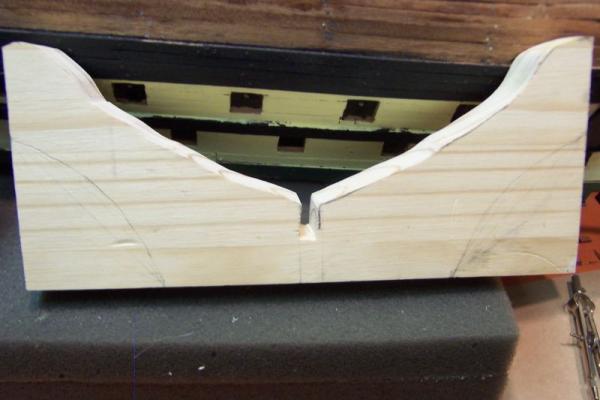
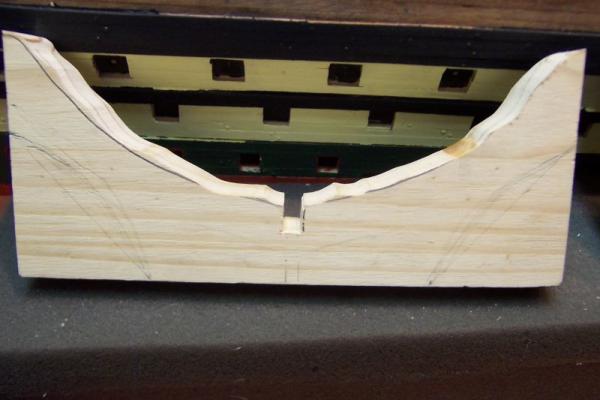
After the entire hull was planked I turned to making a display cradle for this rather large model. I wanted something other than the usual cradle stock supplied with most kits, but the Montanes, did not have wood stock or a plan for a display cradle at all. I developed this display stand with the size and weight of the finished model firmly in mind. I actually had a few boards cut from a six foot 12 inch wide stock that I had purchased from the local Home Depot for a bookcase project for the admiral, which never was started. I cut one down to the length appropriate for the Montanes, and used another board to cut the forward and aft supports. The rough sketch shown was done with the help of a contour gauge, but the final versions were not even close. I had purchased the largest gauge available before I figured out that they really don't make a contour gauge big enough to actually be of use for this size of hull, at least not for reasonable prices. To get the proper fit to the hull I eventually traced the pattern onto a cheap balsa wood sheet and then cut, sanded, fitted; repeat cut, sand fit the balsa wood to the hull. Then I used those templates to trace the proper pattern onto the 1 inch wood stock. A friend of mine assisted with the router job and let me use is band saw to cut the support pieces. I then used a cherry stain on the base followed by a polyurethane clear cut to gloss it up some. I will post the final display base in the next post to keep the size of this post down a bit.


-
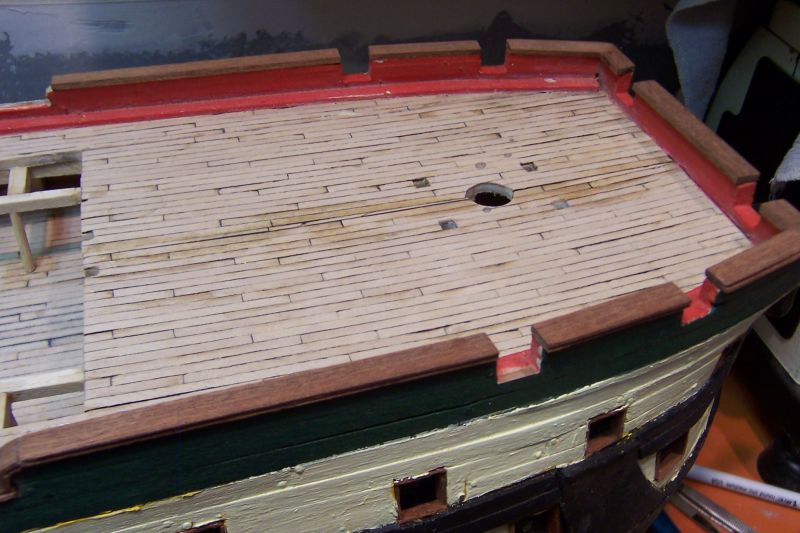
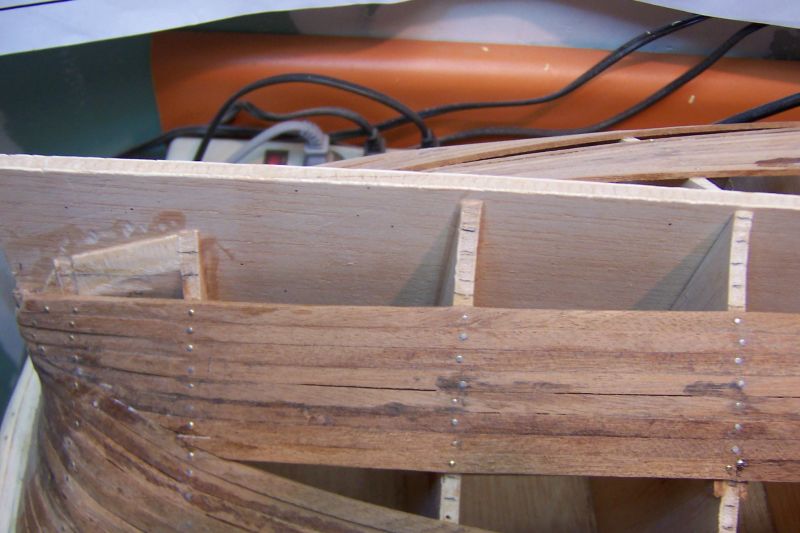
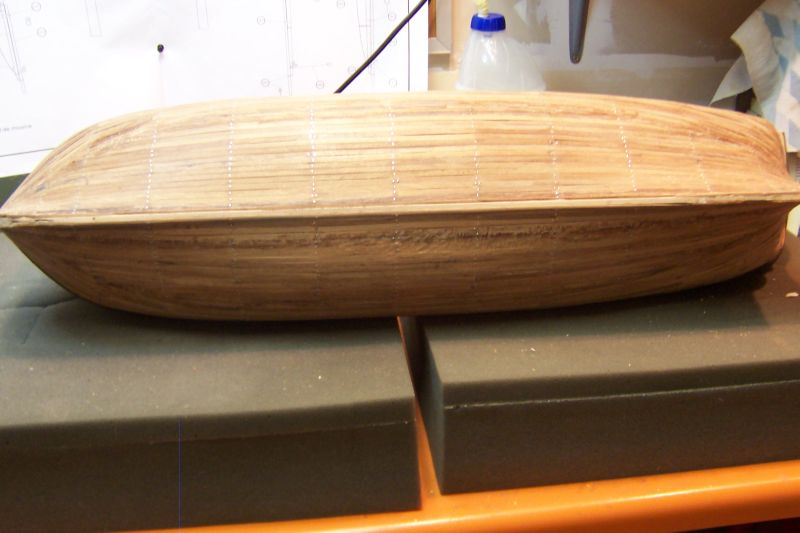
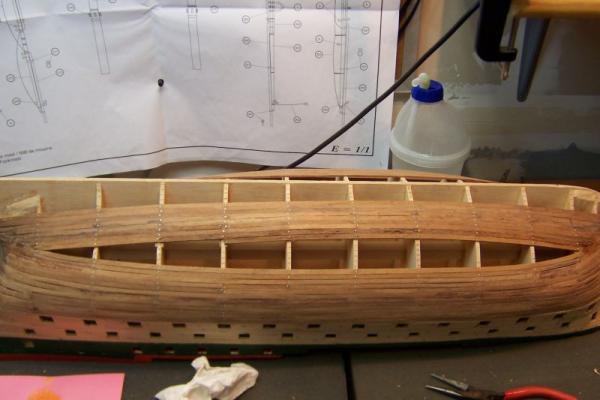
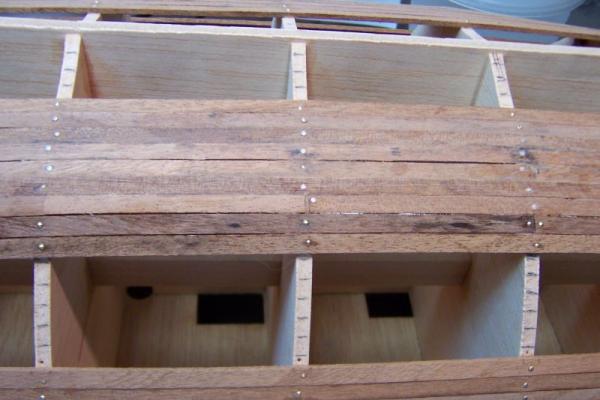
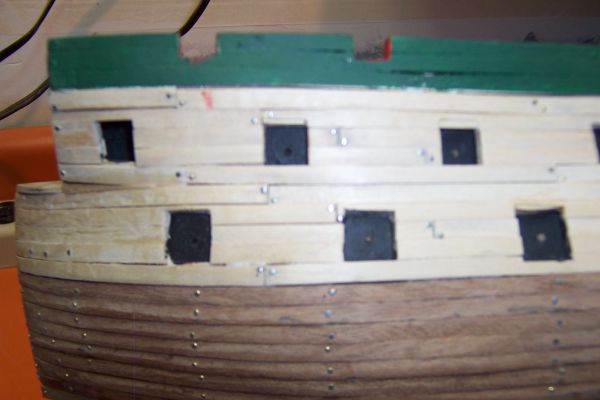
On to the planking the lower hull, you can see how the progress made was a little different than some planking projects. I continued to try to simulate a four strake offset pattern to the strakes. Finally the entire hull planked.


-
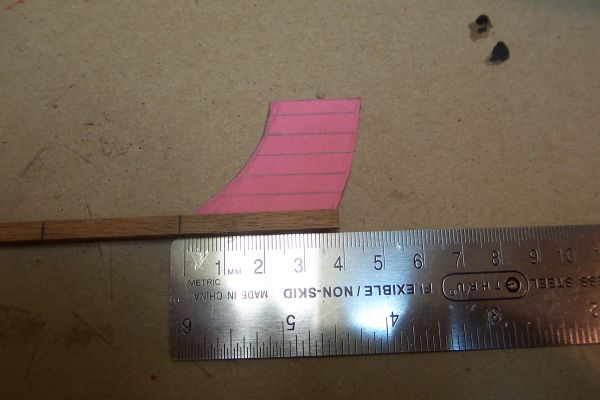
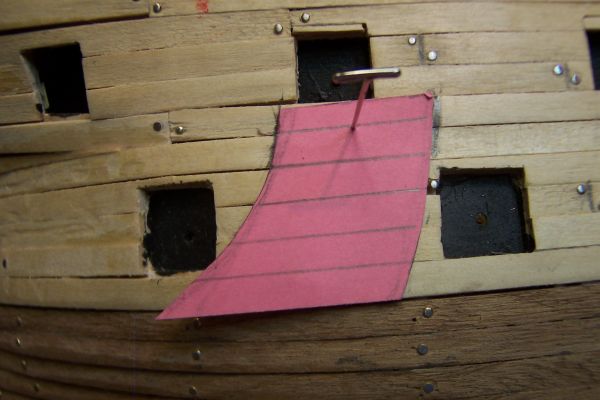
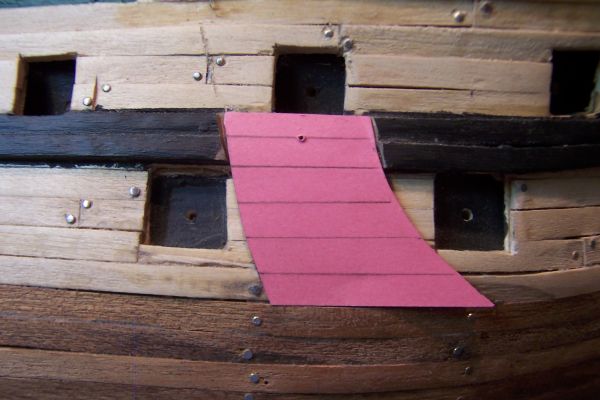
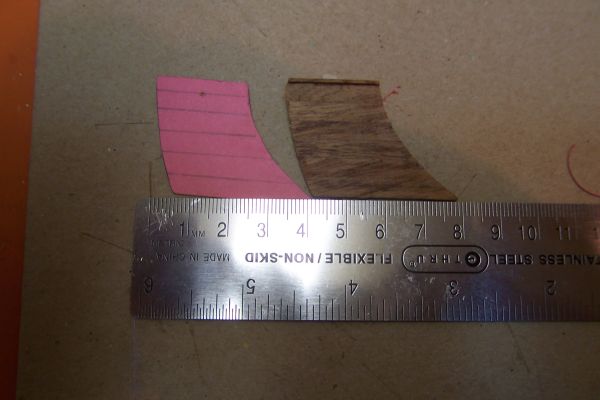
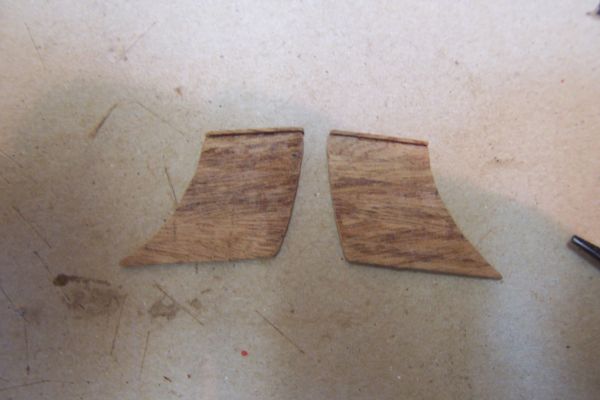
While waiting for the glue to set on the hull planking, I looked ahead and found this interesting piece to make but I didn't know what it was called. The instructions just called it a SLAB, but a helpful forum reader informed us that this was the anchor lining, used to protect the rubbing strakes from the anchor as it was being hauled aboard. I traced the anchor lining from the plans onto a pink index card to cut out and assist in the plank lengths used for this slab. The photos show my progress with this part, which turned out very nice. My one regret is that I choose to paint it black, which might have not been a good color to show the planks. I should have left this piece in the original wood.


-
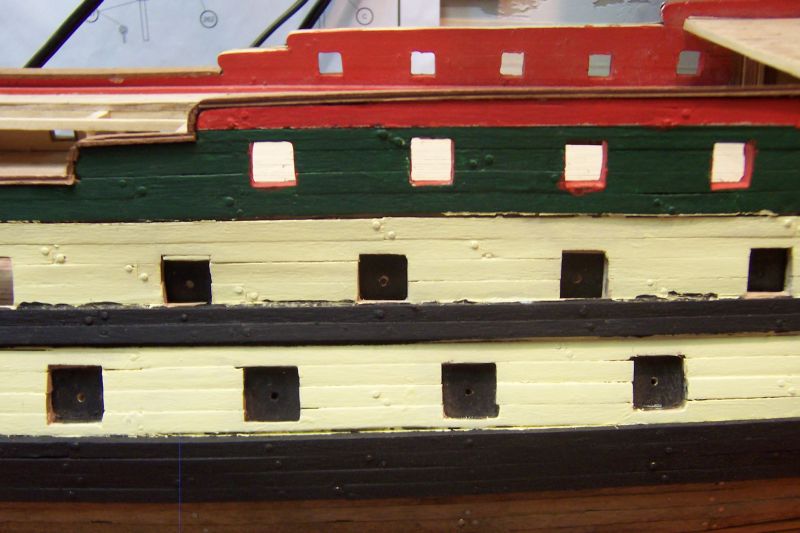
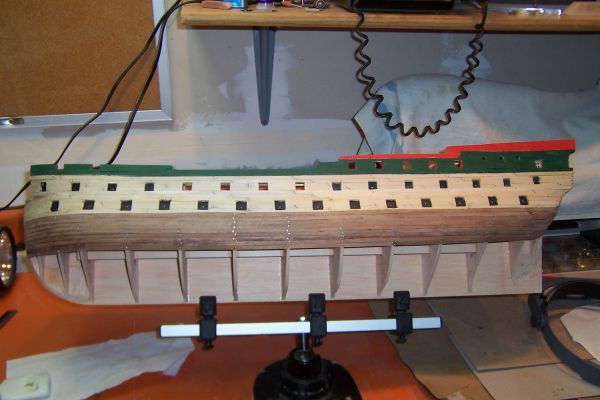
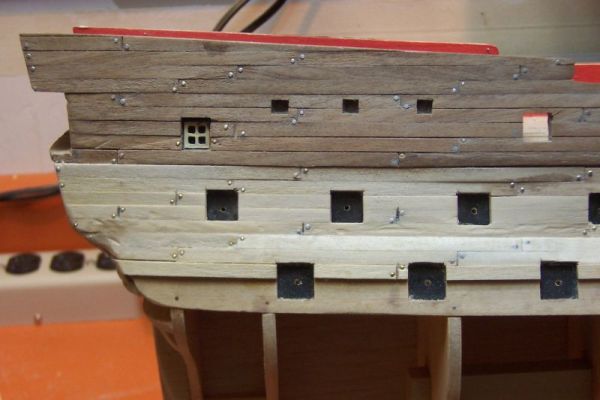
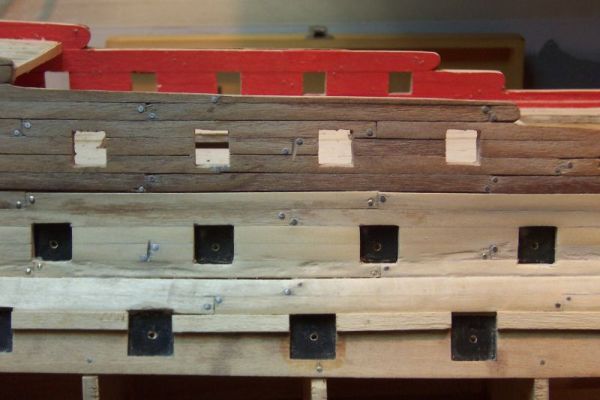
I continue to plank the hull and as the pictures will show, I painted the top bulwark per the suggested colors in the instructions. I have completed seven model kits, as my signature shows, but I had never painted any of them as I liked the natural wood look especially with the Half Moon and the Golden Hind kits as different colored wood strips were supplied for the planking strakes. The Montanes just cried out to be painted, so I wanted to see the effect on the partially planked hull. I also added the window metal highlights painted gold.
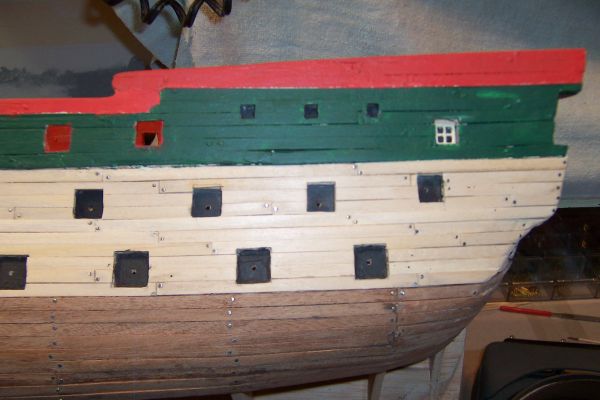
-
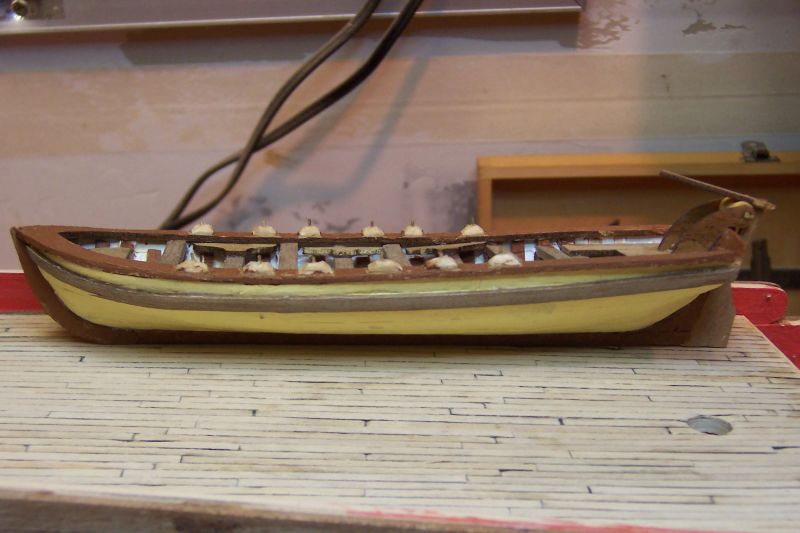
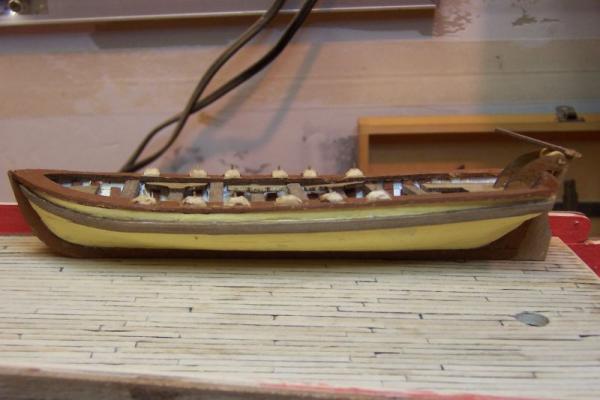
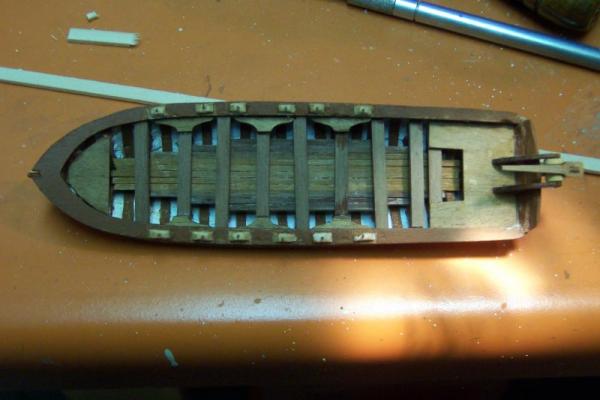
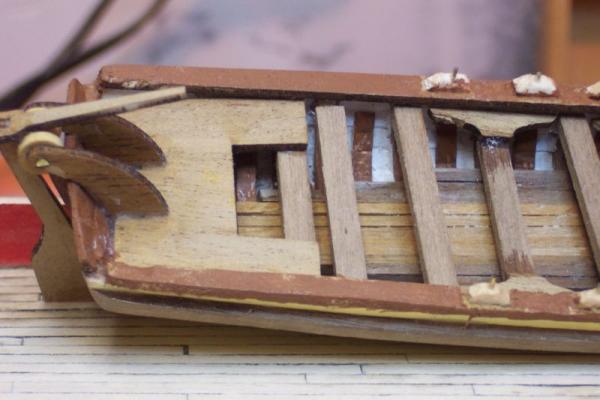
As a break from the hull planking, I assembled the ships boat as this was advertised as a mini-plank on frame kit in itself, I just had to try it. The assembly was pretty flawless, and I am pretty happy with the result and especially since this is my first ships boat built like this.

-
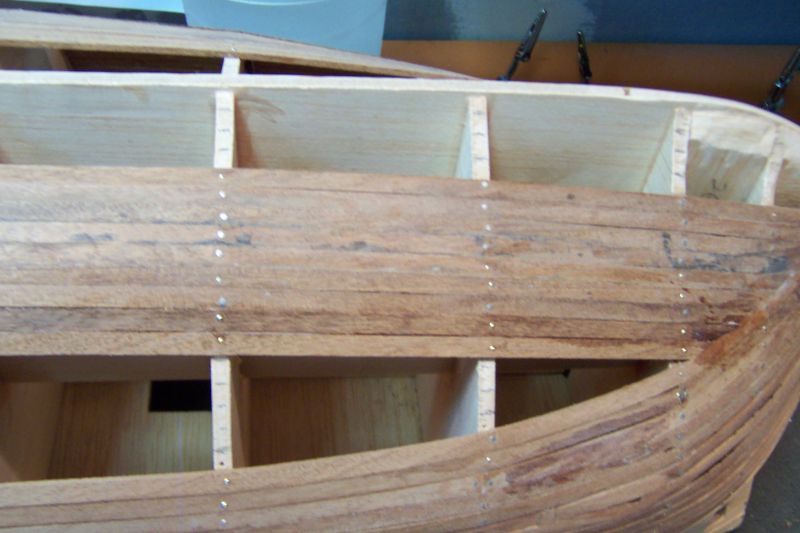
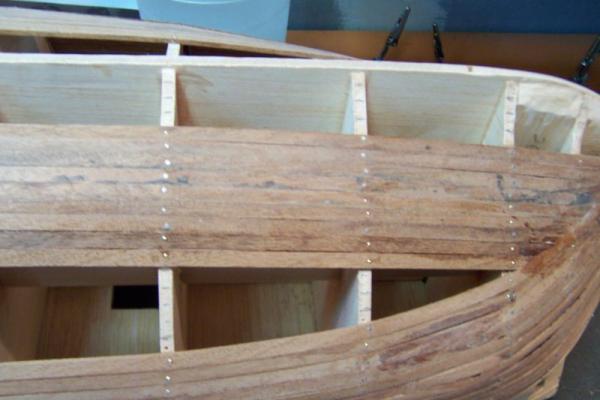
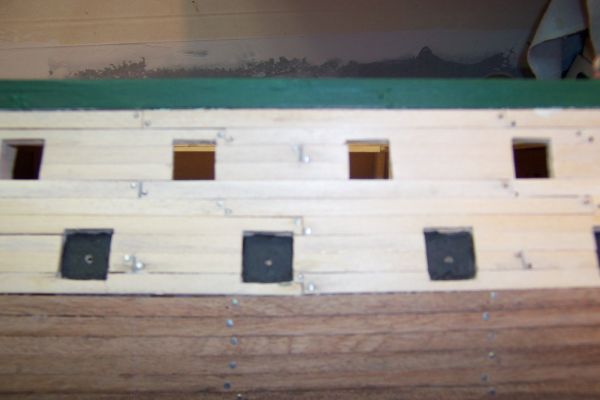
The next construction phase was the longest, as hull planking always seems to take forever. The Montanes is a single plank on bulkhead kit and uses 2 x 5 mm wood strips. Both walnut colored and white colored strips were used and you may see that I tried to run a four strake offset pattern on these hull planks. All nails were removed before painting.

-
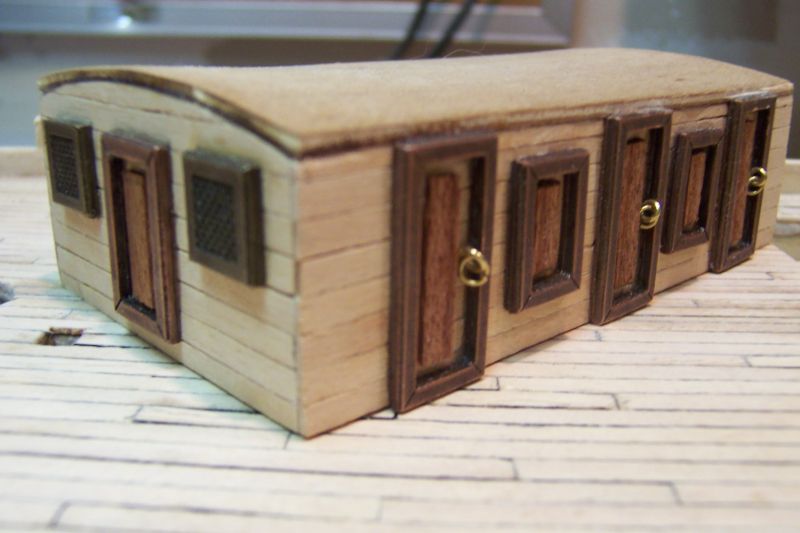
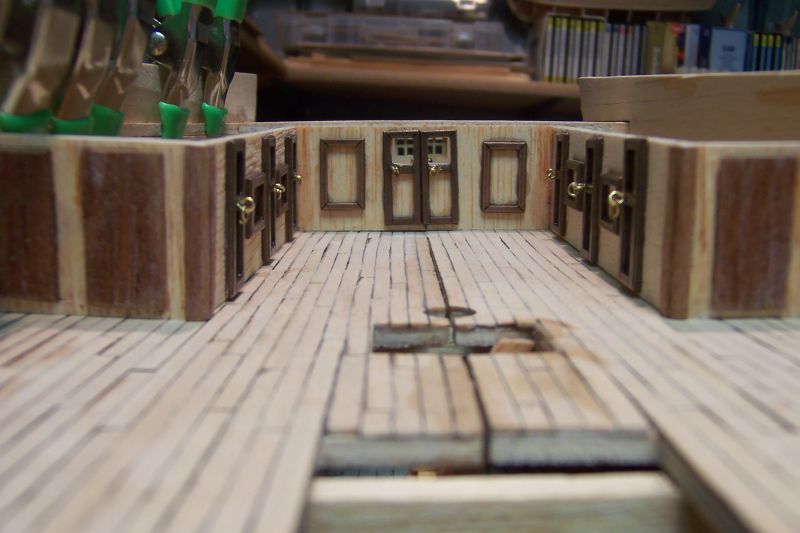
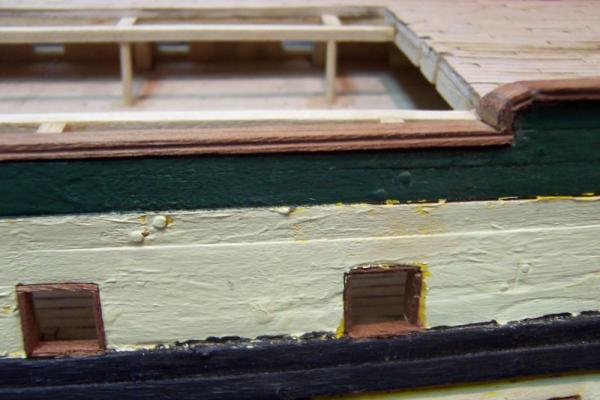
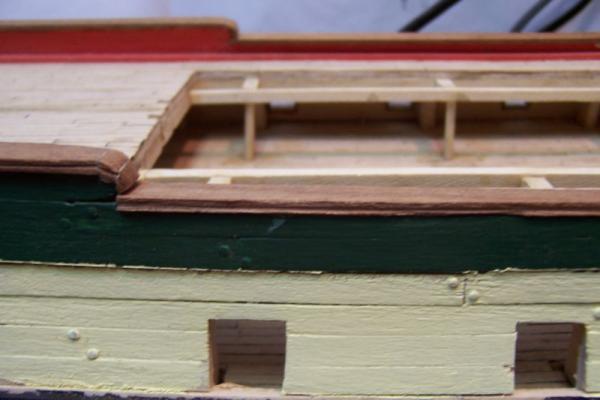
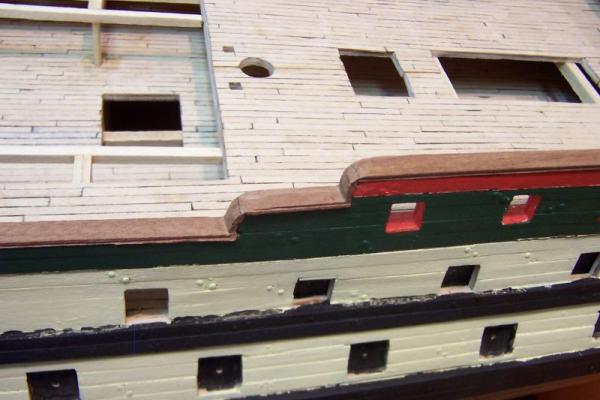
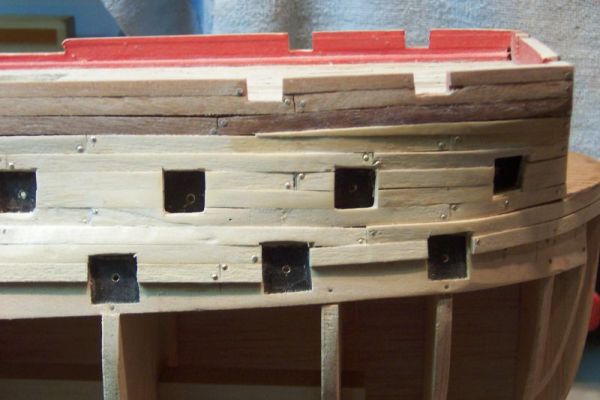
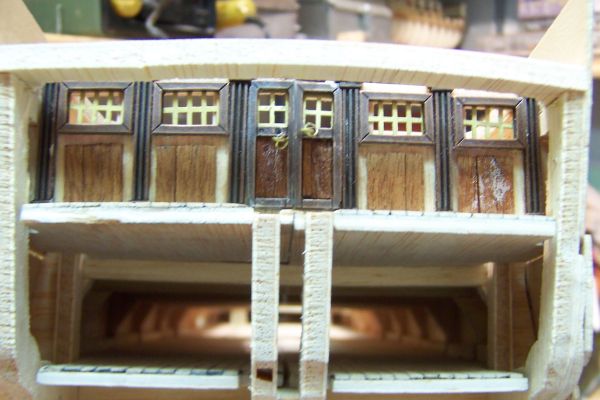
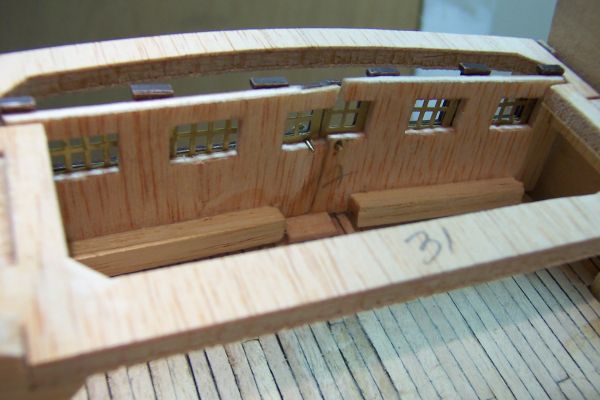
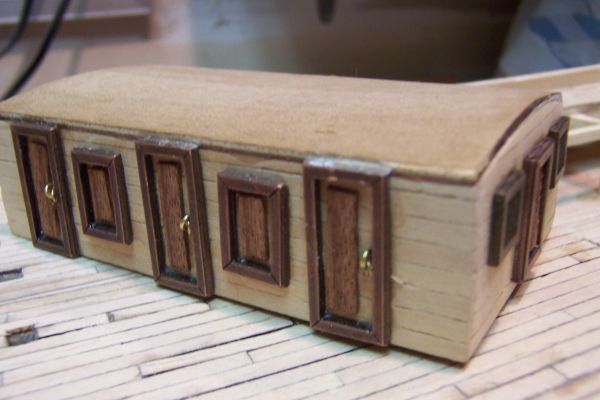
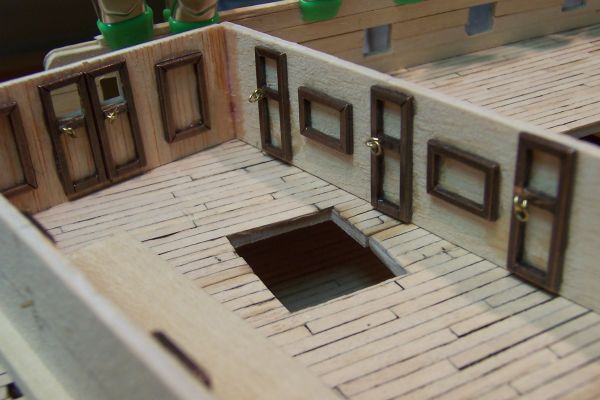
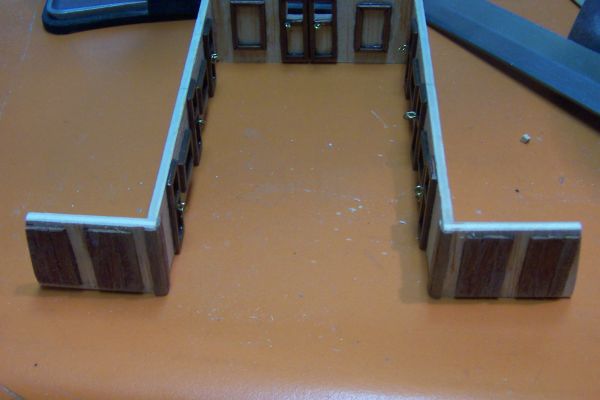
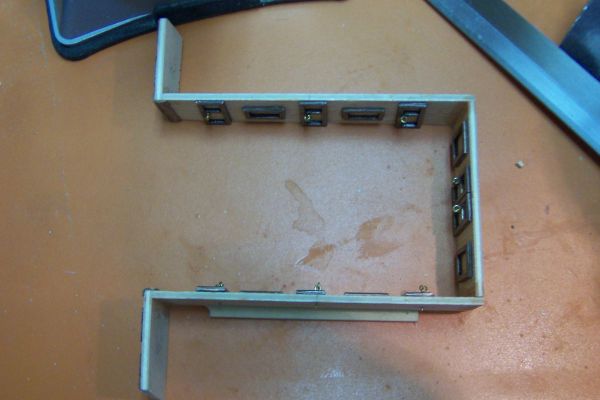
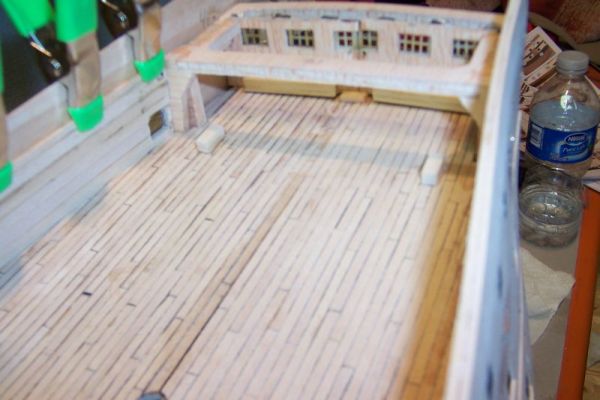
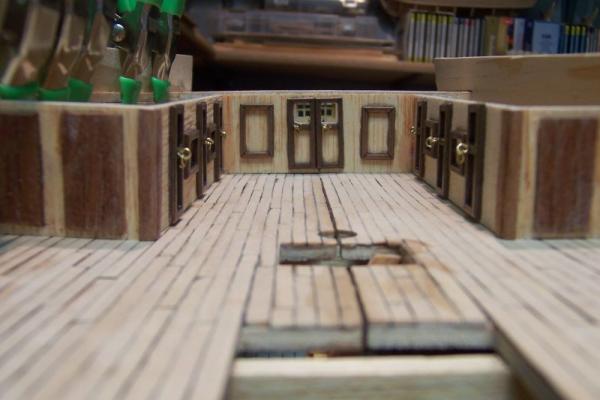
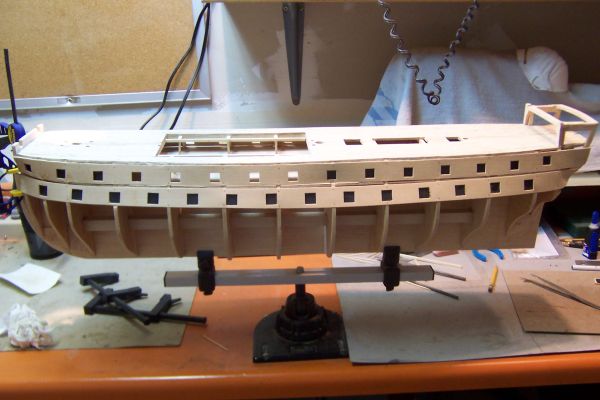
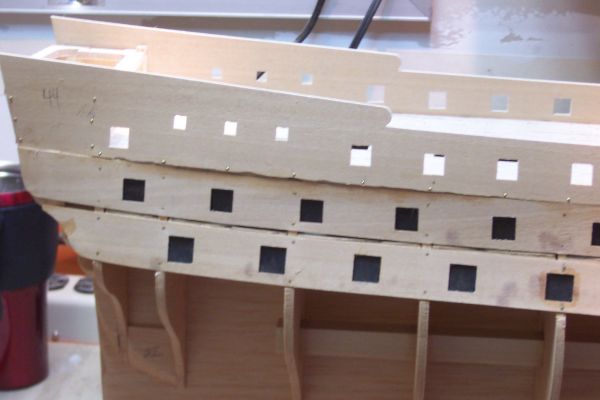
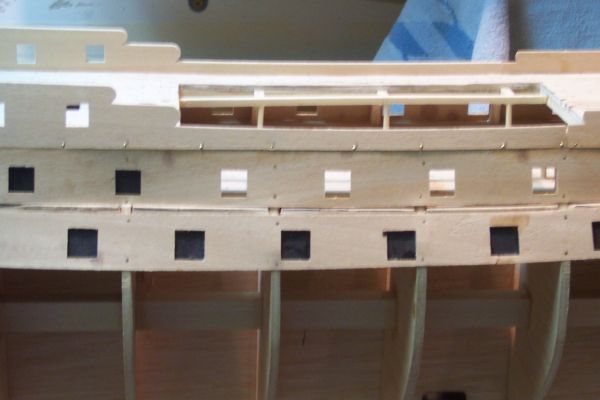
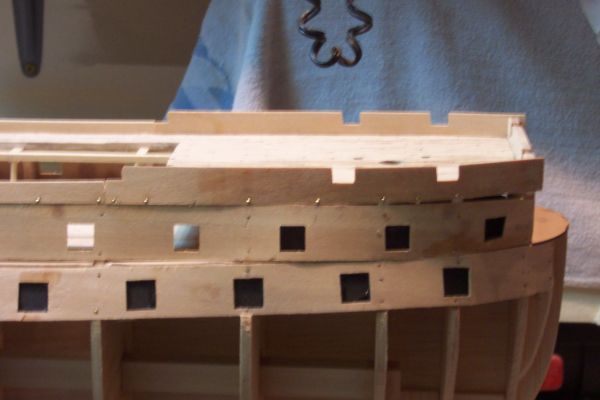
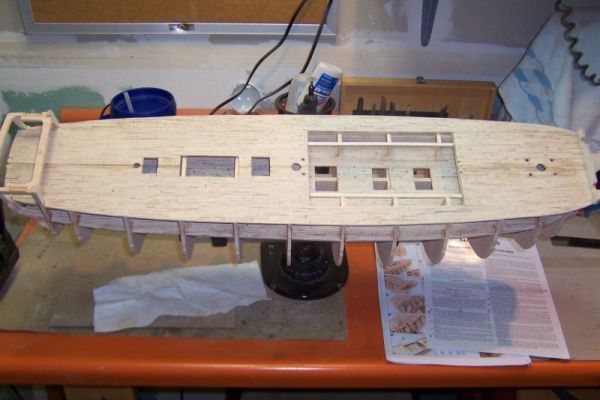
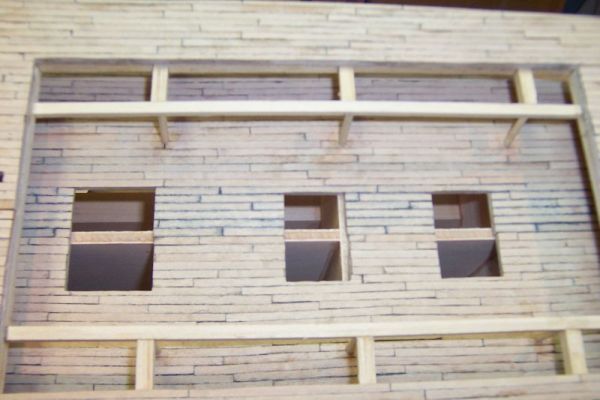
After installing all of the pre-cut / shaped bulwarks, including the first and second battery bulwarks with dummy cannon mounts painted black, I continued by attaching the forward bulkhead piece and lining the inside top bulwark. The stern gallery bulkhead piece included numerous metal and planking strips to complete. However the finished piece would NOT fit into the very tight stern gallery parts that were added earlier. I had to cut it in half and try to align the resulting two pieces again. This took a good deal of sanding and grinding in order to get the bulkhead to look decent. You can see the cut in the photo progression of this post. While lining the inner bulwark while waiting for glue to dry, I went ahead and assembled the junior officers quarters deck house, shown but won't be installed until much later, and the senior officers quarters bulkheads that are to be inserted directly under the quarterdeck. I again veered from the instructions for the senior officers bulkheads that called for making and installing each bulkhead separately and decided to create one elaborate U-shaped piece, cemented together, squared off and installed as one piece versus five different bulkheads. The two blocks on the deck were used to position the final piece into place. My decision proved to be a good one as you can see the result.


-
To Landlubber Mike; Yes I was nicely surprised by the customized name plaque and they spelled my name correctly also! To Rich; I was very happy that the laser cutting of the bulkheads and false keel were so very precise that I hardly even had to sand anything before cementing them together. Usually you have to sand for a few hours to get the kind of fit that this kit gave me.
-
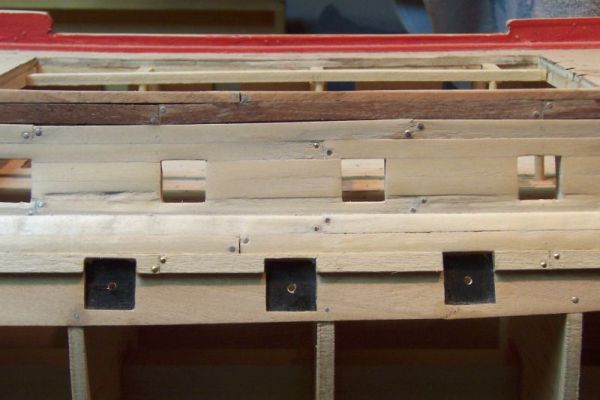
The kit included a pre-cut first and second battery bulwark that is affixed to the bulkheads and helped formed the hull shape. I veered from the instructions for the dummy cannon mounts blanks along the second battery deck as I felt that putting a base on each part #39 that would be used on the second battery deck, which had an actual deck to use, would make it much easier to cement down and position. If I had followed the instructions, I would have been gluing a 2 mm bottom to the second battery deck instead of a 3 to 5 mm more solid base. They worked well enough and just how I thought that they should. The first battery gun ports had no deck to speak of so I just cemented those flat blanks to the preformed bulwark just as the instructions directed.

-
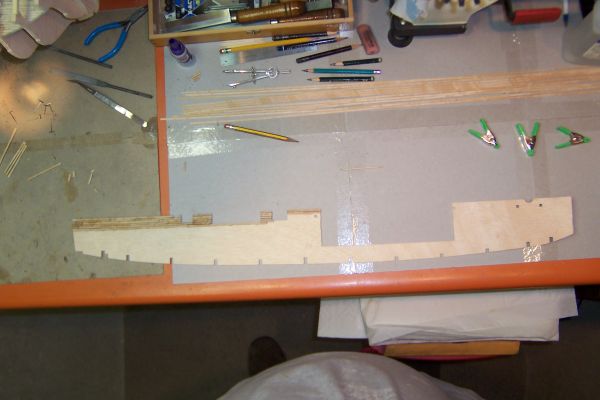
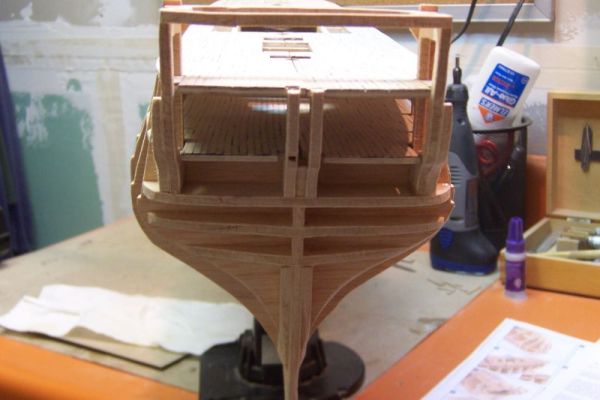
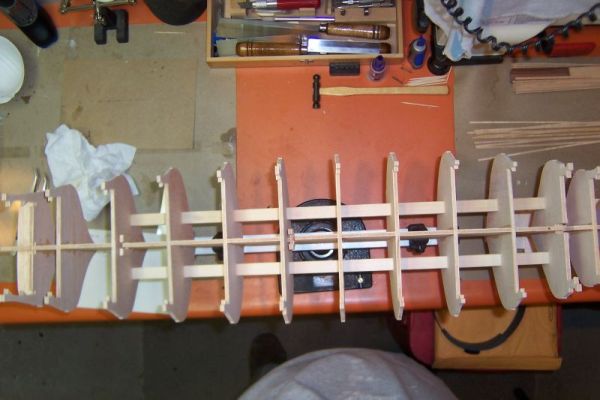
I can't seem to get the copy and paste function to work from my Word 2013 document, so maybe I will just post the photos that are in some order of the build to get MSW caught up with the current project. I will try to comment in detail of any changes I made from the original kit instructions or parts. All of these older photos were saved at 600 X 400 resolution, so they are not very big files to add. Following instructions, I assembled the remaining carcass, which included a second battery deck planked, the stern gallery base and the bow filler pieces. The build progressed normally as the following attachments show, until the dummy cannon mounts where fashioned, as I did something a little different from what the instructions said to do. I will show those in the next post so as not to make this too large.

-
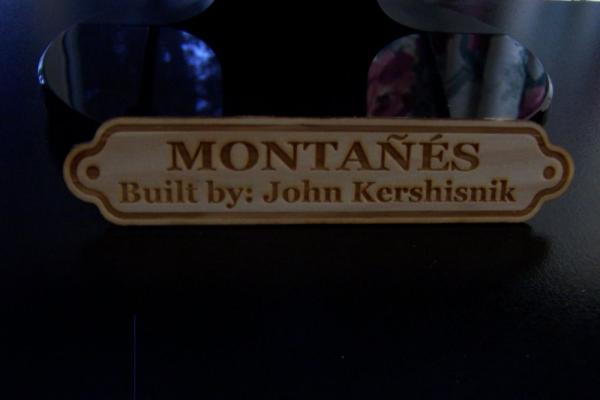
It has been awhile and it will take me a bit to copy my current log to MSW, but I had to interrupt this build log to show you what I received in the mail today from OcCre Spain. I needed some more cannon ball, ammunition to complete a certain piece of the model, I will show that later. However since Model Expo is no longer carrying OcCre kits, in fact the only import kits that they carry are Corel and Mamoli, they told me that they no longer replace parts for OcCre even though I purchased the Montanes and the Nuestra Senora del Pilar from them. They did give me the email address of the person over at OcCre Spain that will do so. Anyway, I needed some additional black cannon balls, and OcCre sent me about 50 black and 50 silver ammunition. The additional surprise was this name tag that had been custom created, probably by laser, for my Montanes build. I thought that it was very cool and here is the picture. Now back to recreating the build log.
-
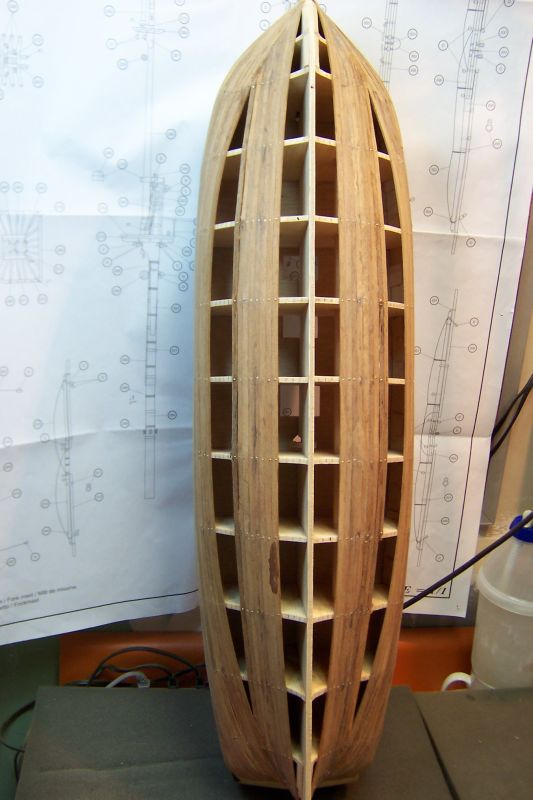
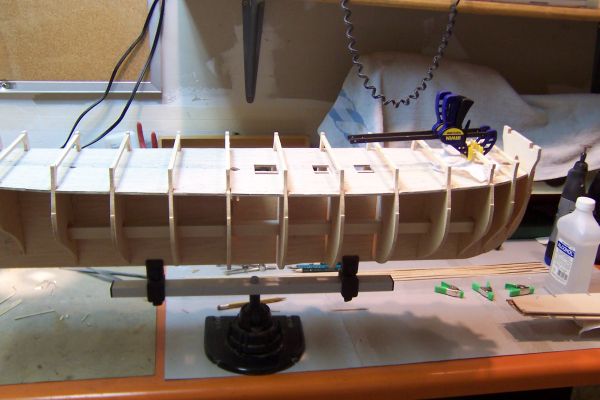
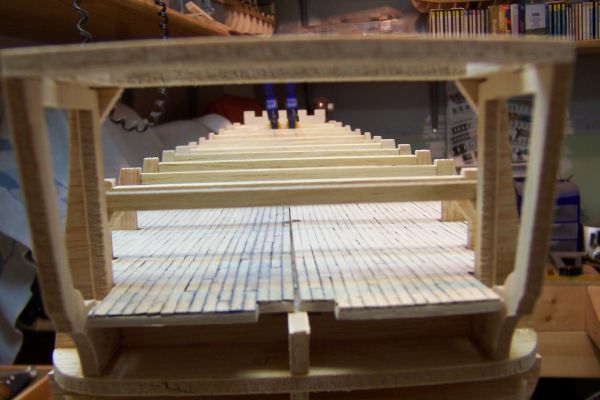
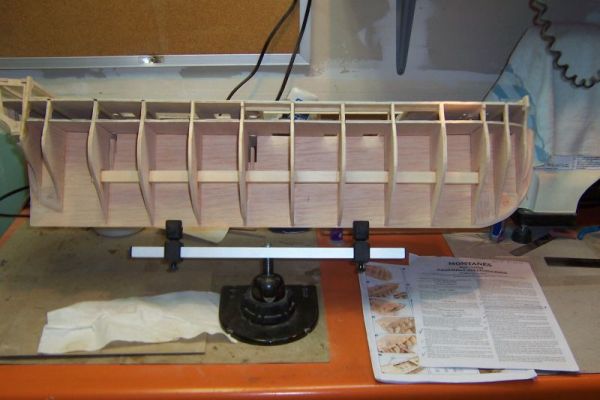
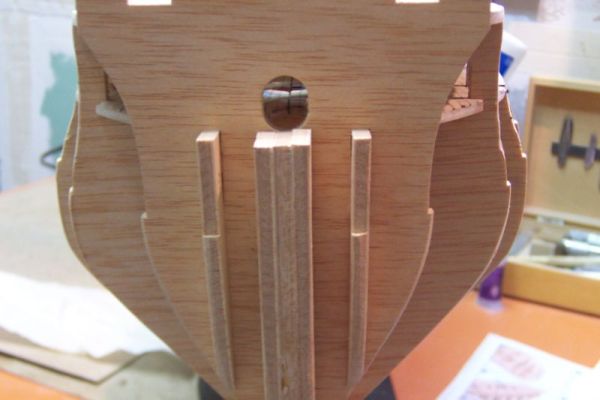
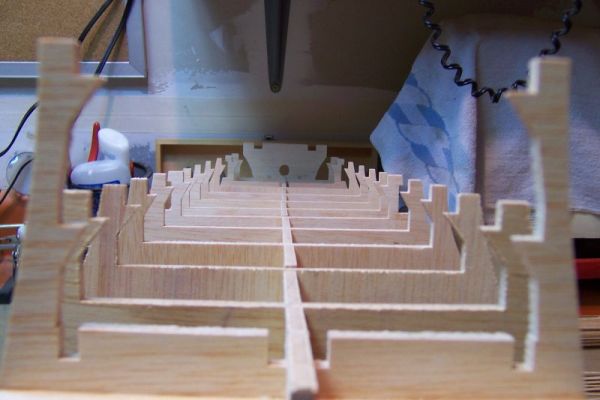
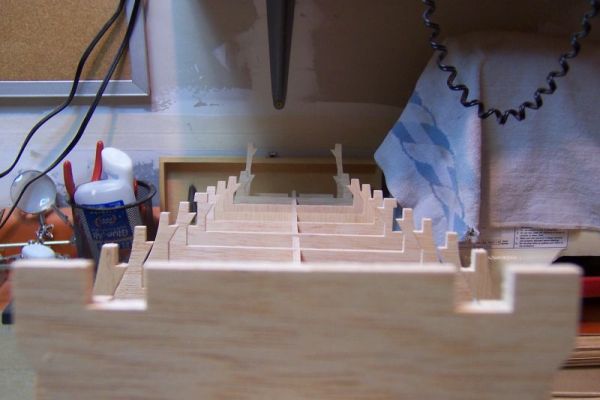
Since I am still building this kit and had it posted up to the crash, I am going to spend some time reposting this build log from my backup files. I have been and still am posting this log on Ships of Scale, a smaller forum than this one, however there are many names that I recognize that post to both forums. This is a 1:70 scale model but even at that the model will measure 49" in length by 35" in height and about 19" wide when finished. The OcCre kit quality was excellent as the false keel and all 15 or 16 bulkheads fitted perfectly with just very limited sanding of bumps where the pieces were cut out of the laser cut wood stock. I finished assembling the entire carcass or hull in about two days. The carcass looks good, all frames have fit perpendicular to the false keel with a tad flexibility to enable a proper fitting of the planked decks, part #27 and #32. In fact the support beam, part #15, going through the bulkheads is still not glued yet per the instructions.
-
model expo & Euro kit manufacturers
Sir Charles Edward replied to hamilton's topic in Wood ship model kits
ME is only carrying Corel and Mamoli imports now per thier website. They even have ceased carrying OcCre kits, however they might still special order any kit that you wish from the European manufacturers. The cost of those kits is becoming almost prohibitive for any US distributor to carry any kind of inventory. I have ordered from the European manufacturers directly and have not been disappointed in their delivery. The freight cost can push toward and above $200.00 though, but that is either UPS or FedEx which usually arrives in great shape well packaged, the three or four weeks that it takes can be trying for some though. I did find a US distributor of OcCre kits near San Francisco CA, and they carry a decent inventory of each OcCre kit. The link is here: http://www.occreusa.com/index.html and is a division of Ages of Sale. Prices are good and orders ship in a few days.