
My Fathers Son
-
Posts
259 -
Joined
-
Last visited
Content Type
Profiles
Forums
Gallery
Events
Everything posted by My Fathers Son
-
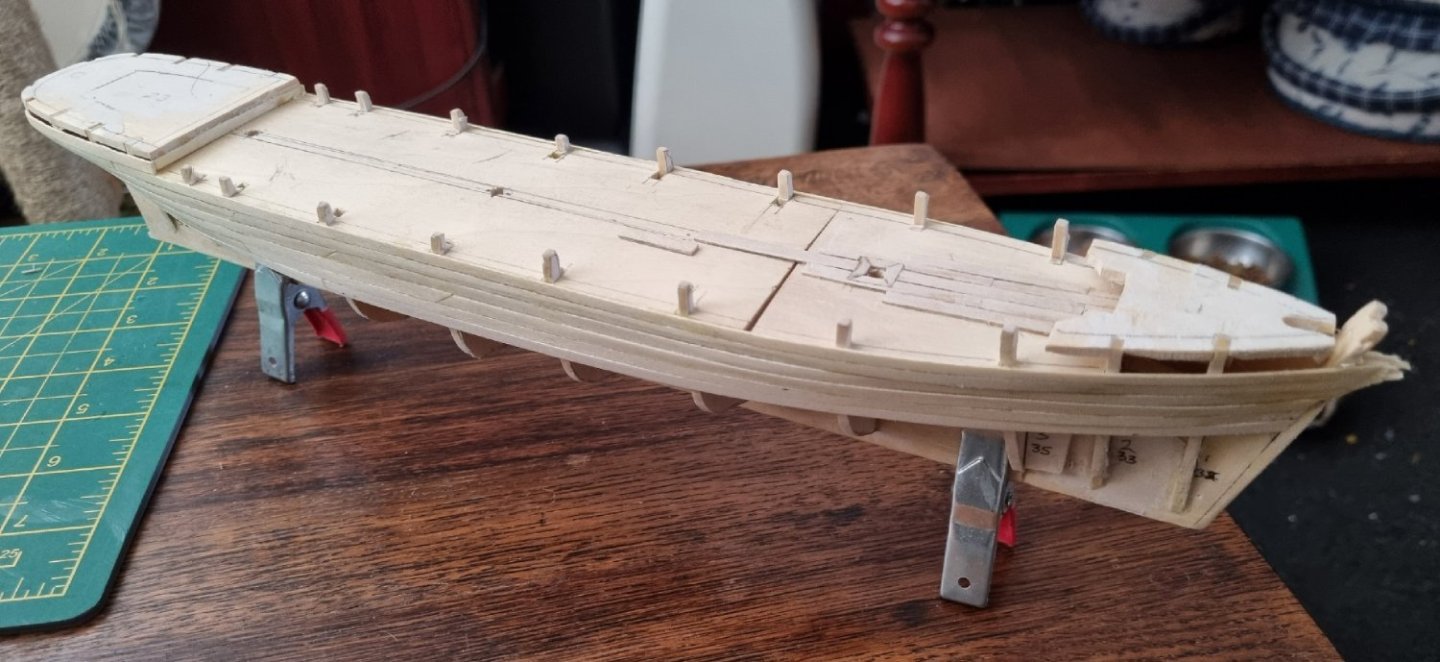
So my baby's are now a year old, so I have taken down my practice hull to see what I can get away with without the fiends getting too curious. So far, they have not been overly curious but the boy, now nearly 6kg, does attempt to sit with me when I have been working on it. i have been planking the hull with 3mm strips of 3/16" basswood. At this width, i am able to manuaver it into place keeping it flat against the bulkheads and curving up to the last strake. I have also started setting up the deck for the masts. I have purposely left the lower strokes of so I can create a box below decks to receive them. I am torn between removing the extensions of the frames to install the gully now or to install the sides above decks now avoiding glueing to them. I suspect the former is the correct action as I am planking over a false deck. I am aware the deck planks are not to scale, but this is just to give me some practice. I am still very nervous about taking CS down of the shelf, but it would seem that I am able to take on tasks I can do without her in front of me. Still have the majority of the sails to set up so hopefully I will be able to get back to making progress with the real thing. Simon
-
Ah, remember, once you start down that path, forever will it control your destiny, you don't know the power of the Dark Side, lol. I have made a 1:200 (approx) of this hull and yes, it has very graceful lines and frankly, looks like a racing yacht, at least before you add the fore and aft decks and 3 masts. The drawings attached to my last post are the best I have been able to extract from the line drawings and then refined by matching them to the fore/aft horizontal and vertical planes. I look foreward to seeing your log, I want to finish the rigging on CS before physically starting on this project so you may be starting before me. In the mean time, I am reading Underhill and using the tables to guide the dimensions of the yards and spars, the line drawings I have only give me the length in proportion to the hull. Like you, I will be using commecially available Blocks and Deadeyes, although they will probably have to be adjusted as the cheaper ones tend to be rectangular blocks with holes in. I dont have a workshop as such, so I will also be using commercially available wood strips. I have 5mm and 2mm ply at home and I can get boxwood of varying thickness locally. Cornwall Model Boats will be my "go to" supplier for the rest. Good luck on your "Big T" and feel free to use or adapt the drawings in my log. In case I didn't mention it, they are on A0 size paper. Simon
-
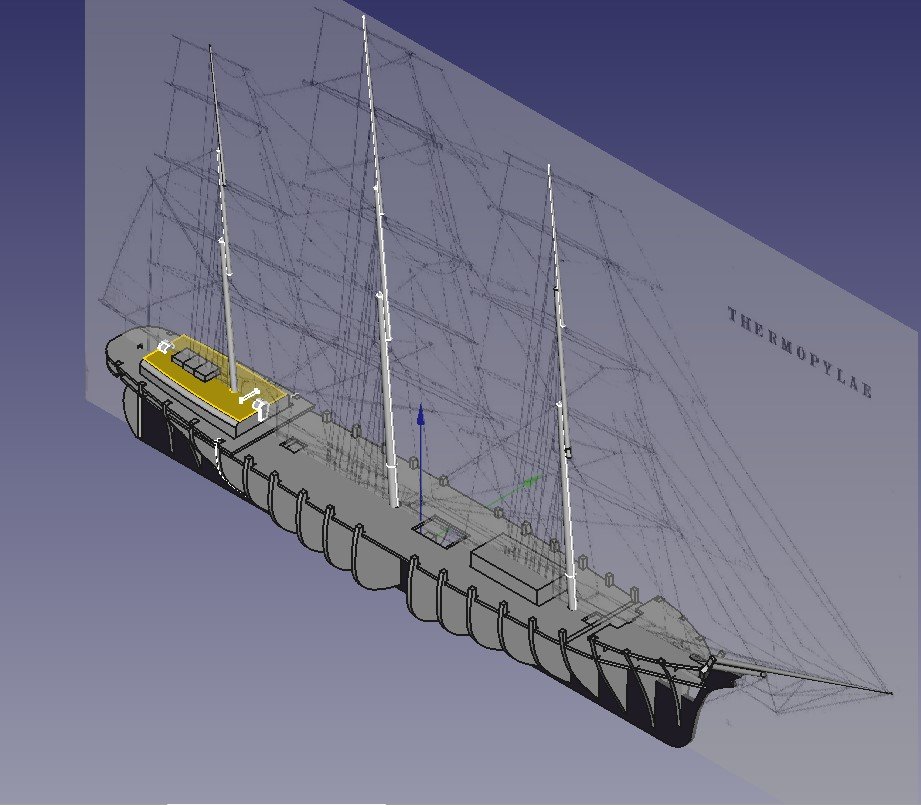
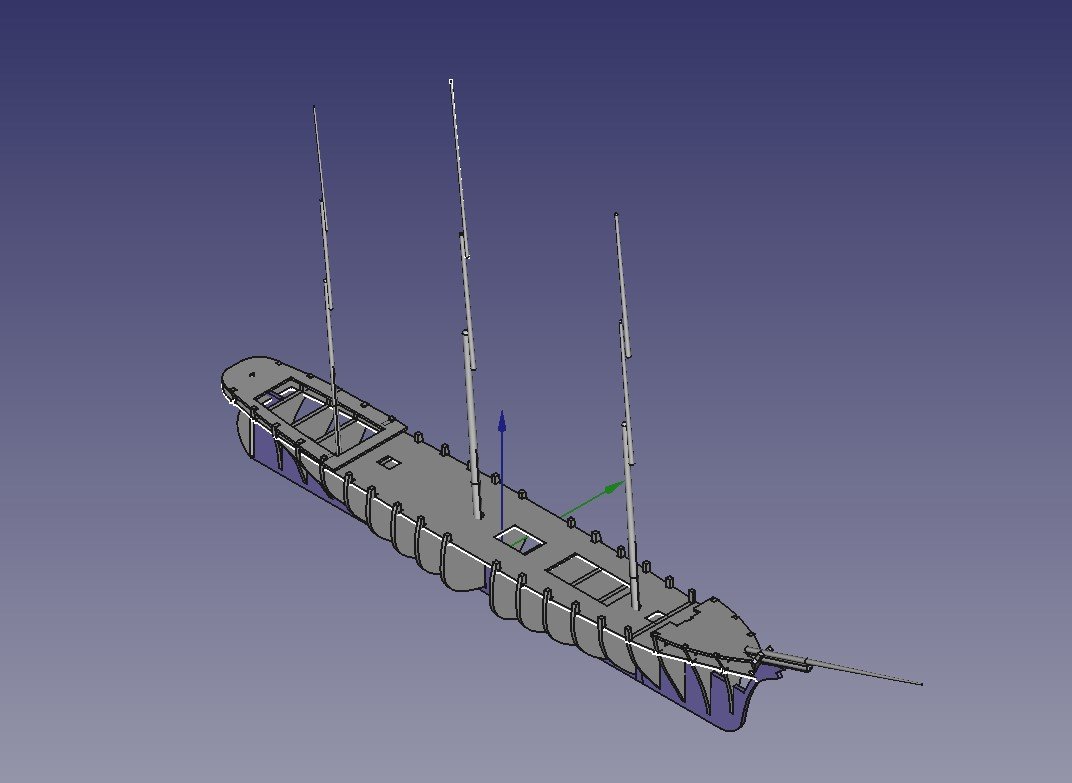
I finally worked out how to combine two Extrudes into a single solid so the Main Deck curves nicely from Stem to Stern, but not to introduce the camber athwart ship. I have been constantly refining the shape as I have been able to assemble the hull digitally, which is why I have not published any plans on here. Here is a sample of what they are looking like so far.Thermopylae Project-Page 2 3mm Parts.pdfThermopylae Project-Page 1 5mm Parts.pdf Here is what the assembly looks like so far. Simon
-
Hi Keith, He is my second cousin actually, and his hobby is making model steam trains. He uses the same gauge as the track in Tunbridge Wells park as well as the track that runs around the perimeter of his home in Crowborough. Simon
-
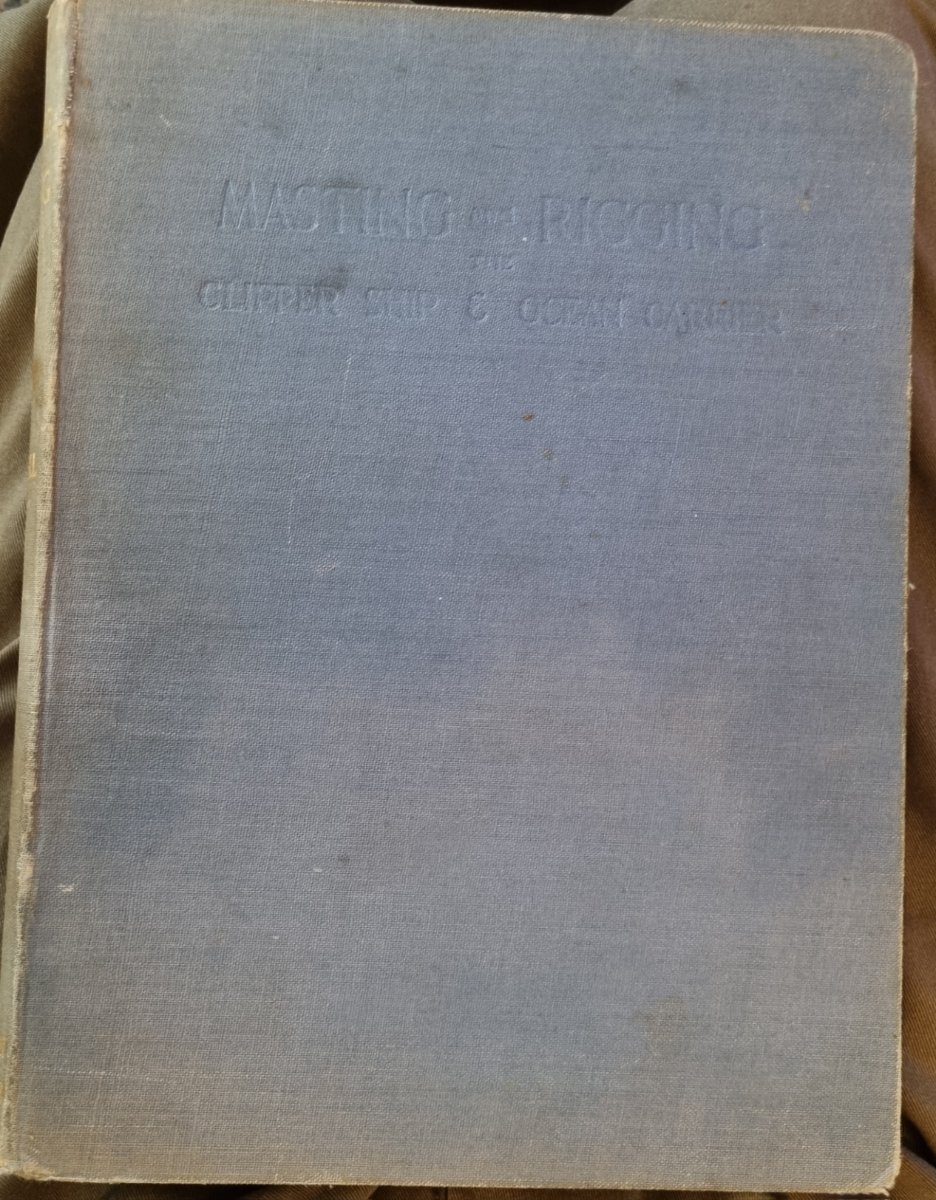
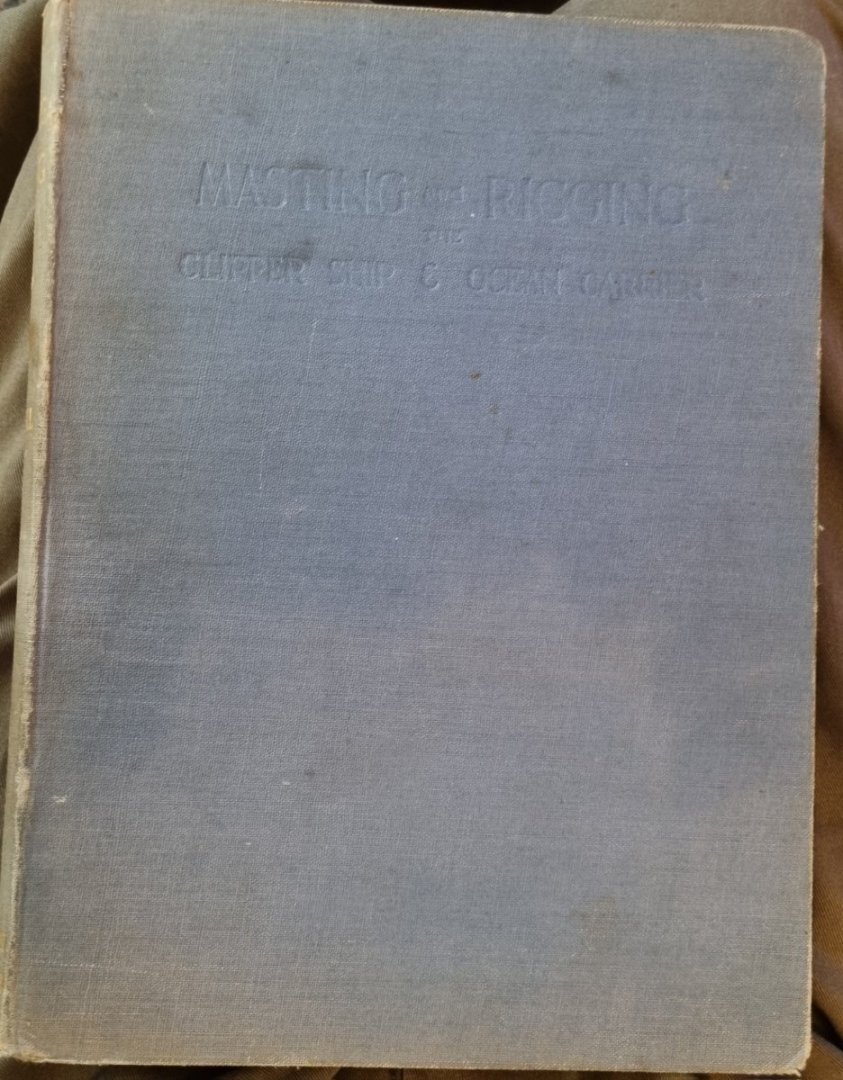
Woo hoo, my own copy of Masting and Rigging arrived today. No dustjacket and the print is slightly smaller. The copy from the Library is 1965 print but mine is 1949, but the content should be the same. The deck plan is intact and the whole book is is good condition. Simon

-
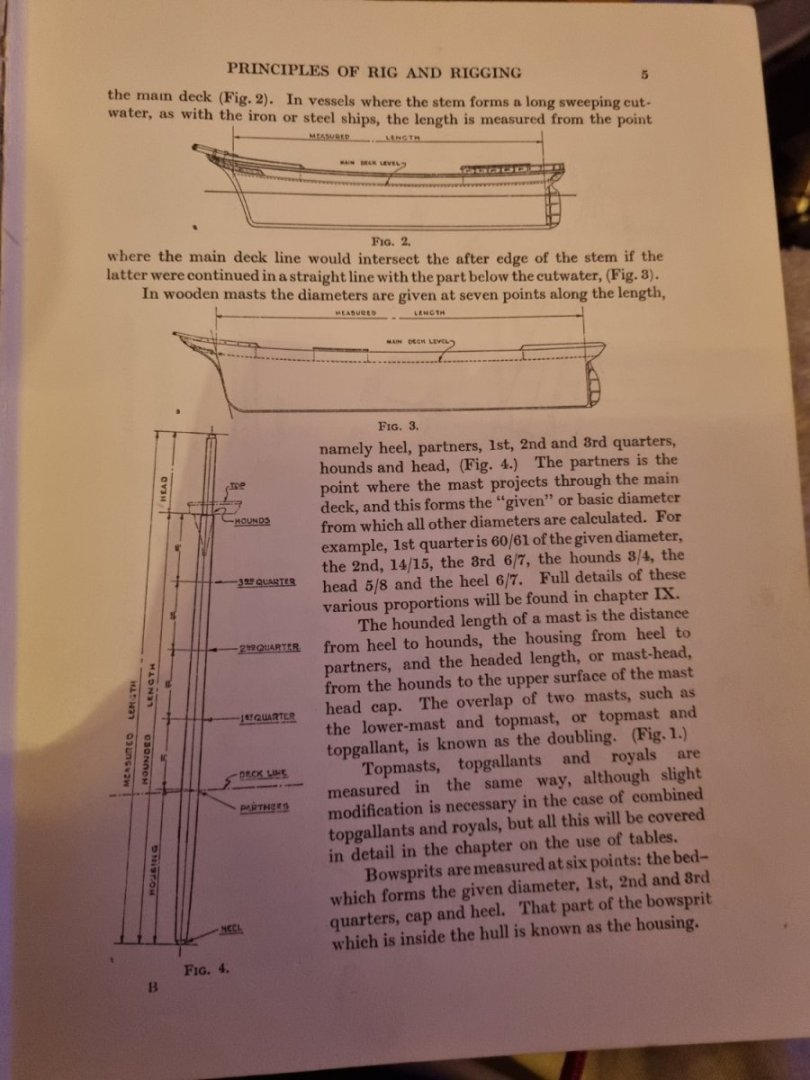
I have managed to get a copy of Masting and Rigging by Harold Underhill from the Library. I can't keep it for much longer but it has convinced me of its necessity to have a copy of my own. By page 5 it has answered one of my recent problems in determining the size and shape of each section of a mast. For instance, if the mast diameter is say, 10mm, then it will reduce in diameter at each quarter at fixed rates, 60/61, 14/15, and 6/7. At the hounds it would be 3/4. All the tables are in Chapter IX so I have a way to go to to read these. So while the scaled images I have imported show Cambells over height of the masts, I will have the tables to calculate the correct level of tapering. Hope every one is safe and well this Christmas. Simon
-
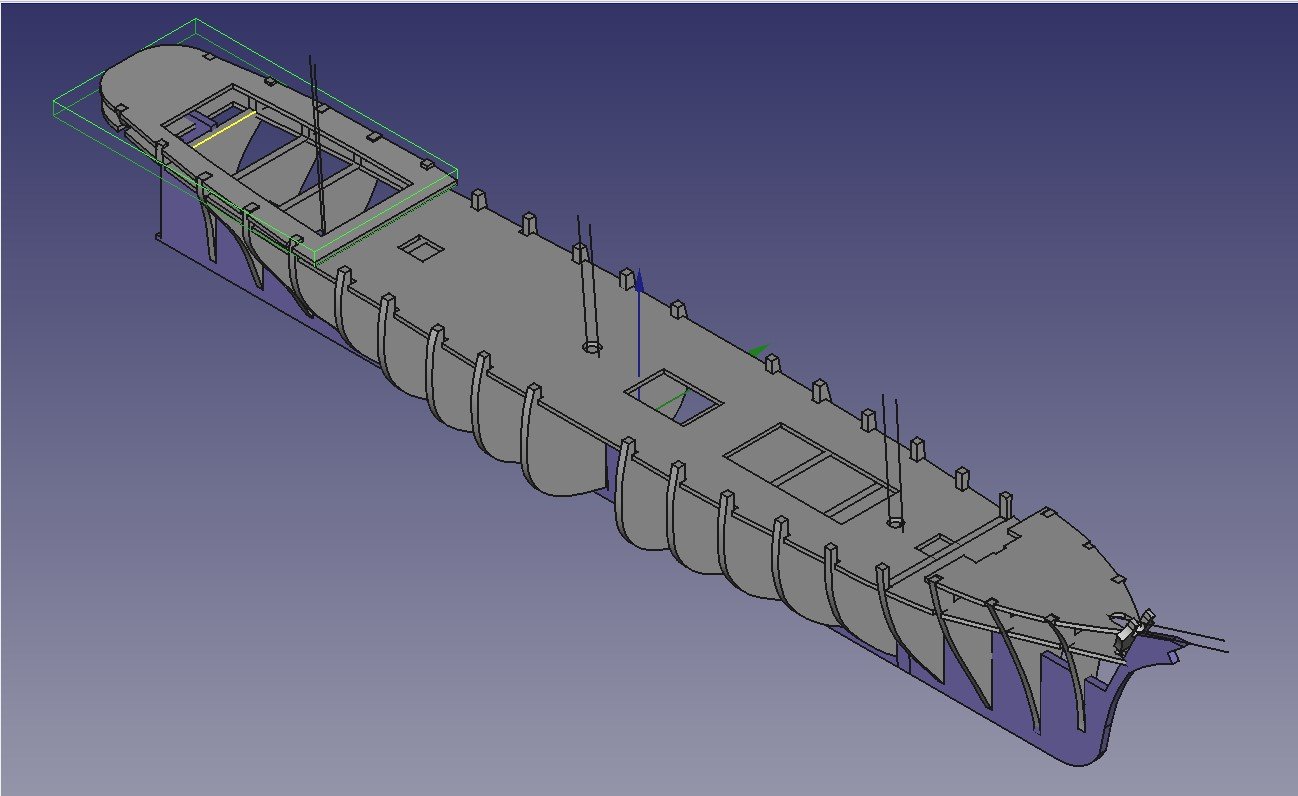
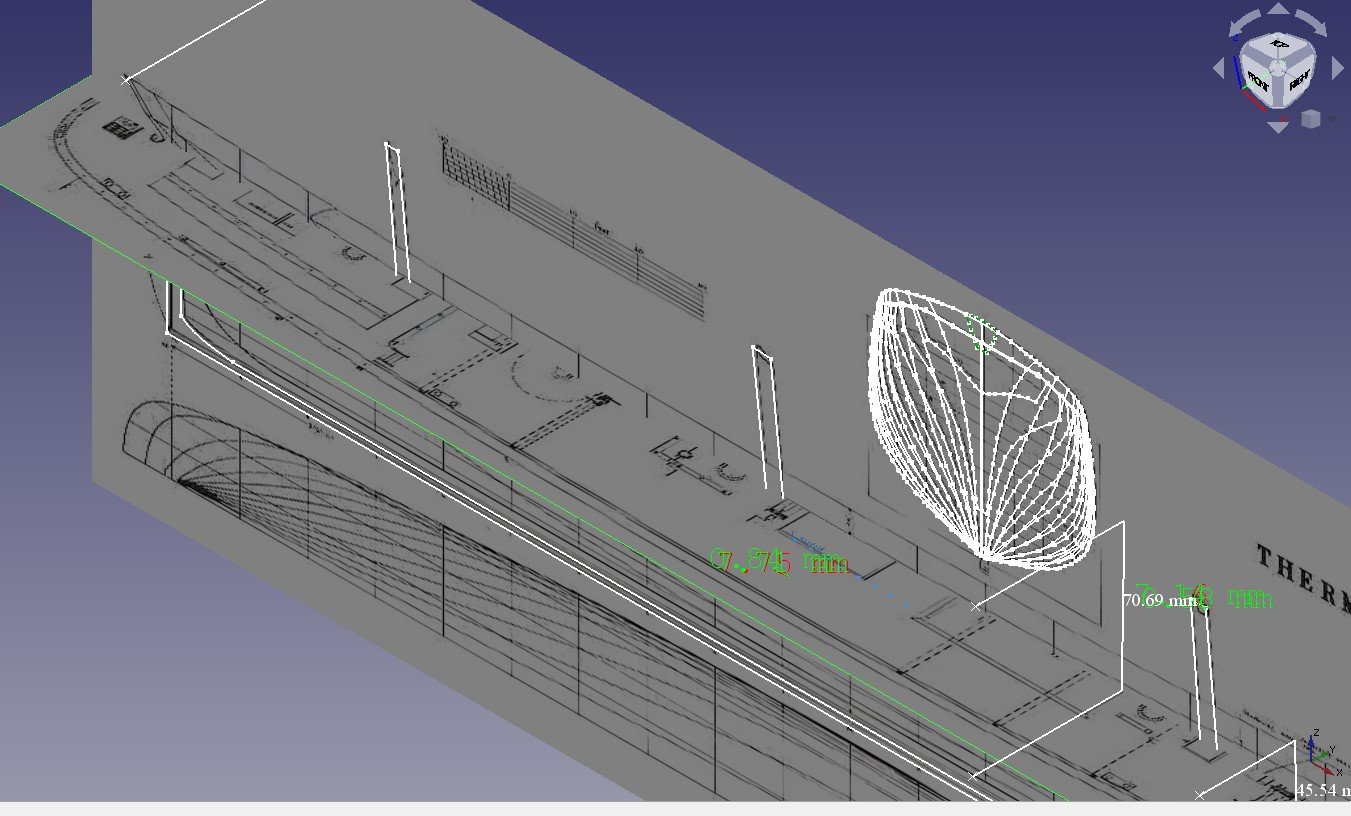
So yes, Underhills book is on my shopping list. Putney Library is showing as having a copy so I might get a chance to go and look through it first. The draft of Flying Fish looks like this. My attempy to merge two profiles via the Boolean tool has not worked for me so back to the drawing board but you can see how quickly a hull can be given a shape from just three images. Getting back to Thermopylae, this is where I am at the moment. I am debating in my head to what detail I need to create the Deck houses as when I make the actual model, I will create the basic block to the apprpriate size and then add detail by adding on strips to simulate the panelling and detail. I can use images on the plans to show the sort of detail that is due, but these plans just need to show the locations and outline shapes of the items to be included. Simon

-
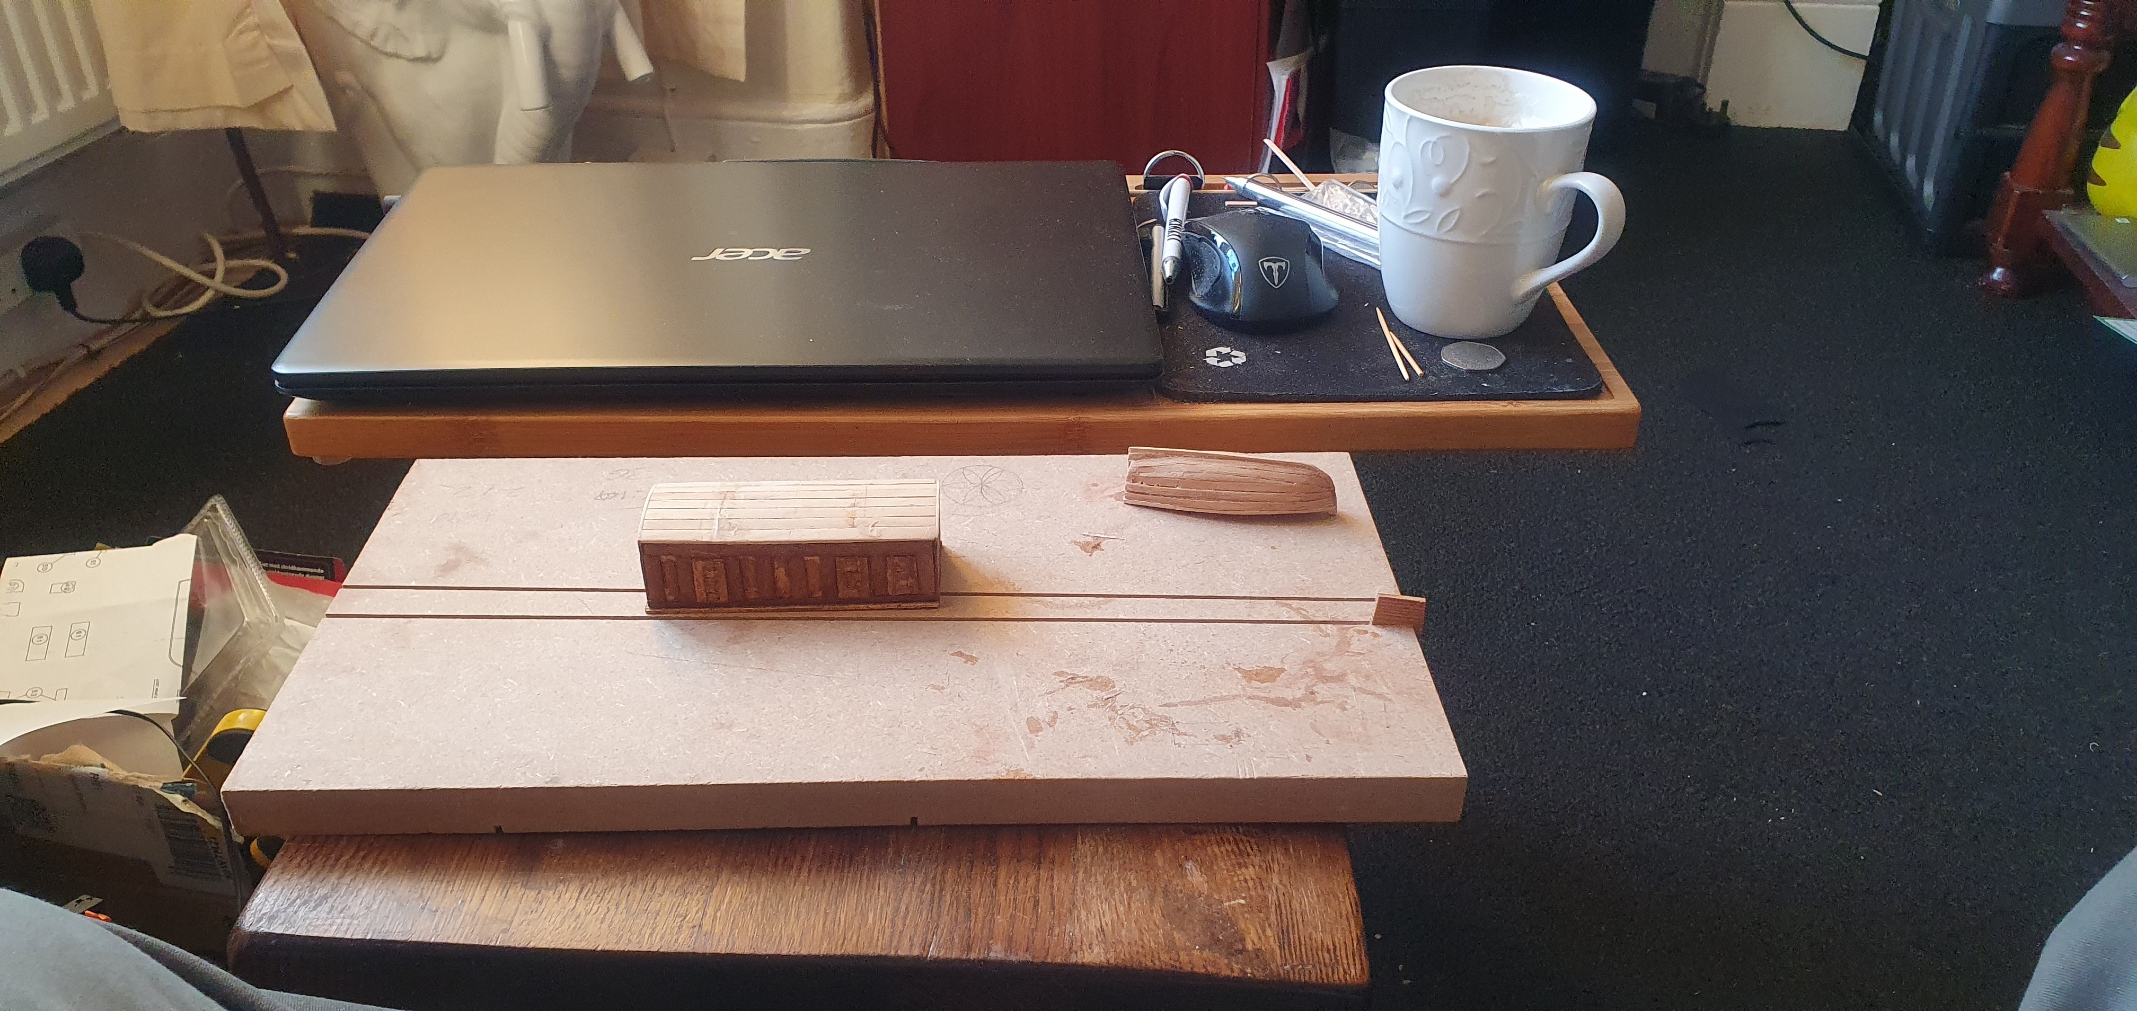
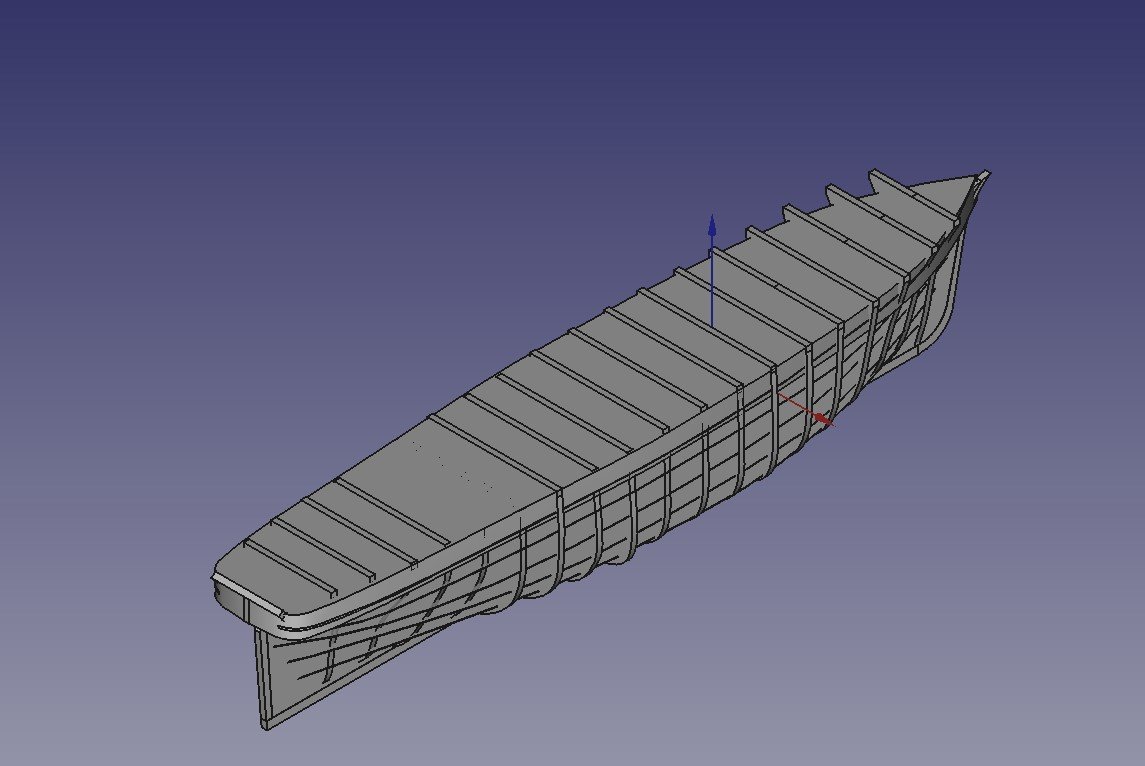
My mental block remains on stepping the masts but I have but I have made a decision to carry on with the rest of the plans. I have reviewed the thread on using FreeCAD and the guys have gone into incredible detail down to creating the ropes but this level of detail seems to making a virtual model rather than creating plans for a physical model. So I am now just looking to set out the deck houses, pumps etc. I have built 3 small boats in the summer and I just need to check these for size, if not, then I have a couple more to make but I enjoy these, so no problem. Just for an exercise, I extracted a set of drawings from my book for Donald McKays Flying Fish. The hull is almost complete bar 3 ribs. Surprisingly easy second time round. Simon
-
You can find the series under the title of FreeCAD 0.20 for Beginners and the 1st Tutorial is at Just subscribe and you wil get a series, each one is about 30 minutes long and works through an exercise that is easily repeatable and the author talks you through the process. I have got stuck on stepping the Masts , it shouldn't be this difficult but I am having a mental block on it. Simon
-
Hi Juergen, I am familiar with Macro's, I have written a few in Excel and Word but a Macro would not have helped me in this instance. I was struggling because I had completed a couple of lessons and gone ahead and used what I had learned to create parts. What I should have done is completed a few more lessons and I would have learned more about the difference between closed and open sketches, Part Design and Part work benches and boolean operations, any one of which would have made my job much easier. I will need to do this to the TopGallant masts to extend them into the Hounds with the curved space for the shrouds to pass through. I have had the appropriate lesson now so I will try this later this evening. Simon
-
Thanks Dave, its available on Amazon for about the same. However, as I am between employment, I just cant warrant spending money on myself until I get another job. Simon
-
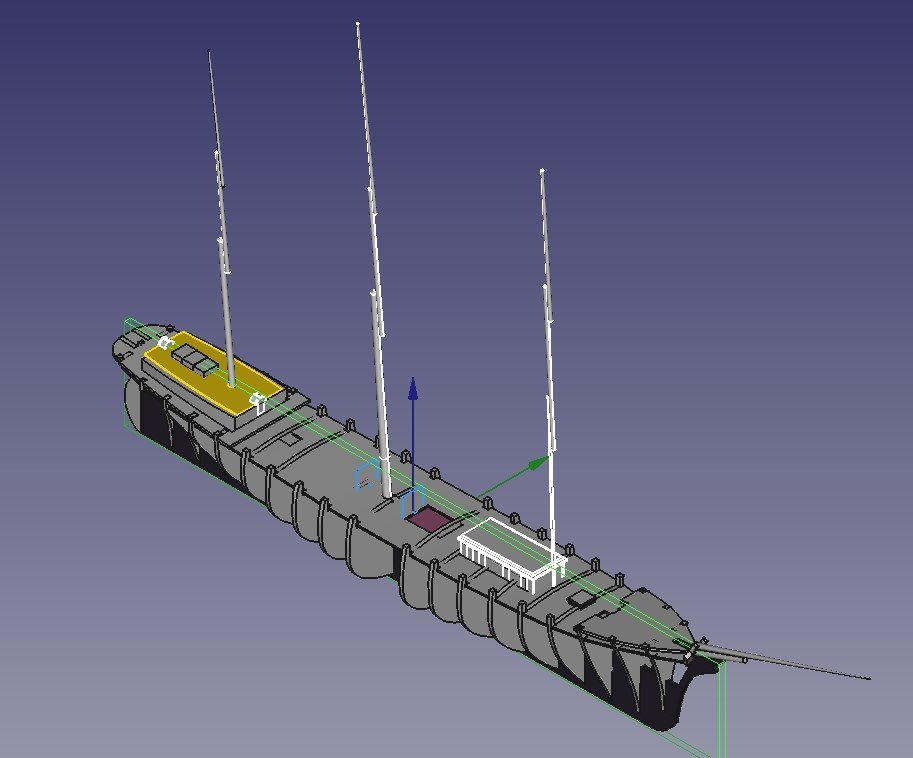
Well, I have found out the right way to make tapered shafts, so I have made the Masts bar one detail, the foot of the Top Masts where they deviate for the shroud lines to pass between the masts. This requires a different technique. As each piece is added, you can manouver the image and see where each piece interacts and make adjustments accordingly. The original locations of the holes for the Masts were close but did not line up. So I have adjusted the deck accordingly. I have work out how to create plans on to PDF but as parts alreadt created change as later parts are added, any plan I create now would be subject to change. I can't afford to spend on Harold Underhills Masting and Rigging book at the moment, but according to Frank Mastini's book, 19th Century Spars were tapered from almost the centre, with only the central section for the fittings to lift and hold the yard at a consistant size. So unless anyone has anything to the contrary, I will keep a central section of say, 1/3 of the width of the yard as consistant and then taper the balance to the minimum. size at the tip. I have been having a bit of an issue with finding a naming standard for masts. The yards are easy and well documented. The lowest Mast is also easy as the only yard mounted on it is the Course, so logically, this is the ForeCourse or MainCourse. The middle section has the Lower Top and Upper Top sails mounted but the Top Gallant is also mounted from the top of the Hounds of the middle Mast. The Top section only has the Royal or Royal and Sky Sail (Main) mounted. So, is the Central Mast the Top or Top Gallant Mast and is the Last section the Gallant or Royal Mast? Simon
-
Sad but true. Started work on the masts last night. Not sure my method of creating tapered shafts is 100% but anyone working from the plans would get the specs. Question. The course section of any mast starts below decks. Would you start the tapering after the mast clears the deck, from a point above the deck or where? I am aware T had composite metal course masts. Simon
-
Well, I have continued with my lessons and have discovered how to create a part that is curved. So I could redo the main deck but as that would only be for aesthetic reasons, not to change the shape, I will pass on this occasion. It requires the creation of two separate sketches and to combine them, something that needs to be planned from the outset, if it is to work correctly. As I have already created the part, it is not playing nicely. I have also worked out how to create an export of scaled drawings, so once I have my parts drafted, I can create a set of working drawings to put this to the test. NB. Orders from my Admiral are that I have to finish CS before I can start a new boat. This means I am going to have to find a way to work on her rigging without attracting the attention of my resident sith apprentices. Simon
-
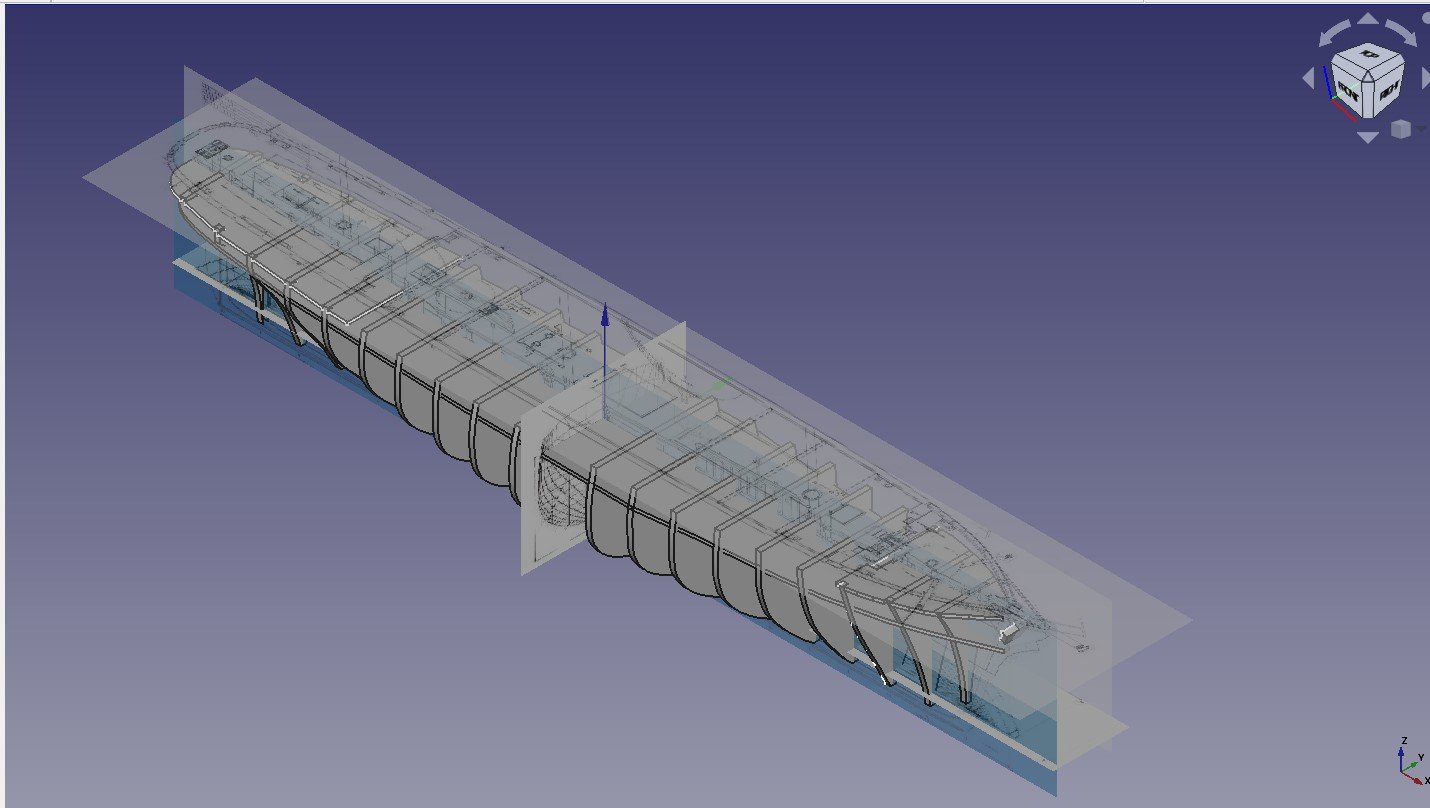
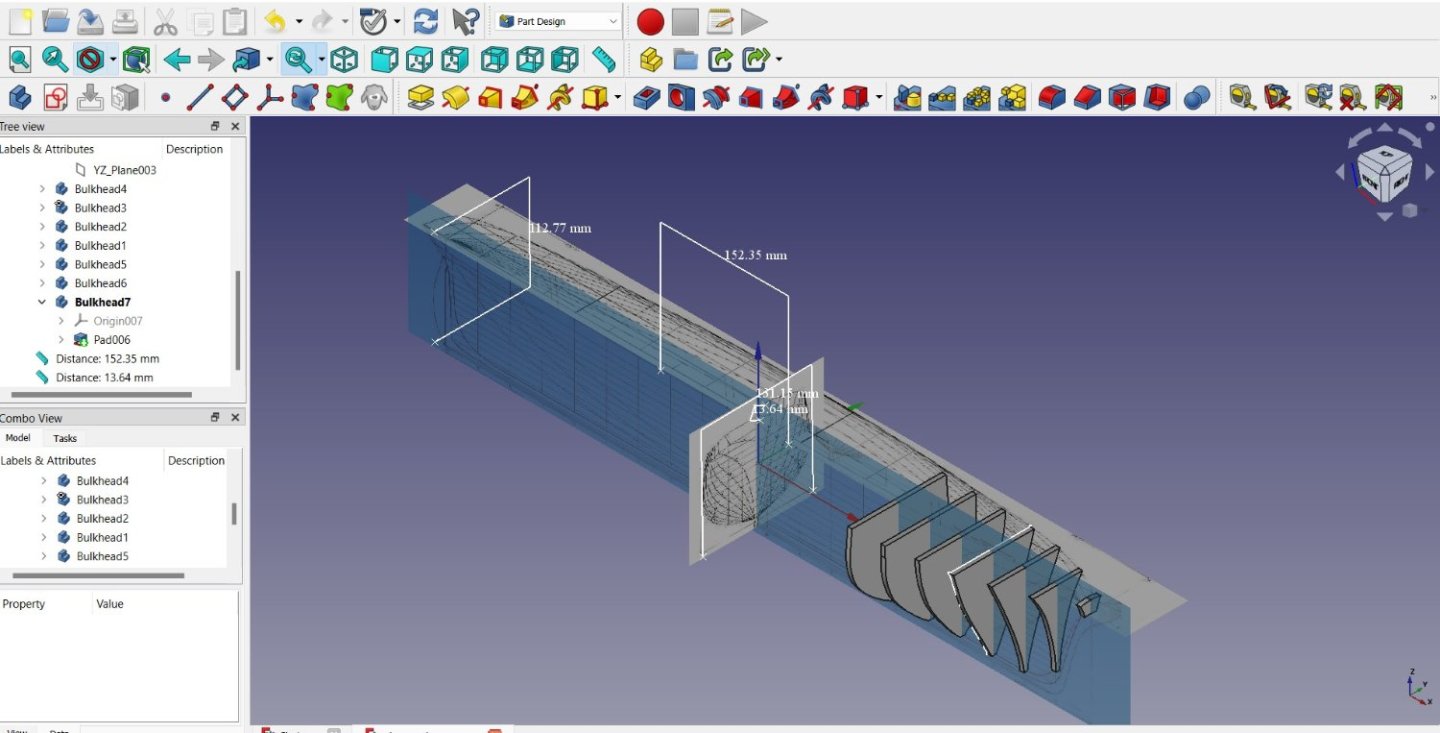
Aha, another little part of the programme unlocked. I have now been able to export images at scale to the approprate sized paper size, so I should, when apprpriate be able to create a physical set of plans I can take to a printers. I think I have the Keel finished and the majority of the Bulkheads, but I am not yet happy with no 1 as this should incorporate the knightheads and what I have produced so far is not looking natural to my eyes CAD is a fantastic tool as it lets you build the item in 3D, change it, delete it and start again without wasting a single piece of wood. It can be frustrating in the extreme, but when it works, it really works well. Once I have finished straightening up a few curves (hows that for an oxymoron) on the decks, the next job will be the deck houses. Simon
-
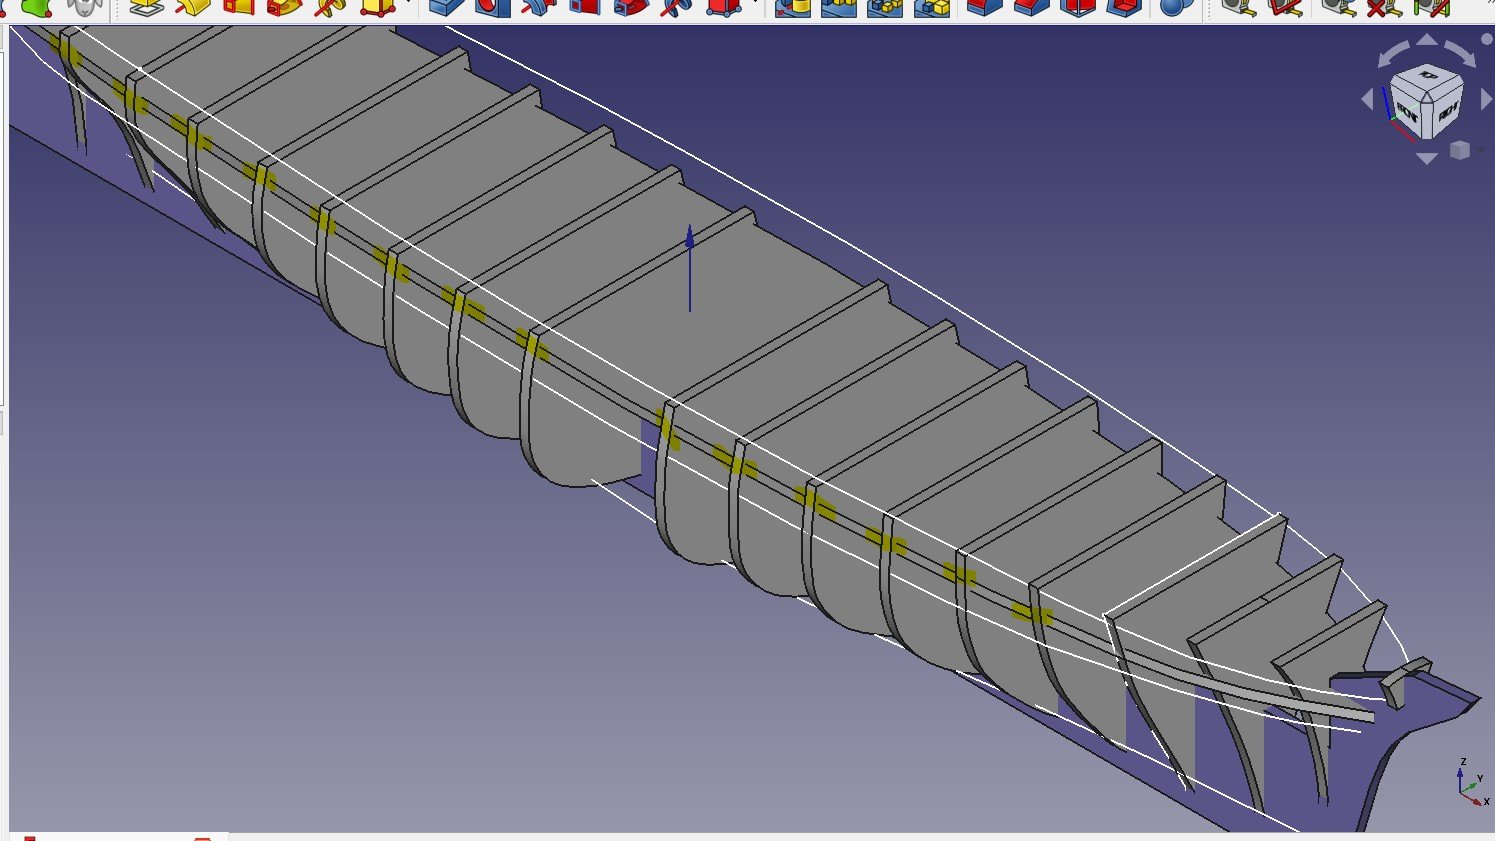
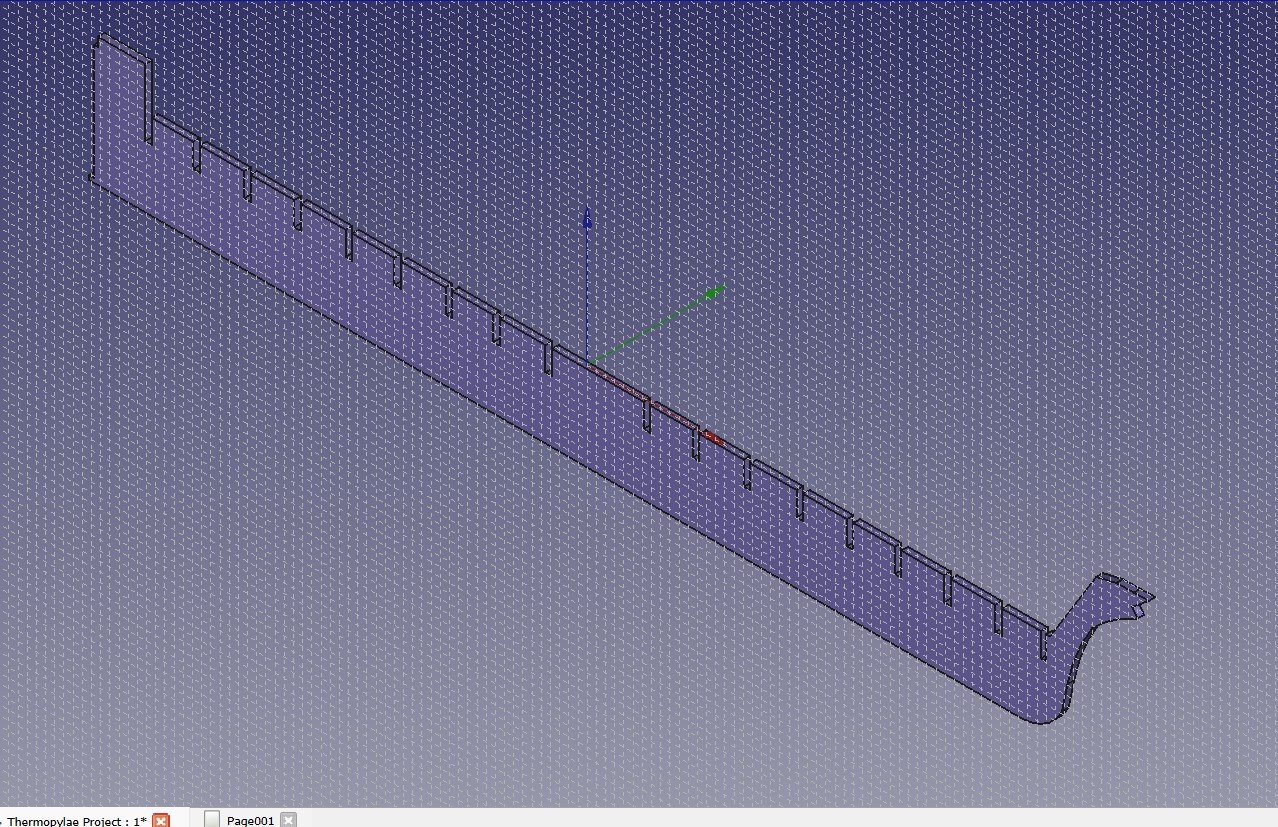
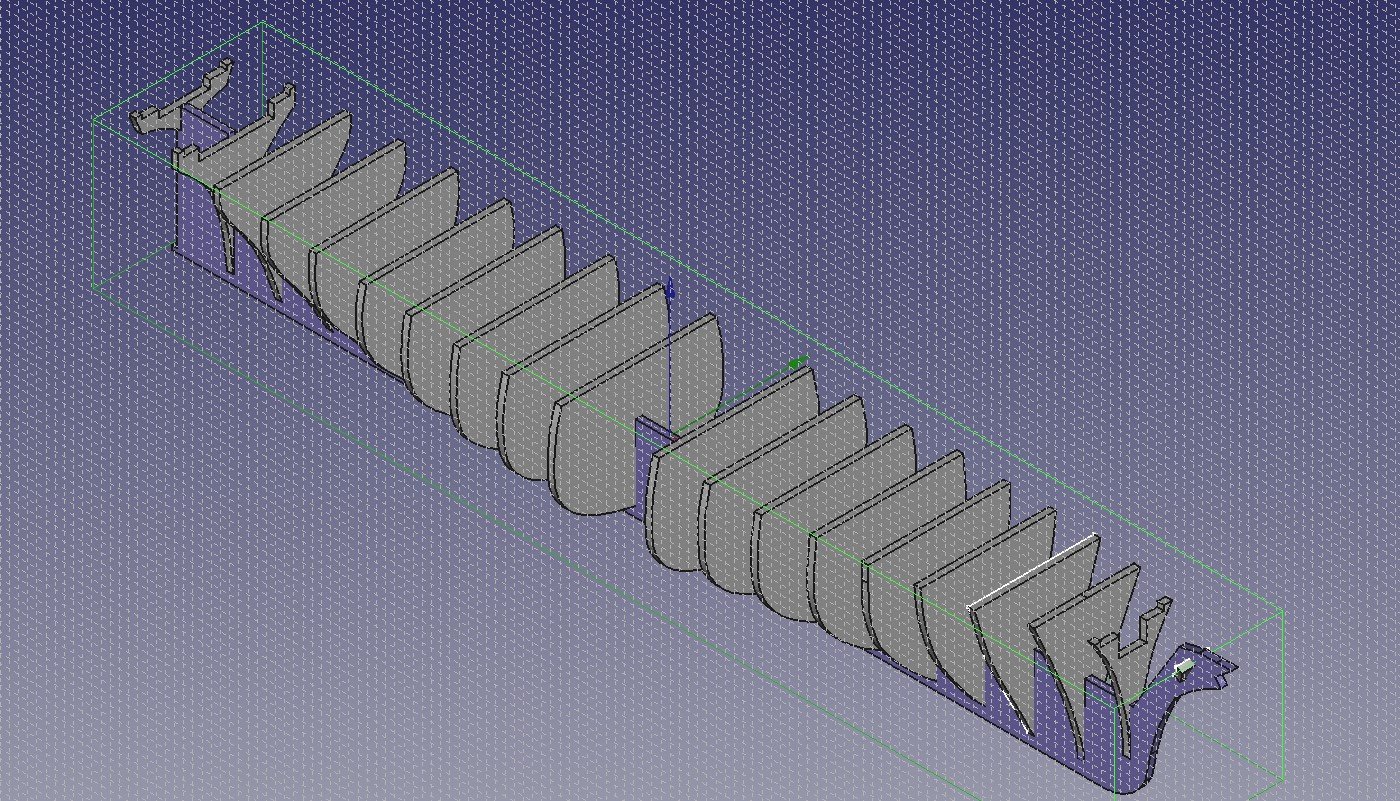
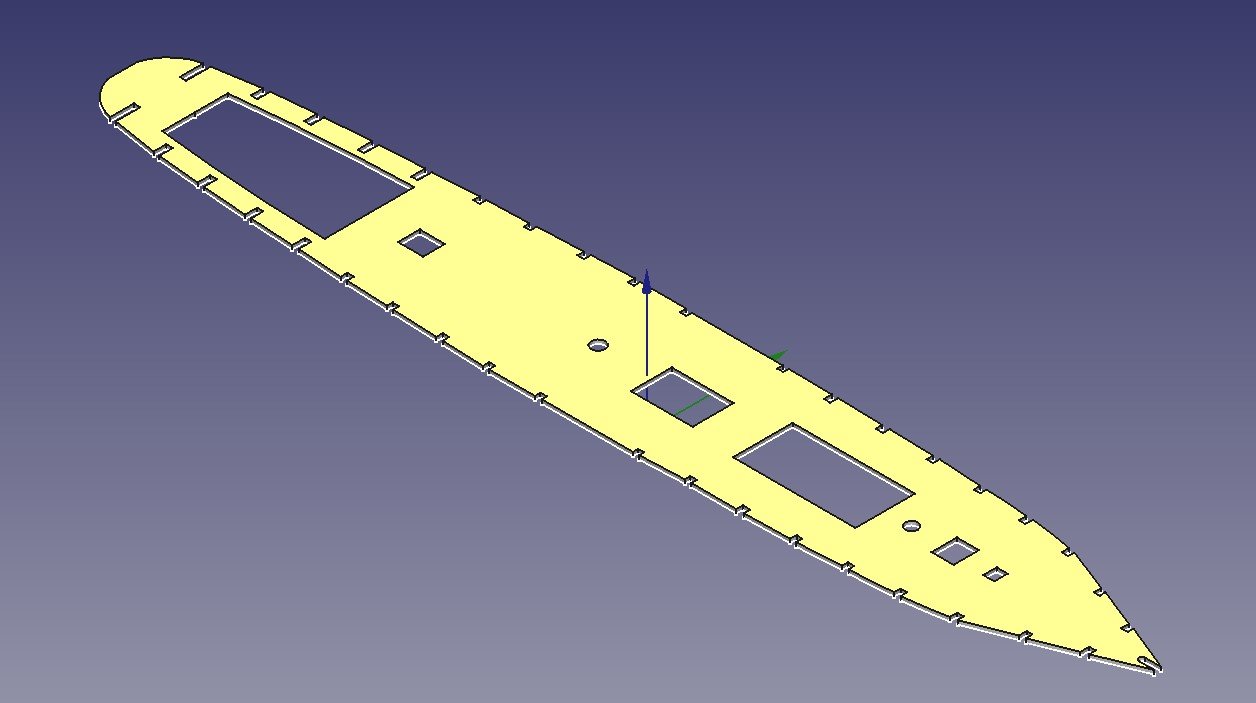
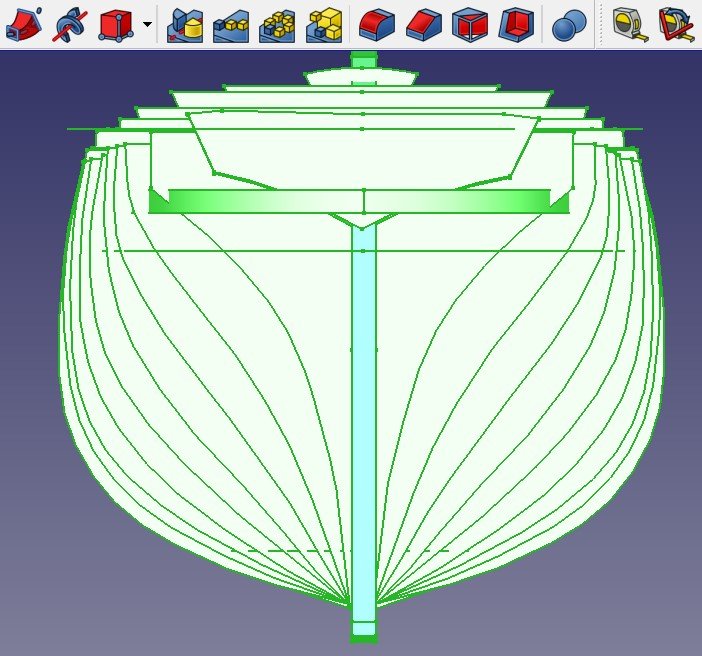
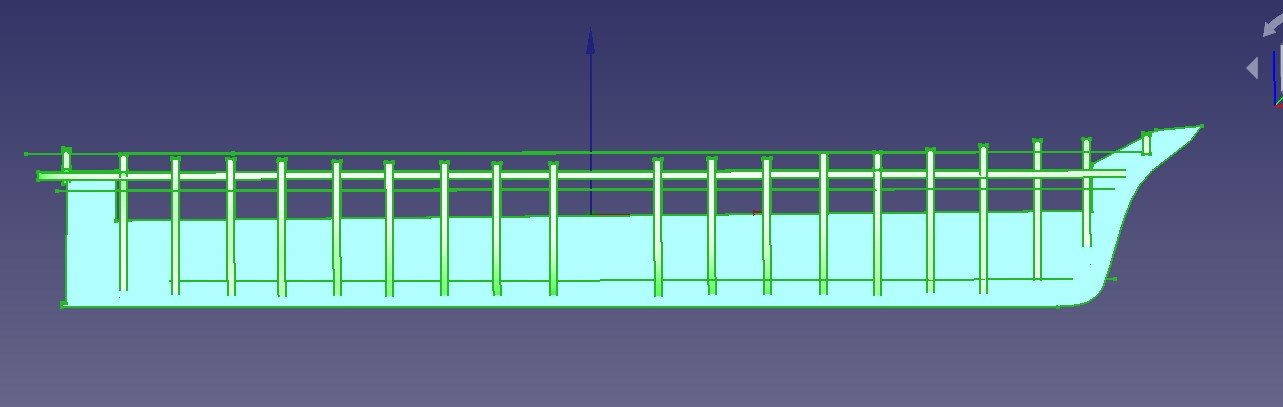
I have made some progress today but this is very time consuming. I am sure there are short cuts to do repetive tasks but I have yet ti find them. I had to redo the Main Deck, I had used a tool called a B-Spline but subsequently discovered you cant break into these to cut the slots. So I used Arc's fore and aft and a series of straight lines in between. So I have finished adjusting the Keel. The Main deck currently looks like this. As well as slots for the bulkheads, I have cut out the Hatchways, the Mast locations and the Access ways. I have also cut out the locations for the two deck houses. The Keel with the Bulkheads mounted looks like this. Bulkheads 2, 19 and 20 have been adjusted so they now have the slot to sit on the Keel and the cuttouts to support the decks. Just another 17 Bulkheads to go. Simon
-
I have now completed all the basic bulkheads, keel and three decks and am now in the process of lining them all up. This is a long job as it means going into the bulkhead and seeing where the deck and keel overlaps. I remove the slots and save the Bulkhead. I then go into the keel and cut out the slot for the bulkhead. Lastly, I go back into the deck(s) and add the slots and adjust the size to ensure they line up with the bulkheads. This all sounds relatively simple, just time consuming, but everytime you re-open a sketch to adjust it, you undo the constraints and it is murder getting these back in place. This has to be perfect before you can close this and the solid drawing of the part will accept the changes and update. You cant move on until each part is completed in sequence. My old mum said patience is a virtue! Well, I must be a bleeping saint by now, lol. FreeCAD is what is says on the tin, Free, so I am not going to complain, but there are things that users need to be aware of before you embark on a project. There is no real Manual. There are lots of user groups and YouTube videos , some better that others, the one I have been using is the series under FreeCAD 0.20 for Beginners. You need the sound on, the guy that creates these talks you through a lot more than he actually shows but he knows his stuff and he teaches it at just the right level. If I was doing this again, I would be more organised from the start. You cant move files around like you can in Windows. So to keep things together, I would import all my images in one go so they are not spread out all amoungst the miriad of construction files. The Construction files can be created in groups such as Keel, Bulkheads, Decks. I can create new folders for Deck Houses, Masts, Yards etc but once a file has been created, it is not easy to move it. Bat, as I said, it is created and maintained by people providing their time and expertise for free so I will not look a a gift horse in the mouth. One thing I have to learn how to do is to introduce a curvature to a deck. I have seen a Tutorial that shows how it can be done but that is an advanced class and I am not there yet. I have only just learned how to set a deck at an angle. Simon
-
I am now at the point were I have completed the basic frames for the Keel, all the Bulkheads and one deck profile from the lines plan. I am missing one bulkhead as there were only 10 profiles on each side but there were 21 cross sections at 10 foot intervals. I will not loose any sleep over this as bulkheads 10 and 11 are all but identical. As you can see, there is a relatively clean transition from the Stem or Stern to Midships so with a few tweaks, I think these are a fair import. I have positioned these along the keel in line with the original drawing and these line up quite well with the Keel so I am happy with this as well. However, I wish I could say the same for the deck. I used the line drawing to produce profiles where I thought the Main deck should be. It lines up just below the fordeck but thats it. If you look at where I have highlighted, you will see that the deck does not extend all the way to the edge. I will import the deck overview and scale it to see if that gives me a better result. Then I have to lean how to remove the bits that overlap between Keel, Bulkheads and Deck. Still a long way to go. Simon

-
FreeCAD is a finiky programme and its a steep learning curve. I have had to start again on more than one occasion, each time incorparating what I have learnt in between. This is the latest attempt. You will noyice that I trimmed the imported images so that they only included the lines specific to the plane they related to. Once I have created the basic Bulkheads I will be able to create the keel and this will show me where the bulkheads intersect and I will be able to remove sections from both the keel and each bulkhead accordingly. Similarly, I will design in the levels for the decks and remove the excess from each piece. Its the way FreeCAD works apparently. A long way to go yet. Simon
-
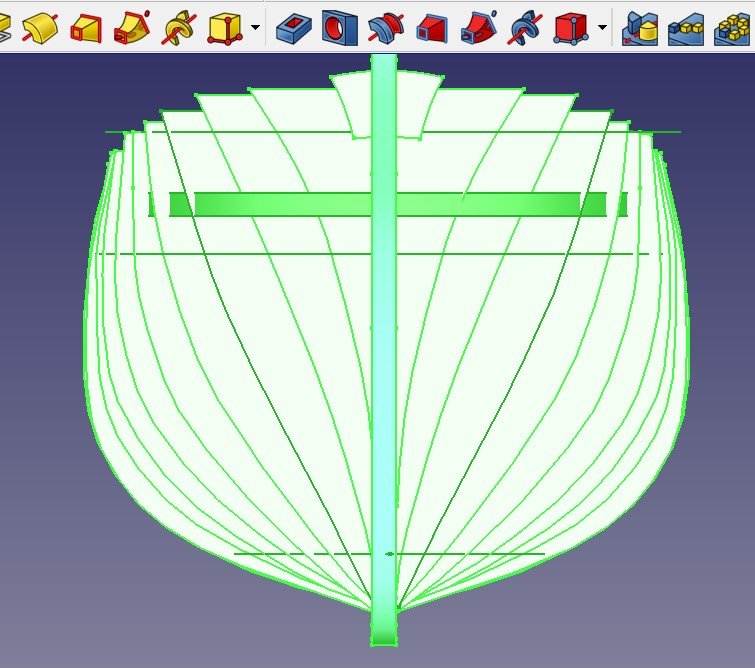
They say you cant teach an old dog new tricks; well this old dog is having a go. I have lost track of the number of times I have loaded an image and the bleeping program has deleted it, or just as I am saving an hours work, one of my four legged assistants walk accross the keyboard and the whole thing goes haywire, but I may be getting somewhere. I started by importing the basic lines image and resized the image to give me a hull that would be 645mm (27") long from the sternpost to where the Knightshead should be. There is a marker on the plan that suggests that this is supposed to me 210 feet full size. By scaling the image to 27" this should equate to about 1:95. I set this as the Vertical Image plan. I then used this to draft each bulkhead 1 to 20, the Keel, which also records the mast locations as recorded on that drawing. There was no information on that plan to plan the deck levels or where the aft and fore decks start and finish. So, I took the image that had the deck layout, made a copy and cropped it just to include the deck layout. I then imported the image on the horizontal plane. You have to locate two common points on each plane and then change the second image size so that the measurements between the points is the same in both images. In the image above, this has been done but I had not yet alighned the images so they were lined up, hence the mast locations do not tally. Simon
-
Hi Keith, Glad that's cleared up, lol, I wish I could afford better drawings but it is what it is. With a boat that is 212 ft or 215 ft and a drawing with a scale marker that is one size and a drawing with 10ft markers that are a different 10ft to the scale marker, I am surprised that I have come up with a hull that comes up at a scale any way close to what a 1:96 scale hull should be. So on this occasion, with or without an .02 variable in the interpretation was never going to make a significant difference. Thanks again for keeping a weather eye on me. Simon
-
Hi Keith, These are 1:1 conversions that you get if you type the question in Google "what is 1ft in centimetres?". But thank you, you confirmed my math was on track. I have adjusted the size of the imported image so that the scale board and bulkhead spacing is as close to 31.75mm as I can get it. This results in a hull approximately 650mm long. Every time I change these sizes, I risk the ratio between length and height, so I think I will settle for this. Still trying to get the rest of the program to work. Simon.
-
Can someone check my math for me please. I have managed to import the Basic Lines image into FreeCAD and worked out how to change the size of the image. I havent worked out how to draw the parts over the top yet, but I will if it kills me (and it probably will). That asside, I need to get the image the right size. The image very helpfully has a scale chart on the top left corner of the image showing 4 blocks of 10ft, and the drawing is divided into 10ft sections. We know she is 212ft (or 215ft in some reports) and the last line on the right is at the point of the Knights Head so that would make sense for a boat of about 215 feet. So what I want is to be able to do is to set the size of the image to the required scale. 1:96 scale is my scale of choice. 1ft is 30.46cm so 10ft is 304.6cm and at scale 1ft should be 31.75mm. All I have to do is calculate the neccesary pixle no necessary on both the X and Y plane and hey presto, I have a drawing to the right scale. Even if I cant draw the plans from this, I can take all the necessary mesurements from the resultant image as that function is available. Simon