
My Fathers Son
-
Posts
259 -
Joined
-
Last visited
Content Type
Profiles
Forums
Gallery
Events
Everything posted by My Fathers Son
-
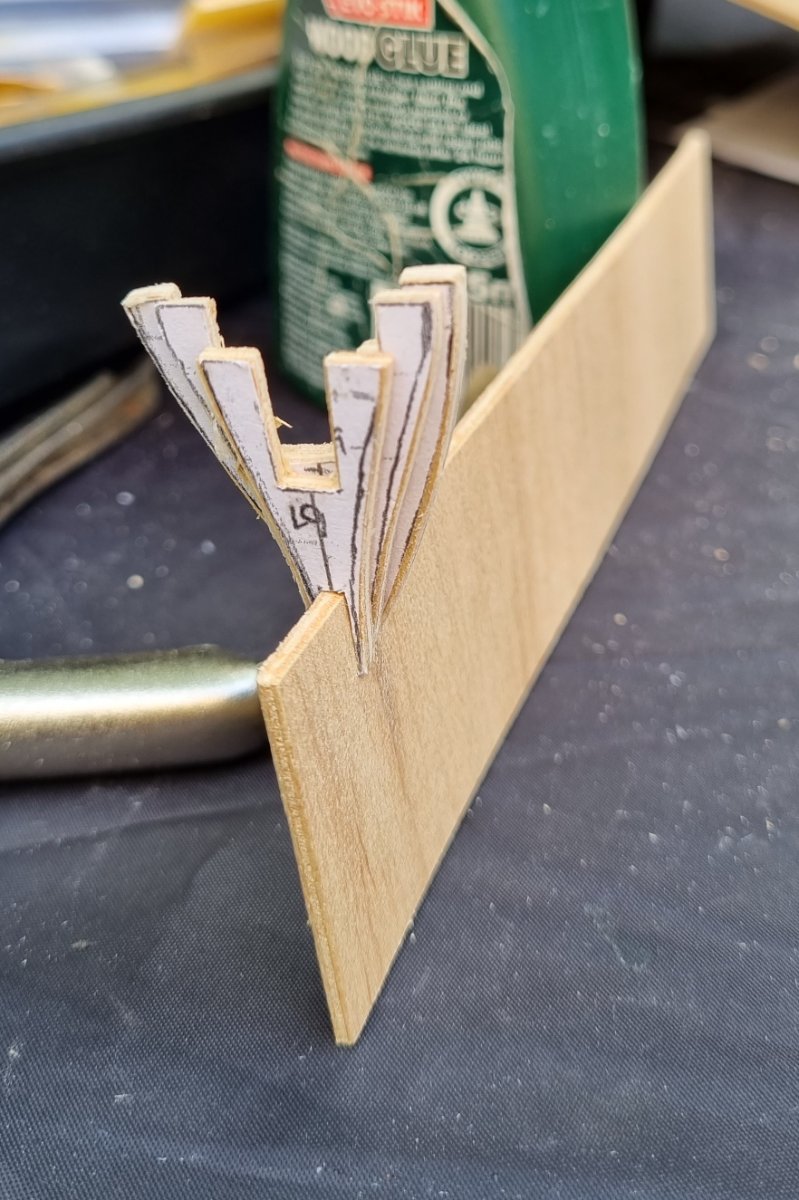
So, the rain has taken a breather, and I am able to sit in the garden. All the bulkheads are reunited in order and pressed together, I have sanded of the most obvious errors. They are beginning to reveal the more elegant shape of the hull. I will still need to fair the fore and aft bulkheads once in place on the keel and that is my next piece. Simon
-
Hi, yes, I have Autodesk360, FreeCAD, GIMP, I have even tried Sketchup. I can import the file/image into a layer, create a new layer and try to trace the image, but the image I am tracing disappears. I try setting the top layer to transparent but it just doesn't work for me. Last time I tried I got to the point where I wanted to throw my laptop across the room so I gave up and resorted to pen and paper. Simon
-
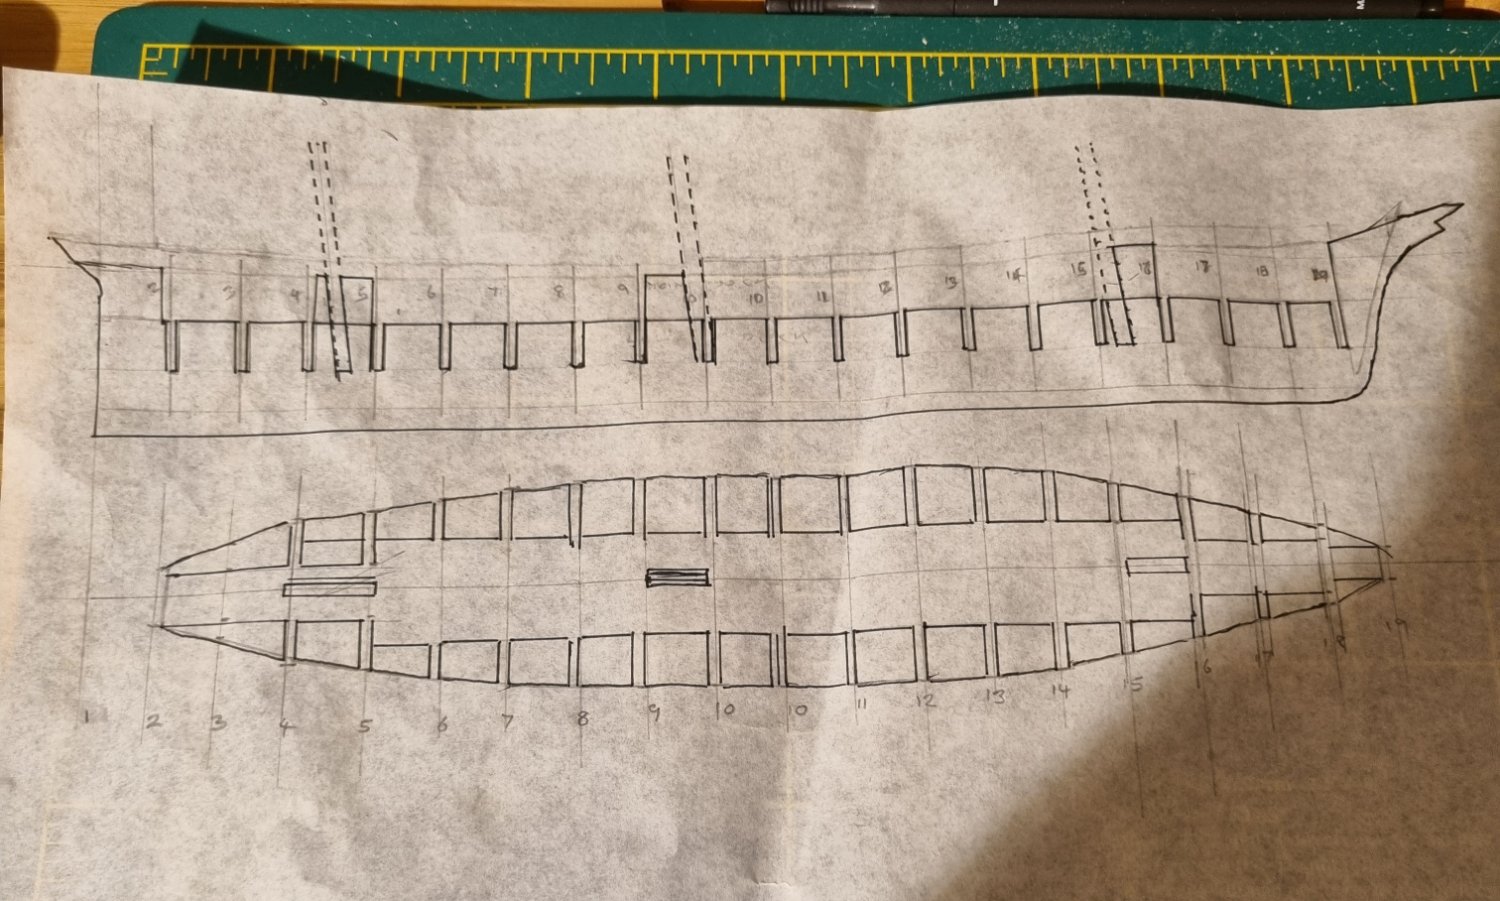
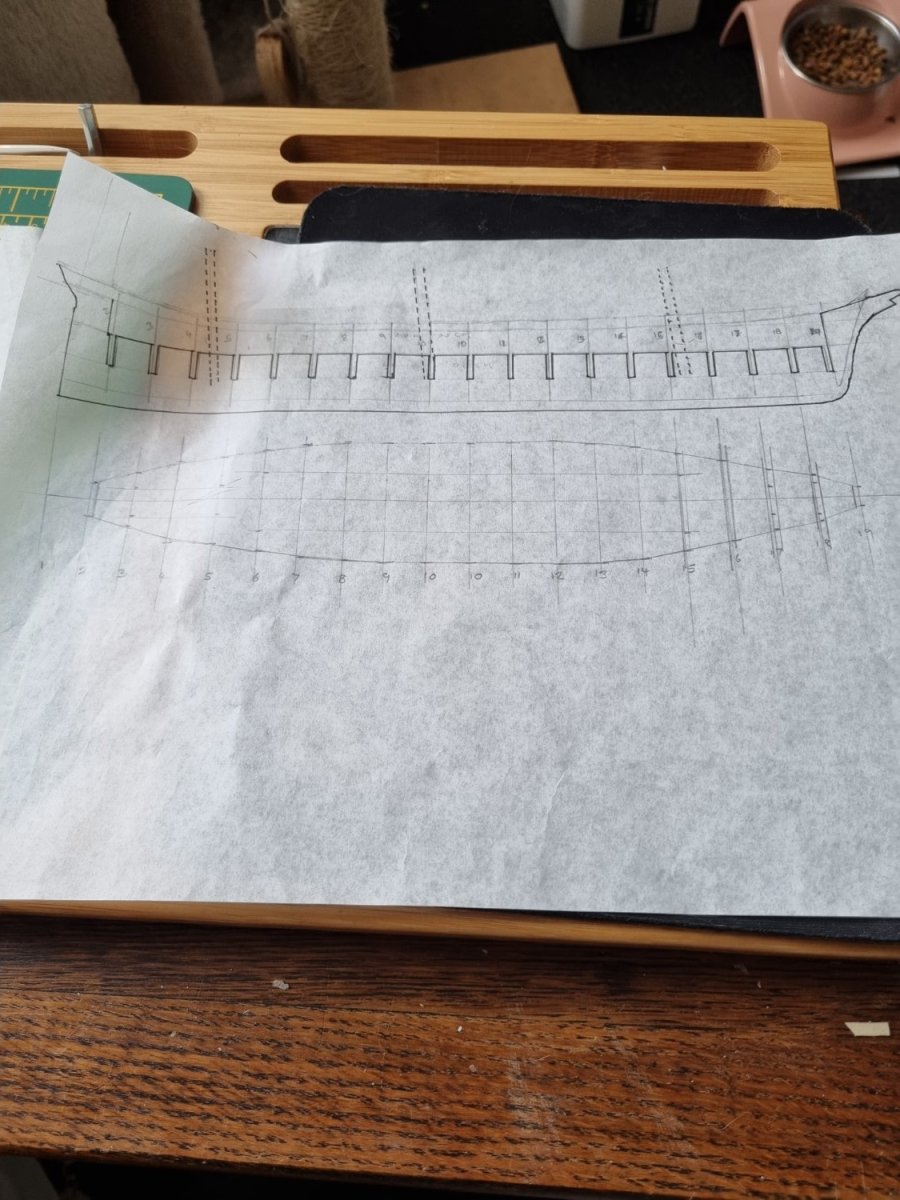
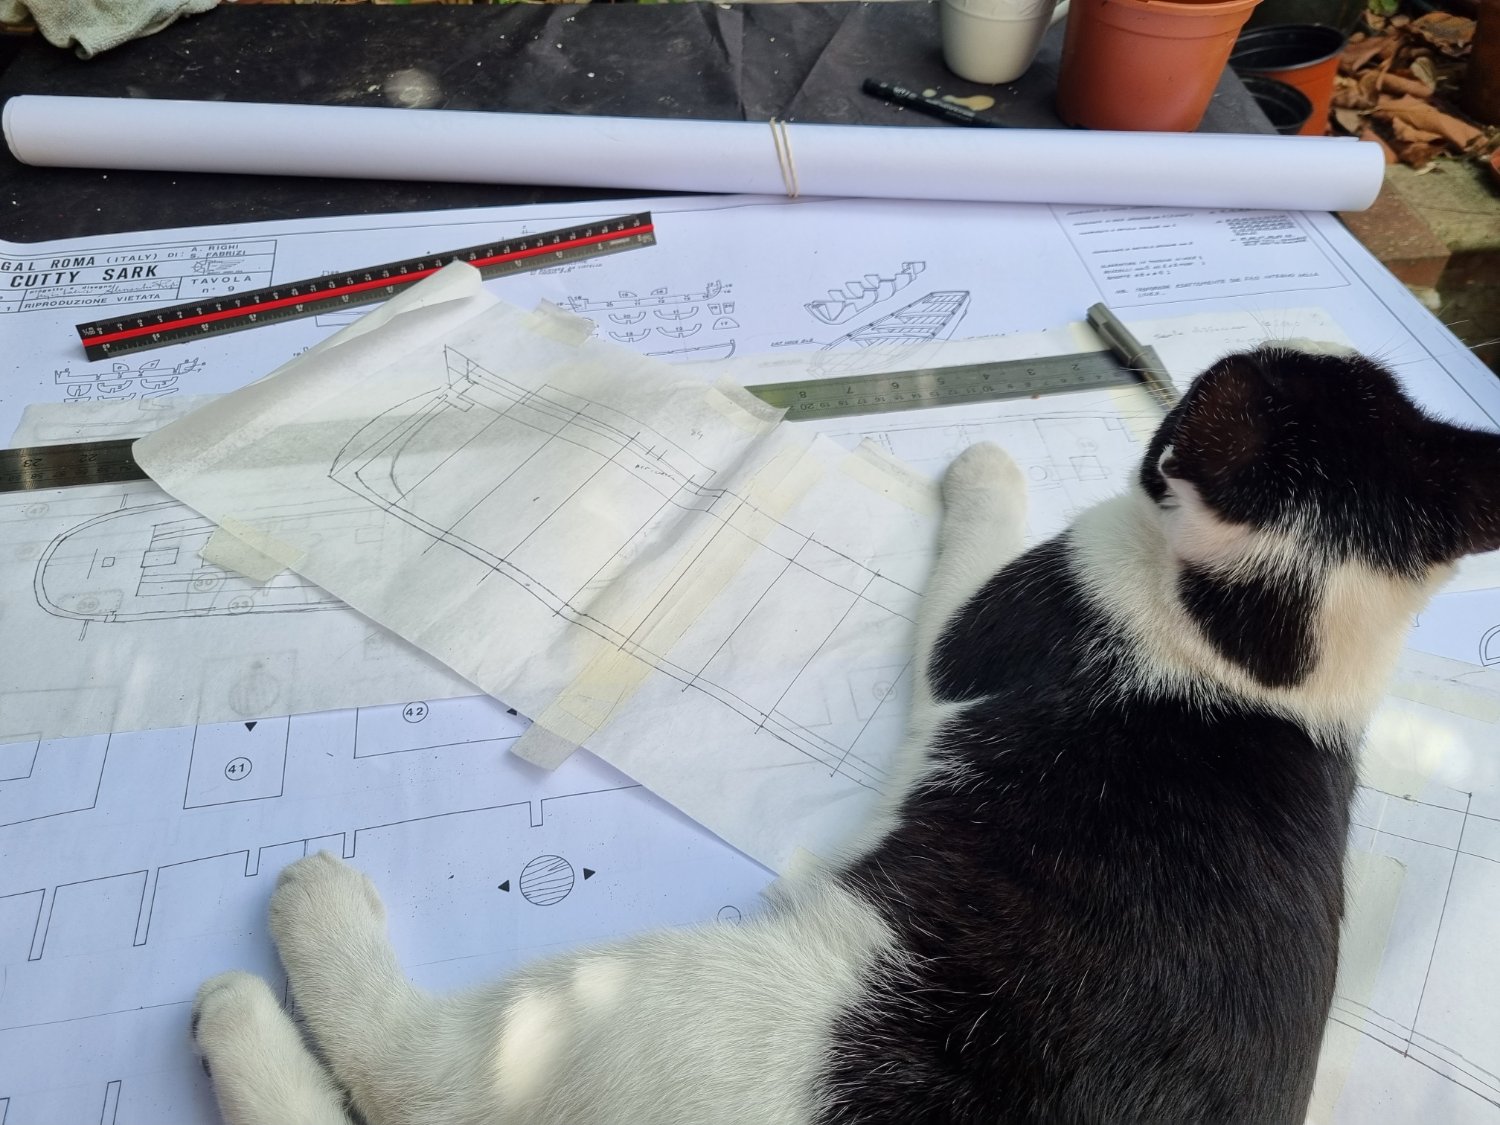
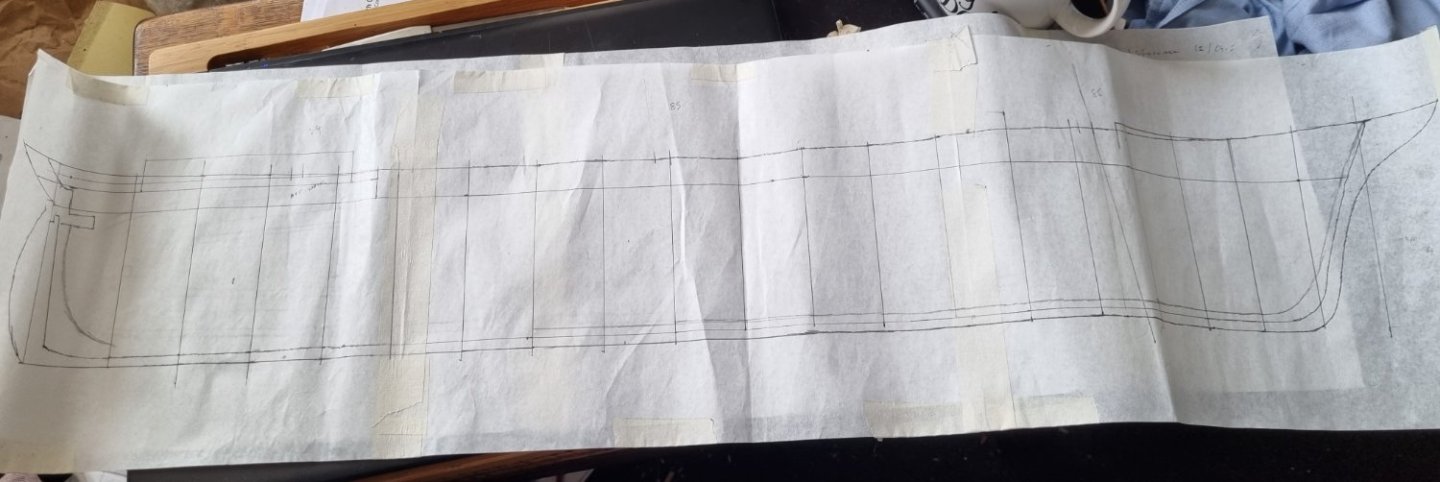
Thanks Roger, I have been looking for a French curve and a long time ago, back in the dark ages, I had a flexible ruler, darned if I can find one now though. Good stationers are hard to find these days. I have looked at the inventory of the drawings held by the SS Great Britain people and there are quite a few. Some show the measurements of the size of the plans but not all. It was not obvious how you purchase copies but prints were very expensive. As I have just been made redundant I am back to counting the pennies again. I have cut out the rest of the bulkheads and yes, there are errors, but this will show me the difference in the hull shape between CS and T both forward and aft, I can see that from the bulkheads on their own but it should be much more obvious. i have drafted a keel and lower deck, hopefully these are a bit more accurate. I suspect that the lower deck will require shaping and the main deck will have to wait until the mast mounts are in place. Simon

-
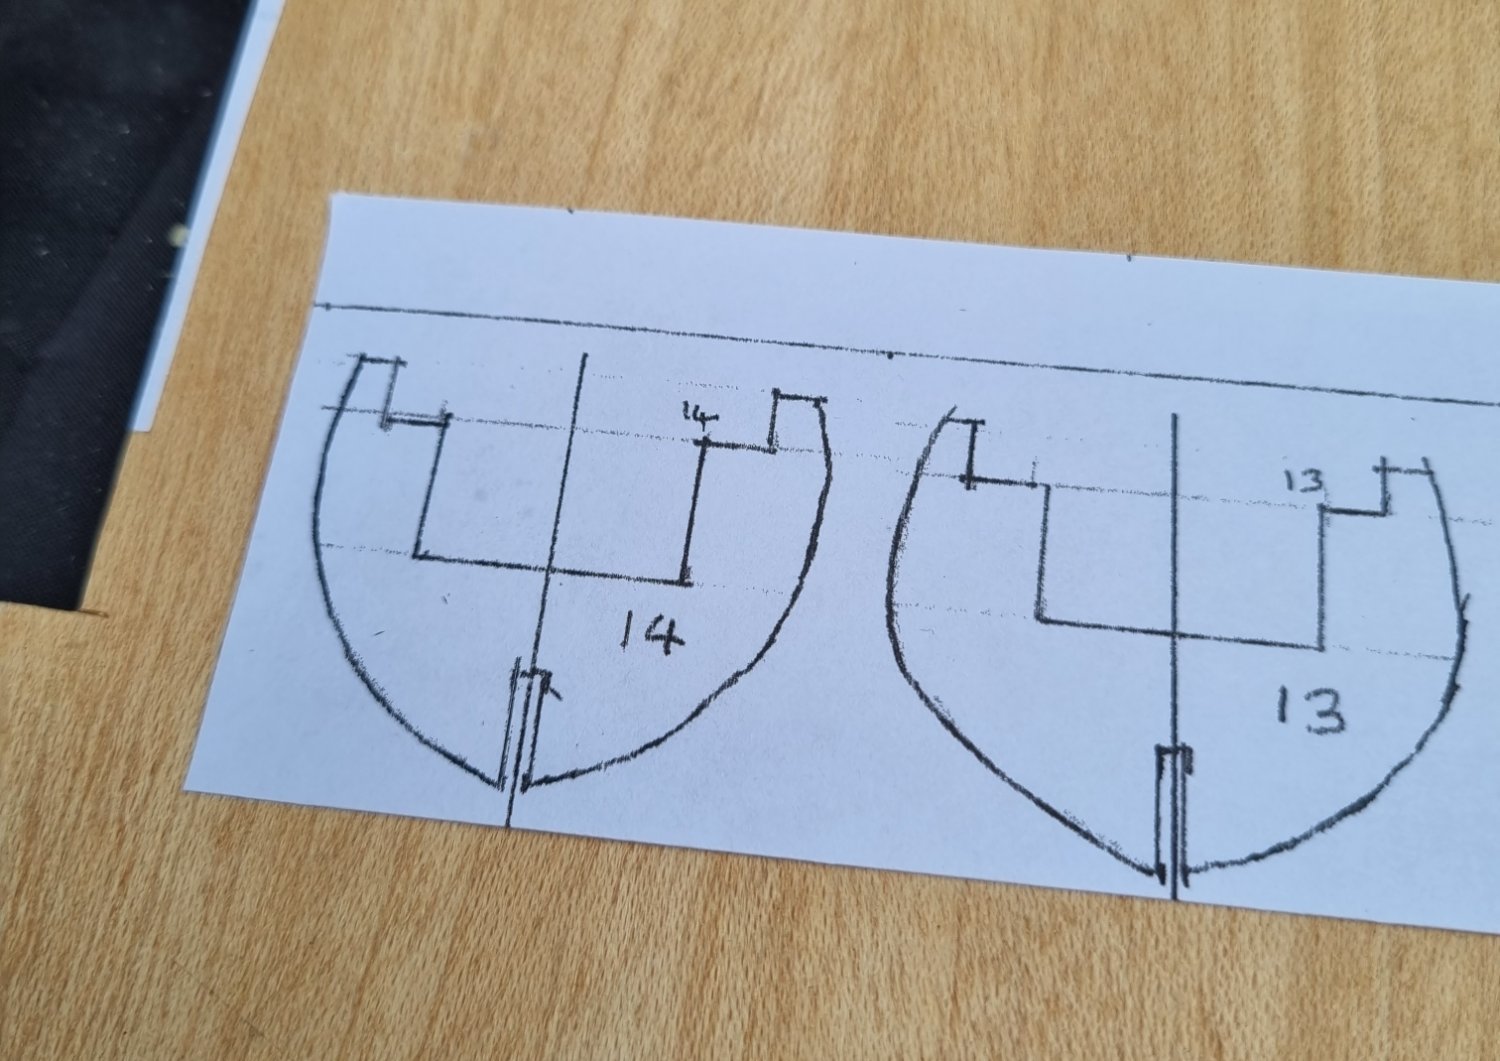
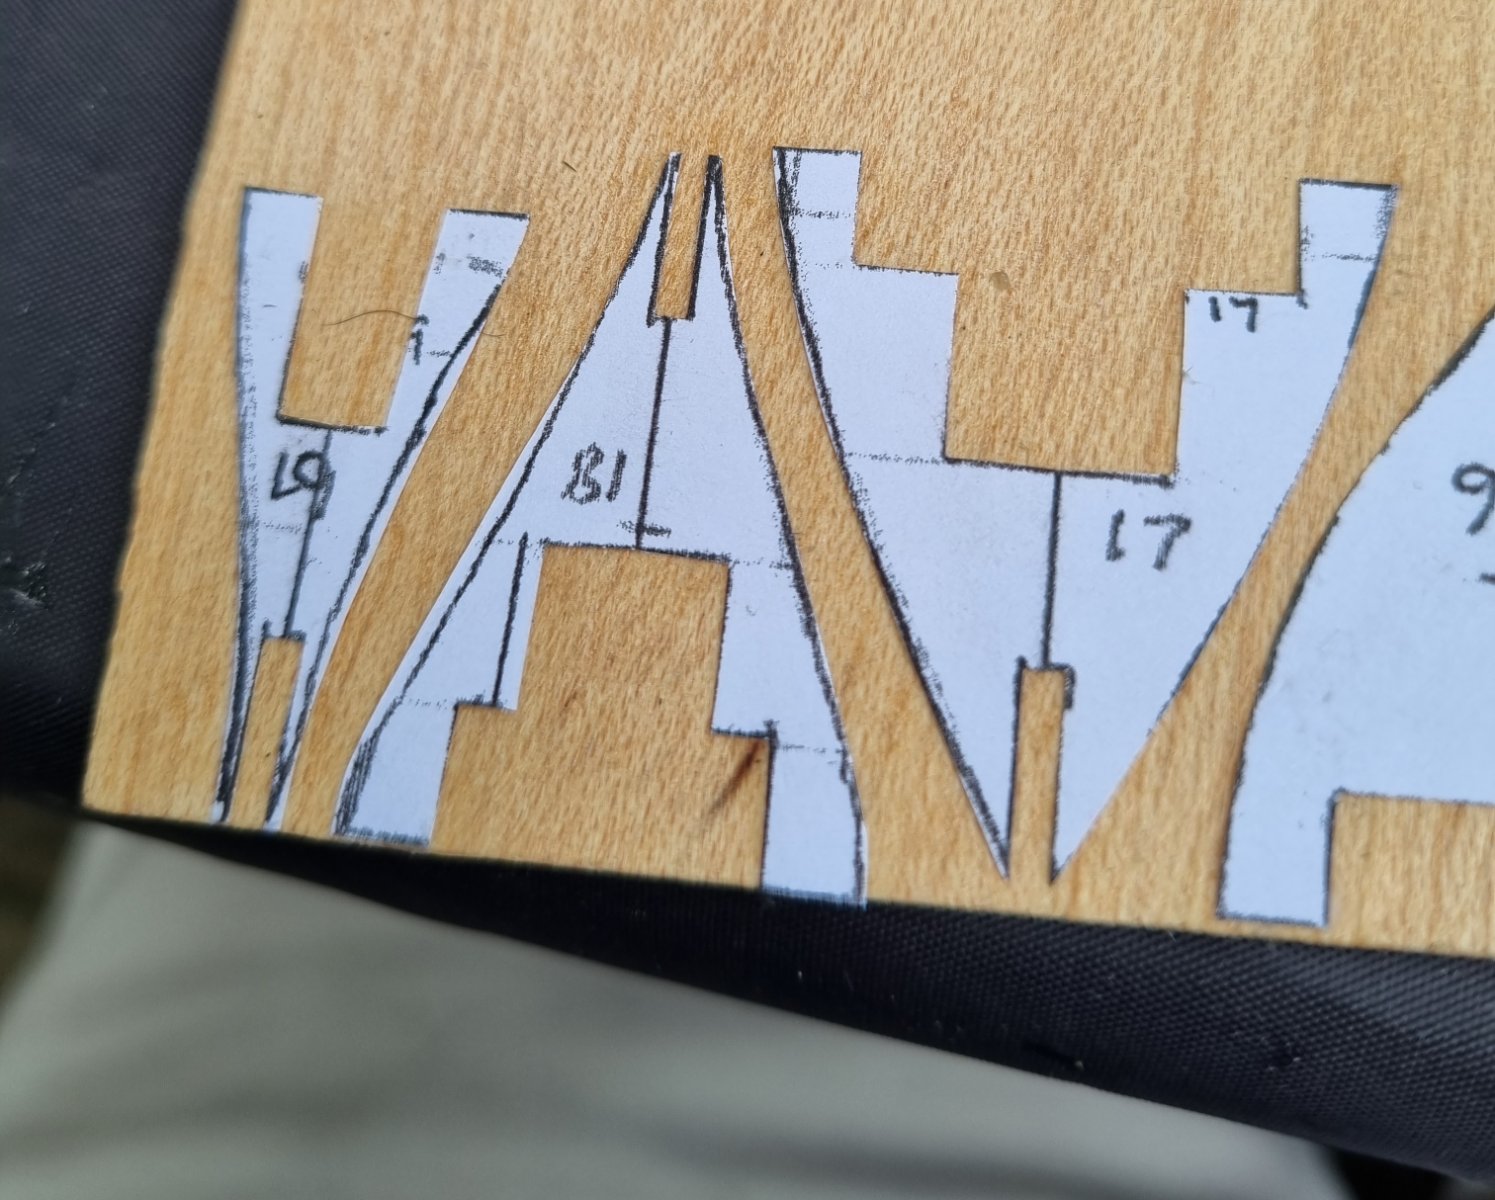
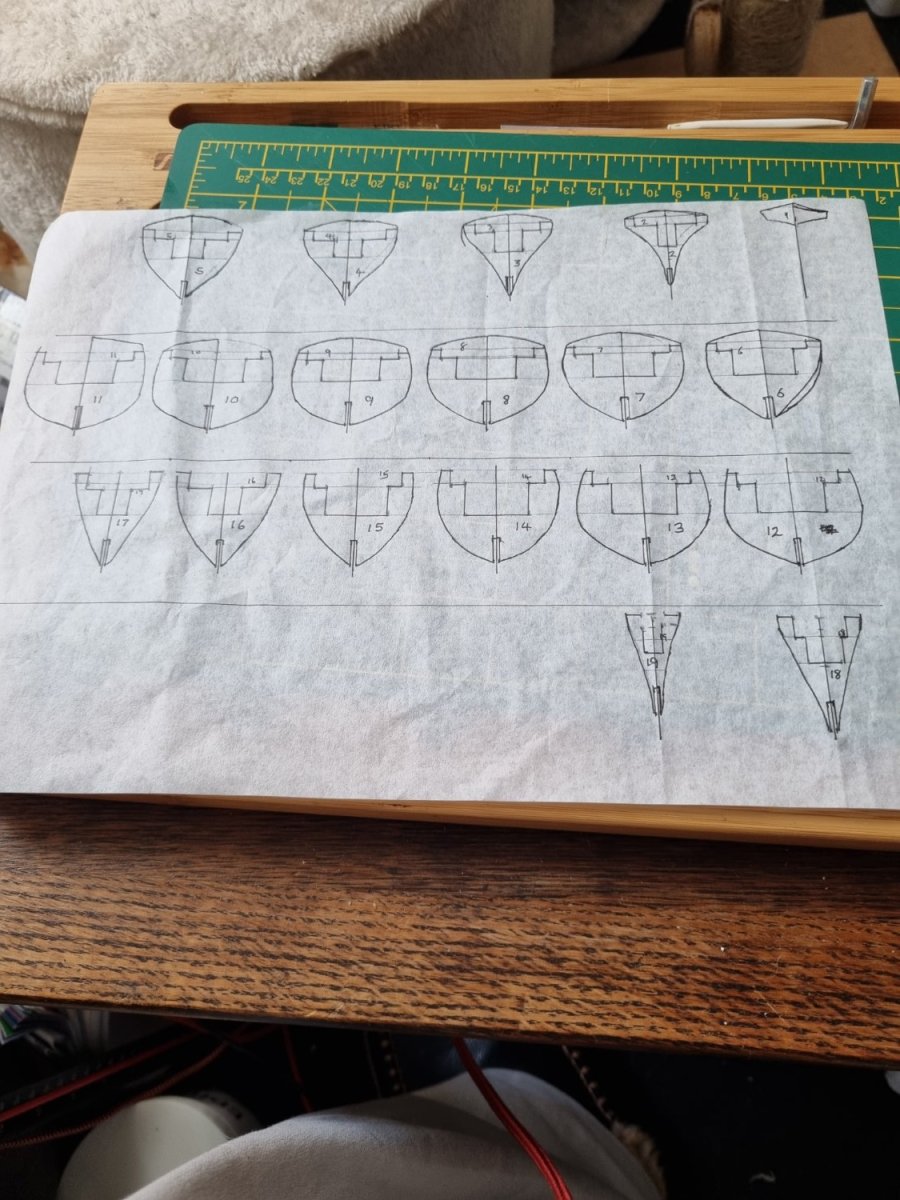
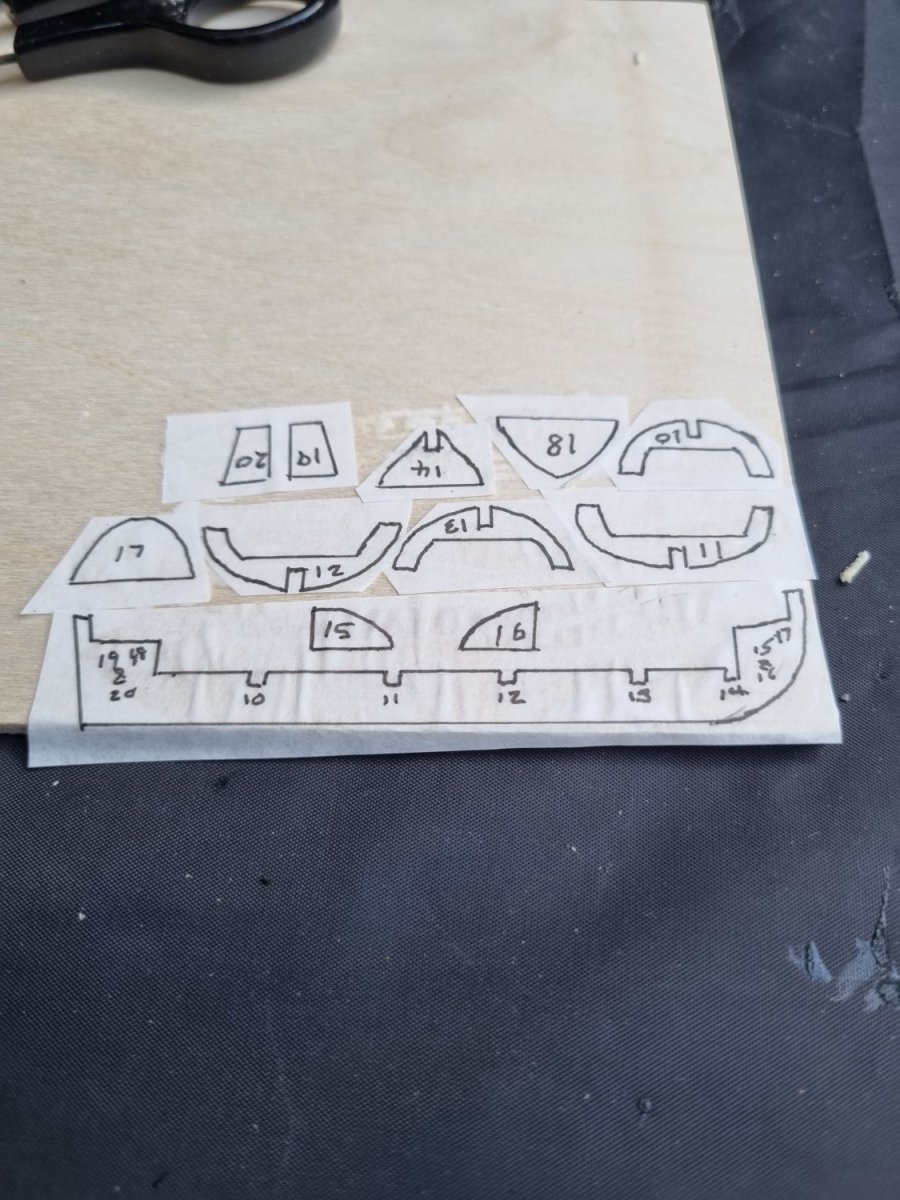
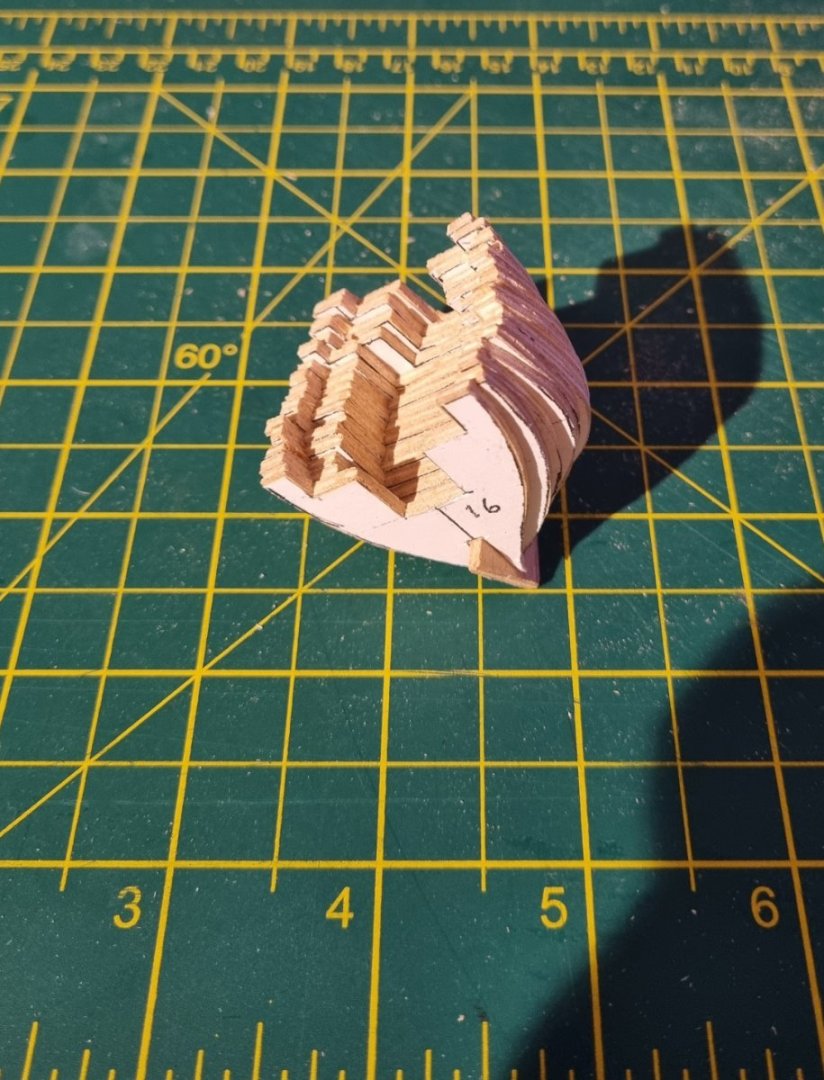
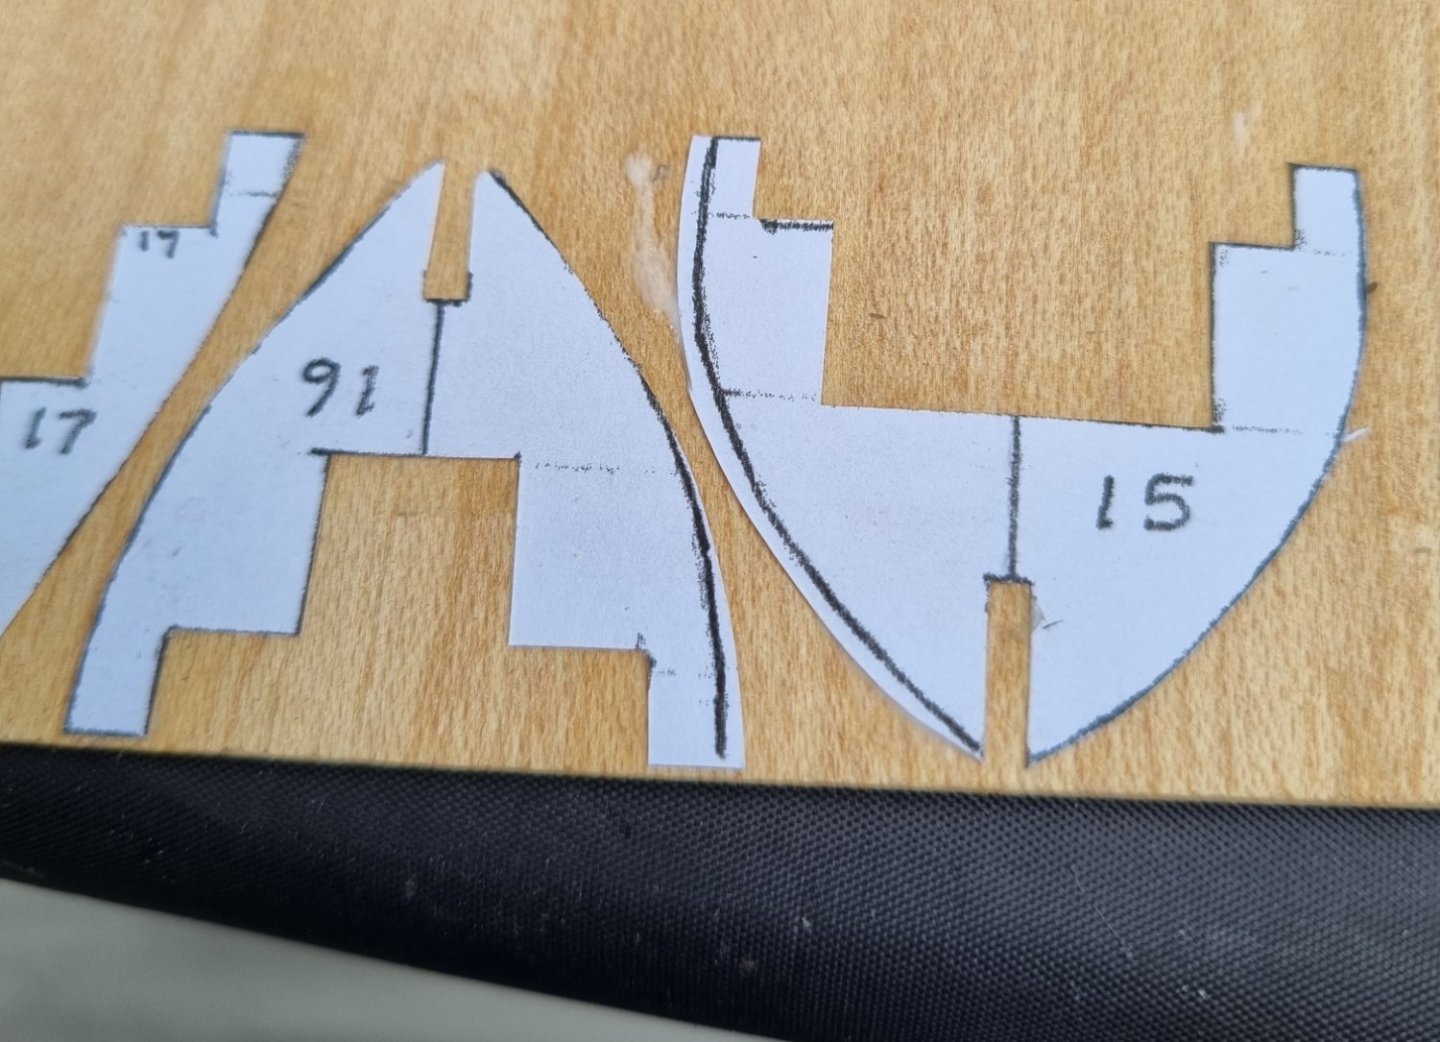
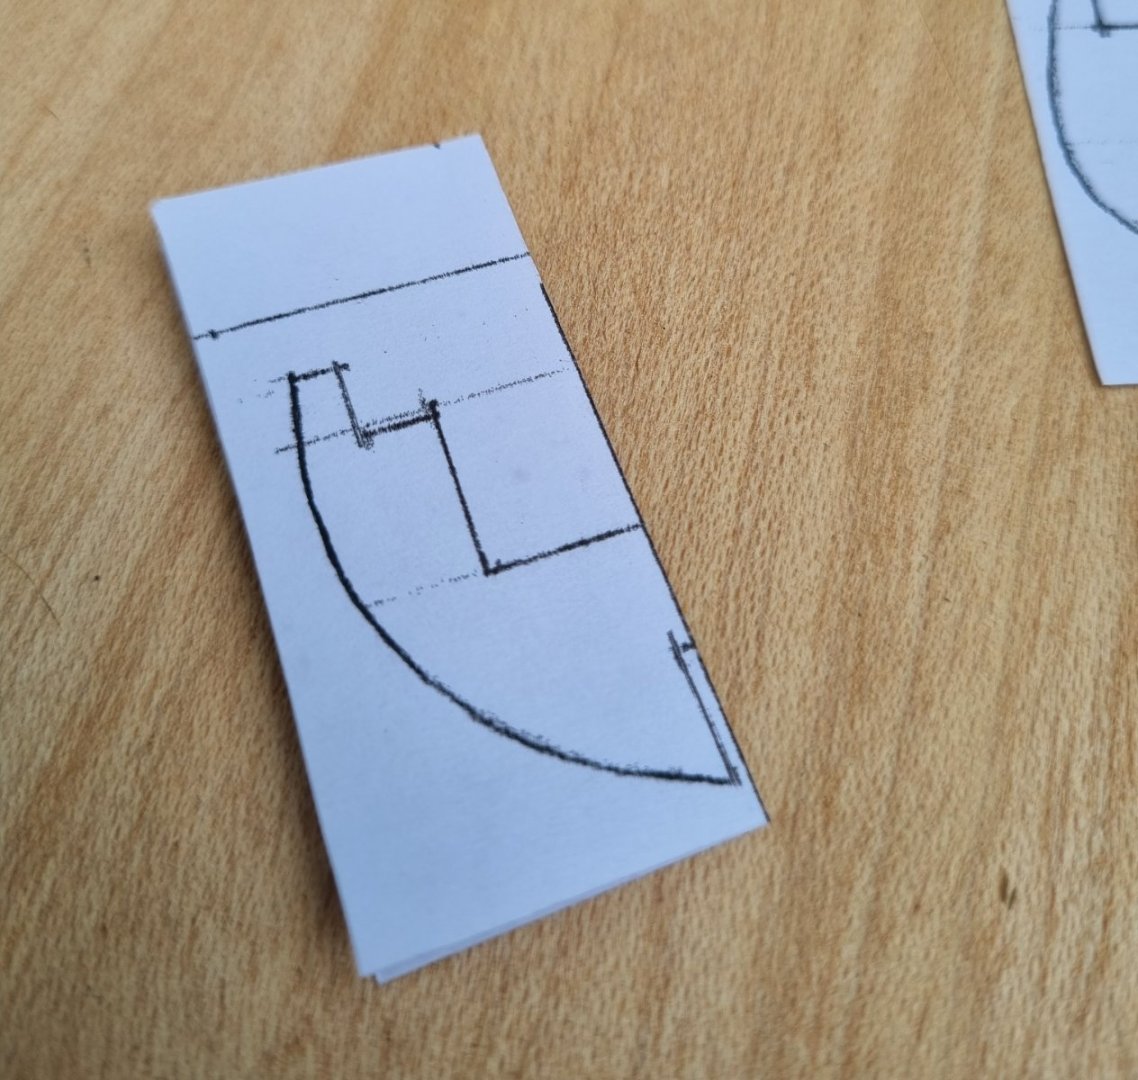
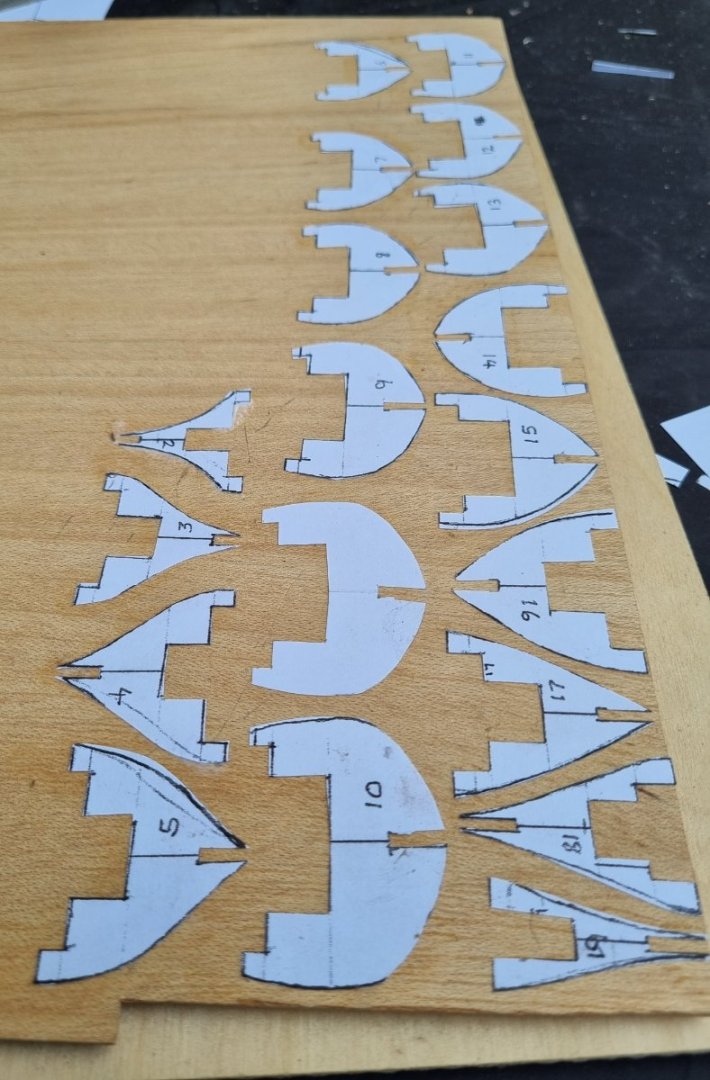
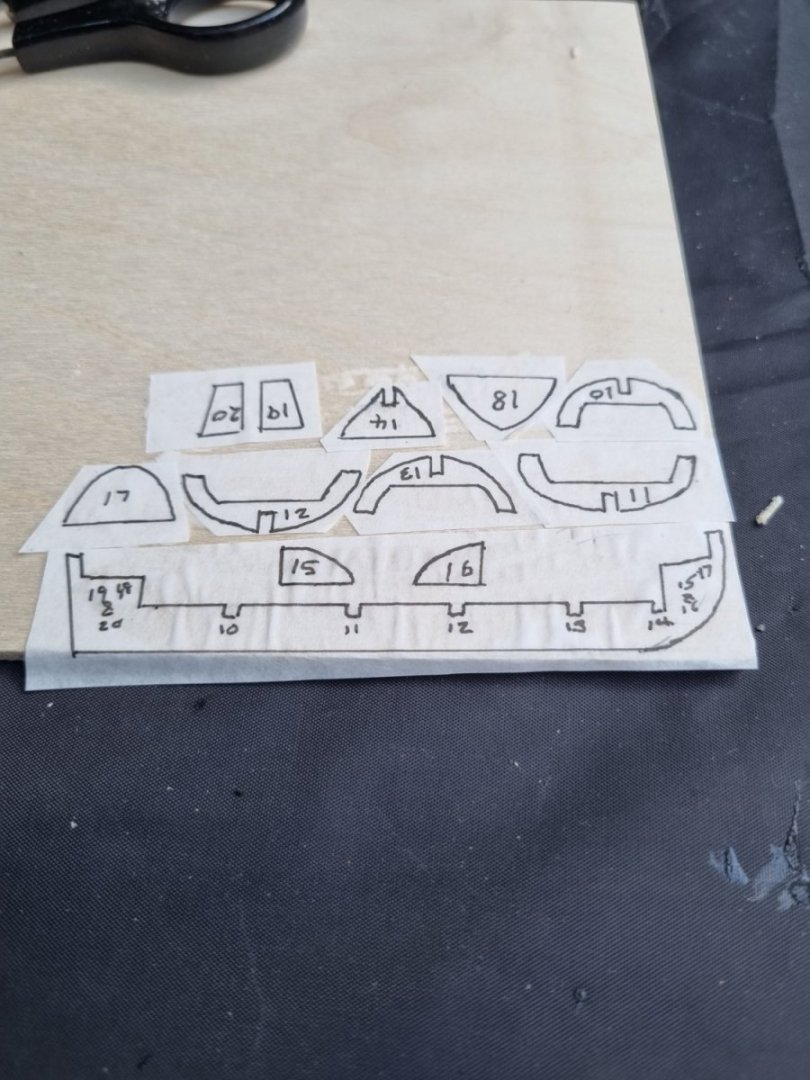
So, this morning I copied my sheet of bulkheads and proceeded to cut these out and immediately noticed how inaccurate they were. there was barely a single image that was a mirror image. However, i had included a centre line on every image so i cut out the image in a general block and folded it down the centre line, decided on the best profile and cut through both sides. So once unfolded, whether the cut was on the line or not, the stencil was a mirror image. i glued these to a sheet of 2mm Lite Ply. I am now in the process of cutting these out but am again, after only three, 17-19, noticing what a bad job I did on drawing these up. No 19 is not even full height. Rather disappointed with this, technical drawing was one of my best subjects at school. OK, I had proper drawing boards and all the right equipment and I did this on a A4 cutting board on my coffee side table, but I was only tracing a few lines for goodness sake. Going to have to see how the next few go before deciding if this is worthwhile continuing. Simon


-
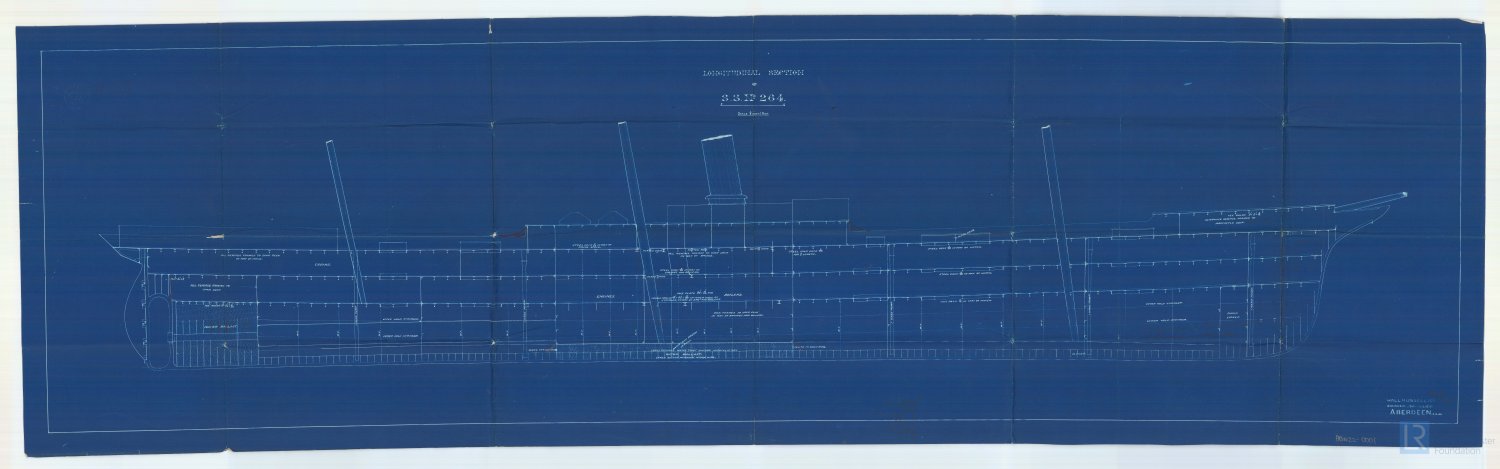
Thanks for you suggestions Roger, I had come to the same conclusion as part of this rather steep learning curve. However, as the keel is only 3/32inch thick I was not sure how much of a rabbit I cut cut without compromising the structural strength of the keel. I did contemplate adding a carved block to the stern, but as this was a practice piece, I wanted to explore what would occur without it. I did add additional shaped parts below the rear of the stern as I knew that I would not be able to bend the plank without it. I am not totally disappointed with the natural twist of the plank achieved and I am not convinced I would have carved the same shape in a balsa block. The practice hull I have been working on is from plans for Cutty Sark. The images above are drawings I am drafting based on David MacGregors drawings above. Whilst those posted by Bruce are three separate images, they are still only small images and when you try to print them to larger papers, they become pixilated and you lose detail. Naturally, the line drawing prints out a hull measuring just under 7 inches. I have managed to enlarge these to just under 10 inches. So a boat about 65 metres would be 25 cm or 1:260 or there abouts. Before anyone mentions CAD, I tried Autodesk360, FreeCAD and GIMP before resorting to pencil and tracing paper. I made enough mistakes on my last attempt for me to contemplate a second practice, this time using my own plans. Simon


-
I have put it away for this evening now, I will be trying to get some of these drawings into a CAD program, if only in 2D, as these only print out very small and loose a lot of detail when you try to print out larger. Also, the very sad news of the passing of Queen Elizabeth II this afternoon is dominating the news in the UK so want something I can did in and out of. Simon
-
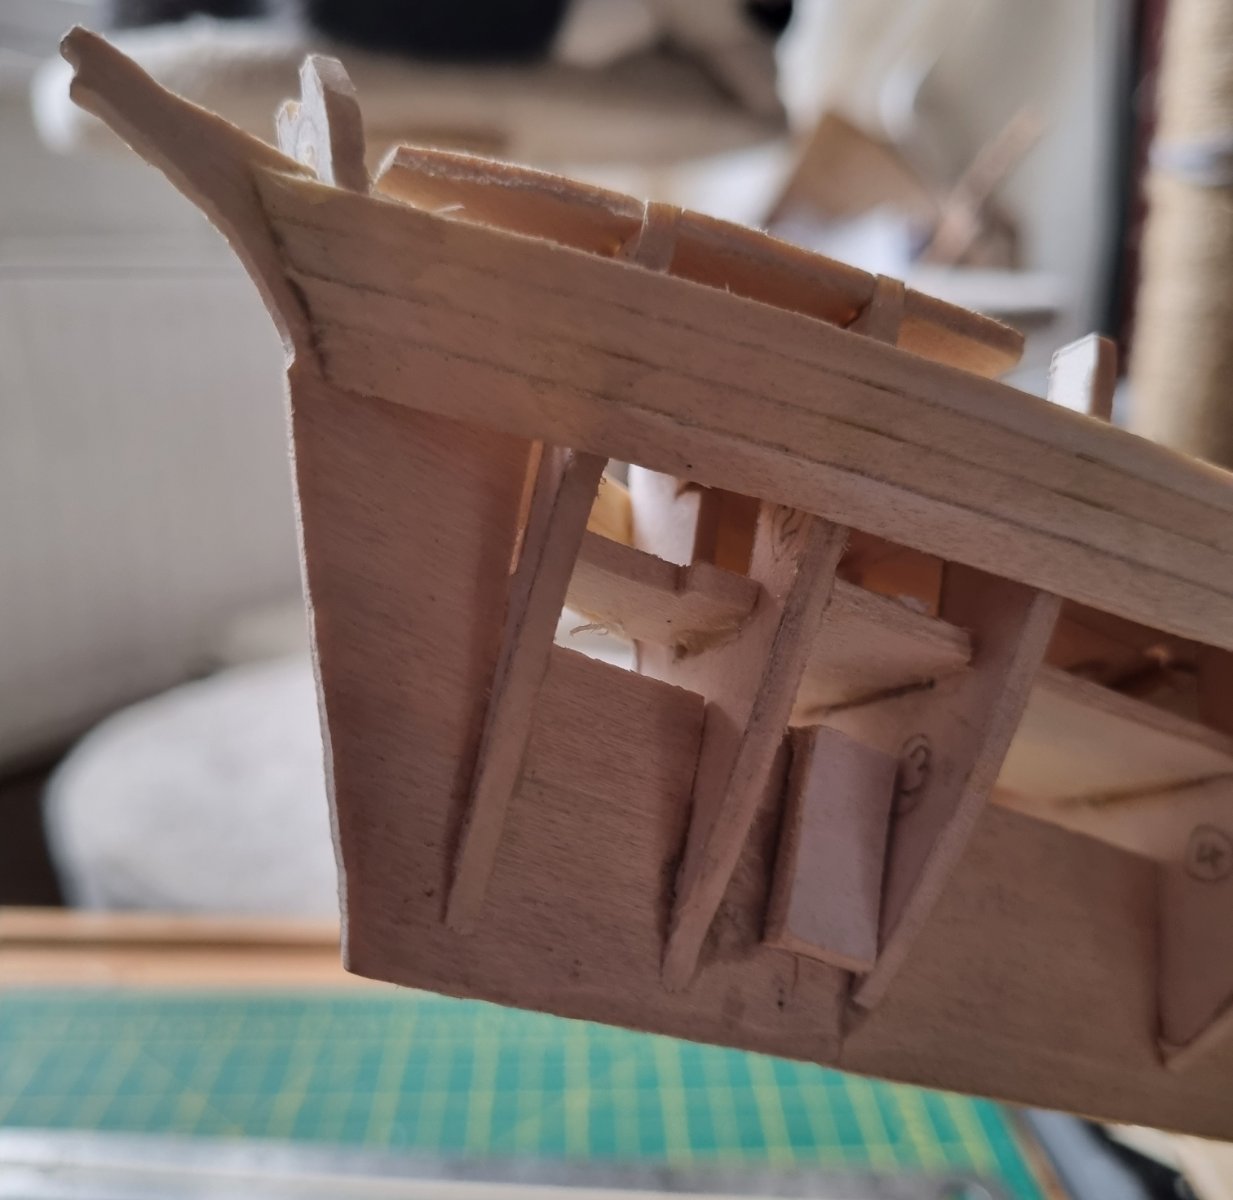
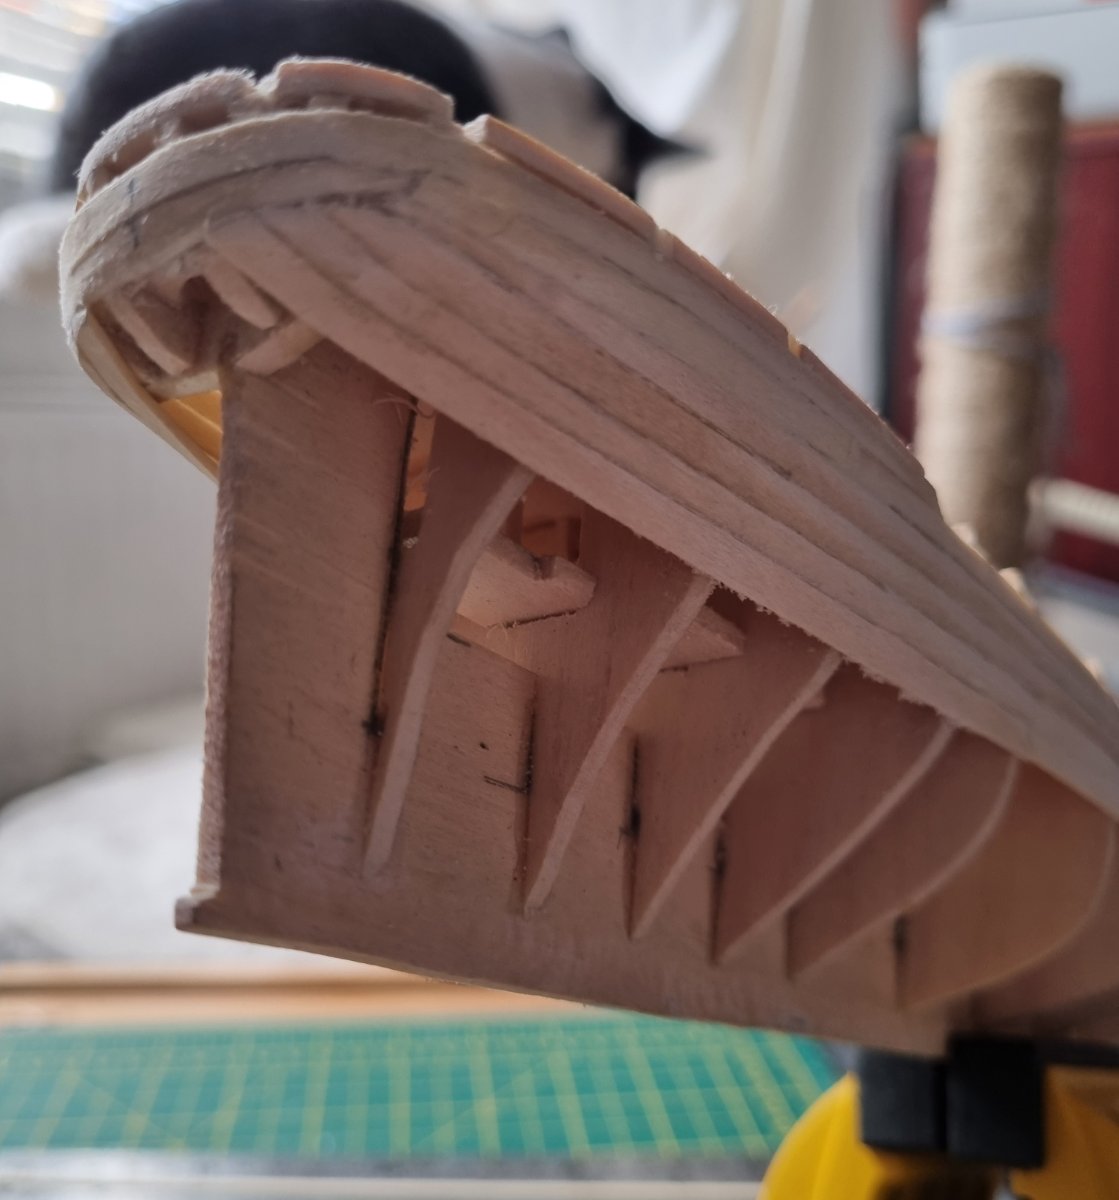
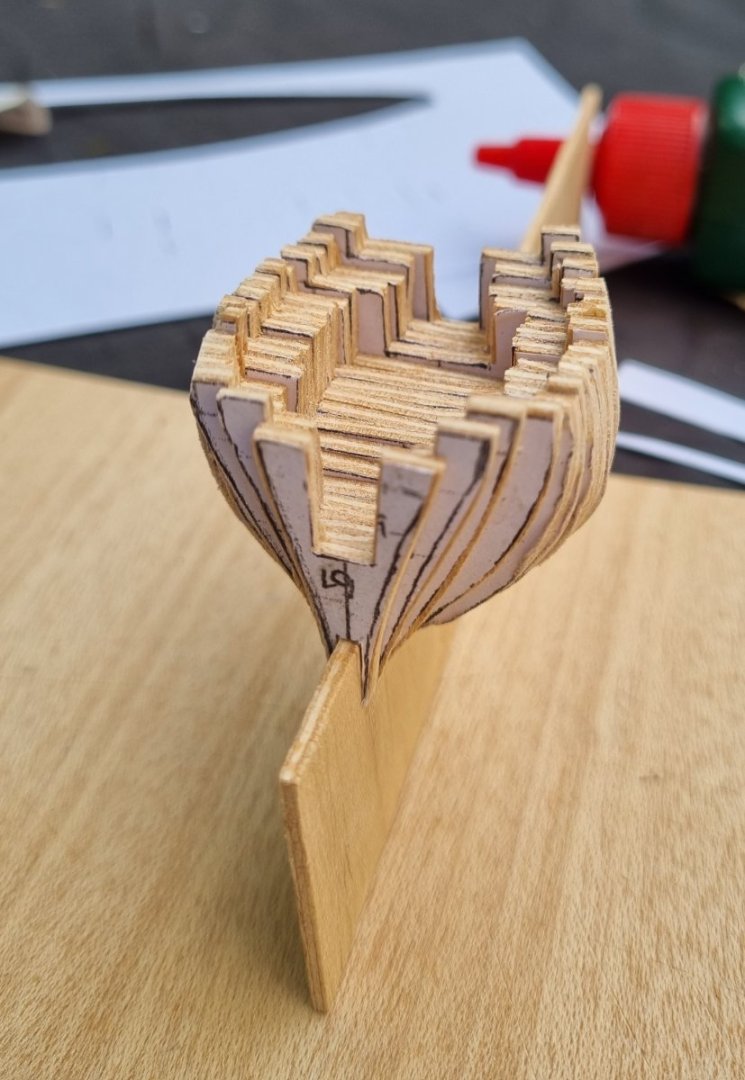
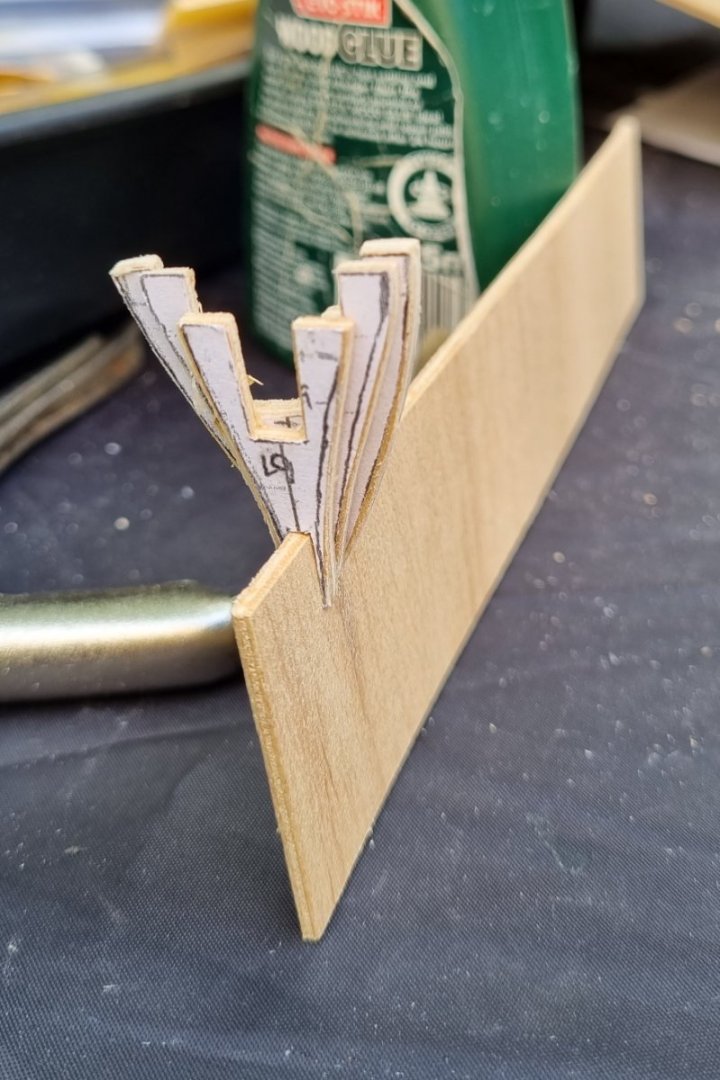
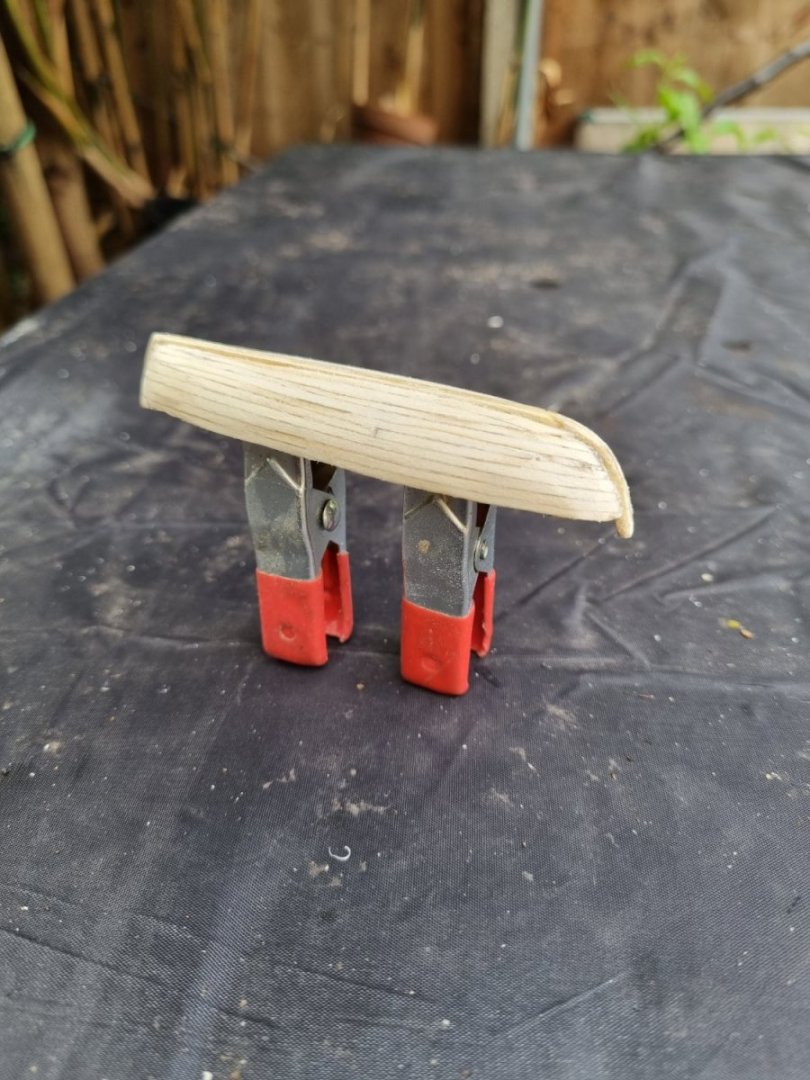
Continuing with my practice hull I now have at least 4 strakes on each side. These are cut 3mm strips of 1/32 basswood so there is some variation in sizes and unfortunately my source blank is not long enough to provide full length planks. I chose to proceed without any infill pieces and have bent the plank without wetting or heating the plank. This has allowed the natural resistance of the plank to shape the twist and has only required the slightest of pressure from a clamp will the glue set to give this result. I only have .78mm of timber so there is a limit to the amount of sanding. So to create an acceptable finish, some filler would be necessary, but I think I am getting the hang of this. You might notice the special adaptation to the stem, this is Kobi's contribution, every time I get up and leave the room, I find him biting the front end.


-
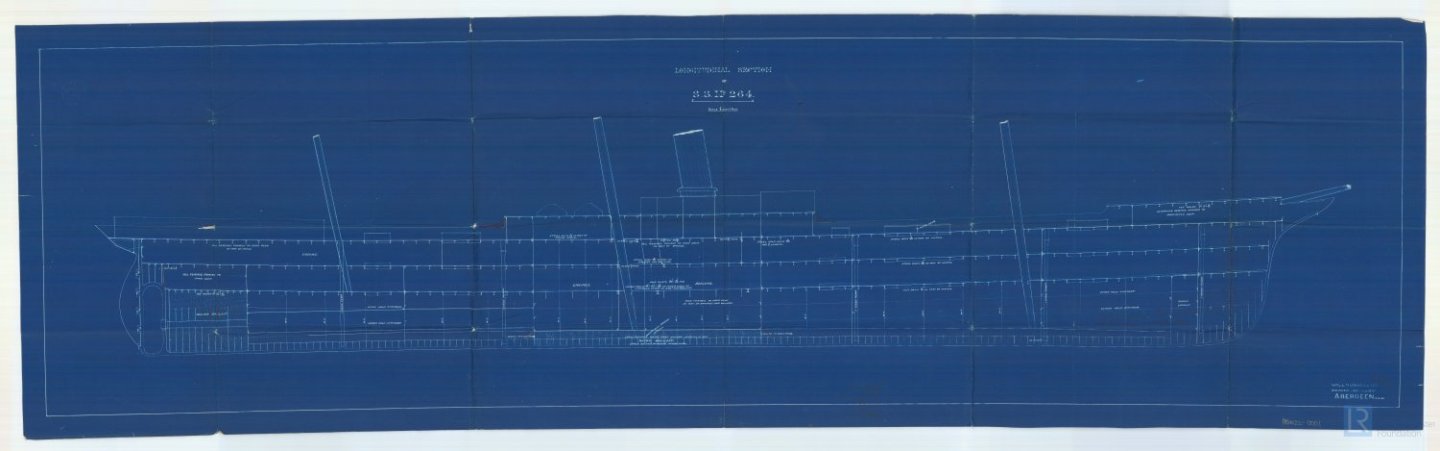
I am going to have to hope these print a bit clearer as in A4, the Scale in the corner condenses a foot down to 50mm. A2 will not be full size hopefully reduce the scope for error when adapting the scale. That link you put in Bruce is an incredible resource. It would appear that in September 1890, plans to convert her to a sail assisted steamer were drawn up, I dont think i want to go down this route, there are a couple of deck plans that should prove usefull and plenty of reading. Thank you Bruce, this will keep me busy for a while. Simon
-
Hi Bruce, These are David MaGregors drawings, but as you have these as three seperate images, they are much clearer than the single image that I had. Thanks ver much for this, these should make adapting my plans that bit easier and more accurate. Simon
-
I am, I am currently adapting a Mantua 1:96 scate Cutty Sark plan and a very poor print of David MaGregors drawings. I haven't started cutting anything out yet, I am practicingmy hull construction and planking before attempting the real thing. Simon
-
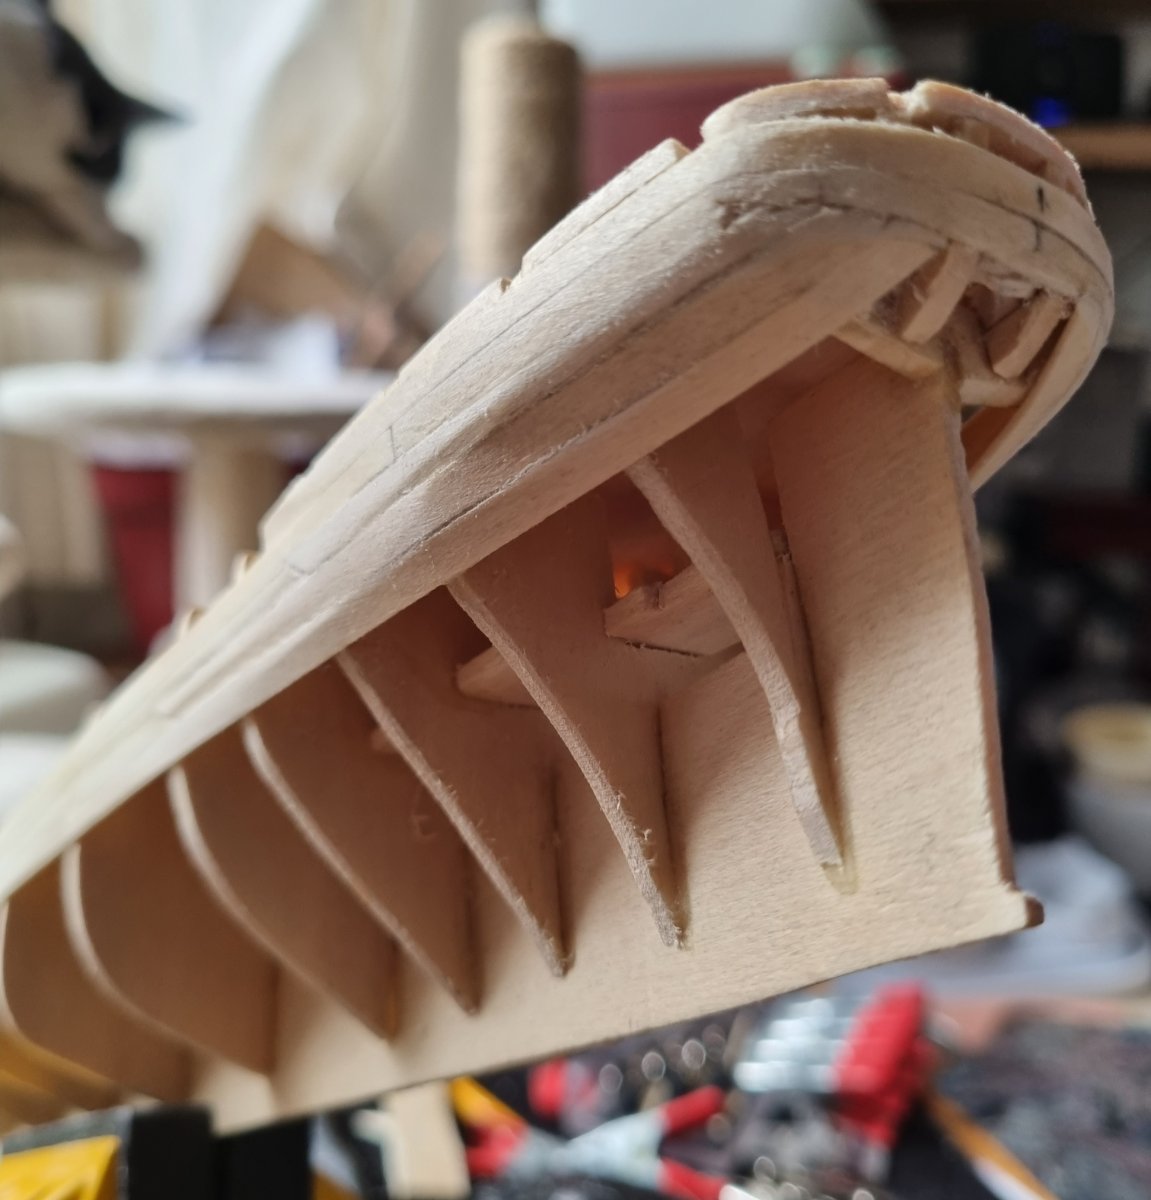
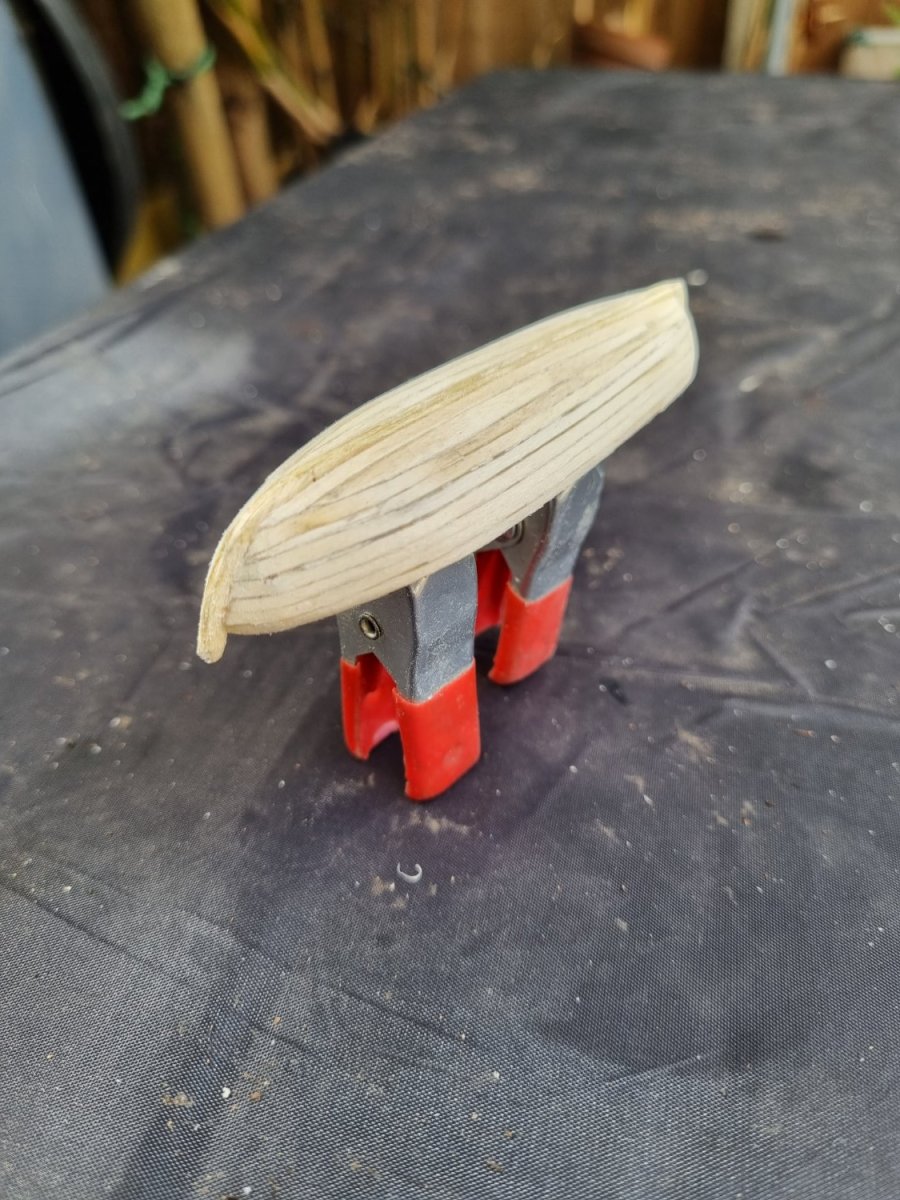
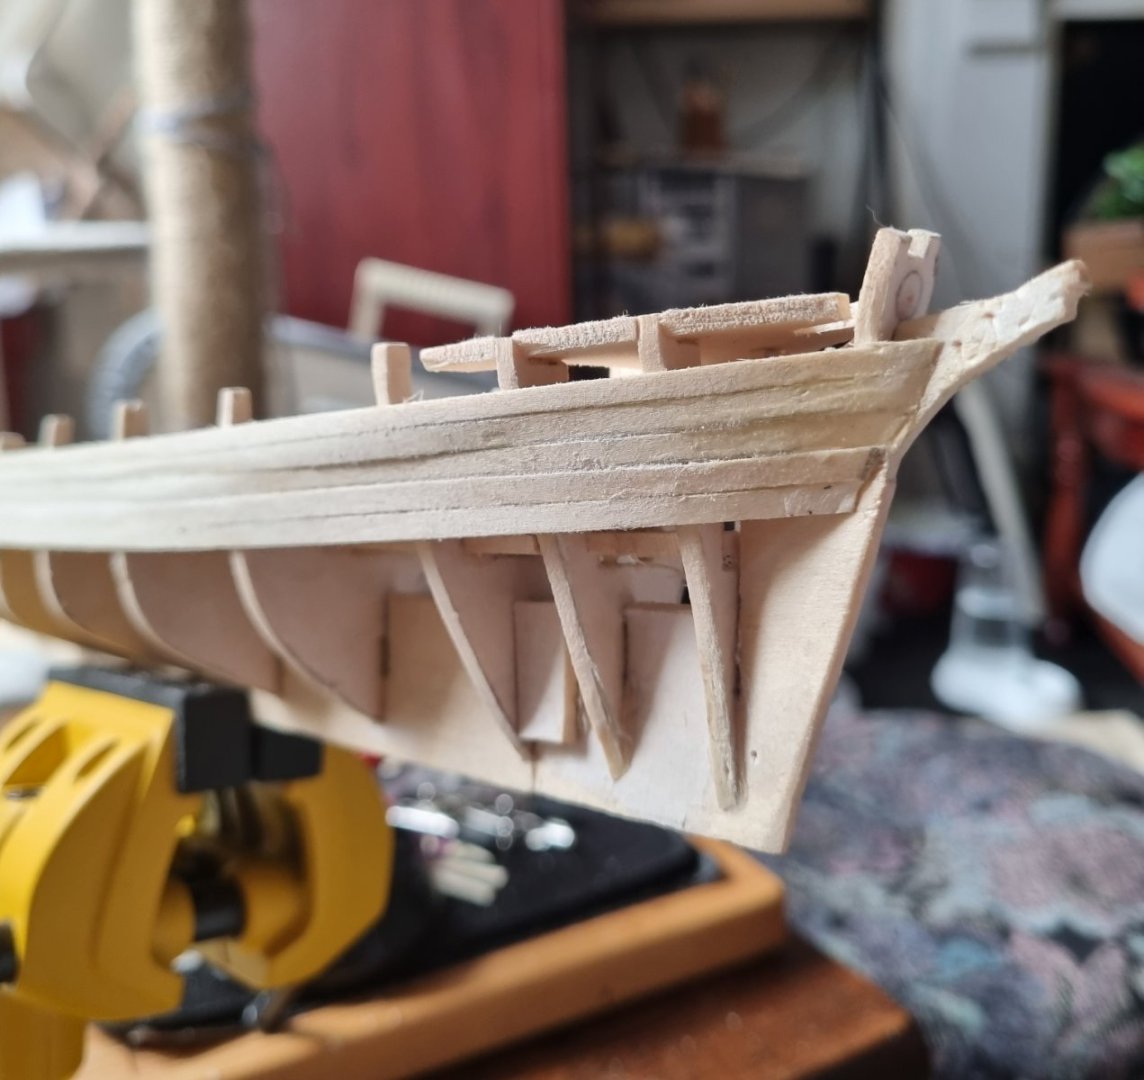
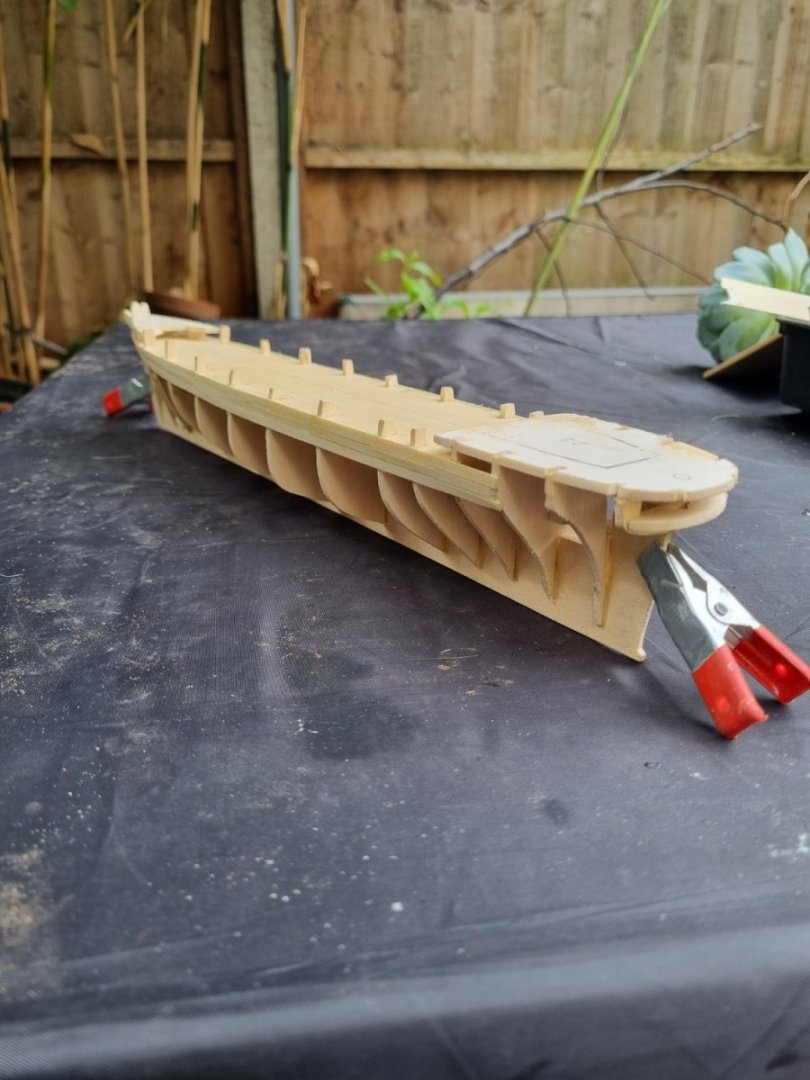
I am still in practice mode as I have not made a hull before and don't want my T to be my first. I have made several small boats, life boats etc, and results have varied. So, just to get my hand back in, I started out on a lifeboat. As mentioned before, the parts were cut out a bit hurried in 1/32 basswood which was to fragile so I strengthened the parts by laminating the basswood alternating the direction of the grain. Not everywhere, but at the crucial junctions it is either 1/16 or 3/32 ply. There is some work to do on the inside as tit does not bare scrutiny at present but this is the outside. The plans called for the planks to be in .5mm x 3mm planks but I tried this on another attempt and the scale just looked wrong plus the curvature meant that each plank had to be shaped. 1/32 basswood is .78mm or there abouts so I guessed at cutting stripes about 1mm . The curvature of the planks started to get extreme on the bottom of the boat so I then restarted from the keel and met my planks in the middle. It might look a little messy close up, but after a coat of stain or paint, I doubt anyone would call me out on it. As you can see, I have put together a CS hull in 1/200 scale. This is never going to be a finished model, it's for practice only. I still have some fairing to do, which I found out after starting planking. It has also shown me that I need to add some frames below the aft deck above the transition. As the plans do not provide these, a little improvisation is required. These are the things you only learn on a practice run. I believe I have seen people fill these areas with balsa block. Simon

-
So I have been working on getting what useful information I can get from those printouts with all the loss of detail that entailed. This is what I have so far. I am happy enough that the leading edge is the shape I need so I have worked this in to the Cs plane. My first redesigned part. I know, my curve is not very smooth, I need a French curve or flexi ruler. I started cutting out a lifeboat in 3mm beech ply yesterday and while this is much stronger, it's still wrong. I know that in kits, these parts all come on the same sheet, but in this case, one size does not suit all. The keel and parts 10 - 14 need the strength of the ply but the drawings are not for 3mm. Parts 17 and 18 need to take take .5mm plank on top but don't need the strength and definitely not the thickness. Parts 15/16 and 19/20 need the thickness but as they need a lot of shaping could do with being in a softer material egg Balsa. I shall persevere. Resistance is futile. Simon


-
Thanks for that, so while I will be getting a good book, it is not going to be of any great help in this particular task. I think i have that plan you refer to, i printed it out on A2 but the definition at that size means the lines are totally lost. Plus the plans are in two different scales to boot. At that size, the line plan of the hull is fairly close to my CS plans so I can get that Aberdeen Stem on to my keel. Simon
-
Hmm, don't think this was down to any mass book-burning event, something far more sinister, the gradual reduction in funding of public libraries. Nobody notices that they are slowly getting smaller, selling of the lesser used books, till one day, when you search for a book you know they had! The book was not even available to take out as it was in the reference section so could only be viewed in the library. I have found quite a few volumes for sale in the UK on Amazon, Ebay and other used book sellers online and they all seem to be ex-library copies. So I have picked the one that claims to be the one in the best condition at the same price and now sit and hope it still has the intact plans. Simon
-
Managed to remember the book I was looking for, David MacGregors American and British Clippers as this has plans of Thermopylae in it. I had found a copy in one of my local library's but on searching again, it is no longer on the list. Typical. So I have found a copy on Amazon and ordered it, ETA is circa 6th Sept so I have to exercise patience. I have been rigging for so long that I thought I would get my fingers back to cutting and sticking, and have a couple of practice pieces on the go. One of the is a life boat, so I picked up a small sheet of 1/32 basswood. Mistake 1. Didn't take my time coping the part shapes from the plan. Mistake 2. Didn't take my time cutting out the parts so any errors were exaggerated. Mistake 3. Choice of material. 1/32 basswood is just too fragile and the grain is all in the same direction. Going back to the plans and translated the material description and it was supposed to be 5mm poplar ply (5 layers). 5mm, no way, that's huge. 3mm I would get, but not 5mm. 1/32inch is about .78mm so I have glued additional 1/32 strips either side of the keel, stem and stern posts and single pieces to each rib piece. This has also allowed me to correct some of the inaccuracies from the hurried cutting out. Next is to remind myself how to bend my strips so I can plank it. Simon
-
Yes, just reviewed that site, very impressive, saved a few of the images for reference purposes. Simon
-
When I first suggested this in my Cutty feed, someone quoted a book that contains planes of Thermoplylae but I was unable to source a copy for myself. I did establish that Battersea Library had a copy but unfortunately, I cant find a reference to the title of the book now. This is typical as my health has forced me to take some time of and I have the time to go sit in a library, I cant recall the book I am supposed to be looking for. Bah humbug Simon
-
Hi Dave, I have seen images of that model online, as would be expected of a constructors model, it is excellent. I will try your suggestion. Thanks Simon
-
No Kit Bill, this is a scratch build. I have a copy of the Mantua Cutty Sark plans which I will be adapting. Thermopylae had a very different stem to CS and her Stern will need some changes too. Locations of Masts and deck houses are completely different and the quarterdeck is nearly a full third the size. However, it will still be easier to adjust these drawings than it would be to start from scratch. Simon
-
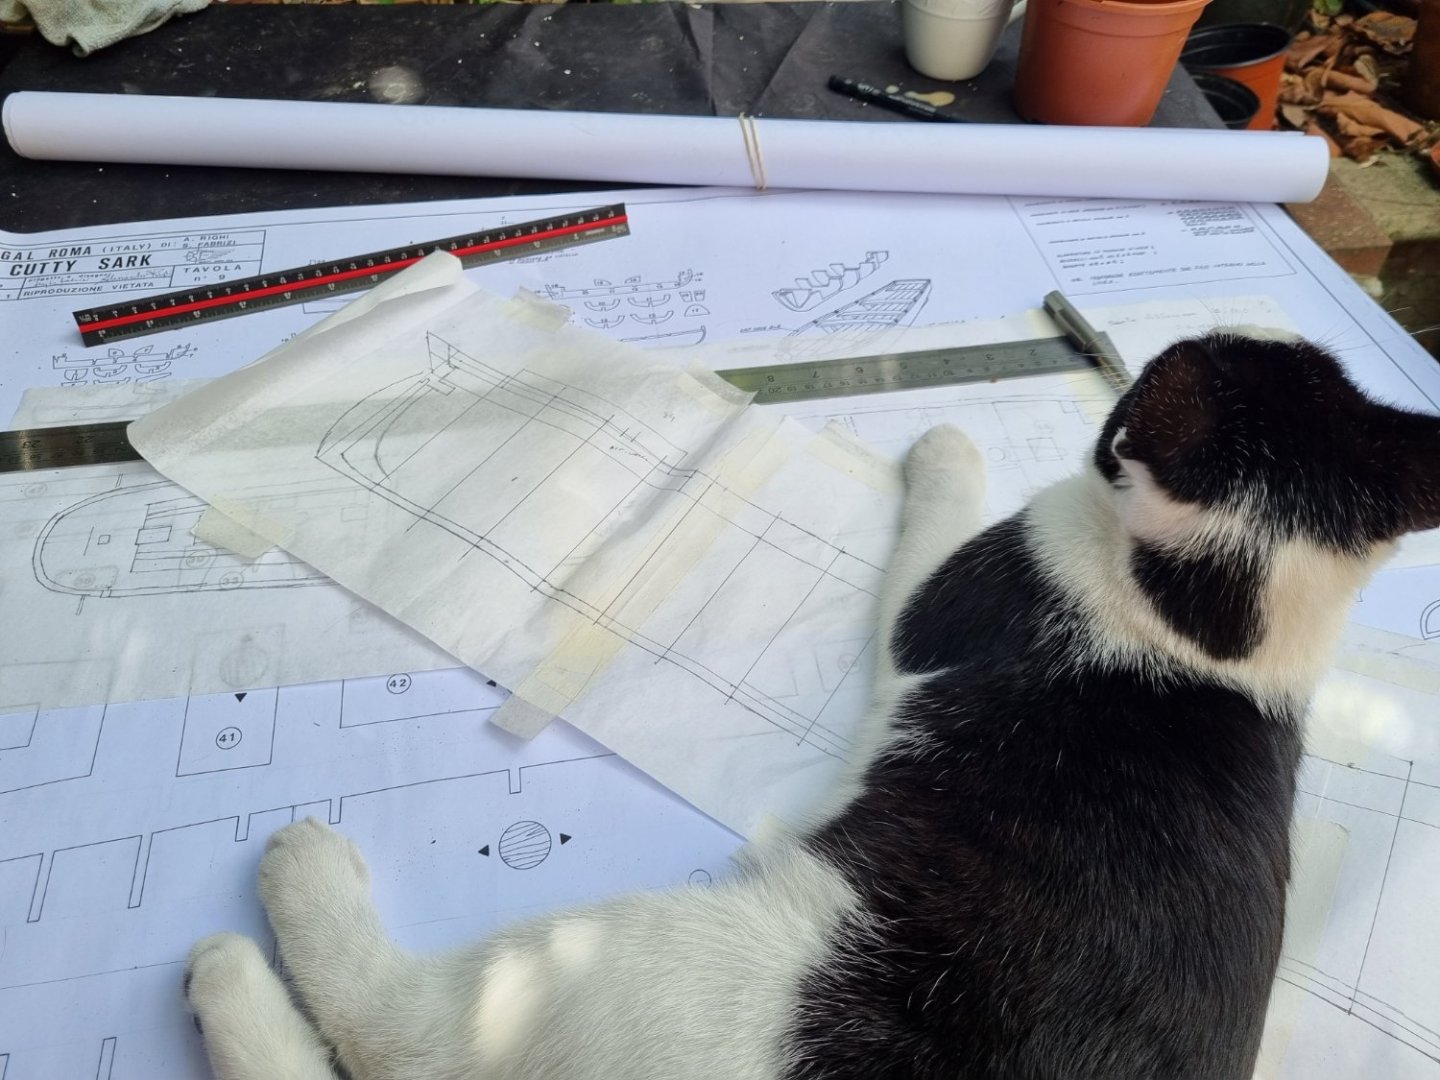
So I have one set of drawings that have given my the lines and layout but this was OK at A4 but printing it out at a scale I want to work in is very poor and all but unusable. It does give me overall dimensions and proportions so not a complete waste. Many in the past have noted the similarity to Cutty Sark, at least in size, so I figure if I take my CS plans and overlay them with the extracts from the line drawing of Thermopylae, I may be able to come up with an acceptable hull. I am looking at doing just that relaxing in the garden with Kobi helping of course. simon
-
Well my Admiral gave the go ahead for a second boat and with a little crafty coaching, she even suggested the subject. This is going to take a while and I hope I have the time in me as I have just been informed that I have acquired another pair of clots in my right lung. I will be anly assisted by my two feline assistants, I feel relatively safe to do this at the design and early construction stage, it's only when I get down tobthe fine work and rigging that I have to keep it out of reach.
-
They ate at the stage of having mad half hour hour bursts of energy running full speed from one end of the house to the other. Heaven help any thing or one in their way.
-
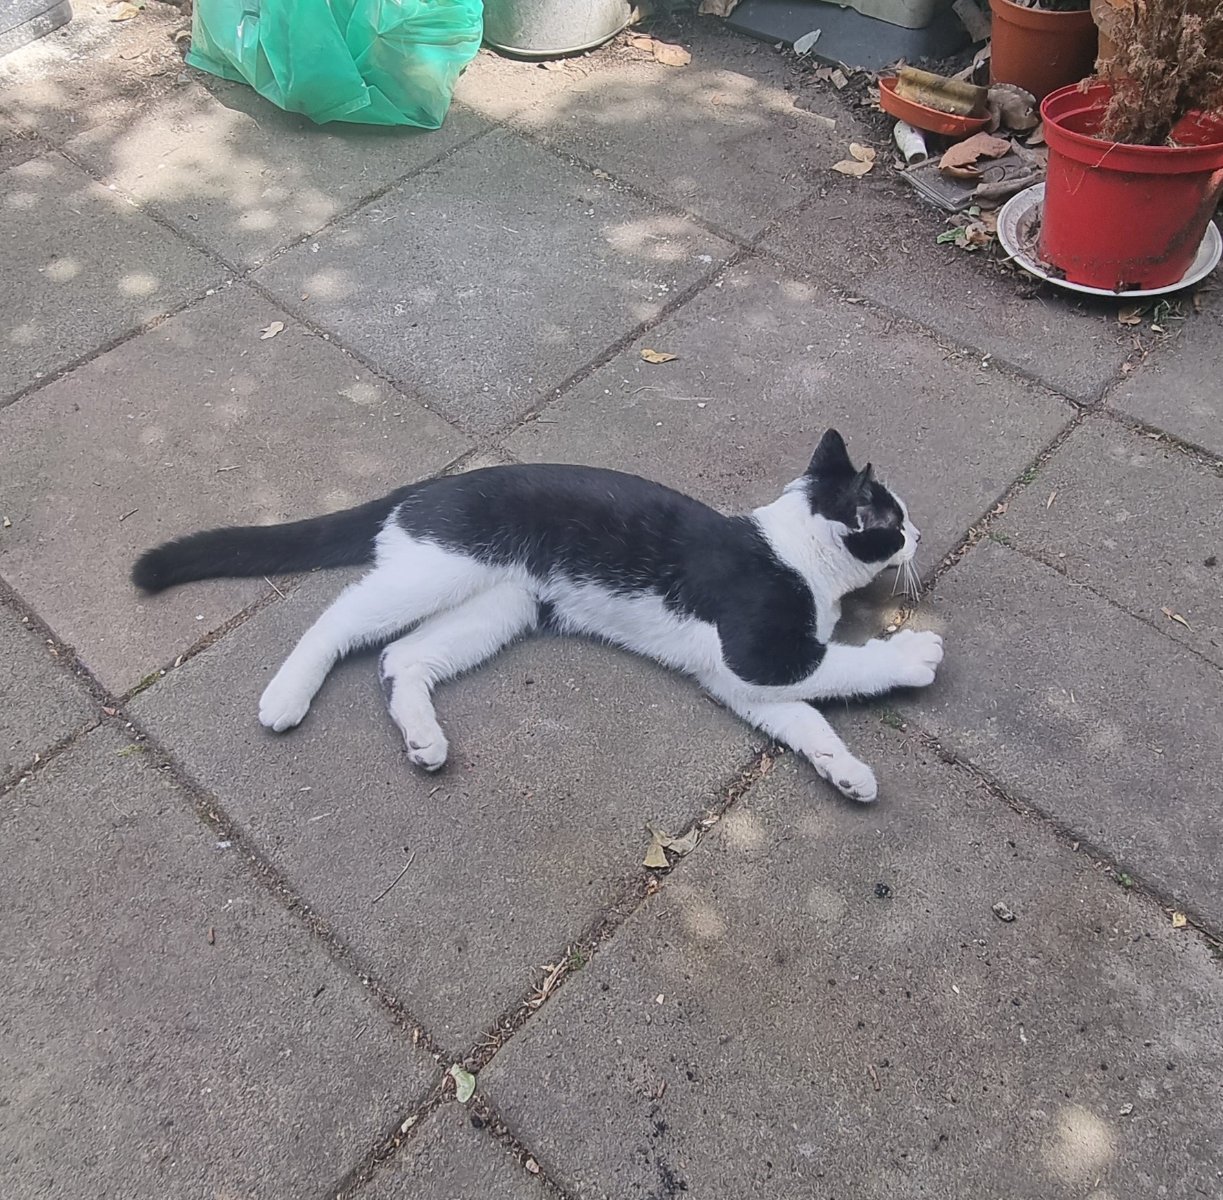
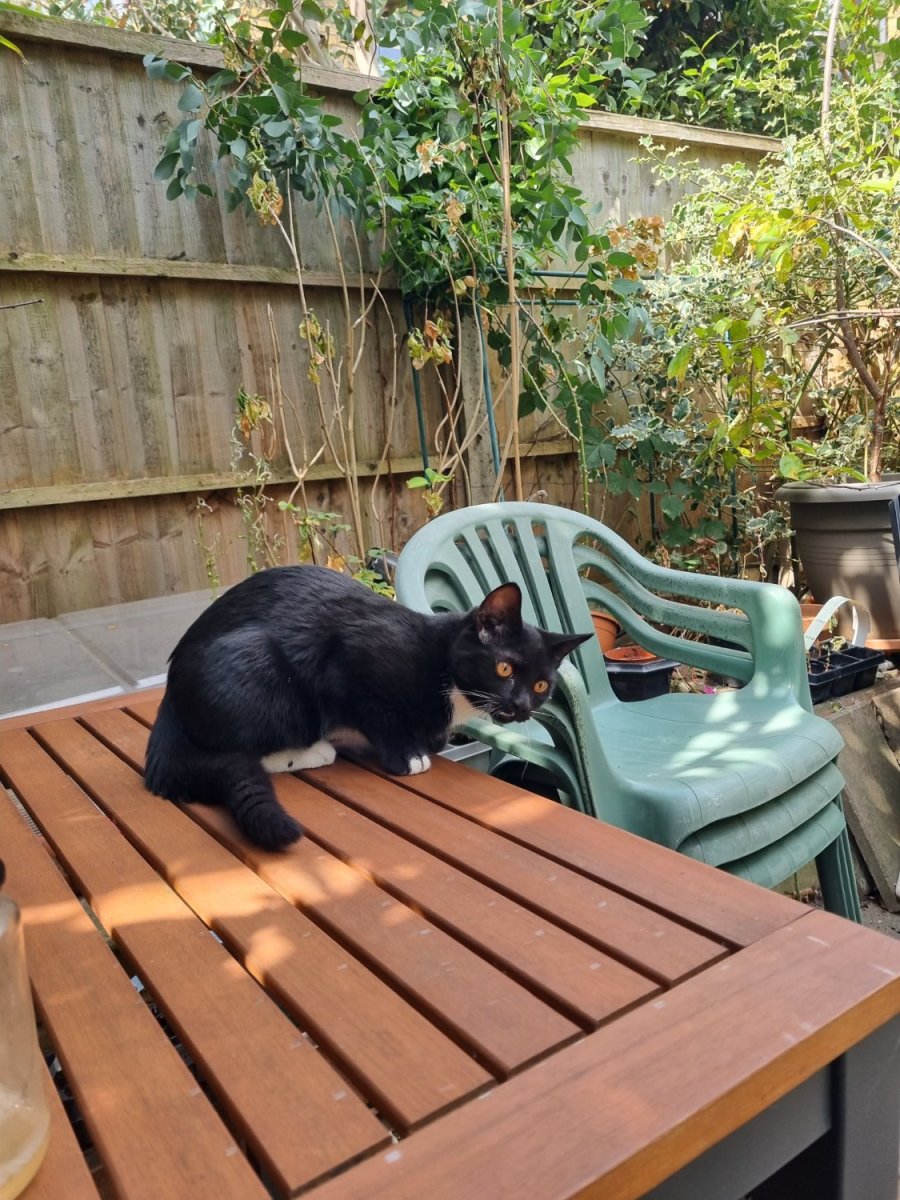
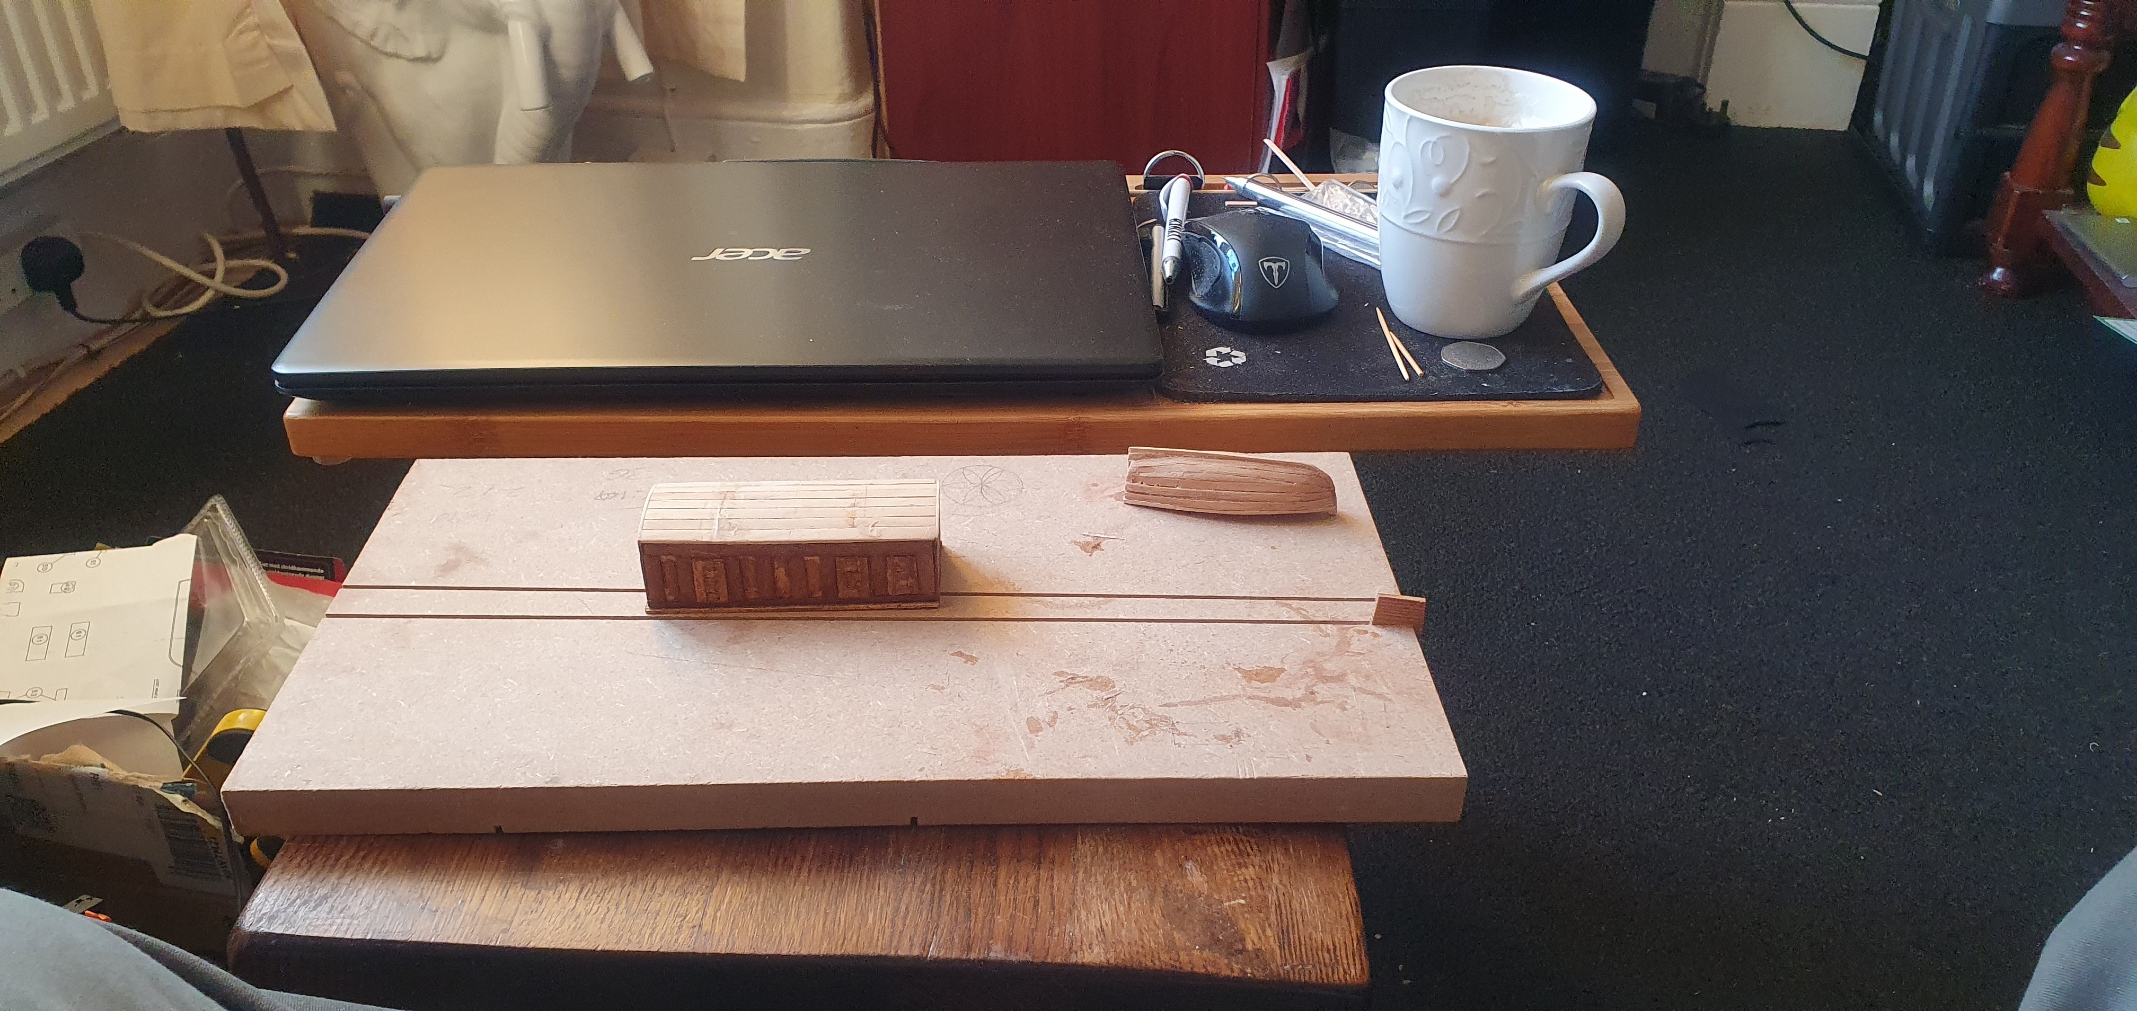
Well, they started out yey big.but now they are this big. The black and white male is Kobi and is now 3.5kg. The female that is mostly black is only 2.5kg but she is quick and full of mischief. I have been sat at that table in the garden making a practice hull at 1:200 and they just walk through my work space or climb up on to my lap, no matter what I am doing. Bless them 20220414_223016_01.mp4 20220414_223016_02.mp4 20220414_224727_01.mp4


-
Well, my Kittens are now 6 months old and instead of tiny bundles of fur they are now 3kilo bundles of high energy fur running through the house destroying everything in their path. So Cutty Sark is staying right where she is, on a high shelf, out of reach and not attracting their insatiatiable curiosity. I have been looking for plans for Thermopylae but also, I have never actually made a hull and I do not want to cut my teeth on a crucial one. So, I have scaled down my Cutty plans to 1/200 and am taking a dry run at cutting out and assembling the parts. Going well so far.
-
Keith, I have sat here hesitating over the keyboard at a loss of what to say that has not already been expressed, its just not supposed to happen in that order. We are built to accept the eventual loss of our parents, its an inevitable thing, but our children are supposed to outlive us. I had two brothers that passed before my mother and I watched a light go out of her eyes each time, so I do know your pain. We may all be at different corners of the globe but you must know that our thoughts and best wishes are with you. Simon