
My Fathers Son
-
Posts
178 -
Joined
-
Last visited
Content Type
Profiles
Forums
Gallery
Events
Everything posted by My Fathers Son
-
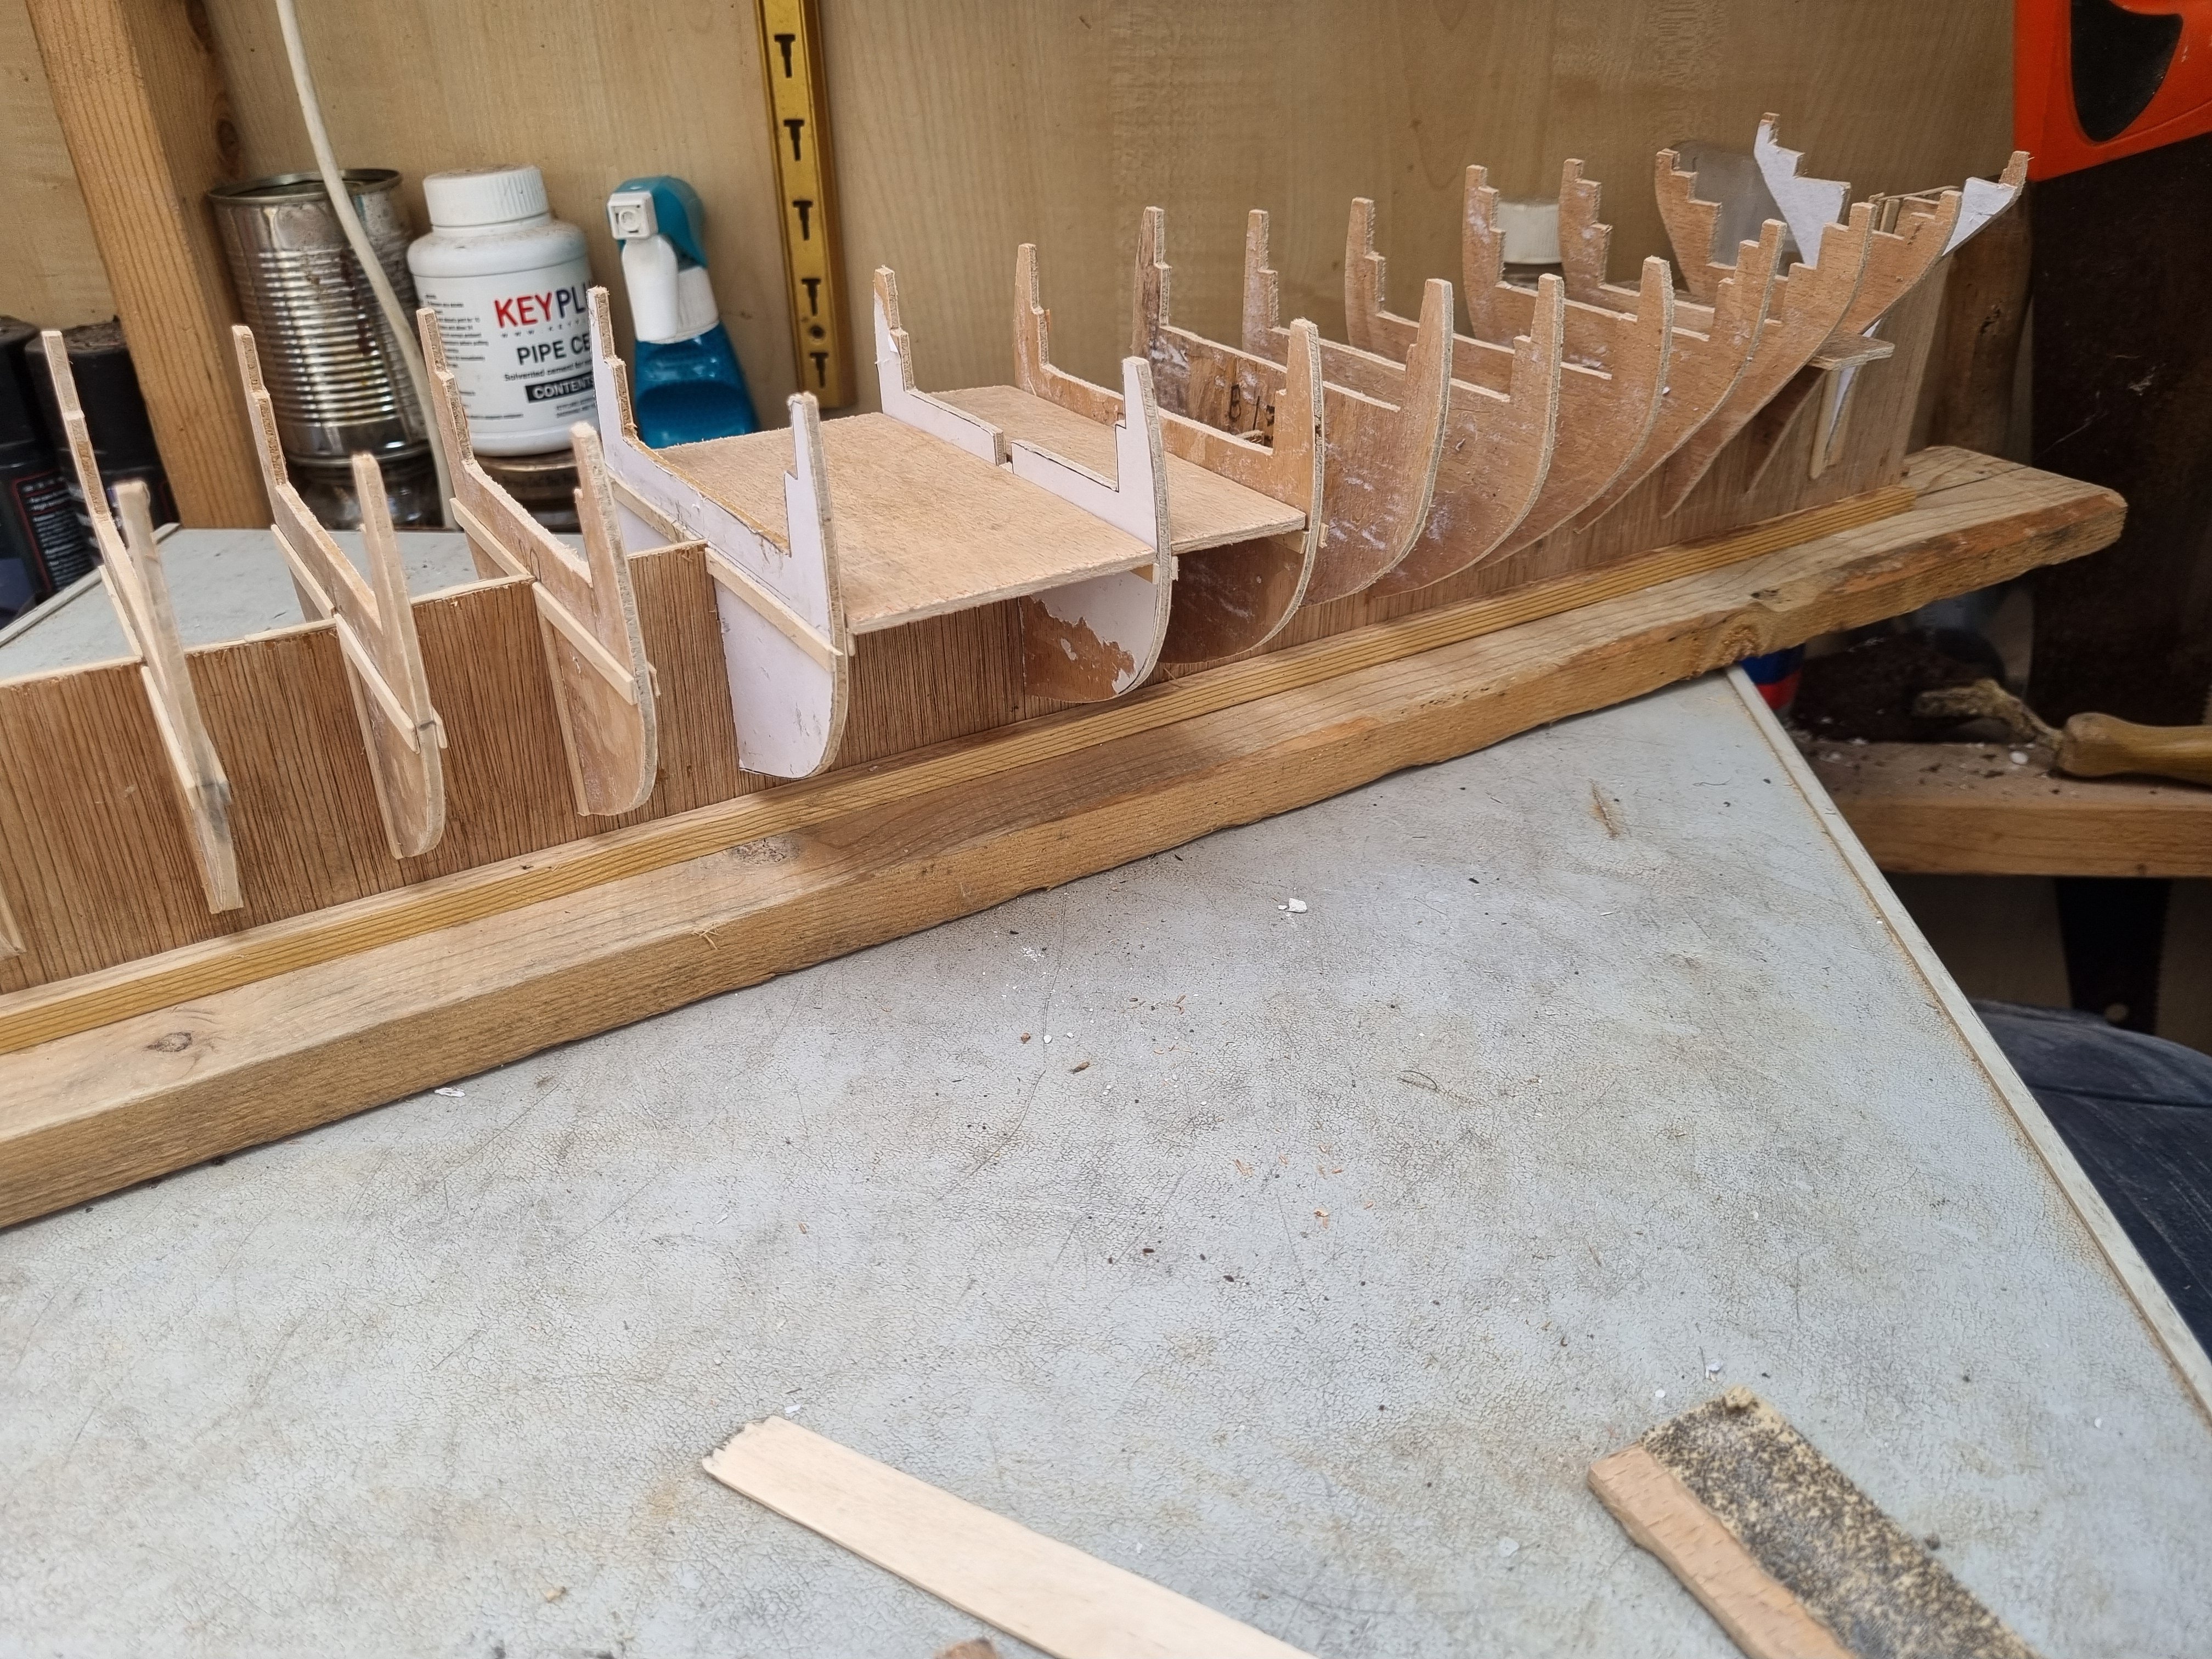
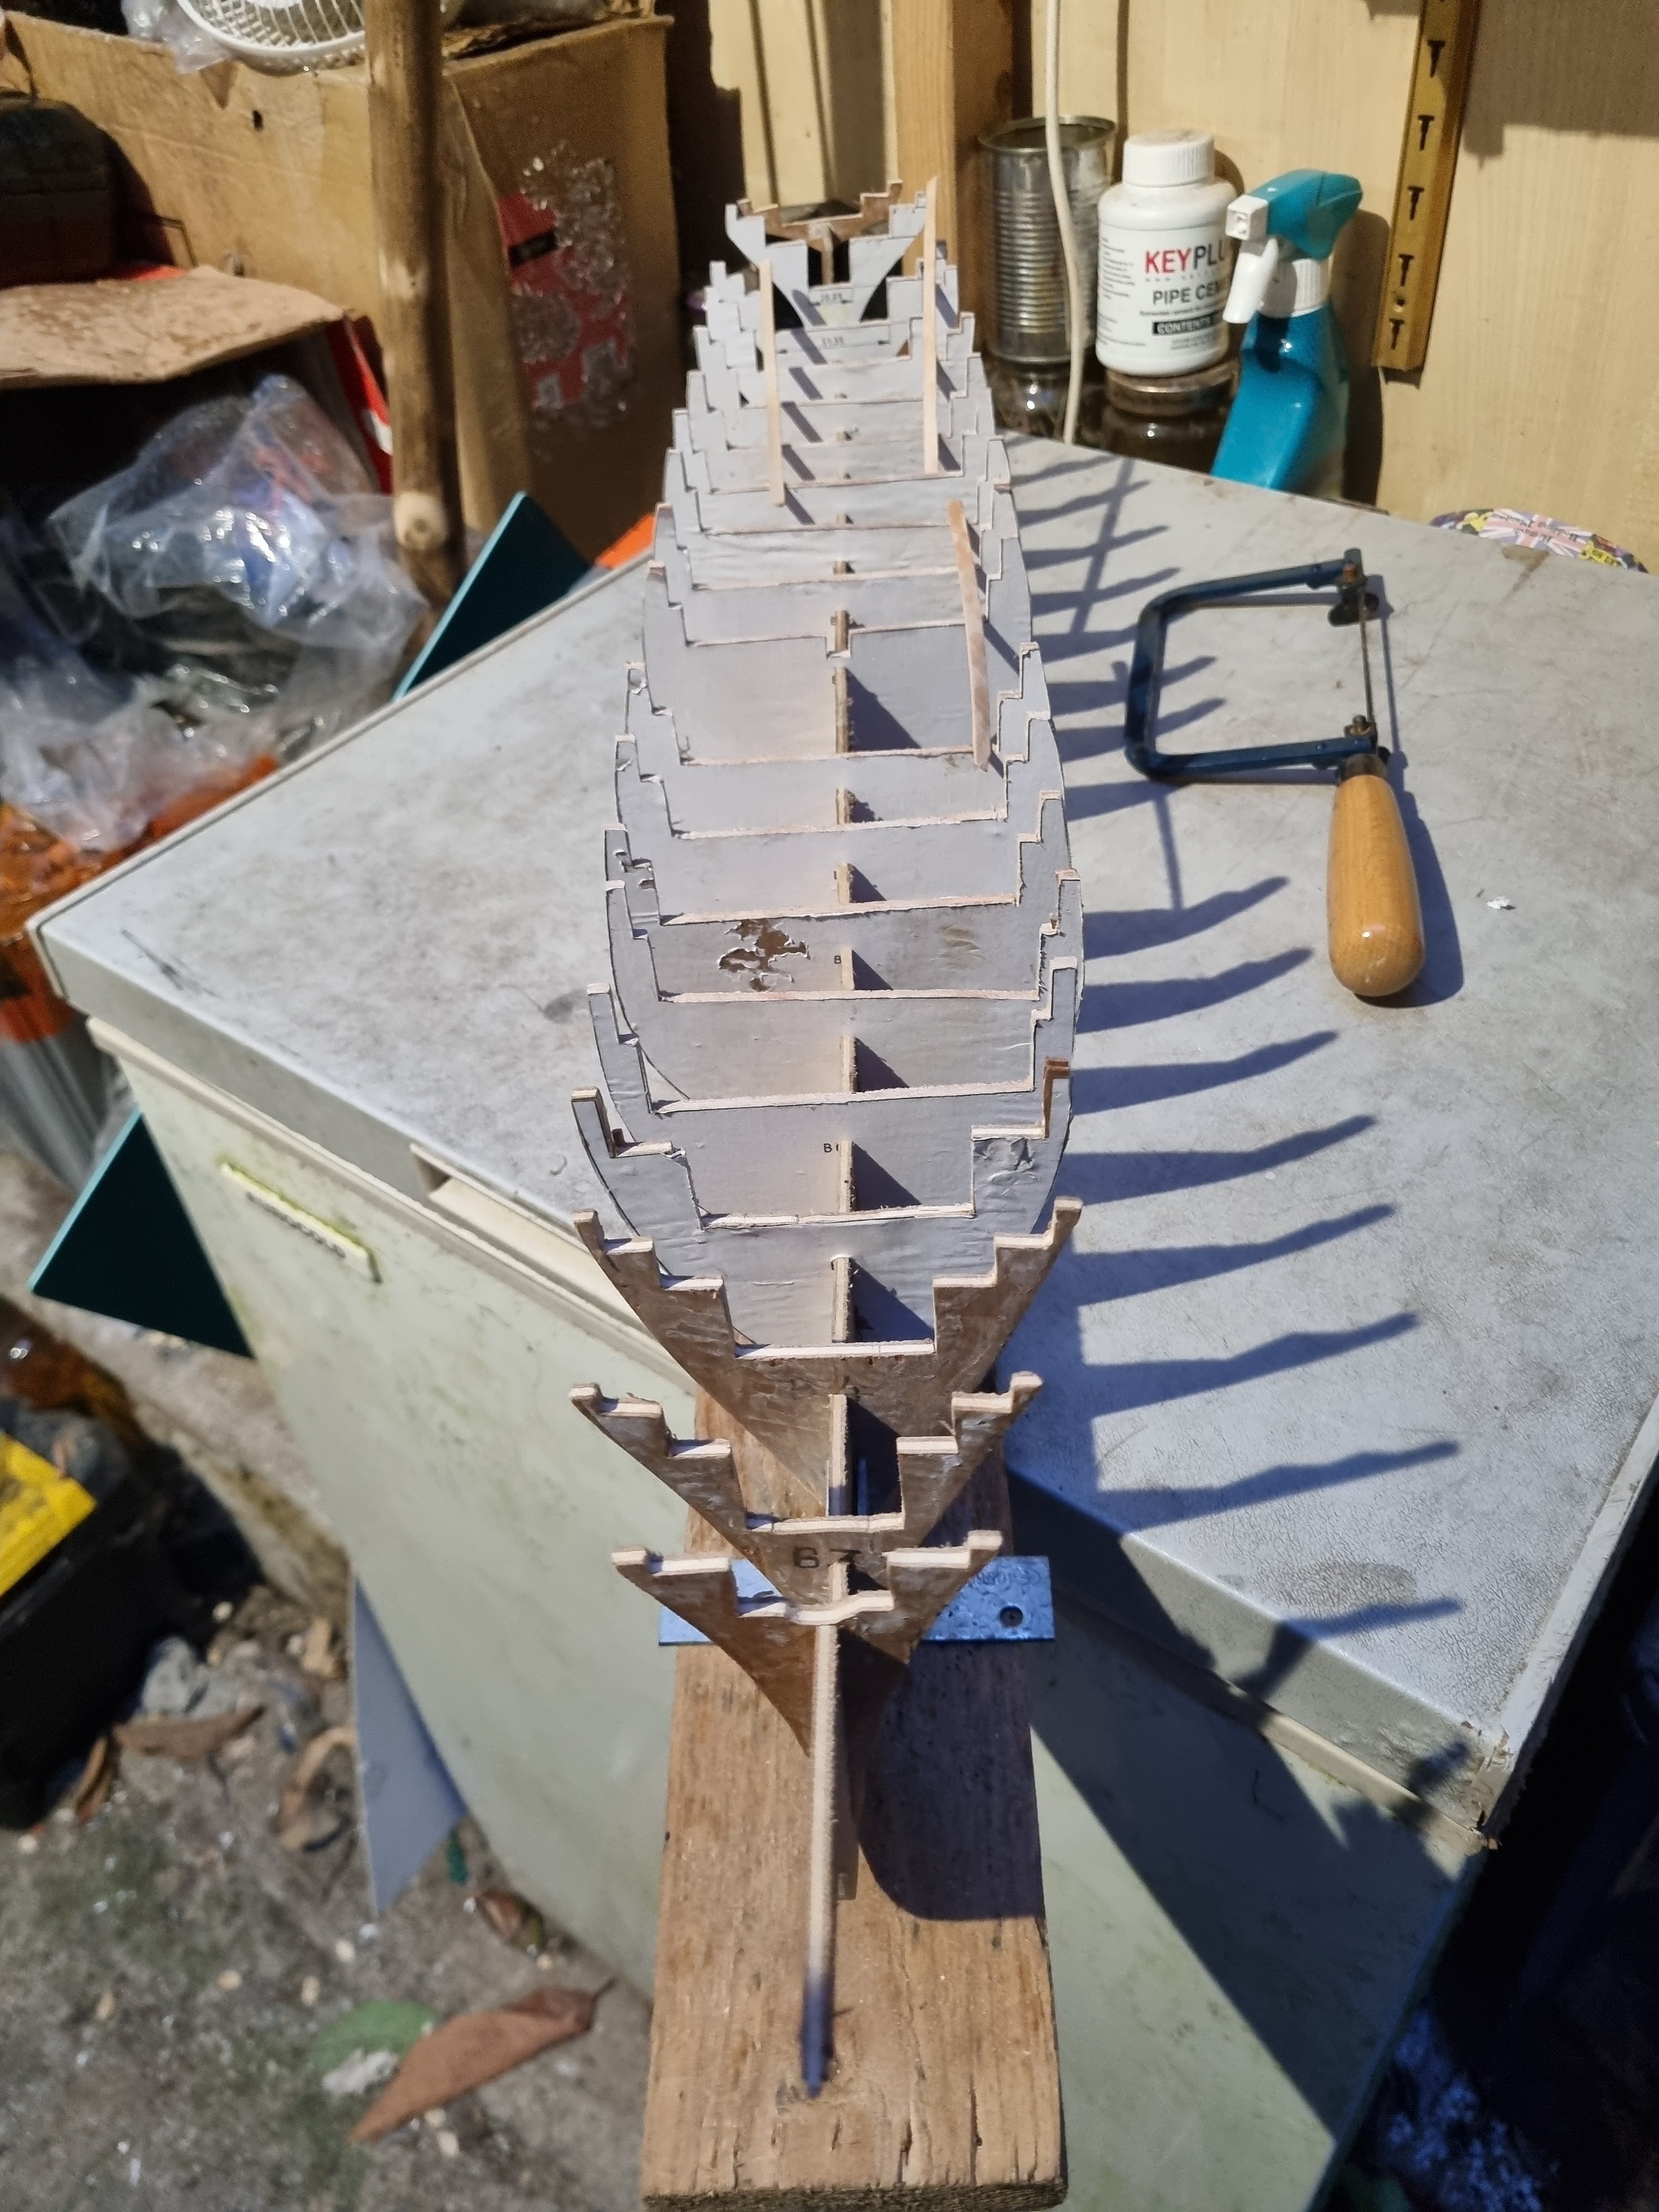
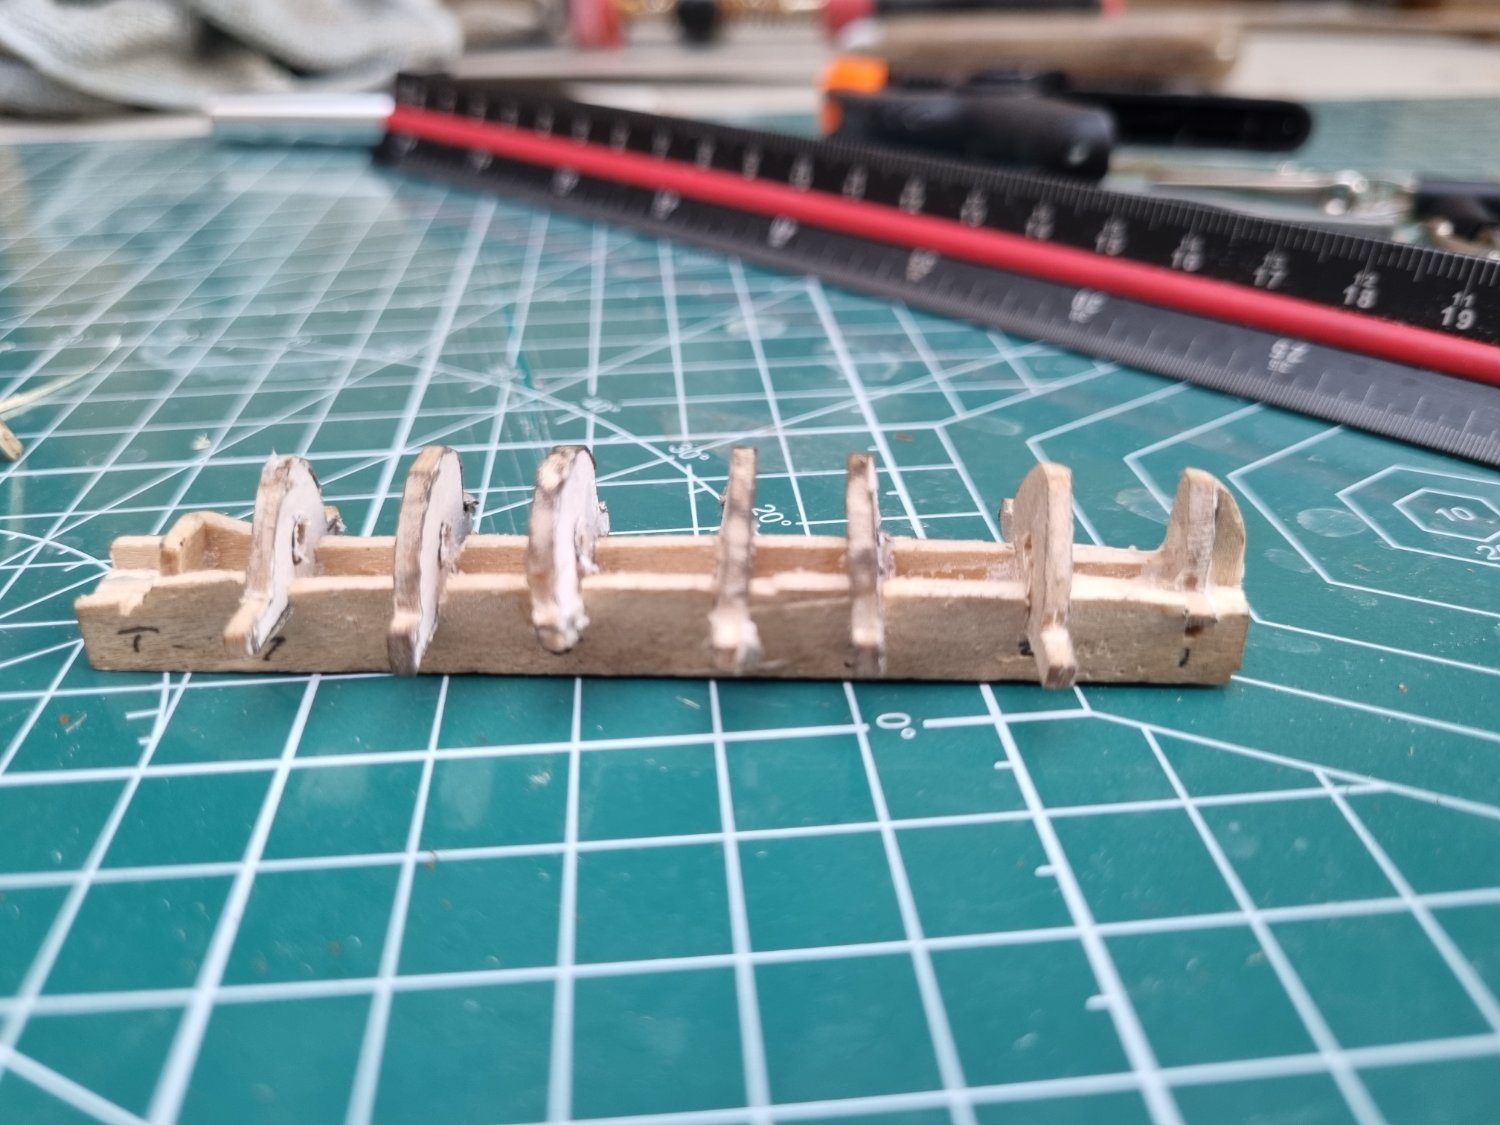
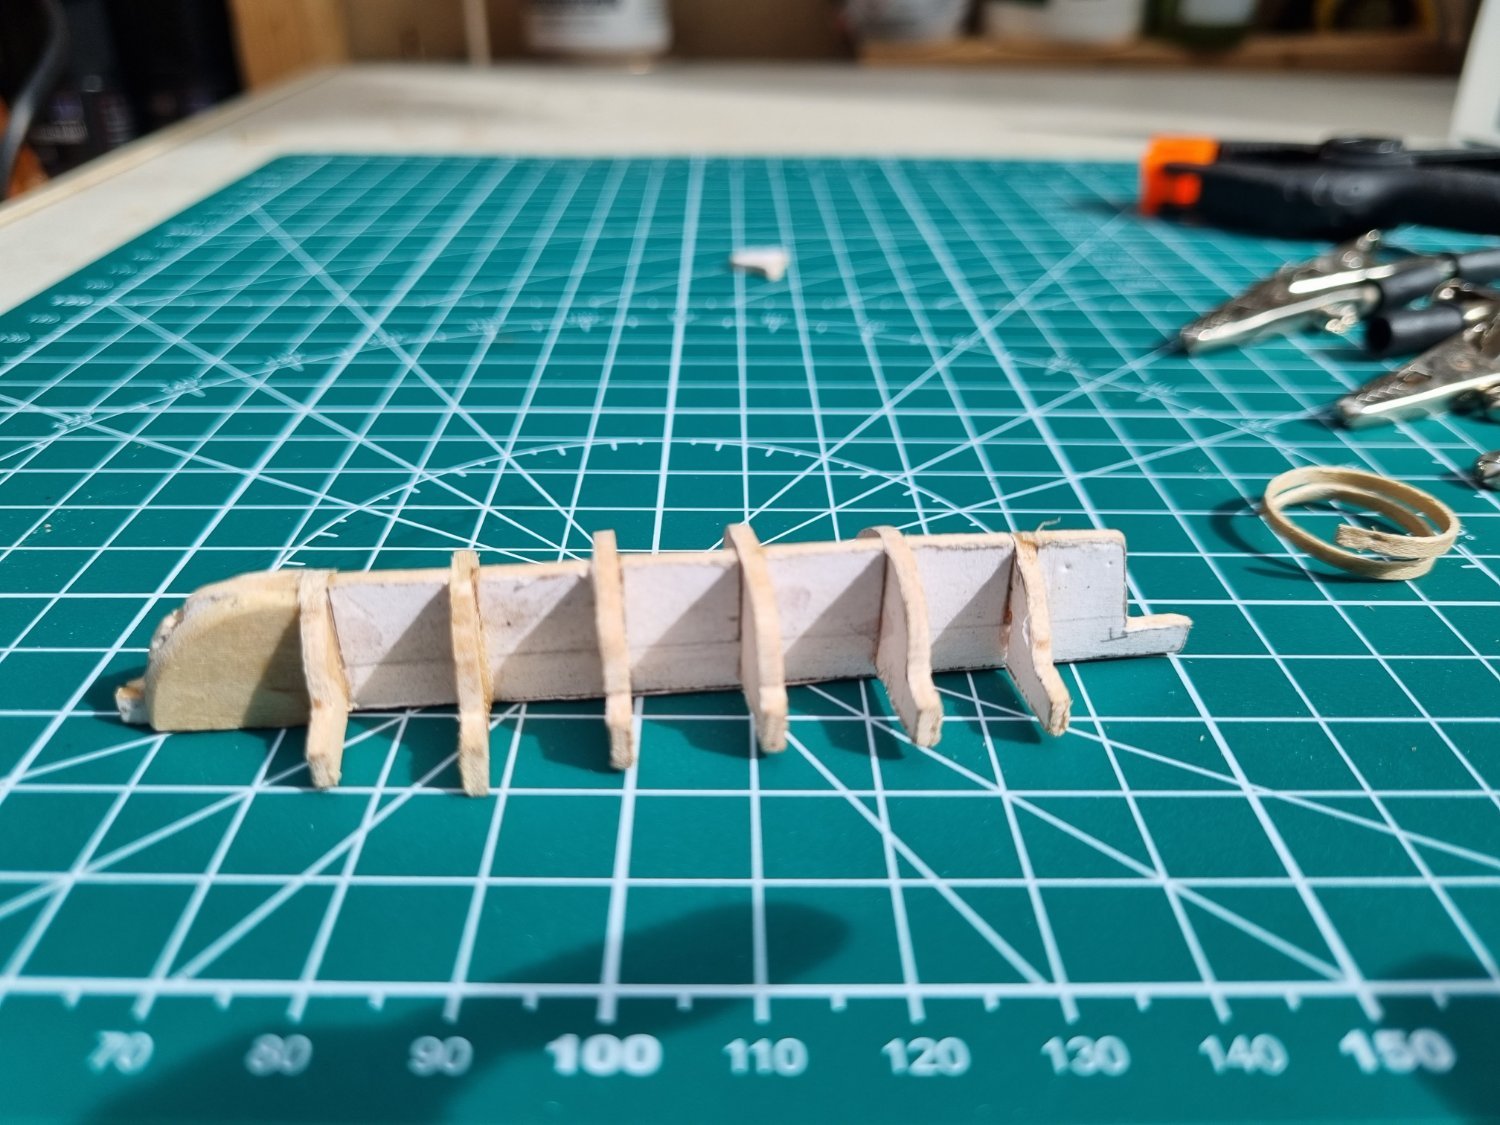
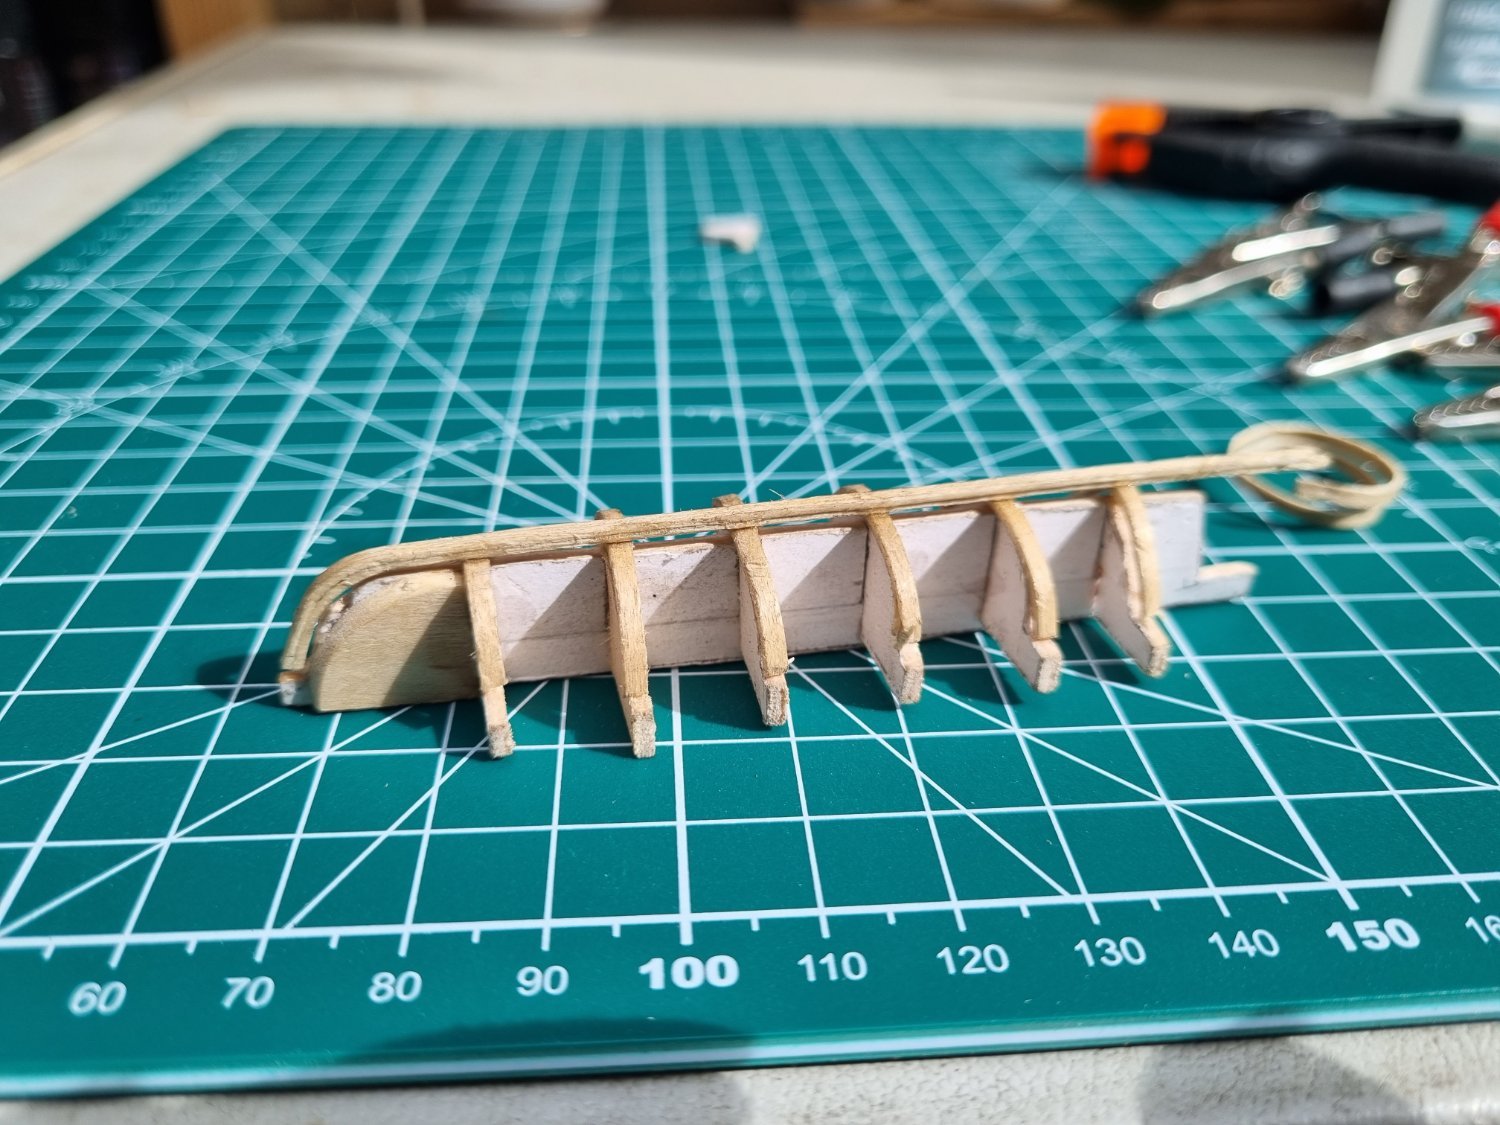
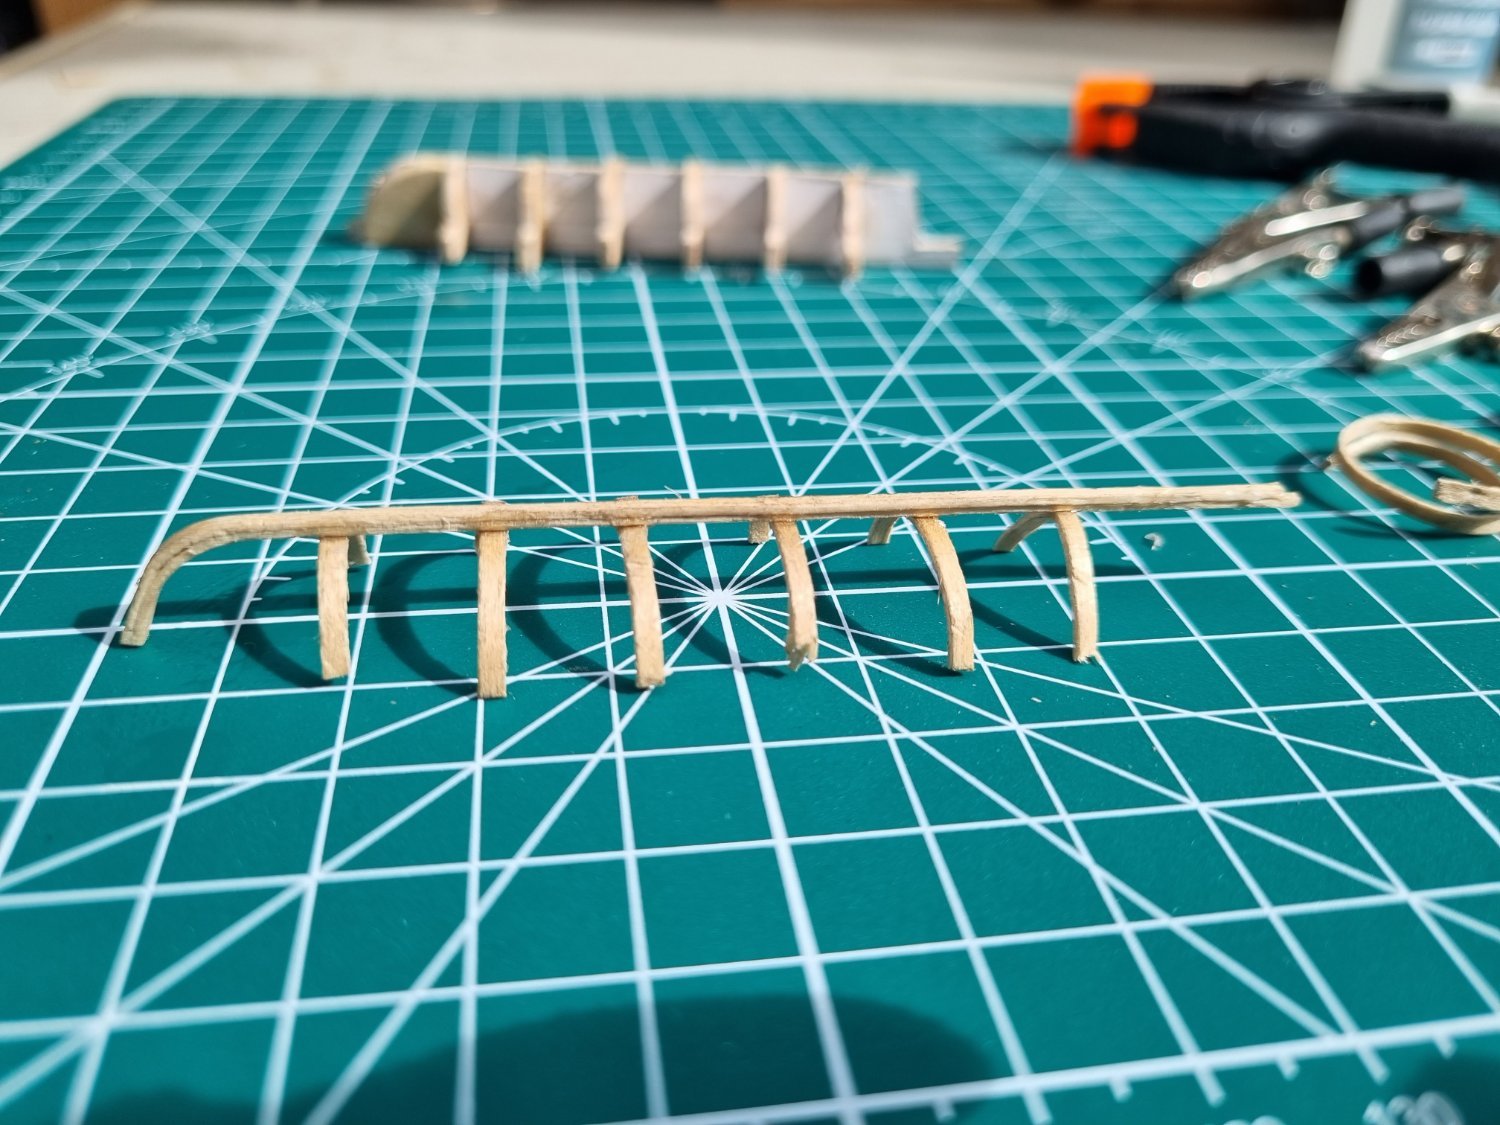
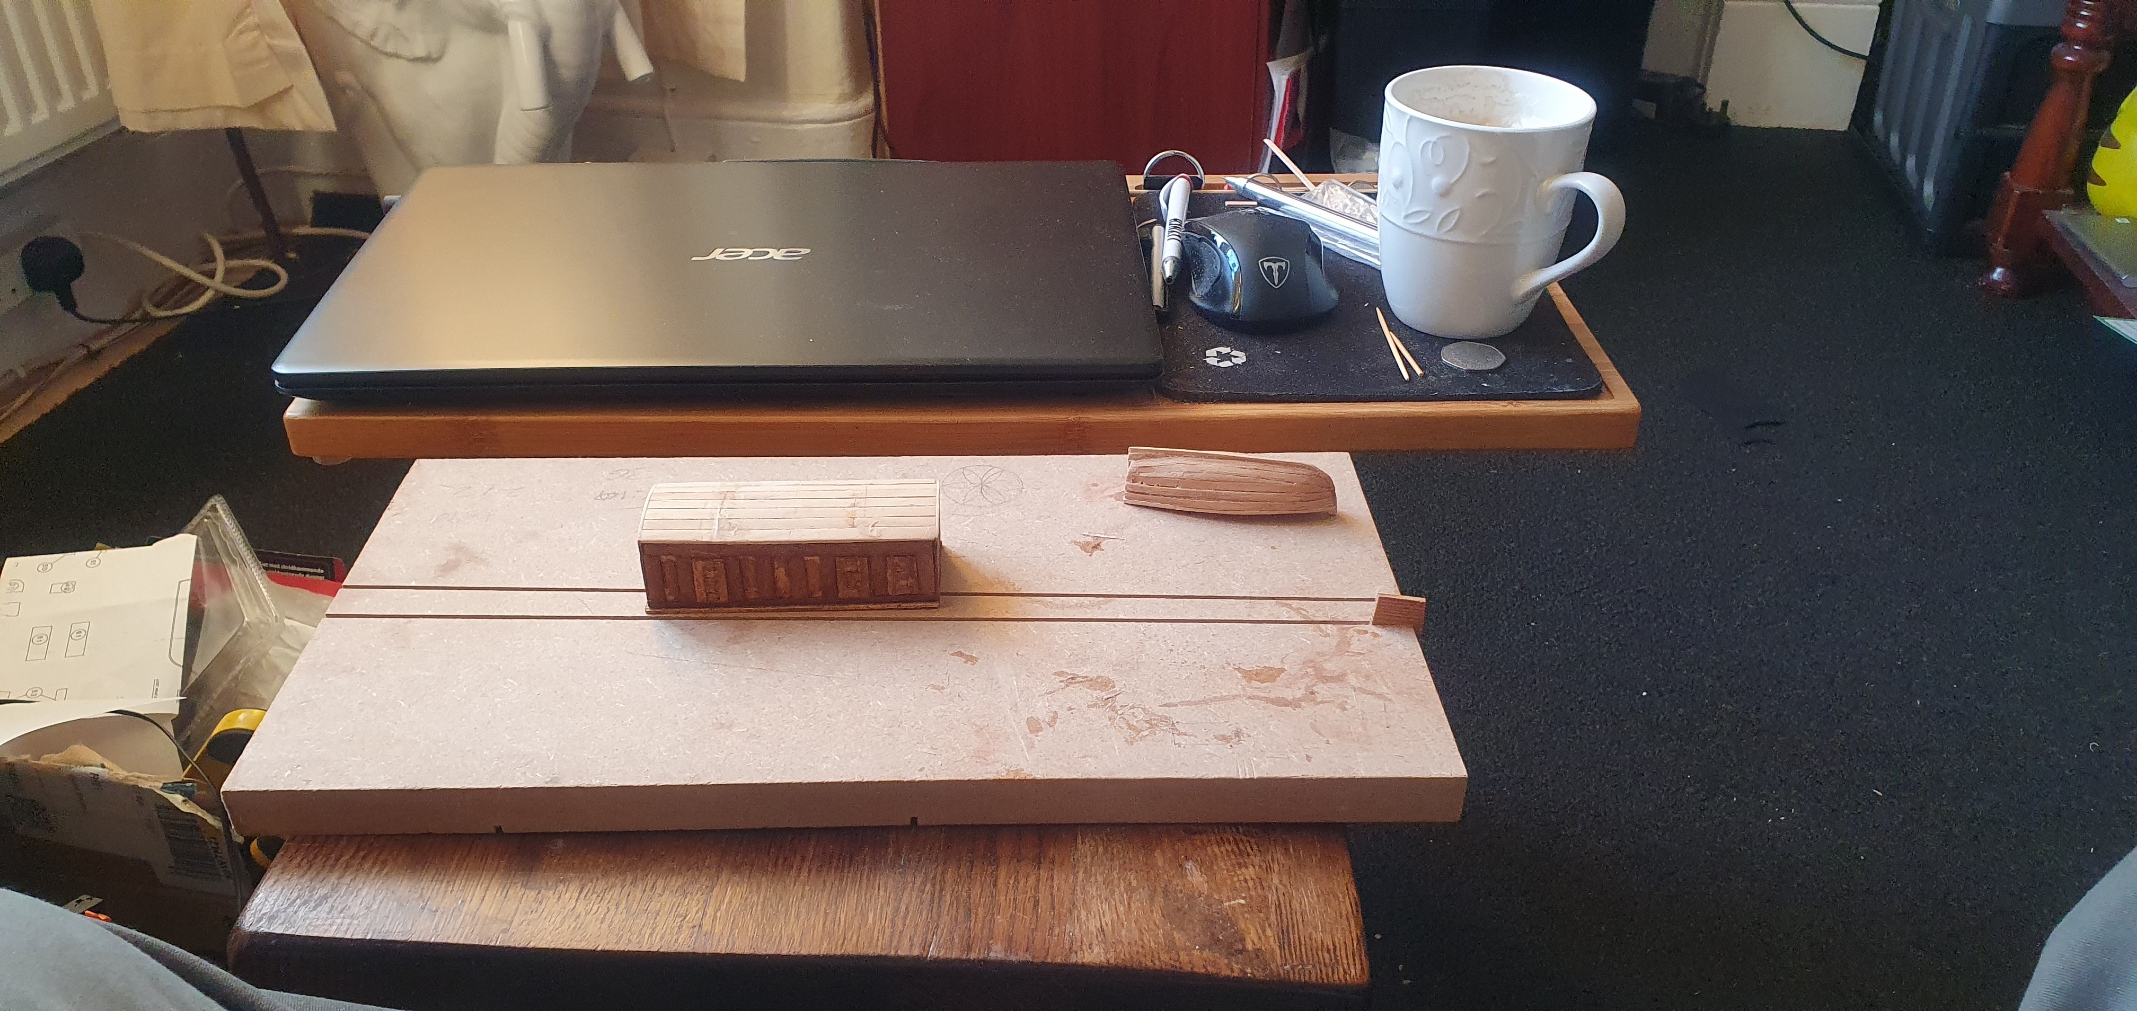
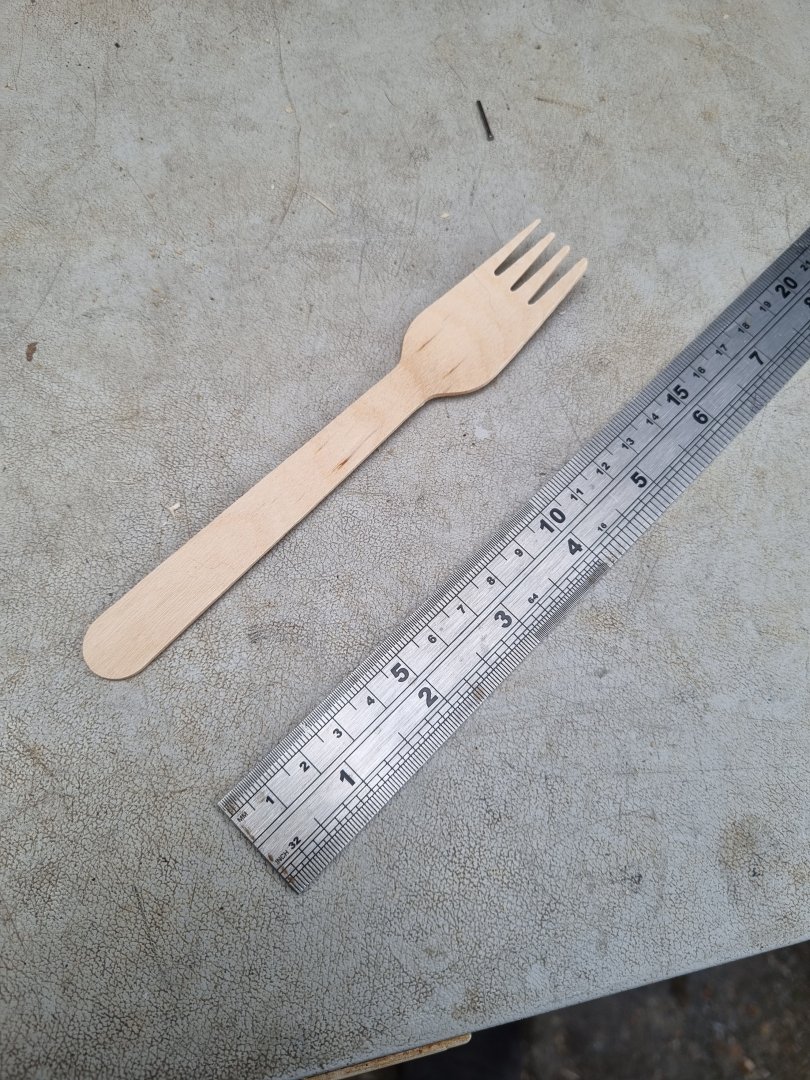
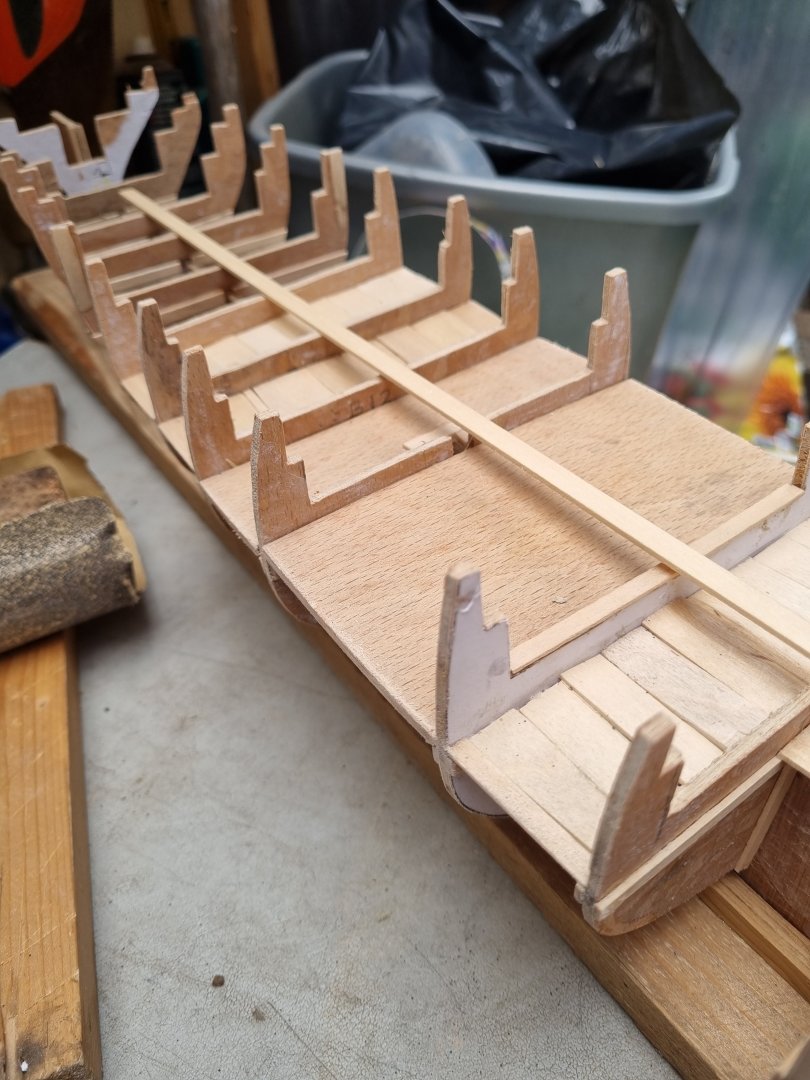
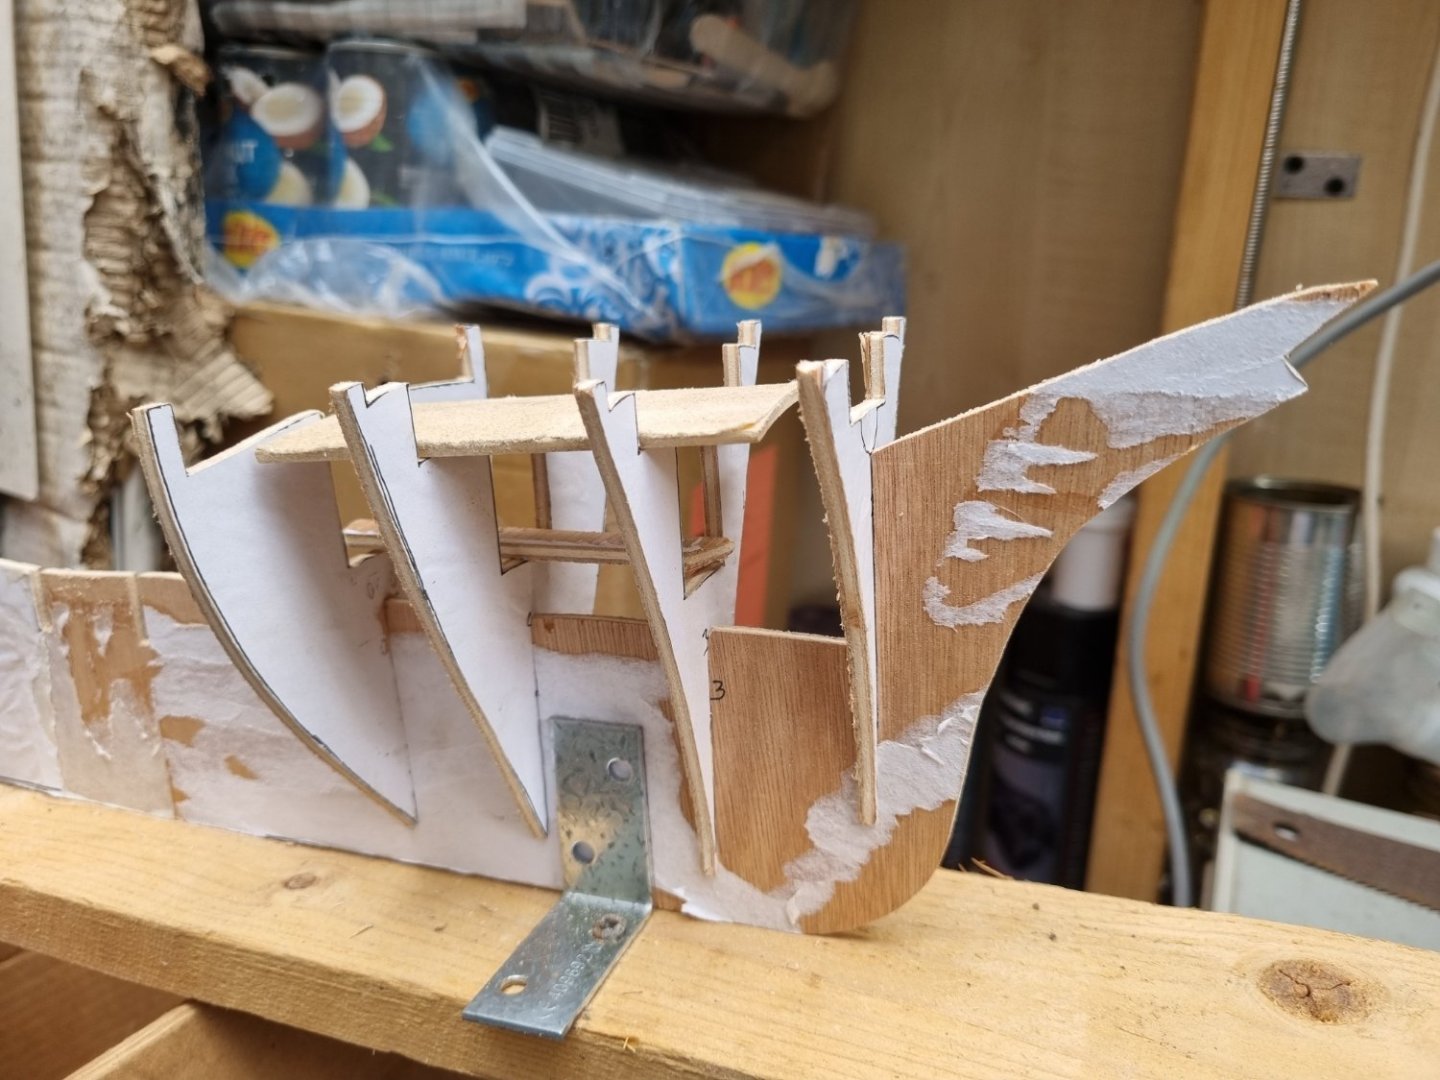
Continuing to build in the spacers between the bulkheads. It takes time to cut and shape the material I am using. What it looks like is immaterial as they will never see the light of day once the decks are installed. KFC have kindly changed from plastic sports to wooden spoons and forks and this has provided a cost effective source for this purpose. As I go, I am checking for straight lines and the fore section is now very stable and nearly complete. Just the sections aft of bulkhead 14 to complete. Simon
-
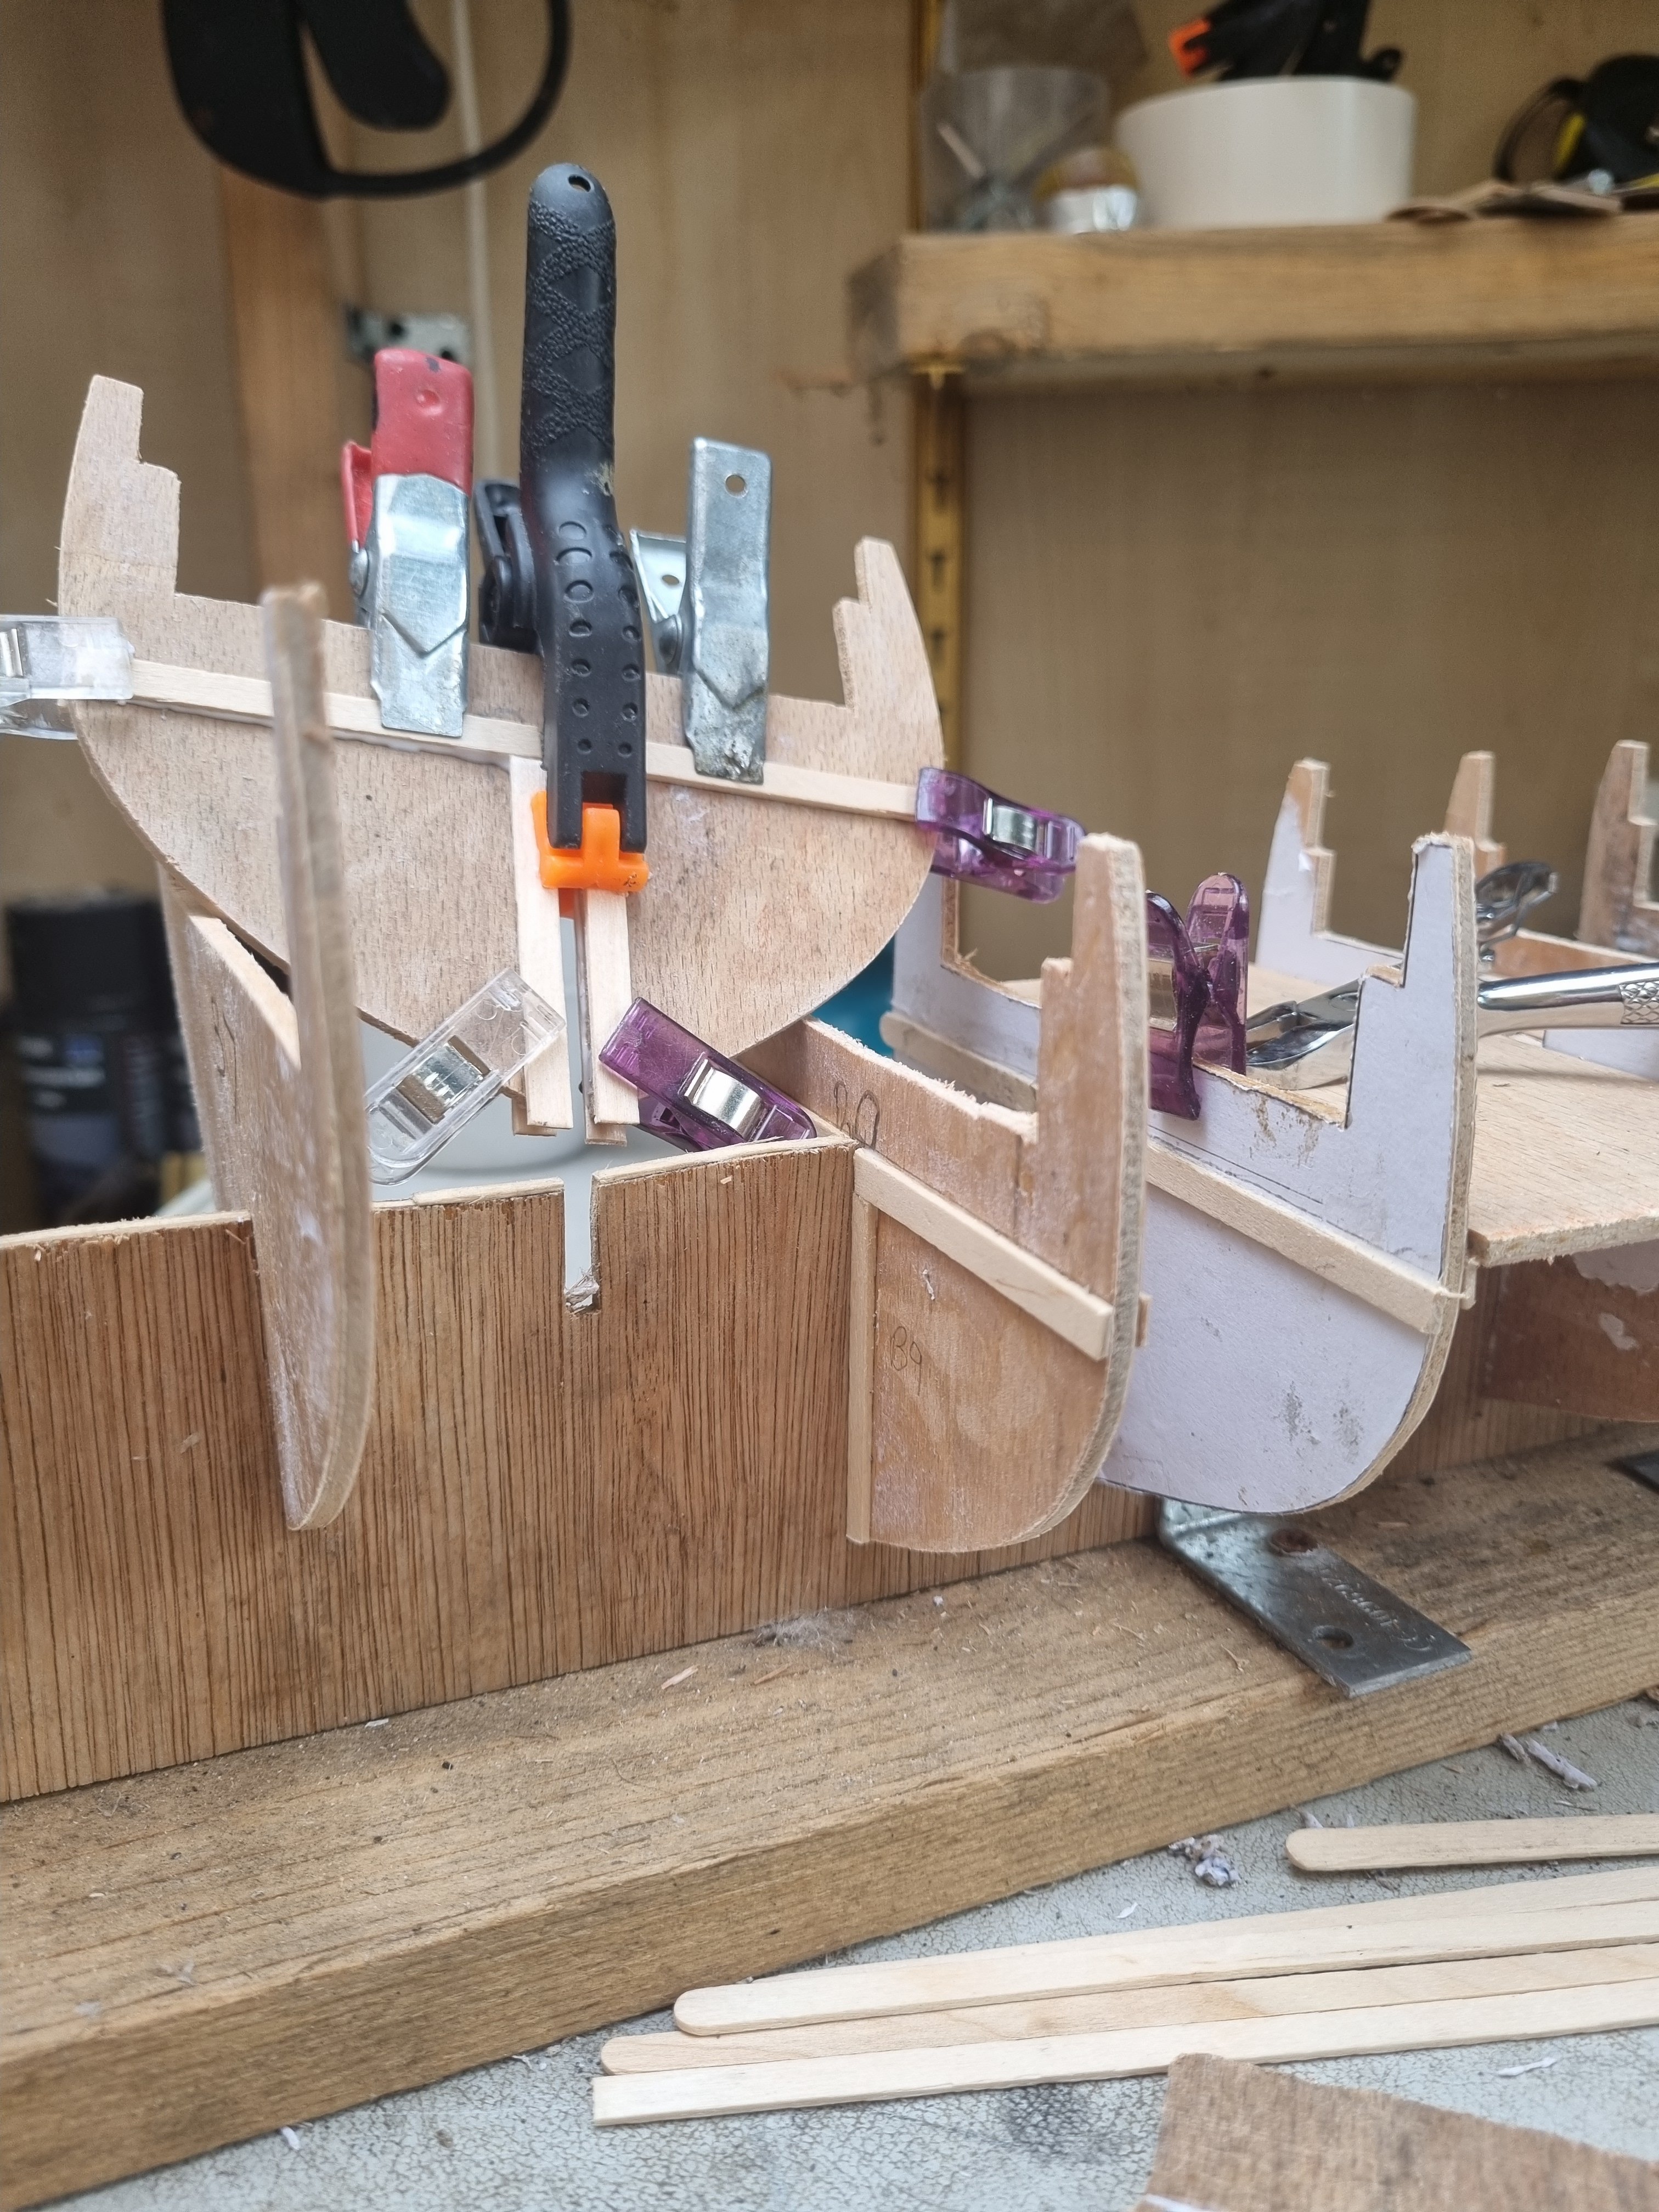
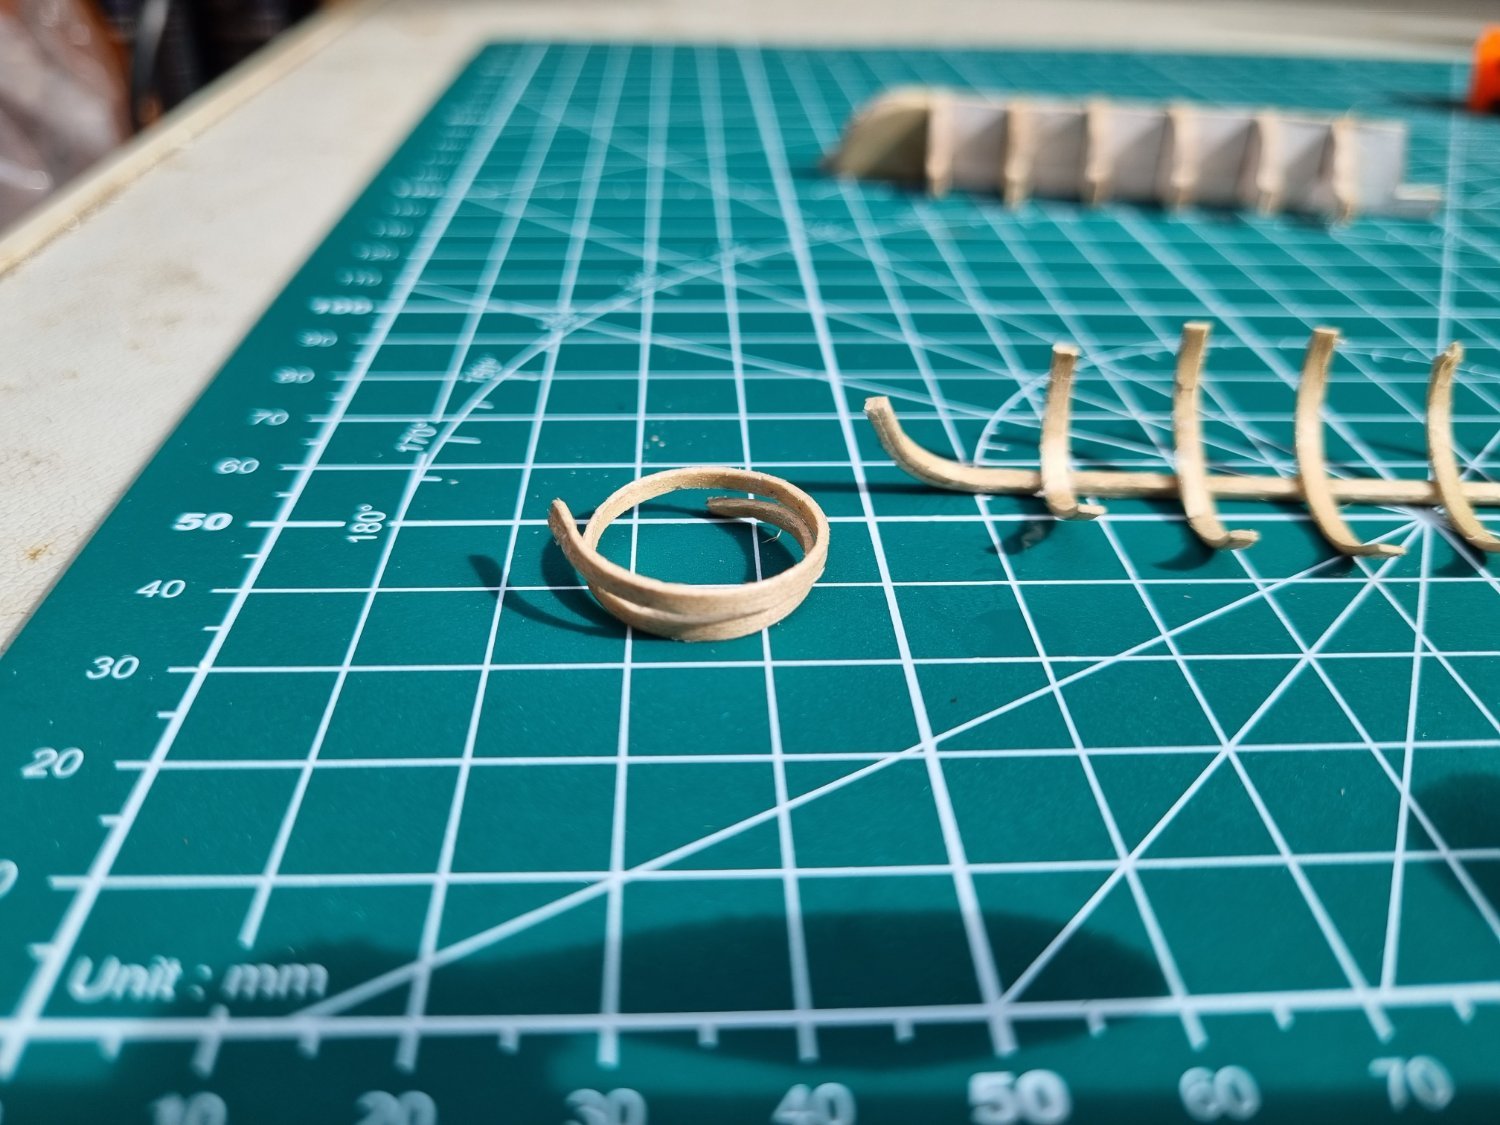
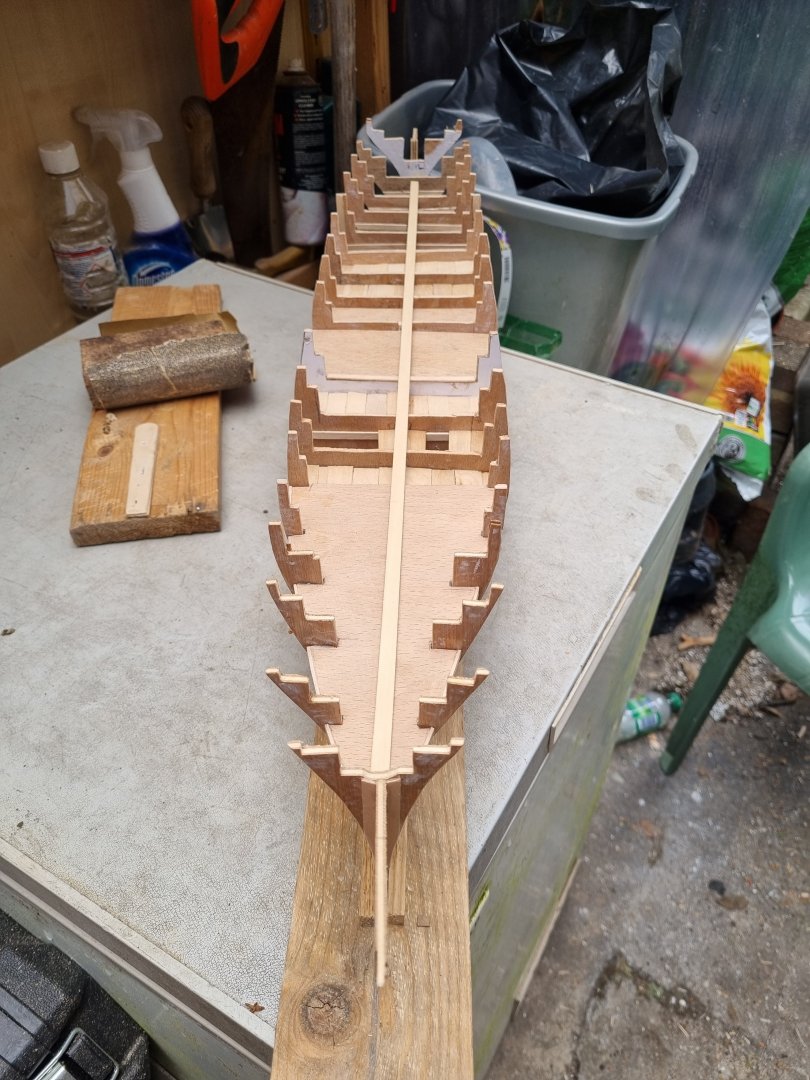
So progress is slow as each bulkhead has to have the stringers attached to add support for the spacers to be inserted. While I do this, I created the forward section of the false deck but for some reason I haven't been able to accurately set the width. Correcting this by adding extra wood around the edges. Still a little more to do there. I tried out a set of strips to check the run and this identified a few errors in drawing and cutting out of the bulkheads. All fixable so no real problem and all the errors will be below the decks and will not see the light of day once the hull is planked. One thing, in this hobby, when someone asked what tools they need, tell them to buy lots of clamps. And when they think they have enough, go and buy some more, you can never have too many clamps. Simon


-
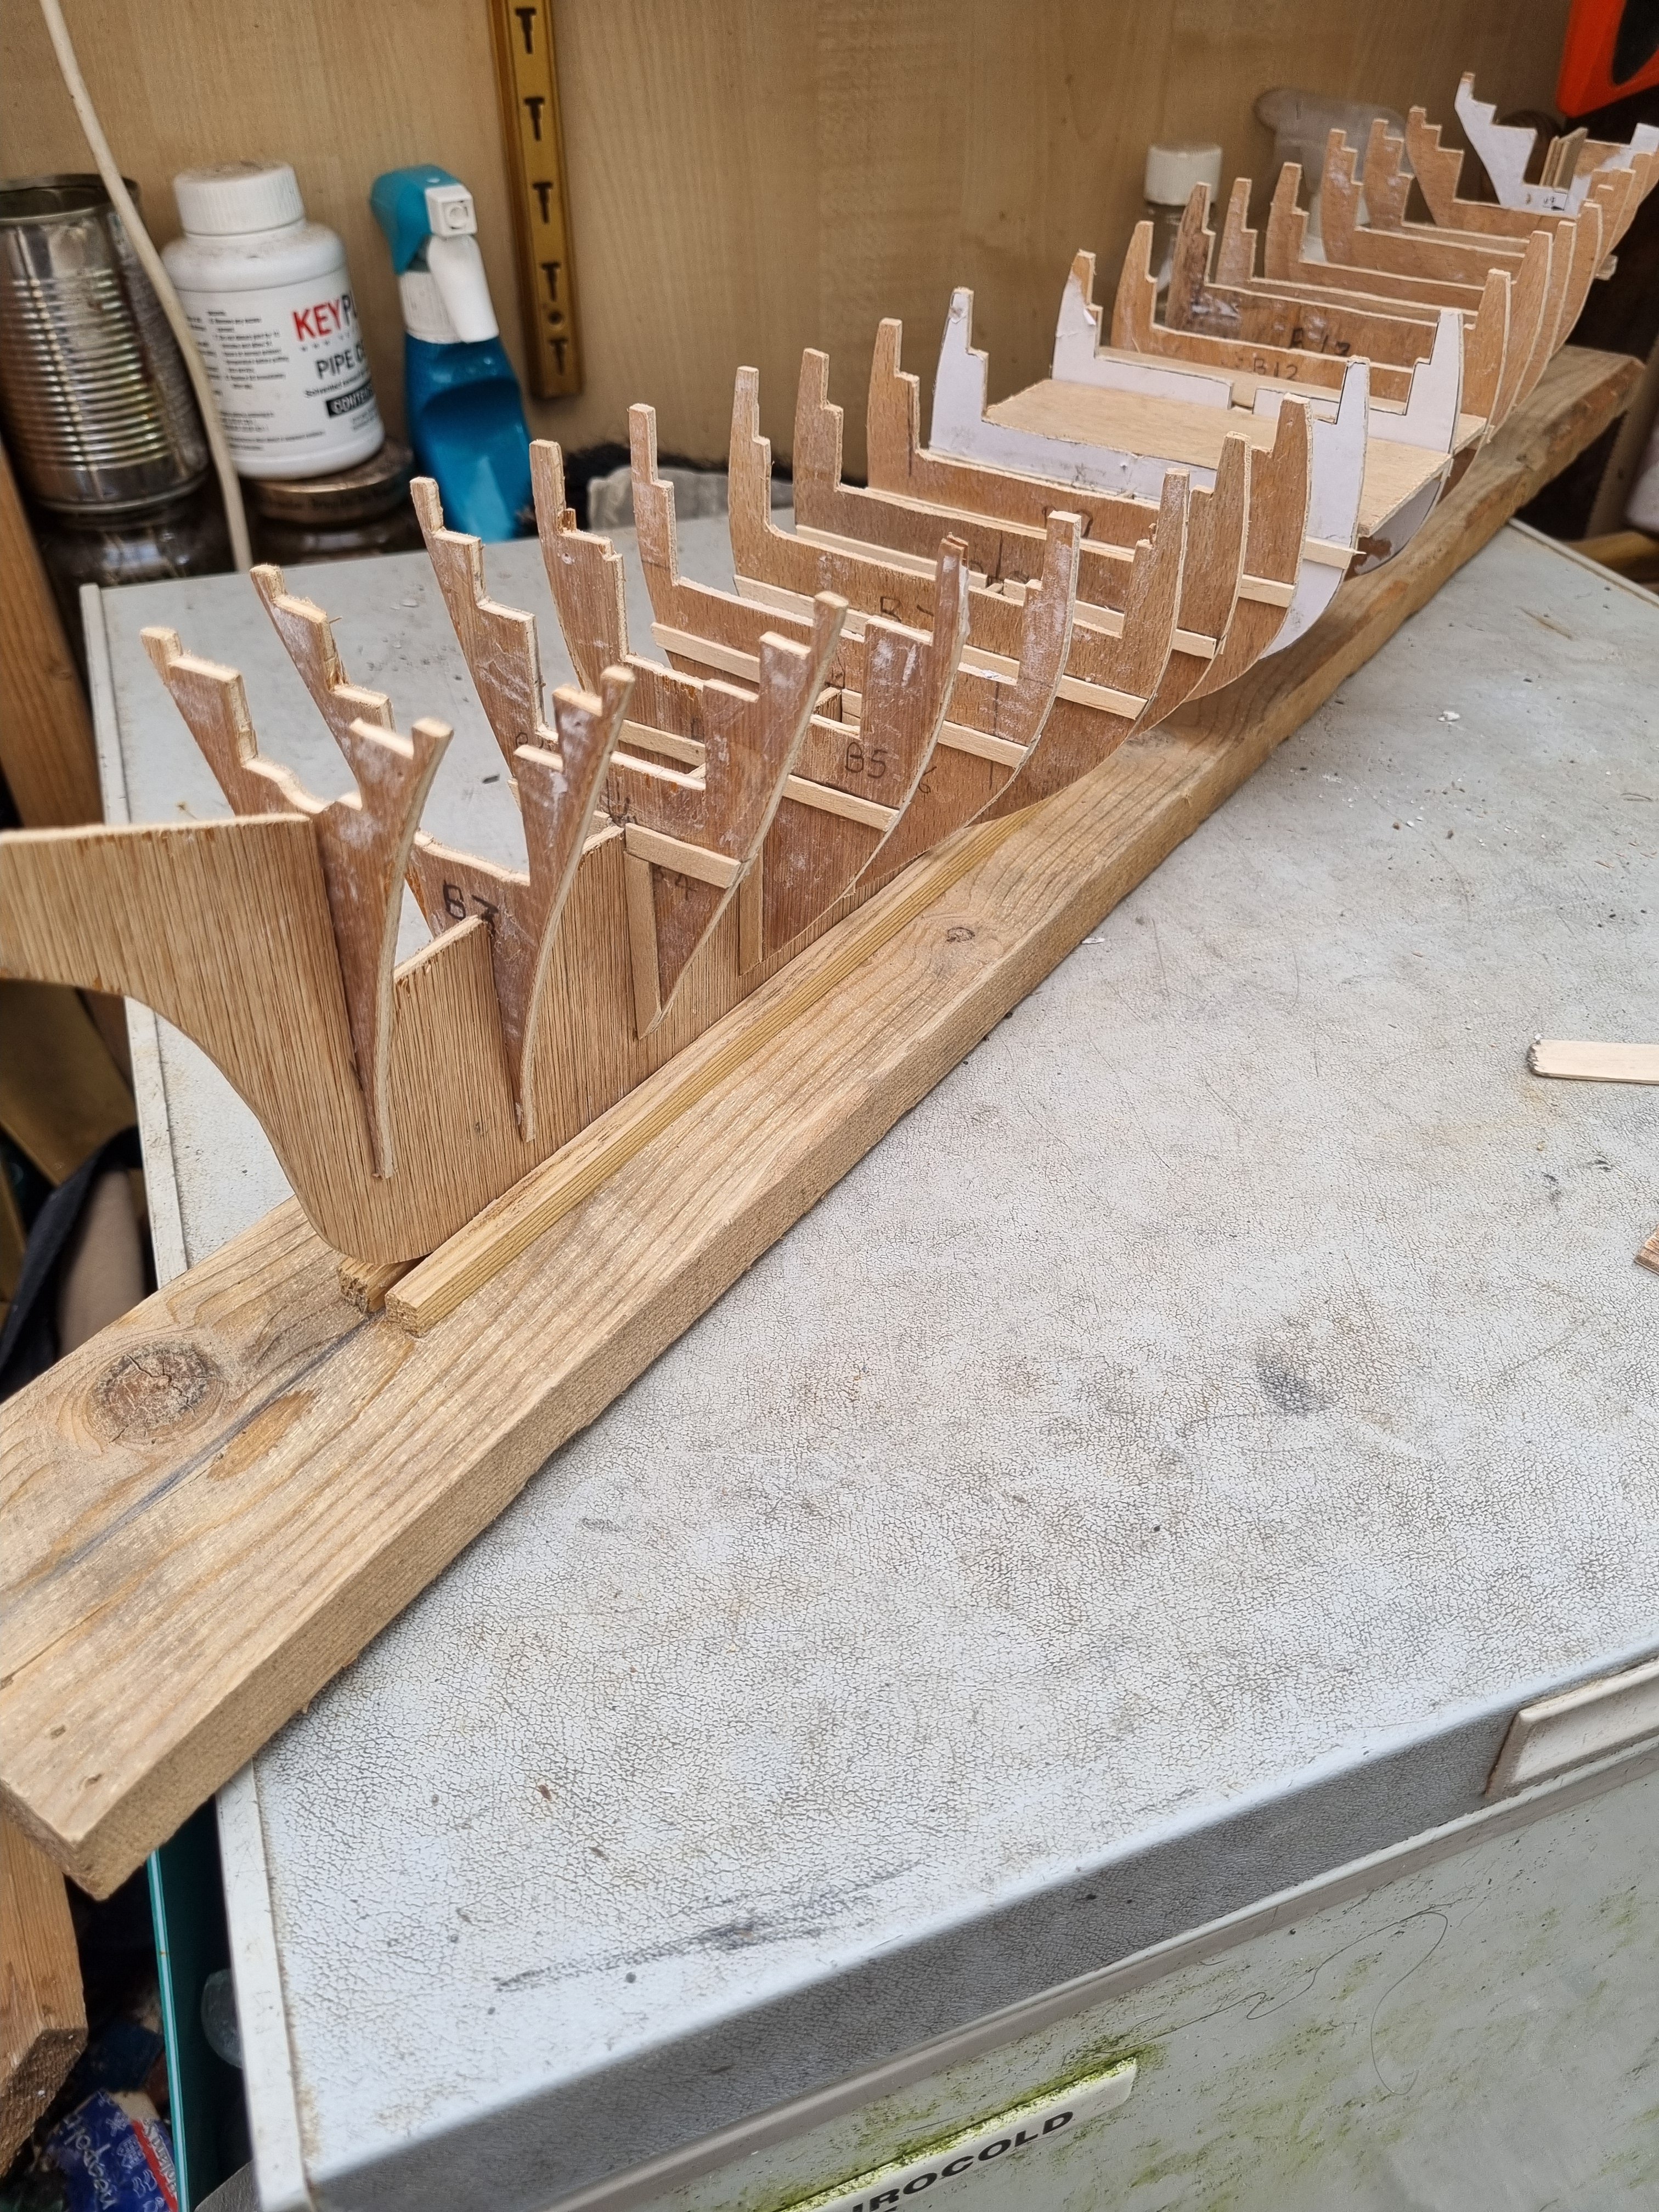
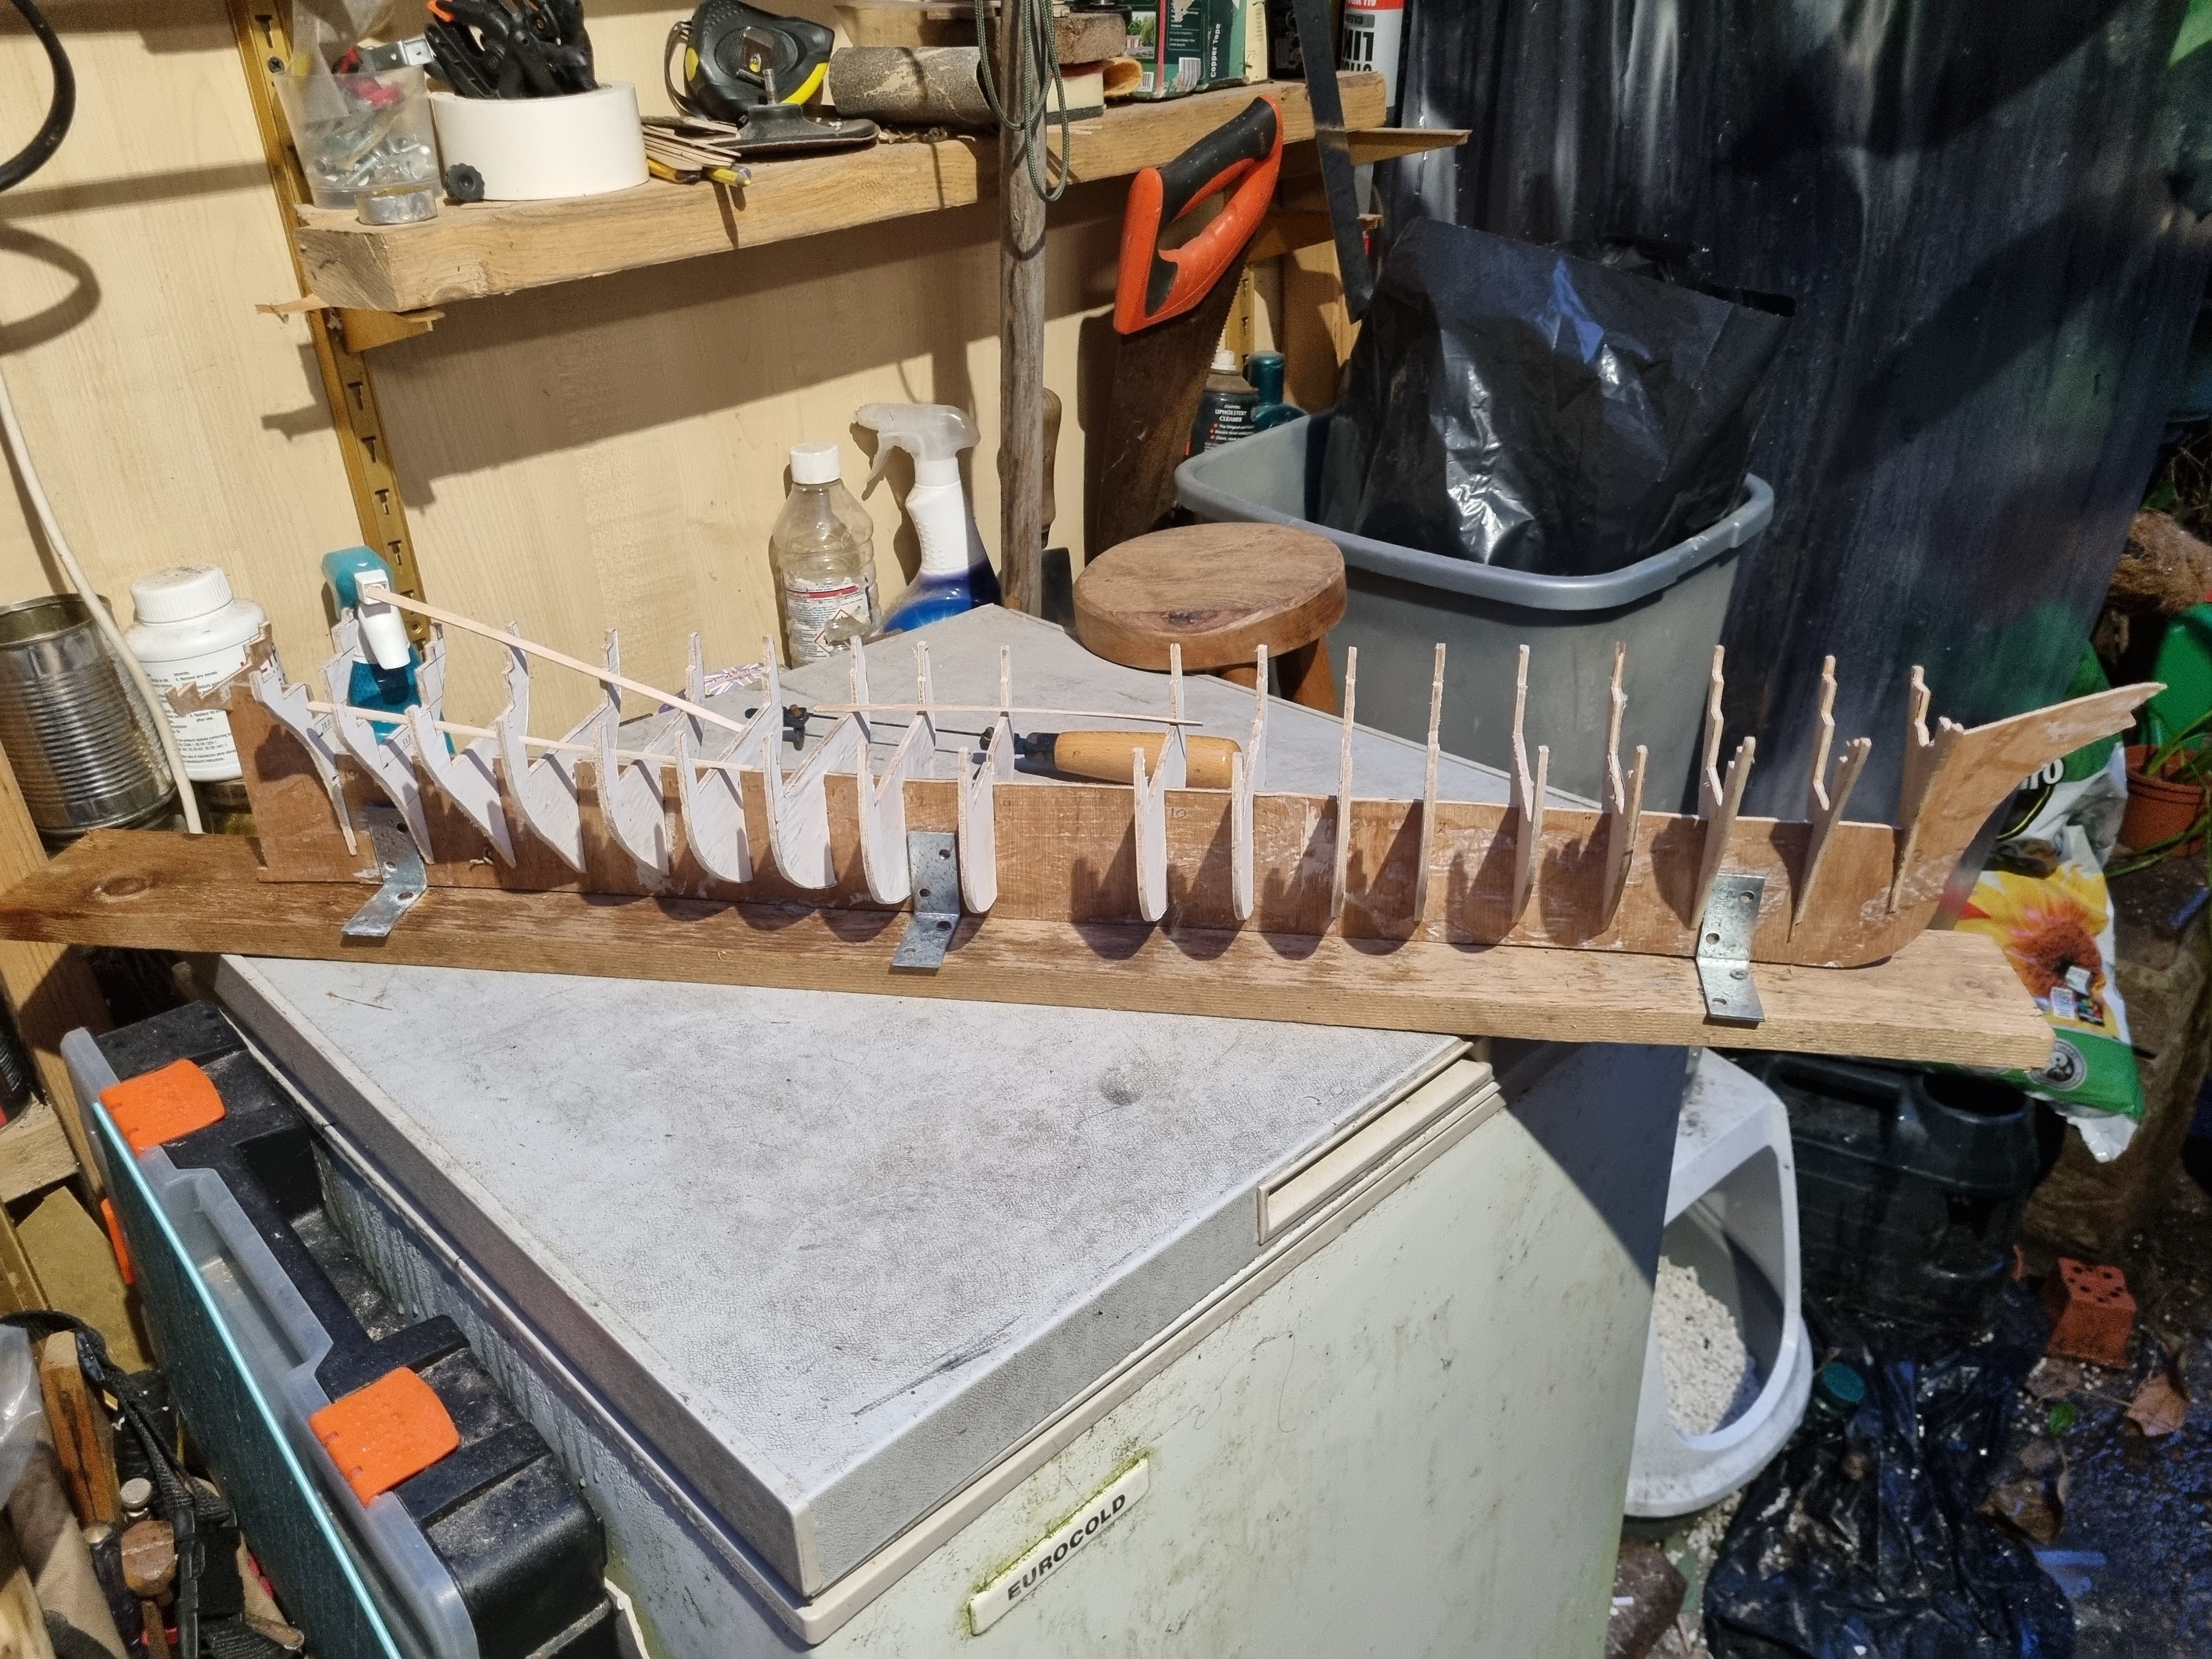
So I made an adjustment to the way the keelson is secured to the board, this should keep it straight. The three brackets this replaces were not holding the keelson very securely. I can't believe the price of balsa, it's ridiculous. So I will only block the stem and stern, and use accurately cut spacers to maintain the correct position and spacing of the bulkheads. I have been adding additional strips to the bulkheads, these help to keep the bulkhead square to the keelson and something to glue the spacers to. Just have to work out the correct position for the knighthead then can work on the stem blocking shape. Simon


-
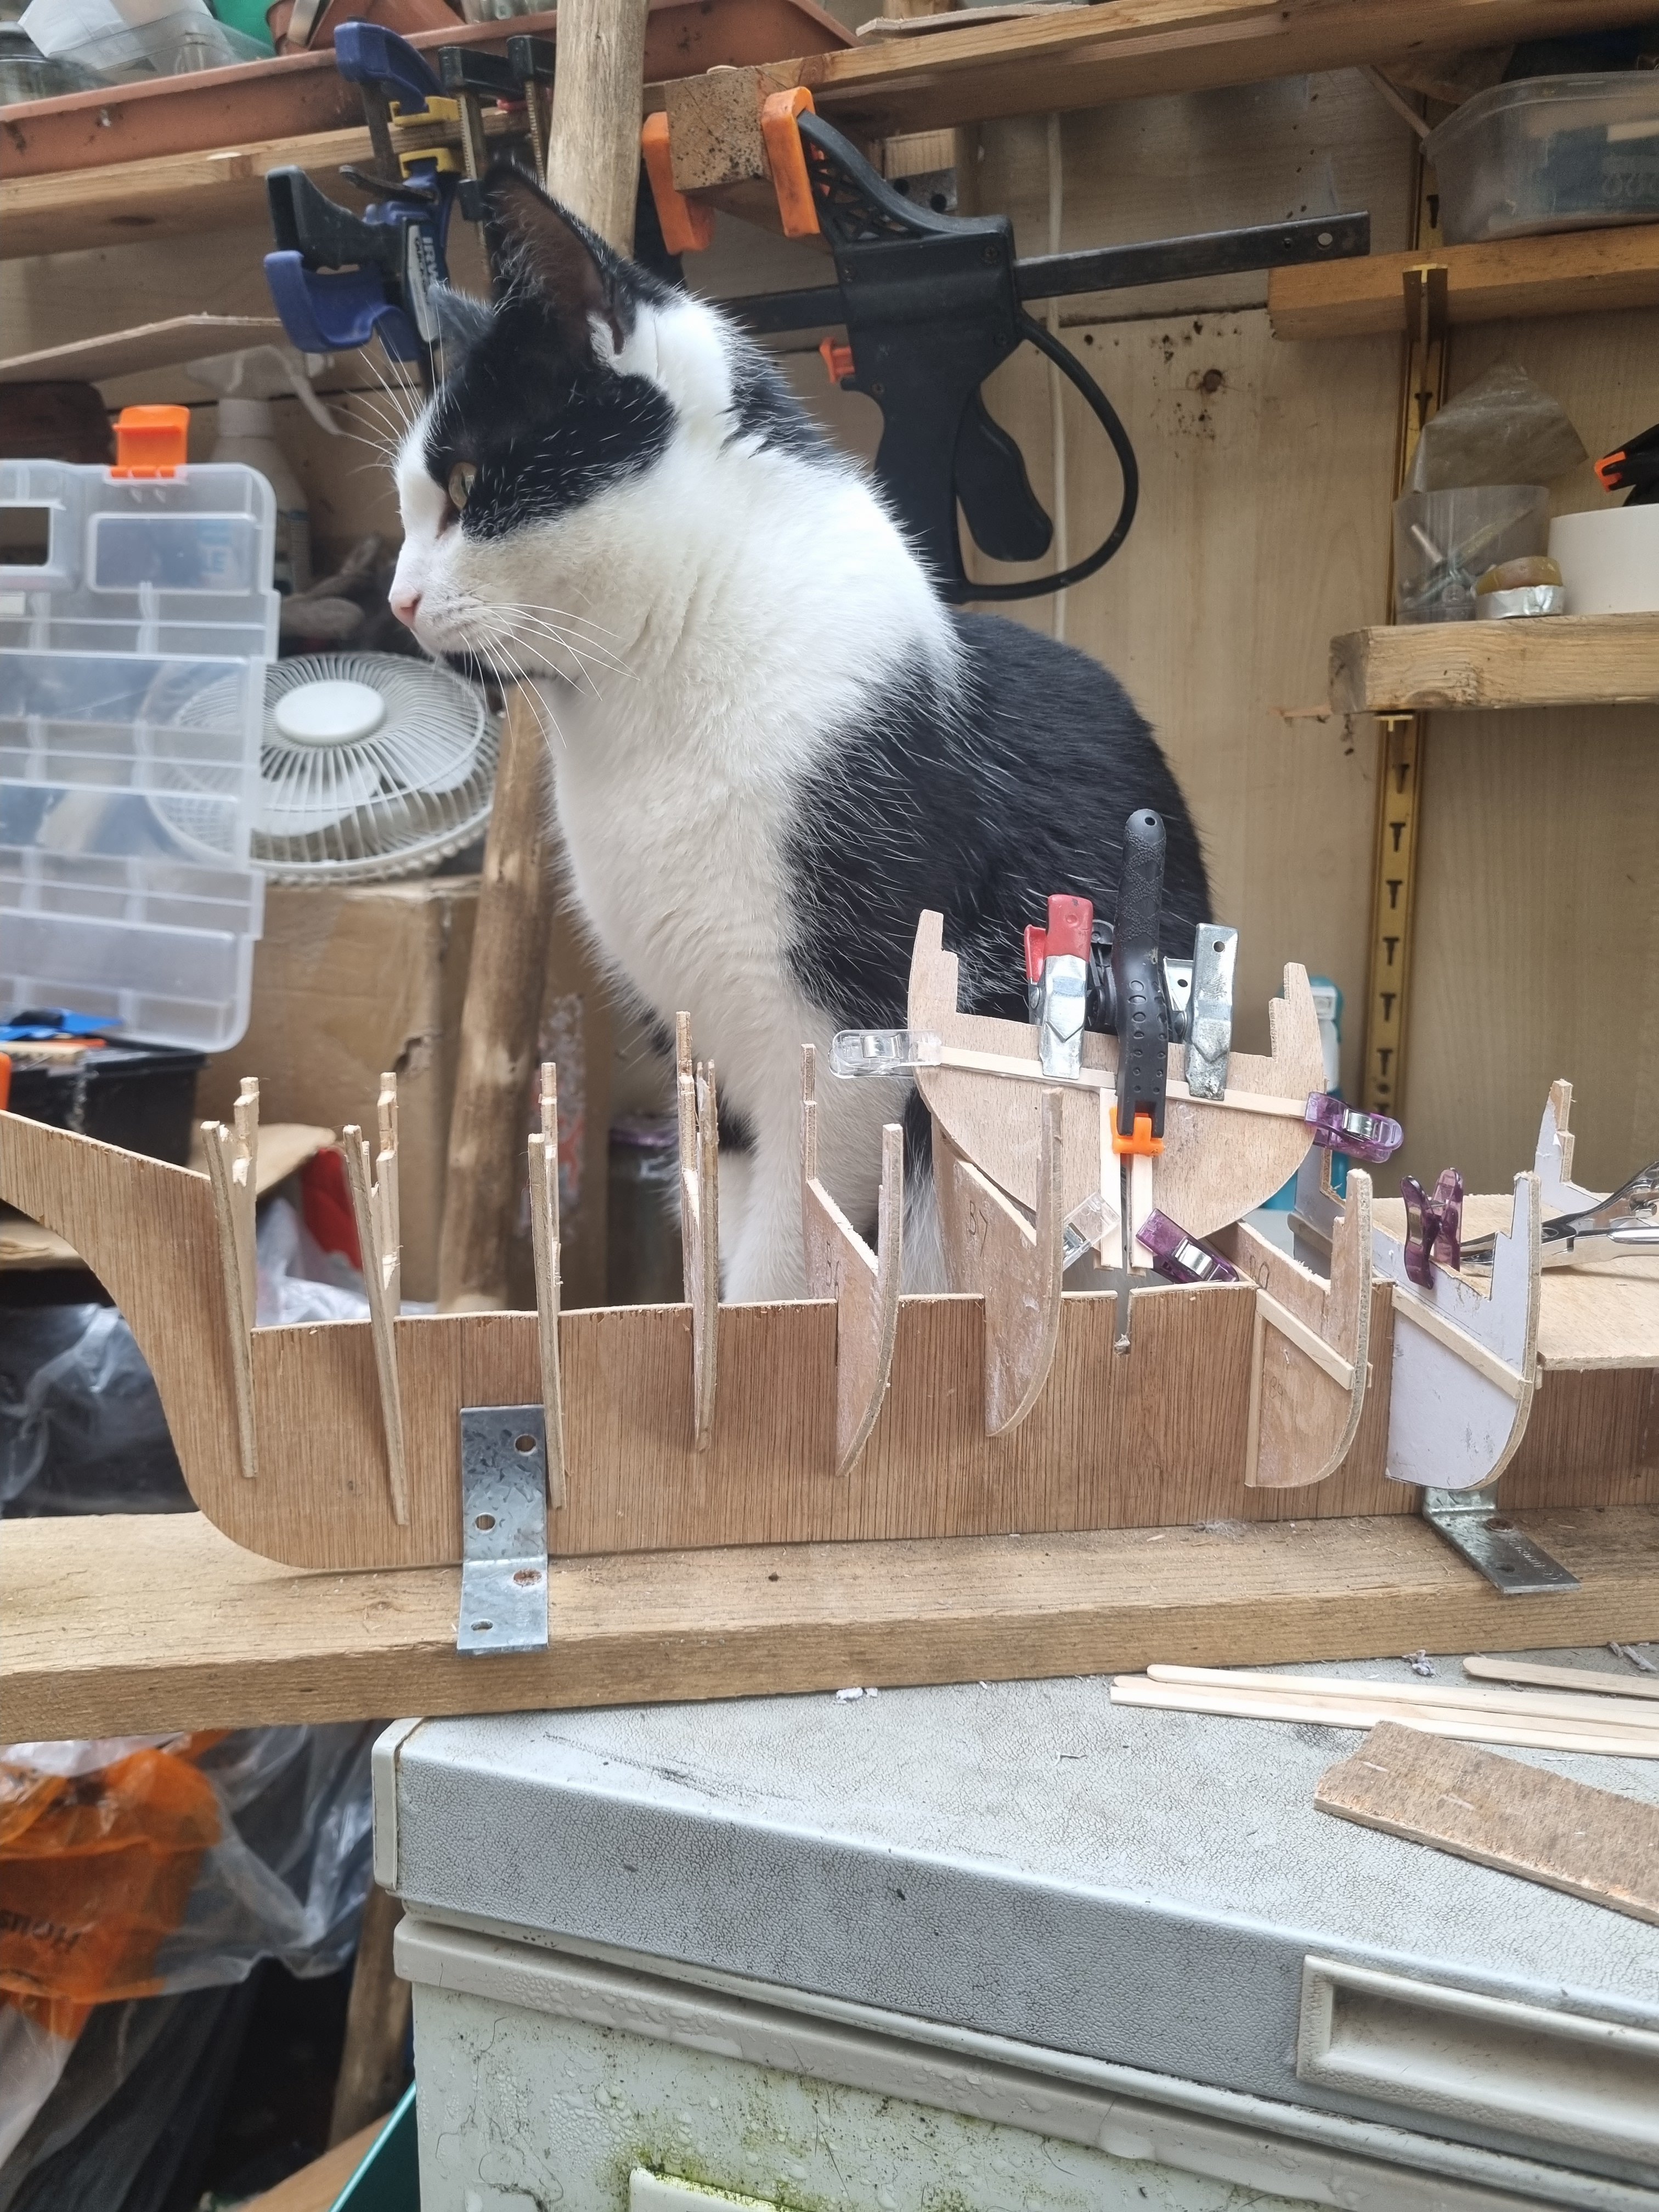
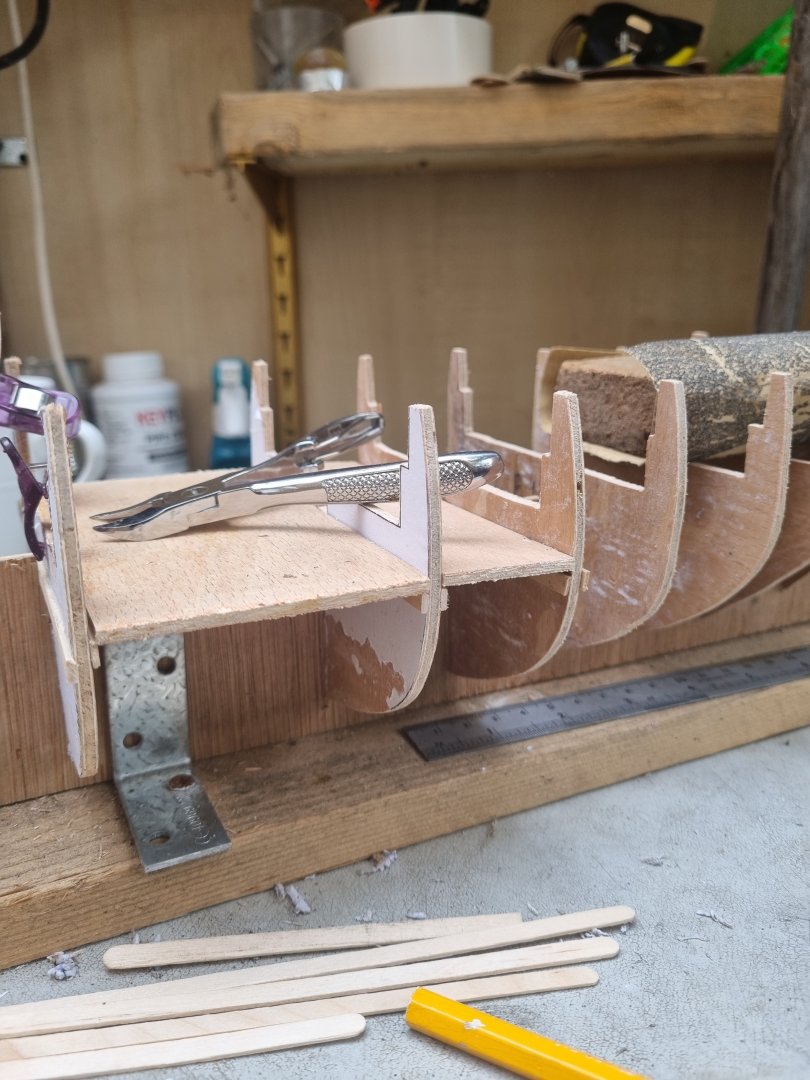
The ply I used for the bulkheads is fine but but the keelson flexs like an agitated snake. I have looked into the price of balsa block and I just can't believe the price of it. So, with my thinking cap on I have decided to create a series of boxes with the upper level being in no more than three pieces. This means an extra level of ply level with the top of the keelson. To support this I am adding strengthener to each bulkhead. They will also increase the thickness of each bulkhead to help keep them at 90 degrees to the keelson. And as you can see, my assistant is ready to lend a paw. Simon


-
Cutty Sark by Nenad
My Fathers Son replied to NenadM's topic in - Build logs for subjects built 1851 - 1900
Sounds very interesting.- 4,145 replies
-
- 1
-

-
- cutty sark
- tehnodidakta
- (and 1 more)
-
I will strip of the paper templates and I need to locate the places on the keelson for sockets for the masts. I am debating which is better, filing the space between each bulkhead with balsa or can I just add squares of ply. Stem and Stern will have to be balso filled so I have something to support the planking. I intend to add a lower deck the lengh of the boat which should add rigidity and then there will be the main deck which should add strength. The first planking will be 1/32" basswood and I will have a look at Cornwall Model Boats for the top planking. But that is a long way off just yet.
-
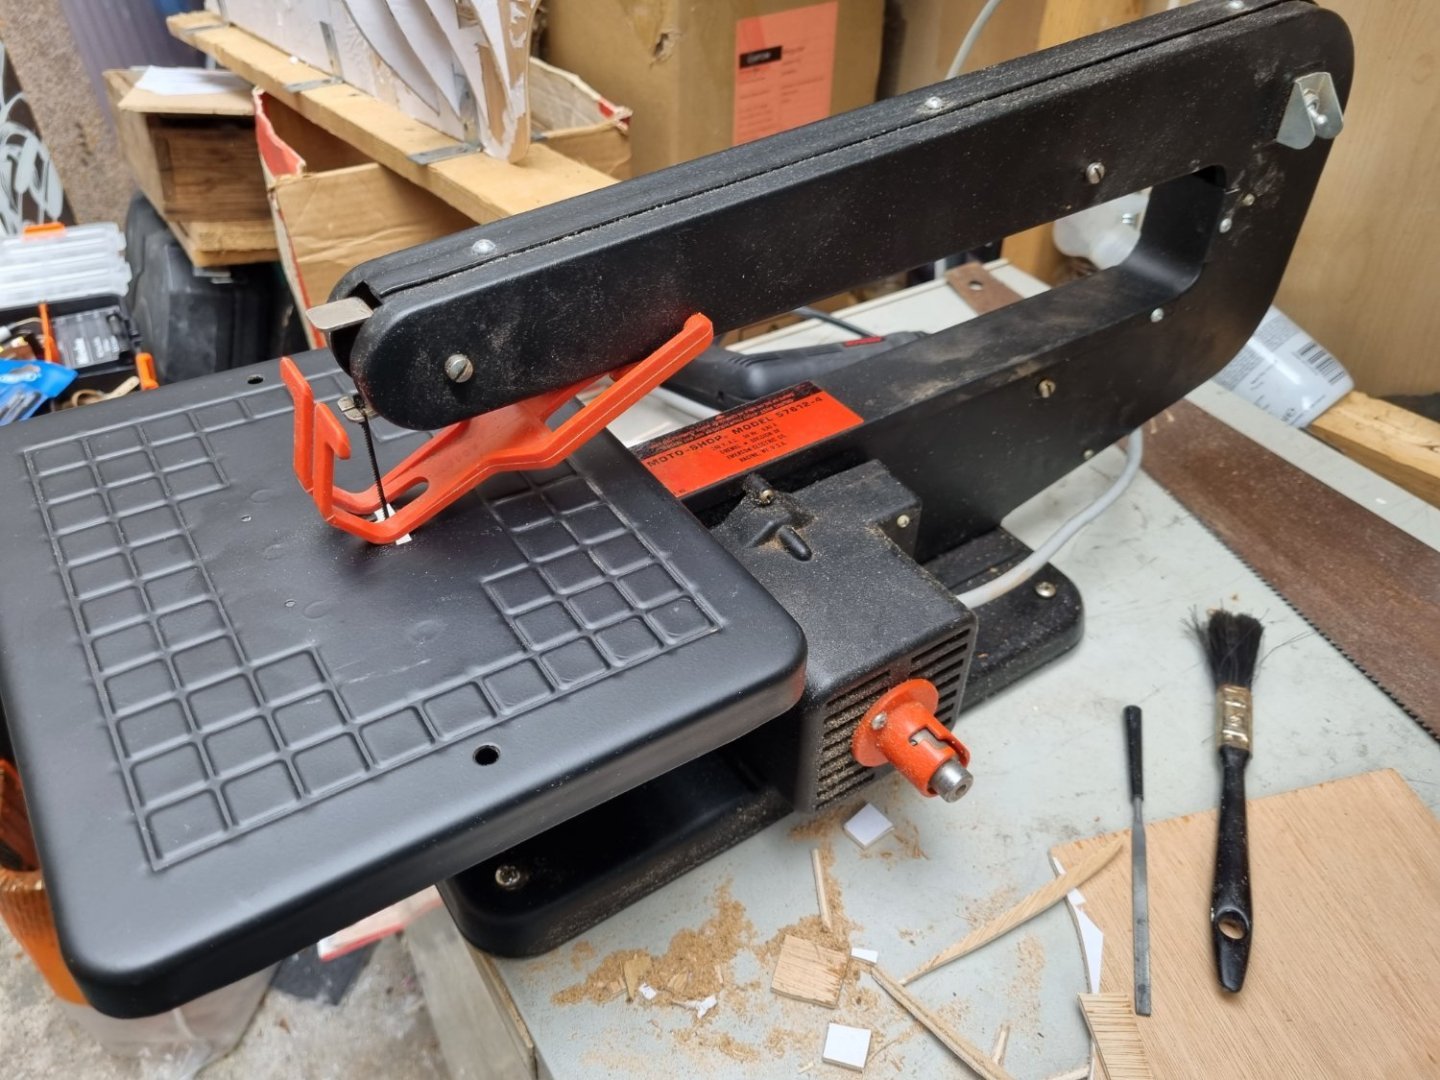
Thanks Keith, well it might be raining but my workshop is dry, well mostly. But at least I managed to cut out the main bulkheads. The penaltimate one, no 19, is sitting proud but I can adjust that when I get my next spare time. These were all cut by hand as that scrollsaw I bought can't cope with 3.6mm ply. Still not advanced my rigging on Cutty as my 4 legged fiends are too interested in what I do.


-
Its been a long time since I last posted but I have bit the bullet and have adjusted or cut out the majority of the bulkheads, bar three. So far they appear to be lining up as planned, pictures will follow. The main delay has been the fact that my workshop is no longer my armchair, it is outside and only partially enclosed, so had to wait for warmer weather.
-
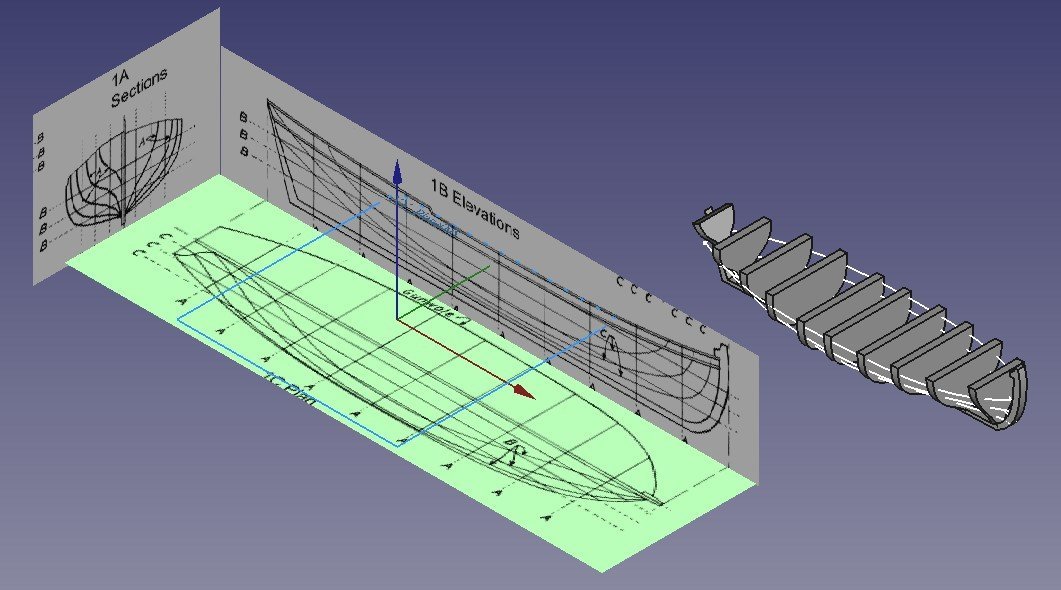
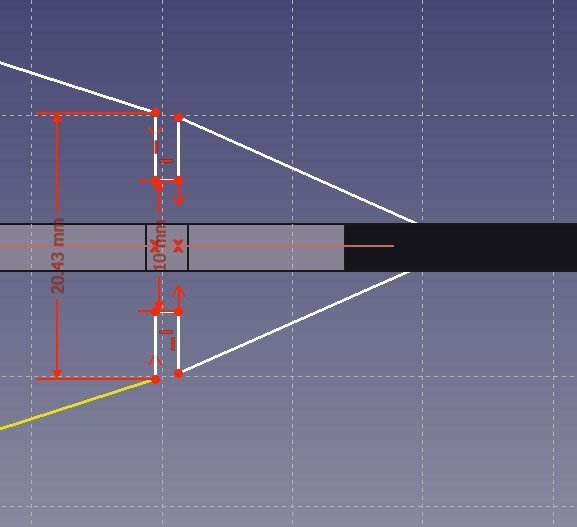
I used a generic imge of Line drawings for a Captains Gig and constructed virtual model. I used the templates derived from yjese plans and the resultant phisical model has been installed on Cutty Sark. I faithfully created the frames from section 1A . I took a template from Elevayions 1B to give me the shape of the keel and the curvature of yje Gunwhales. However, creating the Plan from 1C shows an anomile whick can be clearly seen on the model as the lines should intersect the edges of the sections. This is relatively accurate on the stern half of the boat but not so forward of the central section. If i tried this with the vertical profiles from 1B Elevations, you would get a similar result. The drwings are cut and pasted from a single drawing. I have combined the documents to ensure that A, B and C are in the same proportion in each image but the result is always the same. I am happy with the boat built based on these drawings and have saved the formers so I can build a similar boat for Big T but this part of CAD work is a little frustrating. Also, I think I am reaching the limit of the complexity that either FreeCAD or my Laptop can work with. When creating complex documents there are noticable delays between mouse clicks and action on the screen plus when I try to keep my files in a structured way, half the screen blacks out when I am moving files. I needed to edit the Main Deck file as I am not happy that this does not extend out to the side of the vessel, but I cant edit the sketch. Nor will FreeCAD let me delete it and star again without affecting many other parts. I have hidden this document and am nearly finished creating a new one but this just exagerates the problems with a slow system. My laptop is not that old but I suspect that the built in graphics card is reaching the limits of its capabilities. Bah humbug. Simon
-
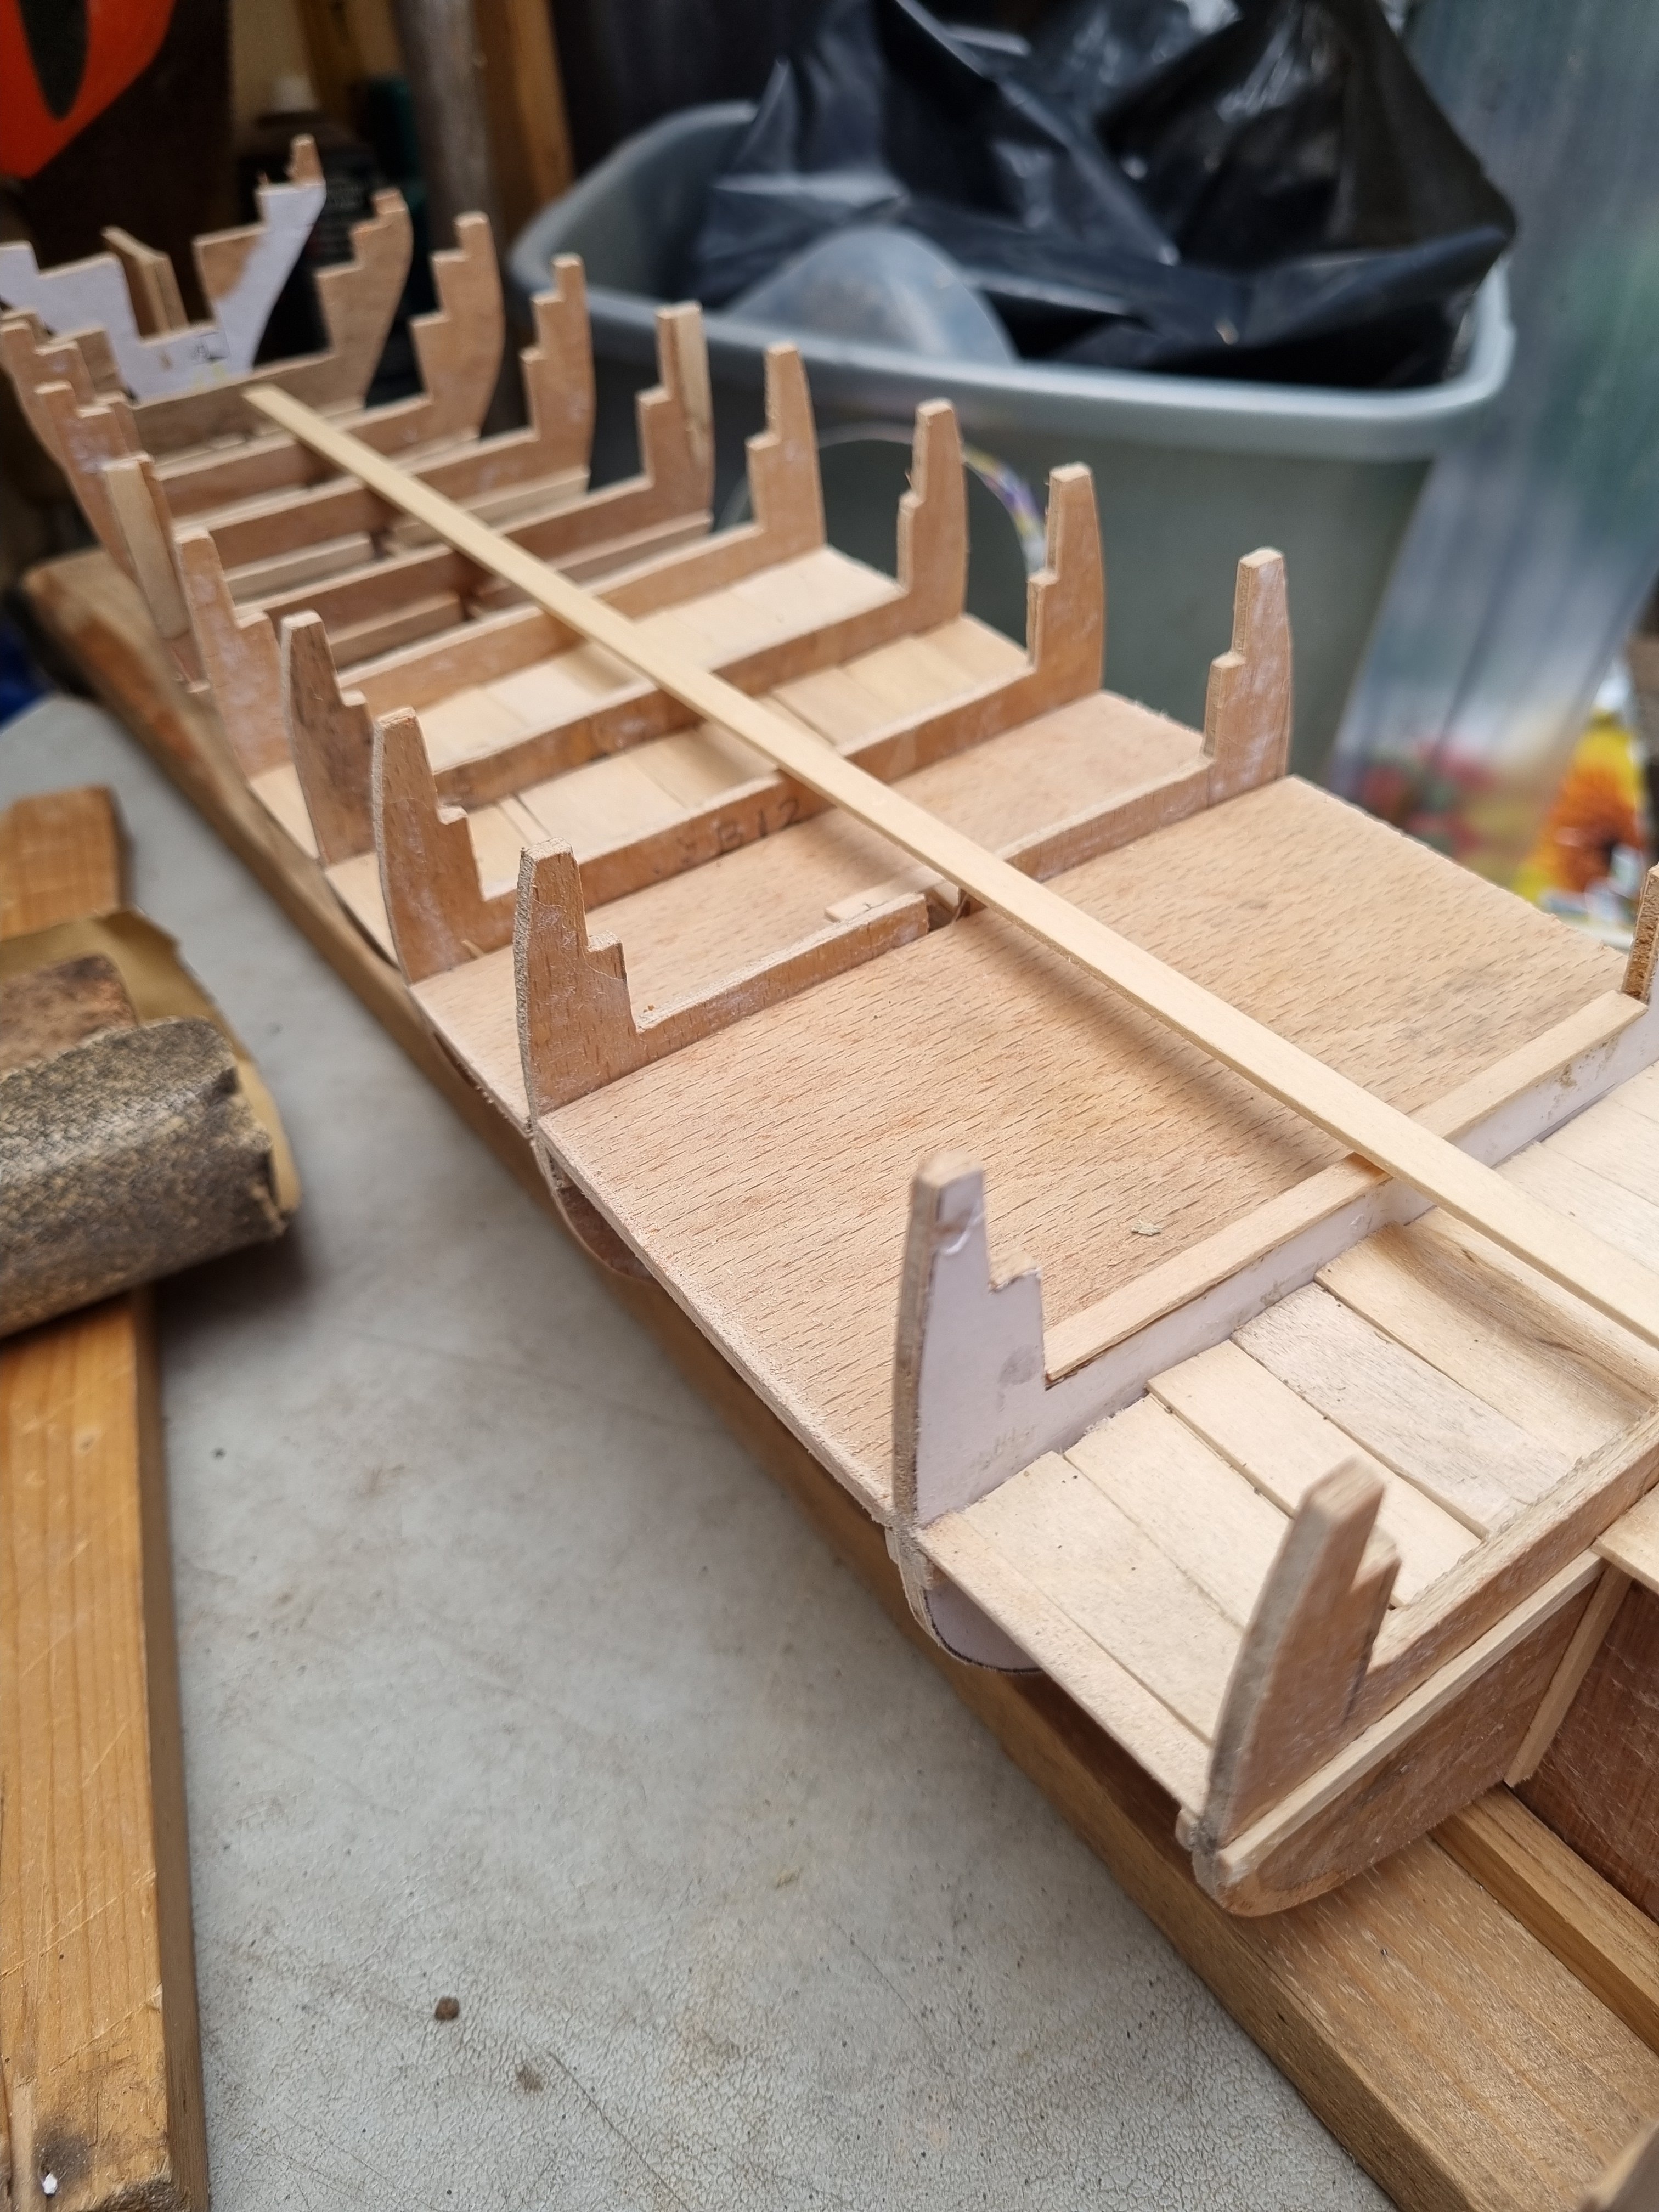
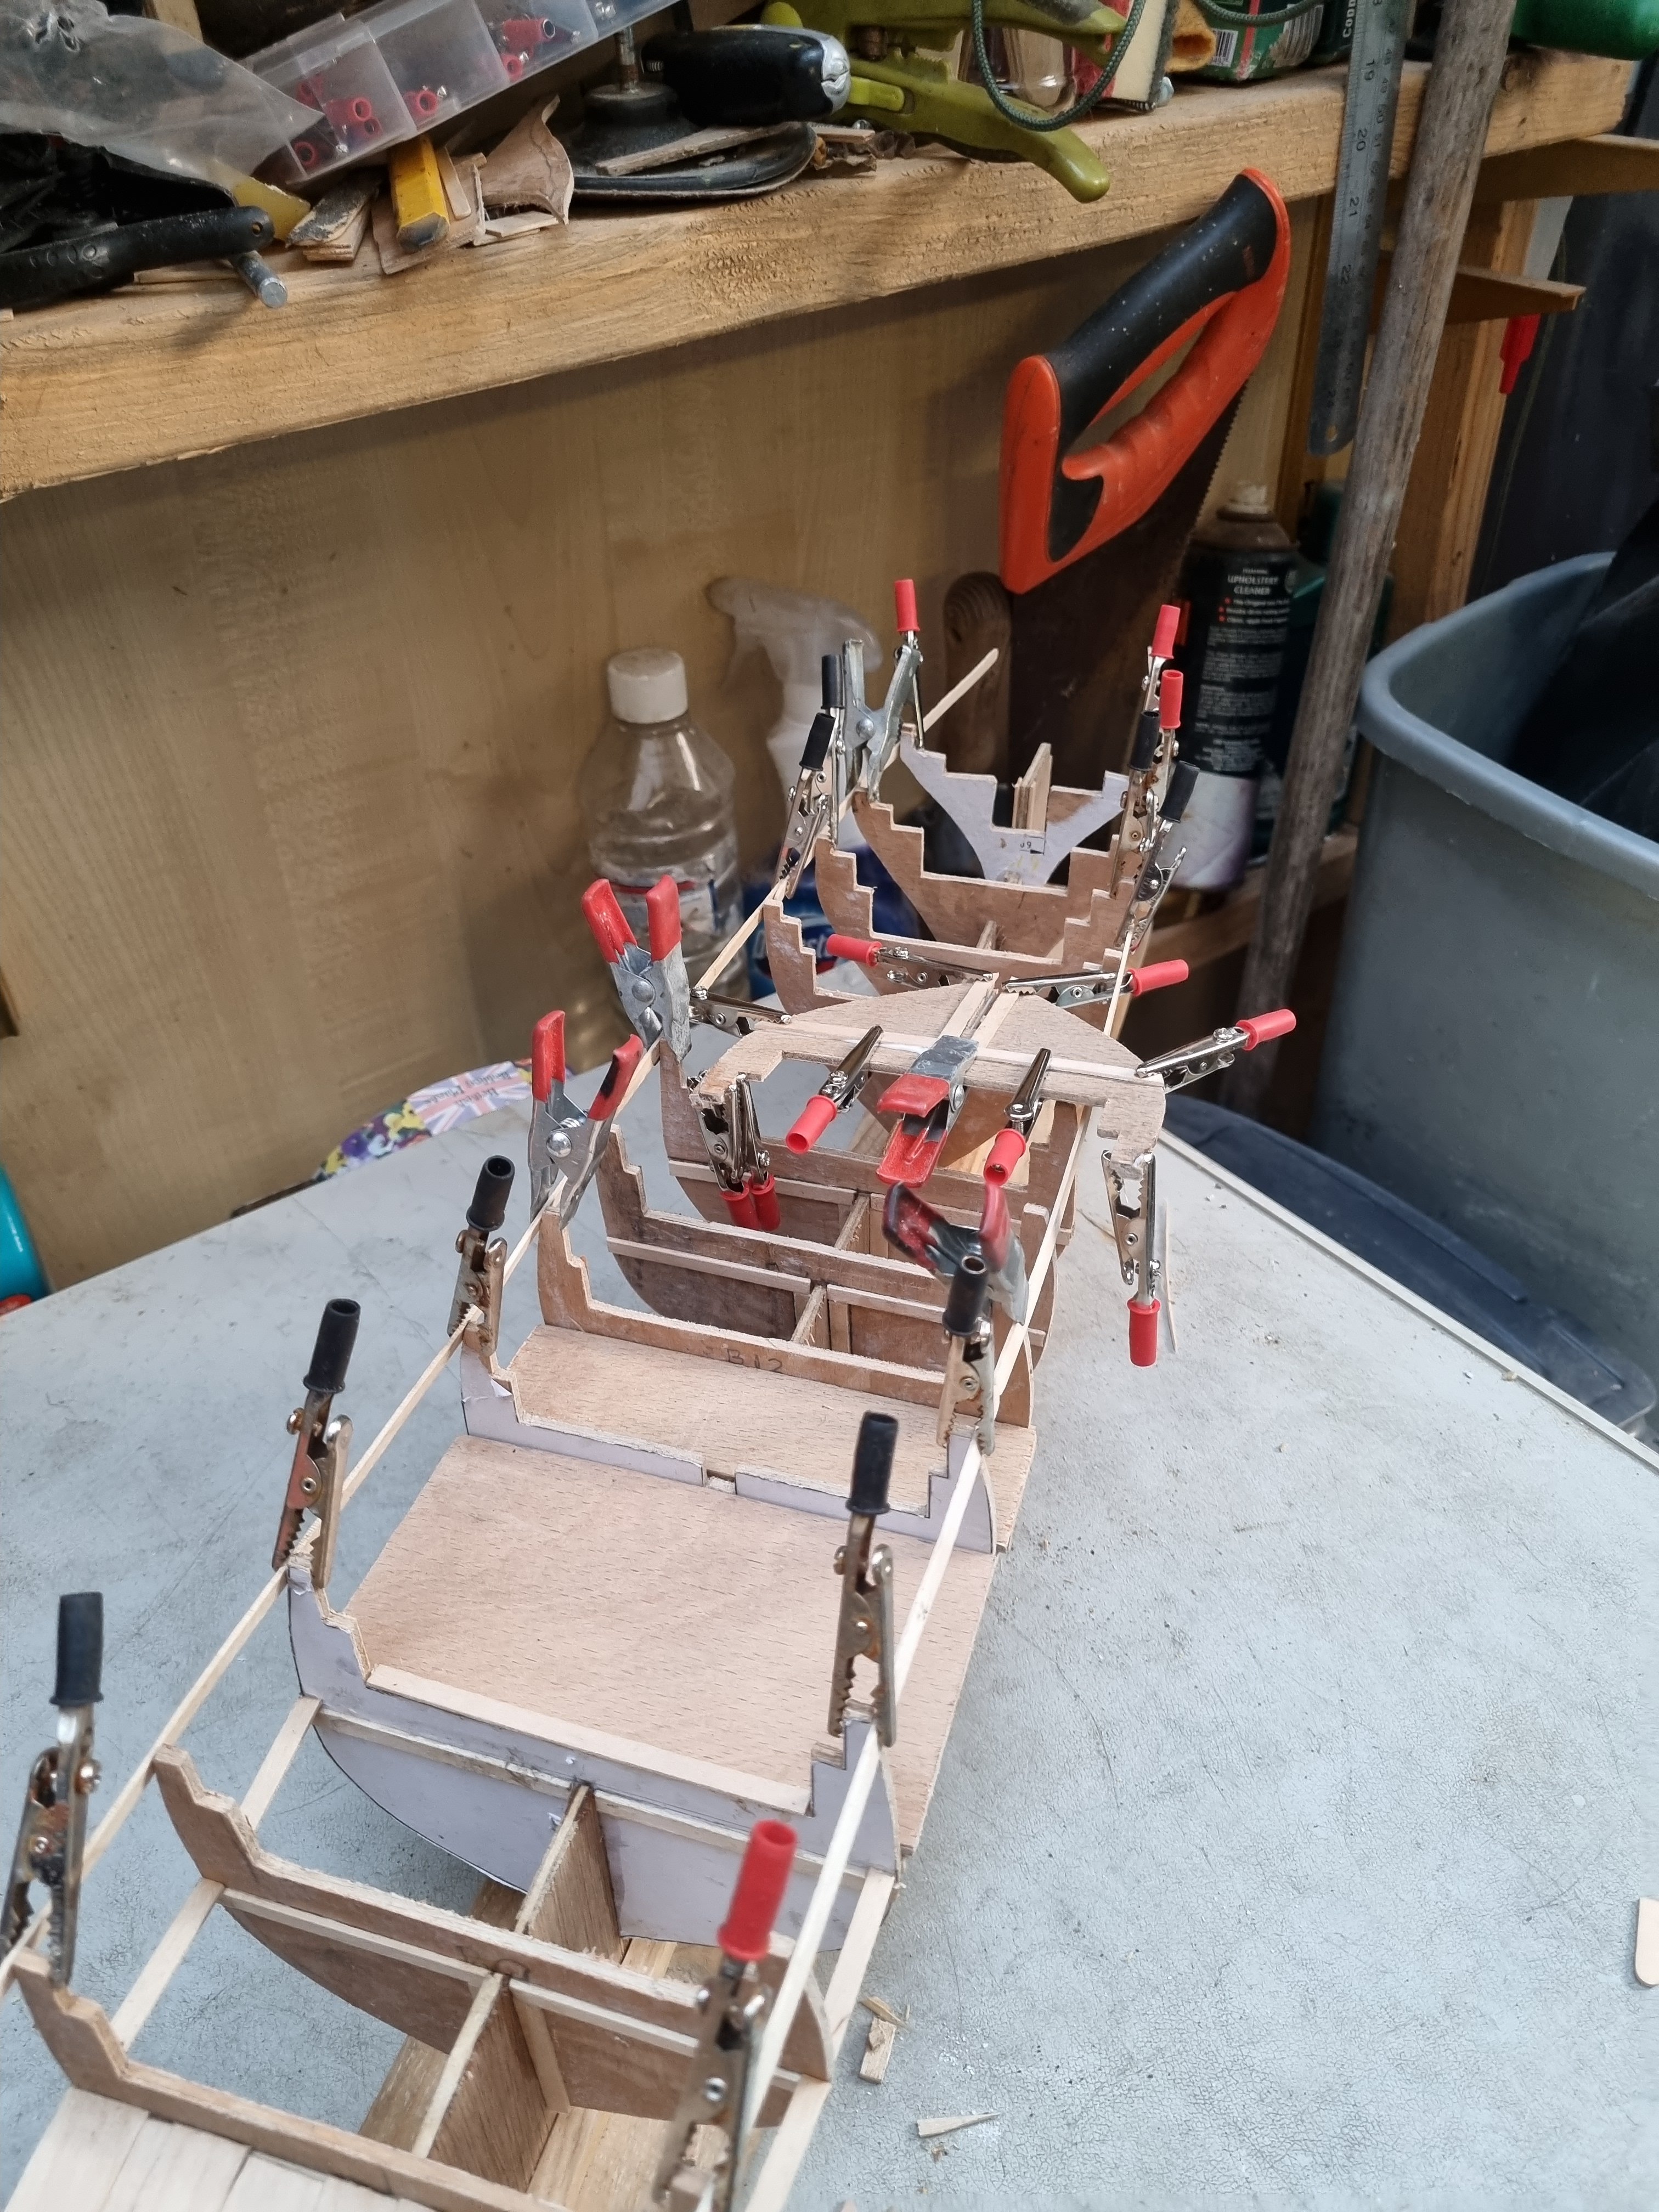
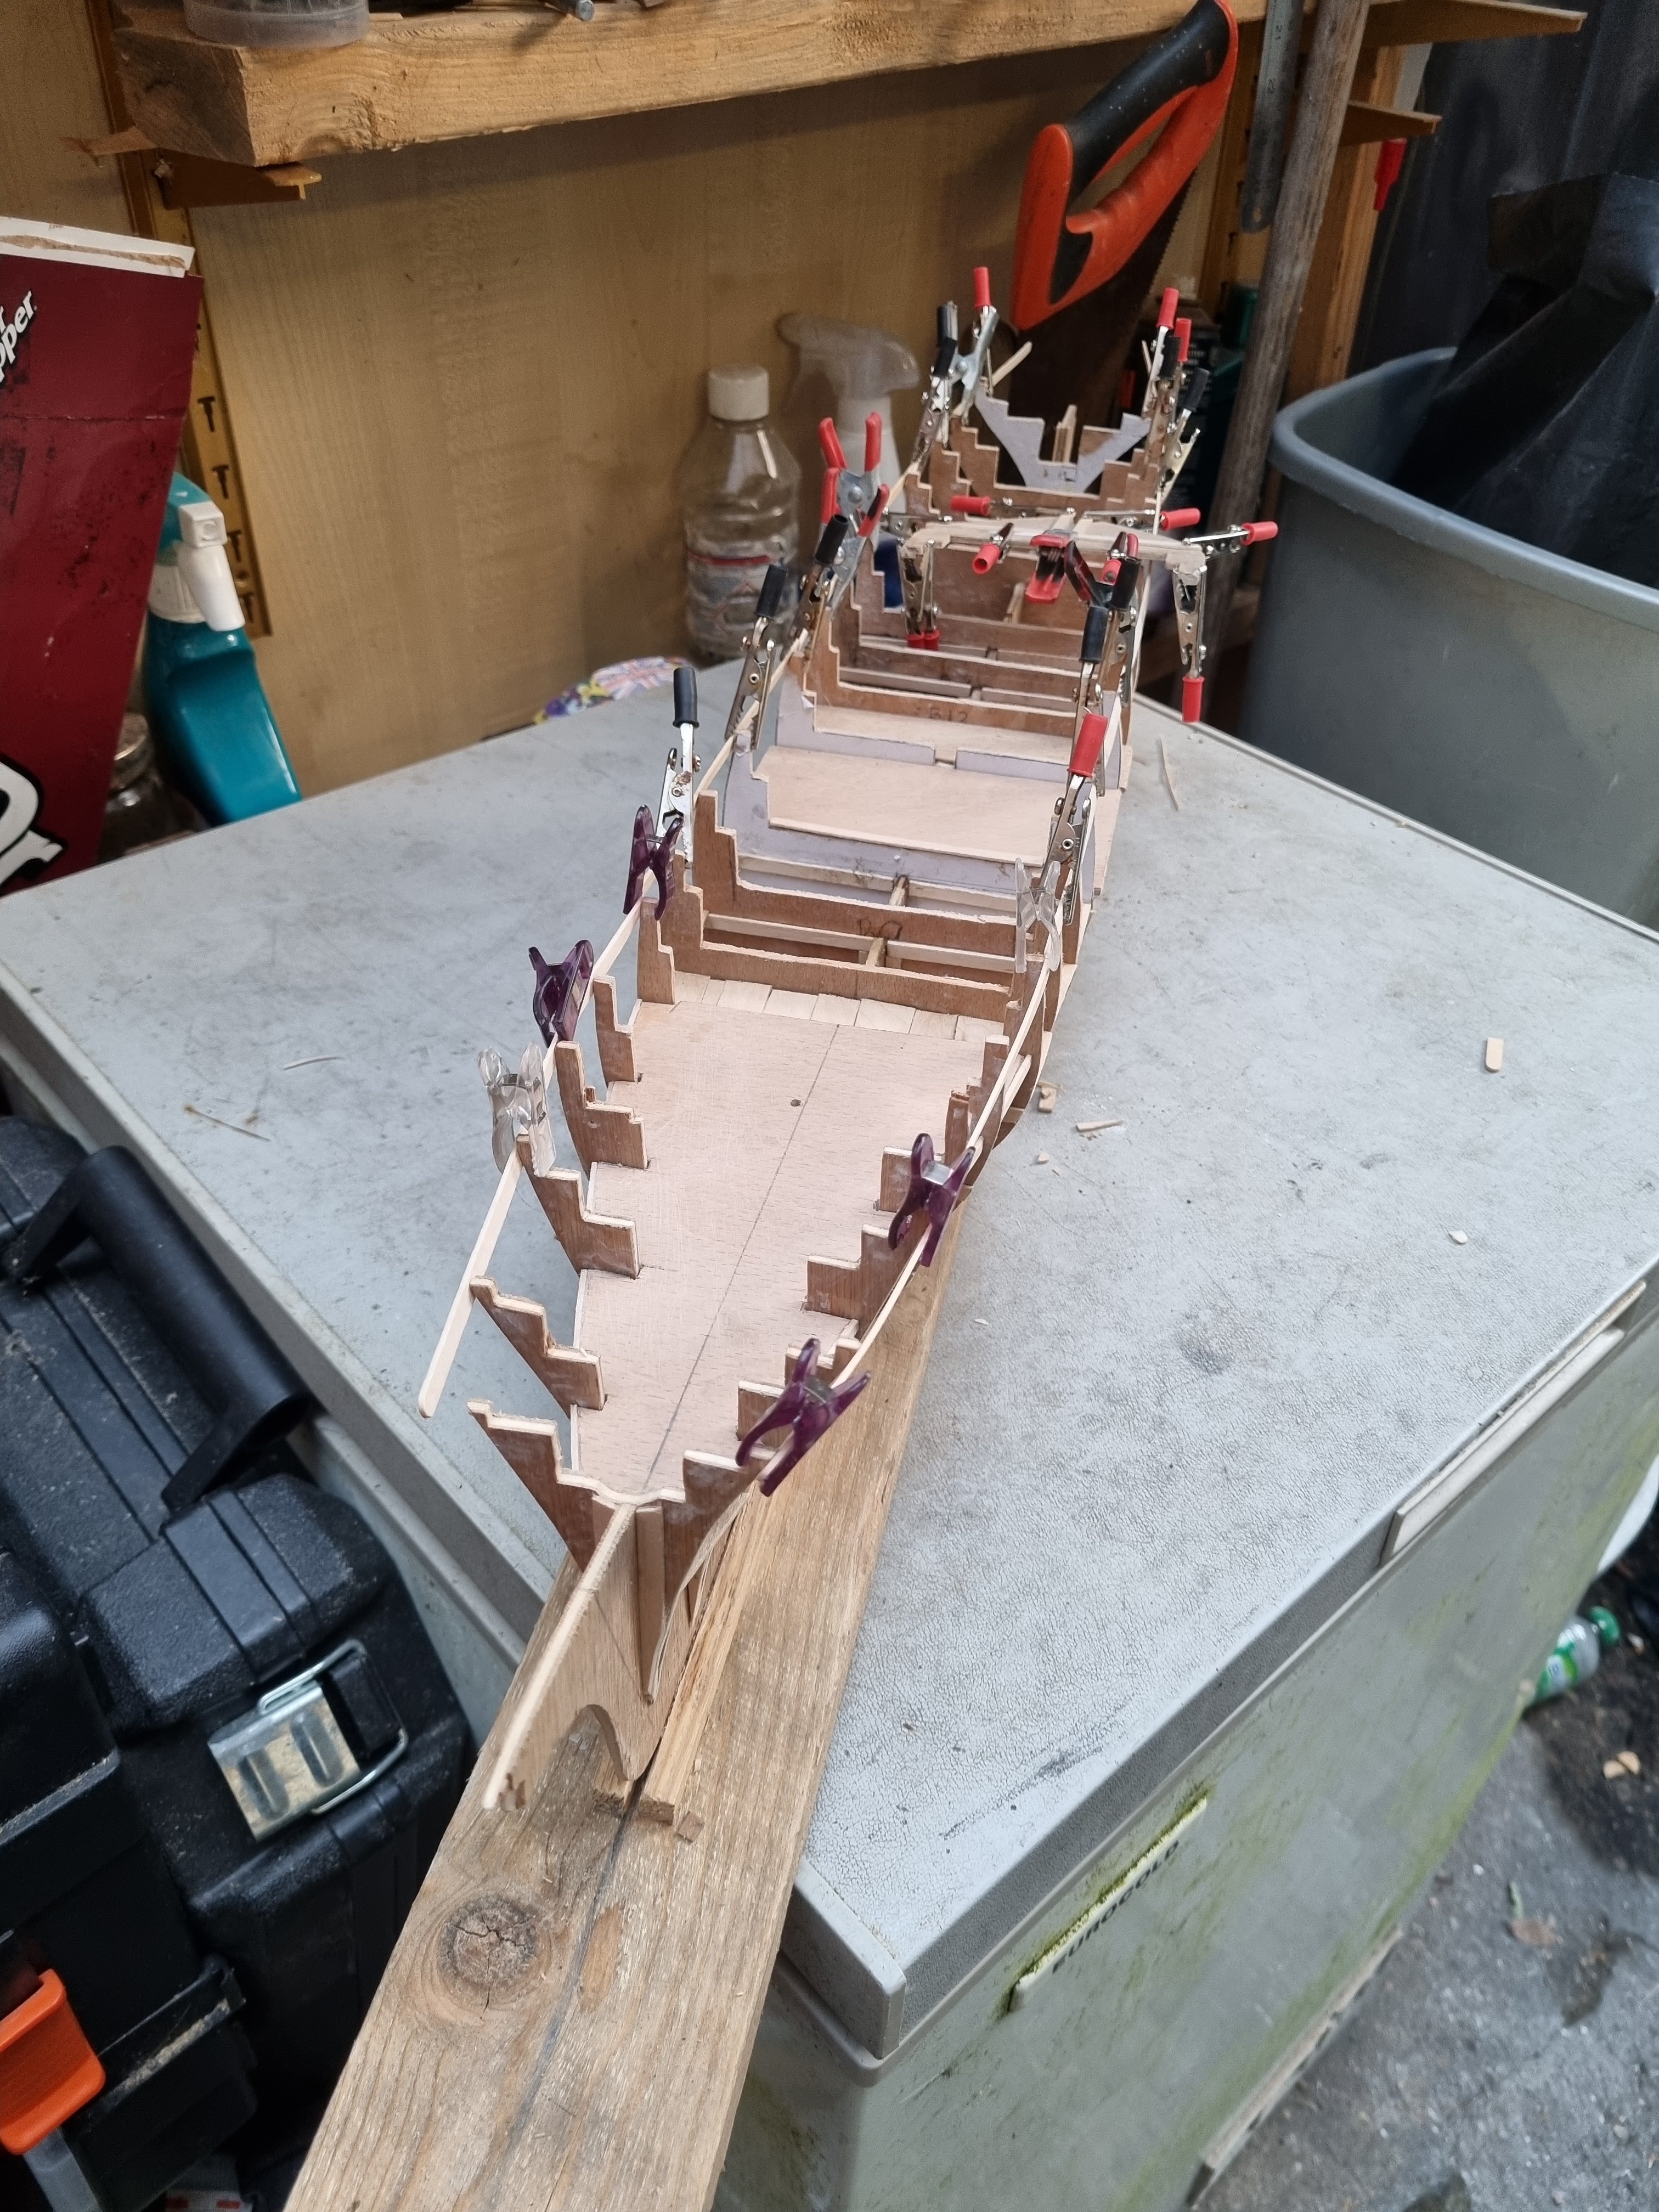
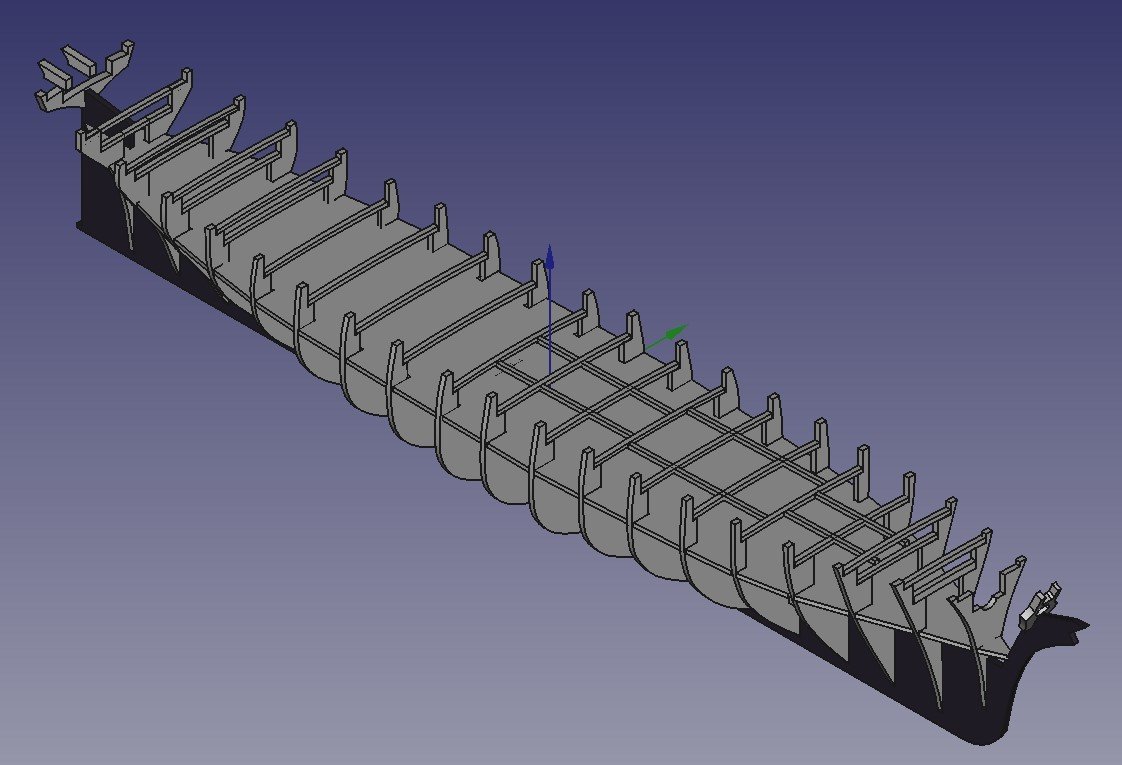
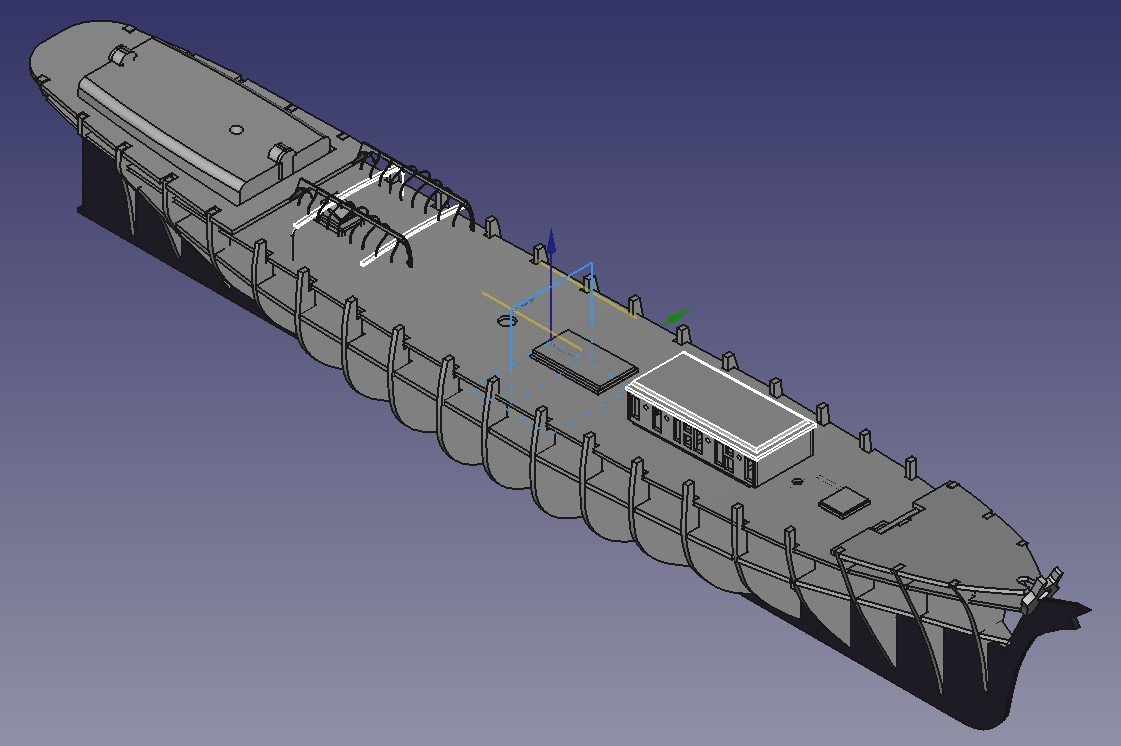
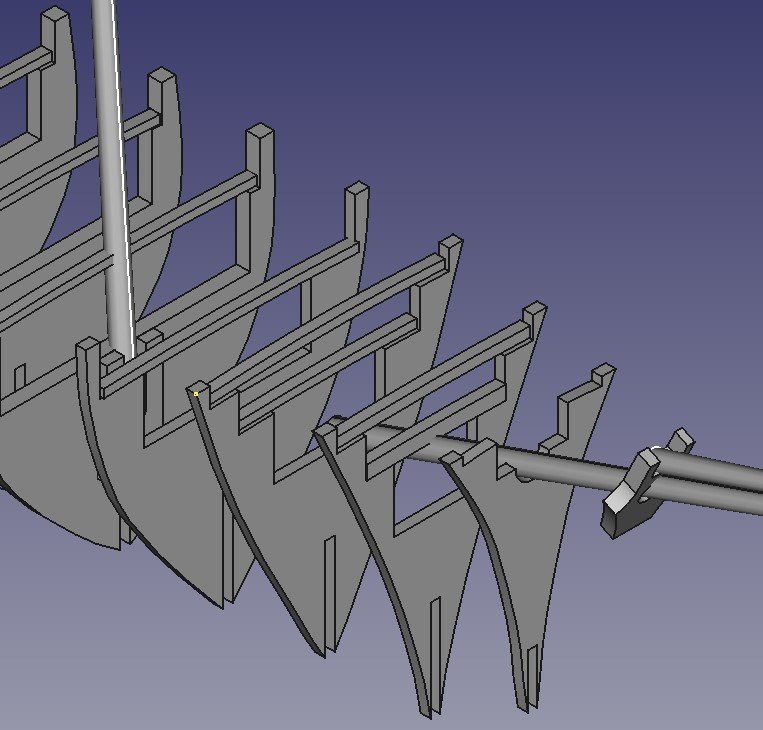
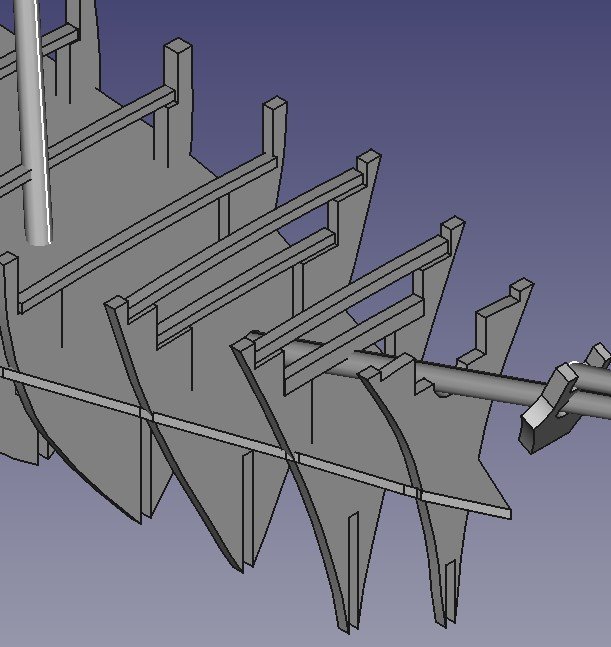
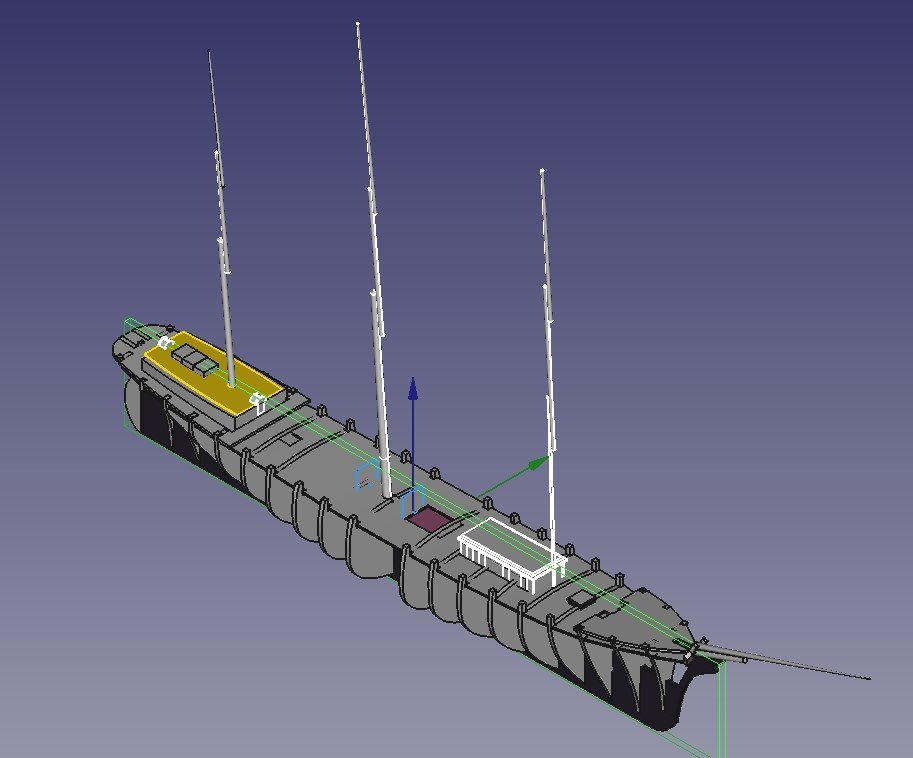
Made a little progress on refining the Bulkheads. The lower deck is complete but as the support for the top deck was limited to the edges, I did not think this would support the main deck. I have constructed the cross beams that sit on the Bulkheads and am desiging supports that run fore and aft so there is suppory for hatchways and Deck. I will also make vertical supports much the same way that the real thing. I will partially plank the lower deck so the covers for the main hatch can be removable Based on the work so far, the boat will look something like this. Simon
-
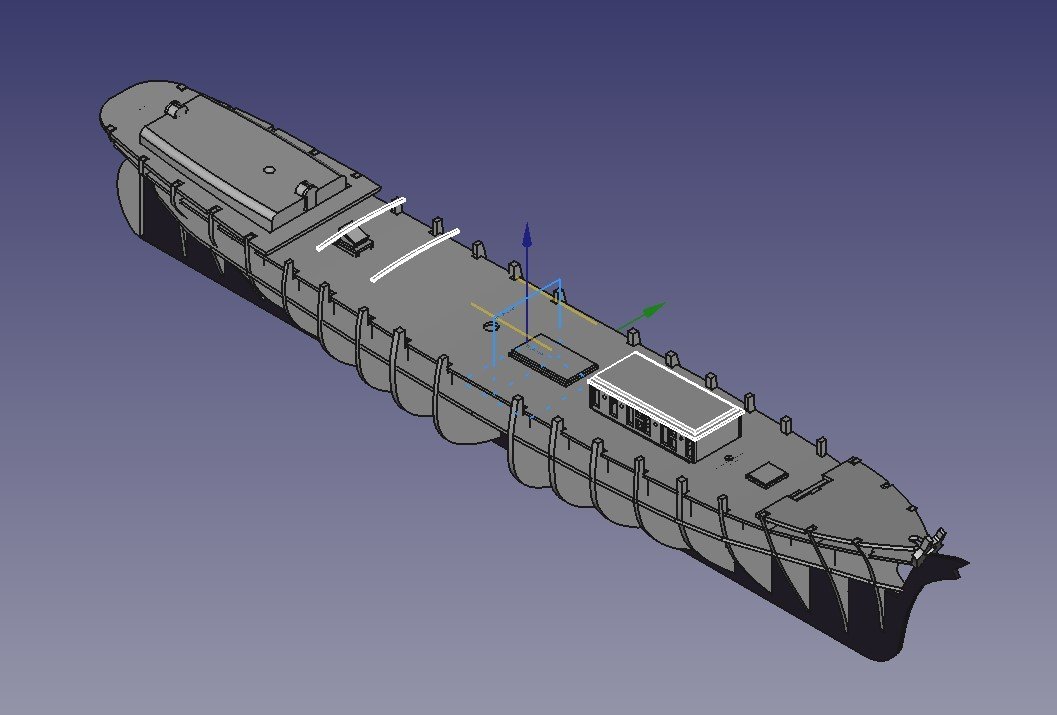
I have now finished working on the Lower Deck. If you compare this yo earlier images, you will see it is a lot more accurate towards the stern. The edges of the deck are not curved lines, they are short straight lines. This is because FreeCAD v 20 would not let you cut into a complex curve. V21 will and that is the version I am working in now but it was too late to go back to the start of this deck. This will be corrected at the time the Bulkheads are installed and faired. Next to tackle is the Main Deck as I have changed Bulkheads so I need to do the same to that deck as I have the Lower Deck. Simon

-
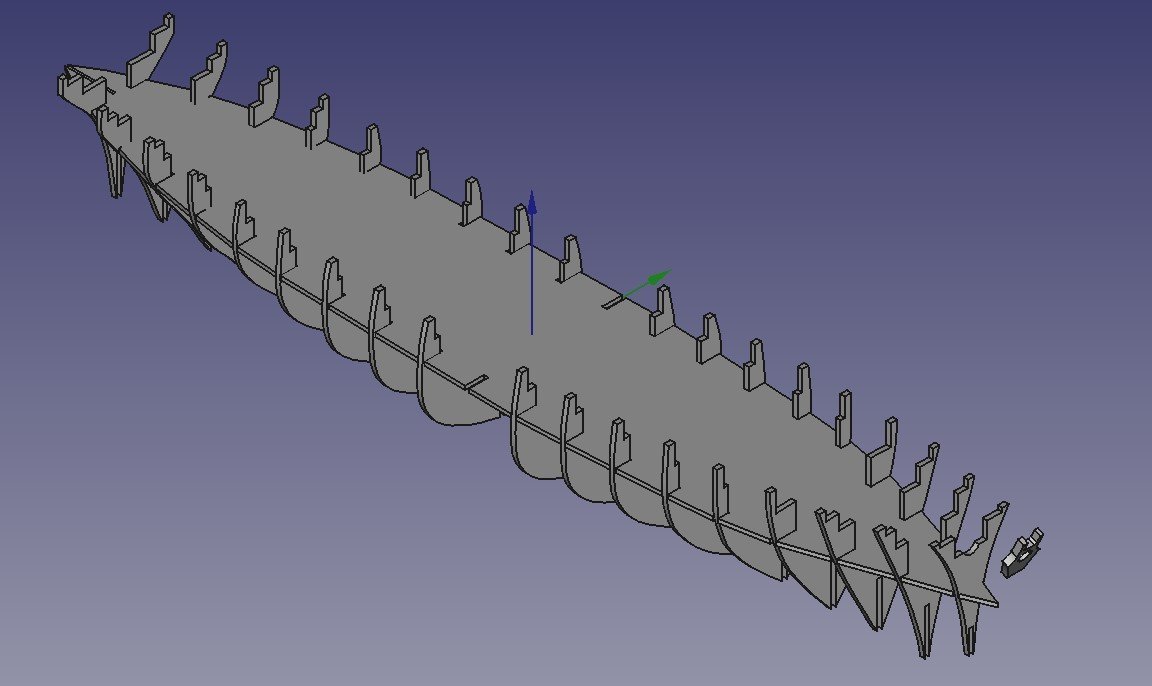
I have finished adjusting the Bulkheads for now and assembled it looks like this. However, I now have to create the locator cut outs to lock in the bulkheads square to the keel. This is a time consuming task and has a tendancy to break drawing so the 3D image will not redraw it self. 1 down, 18 more to go.


-
Having taken a look at the first few Bulkheads I am a bit concerned that the Lower Deck, whose main purpose is to create rigidity laterally will be too narrow at the crossings with the Bulkheads. But if I treat it the same as the Main Deck, then there will be insufficient support for that deck. And to cap it all, two of the three masts will be installed at or very near the junction of the lower deck and the bulkhead. So having put my thinking cap on, I have started adjusting the designs of the bulkheads so that a much wider lower deck can be fitted to stabilize the lateral strength of the hull. I can then make support beams that will install to support the main deck and again for the Fore and Aft upper decks. These will be laminated planks rate=her than plywood as they will take the curve easier. With the lower deck installed it will look something like this. I can then make Central Virtical supports and horizontal supports between them that will lock in the location of the Masts and support the Main Deck. There is going to be a lot of trial and error with this project as I have not actually built anything I have drawn in FreeCAD. Simon
-
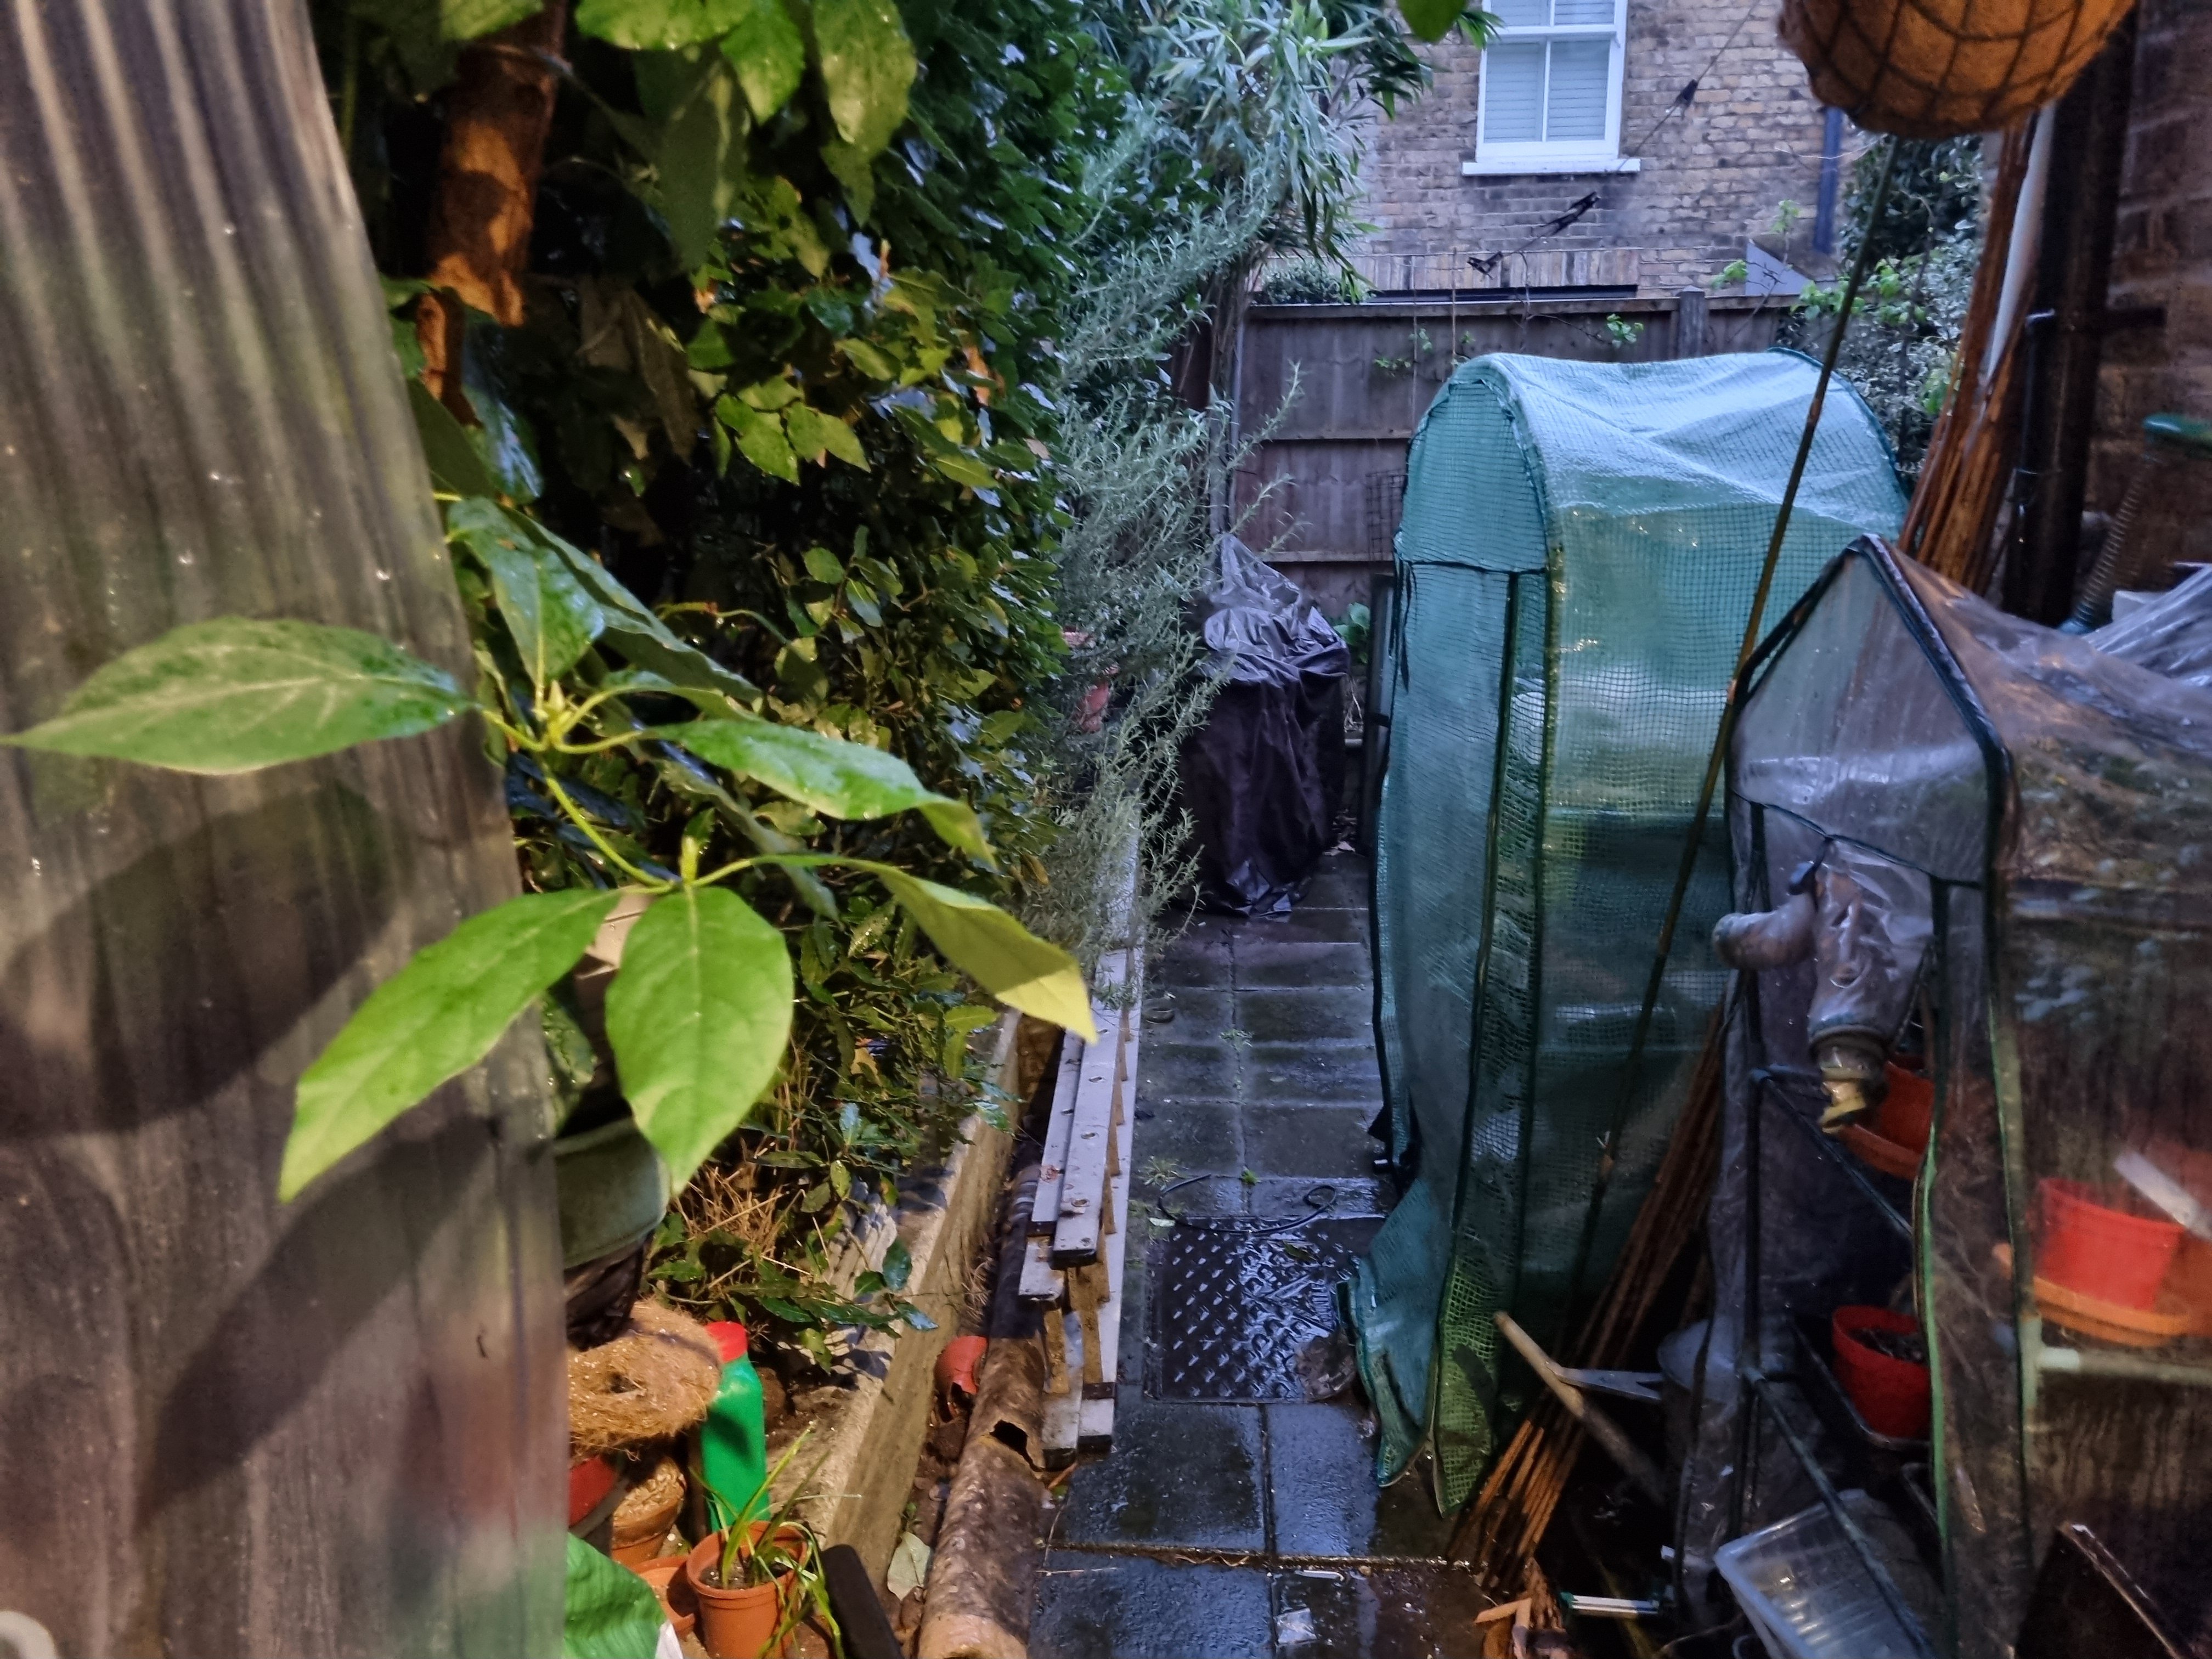
After all this time, I have started cutting out the false keel and bulkheads for Thermopylae. This is courtesy of my new addition to my tool box and my temporary workshop in the back garden. It is second hand and the sander attachment was missing but it does cut 3.5mm ply quite nicely. I did have to get the replacement 4" blades from ebay-usa.
-
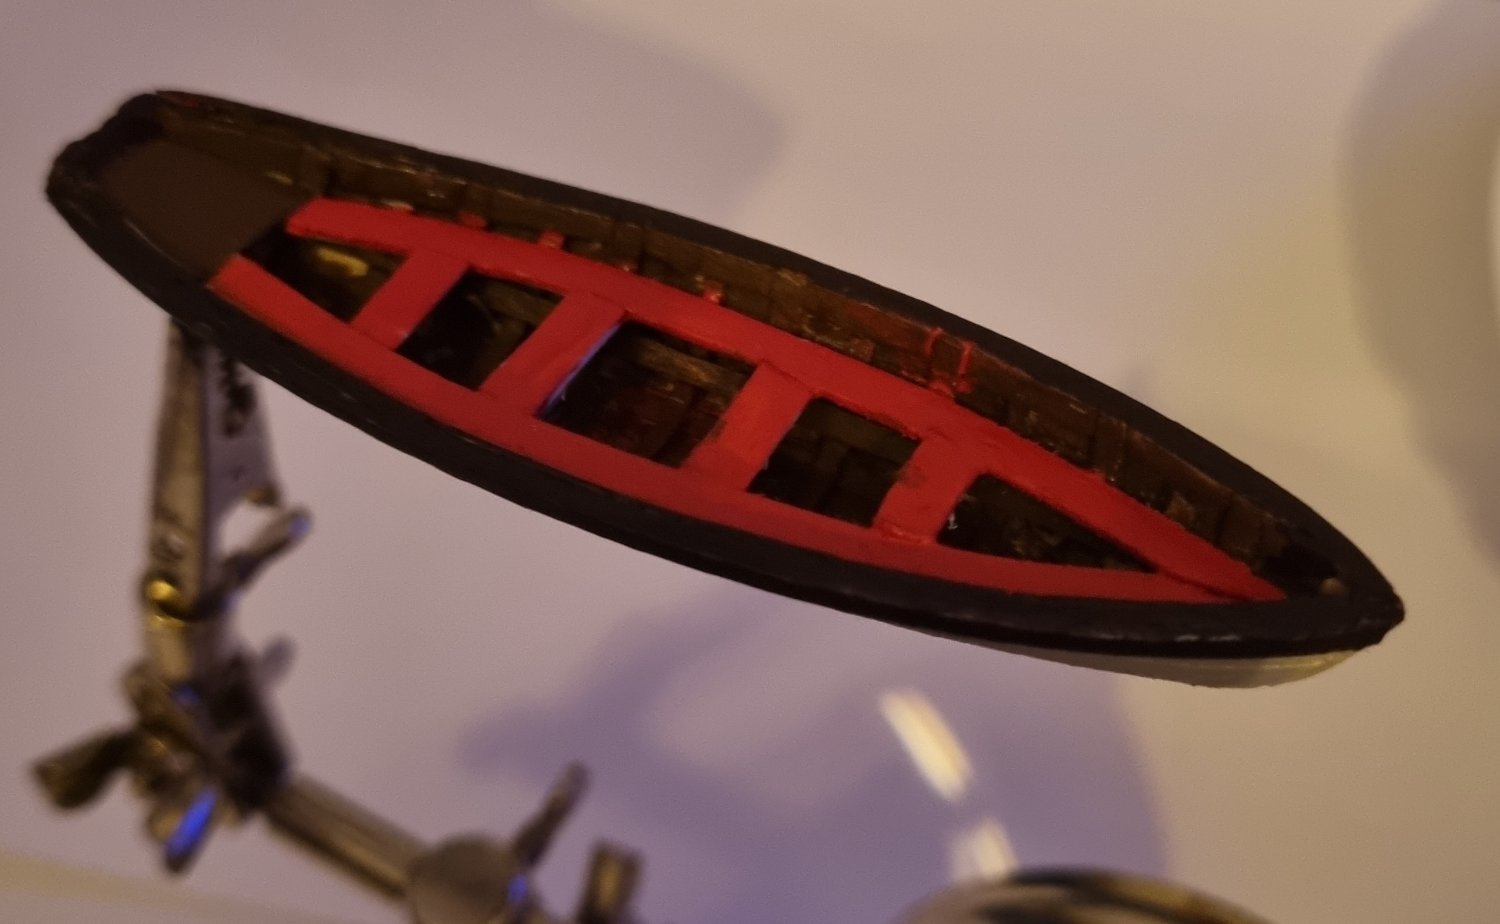
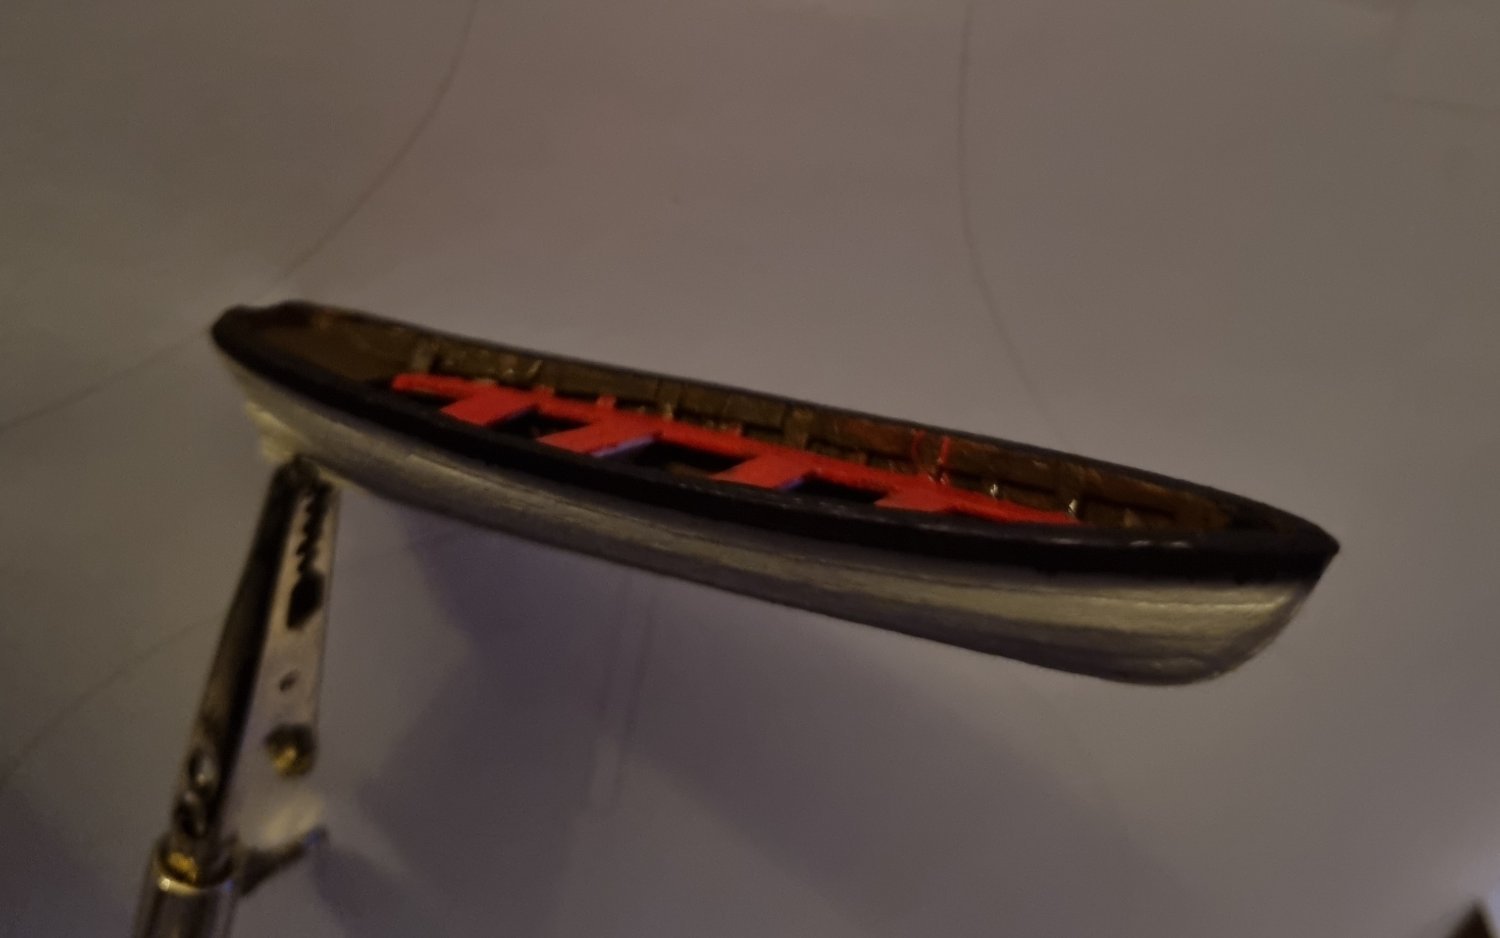
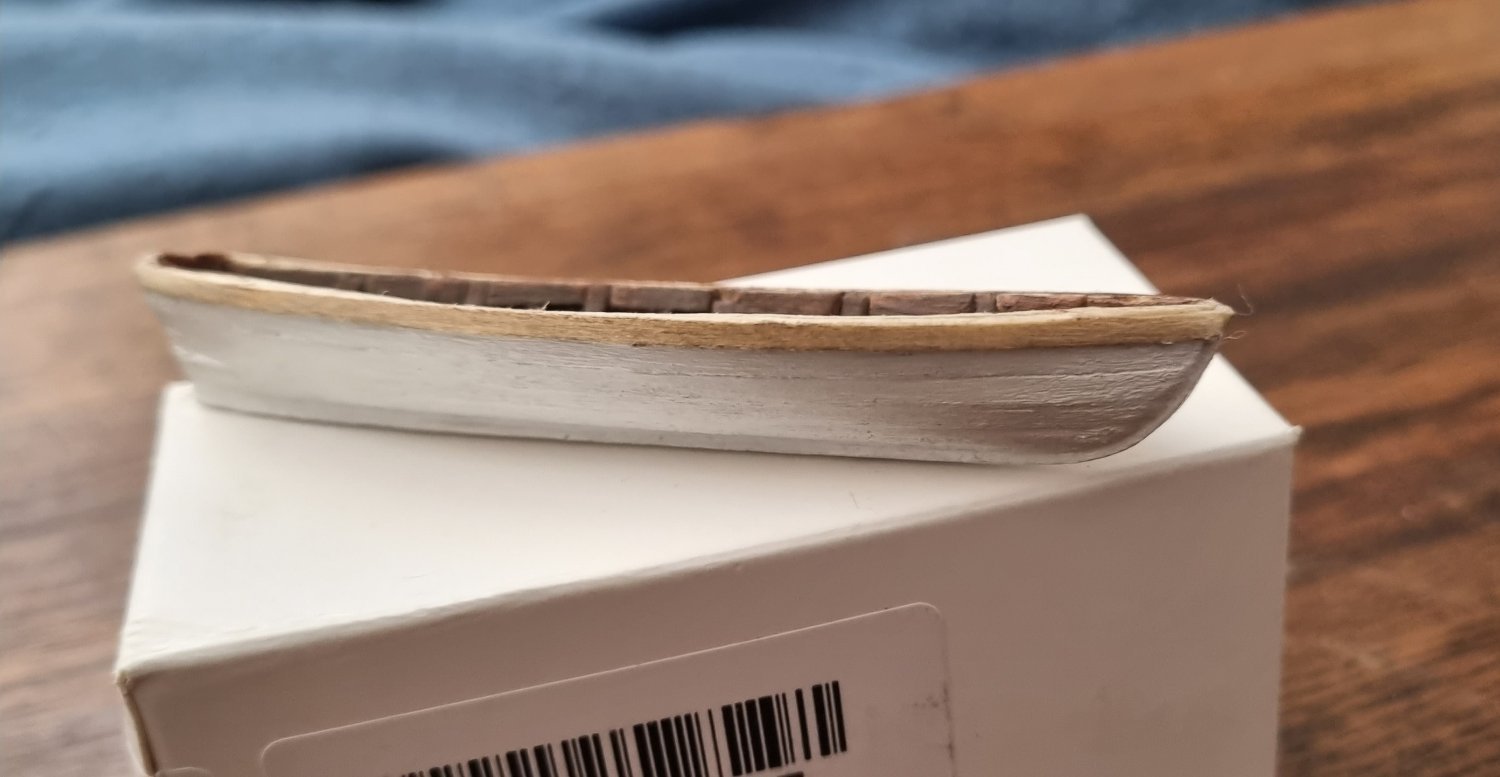
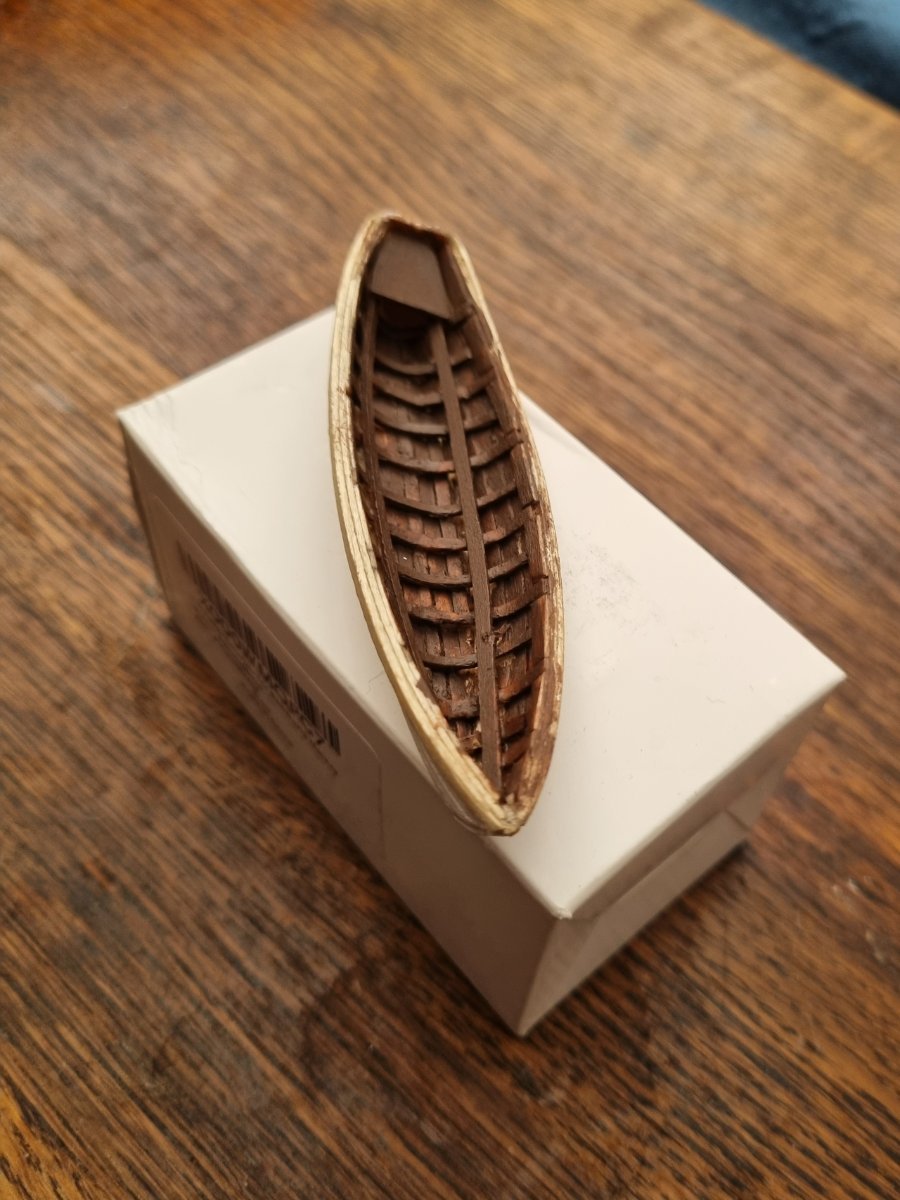
Well, that's the seats installed and the paint is as far as I go with this. Any brass work I do is going to be out of scale


-
So a little progress, still have the seats to install and some brass work to sort out. The gunwhales will be painted black. I am liking the proportions much more than previous attempts.


-
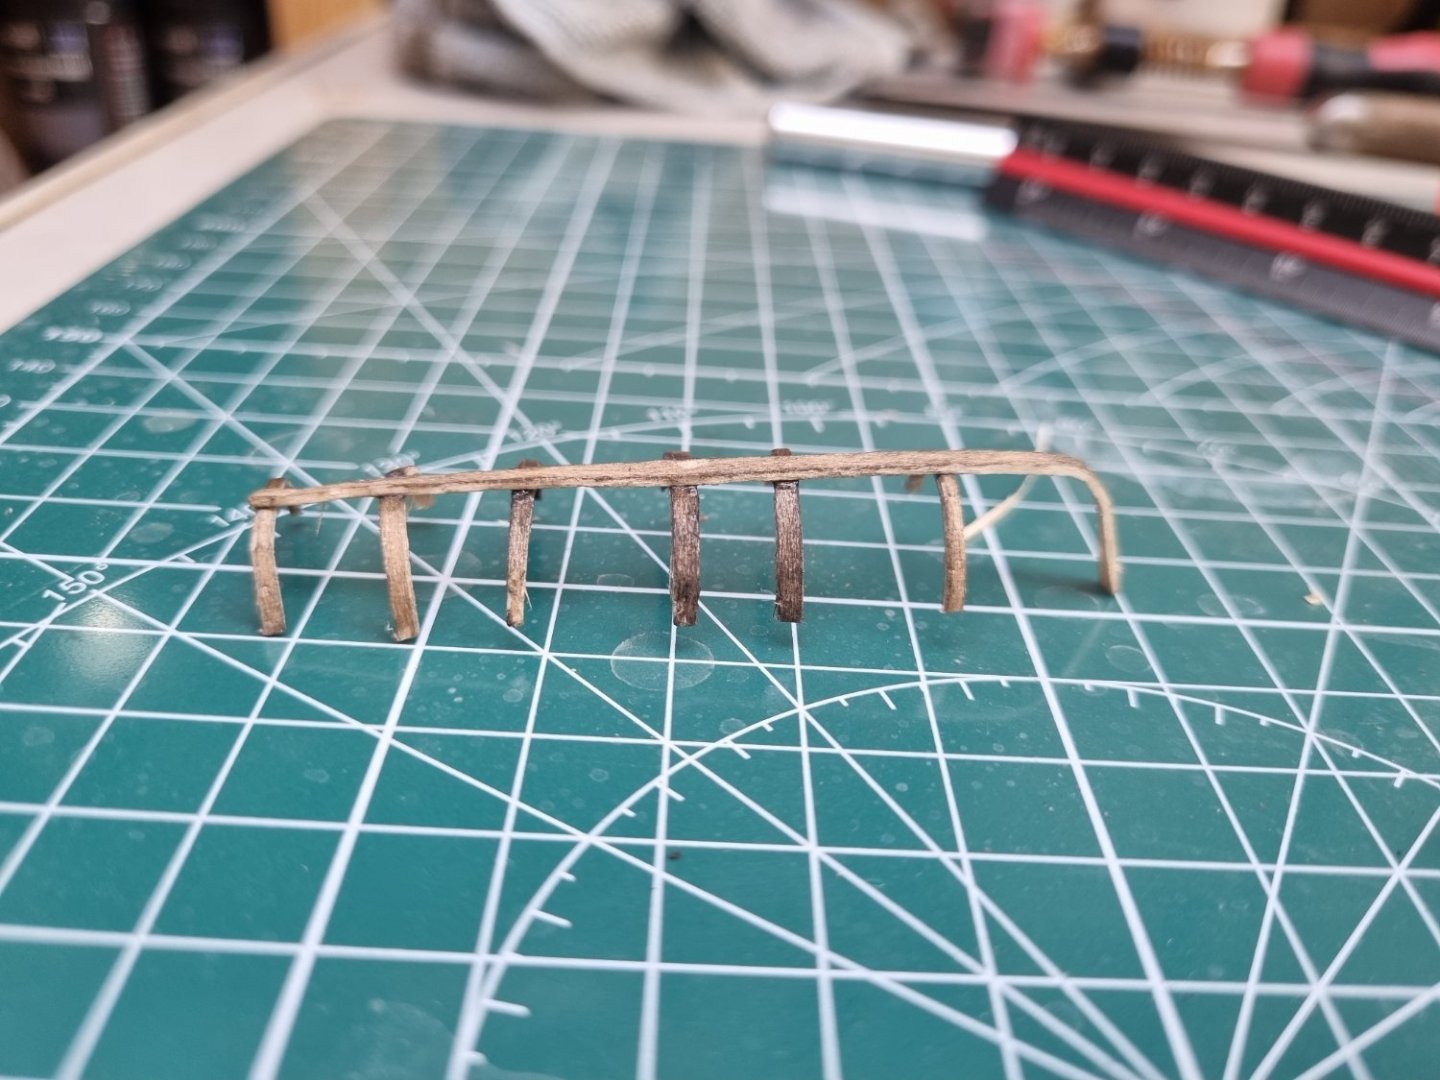
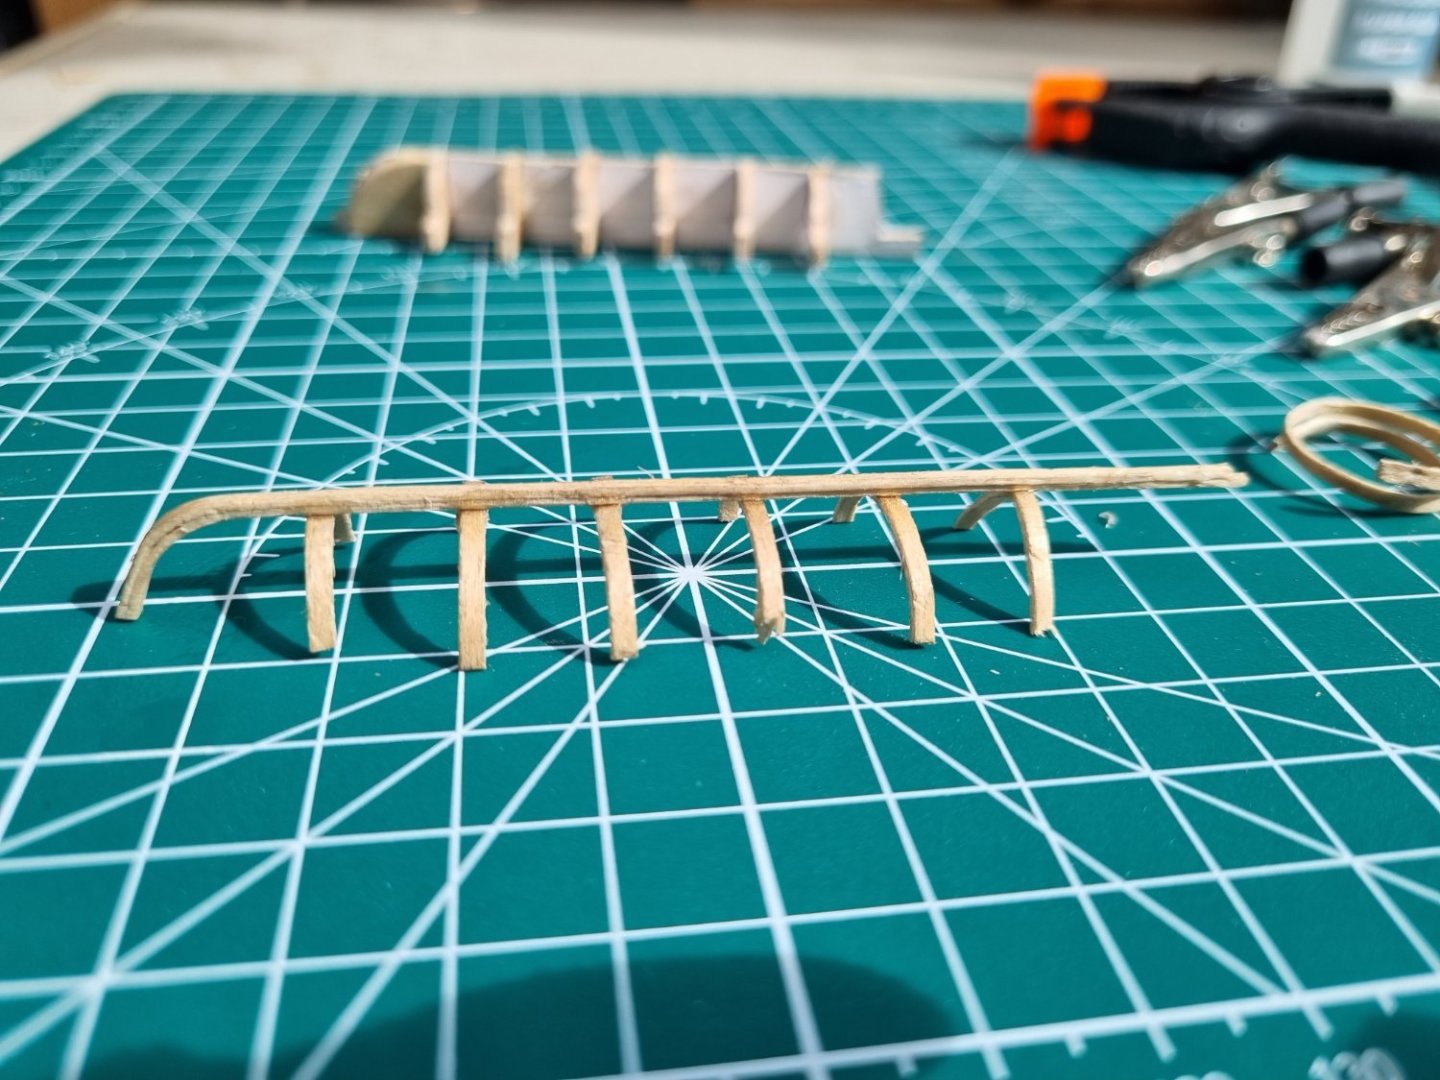
Since starting a new job after being made redundant I have been too tired when I get home so have not really done much. That plus while undergoing a stress echo cardiogram, they induced a minor heart attack which meant another week stay in hospital. I have been told to relax and there is not much more relaxing than making small boats. I wanted to improve on my captains gig as the proportions were all wrong. My second attempt was better but my Admiral and I think I could do better. So I go ahead and make a new design in FreeCAD as version 21 is available. I cut out the parts for the former and create a frame and keel. I go inside to make a coffee and hear a sound like a blow torch, rush out to my work area and find that two disposable lighters have somehow ignited and my tray with all my modelling stuff is ablaze. I managed to snuff it out without too much drama but you can be sure that my formers and the lattest frame attempt are all gone. So ba k to drawing board. Created new design in FreeCAD to modify the former. I recently aquires a 15" Dremell scroll saw second hand and used this to cut out the parts. Rhe ribs were present by wrapping the soaked strip around a piece of 15mm copper pipe which I then warmed over a candle. This made it very easy to press the cut length over the frame to achieve their final shape. Next up, planking.


-
I also agree, your hull looks really good, the brass bulwark is a nice touch. I don't lament the Kit version of Thermopylae as I wouldn't be able to afford it. But a decent set of plans in 1:95 would be be very welcome instead of a bodged conversion of CS plans. It would save me a lot of hard work in FreeCAD or 360.
-
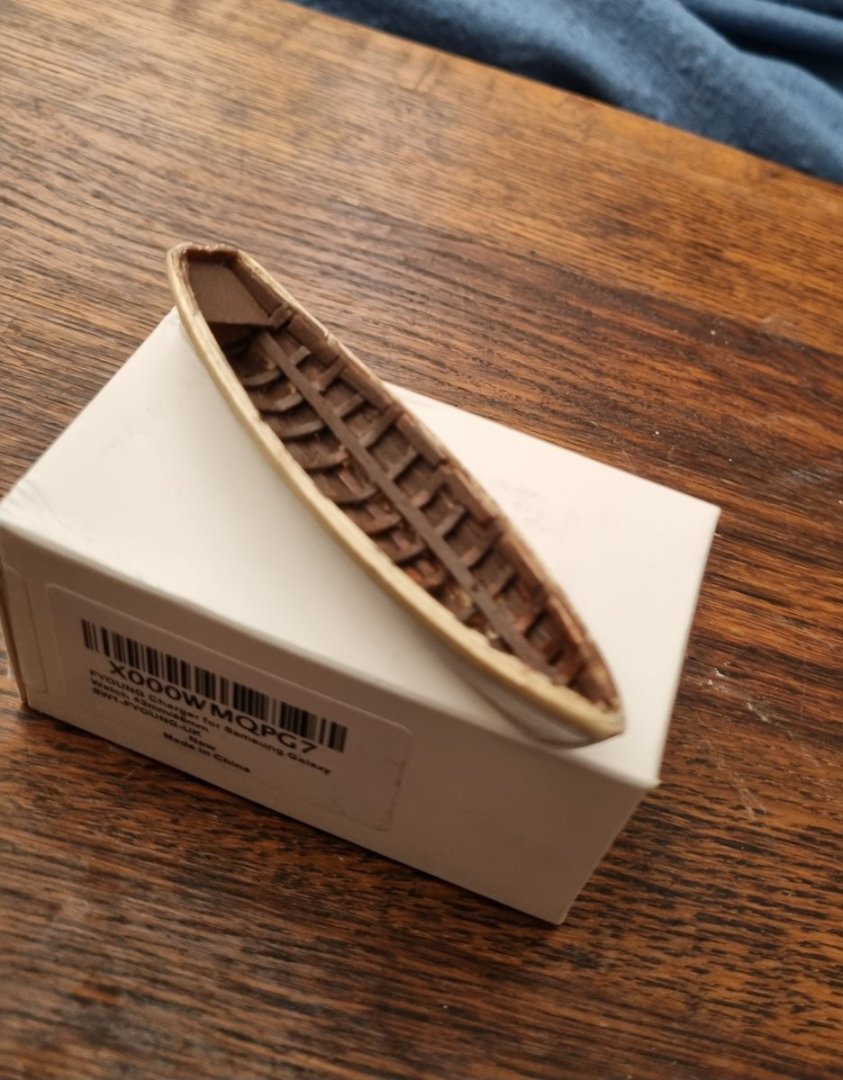
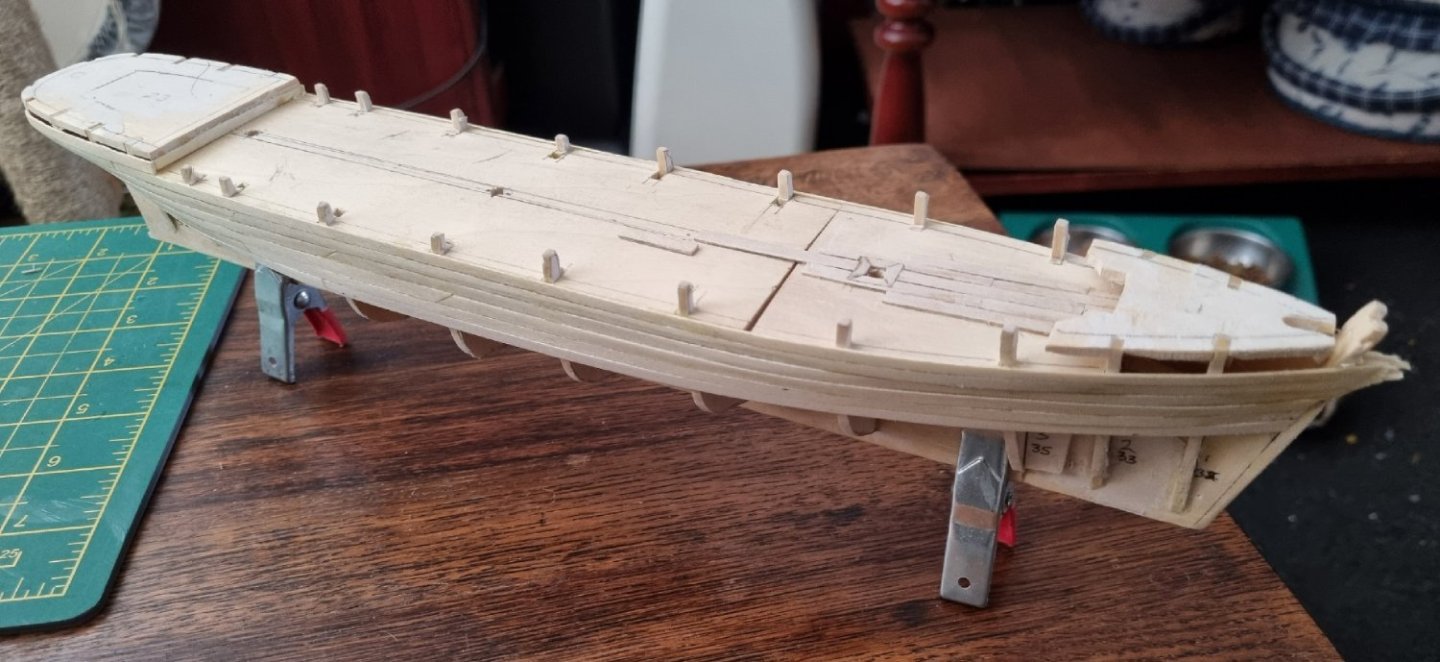
So my baby's are now a year old, so I have taken down my practice hull to see what I can get away with without the fiends getting too curious. So far, they have not been overly curious but the boy, now nearly 6kg, does attempt to sit with me when I have been working on it. i have been planking the hull with 3mm strips of 3/16" basswood. At this width, i am able to manuaver it into place keeping it flat against the bulkheads and curving up to the last strake. I have also started setting up the deck for the masts. I have purposely left the lower strokes of so I can create a box below decks to receive them. I am torn between removing the extensions of the frames to install the gully now or to install the sides above decks now avoiding glueing to them. I suspect the former is the correct action as I am planking over a false deck. I am aware the deck planks are not to scale, but this is just to give me some practice. I am still very nervous about taking CS down of the shelf, but it would seem that I am able to take on tasks I can do without her in front of me. Still have the majority of the sails to set up so hopefully I will be able to get back to making progress with the real thing. Simon
-
Ah, remember, once you start down that path, forever will it control your destiny, you don't know the power of the Dark Side, lol. I have made a 1:200 (approx) of this hull and yes, it has very graceful lines and frankly, looks like a racing yacht, at least before you add the fore and aft decks and 3 masts. The drawings attached to my last post are the best I have been able to extract from the line drawings and then refined by matching them to the fore/aft horizontal and vertical planes. I look foreward to seeing your log, I want to finish the rigging on CS before physically starting on this project so you may be starting before me. In the mean time, I am reading Underhill and using the tables to guide the dimensions of the yards and spars, the line drawings I have only give me the length in proportion to the hull. Like you, I will be using commecially available Blocks and Deadeyes, although they will probably have to be adjusted as the cheaper ones tend to be rectangular blocks with holes in. I dont have a workshop as such, so I will also be using commercially available wood strips. I have 5mm and 2mm ply at home and I can get boxwood of varying thickness locally. Cornwall Model Boats will be my "go to" supplier for the rest. Good luck on your "Big T" and feel free to use or adapt the drawings in my log. In case I didn't mention it, they are on A0 size paper. Simon
-
I finally worked out how to combine two Extrudes into a single solid so the Main Deck curves nicely from Stem to Stern, but not to introduce the camber athwart ship. I have been constantly refining the shape as I have been able to assemble the hull digitally, which is why I have not published any plans on here. Here is a sample of what they are looking like so far.Thermopylae Project-Page 2 3mm Parts.pdfThermopylae Project-Page 1 5mm Parts.pdf Here is what the assembly looks like so far. Simon
-
Hi Keith, He is my second cousin actually, and his hobby is making model steam trains. He uses the same gauge as the track in Tunbridge Wells park as well as the track that runs around the perimeter of his home in Crowborough. Simon
-
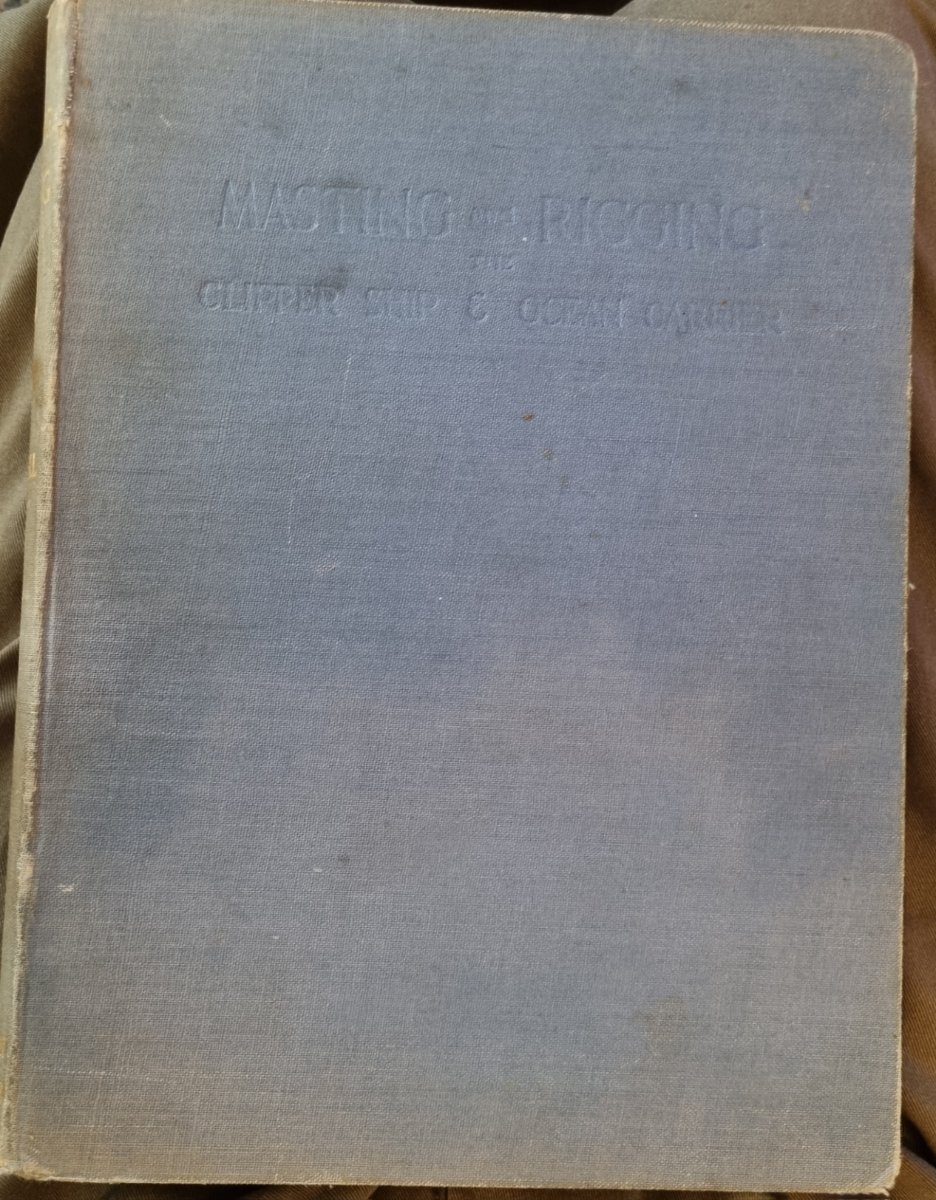
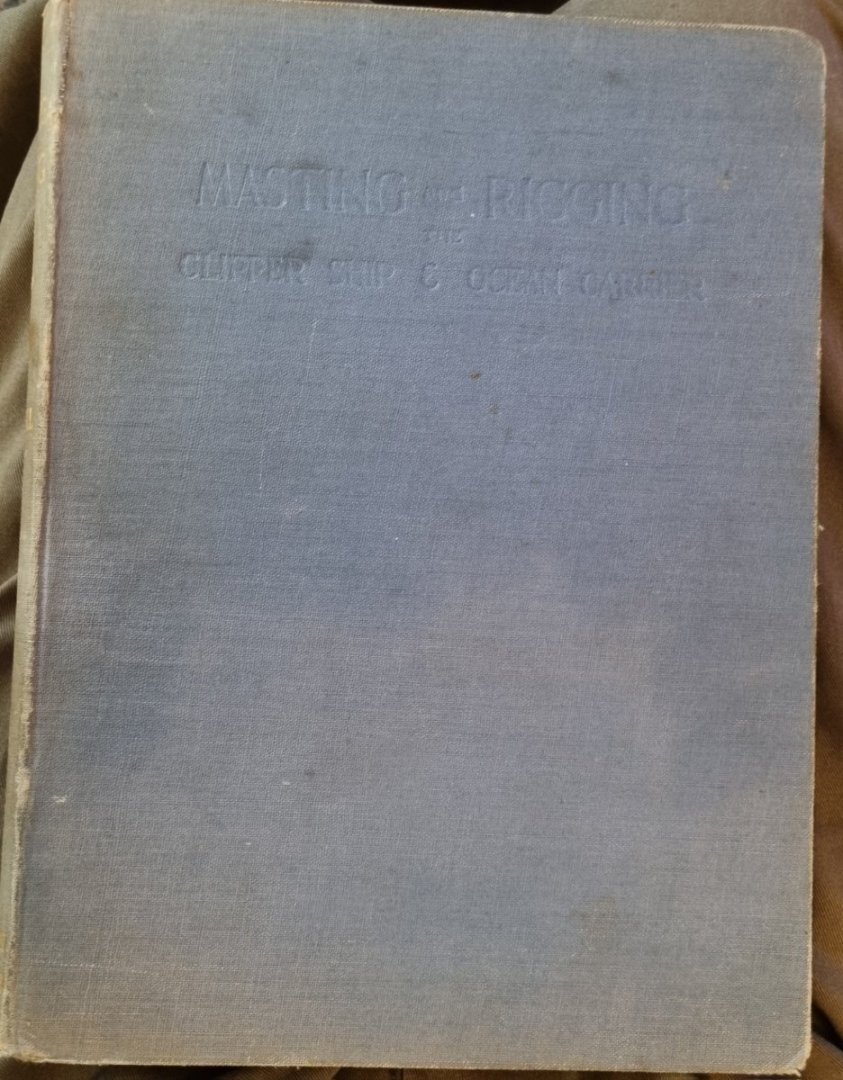
Woo hoo, my own copy of Masting and Rigging arrived today. No dustjacket and the print is slightly smaller. The copy from the Library is 1965 print but mine is 1949, but the content should be the same. The deck plan is intact and the whole book is is good condition. Simon

-
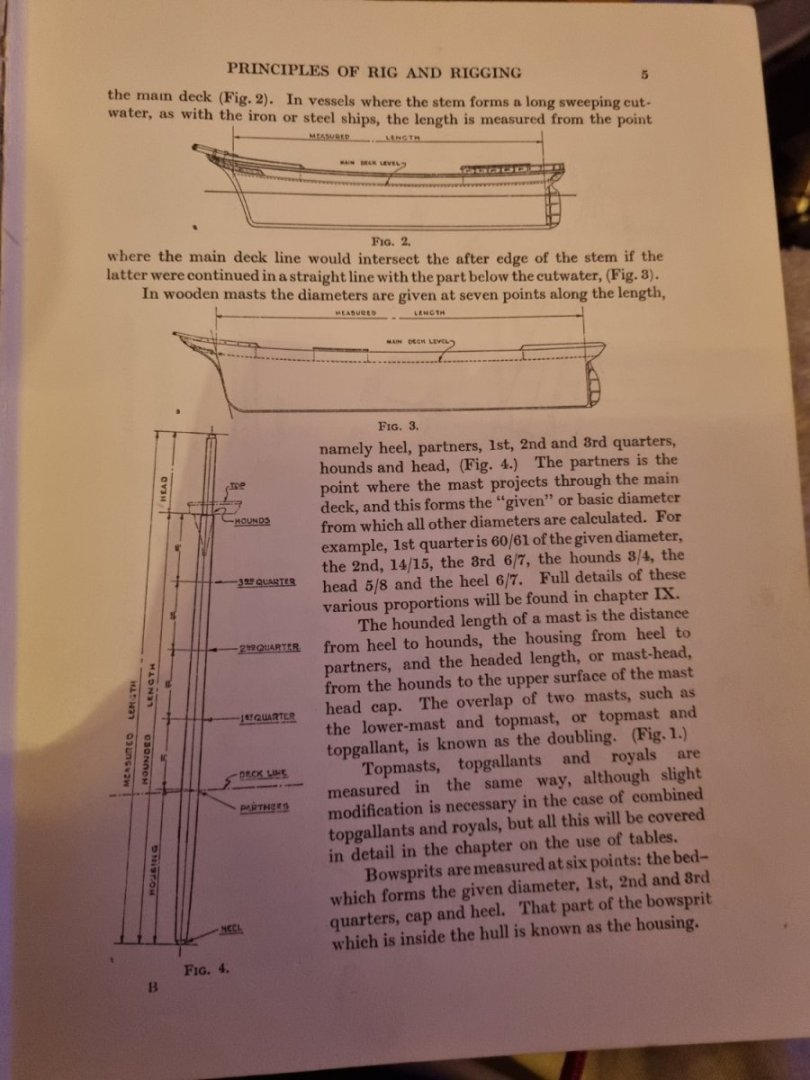
I have managed to get a copy of Masting and Rigging by Harold Underhill from the Library. I can't keep it for much longer but it has convinced me of its necessity to have a copy of my own. By page 5 it has answered one of my recent problems in determining the size and shape of each section of a mast. For instance, if the mast diameter is say, 10mm, then it will reduce in diameter at each quarter at fixed rates, 60/61, 14/15, and 6/7. At the hounds it would be 3/4. All the tables are in Chapter IX so I have a way to go to to read these. So while the scaled images I have imported show Cambells over height of the masts, I will have the tables to calculate the correct level of tapering. Hope every one is safe and well this Christmas. Simon