


Avi
-
Posts
323 -
Joined
-
Last visited
Content Type
Profiles
Forums
Gallery
Events
Everything posted by Avi
-
Ok now I completely understand what you are saying. I see it in the pictures as well. I also have the glued up planking (as well as the scribed that comes with the kit), and just checked the order, it is indeed 1/16”. If anyone comes across this in the future, here are useful links: - 1/16” glued up decking - 3/32” glued up decking - ⅛” glued up decking - 3/16” glued up decking I will take them out and look at them against the ship, see if the 1/16 vs 3/32 is visible enough for me to want the other planking. I also have various bits of planking around, so I can get some feel for it. It is frustrating, like the gudgeons and pintles, there are too many places in the model or book where the information is wrong, leading you to make mistakes or order the wrong parts. The book itself is in serious need of review, revision and modernization (cc @MrBlueJacket). thanks for going into the detail @KurtH; it really helps
-
Do you mean you would order different sheets?
-
@KurtH I don’t understand. The glued up planking comes as sheets. They just are used as the deck. What did you mean by you would use 3/32” rather than 1/16”? it sound like you mean actual planking strips, but how do those fit into that? You also reference the photos in Arnot’s book. Where were you able to see the deck plank width in there?
-
About that gundeck. I’ve got the glued up planking, which is four sheets. Each deck (gun and spar) is two sheets side by side. My plan is to cut the sheets for the spardeck but not quite snug, just a bit too big, 1-2 mm around. Then I’ll take one of the cannon and glue it together with glue that comes apart easily, as I’m not planning on painting yet, just using it for measuring. I’ll probably use Elmer’s glue, which I hear can be removed with vinegar. Open to suggestions. Either way, I’ll use the cannon to determine what the correct deck height should be at each point, by placing it on the deck planking at the gunport. Where the deck needs to be higher, extra hull planking under the deck planking will provide the boost. Since it is so very thin, I can get tiny gradations. I expect to start around mid to late August.
-
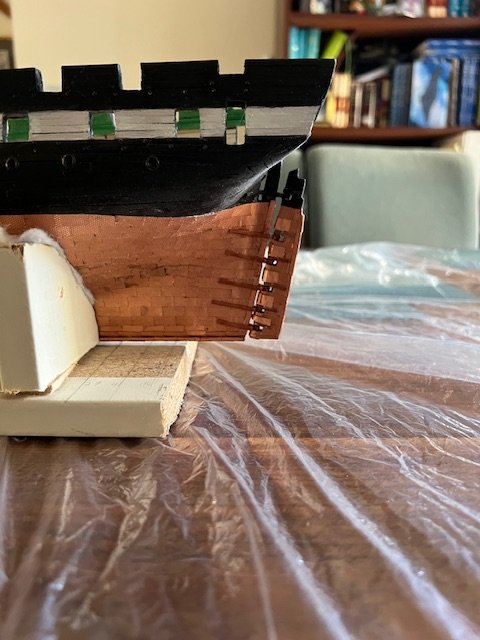
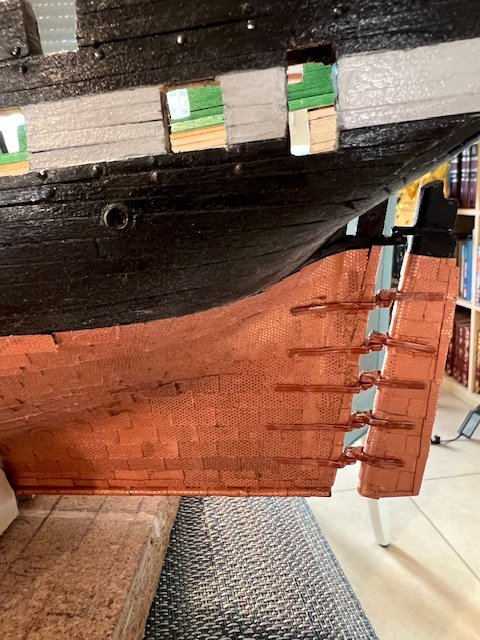
It was a lot of work, including cutting through copper and then adding plates where they got ruined or where I cut too high, but rudder looks better. I think this stage finally is done. Next post will be about starting the gundeck.
-
I plan on removing them from the rudder and cutting in to countersink them. This whole discussion has been quite helpful, thanks!
-
Yeah I saw that as well. But I’ve no idea how to get that. The gudgeons and pintles are as flush as possible with the hull and rudder. How would you get it in closer?
-
Rudder shipped. The gudgeons and pintles aren’t permanently attached to each other, in case I need to remove them for work. But they are glued to the hull and rudder, respectively. I had them primed and painted, then attached them. And when I did, most of the paint came right off. I had to do another coat or two. And I suspect more in the future. But good for now.
-
I’m actually pretty happy with the copper that’s on the hull. My gudgeons and pintles finally showed up, so going to get those trimmed, painted and applied, and finally move on to the gundeck.
-
Yeah. I’ve got someone visiting near him in a week, she will bring it back. Phew.
-
Well, in a funny twist, bluejacket sent it to my brother in the USA, who came for a visit. He opened the envelope to check it when it arrived, then put it in his baggage… but didn’t realize until he got here that it had fallen out of the envelope while packing. Oops. 😆
-
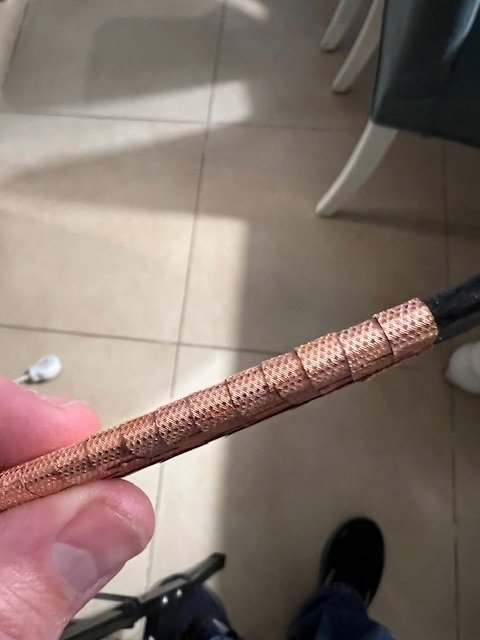
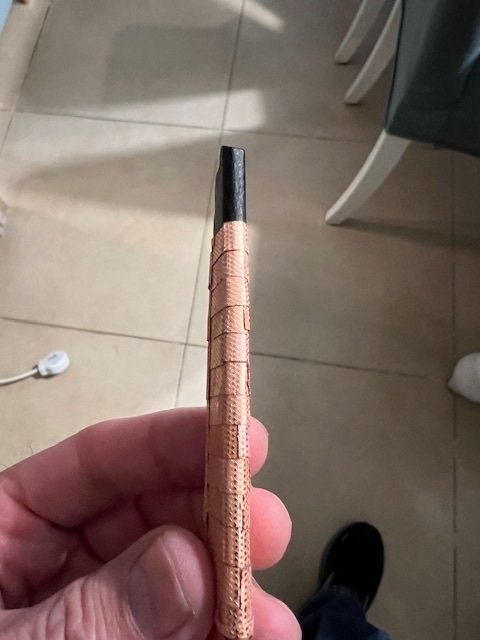
Redid the rudder. Used an iron to heat up the copper, removed all the plates, cut my finger (optional), sanded it down, then sanded a curve, primed, painted, and applied new copper. Giving it a day, then will wax and varnish. Bluejacket is sending me replacement gudgeons and pintles of the correct width, but they will not arrive for a few weeks.
-
Not terribly so, but I do have this one. Remove maybe 15-20 copper plates and I can shape it.
-
That’s a fair point, unless there were a large enough gap between rudder and sternpost, which would not be great for the fluid mechanics. The picture from the museum shows it. Even rounding it won’t help much, without some serious tapering. Those gudgeons and pintles are ⅛”, the wood stock for the rudder is 5/32”, add the copper and it’s up to 7/32”. I’m somewhat perturbed that the guide didn’t say anything about rounding. It’s obvious once someone smart like @Gregory says it, but not before that 🤦♂️ I would like to get that rounding in anyways. But even if I do, I need gudgeons and pintles with wider spacing in the gap. I’ll have to get from bluejacket. As for the rounding, I could remove the leading edge copper plates, and then either add material or sand it down. Anyone remember how to remove contact cement? 😁
-
I probably read that at some point or another, as I read every build log that might help. I must have forgotten. I’ll just have to get those. Thanks @JSGerson if anyone comes across this in the future, here’s the link https://www.bluejacketinc.com/shop/fittings/under-water/gudgeons-and-pintles/f0852-1-4-to-fit-rudder-thickness/ item F0852
-
No they don’t. Nor does the book say anything.
-
Ok I primed them and will paint soon. Never a boring moment. Despite the promises of the book, the gudgeons are too narrow to fit over the coppered sternpost and hull, and same for the pintles over the coppered rudder. Oops. I’m not quite sure what to do here. The metal is soft, so I try to shape it, but I’m more concerned I’ll snap the pieces off.

-
I finished coppering the hull and rudder. Ok so I can paint them the copper colour, or black for contrast. Just my choice? I’ll mull it over. Do I need some layer on this Britannia metal before the paint? Or primer? Or just a few layers of paint?
-
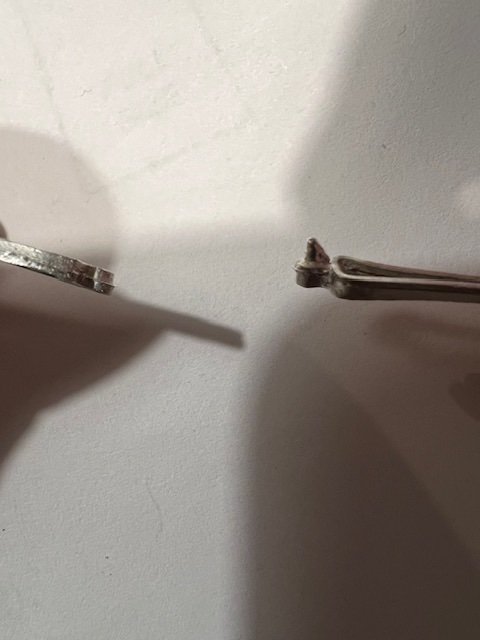
One issue down, thanks to @ERS Rich I filed the triangles down to more of a post, then used fine drill bits to smooth out the bores on the pintles. They all go in smoothly now. 😃 Now to decide about how to finish them before mounting.
-
Thanks @ERS Rich; did you paint them?
-
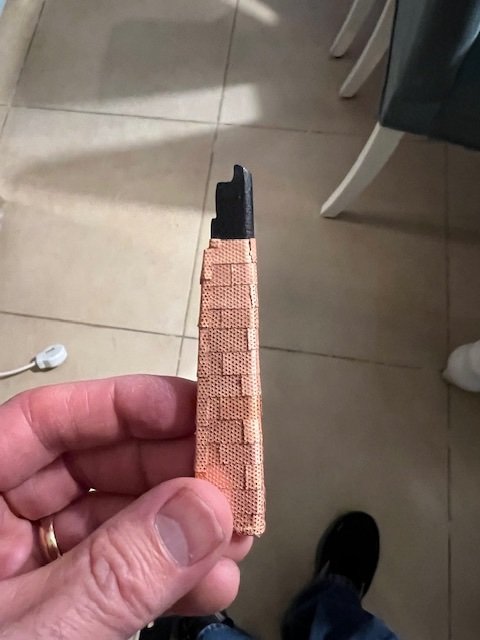
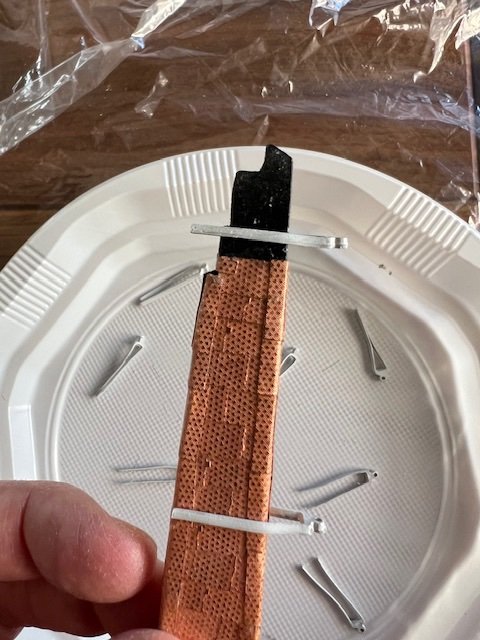
Hard to believe it has been two months since I posted. Life has been a wee bit busy here. Before I start on the gundeck, I’m going to place the gudgeons and pintles (my phone keeps trying to auto correct those 😂) The book recommends not shipping the rudder permanently yet, but to wait until some of the harder work on decks and masts is done, since the rudder is fragile, which makes sense. I ran I into two issues. First, the gudgeons and pintles are of that metal. Should they be finished or painted in some way? Second, I don’t understand how you attach the rudder to the sternpost, or more correctly, the pintles to the gudgeons. There are holes in the pintles, which the guide suggest running a stiff wire through for alignment. But the gudgeons have more a triangle than a post on them. It isn’t something you can set the holes from the pintles onto. I could put the gudgeons in with them facing down, and then just glue the pintles to the gudgeons, but then it would have no motion. I guess I also could carefully trim down the triangles to a post with a file? Not sure. Pictures attached.


-
Dang that is great! I’ll pick one up. Thanks!
-
Yup. Long time ago though. I started copppering early this year. Is there something specific to which you refer?
-
Hi Nic, good to have you on here. 😃 Is there anything that will act as a sealed layer, like a sheath, over the whole thing? I was hoping a few layers of polyurethane varnish would do it (as implied in the manual), but no such luck.
-
It probably is. Some don’t overlap, which is why it’s a good thing I painted the planks with that good Vallejo copper paint (real flakes in it). Either way, the question is, what can I do to help with it.
