HOLIDAY DONATION DRIVE - SUPPORT MSW - DO YOUR PART TO KEEP THIS GREAT FORUM GOING! (Only 13 donations so far - C'mon guys!)
×


Avi
-
Posts
323 -
Joined
-
Last visited
Content Type
Profiles
Forums
Gallery
Events
Everything posted by Avi
-
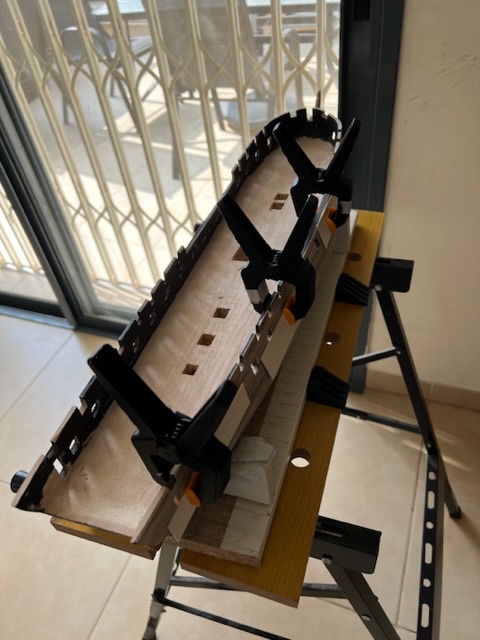
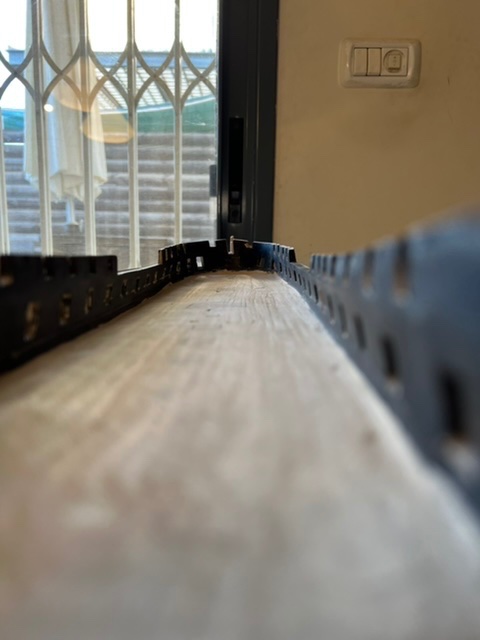
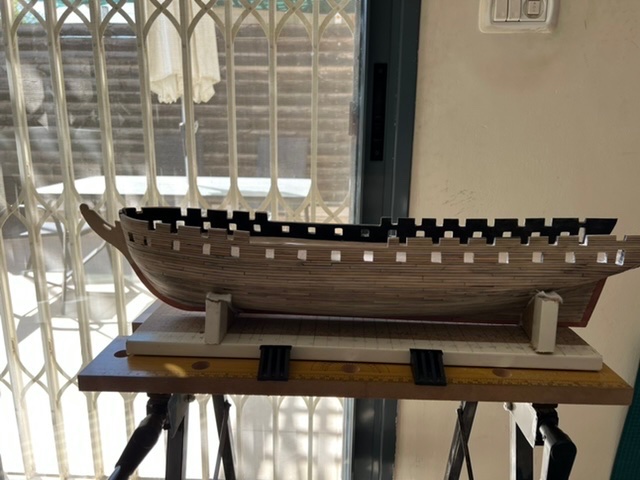
With the new chisels and a bit more time, I got the gundeck waterways installed. Despite lots of shaping of them with water and drying in place (multiple runs), they still weren’t 100%, so CA glue accelerator was a great help. I didn’t trust my carving skills, so I sanded each piece down to get the 45° angle. I need to sand the joints to make them smoother, then complete carving the hatchways, and then on to planking the interior bulwarks.
-
Happy USS Constitution Day! She was launched 21 Oct 1797, which is 225 years ago today.
-
I get it. I go weeks sometimes without touching it, but then return with zest. I do miss building plastic models, though, but no more time in life.
-
I will miss your update @ERS Rich. But I’m looking forward to following the Maine build.
-
And it occurs to me that I will be stuck again soon. I cannot complete the shaping of the bulwarks-meet-deck shape without… gouges! Well, hopefully they will be here soon.
-
Cut the waterways stock into two pieces, one will be long with a slight bend, the other short with a very large curve. Soaked the first long piece in boiling water, then dried the excess, shaped into position and placed clamps. To protect the outside, I placed extra cardboard stick between the clamps and planking. You can see the incomplete hatchways on the open gundeck; they will stay that way until the new chisels and gouges show up.
-
And 2 gouges broke, in addition to the 1 from last week. Oops. I was using the excel inserts into the xacto handle. It worked but no longer. The irony is that I’m almost done chiseling or gouging on the ship. Everything else going forward is cutting or shaping or such. oh well. I ordered a small replacement set on Amazon, but it does take time to get here. I might try to do the waterways in the meantime. will soaking allow me to bend a nice curve into the thicker stock used for the waterways? I’d have to let it dry completely before I could carve it, of course.
-
That’s really smart. I was going to just dig it and fill with putty. This is even better. Thanks Jerry.
-
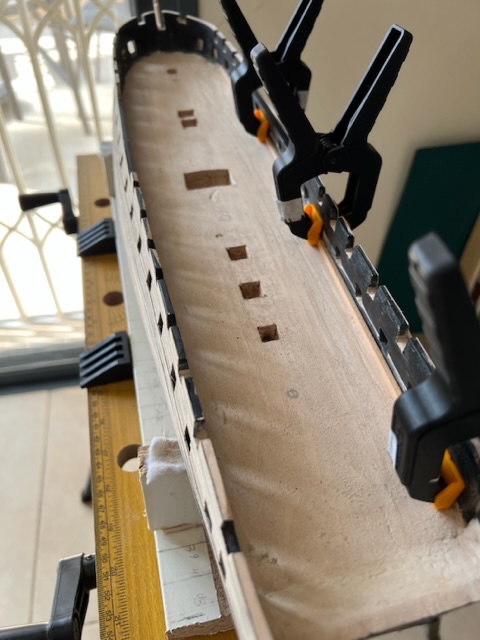
I used a very small drill bit to drill pilot holes a little inside each corner of a hatch, as well as the centre. Then I used a bit larger ones, big enough to get the keyhole saw in. I roughly estimated the 7/8" depth, knowing I always could dig deeper or fill in with wood putty. In the centre, I used a much larger bit, since I wanted to remove as much as I could with a power tool before having to work by hand. In the largest hatch, I used the keyhole saw to cut from corner to corner, which entailed far more physical effort (and sweat) than I expected. Eventually I did get through. I then used the larger 90° chisel to dig in each corner, and then dig out from the depth. I also used various sanding heads on my Dremel, but that was less successful (and I was not careful enough taking the head off and burned my finger, oops). I found that using the 90° chisel after drilling holes worked the best. With the smaller hatches, it actually wasn't all that hard to just place the chisel on the corner and push down. Repeat for 4 corners, a chunk of wood comes out, do it again. Now all of the hatches are dug out. I need to use files to expand the edges a bit and sharpen the corners, as well as dig a bit, and one of them is a bit too deep, so I will fill with putty. After that, sand them all. I will edit to add a picture to this post when I get a chance.
-
Optical loupe with a light. That is a brilliant idea. I’ve no experience with them. Do you mind linking to one, maybe from Amazon @Jerry Berenson?
-
At this rate, you’ll do it in less time than I shall! Serve as my inspiration @KHauptfuehrer hoping to get cutting out the hatches and drilling the mast into the solid hull later this week. Then I’ll do the waterways and interior bulwarks planking. Then airports and scuppers. I’ll stop before laying the gundeck, as I want to do anything else that requires inverting the ship before doing so, as it’s much easier when I can place it on the block without worrying about ruining things. That means sanding and painting exterior planks and eventually coppering, as well as drilling the holes for mounting many years in the future.
-
She is beautiful @Jerry Berenson I am skeptical anything will follow my current build. At this pace it will take me another 5-7 years at least, likely closer to 10.
-
I couldn’t find anything in the plans or BJ manual indicating the height of the berthdeck (and therefore how deeply to cut for the ladders). The manual just says, “it is possible to hollow out areas at these ladders so they look as if they lead to a lower deck.” Useful. Based on my measurements in Anatomy, the planking of the berthdeck to the planking of the gundeck is about 7 feet, give or take. Some were closer to 6.5’, some closer to 7.5’. I’ll work with 7’, and always can fill in a bit if the ladder is too short, or shorten the bottom of a ladder if it’s too long. 7’ @ 1:96 scale is 7/8”. UPDATE: I found the midship section plans at the USS Constitution Museum site here. They show 7' 1⅜" amidships, which is barely different, actually comes out to 57/64". I think I shall be fine with 7/8".
-
After measuring again, I see that the camber at scale is tiny. 3/64” is really small (and the spardeck one is even smaller). No decisions yet, but leaning towards just accepting it as is, maybe using the power hand sander to smooth it out and provide slightly more consistent curve on starboard side. Still not wholly convinced that is easier than flattening the whole thing and cutting the 31 beams. 20 minutes with a chisel, 10 very careful minutes with a hand sander (it doesn’t quite fit in between the bulwarks, and using it on an angle can hit them and ruin them), and the whole thing is much improved. It isn’t perfect, but since I’m gluing on the two sheets of glued up decking, it doesn’t have to be. I did hit the bulwarks once with the hand sander, it took off a bit on an angle, but it will be covered with planking, and so little that it won’t interfere with the plank attachment. If it does at that stage, a little wood filler will do the job. Now to remark the hatches and mast holes, and cut them out.
-
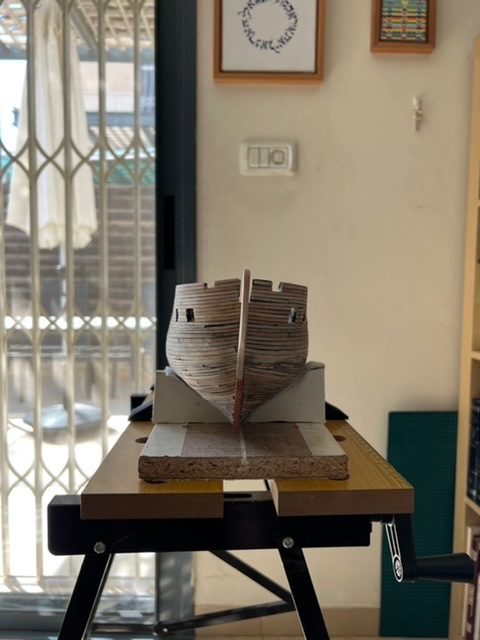
Used my marking gauge to set ¼" inboard of the aft end of the ship, then chisels (actually Excel chisel inserts into my X-Acto handle) to remove lots and shape it right. That included making the port and starboard edges inboard more correctly vertical (they were thickening). Then used the 90 degree angle chisel to remove more from where the deck surface meets the bulwarks, to make it a bit easier to get the waterways in. Then sanded it down: where I had removed at the captain's after-cabin, but also throughout the deck surface. I had to go back and forth between sanding block, sanding contours and sanding sticks, but eventually got it where I liked. Mostly. I found that there are a lot of ridges (grain) in the horizontal surface of the single-block hull, where I am going to attach the glued-up decking. No amount of sanding seemed to smooth it out. I could use my power hand sander, but I am a bit worried about taking off too much, and if I slip even a bit, I might damage the bulwarks. I might try the power hand sander very carefully one evening (way too hot during the day now), or might just use wood filler and sand that down to get a smooth surface. You can see the tough grain in the right hand side of this picture. a more interesting question is the camber of the gundeck. The manual states that the gundeck has a camber of 5”, which translates into 3/64” in this scale model. It also says that the pre carved hull already has this camber built in, or that you can flatten the hull and then use ¼” stock wood to make deck beams that are 3/64” in the centre and feathered at the ends to create the camber. however, if you look carefully in the picture above, it’s pretty clear that the camber is not really there. It is fine going from centre to port, but going from centre to starboard, it hits that grain, drops a bit and then curves *upwards* before hitting the bulwarks. I don’t relish cutting and feathering those gundeck beams when I’ve already got a deck here to which I can just attach the glued up decking, but the camber just isn’t right, the grain is tough, and it may end up being completely messed up unless I either can fix the carved hull’s surface to have the curvature, or just bite the bullet, power sand it flat, and cut the beams. Open to suggestions. I also cut the template of the gundeck down to fit precisely inside the bulwarks on the single-block hull, then cut out where all of the stairs and hatches and masts go, and marked those on the surface. With those in hand, I can cut out all of them from the hull block itself, so that the decking, when cut, will actually show stairs going down or an opening under the hatch gratings. I expect to drill the 4 corners, then a keyhole saw to connect them, then cut out the middle. Those are a lot easier to do now, before I glue in the decking and worry about damaging it. I need to decide how deep to cut. For the hatches covered by grating, just an inch or so is plenty. For those that have stairs, I need to get it exactly right. I am hopeful that the profile and/or Anatomy book will show the height of from the surface of the berth-deck to the surface of the gundeck, so I can cut that.
-
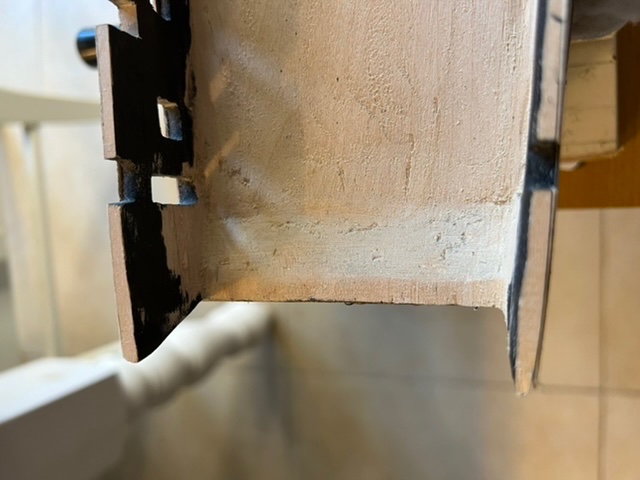
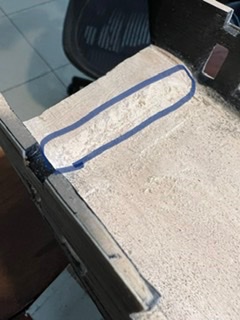
Having gone through the plans and images again, I’ve come to the following conclusion (unless someone can teach me otherwise): 1. definitely sand down the hull under the deck. It will make everything easier. 2. keep the ⅛” “step” at the very aft of the gundeck, but shorten it. I want it to do two jobs. First, it should provide sufficient solidity and volume to mortise the vertical stern timbers into the hull. Second, the step itself, when angled, should provide the angle of the aft hull of the captains after cabin. See attached picture. so I need to sand the deck itself, and trim and sand the aft step. the transom timbers from the kit are 1/16” x ⅛”, and gap between lights in the transom is about ¼”, so placing them ⅛” between the lights, and 1/16” fore to aft, works well. Leaving enough depth to mortise in the timbers, my current 5/8” is way too much, and I should cut it down to ¼” or so.
-
A lot of checking if photographs and videos shows the gundeck waterway extending into the captains cabins, but only insofar as the bulkhead between the captains sleeping quarters / after cabin and the main area. So in going aft, it passes one bulkhead but not the second (given the permanent waterway and removable bulkhead, it’s probably the other way around: the first bulkhead is placed over the waterway, the second at the end of it). I’ll measure the waterway stock and cut into 2 pieces: one from midway between the aftmost gunport and the fourth gunport from forward, where the curve starts to matter, and another from there to the bows. @JSGerson’s model managed to avoid the bows waterways (and hence its difficult curve) as it is hidden; see this post. I need to look a little forward and see if I can do the same. My other consideration before moving ahead is the solid hull underlying the gundeck, and to which I will need to attach the glued up decking. first, it isn’t completely smooth. That will make it more difficult to attach. It might be worth breaking out the sander now and smoothing it, so it is easier to attach the decking. It certainly is easier to do before attaching the waterways. Second, the bluejacket instructions for the model have you leave a “step” at the aft end. That may be fine, but if it is too high, it will make everything off. I need to check how that step is used, both in constructing the deck of the captains cabins and in constructing the stern (timbers and transom), to see if I need to trim this down at all.
-
That works. Those posts are really clear. I also have a clear picture of where I need to go now. I’m not quite sure about the scuppers, but I have enough in hand between your posts and Brian’s links and my plans (BJ and MS), to see that I will be able to figure it out. most importantly, I clearly can defer it until I finish interior planking, cutting out the hatchways, and even laying the gundeck planking if I do choose. next step then is the waterways. Still not quite sure how to cut and curve them.
-
@JSGerson I took a look at your log. What did you make those scuppers out of?
-
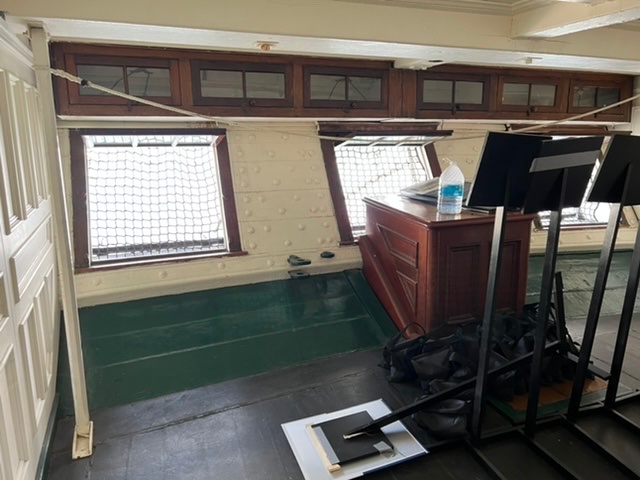
Thank you both. I’ve got the model shipways plans, so I’ll look at those in more detail. I didn’t quite know how to read the pdf you attached @Brian Falke Is that a face on view? How are they constructed? in your picture @JSGerson, I think the airports are the round circles below the gunports, 4 airports in the picture? Why do two look like they are filled with white? is the scupper the racetrack shaped one just to the upper right of the leftmost airport? How is that constructed?
-
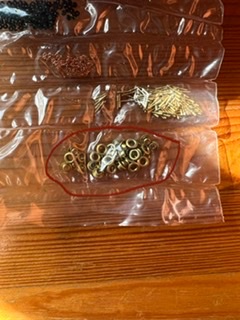
Back to work on Connie after a summer of business and personal travel. Those national parks are just beautiful! Having finished outside planking, I’m turning to planking the interior of the ship, just the gundeck and spardeck, of course. A few conundrums (conundra? 😁) to figure out. 1. I’ll start with the gundeck waterway and then plank up to the spardeck waterway, then plank to the caprail. But will I need to do the various knees supporting the spardeck to get the spardeck waterway in place? I don’t think so, but unsure. I’d prefer to do the whole planking, then worry about the knees, beams and decks. 2. I’m trying to figure out if I should drill/saw out the hatchways down from gundeck to berthdeck before laying the deck down, and then just cut it open afterwards. That seems to make sense to me. 3. What’s the best way to cut and shape the waterways? There are four long straight planks of wood - one each larboard and starboard, spardeck and gundeck - which need to be molded to the curved interior of the hull. I assume some form of planing and sanding to get the acute angle to match the hull interior, similar for the angled (~45° hull to deck) inside. But the plank itself needs some curve as the ship runs aft to forward, and especially at the tight curving at the bows. Also, how to match it up to the deck planking where it curves sharply inwards at the bows. I can keep it a continuous curve (if I can figure out how), but that doesn’t seem “right”. Photos from my May visit to the ship show the spardeck waterway continuous (gundeck forward was closed to visitors). Would “staggering” it (nibbing) be better? And how would I accomplish that? Interestingly, the manual says that it “adds extreme realism” and that restorers “used this technique on the constitution during each of her deck renewals”, but my pictures (above) from May do not show that. 4. The BlueJacket manual has this cryptic phrase: ”The berthdeck airports are now located, drilled out, and brass ports installed. If you wish, you can make up the “rigols” (rain scuppers) for each gundeck port. Make them of flattened wire and glue them into place.” I believe I’ve found the airports on the plan profile, and I think the brass is what is in the attached photo, which may be listed in the parts list as “3/32 Airport”, but unsure. Also unclear if those should be brass (placed after painting) or painted (placed before). Unfortunately, nothing on the scuppers, what they look like, how to make them, or where to place them. 5. Similarly, I’m wondering if I should drill the holes into the solid hull for the three masts now, before laying the deck planking sheets, or if that will make it difficult to align the holes in the actual gundeck and spardeck in the future? I *think* I can just go do the waterways and interior planking, then worry about cutting out the hatchways and drilling out airports and scuppers, which should let me move ahead until I figured those out. But not sure.
-
Share a link to your build log, Jerry.
-
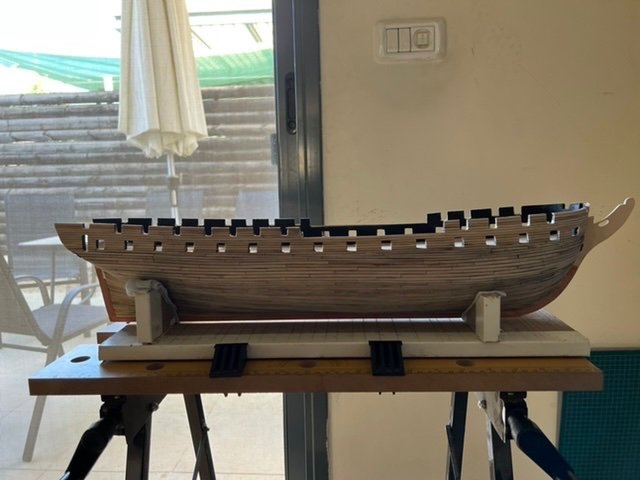
Lots of business travel, not a lot of time to work on it. Finally got some today. today was just filing open the gun ports, so that they all are the proper four plank height and proper width. That back and forth pressure inevitably knocked off a few planks, so I glued them back on. I mainly used a flat file for the edges, and square with its sharp corners for the corners. A few of them had a lot of hull material sticking out, so I used a small (keyhole) saw attachment to my xacto knife to remove most of it before filing. picture after adjusting is attached. someone also asked for a picture straight at the bows; that too is attached. I’m not overly enamoured of the planking job at the bows, but once I sand it down and paint it, it will be fine. And anything below the waterline will be coppered anyways.
-
I will take a pic when I get a chance. as for the quarter galleries, I haven’t tackled that yet. I don’t plan to got a while. I’m going to handle the interior bulwark planking (which means the waterways as well), and then copper first.
-
Some pictures, as promised. I found when I planked and then cut out the gunports, that they didn’t quite align with the cutouts in the hull. If you look closely, you’ll see in some of them the hull peeking through or some lingering glued plank pieces. In any case, I had to reglue some of the plank pieces, so I’m giving the CA a few days to fully set, and then will file down to get the openings aligned.