Trond
-
Posts
166 -
Joined
-
Last visited
Content Type
Profiles
Forums
Gallery
Events
Everything posted by Trond
-
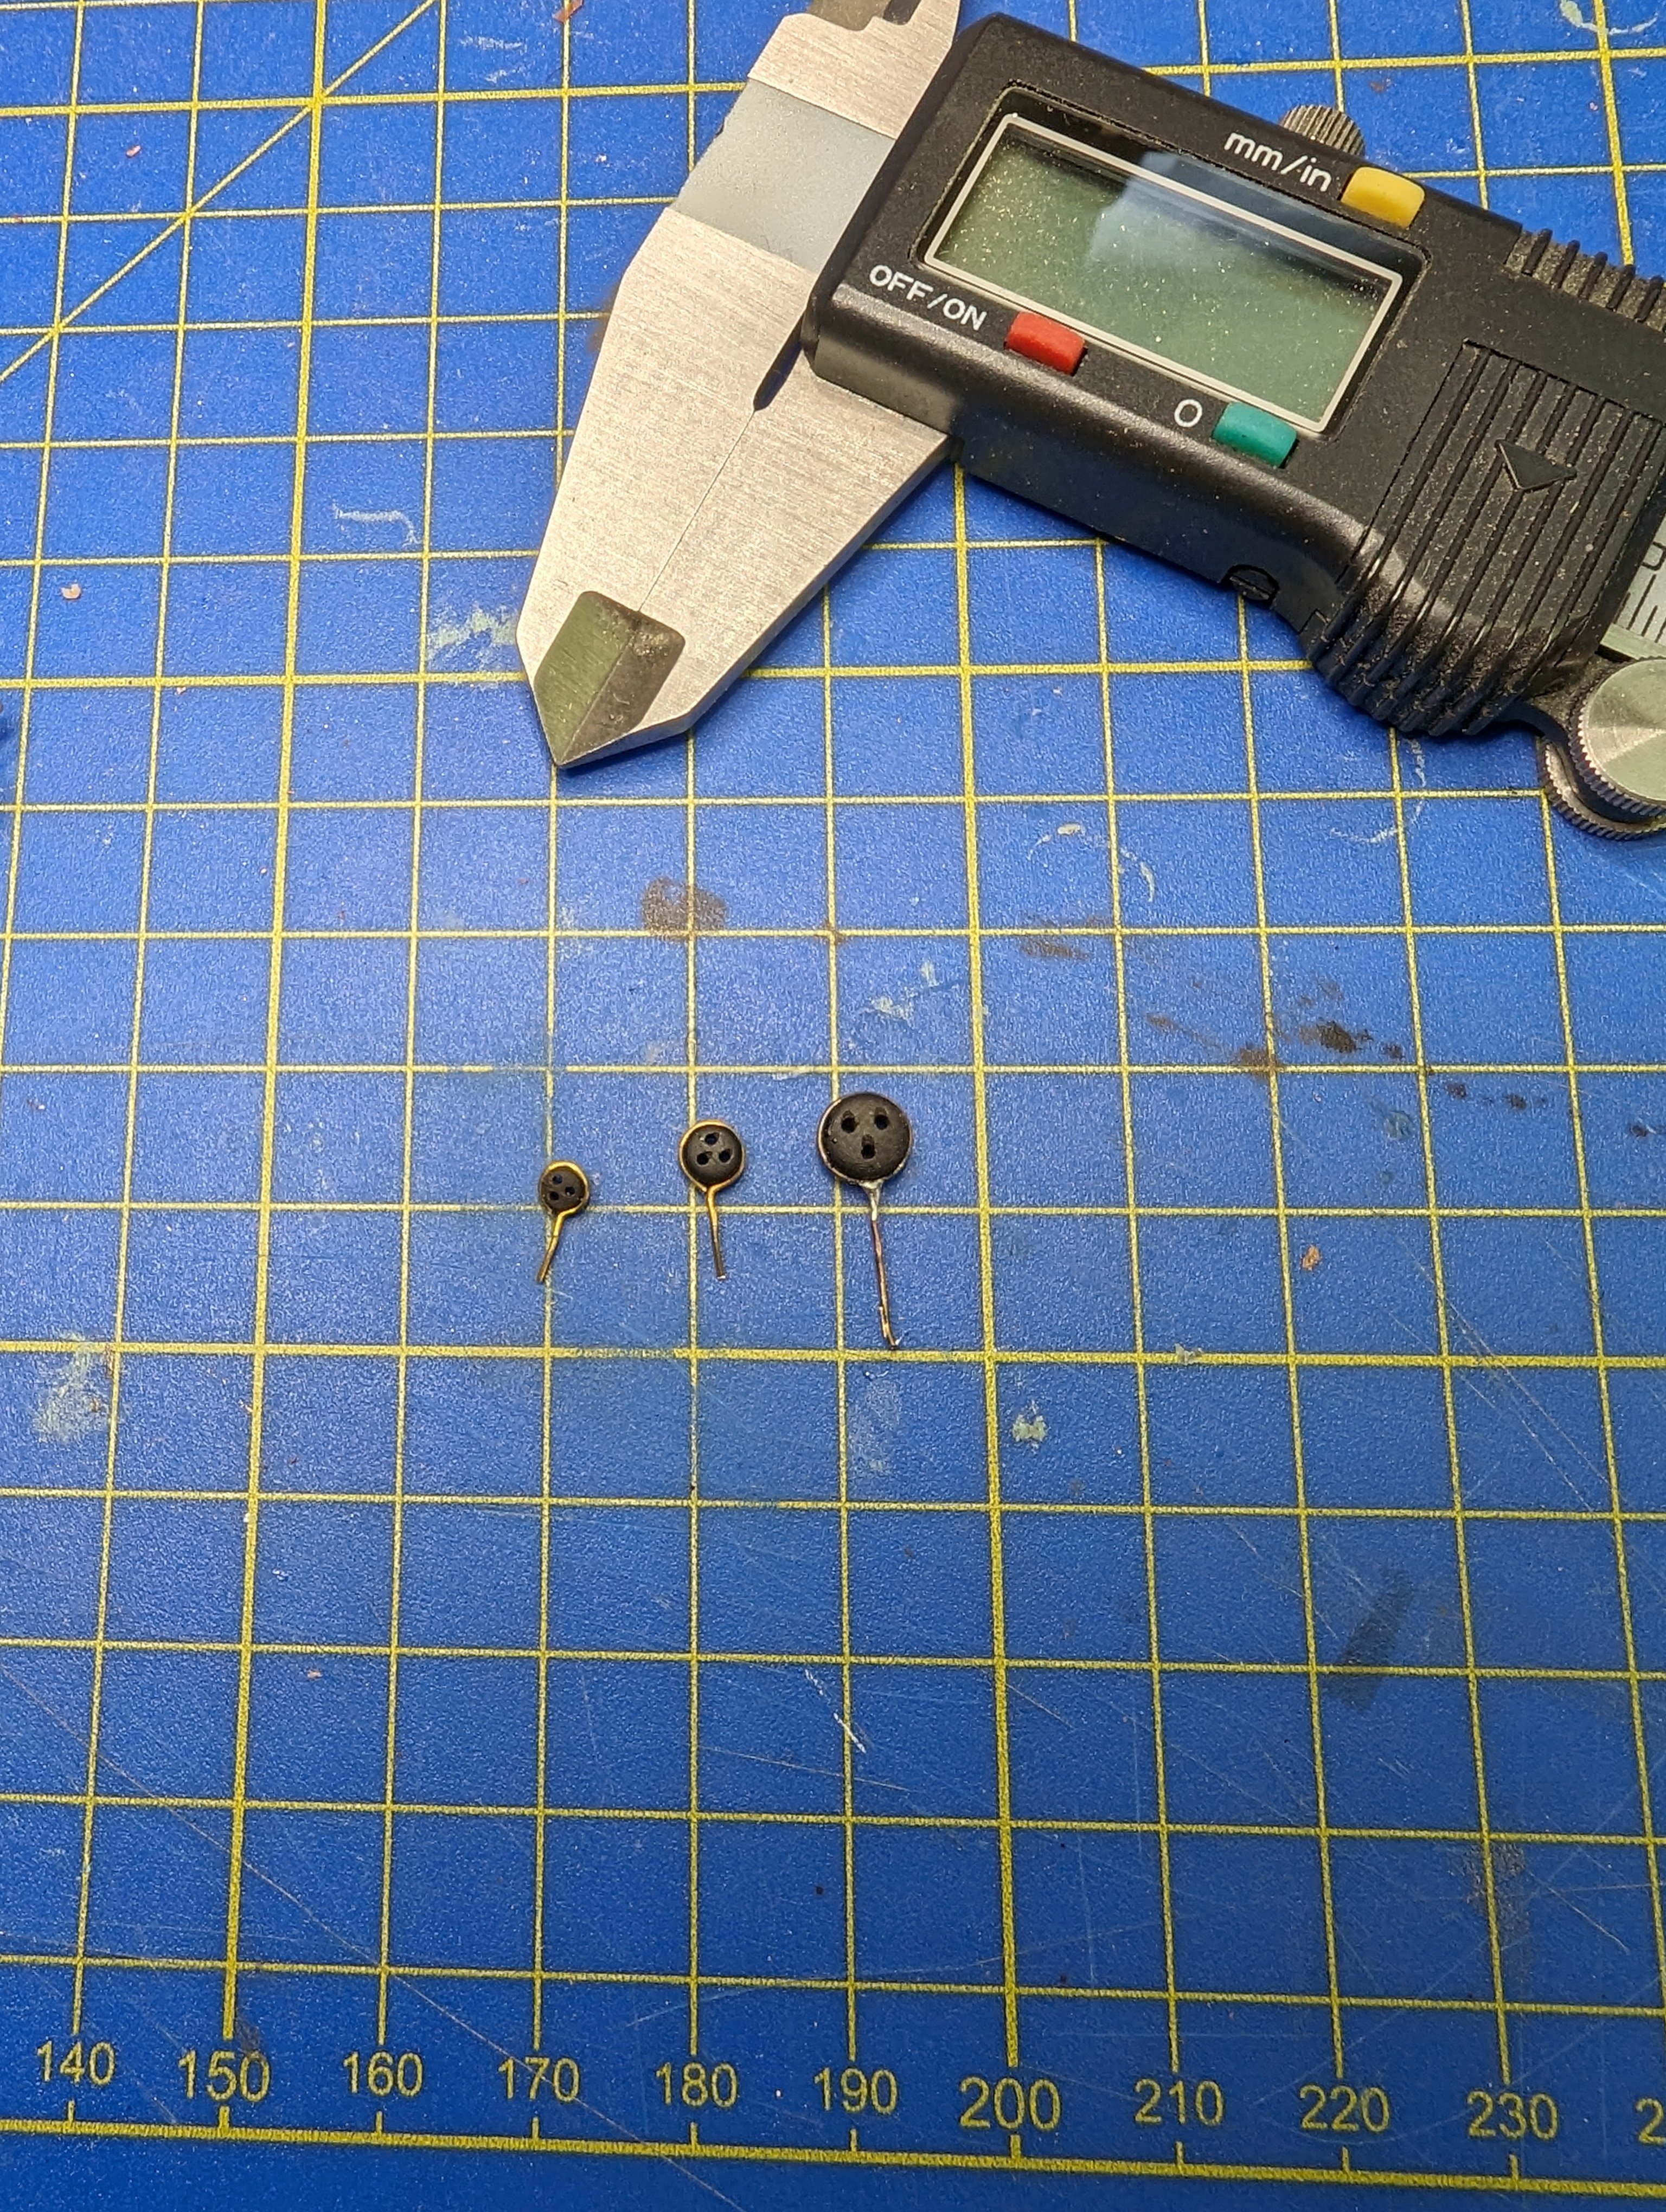
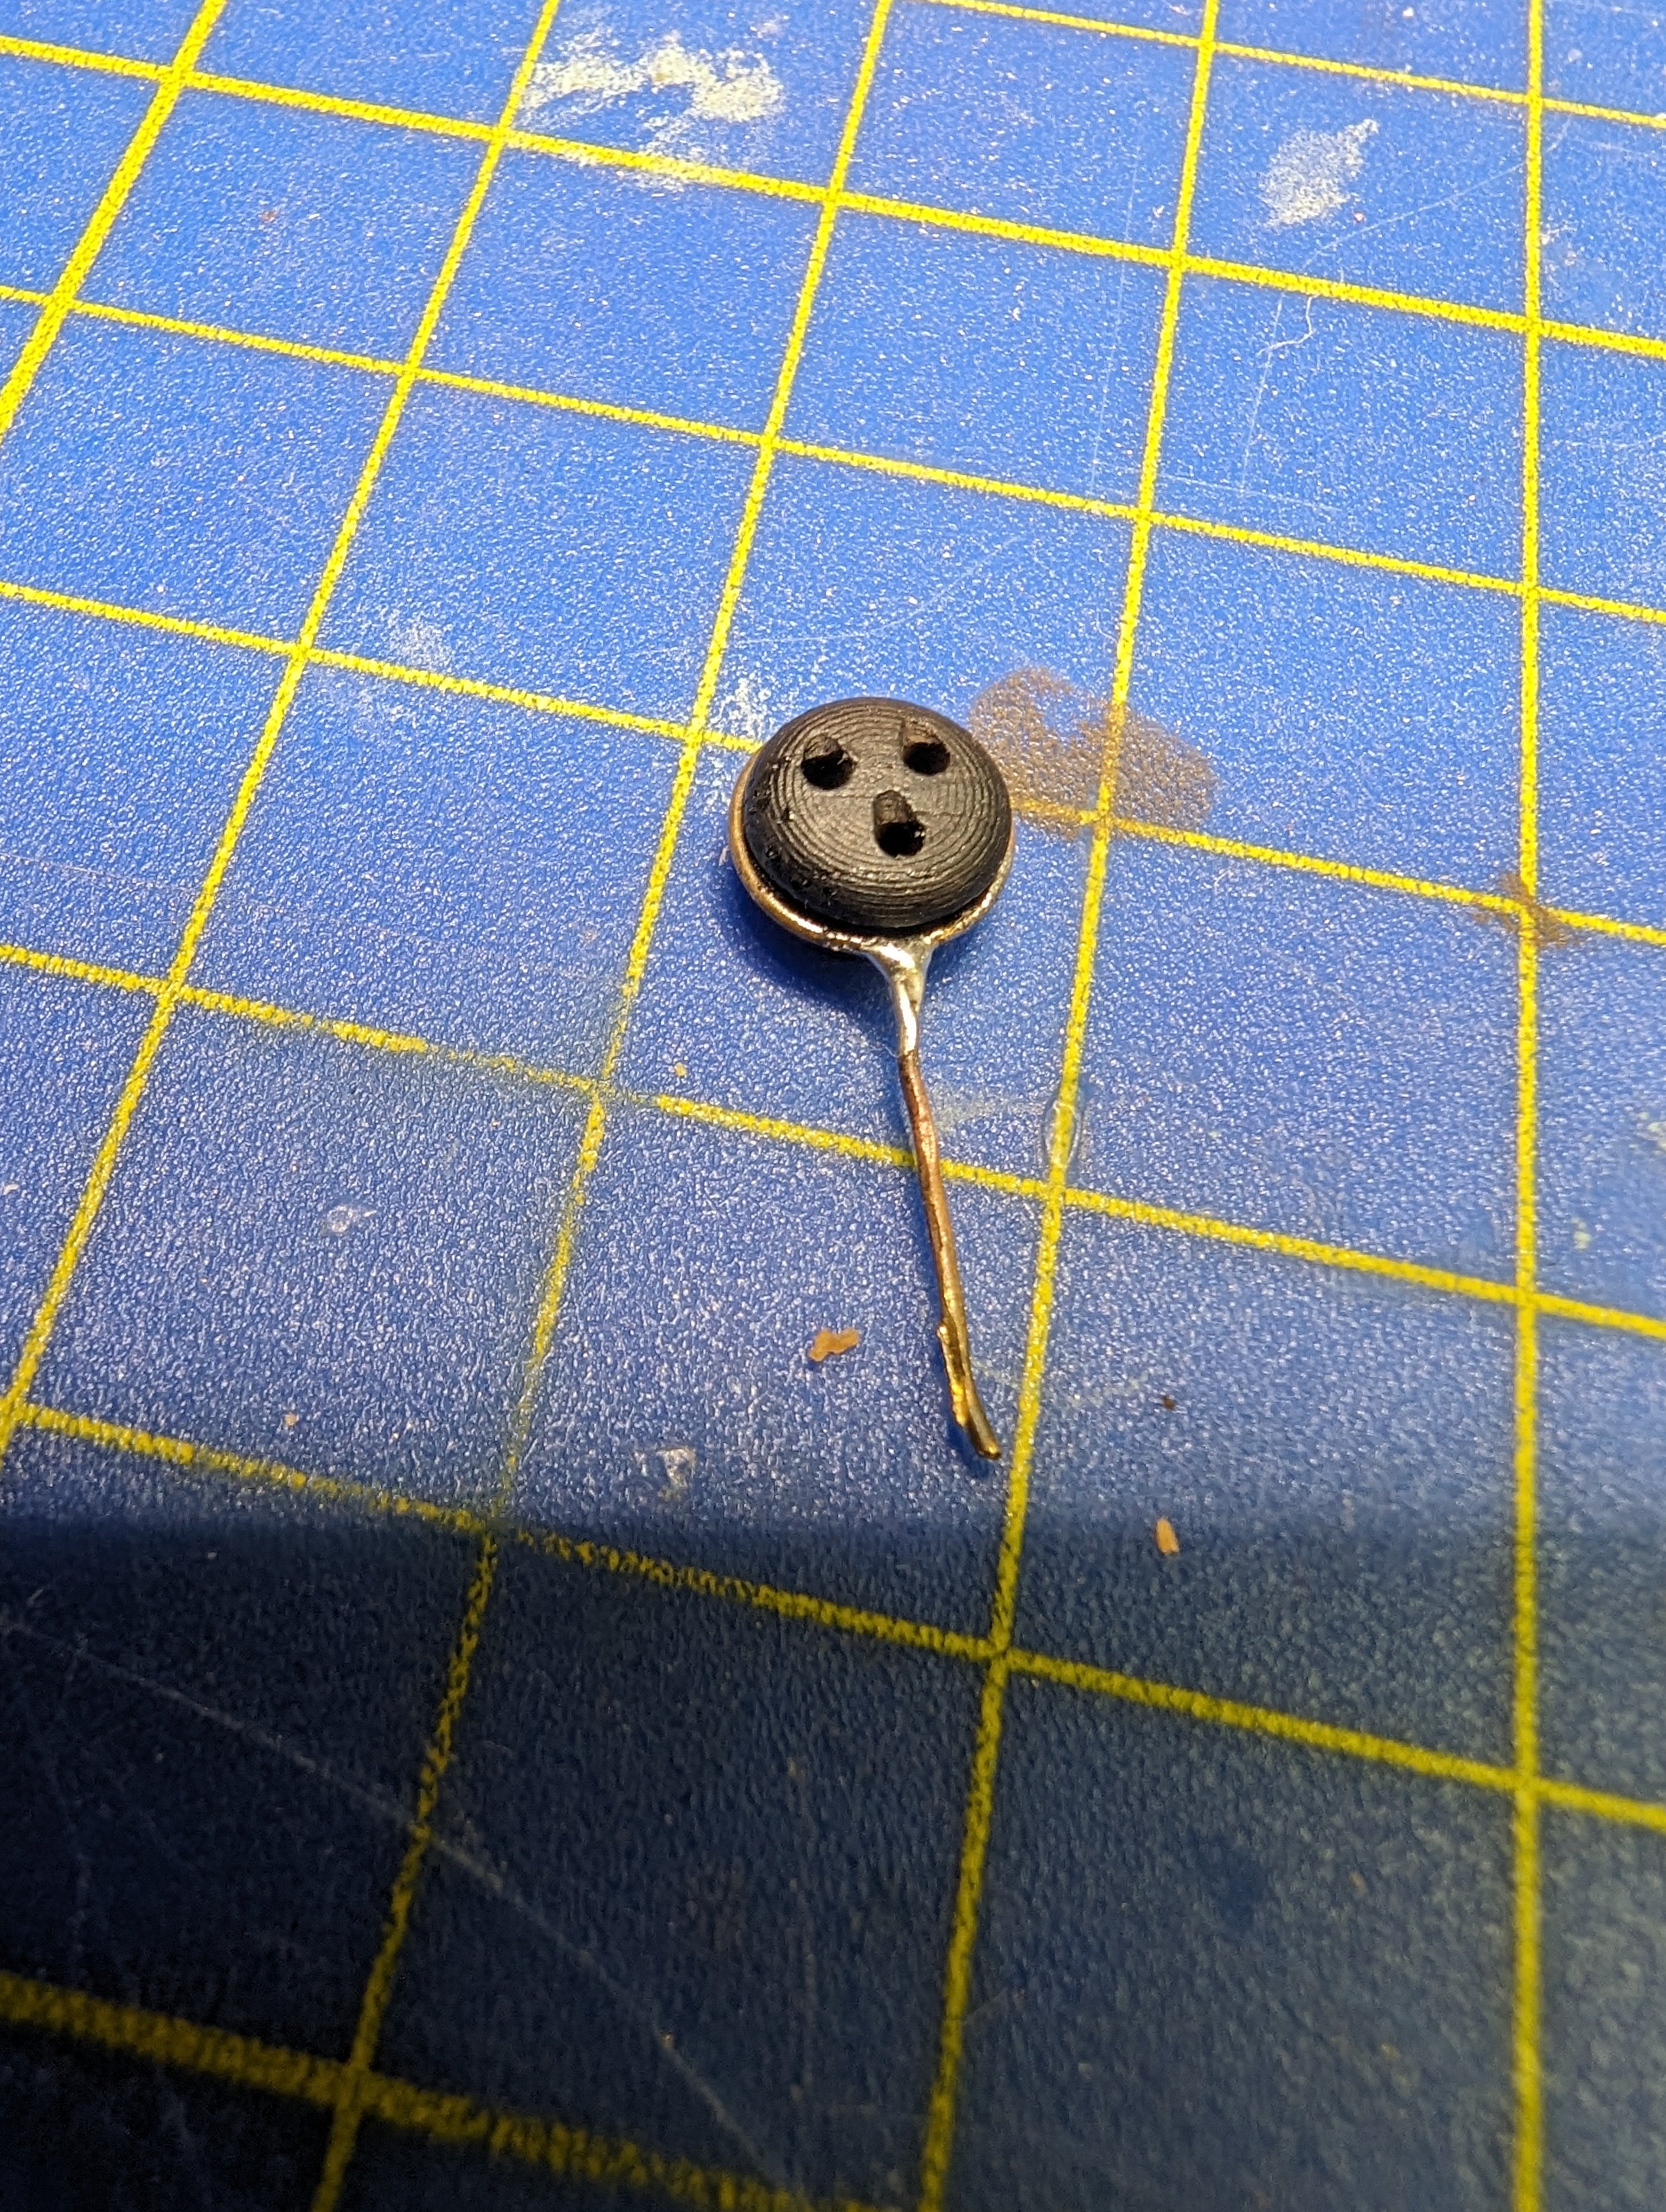
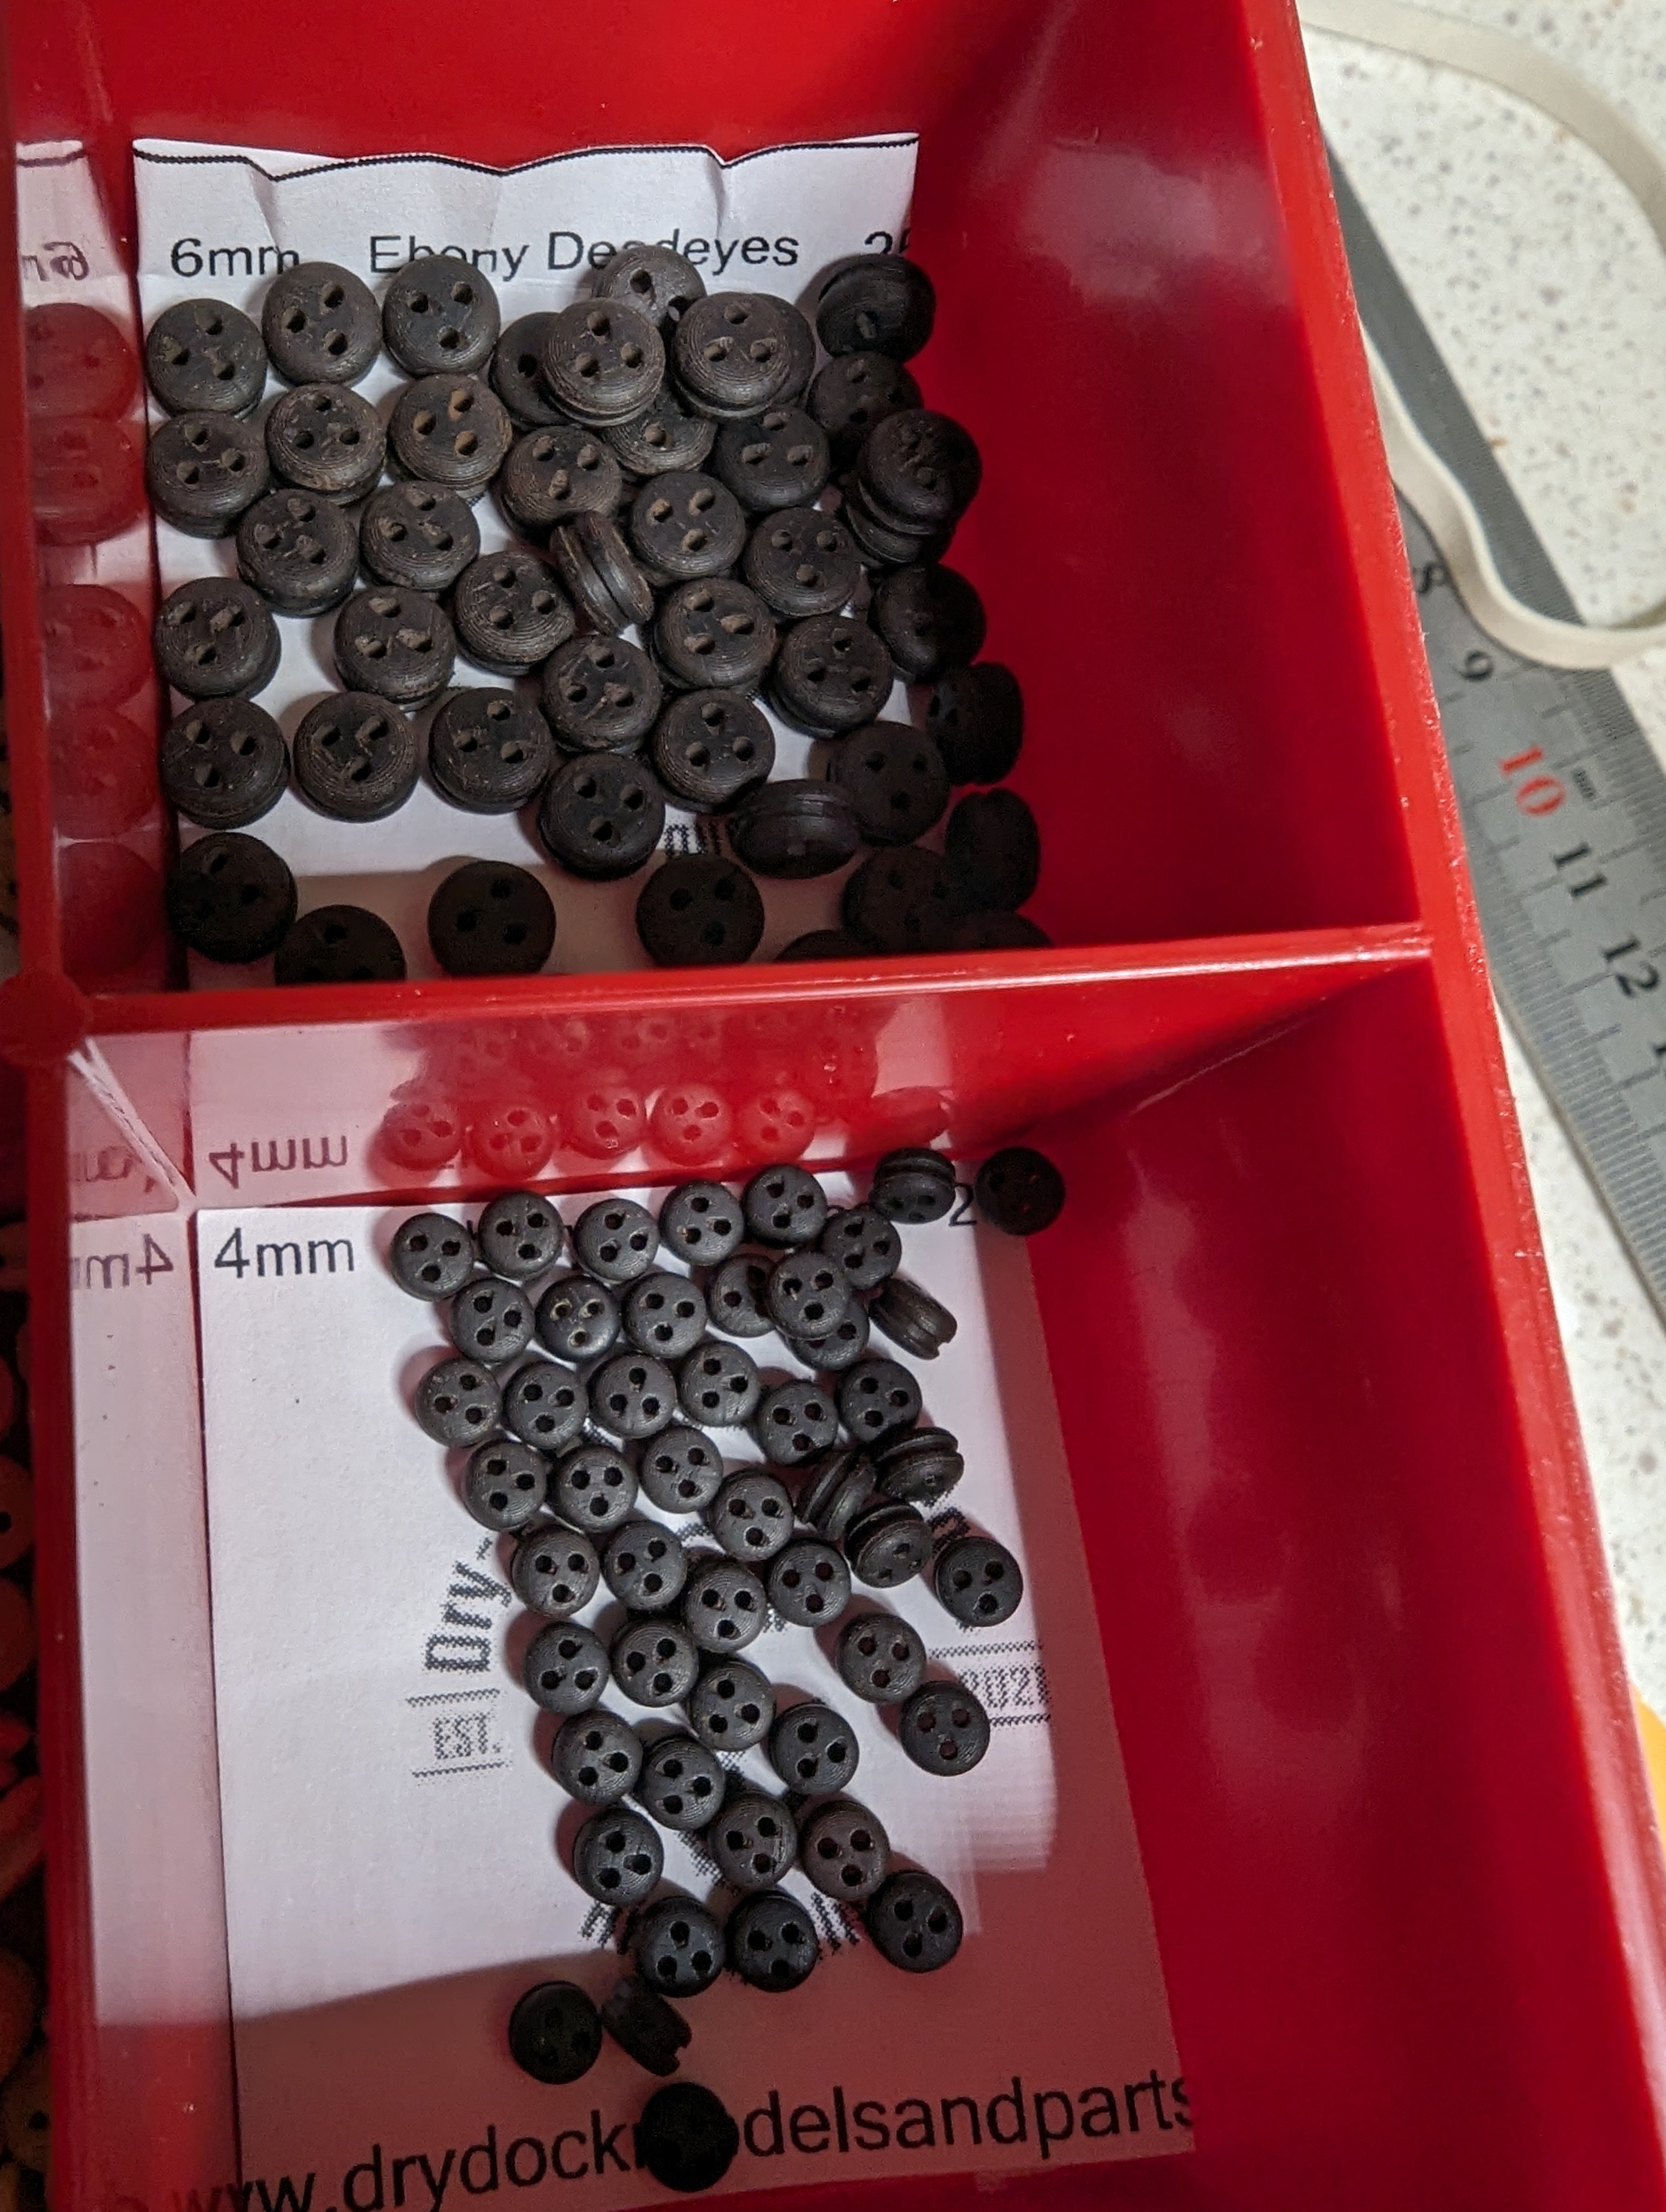
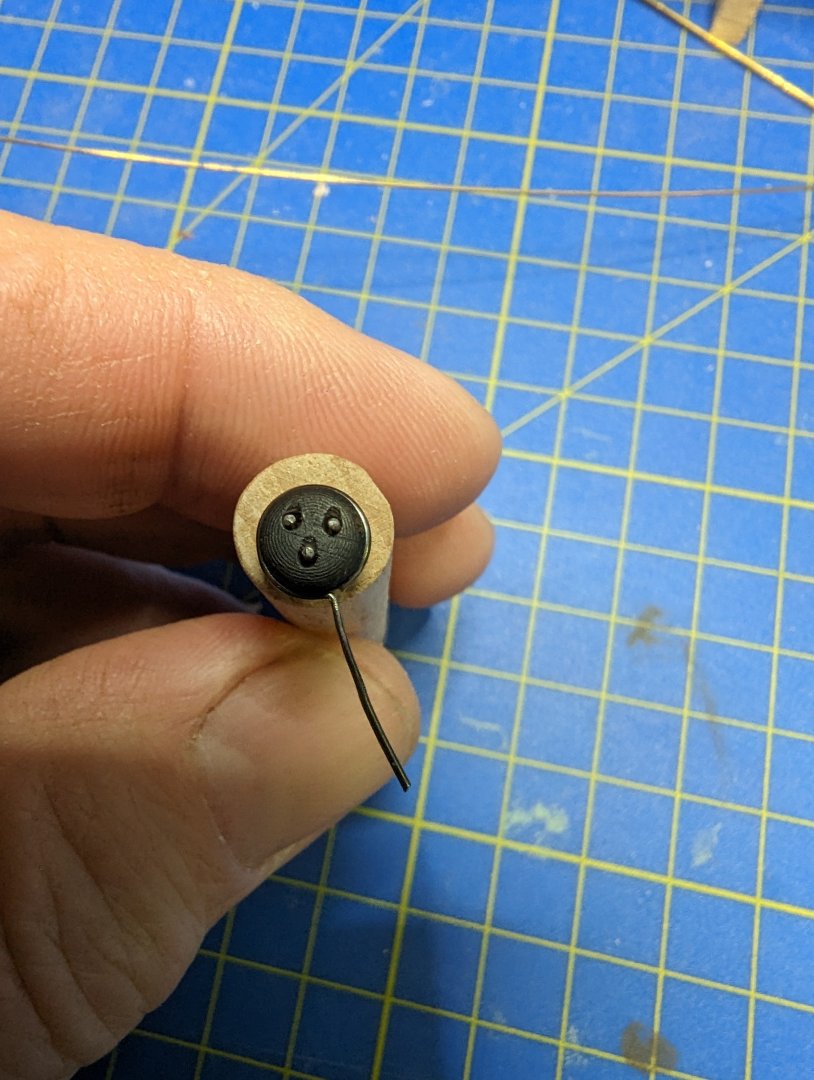
Finaly got my deadeys, but now have a new challange and that is sodering. My deadeys are 6, 4 and 3mm I've looked at Youtune and done a lot of tries, but it is a not easy I've made a tool for holding the largest Have finishe one of many


-
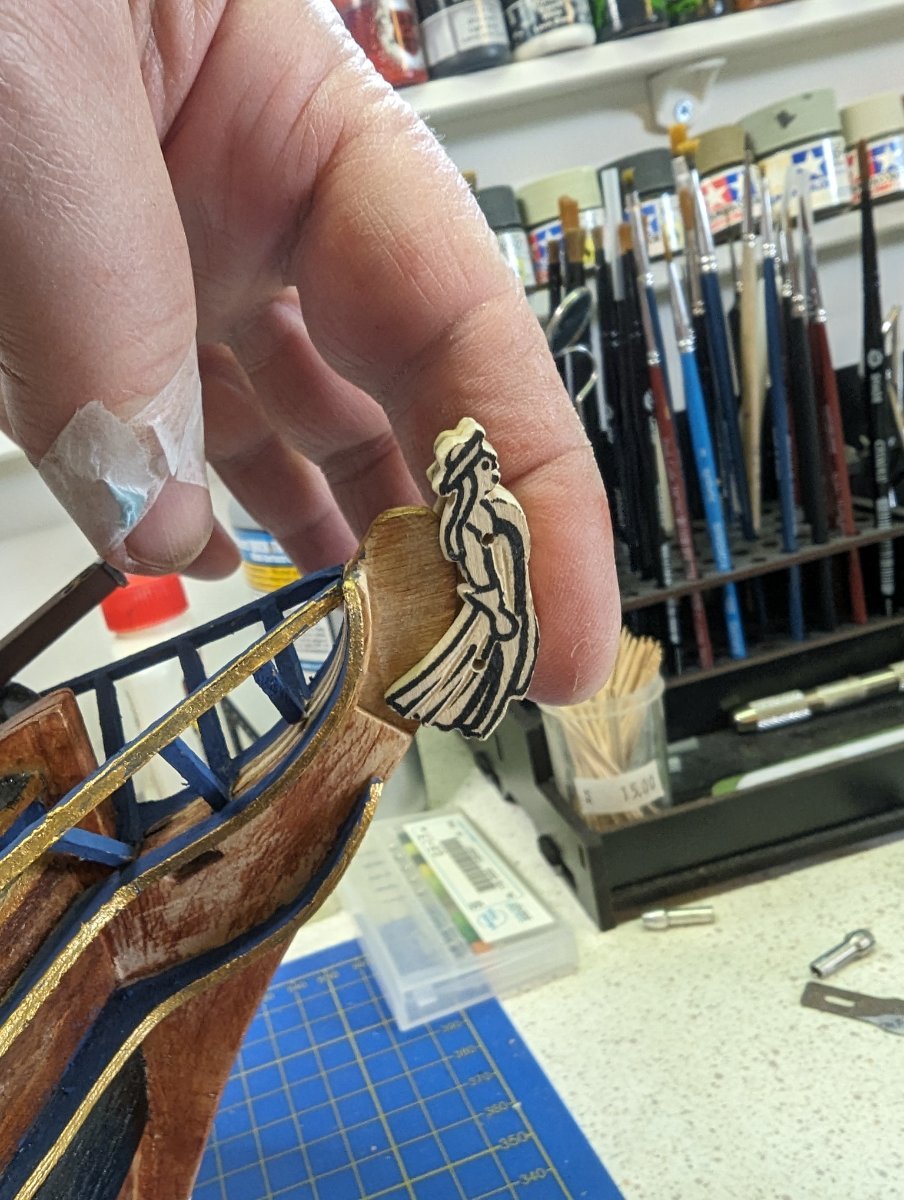
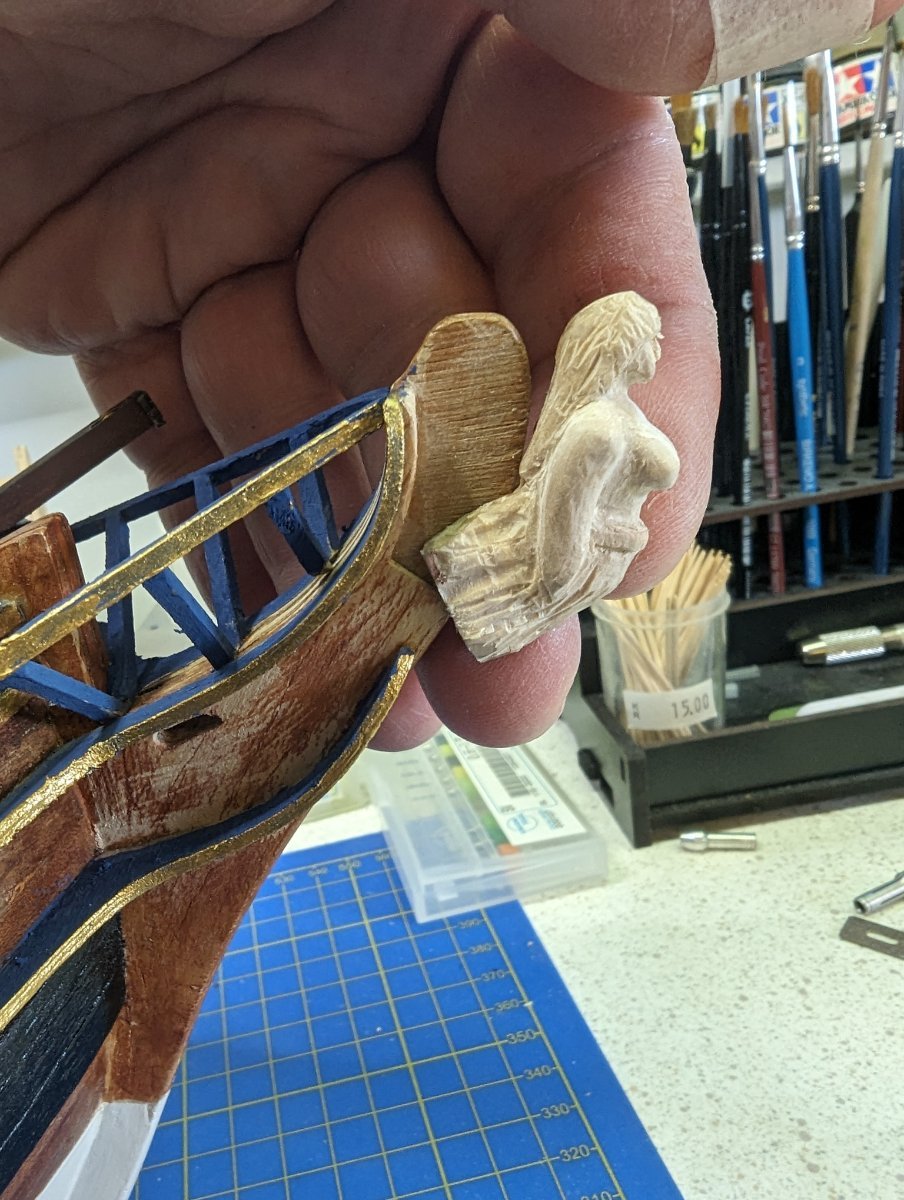
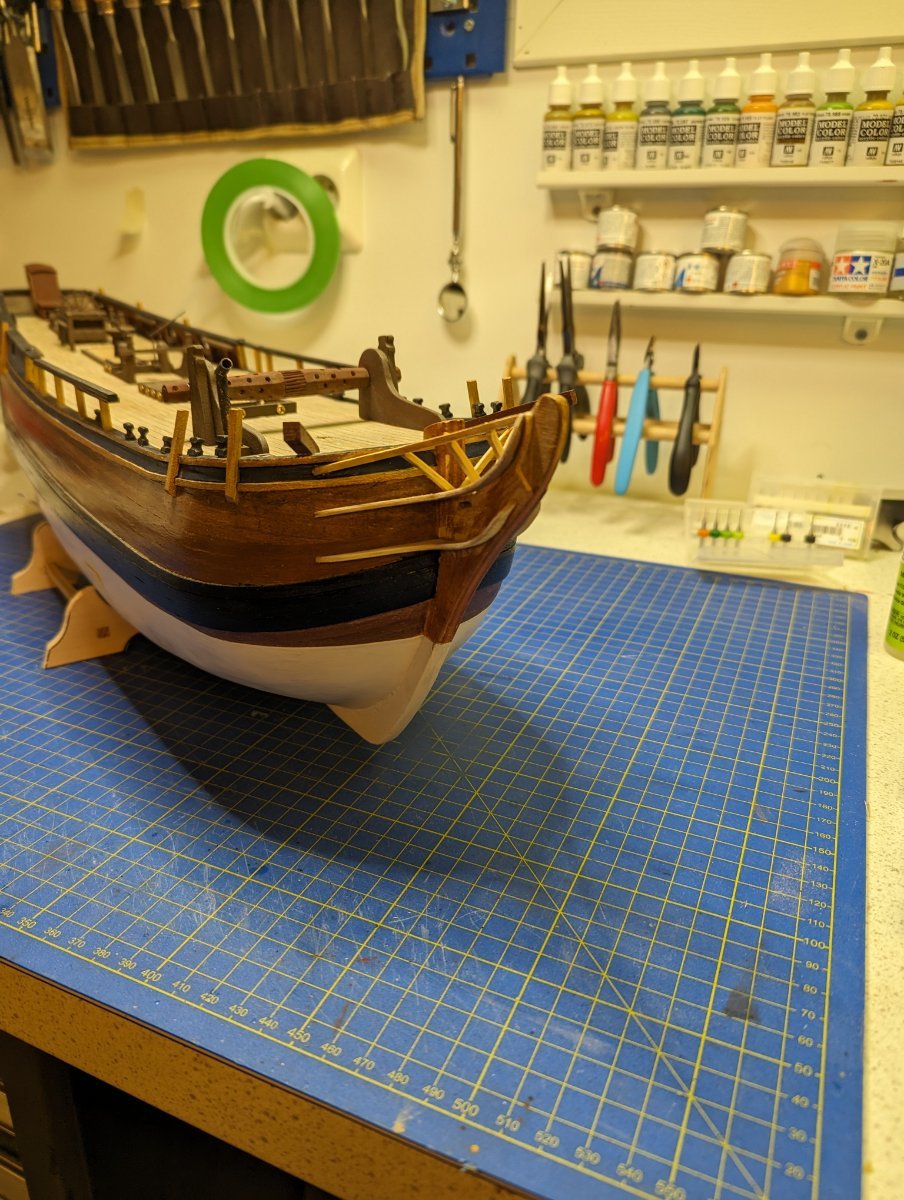
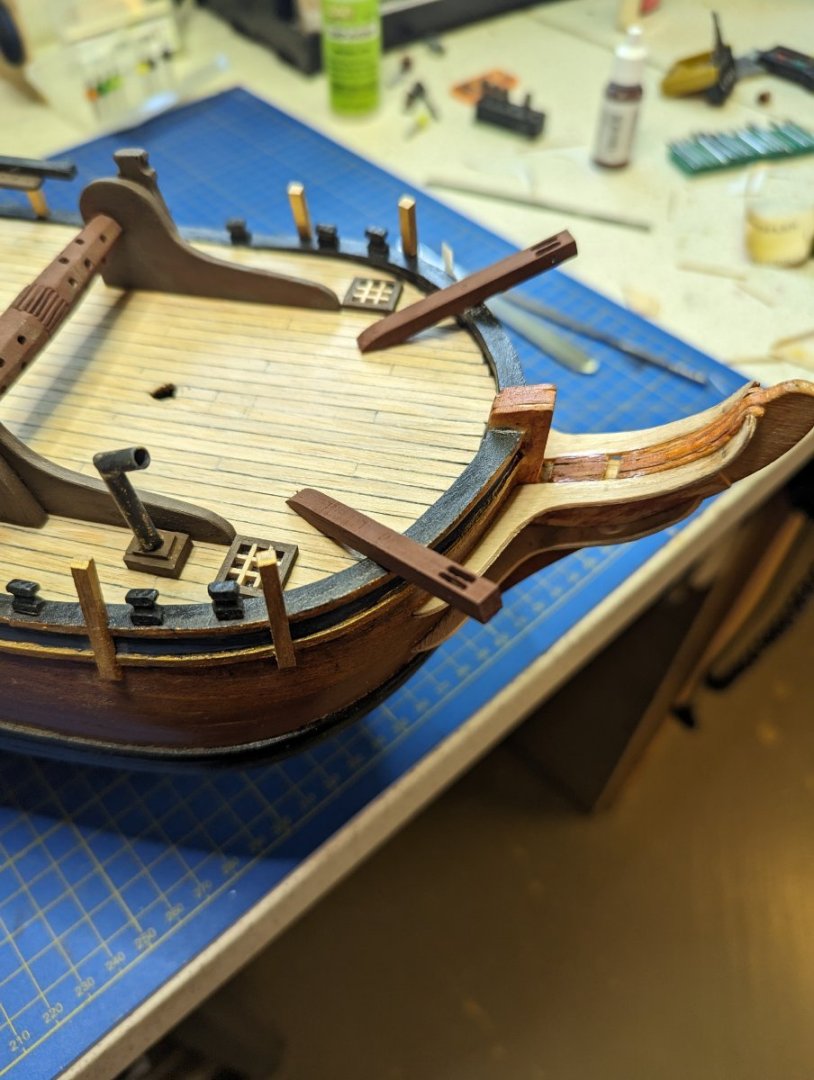
Took some work, but not finished. And I think it is a huge improvment with my new carving compared to the one with the kit. Any suggestion to colors? And yes I'm going to paint the ship bow, just need to get the time to go and visit the same shop again (not in my city)


-
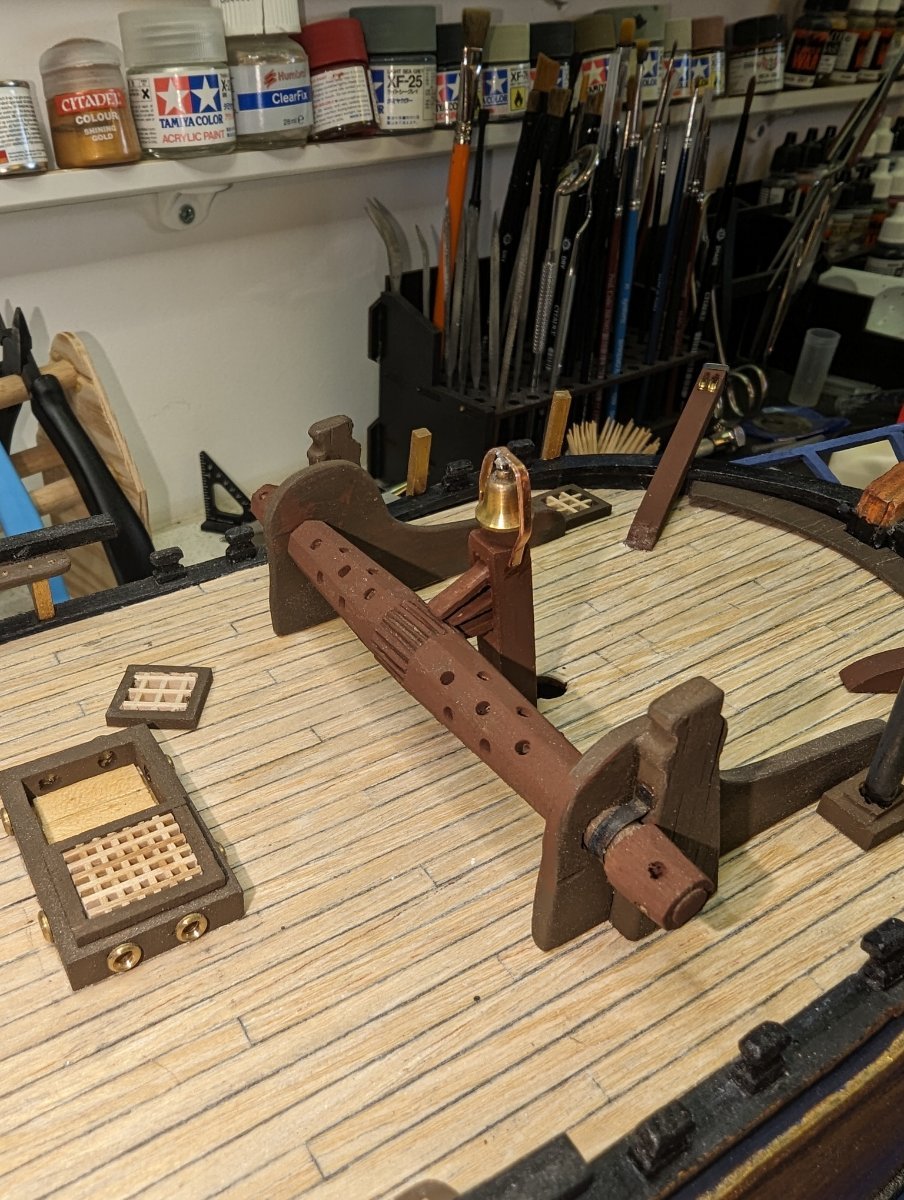
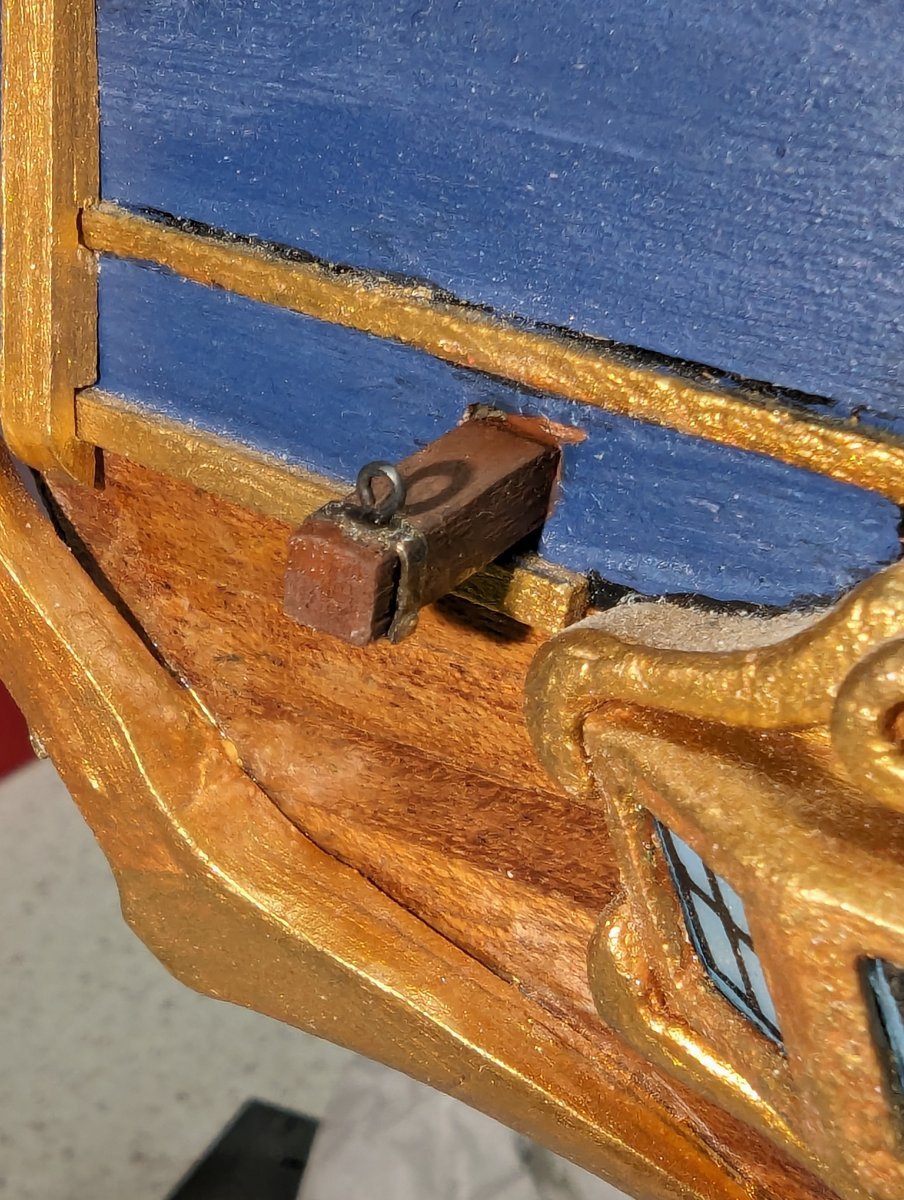
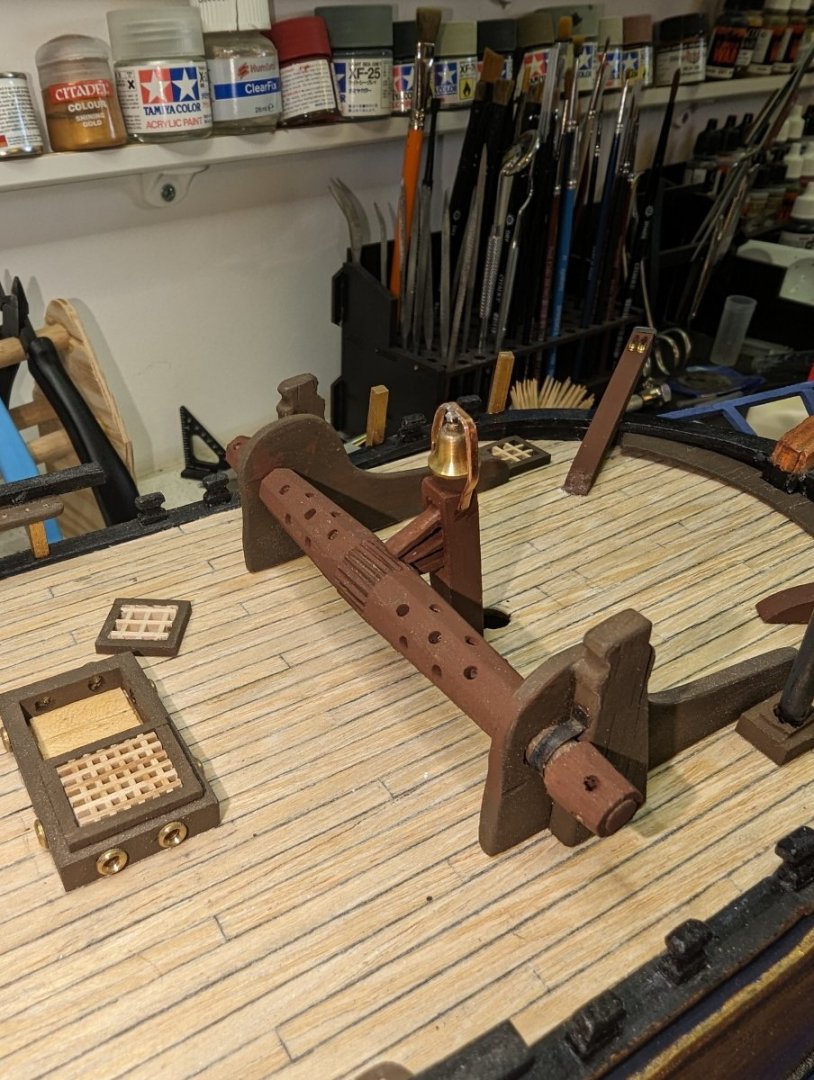
The bell is in place. Whentthrough what size and how many deadeys I needed, more than I had. The bough a supplement package to the original kit with fittings, canons +++, but that was missing a lot and not very up to scale. So need to buy all blocks (boght some earlier) and other supplemtns for rigging. Also startet with the figure. So this is take 1 and I'll see how many tries before I get it right. 1st time carving.


-
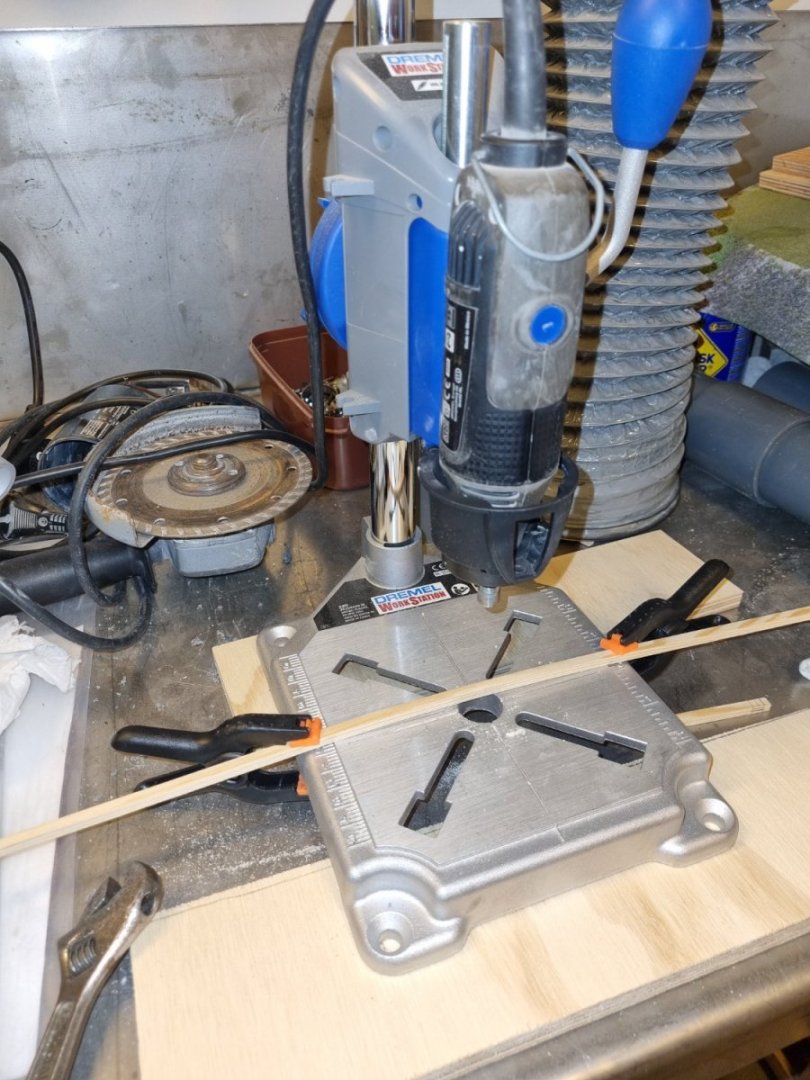
Making these holes for the disc wheels was challenging. The milling machine did not work, so I had to trill by free hand. Not the best, but ok enough.


-
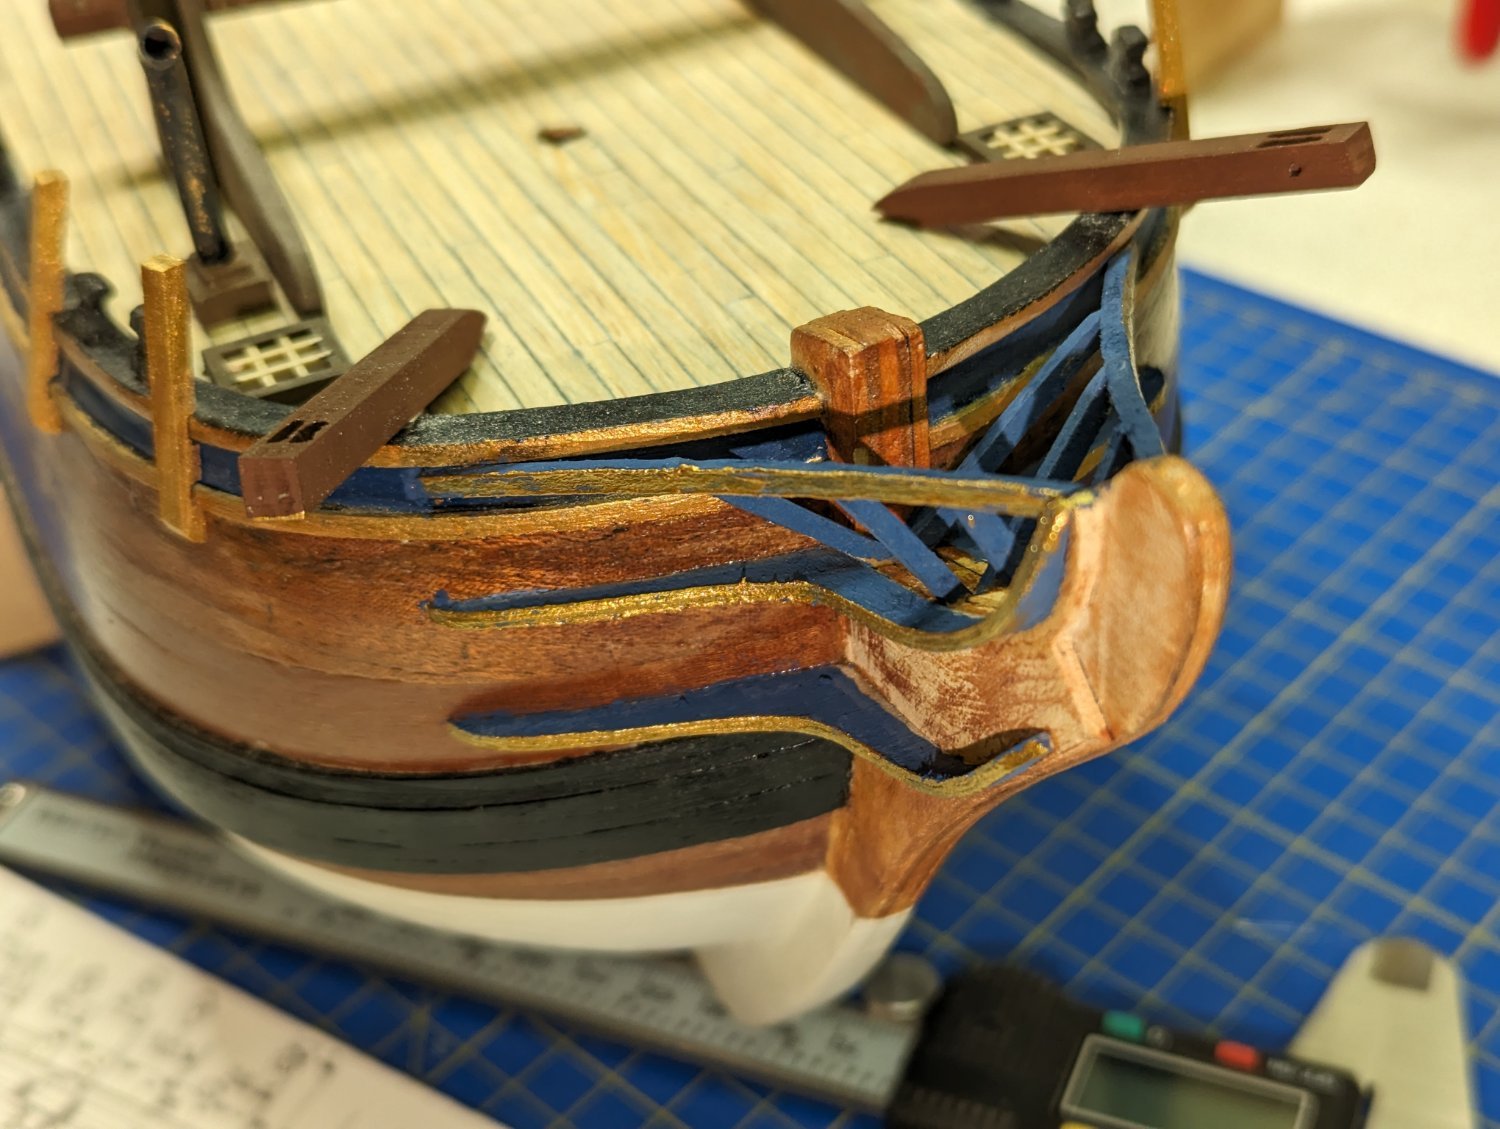
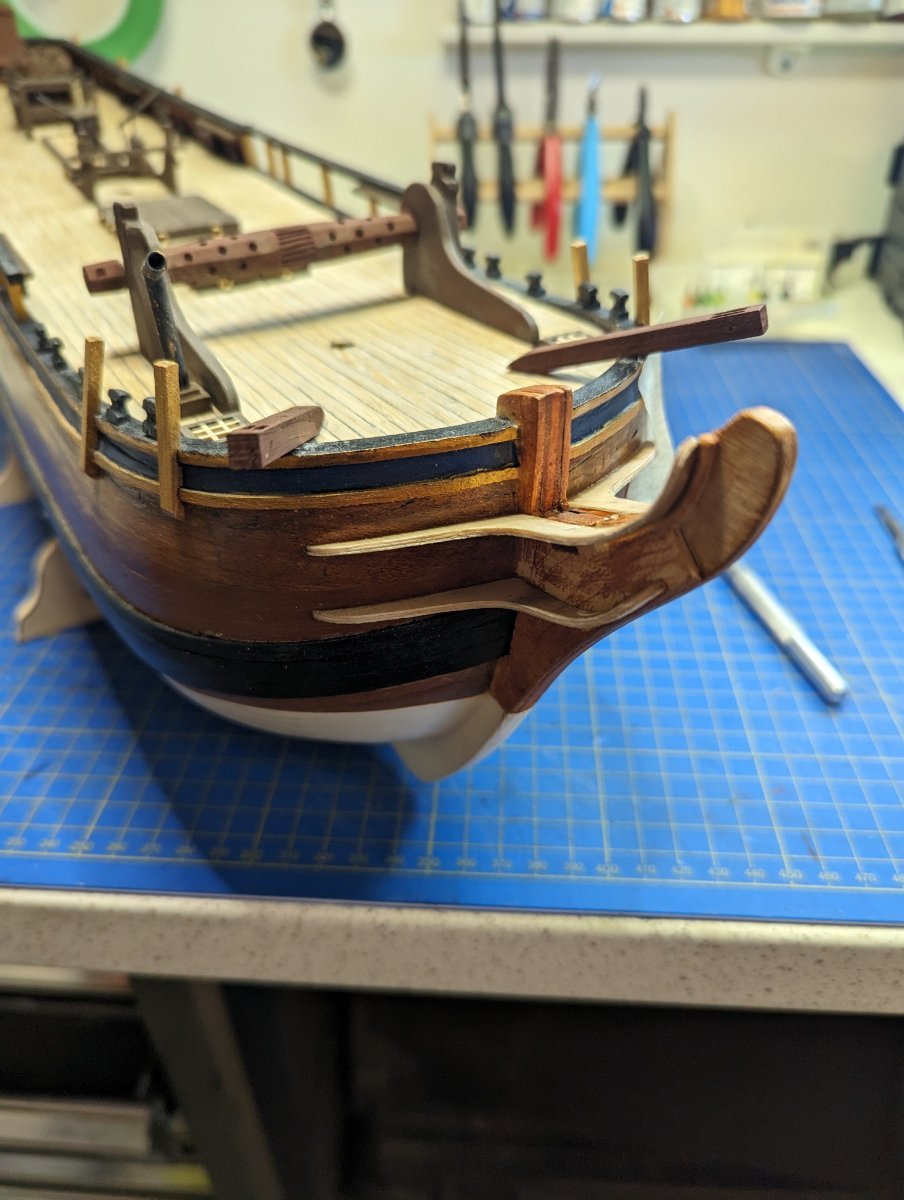
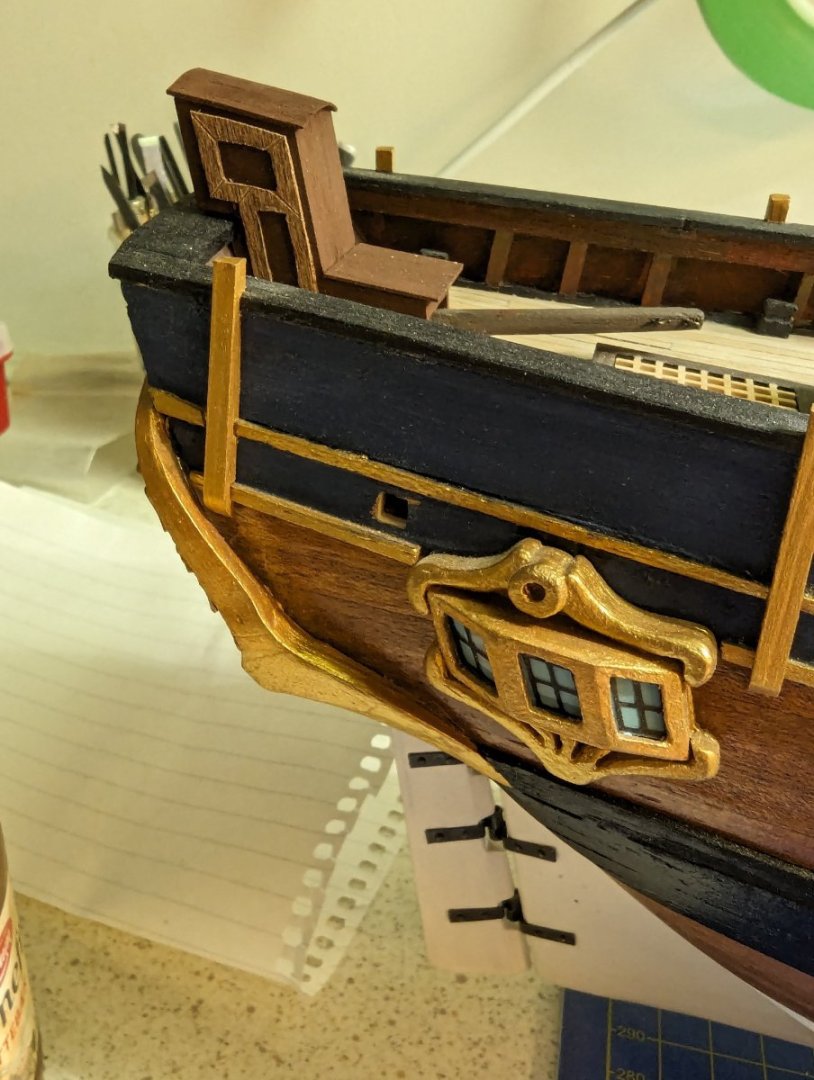
I see there is many interpritation on how the bow is suppose to be, both in shapoe and color. So here is mine. I need to get some more stain, same as the rest of the ship.

-
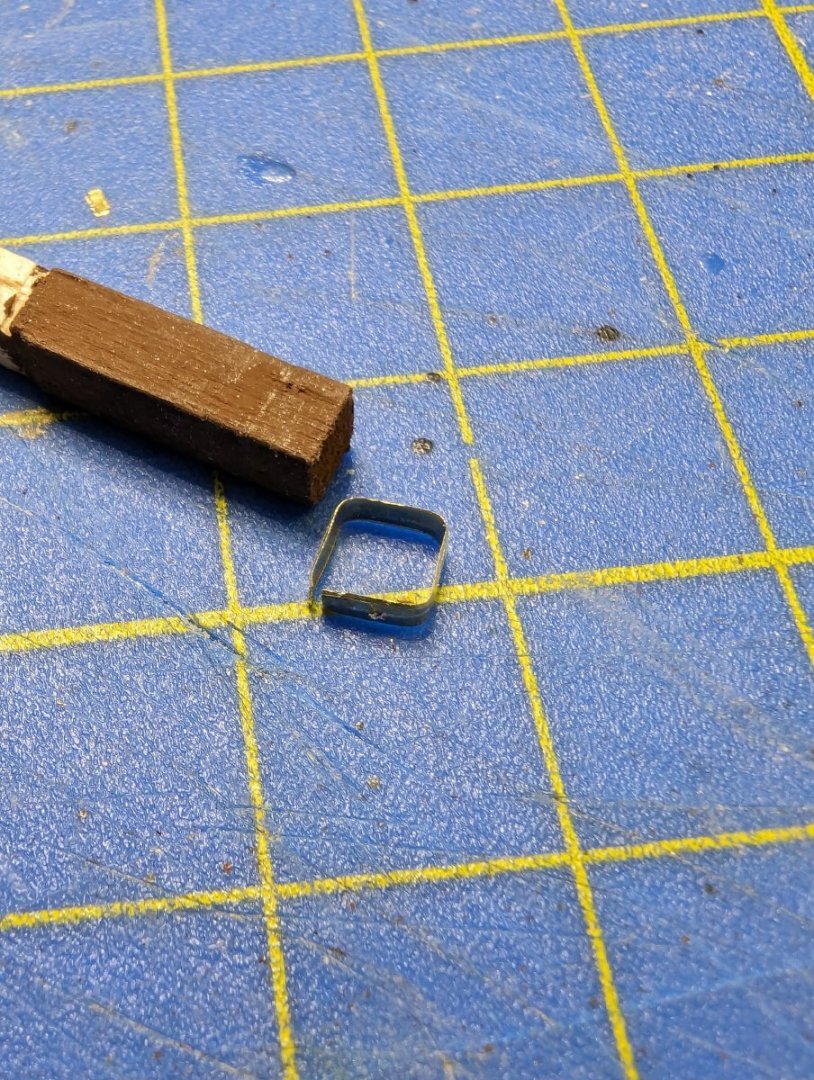
Finaly got the side "support" (don't know the name) in place. Needed to do some soldering which I haven't done before, but it when ok. Practice make perfect .

-
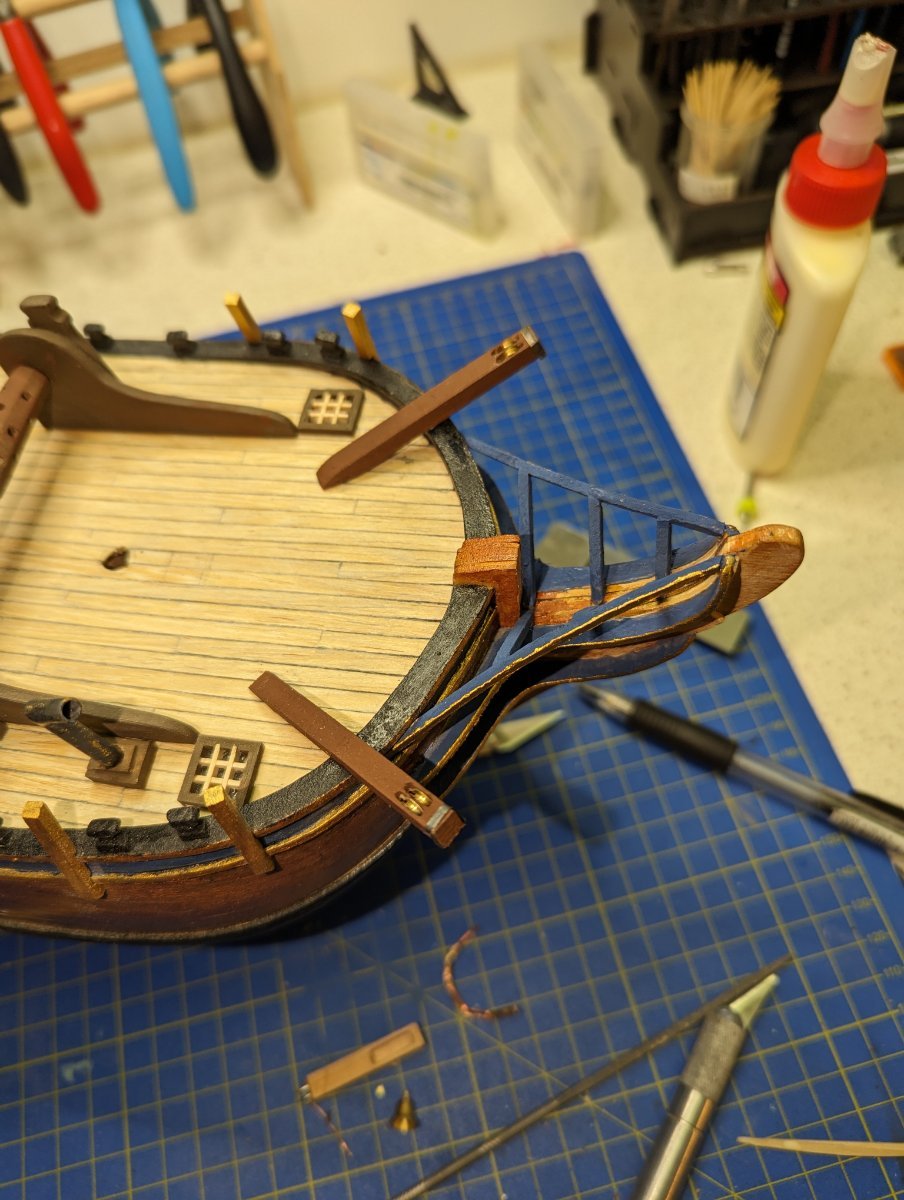
The "break" is over and it's back to building and hopefully my personnal distraction is over for some time. Well, trying to finish details on ship outer part. I see there is so many ways of doing these decoration on bow of ship. So I've taken some personnal liberties.


-
Got a point there. I'll put it on my learning account of what to do and don't
-
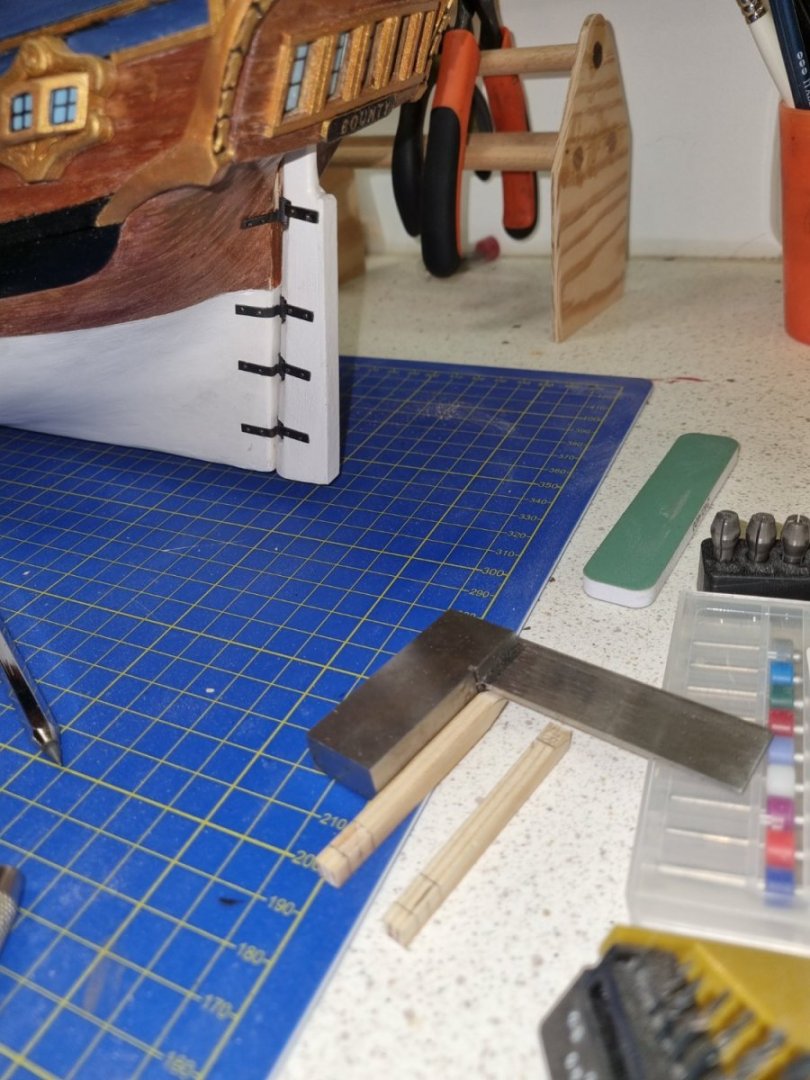
Finished adding the rudder. Learned that neext time it is beeing attached early and before adding deck fittings. Looking at the picture now I might paint top part rudder brown. The only problem is getting the same color. Any thoughts guys?
-
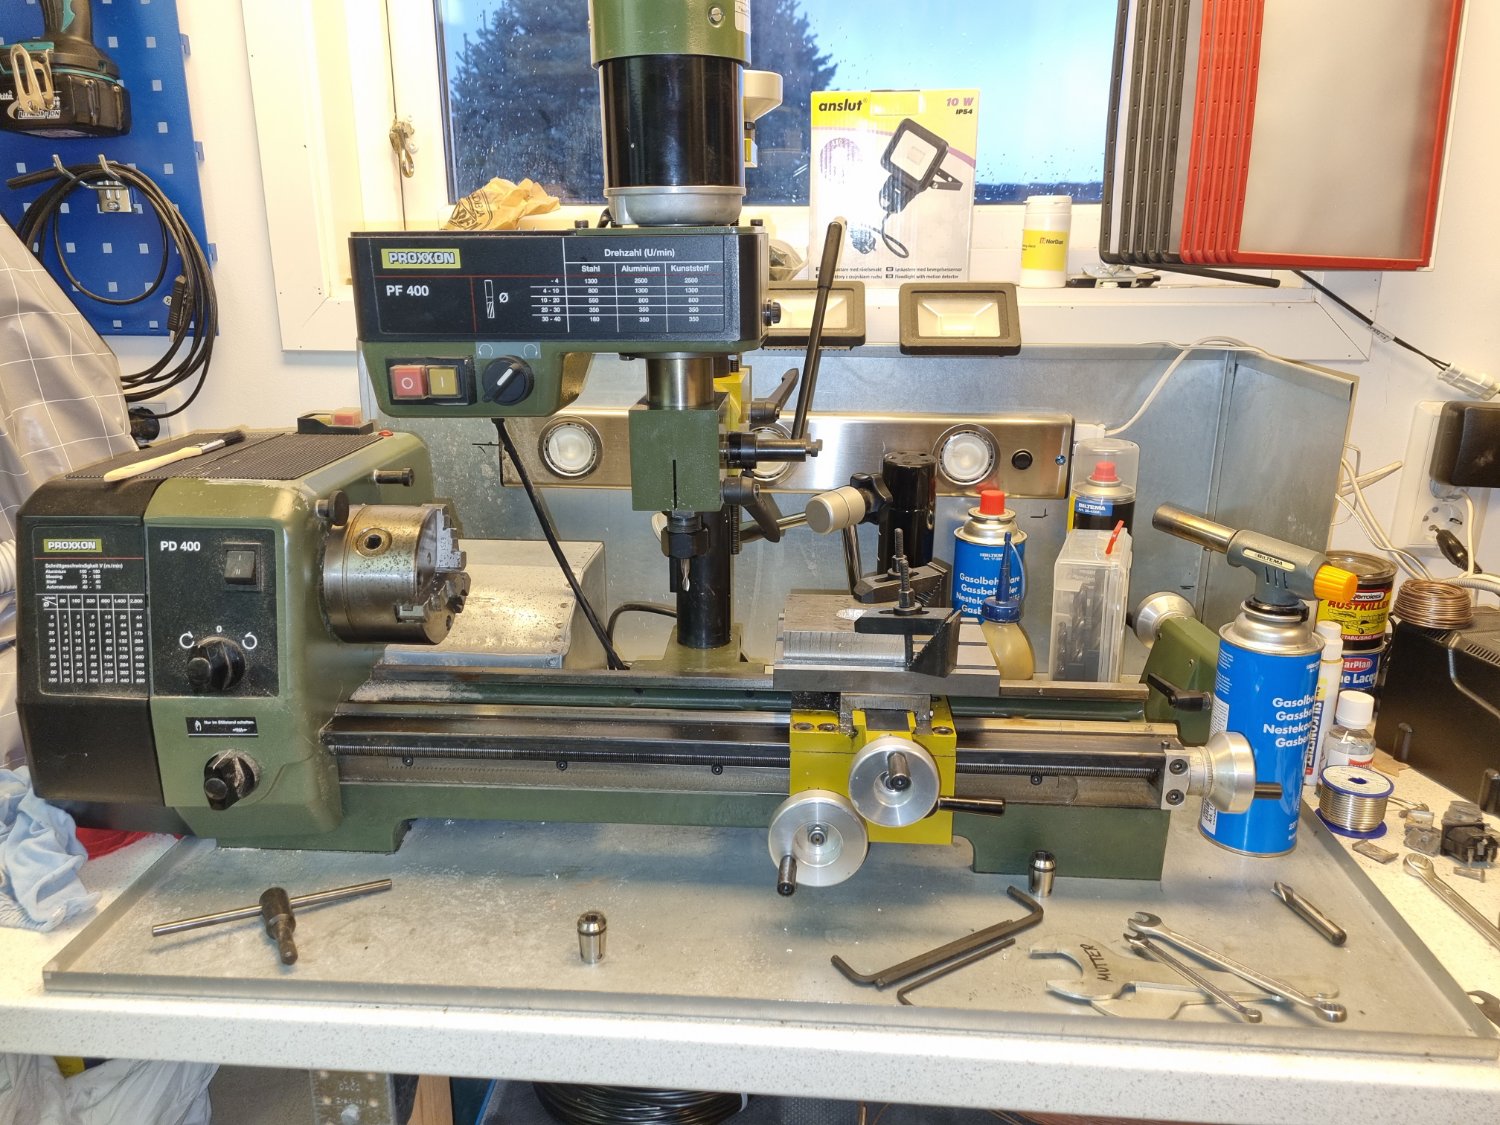
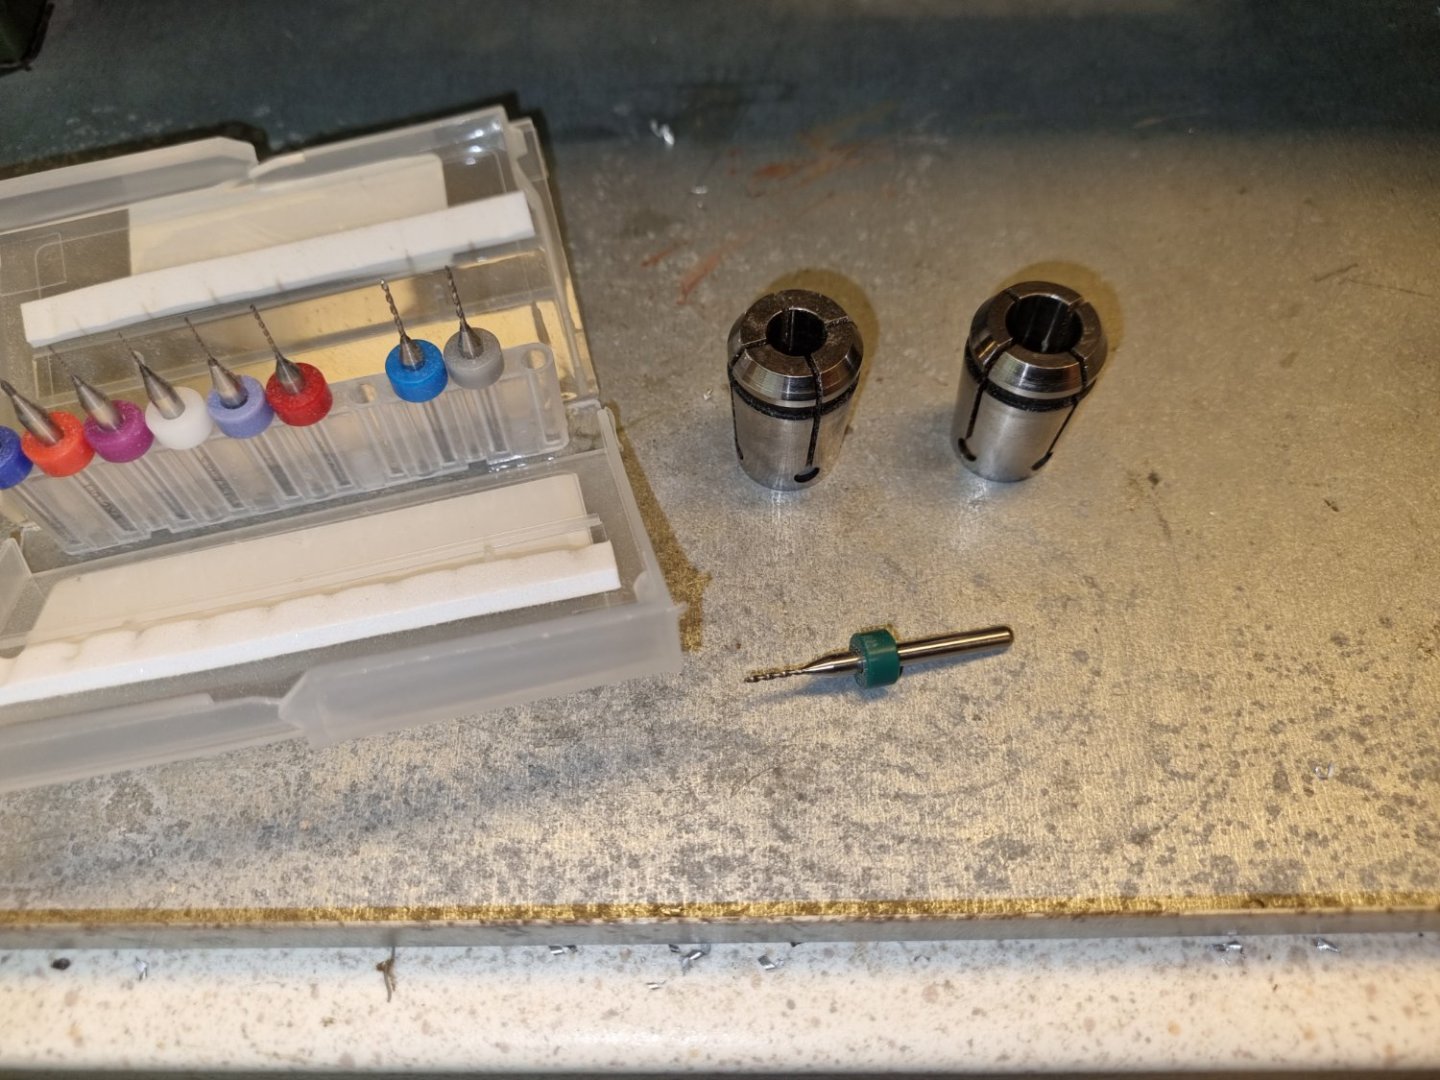
I screwed up with my order and bought something that I really didn't need. Thank to you Lyle I did another going through my thought and what I had and what I needed. I got stop my order right before it left the shop. Know I'm going through what I really need. So, I have a lath with a mill. What I didn't know or though about was by getting a set of collets other than Proxxon, since what they have are to big. By that I mean my very small drills 0.1-1.0mm which have a base stem of 3mm, which is to small for what Proxxon supplies or what I have. I also saw that it is possible to get a gear tooth chuck (10mm) with adapter that I can fit into my mill. So I've asked for price and delivery of small collets and a gear chuck. It saves me a lot of money and is more accurate than what I've used so far.

-
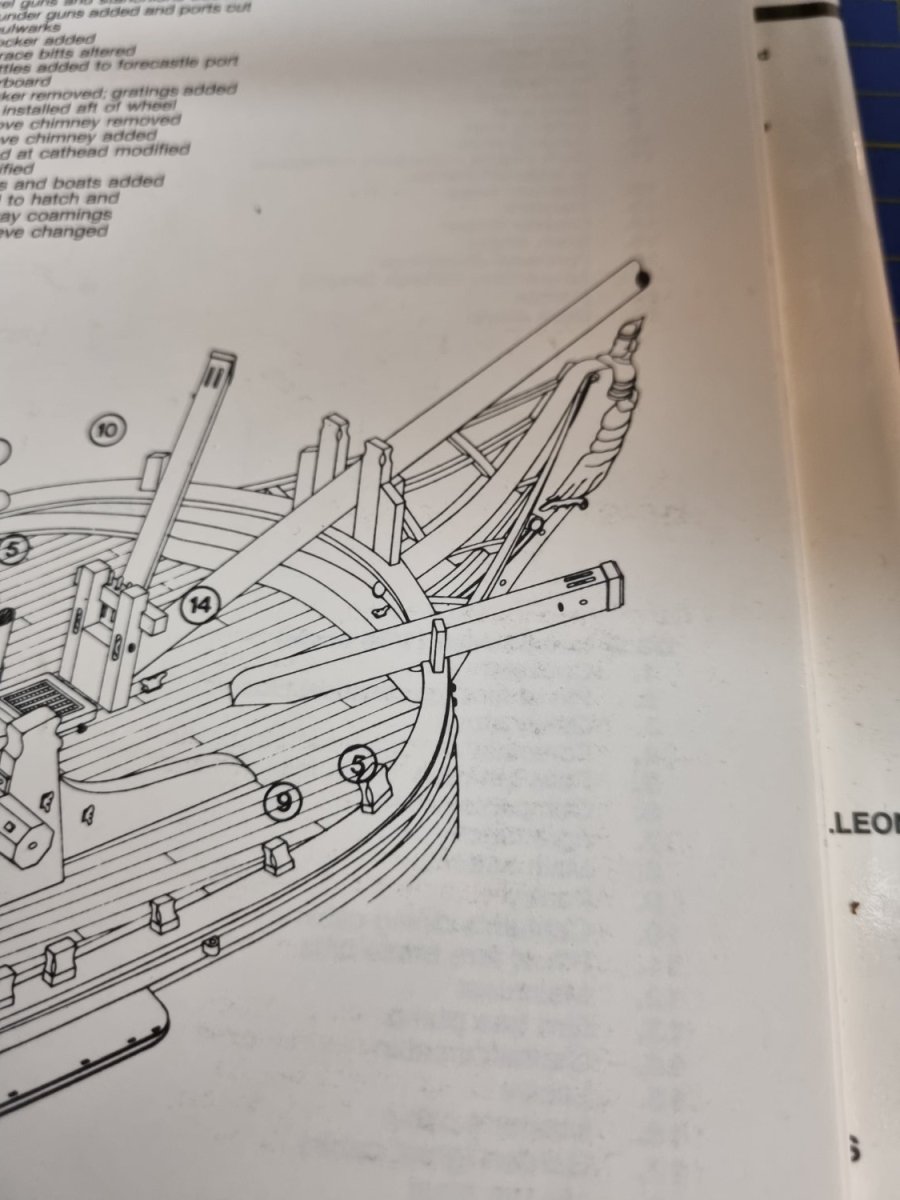
Nice work Lyle and great pictures. Just had a more detail look in the book and I agree with you that drawingsit are complicated. So thanks for sharing good pictures. A very good reference when I get to that stage (some time in the future)
-
Found a Proxxon drill on sale and bought that, online. So nowjust wait.
-
Thanks, I will have a look
-
Nice work LyleK1. In the Armed transport Bount book there is detailed rigging and the figure is descibed as a women in riding clothes. I'm following the book as good as I can, but must admit I'm not sure how accuret the book is since from my understanding there is not to much detail from the real ship building.
-
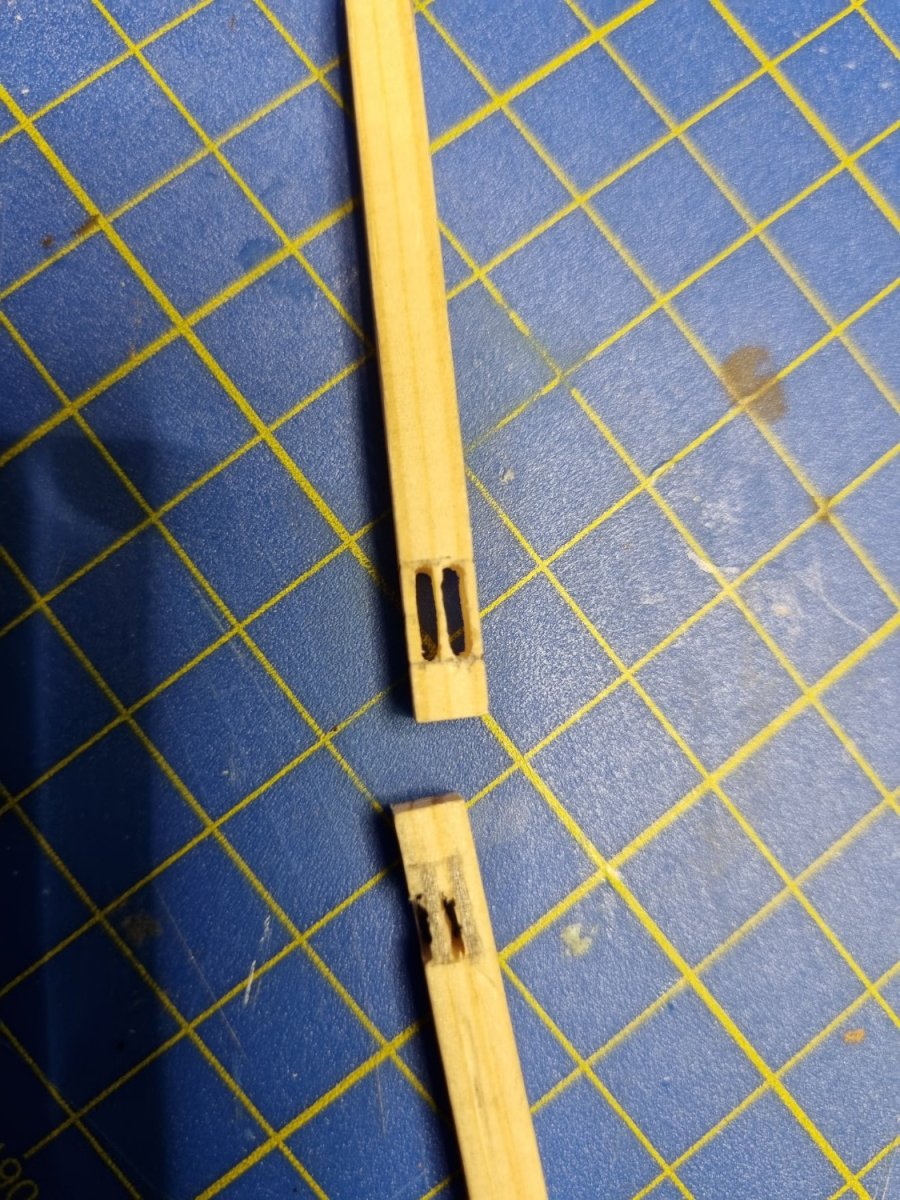
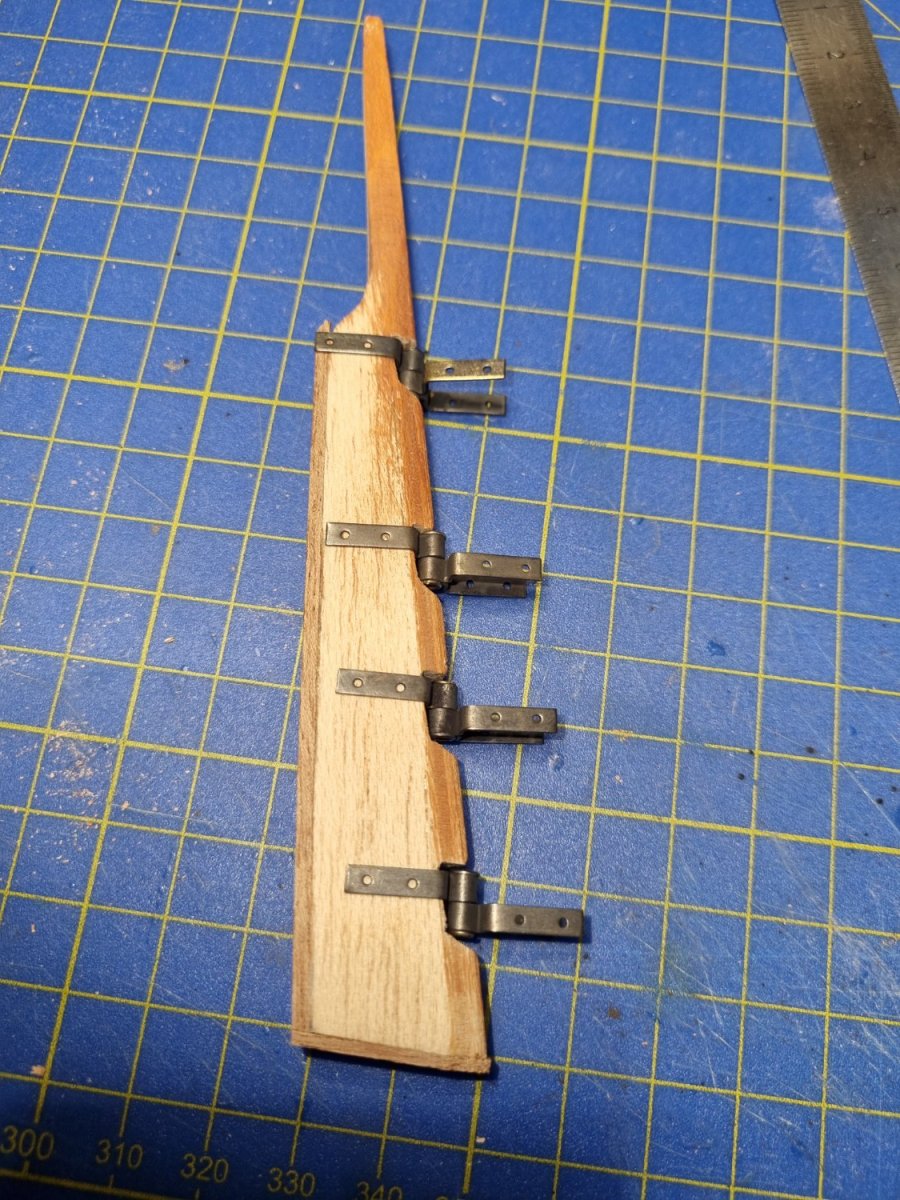
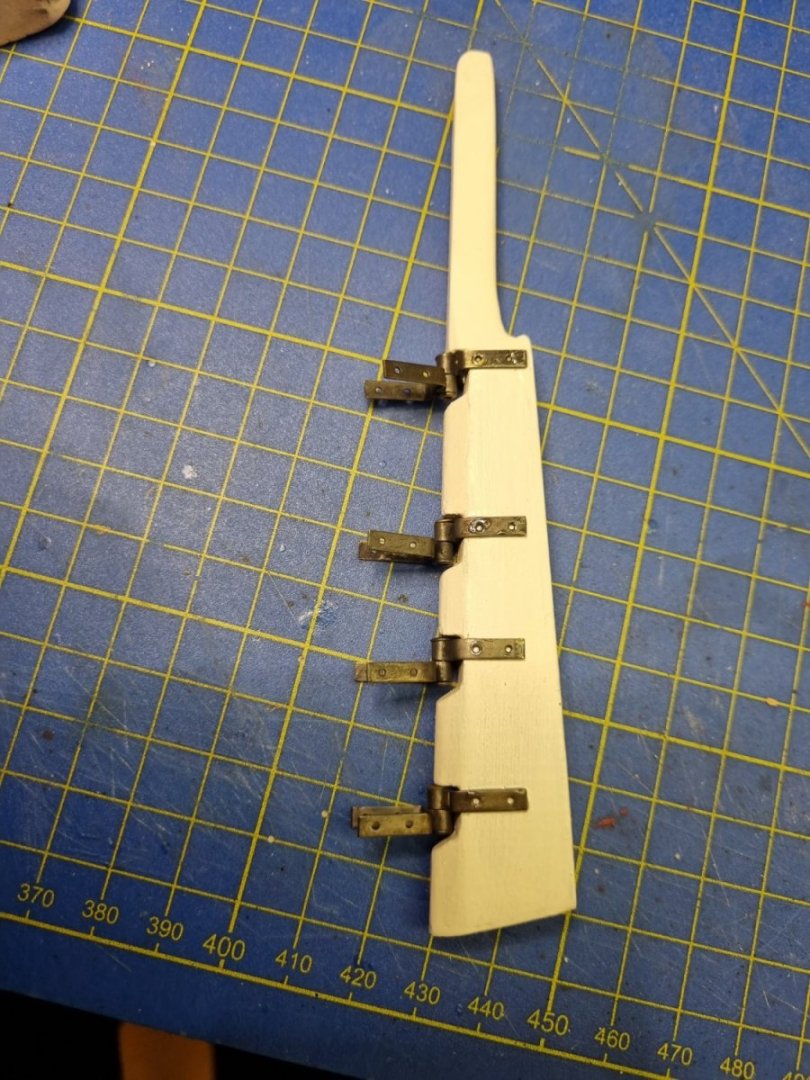
Next is the rudder. I accually could use the on in the kit with some modifications. Added on some wood and made som notches for the hinges. I cheated and bought the hinges. Had to paint it several times to get an ok finish. At the same time I'm working on the Timberhead. The challange has been making the hole at the tip. My drill jig is not stable enough. The with of the holes are 1.2mm. So I need to figure how to make them even and parallel. I definitely should by my self a good columnar drill. Need to look around. Anybody have any referance on good ones?


-
Found a piece (tail rudder) from the kit i could use, but need modifying( alot). Here I've made groves for the hinges, that I've blacked. Also added piece of wood on the bottom and back. The top of the tail rudder is way to thin. Had to glue on some wood and than afterward make it suitable.


-
All the top fitting is scratch build and will be. The only thing I can use from the kit now on is 3 types of rope and maybe the mast and spare. So It is sometime frustrating, but at the same time satisfying. I learn alot and it's fun to see the ship beeing built kind out by my self, using HMS Bounty book.
-
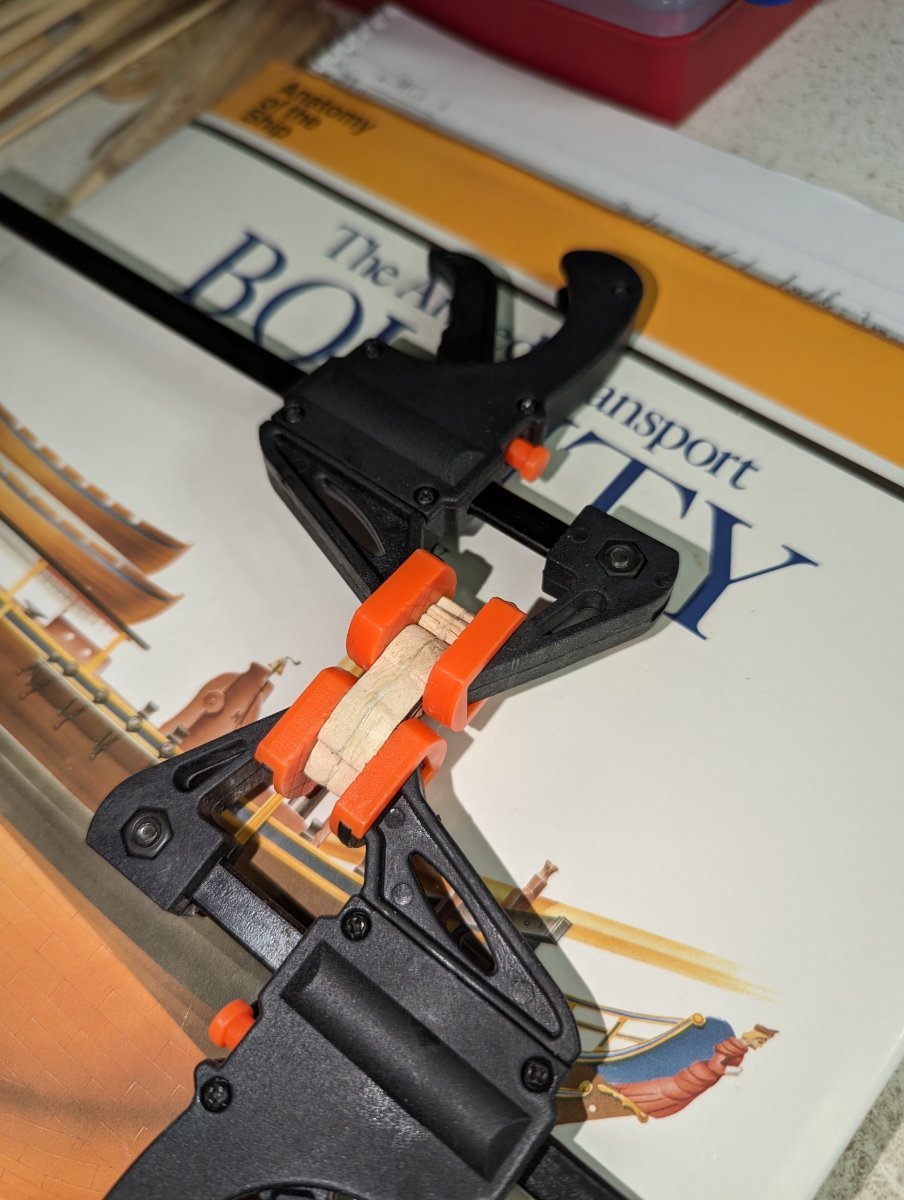
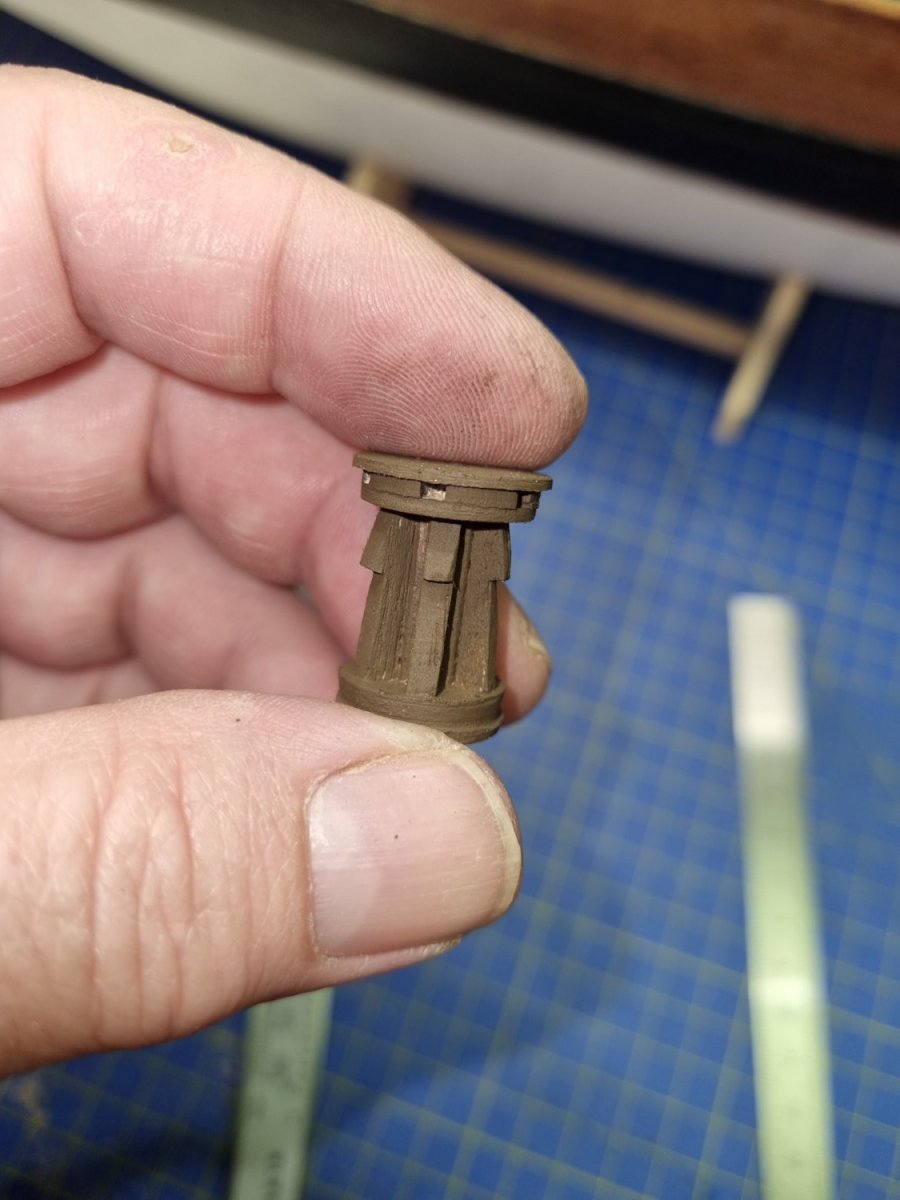
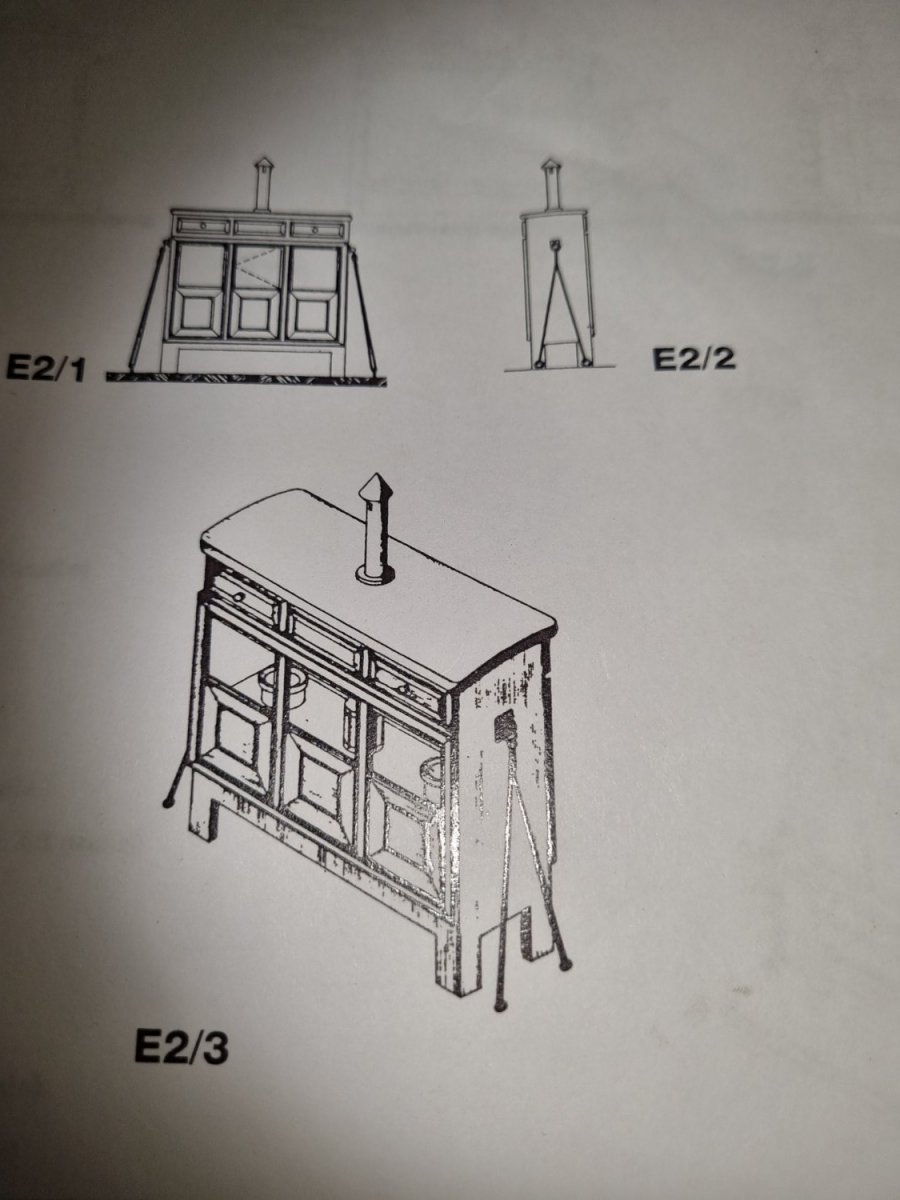
Another scratch build. Had to make it twice to get it ok. Going to make more detail drawing next time and also use harder wood. The wood I'm using is to soft (it is not balsa).


-
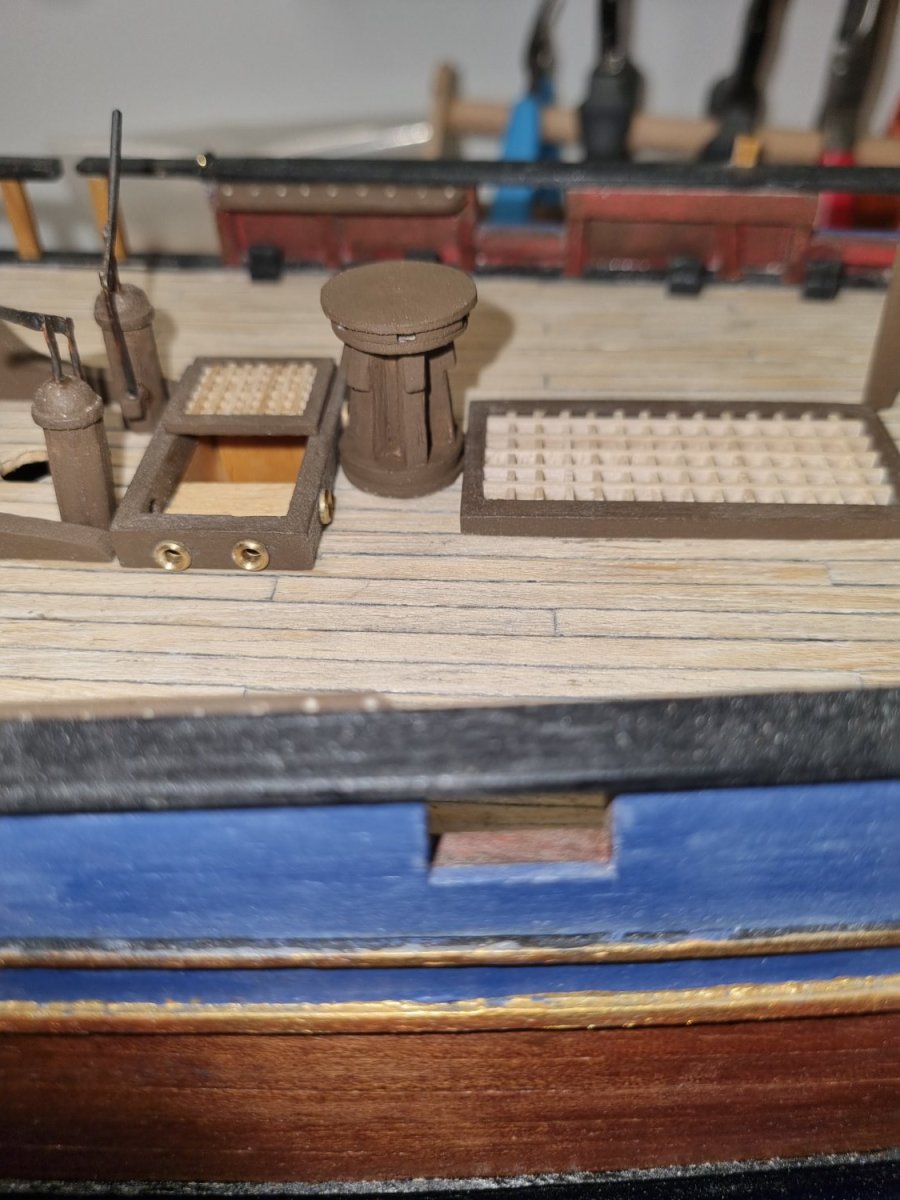
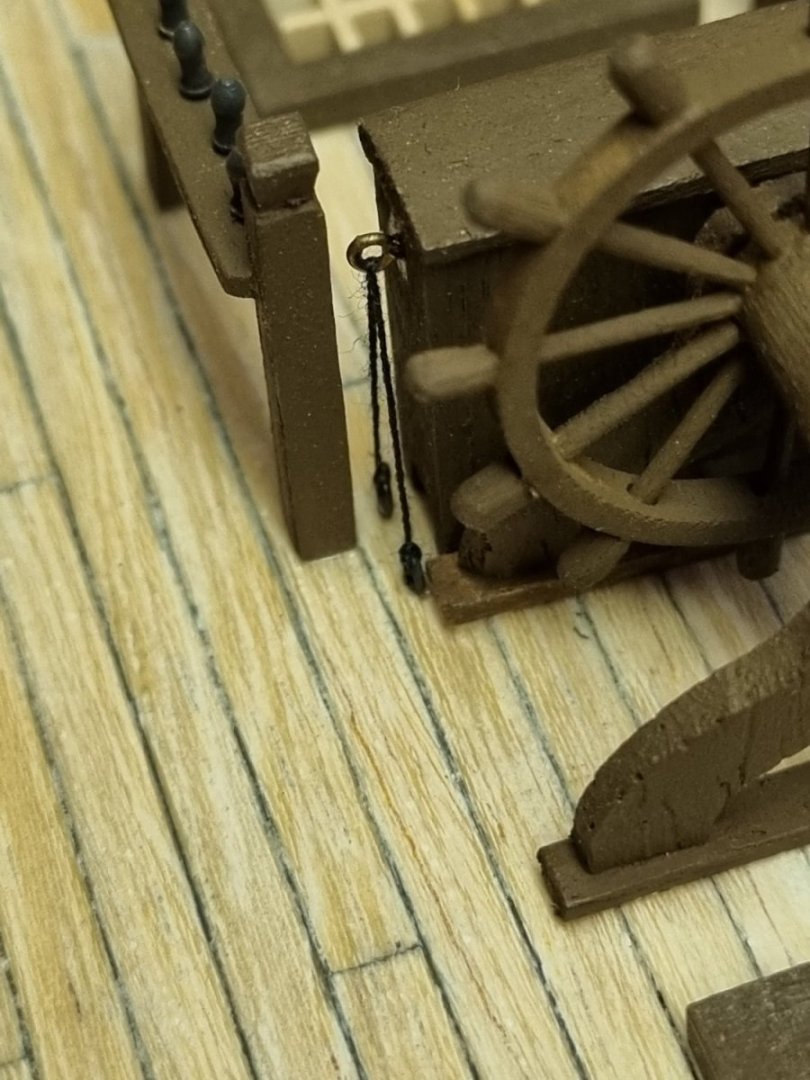
Finaly got the binnacle in place with securing rope.

-
Thanks AJohnson. I think I will raid my wife hobby room and see I can find som black thread to use for securing rope since I don't have a rope making machine? Is there anybody that has bought a rope machine and have experience with it?
-
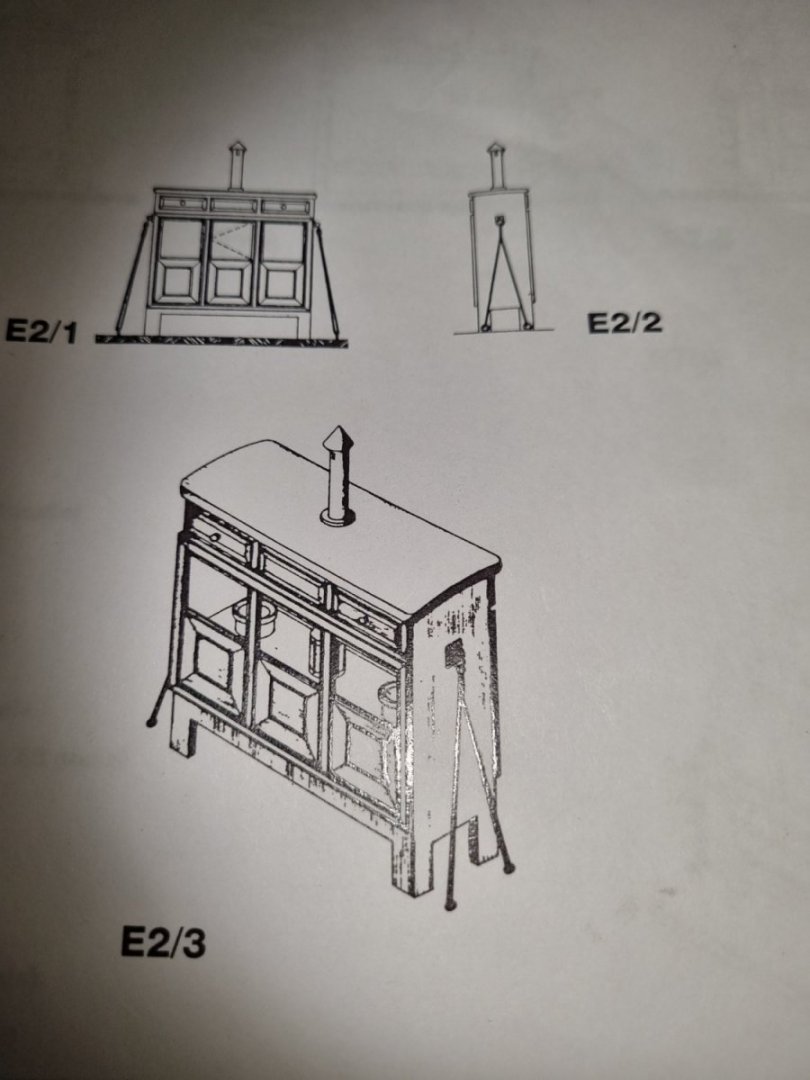
No apologize needed Gregory. I'm new to building wooden ship in scale and my learing curve is preatty step, so all commetens are welcomed to help me learn more about ship building and their history. Another dumb question is the binnacle used for storing maps and navigation tools?
-
I is showed on several drawing in the The Armed TRansport Bount by John McKay. I see he is an architectural draughtsman and he has several referances. I must admit I'm not deep into the sourcees on ship, yet ( but may come over time) So I trust this guy. My kit is far off the real Bount, so I guess by following John McKyay as far as possible would be good. Can't follow everything since my kit Bounty is not in correct scale.
-
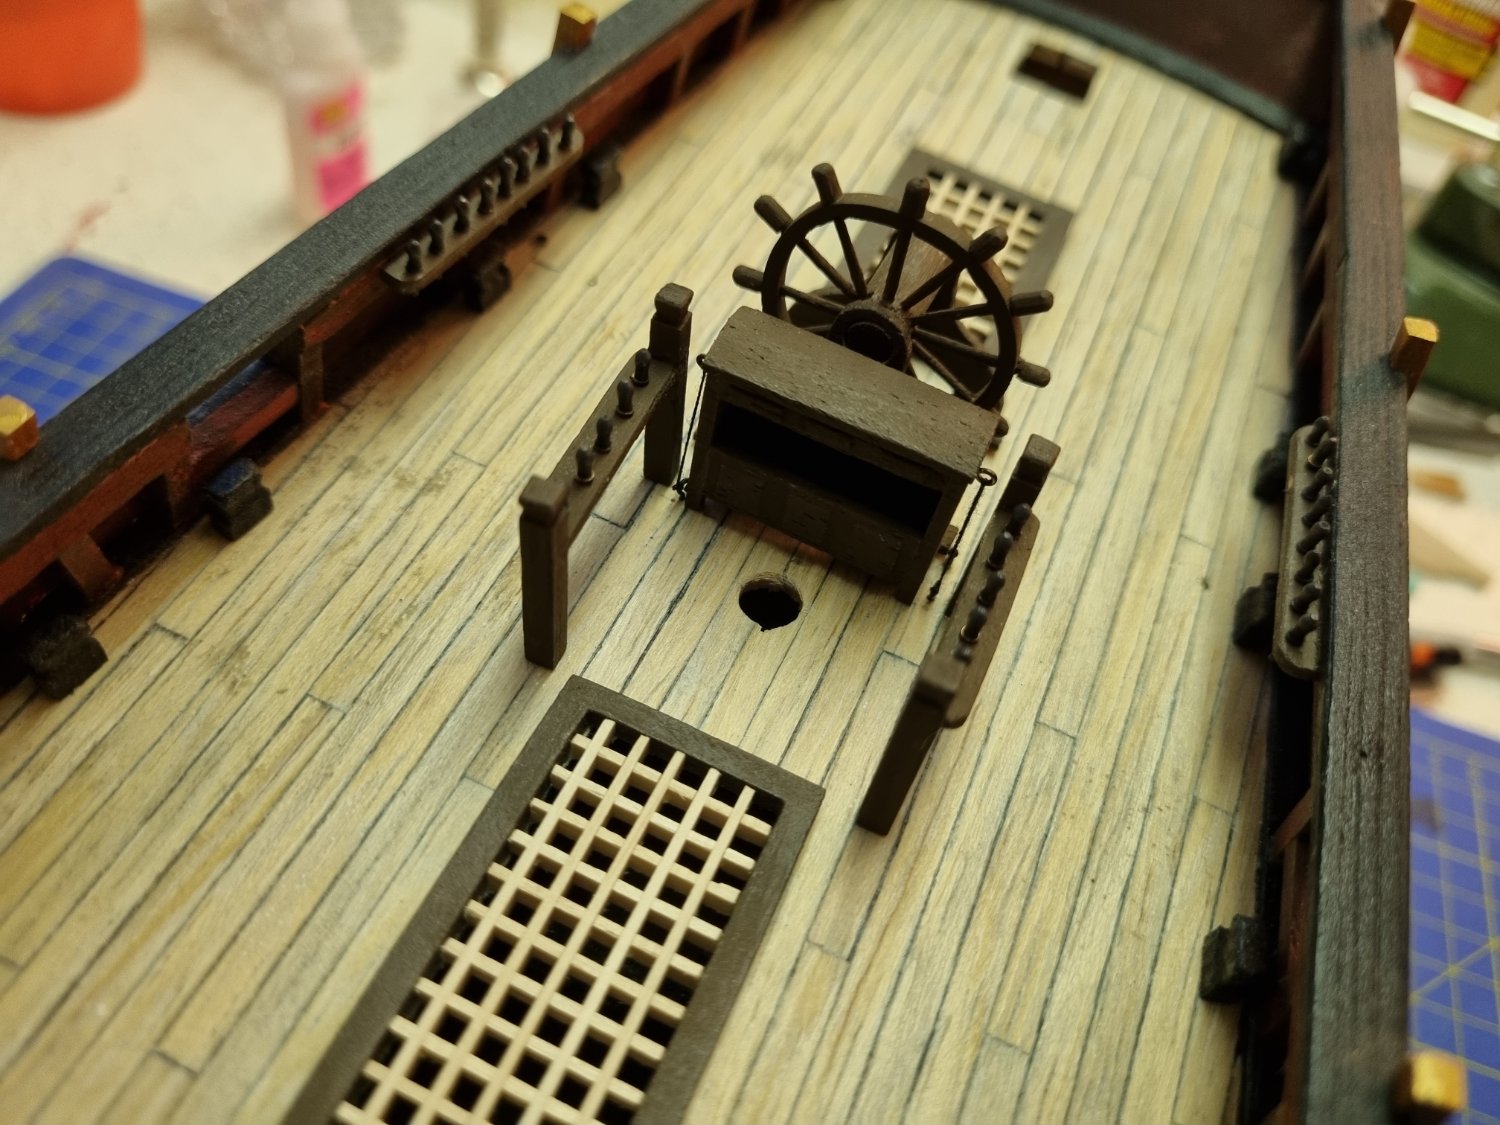
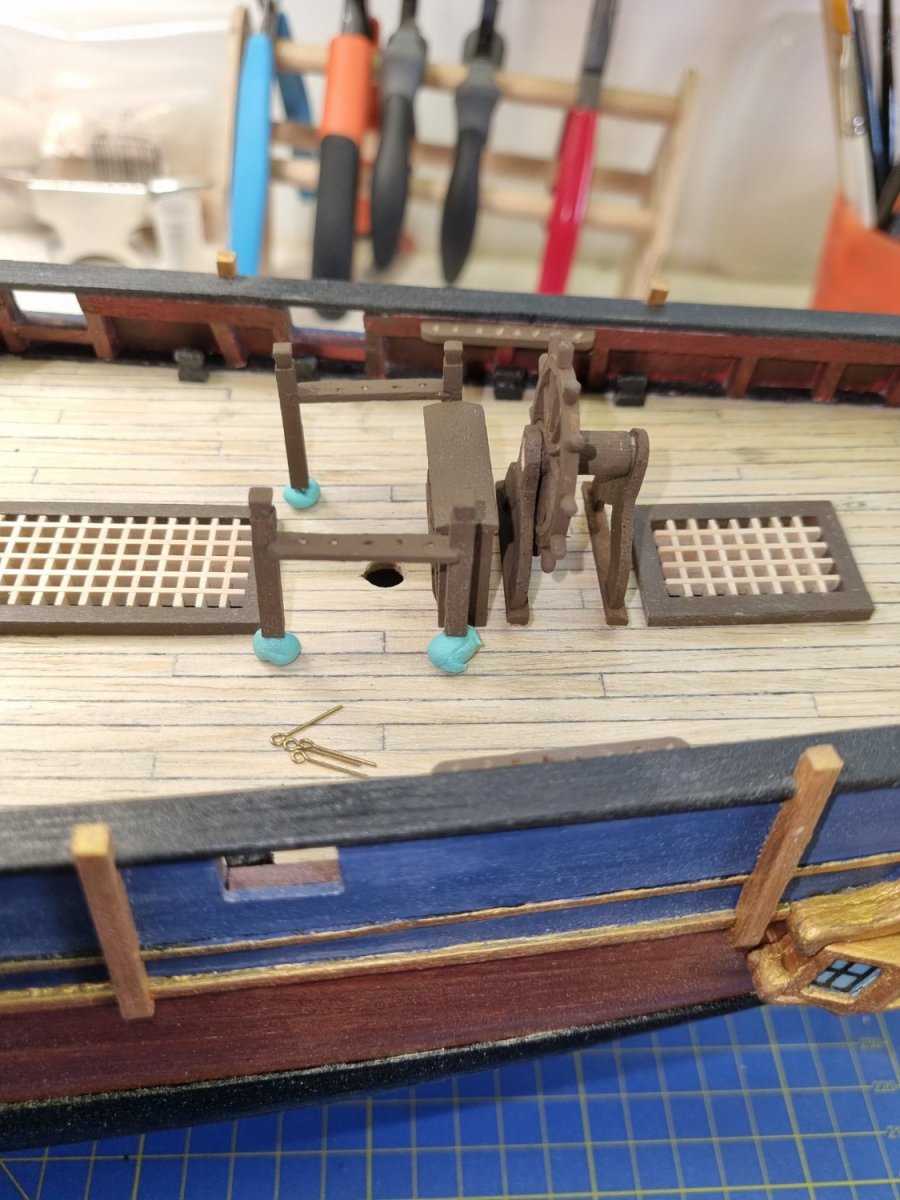
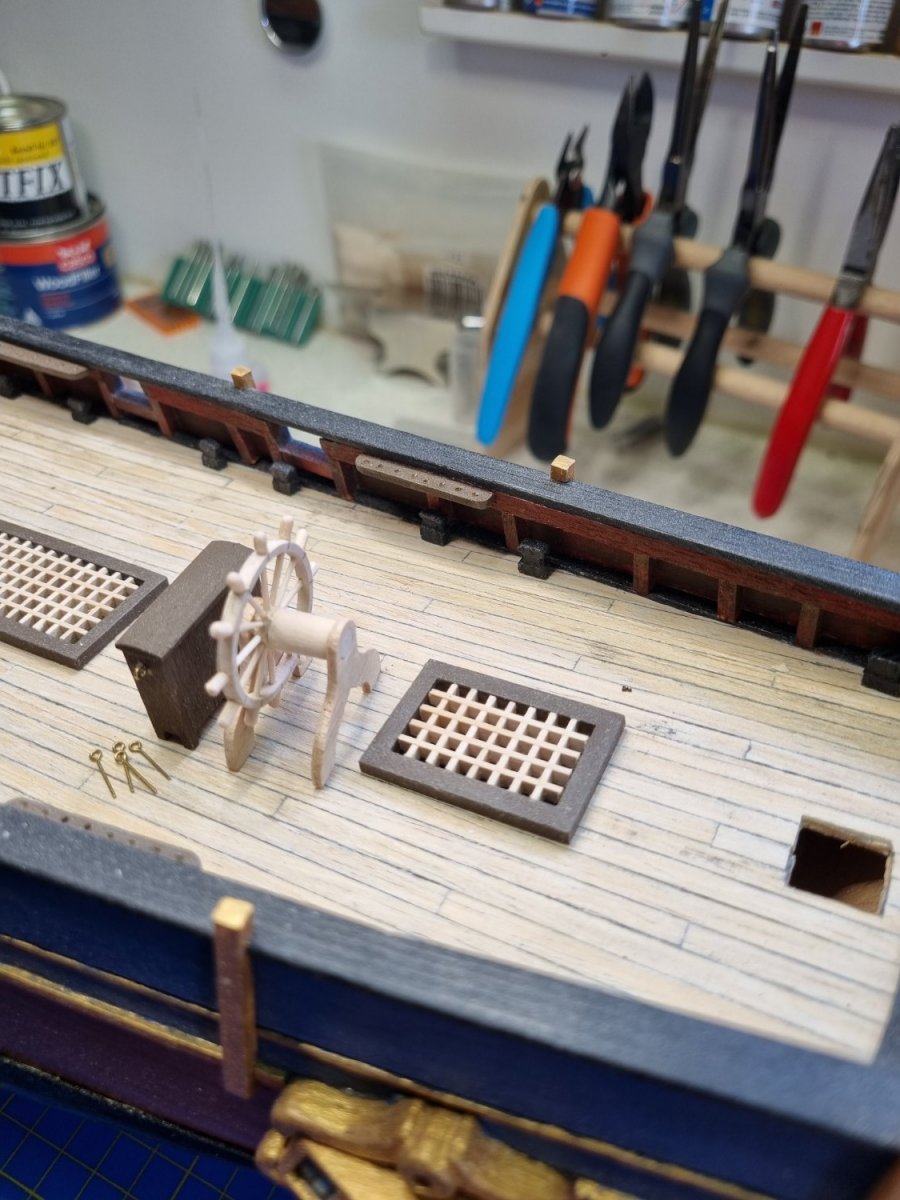
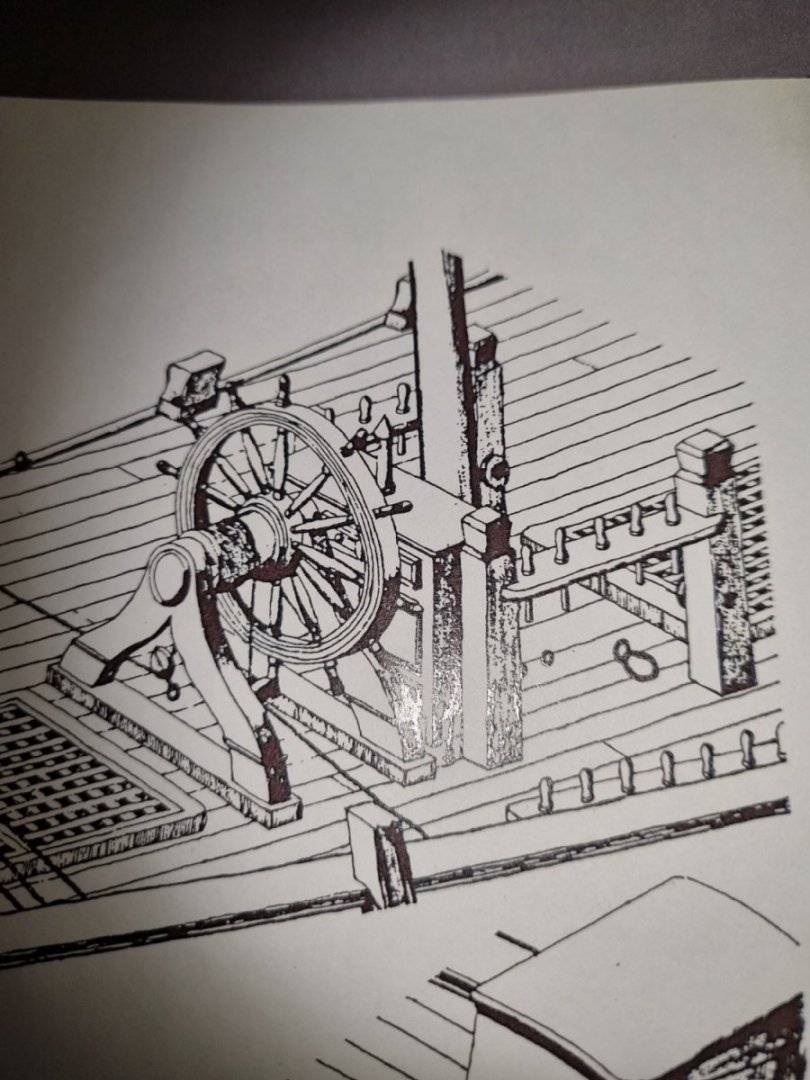
Here is a try-out on placing out steering wheel, shelf and rope securing station (don't know what is called, need to look it up). I do have a challange and that is securing the shelf before placeing the rope securing station , in accordence to book. Does anybody know anything about the securing rope? The only "rope" i have is a whit "rope" that following the kit or black sewing machine thread. I need to get myself a rope machine.

-
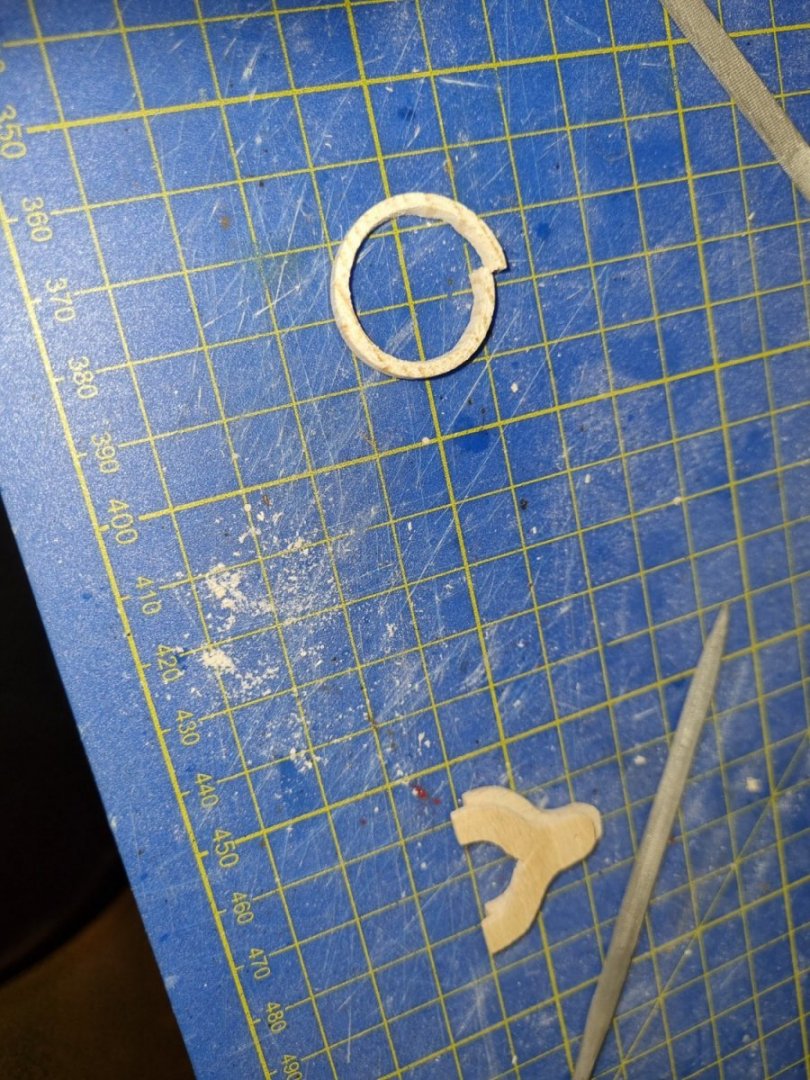
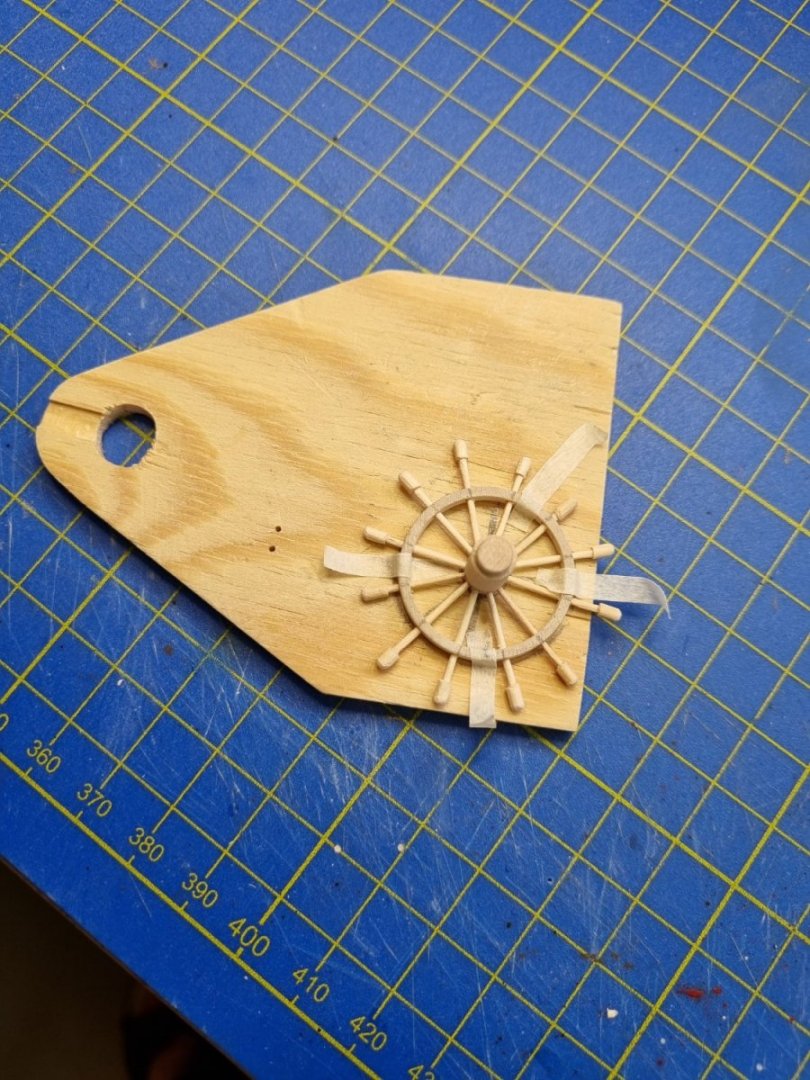
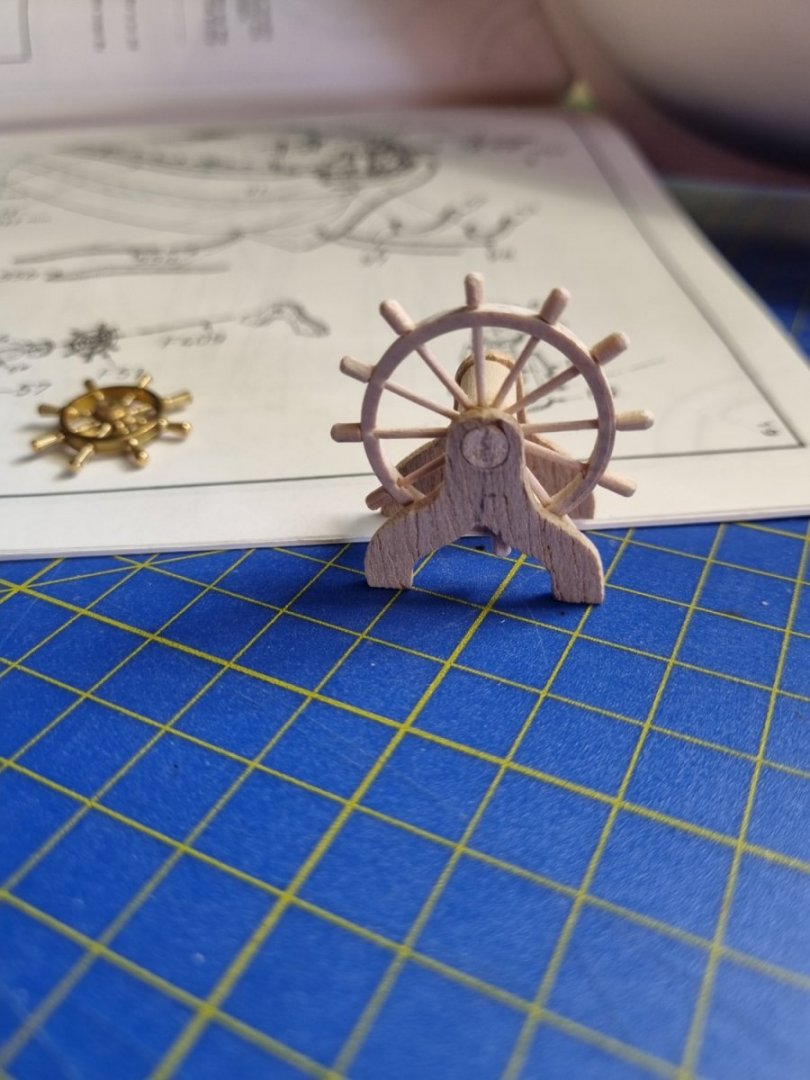
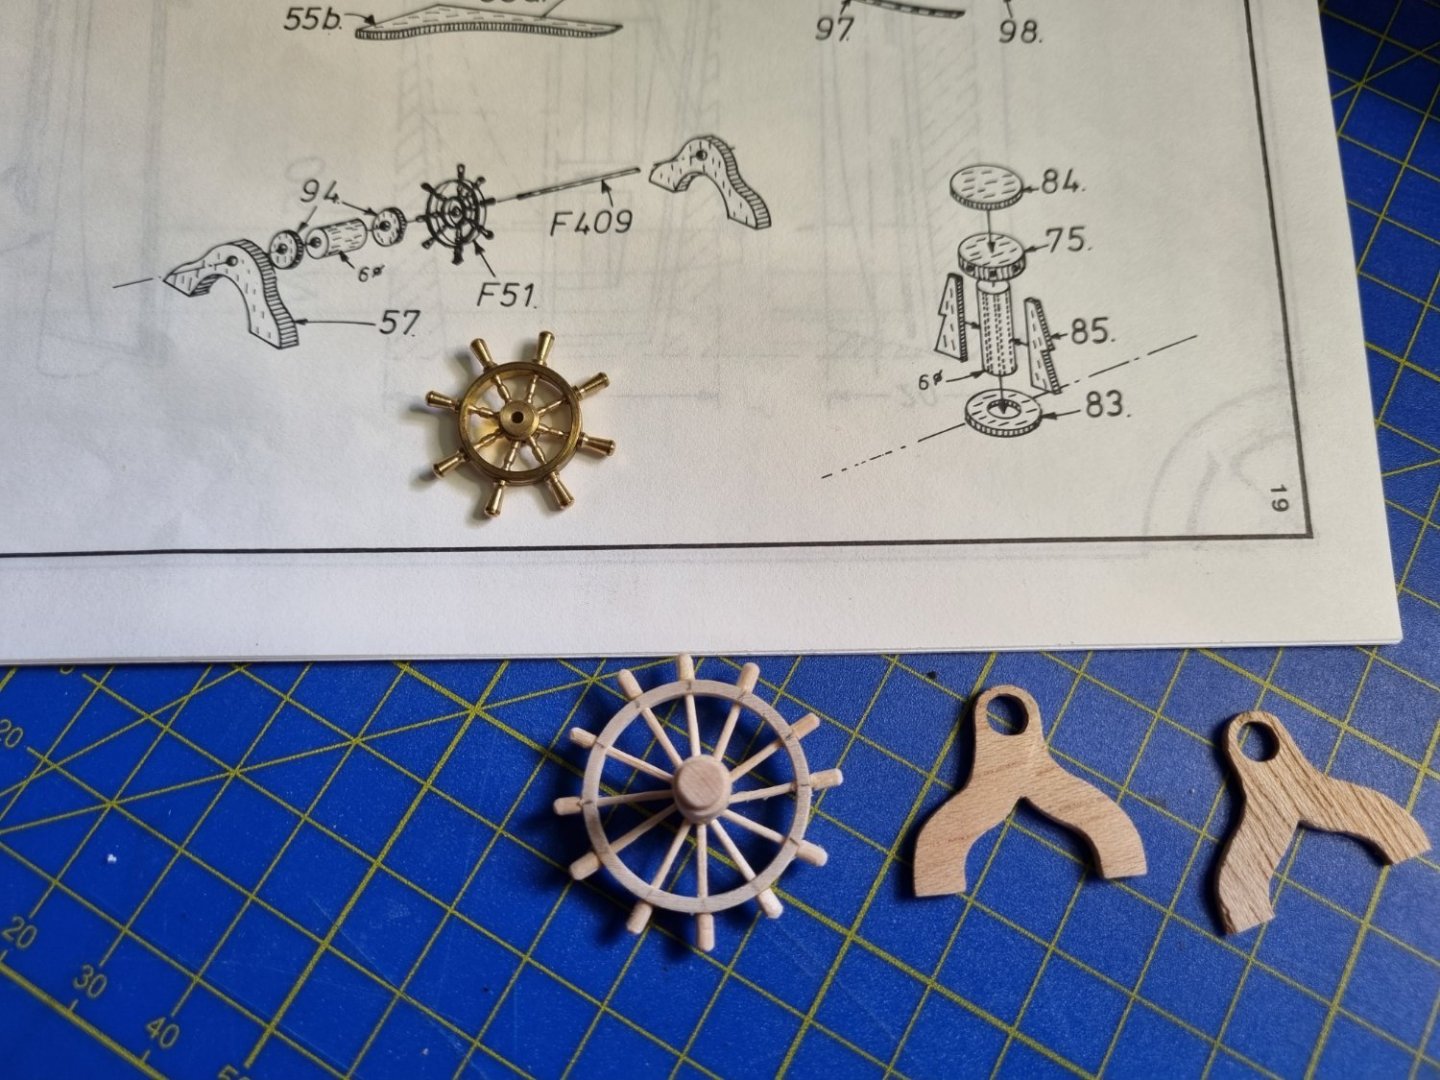
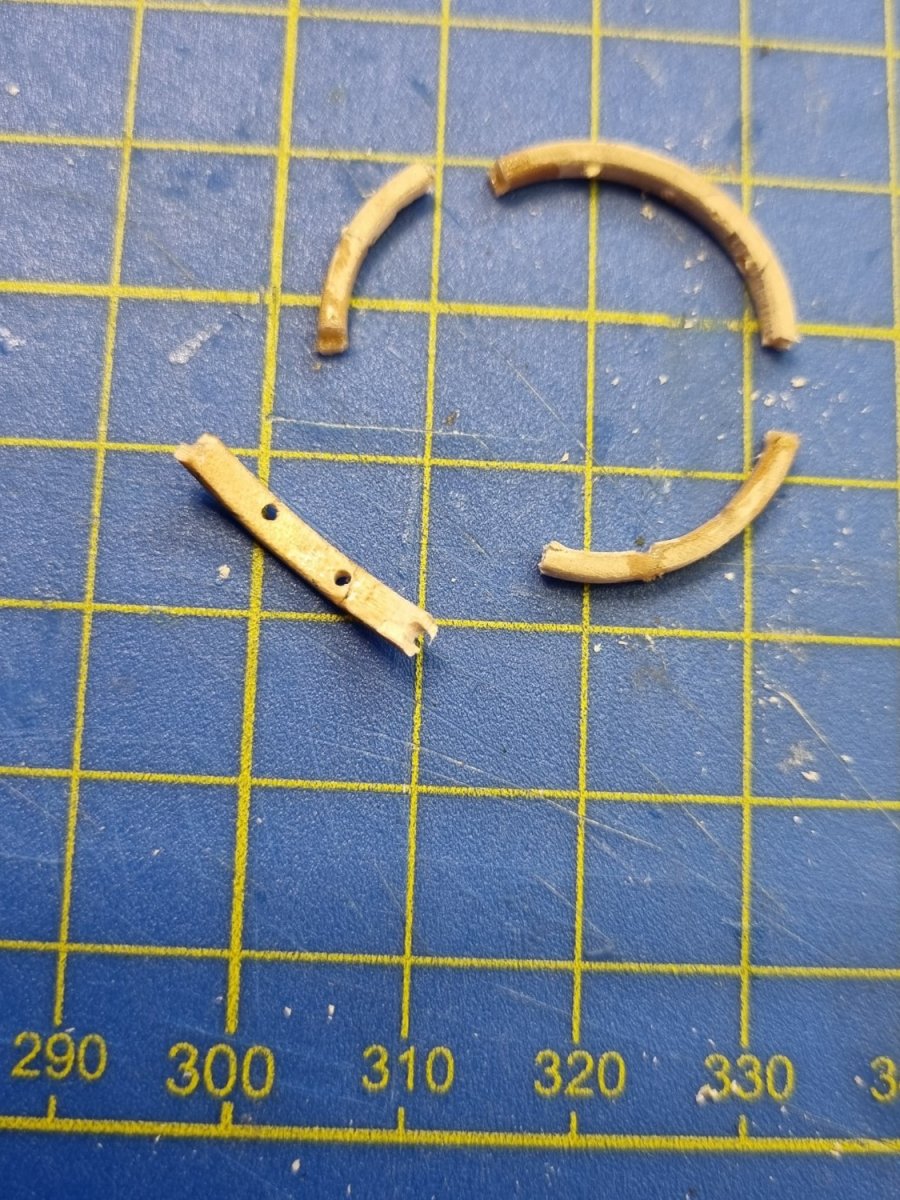
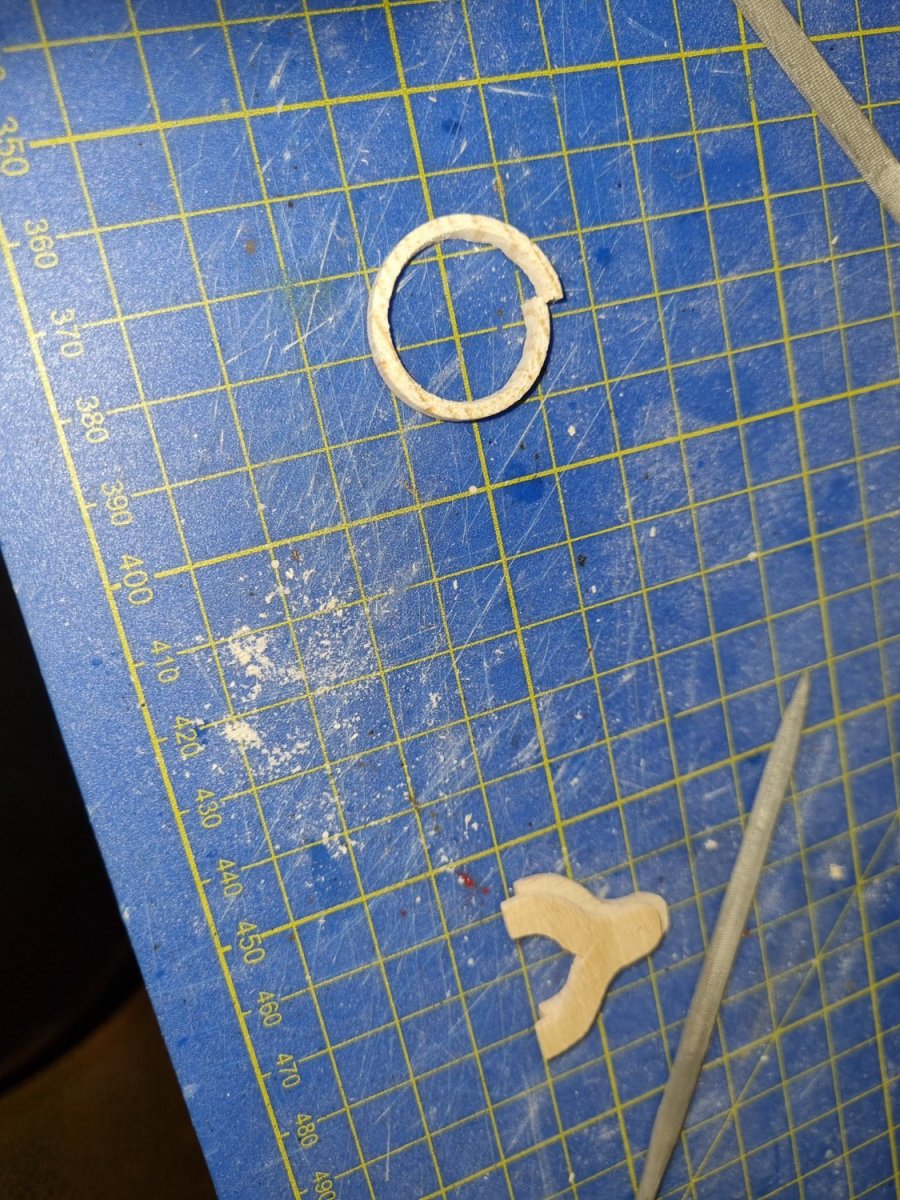
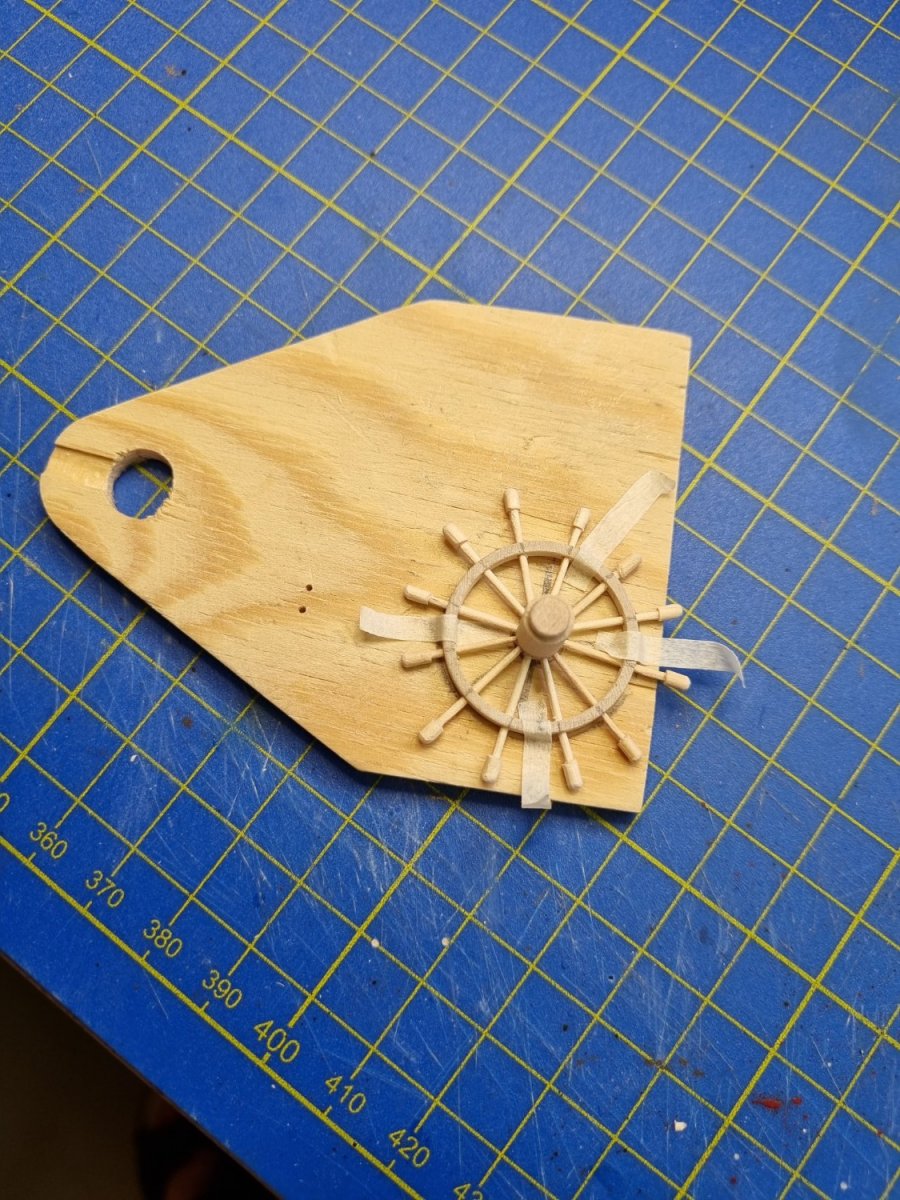
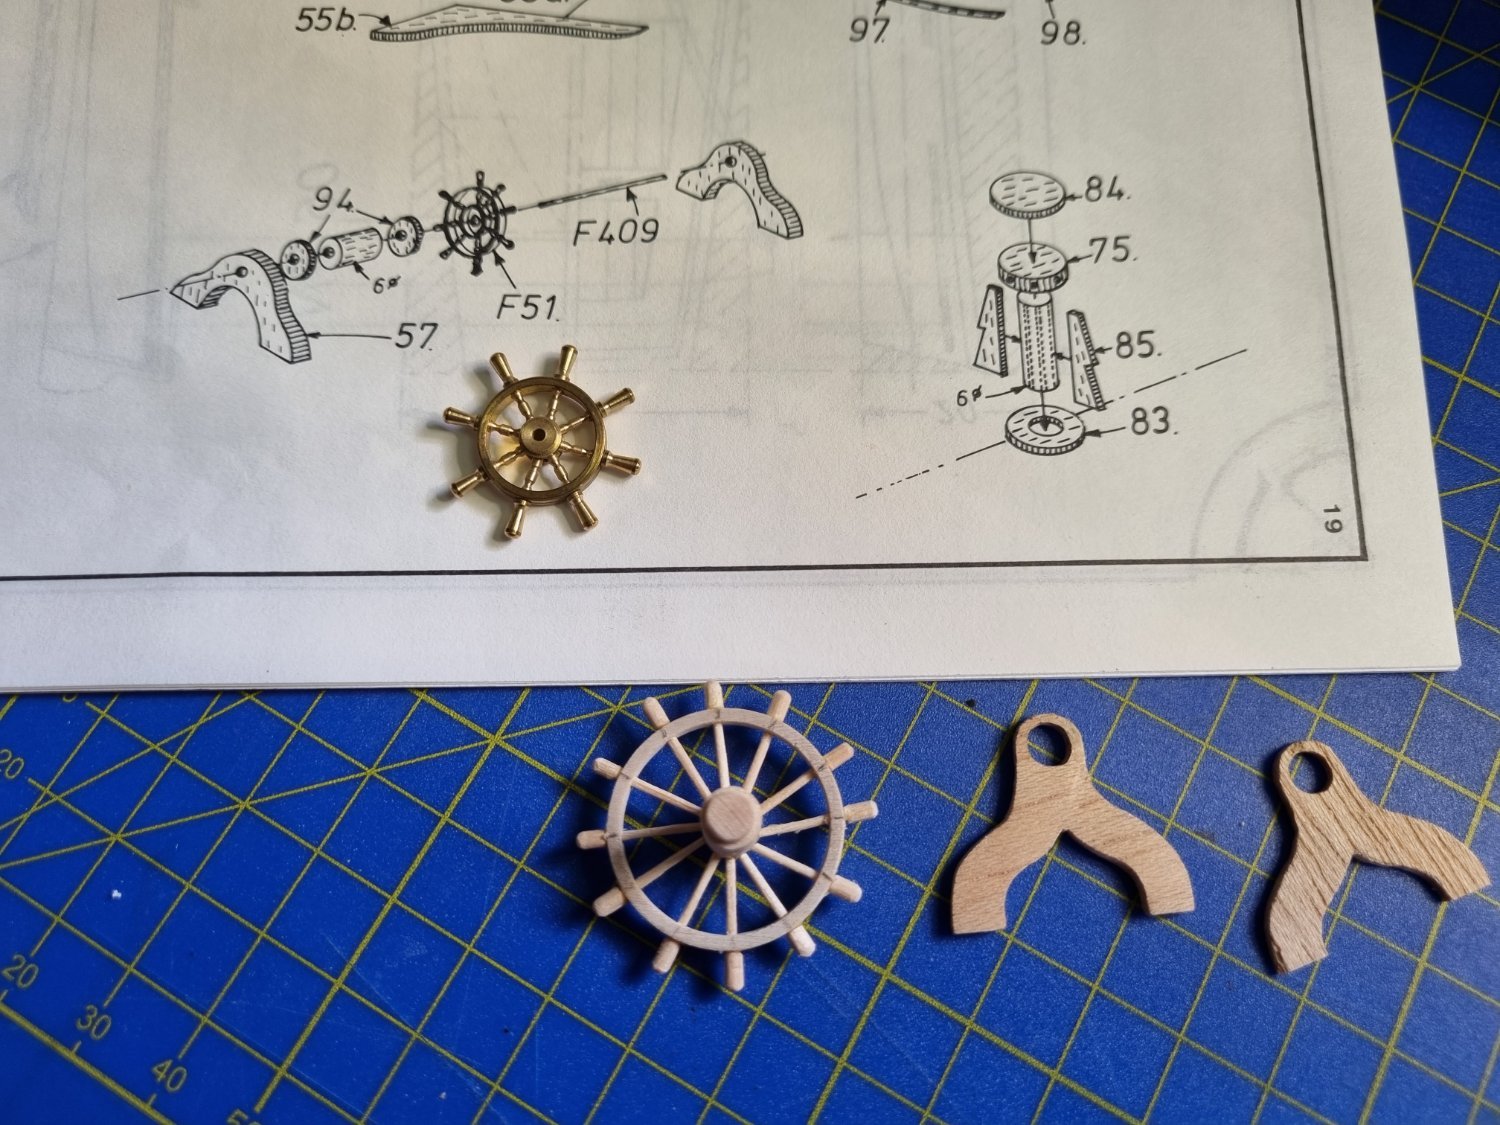
I'm useing Armed Transport Bounty as referanse since the kit drawing is very bad. In the book the drawings show 12 spokes. It was a very challenging job, but satisfied when I completed it. Sometime I feel I'm doing more scratch building than kit building and I couldn't have done it without the book.
-
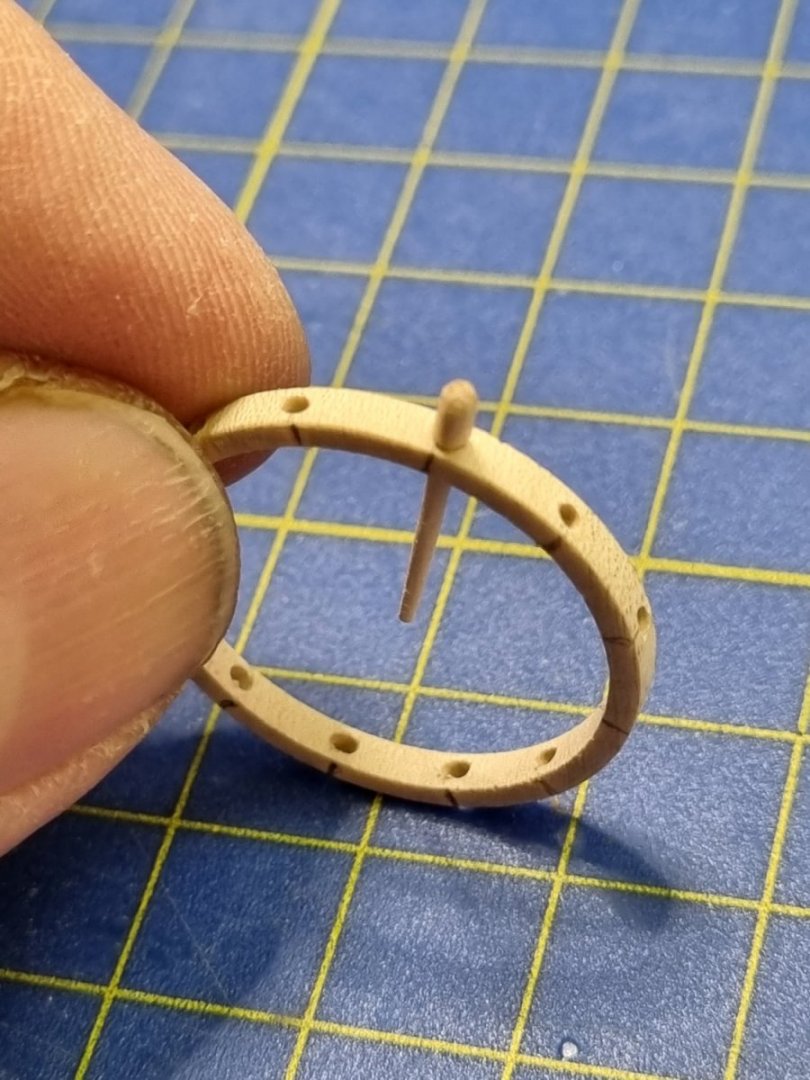
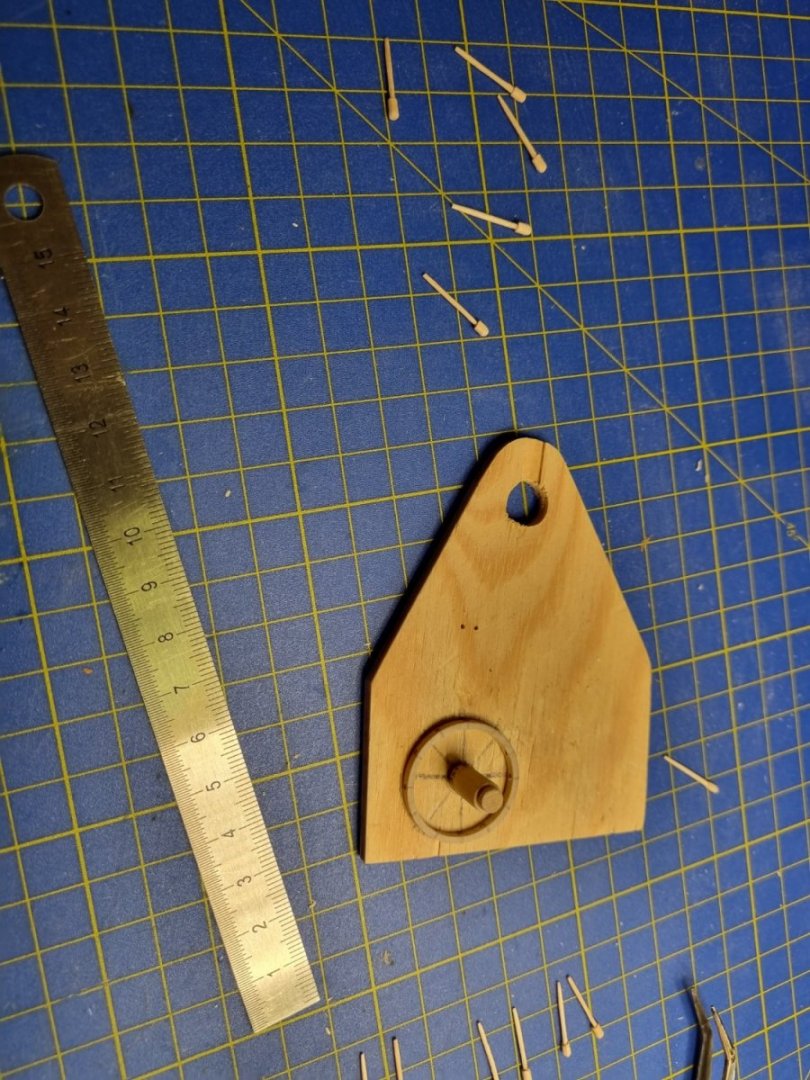
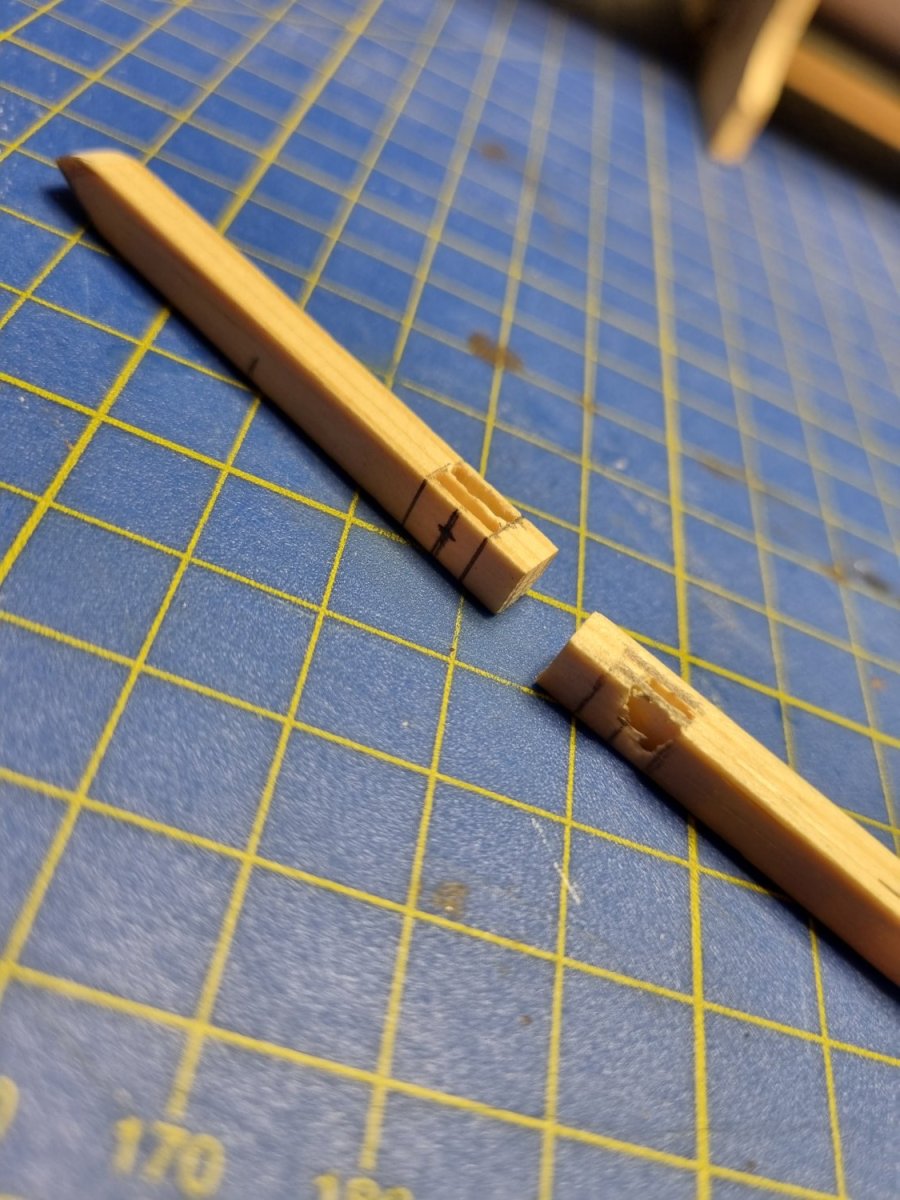
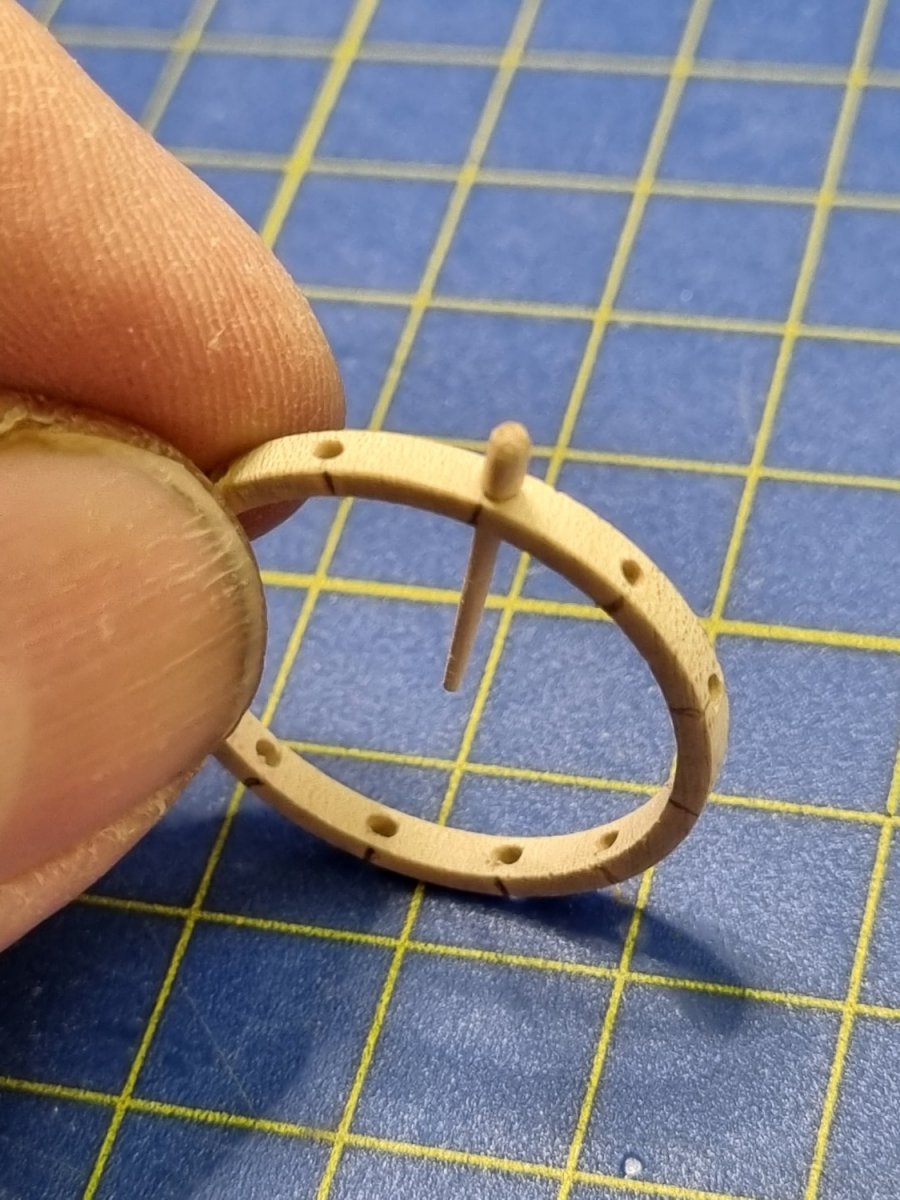
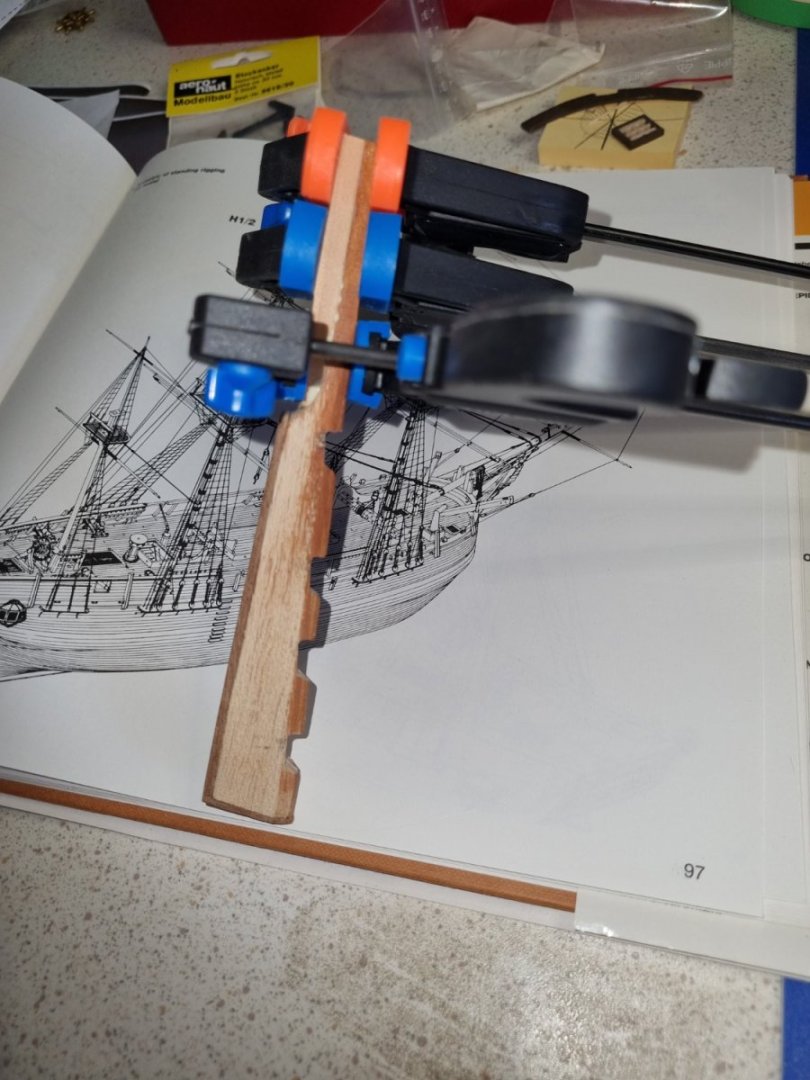
I had a lot of problems making the helm and had to get different woods, something that is hard. Did a lot of trial and error. A lot of frustration when almost everthing is ready then, the last part of making breaks all. Well, after may tries I got it right, and that makes all the failure forgettable. I used wooden toothpick as base for making the helm pins. Made a jig for installing the pins. Picture showing trying out the jiig and see if I drilled the holes correct, inner stem and outer ring, ok. So the final product before paint. And compare to the kit helm....