Trond
-
Posts
166 -
Joined
-
Last visited
Content Type
Profiles
Forums
Gallery
Events
Everything posted by Trond
-
I'll make a note of your suggestion, but I will first try to blow it up to A3 format on the company copy machine and see if that works.
-
Thanks guys, I see that I will need to keep pushing my boundaries on my ship building skill if I'm going to try get it "close" to John McKay standard. It is good that hear that there are other that has used the book and hopefully I can ask some questions from 😉. When giving the book a first look it was a lot of info on mast, yards and rigging. And a little confusing from a first time builder. What is the best way of getting some large paper copies from the book, to have in my workshop for making notes on?
-
Nice, are this part of the kit or did you make it your self? I haven't got to this stage yet. But since I don't have this in my kit, but it's described in the Armed Transport Bounty, I will use your nice built as a guide.
-
Your doing a great job Lylek. Hull planking is something I need to focus on my next build. So walnut is your big love now? 😉 How much of the inside are you planning to show or put in another way, how big of a hole in the side are you removing/not installing?
-
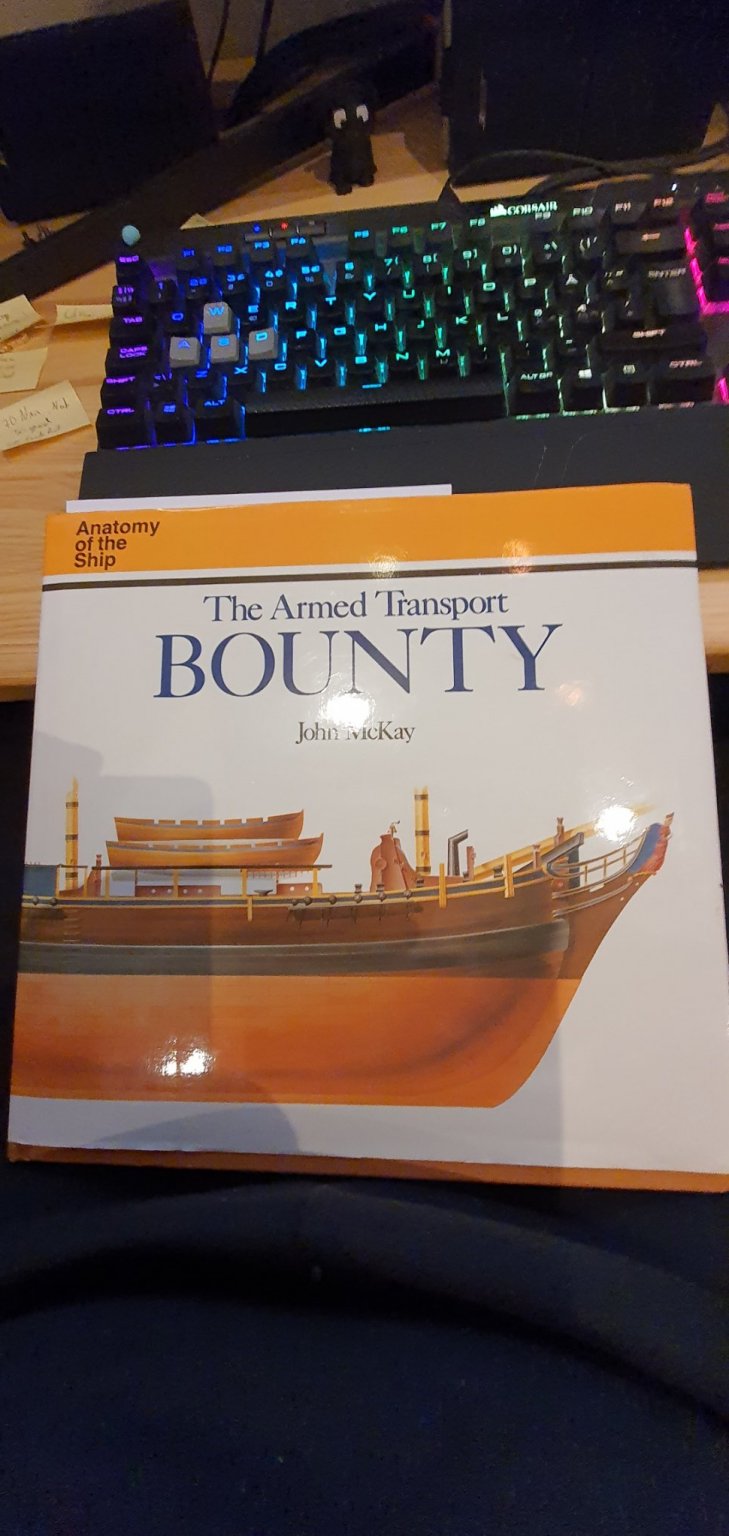
A big day to day. I finally got my Bounty book today. It took a little over a month from ordering from US to get it to Norway 😒. Well, now I have it and it has a lot of information which will be useful for my build. The only problem is that there are some fault from Billingboats that I just need to accept. Either that or build a new Bounty 😆 NO, that will not happen, but I will use it to try to make the rest of the ship as authentic as possible. I need to do some reading and bring the book to work (since I have home office) for some copying that I can write notes on, make measurements over to 1:50 scale and in metric. I also need to do some experiment with paint to get those light spots on the hull correct. Thanks Keith for your info on what umber paint is.

-
Thanks Keith, Now I need to find the name for it Norwegian or a local hobby shop that has a good selection of paint. Hopefully it is a known color and easy to get. Would it be any problem painting acrylic on top of oil paint? Do you always put varnish on top painted and unpainted surfaces on the ship? I see many put glossy varnish on ships and for me that totally ruins my impression of the ship, so I wouldn't do that. Maybe a thin layer of mat varnish?
-
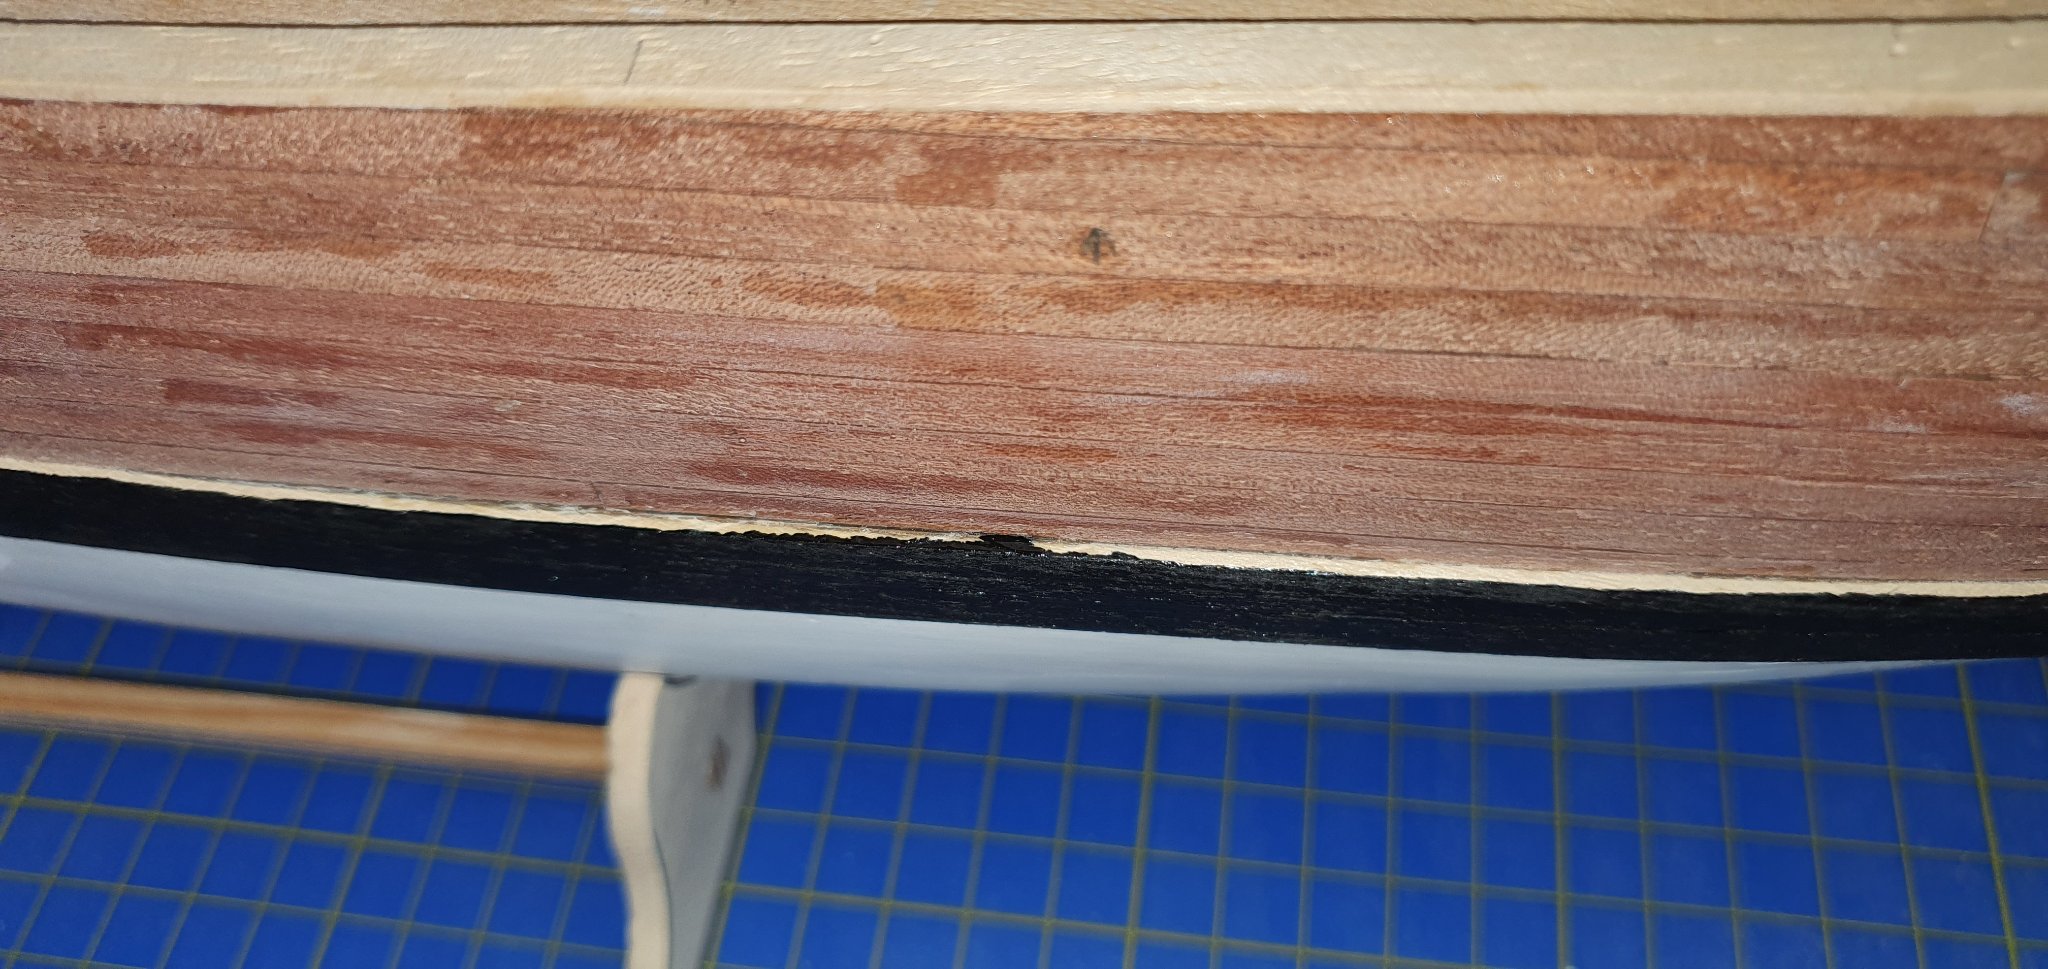
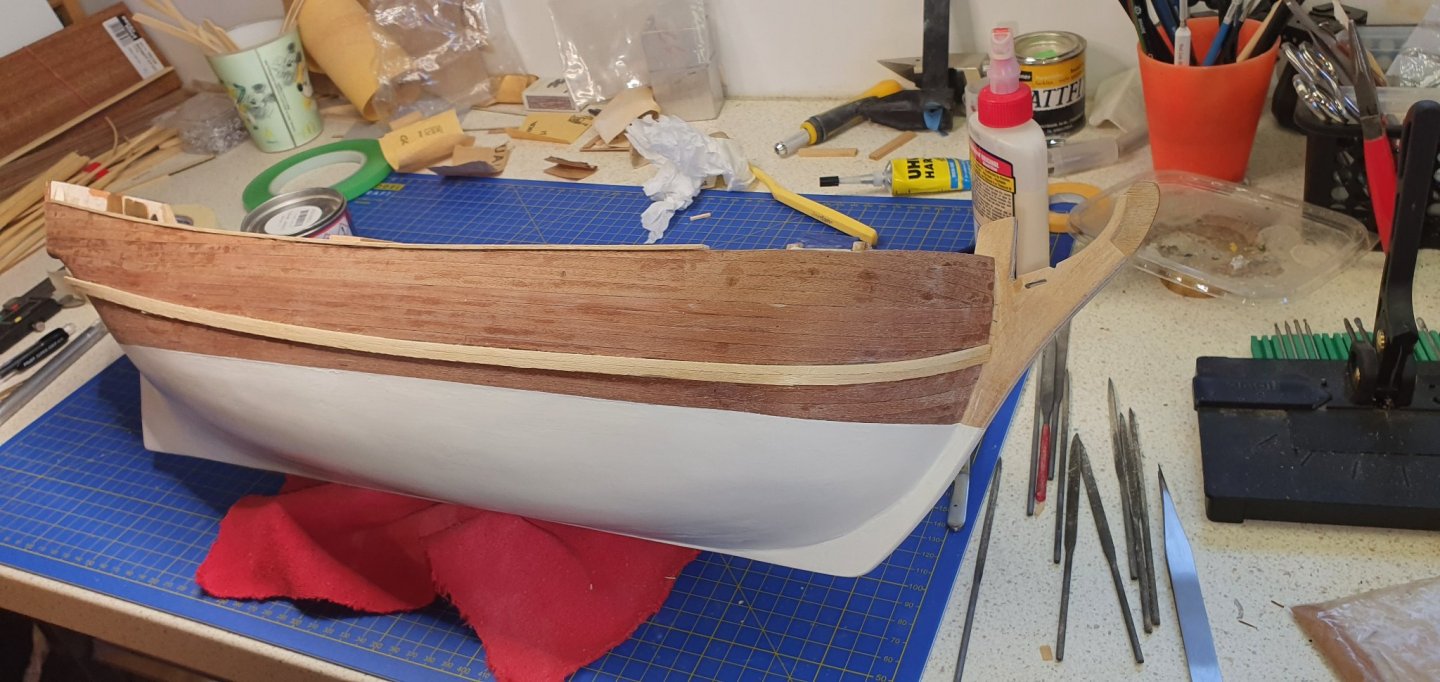
Finished sanded and painted. Tried putting on Gilding Foil Flakes, but had the wrong glue. I will try getting the right glue and try it out, since I think it will look more authentic, at least what I think after watching new build where they used gold leaf. I glued on the top wale and painted it black. There is a little gap in aft, but wouldn't be able to do that before I glue on the windows with decoration. There are three small spots were the wood color of the plank has gone light. I've tried different paint mixes, but they look worse than just leave them as is. Anybody got any suggestion how to get that fixed? The model is starting to look like a real ship and there is a ton of lesson learned along the route, but that is the fun of the hobby. 😉
-
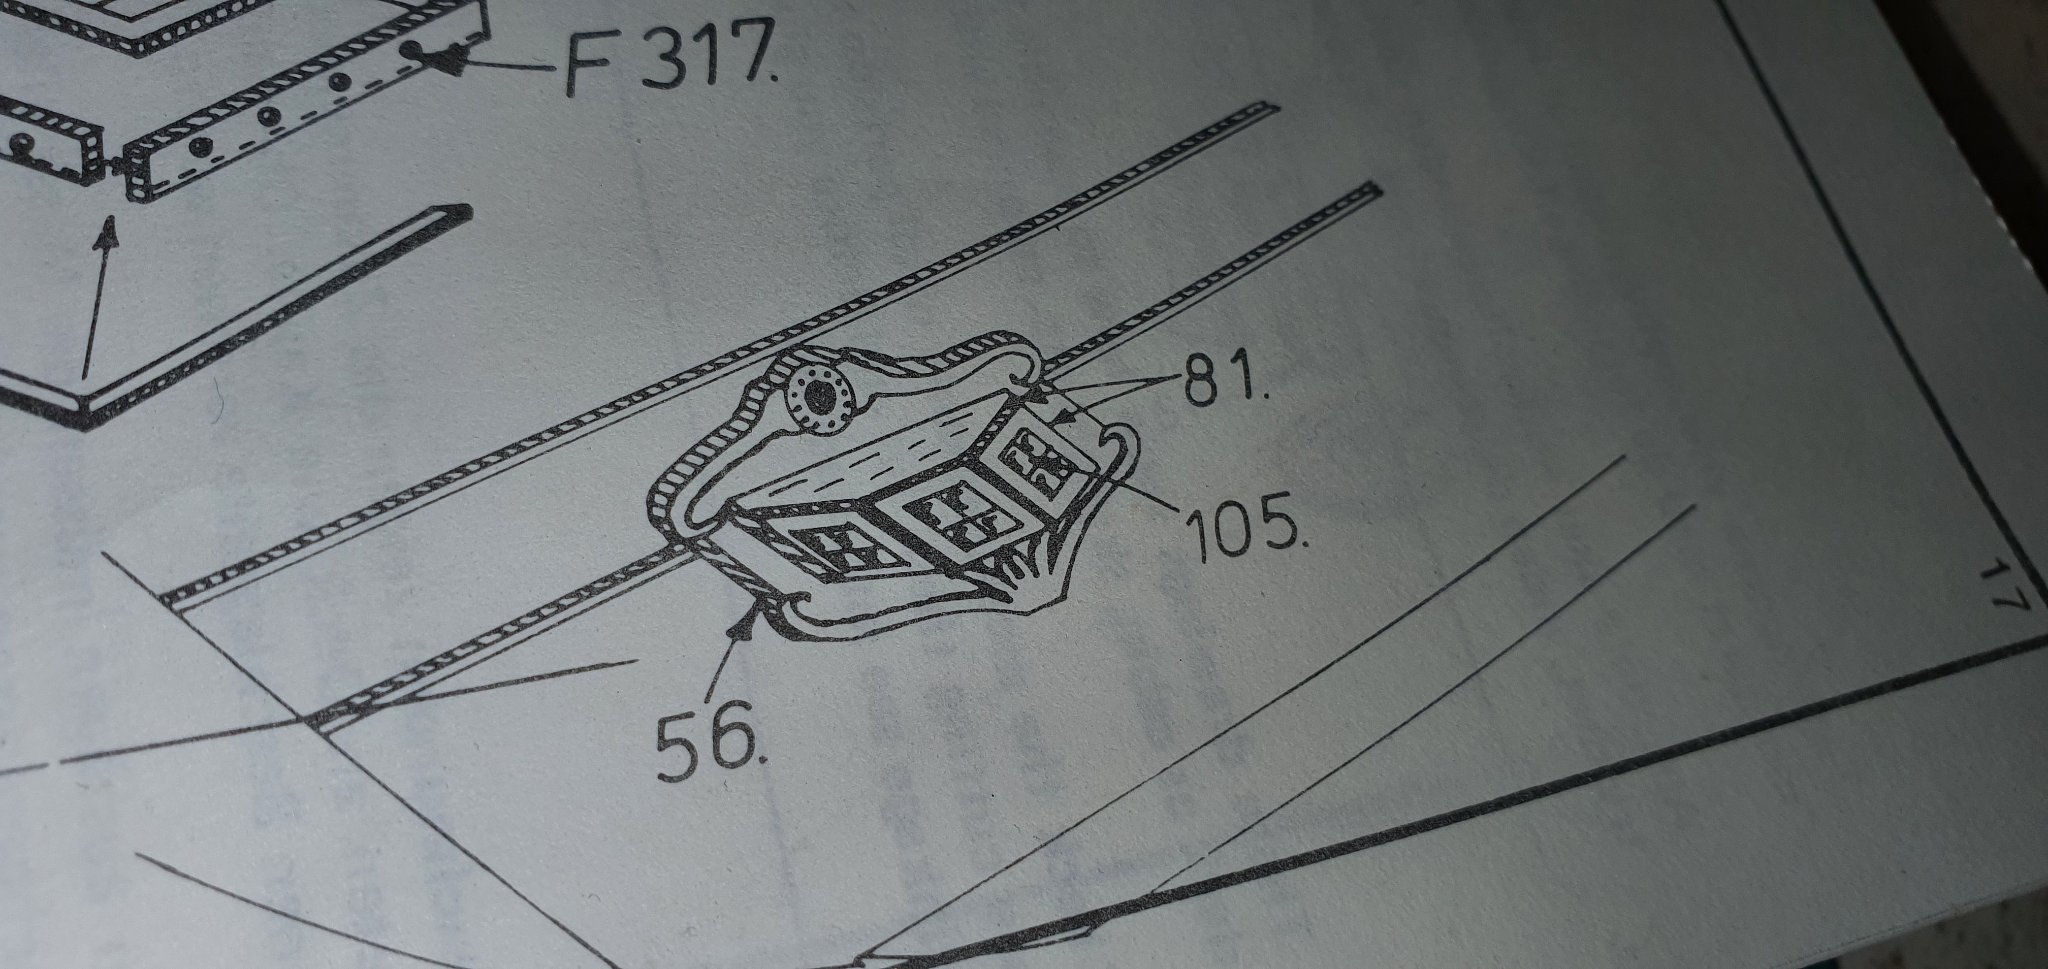
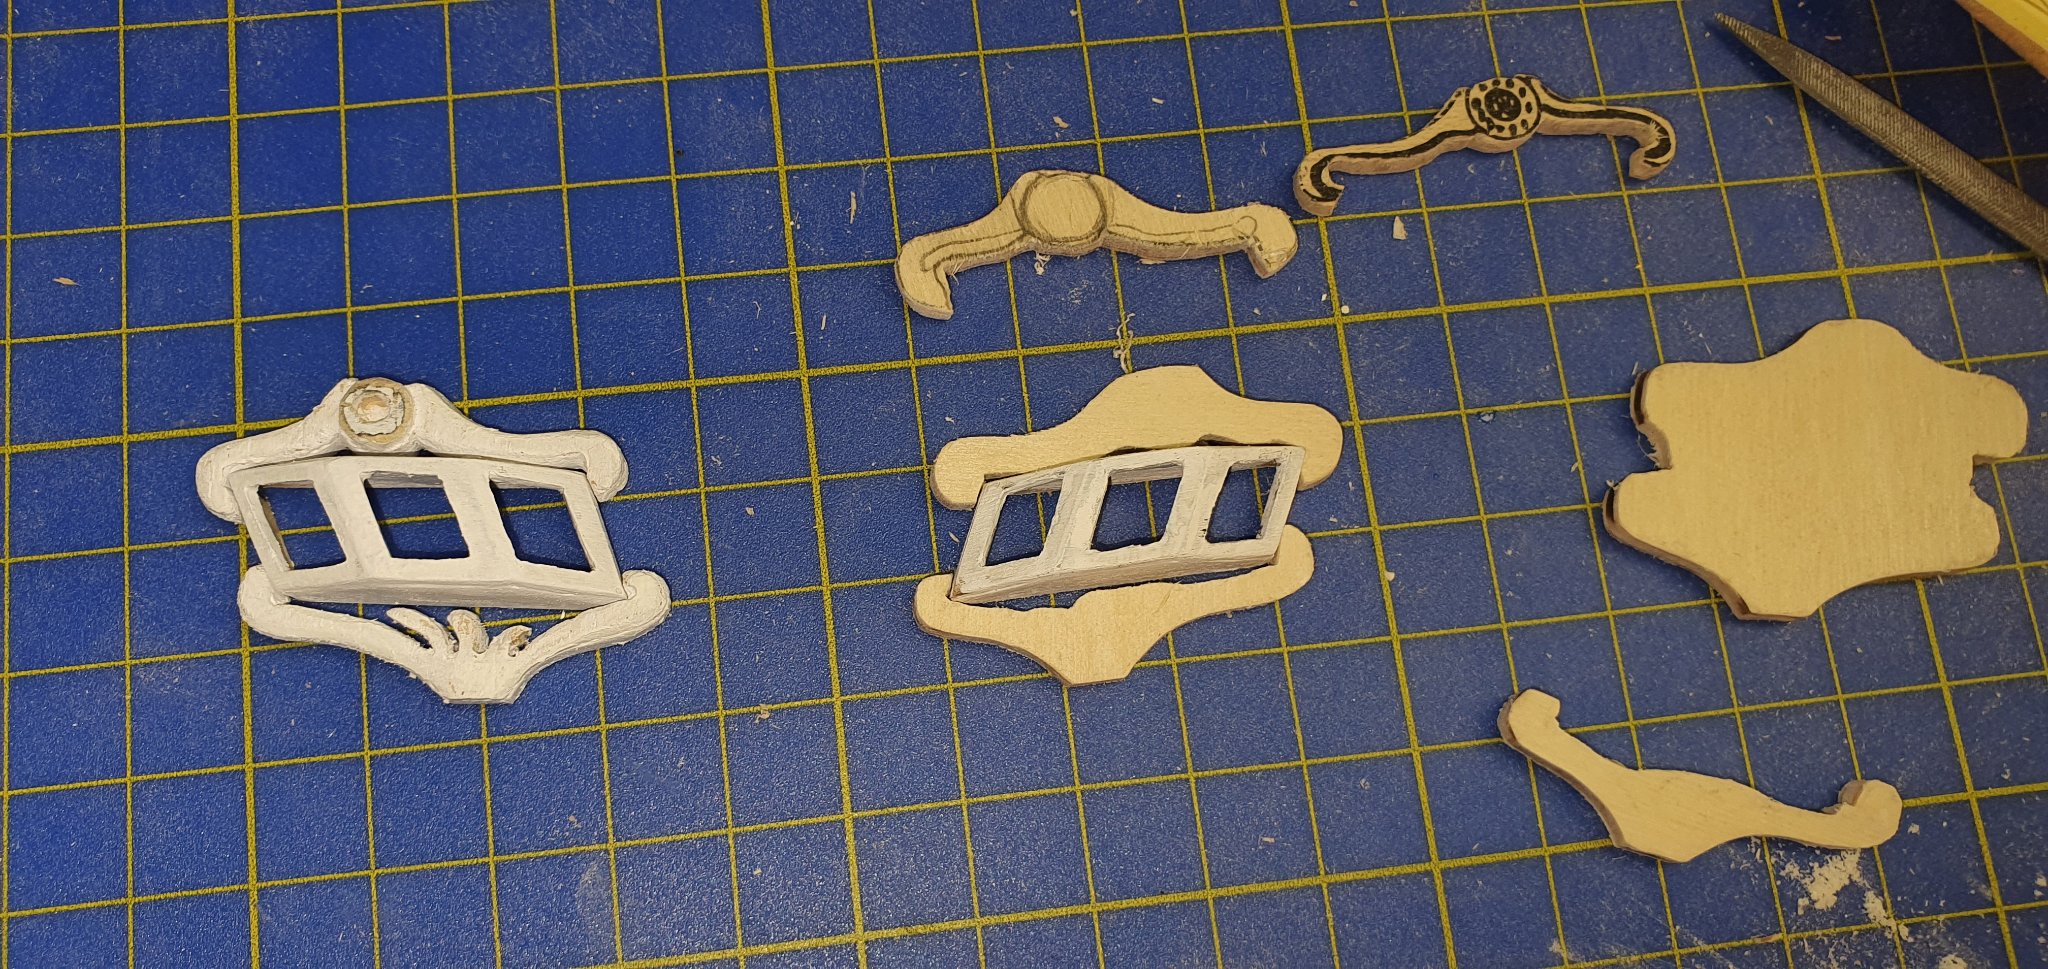
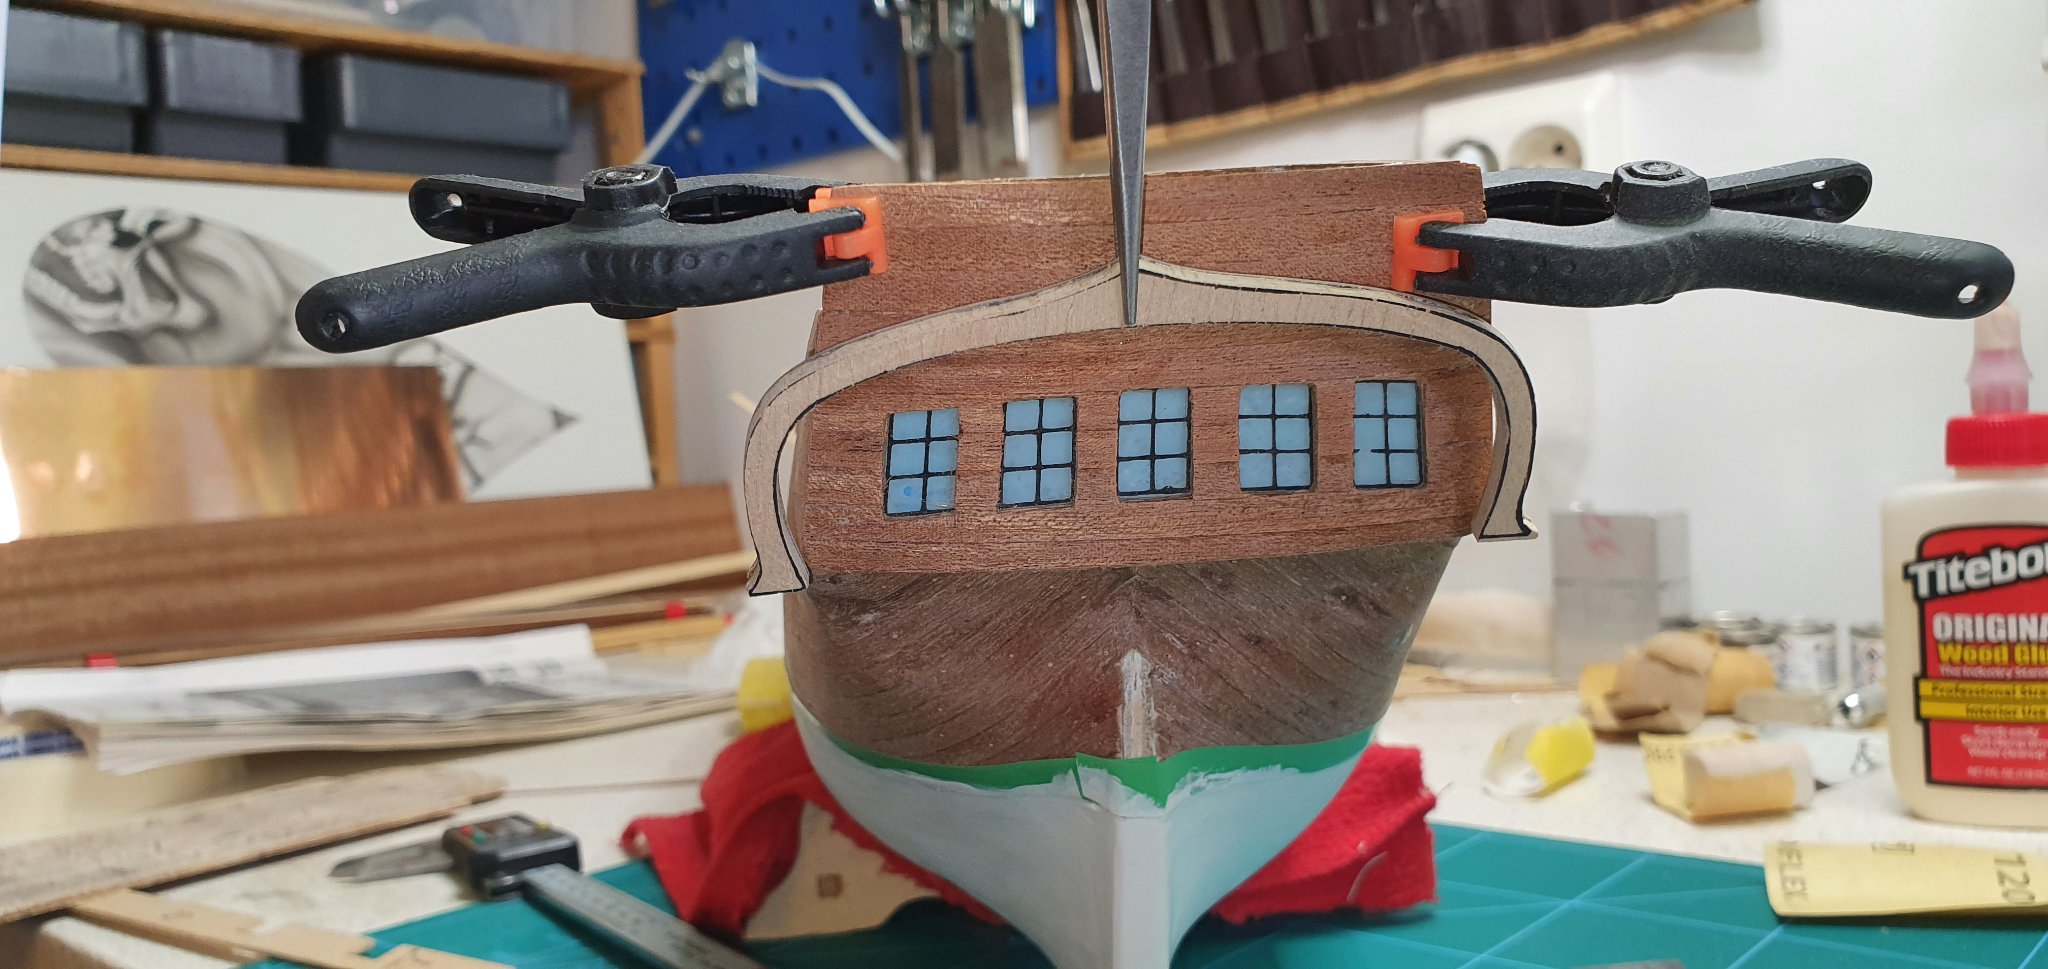
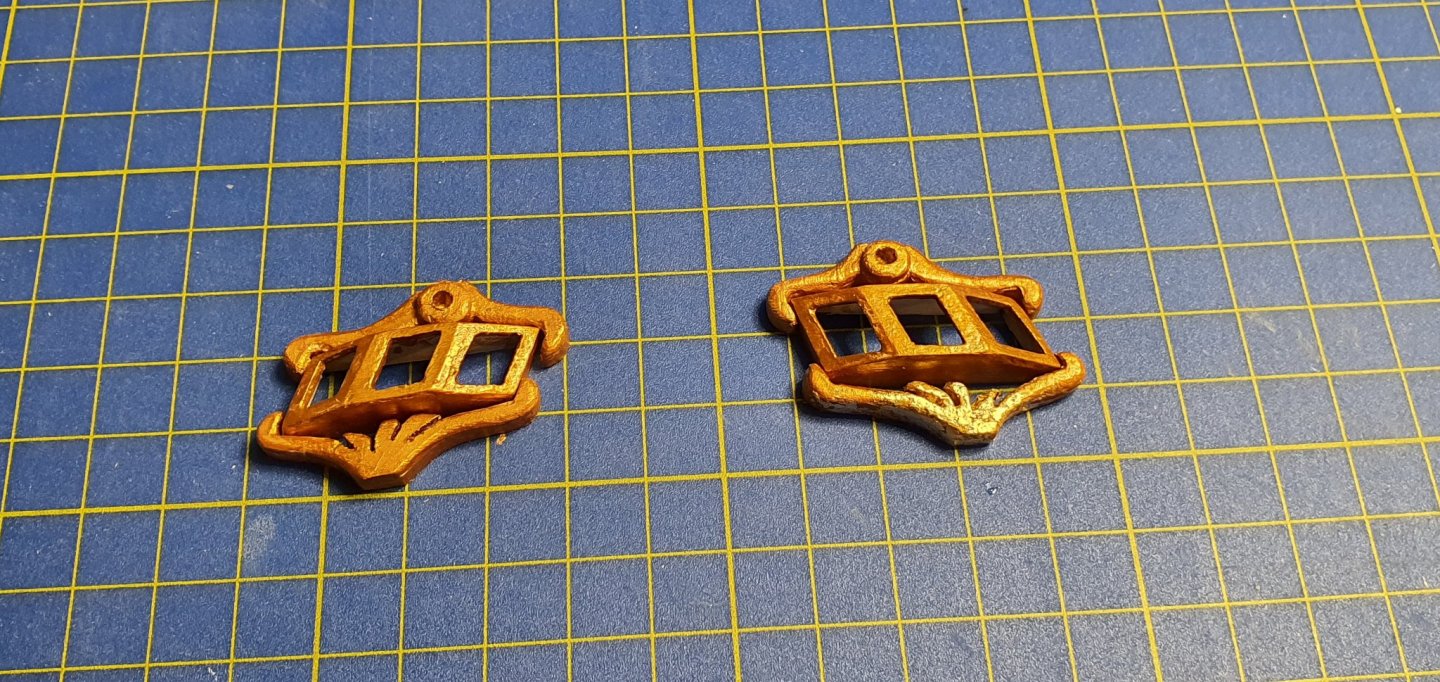
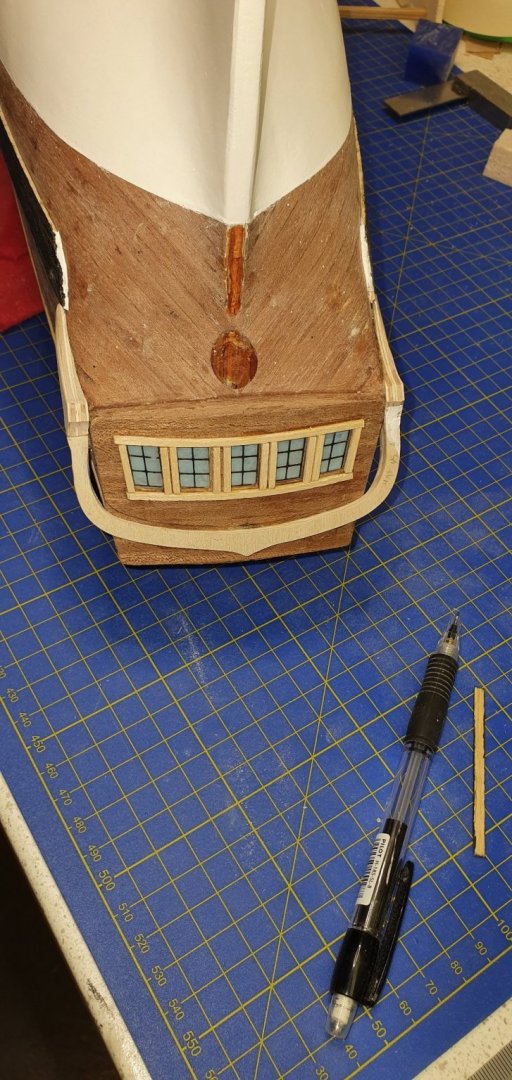
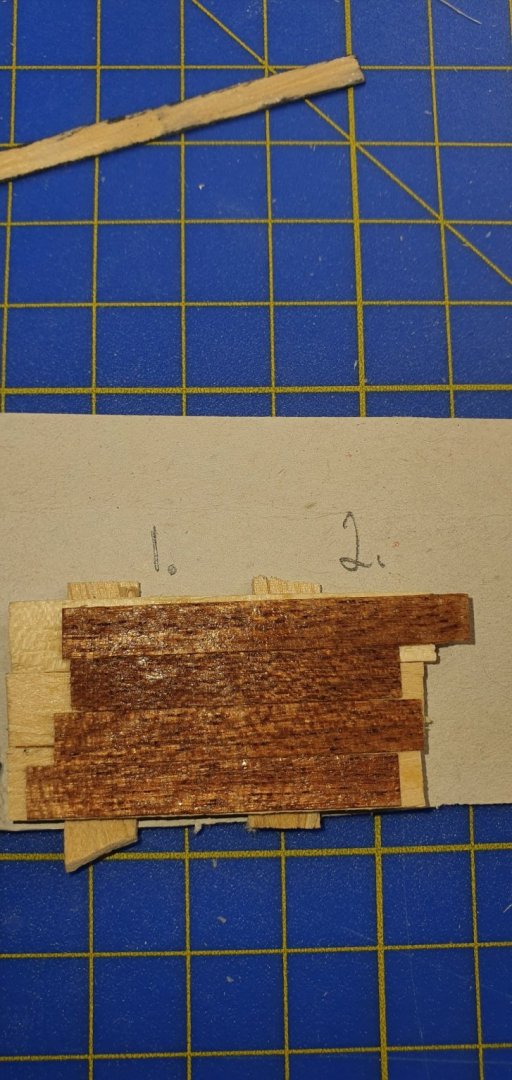
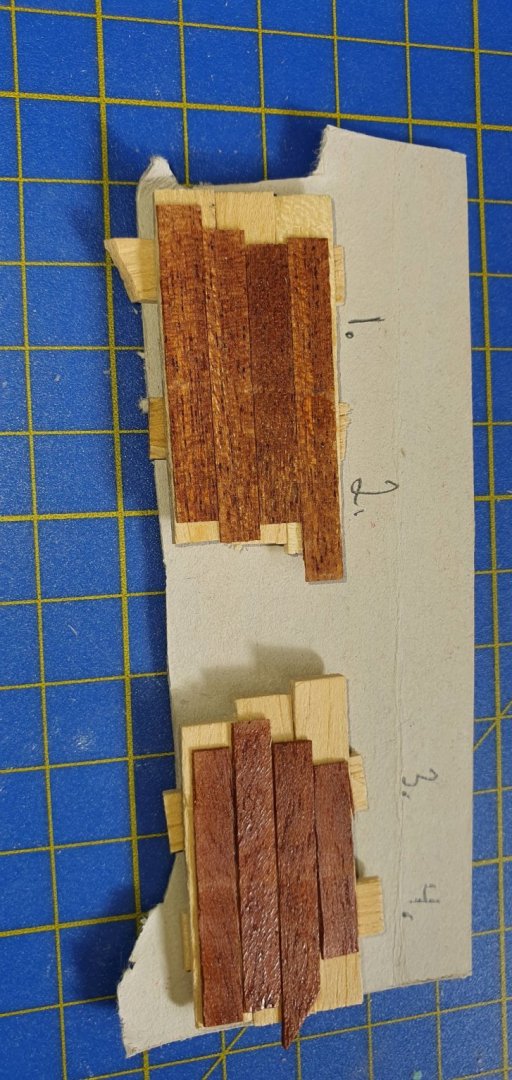
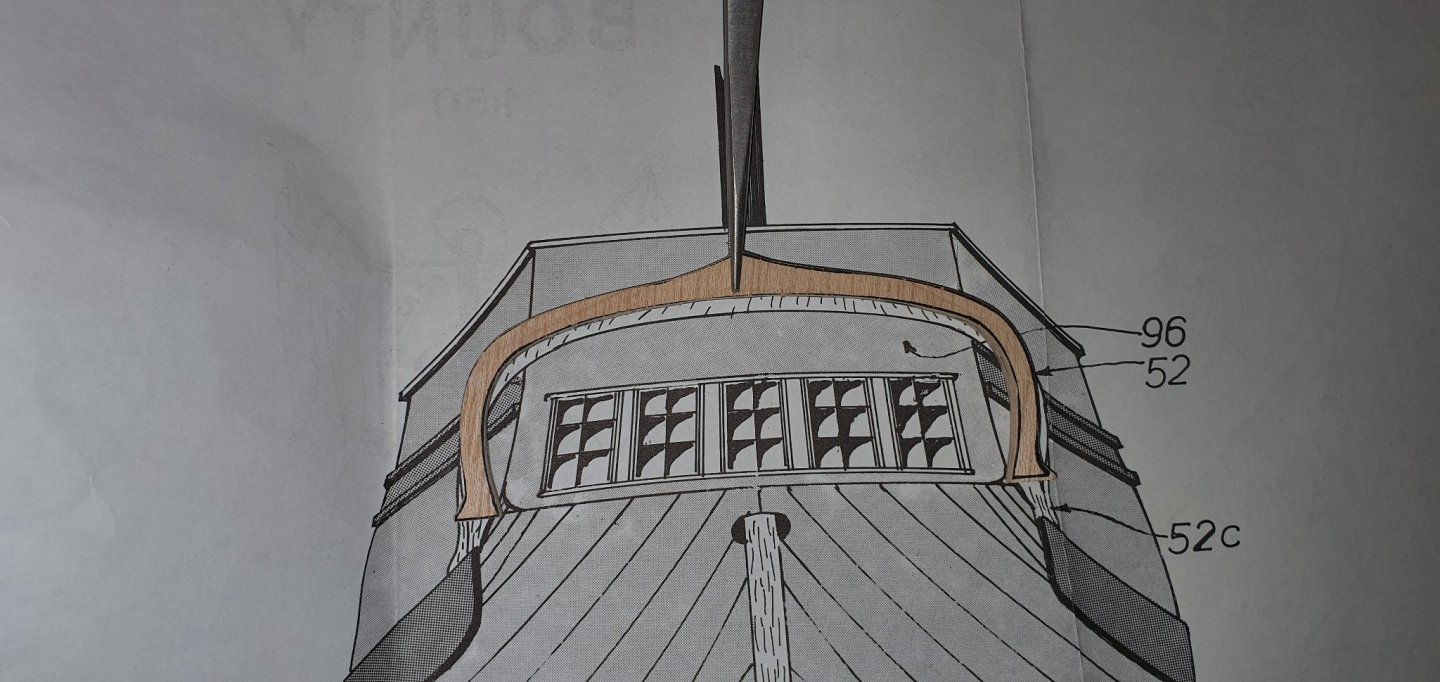
Time to do the side windows. This is the hole instruction, so it was time to make those braincells work again. This is the supplied wood piece. Not good good at all. So I copied the head and bottom piece and made them double. Then I carved out the profile and sanded. I started with the right piece and cut out the top and bottom. Made window part, sanded and paint first layer. Then I put on some filling and sanded again. When I'm happy I will paint all gold before gluing onto the side of the hull.


-
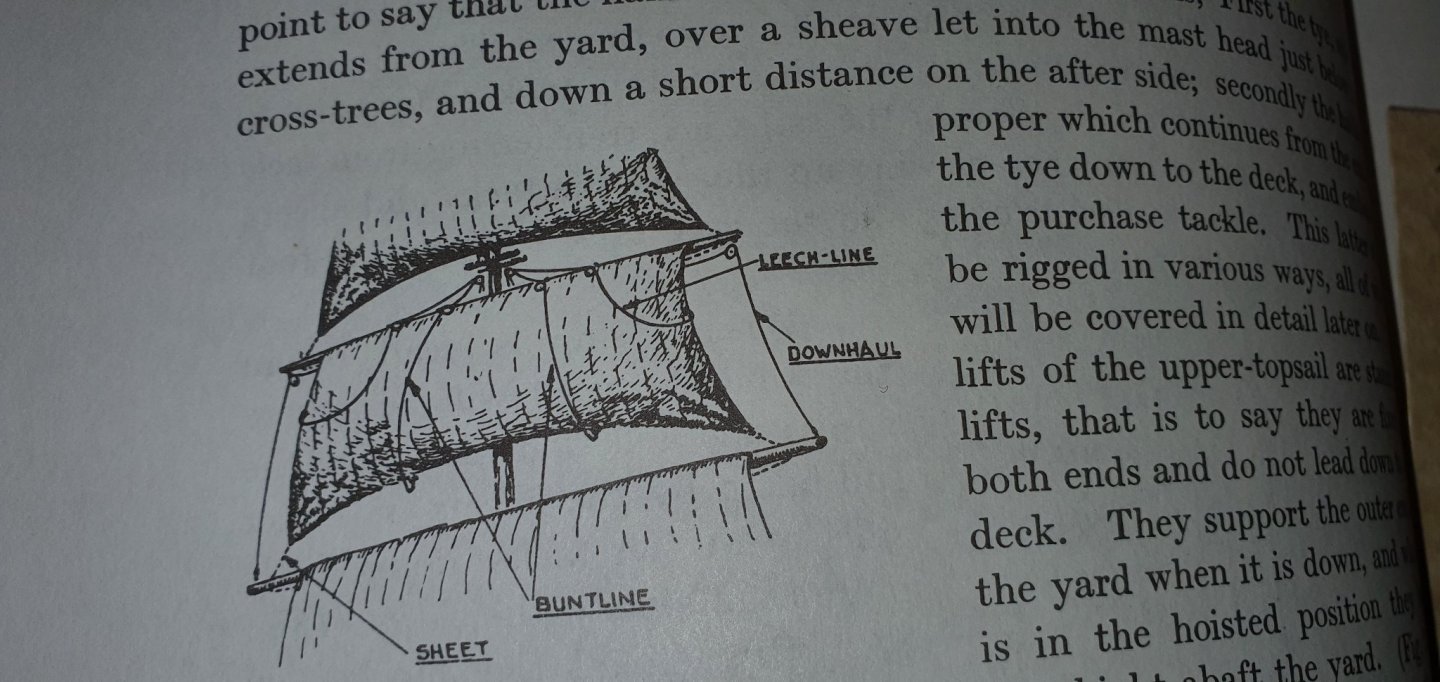
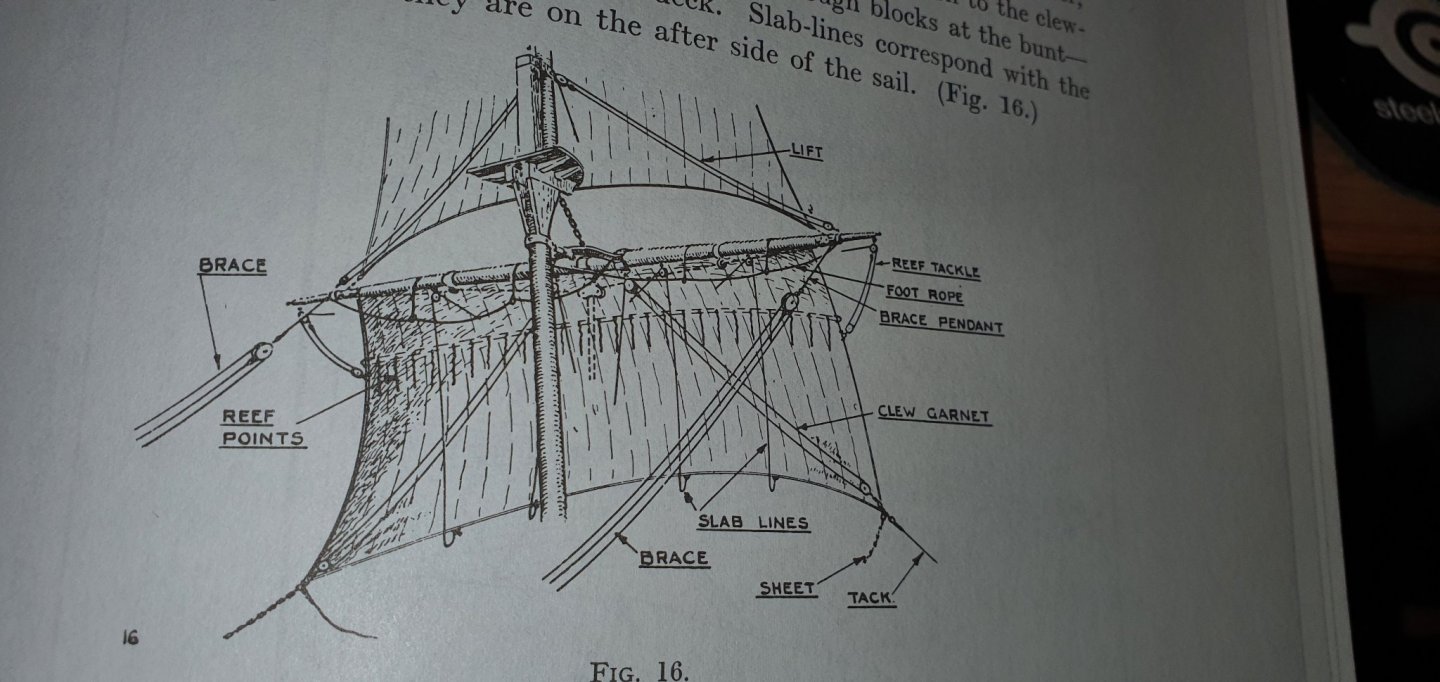
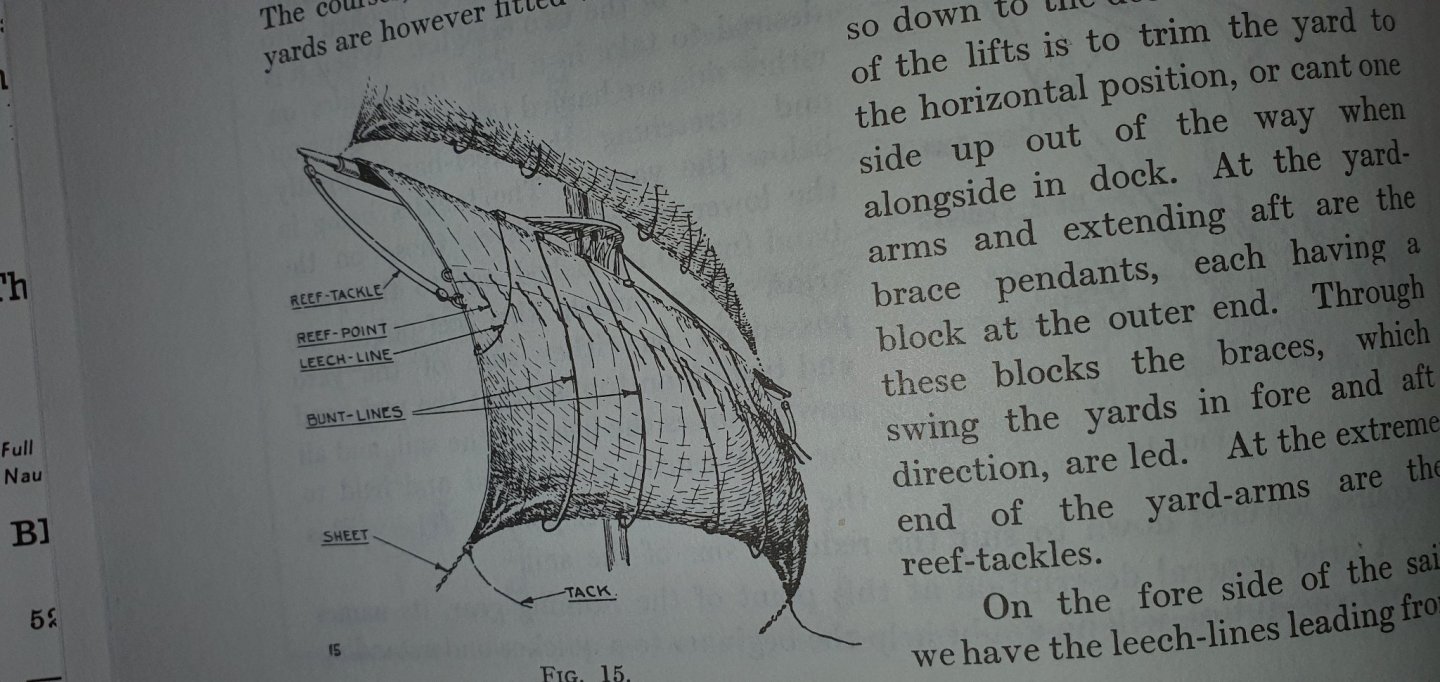
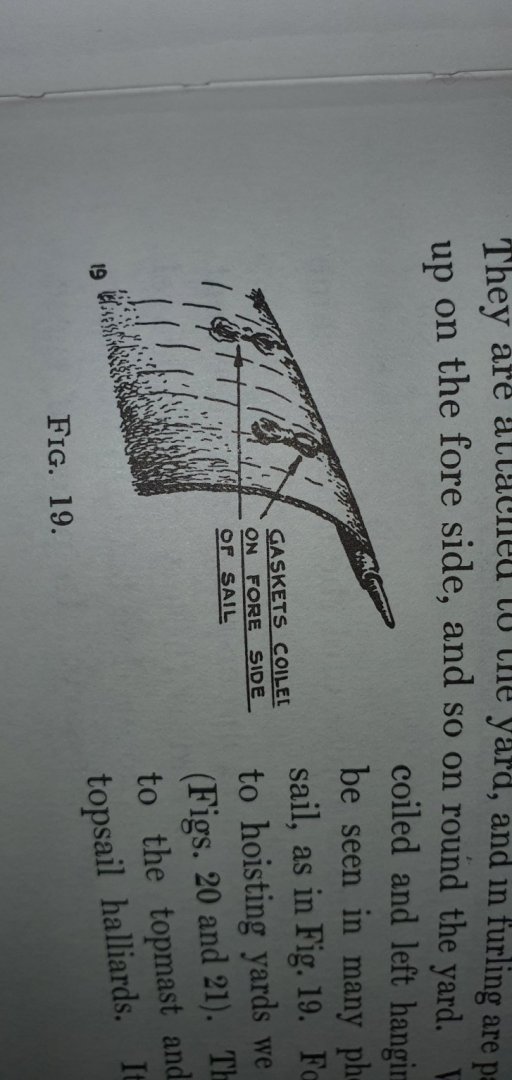
Slablin, Buntline, Reef points and Gasket coil definitions
Trond replied to Trond's topic in Masting, rigging and sails
Thanks for the clarifications. -
Nice planking and I see you have sent a lot of time drilling those holes, but a very good result. Which method did you use for getting the planks black on the side? I've tried pensile and black marker, but so far it's been no good.
-
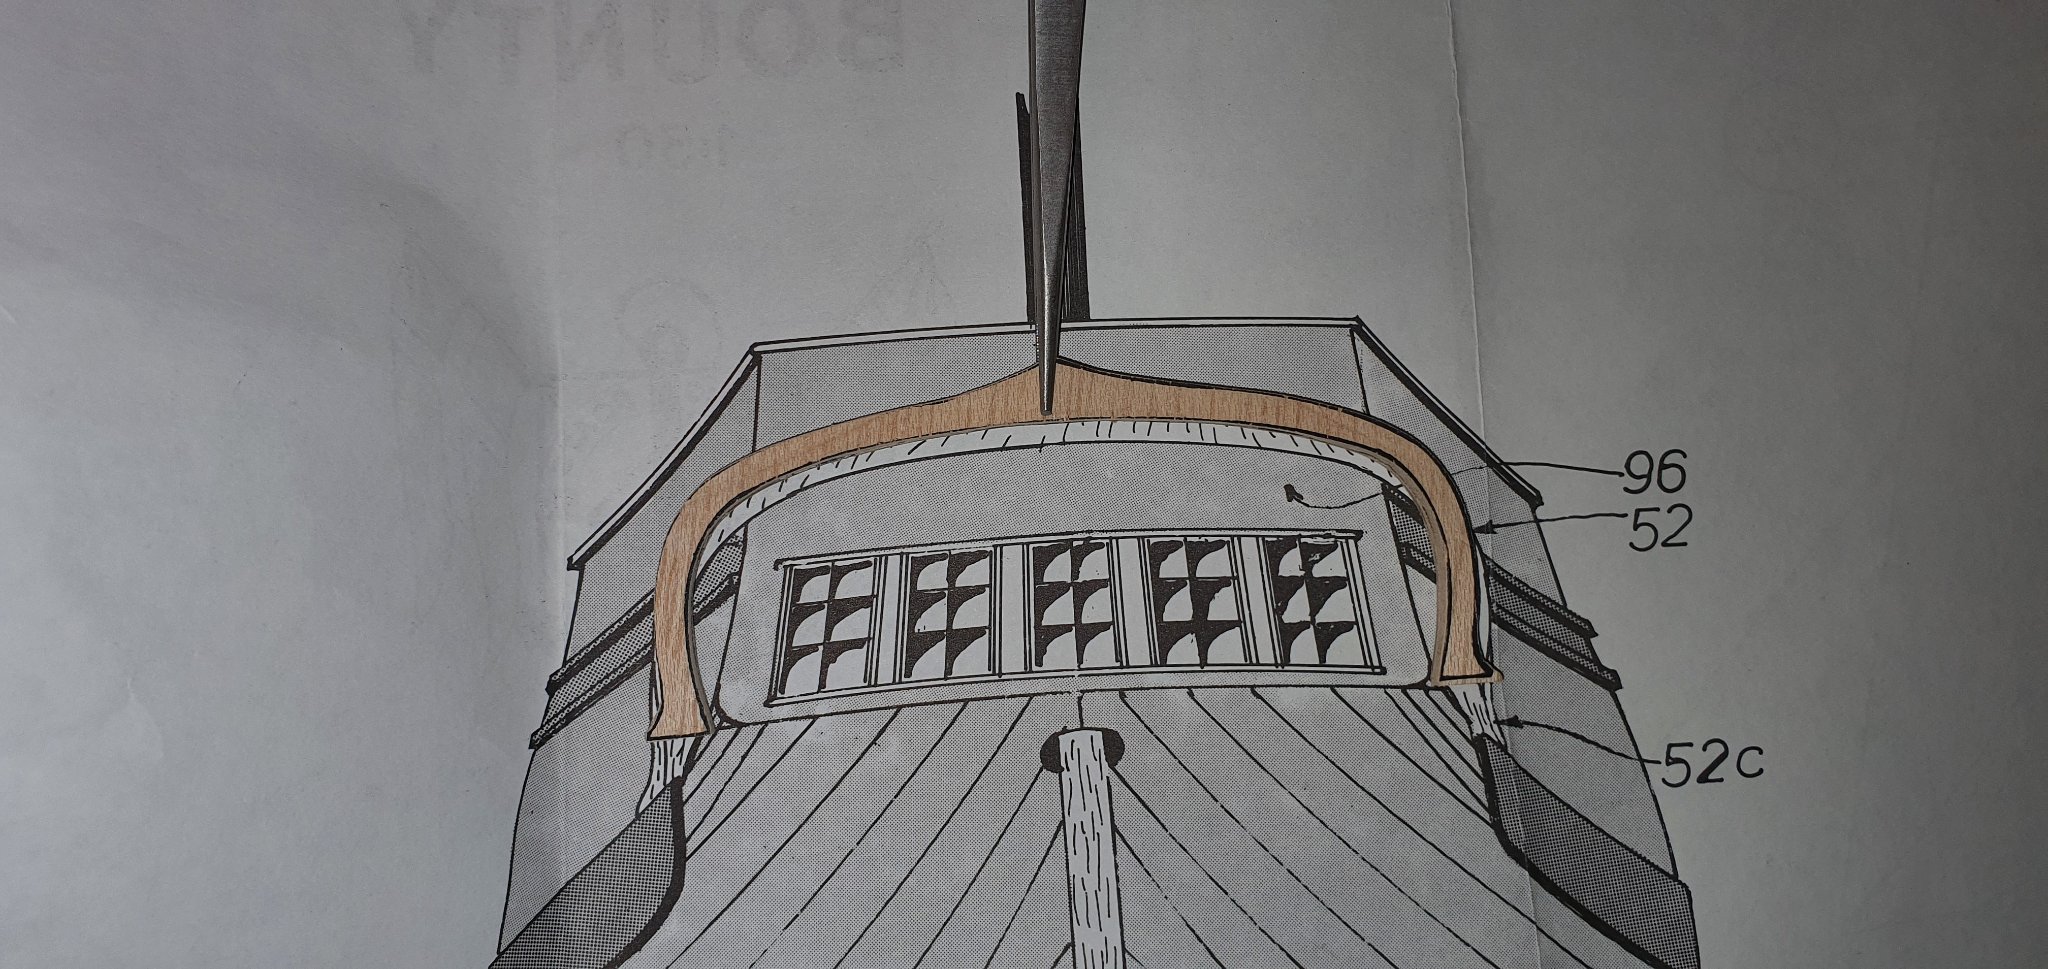
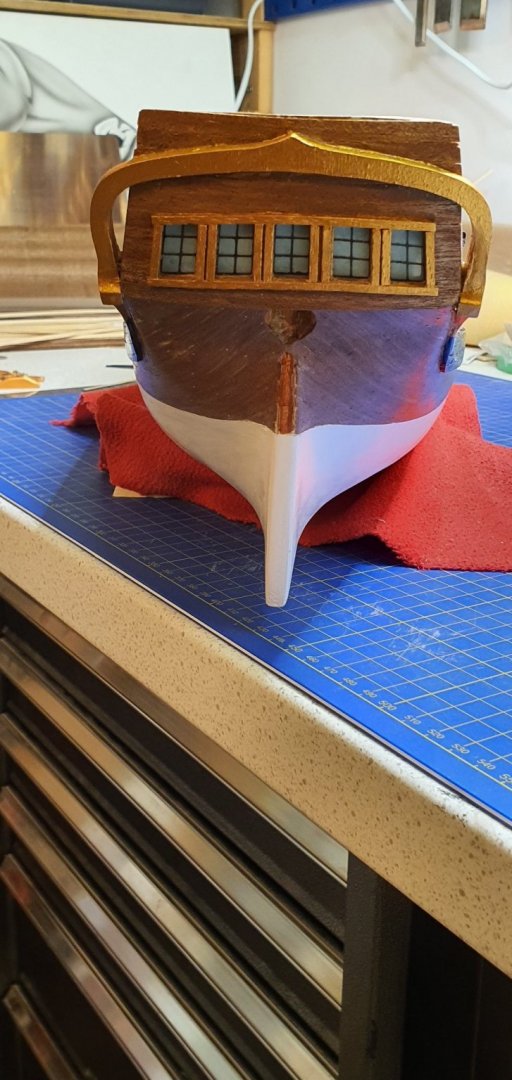
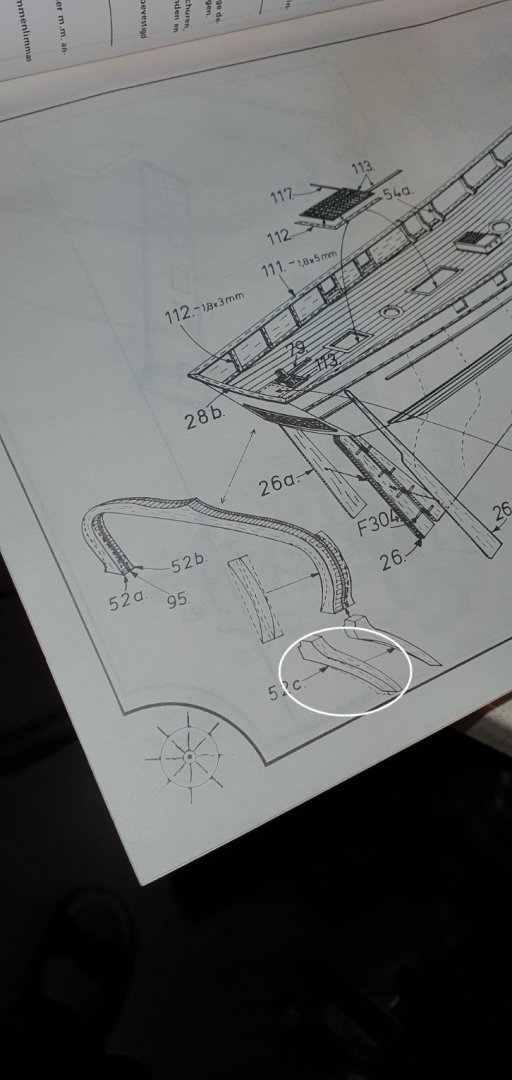
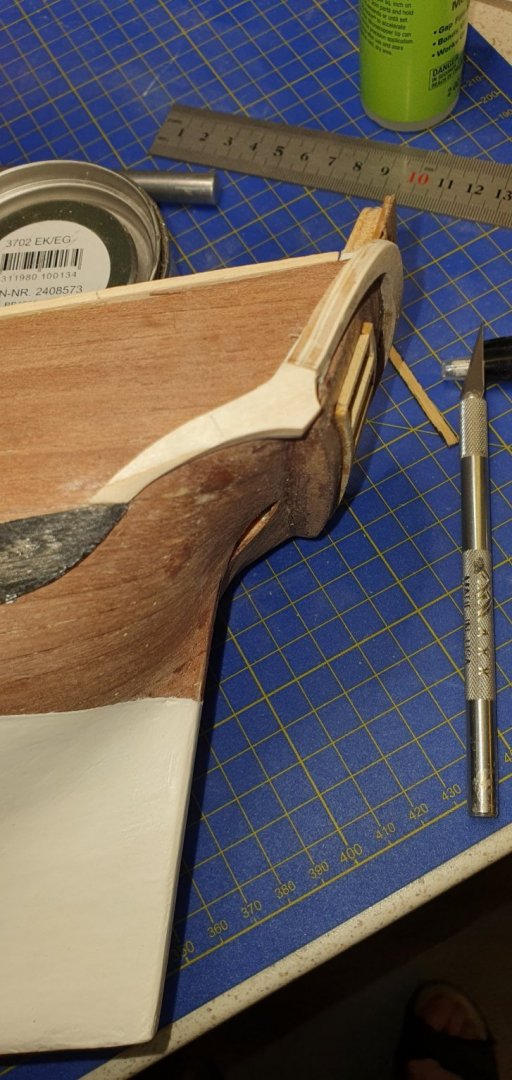
Before I can do the last wale I want to finish the rare cabin with its outside decoration and side windows so that I can get the correct length of the wale. Again I need to do some adjustment or rather actually I just made need part. It took a lot of thinking forth and back to understand how I was going to fit it on and make it look good. So I ended up make 4 pieces and glued 2 and 2 together. Then I sanded each piece to fit on the hull and glued. Need to do some sanding before painting, but it looks ok. It is a pretty step learning curve, but it is fun.
-
Slablin, Buntline, Reef points and Gasket coil definitions
Trond replied to Trond's topic in Masting, rigging and sails
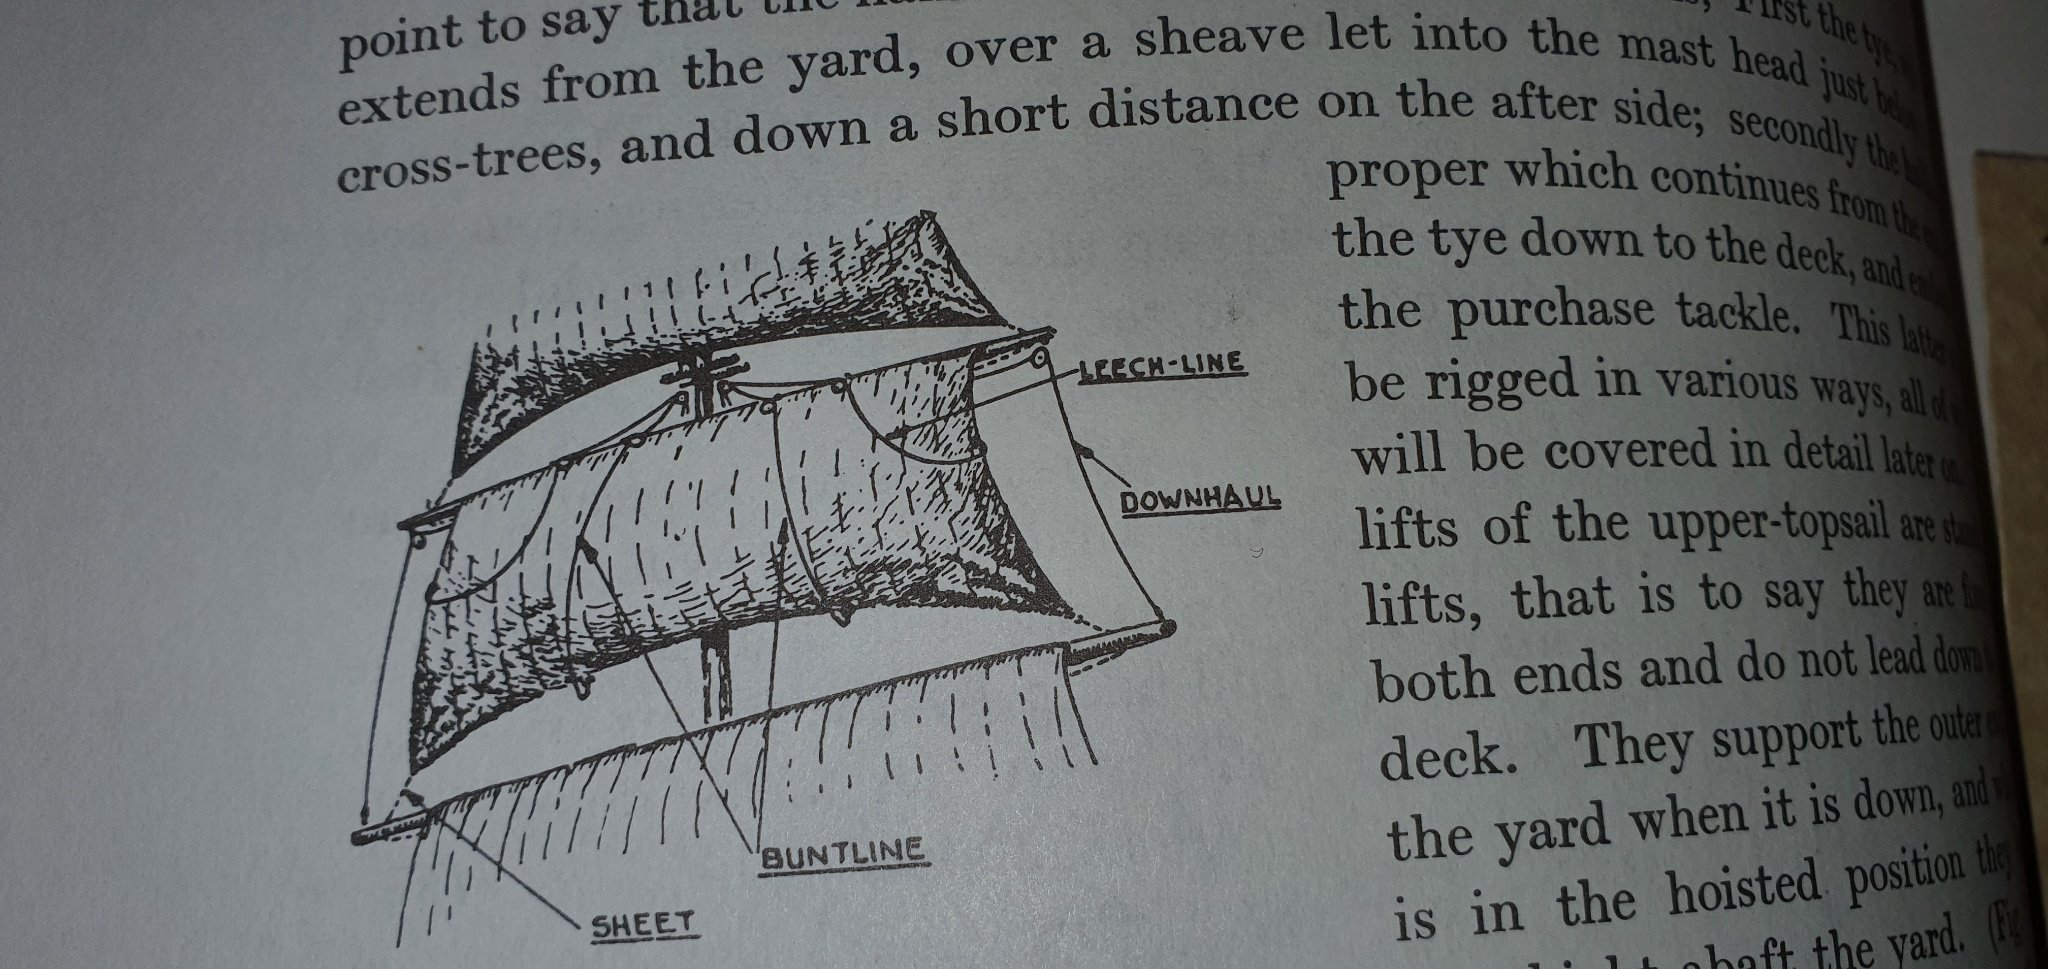
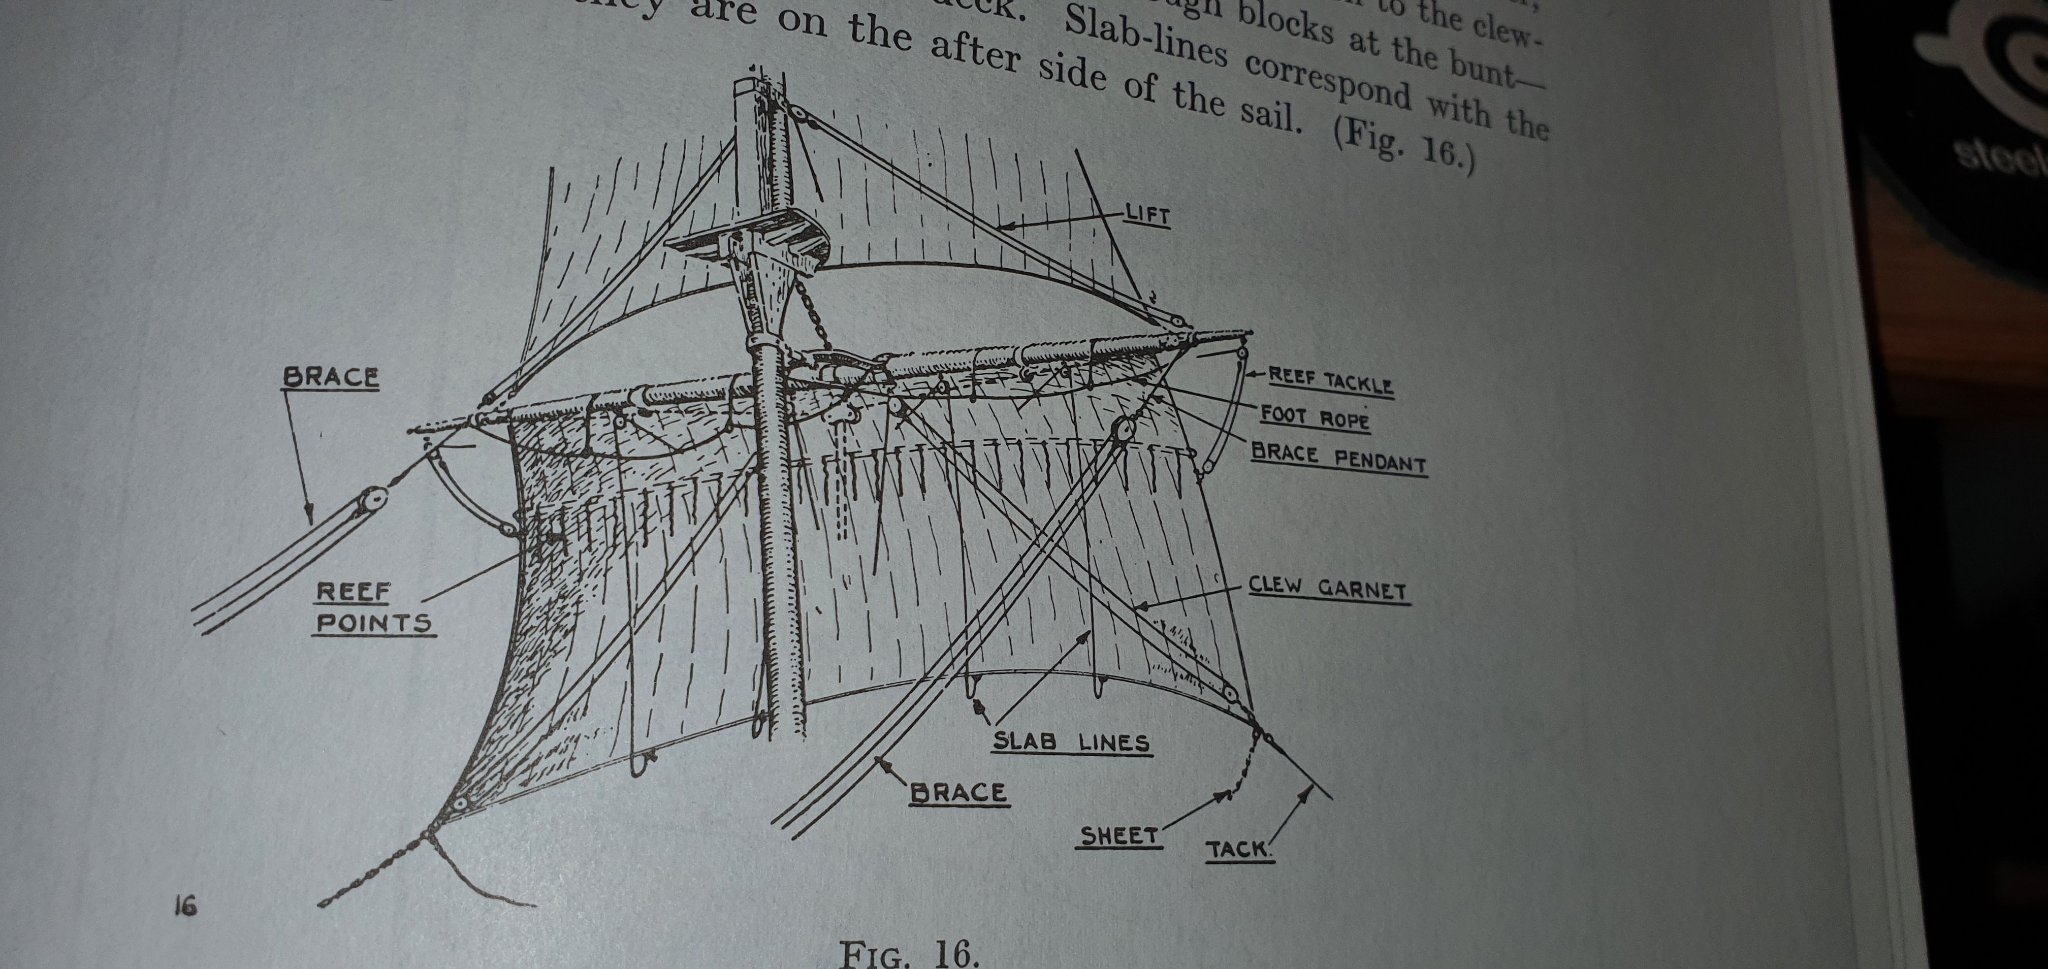
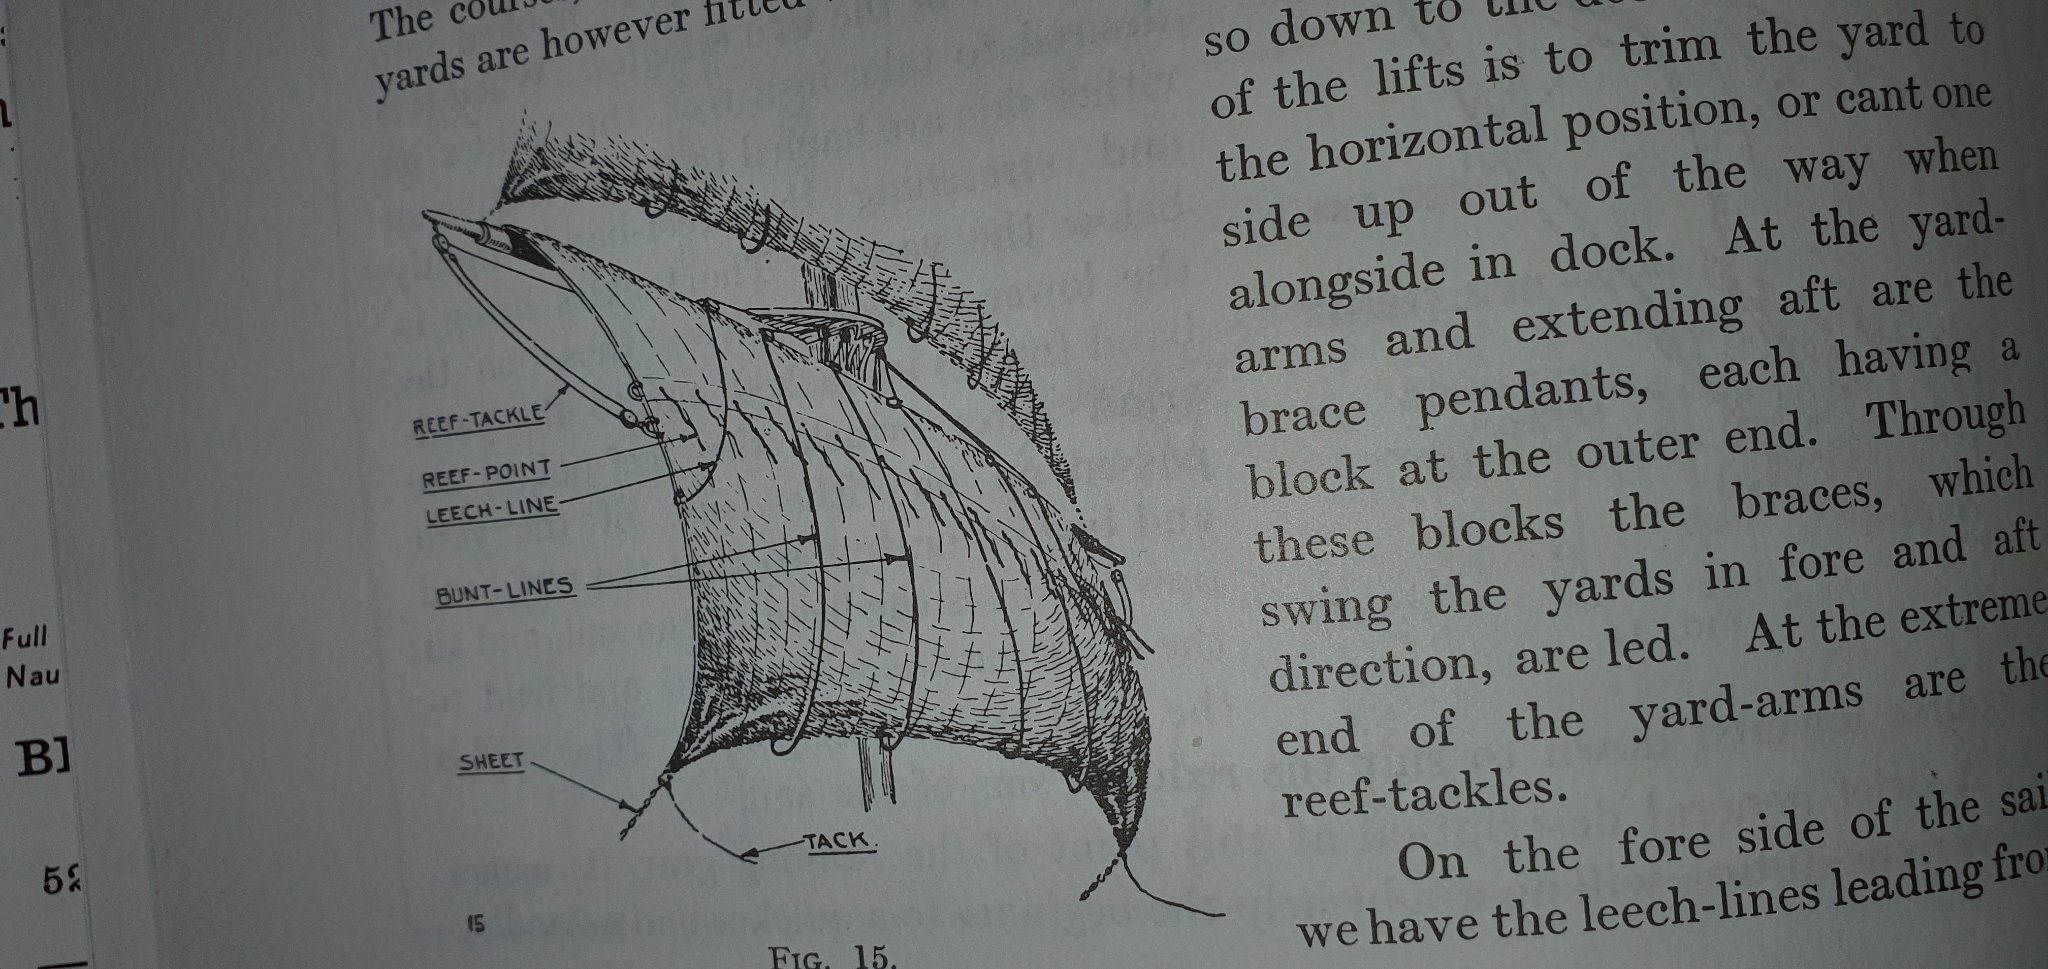
I'dont kow if I just thinking way of or to slow, but why would you have both bunt lines and slab lines? Aren't they both pulling up the sail to the yard, one way or the other? -
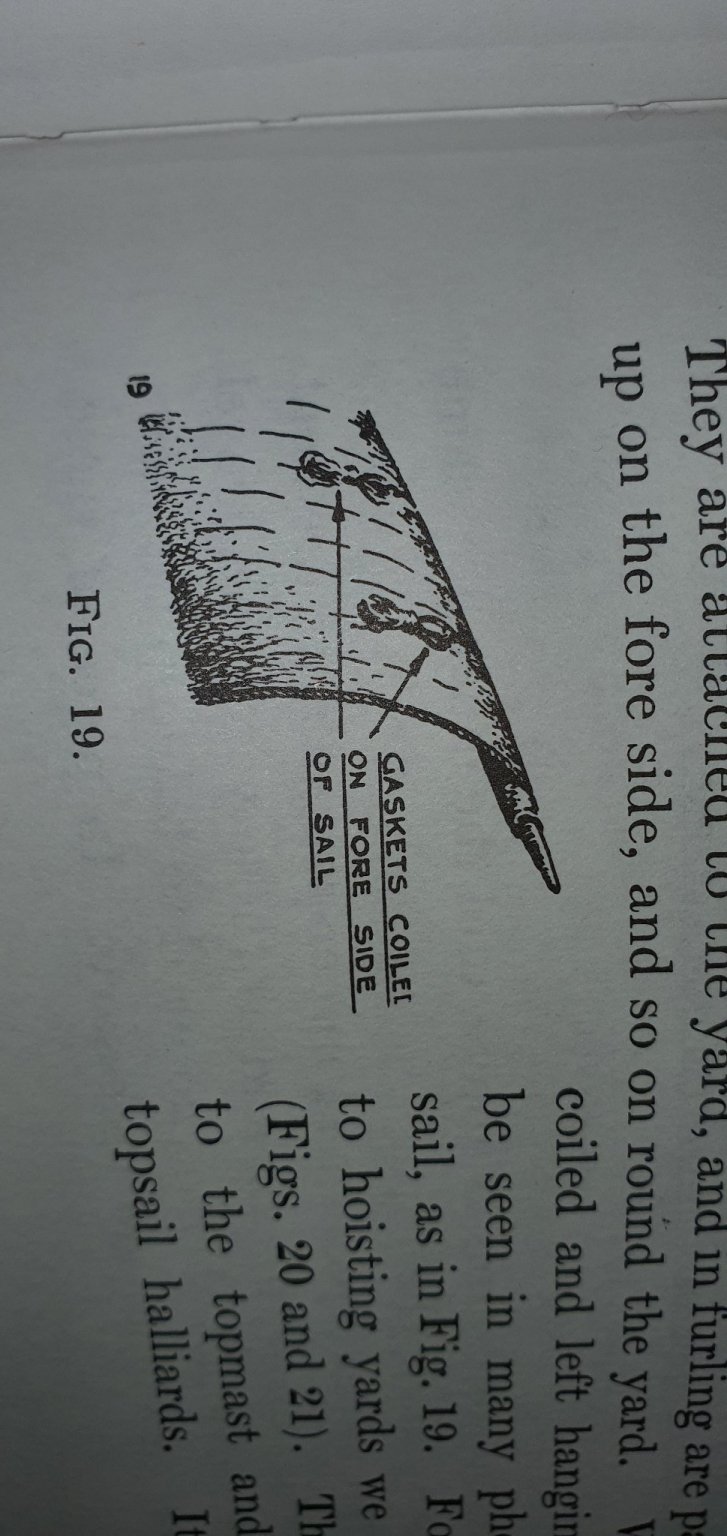
I'm guessing that I'm in the position as many other modelers in here, I'm new and the model kit instruction is not very good. So, I've bought a couple of books trying to learn standard rigging and sail for ships to due my rigging on the Bounty. My questions are: 1. Is Slab lines and Bunt lines the same lines just for and back of the sail? On the drawings it look like it. 2. For my both Reef points and Gaskets are doing the same job, tieing the sail together, correct?
-
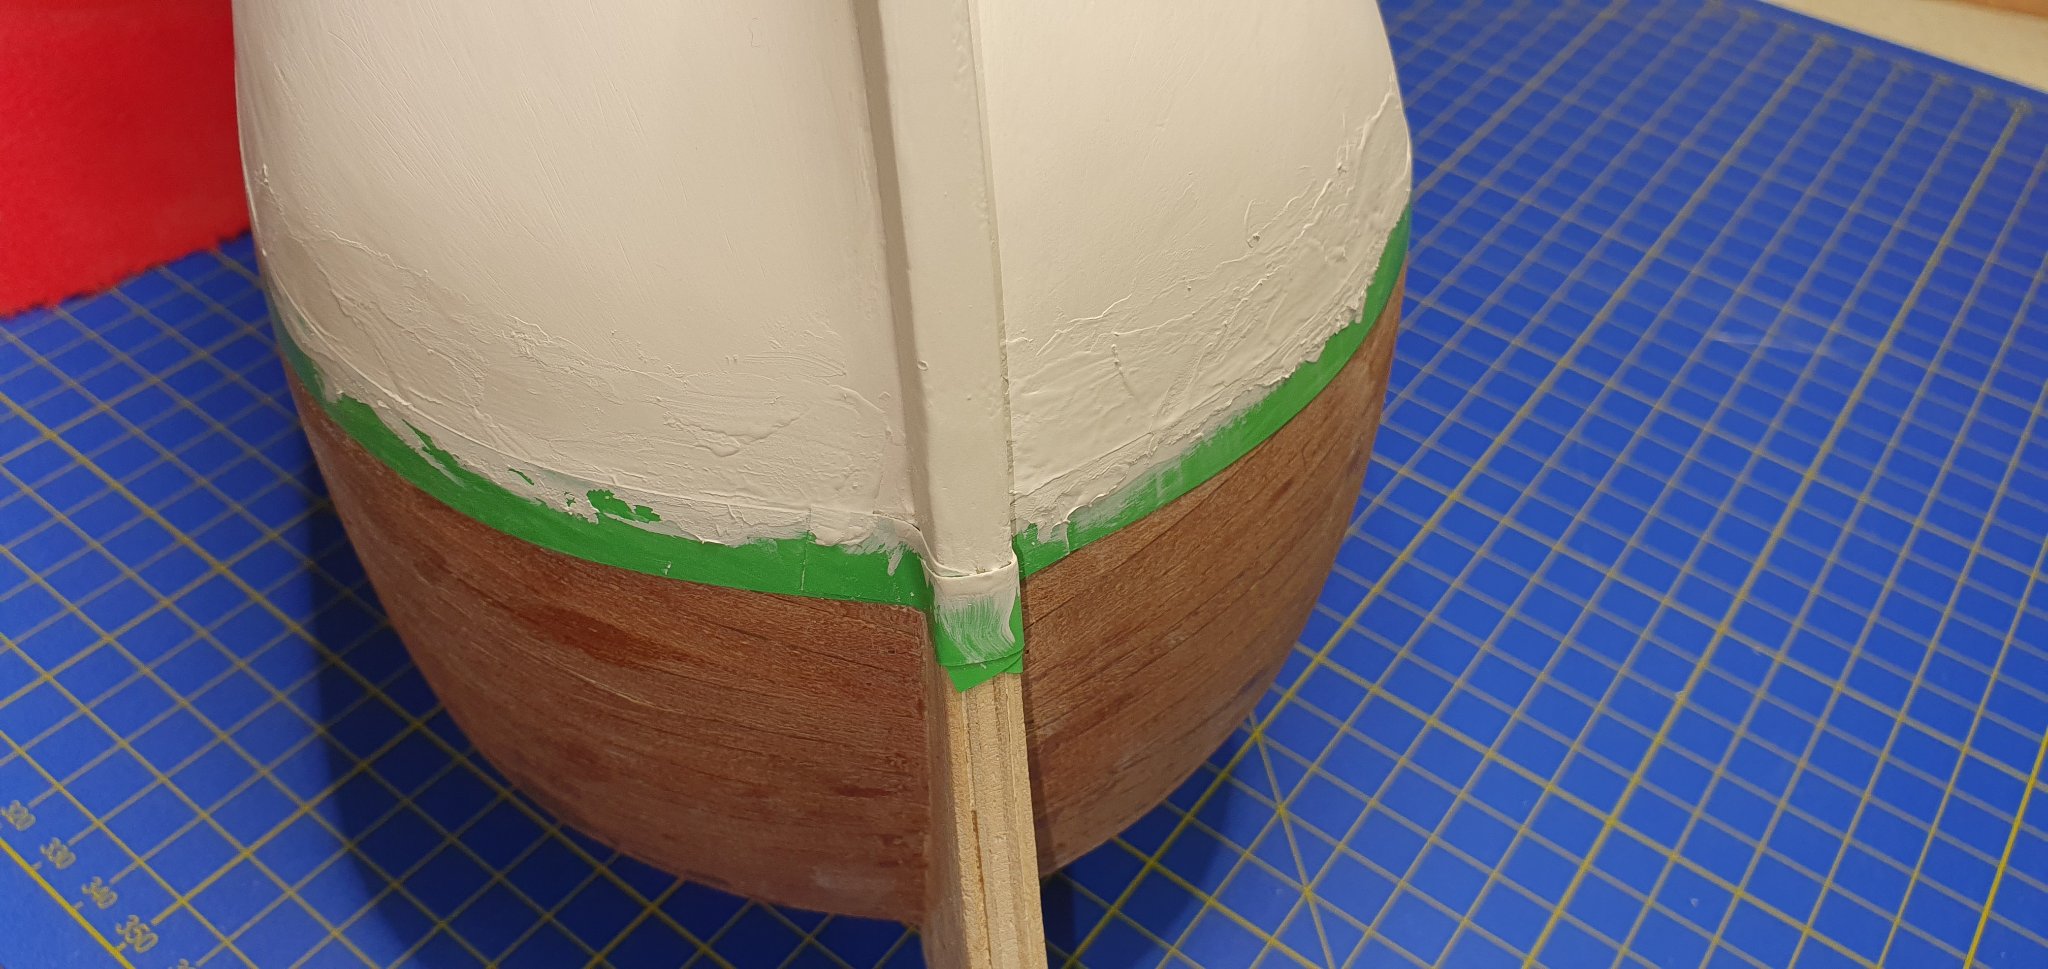
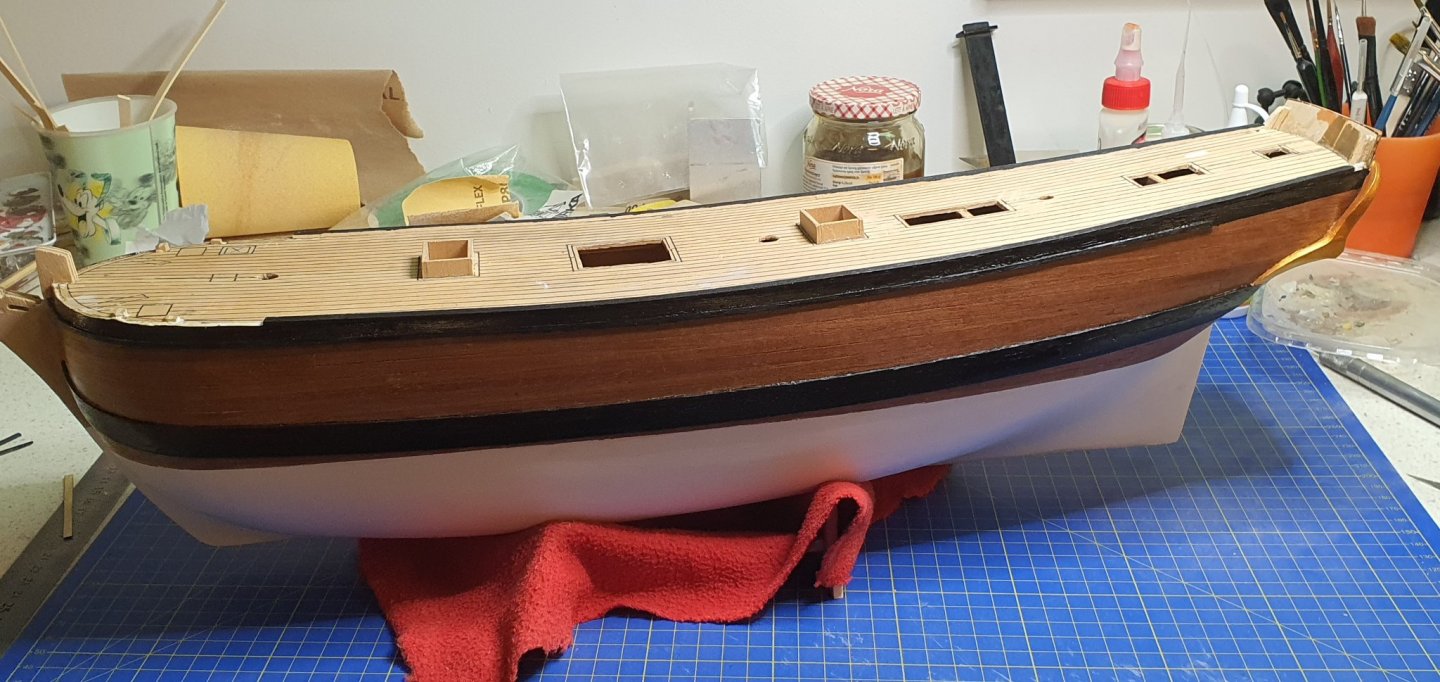
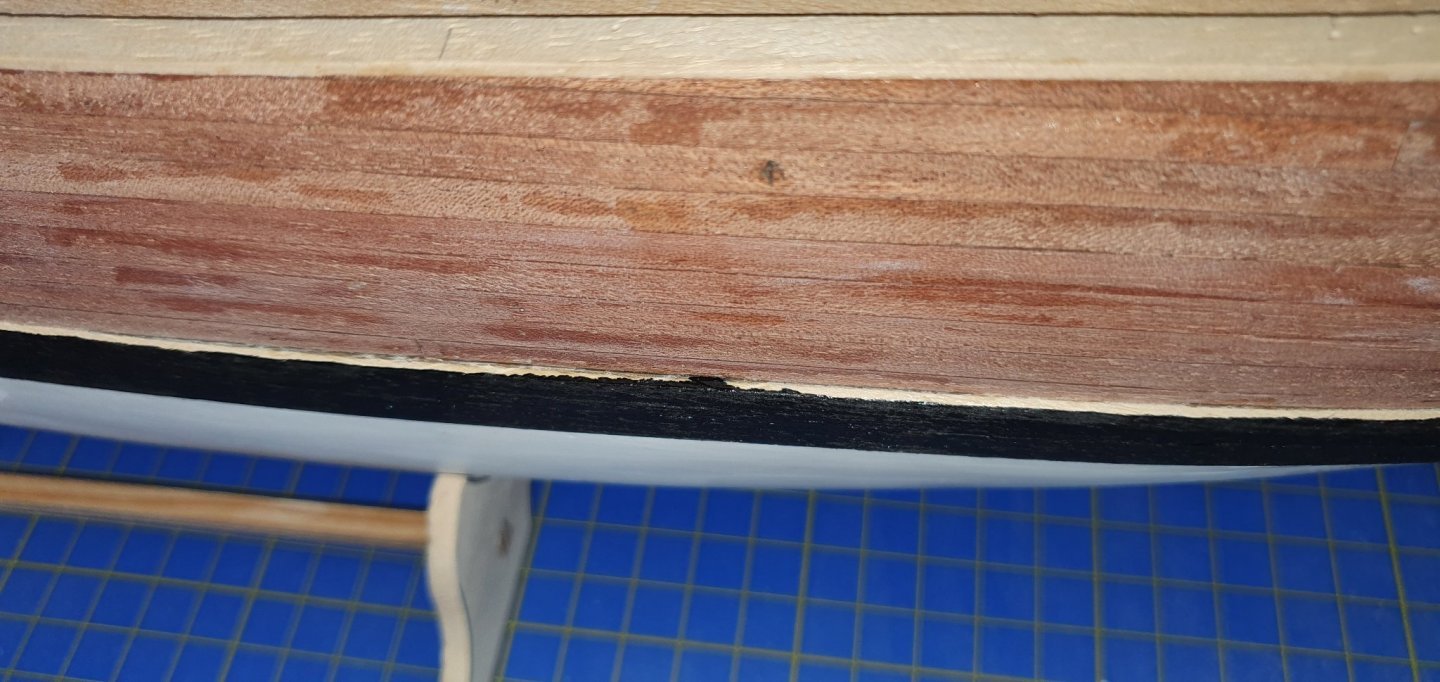
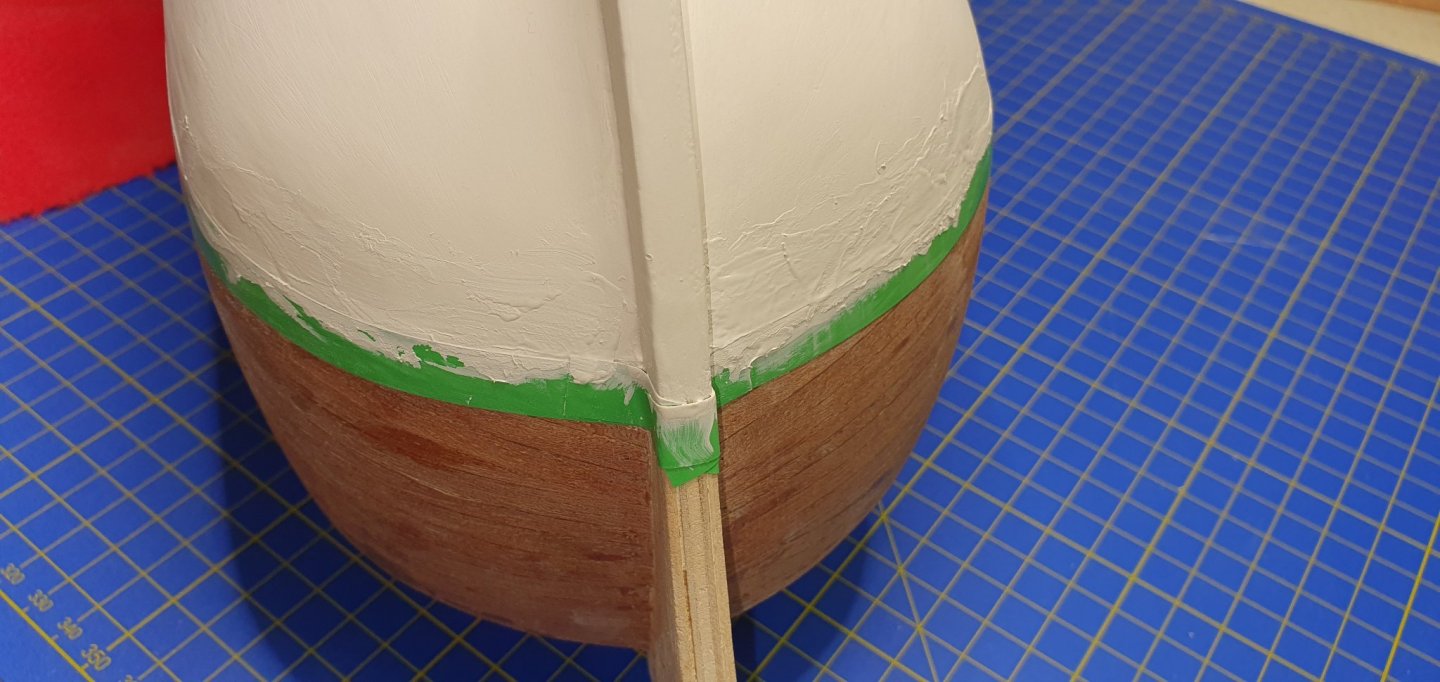
Glued on the rest of the wales and painted part of it black. Got the wrong black, it was gloss insted of matt The "white" line is the unpainted side of the wale. Because the wood was so dry I must paint the rest of the planking with varnish before painting the rest of the wale black. If not I risk of the black paint being soaked onto the planking. Her was a close call
-
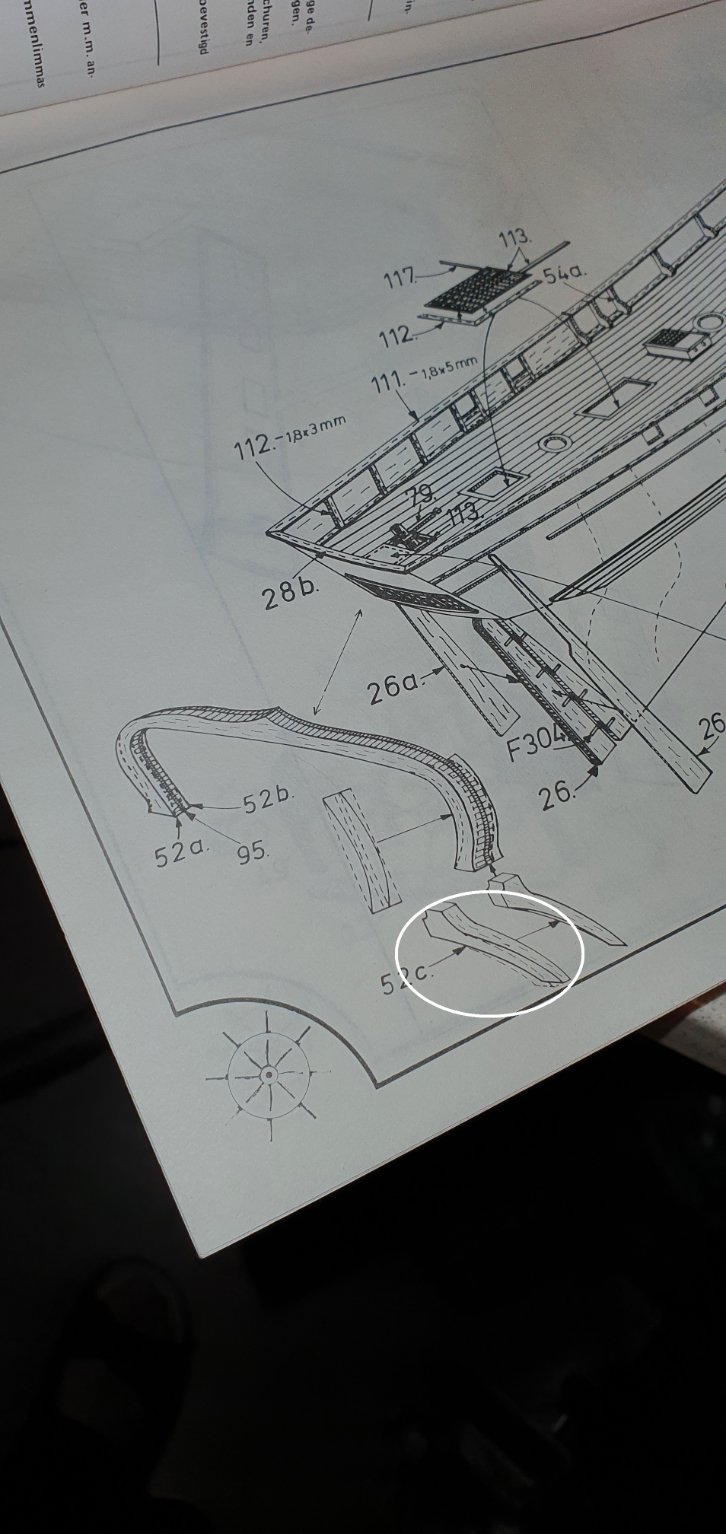
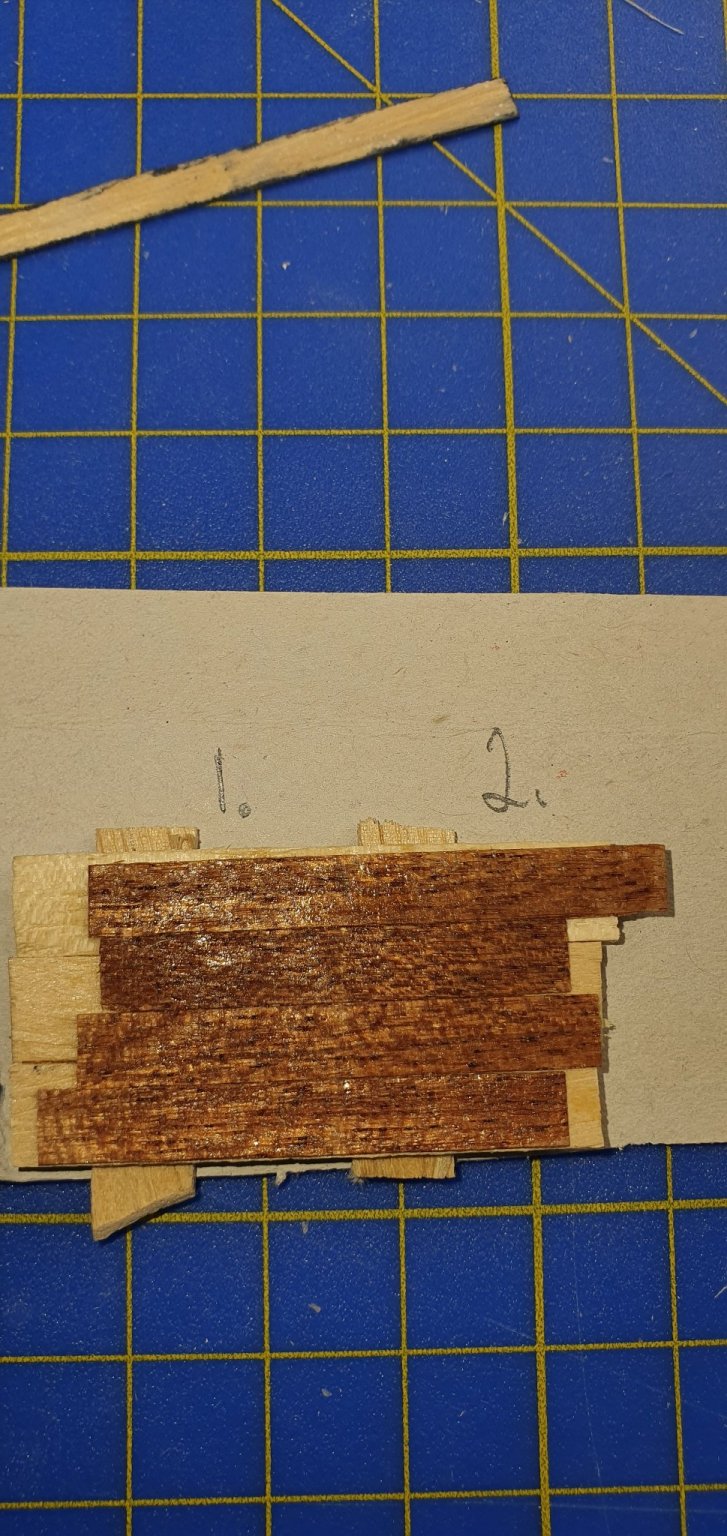
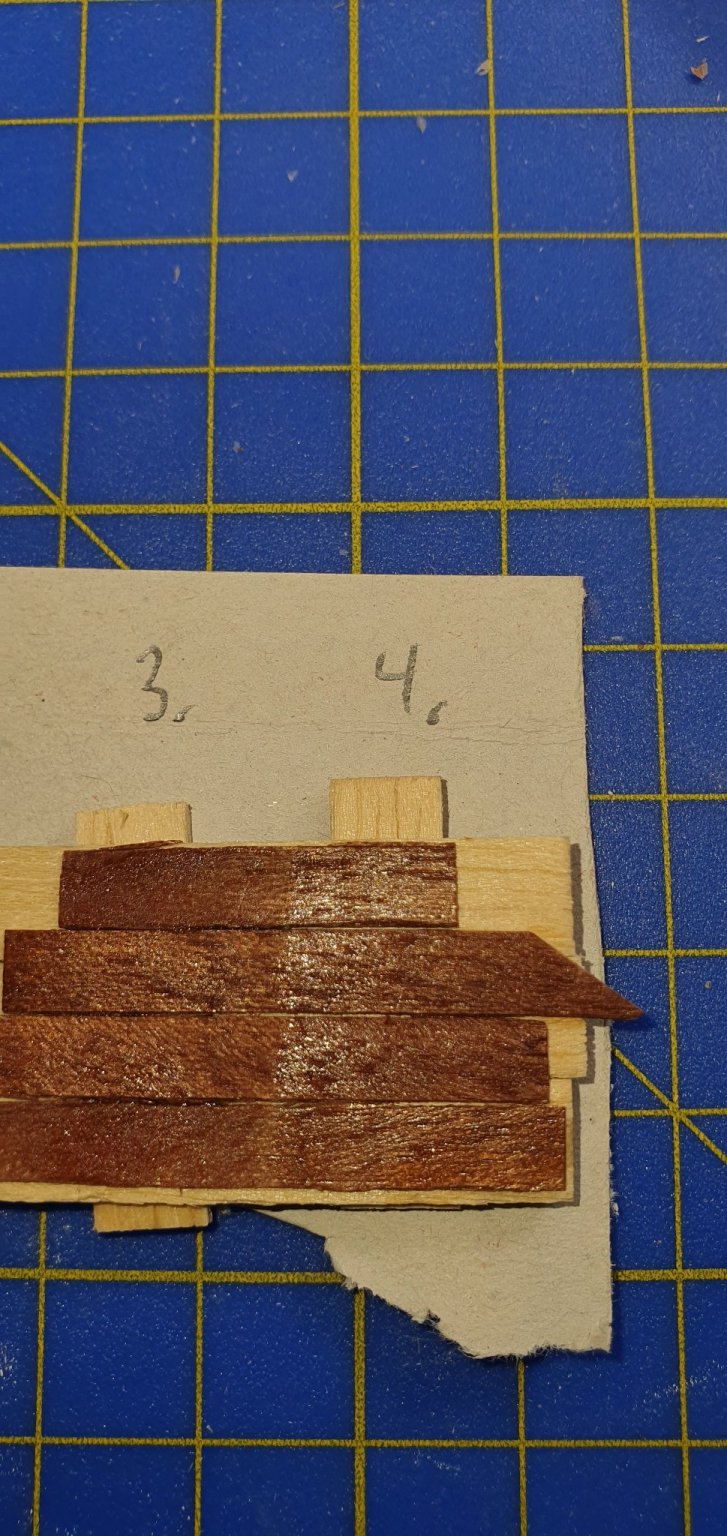
Well it was time to start putting on the wales, which took some time to measure out where they where suppose to be. Had to measure out from the drawing. I Half done, but wasn't sure how the rear wales should end, so waited to do that to last. While I was waiting for the glue I tried the different varnish. I have seen different ones hear on the forum, but different brand.. her where I live, so need to do some testing. I see it is very difficult to differ between the samples, but 1 and 3 is with normal oil based varnish bout in hobby shop - Humbrol and 2 and 4 is a varnish used on boat with some brow/red in. 2 and 4 give a little extra "glow" to mahogany wood, so I will use that one. Another challenge is to learn all the different names for rigging the ship, since the instruction is crap and no real instruction. So I use a lot of time reading my newly bought rigging books to learn rigging.🤔 I also bough a bunch of blocks to the ship from Syren, but delivery time to Norway is approx 20 days 😢. Well, lot to do before that time anyway.


-
Welcome from Norway!
-
Looking forward to see the result.
-
It looks nice. What is the width of the plank? I'm building 1:50 and my planks are 4mm which look very narrow.
-
I'm trying to find a local store where I can get some small sample to try out. Usually one can only buy in liters as min. I got another question if you don't mind. What size did you use for rope/line and blocks? The blocks in my kit is one size and terrible. I'm lookin in my newly books (Art of rigging and Masting & rigging) and there are so many types of line/rope which gives a lot of different block.
-
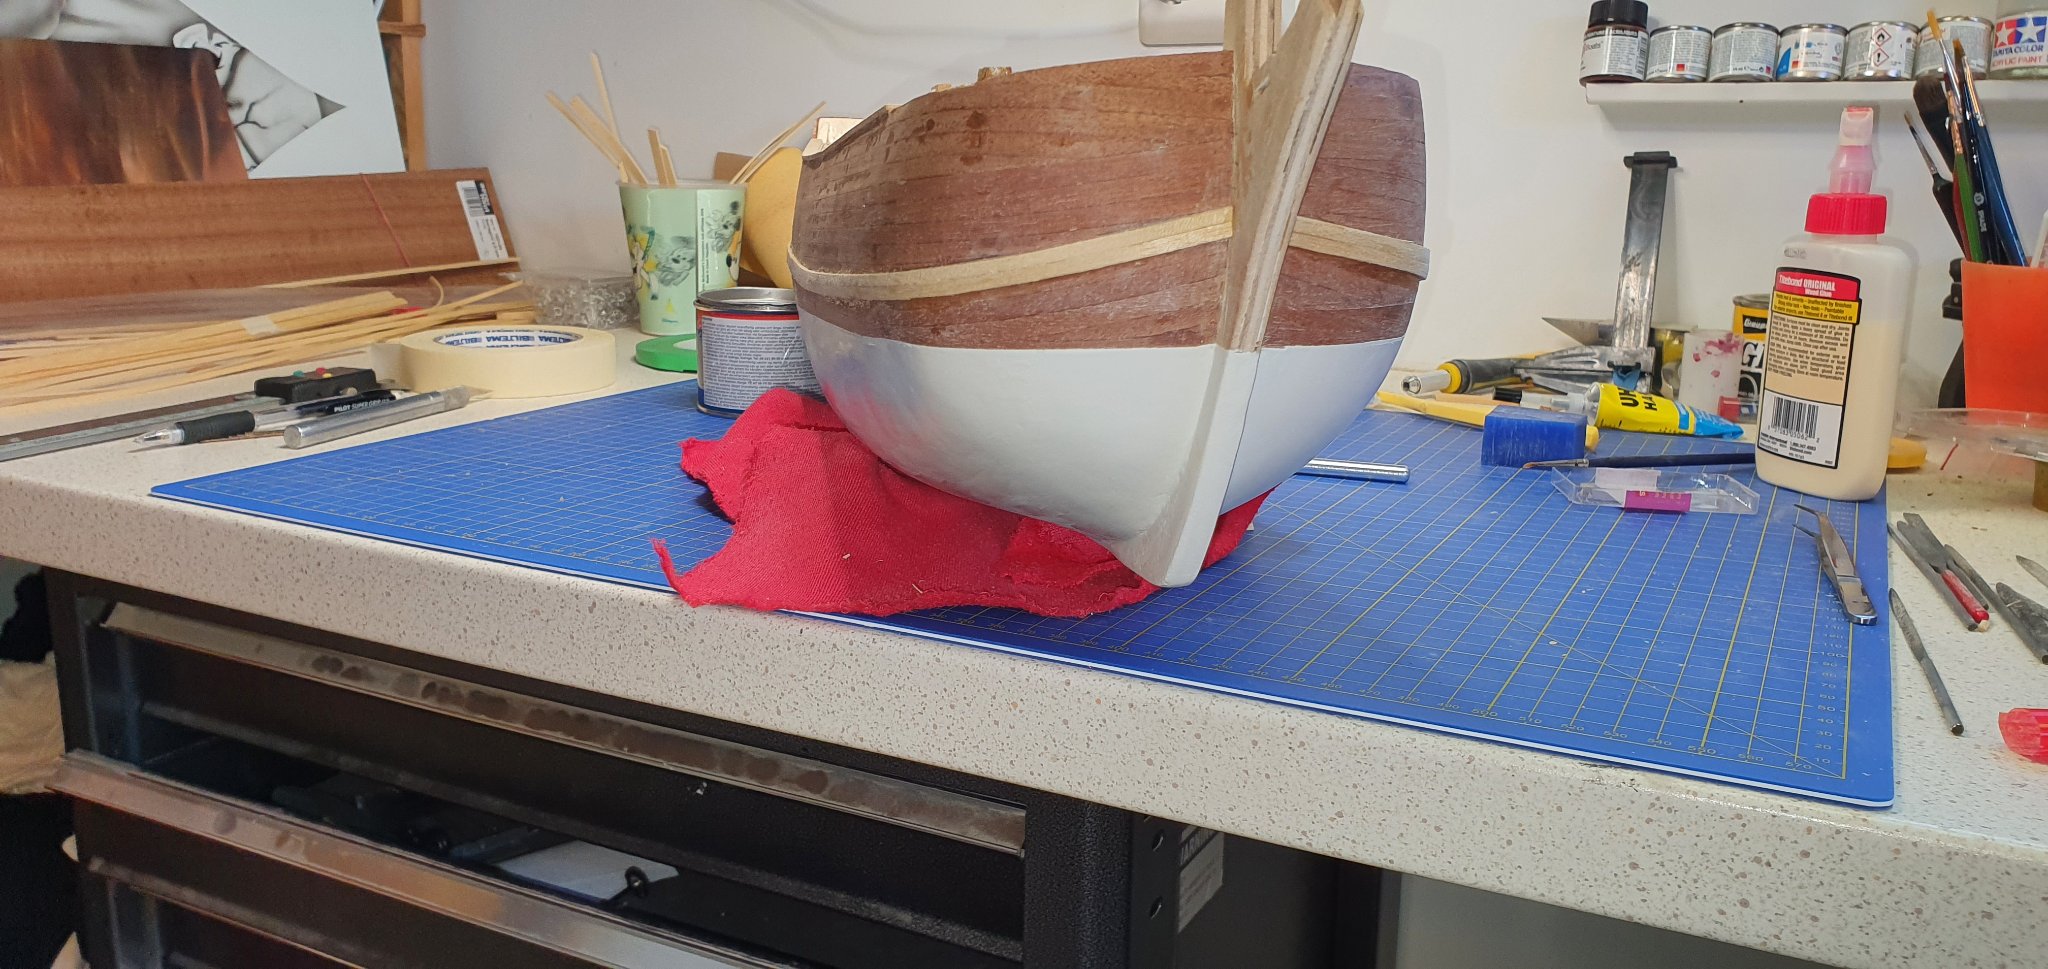
Finished filling and sanding. Painted the hull for the last time (I think 🤨) Made a hole for the ruder and started putting on window frames. Also need to put on the wales, but I need to put then in water for bending. In the mean while I've been trying to straighten out some bent pieces. I have put them in water for many hours and then put them under weight to keep the straight, but they went back to their original form. So I need to make some new pieces from a straight plate.

-
Can you solder the aluminum for a stronger connection or is glue the best solution?
-
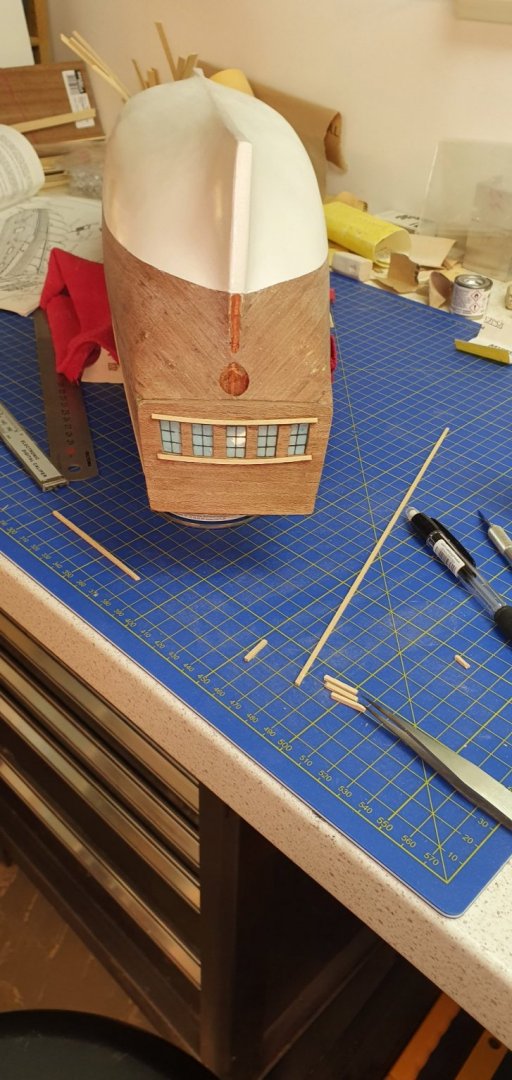
Still filling and sanding to get the worst bumps away. I'm defiantly learning the hard way. I'm never going to do a "speedy gonsales" way forward as I did 25 years ago. I hope this will be the last filling, than I can sand it and than paint the last layer of white on the hull. I've been working on the detail at the back and as if there was enough errors done by my self, there is also errors made by Billingboats. IT does not fit. It is suppose to go on the outside. So I need start making new improved parts.

-
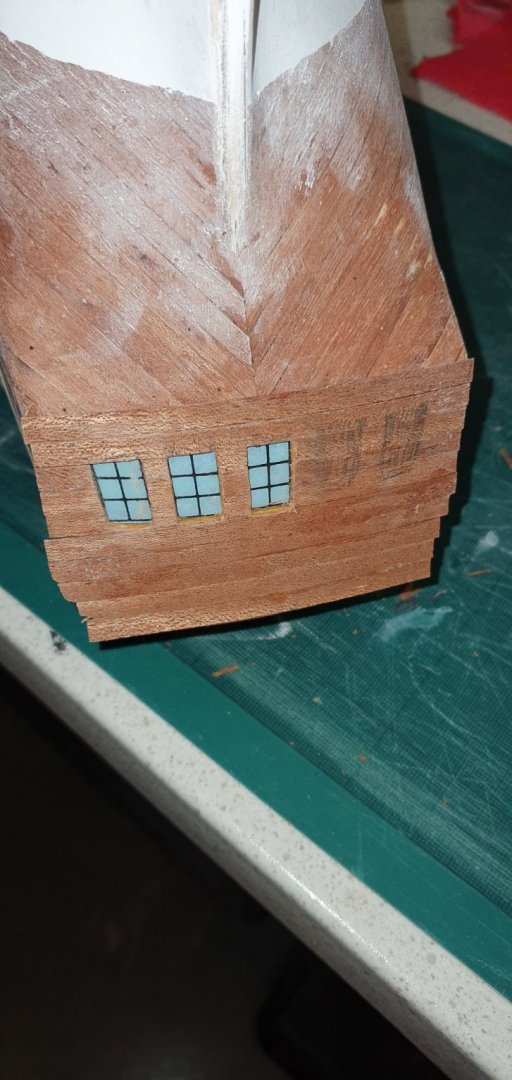
I've continued filling out holes and uneven edges and sanding. Though I was doing a smart and easy solution by planking the hole rare part of the ship including the windows, but it turned out to be a stupid idea. It takes a lot of time removing the planking over the windows. What I should have done was cut exact plank to each piece around the window. ☹️ The white stuff is from sanding and will be removed before treating the plank.
-
Hi AJohnson, You have done a nice job. It was interesting to read your background story with putting it aside for 10 years. For me it was 25 years. I will follow your build, since you are also in front in the building process of the Bounty. My set is from Billingboat with very few instructions and drawing. I have order the same book on Bounty as you have (Armed transporter), so I hope it is a good reference book for building the Bounty. I'm new to building wooden ship so I hope you don't mind if there pop up a question or two during your build.