HOLIDAY DONATION DRIVE - SUPPORT MSW - DO YOUR PART TO KEEP THIS GREAT FORUM GOING! (Only 24 donations so far out of 49,000 members - C'mon guys!)
×


Trond
-
Posts
166 -
Joined
-
Last visited
Content Type
Profiles
Forums
Gallery
Events
Everything posted by Trond
-
Your doing a great job Dave. I see all the work you have done and I haven't started jet. So I guess it is a mix of excitement and worries to start rigging. How tight are the lines? In real life it is easy tightening here, loose up other places, but on small scale? Well , continue the great work. TrondSB
-
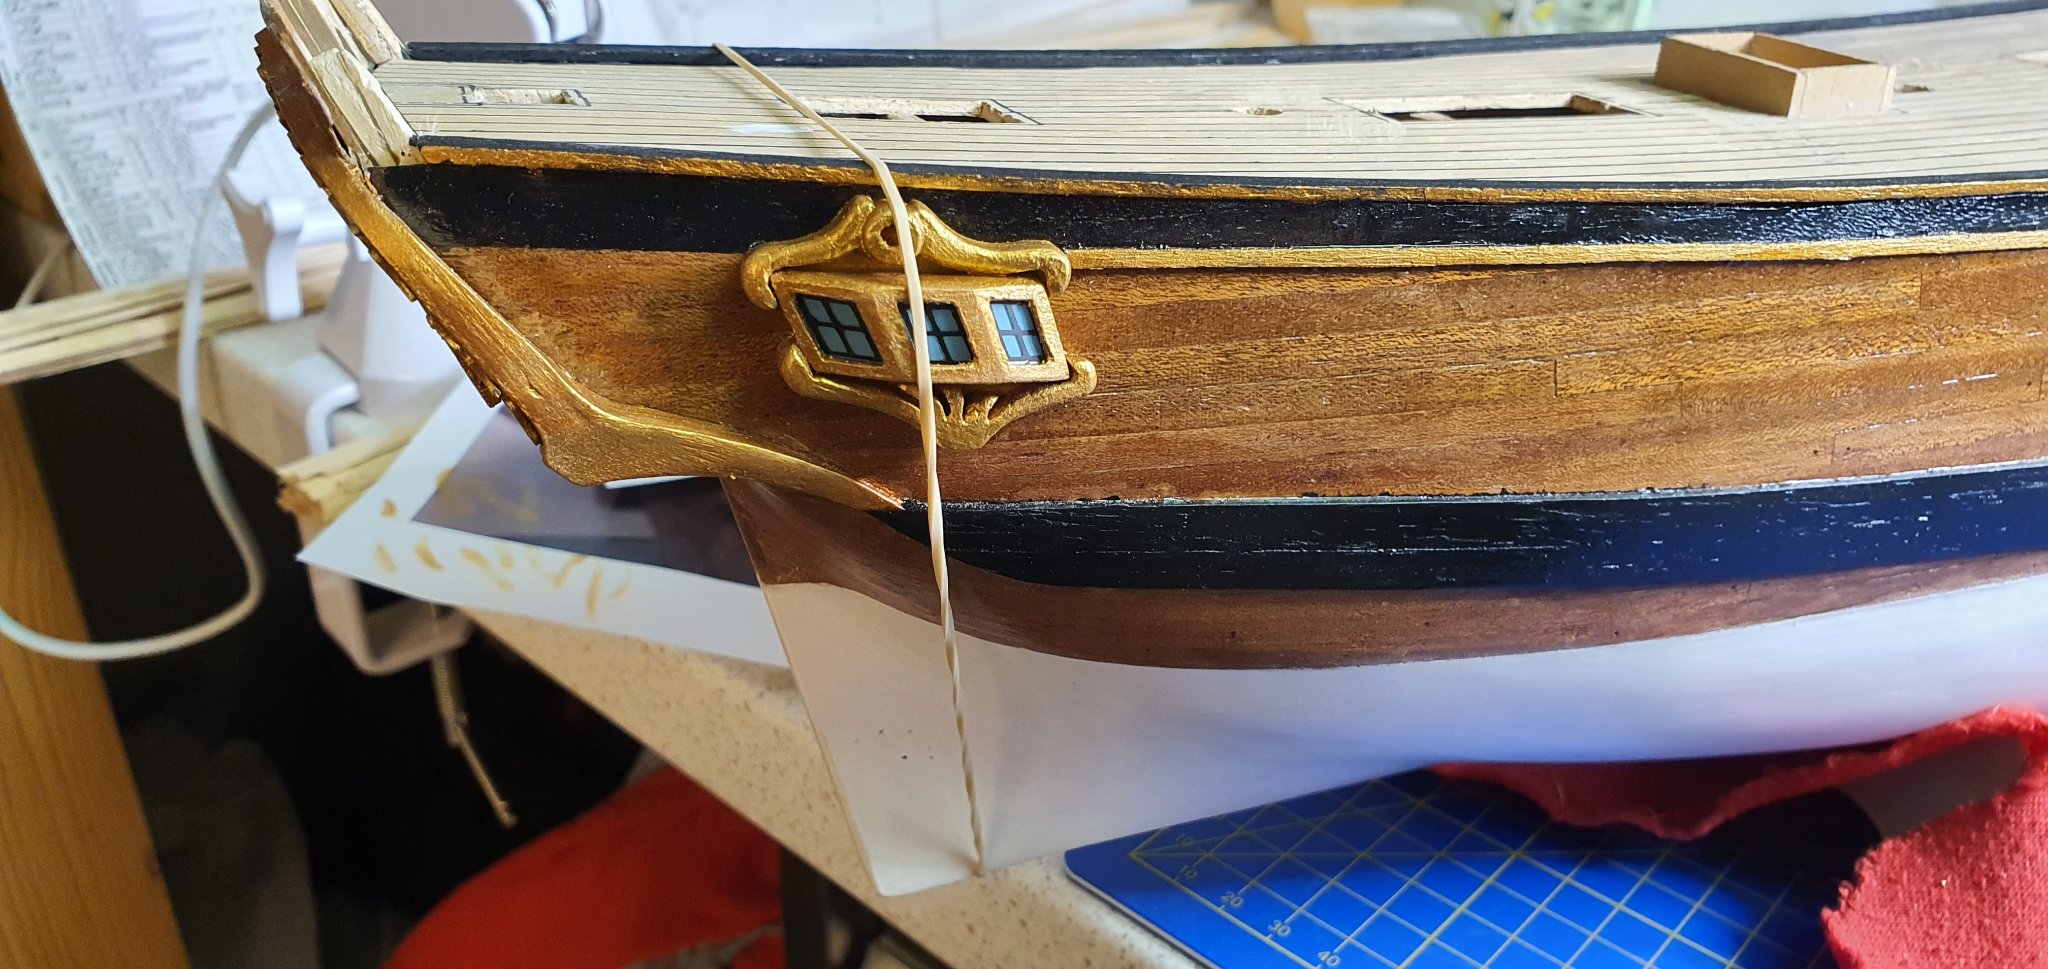
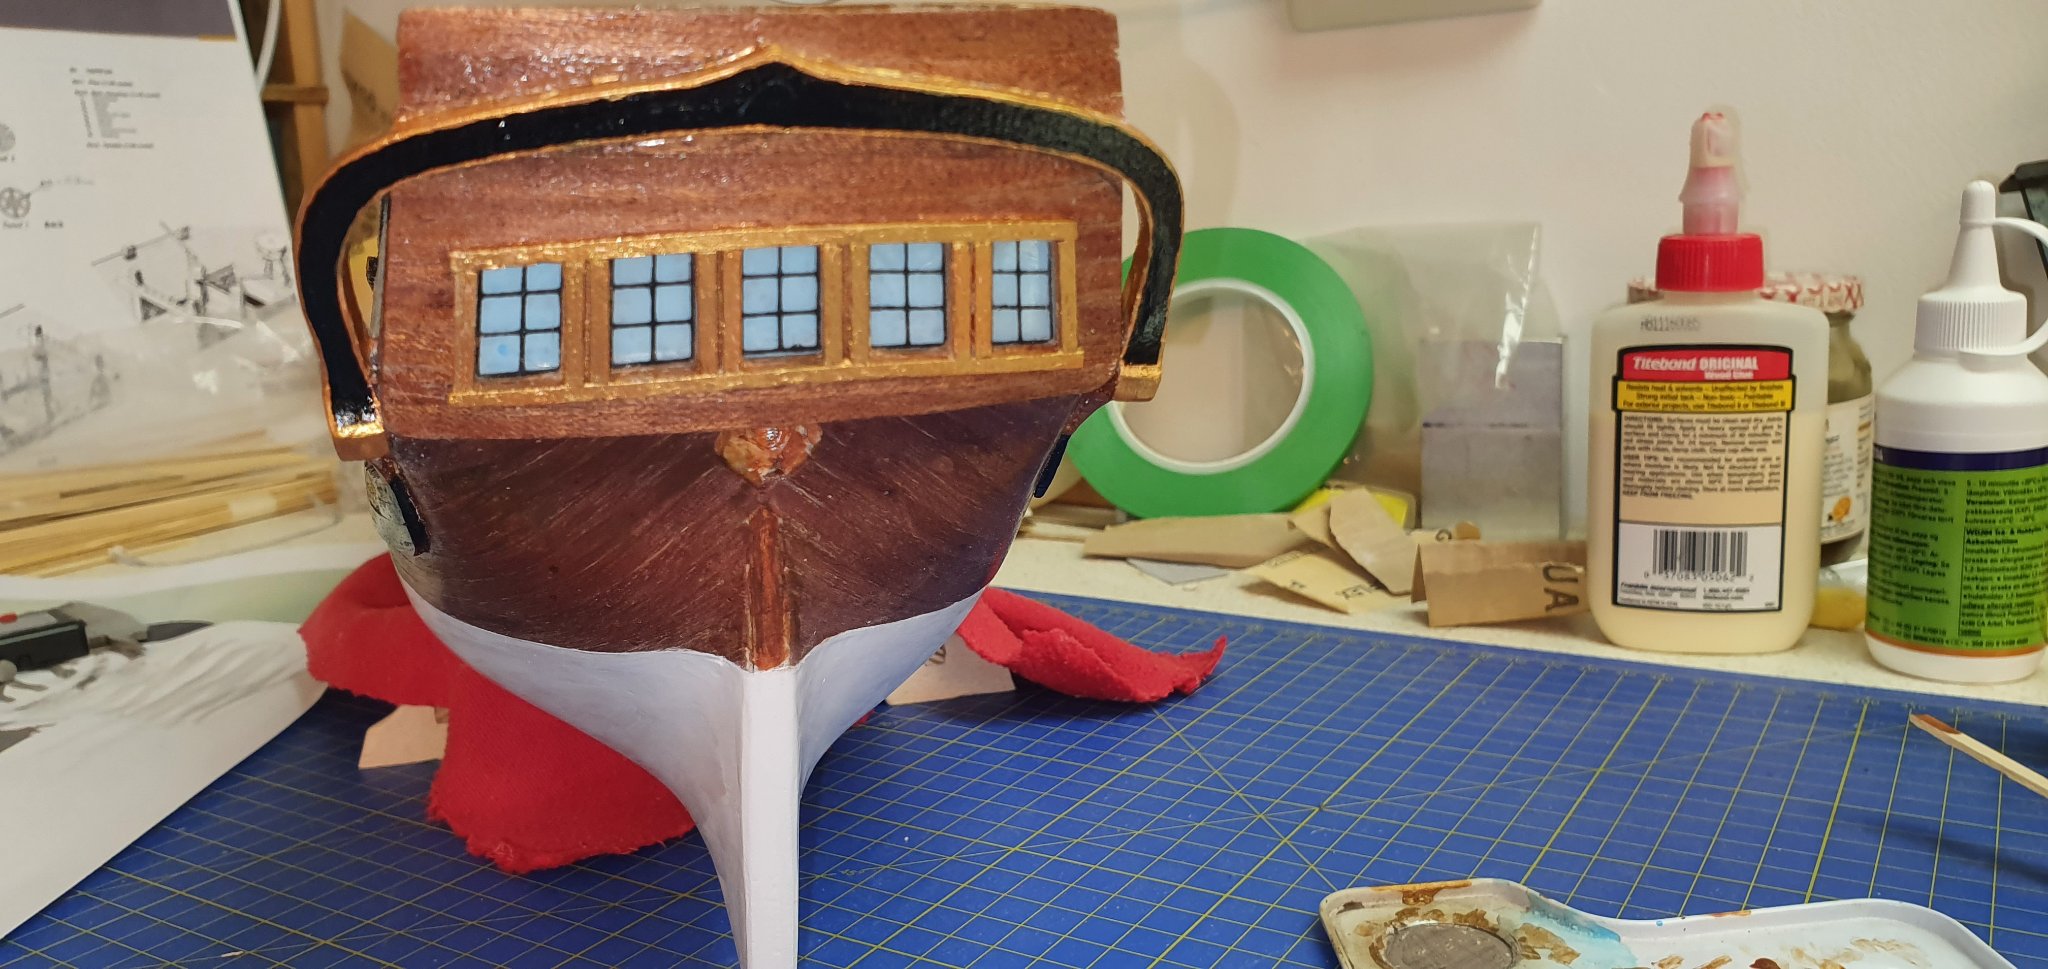
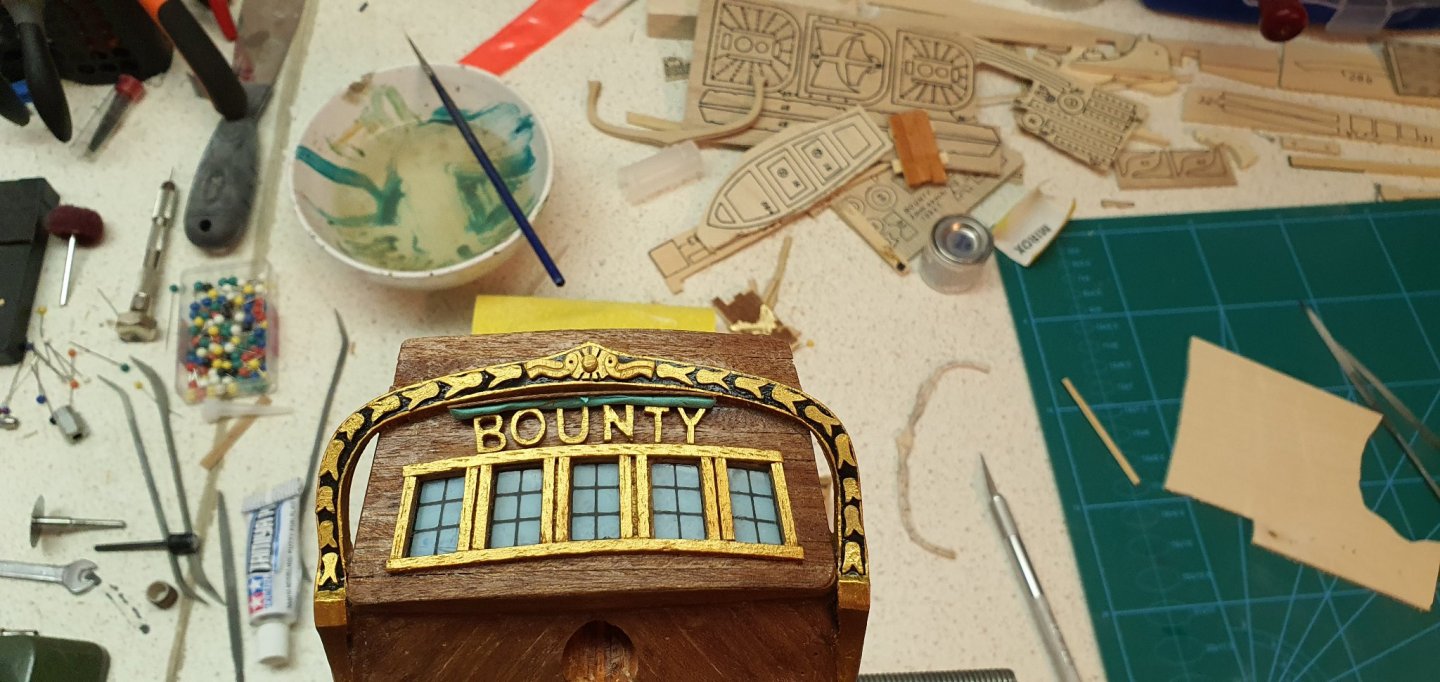
The weekend is over and it's back to building. Nice weather weary often end up in working in the garden or at the cabin. I've been working with where to place the Bounty name and size. Tried under, but it is very small and than I cut some out in wood and placed over, but I think it is to bulky. Any suggestion out there? The letters also didn't turn out to good. I need to do some more thinking and trying. Instead I finished the side windows and glued them on. That was a more pleasant experience.

-
Thanks, yes it helped. Looking forward to see your progress. Will take notes.
-
Since this is one layer-plank on frame, what do you use for filling in small gaps? Do you glue the side of each plank to the one already there on the frame or just to the frame it self? I cheated a lot on mine, so I try to learn
-
Finished all the small parts and glued everything on. My next build I will do decoration differently, but compared to what the kit had (nothing) I'm happy. So the next action will be making the name BOUNTY. I've seen two variations; bellow and above the window. I think I will go for above, but will do some printing and see which version is "best". I see that McKay in his book has placed the name bellow the window and the Bounty replica has it above.

-
HMS Bounty by AdamA - 1:48
Trond replied to AdamA's topic in - Build logs for subjects built 1751 - 1800
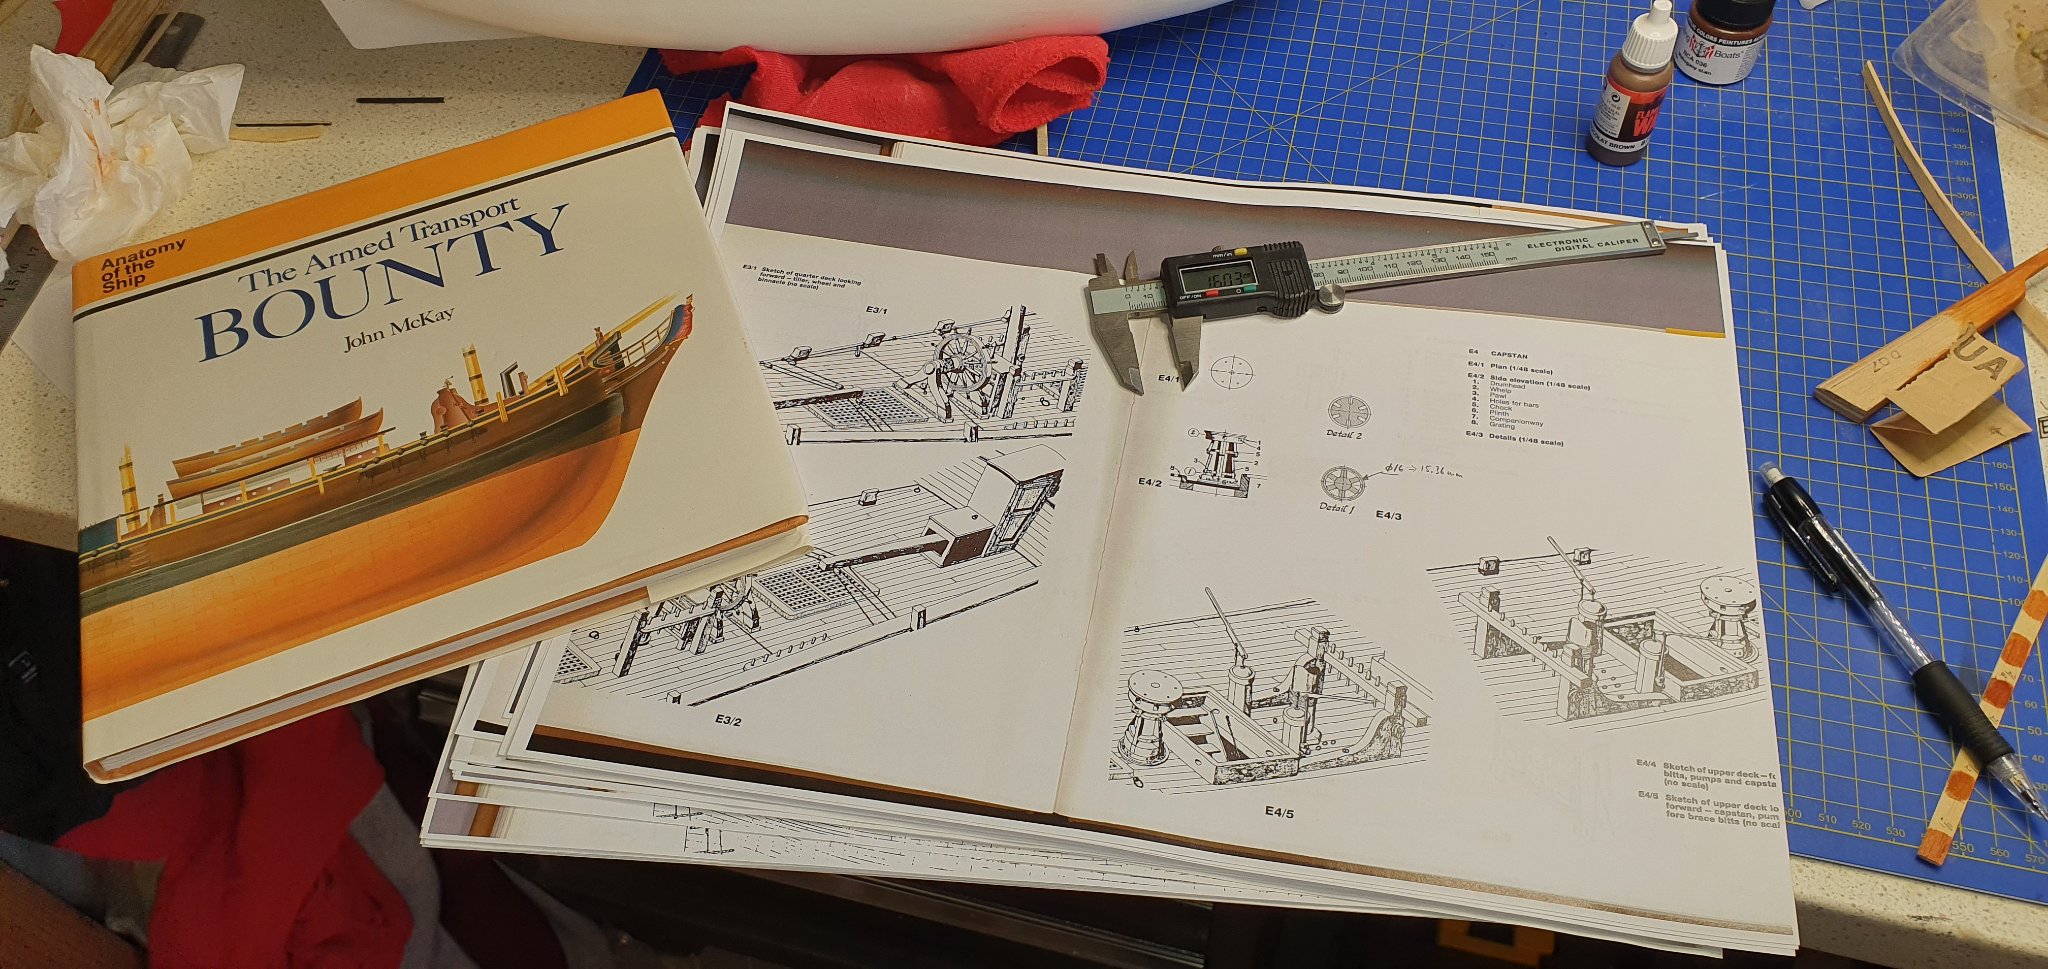
You are doing a great job. It look fantastic. I'm on my first time building a ship and also have the McKay book for reference on my kit build, so it will be of great interest to follow your work on scratch build of the Bounty. Did you copy the drawings from the book or did you buy the drawing separate from the book? -
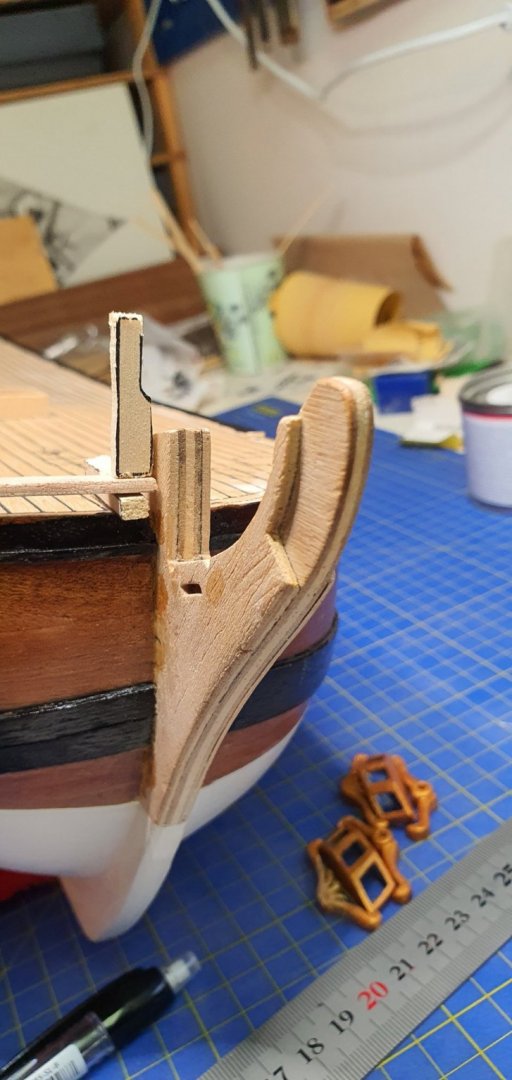
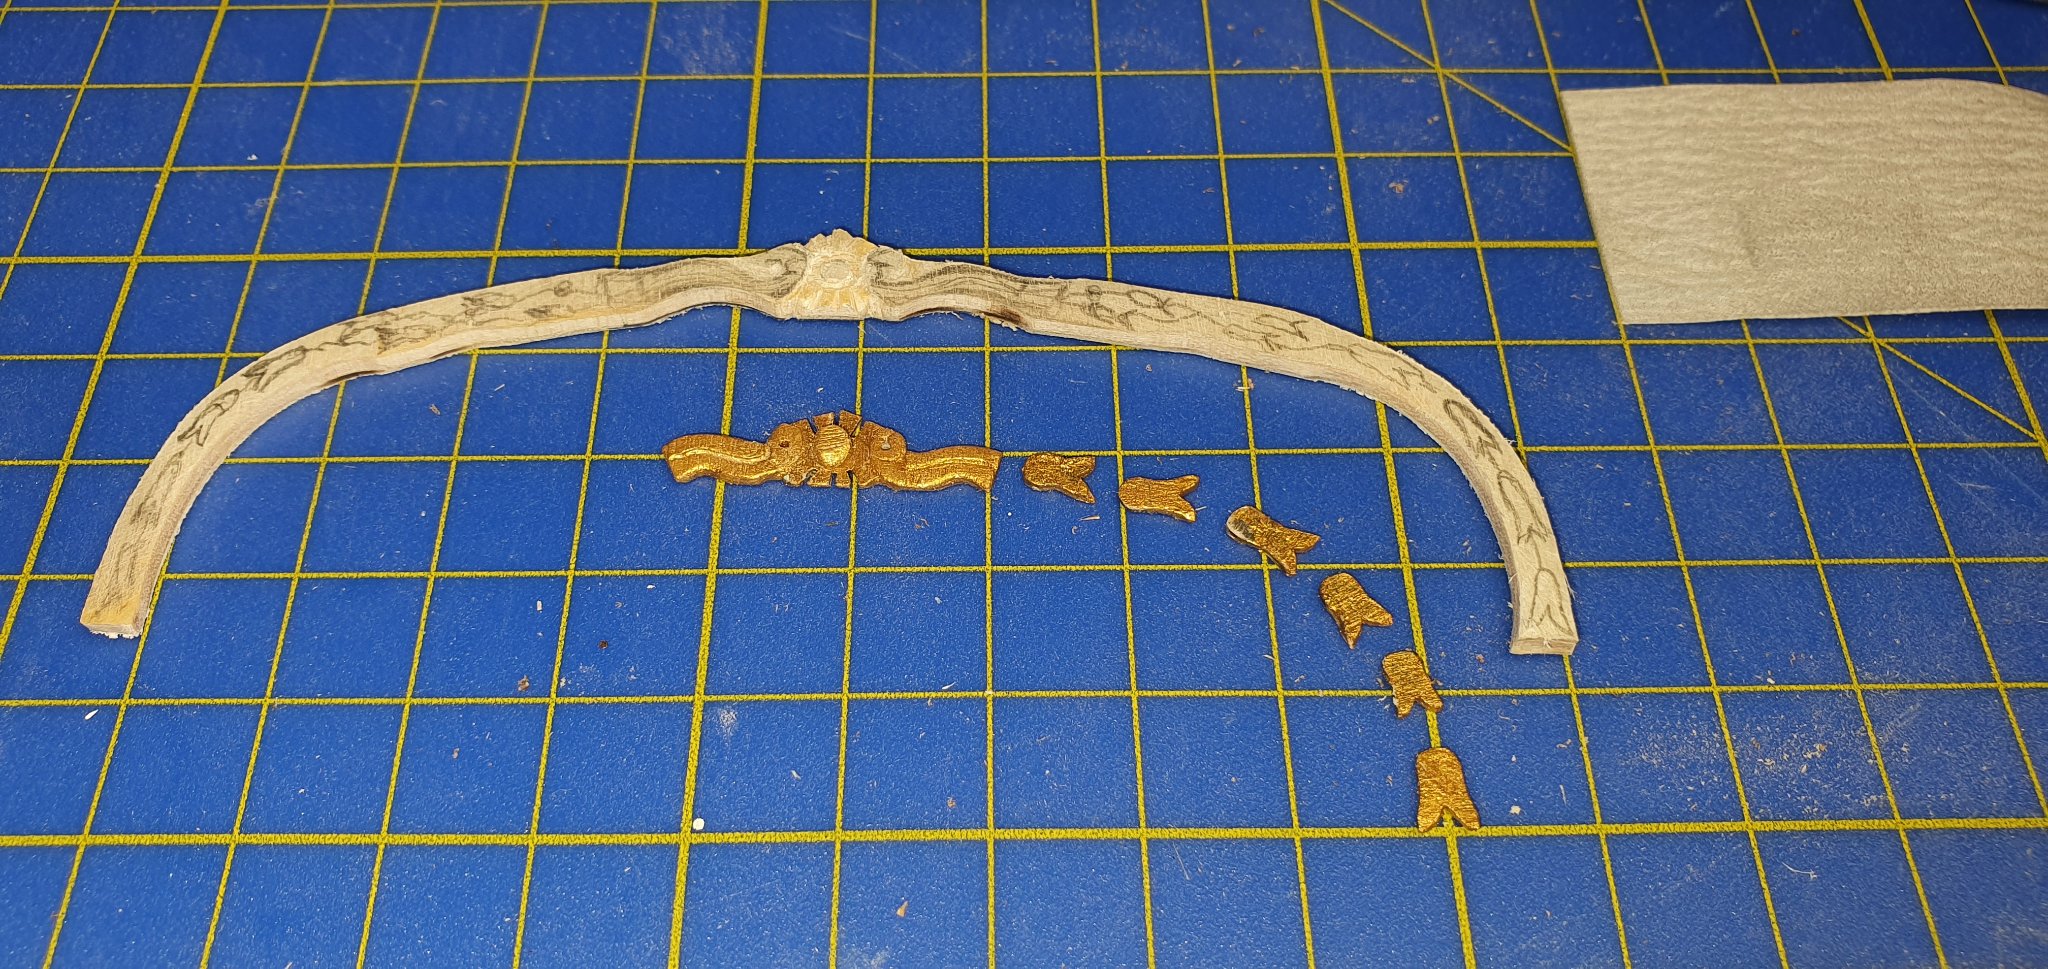
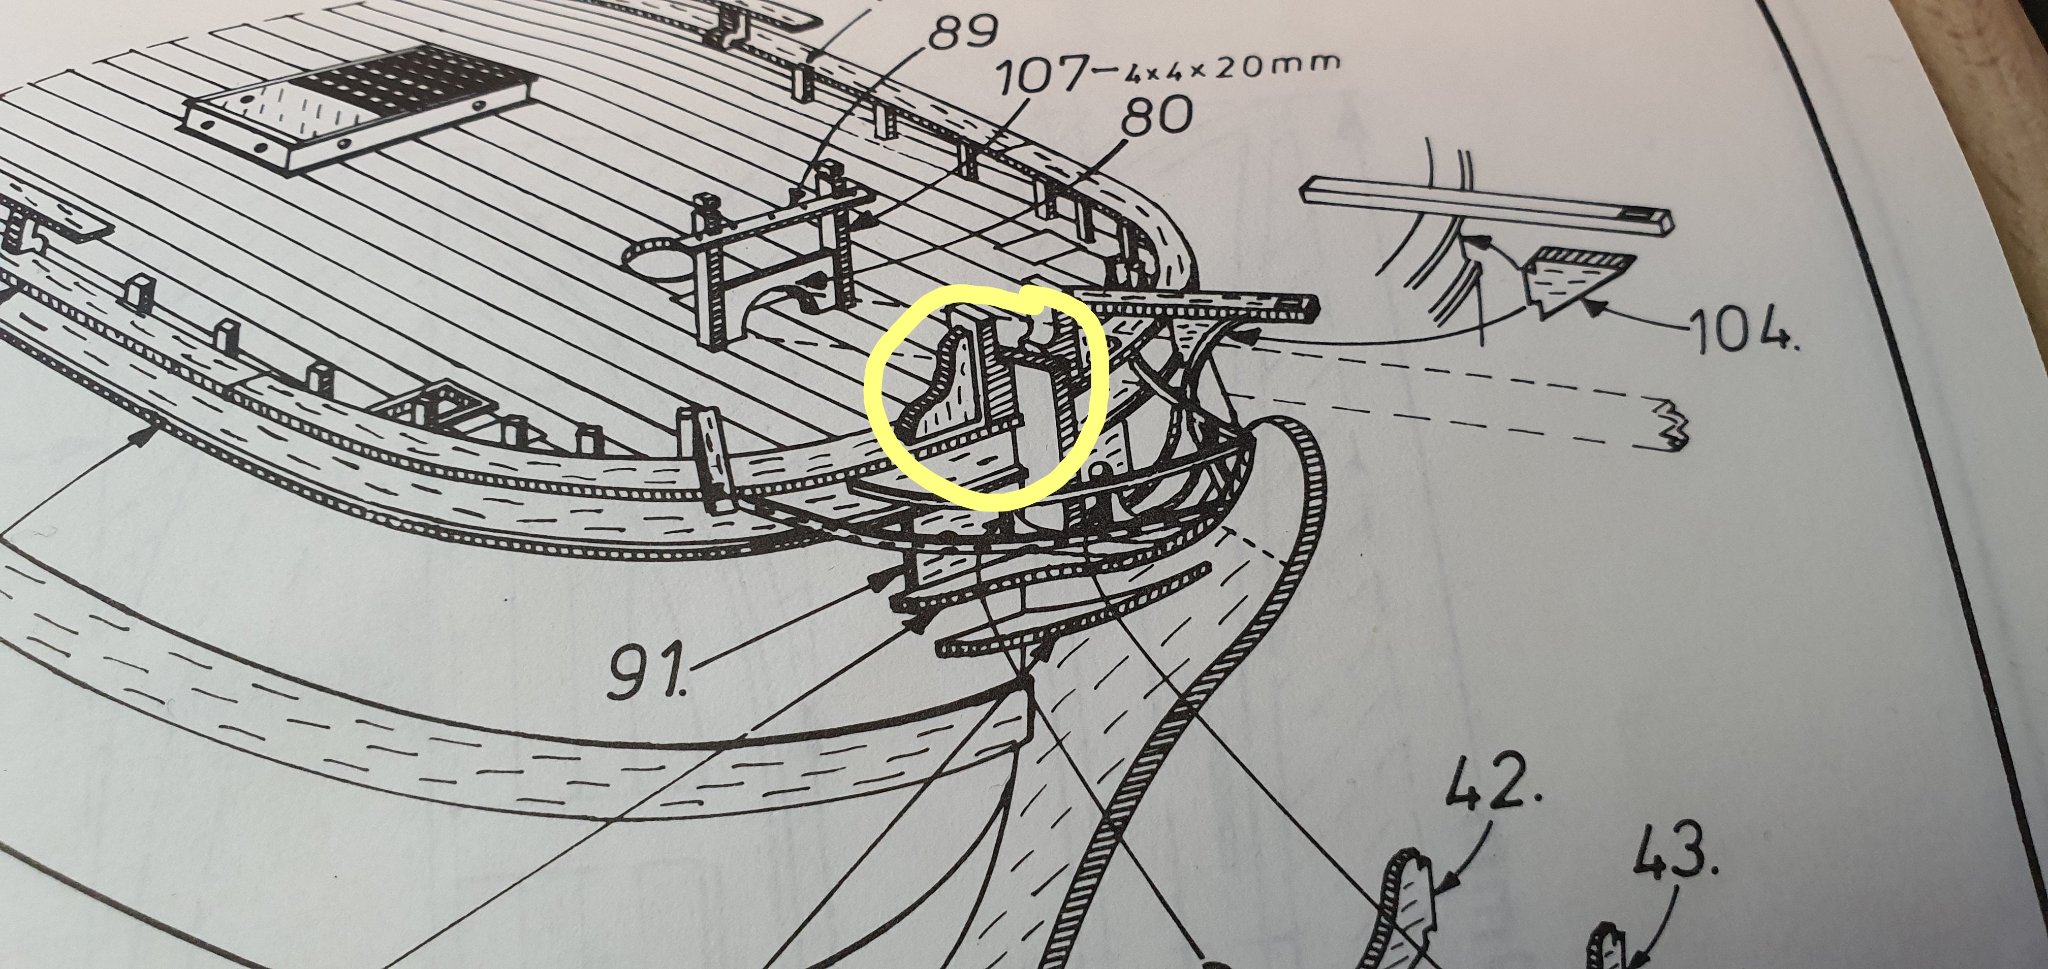
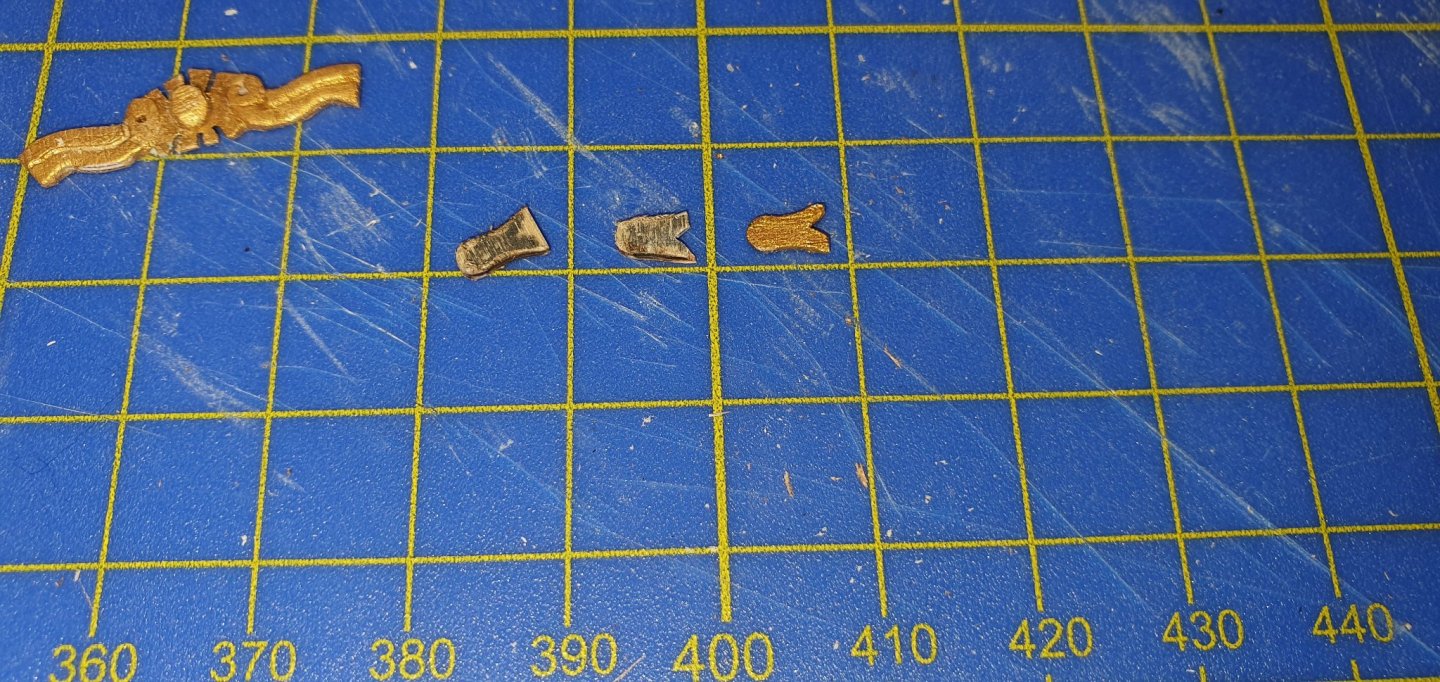
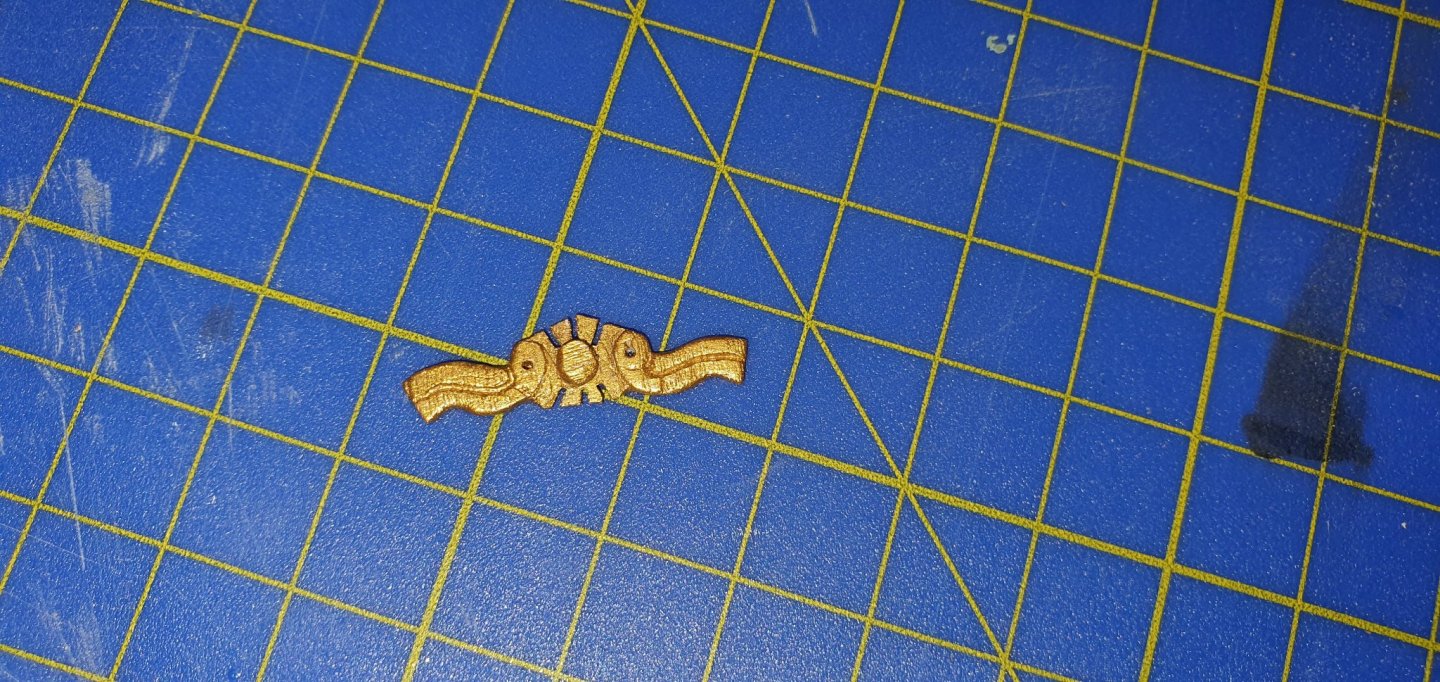
Did some more test on decoration and how to do it. But first I painted the aft beam where decoration will be glued on. I continued with black and gold. I decided on a tulip shape and I think it will work. First I made some rough drawings on thin box wood plate and cut it out. Than it was sanding and filing. Lost on during painting. Holding it to hard with twicer and it pop out and landed somewhere in the room. These pieces are small. Here you see my plan for installing it on the ship. I don't know if I need some kind of "tread" binding the pieces together or if it will look ok. Any suggestion? Only problem is how to do it. So I will continue with make pieces for the other side and use some sticky past (in Norwegian it is called teacher glue) and try it on.


-
Thanks Dave, Always nice with a visit and some feedback. So far it looks like the Bounty book is good regarding rigging, but will see when I get there. One thing is for sure it is a million times better then the instruction/drawing in the kit. I also got good help on the forum for helping me out on some question regarding understanding the rigging tables. I think the Armed transport Bounty in combination with Masting and rigging by Harold Underhill and Steel's elements of mastmaking, sailmaking and rigging should pull me through a good rigging of the ship. Now I only need to read through them 🧐. I've started, but there is a lot of information, going forth and back to understand how a ship is build and works. Getting there slowly. I just watched Master & Commander: The Far Side of the World with Russel Crowe and I defiantly saw the movie in a new perspective after have learn more about ships and how they work. The book you suggested will be on my list down the road, but first need to go through my other books.
-
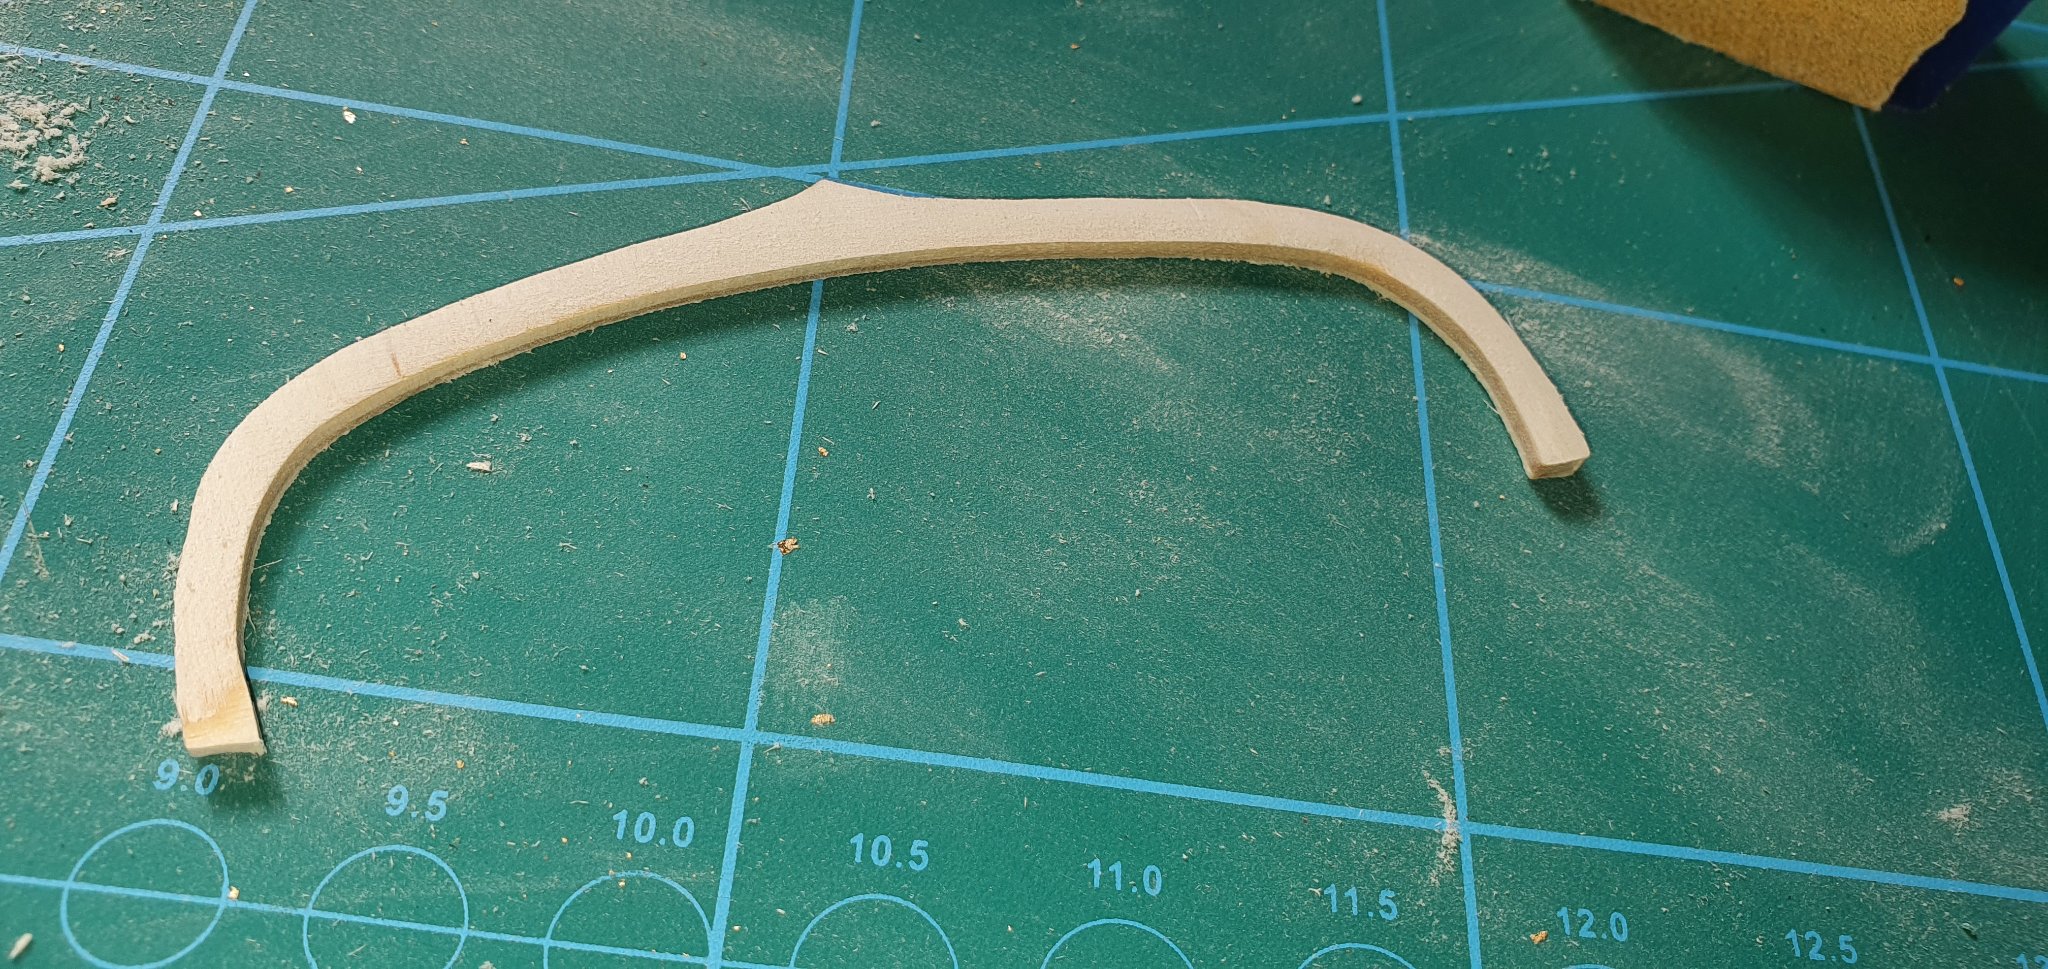
Tried something new, made a copy of the middle section onto paper and cut out a piece from some left over pieces in the kit. Then it was back to cutting, filing and sanding. and some paint. This was first part. Know I need to figure out the rest of the decoration. Maybe some lilies or tulips. When one work with this, one understand the amount of time, practice and skill it takes to be good and amazing to look at the ones here in the forum that has this skill.

-
This is just pleasing for the eyes to look at.
- 185 replies
-
- 1
-

-
- queen anne barge
- Syren Ship Model Company
- (and 1 more)
-
Thanks Blue Ensign. I have gone forth and back between the pages in the book, but did not see that one. I guess that is the challenge of being new to the game. I even had to look up cleats to know what it was. Well I'm learning.
-
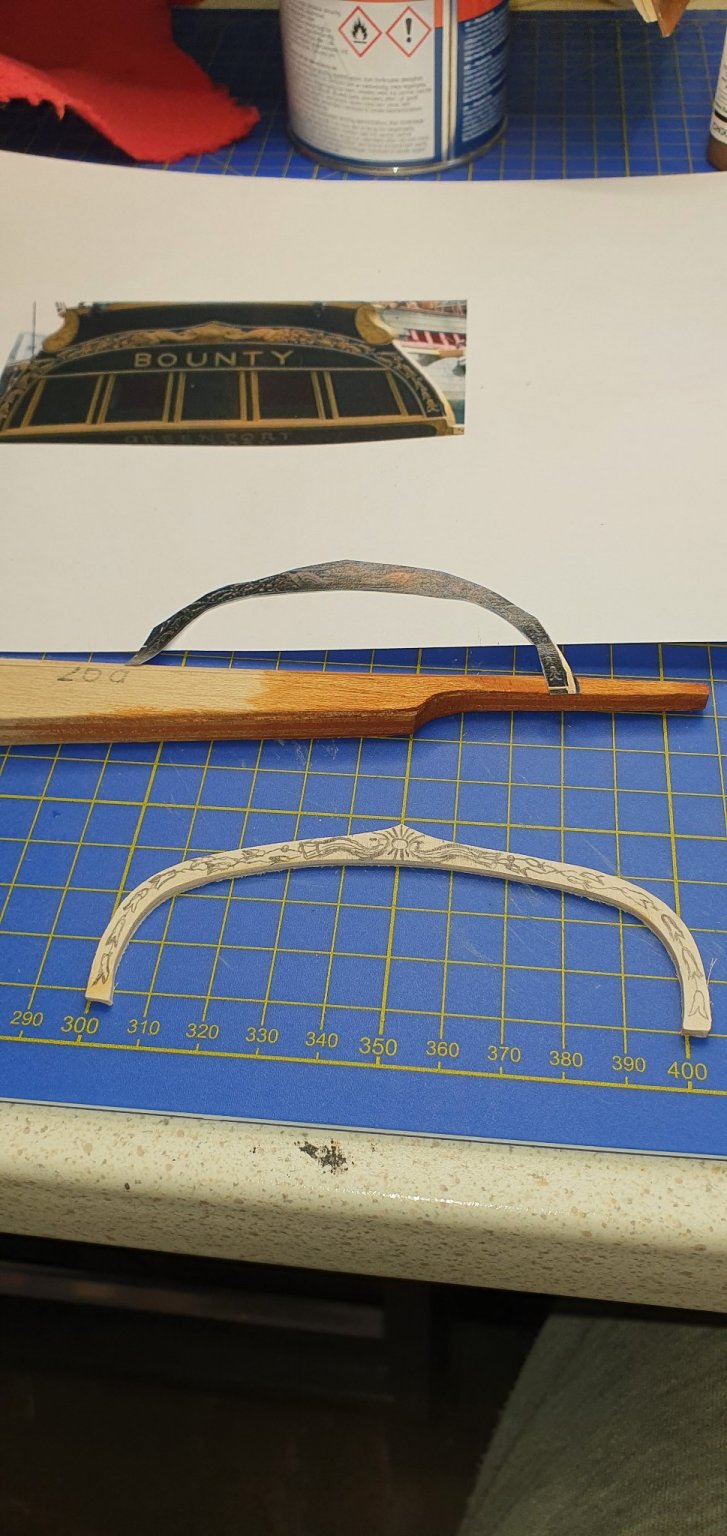
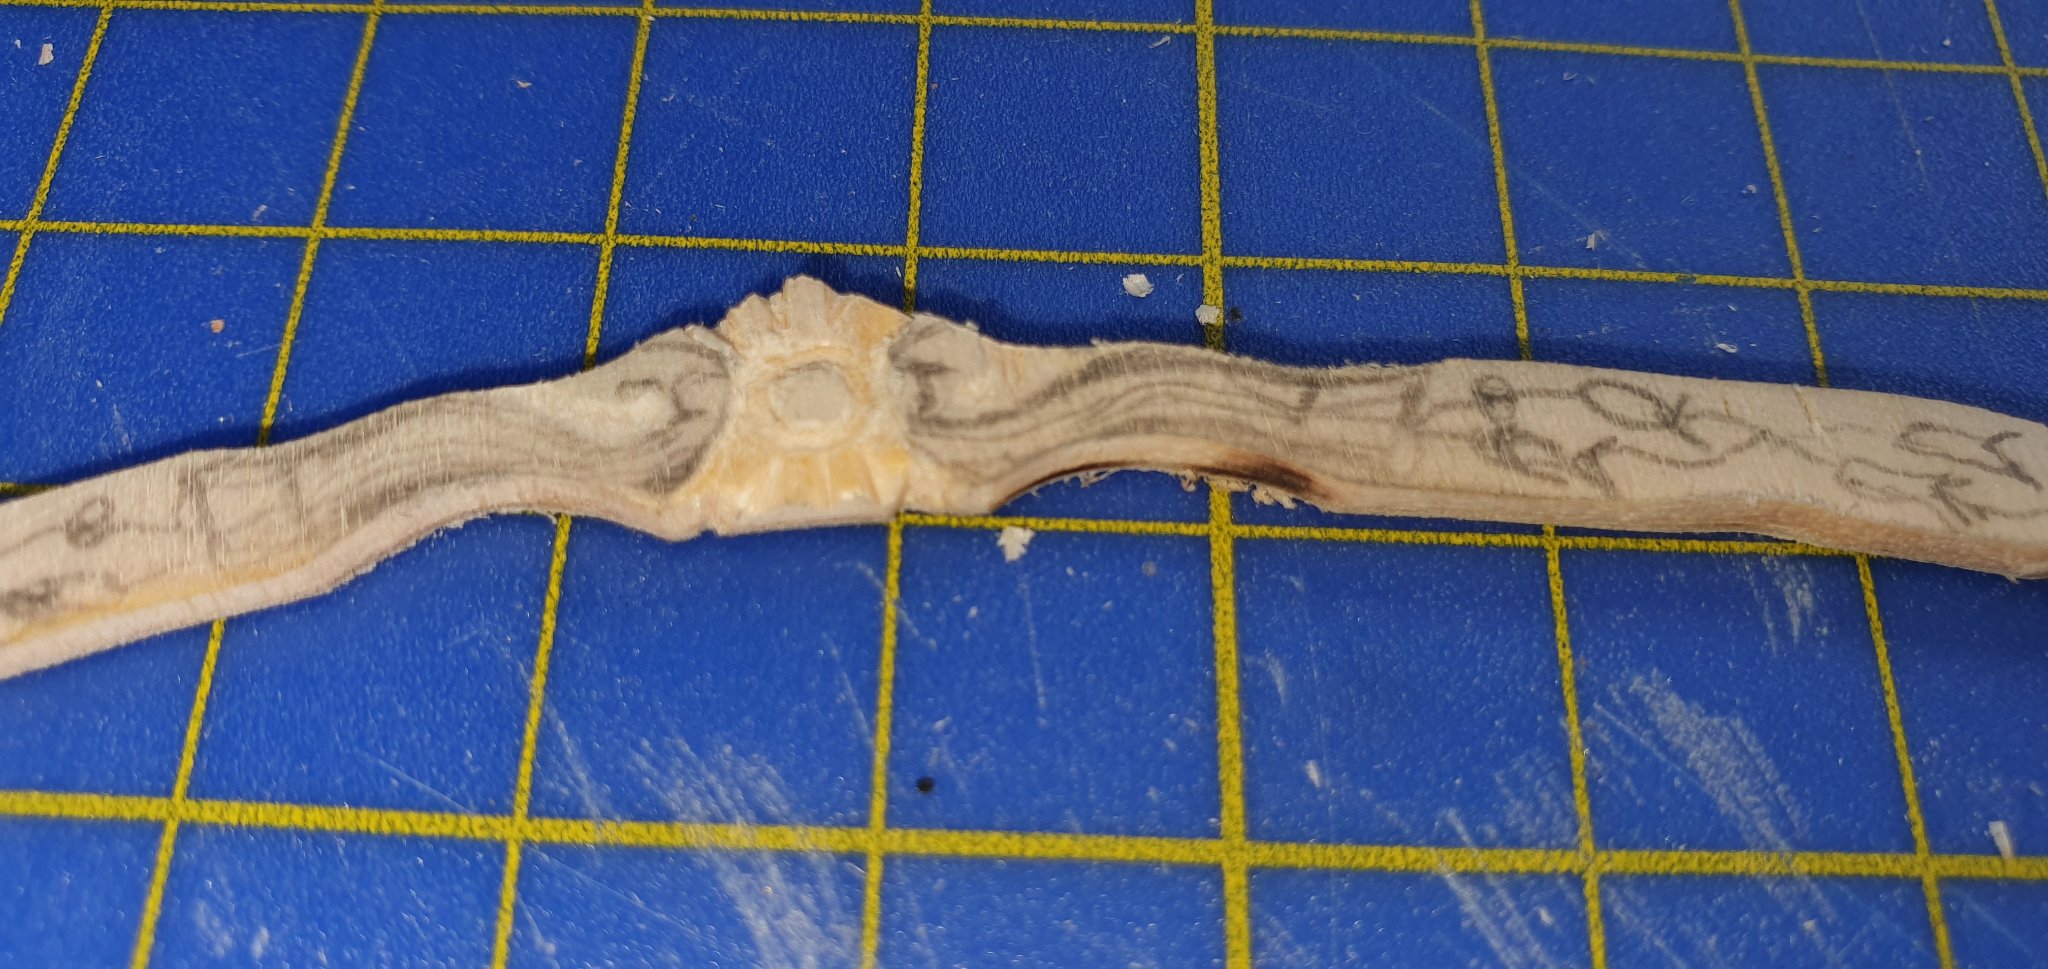
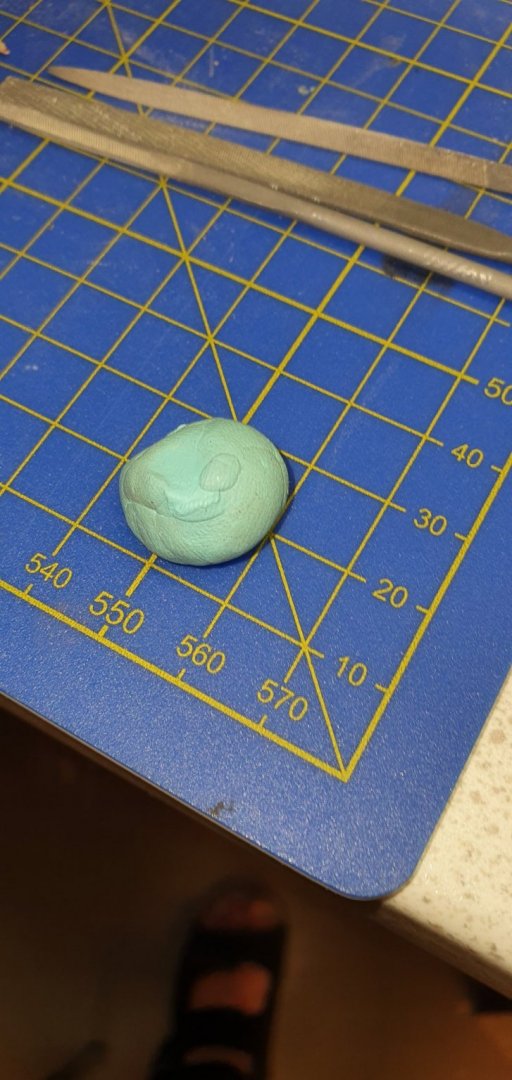
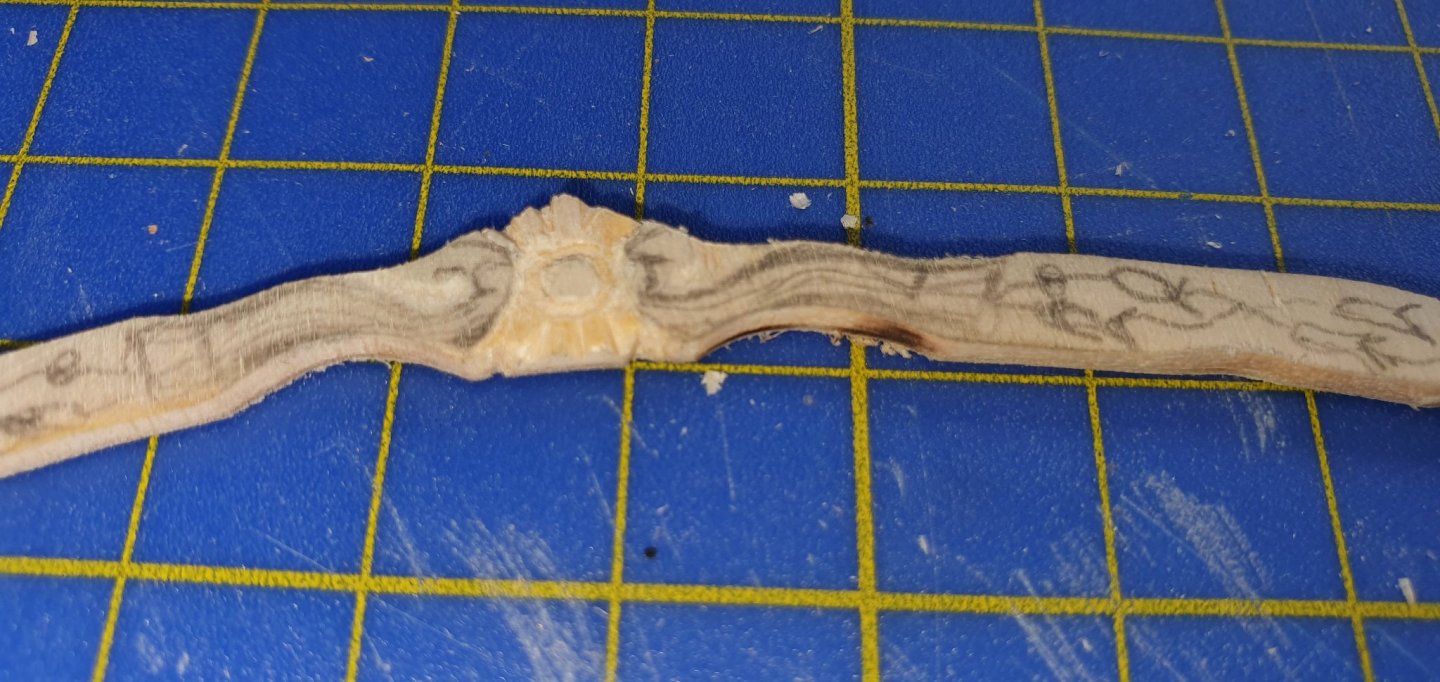
I put the question regarding interpretation of the table in a separate question under the Book forum, so hopefully someone can answer. Since the weather here was fantastic this weekend and all my time was outside I didn't get much done, but started trying to carve for the aft decoration. Started make a piece to carve in. The intention is to glue it on existing aft structure. Than I started to draw on the piece. Then started caving, but not easy. It is very small. I think I need to change tactic. Trial and error 🤨


-
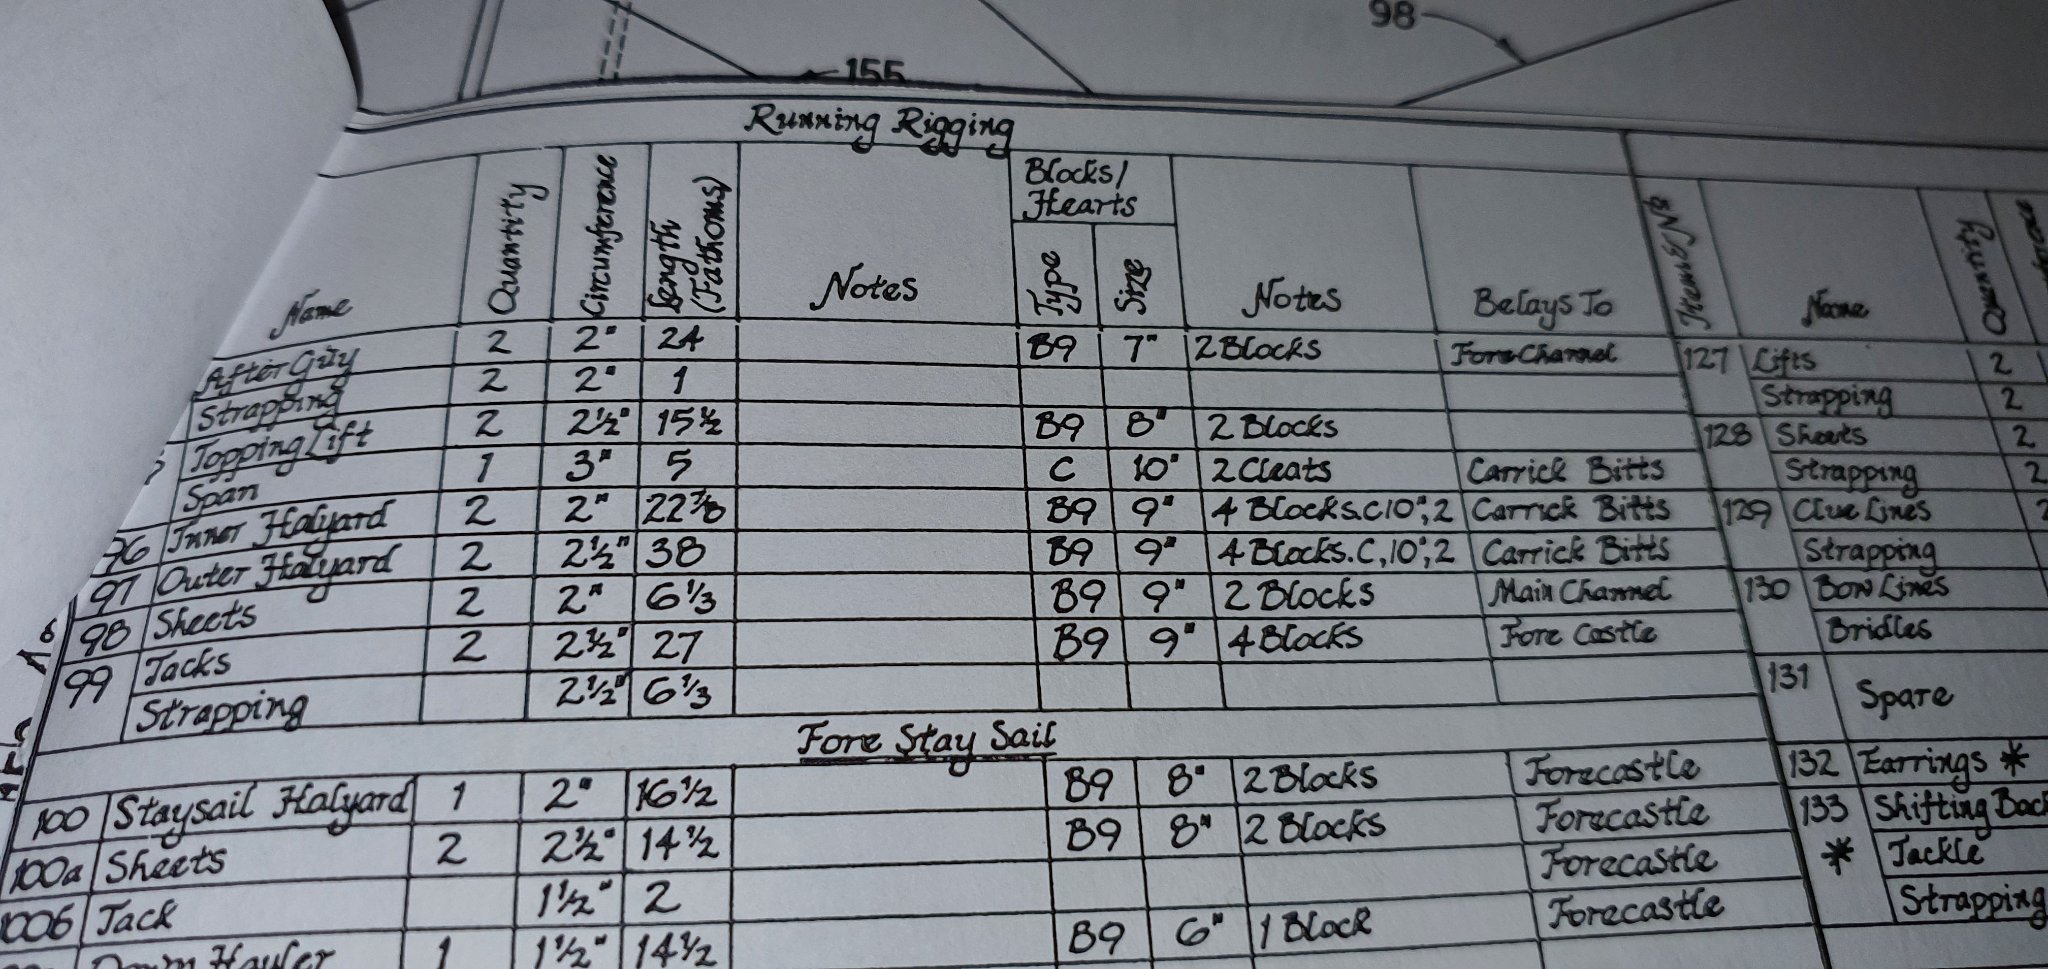
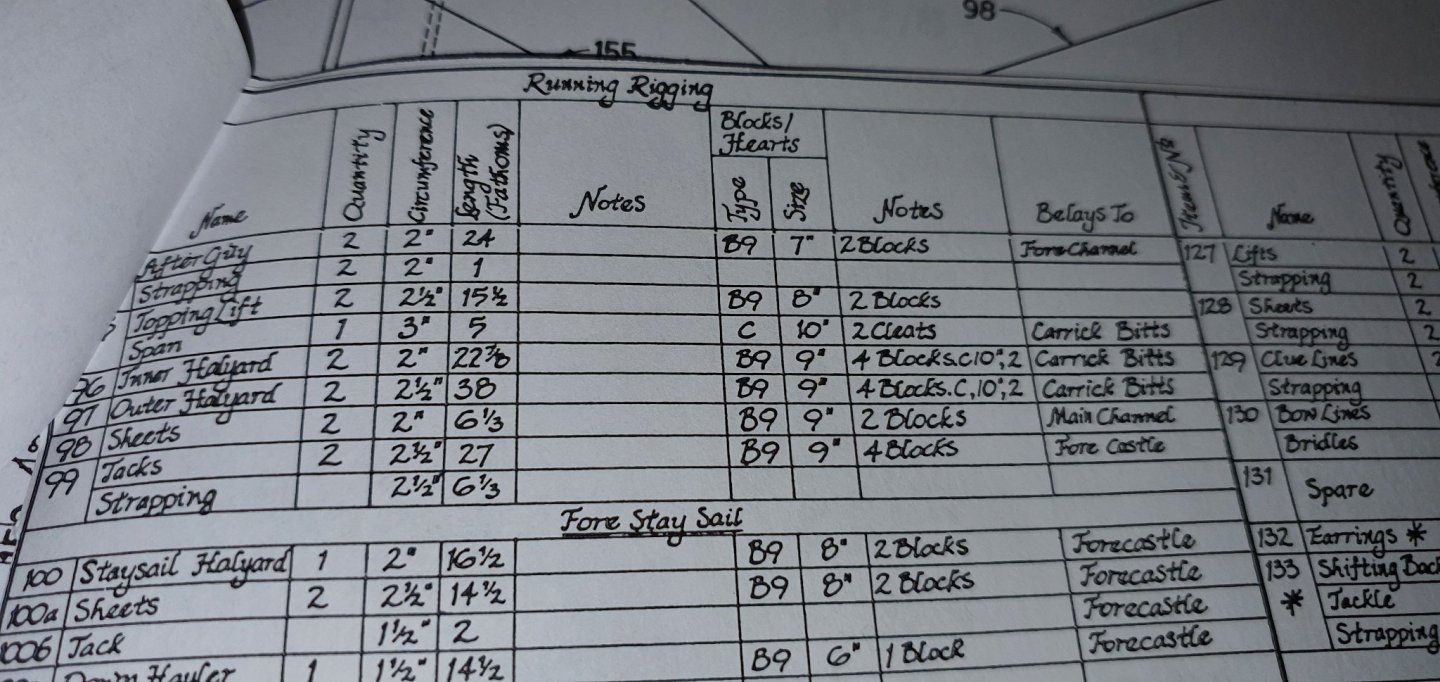
I bough the book The Armed Transport Bounty which has a lot of good detail for building the Bounty including a table over all rope sizes and blocks. In the table there are detail describing block size and type, but it is confusing to understand which type of block to use. In the beginning I thought H=heart (as you have picture of) and B=blocks, but then there was C, D? Also thought B9=9" block, but that was not correct. Hope someone with more understanding of ship building could explain how this works and what it means, so that I can try to build my Bounty as accurate as practical possible.

-
Yes it does. In the beginning I that the Letter was H=heart (as you have picture of) and B=blocks, but then there was C, D? Also thought B9=9" block, but that was not correct. So, I'm trying to understand.
-
I'm doing some reading in the Armed transporter Bounty looking at details. When I'm reading the list on 108-112 and looking at blocks it list up size which I understand and need to convert to 1:50 scale. The one I'm having problem is type of blocks. It list up B9, B12, C, D1, H. Can anybody tell what these codes mean? I will hopefully start drawing the carving for the aft during the weekend and try carving. We have nice weather outside and the wife expect a lot of work in the garden.
-
I would really appreciate if you guys could do that. Then I can print it out and use it as a template for the carving. I feel that the Bounty is missing something without some kind of decoration on the aft and I've been looking at some of the discussion on the forum on how to do carving. Love a new challenge
-
I see on picture/drawing of the Bounty there are carvings on the back. I tried to copy from the book, but it was no use. Does anybody know where it is possible to get drawing for carving that I can put on aft decoration?
-
What are you using for blackening? I that if one uses gunmetal it was something of an acid base(ish) chemical that changed the copper color over to black/dark blue color, or am I way of?
-
Been a week with little progress on the model after my blunder with the wales. And it does not help with tons of stuff to do at work. Well, last evening I went to my work office (got home office) and did some copying from my Bounty book. The kit is a combination of bad/missing instructions, wrong size on part or just missing parts. So i need to make a lot of the items on deck my self. I'll use the drawing from the book and calculate everything over to mm and a scale of 1/50, and write everything over onto the drawing. It is a lot of work, but do it in steps.

-
Thanks guys, Many good point. It is only a little confusion/what to do when one read all these tables with all those "20" rope sizes and one is 7mm and next i 7.89mm. So I will do some scale converting and see what is practical possible out from what is available and what I have.
-
Hi, Since I'm very green to ship building I've bought books on rigging and have been read forth and back on scale and sizes of blocks, deadeyes and rope. I'm building the Bounty and I have a book on Bounty where McKay list up many sizes of block, dead eyes and rope, which give me a very detailed information on rigging of the ship. My problem is there is a lot of different sizes and a lot of sizes have small difference between them. I haven't seen many finished ship and have little knowledge (so far) on correct sizes of blocks and deadeyes for the different ropes. I can easily see a difference between a nice block like Syren compared to a standard square block in the kit, but not if it was correct to use 5/32" or 3/16". So my question is do you notice if one use for example 3/16" block in places where the table say 5/32" and 1/4" block? and of course the blocks need to be correct.
-
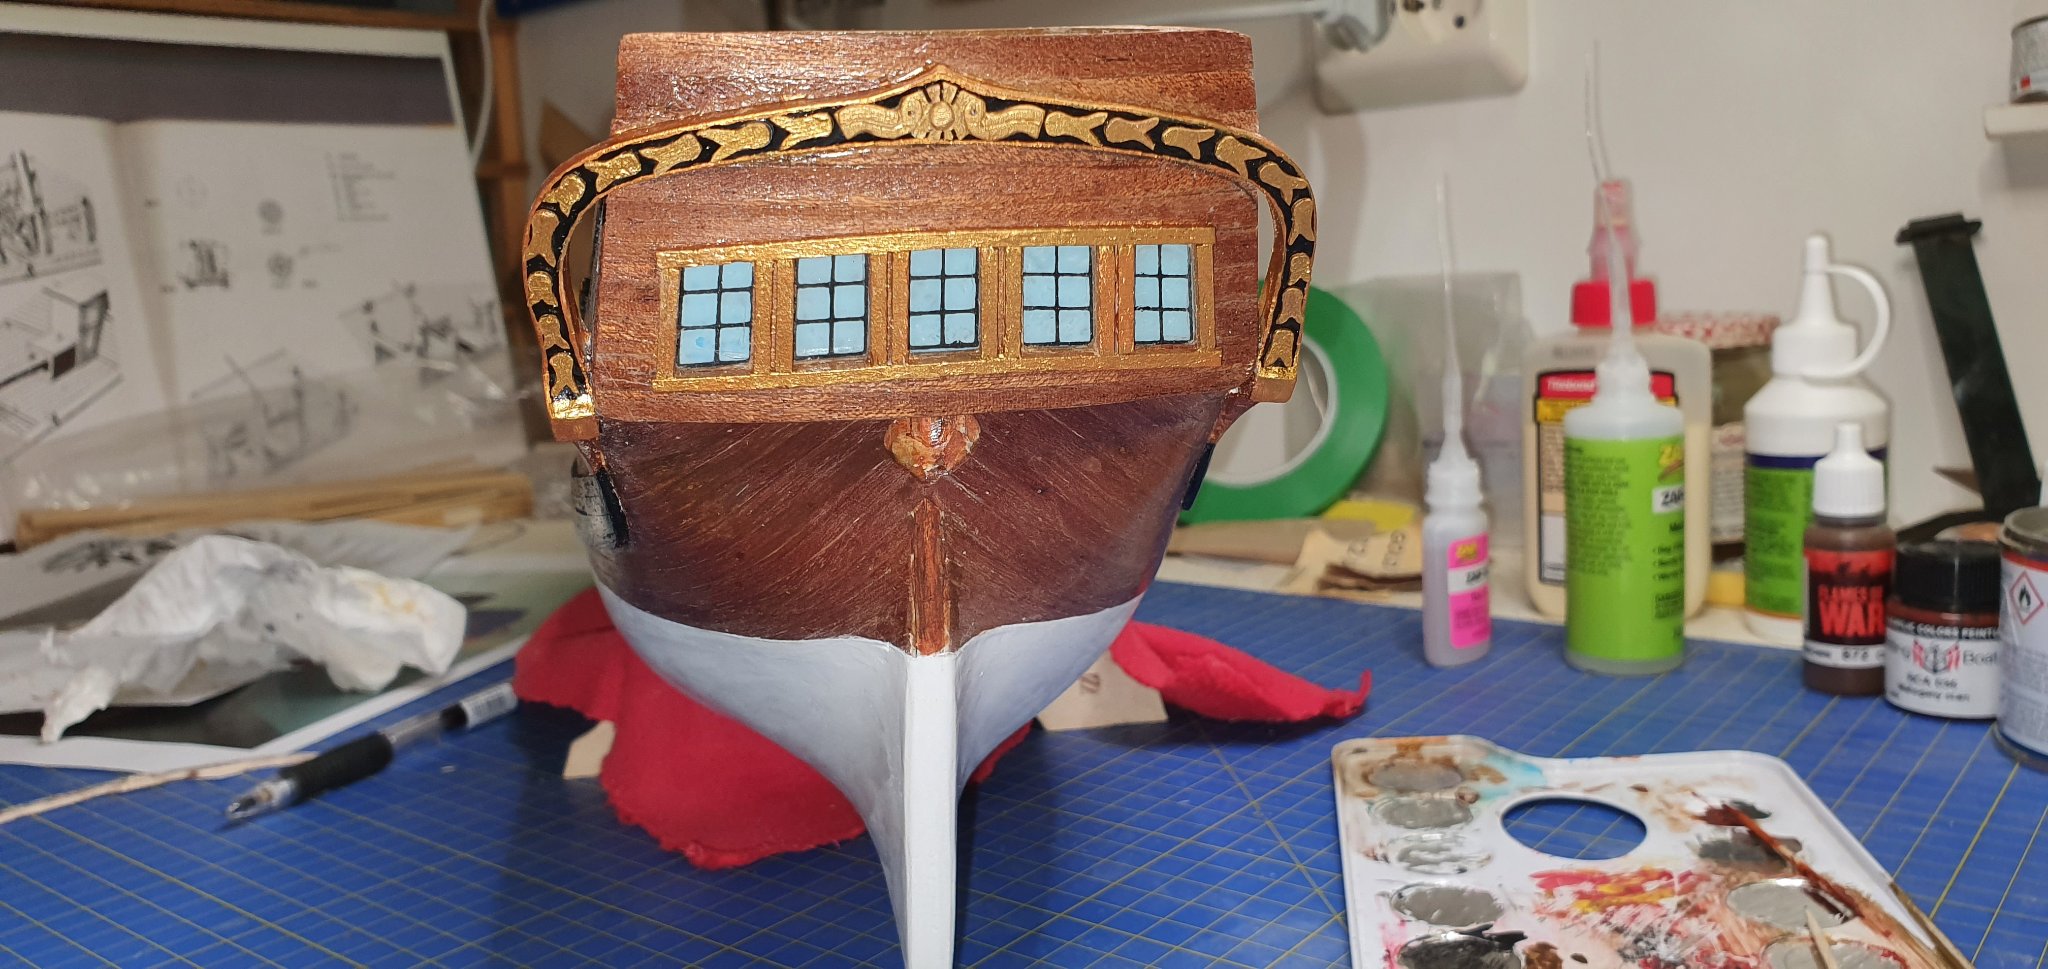
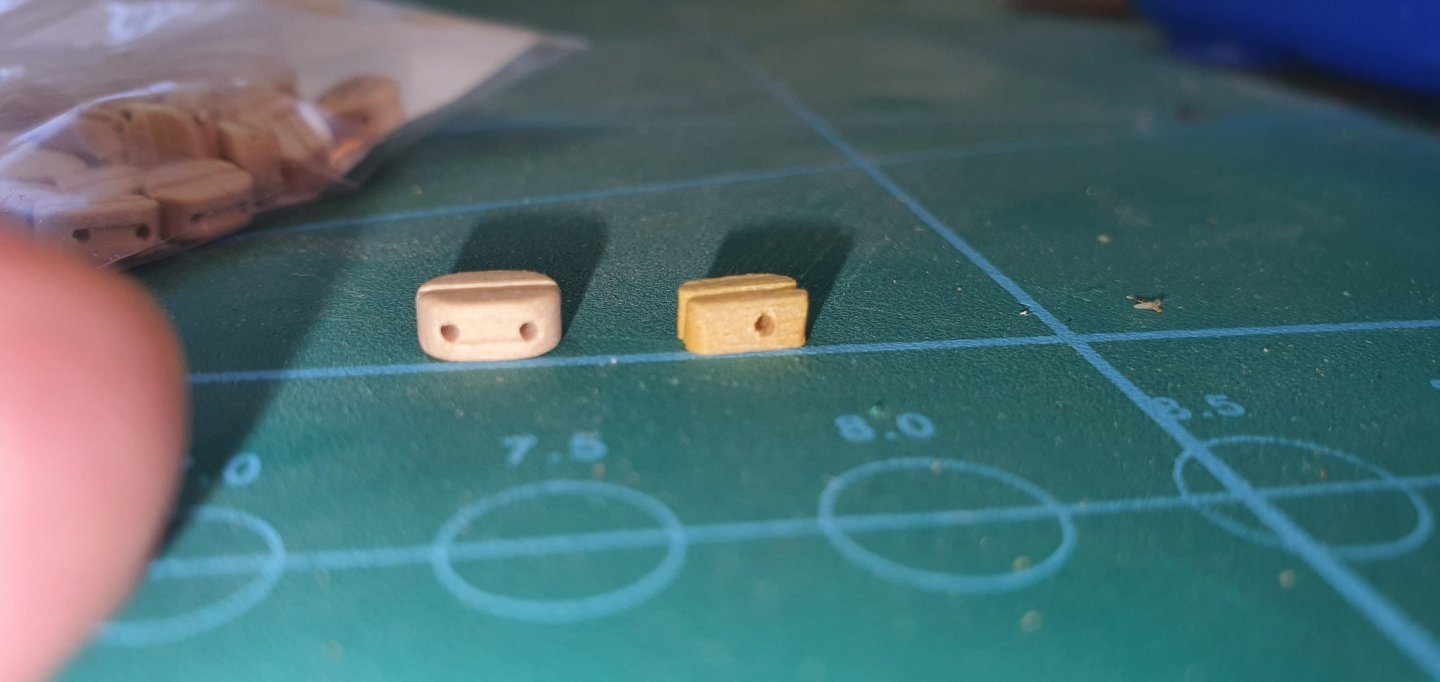
After cutting, scraping, sanding, gluing and painting I think I'm a little in forward since last time. It is way from perfect, but I'm happy. I have also changed some of the painting color. I made the top wale gold same as décor in the aft. I know it is a little difference from what McKay has in his book, but I was looking at a lot of different color combination on different models on the web and though this was a somethin I liked and hopefully not to far off. And also there are many other part of the model that is not according to McKay. I also received my blocks from Syren and they look way better than the one in the kit. I just have to decide on how far I want to take the detailing with different rope sizes and block sizes. When I look at builders like Thomas J. Lauria and other good builders I want to take it far, but I need to take it down many steps and get my feet planted down to earth. This is my first build and they have been doing this a very long time. So I'll most likely go with 3 or 4 block sizes, but need to do some more reading. Is there such as a "normal standard" for how many rope, blocks and Deadeye sizes one use on a1700-1800 model ship?

-
It is fantastic that more knowledge people here in the forums help us new to ship building (like me) with understanding ship/sailing terminology. Here is the link to Steel https://www.thenrg.org/resources/Documents/articles/TheArtOfRigging-Steel.pdf book with a lot of rig tables as Allanyed mentioned. What I found is that it is possible to get good books for building ship at low cost, by choosing electroical version ($8-15). Just need to check the different web pages (Ebay, Amazon, Biblio, Abebooks...).
-
Thanks Keith, My frustration only last a short time. When I've fixed it and I'm on track again everything is good. The more I read in my books about Bounty and rigging the more I understand and looking forward to be able to get the rest of the ship ok.
-
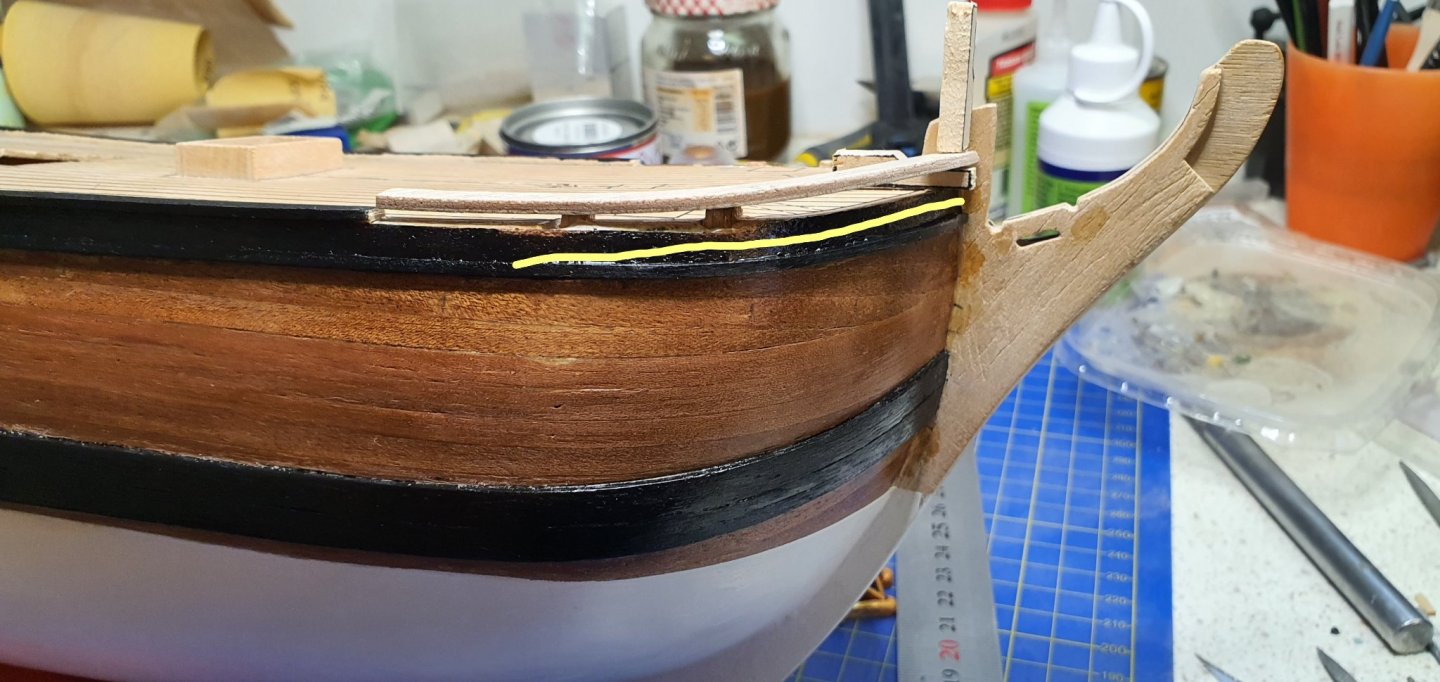
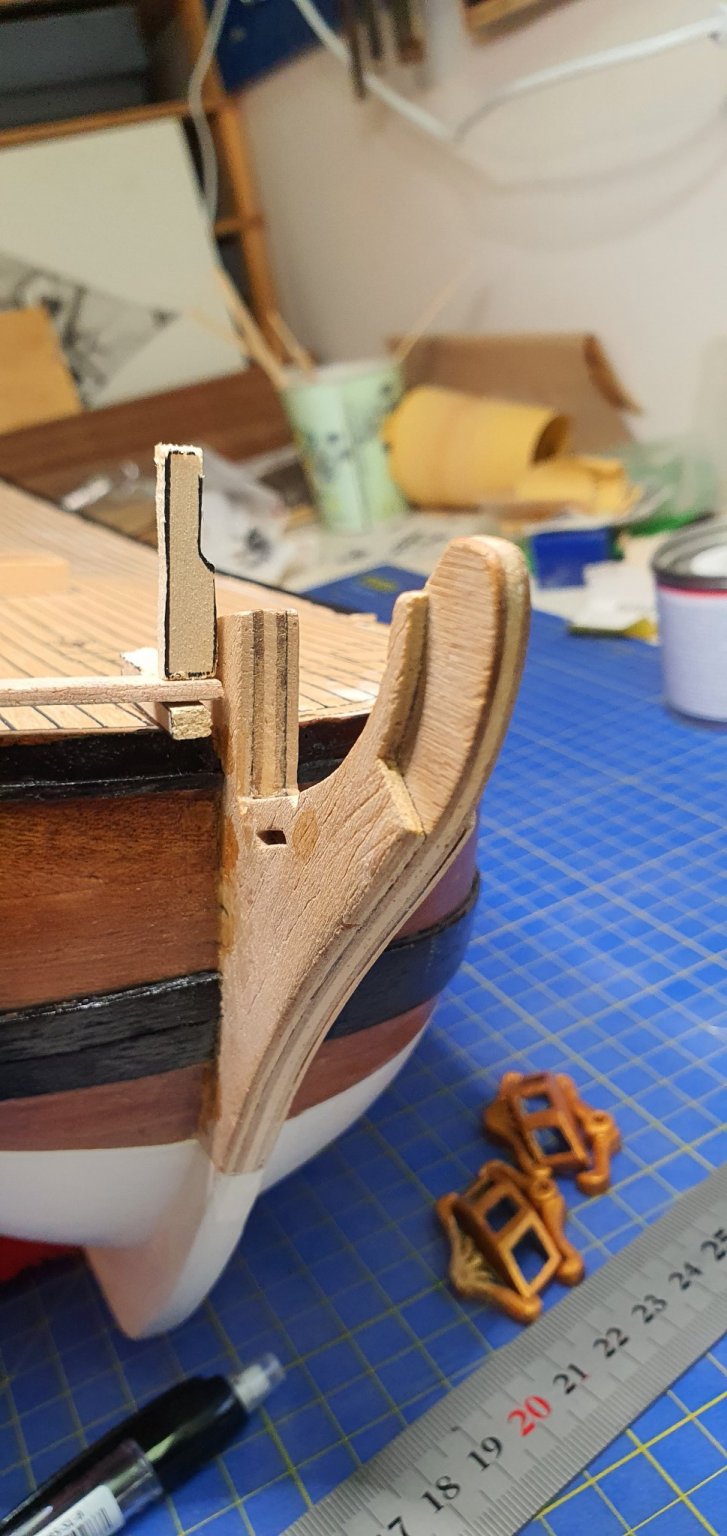
Found a serious mistake during my last build. Due to confusing drawings/instruction I didn't see that the top wale is to follow the outer front deck plank. So then I first I have to figure out how high the outer plank is to be. Since there are some mismatch on instruction, drawing and part. Nothing is glued, just laid out for showing the situation. The plank is also wrong dimension due to to small drawings, so I will have to make some new. The part size is way of. When measuring on drawing there is a mismatch with instruction, so I'm a LITTLE frustrated. When I have put together the top plank, I will need to cut away the necessary length of the wale, scape of paint, glue on new wale and paint it. I feel sometimes that i take 3 step forth and than 2 back. This was done before I got the Bounty book and I will defiantly use the book all the time from now onward. Learning: read everything at least twice and stop up and think if everything is correct before acting. 😉