Barbossa
-
Posts
509 -
Joined
-
Last visited
Content Type
Profiles
Forums
Gallery
Events
Everything posted by Barbossa
-
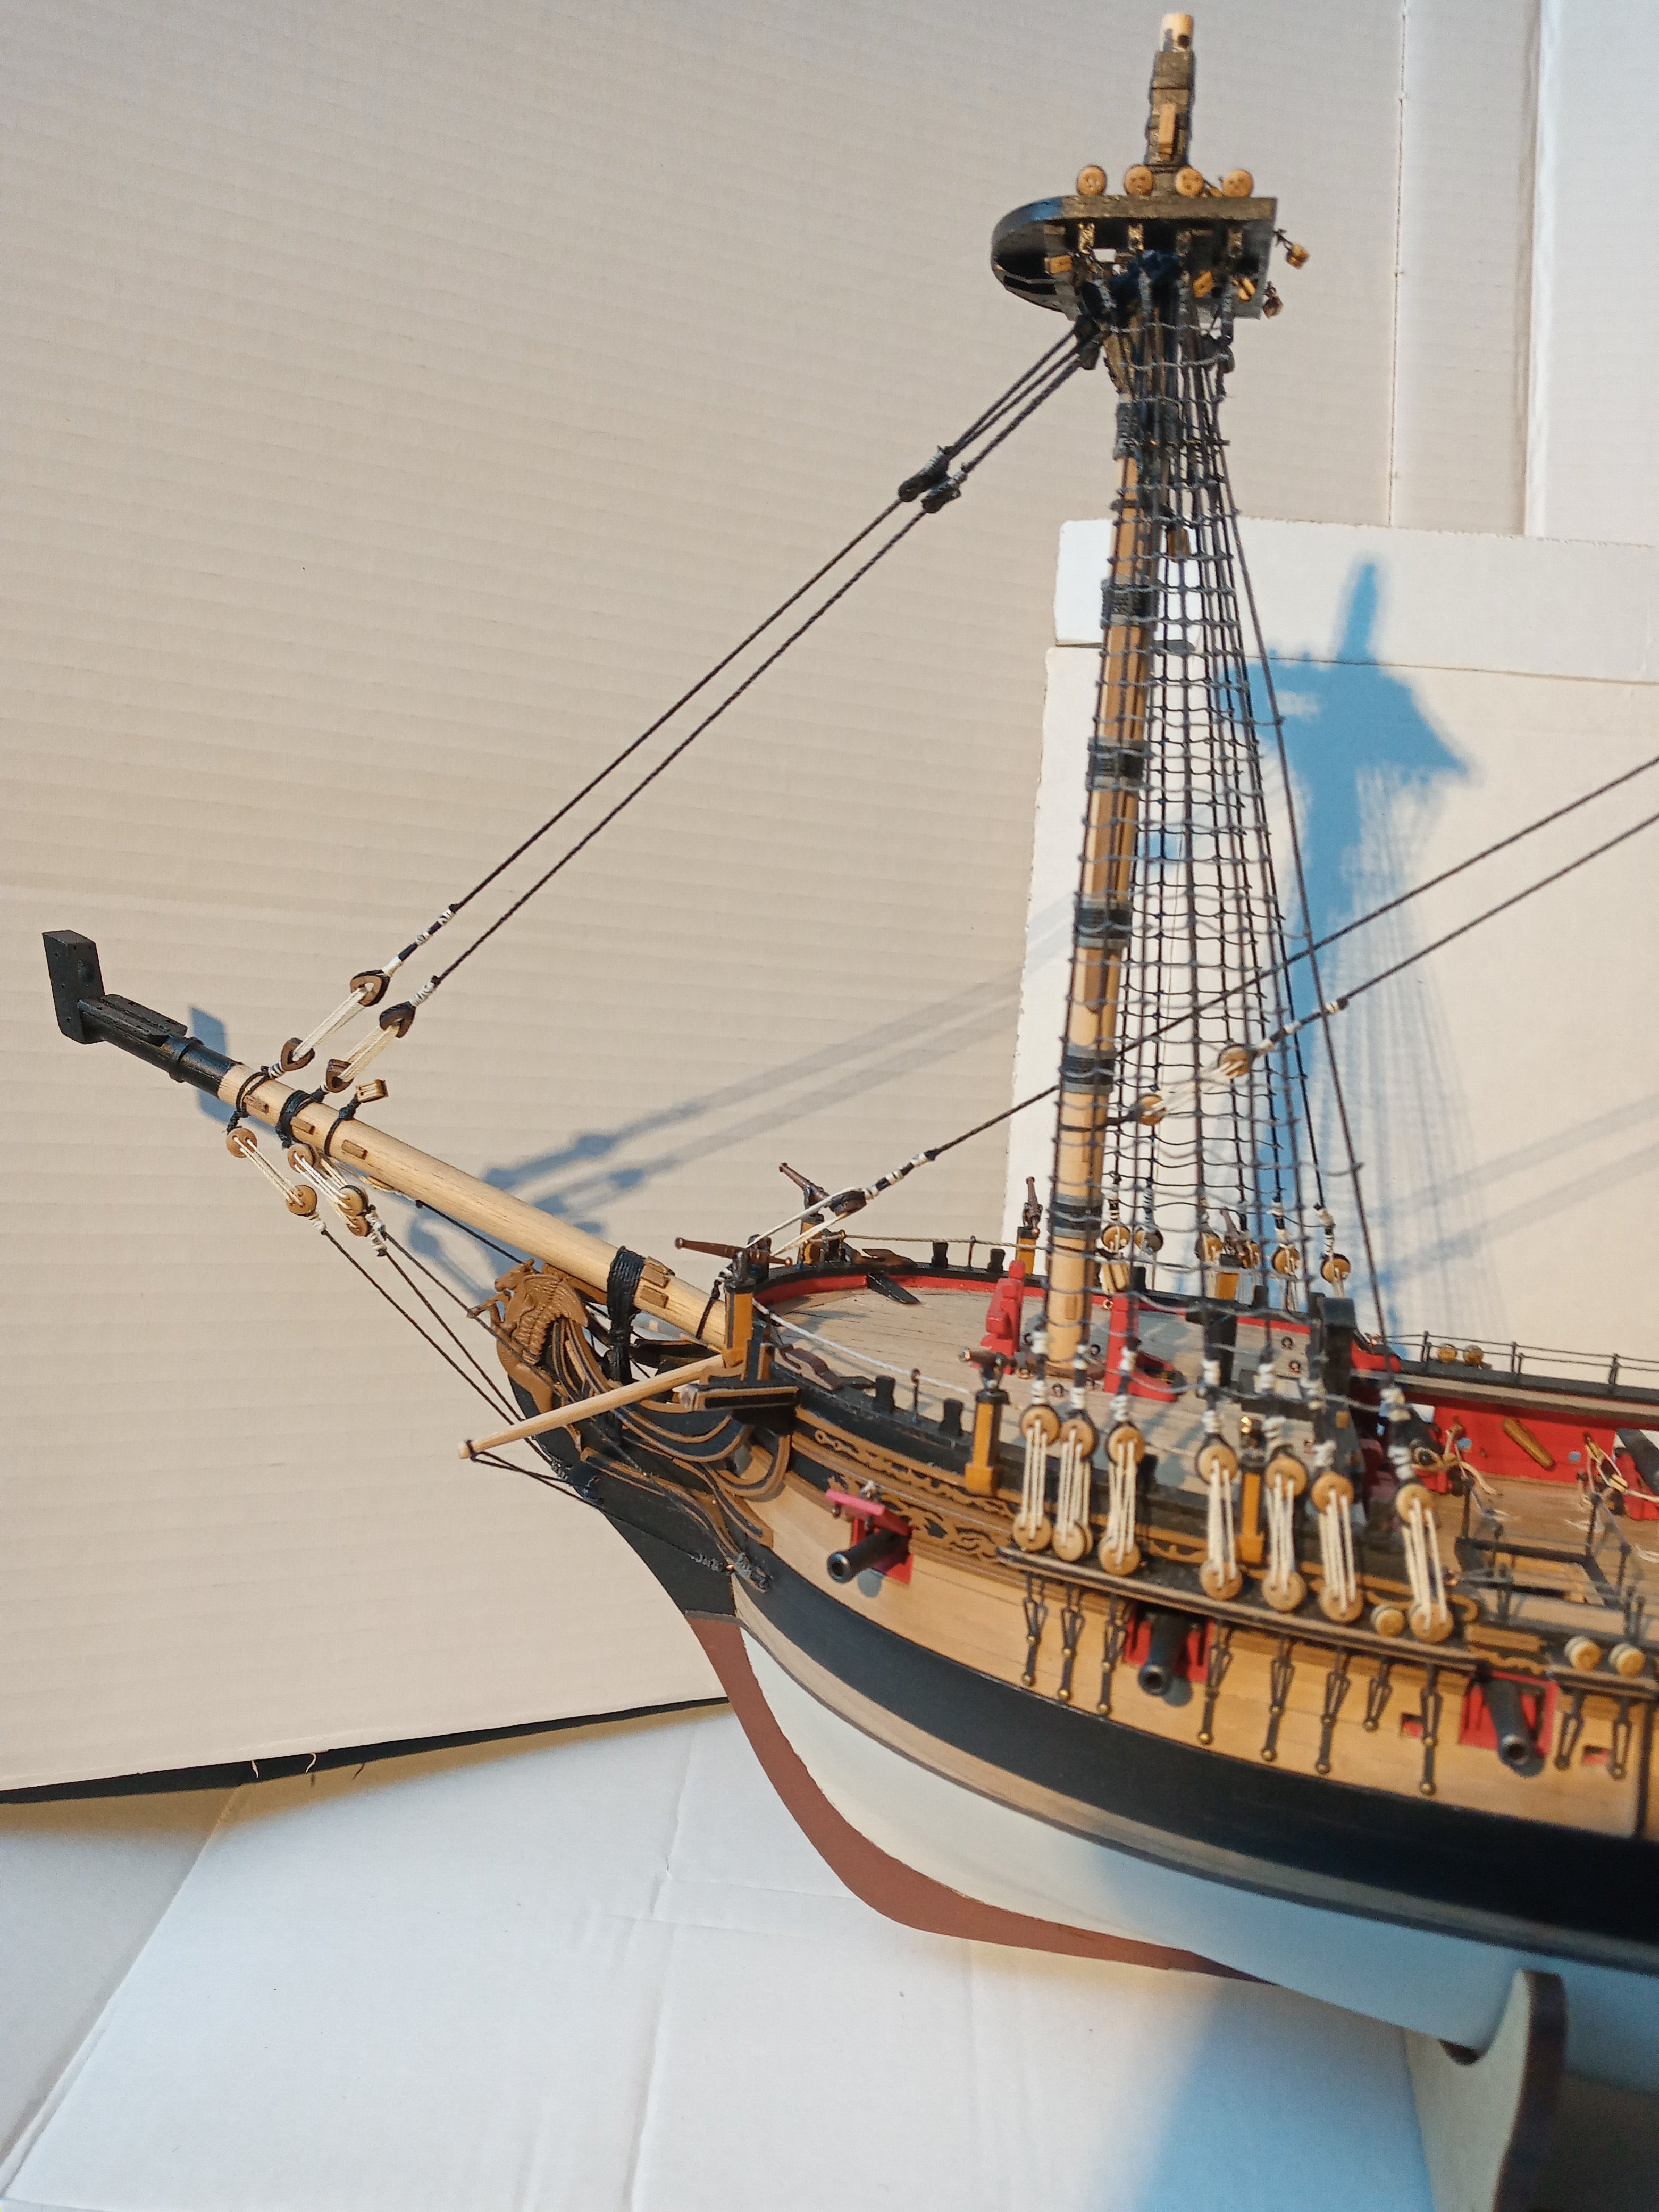
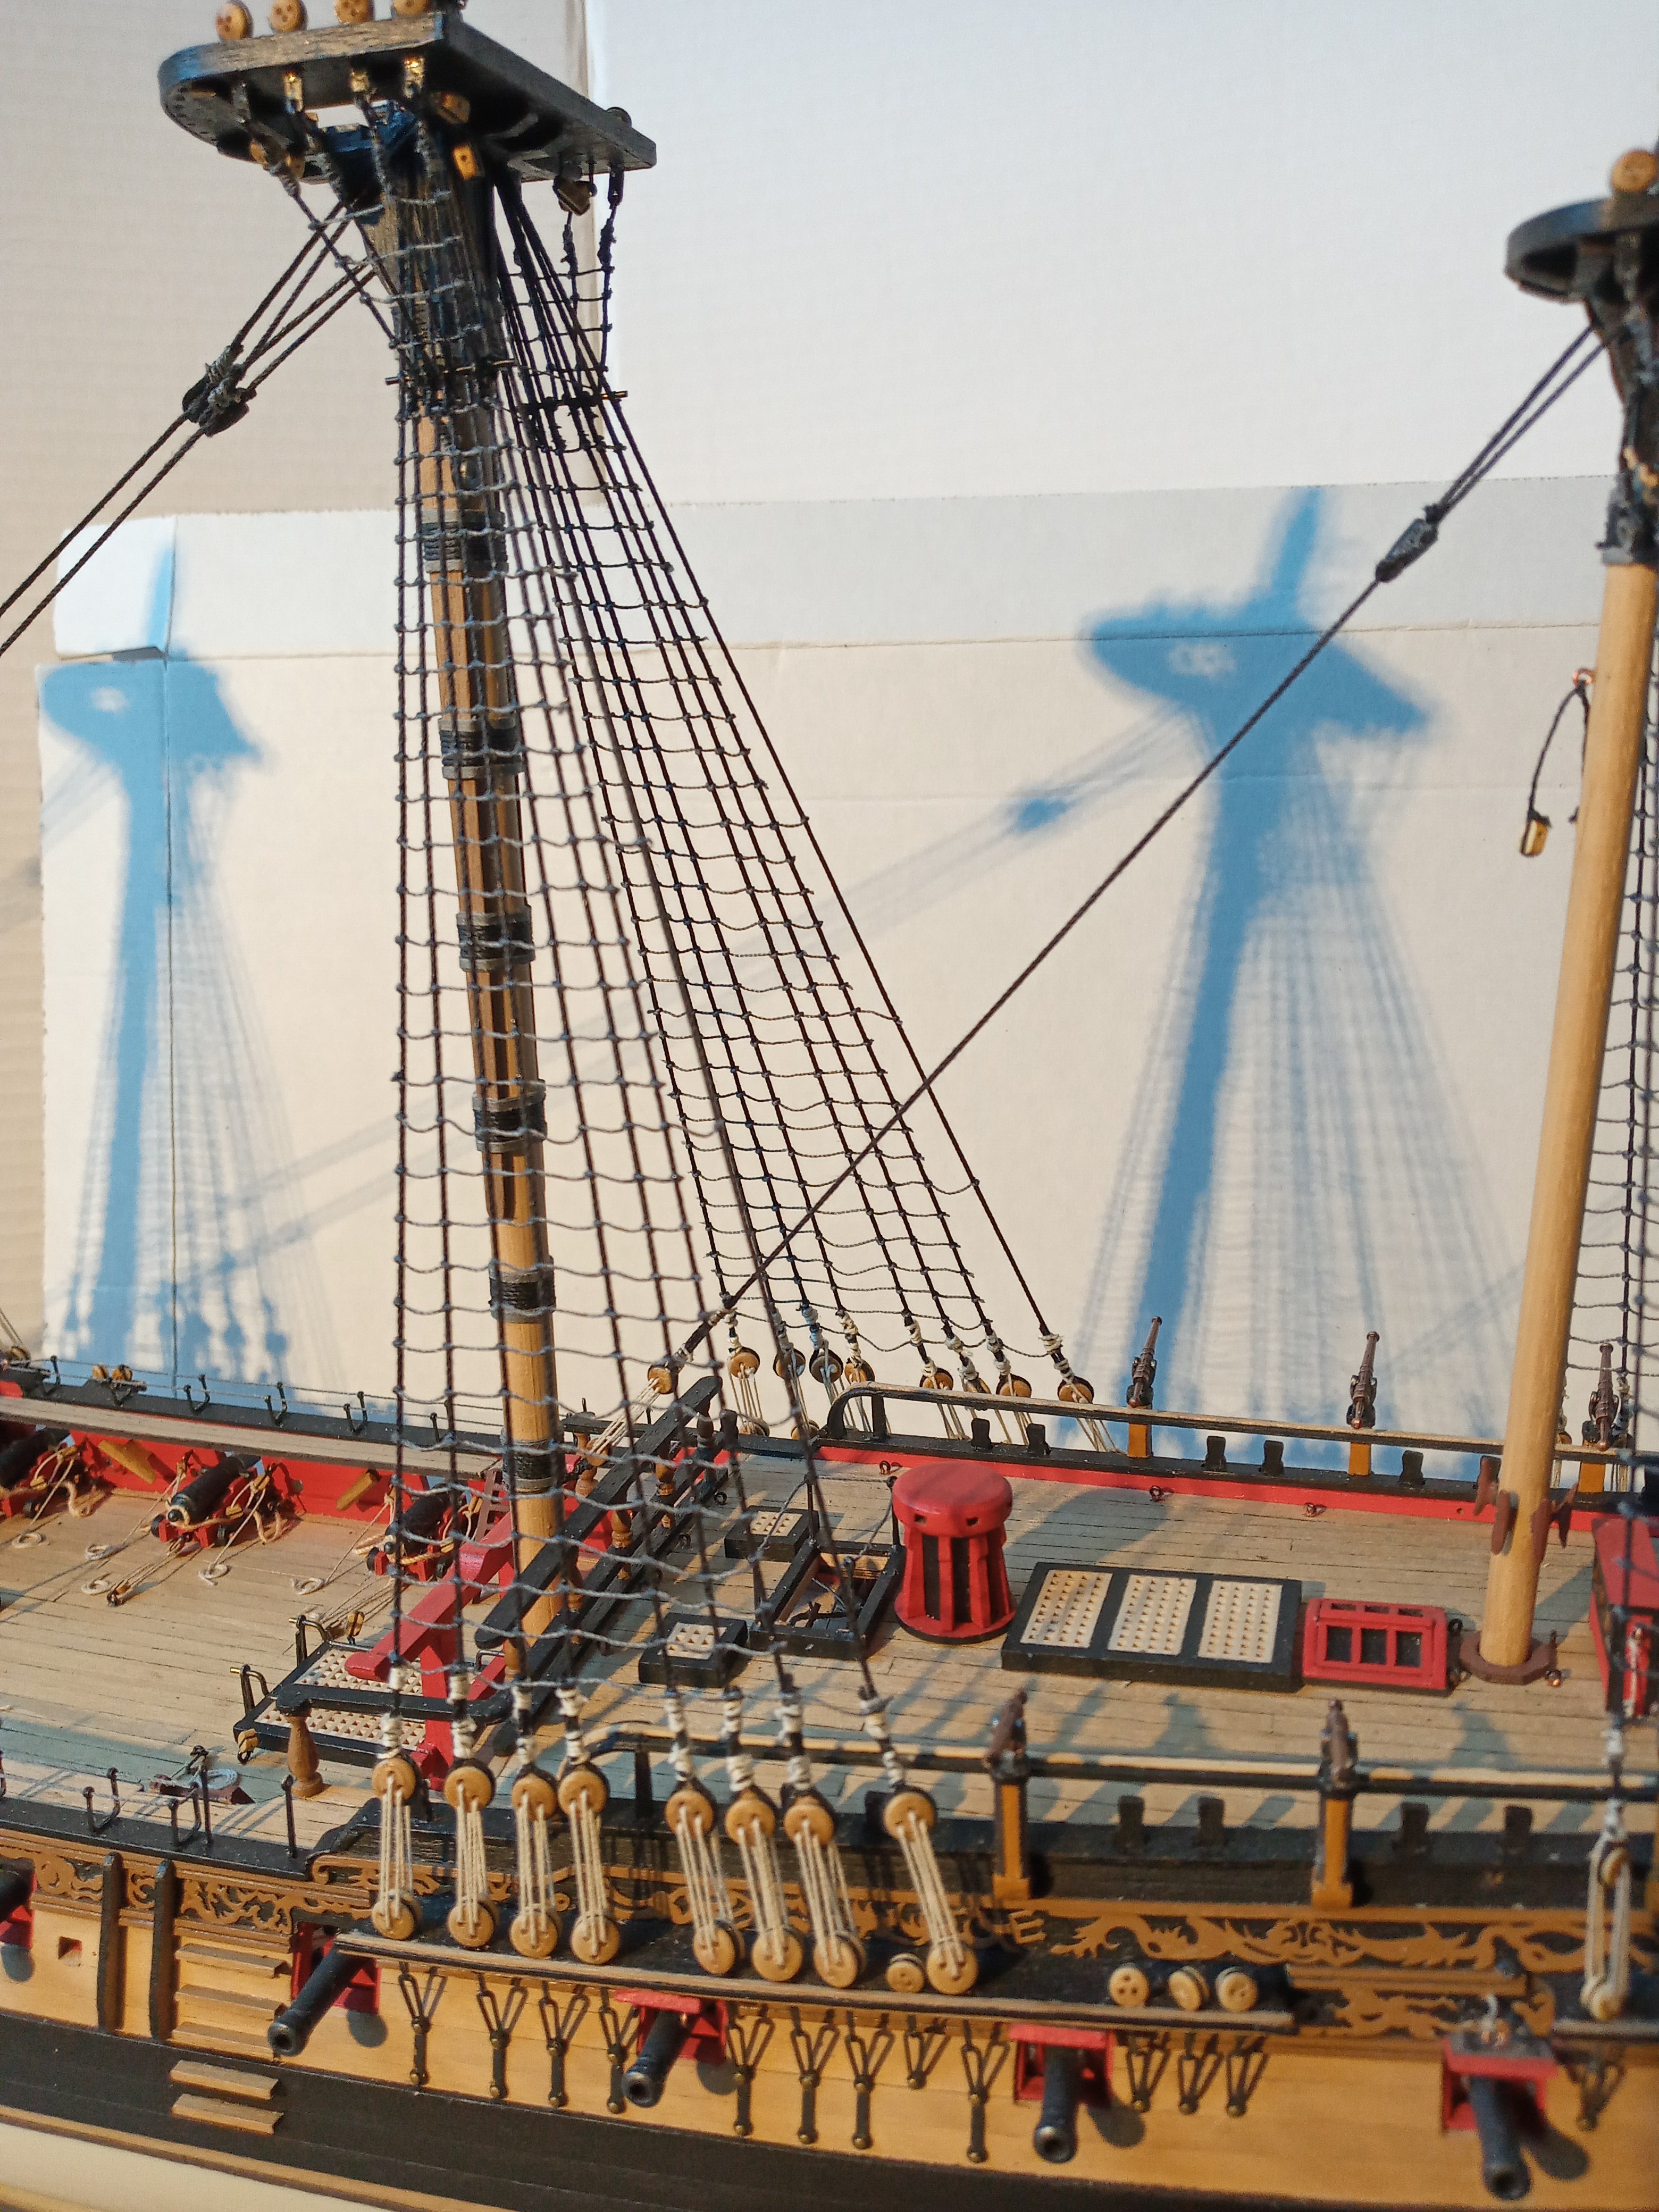
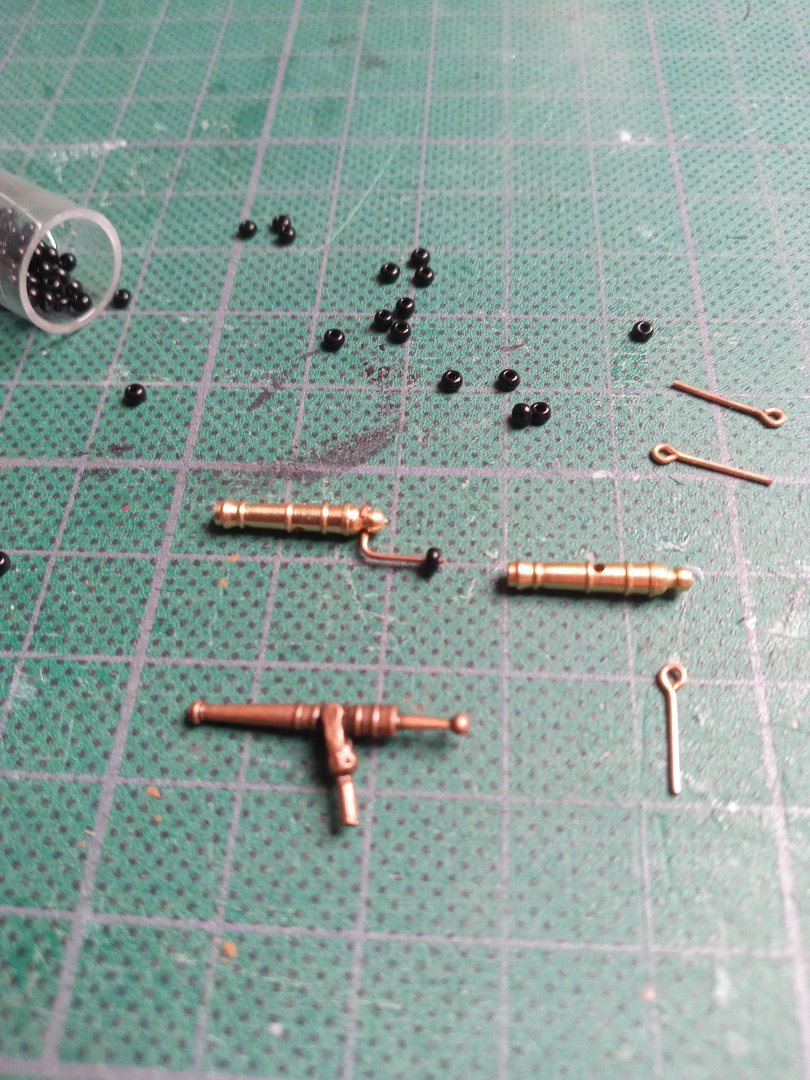
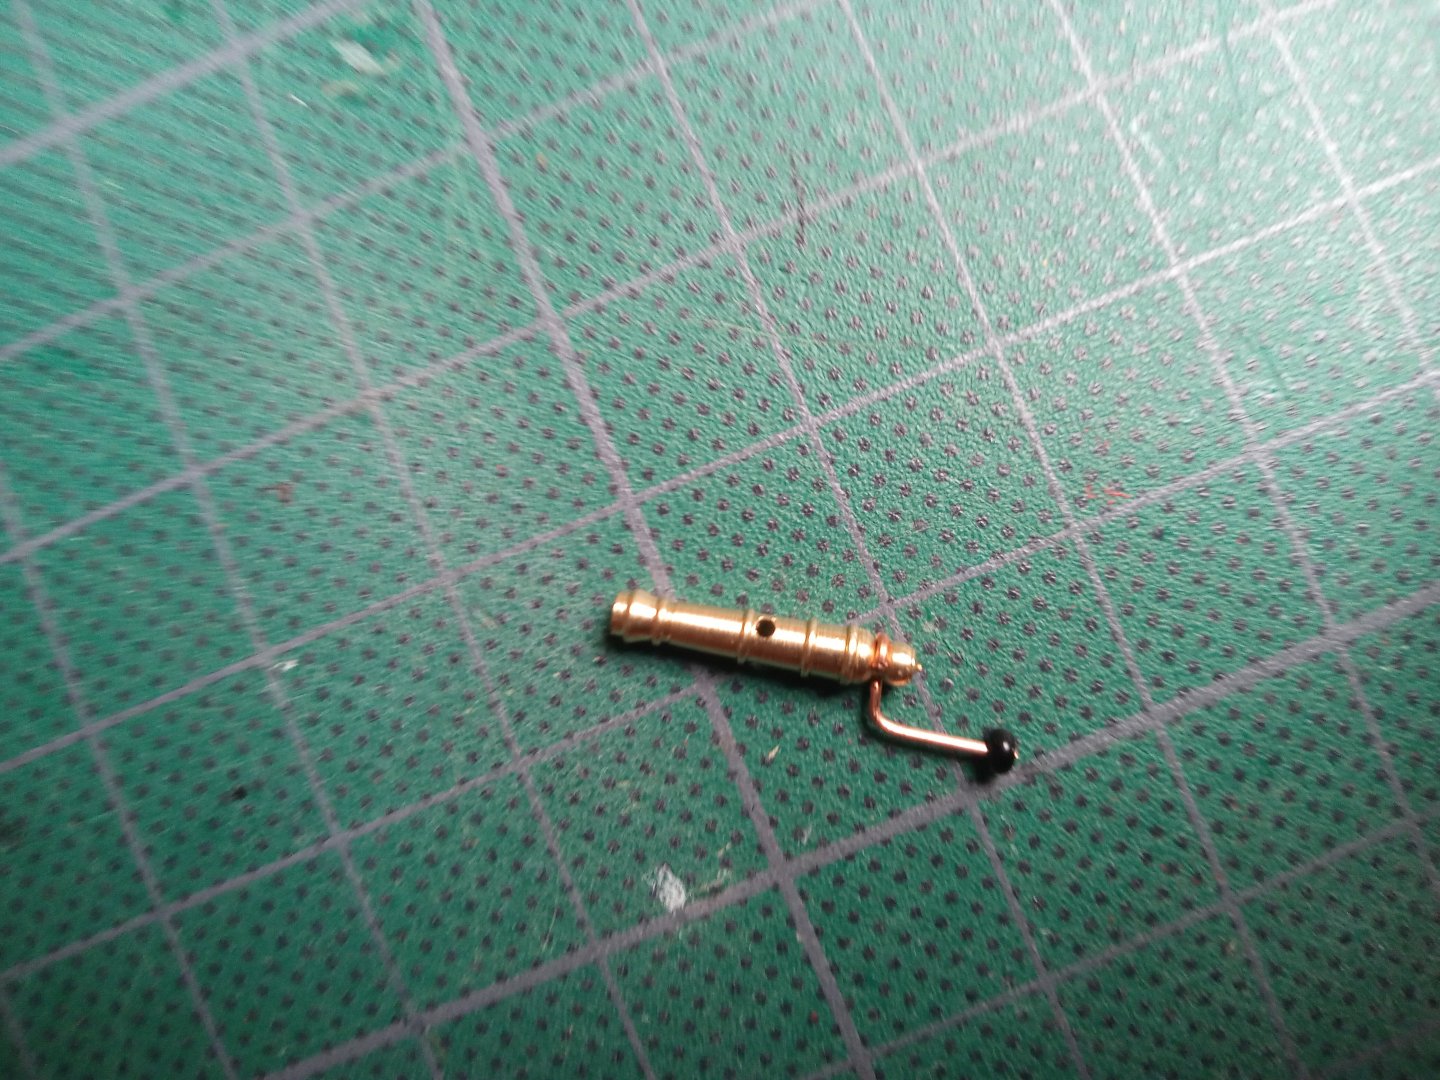
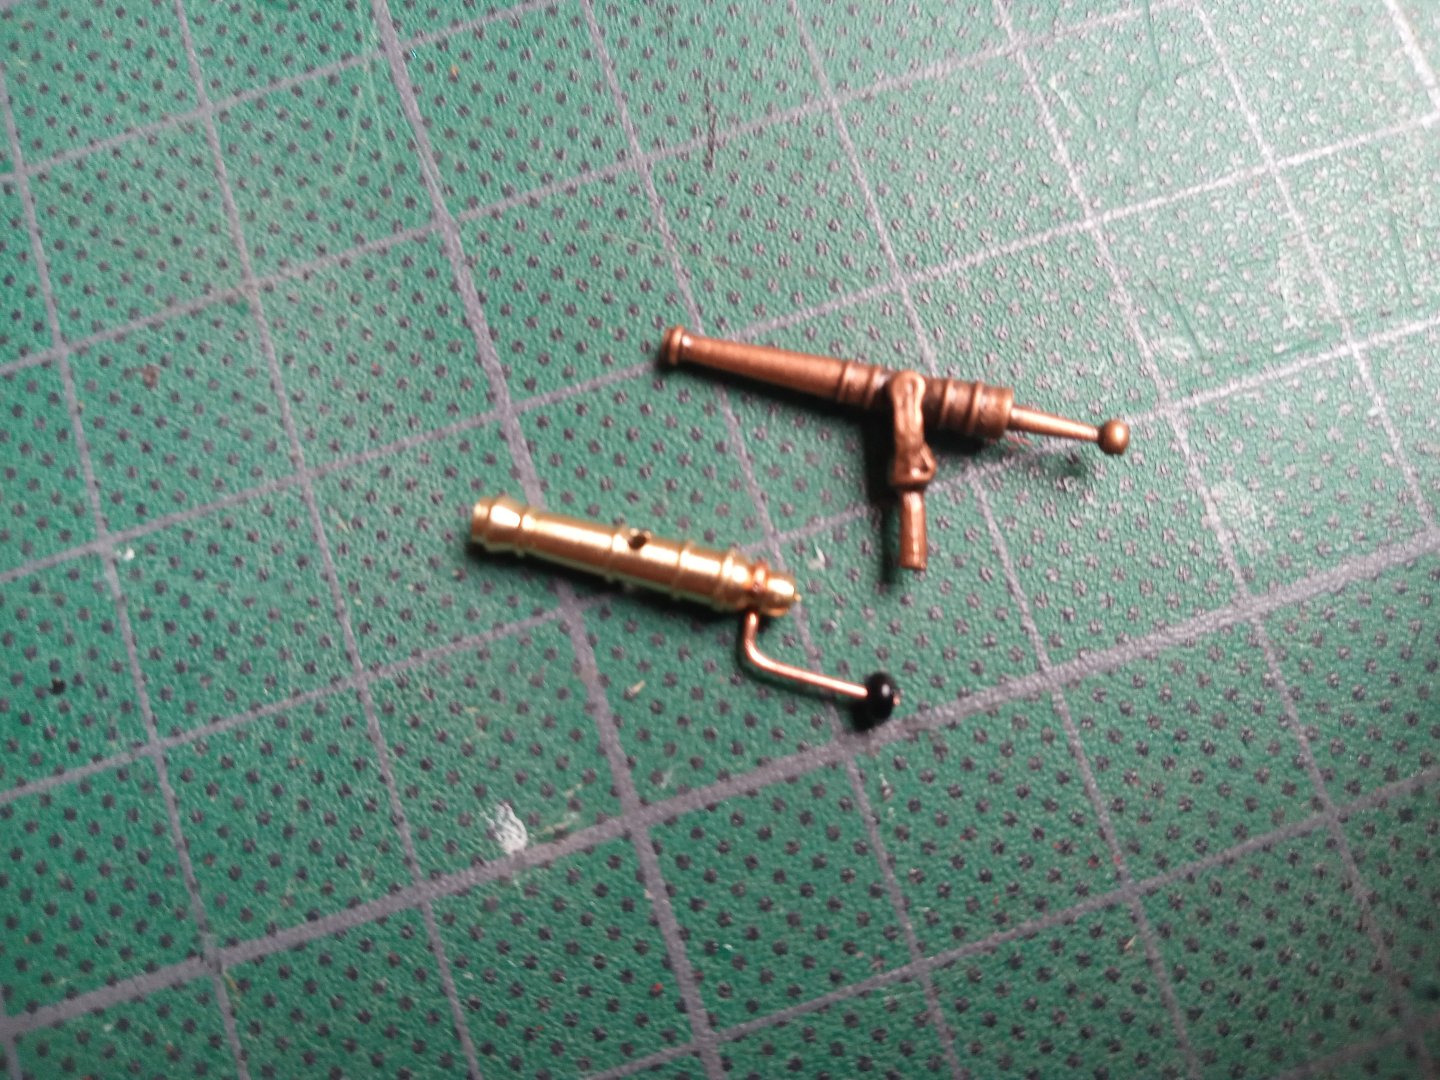
 Shrouds and ratlines...at last ( for the time being ). Still trying to avoid as much as possible bulky knots and joins. The swivel guns : this is the last option by using the pieces provided with the kit. Although dry fit ...seems not that bad. I kinda like the contrast between the copper natural look and the metallic color supports. I'm still in the waiting for a better and feasible alternative. Enfin, wait and see...
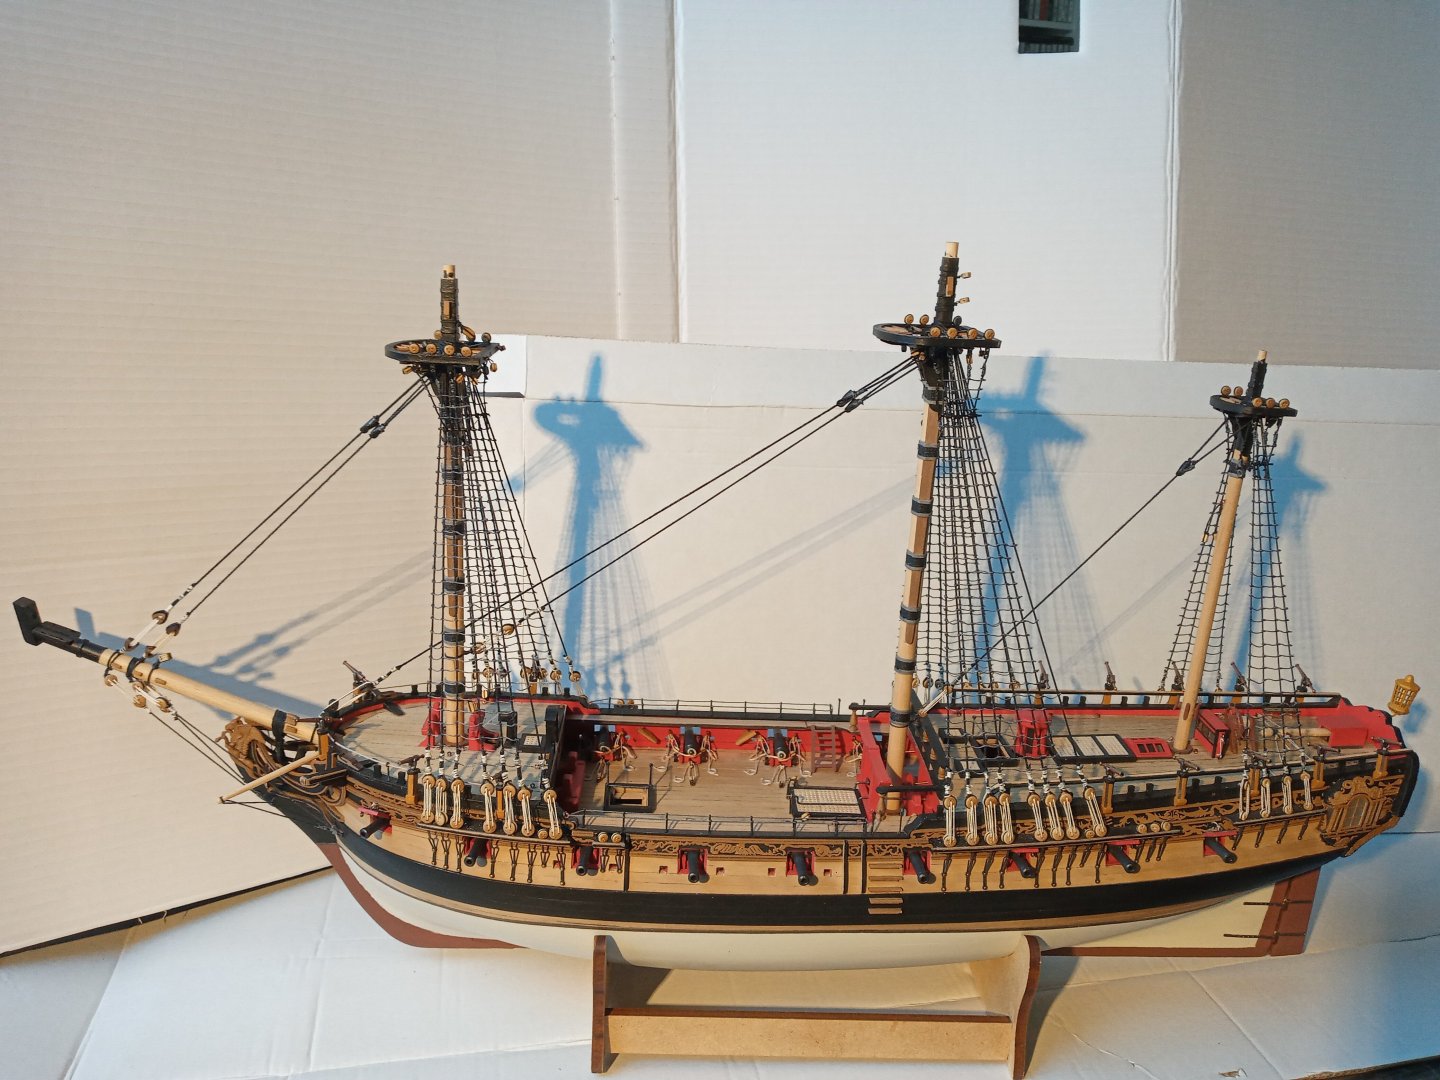


-
Welkom !
-
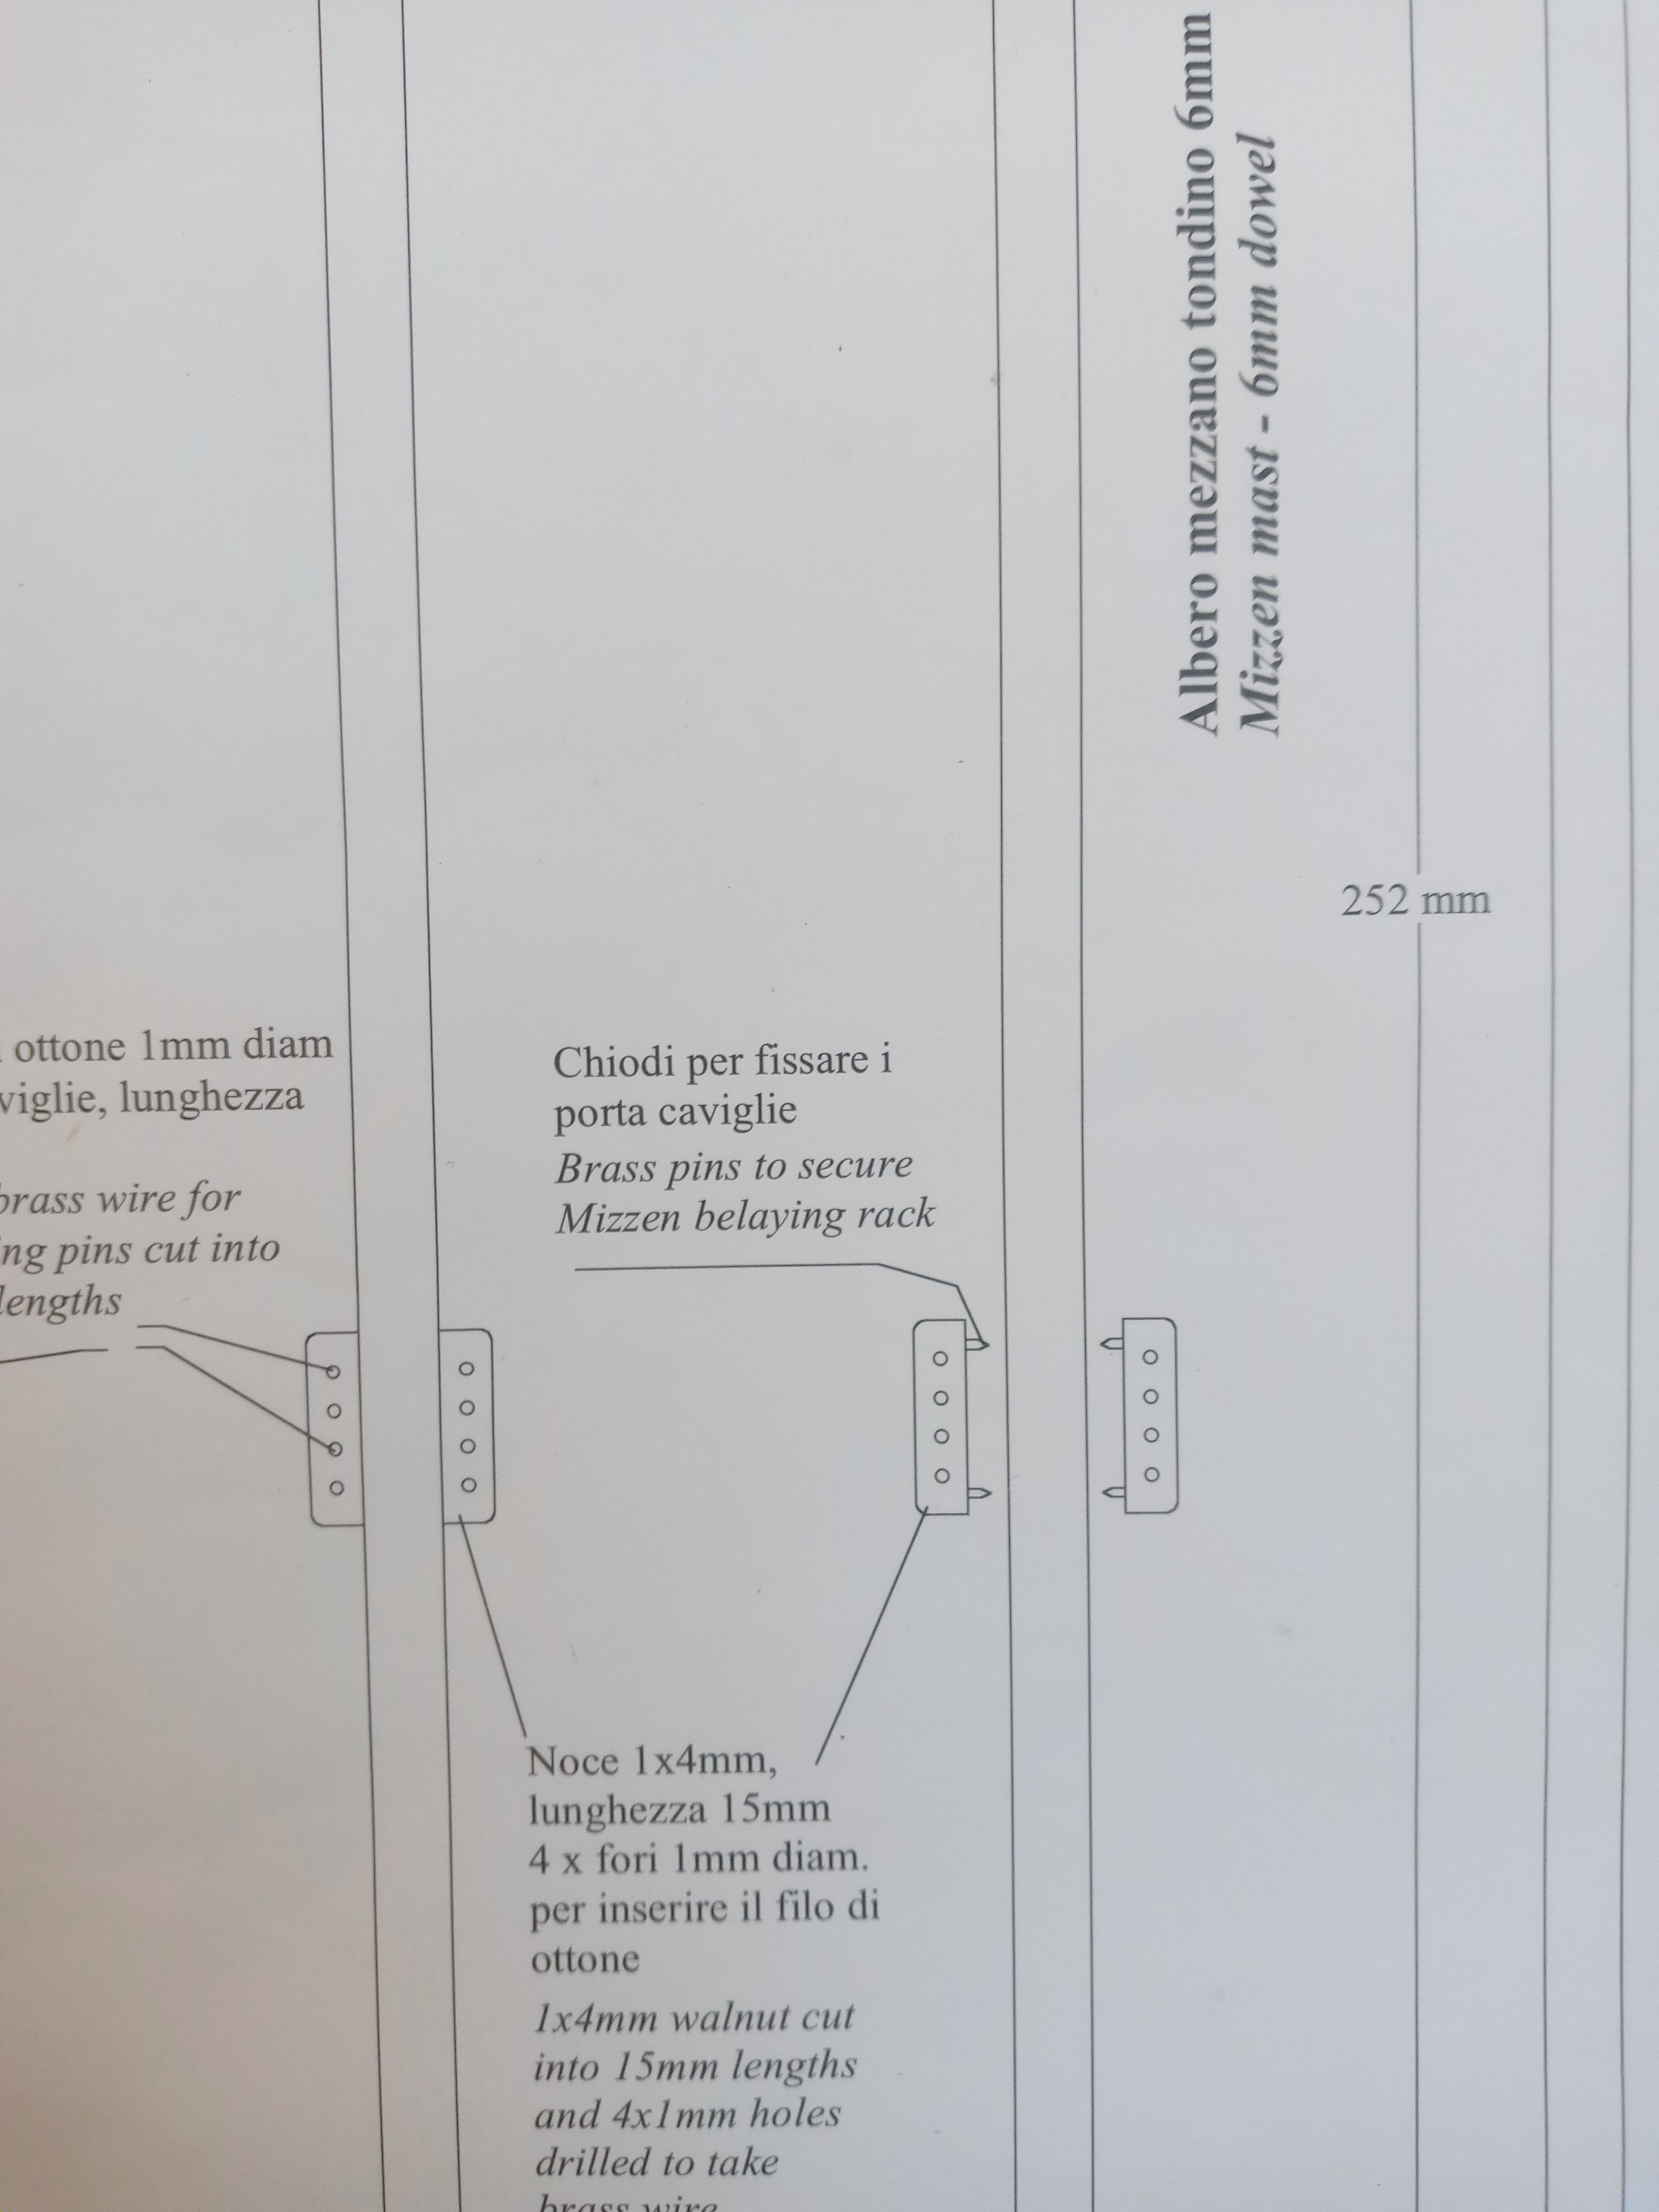
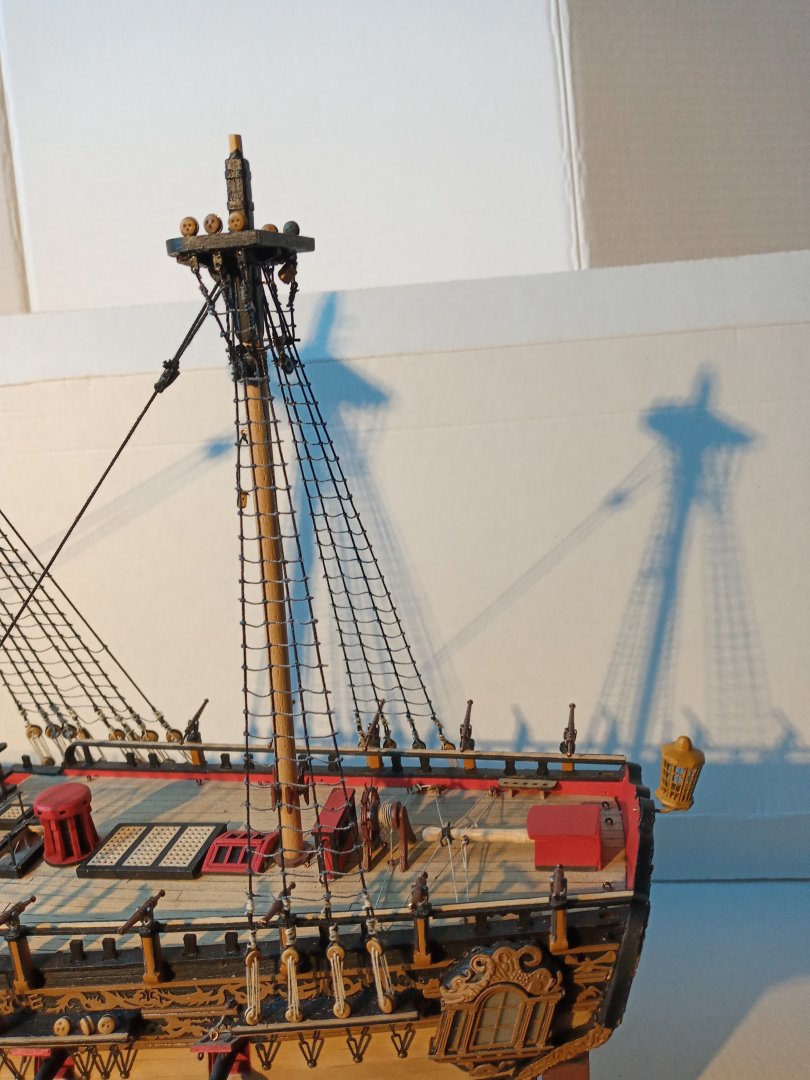
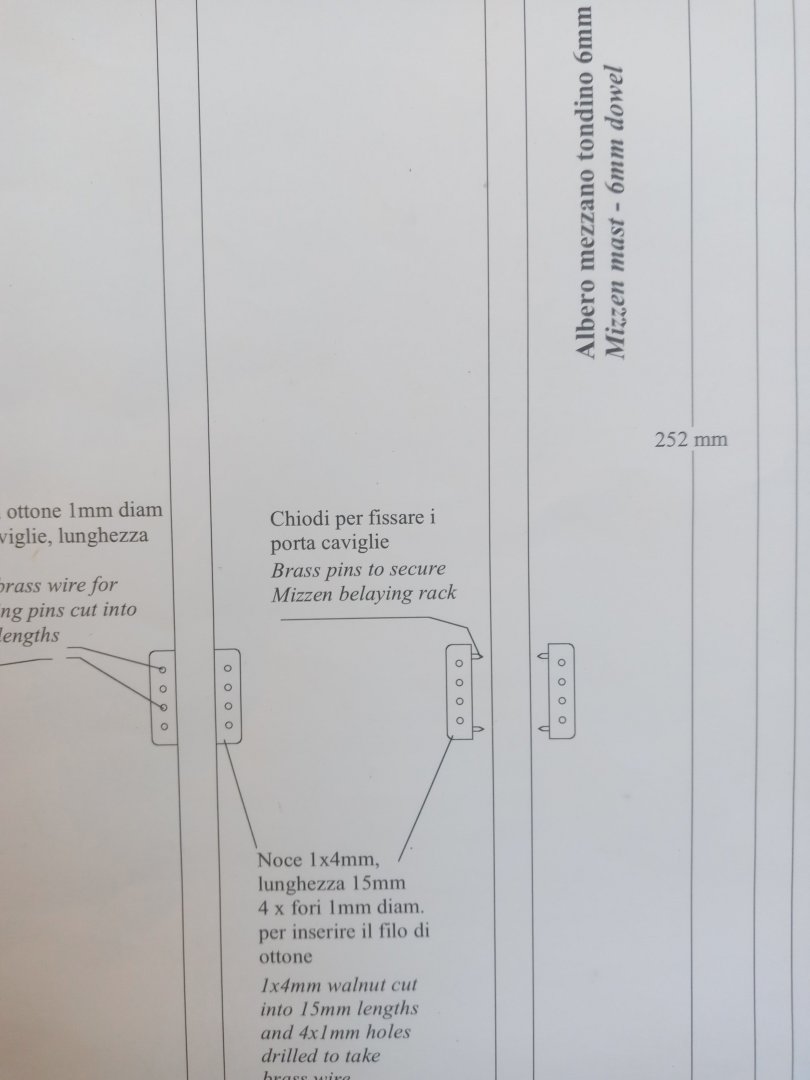
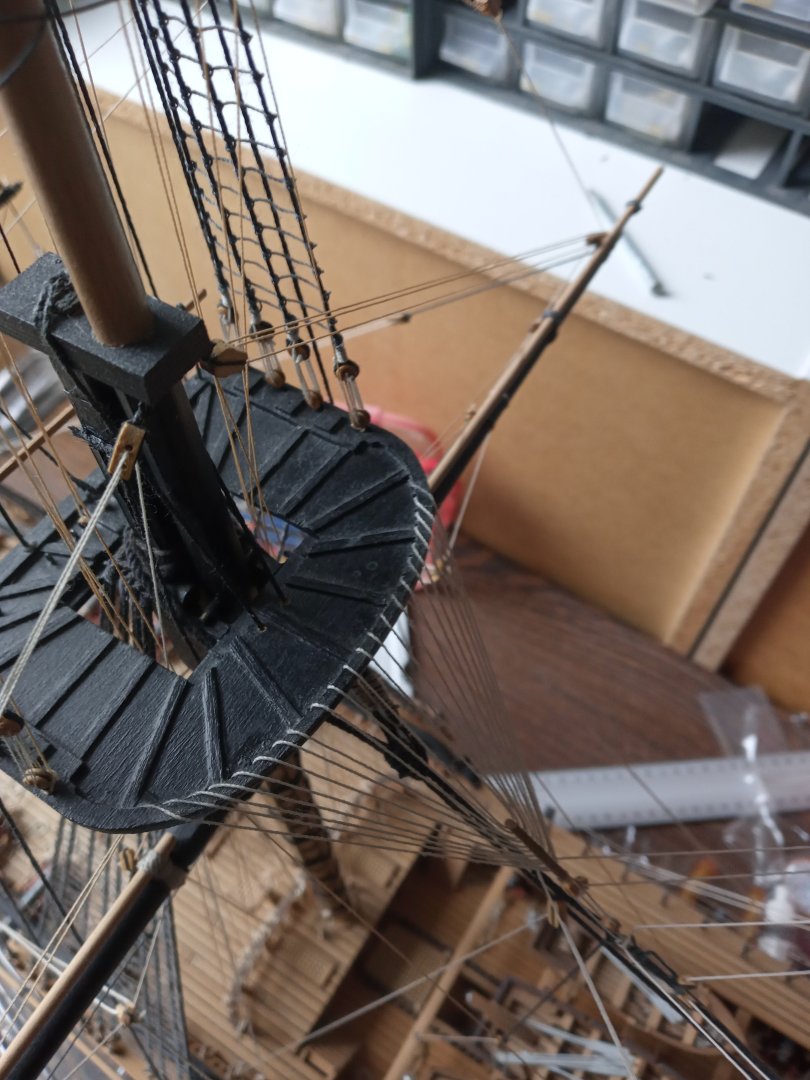
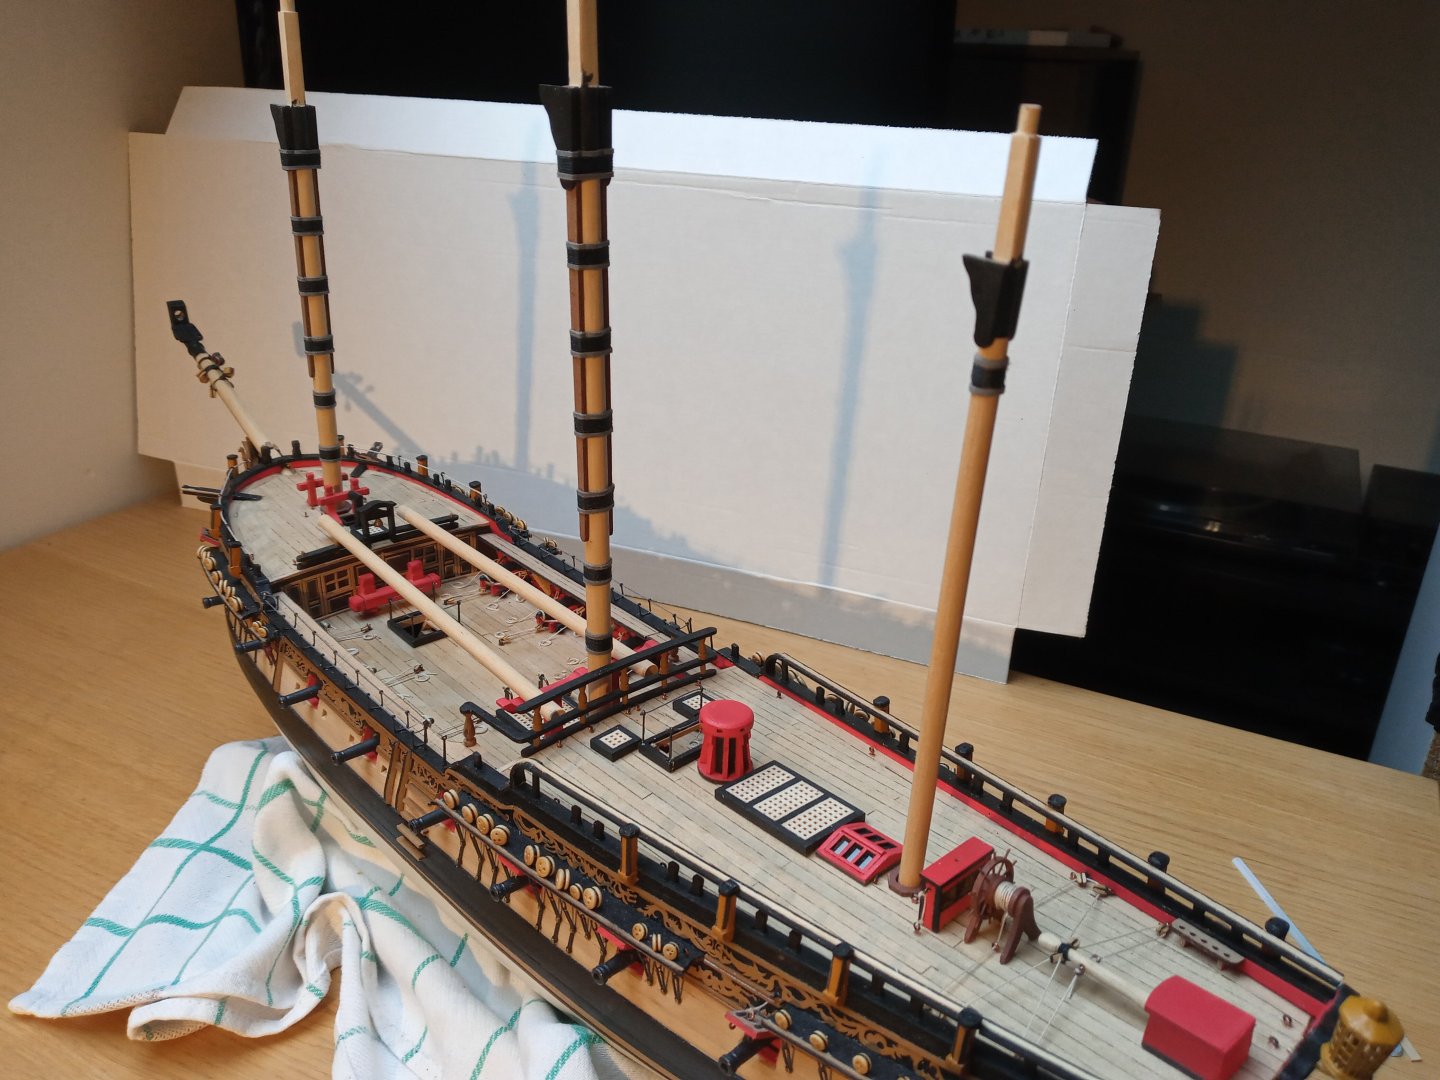
Well,...more or less ready to proceed with the first part of the standing rigging. Foremast, main mast en mizzen mast tops are dry fit. Regarding the mizzen mast, I deviated from the plans and ( accordingly to e.g. Pegasus buildlogs belonging to Moonbug and Blue Ensign ) installed some cleats. As I had to drill a number of very small and undeep holes I was nonetheless anxious to weaken the structure of this item, I limited myself to 5 cleats. It will have to do. The cleats were purchased through the aftermarket and were to be inserted.


-
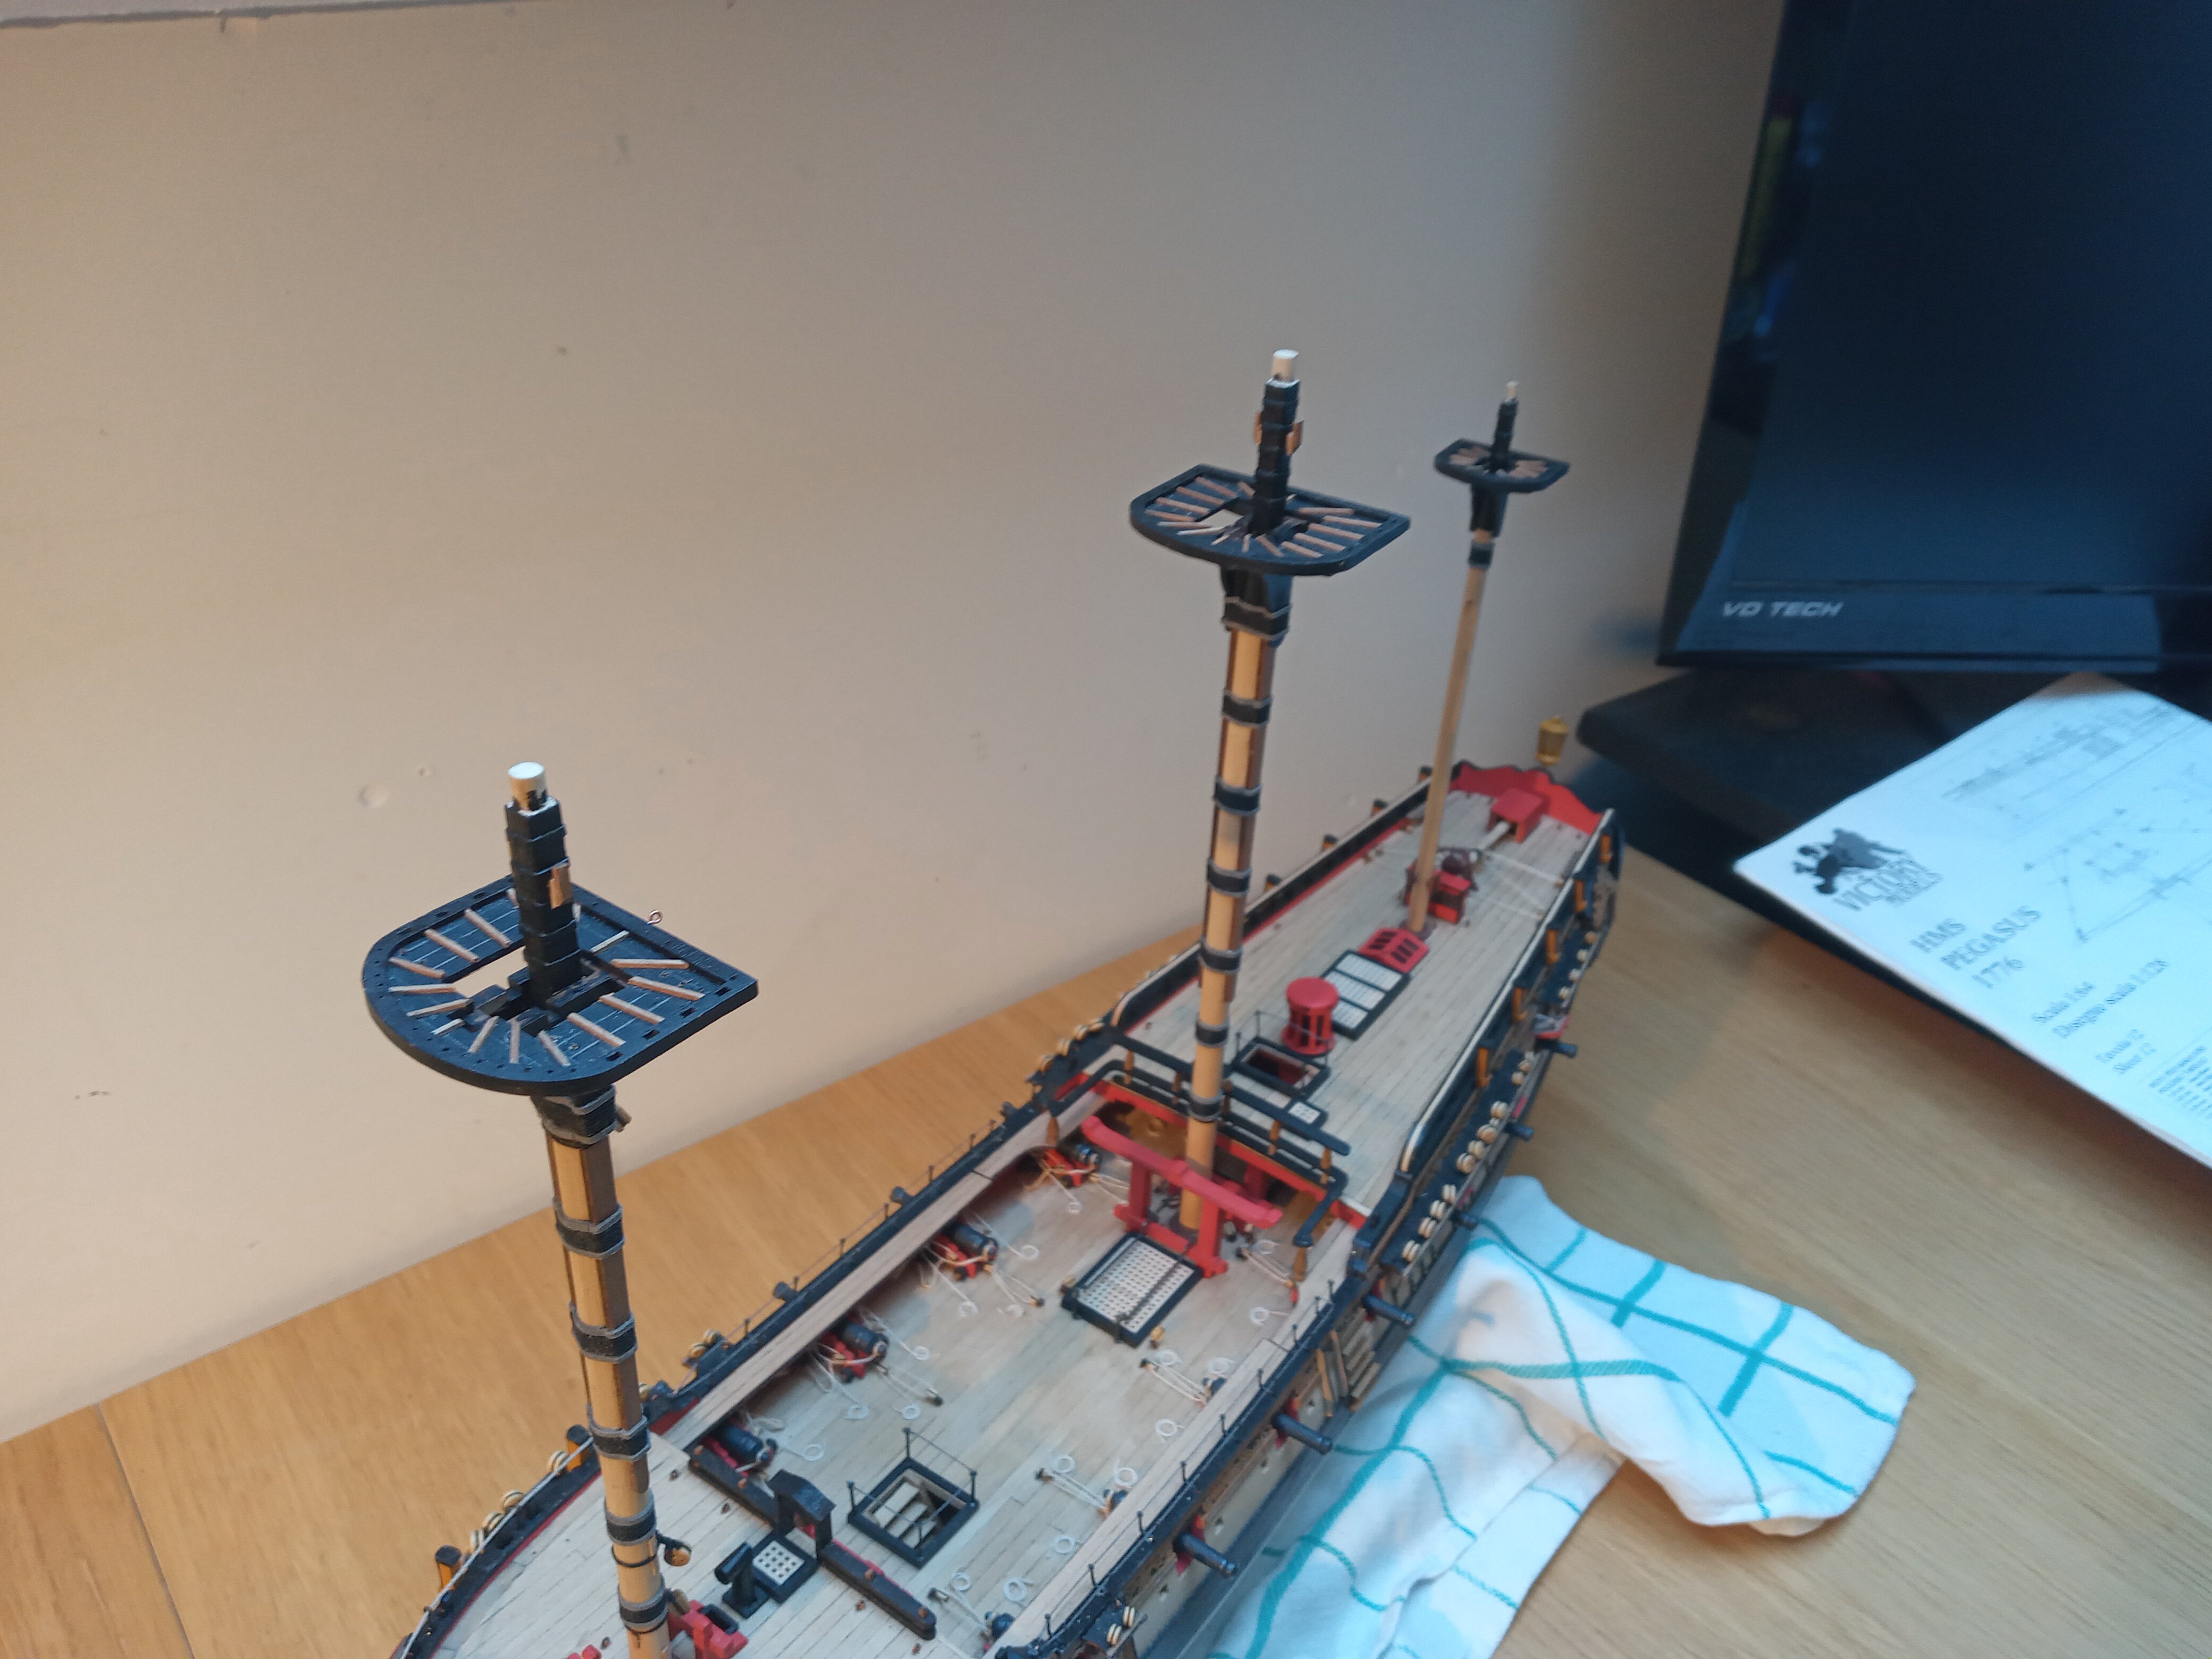
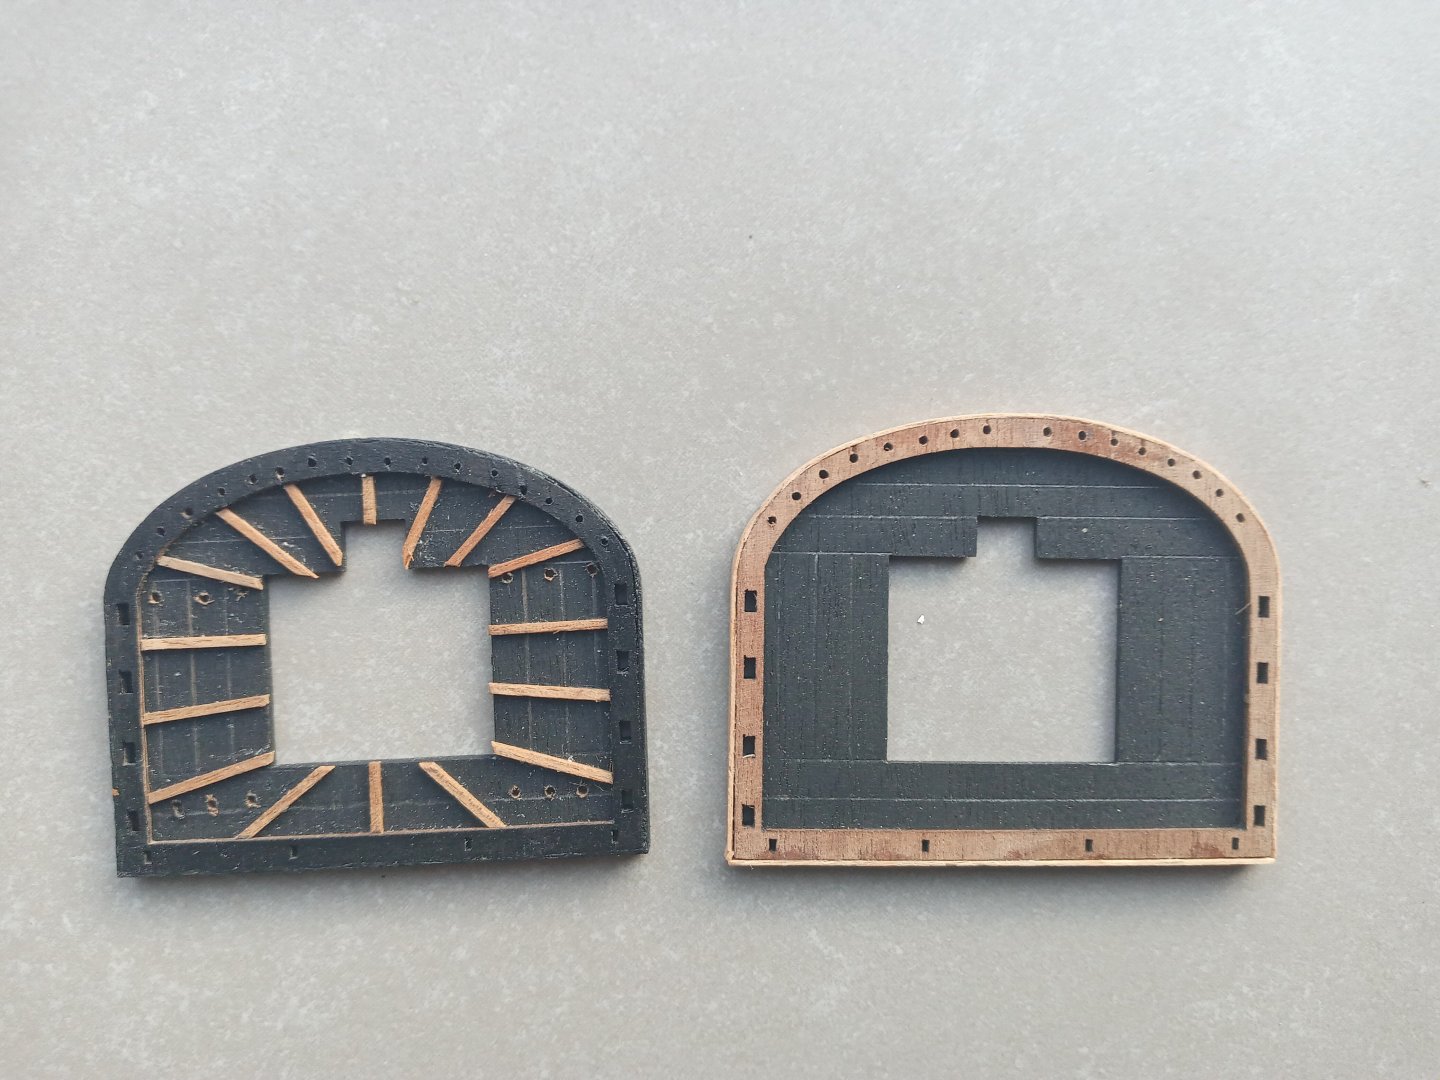
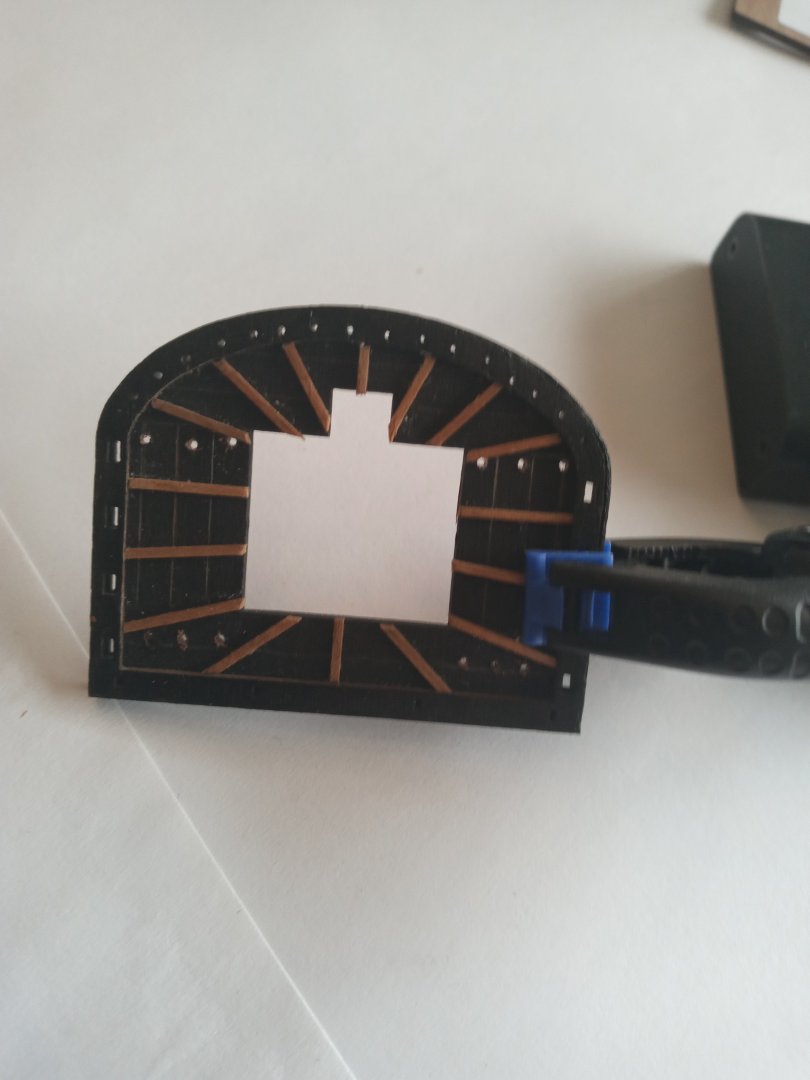
Baker, It definitely is : on the left still the same foremast top. On the right the main mast top ( work in progress ) The holes in the main mast top were all exlusively made with cobalt drills. ( 0,9 mm ) And the difference is just stunning. On the risk of digressing a bit on this specific topic, I can only recommend anyone who's dealing with the same issue : Go for the decent tools : it's money well spent.
-
Let's call it a recovery. The inevitable splinters were dealt with putty. I connected the flexishaft to my mini lathe ( proxxon db 250 ) A try out on some leftovers seemed the right thing to do.

-
Following Bakers and Moonbugs sound advice : here's the latest purchase. A set of 150 quality drills ( diameters 0,4 till 3,2 mm ) and the Proxxon Flexishaft 110 BF. A try out using some wooden leftovers ( same material frames from the kit ) is perhaps recommendable. I'll keep you posted. Thanks guys 👍

-
Thanks for the info, Patrick. Good news and following your advice : the HBM cobalt set and the Proxxon 110BF 28622 are on their way.... Bad news : along with this purchase, I could not resist the temptation of this amazing bird ....https://www.italeri.com/en/product/3145
-
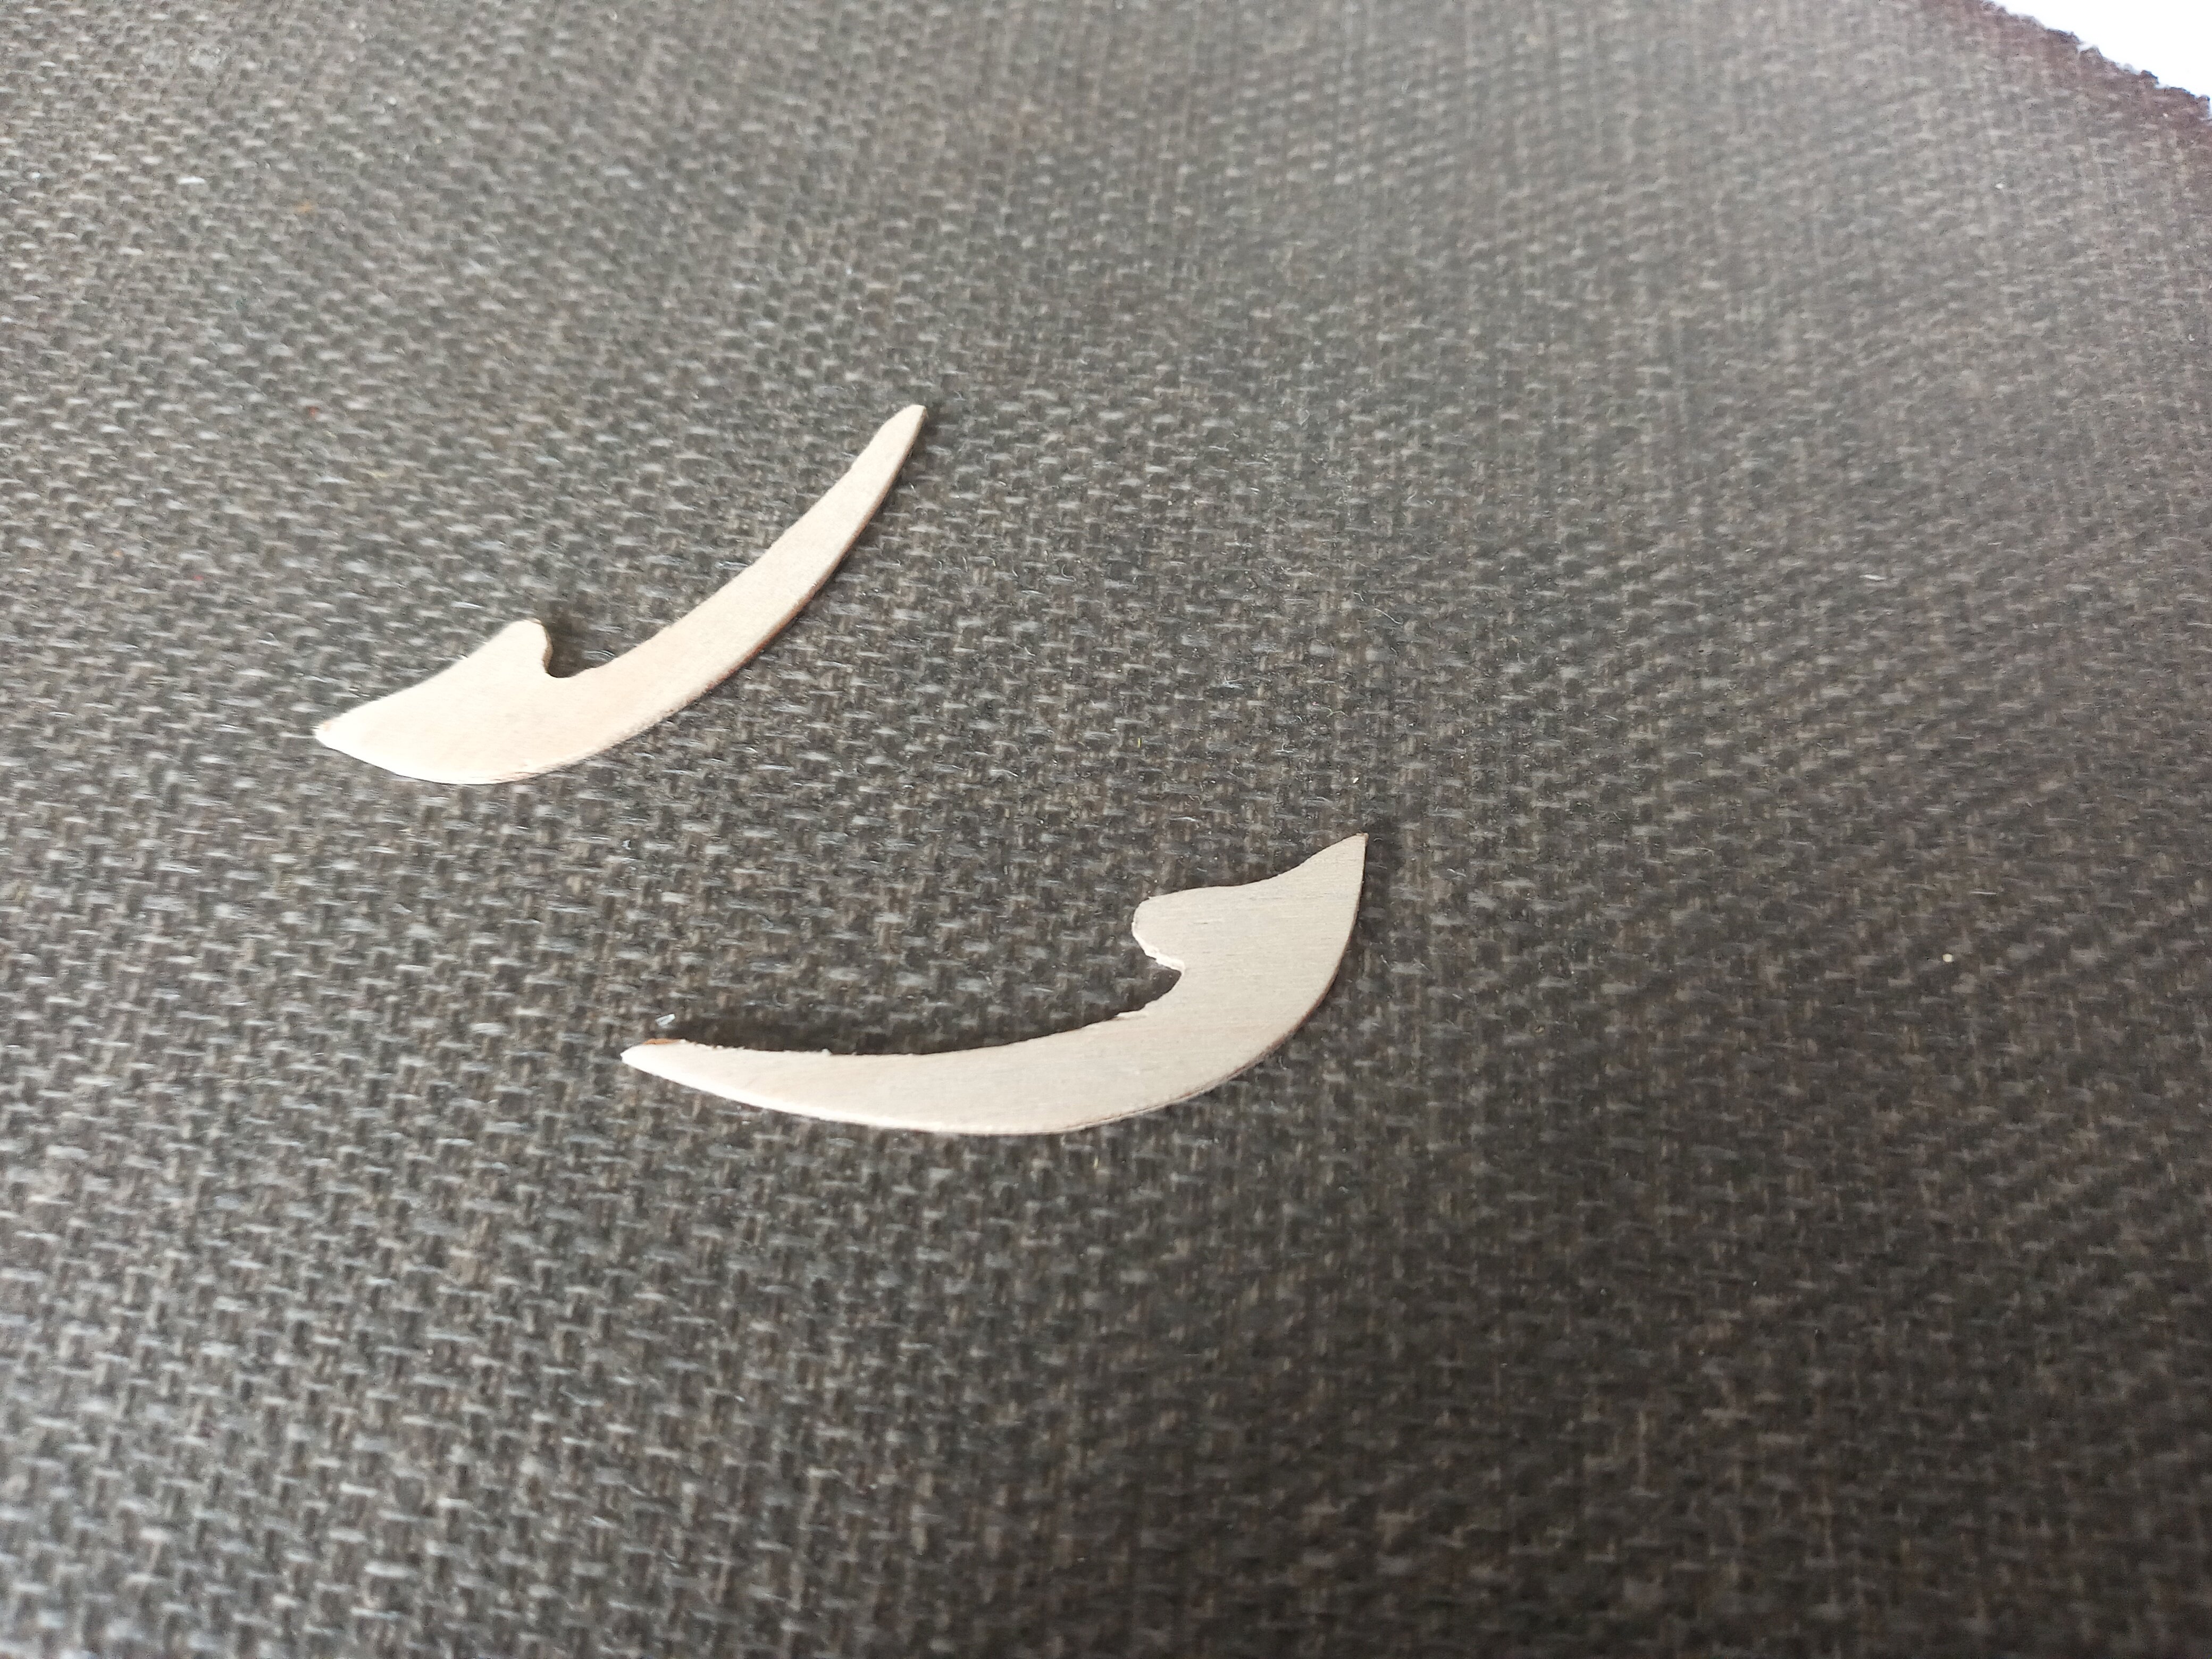
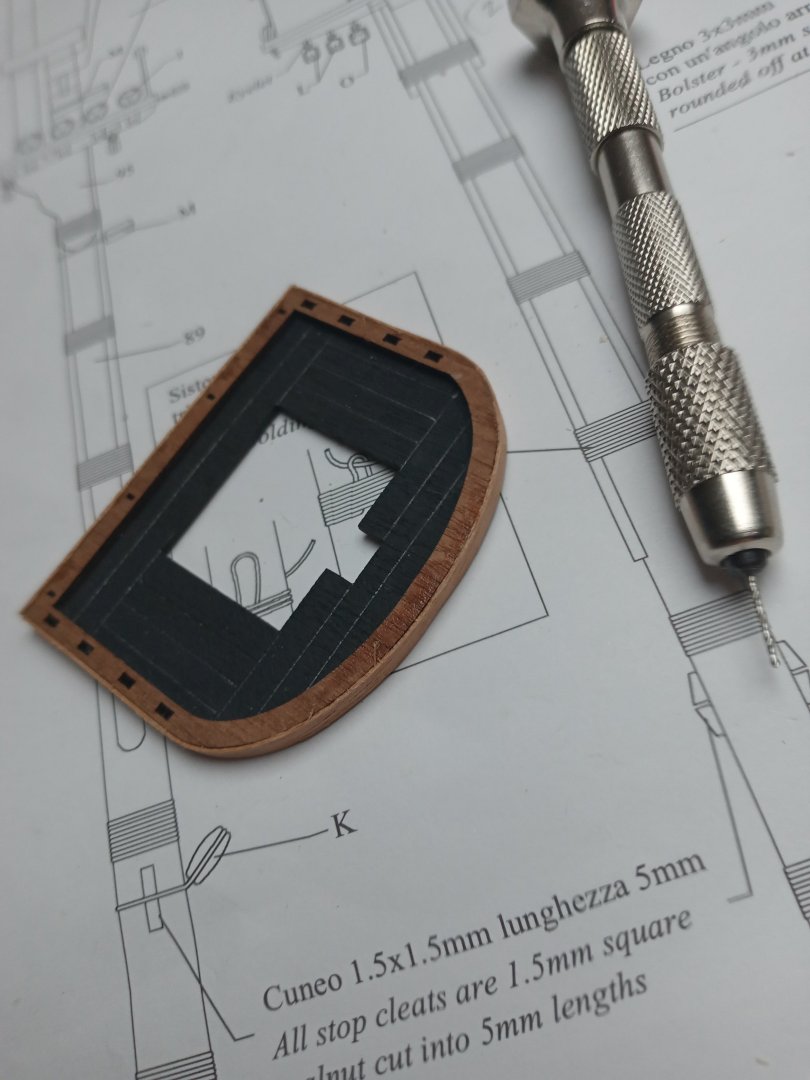
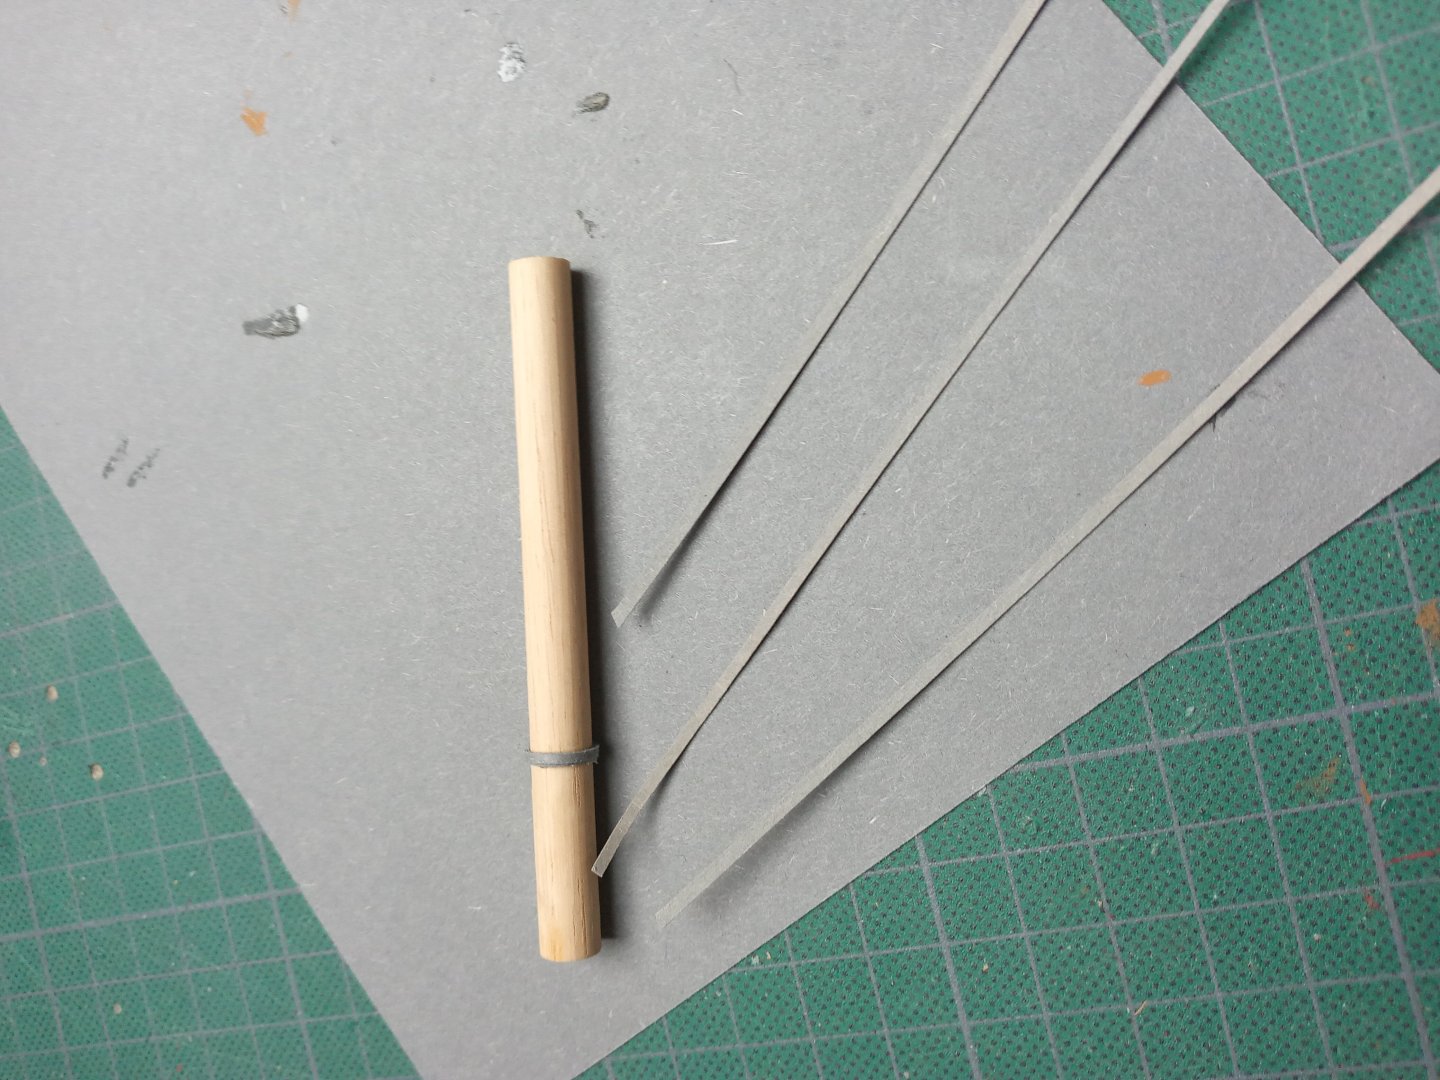
Foring holes for the crowsfeet : A (little ?) setback. 😒 Drilling holes (close to one another) into walnut : I had already an unpleasant feeling about it but proceeded anyway against better judgement..... In a effort to avoid the inevitable I reinforced these items with a 0,5 strip but this did not work. (see last pic ) A possible explanation : increasing considerably the (rpm) speed with an appropriate drilling machine, which I don't have at my disposal As I'm out of options, I'll stick to the approach related to my previuos build, drilling the holes just behind the edges as you may notice on the second pic in attachment. Later on : filling up the homes with some putty and paint.

-
Thukydides, Thanks for the sound advice. I think I'll settle for the brass tube. Nearby ( at least to Belgium standards 😉 ) 2 km, there is a Iarge DIY store. I'll take a look. To simulate the weight, the idea is to fix them to a 0.5 mm brass wire and bend some Güterman thread around the brass wire. We'll see how this works....
-
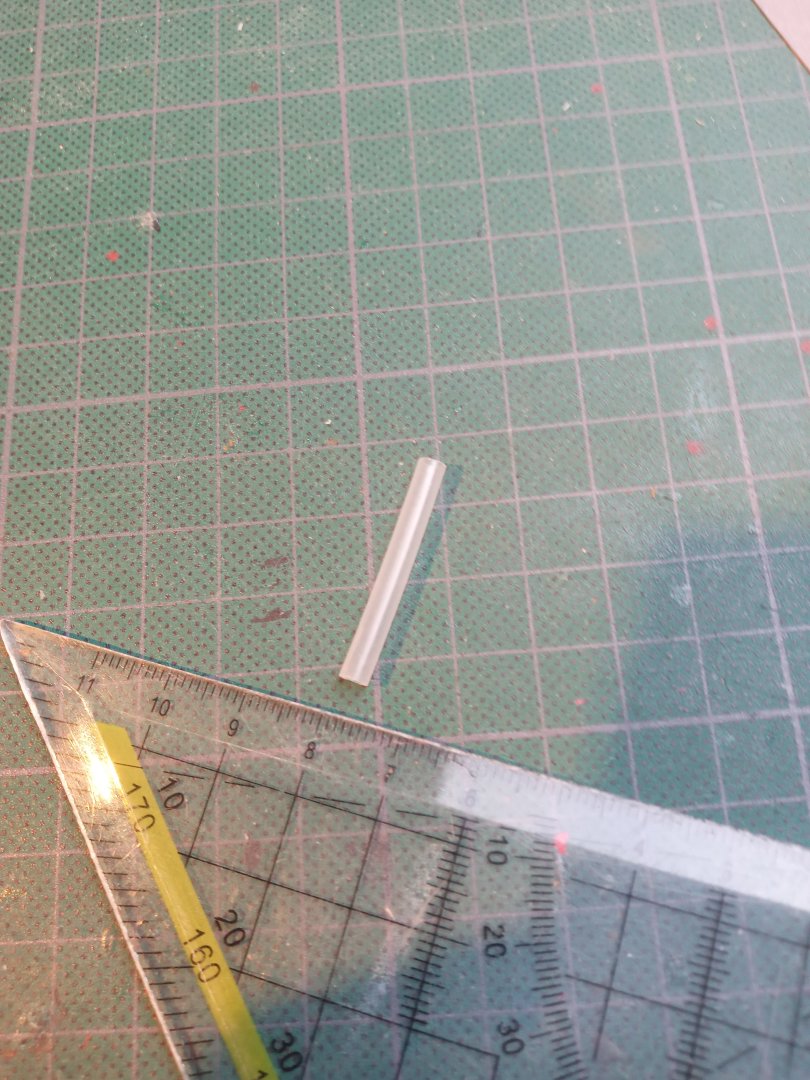
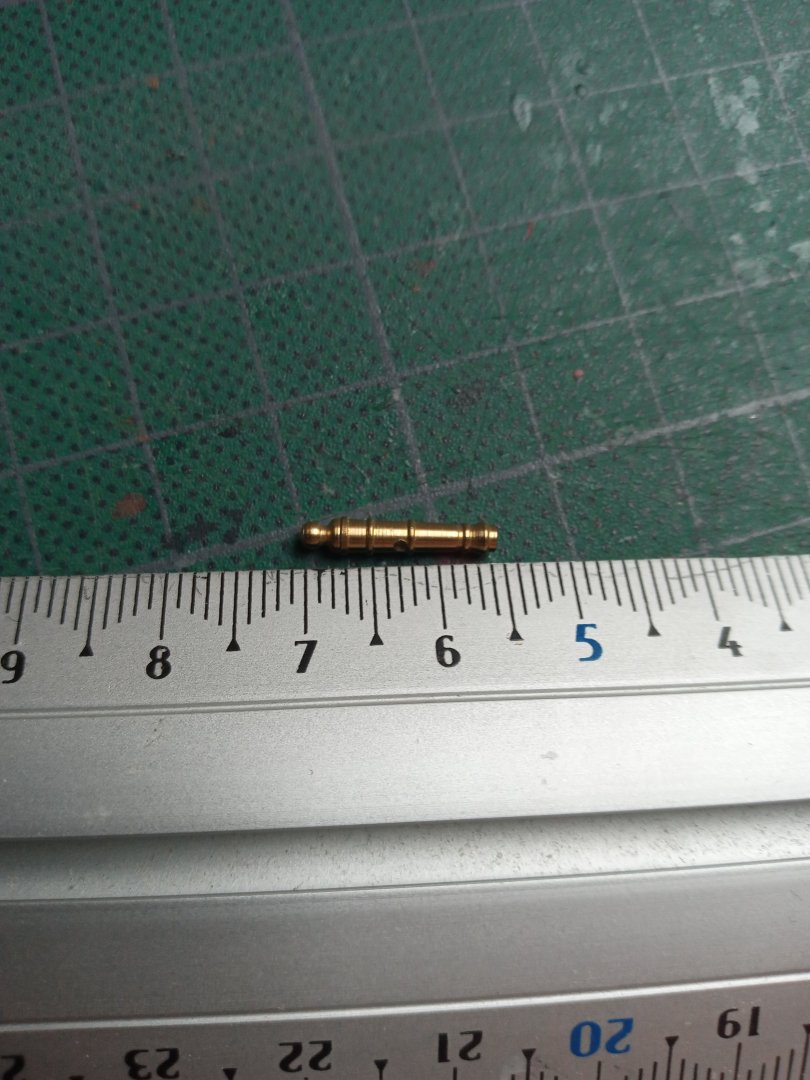
A question about the burton pendants. A slice of this small plastic tube is perhaps an option, any thoughts on this ? All feedback is welcome
-
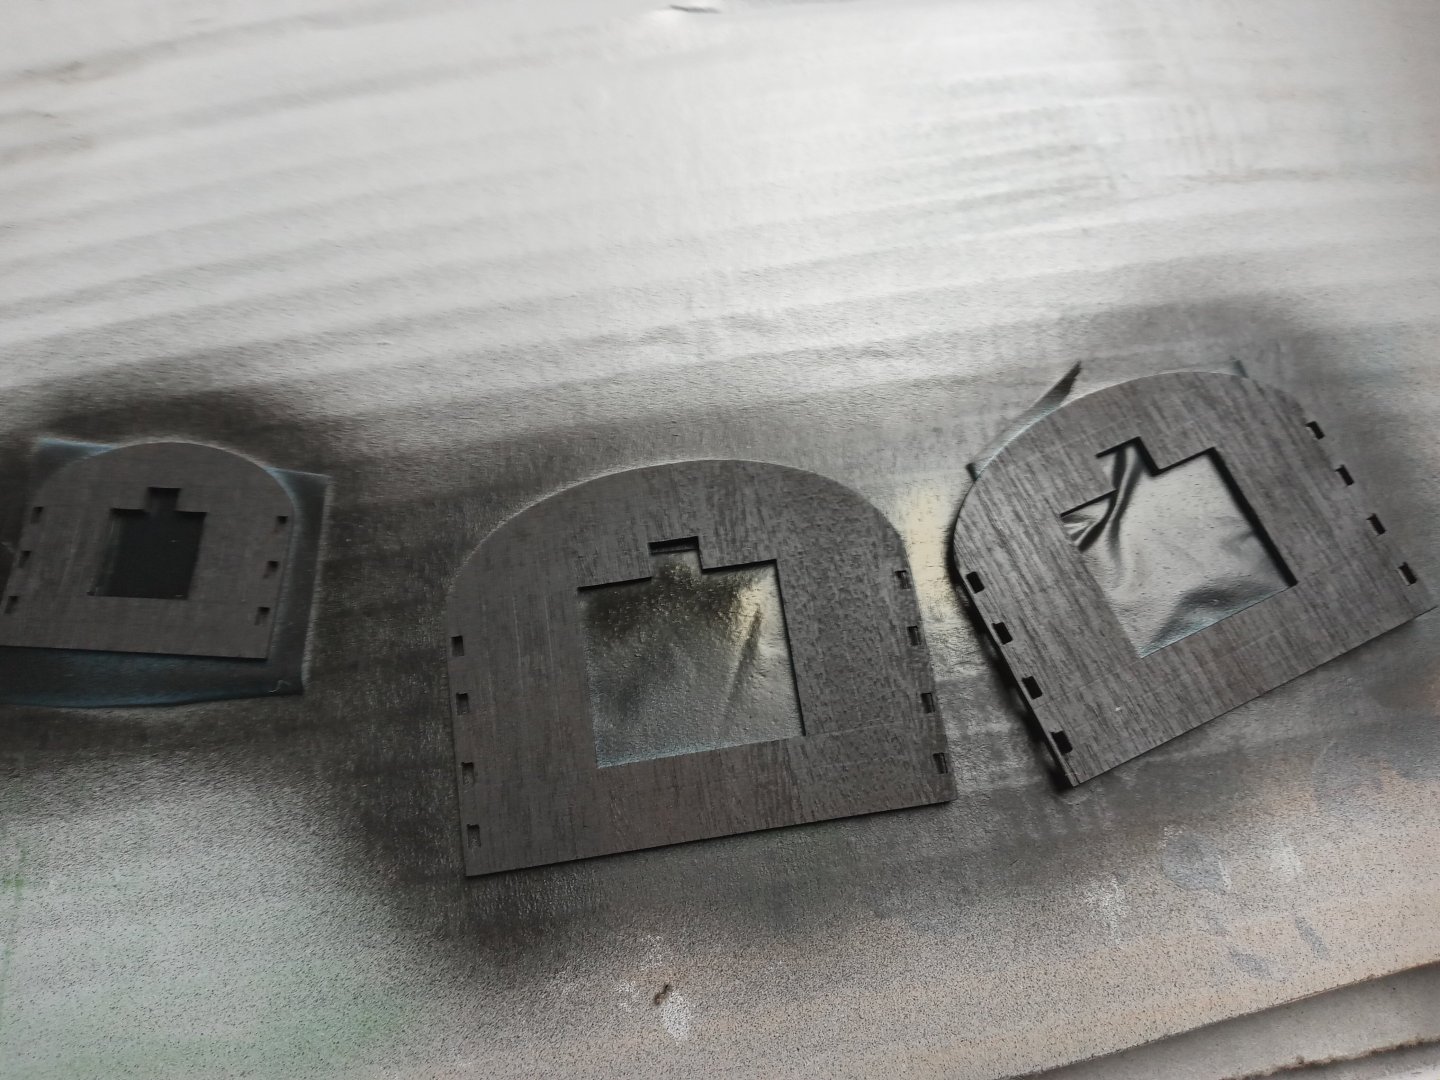
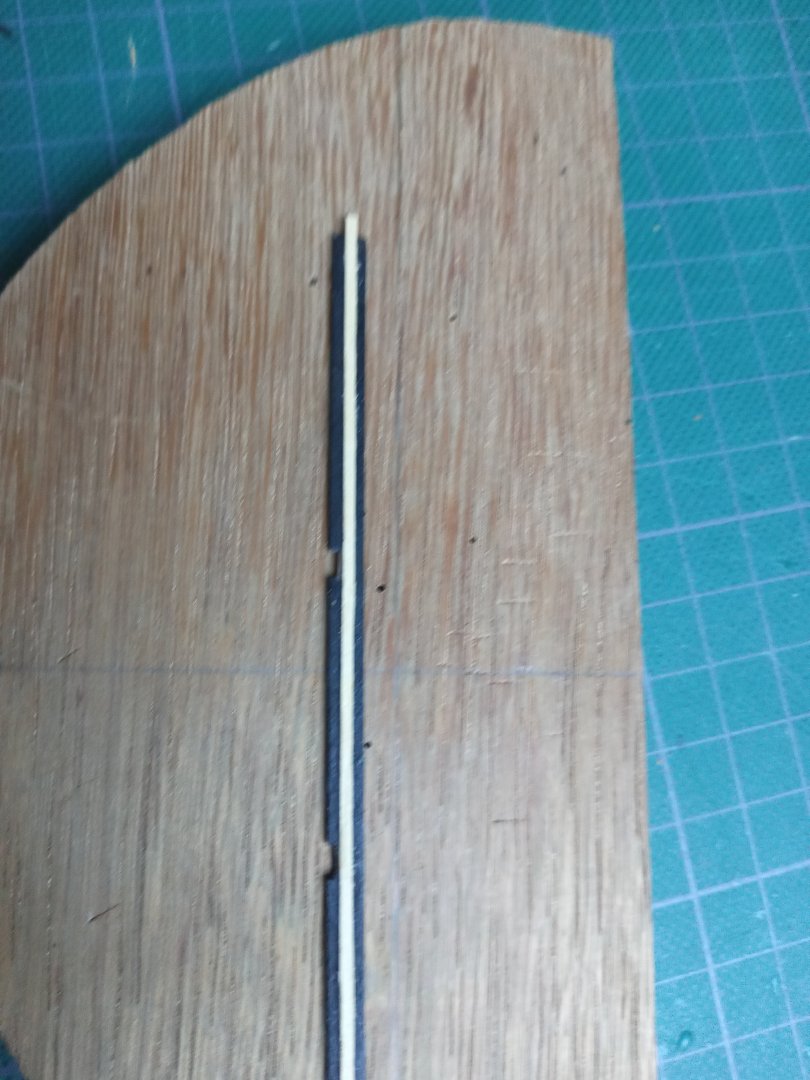
The wooldings. You may notice the grey rings on each side of the wooldings. They're made out of paper that was bended twice around the ramin dowel. The Fore and maintops adding extra planking, be it 0,5 mm strips would make these parts way to thick so I tried something different. made a sort of an imitation using a pencil ( code 3 of H ) upon the black painted surface. For the latter an airbrush is recommendable.
-
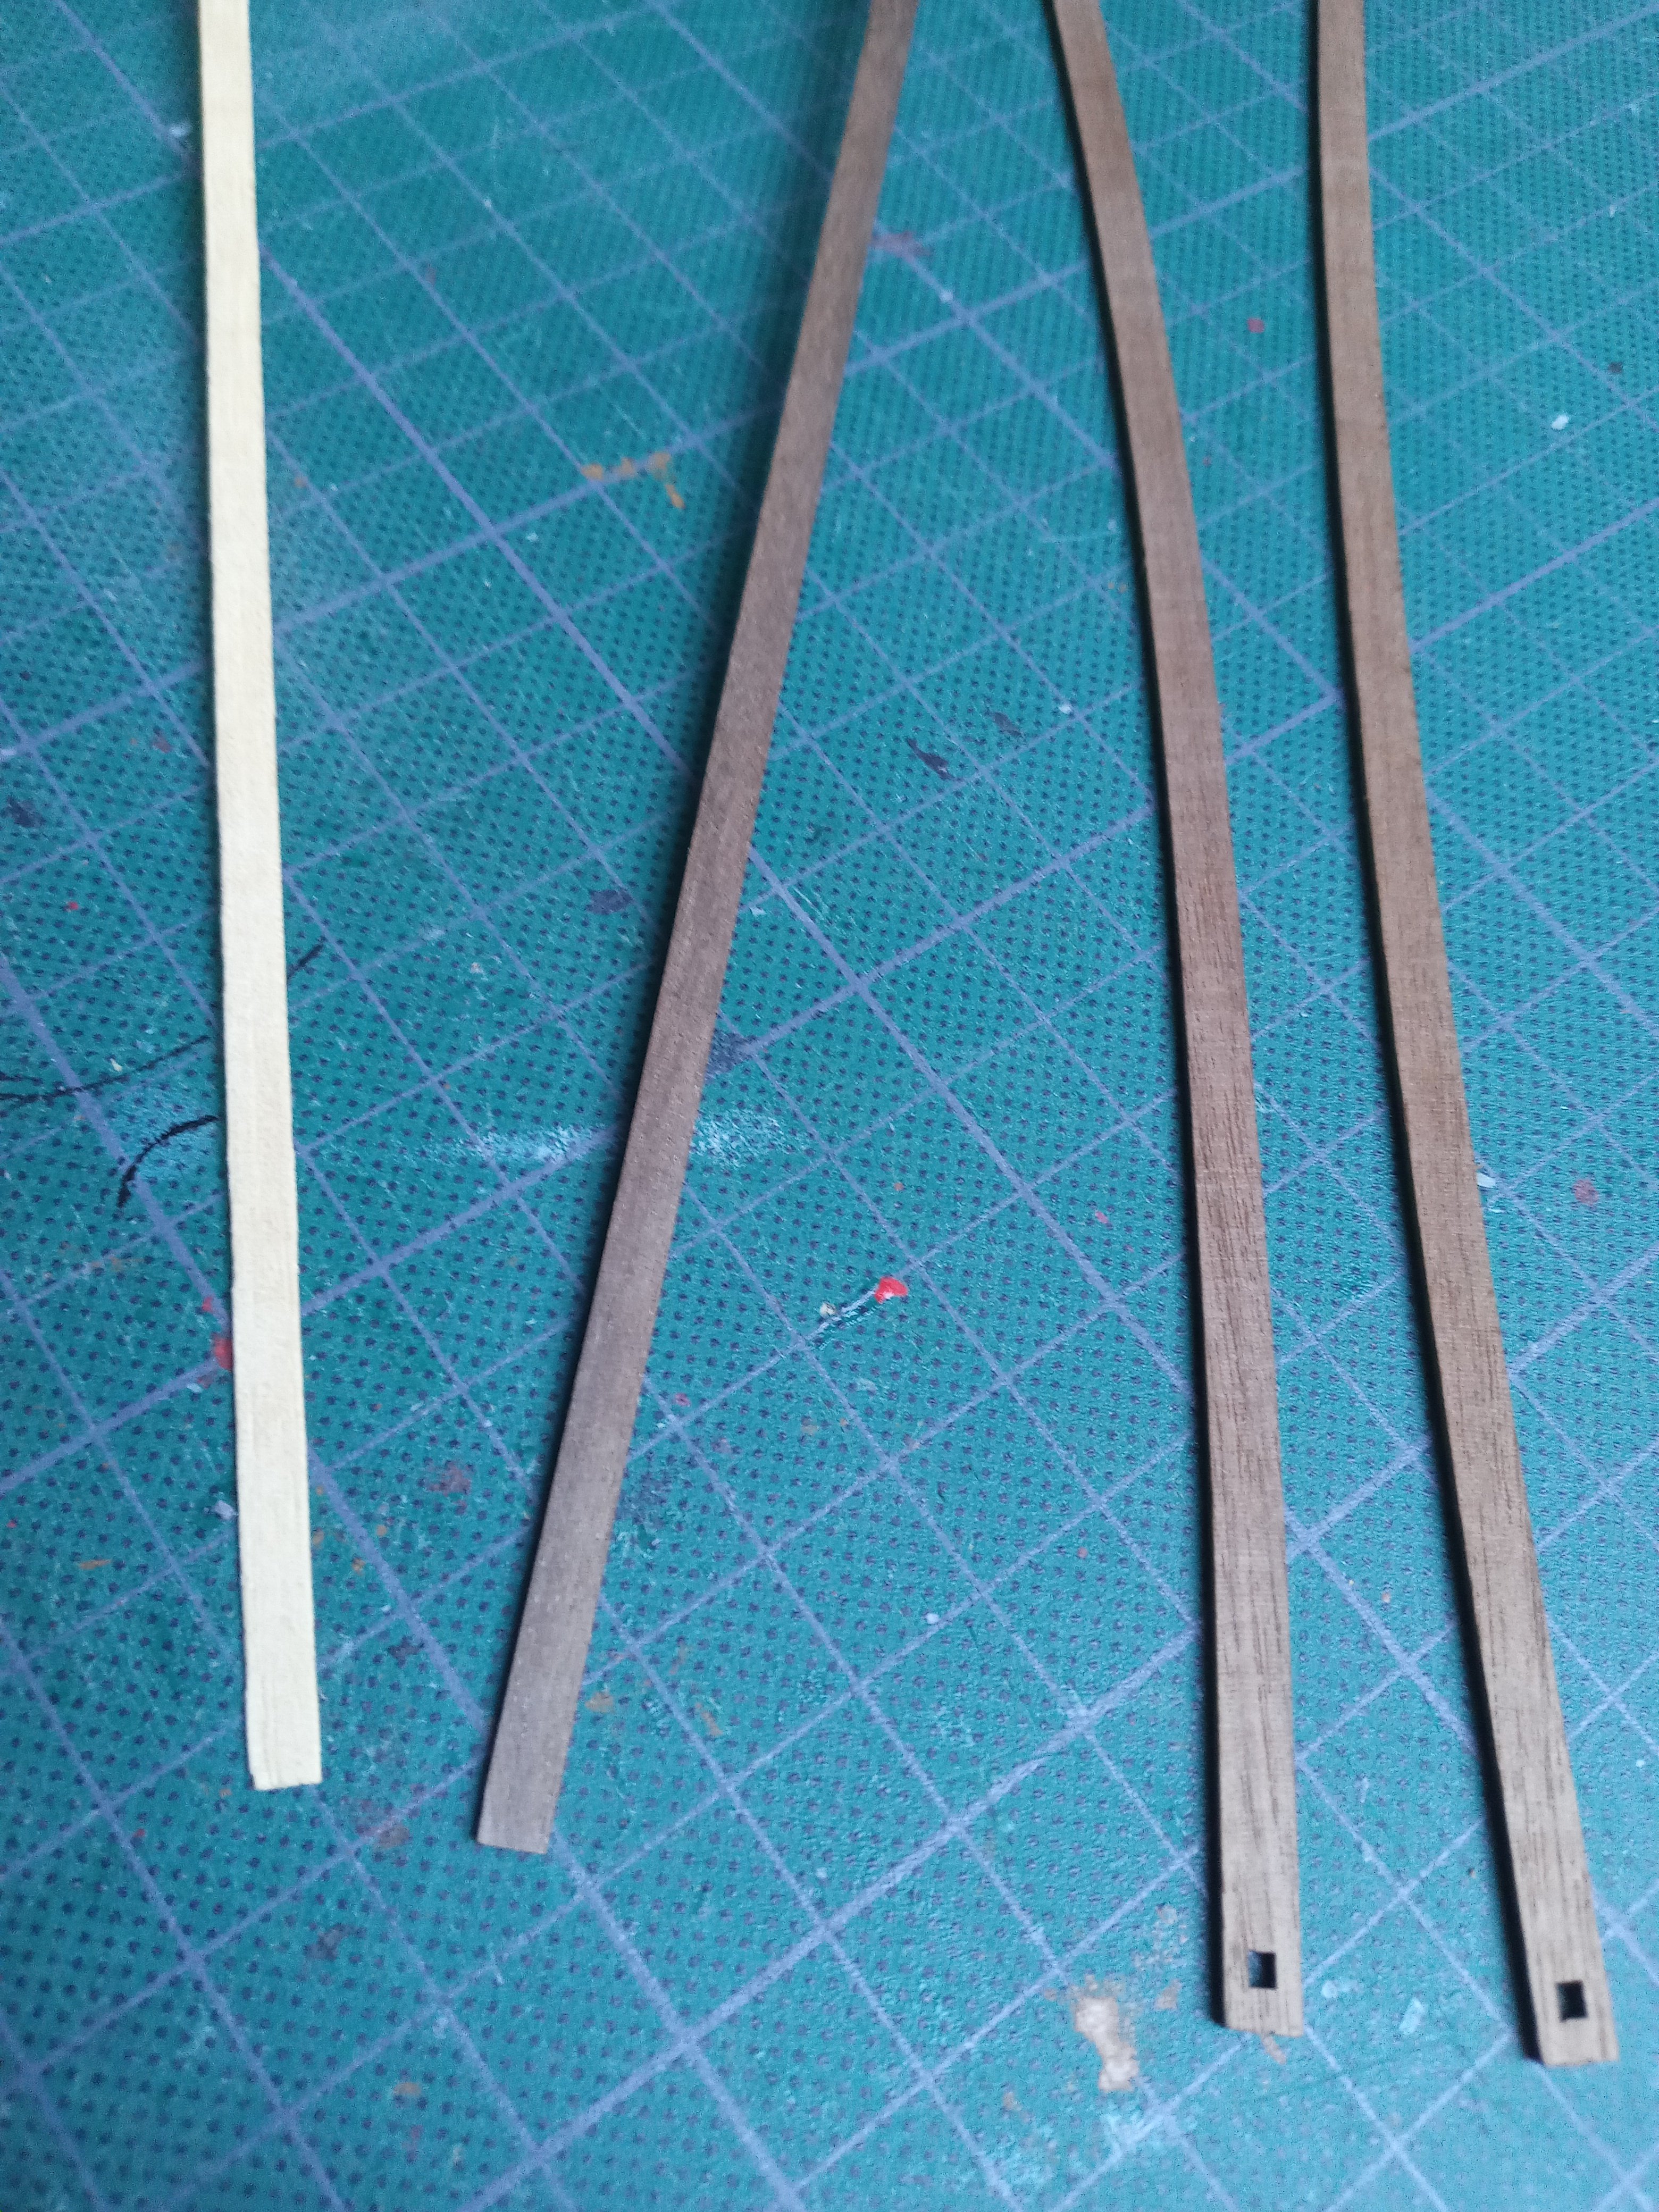
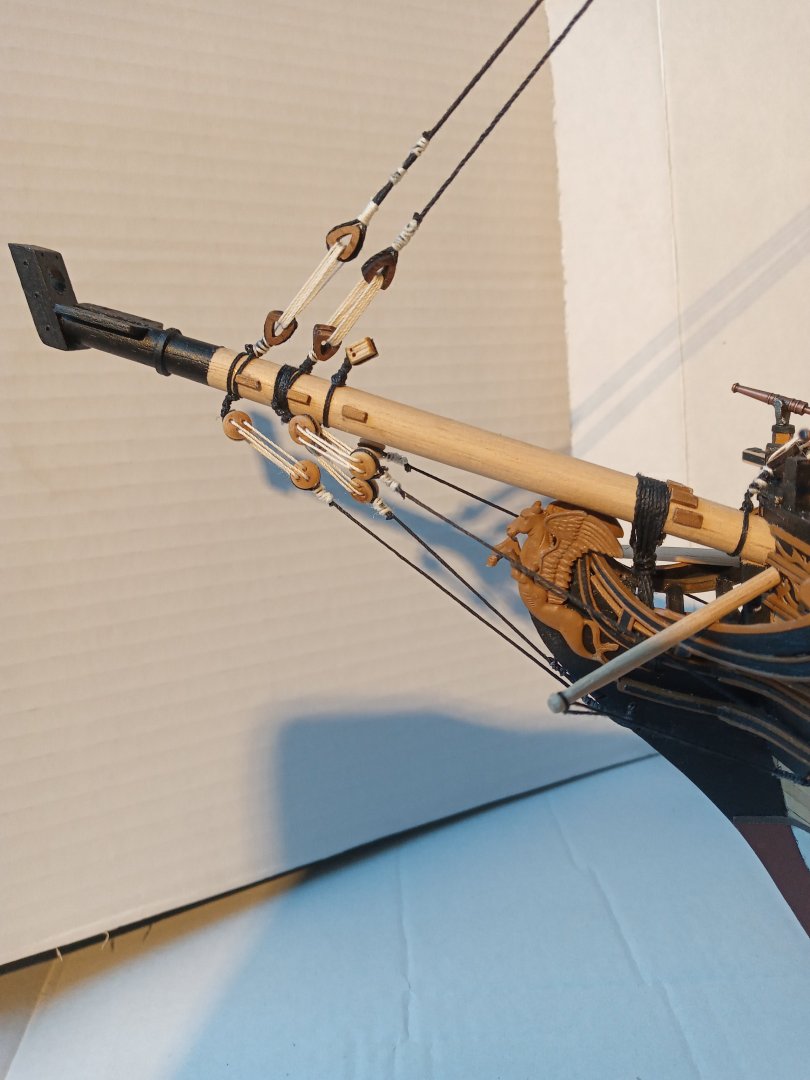
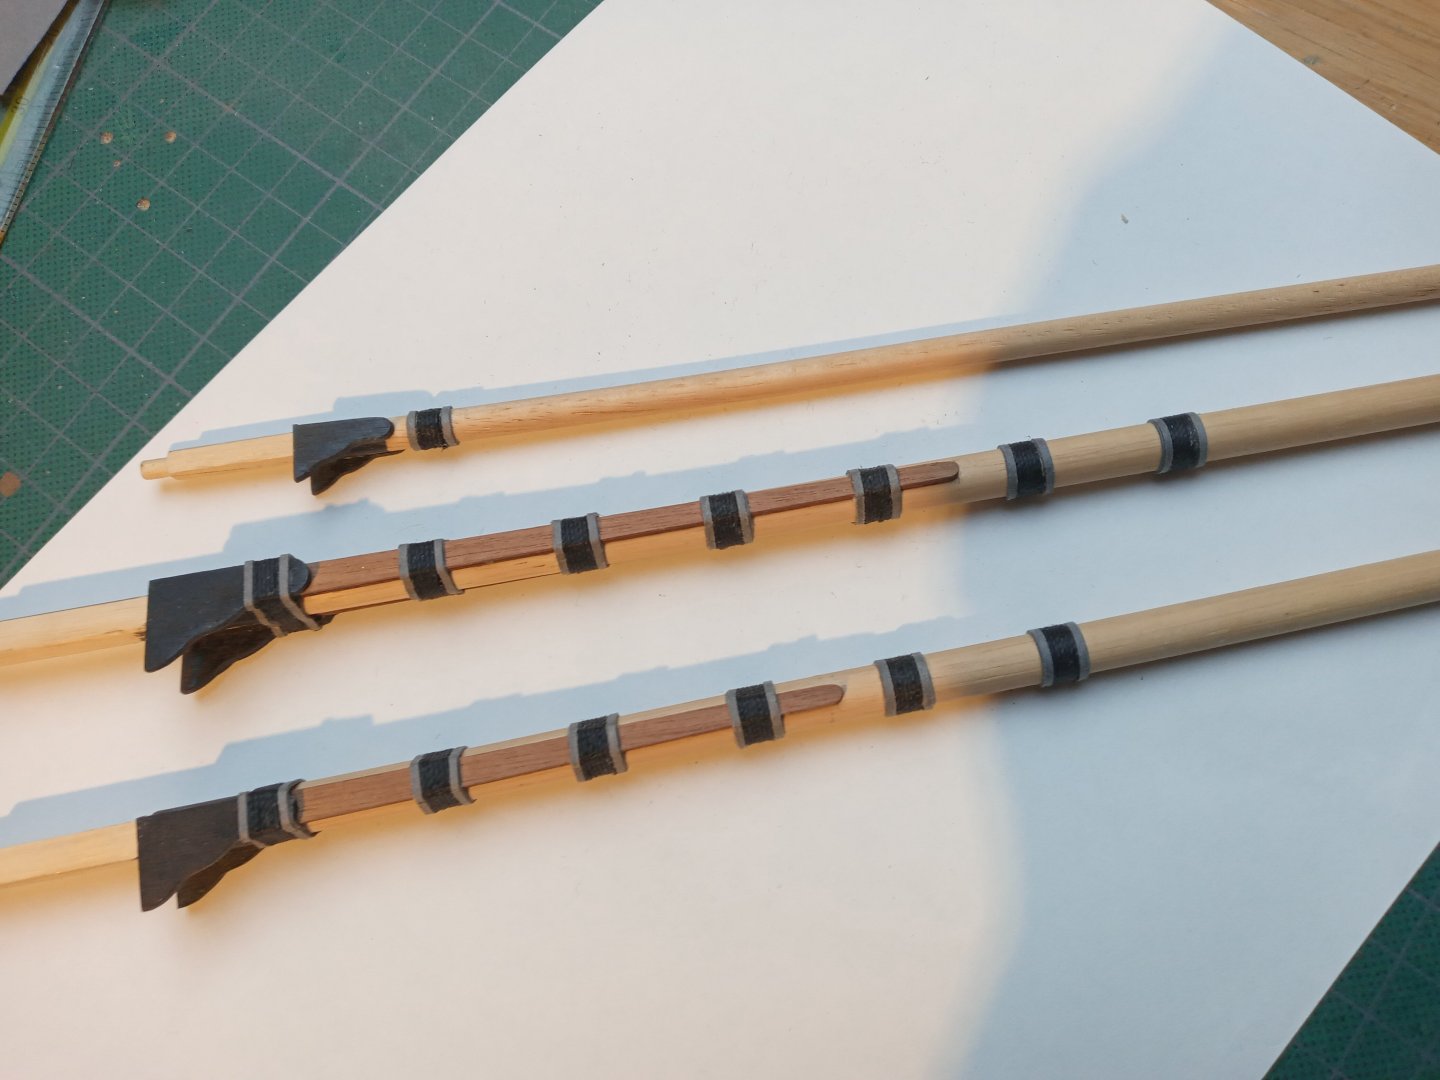
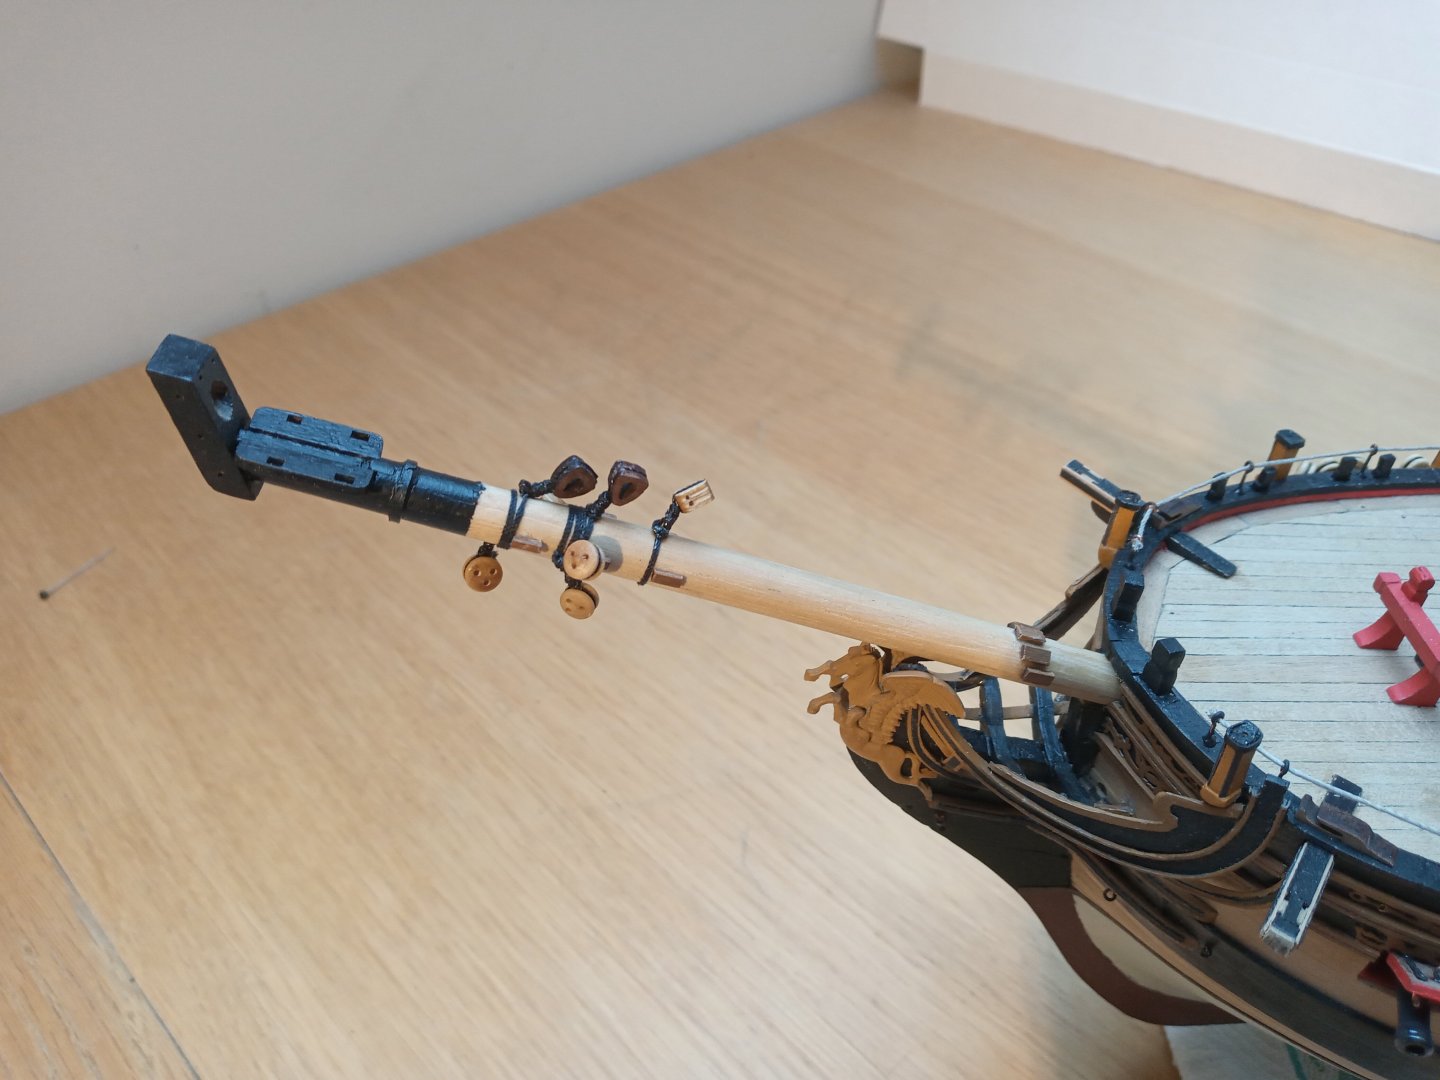
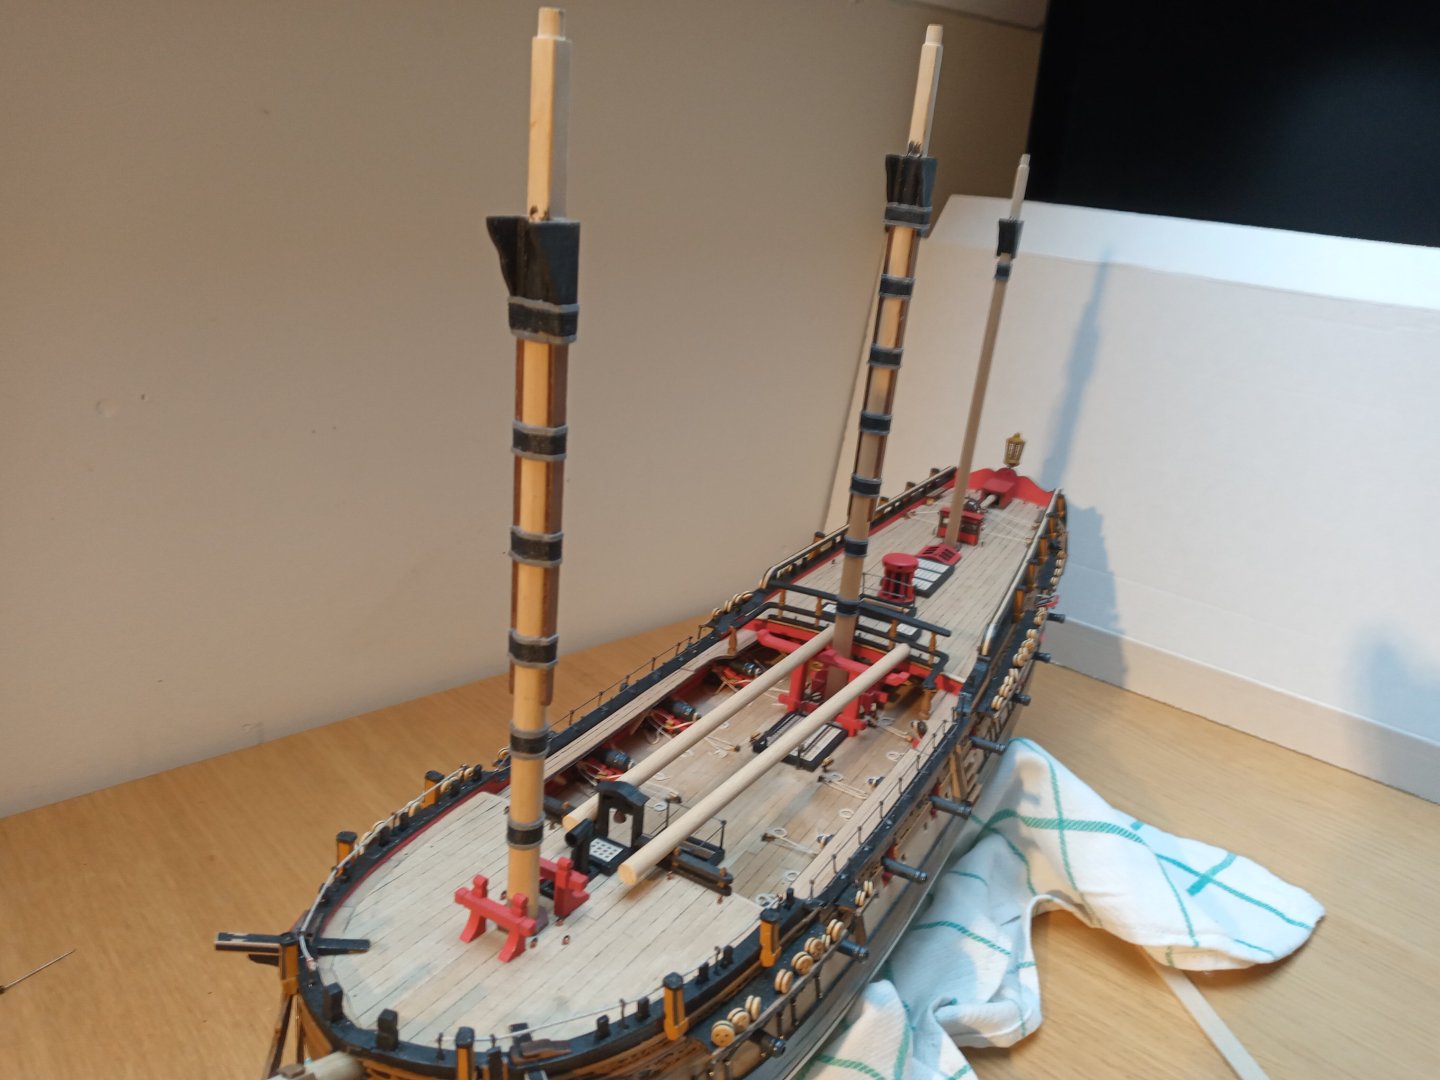
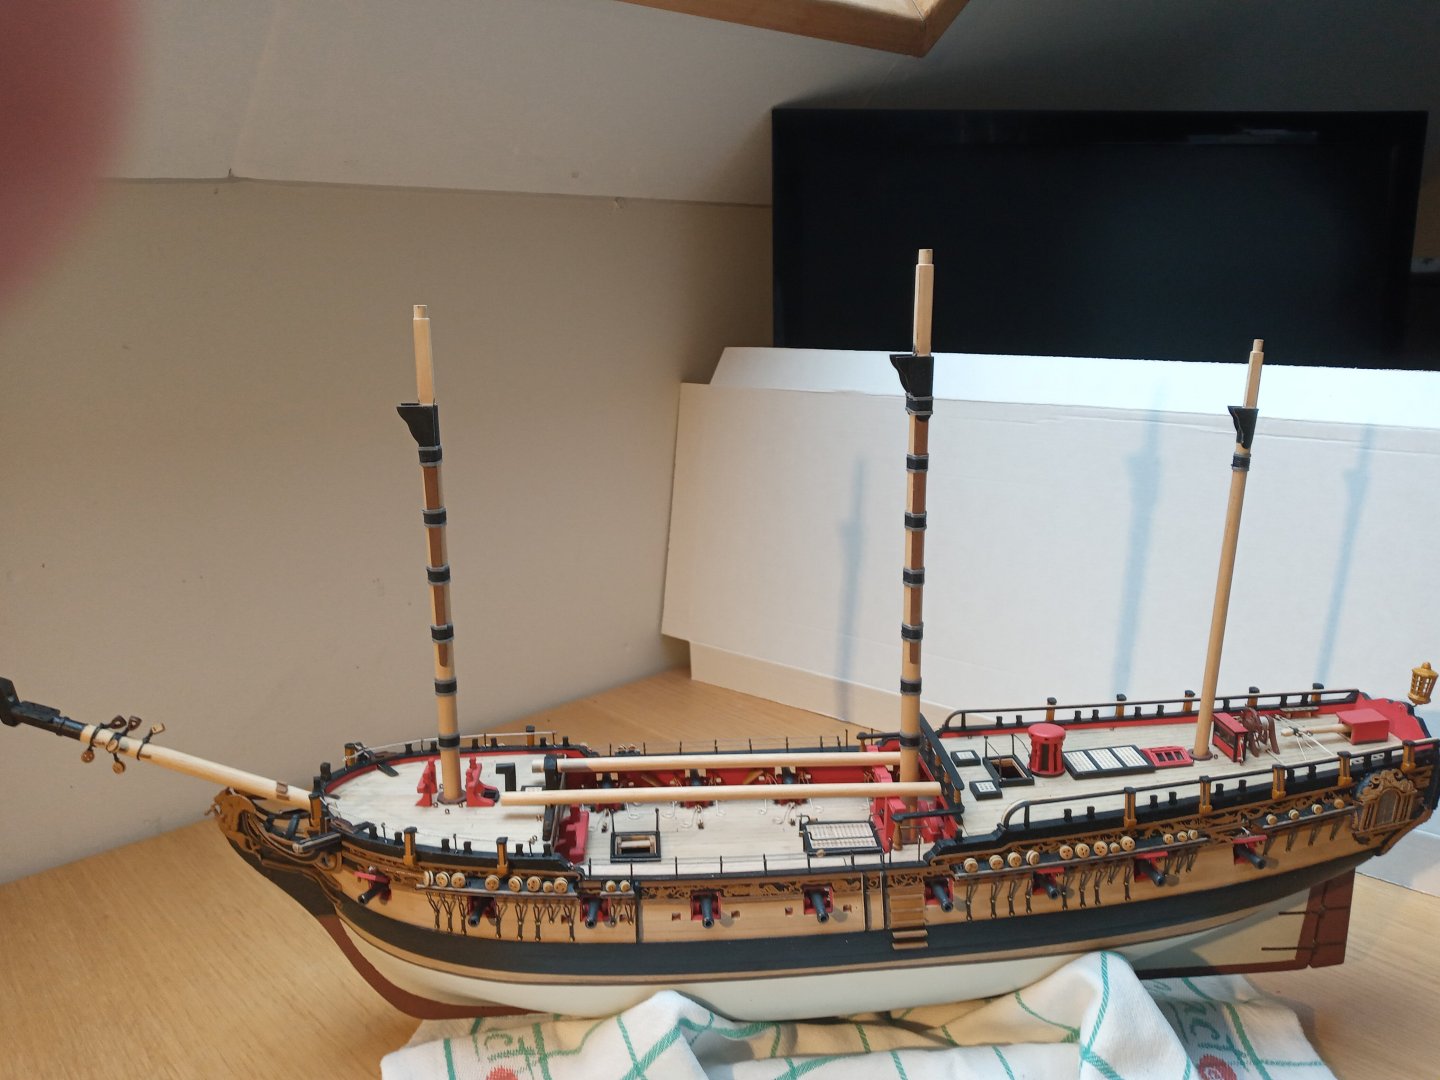
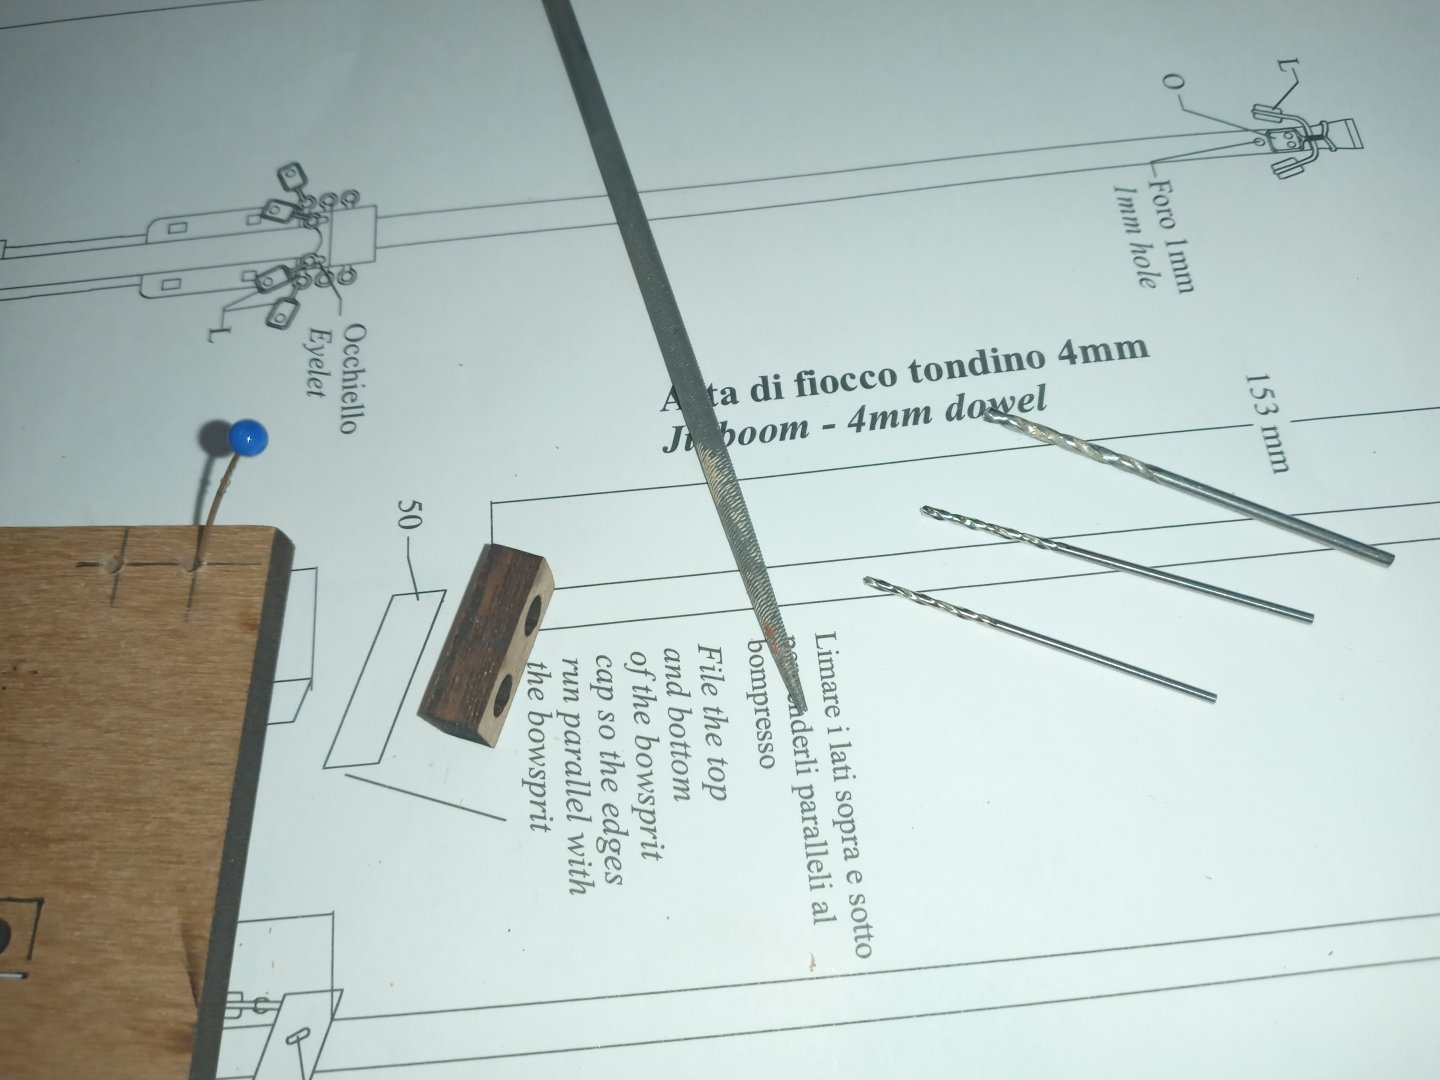
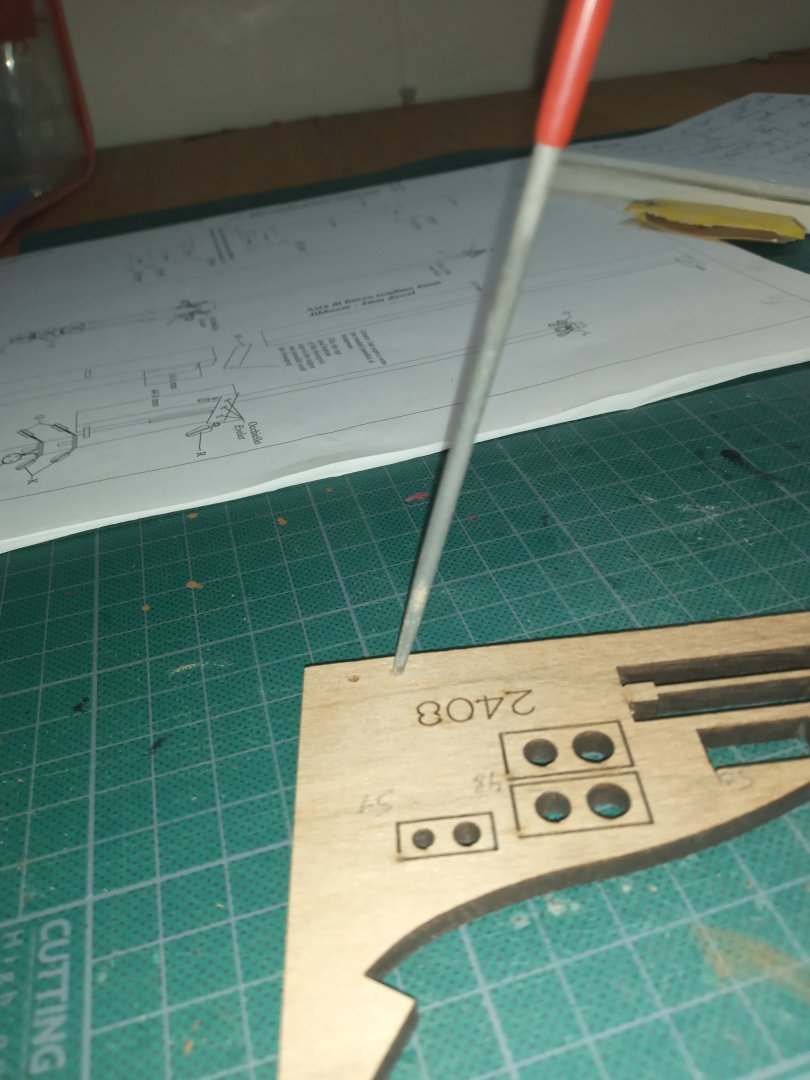
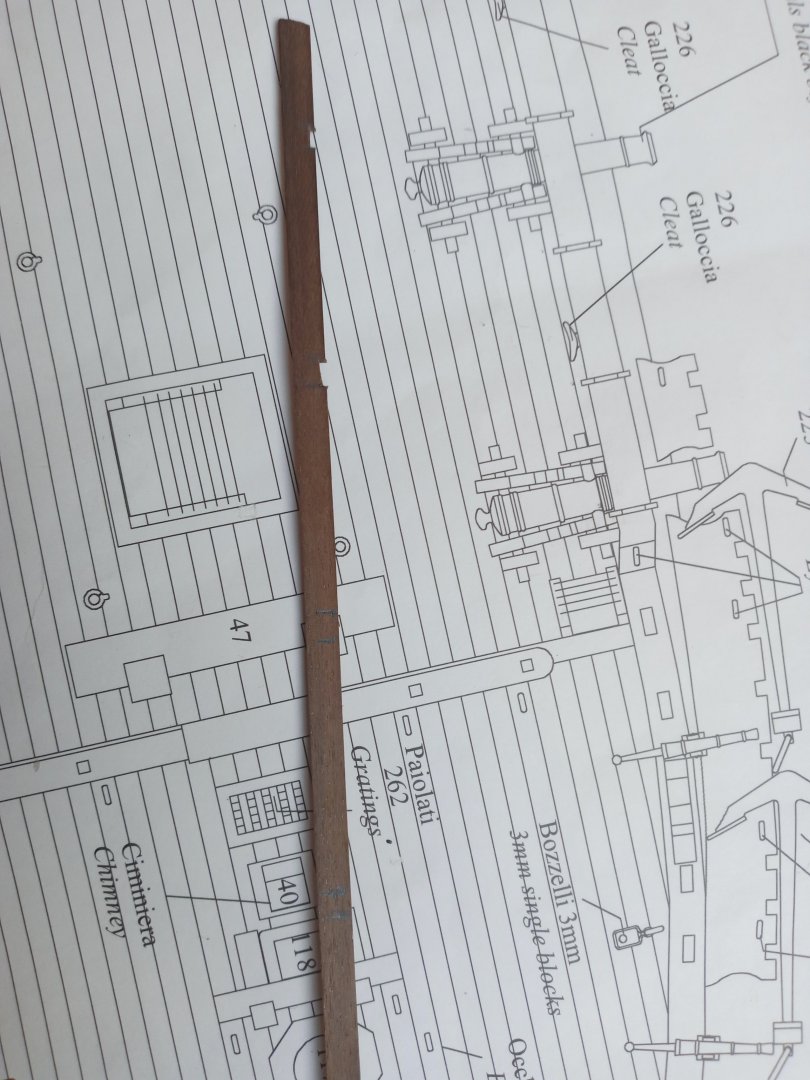
Started with the masts I did not use the provided walnut dowels and went for ramin. I prefer the natural color especially after a varnish coat. A matter of personal taste, I guess. The bowsprit As I want to avoid bulky and clumsy knots, it is recommendable to consult other buildlogs. 5 blocks at the top of the bowsprit jibboom? A bit crowdy....thus I copy/pasted ( more or less ) the BE and Moonbug approach. By luck I've found a spare triple block and fored a 0,8 mm hole where I inserted a piece of brass wire and created 2 loops on each side The bowspritcap was another concern I replaced piece n° 50 with a scratch built item To compensate the angle of the bowsprit, I fored holes that described the same angle.

-
Hi Bug, Nice work (as always). It is a pleasure to follow your progress as I like the way you combine evident explanations with pleasant photos. Non native english speakers ( such as I ) are in debt. Keep up the good work and a happy 2025 !
- 419 replies
-
- 1
-

-
- Victory Models
- Pegasus
- (and 2 more)
-
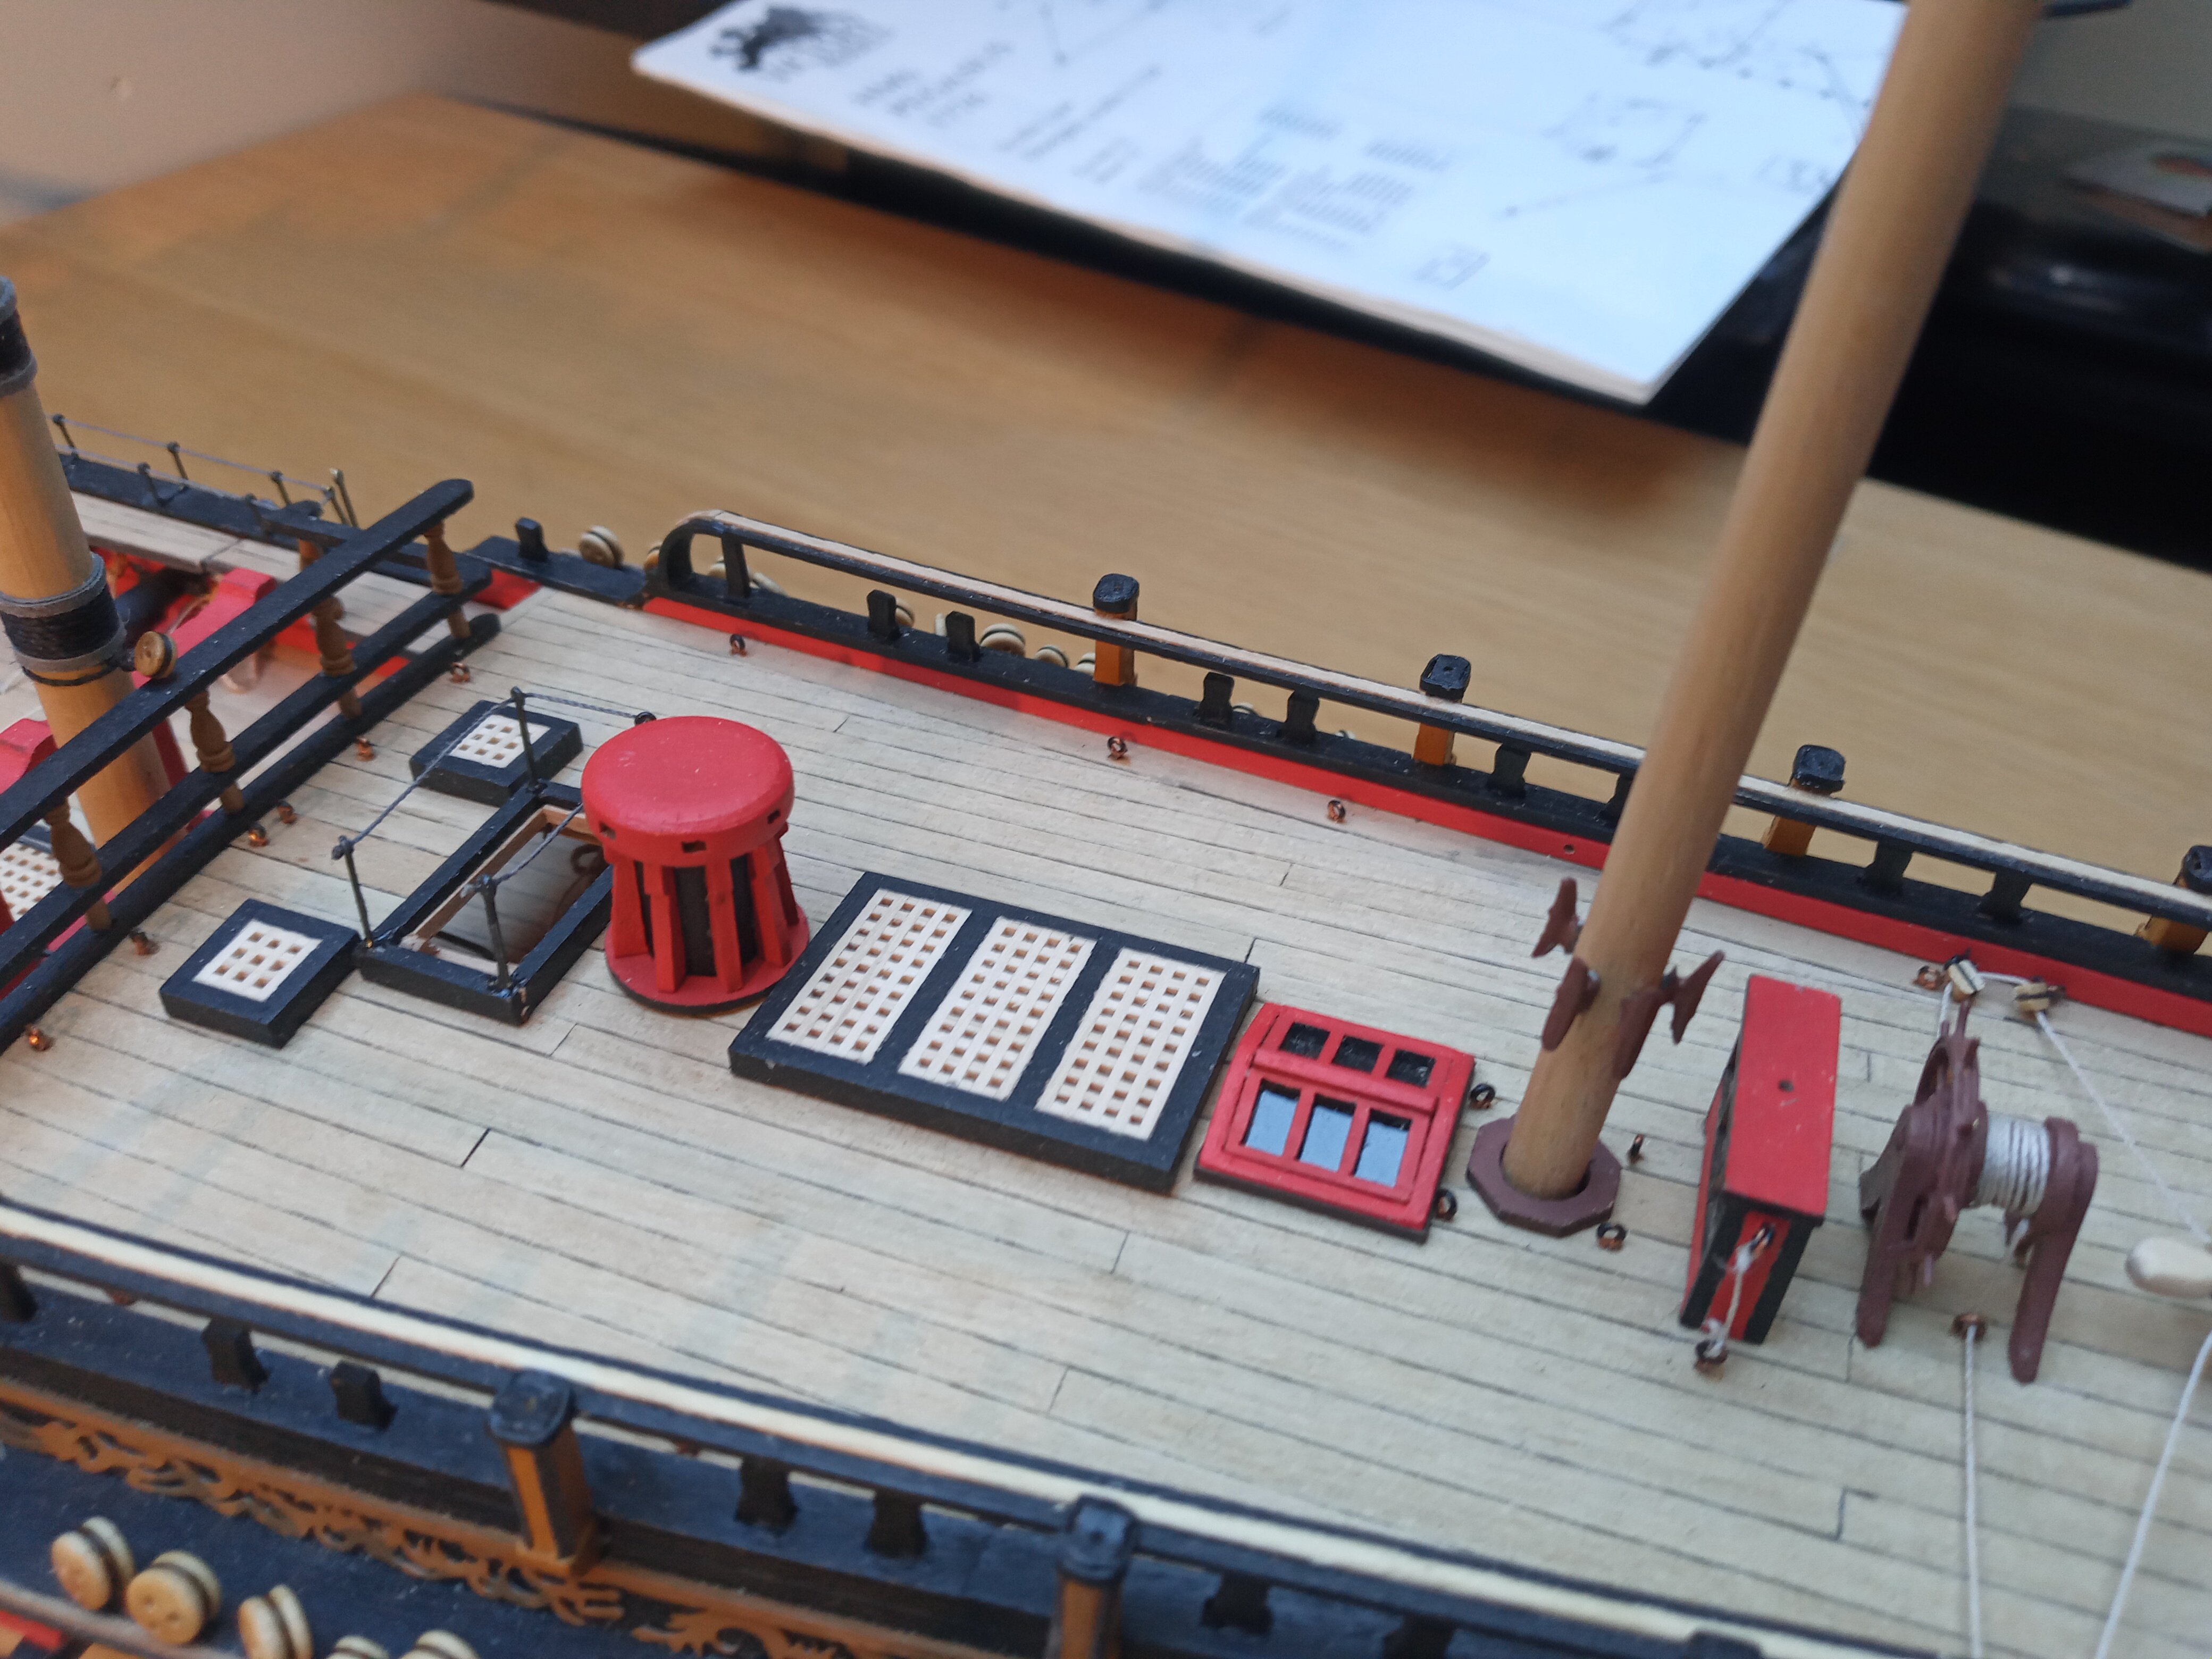
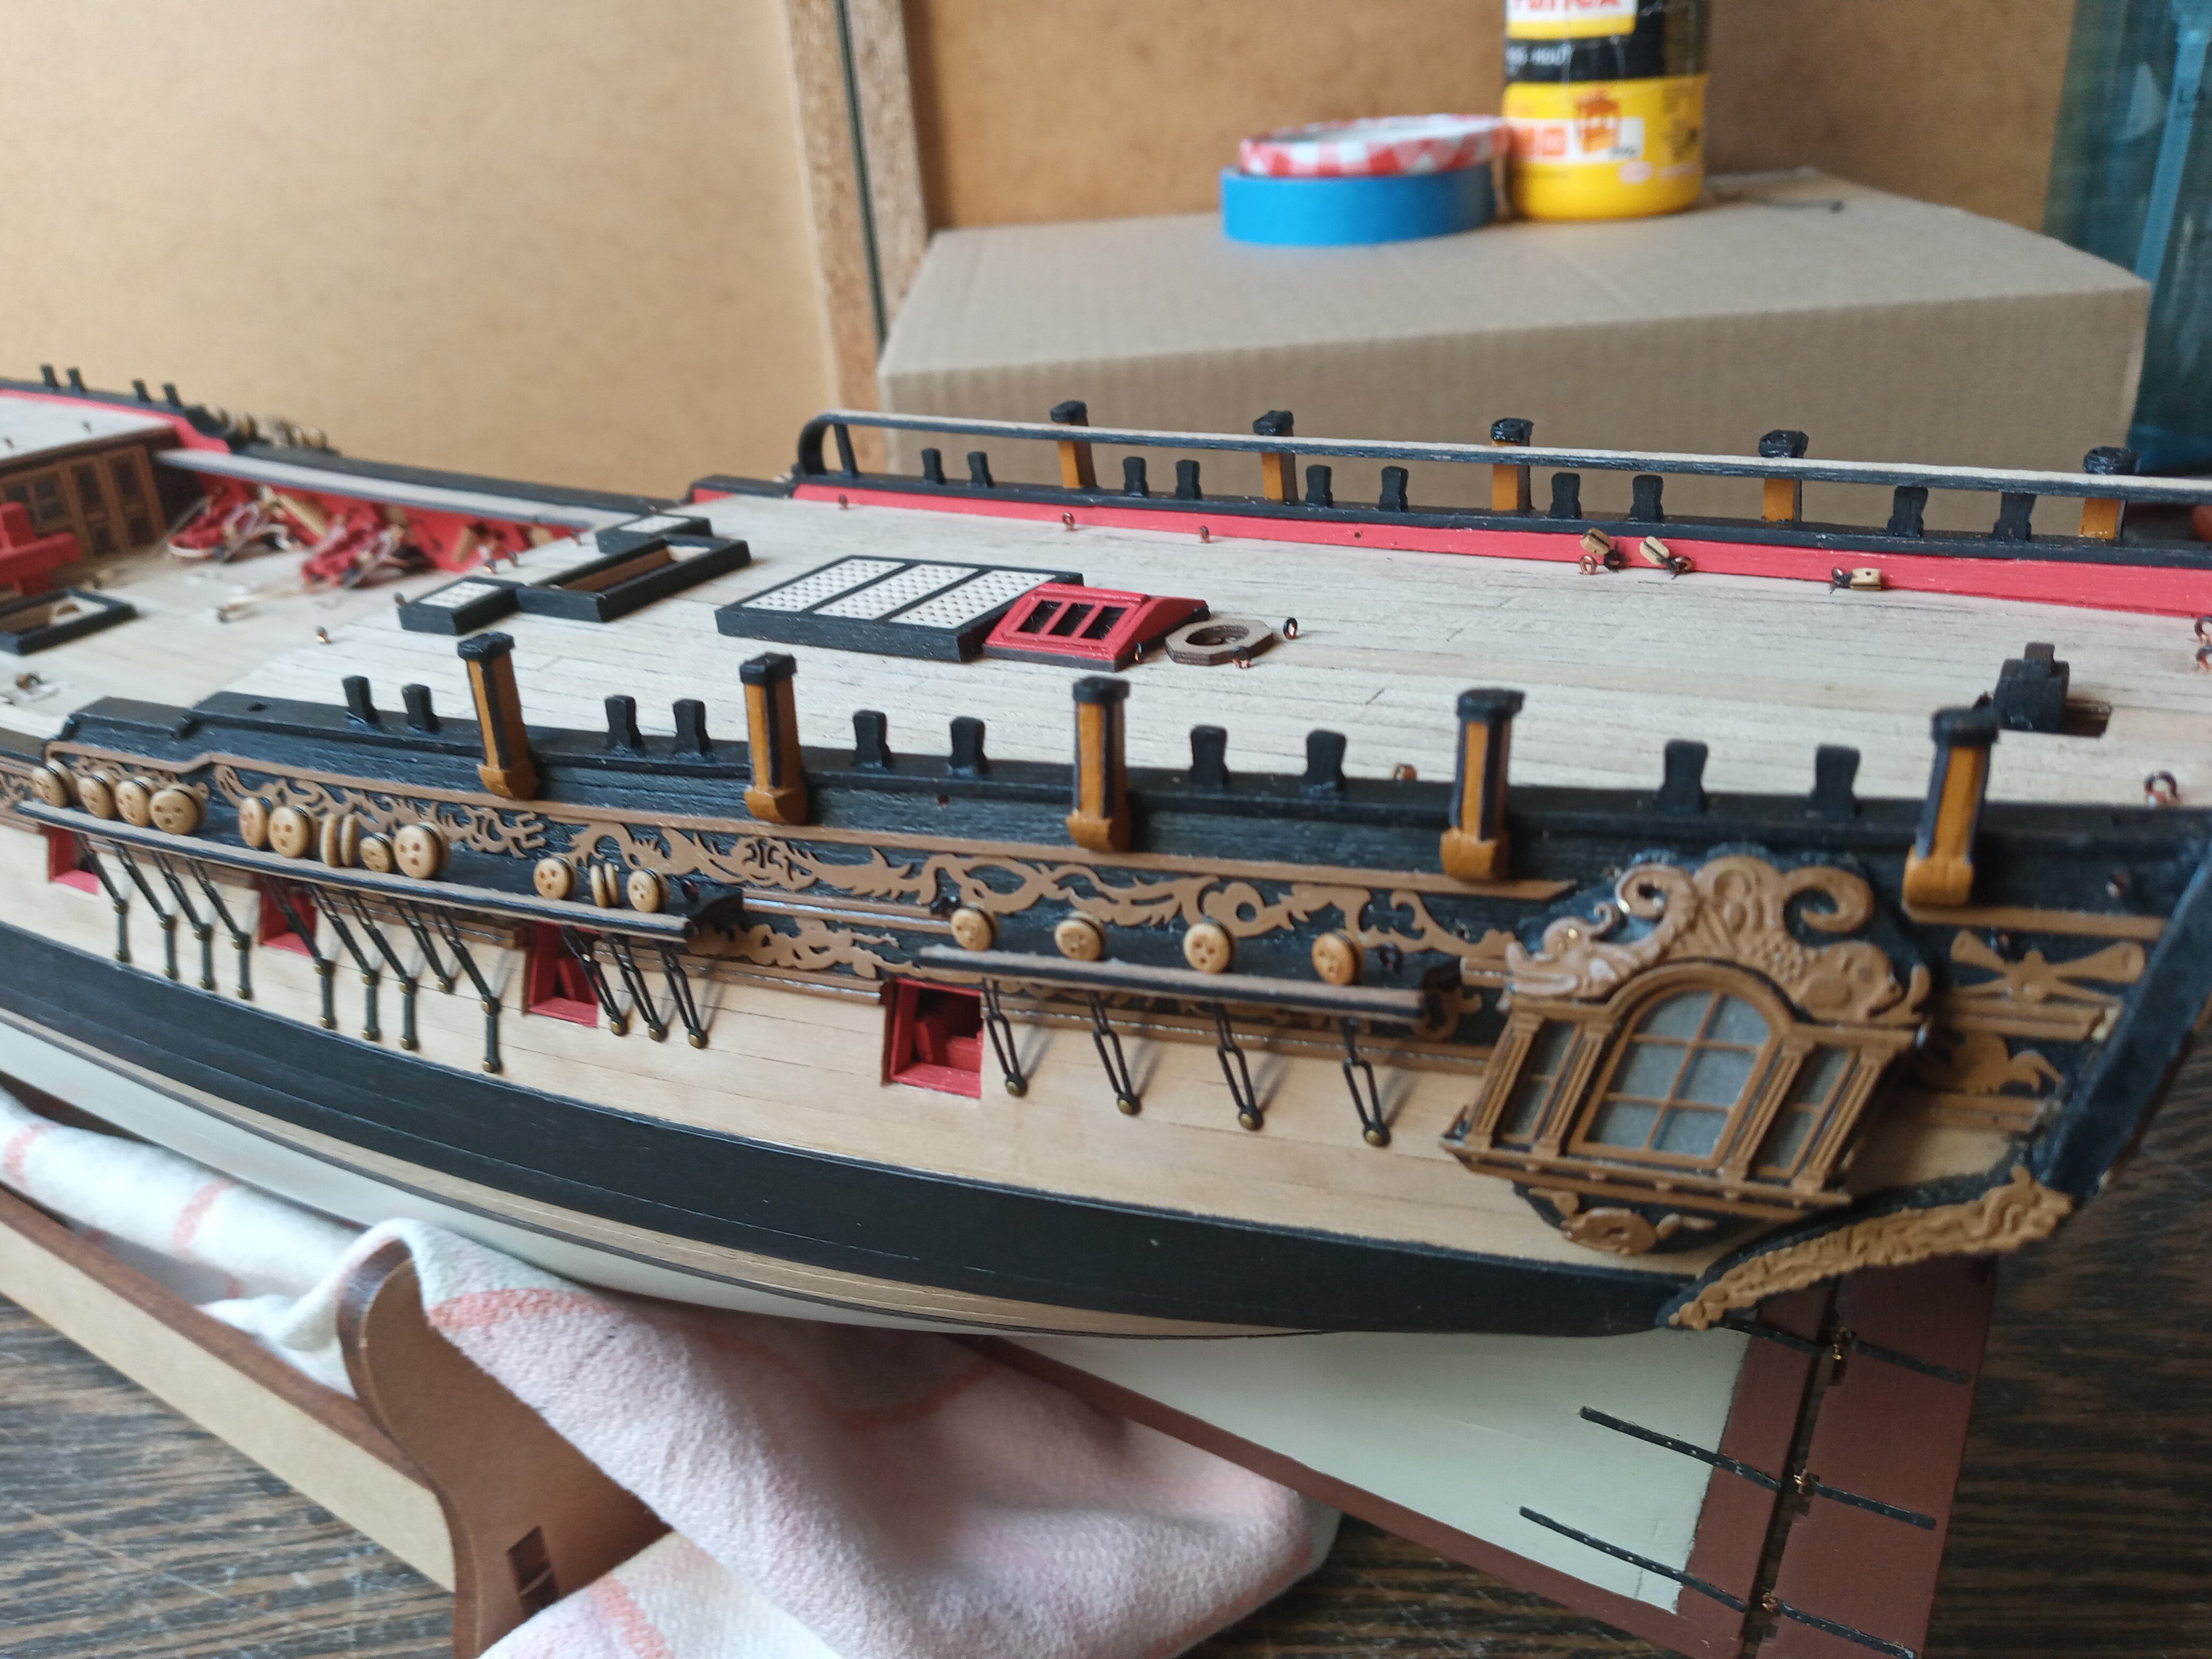
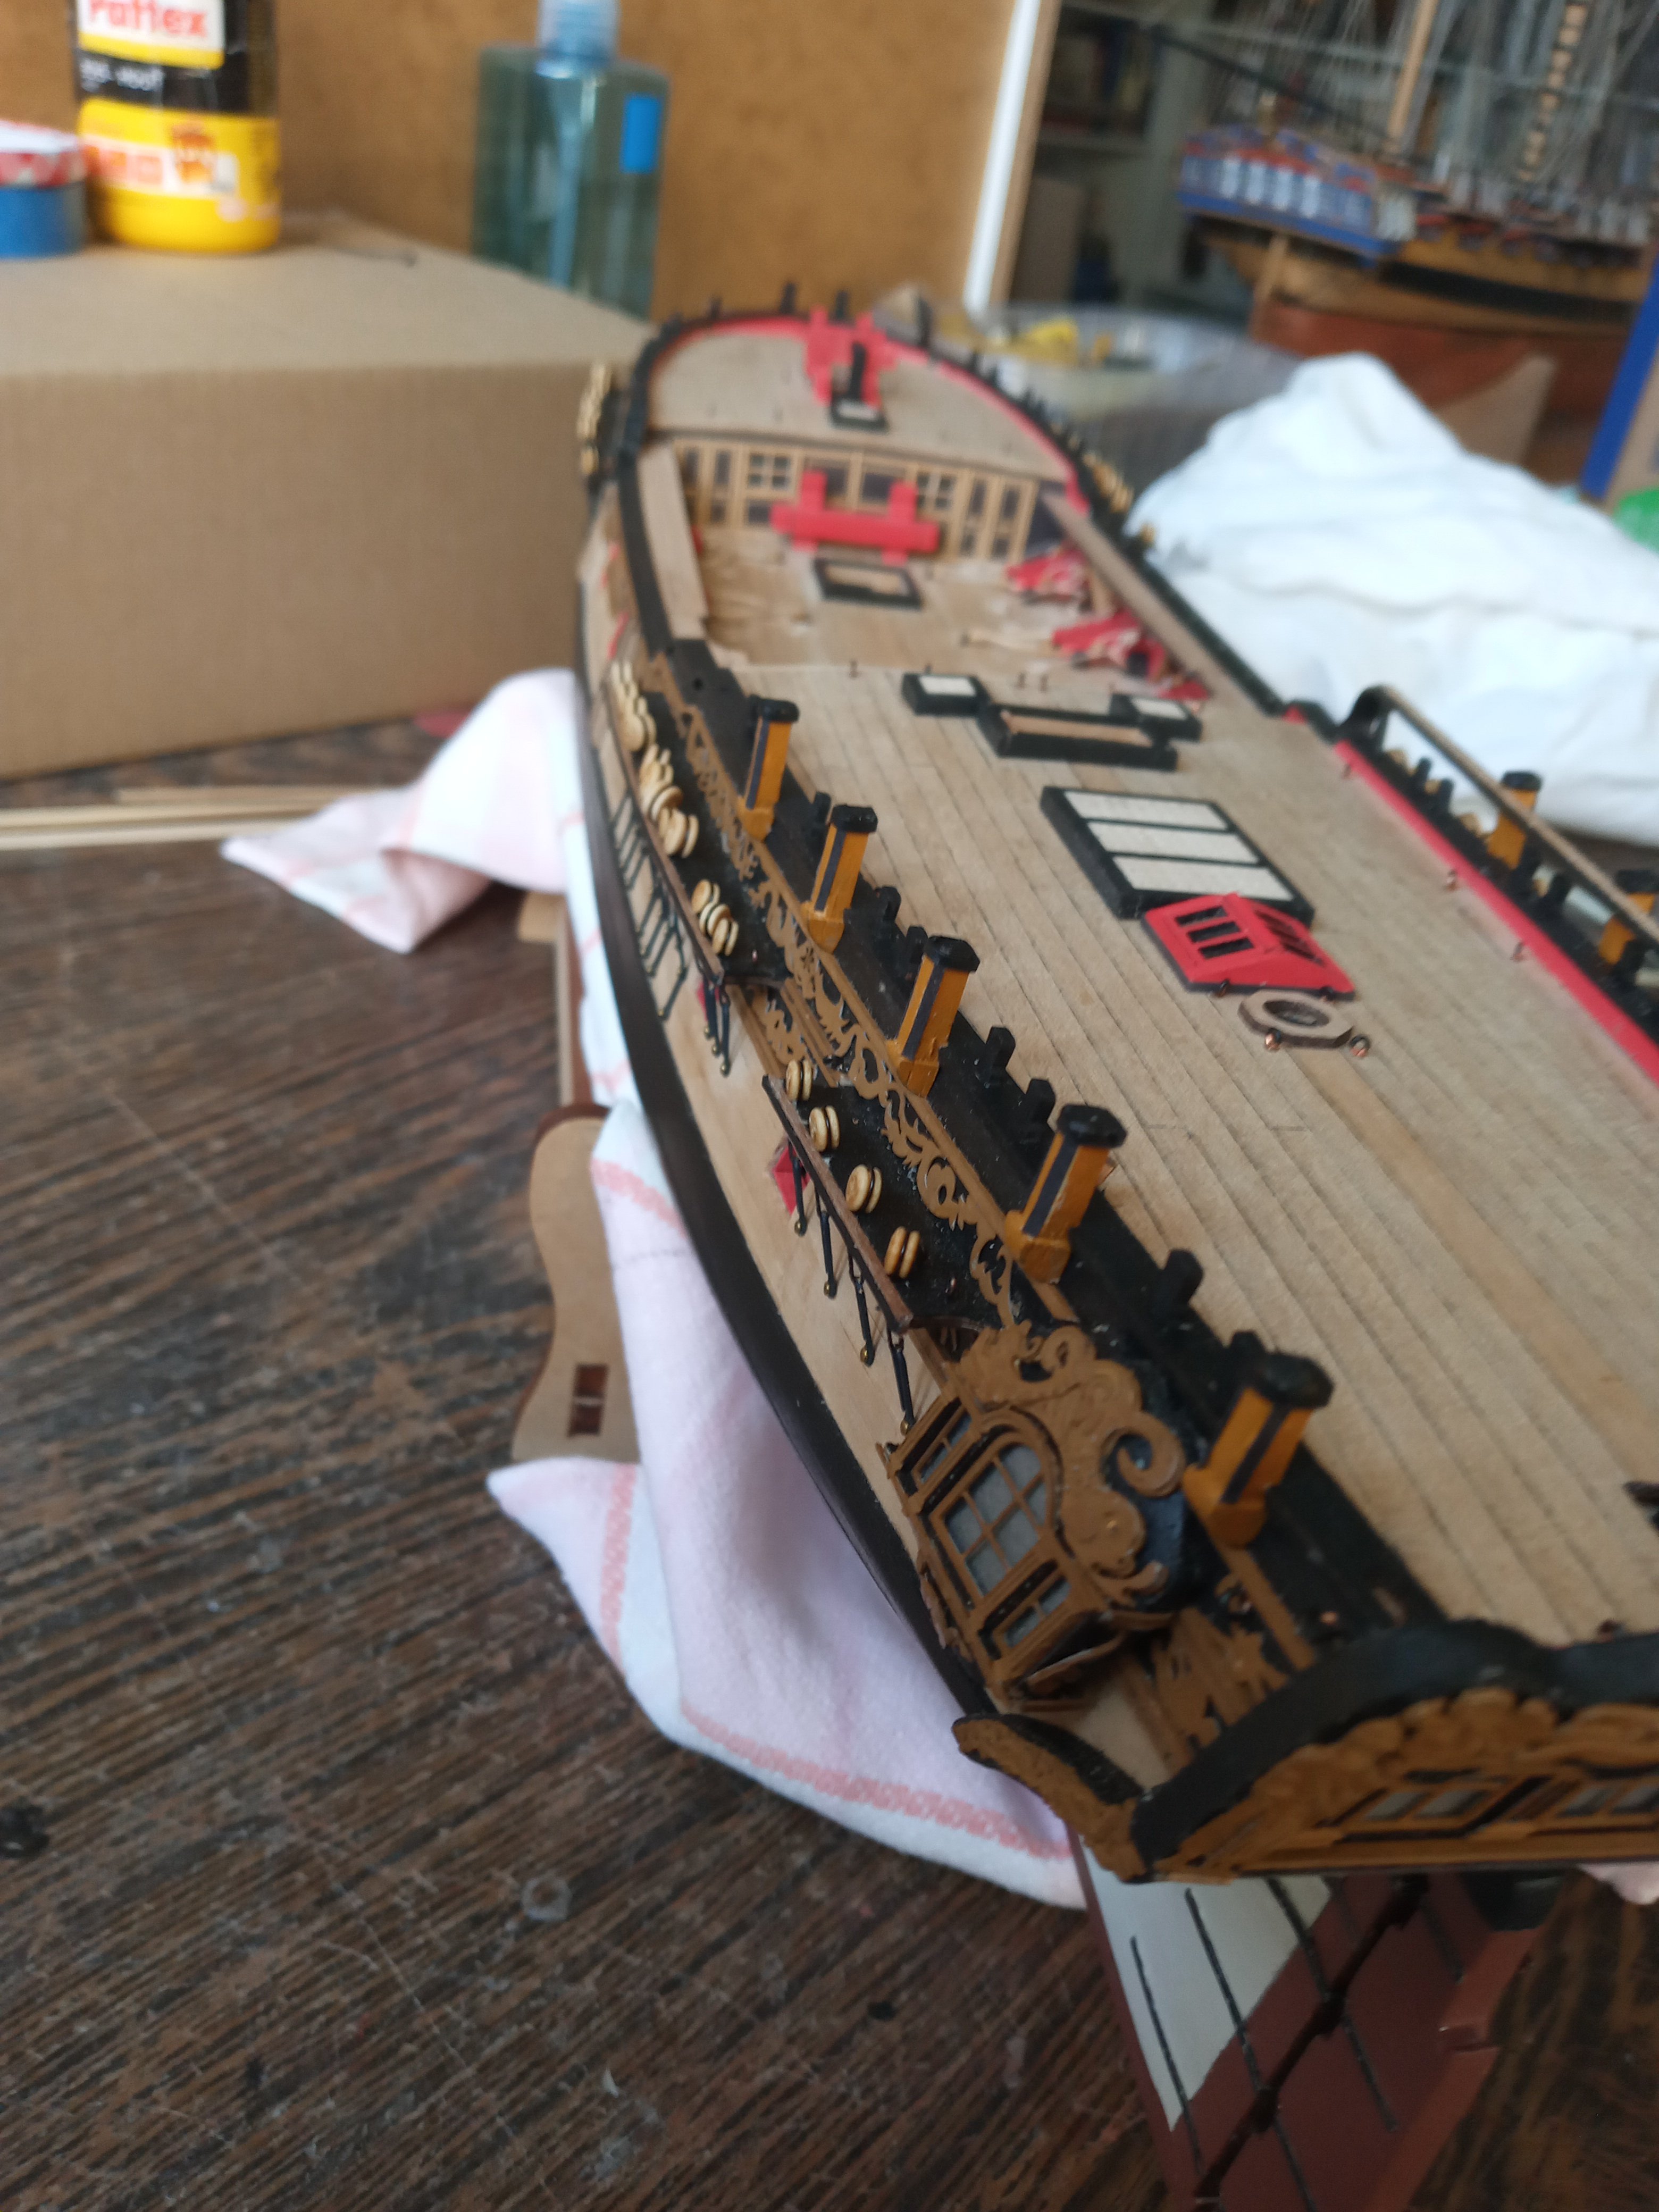
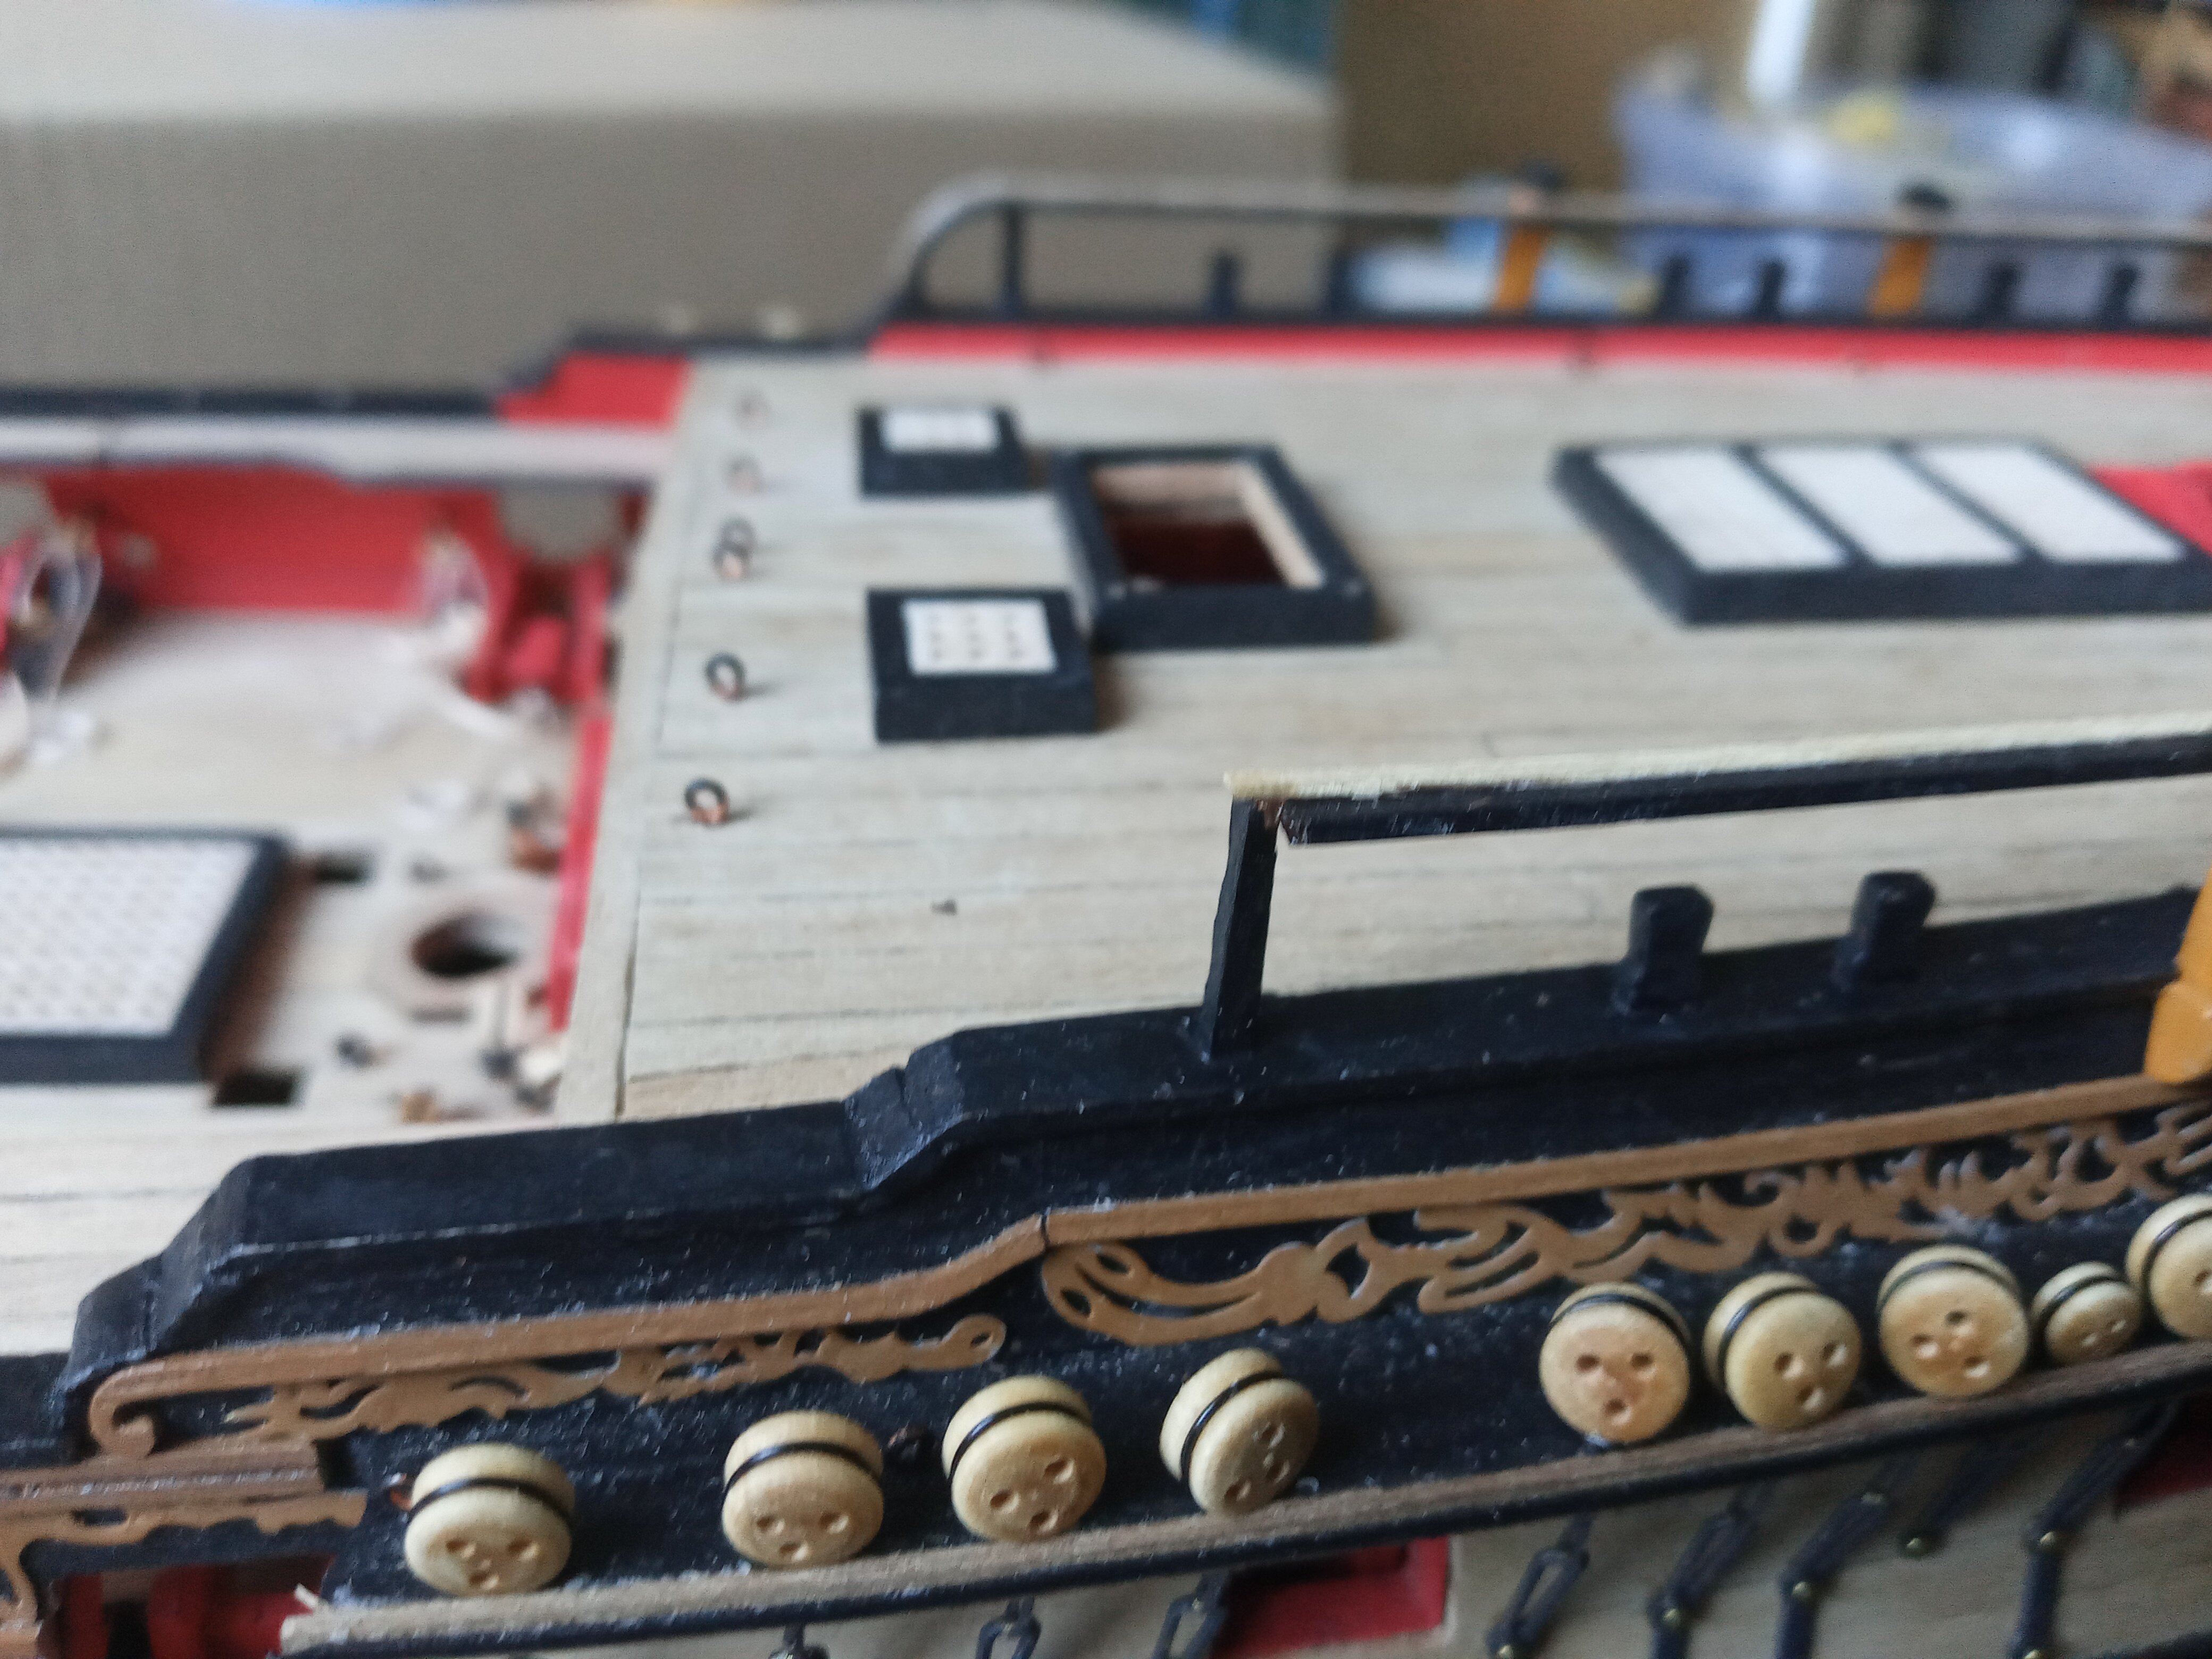
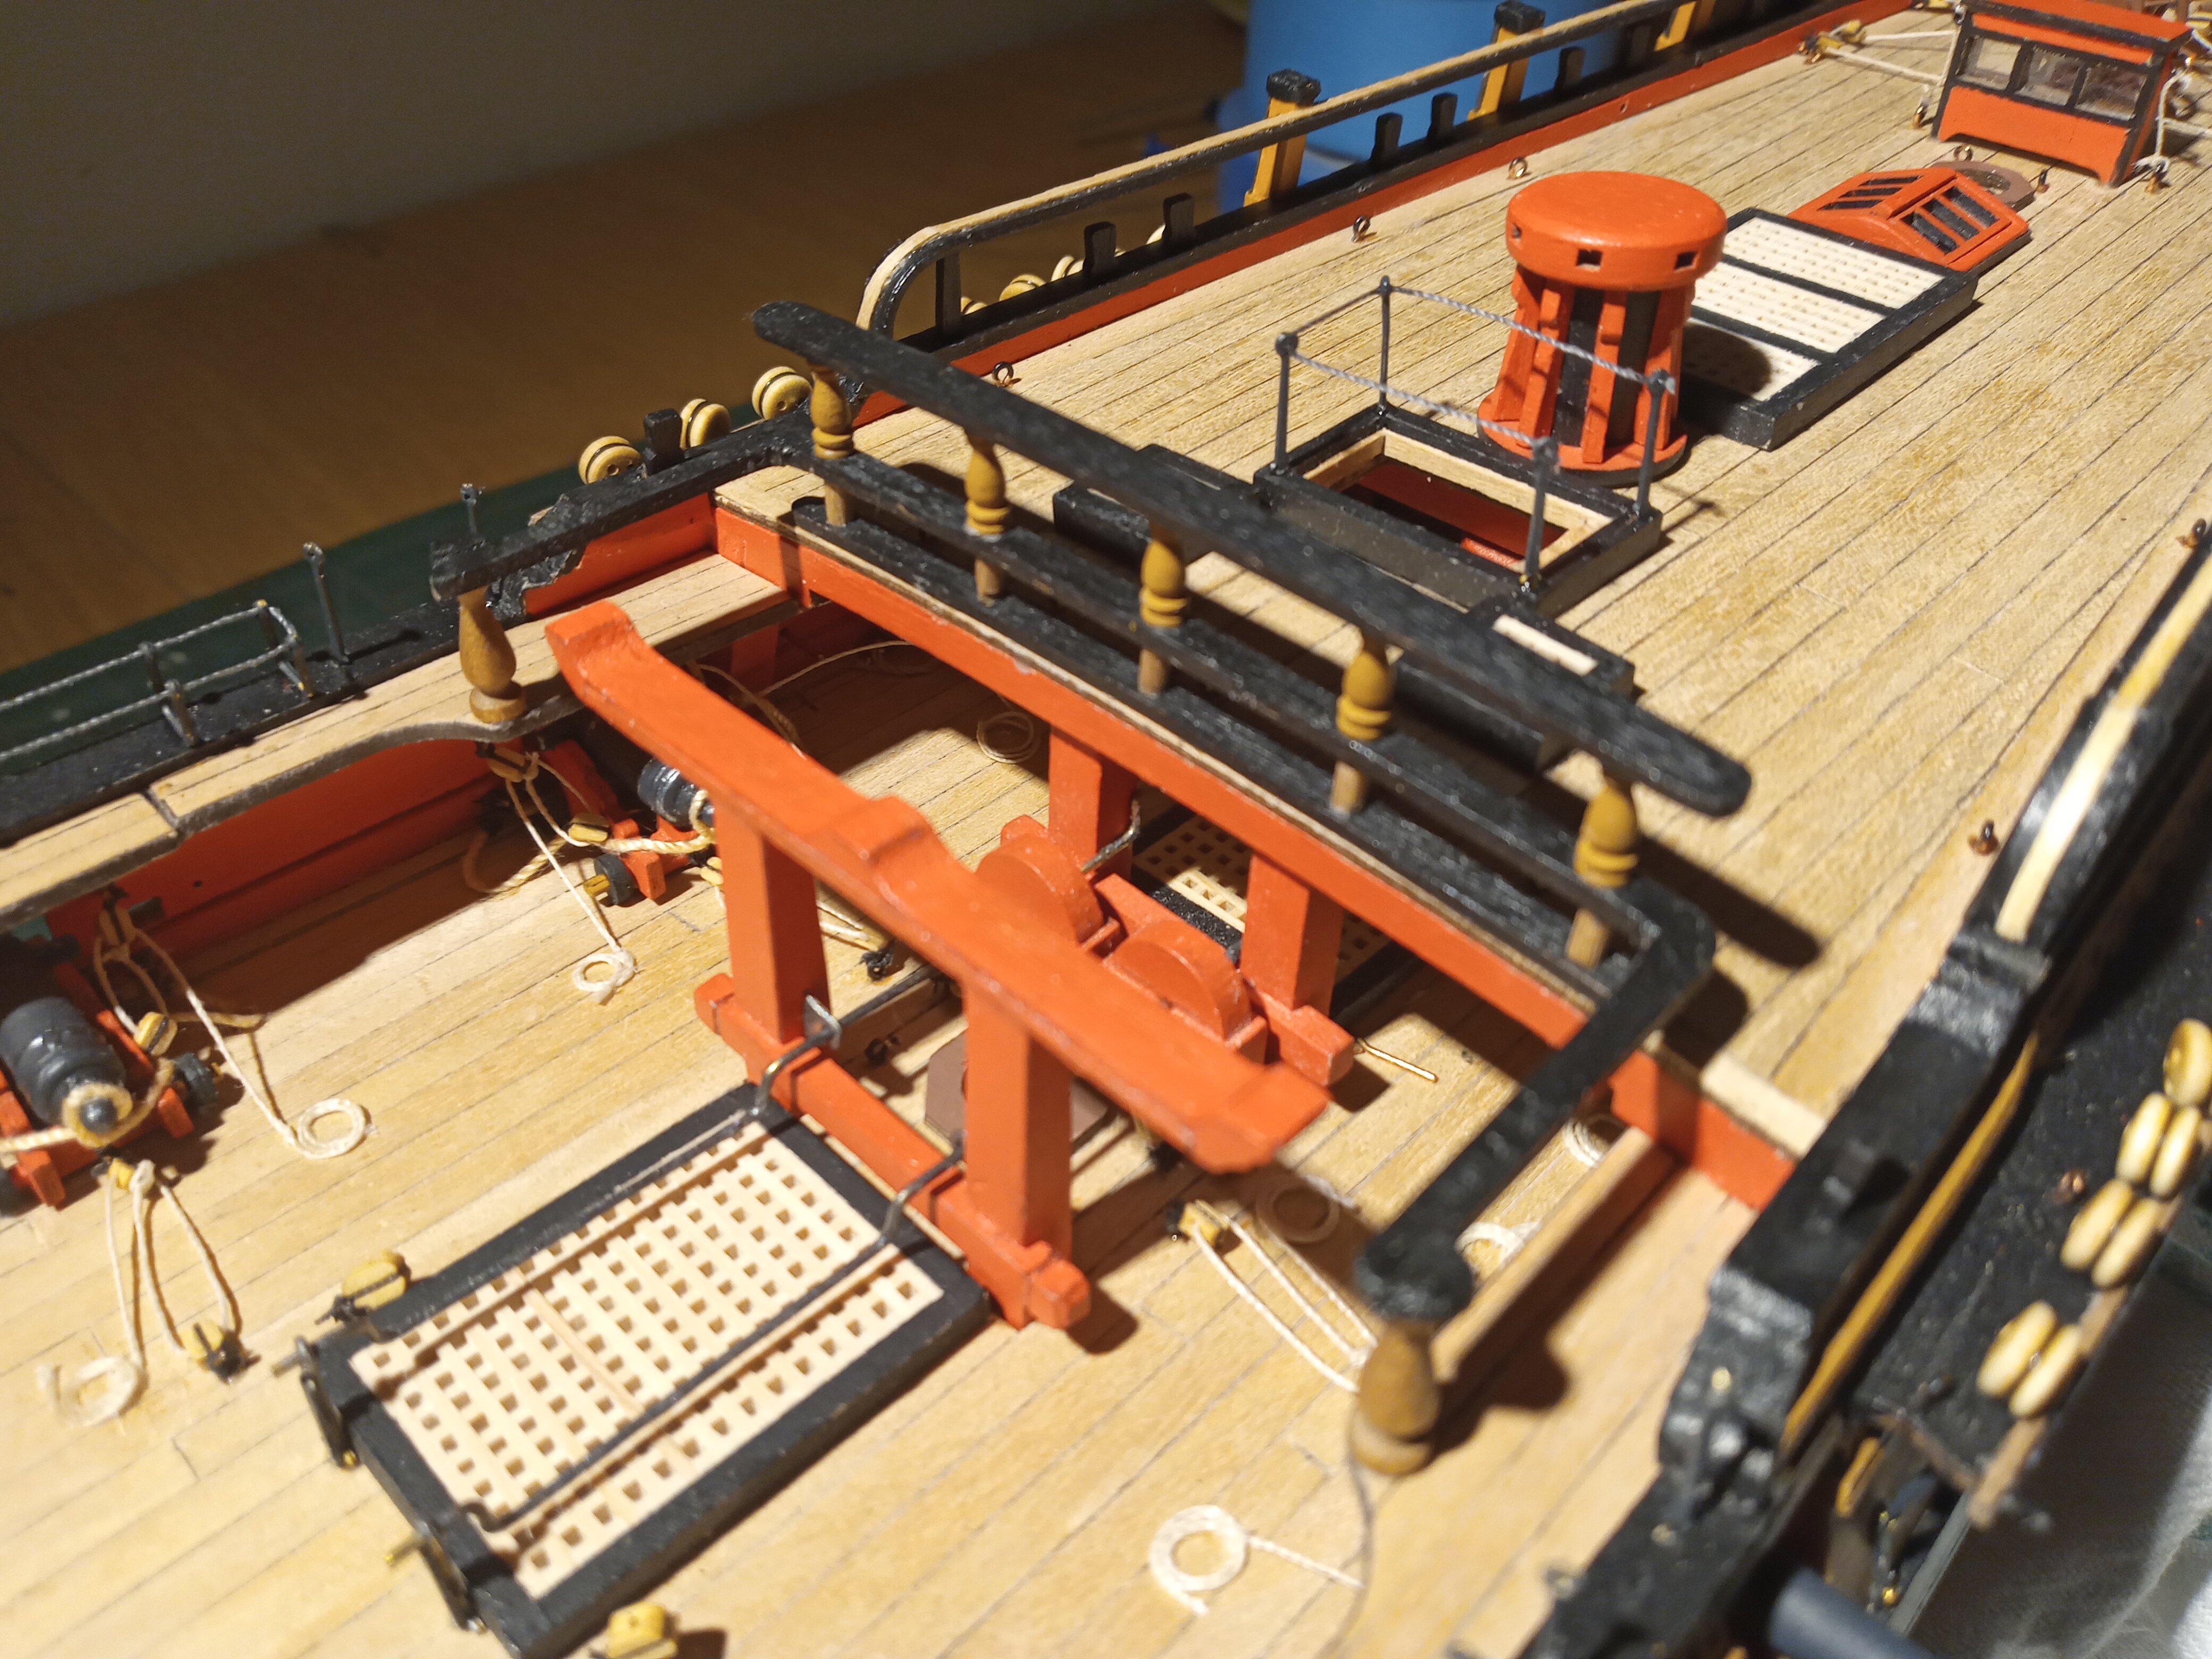
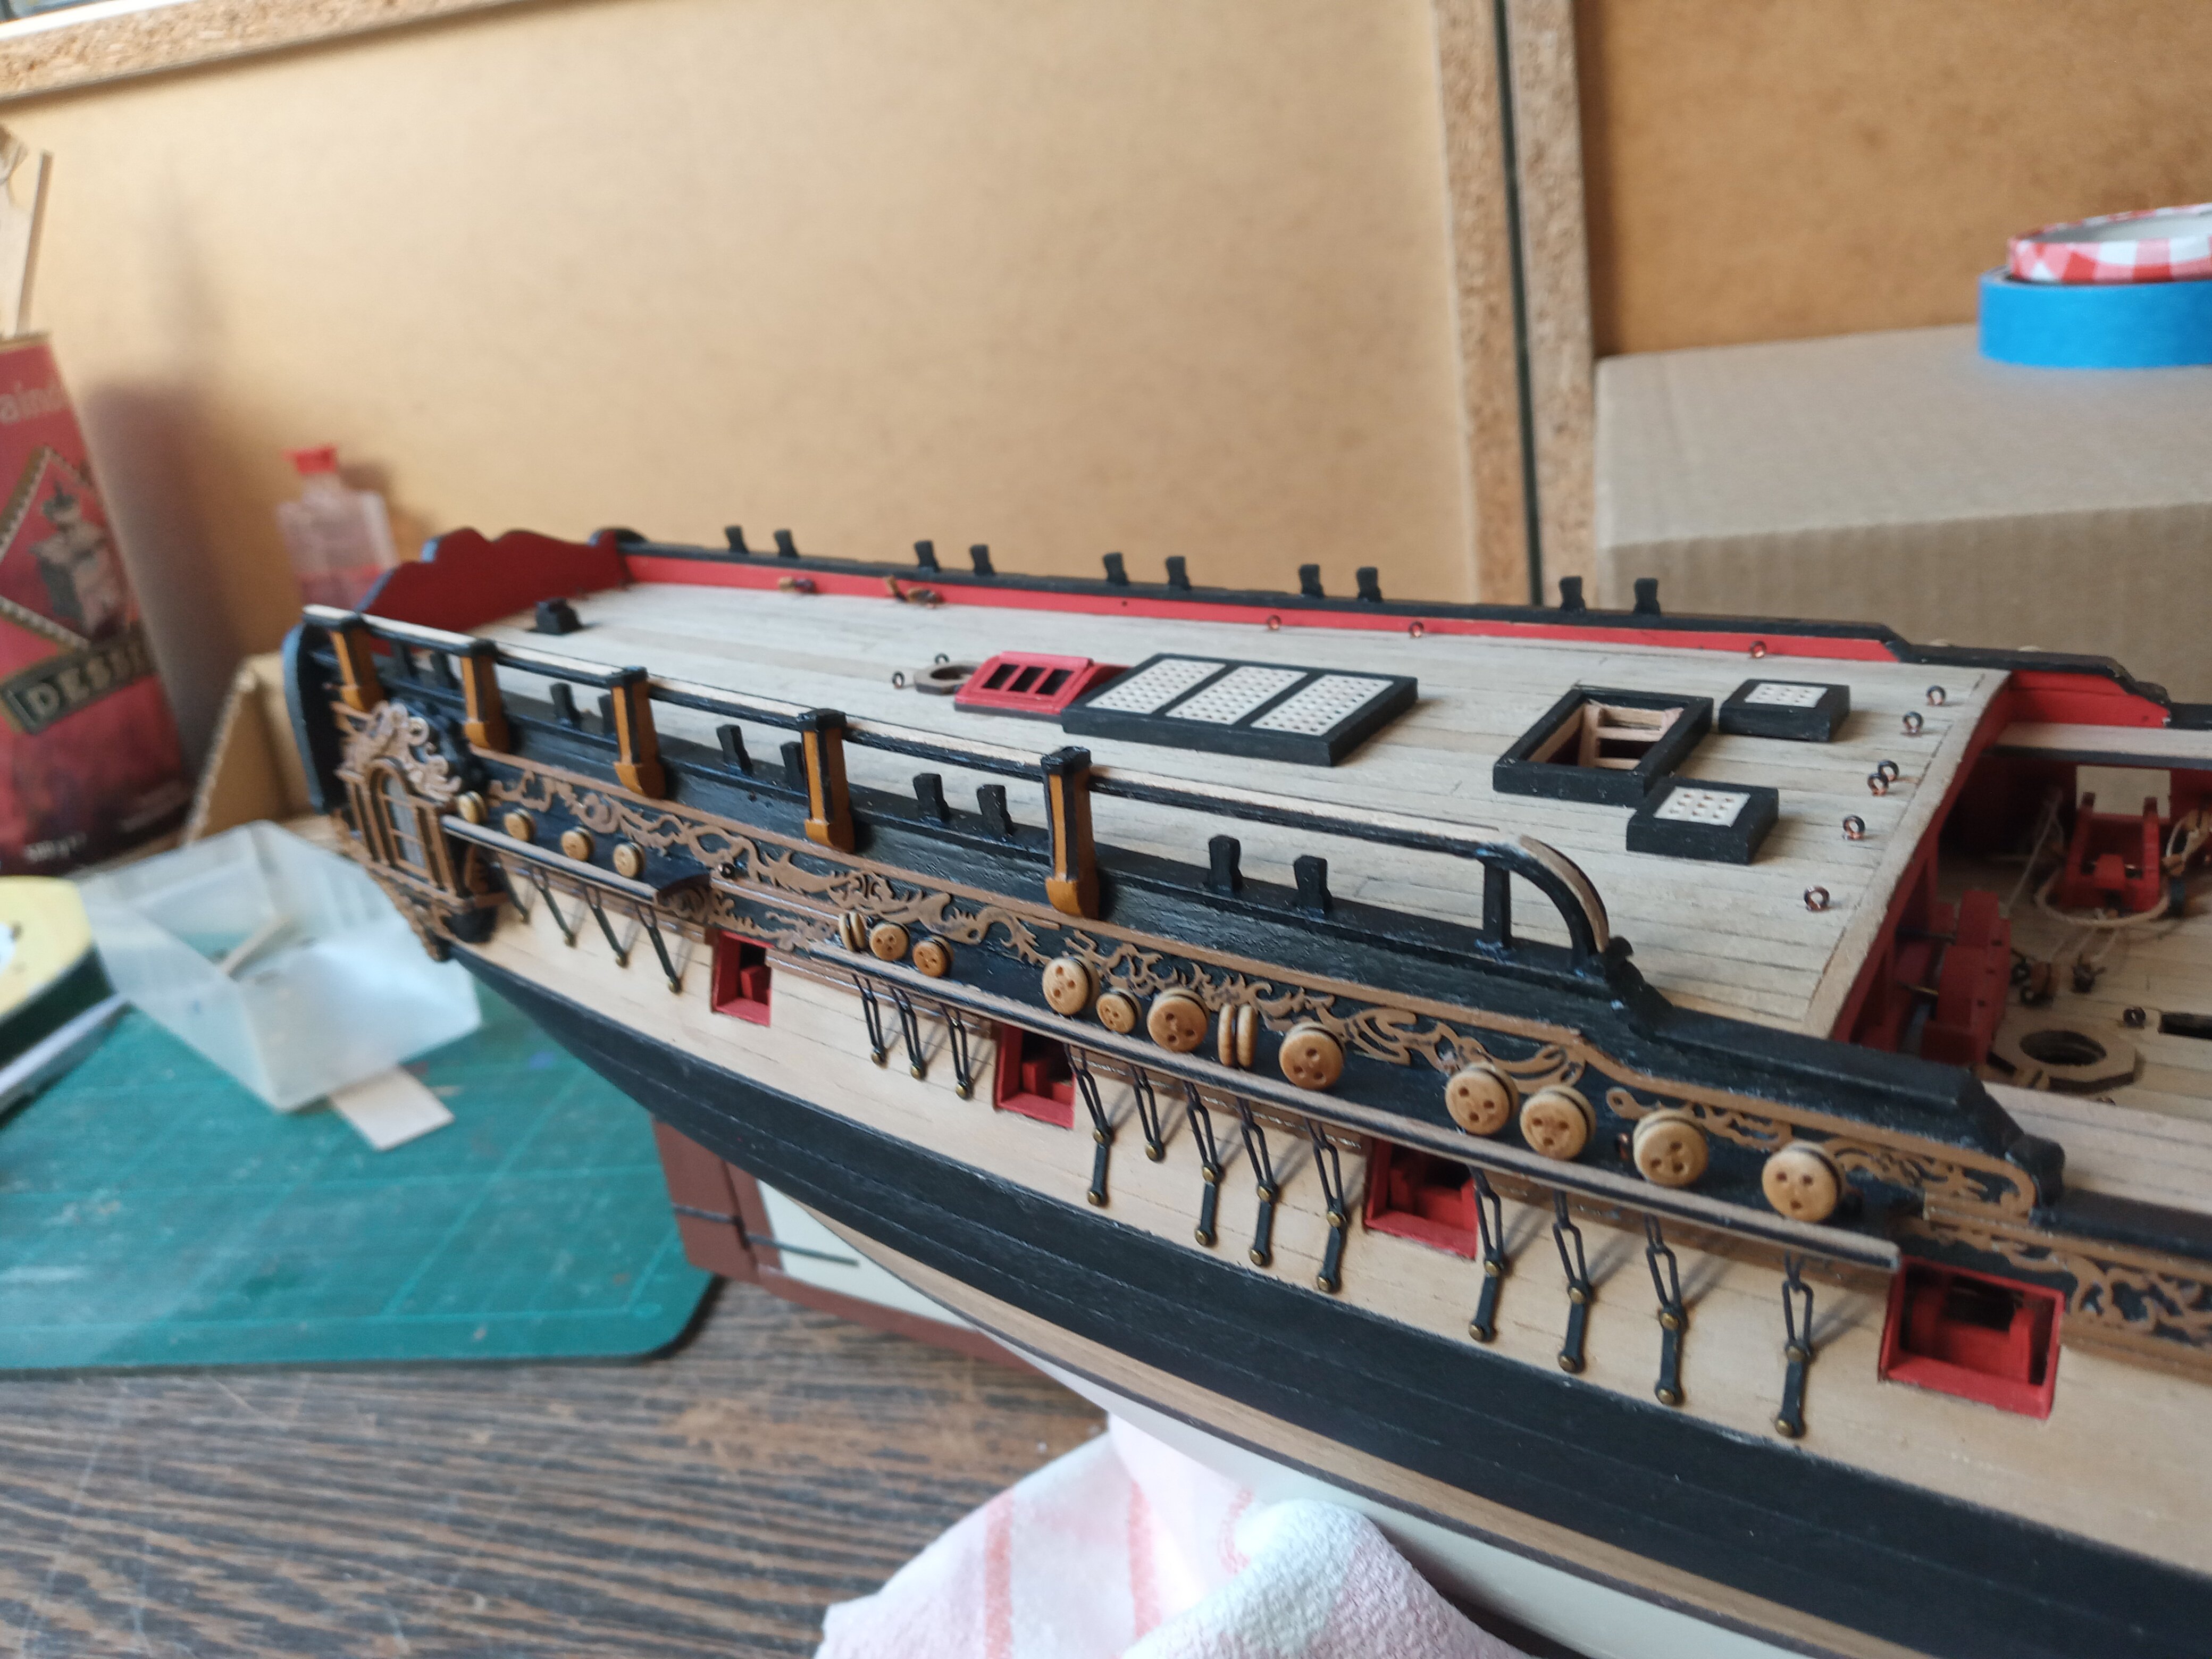
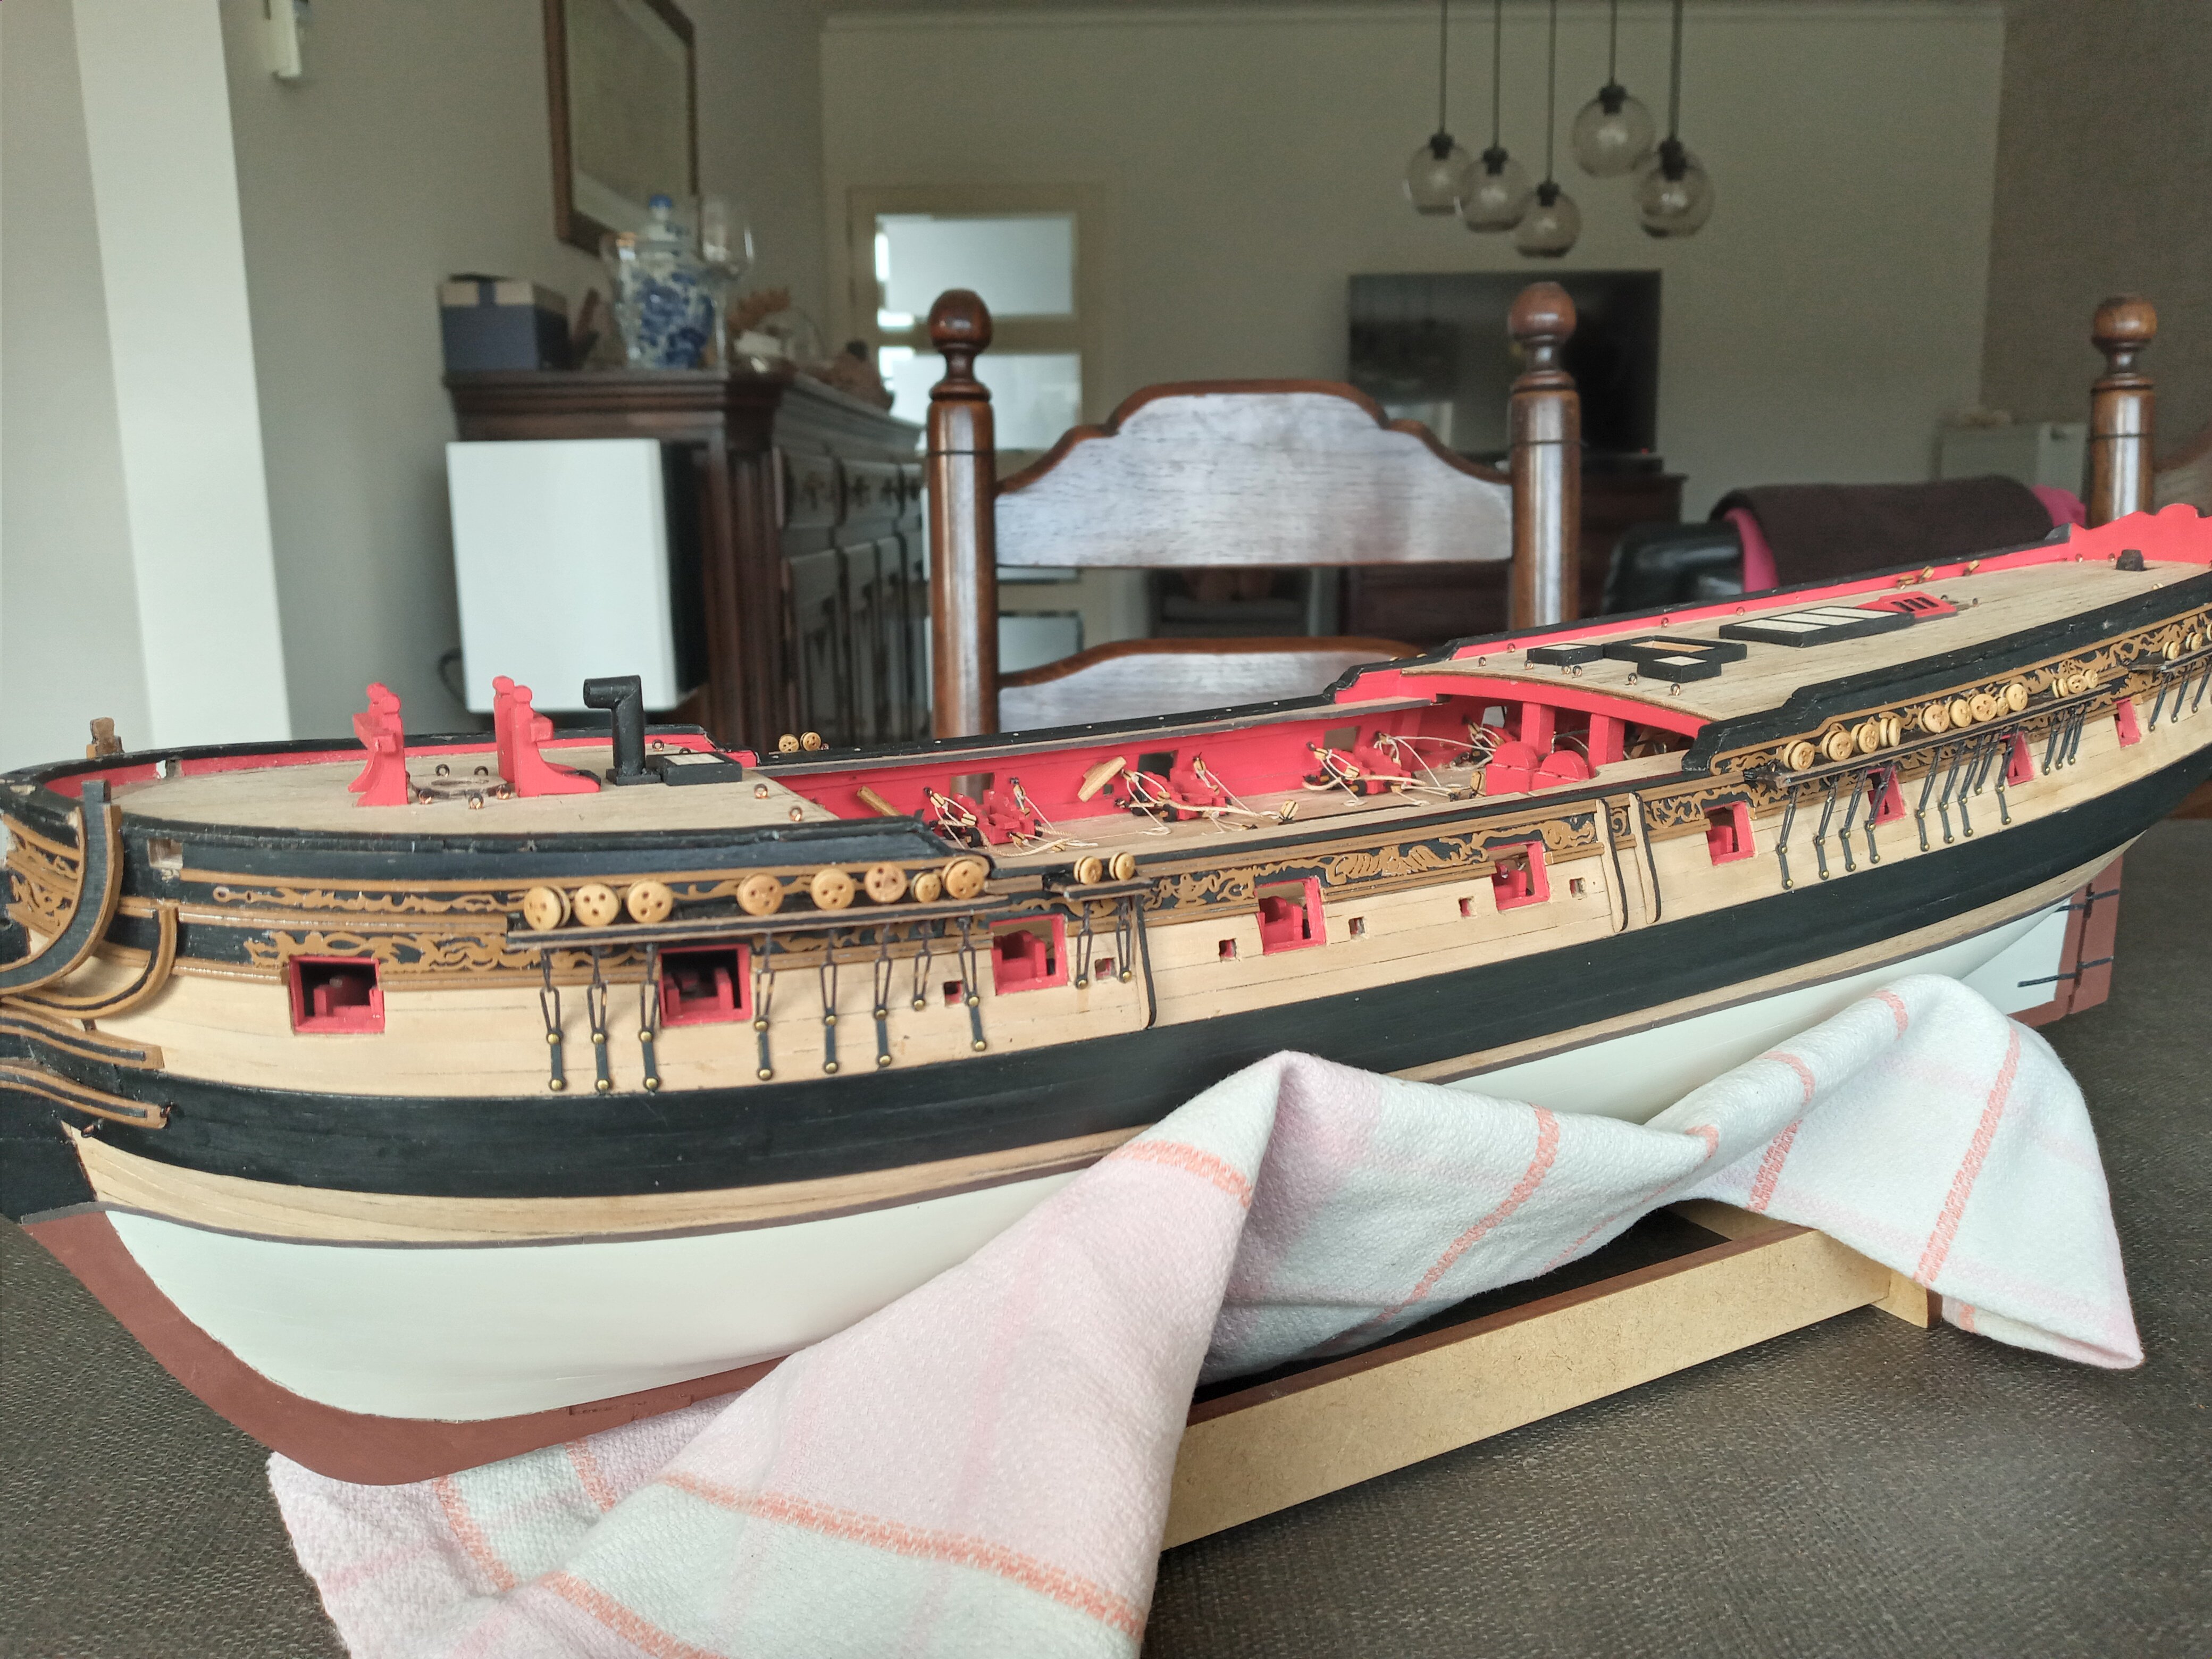
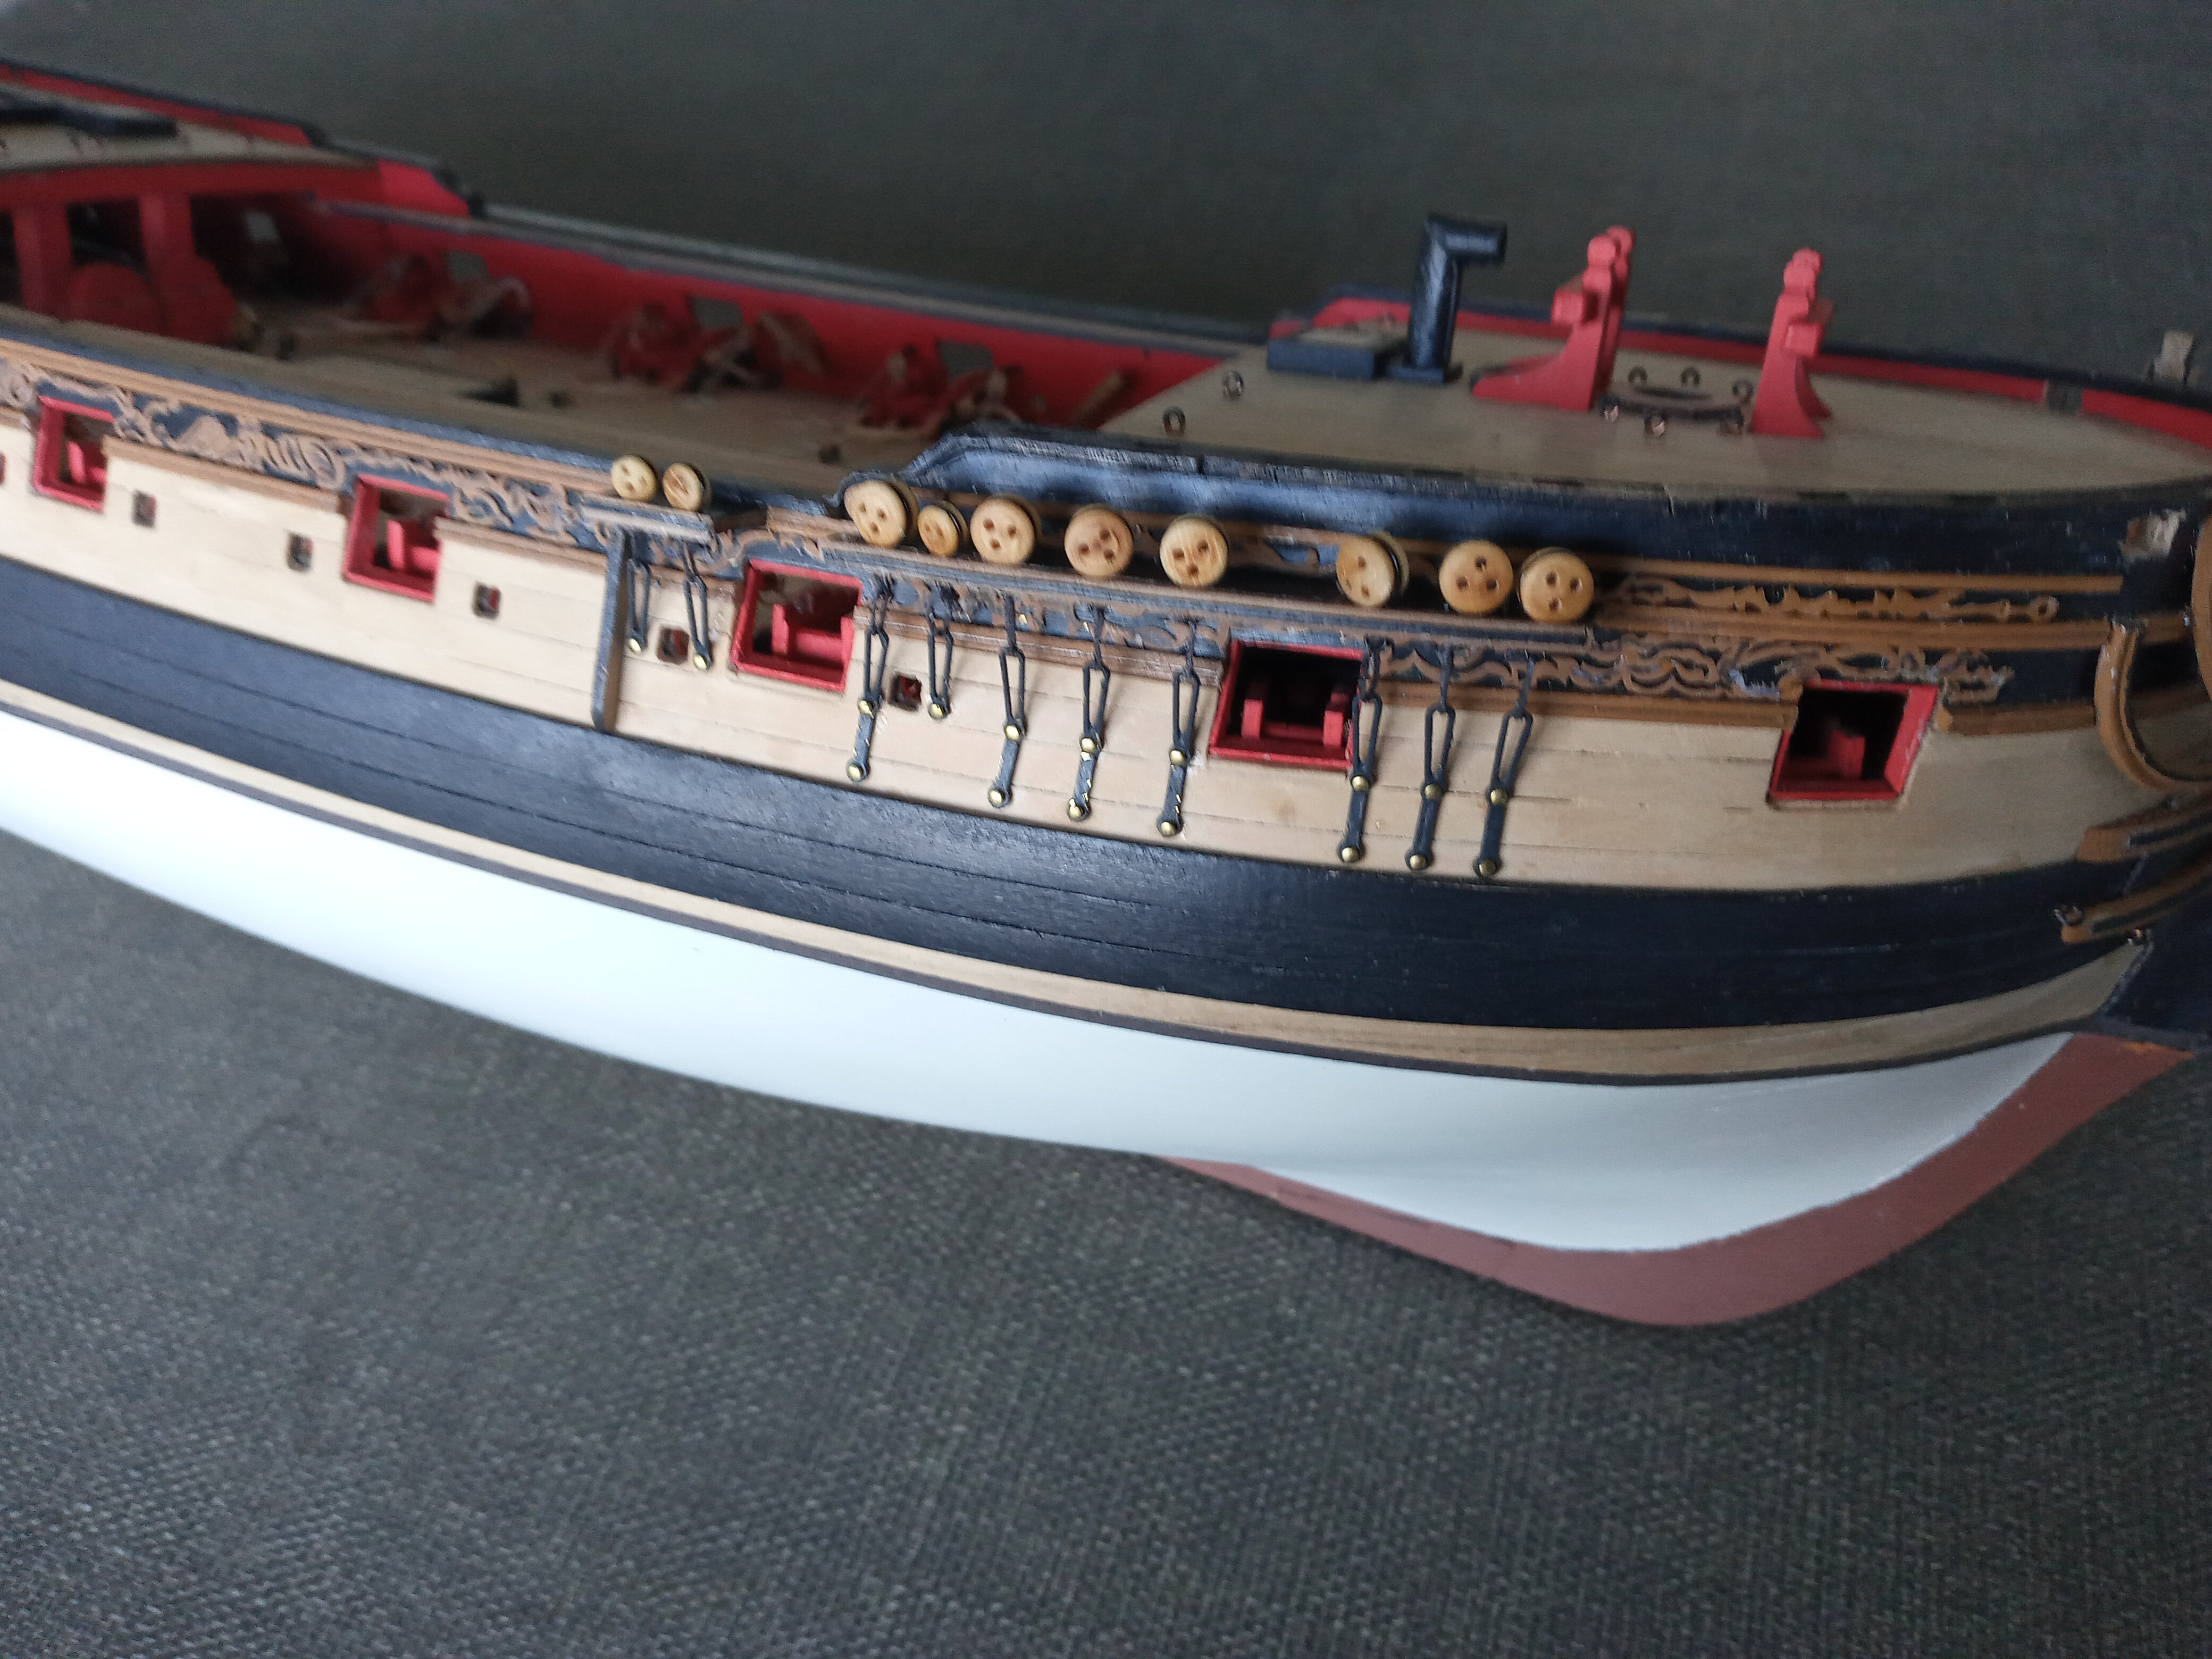
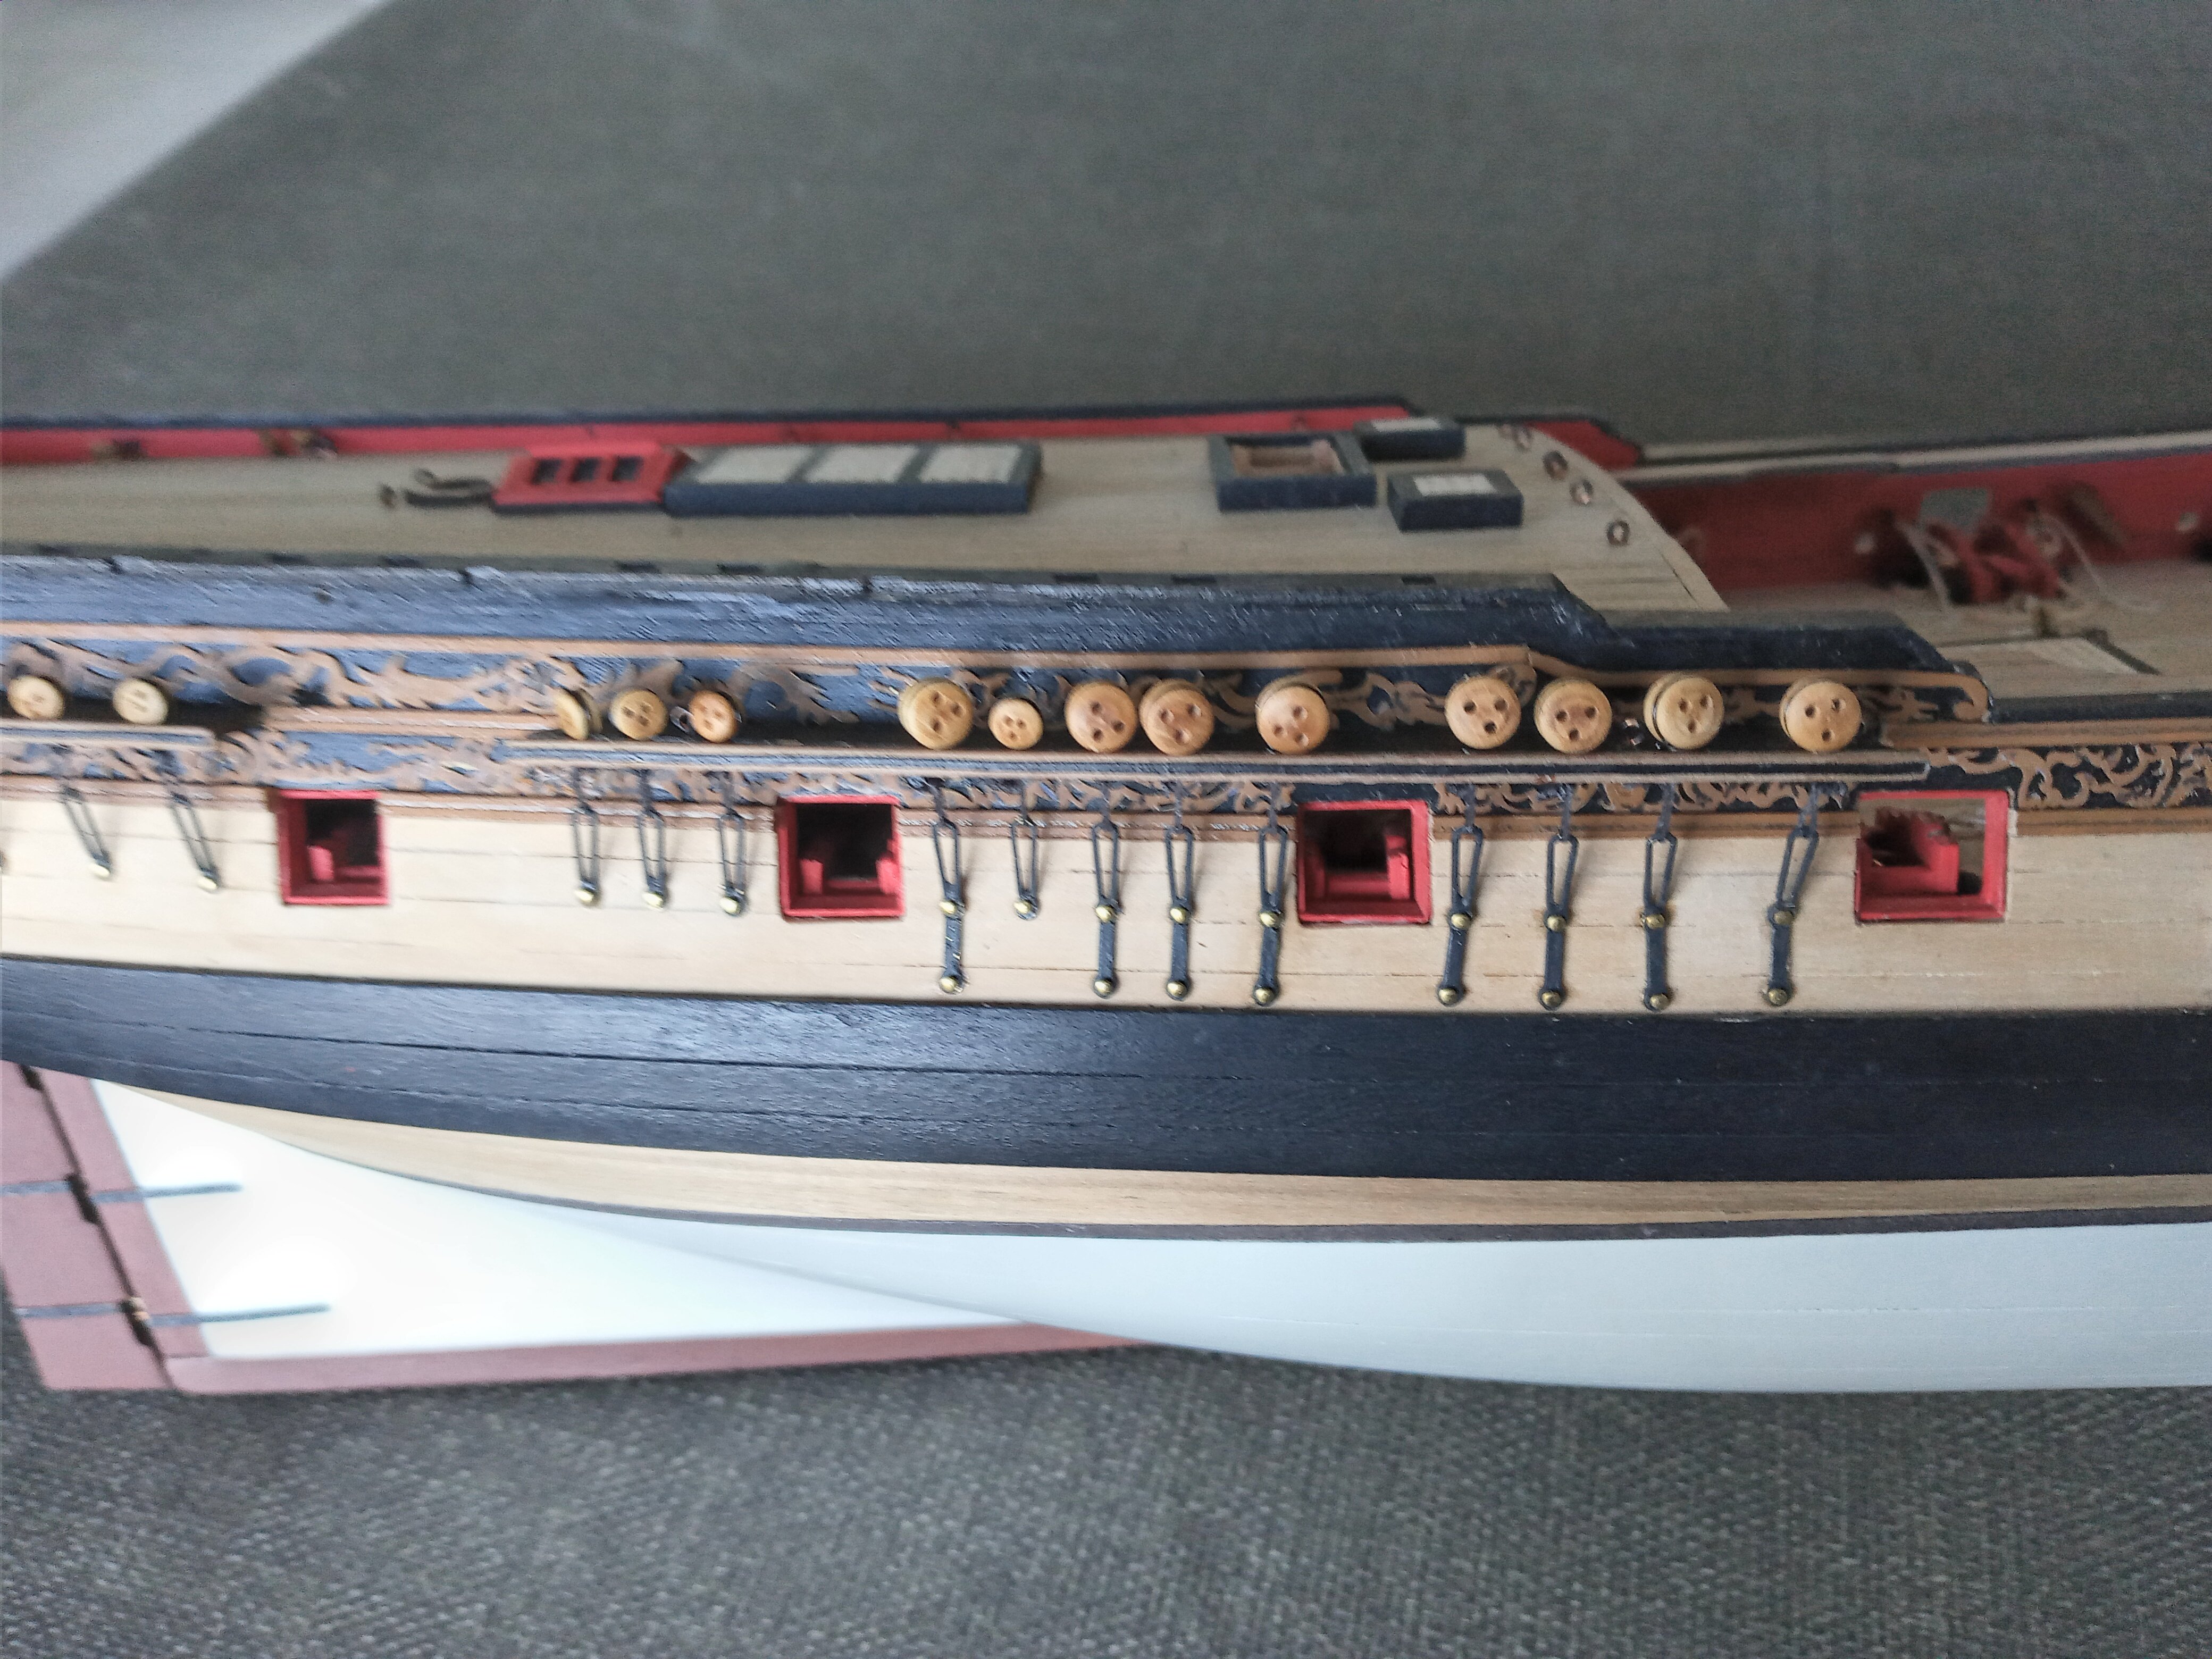
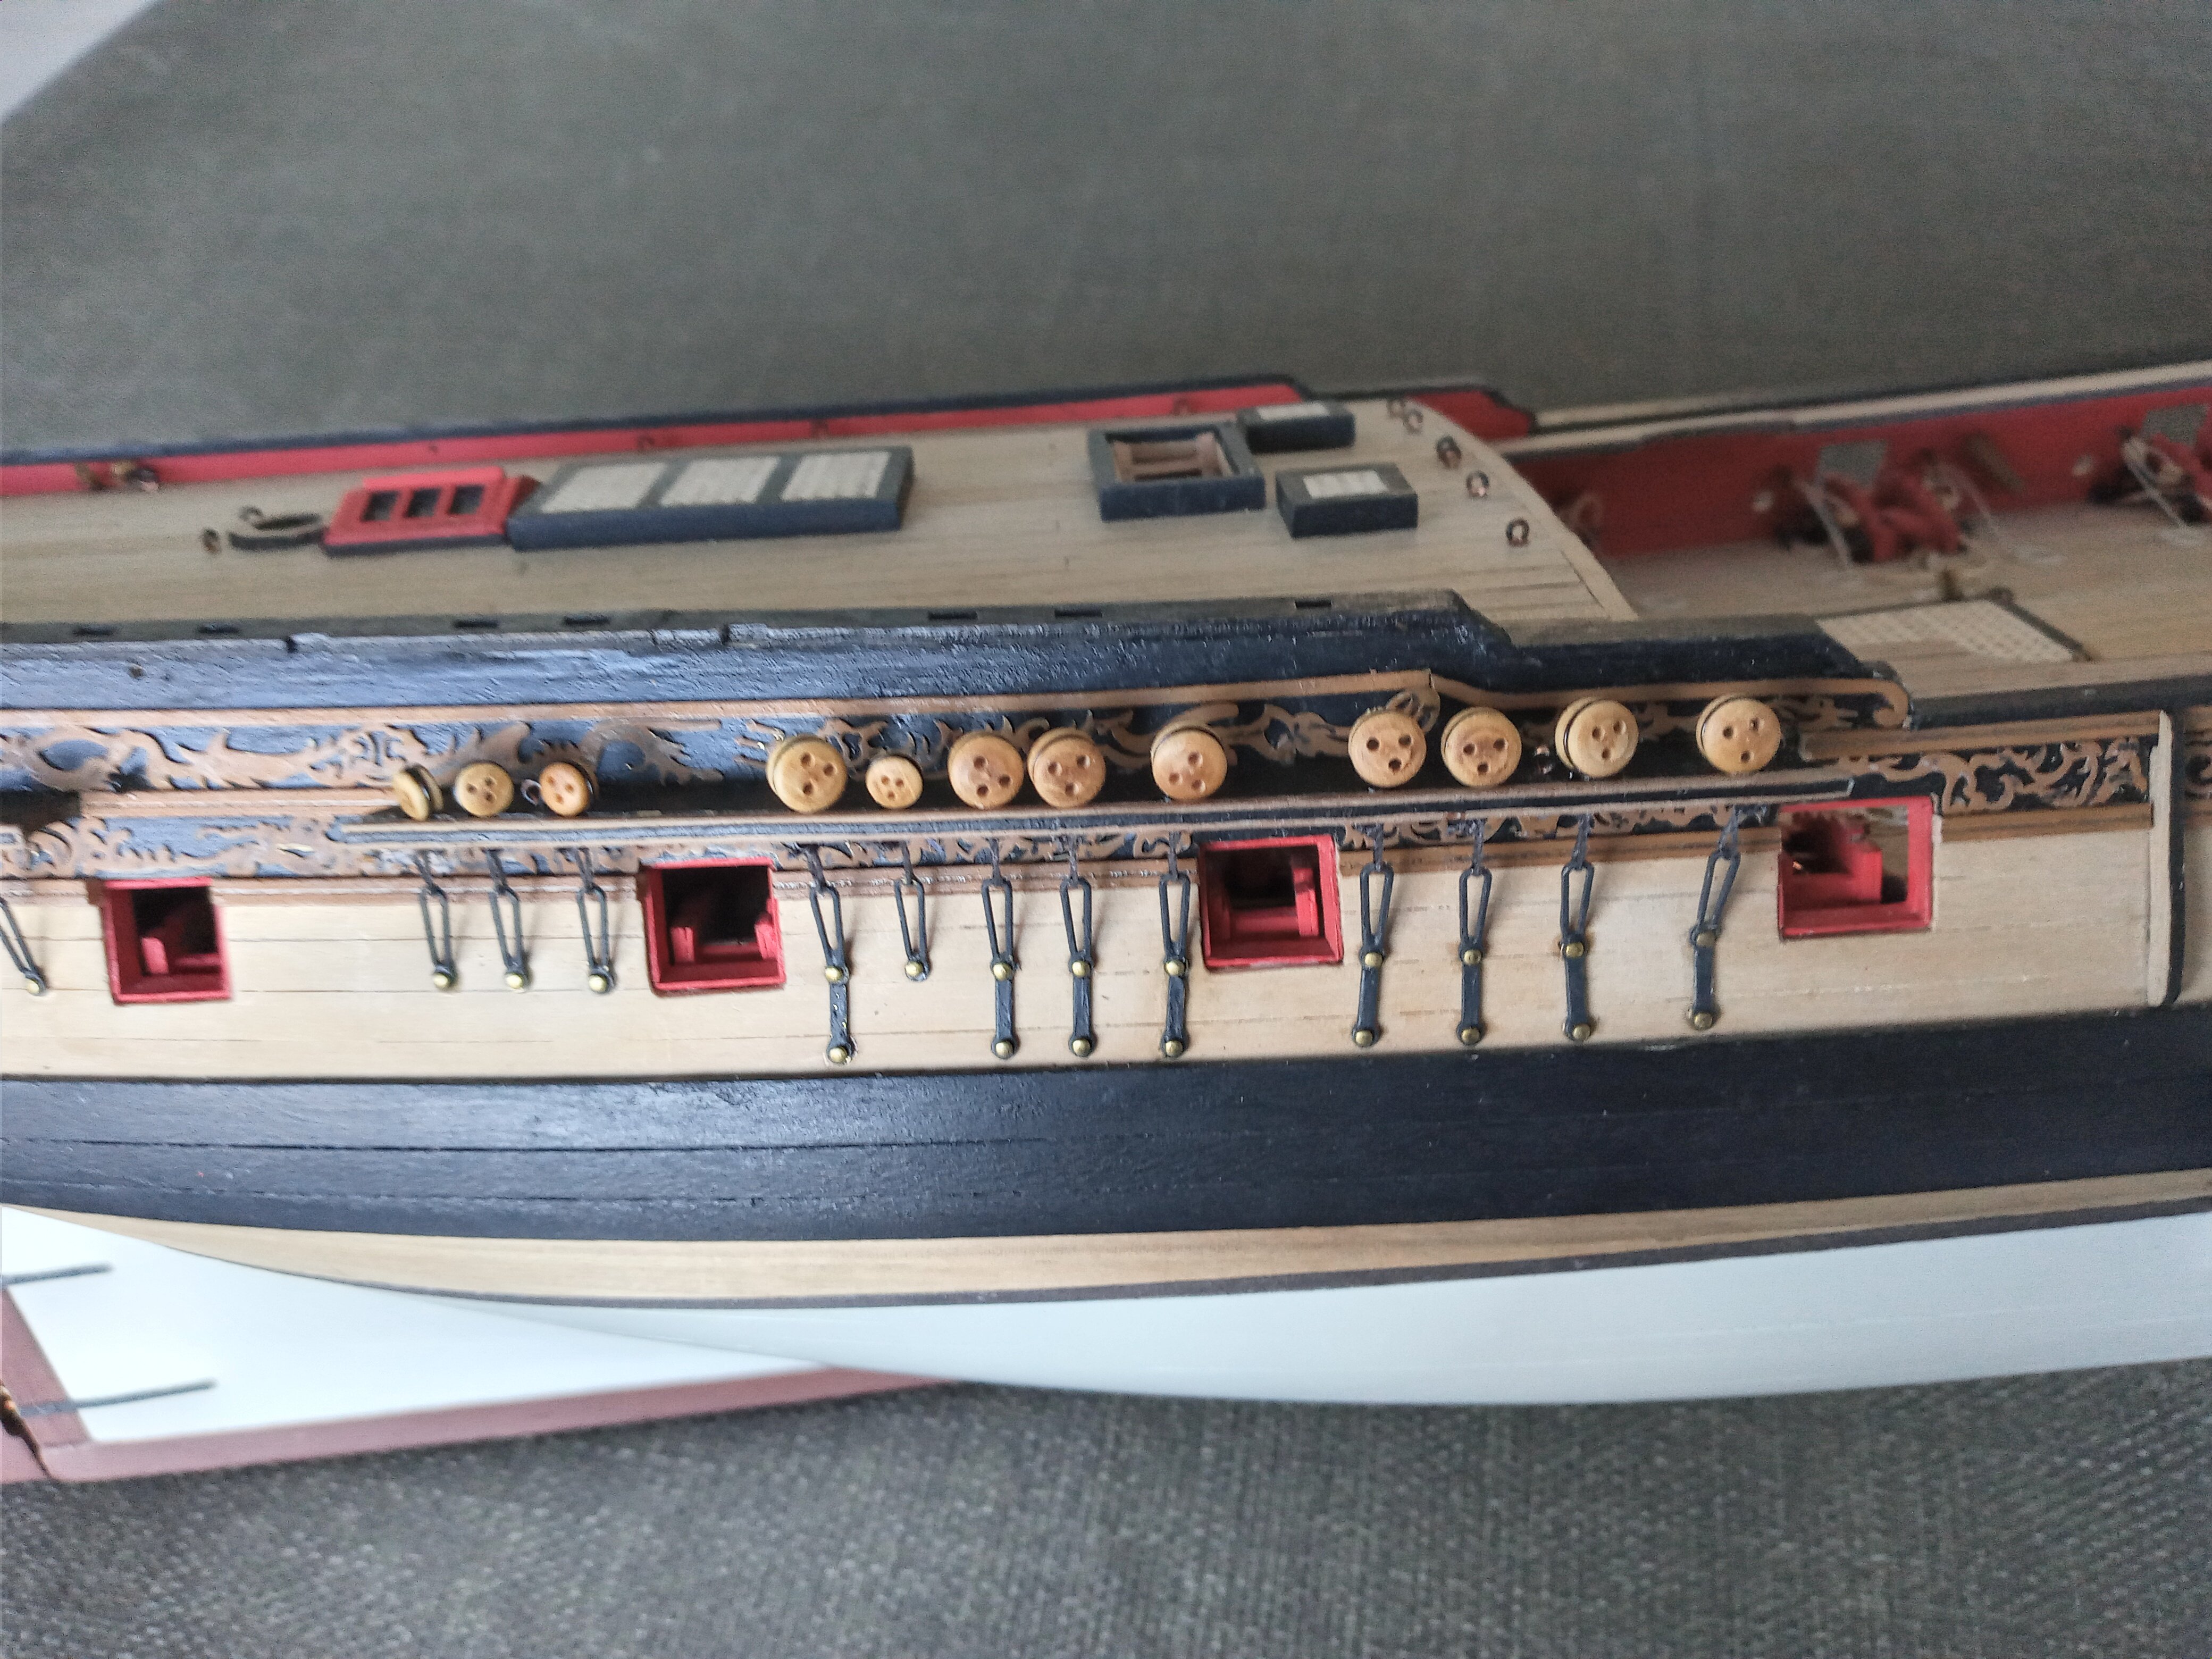
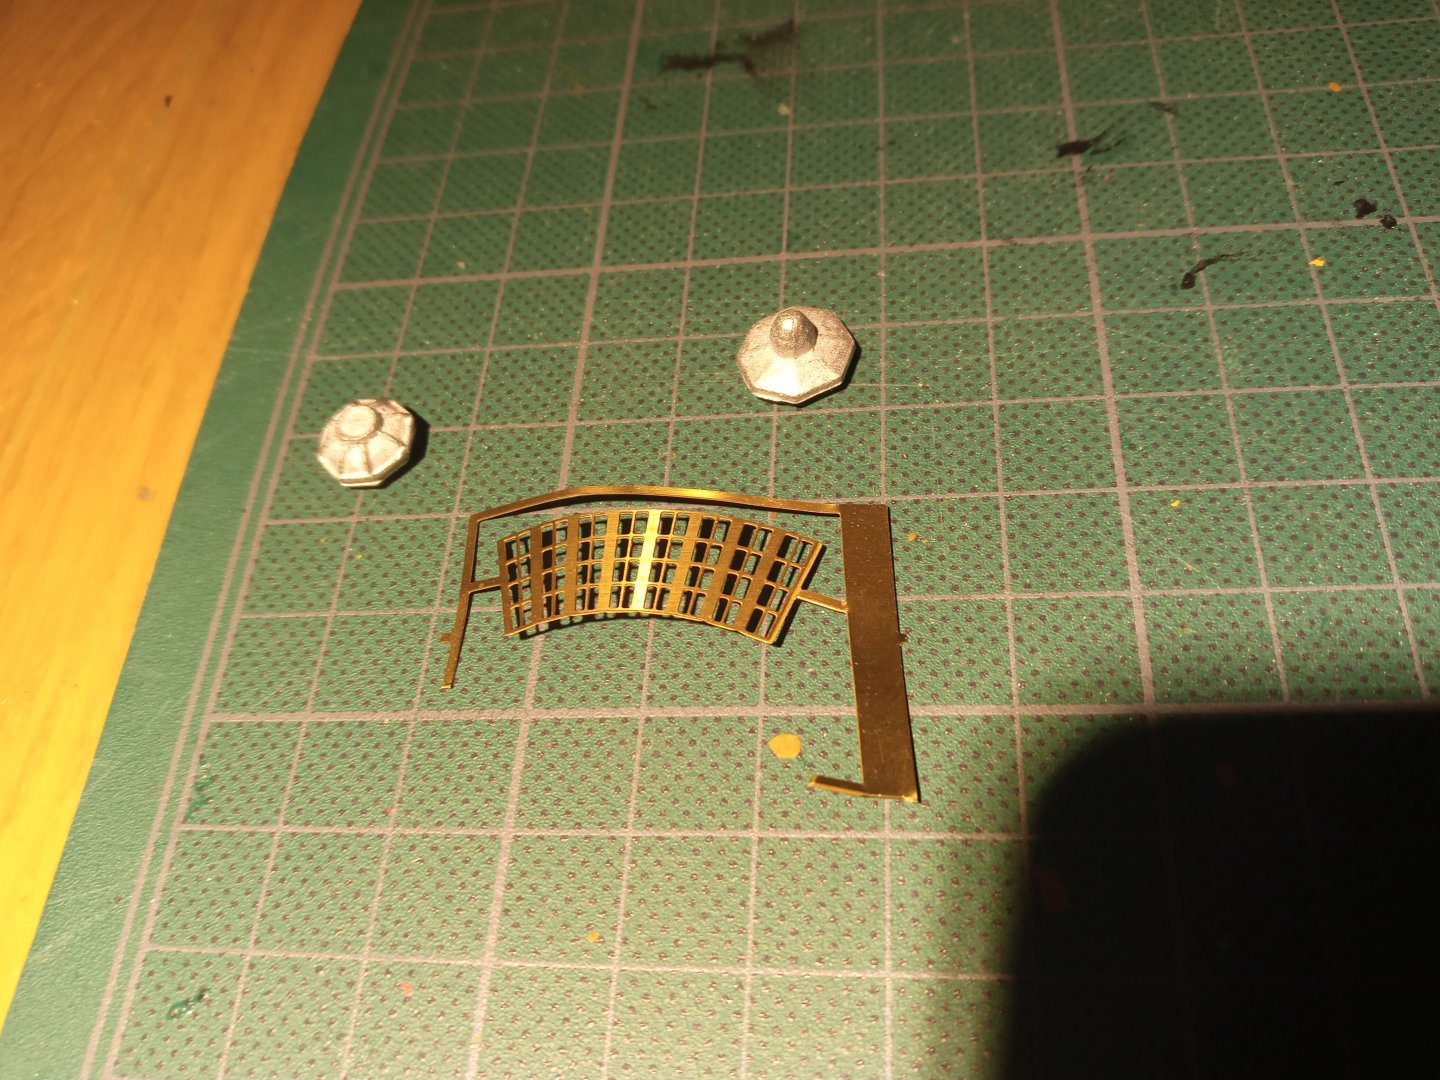
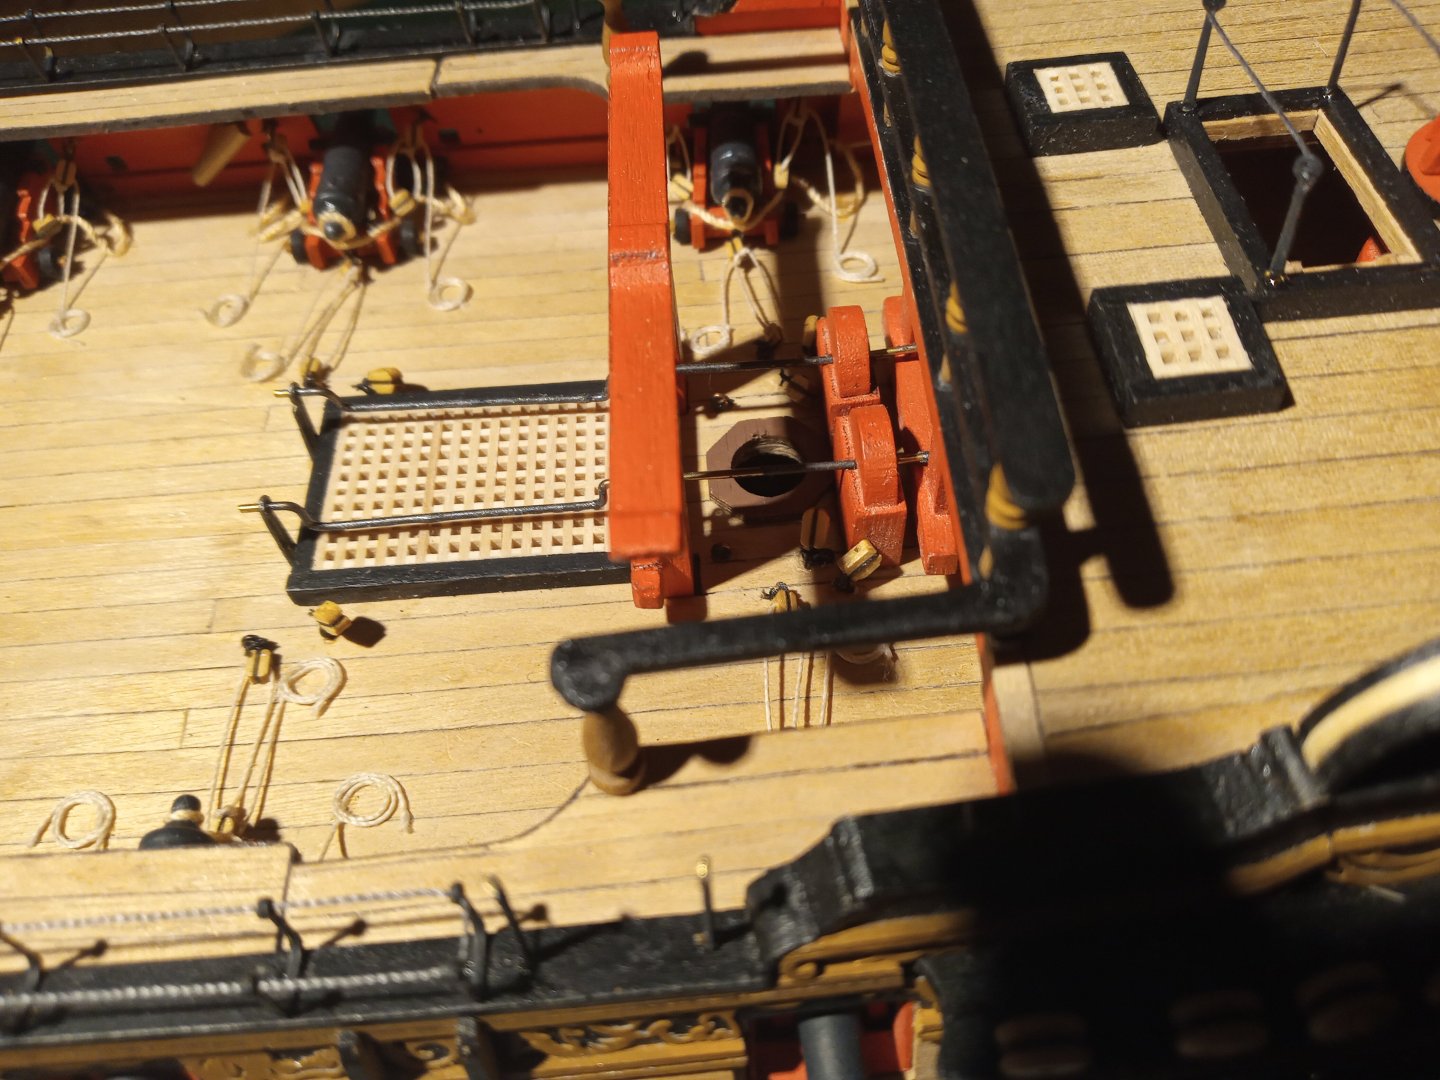
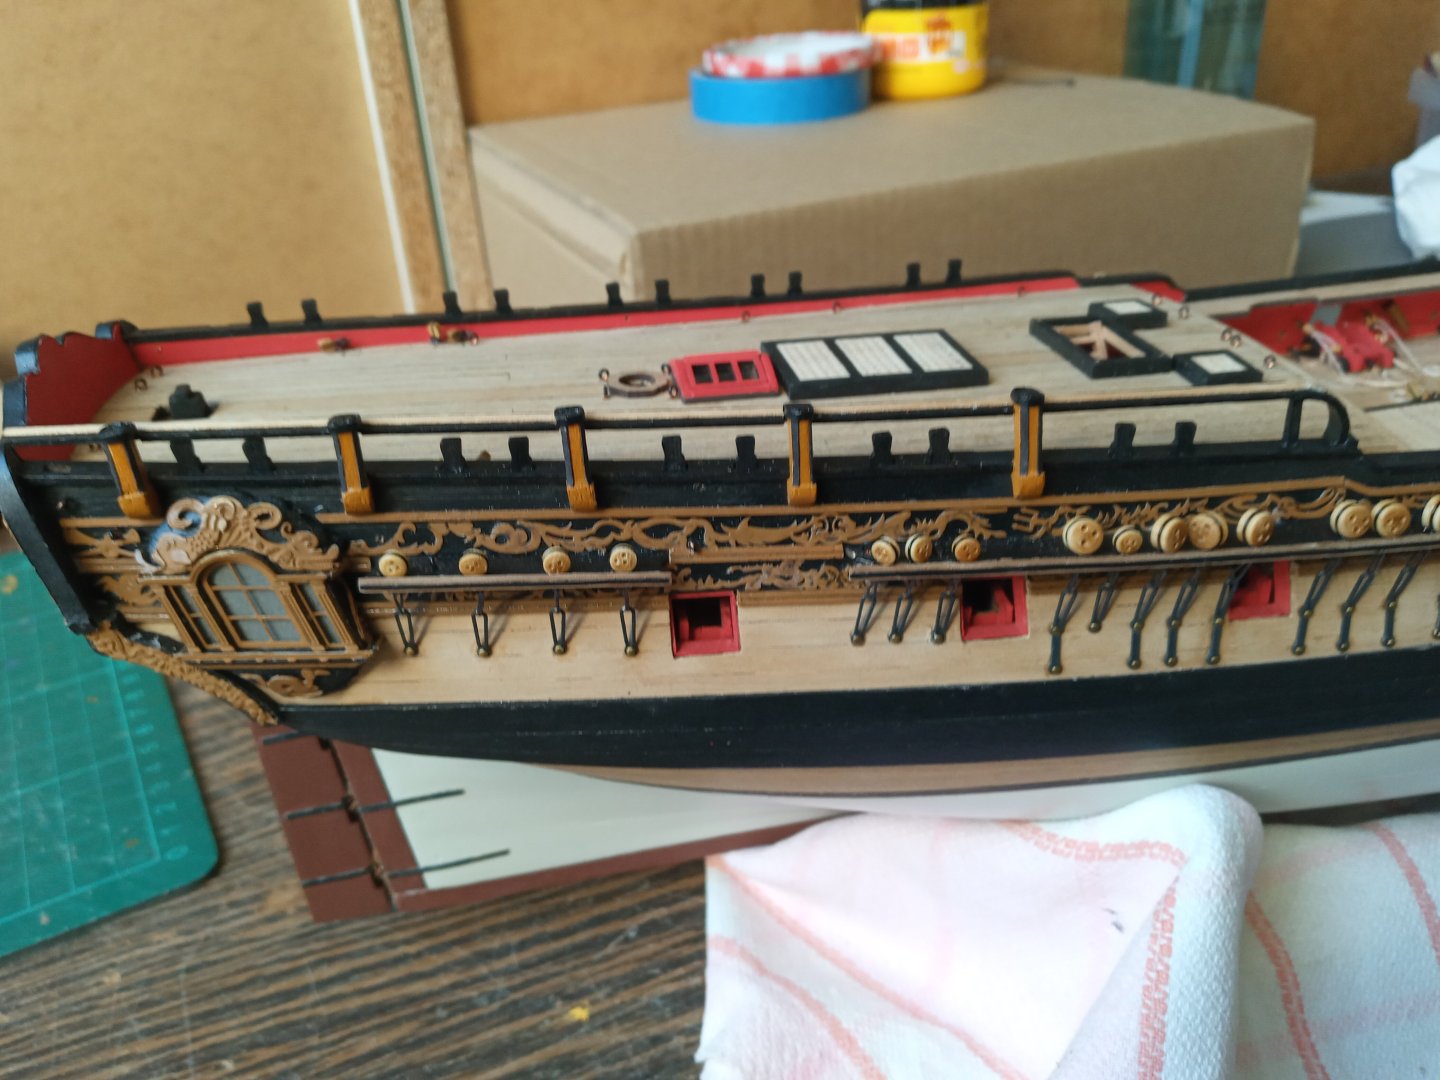
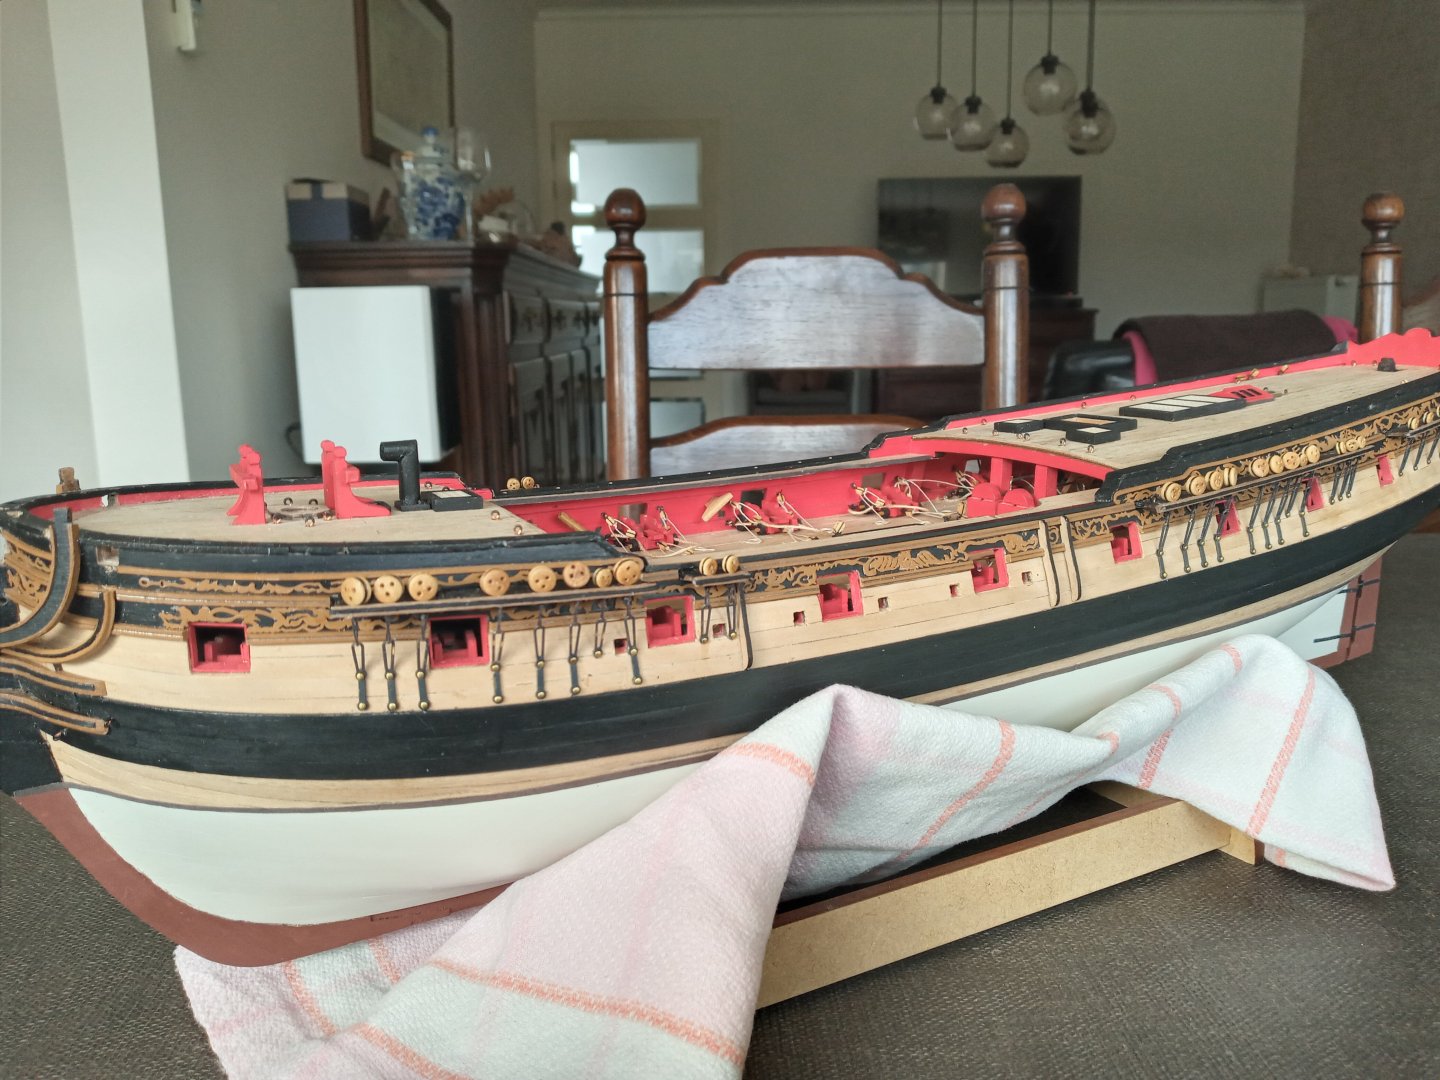
Continuation Bulwark open rail. I went for another approach as I felt insecure about the alignment of the swivel gun supports that contained a slot in which the rail initially belonged. A vertical misalignment would obviously put myself into trouble so I went the opposite way and did not use the original rails ( parts 81) and creatd my own swivel gun supports and rails. The latter received a small slot. Color swivel gun supports : also AV 70.877. The curve at the end of the rail was made out of several layers of thick paper of light card ( if you like ) Another point : I had to bend the rail in a self made jig ( after warming and soaking ). Added some extra pics, hope they tell ore than words. The pumps, the supports adjecent to the gratings (parts 177 ) were a bit to tiny for my taste so I glued a small piece of wood . So what is to come ? The swivel guns = there's a plan A, B and C Plan A : the aftermarket guns in combination with the hammock cranes ( see pic ) Plan B : using the ones provided in HMS Speedy Plan C : use the ones provided in the kit ....haven't figured this out yet... The masts Definitely use ramin dowels as I'm not very enthousiastic painting these items in any yellow color


-
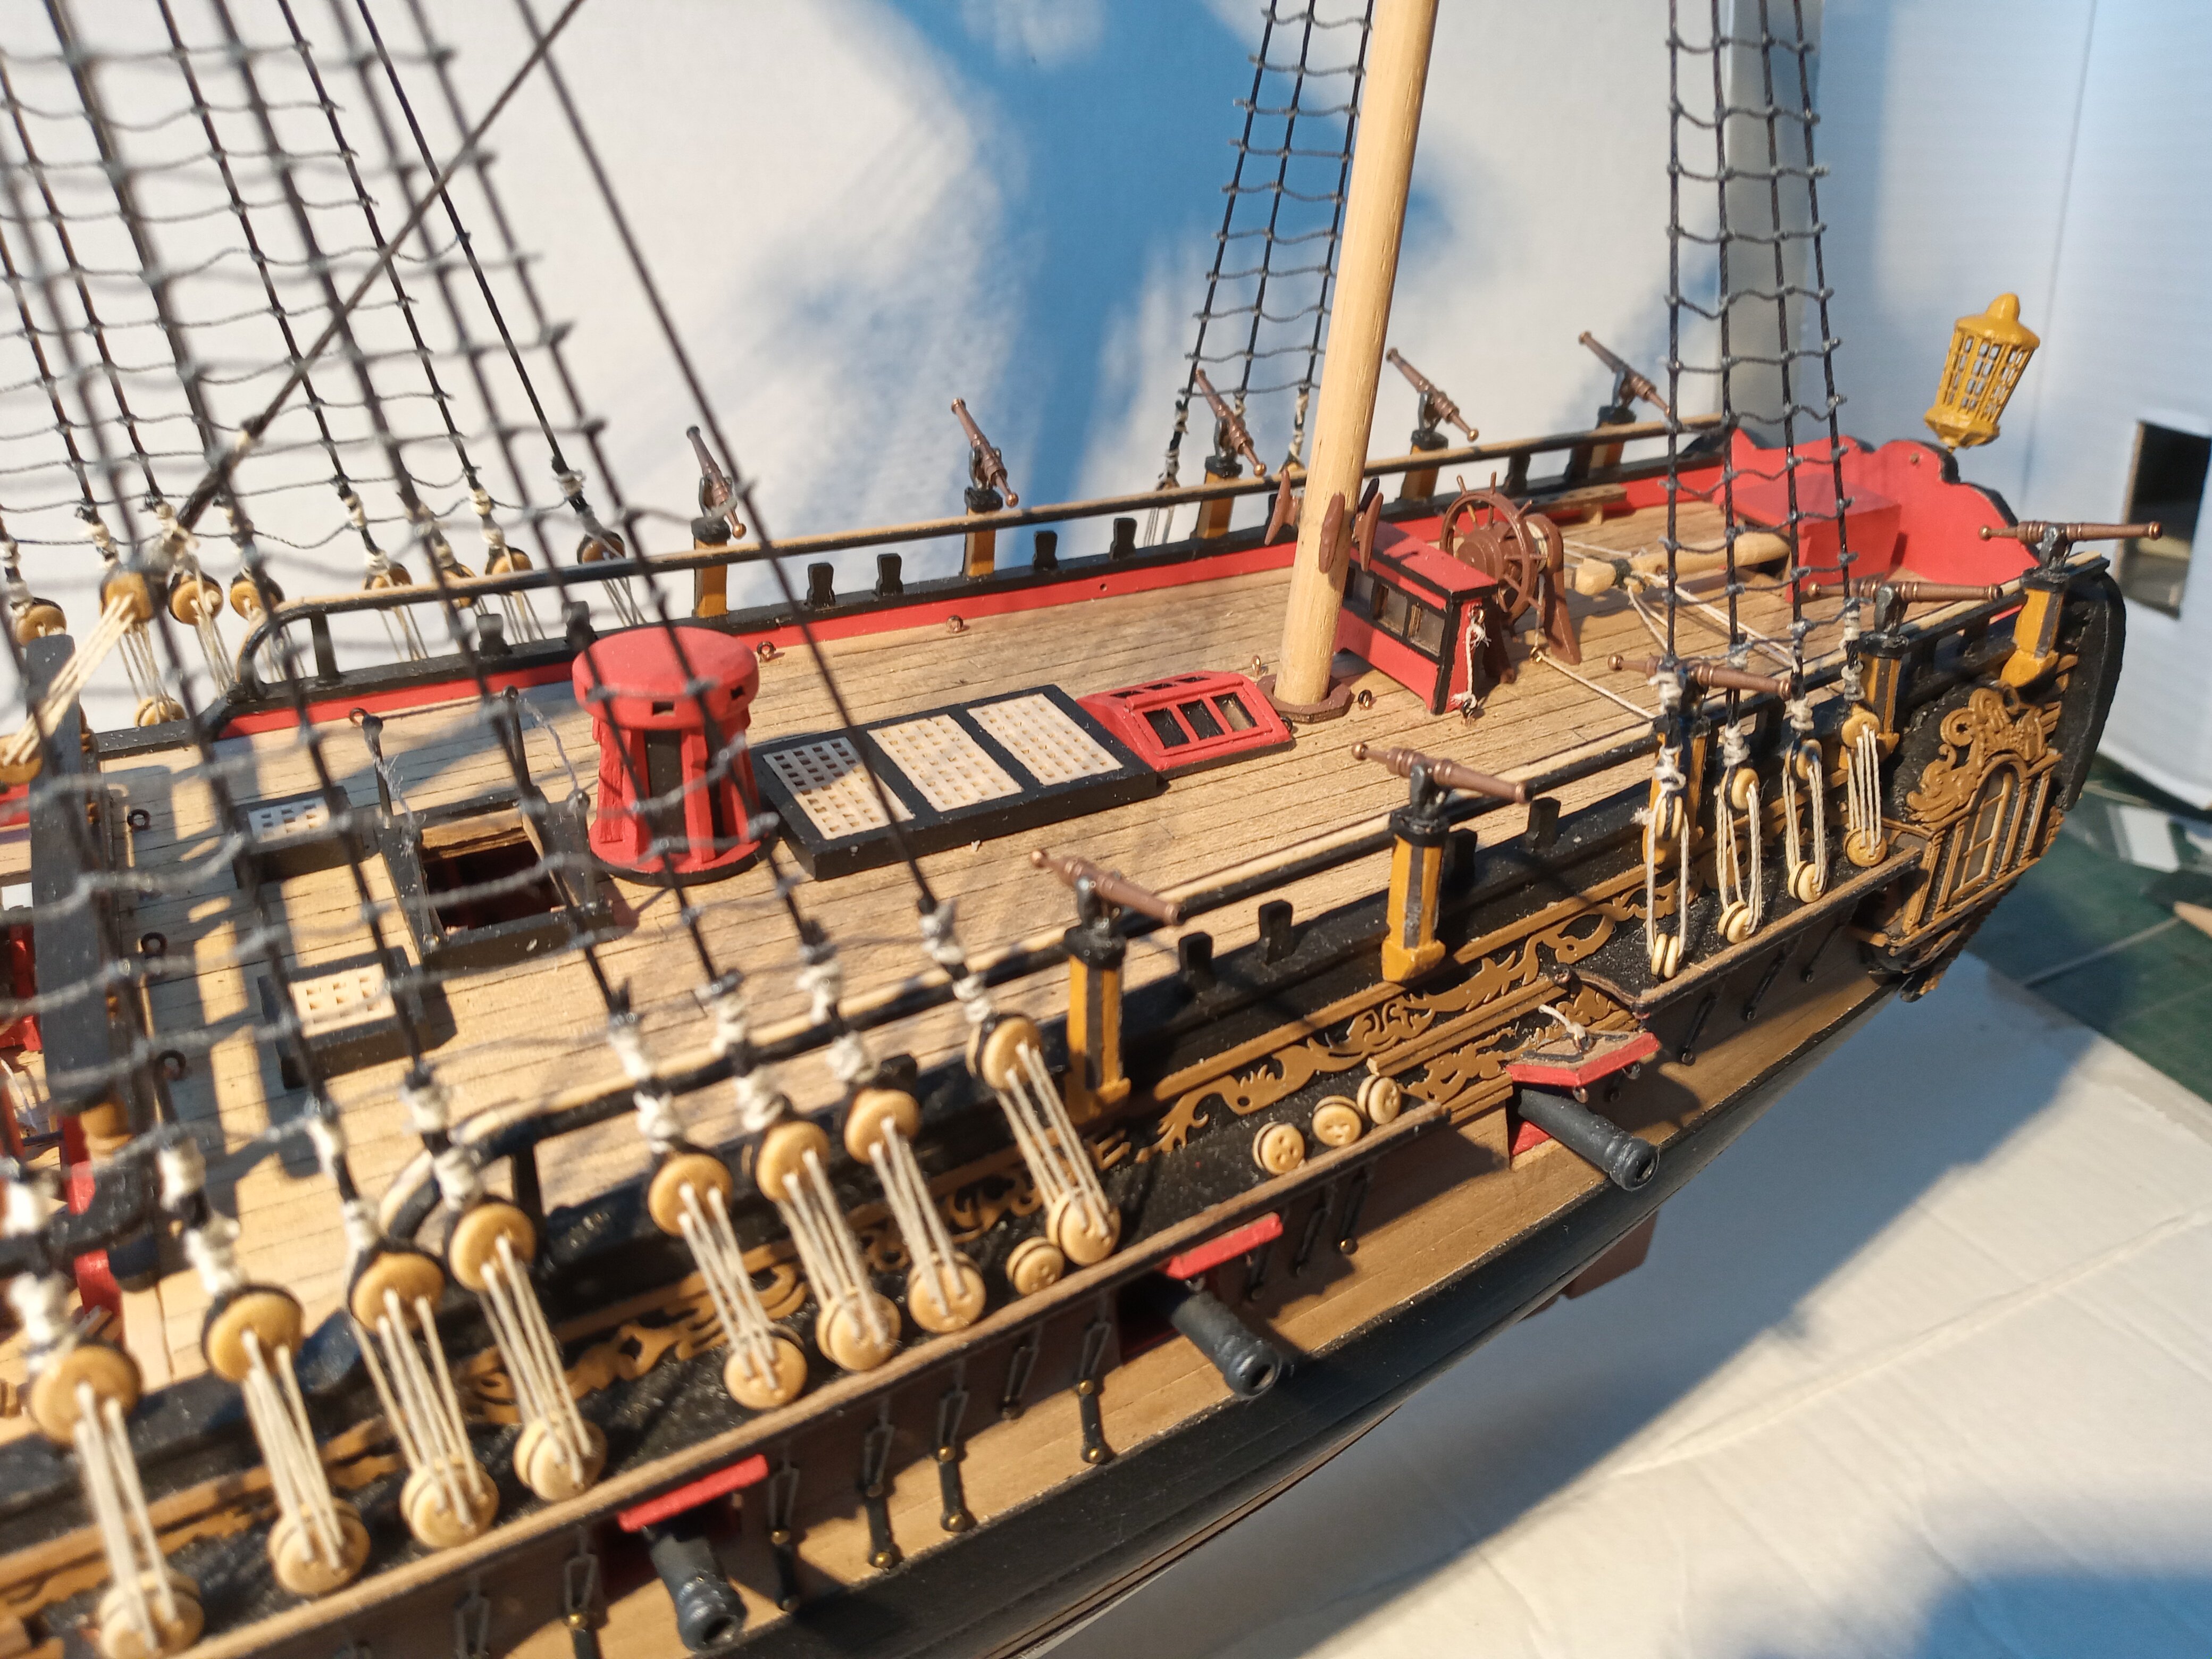
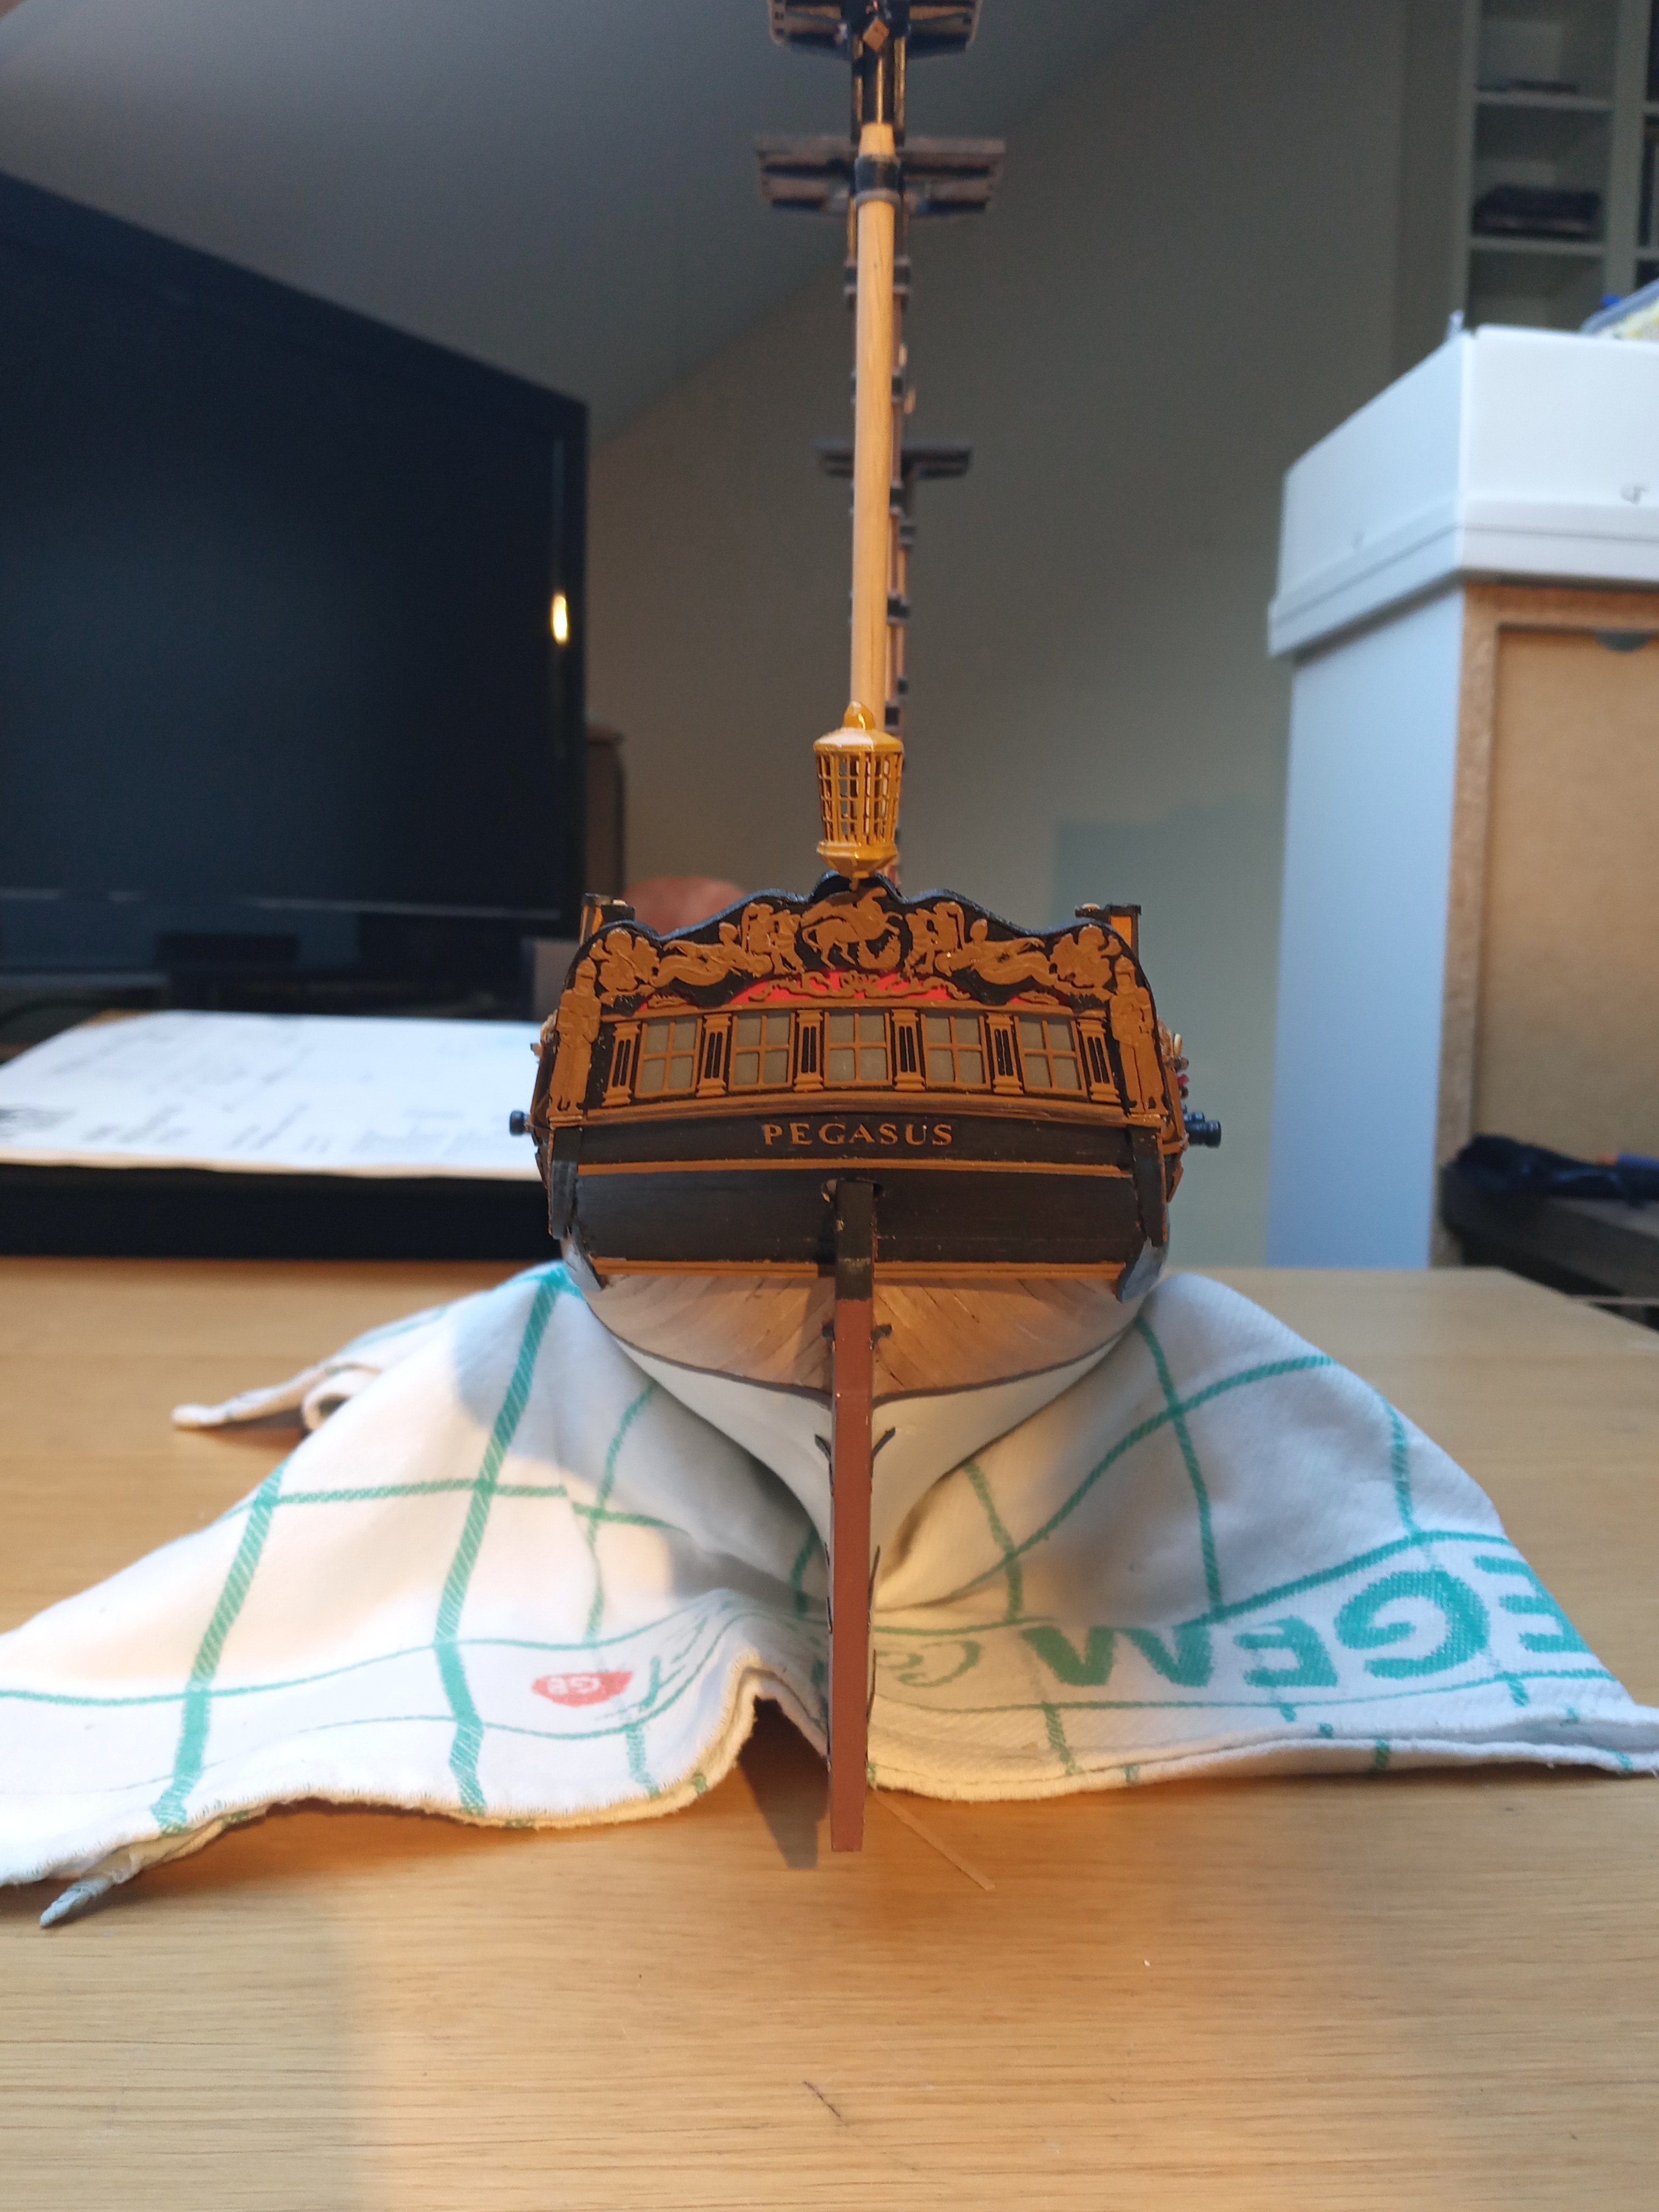
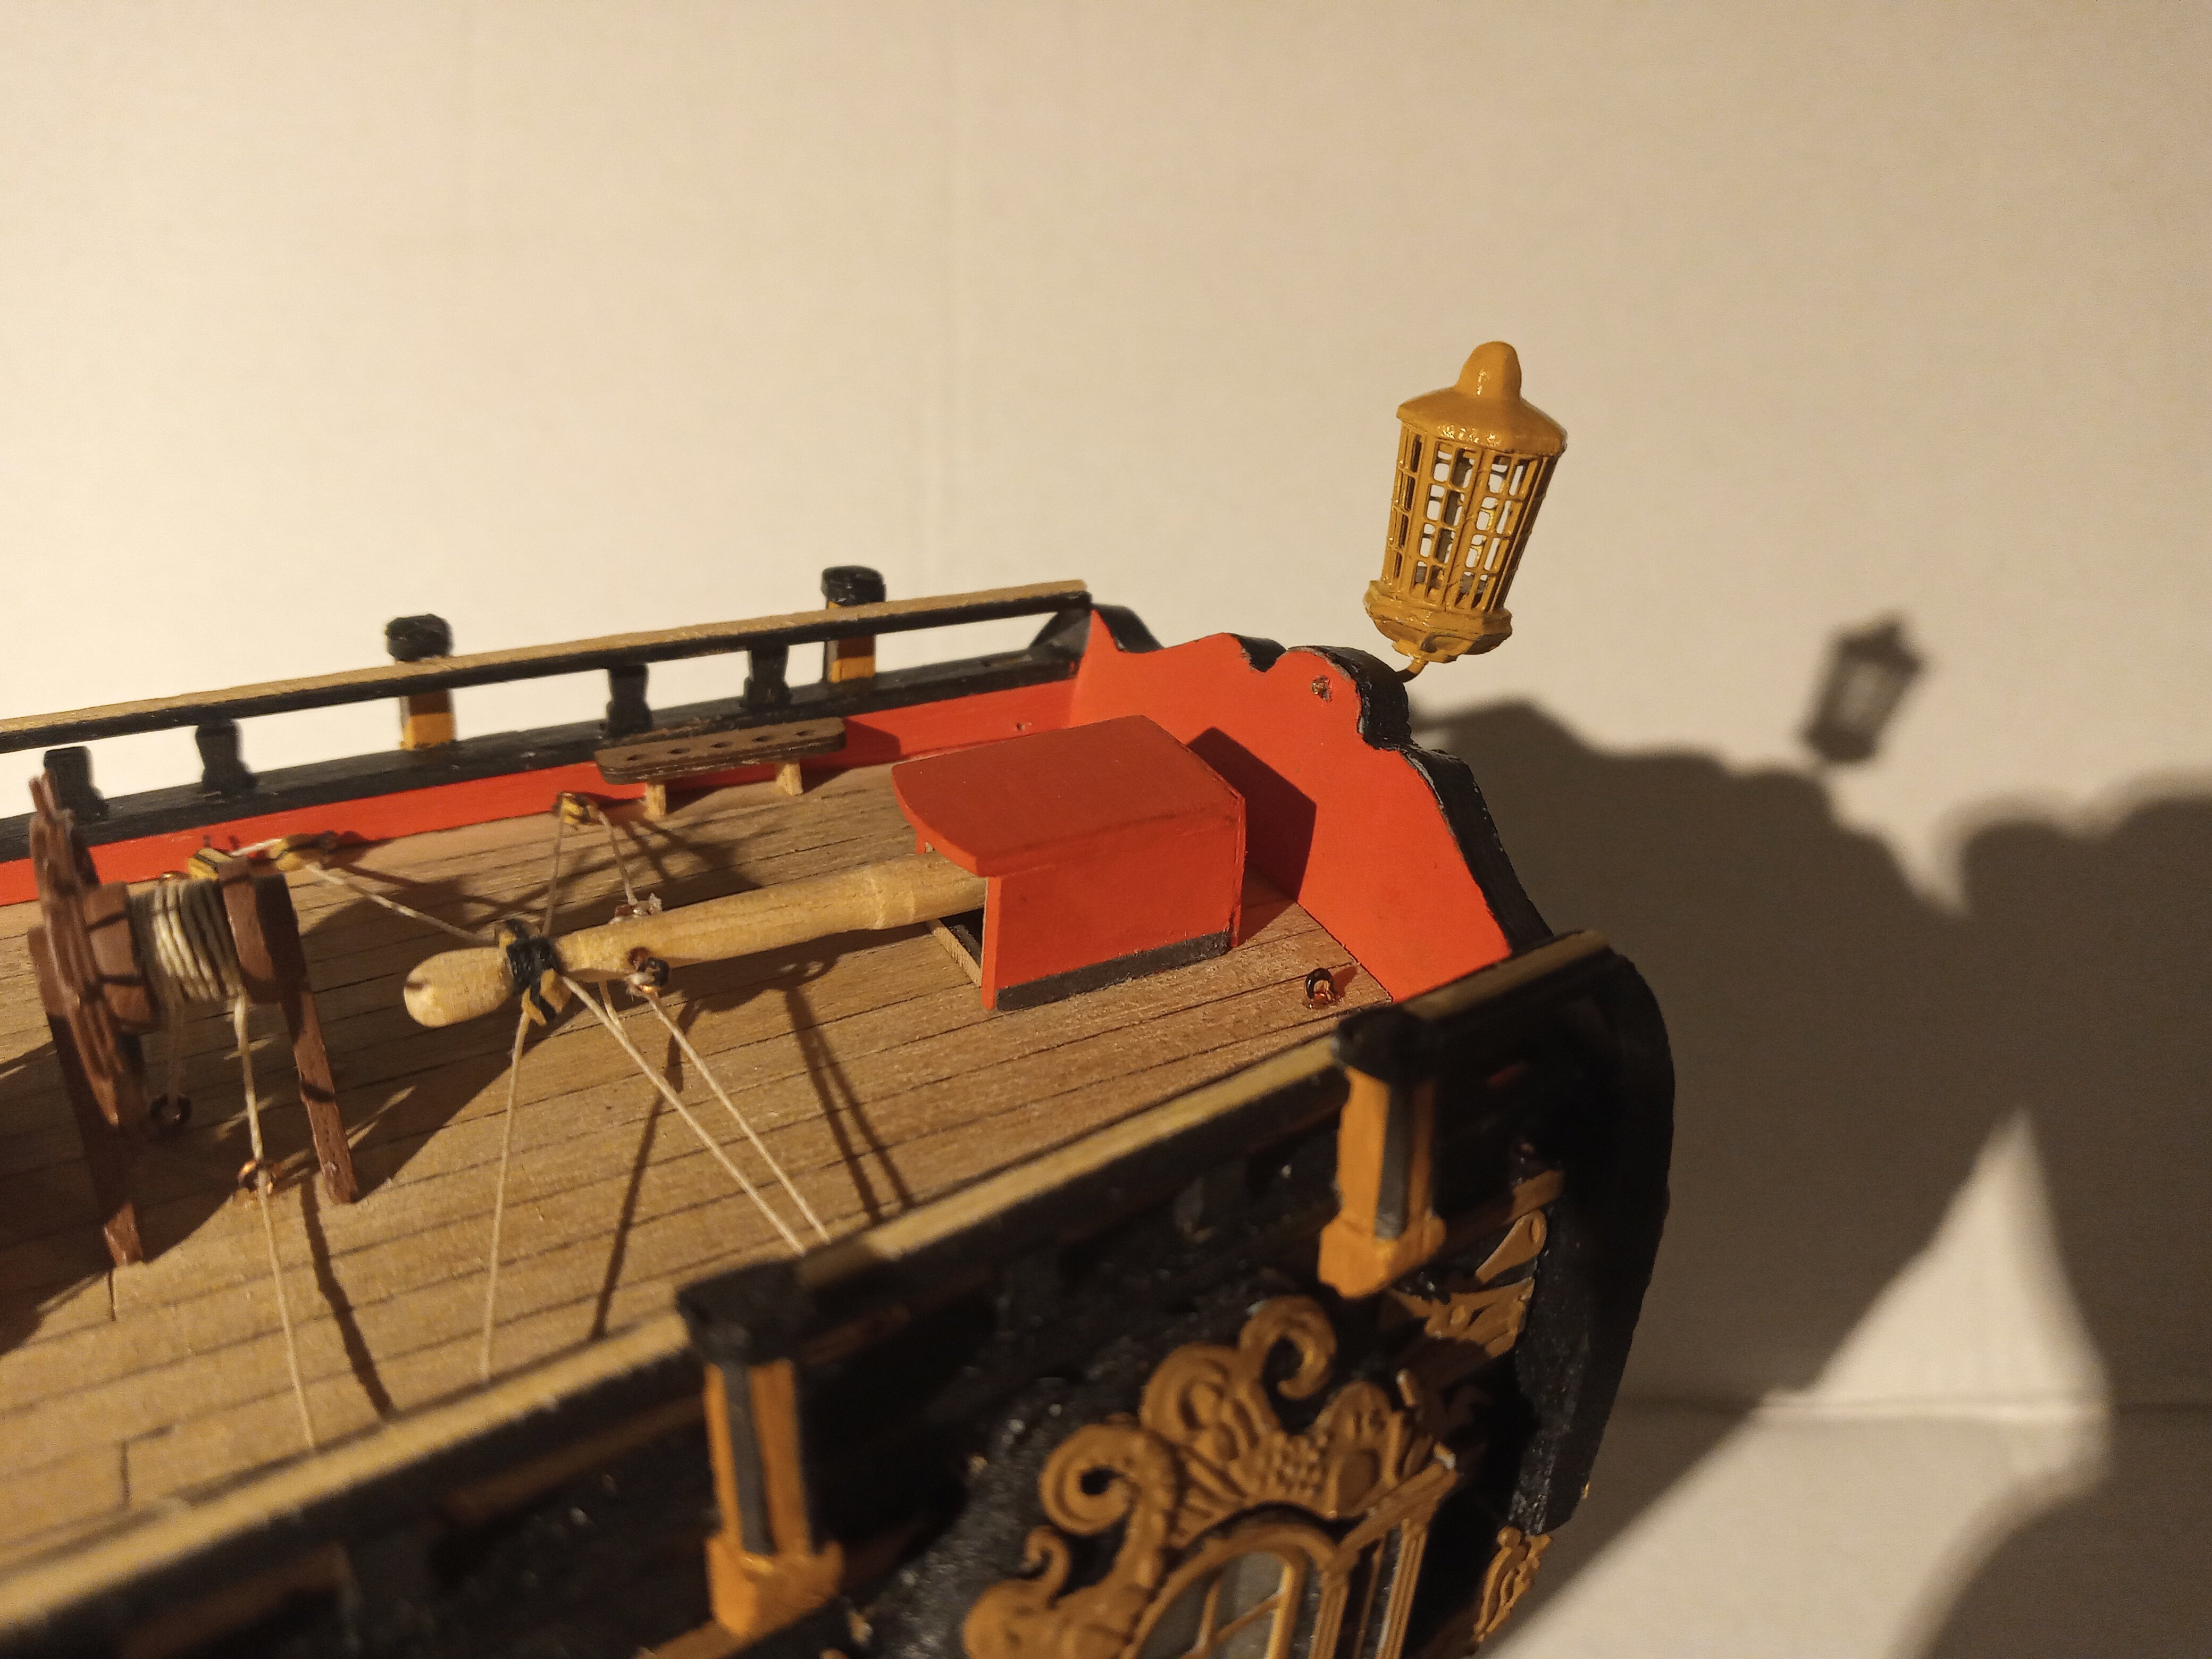
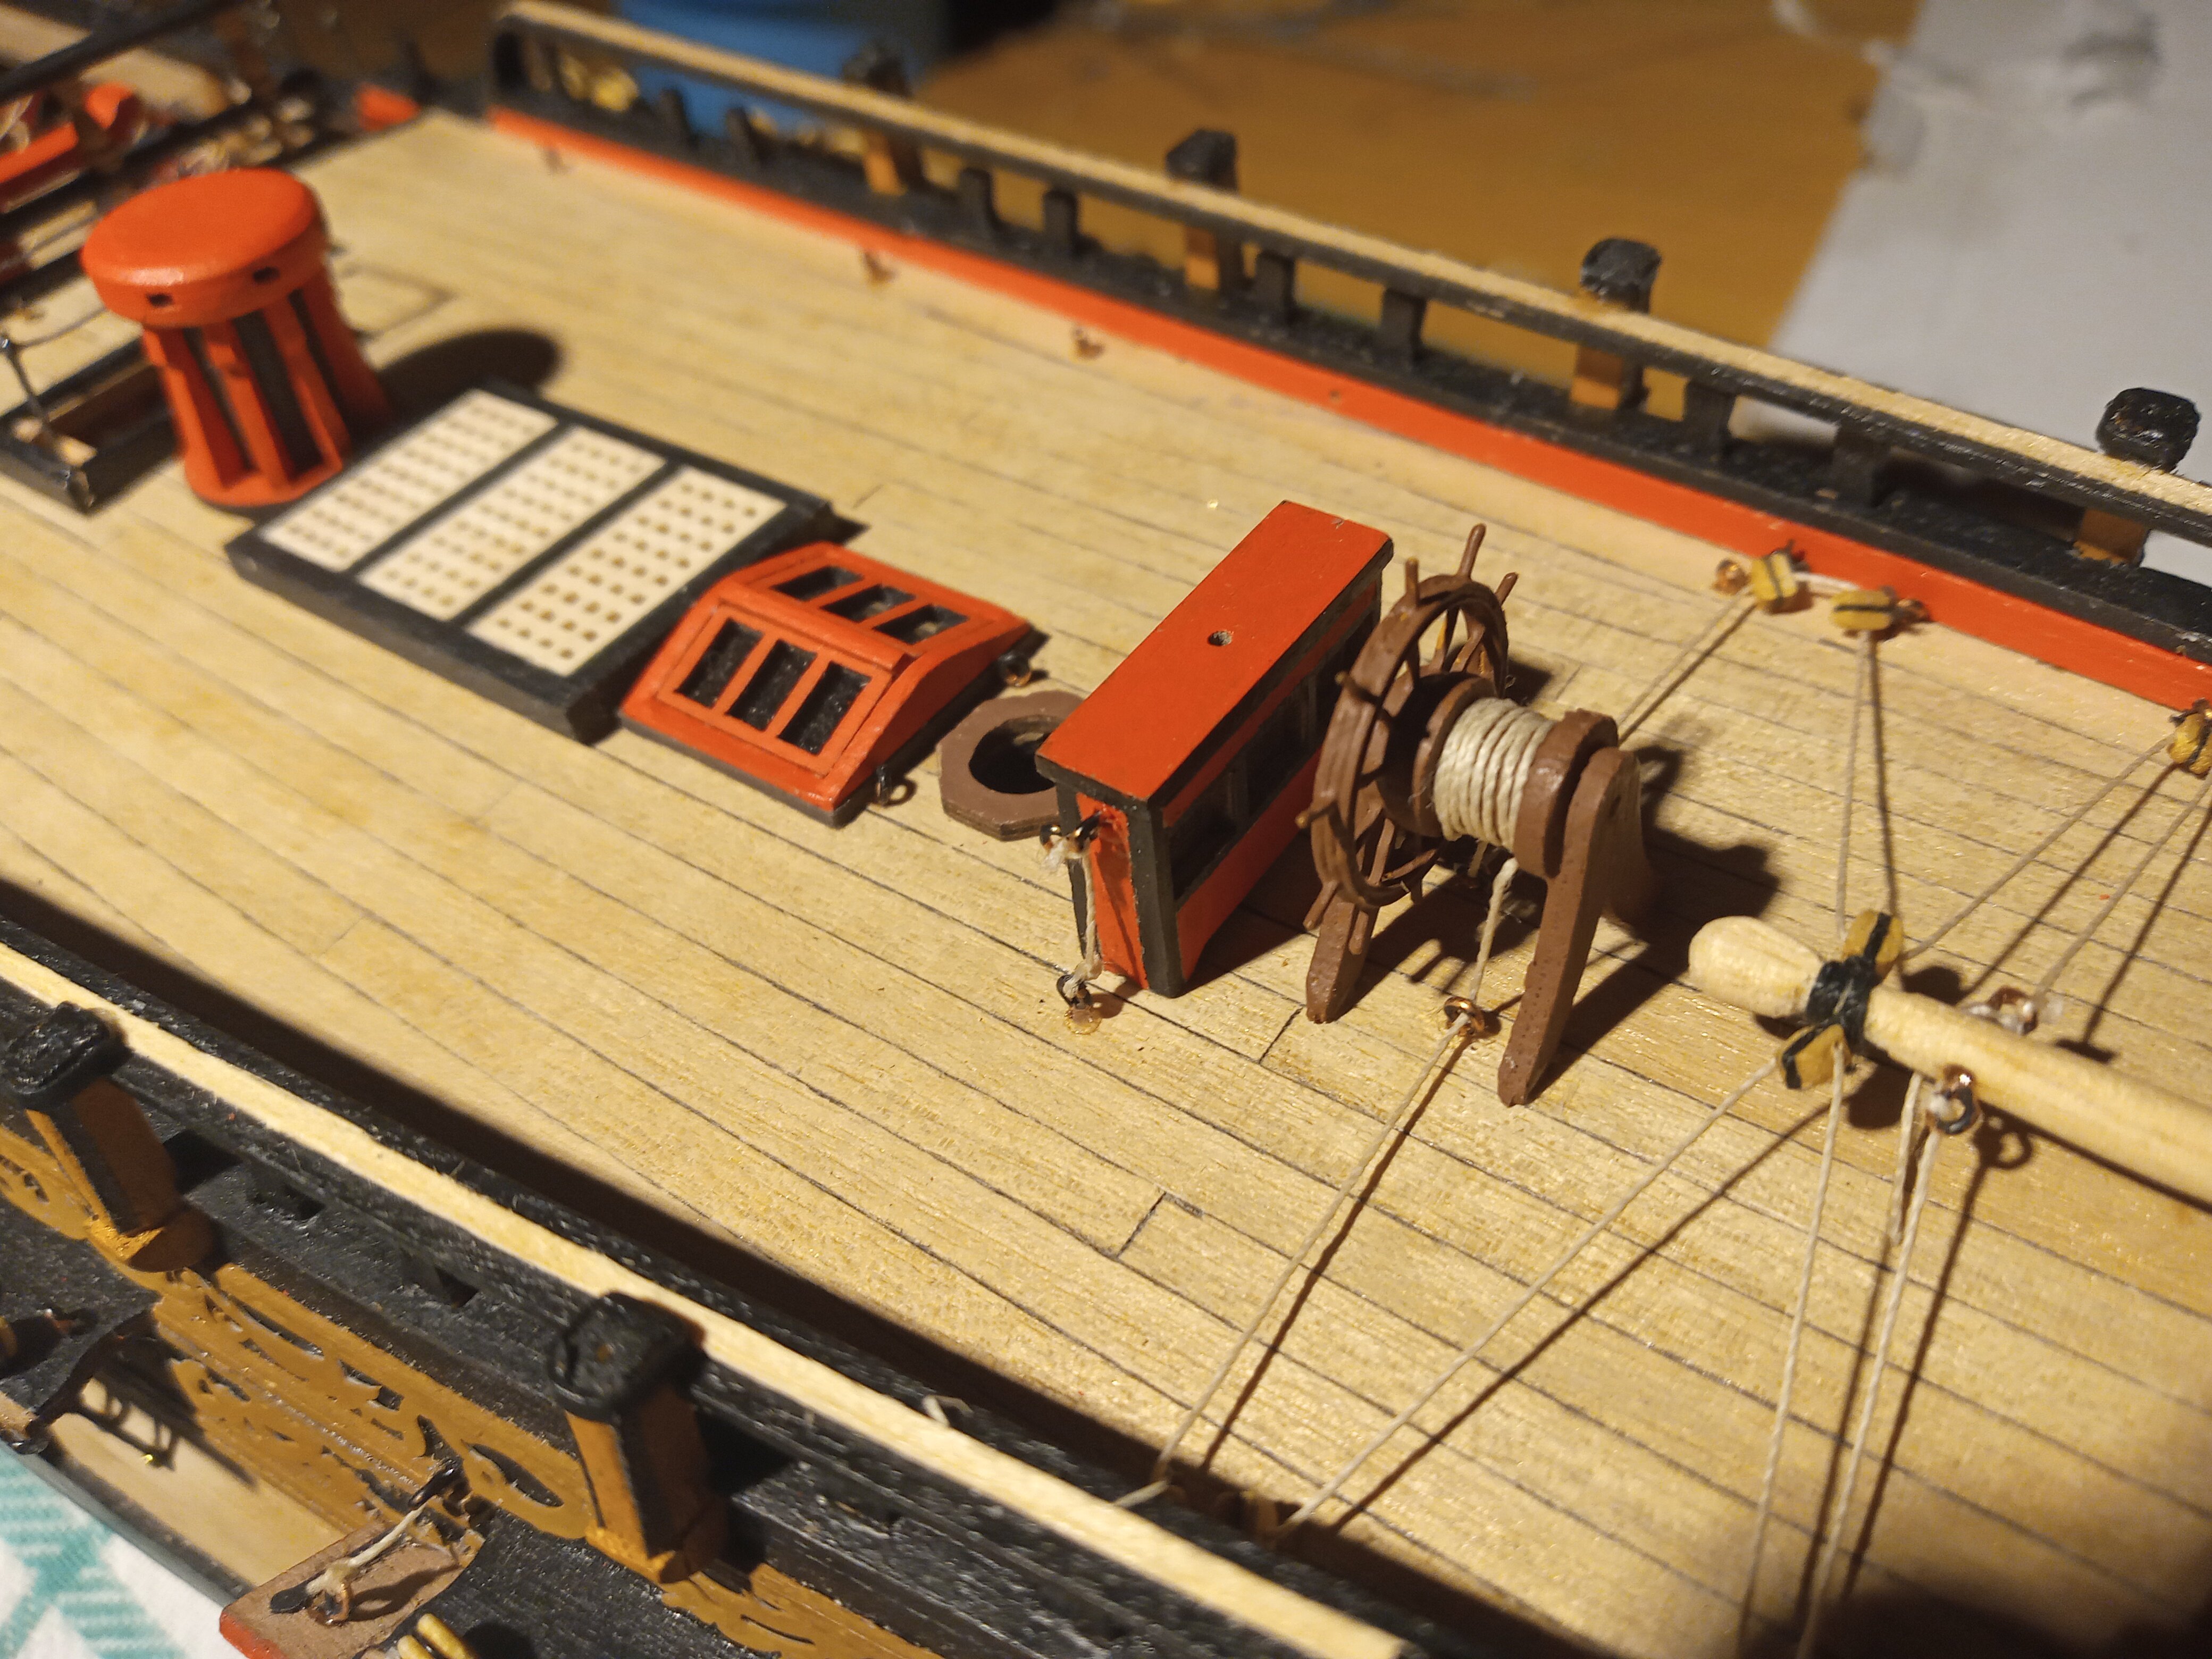
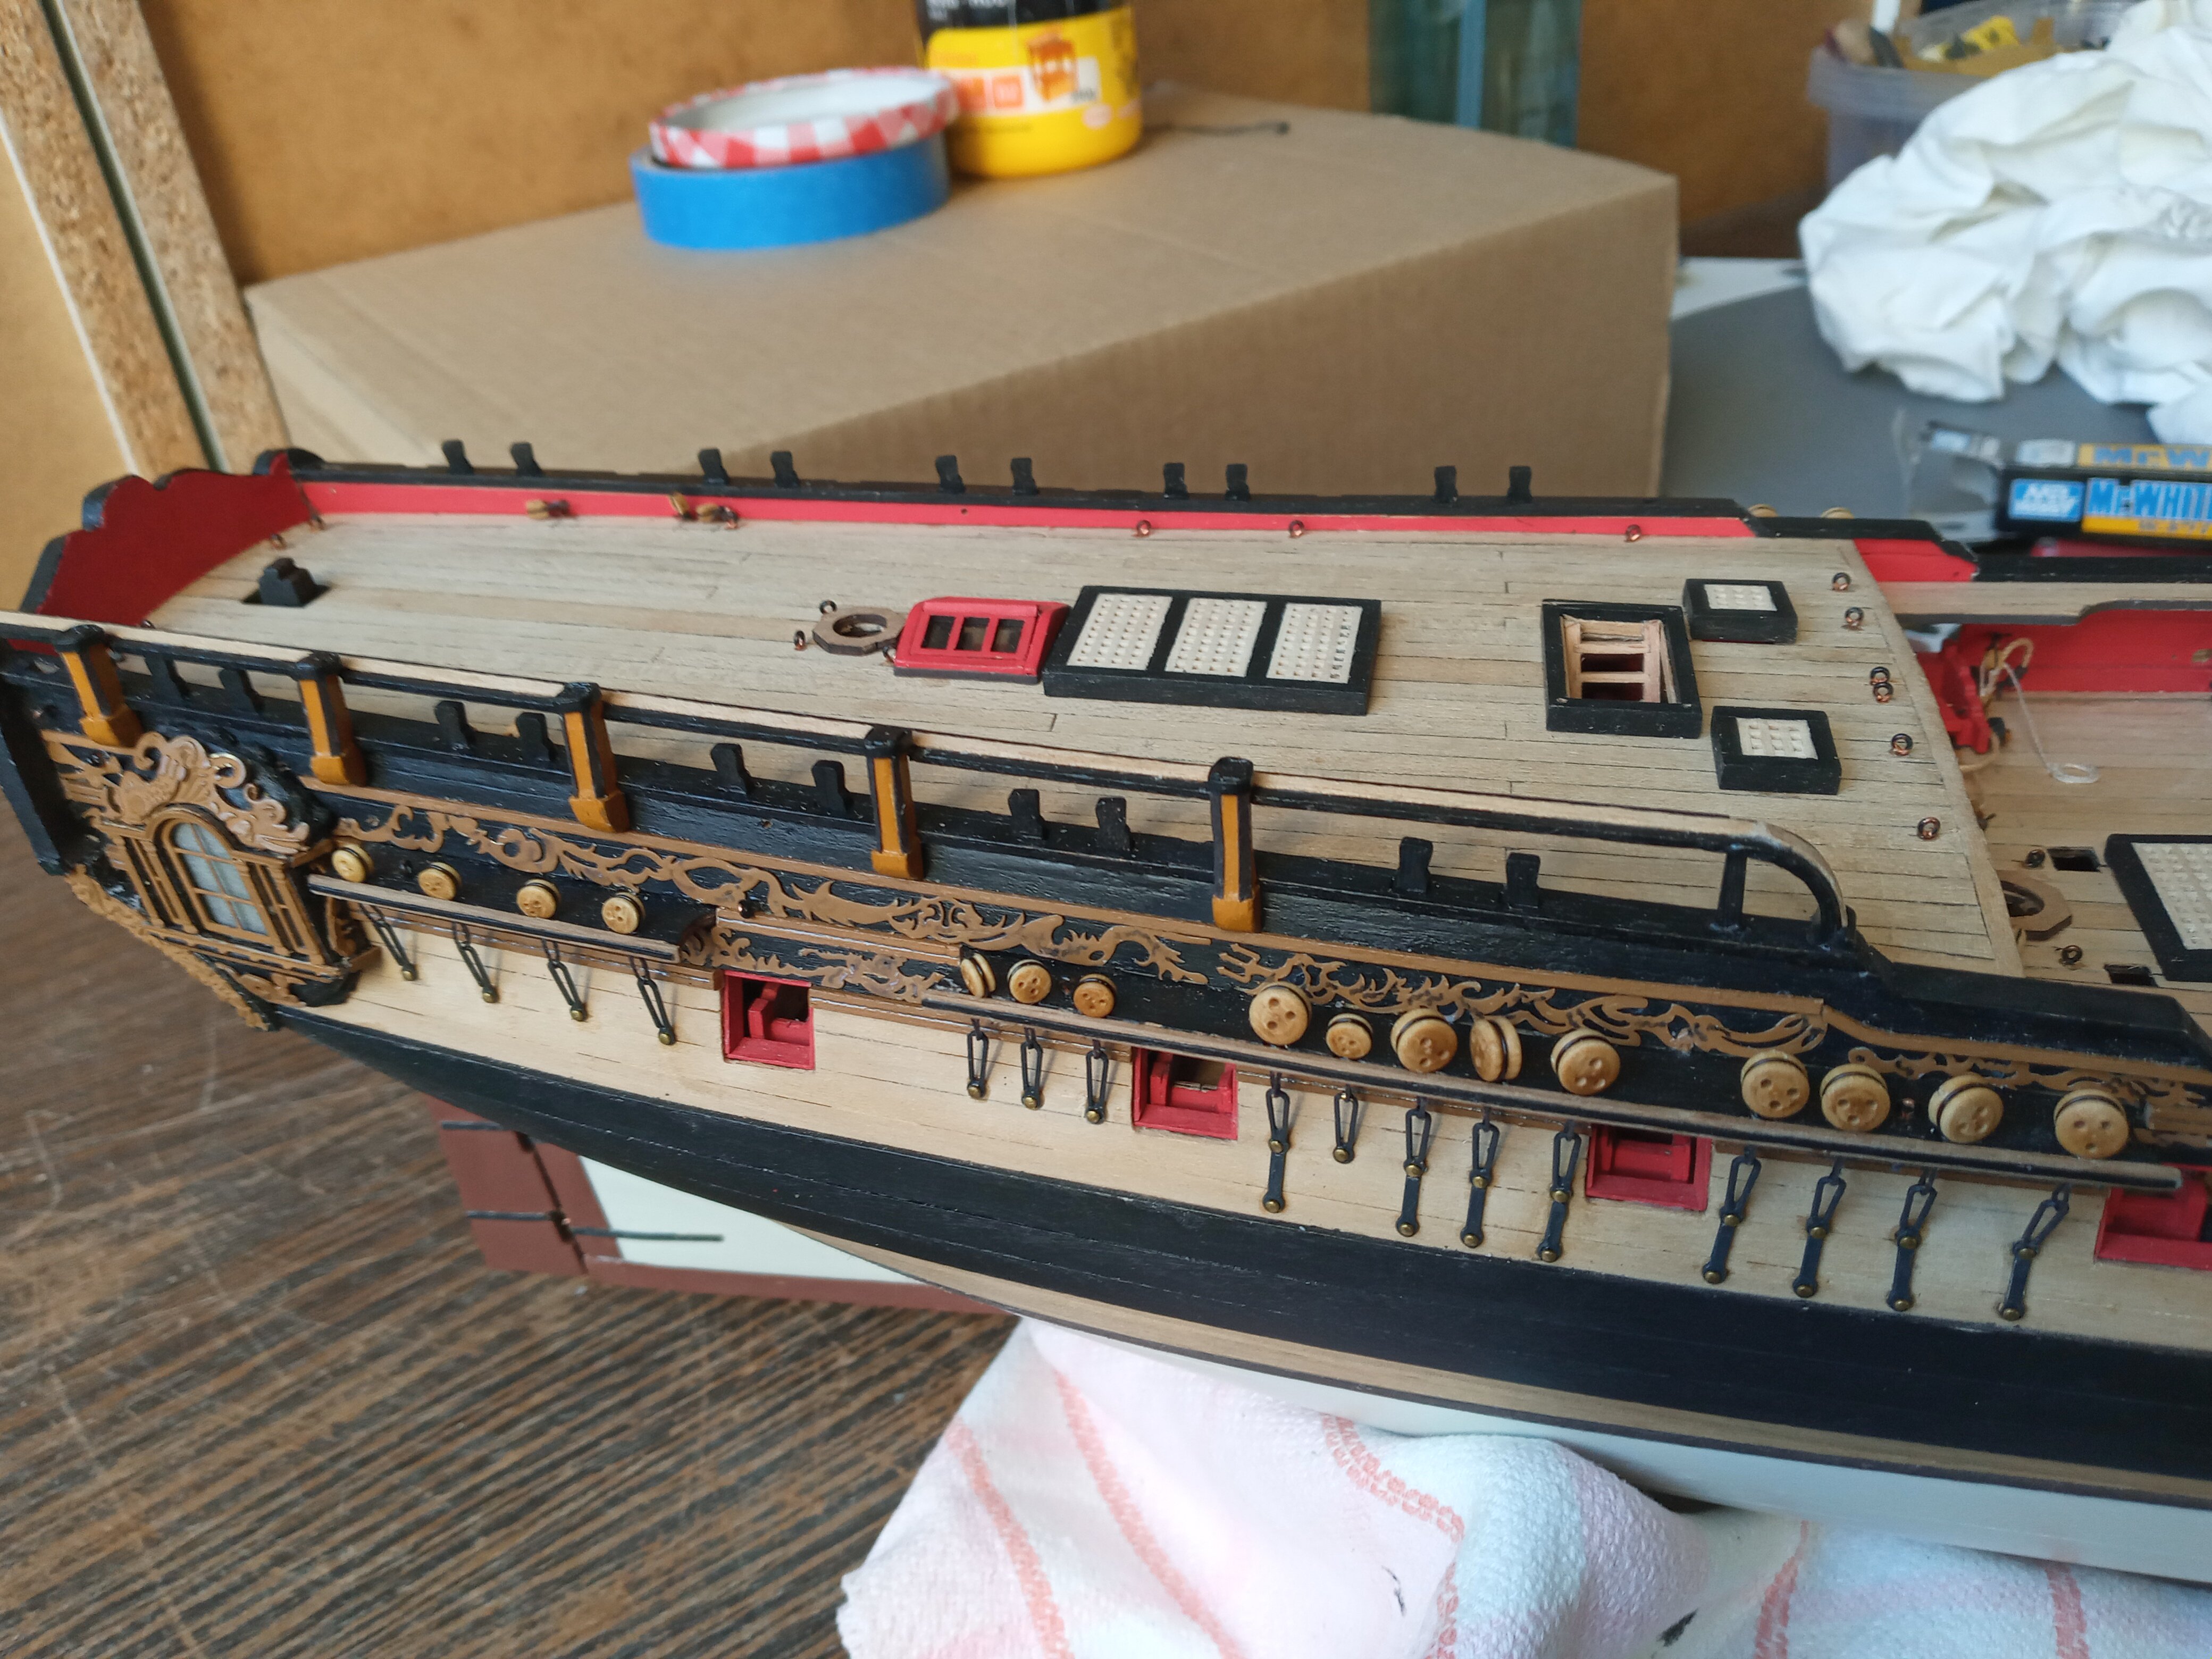
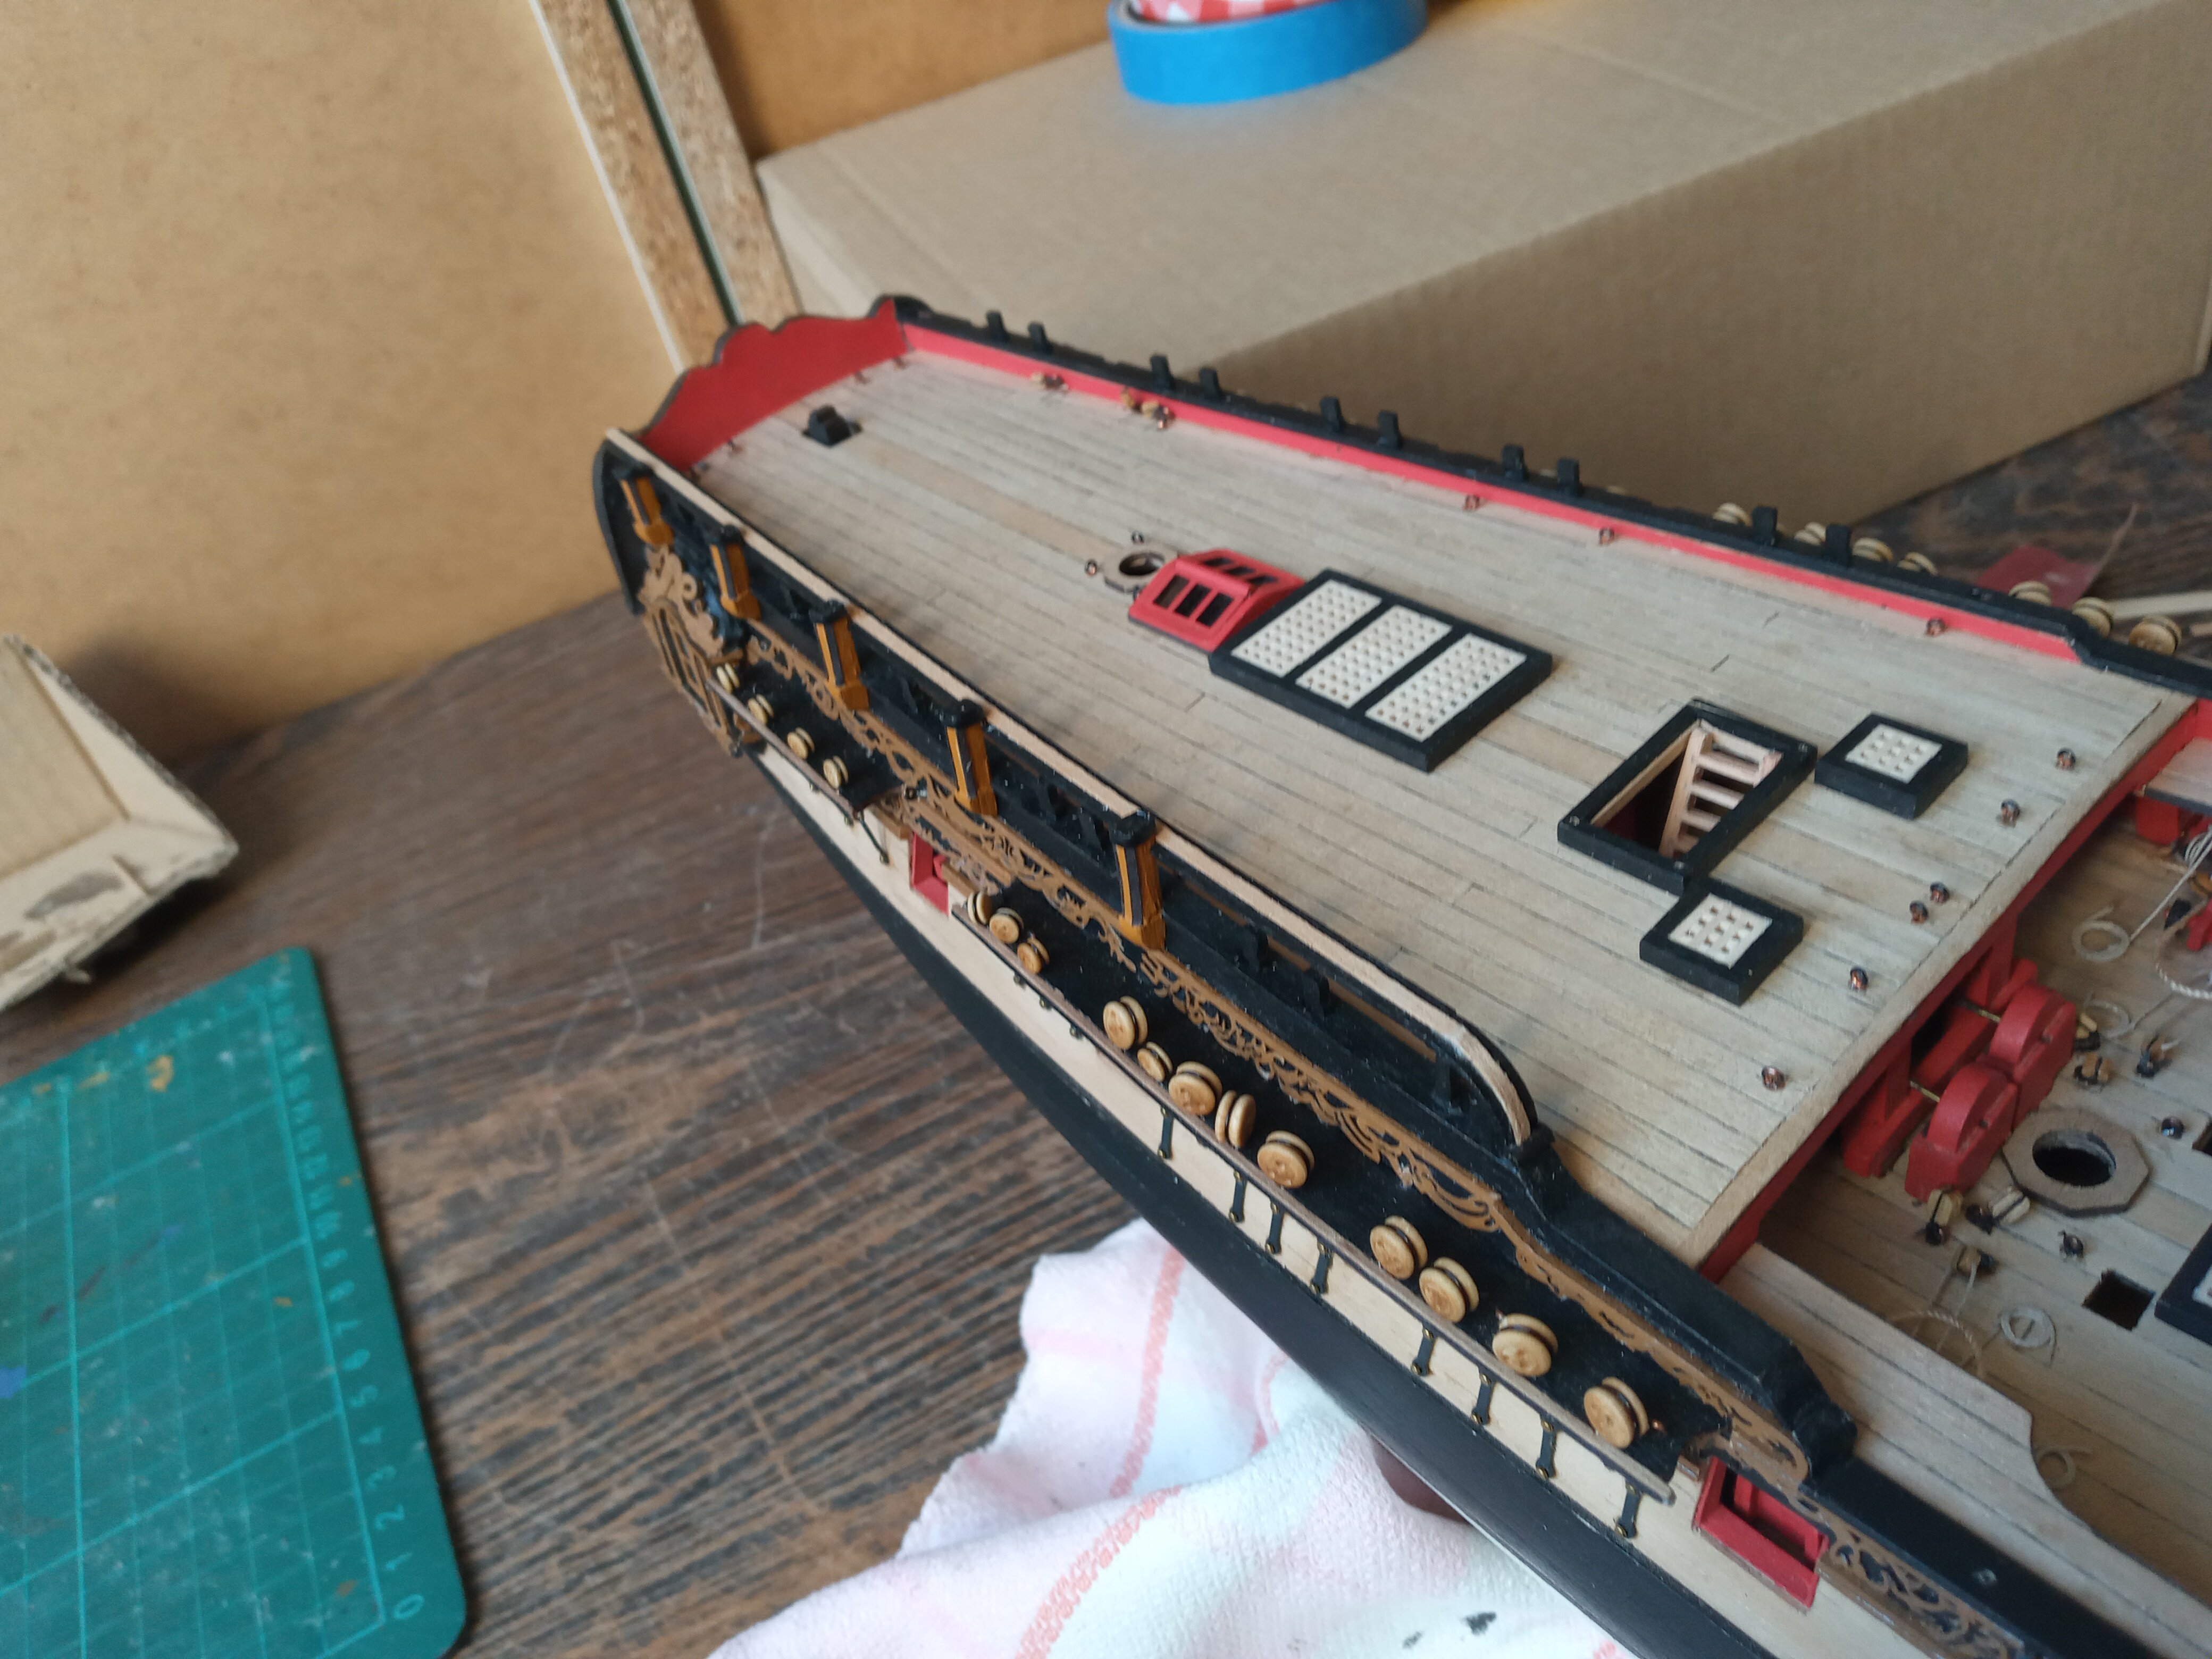
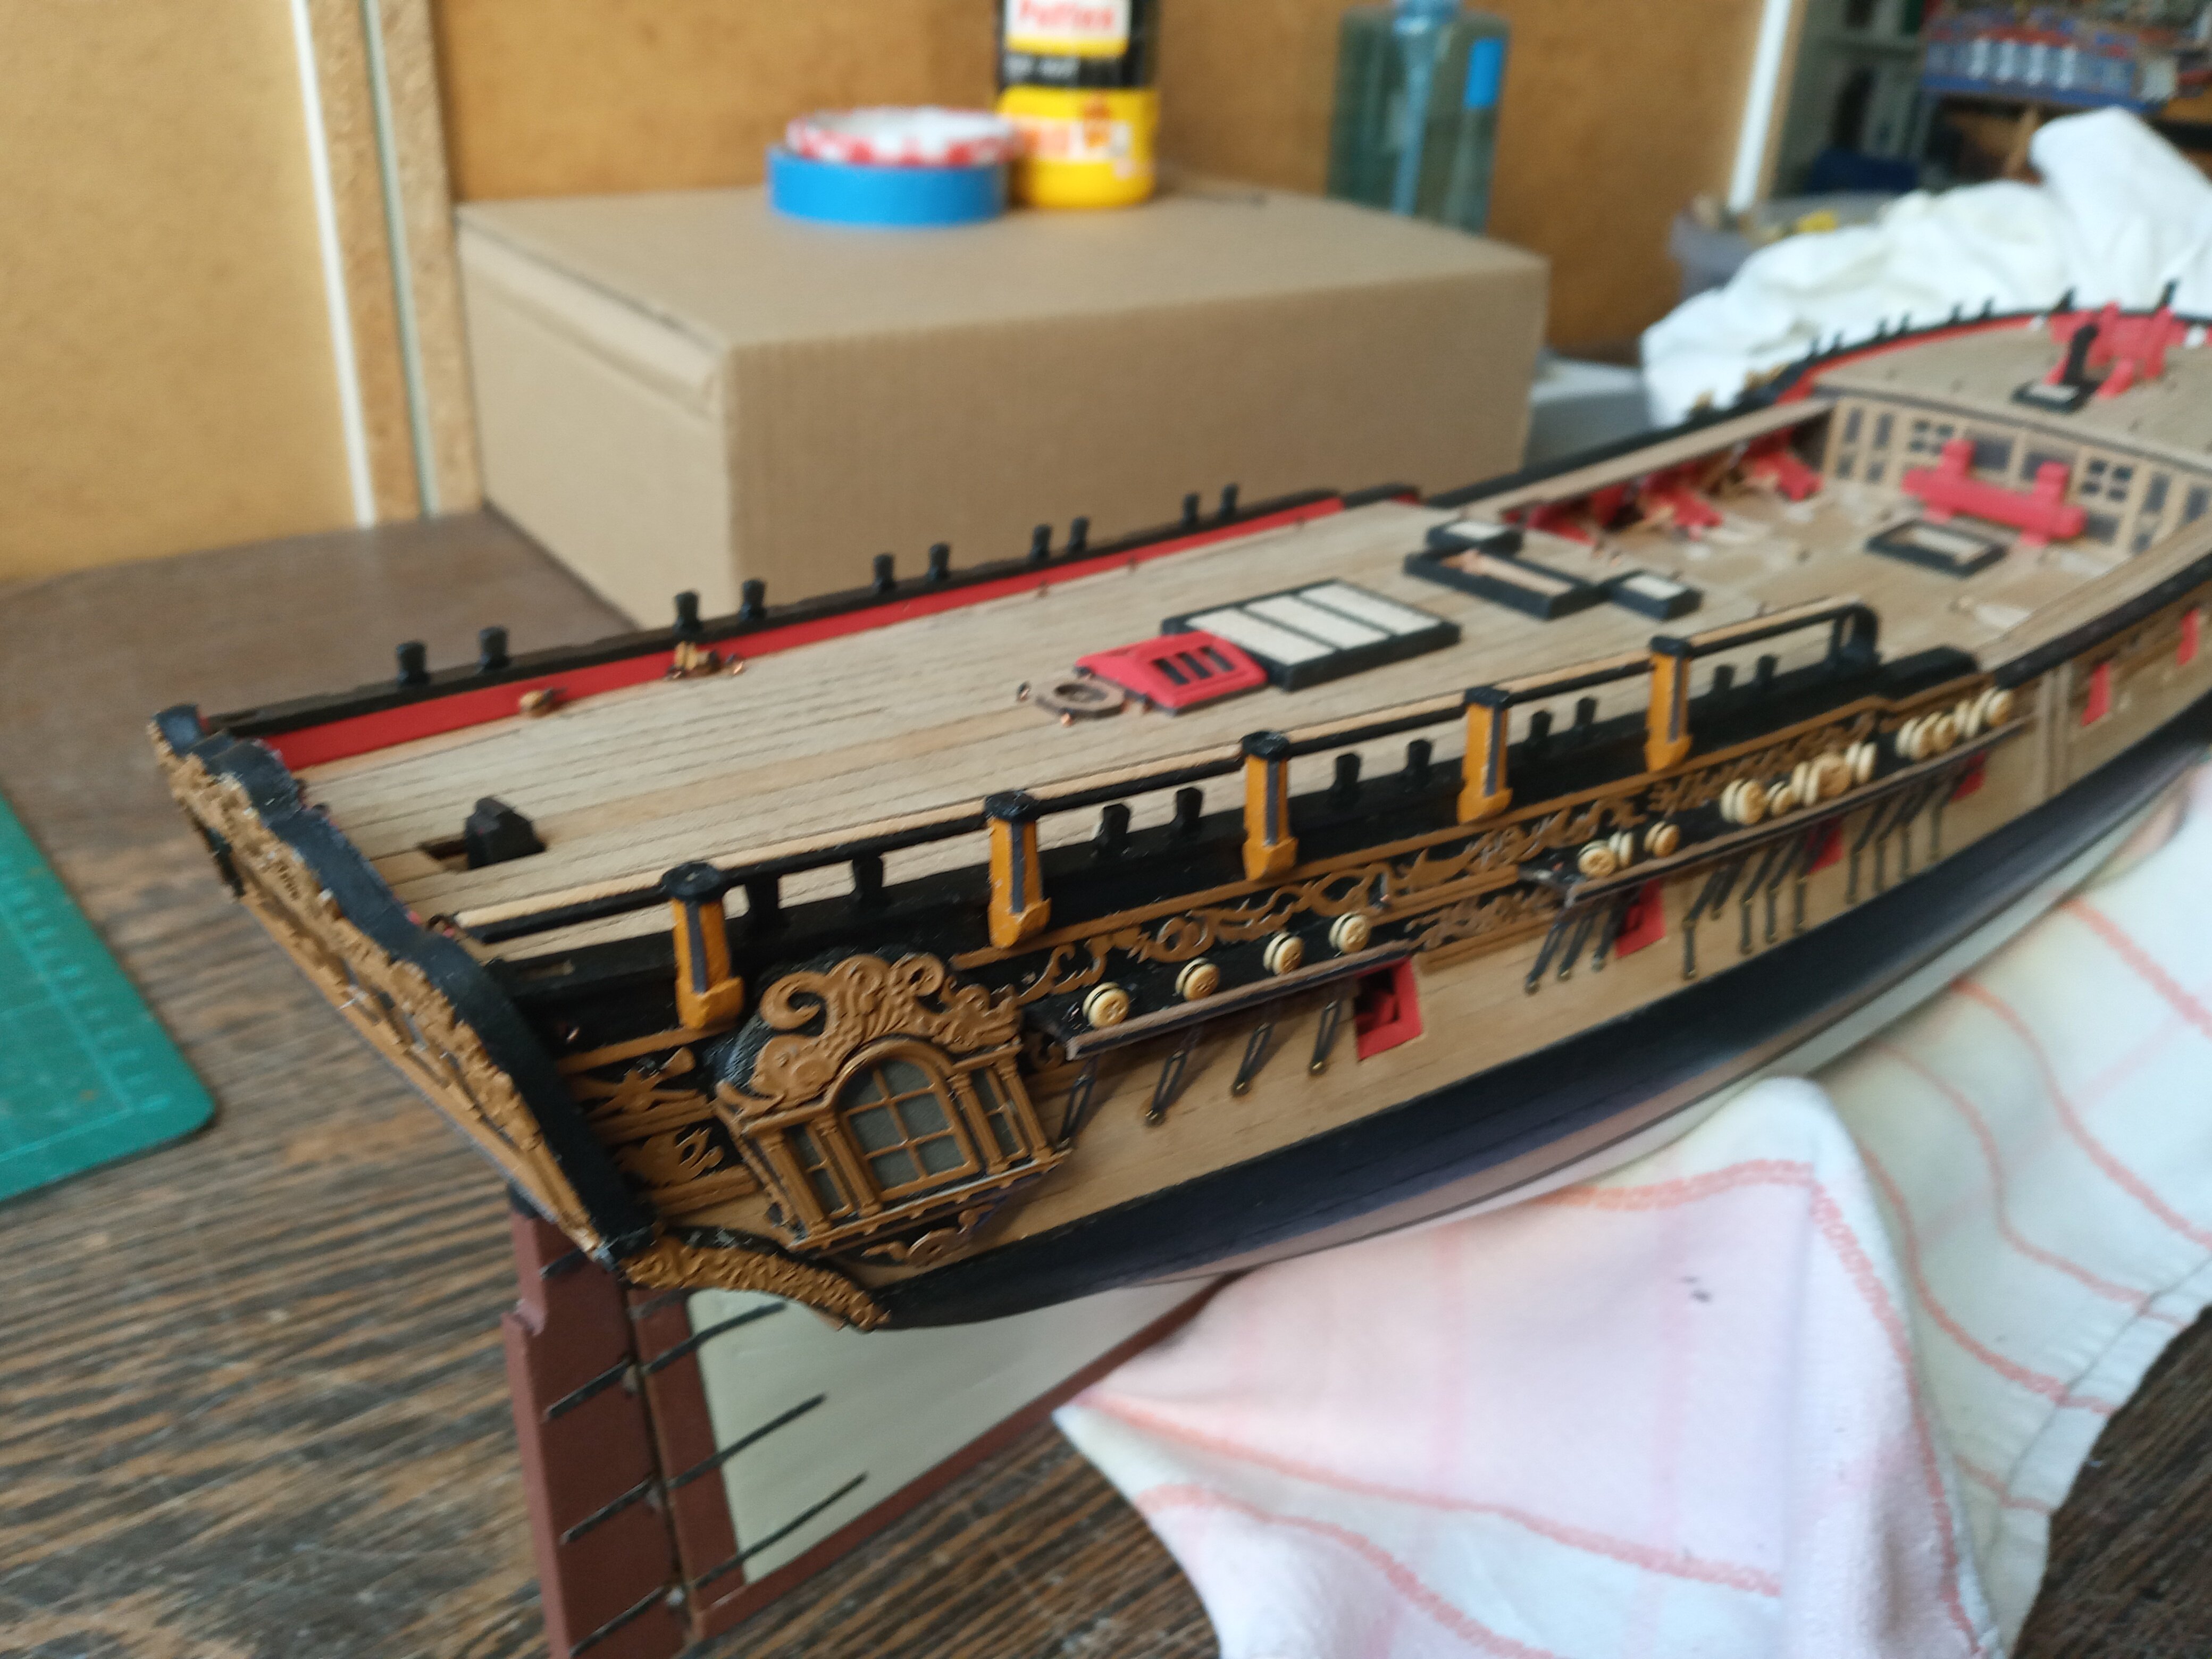
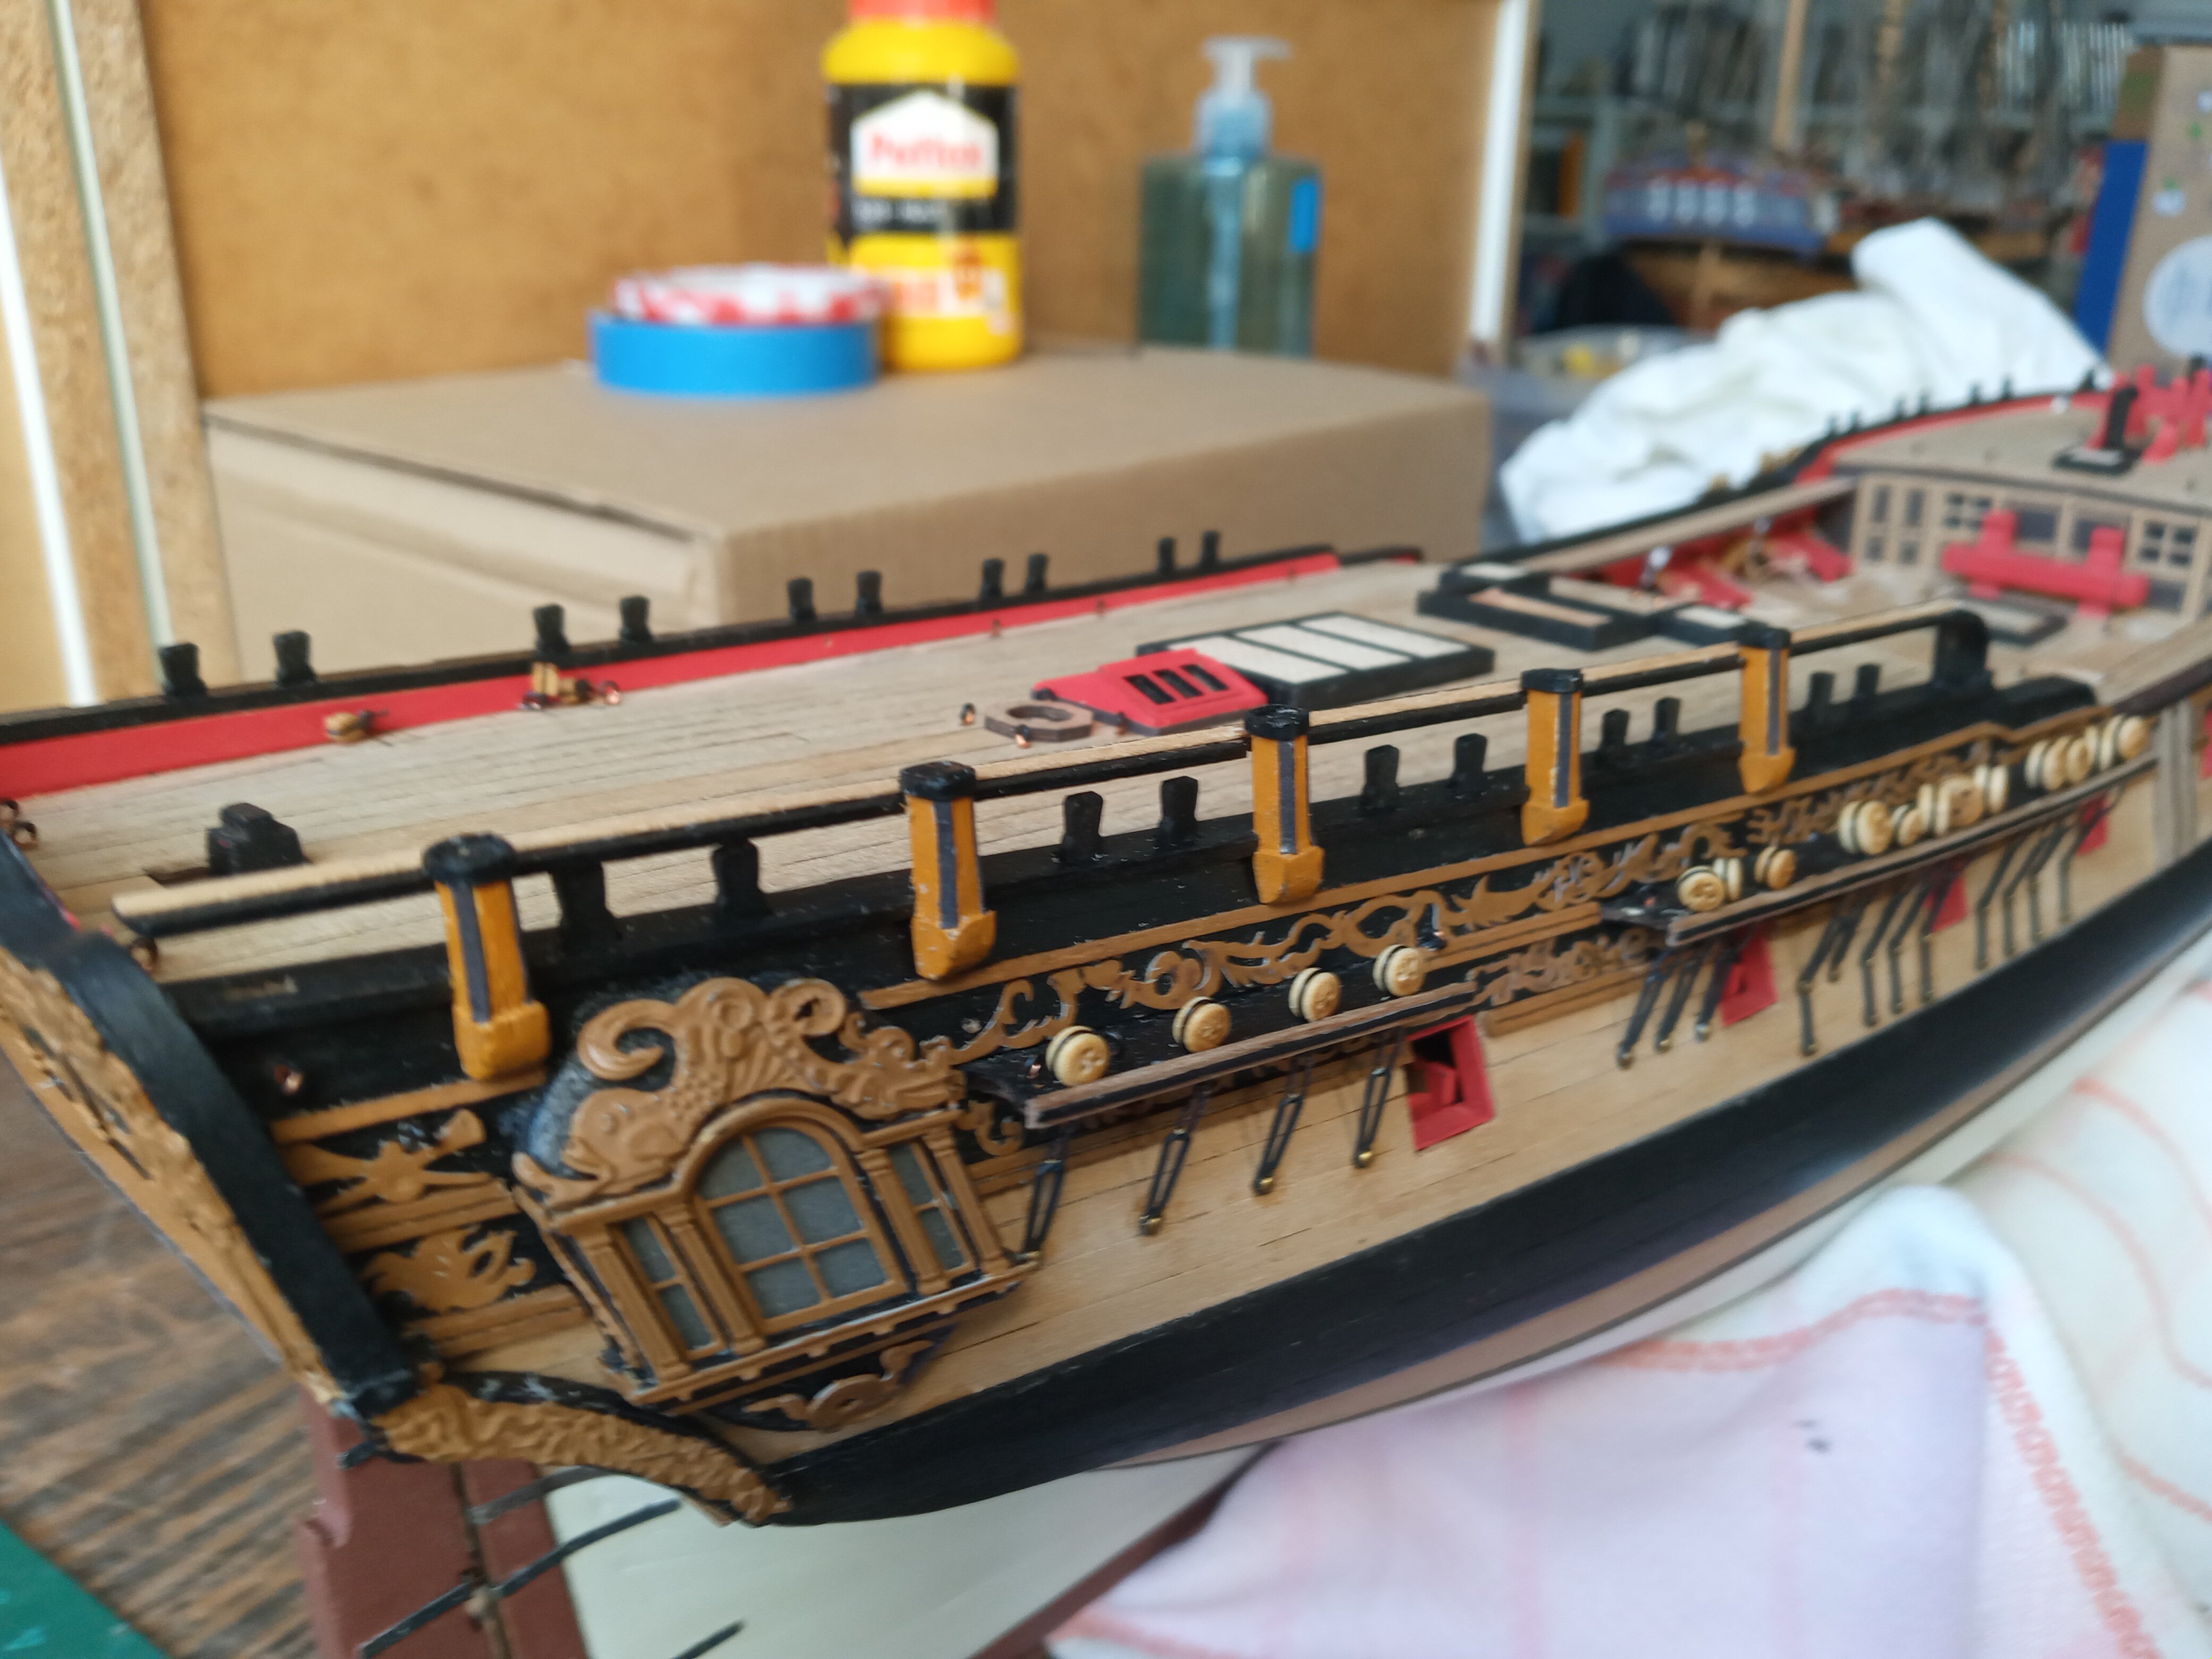
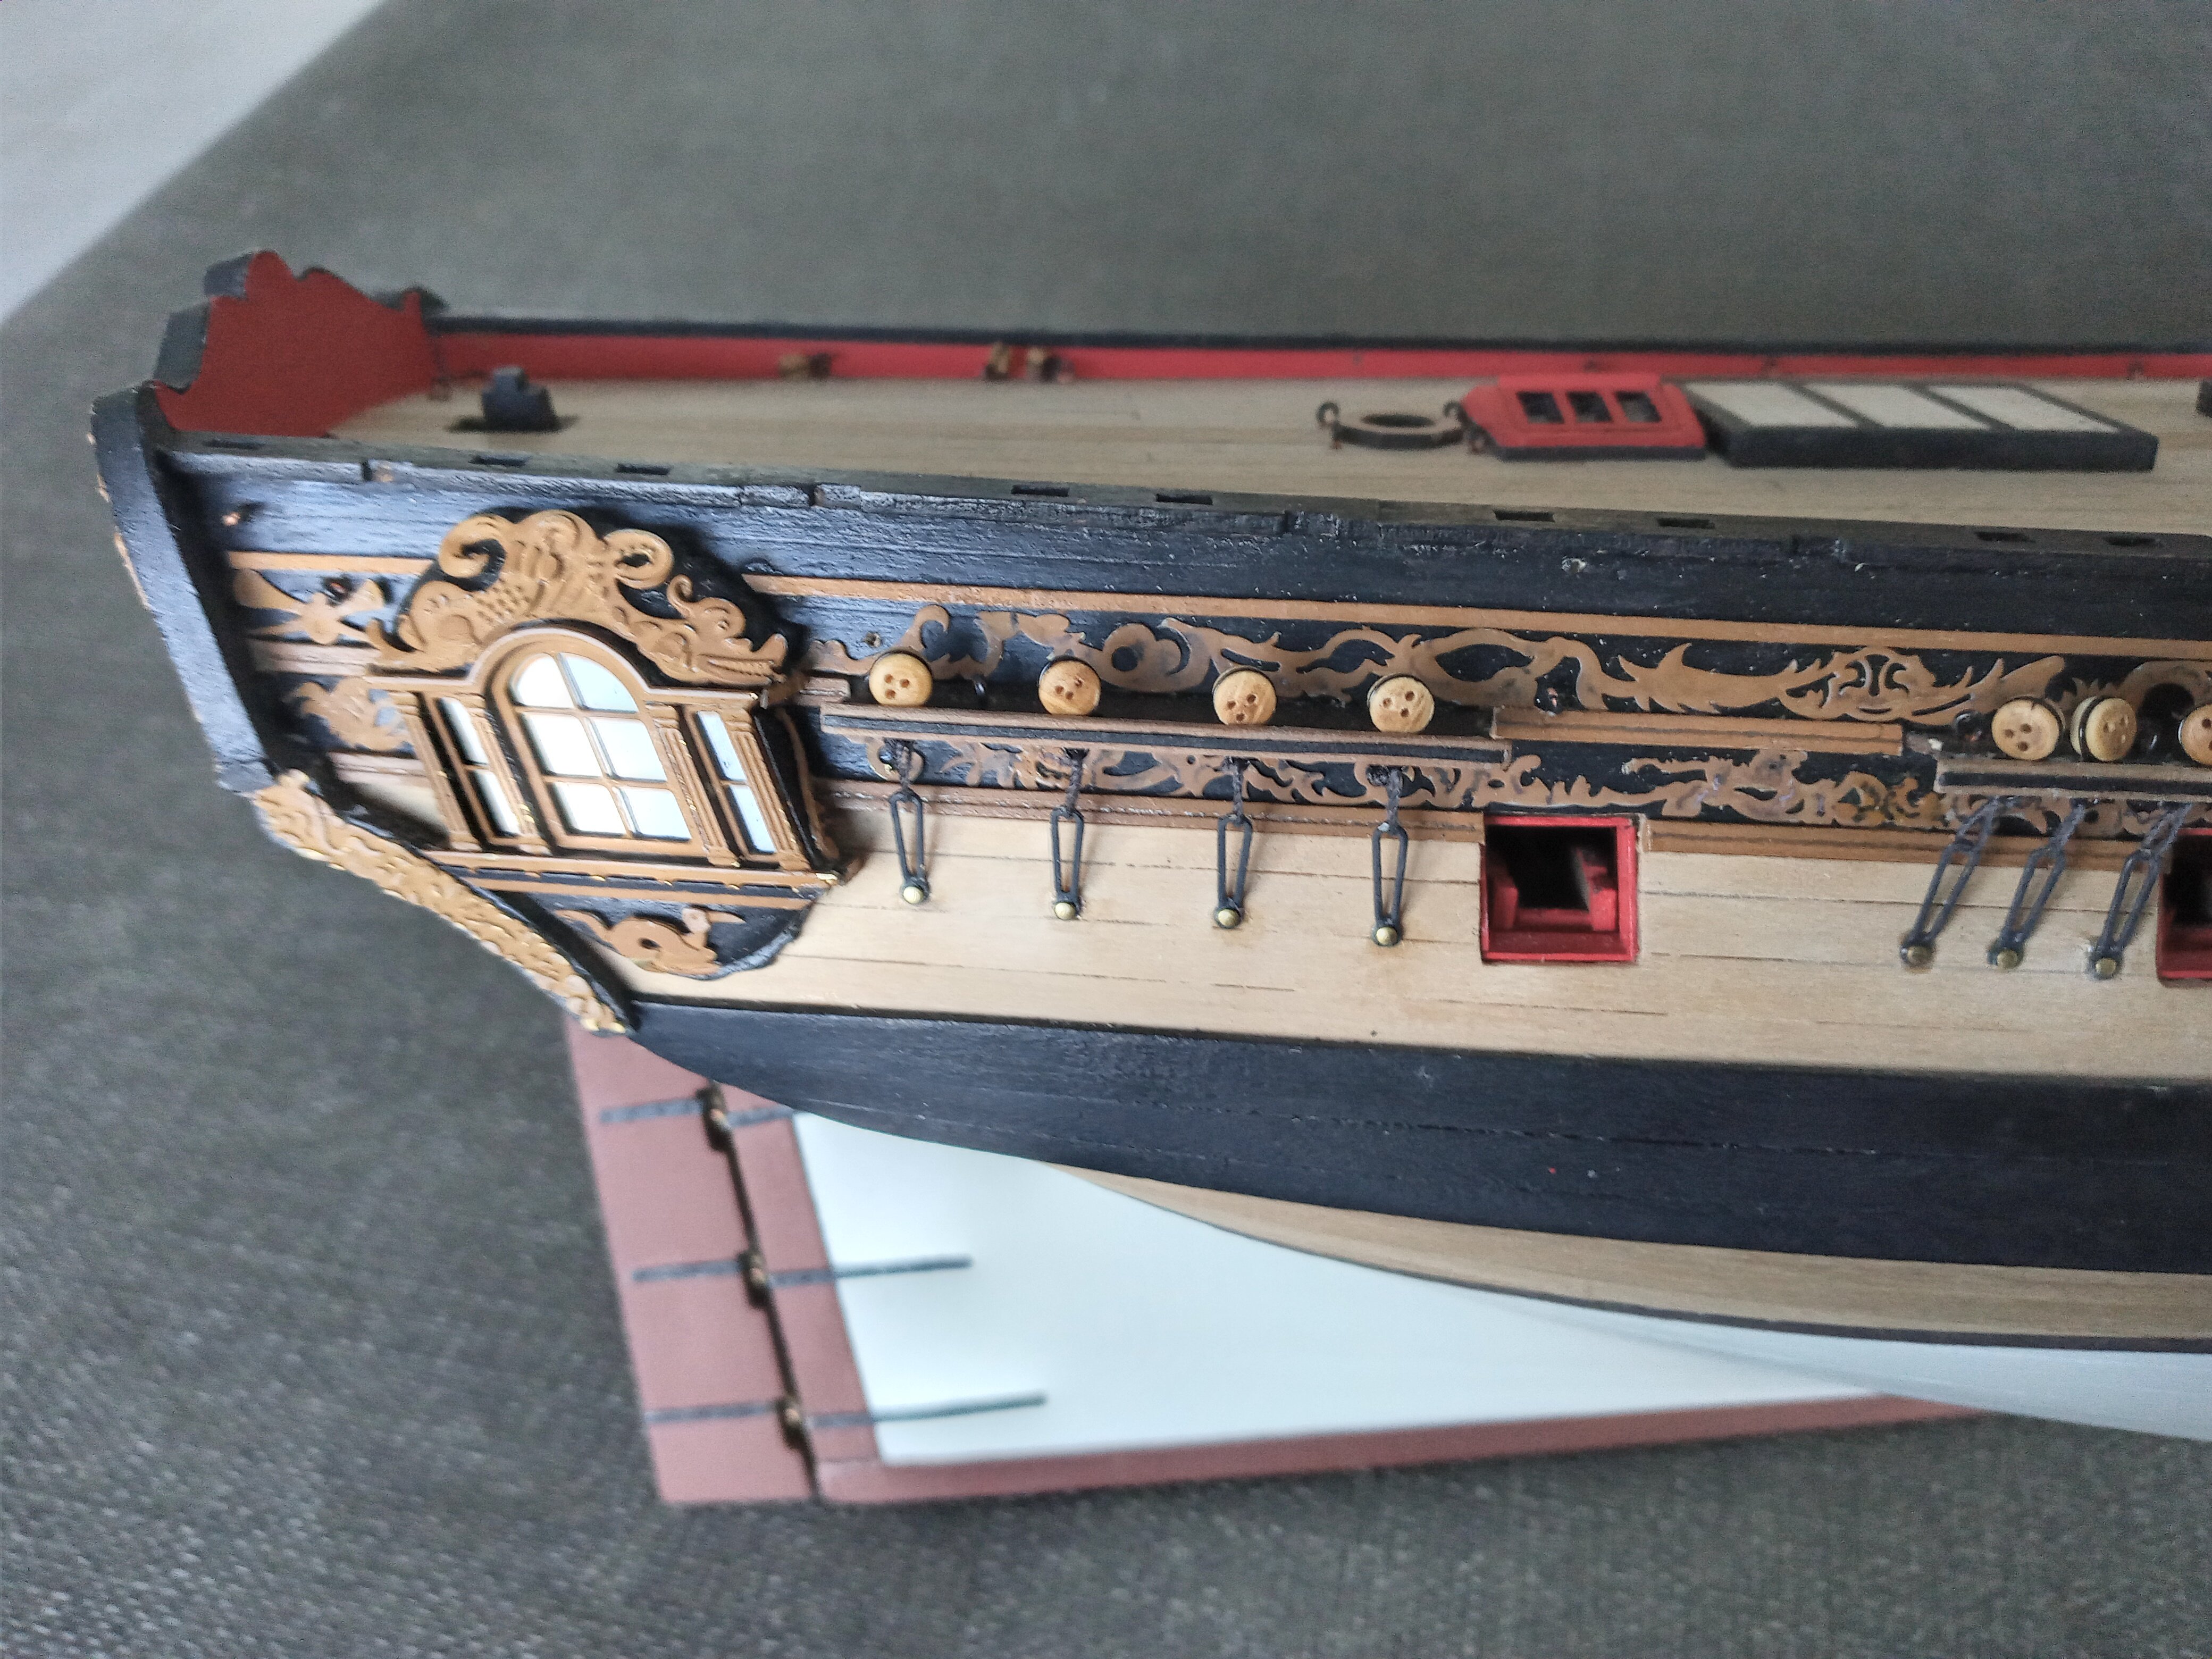
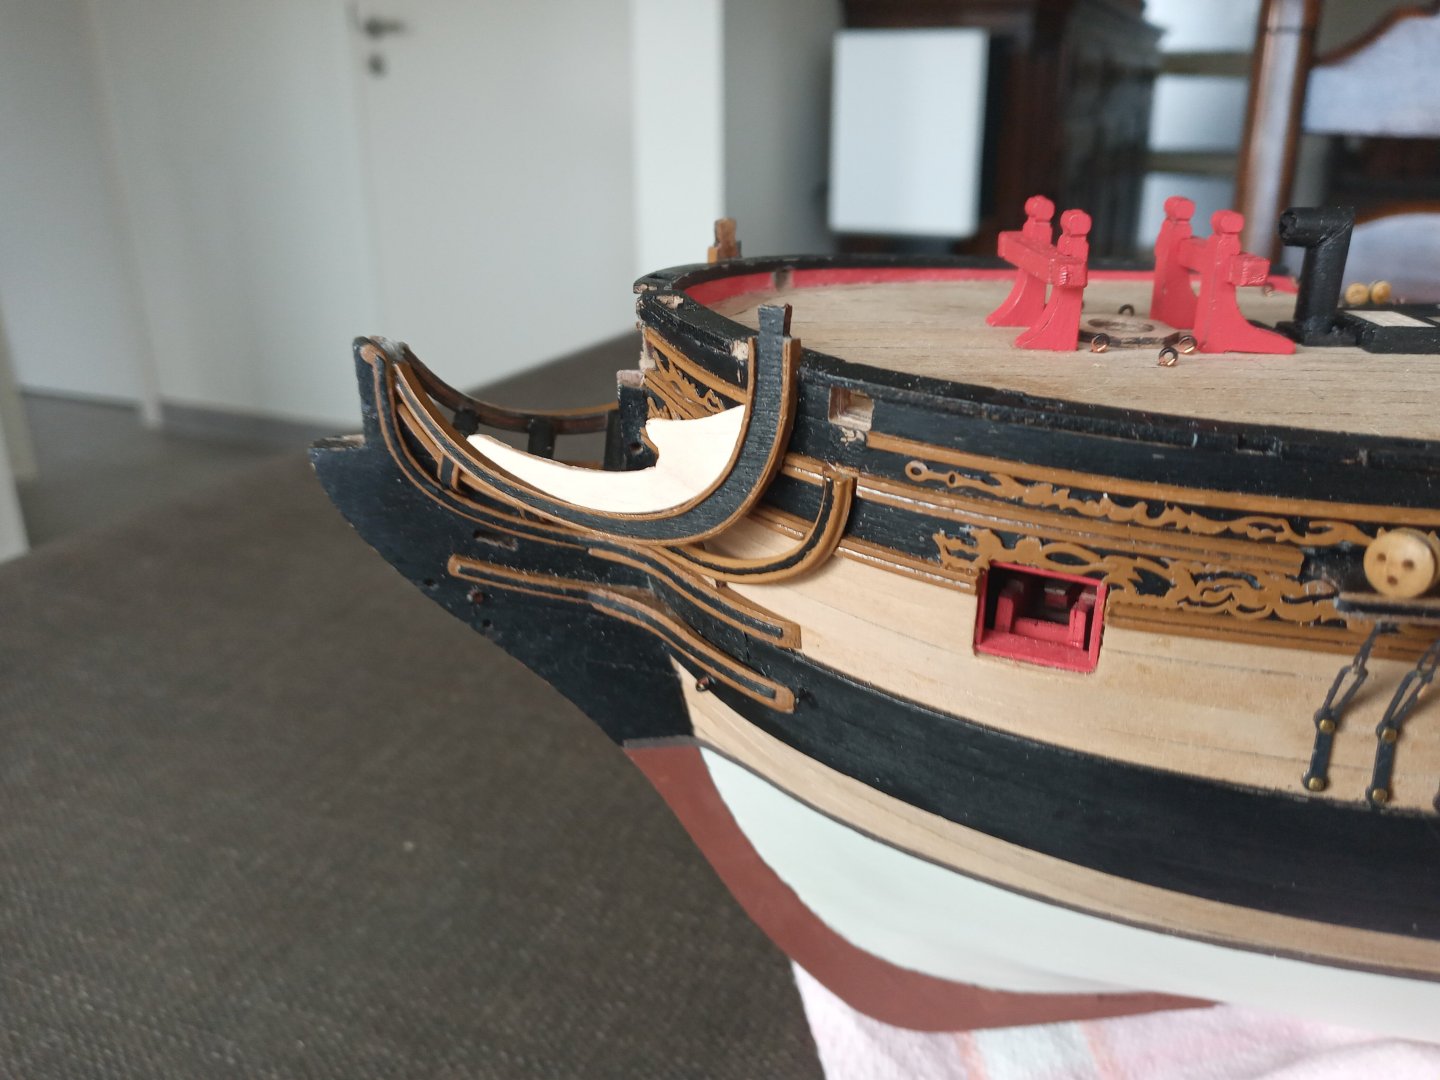
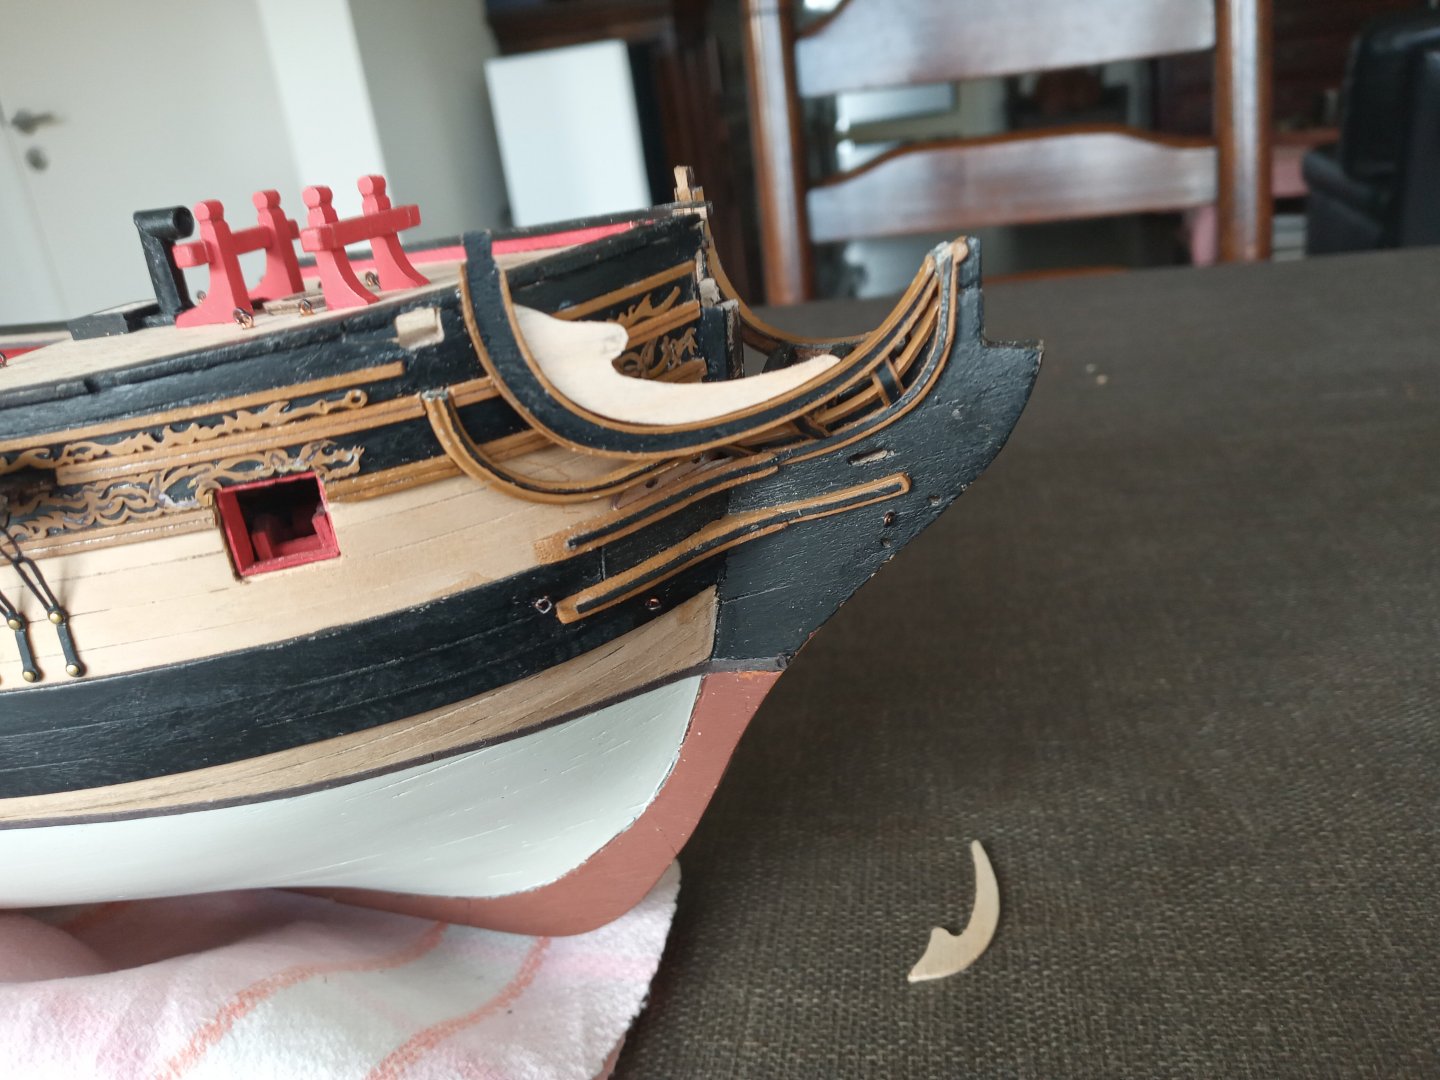
Referring to my previuos post, first of all a sincere word of gratitude towards the kind and very encouraging words and immensly interesting builds on this forum ( finished and ongoing ) which are for me a true source of inspiration. Concerning the color scheme for HMS Pegasus, compared with HMS Fly , I always preferred HMS Fly as I came across a few examples of red, black and white (beneath the waterline ) during my research. Let's overlook a few items. Lamp. I'm fond of the gaffsail arrangement without the boom ( e.g. see Blue Ensign's log ). If not, the lamp would clearly obstruct with the boom. The moreover, I intend to place a flagpole. The lamp itself was purchased through the aftermarket ( Caldercraft, If my memory serves me well ) and was part of a kit of 3 lamps ( the biggest embellished the stern of my Diana ) Paint : AV 70.877 Gold Brown. Rudderhead housing For the same reason, thus the flagpole, I had to customize this part a bit. Concerning the rigging part, I sticked to the building instructions but for the sake of visibility, I omitted the 3mm blocks under the ship's wheel. The Breastwork Quite delicate assembling it was ( says Yoda🙂) and the extremities did not fit properly upon the stanchions ( Pegasus builders : part n° 13 is the subject ) so I had to be creative to solve this by adding a small part of wood in the shape of a half moon. Neither did I use the stanchions provided in the kit, instead I went for spare stanchions which were more to my taste. ( to be continued )


-
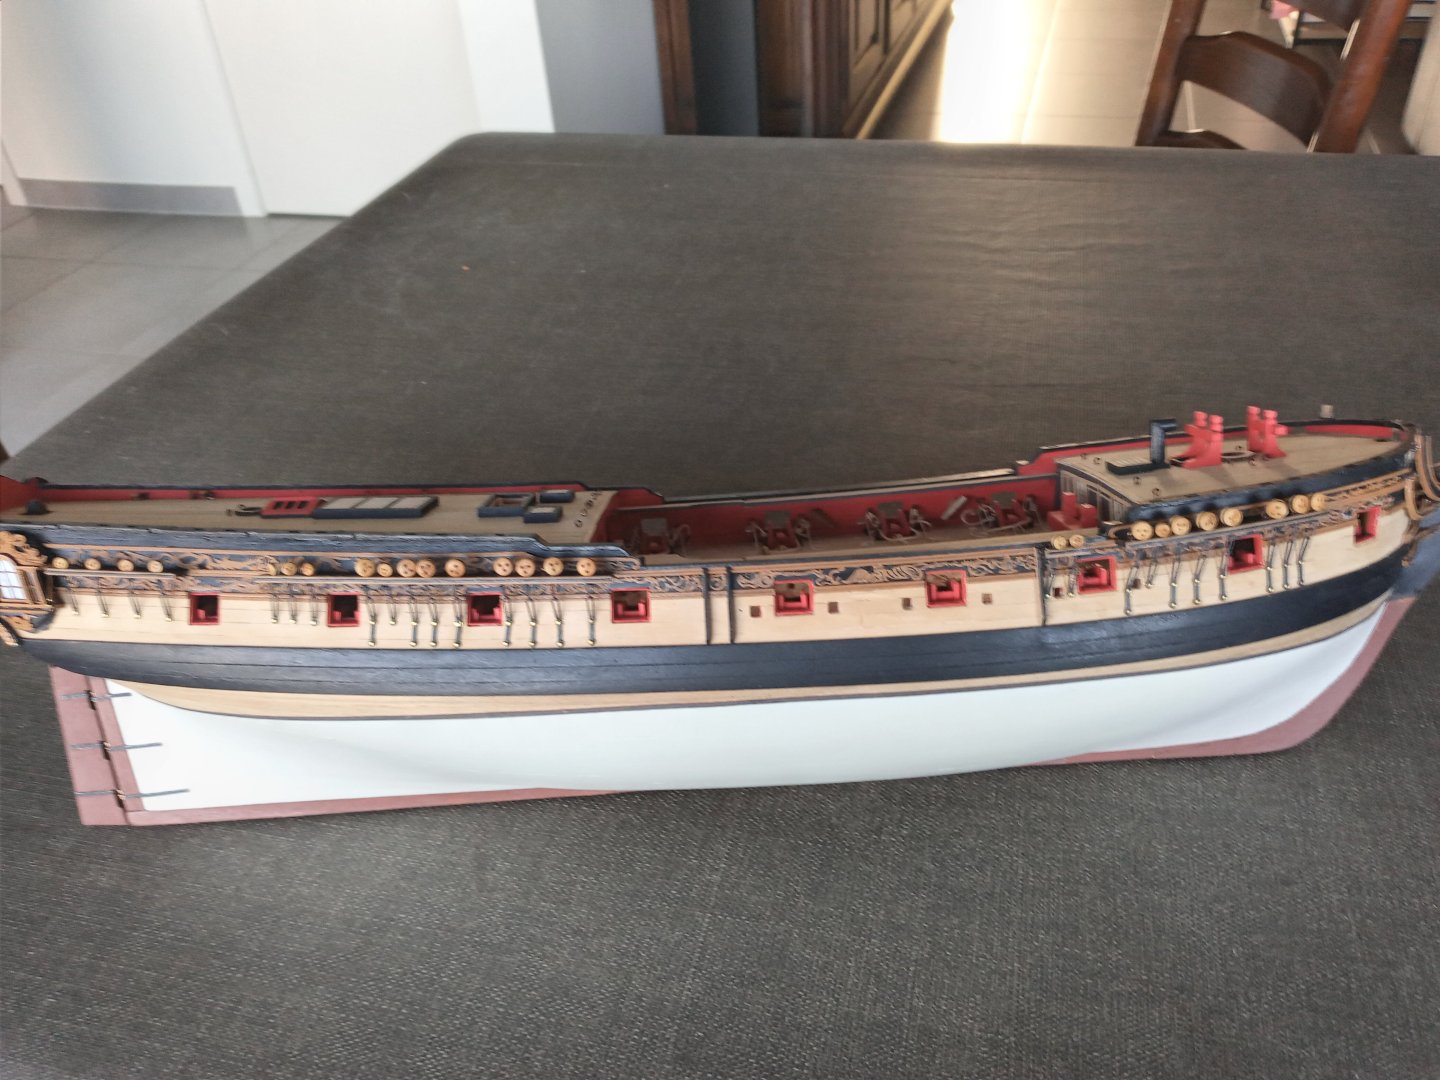
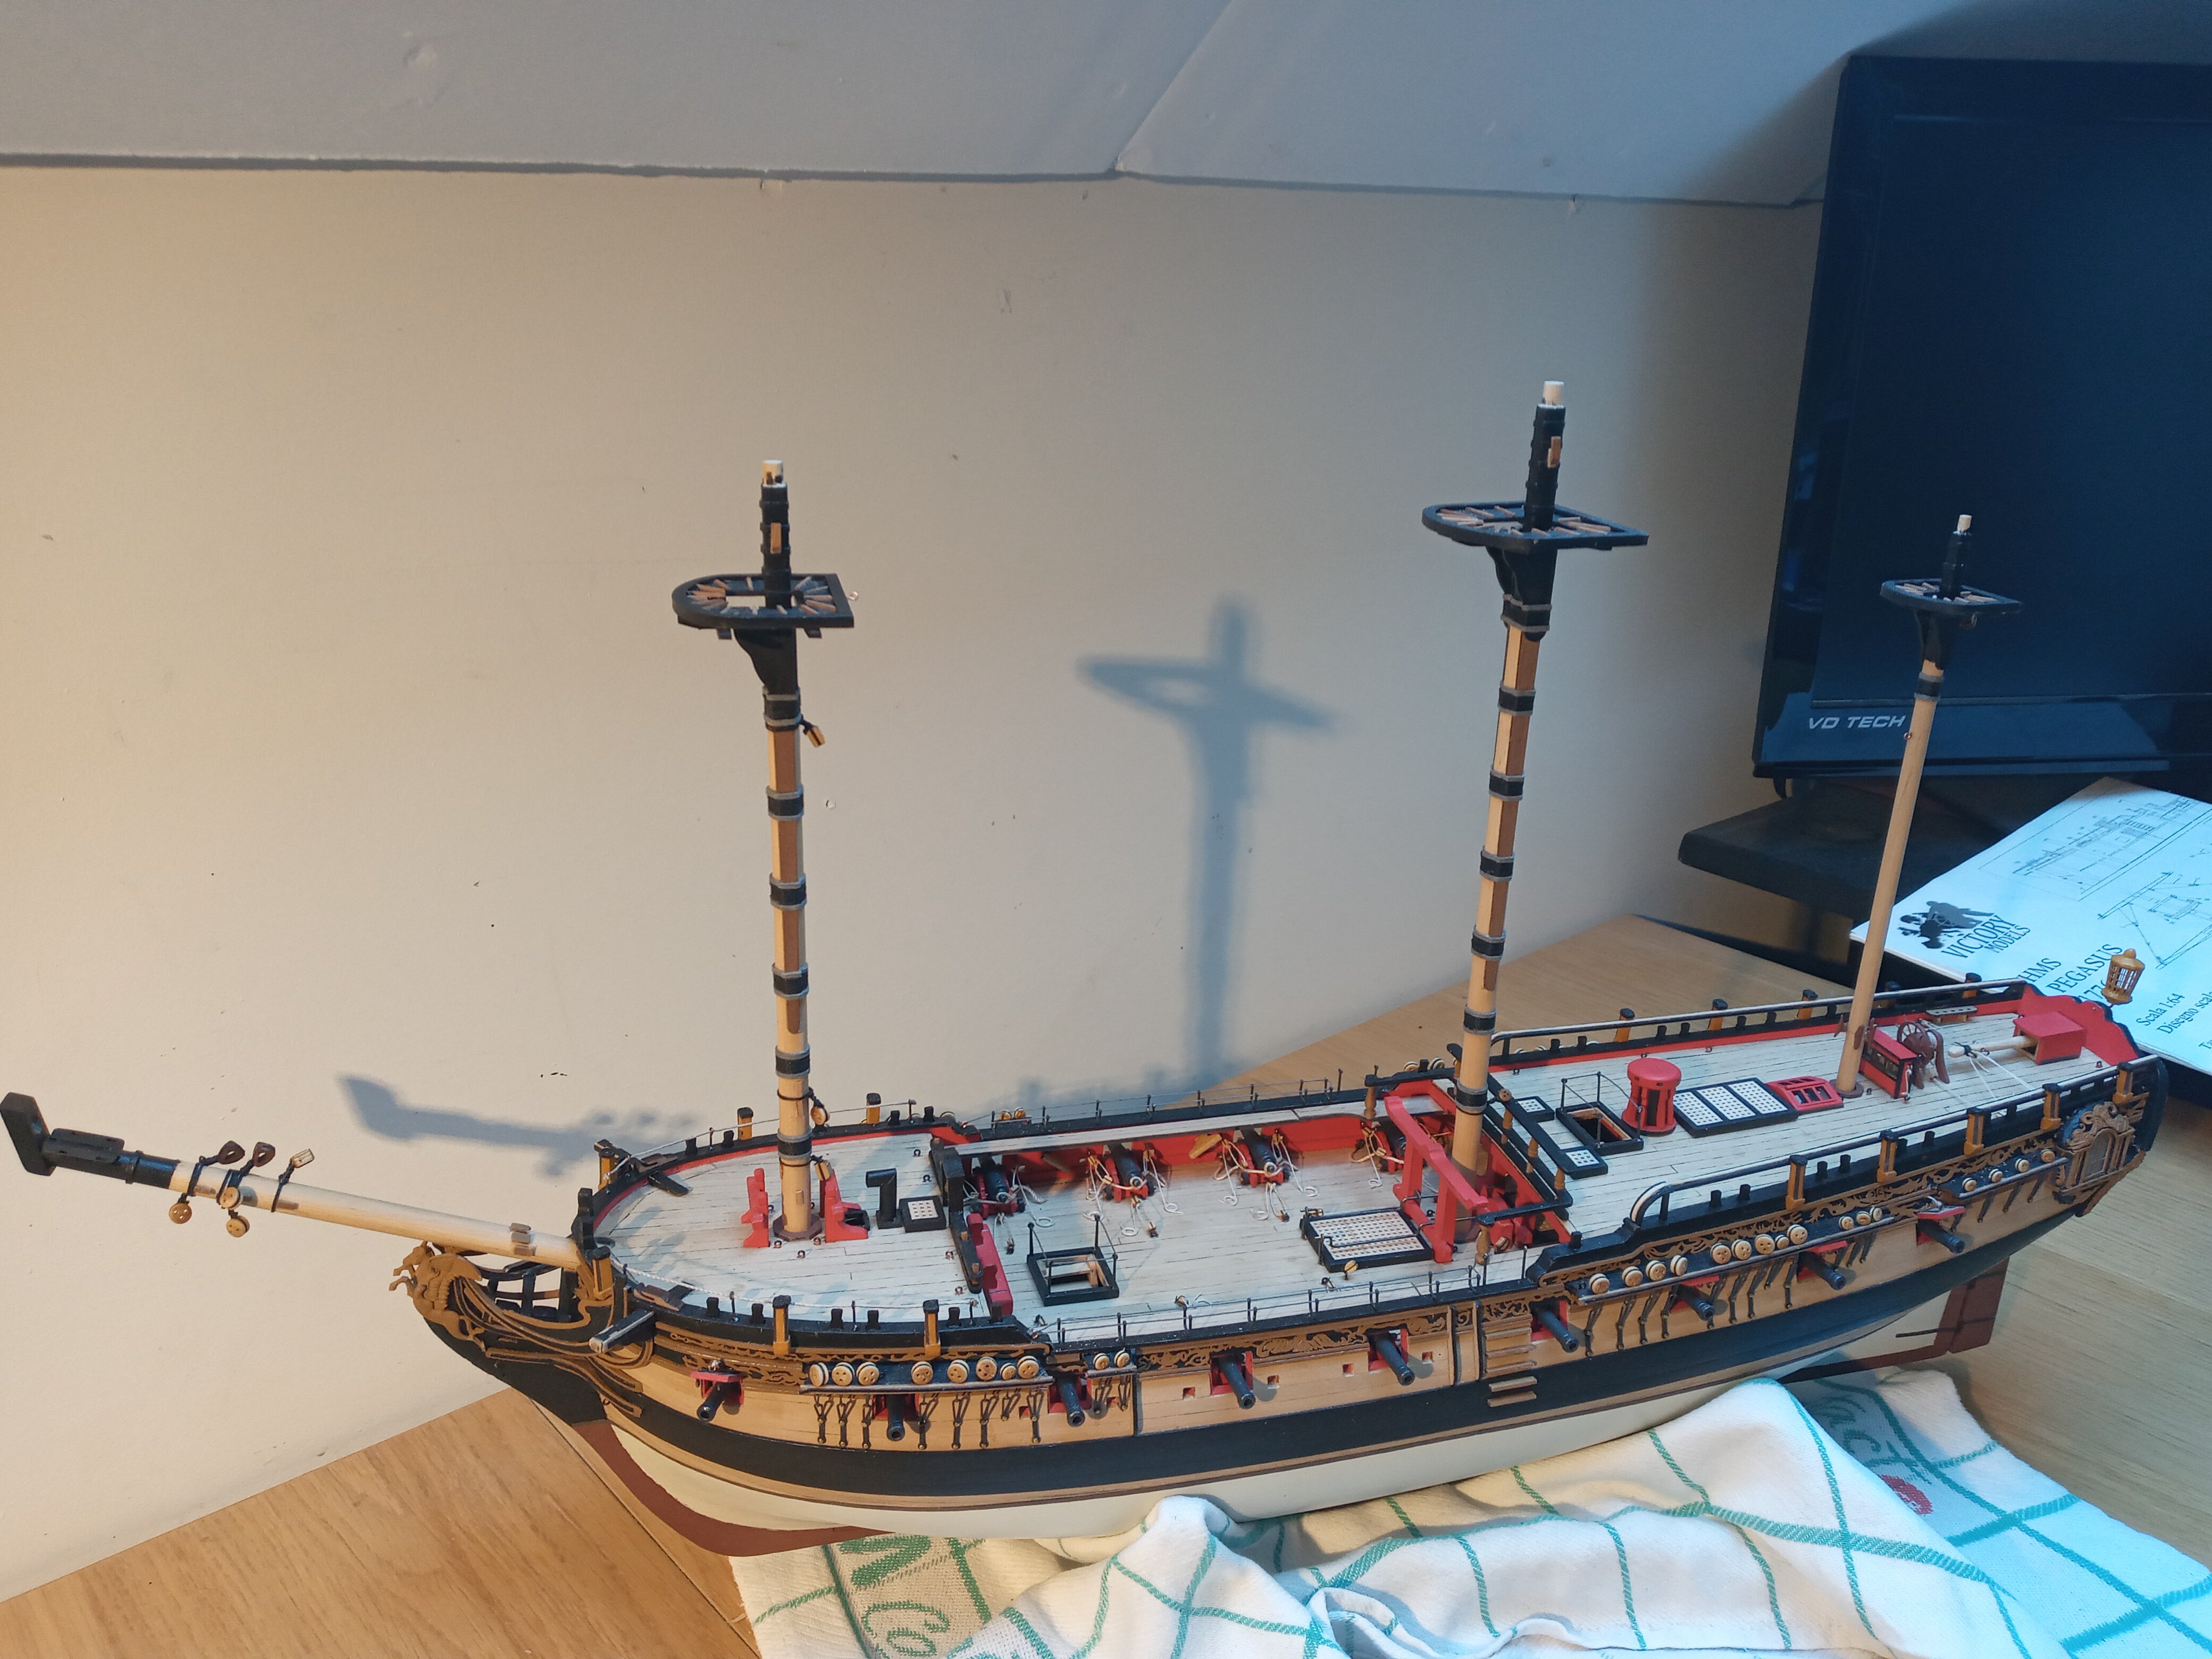
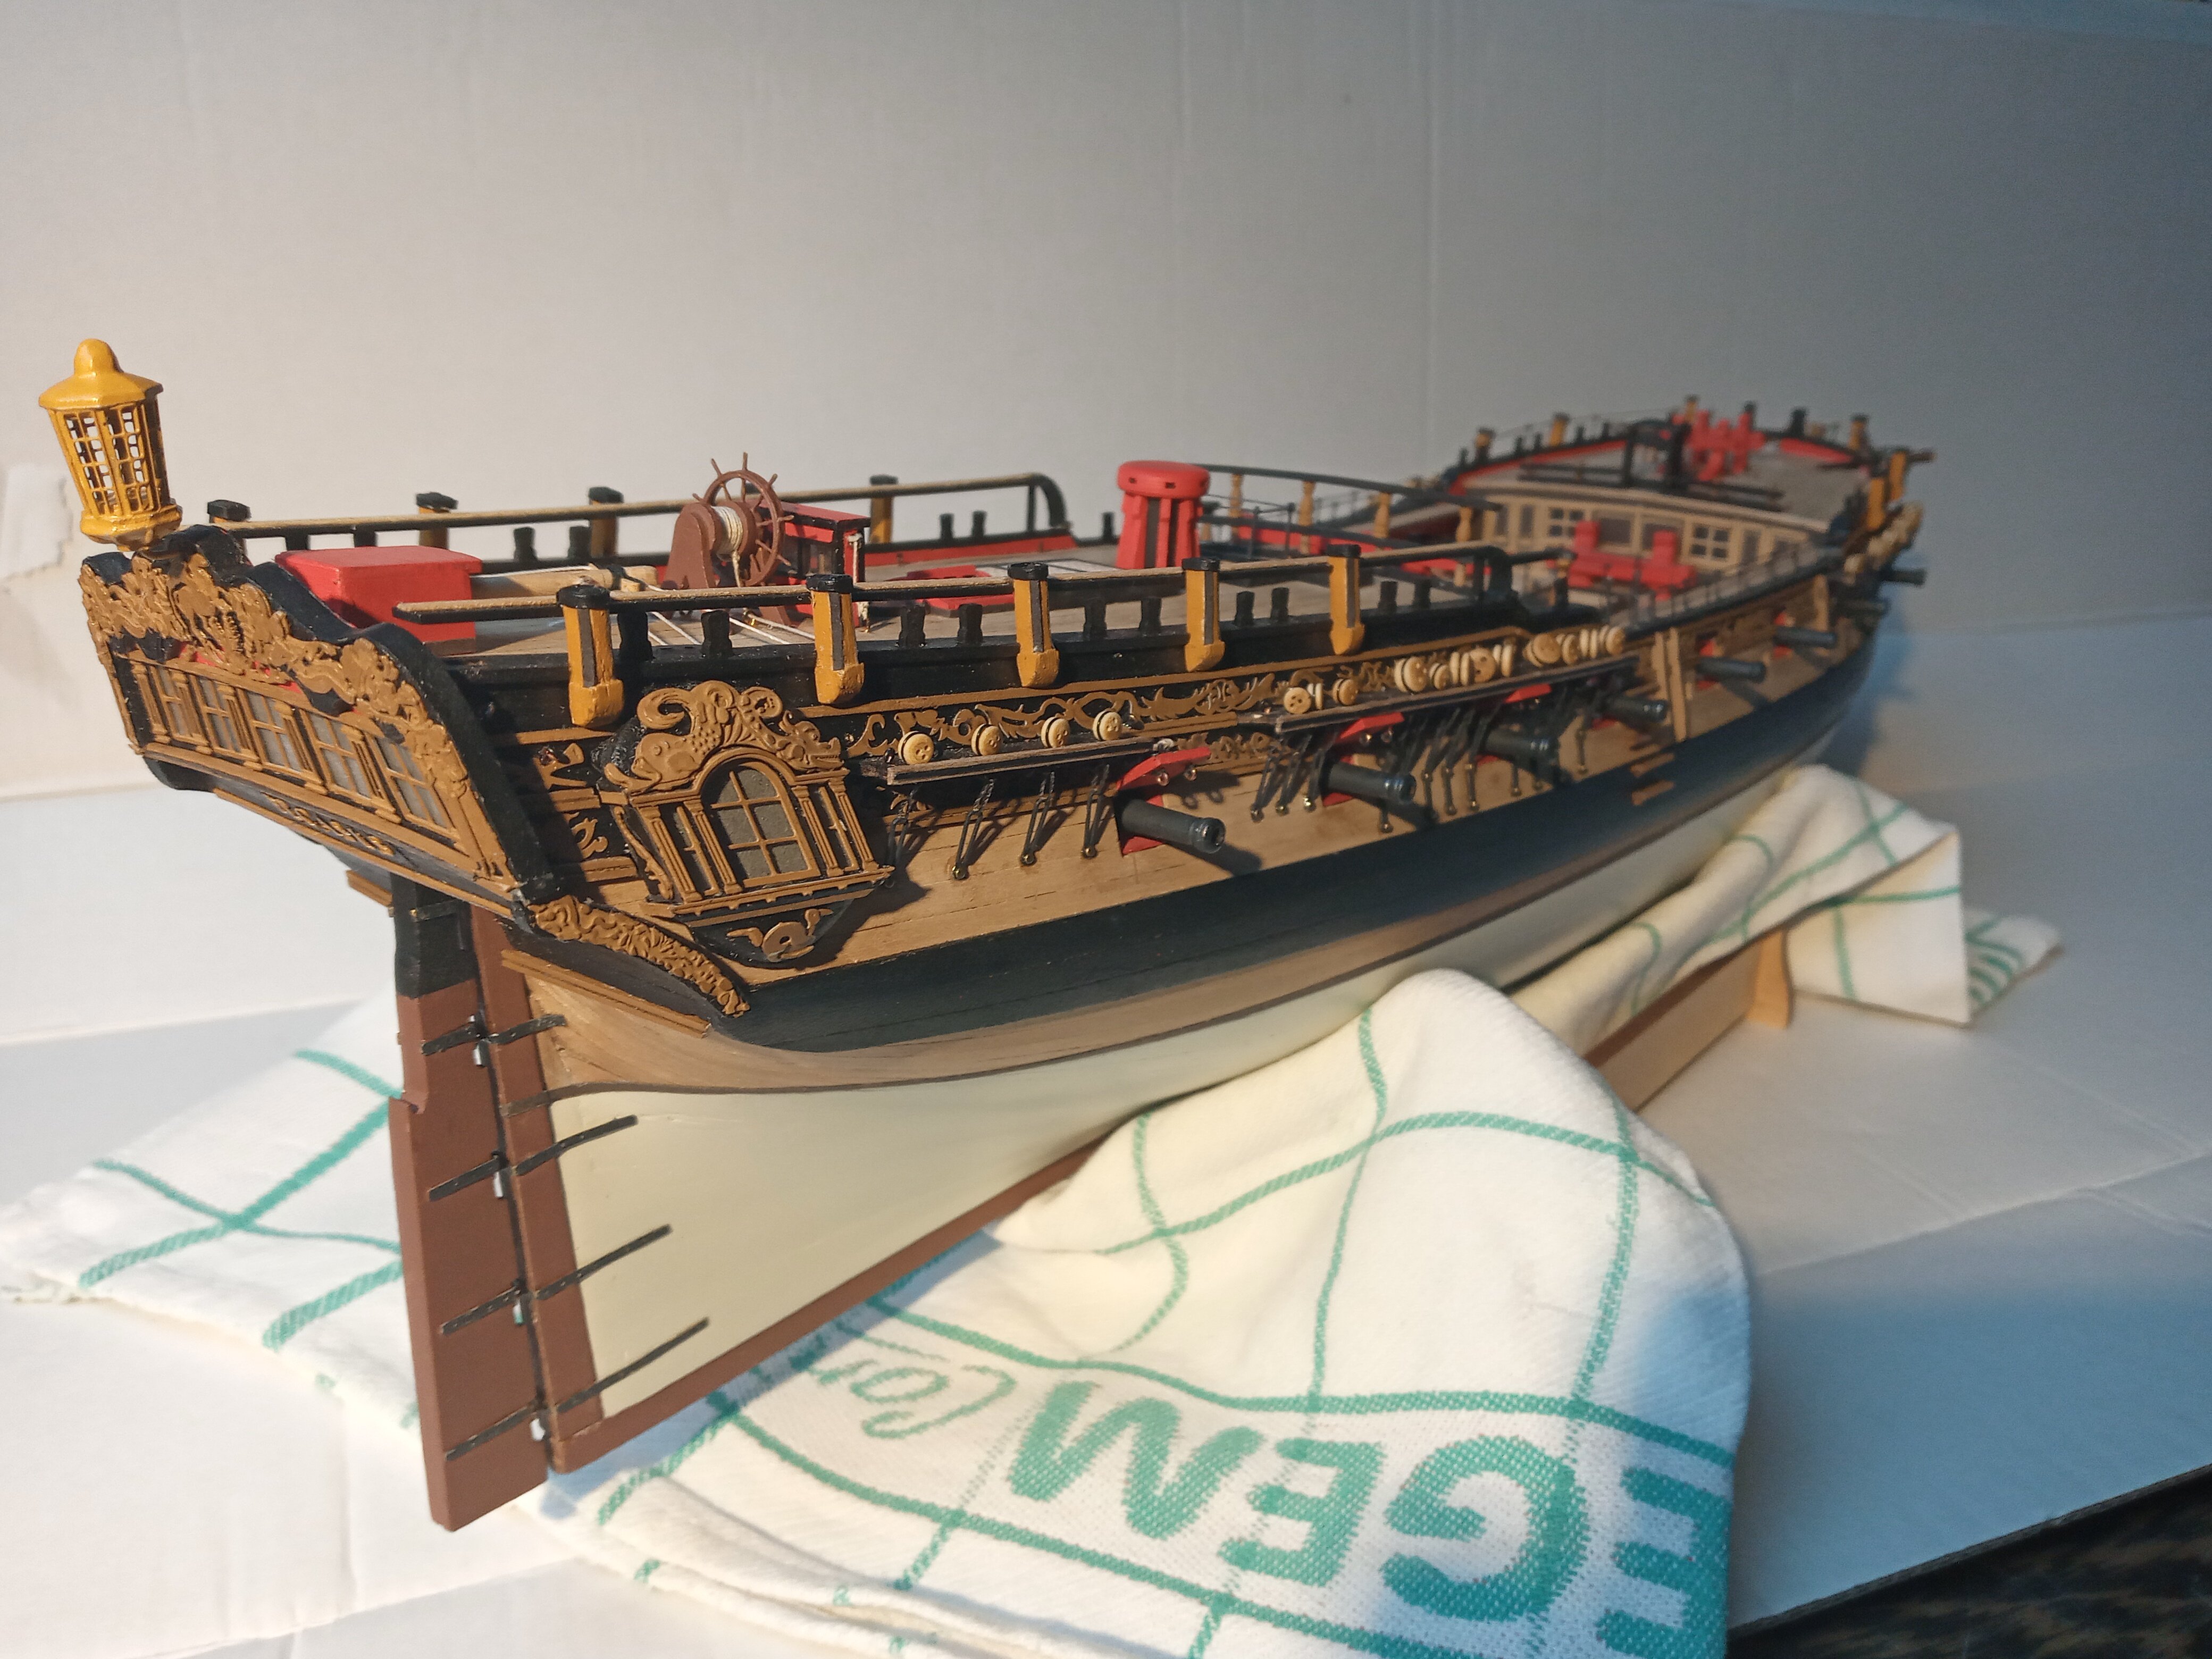
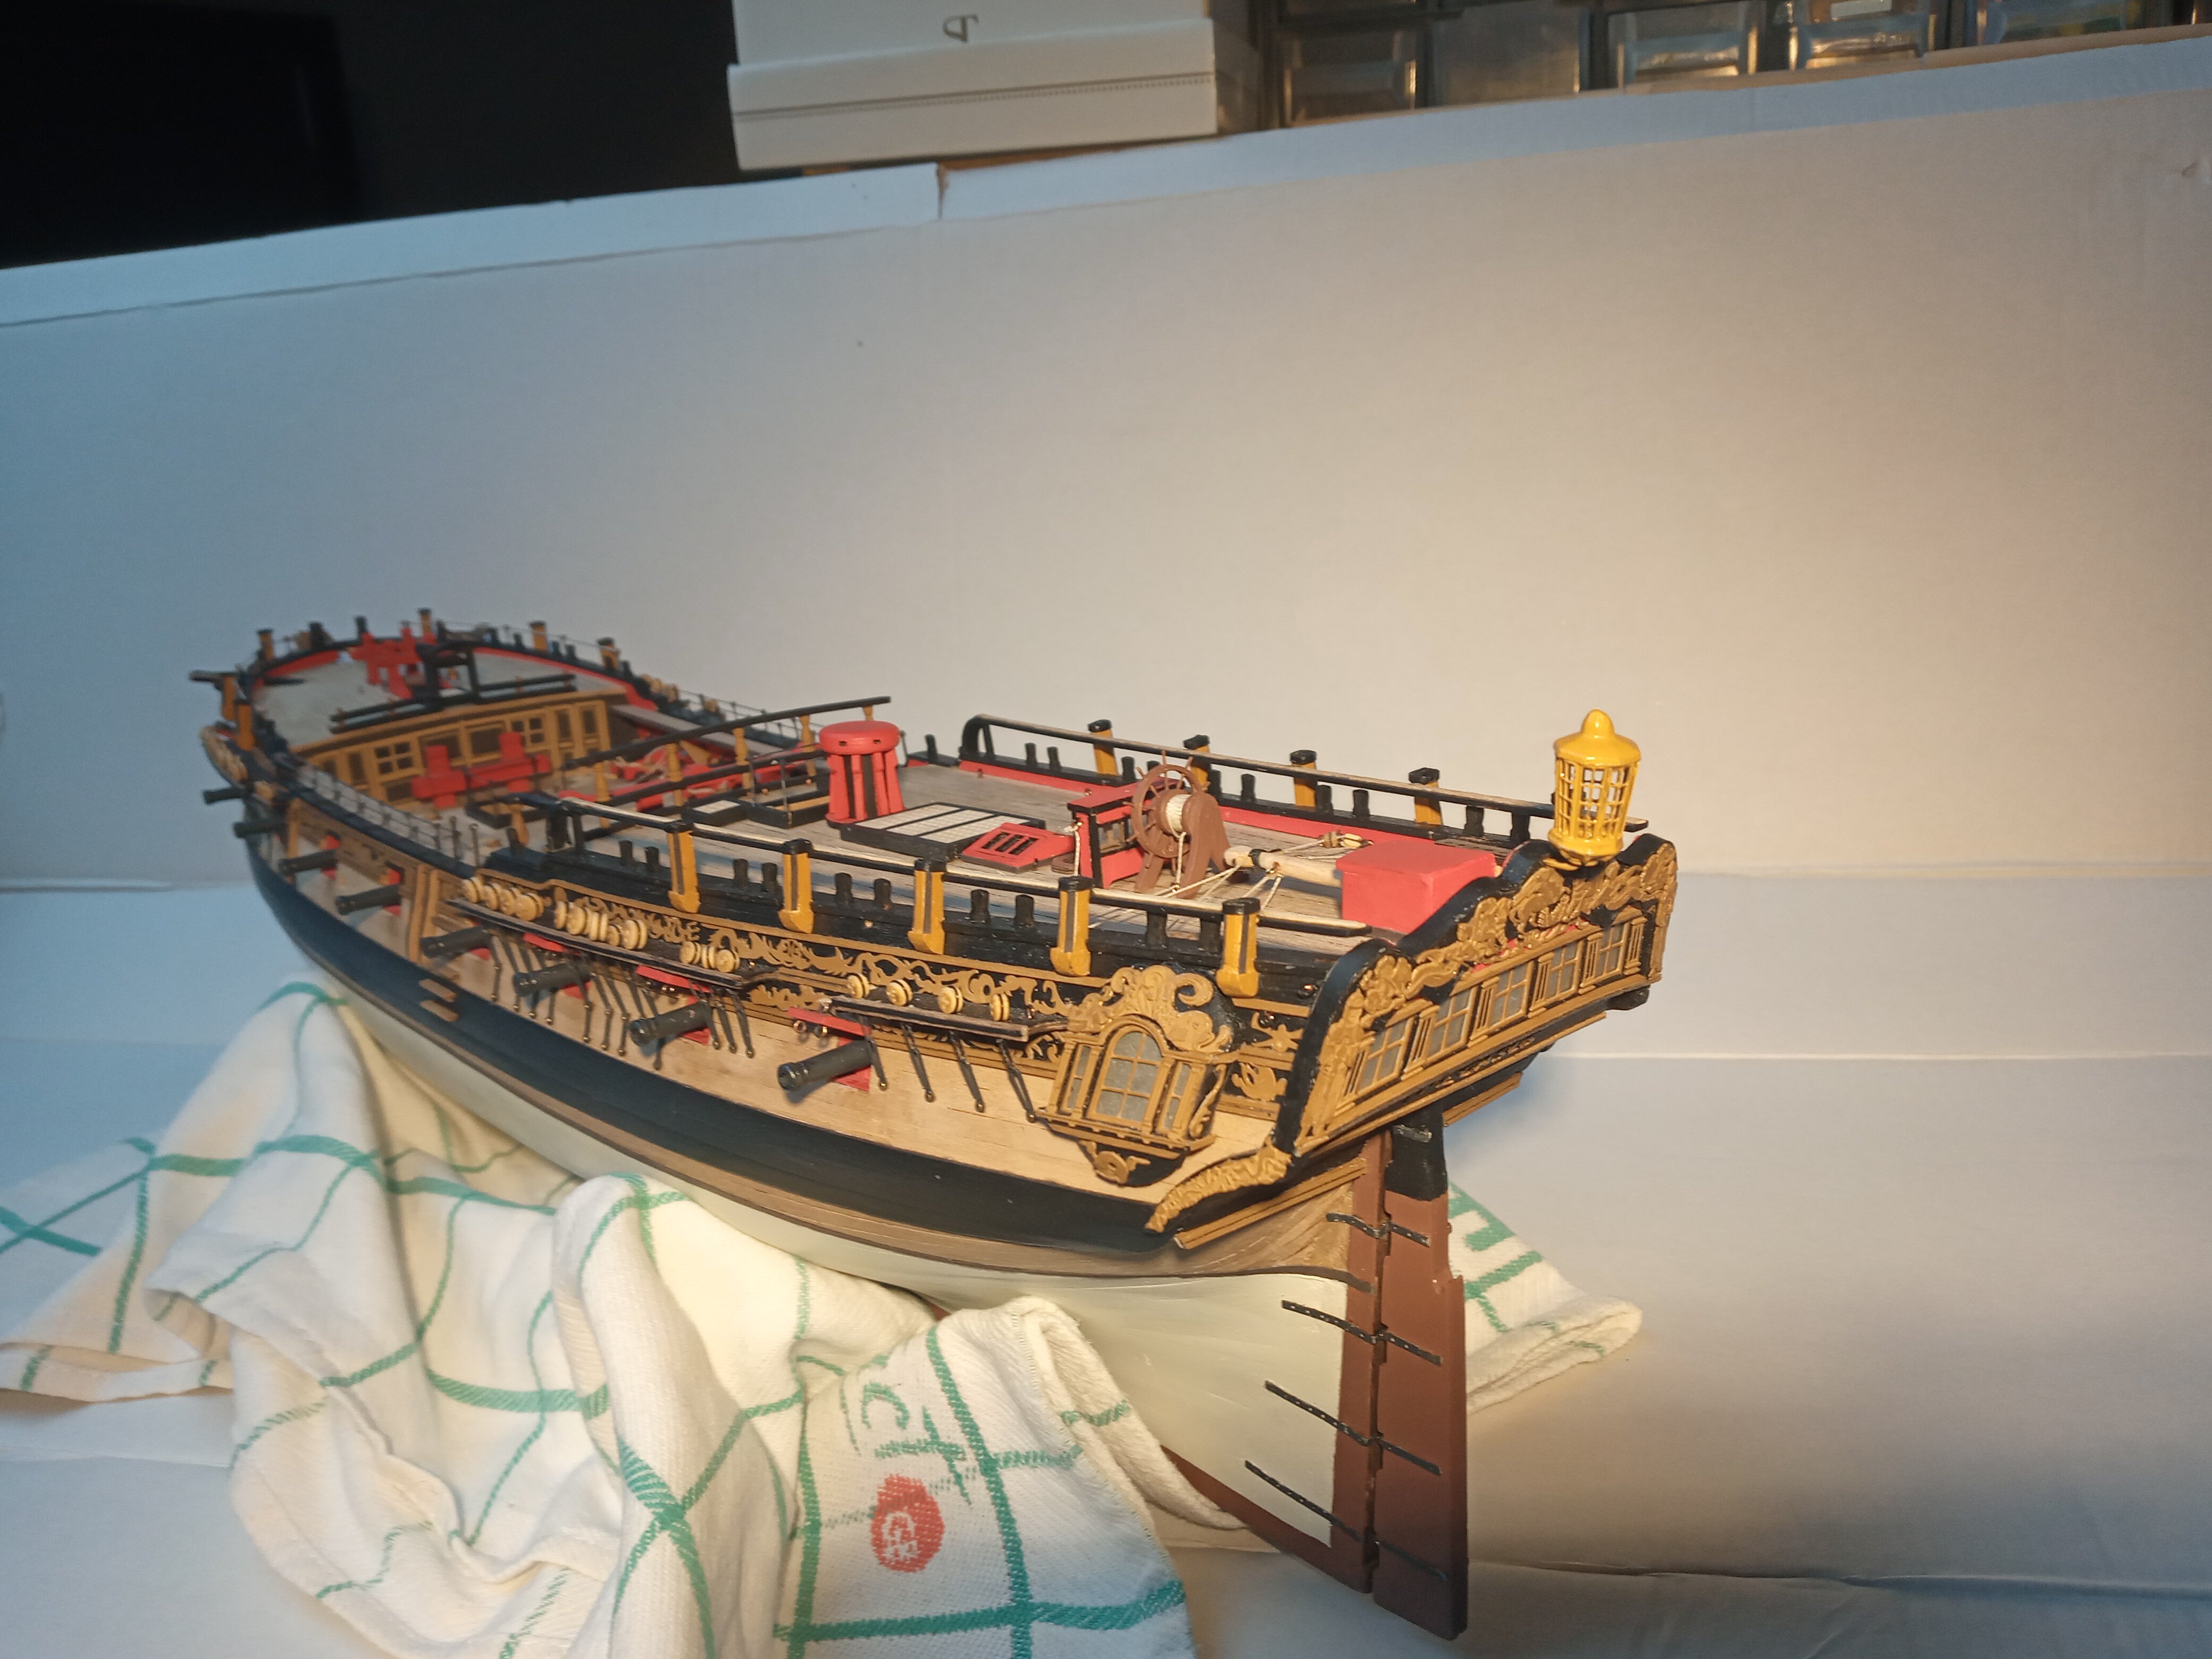
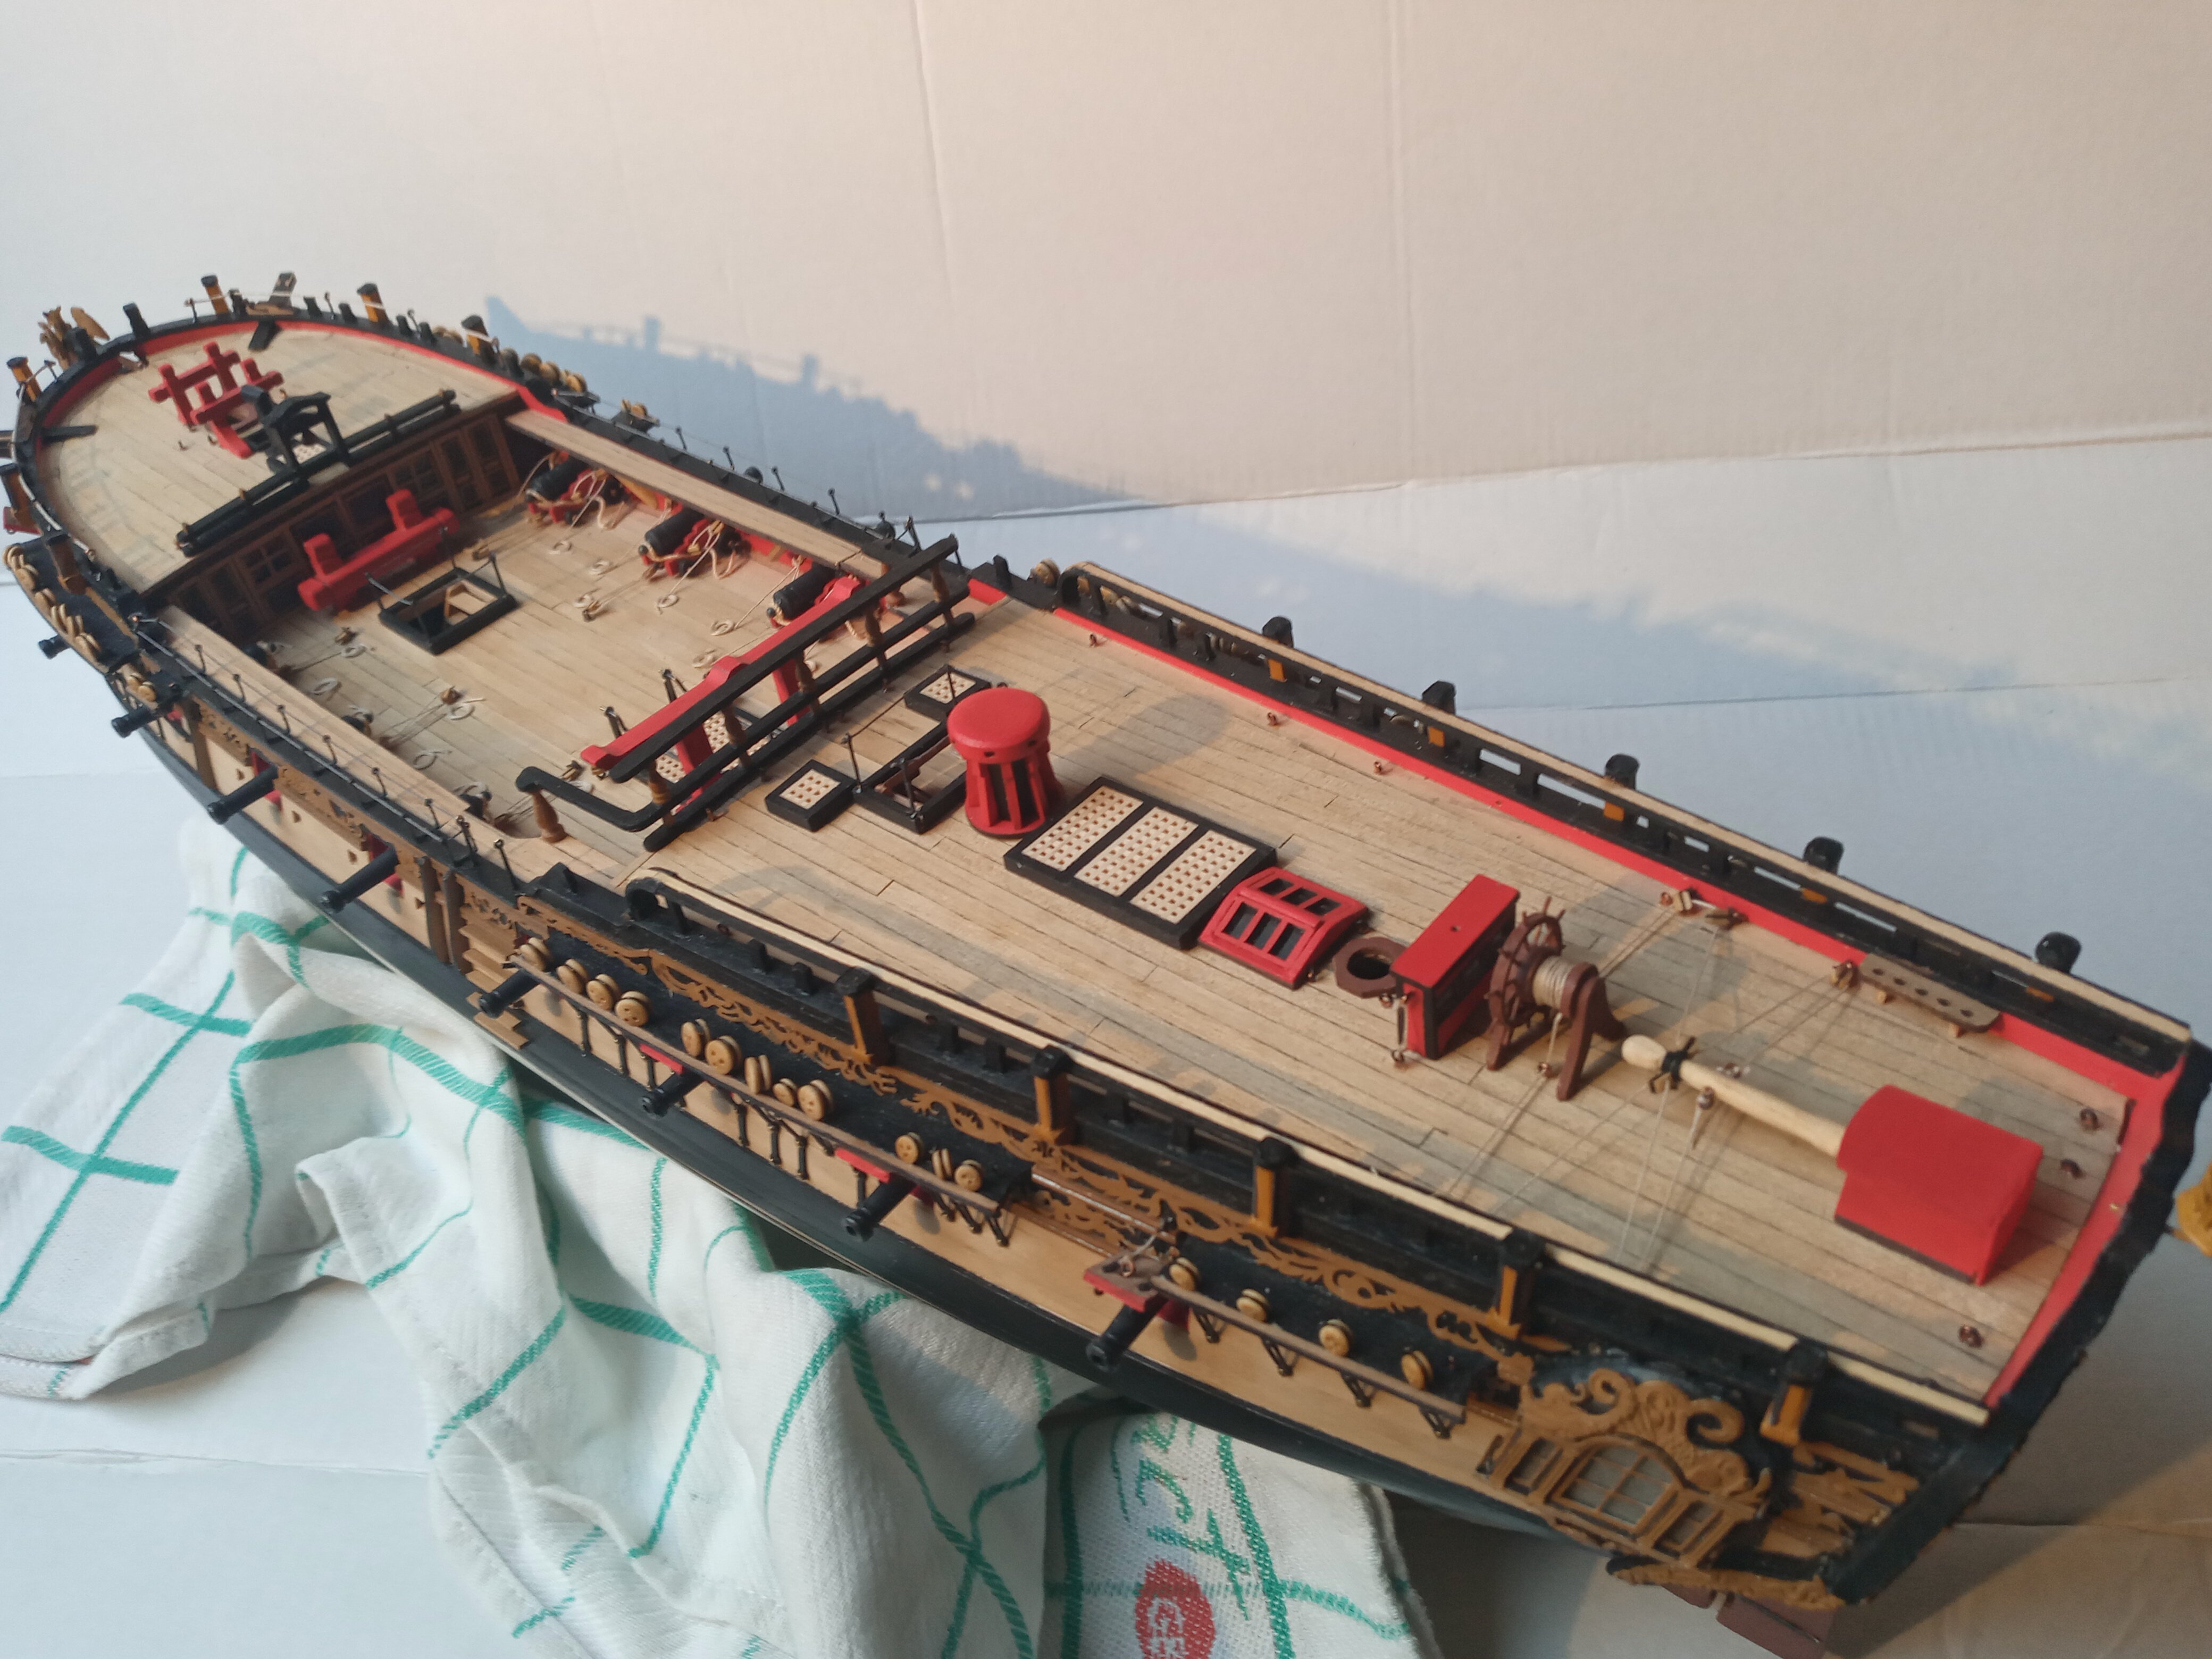
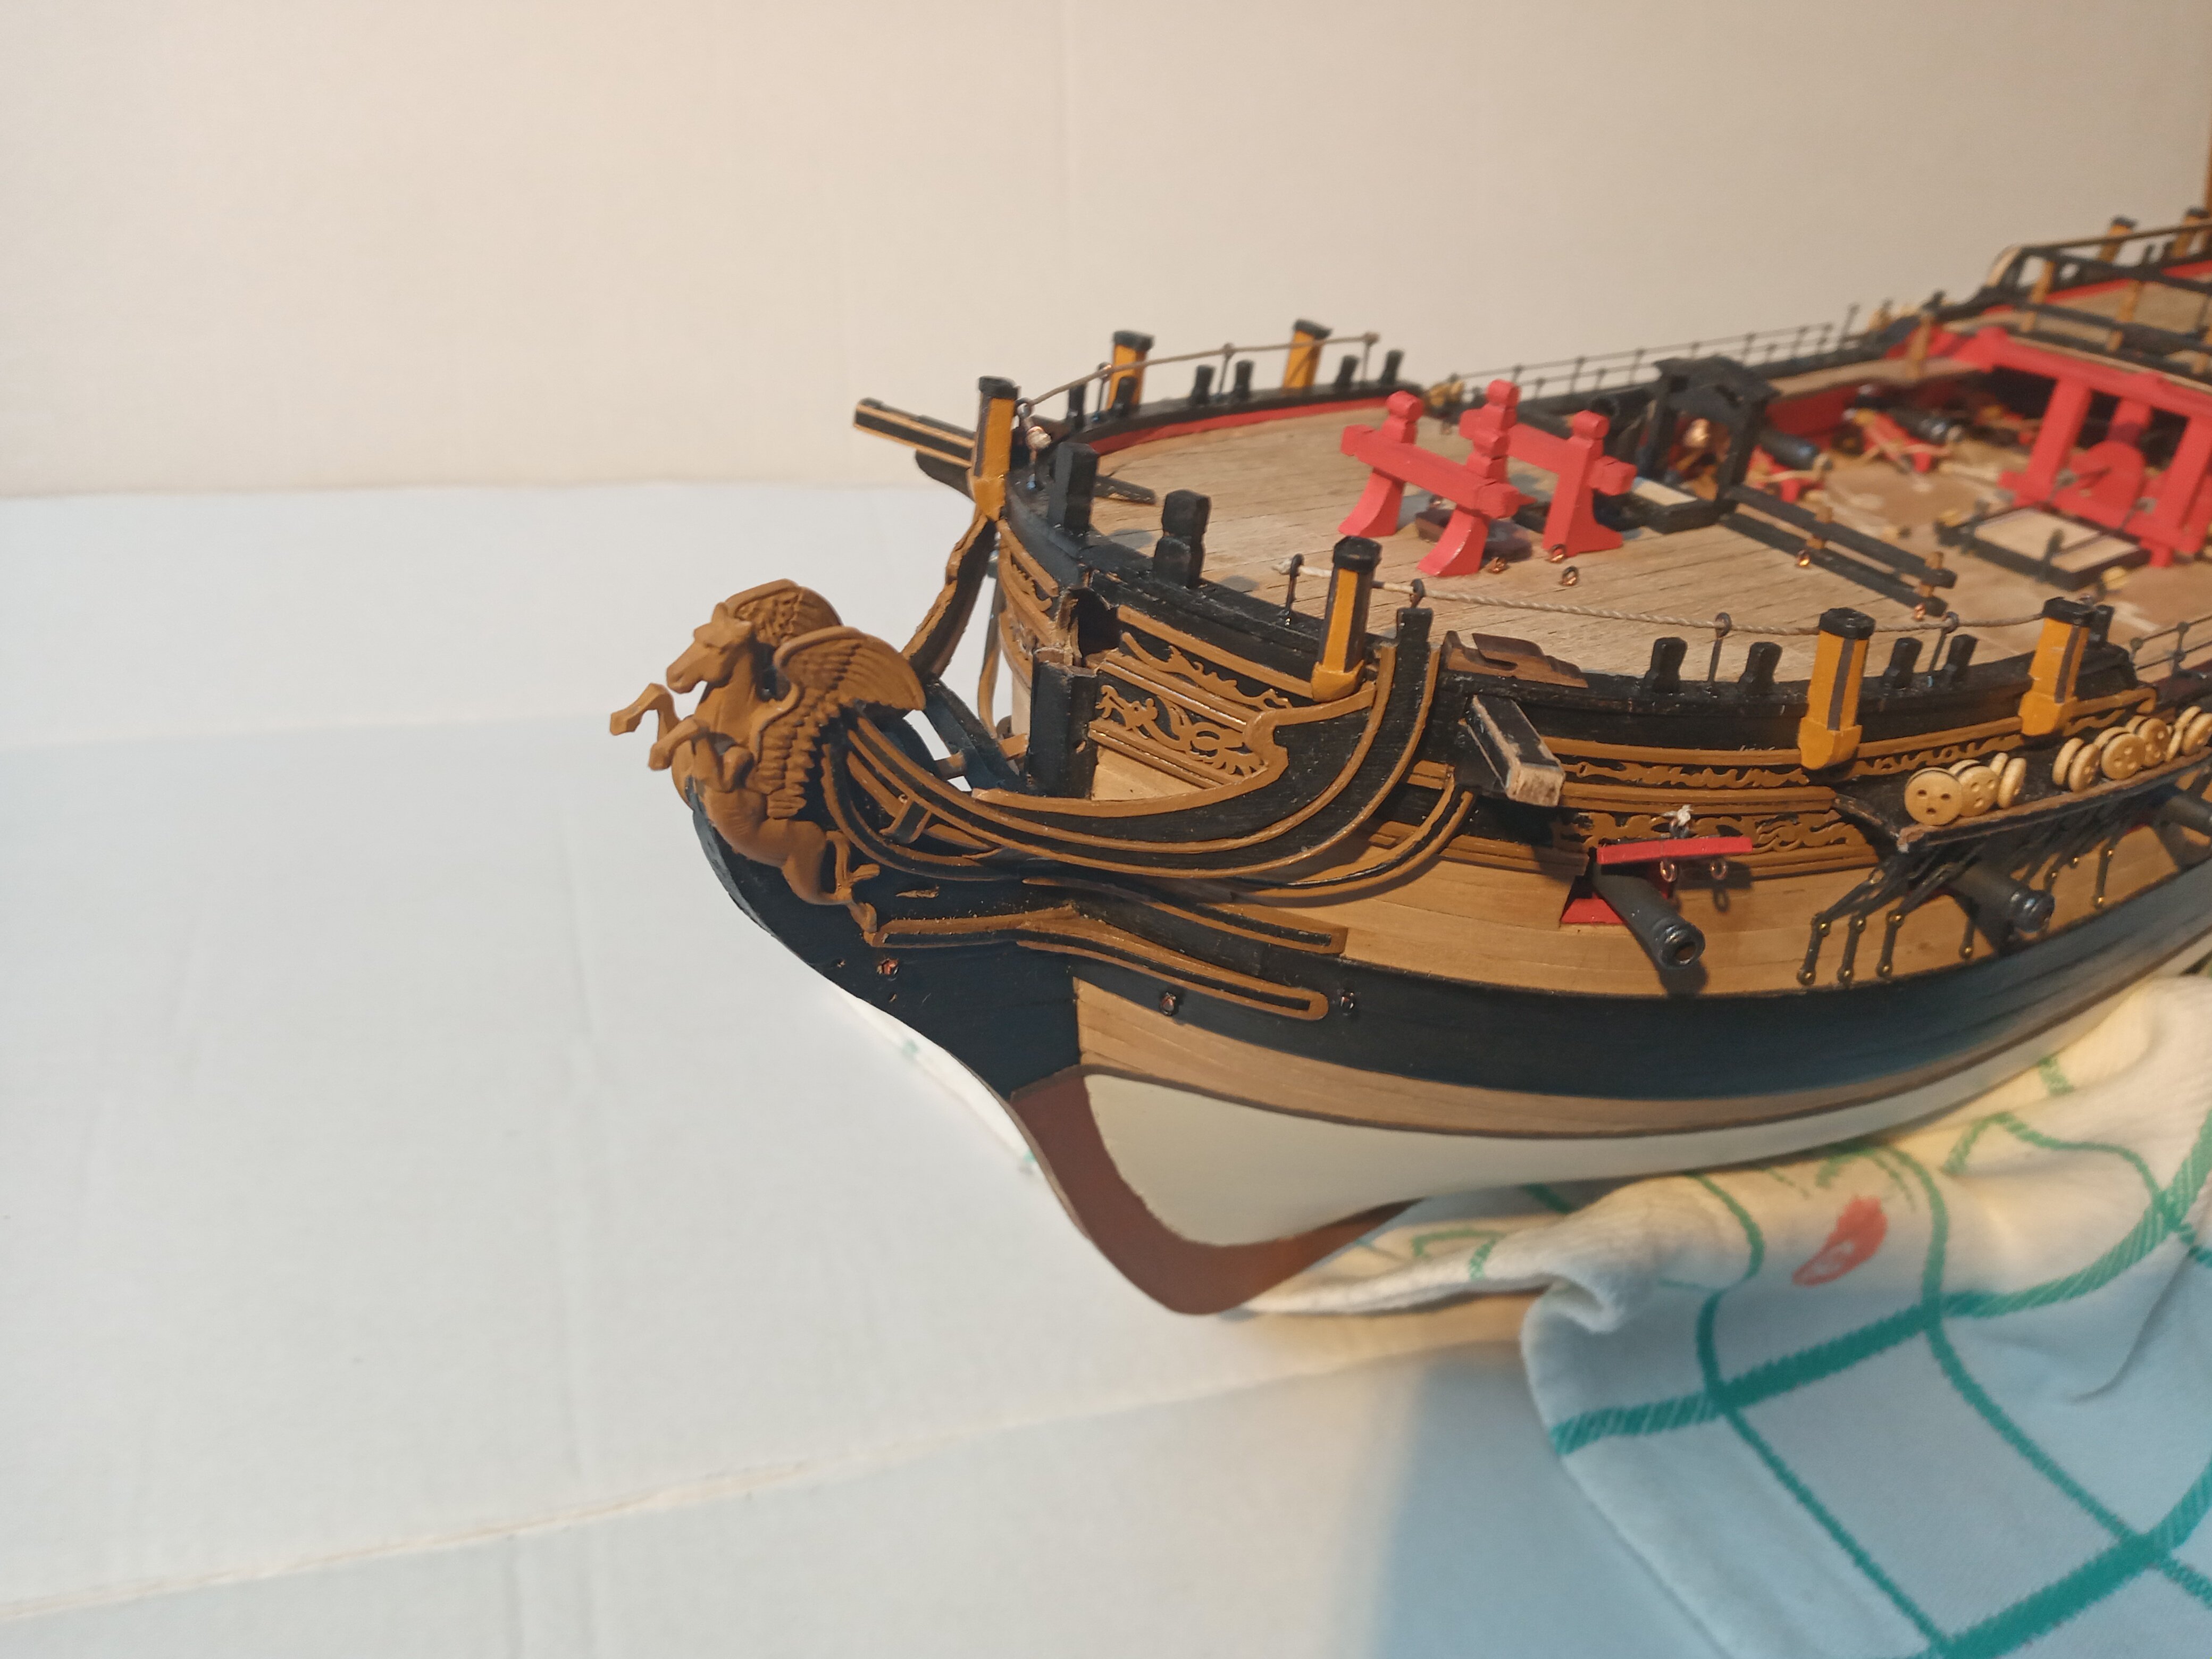
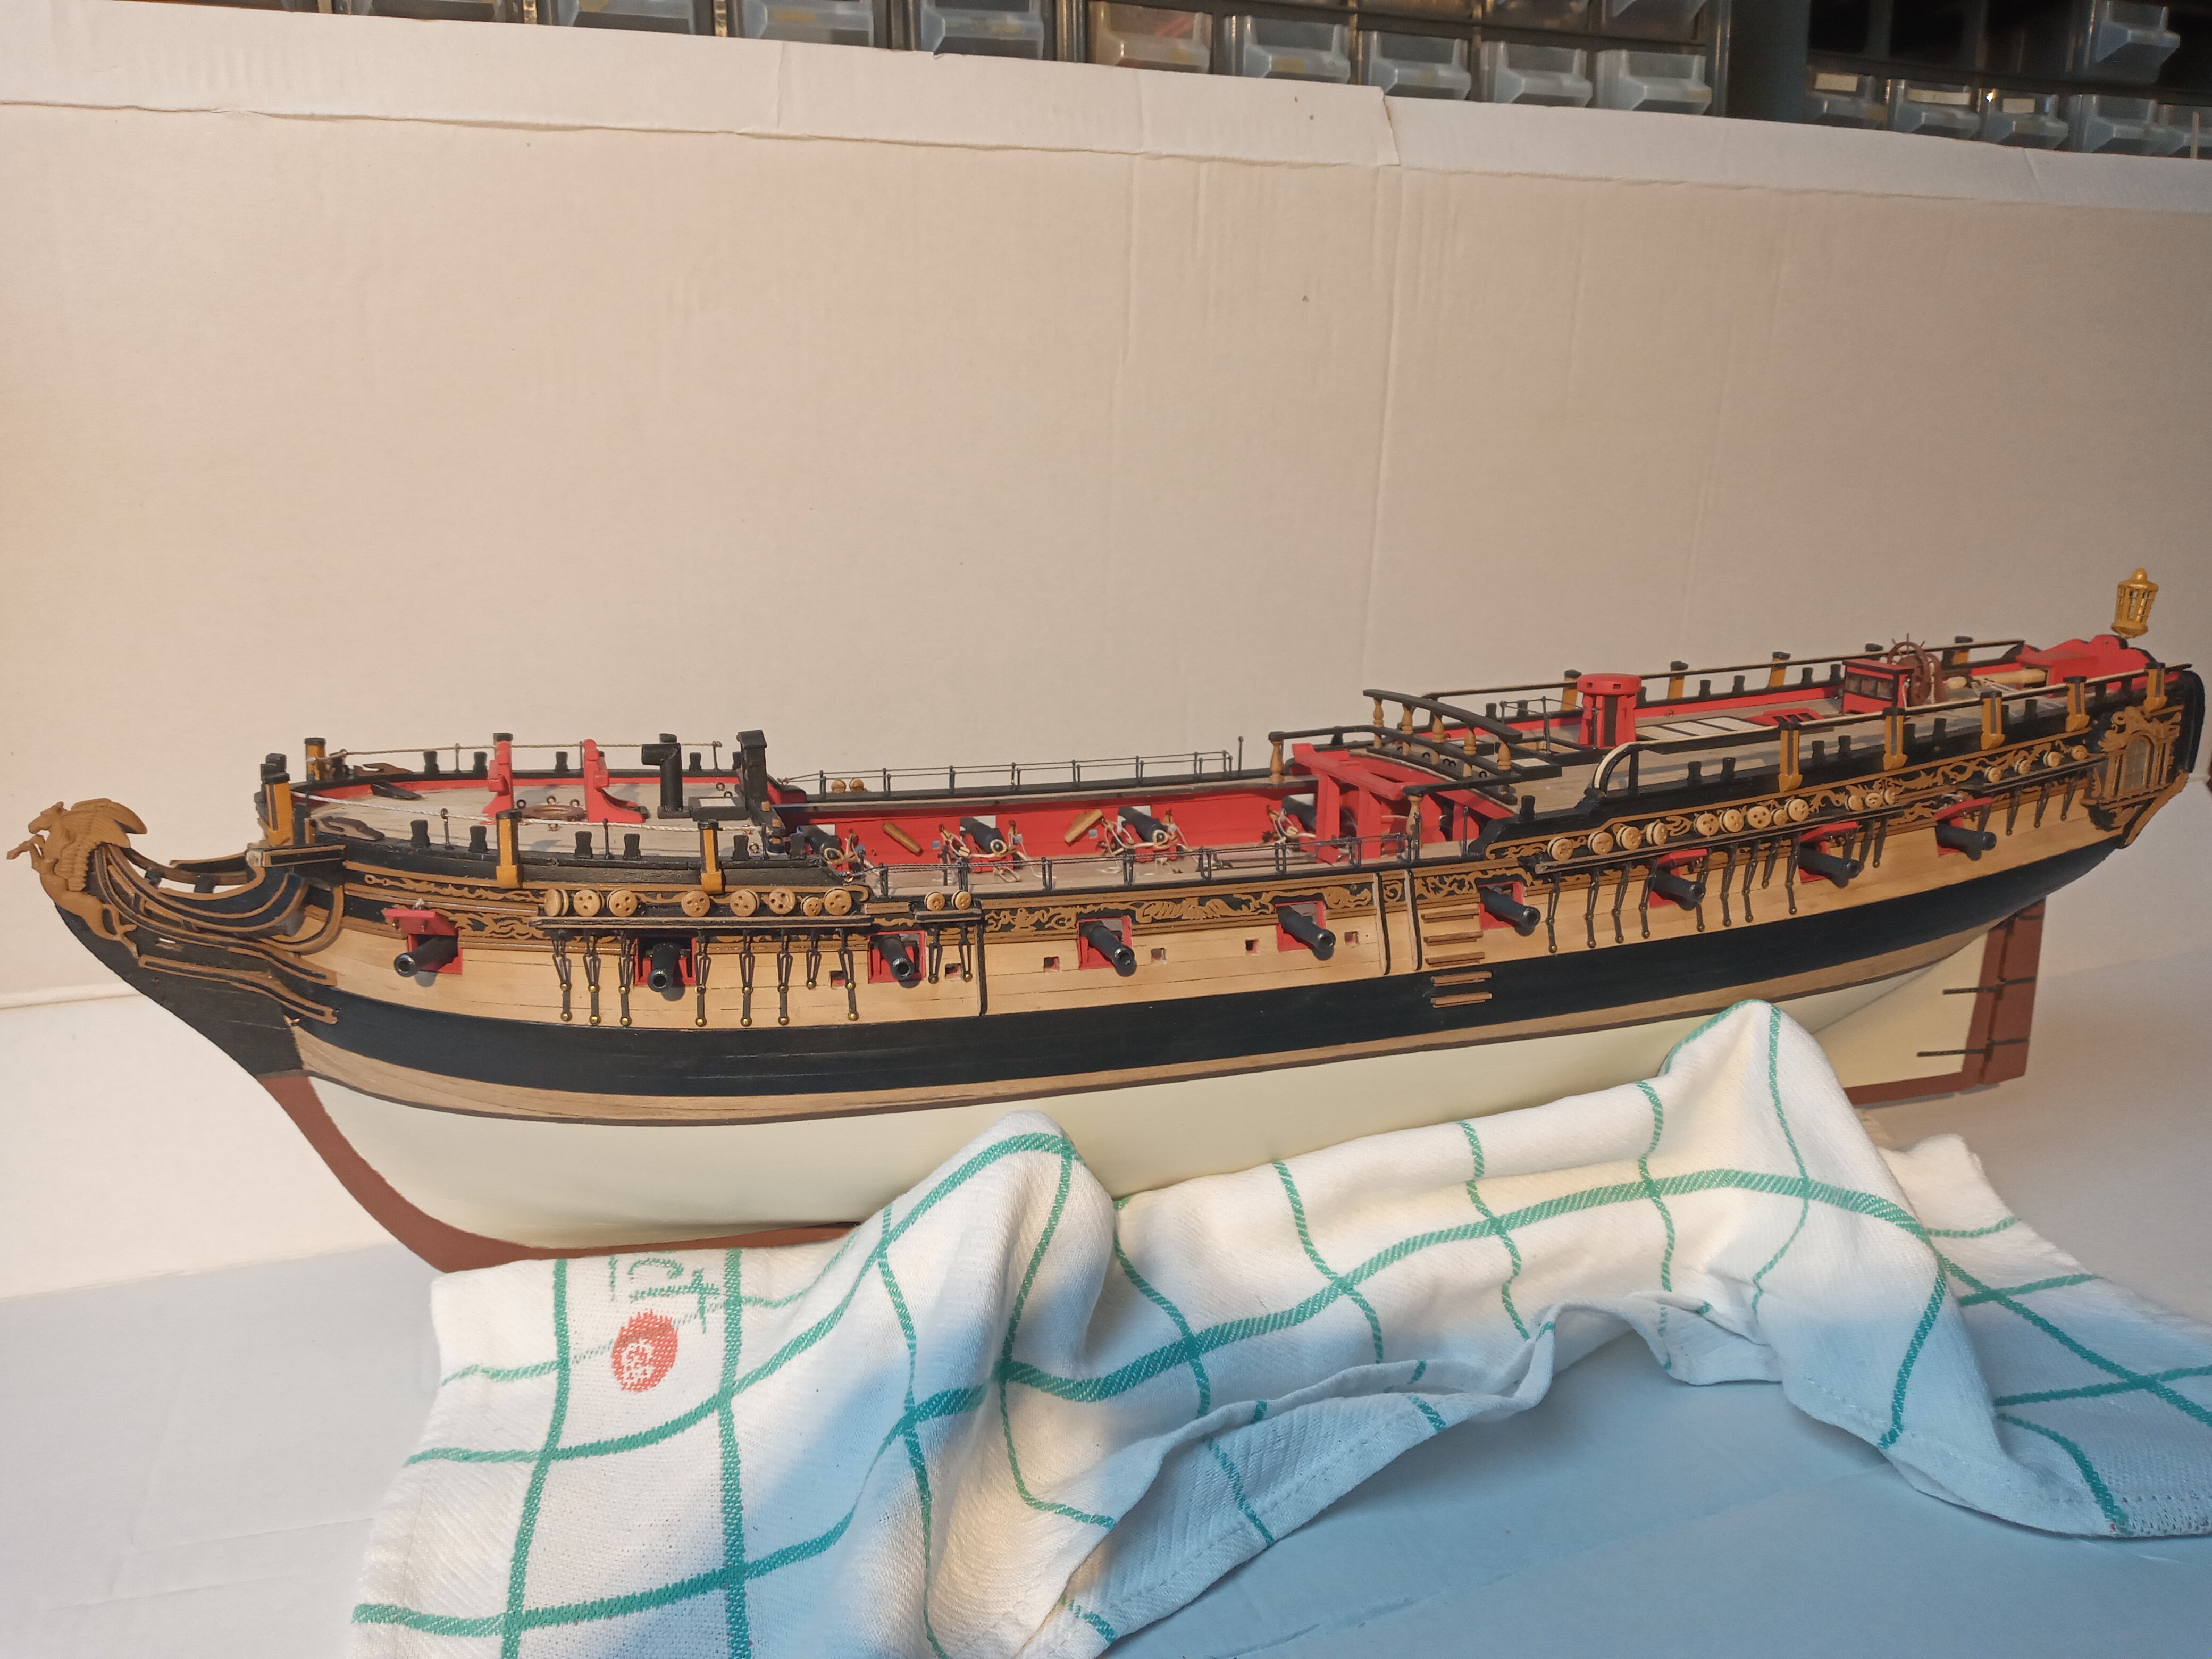
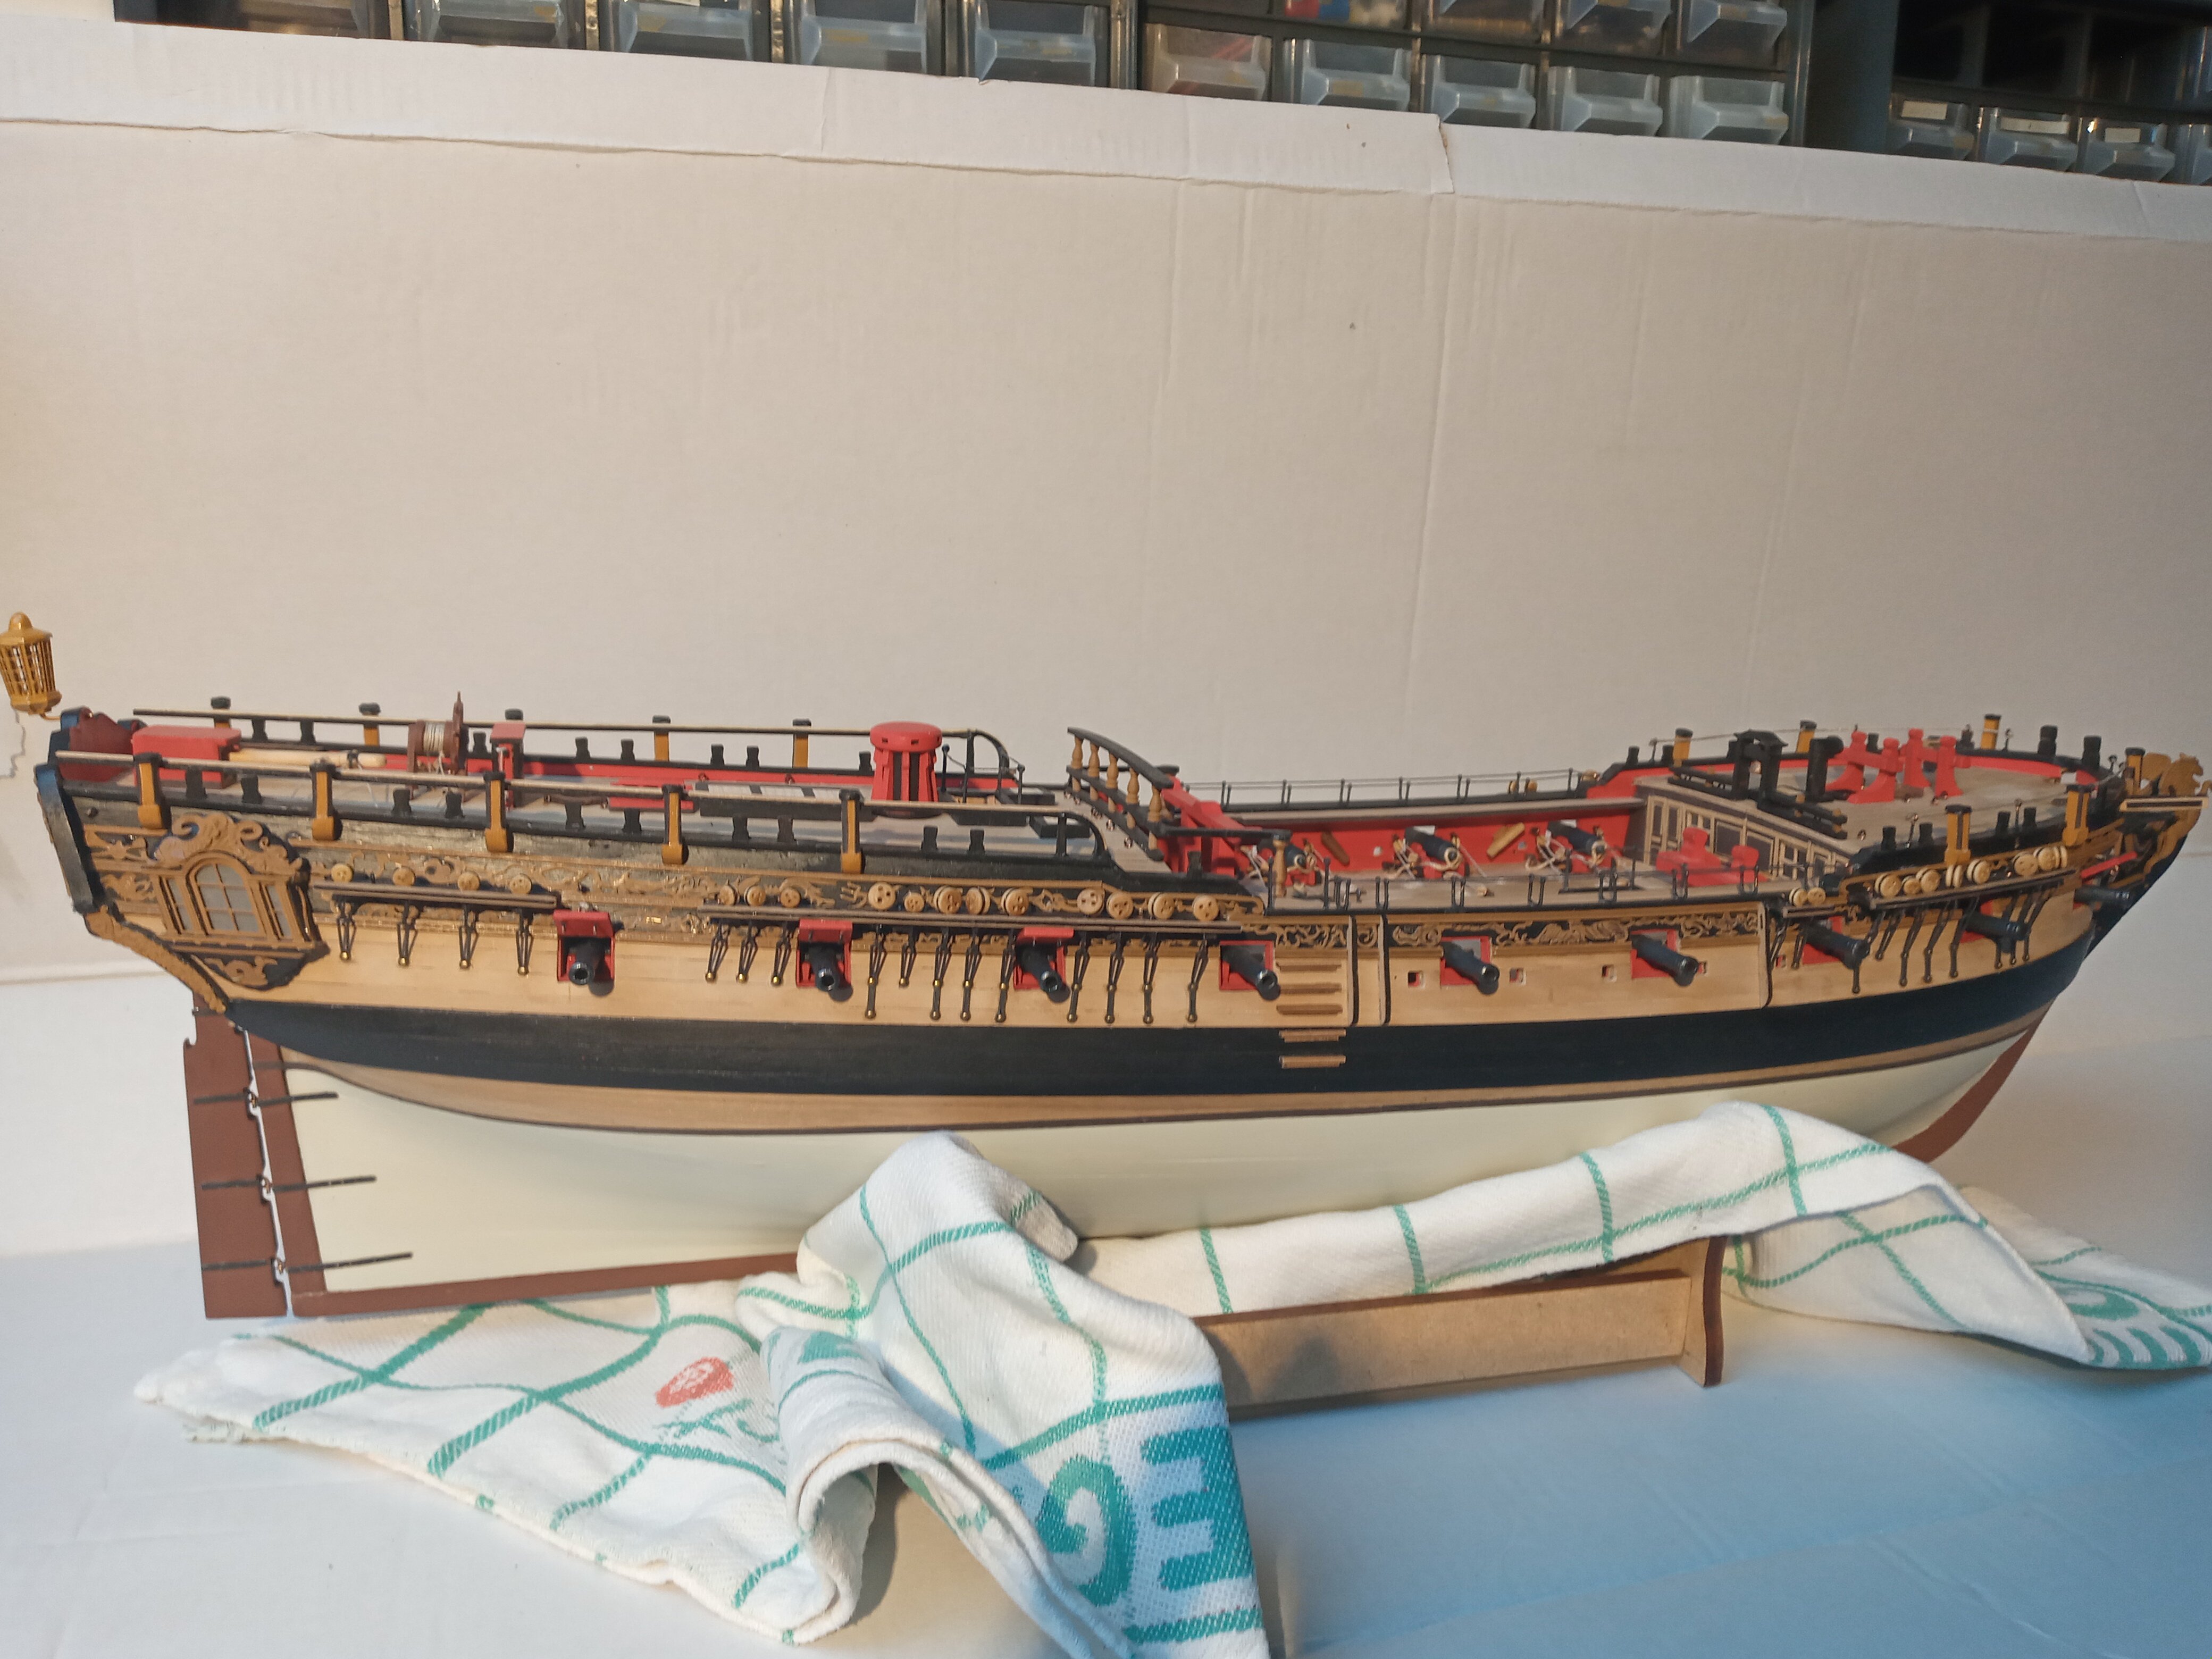
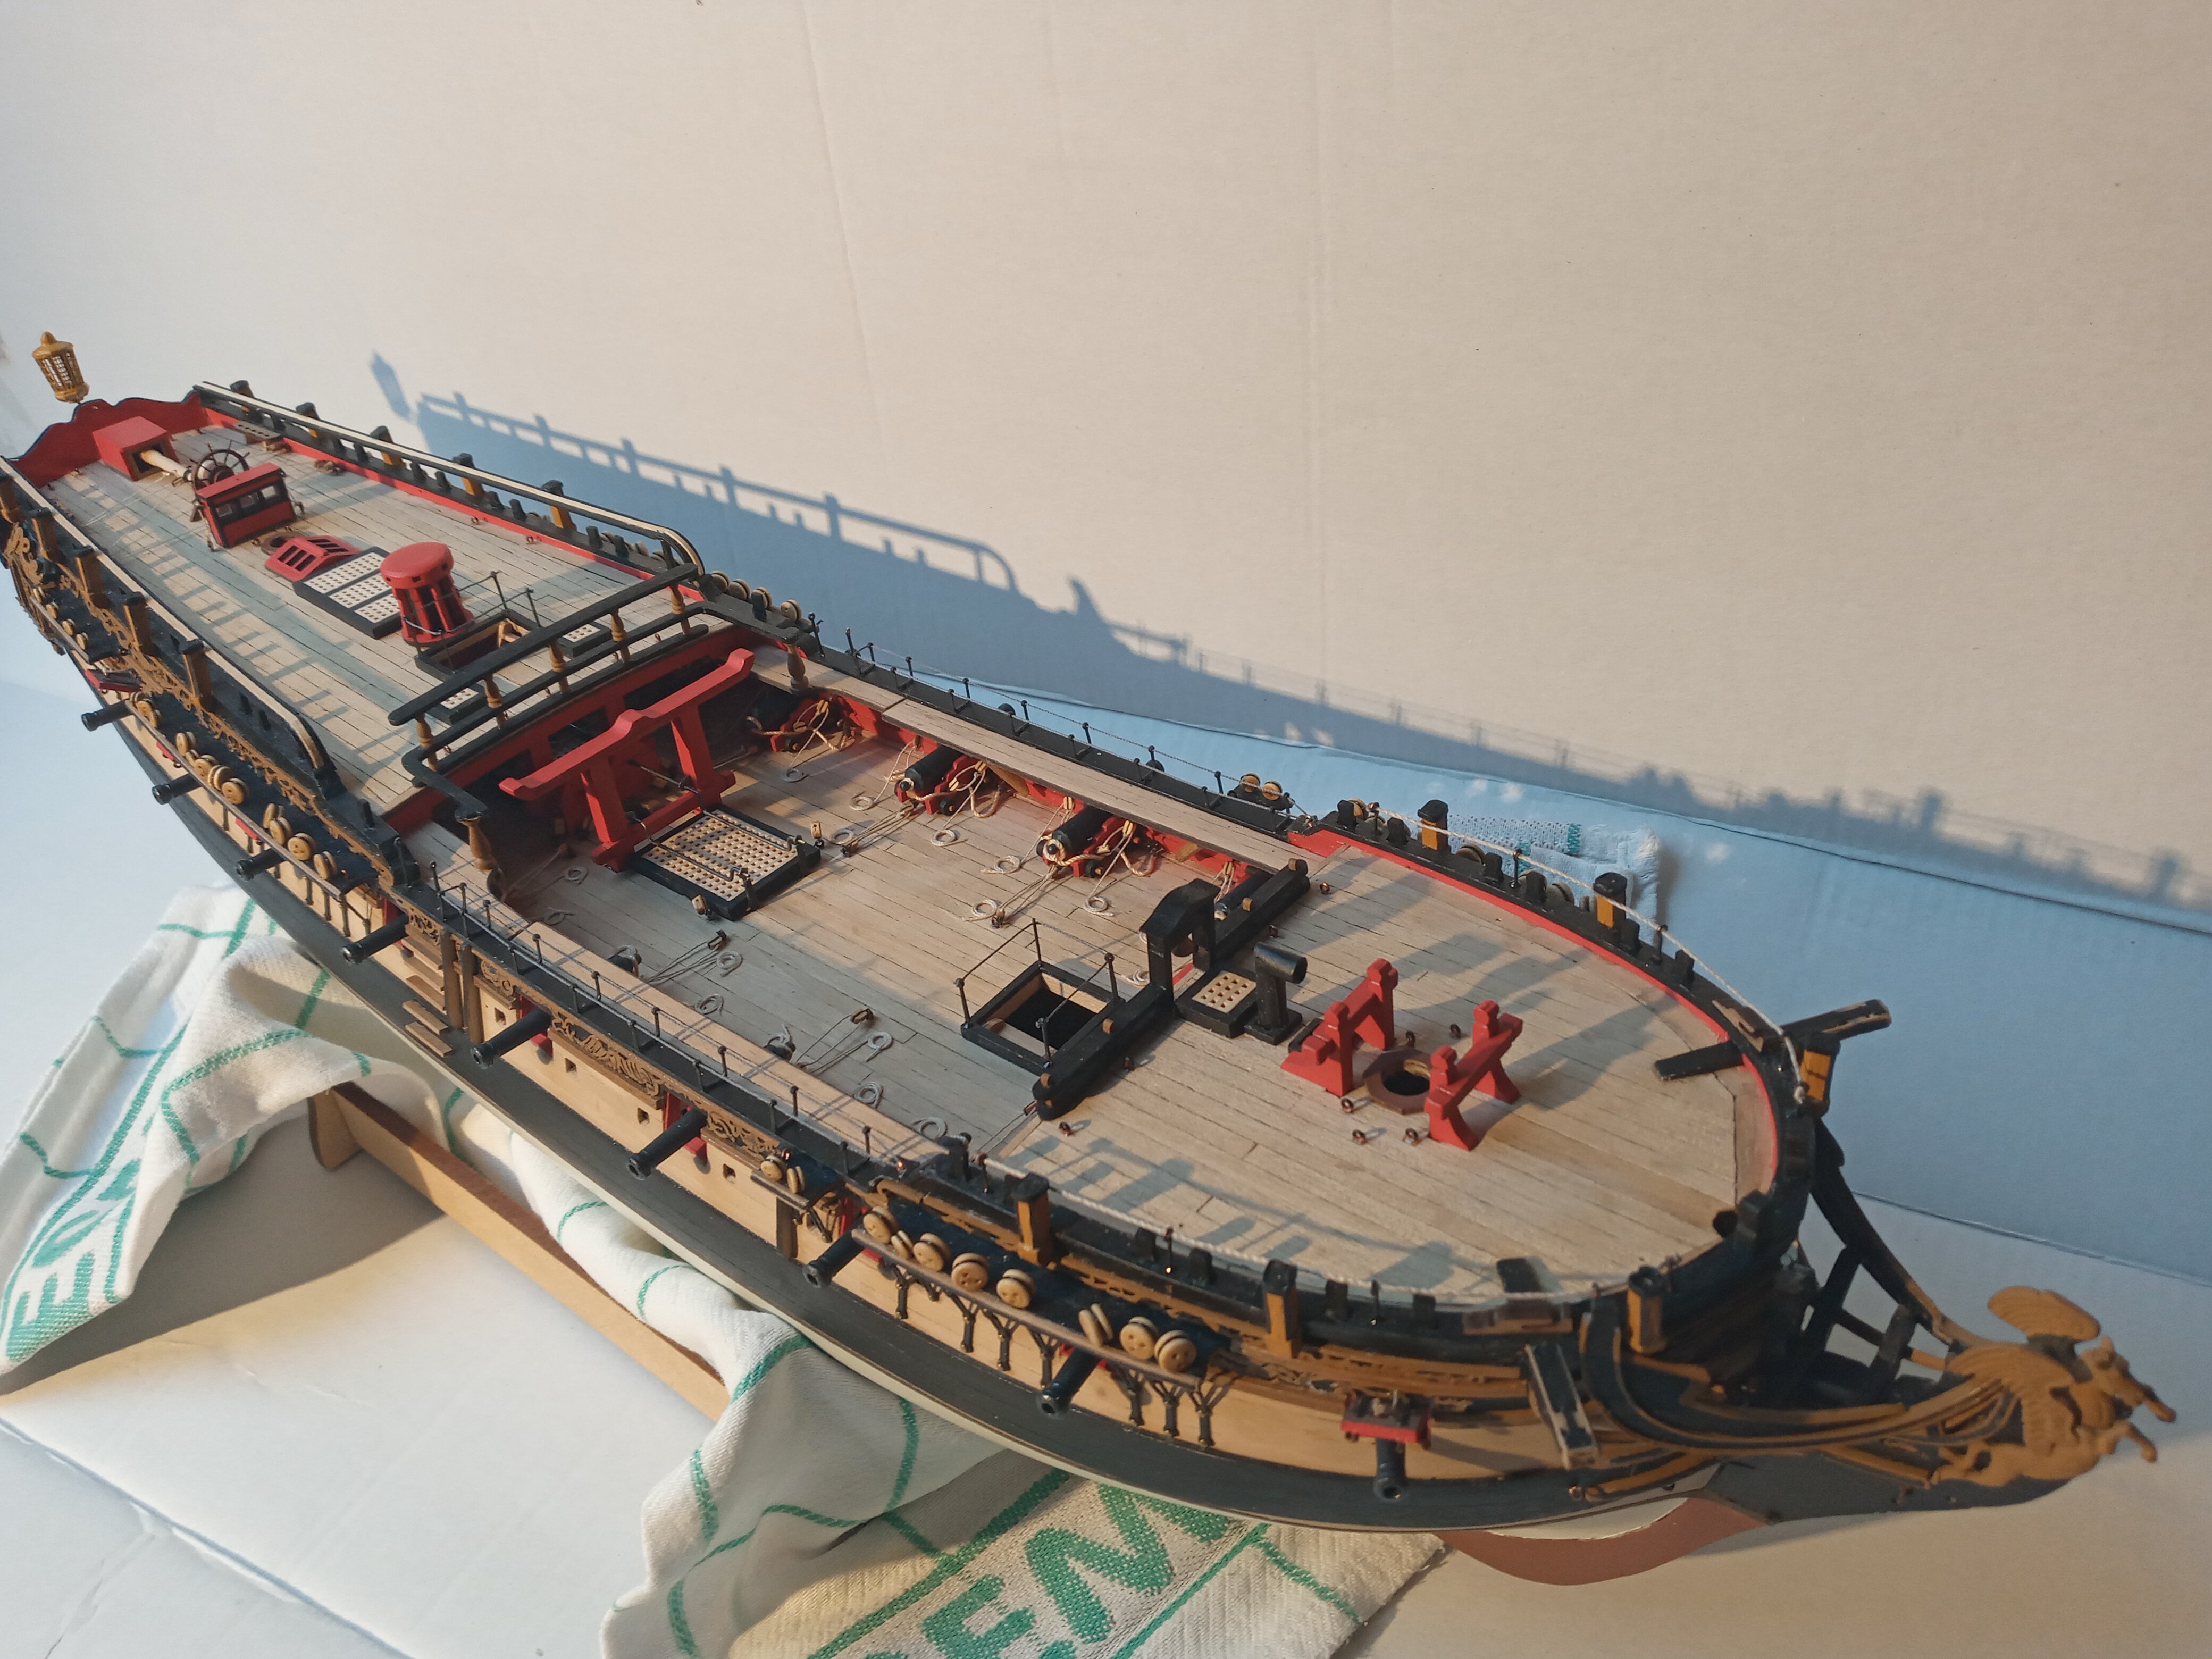
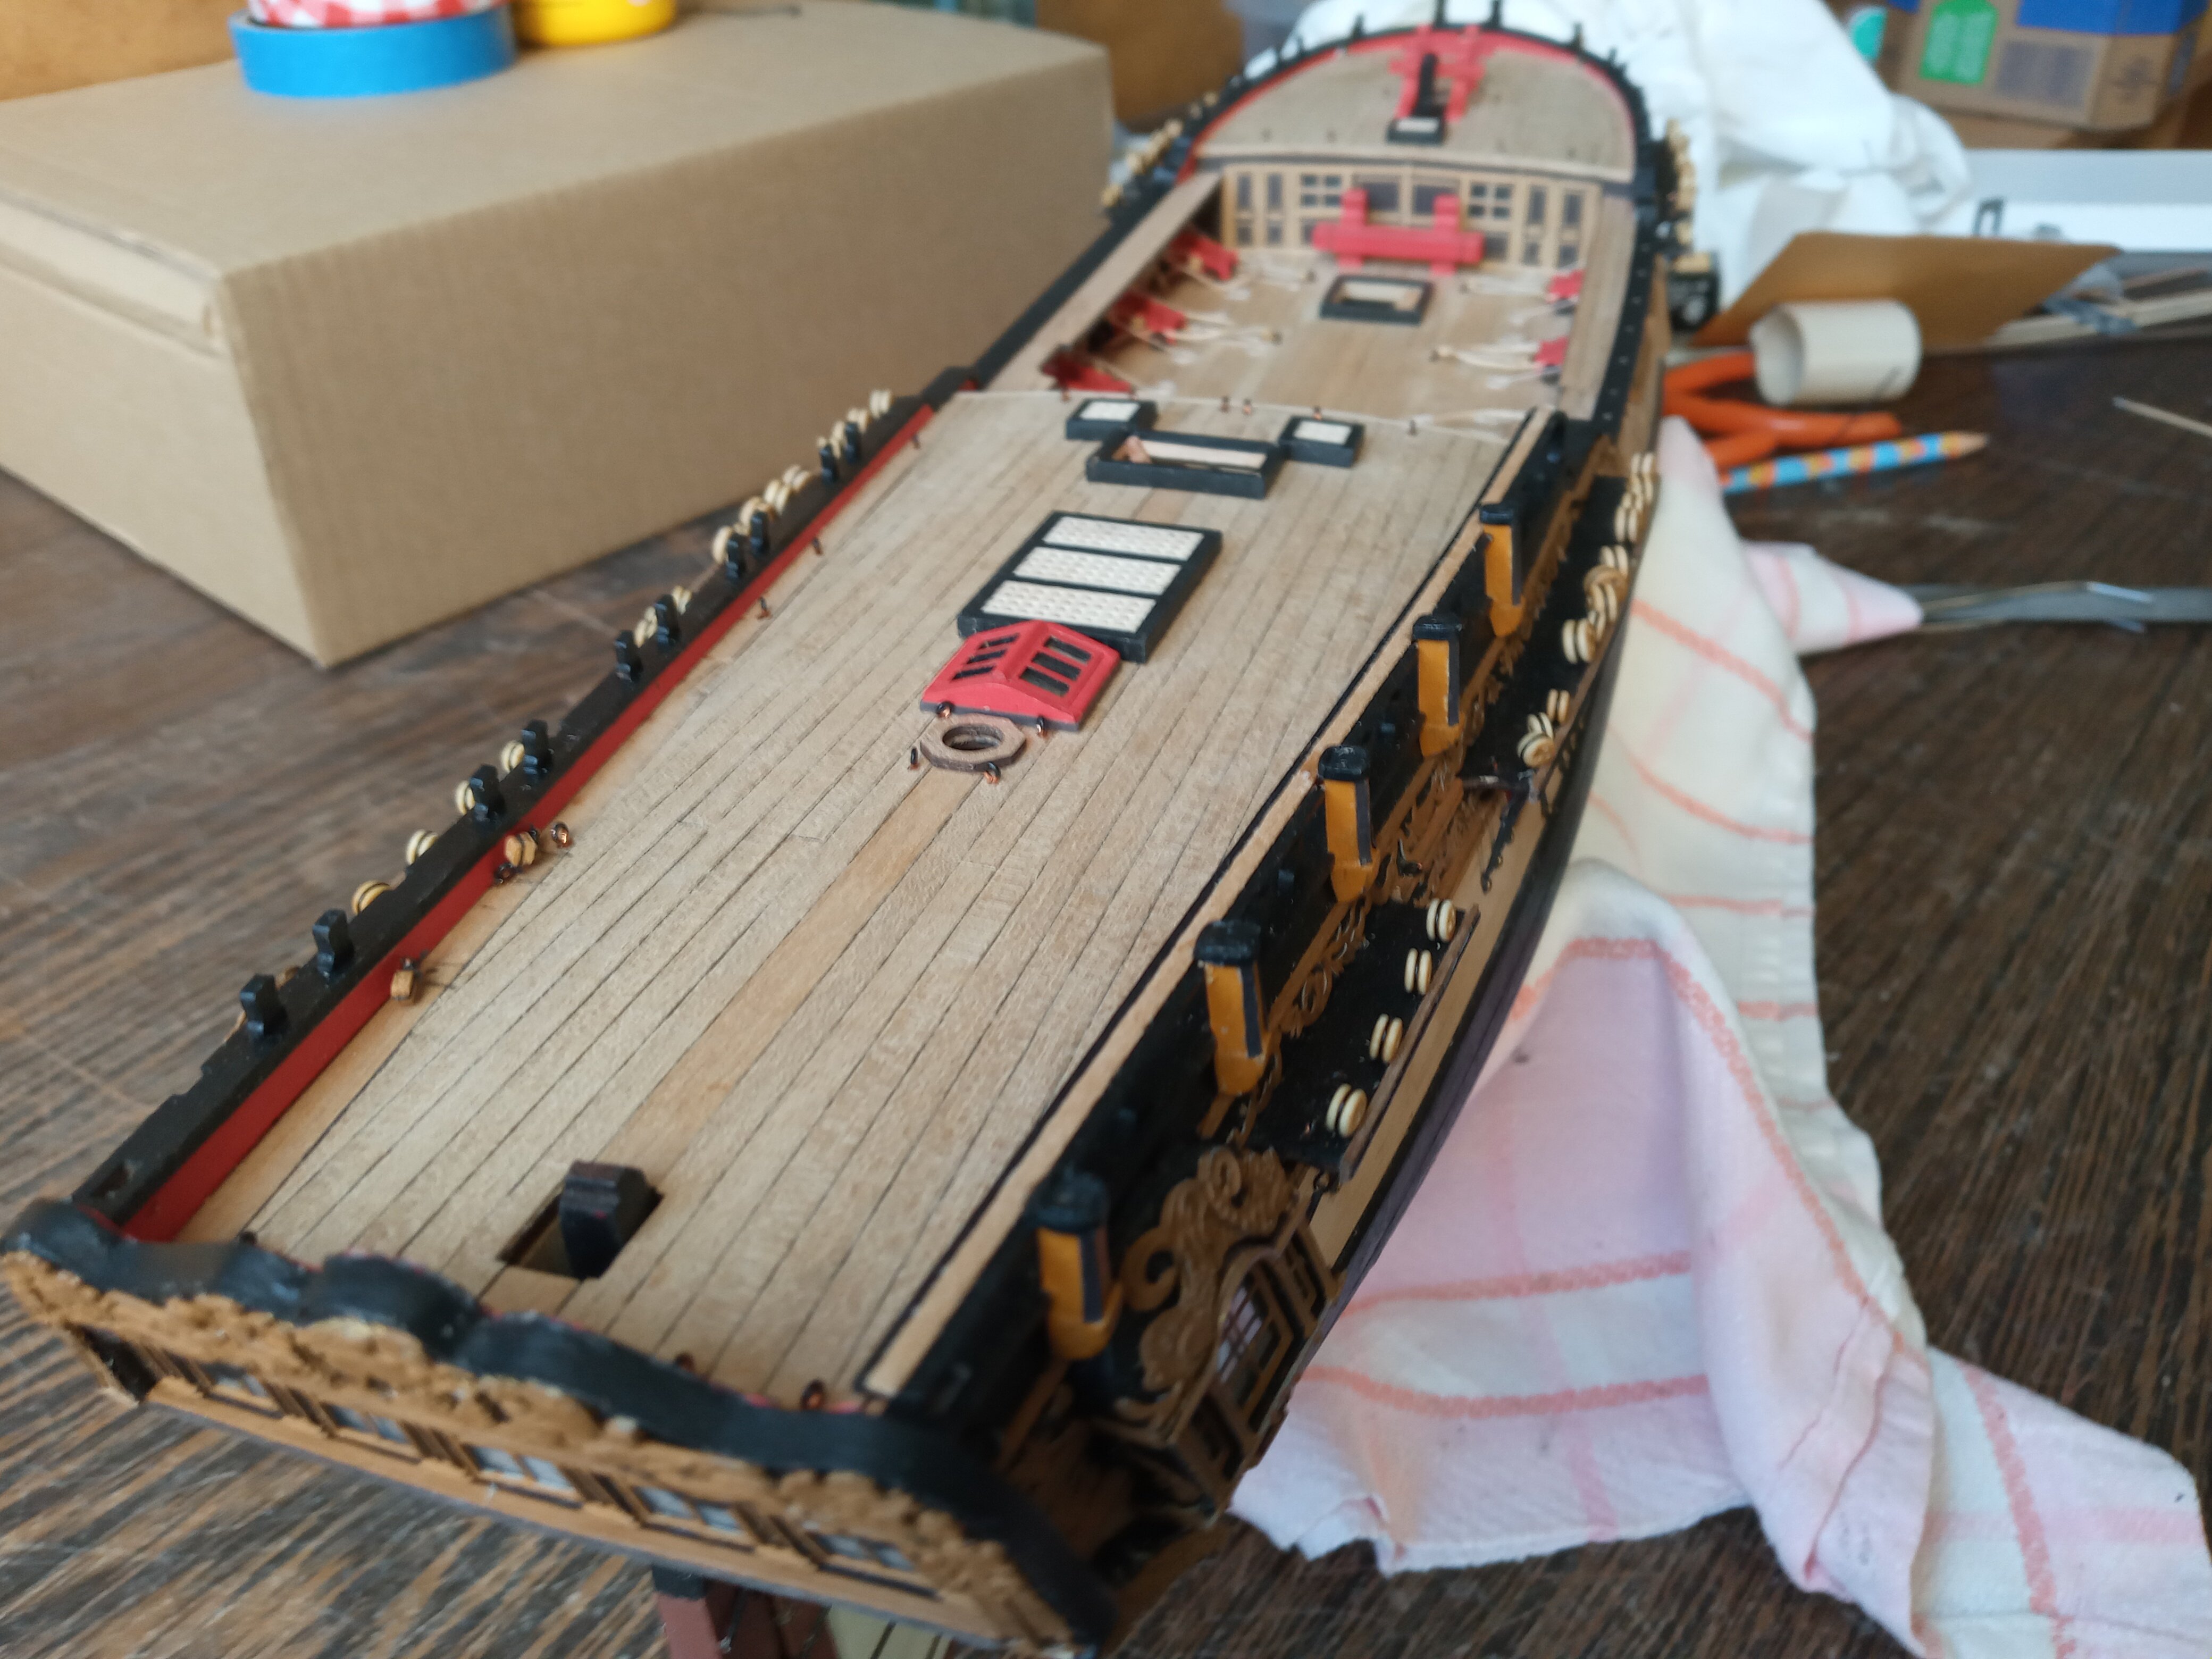
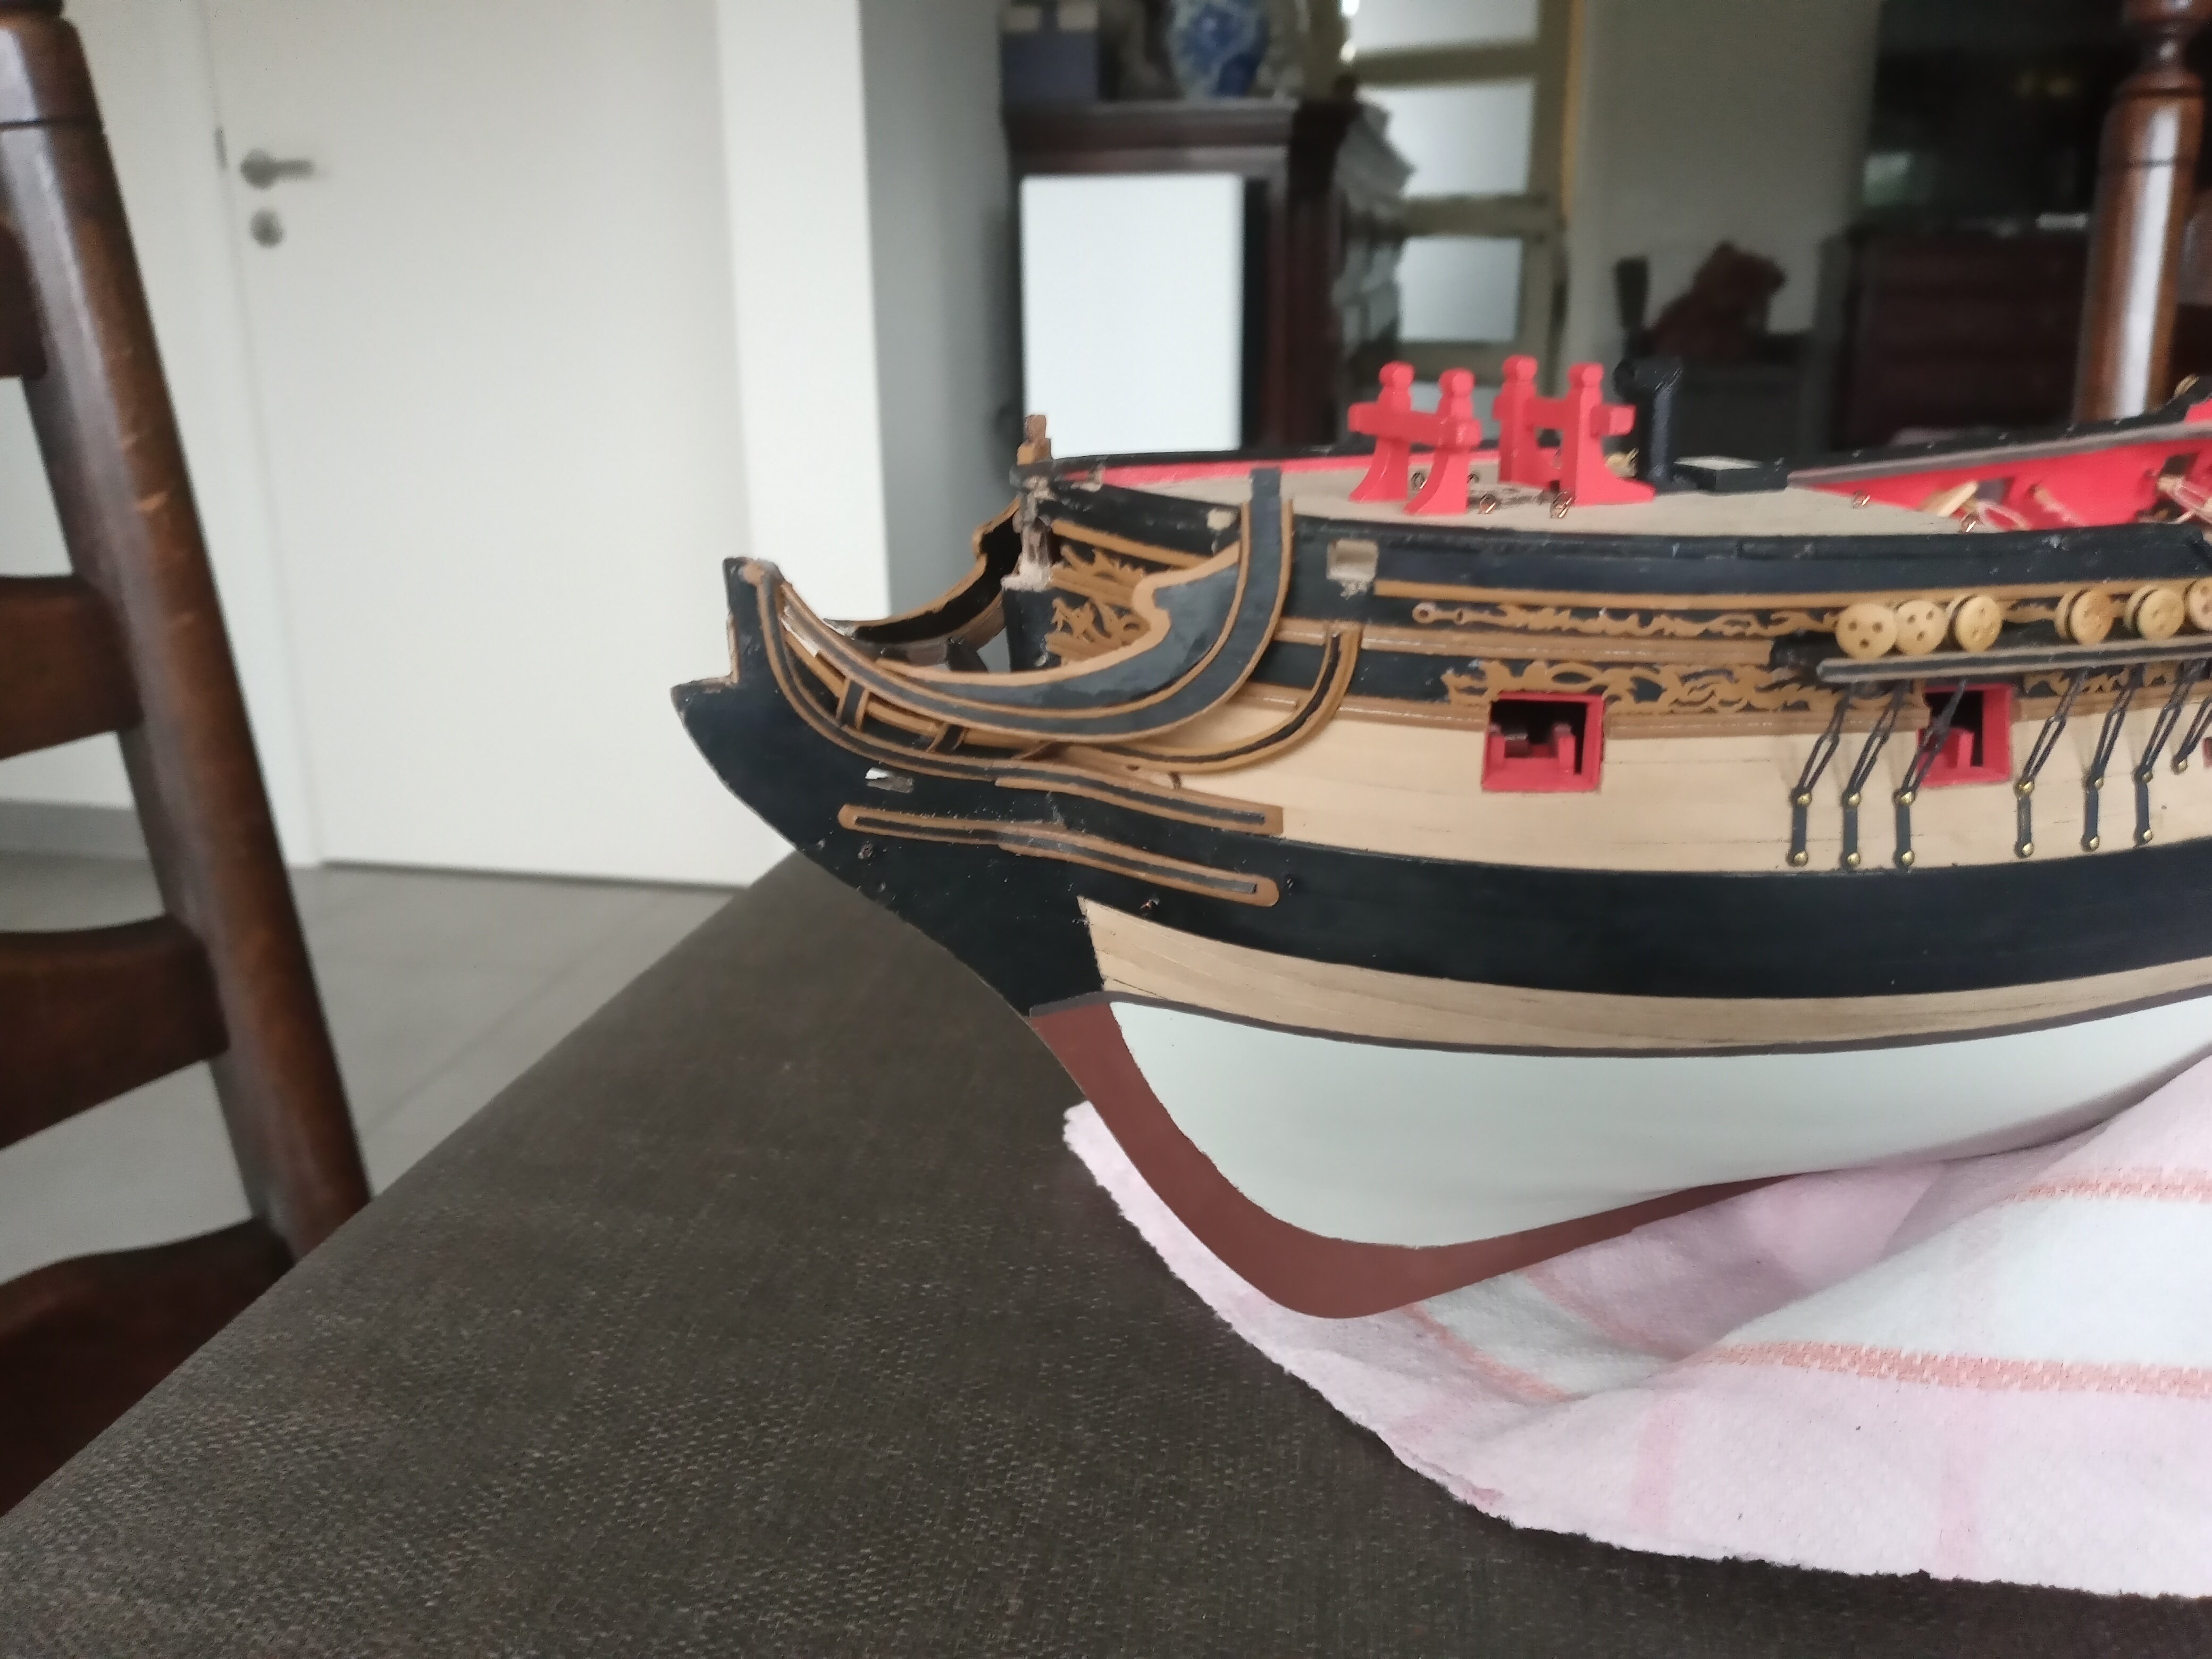
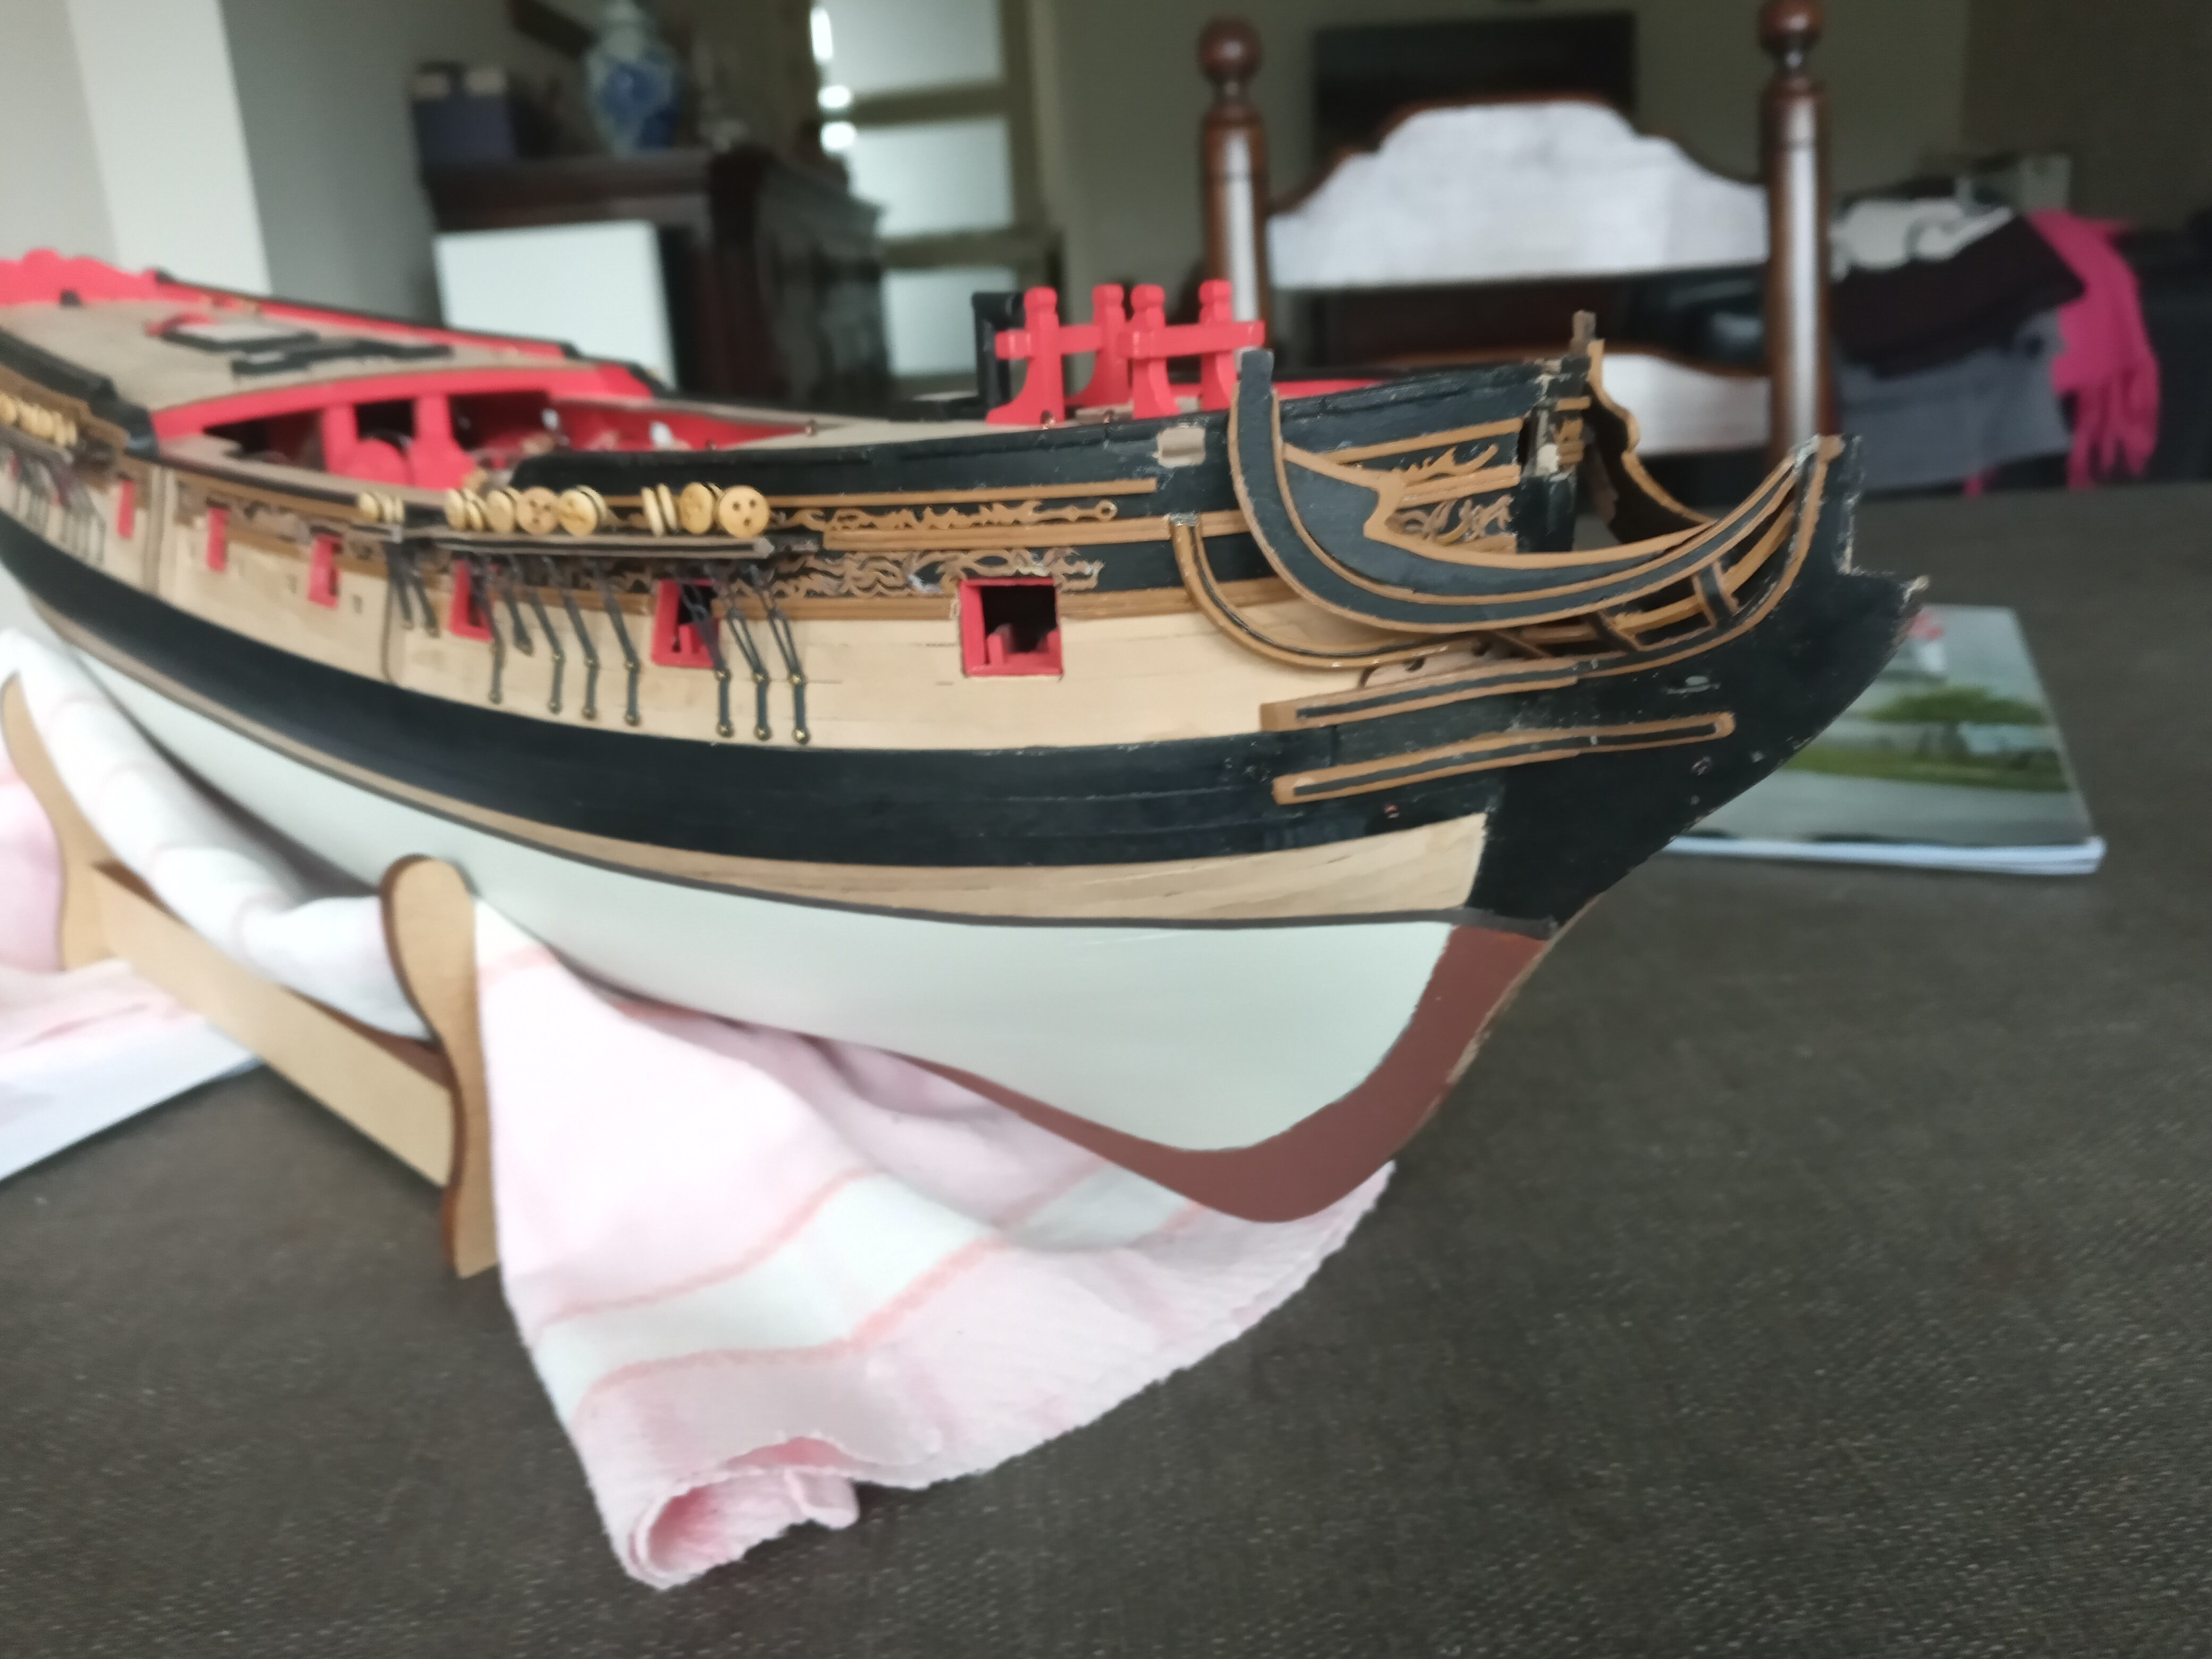
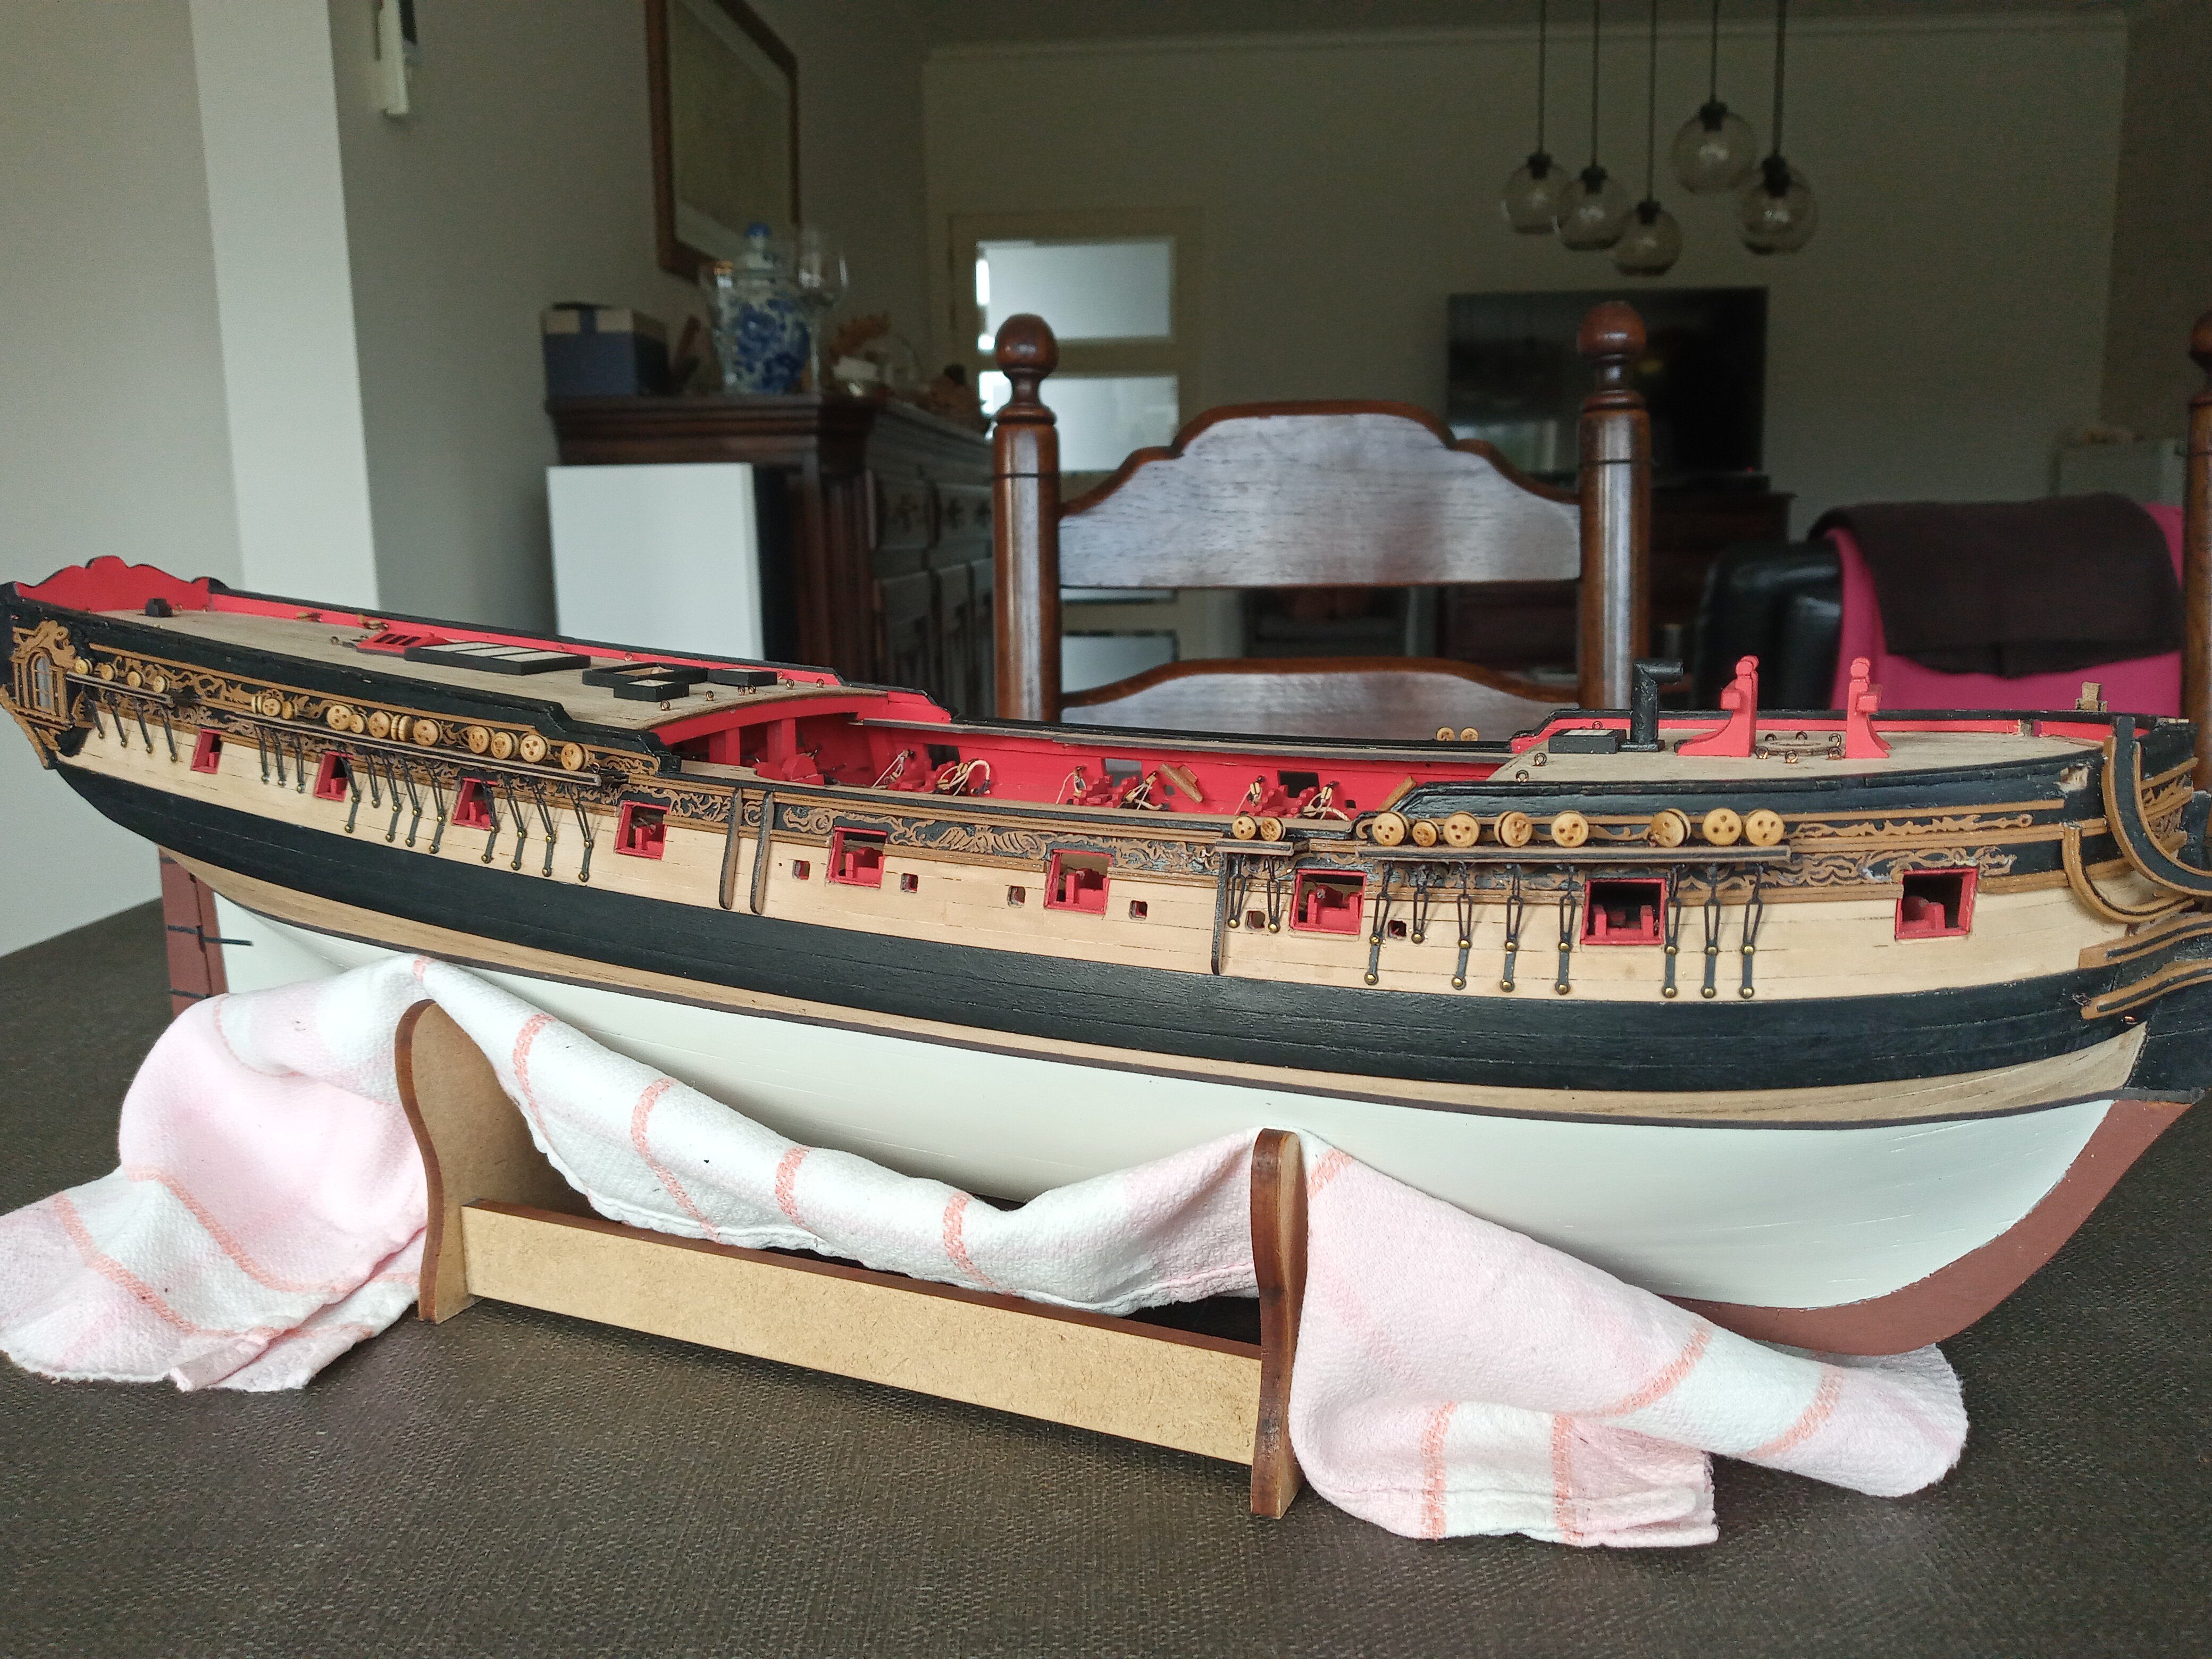
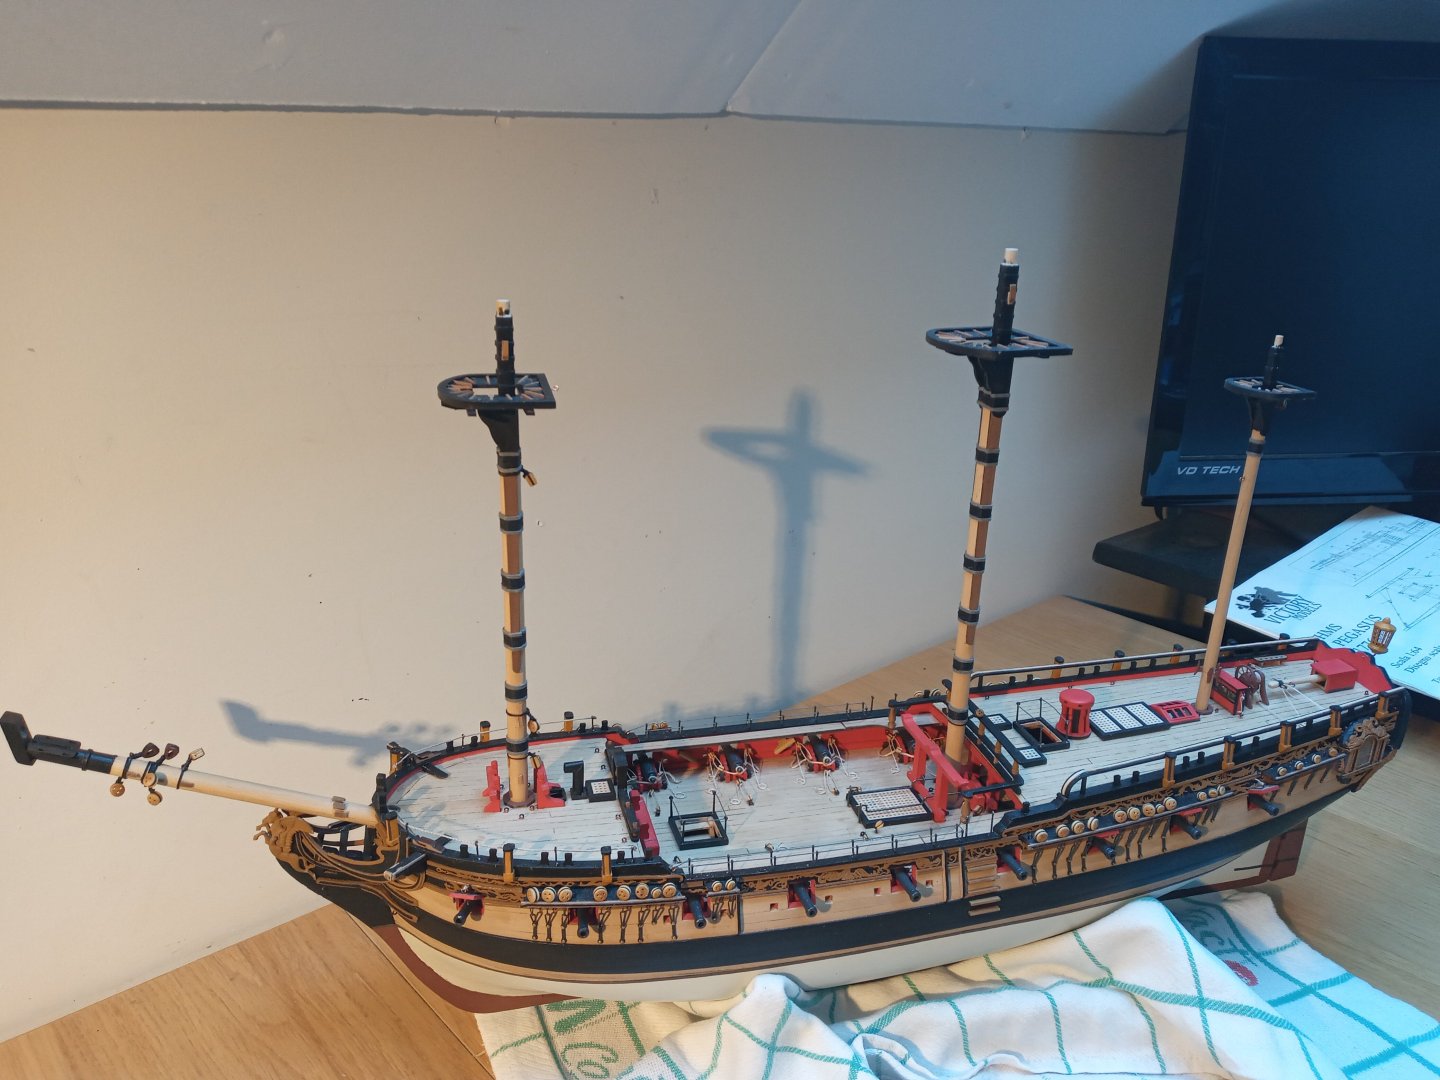
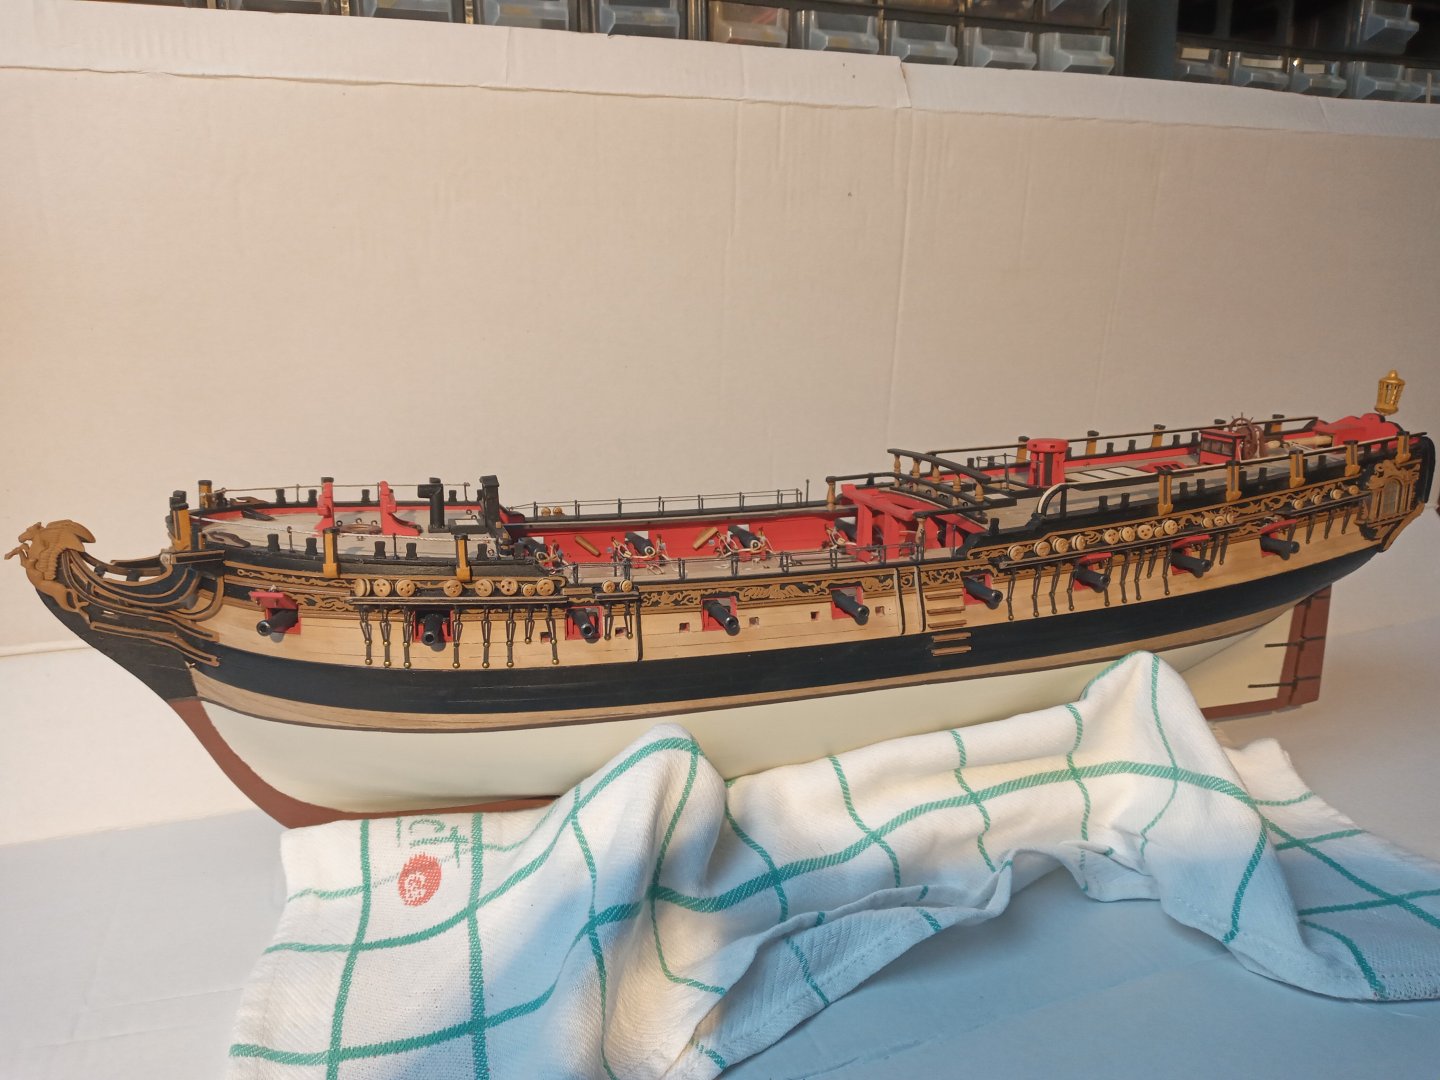
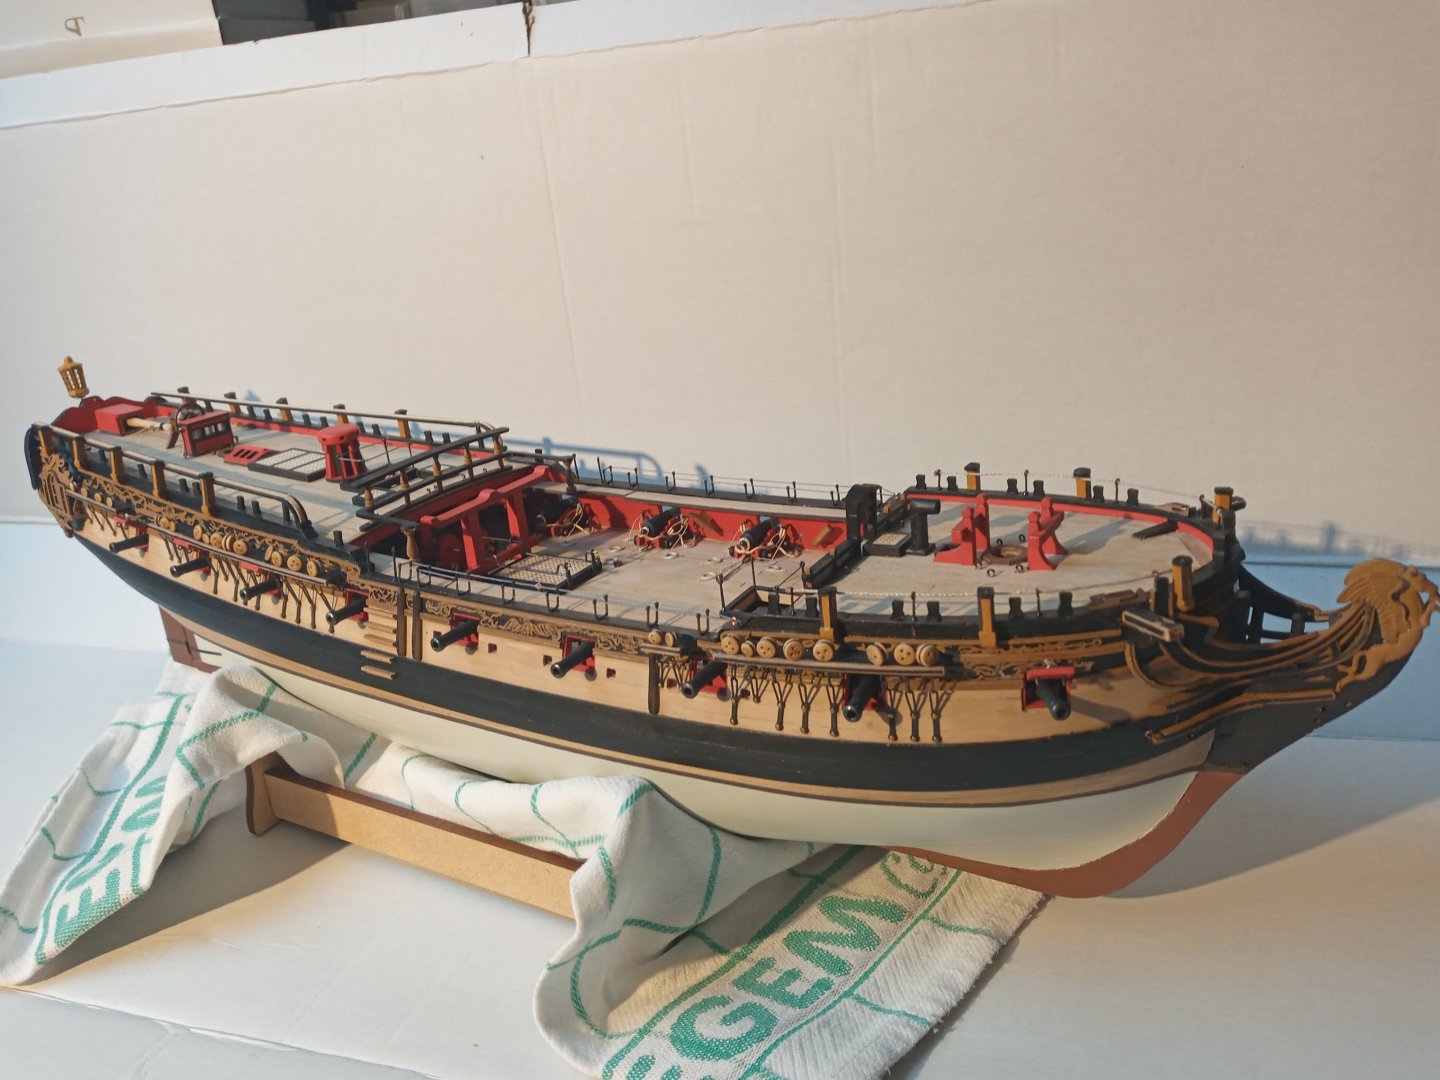
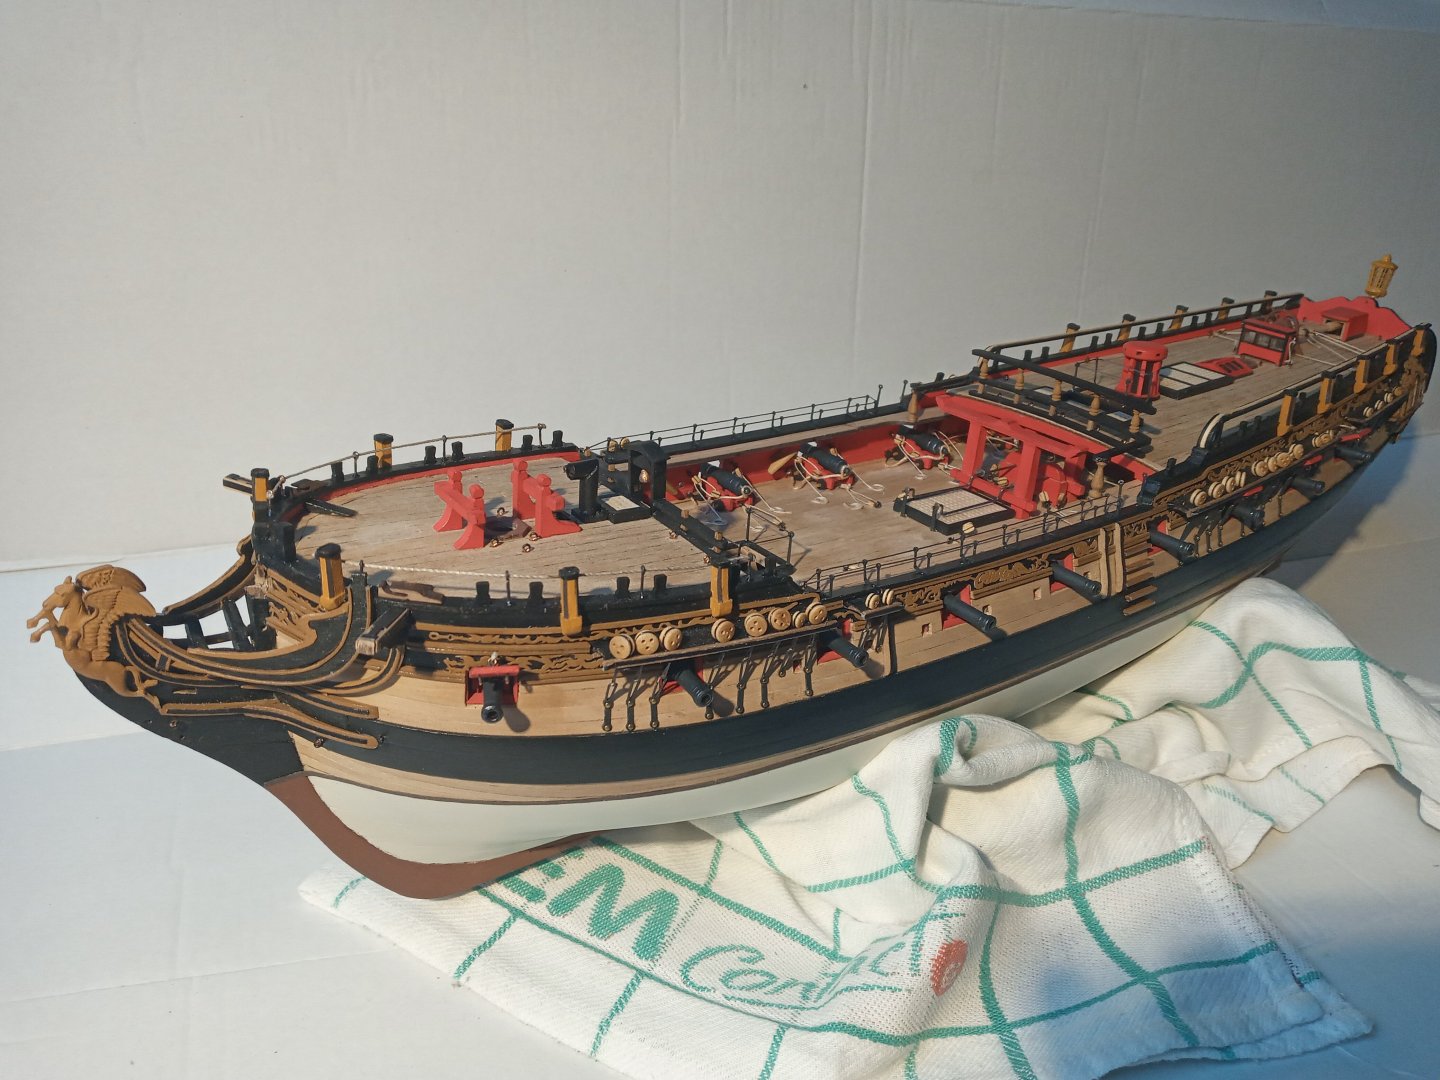
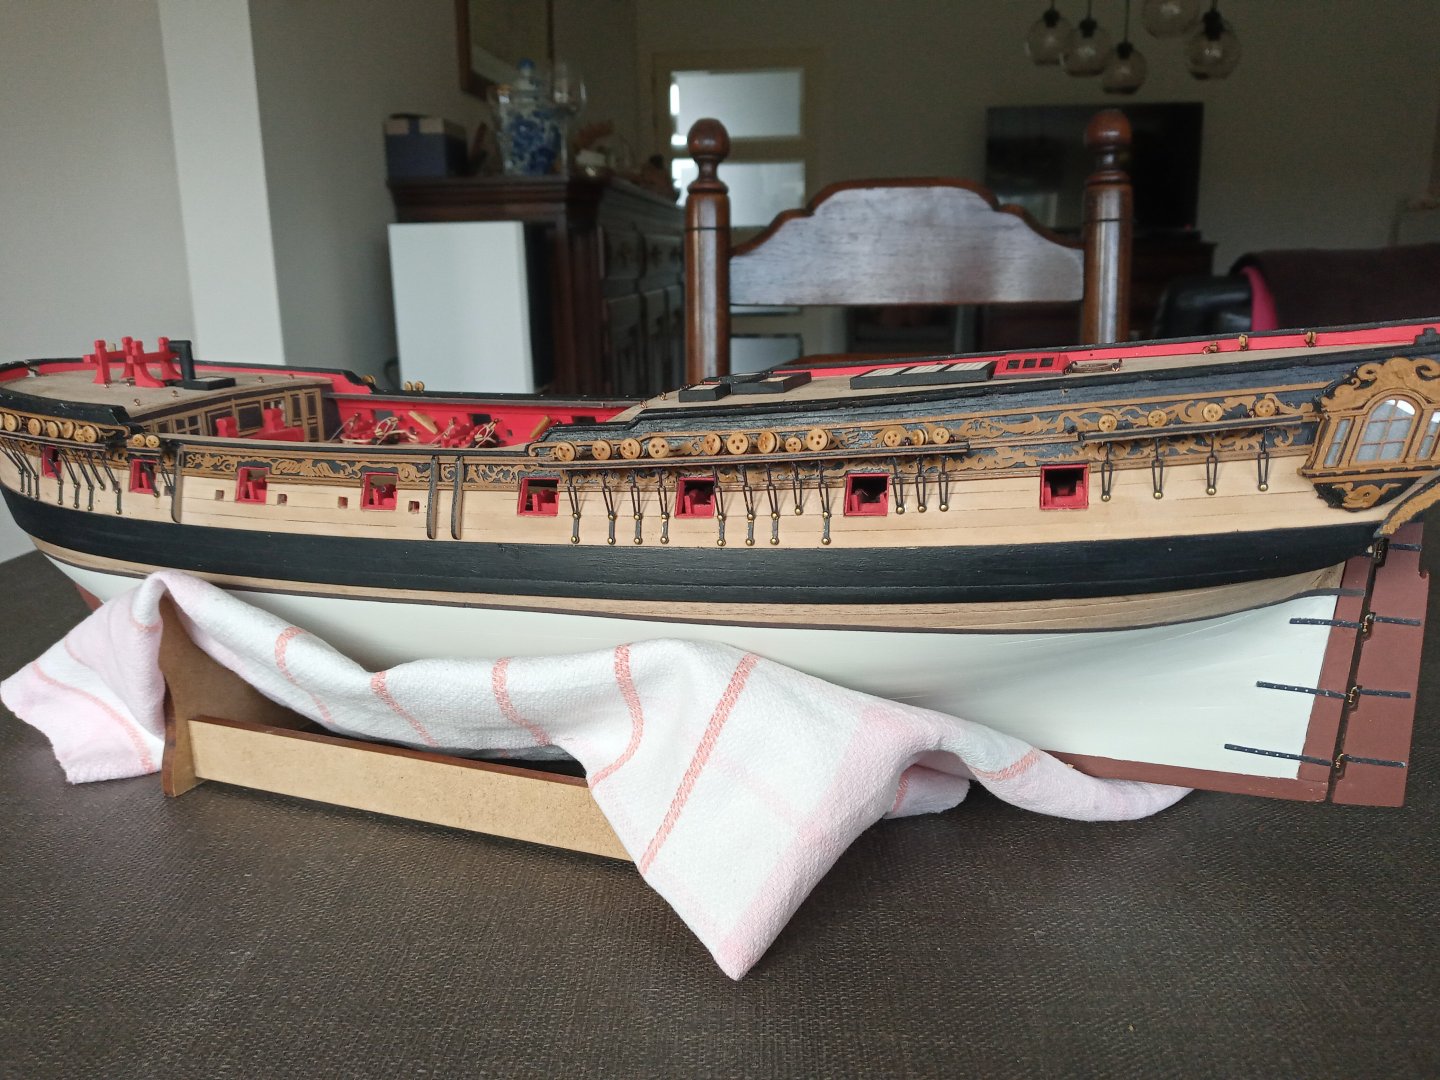
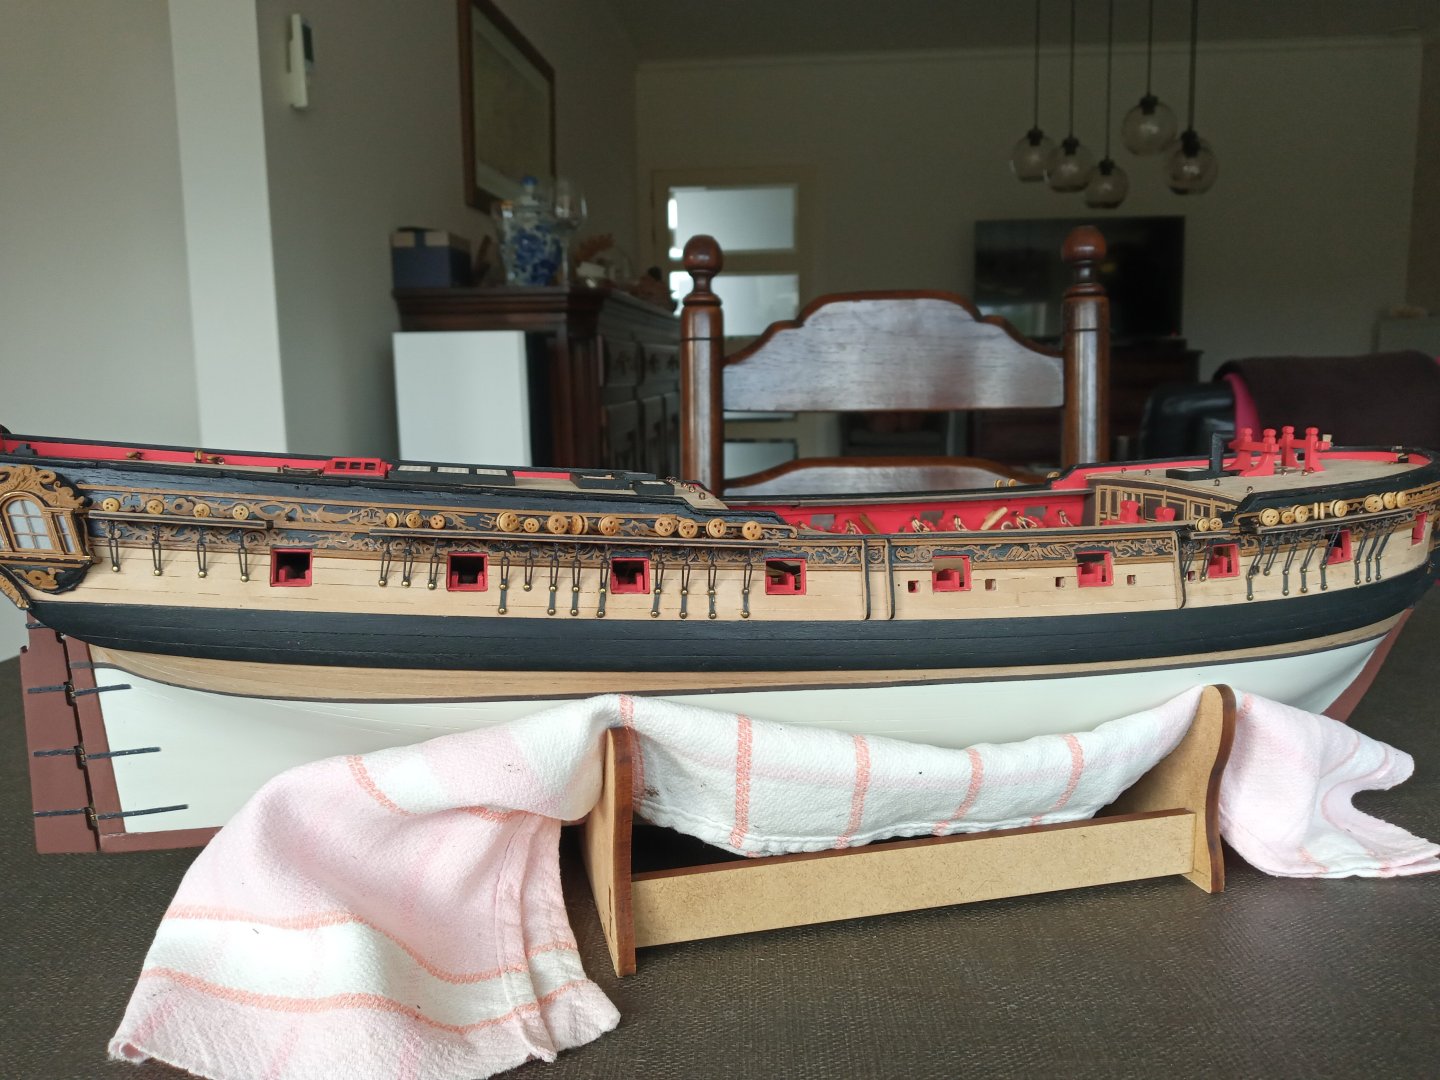
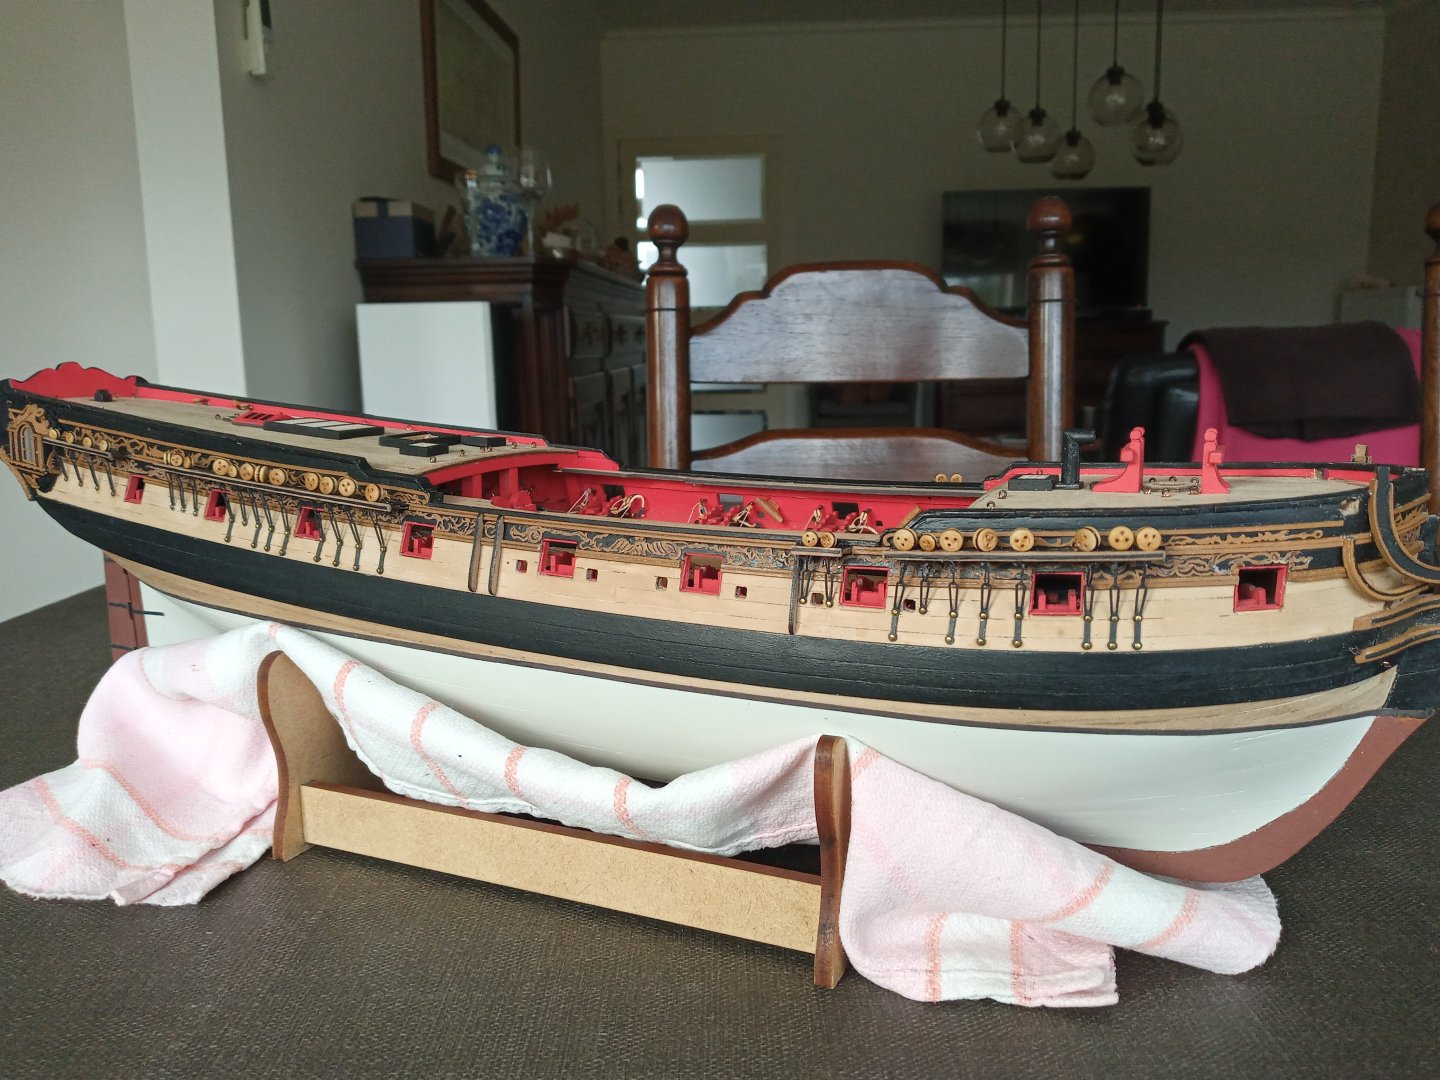
The hull almost done ( post 1/2 ) Here's some general/overview pics. In the near future, comments and further explanations are to be expected.


-
"heads, toilets... yes or no?" Just my 5 eurocents : It's ok putting extra effort in extra detail as long as it is visible/noticeable. Off topic : also served in Germany 1982-1983.
-
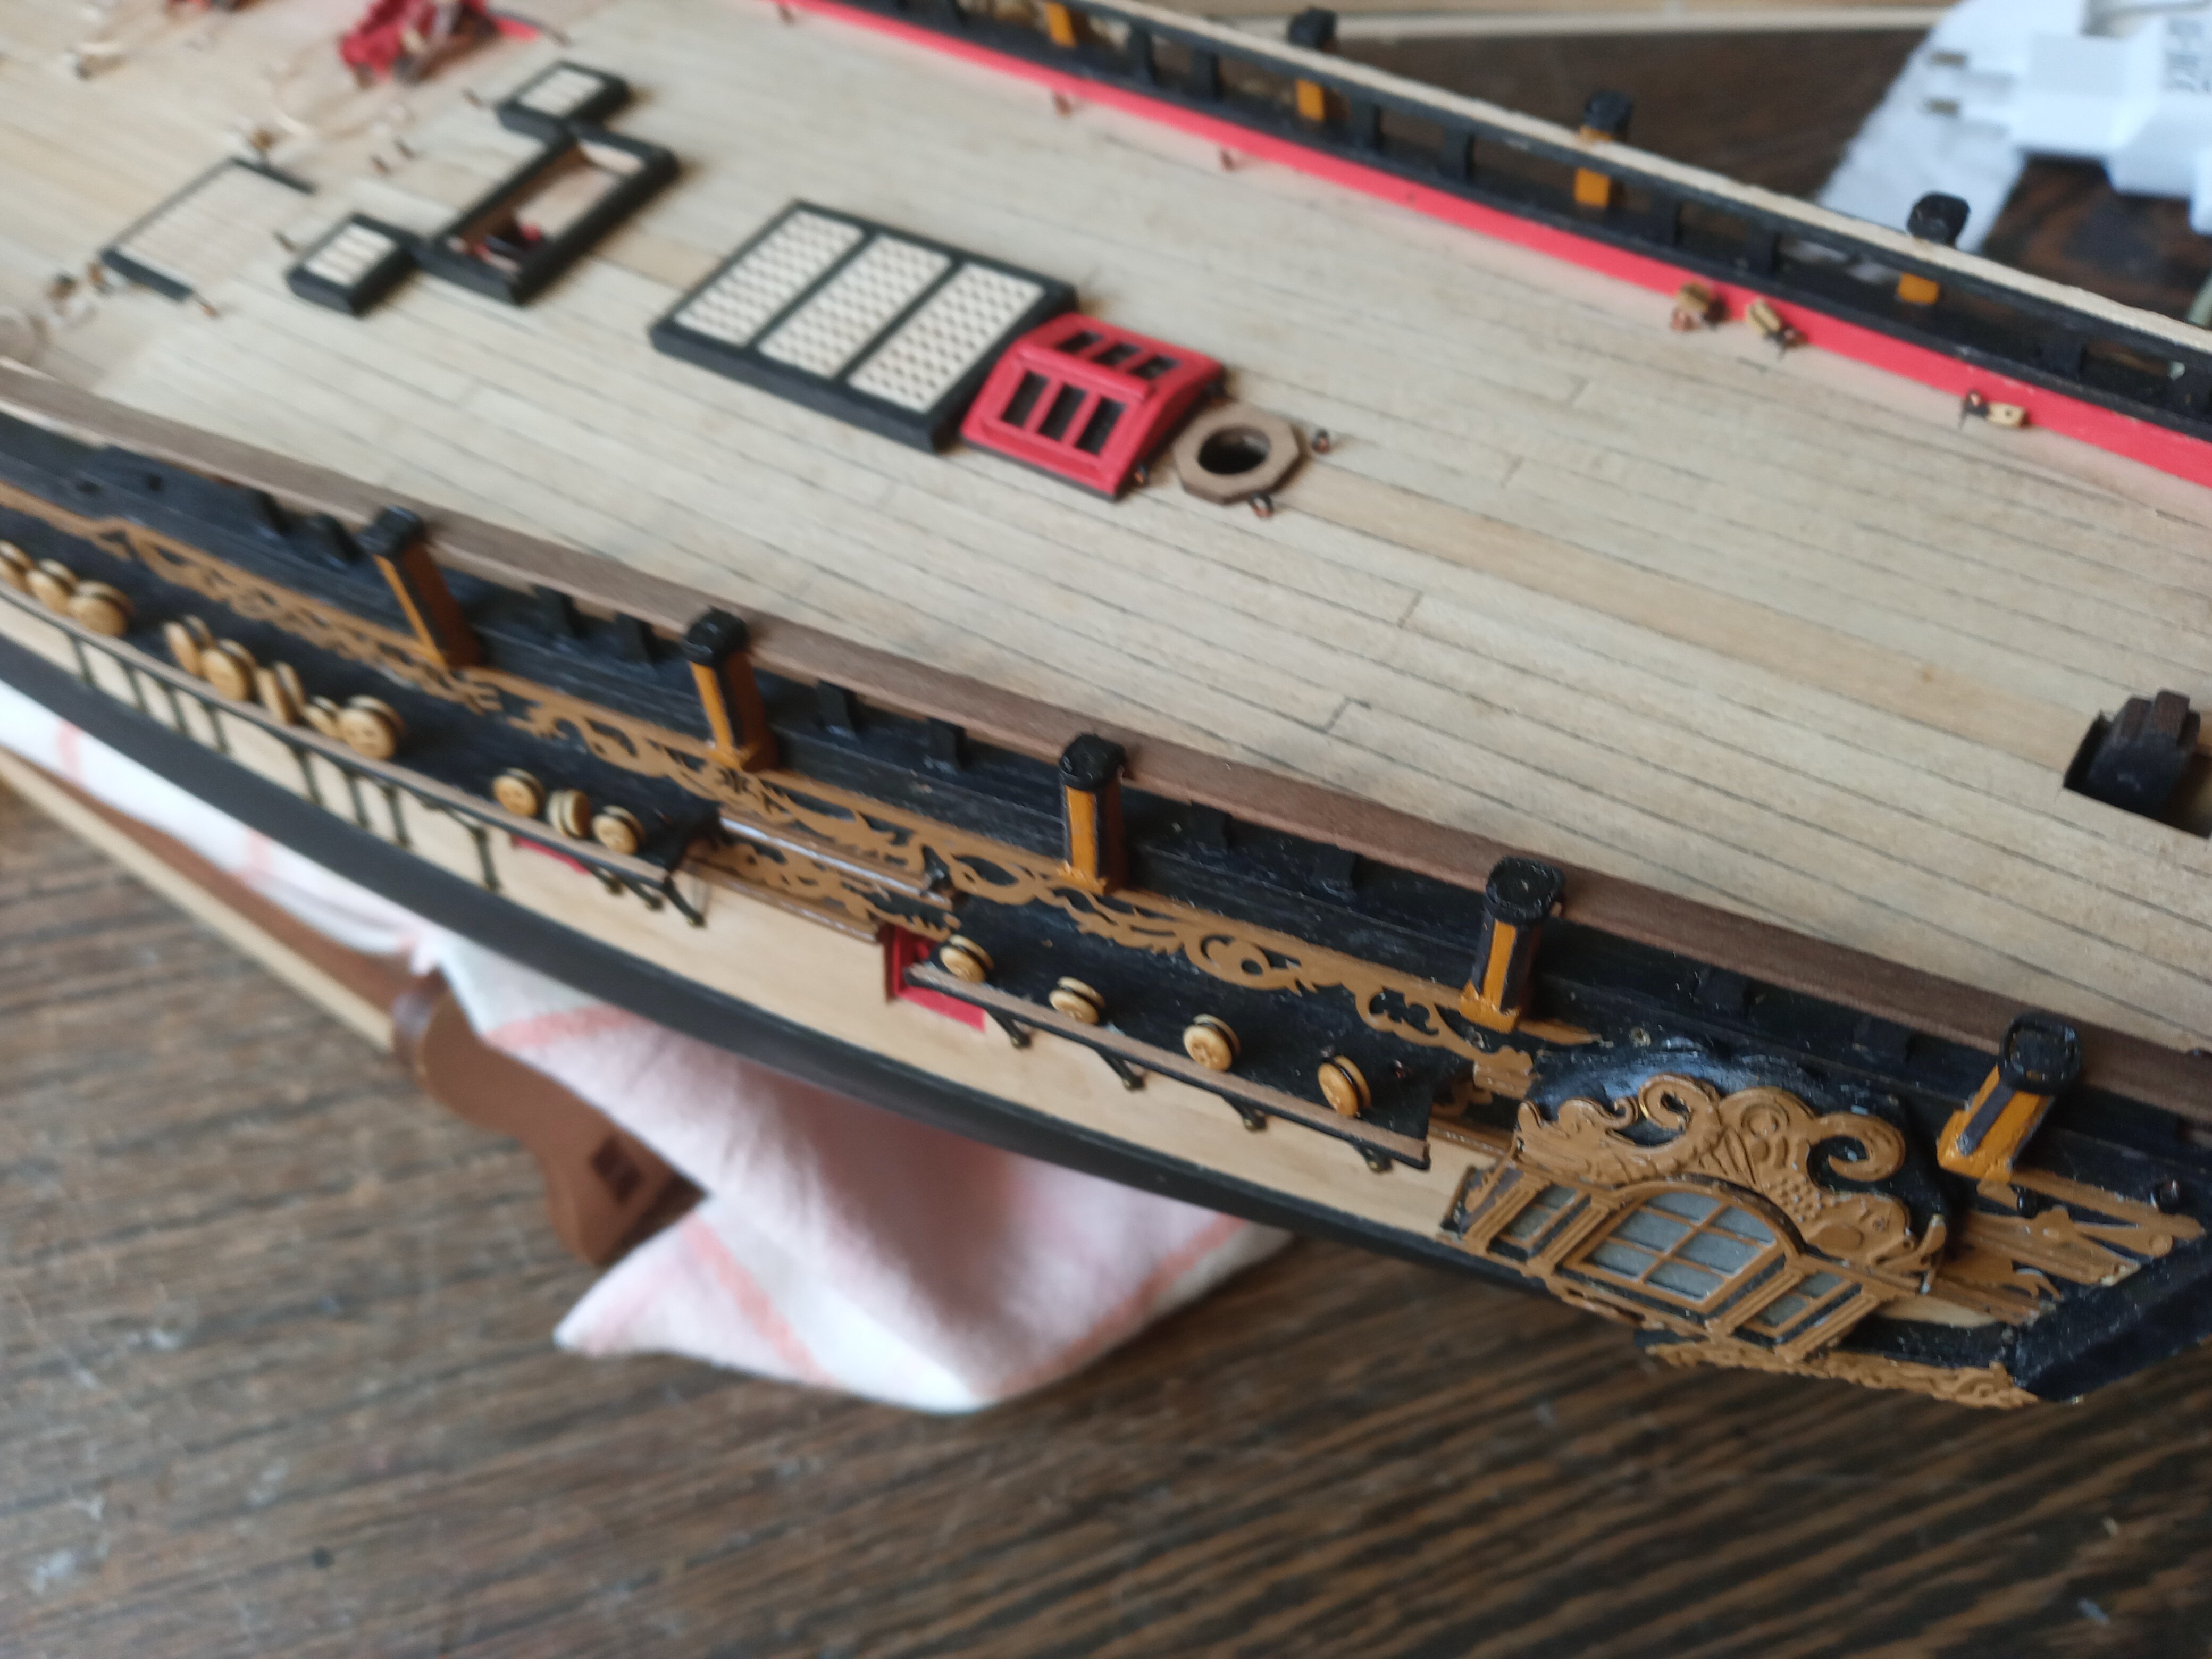
Upper rail, Quarter deck ( starboard side ) As a deviated a bit from building instructions as well as the supplied parts, quite happy with the result after all. A previous build, San Felipe ( few decades ago ) was a source of inspiration for the extra decoration strip. Next post will be realted to the port side and I'll get more into details ( kind a step by step )


-
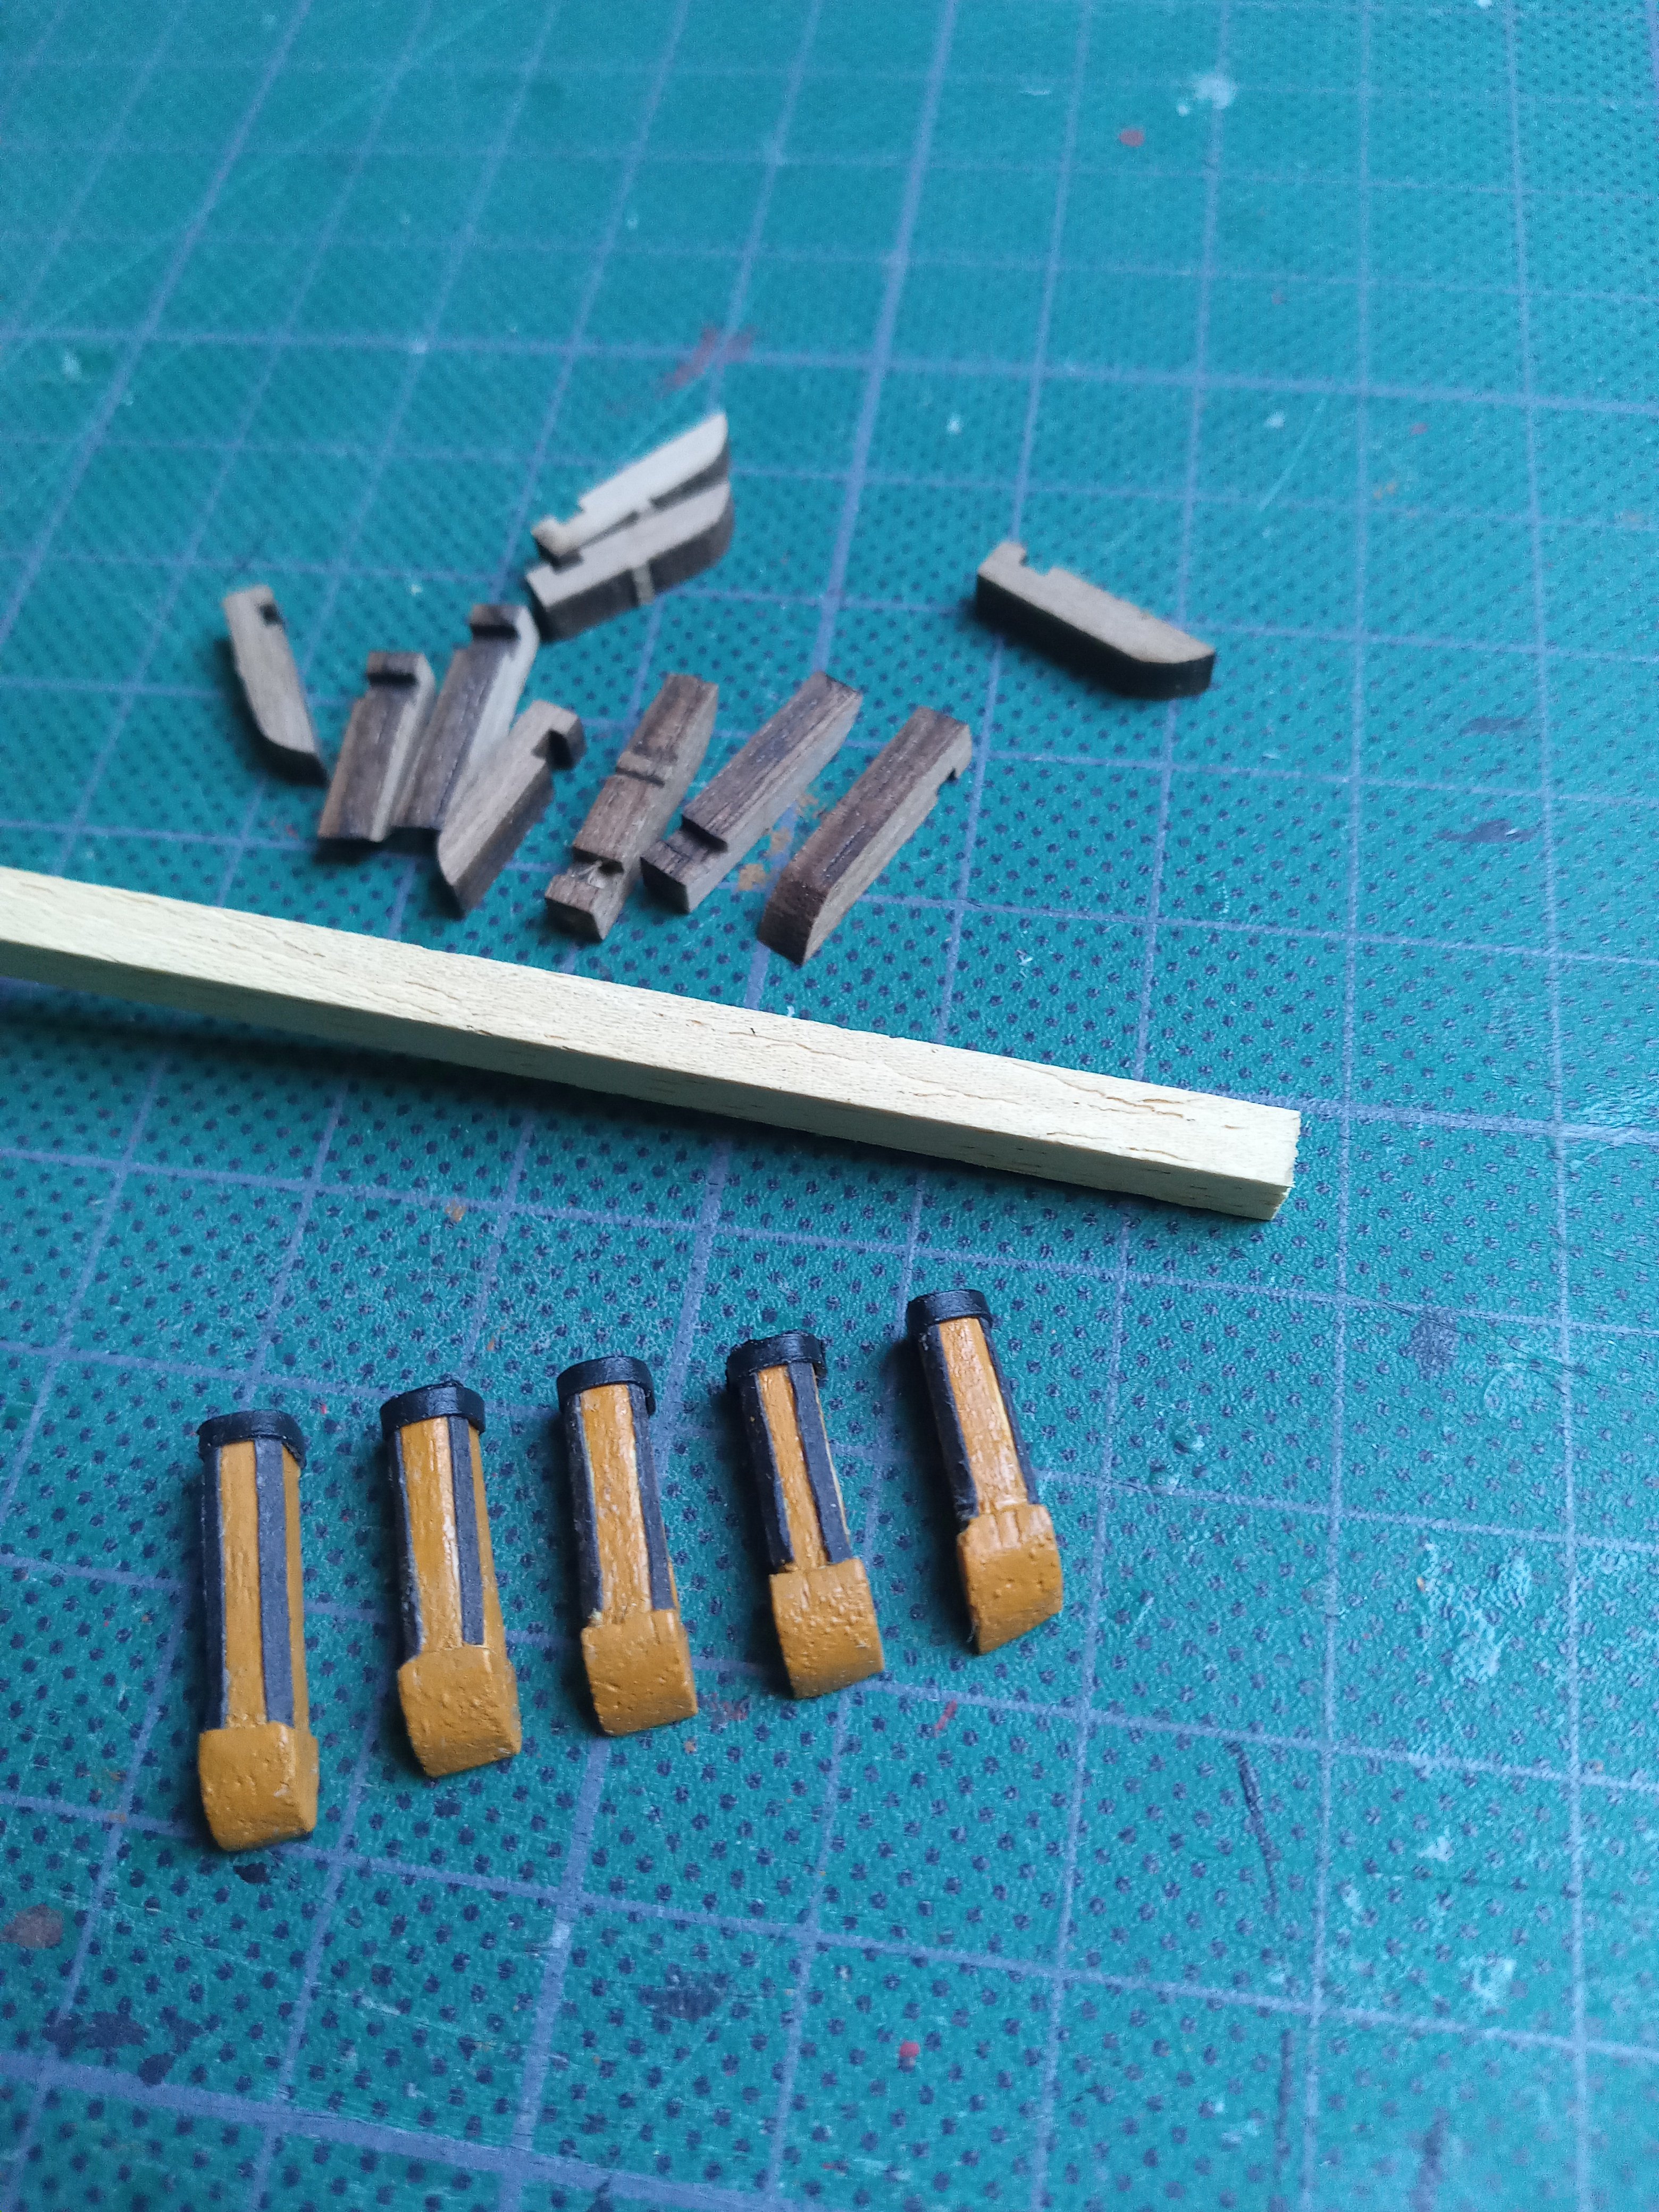
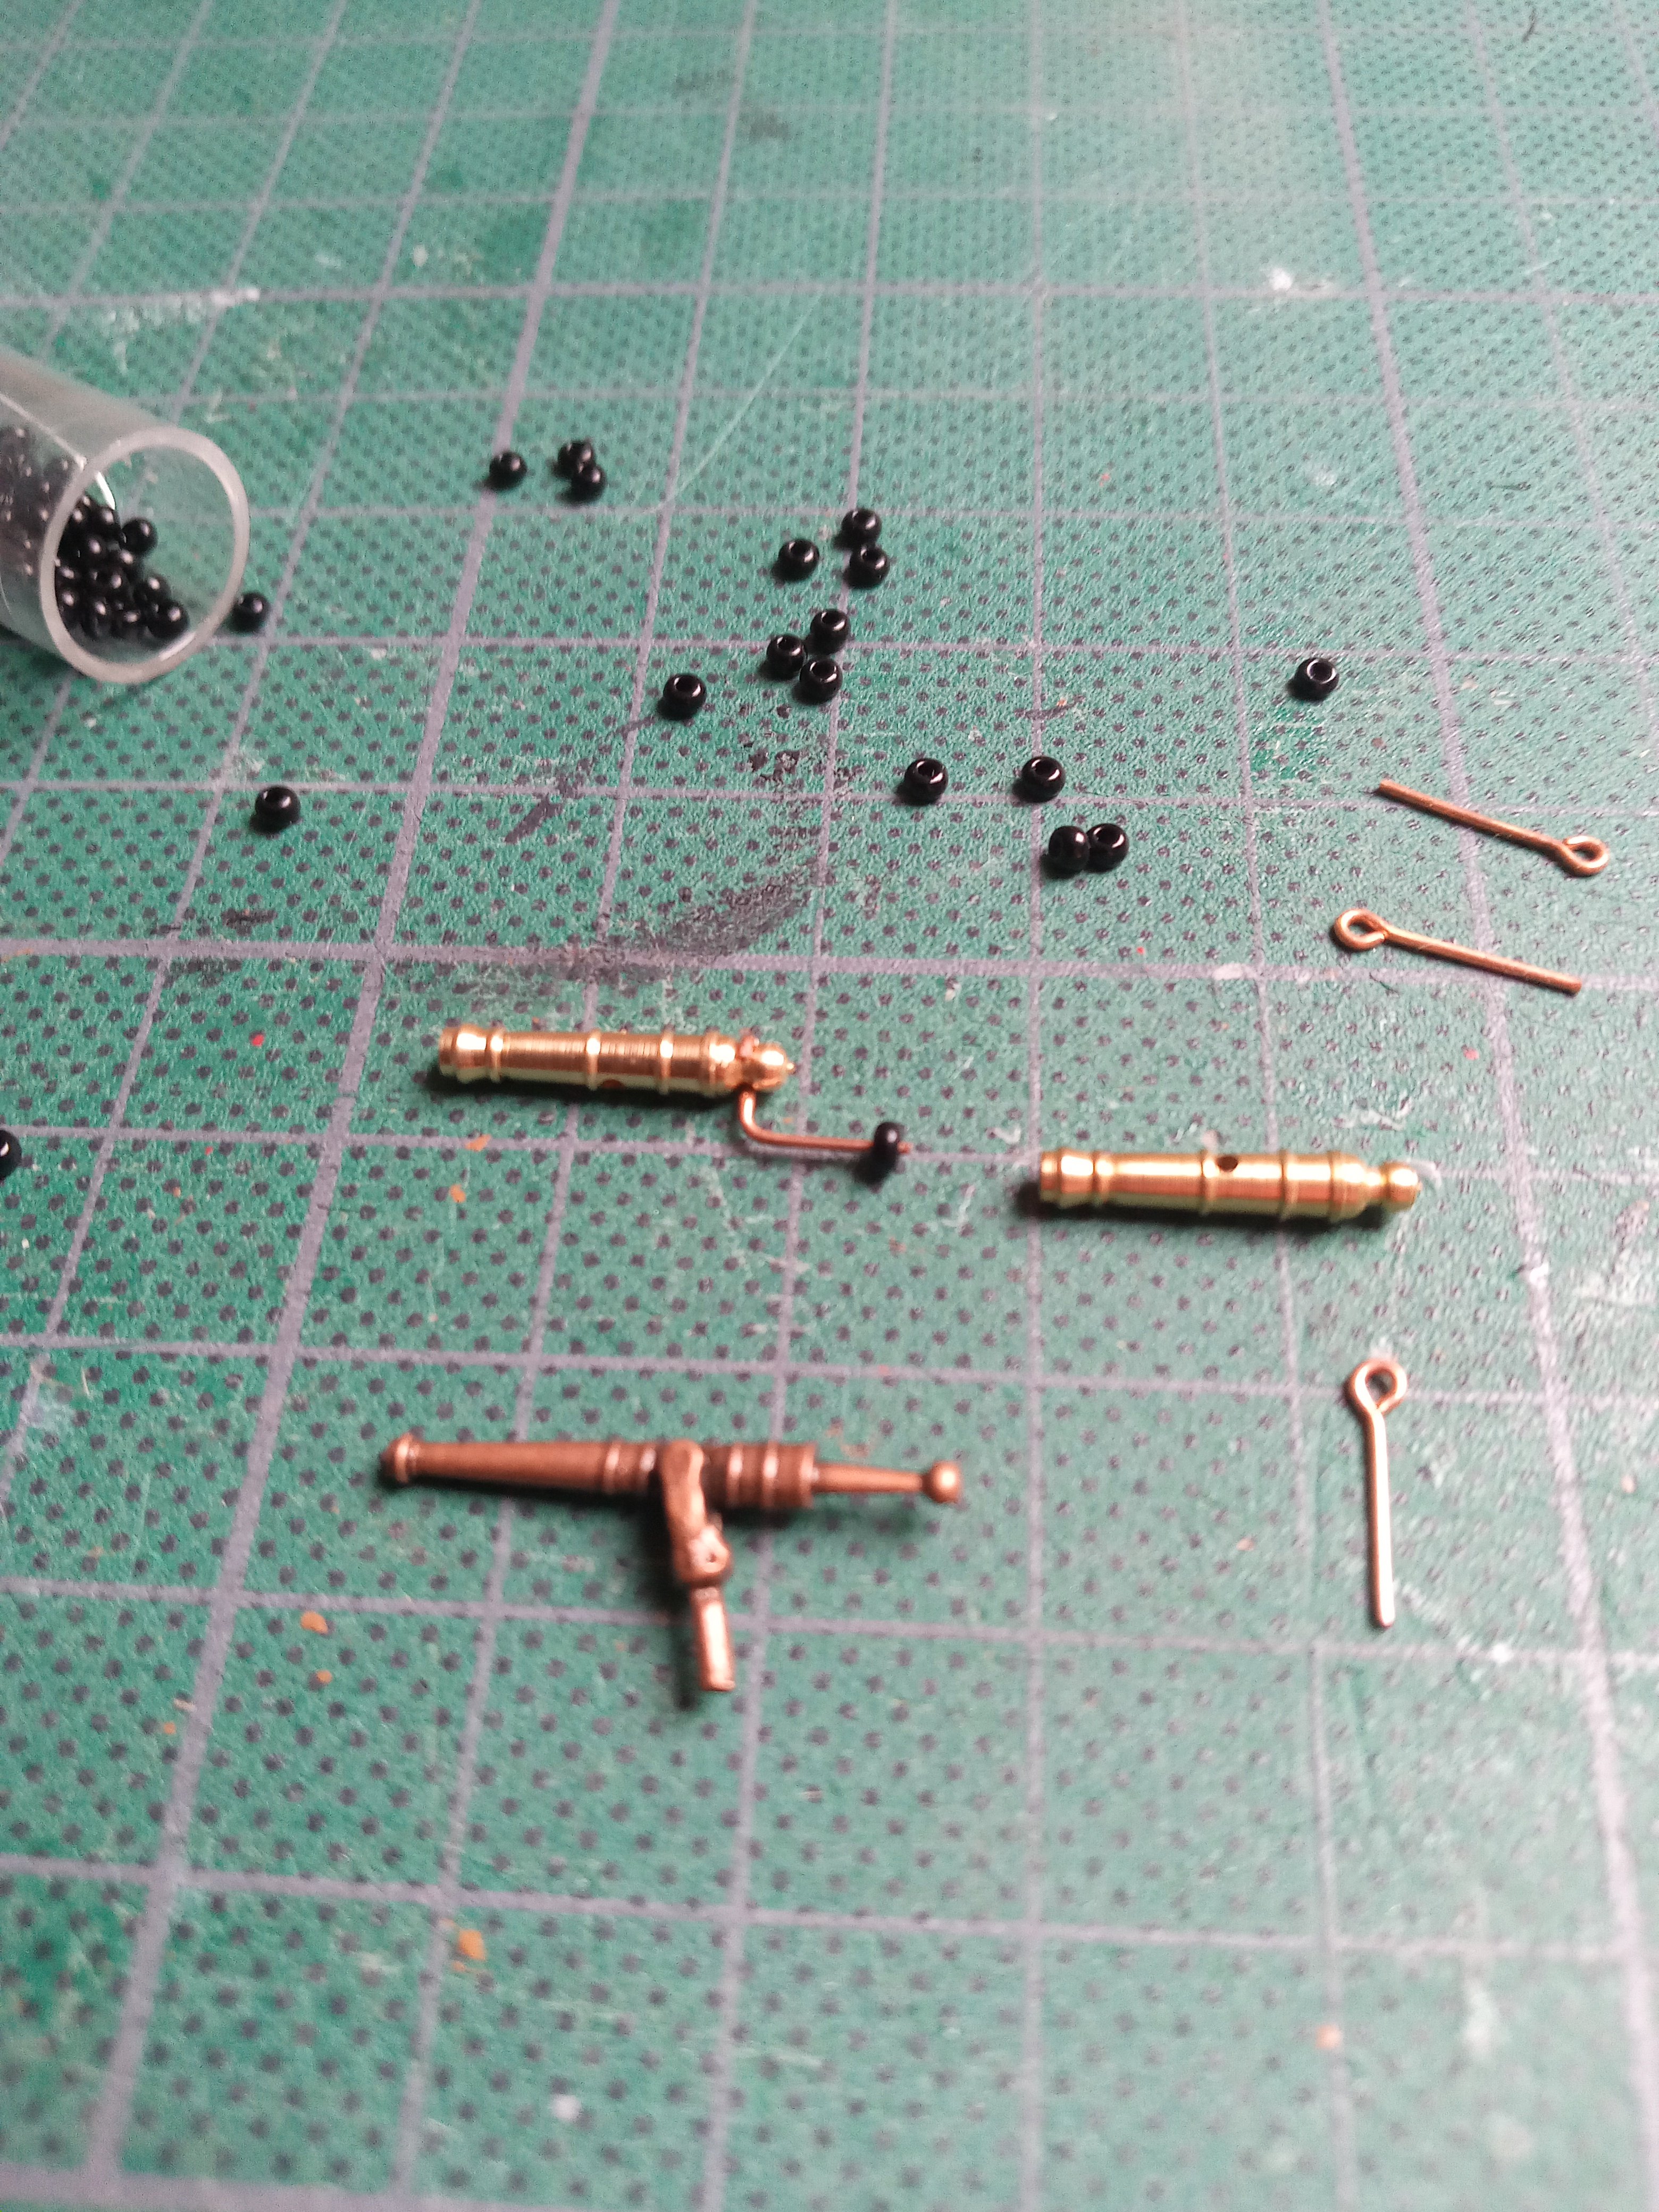
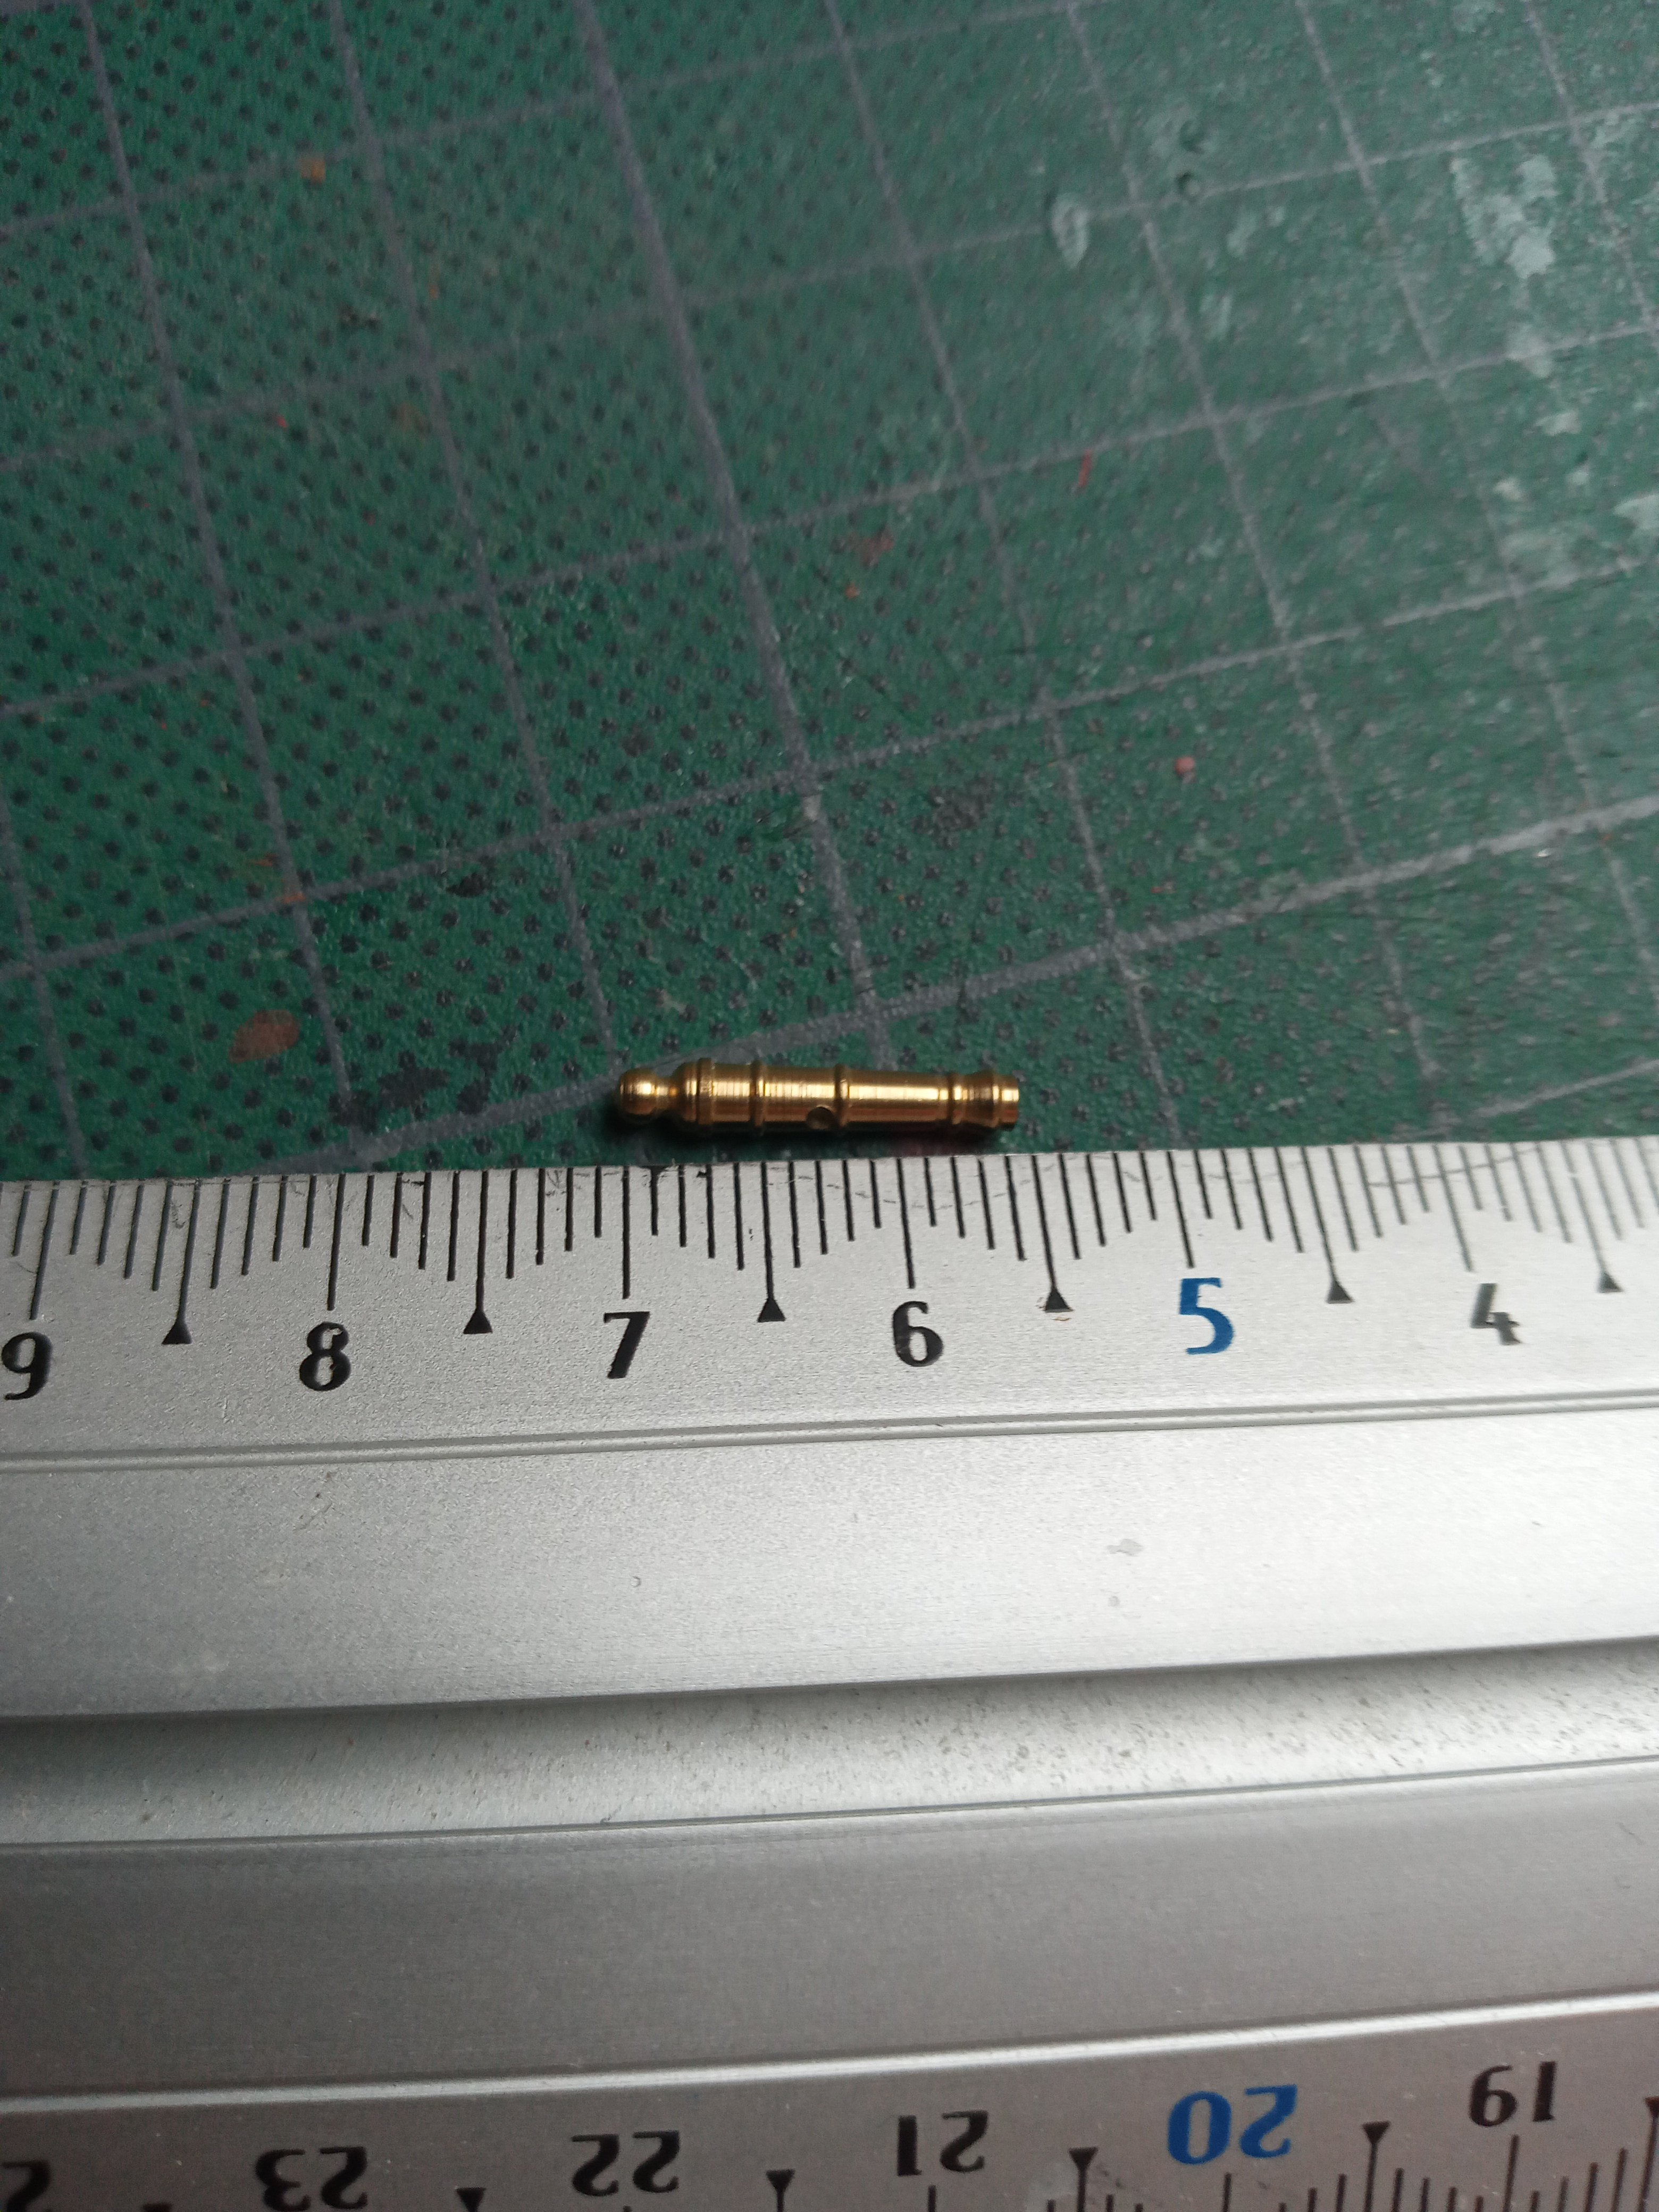
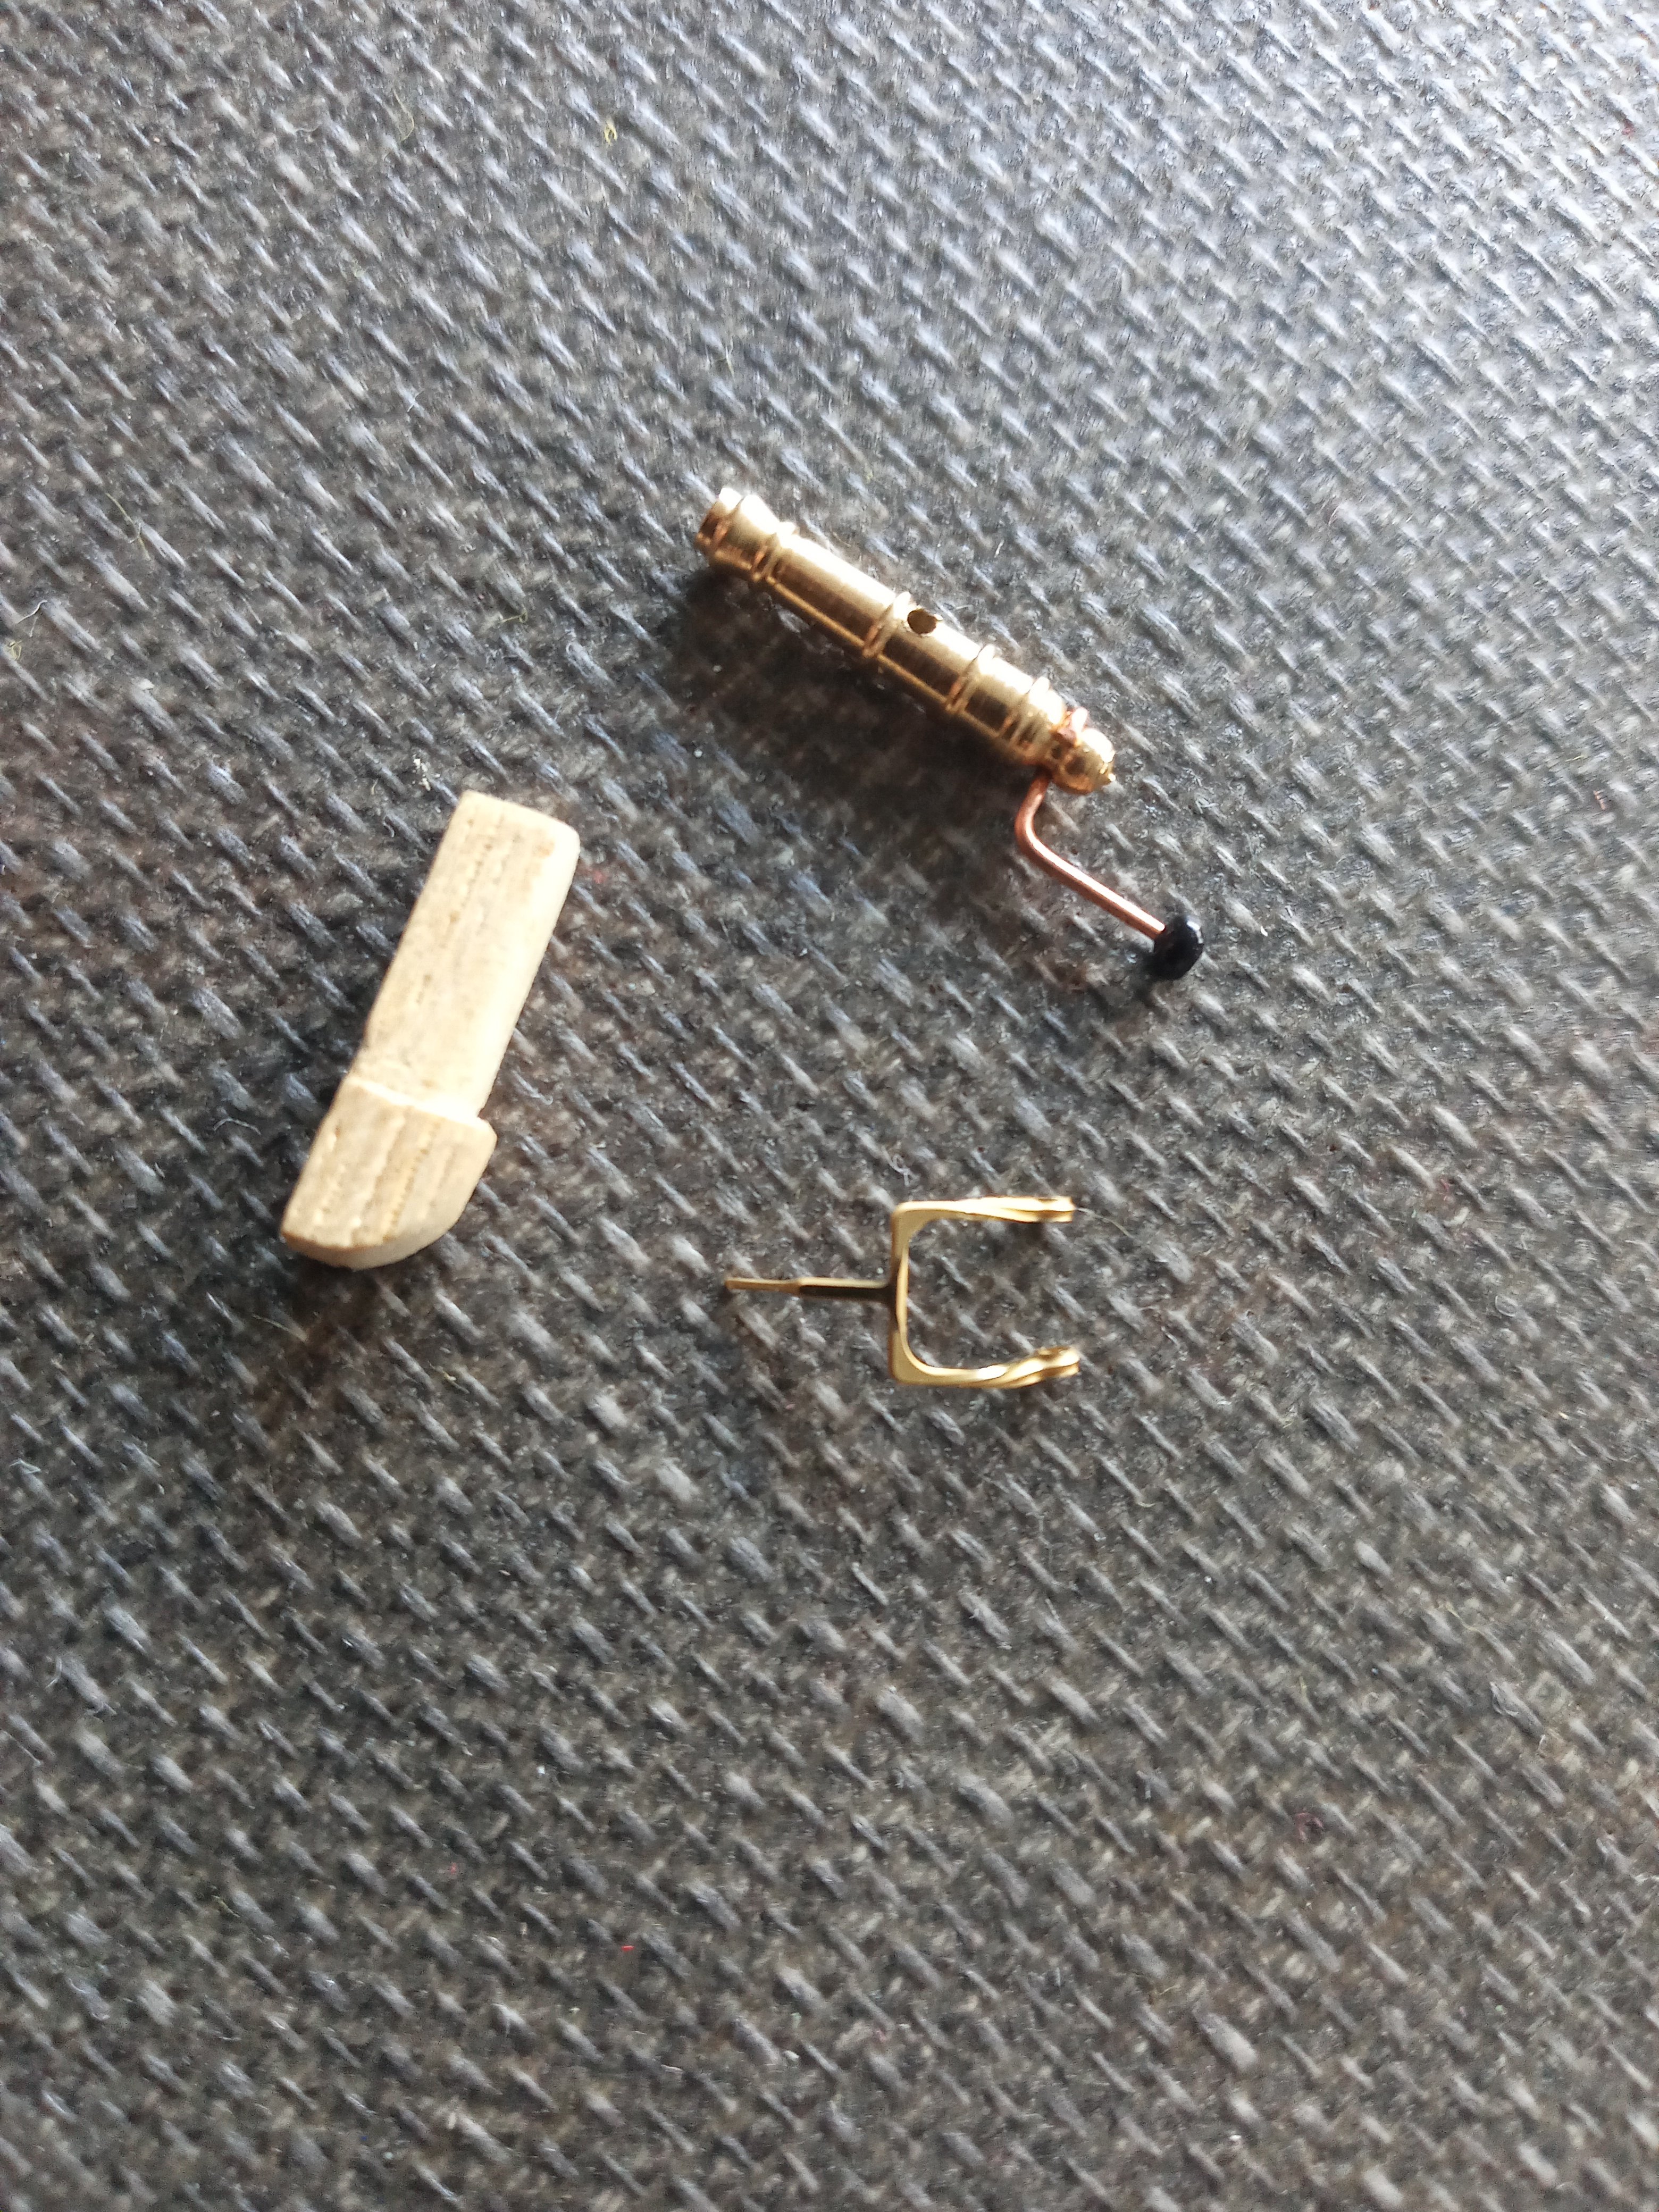
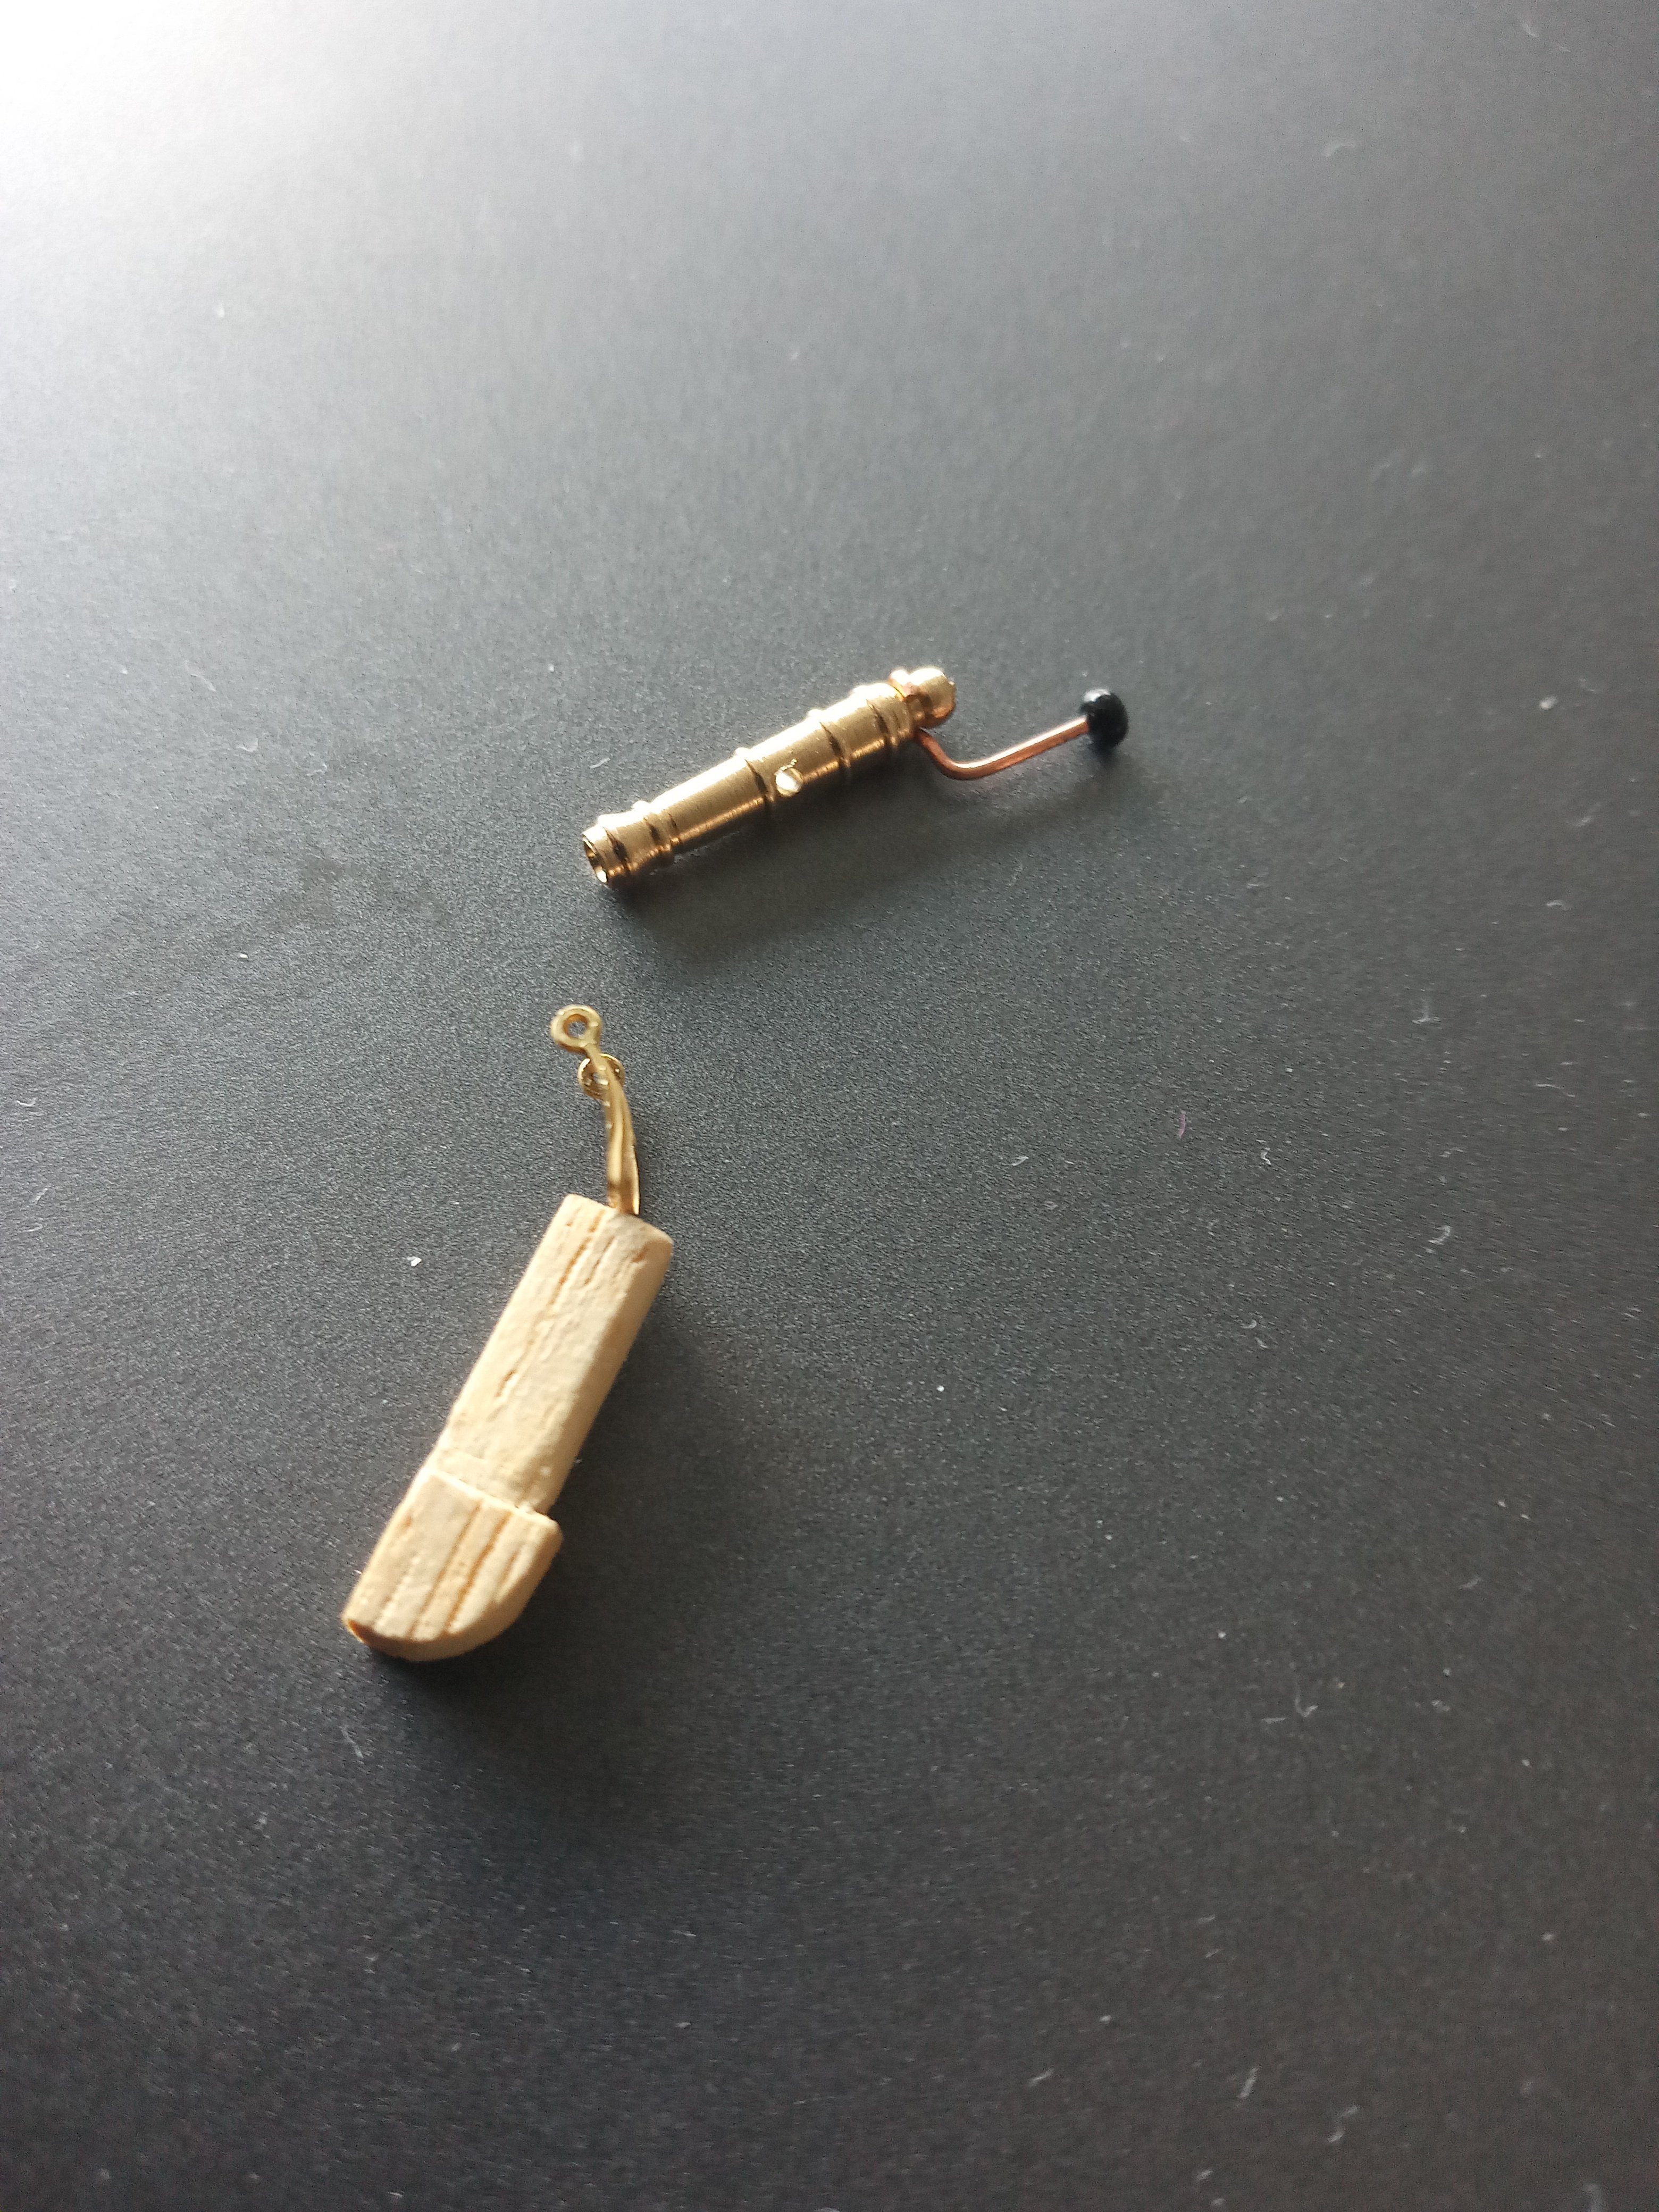
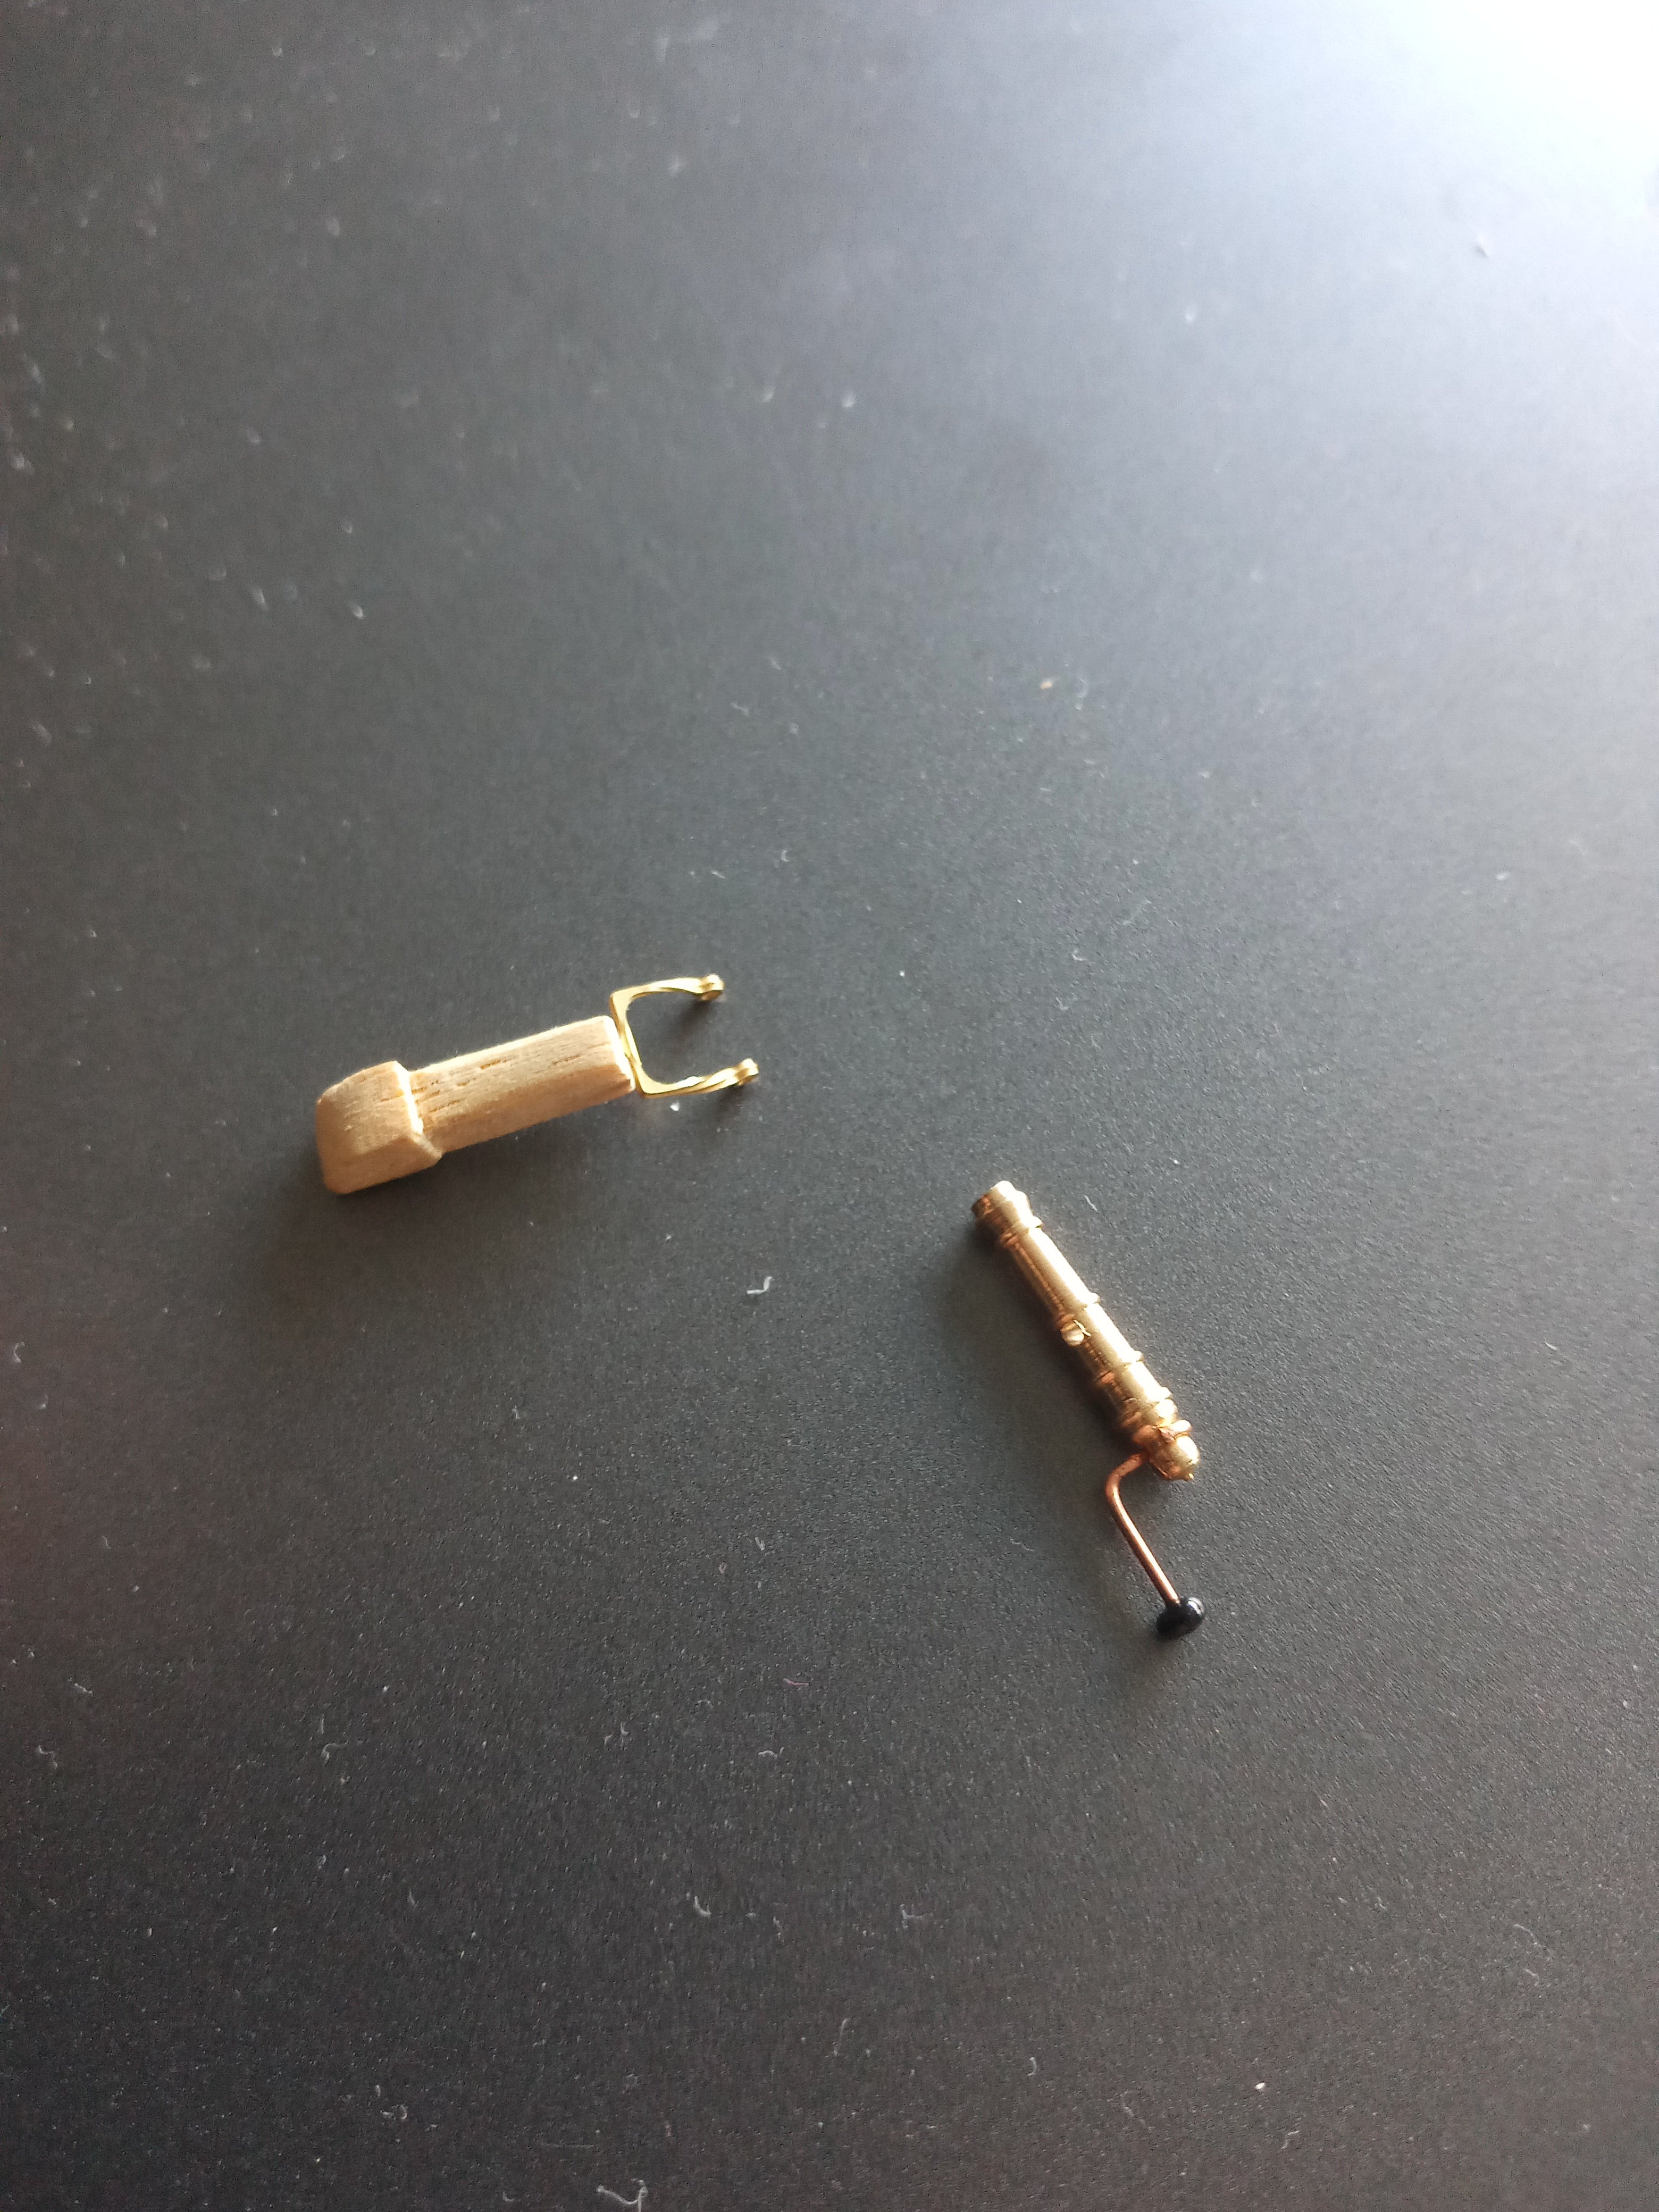
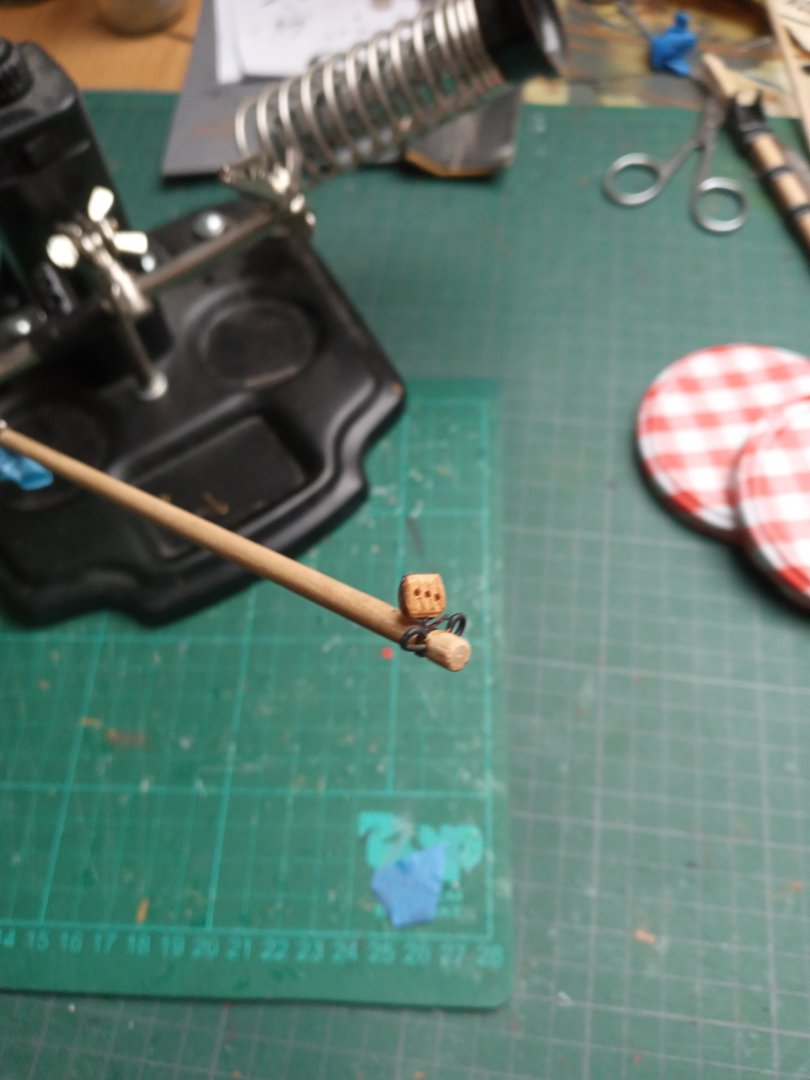
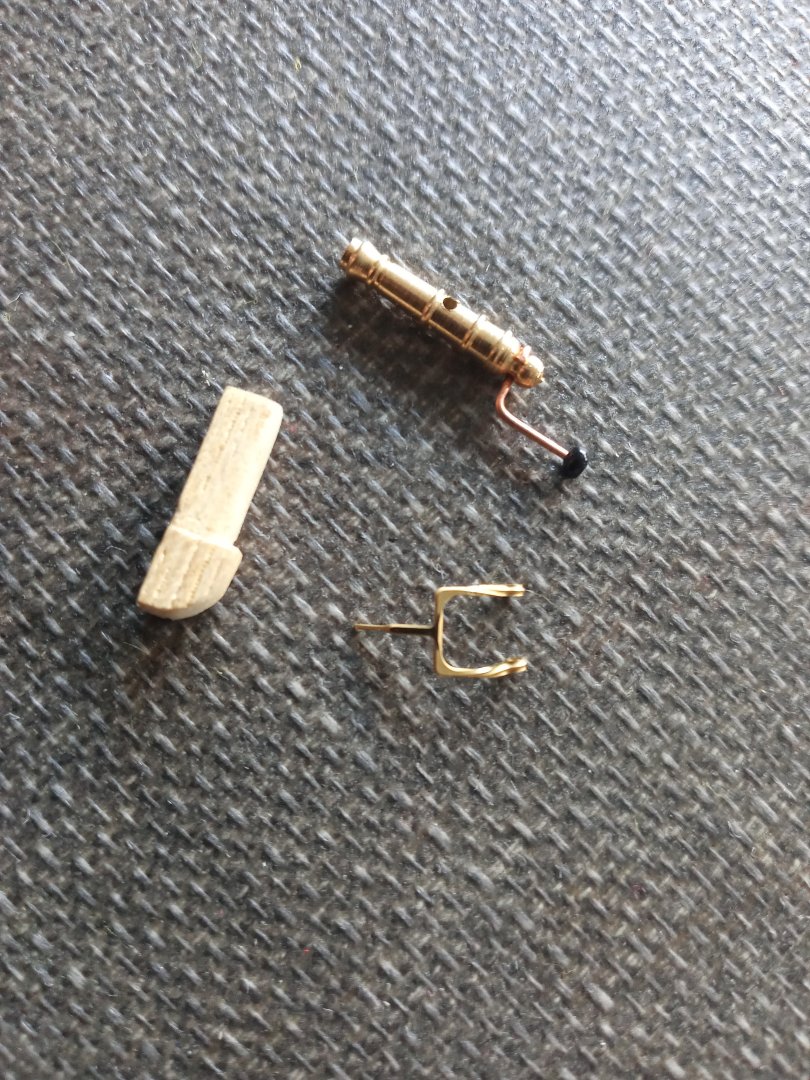
Hi Folks, Regarding the swivel guns, I think we may have a breakthrough. 1) The guns : purchased them in the aftermarket, I believe the brand is Mantua 2) The handle : I made it eassy on myself. Open an eyelet ( gently ) put the loop around the cascable and gently close and fix the loop. Bend 90°. On the tail I glued a sort of a "mini-donut". The latter is available in handcraft-hobby stores. 3) The fitting : as I'm not going to install the hammocks, I used the PE parts for this purpose. 4) Wooden support : made out of 4x4mm birch. Not the ideal material but imho better than walnut. The availability of e.g. boxwood in the neighourhood is a bit questionable. Accordingly to instructions drill a 1mm hole in a 3x3mm walnut piece....as this particular piece has a slot in that area....well, good luck with that. Some extra sanding and painting will do the job. After some research, I noticed other , probably better solutions but often they involved soldering, etc...I was not into that. Not the ideal, but I can live with it. Any thoughts on this are welcome.


-
Et voilà. next update : next of the deck stuff especially swivel guns. This might take a while, I'm not very enthousiatic about what the kit provides regarding the matter.


-
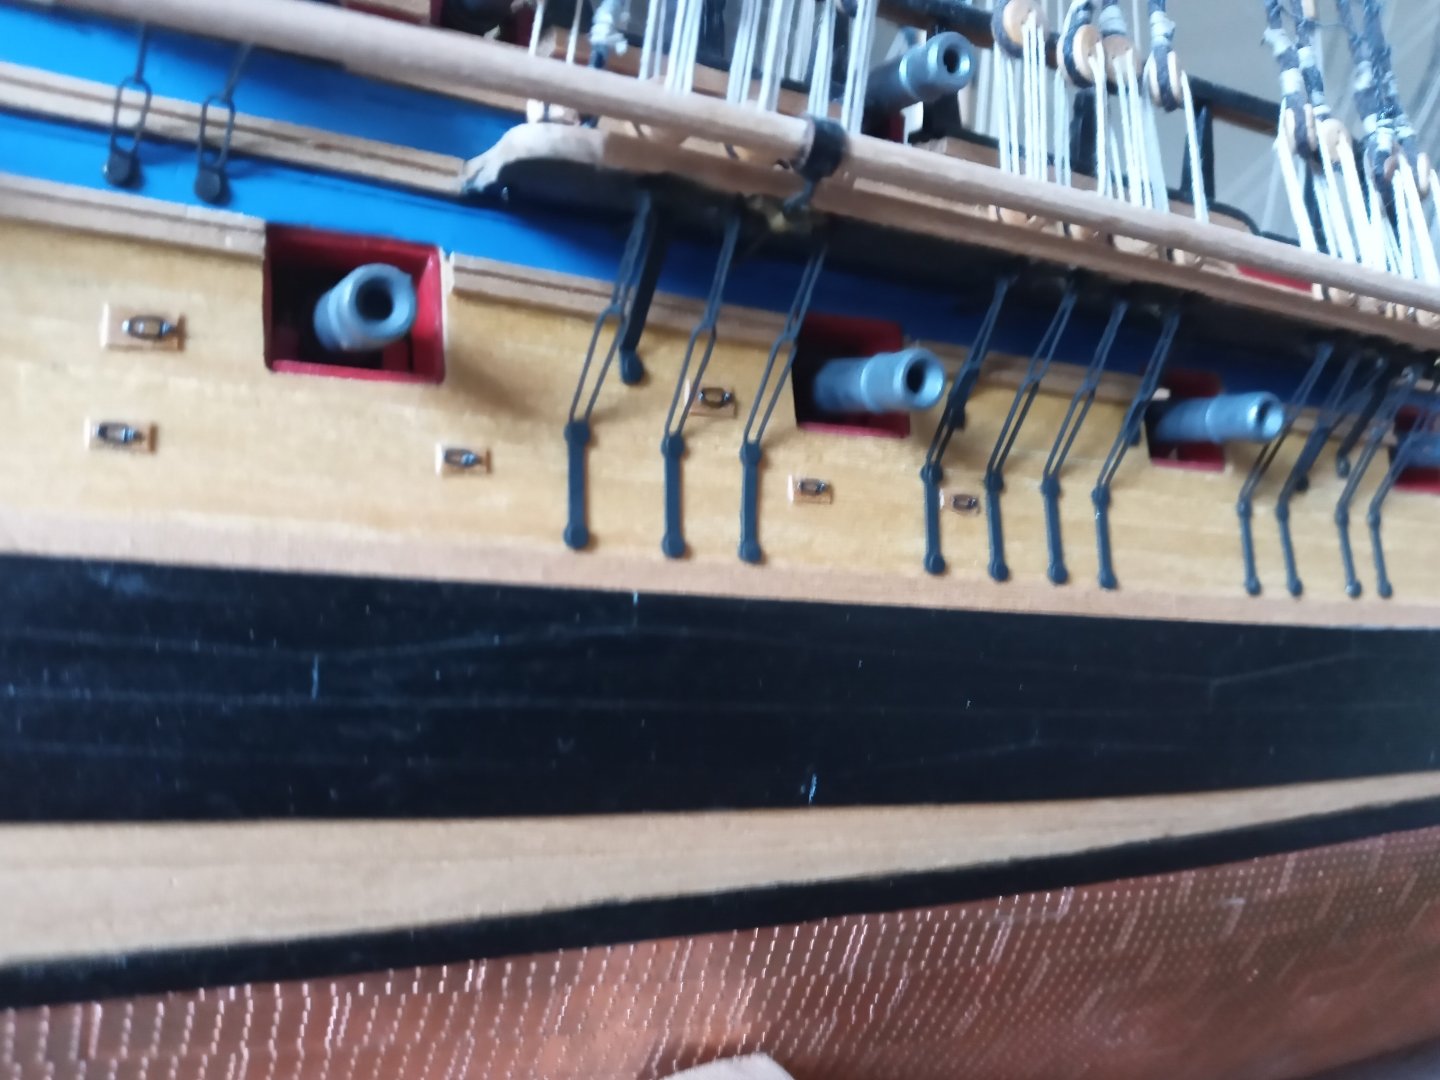
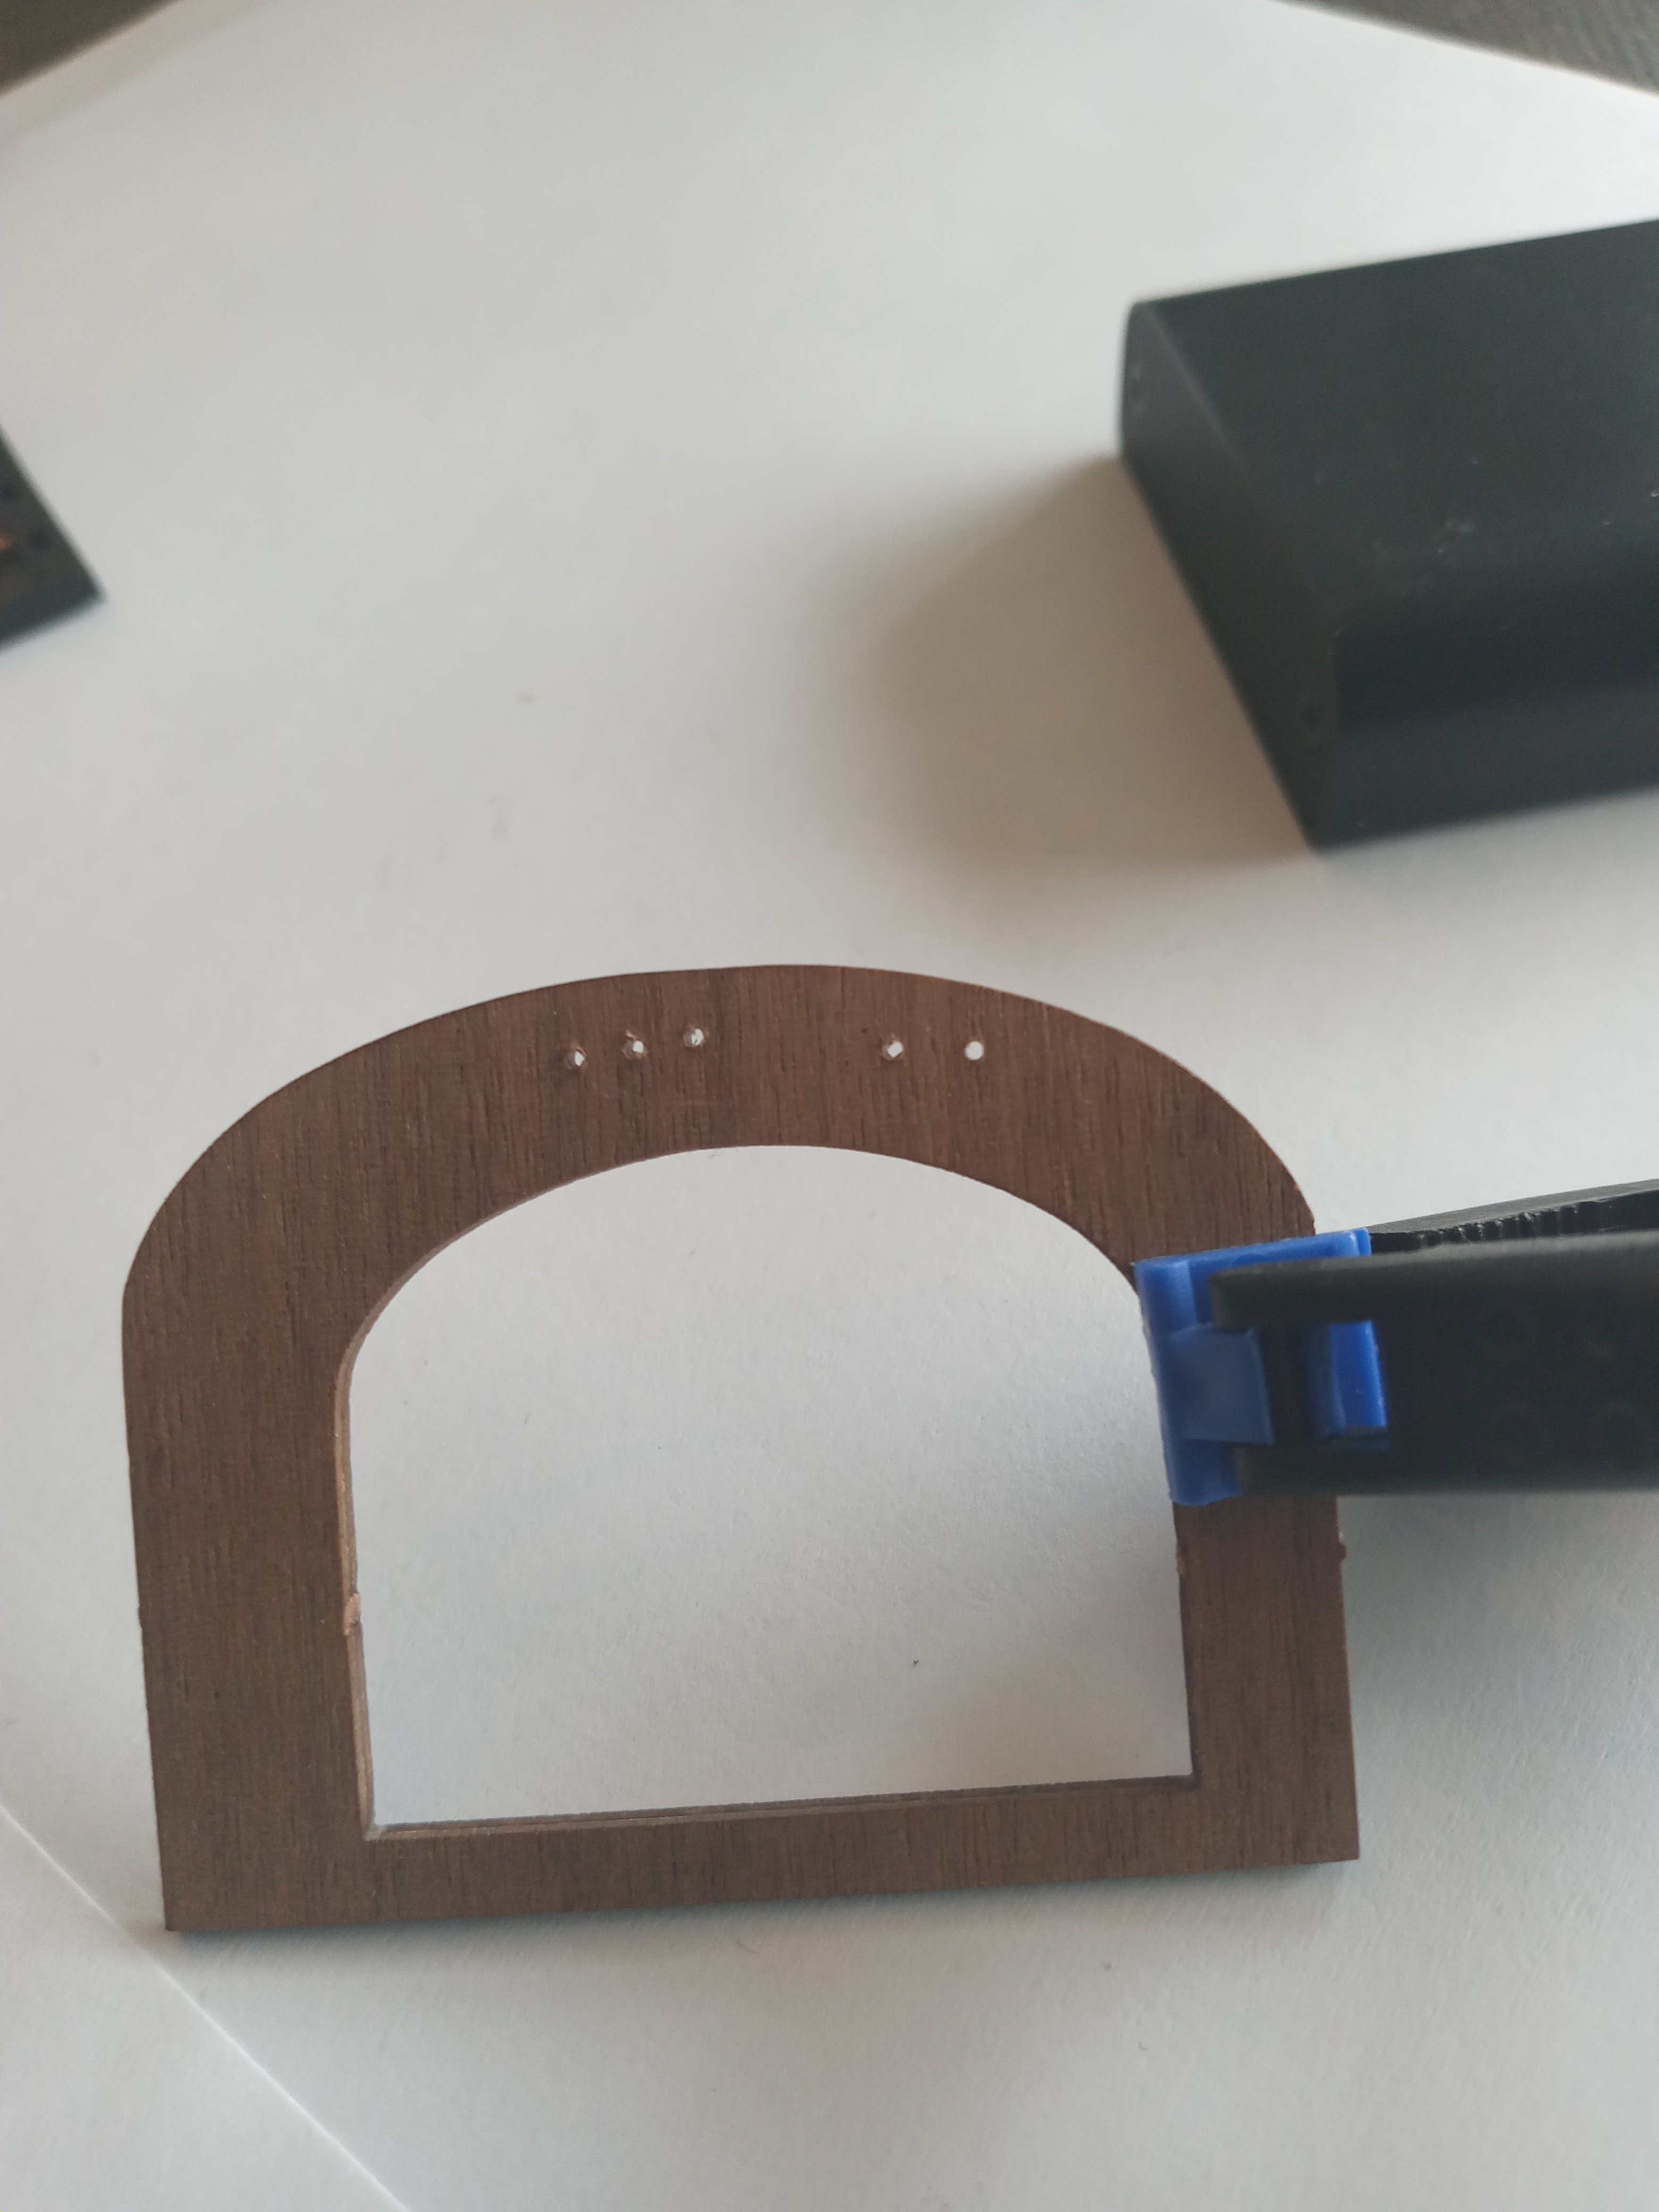
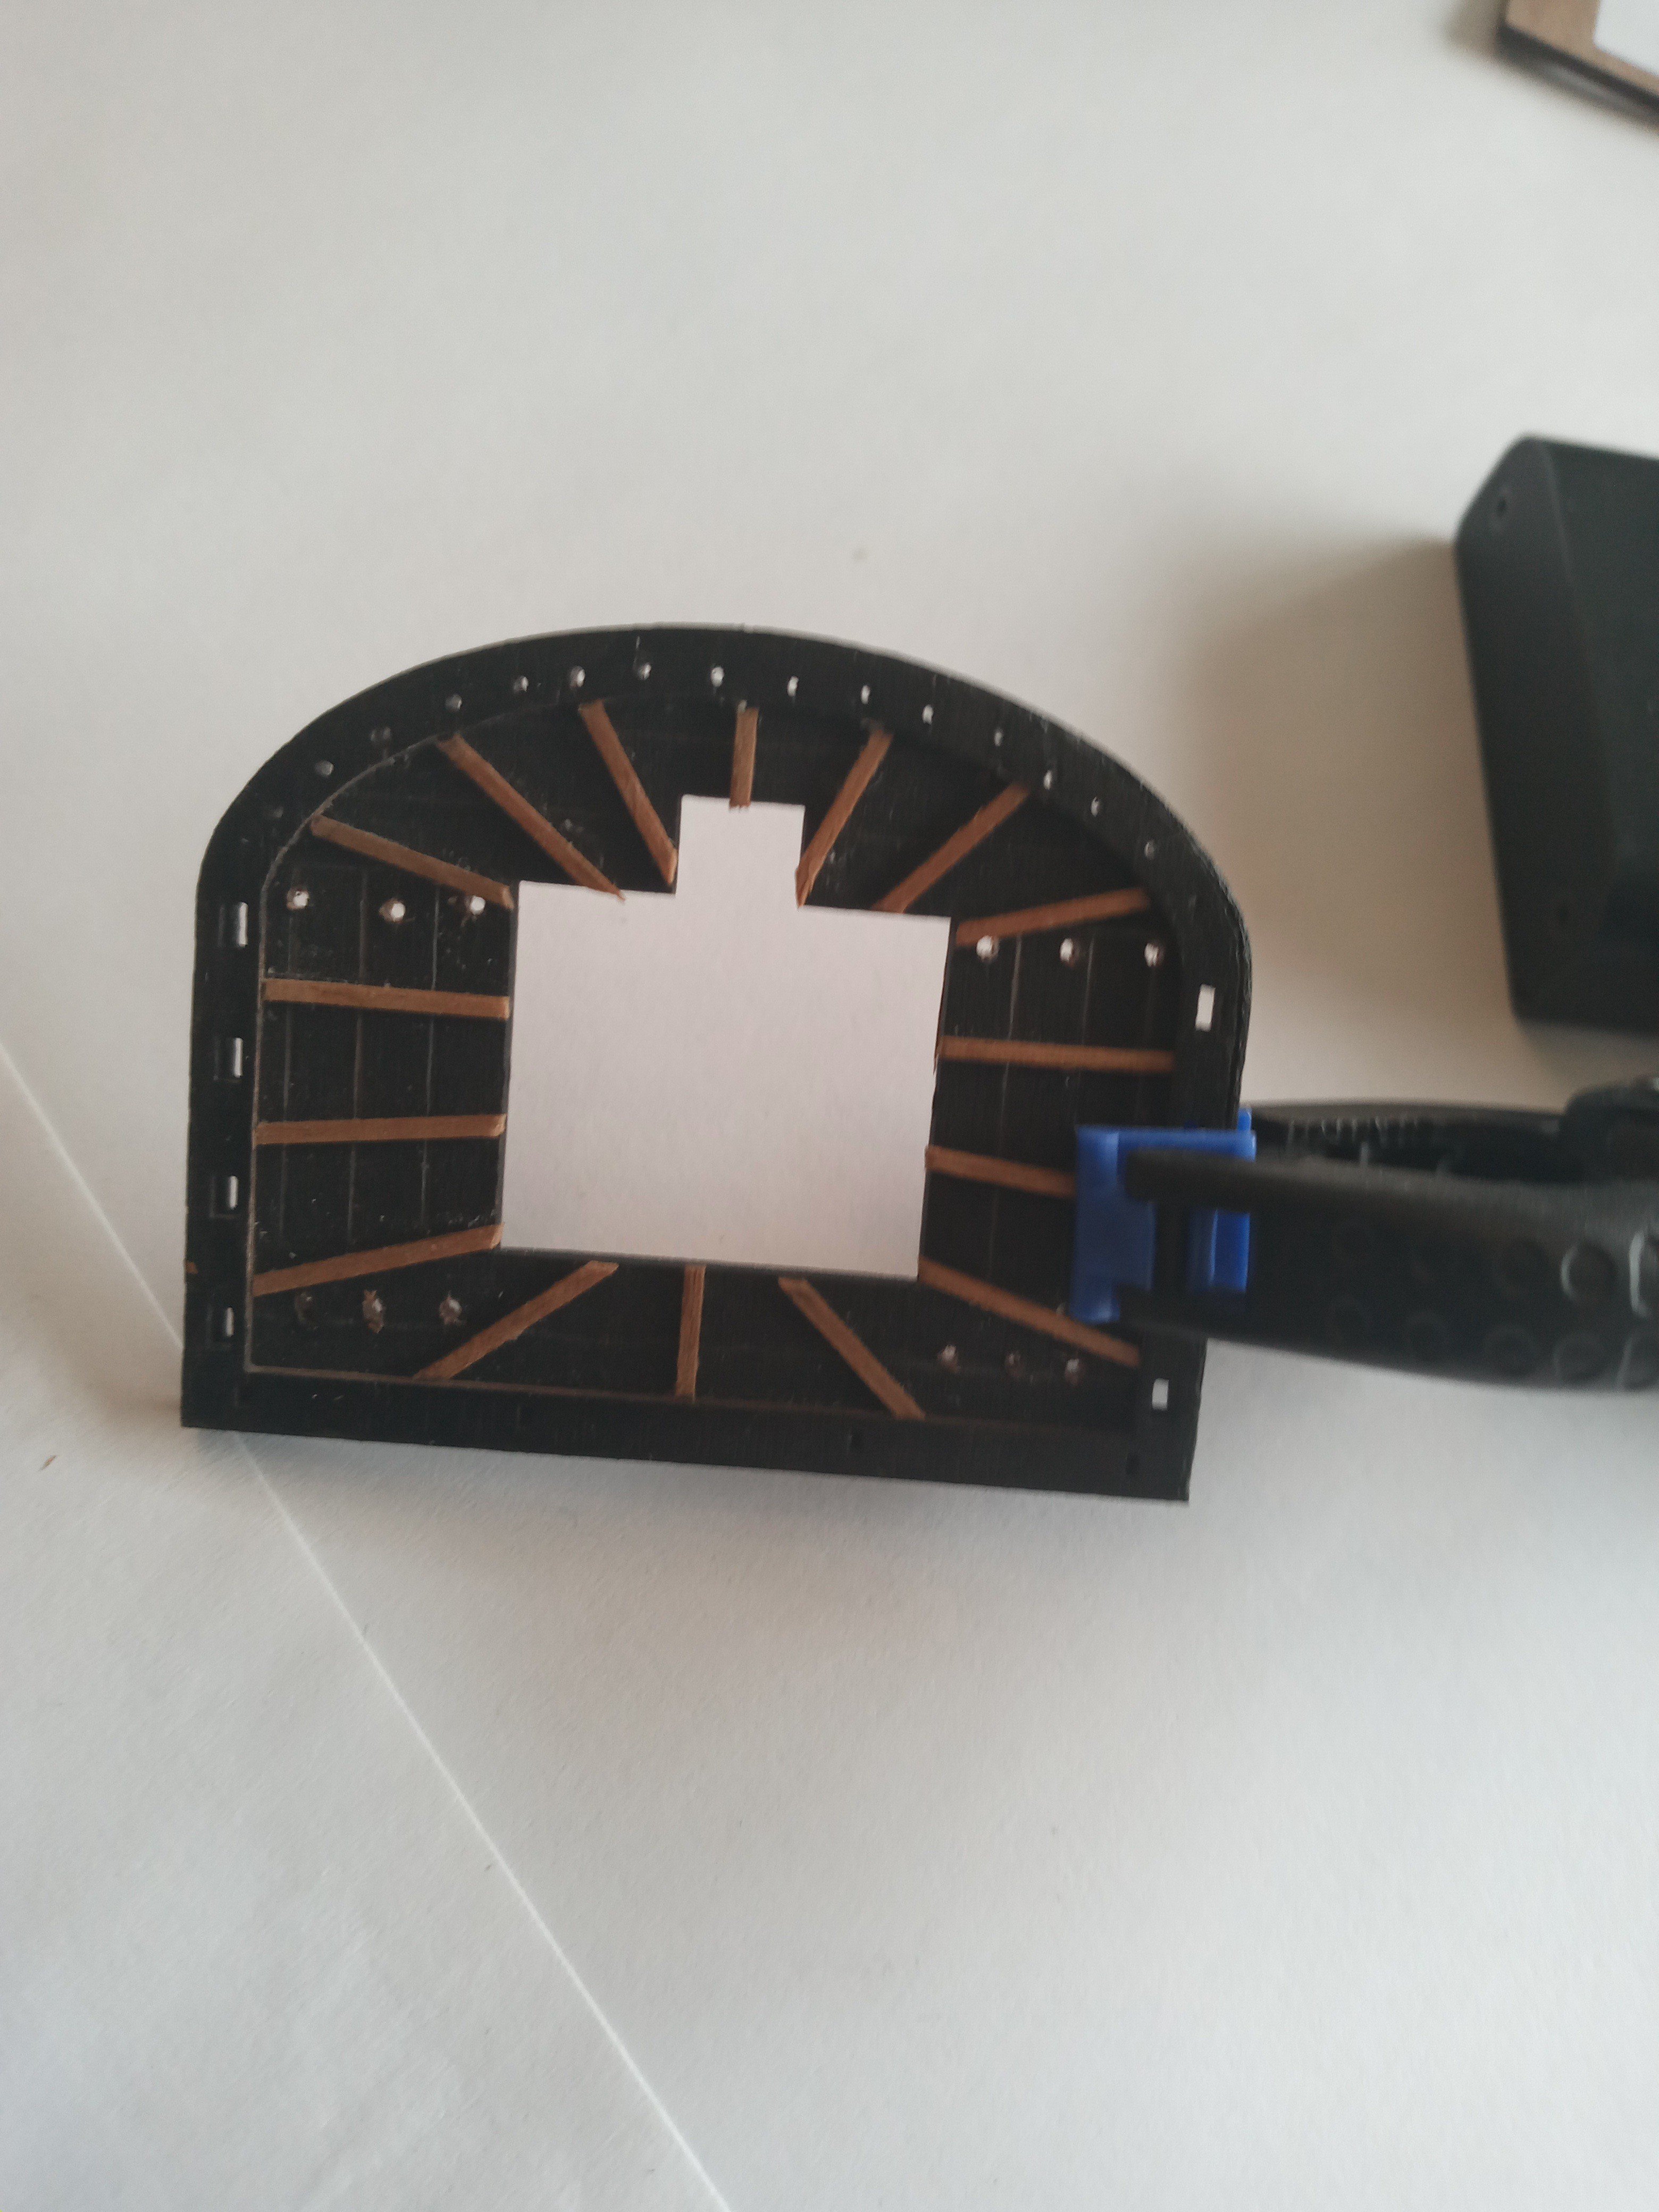
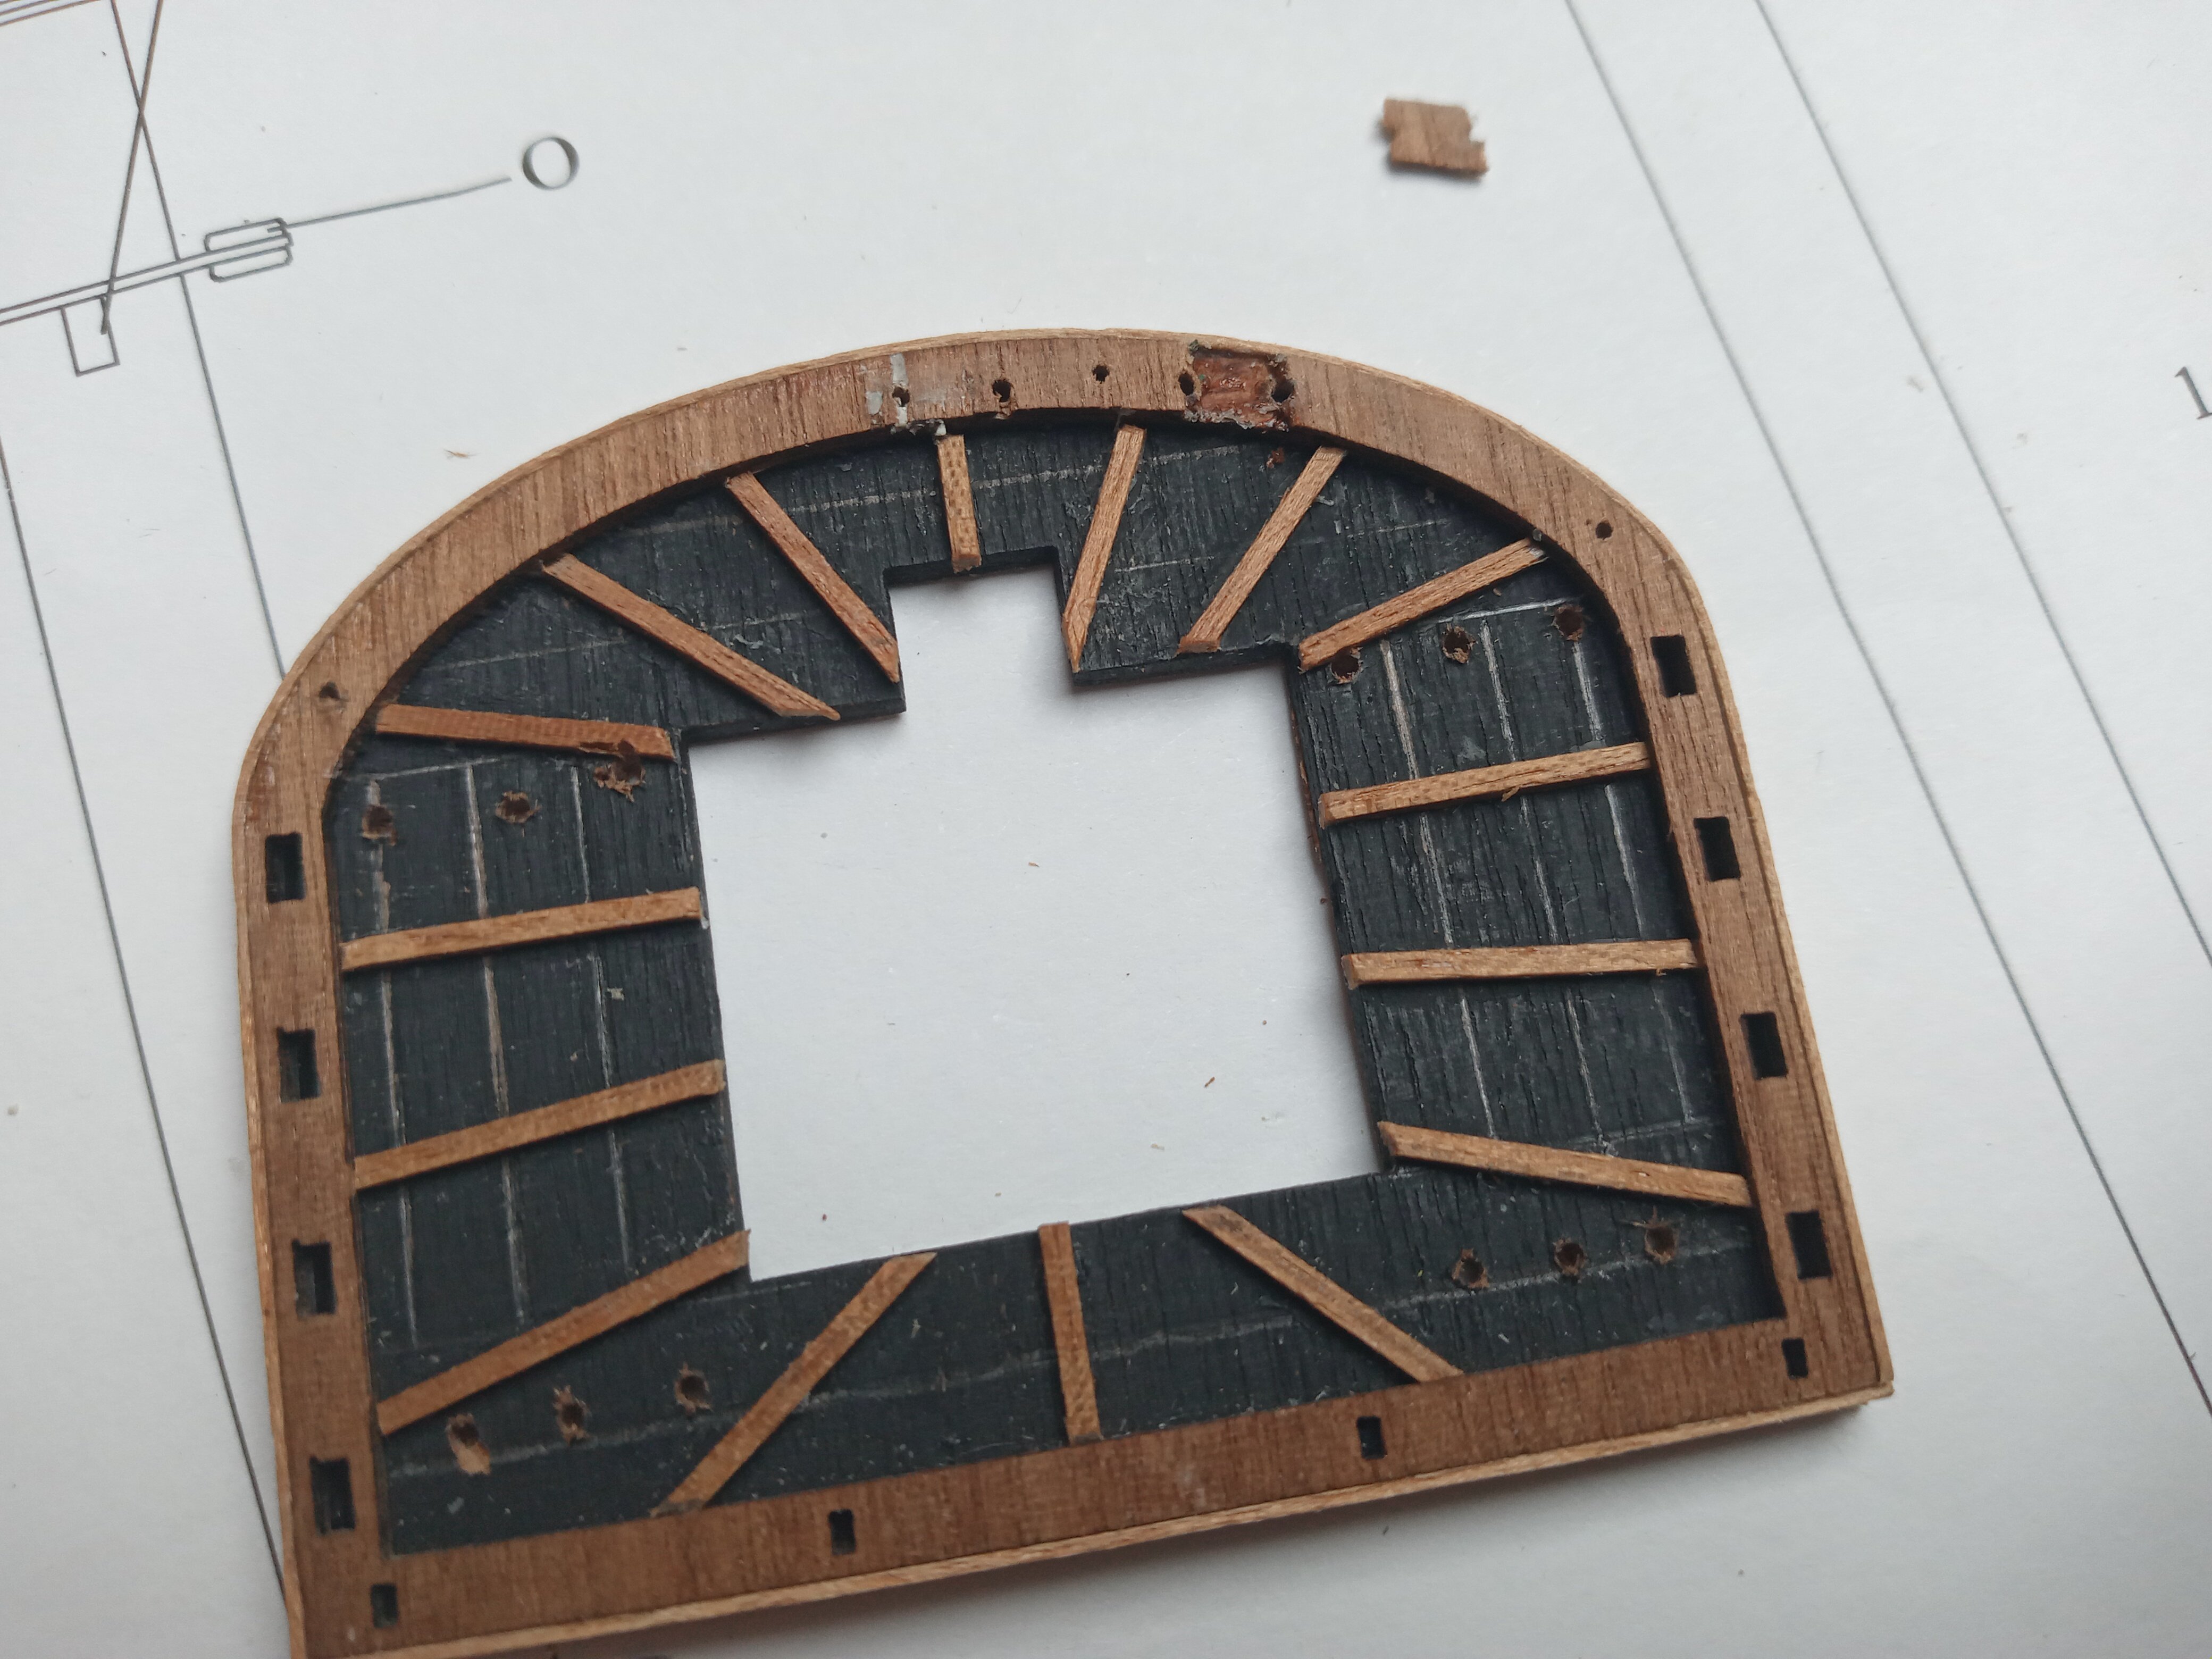
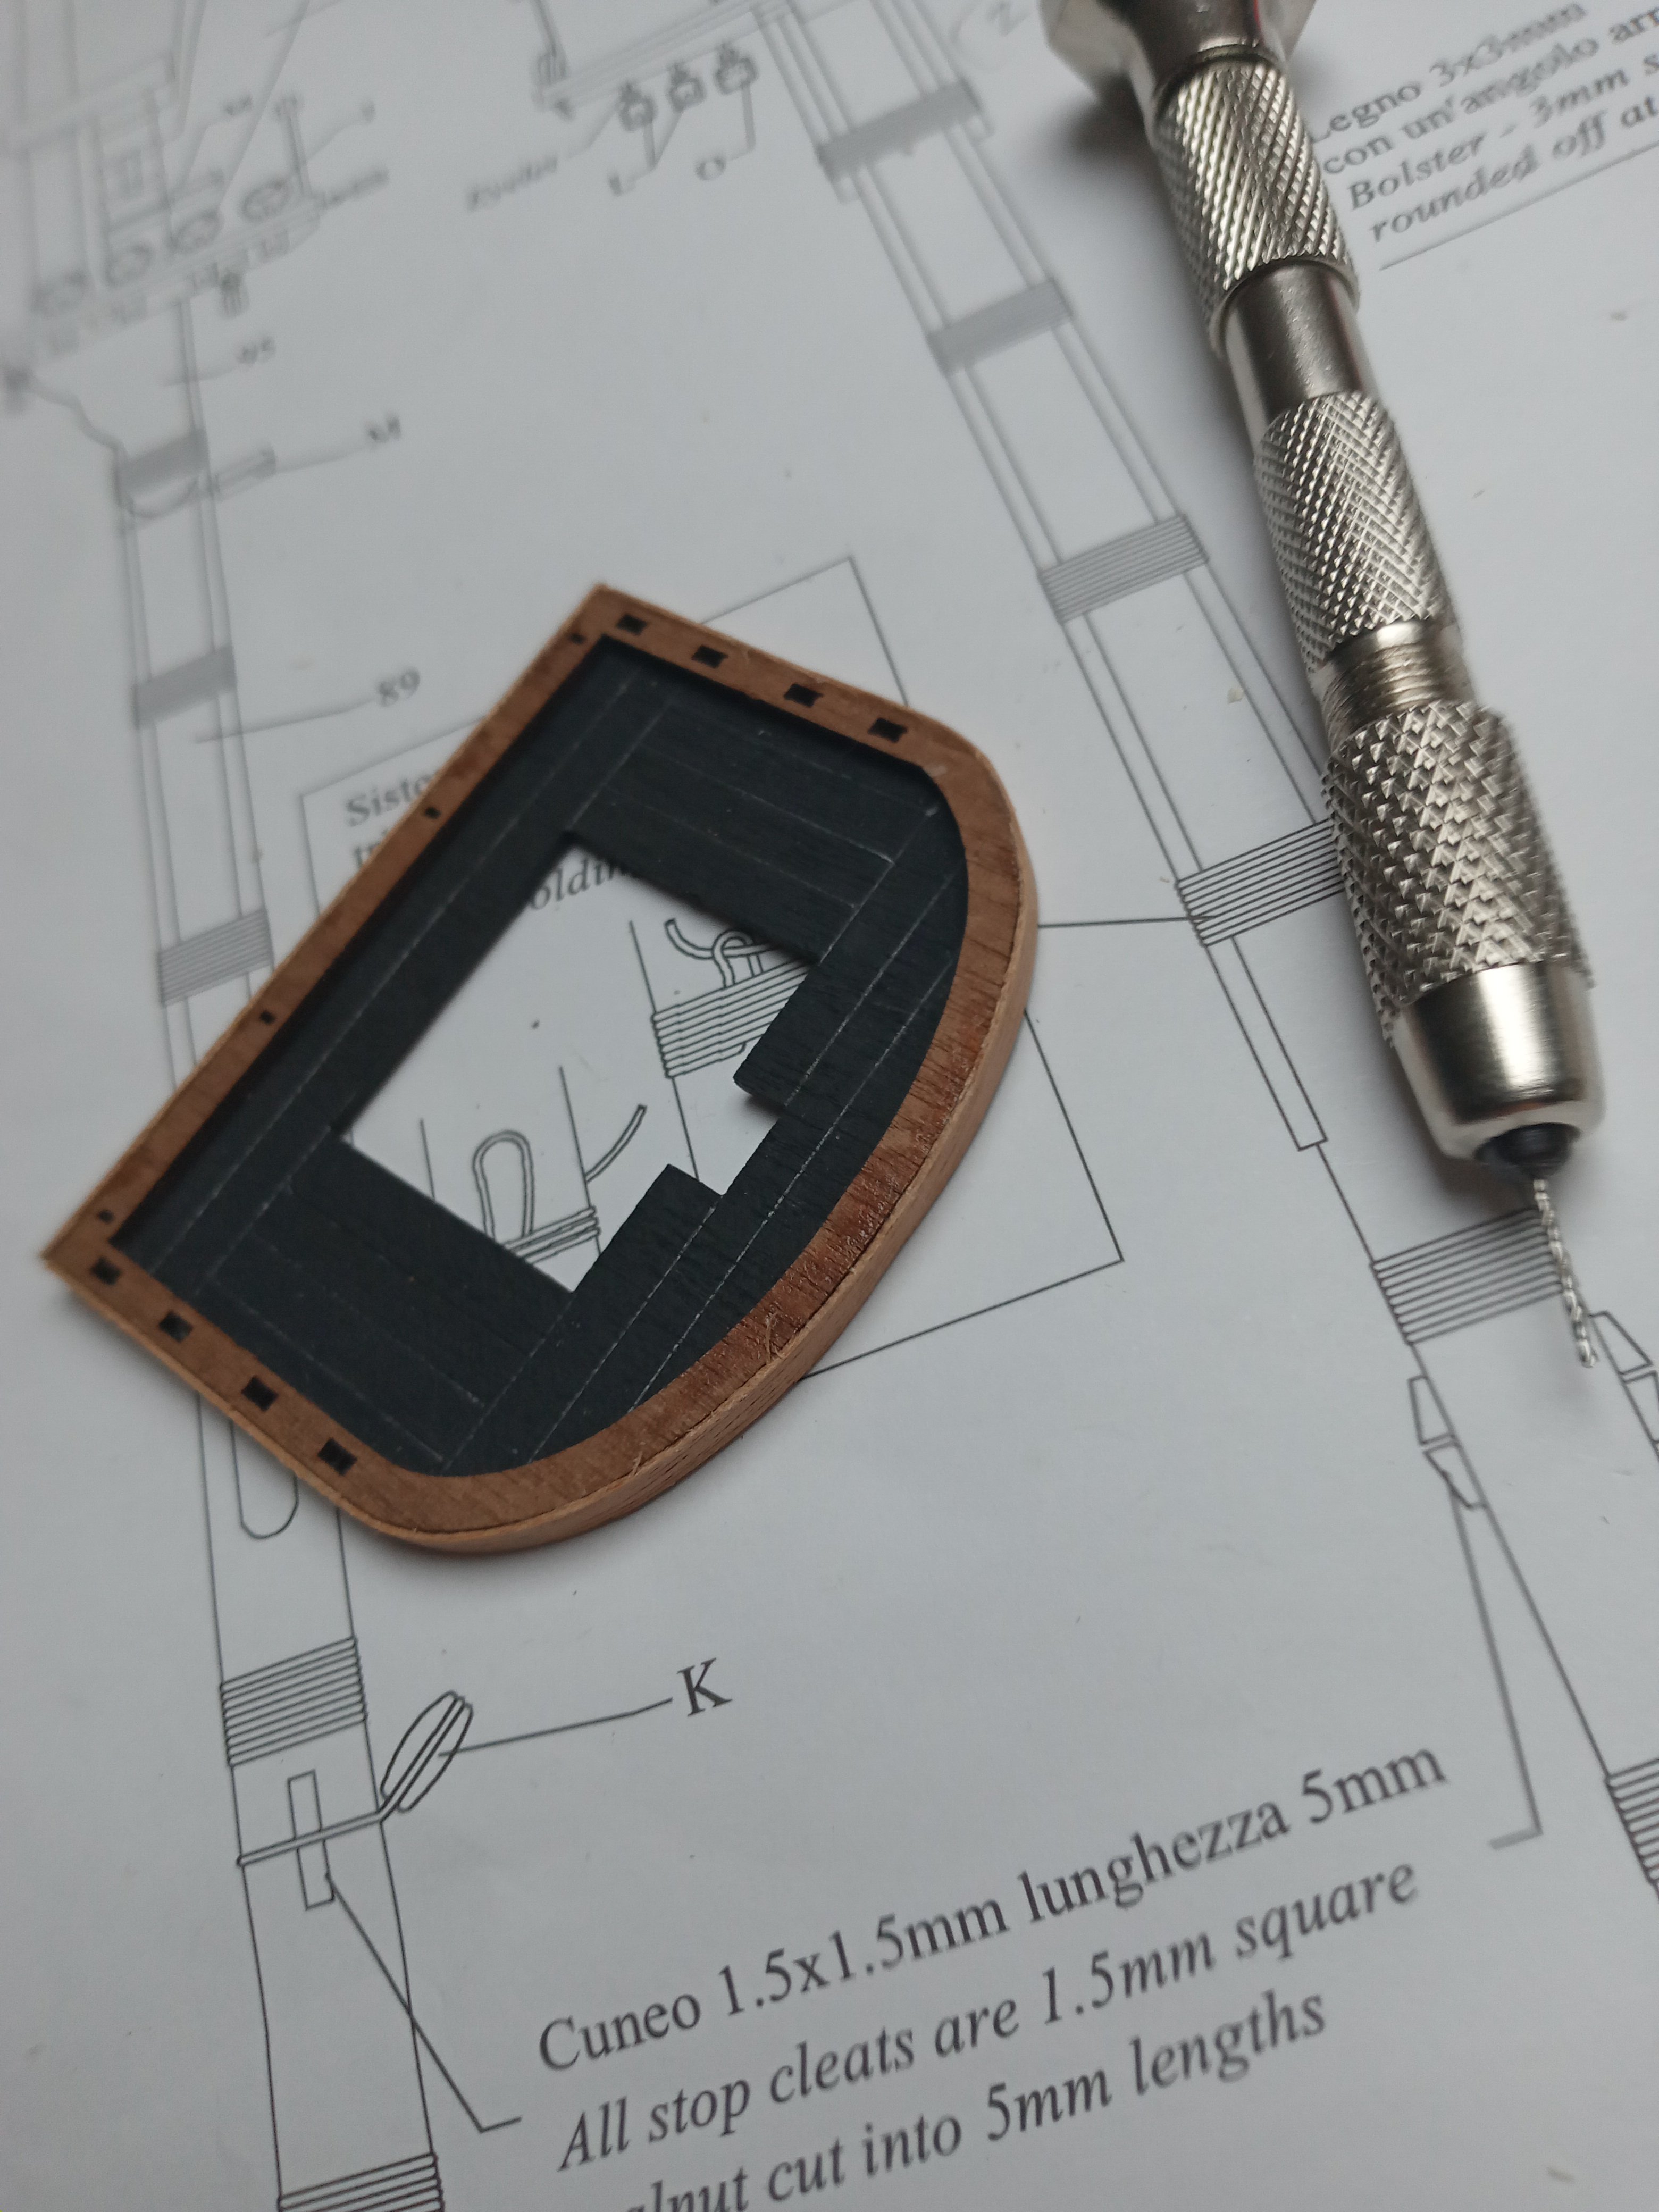
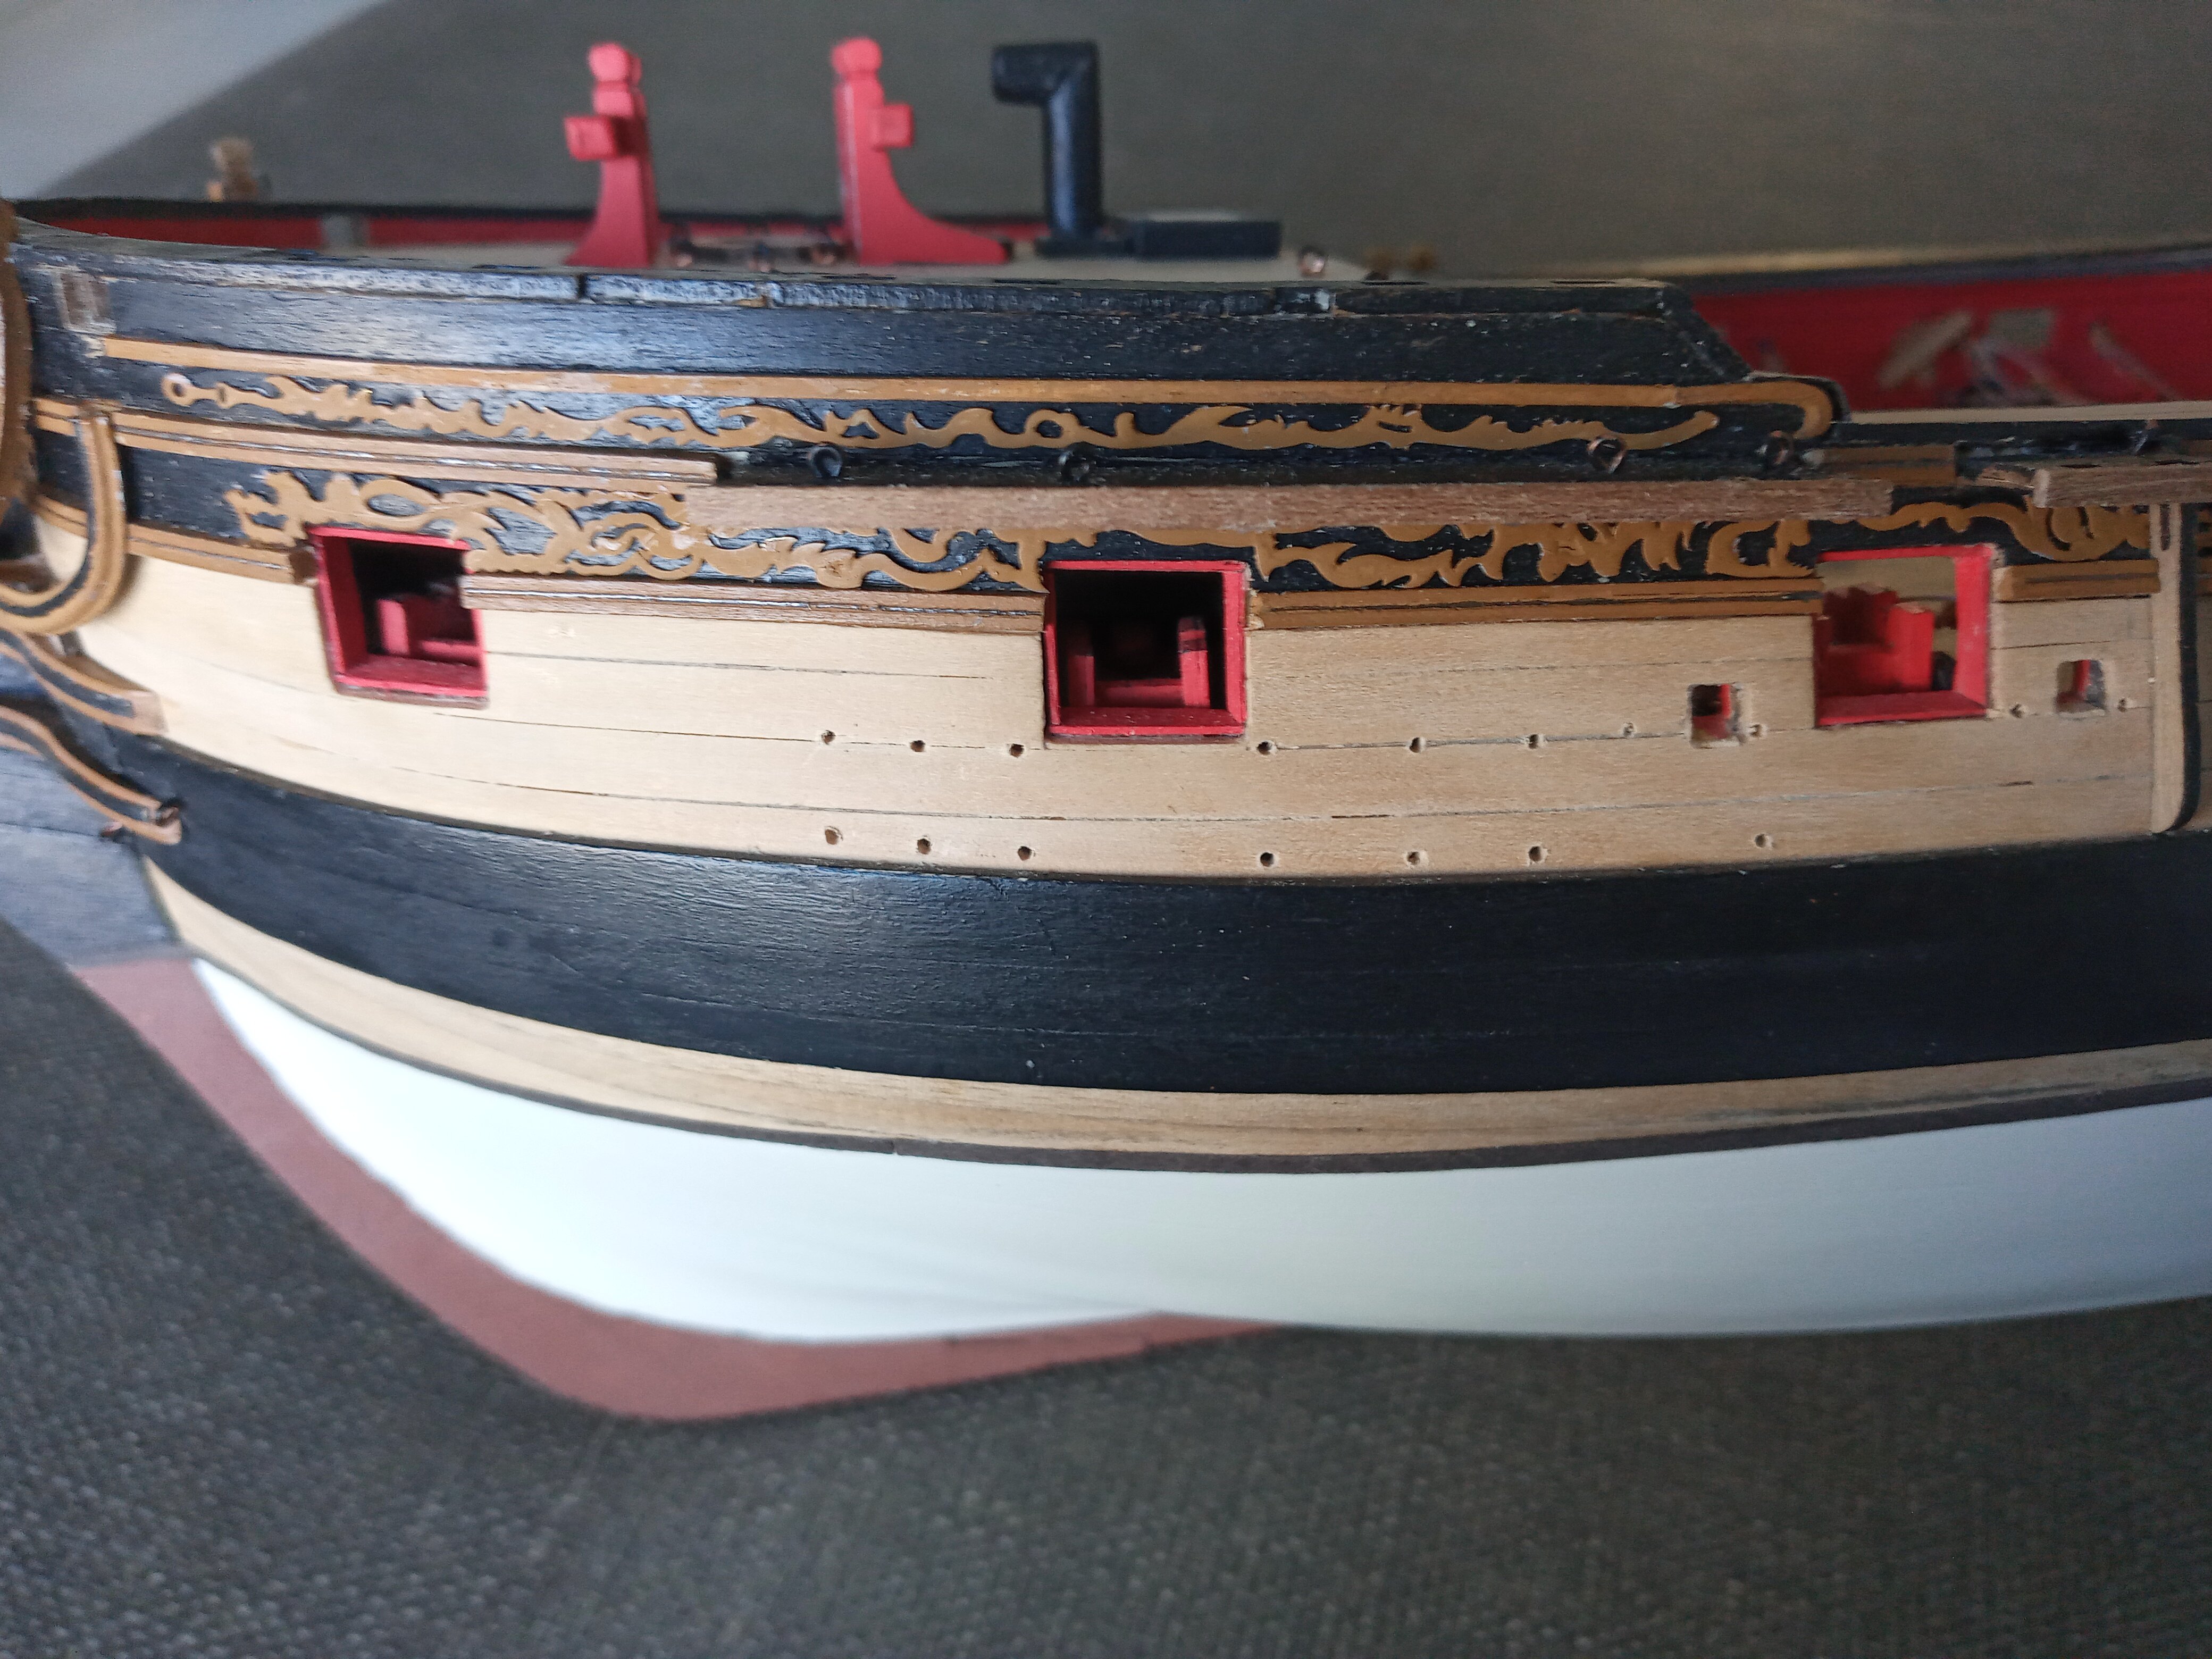
At last : chainplates & channels done on both sides. At present and not provided by the kit an addition to the gallion. I admit it's a simplified version but I'm working with 1.5 mm plywood. Thus I can't take any chances. Although, I have no clue regarding the purpose of this item.

-
Probably ( or certainly ? ) not by the book.... Adding clinker planks on the surface involved and painting accordingly the quarterdeck might help but as mentioned I'm afraid this option is in opposition with the original plans ? Tiger II ? I'm amazed by the weathering effects you can admire on plastic modelling fora ( and diorama's )
-
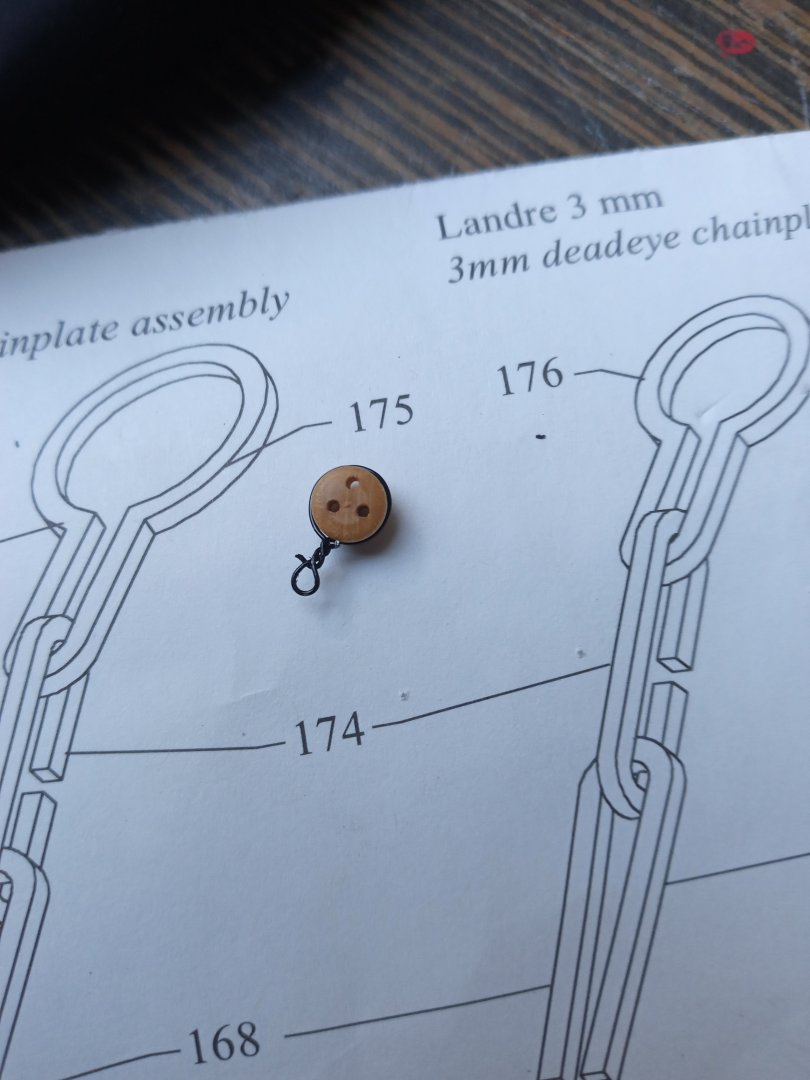
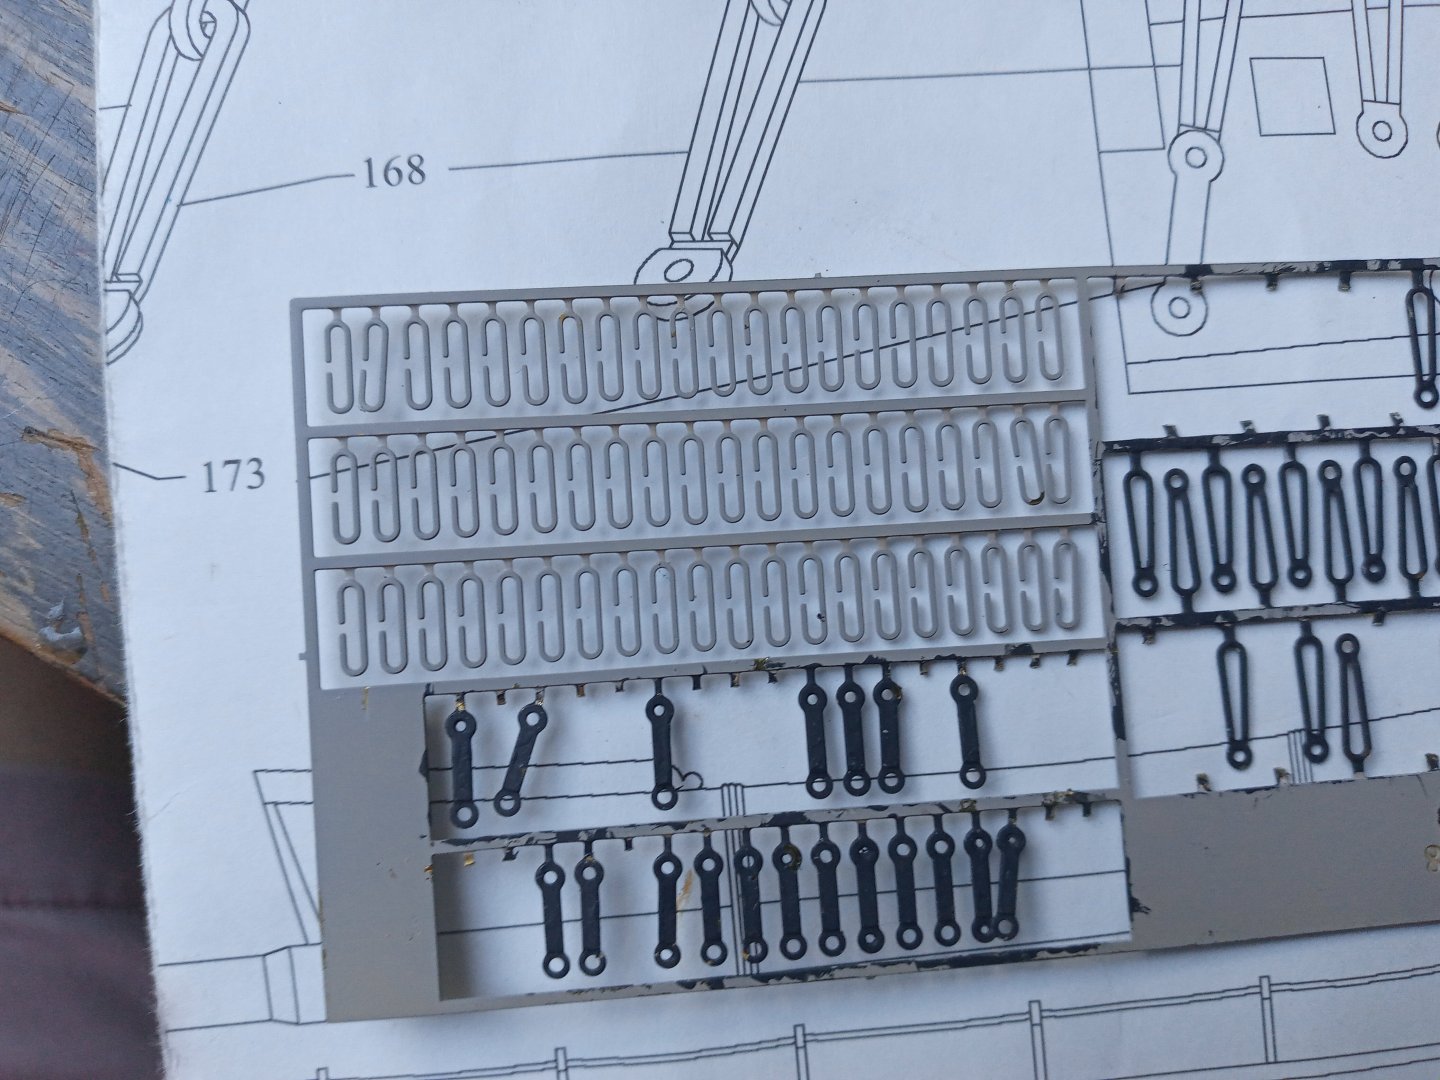
Chainplates and channels ( post 1/2 ) It's been a while, but I must admit I struggled a bit regarding this stage and came,to the conclusion to copy paste the approach of my previous build ( HMS Diana ). Thus I replaced the deadeye chainplate with blackened ironthread and part n° 174 with Gütterman thread. Regarding this latter part, I was not very fond of the gap. The thread : had to make sure the knots were tightened enough to compensate the tension exercised by the shrouds . Secondly, the knots are hardly visible : under the channel and behind the loop of my deadeye chainplate alternative. Another issue I encountered : while proceeding, the paint of the chainplates was peeling off regardless my efforts to use a proper primer coat. Nothing we cannot fix, so no harm done. The edges on the channels were covered by a 1 x 2 mm walnut strip, later on I fixed a small strip of black paper just for aesthetical reasons. The last pic shows the port side that still needs to be done. You may notice I went for a different chimney upon the forecastle.