HOLIDAY DONATION DRIVE - SUPPORT MSW - DO YOUR PART TO KEEP THIS GREAT FORUM GOING!
×


Fubarelf
-
Posts
115 -
Joined
-
Last visited
Content Type
Profiles
Forums
Gallery
Events
Everything posted by Fubarelf
-
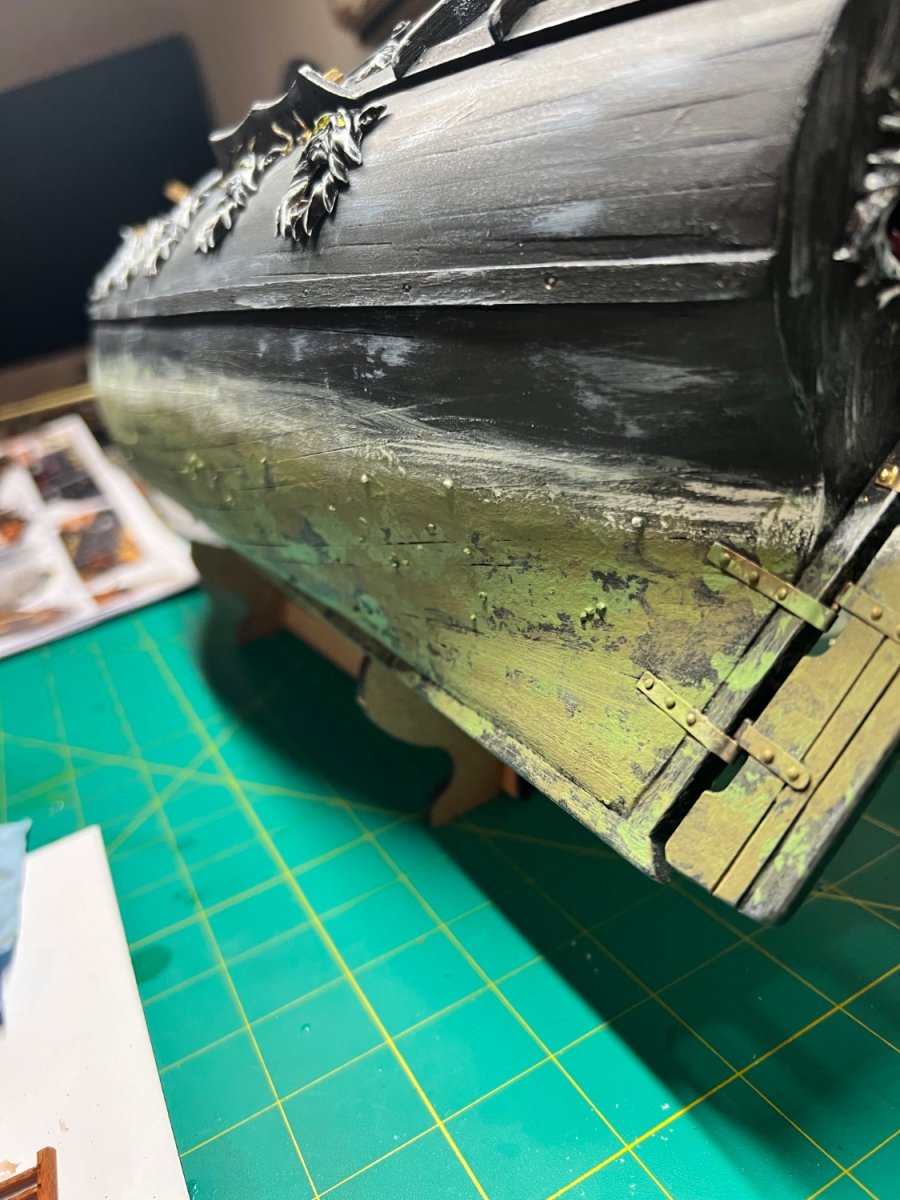
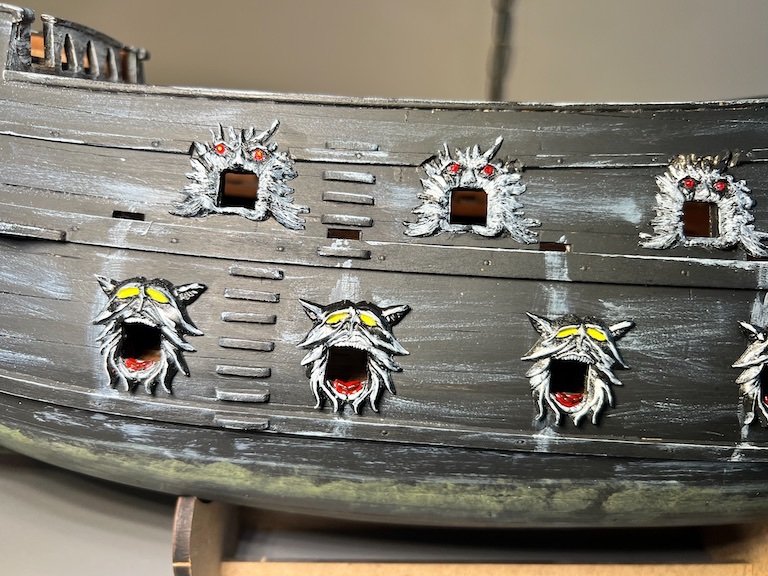
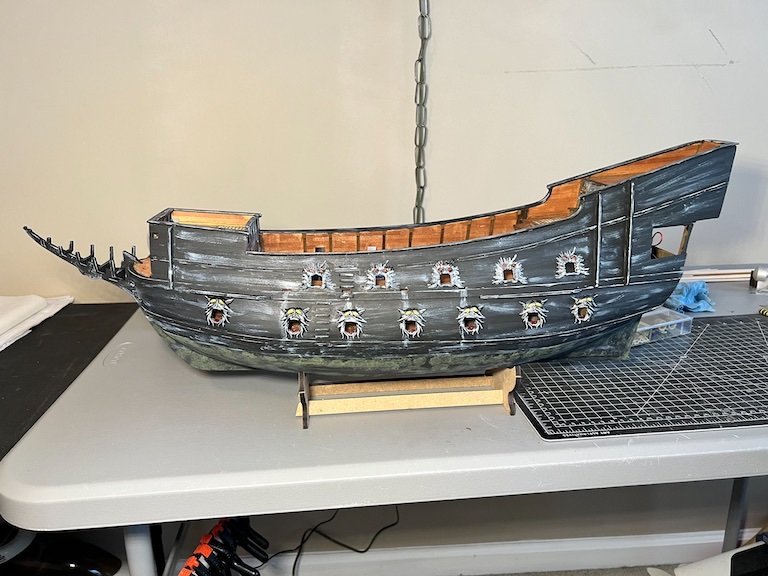
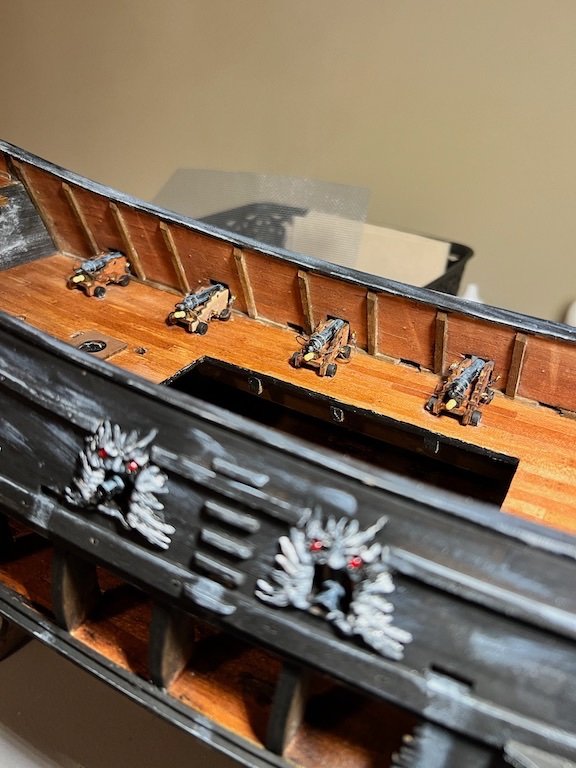
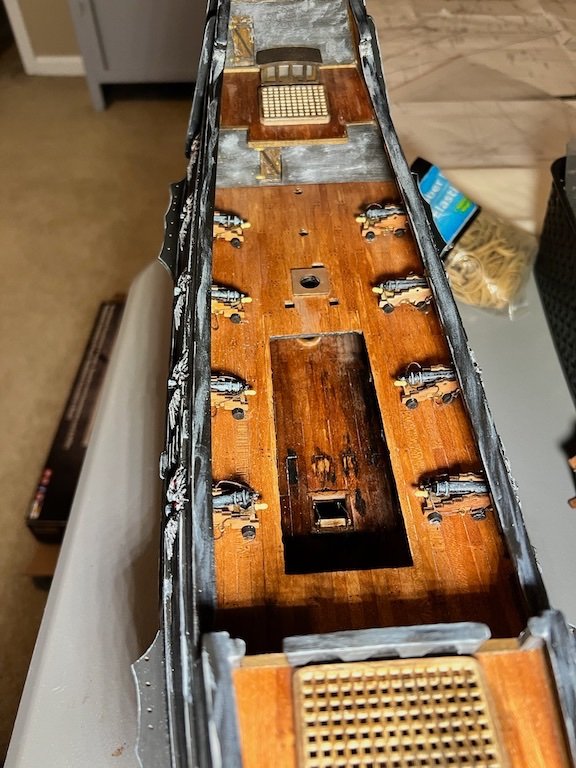
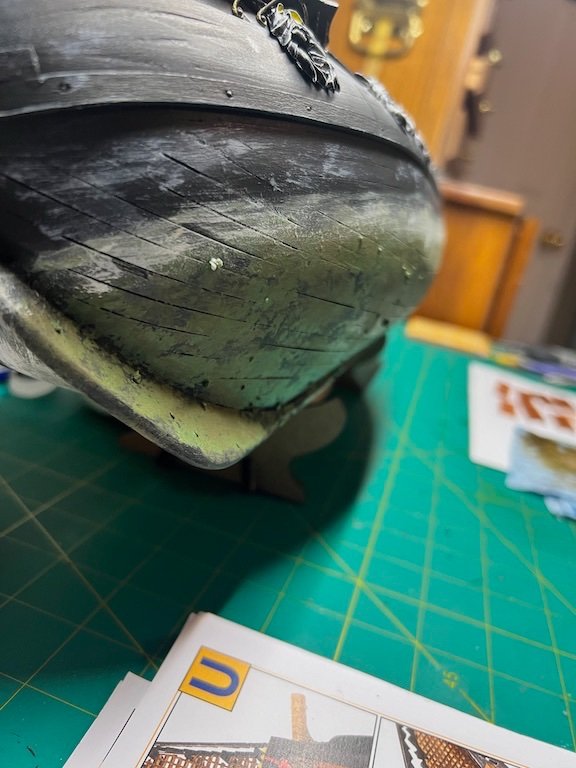
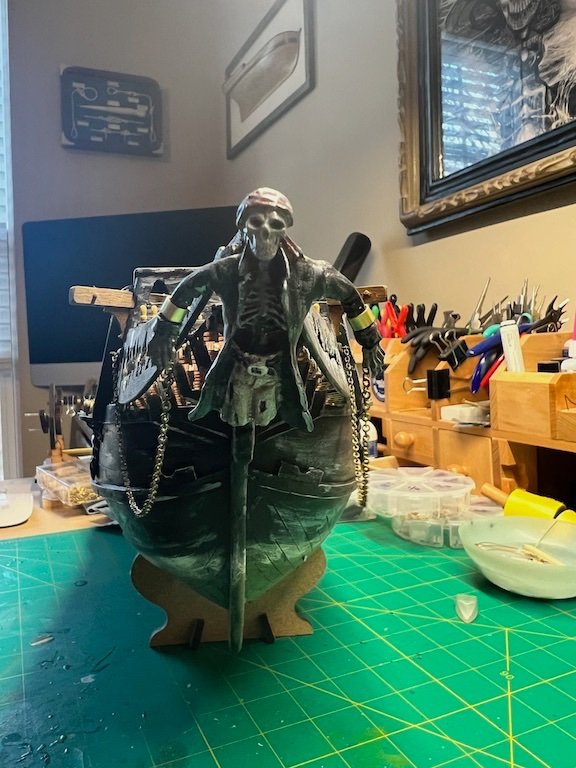
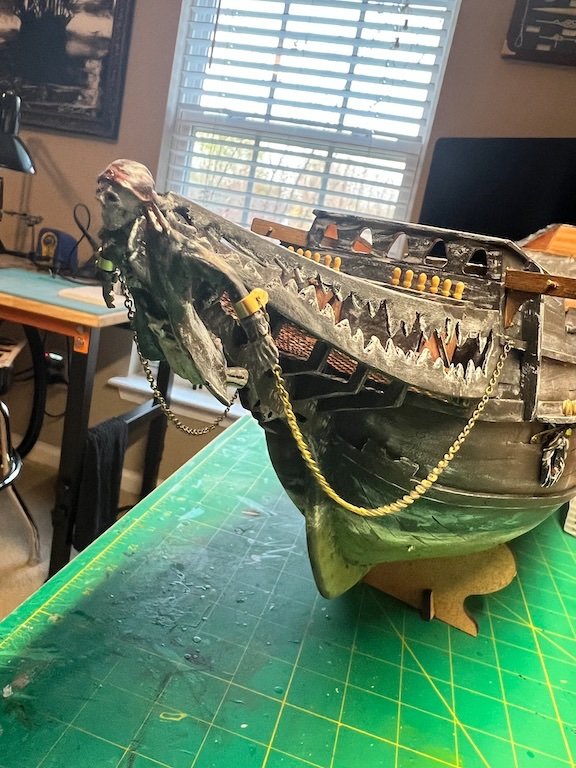
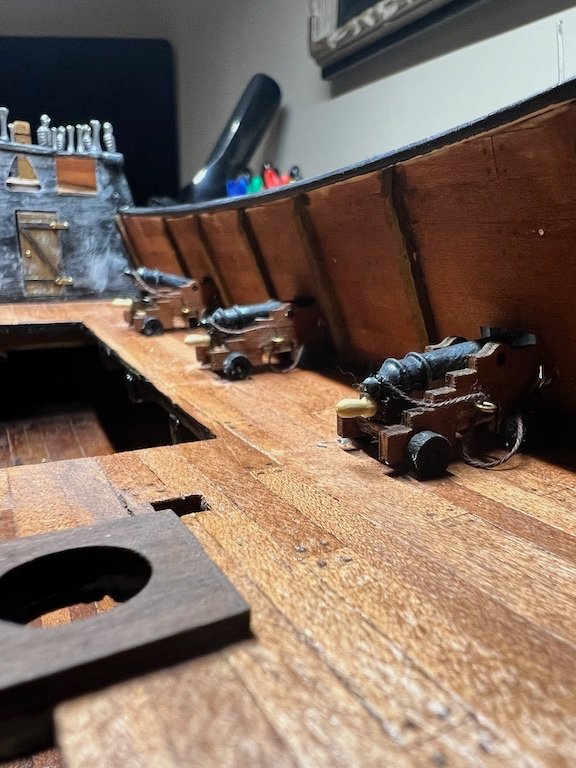
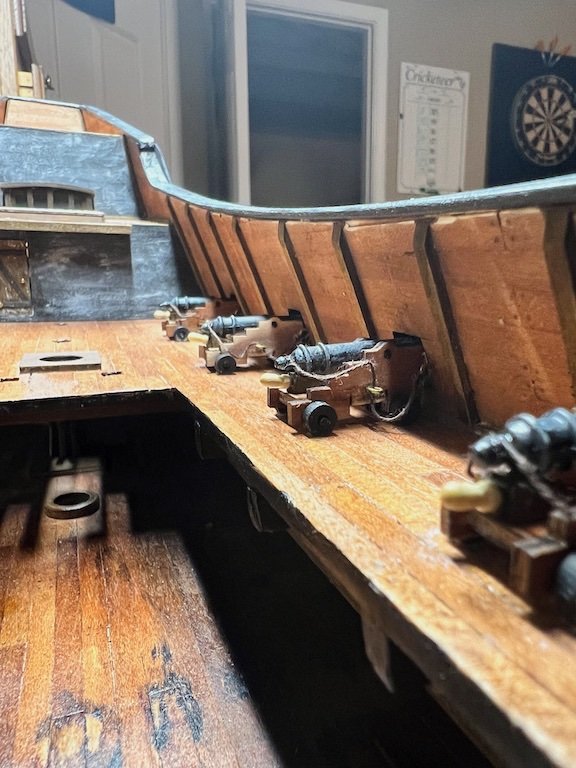
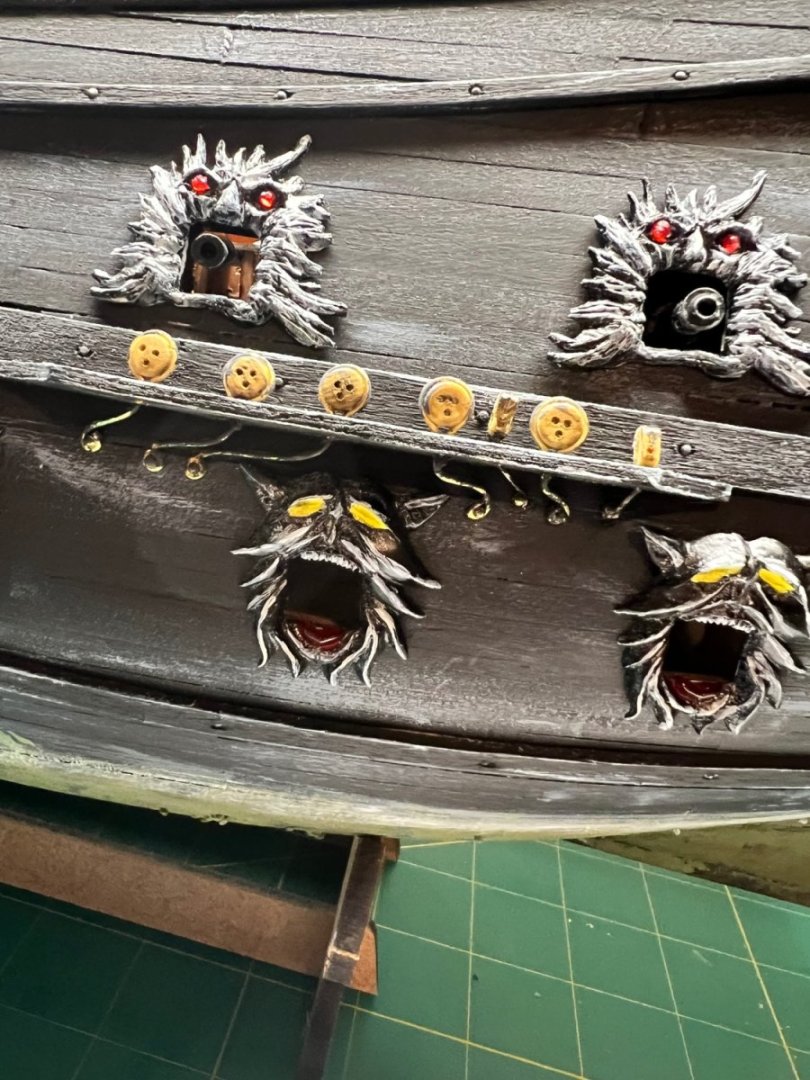
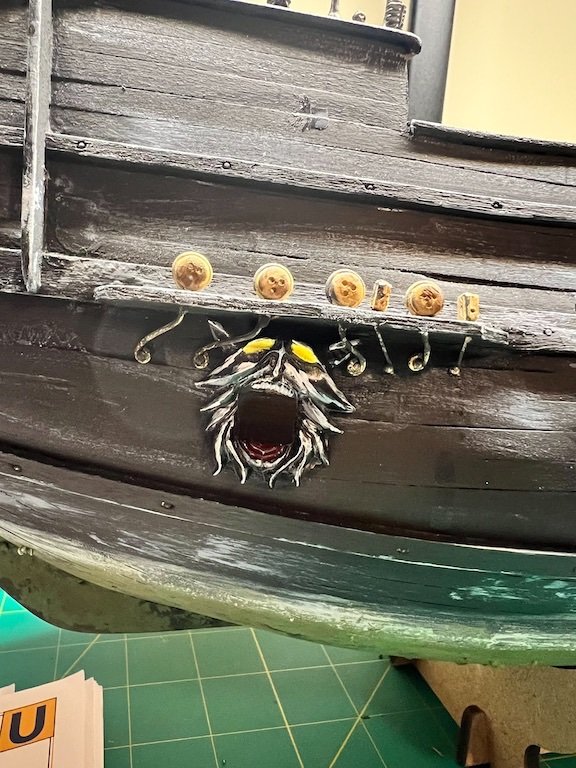
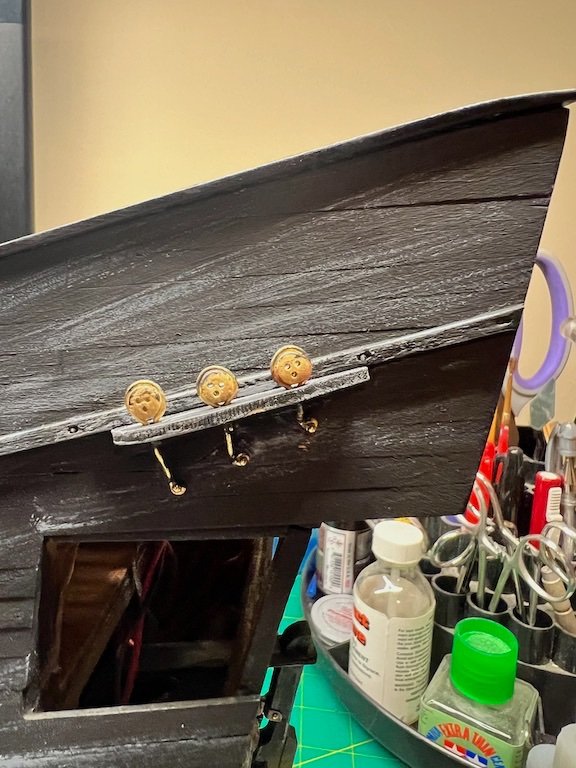
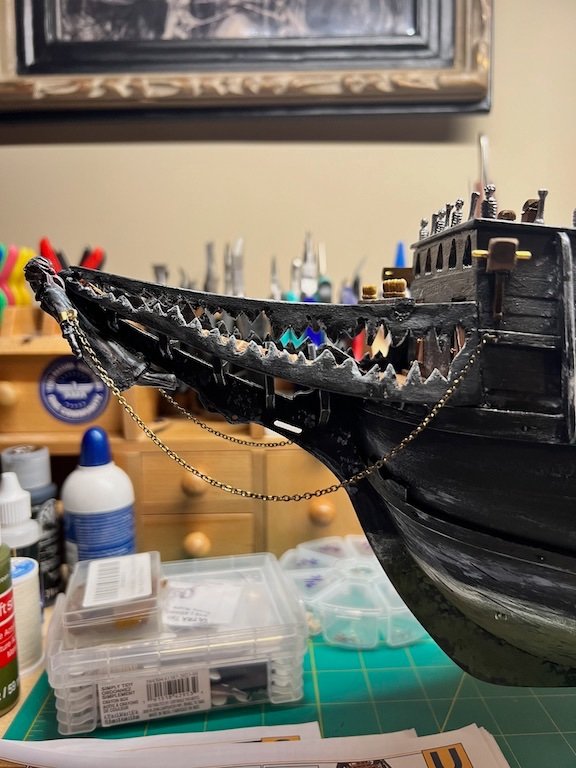
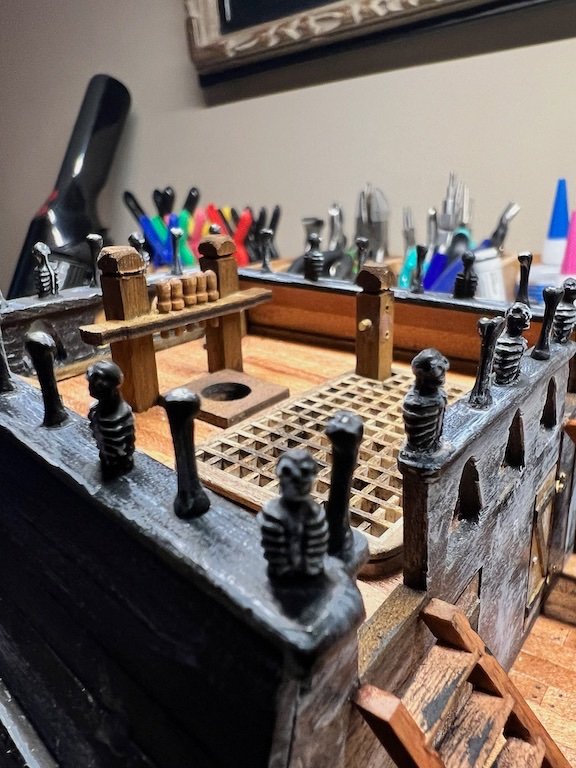
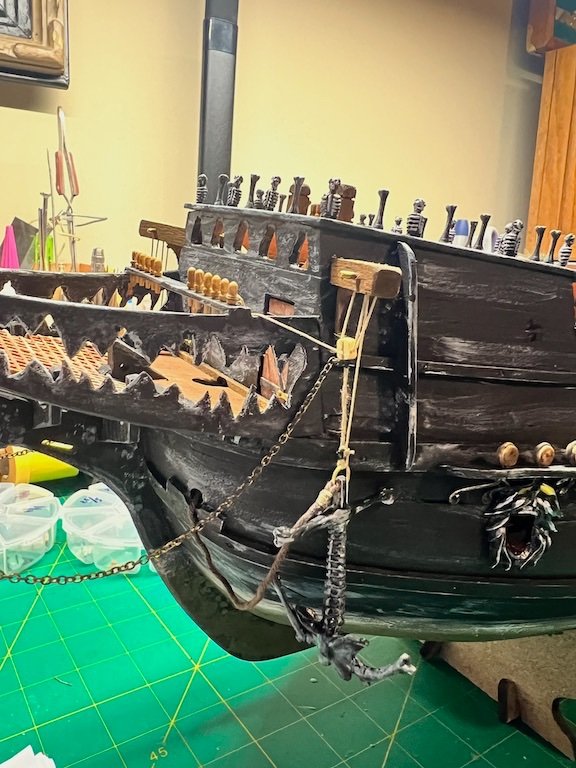
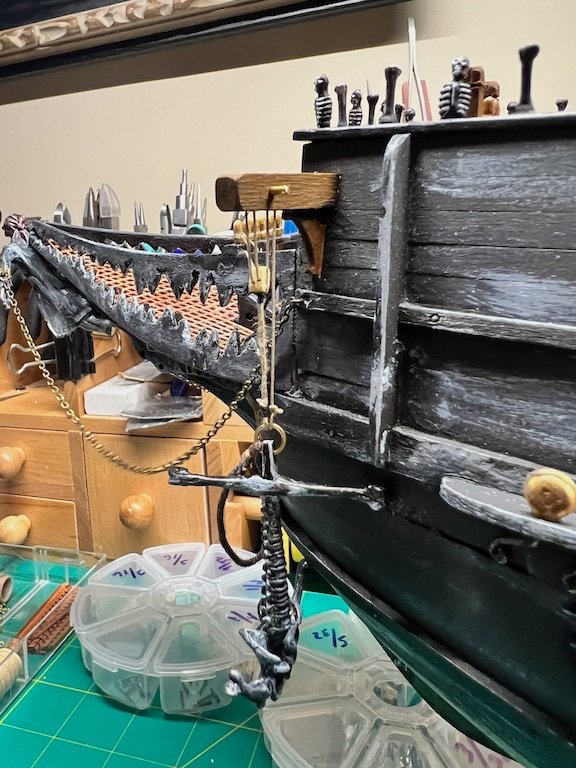
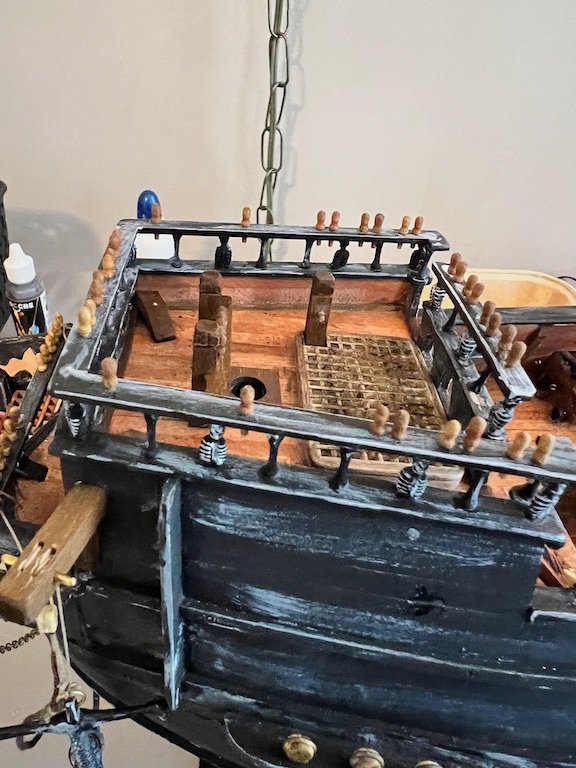
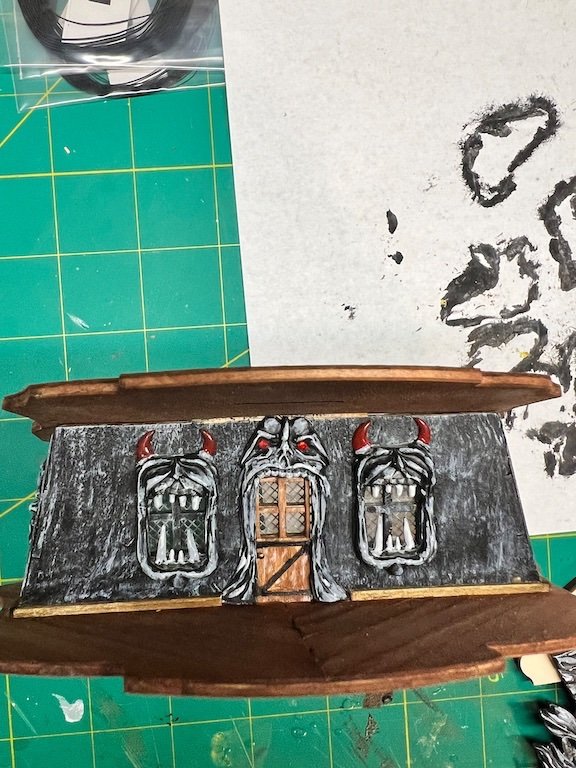
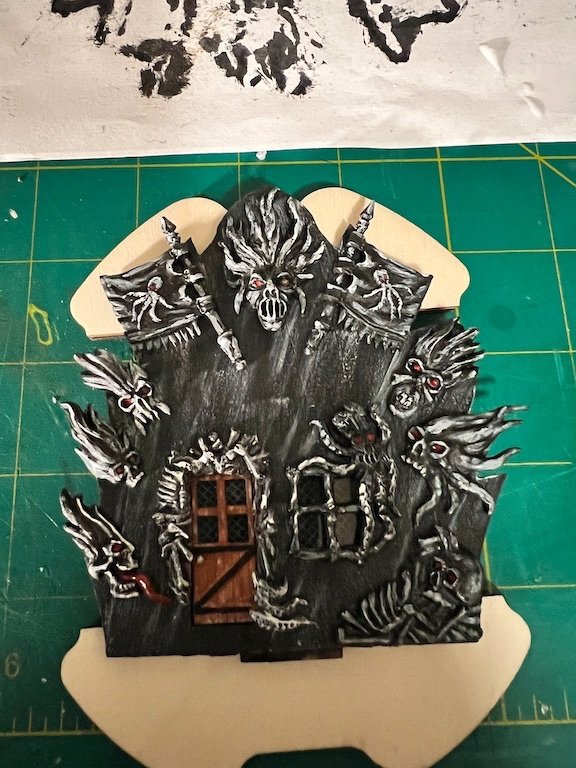
 Continued progress on the Dutchman. Completed painting the hull and then painted and attached her figures on the cannon ports. I used small "jewels" for the eyes where they fit and painted yellow eyes for the others. Wanted them to stand out against the black hull. Next, mounted the cannon to the main deck and rigged. I added weathering to the bottom of the hull to simulate algae and salt, and mixed some course sand Ito the paint in an attempt to simulate barnacles. Not perfect but I think they look pretty good at this scale. It took several sessions to build all of the fife rails, bits, belaying pin rails, anchors, figurehead and other details. Once I had them all finished and painted I installed everything on the ship. Finally, I added the deadeyes blocks to the chain plate channels. Rather than wrapping wire around the deadeyes and twisting to form the chain plates, I wrapped the wire and soldered. Thought this was cleaner look and it made for a better fit in the channel. That's it for now. Tim
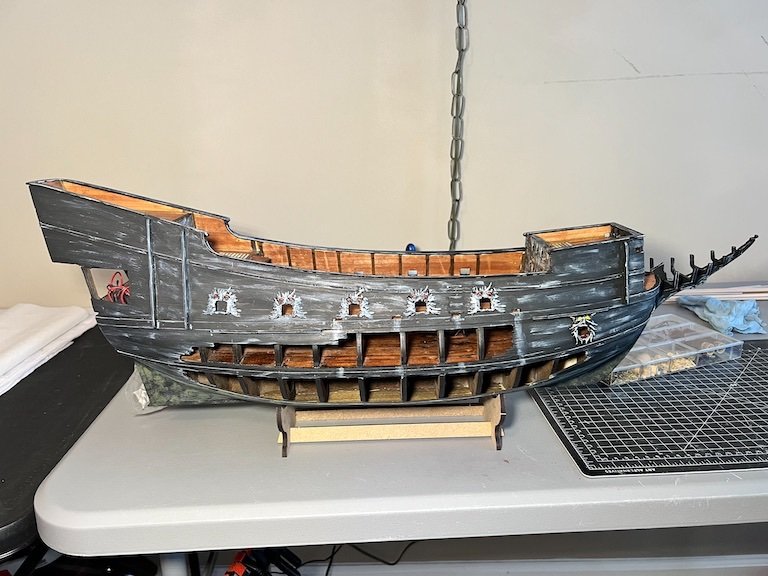


- 30 replies
-
- 2
-

-
- Flying Dutchman
- OcCre
- (and 1 more)
-
Thank you, Bill!
-
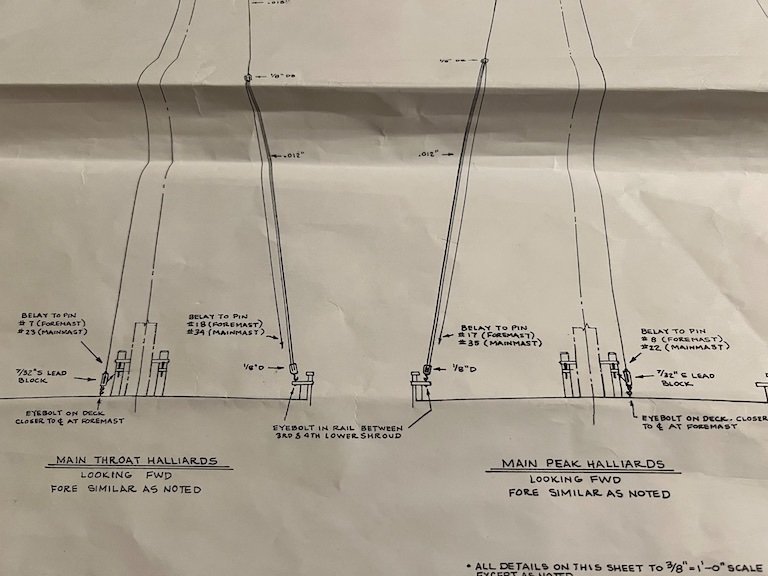
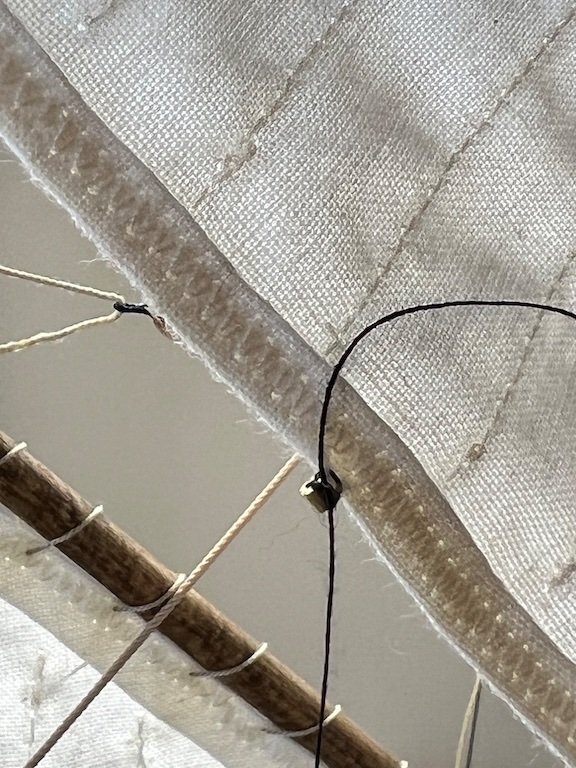
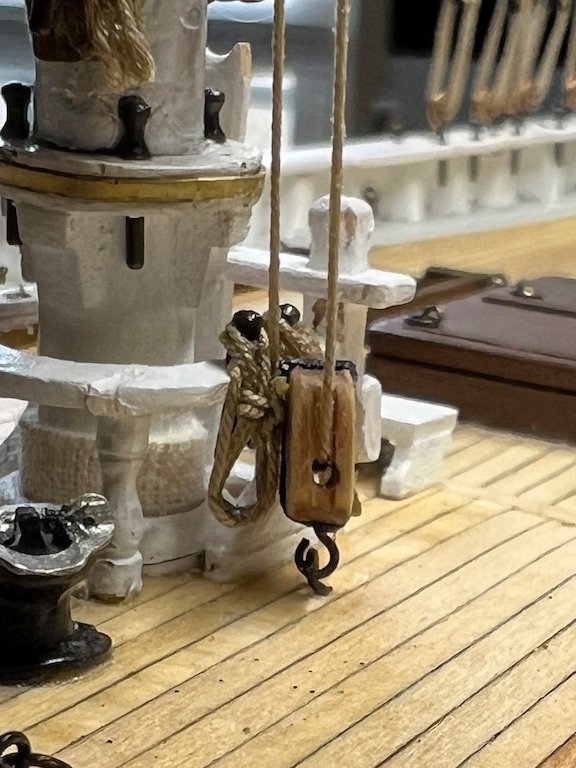
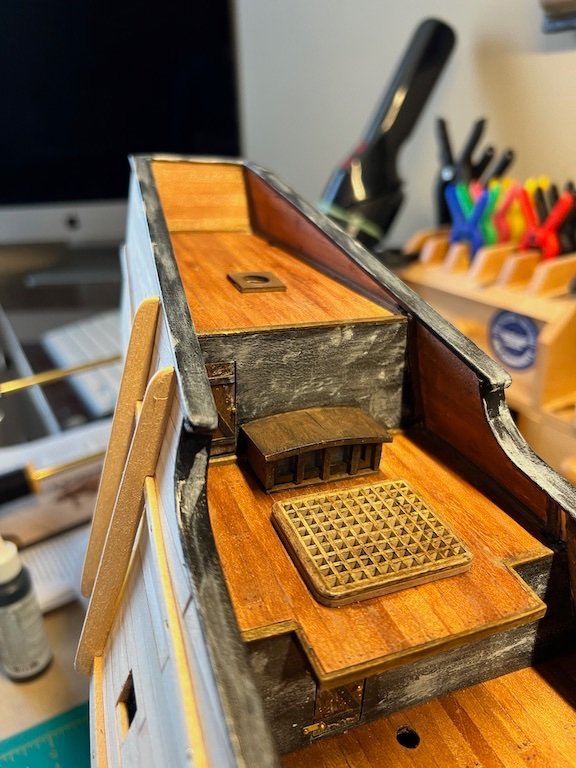
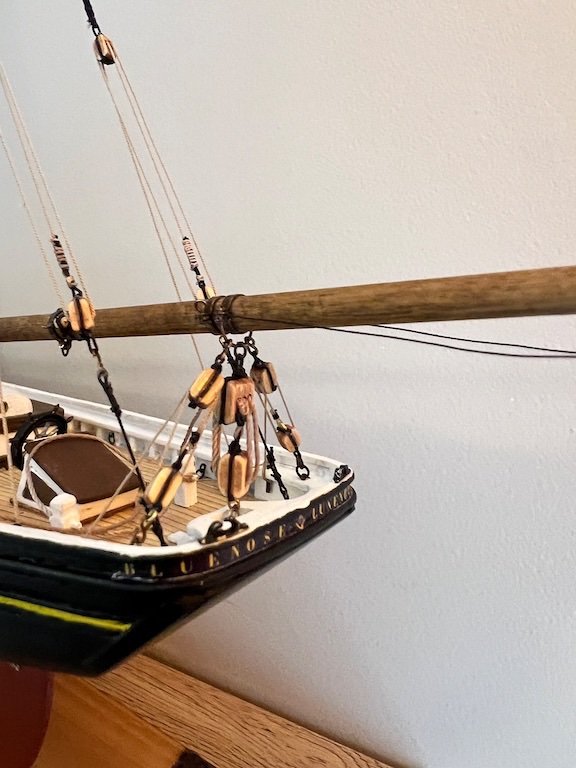
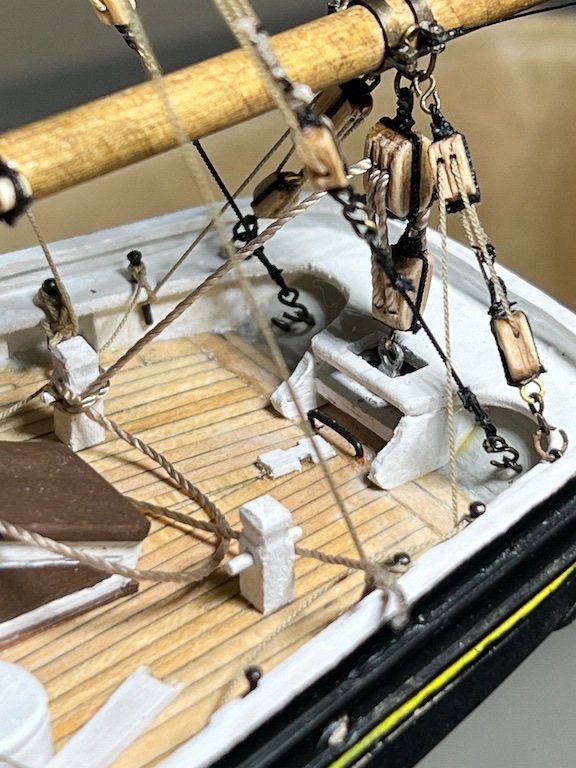
Thank you, Gregg. The blocks on either side of the fire rail are for the main throat and peak halliards. They support the main gaff. Detail is on plan 6. Tim
-
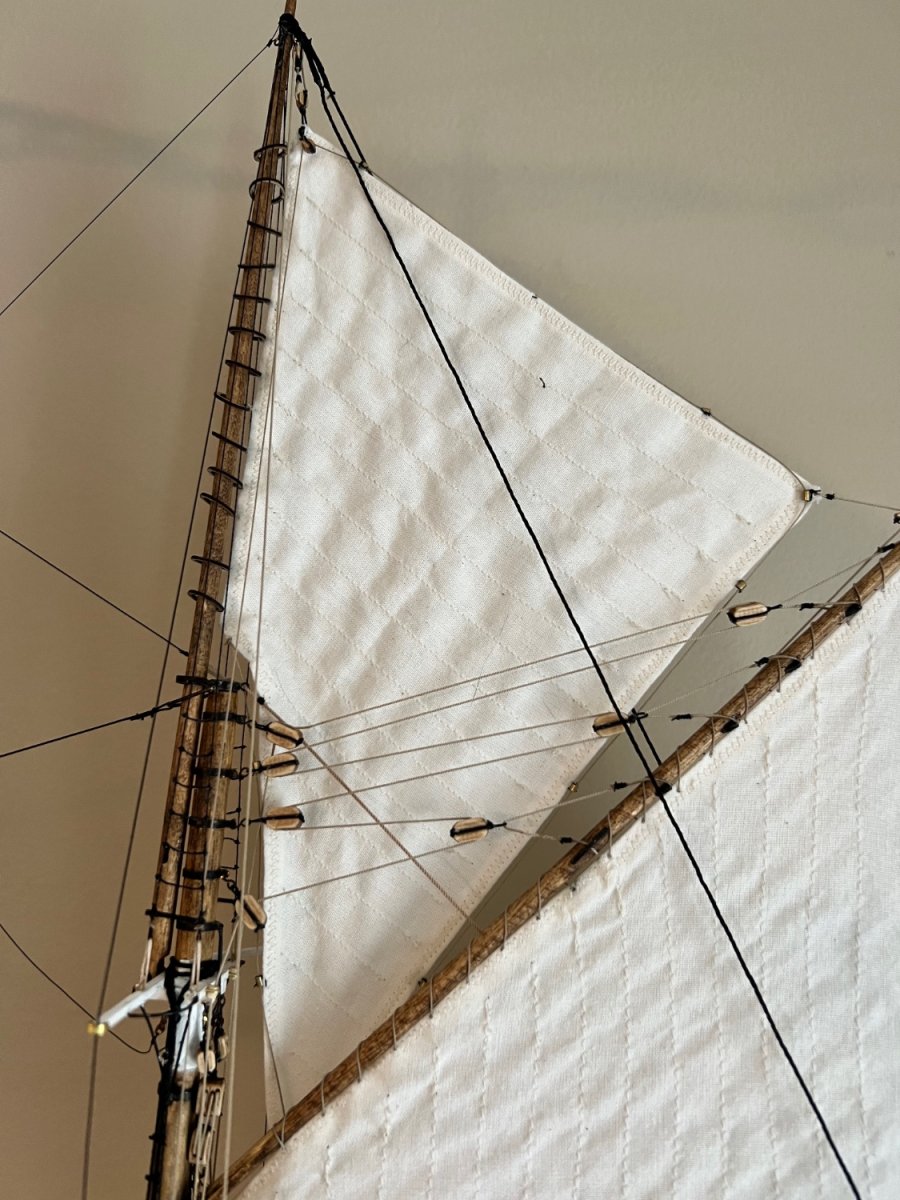
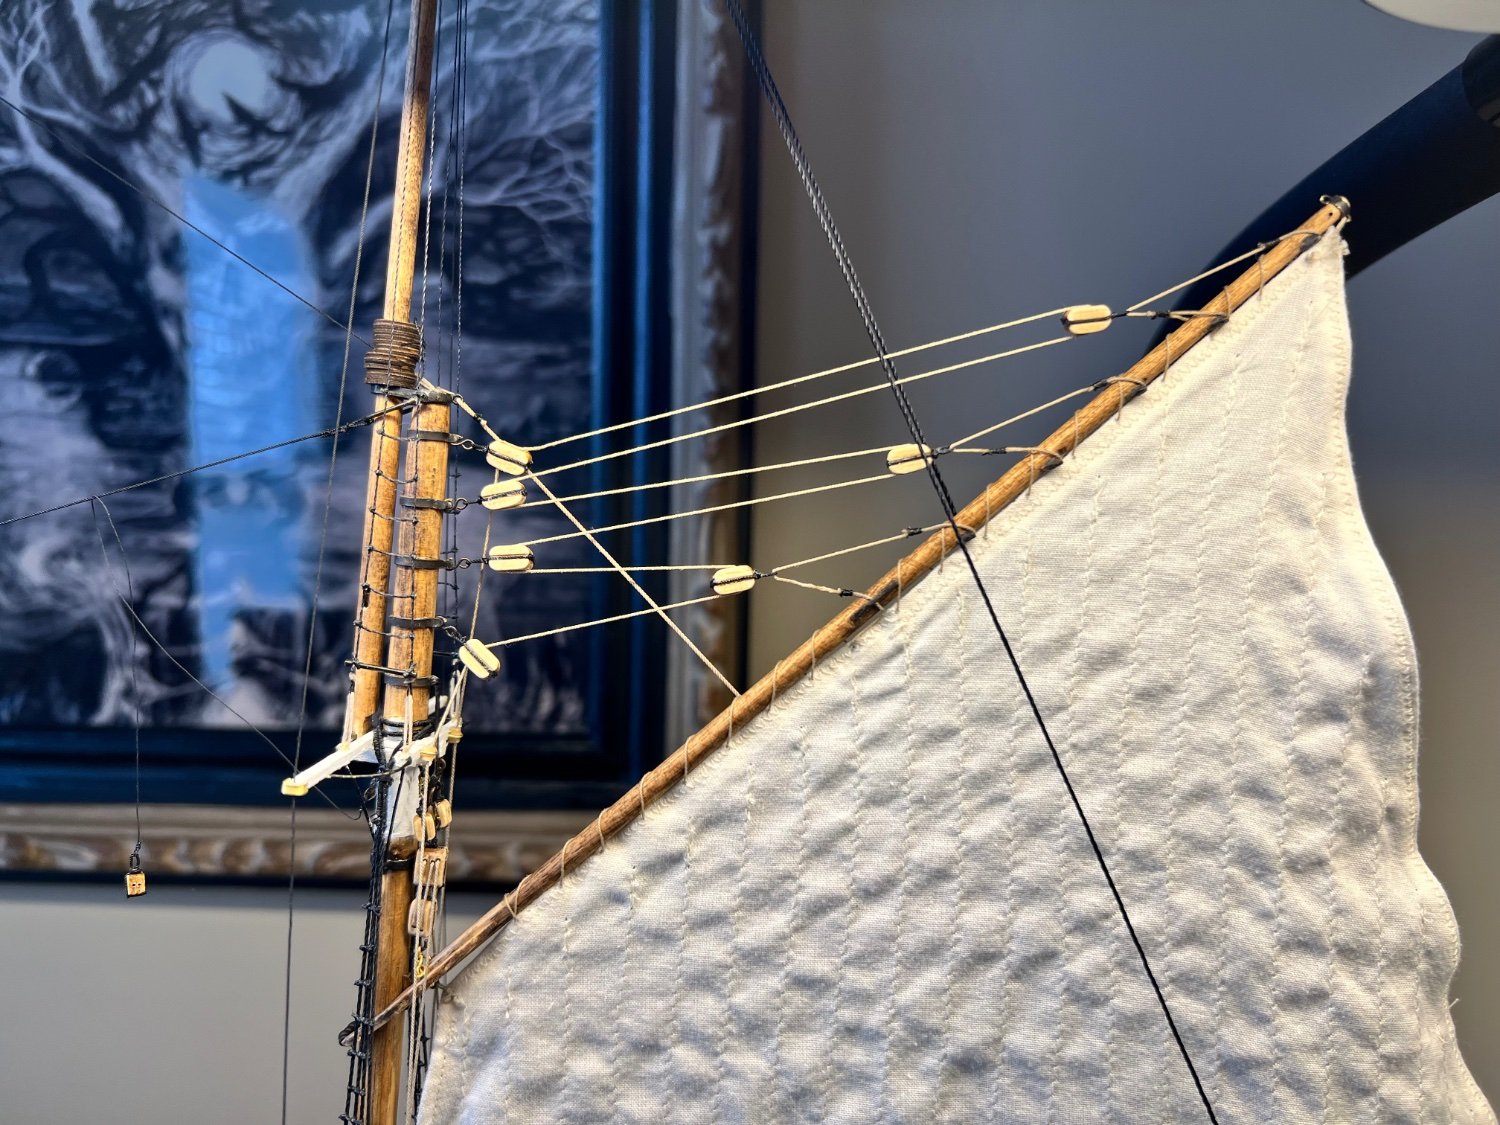
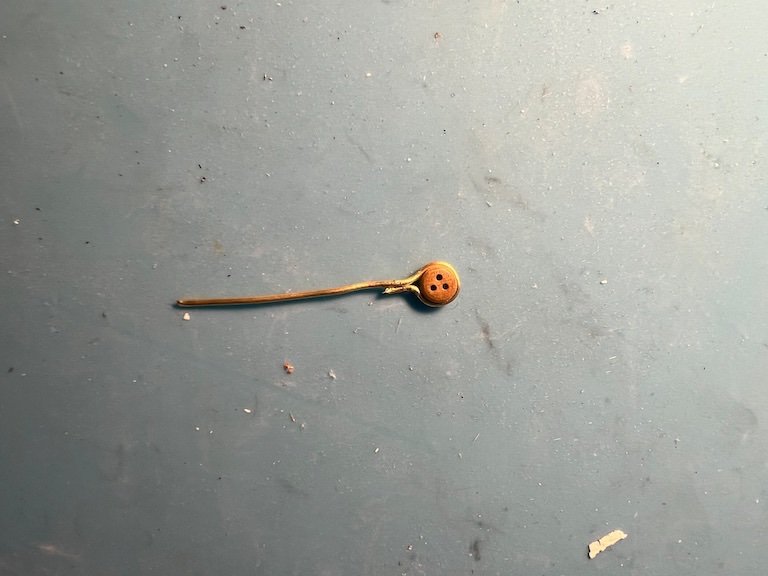
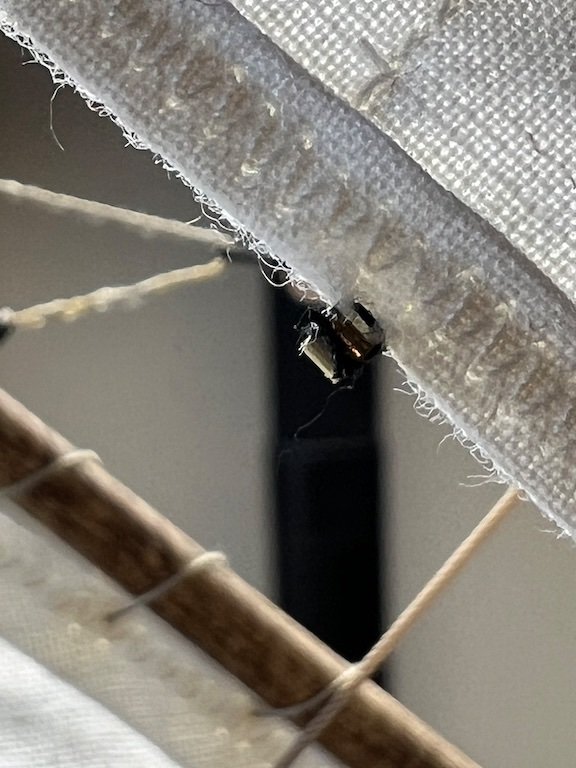
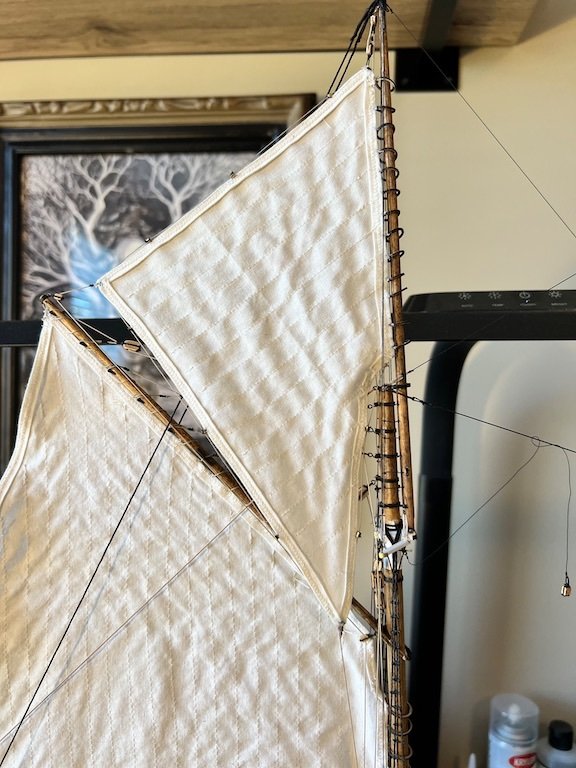
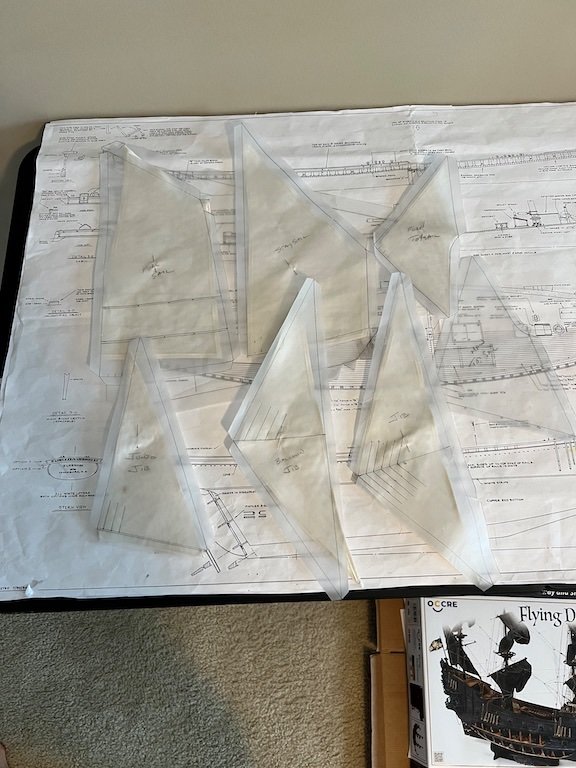
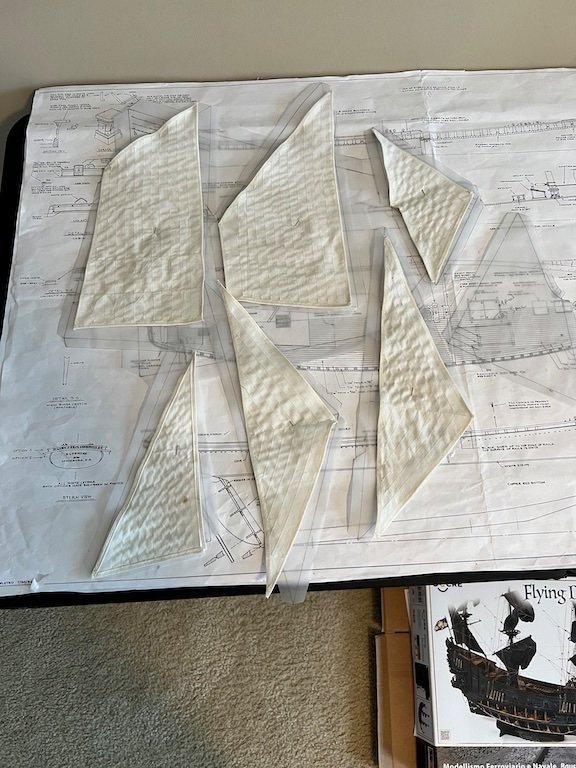
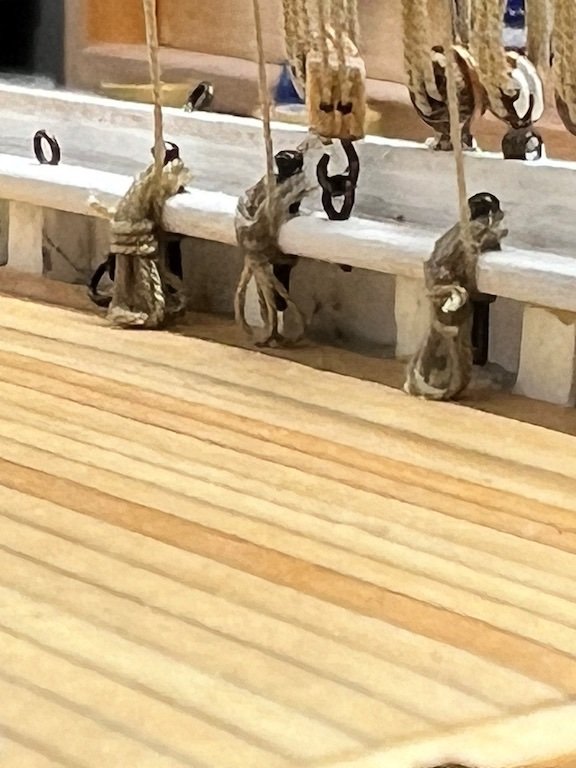
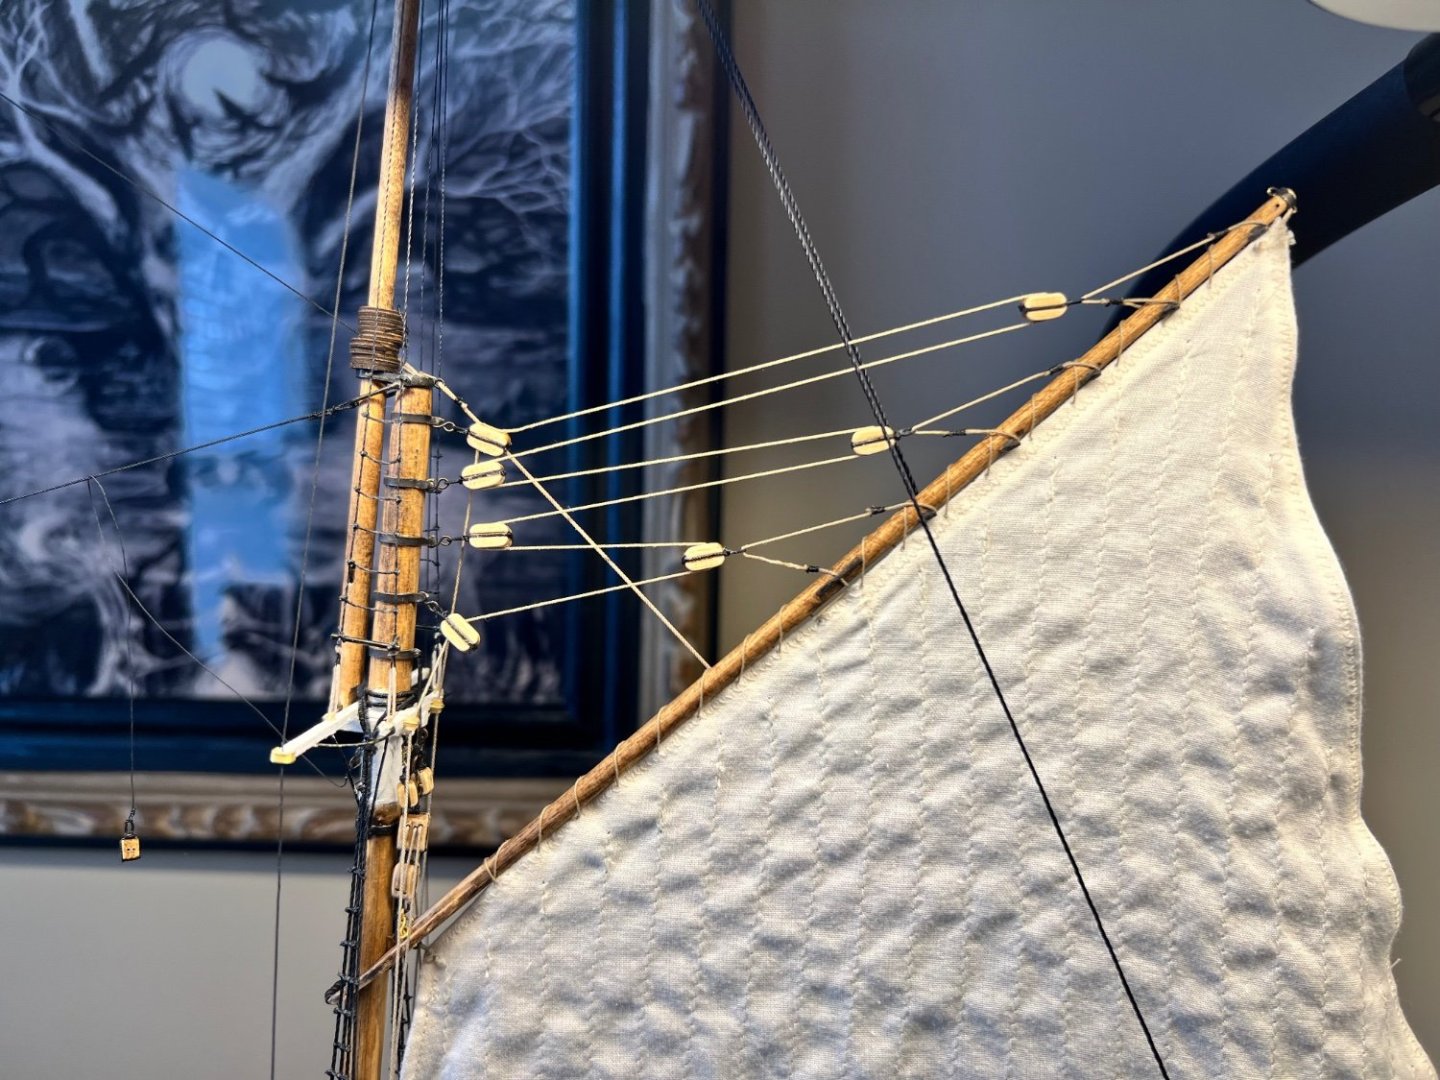
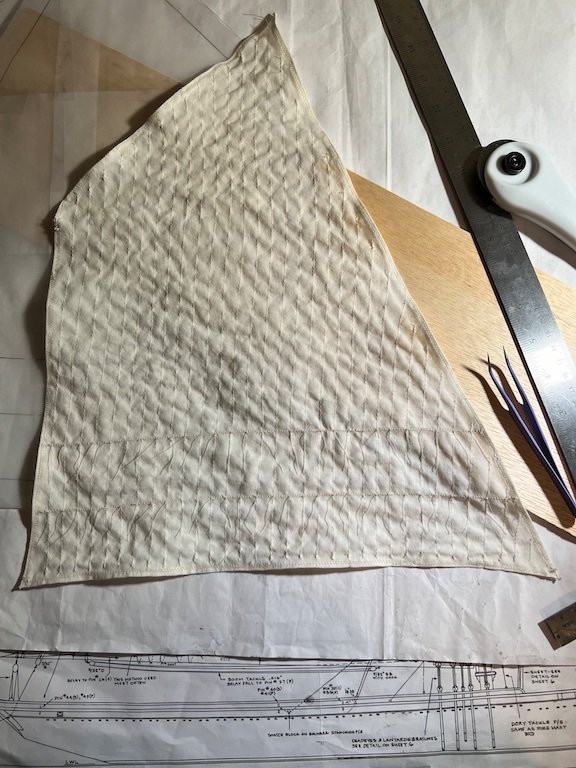
Finished creating the rest of the sails! I redid the jib sail because I stretched it too tight while sewing and had a bow in the long side. Learned from this and allowed the sewing machine to just pull the material through. The rest of the sails went pretty quickly once I had the routine down. I have learned the hard way to really study the plans BEFORE starting to rig a sail. I rigged the main topsail next and started by tying the sail to the mast hoops in the same fashion as the main sail. I ran thread through the edge of the sail, evenly spaced for the 13 mast hoops, and then tied to each of the hoops starting from the top down. Here is where the "study the plans" part comes in... Did not catch that the was a clew line on this sail until after I had all of the mast hoops tied on. I did not want to redo that, so I figured out how I was going to add the clew line and did that with the sail on the mast. I looked at the build by Suburban Ship Modeler for reference, but the way he attached fairleads to the sail was just not working for me. I did use the brass tubing as he had but I tied on by running thread through the cut piece of tubing and the sail and then tied one more time around the tubing to secure it. I added a single, 1/8 block at the mid and bottom points and then threaded the line through. Will be ding this off ship for the fore topsail. With the clew line, there are four line that have to be rigged and the tied off at belaying pins. Two to the starboard rail, one to the port rail and one to the port side of the fife rail. I finished them all off with coils tied to the belaying pin. Finished sail. Tim

- 145 replies
-
- 3
-
-
- Bluenose
- Model Shipways
- (and 1 more)
-
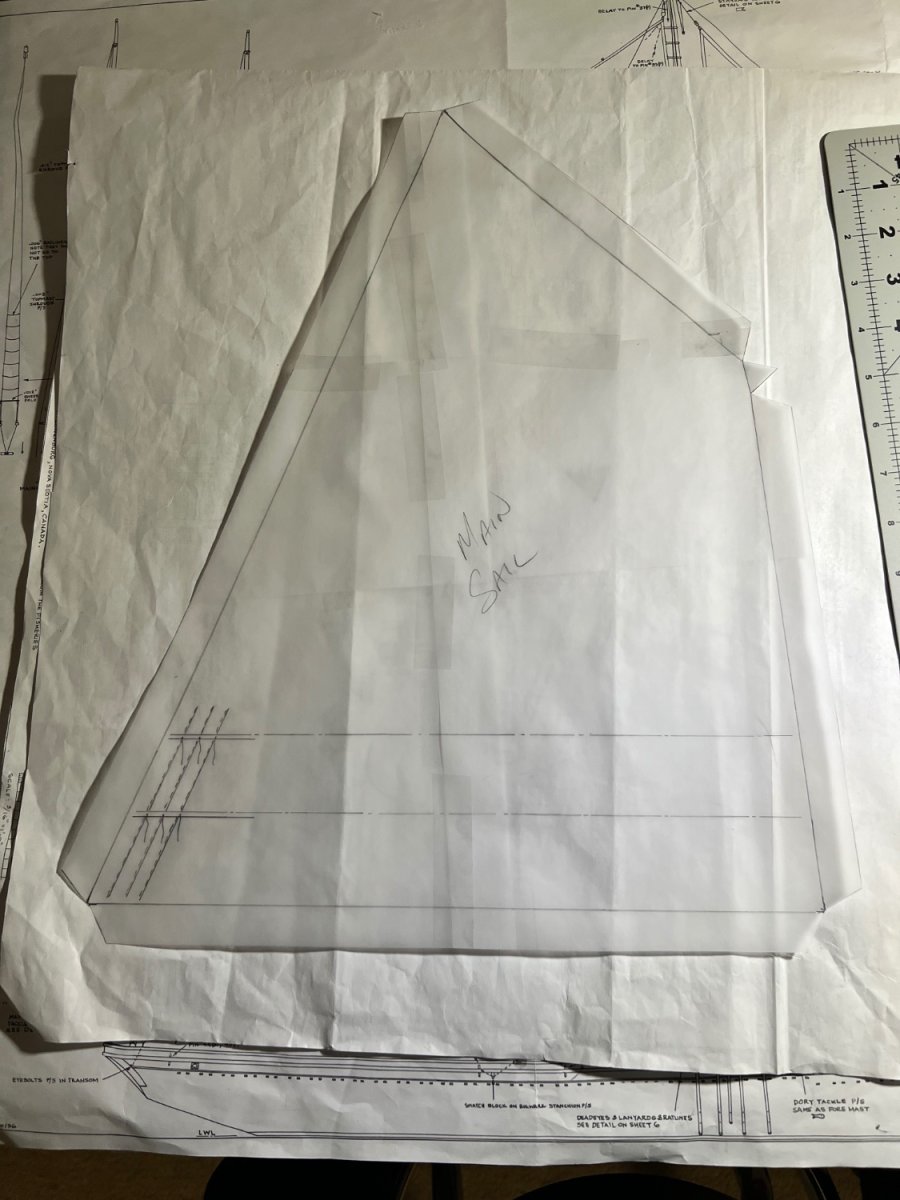
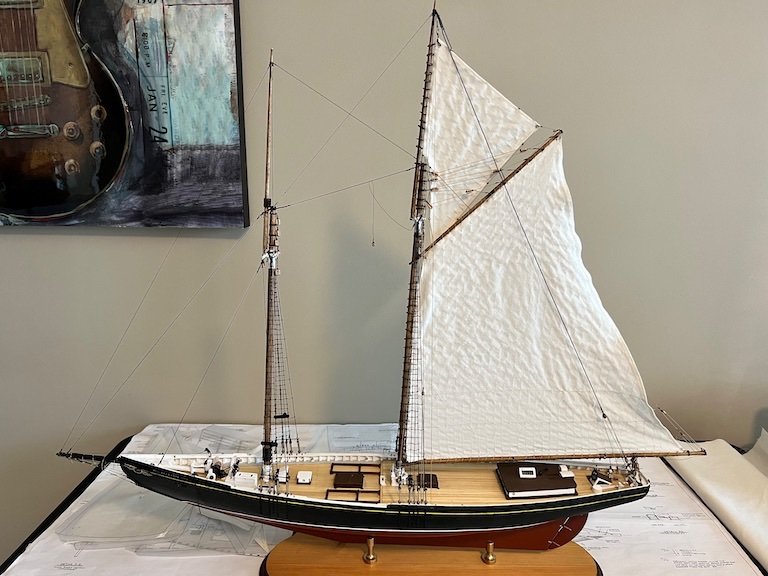
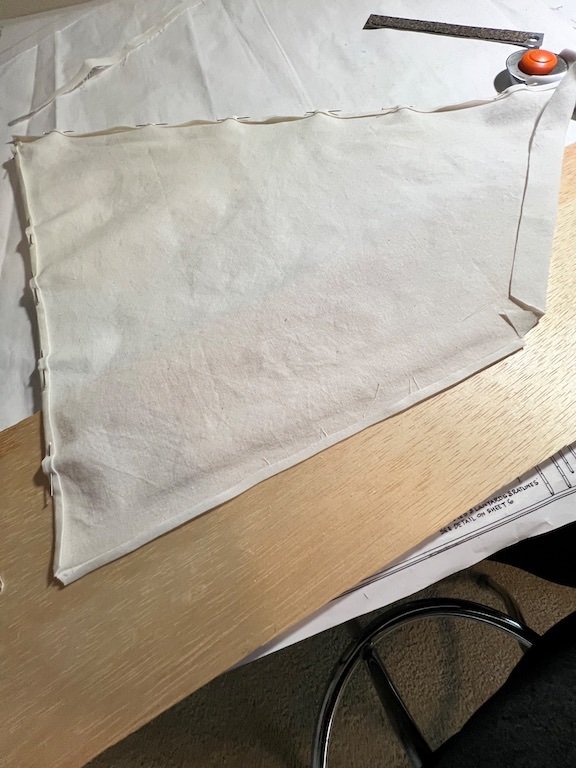
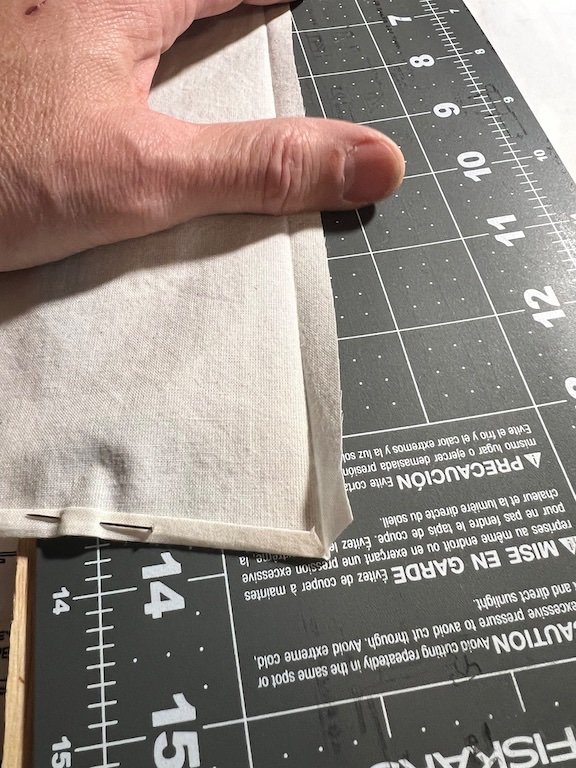
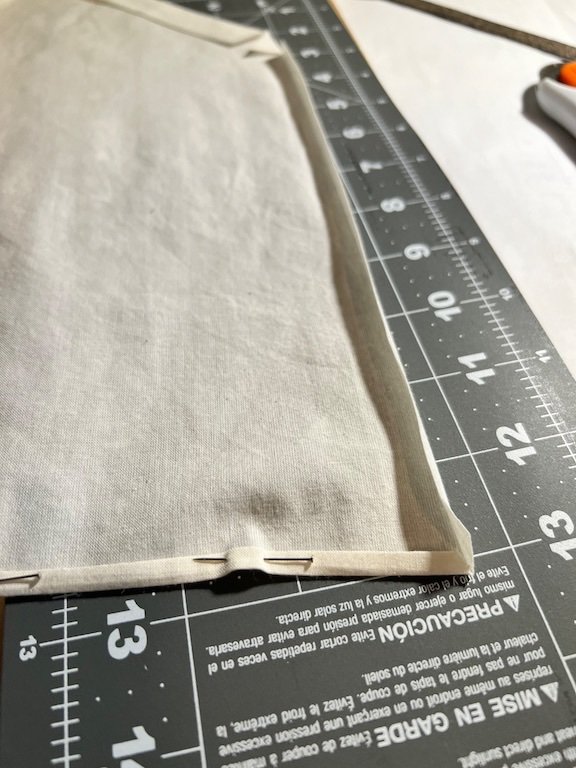
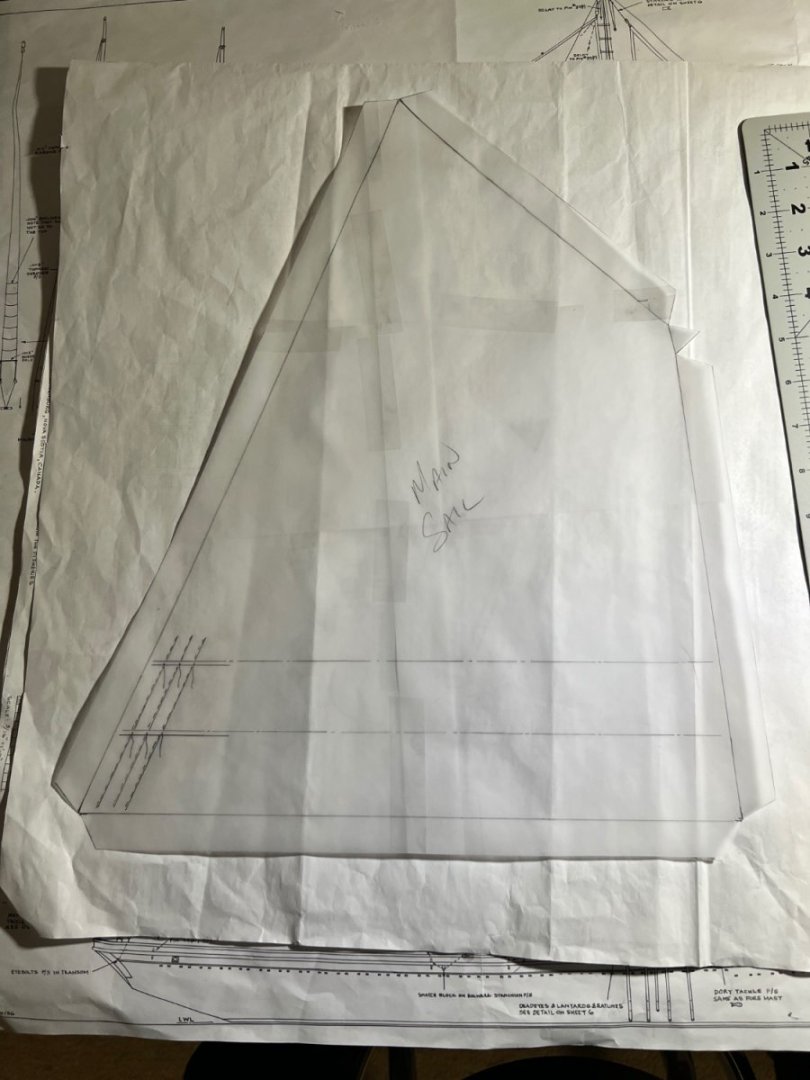
On to the sails! I started with the main sail, since I have the main boom rigged and can't really go any further without the sail. I started by tracing the main sail from the plans. I added "wings" (don't know the technical term) arrant the edges of the sail which will be folded over to create the hem around the perimeter of the sail and drew in the reefing strips and the seems that were on the plans. I pinned the tracing to the sail fabric and cut it out with a cutting wheel. Next I folded and ironed the wings and pinned the hem for sewing. I did not get any pictures of the sewing process. I used a zigzag stitch for the hem. Next I ran straight stitches along the length of the sail for the panel lines and then used a high zigzag in two lines across the sail for the reefing strips. I finished up by tying the reefing rope on both sides of the sail along the reefing strip. It's been a long time since taking Home Ec. in high school, but it sure did come in handy on this project. Once the silk was complete I lashed it tot he user gaff and the main beam and the finished up the rigging. One down, 7 more to go!! Tim


- 145 replies
-
- 2
-
-
- Bluenose
- Model Shipways
- (and 1 more)
-
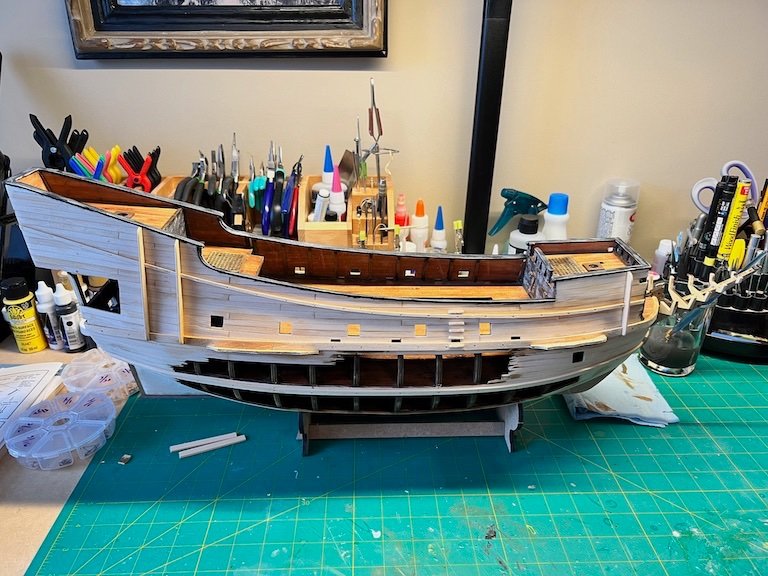
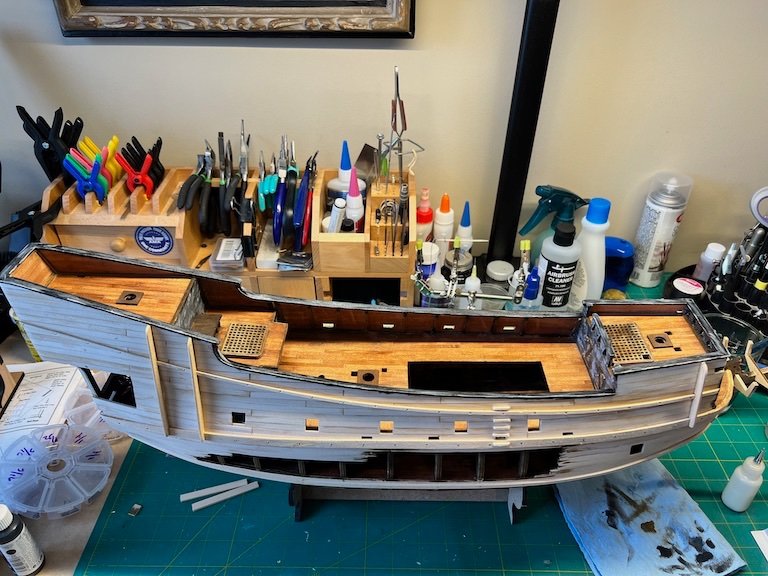
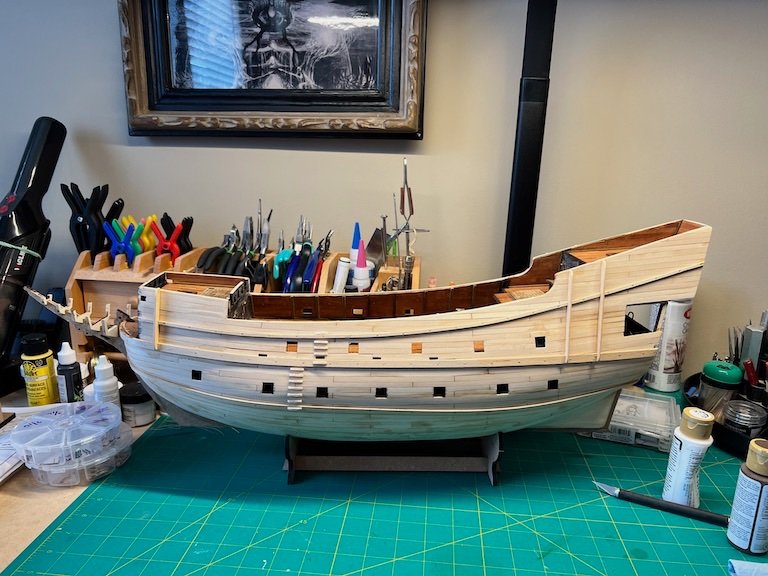
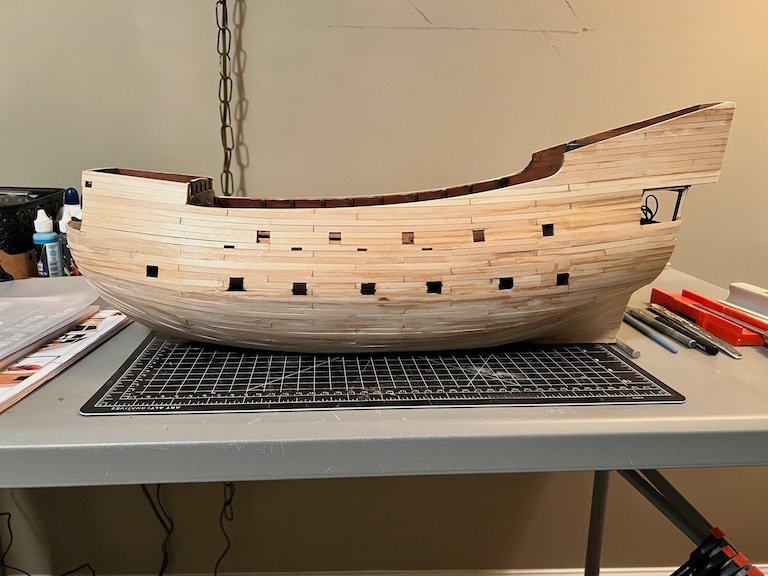
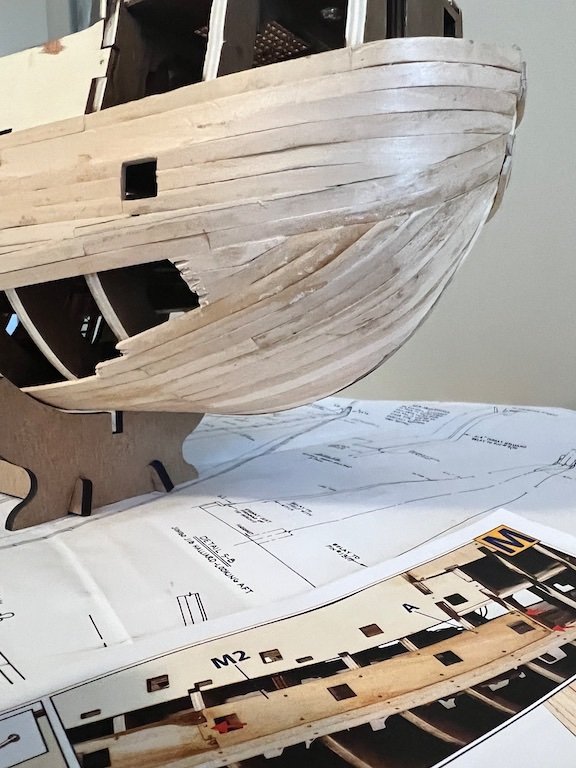
Finished up the planking and started sanding out some of the rough spots. The planks in this kit are really thick, so plenty of material to work with, although not looking for a perfect finish. After sanding, filling in a few gaps and low spots and sanding again, I added the wales, and other features to the hull. Planked the exterior of the fore cabin, painted and highlighted and added the doors. Planked the stern. Finished up the main structure of the hull by adding the railings. I built the bow and stern railing off of the hull so that they could be painted prior to installation and used mitered corners rather that the end joints shown in the instructions. The stern side railings had to be shaped so they curved down from the transom. I soaked the wood and used the plank bending iron. Also used the iron to bend the end of the side rails rather than cutting into pieces to form the shape. Next are all the small bits. 20 cannons to build! Tim


- 30 replies
-
- 3
-
-
- Flying Dutchman
- OcCre
- (and 1 more)
-
Thank you Gregg. Probably other ways to form the loop, but it’s working pretty well for me. I went back and looked at my pictures of the boom tackle and noticed one of my blocks is backward. Ugh! Good thing I didn’t glue everything down.
- 145 replies
-
- 1
-
-
- Bluenose
- Model Shipways
- (and 1 more)
-
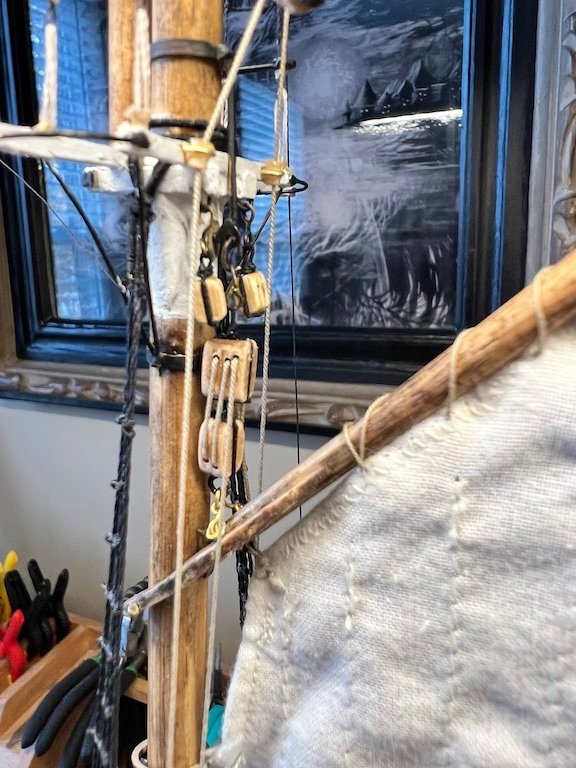
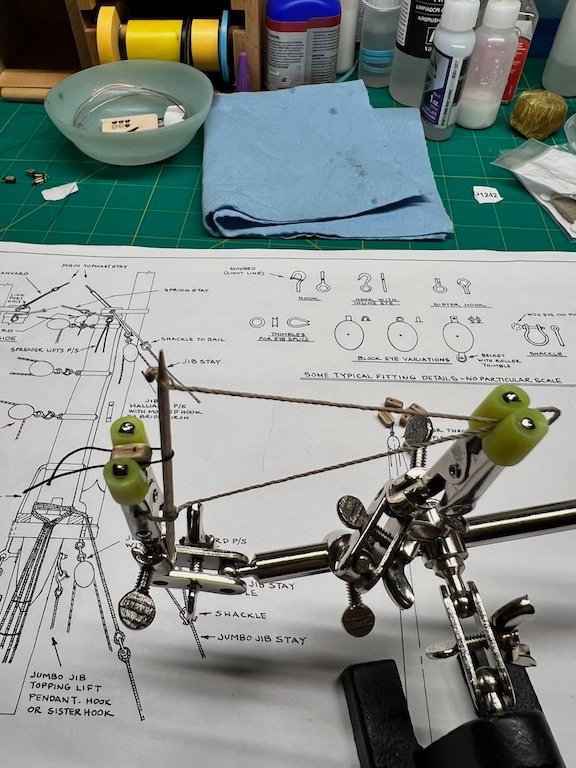
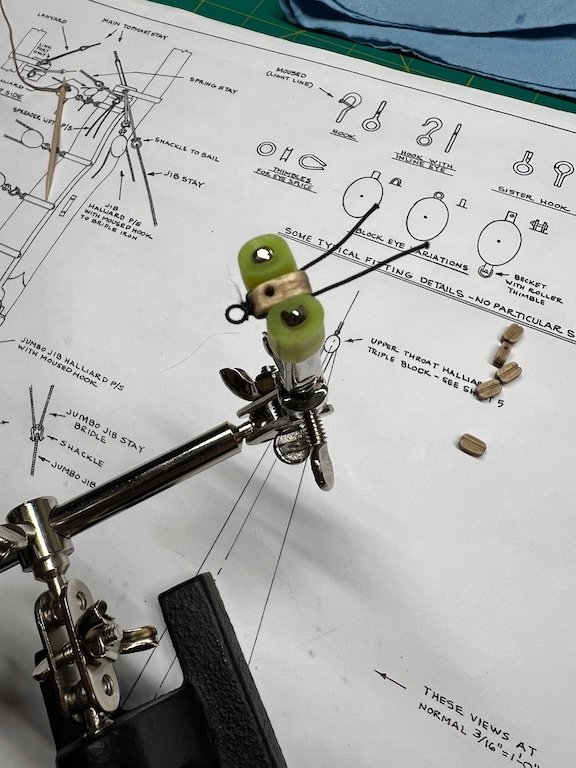
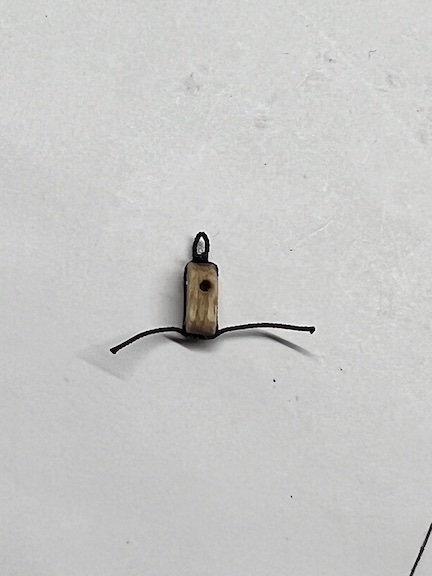
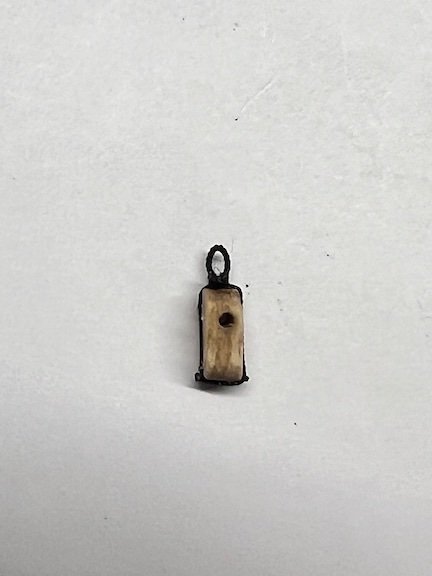
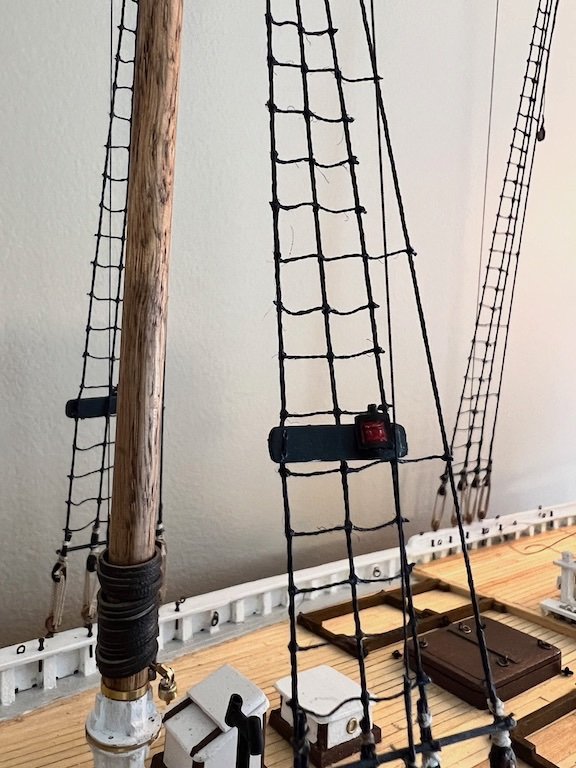
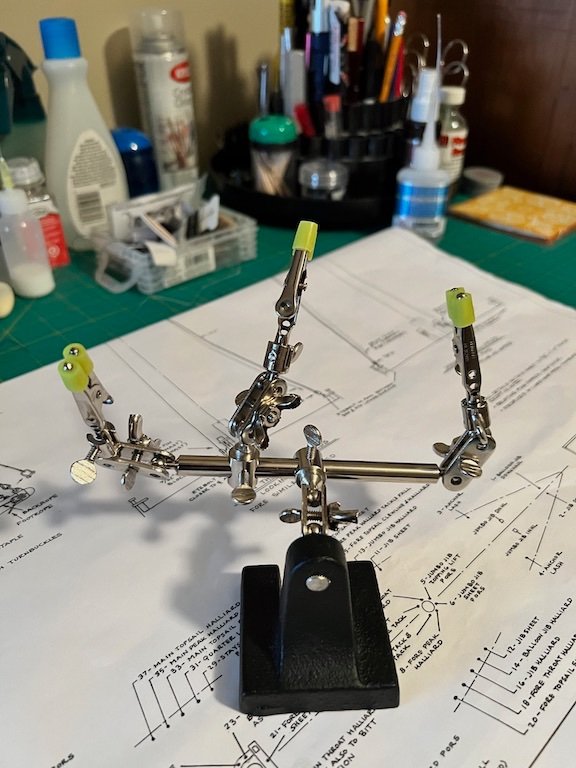
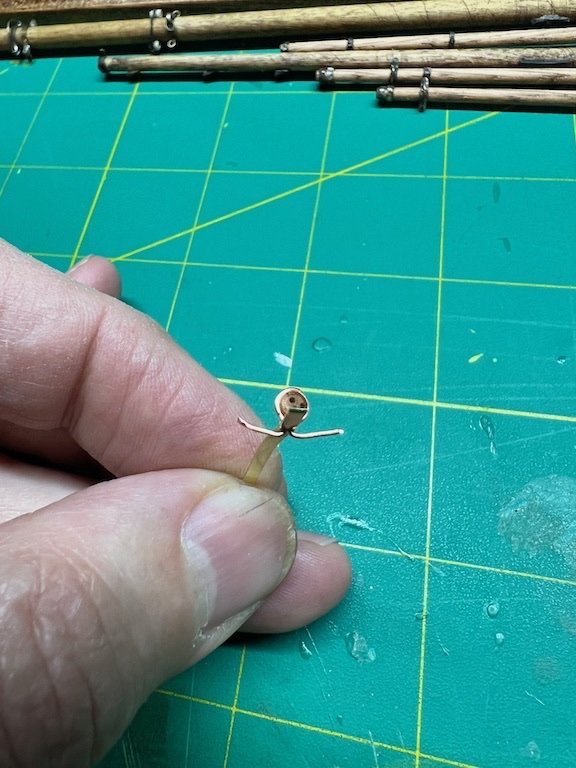
Made some progress on the rigging. The helping hands are indispensable for working on the blocks and there a bunch to do with the running rigging. I created a quick "loop form", for lack of a better name, using some rigging line and a toothpick. One end of the line is glued on the toothpick to keep it in place and the other has a loop, hardened with CA that I can slip on and off to position it once the block is held in one of the clamps. Once that is in place I can tie the seizing line in-between the clamp and the toothpick, which leaves a perfectly sized loop on the end of the block. After the loop is seized, I remove the block, wrap and glue the loose ends around the end, and then cut the line flush with the corner of the block. As a break from the blocks, I added the marker lights to the forward shrouds and the star to the bow. Next I started rigging out the main boom. I added the foot ropes and then moved on to the boom crutch tackle. There are a lot of blocks and lines in a small space at the stern. I have everything tied to the appropriate belaying pin or to a bitt, but nothing is permanent at this point. I need to snug thinks up and want to think through adding the sail before I lock everything in. Finished up with the topping lift. Looking at the remaining main boom rigging, the rest will wait until after the main sail is added. Tim
- 145 replies
-
- 5
-
-
- Bluenose
- Model Shipways
- (and 1 more)
-
Thank you Gregg! I use the fuel tubing as a cushioned grip on xacto knife handles as well.
- 145 replies
-
- 1
-

-
- Bluenose
- Model Shipways
- (and 1 more)
-
Finished up the standing rigging over the weekend! This was quite a process, as I redid several of the lines (some multiple times) not liking how they turned out (too tight, too loose, I didn't like the way it looked, etc). Hopefully I have learned enough from the standing rigging work to limit the number of redos on the running rigging I ordered the 3 clamp ;helping hands from Micromark. I used fuel tubbing from my R/C stash for extra grip on lines and to keep the clamp teeth from digging into the blocks. This will be a huge help as I get more into rigging blocks for the running rigging. Tim

- 145 replies
-
- 5
-
-
- Bluenose
- Model Shipways
- (and 1 more)
-
Thank you, Hamilton!
-
Thank you, Nirvana!
-
It's been a fun build. Lots of opportunity for creative license and straying from the basic plan, which based on your Black Pearl, seems to be right up your alley. Your build is fantastic!
- 30 replies
-
- 2
-

-
-
- Flying Dutchman
- OcCre
- (and 1 more)
-
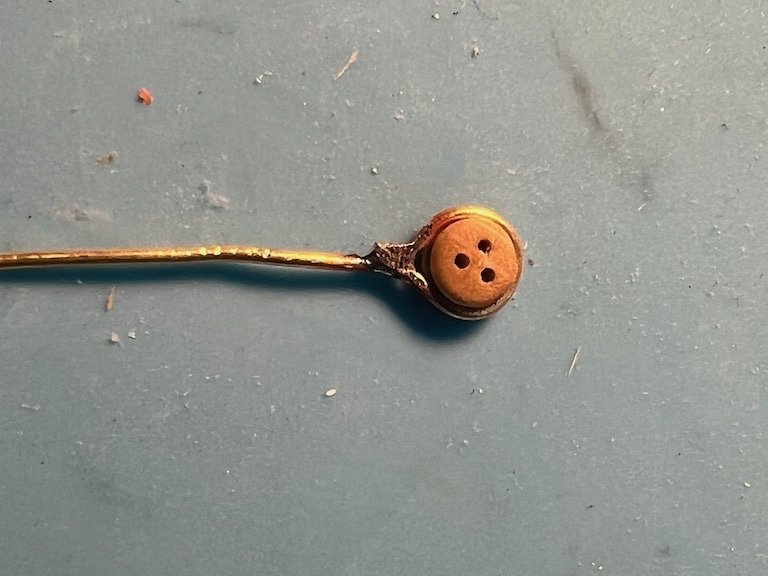
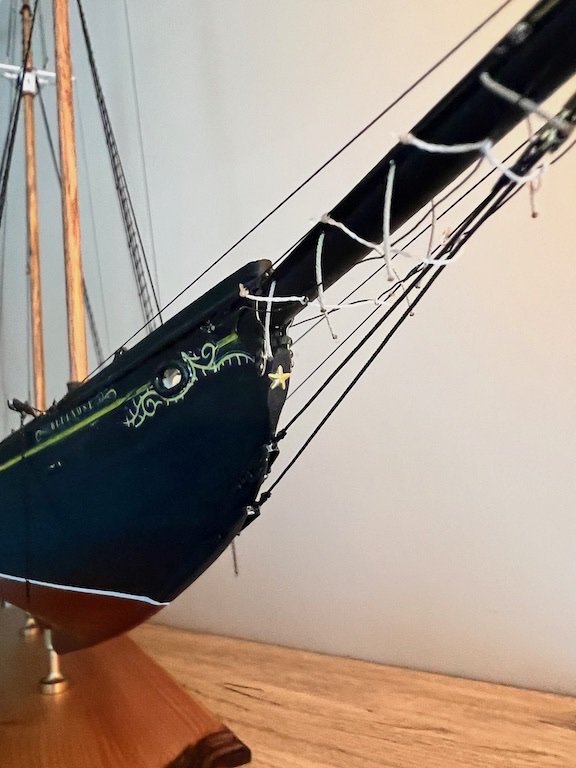
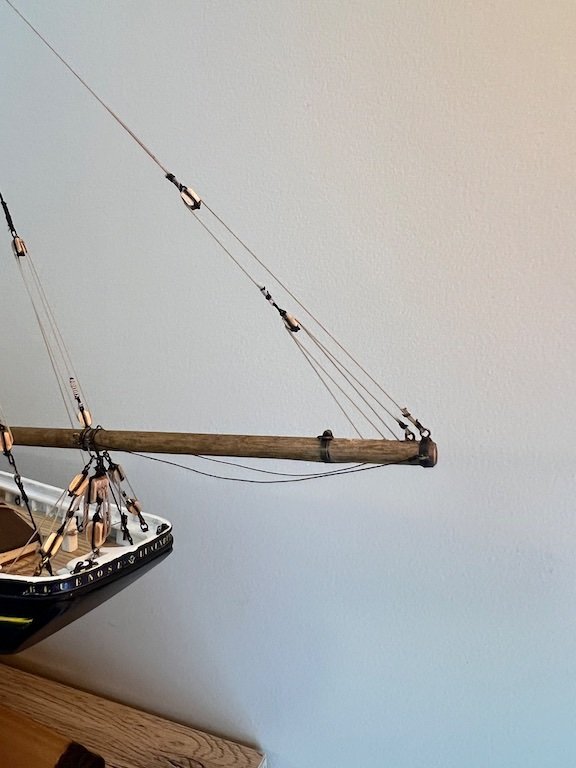
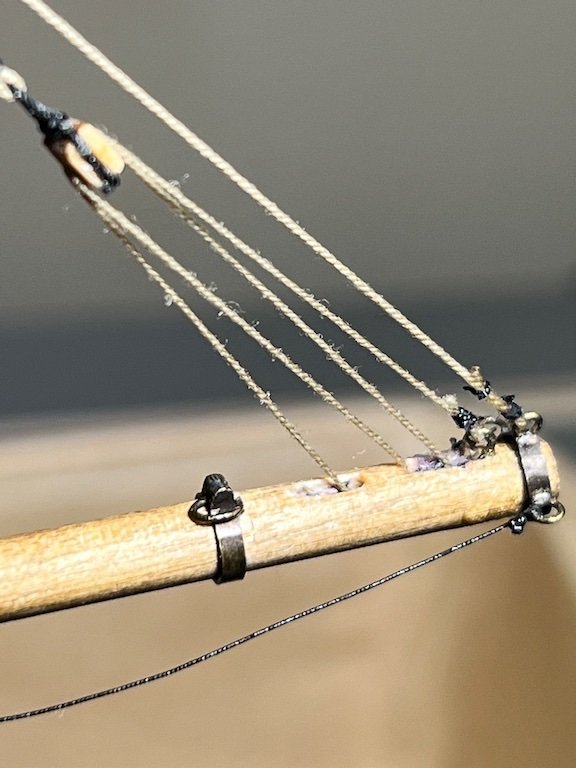
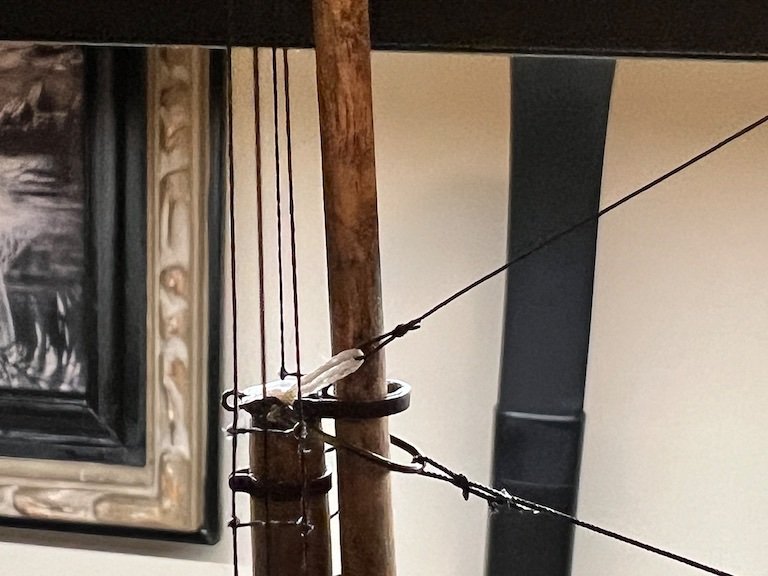
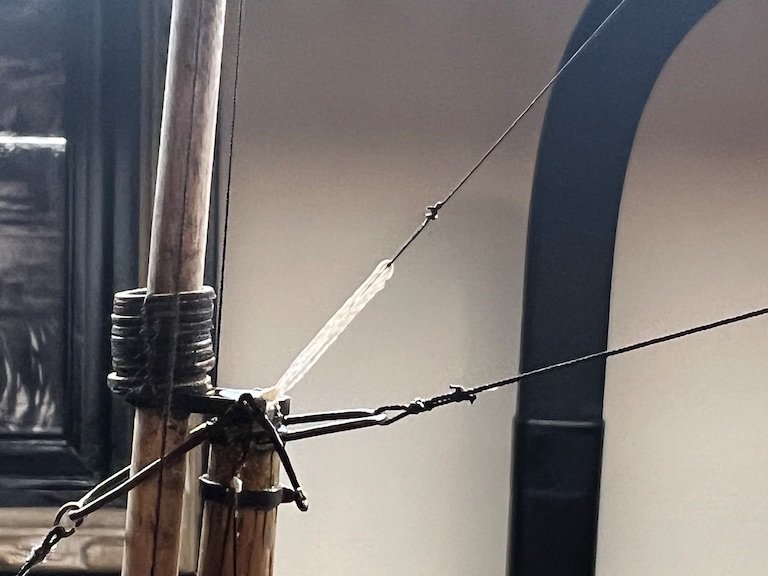
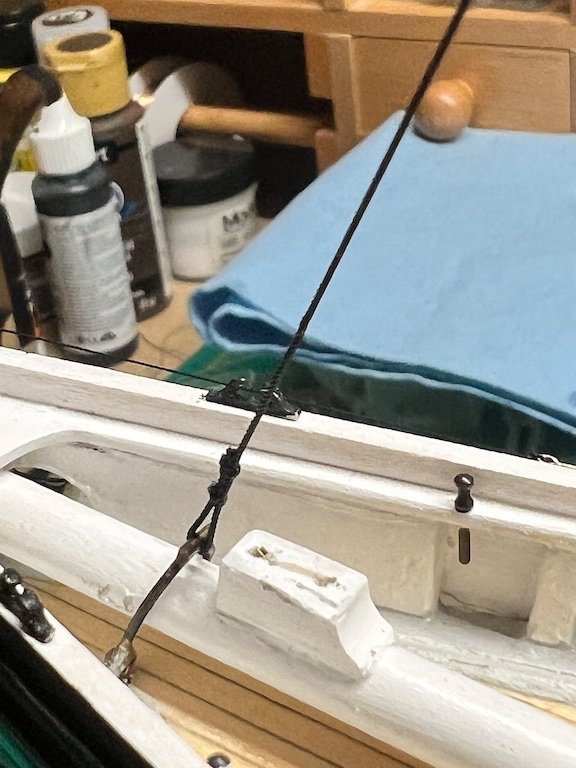
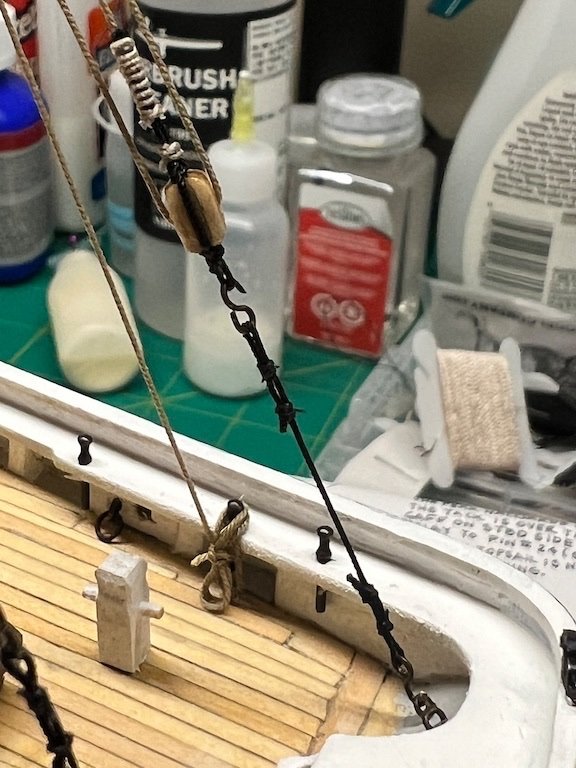
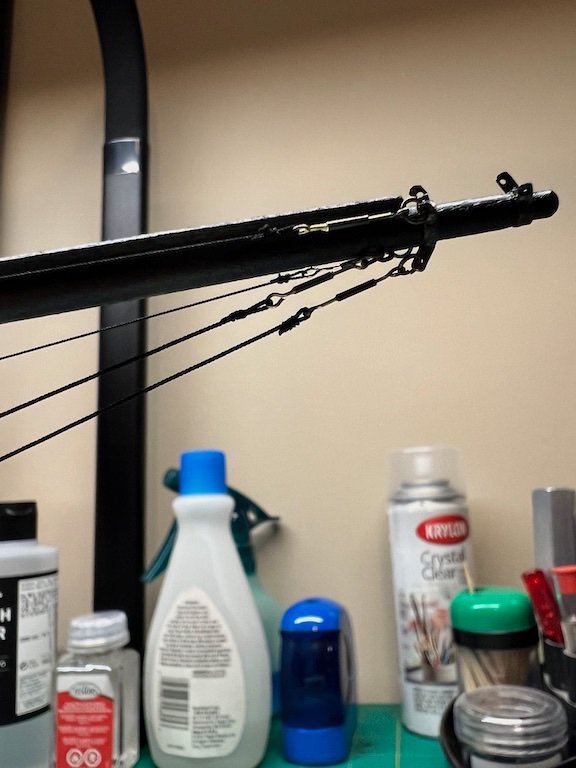
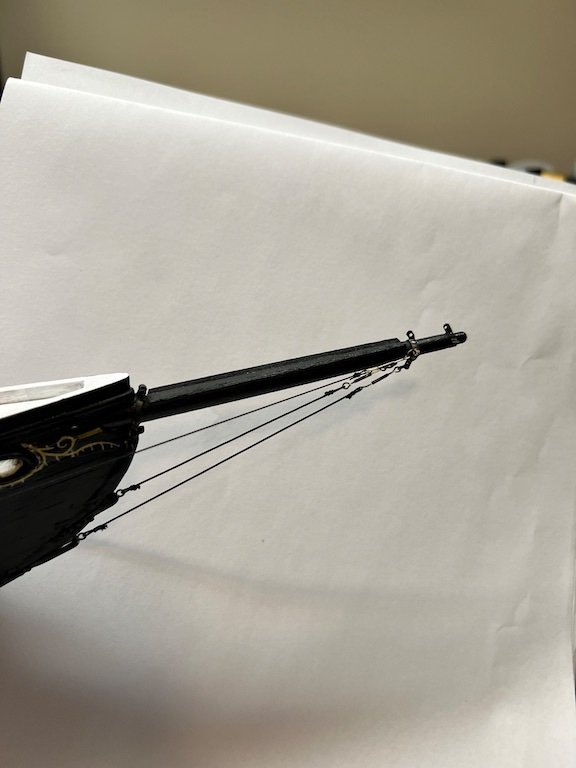
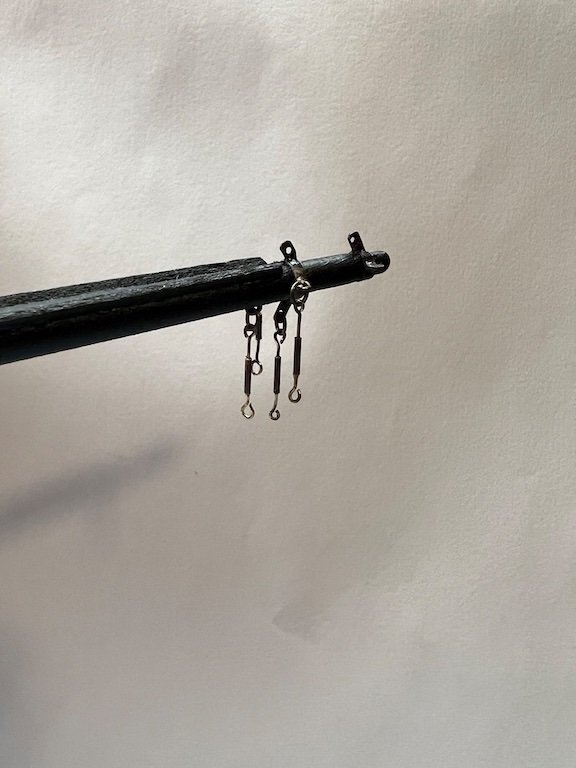
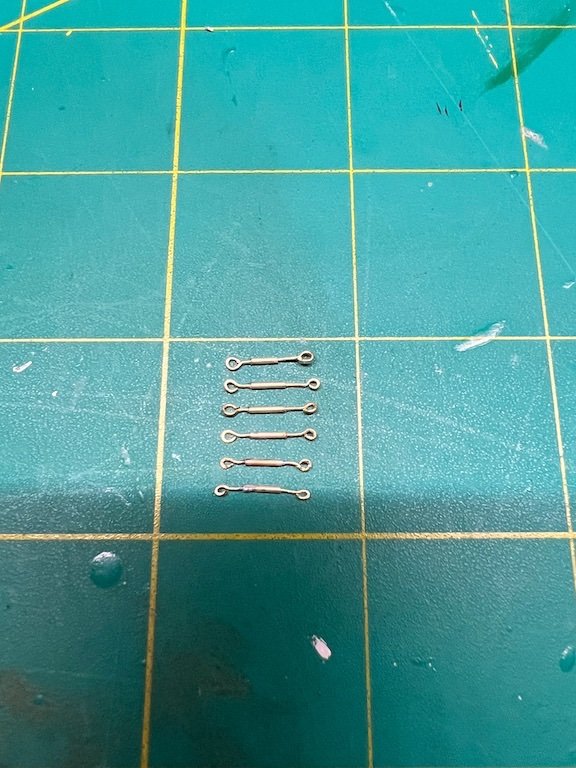
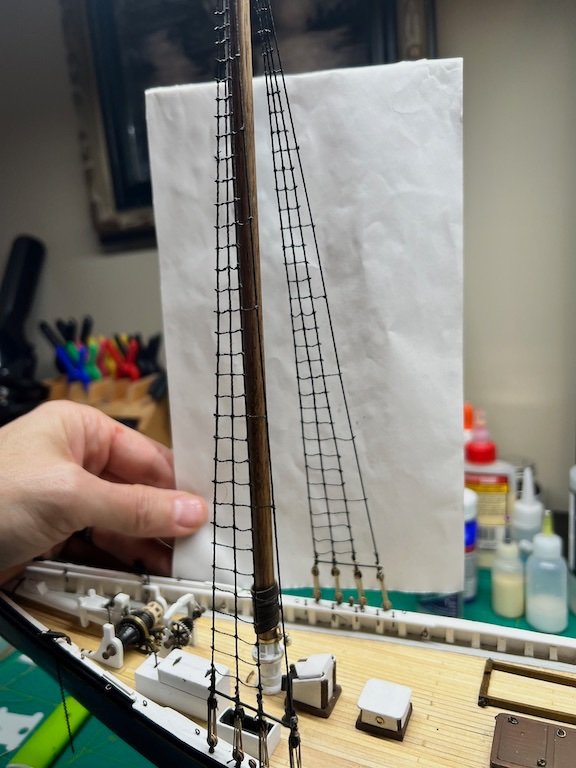
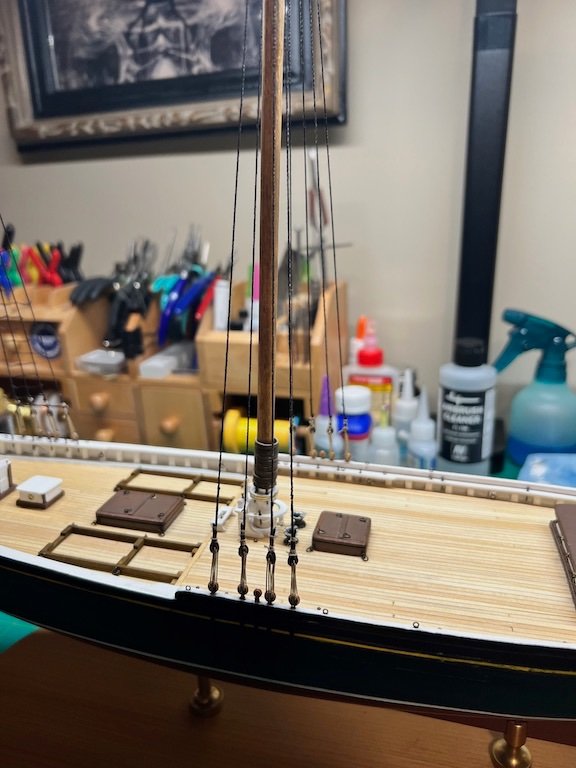
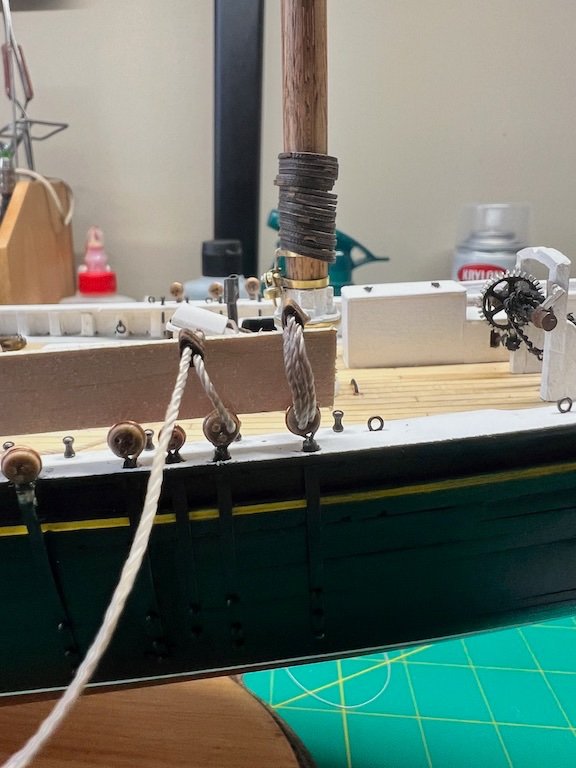
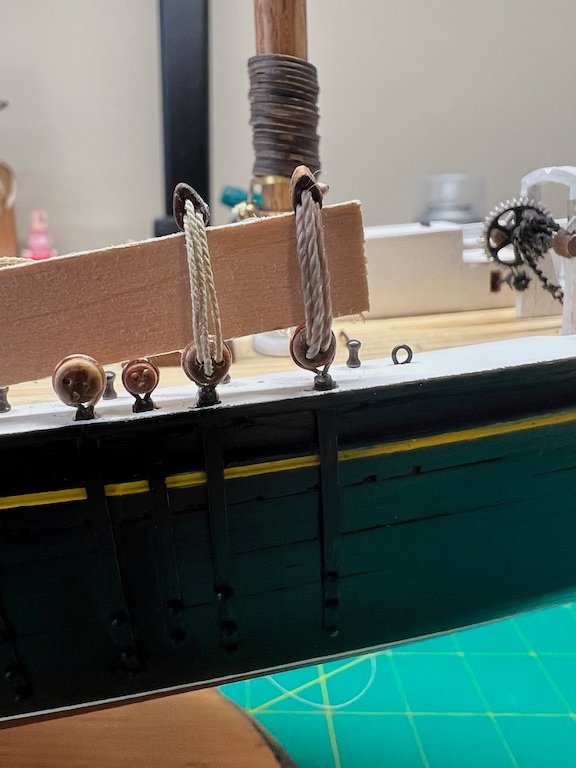
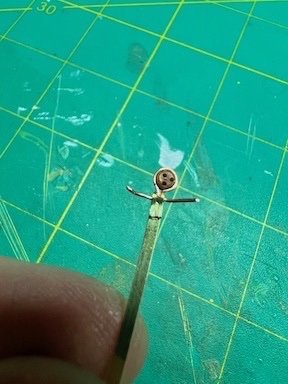
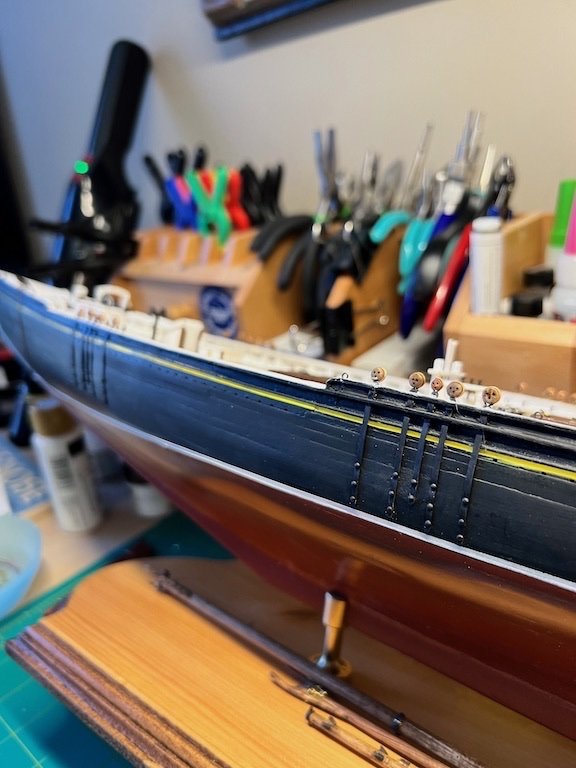
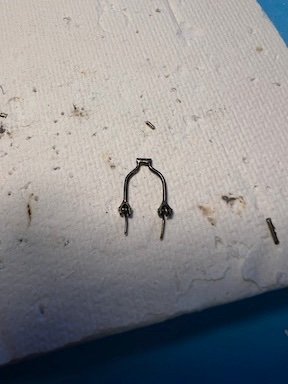
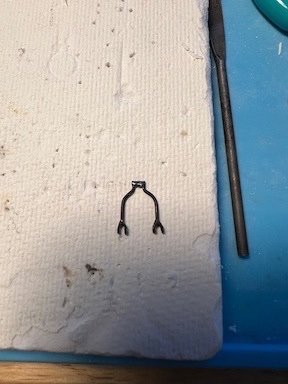
Finished up the ratlines on the main mast. Didn't get much else done on the Bluenose over the holidays other that a few detail touch ups, as I was waiting on more rope to come in from Ropes Of Scale. The stays and bowsprit rigging line sizes were not close to what is supplied in the kit and I did not want to use the same size line for everything. Once the line came in I got to working on the bowsprit rigging. I created turnbuckles using 1/32 brass tubbing and 1/64 brass wire. The brass wire fit perfectly into the tubbing and I used solder to secure the wire. After the wire was secured, I bent and shaped the hooks on either end. These seem to be pretty close to scale. I blackened the turnbuckles and attached them to the bowsprit. I threaded and seized the lines to the turnbuckles and then ran the lines to the bobstay plates and guy plates and seized them in place. Still have the add the back rope and foot rope and stirrups to finish up. Tim
- 145 replies
-
- 7
-
-
- Bluenose
- Model Shipways
- (and 1 more)
-
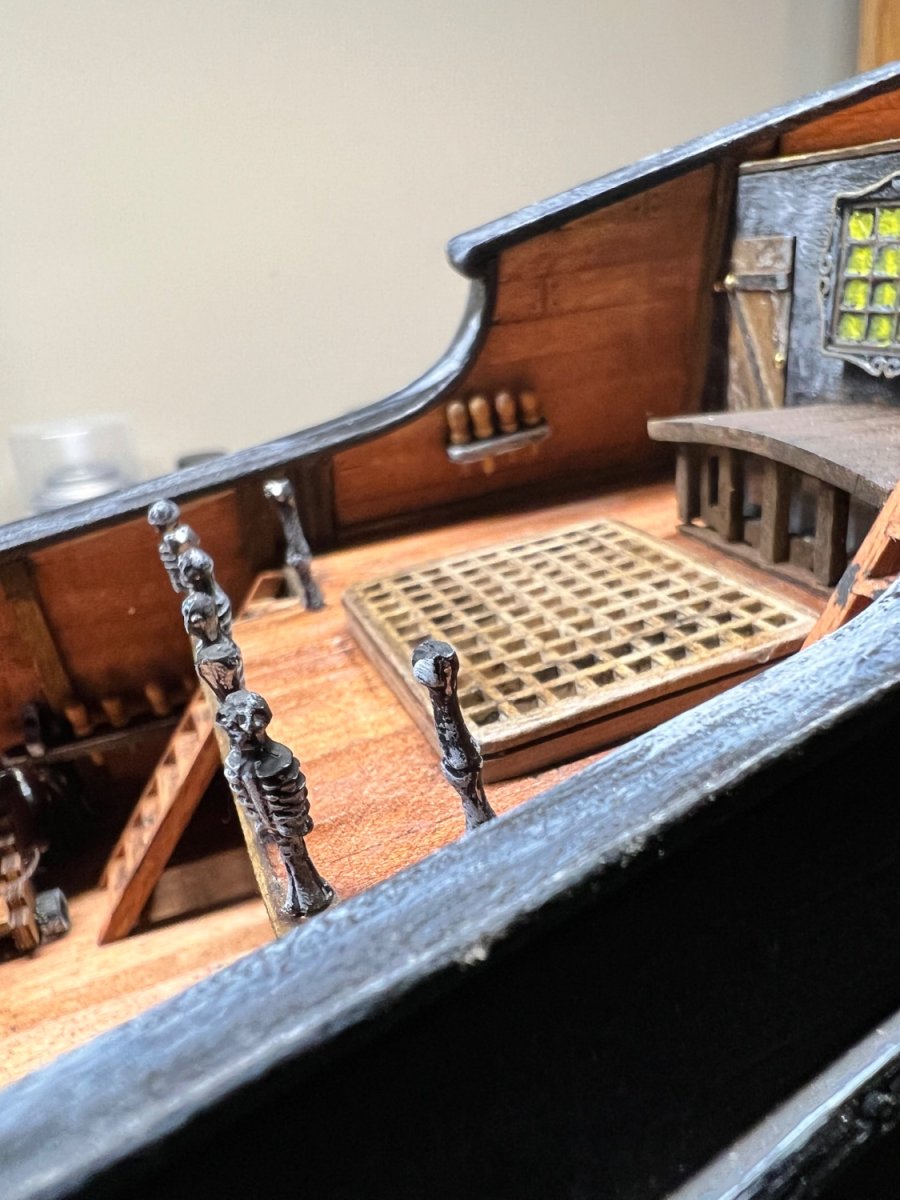
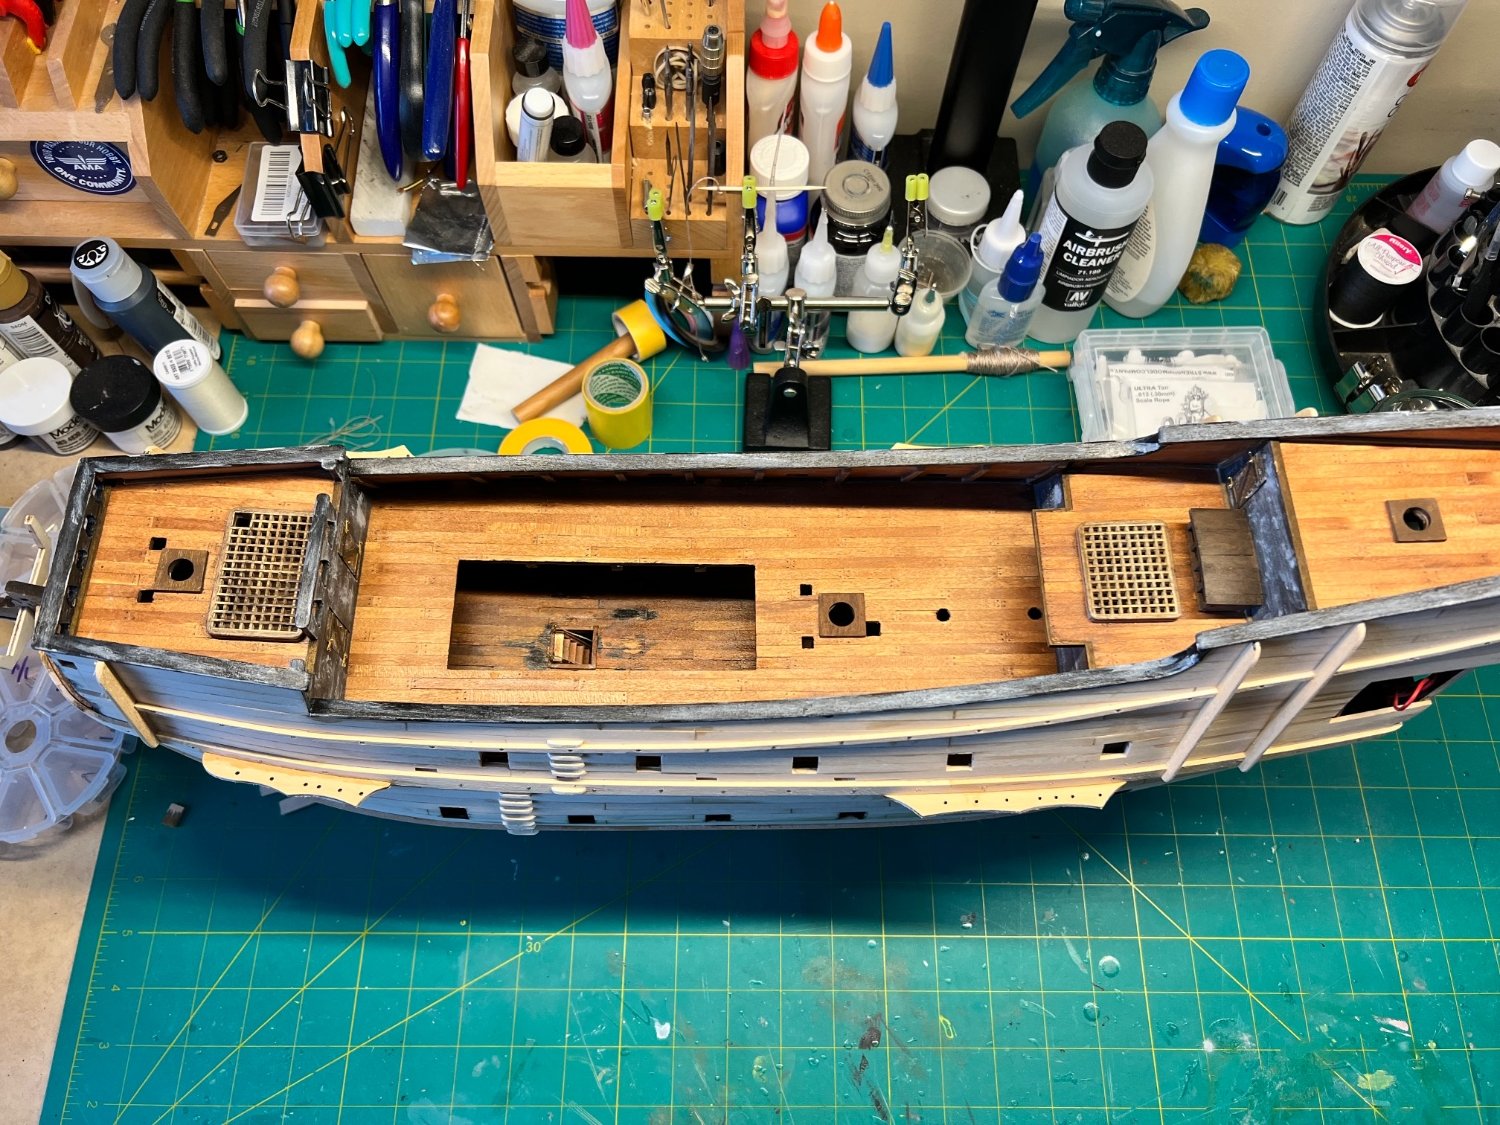
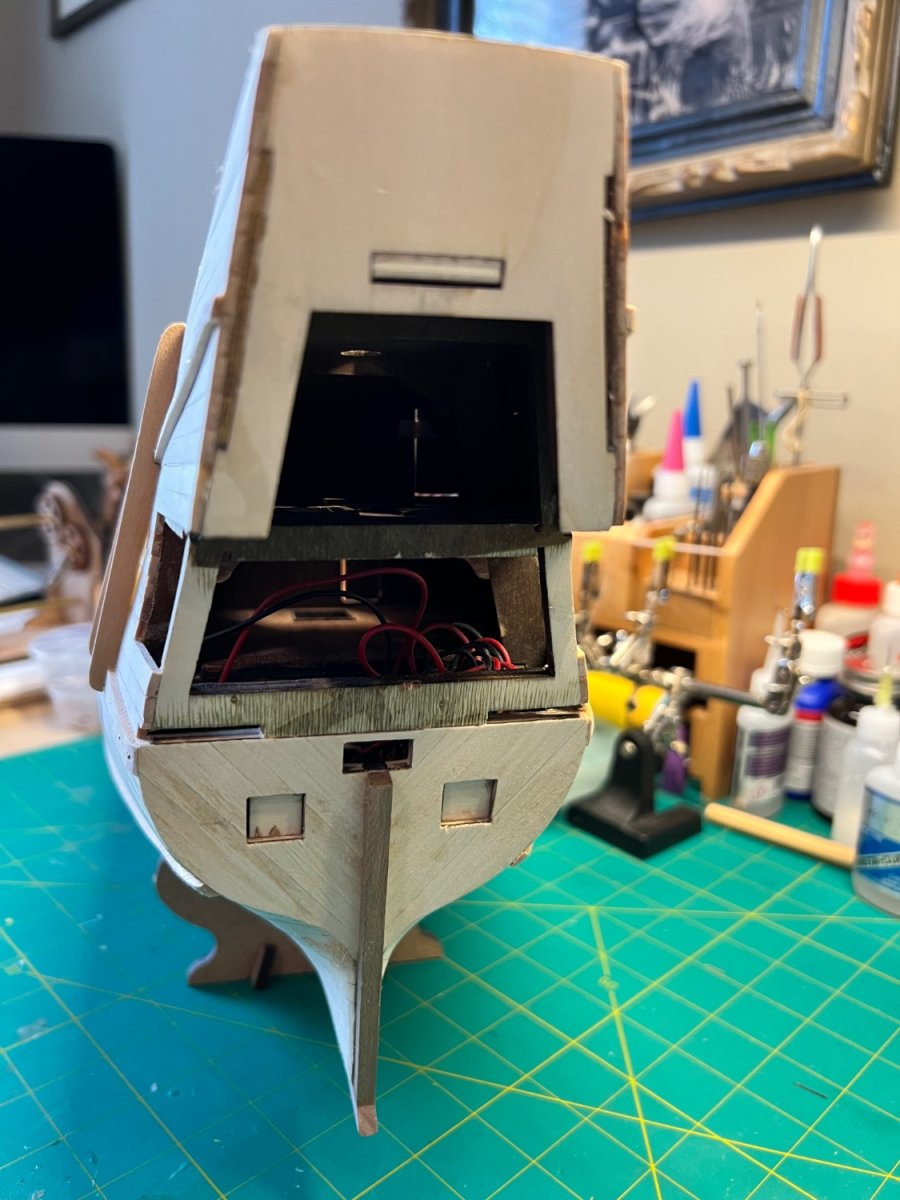
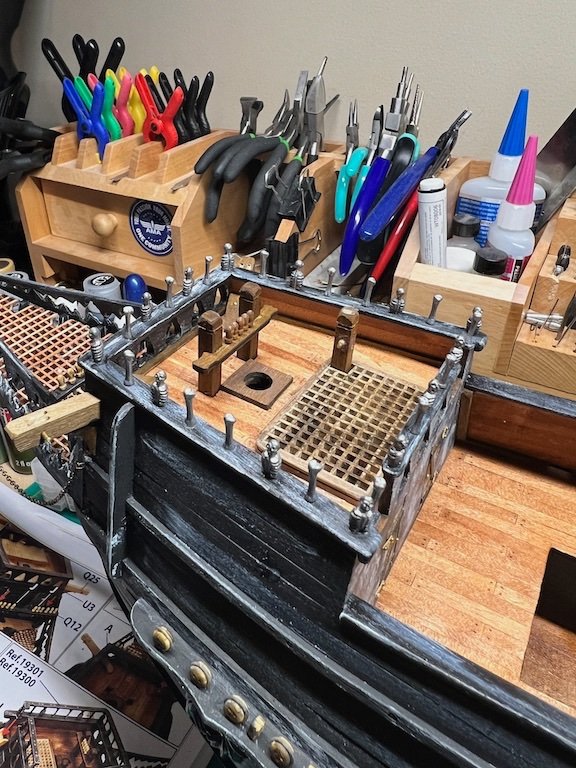
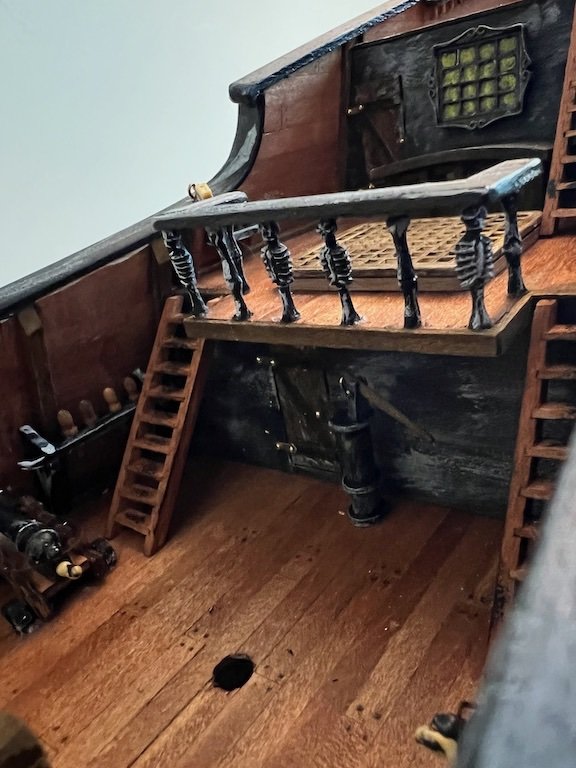
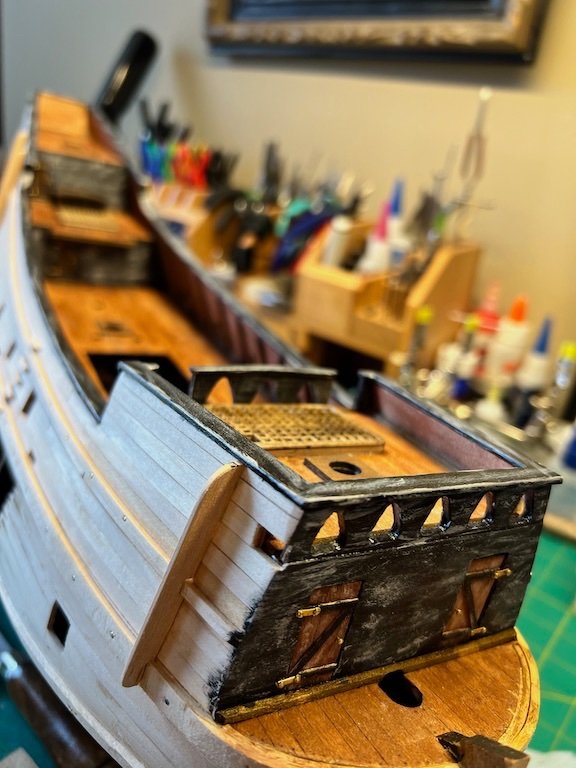
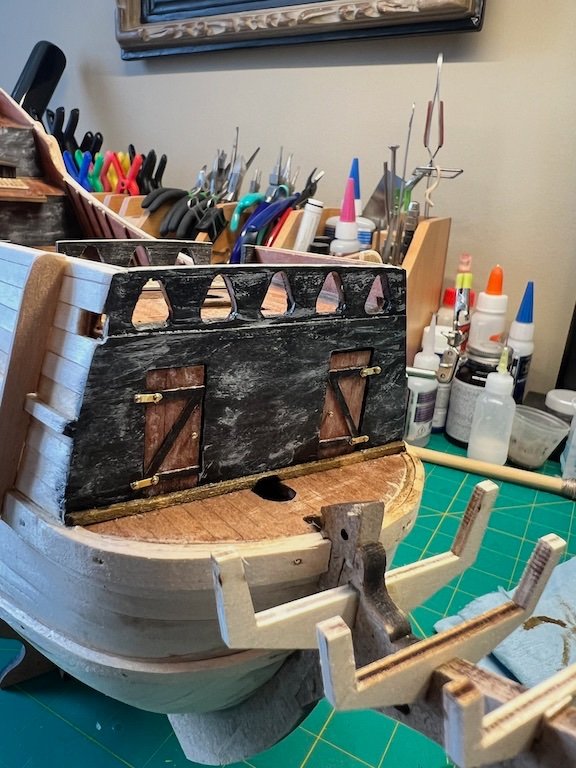
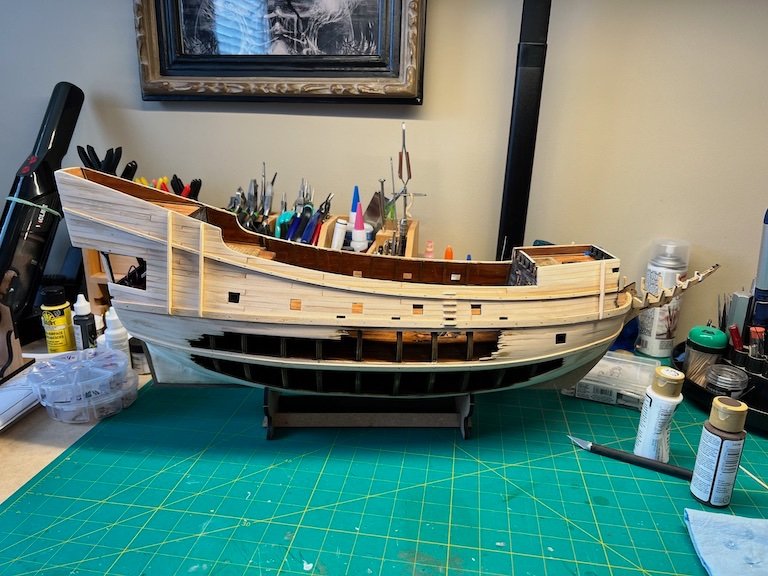
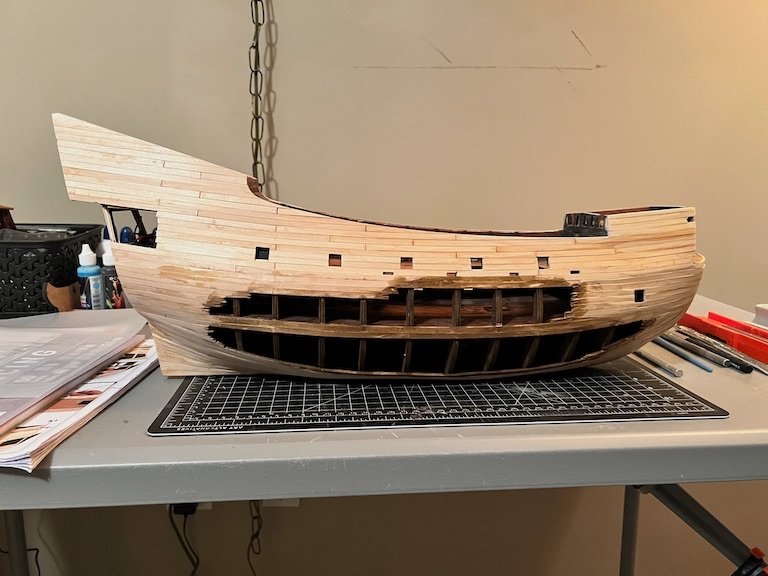
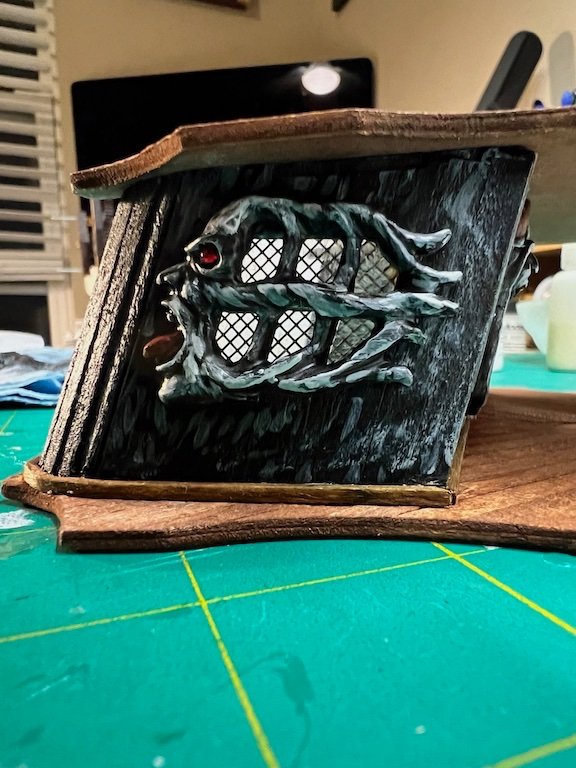
Haven't worked on the Dutchman in a while, as I have been focusing my time on the Bluenose. While I was waiting for some additional rope to come in for the Bluenose, I finished up the starboard side of the hull. I decided I wanted to have the hull planking go all the way to the stem, vs leaving the plywood bow fillers exposed as per the instructions. Still in need of a good sanding. I also installed the below deck lighting while everything was still open. I started on the port side planking and, in between rows of planking, started on the stern cabin and details. I planked all of the balcony flooring and exterior cabin walls to give them a little more texture and keep the door details the same as the others on the ship. I painted the cast pieces with flat black enamel and highlighted with white with a few red details. I used tiny faux, red jewels for the eyes on the cabin figures. Will continue on the planking in-between rigging work on the Bluenose. Tim


- 30 replies
-
- 7
-
-
- Flying Dutchman
- OcCre
- (and 1 more)
-
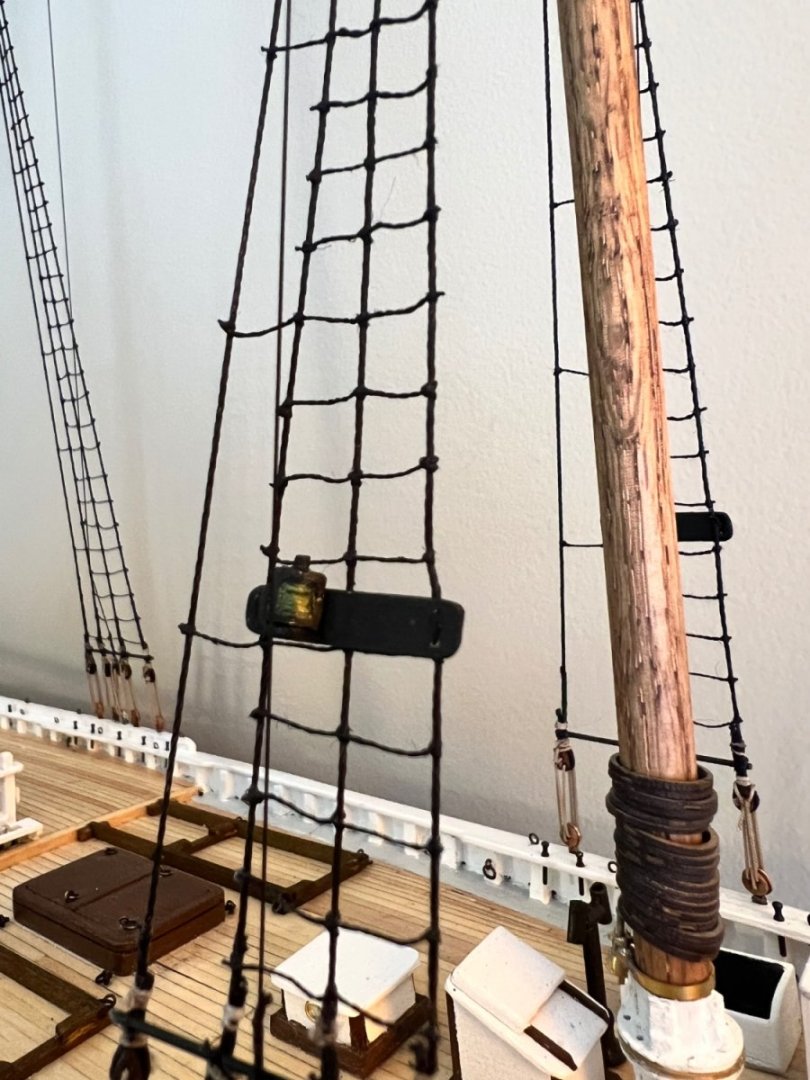
Finished up the Ratlines on the foremast shrouds. On to the mainmast... I followed the same process of seizing the shrouds in the middle, where they wrap around the mast, and on the ends, to wrap around deadeyes. Once the shrouds were seized to the mast I started to attach the deadeyes. I did this a little differently than on the foremast. For the foremast I threaded the lanyards through the deadeyes and then wrapped and seized the shroud to the upper deadeye. For the main mast, I used a wire to space the deadeyes and then wrapped and seized the shroud. Once that was completed for all the shrouds, I threaded the lanyards through each pair of deadeyes and tied off. Both ways worked pretty well, but it was easier to thread the lanyards and maintain consistent spacing with the method I used for the mainmast, as I was able to tie them of as soon as they were threaded vs leaving them loose and waiting until I had attached the shroud to the top deadeye. On to the ratlines... Tim

- 145 replies
-
- 3
-
-
-
- Bluenose
- Model Shipways
- (and 1 more)
-
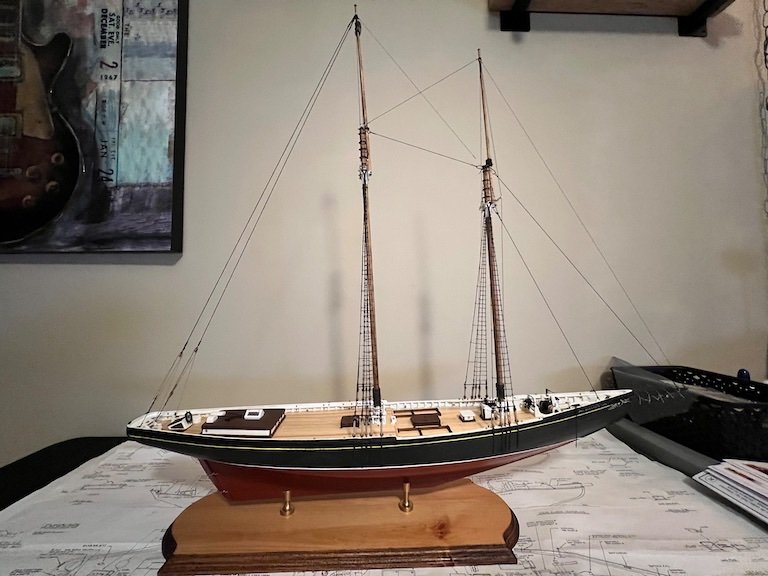
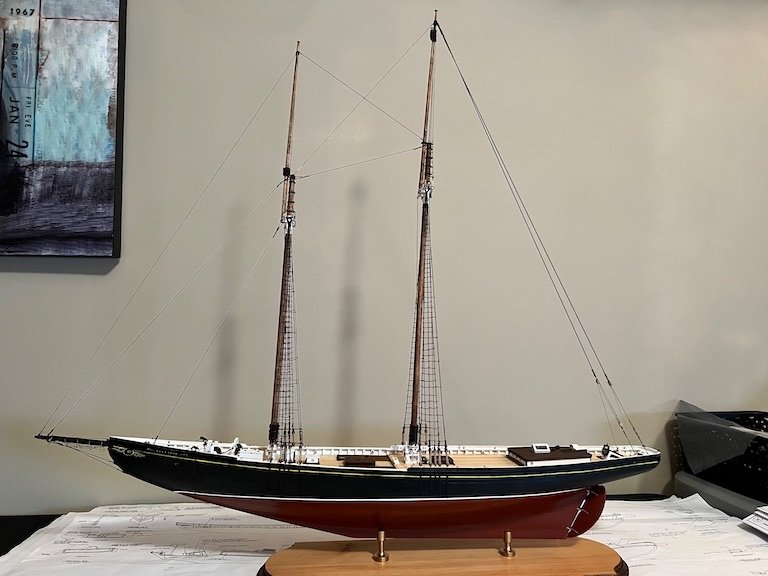
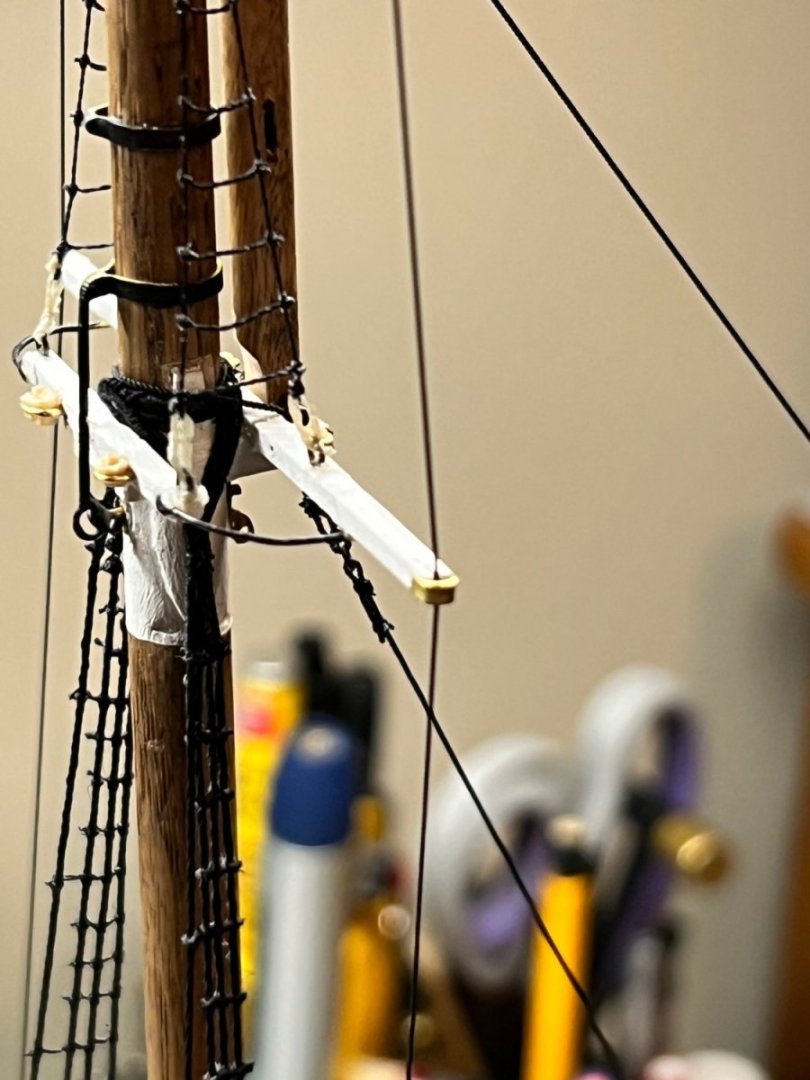
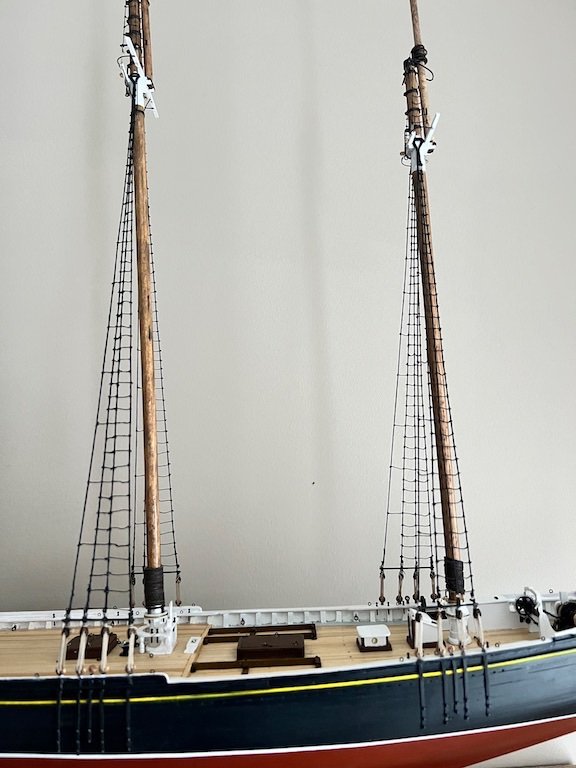
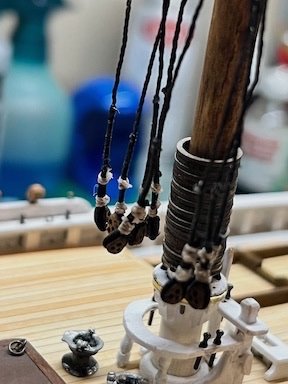
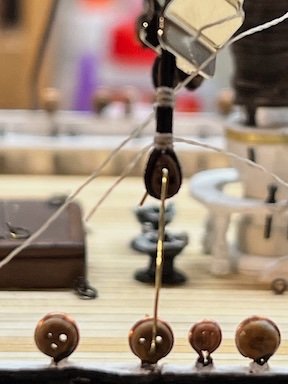
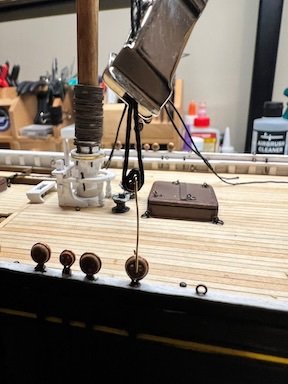
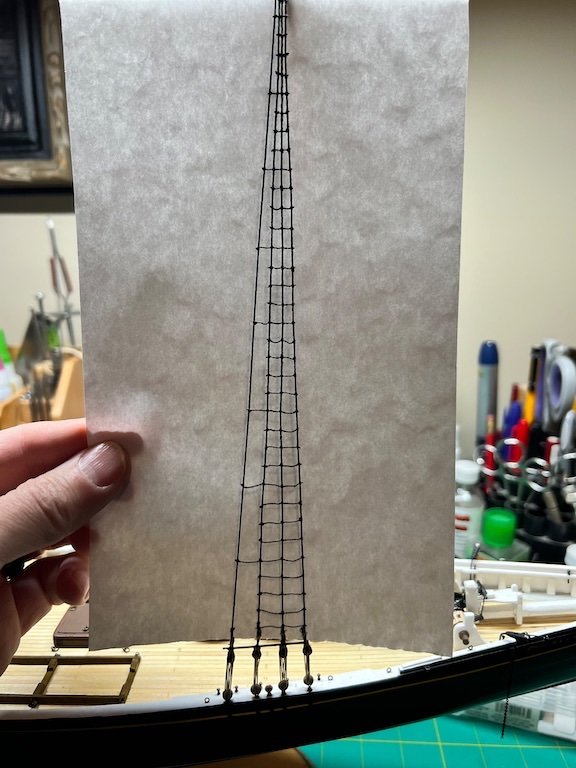
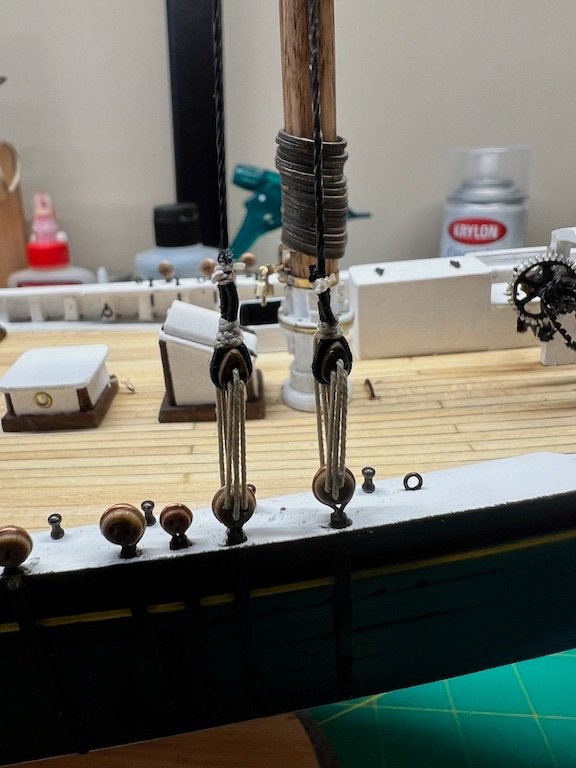
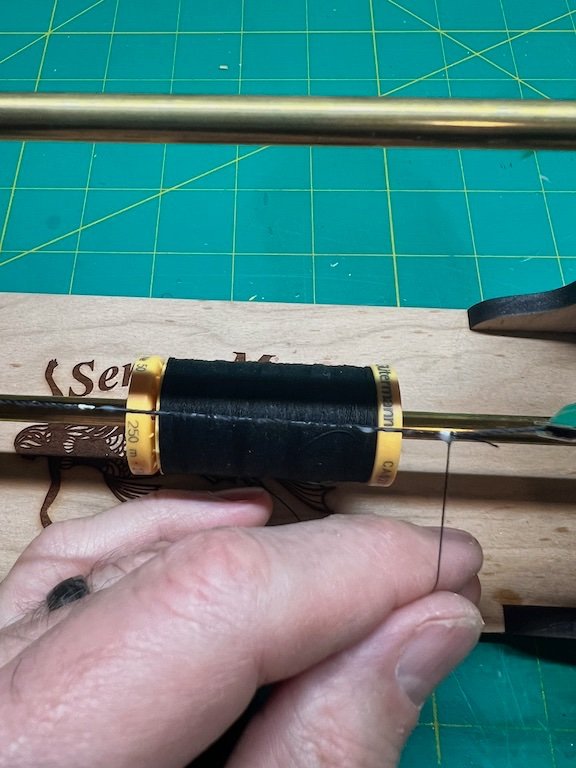
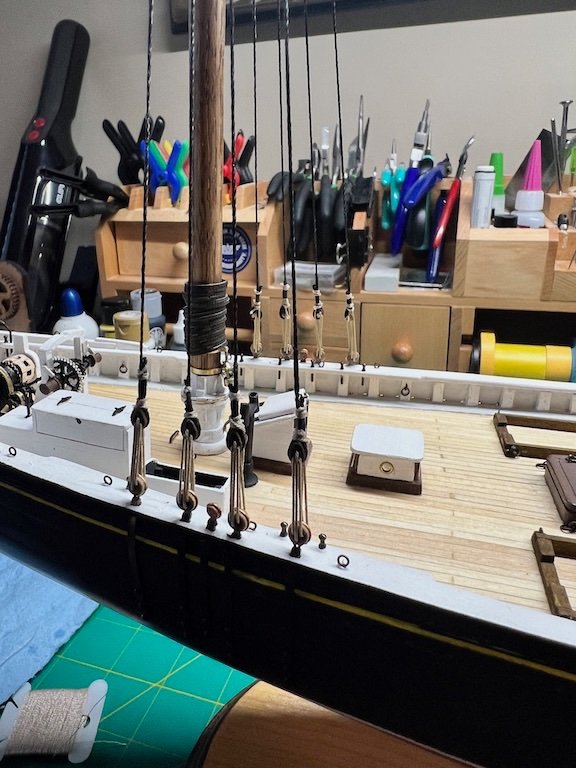
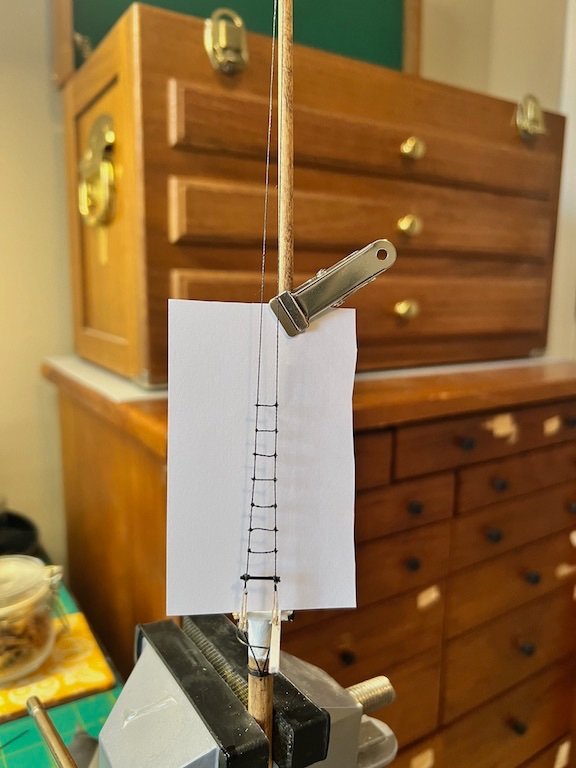
Masts installed! This marks completion of the build, with the exception of a few minor details still to be added. Getting a start on the rigging. I started with the foremast shrouds, then stopped, when I was not happy with the results using the supplied rigging line. I am OK with the supplied black line for the shrouds, but the tan just wasn't working for the deadeye lanyards. The smallest diameter line was too small and the next size up fit, but did not look well defined, as the thread wind is pretty loose. The line isn't pulled snug in the photo below, but the look didn't improve much even when it was. I went to Syreneshipmodel.com and ordered two sizes of their tan rope, .012 and .018. The .018 worked perfectly and what a difference in quality! Syrene on the left and kit rope on the right. I cut lengths of the .018 black line and seized the middle, where it wraps around the mast and the ends, where the deadeye are seized in. Once the seizing thread is tied on, I put a little diluted white glue on the shroud line the length of the seized section. This secures the thread and, as I am winding, the little dot of white helps to show the progress of the wrapping. It can be hard to see with the back on black and I think it helps to avoid any gaps in the seizing. Shrouds attached and lanyards threaded through the deadeyes and tied off. I used the same carbon fiber rod for the sheer pole as on the upper shrouds. Started on the ratlines. Tim


- 145 replies
-
- 5
-
-
- Bluenose
- Model Shipways
- (and 1 more)
-
Looking good, John! I broke one of the cross trees as well when I pulled the shroud too tight ☹️. I should have added the blocks, like you did, before I mounted the masts. -Tim
- 282 replies
-
- 1
-
-
- Bluenose
- Model Shipways
- (and 1 more)
-
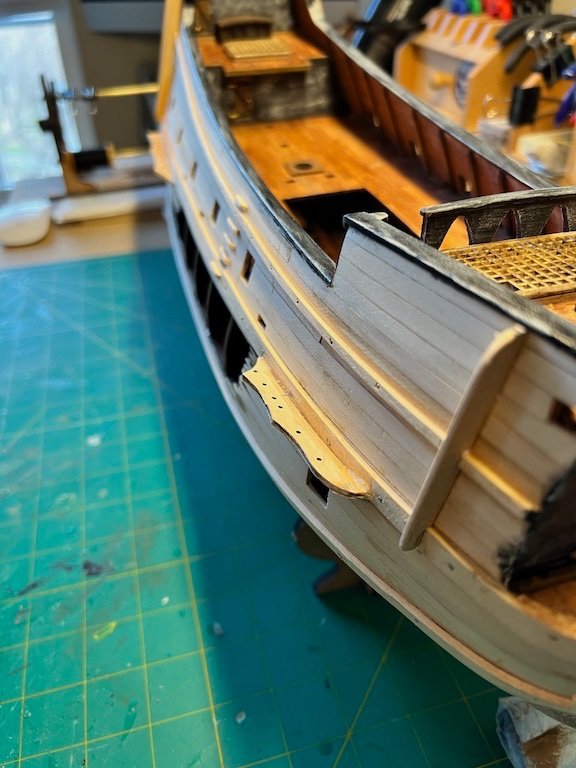
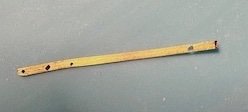
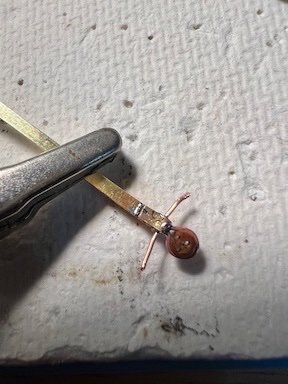
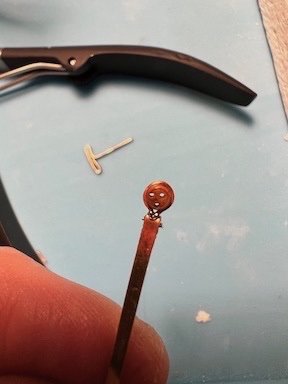
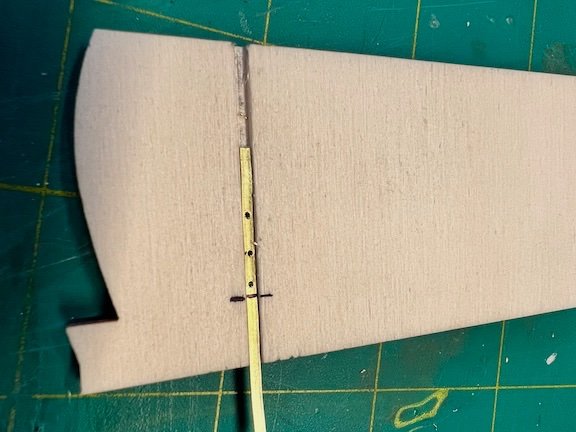
I have completed and installed the chainplates. I cut the brass strip to the appropriate lengths and then drilled a 1/32 hole through one end of each strip. I also marked the holes for nails at the other end, but decided to wait to drill them until the deadeyes were attached. Using the kit supplied copper wire, I wrapped a piece around each deadeye and the fed the ends through the 1/32 hole until the deadeye was snugged up to the strip. I then bent the wire out to the sides. I thought this would made a reasonable facsimile of a bolt. I folded over the short end of brass strip, crimped down with pliers and the soldered. I created a jig to drill the remaining holes in the chain plate. As luck would have it, the blade currently on my saw is the same width as the brass strip. A shallow pass through a scrap piece of wood provided a channel for the strip. I drilled out one extra strip with holes per the plan and placed this on top of the chain plate in the slot. I forgot to take a picture with the chainplate inserted, but below is the jig. All the chainplates have been installed. On to the rigging! Tim
- 145 replies
-
- 3
-
-
- Bluenose
- Model Shipways
- (and 1 more)
-
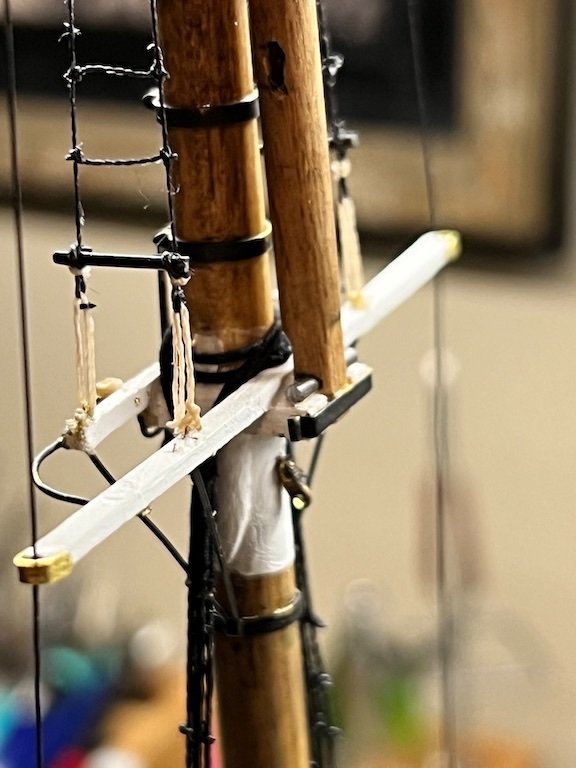
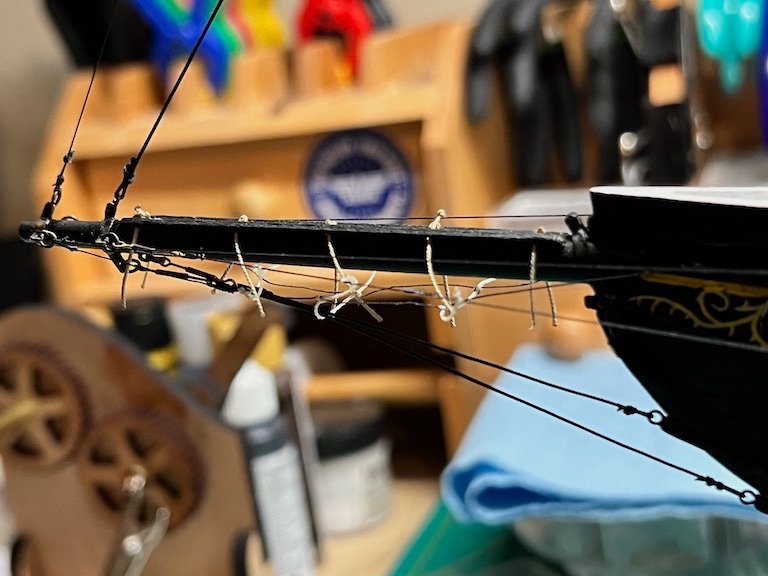
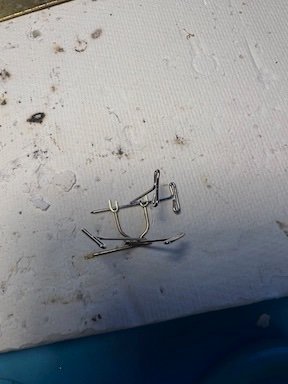
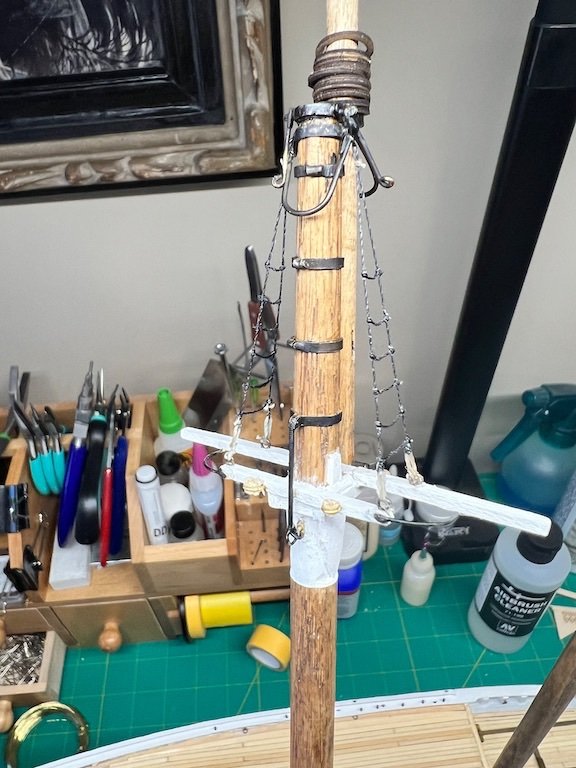
After going through the deck plans again to make sure all of the various eyebolts, belaying pins, etc were in place, I realized that I had not made the jumbo jib boom stay. Another opportunity for soldering practice! While the masts were still separate from the hull, I took the opportunity to add the spreader lifts/ratlines to the foremast and the topmast shrouds/ratlines to the main mast. I seized the shrouds at the mid point then wrapped around the topmast and tied off. I used tan thread run through the eyes on the spreader bars to create the lanyards and then fed the shroud lines through and tied off. I used pieces of carbon fiber rod, lashed to the shrouds for the sheer poles. The ratlines were tied with a regular knot on the left side and then a clove hitch on the right. Once all were tied and lined up, I added a bit of glue to each knot to hold everything in place. All that remains to add is the chain plates. The additional brass strips came in from Model Expo, so I have started to make those and should have them finish and installed today. Tim

- 145 replies
-
- 3
-
-
- Bluenose
- Model Shipways
- (and 1 more)
-
Thank you Hamilton! The metal work has definitely been a learning experience and probably explains why I came up short on the kit supplied brass strips. 😬 Tim
-
Thank you Gregg! Your build is coming along very nicely as well. Really like the deck details you have added. I have been trying to decide if I want to add barrels and need to figure out the anchors, ropes and chains up around the bow. Model Expo sent the bras USPS, so hoping it arrive in the next few days. Really want to be able to work on the chain plates over Thanksgiving weekend while I have some time off. Tim
- 145 replies
-
- 1
-
-
- Bluenose
- Model Shipways
- (and 1 more)
-
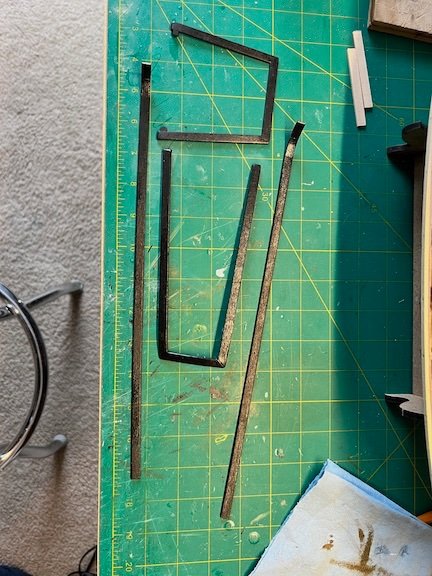
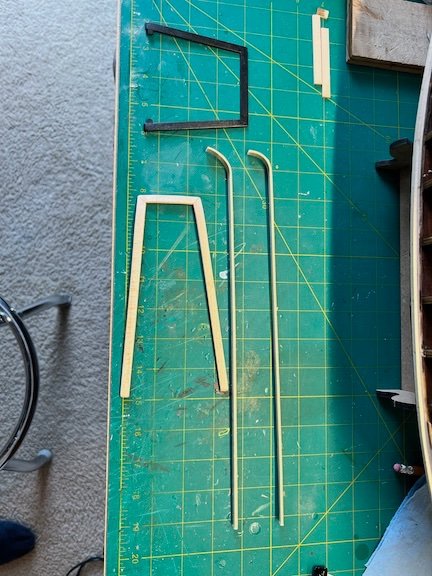
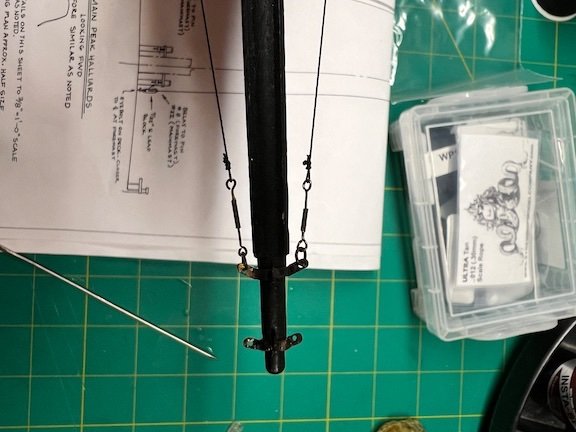
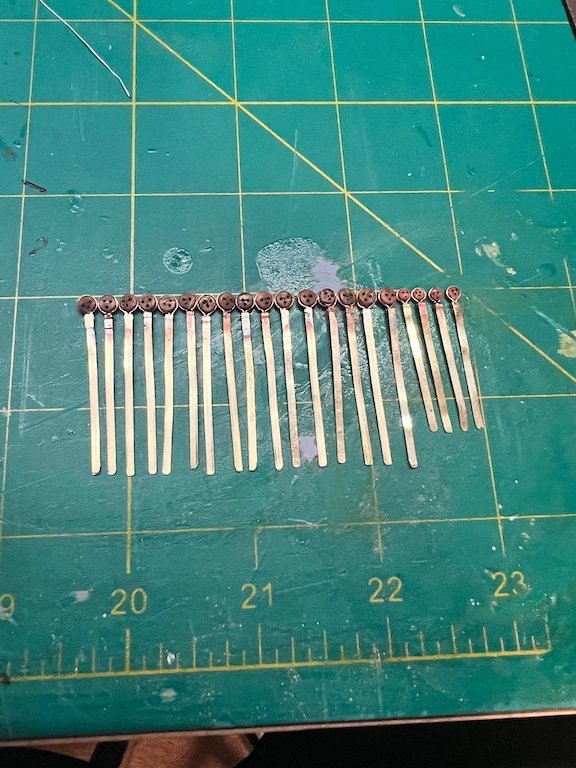
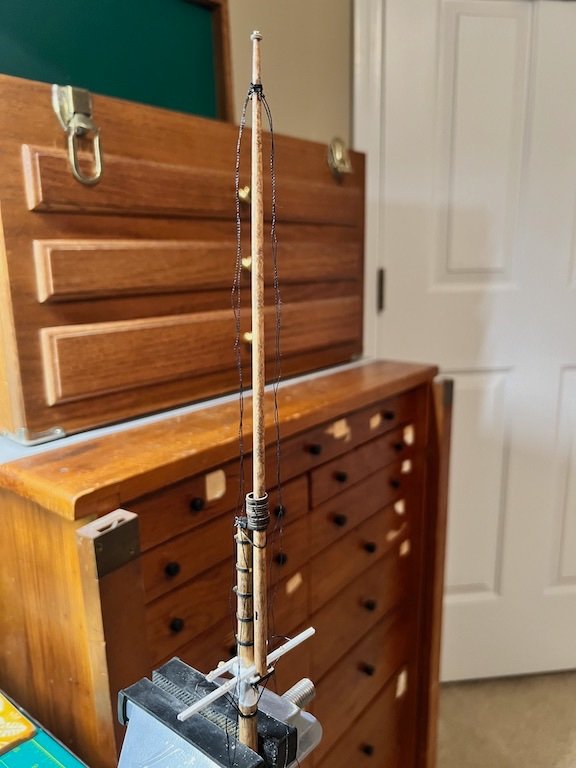
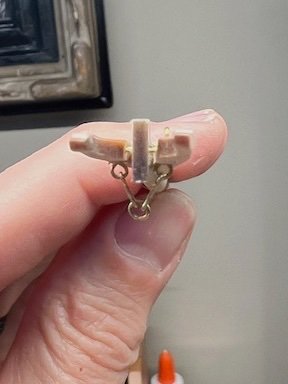
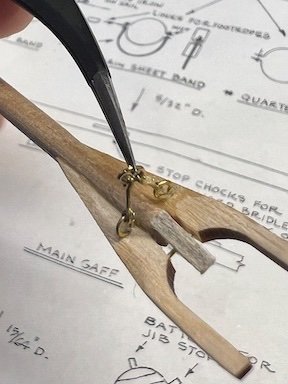
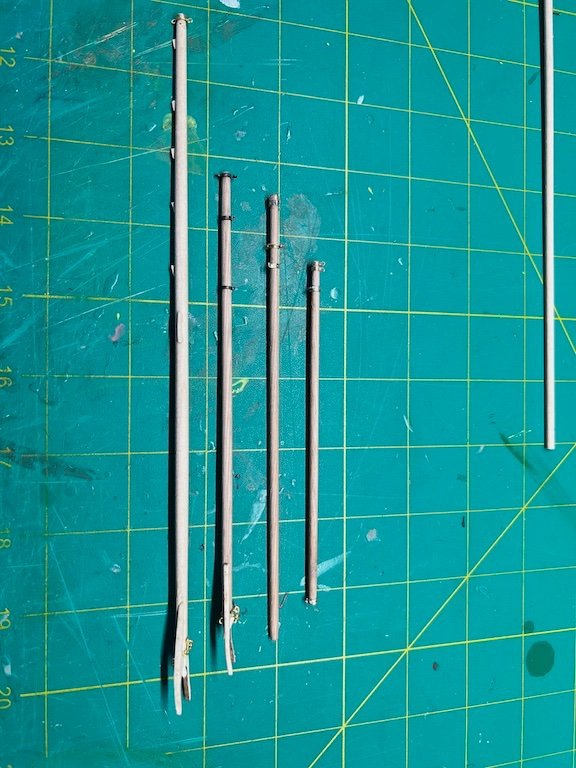
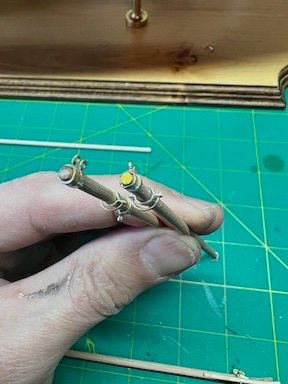
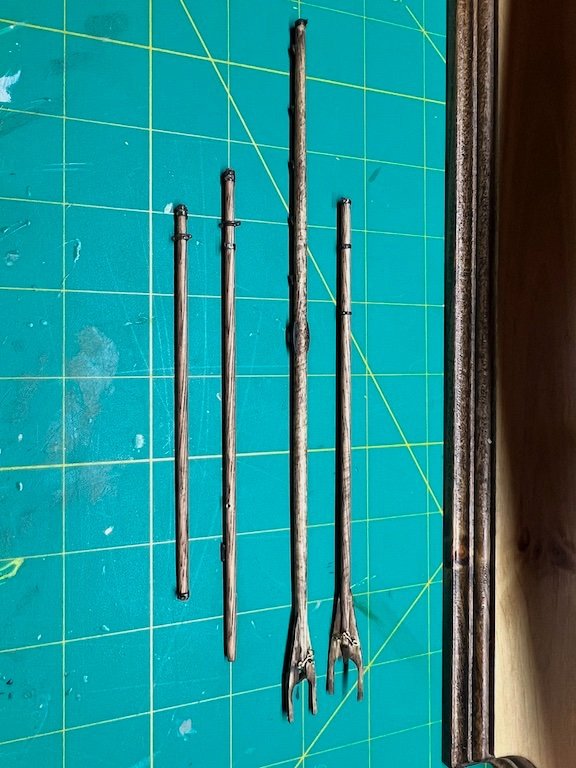
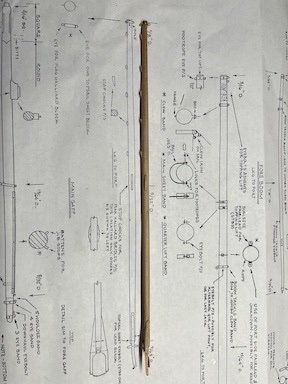
I have finished work on the Booms and Gaffs. There were a bunch of little bands of various designs...lots of soldering practice! These were small, especially on the tapered (5/32) ends and were a real test to get shaped and fitted properly. The main gaff and fore gaff also throat halliard linkages. Finished with the brass blackened and the Booms/gaffs stained Last bit to complete before the rigging starts is the chainplates. I ran out of the brass strip supplied in the kit. Not sure if it was short to begin with or I just used up more that I should have at this point in the build. I reached out to Model Expo they had extra mailed out to me the next day! Tim

- 145 replies
-
- 1
-
-
- Bluenose
- Model Shipways
- (and 1 more)
-
Thank you Helmar! I am new to rigging as well and am about to start on the Bluenose. I plan to refer to the link below as I work through the rigging along with @hamilton Bluenose build.
- 145 replies
-
- 1
-
-
- Bluenose
- Model Shipways
- (and 1 more)