HOLIDAY DONATION DRIVE - SUPPORT MSW - DO YOUR PART TO KEEP THIS GREAT FORUM GOING!
×


Fubarelf
-
Posts
115 -
Joined
-
Last visited
Content Type
Profiles
Forums
Gallery
Events
Everything posted by Fubarelf
-
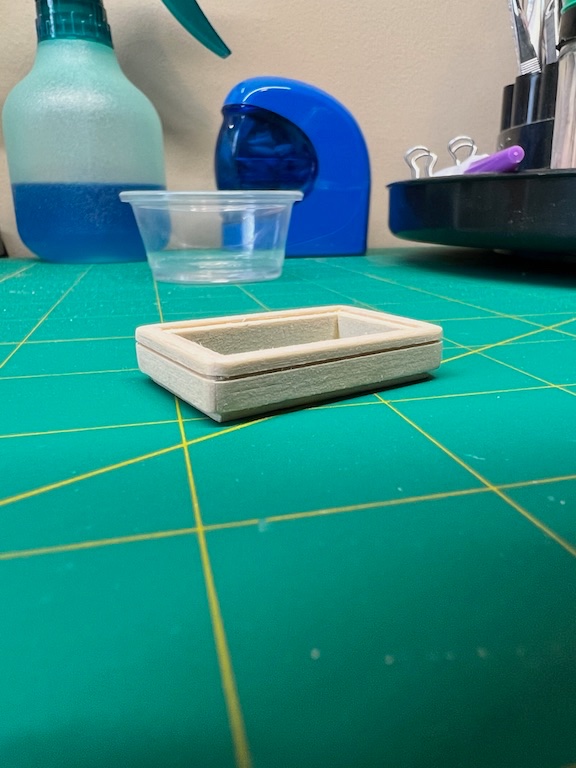
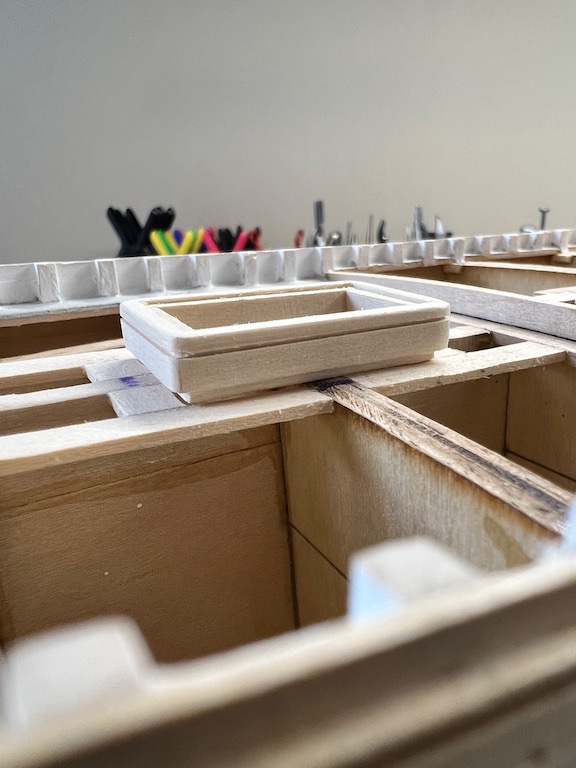
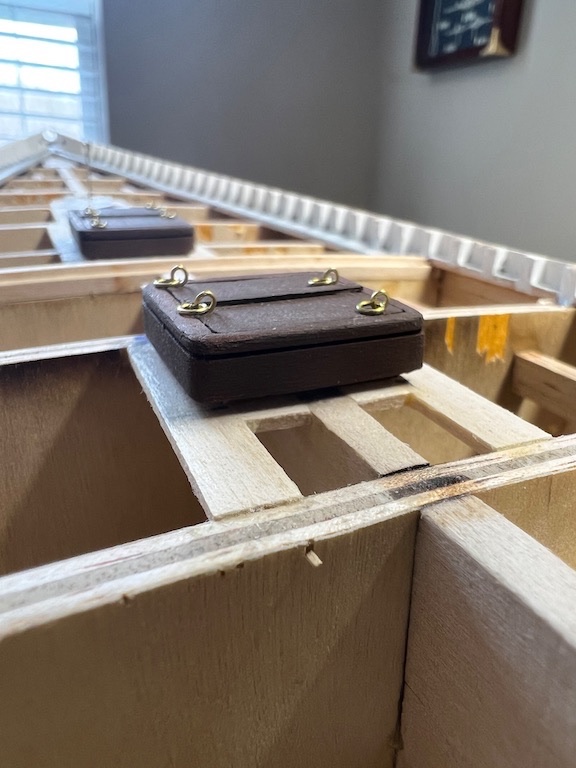
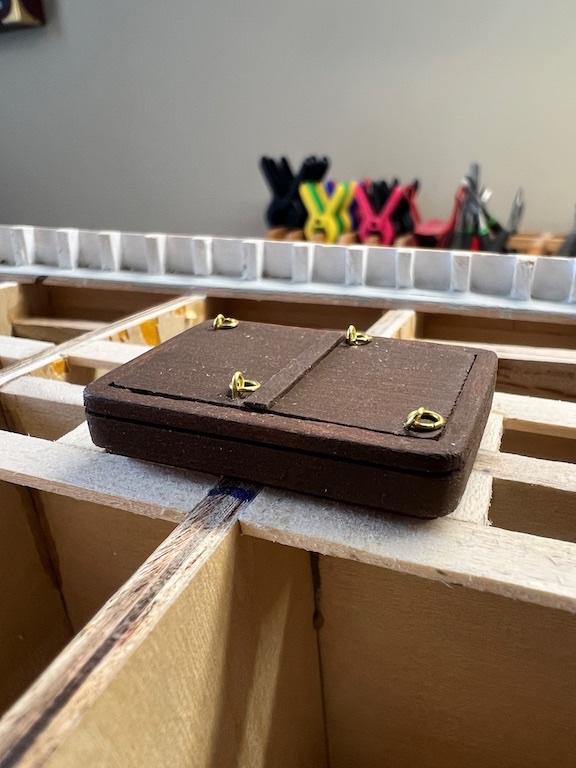
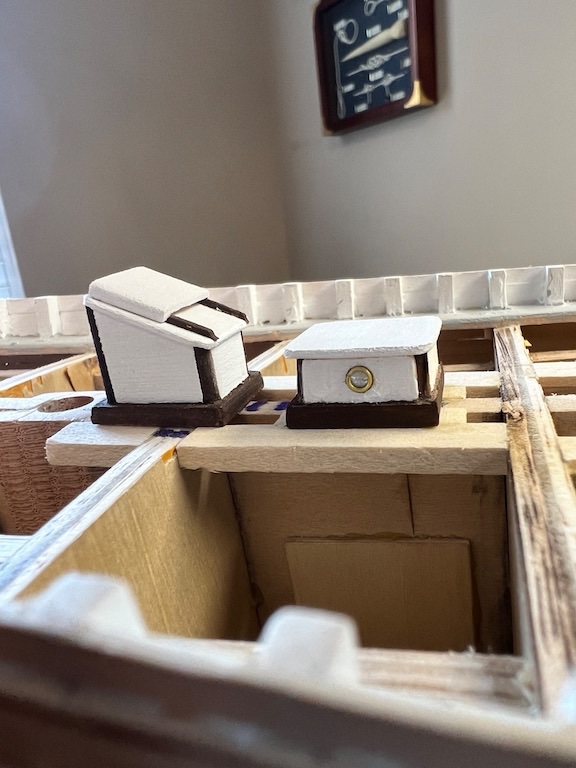
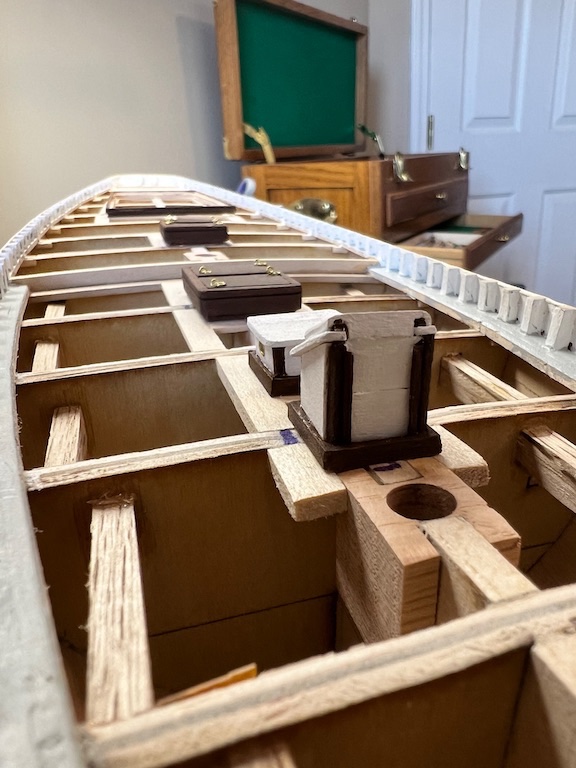
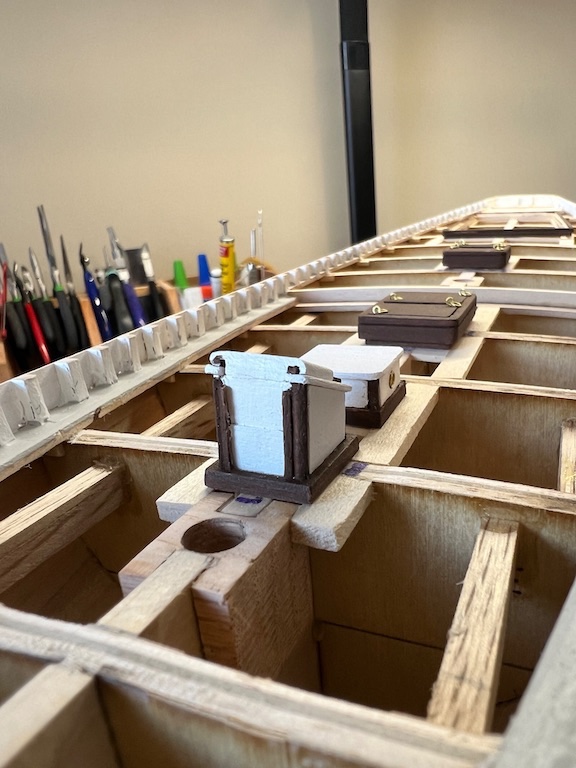
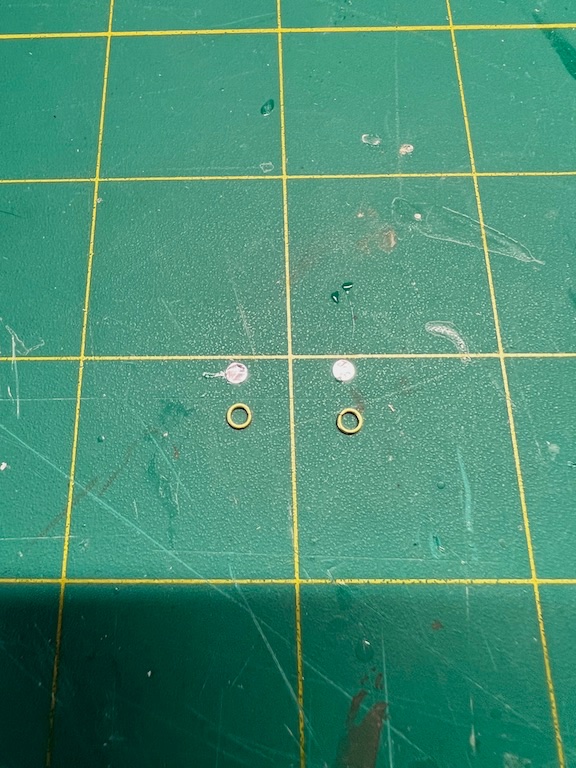
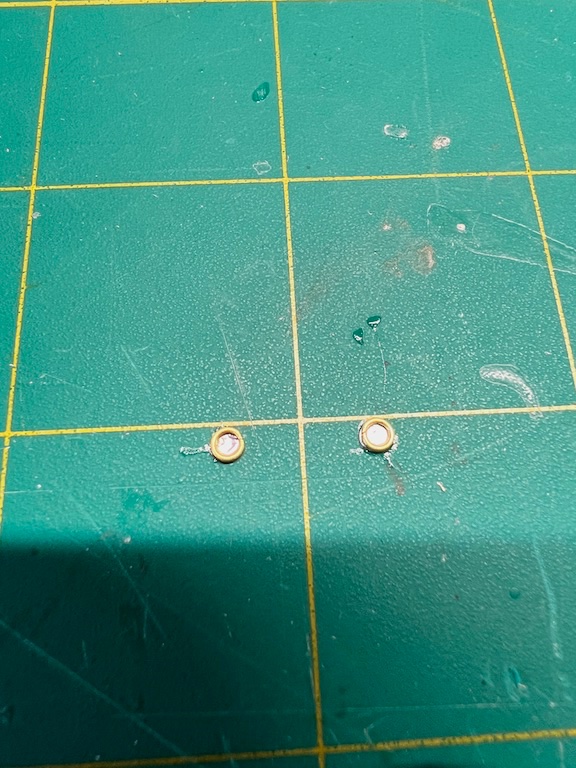
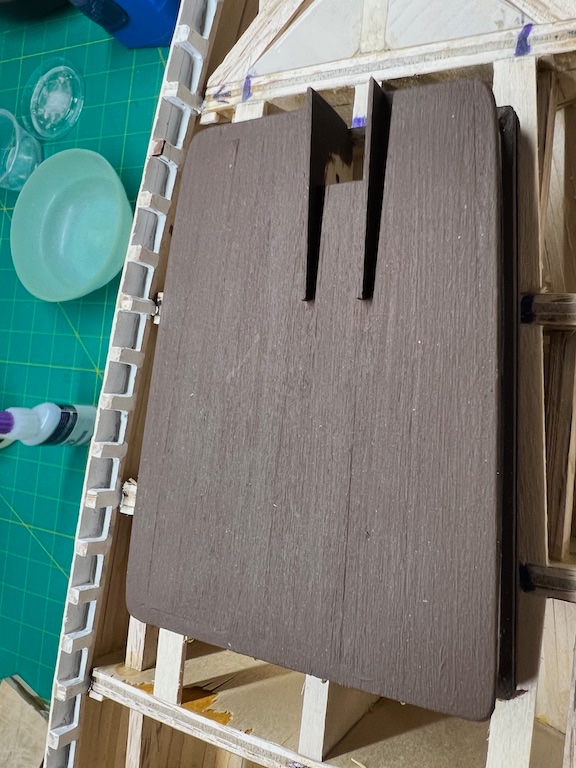
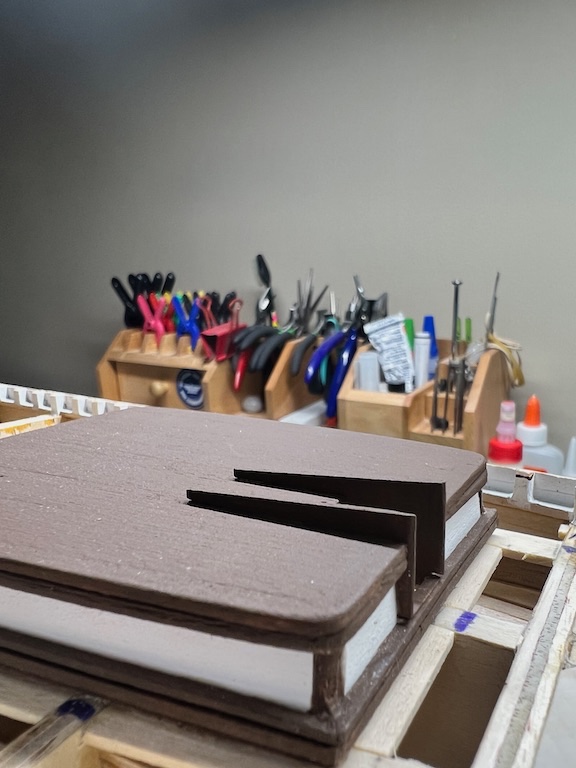
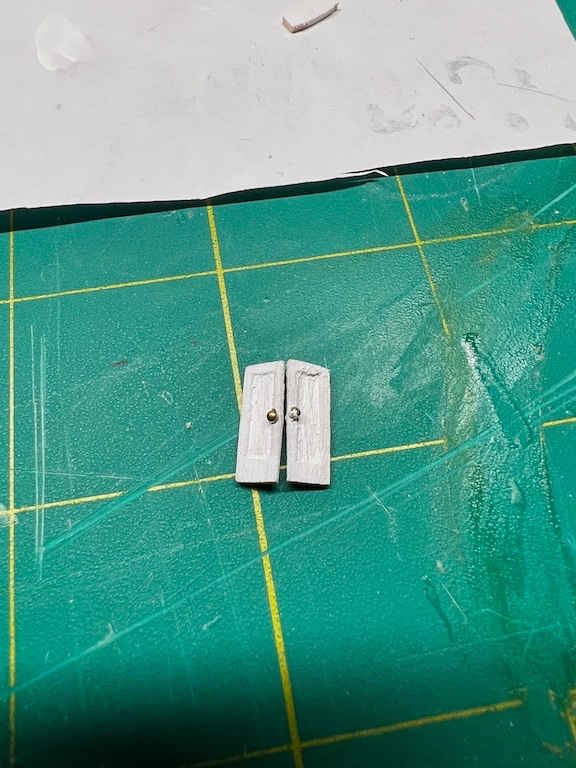
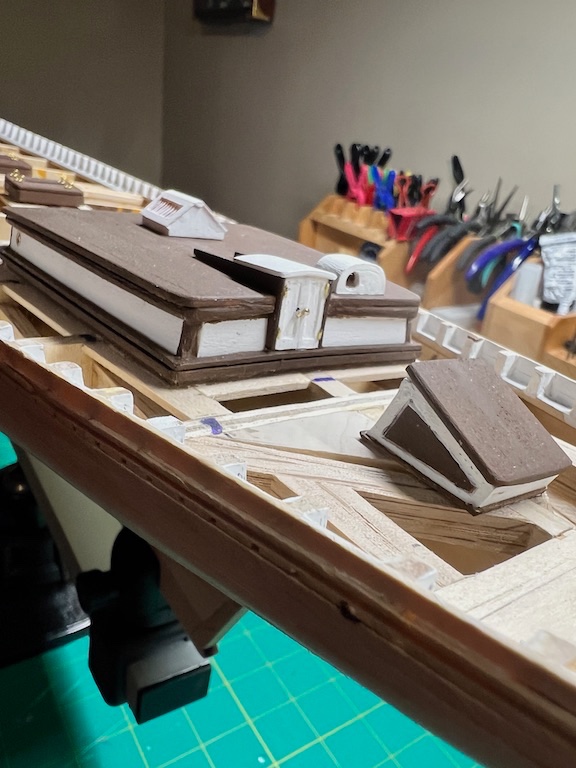
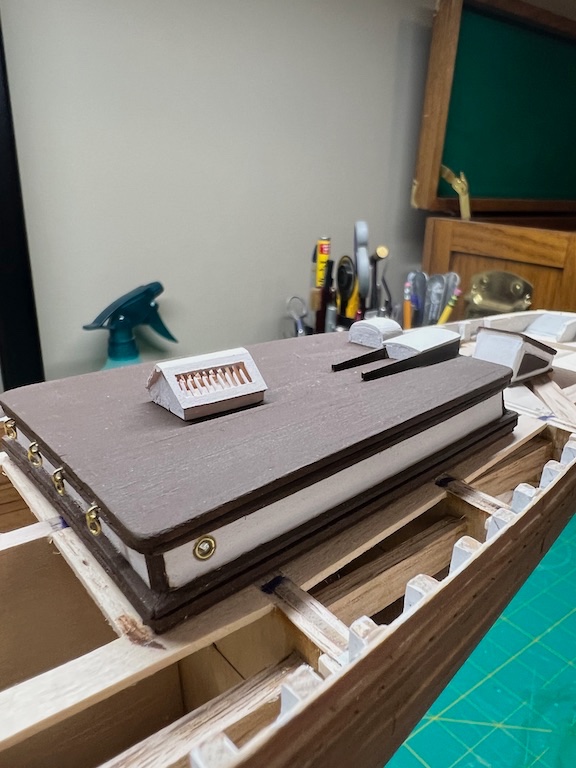
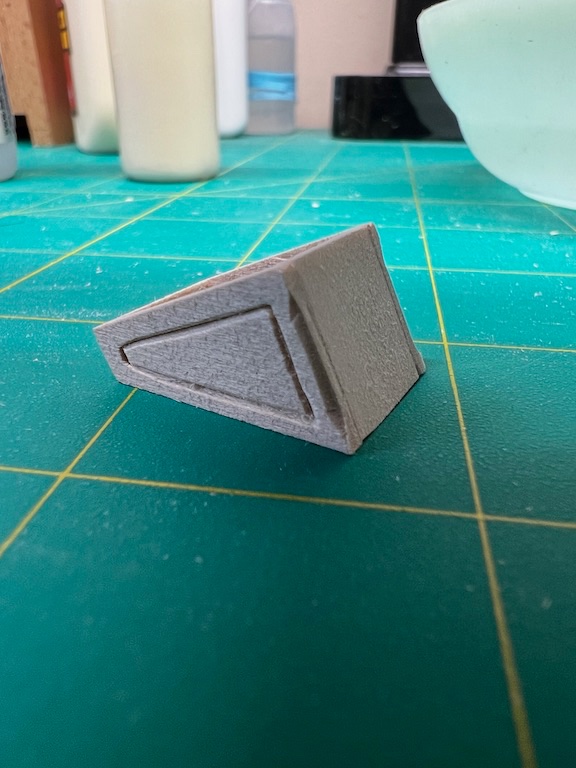
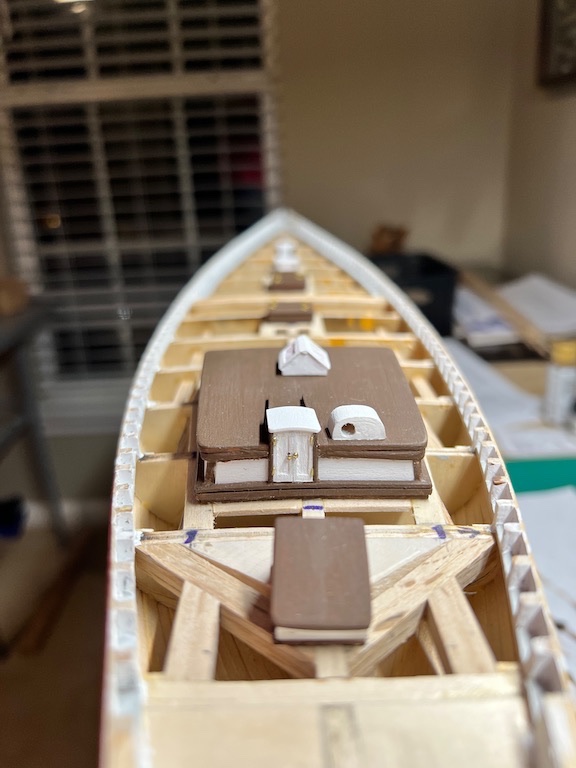
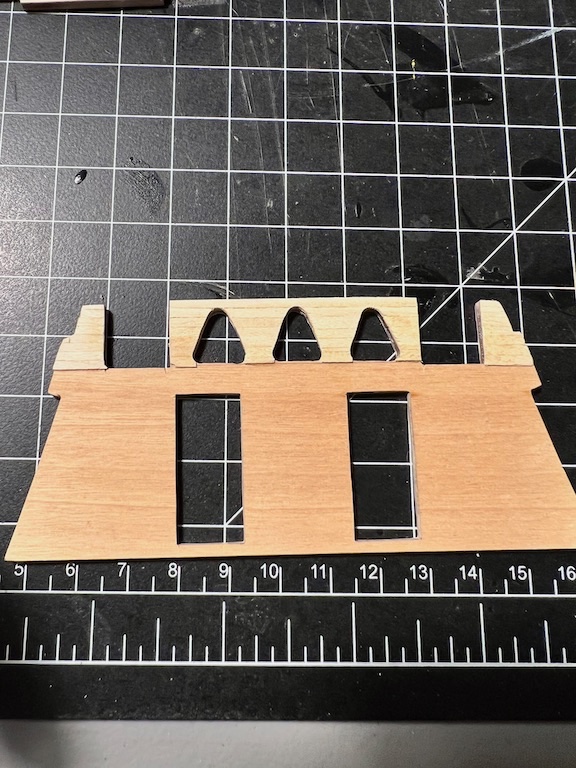
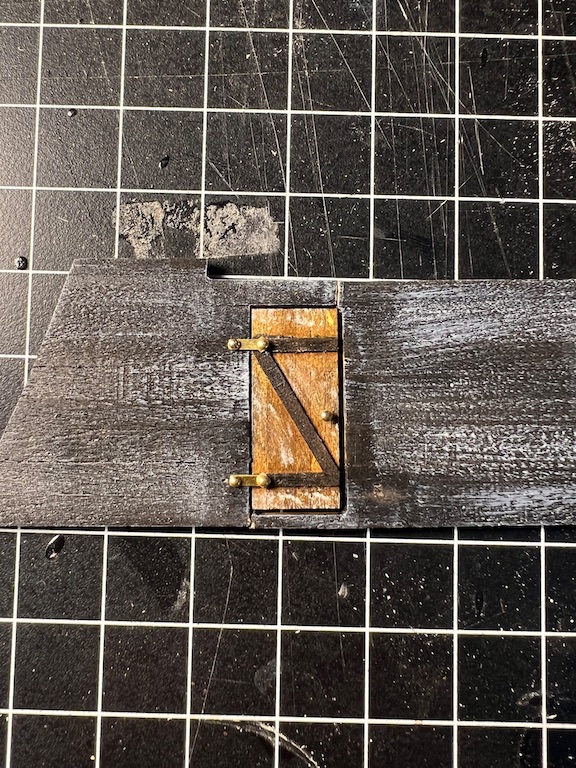
 Before getting started on the decking, I decided to work on all of the deck structures. I needed a break from any kind of planking and I wanted to get at least the main cabin and the hatches completed, I plan to have the installed on the bulkheads with a 1/16 groove to fit the decking under and around the structures. I started by laying out the plan cutouts to show where additional support was needed for attaching the deck planks. I really only needed to add support around the hatches and the main cabin, as the remaining structures will be installed on top of the finished deck planks, but I got carried away. I started with the hatches. Next, I built the skylight and companionway. I wasn't sure what to do to create the airports for the skylight (and later for the main cabin). I had seen on one of the model ship sites that there were air port fitting available, but I decided to come up with my own. It looked like the rings provided in the kit were the perfect size. I just happened to have leather hole punch that was the same size as the rings, so I punch out disks of aluminum foil, glued on to the rings. I drilled holes about the sam size in the sky light and then glued the ring and foil into the hole. As I was building up the main cabin, I forgot to take pictures as I was working, so I only have shots of the later stages. I shaped and installed the base moulding onto the bulk heads and extra support. Next, I installed corner pieces and cut and fit the walls. Since the upper moulding had rounded corner, as opposed to mitered corned like the lower moulding, I shaped one long piece and then soaked it so I could bend as one piece around the cabin. I built the roof by creating an outer frame and the installed decking planks, tapering each to account for the trapezoid shape of the roof. I cut out the hatchway and installed the side pieces extending back for the hatchway rails. I carved doors and added door handles, using filed down nail heads. I finished up by installing the doors and adding the hatch. I built the sky light and compass housing earlier. Not sure I am happy with the skylight and may redo that later. Last piece was the wheel housing. Looking forward to starting on the decking... Tim
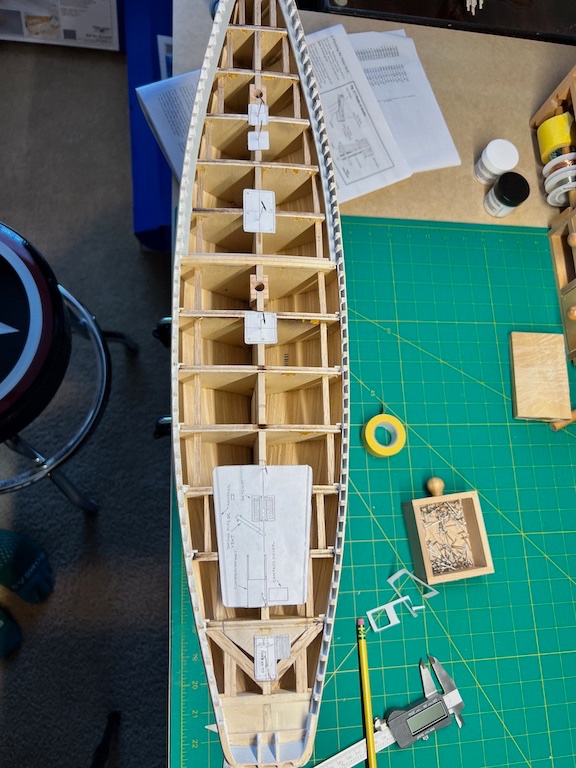


- 145 replies
-
- 4
-

-
- Bluenose
- Model Shipways
- (and 1 more)
-
Thanks Bob! Yes, she is a constant presence. Her favorite spot is lying on the plans! 😺
- 145 replies
-
- 1
-
-
- Bluenose
- Model Shipways
- (and 1 more)
-
Thank you Dave!
-
Thank you Derek!
-
Thank you @rcmdrvr! I am planning to paint the hull.
-
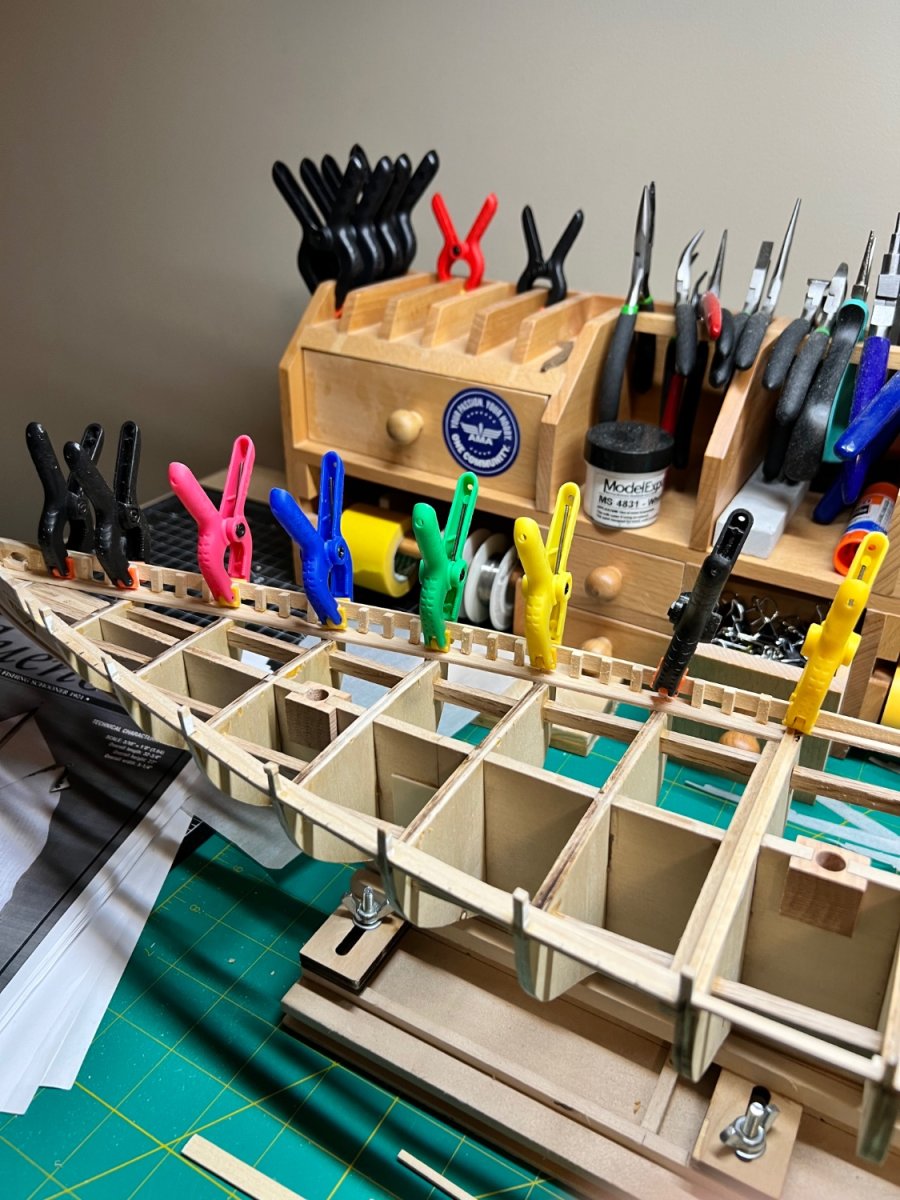
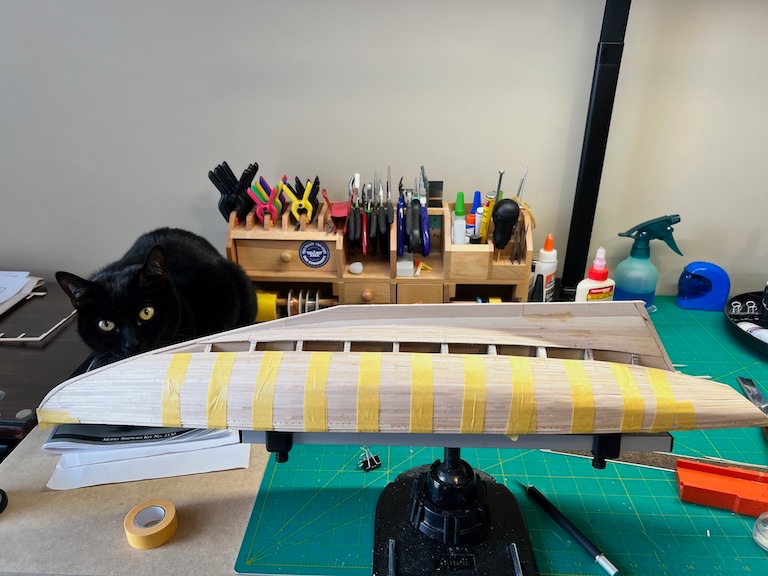
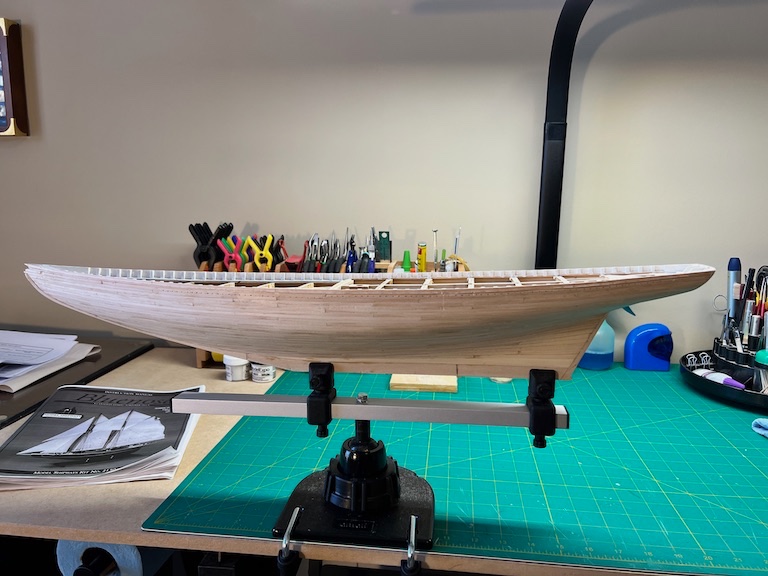
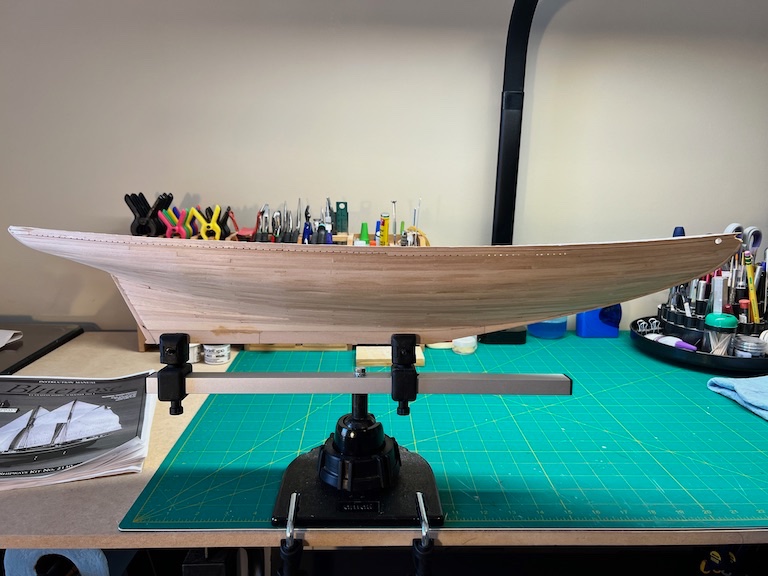
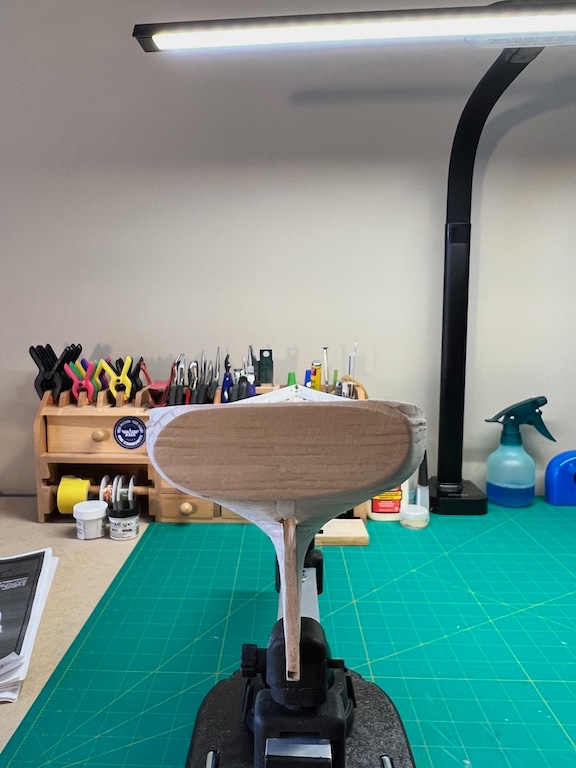
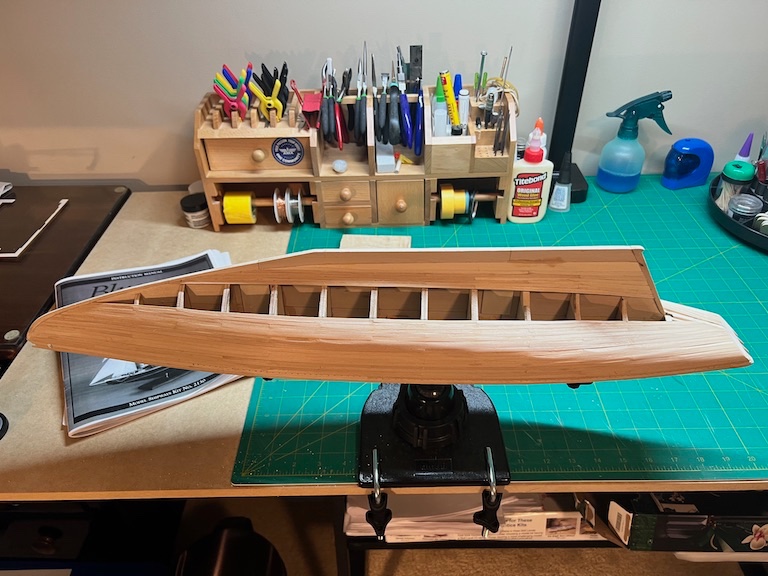
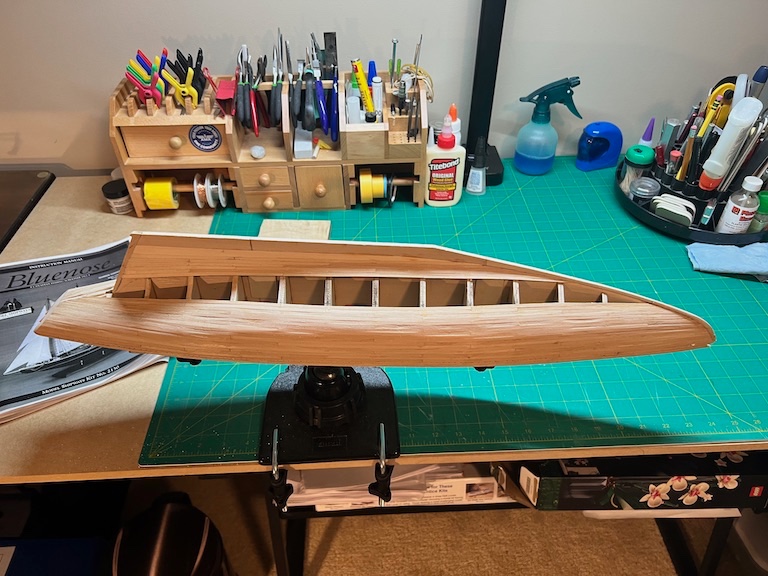
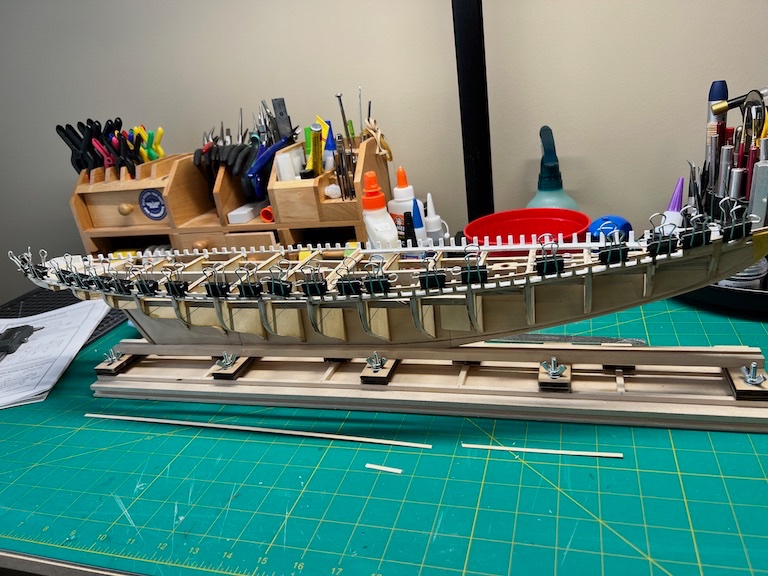
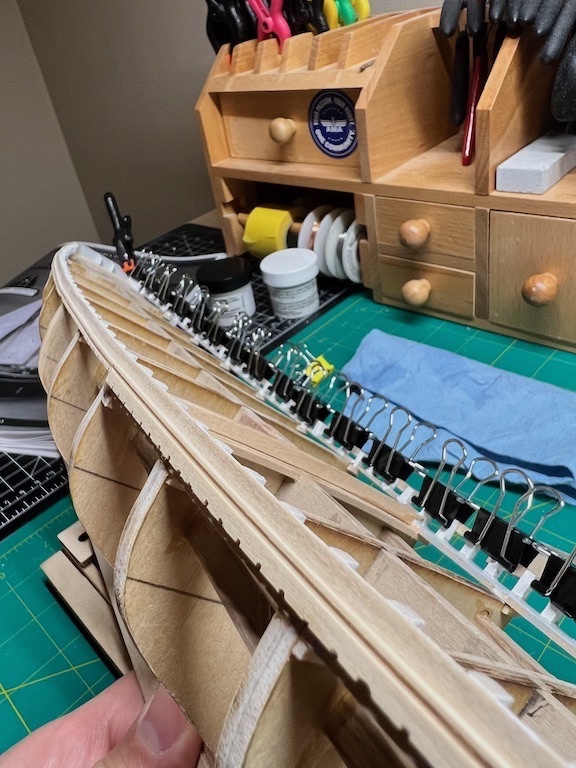
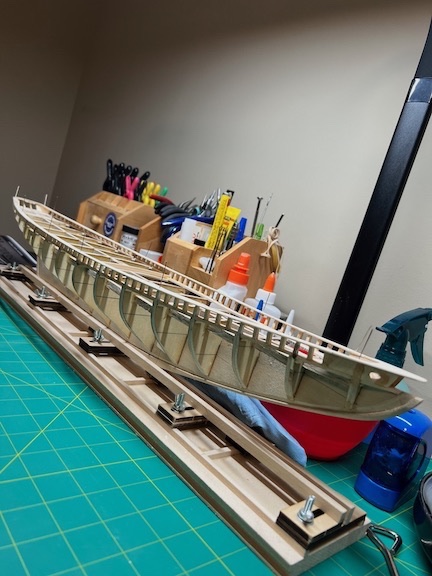
Hull planking complete!! Just needs a little more sanding and potentially a little wood filler in a couple of spots. Overall, turned out pretty good for my first complete hull. I spent some time thinking about how I would clamp the planks while the glue dried on the last belt. I decided to use tape threaded through the hull and wrapped around the planks to hold them tight. In hindsight, I probably could have used this method earlier for belts "A" and "B". It did a good job holding the planks and did not damage them like the clamps I had used earlier. So glad to have that done...on to the decking... Tim
- 145 replies
-
- 6
-
-

-
- Bluenose
- Model Shipways
- (and 1 more)
-
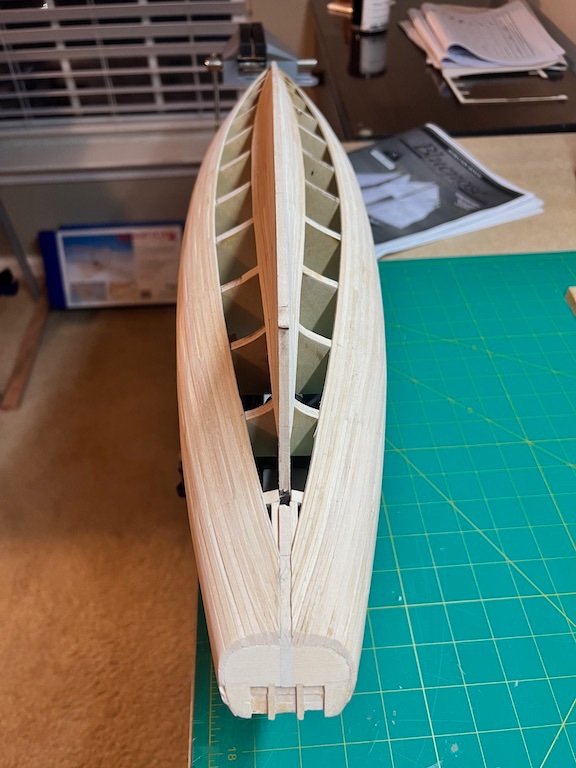
Belt "B" complete!! Steadily improving my planking as I get further along, but still plenty of practice needed. I started with the starboard side. I have read that you should plank evenly on both sides, replicating the planks as you go, but I made some errors on the first side that would have been duplicated had I done that. Happy with the result and looking forward to finishing the planking!! Tim
- 145 replies
-
- 5
-
-
- Bluenose
- Model Shipways
- (and 1 more)
-
Patrick, The sapelli stain is on the decks and the interior of the hull. Everything else is the walnut stain, except for the cabin walls, which are painted black. Tim
- 30 replies
-
- 2
-
-
- Flying Dutchman
- OcCre
- (and 1 more)
-
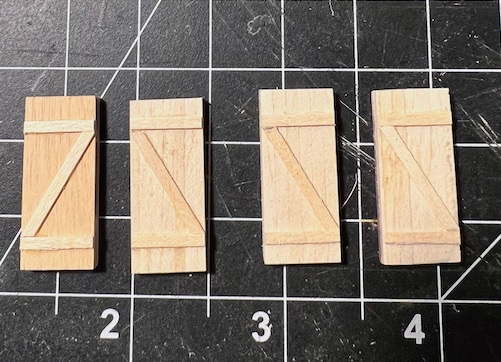
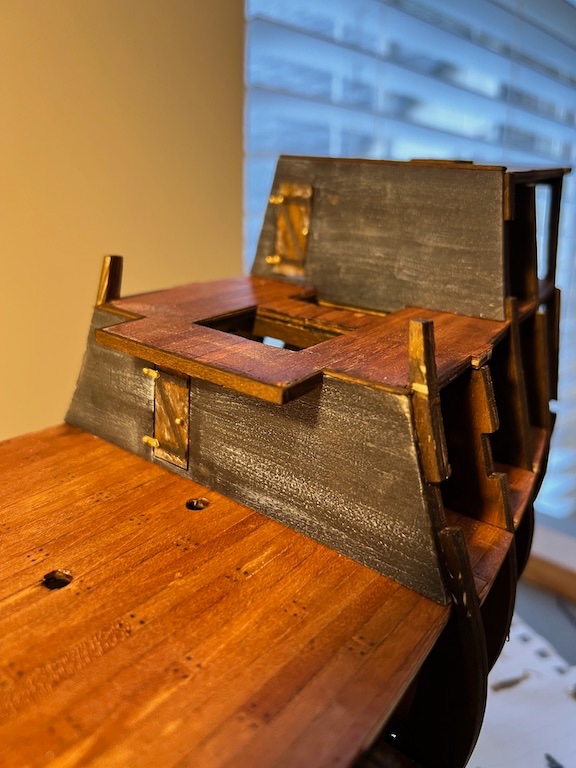
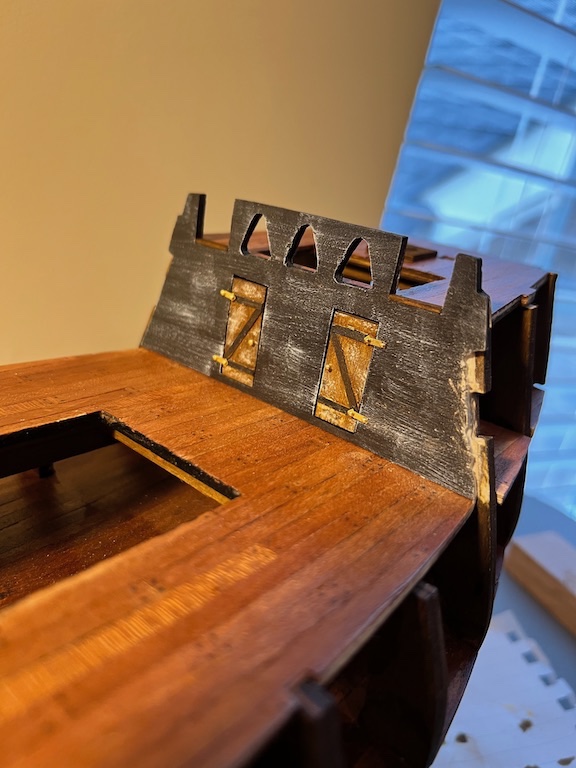
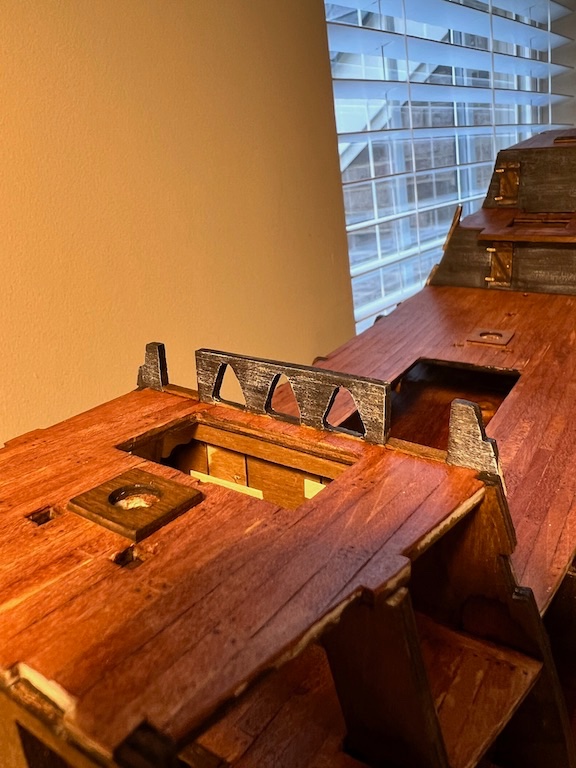
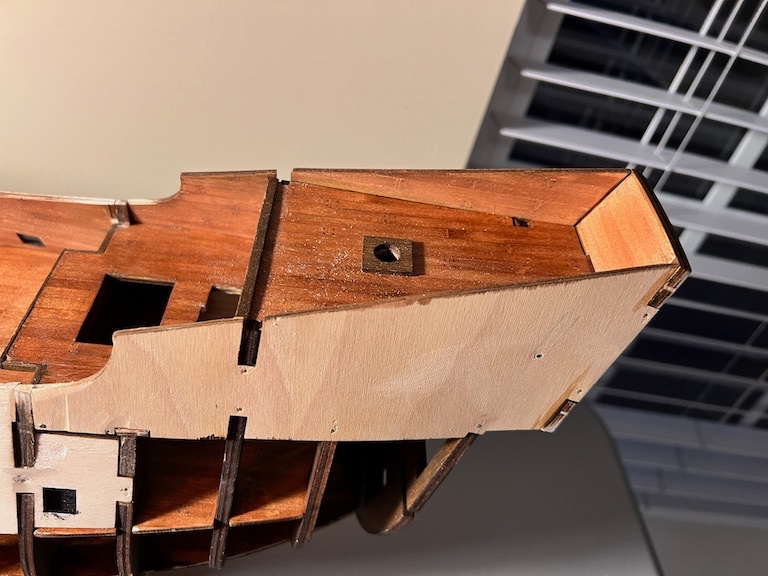
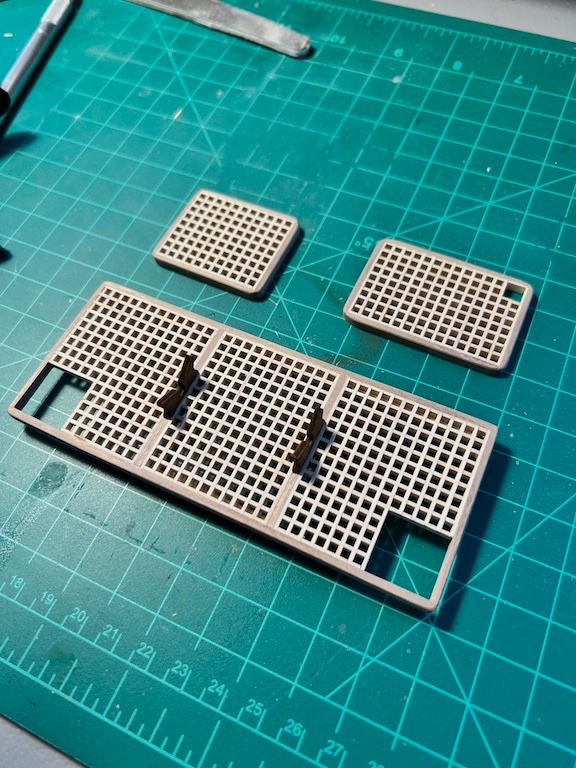
I planked and painted the cabin walls. I added planking to the back of the double door wall that extends above the deck. I don't like that the exposed surfaces are plain. I plan to do this to the interior of the hull as well. For the doors, I planked them with narrower strips and added bracing strips for a little more detail. I also stained them vs painting for a little contrast and so the detail on the doors stands out. Cabin walls installed. On to the plywood side pieces. I fit the side and stern pieces on the hull and marked them to outline where the internal surfaces would be visible. Using these lines I planked the interior. After I cleaned them up a bit, I installed the sides and stern pieces. This took some adjustments to the sides and the slots in the bulkheads to get everything to fit and line up properly. Where I was unable to push the pins in below the surface of the plywood, I used a file to make them flush to the surface. I plan to add some additional detail to hide the gap where the sides and deck meet and to cover exposed plywood bulkheads on the interior. Next, I worked on the grates. After assembling, sanding down to size and adding the cutouts, I framed them in and then rounded off the frames. Tim

- 30 replies
-
- 5
-
-
- Flying Dutchman
- OcCre
- (and 1 more)
-
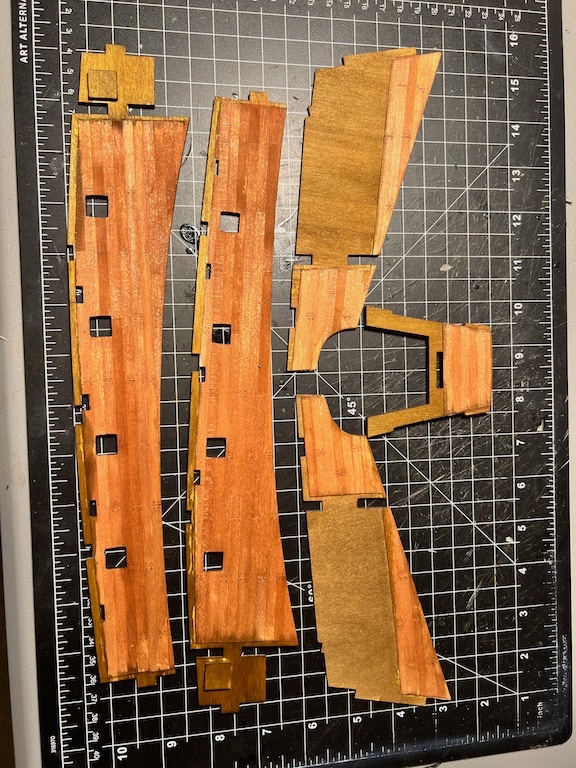
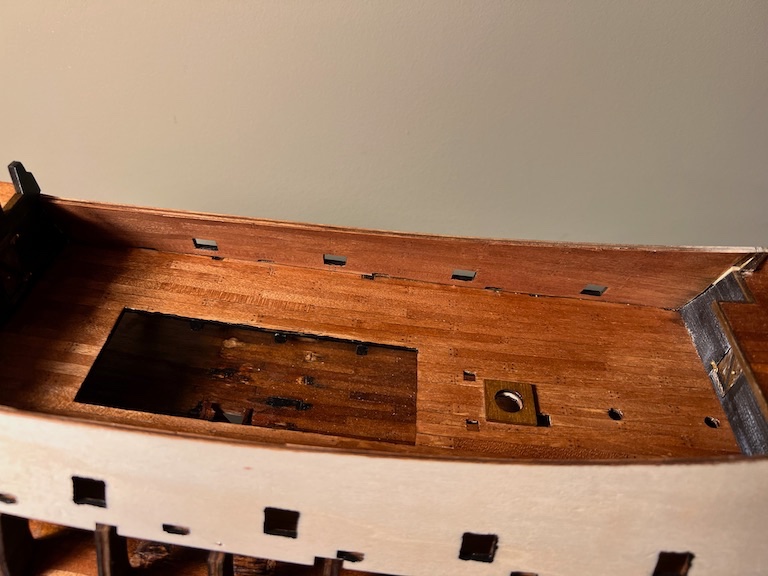
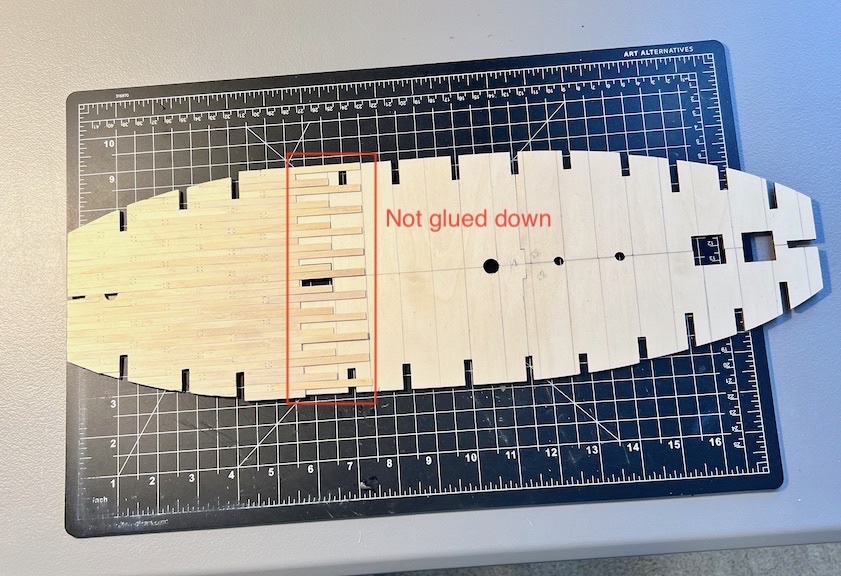
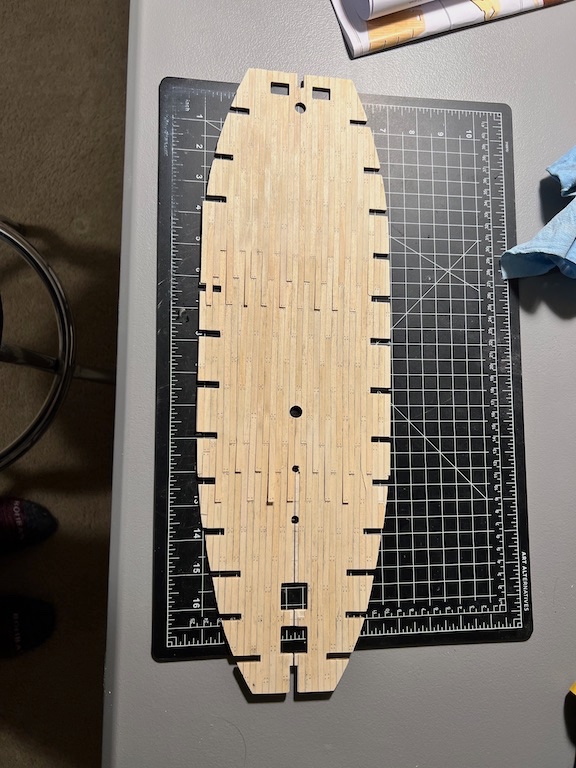
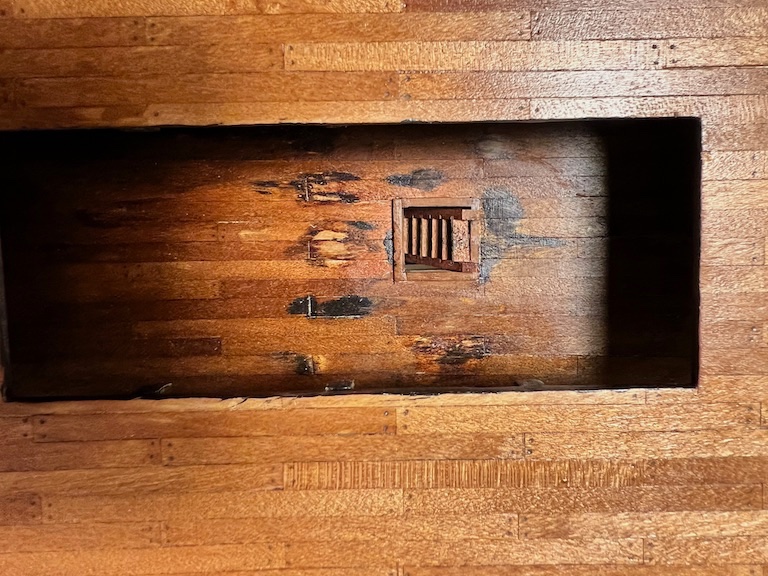
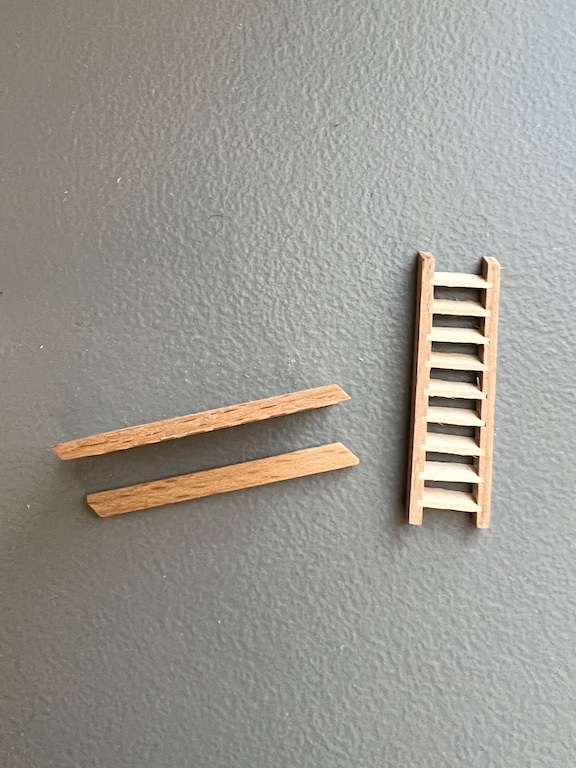
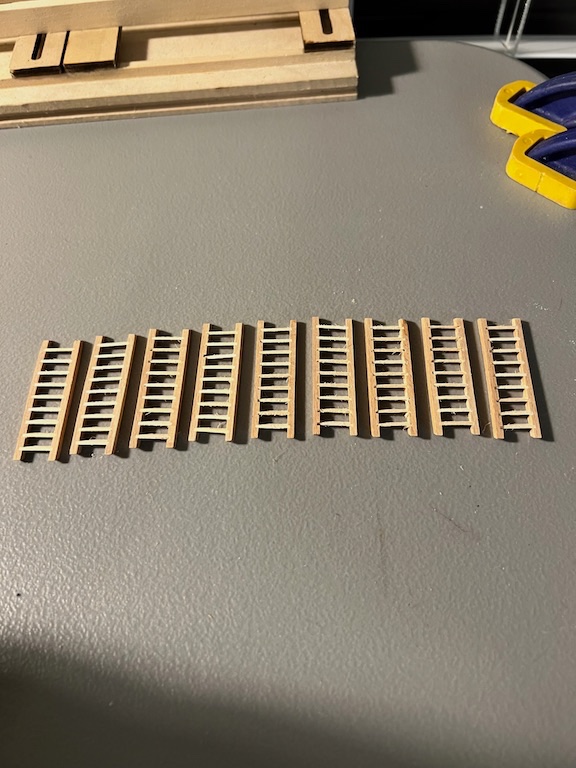
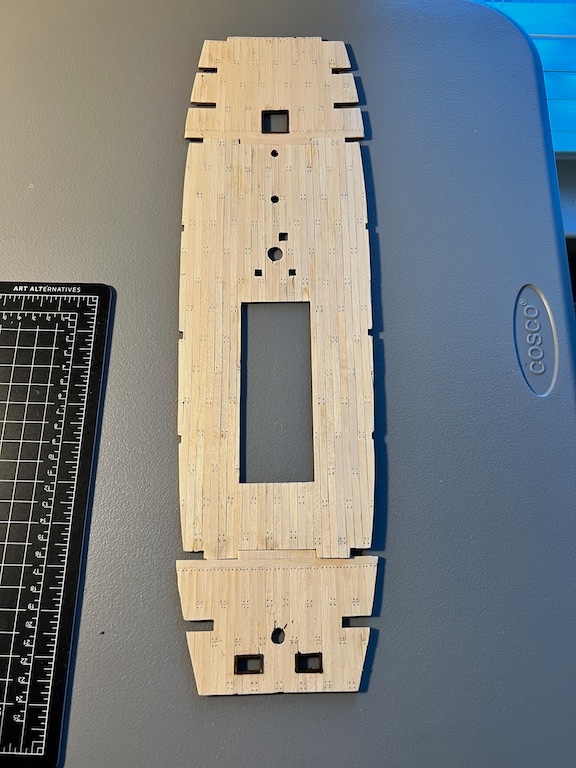
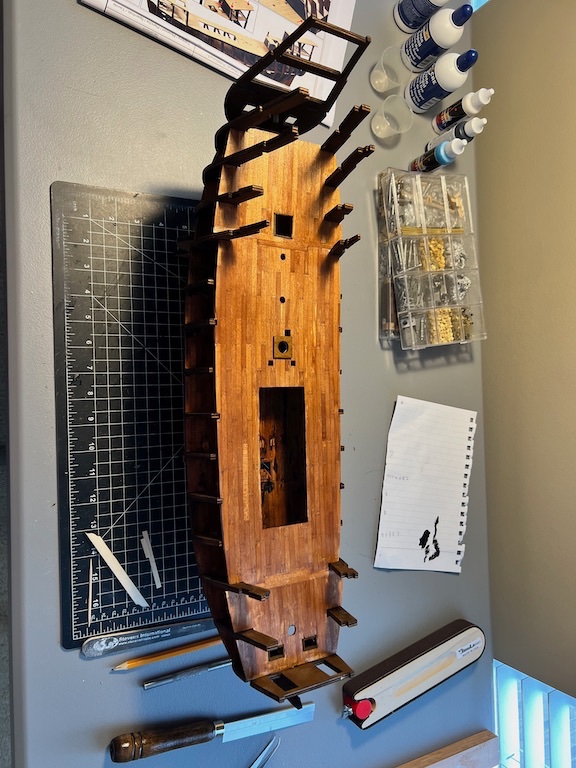
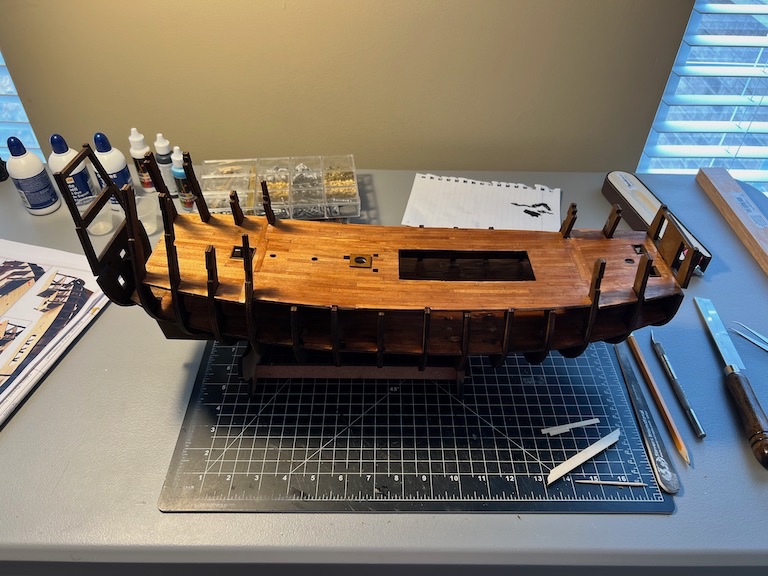
The decks for this model are split into multiple pieces of plywood that get fitted in-between the sides of the bulkheads after decking planks have been added. Following the directions leaves the first deck with unsightly lines across the deck and down the middle of the fore and aft sections that just don't look right. to correct that, first I joined the two pieces each of the fore and aft decks to plank as one unit. It's a tight fit to install as one piece, but it works. Second, I used tape on the bottom of the decks to align the full deck, so that I could plank continuously along the length to cover the seams. where the decking plank overlapped onto the next section, I did not apply glue and will wait to secure until all the deck is installed on the ship. After installing the decks I glued down the loose ends of the planks. Lesson learned...CA soaks in and seals the wood! No amount of sanding will clean it up to allow stain to penetrate, so I ended up with plain wood spots on the deck. I tried staining with a furniture touchup pen as well as using paint to blend in the spots. It doesn't look horrible and I would not expect pristine decks on a ghost pirate ship, but will apply that learning on the upper decks. In between decks, the plan calls for the ladders to be built. This was a tedious task, but I'm happy with the result. I felt like the ladder sides were much too wide, so after I had them all built, I used the disc sander to thin them down for a more scale look. I followed a similar plan for the remainder of the decks, working to hide the seam and dress things up where I could. I added the framing to the hatches, even on the potions of the decking that will never be seen. I wanted the practice and I know they are there even if no-one else will see them. Work on the cabin walls and doors is next. Tim

- 30 replies
-
- 7
-
-
- Flying Dutchman
- OcCre
- (and 1 more)
-
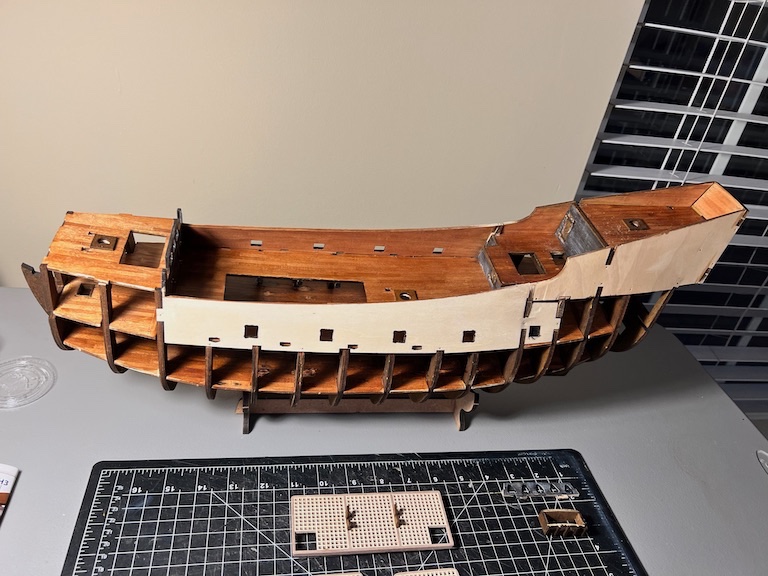
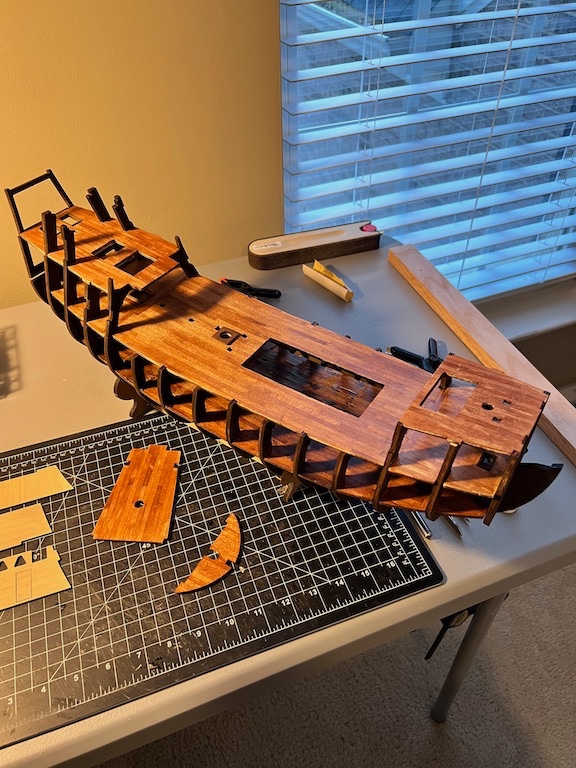
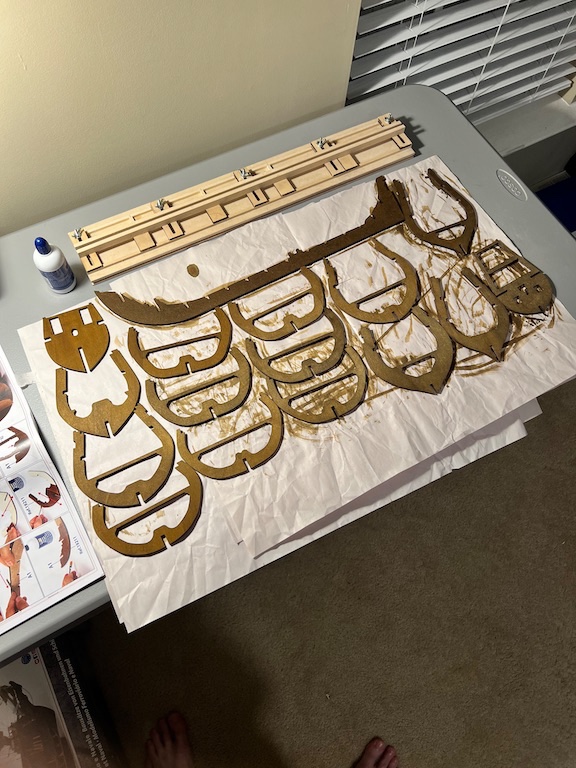
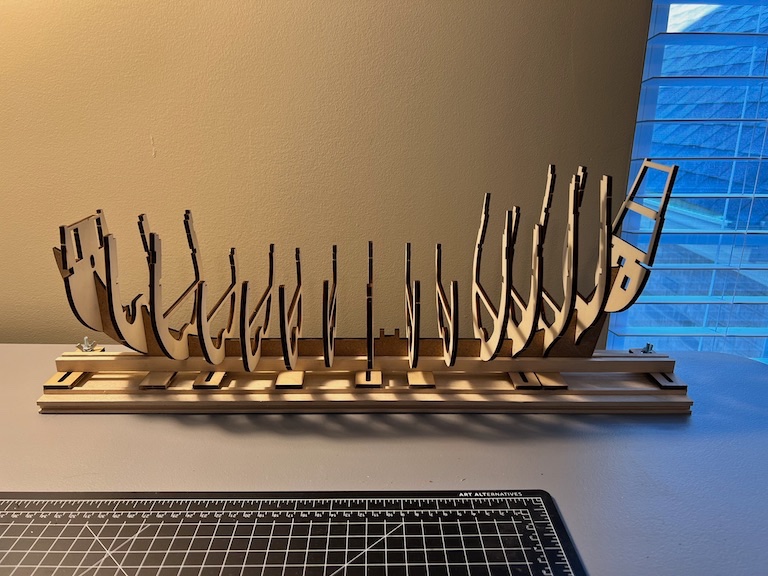
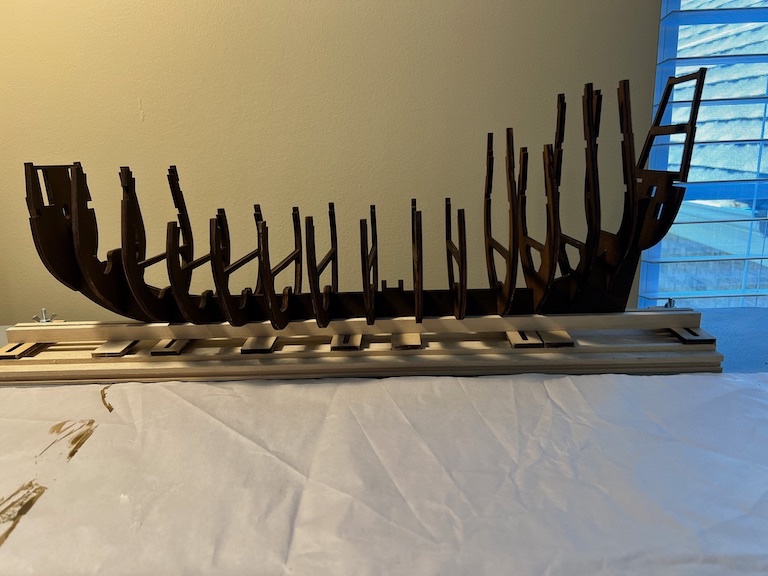
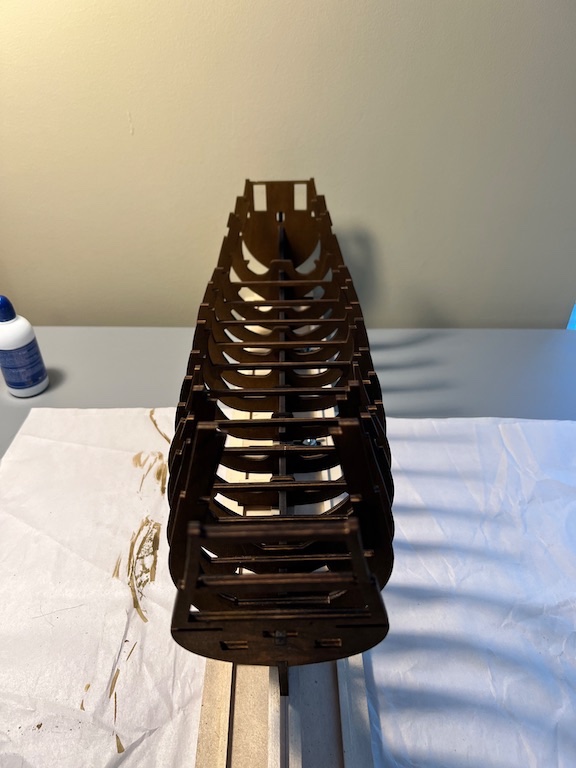
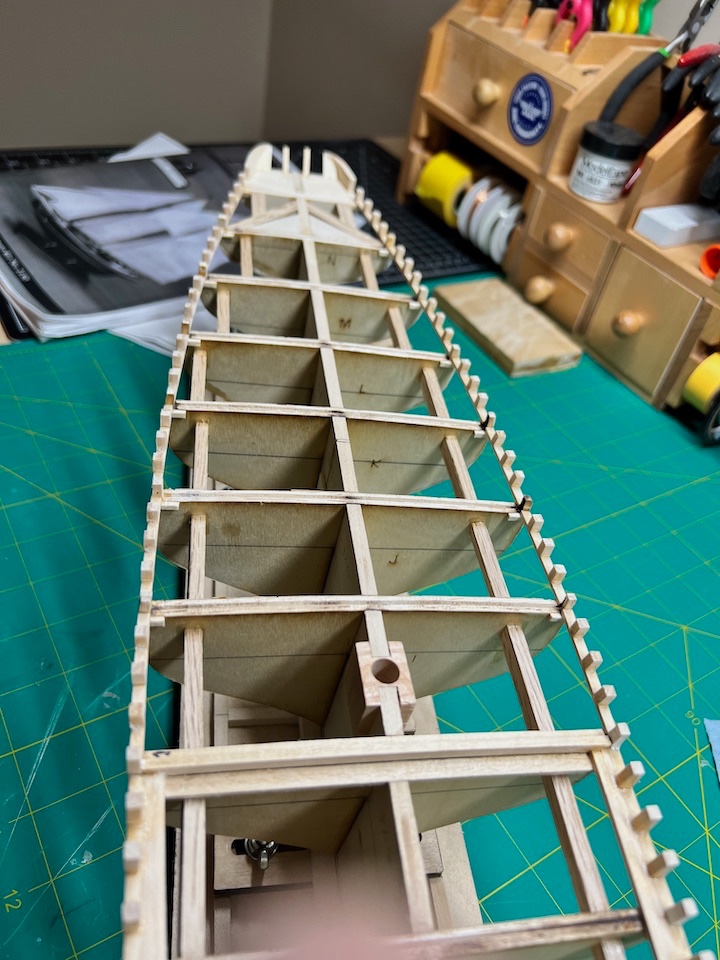
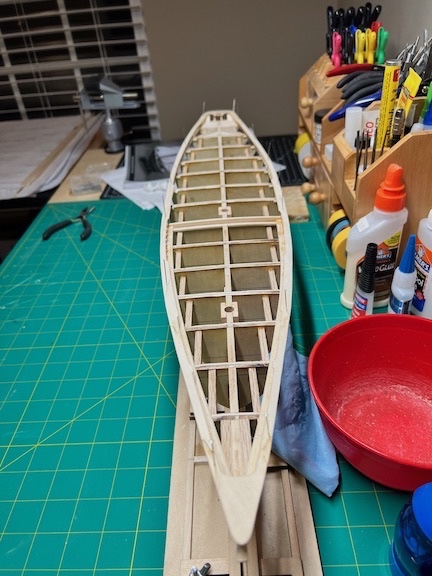
I started with cutting out the keel and all of the bulkheads Since there are no drawings of bulkhead layout, I just assumed all of the bulkheads needed to be set at 90 degrees to the keel when flat on the table. I test fit everything, and it all fit nicely. After staining all of the parts, I glued into place using a square and lego brickss to make sure everything was lined up. I have completed all of the decks and installed and will go through that in my next post. Tim
- 30 replies
-
- 10
-
-
- Flying Dutchman
- OcCre
- (and 1 more)
-
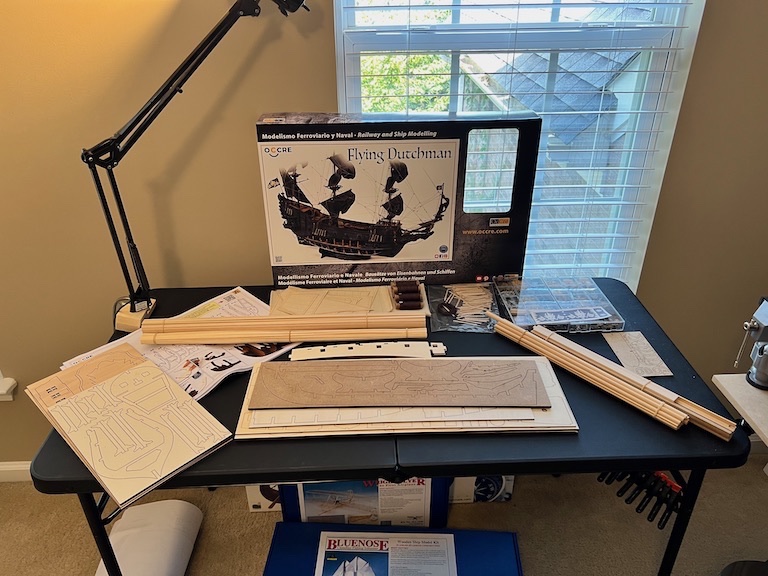
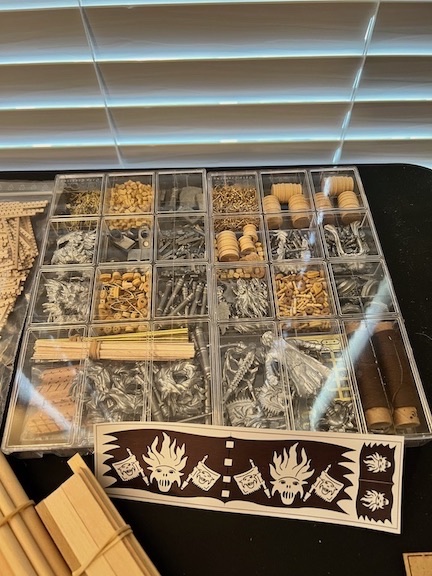
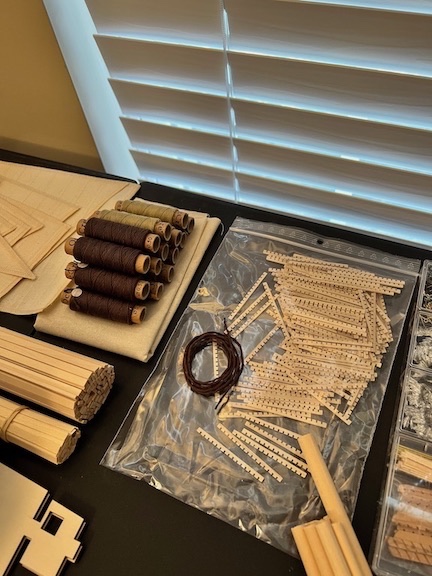
I came across the Flying Dutchman when it was first released a couple of months ago and quickly decided that it was a model I wanted to build. I am a big fan of the Pirates Of The Caribbean movies and pirate movies/stories in general and this looked like it would be a fun model to work on. This is only my second wood model, and barely that, as I have been taking my time on the Bluenose (https://modelshipworld.com/topic/32741-bluenose-by-fubarelf-model-shipways-scale-164/ and have a long way to go. I figured this model would be good as a skill builder and provide an opportunity for some creativity. I have no experience with Occre, but the kit seems to be well made. There are lots of laser cut parts and two boxes full of detail parts. Nice feature to have all of that neatly organized in the plastic boxes. Something I am sure to reuse down the road. When I bought the kit, the offer included the paints and stains needed along with a custom base and LED light kit. I plan to build this with the open hull as designed and to utilized the lights. Occre creates a very easy to follow, color illustrated manual for the build. No drawings to follow along, but they do have a detailed rigging plan. Occre has also posted a full video series on building this model to YouTube. They pretty much follow the manual verbatim in the videos. An interesting feature of the parts list is that, instead of listing out all of the stock (i.e. - 48 - 1mm x 3mm x 600mm strips) they give specific dimensions for pieces to be cut from the stock (i.e. - 12 - 1mm x 3 mm x 65mm). Well, on to the build...
- 30 replies
-
- 7
-
-
- Flying Dutchman
- OcCre
- (and 1 more)
-
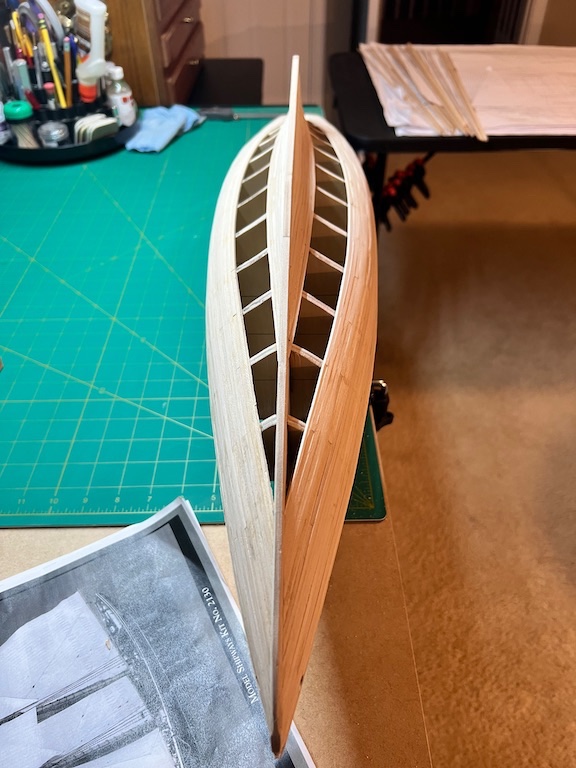
Belt "A" is complete. Not perfect, but also not out of the range of sanding smooth. Learning as I go to bevel/shape the planks to make for a clean tight fit. As you said Dave @CPDDET, it gets easier the more you do. Thinking ahead and shaping the planks, so that the plank being installed not only fits tight to the previous plank, it is also set up to make for a clean fit to the next plank, has been the biggest challenge and learning. Moving to the middle belts next.... Tim
- 145 replies
-
- 6
-
-
- Bluenose
- Model Shipways
- (and 1 more)
-
Finished up the first belt "D" of planking! Going to start to plank from the waist down and for belt "A" next. Tim
- 145 replies
-
- 3
-
-
- Bluenose
- Model Shipways
- (and 1 more)
-
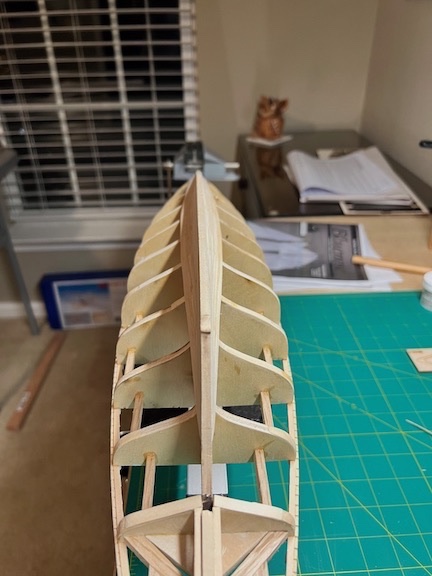
One newbie to another, I think it makes sense to finish the fake stanchions, the hawse timber and the transom and then add the top rows of planking with the cove an scuppers. I painted the waterways, stanchions and the inside of the hull between the stanchion, which I think would be challenging once to main rail is on. Also, having the top row of planking and the stanchions completed enable you to sand everything flush to facilitate a clean install of the main rail. I’ll confess, i did snag a couple of the fake stanchions and had to redo the, 🙄.
- 184 replies
-
- 1
-
-
- Bluenose
- Model Shipways
- (and 1 more)
-
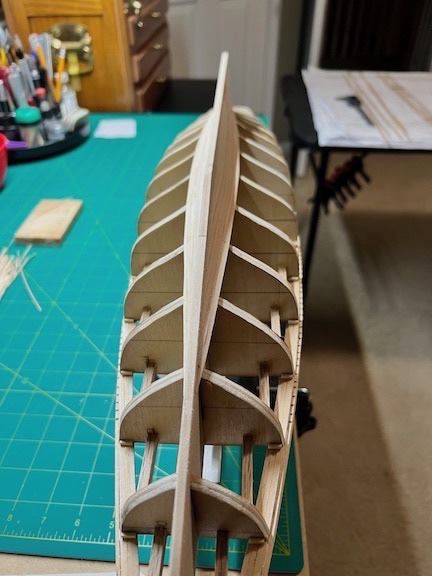
Great start Gregg, moving right along! Definitely a lot to go before planking starts. One lesson I learned the hard way was to check the plan and check the build often. I found many inconsistencies between the laser cut patterns and the plan profile drawings, unfortunately after I had progressed on the build and a keen eye spotted and pointed out my miss. After a little deconstruction, I had to do a lot of work to get the bulkheads all to the right widths and faired out. I noticed in the lengthwise shot of your ship showing the clamping of the waterways that the outside waterway does not extend all the way to the end of the bow. Maybe still to come. Just wanted to call out, as the hawse timbers will be installed on top of that waterway plank Tim
- 184 replies
-
- 1
-
-
- Bluenose
- Model Shipways
- (and 1 more)
-
Have to admit, I’m a bit of a neat freak. A place for everything and everything in its place. That, and the cats have a bad habit of knocking any loose bits on the floor and carting them off to parts unknown. 🫤
- 145 replies
-
- 2
-

-
-
- Bluenose
- Model Shipways
- (and 1 more)
-
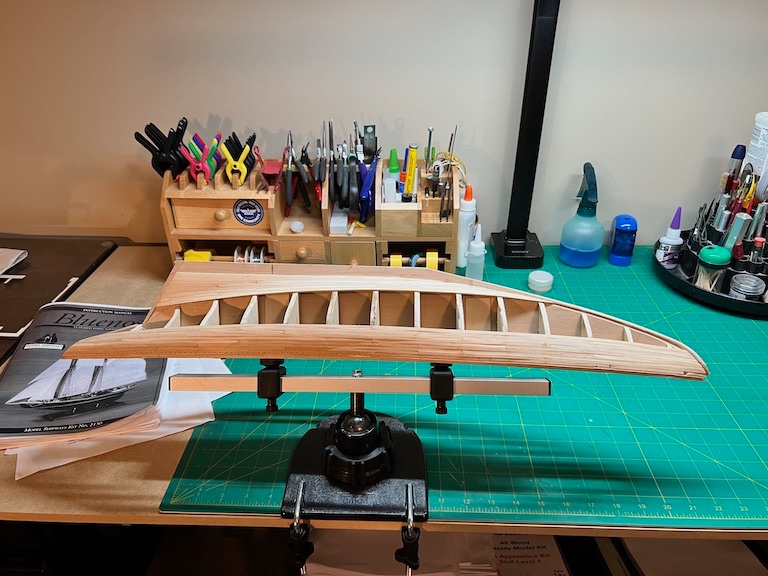
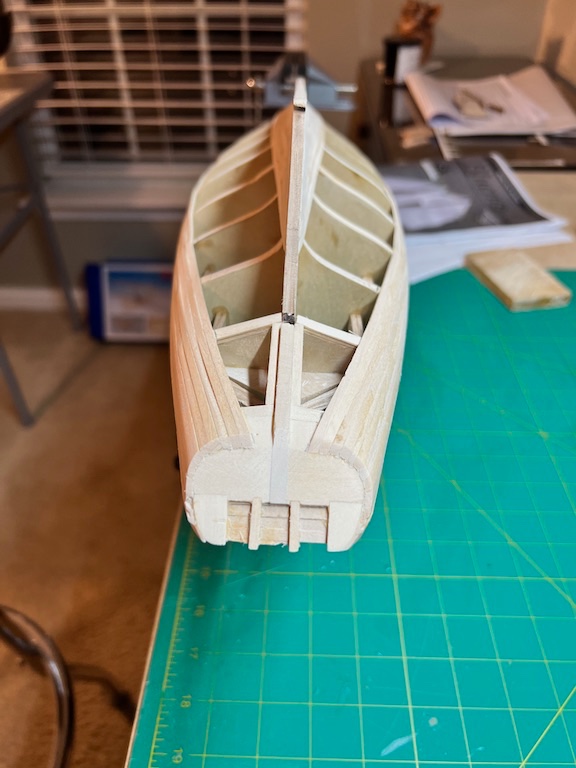
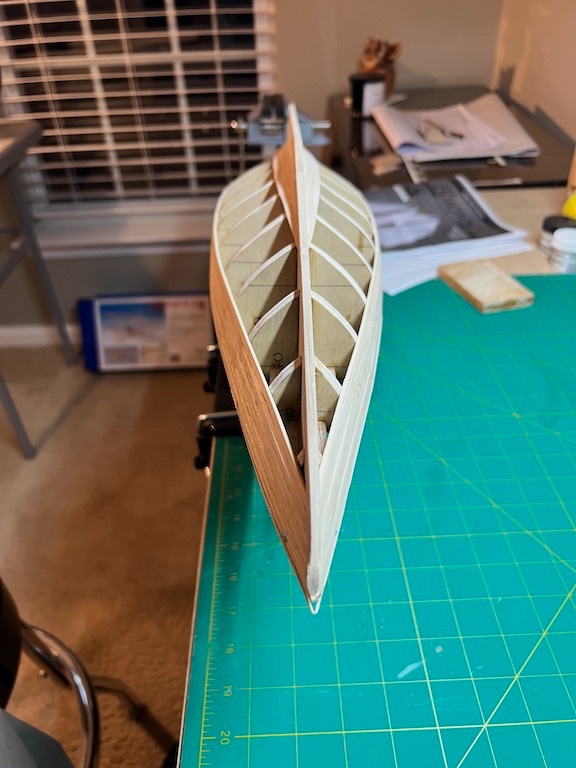
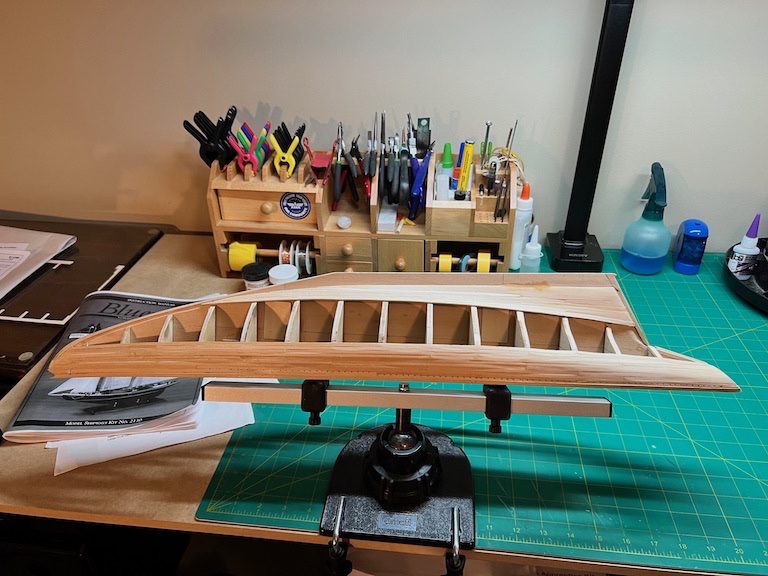
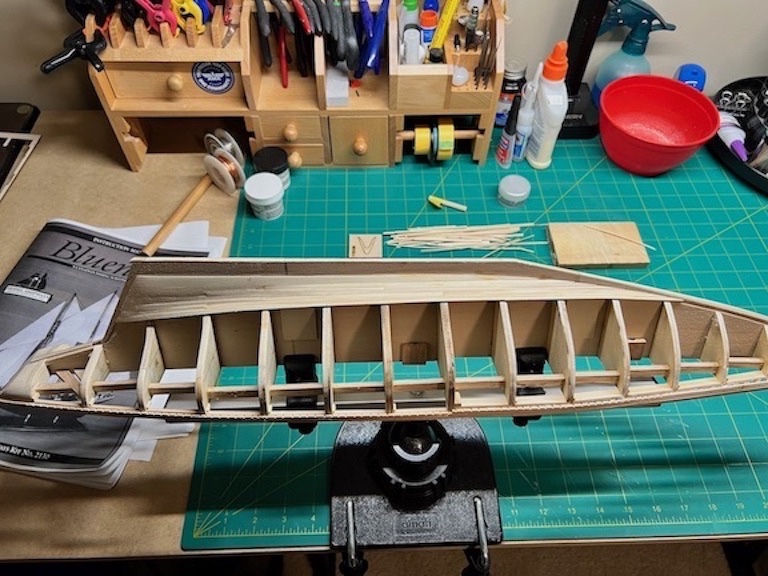
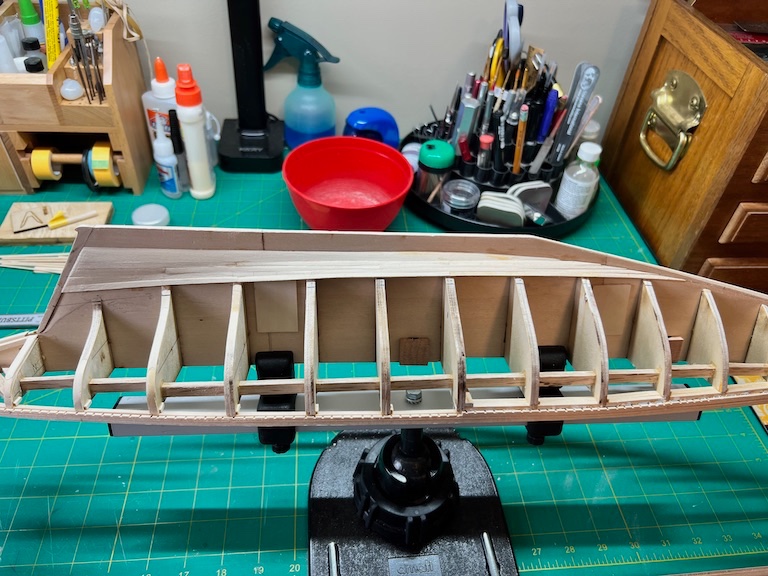
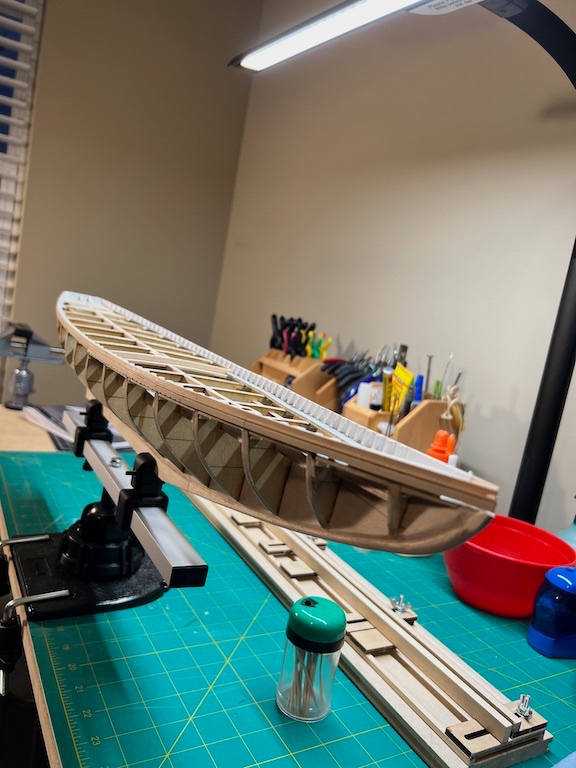
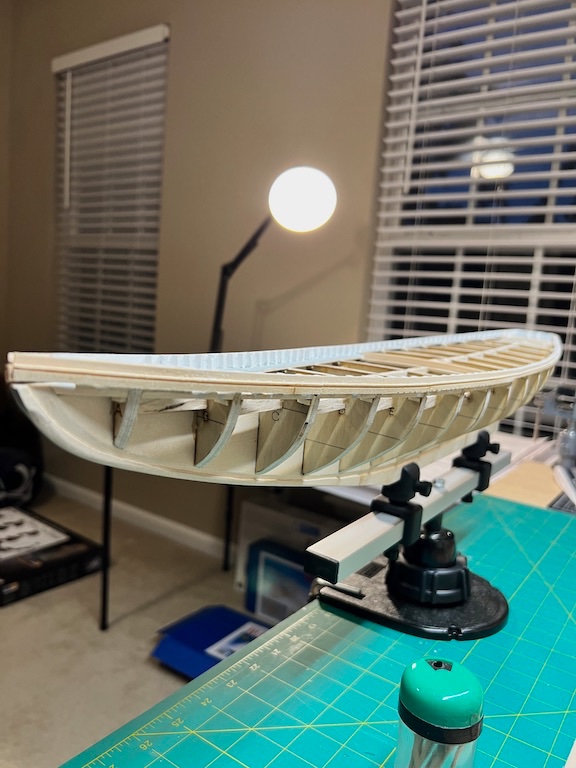
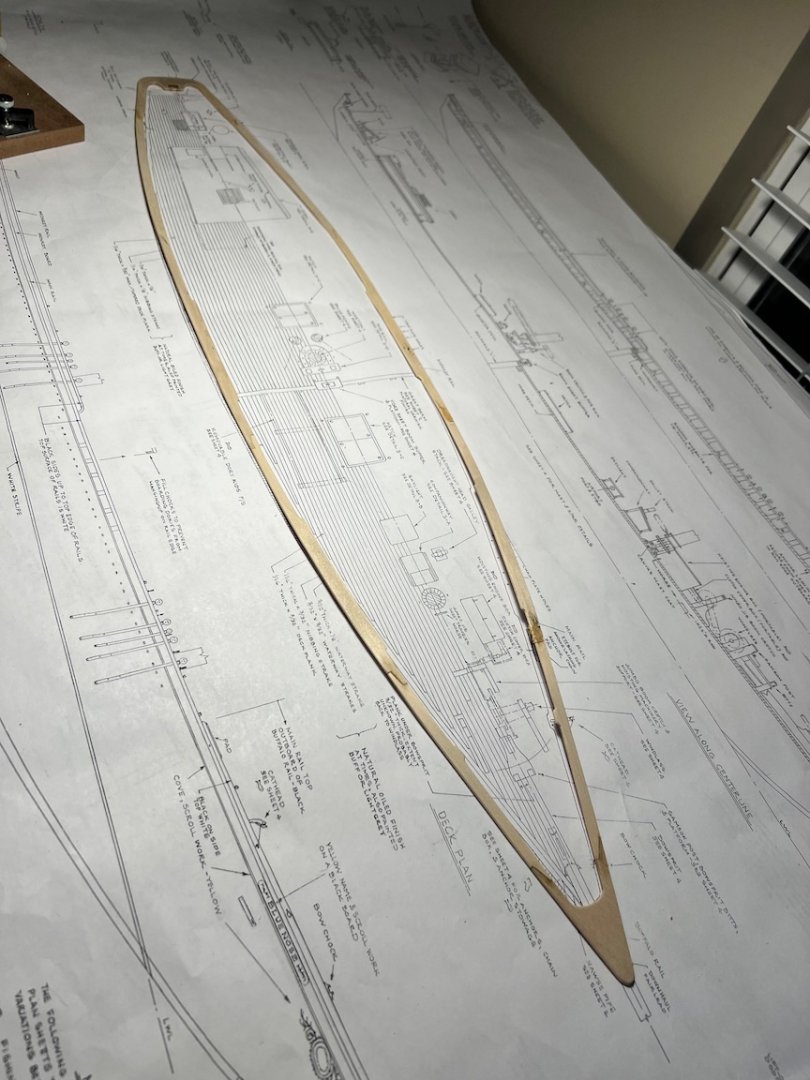
I have started on the planking. I shaped and installed the garboard strake on both sides. I this marked the first belt, based on the plans and marked out the plank widths at the stern and each of the bulkheads, along with the end point along the keel, where the planks taper into the keel. That was the easy part! I had planned to work evenly on both sides as I installed the planking, but after installing the first plank on each side, I kept going up the port side. What you see in the 2nd picture below is the second attempt. I was up to 3 rows of planking above the garboard and didn't like how it was turning out. So, I took all that off and started over. Having only done the NRG half hull before this, I am still learning, so lots of trial and error. Slow going , but in no rush... Tim

- 145 replies
-
- 4
-
-
- Bluenose
- Model Shipways
- (and 1 more)
-
Gregg, Great job on the rabbet! Was definitely the most intimidating part about this build so far, trying to get symmetry and only having a 1/16 of an inch to spare. Tim
- 184 replies
-
- 1
-
-
- Bluenose
- Model Shipways
- (and 1 more)
-
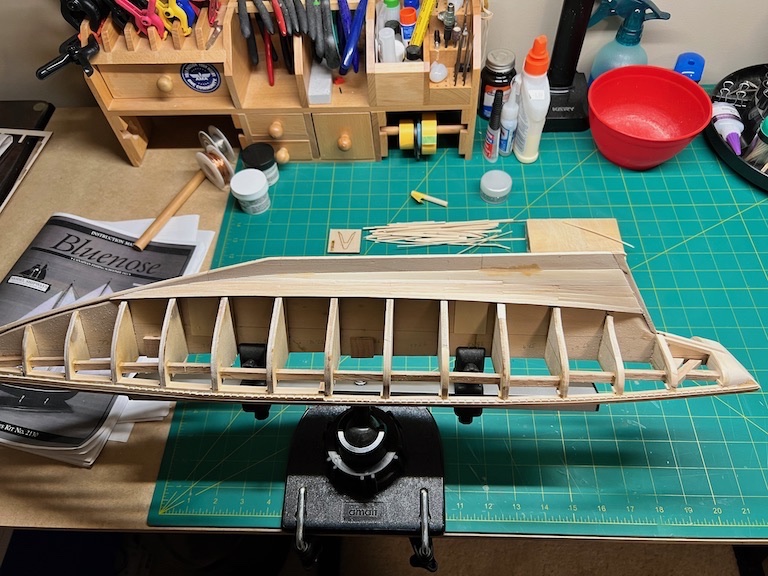
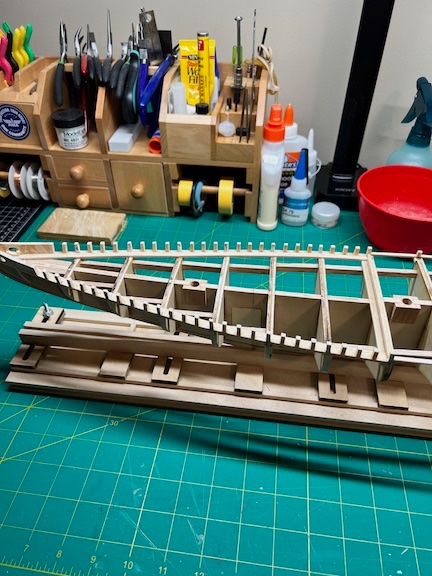
It's been slow going the last several weeks. Travel for work and great fall weather has left little time for working on the Bluenose. I was able to get the first two rows of planking installed. I installed the top row of 1/32 thick planking first. I cut the planks into 5 sections, most spanning 4 bulkheads. Next, I cut the cove into the top row of 1/16 thick planking with my table saw, ripped the aft section to the proper width and then cut in the scuppers. I used roughly the same rule of thumb of 4 bulkheads to cut the plank into sections, making sure that the butts did not align with those on the plank above. After install, I painted the stanchions and inside of the hull between stanchions white. I had painted the waterways grey earlier per the clout on the plans. I will need to go back and cut in the hawse holes through the planks and cut the planks at the bow to fit flush around the bowsprit. Tim
- 145 replies
-
- 4
-
-
- Bluenose
- Model Shipways
- (and 1 more)
-
Thank you Gregg! Happy to have you follow. I have followed multiple builds of the Bluenose on this site and hope to do this kit justice. I have received some great feedback and had to backup and redo a couple of steps in the build already. Great learnings and hopefully a positive impact to the finished product.
-
Thank you Dave! Added the fake stanchions to the quarter deck. Test fit of main rail. Tim
- 145 replies
-
- 1
-
-
- Bluenose
- Model Shipways
- (and 1 more)
-
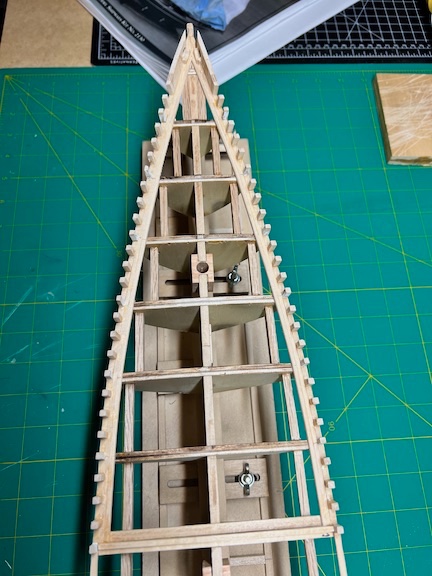
Completed assembling the main rail. Needs a little more sanding, but trying to be careful not to over do it. Added all of the fake stanchions to the fore deck and shaped to the hull. I tried to cut them all to the same length with a kerf saw and mitre box, but there was some minor variation. So, I sanded across the tops to make sure everything was even so the main rail will sit flush. r Tim

- 145 replies
-
- 5
-
-
- Bluenose
- Model Shipways
- (and 1 more)