HOLIDAY DONATION DRIVE - SUPPORT MSW - DO YOUR PART TO KEEP THIS GREAT FORUM GOING!
×


Fubarelf
-
Posts
115 -
Joined
-
Last visited
Content Type
Profiles
Forums
Gallery
Events
Everything posted by Fubarelf
-
 Thank you Allan! The Legos are quite a useful tool and, and cheap. Yes, it has the same meaning as the military acronym. I played softball on a team called the Fubar’s years ago. I also worked for Keebler at the time, so I was known as Fubarelf. It stuck and I’ve been using it ever since. Tim
 -
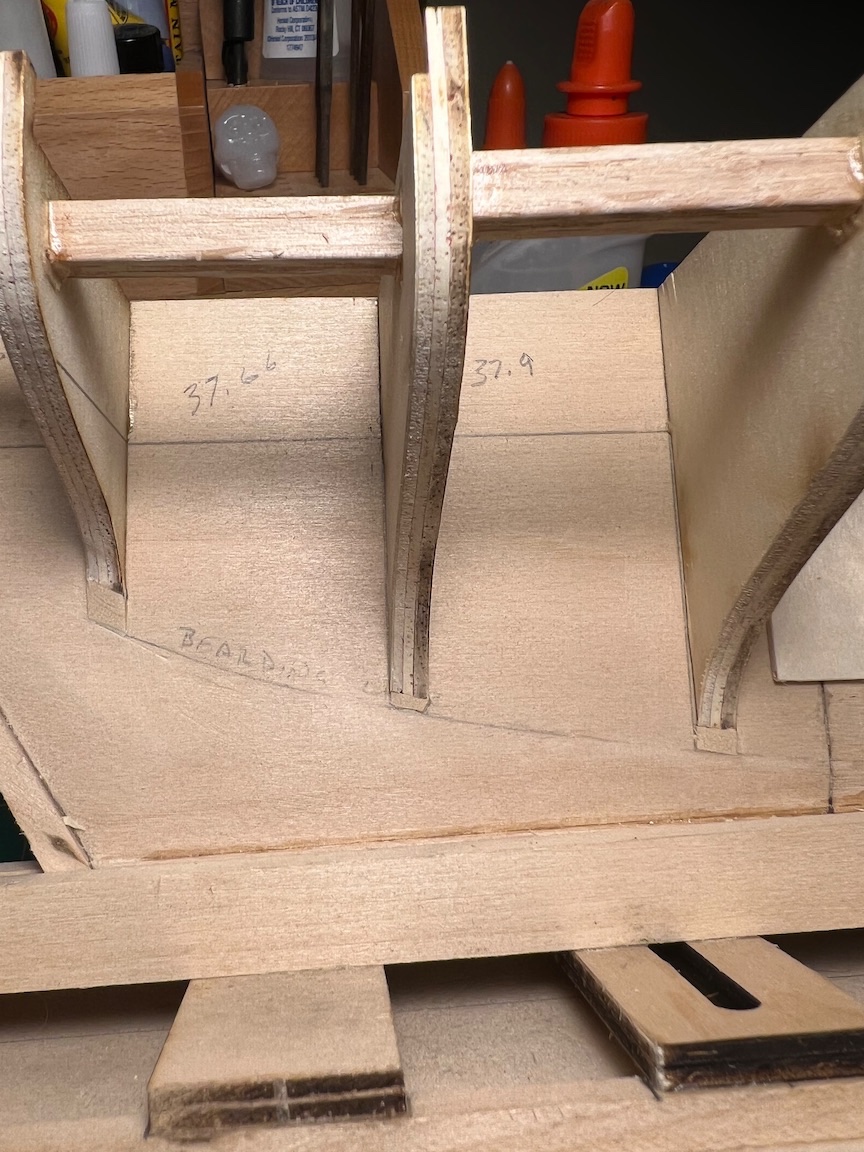
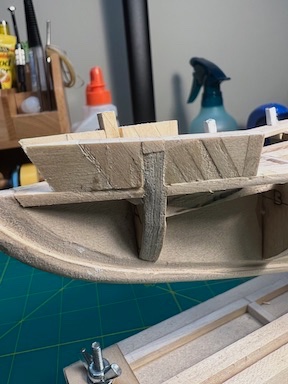
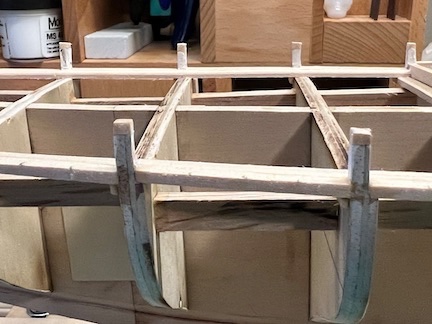
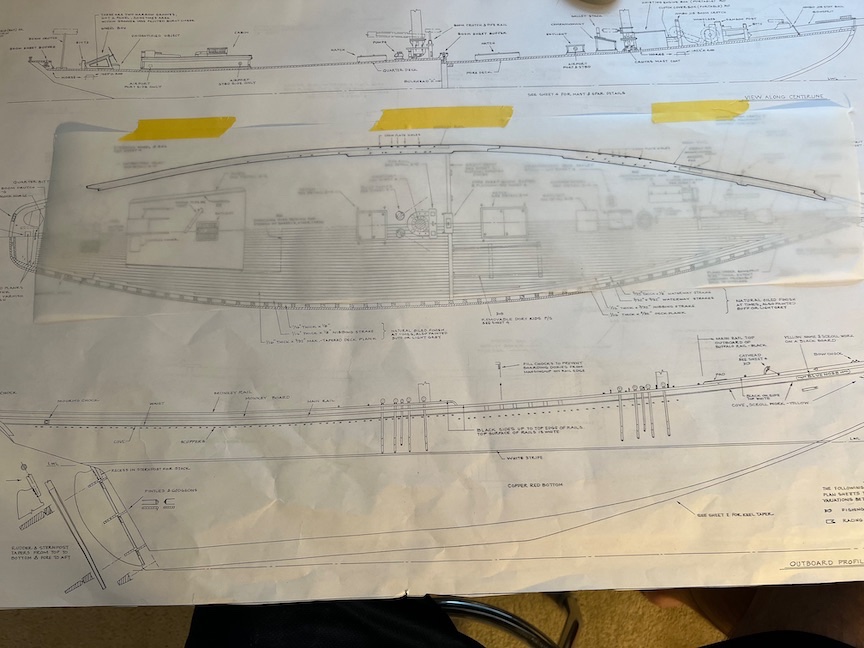
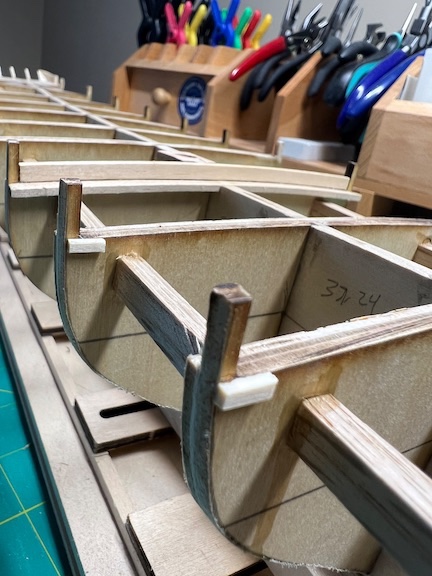
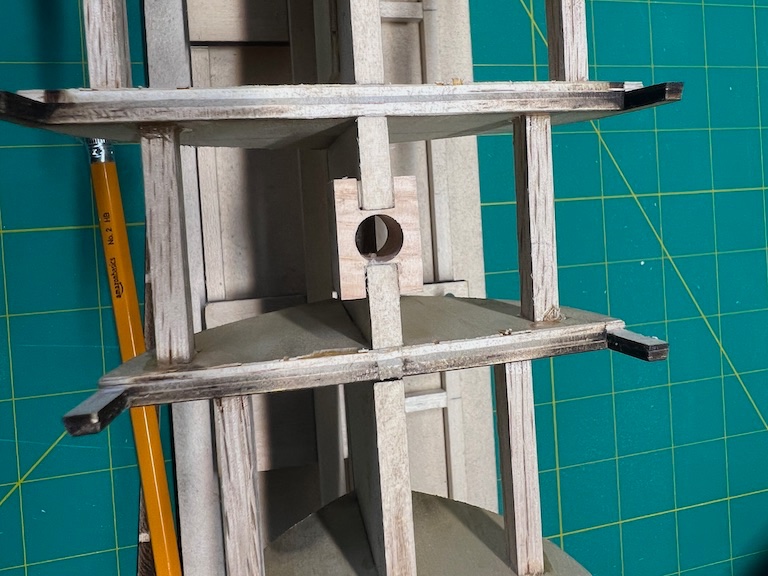
I have been working to fix the stern issue that was pointed out by @Retired guy. I truly appreciate the keen eye and willingness to offer constructive feedback! As I started to assess the problem and develop a solution, I determined it was best to just remove everything and start from scratch. I learned a valuable lesson to measure all the parts and compare to multiple points on the plans. It turns out that the bulkhead outlines on the Laser Cut Wood Pattern Plan do not match the bulkheads on the Plank on Bulkhead Construction Plan. I built the stern off of the ship, as I had broken off the tail piece of the keel earlier. I used the Plank on Bulkhead Construction Plan for all of the dimensions and when I reattached the stern, it turned out to be wider than bulkhead N, causing the flair out toward the stern. So, I ended up adding strips to bulkheads L, M and N to bring them to plan dimensions. I cut a new tail piece and bulkhead O from a 3/16 thick sheet and then glued in the stern blocks. After shaping to the plans and adding the transom pieces, I reattached the assembly to the ship with a little different reiforcement than I had originally used. I had removed the waterways back to bulkhead L, so I recut and installed those. Finally, I cutout and shaped new side pieces and added the stern fake stanchions. After all that was done I double check that the hull was faired from front to back and made some minor adjustments with sanding or adding strips where needed. Had I done that earlier in the process I would have realized the mistake with the stern! So many lessons learned and much happier with the results! On to the the main rail... Tim
- 145 replies
-
- 3
-

-
- Bluenose
- Model Shipways
- (and 1 more)
-
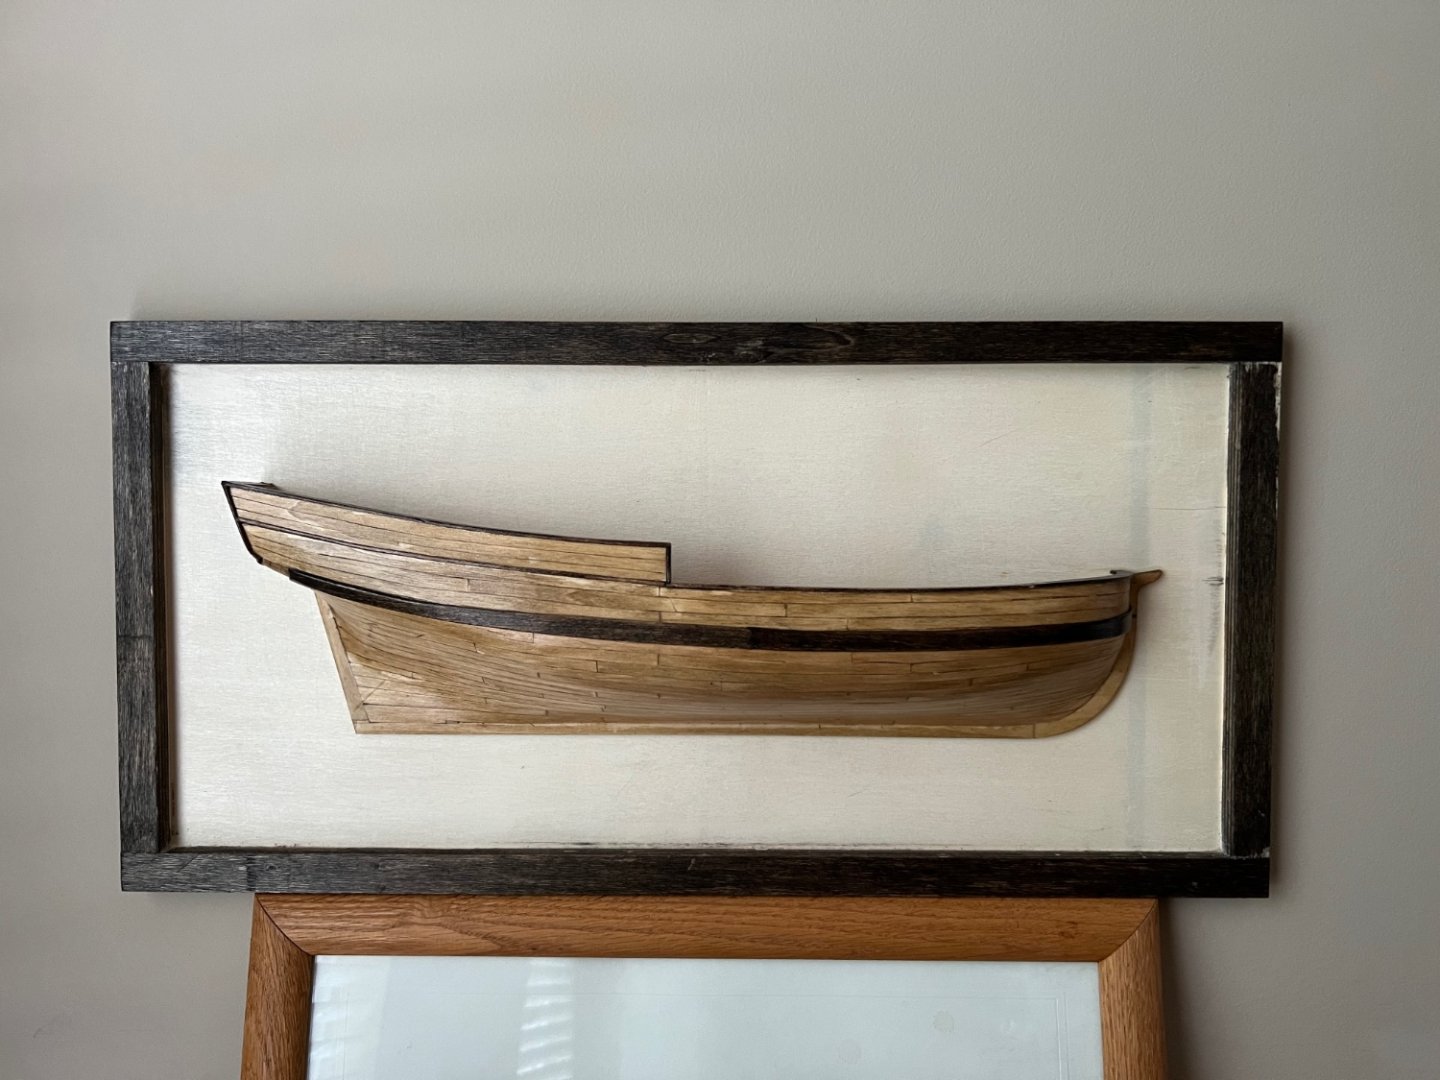
Looking forward to watching your build. I'm currently working on the Model Shipways Bluenose, but have this one sitting under my desk.
- 75 replies
-
- 1
-
-
- Oseberg
- Billing Boats
- (and 1 more)
-
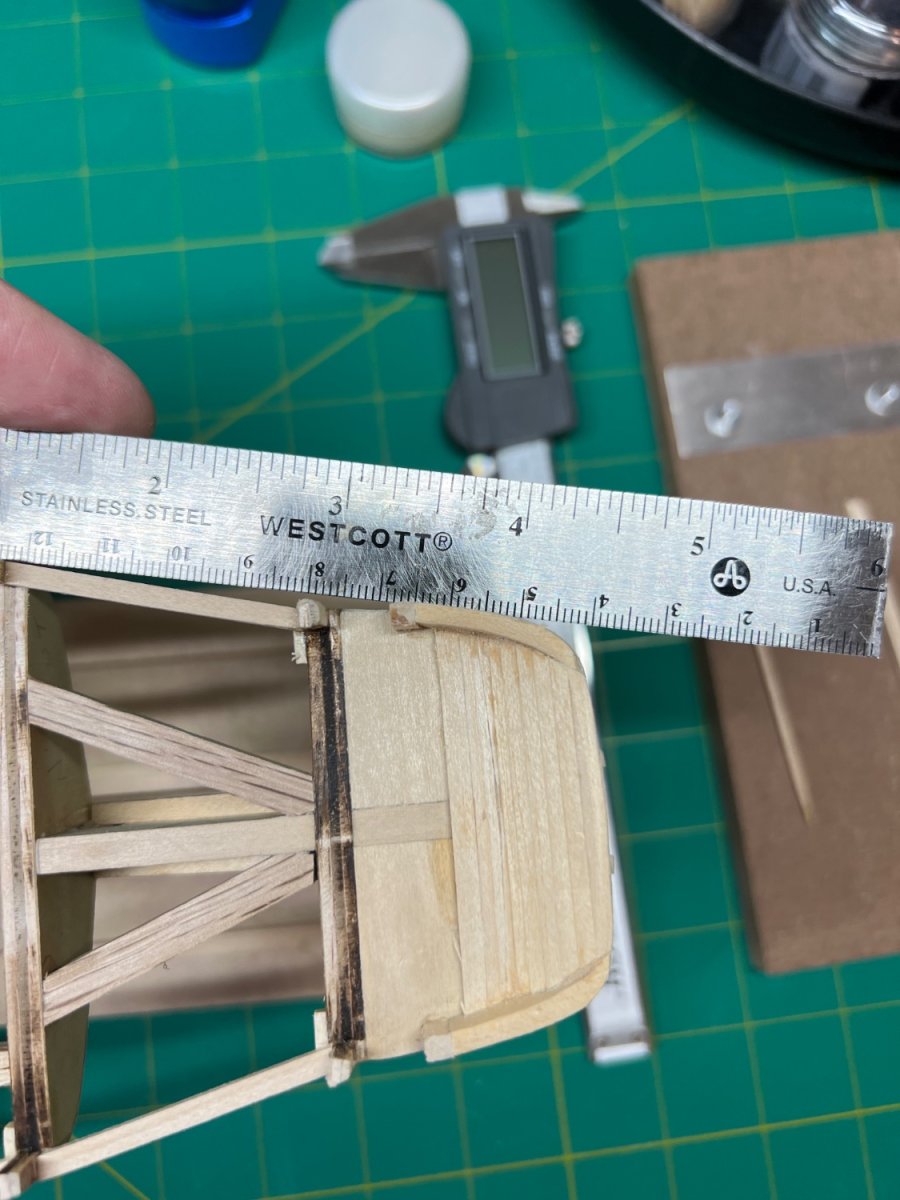
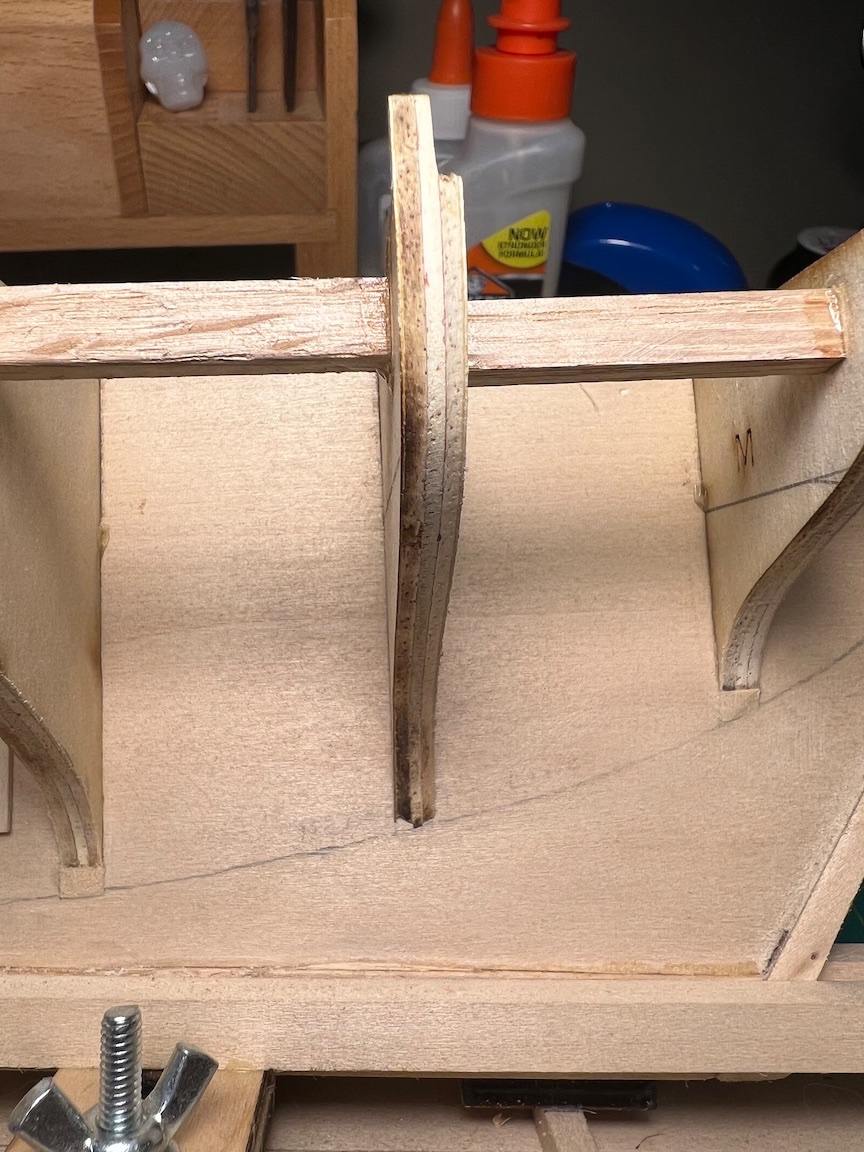
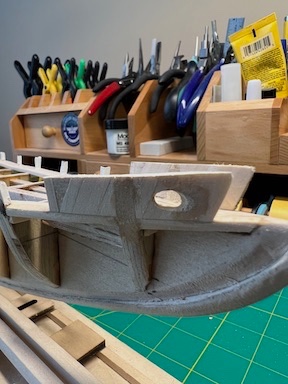
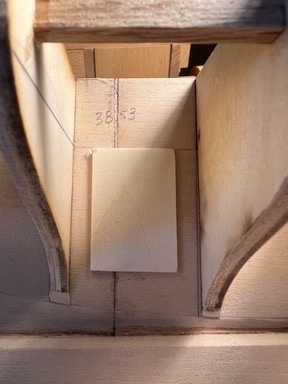
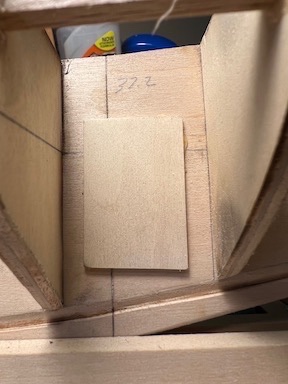
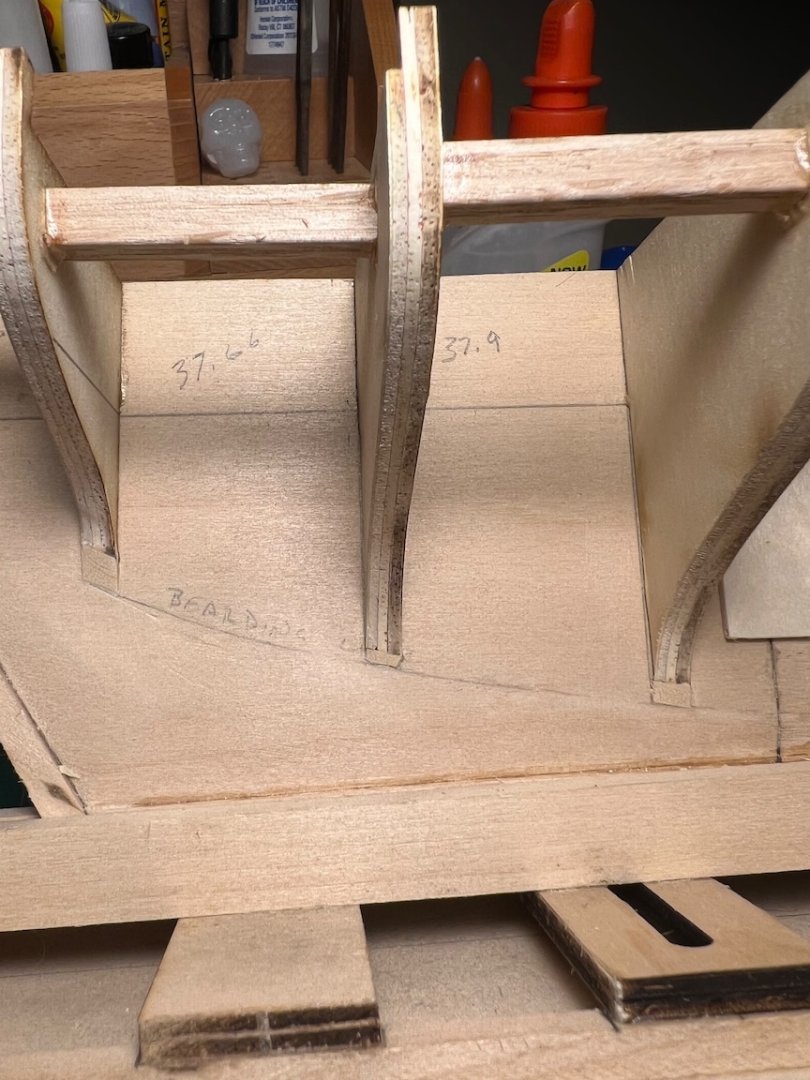
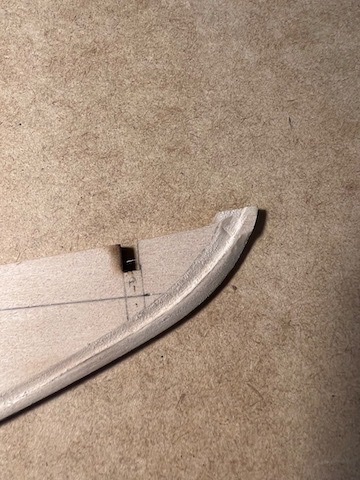
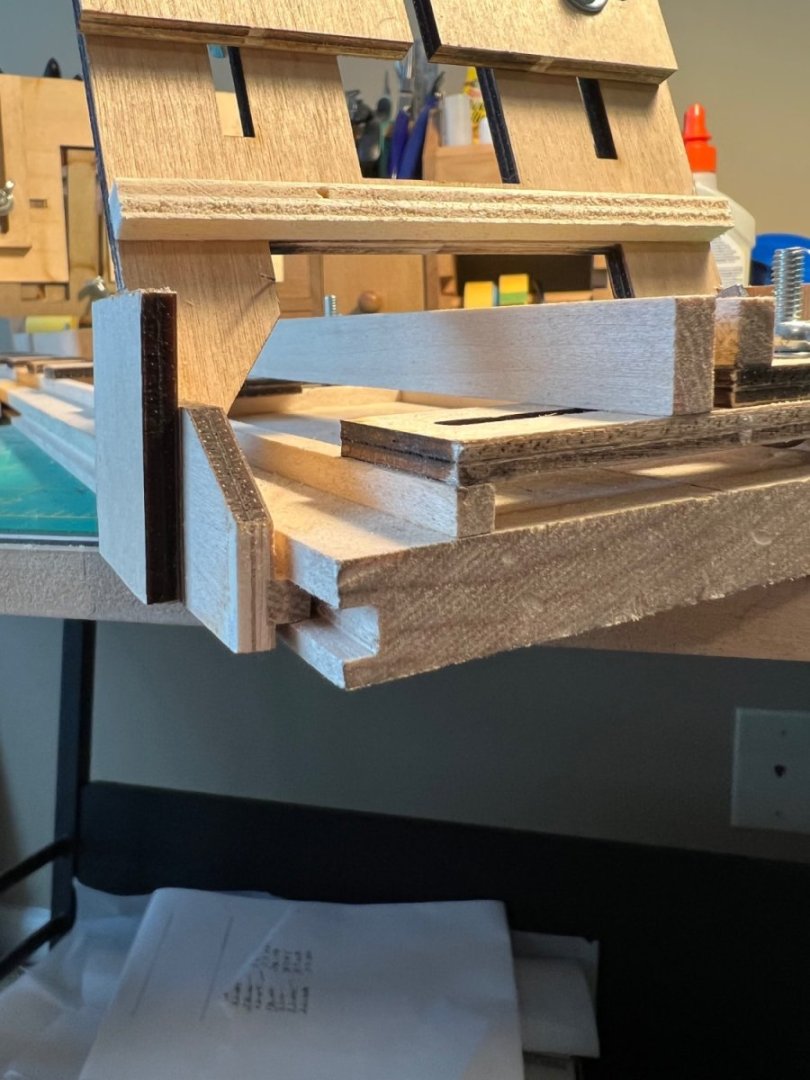
Thank you Richard! You are correct. After measuring, it is about 1/8 of an inch out at the end of the block. Great catch and I appreciate you pointing it out. I started to pull everything off of the stern block to correct it and noticed a couple of other issues in the process. The gap the picture below shows is actually because the width of bulkhead “O” is over 1/8 of an inch narrower than the Sheet 2 - Plank-On_Bulkhead Hull Construction plan shows. Bulkhead “N” is also too narrow. The odd thing is that they both match the measurements from Sheet 1 - Laser Cut Wood Patterns. So, going to take it all off and start over. Unfortunate, but a great learning experience. I will post pictures of the repair work when completed. Tim .

- 145 replies
-
- 1
-
-
- Bluenose
- Model Shipways
- (and 1 more)
-
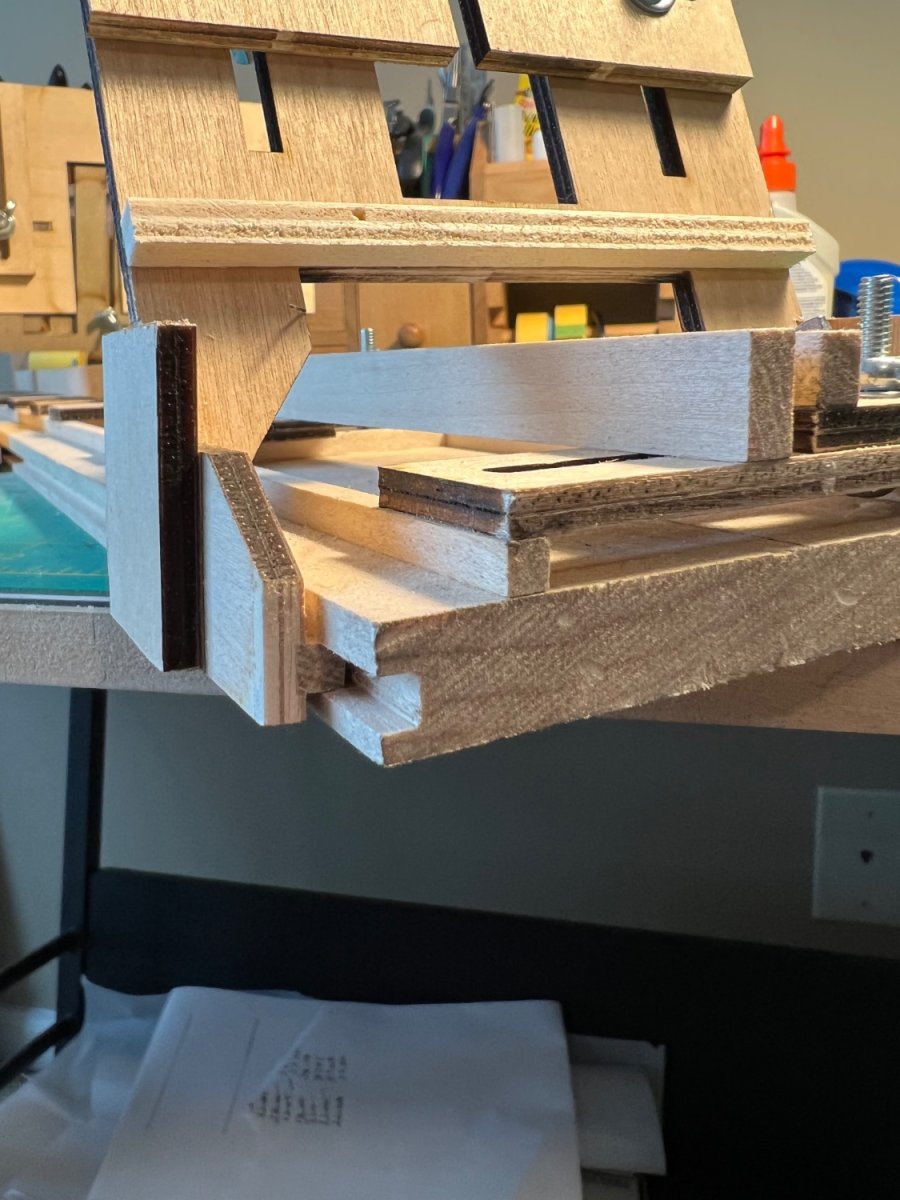
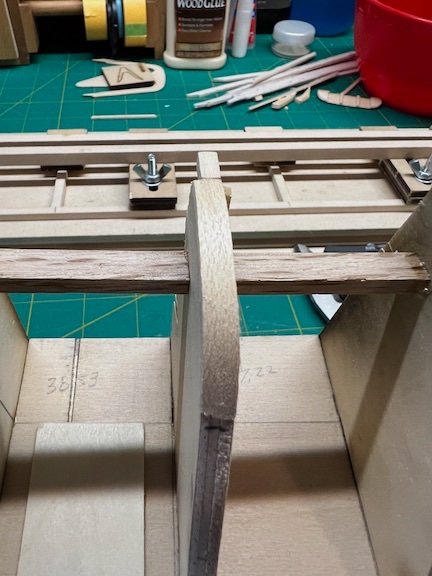
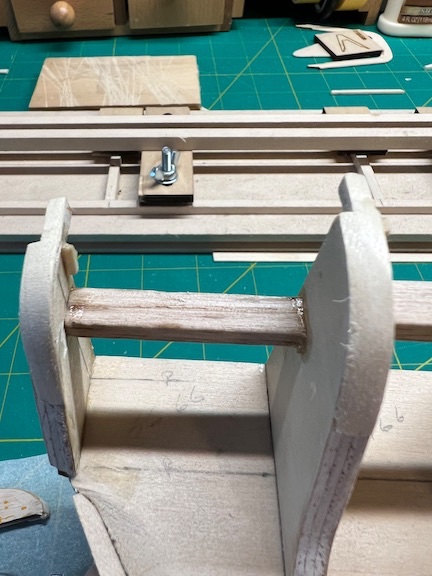
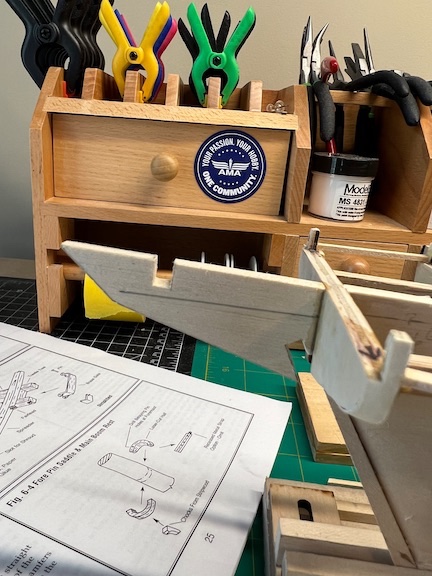
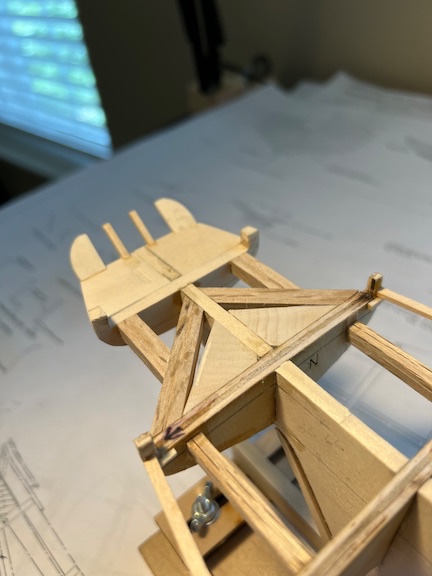
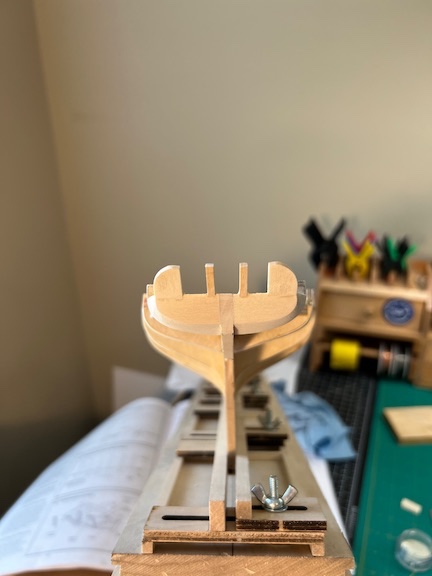
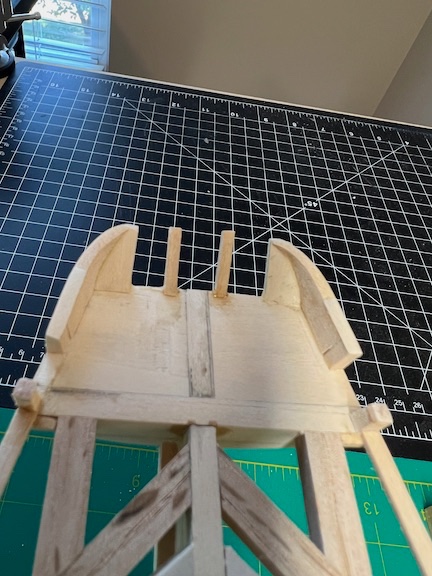
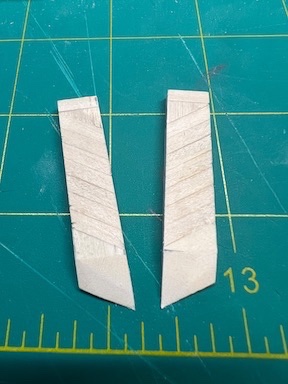
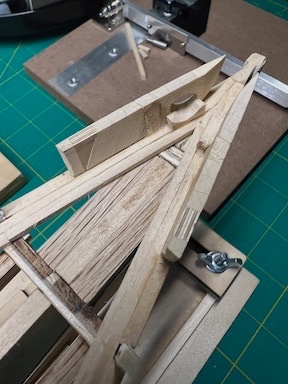
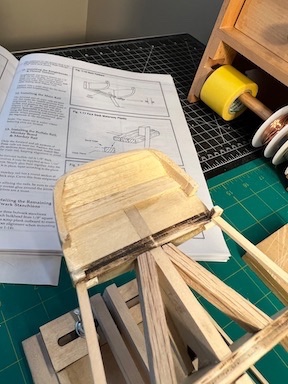
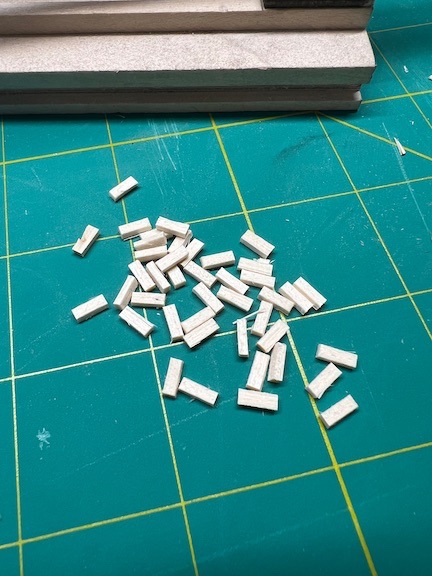
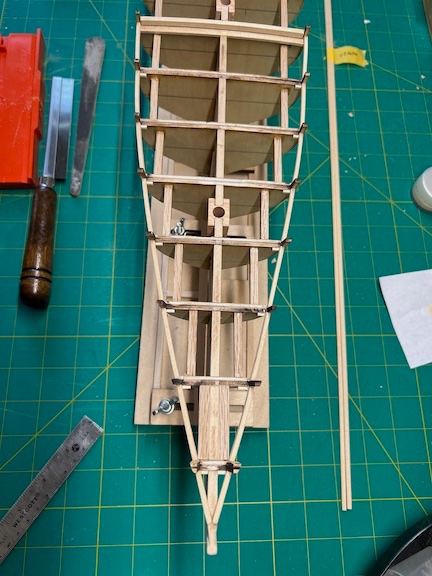
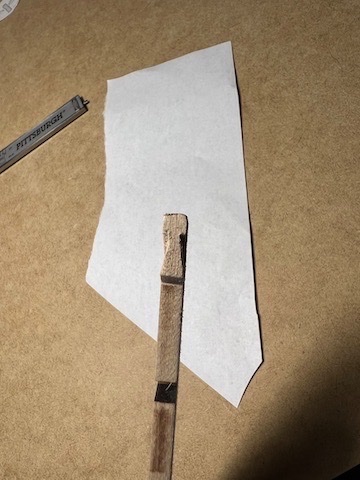
Decided to wait on the nibbing strakes until later and worked on the hawse timbers, knights head per the instruction sequence. I constructed the hawse timbers per the instructions as they were on the real ship. First I cut 1/8 square pieces for each side to the proper angle and just a bit longer than the plan and glued together along a straight edge as a guide. I then cut the fake stanchion and triangle piece and glued them in place. Lastly, I made the knights head and glued in place. Once the glue had dried, I measured and drew a line across the top of the finished piece to the match the plans and then cut along the line to get everything even across the top. Last step was to bevel the knights head. I built the whole piece as one to keep everything lined up appropriately and then cut out middle stanchion section and glued the two pieces in place After gluing in place I notice that the bulkhead "A" stanchions were short by almost 1/8 of an inch, so I added 1/8 square stock to extend them to the top of the hawse timbers. I checked the rest of the stanchions on the fore deck and they were all short to varying degrees, so I added stock and sanded them all to the correct height. Looks like the quarter deck stanchion are short as well, so I will deal with those before moving on to the main rail. After gluing both sides in place I worked on the hawse holes. using a small drill bit in a pin vise, I drilled several holes through the hawse timber at an angle around the inside of the oval I drew from the plans. Once I was able to open up the hole, I used a round file to finish shaping it out to the edges of the line, trying to maintain the offset angle. When that was complete, I added the chafe blocks and shaped them to match the hole. Next, I moved to the stern and finished out the inside. I am going to work on the main rail next and have traced the pattern for the section between the bow and stern laser cut pieces. I will likely cut this into 4 pieces per the instructions to keep each to about 6". That's all for now! Tim

- 145 replies
-
- 6
-
-
- Bluenose
- Model Shipways
- (and 1 more)
-
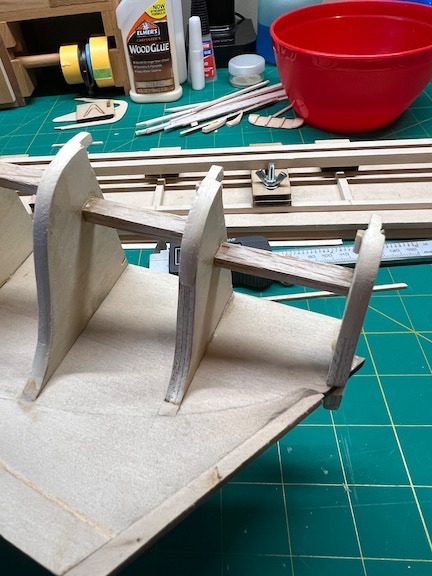
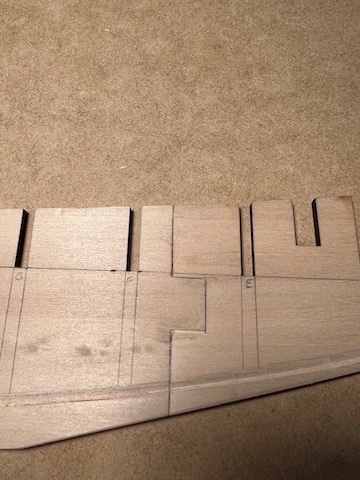
Moving on to the next step in the manual, I worked on installing the waterways over the weekend. Had to make a journey (40 miles) to the nearest hobby store to get 3/32 x 3/32 strips. The kit was short 2 of 4 (which was the only thing missing) and I had thought at the time that I might be able to make due with only two, so I didn't bother to have MSW replace them. Well, that was before I made the error of using them for the waterway planks that fit between the stanchions. Supposed to be 3/32 x 1/8. I had the right size pulled out of the box and set aside, I just grabbed the wrong one and went to town. Measure twice, cut once!! To begin with, I added scrap "shelves" for the end of the planks that butt up against the bulkheads. I probably could have held the planks in place long enough for the glue to set but, I had seen this done for other builds and thought it would be much more sturdy. After removing all the wrong size planks, I cut the 3/32 x 1/8 stock to fit in between the stanchions, test fit and adjusted to make sure everything was lined up, and then secured with a drop of thin CA at each end. I cut and installed the second plank row of the waterway next. Rather than just use one long plank, I cut the plank into sections. The bulkheads are about 8' OC based on the scale of 3/16" = 1', so this means 8 or 16 foot planks. I figured this was reasonable, and without adding something in-between the bulk heads to support the joints, there really was no other option. I used wood glue along the edge, at the joints and where the planks sat on bulkheads to secure these. Wrong Size Correct size with second waterway plank installed I finished up the fore deck waterway by installing the 3rd plank row in similar fashion and beveled so the inside edge was 1/16" to sit flush with the rest of the decking to be installed later. I offset the joints so that I didn't have any side-by-side. Next, I installed the quarter deck waterway between the stanchions. That's it for now. Although out of sequence based on the manual, I plan to add the nibbing strakes next . Tim

- 145 replies
-
- 5
-
-
- Bluenose
- Model Shipways
- (and 1 more)
-
Thank you Nirvana!
-
Thank you David.
-
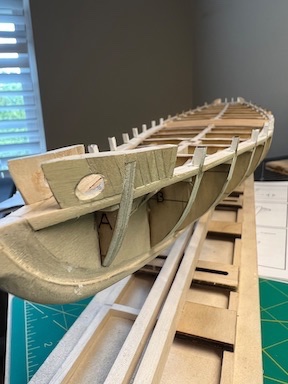
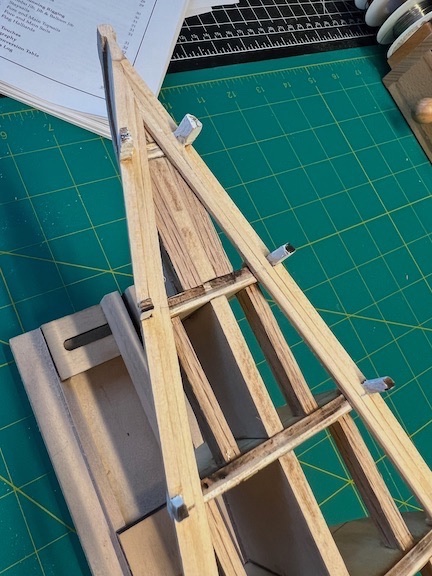
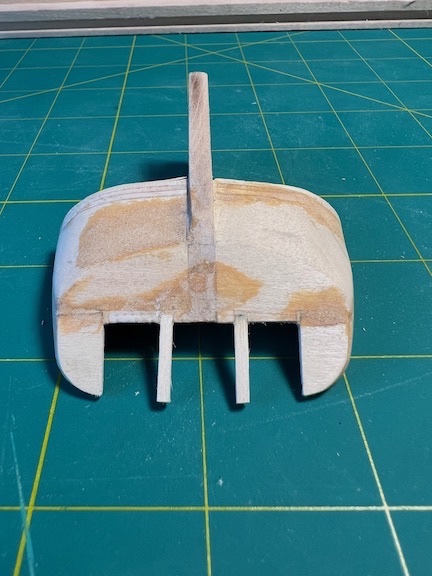
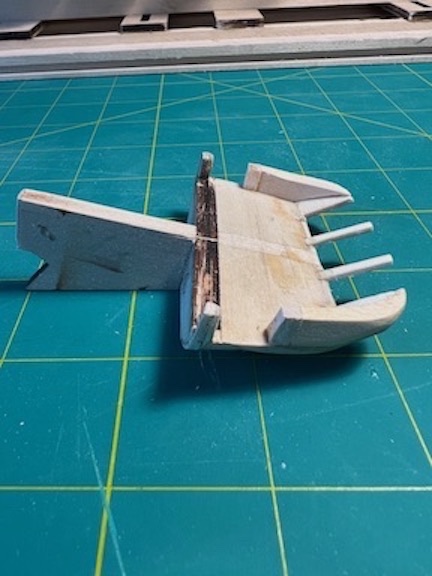
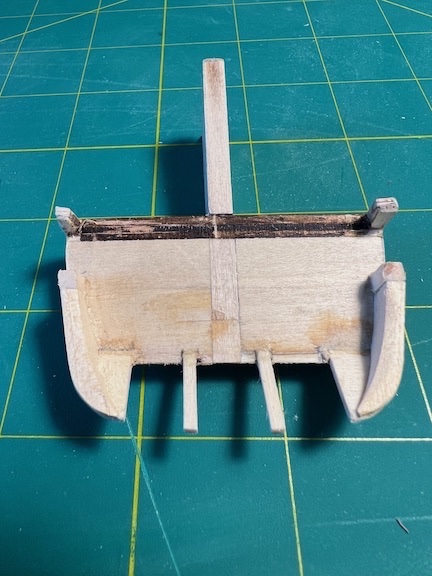
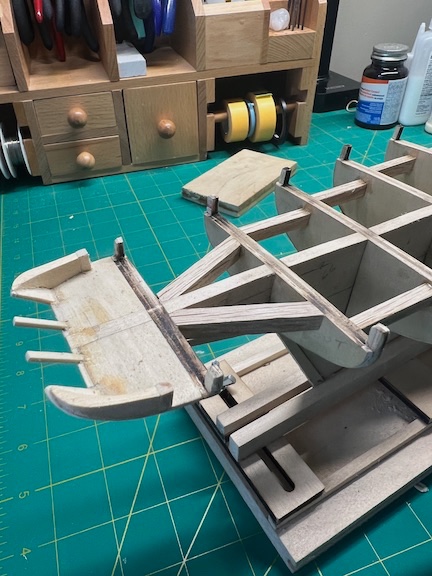
As I mentioned earlier, the stern section broke off while working on the stern block. I marked up the blocks and got them cut down a bit prior to gluing to the stern. I had completed the rough shape of most of one side and "snap". While I would not have purposely broken or cut the piece off, it certainly made it easier to work on. I finished the shaping of the stern blocks and then added the quarter and transom frame pieces. I made several attempts to get the side "steep tumble home" pieces cut out and shaped. I really had to think through the process to cut and shape the complex curves and angles from a square block but, finally got the two pieces to what I think is the right shape and both sides pretty closely matched. After completing, I reattached the stern section to the keel. I added reinforcement braces and then installed the horn timbers. Last think before moving on to the waterways, I drilled and cut out mast blocks to slide into the slots in the keel. Hoping to get started on the waterways this weekend. Tim
- 145 replies
-
- 5
-
-
- Bluenose
- Model Shipways
- (and 1 more)
-
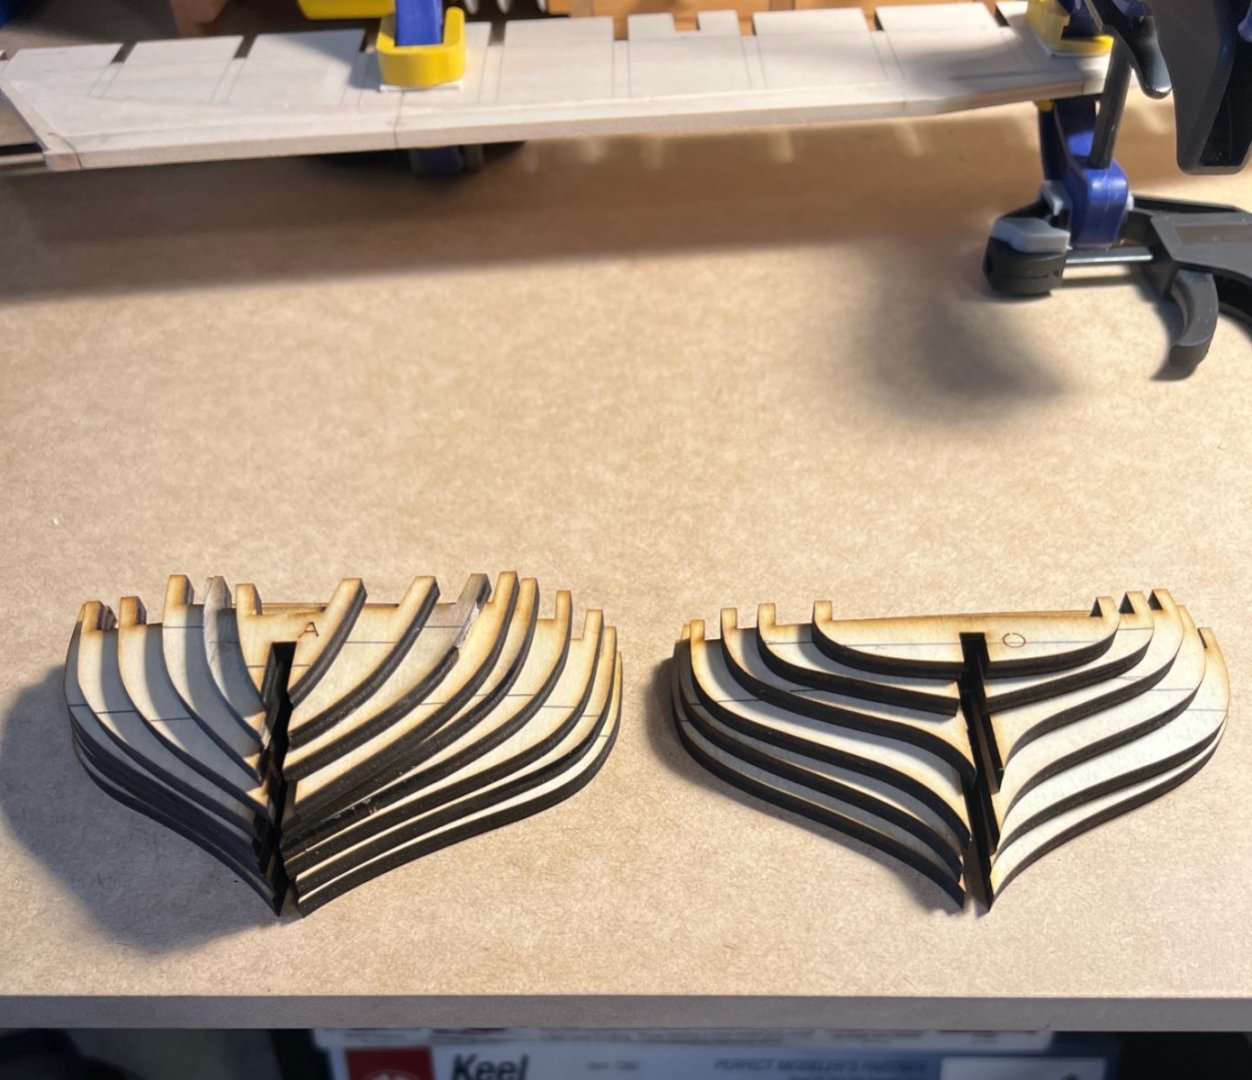
Wanted to make sure I was not missing something in the instructions or plan. The plan and instructions show 2 pieces for the great beam and one for the deck beam at bulkhead H. The single deck beam is on the same laser cut sheet as the keel. On the other small laser cut sheet, it looks like there are two each of the great beam pieces. Each piece measures to the plan dimensions. Are they just extra or am I just not seeing where they would be used?

- 145 replies
-
- 3
-
-
- Bluenose
- Model Shipways
- (and 1 more)
-
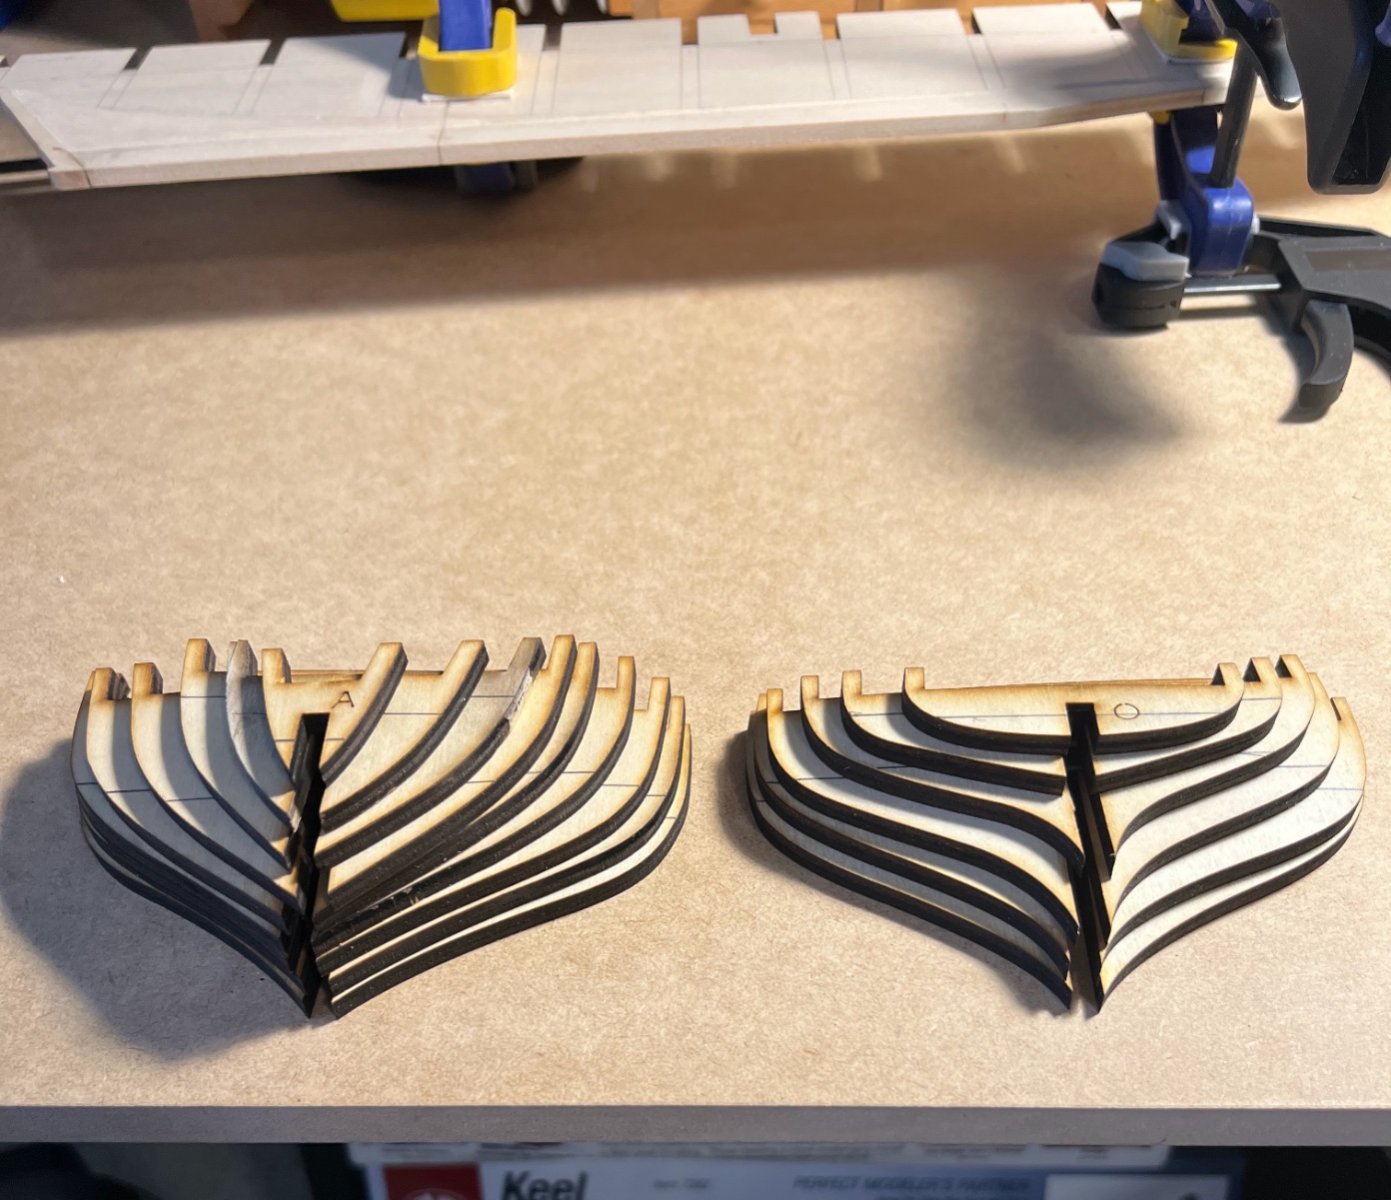
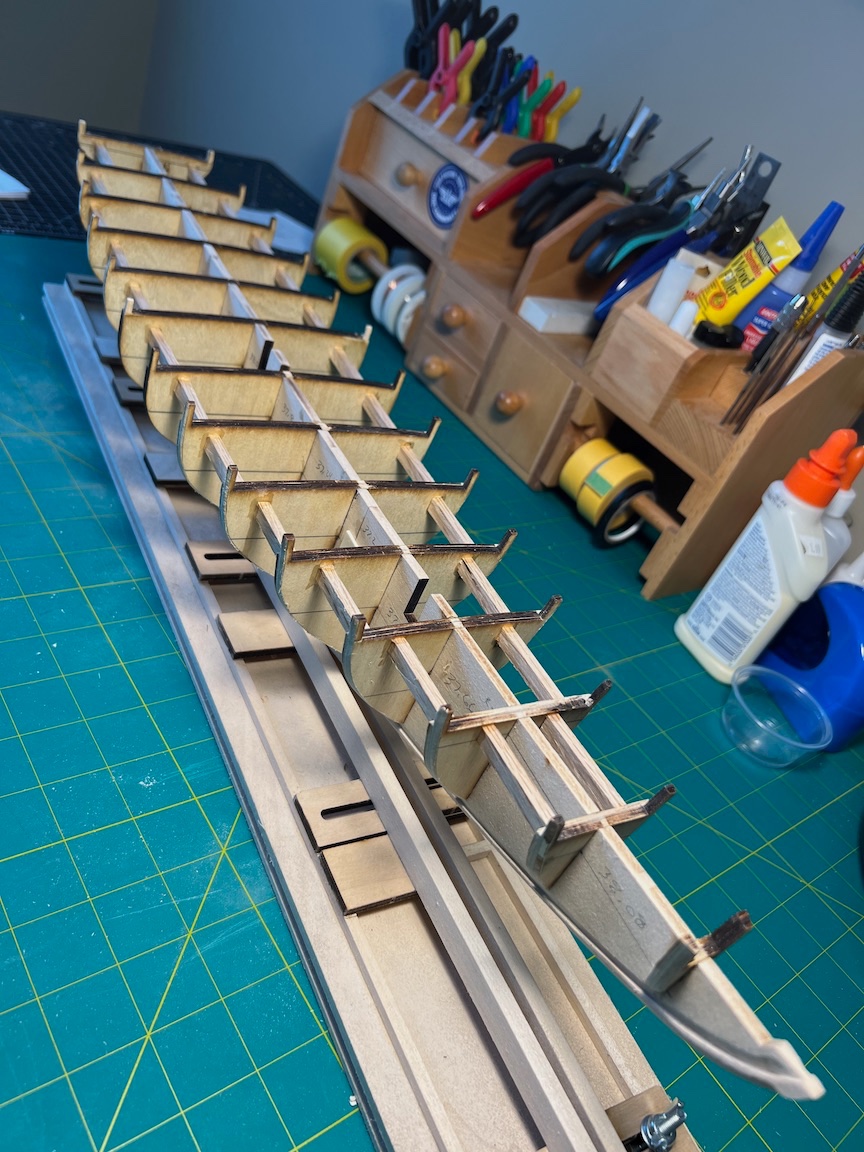
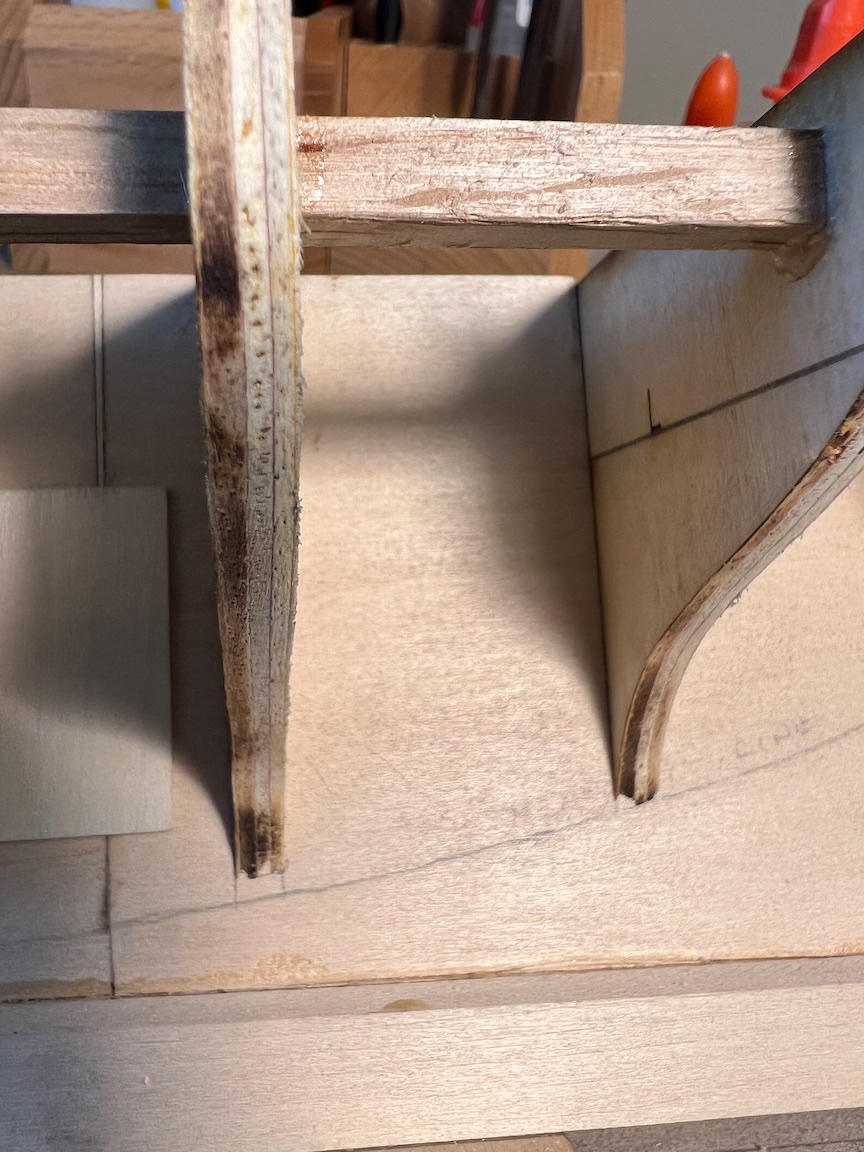
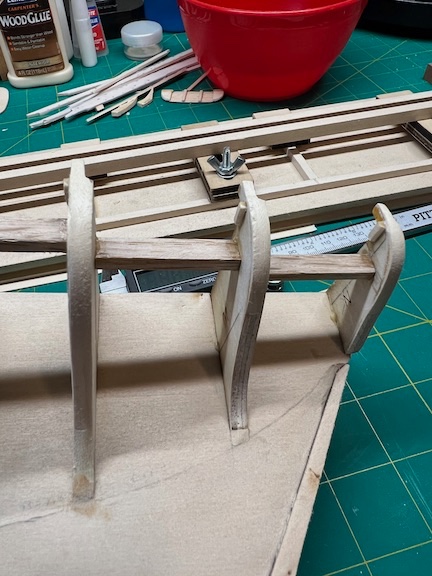
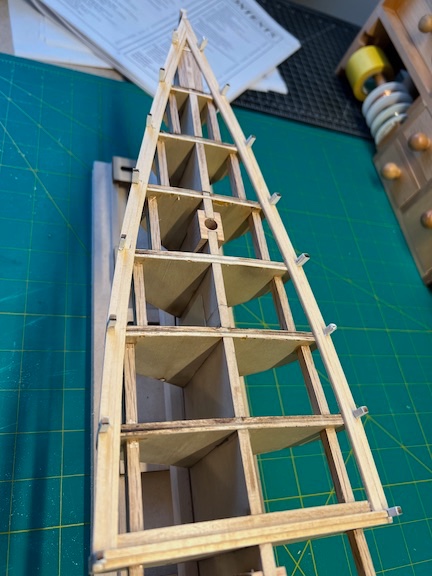
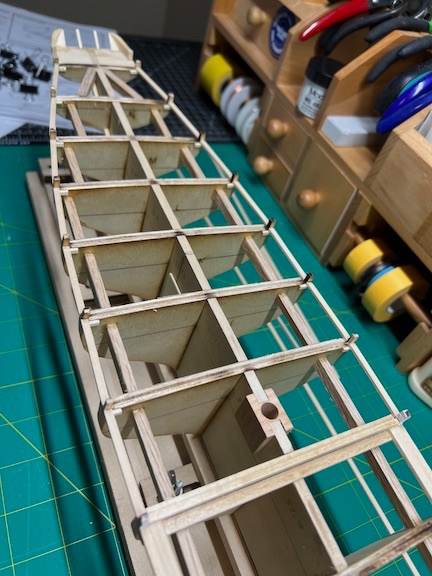
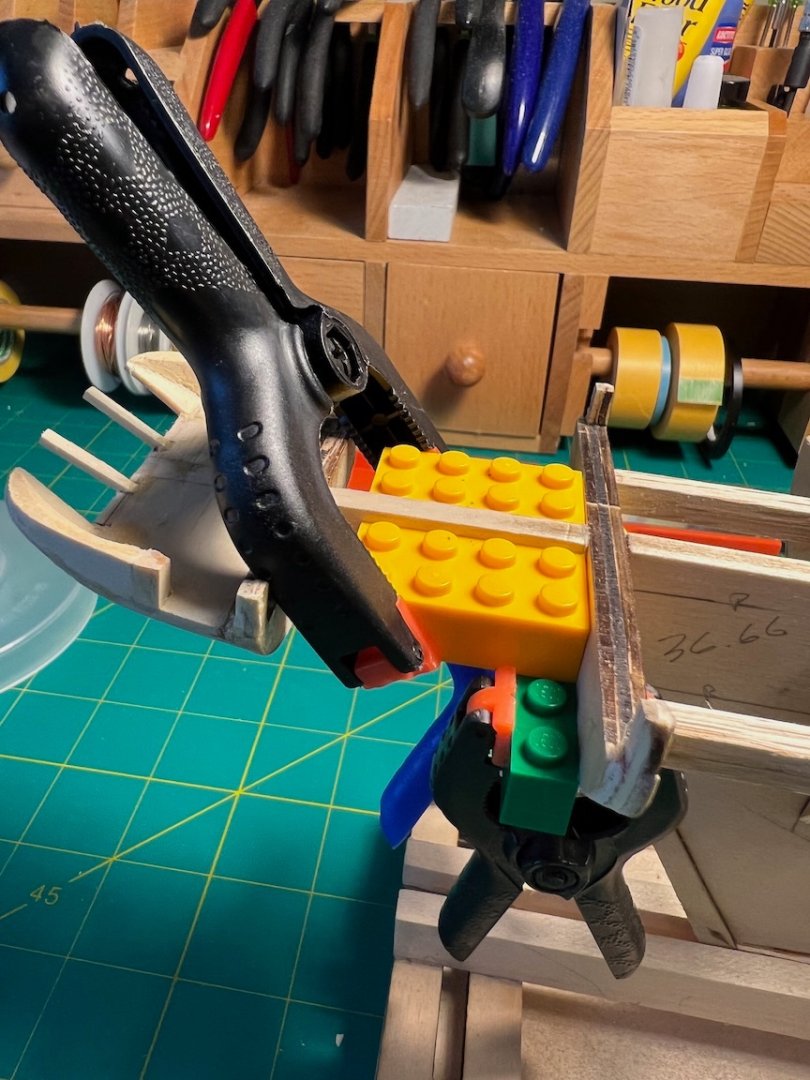
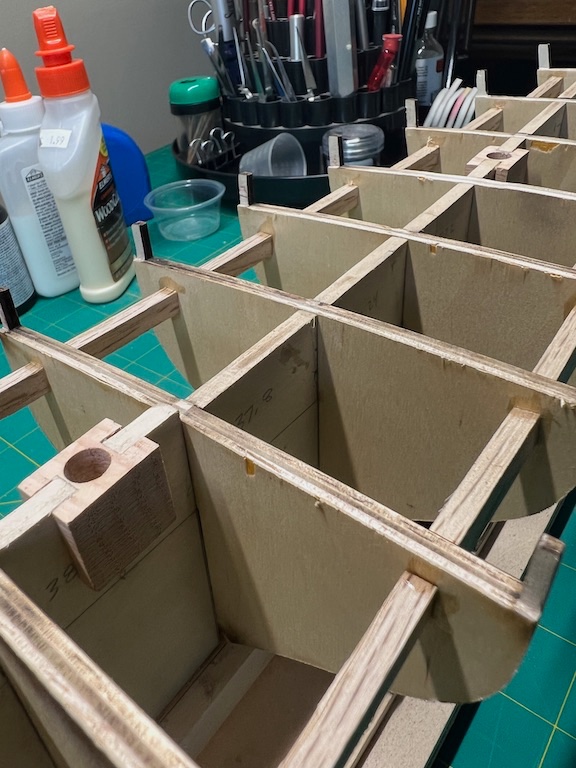
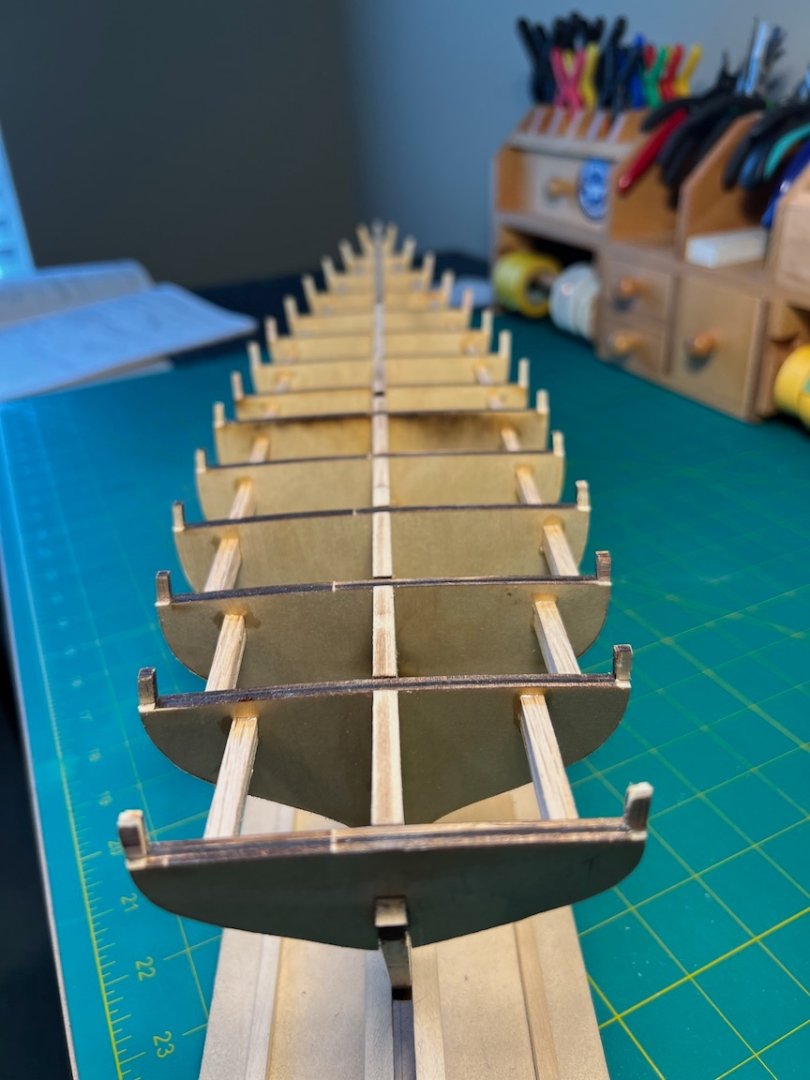
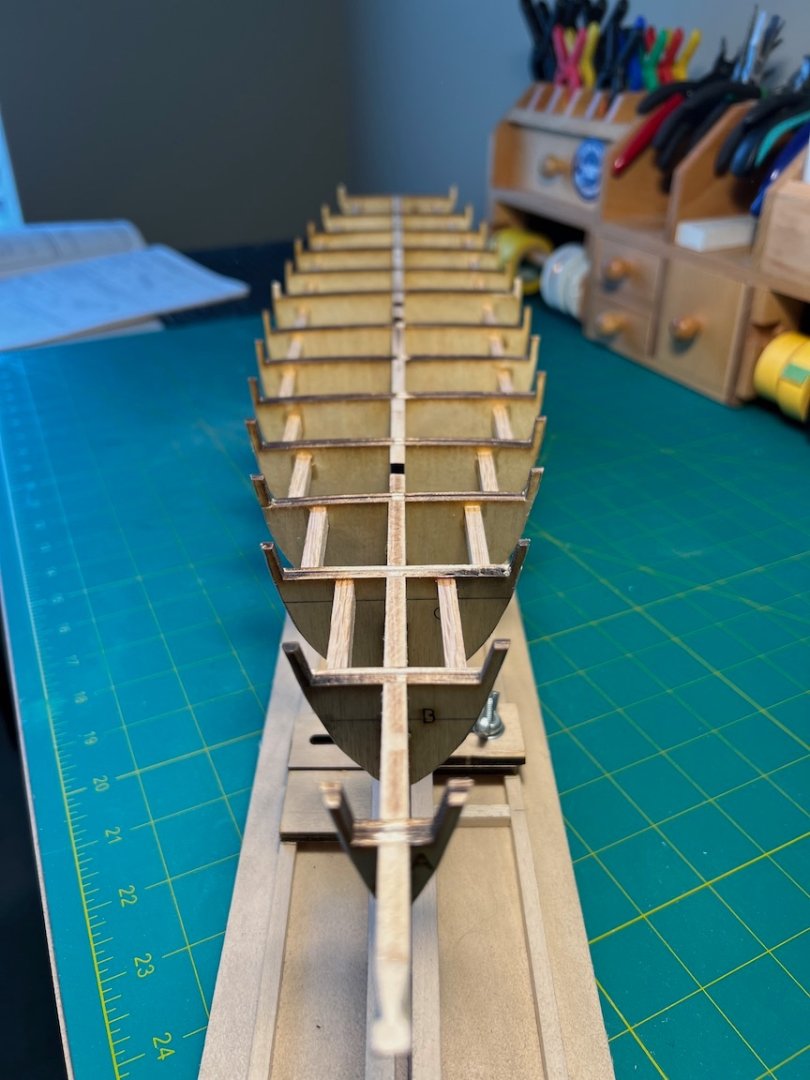
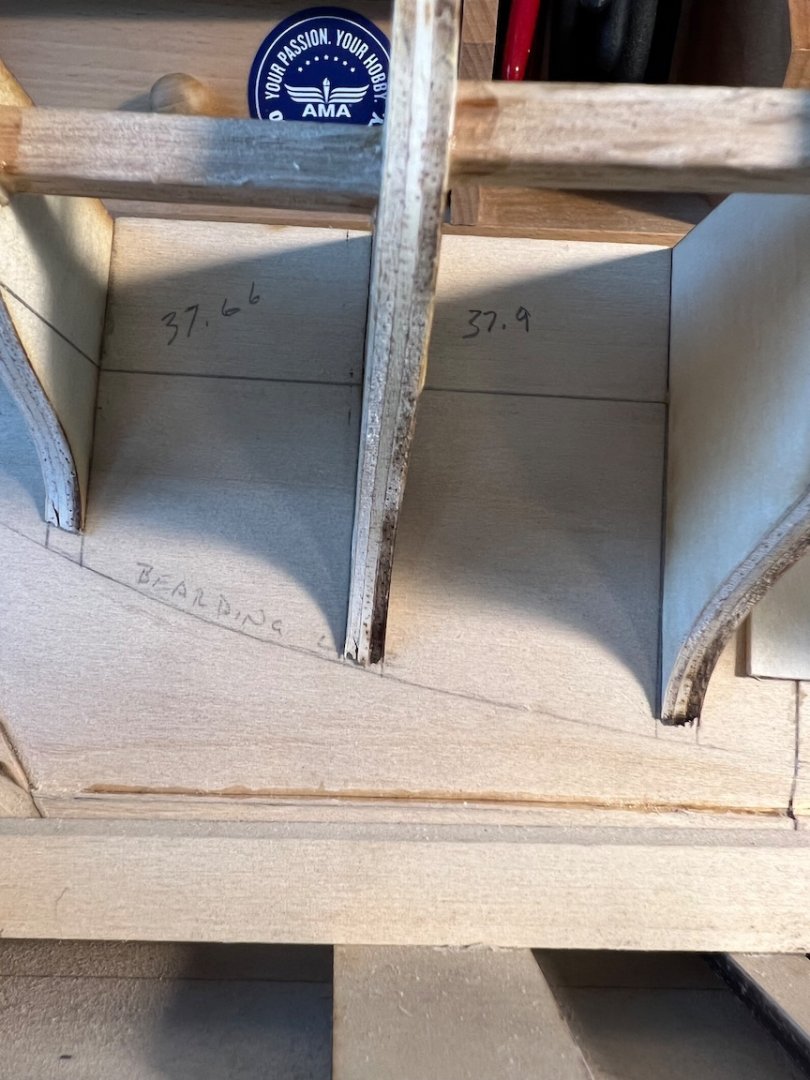
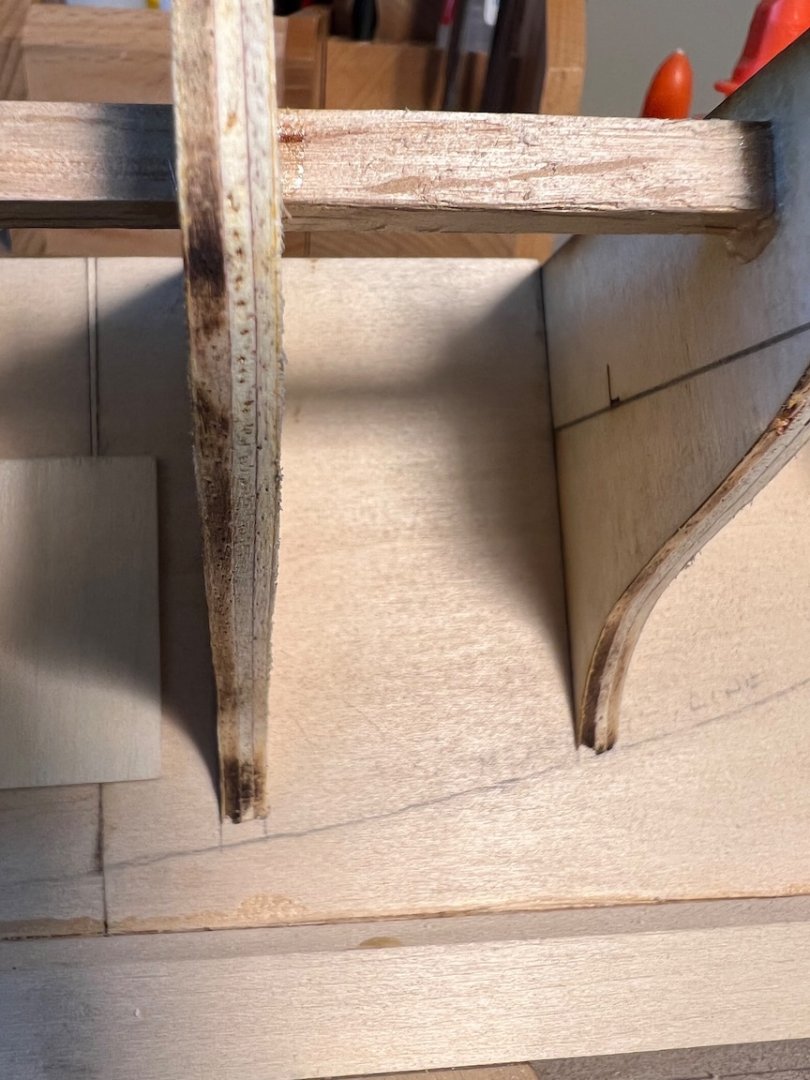
After I had all of the rabbets cut in, I glued reinforcement pieces over the keel joints at the keyways. I waited until the rabbets were cut in to keep the keel laying flat on the workbench while I carved and sanded the rabbets. Next up, the bulkheads. I cut out all of the bulkheads and then marked each with reference lines and bevel lines from the plans. I then took the time to shape each one to the planned taper with a Dremel and sanding drum attachment. This is definitely easier than trying to sand the bevels once attached to the keel and, as you can sand them individually without having to constantly handle and work around the full assembly. I test fitted the bulkheads to the keel. I sanded all of the bulkhead and keel slots to remove the laser char on the mating surfaces. Some of the bulkheads were fairly tight or did not want to fit at all without extra sanding of either the bulkhead slot, the keel slot or both. Once I had everything fitting nicely, I began to glue the bulkheads in. The Fair-a-Frame was good to hold the keel and keep it aligned, but the bulkhead jig was of no use for this model. It is designed to align the bulkheads at a right angle and perpendicular to the bottom of the keel, but none of the bulkheads on the Bluenose are aligned at right angles to the flat part of the keel. I used the extended slot lines I transferred from the plans to make sure the bulkheads were seated properly and then used Lego bricks and clamps to hold everything square while the glue dried. I worked from front to back, gluing every second bulkhead in, to allow space for the Lego and clamps and then came back and glued in the rest. (I forgot to take pictures of this step ) Once all the glue had dried I added support pieces between the bulkheads on each side. You will probably notice that the stern bulkhead is missing in the pictures. I took these after I had started working on shaping the stern blocks. I had reinforced the fragile section of the keel with a couple of scrap pieces, sandwiching the keel with a clamp. It worked well...until it didn't and I broke the stern section off. Honestly, it was actually MUCH easier to work with one it was detached. Most of the bulkheads lined up really well with the bearding line, with very little carving or sanding. There were a few toward the stern that required some extra attention. I glued in pieces to fill the gaps and then sanded to align to the bearding line.


- 145 replies
-
- 3
-
-
- Bluenose
- Model Shipways
- (and 1 more)
-
Richard, Thanks for the encouragement. I have read your build log multiple times and it is a beautiful build! I am in awe of your skill and definitely have shop envy! I don't have the space, funds, or time to dedicate to building a shop like that but maybe someday... In the mean time, I will take my time on this build and draw from all the great ideas and advice I have found on this site. Tim
- 145 replies
-
- 1
-
-
- Bluenose
- Model Shipways
- (and 1 more)
-
Thank you David. I enjoyed reading your build log of the Bluenose. I definitely appreciate any feedback or guidance as I work through this build. I would like to be accurate to the original and will continue to research as I work through the build. I think I prefer the original stern lettering with the Masonic symbol and will look to replicate that. I have a long way to go… Tim
-
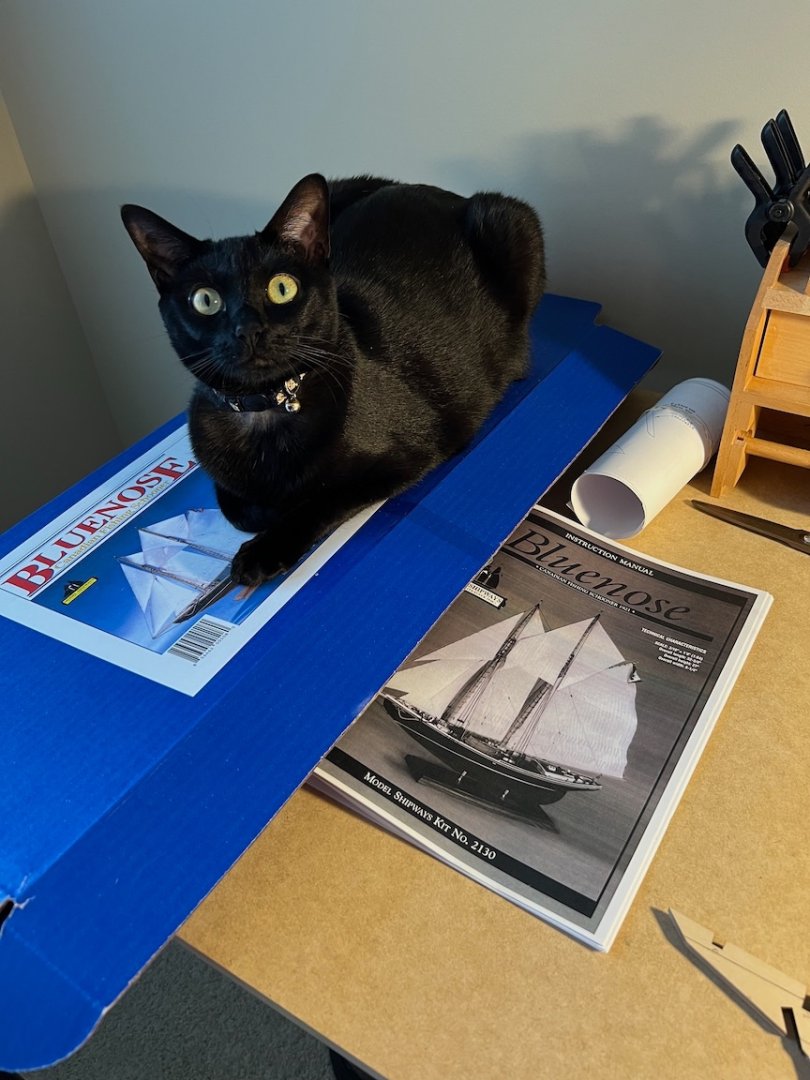
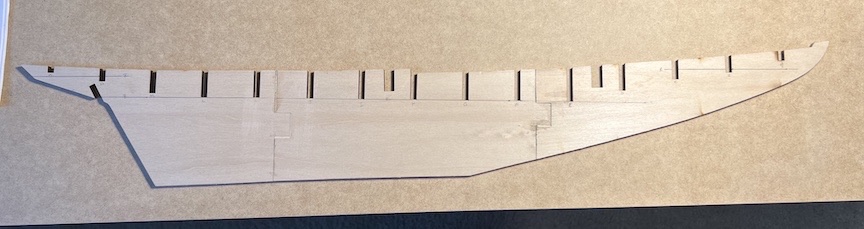
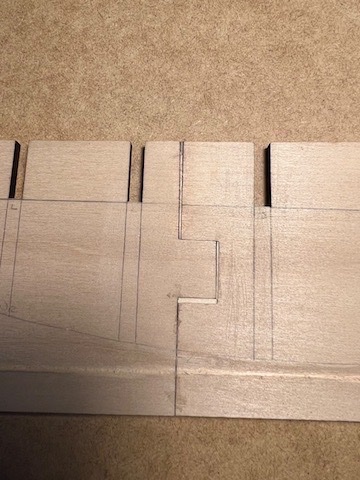
Getting started on the build. I suspect my assistant will be by my side, either sitting on the box, the manual or the plans throughout the build! After checking through all of the parts (nothing missing) I got started on laying out the keel. I laid out all of the reference lines. All of the pieces were straight but, I had to add several spacers at the joints to keep the reference line matched up and make sure everything was solid. Once I had the three pieces together, I laid out all of the rabbet, bearding and bulkhead lines. I then started to carve all of the rabbets. This was one of the tasks that I feared the most. I did get some practice on the NRG half hull, but that was only one side and it was a relatively simple cut. With the varying widths and only 1/16 inch to spare at the deepest portion of the rabbet, I was concerned with cutting too deep. I took my time and I have to say it was actually a very enjoyable process.

- 145 replies
-
- 5
-
-
- Bluenose
- Model Shipways
- (and 1 more)
-
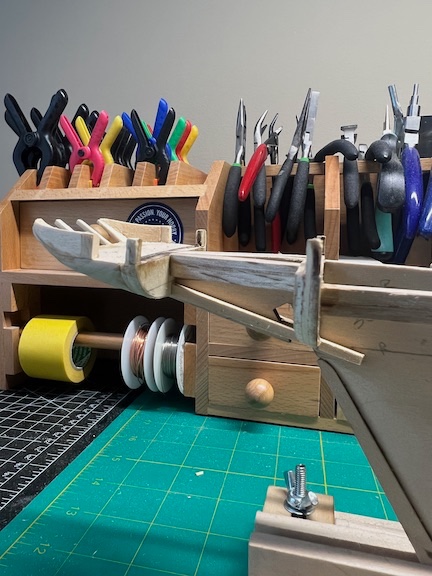
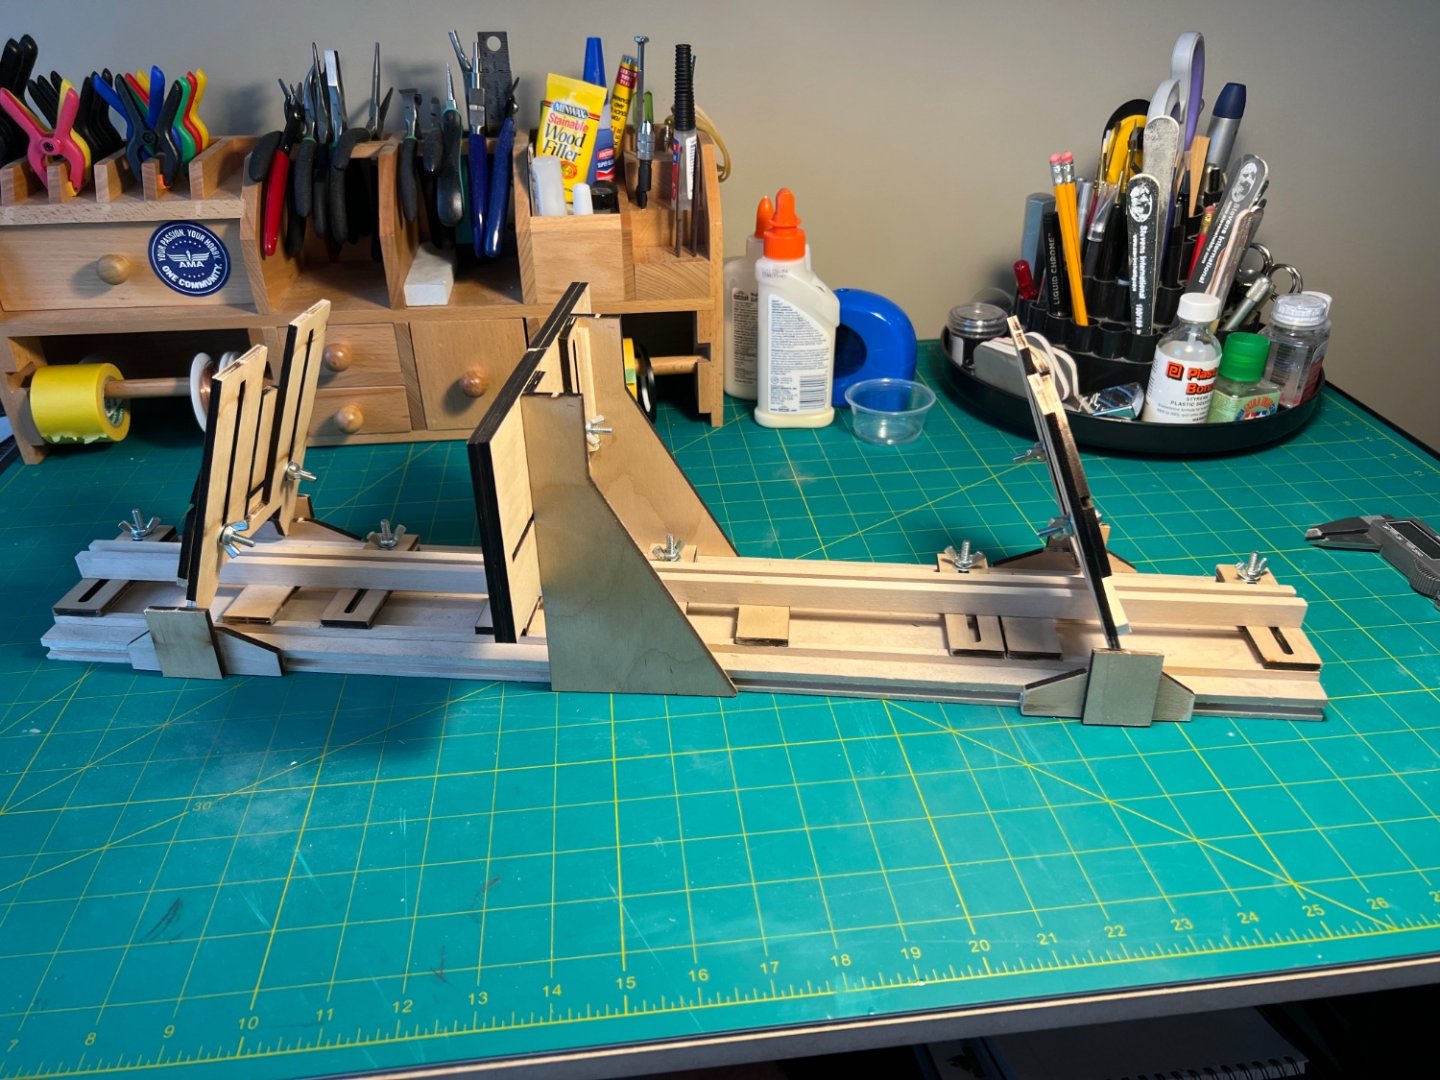
This will be my first attempt at a full wooden ship build. I have built several plastic model ships (Constitution, Cutty Sark and Charles Morgan, all by Revell) and R/C model airplanes but, this will definitely be a test of skill and patience. I started by building the NRG half hull to get some experience with planking. That went pretty well and I learned a lot! I have always wanted to build a model of the Bluenose, as I am from Canada and have been fascinated by this ship for as long as I can remember. I took the opportunity to dig in deeper to its history by reading Bluenose by Brian and Phil Blackman and A Race For Sailors by Keith McLaren. This ship has a fascinating story and, unfortunately, a sad ending for such an icon of maritime history. I purchased the Fair-A-Frame from Model Shipways, as it looked to be the best way to hold the keel while I worked on bulkheads and everything on the deck (and I was able to get it on sale!). I modified it based on the changes that @Retired guy made prior to his Bluenose build. This is definitely an improvement to the unit and really locks in the jigs that slide along the base. I have been procrastinating since finishing the Half Hull, mostly because I am a bit intimidated with this build. Reading through the forums, there are so many talented folks and high quality builds of this model. Time to get under way and I hope that I can do it justice.
- 145 replies
-
- 4
-
-
- Bluenose
- Model Shipways
- (and 1 more)