Fubarelf
-
Posts
115 -
Joined
-
Last visited
-
 Fubarelf reacted to a post in a topic:
Santa Maria Caravelle by GGibson - FINISHED - Ships of Pavel Nikitin - 1:48
Fubarelf reacted to a post in a topic:
Santa Maria Caravelle by GGibson - FINISHED - Ships of Pavel Nikitin - 1:48
-
Fubarelf reacted to a post in a topic:
Bluenose by Benjamin S - POB - from Model Shipways plans
-
Fubarelf reacted to a post in a topic:
Santa Maria Caravelle by GGibson - FINISHED - Ships of Pavel Nikitin - 1:48
-
 Fubarelf reacted to a post in a topic:
Flying Dutchman/Black Pearl by Glen McGuire - FINISHED - 1/700 - BOTTLE
Fubarelf reacted to a post in a topic:
Flying Dutchman/Black Pearl by Glen McGuire - FINISHED - 1/700 - BOTTLE
-
Fubarelf reacted to a post in a topic:
HMS Victory by Yabuhebi (Chris) - Caldercraft - 1:72
-
Fubarelf reacted to a post in a topic:
HMS Victory by Yabuhebi (Chris) - Caldercraft - 1:72
-
 Thank you, David! My work bench is currently empty and you have inspired me to give the dories another go. Tim
 -
Thank you so much, Ed!!
-
Thank you, Bob!
-
Thank you, Chris!
-
Seventynet reacted to a post in a topic:
Bluenose by Fubarelf - FINISHED - Model Shipways - Scale 1:64
-
ccoyle reacted to a post in a topic:
Bluenose by Fubarelf - FINISHED - Model Shipways - Scale 1:64
-
Ryland Craze reacted to a post in a topic:
Bluenose by Fubarelf - FINISHED - Model Shipways - Scale 1:64
-
cotrecerf reacted to a post in a topic:
Bluenose by Fubarelf - FINISHED - Model Shipways - Scale 1:64
-
bhermann reacted to a post in a topic:
Bluenose by Fubarelf - FINISHED - Model Shipways - Scale 1:64
-
vossiewulf reacted to a post in a topic:
Bluenose by Fubarelf - FINISHED - Model Shipways - Scale 1:64
-
Thank you, Gregg!! Have appreciated all the comment and encouragement!
-
Thank you very much, @CPDDET!!
-
SiriusVoyager reacted to a post in a topic:
Bluenose by Fubarelf - FINISHED - Model Shipways - Scale 1:64
-
GGibson reacted to a post in a topic:
Bluenose by Fubarelf - FINISHED - Model Shipways - Scale 1:64
-
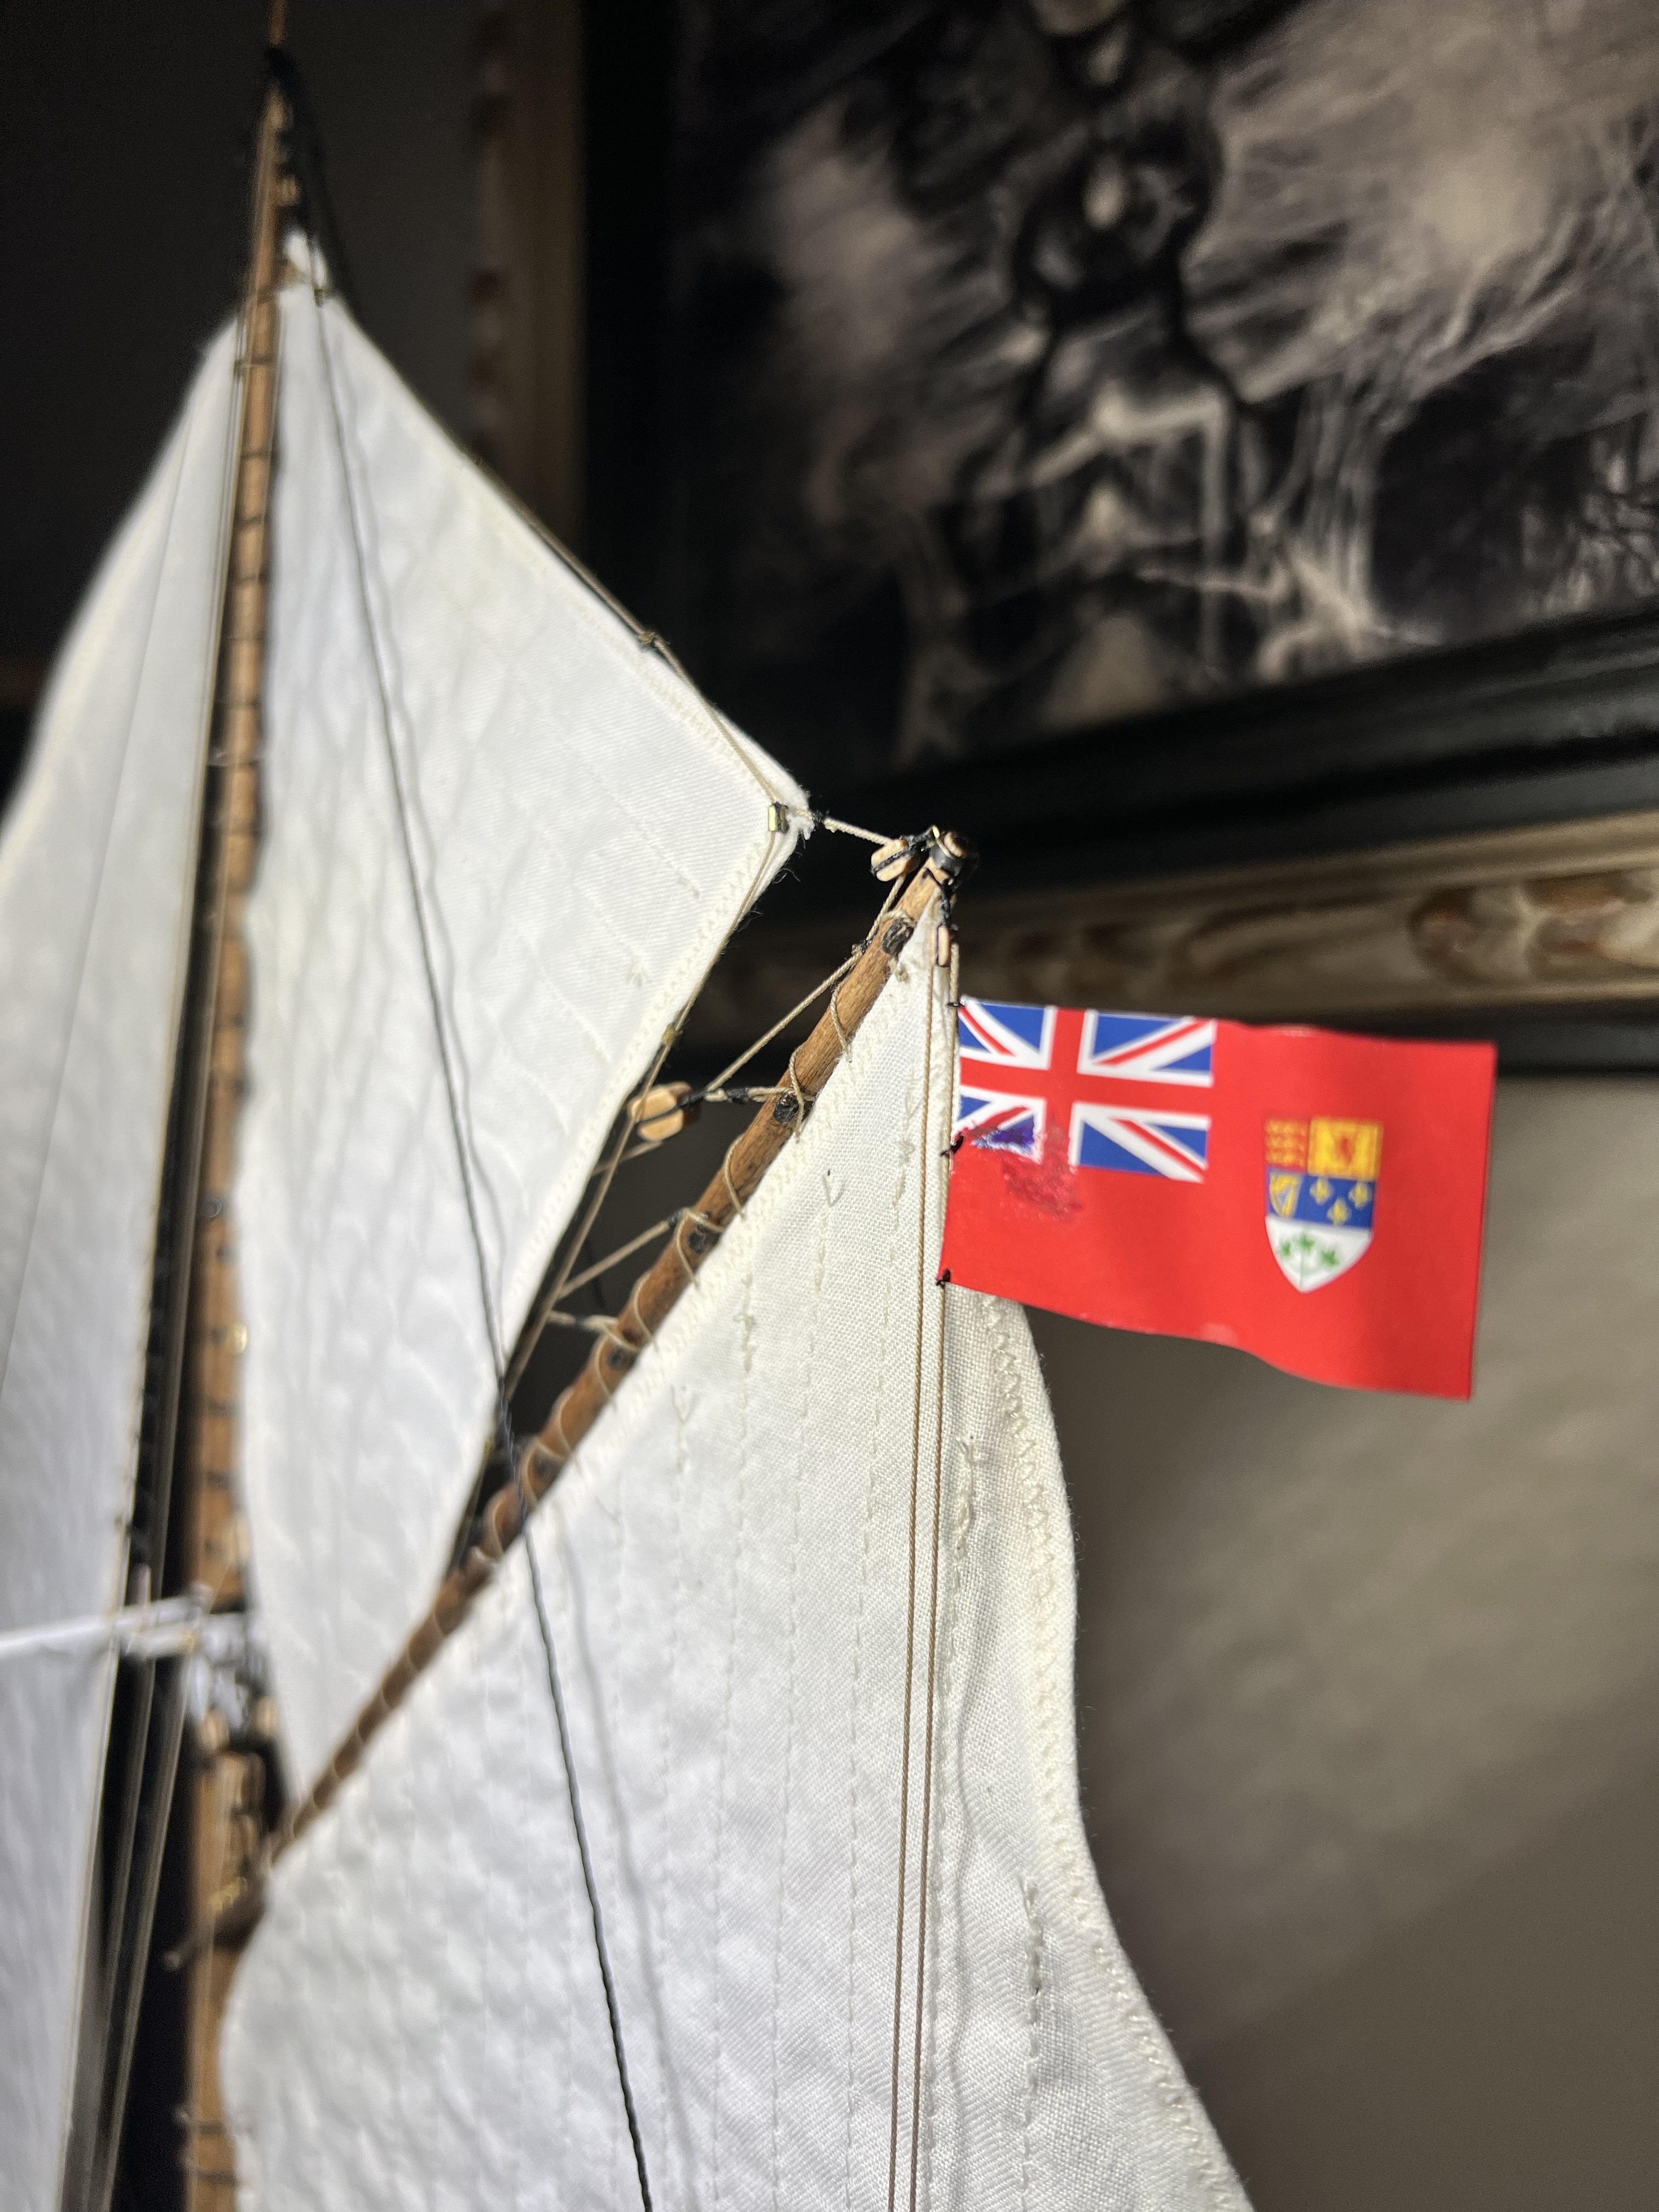
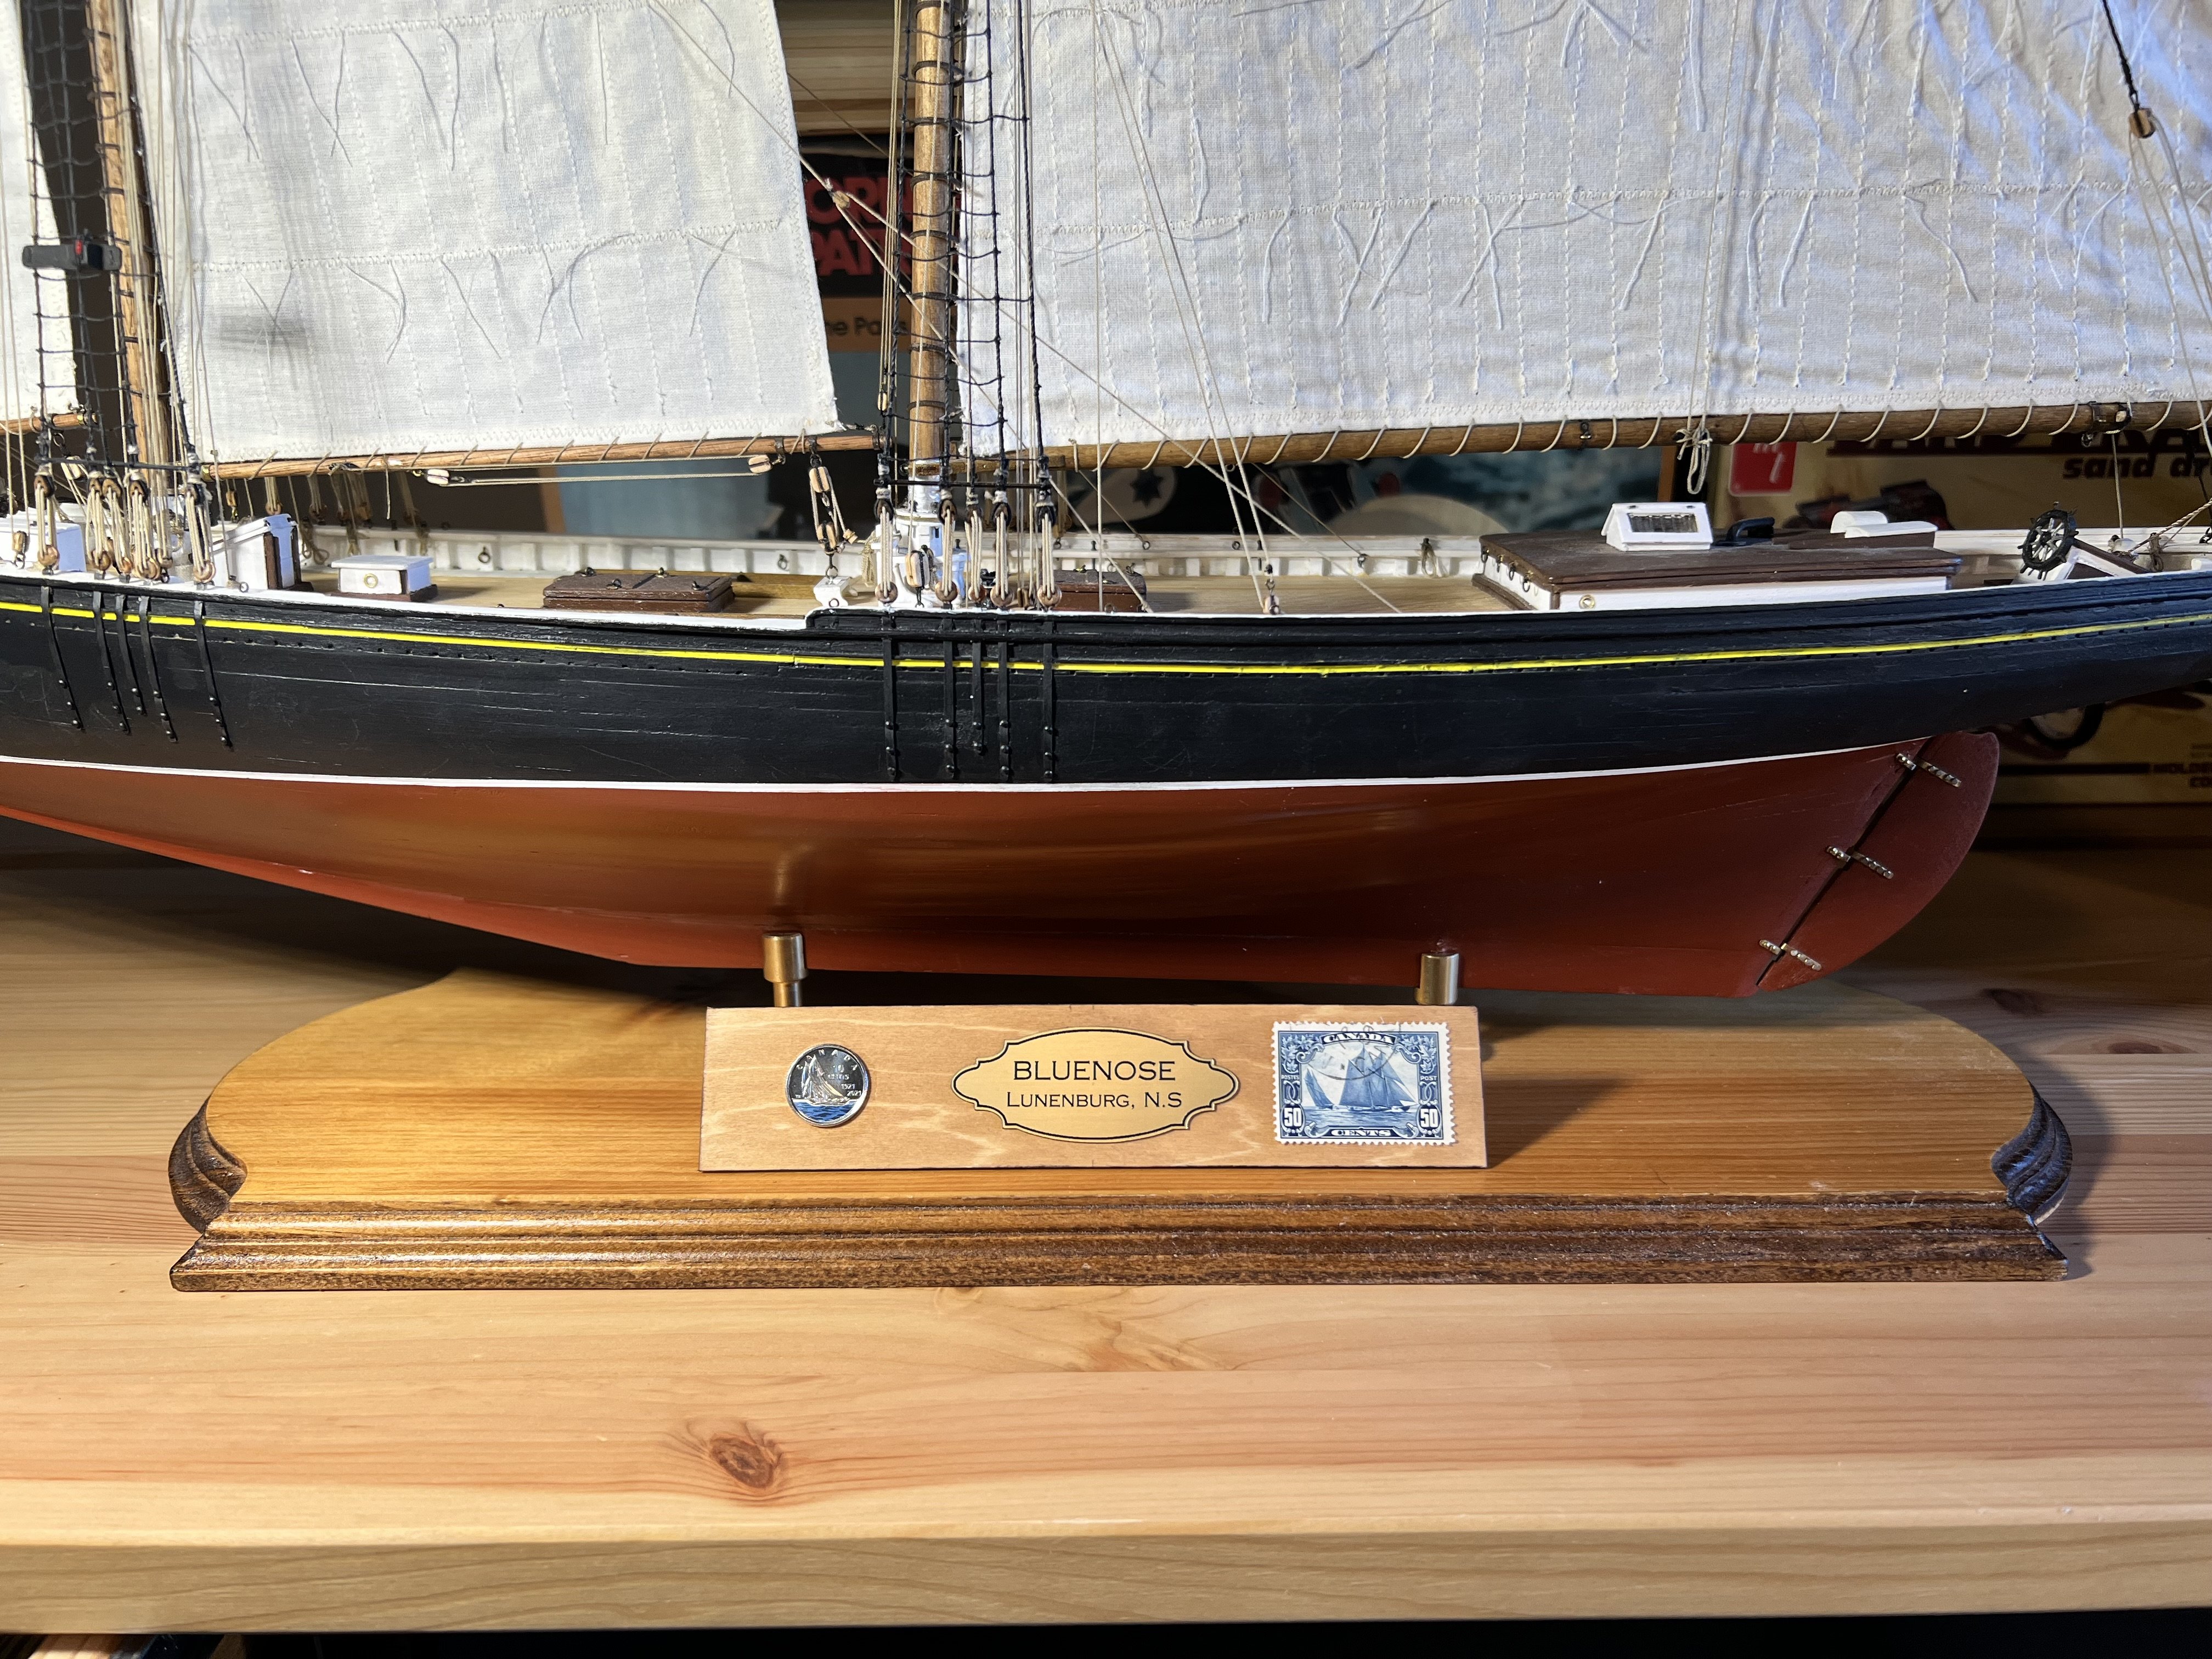
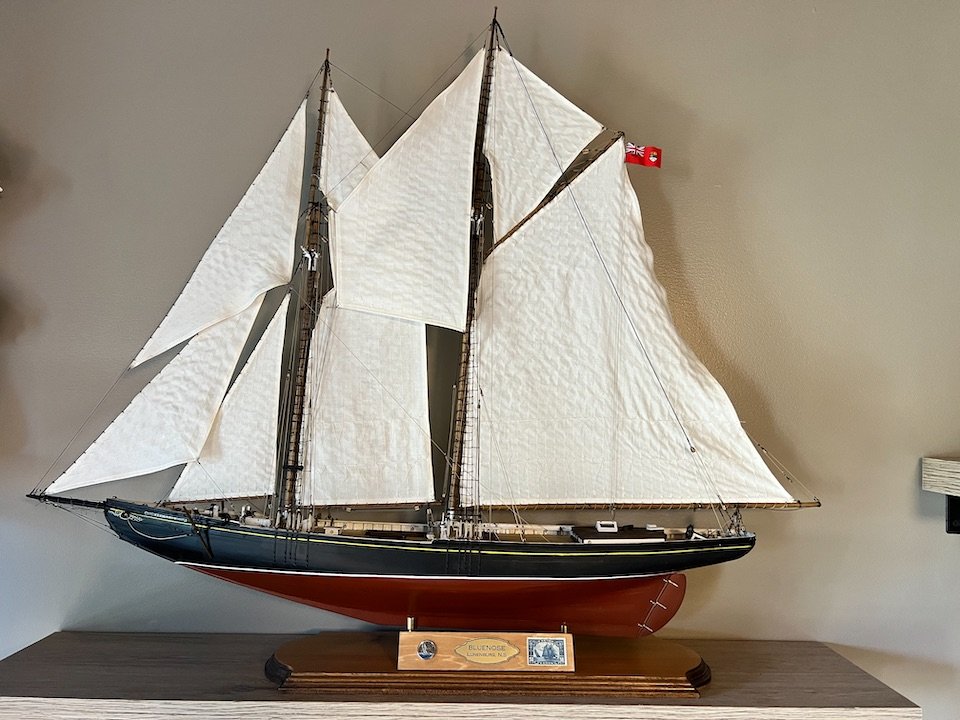
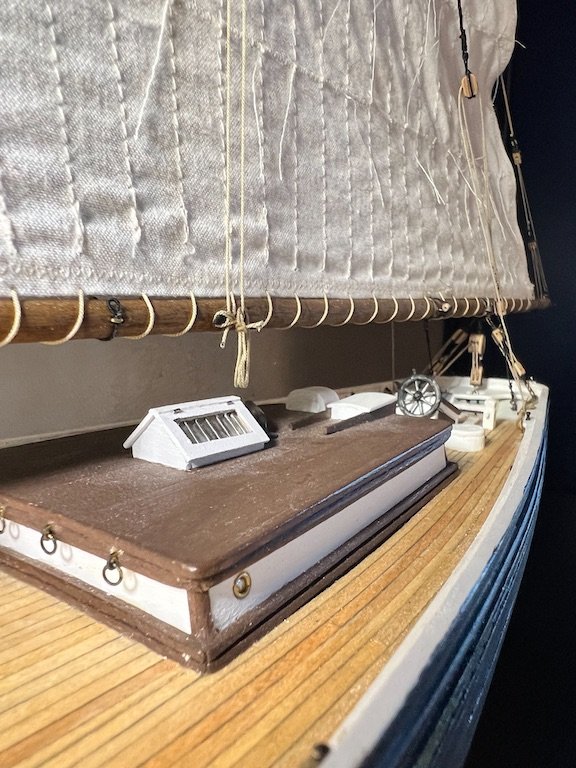
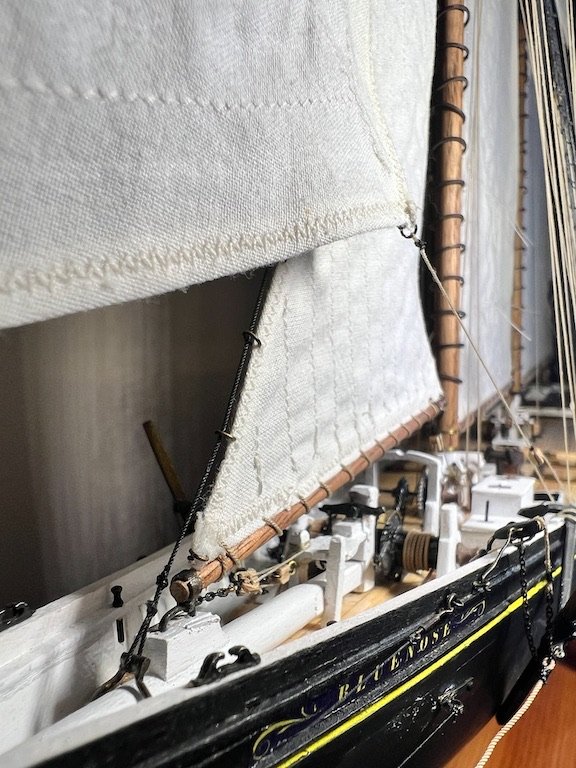
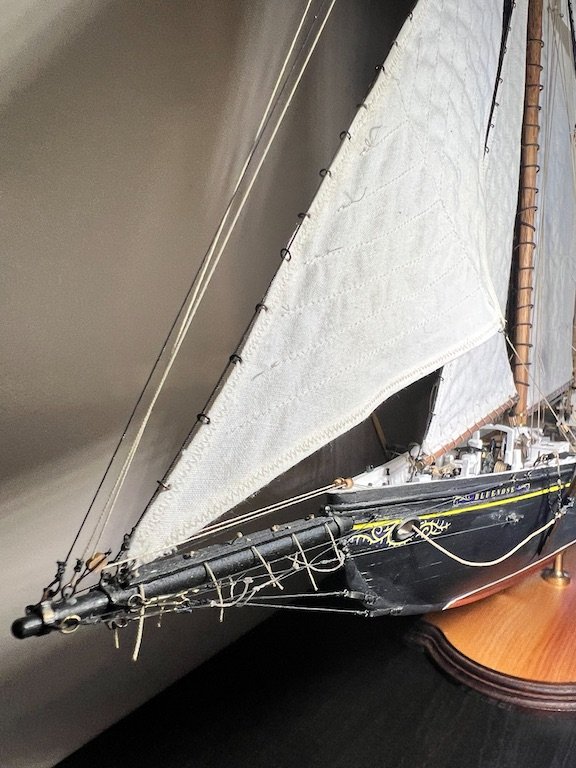
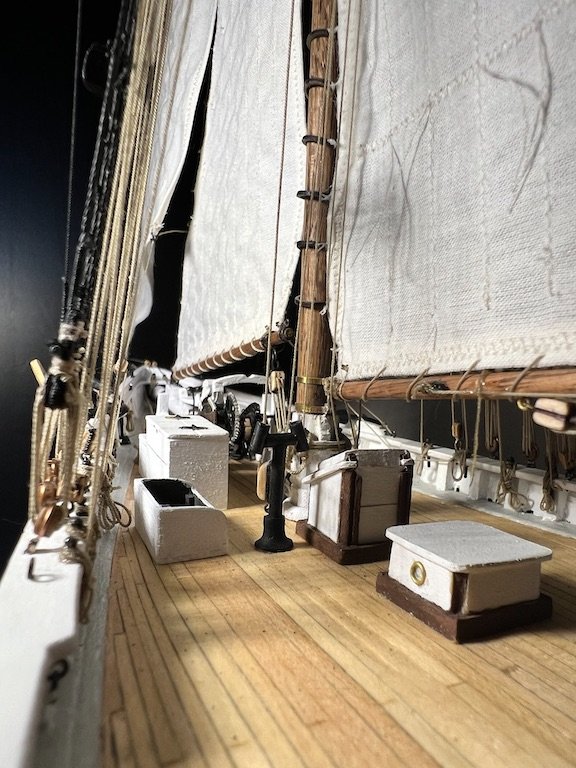
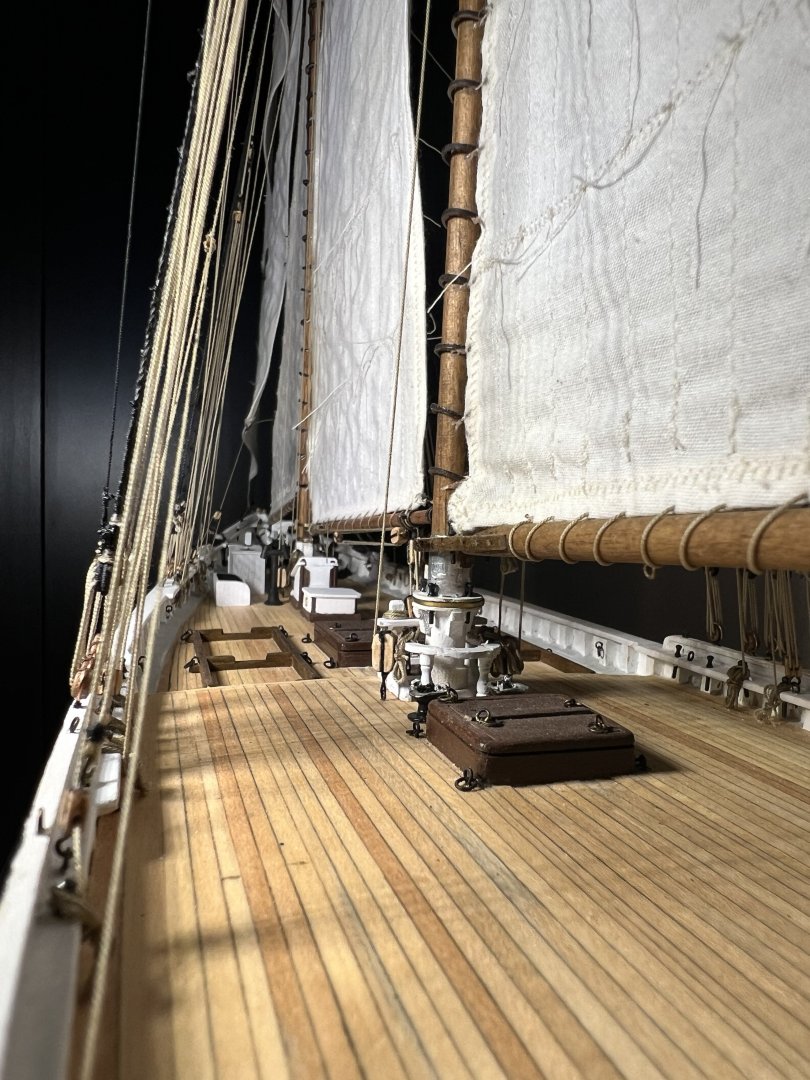
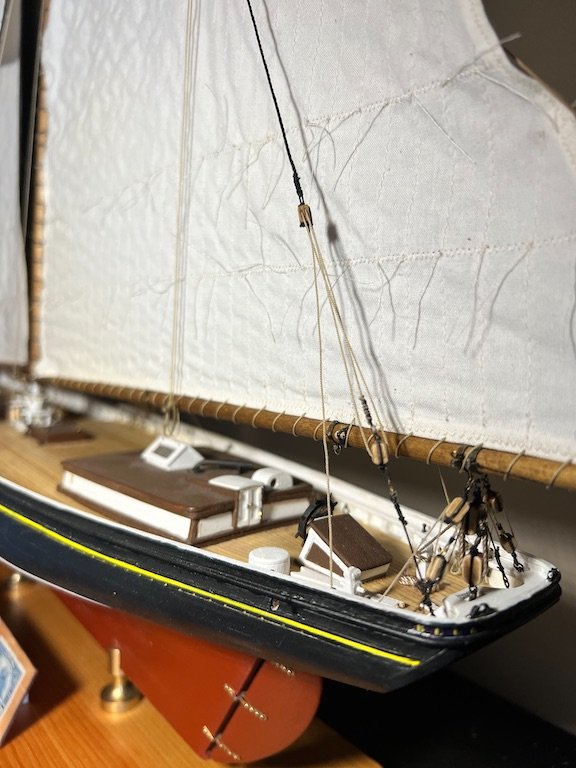
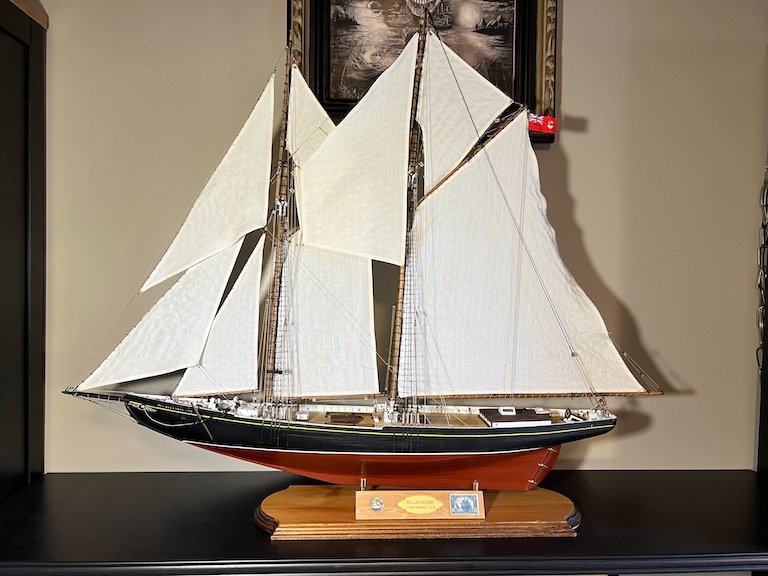
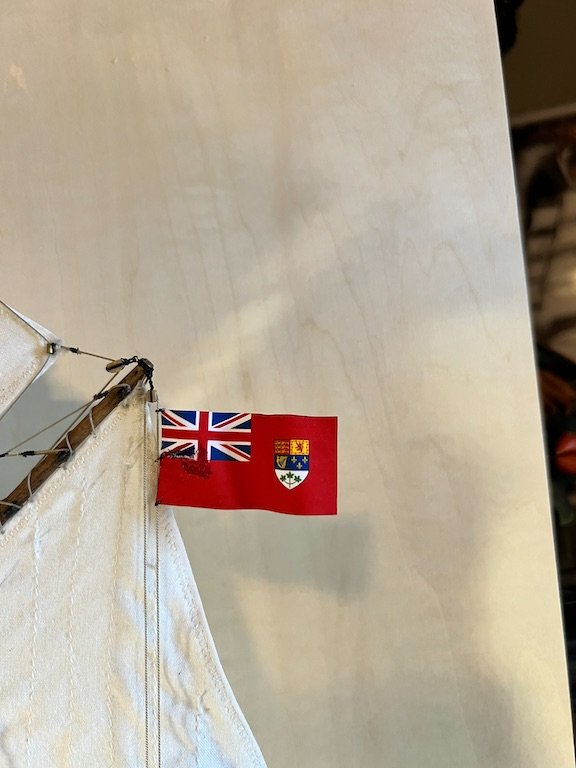
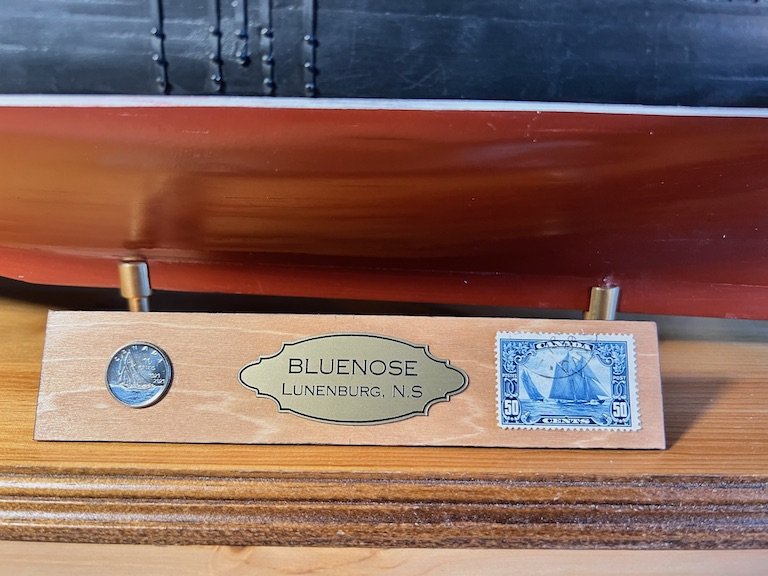
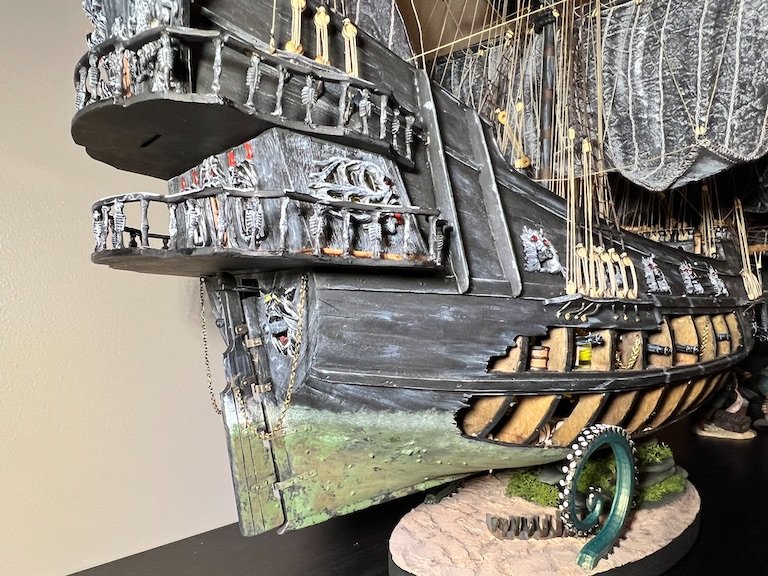
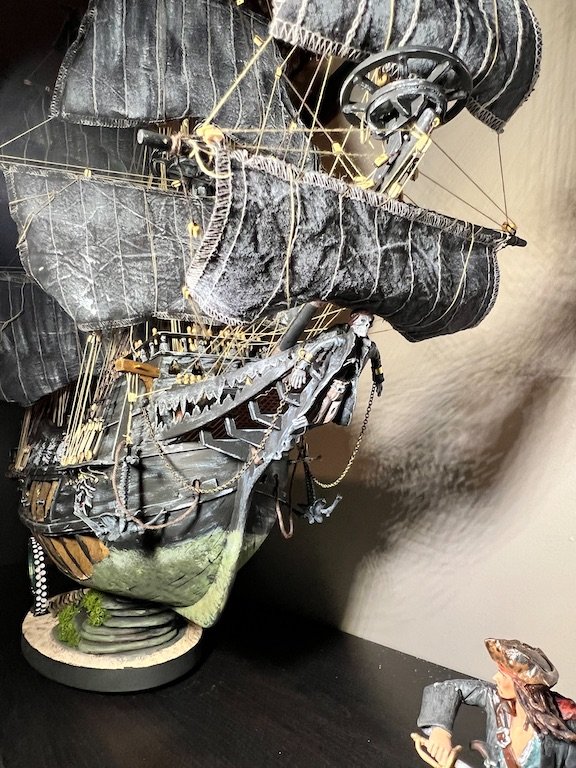
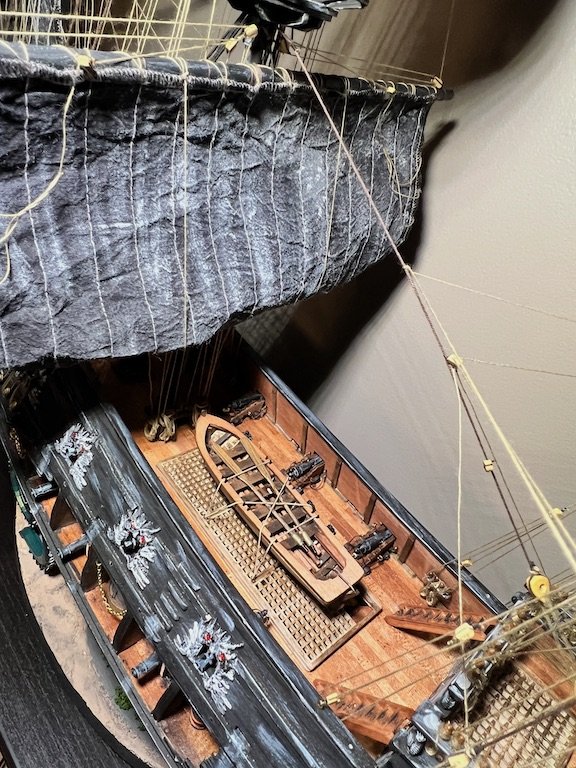
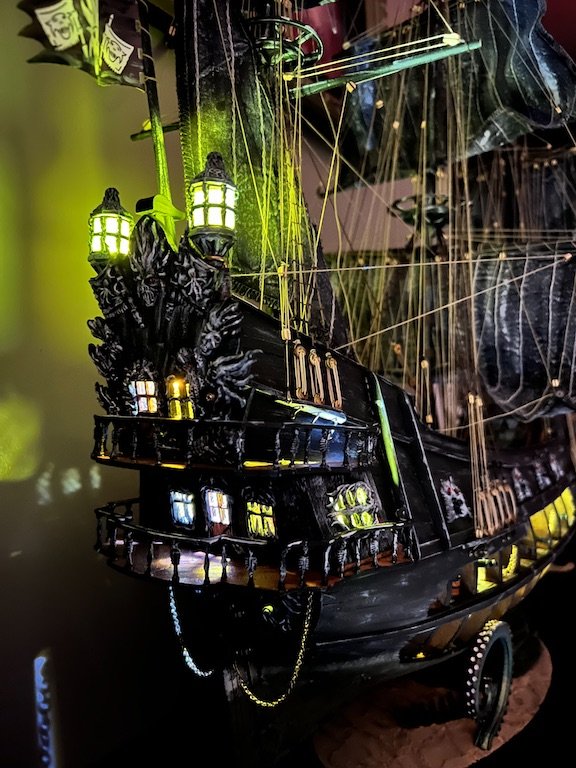
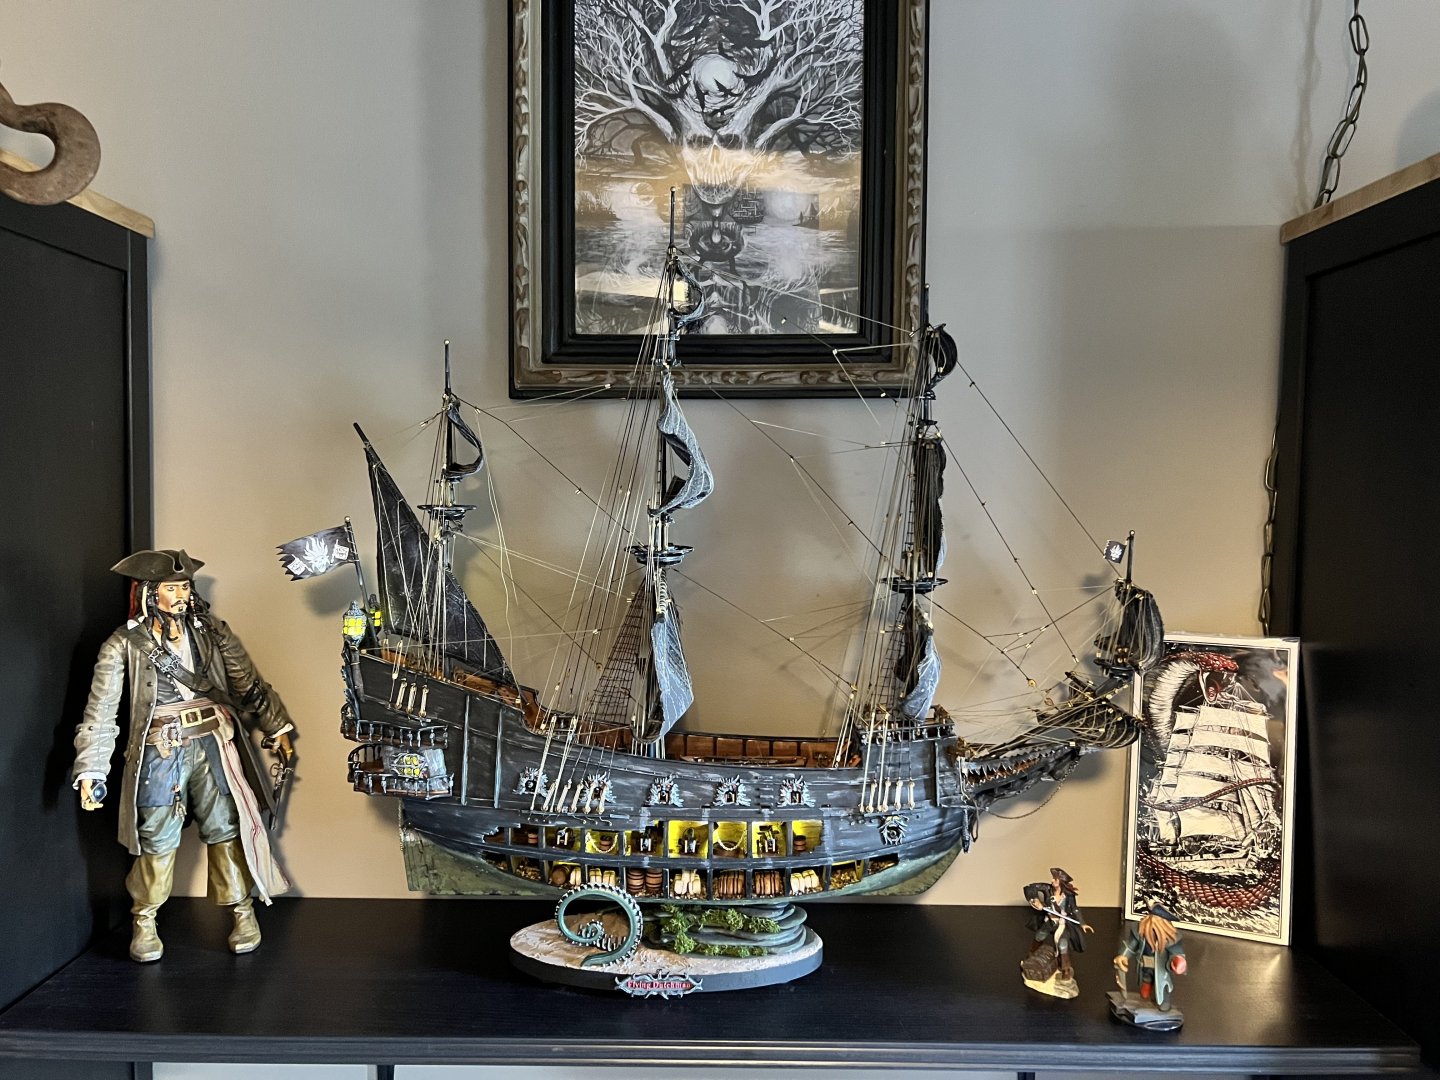
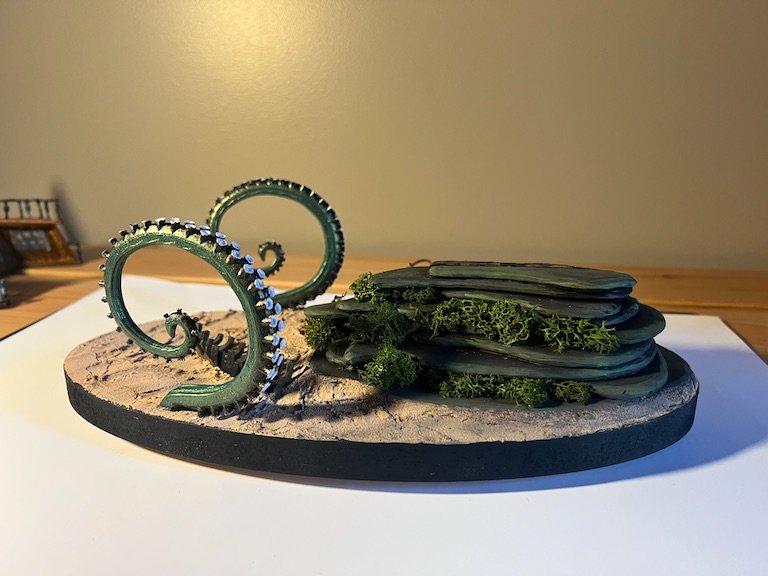
I have finally completed the Bluenose!! I actually completed all the sails and final odds and ends a couple of months ago, but needed to add the flag and figure out what to do about a name plate for the base. While it sat on the shelf, I completed the Flying Dutchman. I found a Red Ensign flag online from www.Duplicataproductions.com. They can in a sheet with several different sizes. Unfortunately, while gluing the two sides together, I smudged part of one side of the flag. Also unfortunate, the size I wanted to use was one of the few that did not have duplicates on the sheet. I tried to fix as best I could. Hard to tell from normal viewing distance, so ok with it for now. May order another set at some point in the future. For the name plate, I ordered a custom printed brass plate from Etsy. I also found a commemorative stamp and dime on eBay. I made a simple plaque with a sheet of basswood and stained before adding the nameplate, stamp and dime. For my first build, this one was challenging but a lot of fun. I have always wanted to build this model, so I can now check this one off. I may come back at some point and add the dories if I find a more suitable option than the kit supplied boats. May just be me, but I did not like the way they went together and thought they would detract from the rest of the model with the way they were turning out. Have several models waiting in the shipyard (Midwest Canadian Canoe, Billings Oseberg, MS Constitution). Will probably build the canoe next, just for a break from the more complicated builds (and rigging!). Happy New Year! Tim


- 145 replies
-
- 8
-
-
-
- Bluenose
- Model Shipways
- (and 1 more)
-
GrandpaPhil reacted to a post in a topic:
Flying Dutchman by Fubarelf - FINISHED - OcCre - 1:50
-
GrandpaPhil reacted to a post in a topic:
Flying Dutchman by Fubarelf - FINISHED - OcCre - 1:50
-
Thank you, Chris!
-
Thank you, Bob!
-
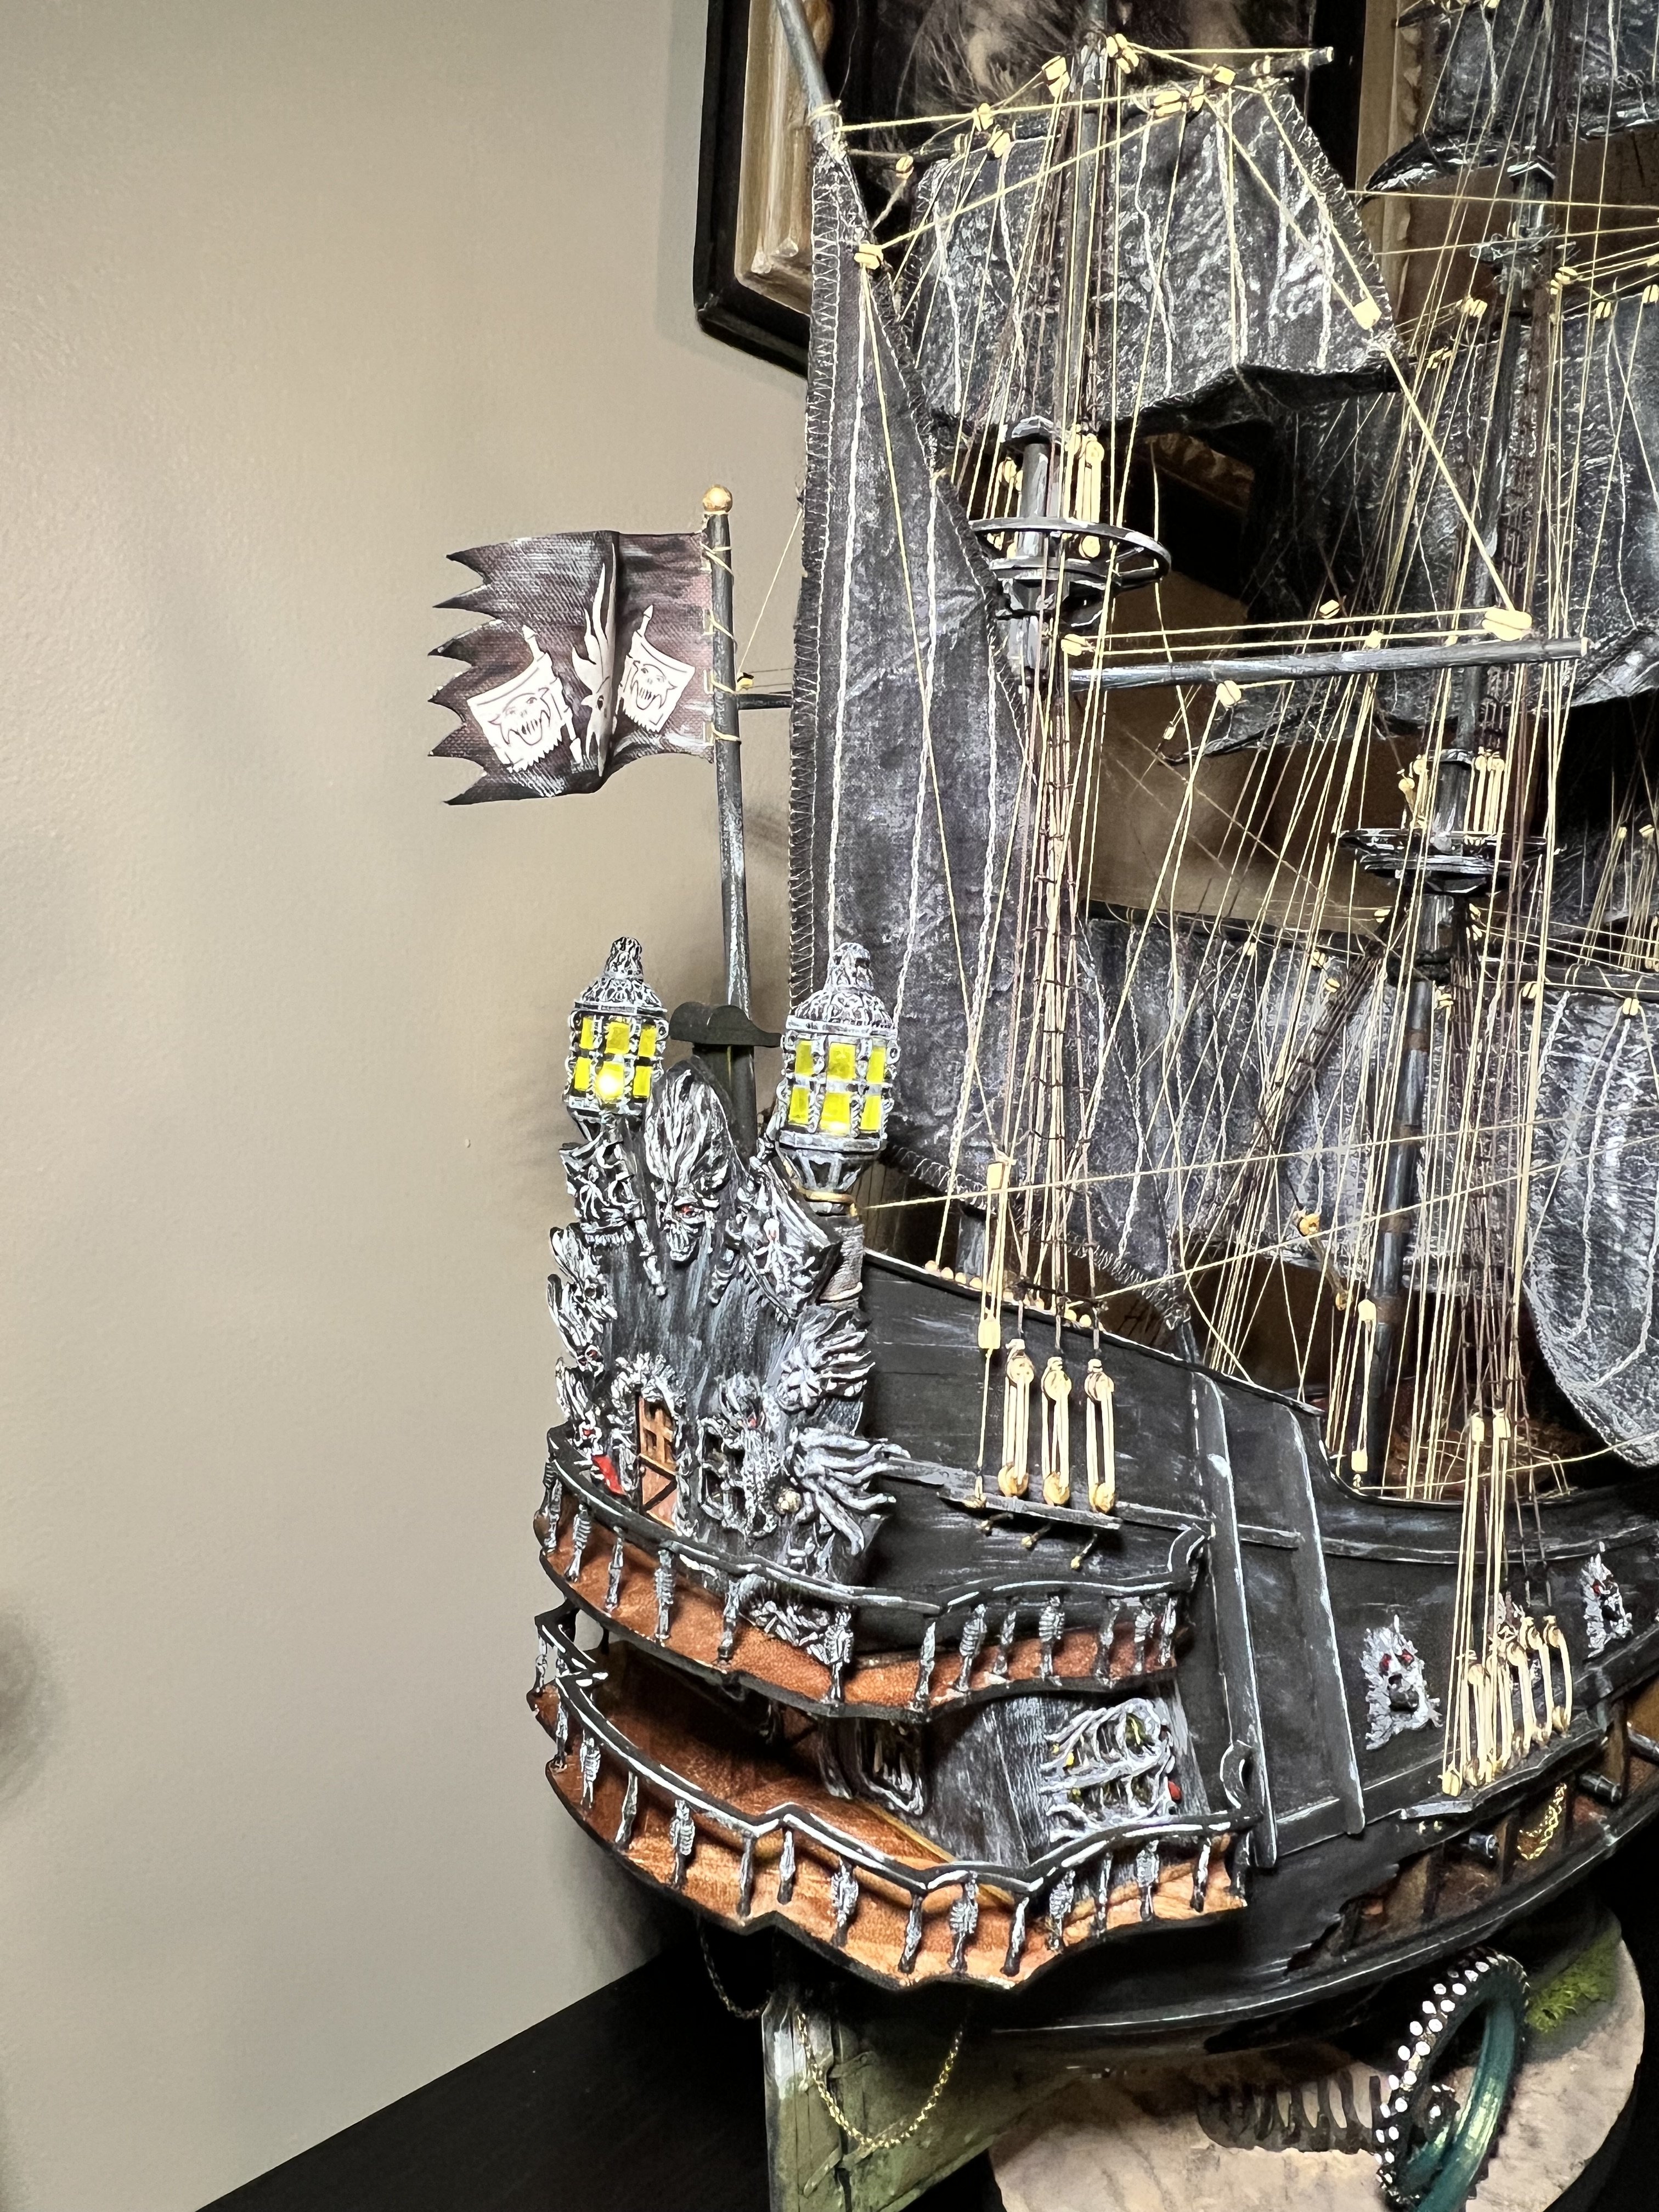
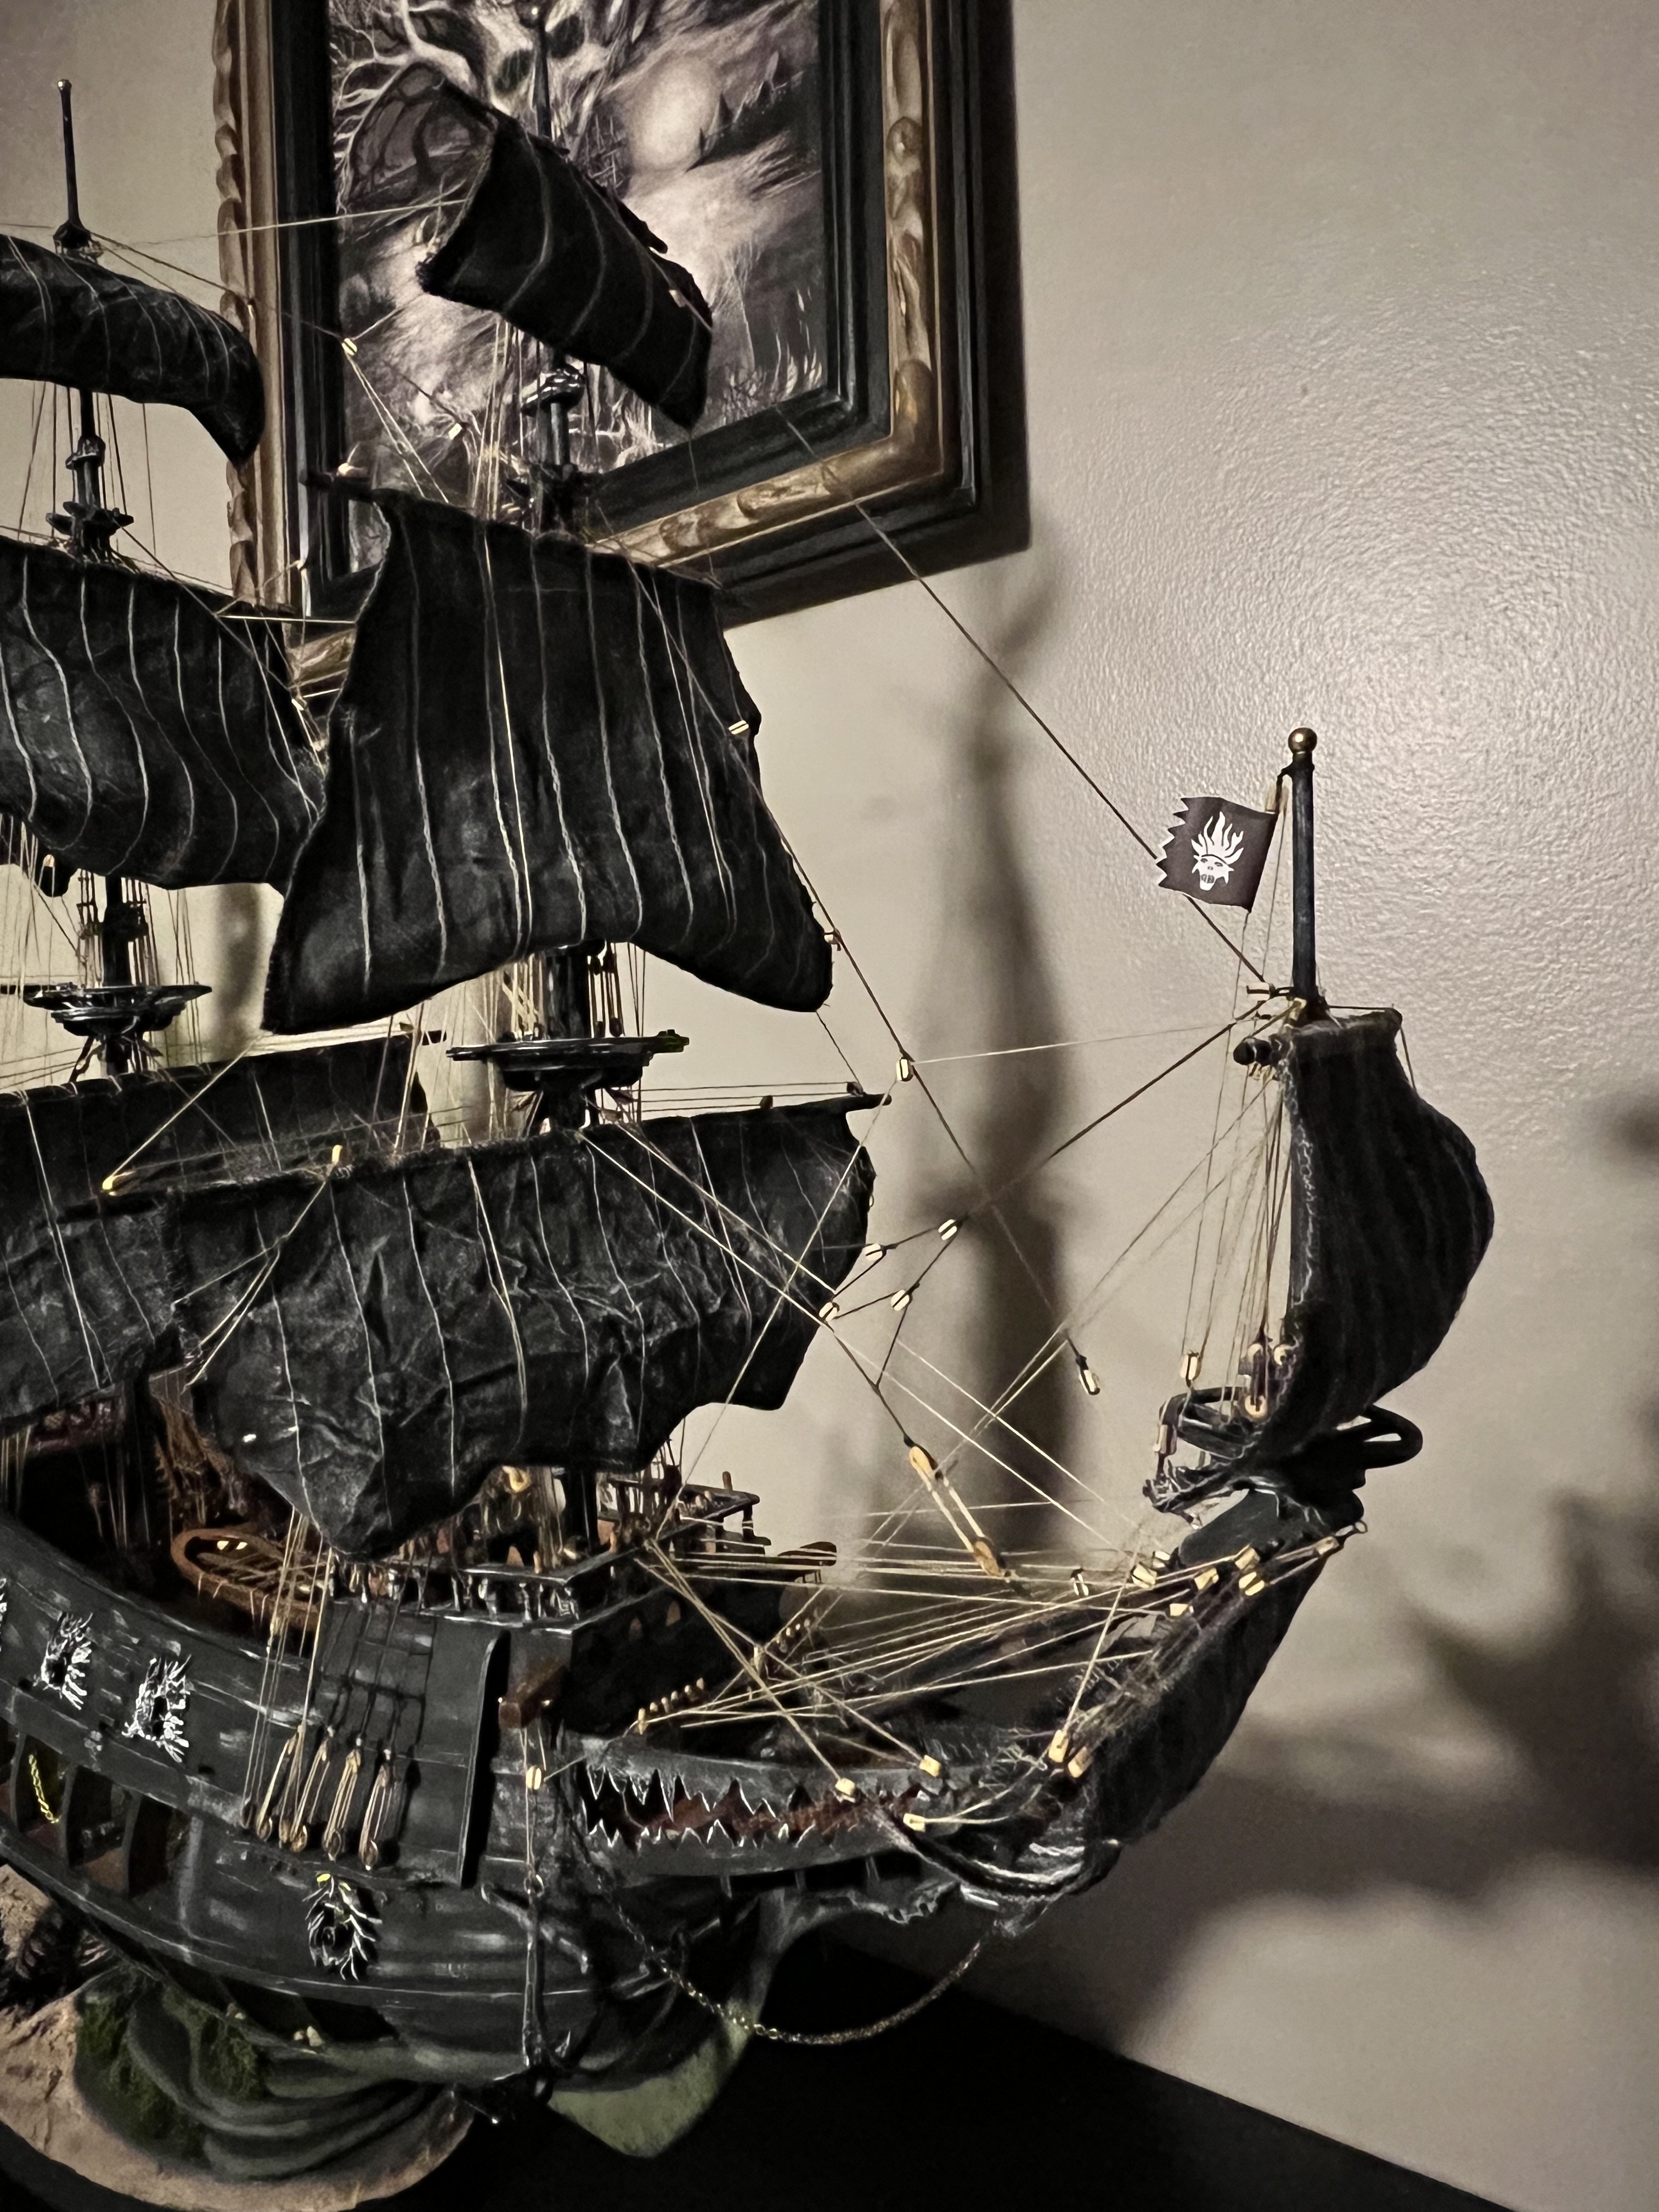
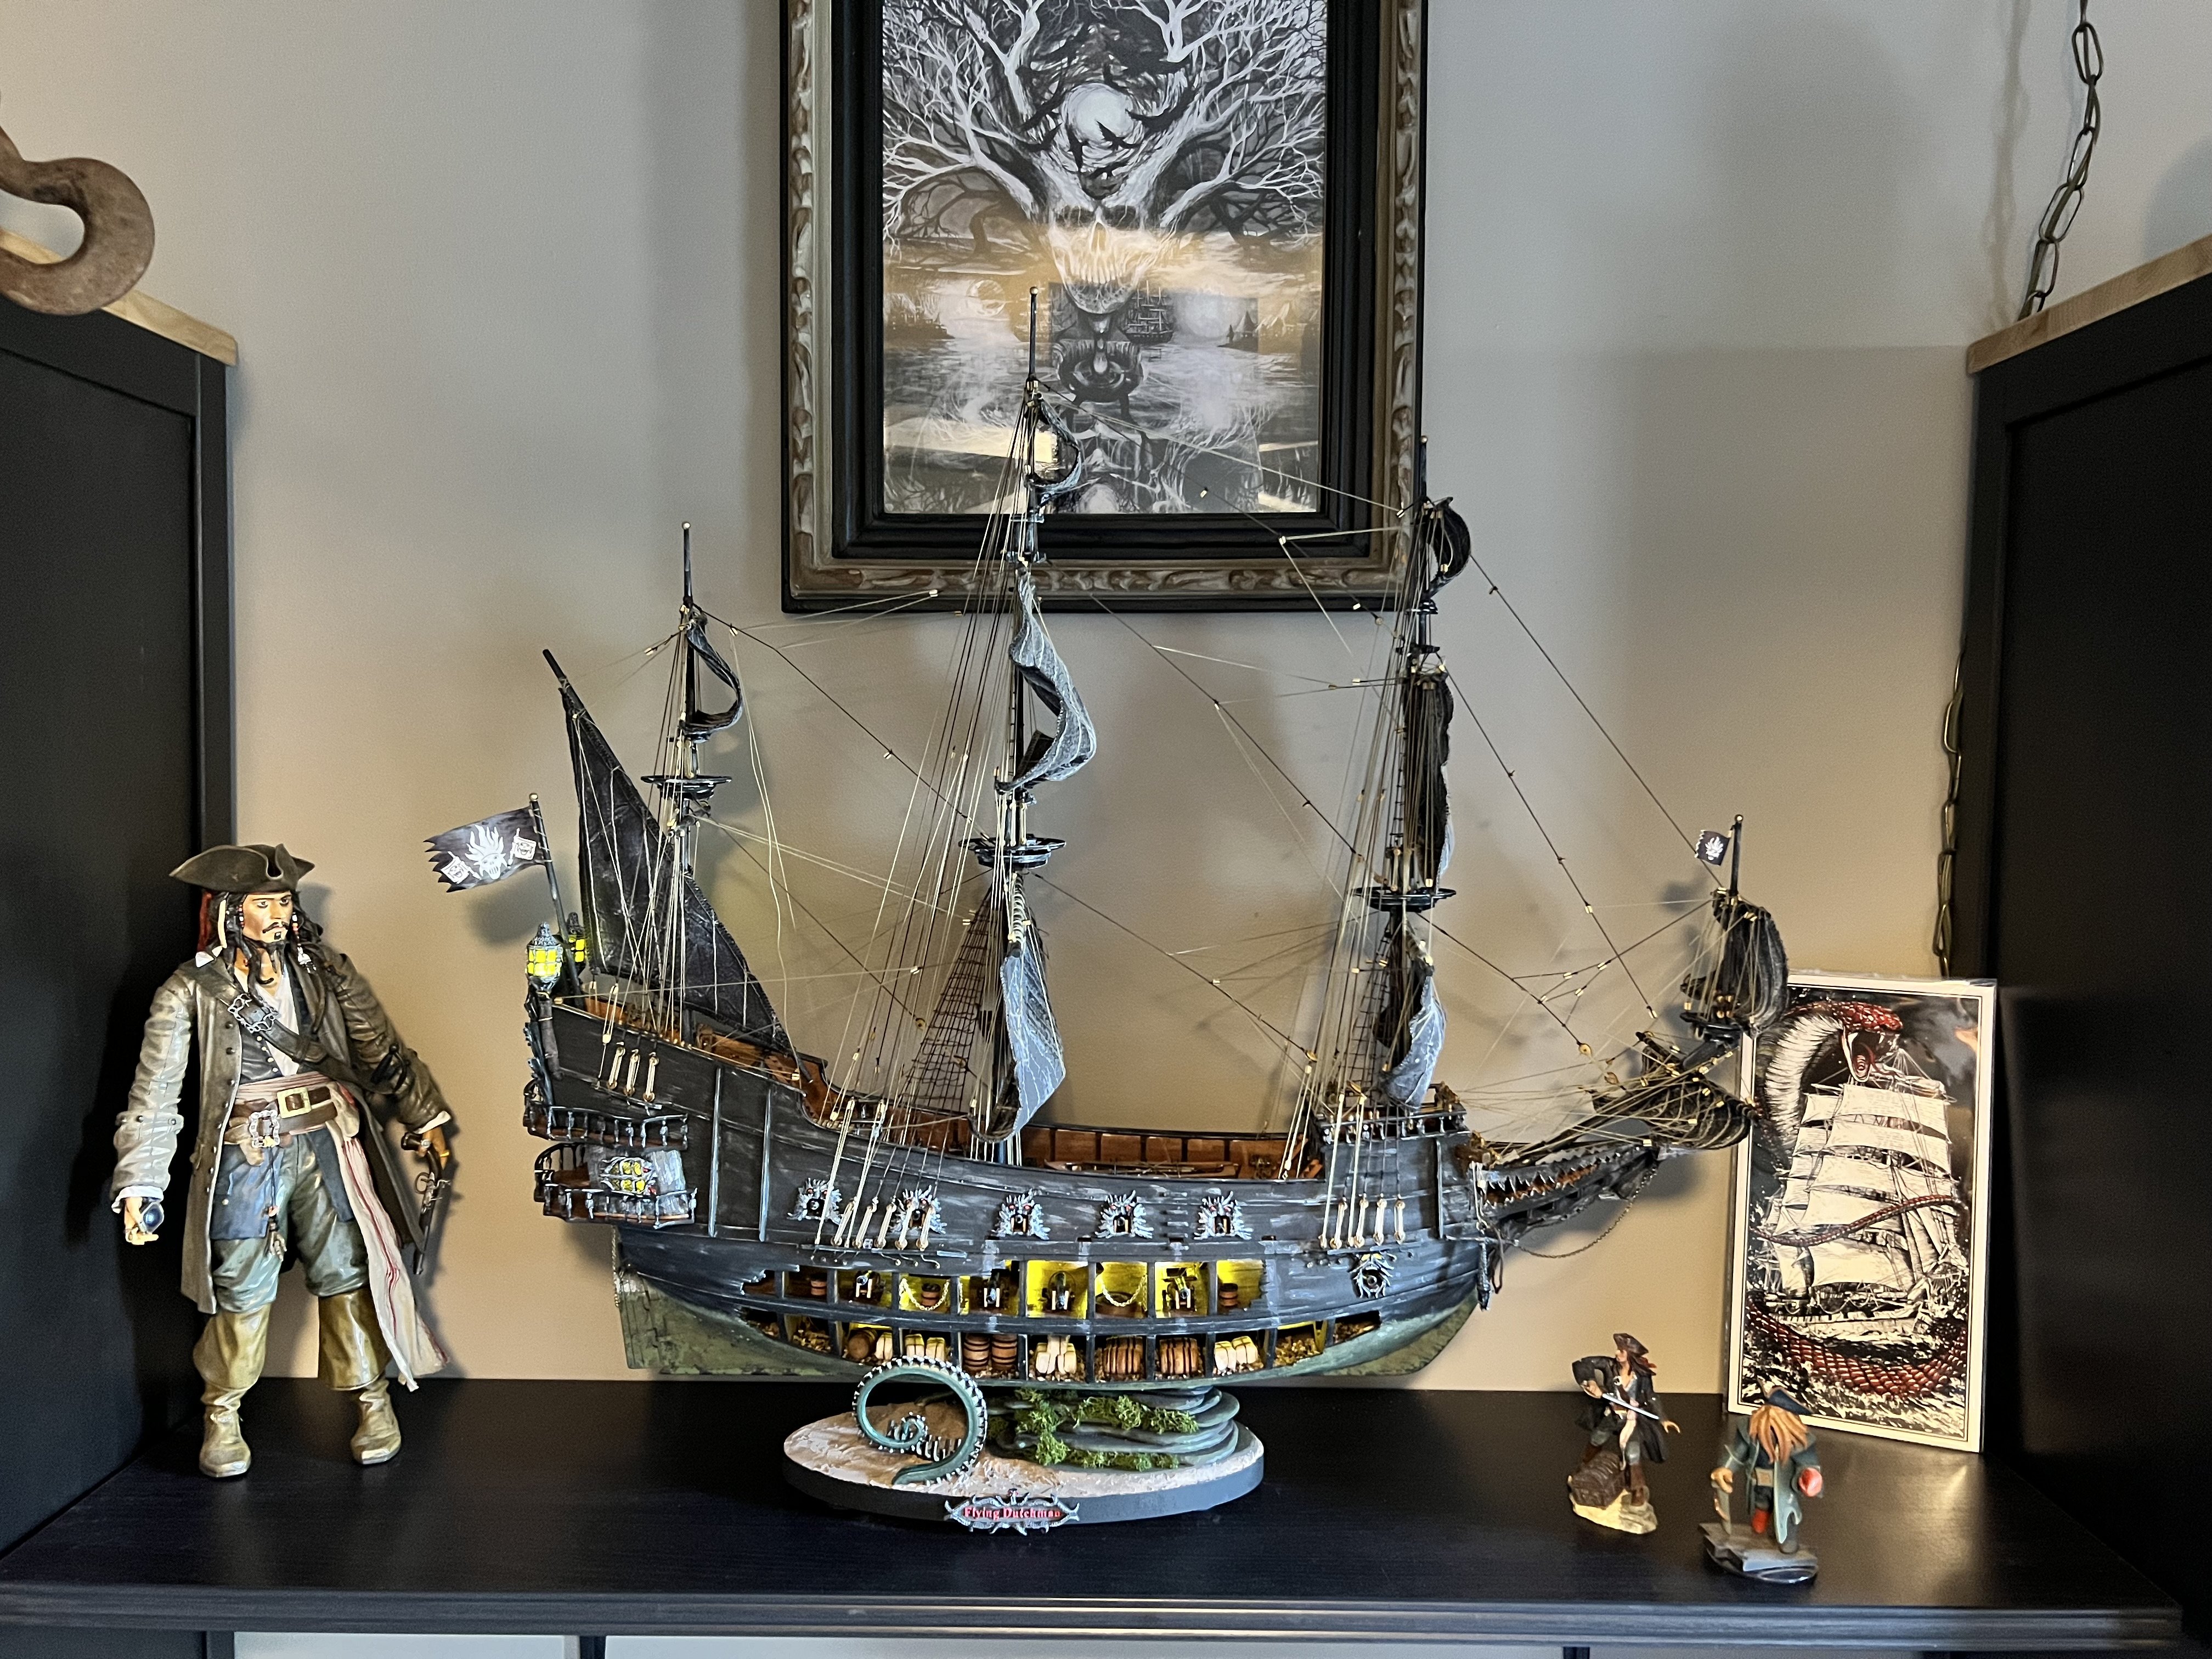
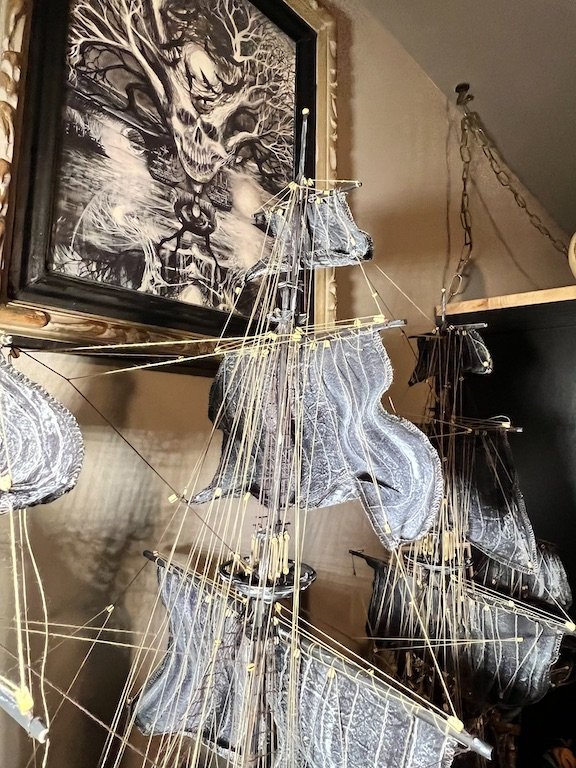
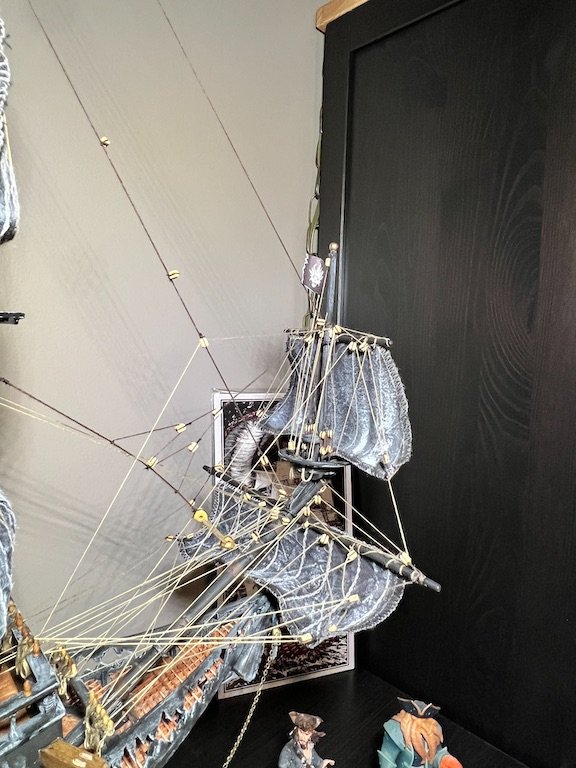
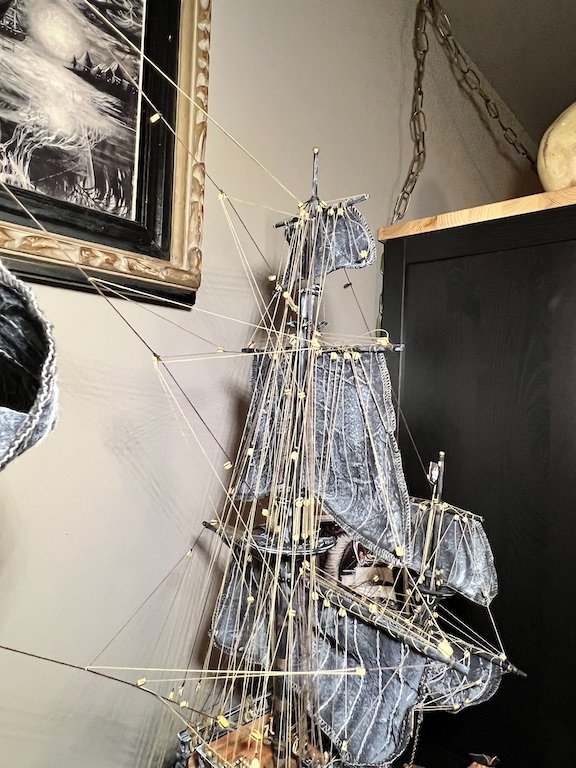
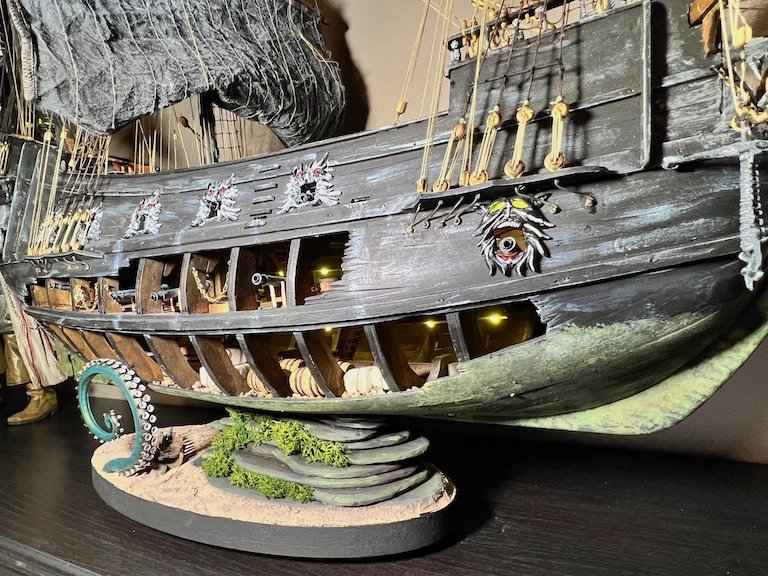
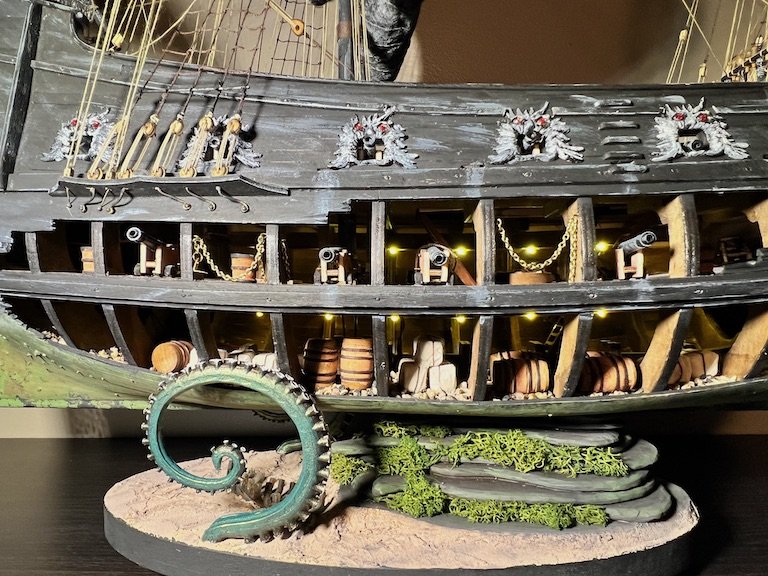
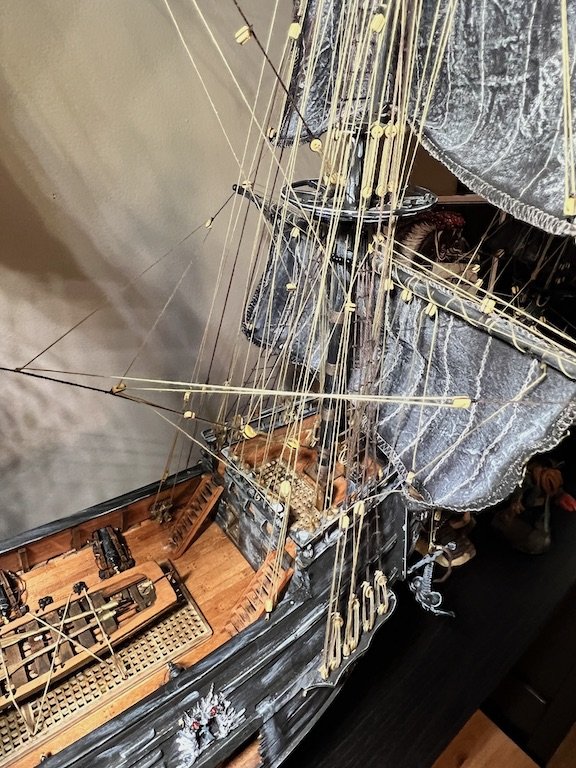
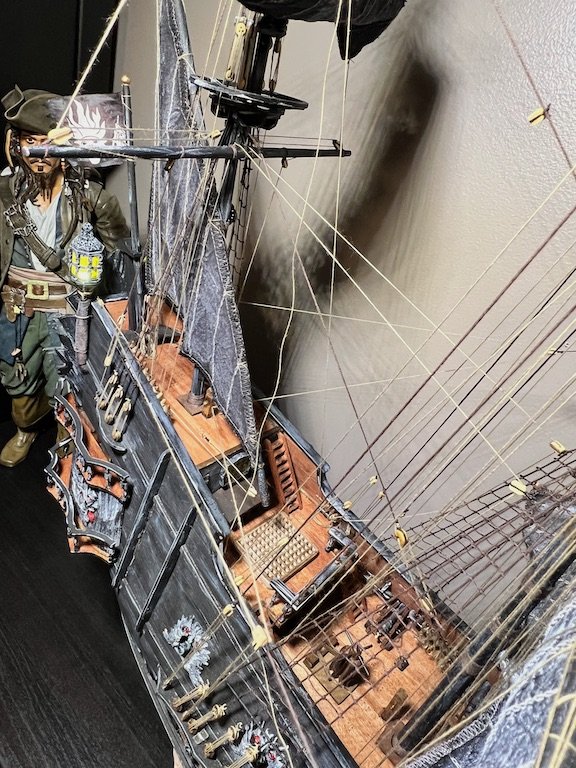
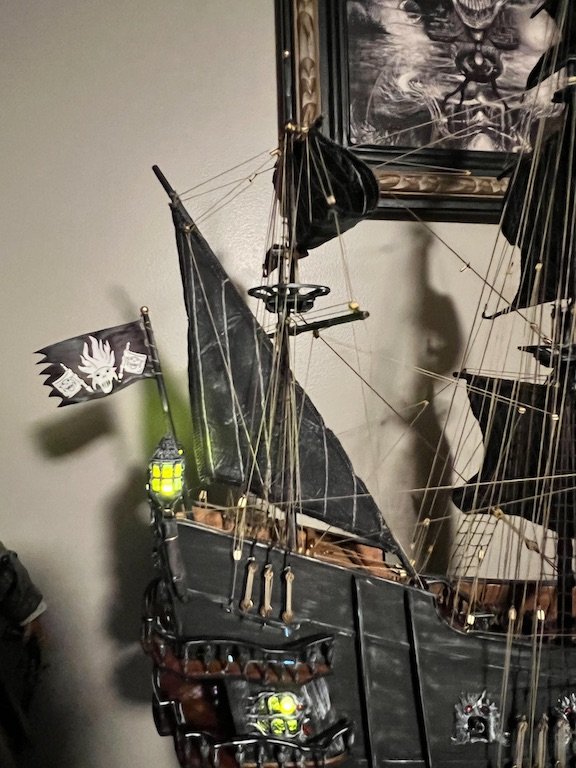
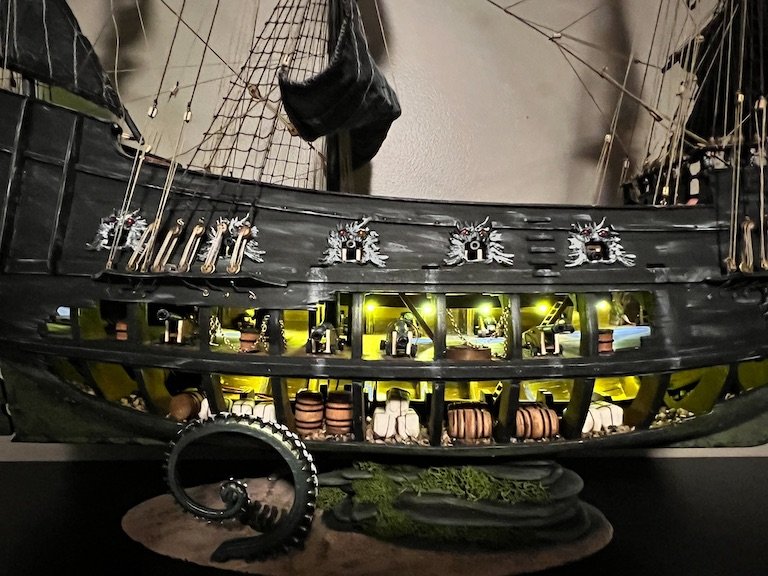
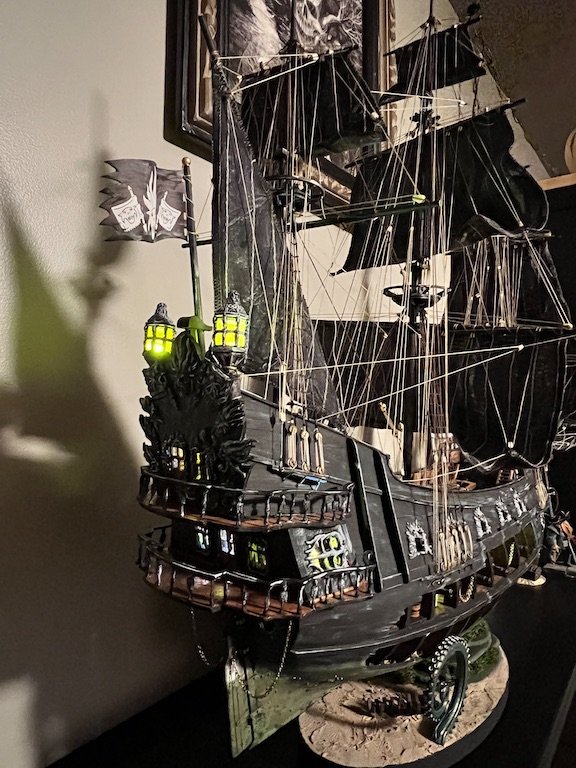
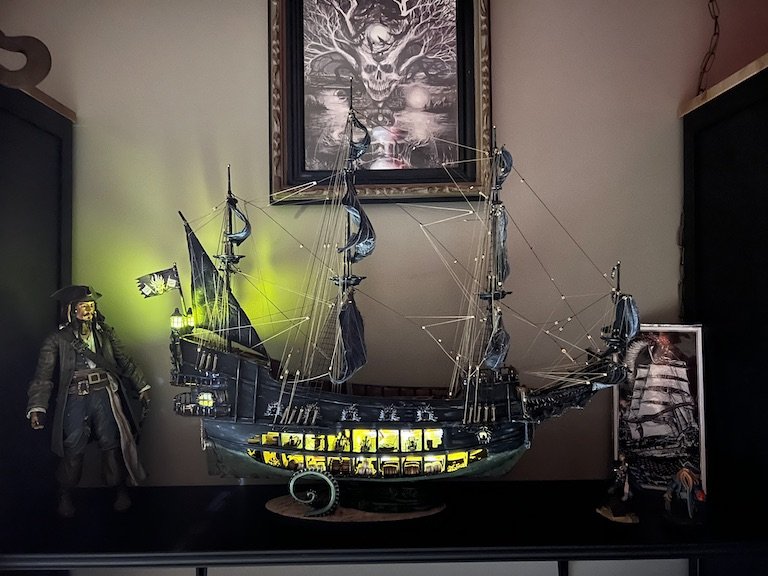
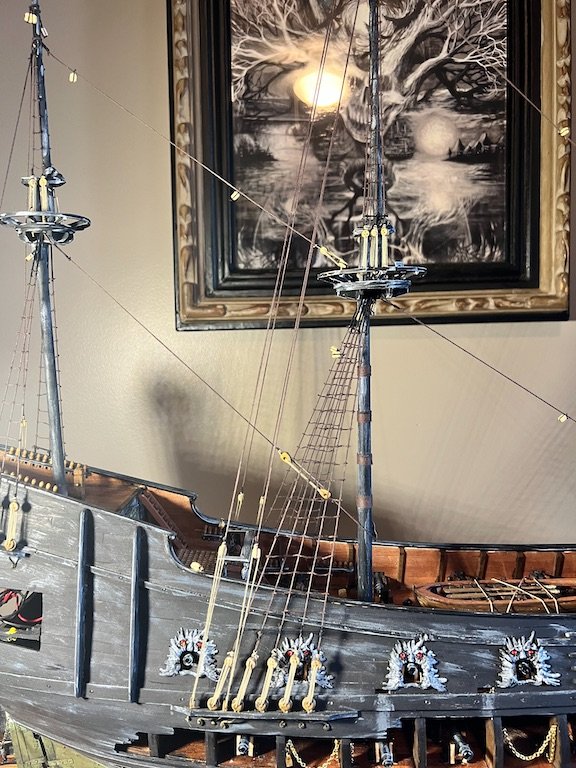
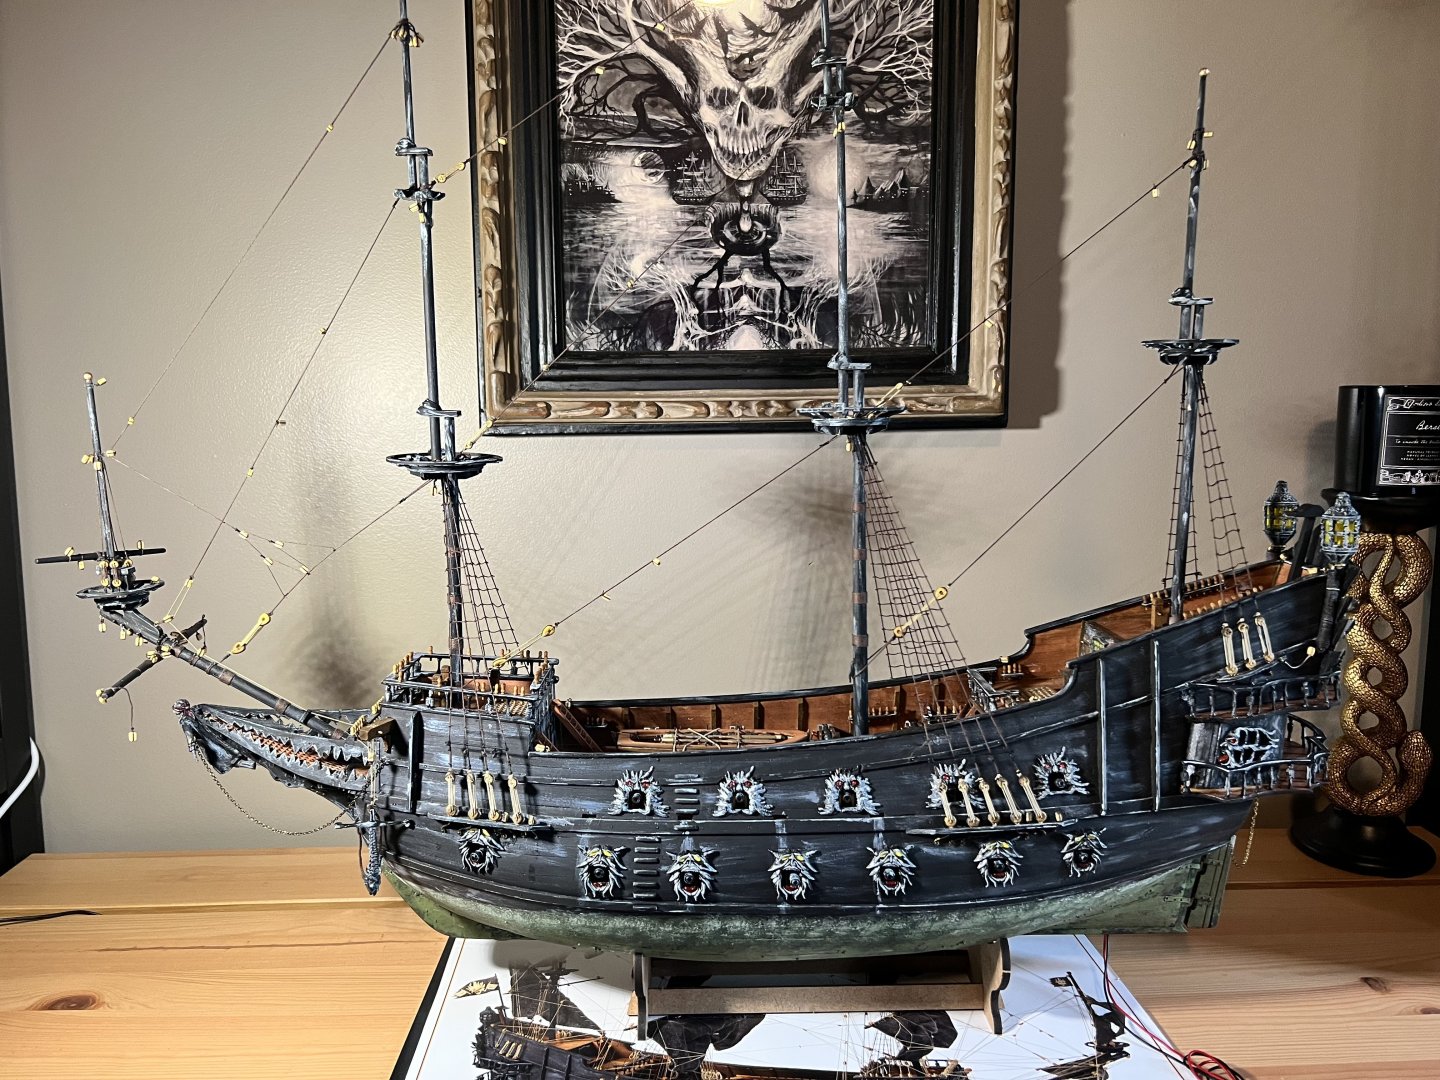
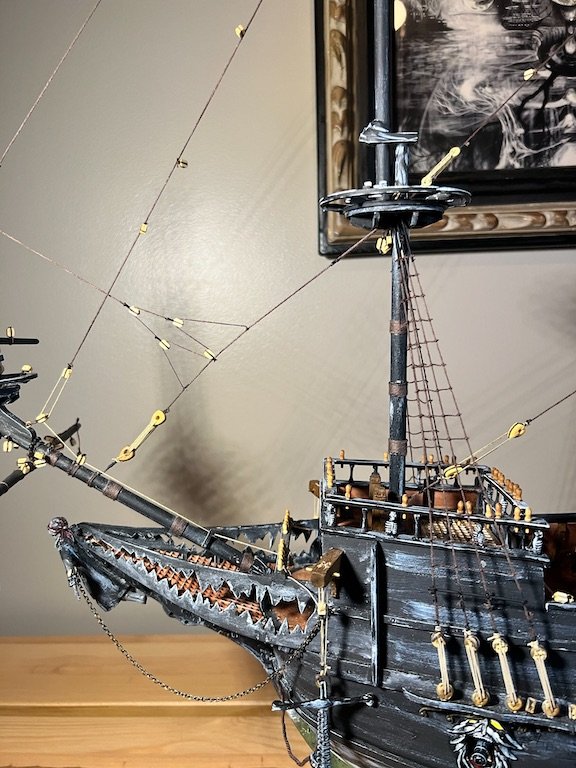
I have completed the Flying Dutchman!! Rigging the sails was challenging, given the lack of a plan view of the rigging. The directions that are provided left a lot to interpretation and the directions did not match the picture of the completed ship provided with the kit. I made a few incorrect assumptions and had to circle back to correct so as not to get lines crossed up or to make room to tie off to the pin rails. I continue to learn more with each build (especially what not to do )and the Dutchman provided a great platform for learning and opportunity to improvise without negatively affecting the finished product model. It all worked out and I am happy with the result! On to the next project!


- 30 replies
-
- 7
-
-
- Flying Dutchman
- OcCre
- (and 1 more)
-
@MBerg Thank you! The stand was fun to work on and a nice break from the rigging. Lots of opportunity on the Dutchman to get creative! Tim
- 30 replies
-
- 1
-
-
- Flying Dutchman
- OcCre
- (and 1 more)
-
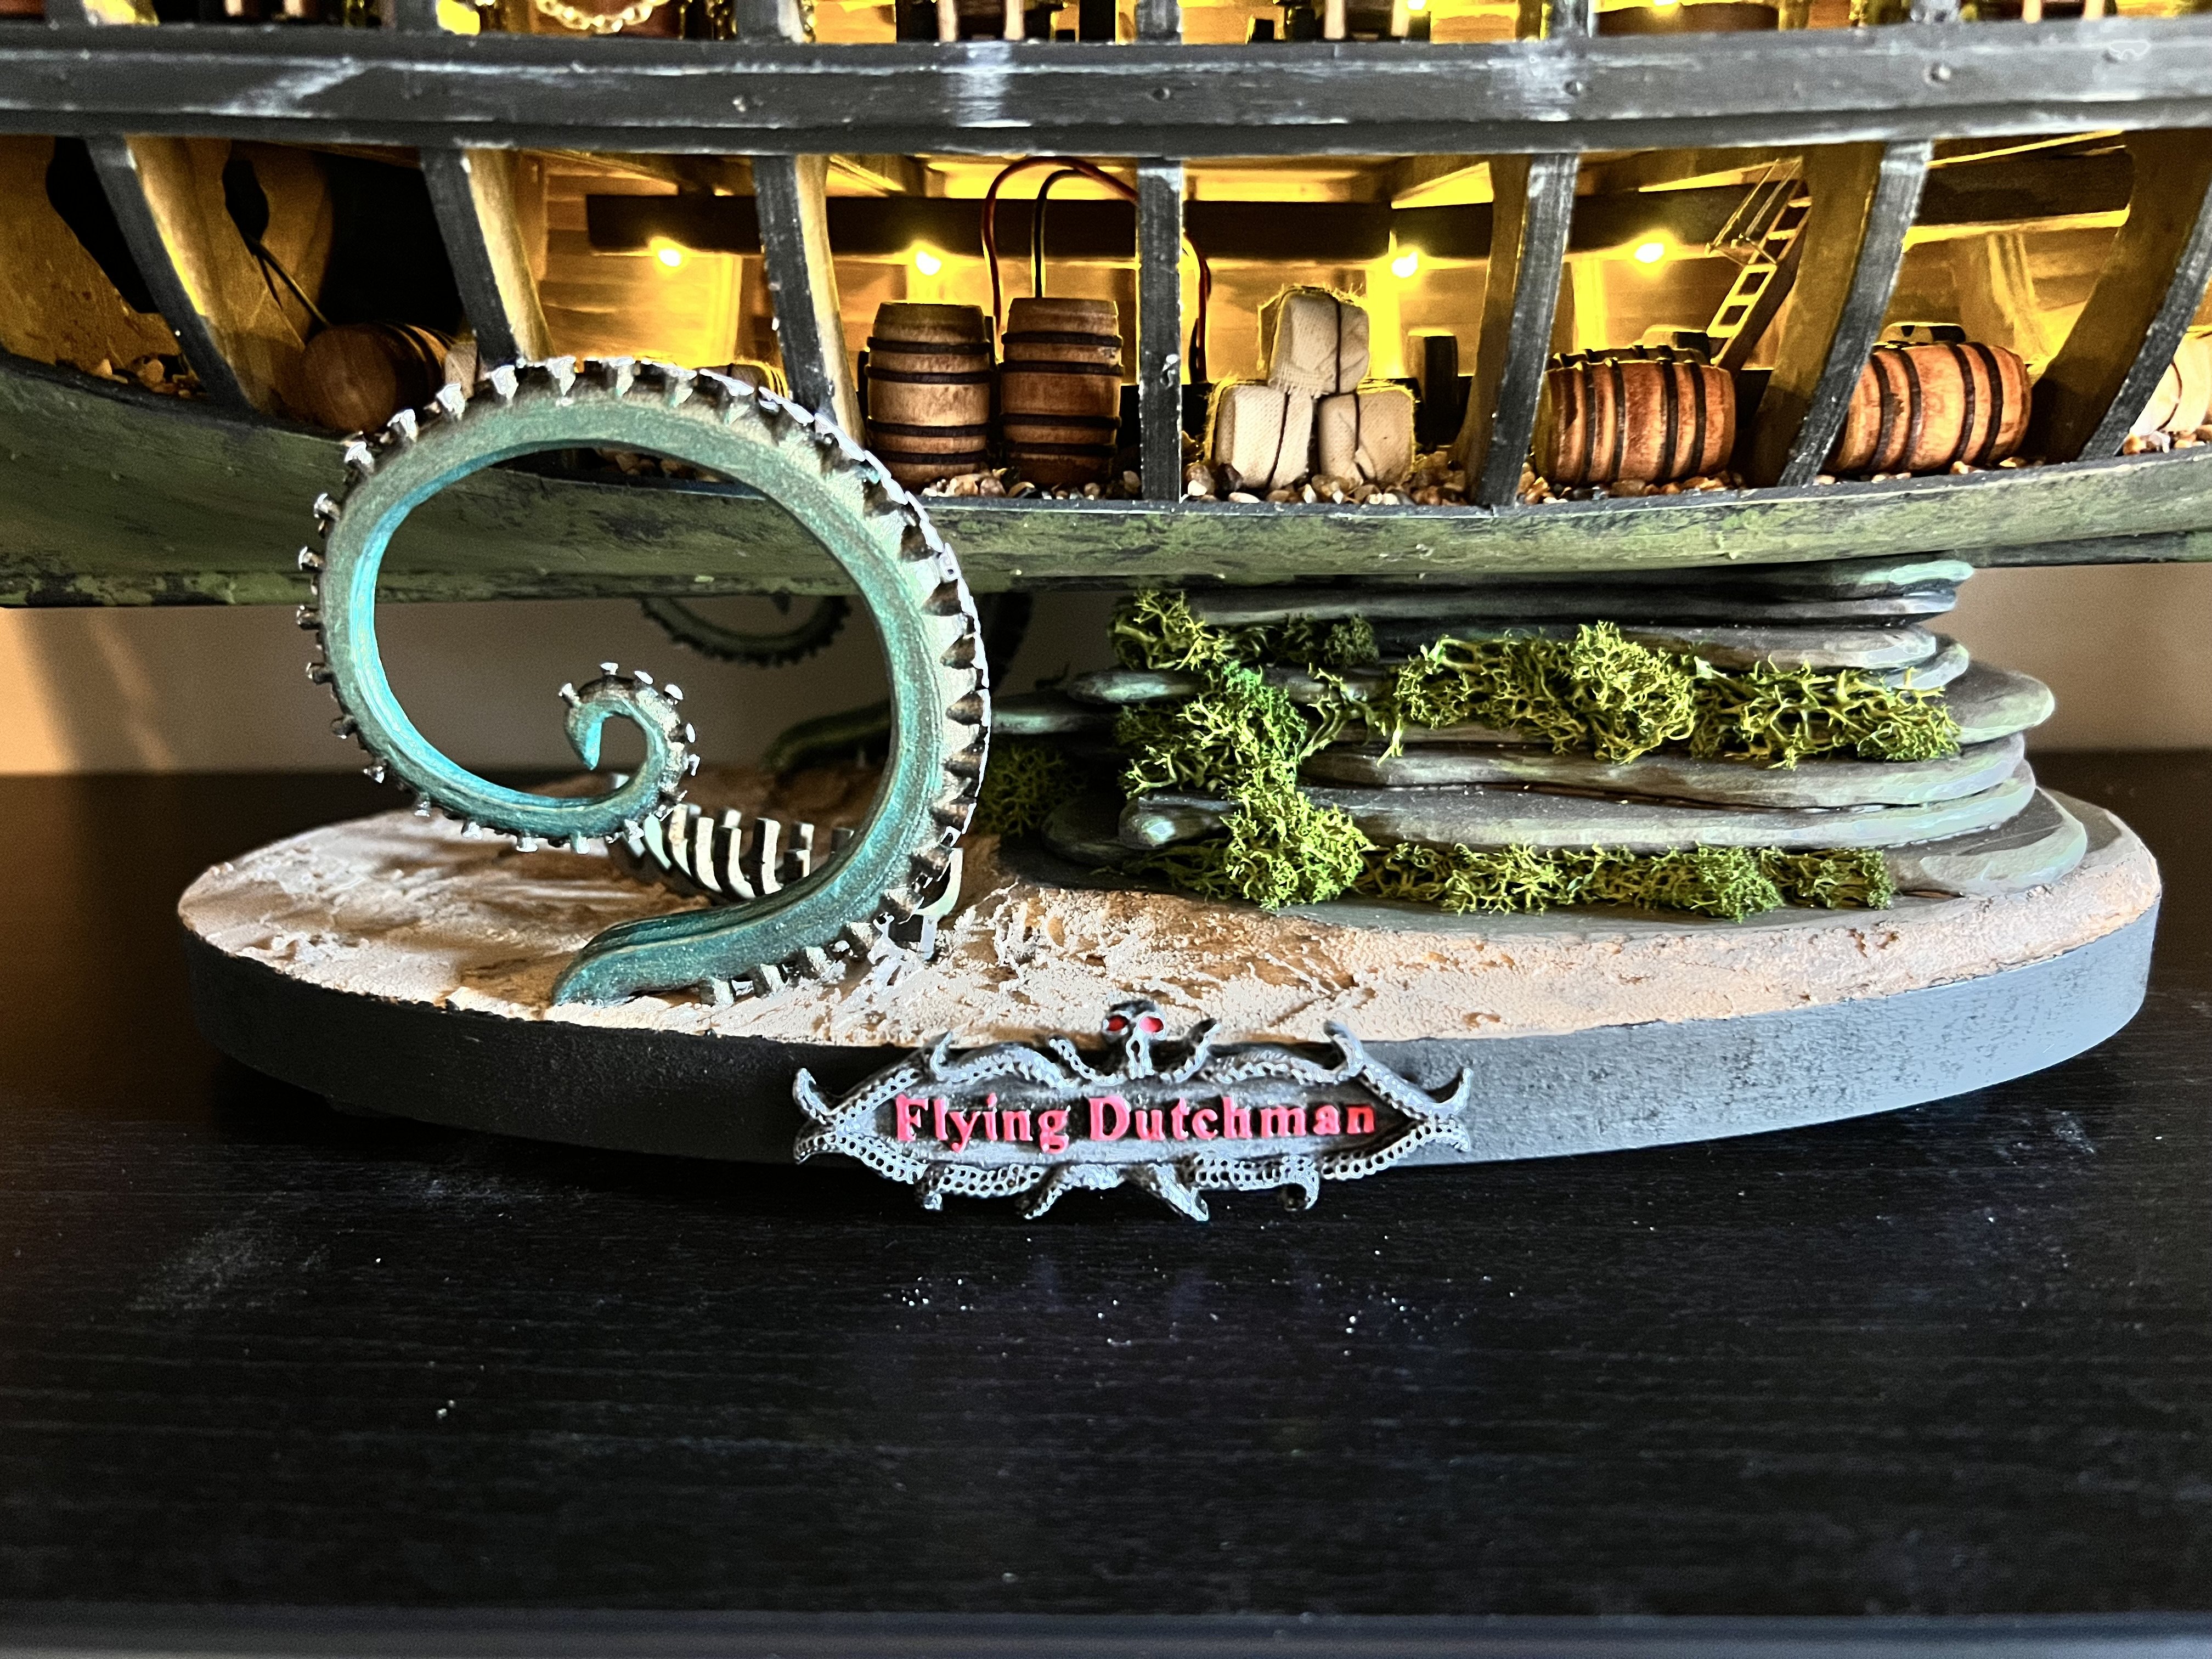
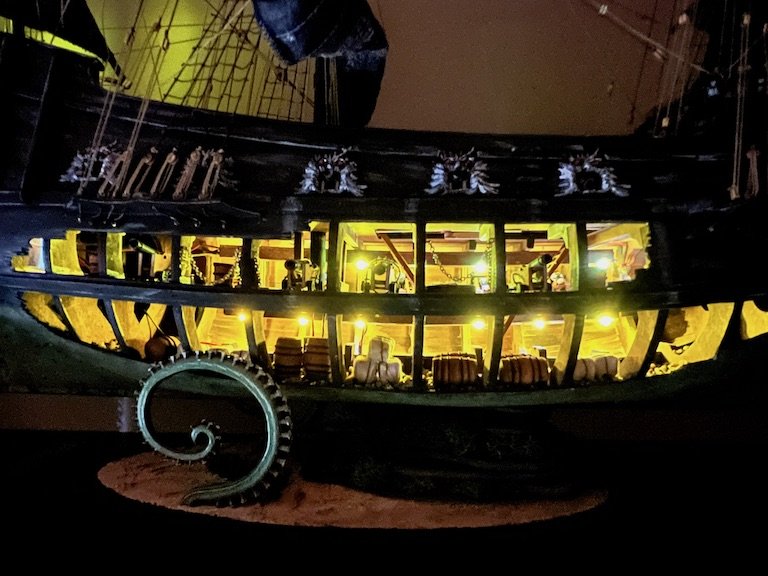
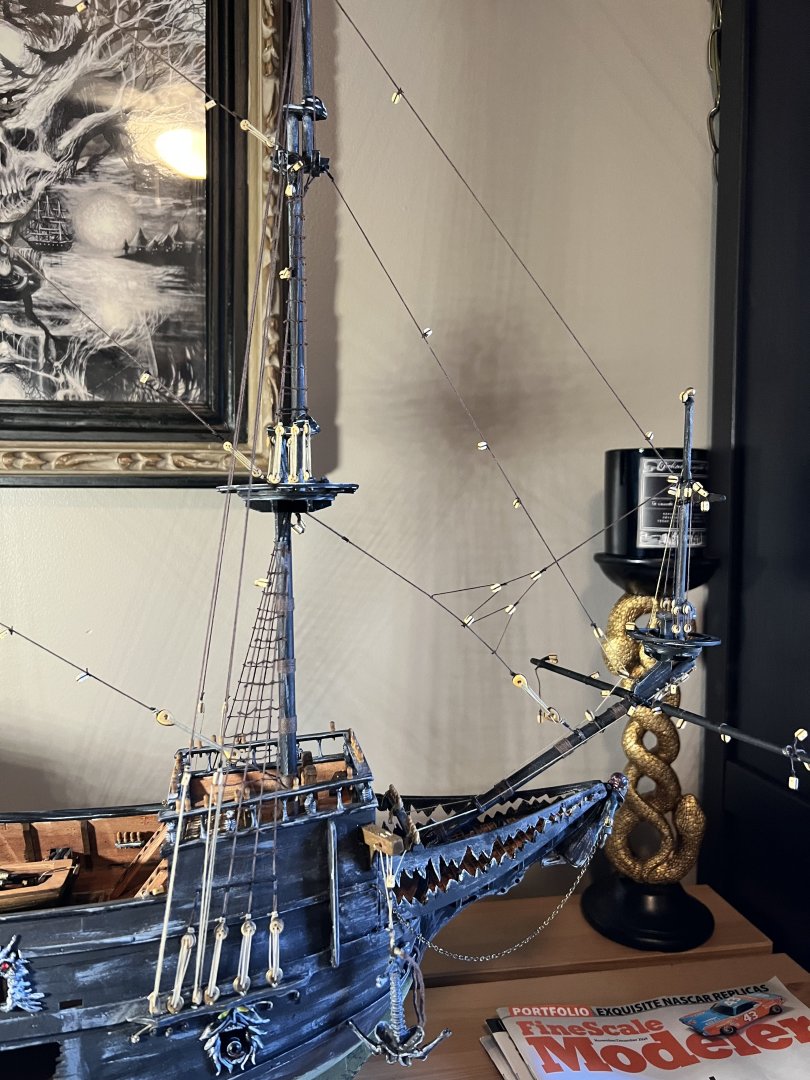
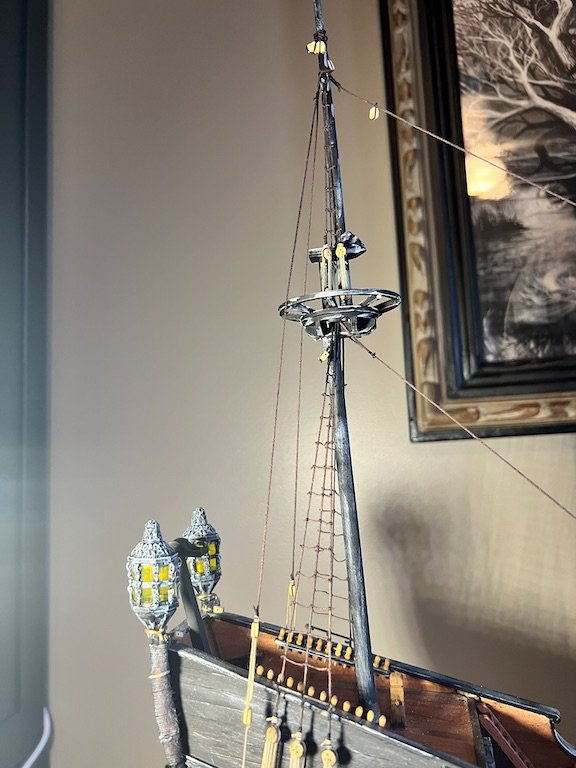
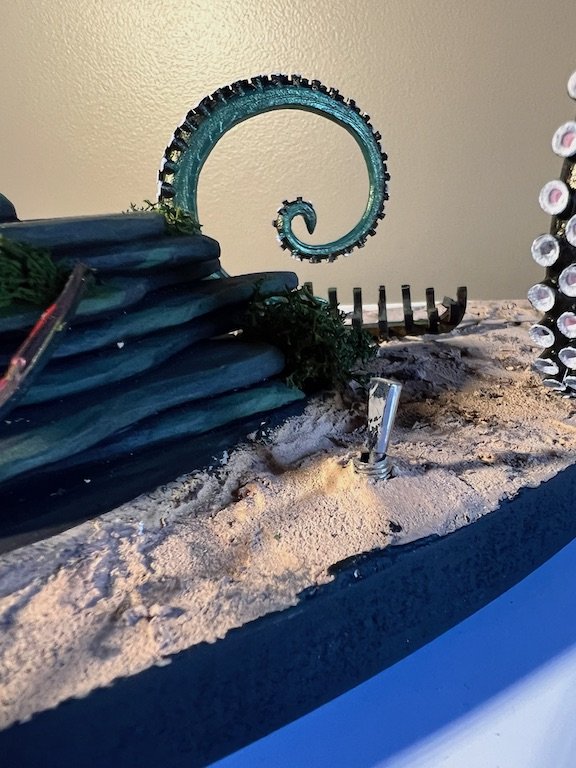
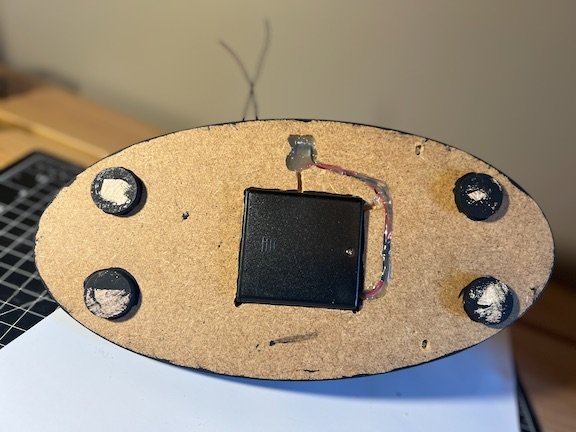
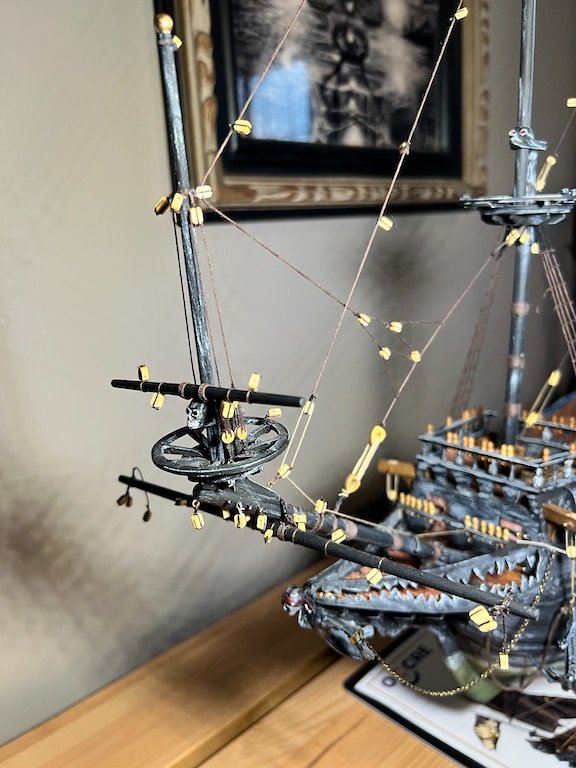
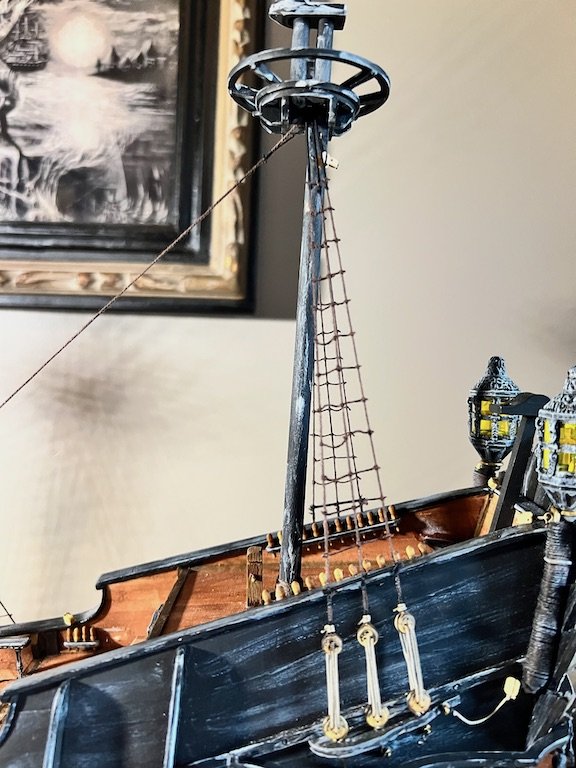
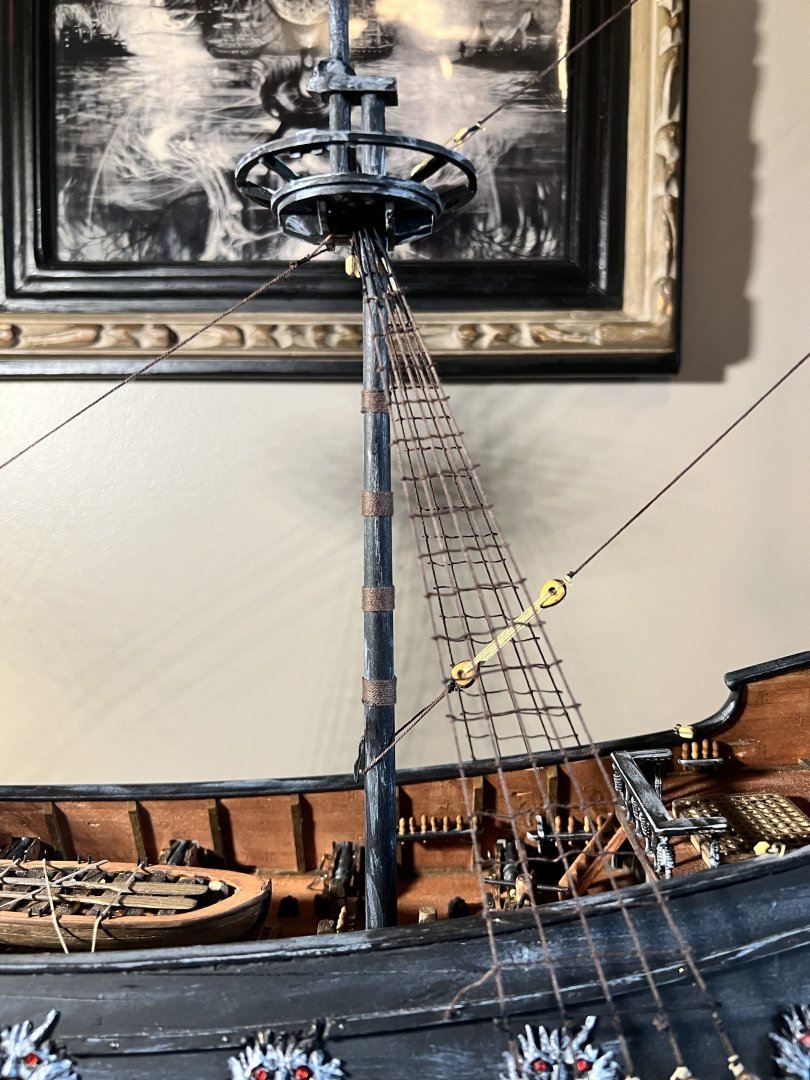
The standing rigging is completed. The rigging diagrams leave a bit to interpretation. Not completely clear how some of the lines should be terminated, so some improvisation was needed. I am sure having more familiarity with rigging would make things clearer, but would also guess that some license was taken given this is a fictional subject. Also completed the riding on all of the yards. Took a break from tying knots to build the base and detail. I cut out a space in the bottom of the base to hold the battery pack for lighting aboard the ship. So I don't have to use the on/off switch on the pack, I installed a toggle switch on the side opposite from where the open areas of the ship will be on display when the ship is on the base. On to the attaching the yards, running rigging and sails... Tim
- 30 replies
-
- 2
-
-
- Flying Dutchman
- OcCre
- (and 1 more)
-
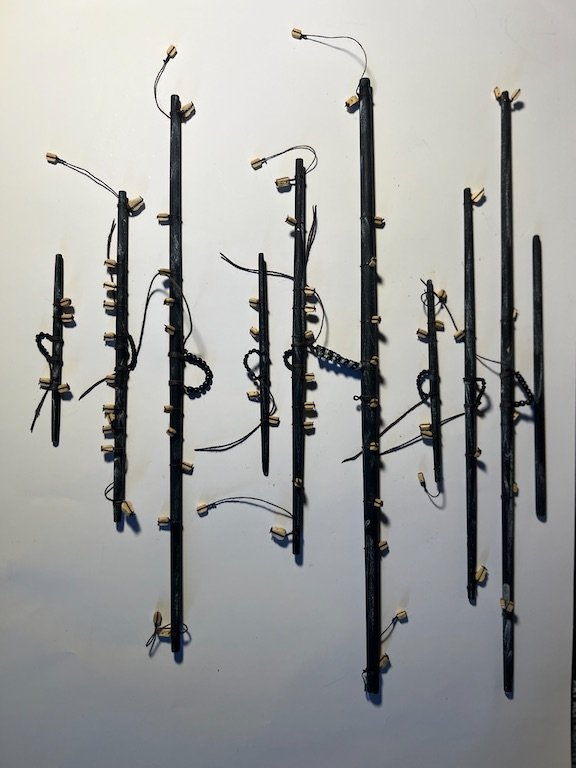
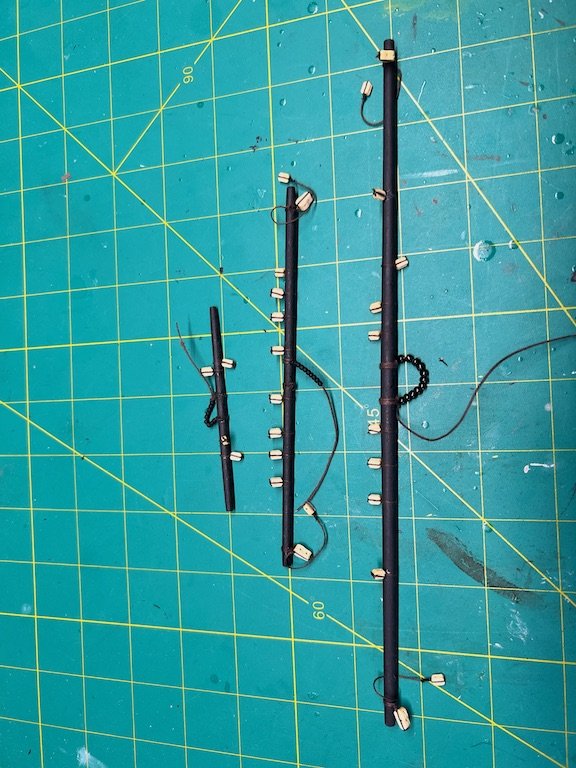
Work on the Dutchman continues. Set the masts and began the standing rigging. Have learned to be very carful with applying CA to the rigging line provided with the kit. too much and it burns right through it or leaves it very weak. Have had to replace several blocks on the masts that have fallen off due to the rope being weakened by CA. Switched to diluted white glue for the mast rigging, shrouds and ratlines. Completed and added the spas to the bowsprit and completed the yards for the foremast. Going to complete the standing rigging before completing and adding the yards to the main and mizzen masts. Tim
- 30 replies
-
- 5
-
-
- Flying Dutchman
- OcCre
- (and 1 more)