Check out our new MSW Sponsor Innocraftsman
×

DB789
-
Posts
425 -
Joined
-
Last visited
Content Type
Profiles
Forums
Gallery
Events
Everything posted by DB789
-
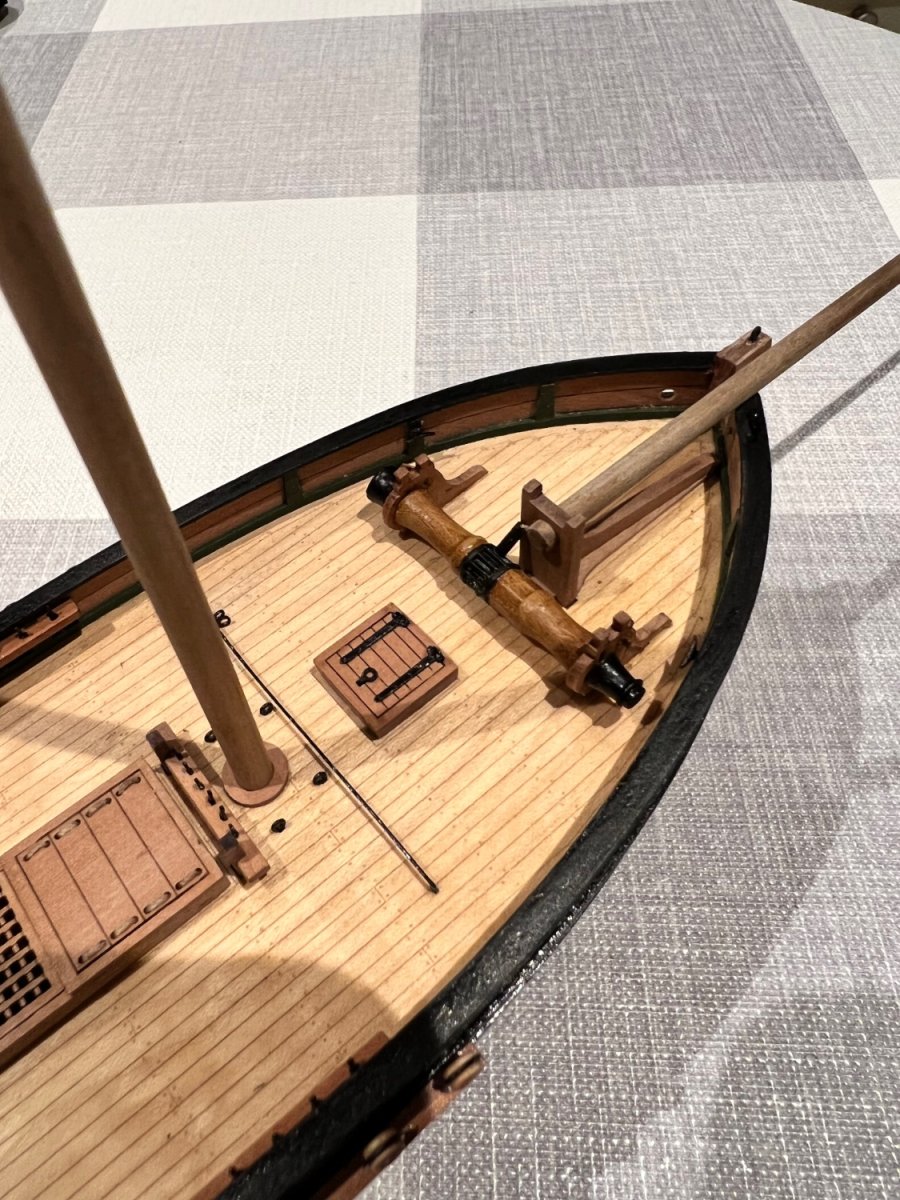
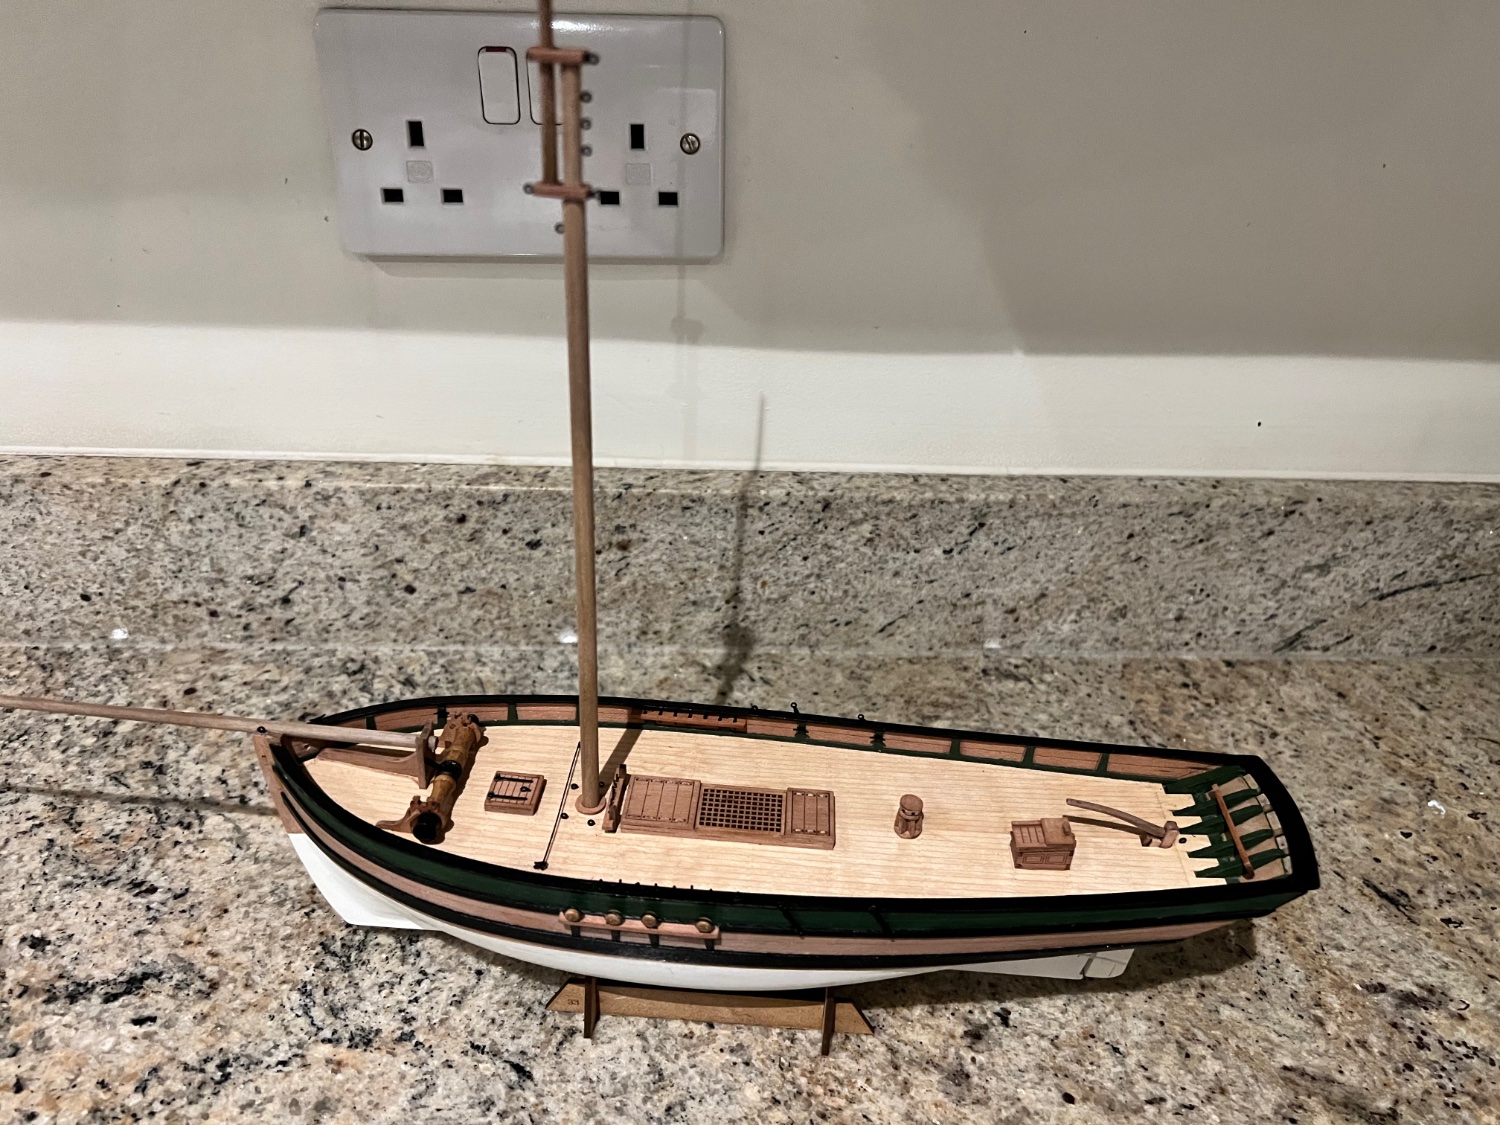
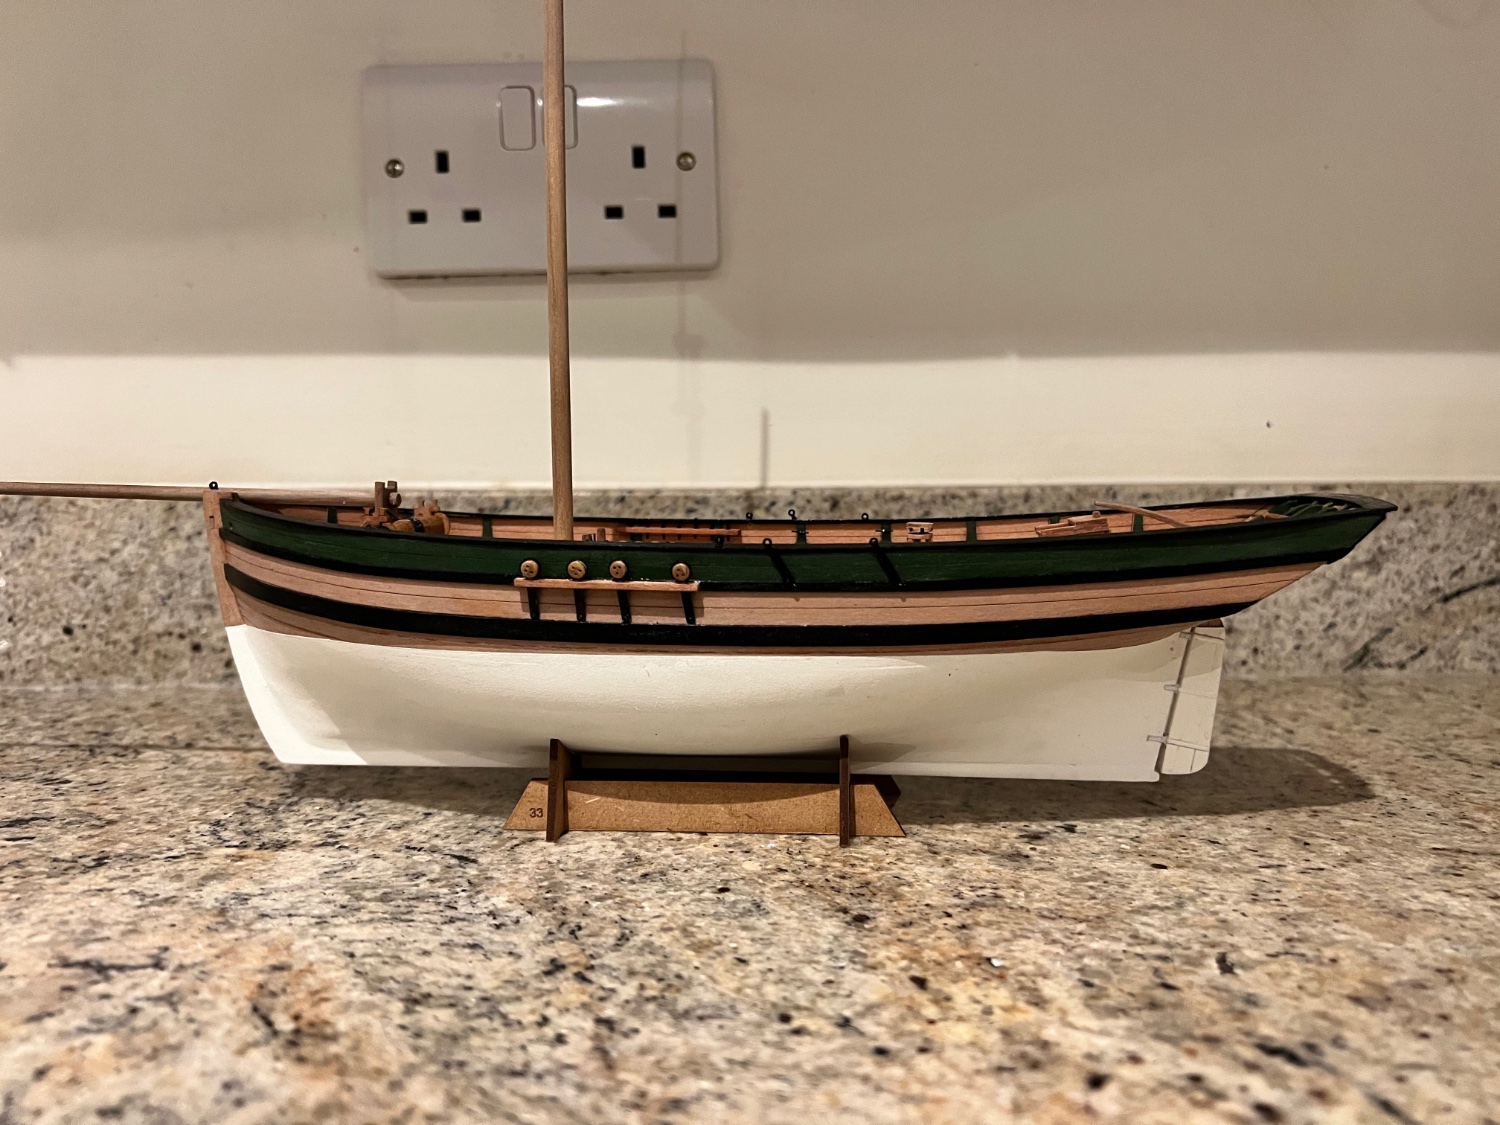
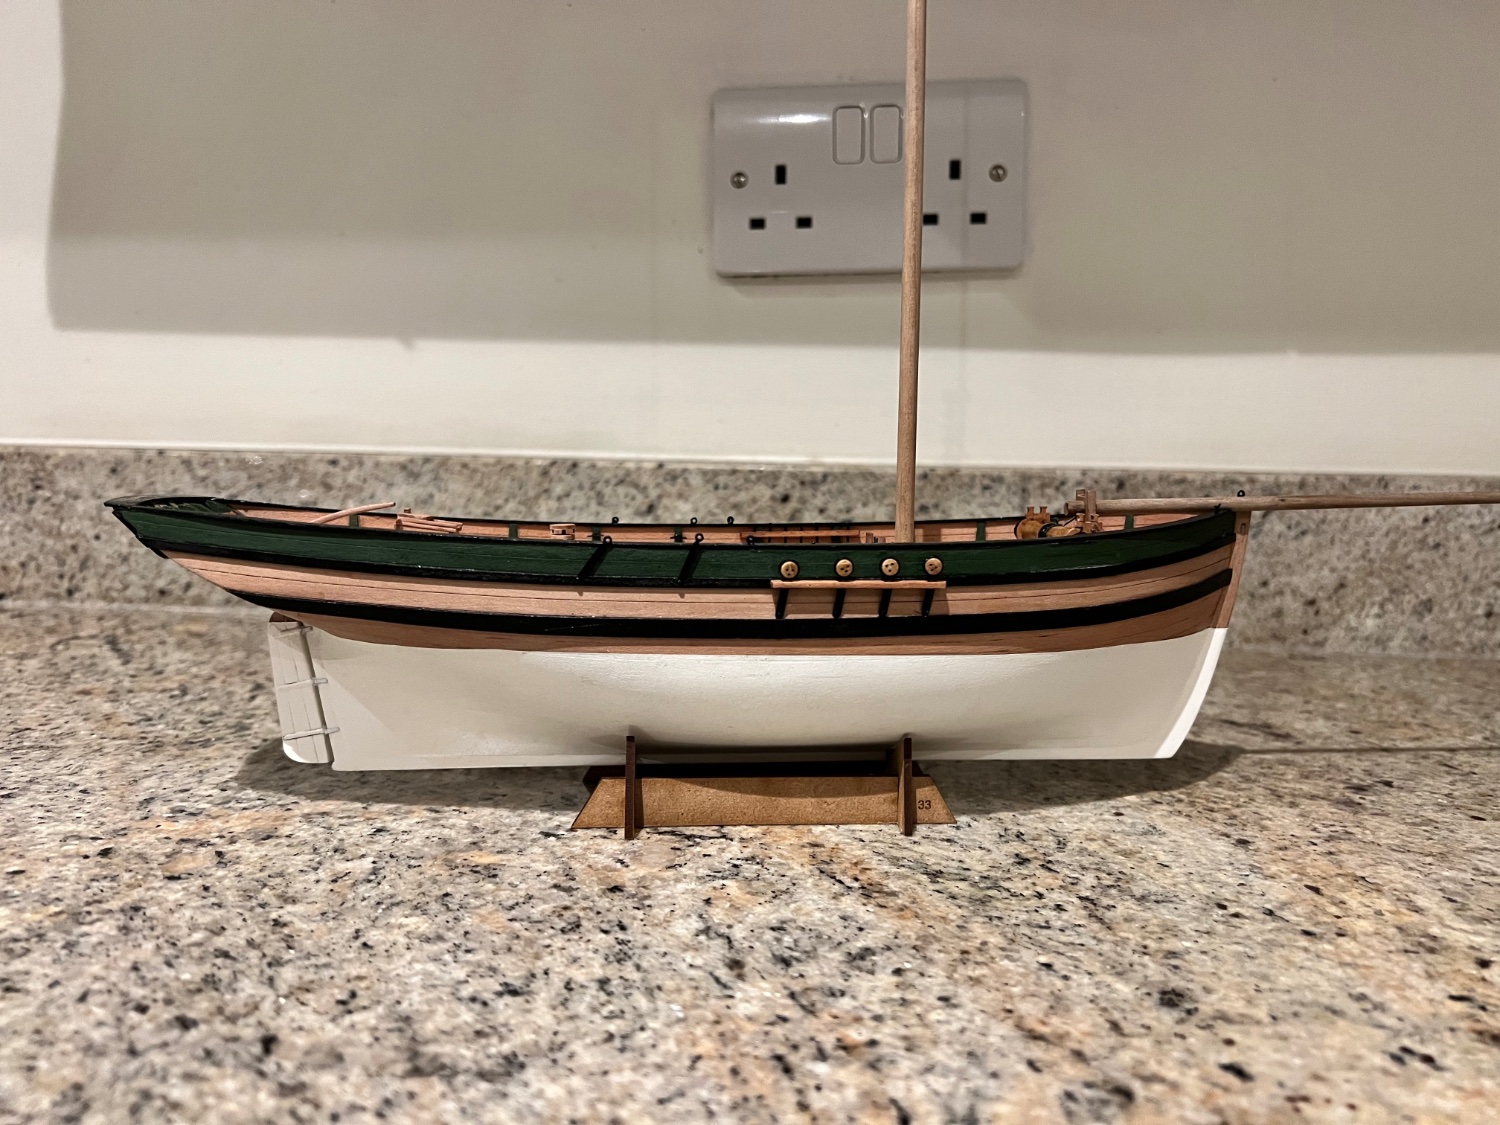
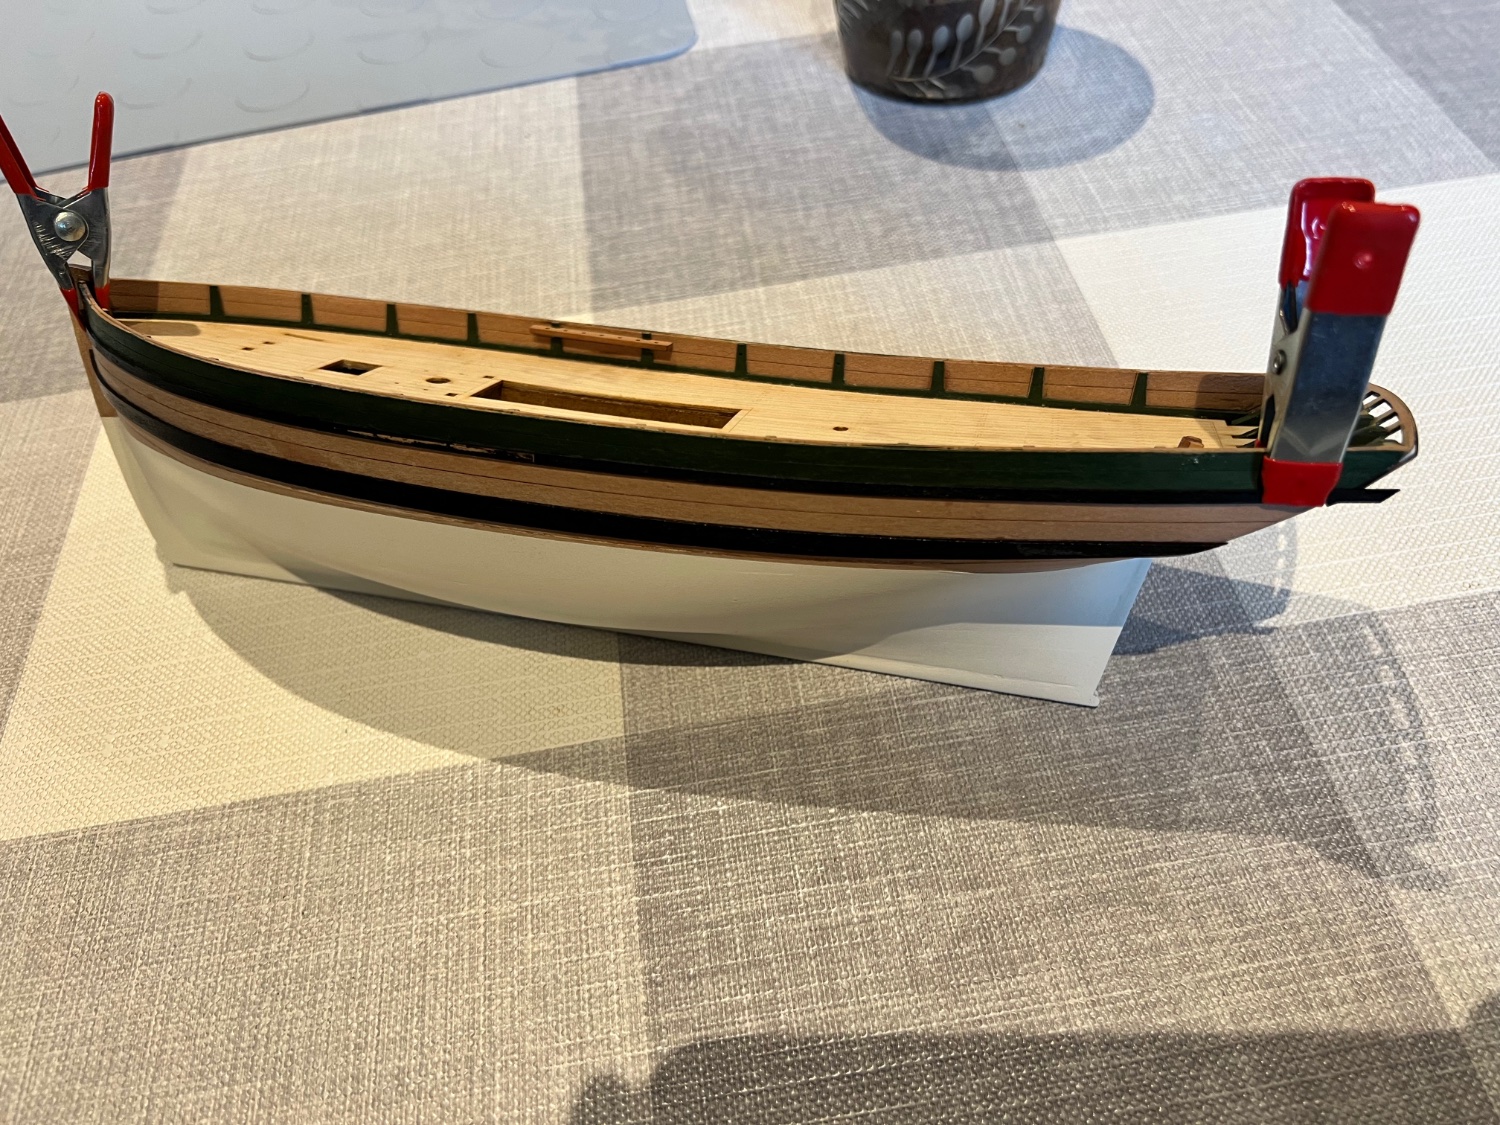
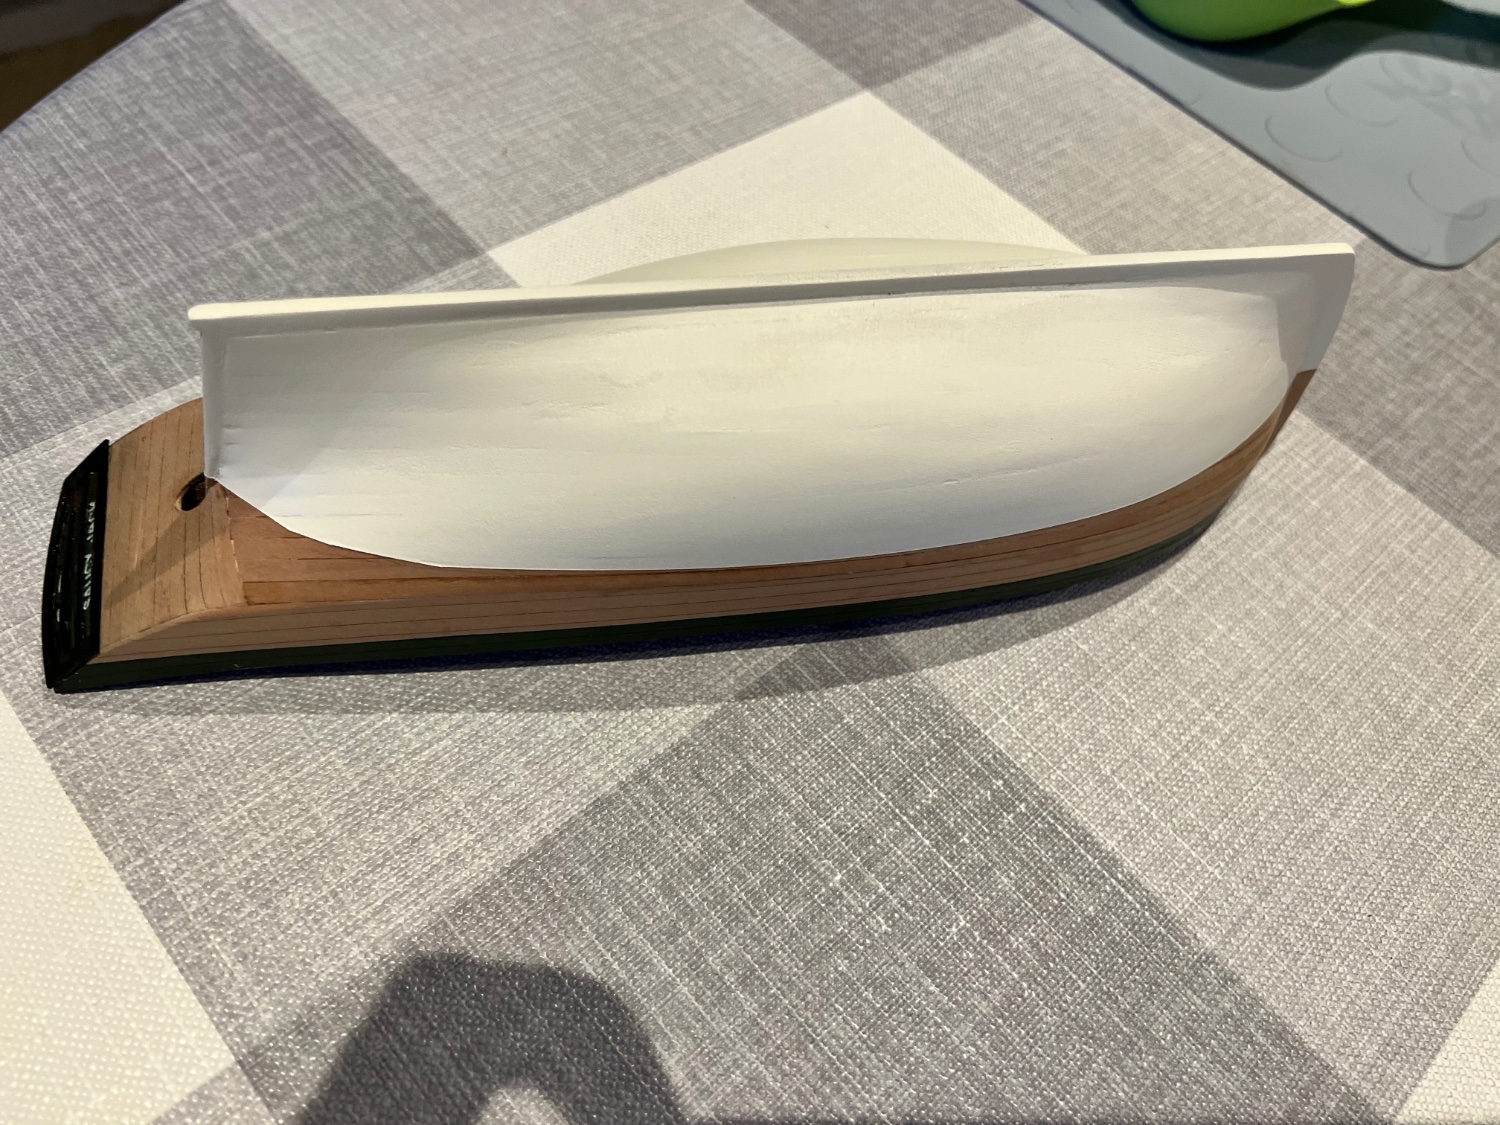
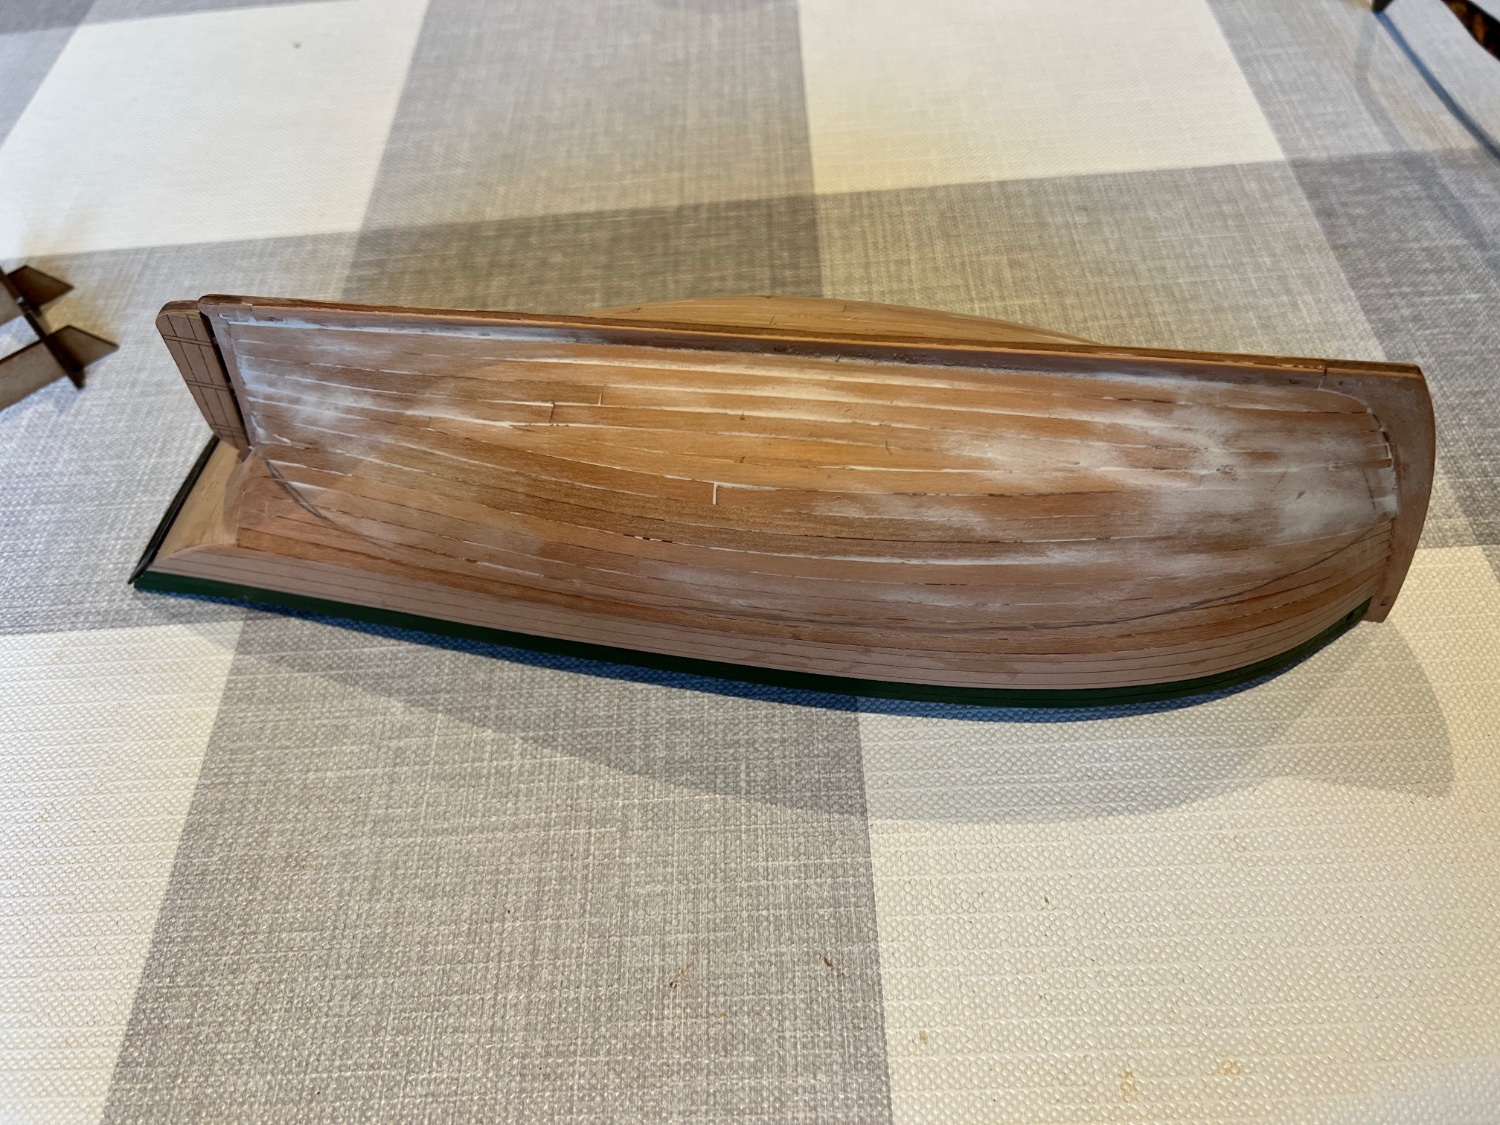
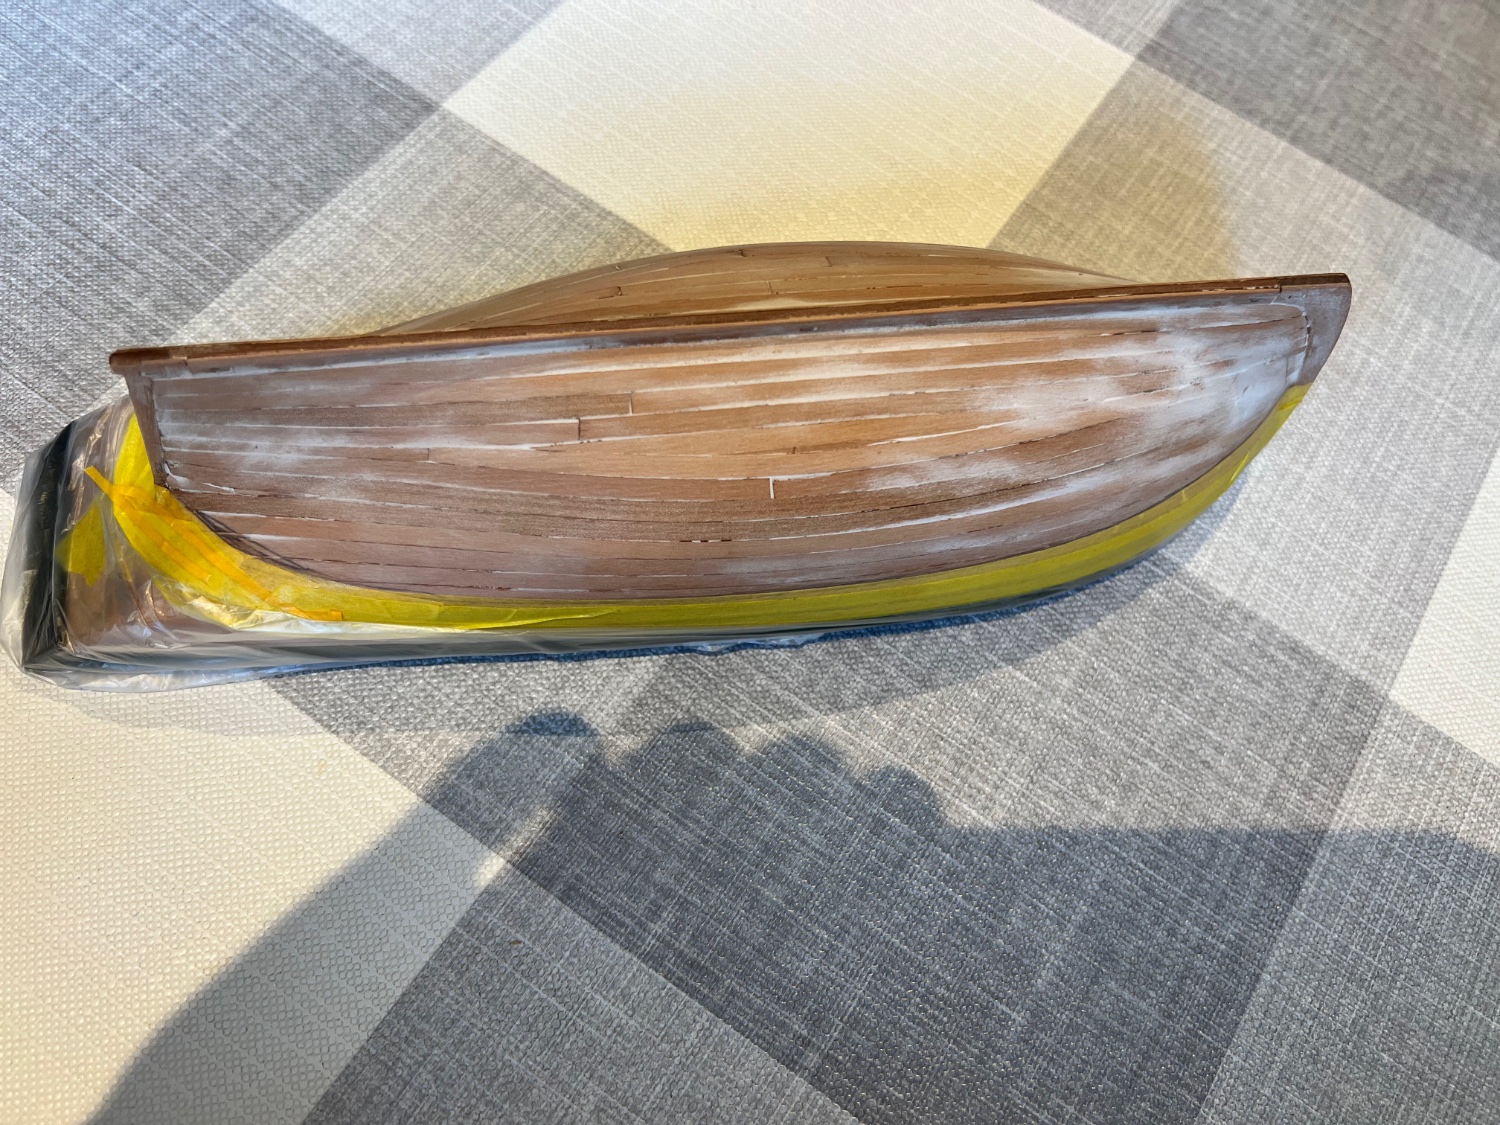
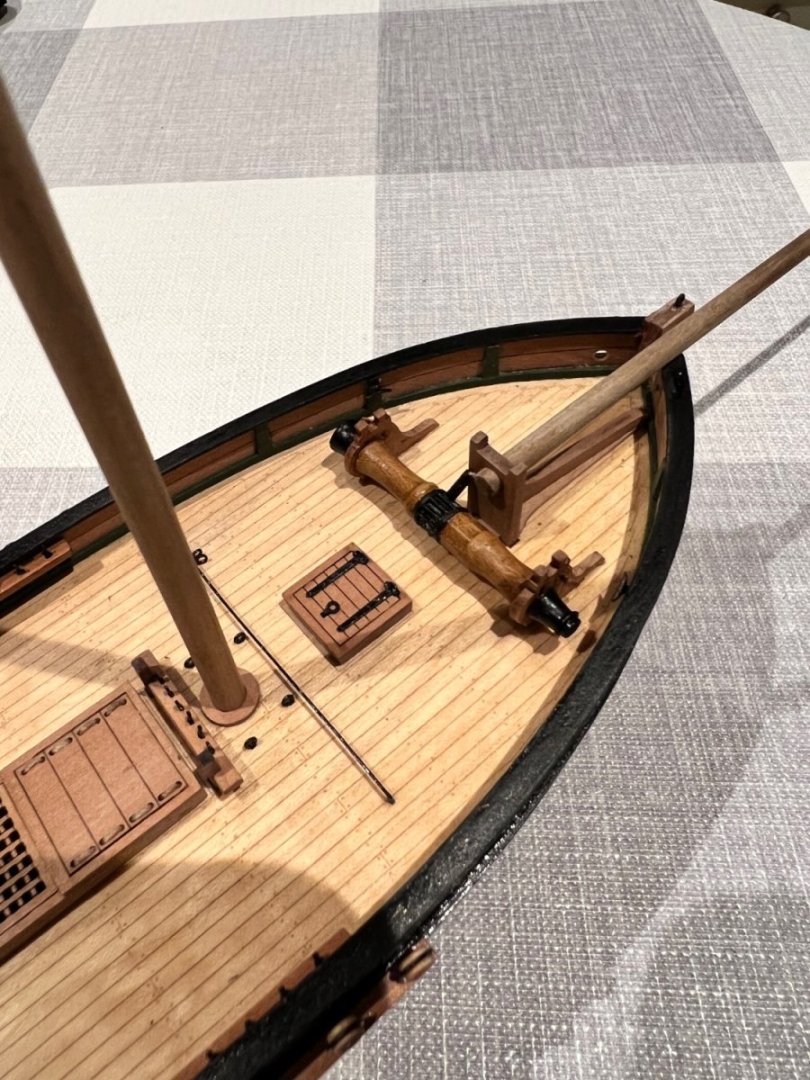
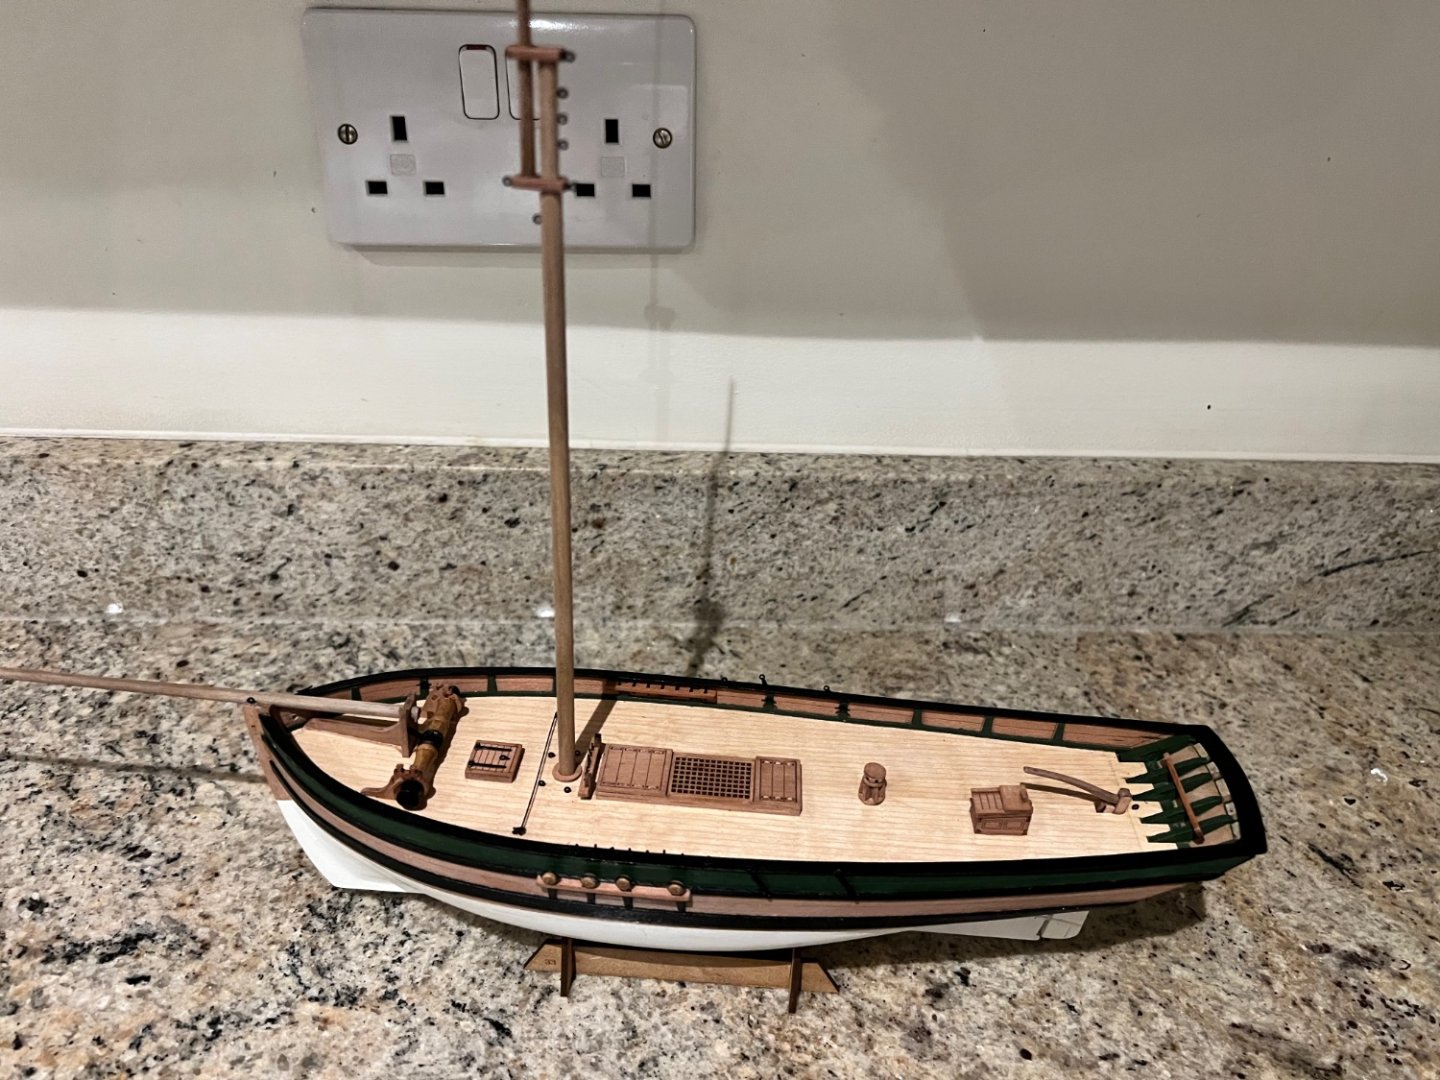
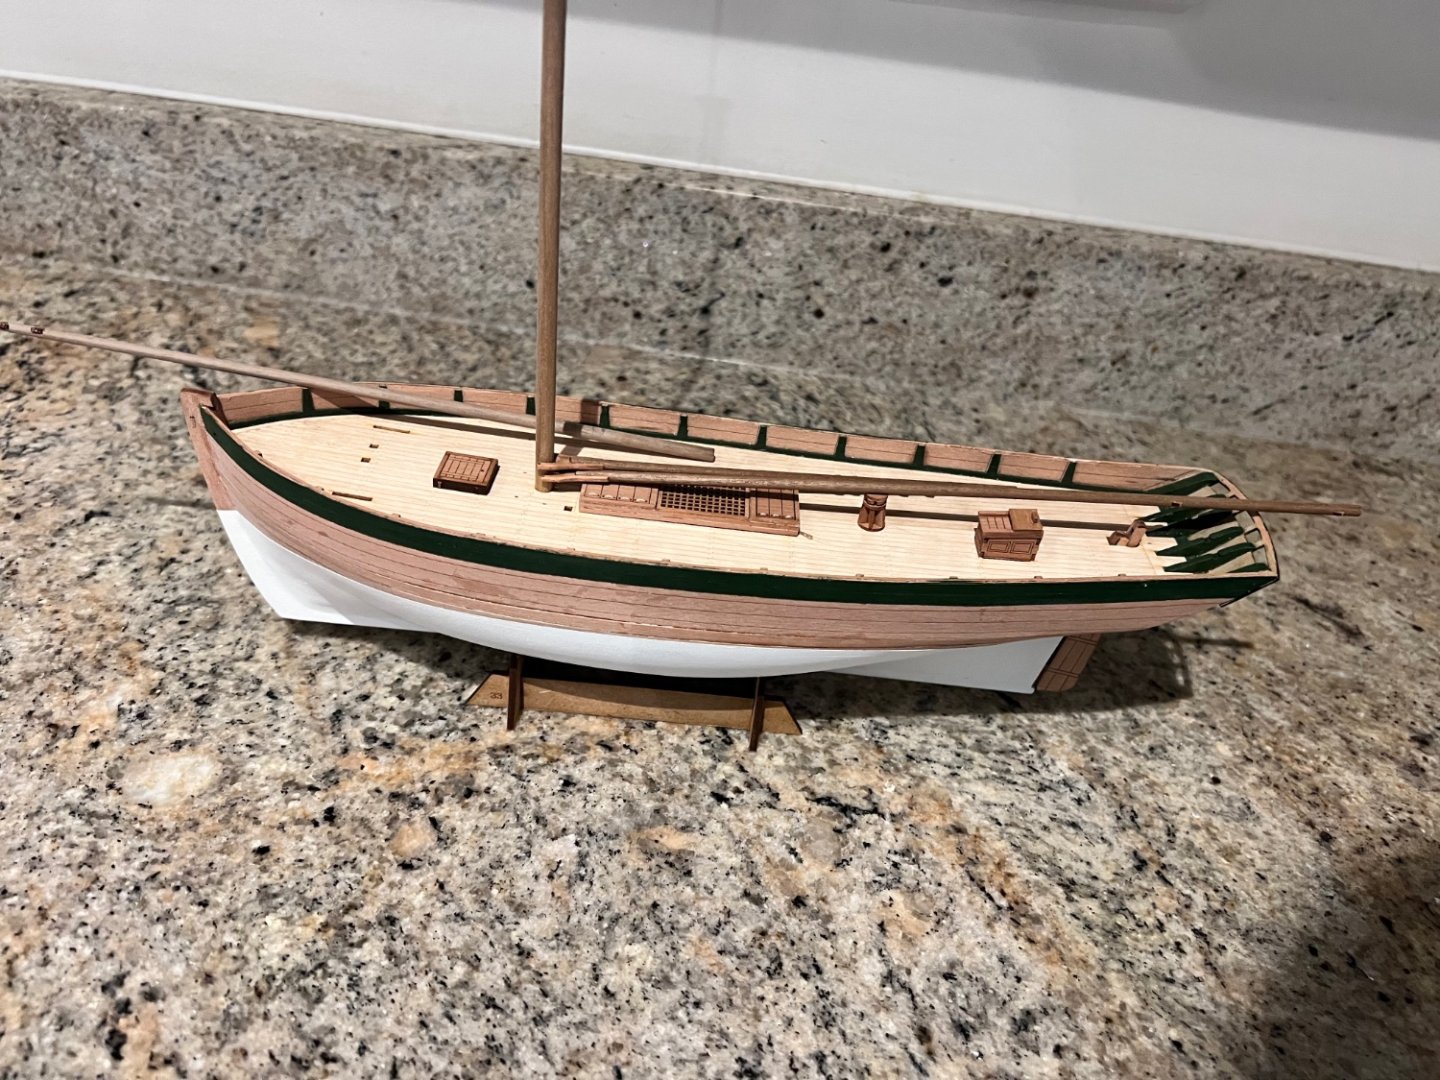
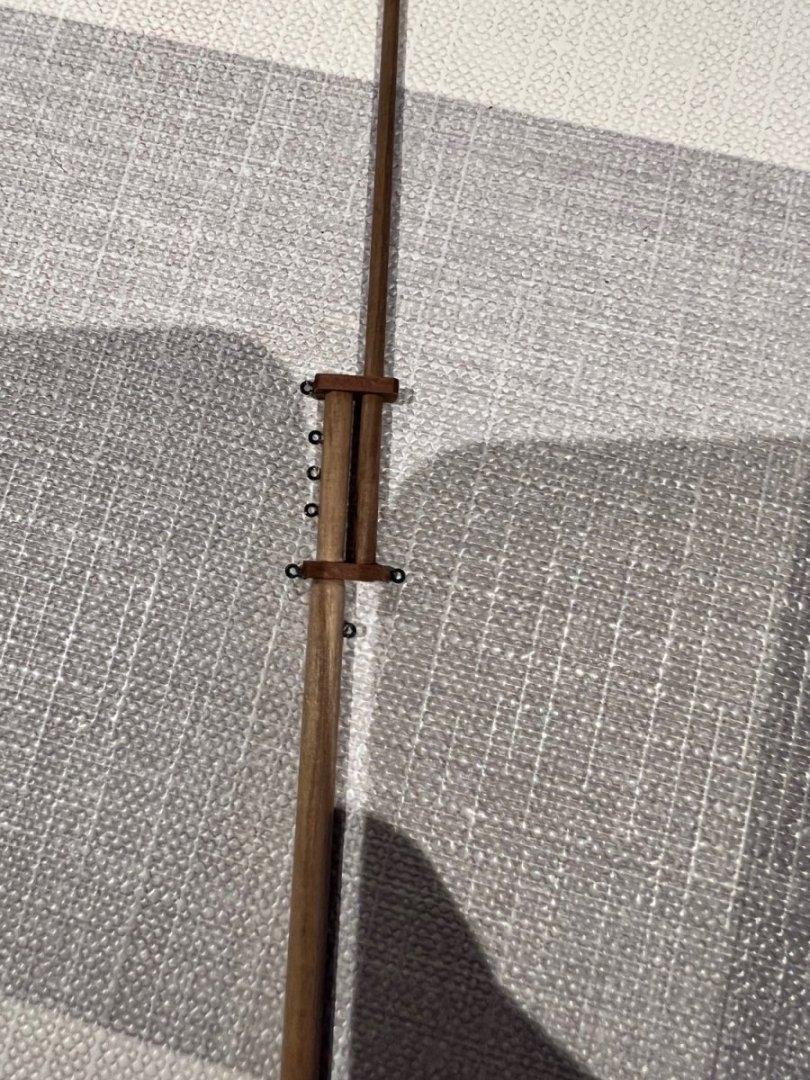
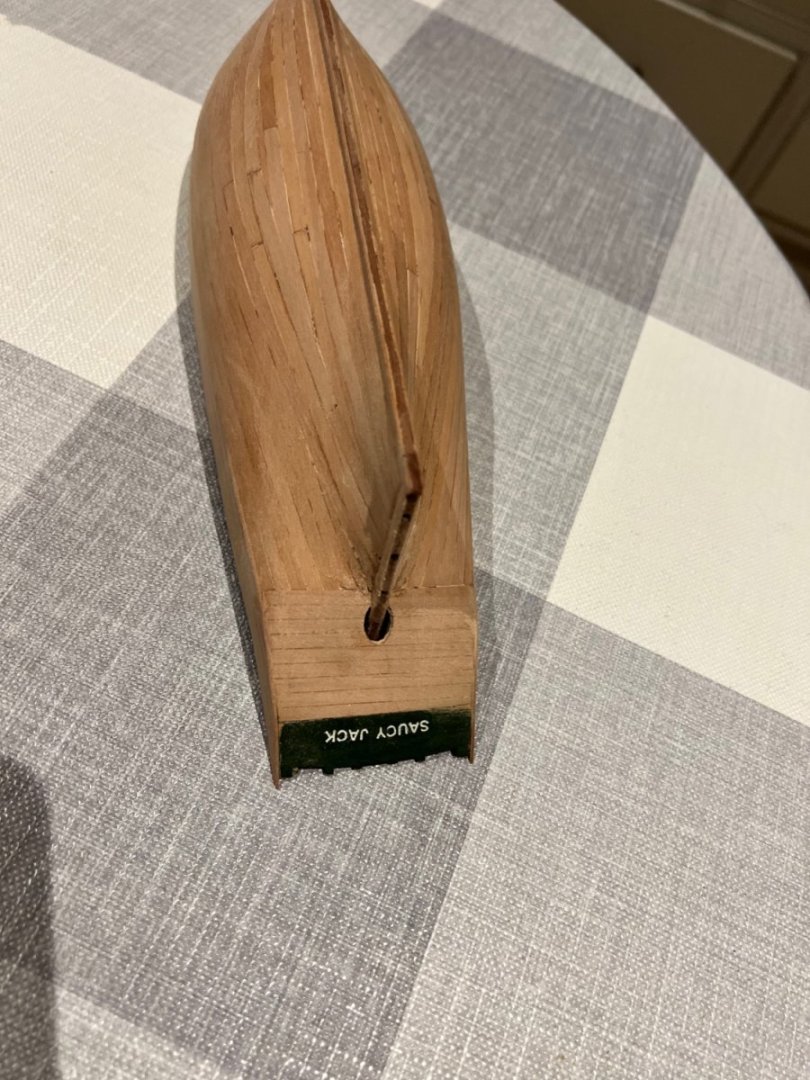
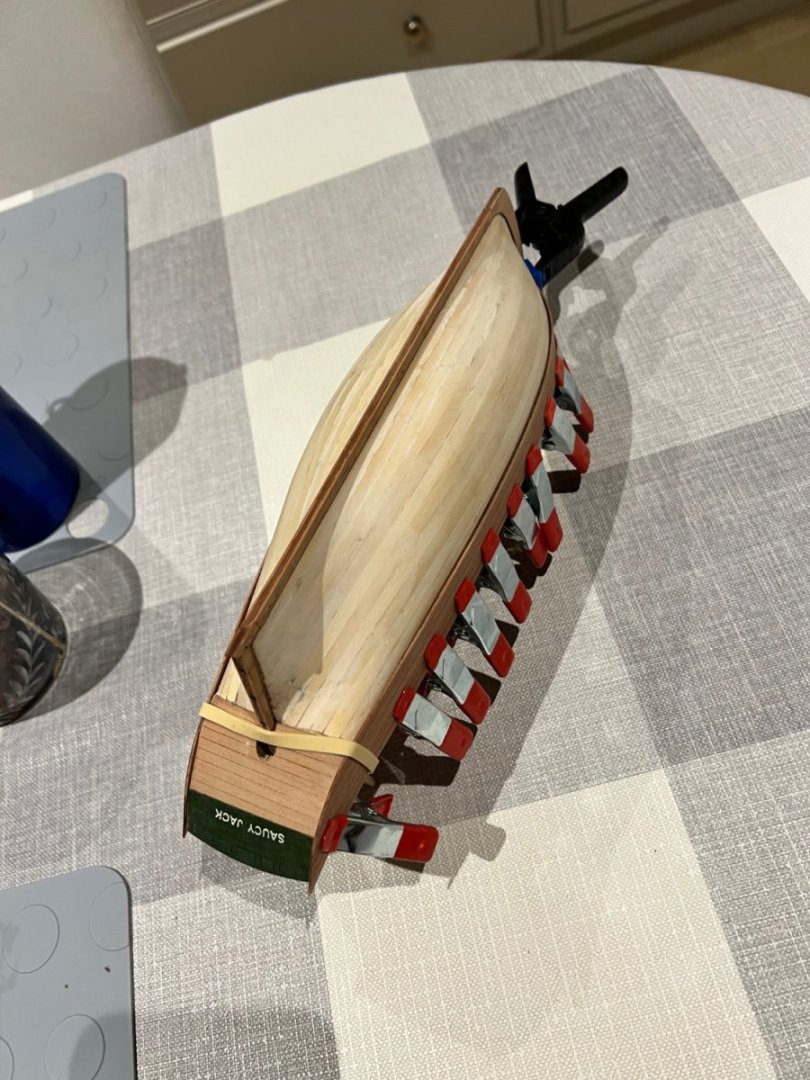
 Thanks Allan. The Jack’s hull is now complete. The channels were fitted and needed two cut off pins each to attach them to the side of the hull. All as per the instructions and lined up perfectly. Deadeyes and their holders and other PE rigging hoops and attachments were added to the hull. The winch was added forward. I used the methodology for painting the resin drum of the winch as though it is wood that James H details in his build log which entails dragging a darker oil paint into a paler beige oil paint. It produces a highly realistic result. A notch was sanded in the starboard gunwale to accommodate the bowsprit as per the method in the instructions and the anchor cable holes were drilled out. Other PE such as the cleats and belaying pins were attached. As was the PE frieze on the stern. Also the rudder and tiller. The latter needs sanding to give it a sanded shape. Is the tiller to scale - it seems large and high compared to the companionway? I notice it does on Nisha too? Maybe they were just big. I tried to coat the exposed wood on the hull with wipe on poly. Living in the UK I don’t think you can buy wipe on poly so instead I mixed 50:50 Vallejo matt polyurethane varnish and white spirits. This didn’t work well and just seemed to strip the oils out of the wood leaving it looking pale and tired - not sure what I did wrong?! After this debacle I treated the exposed wood with straight polyurethane varnish which seemed to revive it somewhat. Time to dye the sails tomorrow. Aiming for a colour similar to James H achieved on the prototype which is much more soft pink / orange than the later fishing boats. So they’ll probably end up dark brown…


- 59 replies
-
- 7
-

-
- saucy jack
- fishing smack
- (and 2 more)
-
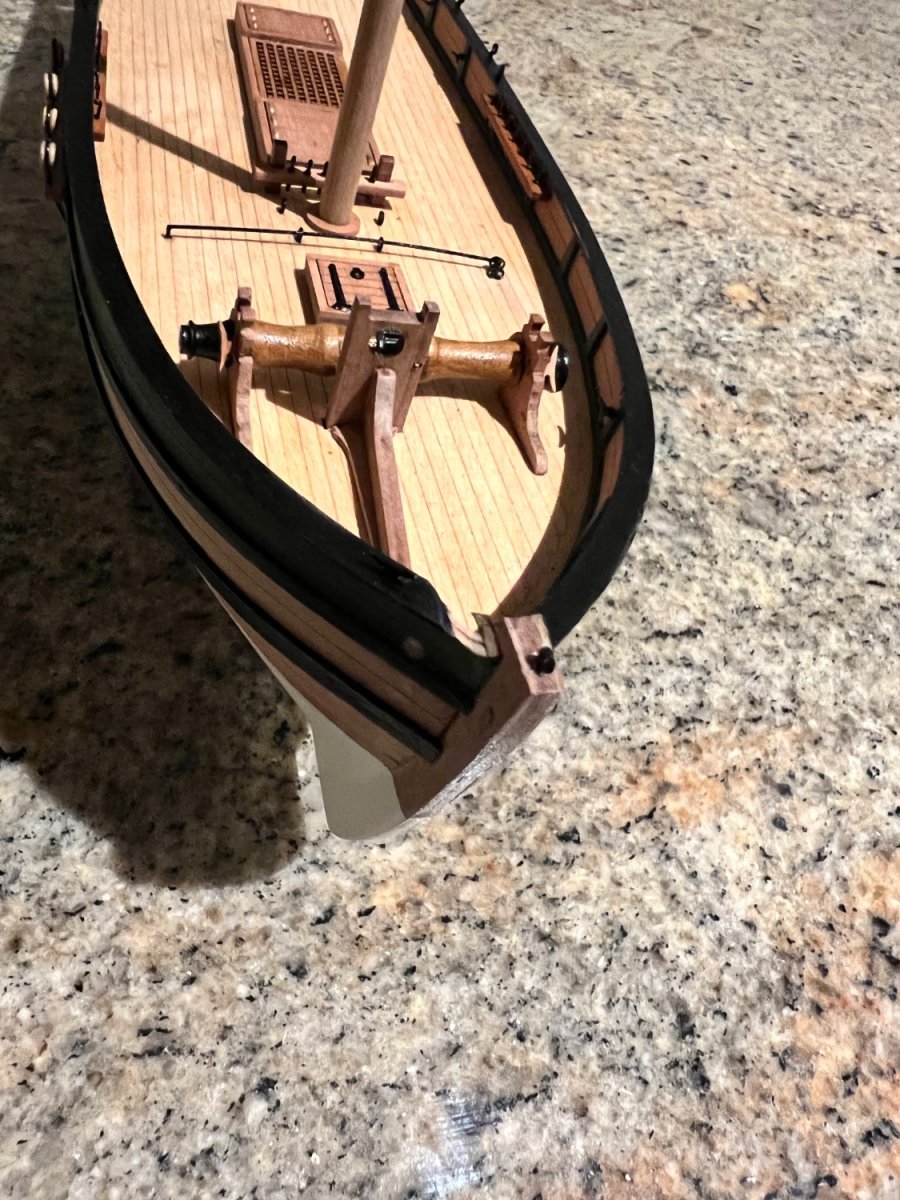
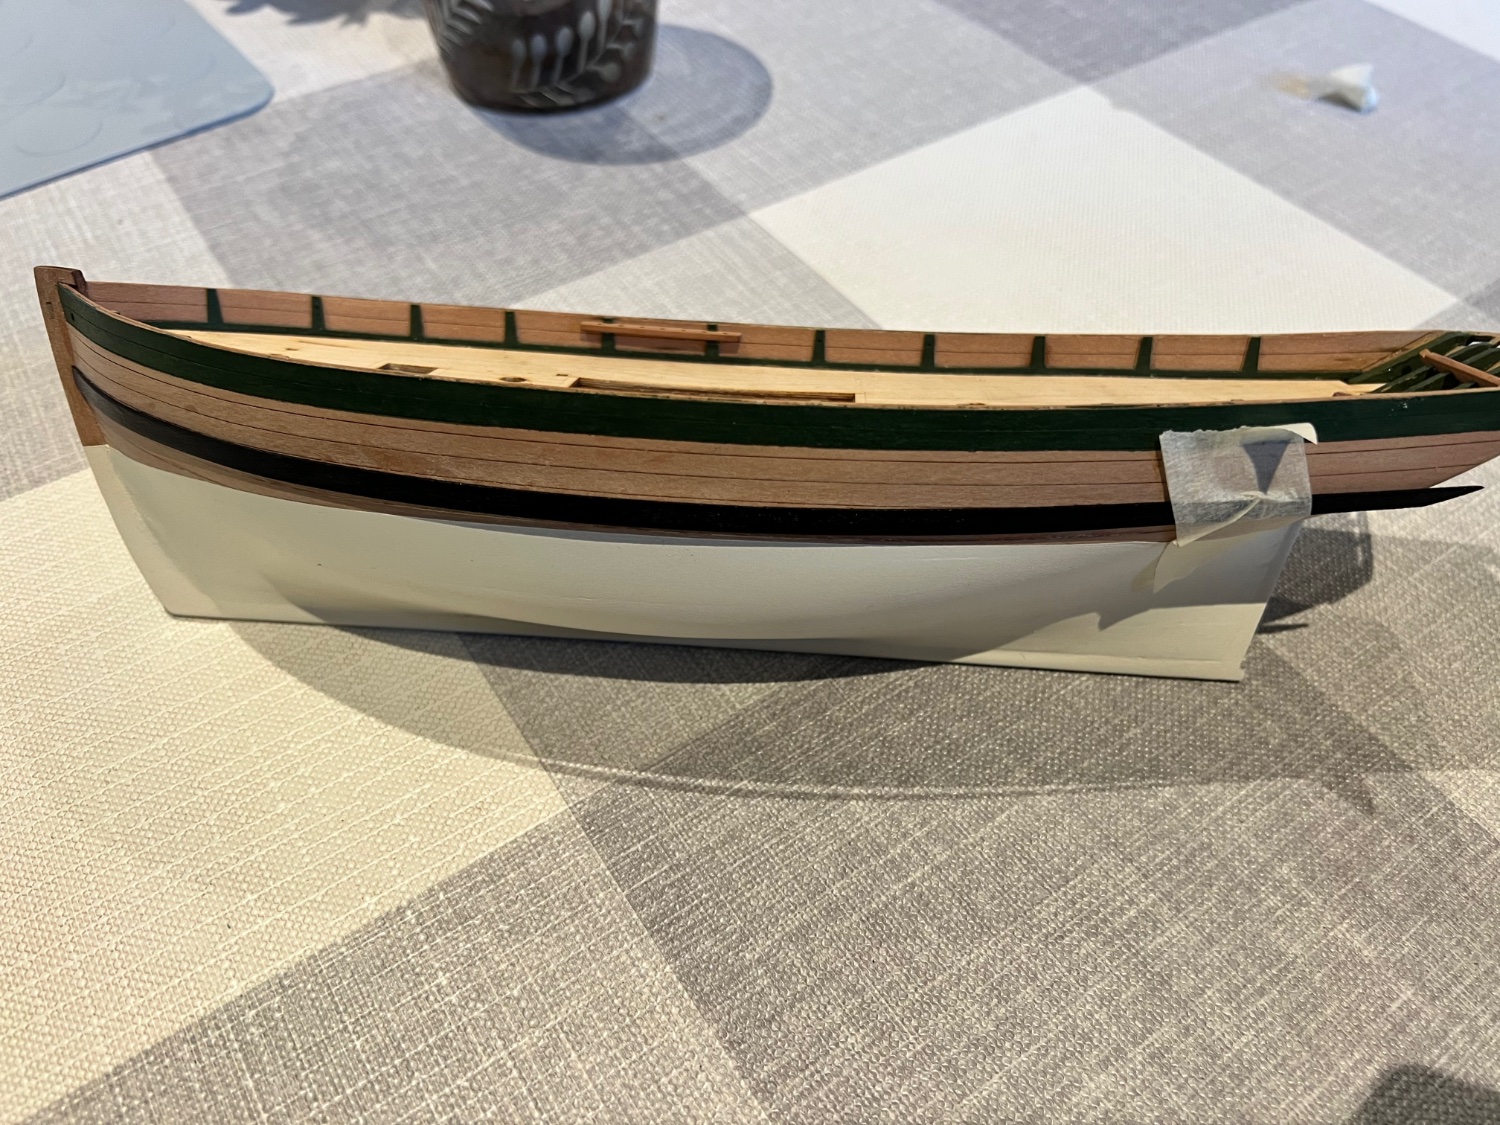
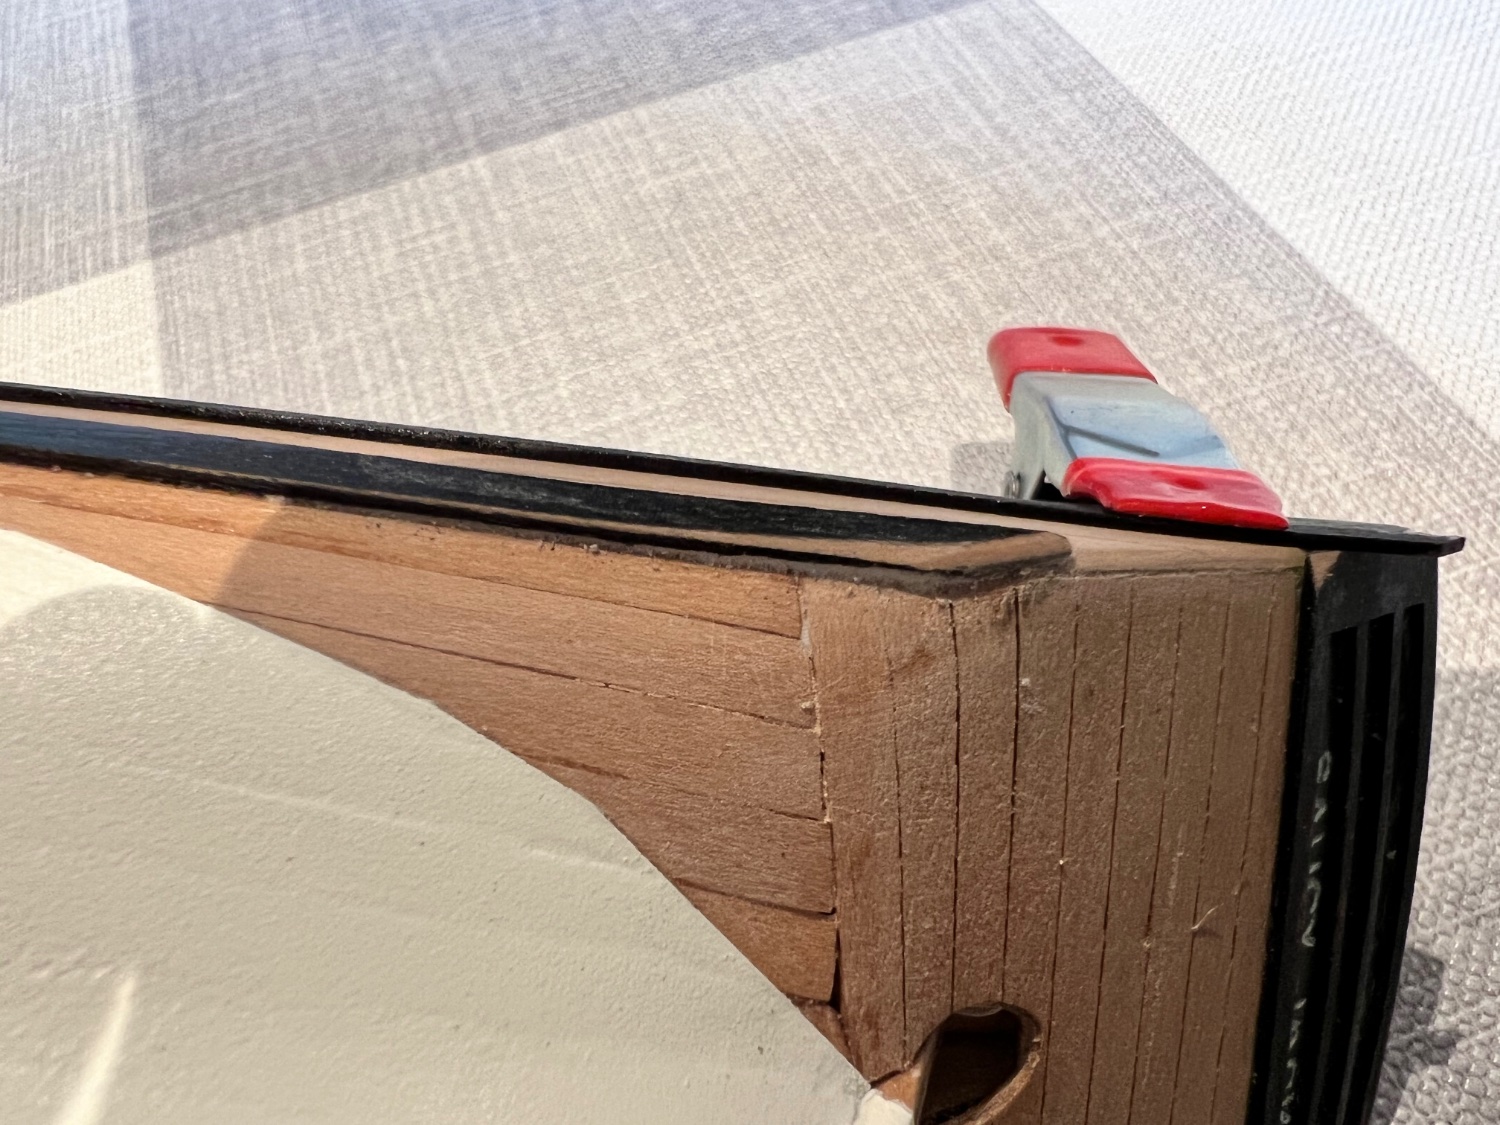
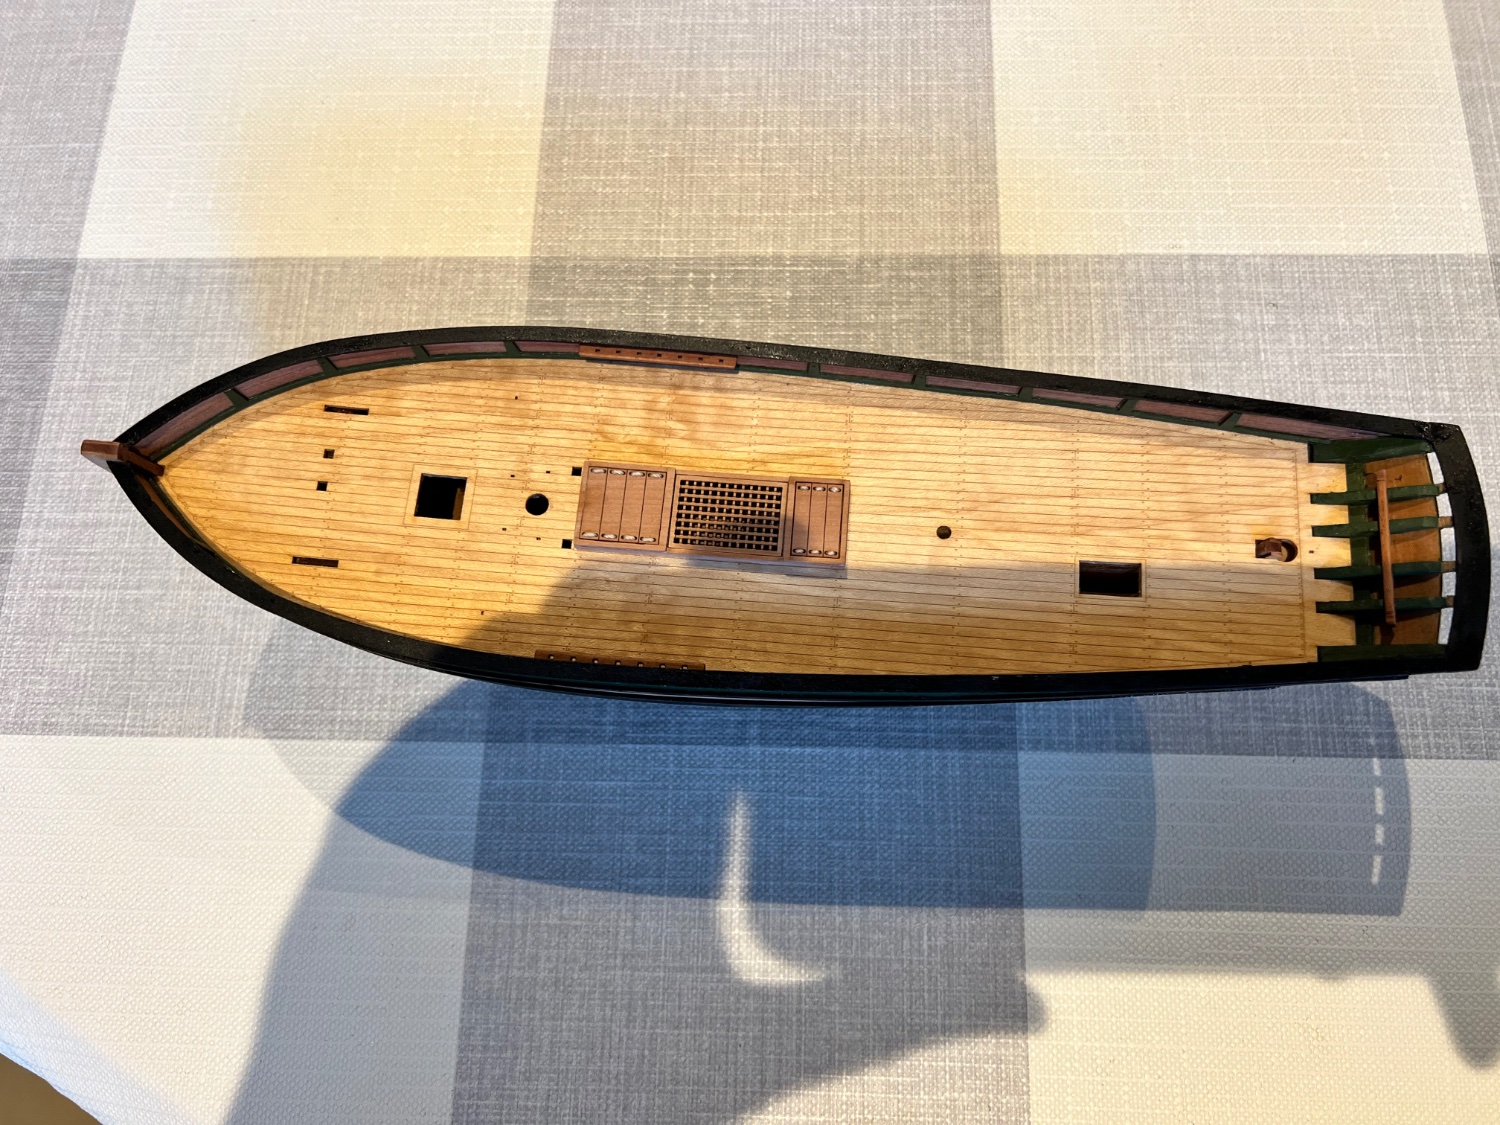
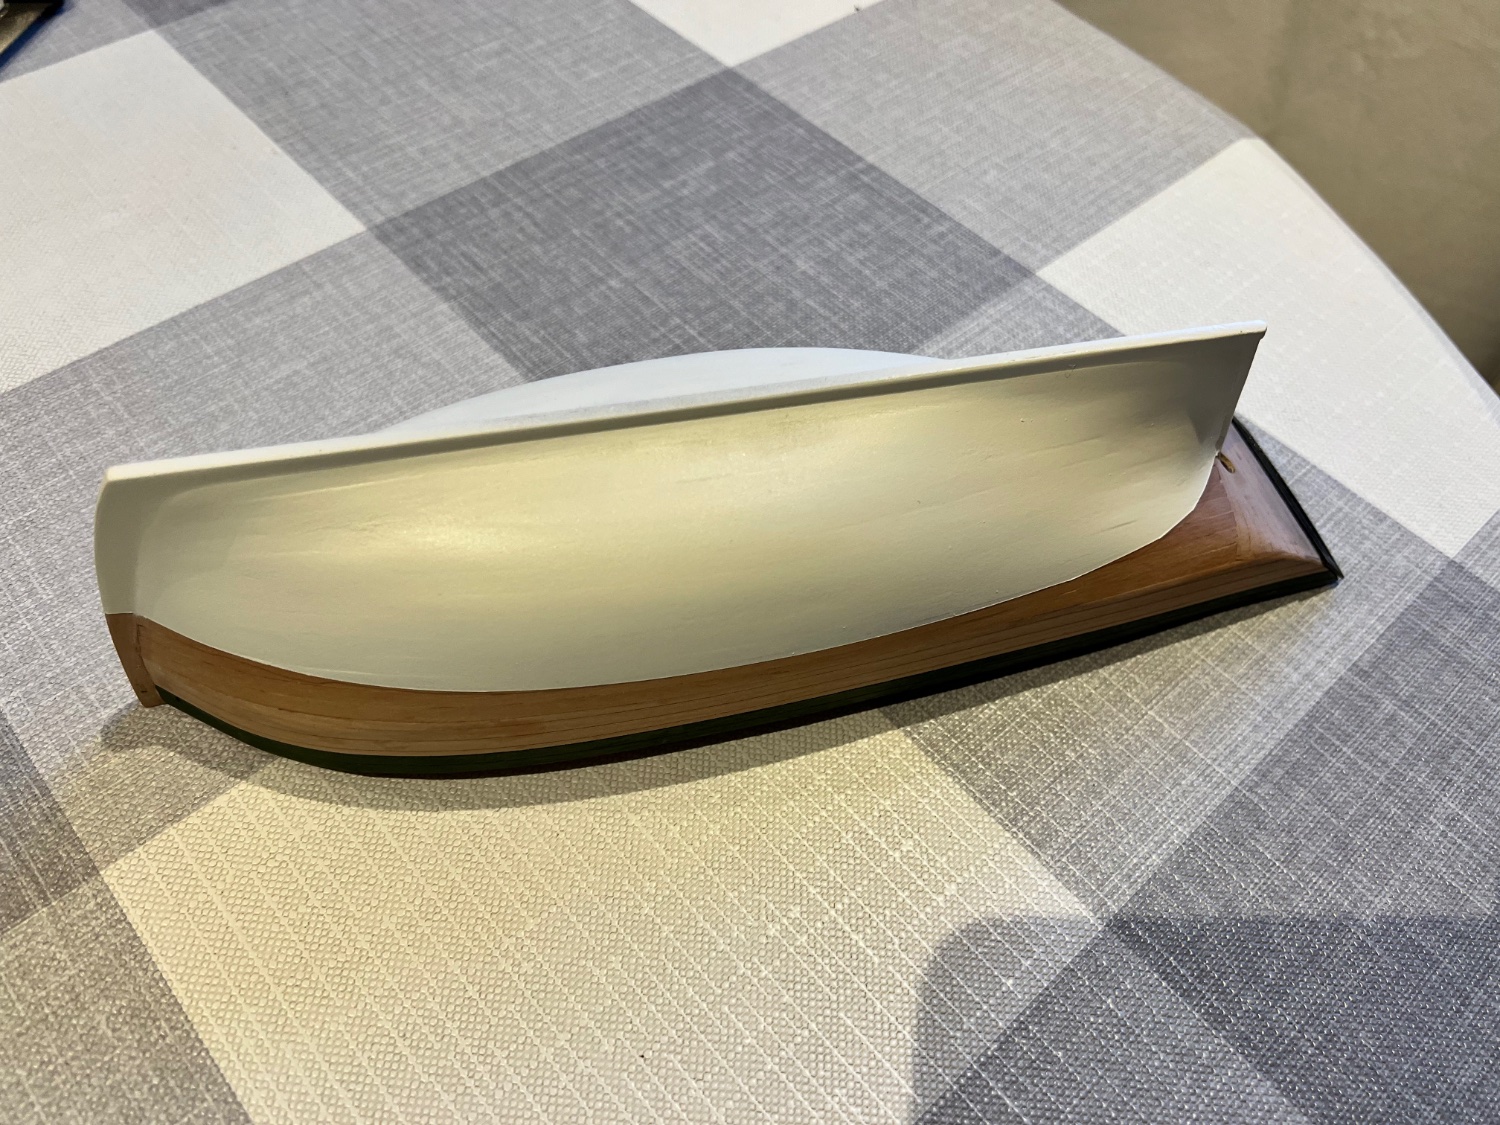
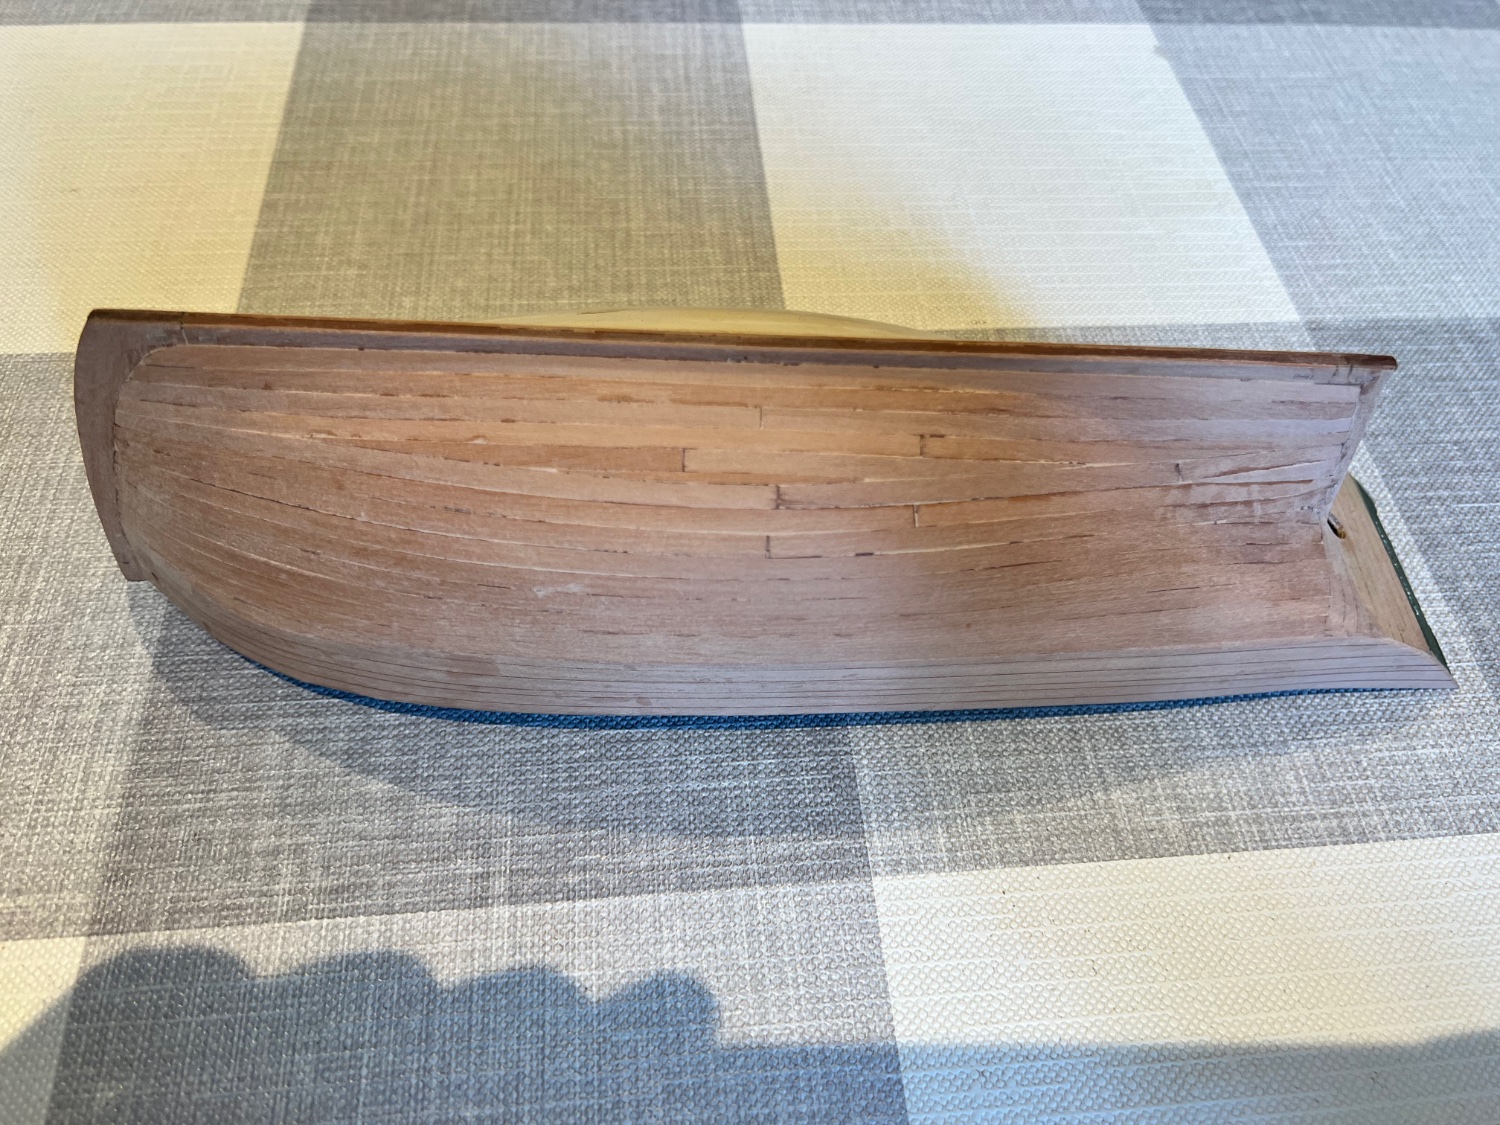
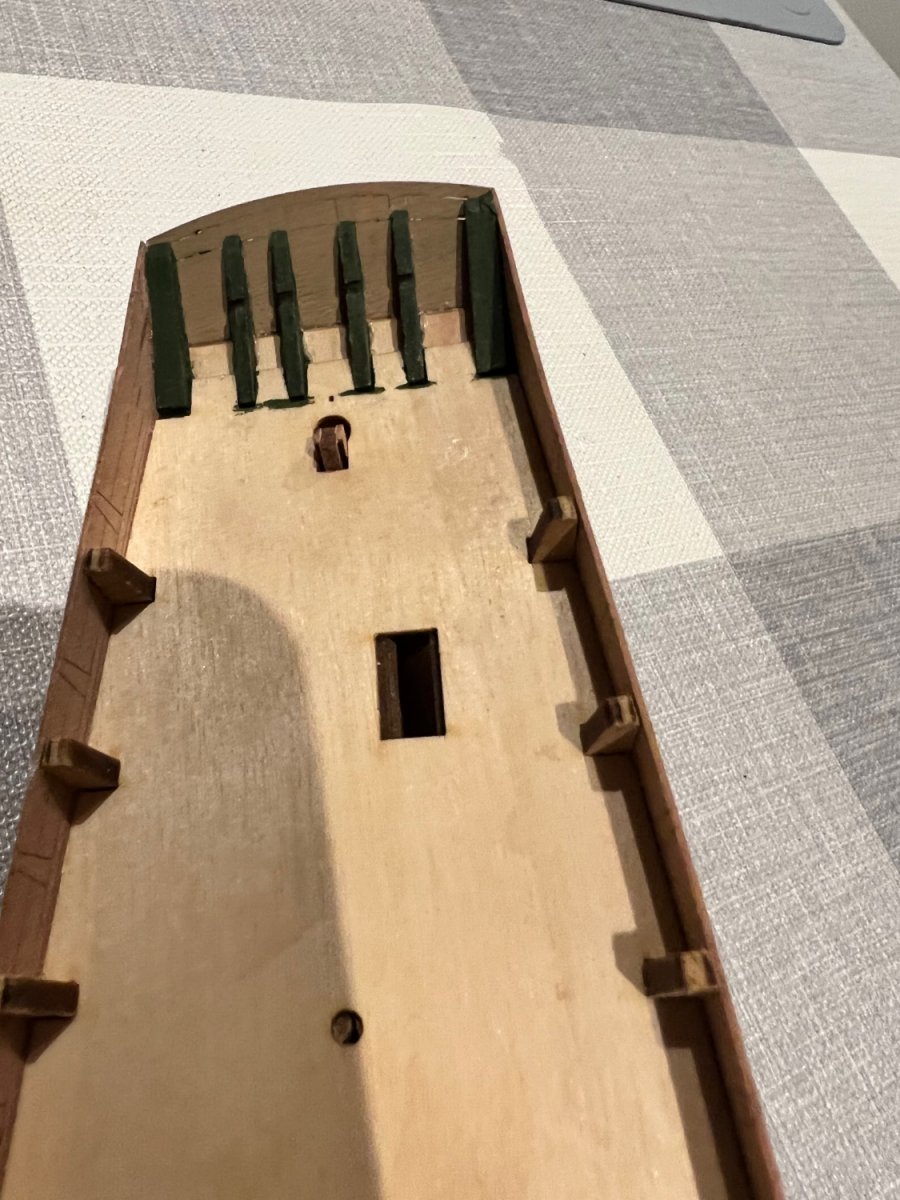
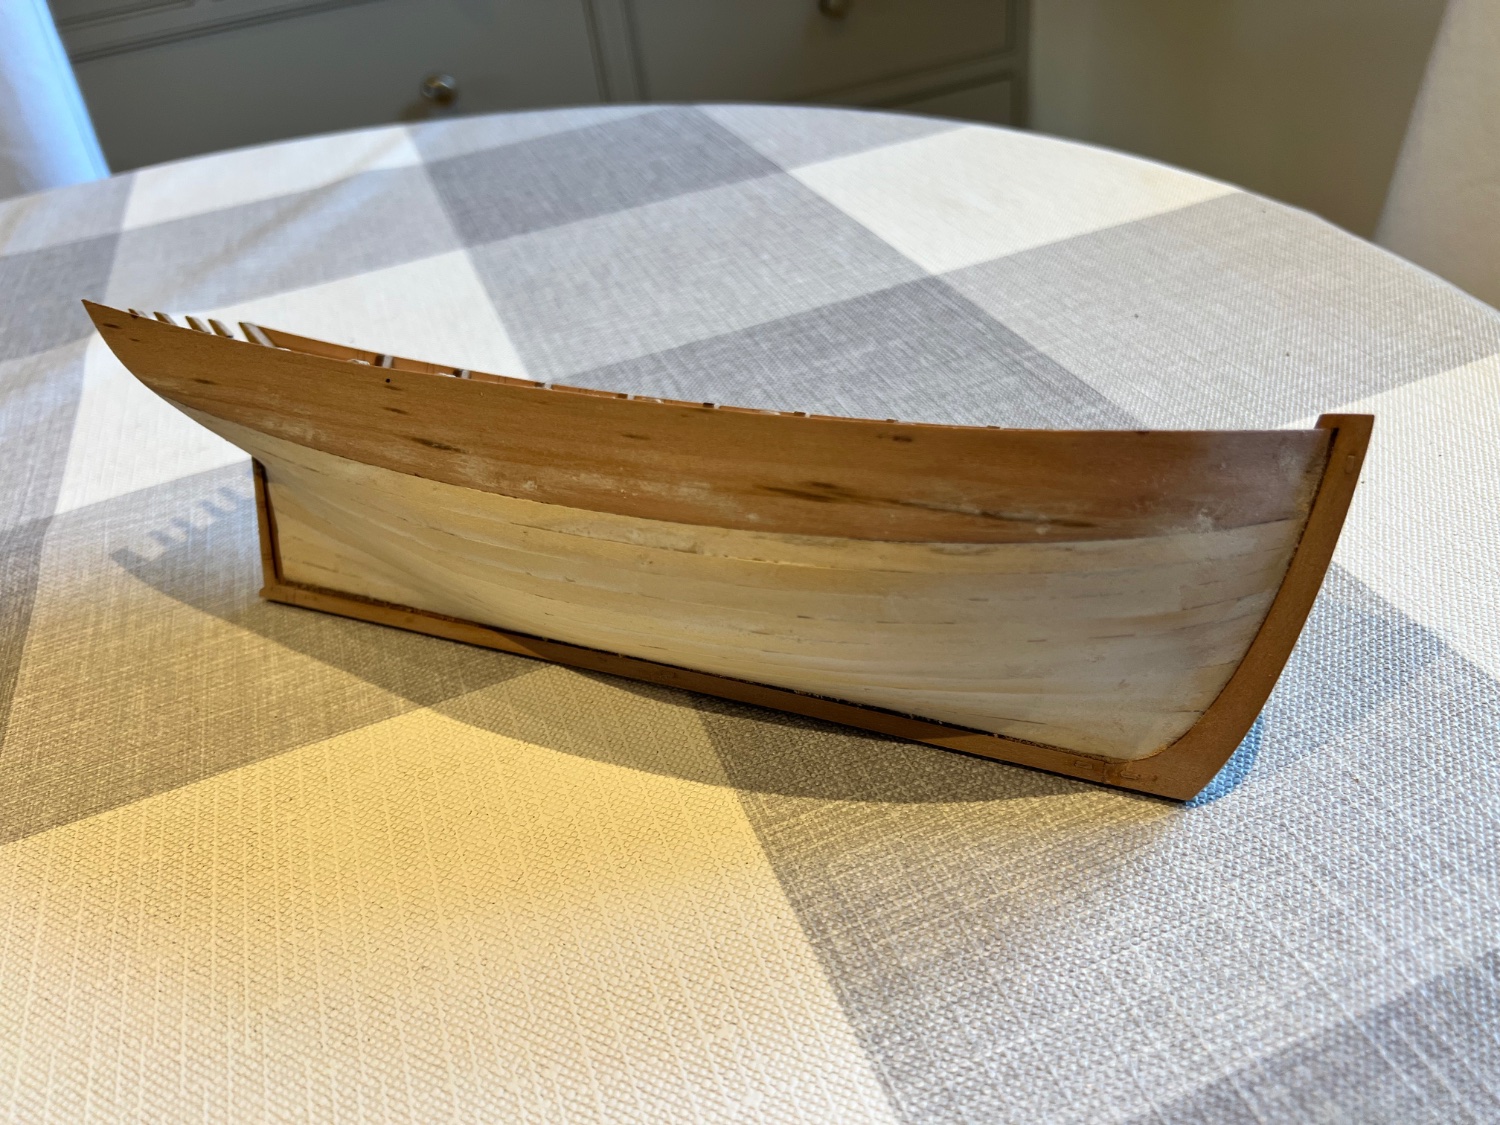
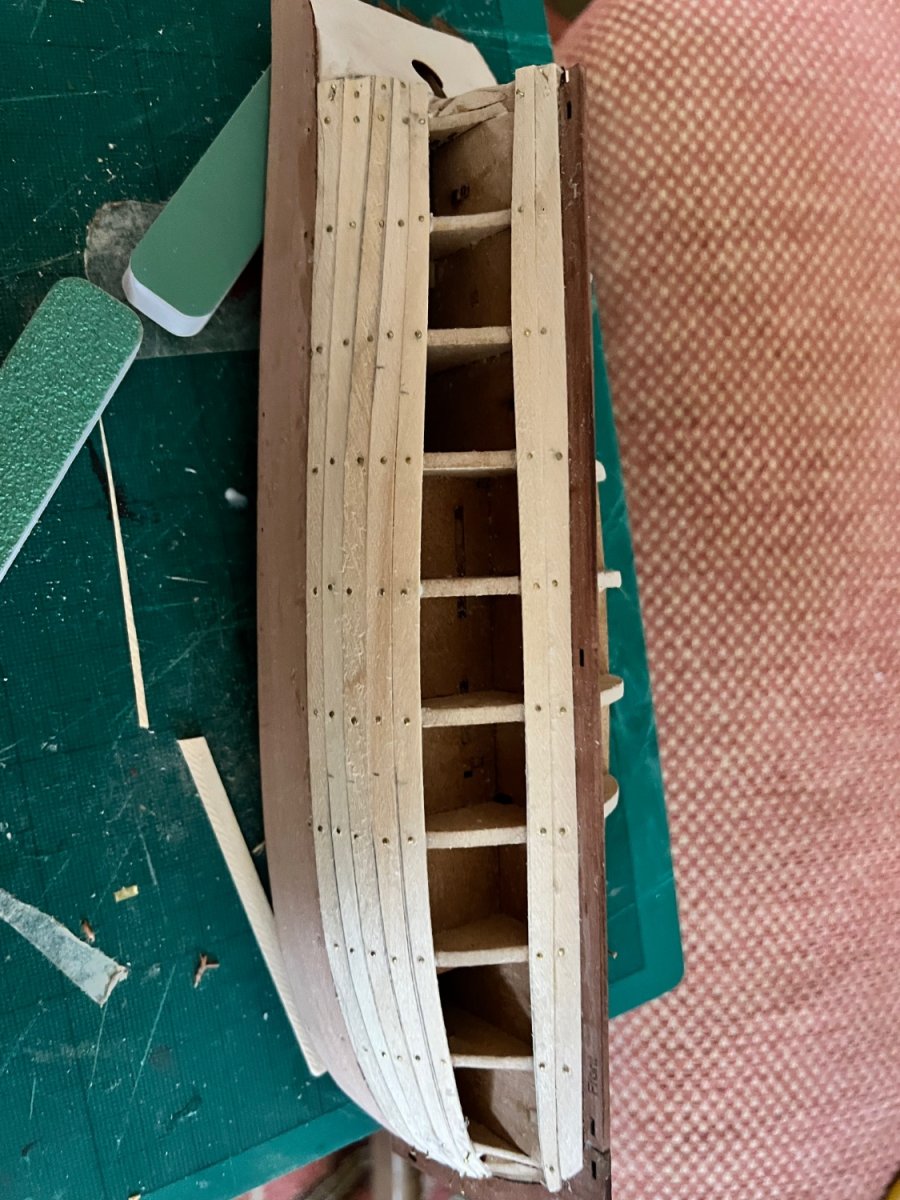
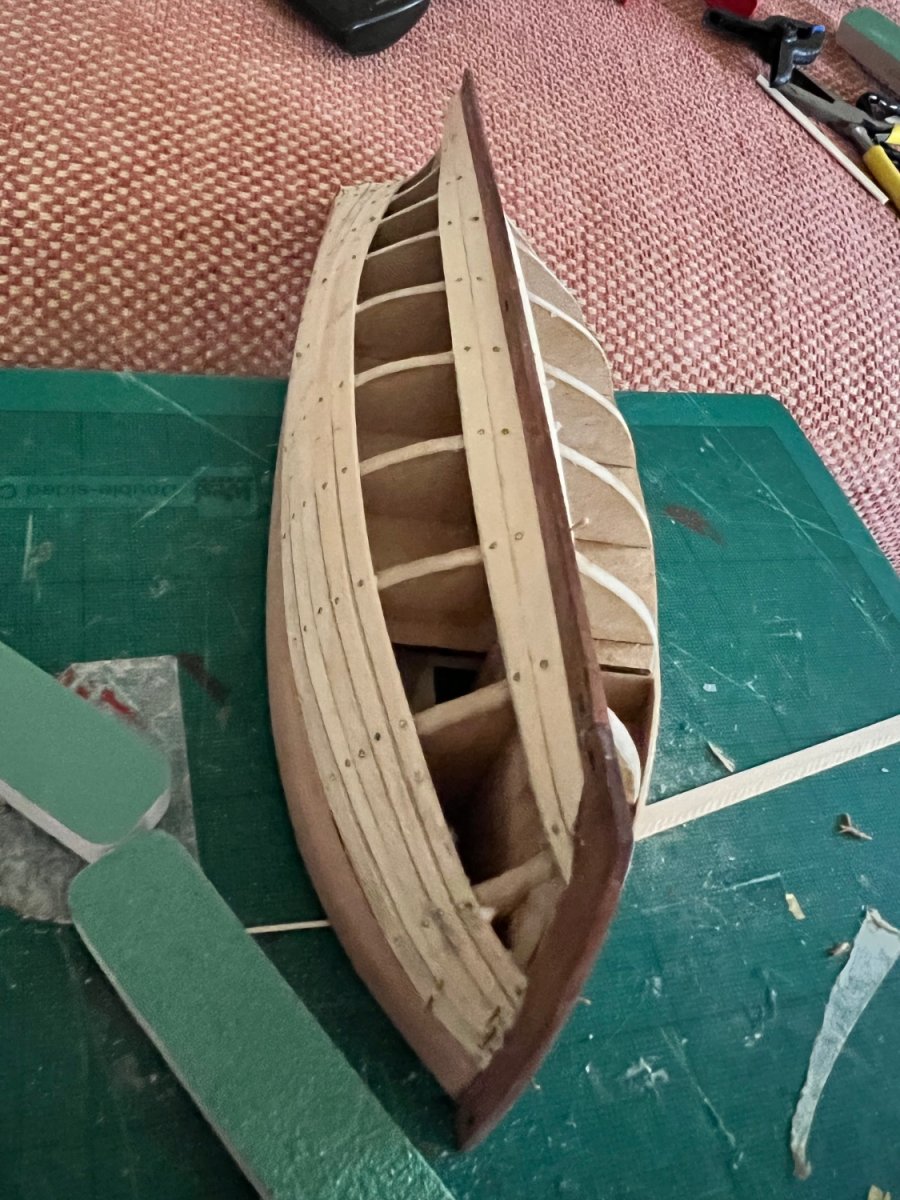
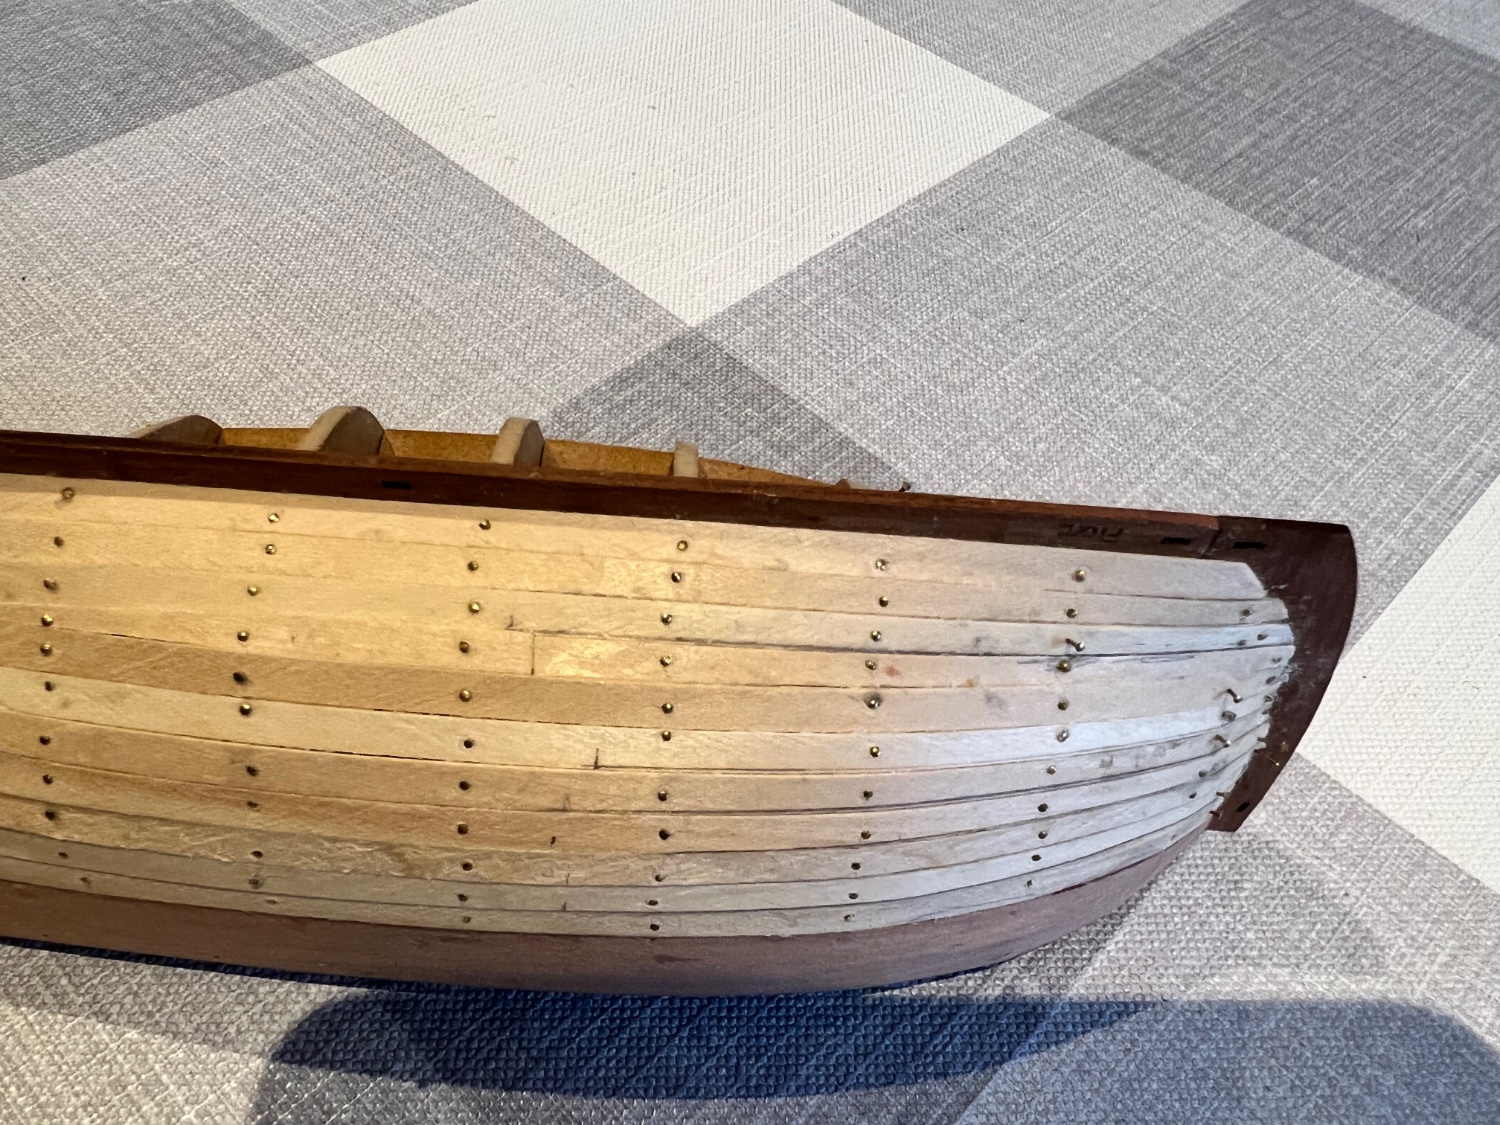
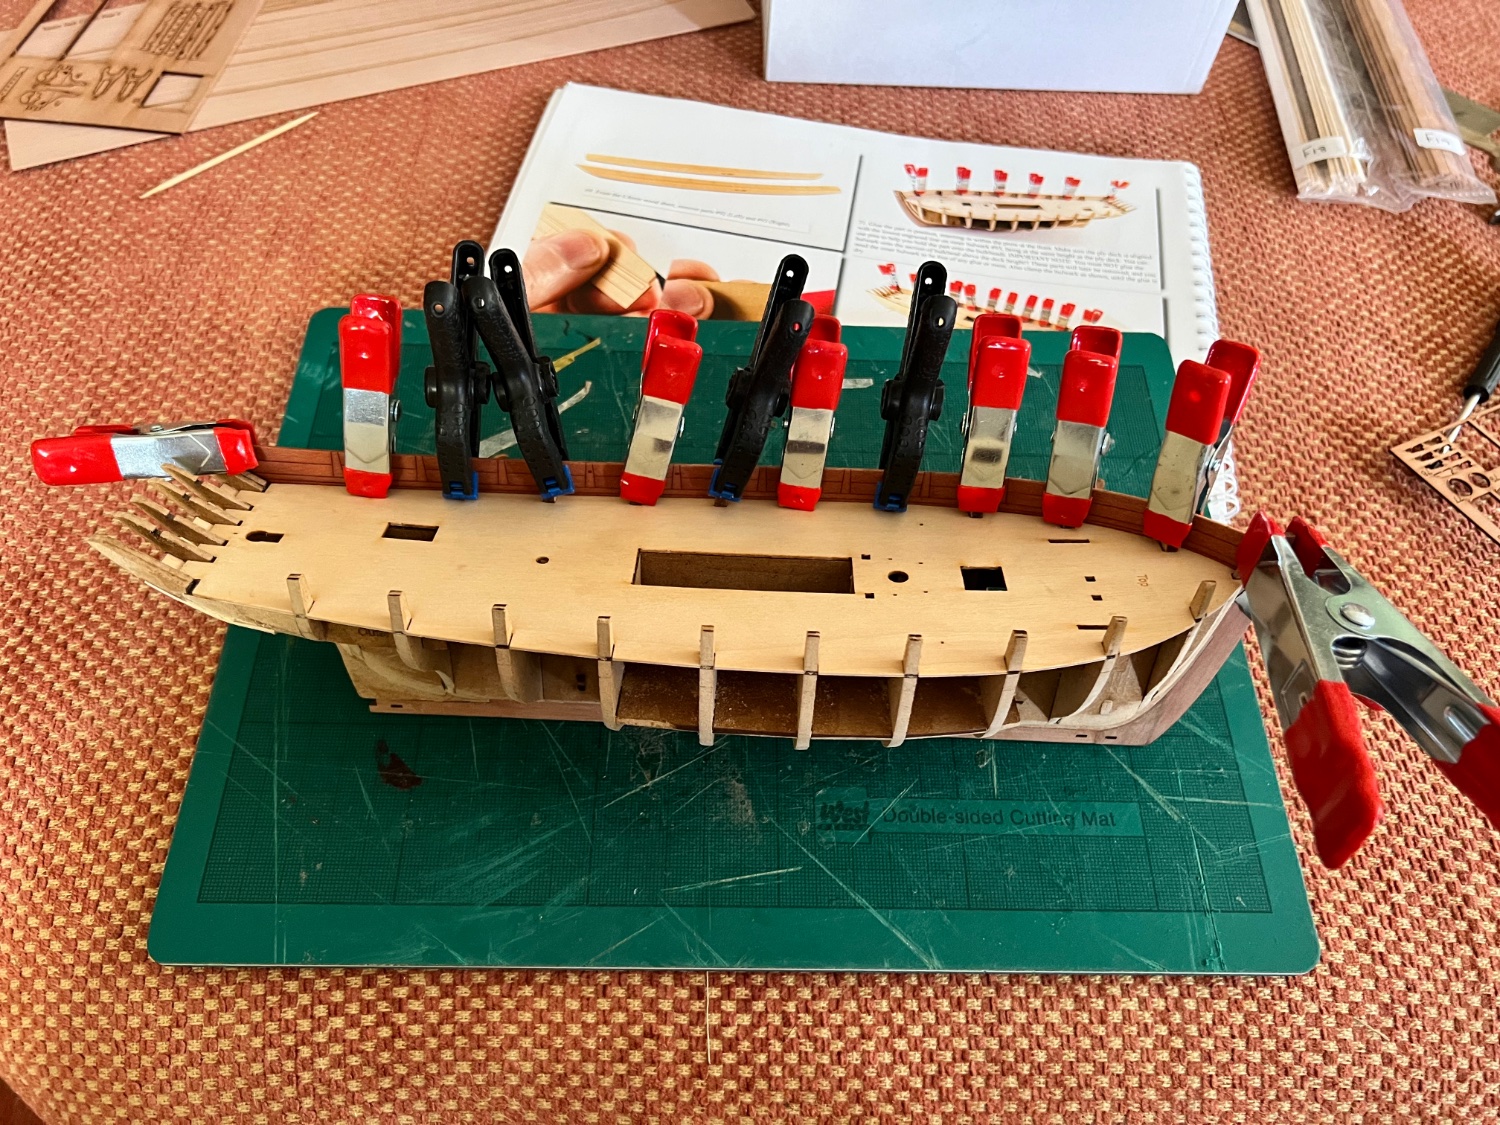
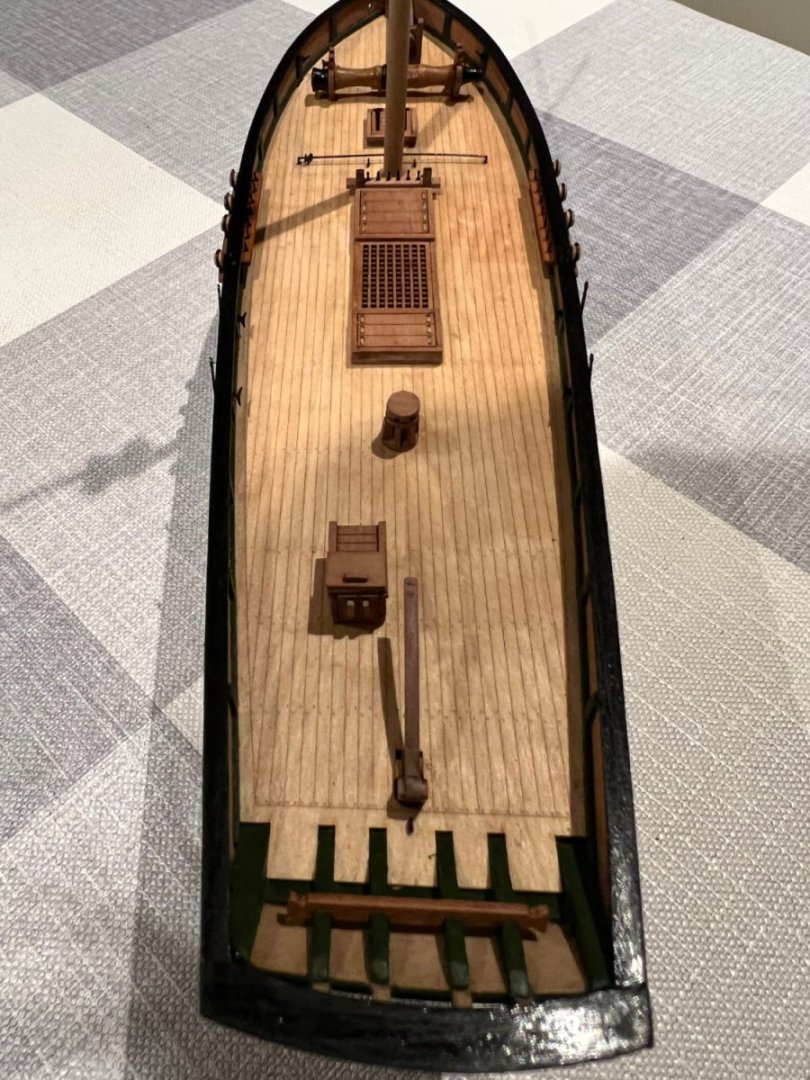
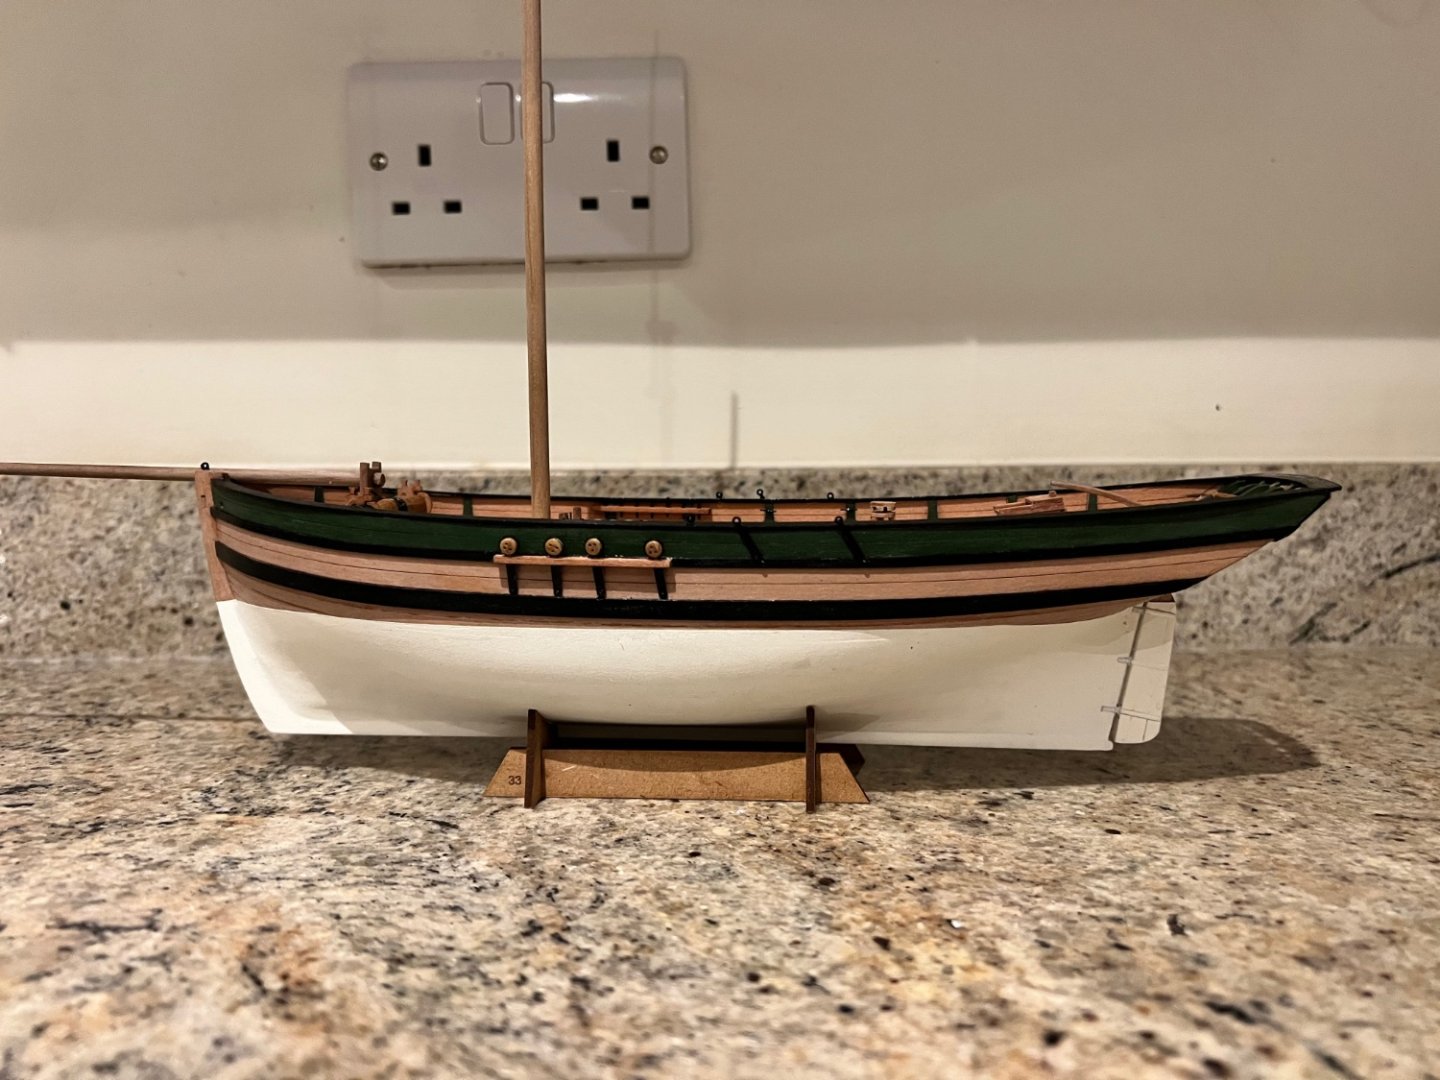
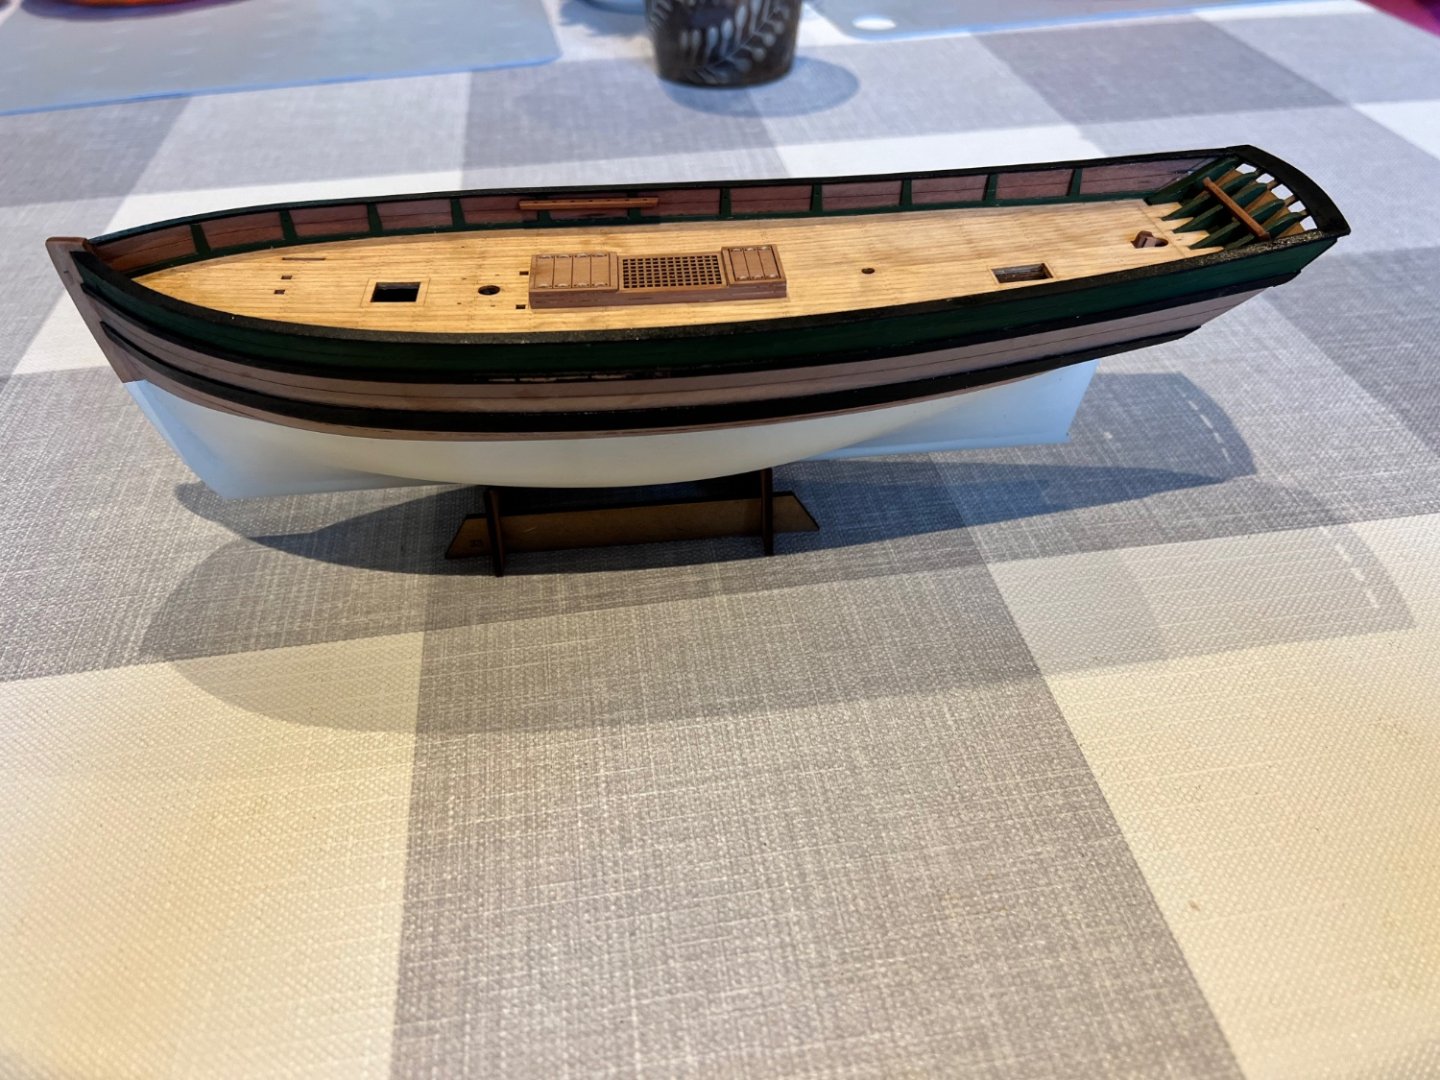
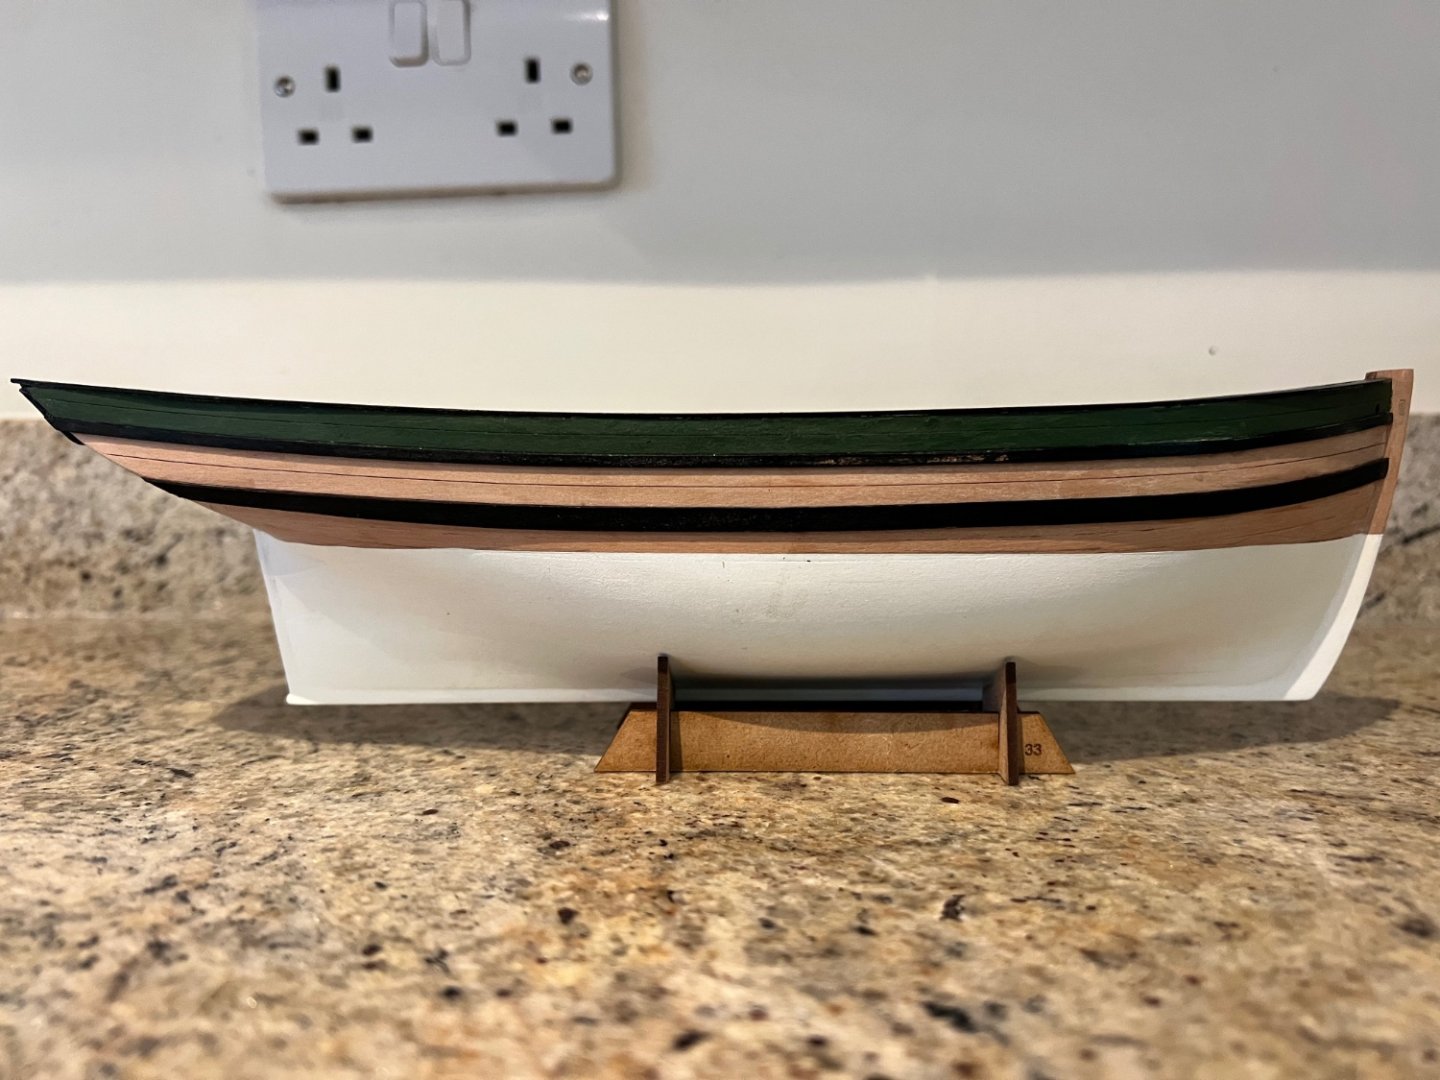
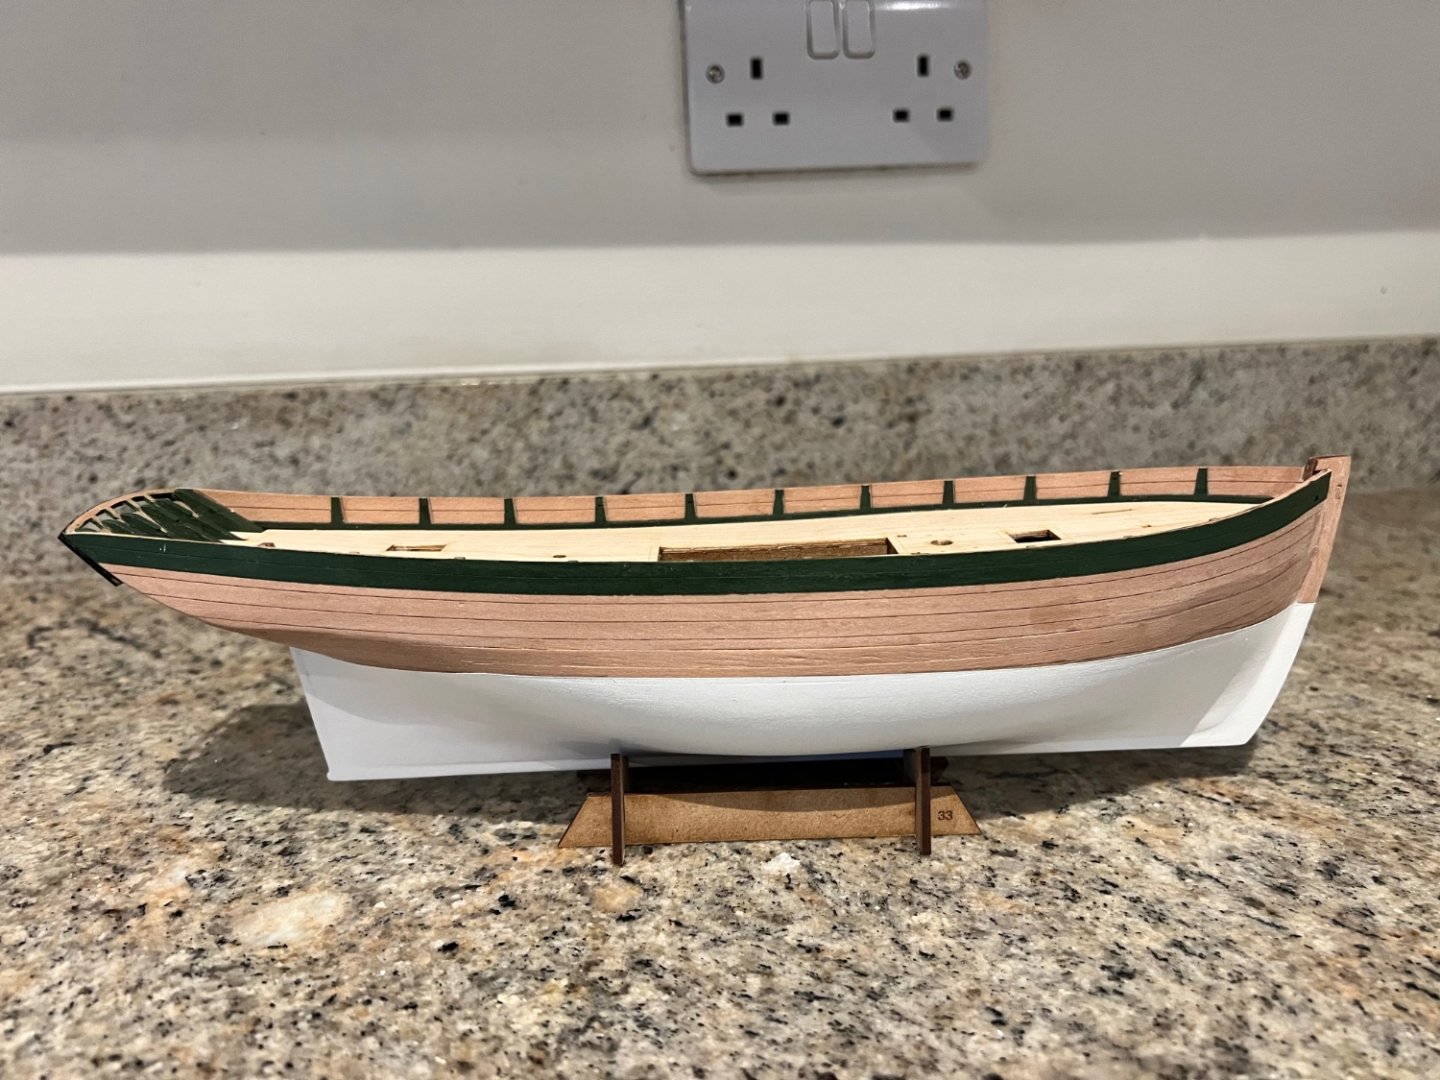
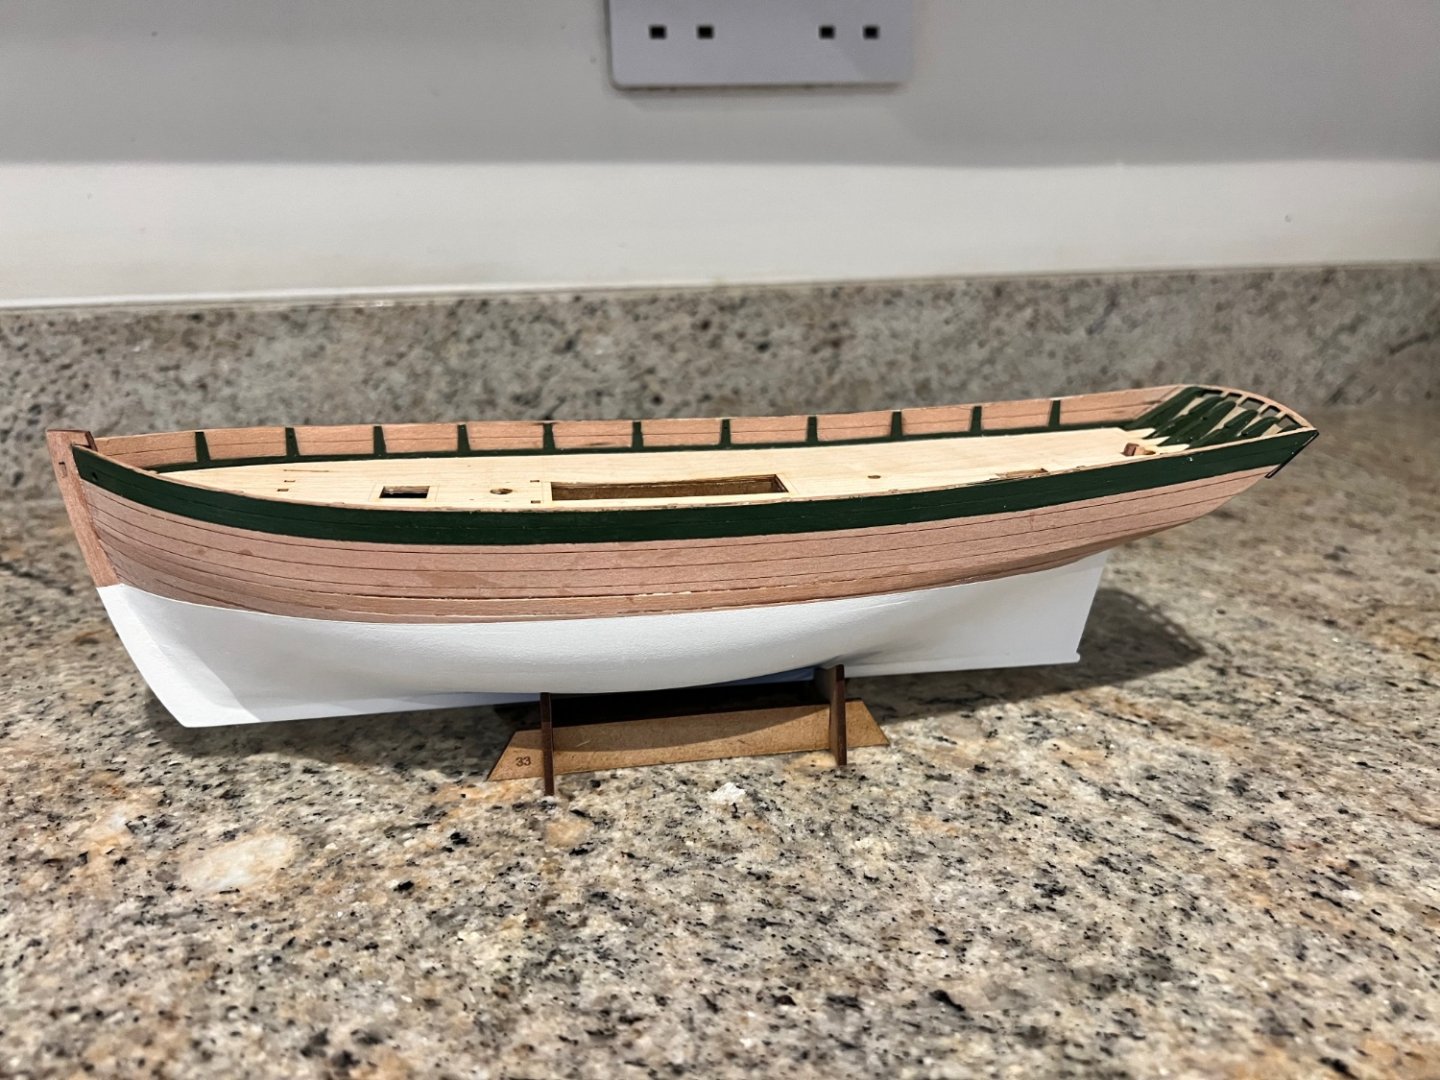
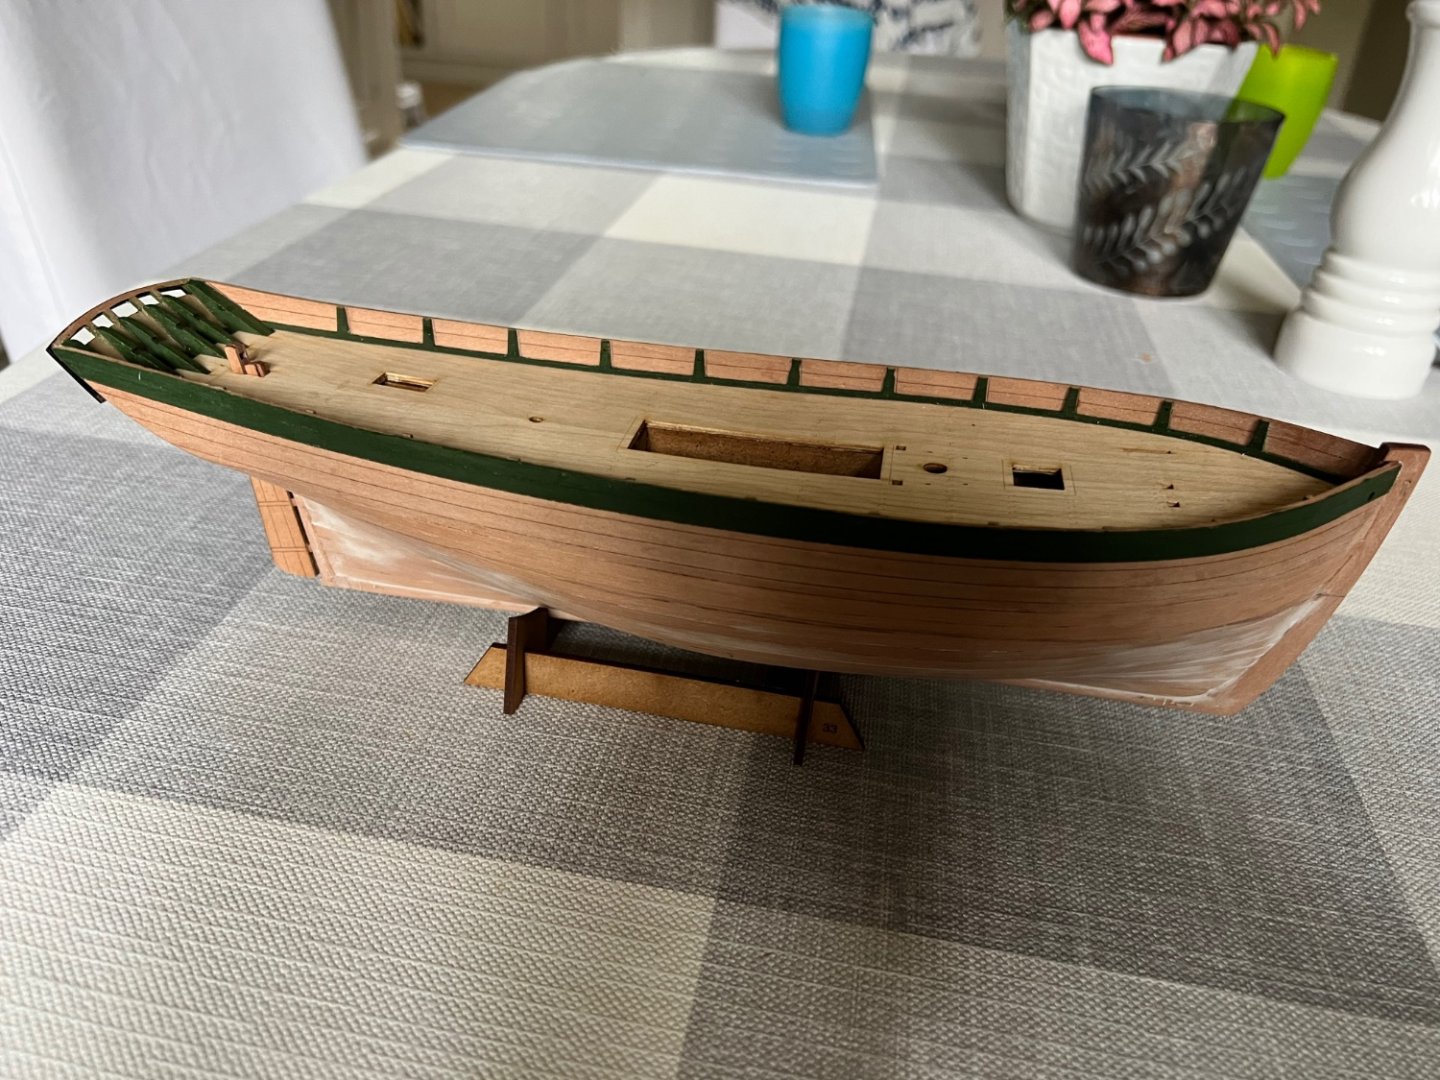
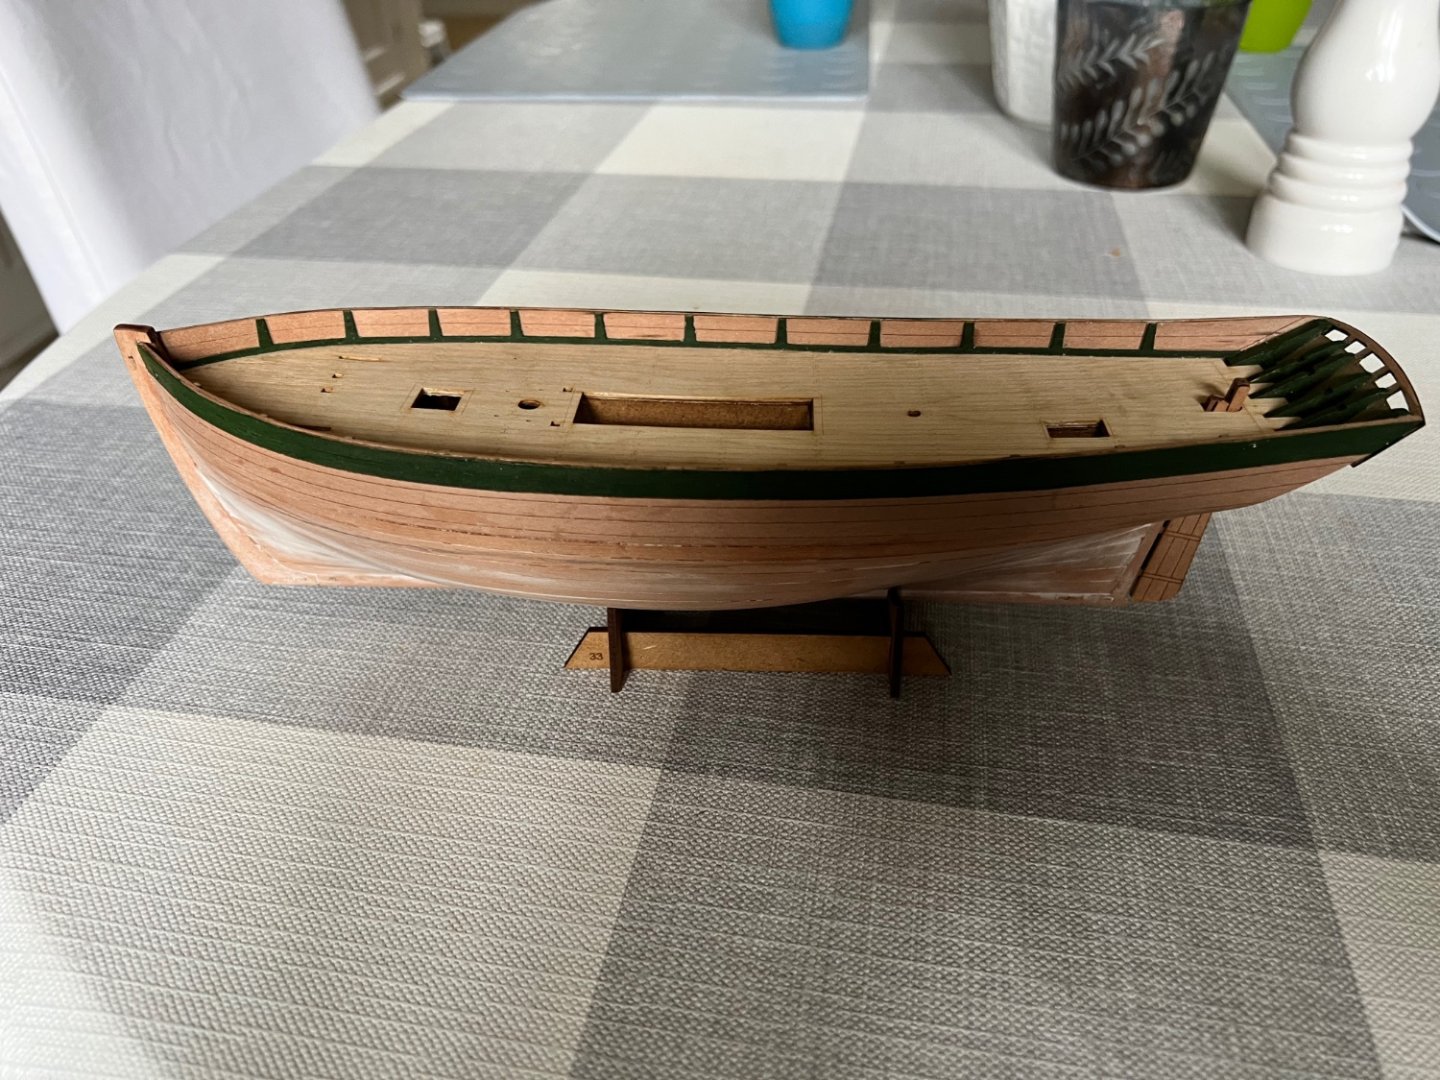
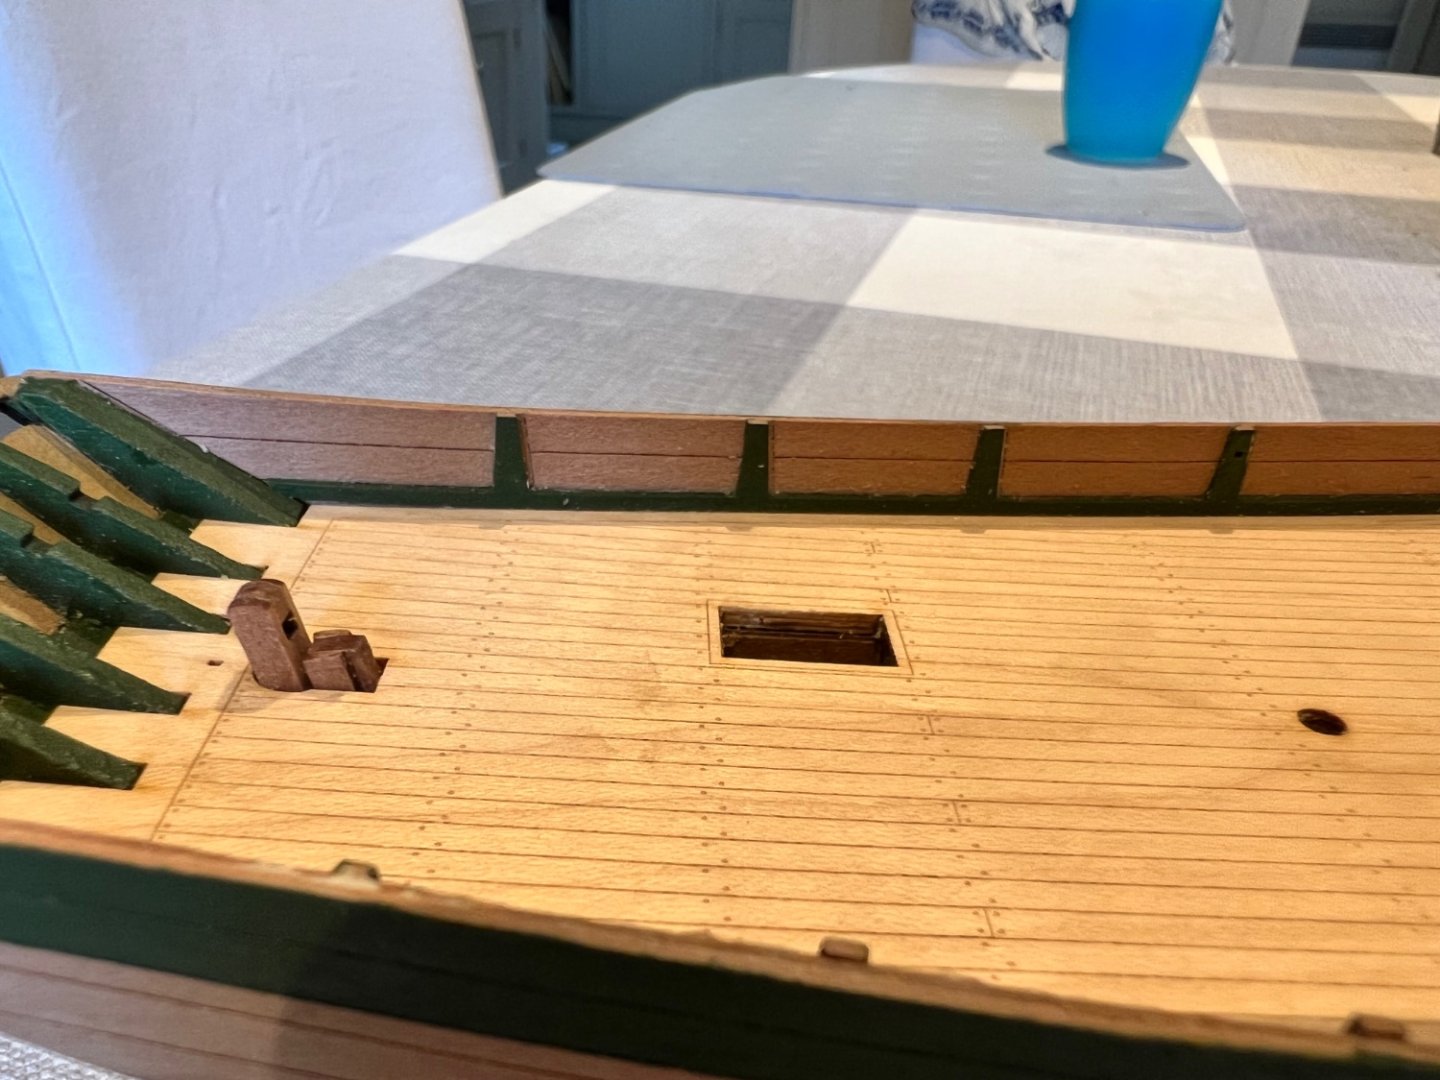
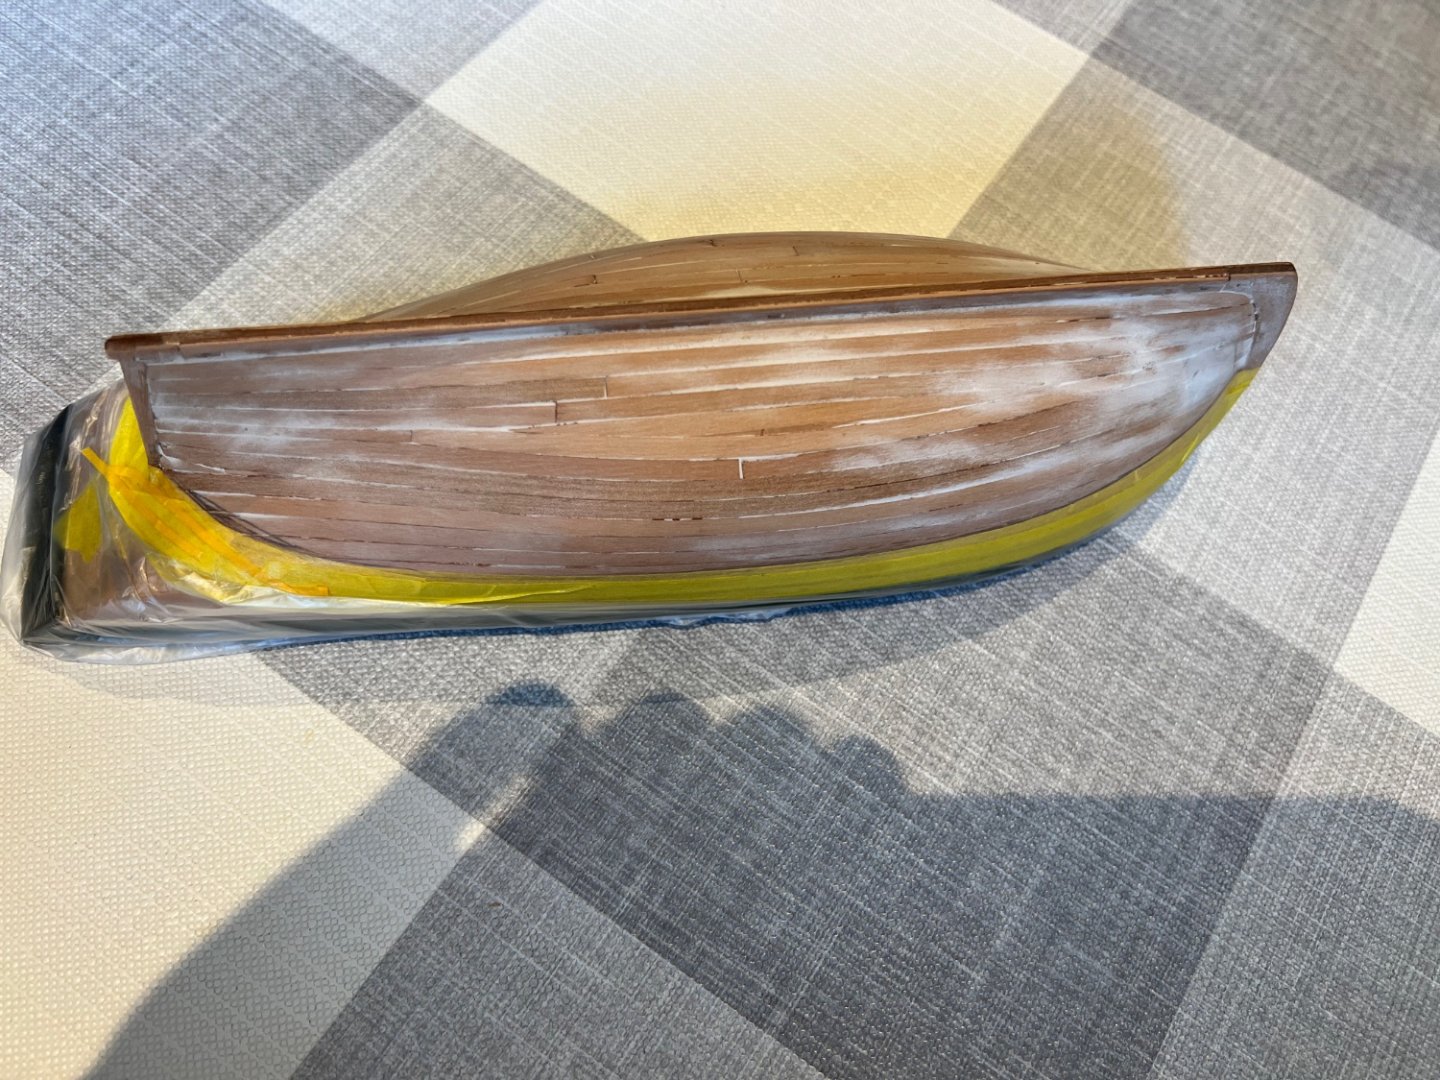
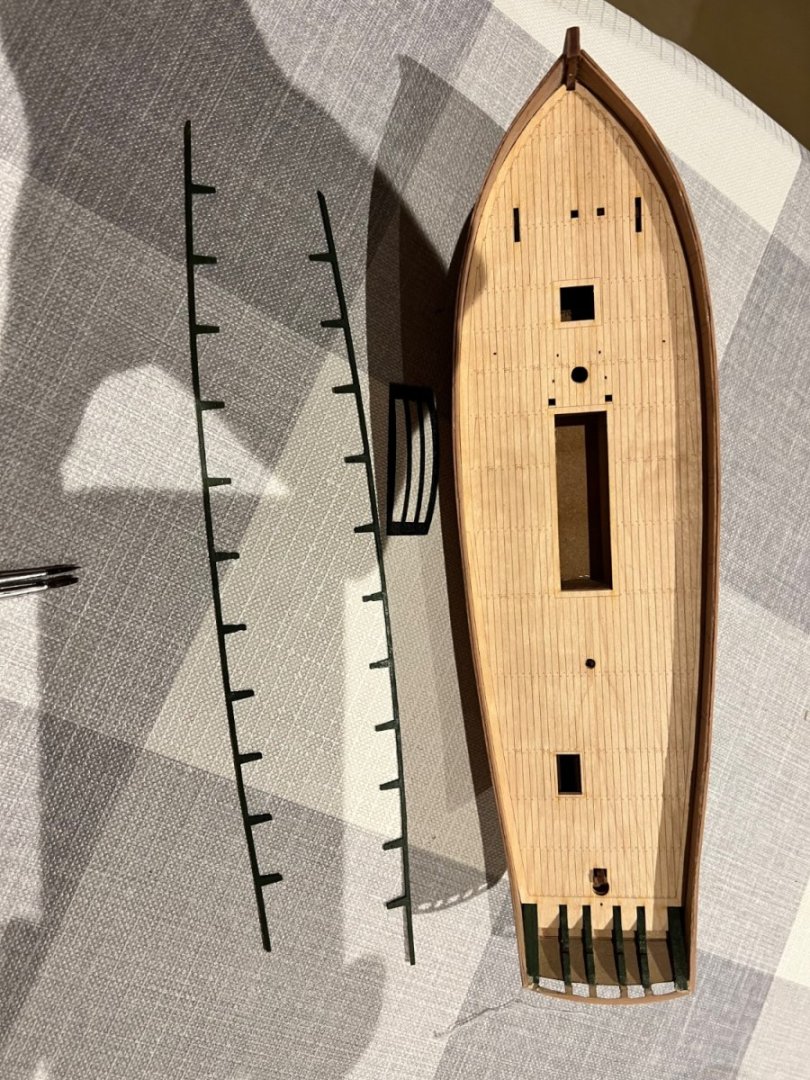
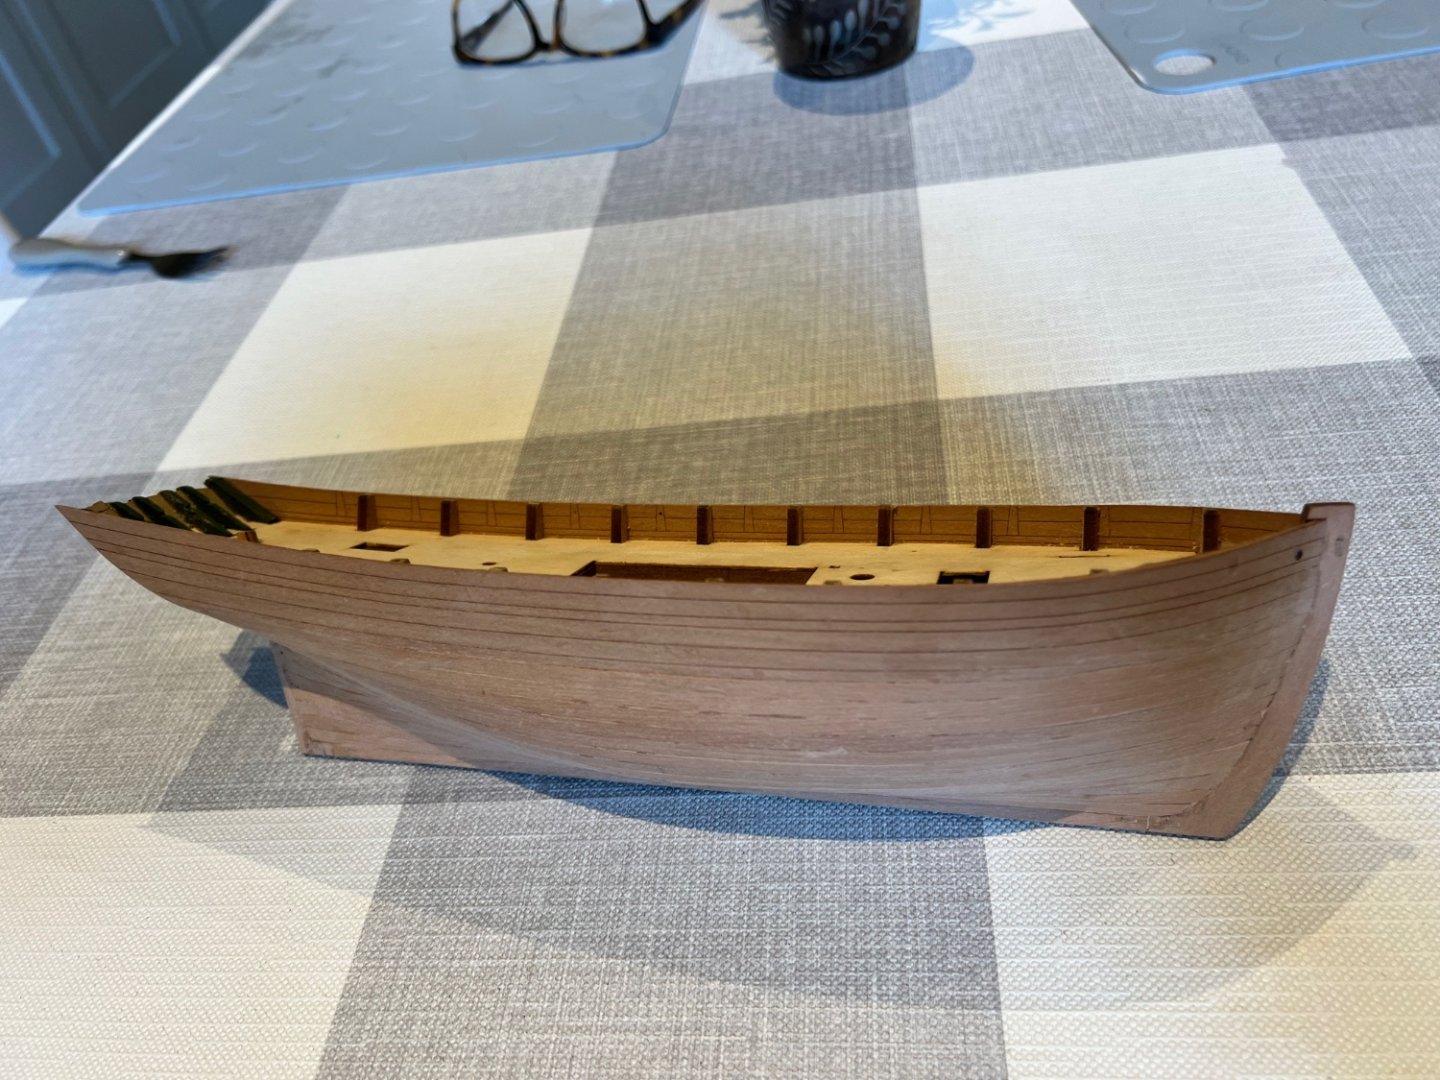
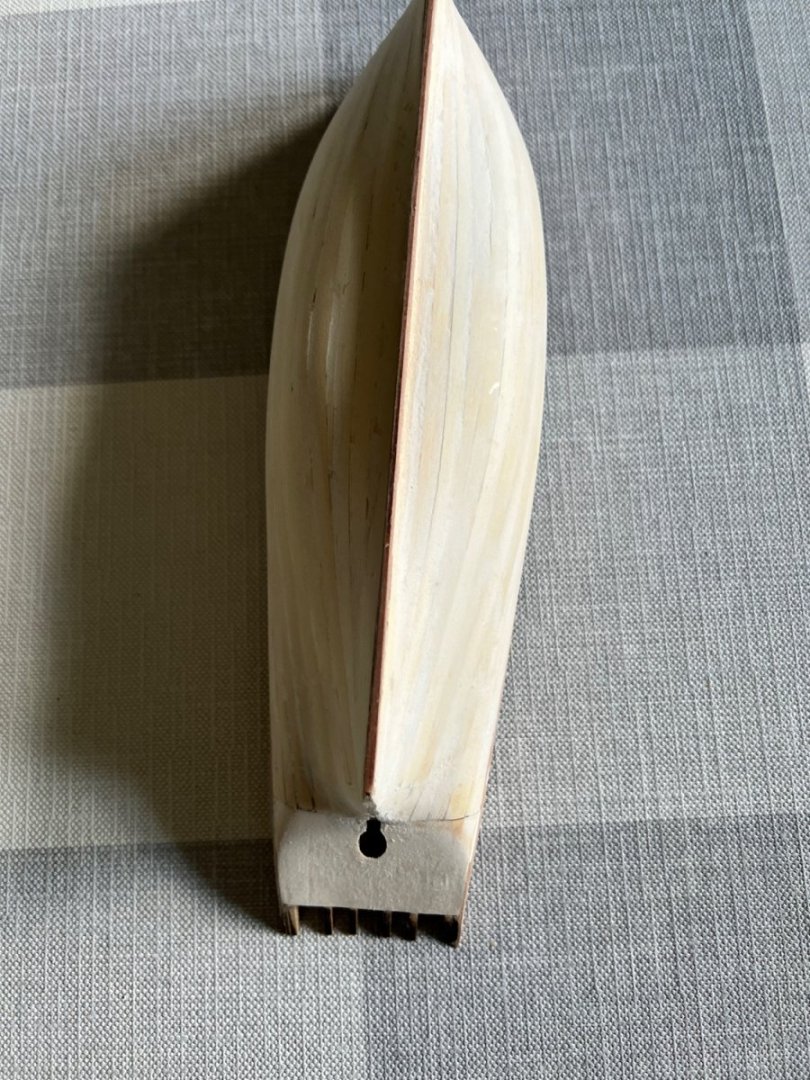
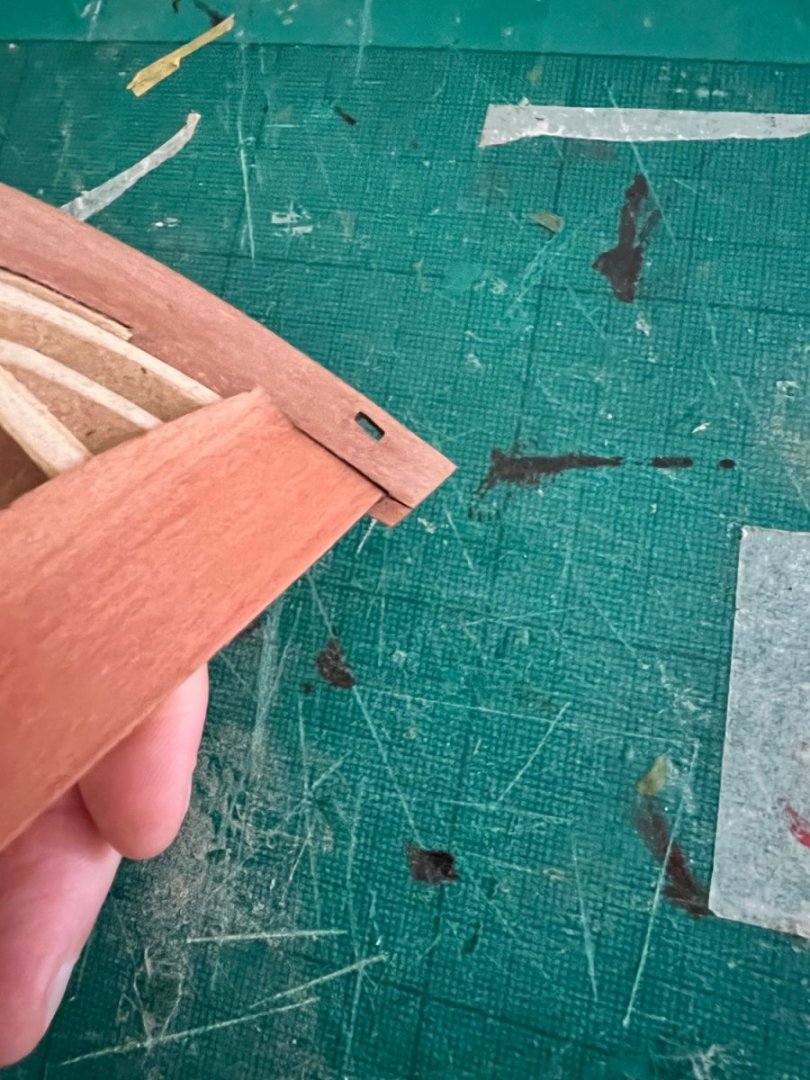
Chris very kindly and very promptly sent me the replacement parts I needed. The rubbing strakes fitted around the hull much easier than I expected, particularly with my slightly bulging bulwark on the starboard side which with judicious sanding and now the rubbing strake is largely invisible. What did throw me is that both the upper and lower rubbing strakes are longer than they need to be. I’m so used to Chris’s laser cut parts fitting precisely that I thought I’d made a mistake but it seems not and cut them to size. The upper rubbing strakes required more care as there is an area where the channels are glued and some other holes that need to be on the right place on the hull. Measuring against the plans I found that fitting the strake at the bow and cutting any excess off at the stern left everything in the right place. The lower rubbing strakes did need some shaping at the stern to fit. These were then repainted and I used PVA plus pear dust filler to fill the small holes below between the stern counter and the planking. Inboard I fitted the belaying pin racks…. … and then the already painted black gunwales. Needed some more sanding at the stern to get the stern gunwale flat. Then applied Danish oil to the engraved deck to give it some more definition and the inner bulwarks and belaying racks. The previously assembled grating was also fitted. Now ready for some deck furniture to be glued down. Front hatch, mast base ring, another belaying pin rack, the capstan and companion way also added. One thing I should have done much earlier and before spraying the hull white is fit the rudder hinges which are now a different white to the hull.


- 59 replies
-
- 8
-
-
- saucy jack
- fishing smack
- (and 2 more)
-
Jonathan, thank you - that’s a huge help. Best wishes Dan
-
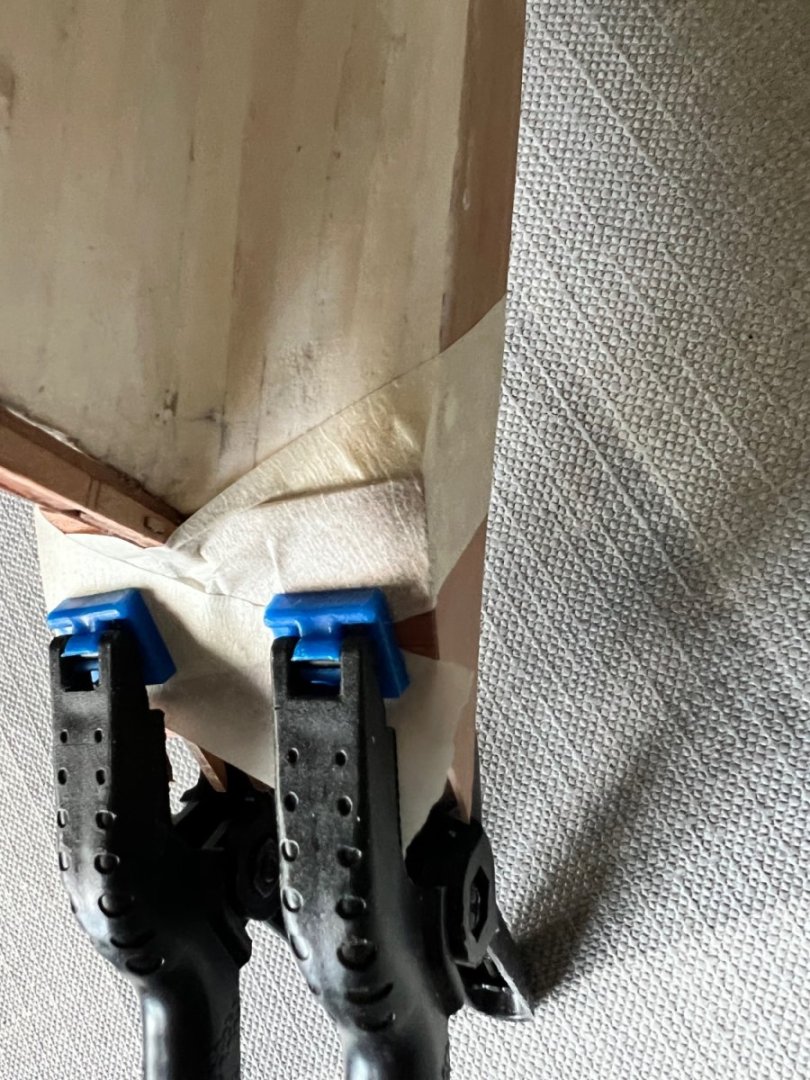
Now for another of those beginner questions. Lots of build logs suggest using wipe-on poly but I read it’s not available in the UK. Is there a good alternative or can you mix it? If so how? I’ve been using either straight polyeurethane varnish and/or Danish oil. If I can mix it how do I apply it and should it be used with Danish oil or on its own. I’m thinking particularly for the exposed pear planks on the hull. Thanks for any advice!
-
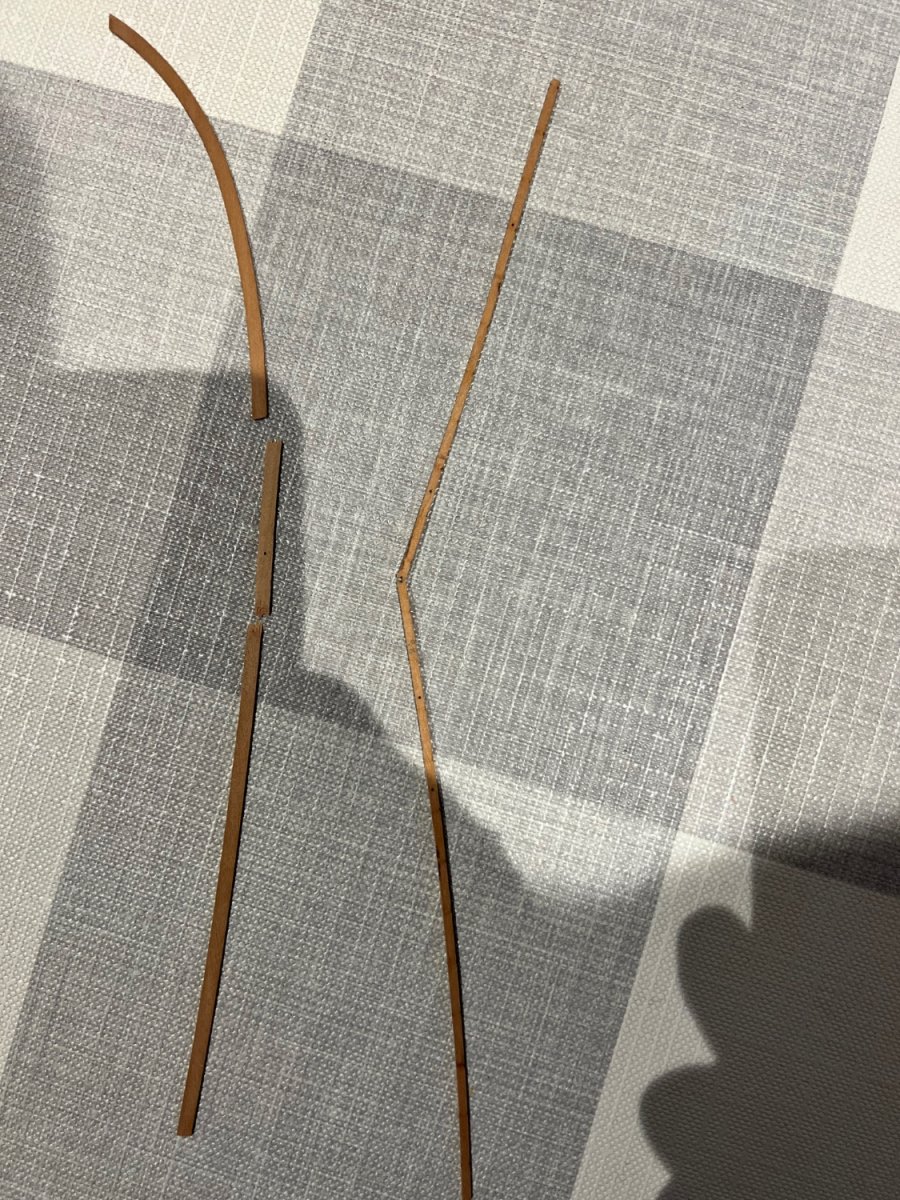
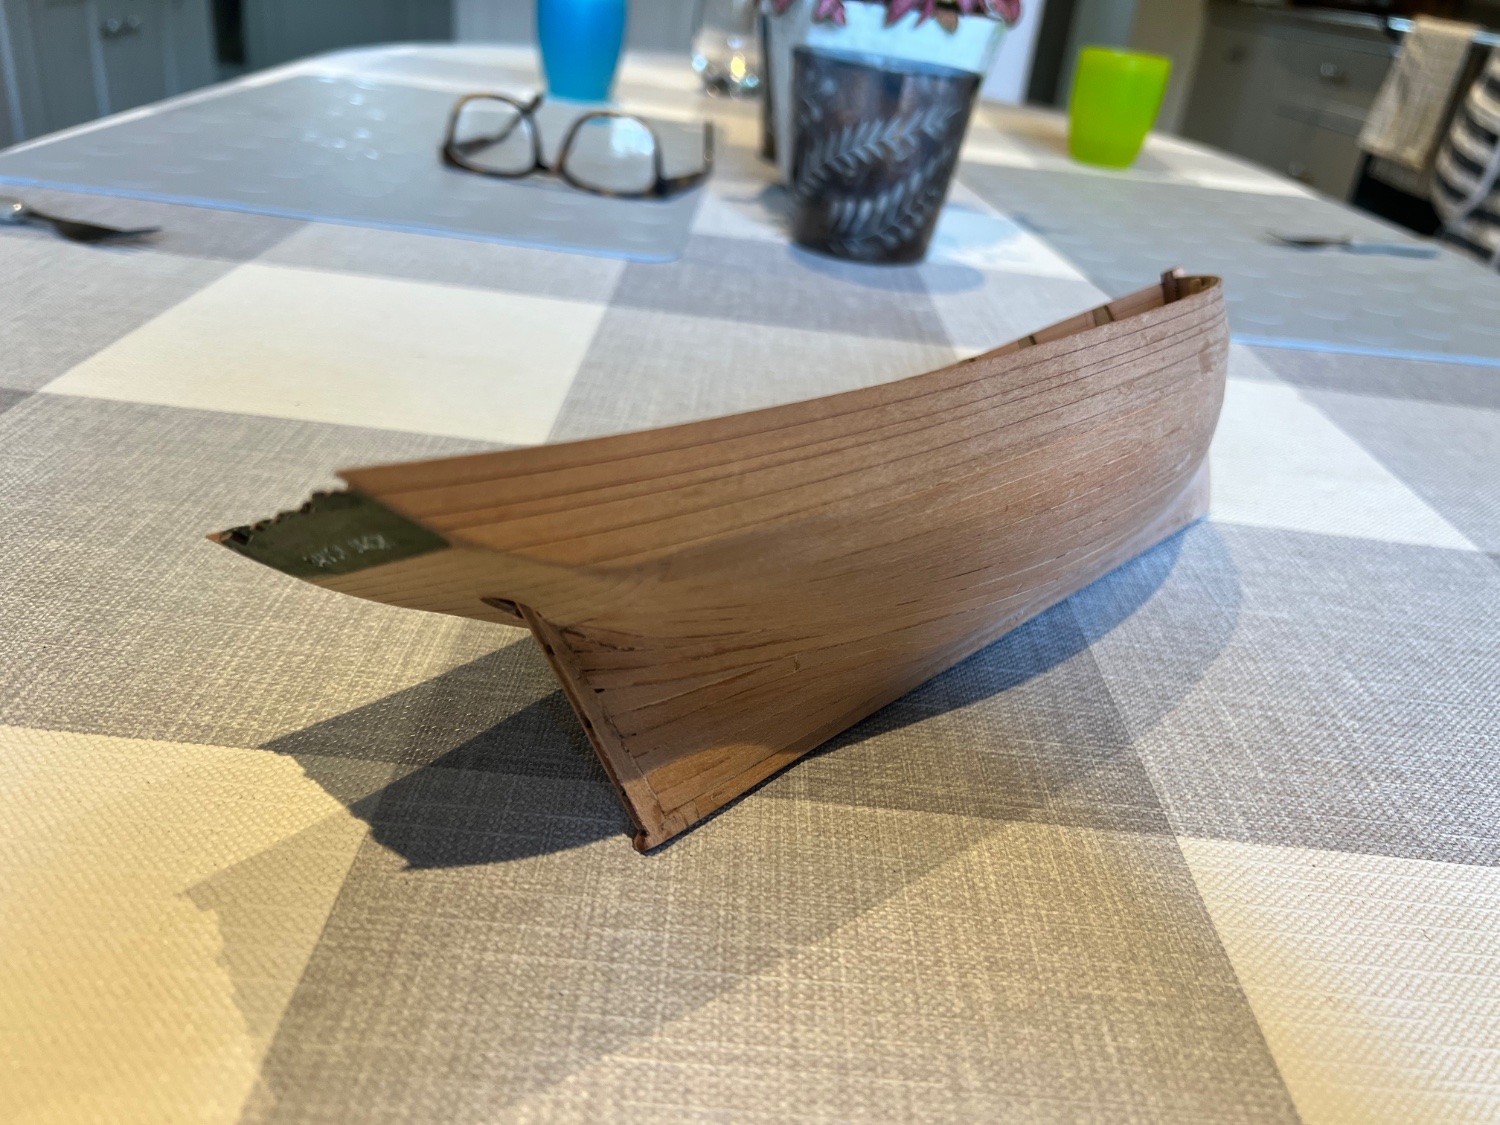
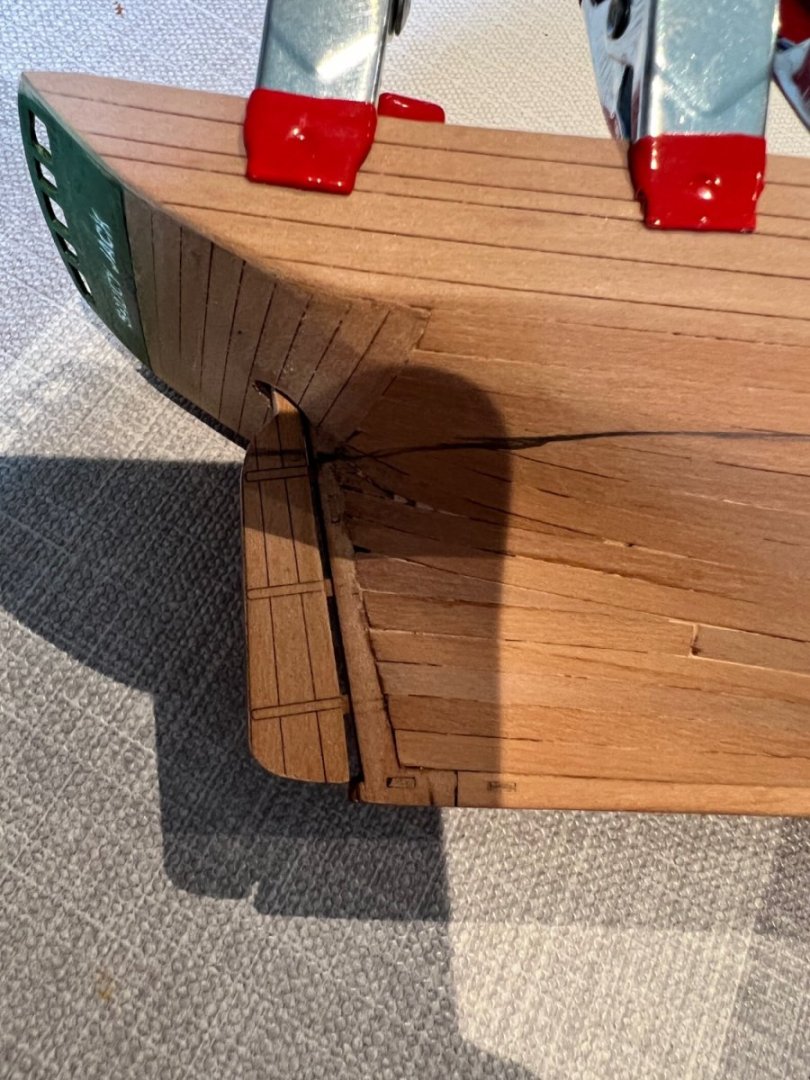
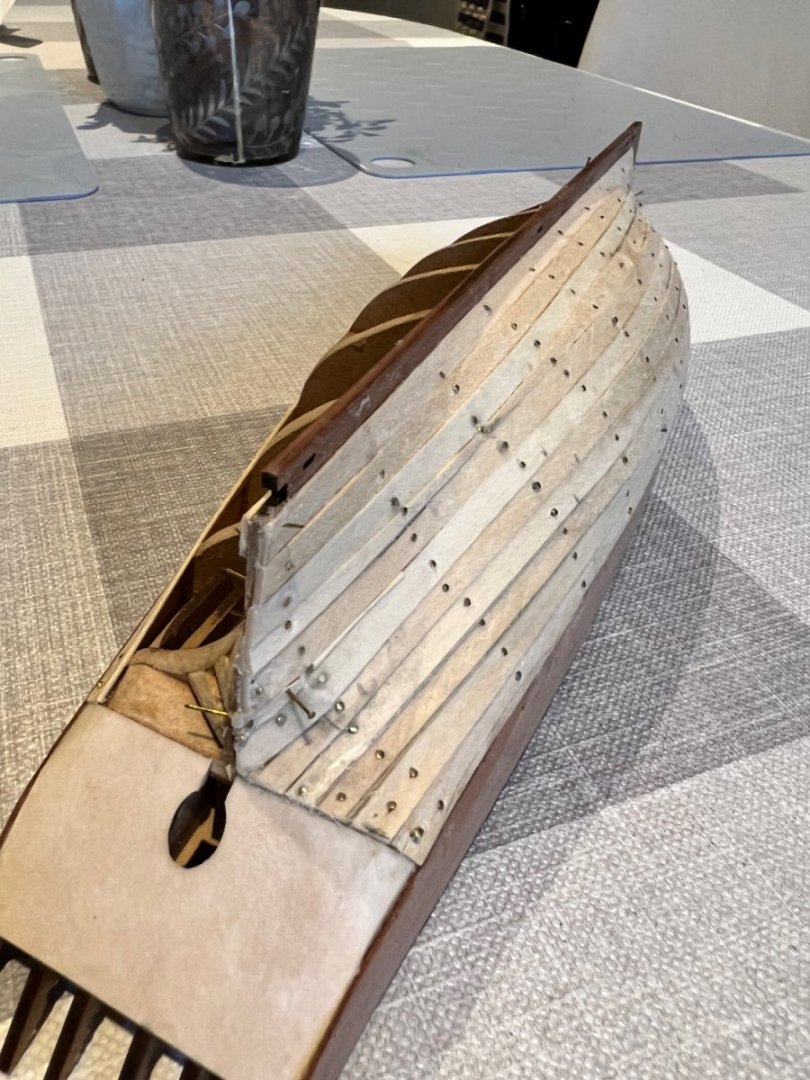
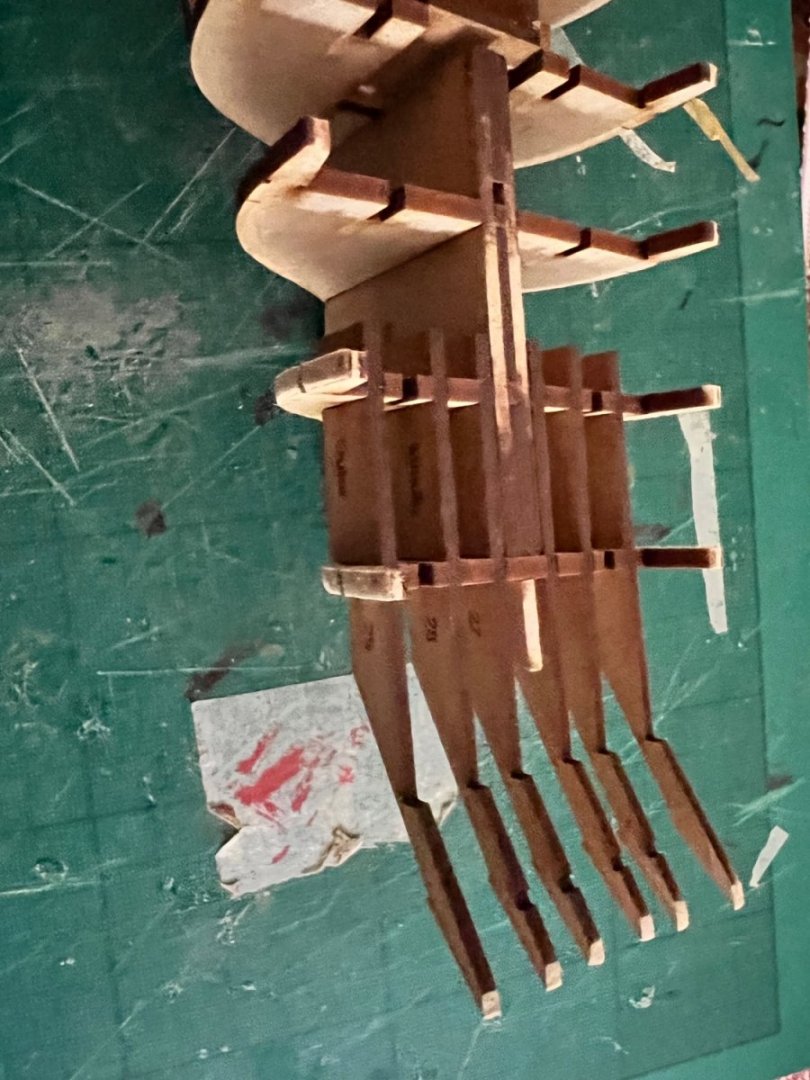
First layer of paint and filler. Plenty to patch up, but I’m not after a flawless finish, I want to see the planking through the white paint as this a working fishing boat after all. Hull now painted. Needs a tiny bit of tidying up around the waterline with a scalpel. Starting to look the part. The scruffy line between the bulwark and the first plank will be covered by a black rail / rubbing strake. With all the fittings, masts and spars added but not glued. Looking good I think! Just as I’m counting my chickens on this build that not much has broken so far. I broke one of the rails and a gunwale in short order whilst sanding them. Both in two places and the gunwale had splintered beyond repair. I’ve emailed Chris and he’s kindly offered to sell me a new sheet with these pear parts on it. May delay the build by a few days. In the meantime, most of the mast and spars are complete. Very easy to put together.


- 59 replies
-
- 2
-
-
- saucy jack
- fishing smack
- (and 2 more)
-
James, Your build log and instructions have been invaluable building the Saucy Jack. Thank you. I really like the colour of your sails, please could I ask what your concentration of RIT tan due to water was and roughly how long you left them in to soak for? Many thanks Dan
- 29 replies
-
- 2
-
-

-
- well smack
- Vanguard Models
- (and 2 more)
-
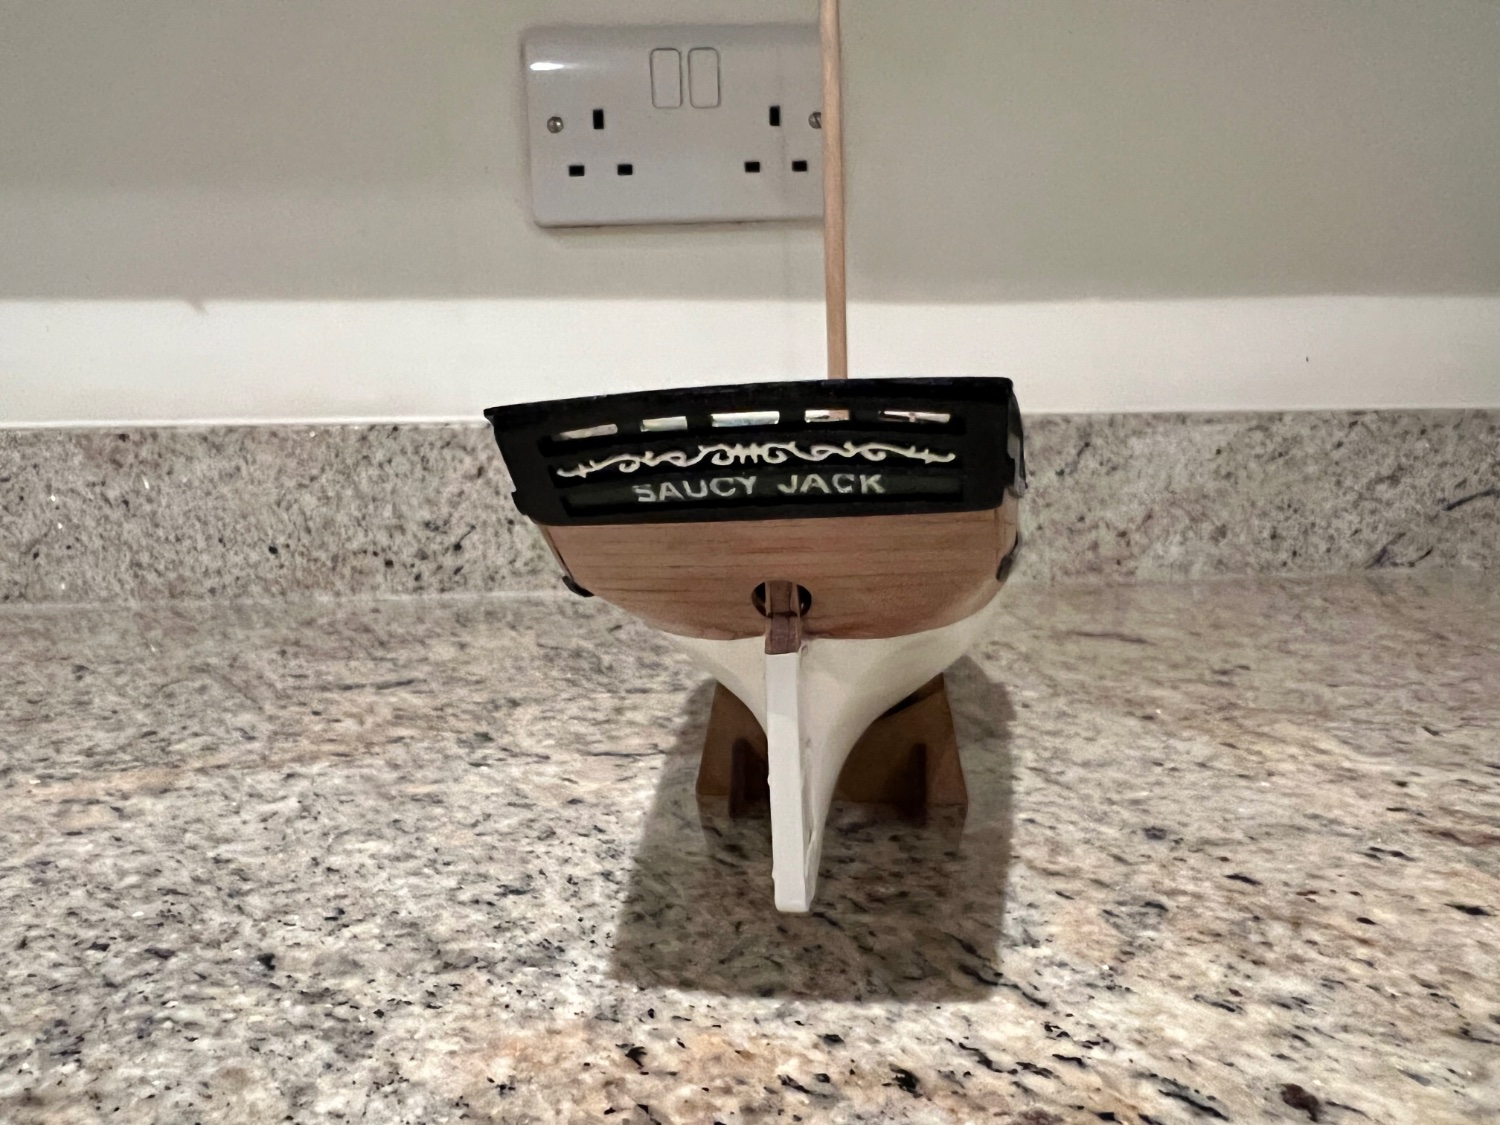
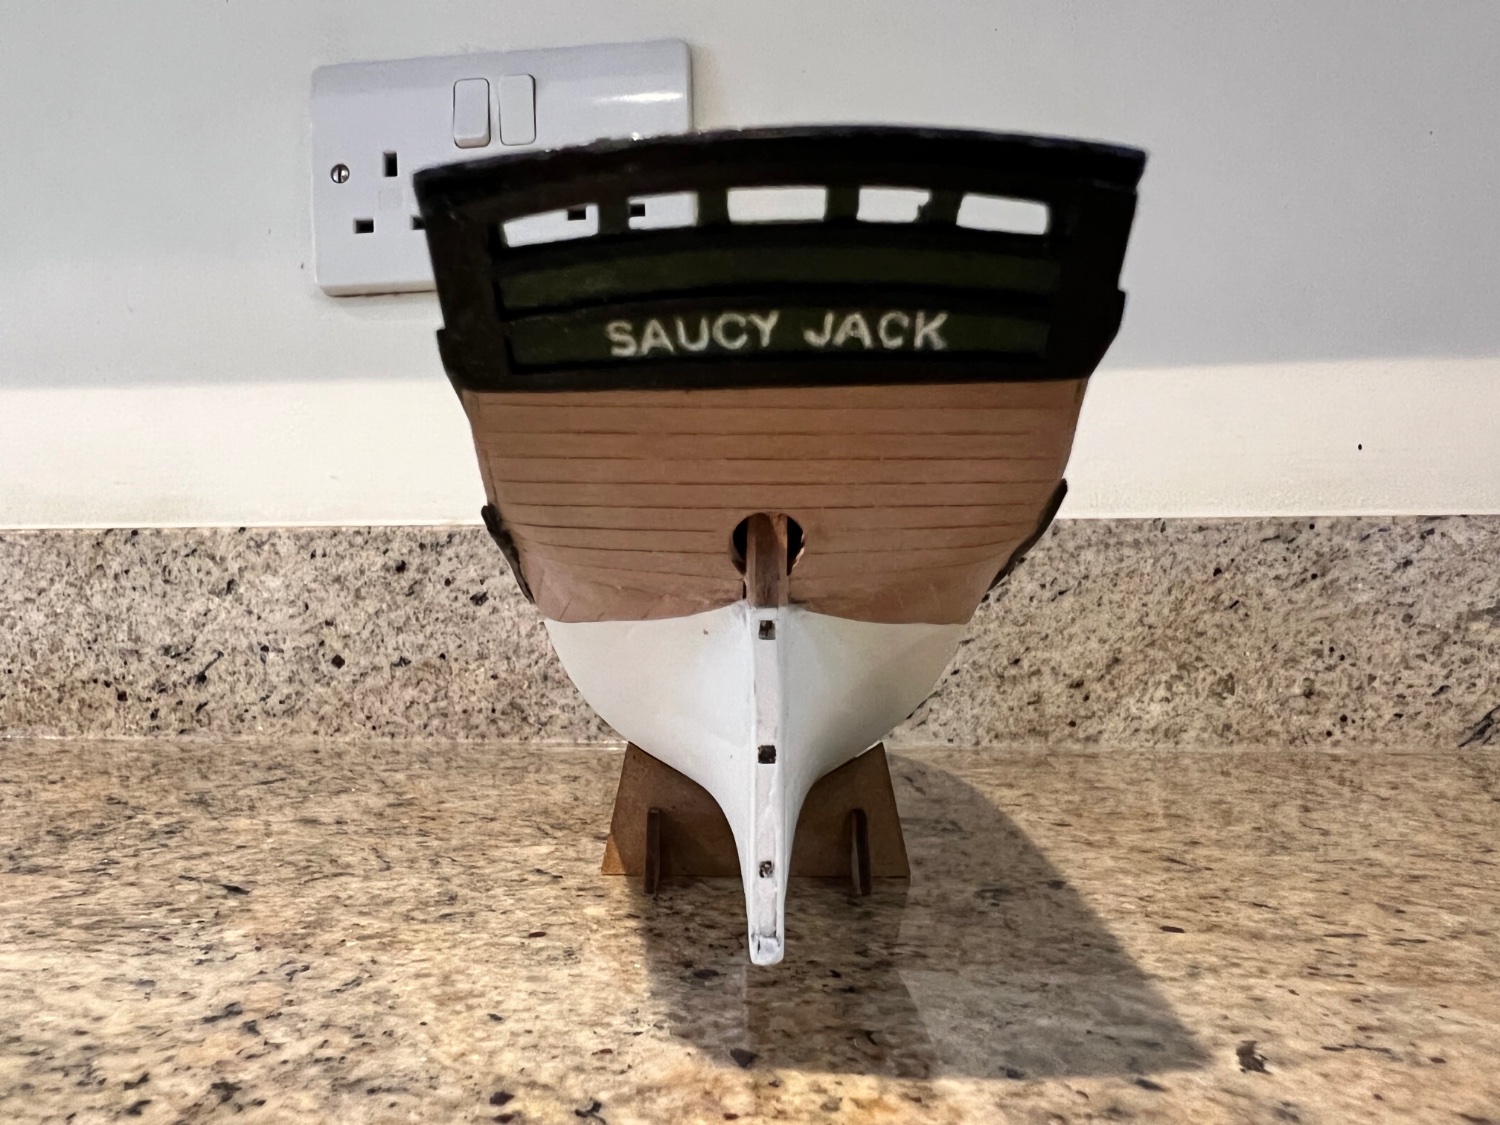
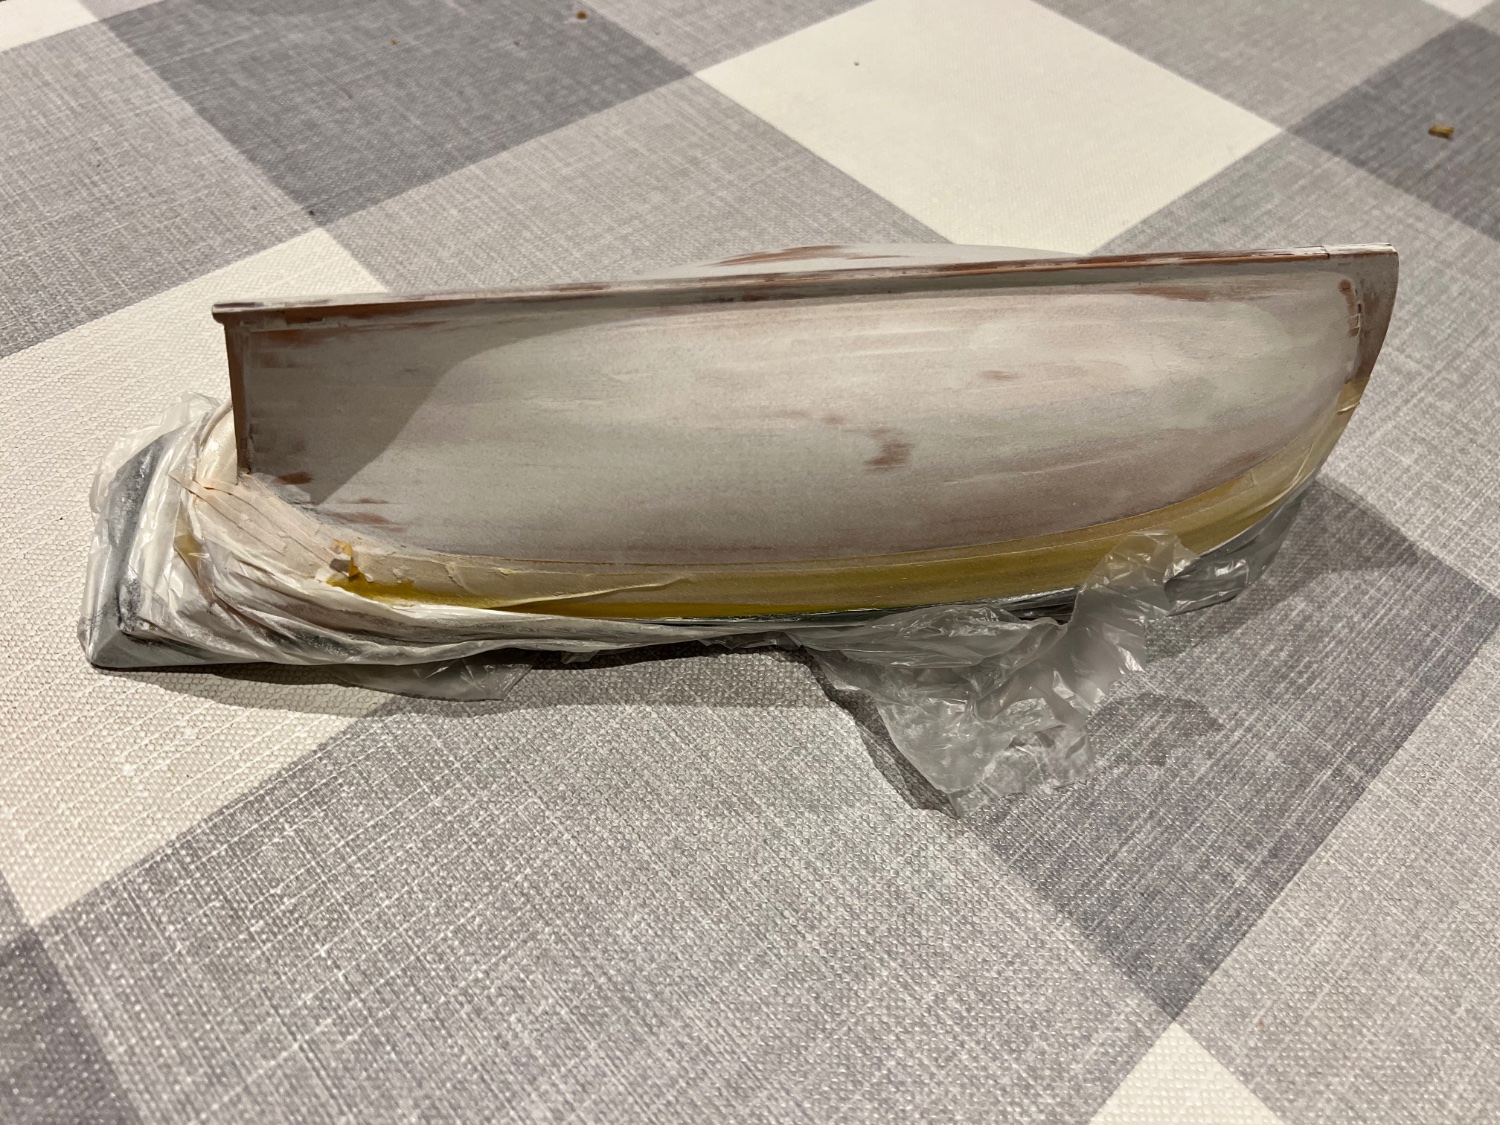
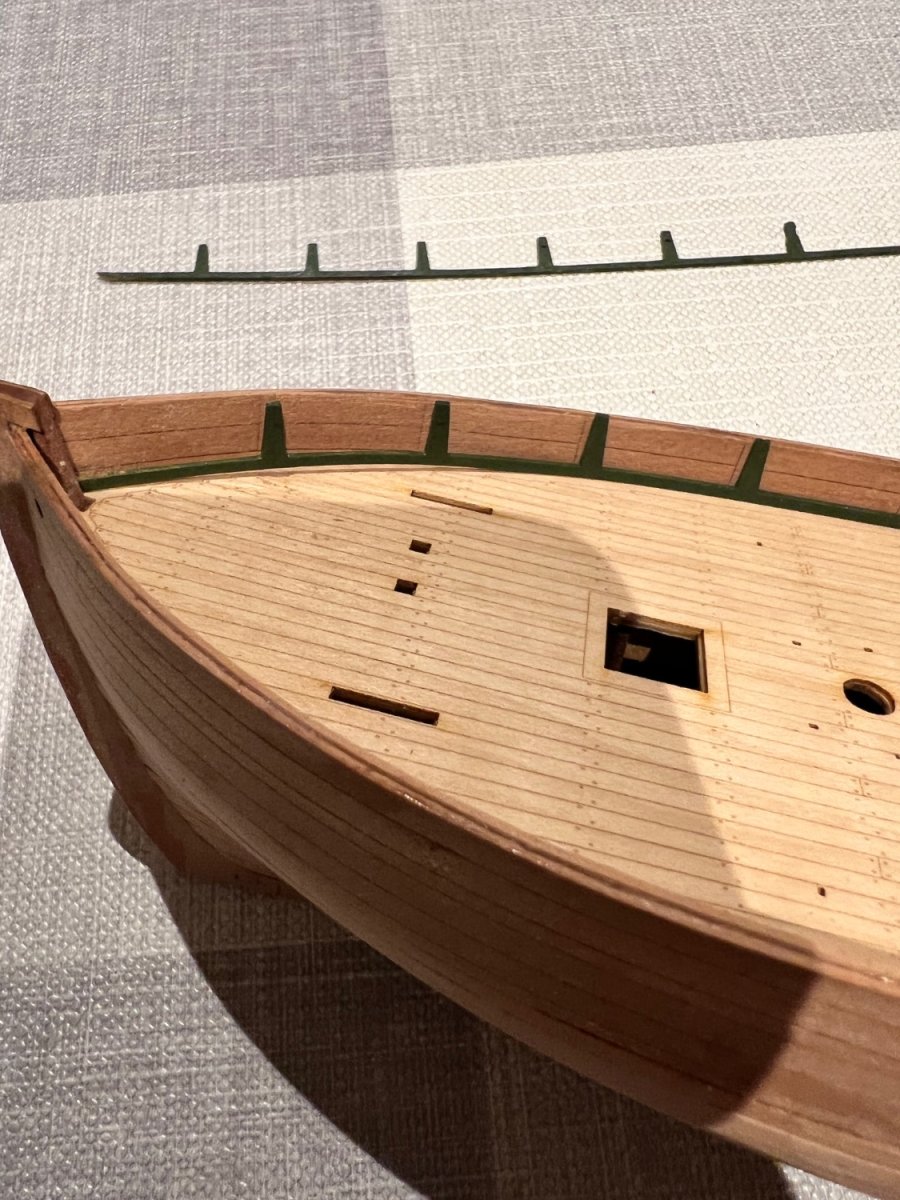
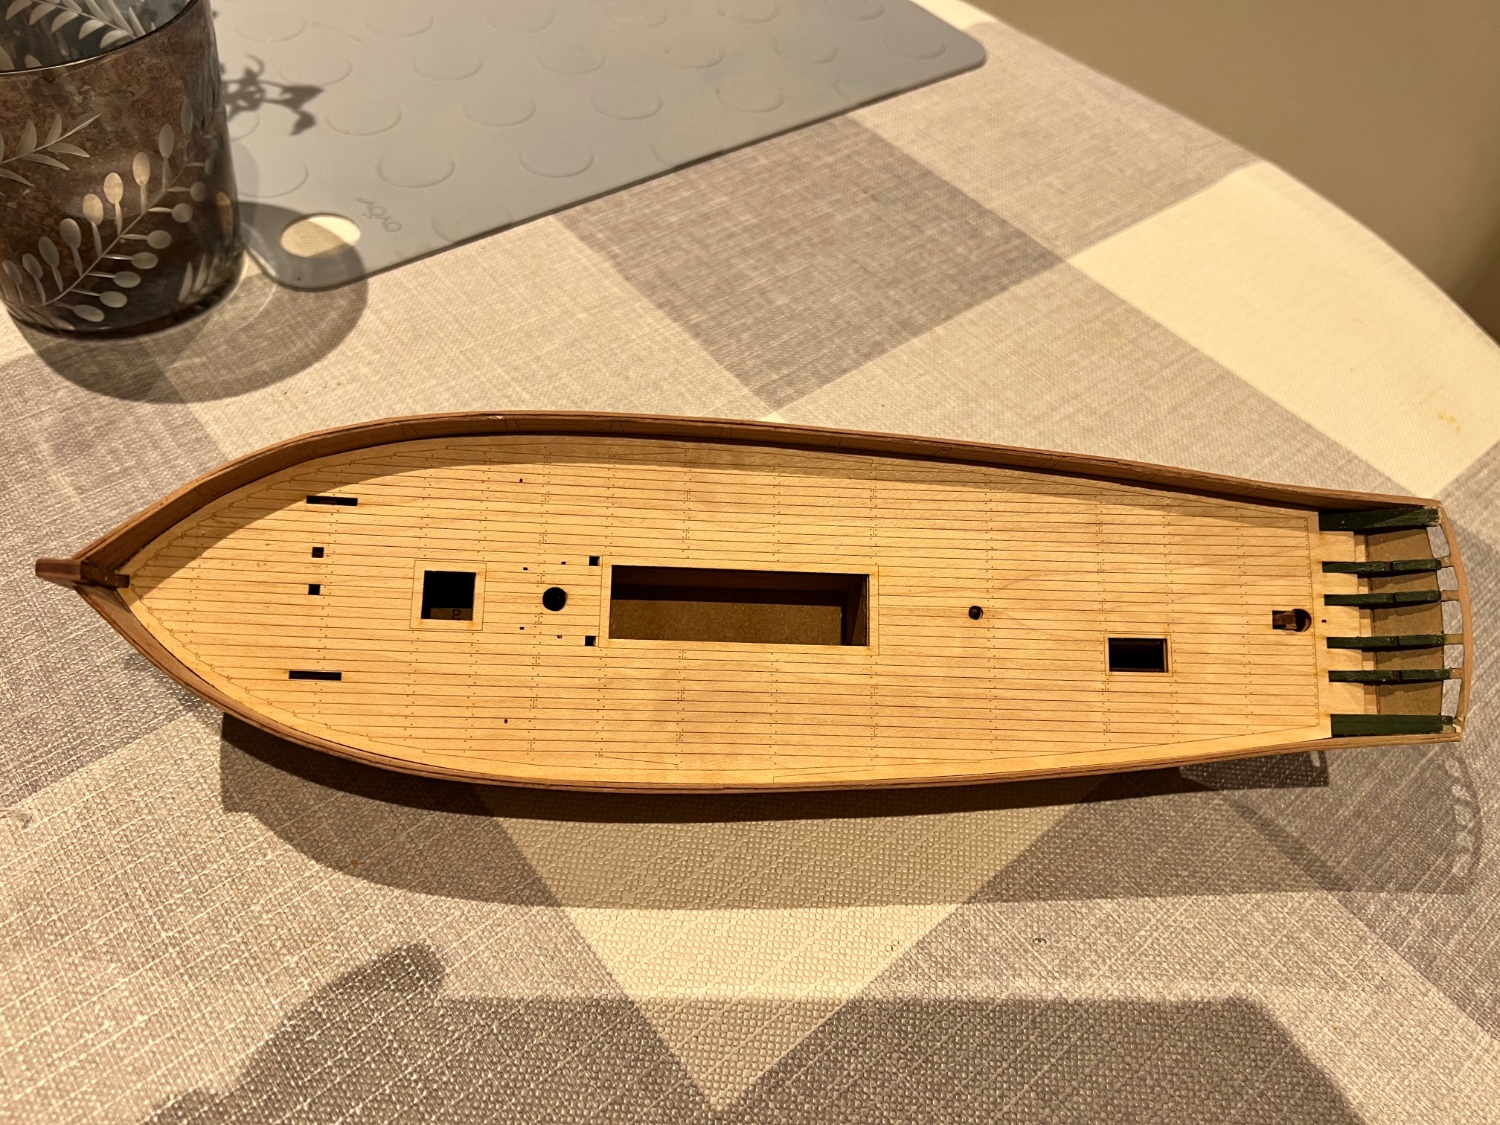
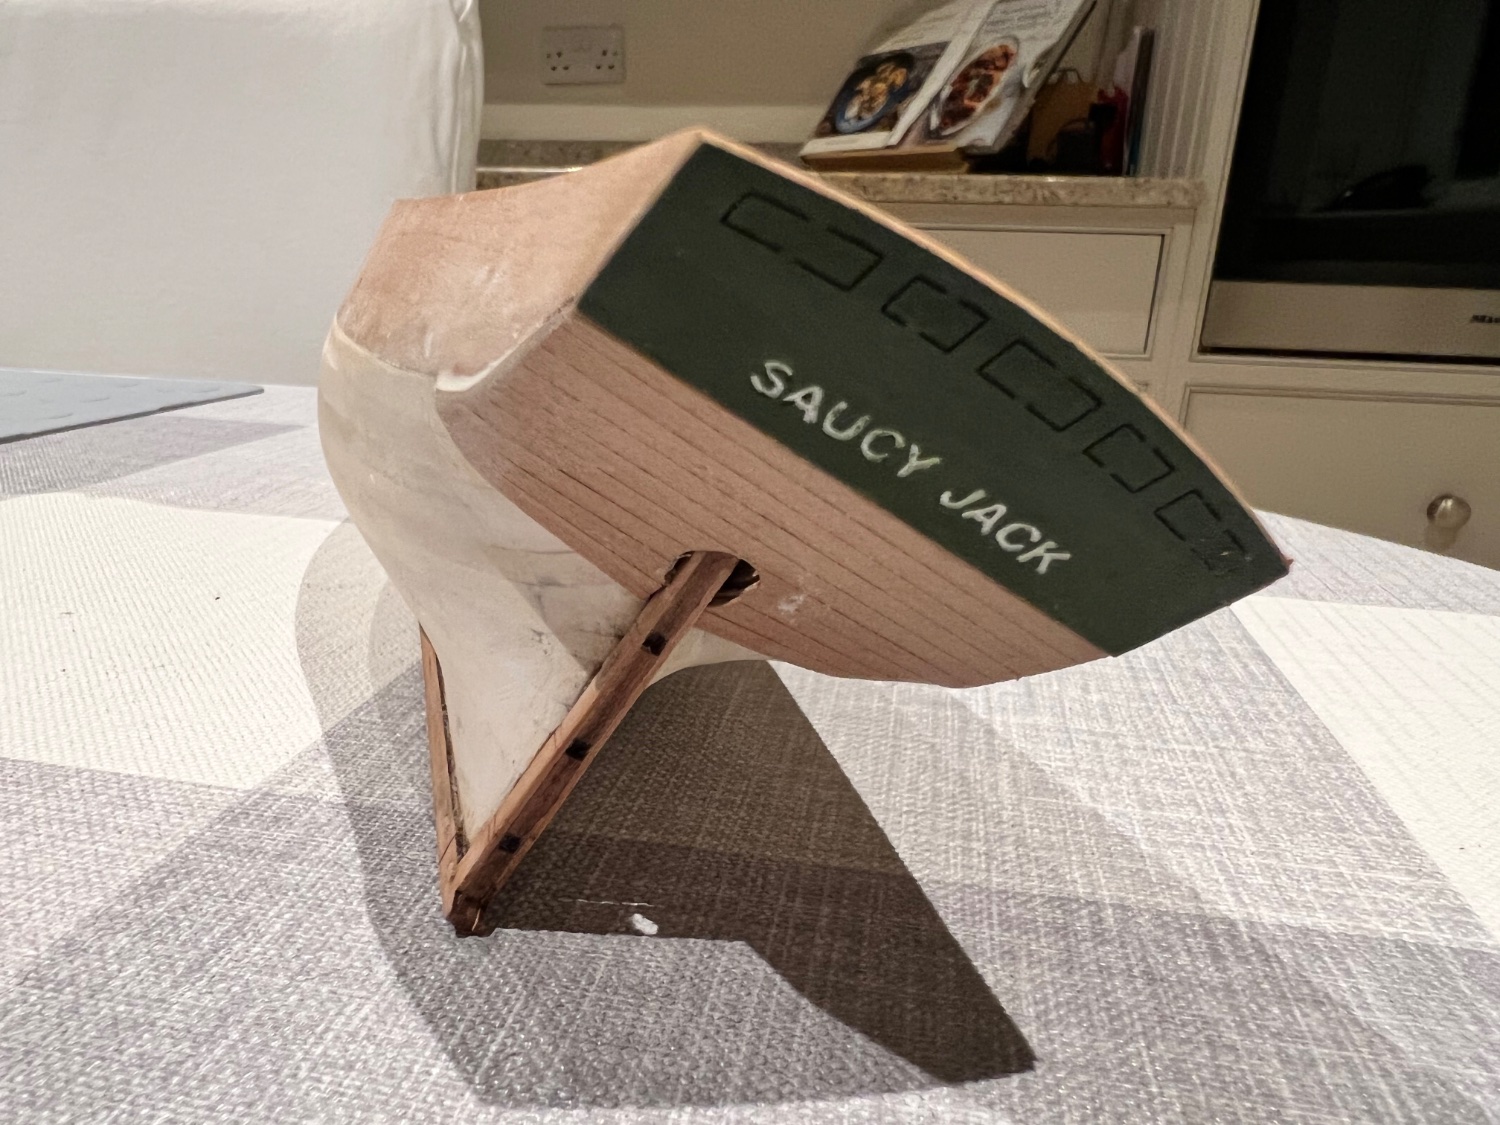
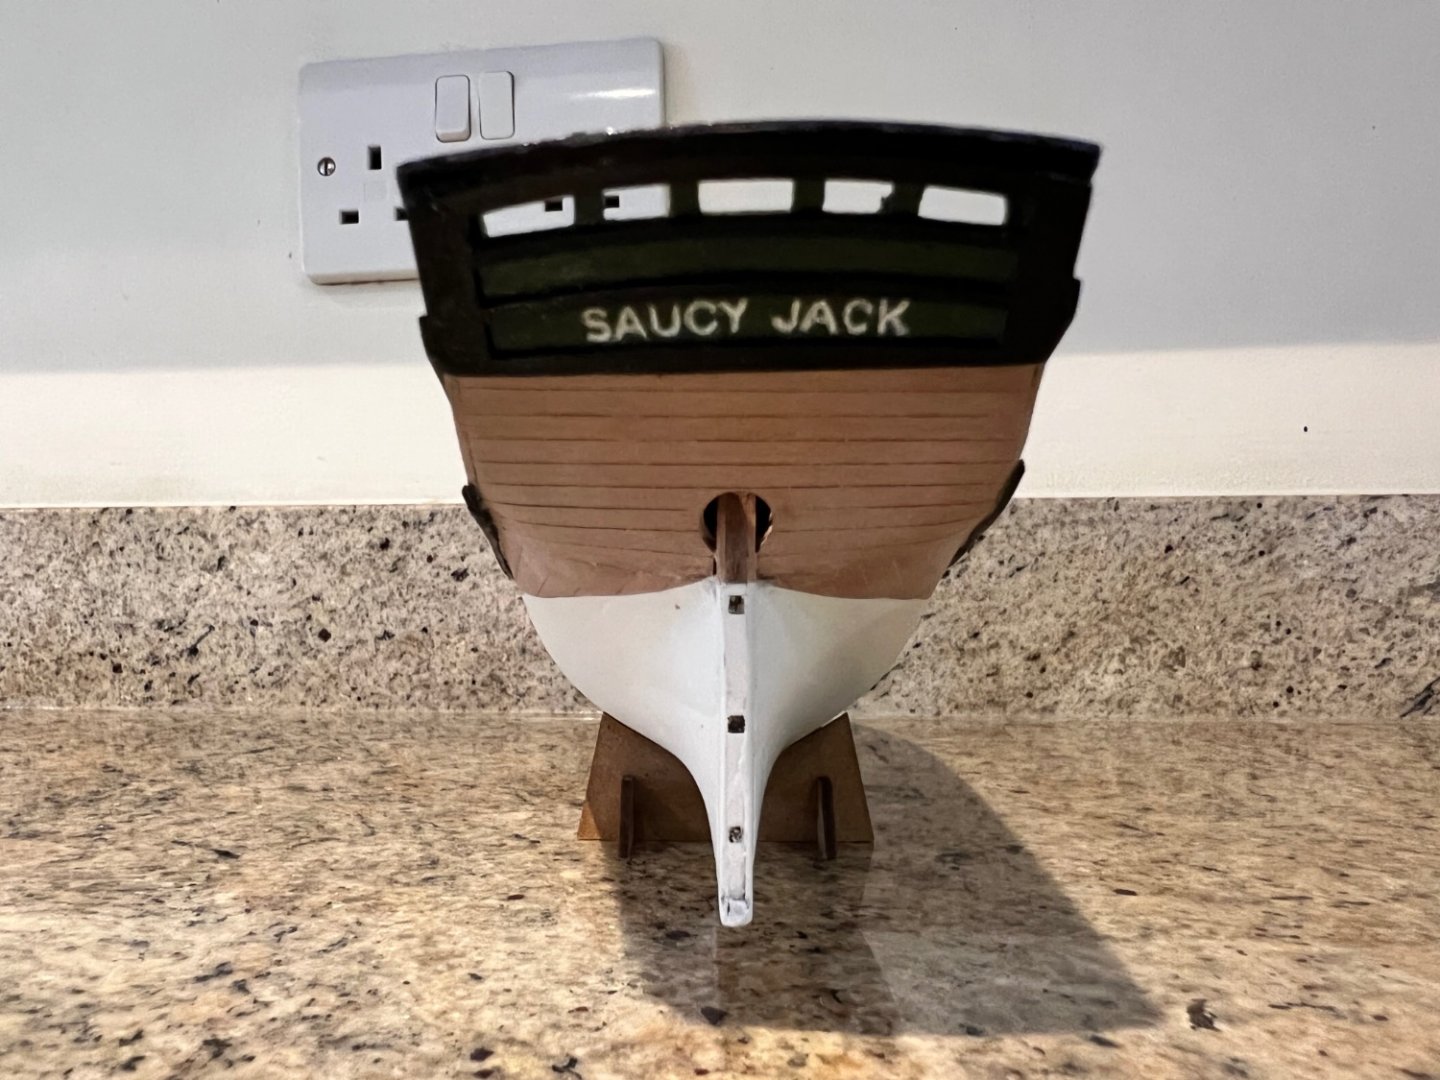
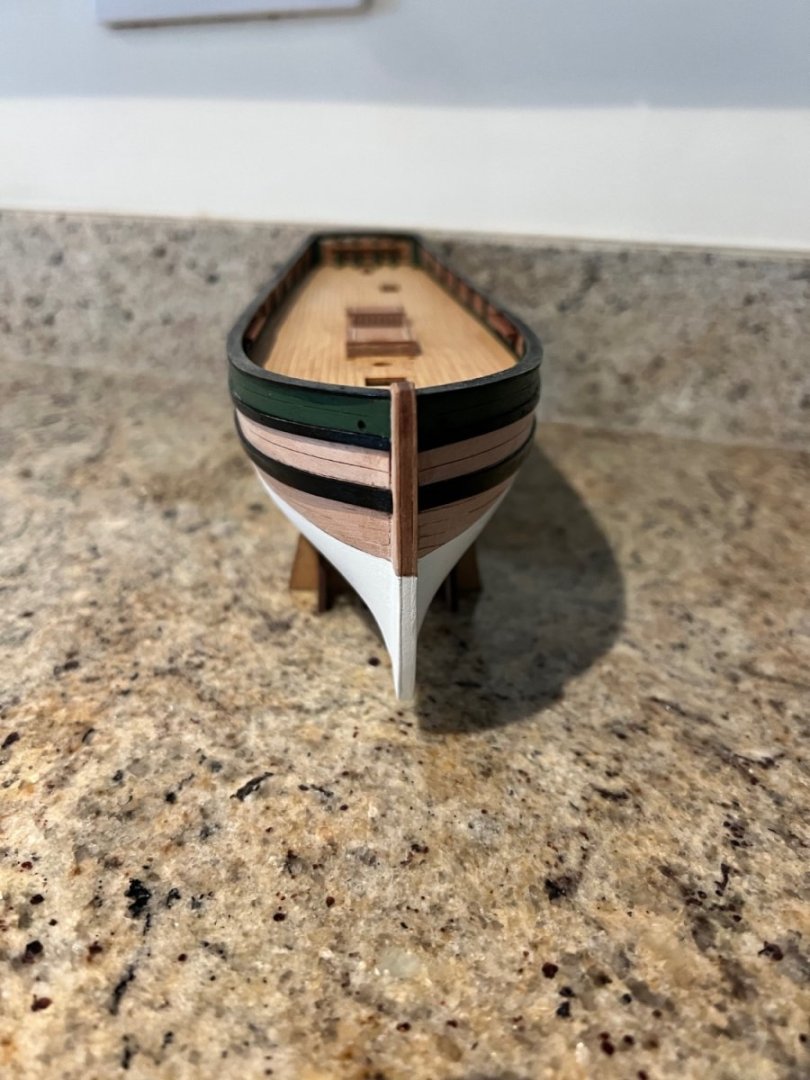
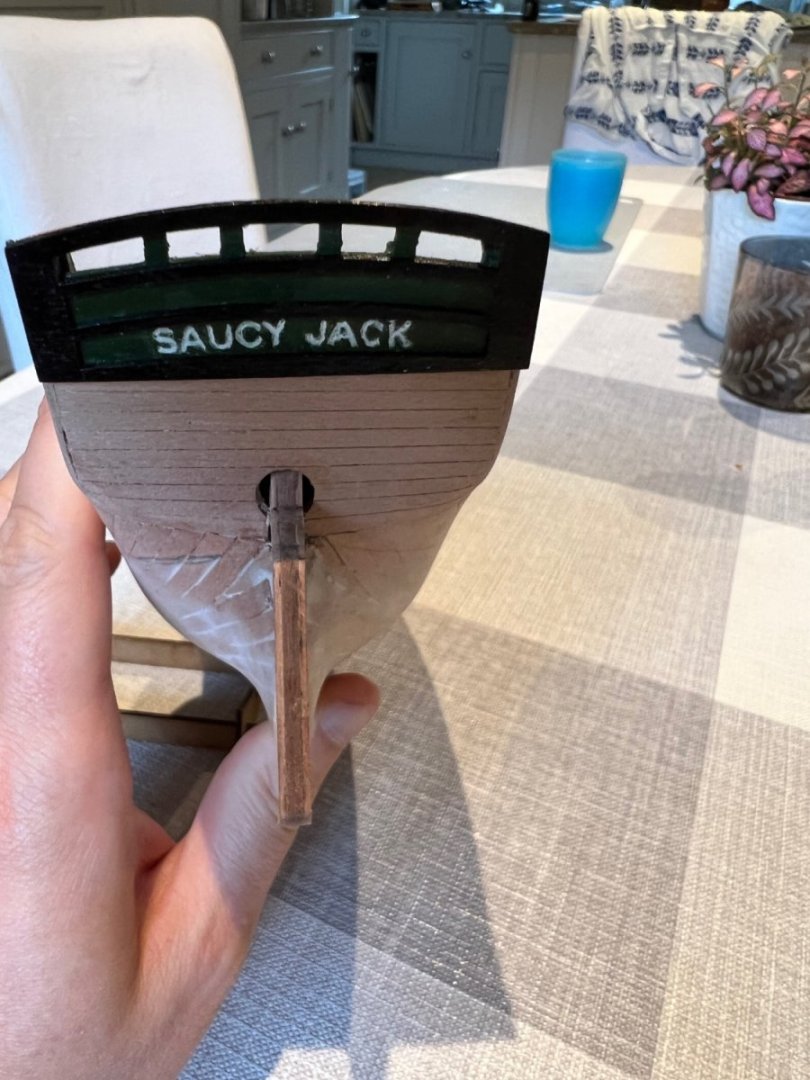
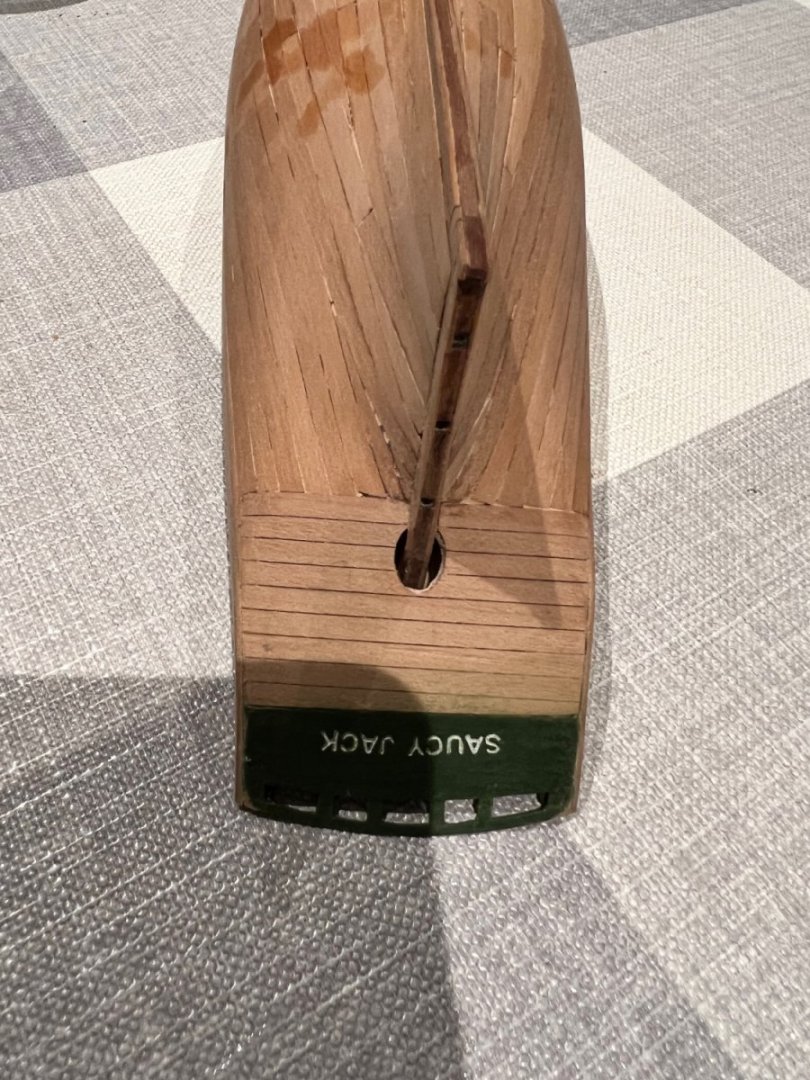
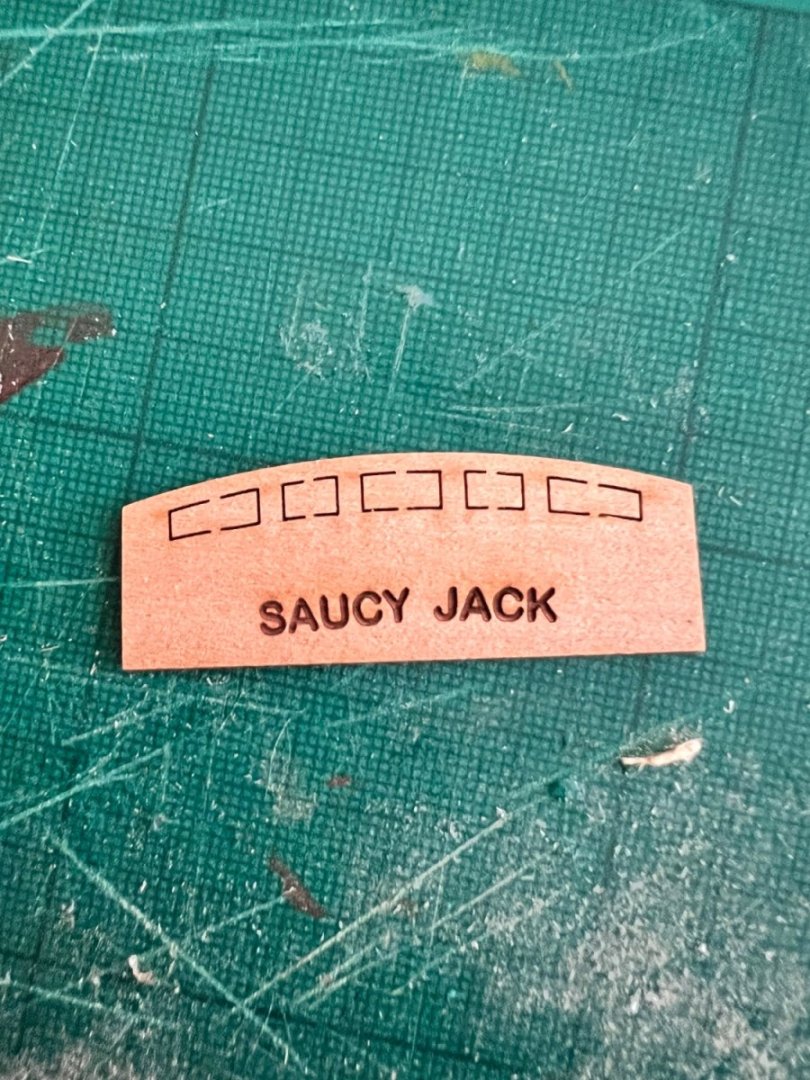
Thanks Glen. Deck is now glued down. The hole that the capstan goes into needs to be deepened as the frames run beneath it. Colour contrast in the photo below adjusted so it’s visible. Easy to fix - I’ve used a drill bit to deepen it a little and cut the dowel on the capstan shorter. Waterline marking was really easy on this boat using the Vanguard waterline marker, I measured up from the keel at the stem and rudder posts and then used the marker to join them. No adjustment was needed amidships. The rudder was fitted temporarily and not glued. The outer stern frame was painted black and then fitted. Whilst I prefer her name in white on a green background this was harder to achieve than I expected and is still a little rough at the edges. The problem was that the engraved name has dark brown laser char at the bottom which is not a good surface for a white Tamiya acrylic paint and was quite difficult to cover neatly. Maybe I should have primed first or used enamels for this, but the surrounding area is also acrylic (Tamiya Flat Green XF-5) and I think that you can’t paint over enamel with acrylic if you make a mistake. End result is OK but not ideal. Next the timberheads were fitted and glued. The system used on this boat is so much easier to fit. There is a very small limitation that if your hull is not the perfect shape then some timberheads may not line up exactly with the engraved lines on the inner bulwark and there’s no scope for adjustment. On my far from perfect hull the forward timberheads lined up, but not those aft. The difference is only slight and not very noticeable. I also painted the top of the outer bulwarks green. The lower hull below the waterline was filled and sanded down. Then the waterline taped so the first layer of white primer can be sprayed in the hull. I do a first line with normal Tamiya masking tape and then onto that I tape Tamiya tape that comes with a plastic bag attached. Bit of a gimmick but it saves time! So far, the kit has been excellent and any of the problems have been entirely self-inflicted!


- 59 replies
-
- 4
-
-
- saucy jack
- fishing smack
- (and 2 more)
-
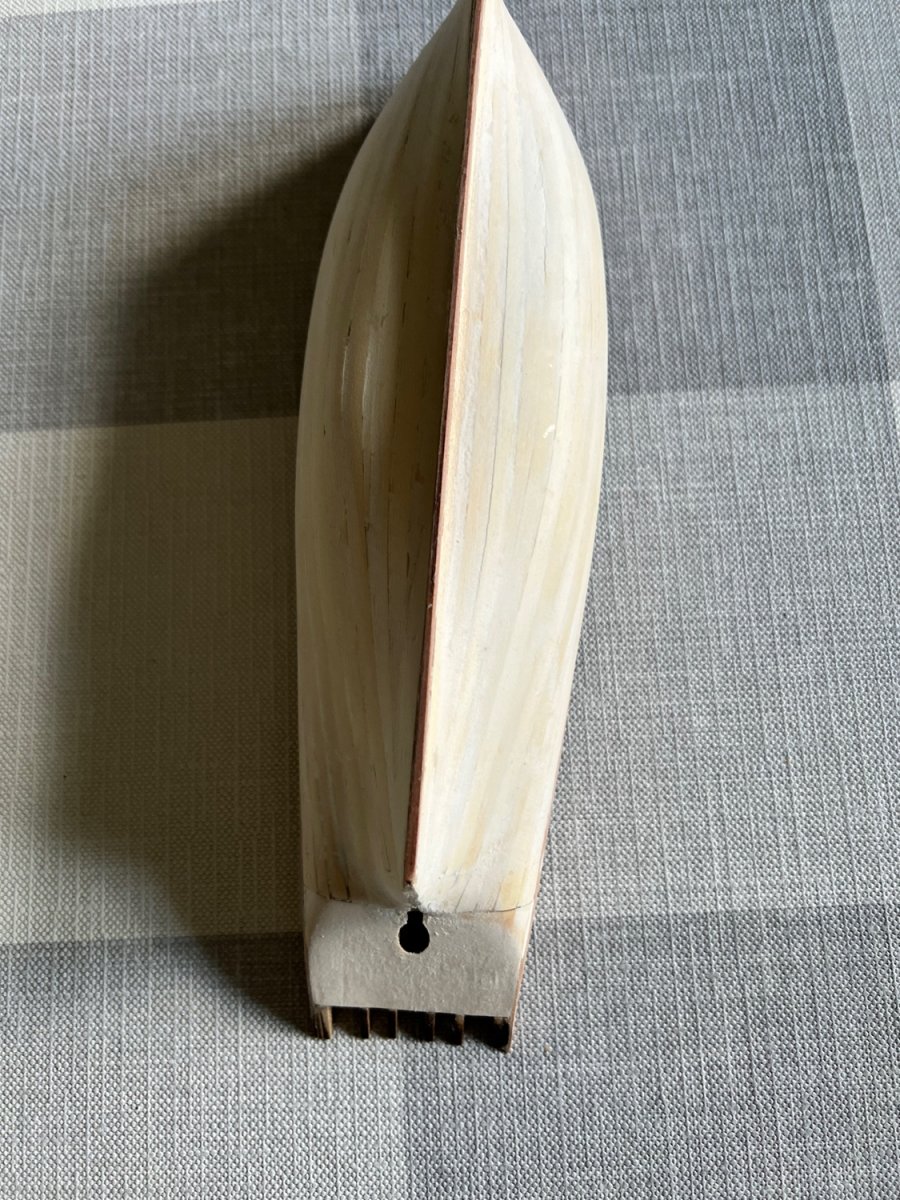
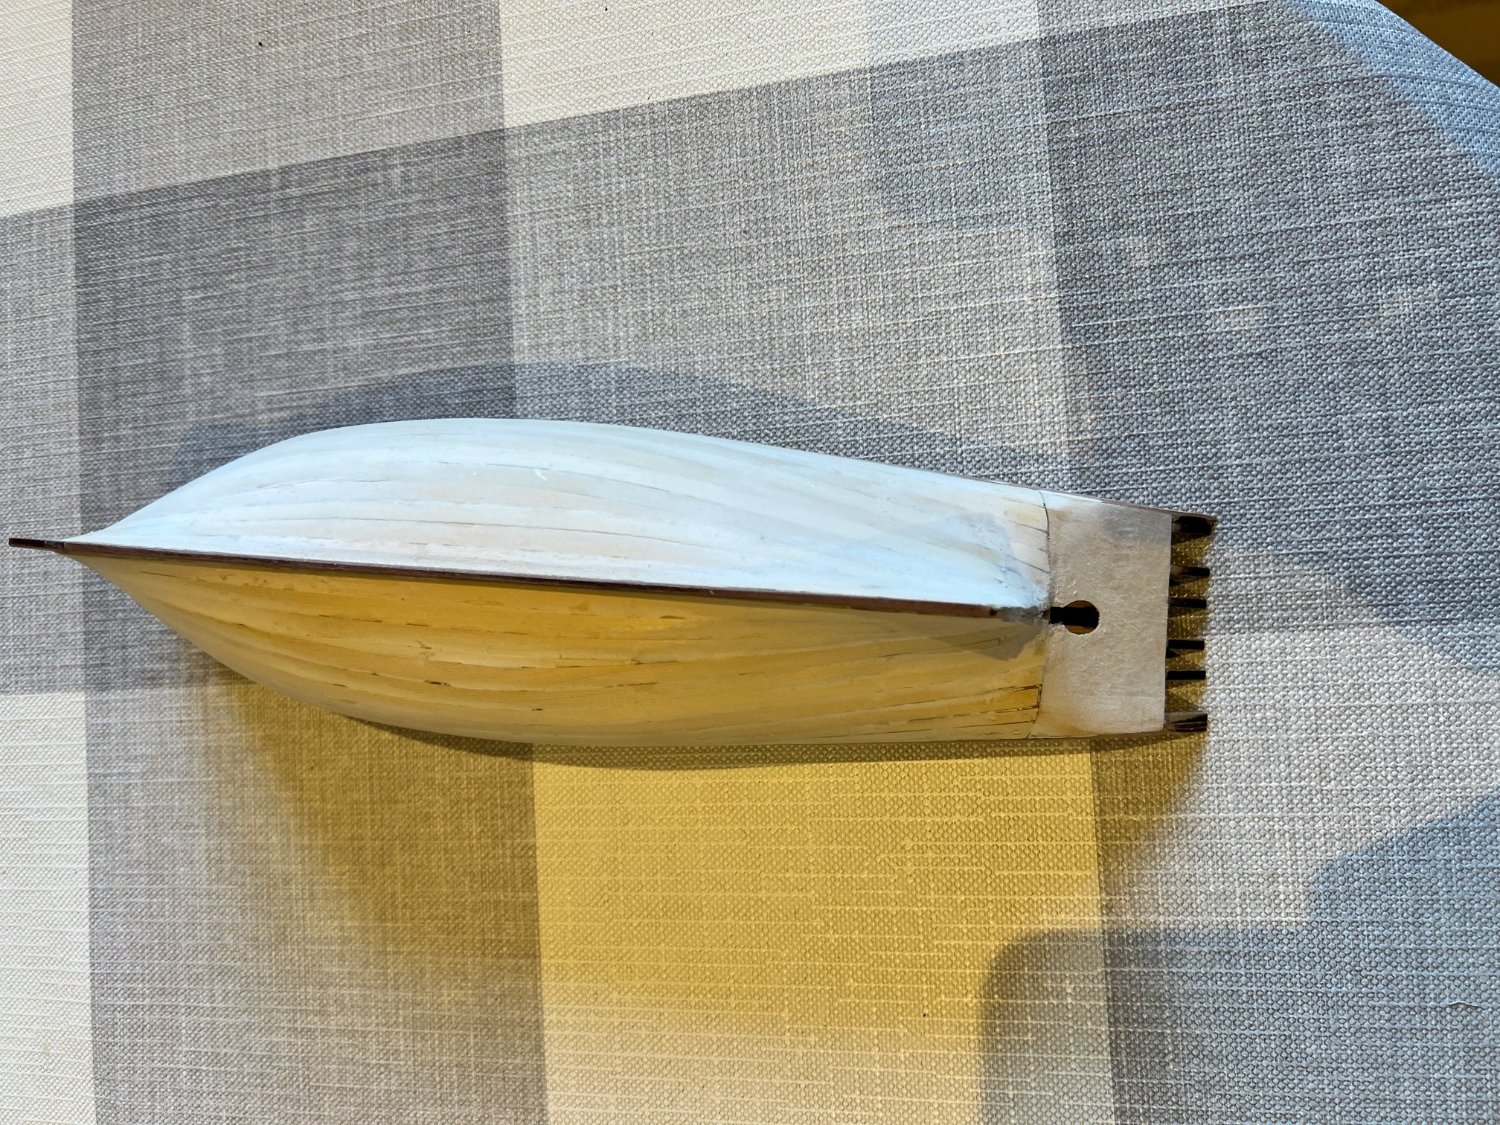
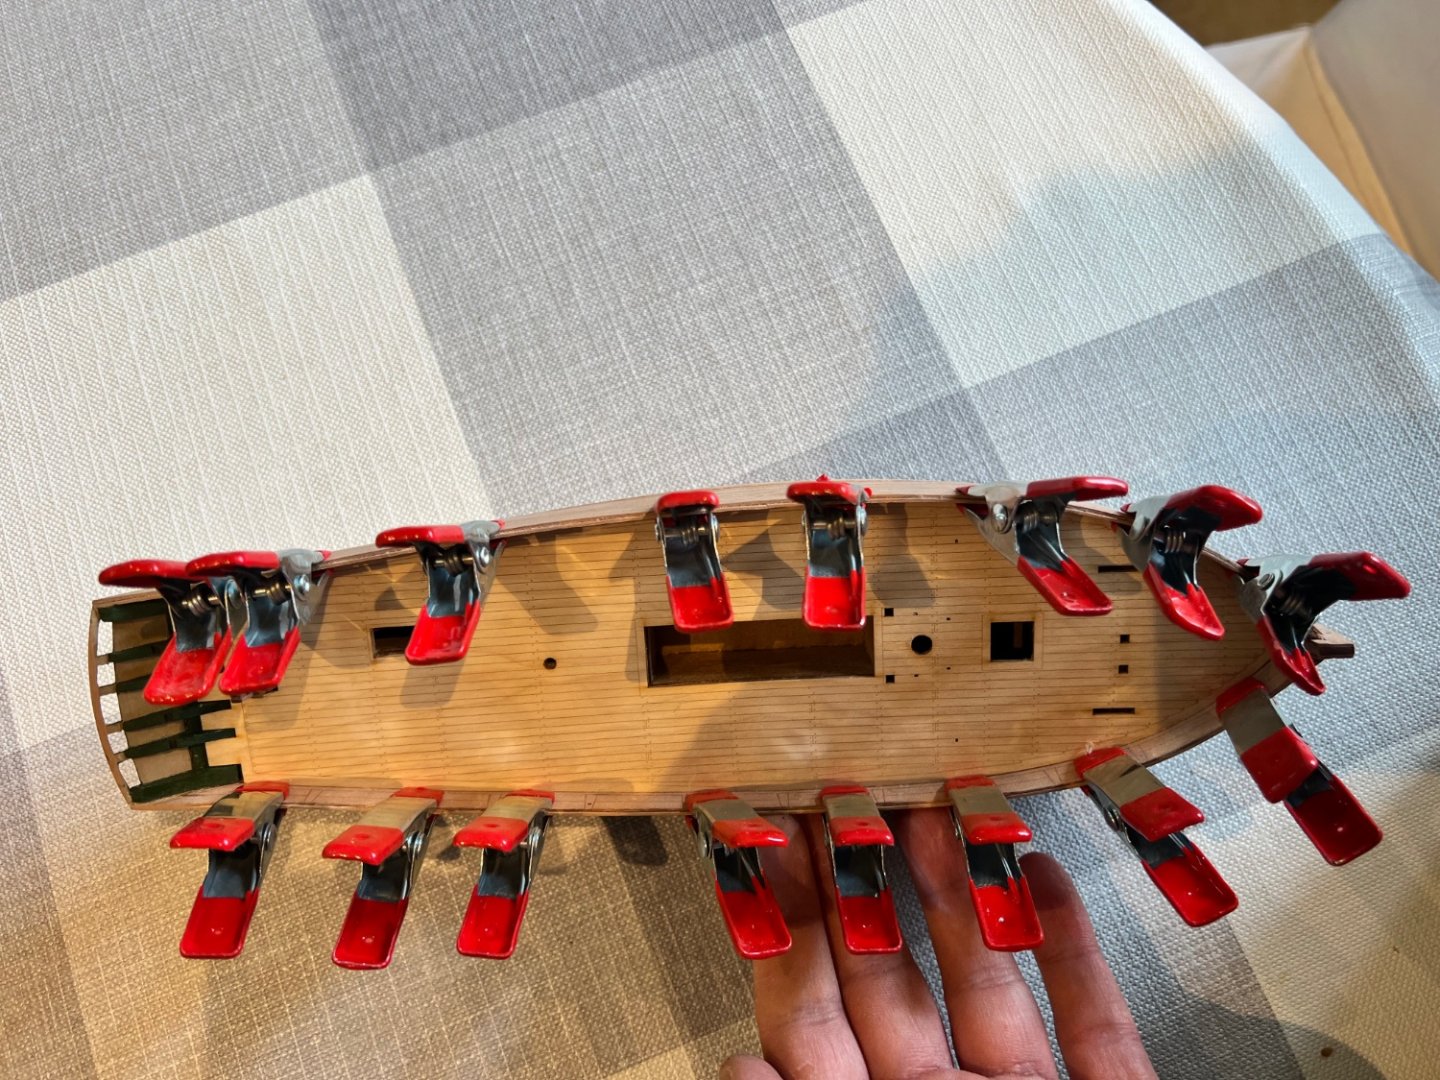
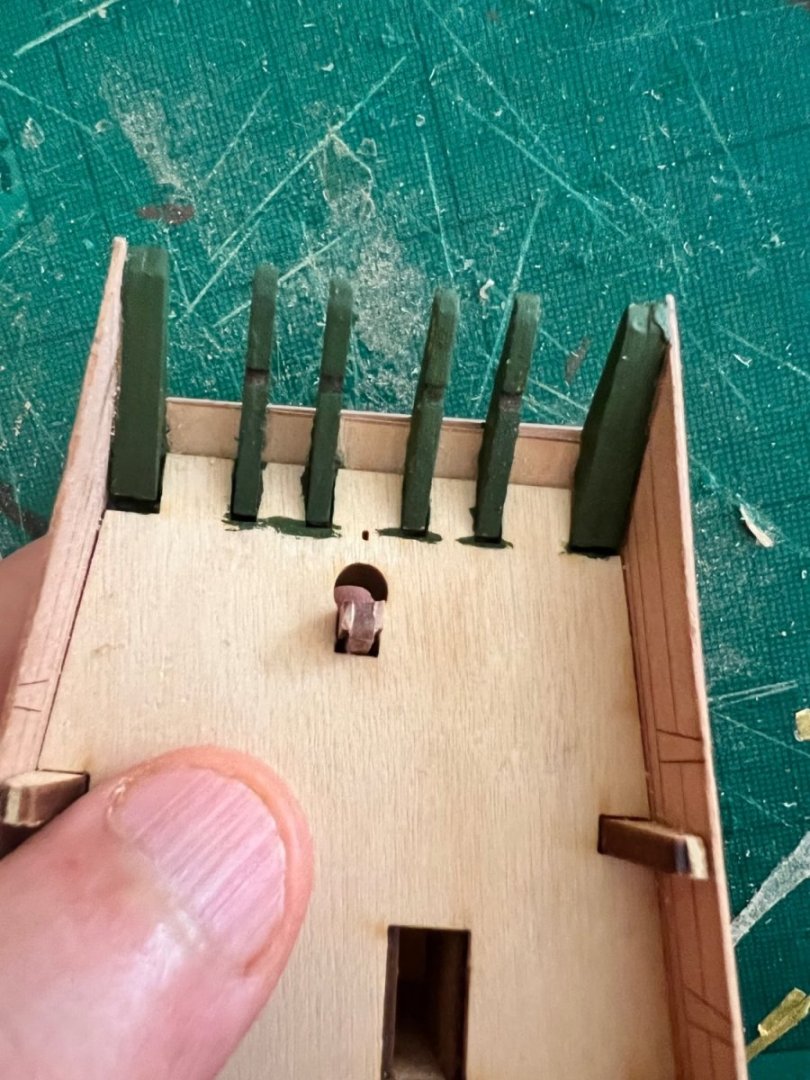
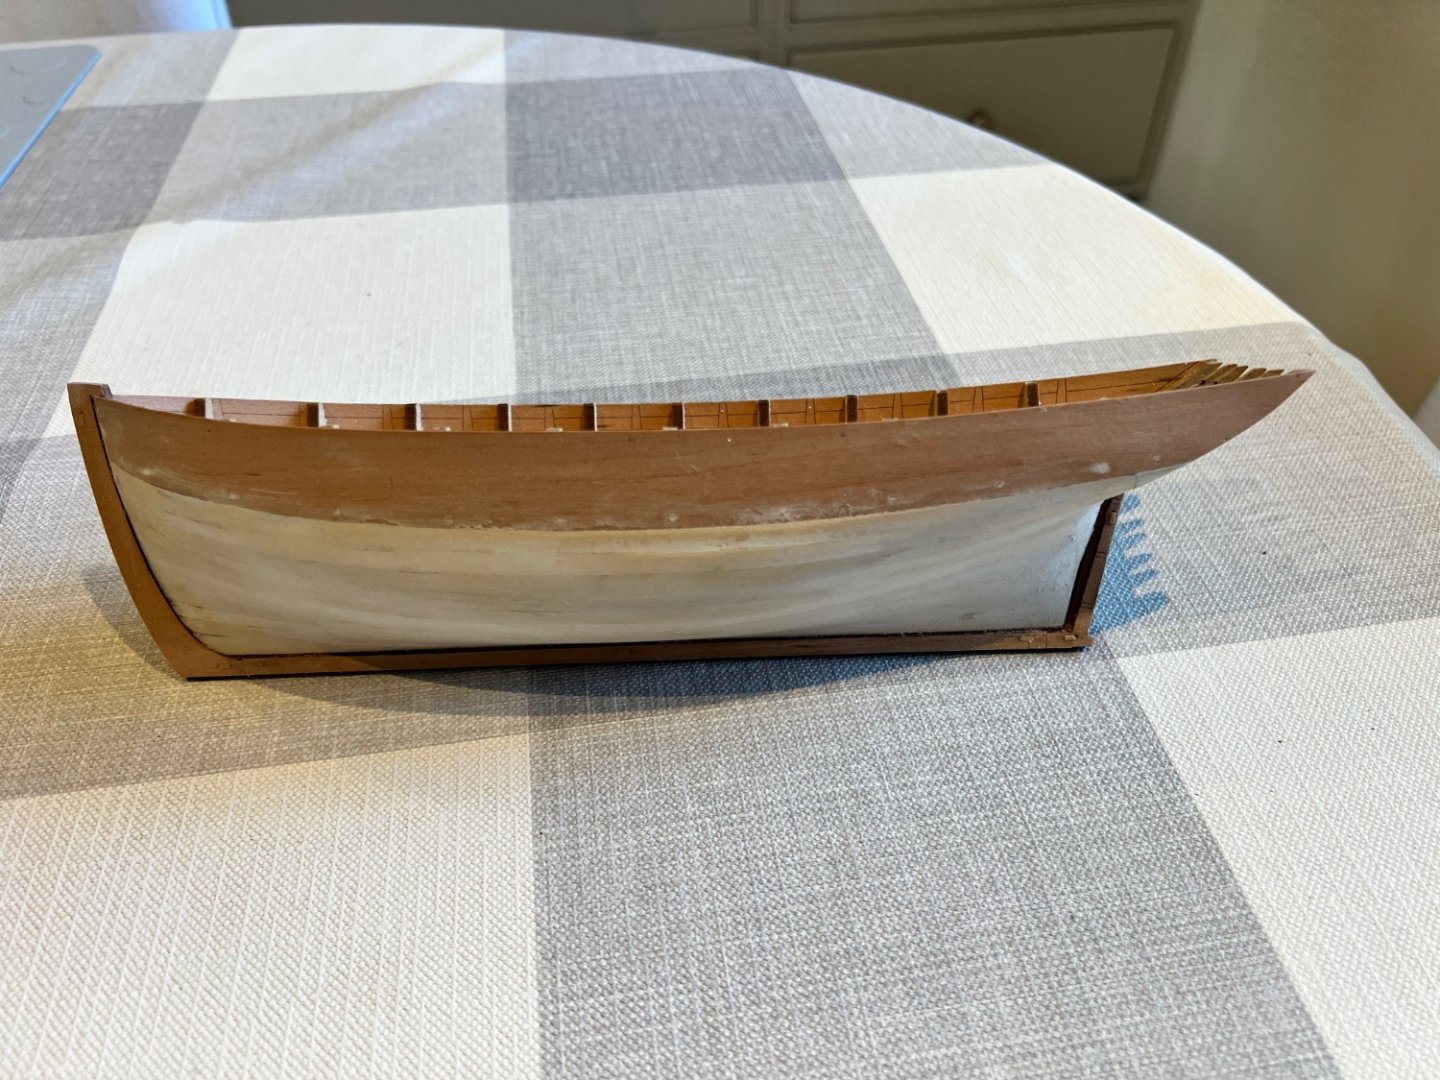
Second planking finished. Some sanding but no filling yet in the photos below. Biggest mistake was not leaving room for a useable rabbet at the bow which has left the planking at the bow a little untidy. Next build I’ll have a plane and vice to enable more accurate tapering and I’ll attempt to measure off and use tick marks to make the planking look more professional. Fixed the broken stern board. Next removed the bulkhead ears ready for the deck. Deck fitted but not yet glued. Looks like I need to sand and move it forward 0.5mm so the hatches align with the sub-deck. Chris has come up with an innovative way of adding the timberheads without having to glue lots of these individually. I’ve decided to paint these green in keeping with the green stern frames. Timberheads only held in place below.


- 59 replies
-
- 6
-
-
- saucy jack
- fishing smack
- (and 2 more)
-
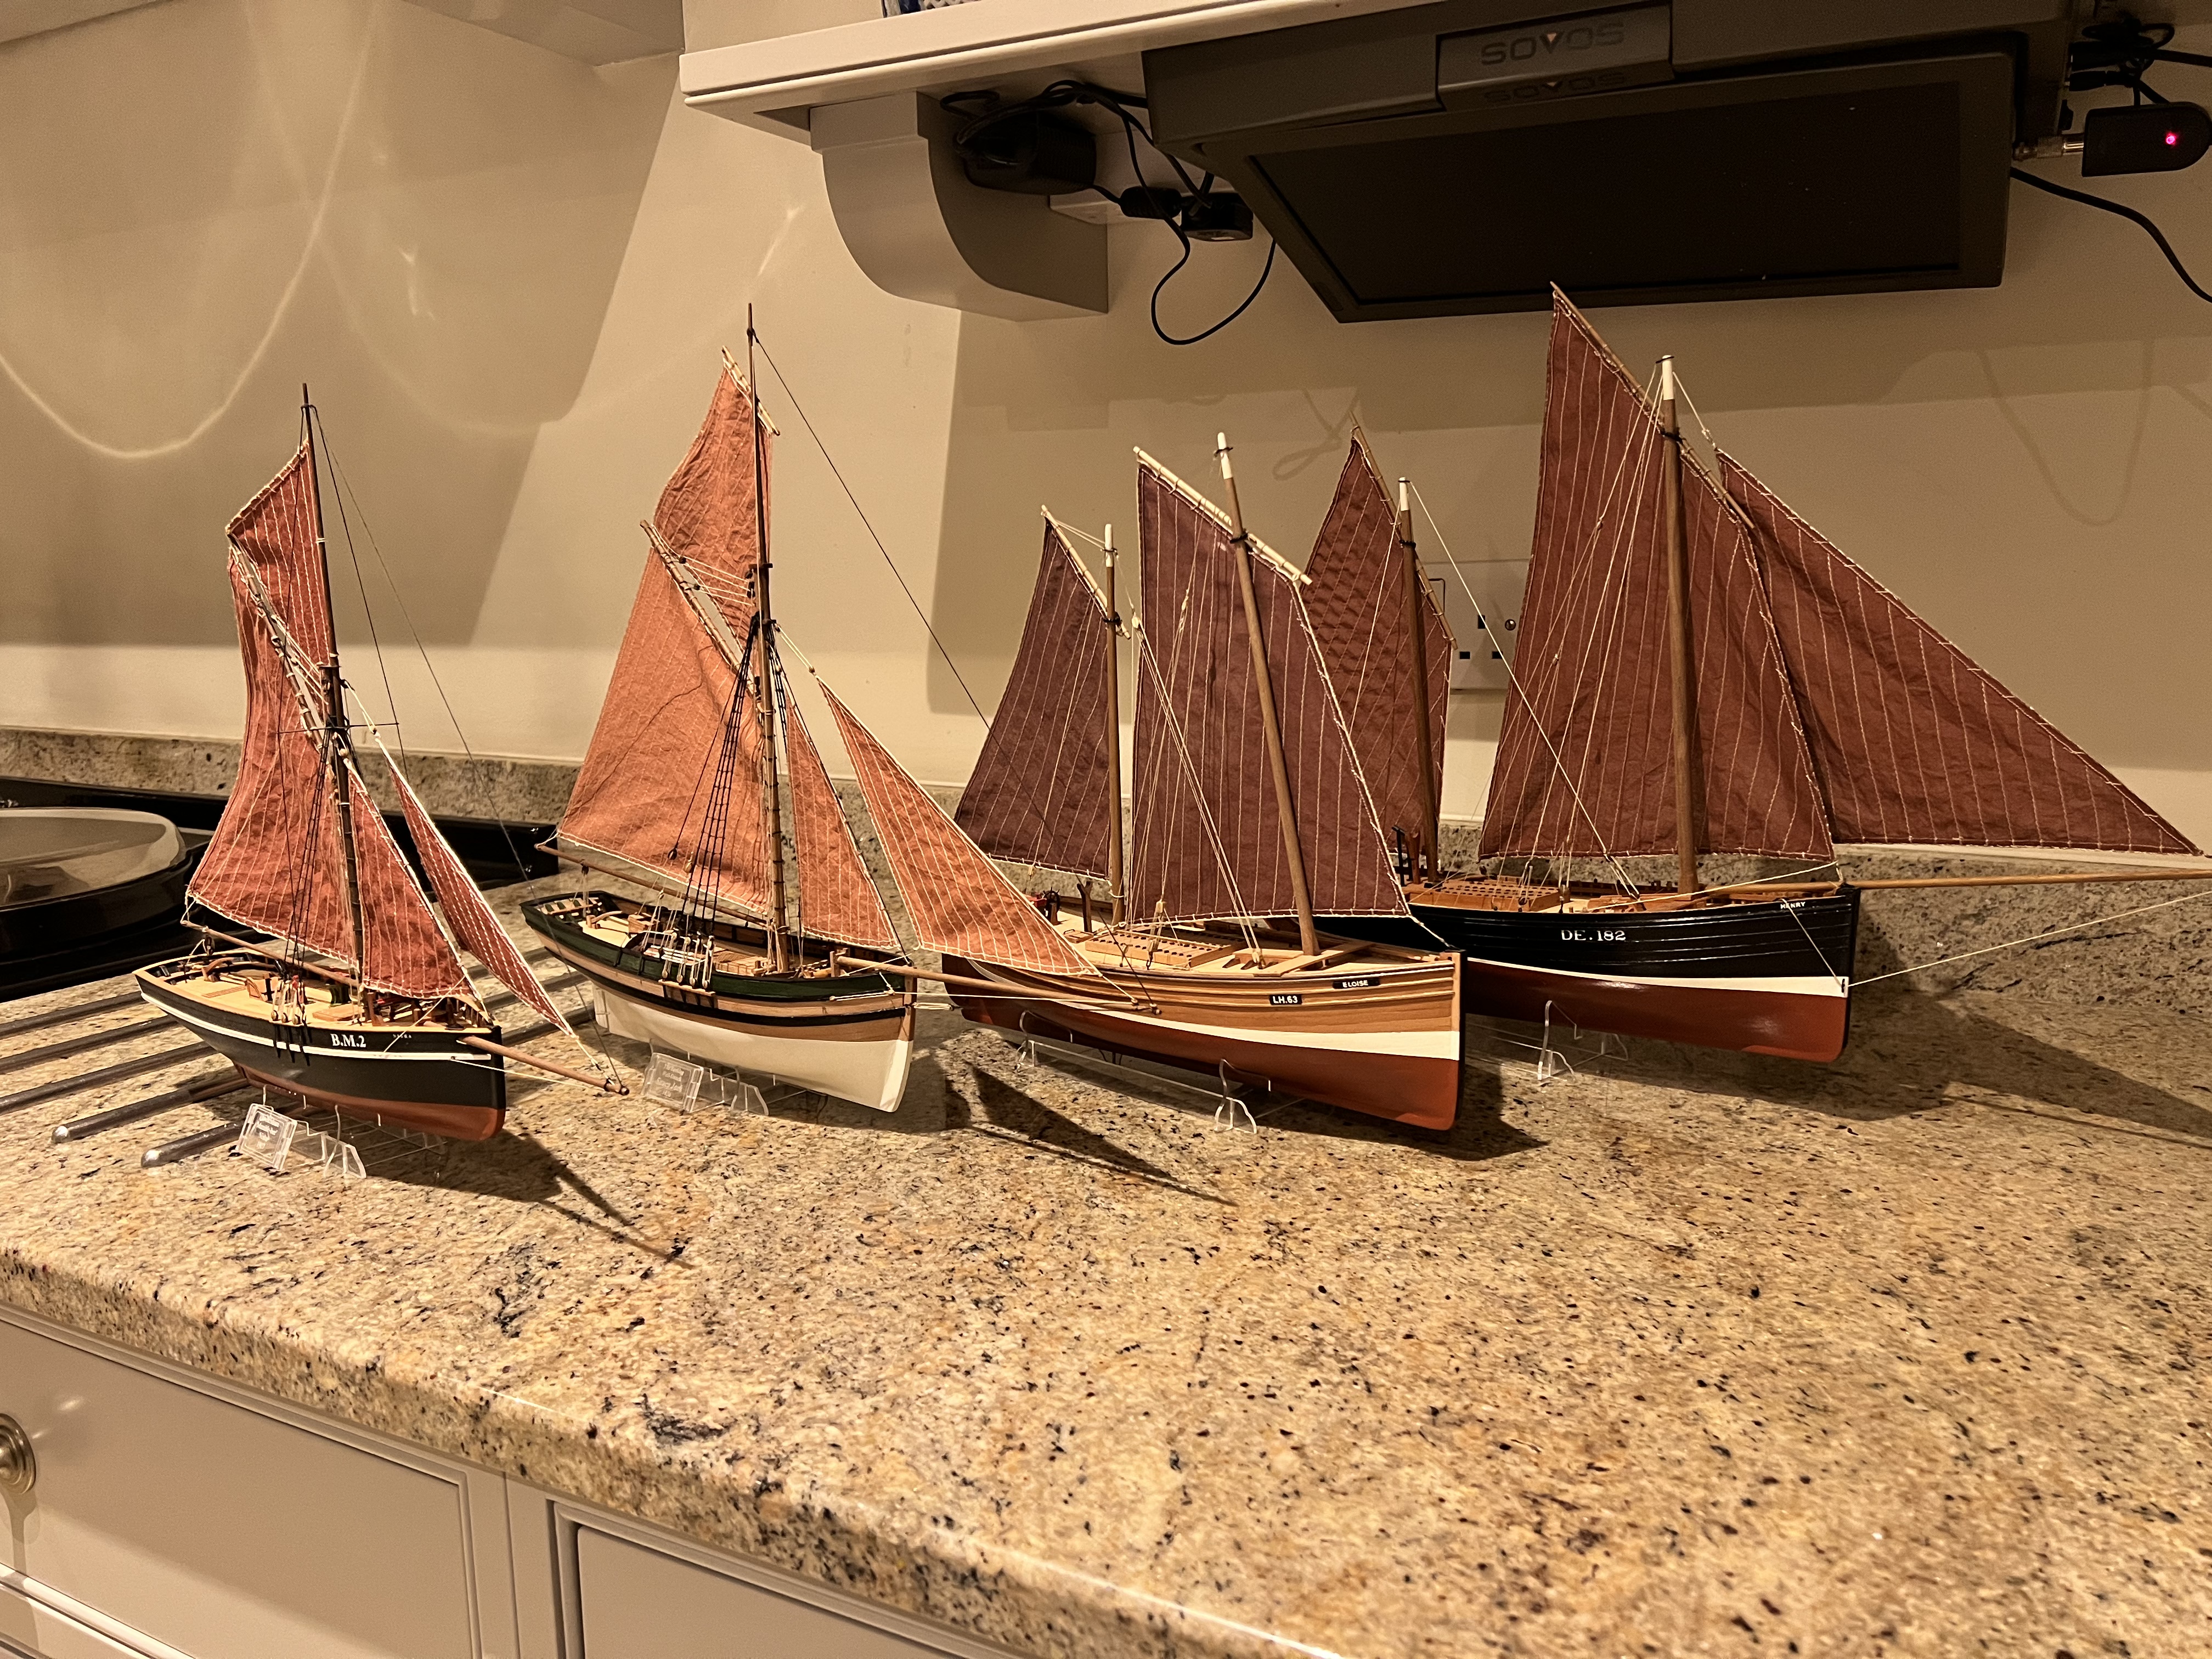
Thanks Glenn. You’ll make short work of this cute little boat after mastering Sphinx! I’ll likely make Erycina next too, although I have bought a Vanguard Alert and I’m a little tempted to have a change and break my straight of four Vanguard fishers so far.
- 59 replies
-
- 2
-

-
-
- saucy jack
- fishing smack
- (and 2 more)
-
She looks superb!
-
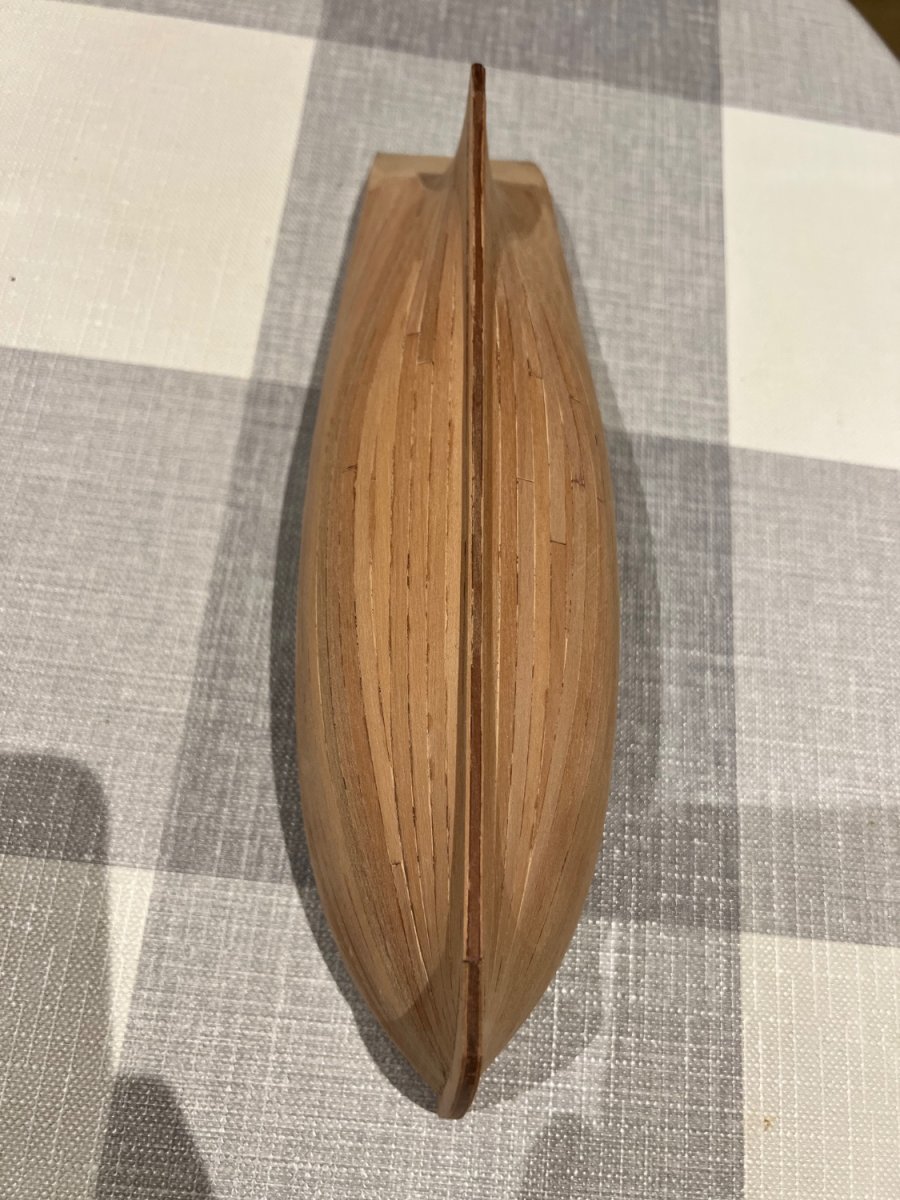
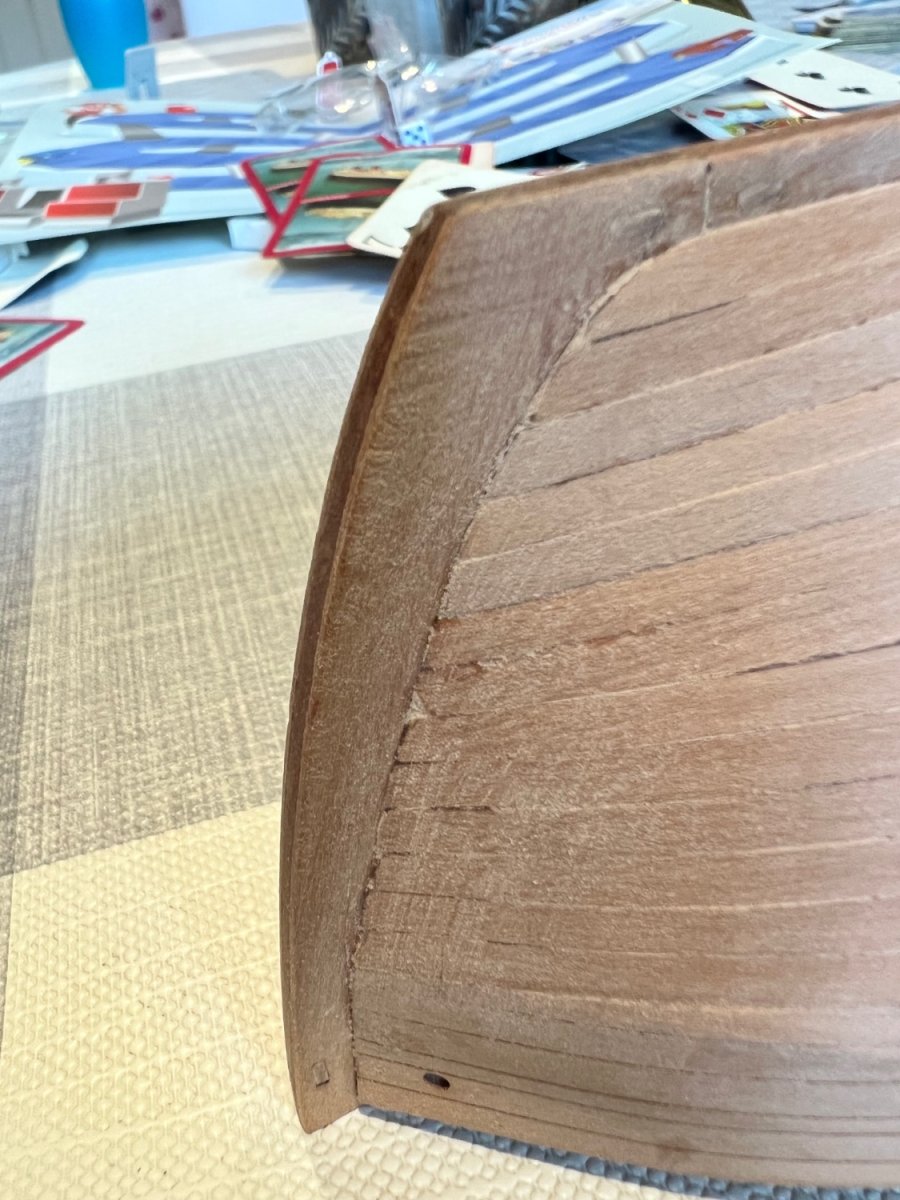
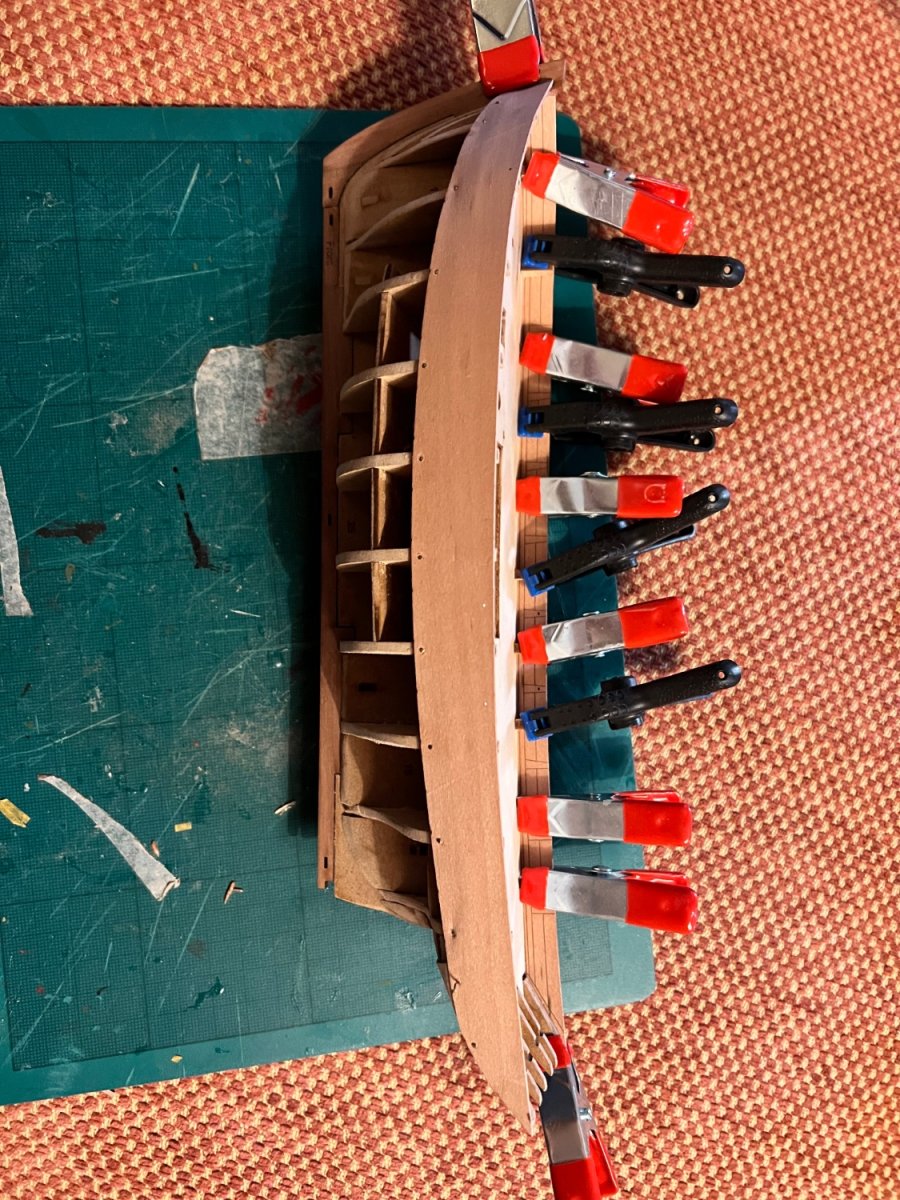
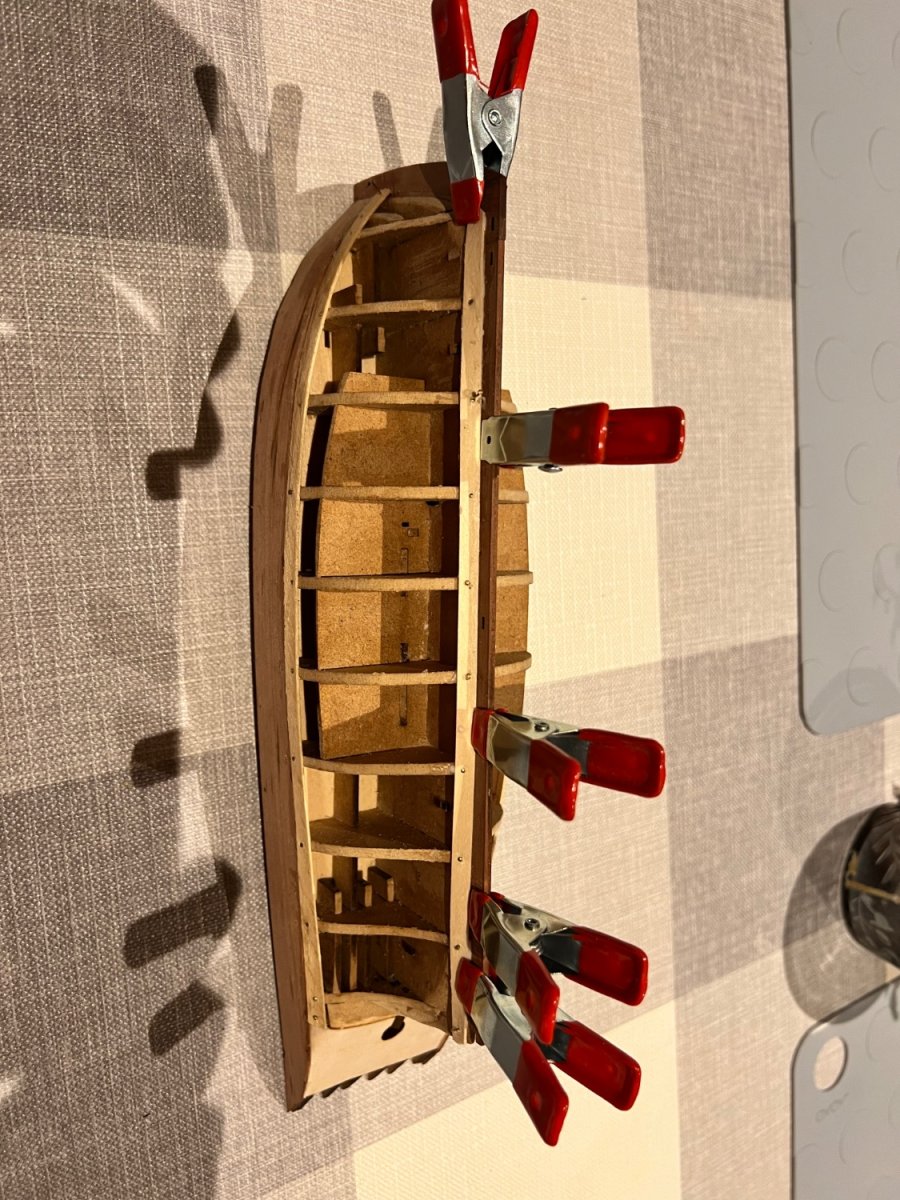
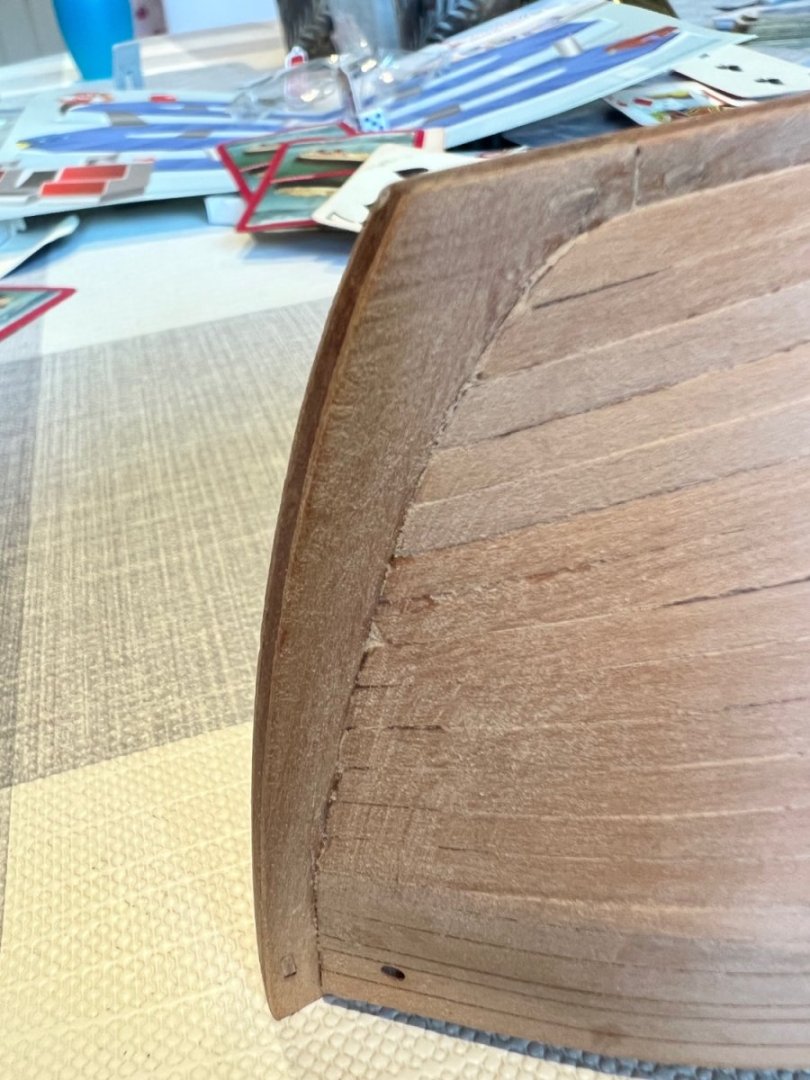
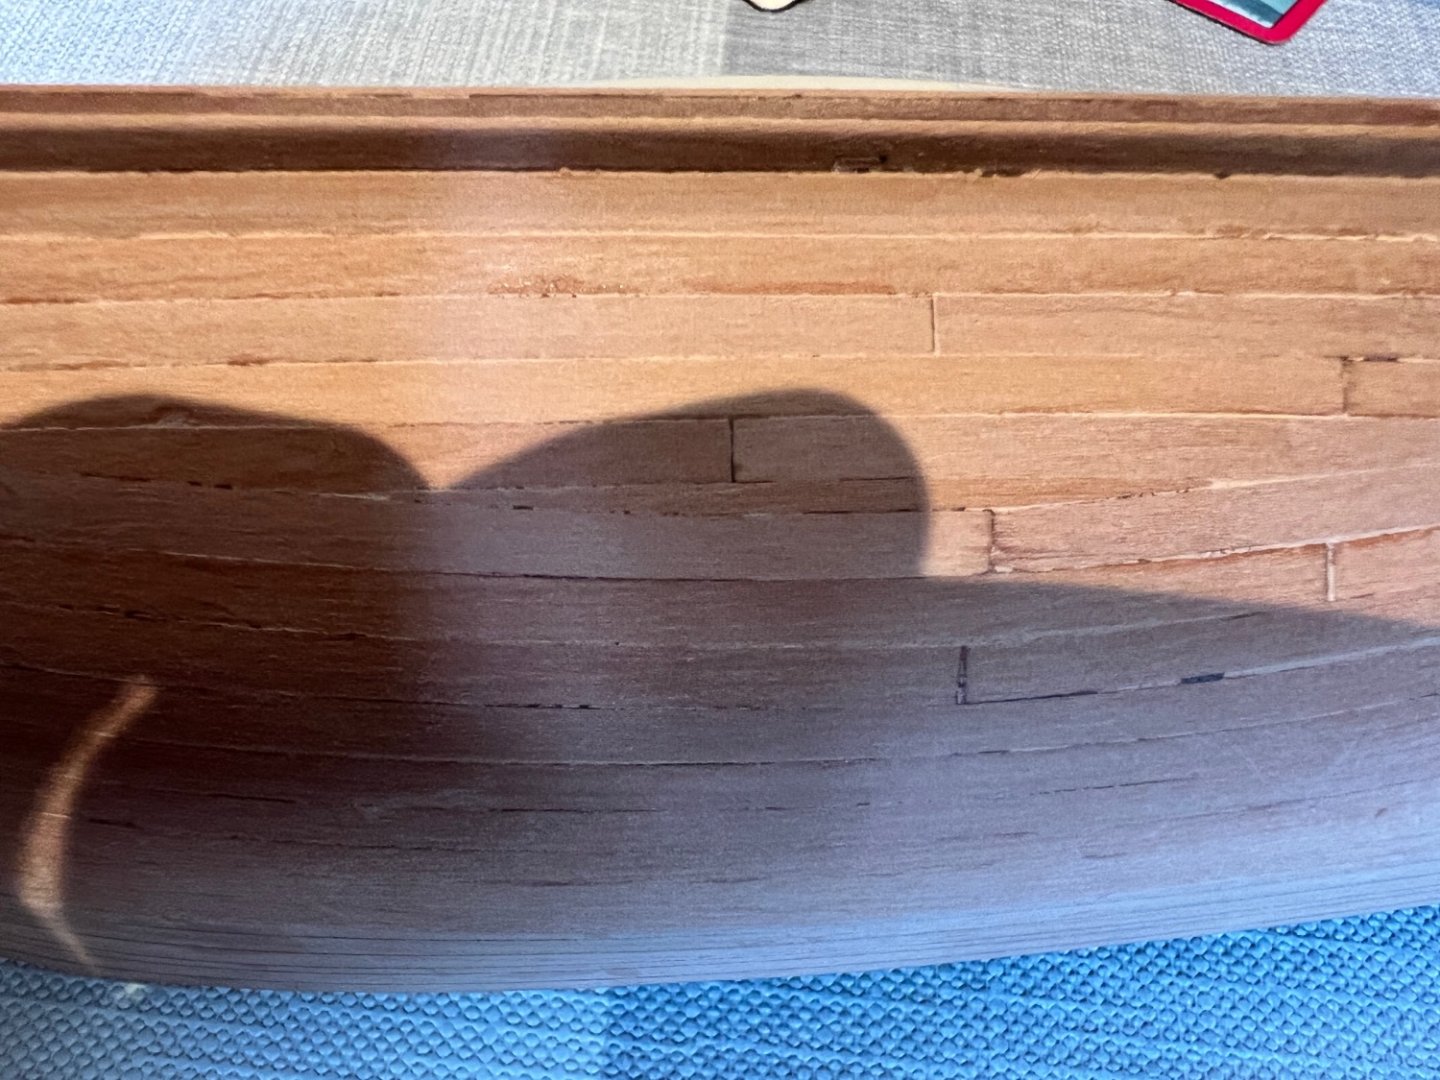
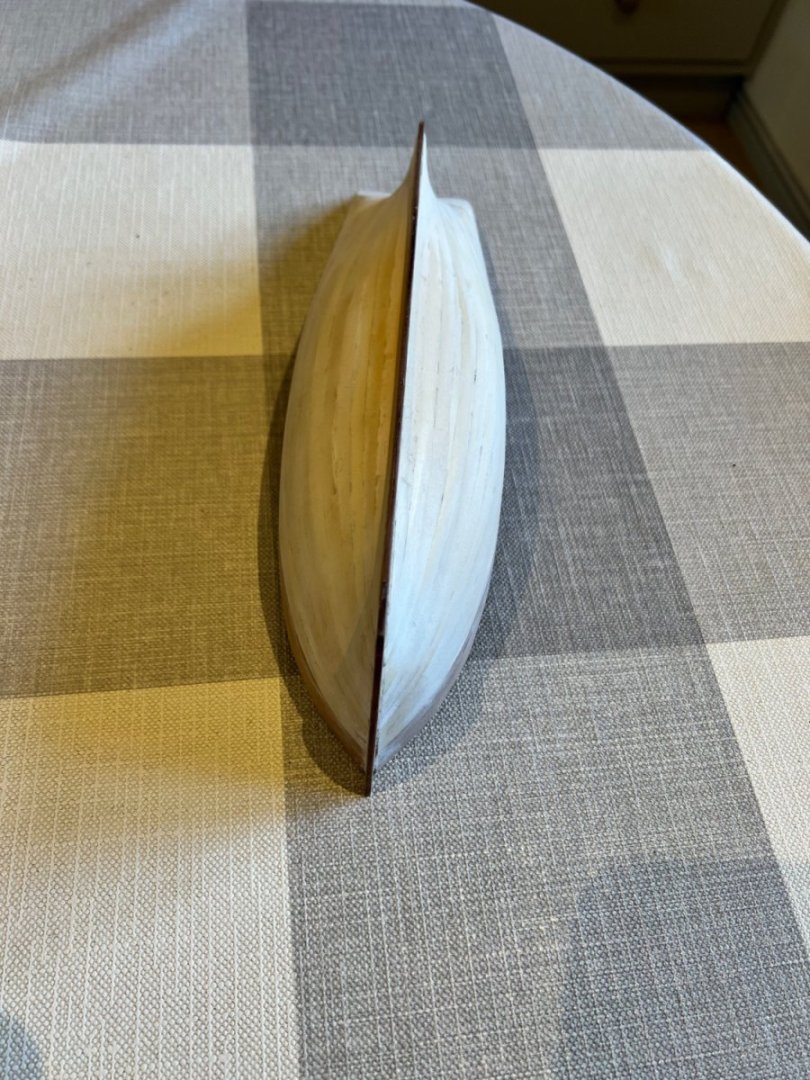
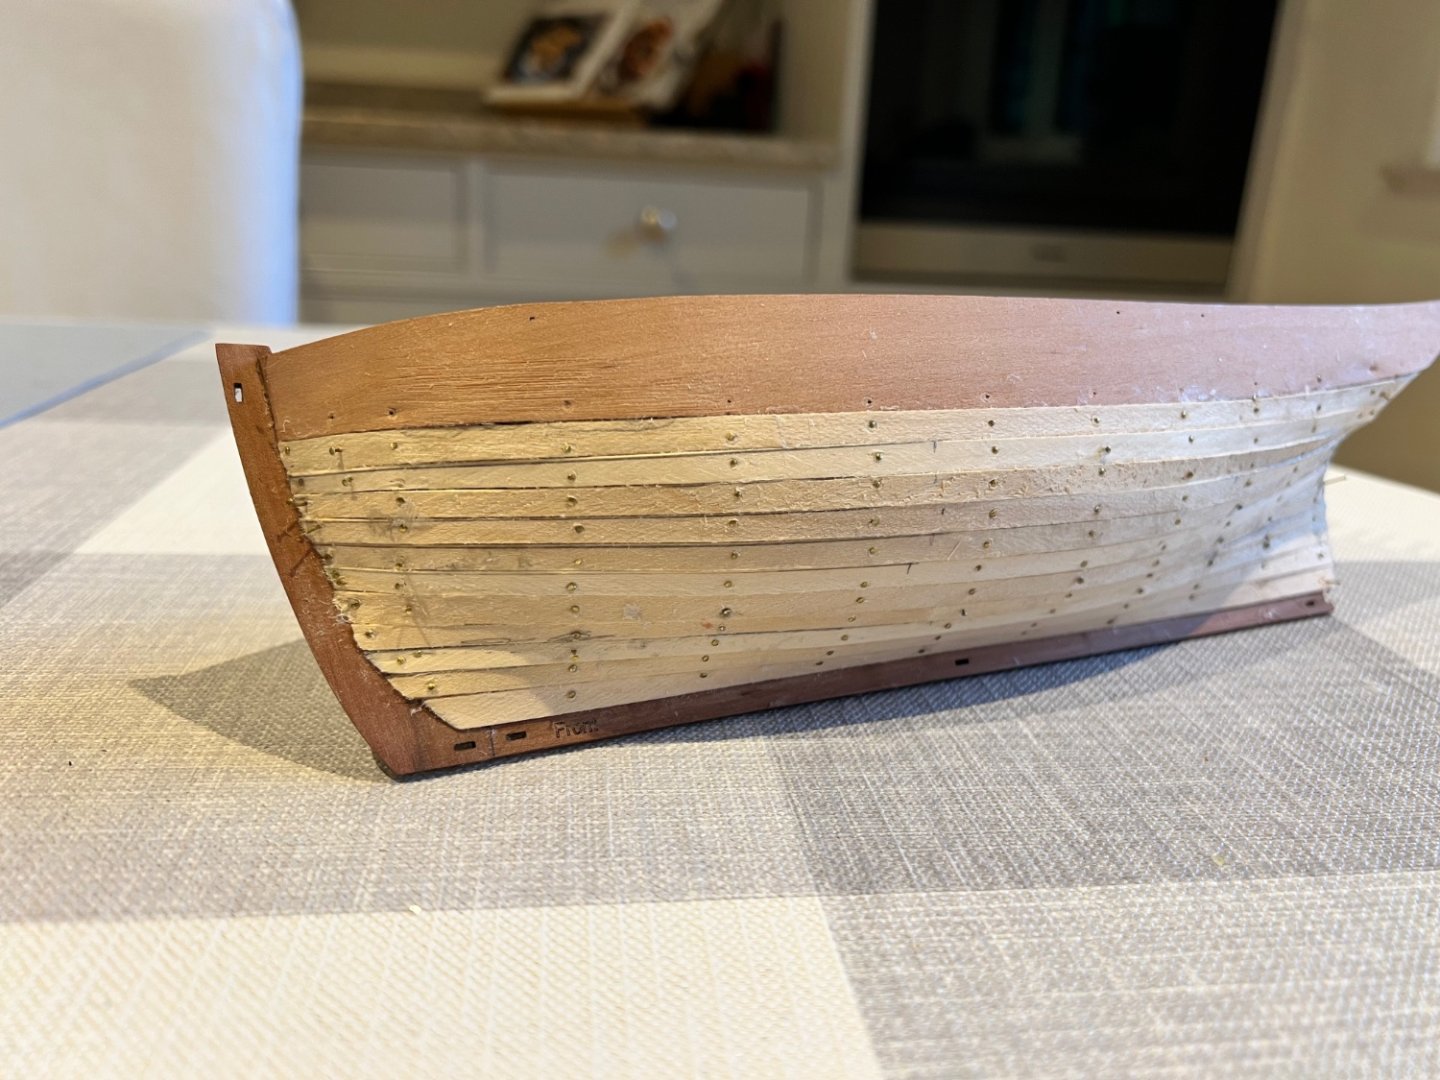
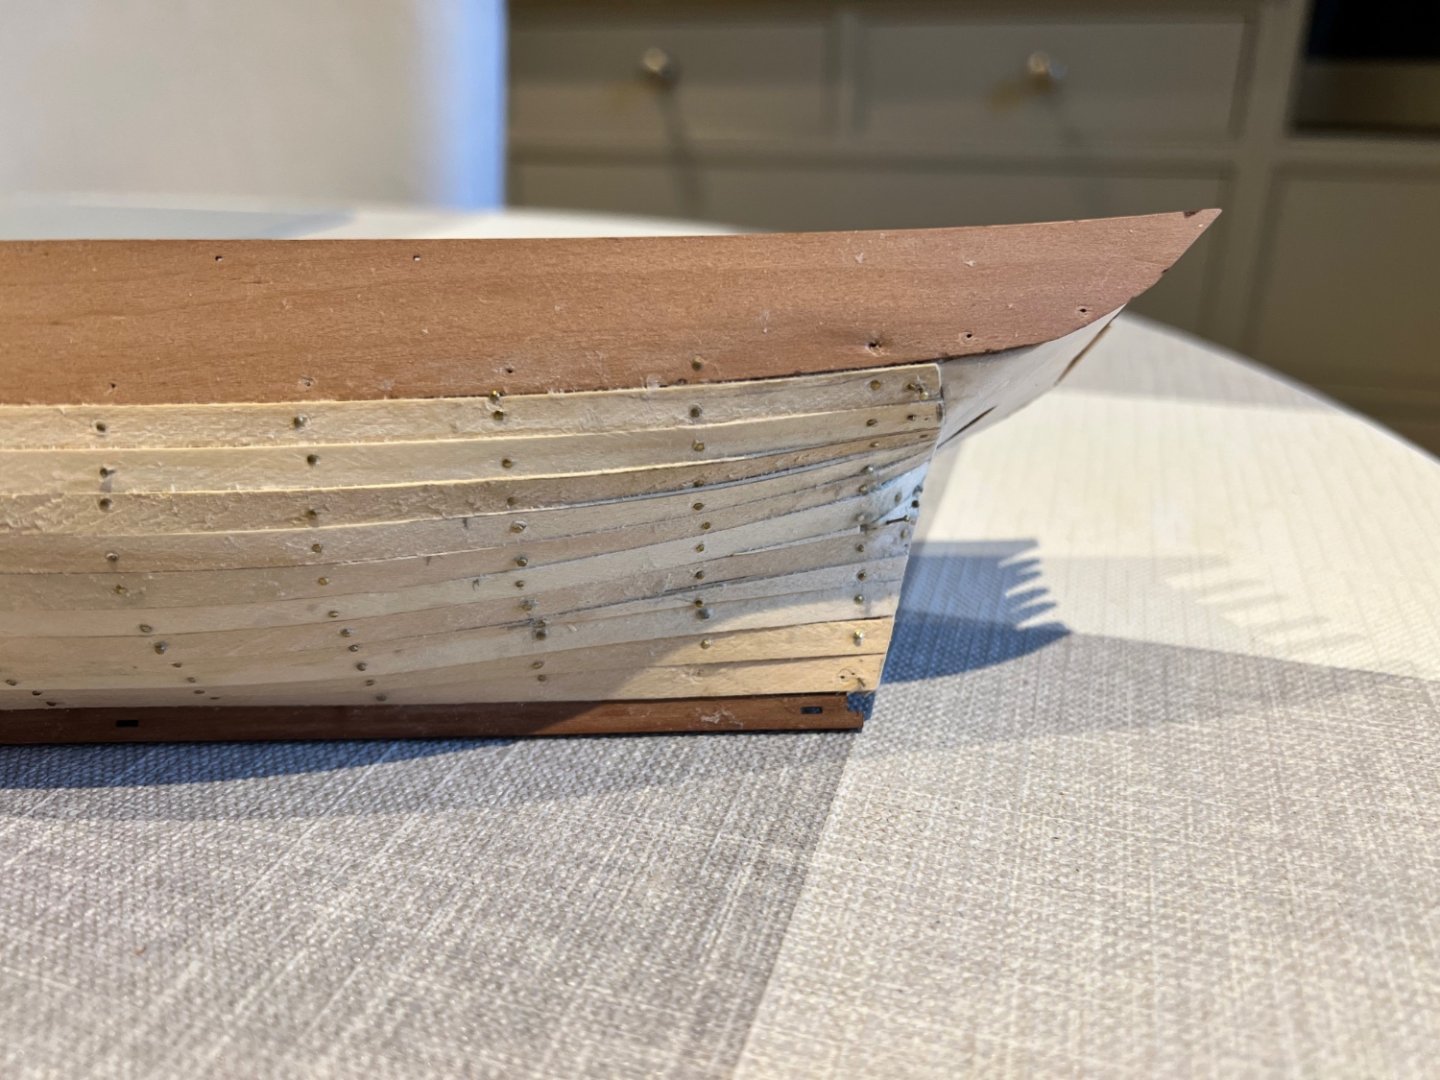
Closing the gap at the bottom of the bulwarks where it curved around bulkheads 1 and 2 was harder than expected even having dampened the bulwark, used elastic bands and drawing pins. I didn’t do so sufficiently before starting the second planking - so there’s a slight bulge there on the starboard side - probably noticeable to no one but me - I couldn’t make it show on a photo. I also managed to break the top off the stern counter. It’s a clean break and should glue on easily. I’m leaving it off whilst working on the second planking. My breakage count on this model is far lower than for Nisha so I’m doing something right and taking a bit more time. Starboard second planking is complete. Focus was ensuring it looks good for the above waterline unpainted areas. Below the waterline I’ve split most planks into two and staggered the joins. Needs more sanding and some filling. I did taper at the bow but not enough and didn’t use tick marks so the final plank was a sliver amidships. The bow suffered a little from not having a deep enough rebate - my failing for not marking out the stem cladding before first planking to ensure there is a sufficient gap. Needs some more tidying and filling. The hardest bit was “turning the corner” where the planking joins the rudder post next to the counter. Needed several stealers here. Looks messy below but will sand down fine and look OK painted. The Jack’s hull isn’t terribly difficult to plank but it also isn’t the easiest due to it being quite curvaceous and was a little harder than Nisha and the Fifie but easier than the Zulu. Port side next.


- 59 replies
-
- 4
-
-
- saucy jack
- fishing smack
- (and 2 more)
-
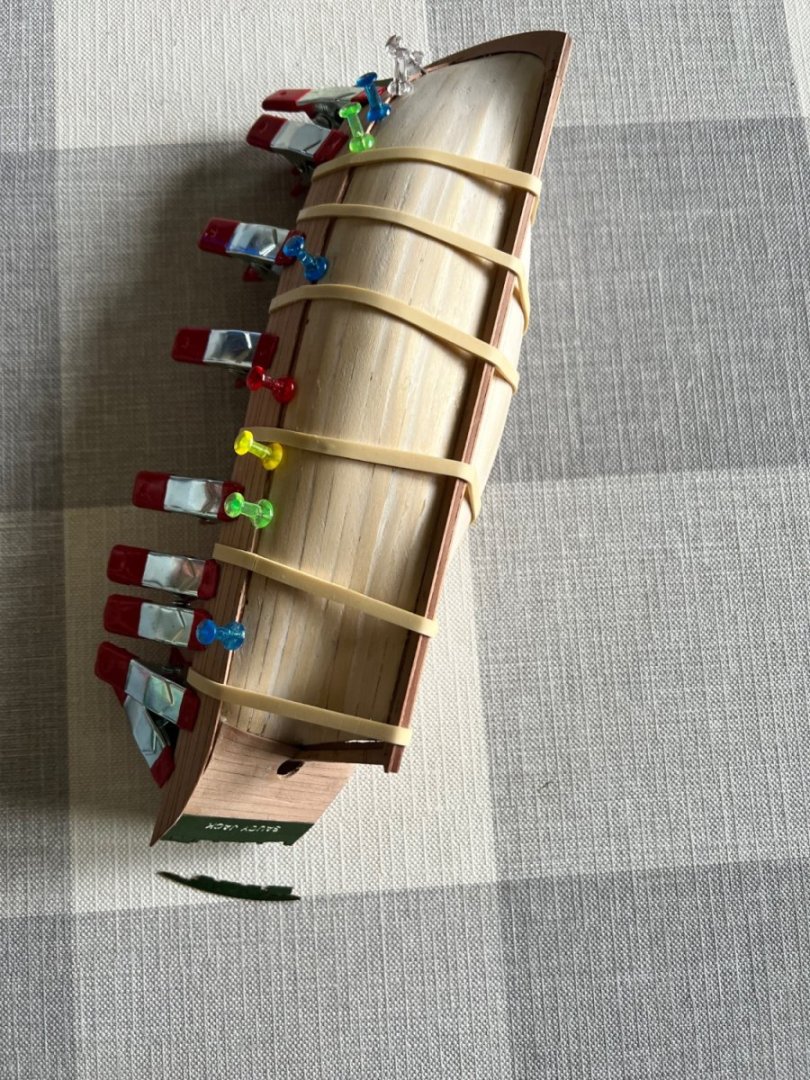
Thanks Glenn, I’ve followed your advice and sanded it level. It’s not very noticeable. Unless looked at from this angle. The instructions don’t say to do so but I’ve soaked the outer bulwarks for 30 mins in hot water and then clamped them on overnight to gain the correct shape. There’s still a gap at the bottom of the bulkhead but I’ll use drawing pins when it comes to gluing.


- 59 replies
-
- 5
-
-
- saucy jack
- fishing smack
- (and 2 more)
-
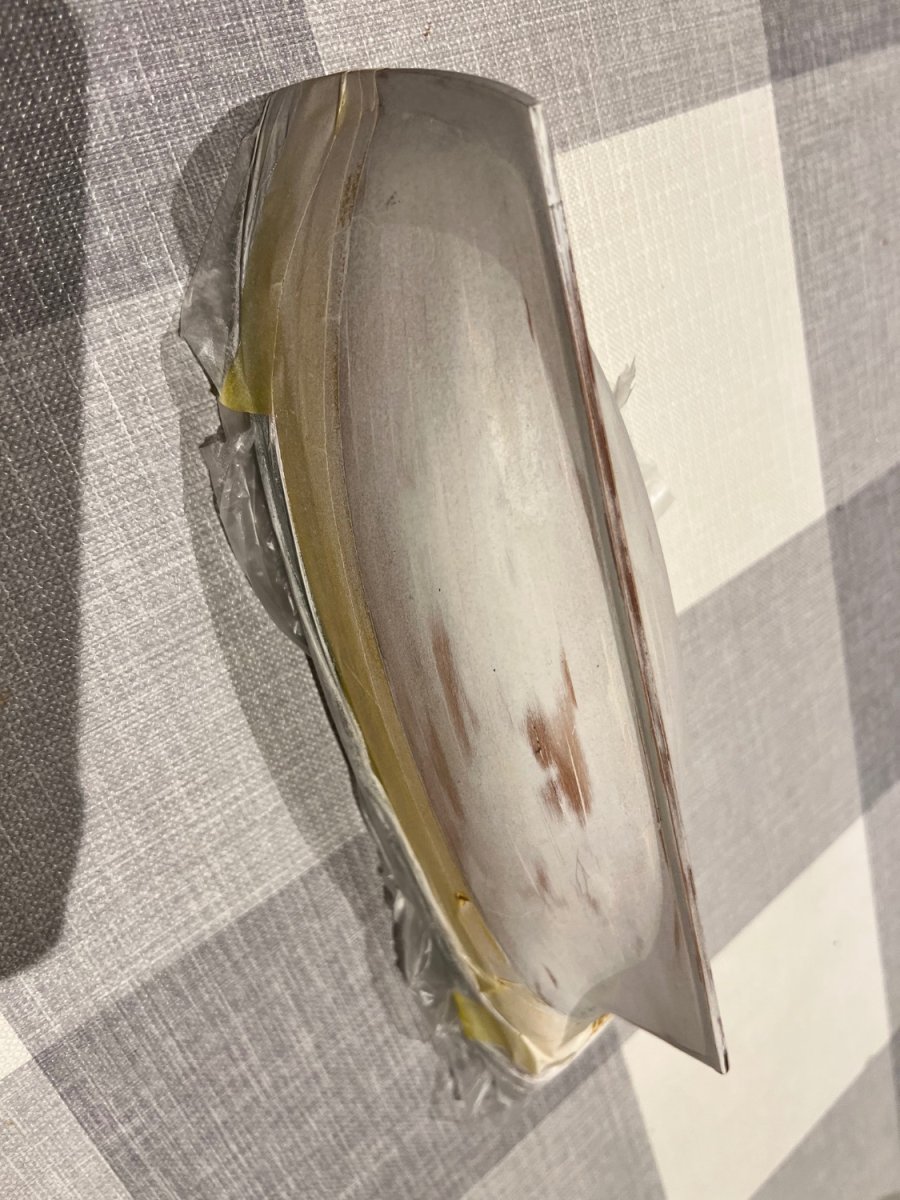
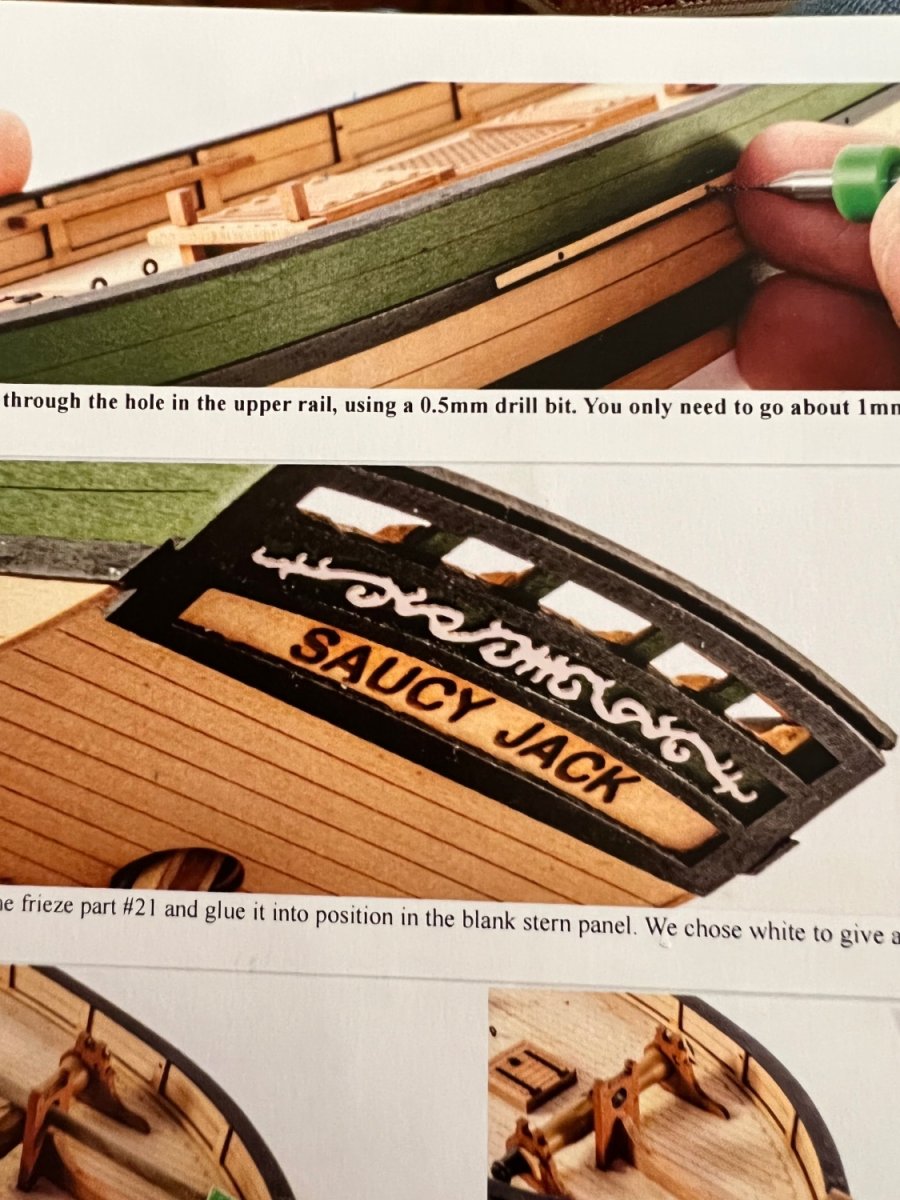
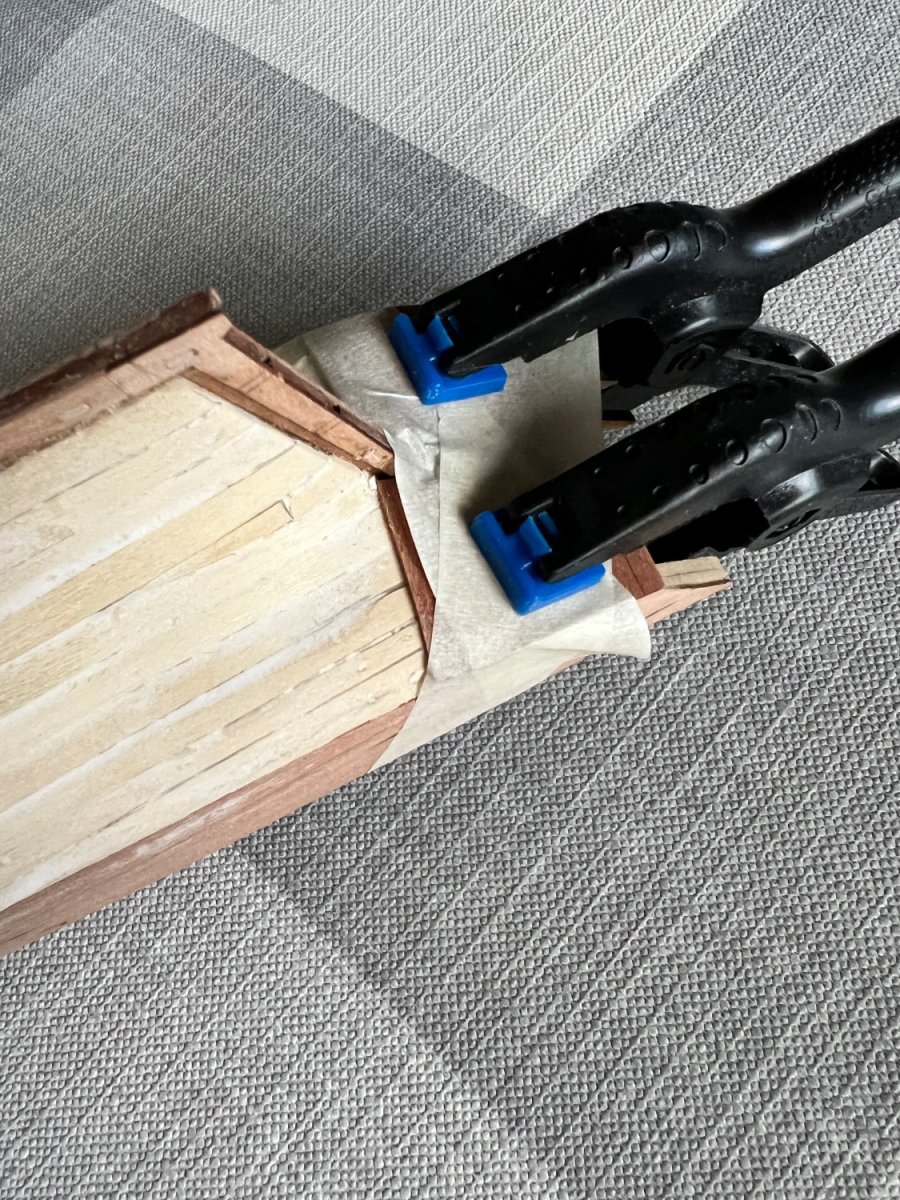
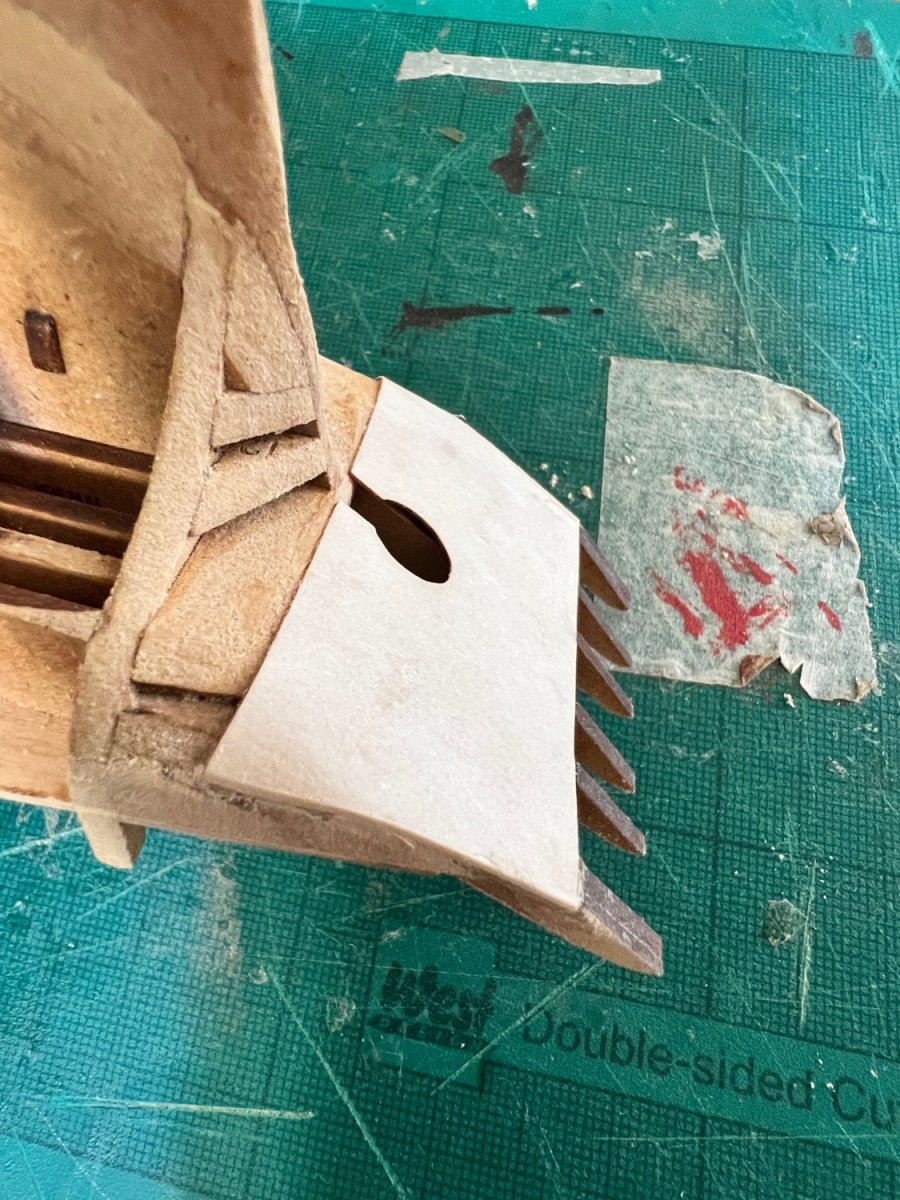
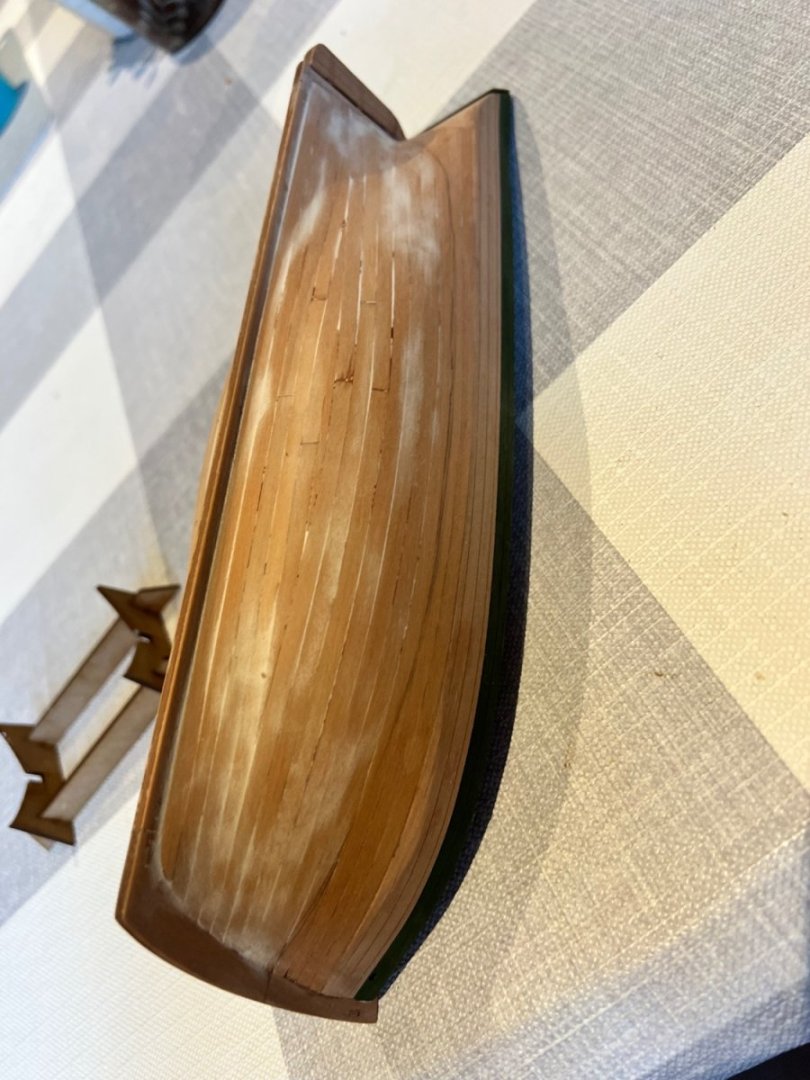
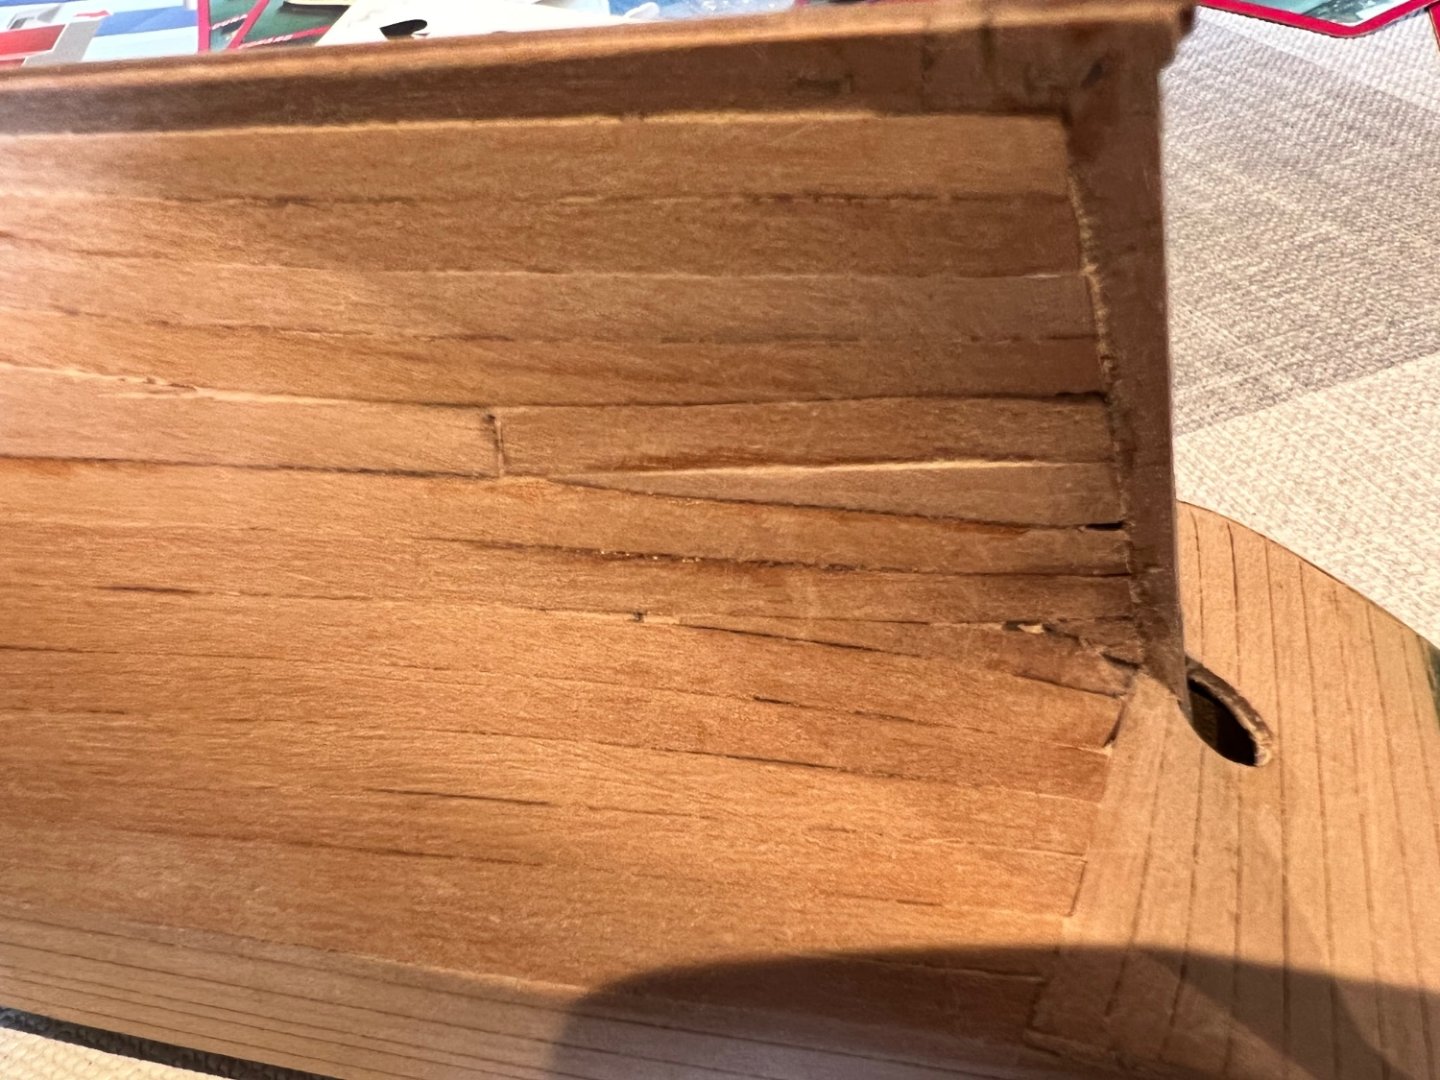
I’ve made a mistake (mine entirely and not a kit problem). Whilst focussing on fixing the outer lower counter’s curves on correctly, I’ve managed to glue it on slightly crooked. It’s glued on with CA (first time I’ve used it on this build) to hold down the “ears” where the wood curves and titebond for rest. I think my chances of removing it without significant damage to both inner and outer counter is slim. What this means is the upper counter will be at an angle. As seen held on below. I think the best approach is just to sand the top of the lower counter straight and accept that it will mean that the top etched plank at the stern will be slightly out of shape. Any other suggestions welcome? Problem would go away if I decide to fully paint the hull. I’m sticking largely to the paint scheme on the box for this model if the hull looks good enough to leave partially bare wood. The only changes I am doing are a) painting the stern frames green as seen above as I don’t like the look of exposed MDF, and b) considering painting the area with the name green with the name picked out in white rather than leaving the bare etched wood shown in the instructions below. This is the outer lower counter bent to shape before glueing.


- 59 replies
-
- 2
-
-
- saucy jack
- fishing smack
- (and 2 more)
-
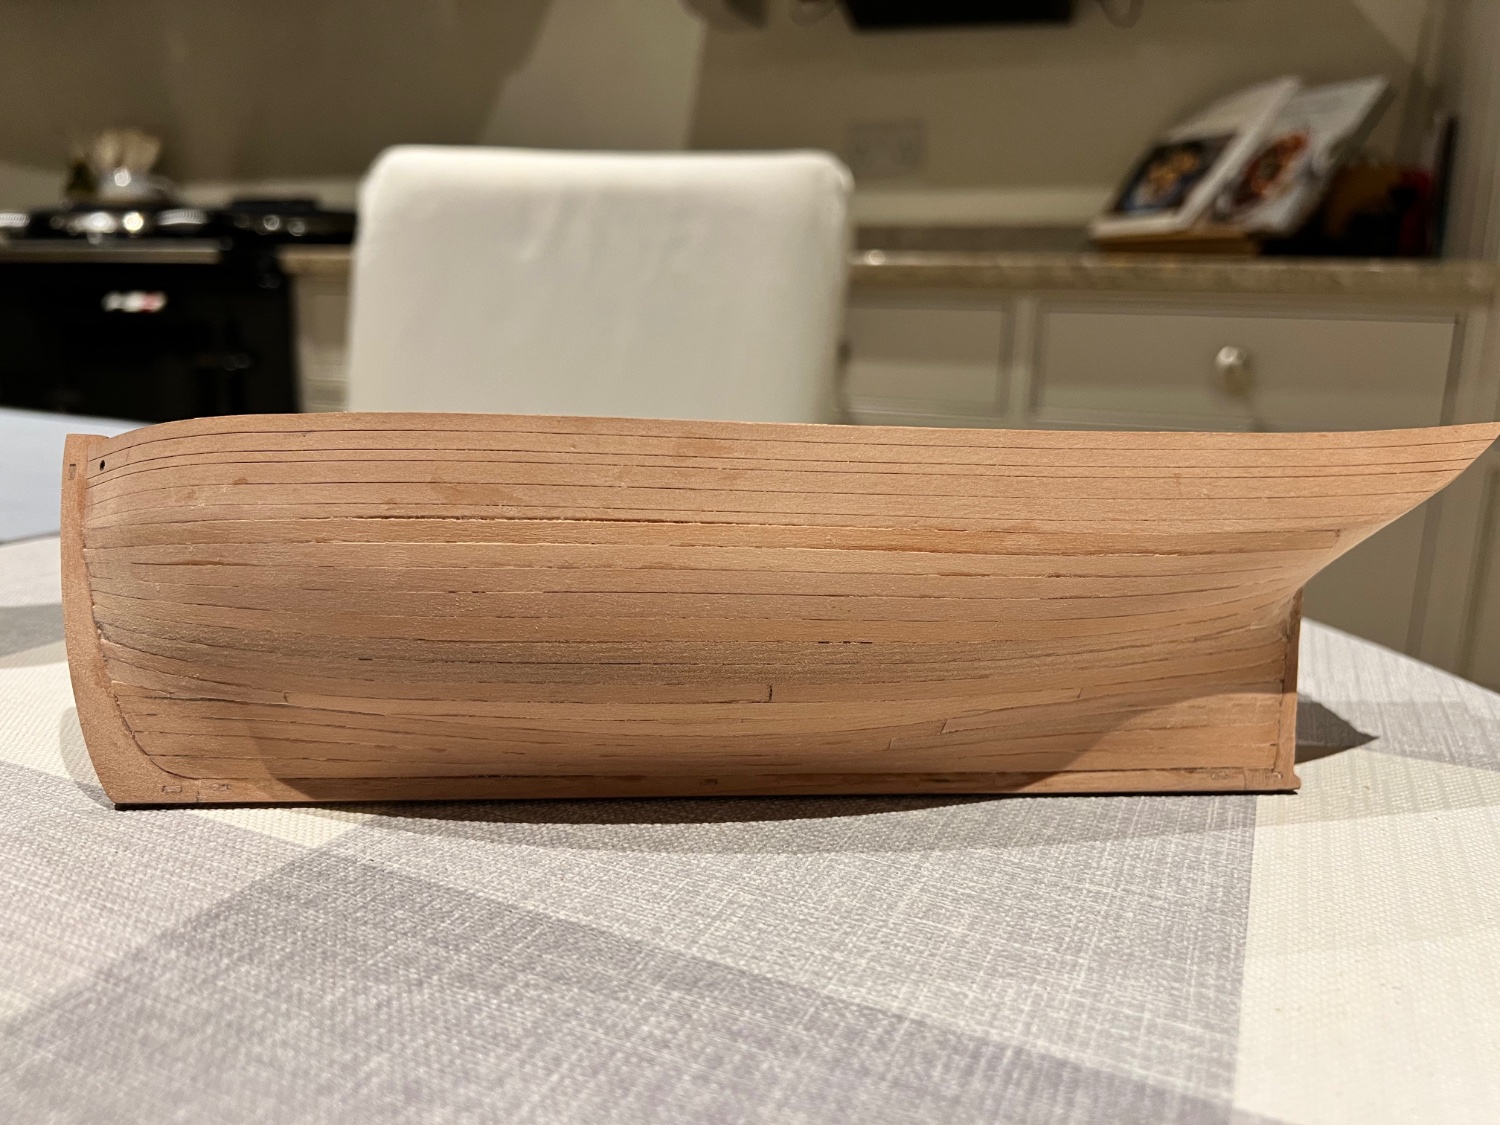
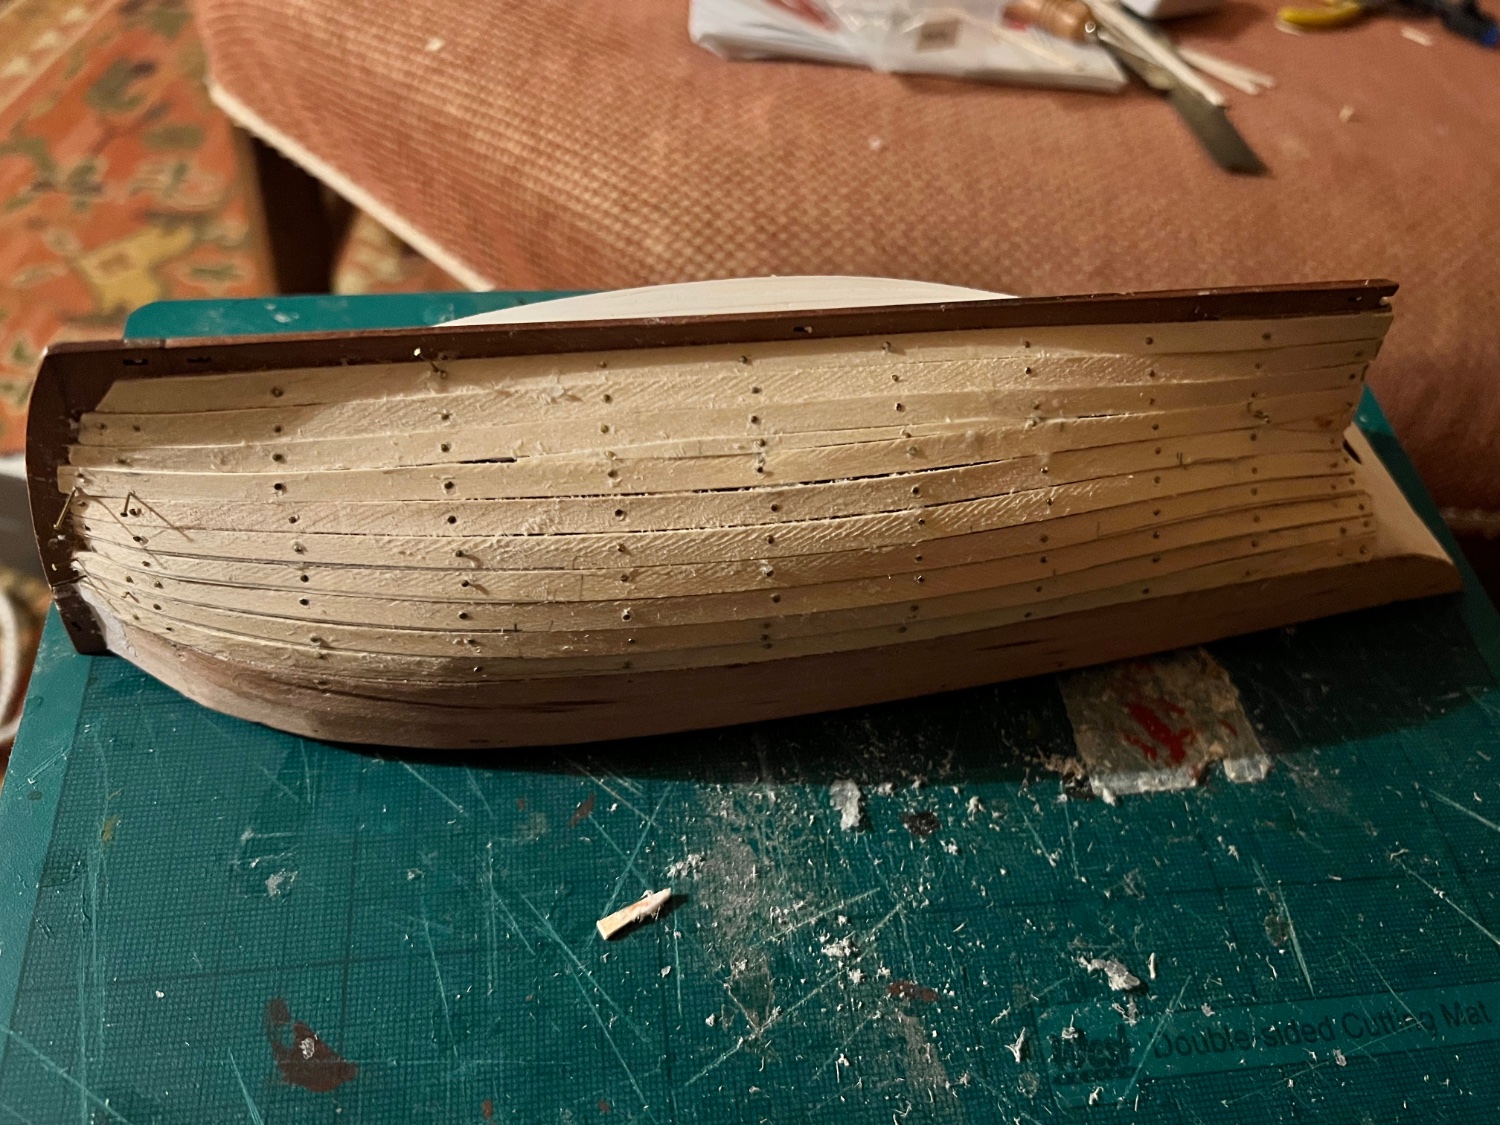
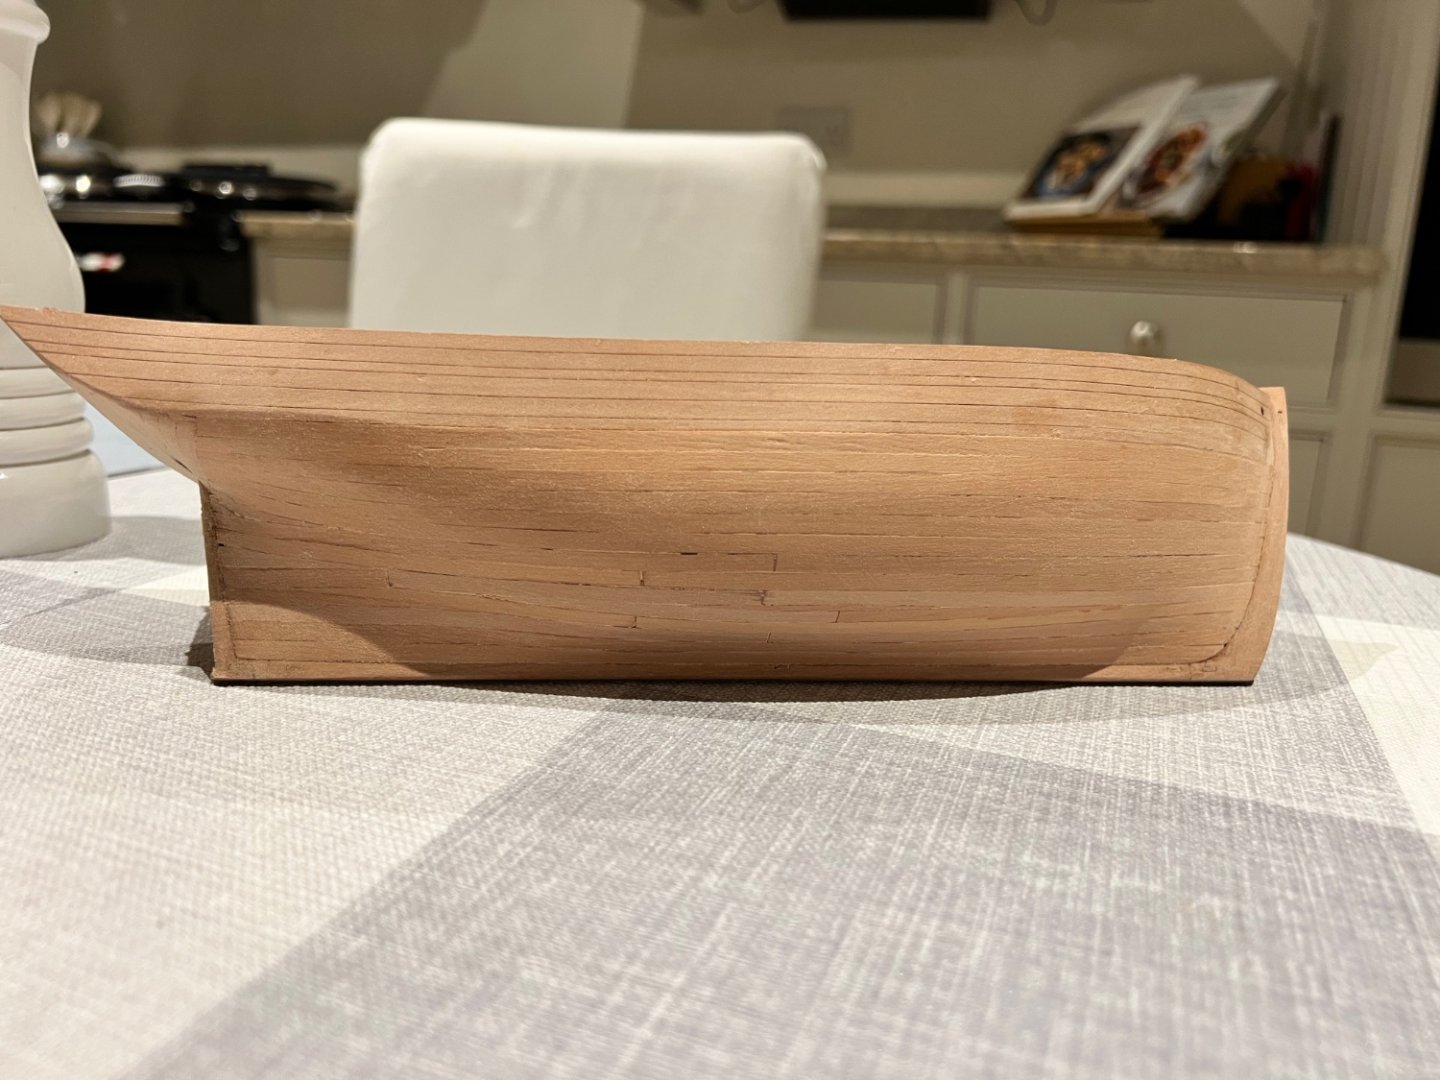
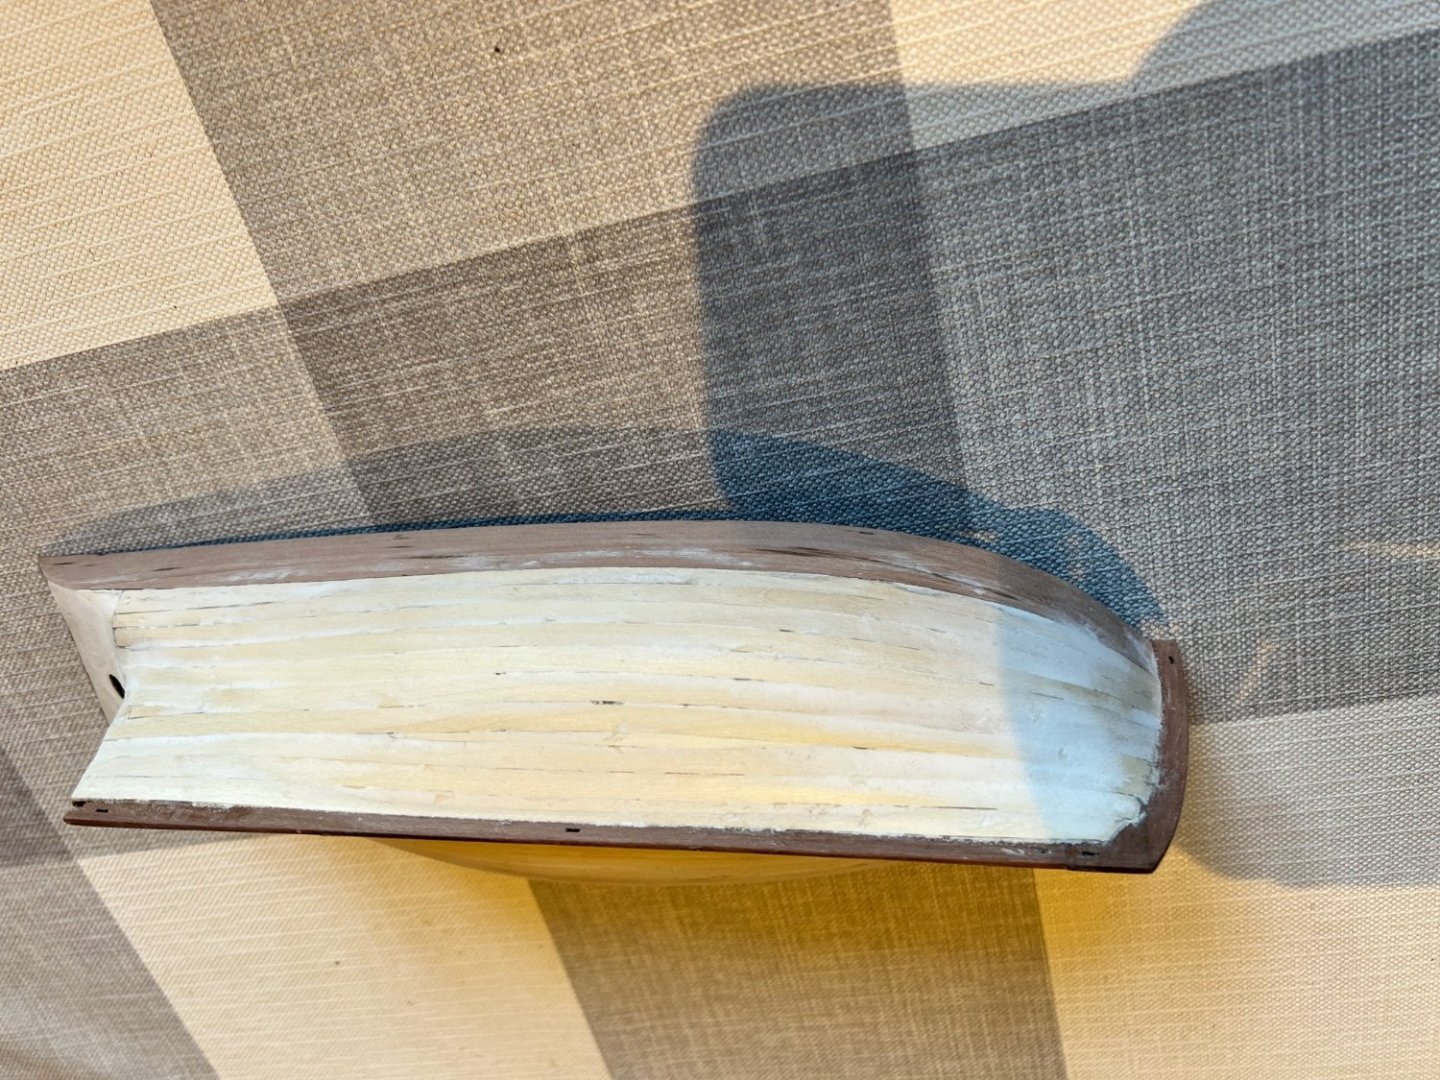
Starboard side now first planked. Another scruffy affair. But also fills and sands well. Both sides are very smooth to the touch and no obvious dips or bumps so should do the job for a first planking. Contrast between the wood, filler and pencil marks makes it look much rougher than it is. Rudder post added, there’s a small gap where I’ve been overzealous in the sanding but this will be hidden by the second planking. Also outer facings on the stem, keel and rudder post fitted. Rebates for the second planking are not as deep as I’d like them ideally to be - my fault, didn’t position the first planking as well as I could have. As usual for a Vanguard model, everything fits together extremely well and the alignment tabs for the outer facings are genius to ensure everything lines up properly. Her fat-bellied hull shape is now very apparent. She must have been a pig to sail especially with a large tank of seawater shipped amidships. Similar sail area to Nisha but much, much slower. Outer counter soaked in hot water and clamp/taped on to dry.


- 59 replies
-
- 5
-
-
- saucy jack
- fishing smack
- (and 2 more)
-
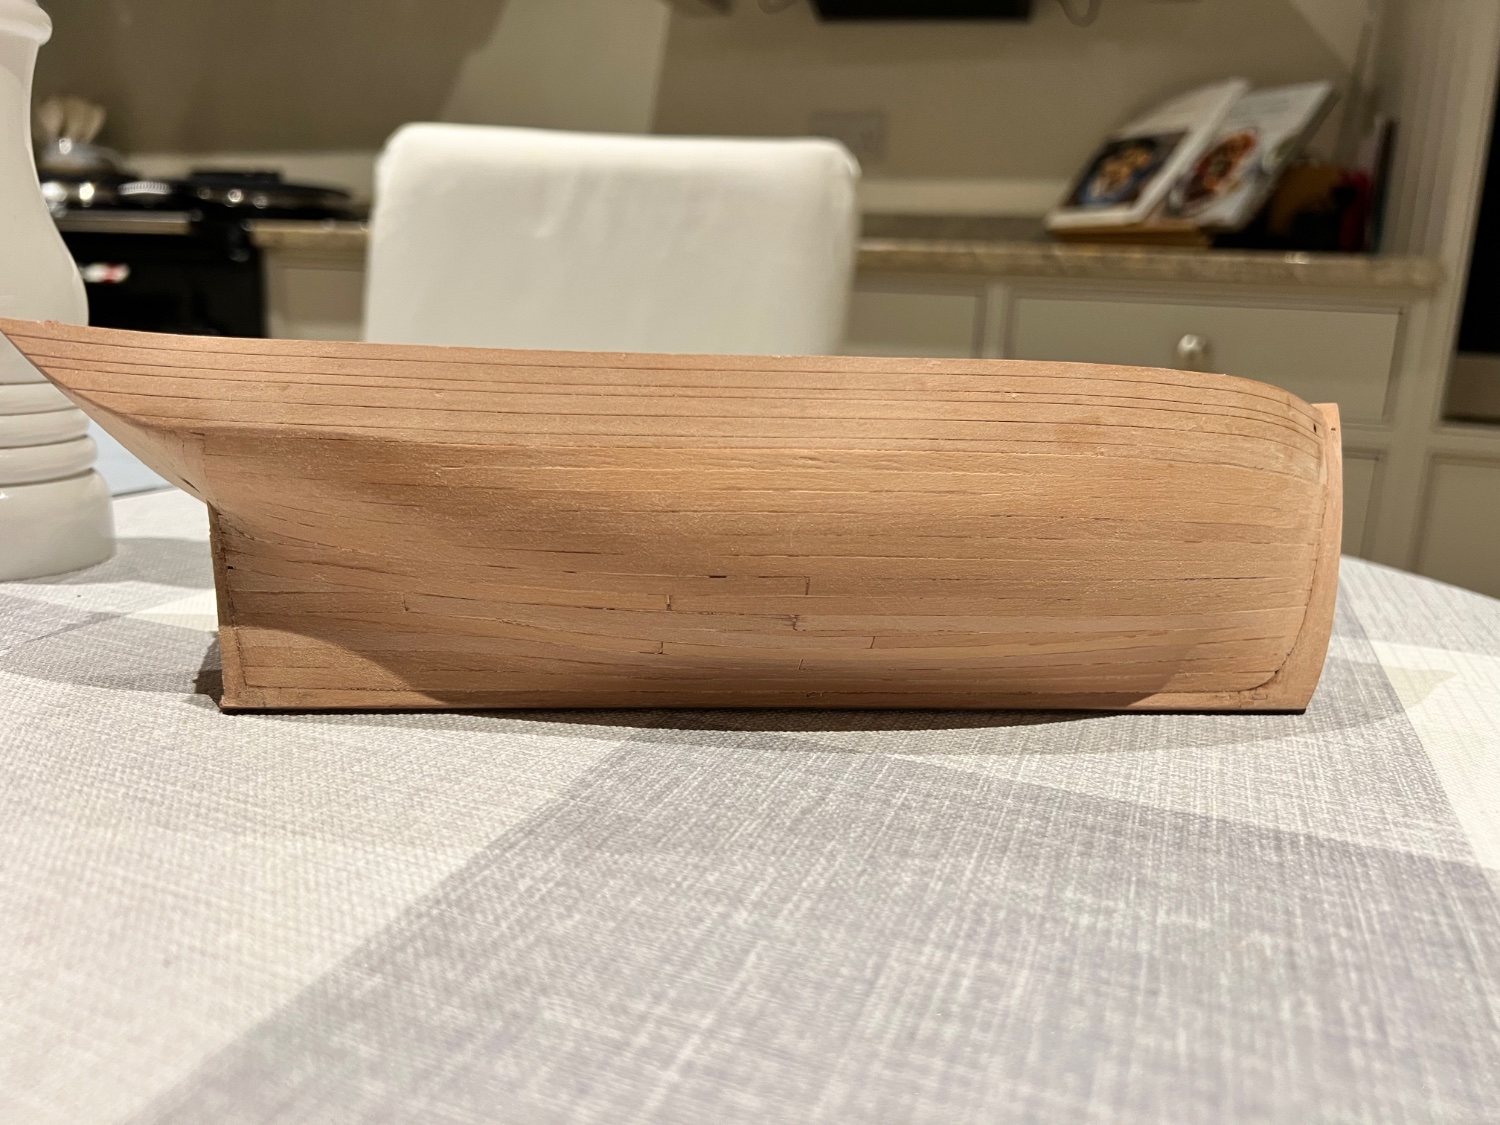
I completed the first planking on the port side today. I know you’re supposed to do it equally on each side, but the MDF skeleton is so robust I thought the chance of warping was remote… I’m not very good at planking and found the stern particularly difficult. I didn’t use tick marks so the tapering is inconsistent, but that doesn’t matter much for the first planking. Really not sure how to neatly plank where the rudder post meets the counter area. As you can see there’s a very scruffy stealer in there and it all looks pretty messy. The plank four up from the keel was the last and I had to shape three separate pieces to fill the gap. Frankly, the planking looks awful in these photos. Not quite as bad in real life and should sand down Ok once the nails are removed. After initial quick sanding the first planking should do it’s job and be a good smooth base for the second planking. I’ll fill and leave to dry overnight before more sanding tomorrow. You can see the messy stern above, now sanded and the stealer more clear.


- 59 replies
-
- 4
-
-
- saucy jack
- fishing smack
- (and 2 more)
-
Thanks Glenn, I’ve been admiring your Sphinx which is stunning! Been away a week so not a lot of progress. Bulwarks attached. I needed to use pins to keep the lower part of the bulwark directly against the bulkheads. The curve between bulkheads 1 and 2 has a tendency to splay out a little. Both sides attached and glue dried. First plank and garboard plank added on each side. No tapering for either. Went on fine except around bulkhead 1 and 2 where I needed to clamp the plank to the bulwark - more to shape the bottom of the bulwark than to change the run of the plank. Just used titebond PVA so far and no CA. Leaving to dry overnight.


- 59 replies
-
- 6
-
-
- saucy jack
- fishing smack
- (and 2 more)
-
Thanks Jonathan, really helpful too. I’ll upgrade my workshop with those! Much appreciated. Dan
-
Paul, thank you very much, I’ll have a go at doing them that way. Probably easier with the soft lime wood than the pear. I’ve also read somewhere about using a moxon vice and a mini plane for multiple planks. Does that approach work? If so I’ll need to buy a plane and vice. Many thanks and best wishes Dan
-
OK, now for one of those basic skills questions I warned you about. Please can someone advise me how you cut planks to an accurate taper? To use any more complex planking technique you need to be able to ensure that you can produce at least a few planks with a similar taper. My method (based on the Vanguard instructions) so far is measuring the end of the plank where the taper should start and marking with a pencil (first area of inaccuracy as the lead mark from the pencil is so wide). Then wetting the plank to help the blade follow the desired line and not the grain and cutting a straight line to where on the plank I want the taper to start. In practice, the blade wanders and I rarely get anything like a straight line and each plank ends up very different to that of its neighbour. I’ve watched the excellent Chuck Passaro planking video - it’s all very well, but only if you can cut an accurate taper in the first place. There must be a better way of doing this! If so please could you let me know. Many thanks
- 59 replies
-
- 1
-
-
- saucy jack
- fishing smack
- (and 2 more)
-
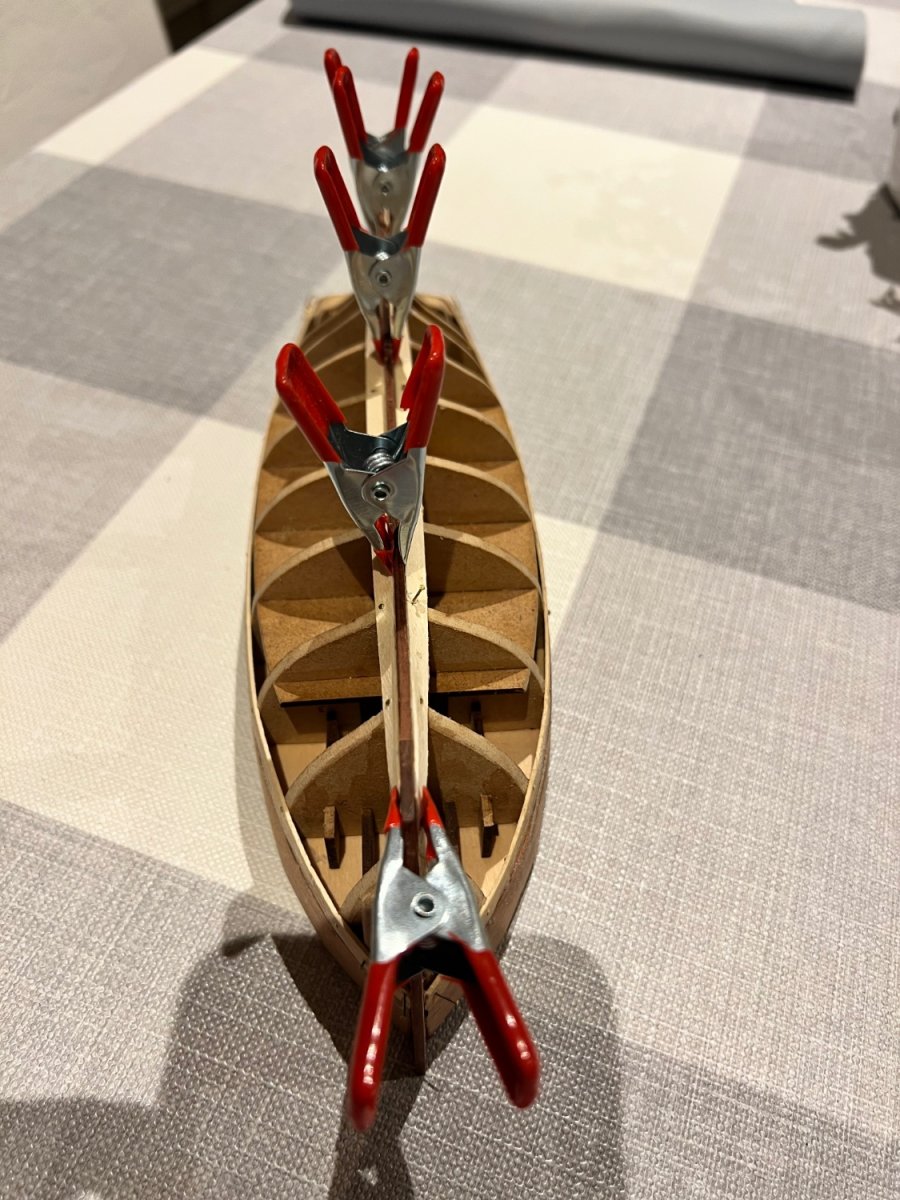
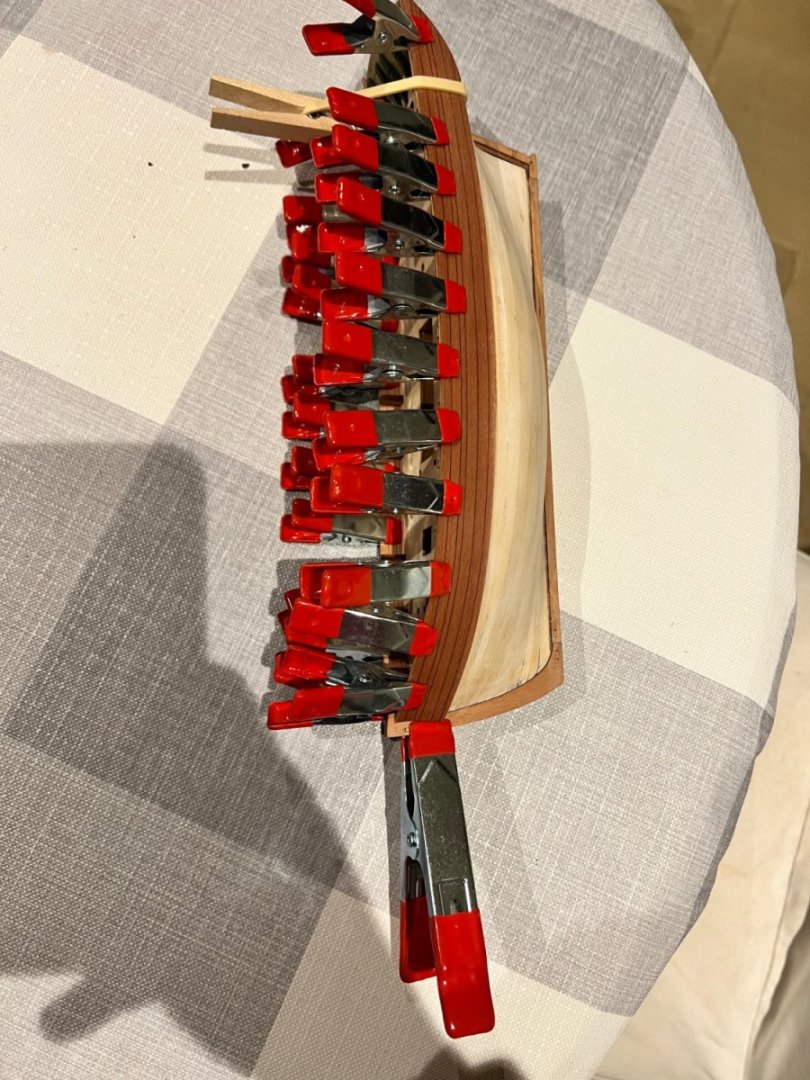
This is the inner counter glued on, it really does bend around the stern structure. Fairing was then completed and tested by laying a plank over the structure at various points. Next came the inner bulwarks. Unlike for some other Vanguard fishing boats, the instructions don’t tell you to soak the bulwark, fit and leave to dry - but I recommend you do, whilst most of the Jack’s hull shape is very forgiving, the bows have a significant curve and fitting the bulwark dry I split the notch in the stem post (see below) because of the tension of the wood completing that curve. The damage was easily fixed with Titebond (I’m tying to use much less CA on this boat compared to previous builds). The bulwark was soaked for 20 mins in hot water and then clamped onto the bulkhead ears and left to dry.

- 59 replies
-
- 7
-
-
- saucy jack
- fishing smack
- (and 2 more)
-
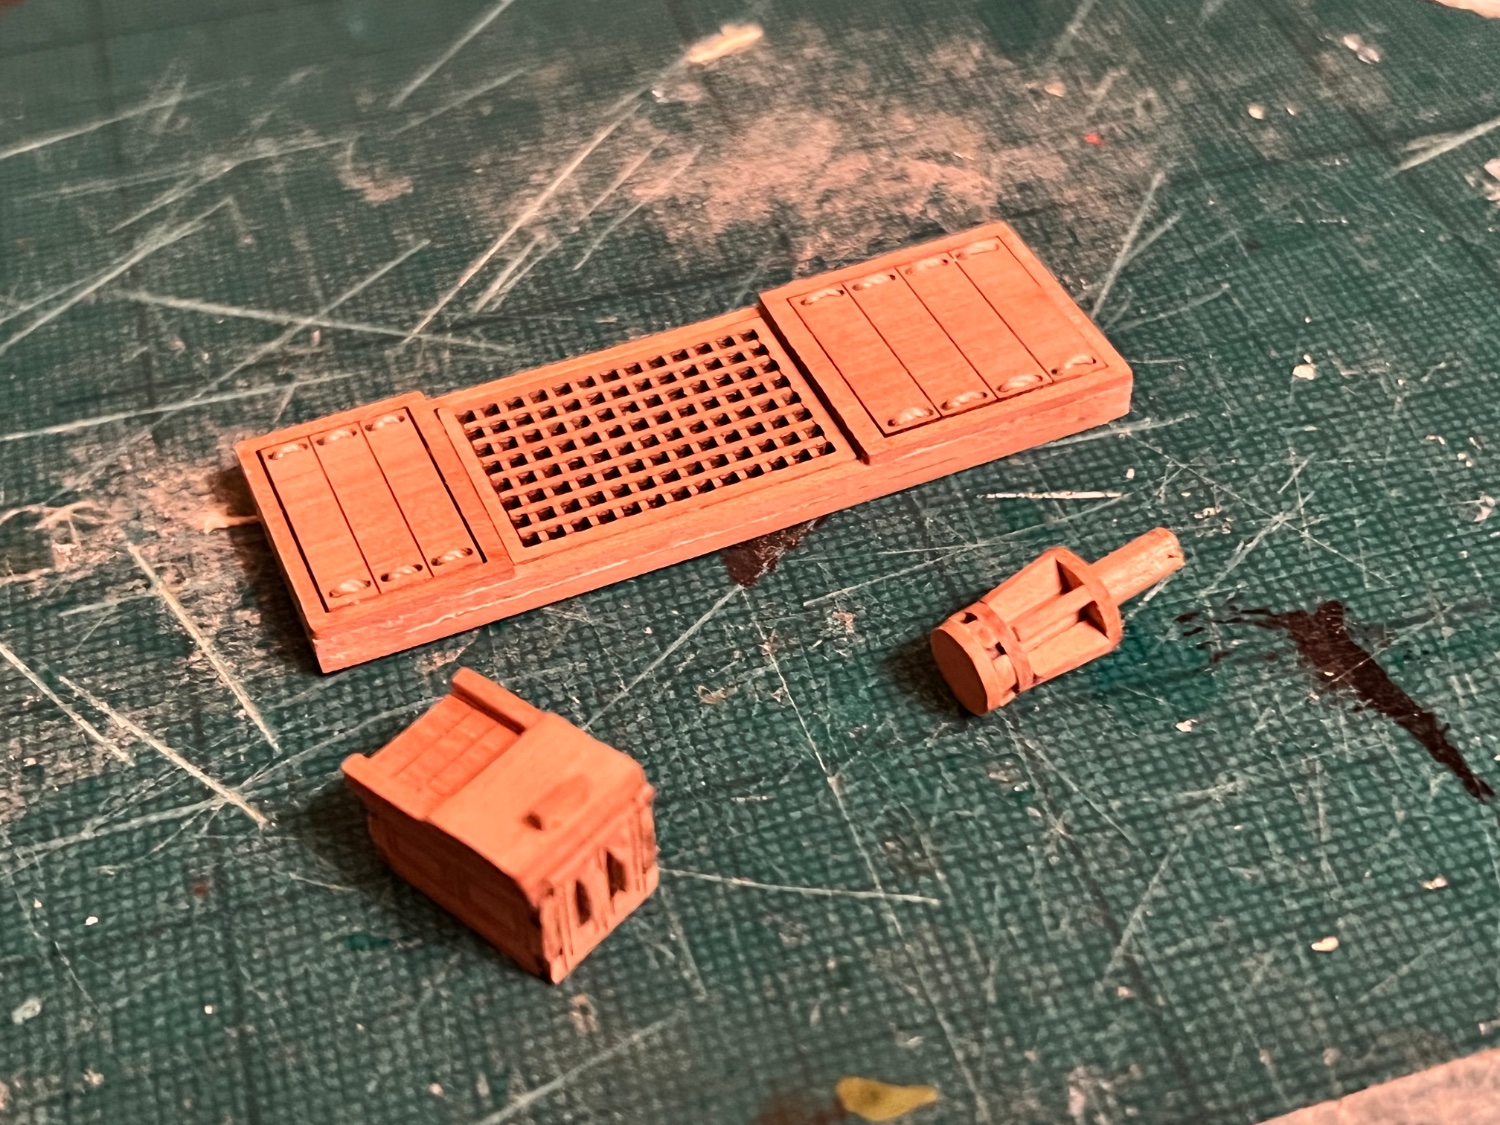
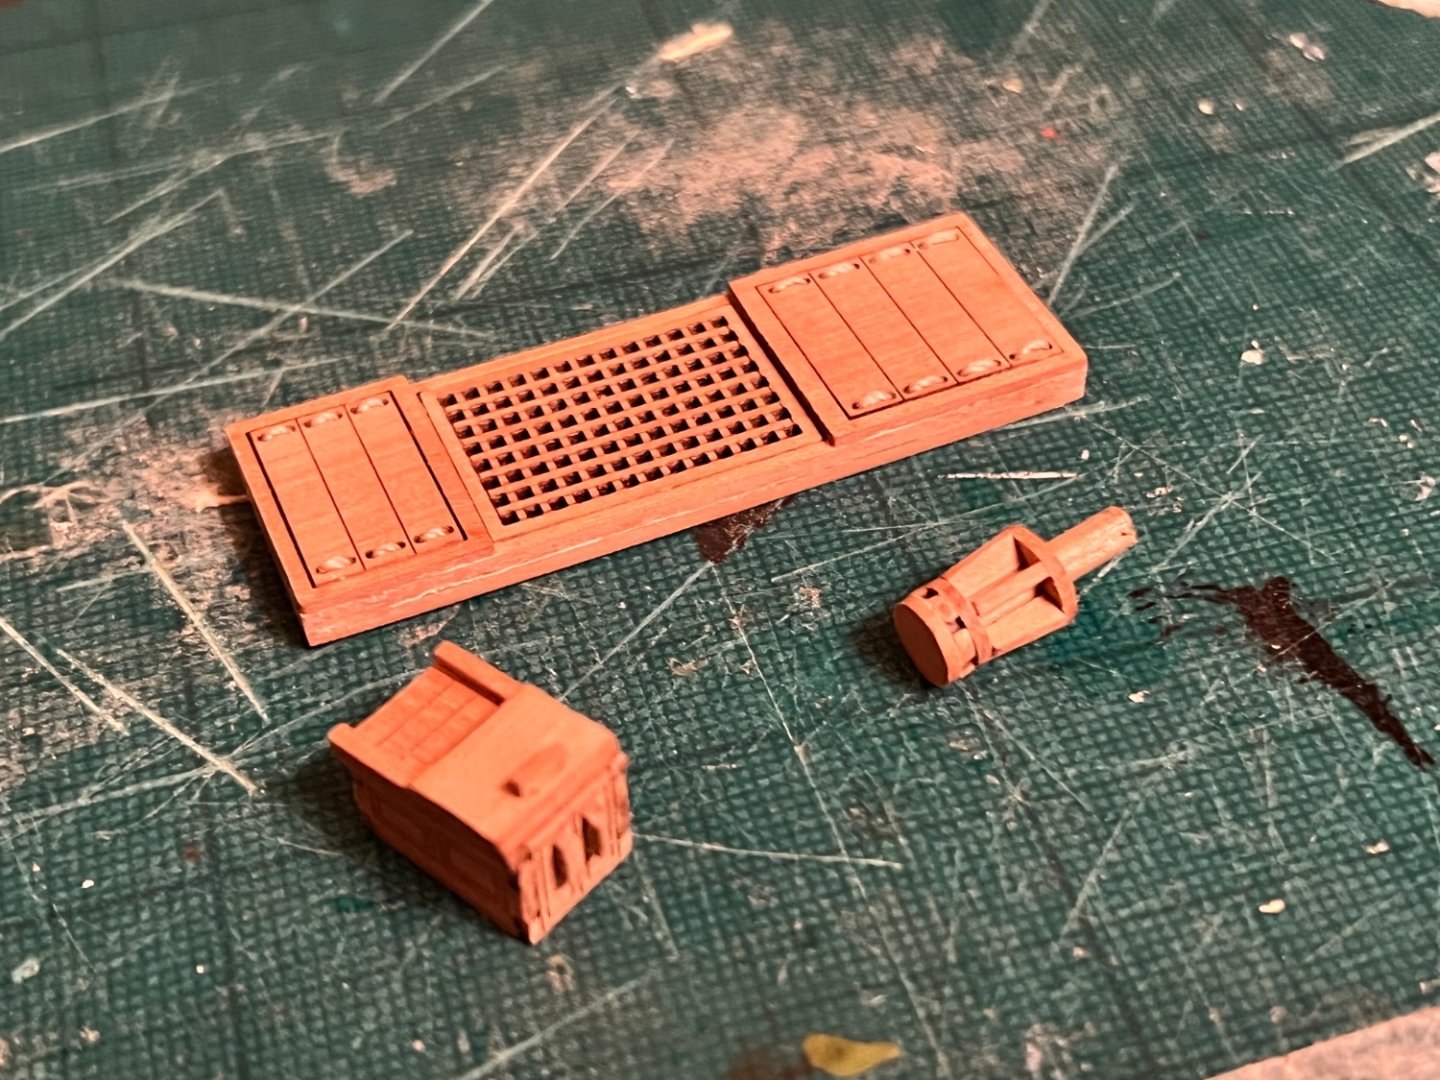
Keel and stem post fitted and left to dry. During glue drying periods I’ve been busy with some of the deck furniture. Much easier to build companionway than on Nisha. Tiny but easy to build capstan. Plus the fish hatches and grating to go above the well.
- 59 replies
-
- 3
-
-
- saucy jack
- fishing smack
- (and 2 more)
-
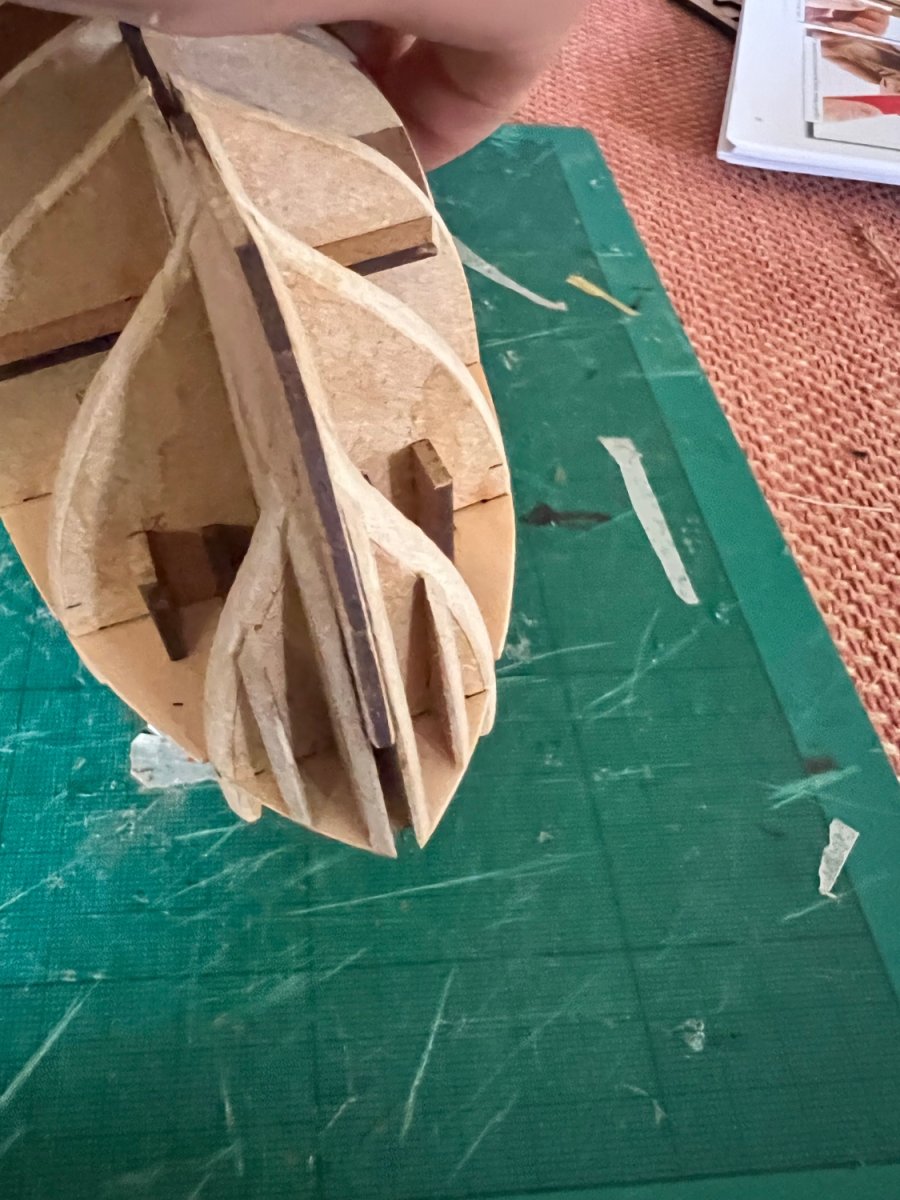
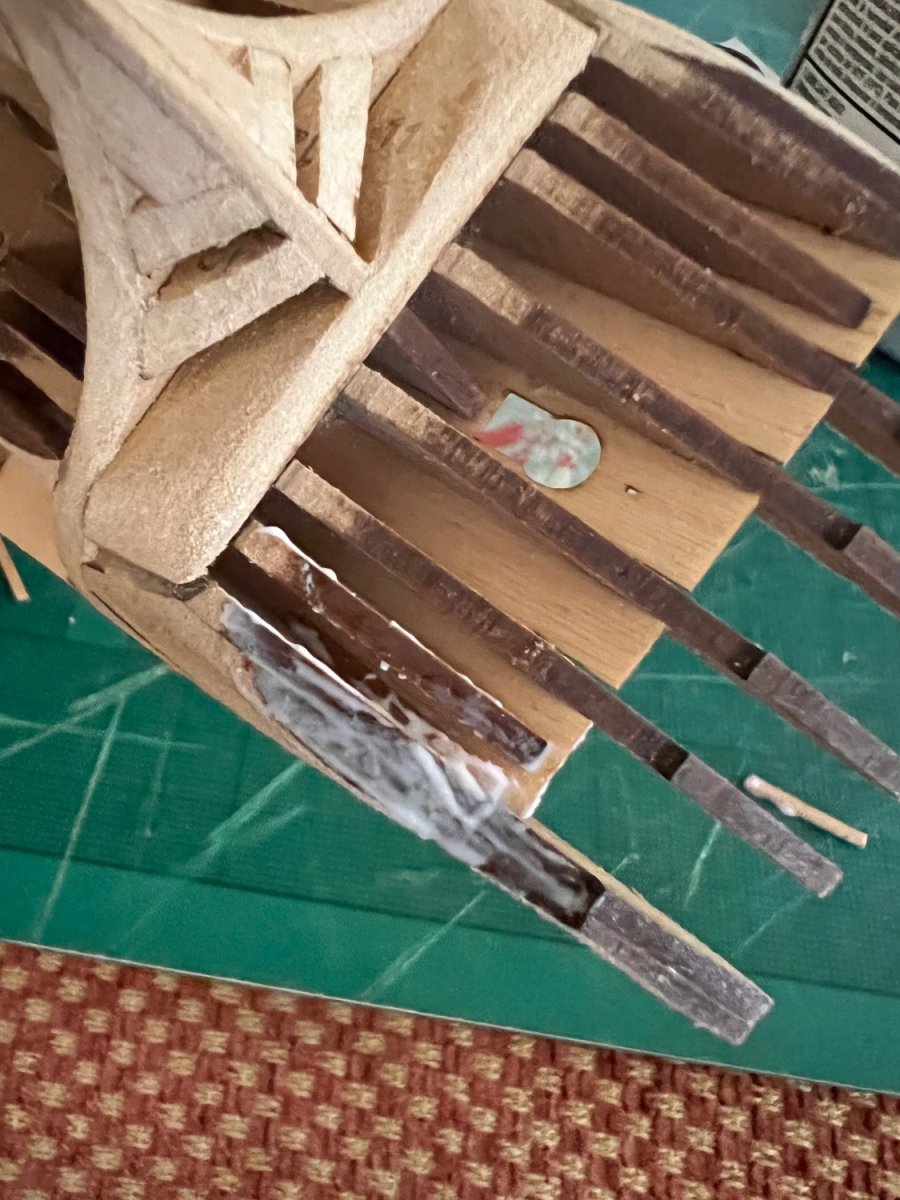
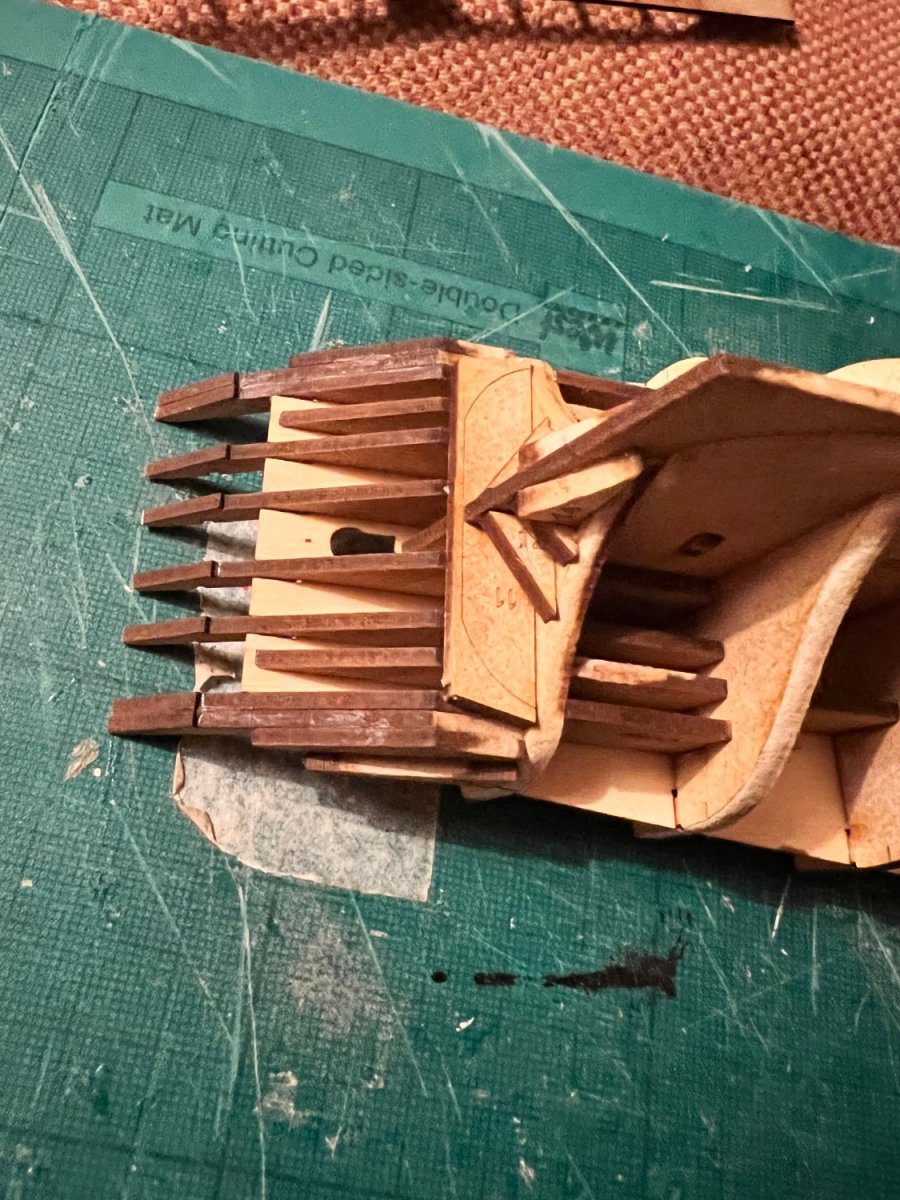
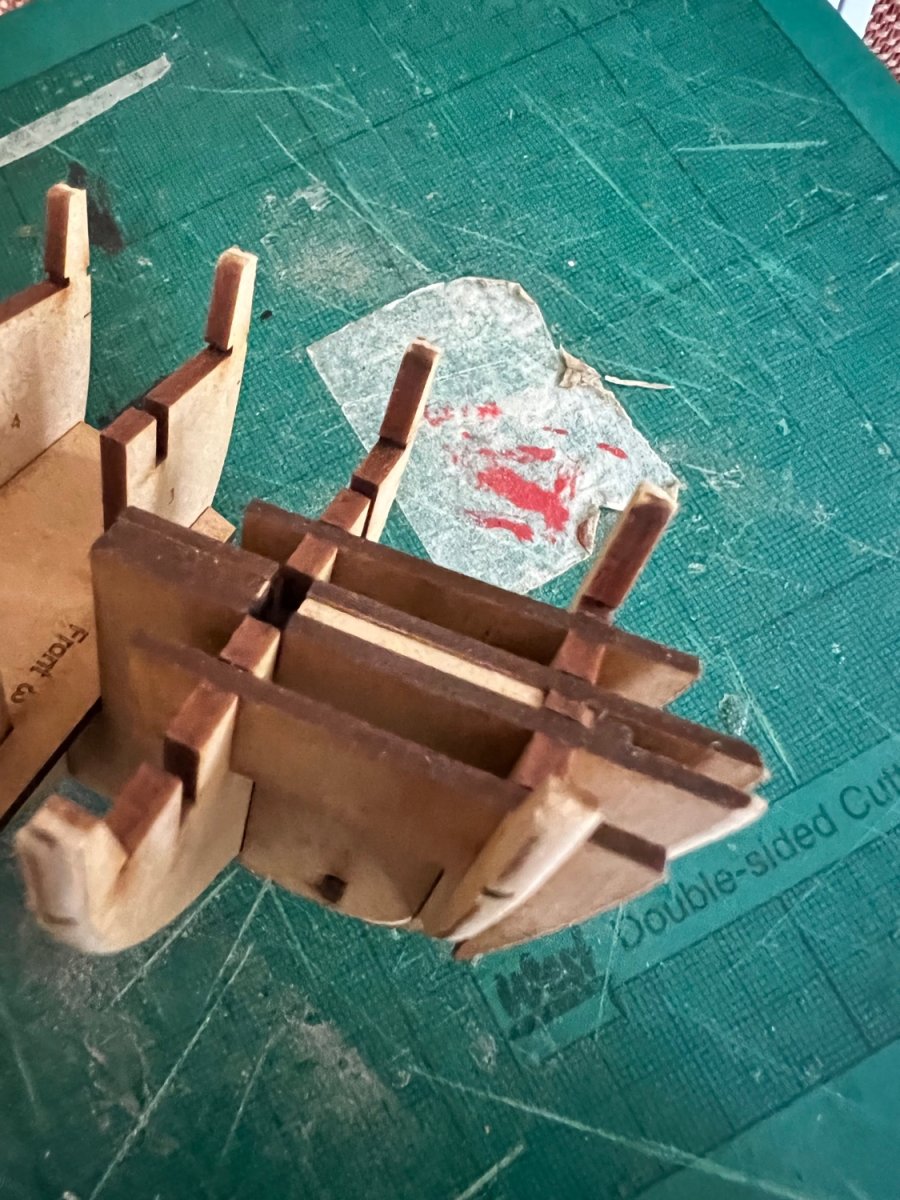
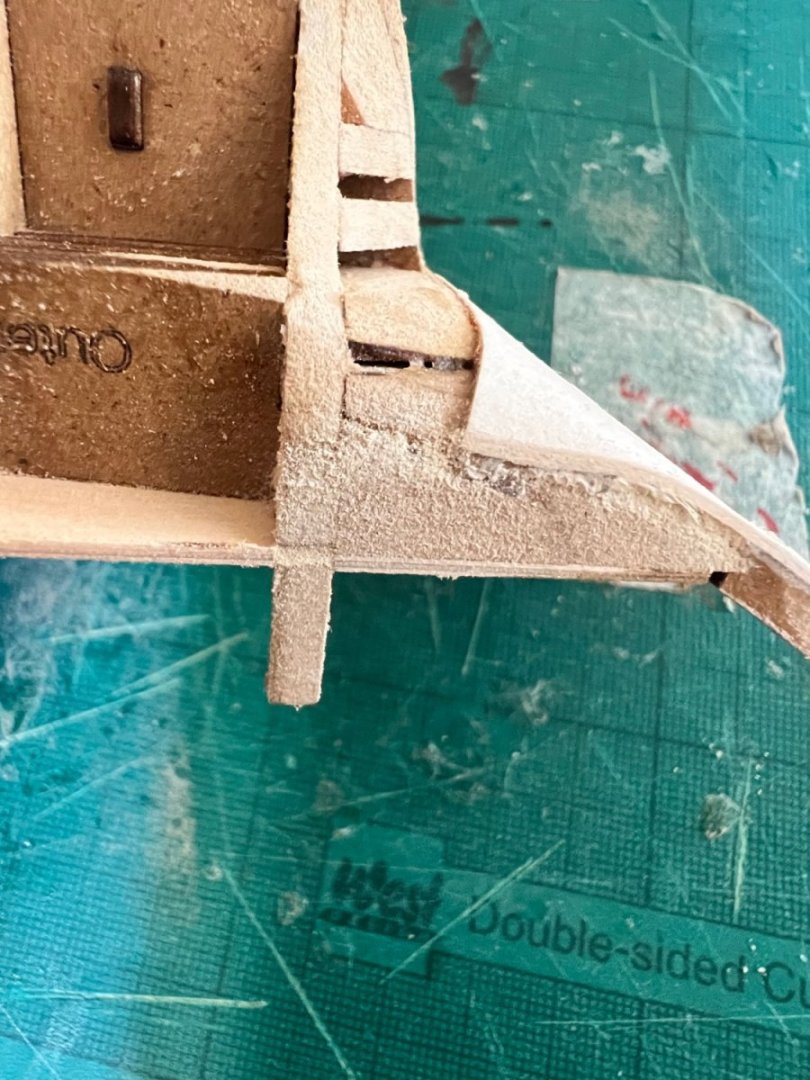
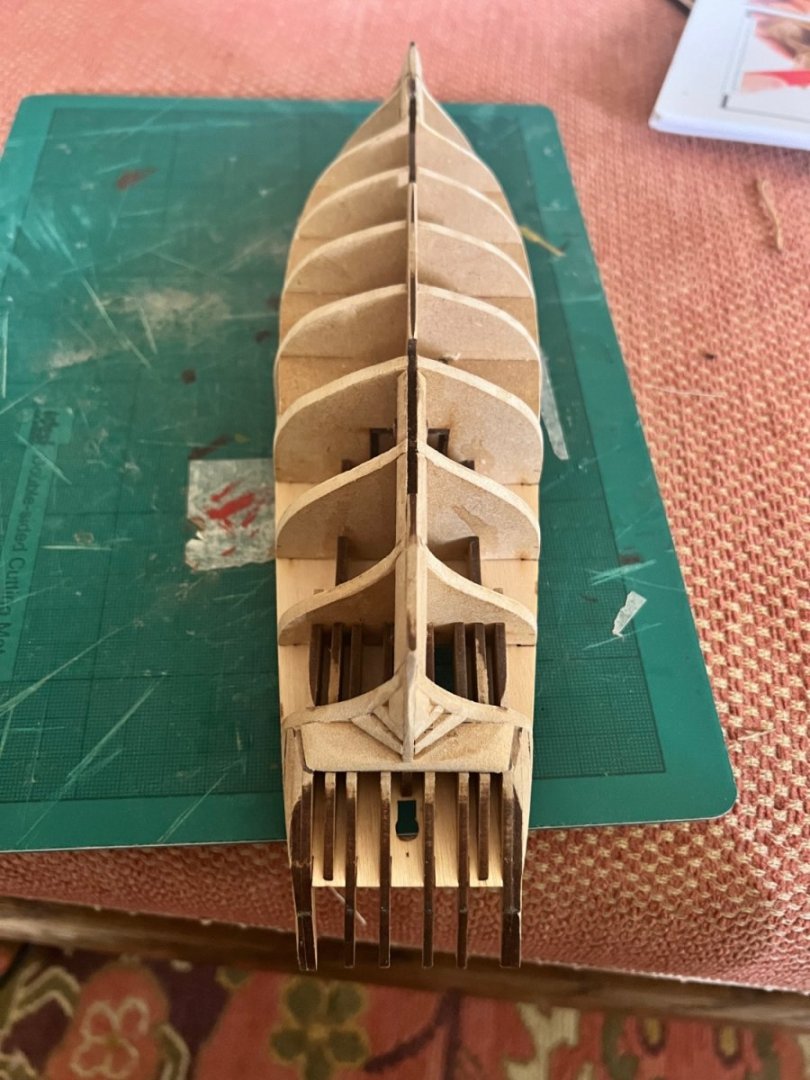
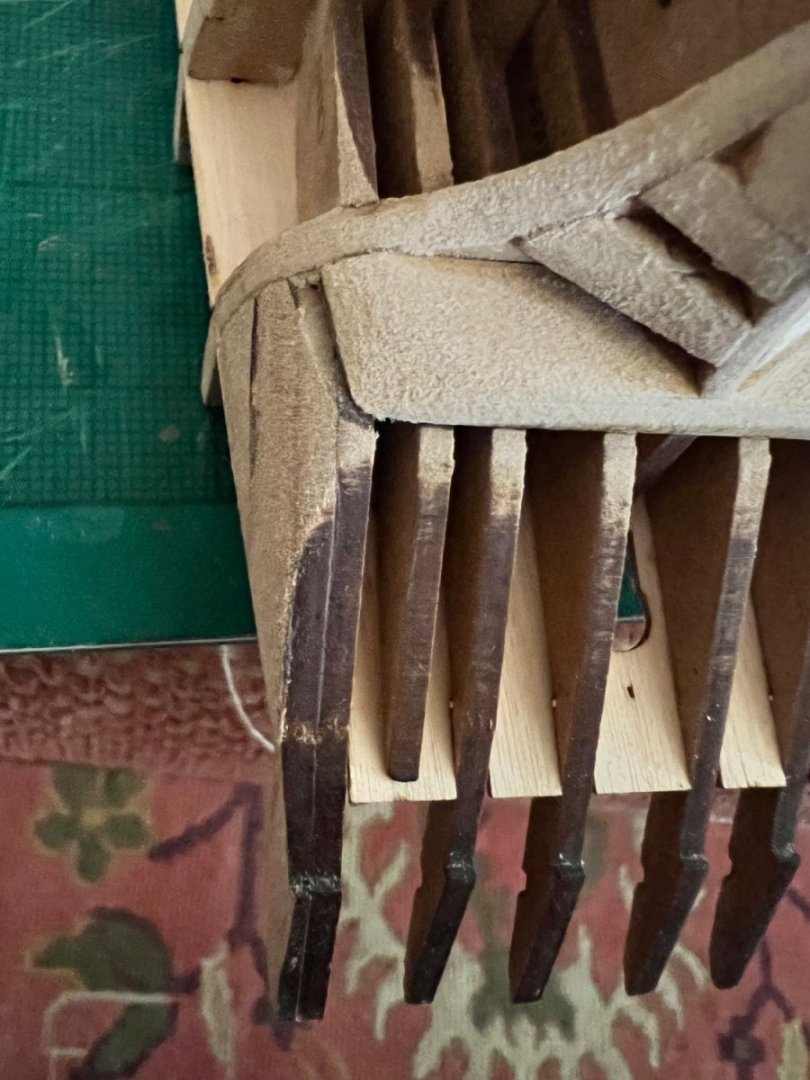
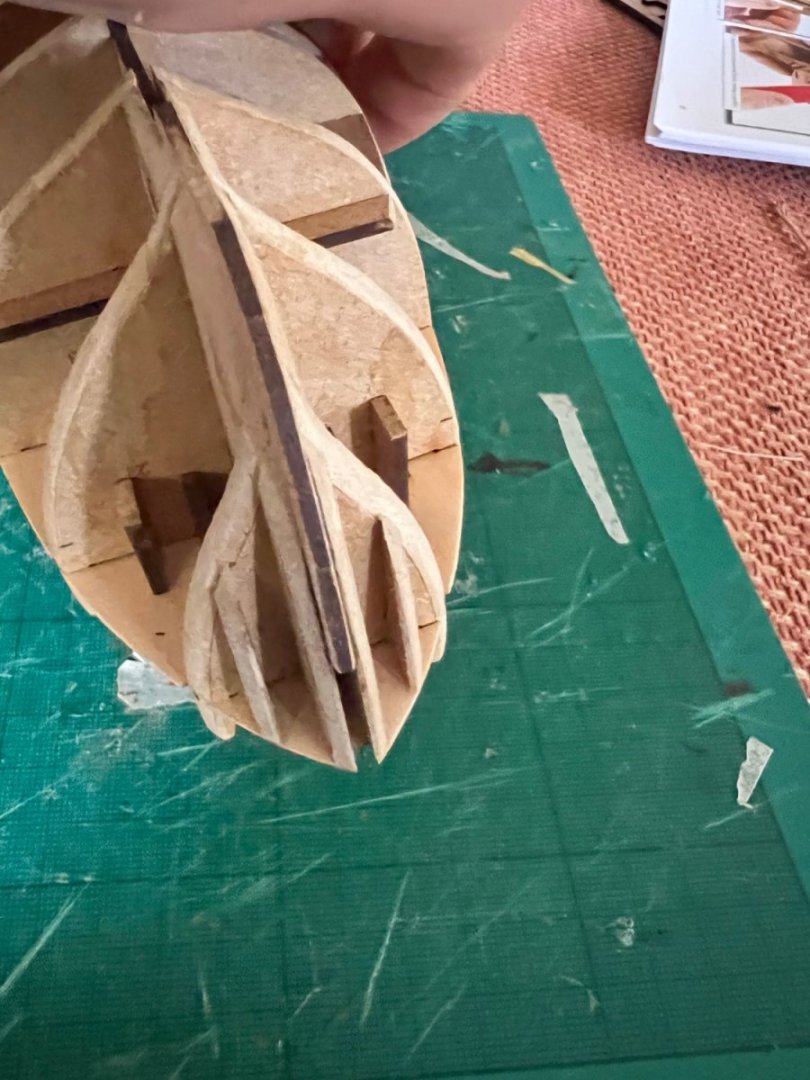
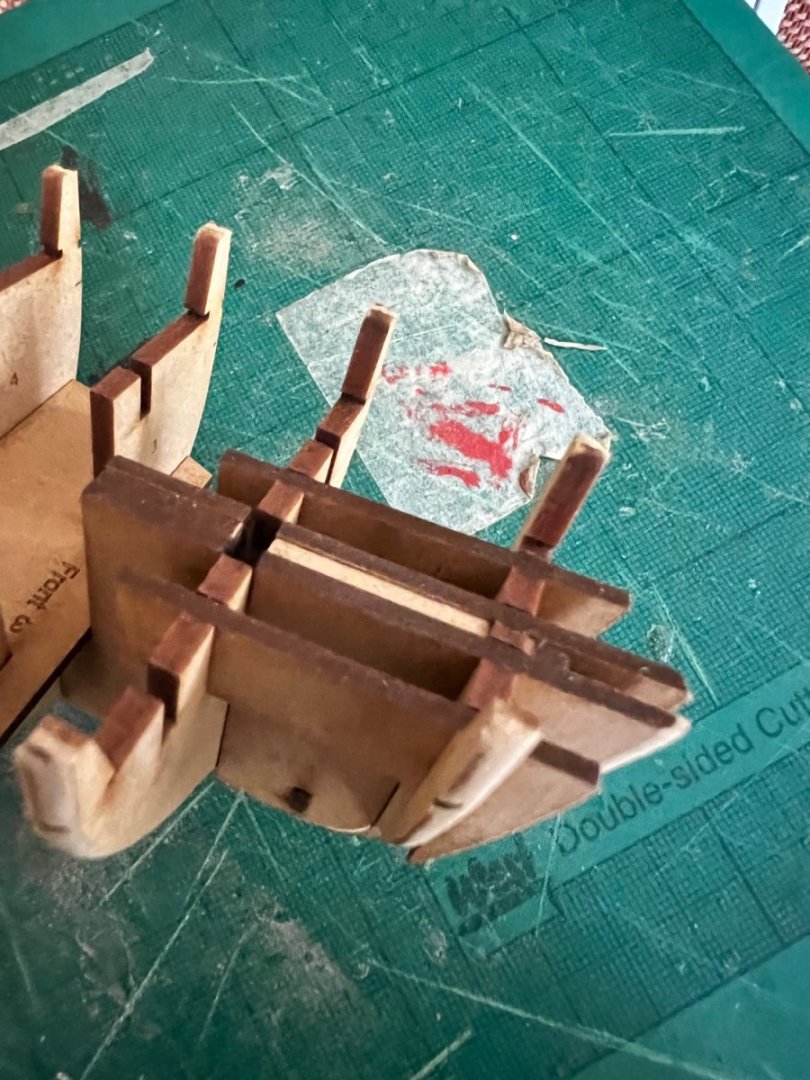
Fairing almost complete. Straightforward except for the area around the rudder post which is a bit more fiddly and not absolutely certain what shape I’m trying to achieve. Copying the instructions as best I can. Bow But disaster struck (as expected) and I broke the outermost starboard stern frame when running planks along the hull to test the fairing. It didn’t come off entirely but went floppy in the way MDF does when it breaks. You can just about see the break in the photo below: Not an easy spot to splint but added a very small splint inboard and smothered with glue. Rather than complete the fairing I decided to add the inner counter to provide support for all the stern frames. I followed how the instructions do it and I can confirm that the counter is bendy enough to go round the corners and have used masking tape to hold it whilst it dries. Leaving it to dry then I’ll check the fairing further and do more fairing if required. The resin cutter is great, but can anyone advise a method for achieving a fake wood paint effect as shown in the instructions? Many thanks!

- 59 replies
-
- 7
-
-
- saucy jack
- fishing smack
- (and 2 more)
-
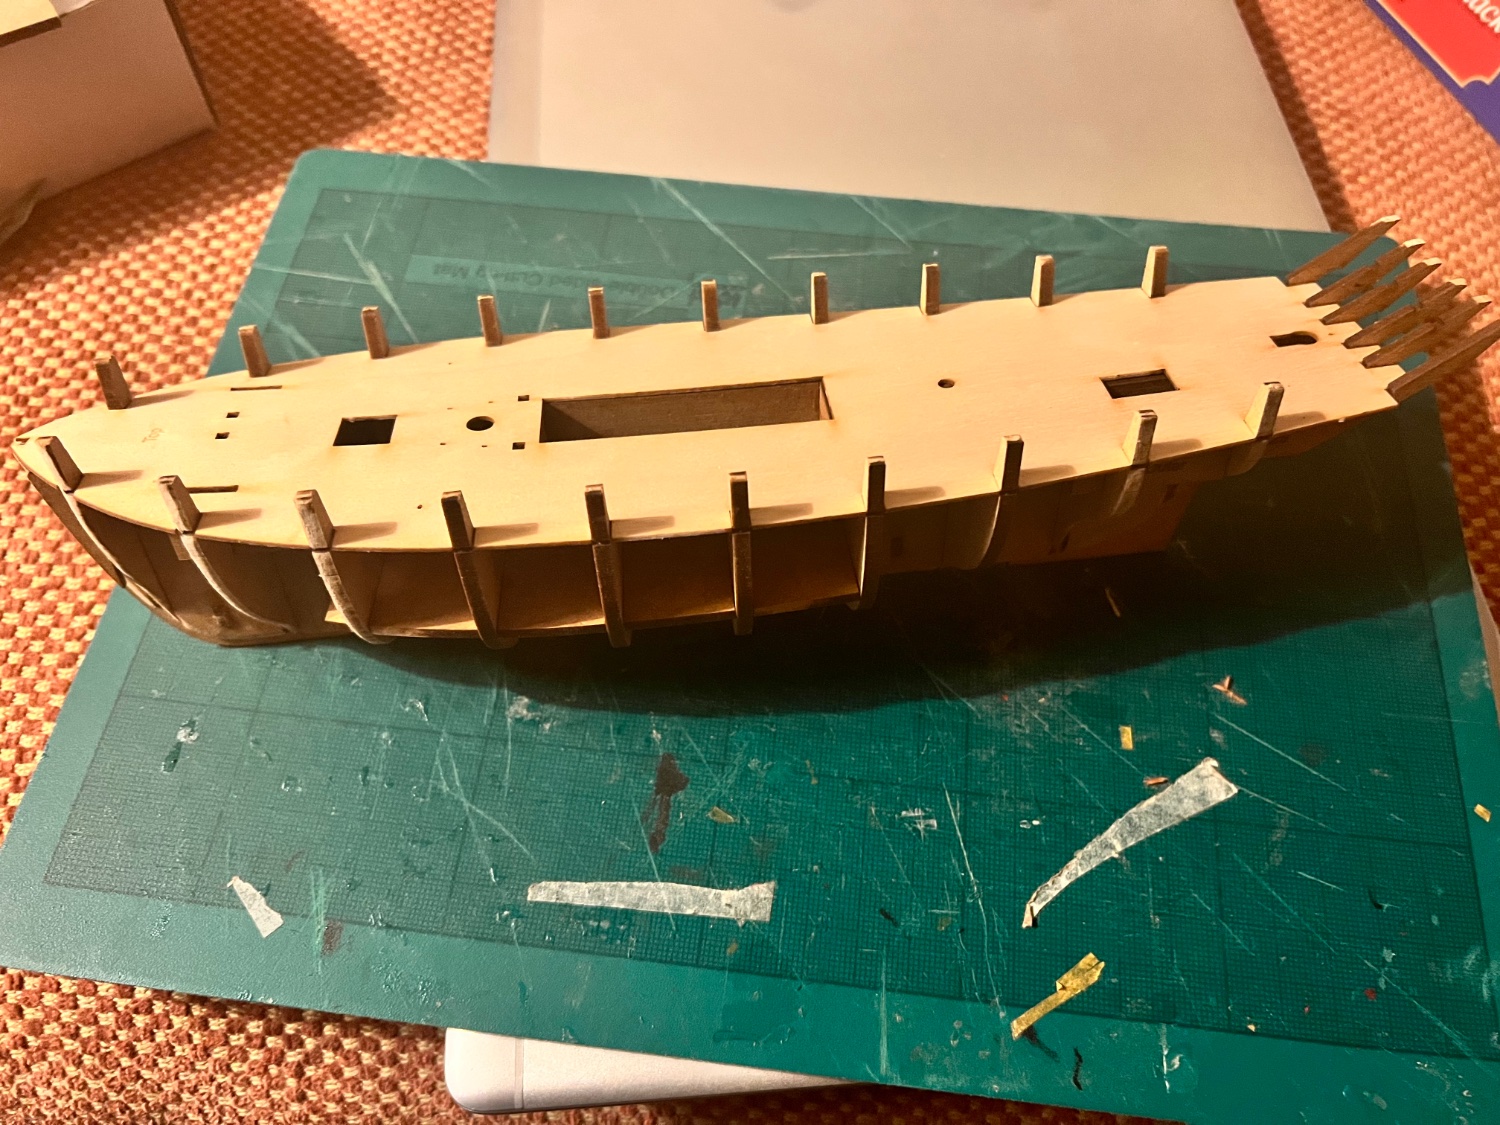
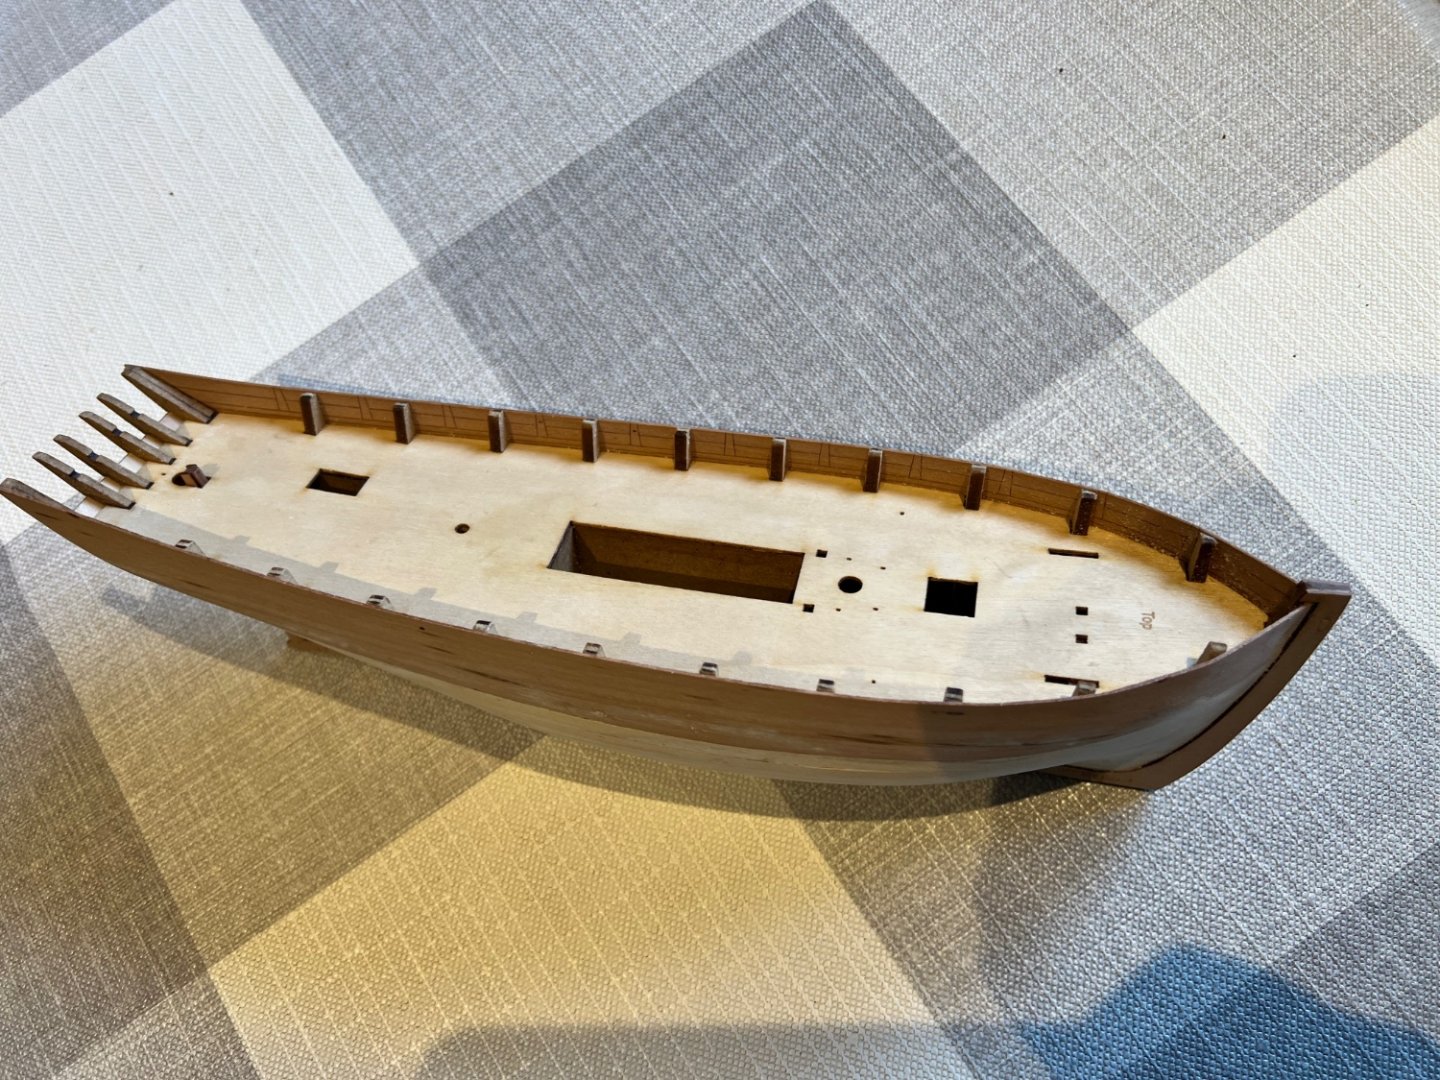
Next the false deck is fitted. It’s made of bendy thin plywood which is very strong. It fits into the notches on the bulkhead ears on one side and can be bent to fit the notches on the other side. The key here is trying not to break off any of the ears (yet) or stern frames. So far so good. The instructions say you don’t need to, but I’ve brushed diluted PVA into the joints between the deck and the structure beneath. You can really see the shape of the Jack starting to become more apparent. Parts #30, 31 & 32 are added to each side of the outer stern frames providing some support and enabling fairing to take place. Parts #11, 12, 13 & 14 are added to both sides of the rudder post. Everything left to dry again before the fairing process starts tomorrow.

- 59 replies
-
- 5
-
-
- saucy jack
- fishing smack
- (and 2 more)
-
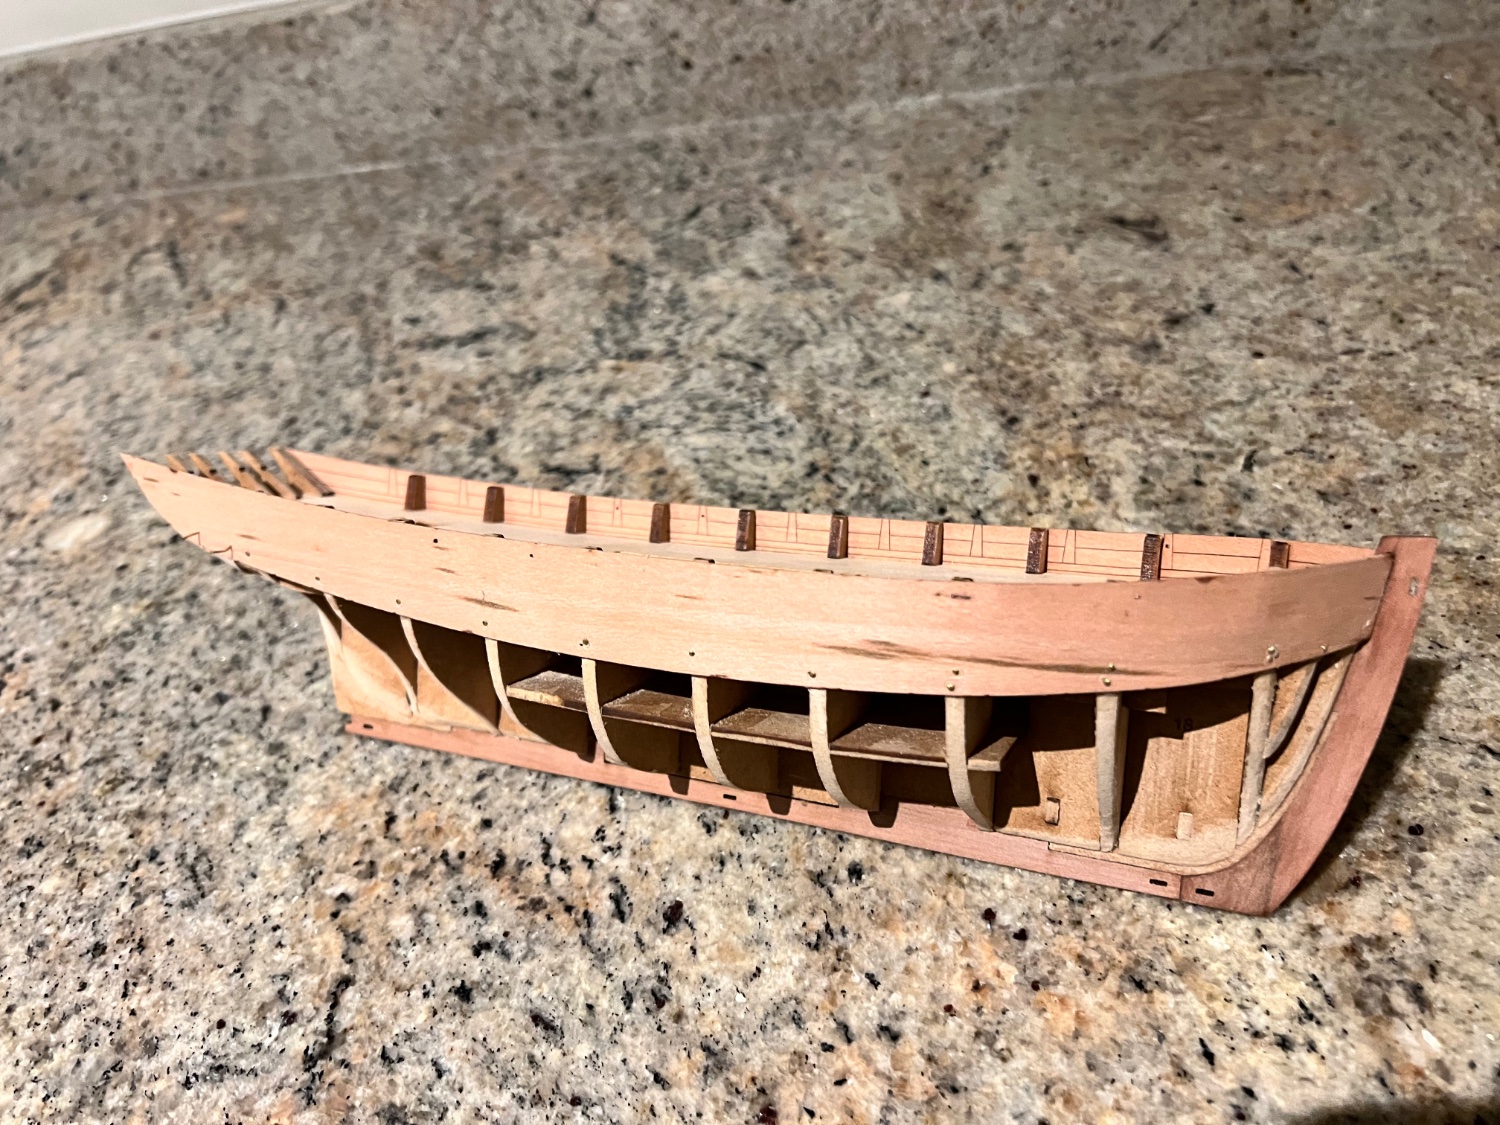
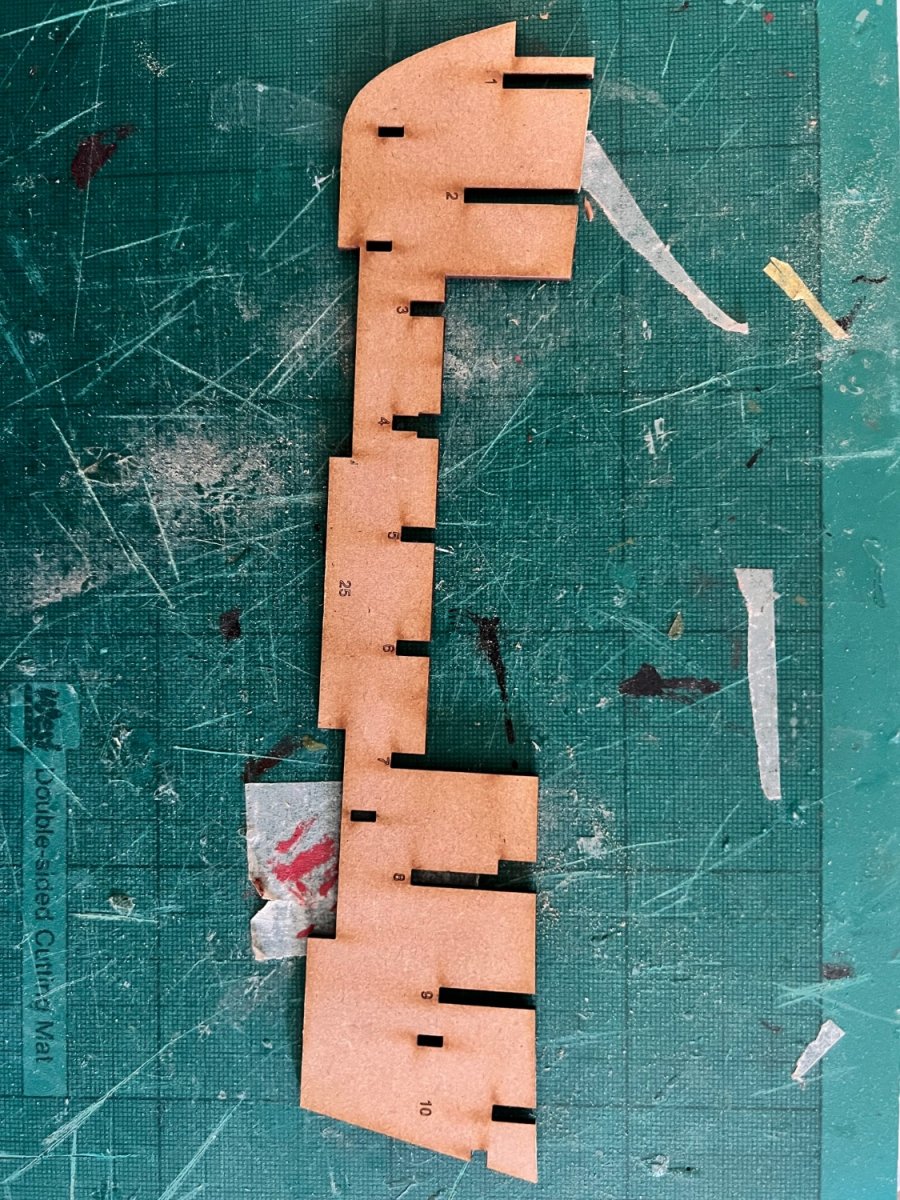
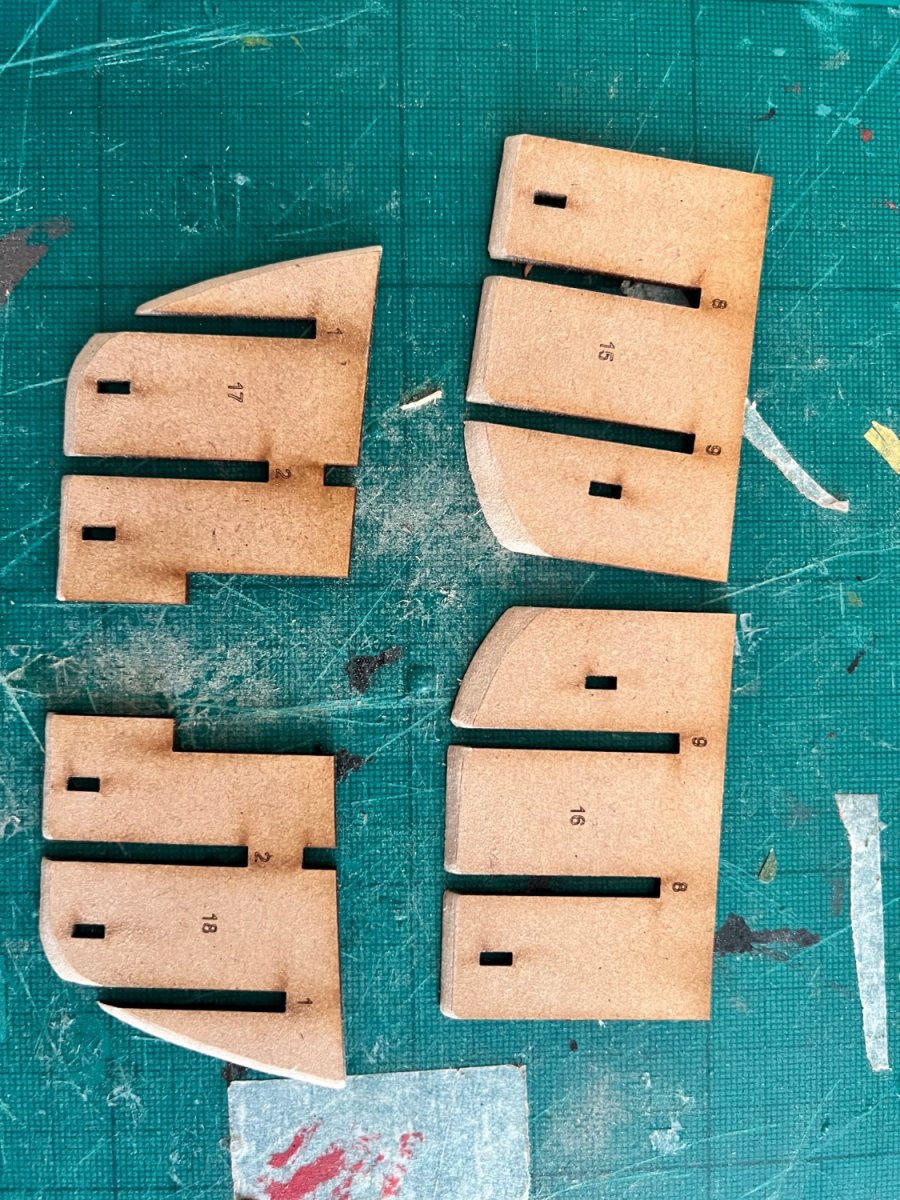
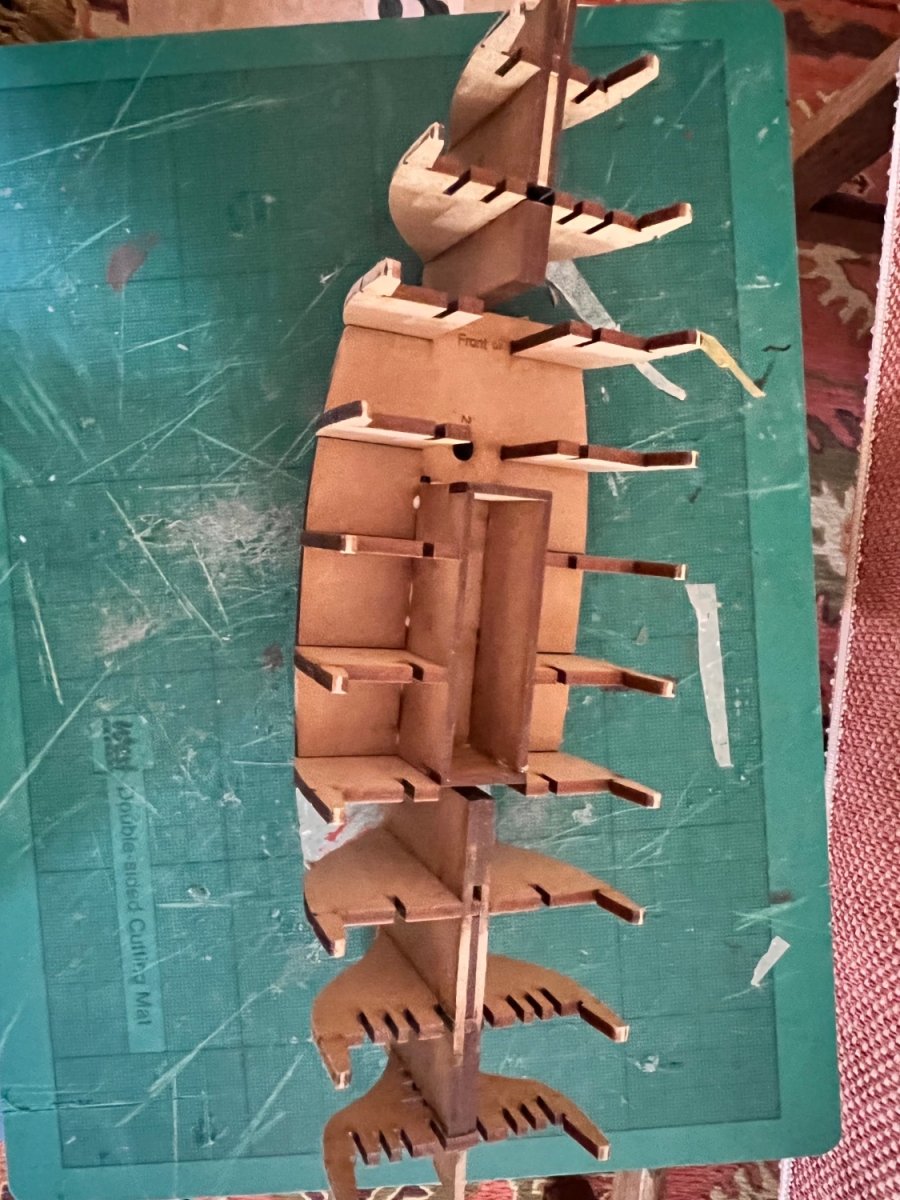
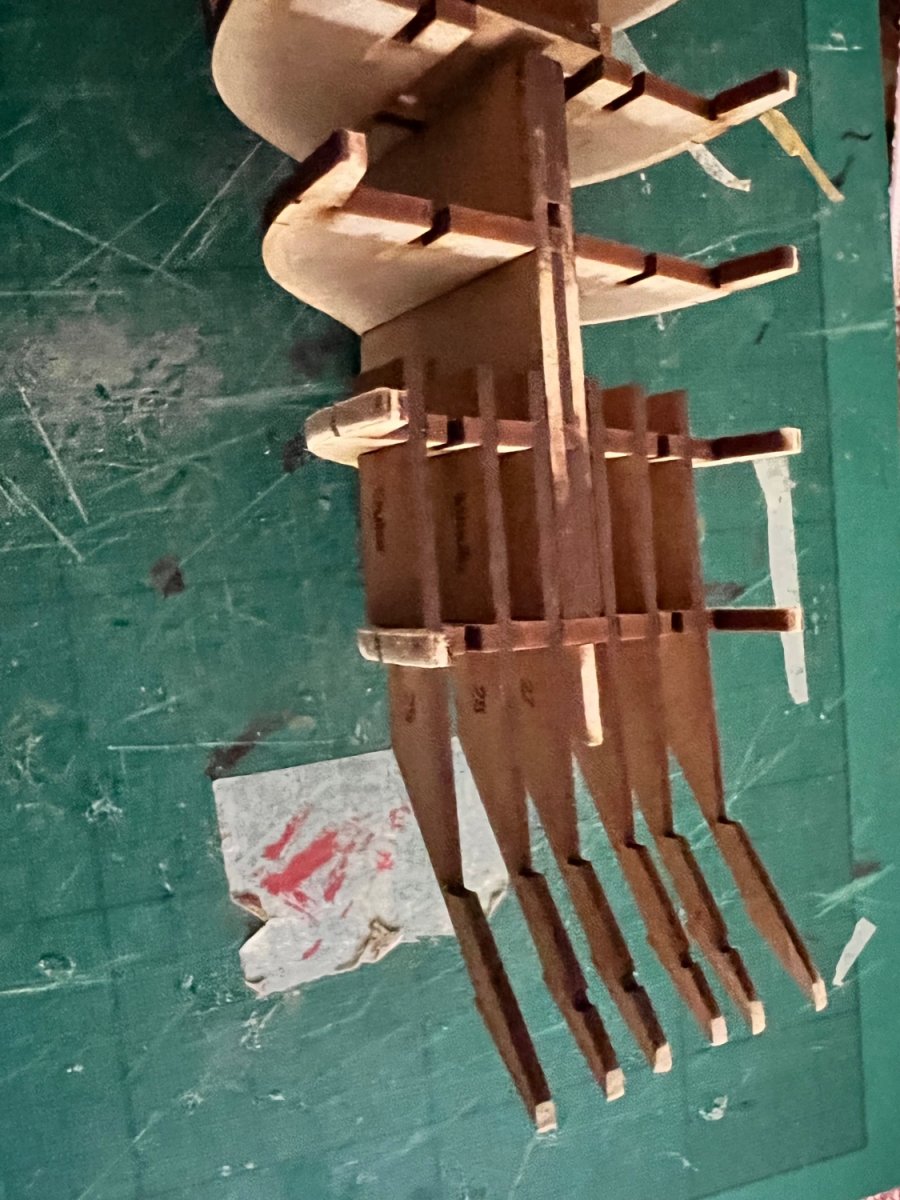
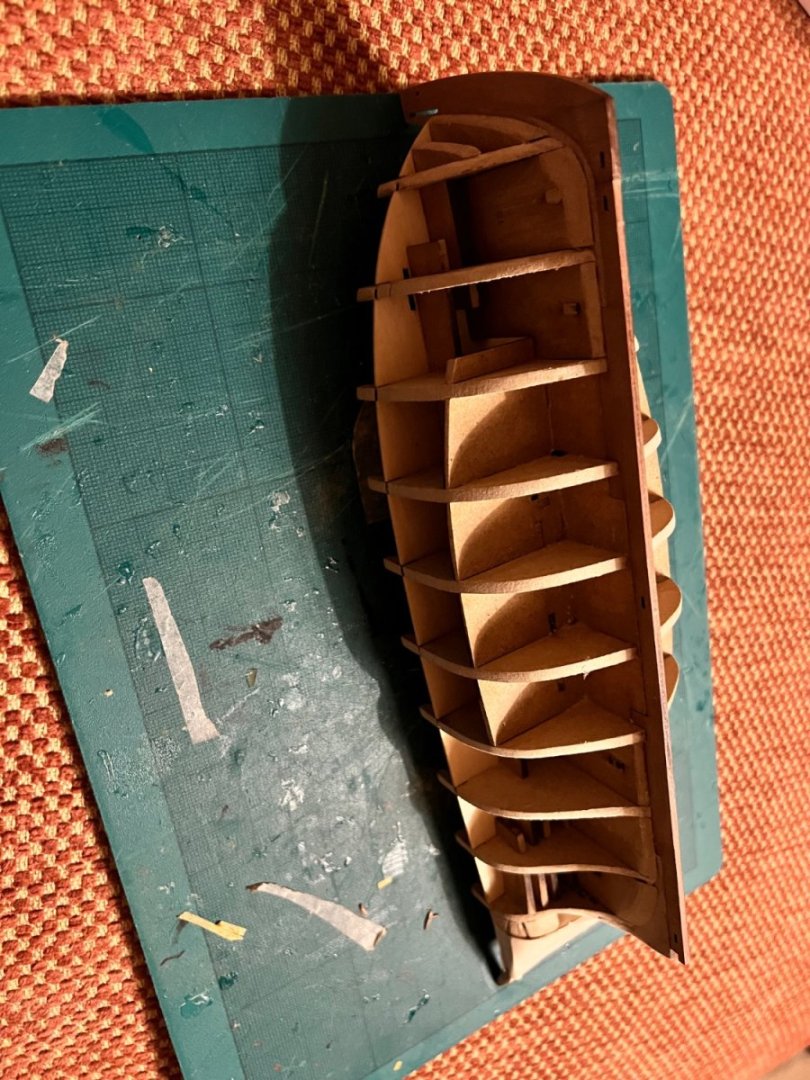
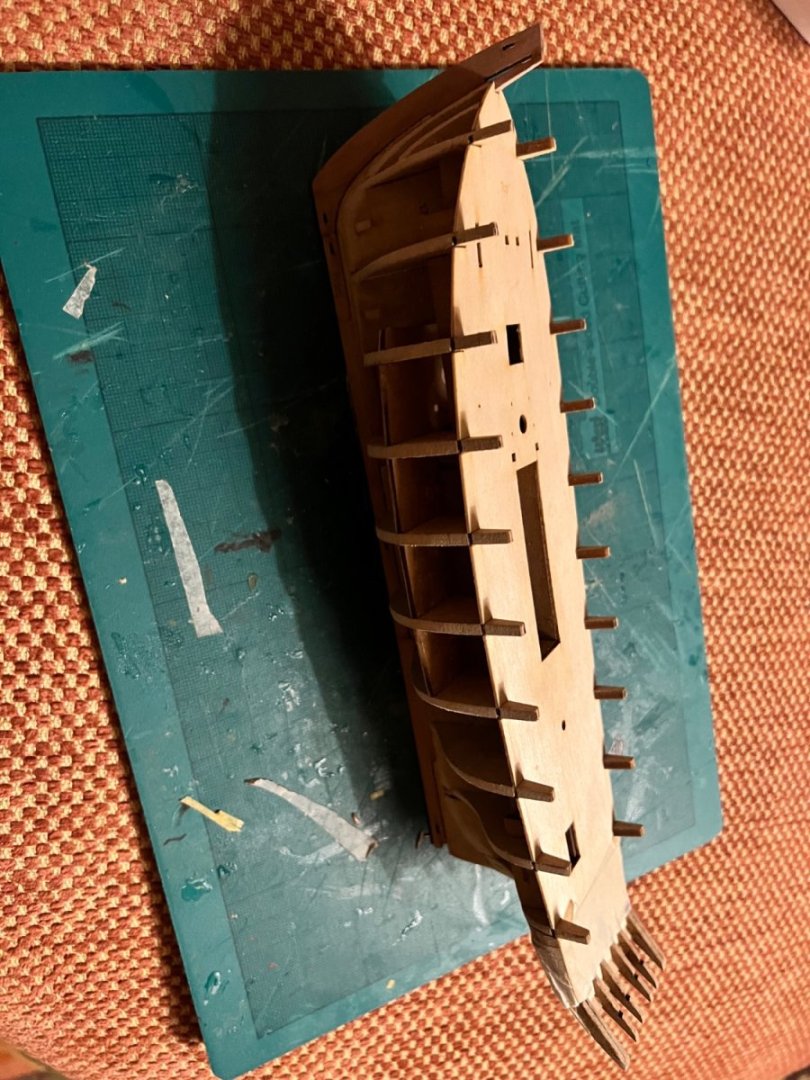
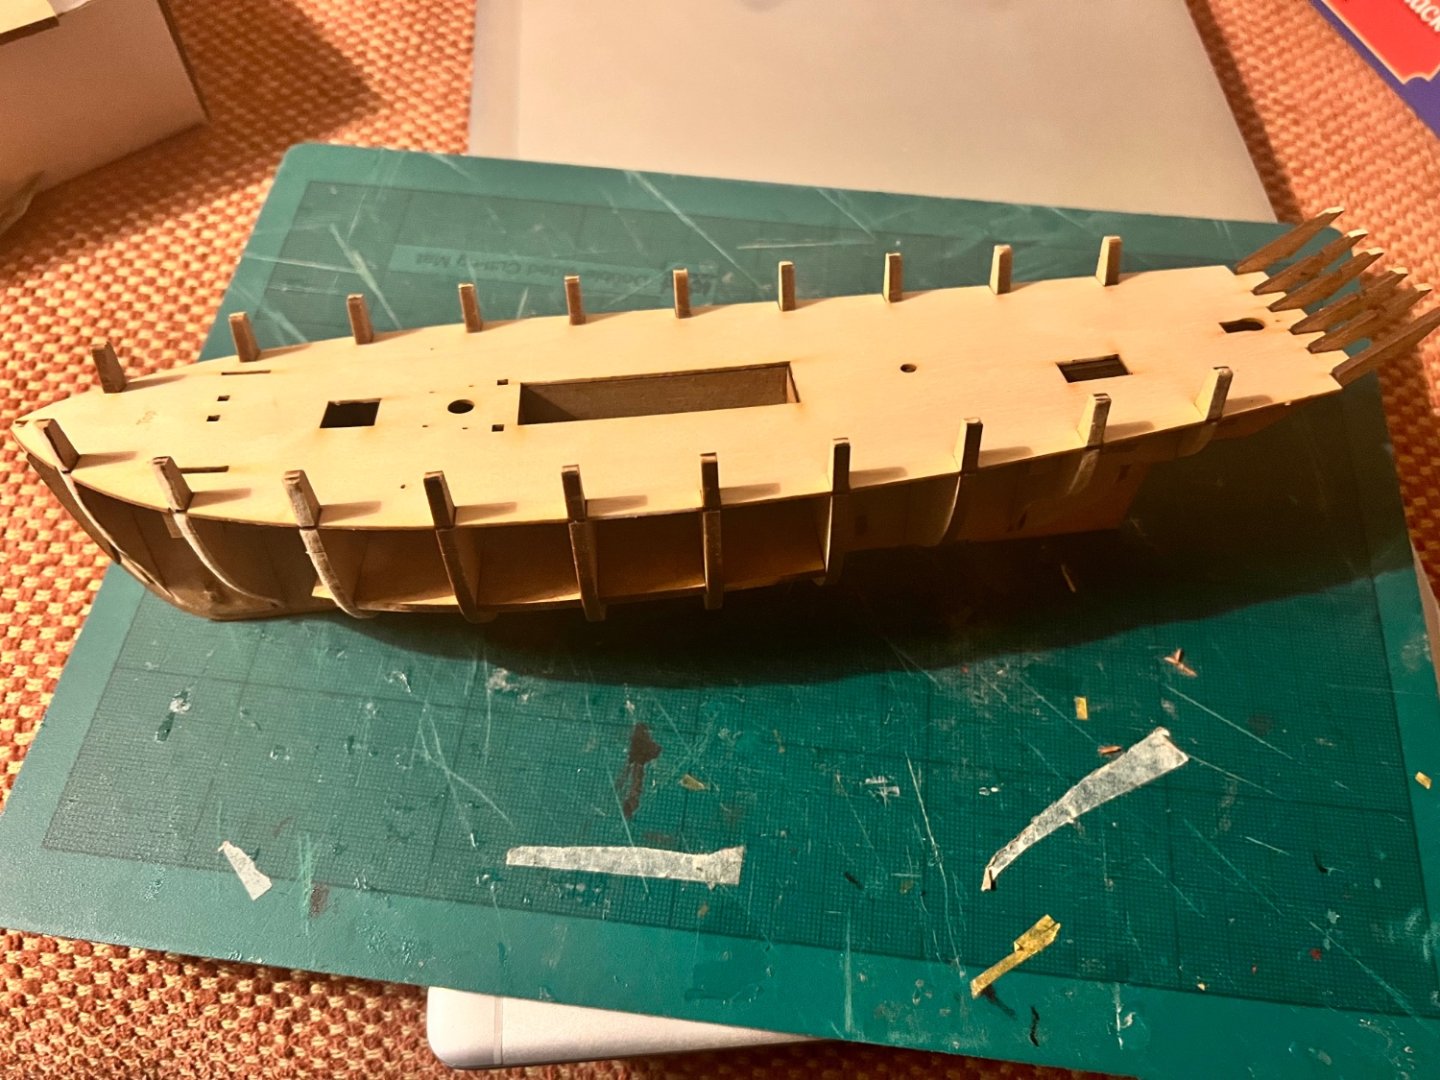
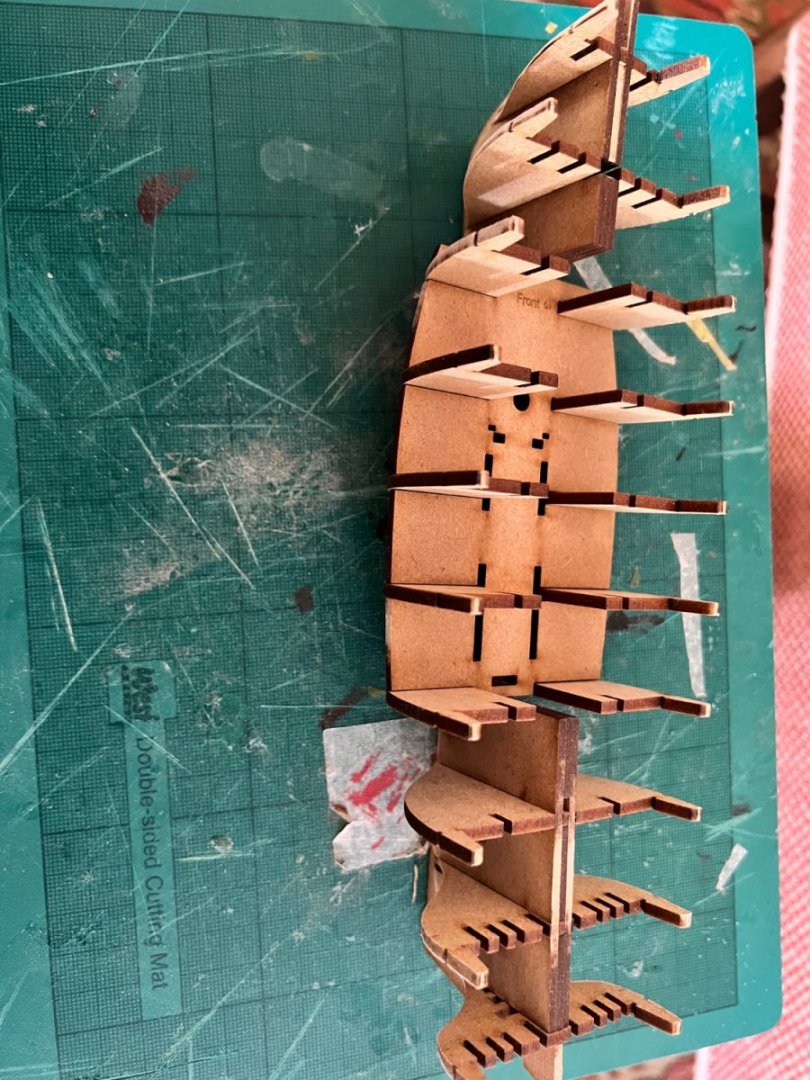
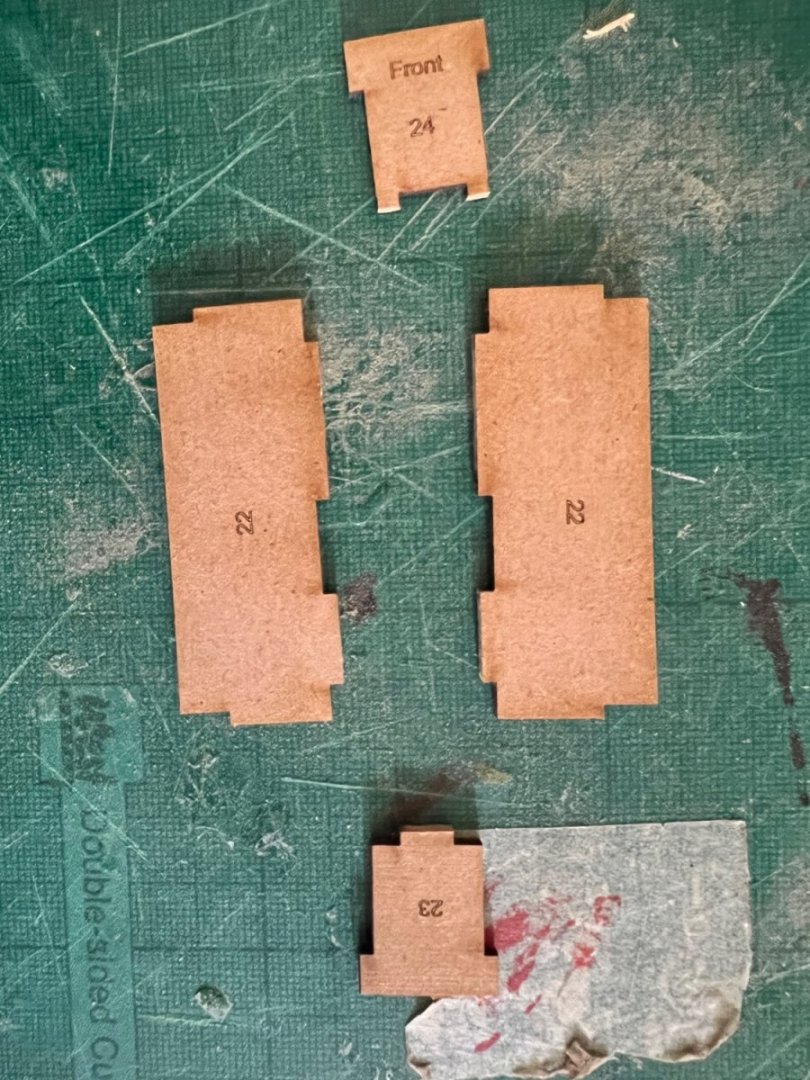
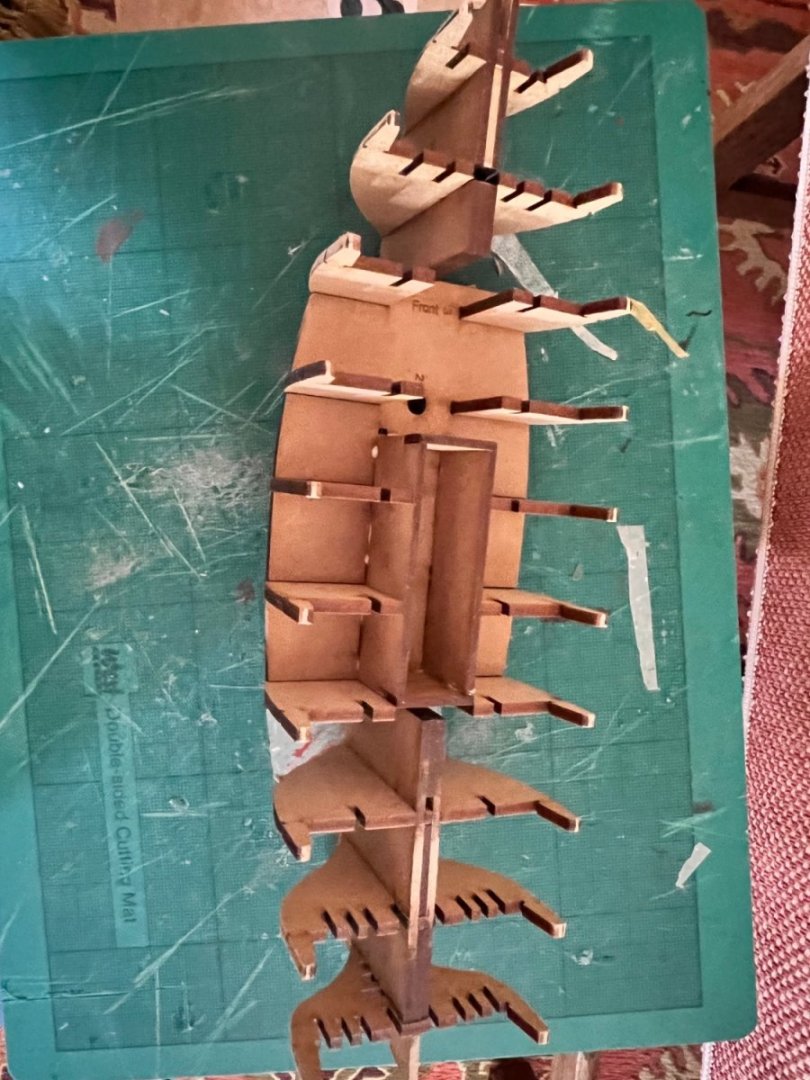
The skeleton of the model is made with thick MDF which enables a strong, rigid skeleton to be built. Bulkheads, the front three and stern two need pre-bevelling. False keel. Dry fitting the bulkheads. They all slot in precisely. Inserts at bow and stern also need pre-bevelling…. ….and are fitted with tabs and glue. Lower deck. Won’t see this but provides structural rigidity. Lower deck fitted. Parts for the “well”. The well smacks had a tank of water amidships to transport live fish back to market and improve their freshness. Well installed and glued to the lower deck Bow supports - parts #20 fitted. Then the stern frames. These are very fragile and I’m sure I’ll break at least one at some point! Longitudinal supports are added. The structure is now very rigid except for the weak stern frames. The precision of these pieces is amazing, the parts slot together perfectly without any sanding required. There’s no chance of this hull warping. Now the joints are painted with diluted PVA glue and left to dry.


- 59 replies
-
- 6
-
-
- saucy jack
- fishing smack
- (and 2 more)
-
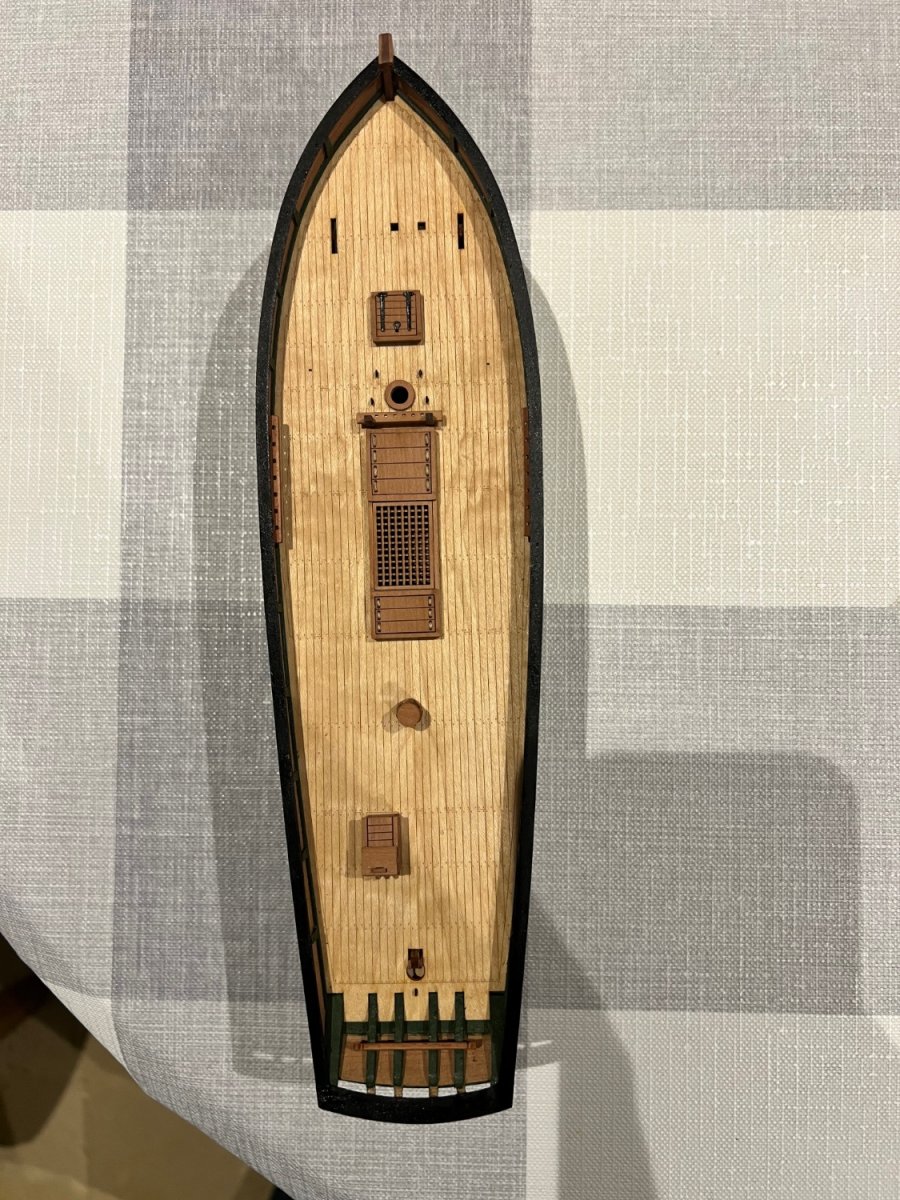
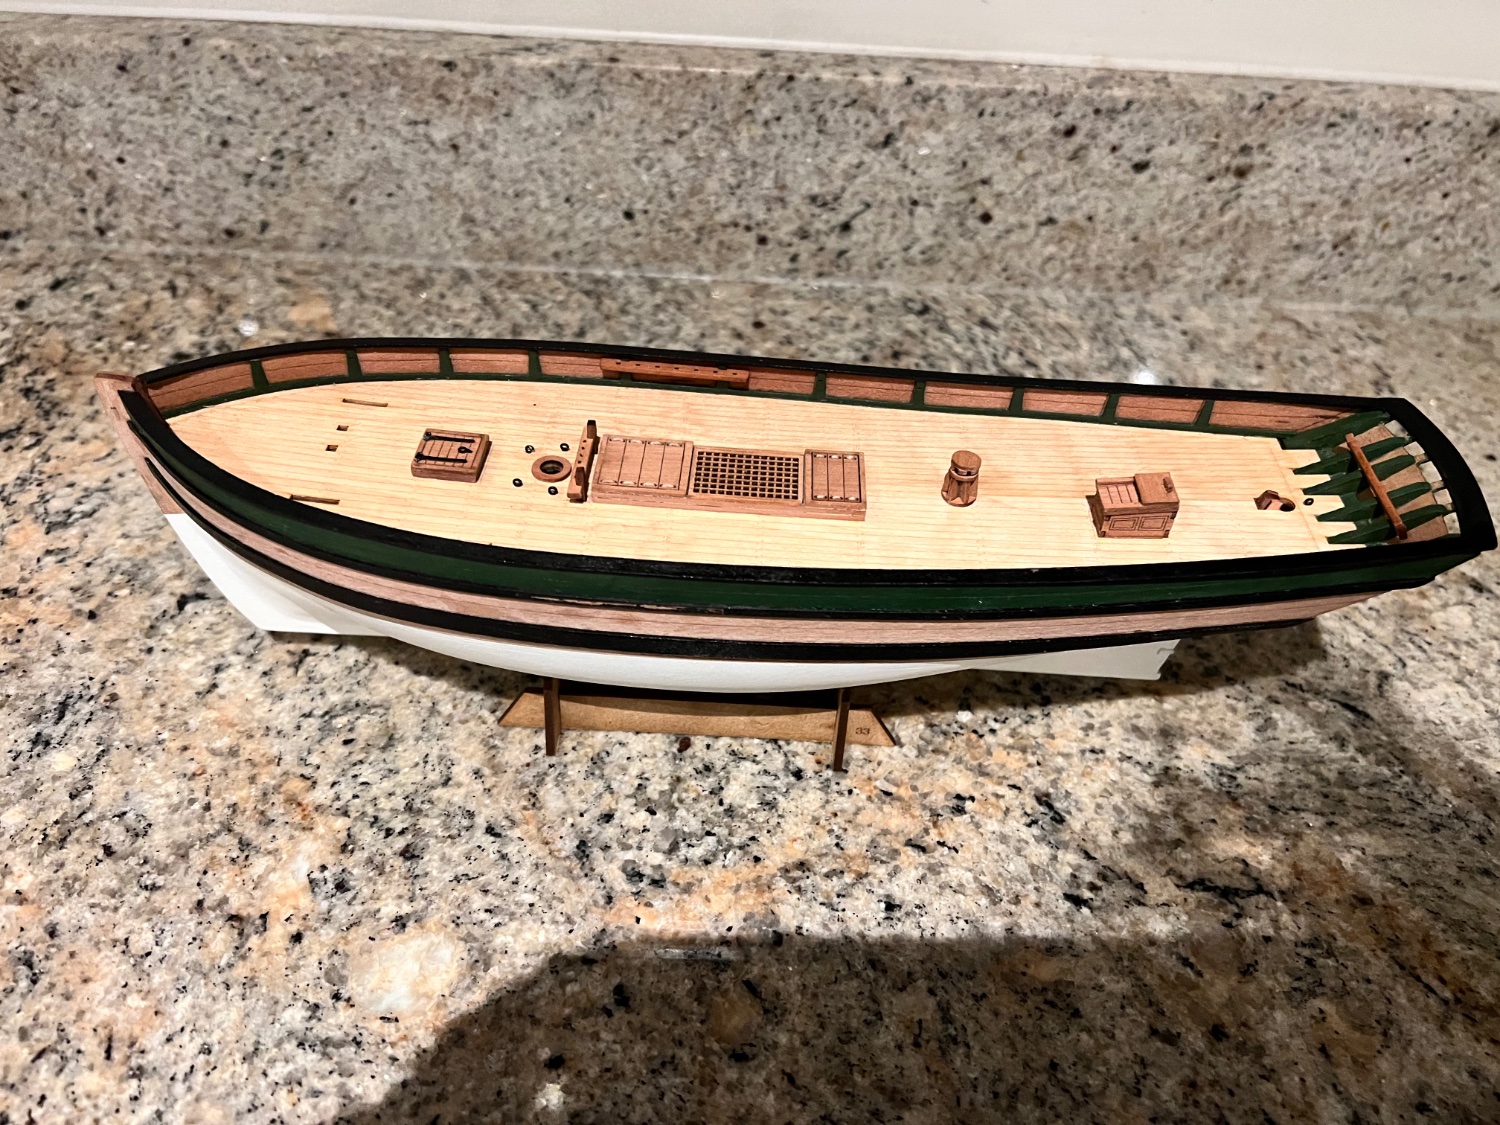
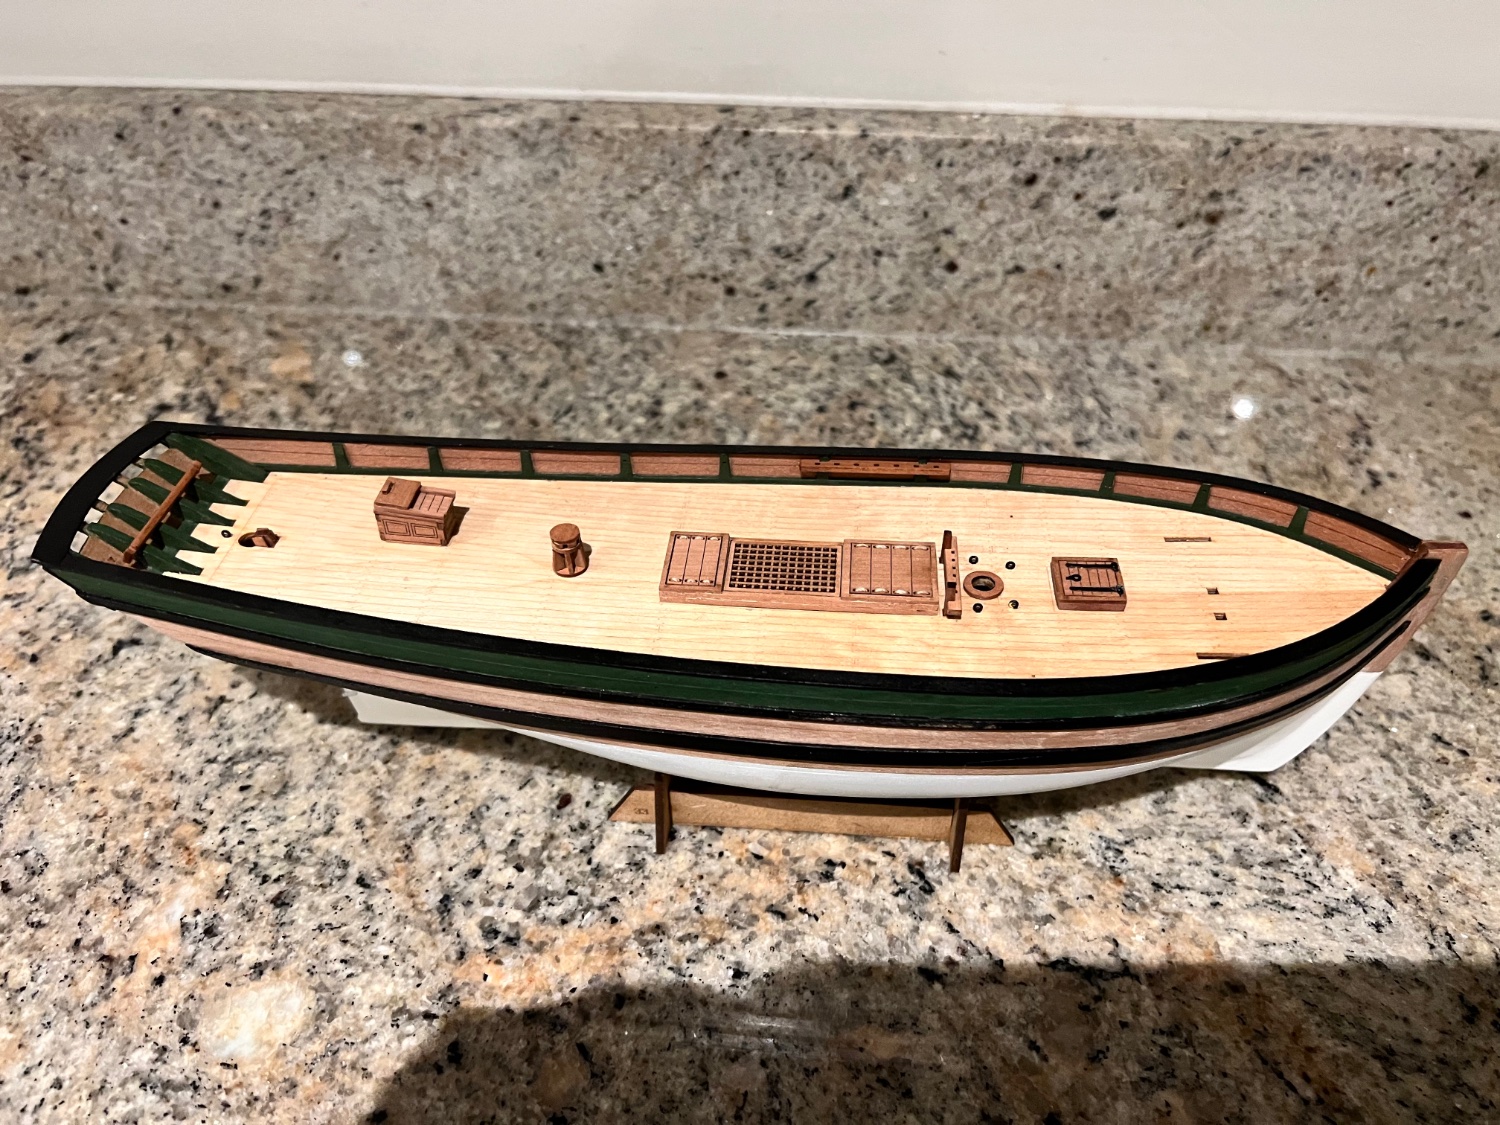
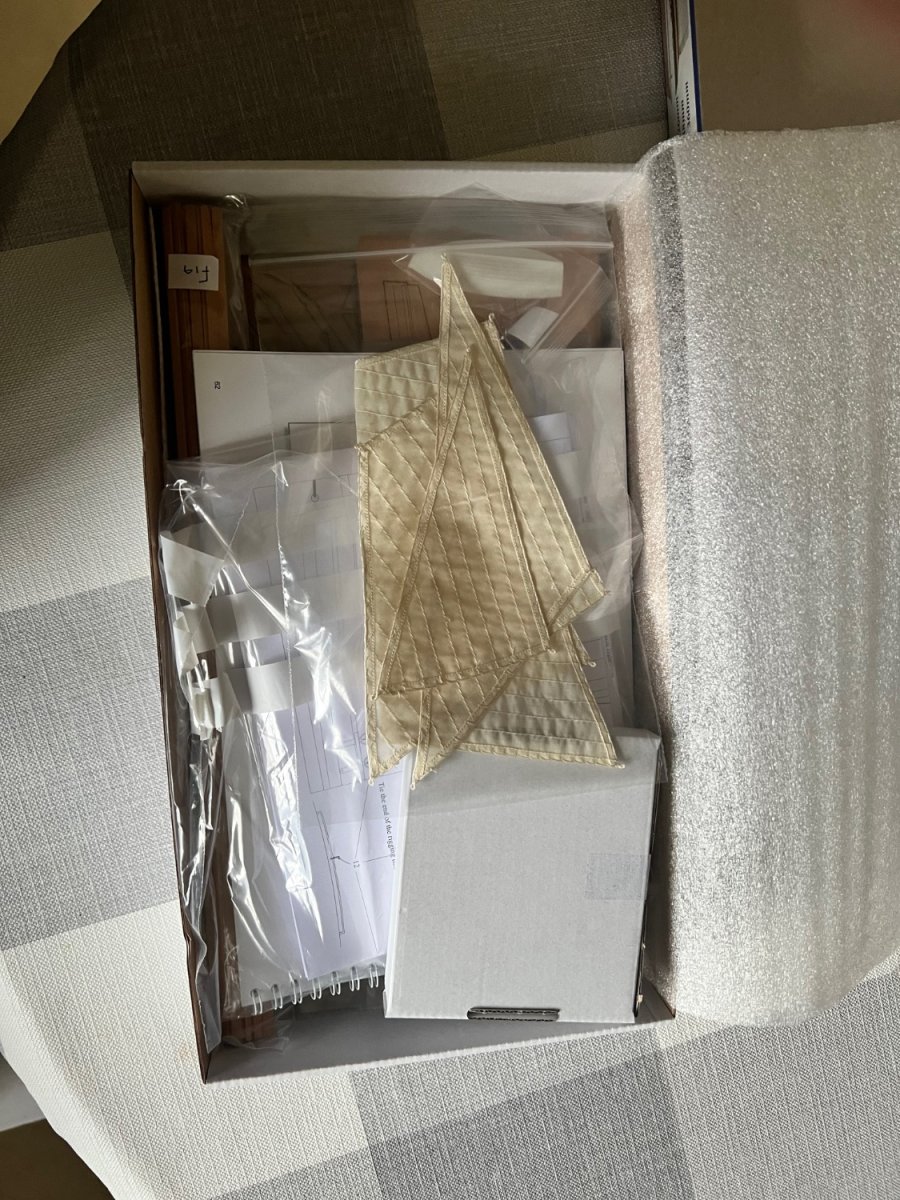
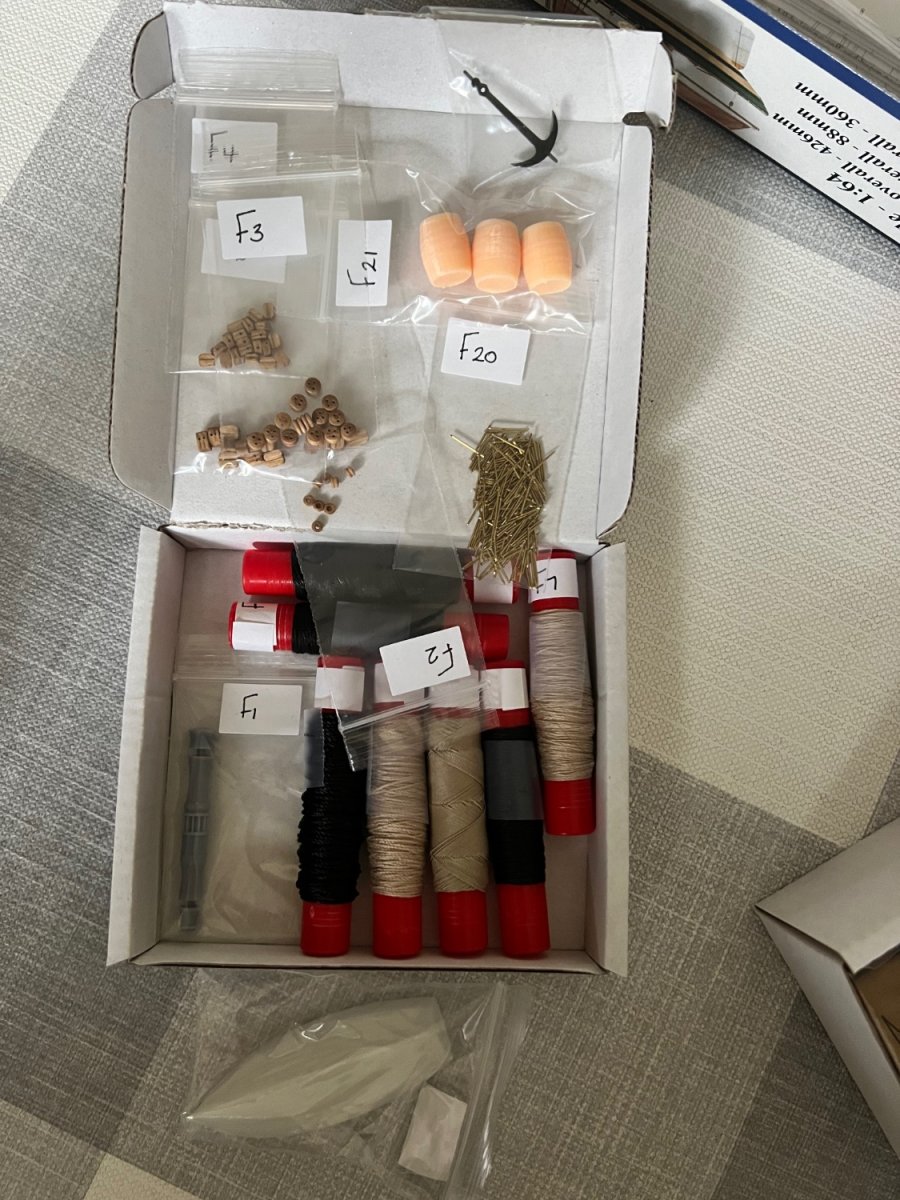
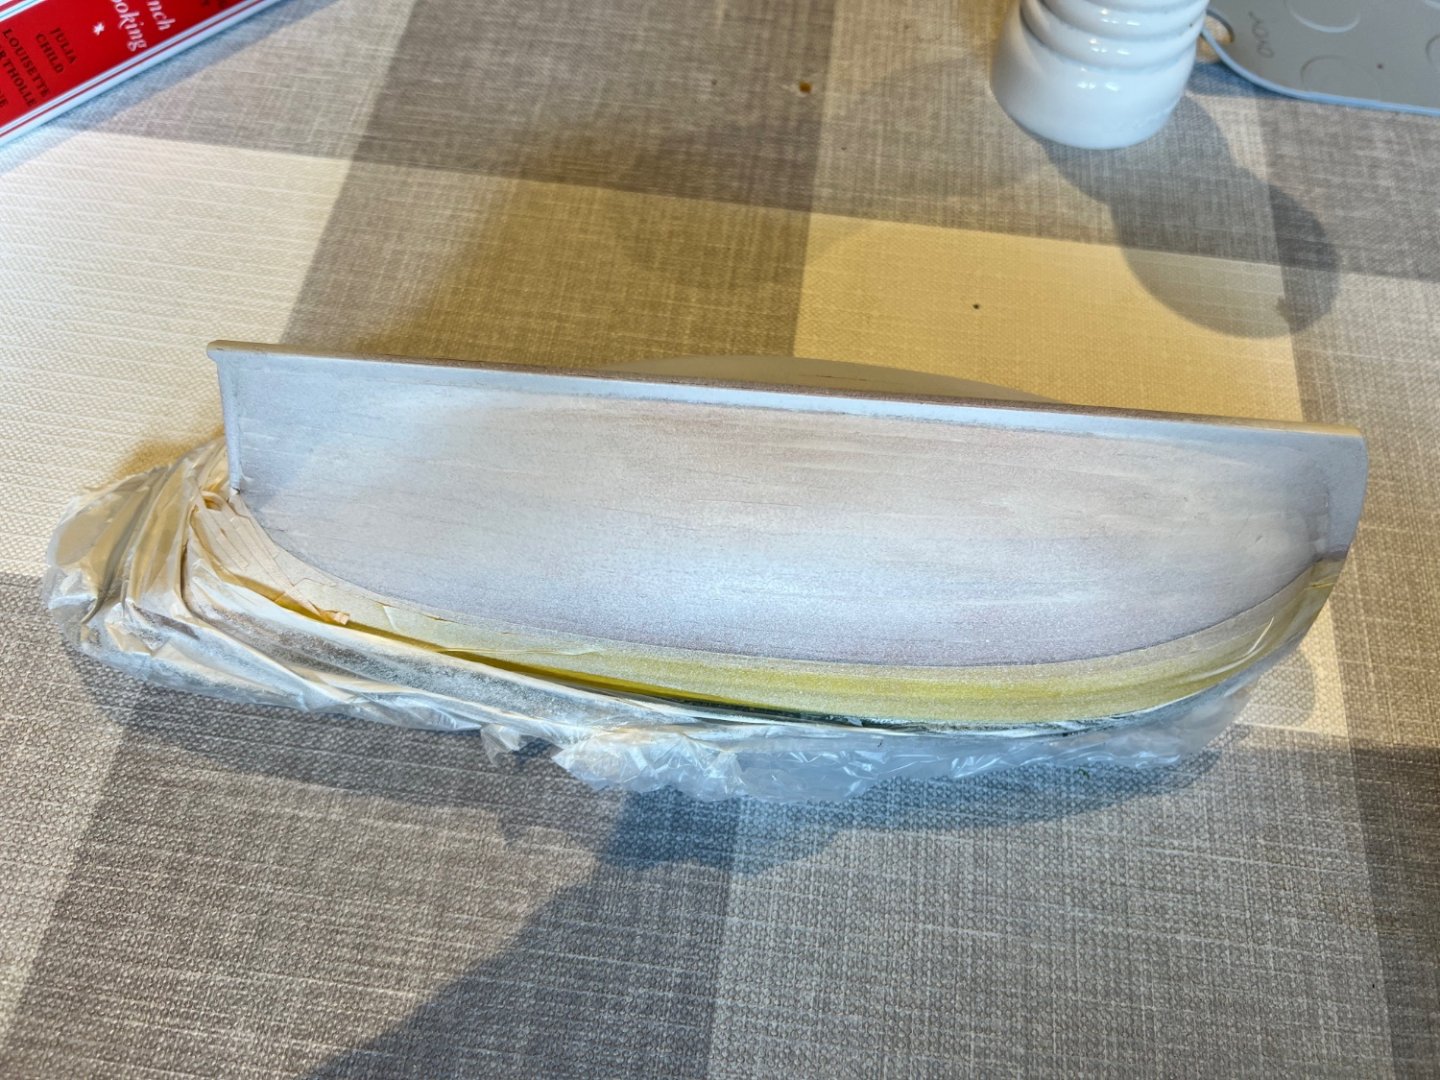
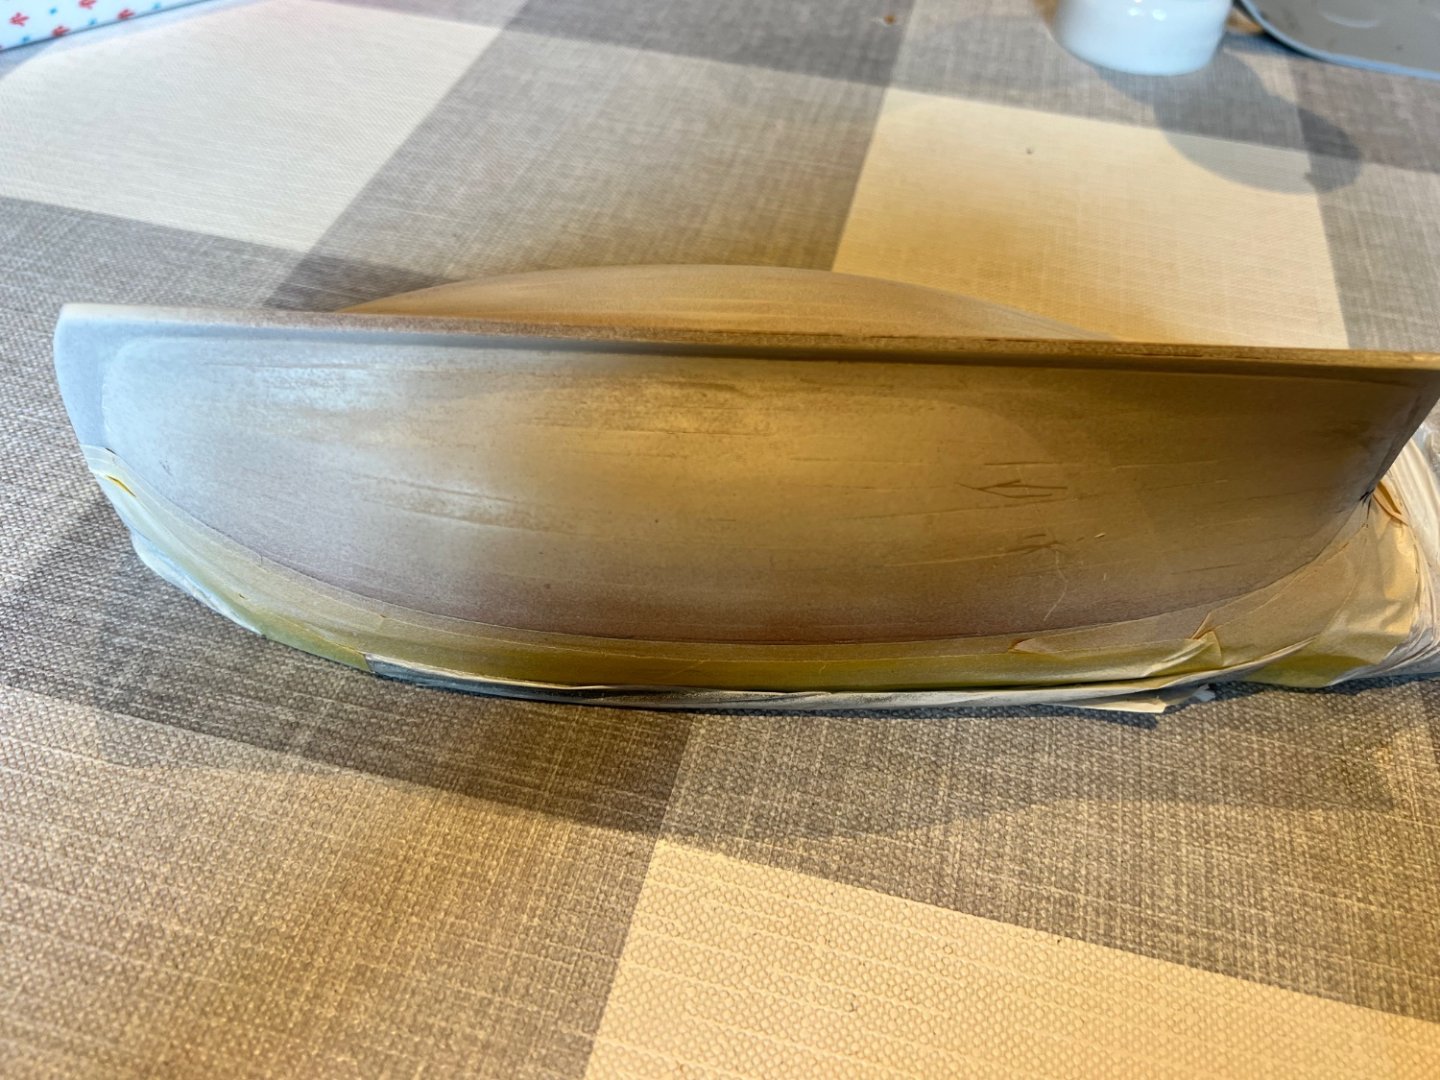
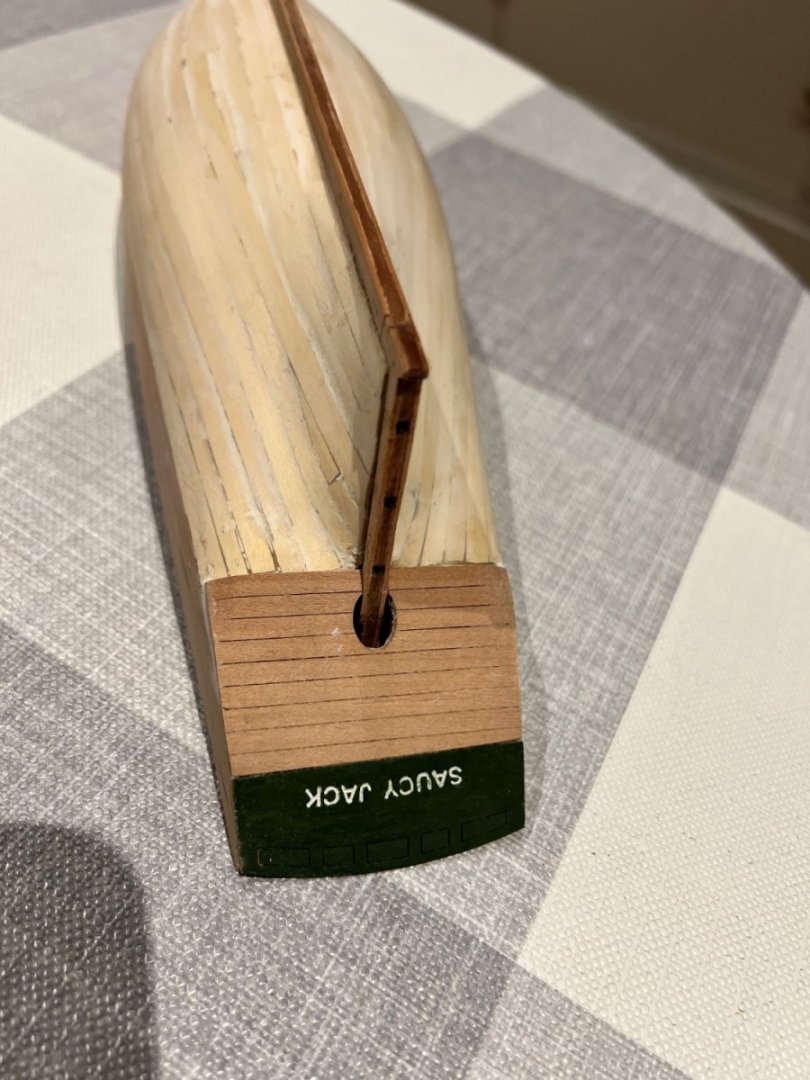
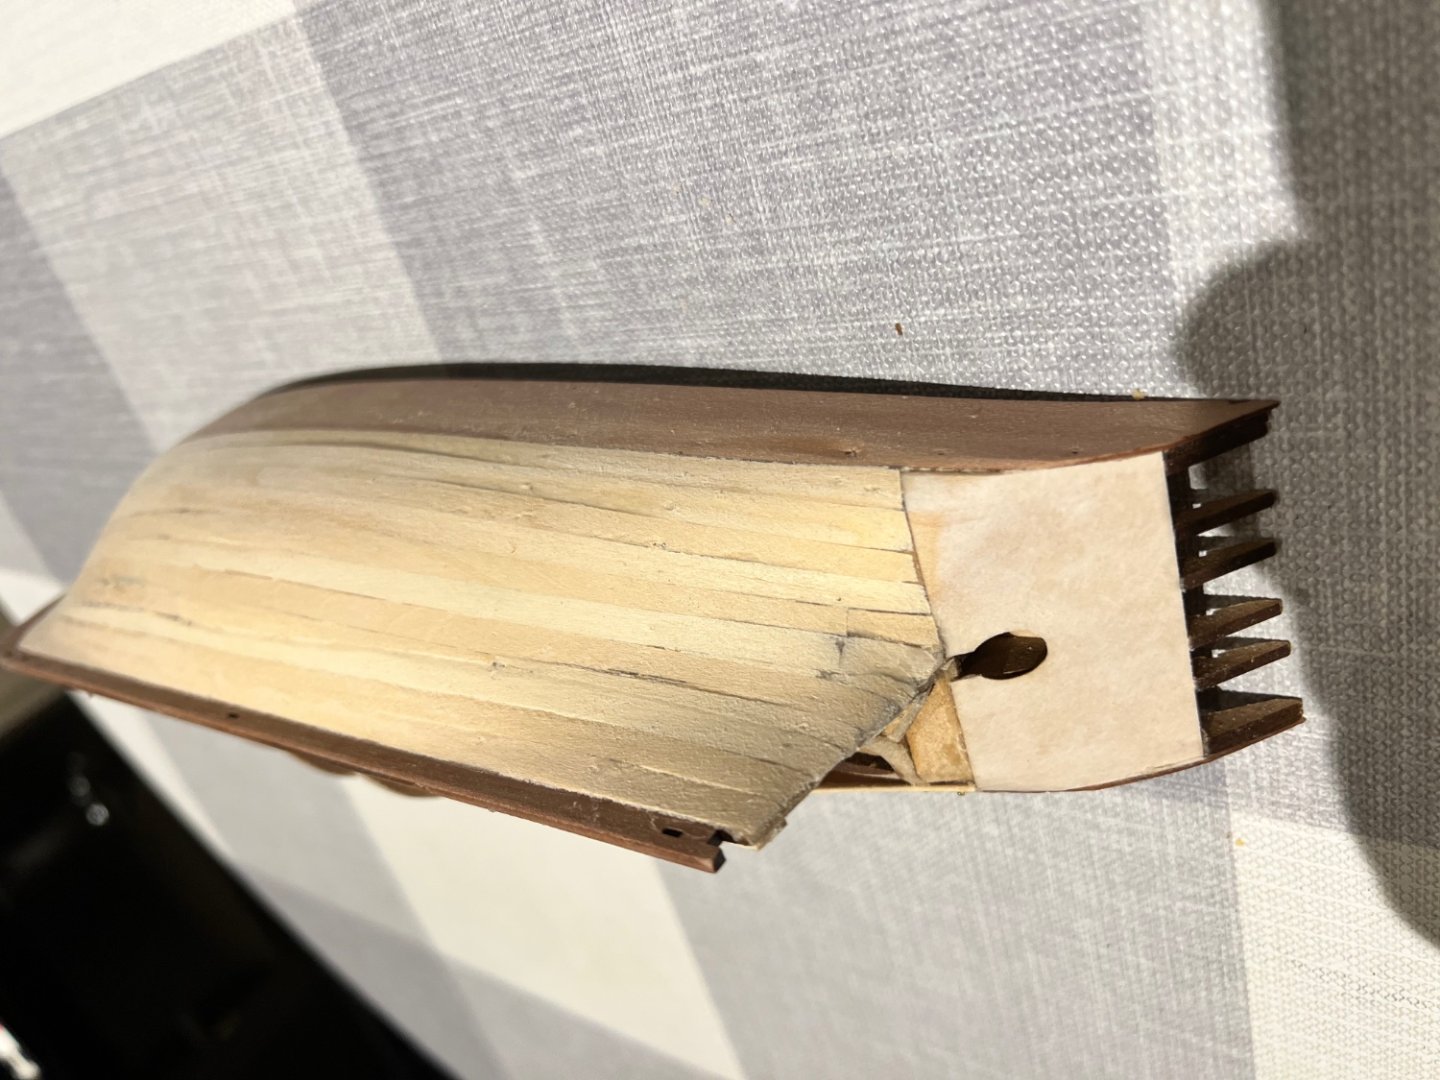
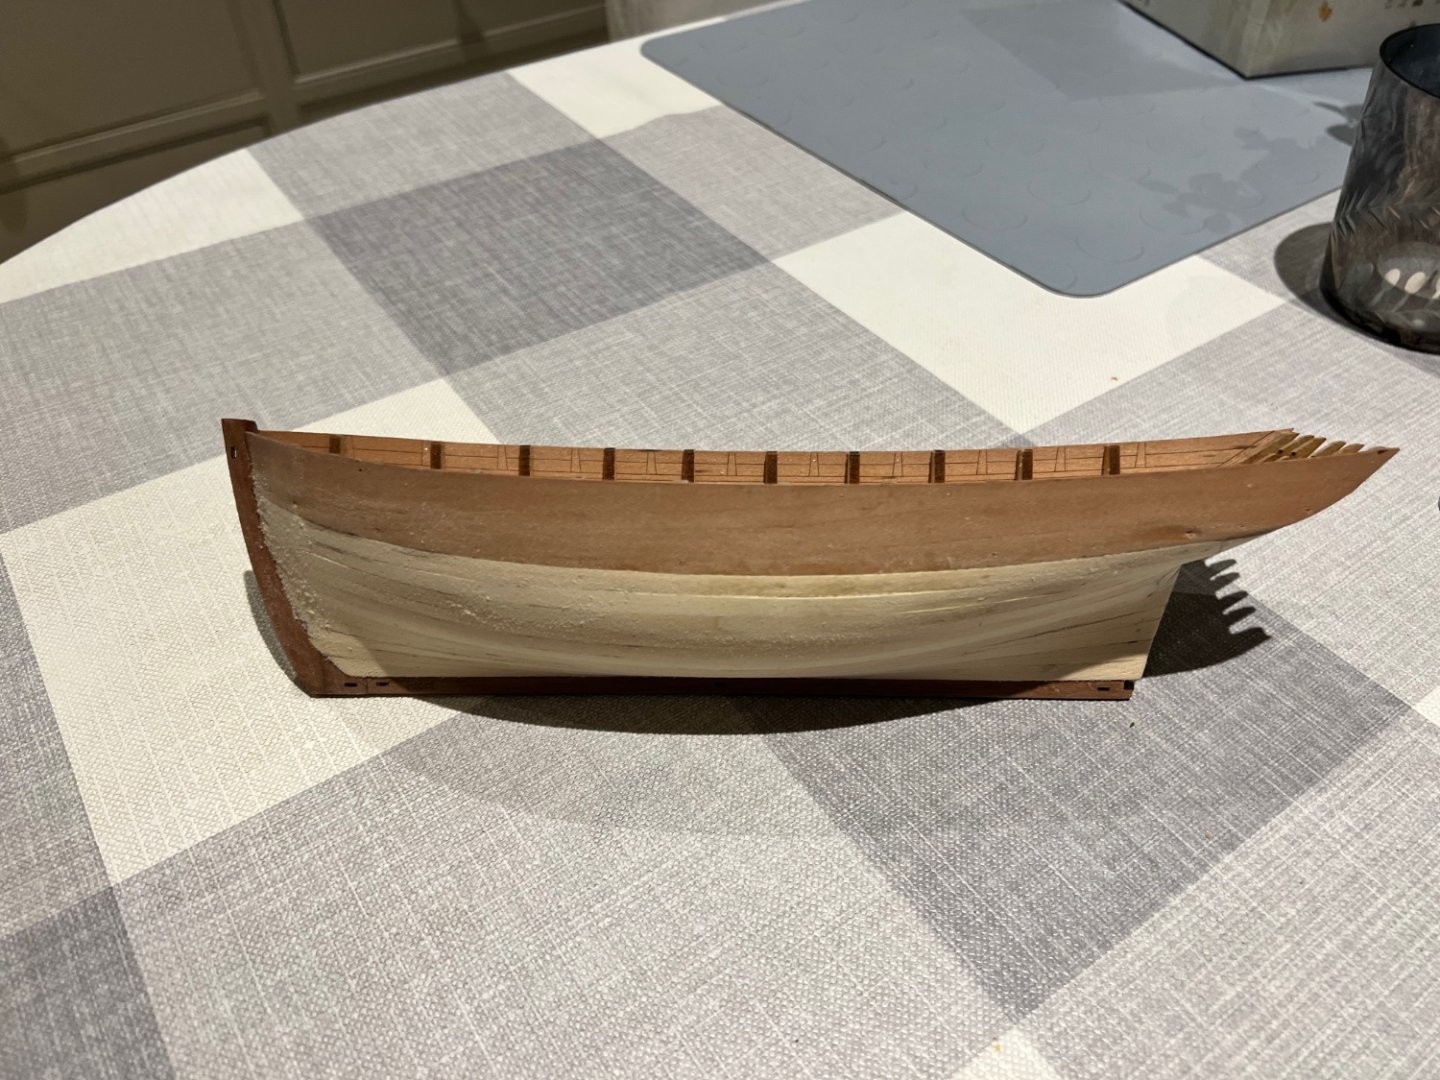
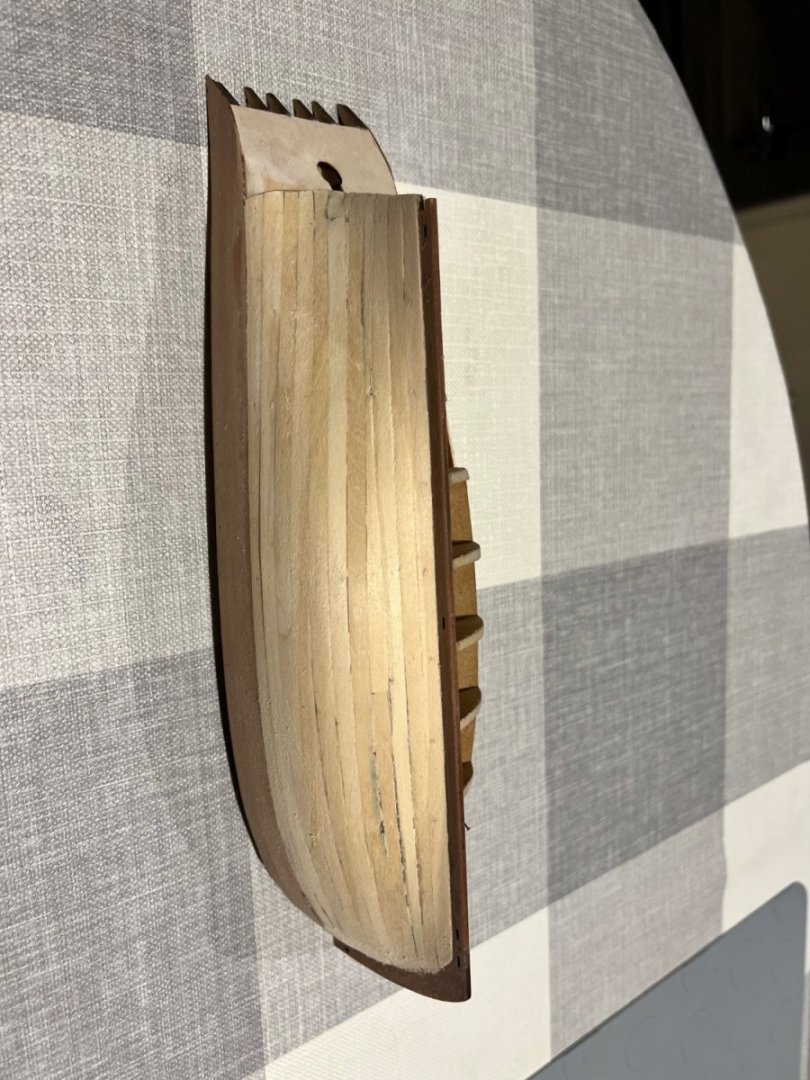
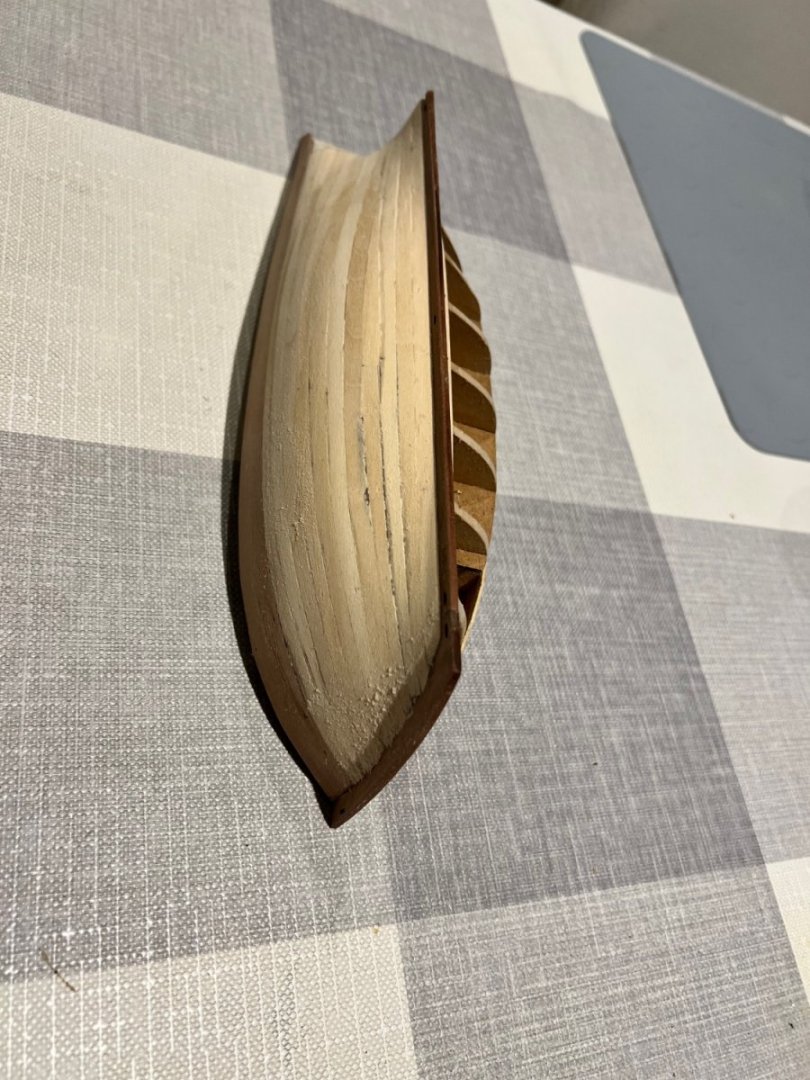
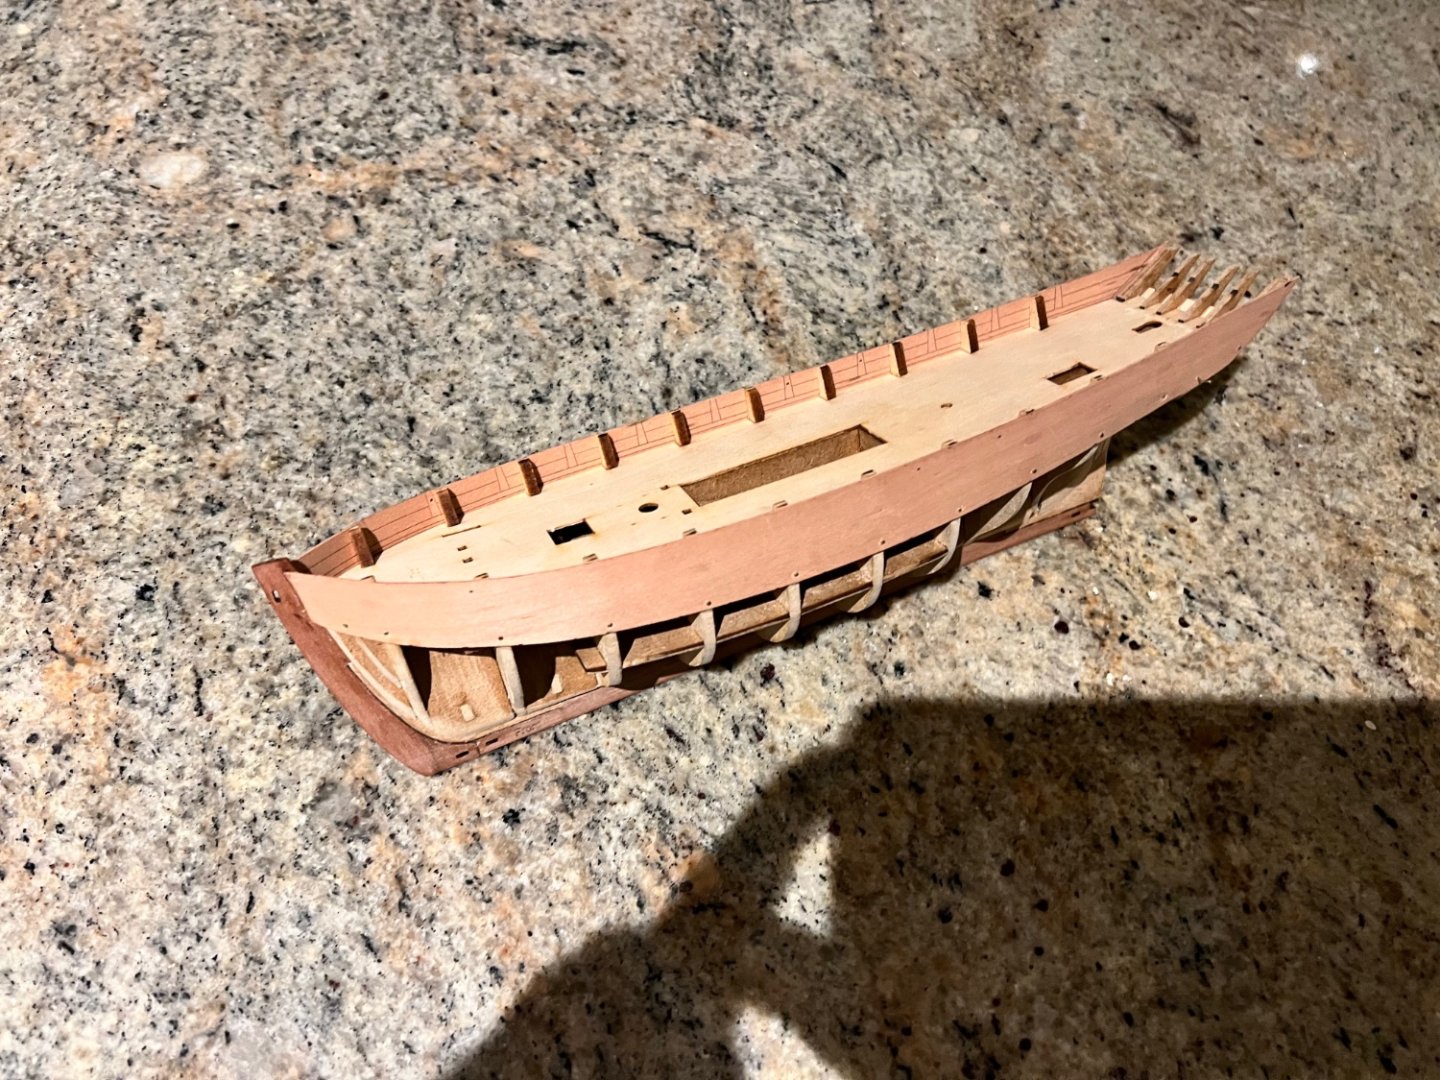
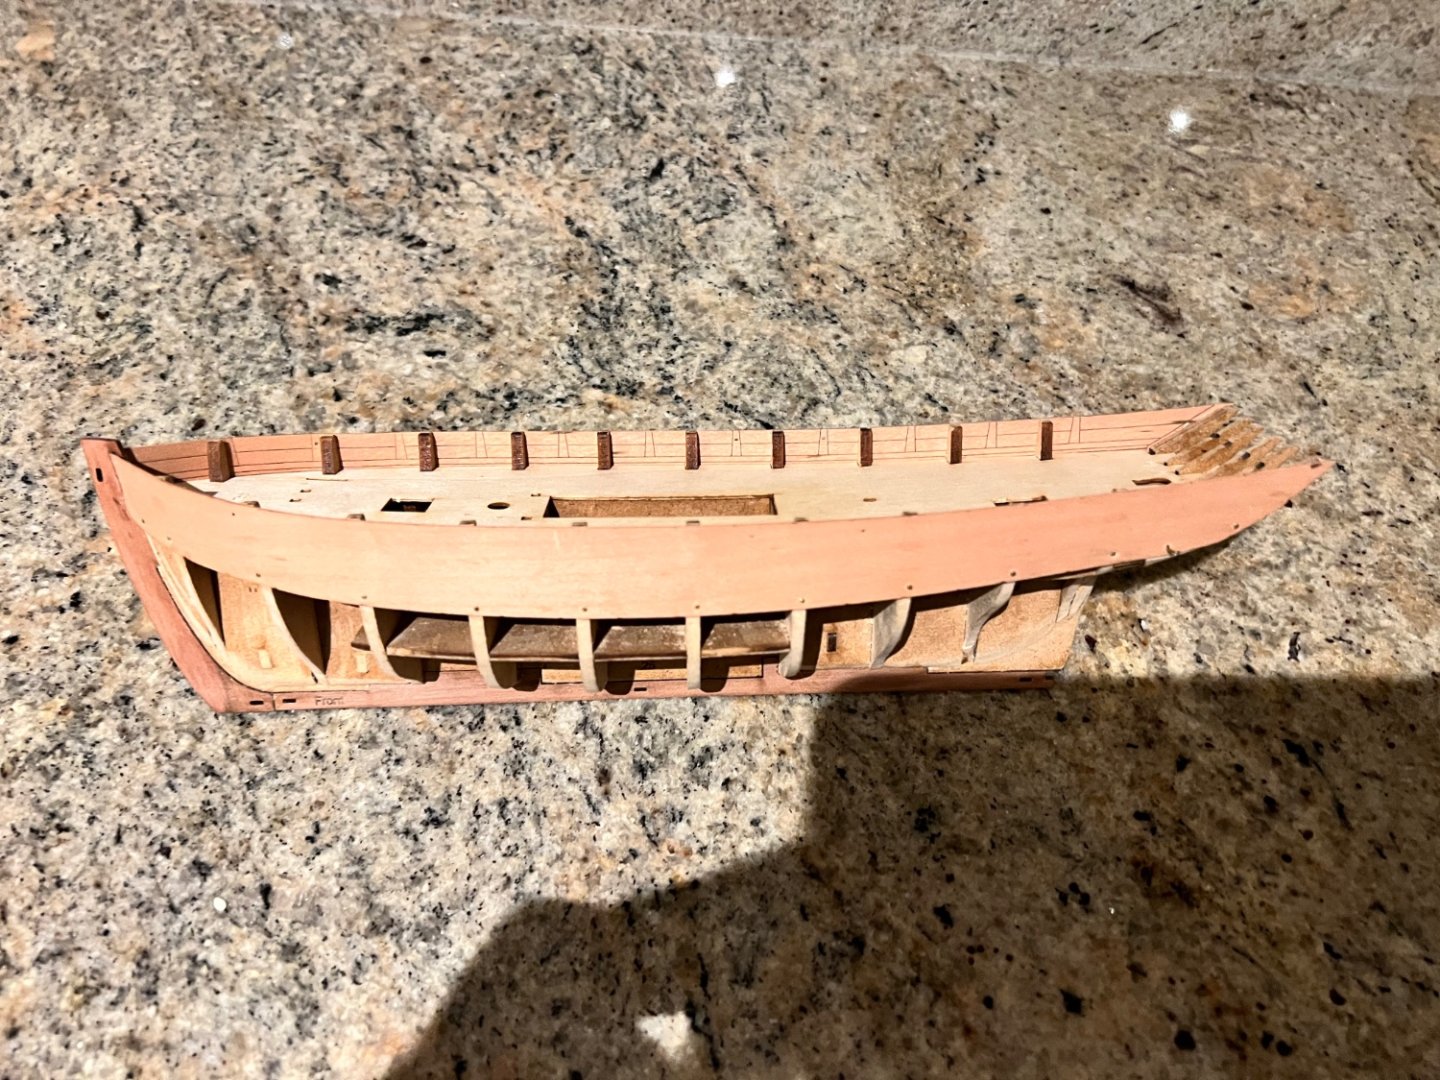
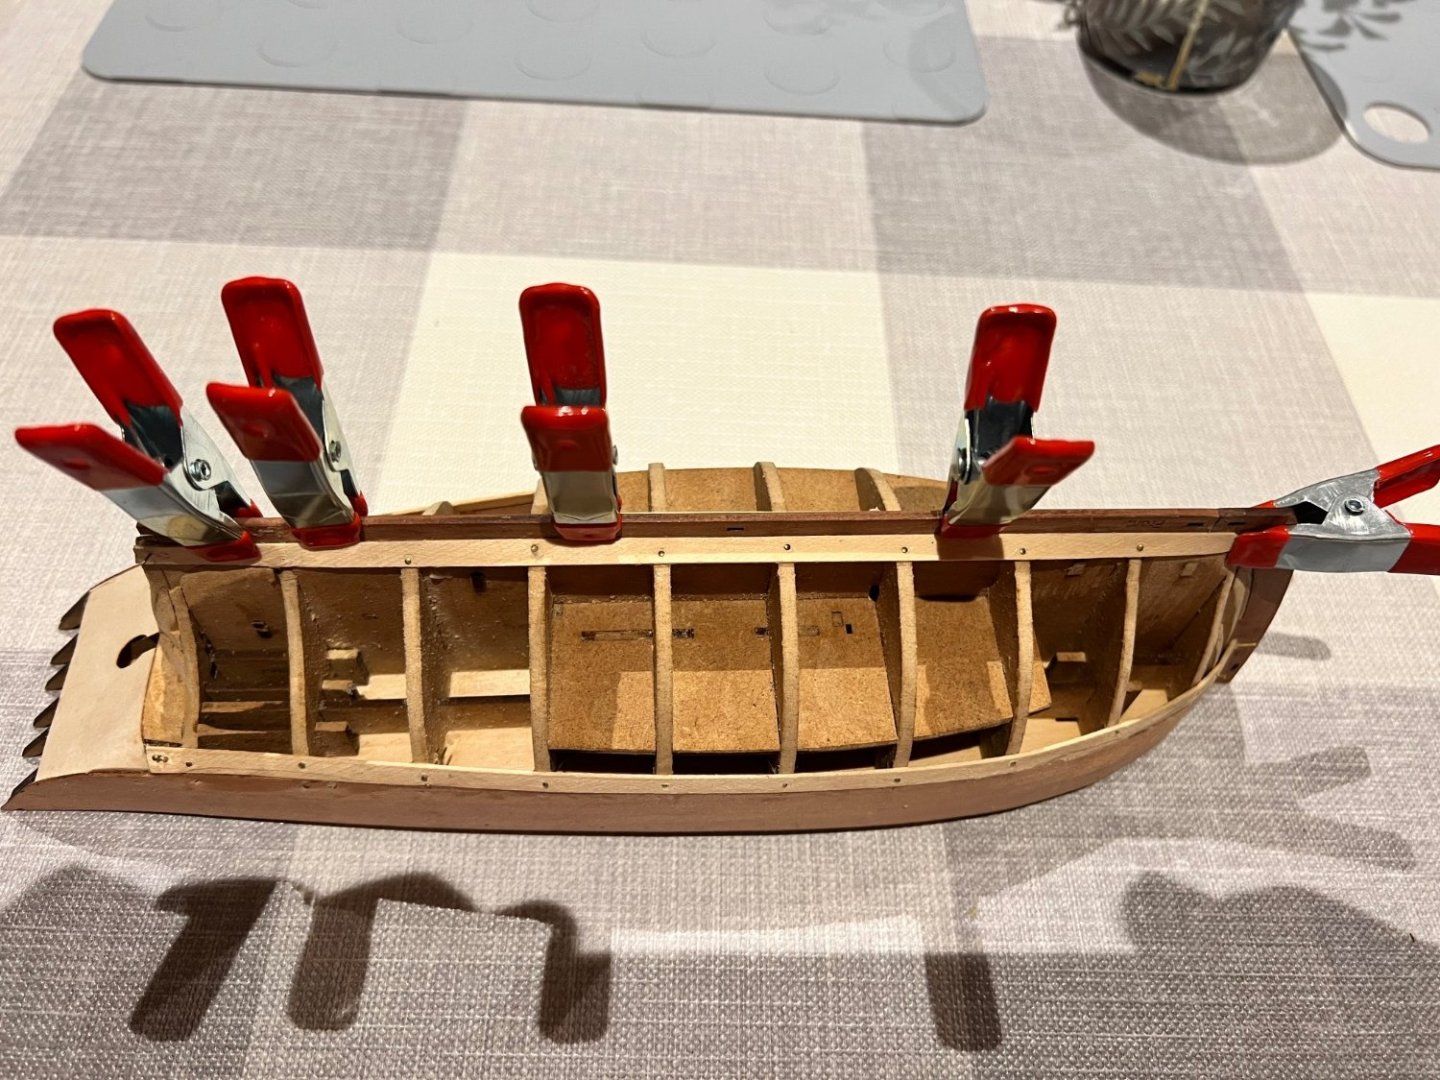
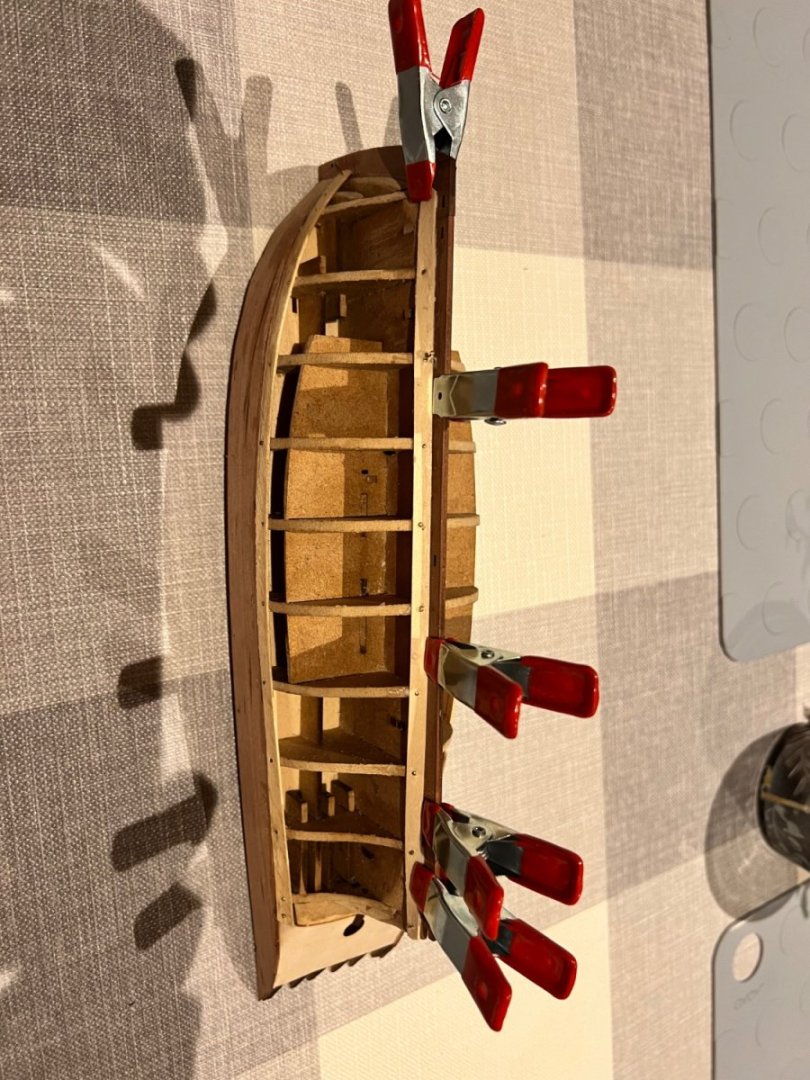
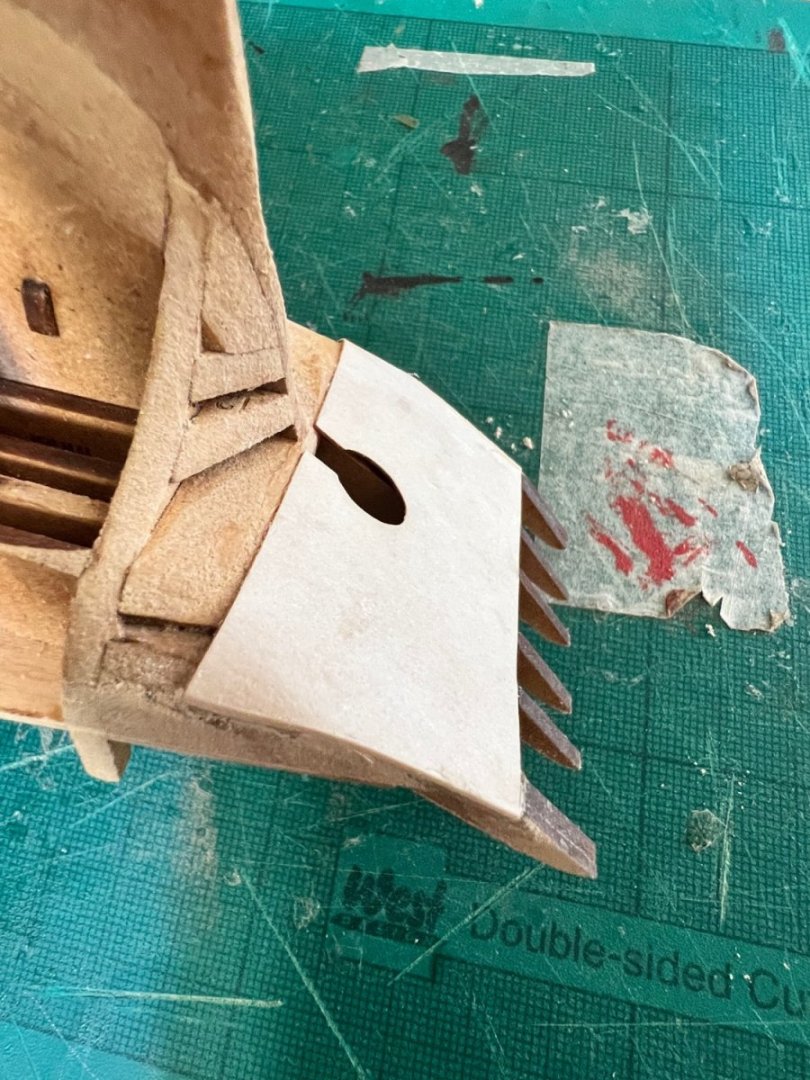
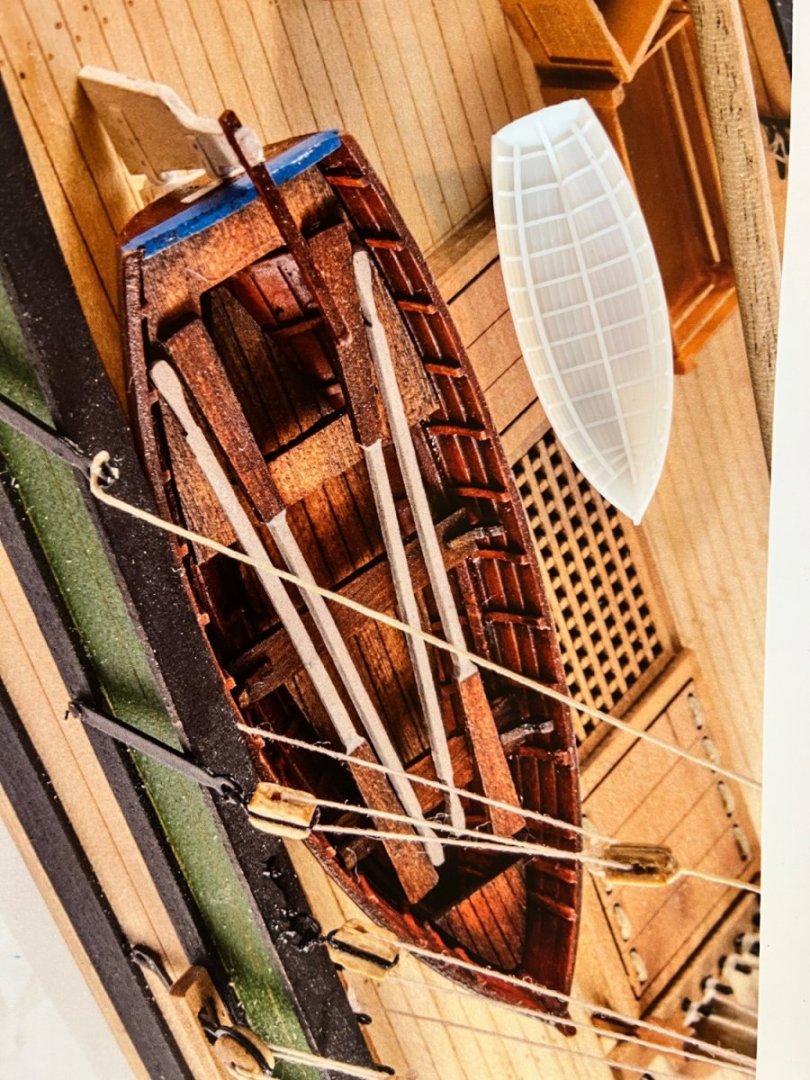
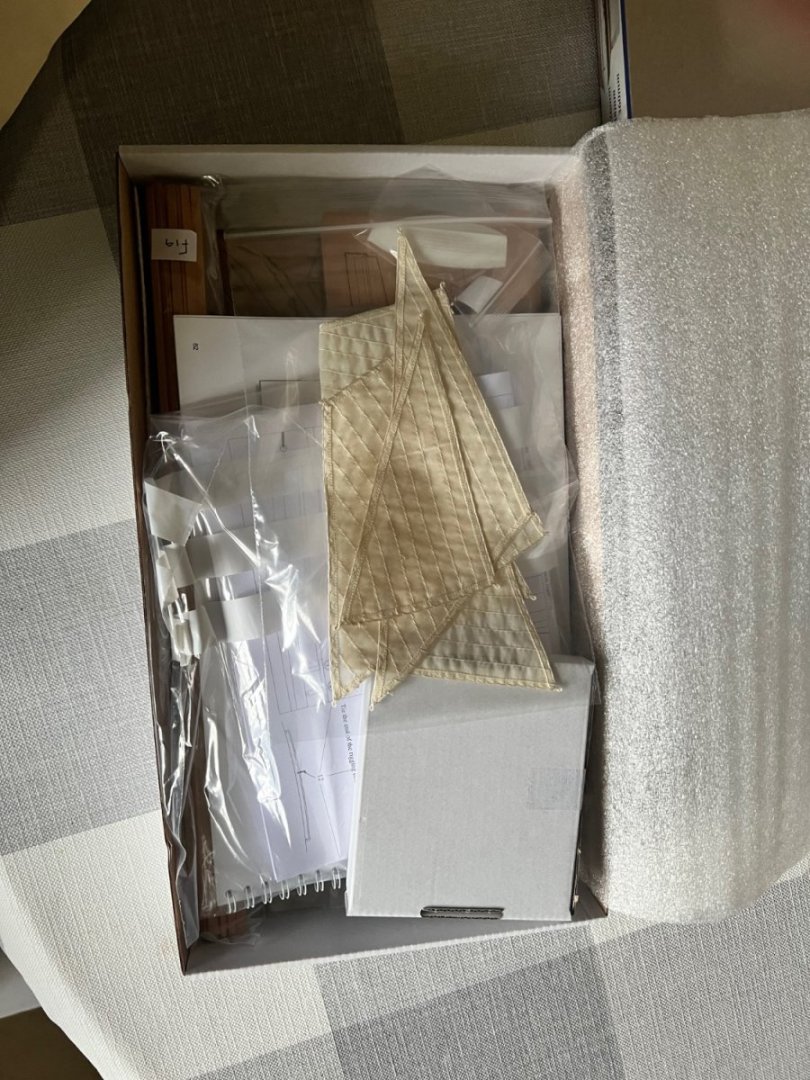
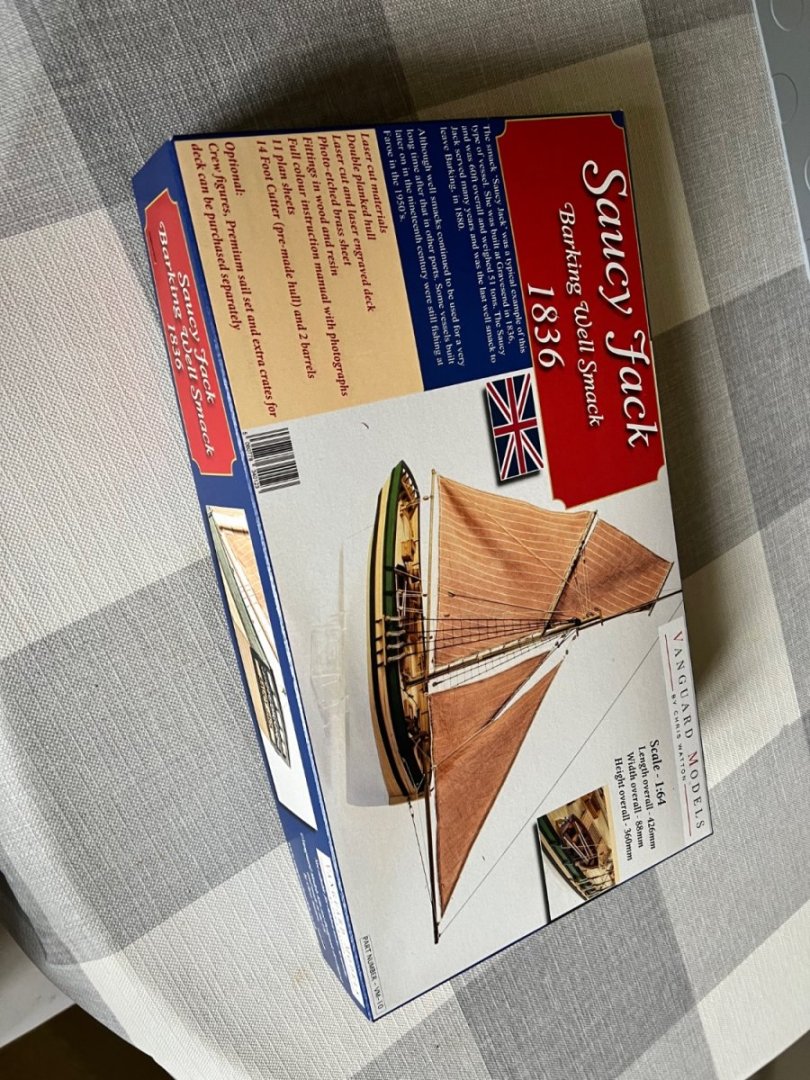
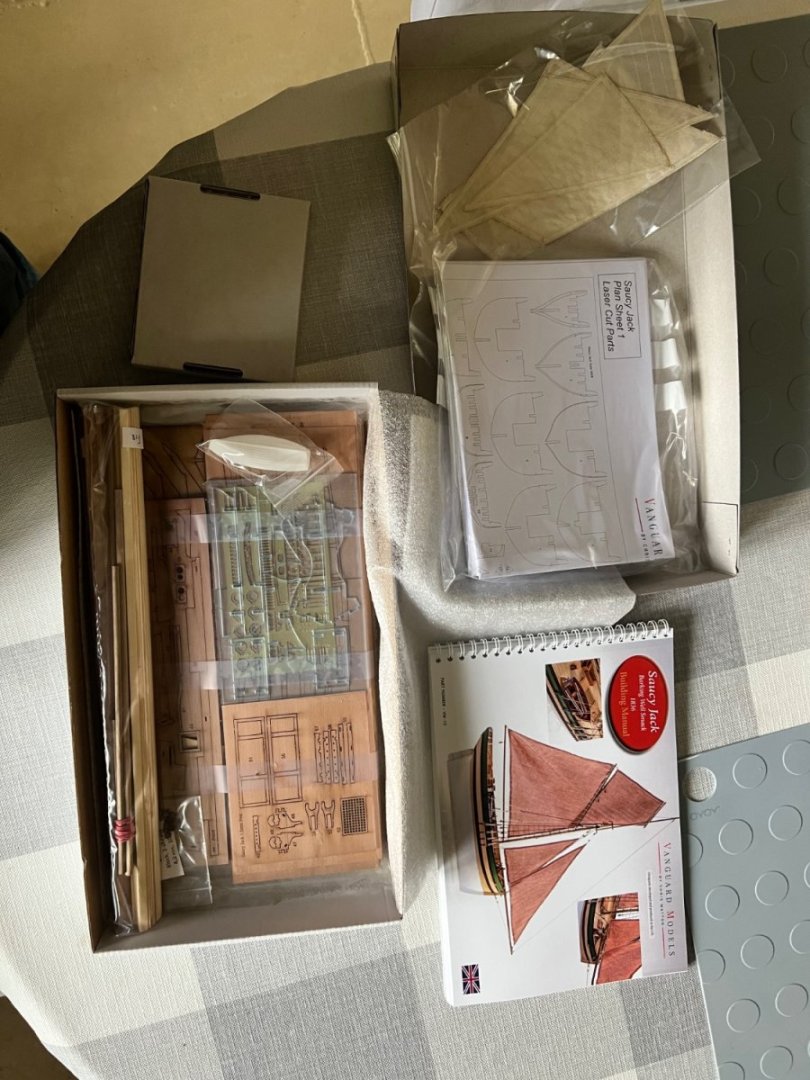
This will be my fourth build and fourth Vanguard fishing boat. I’ve been looking forward to building this boat ever since Chris and James released pictures of her. Launched in 1836 her period and style is more like the late 18th century and early nineteenth century warships that I think are most aesthetically pleasing with much more rounded hulls. In hull length and beam the Jack seems almost identical to Nisha, albeit with a fuller hull and more bluff bows. Other than James H’s excellent build log of the prototype, there aren’t any advanced build logs of the Saucy Jack on MSW. Usually I use other build logs extensively as a guide, so instead I’ve got to write a guide and I’ll try and document it in more detail than my other logs and flag the many mistakes I’ll make. I’ll even include photos of my terrible planking which I usually skip until Its well sanded down or painted. I’m also going to use this log to ask some very basic technique questions I should have asked and mastered on my very first build. So apologies if these are very elementary! I plan to complete her in a similar style and colour scheme to the box art, but I have yet to decide whether there will be bare wood areas on the hull, or whether to paint it green. Likely depends on how well my planking turns out. She arrived in a very smartly presented box. The kit is well packaged and the quality of materials is very high as usual for a Vanguard kit. The pear wood is lovely and precision cut. Some photo-etch too. I’ve bought the high quality sails Chris sources from Master Korabel and also pear wood machined blocks (some of these are not exactly the right size, but near enough). Wadge of I think ten plans, I haven’t opened these yet. Hopefully in exactly the same scale as the model. Again the superb spiral bound instruction book full of photos. High quality resin fittings include an anchor, the winch and three barrels (albeit not the crates shown on the box art - I have some of these bought separately from Vanguard so may include them) for deck clutter. Lots of thread for rigging. There’s a very cute little 14ft resin cutter to build and add details to. I noticed that there are no build instructions for the cutter in the instructions, but I’m sure that I can work it out. All in all a super kit and I’m looking forward to building her.

- 59 replies
-
- 5
-
-
- saucy jack
- fishing smack
- (and 2 more)