
DB789
-
Posts
337 -
Joined
-
Last visited
Content Type
Profiles
Forums
Gallery
Events
Everything posted by DB789
-
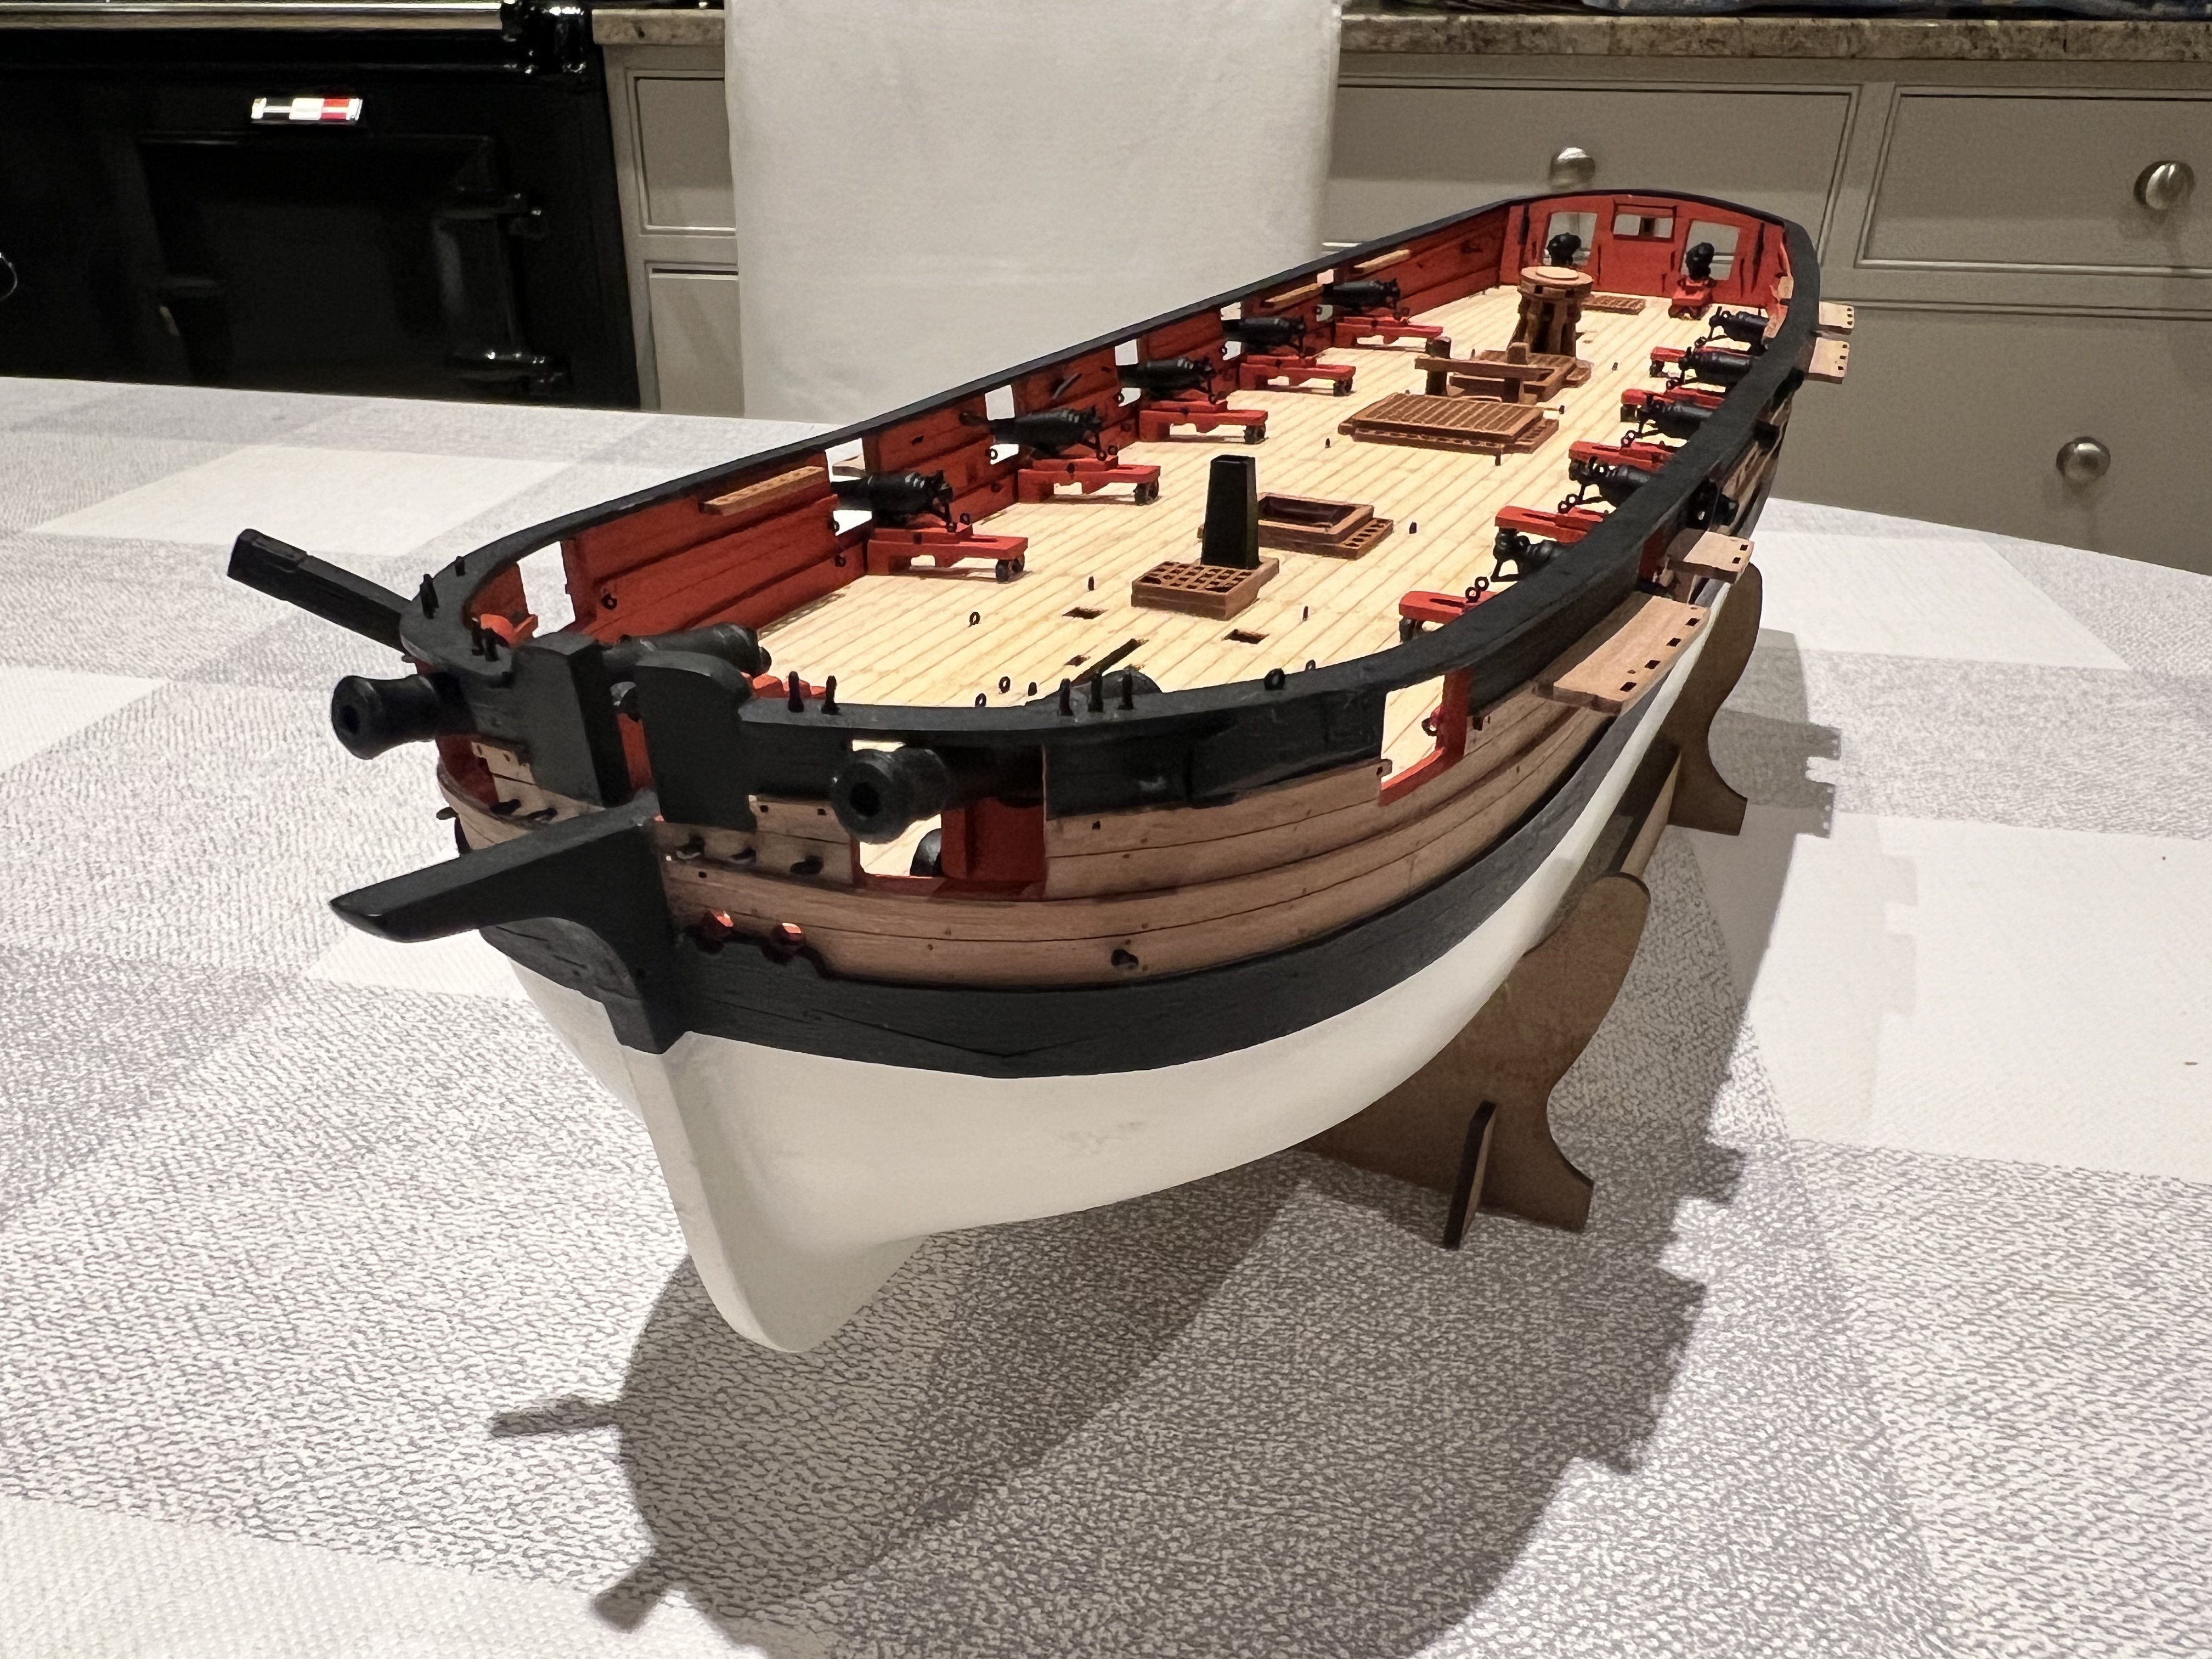
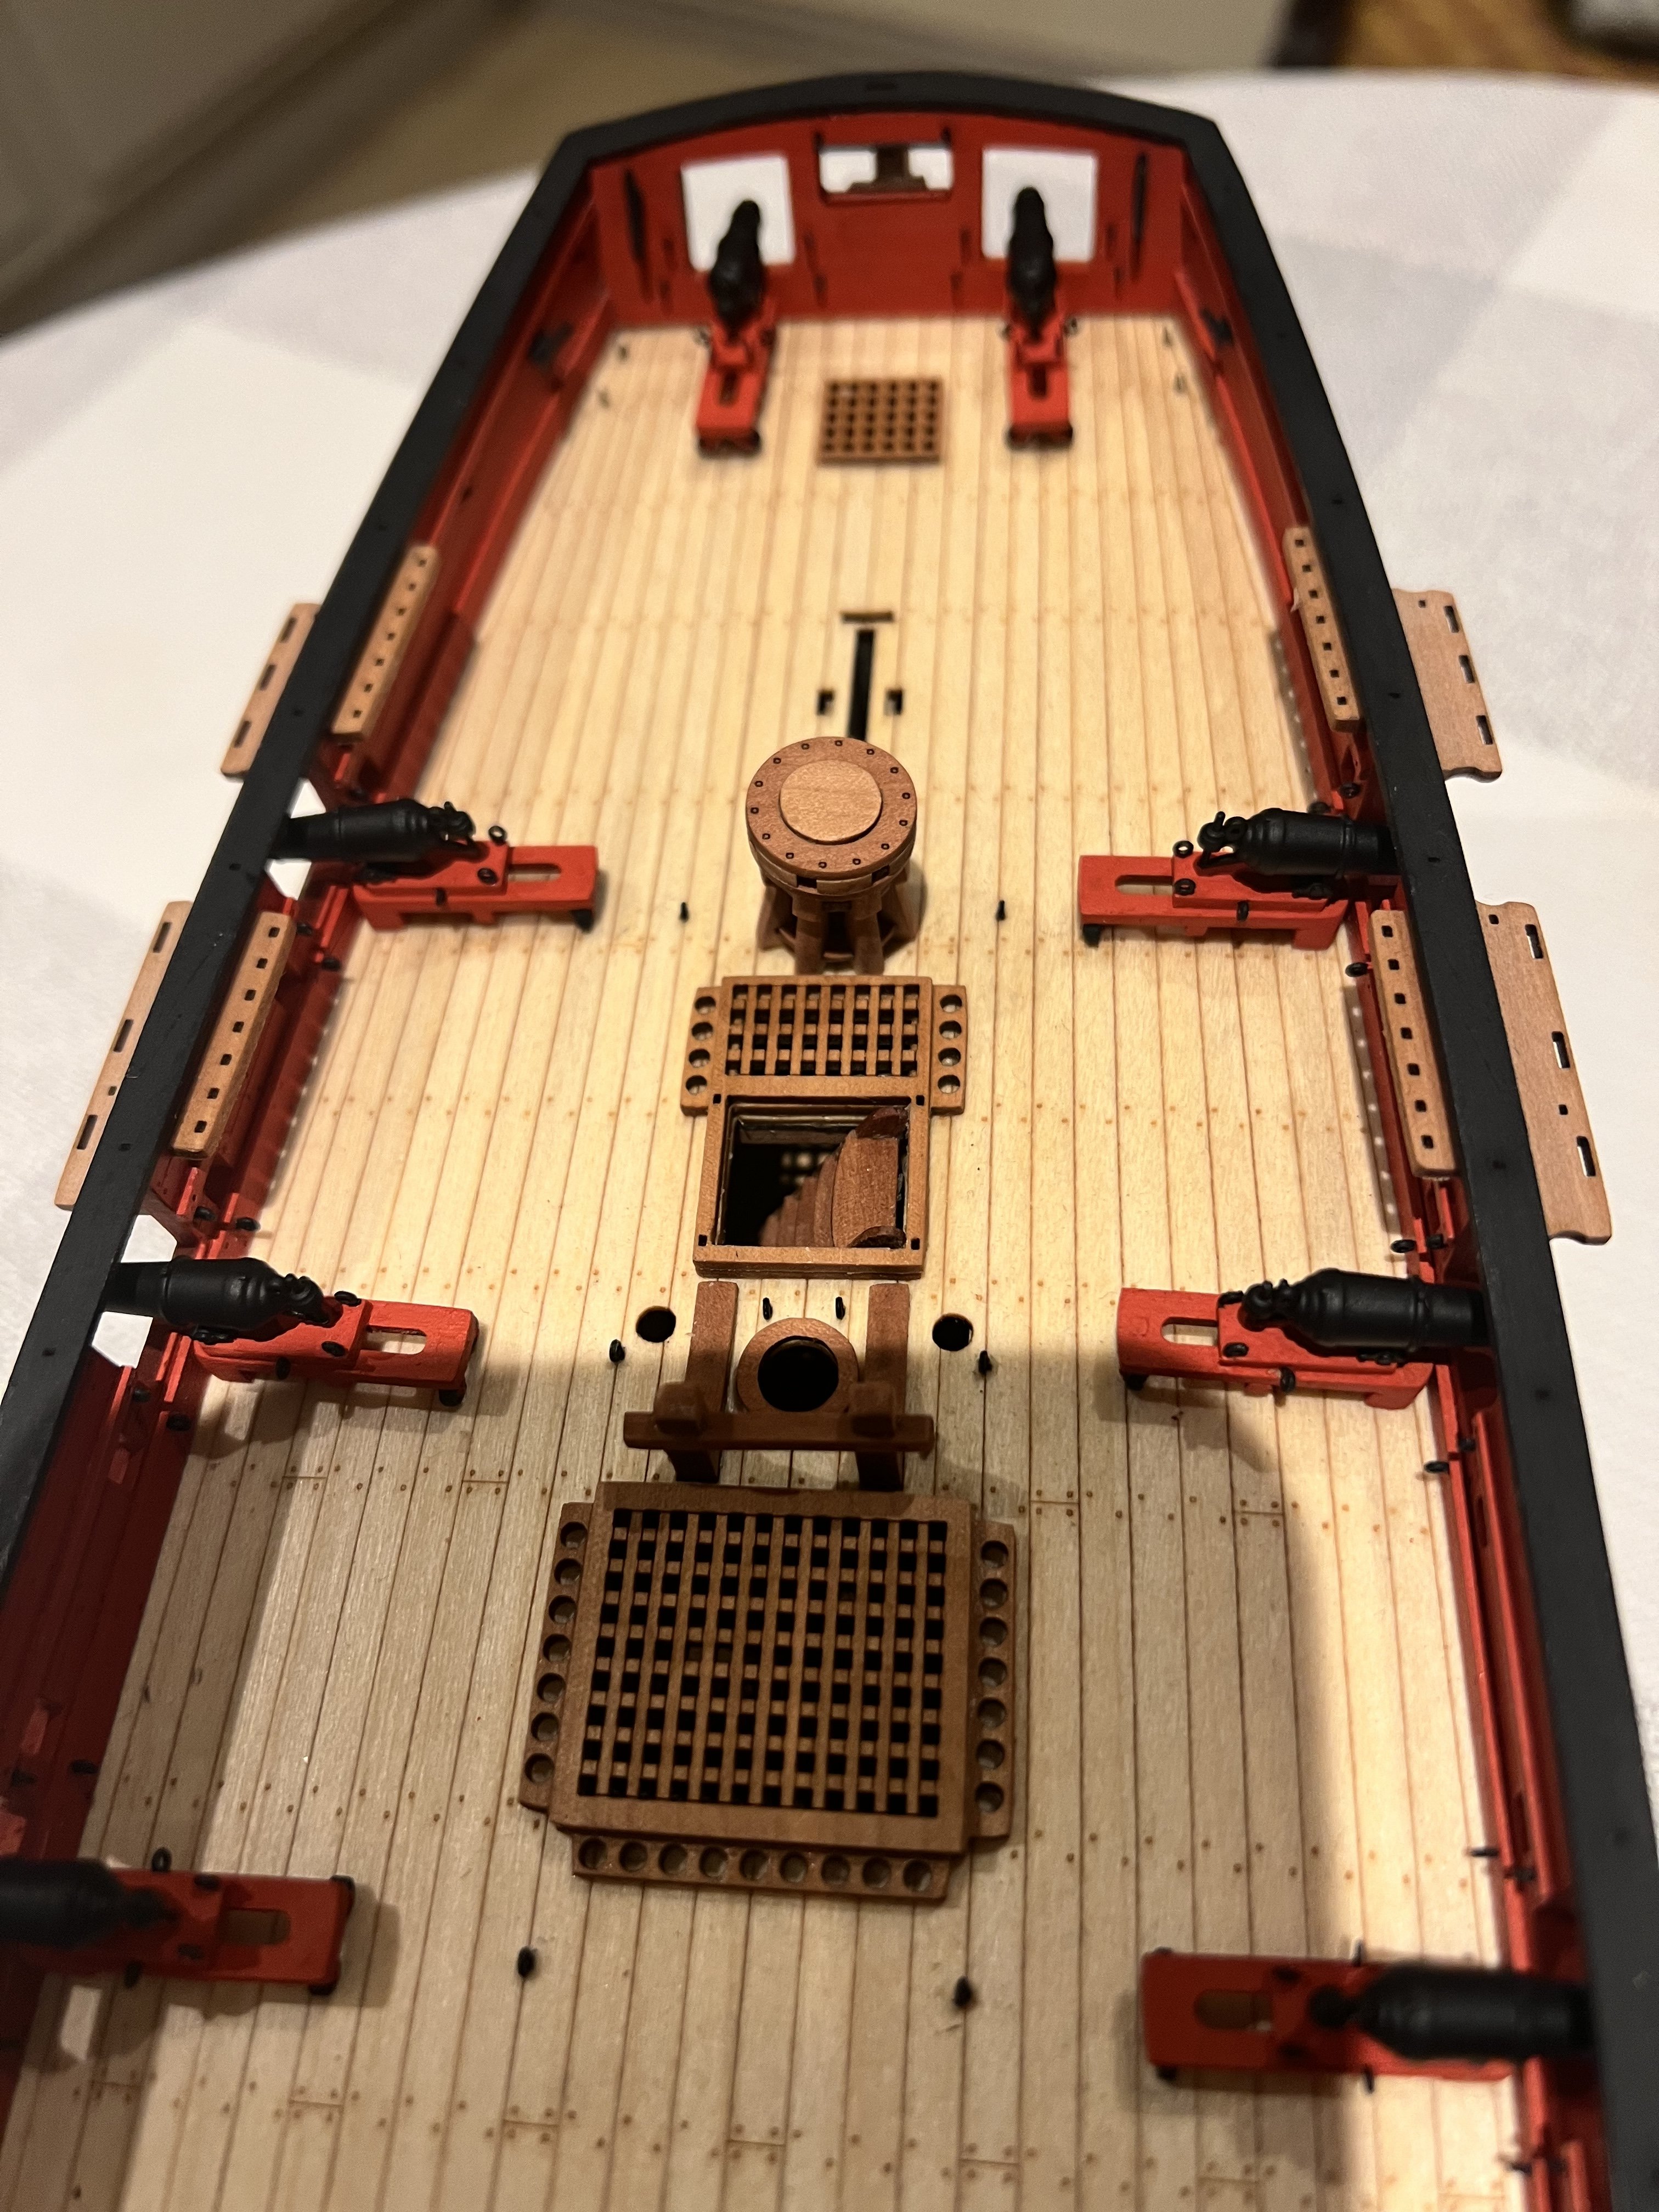
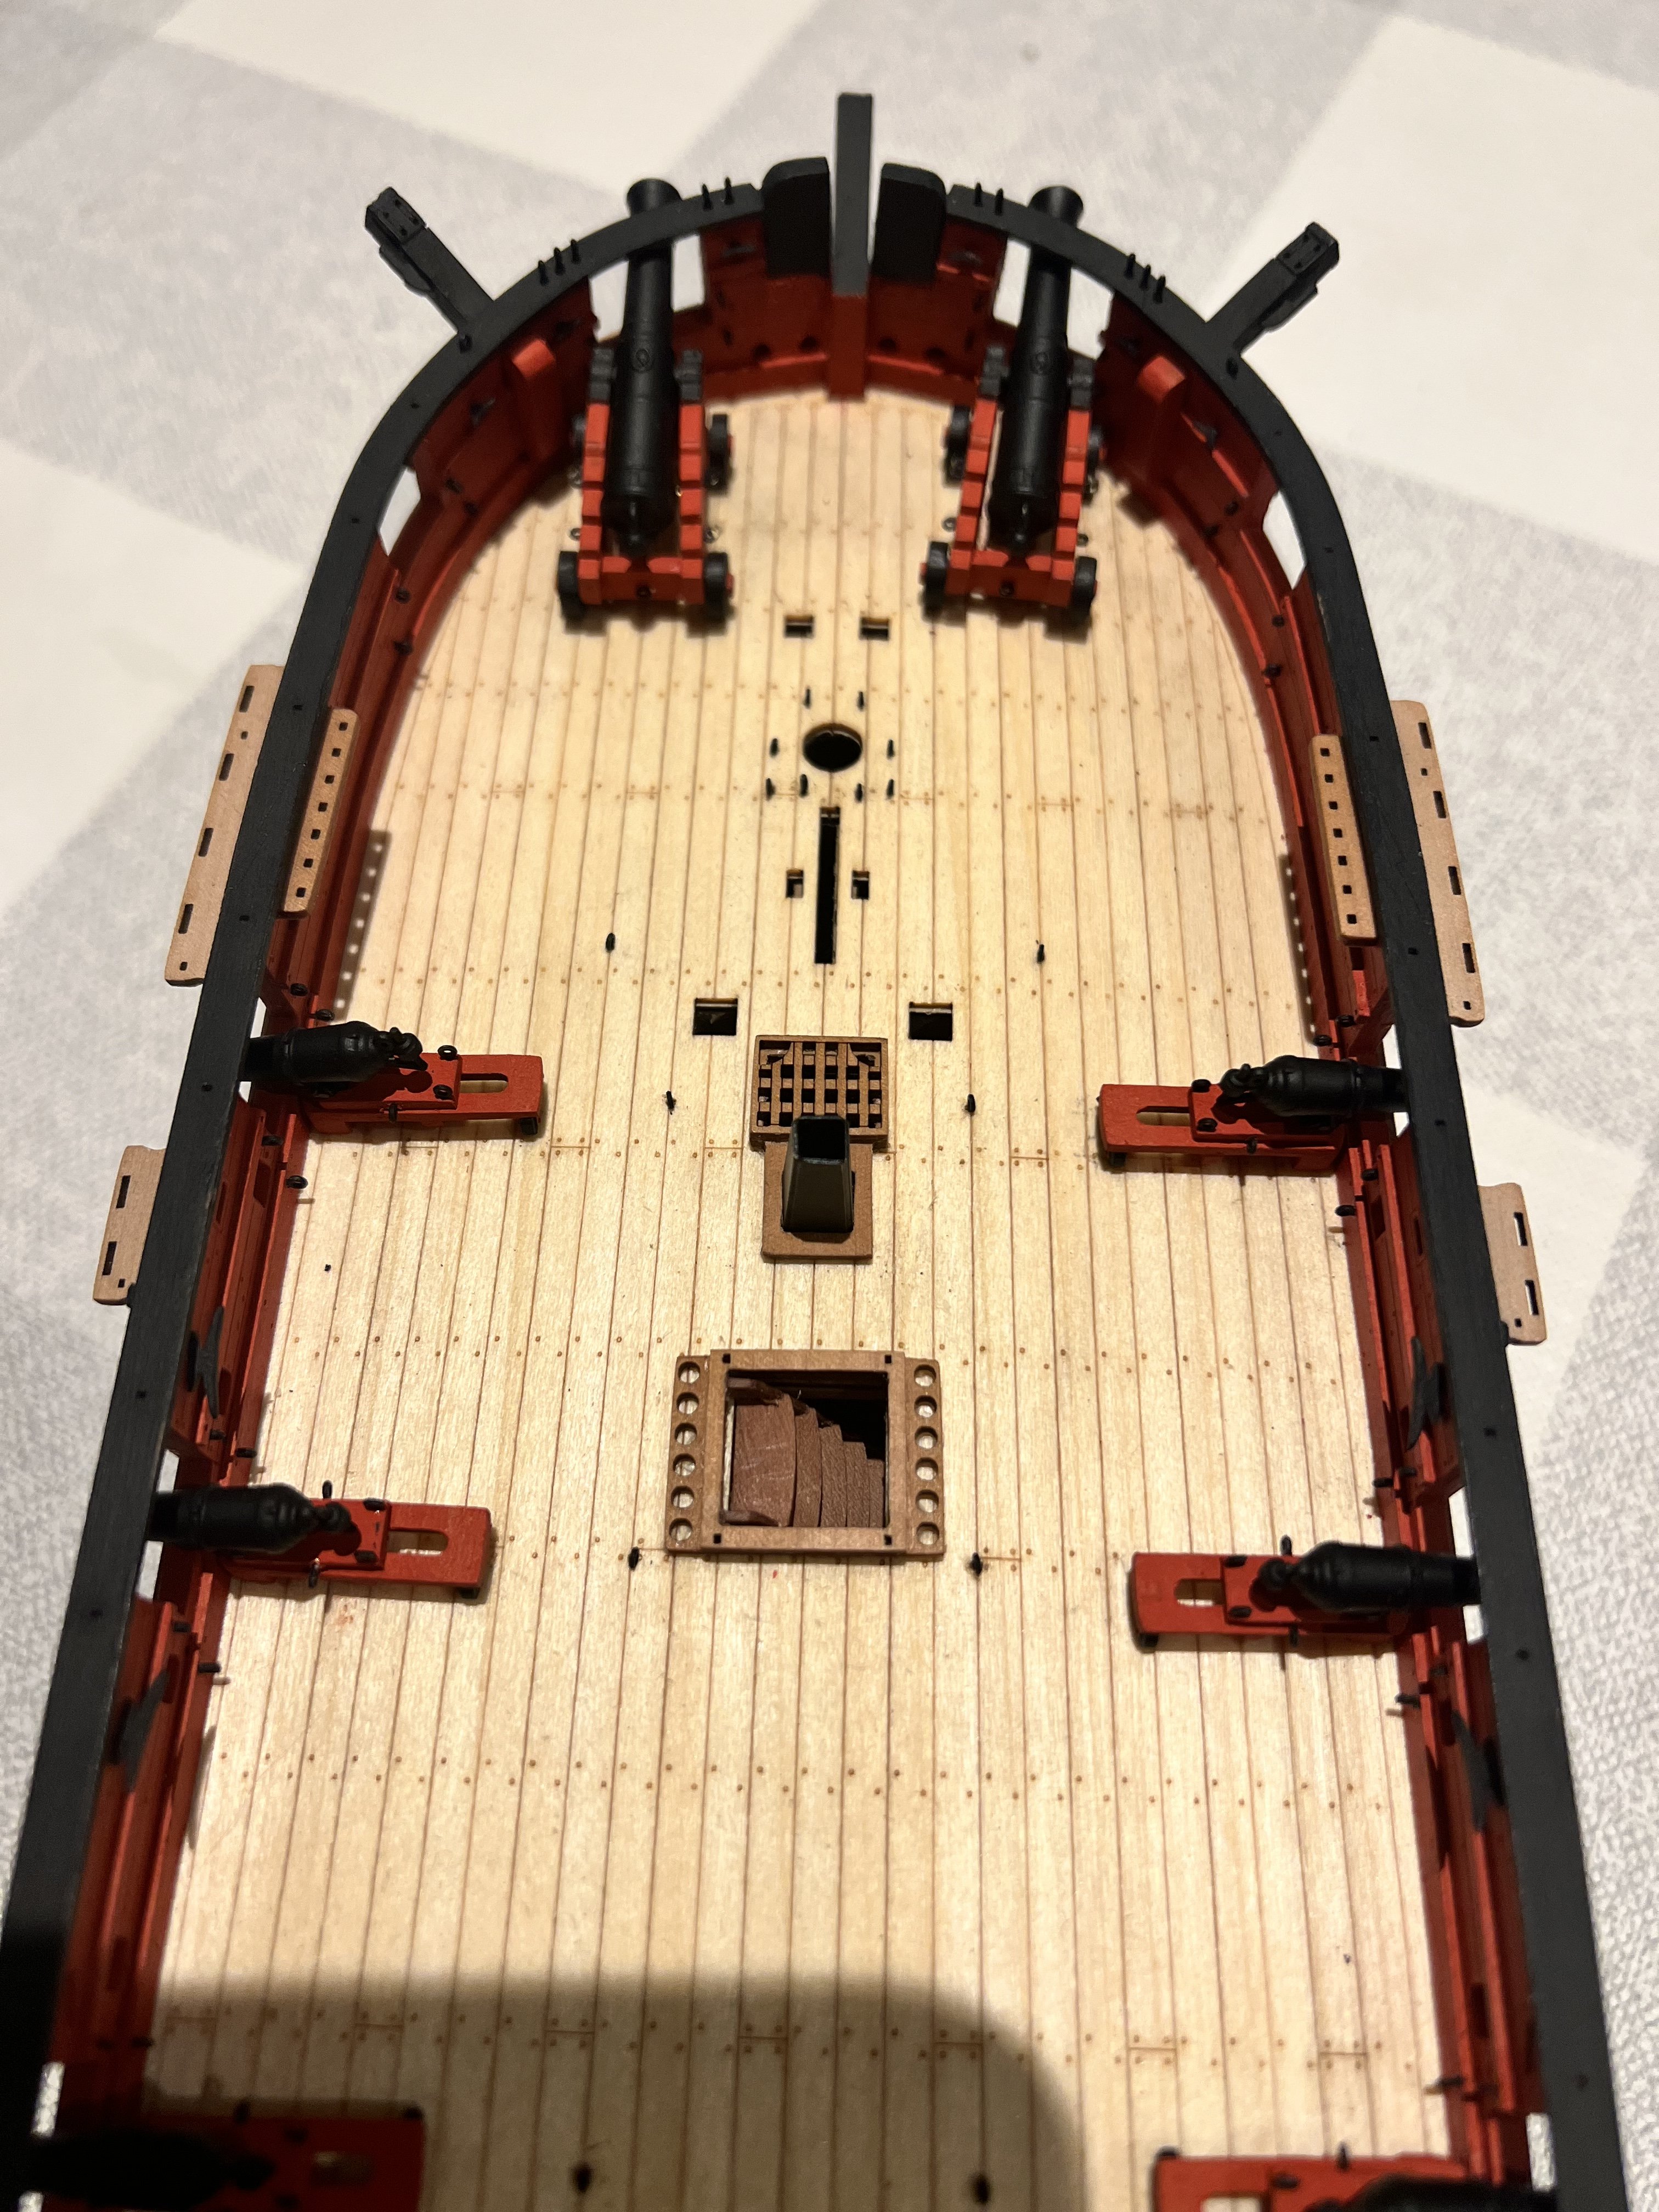
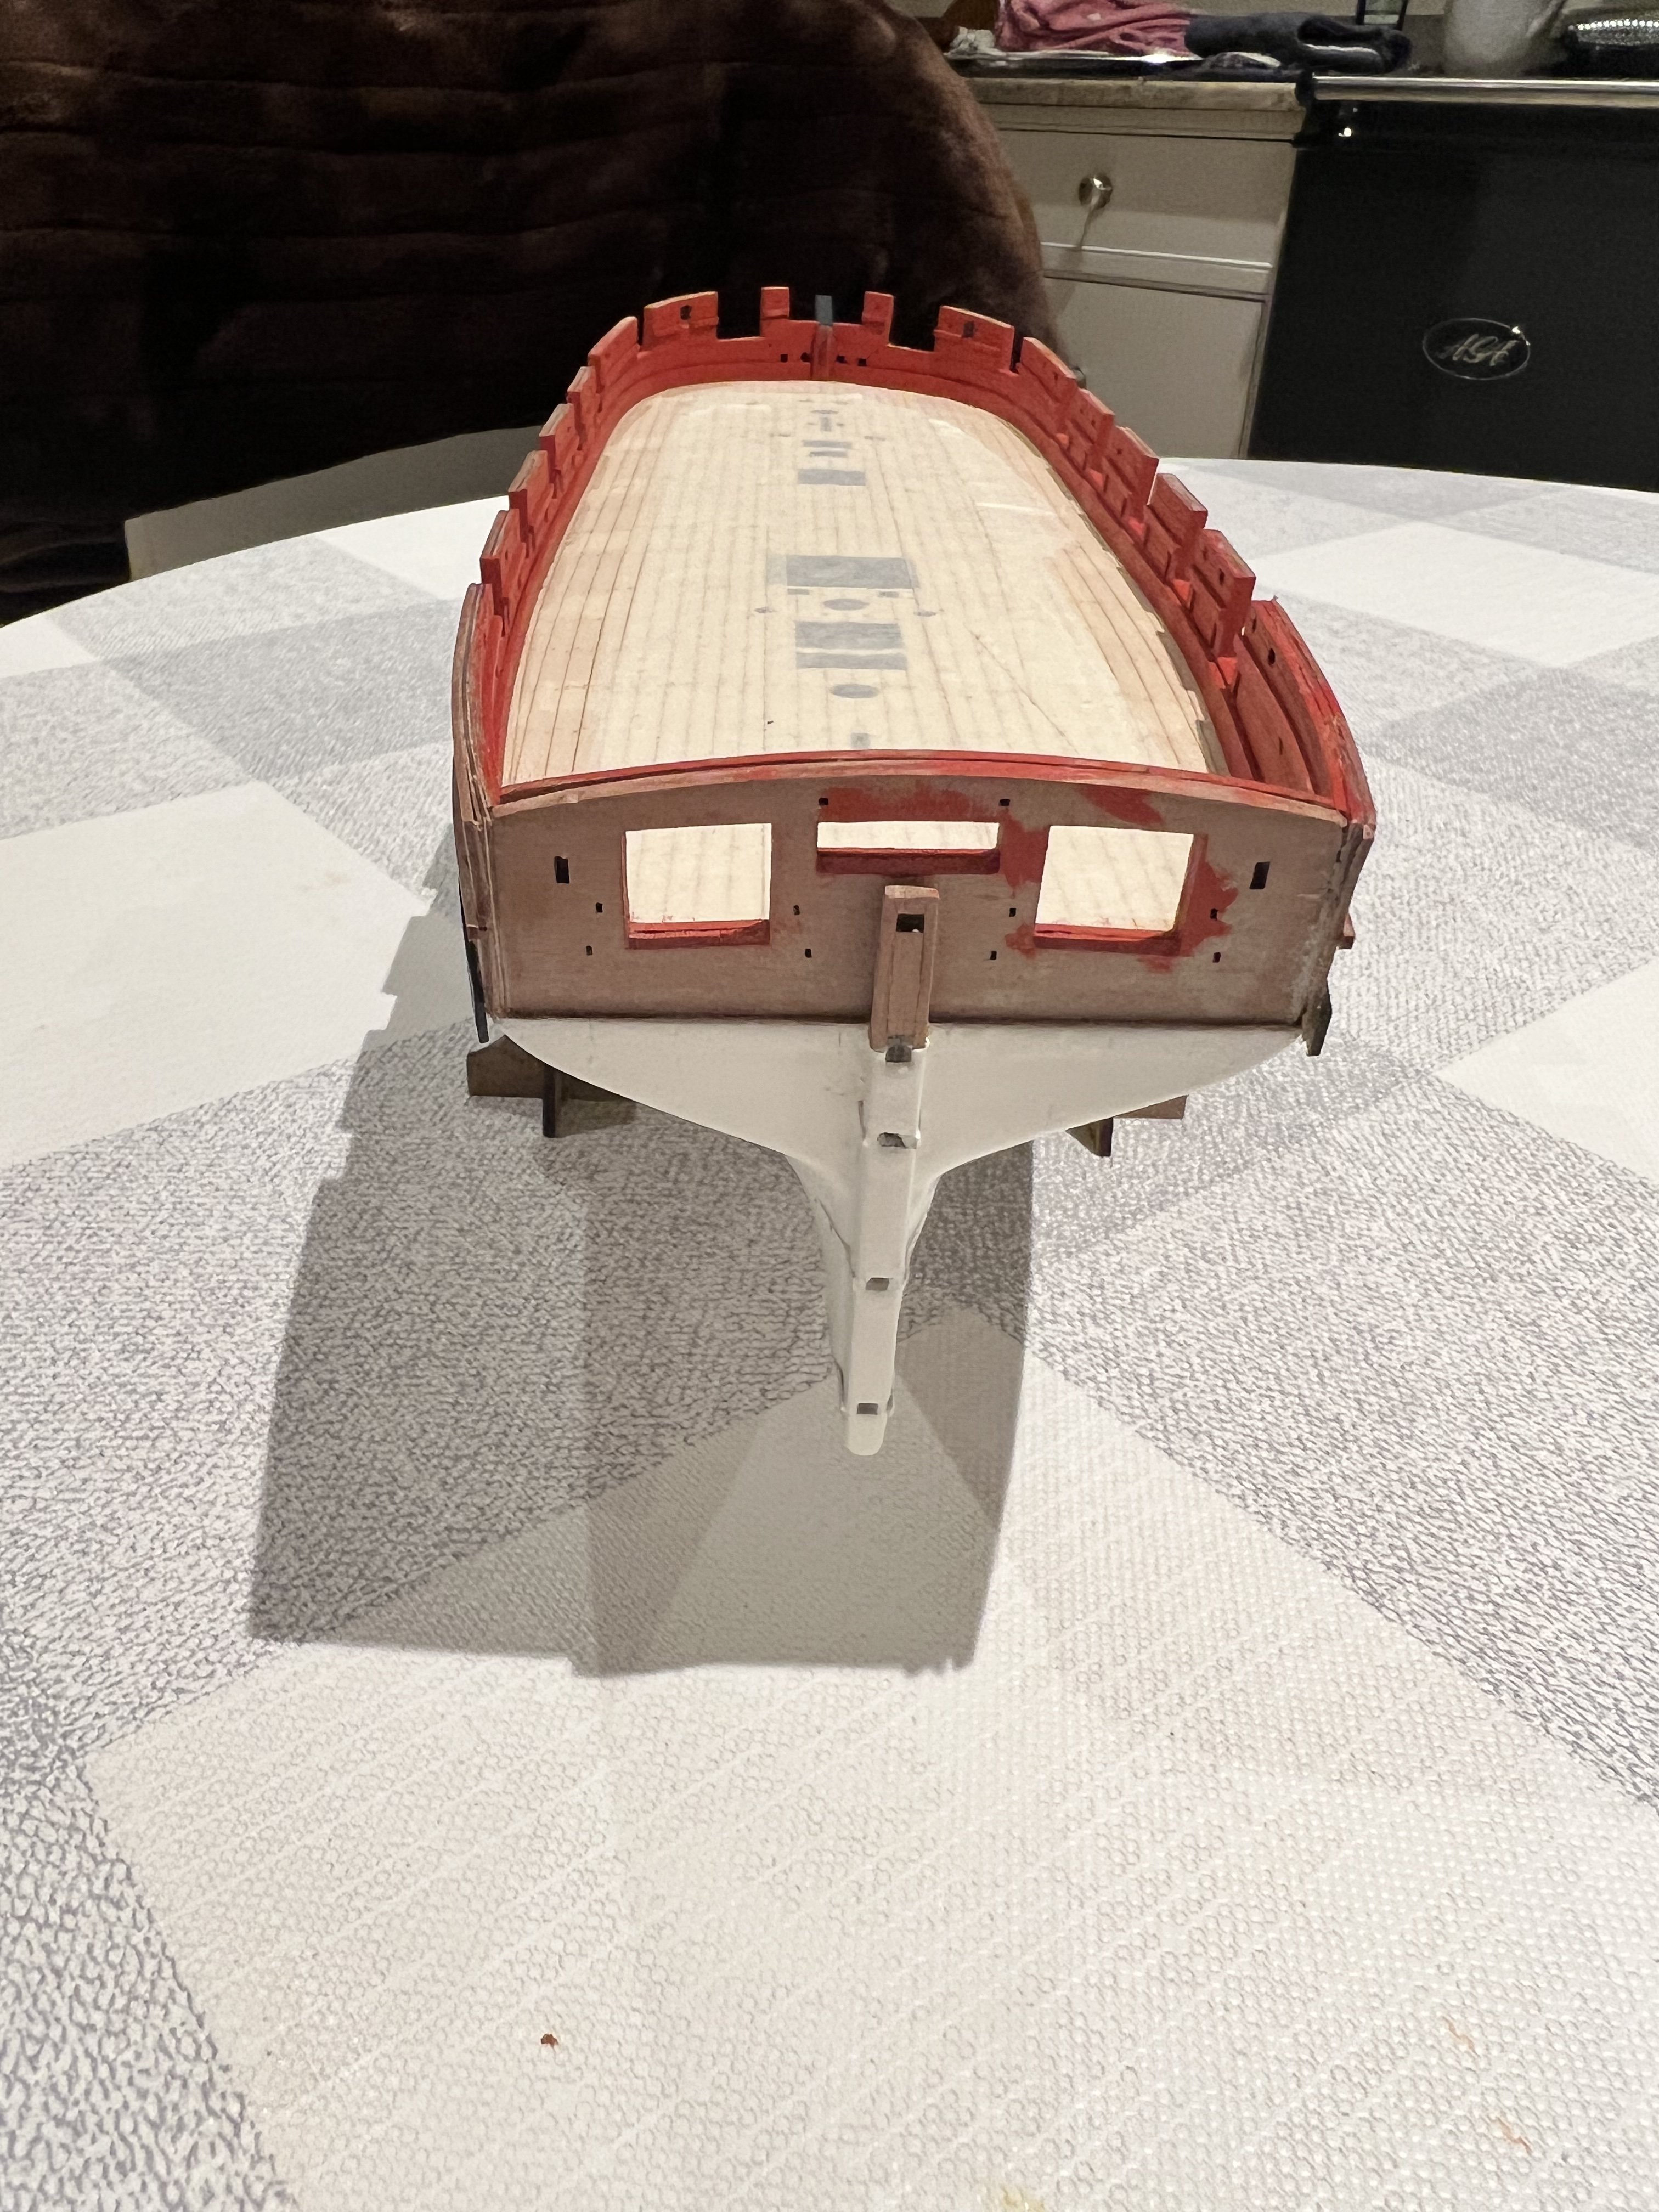
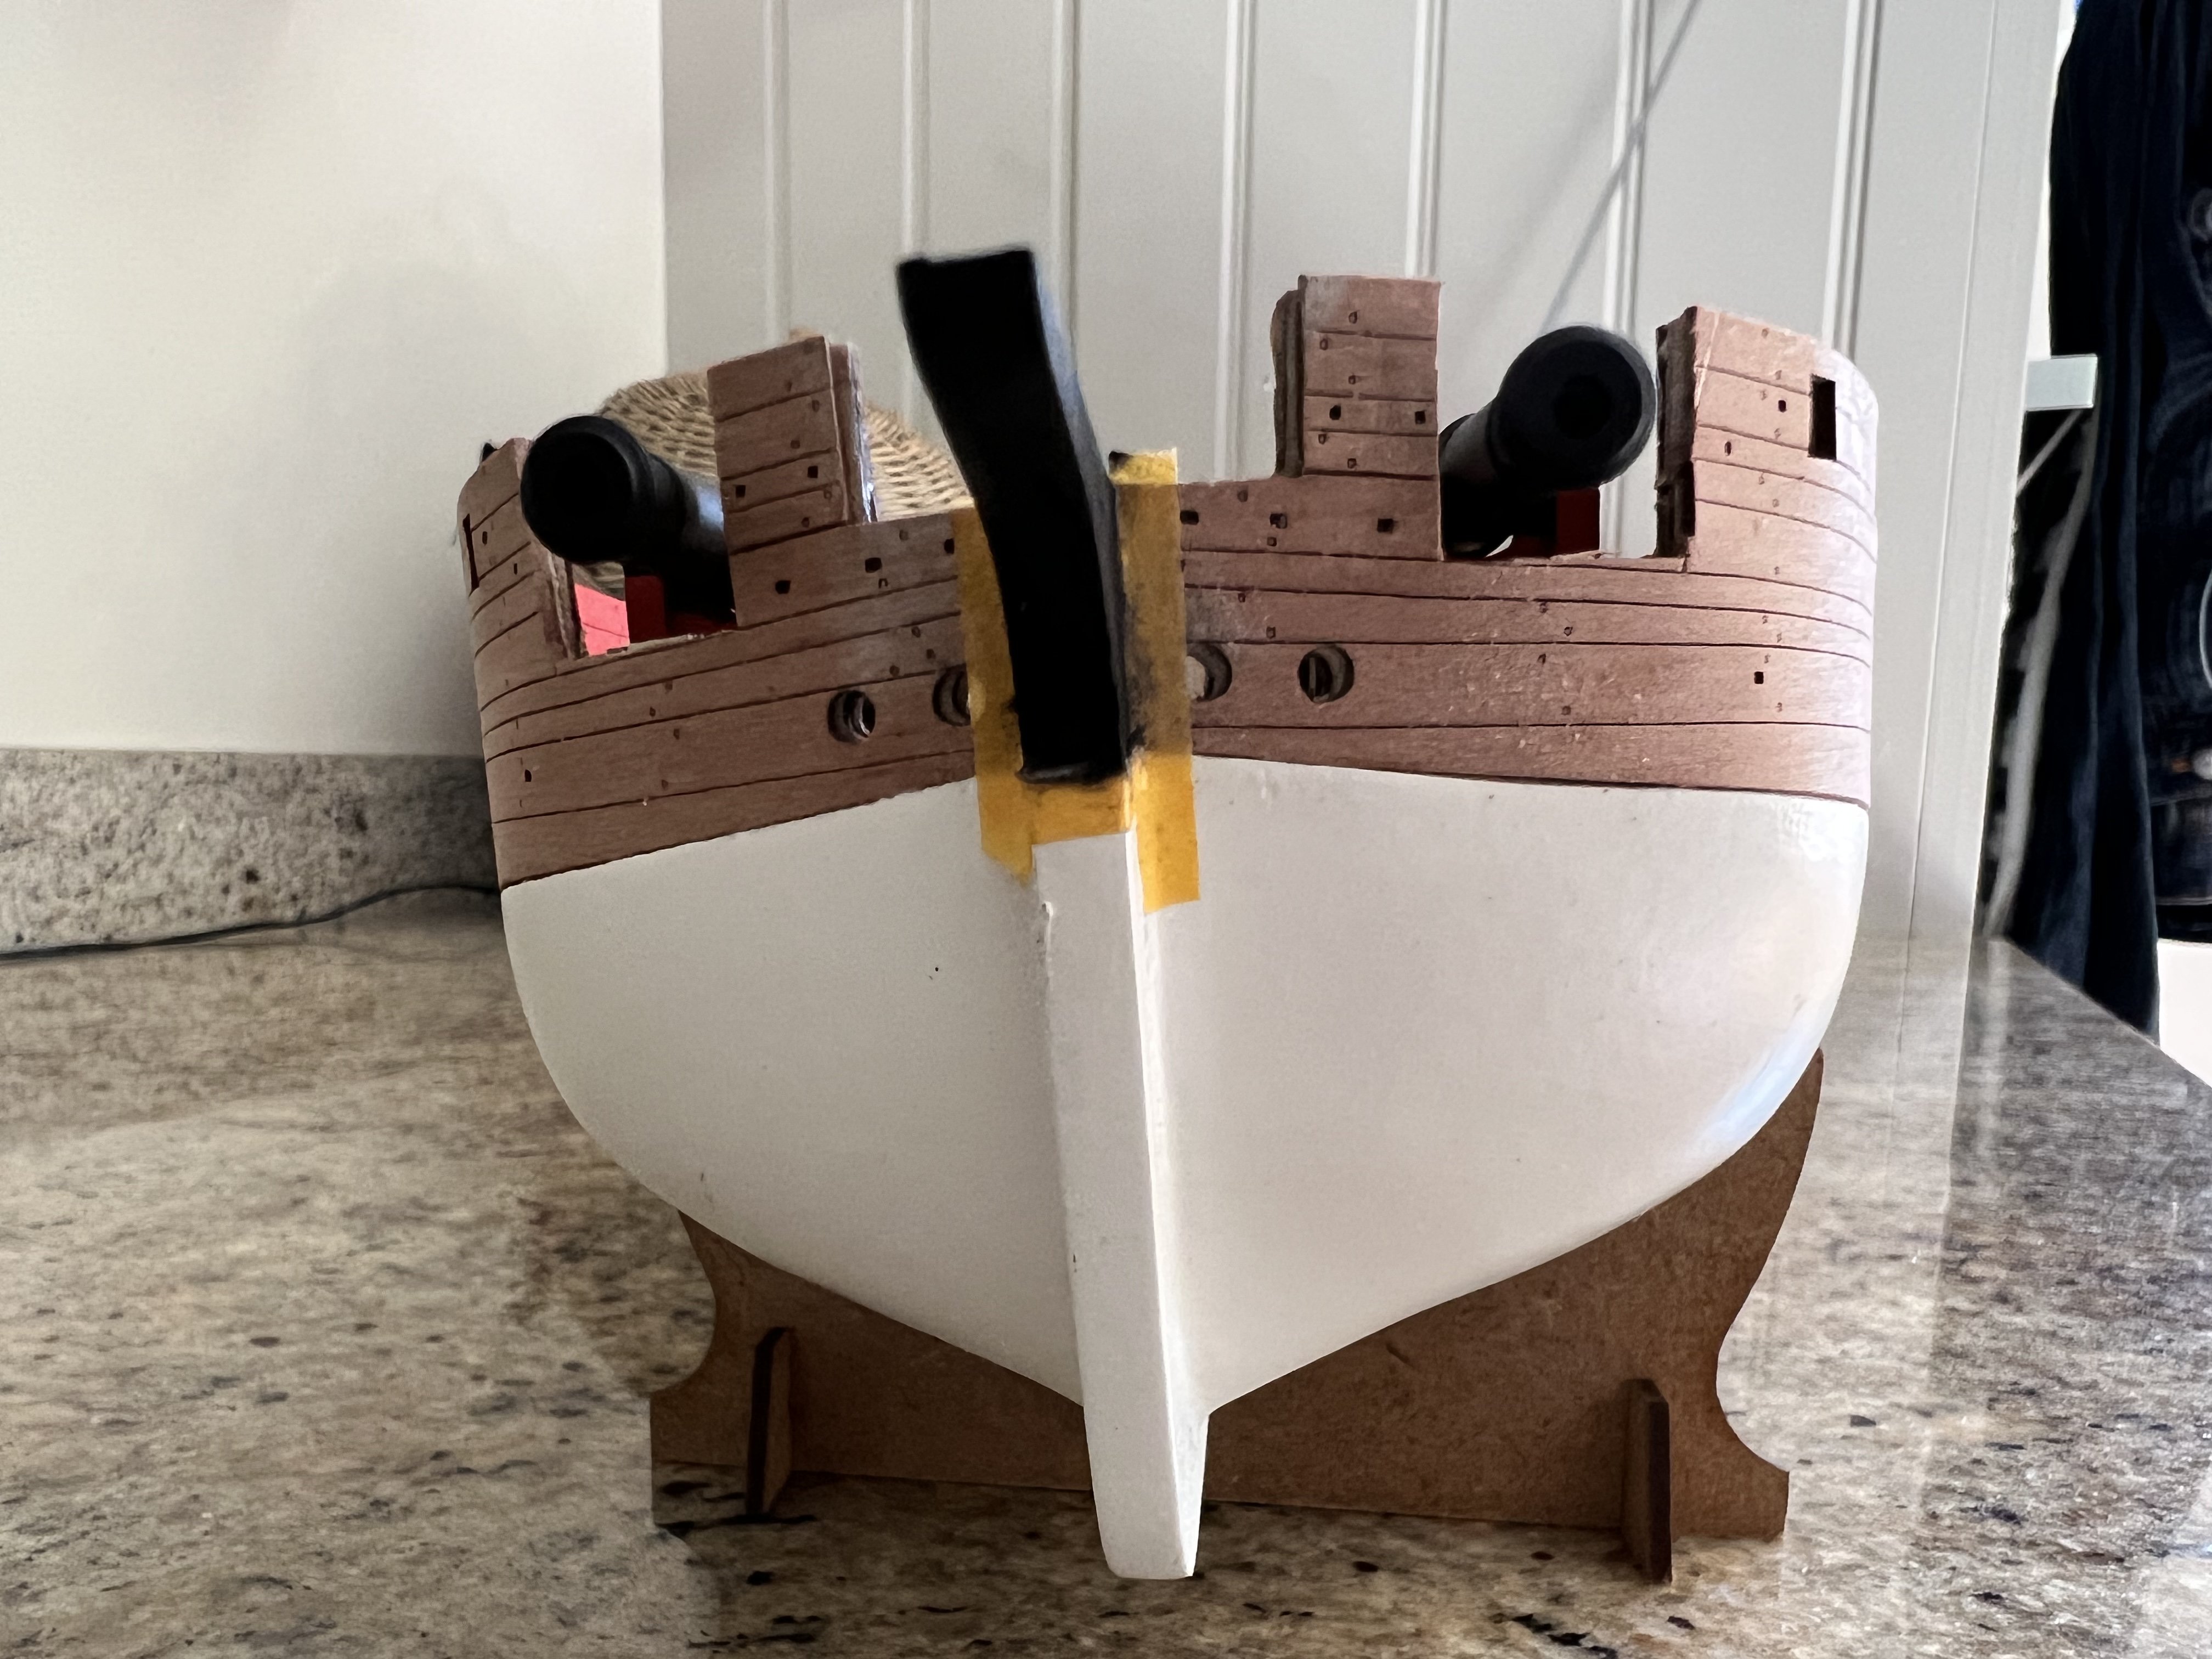
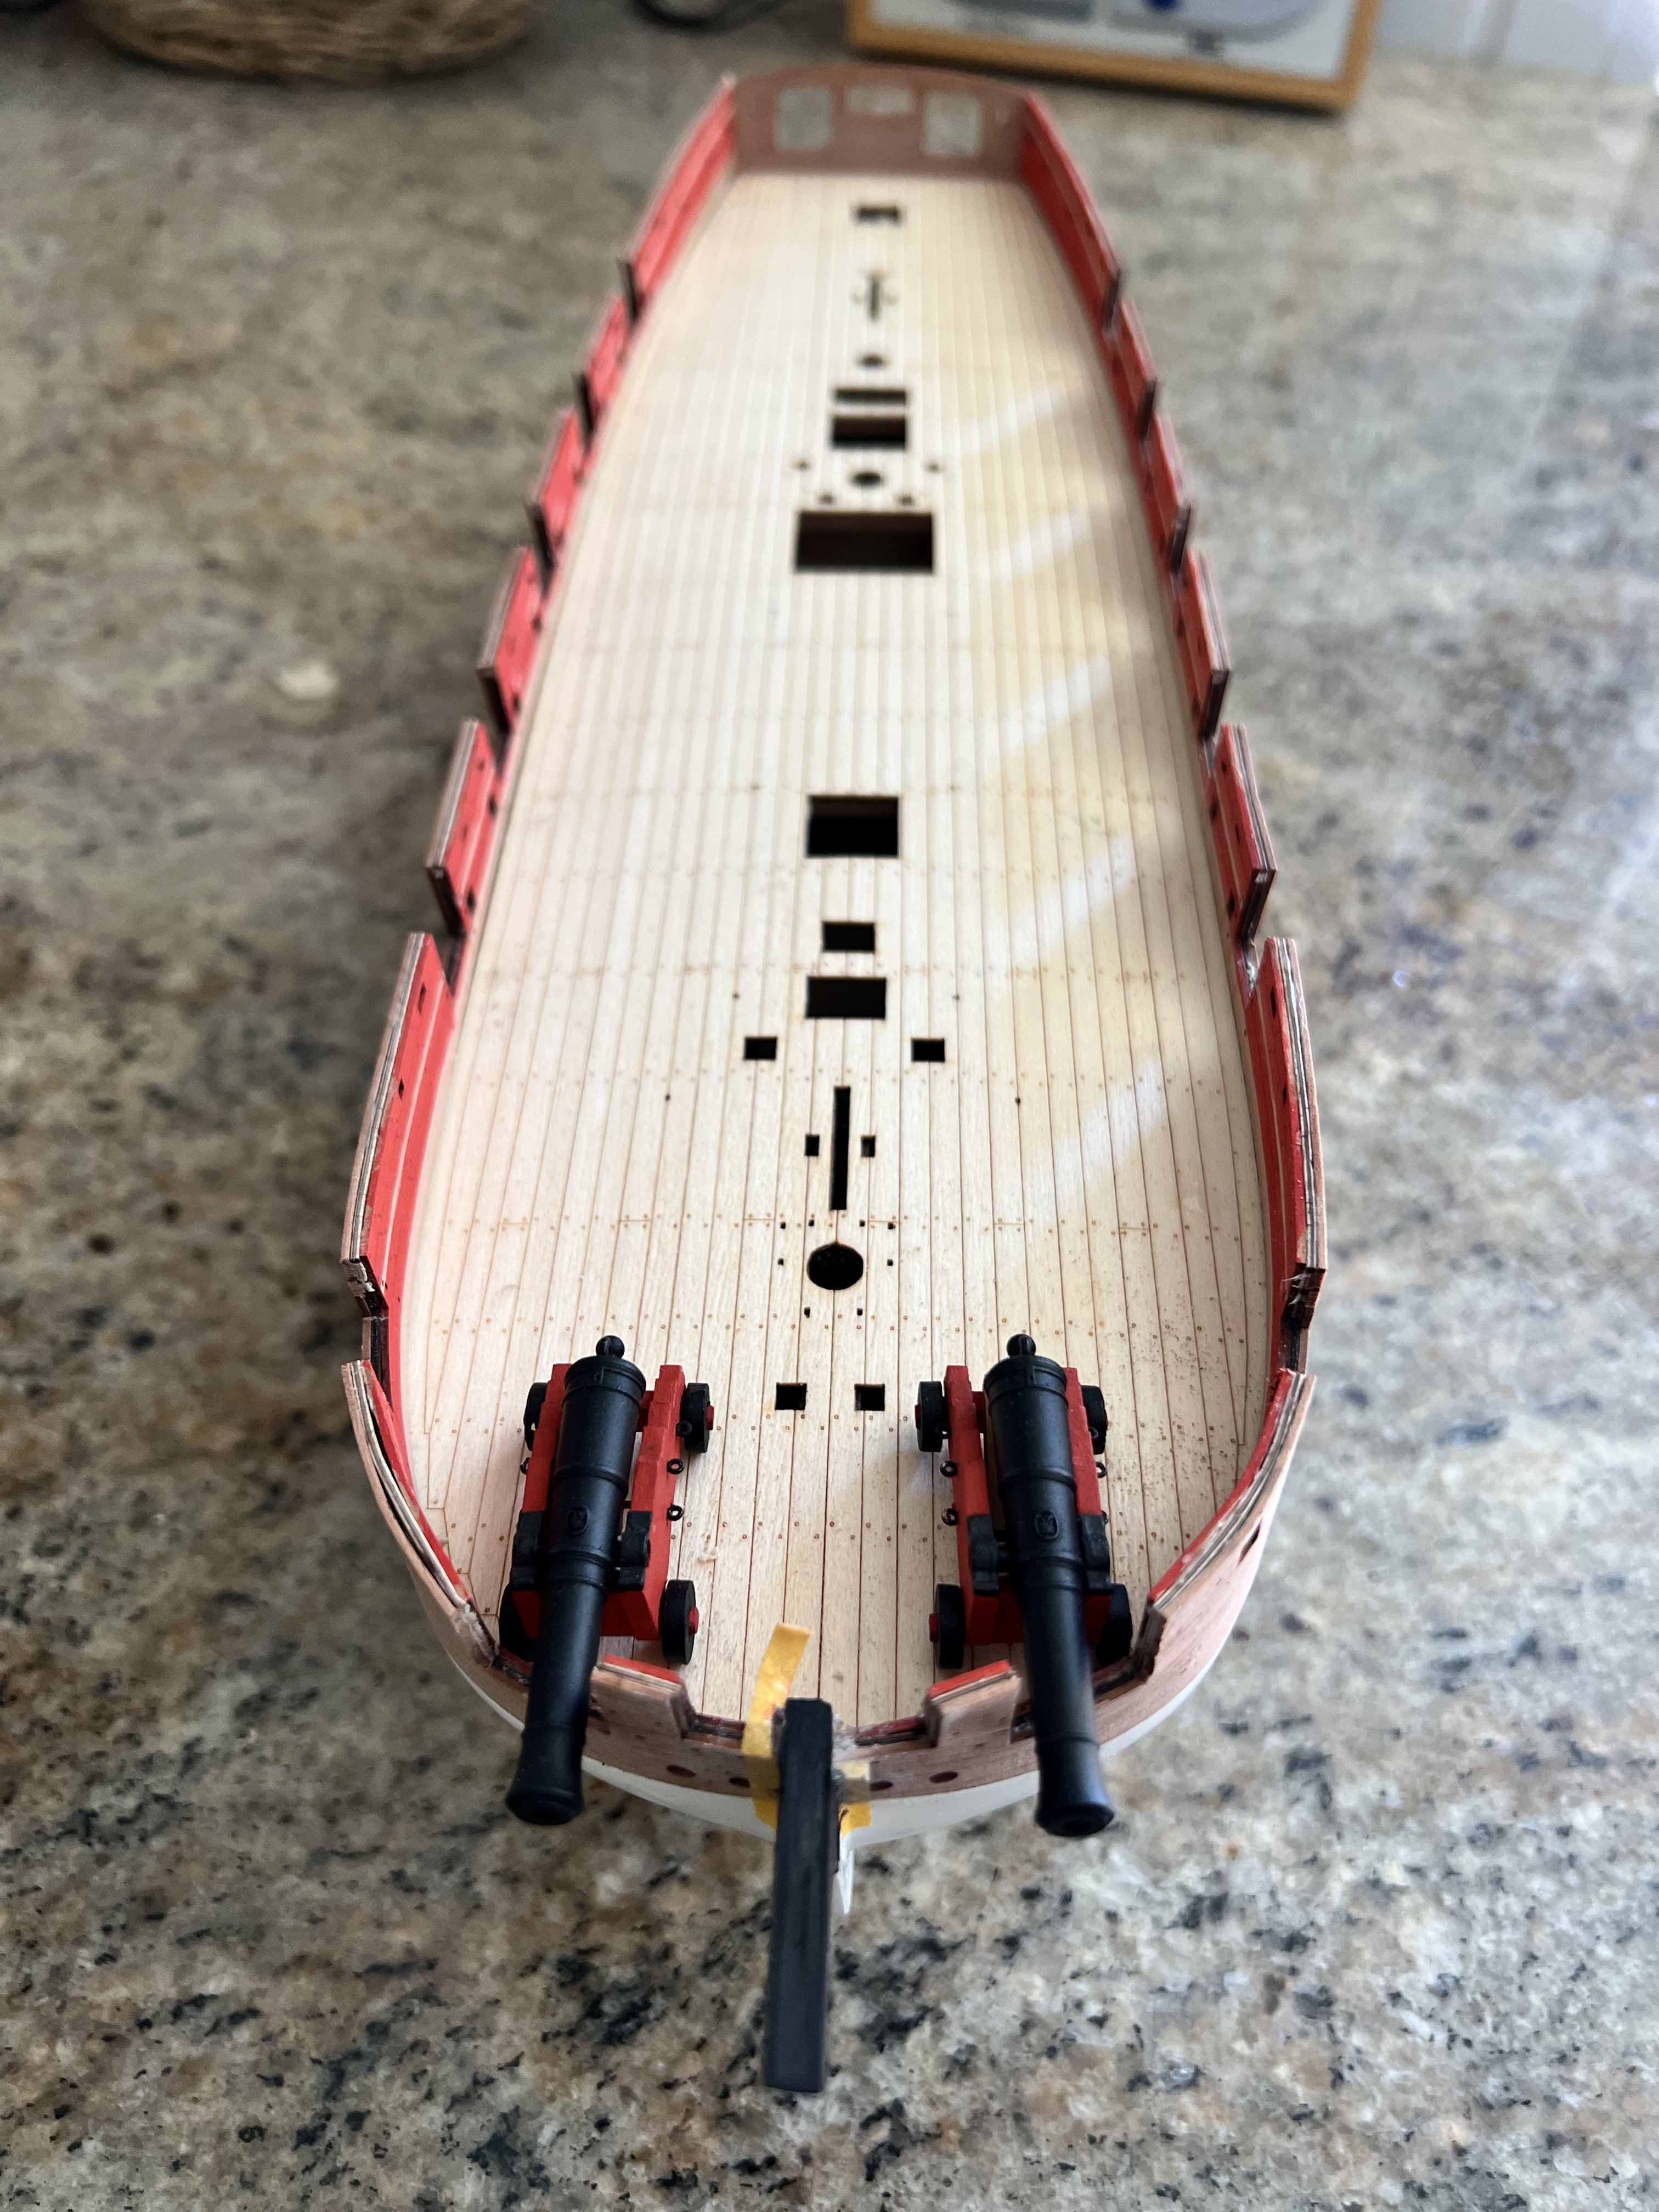
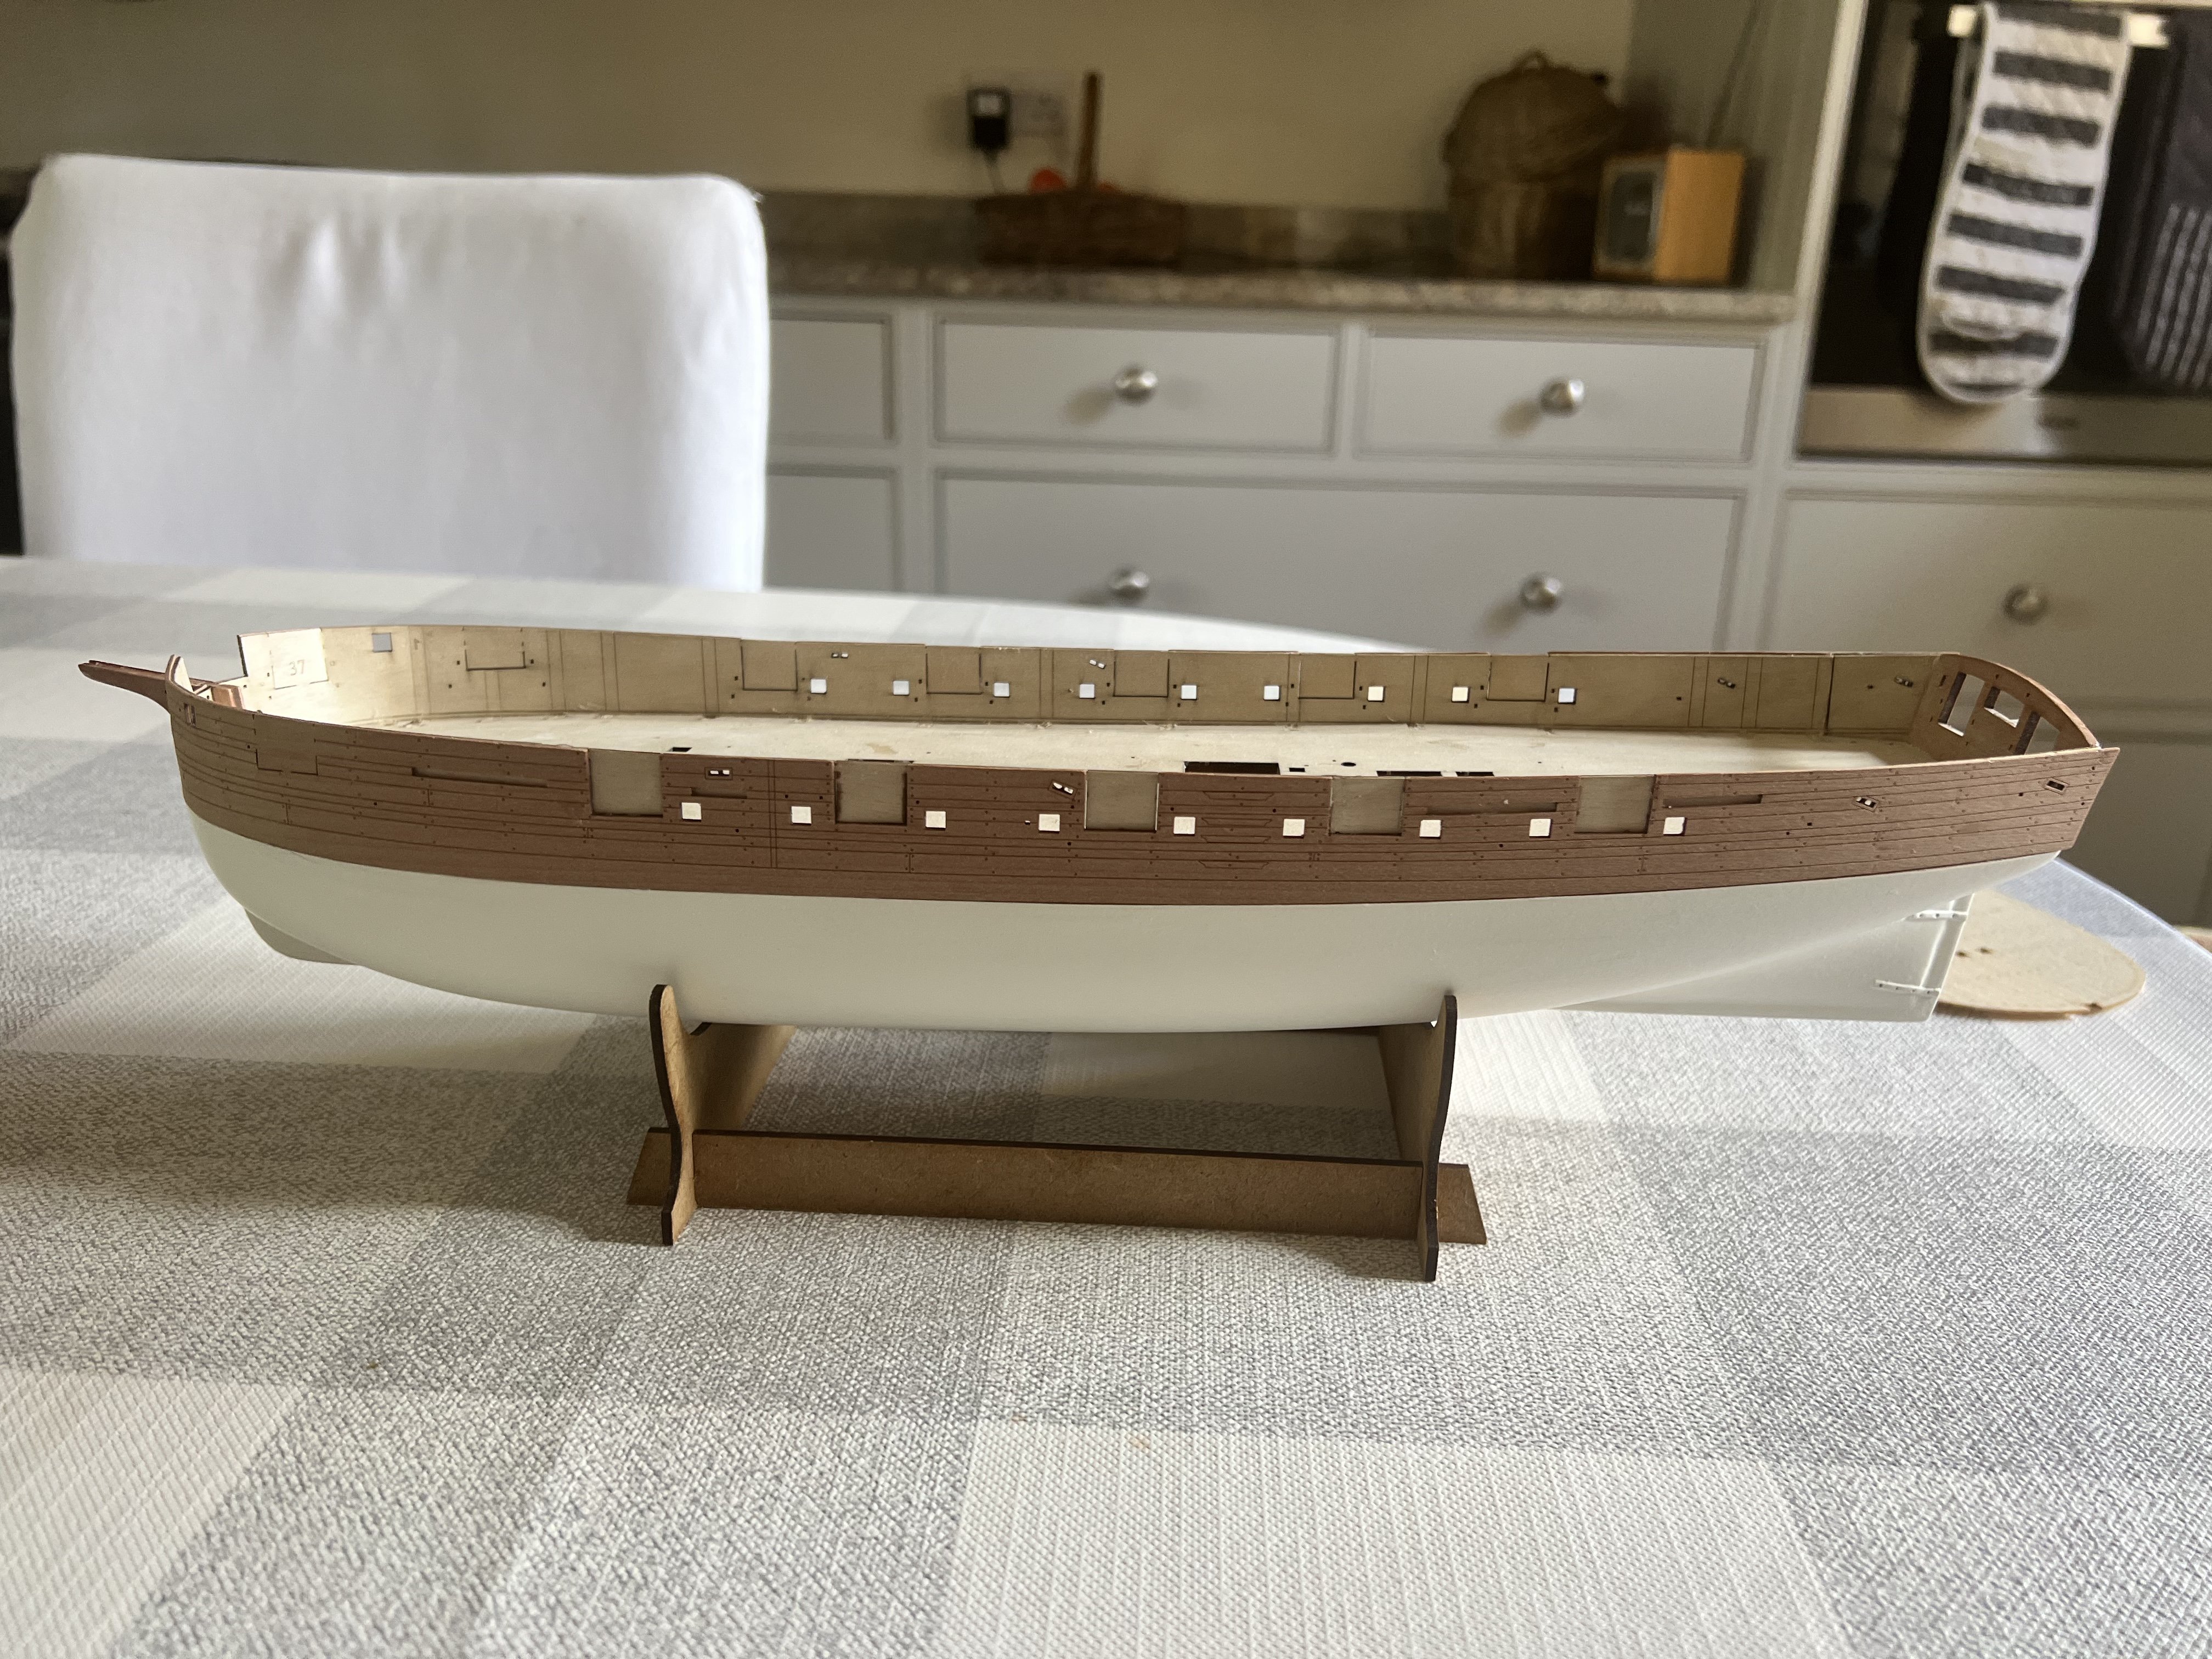
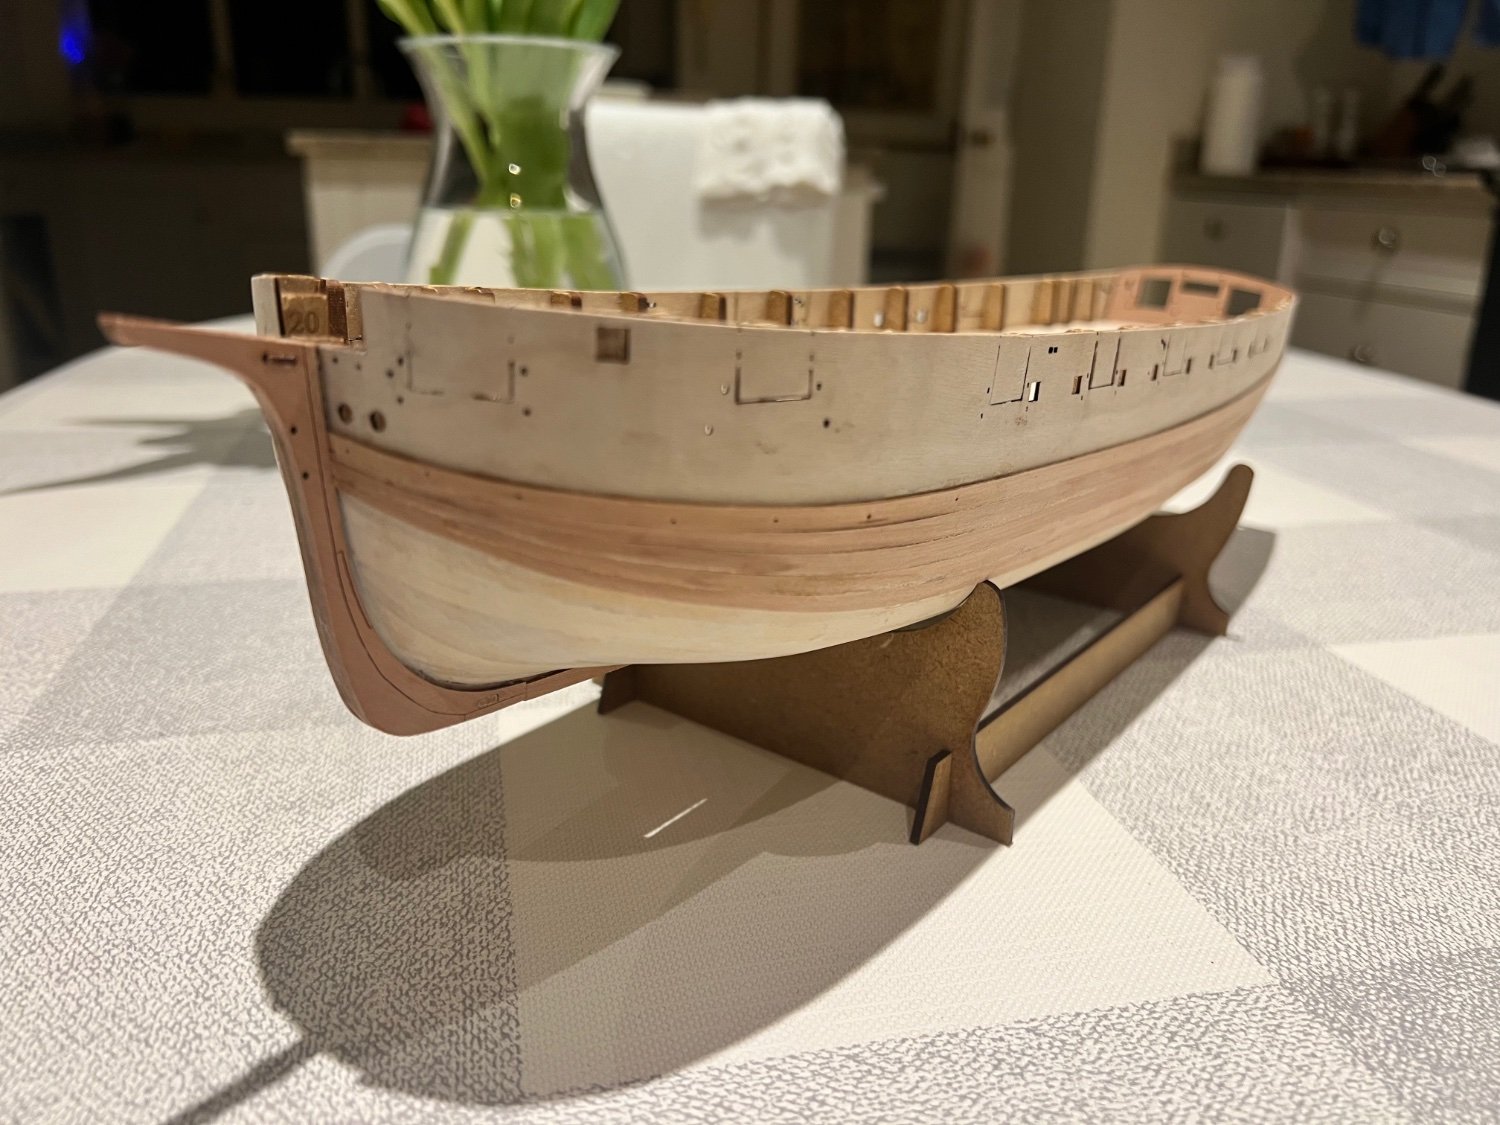
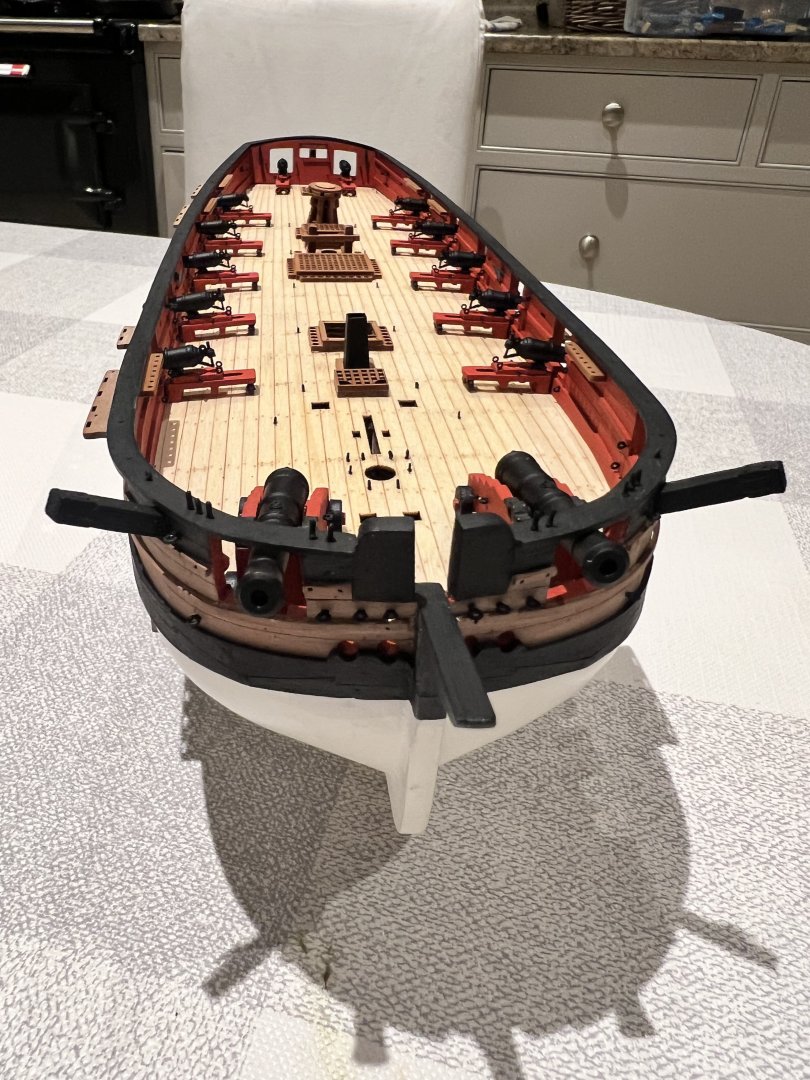
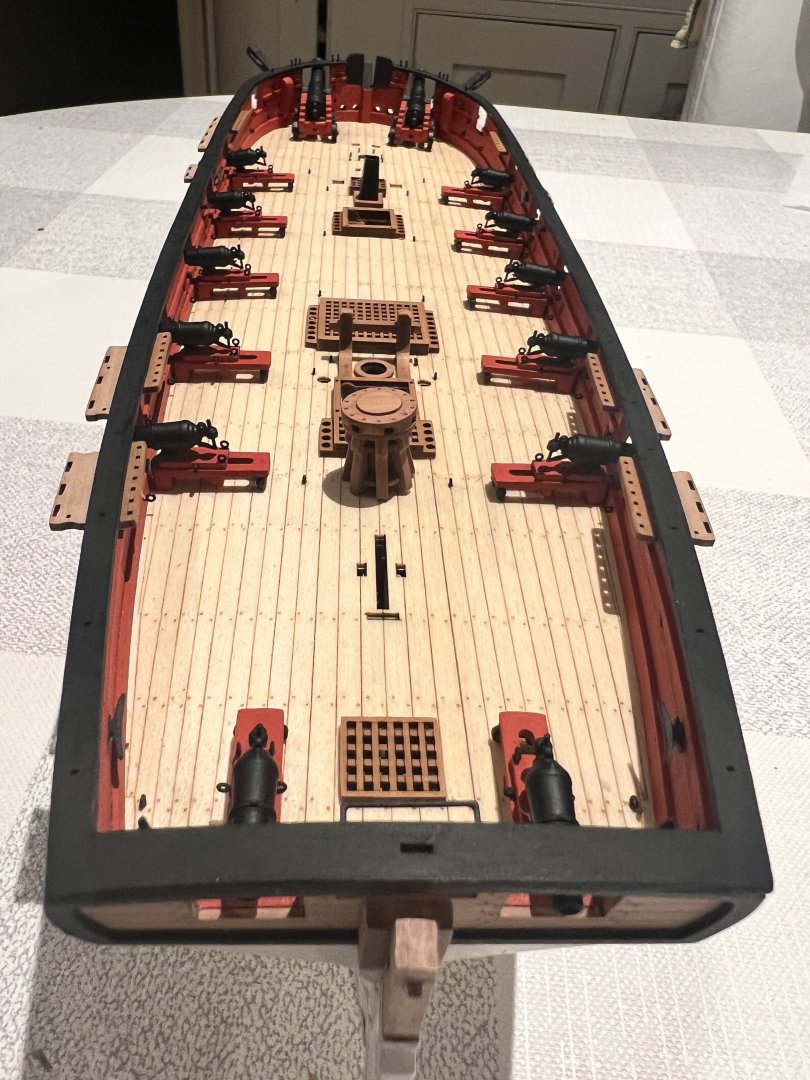
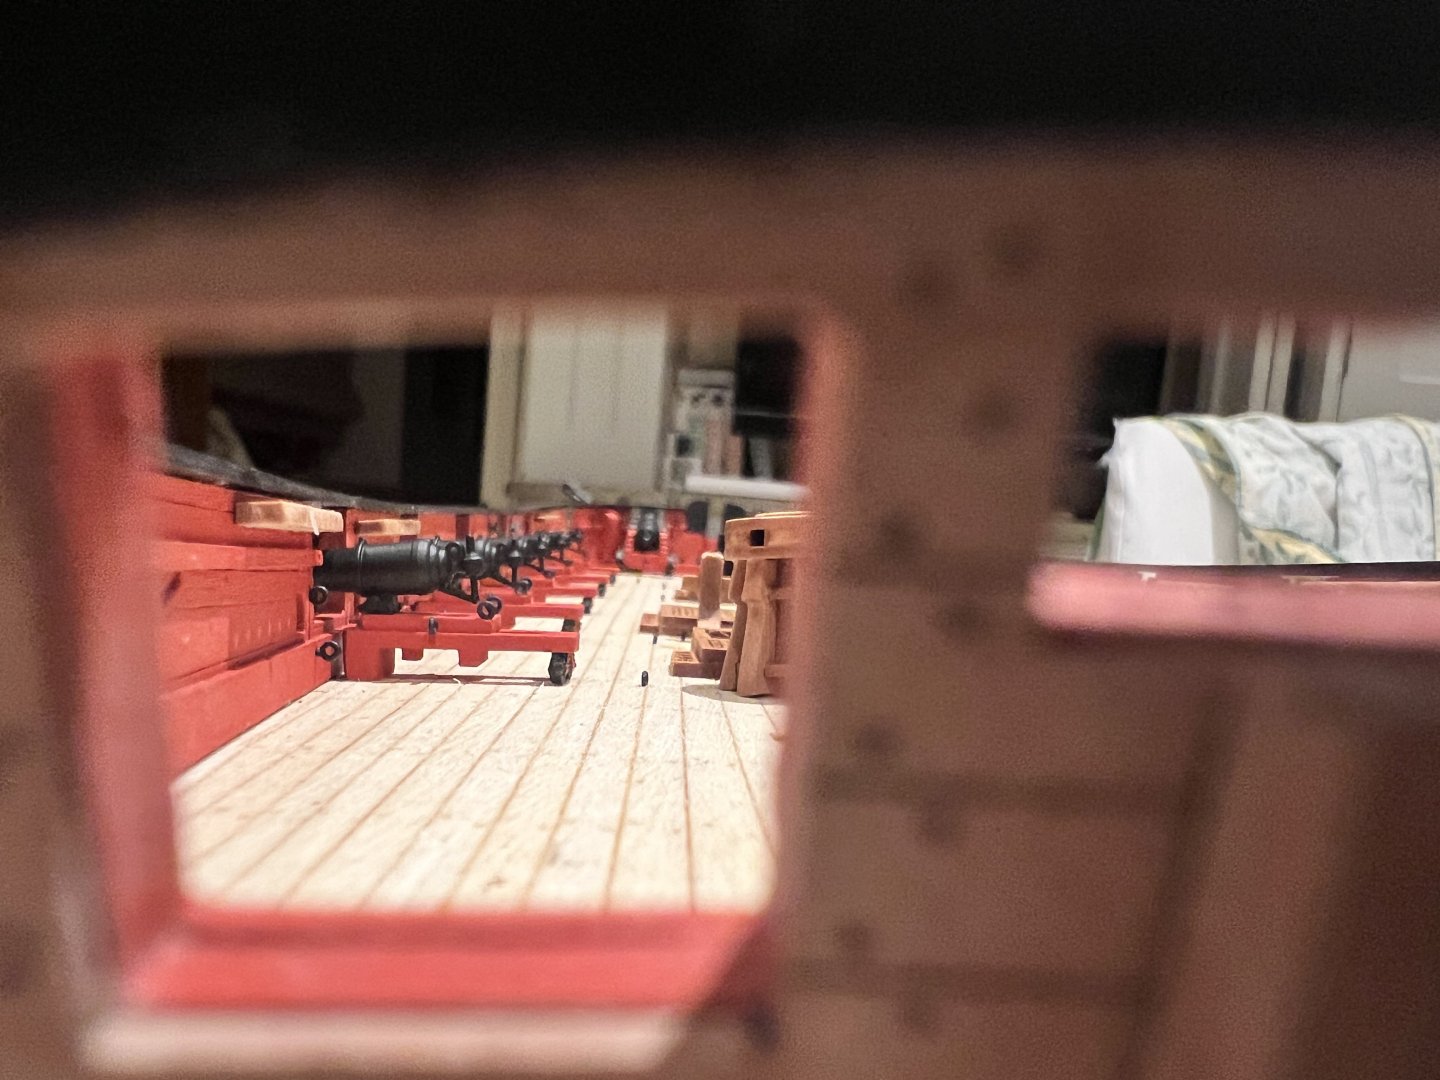
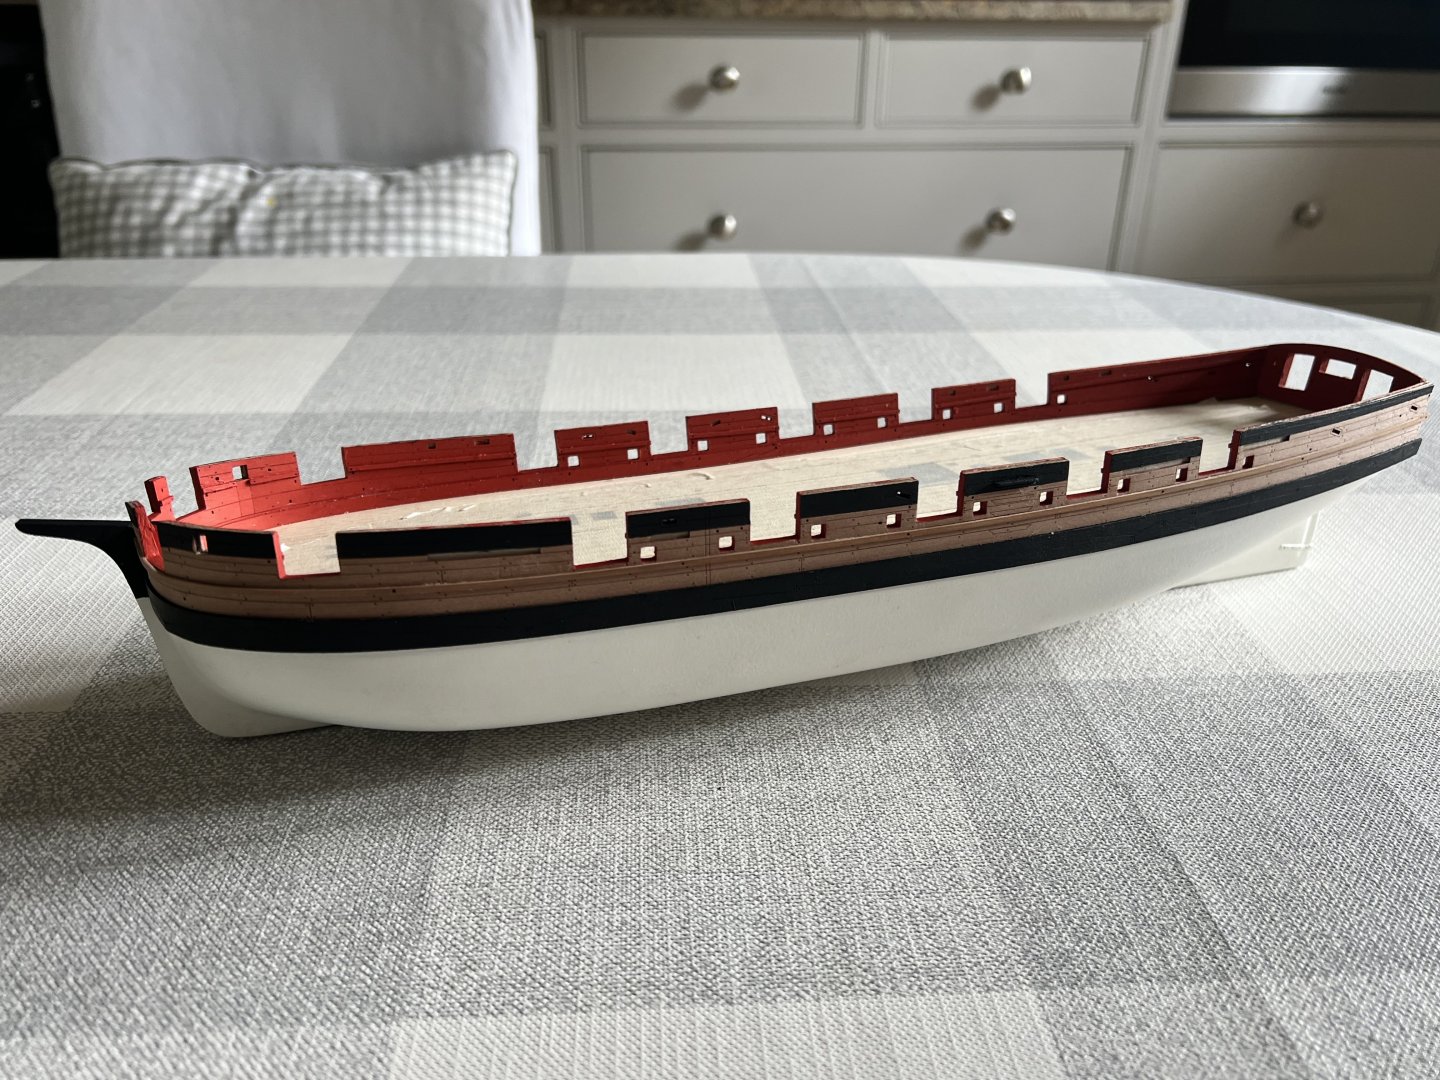
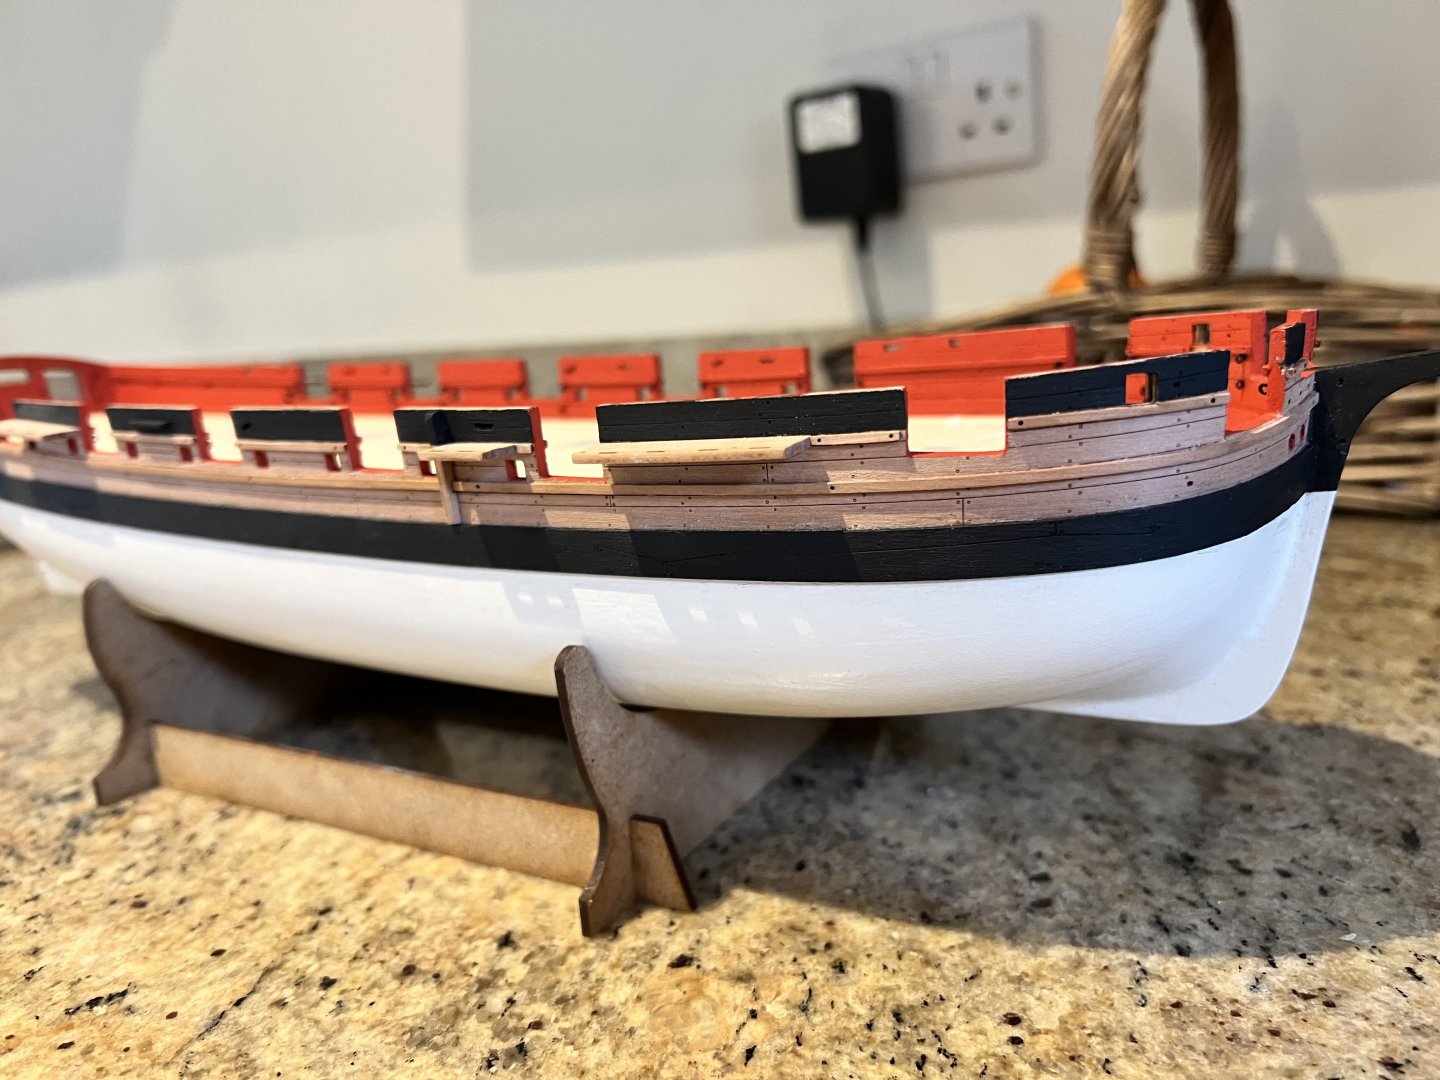
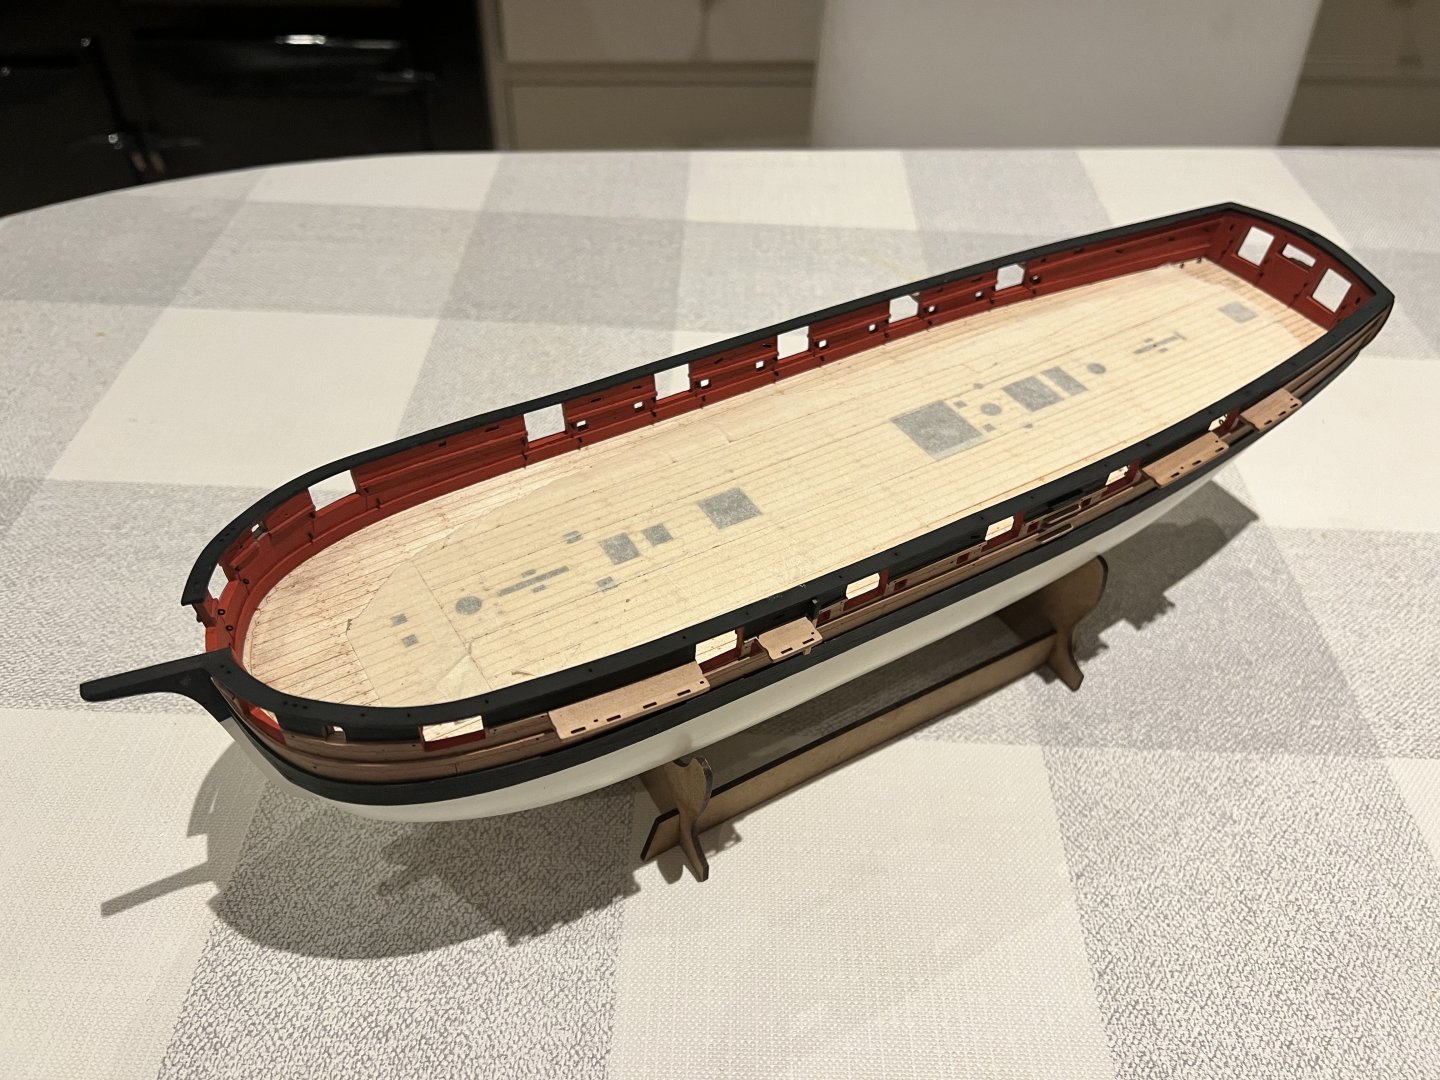
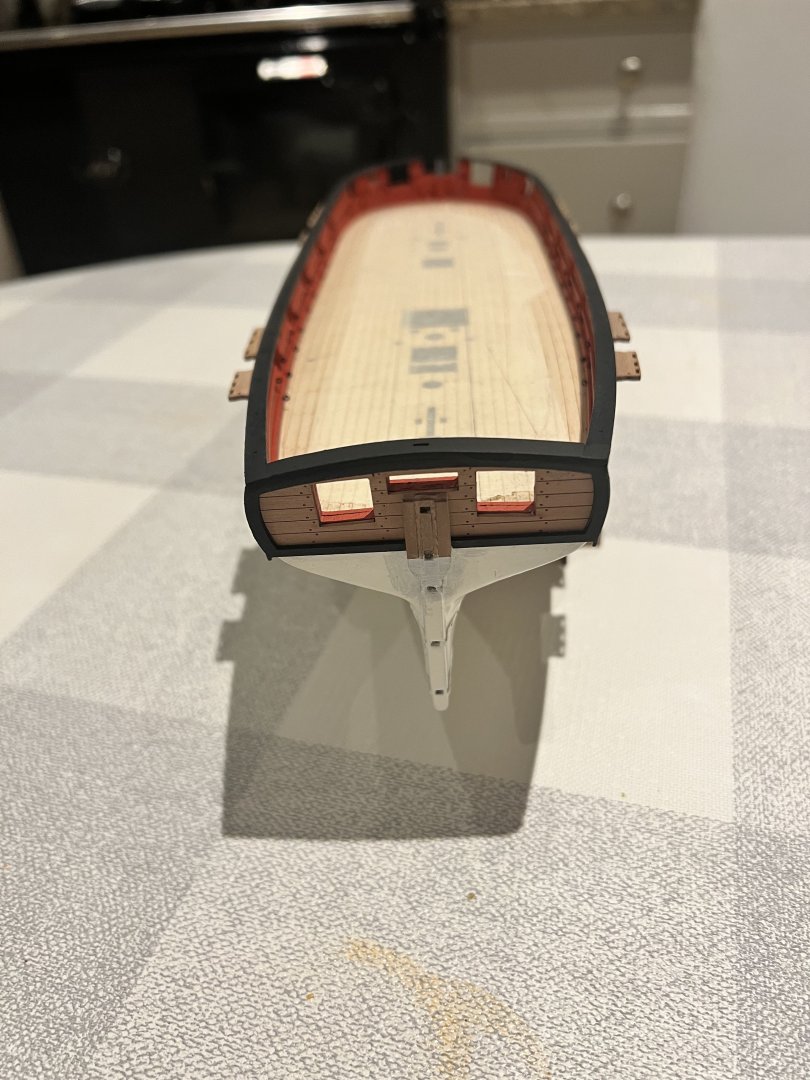
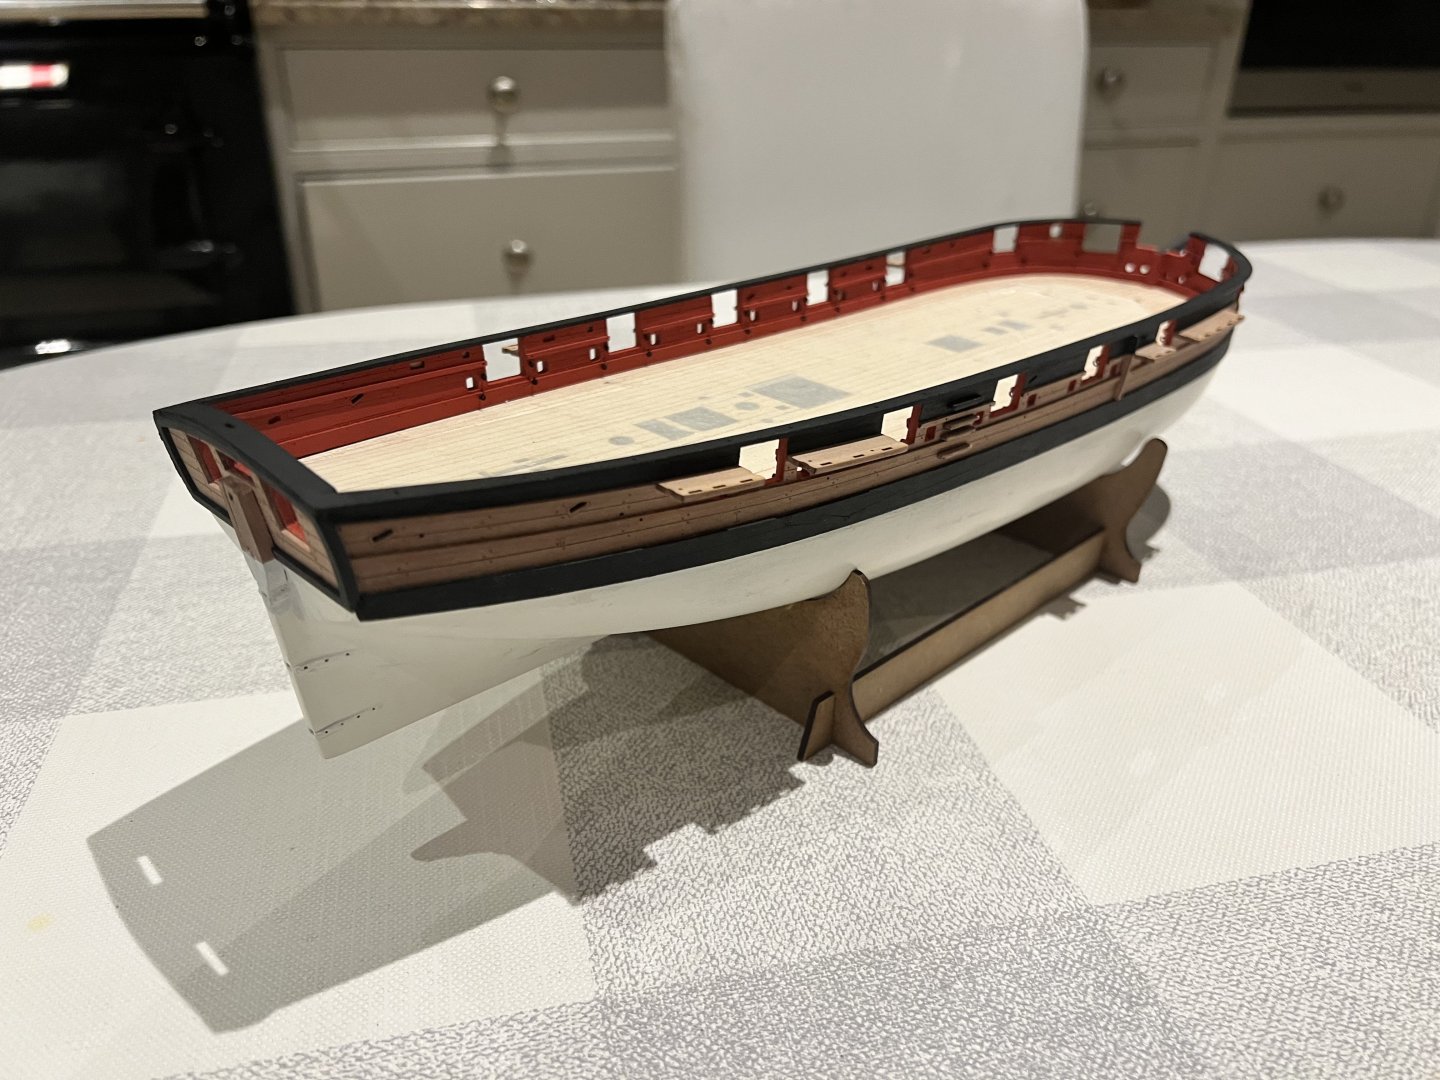
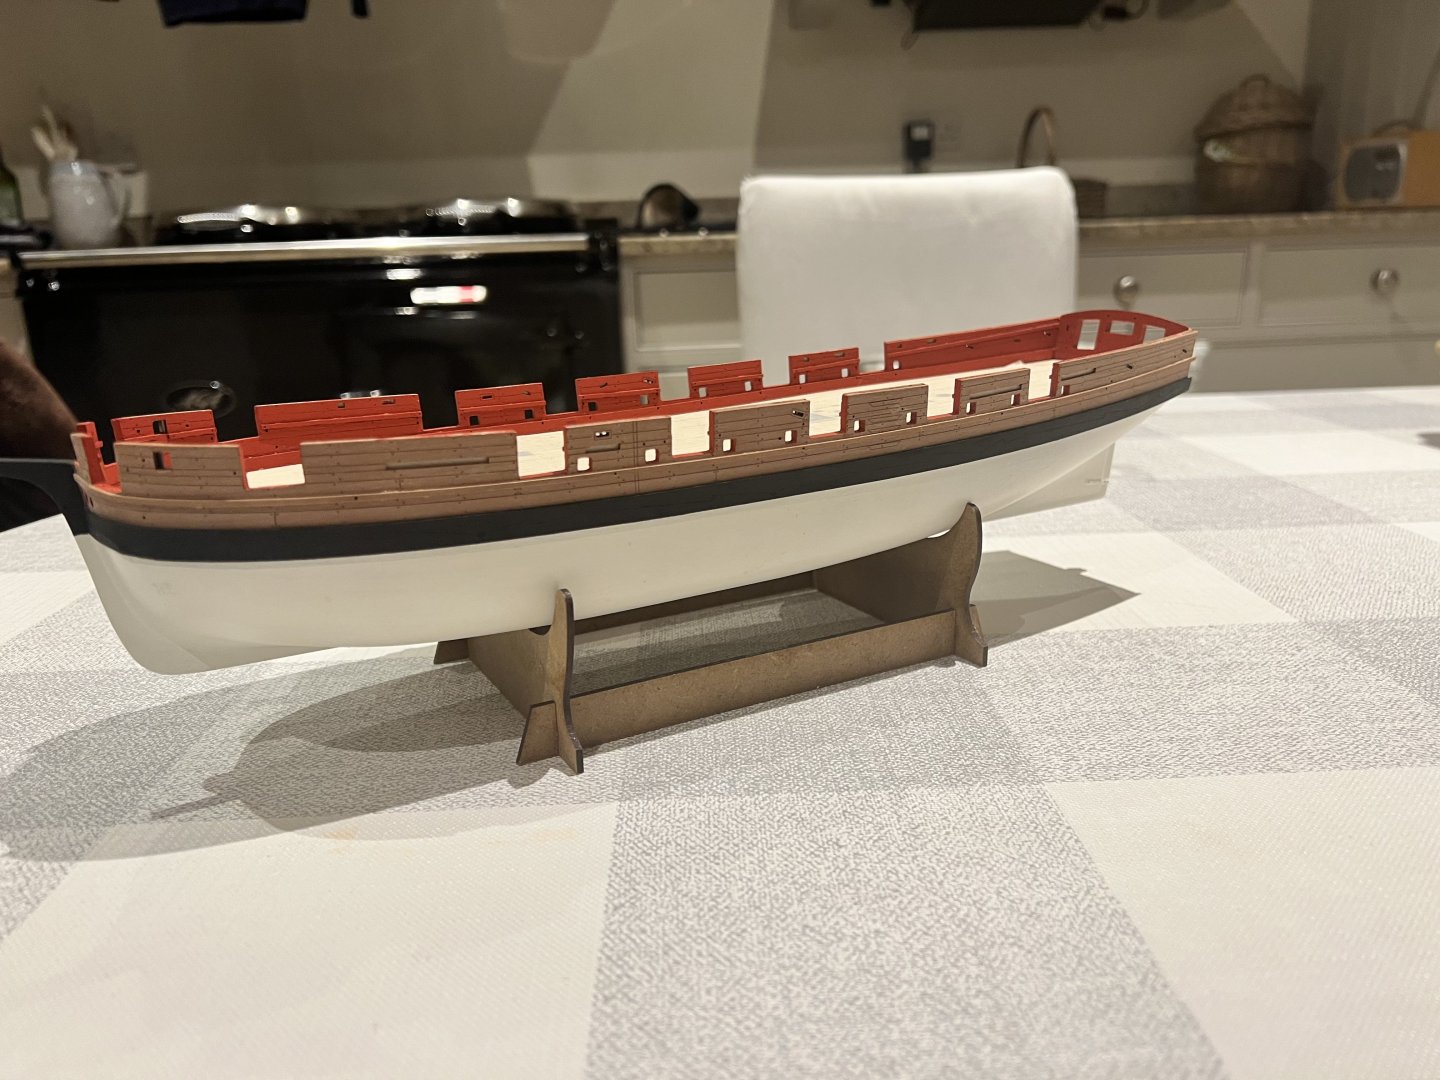
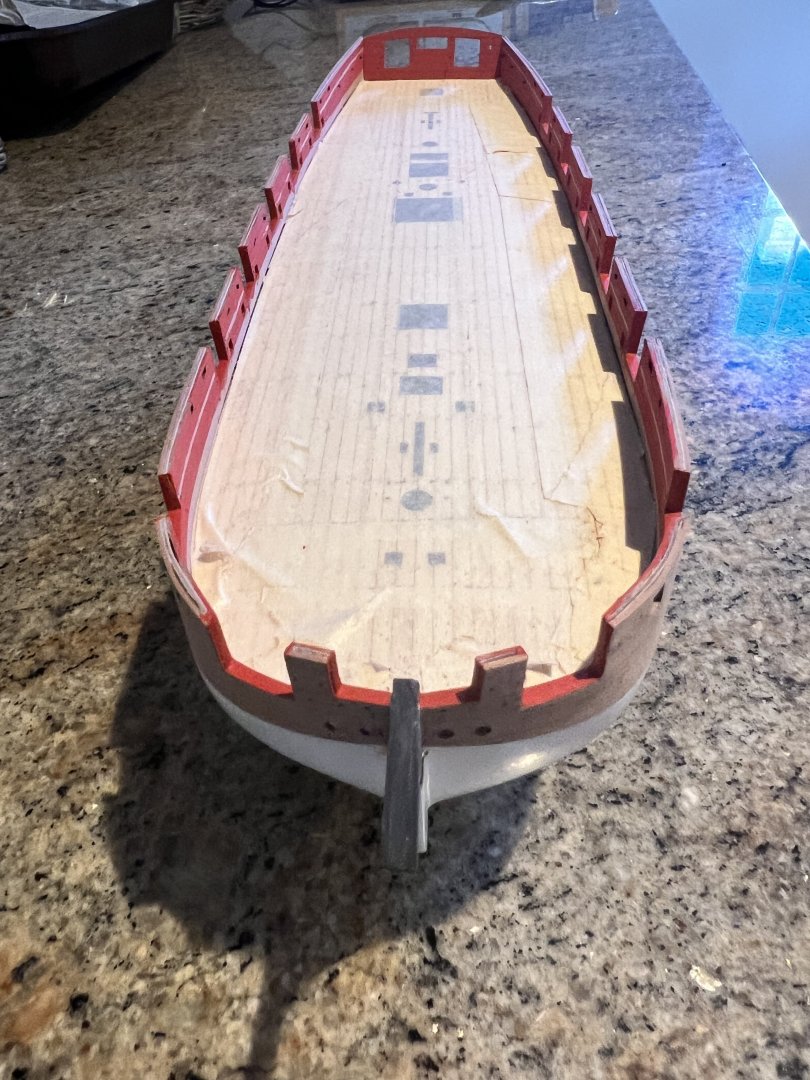
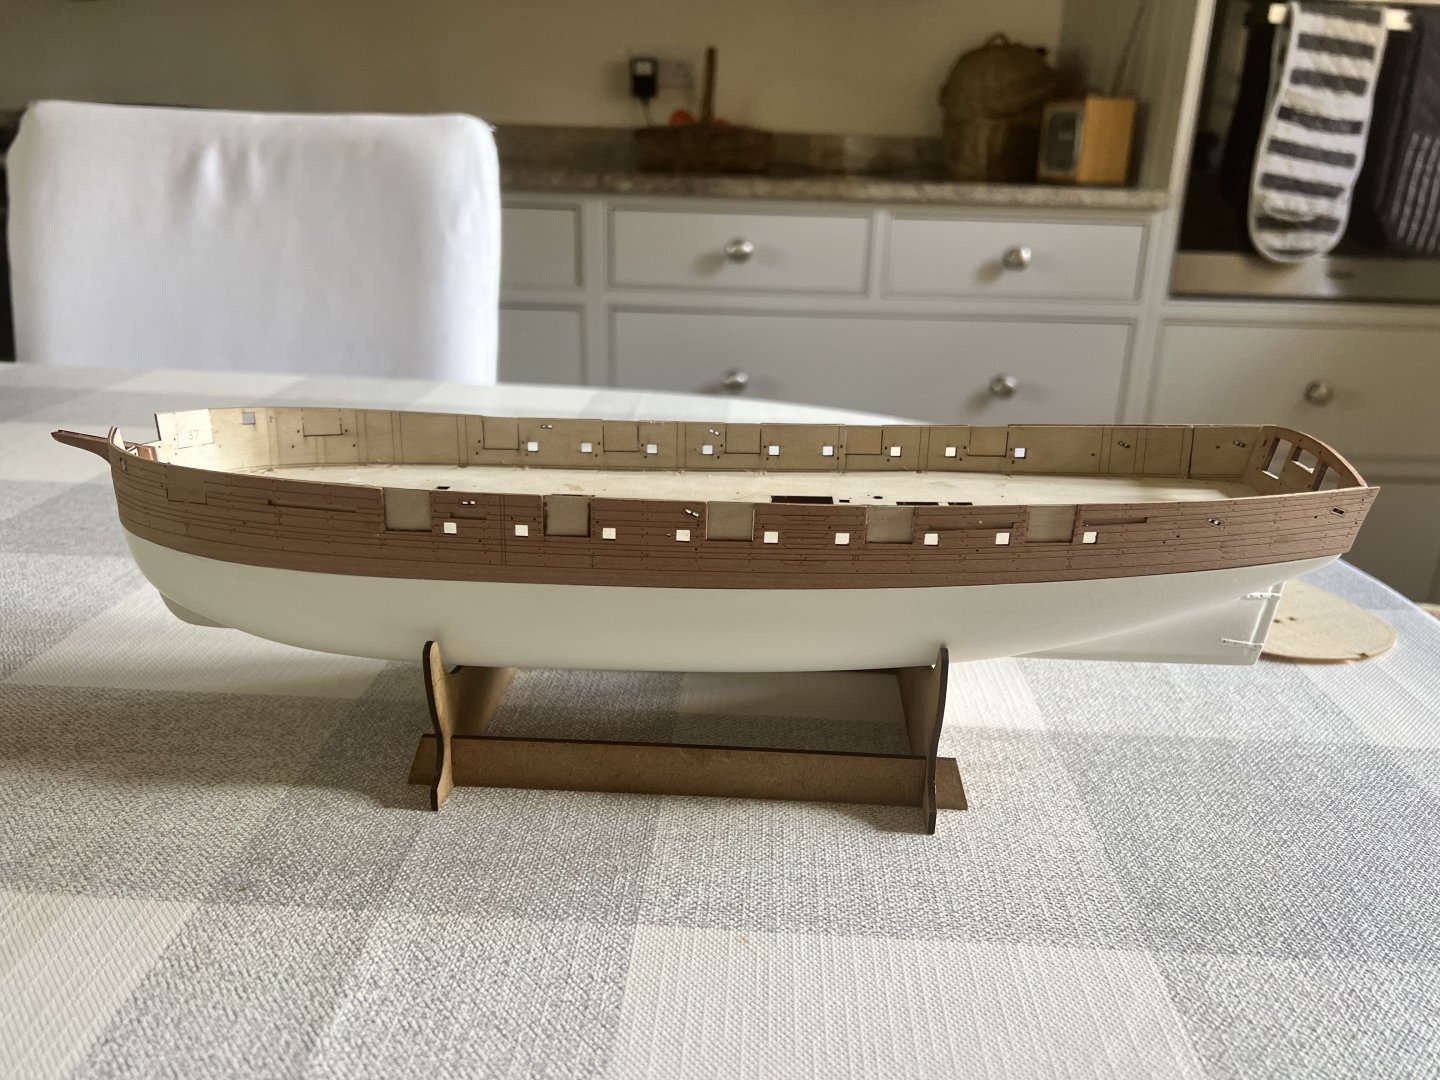
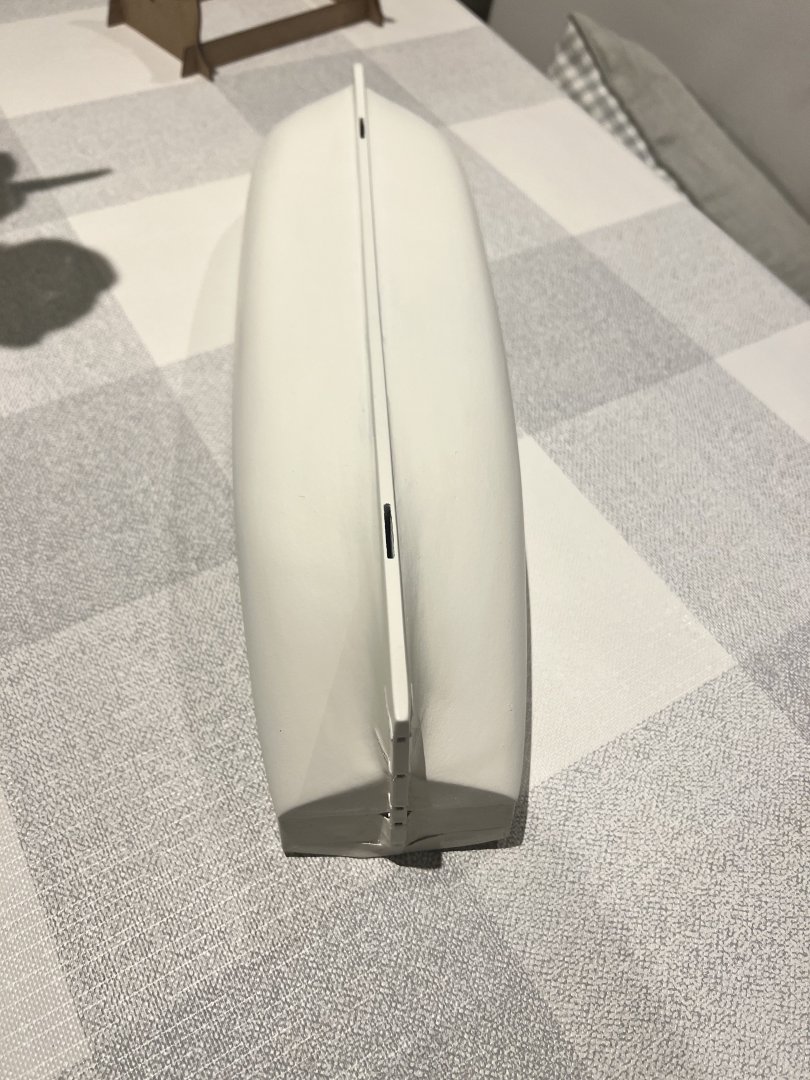
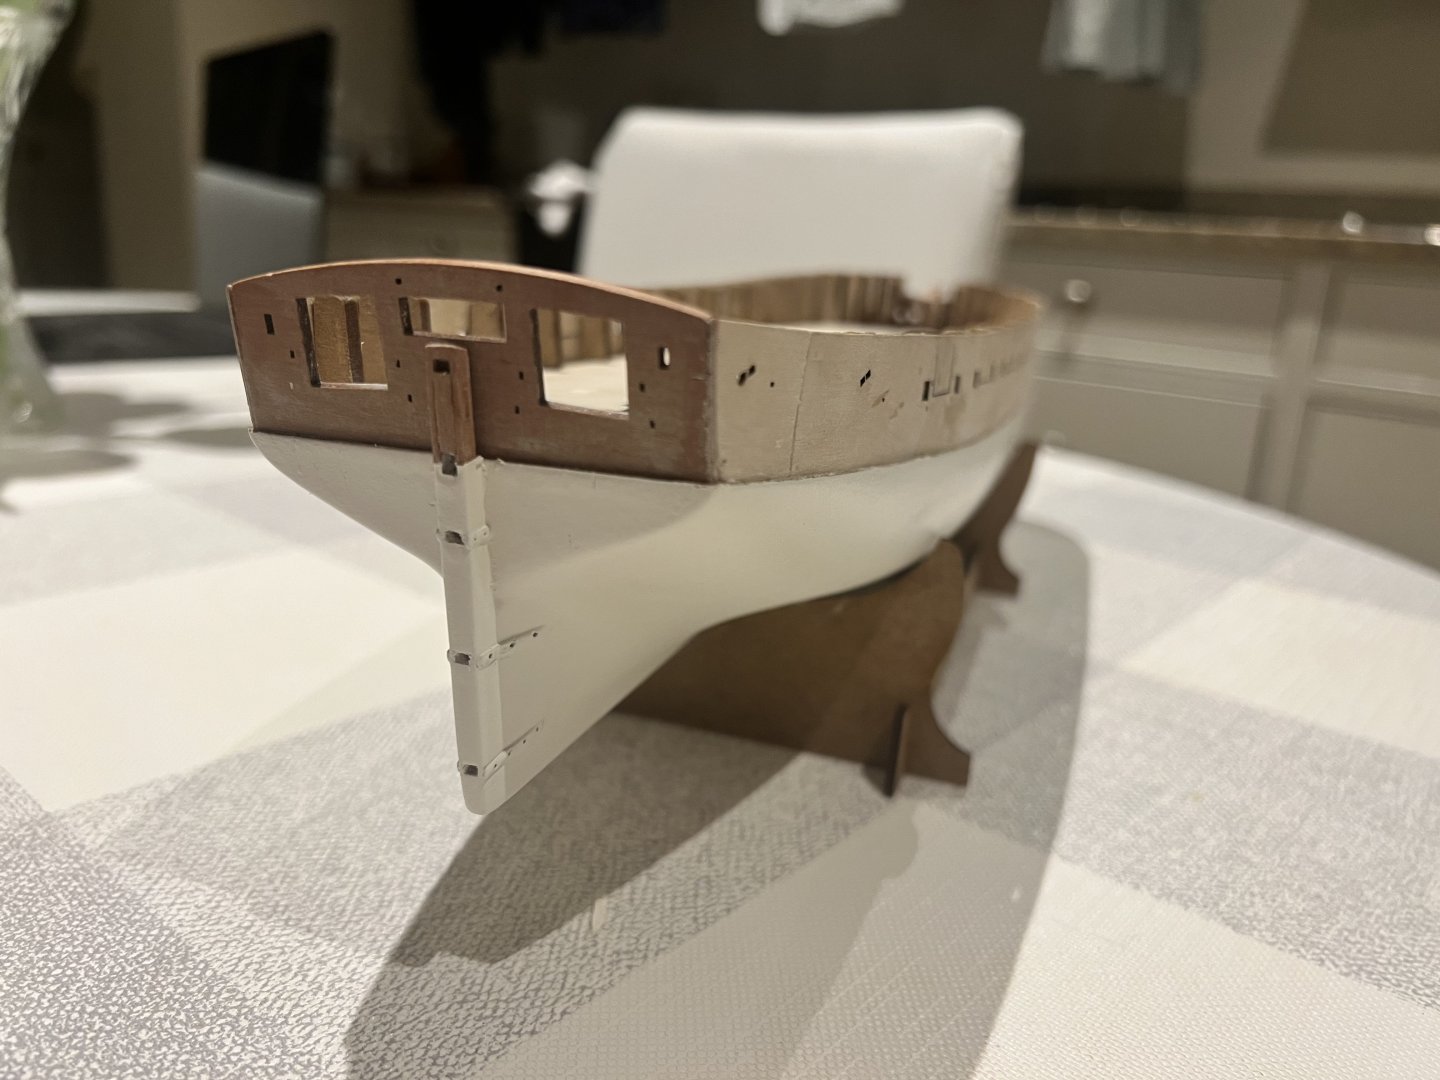
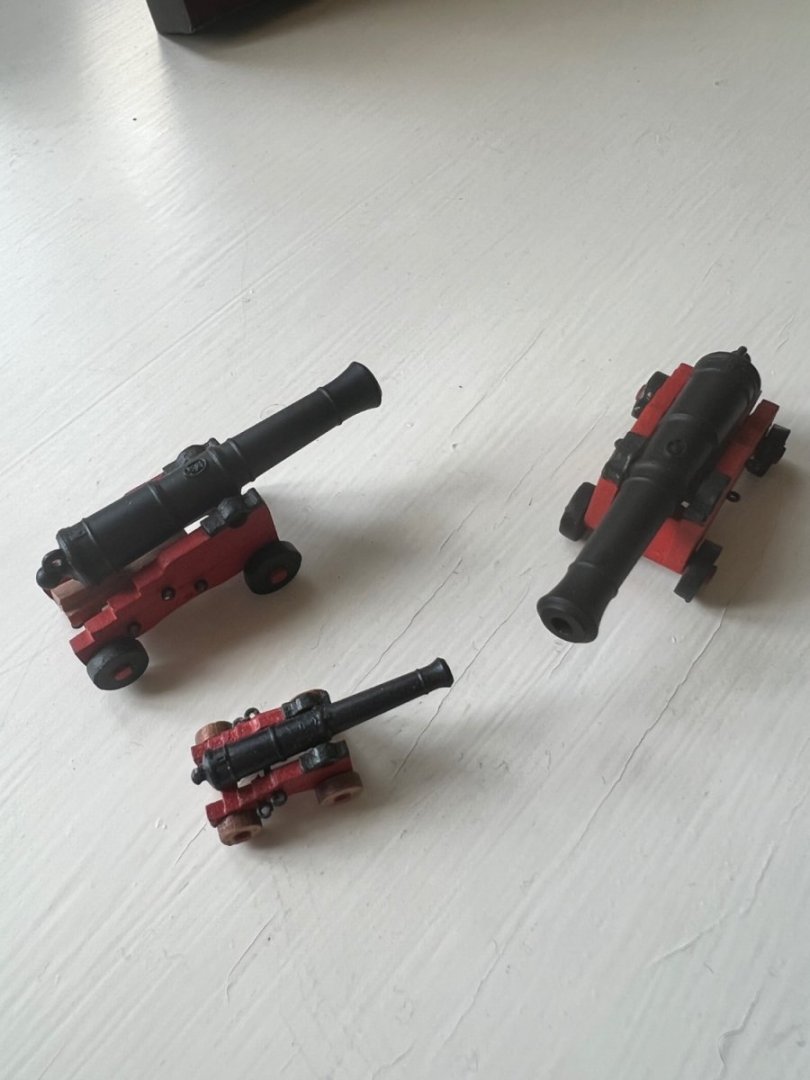
 Started fitting Adder out. I’d already made some of the fittings. She has very nice lines for a gun brig. Parts 173 go below the hawseholes on each side and are not mentioned in the instructions but are clearly on the plans - easy to miss if you just work from the instructions. The carronades still need PE parts 17 and 18 added. I’ve also left the sprue to the lower elevating arm for each carronades in place for now and will remove this at the last moment as I broke a couple of these on Grecian and they proved nigh on impossible to glue back on. I’m not fully rigging the guns but will certainly add breach ropes to the 24 pounders. I may add breach ropes to the carronades but I struggled to make these lie naturally on Grecian. The plans show six side steps on each side with the lower two on the main wale. Chris’s prototype in the instructions photos omits the lower two. I suspect that the plans are more accurate as the bottom of the four steps would be quite a reach from a small boat, but I’ve copied the prototype as it’s more aesthetically pleasing. The parts are there for six steps each side if anyone wants to add them. The deck and inboard fittings were treated with Danish oil and they came up very nicely. I’m not sure what to do on the exposed wood on the outer bulwarks and stern. I’ve scraped PVA glue off the bulwarks in places and I know from experience that Danish oil won’t be absorbed where the glue has been and would give me a blotchy finish. I guess I’ll try some poly varnish or make another attempt at mixing some wipe-on poly. I’ll put Danish oil on the channels to be consistent with wood fittings inboard.


-
Very much looking forward to following you on this. I’ve also got the updated 2024 Speedy to build. Good luck with the build.
-
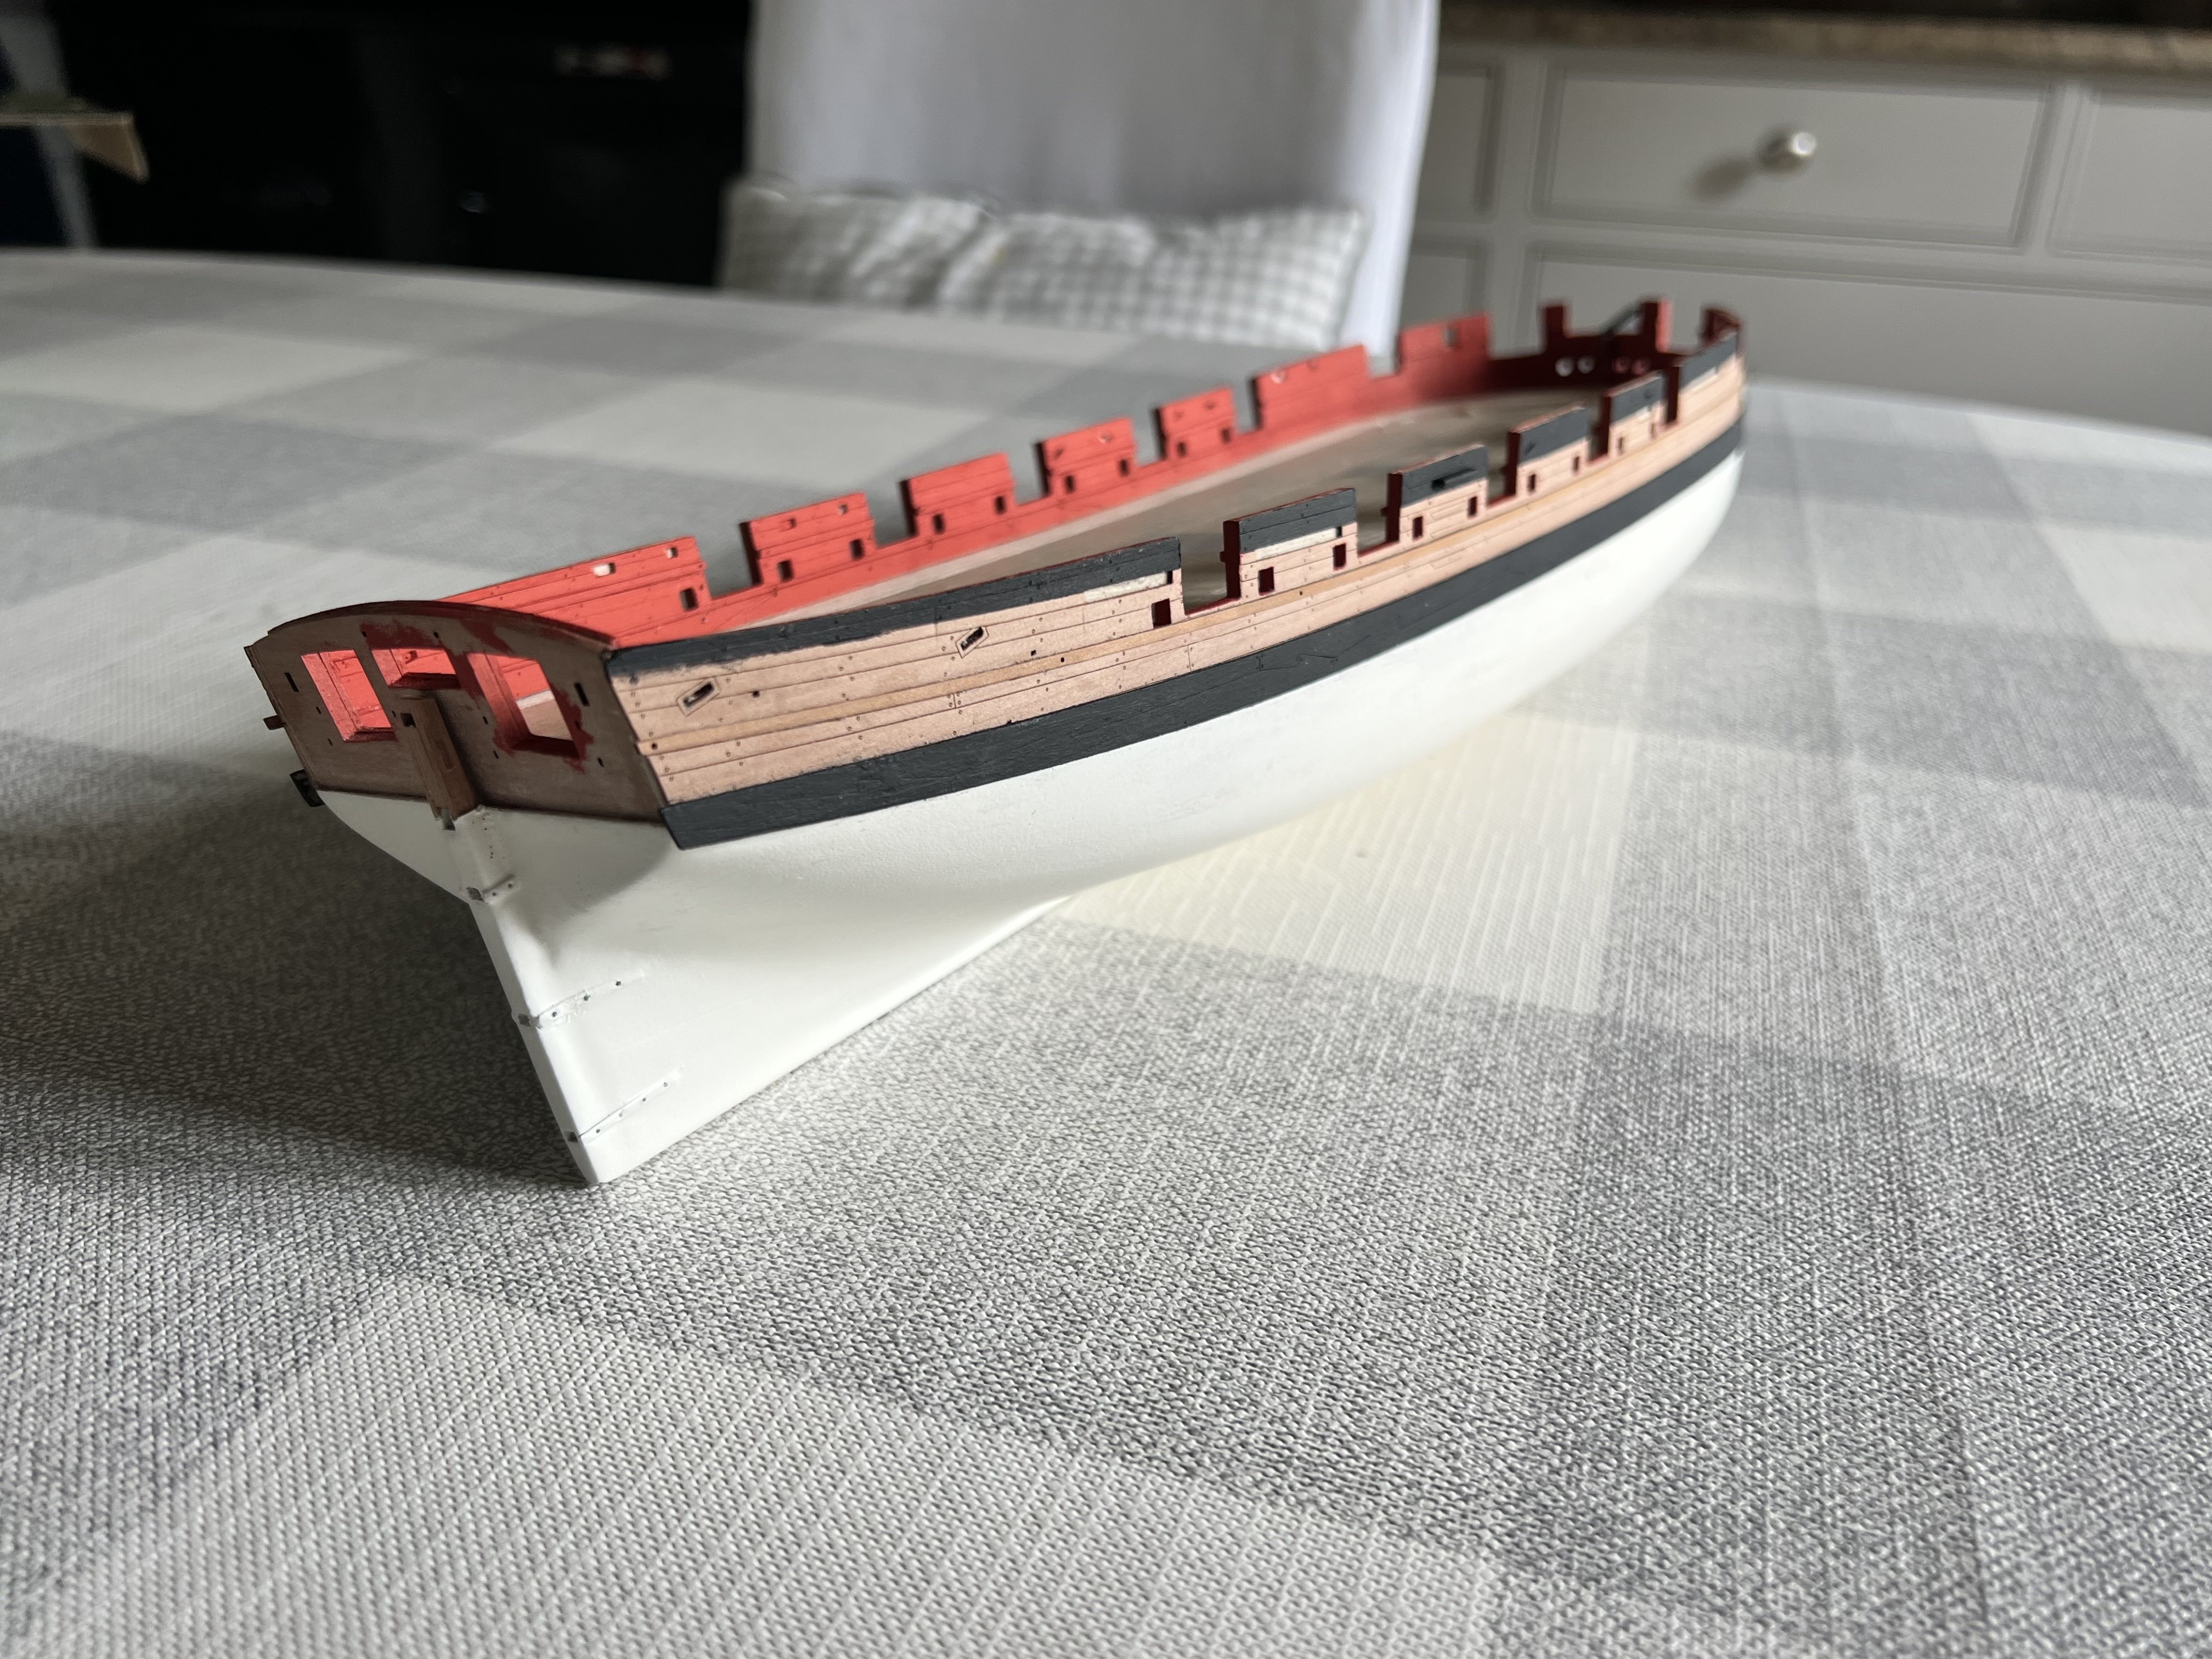
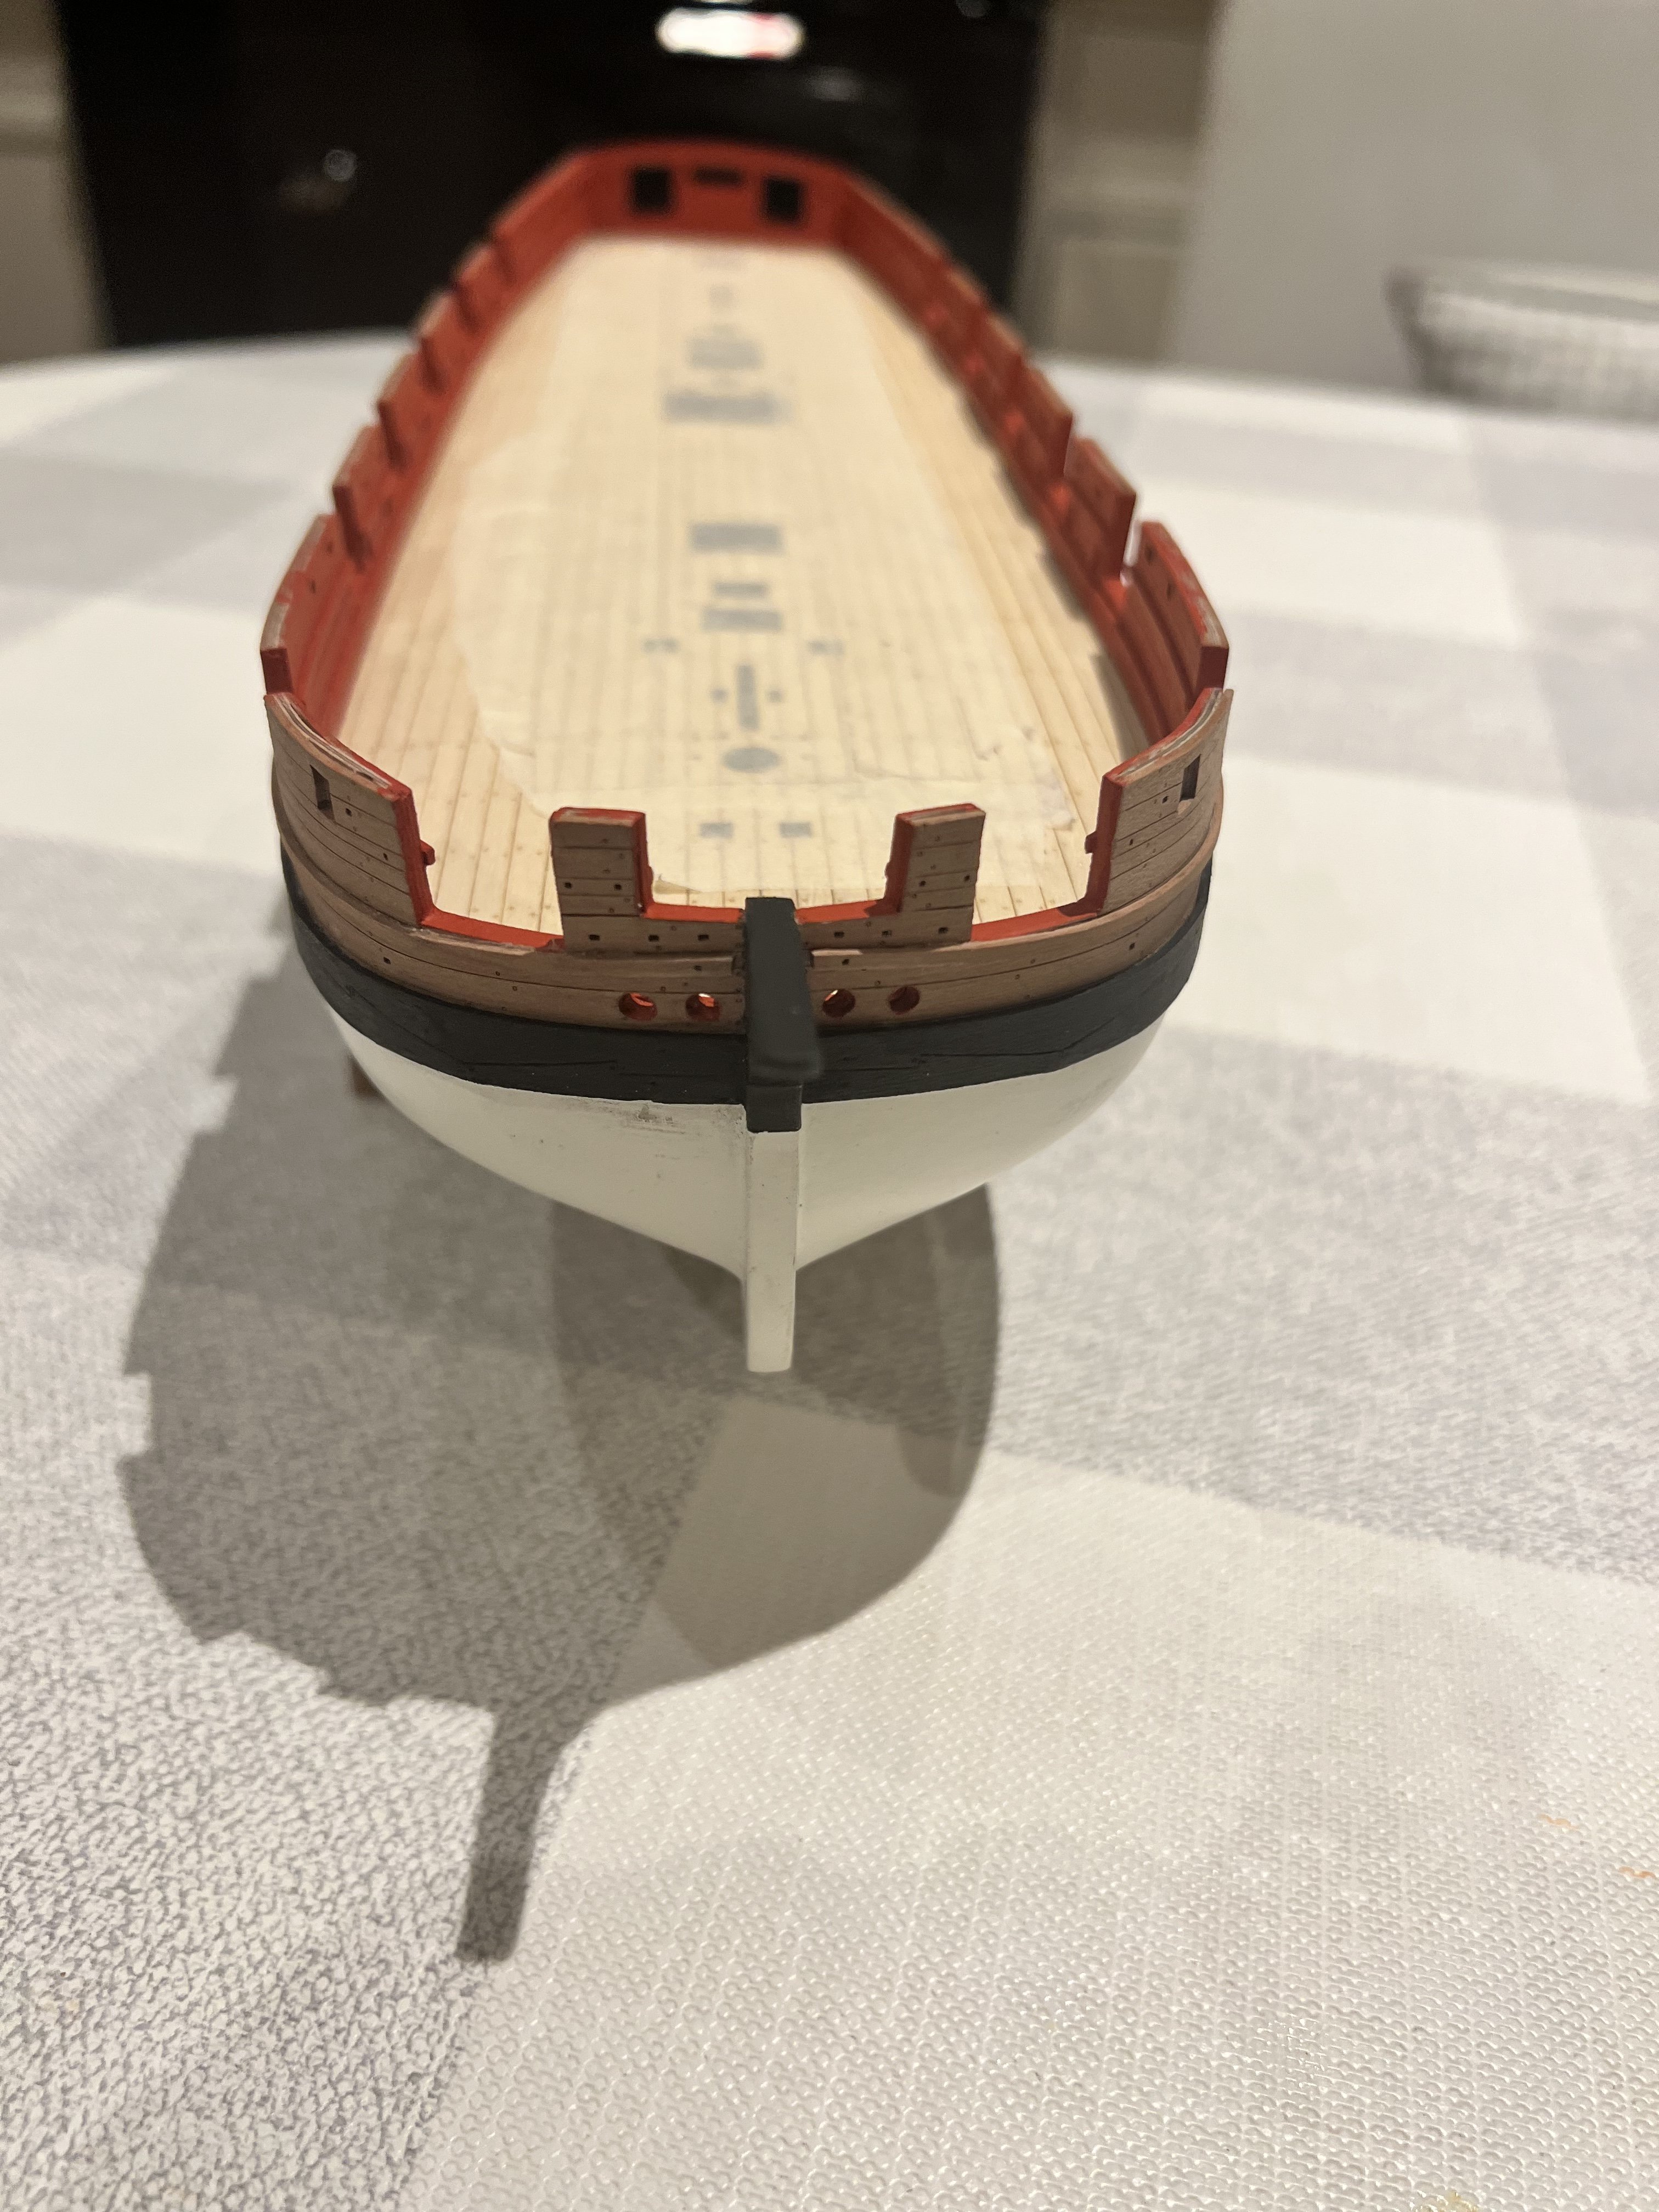
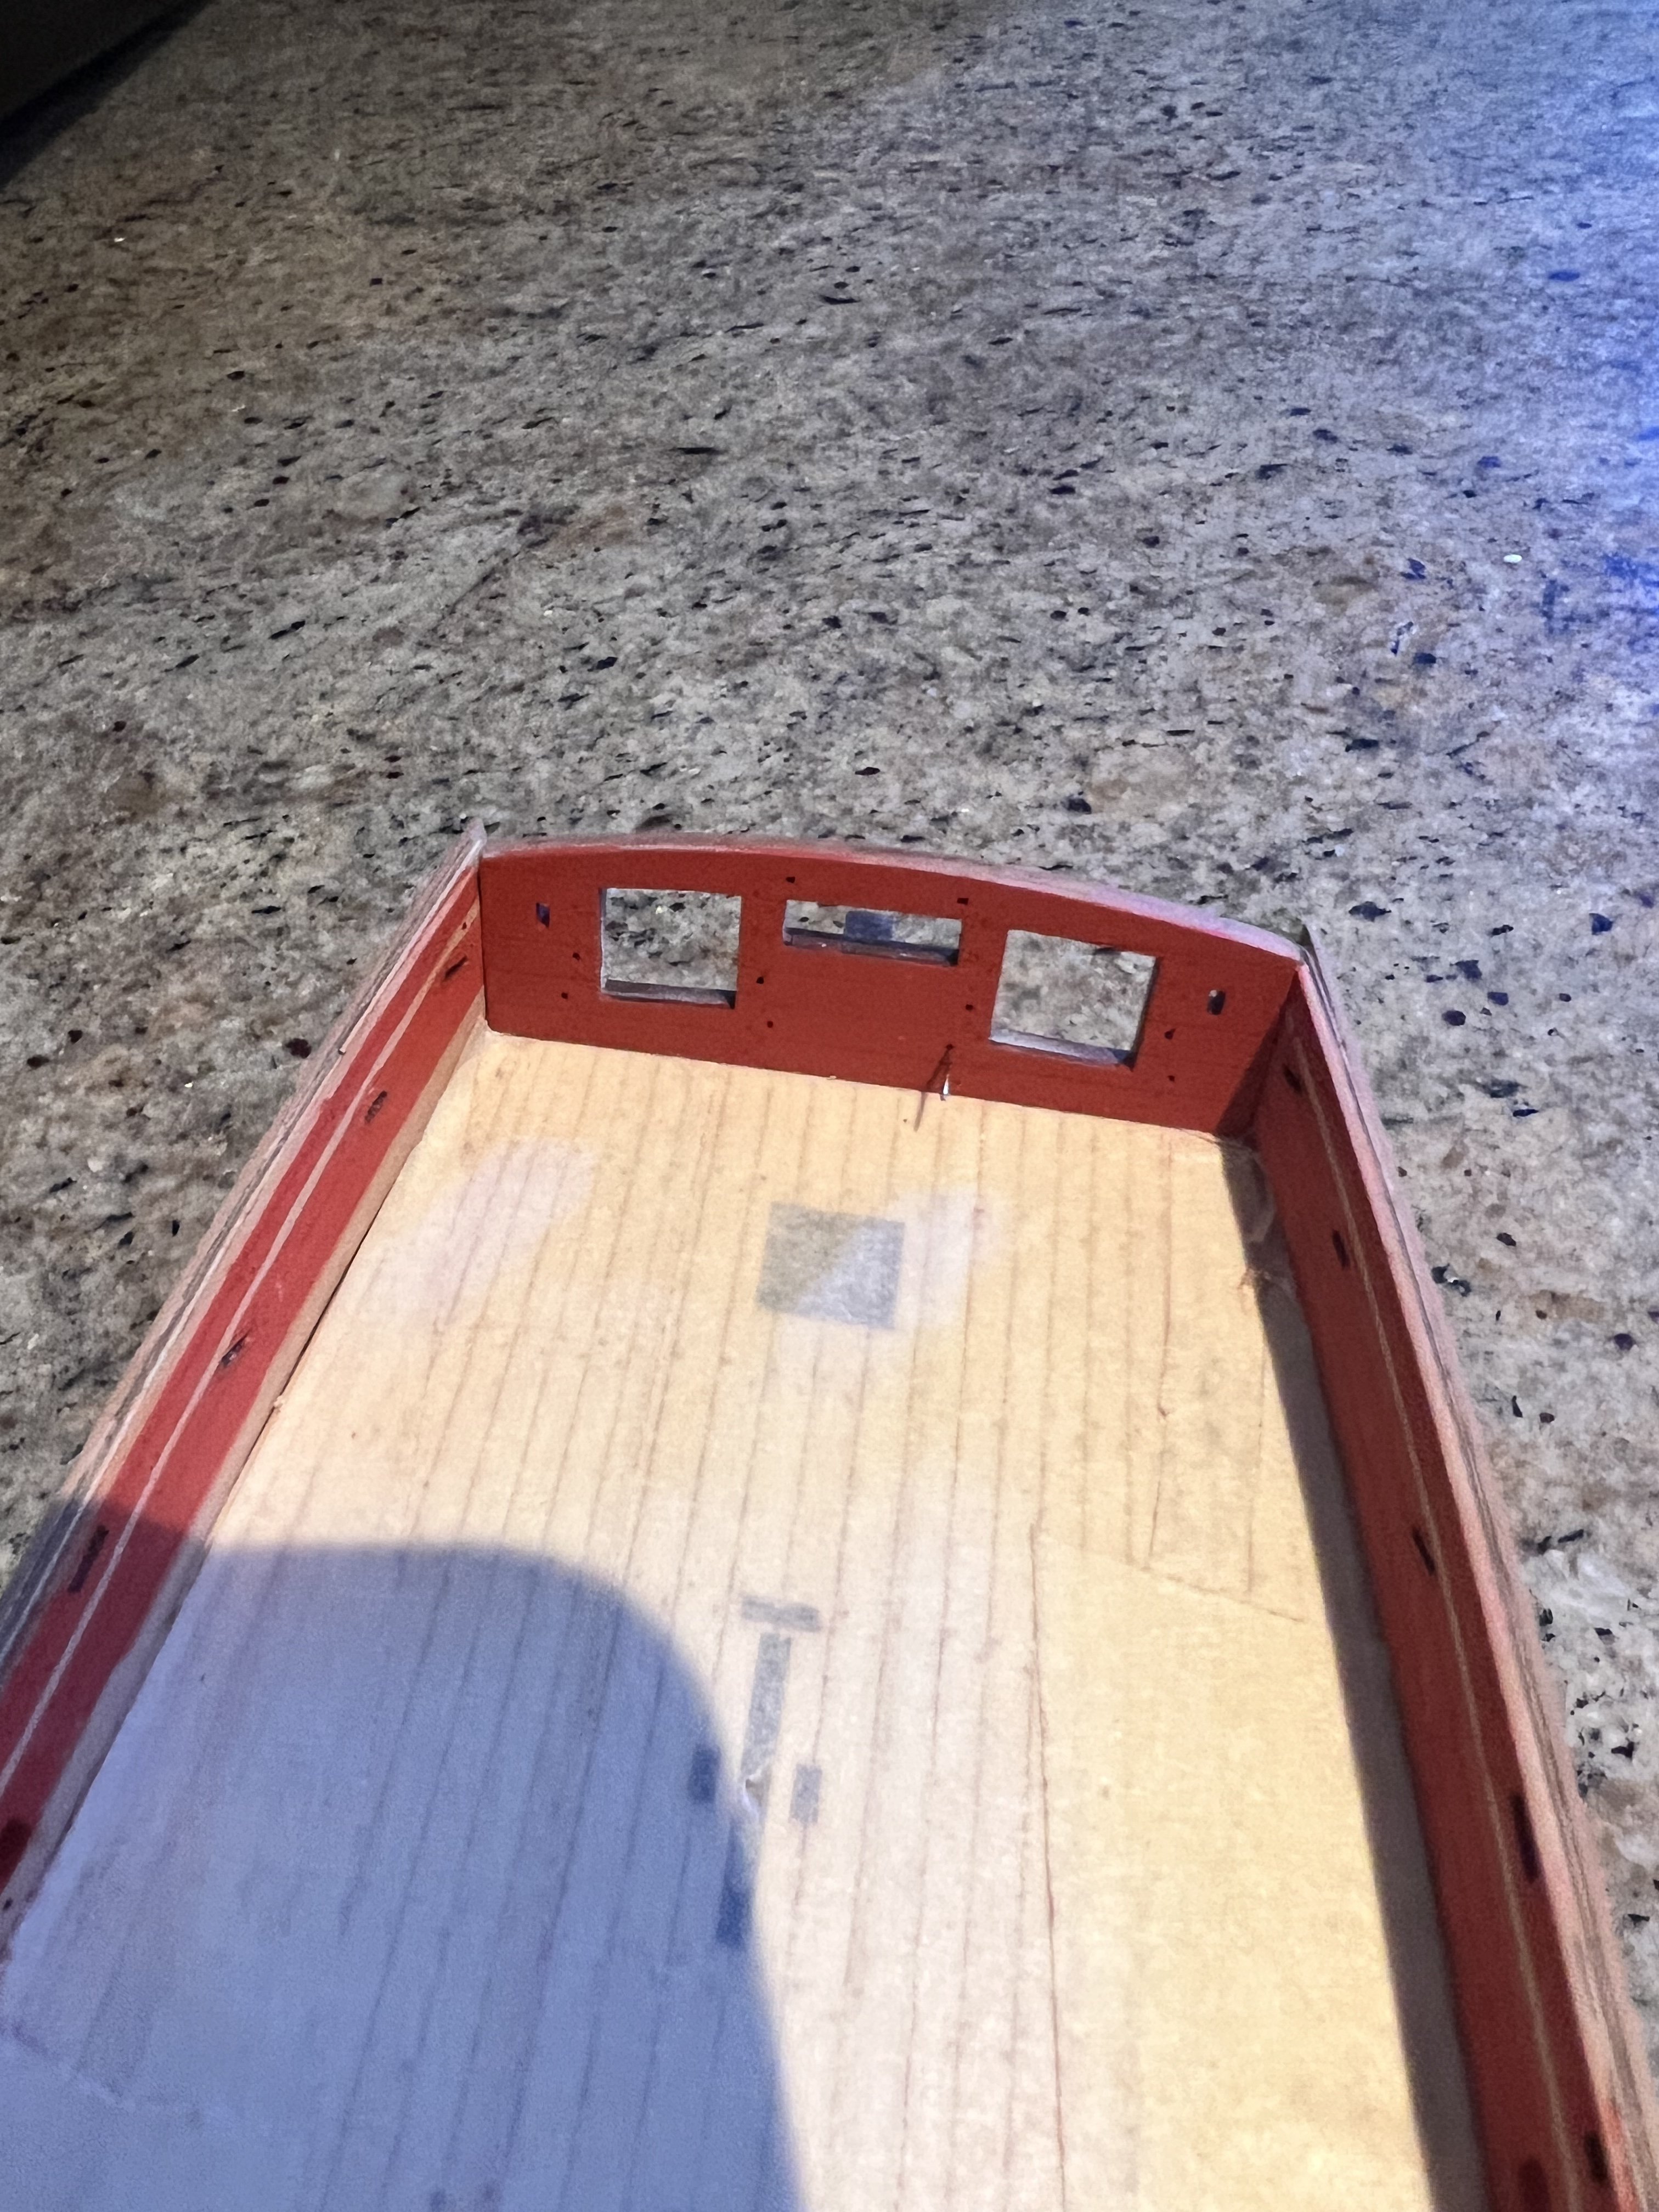
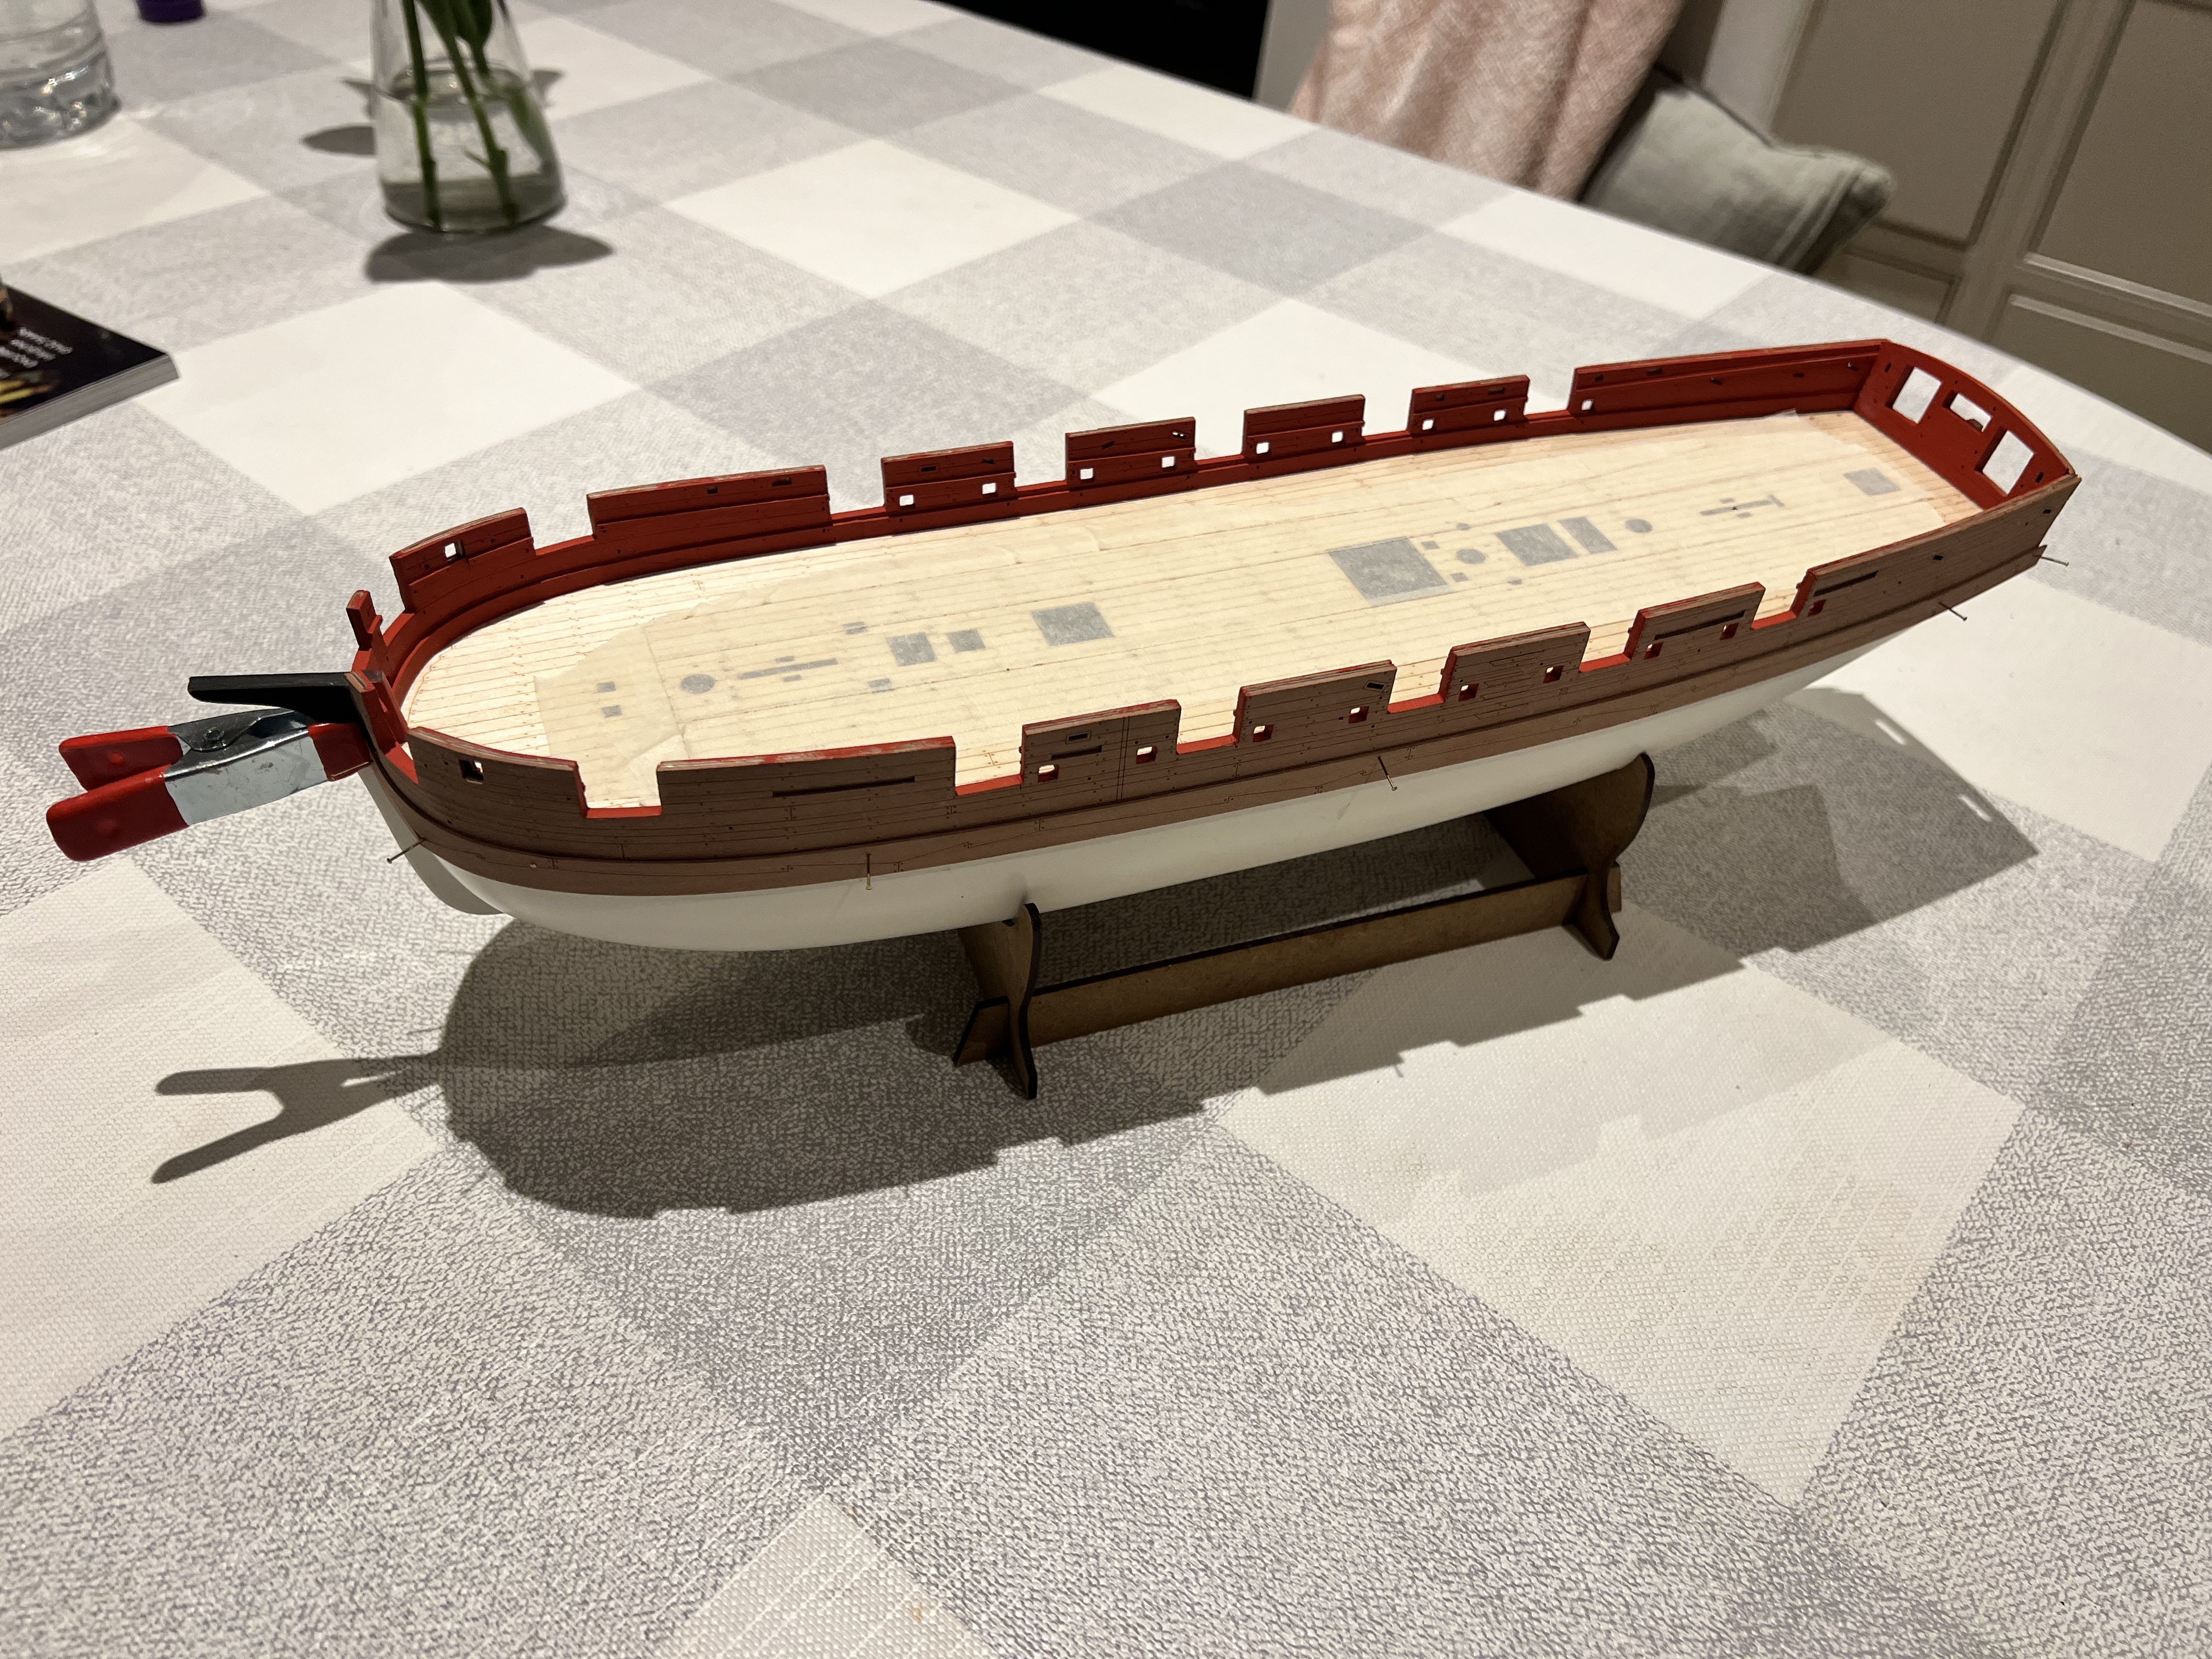
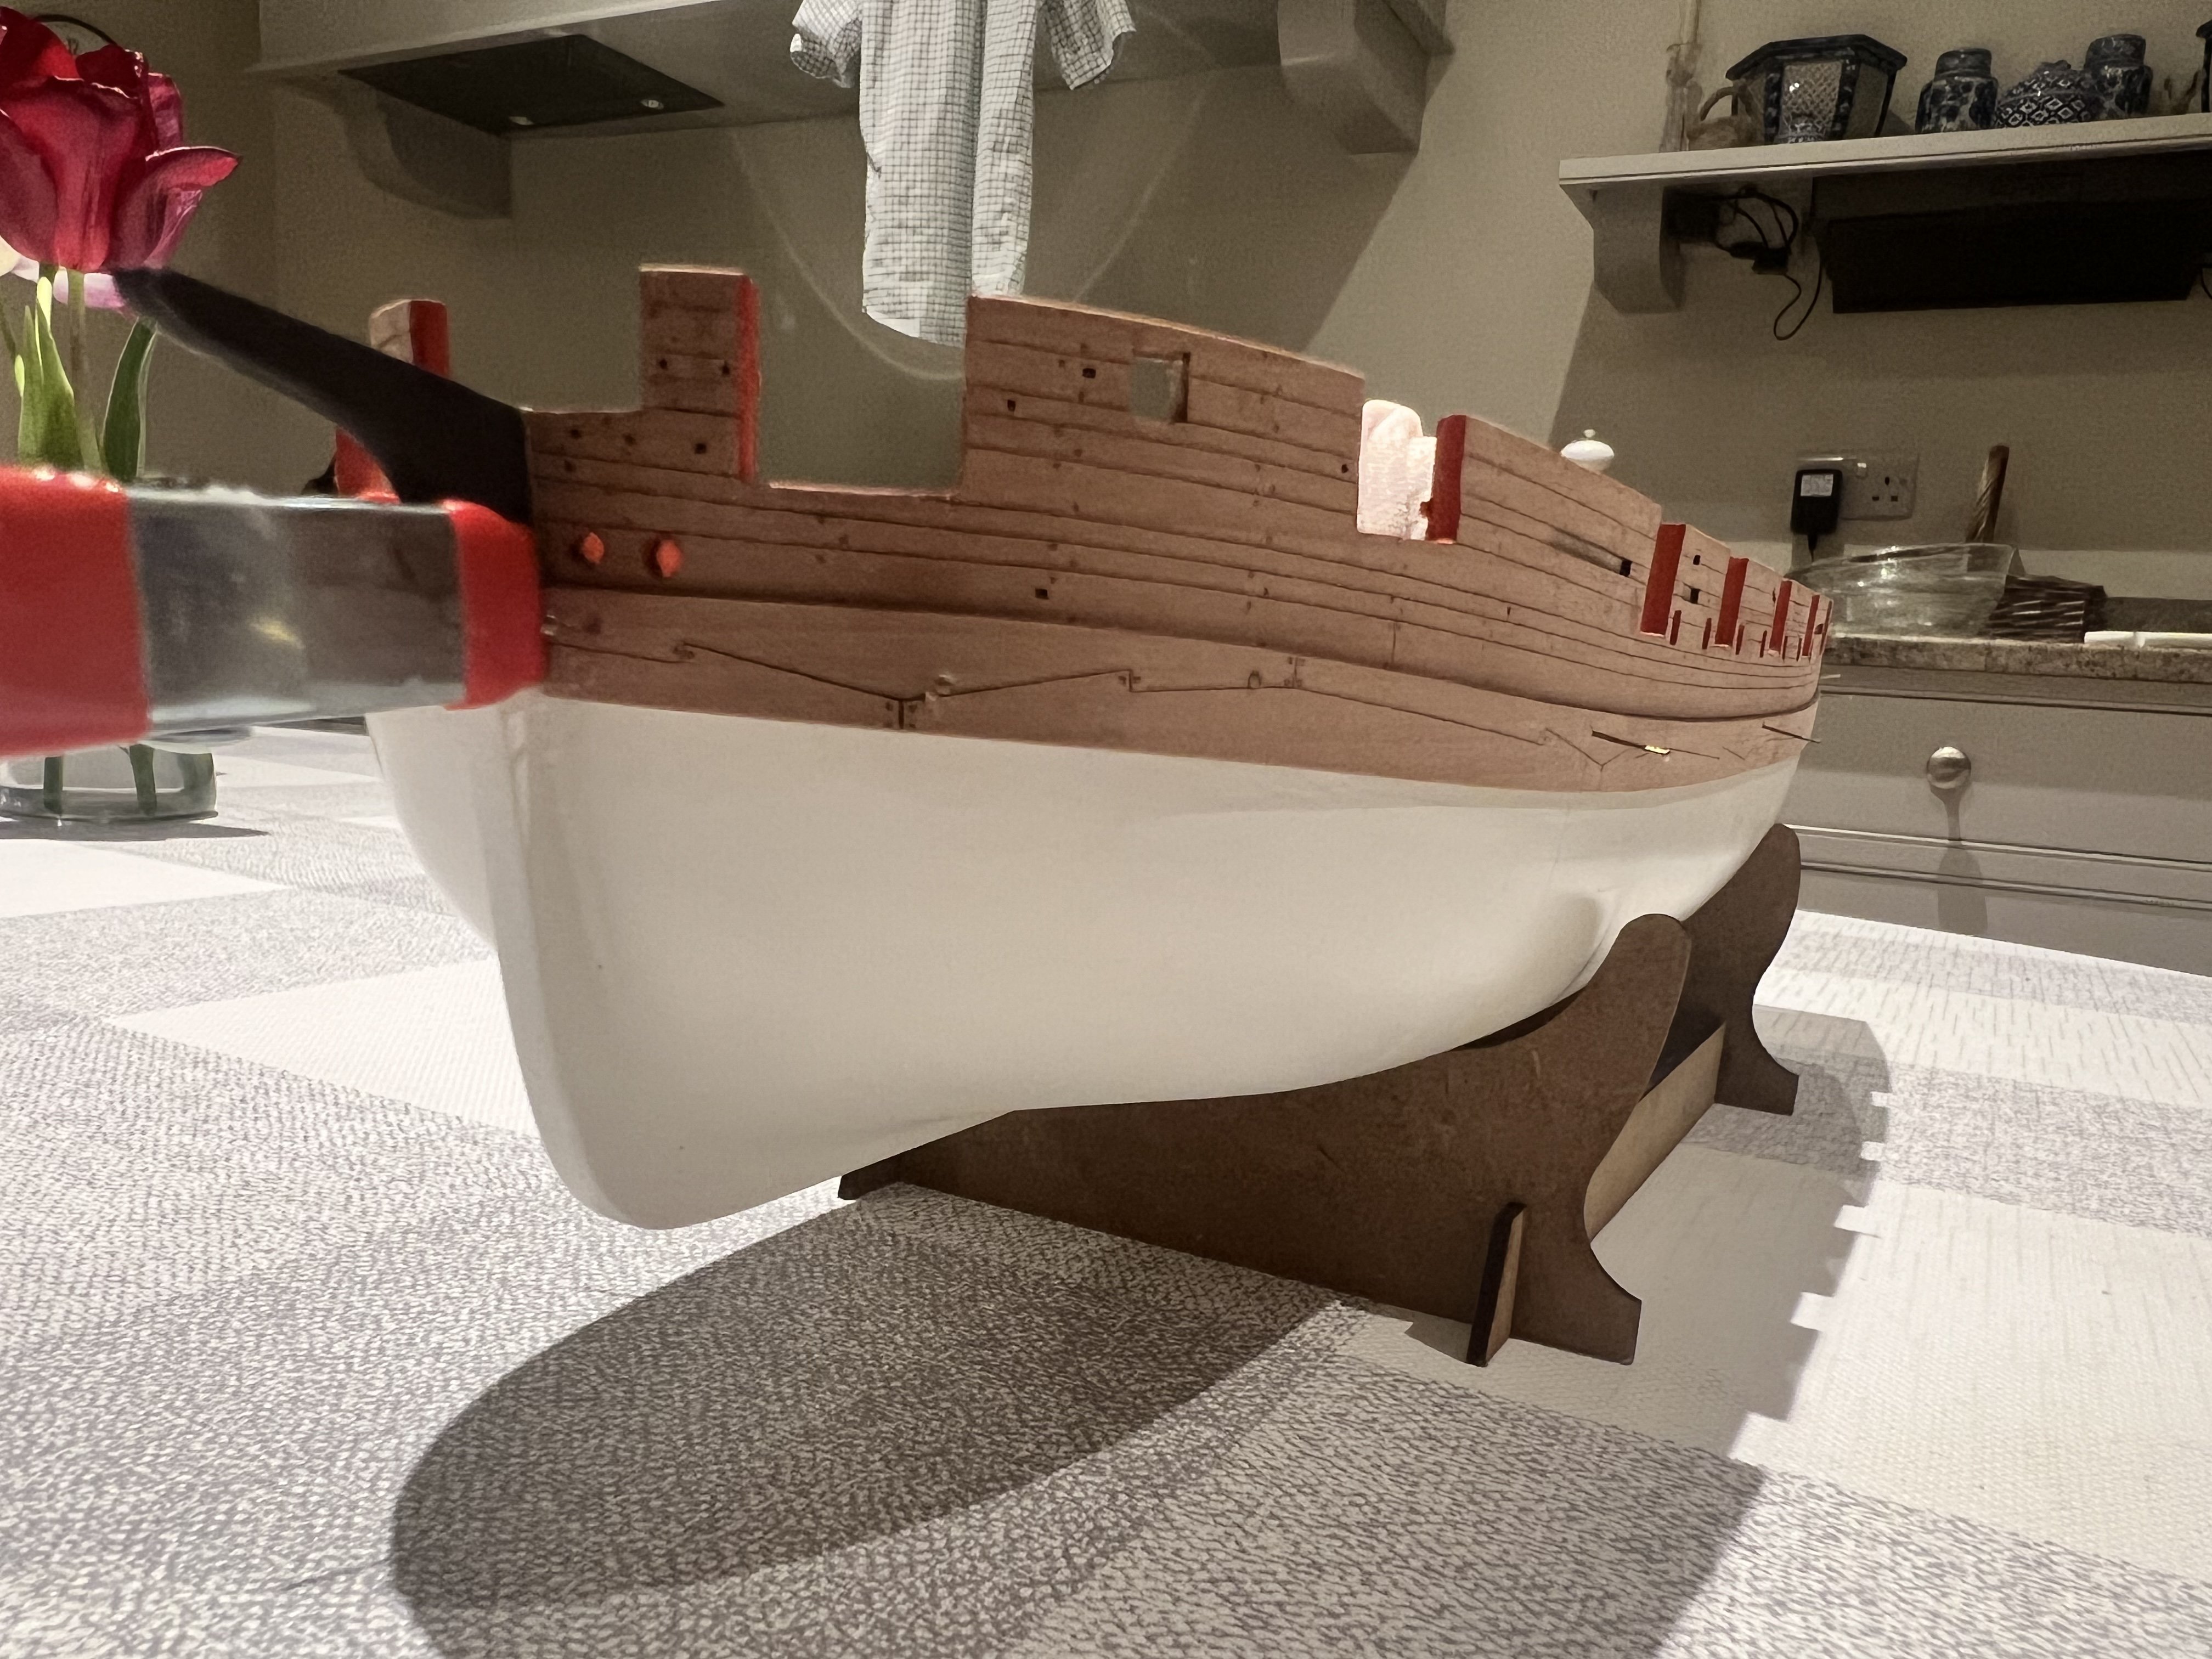
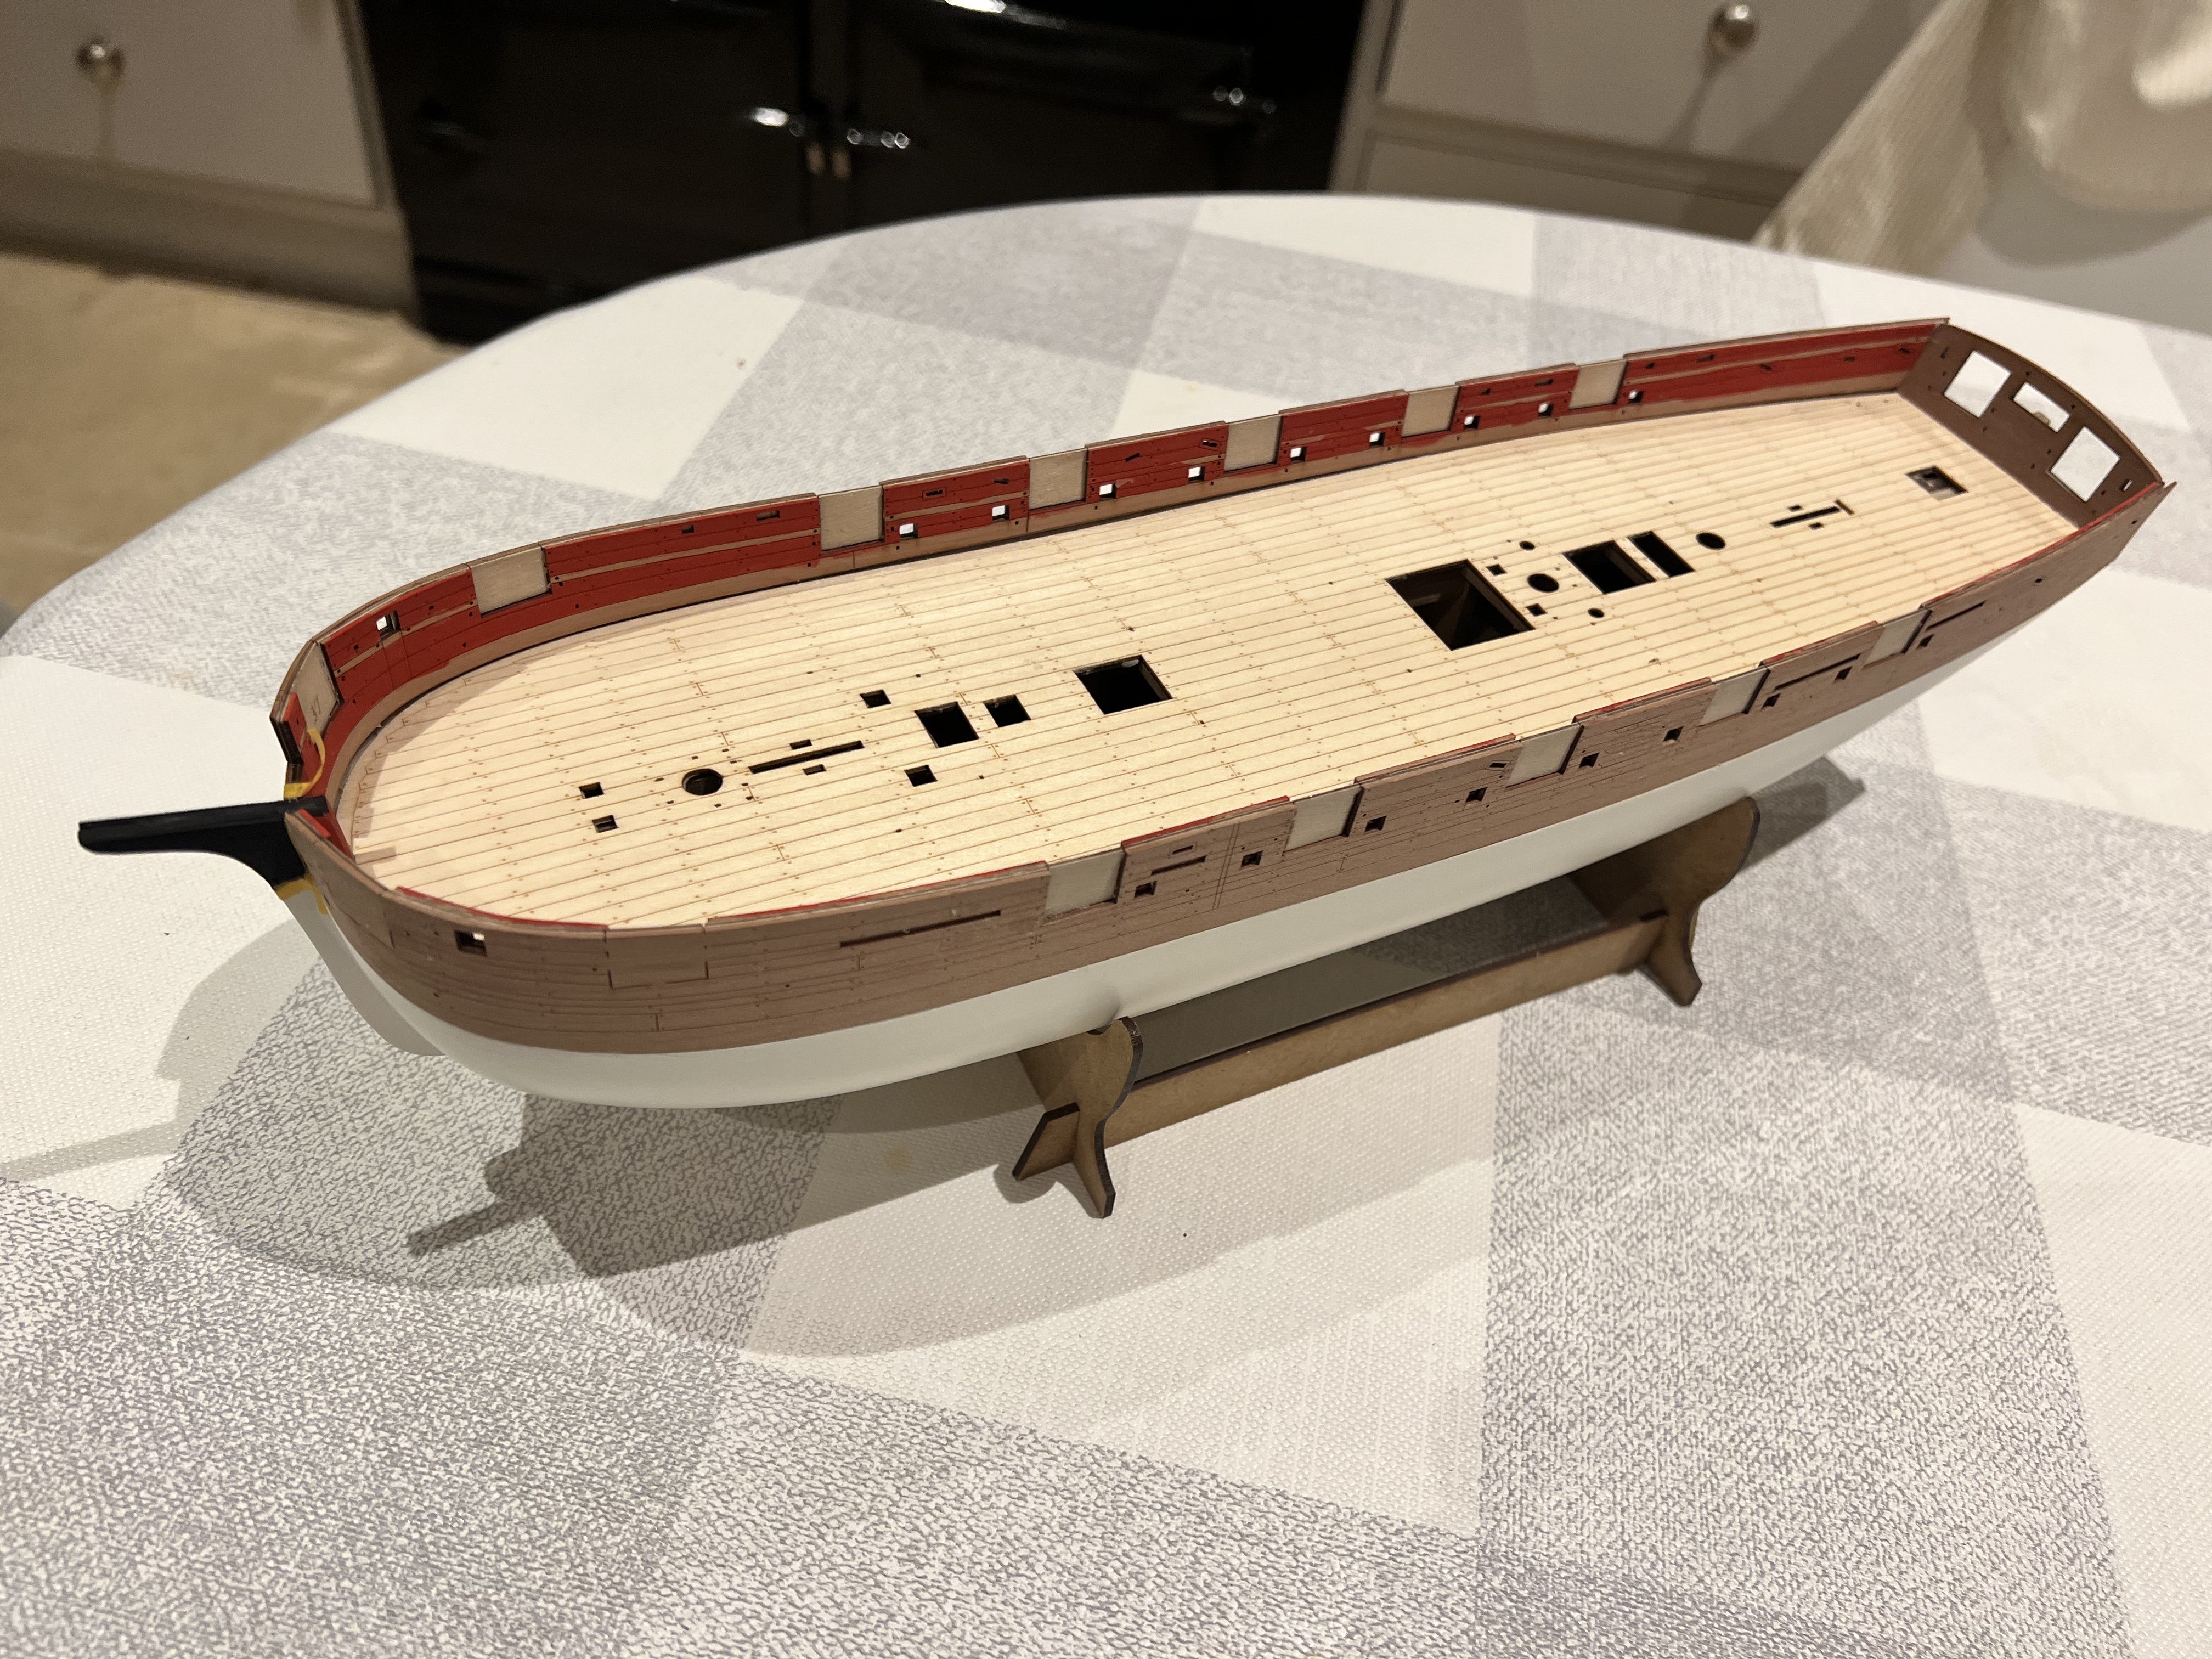
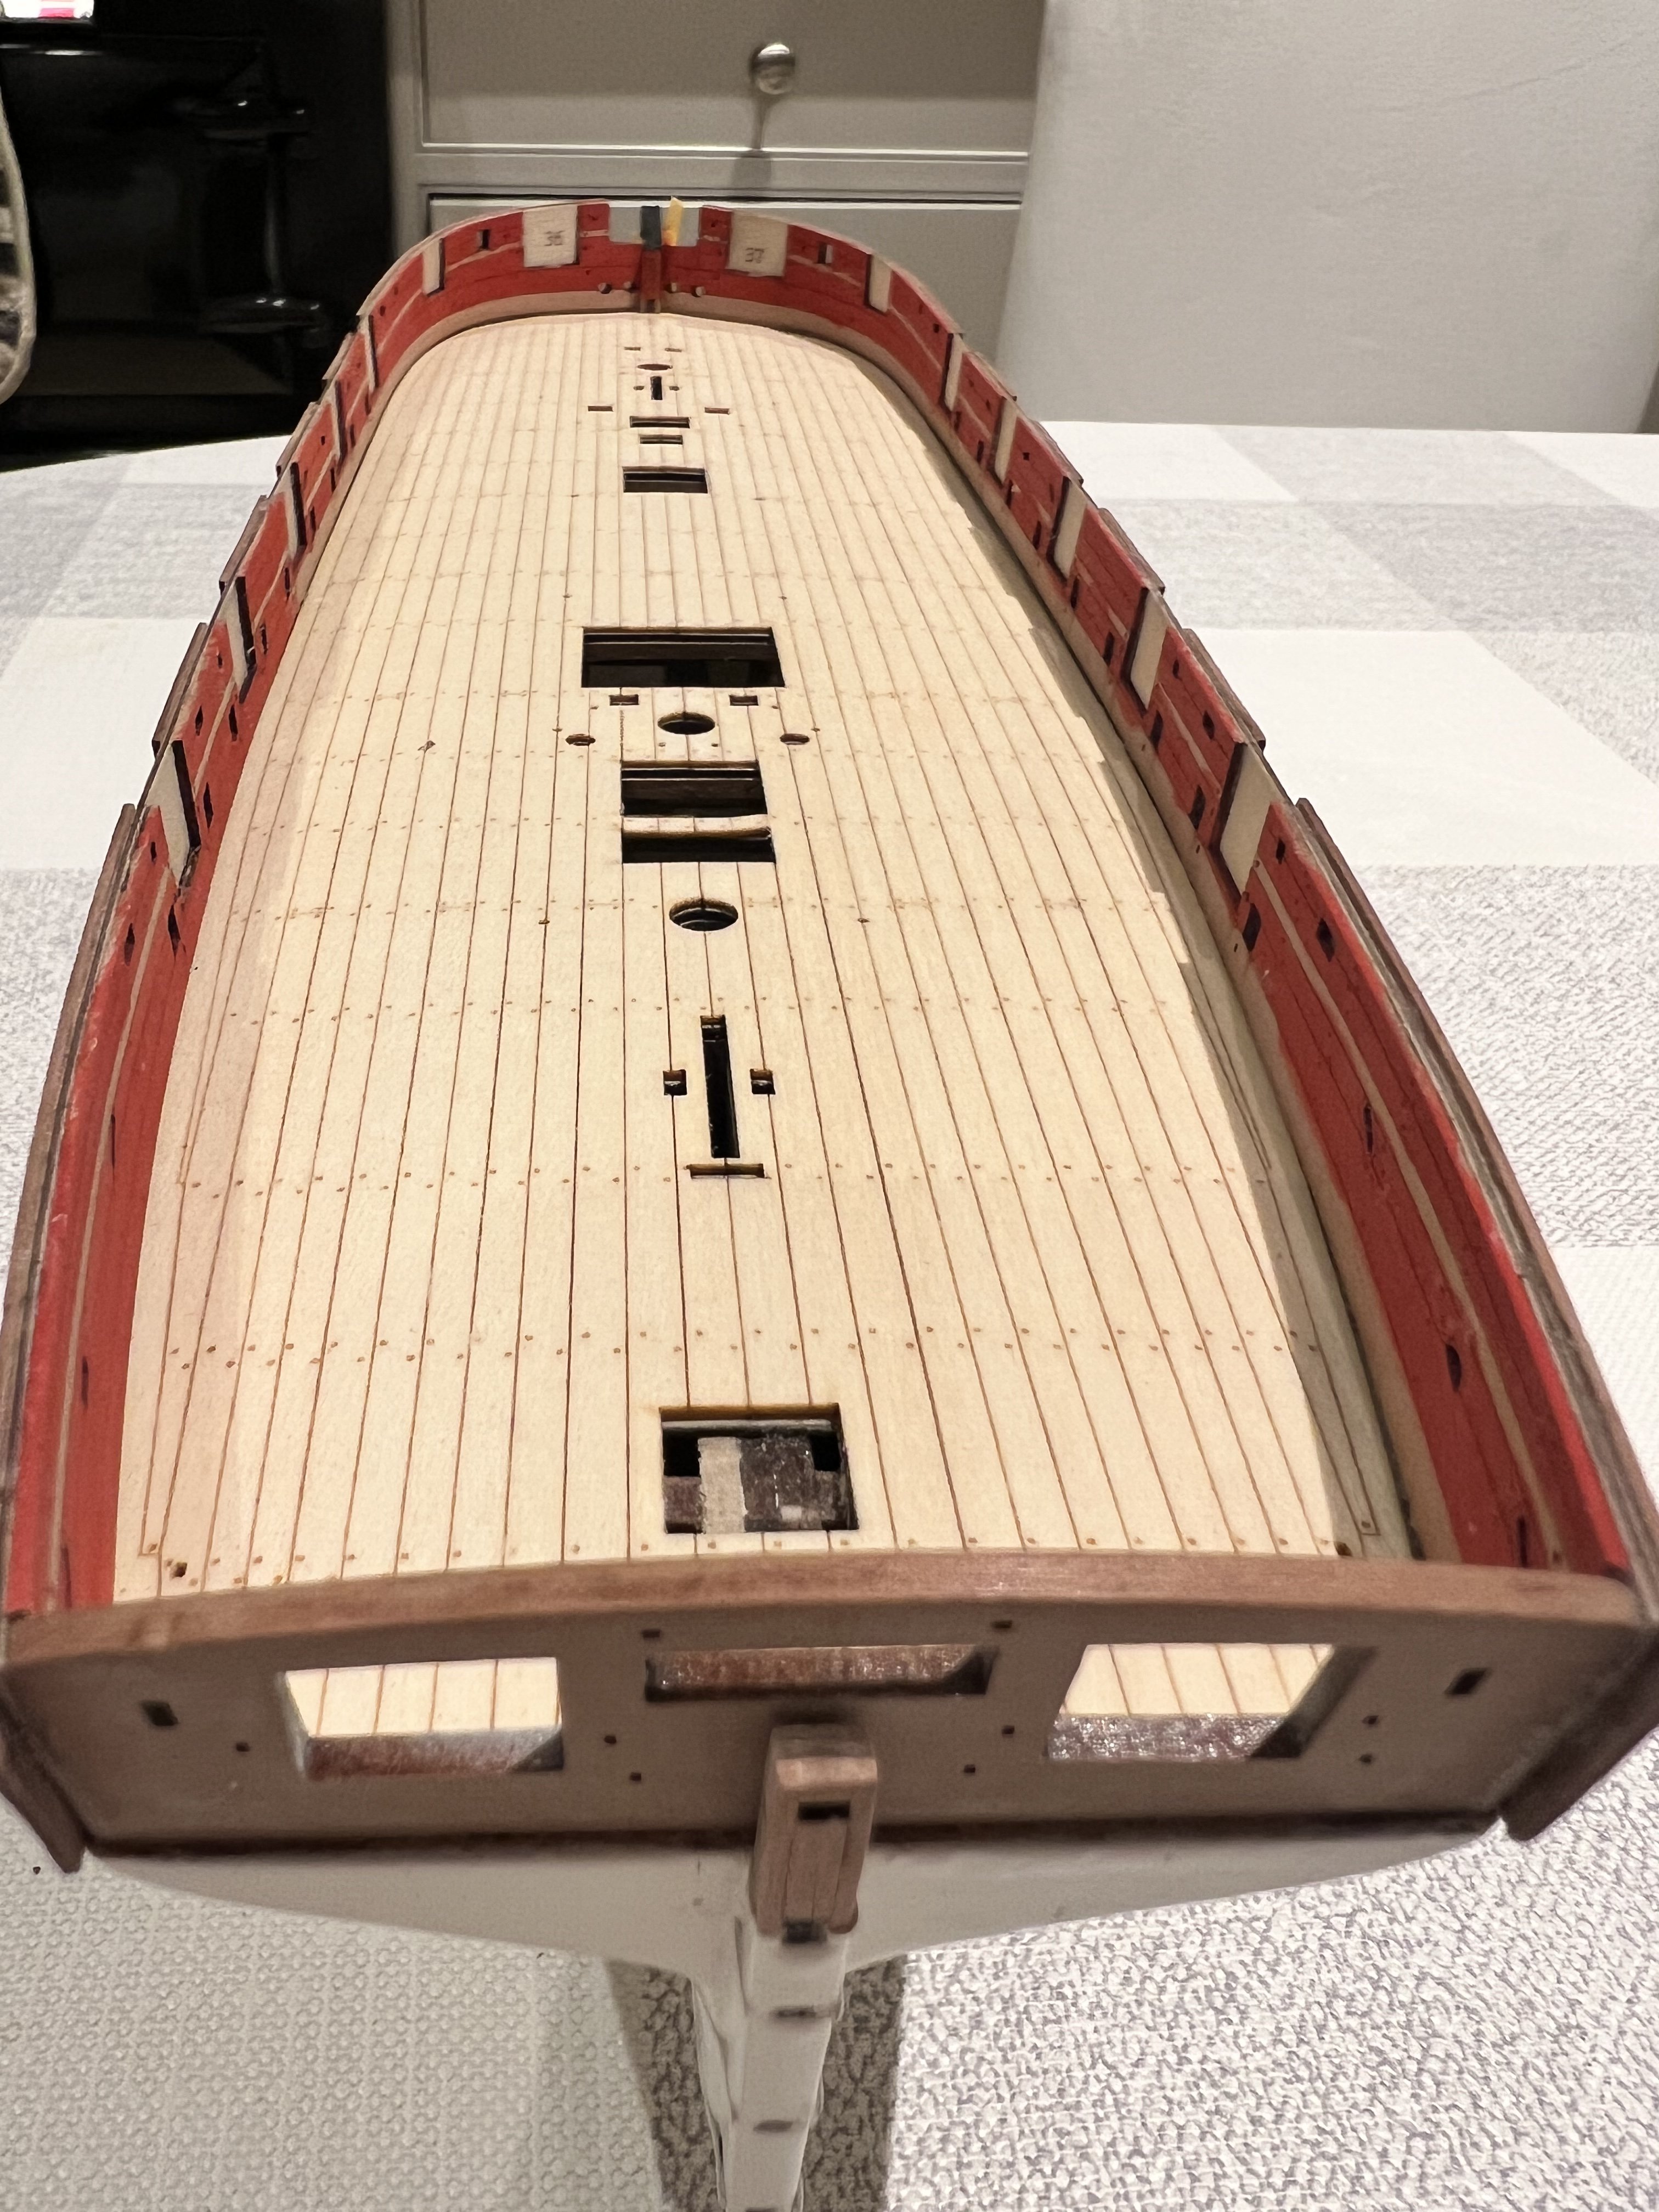
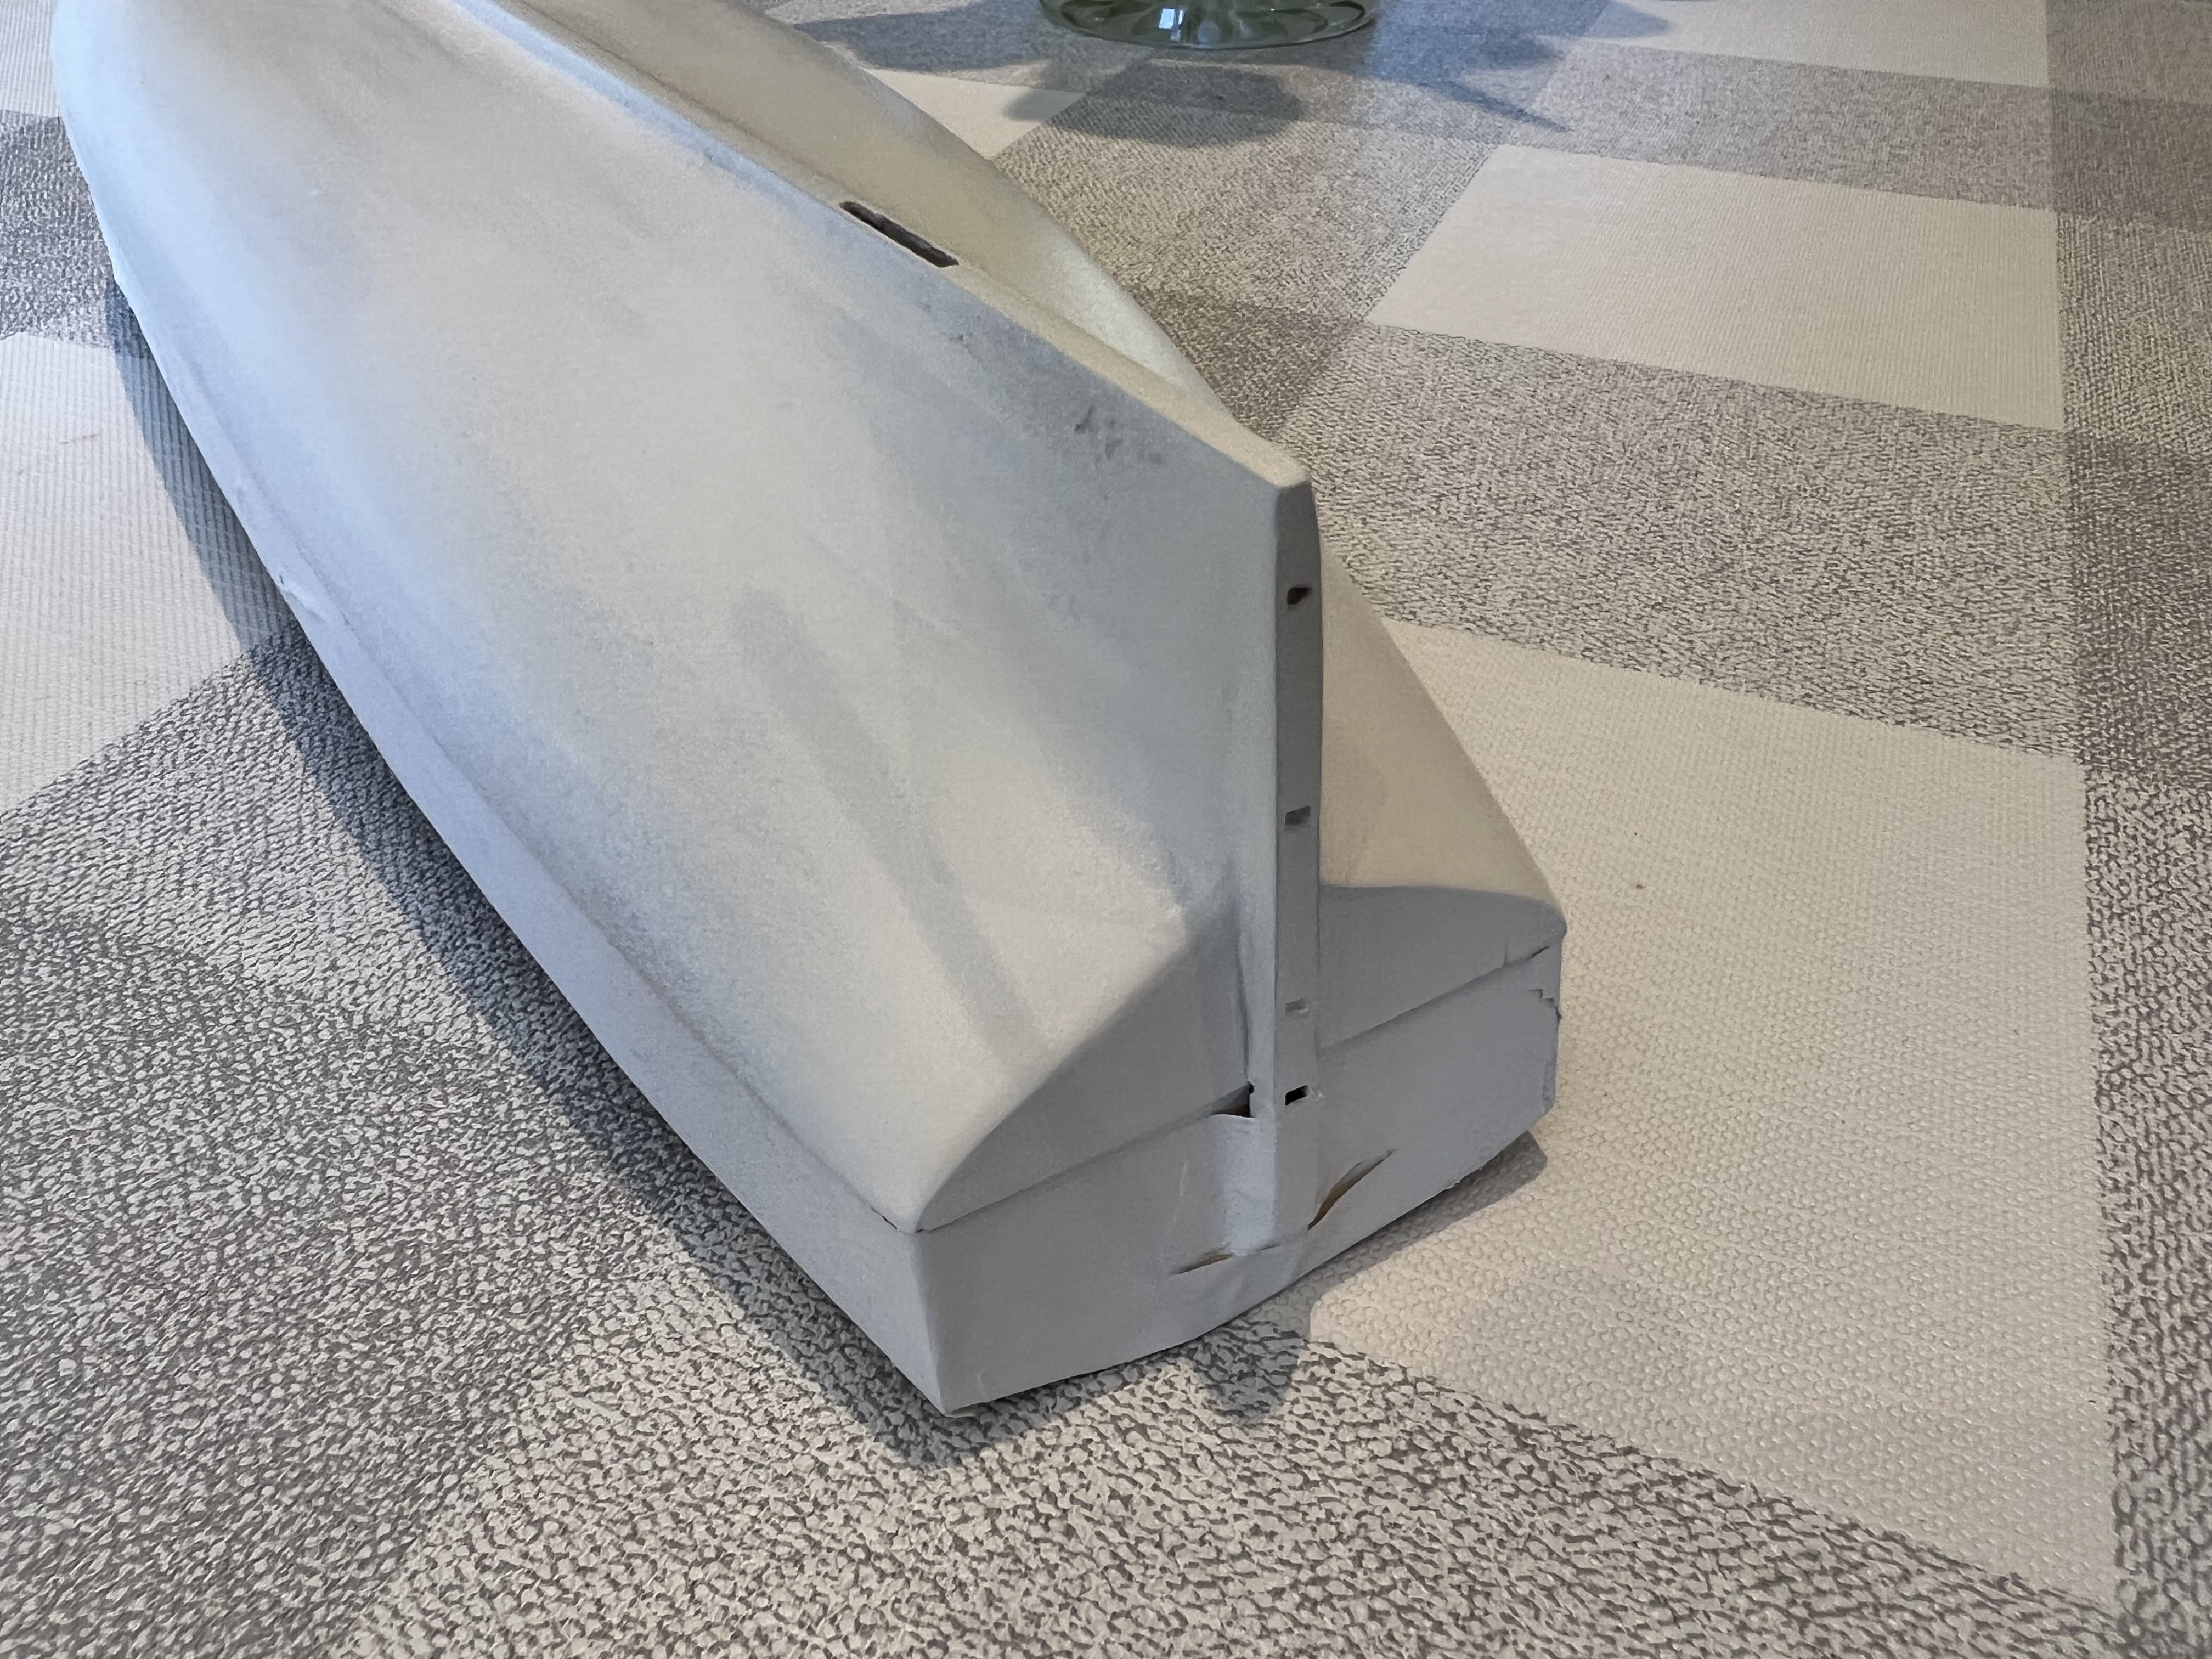
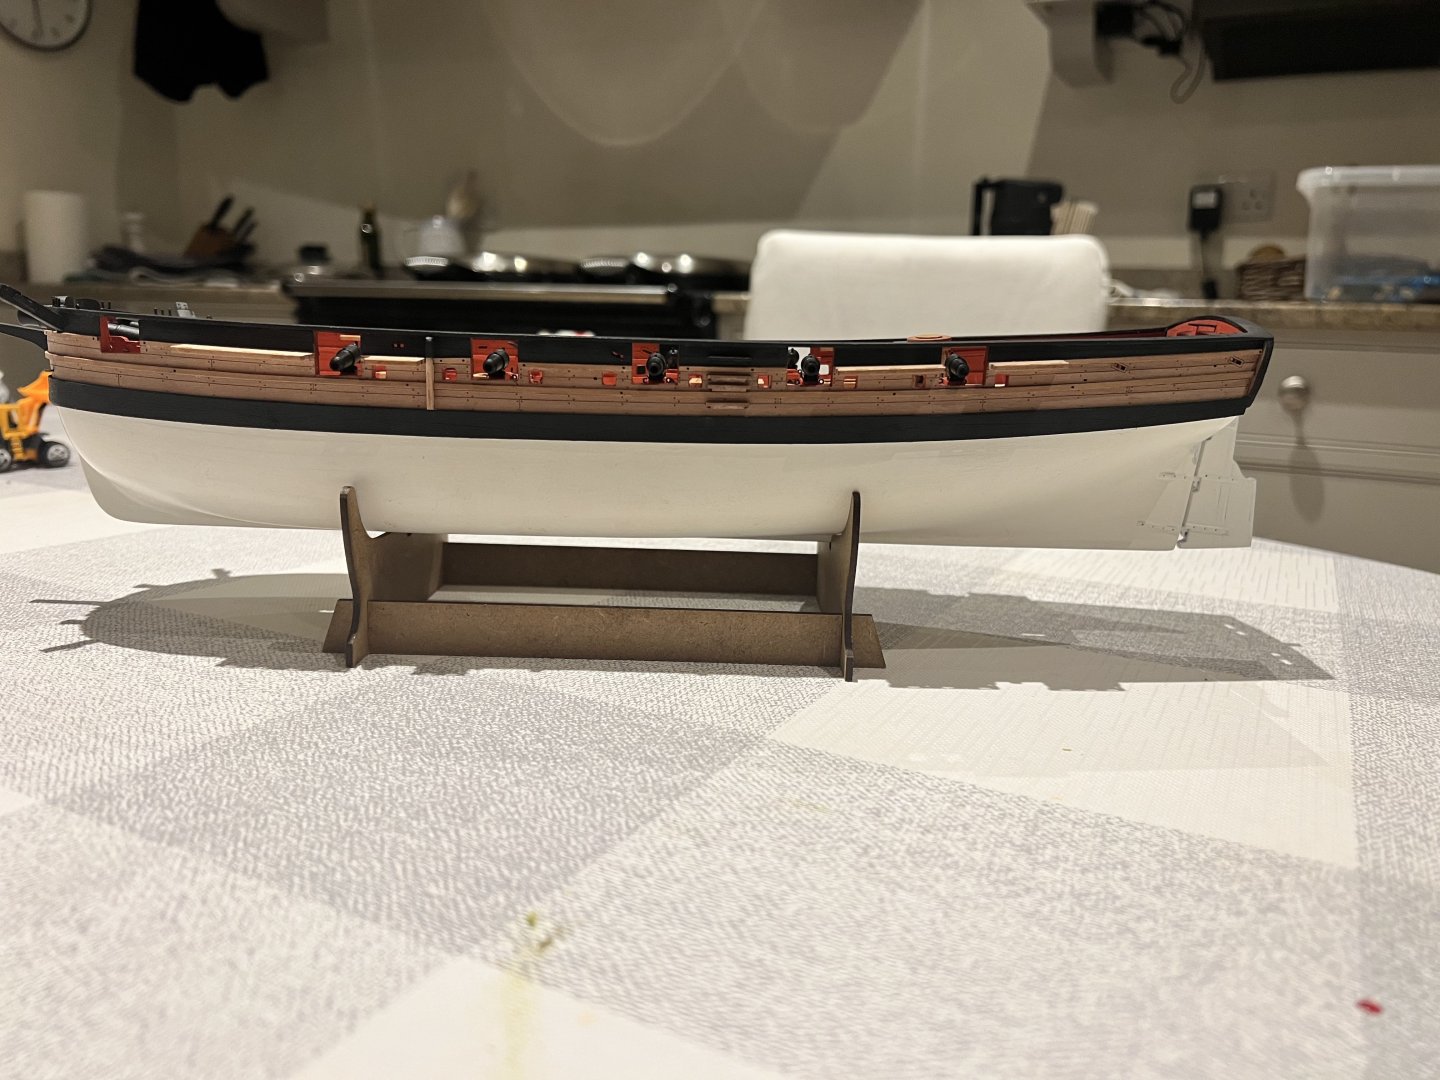
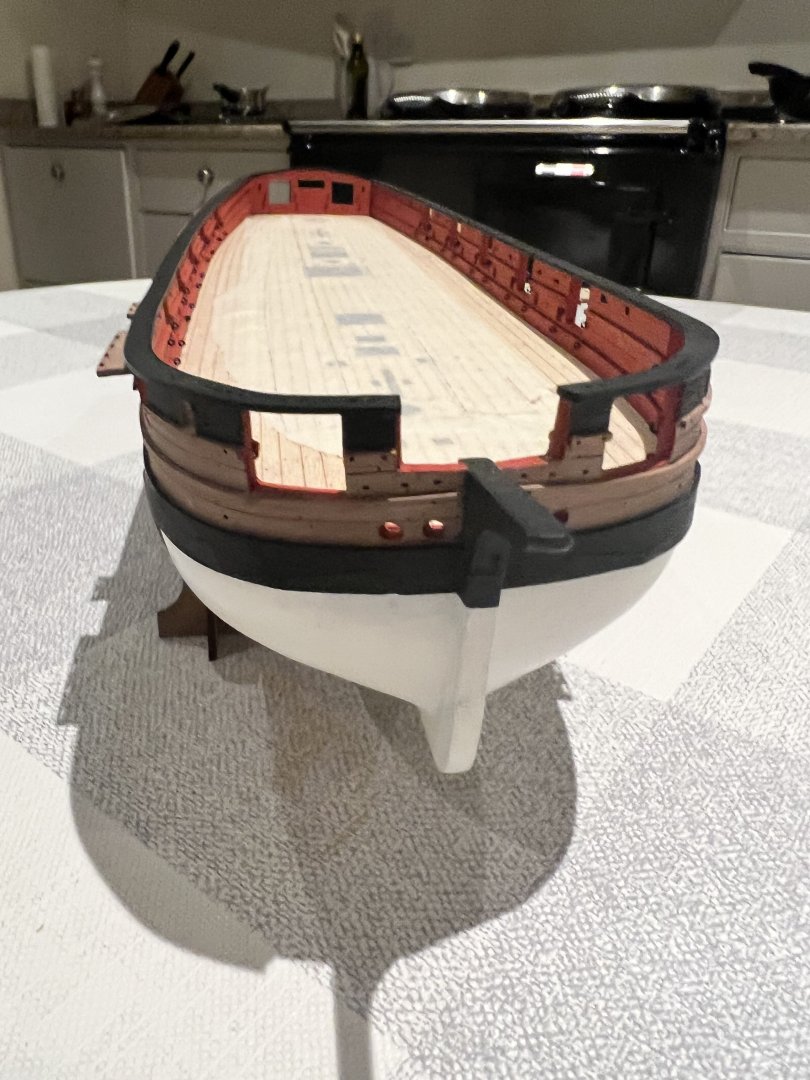
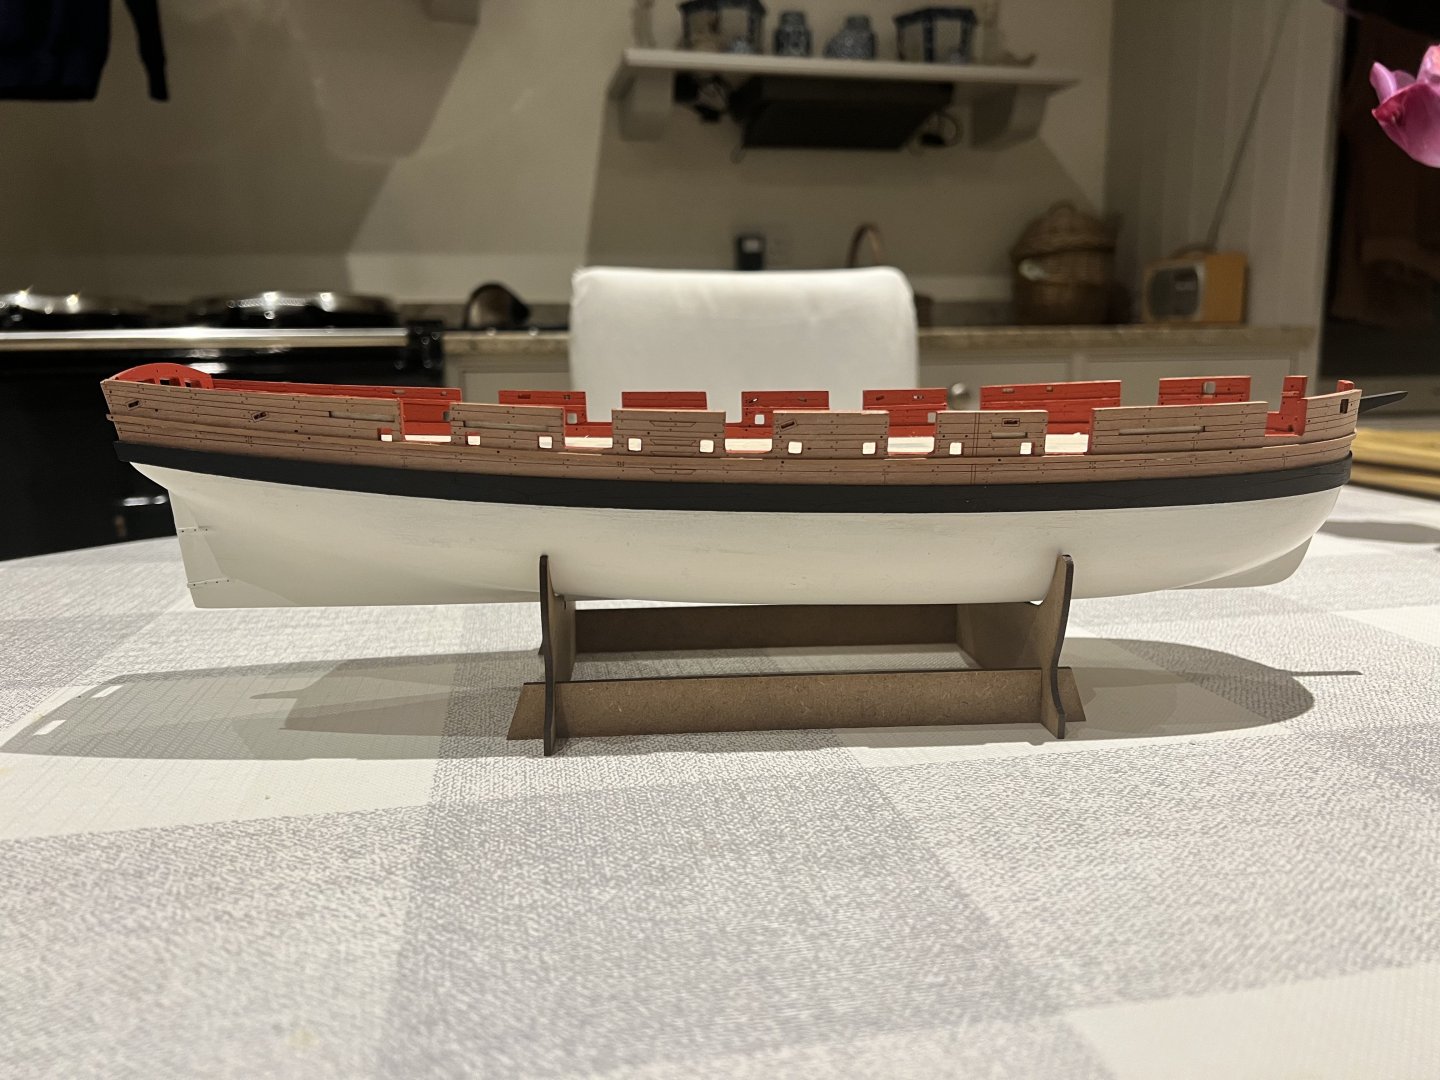
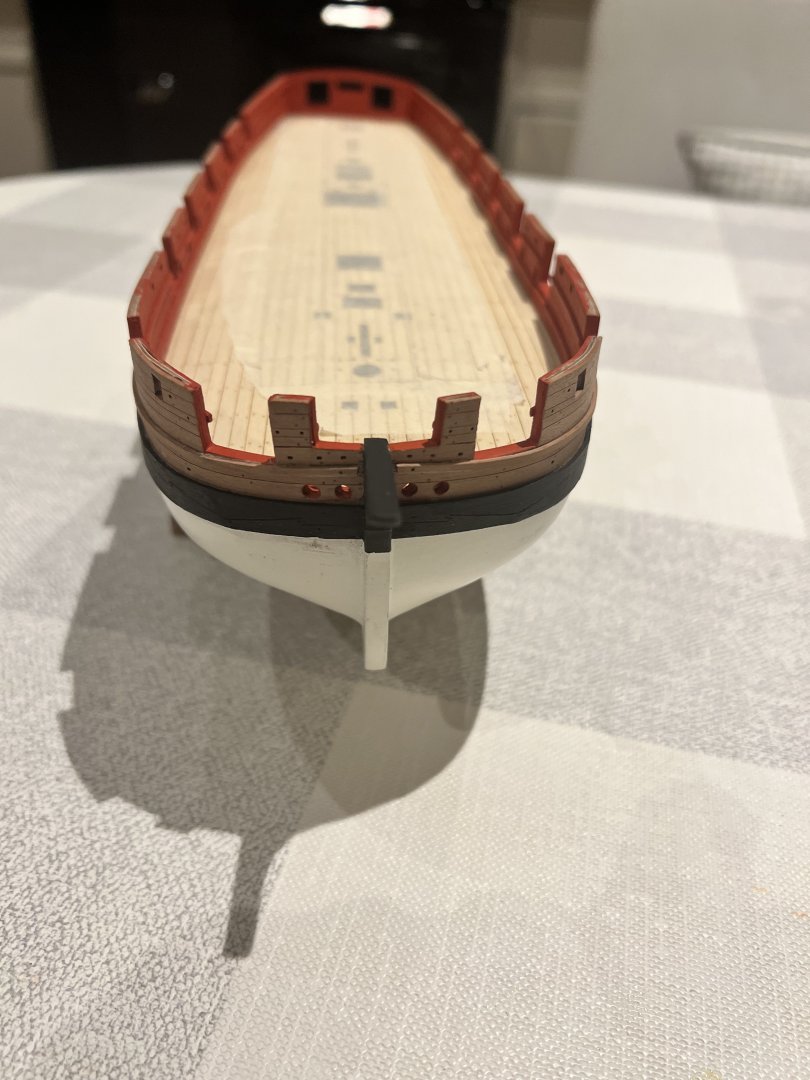
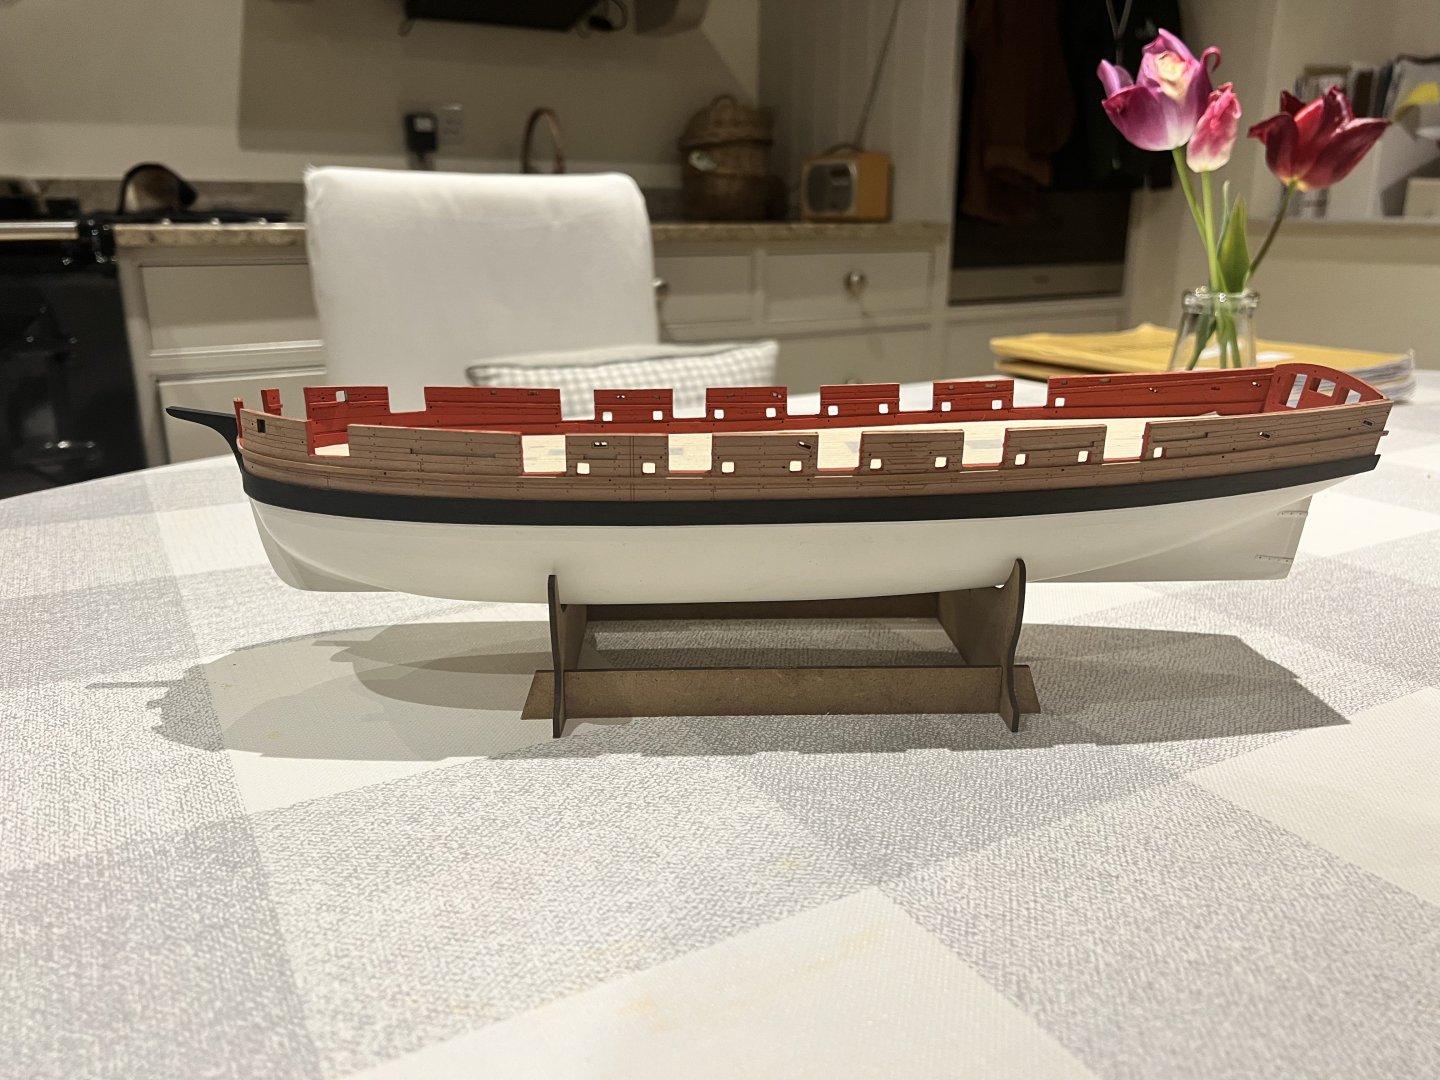
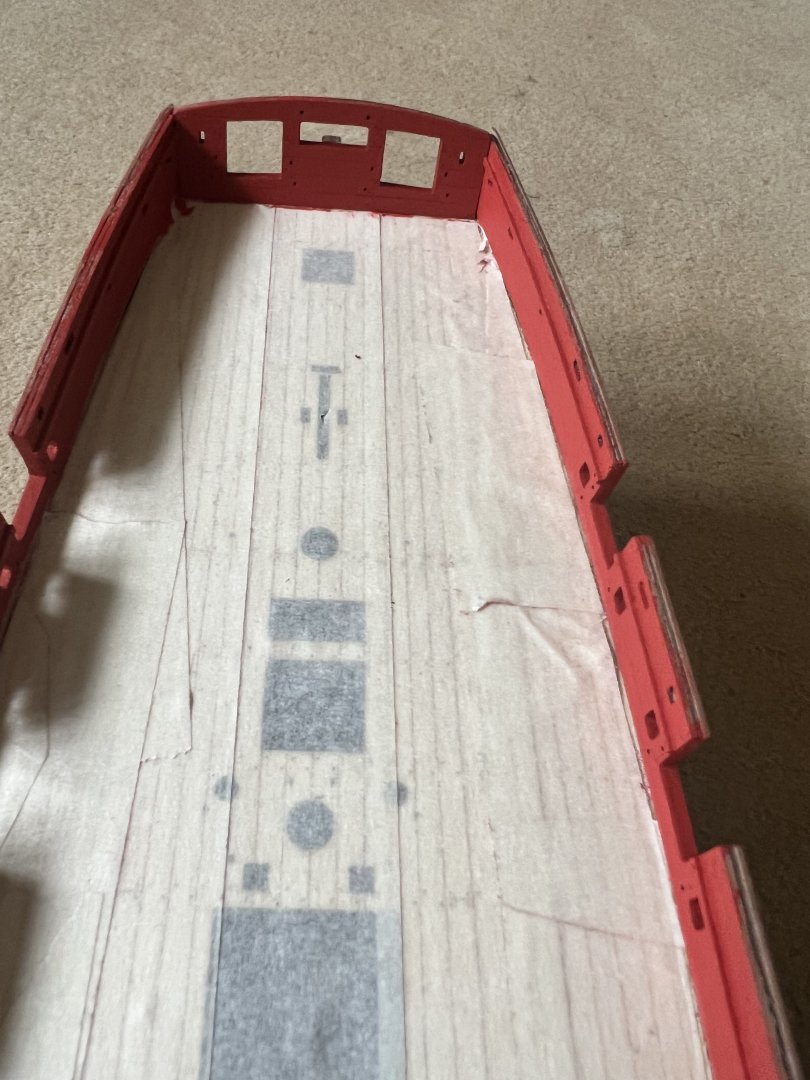
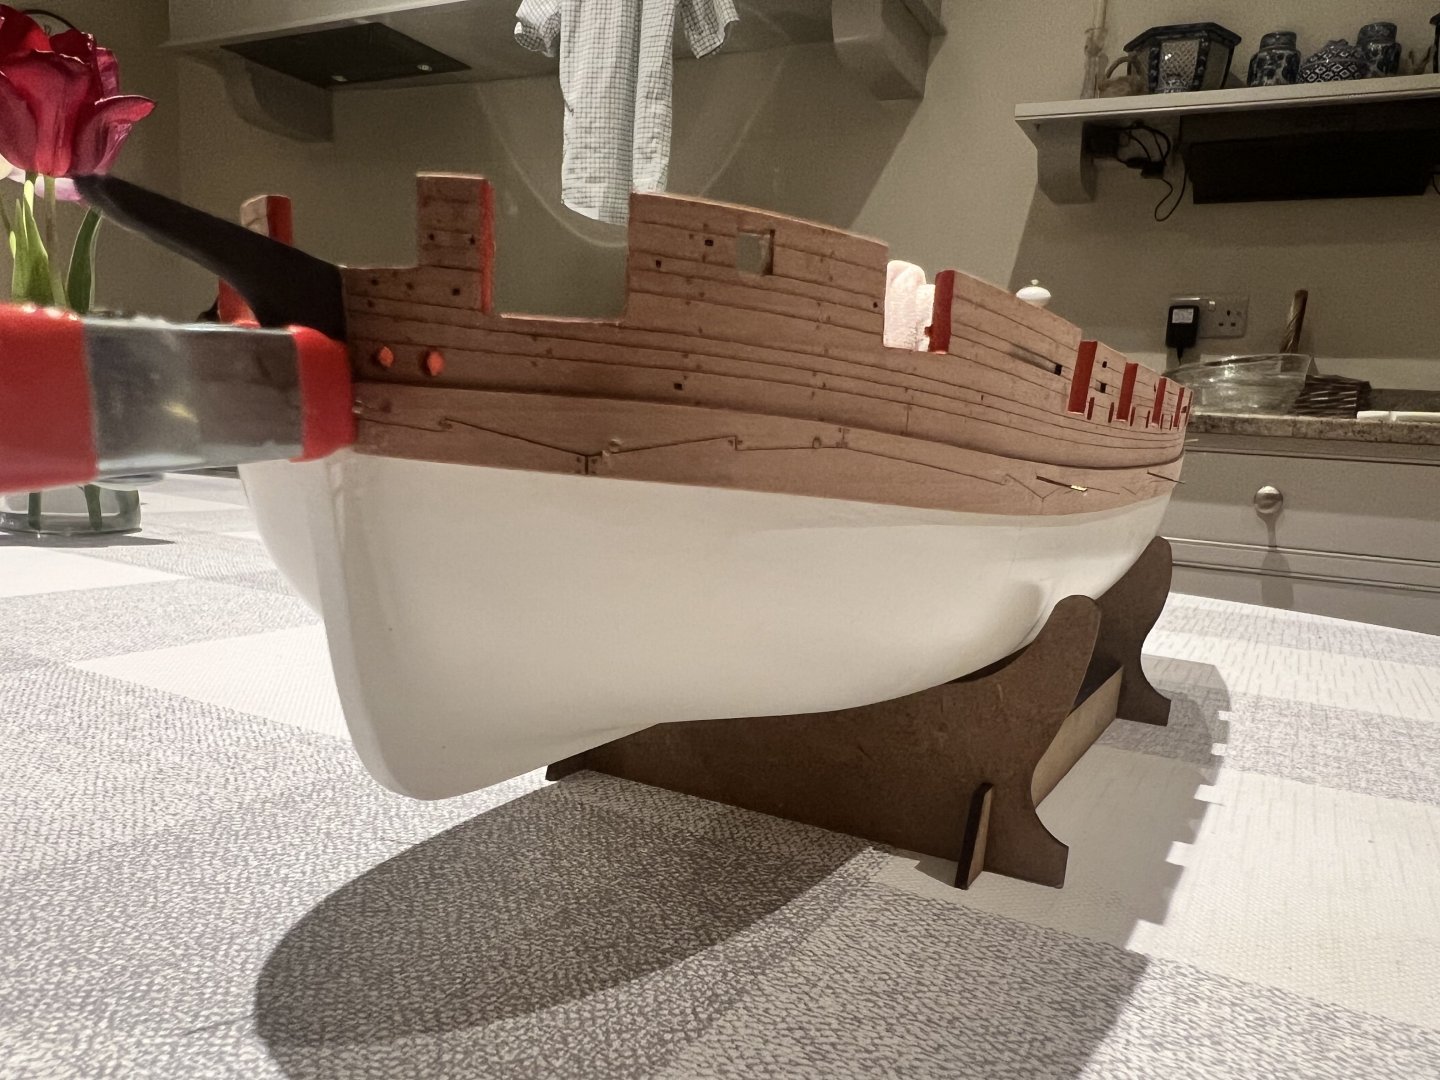
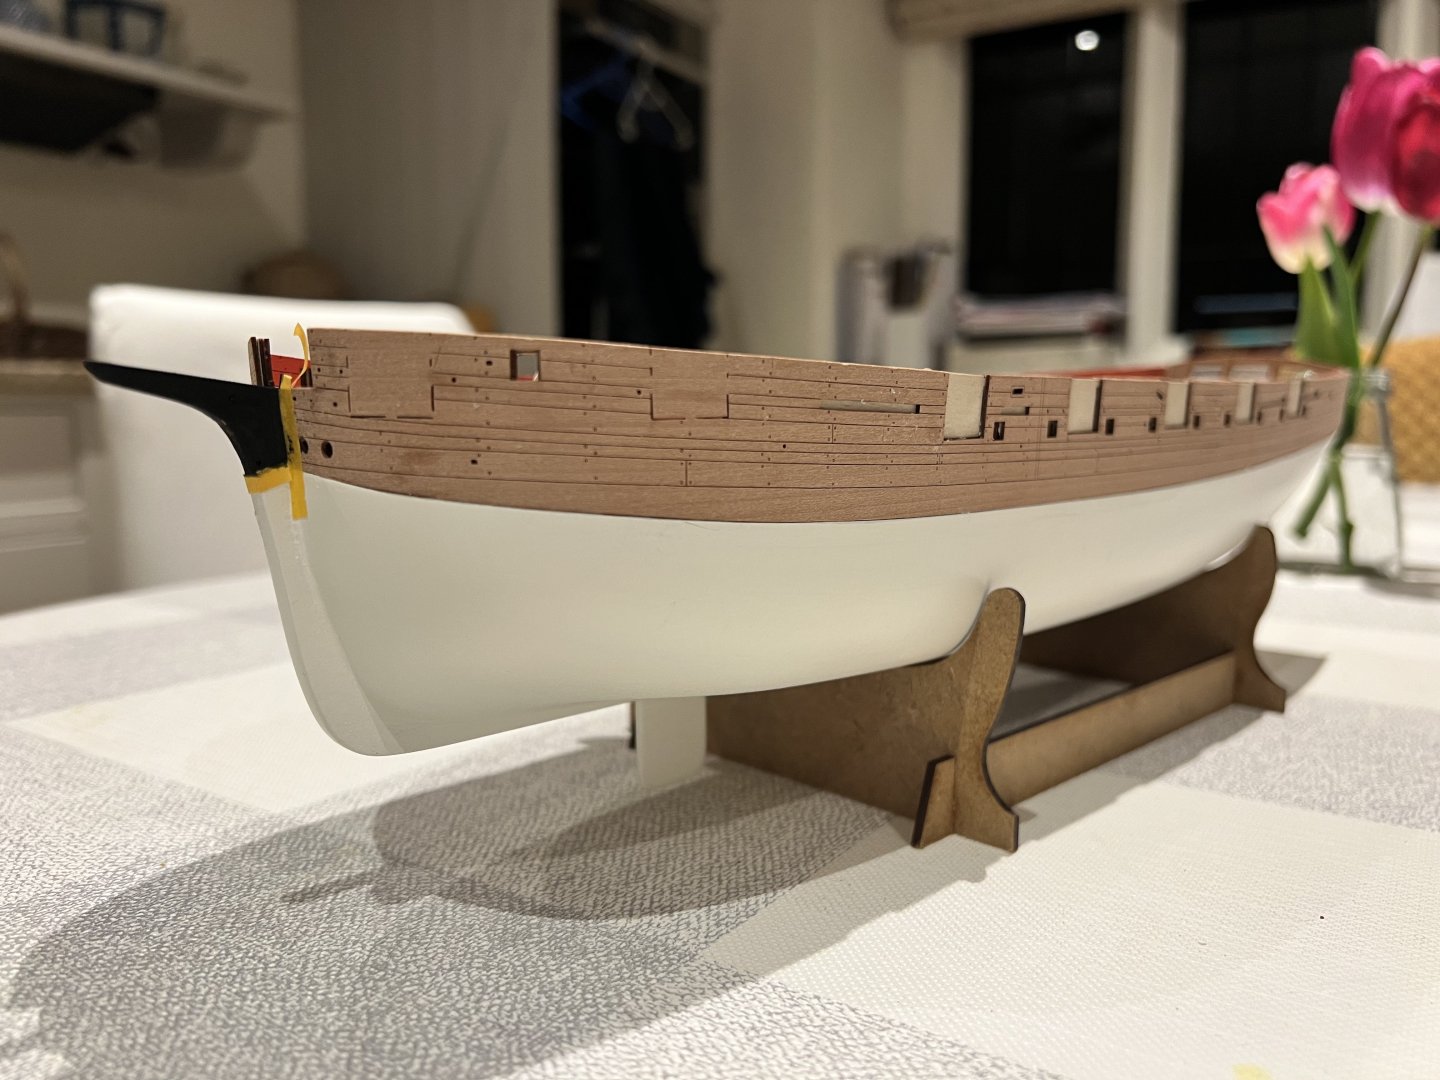
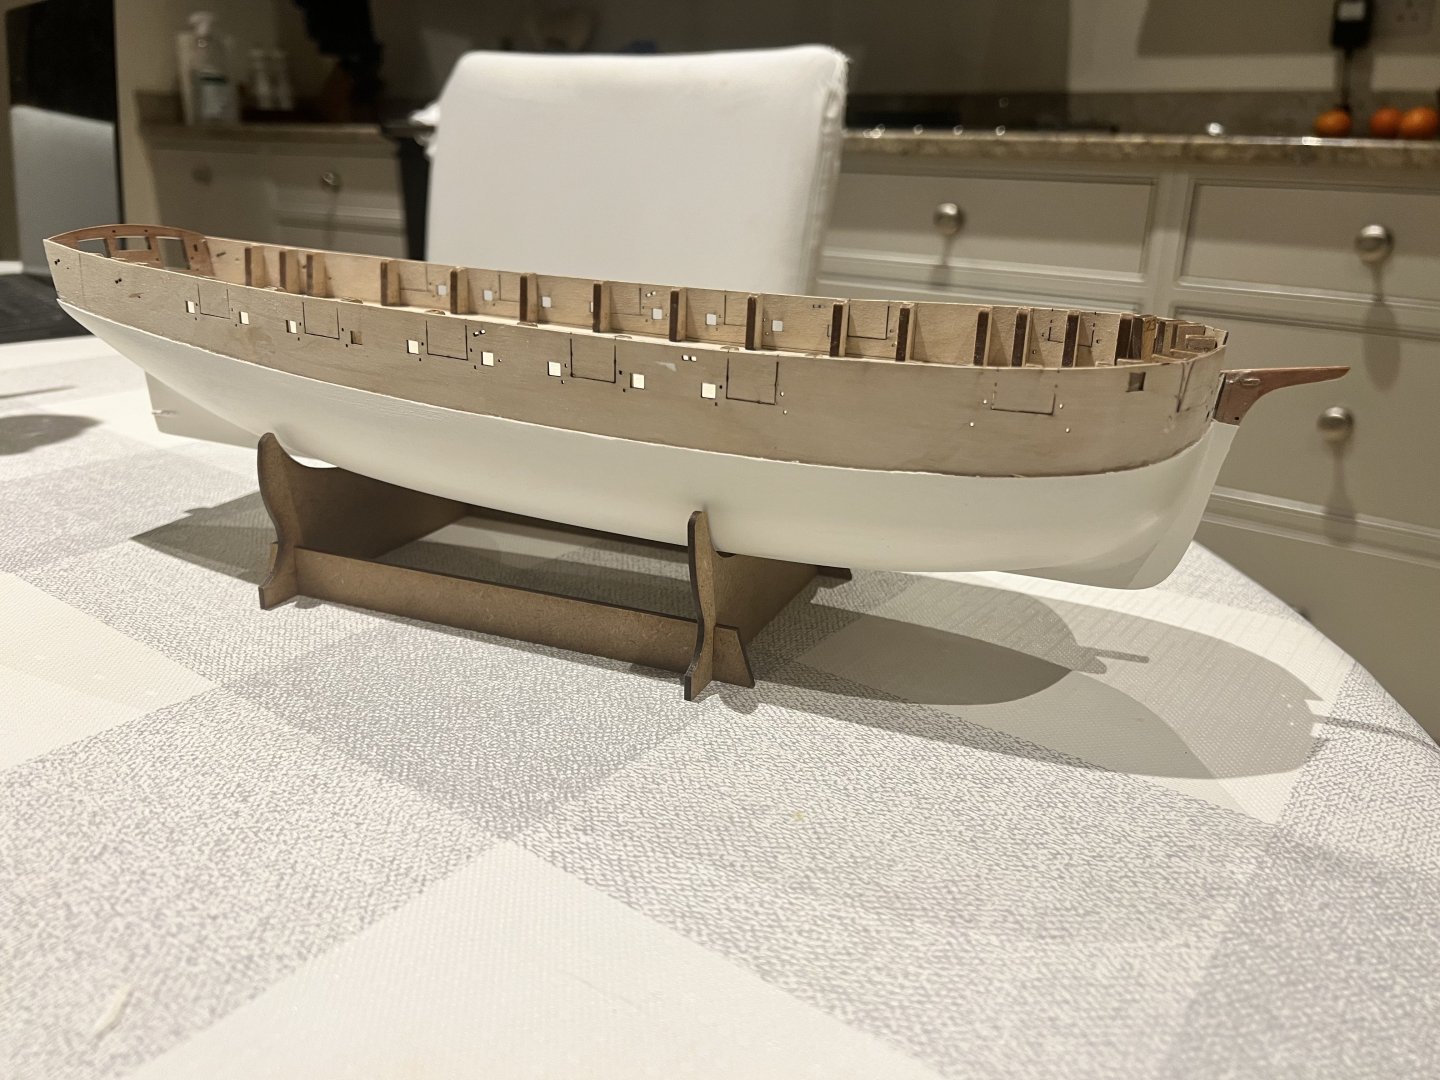
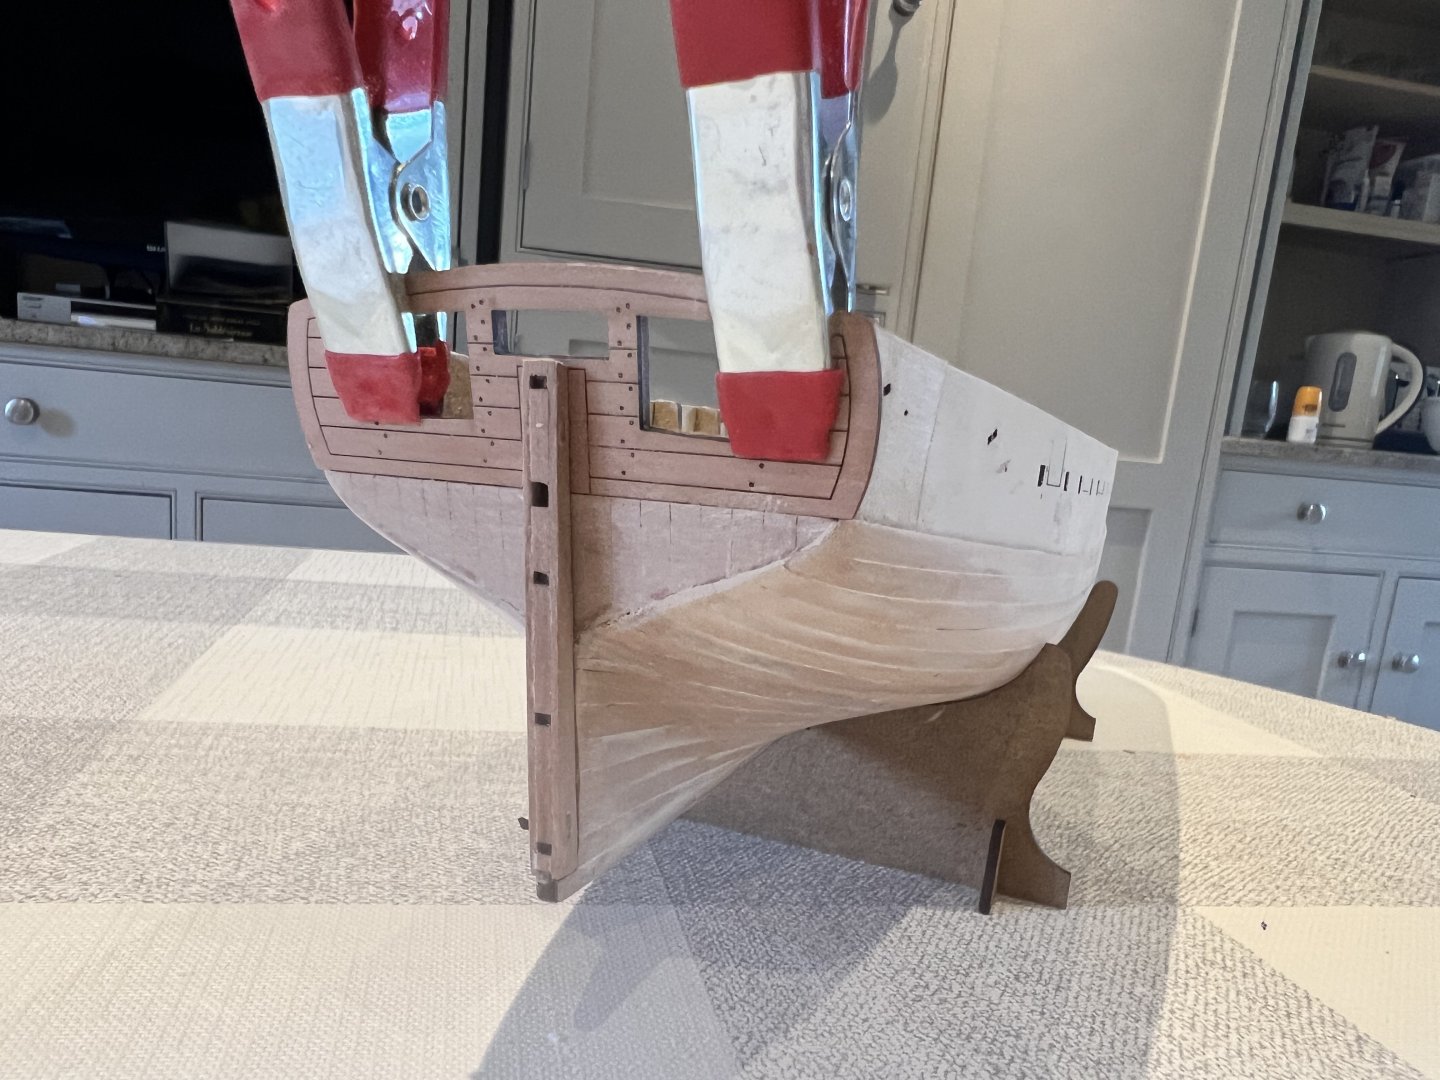
Top of the bulwarks painted black. Then channels and upper rails fitted. Gunwales painted black and glued. Eyebolts added to the inner bulwarks. The gunwale across the stern needed to pre-formed to get the correct curve. I soaked it and let it dry for 24 hours. On the stern the outer stern board was added followed by the rudder post cheeks. Then the aft gunwale and the black trim on the stern. I need to try a different white pain to touch up that matches the spray can white better.


-
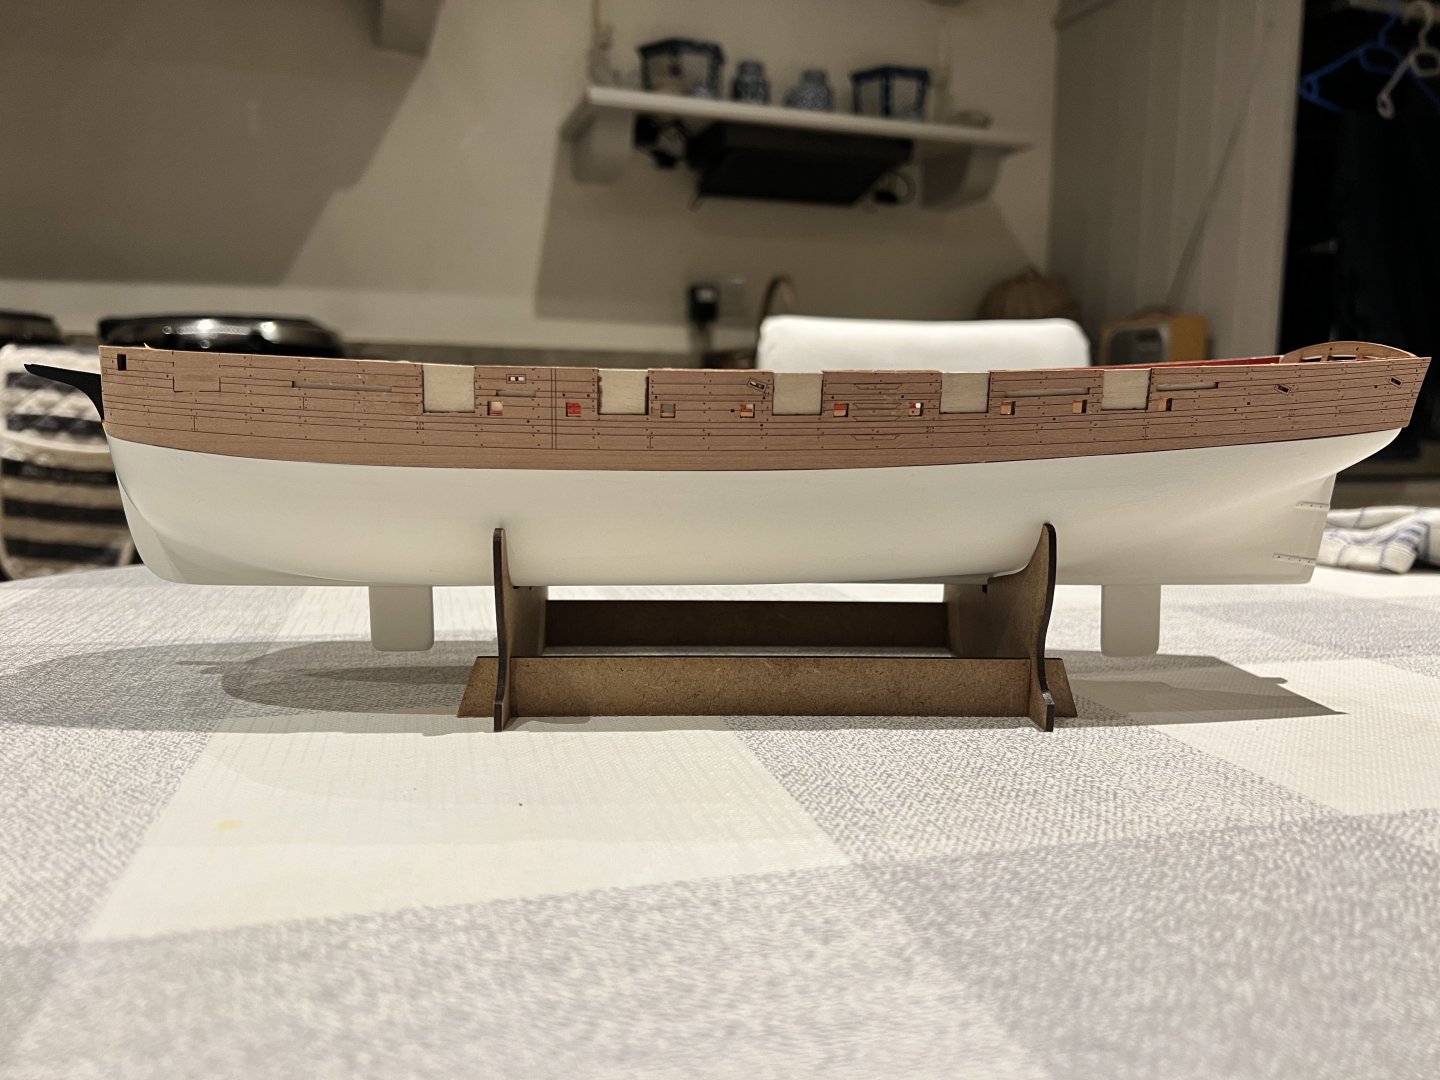
Thanks Chris, it’s almost entirely Chris W’s amazing design. Certainly there’s some basic building skills to master, but so far on this boat it’s been hard to go far wrong due to the clever design, engraved locations for parts and highly detailed instructions and plans. Consequently, it’s actually a much easier hull to build than for example even Chris’s Alert where a little more is left to the builder to think through. There’s been very little ambiguity whilst building Adder so far which is a testament to how well thought out Chris’s models are now. The only exception to the ease of building has been Adder’s planking - mine wasn’t great but being fully painted doesn’t matter. Again, Chris’s design choice of the painted area being traditionally planked and the exposed bulwarks being engraved parts means you can be terrible at planking and still end up with a stunning model. I’ve not rigged a square rigged boat before, so have lots to learn and am intrigued to see to whether rigging will be equally clear and step-by-step.
-
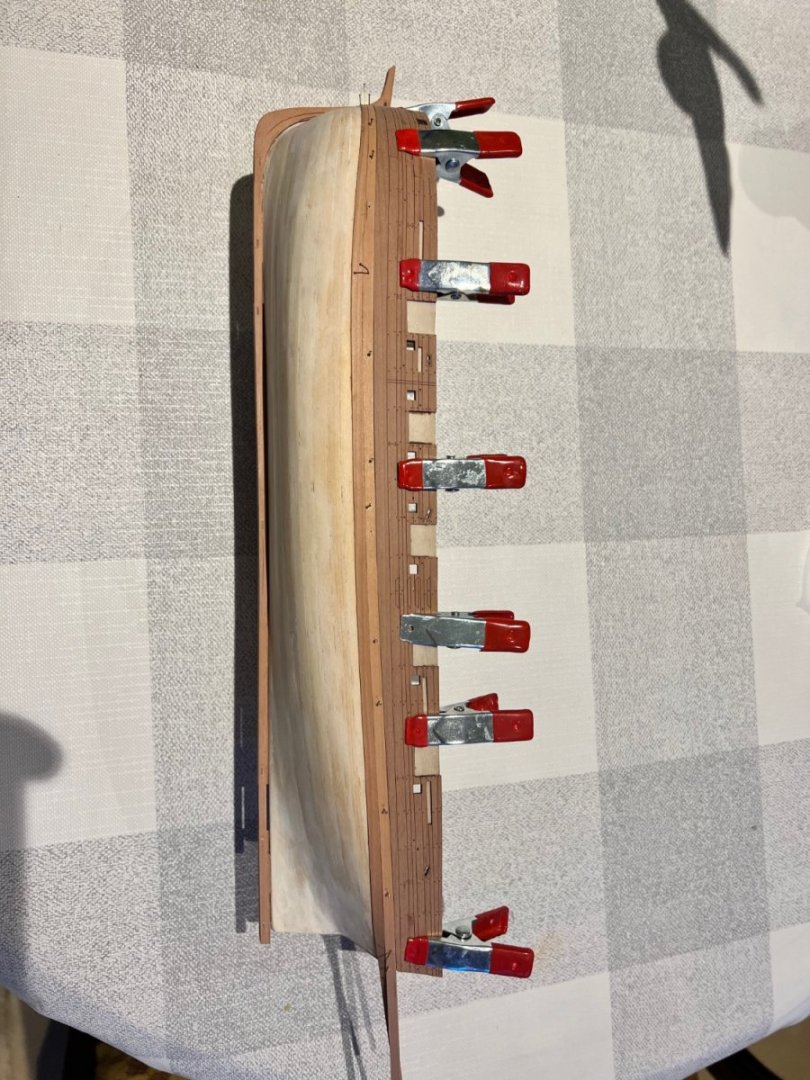
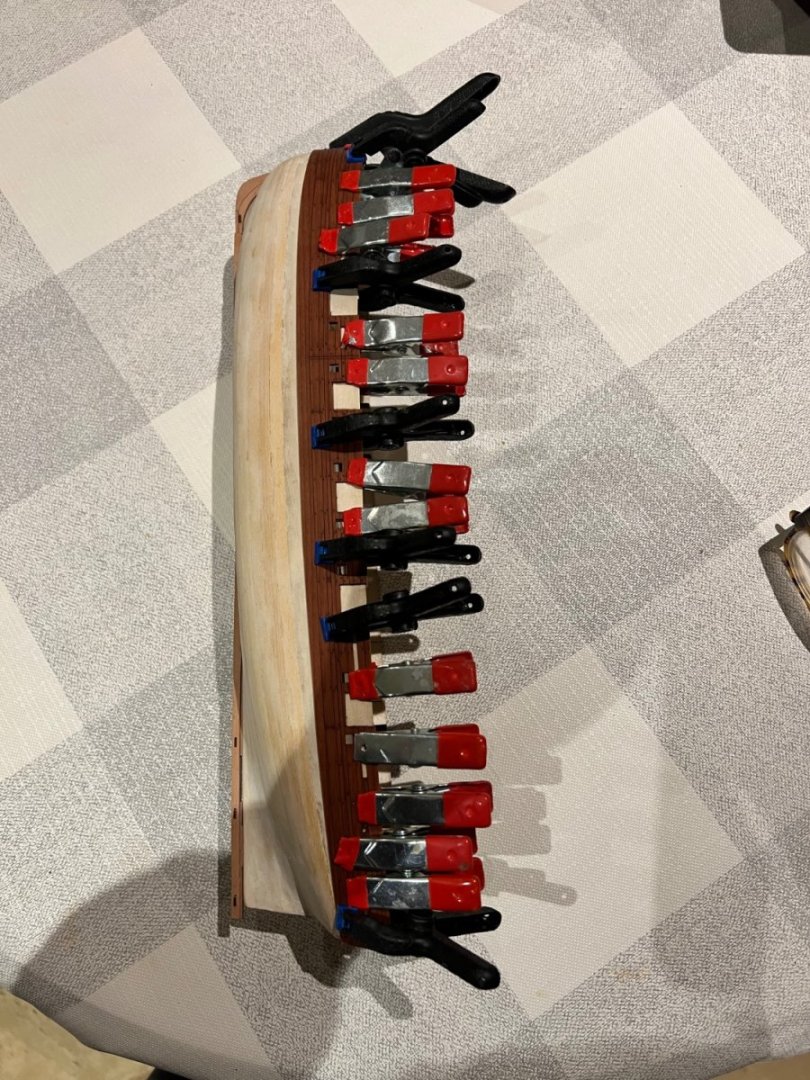
Main wales painted black and glued in place. I used PVA with a clamp at the bow and pins. The instructions say to cut off and file away the excess on the pins, but I didn’t fancy my chances of getting a pin flush with the woodwork. Instead I pulled the pins out and used a touch of filler on the holes before repainting which worked too. I have also added the lower of the two upper rails. Still some tidying to do at the stern. I will likely need a tiny bit of CA to get the bottom of the wales to take the shape of the hull. All went smoothly except I slipped with the pin pushes and created a small divot in the white paint below which I’ve filled and will need to touch up the paint there.

-
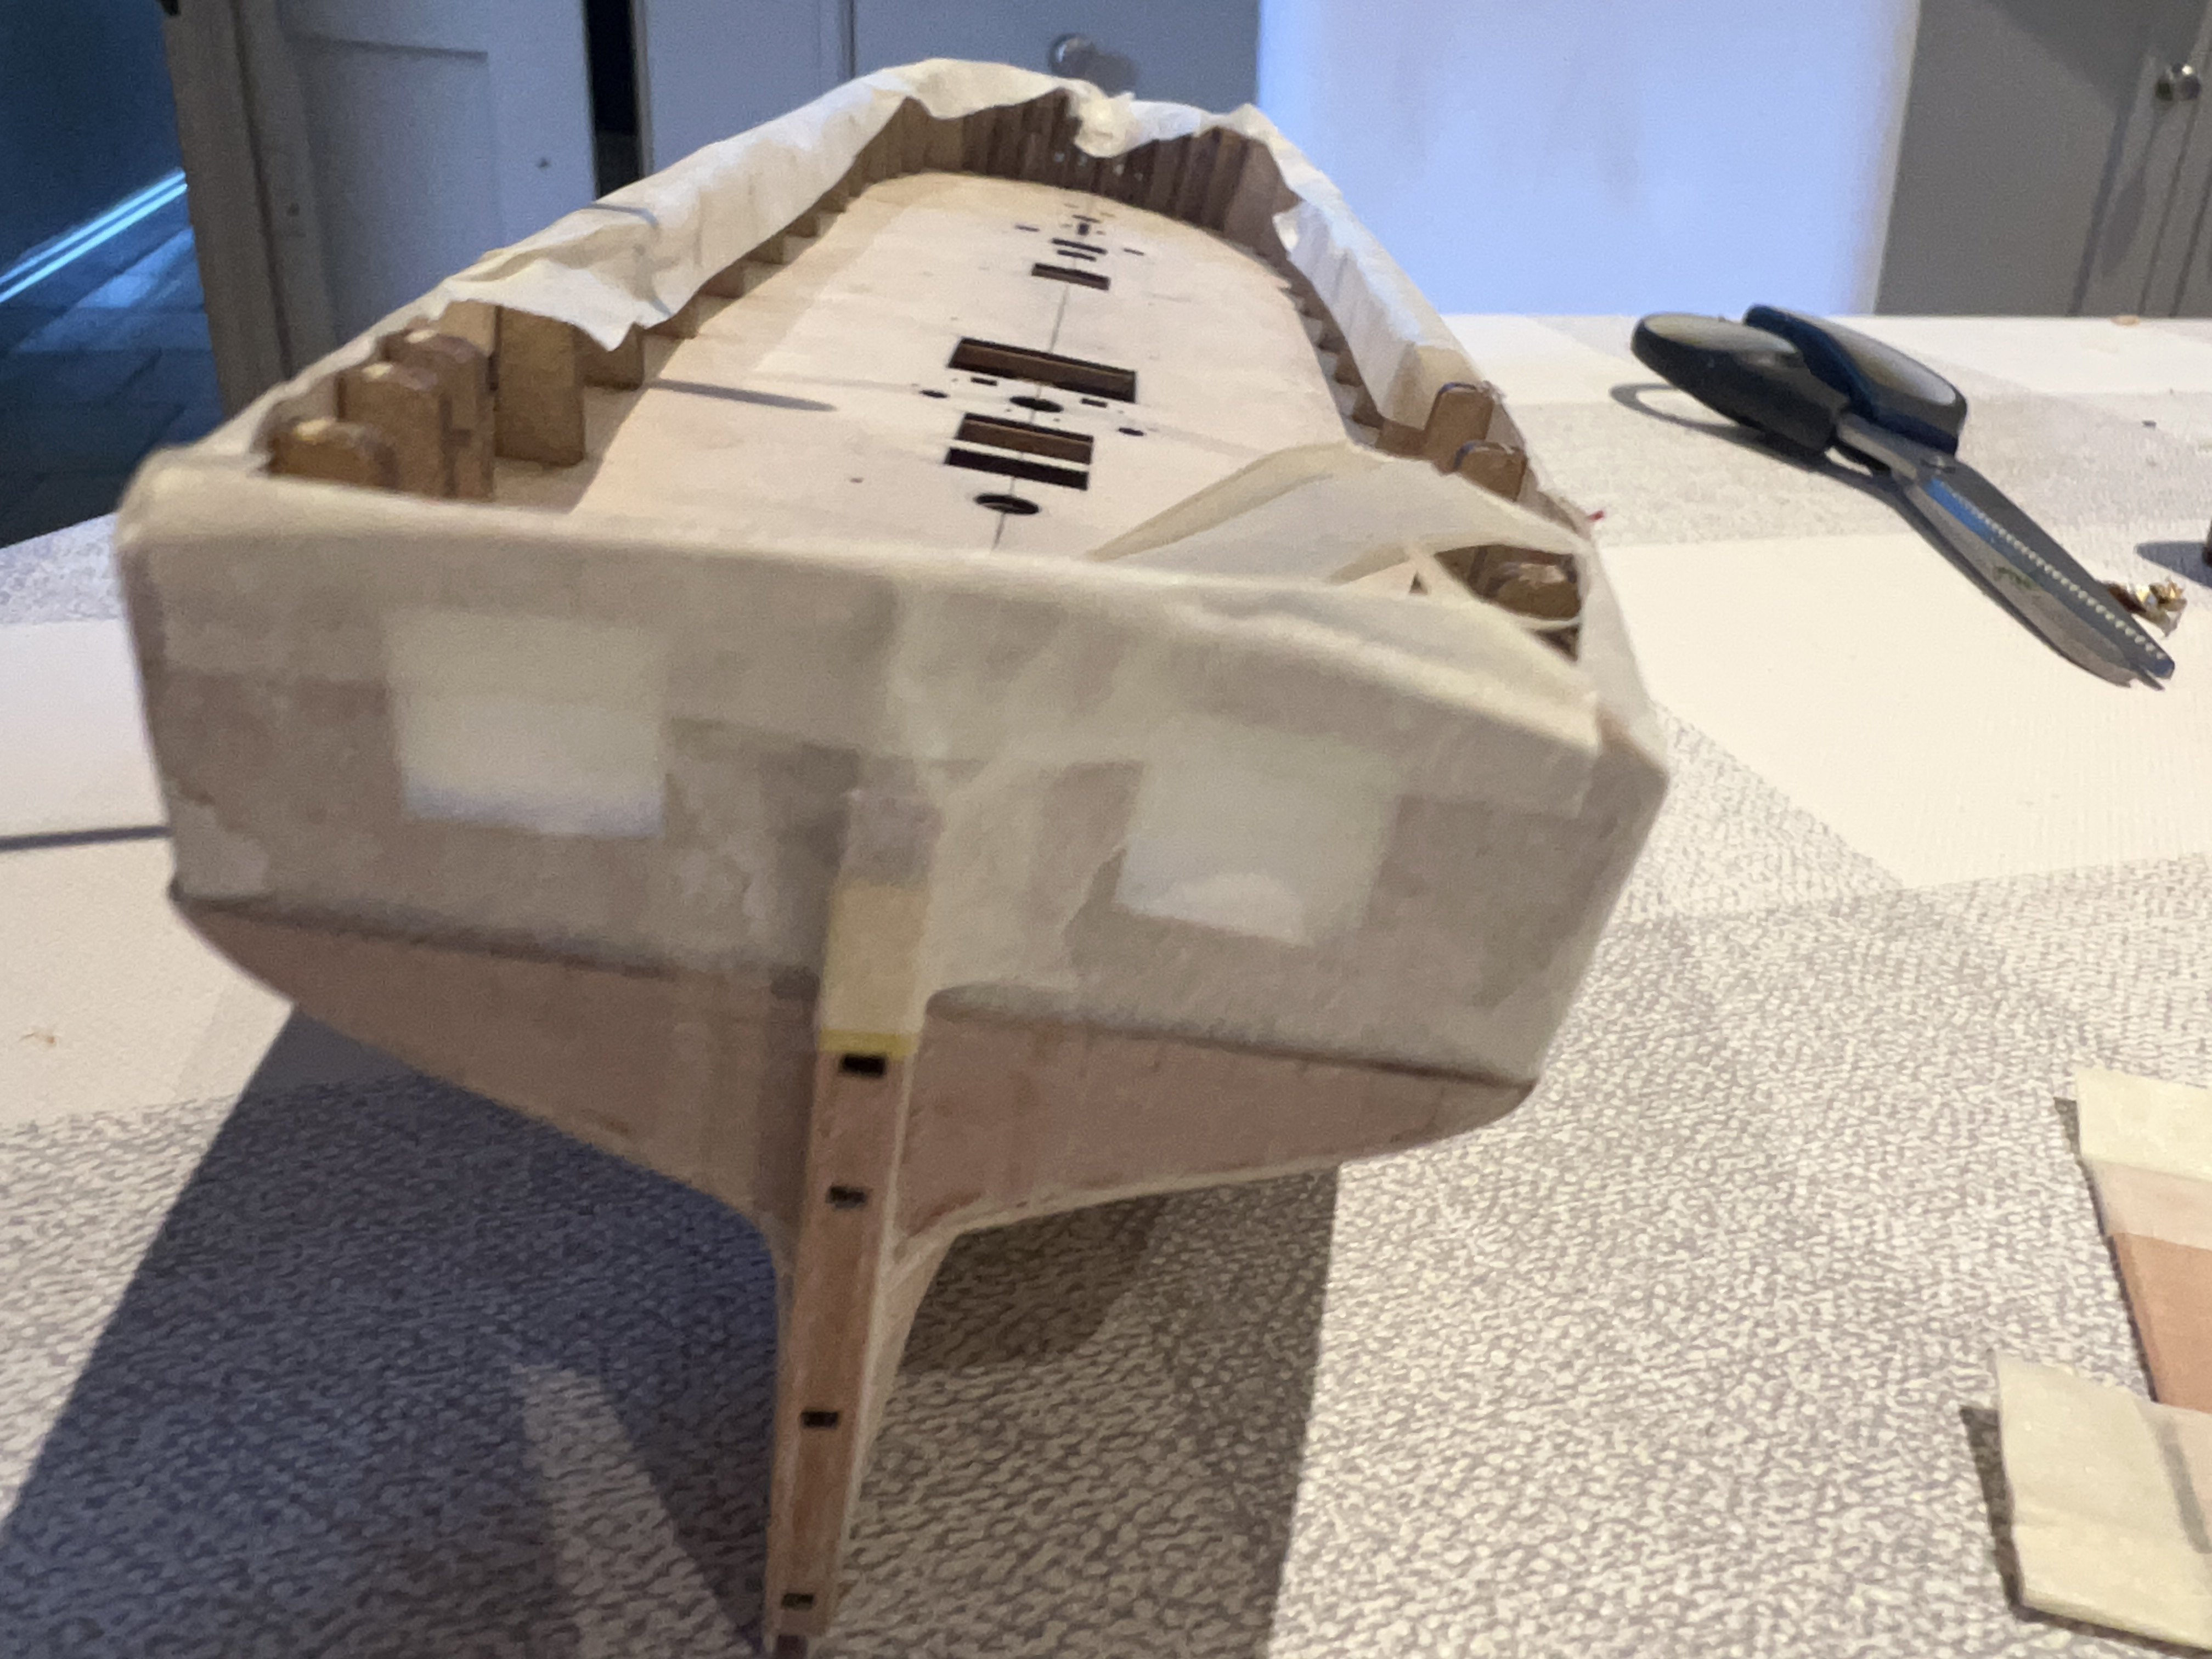
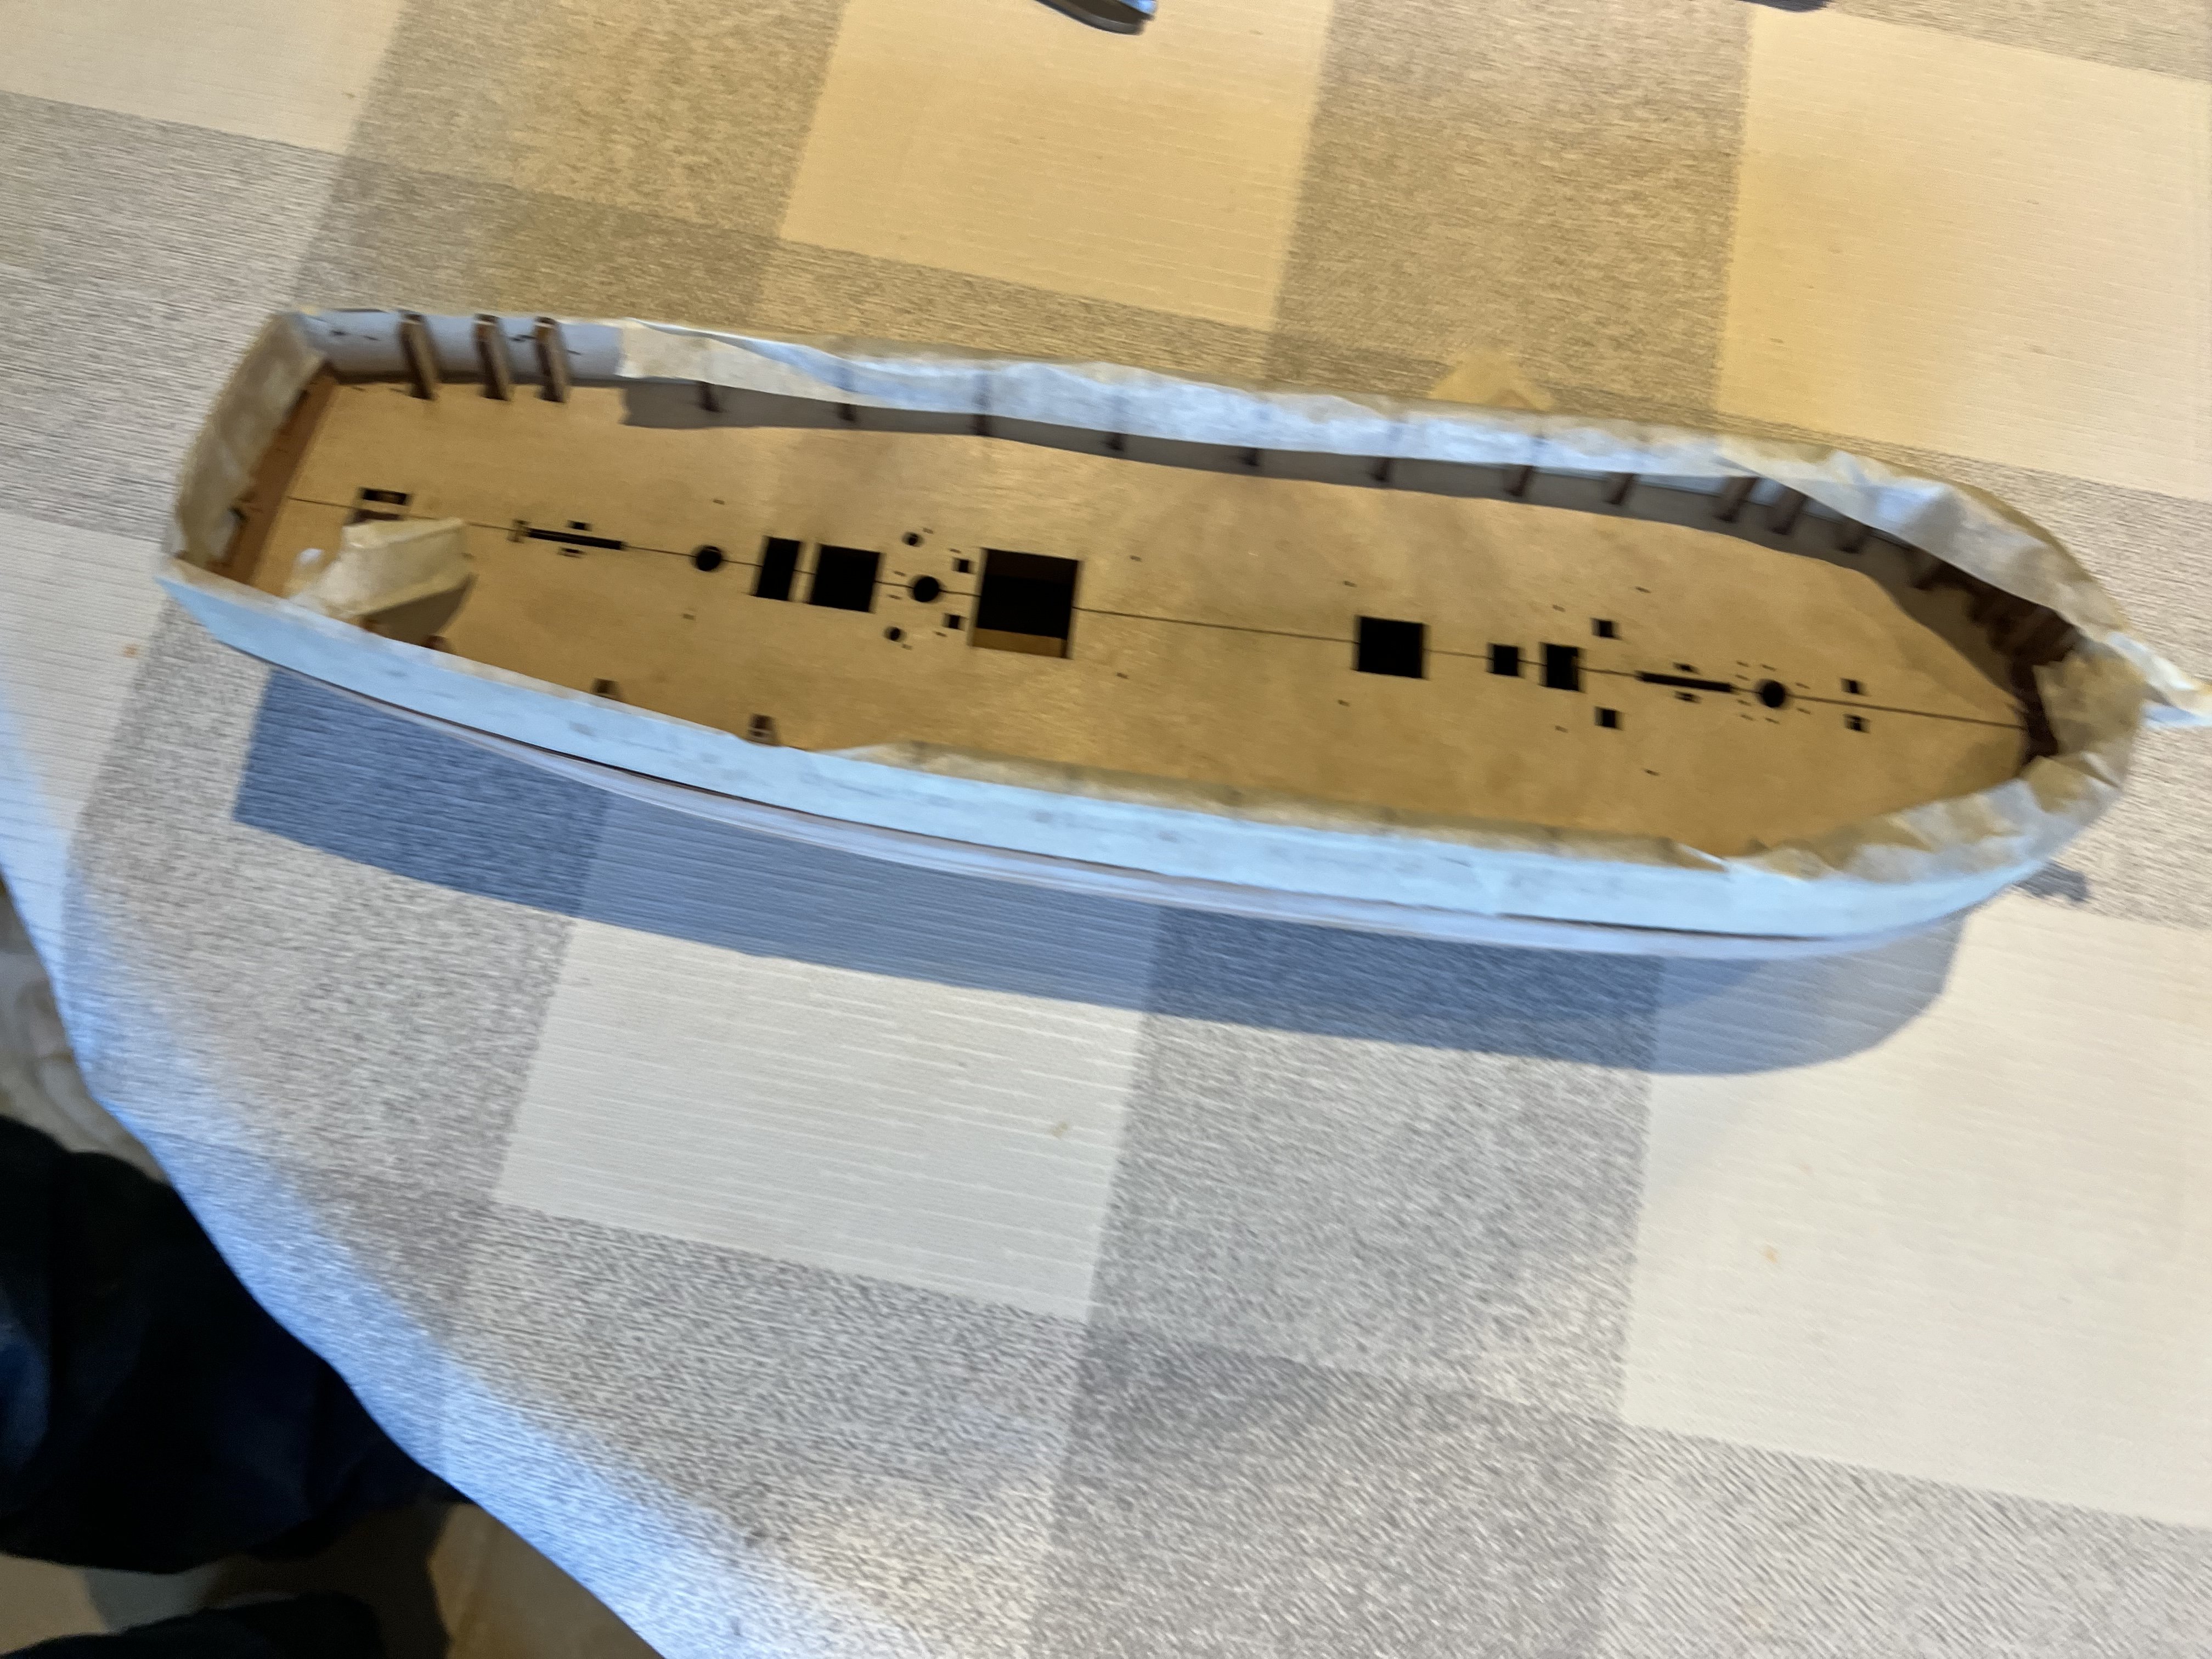
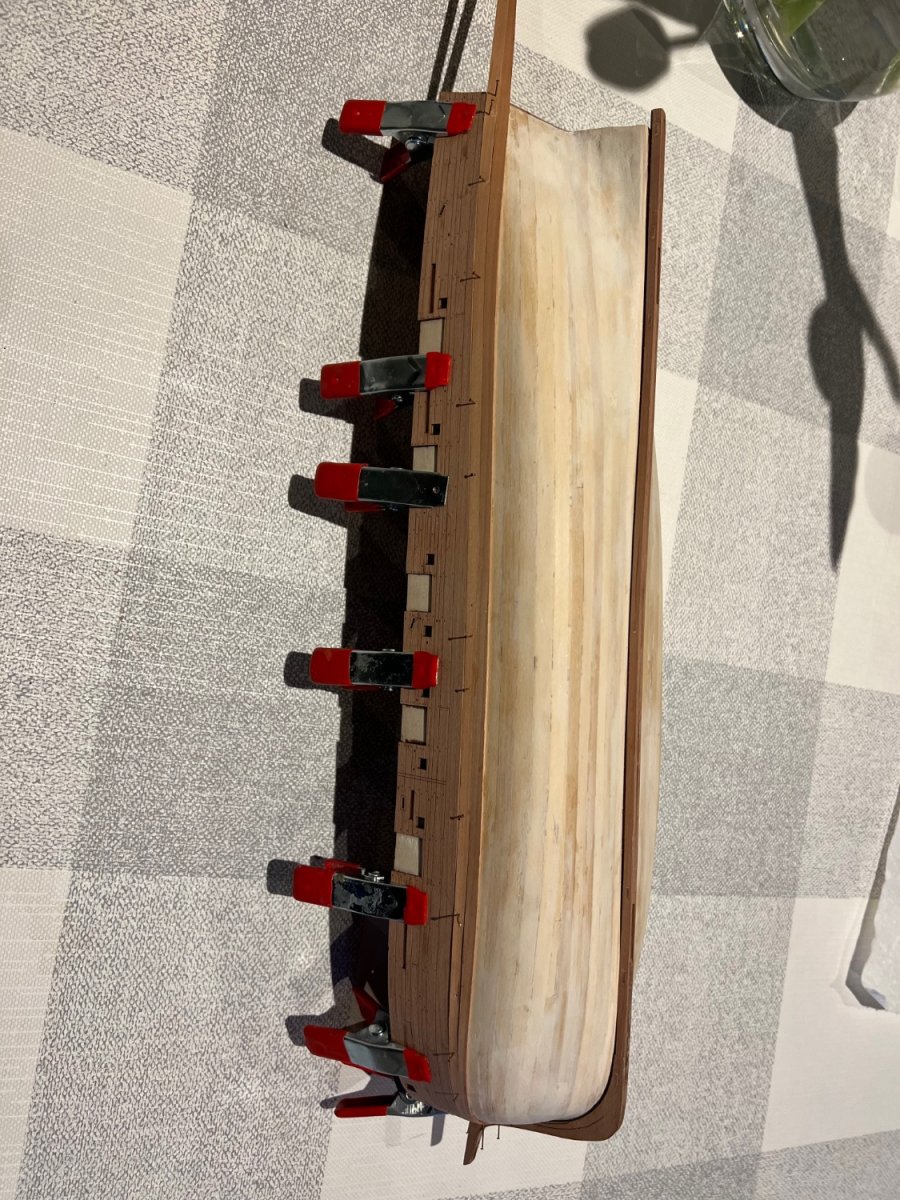
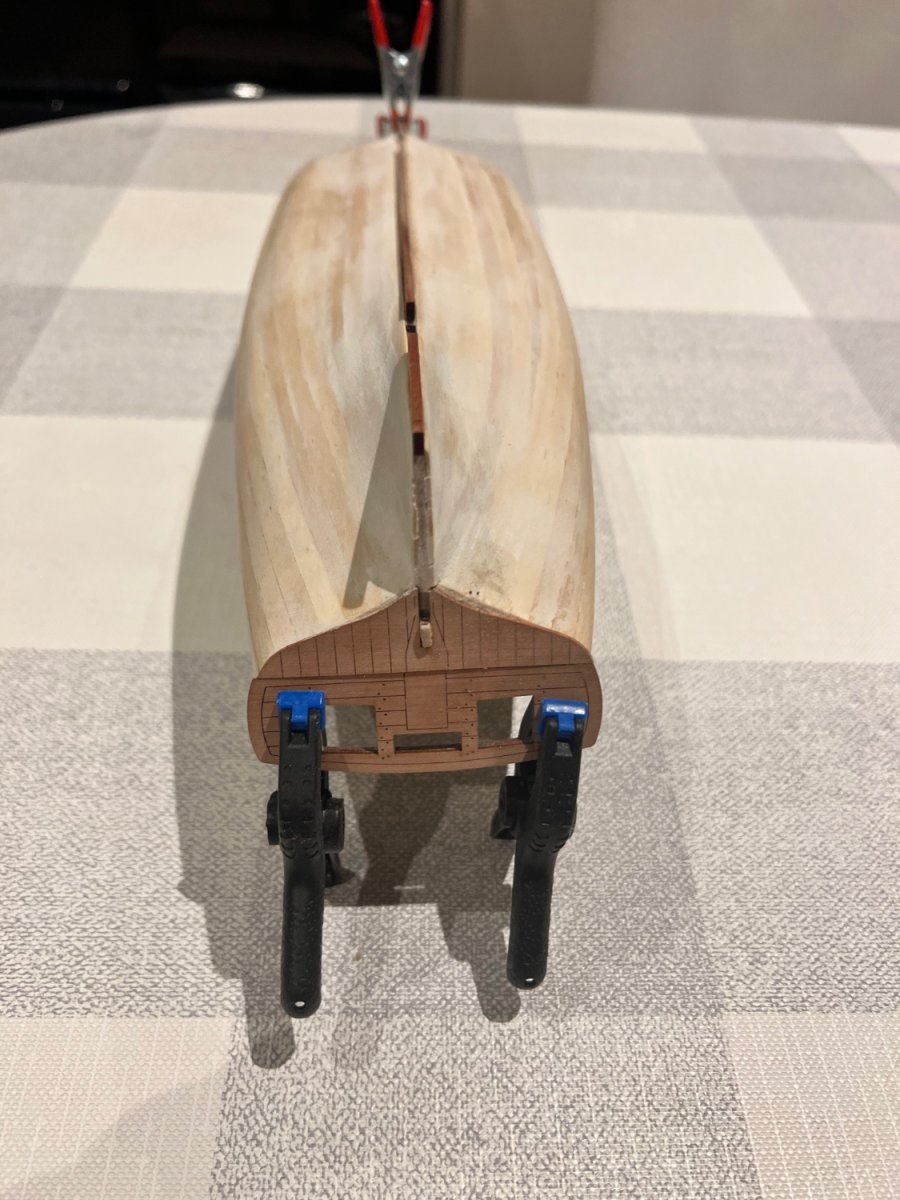
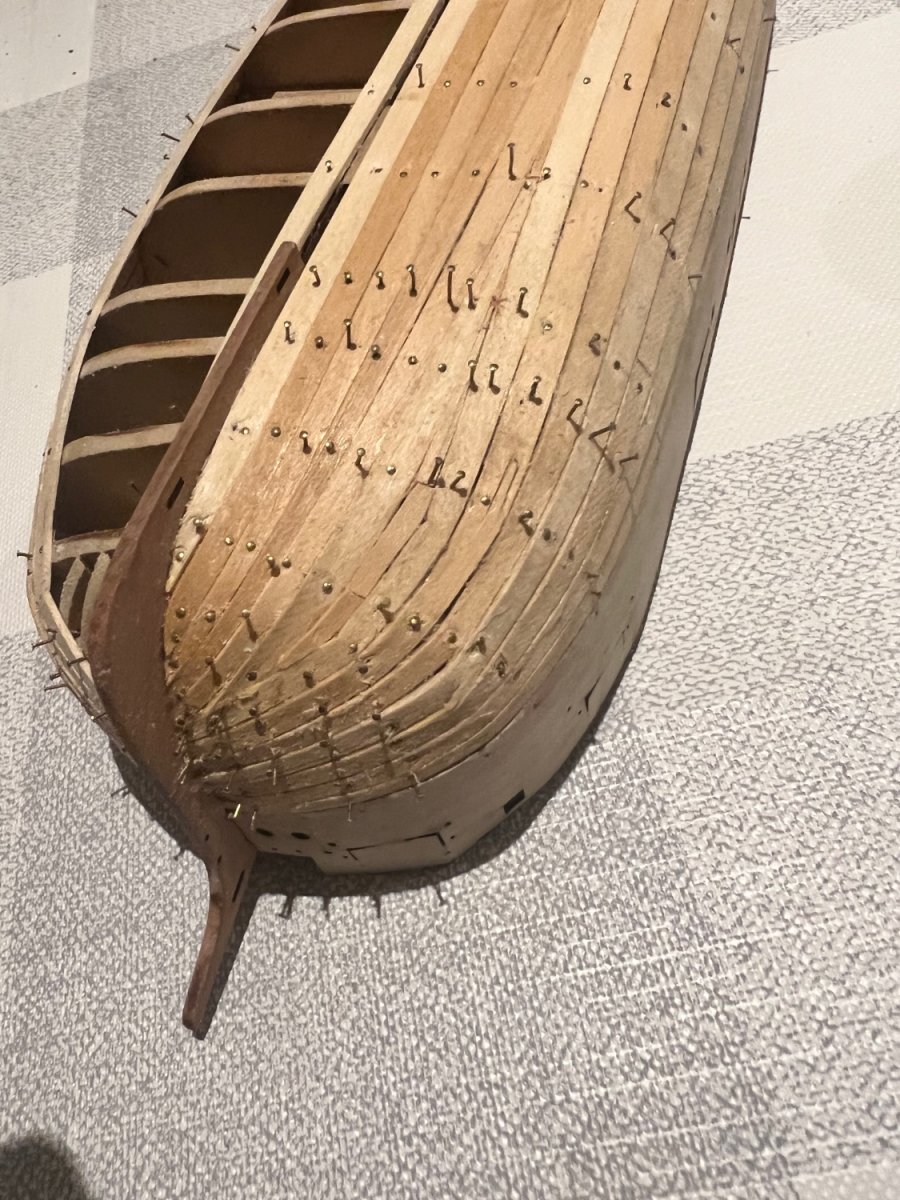
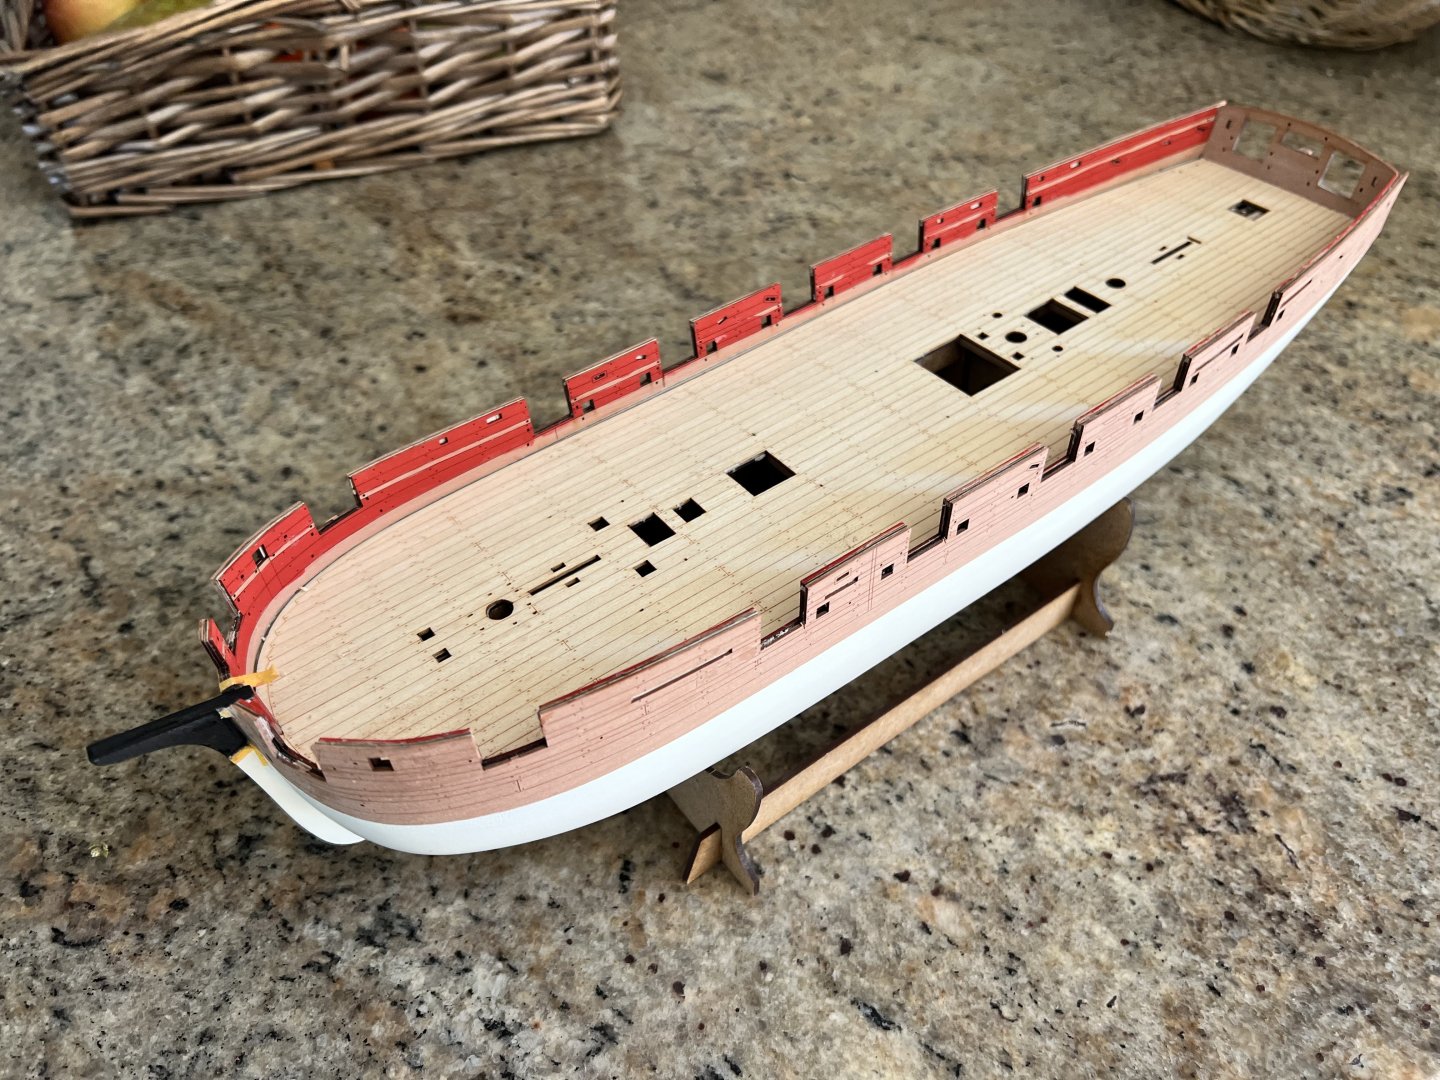
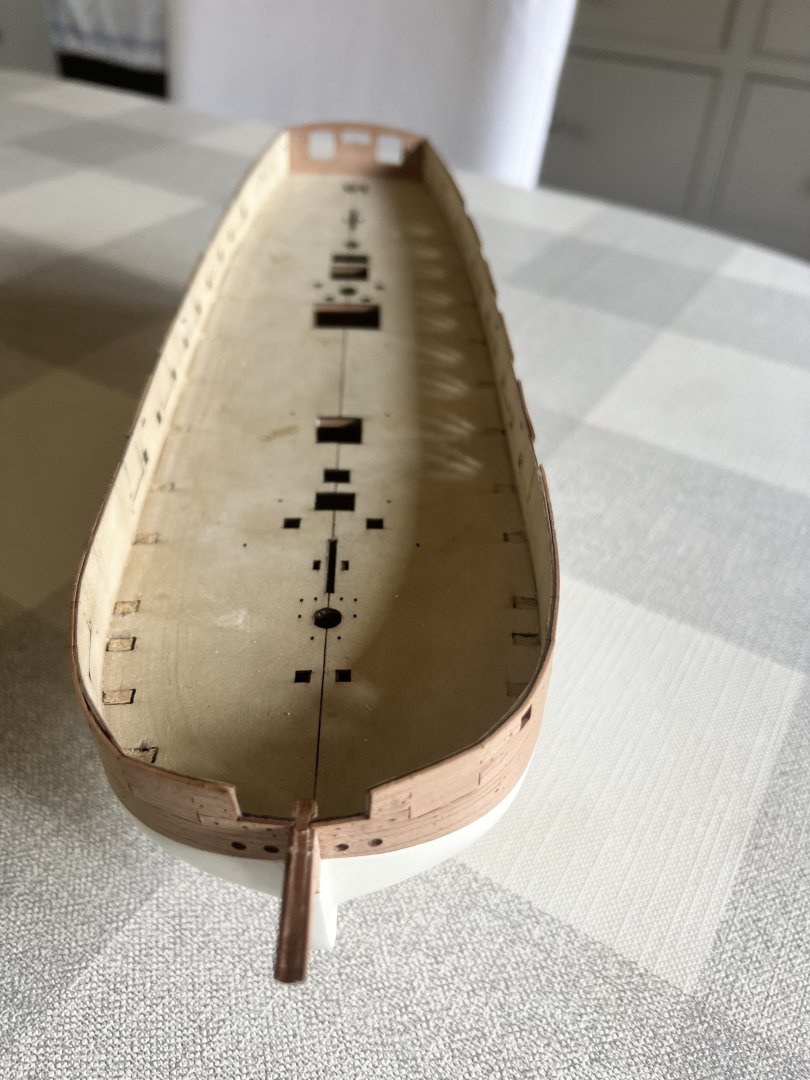
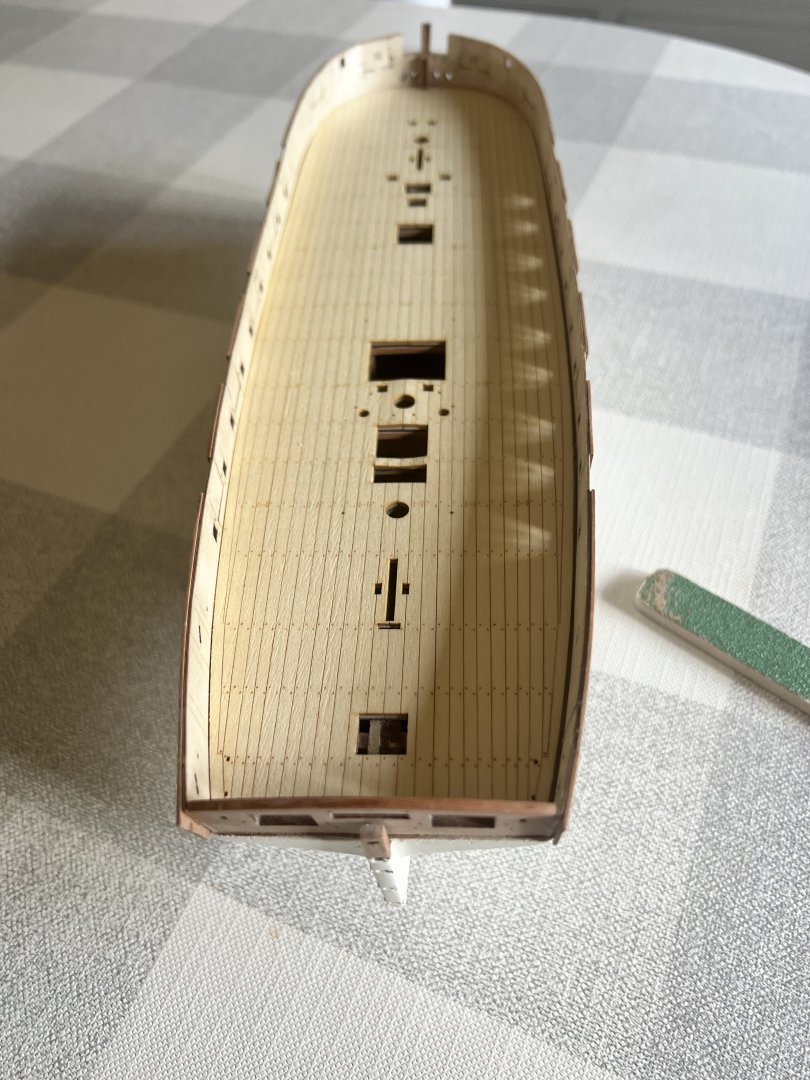
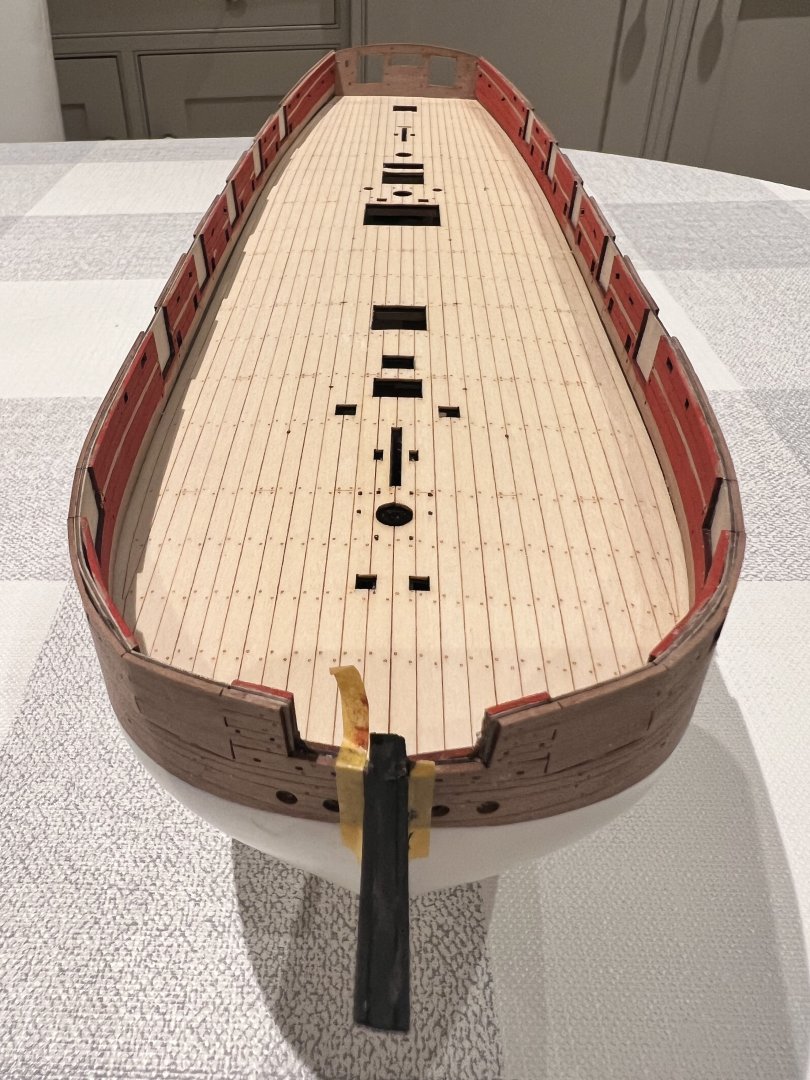
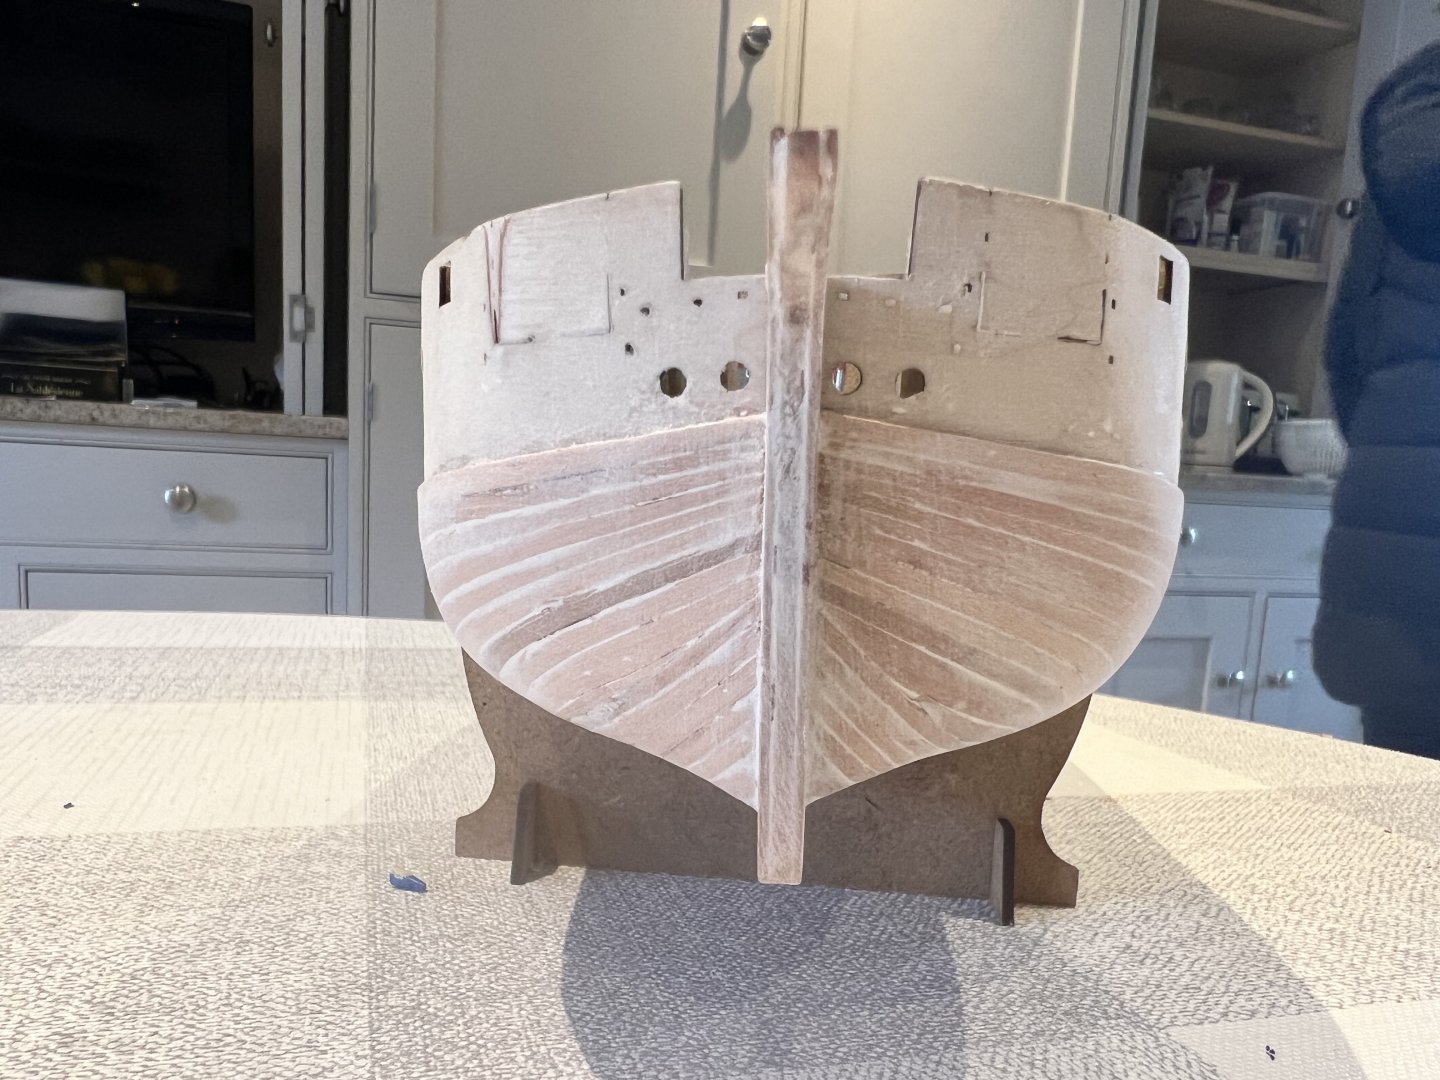
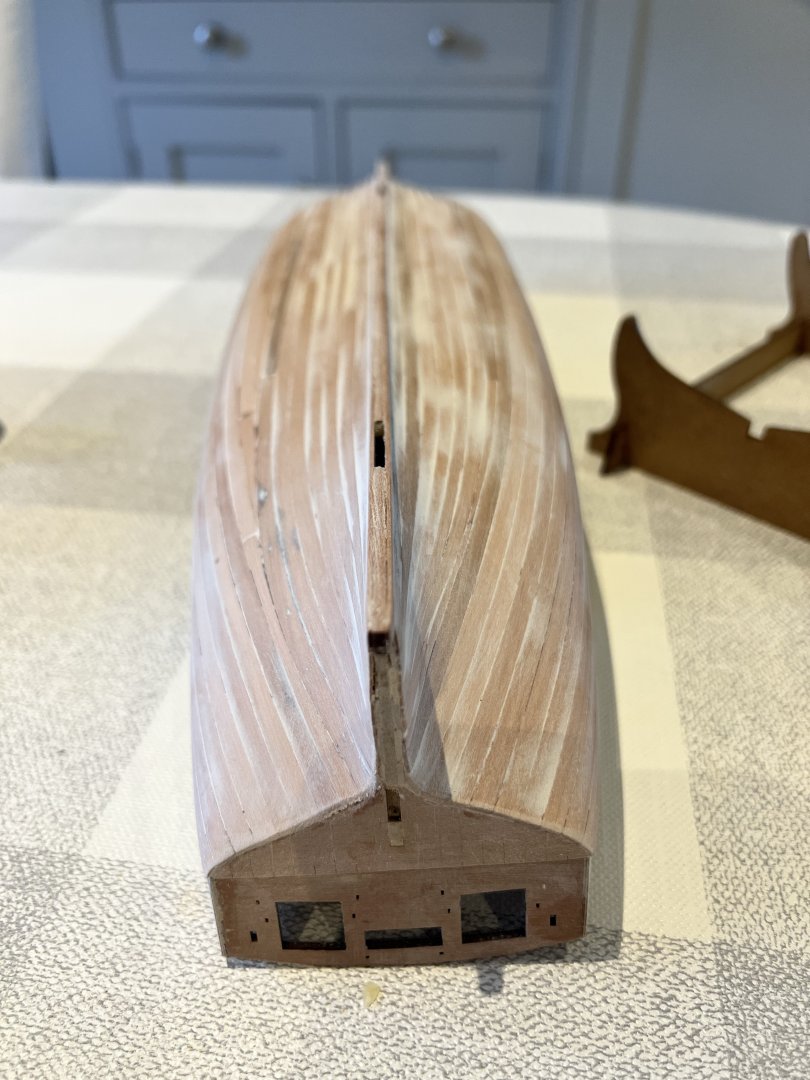
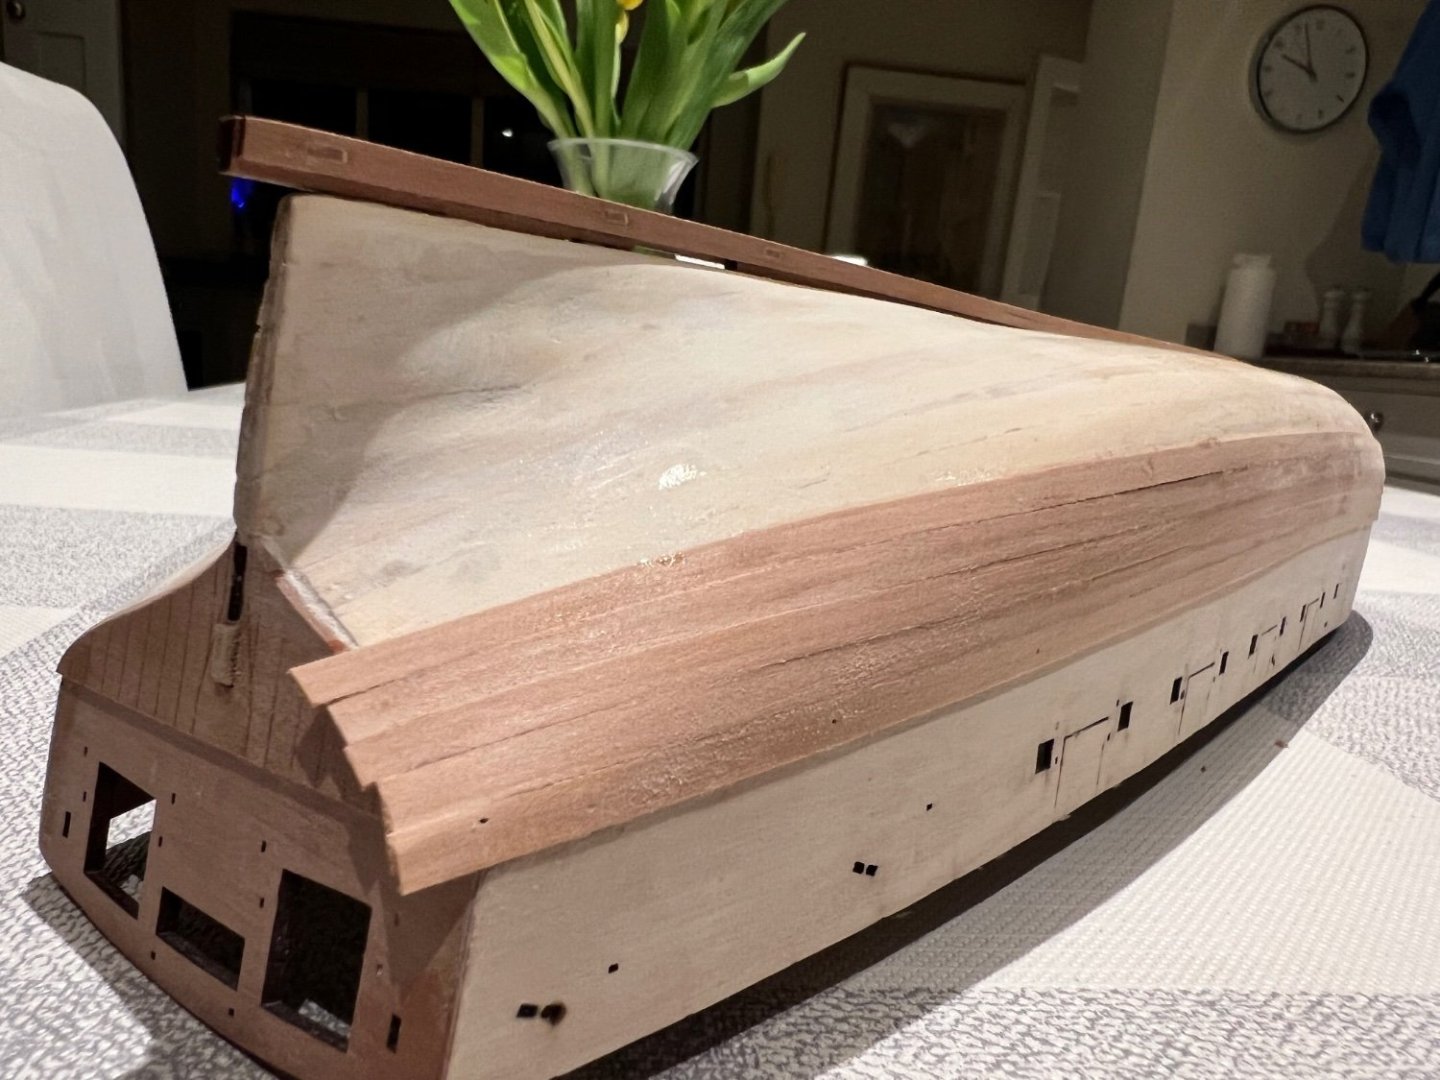
Cutting the gunports in the plywood with a razor saw was very straightforward. I may have very slightly notched the bottom edge in a couple of places, but it’s barely noticeable and will be covered by the rails later. Here she is with her teeth. I fully masked the desk to protect against my clumsiness with a paint brush or file. The gunports and oarport edges, whilst aligned needed some filing and a touch of filler to be smooth. The inner sternboard was added and is an excellent fit. As elsewhere, I used pins in some of the holes to aid with alignment. The inner rails were added and then the inner bulwarks painted. Even with masking tape along the outside of the hull I found I got some seepage of the paint onto the outer wood of the hull by some of the gunports and oarports. I scraped this off with a scalpel whilst still wet. Z Lastly for today the main wales were soaked in hot water and then clamped and pinned to the hull to dry for 24 hours, no glue at this stage.


-
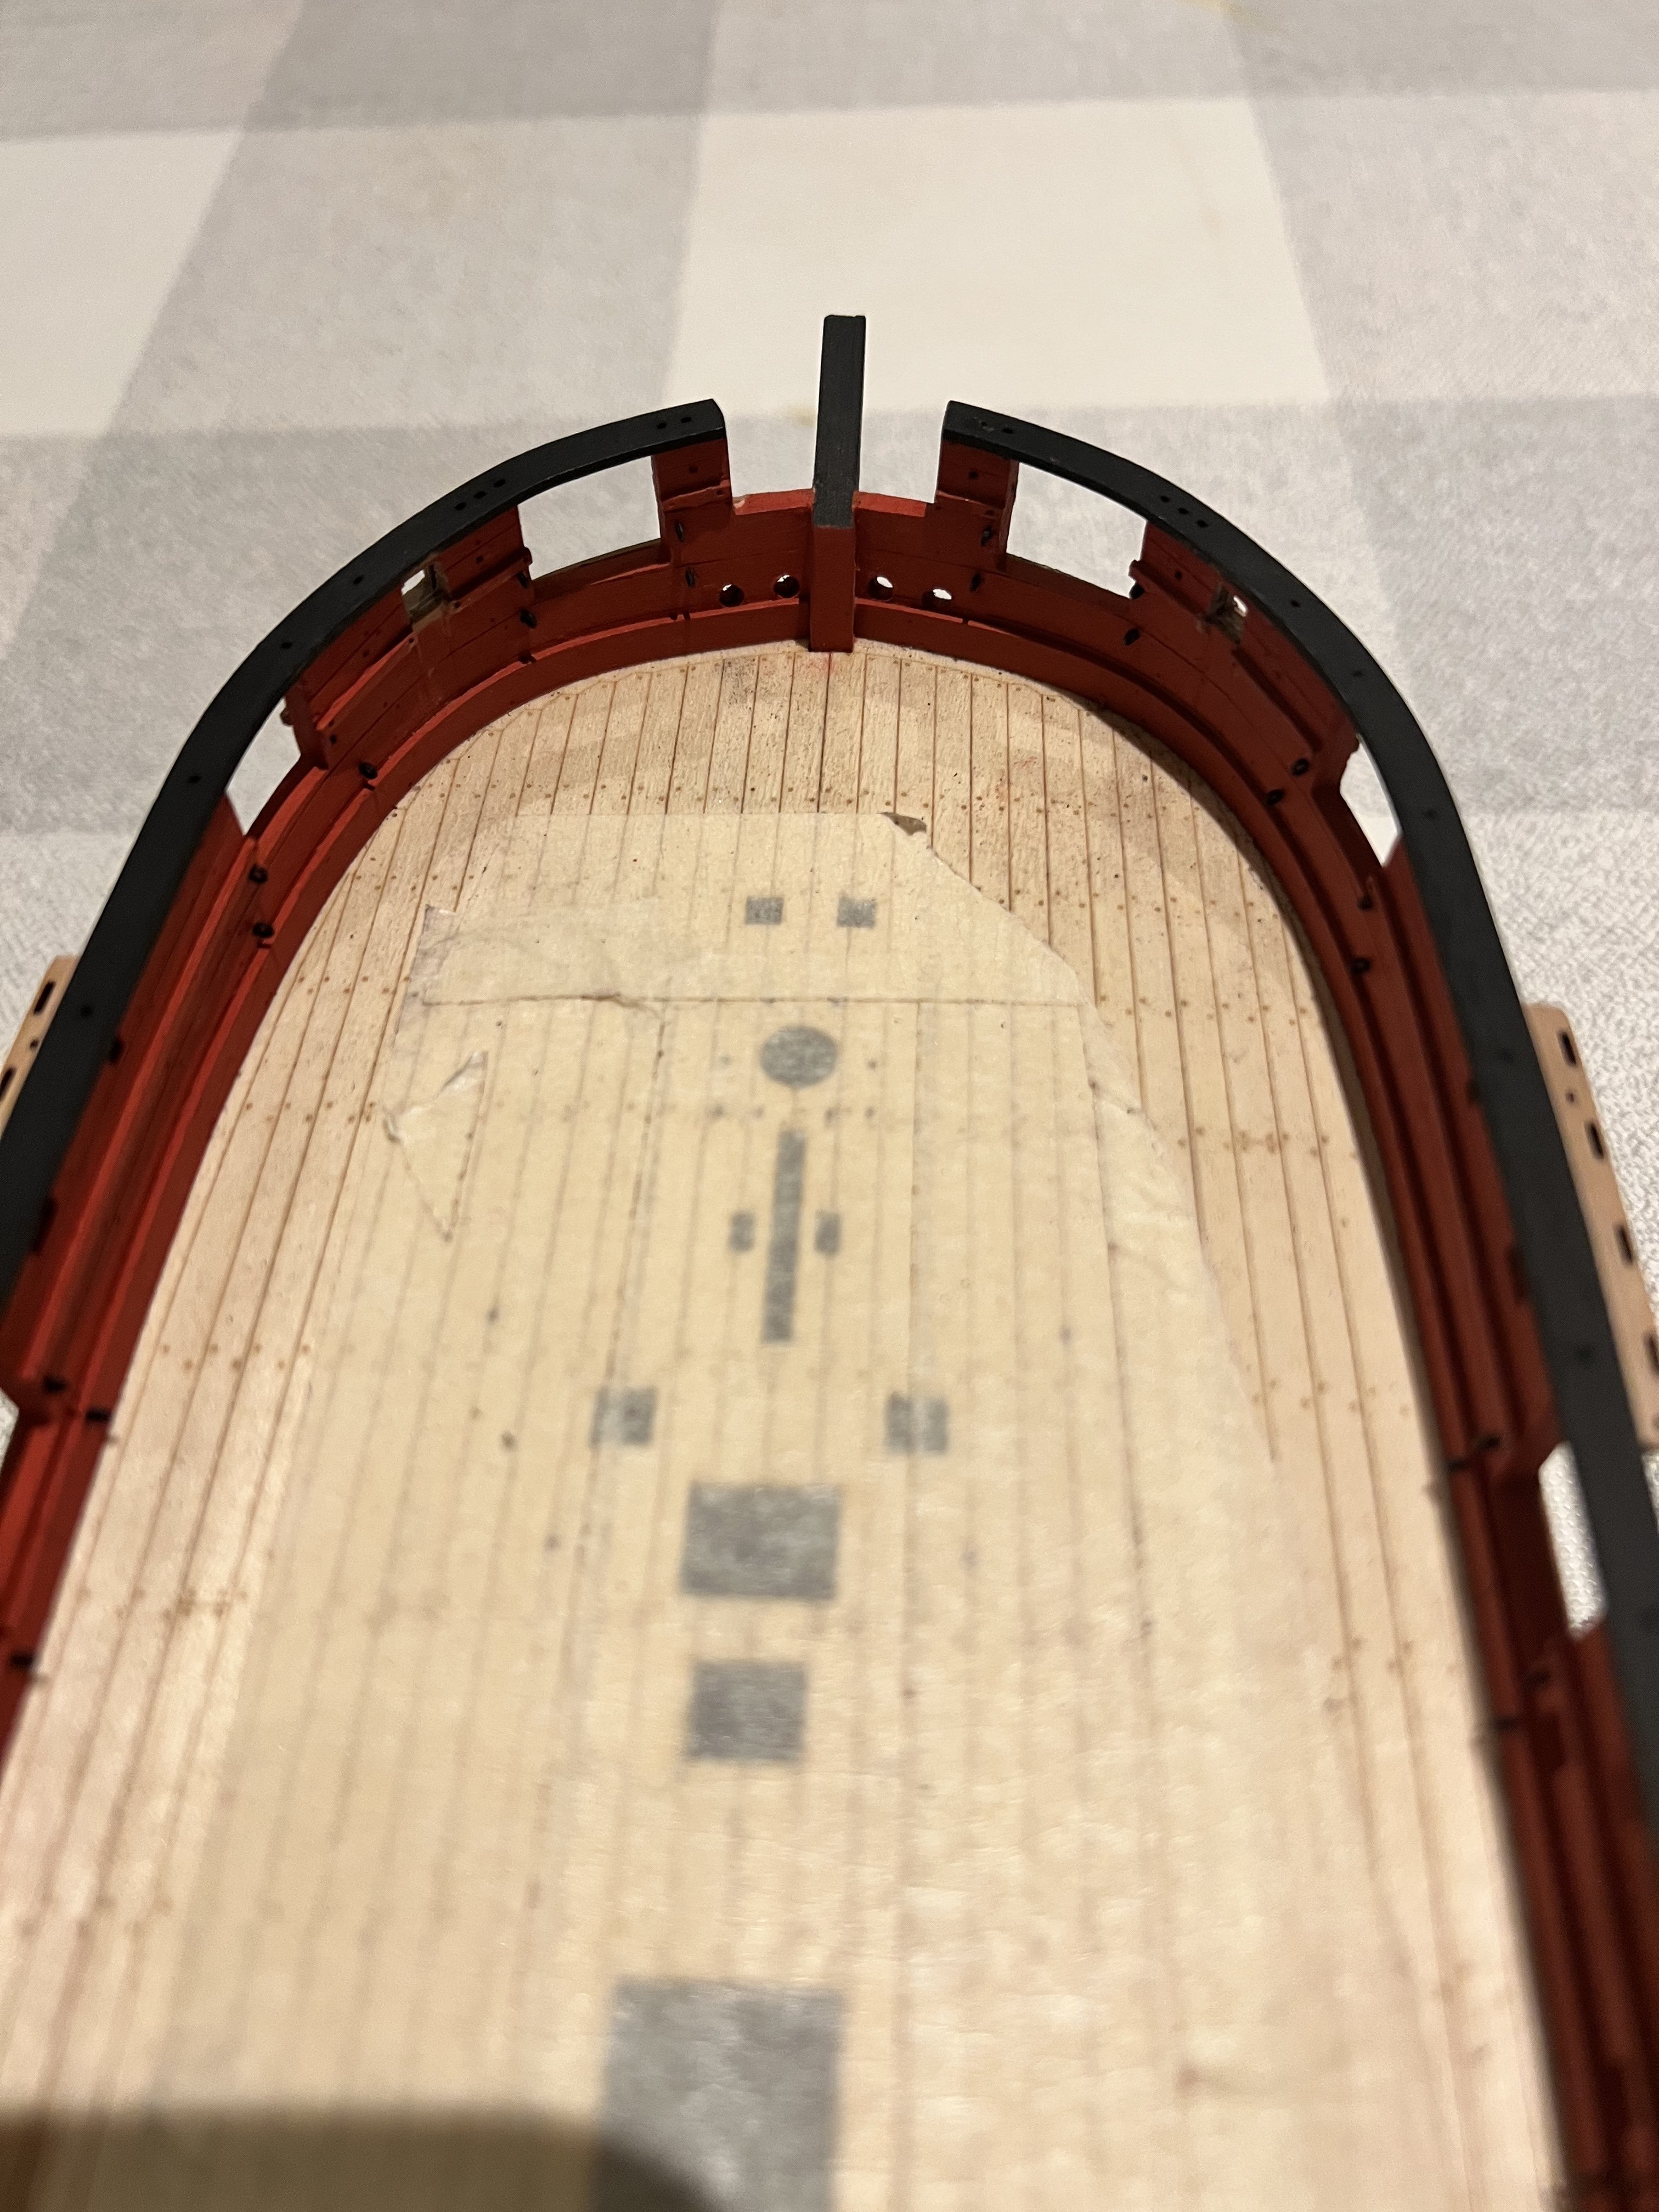
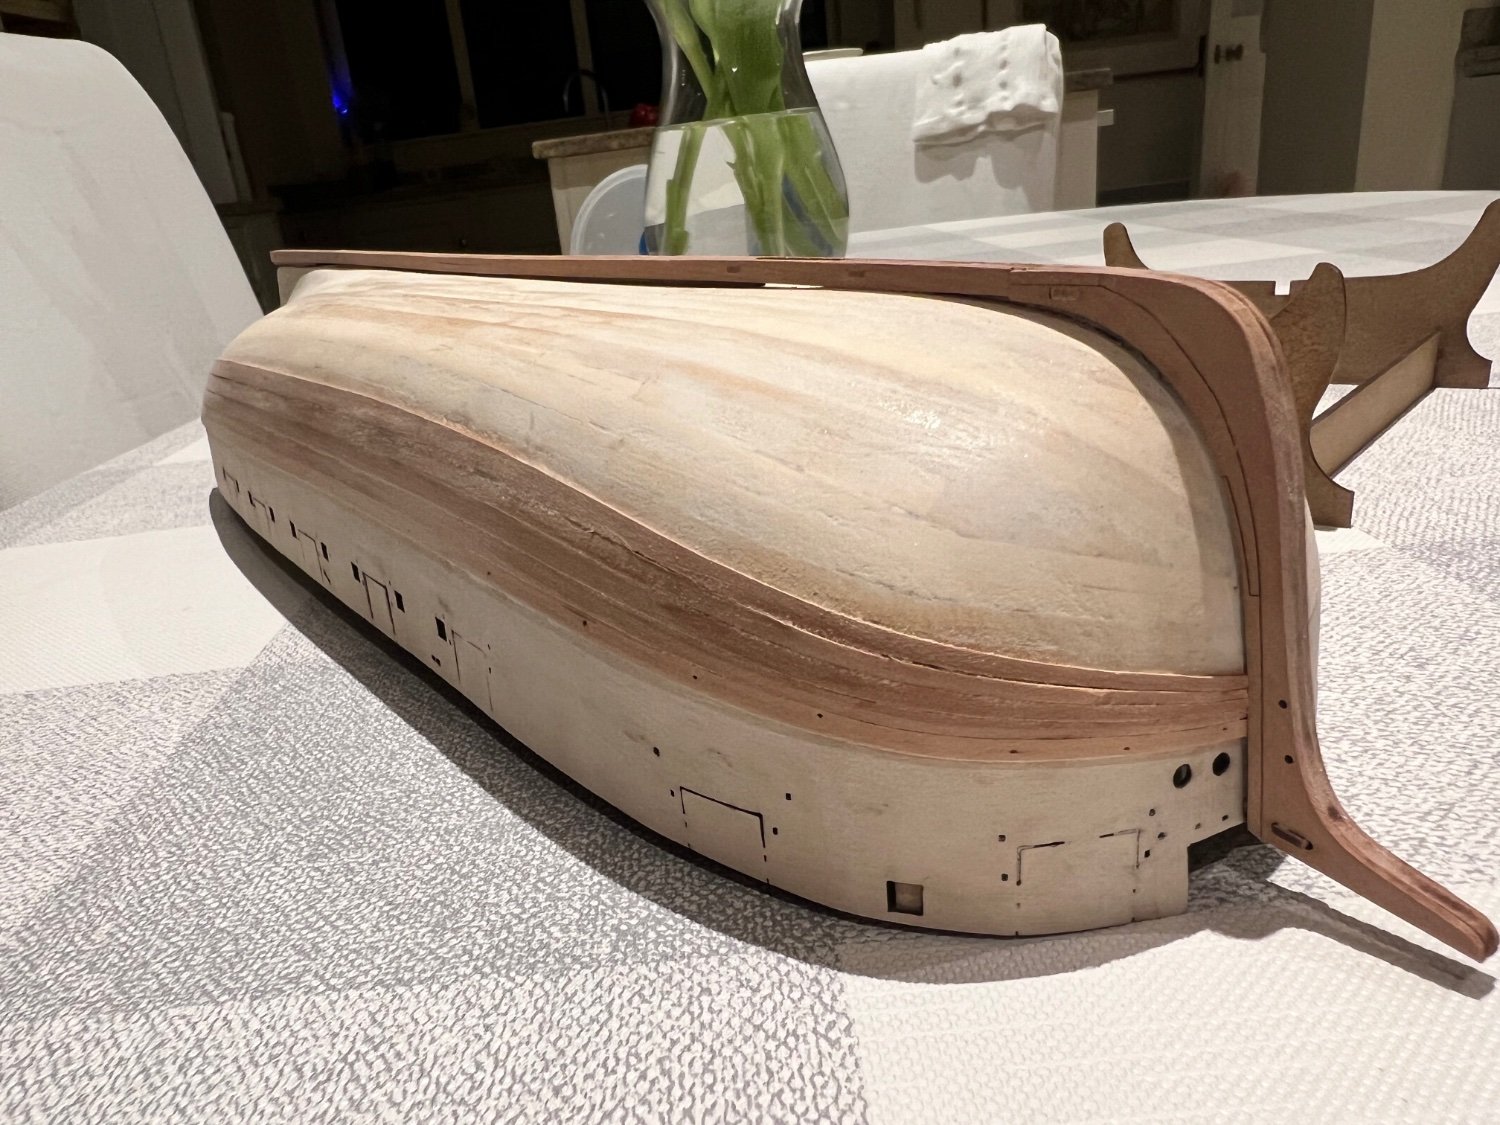
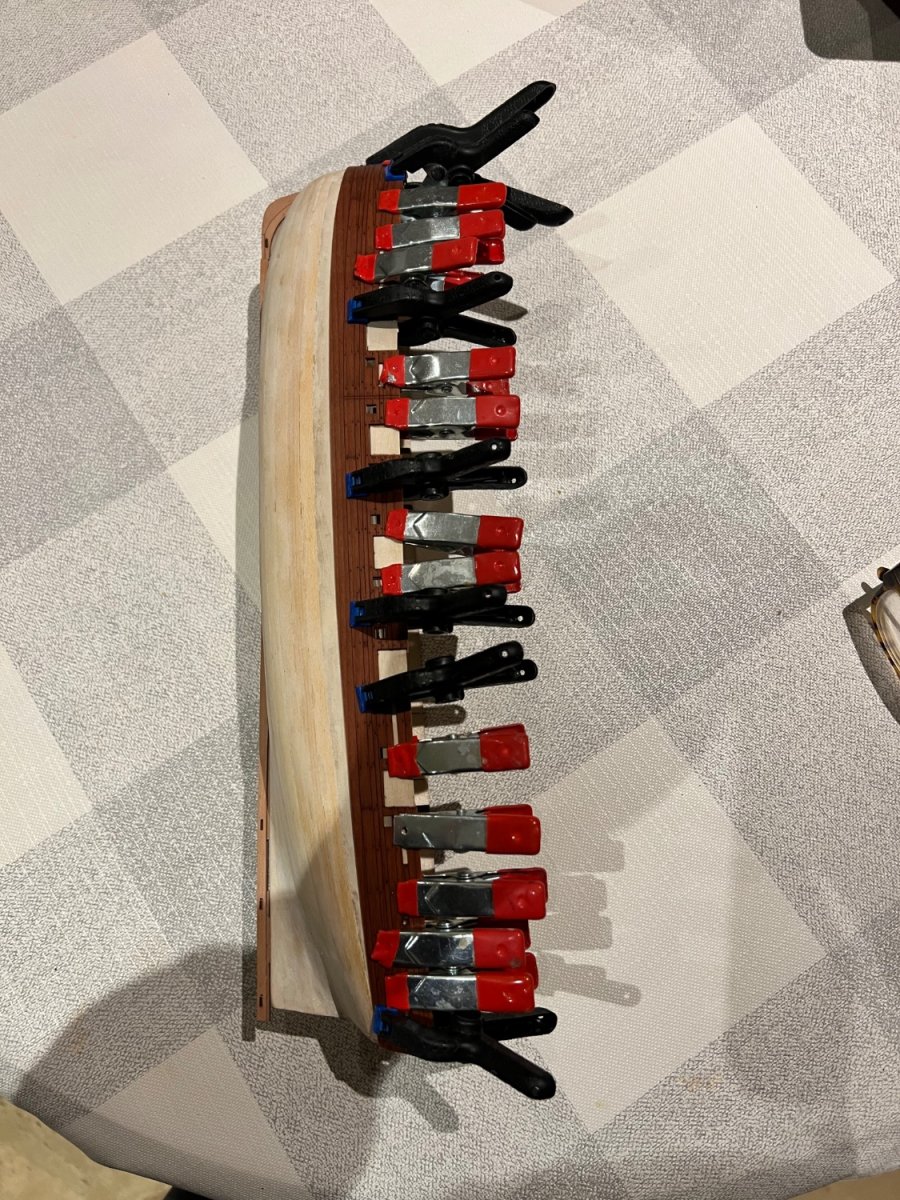
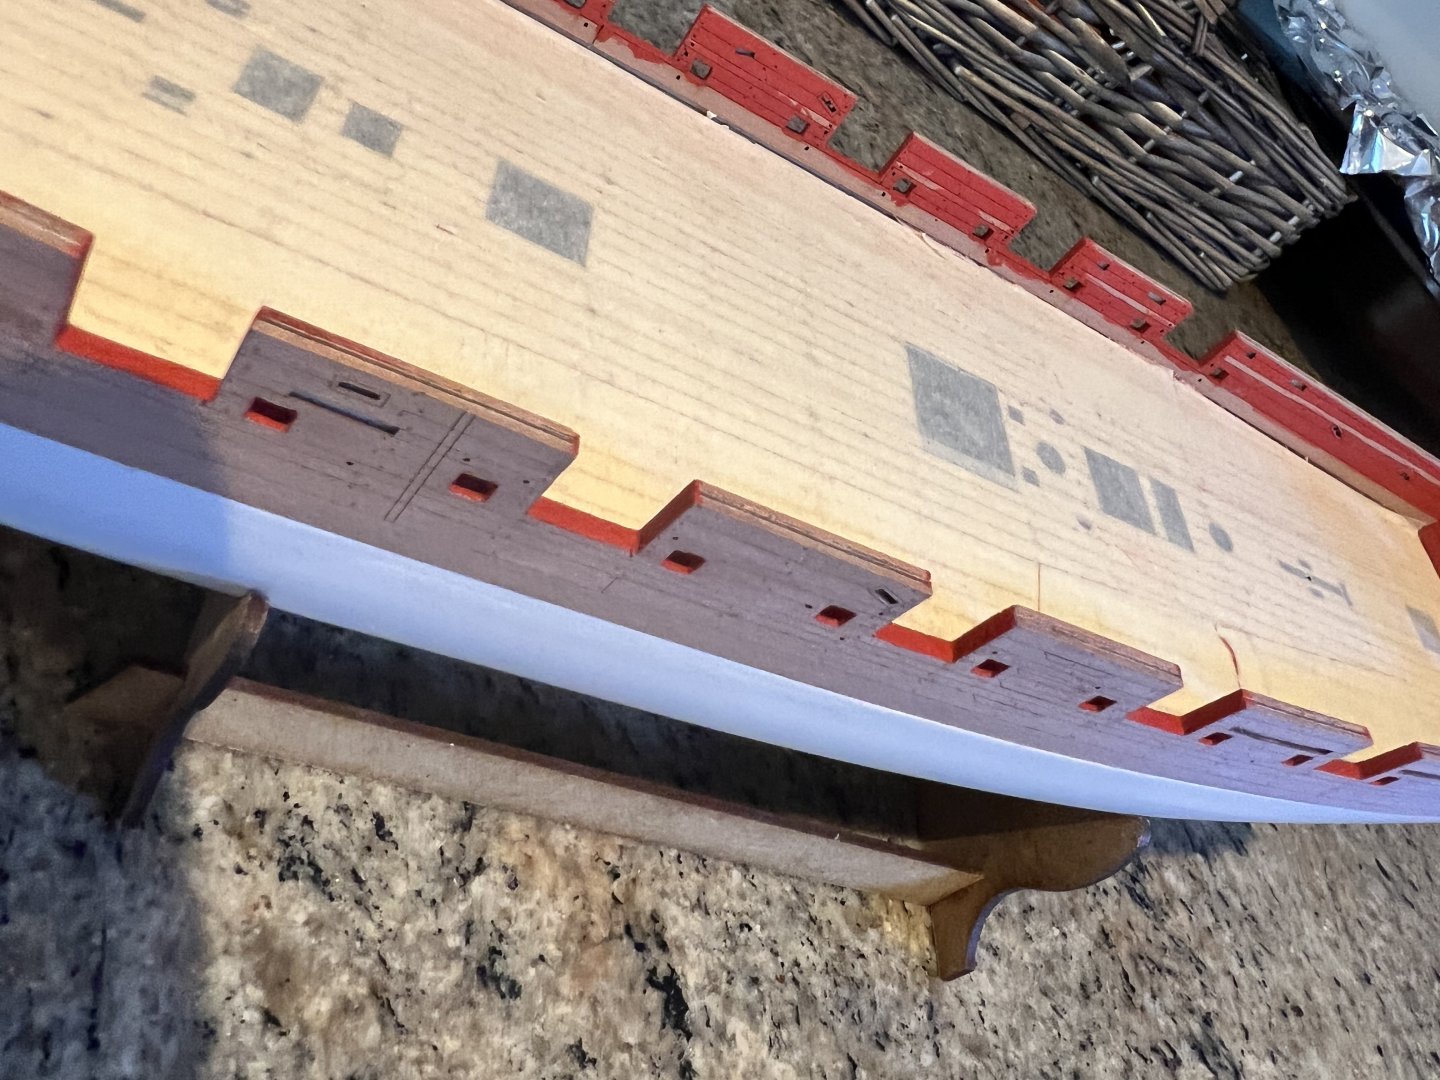
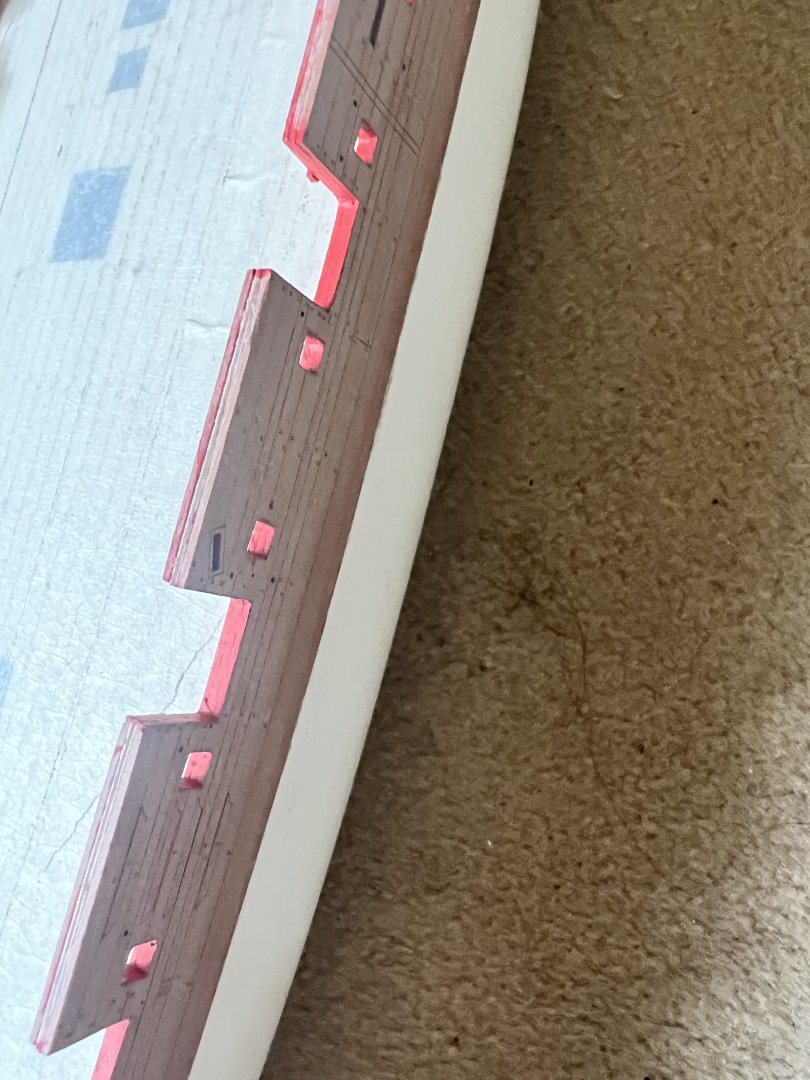
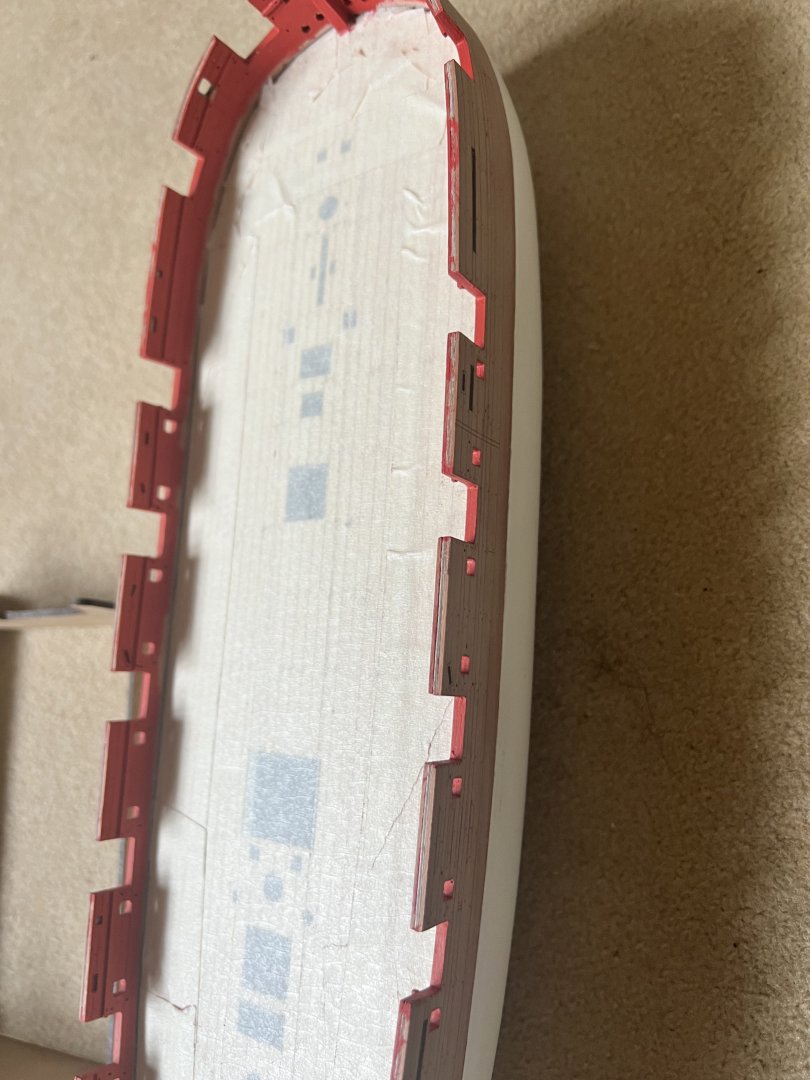
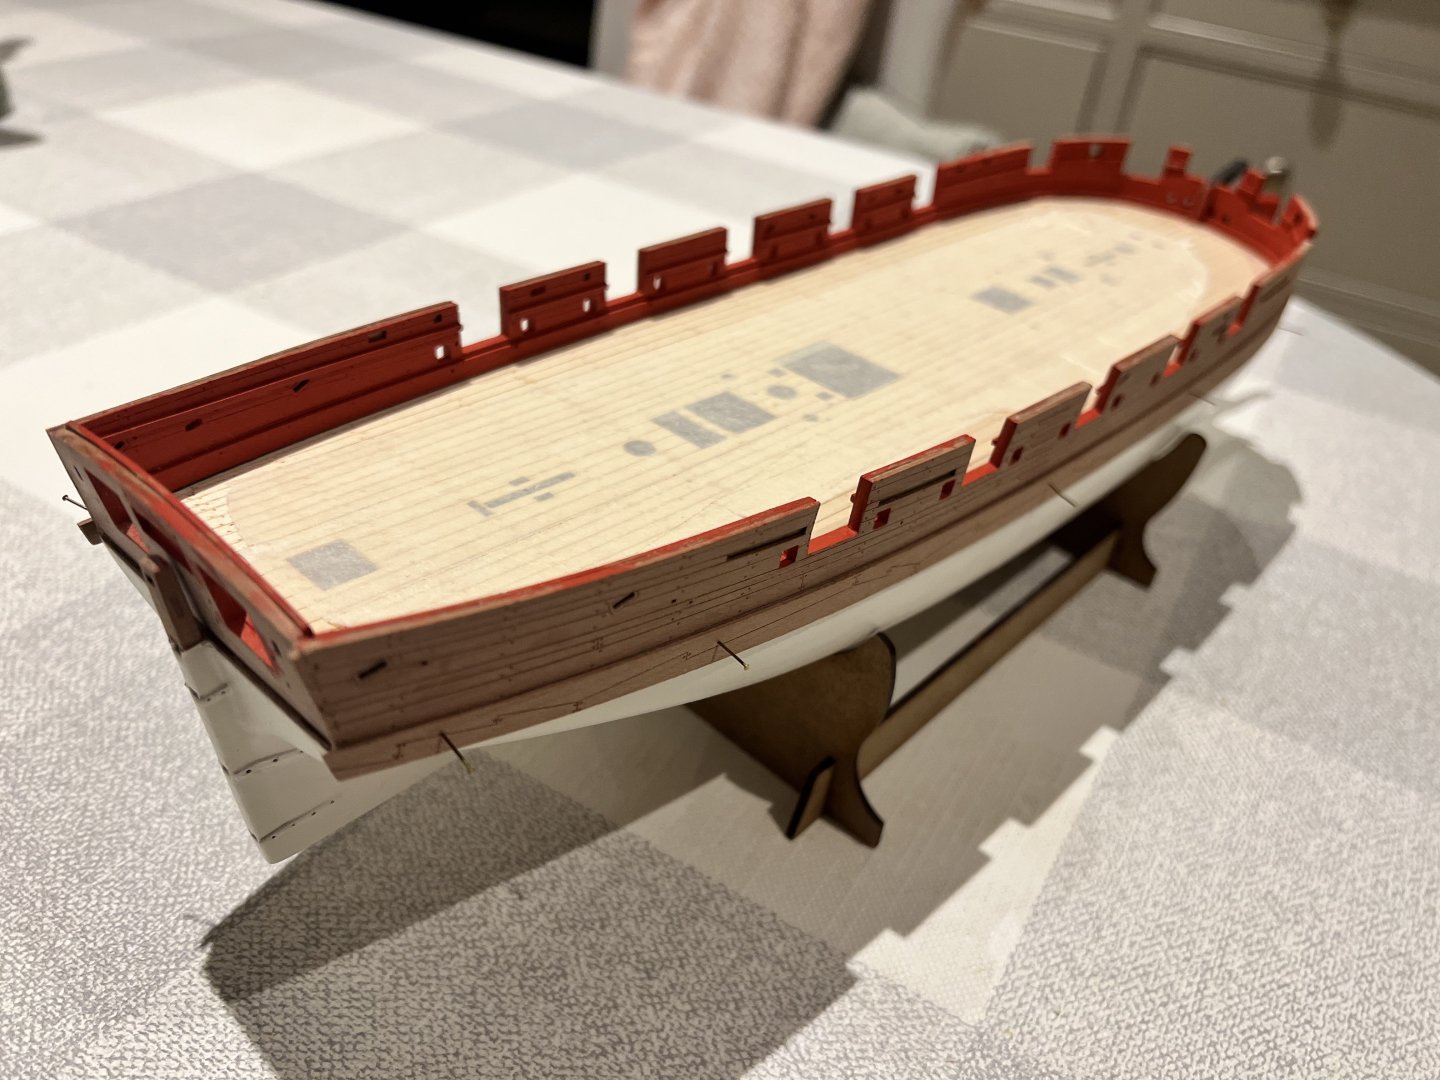
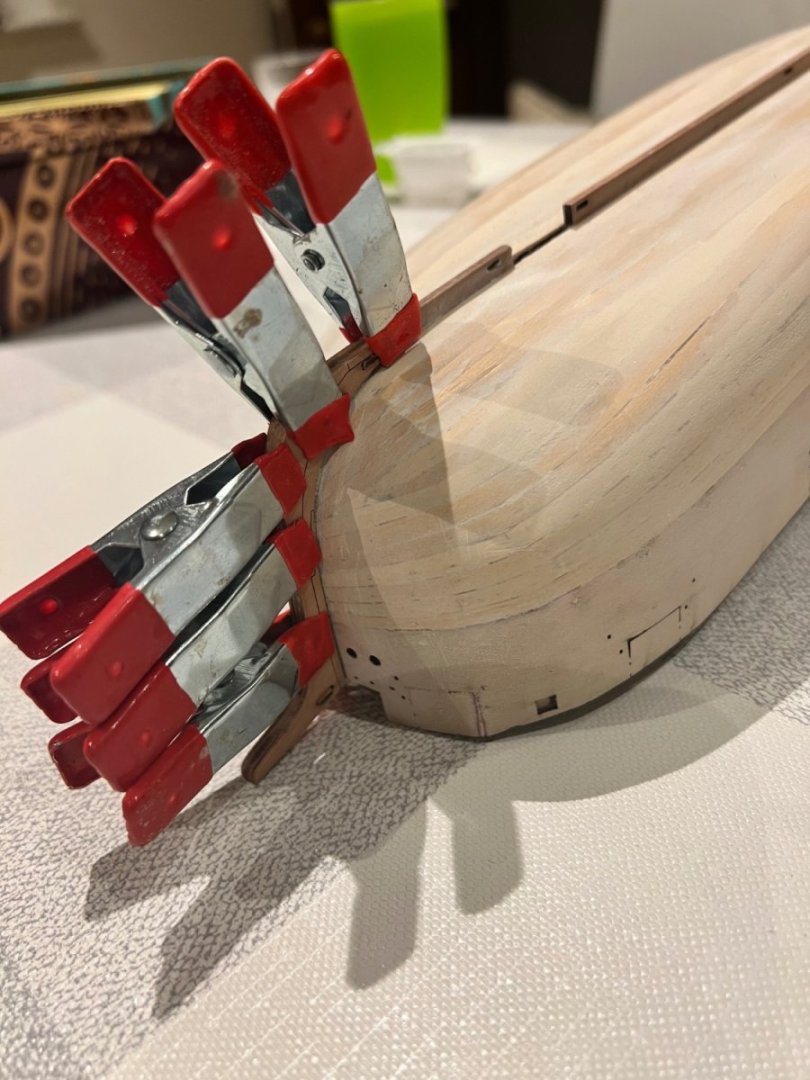
Thanks for all the likes! Outer bulwarks glued and clamped to dry. They aligned very well with the ply. I focused on lining up the oar ports exactly as a tiny gap at the bottom between the bulwarks and white paint will be hidden by the main wales. The bulwarks are a little long, which I think is intentional and will need sanding at the stern - the prototype’s bulwarks appear similar in the instructions. Once fitted the false bulkhead ears were twisted off and any stumps sanded level with the false deck. The engraved deck was then fitted. This needed no sanding at the edges and only a tiny bit off the stern edge to get it to lie flat. Then the inner bulwarks were fitted, glued and clamped. These lined up well too. Again I focused on lining up the oar ports which does leave a bit of a gap at the bottom as described in the instructions and which will be covered up later with spirketting. I started to paint the inner bulwarks red before fitting, but decided that I’d do the second and third coats on the model and would need to mask up the deck given my propensity for getting paint everywhere! I also painted the beak head (think that’s the right term) black. Will need a little filling and more coats of paint. Lastly, the daggerboards are ready and in position, but not glued. Next is cutting out the gunports.


-
Thanks Cisco, hides a not so nice planking job beneath!
-
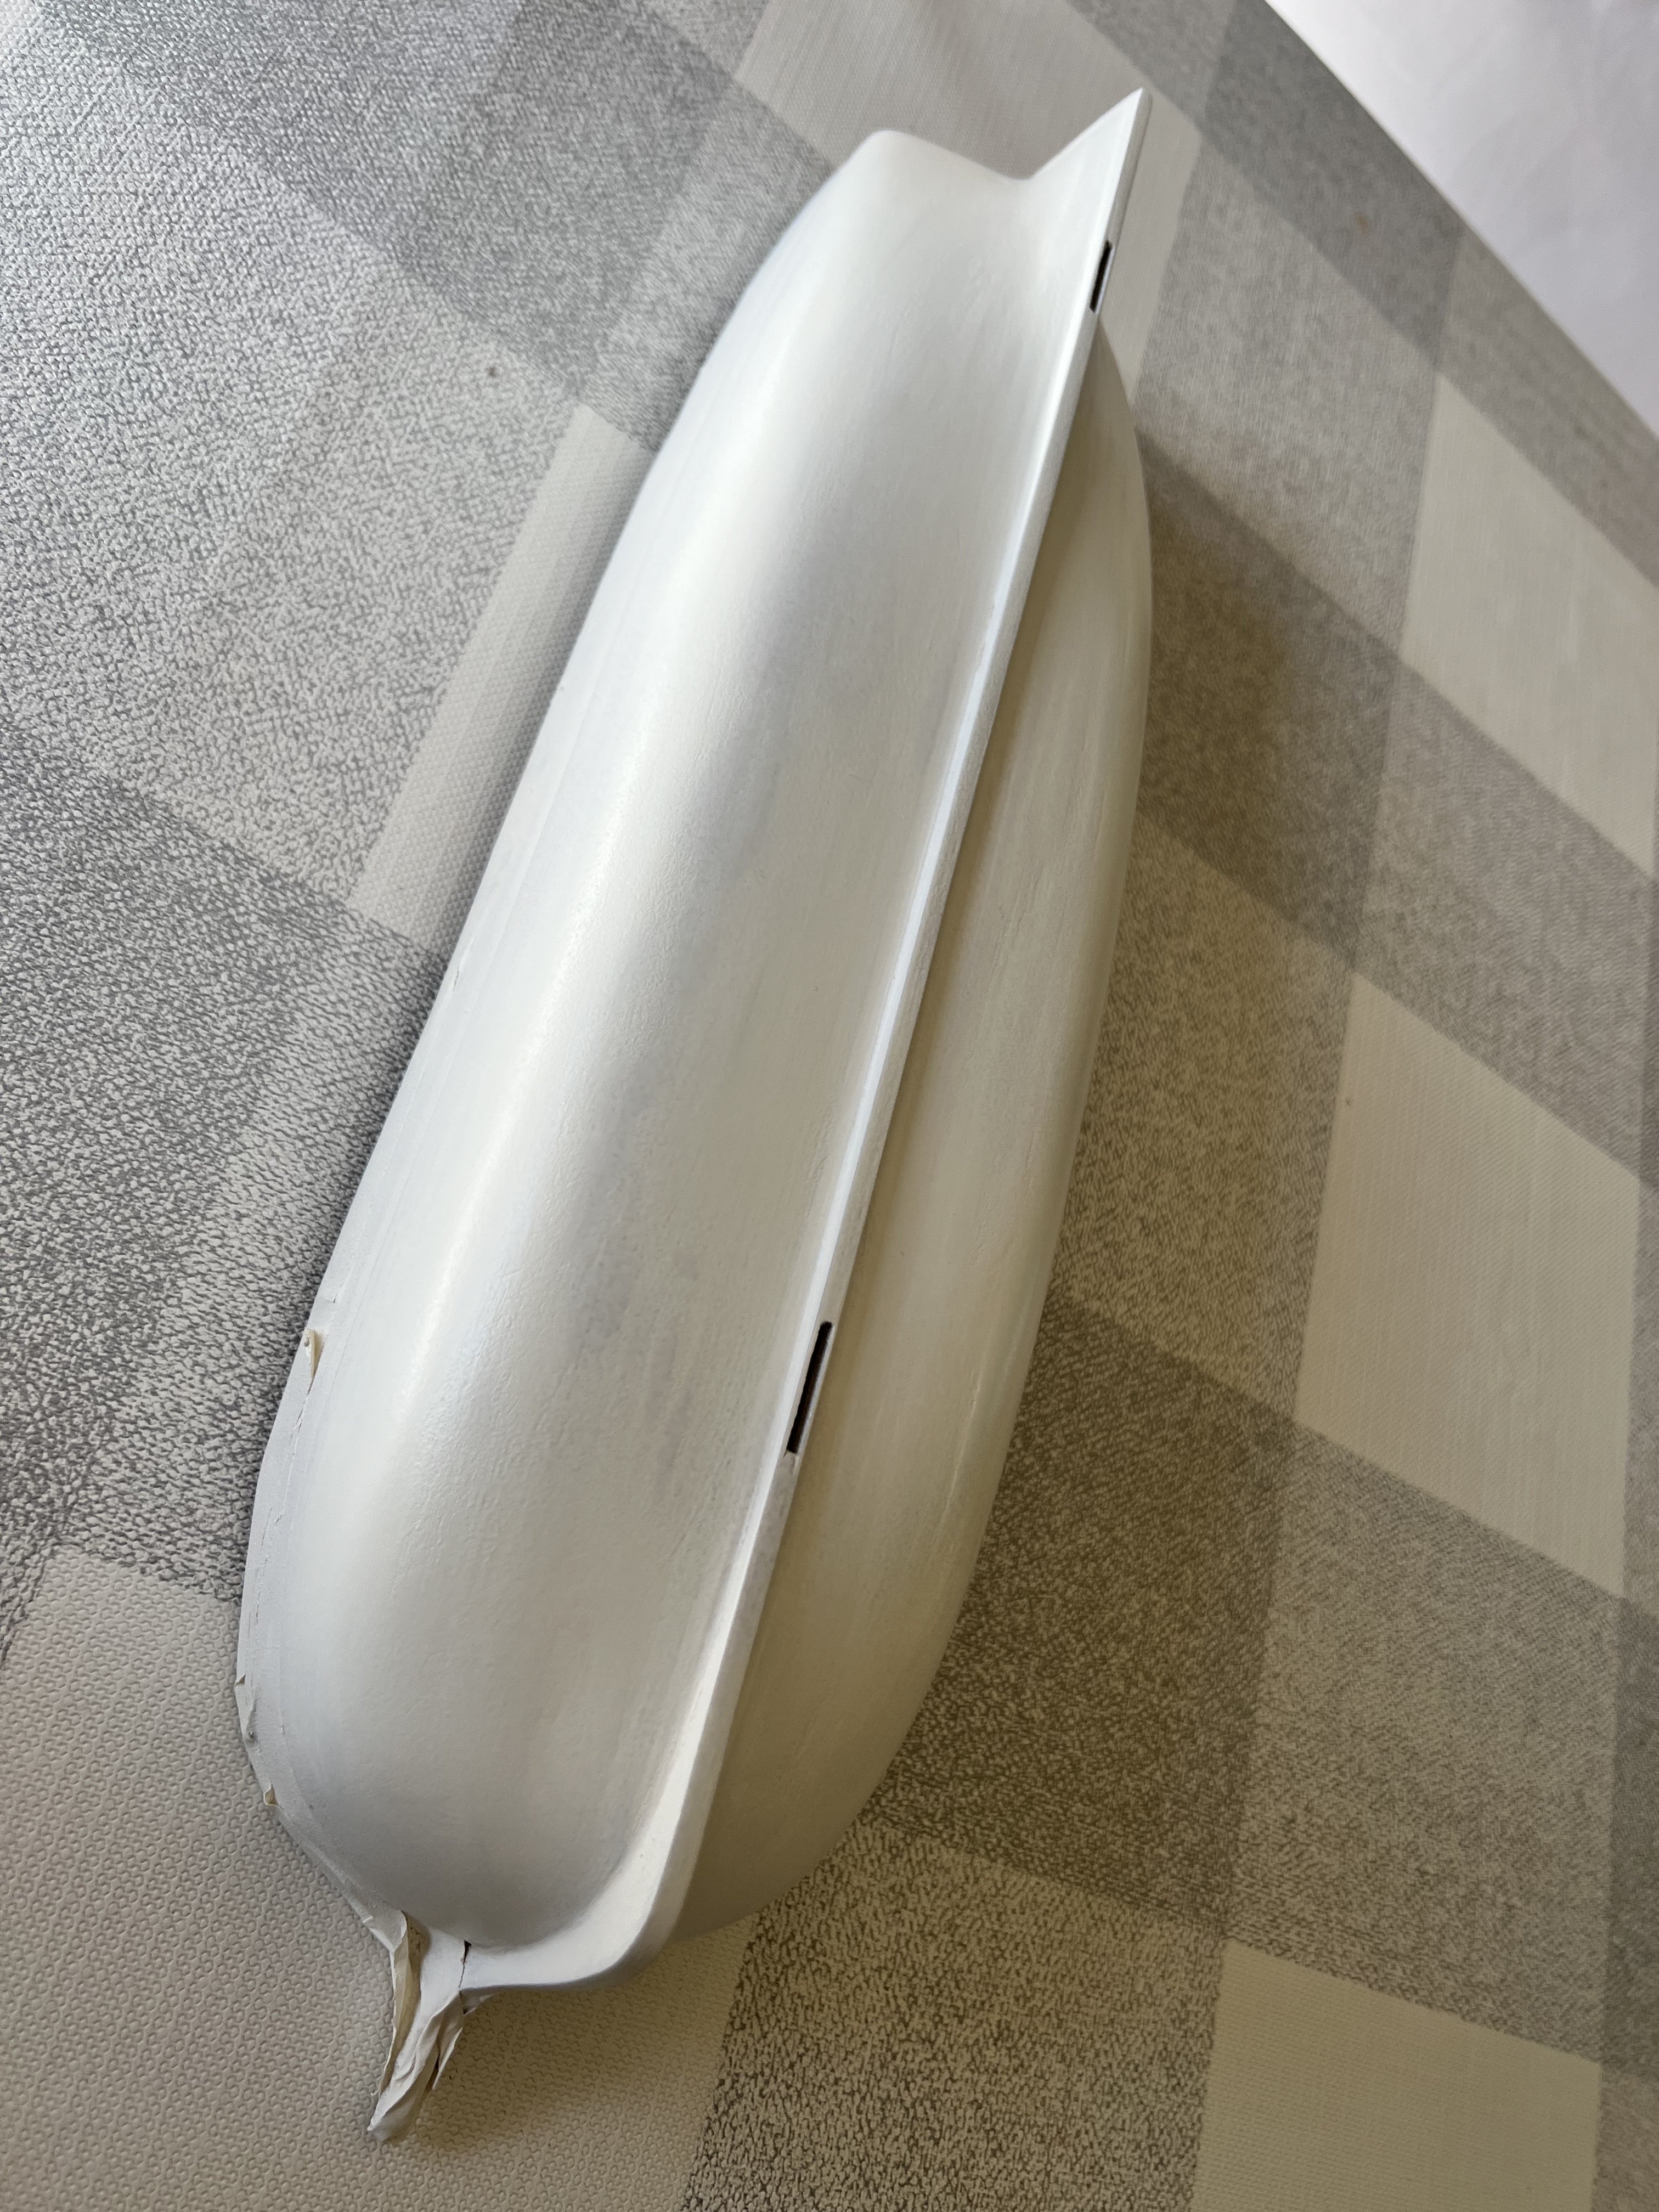
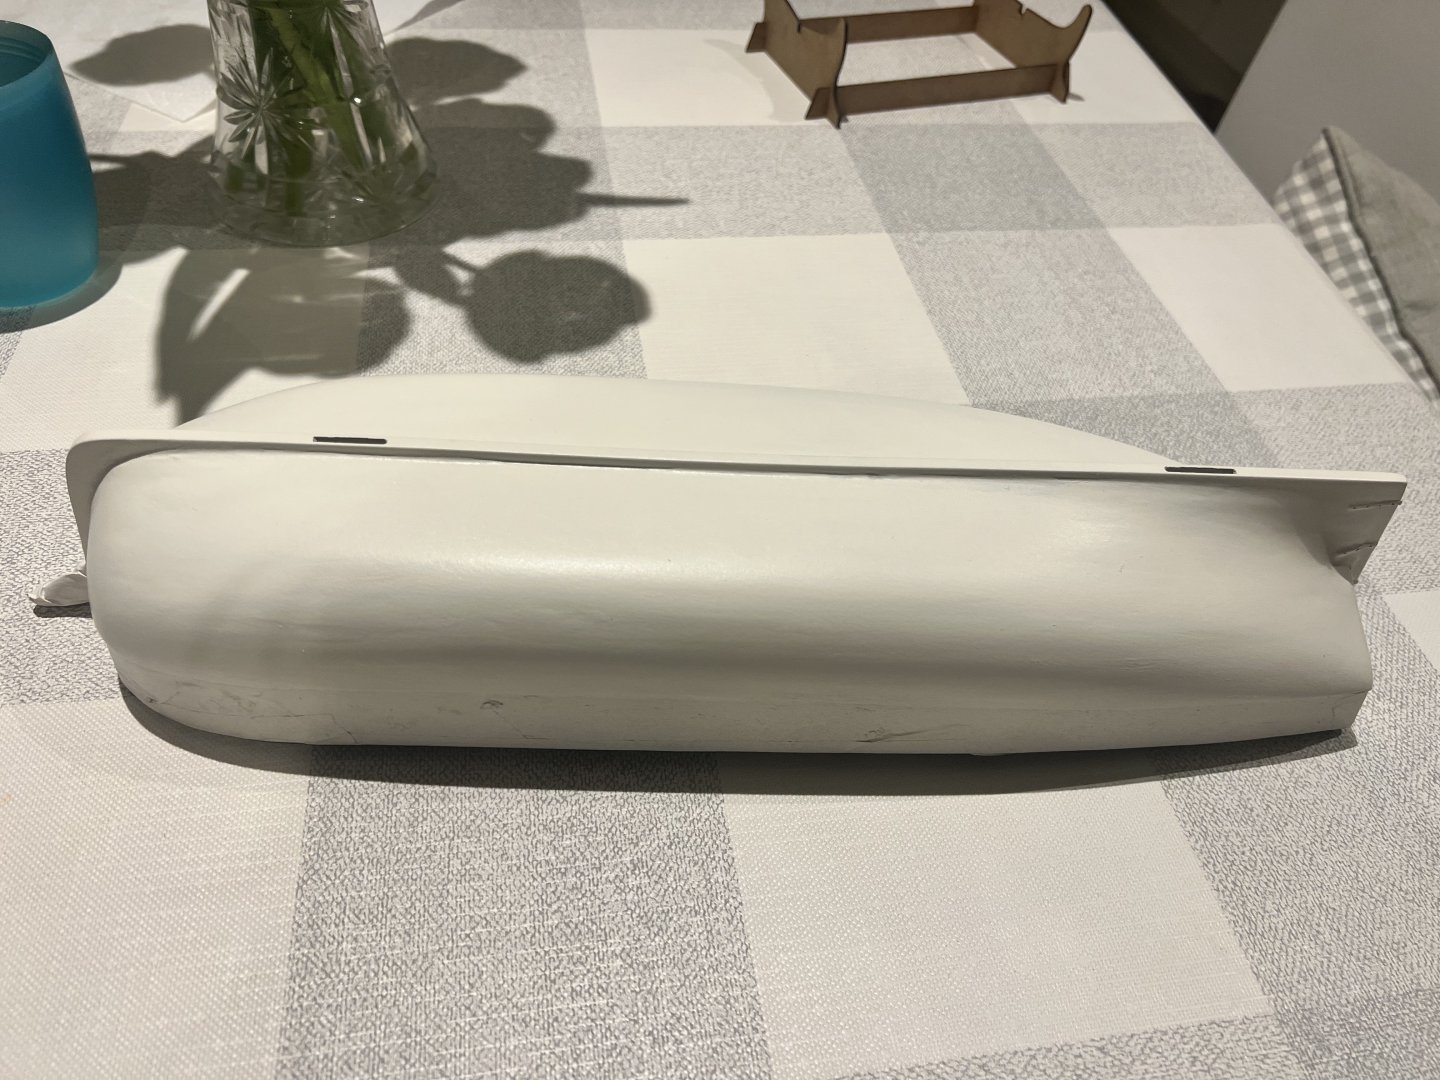
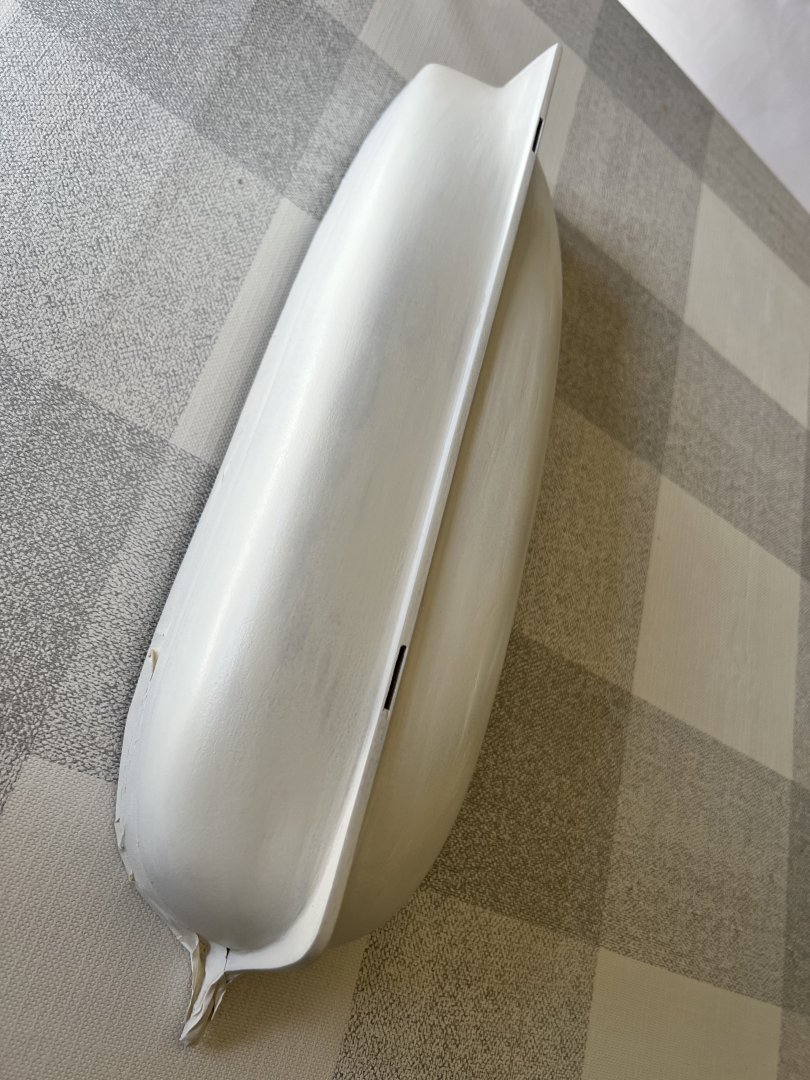
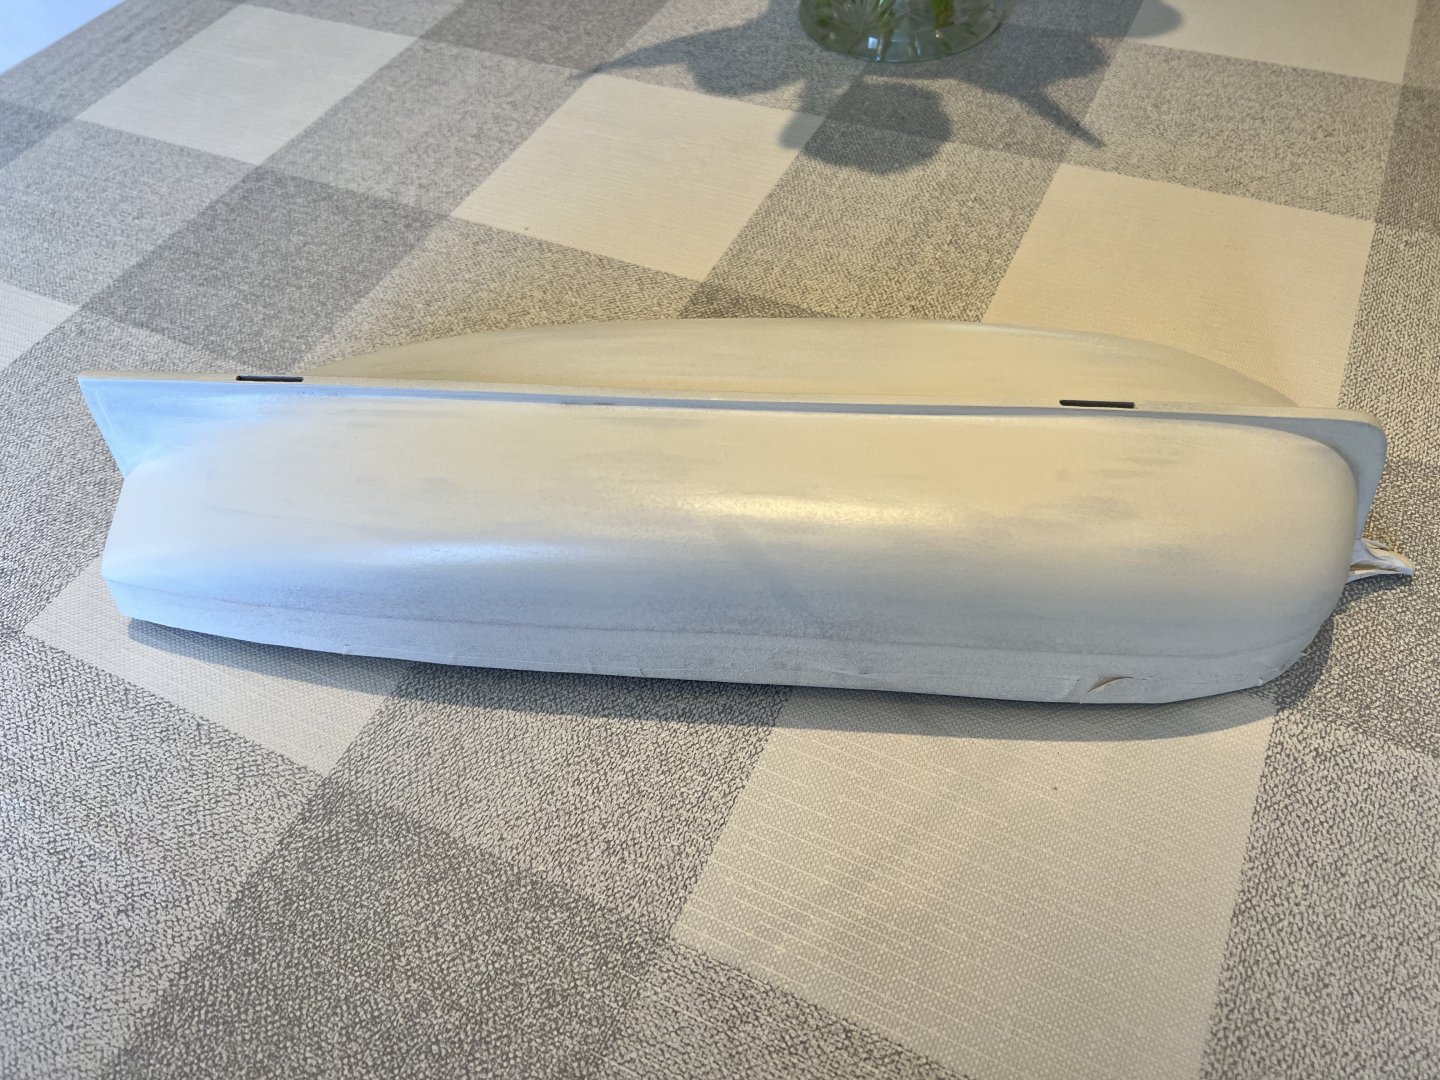
Many coats of paint, filler and sanding later… Added the rudder hinges on too. Smooth, except as always on my builds, I struggle to get the planks neat near the bottom of the rudder post where they do show a little. Masking tape removed. The brilliance of Chris’s design here is that the lower hull is fully painted without any risk of getting paint on any of the outer or inner wooden parts that will show. The line between the upper bulwarks and the white lower hull will be hidden behind black painted gunwales added later providing clear lines on the hull without the risk of paint bleeding under masking tape. Very clever and well thought out.


-
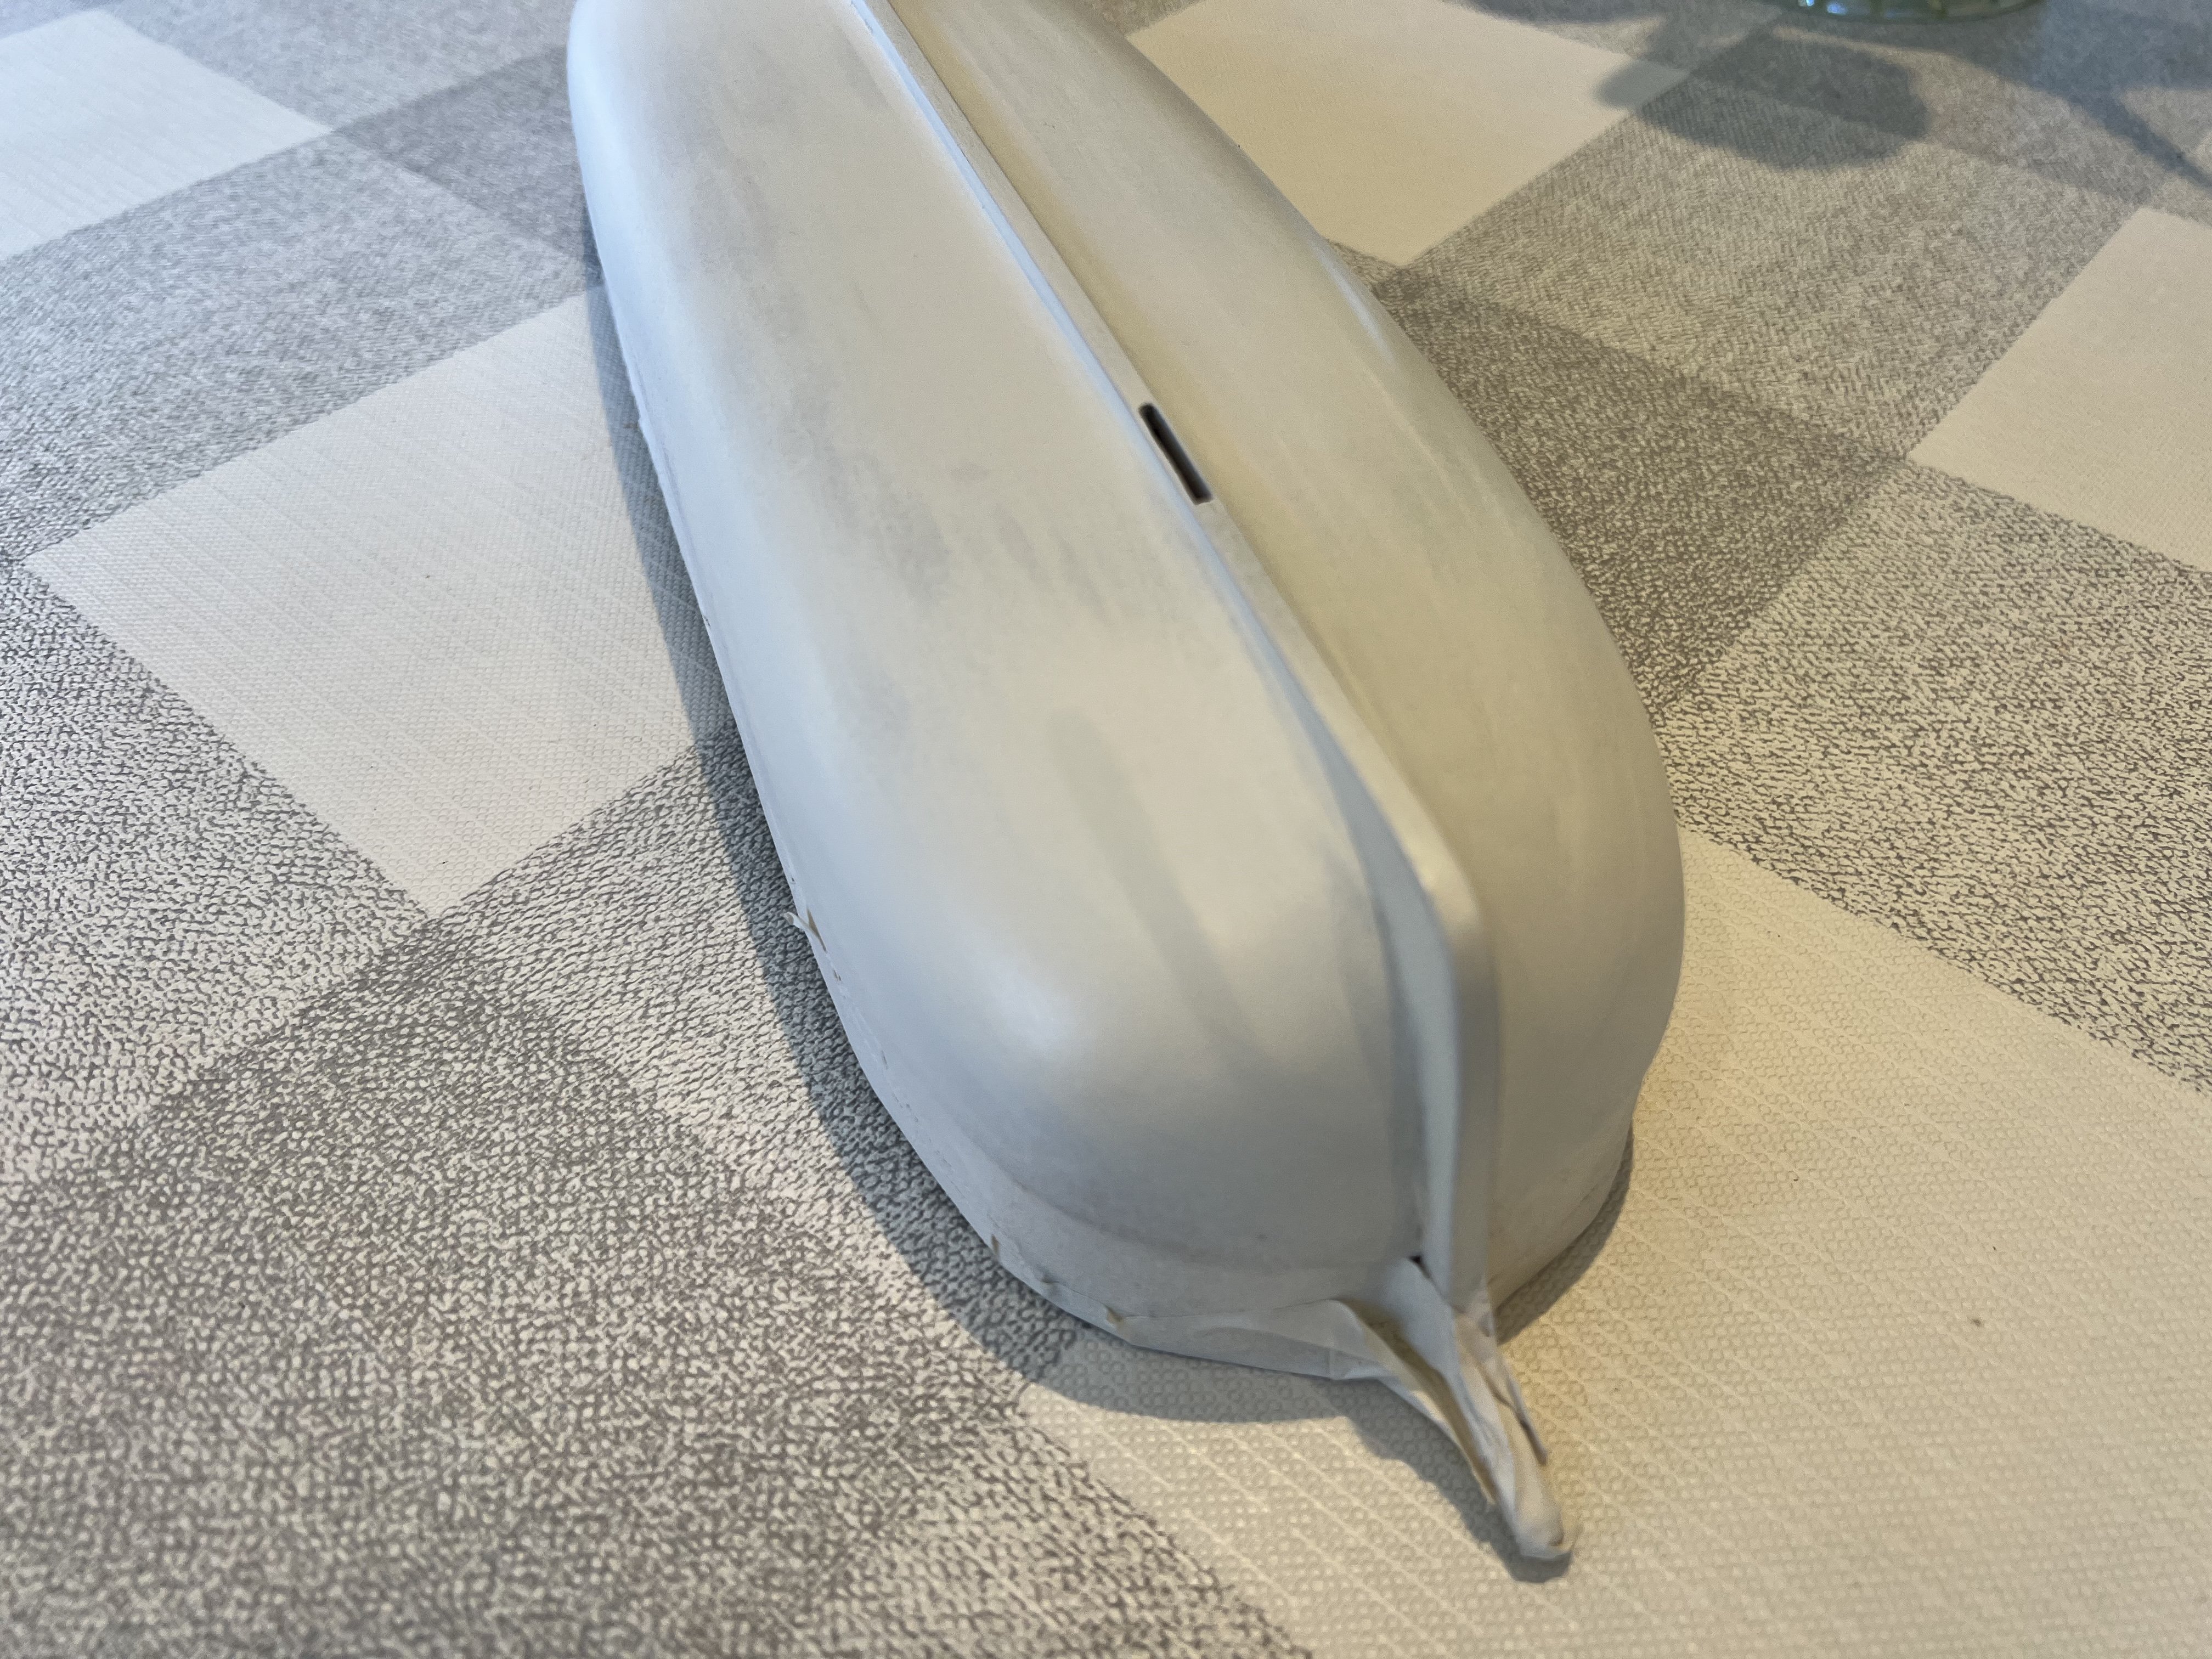
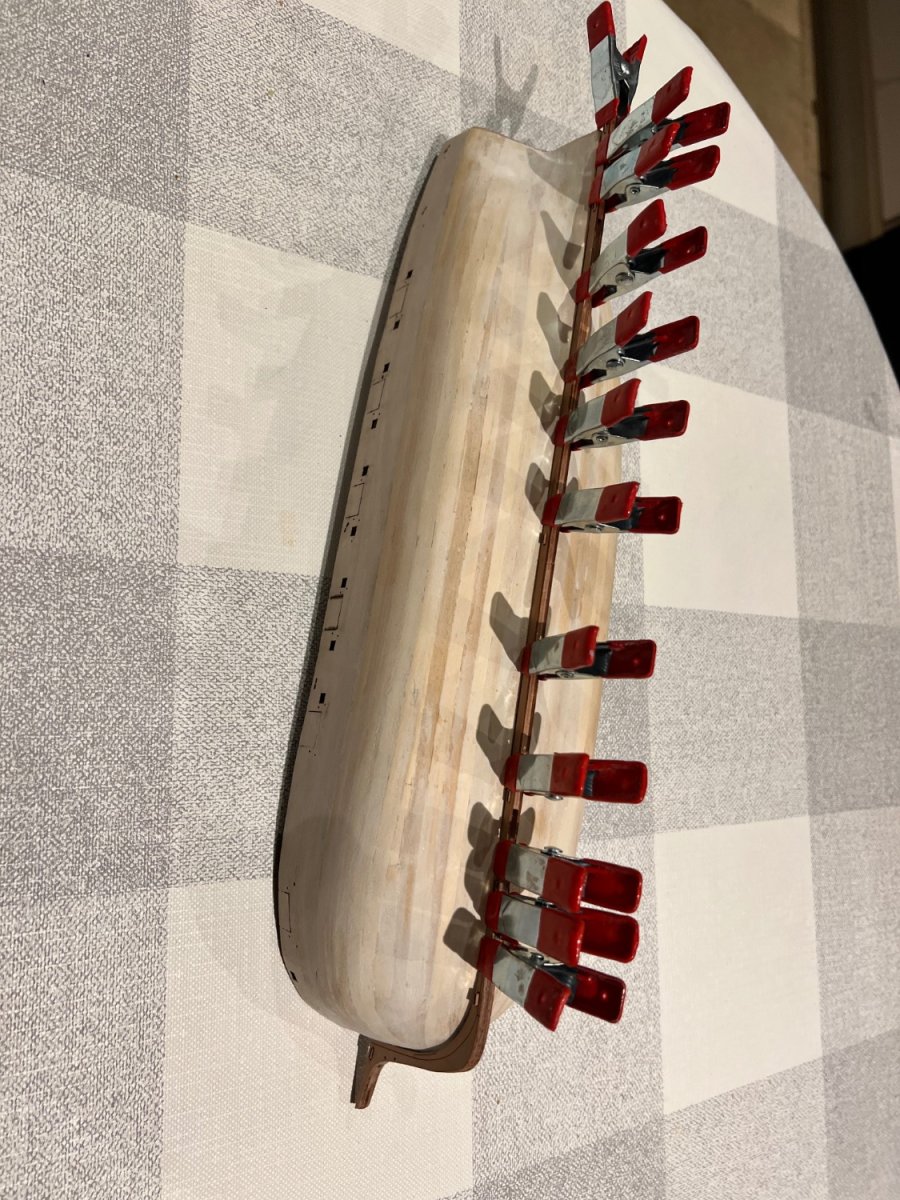
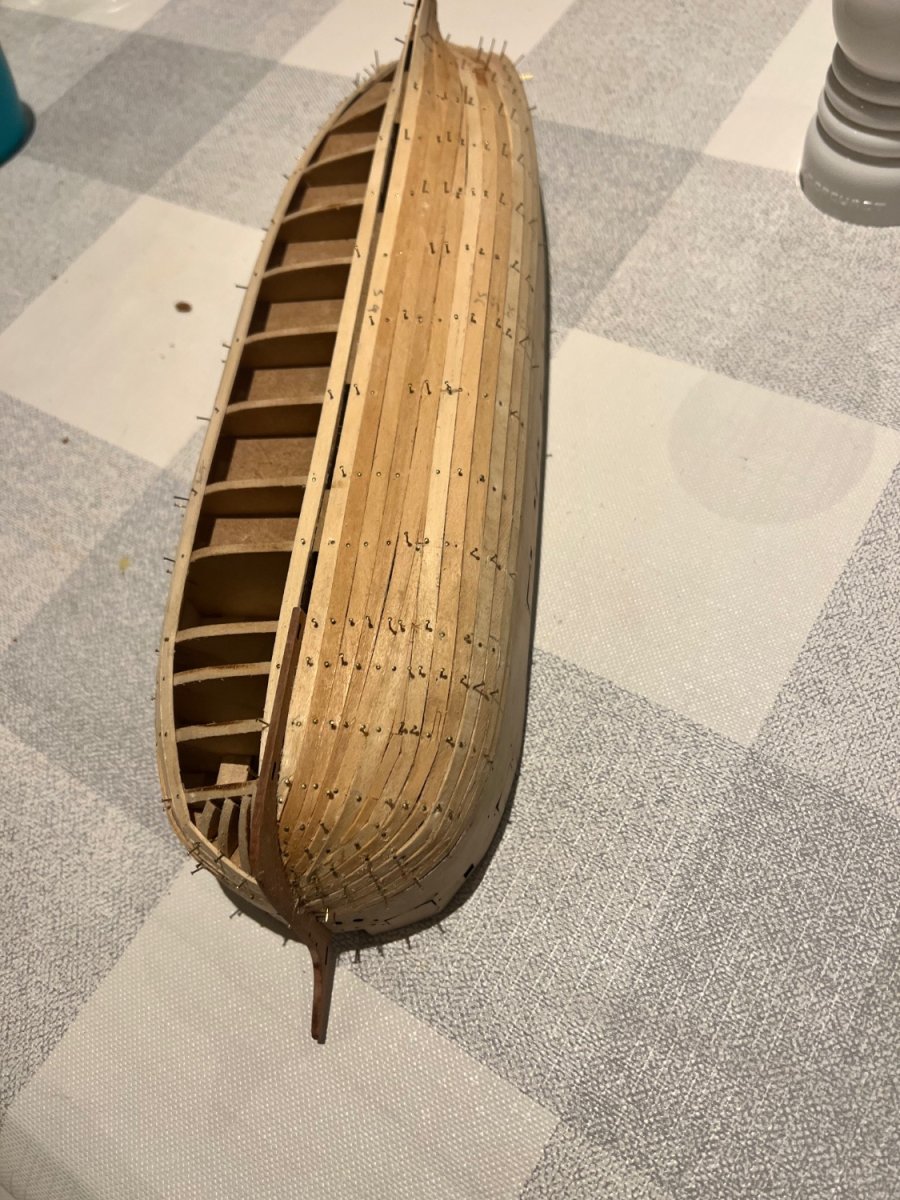
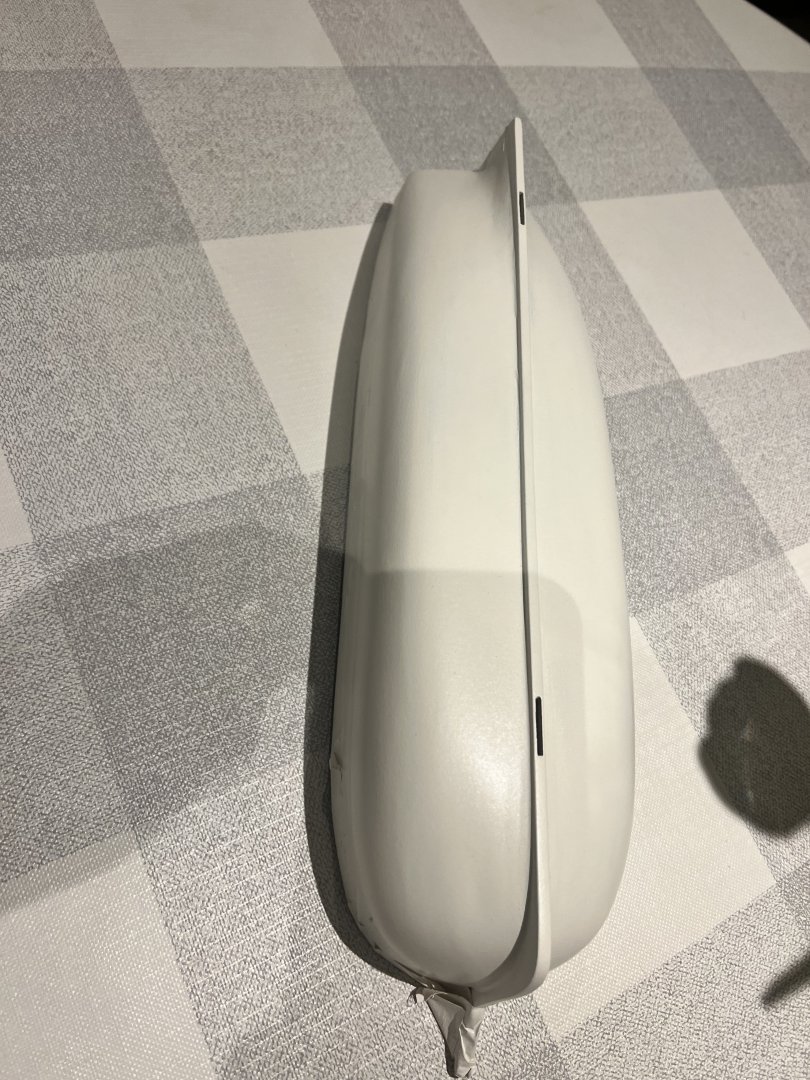
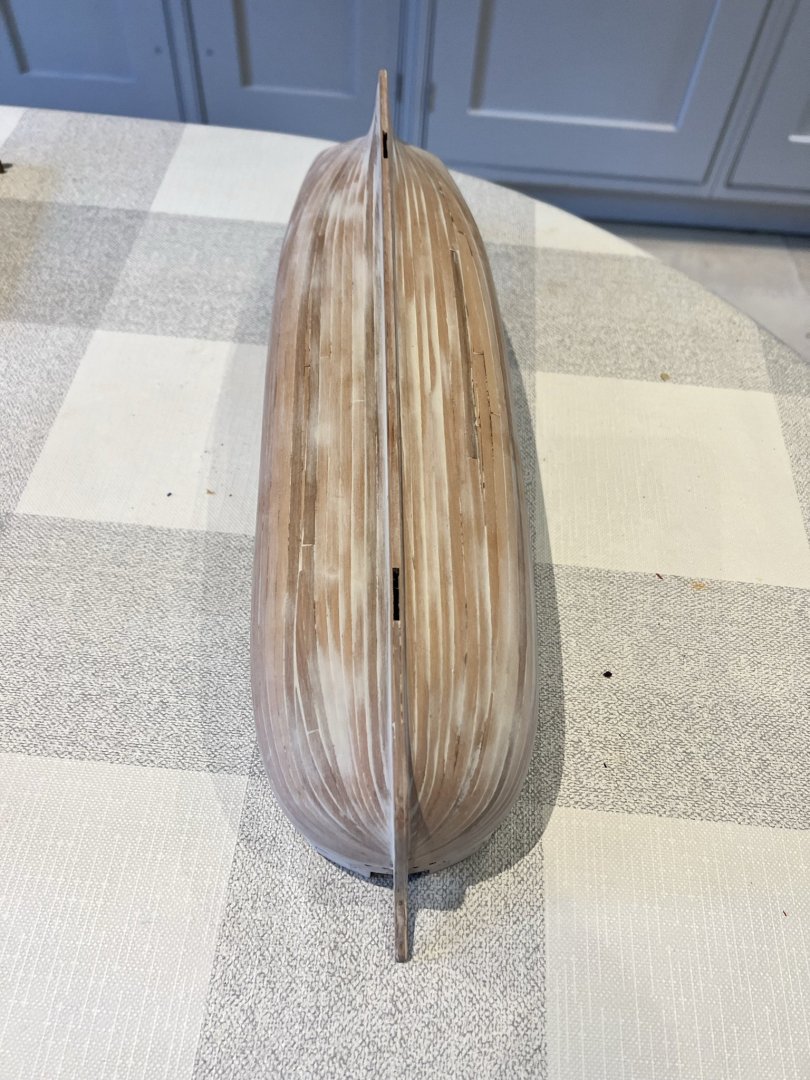
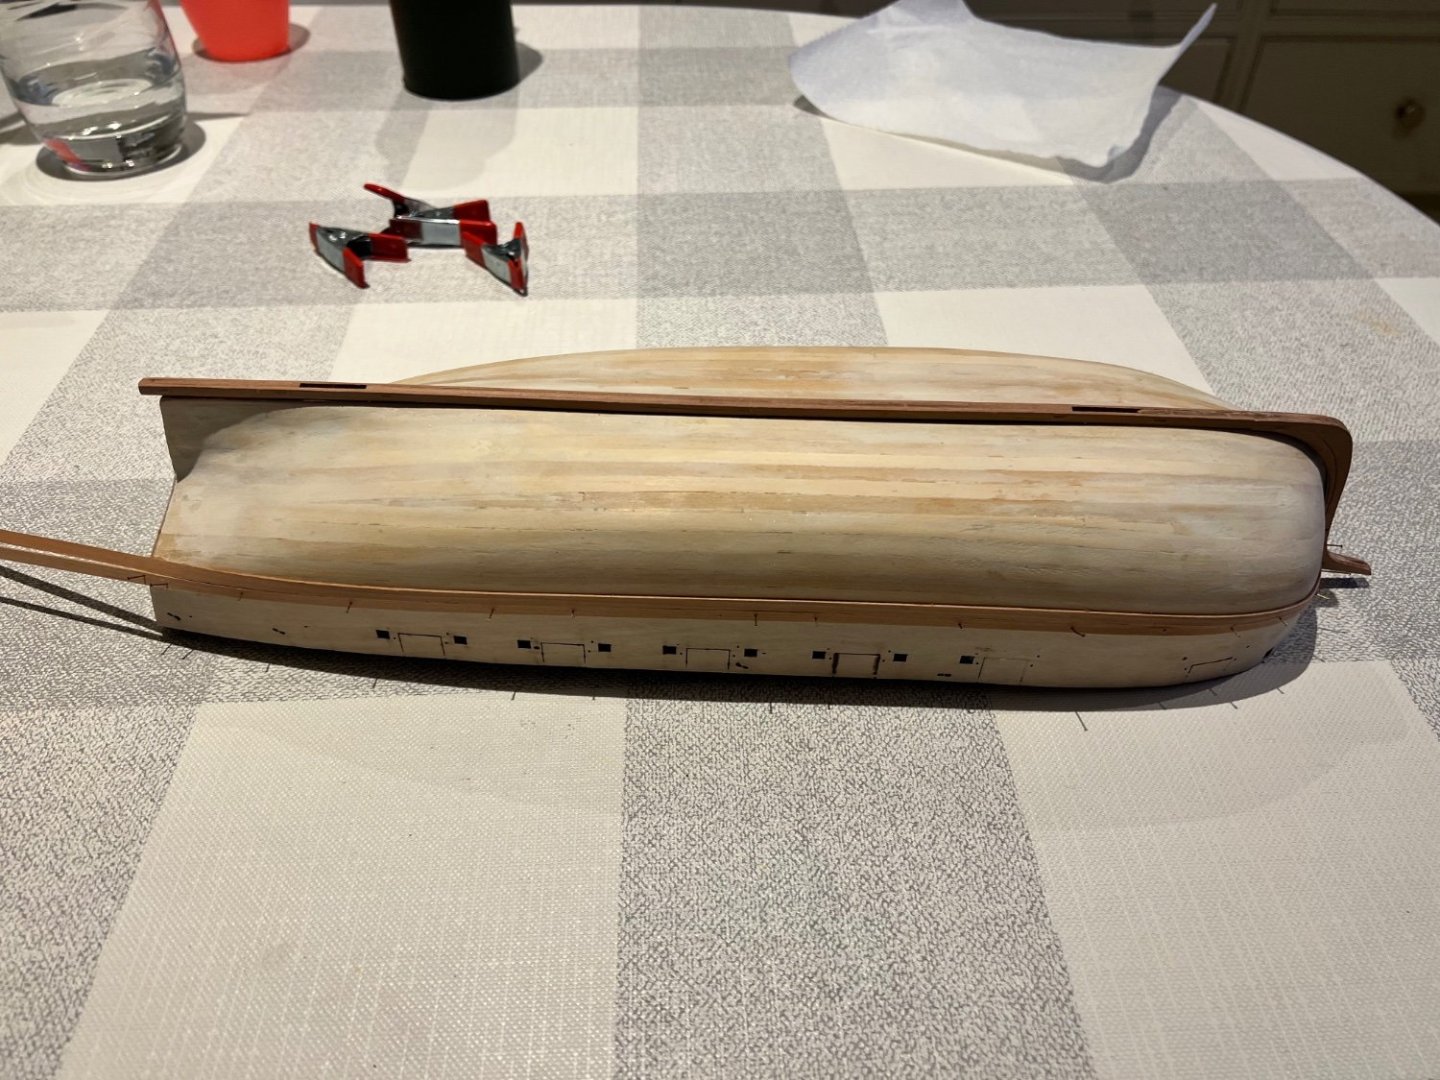
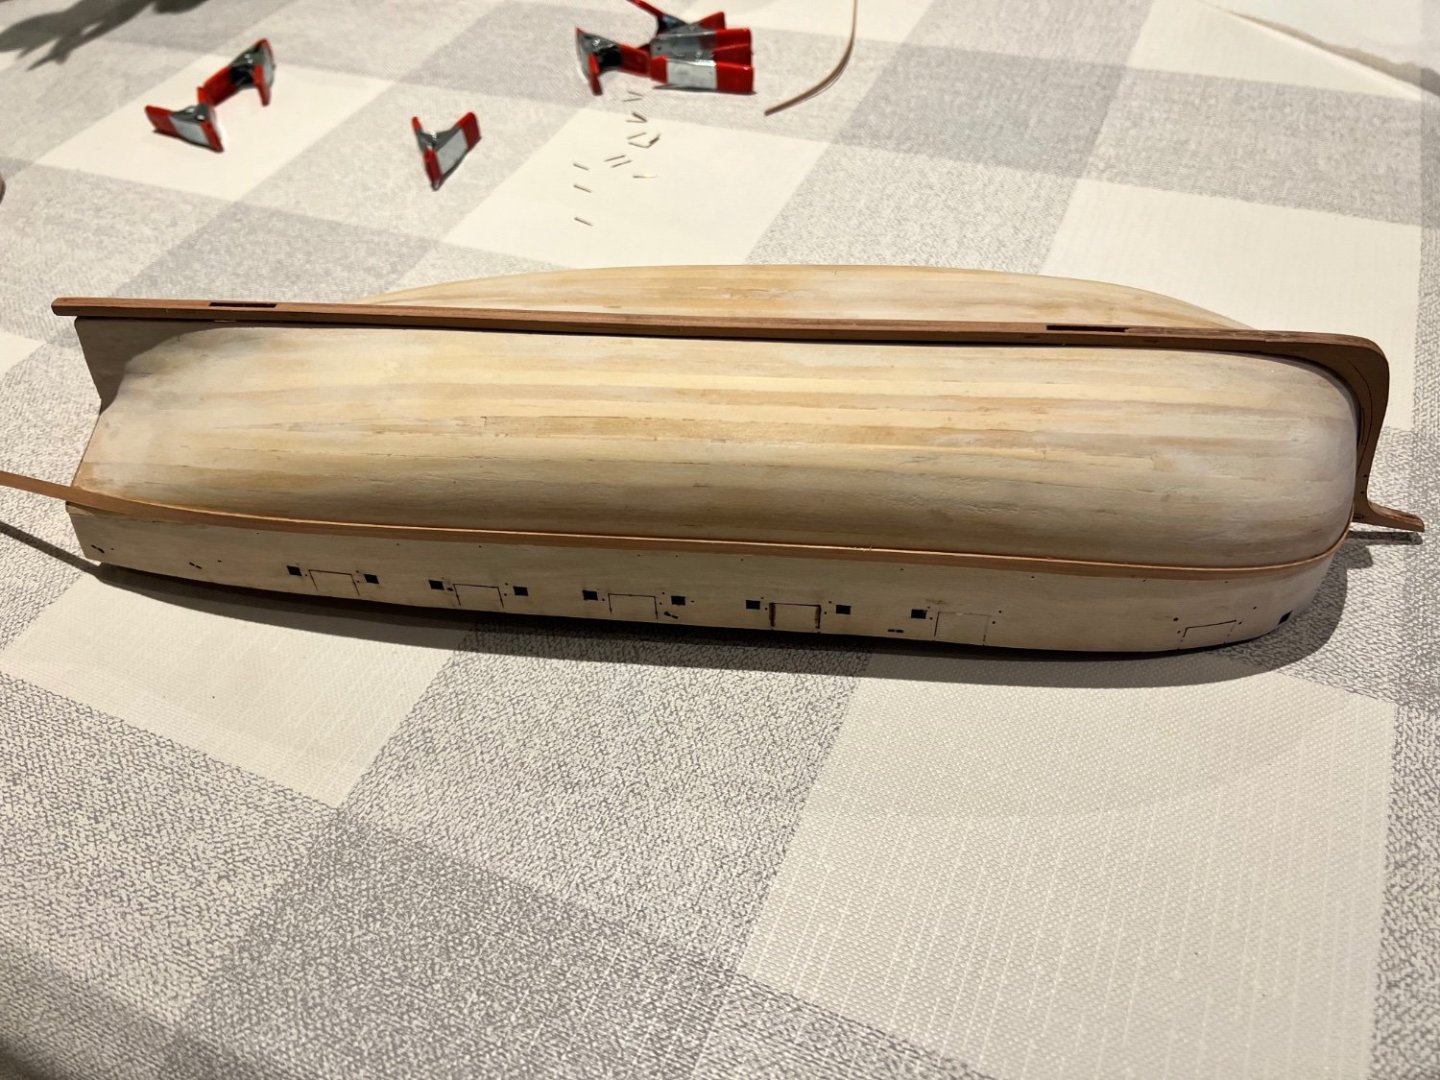
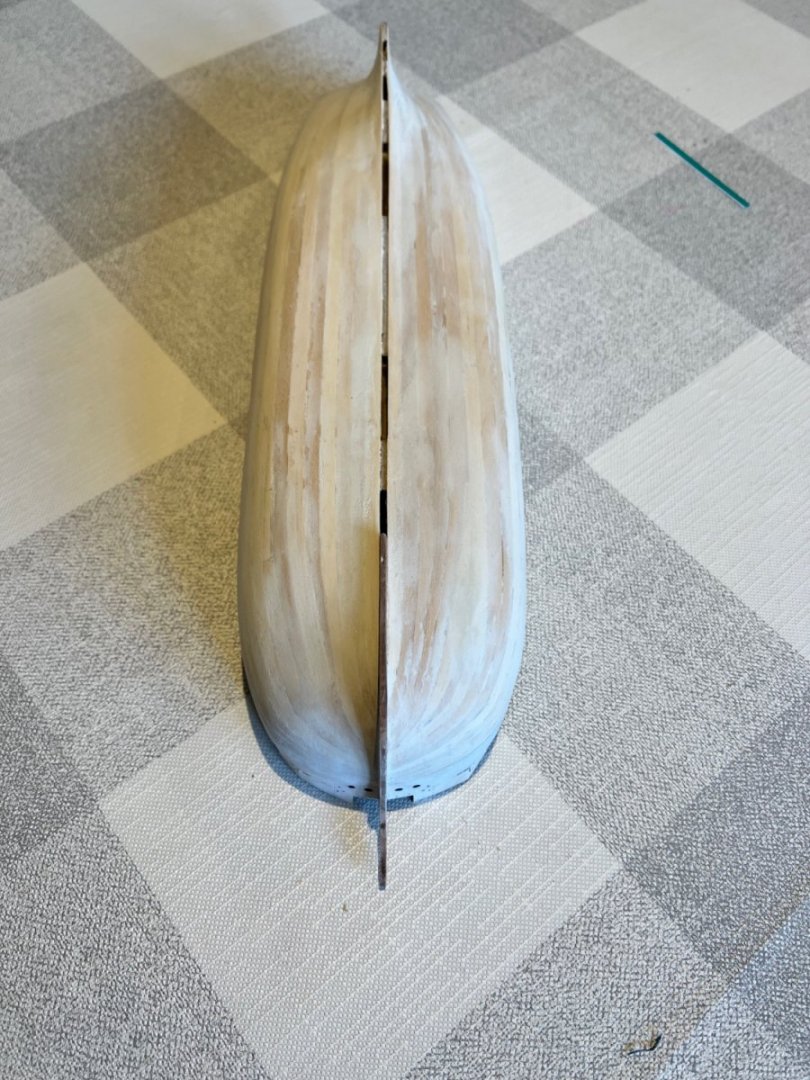
Second planking is now complete. Tapering more aggressively than in the first planking helped a great deal. Having not used tick marks to work out the extent of the tapering at each bulkhead I fell foul of tapering past bulkheads 1 & 2 whilst the planks needed to be wider here, so I needed to fill in the gaps. I haven’t detailed my planking journey here as technically it’s what not to do, and the end result is a little crazy paving in places, but with filler and sanding, smooth to the touch its close to what I’m aiming to achieve as the lower hull will be entirely painted. The outer sternboard was clamped on (not glued) and the sternpost glued in place. The outer sternboard has been removed again and the upper hull has been masked off for painting. First coat of paint has produced a surprisingly pleasing result without any noticeable cracks There are some areas where planks show through and the filler rougher than I’d like, but overall, this looks good to me for a painted hull and not too far off the end result I’m looking for. More filler, sanding and another coat of paint… and repeat…


-
Congratulations on another stunning model. I’ve learnt so much following your builds!
- 636 replies
-
- 2
-

-

-
- Indefatigable
- Vanguard Models
- (and 1 more)
-
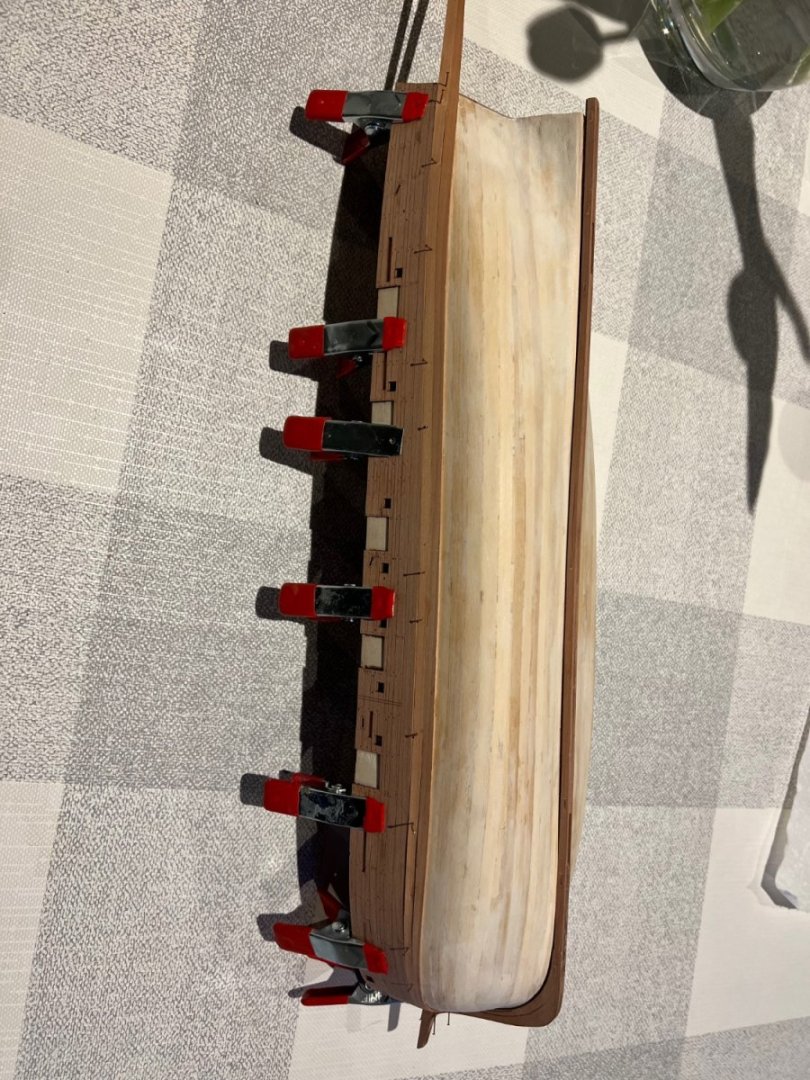
Thanks Glen, she’ll be a minnow compared to your impressive Indy. I’m really enjoying Adder. As per Chris’s excellent guidance the bulwarks, once soaked were clamped and left to dry for two days. I then unclamped them and checked their fit over any holes, oar ports, etc. which was near perfect. The now pre-formed outer bulwarks below: Then the bulwarks were carefully reclamped and the first plank was added without glue and pinned in place snug up against the clamped bulwarks. The bulwarks were then removed so no CA glue sullied them and the second plank added and glued in place. I’ve added back the bulwark for illustrative purposes in the two photos below. (Apologies for photo orientation, I can’t correct this on my iPhone). Then the top plank was unpinned and removed, leaving just the single second plank on the hull. At this stage I debated discarding the top plank as it has pin holes in it, but decided it would be hard to match its taper identically on a replacement plank and the plank will be entirely under the gunwales so the holes don’t matter. This plank was then glued in place too. Then I continued planking down the hull. As can be seen in the photos below I’ve followed Chris’s advice and tapered 75% of the plank away at the bow, except for the top plank which was tapered to 50% so it was less likely to be split by a pin. Looking good so far, only 4 planks on the port side in place, curves look much softer than on the first planking. I won’t have much time for ship building for the next week, unfortunately. Will be back on the case after that.


-
I found them fiddly on Grecian. Clearly you have to shorten the “tongue” a bit as the bulwark is too thin to accommodate the full length. The holes were wide enough for the tongues except for a few cases where the layers of bulwarks were very slightly out of alignment (due to soaking) and in those cases it was relatively easy to enlarge the hole with a micro drill - albeit the drill bit is circular and the hole required is rectangular. I accepted that it wasn’t a perfect fit, but didn’t have problems with CA from that. I would also love to know how the experts would approach this.
-
Looks great Simon
-
Thanks Chris, I’ll leave it a couple of days to dry. I’m not going to glue it until the second planking is complete, as you suggest in the instructions. Just use it for positioning the first plank for now, but it will need to shrink back for that too.
-
Thanks Chris, I’ll do that. How did you bend it dry around the bow? Mine felt like it was going to snap so I soaked it.
-
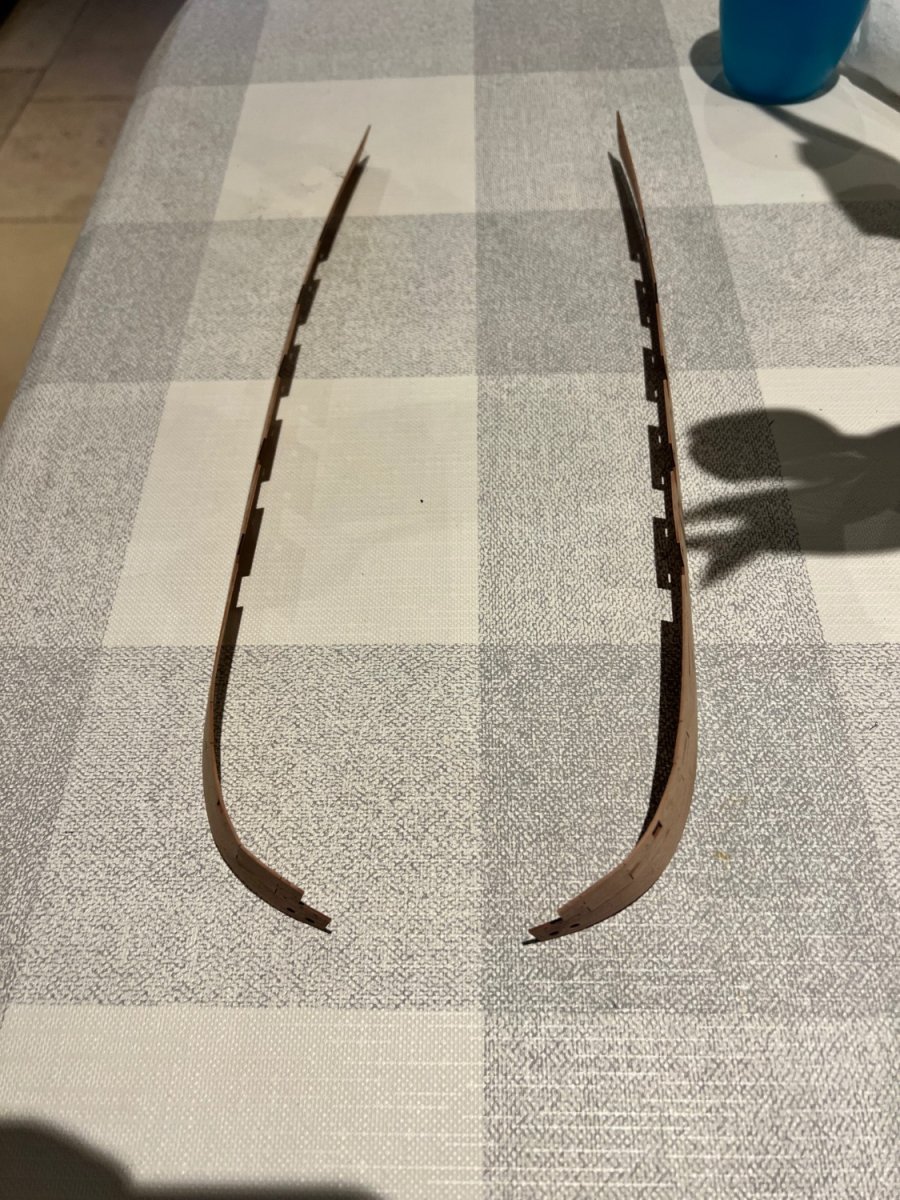
This is the completed first planking, sanded and filled. It’s good and smooth to the touch, although it doesn’t look it in the photos. The lower transom is glued on, the upper part I’ve clamped just to aid positioning the lower transom and will remove. The fascia is added to the stem post, creating a decent rabbet for the second planking. The keel is also added, showing the gaps for the drop keels. Then the fascia for the keel. Lastly in this post, I soaked and then clamped the outer fascia for the port bulwark. I tried dry fitting it, but it would have snapped if I forced it. The instructions don’t say soak the part, but a few pages later, Chris shows these pre-shaped, so I think soaking is the right approach.


-
Thanks Simon, I’ll try that planking technique. You’re right it should really be Duchess before Speedy as the former, like Adder, has slightly simplified rigging with a few lines omitted. Not sure which order I’ll build them… I have Speedy, but not Duchess.
-
Thanks Simon, I do the same pushing the pins fully in when I can’t pre-form the planks well enough, such as in this case. I haven’t tried ironing the planks onto the bulkheads but soak and iron them on a jig as per Chuck Passaro’s method. Usually this works very well, although I’ve never managed to achieve the perfect fit from this approach that Walter [and Chuck] have described, maybe one day…. Adder’s bow is very bluff due to her role as a gun brig, I suspect much more so than Trial and certainly more than any other build I’ve attempted. I’m not at all worried about how the end result will look on Adder. I’m not a purist, if the end result looks good, I don’t really mind how I got there! My build trajectory is likely to be similar to yours. Likely Speedy next, then Duchess unless Chris throws a spanner in the works and comes out with something else exciting like Adder. I’d strong recommend Grecian too, she’s easy to build, looks fantastic finished and the built model is quite substantial compared to Adder, Speedy, Alert, Trial, etc. I don’t think the photos online do her justice as she’s hard to photograph with those very long masts and bowsprit.
-
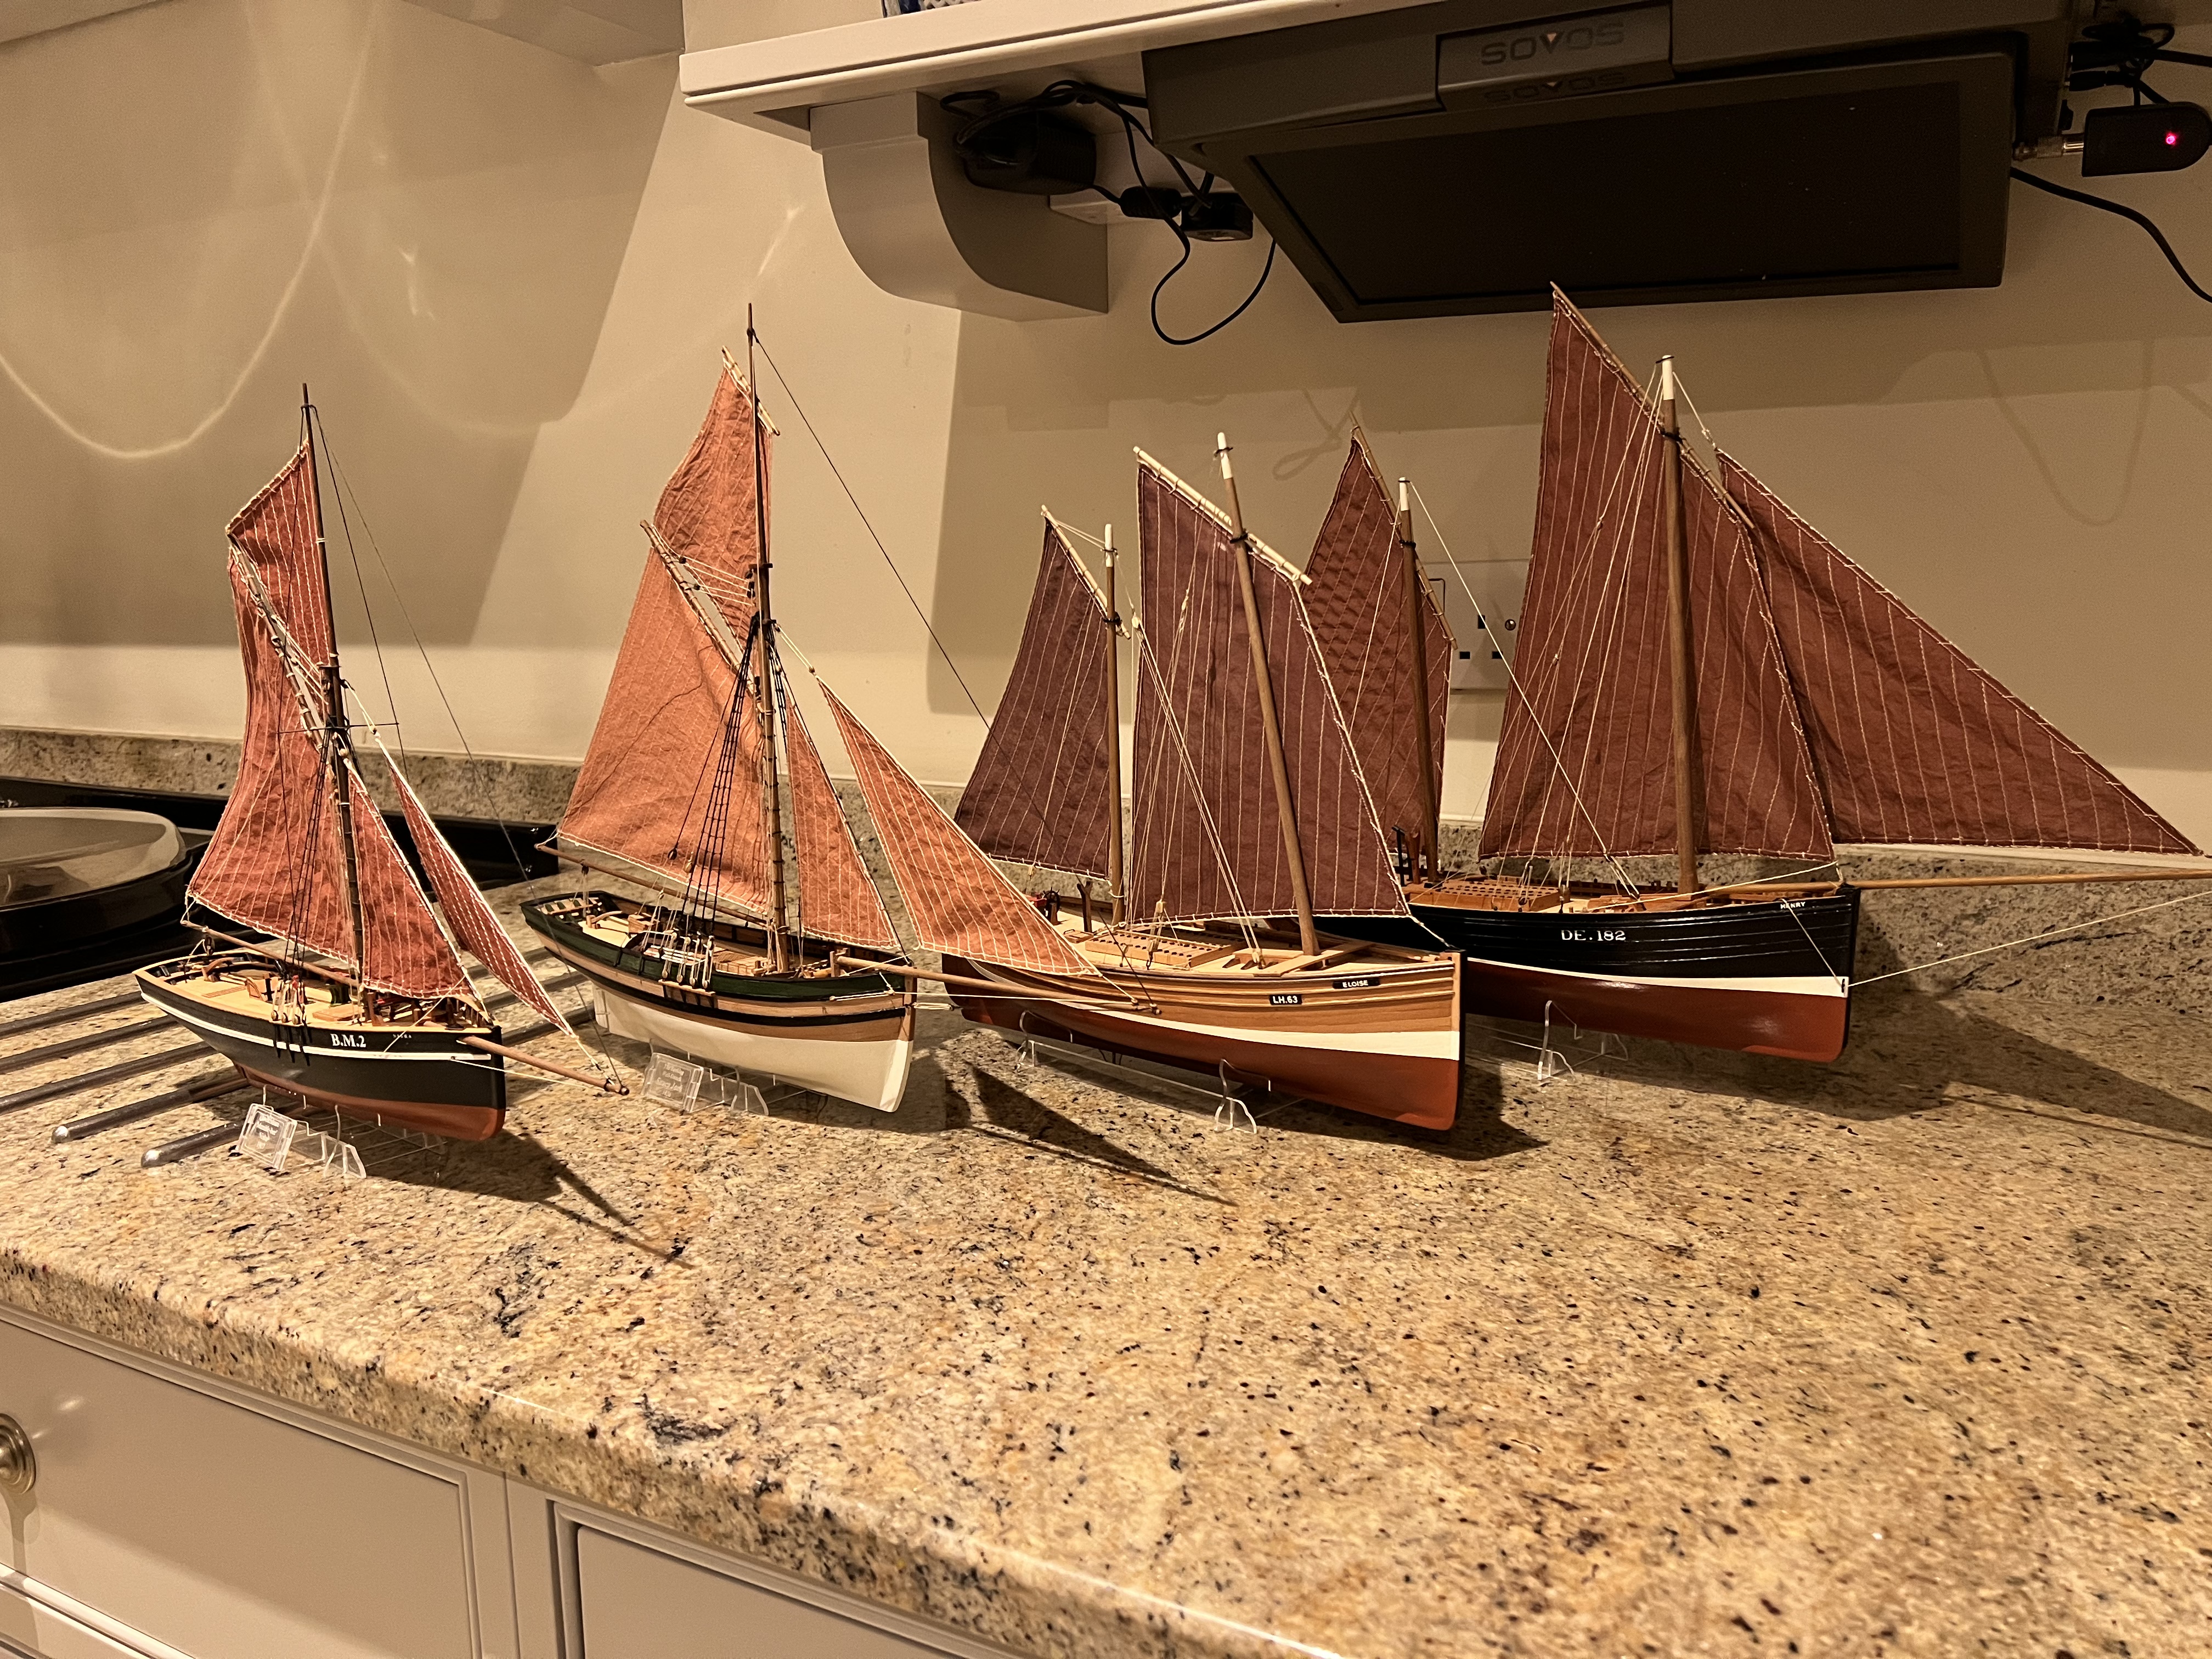
Walter, Simon, I’m not sure I entirely agree on a warship. Looking carefully at Chris’s photos of the Adder prototype on the VM website and in the manual, there doesn’t look like there is any visible hint of planking under a very smooth white painted lower hull. That’s the look I’m aiming for on Adder, although I doubt I’ll be able to achieve it! I liked a bit of planking showing through on the VM fishing boats, as these were likely much cruder built working boats.
-
Simon, look forward to seeing you build her. I’m enjoying your Trial which is looking great.
-
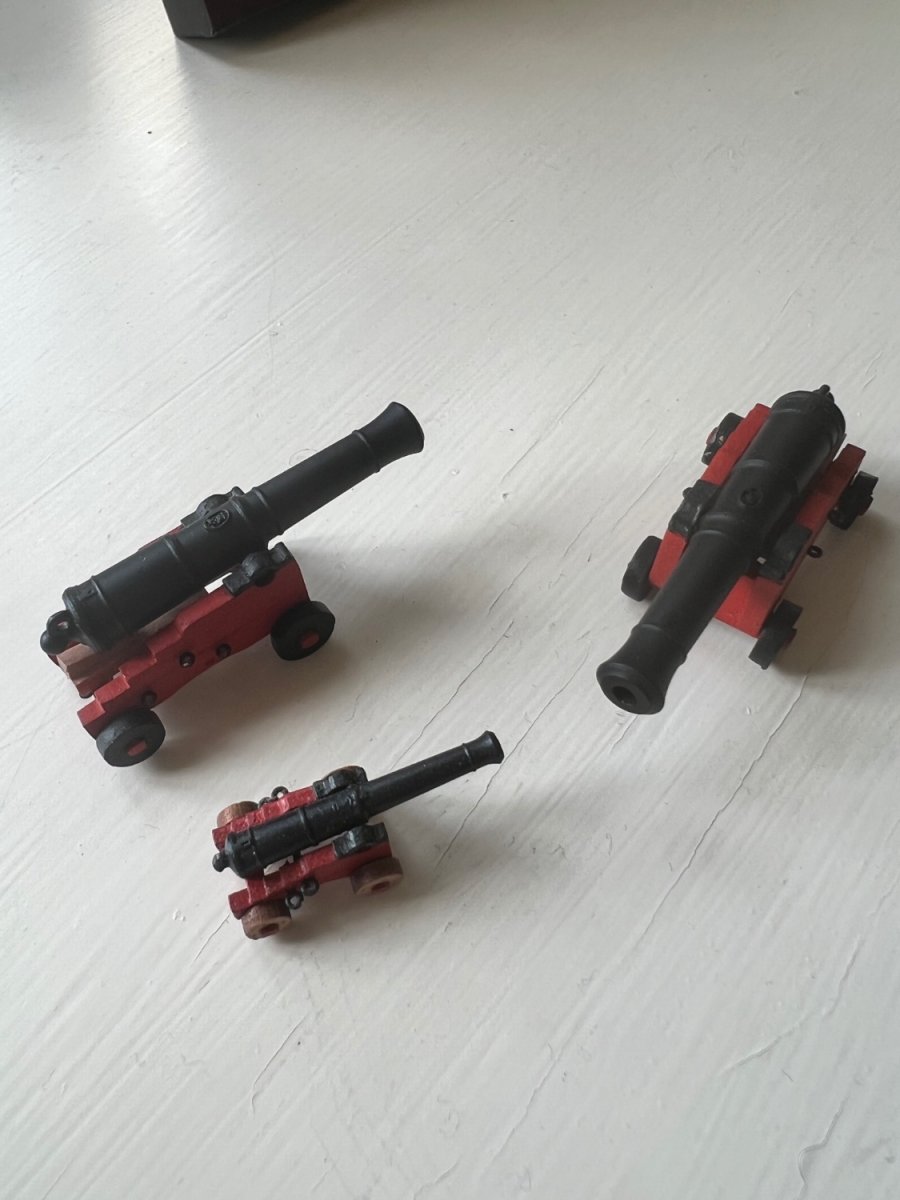
Thanks Ogri, will do. Yes, Chris’s advice is super too. I’ve also built the 24 pounders. I agree entirely on Vanguard. I’m posting my log to help any other builders with some of the issues that I, as a relatively inexperienced builder, run into and how these are overcome. Plus to benefit from the wealth of knowledge, advice and experience of other builders on MSW.
-
Allan, Thanks for the very useful advice. I have indeed watched the Chuck Passaro video numerous times. I don’t use his tick mark method - I’m too impatient and find it hard to accurately apply the correct width of taper to each plank. I think that Chris, Walter and Ogri are correct, the problem for me was not tapering enough, which in turn meant that the run of the planks across the bulkheads was not directionally the same as I checked for whilst fairing by running a test plank across the bulkheads. As I worked down to plank 4 the curve at bulkhead 1 became too sharp for me to pre-form with edge bending. I use the jig, soaking the plank and heating with an iron to edge bend that Chuck shows in his videos, but I wasn’t able to bend a tapered 1mm thick plank to such a sharp angle without snapping it. The lifting you flagged is only really on planks 3-5 from the top and in each case is where the plank has actually snapped. These 1mm thick planks provide a great deal of leeway to sand out a bit of edge lifting. If I’d tapered more then the angle would have been less sharp. You’re right, if I’d used Chuck’s tick mark method for tapering the curve would have been less sharp and preforming would have been easier. The second layer on this build will also be forgiving as it is under the white paint and can also be filled and sanded. But you’re absolutely right, if I ever want an unpainted hull like I need to up my game. Thanks again. Dan
-
Thanks Chris, I was tapering at ~50% so not enough. You make it look so easy in the instructions! I’d done a few more planks down from the top before I saw your and Ogri’s useful advice and have finished the starboard side working up from the bottom. Not planking of great beauty or to be proud of, but will certainly sand and fill into a suitable base for the second planking. Still need to add a stealer at the stern. I’ll try more working up from the garboard plank on the port side. The joy of this build is that even if I do as bad a job of the second planking, it will all be under the white paint below the waterline so can be sanded and filled to perfection. Thanks again for all the advice. Ogri - wish you were doing an Adder log too.