HOLIDAY DONATION DRIVE - SUPPORT MSW - DO YOUR PART TO KEEP THIS GREAT FORUM GOING! (Only 51 donations so far out of 49,000 members - C'mon guys!)
×

DB789
-
Posts
428 -
Joined
-
Last visited
Content Type
Profiles
Forums
Gallery
Events
Everything posted by DB789
-
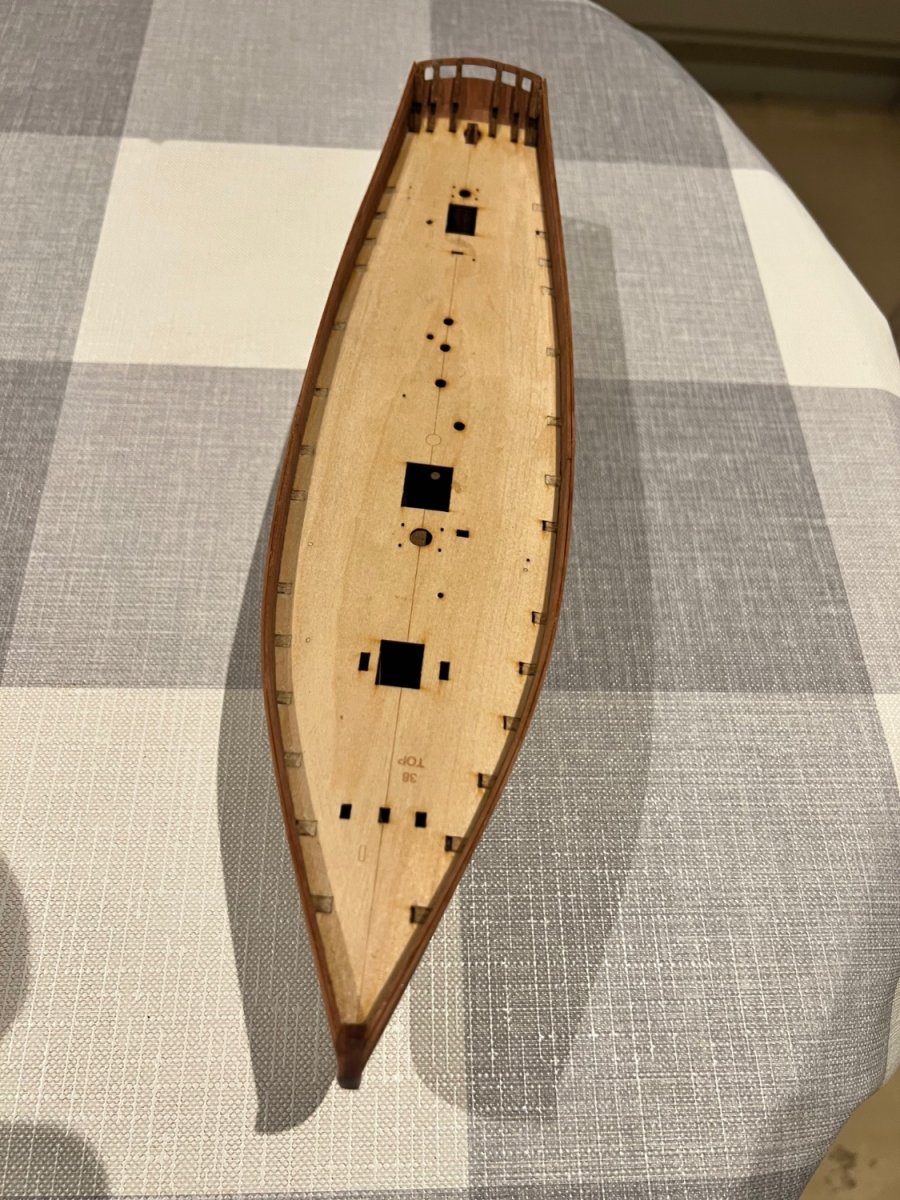
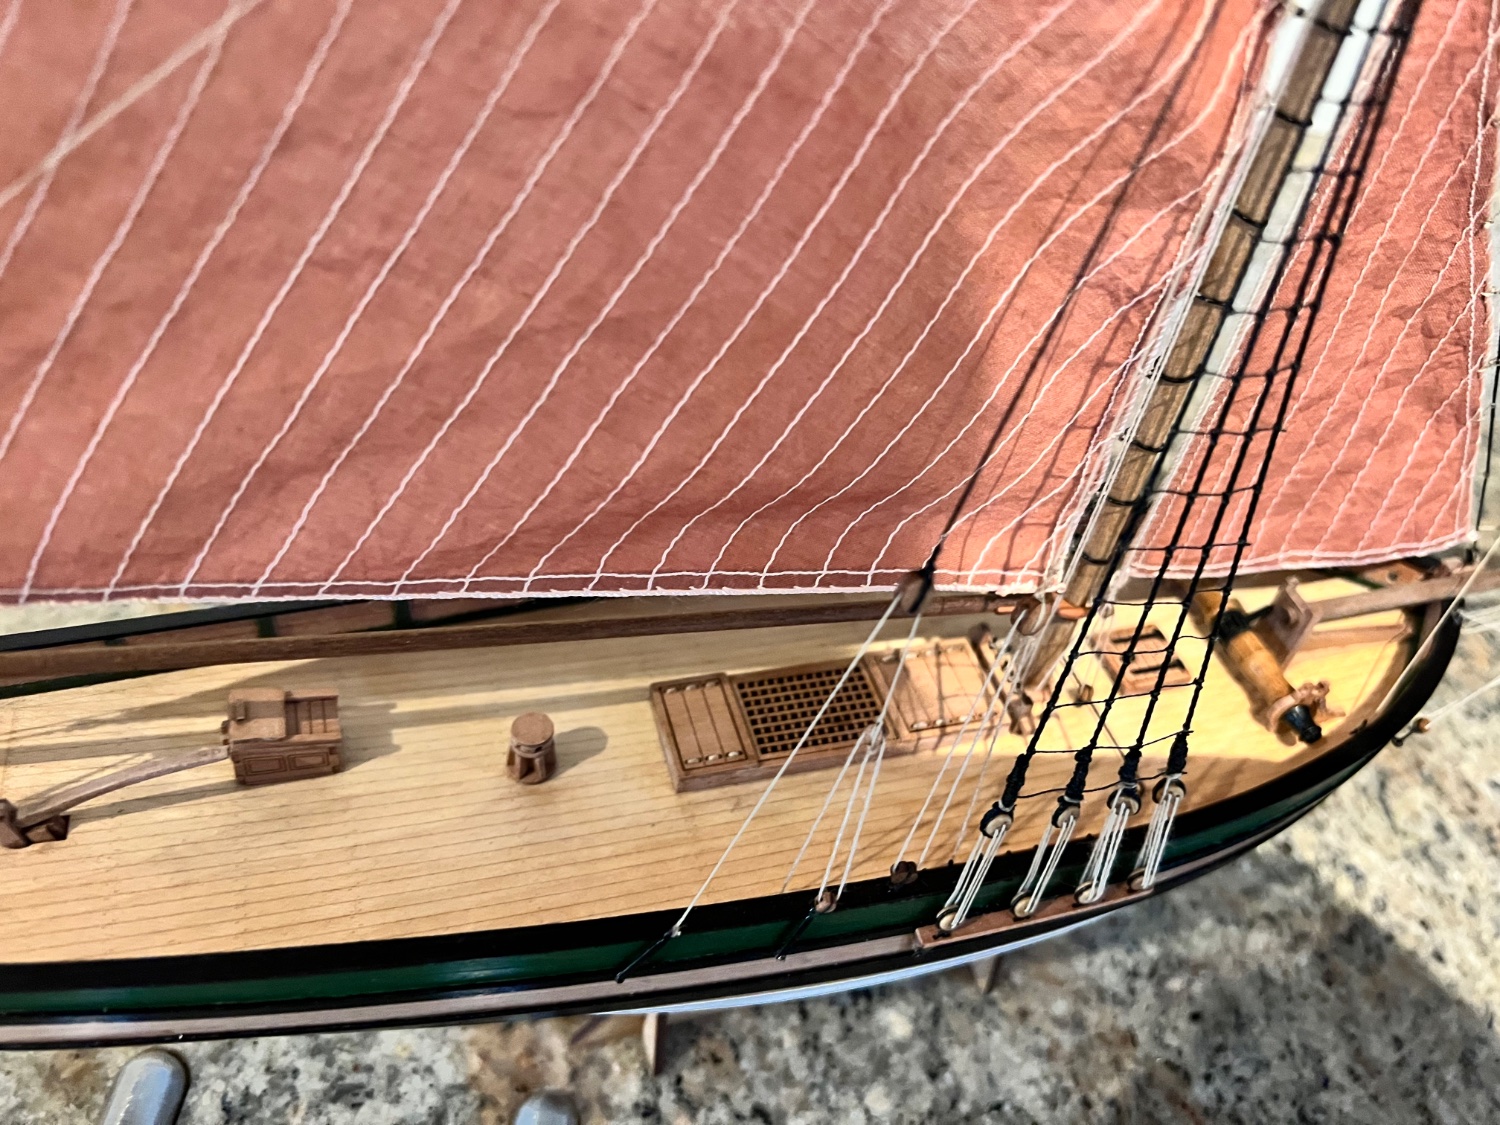
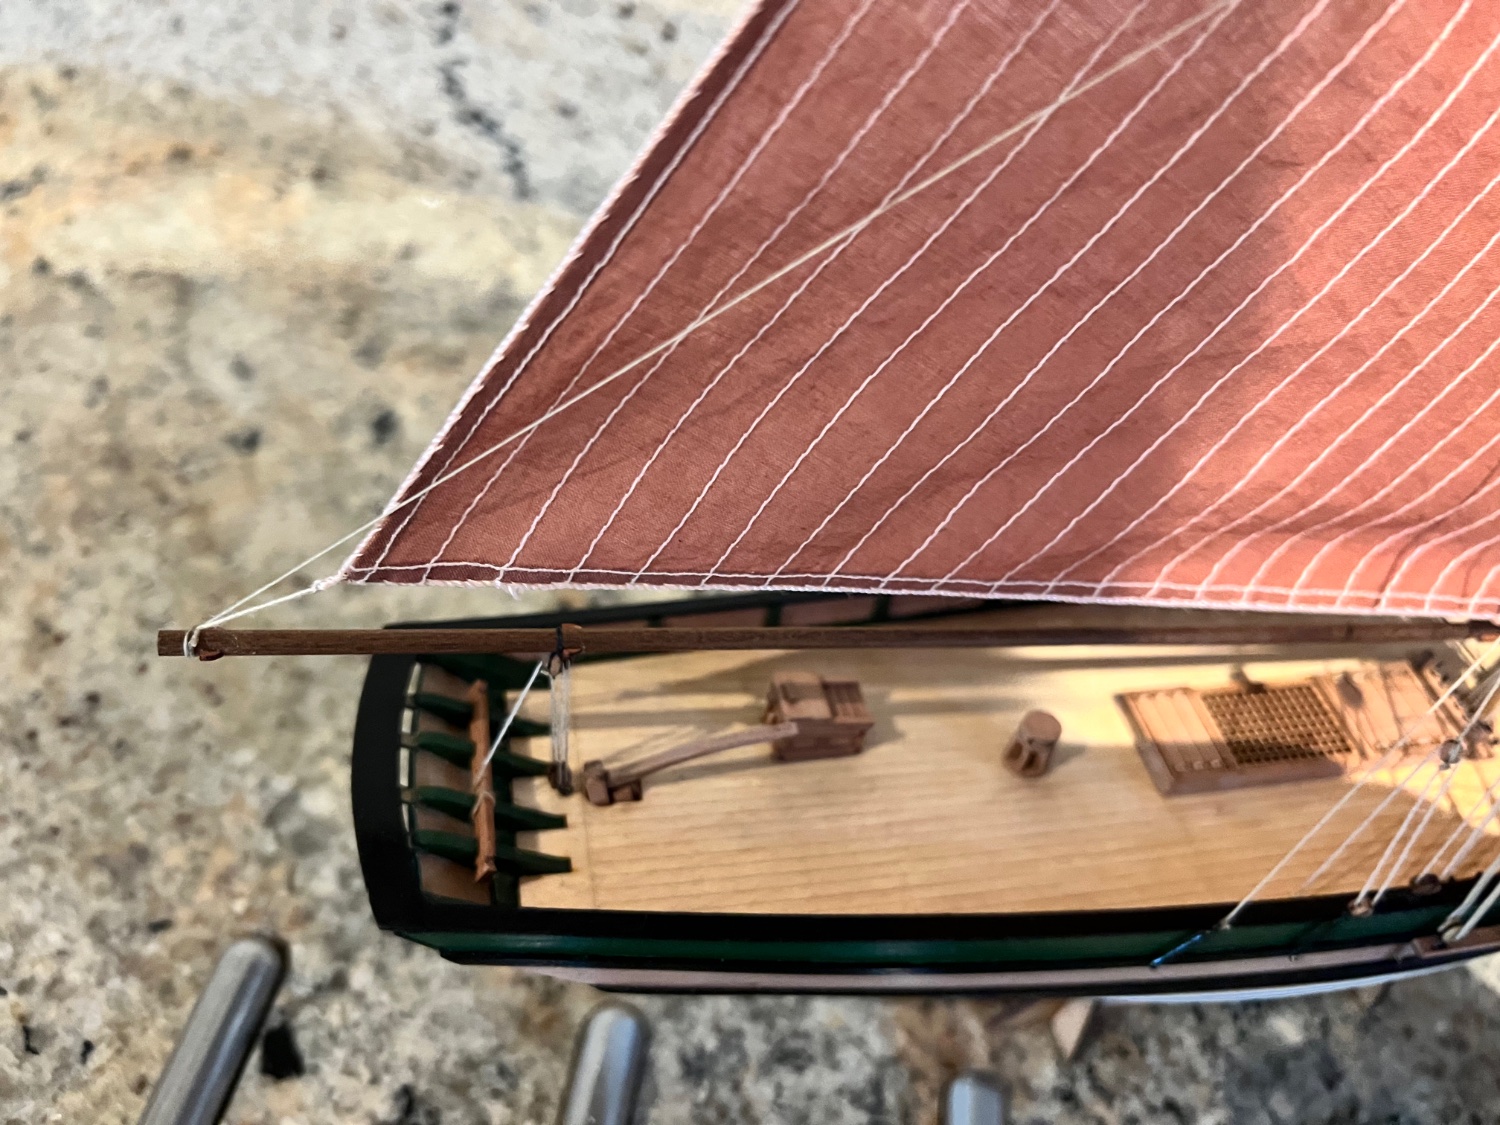
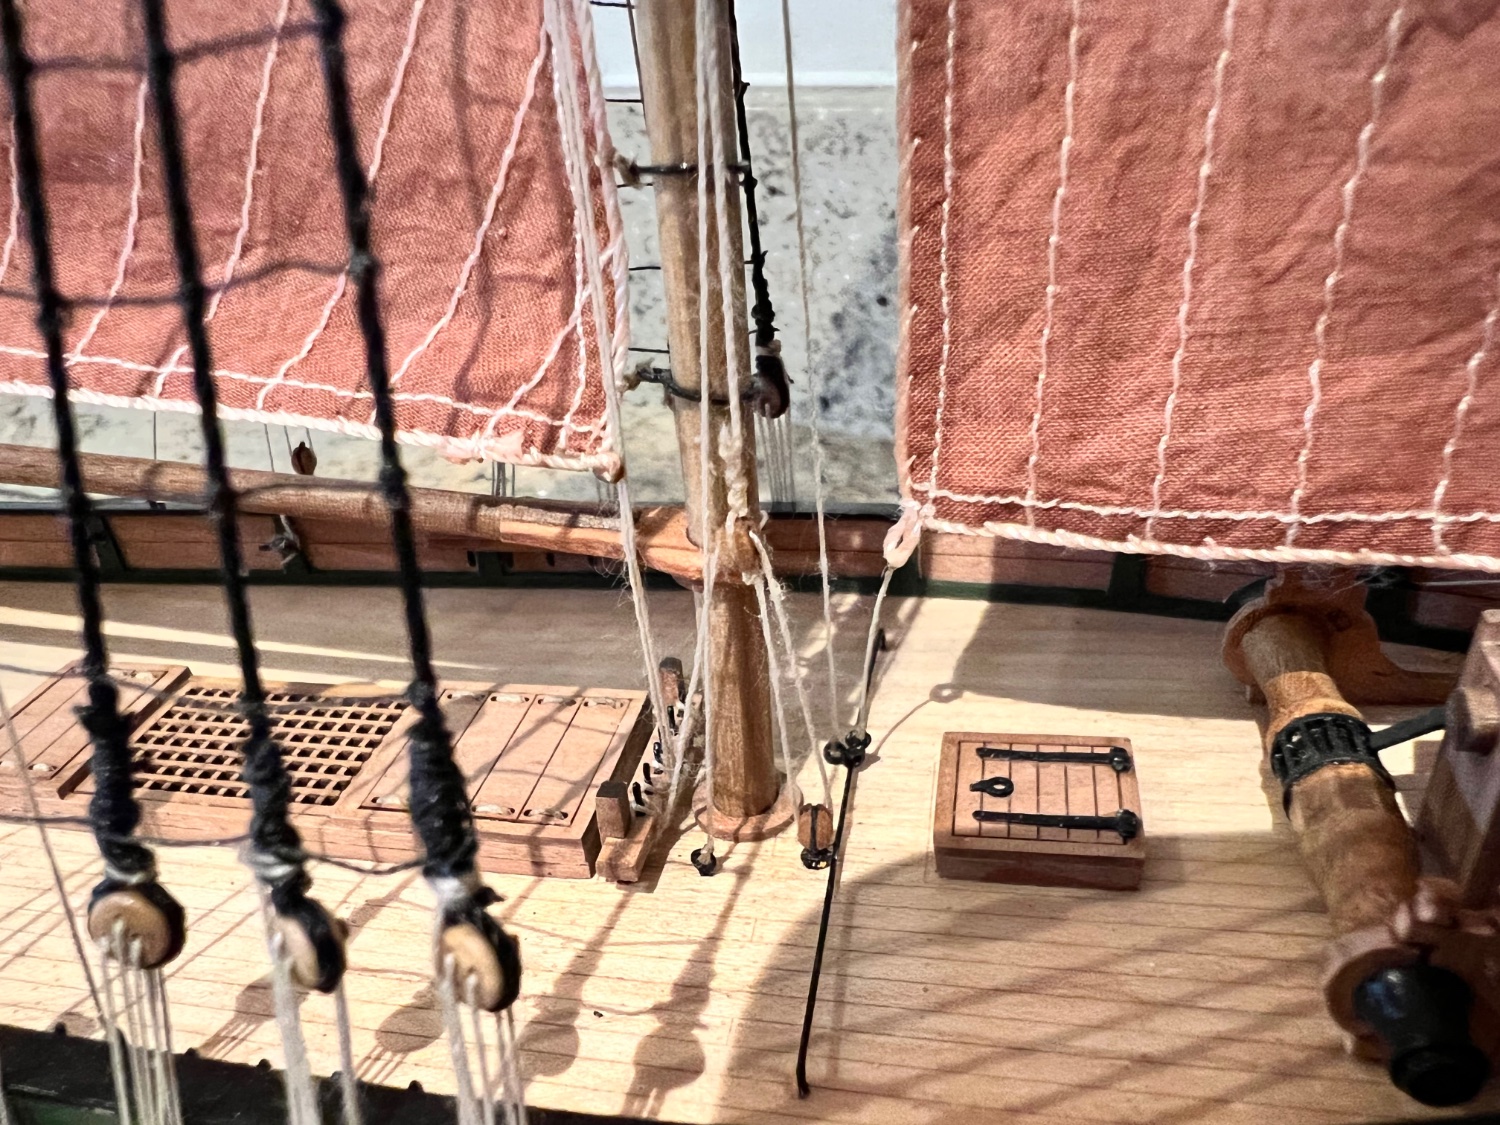
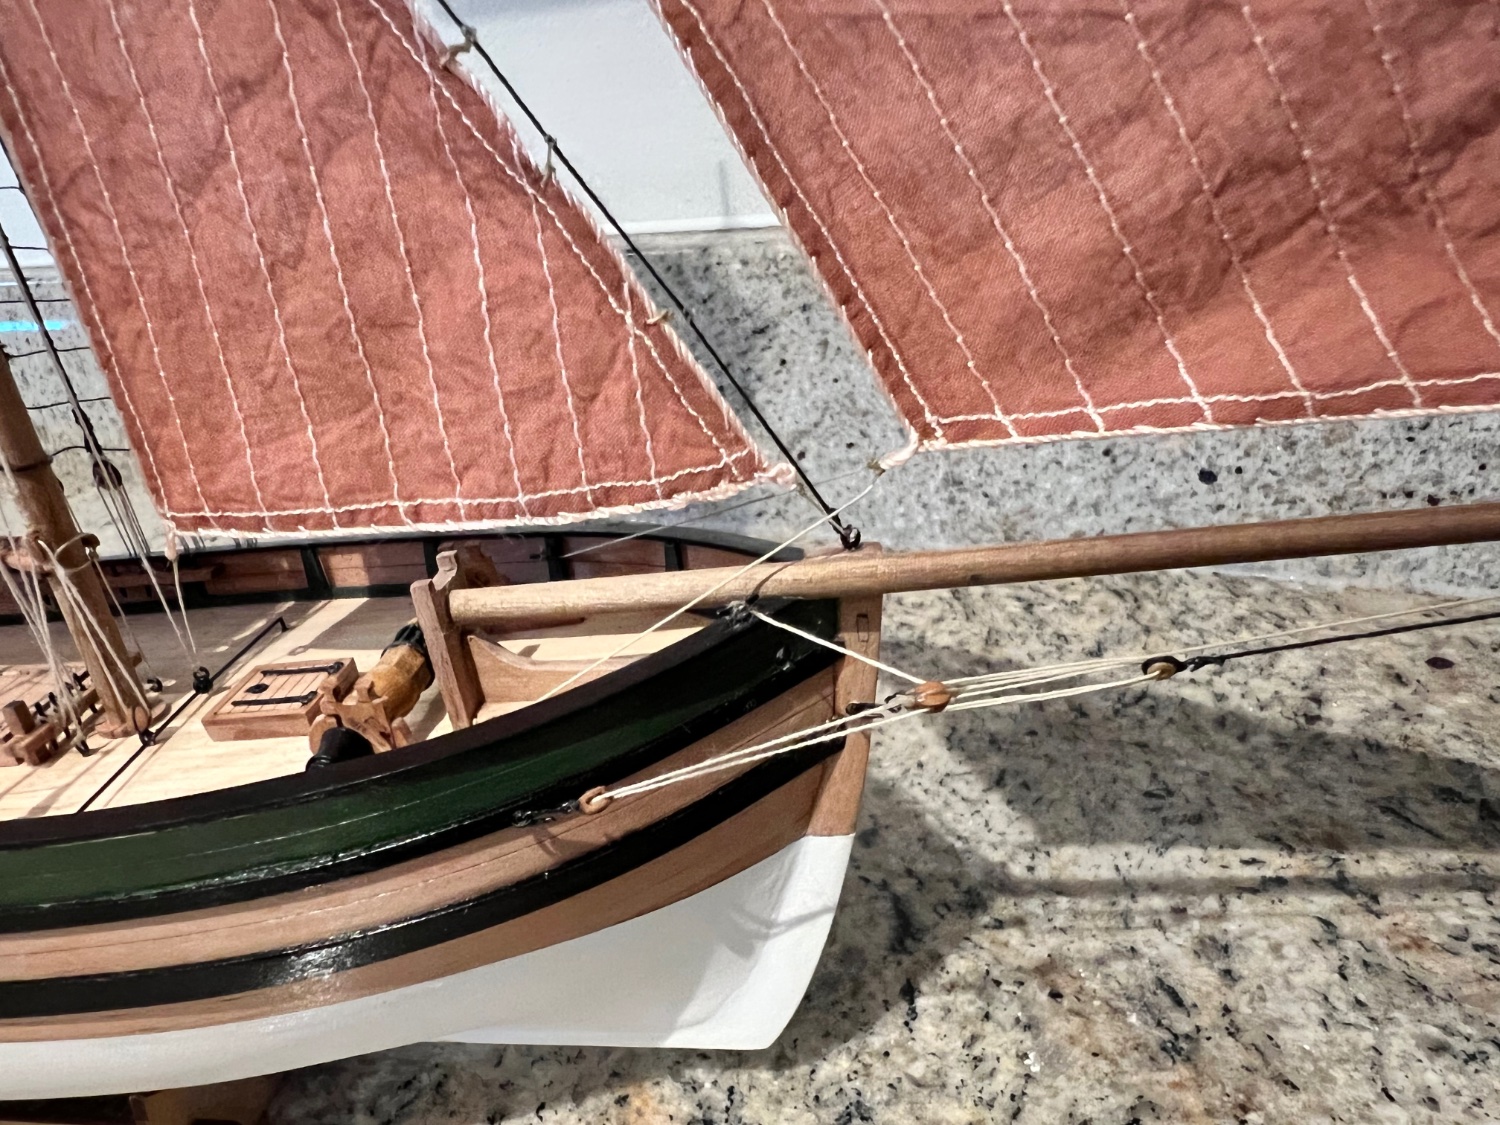
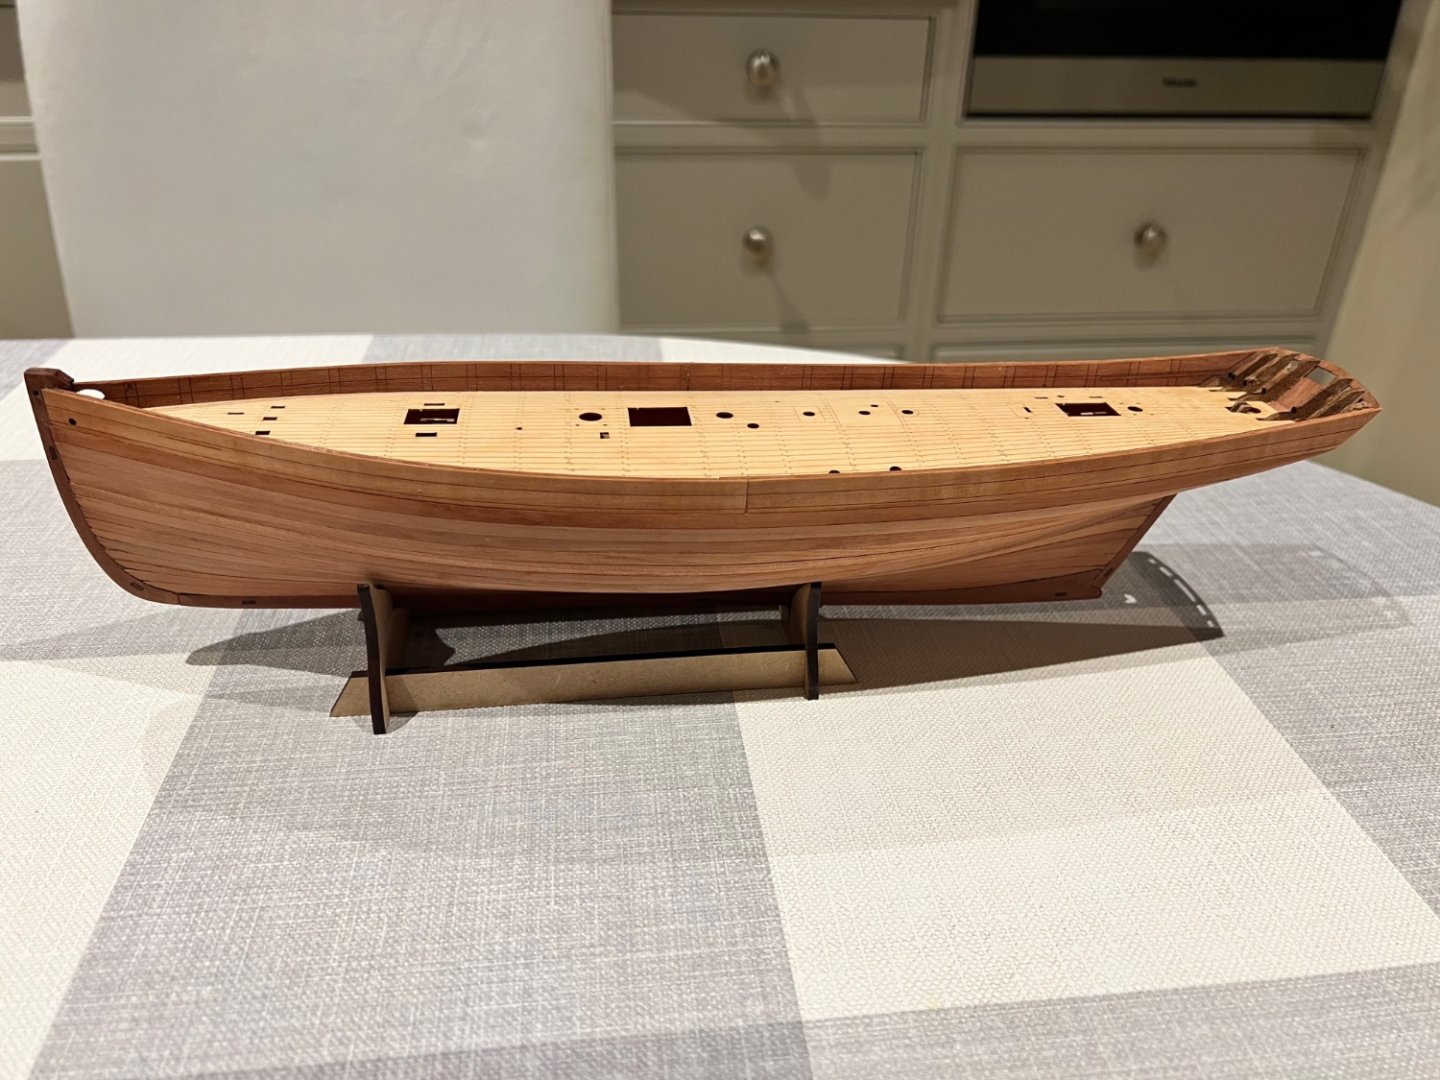
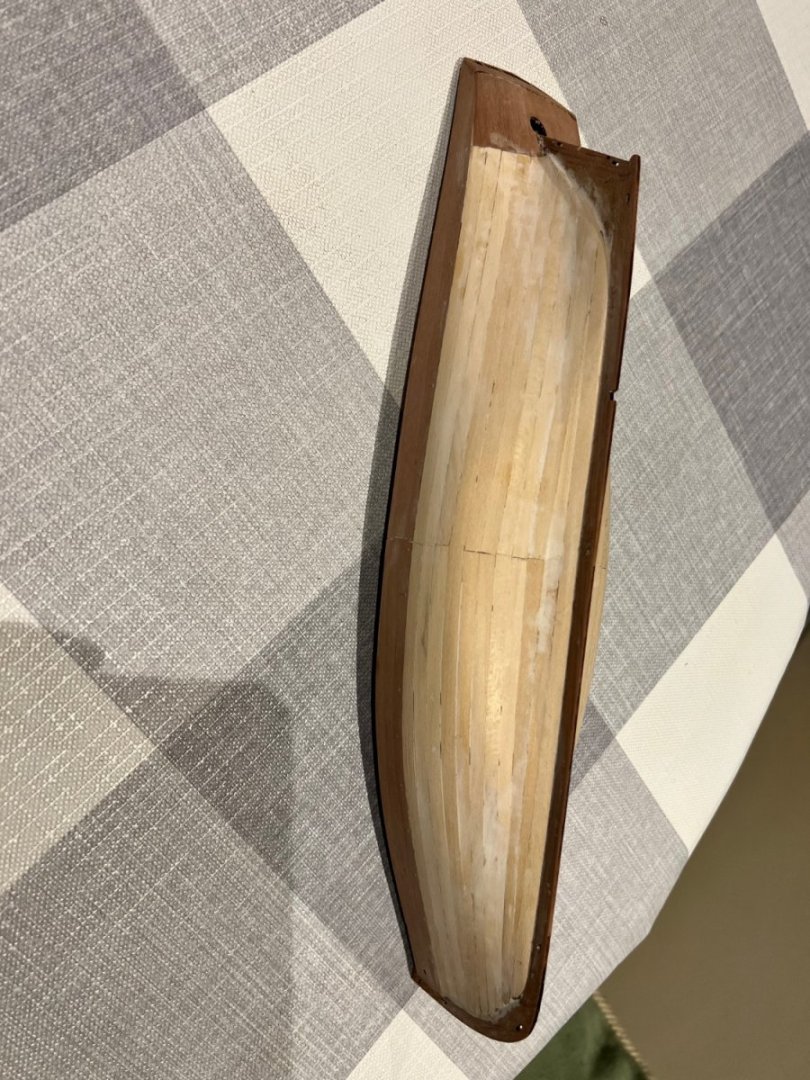
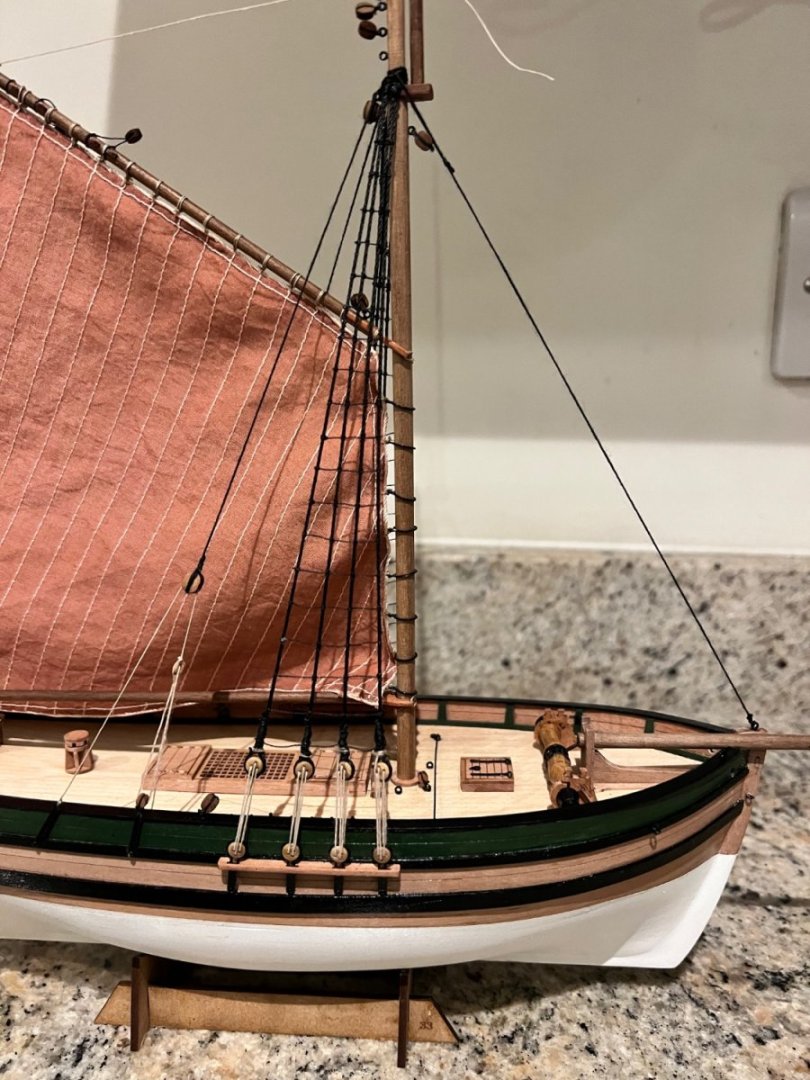
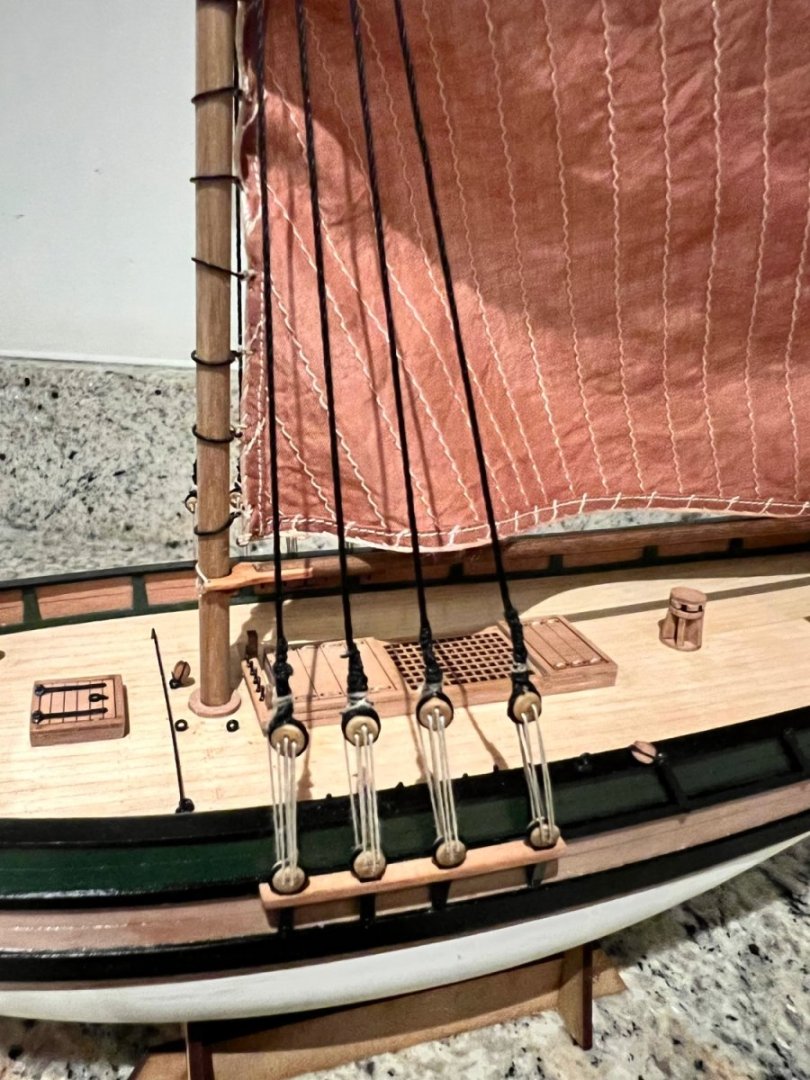
 The bulkhead ears were twisted off and removed. The etched deck for Erycina came with more laser char marks than normal but could be easily cleaned off with some very fine sandpaper. The dust clogged up some of the laser etching so I ran a scalpel along all of the lines to clear them. Then I put a coat of Danish oil on the deck which made it a little darker. The deck fits very well, just need a little laser char removal at the edges to fit perfectly. I haven’t glued it yet as I’ll be painting the inner bulwarks. The varnish for the wipe-on poly came early and having applied it using Glennard’s 50:50 recipe of varnish to white spirit the pear wood does look super.
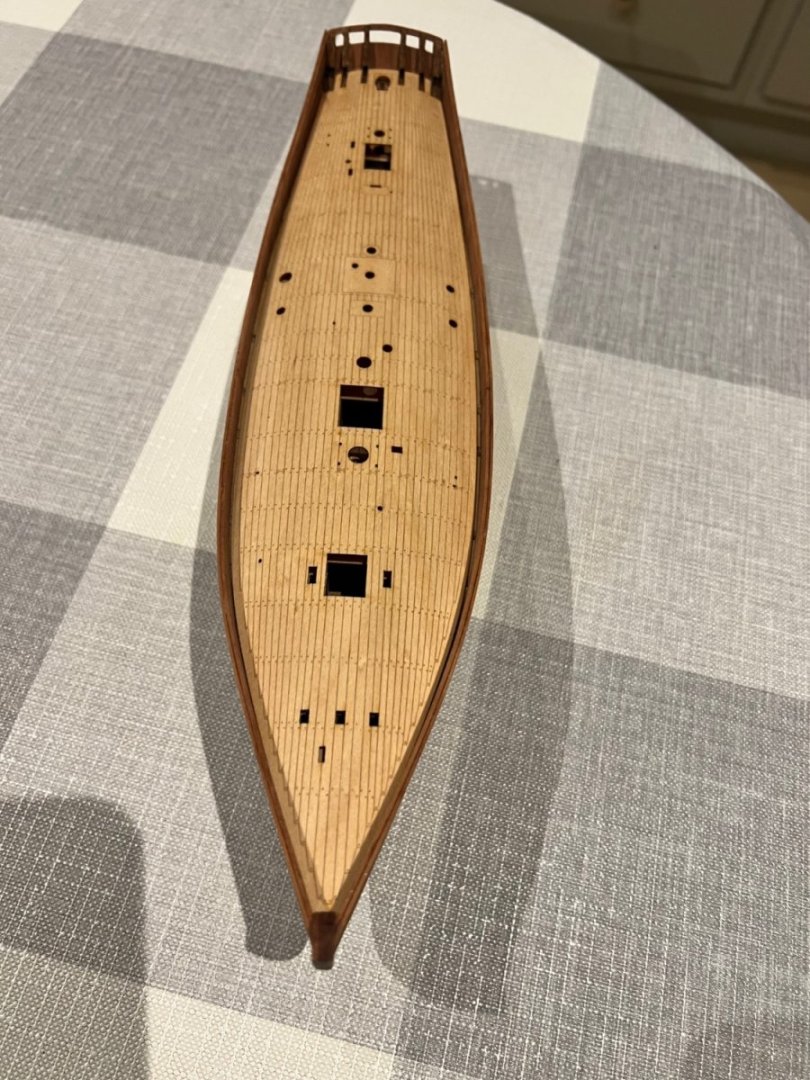


- 46 replies
-
- 3
-

-

-
- vanguard models
- Erycina
- (and 3 more)
-
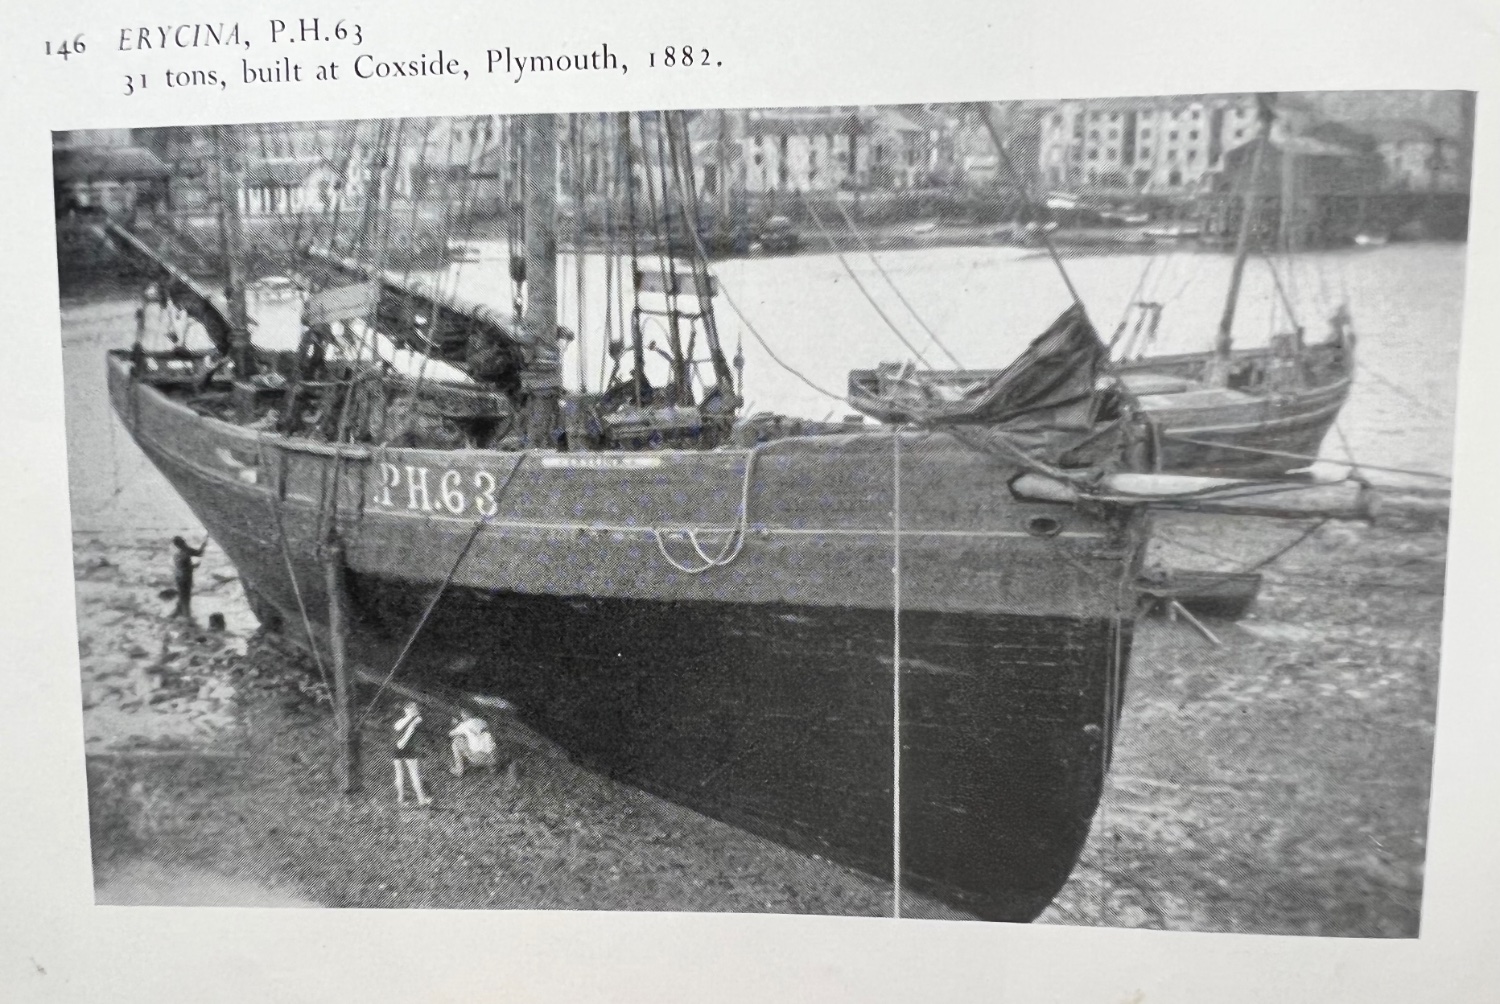
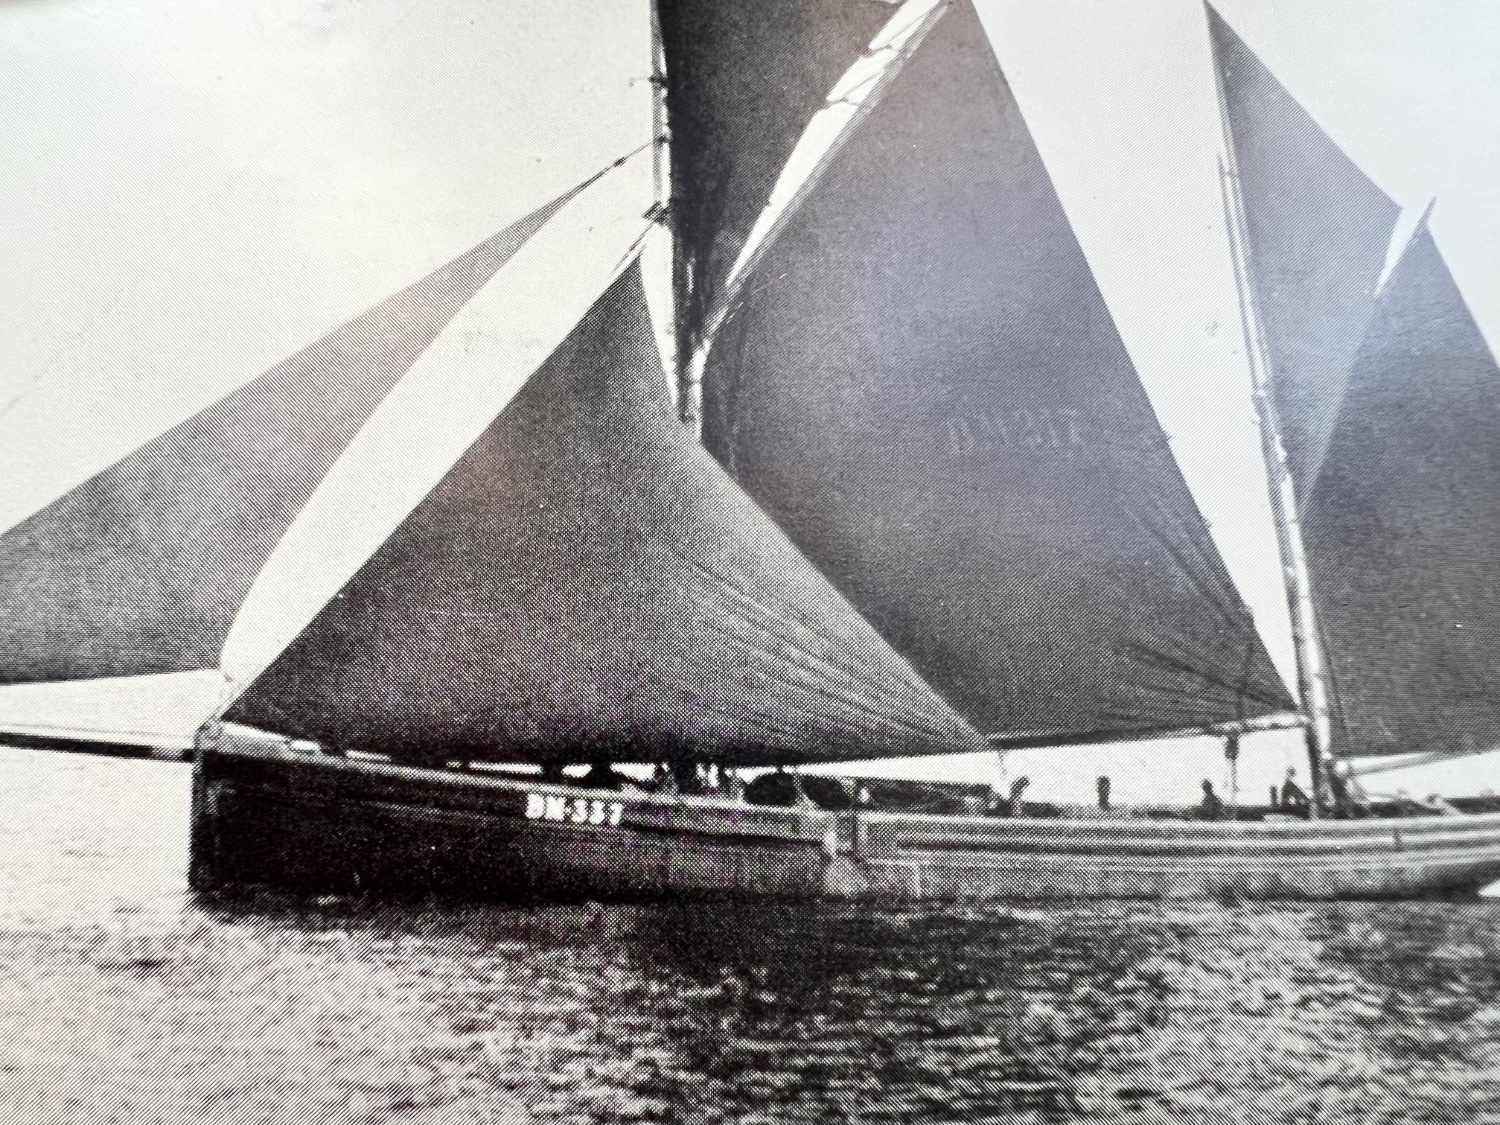
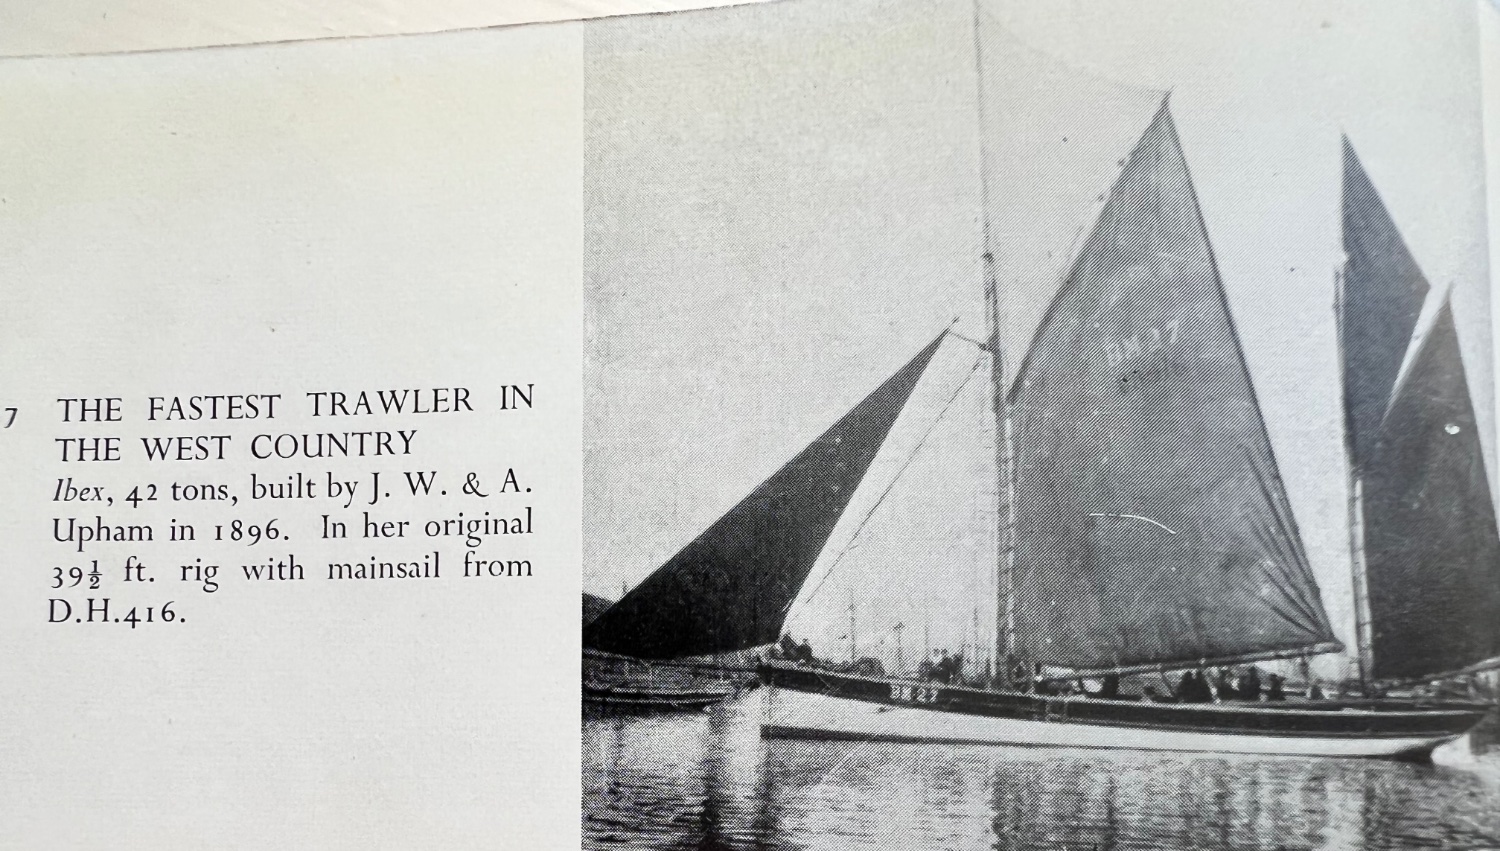
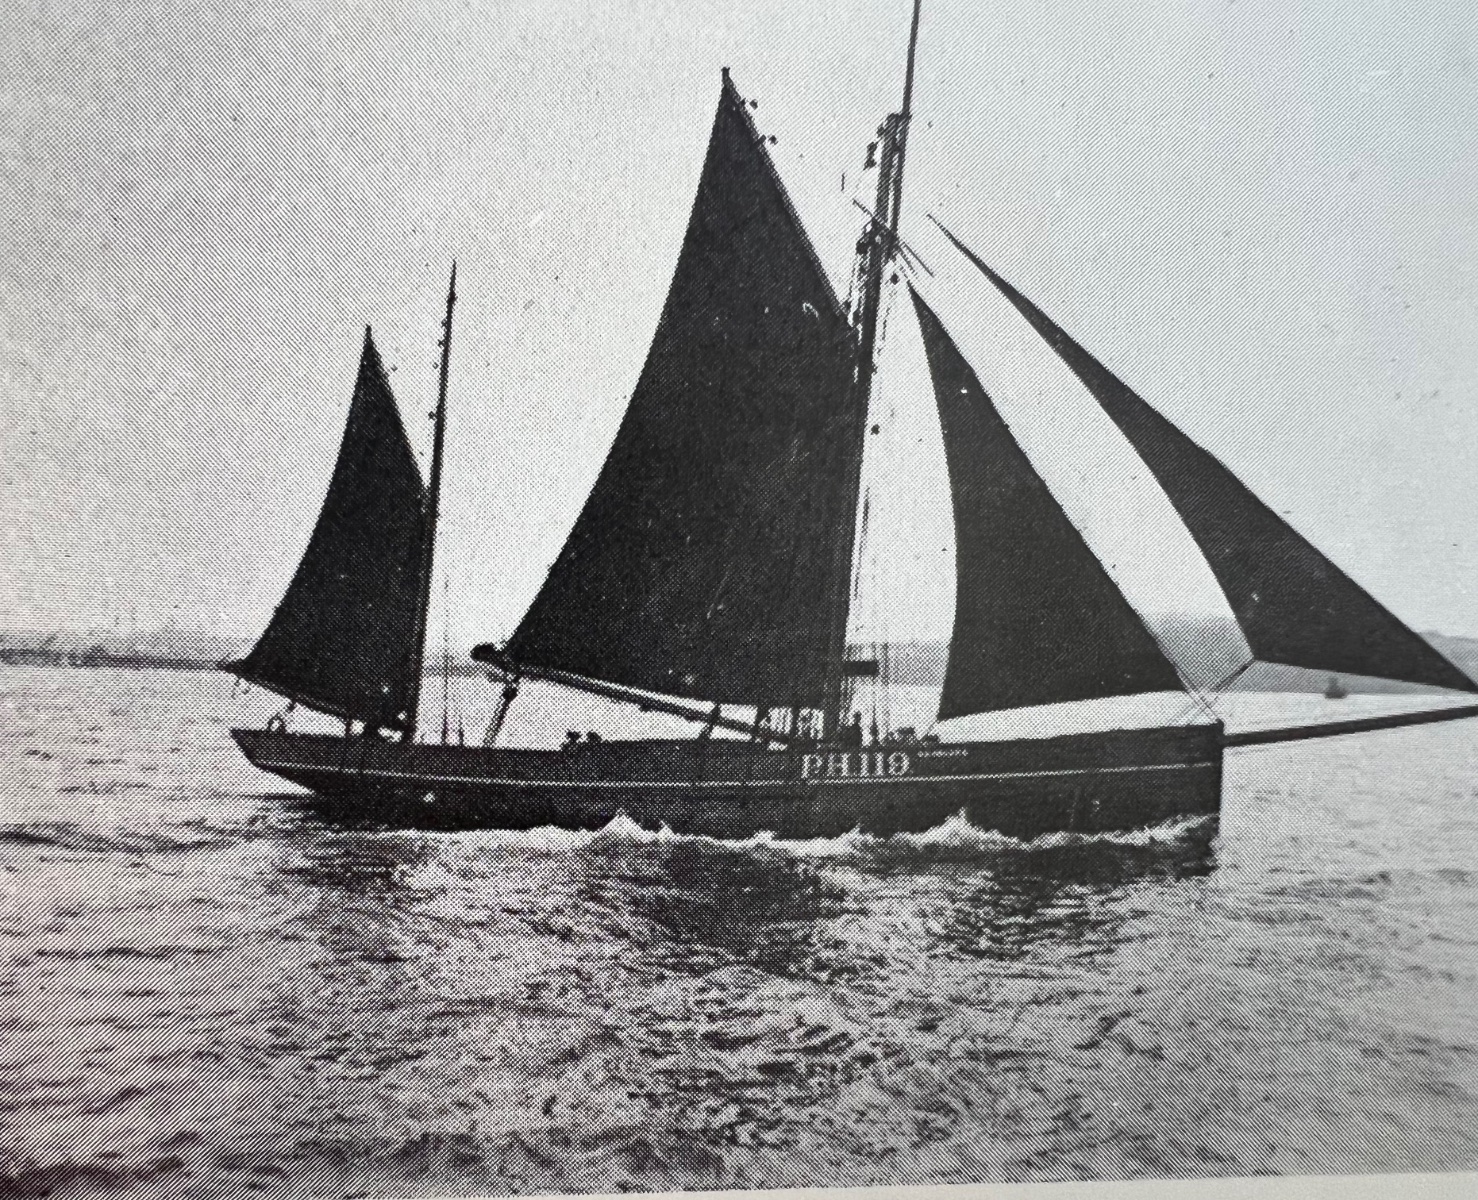
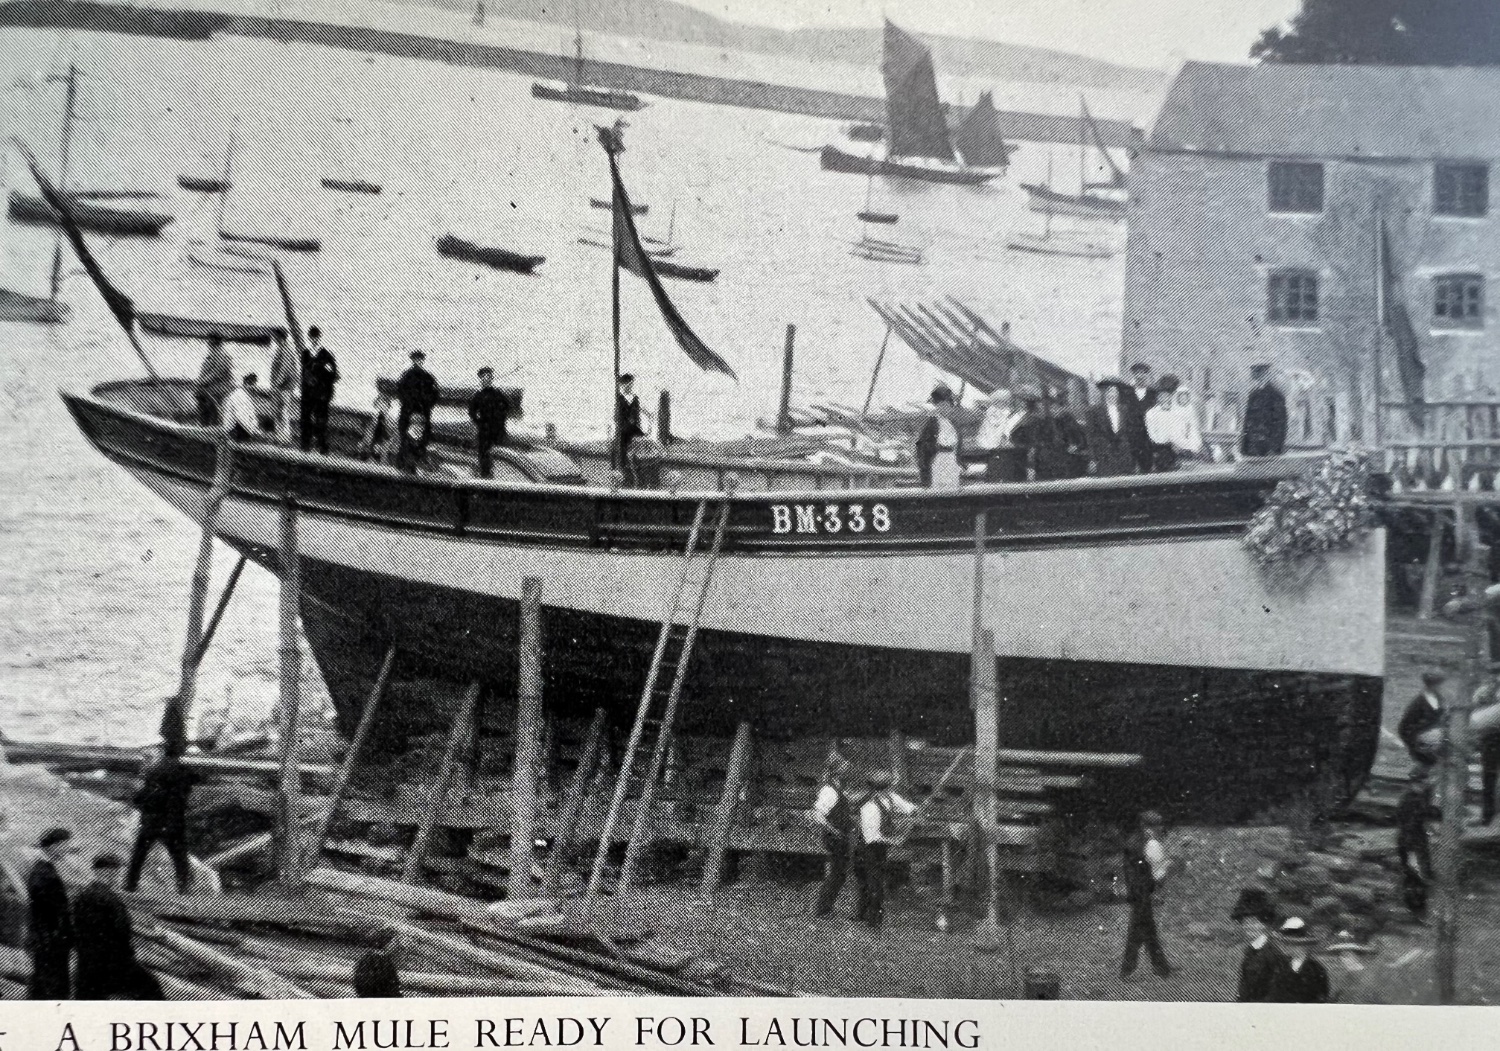
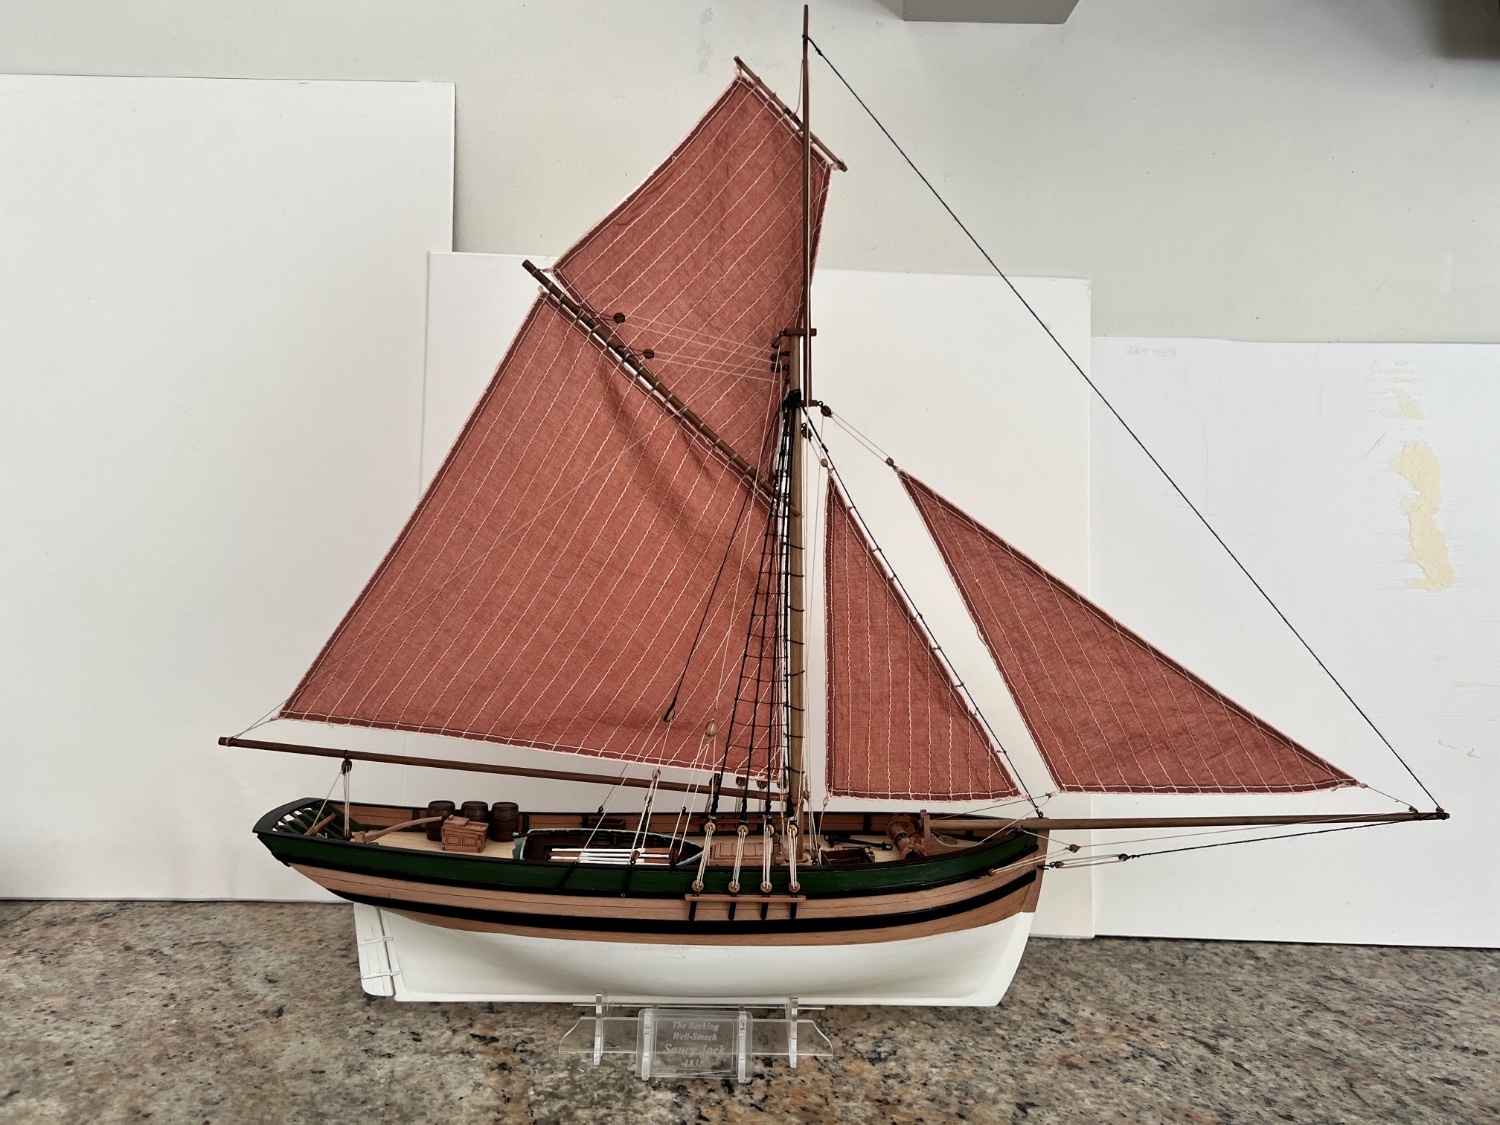
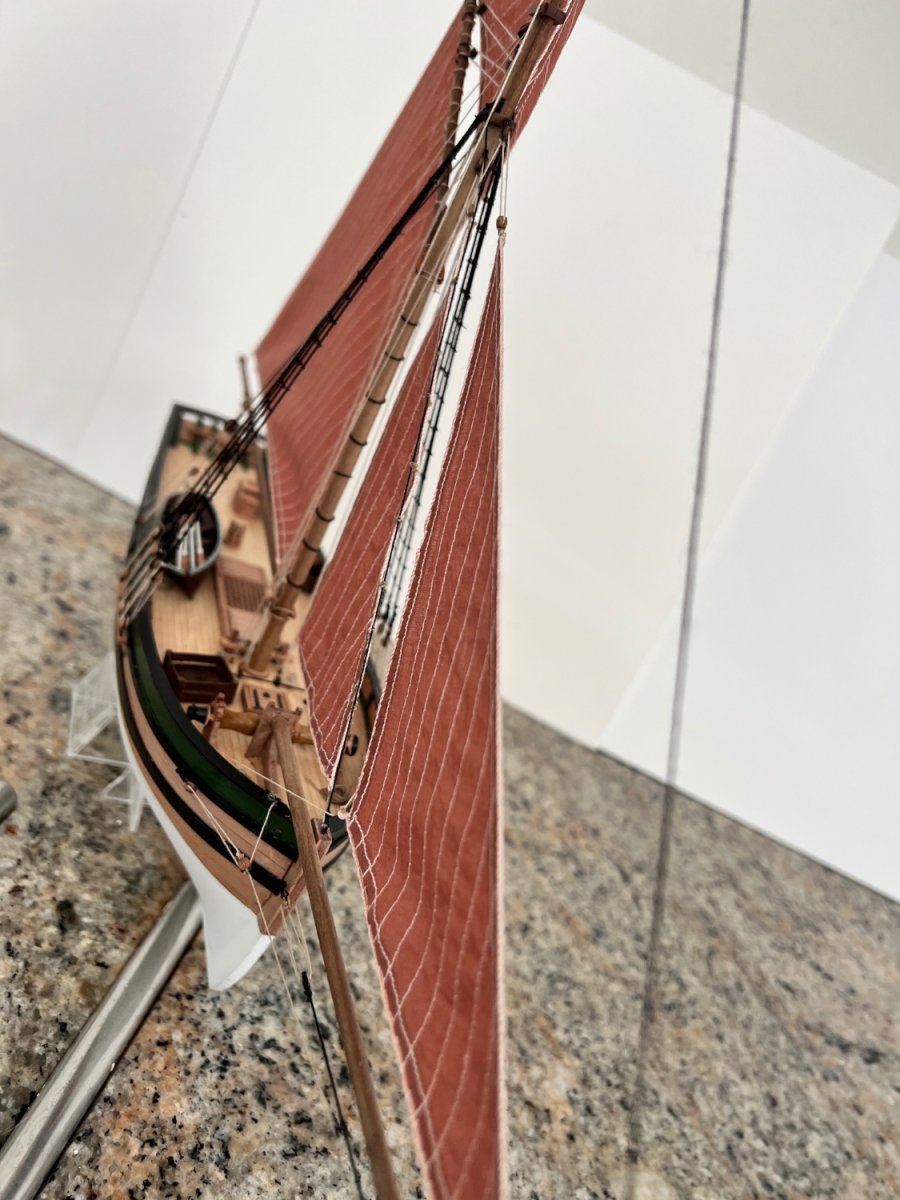
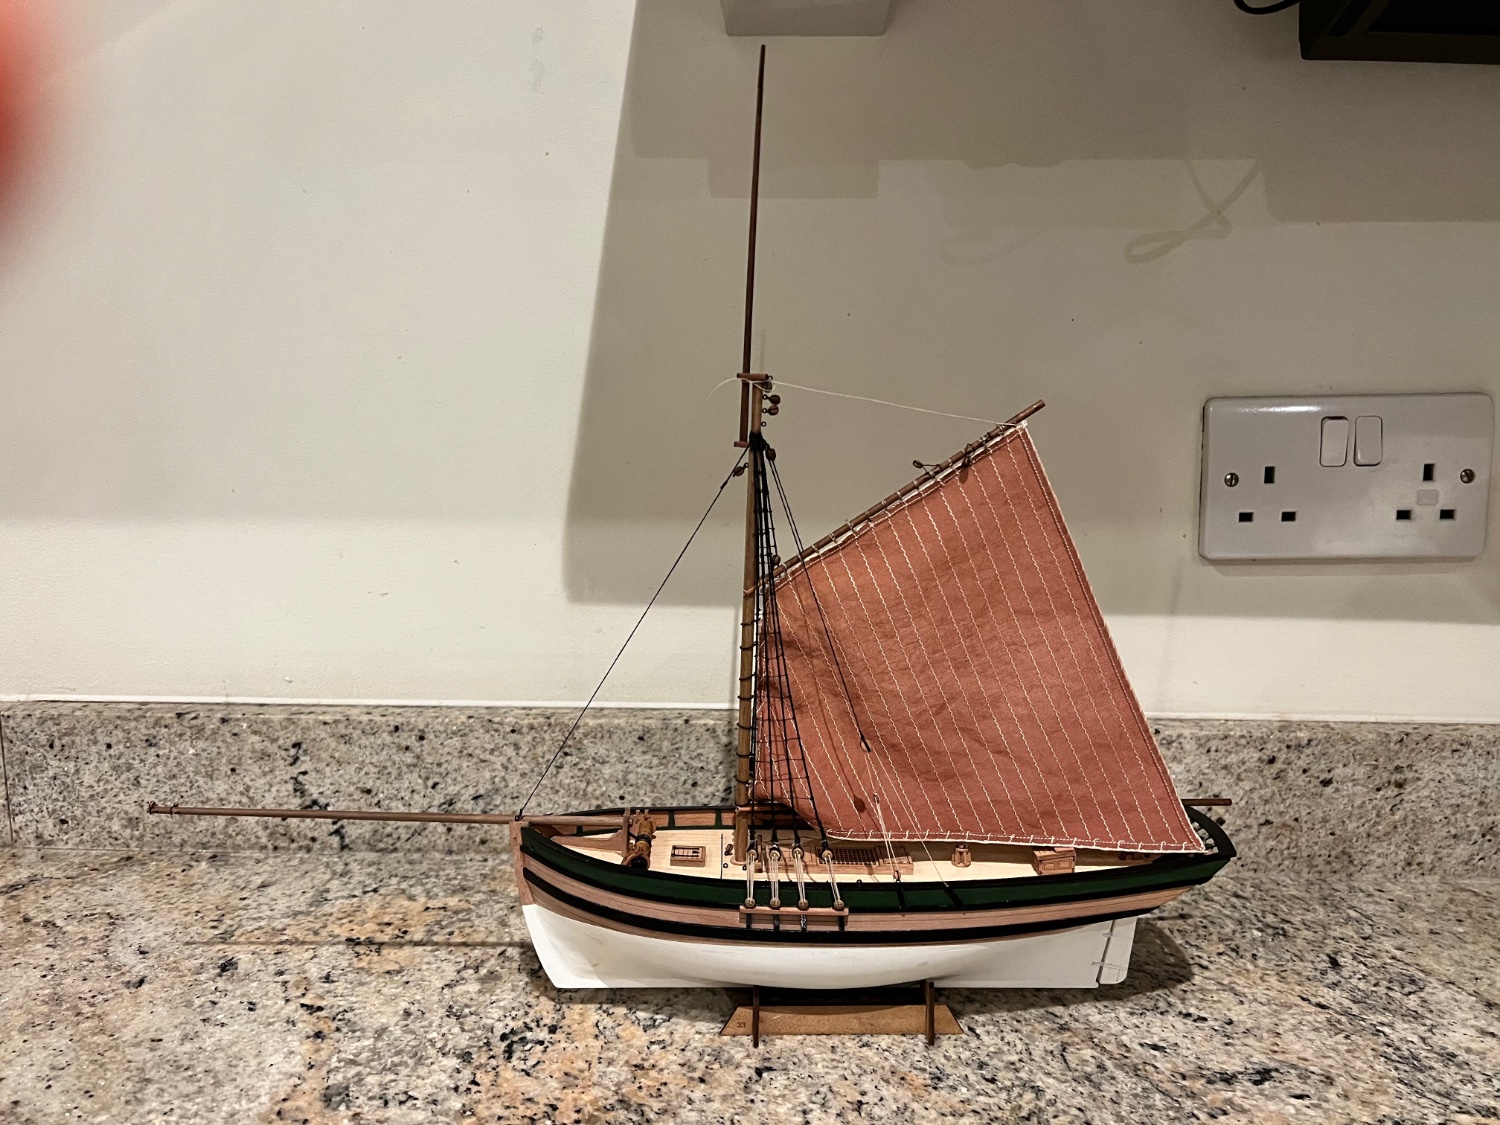
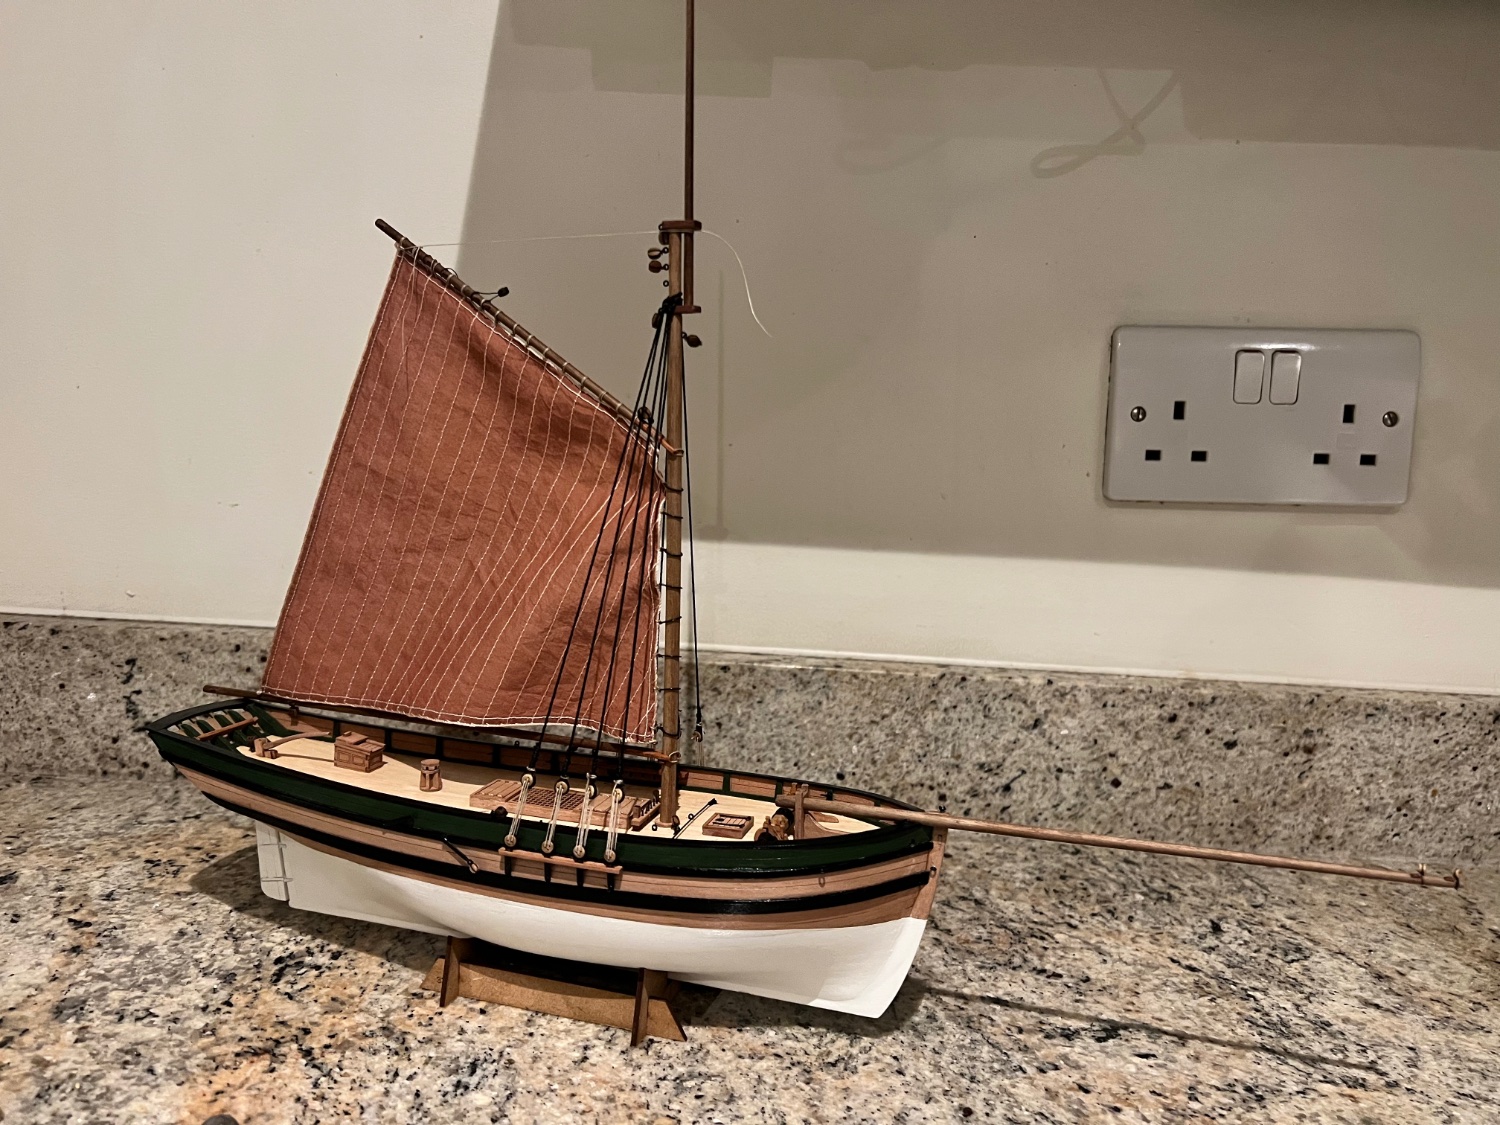
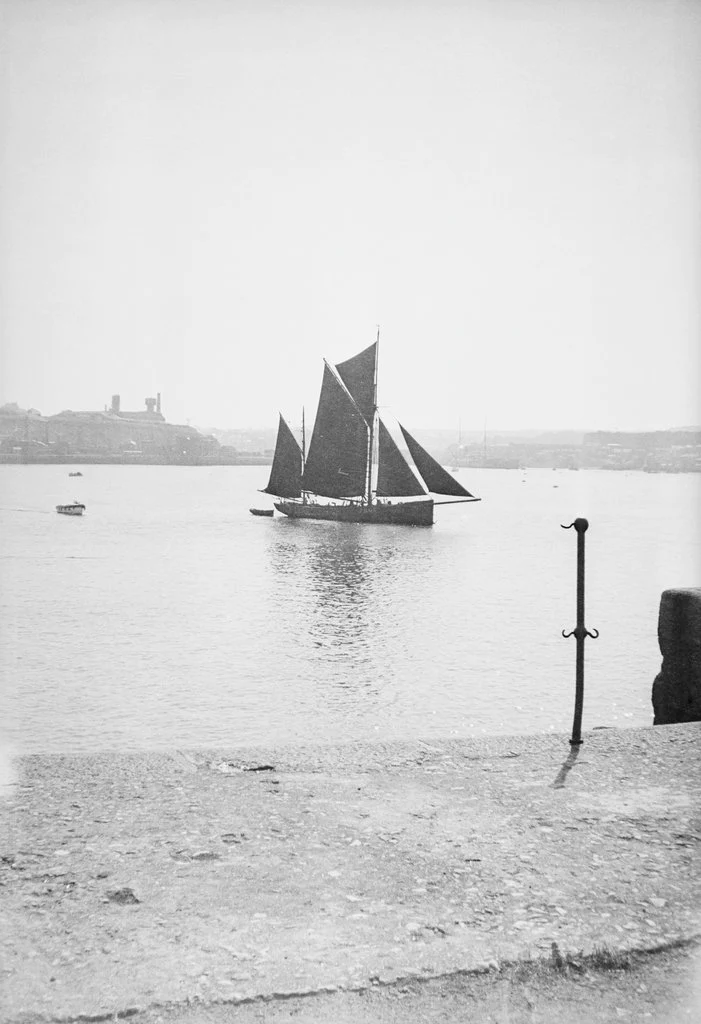
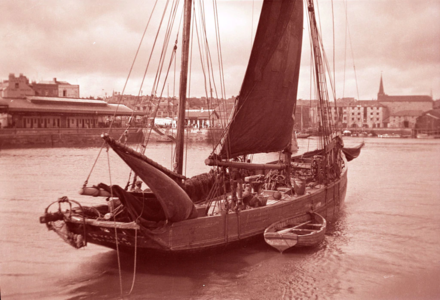
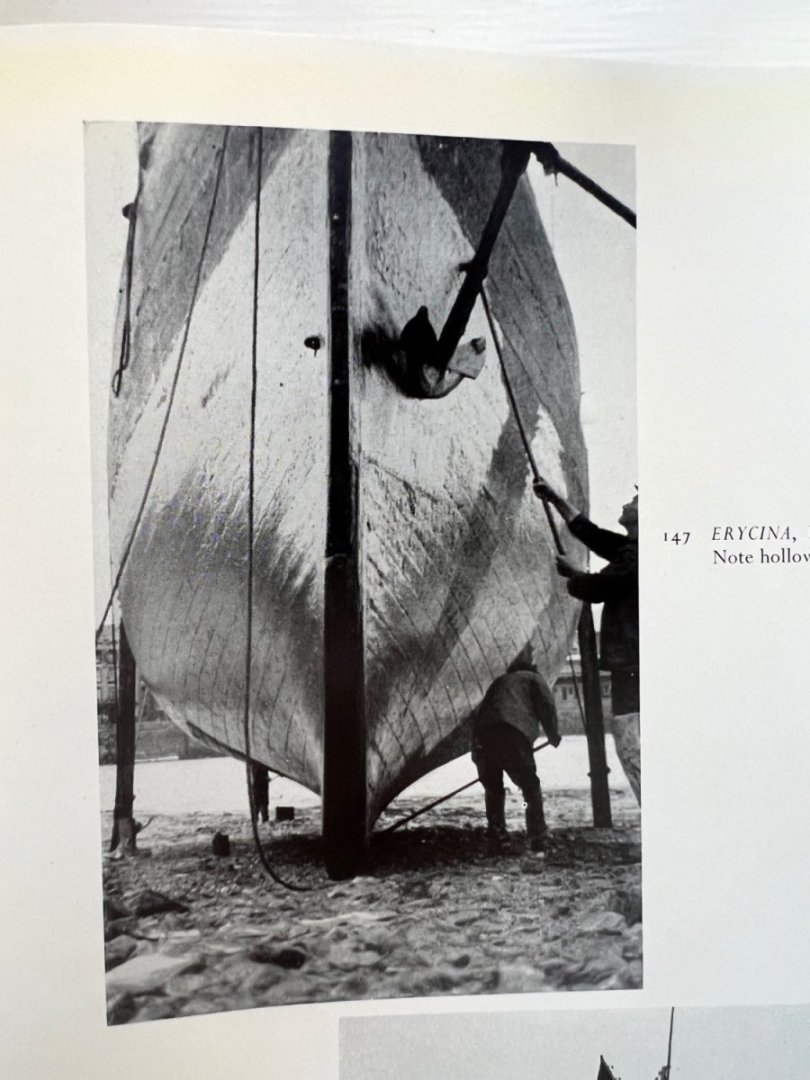
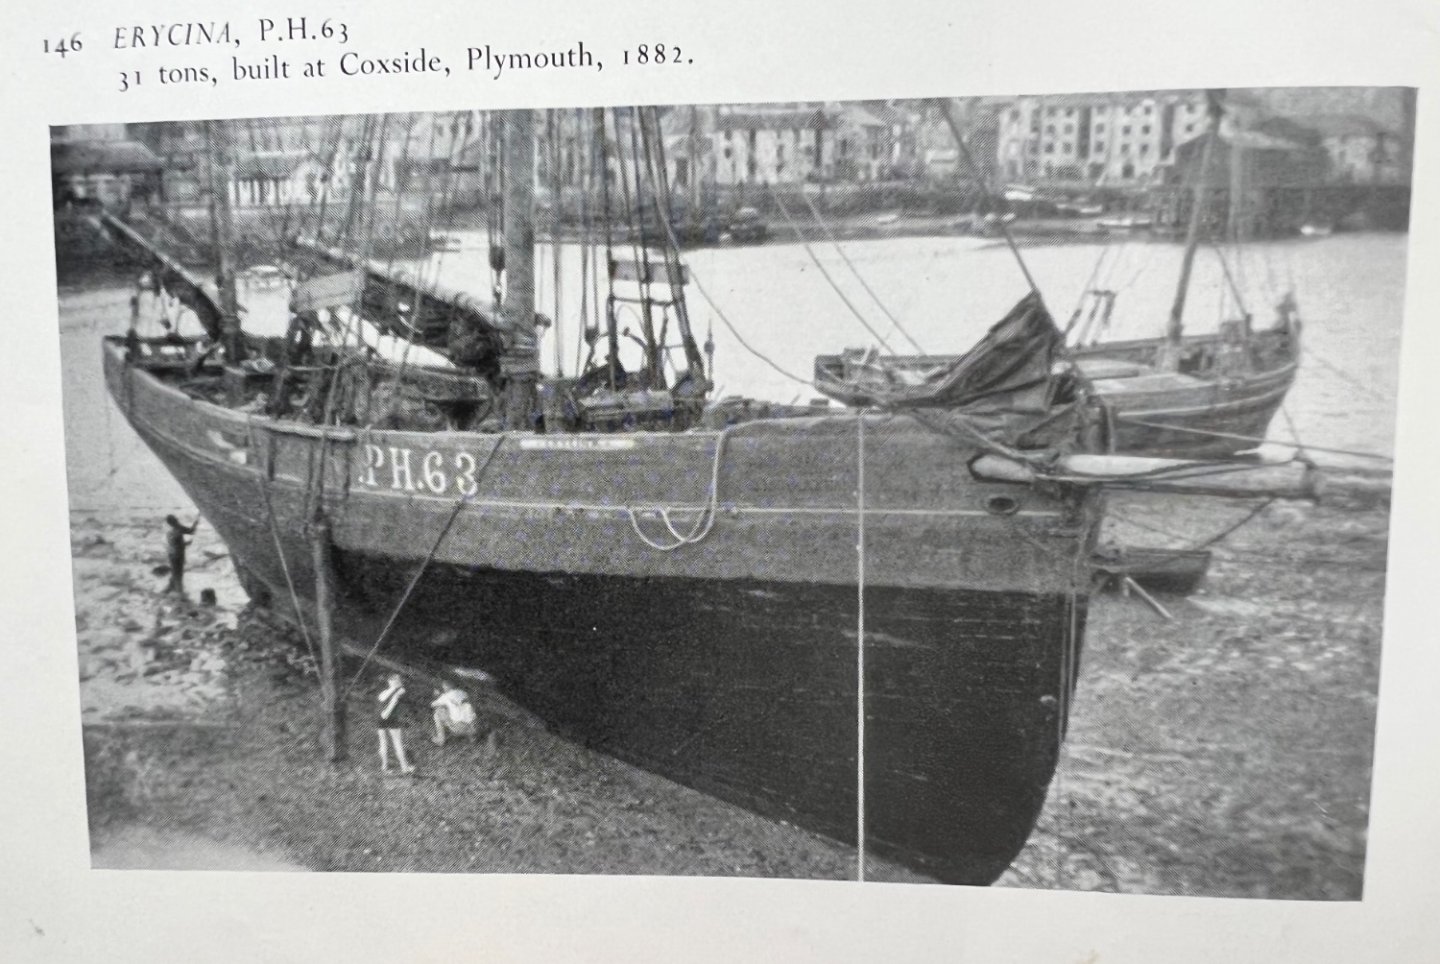
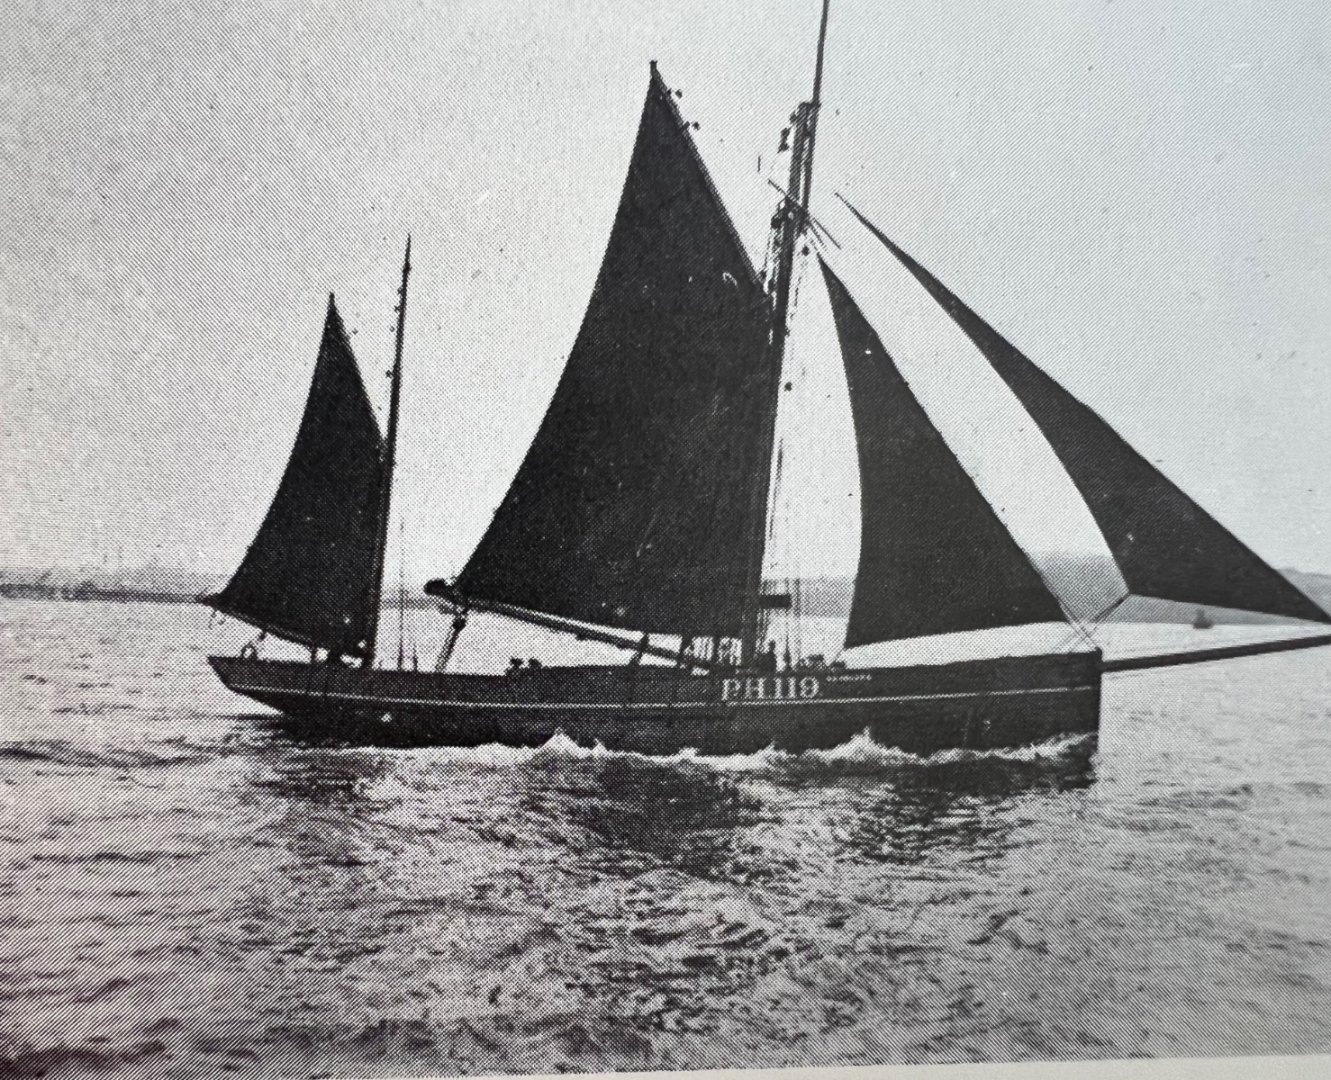
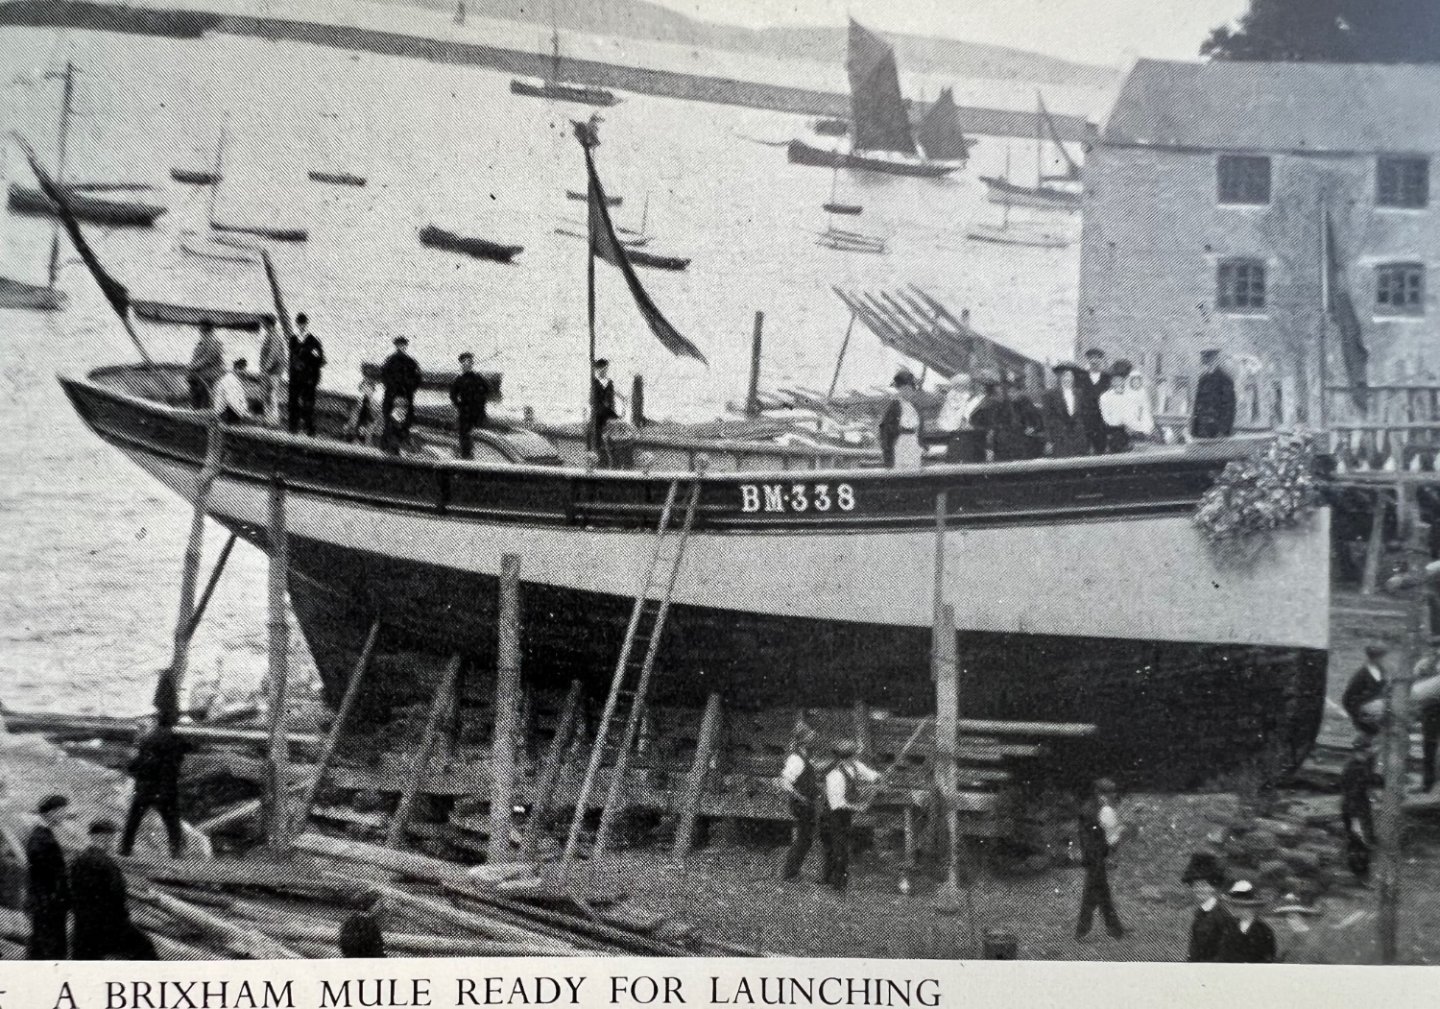
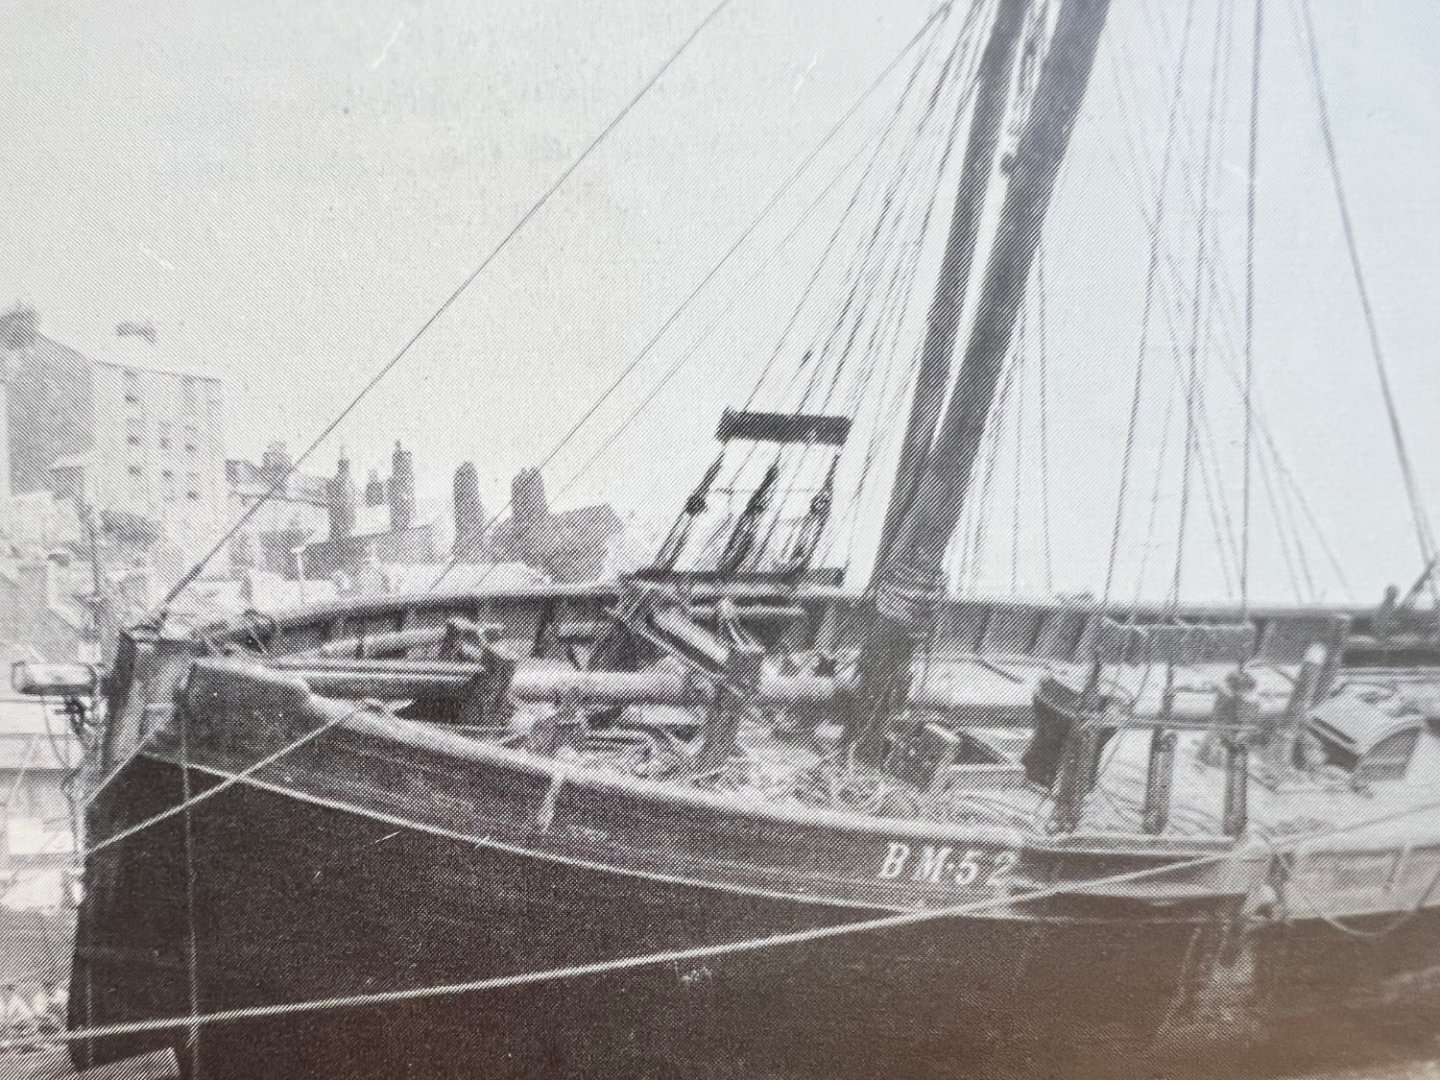
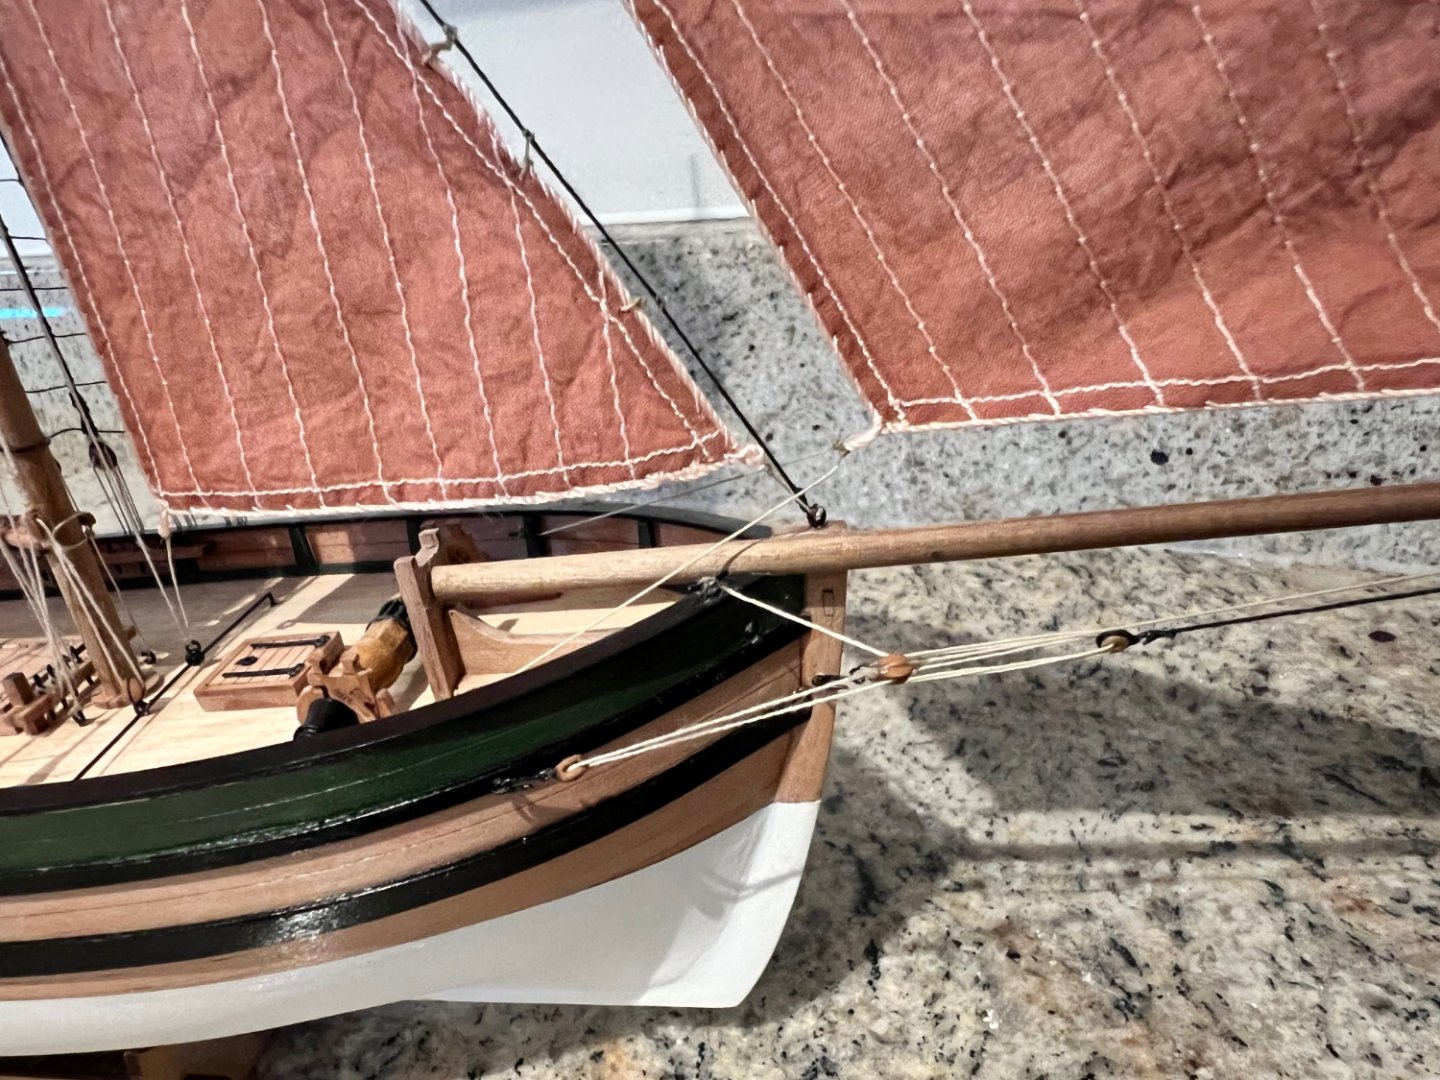
I’ve been doing some research to help educate what colour scheme to choose. There’s four photos I could find of Erycina. I suspect that most of these were taken towards the end of her life (1930s) when photography was more prevalent. It’s clear that she had a painted hull by that point in her life. Unlike most photos of smacks her anti-fouling paint is much higher on her hull than her waterline. It’s possible (likely?) that this wasn’t the case when she was built and more likely that this was done to provide some additional protection to her wood later during her long, 50 year plus working life. There is a lightly coloured rubbing strake under the upper bulwark but it’s much slighter than the one in the kit. I have been going through Marsh’s Sailing Trawlers again. As far as I can tell from the B&W photos, most smacks seemed to have had dark painted bulwarks and hull above the waterline. Below is a Plymouth ketch (not Erycina) and a Brixham ketch, both seem to be painted a dark colour. Sometimes there’s a clear tonal difference between the bulwark and rest of the hull, suggesting a different colour (see below, another Brixham boat). Some of the Brixham boats had the hull below the bulwark a paler colour, including Ibex, Erycina’s main racing rival, and other boats from Upham’s yard in Brixham. It’s hard to tell, but to me the paler lower hulls look to be painted not varnished wood. Nisha was a Brixham boat built at Upham’s so the kit’s colour scheme could be suitable for her, but Erycina was a Plymouth boat. None of the photos show these boats having a white “bootstrap” line between the lower hull and the anti-fouling paint. On the basis of this research I’m erring towards a green bulwark as per the kit, with a white rubbing strake and a black hull below that down to the waterline where I won’t have a white “bootstrap” before the red oxide anti-fouling paint.
- 46 replies
-
- 3
-
-
- vanguard models
- Erycina
- (and 3 more)
-
Craigie, she’s looking stunning, be a pity if you didn’t finish her. I really like your colour scheme.
-
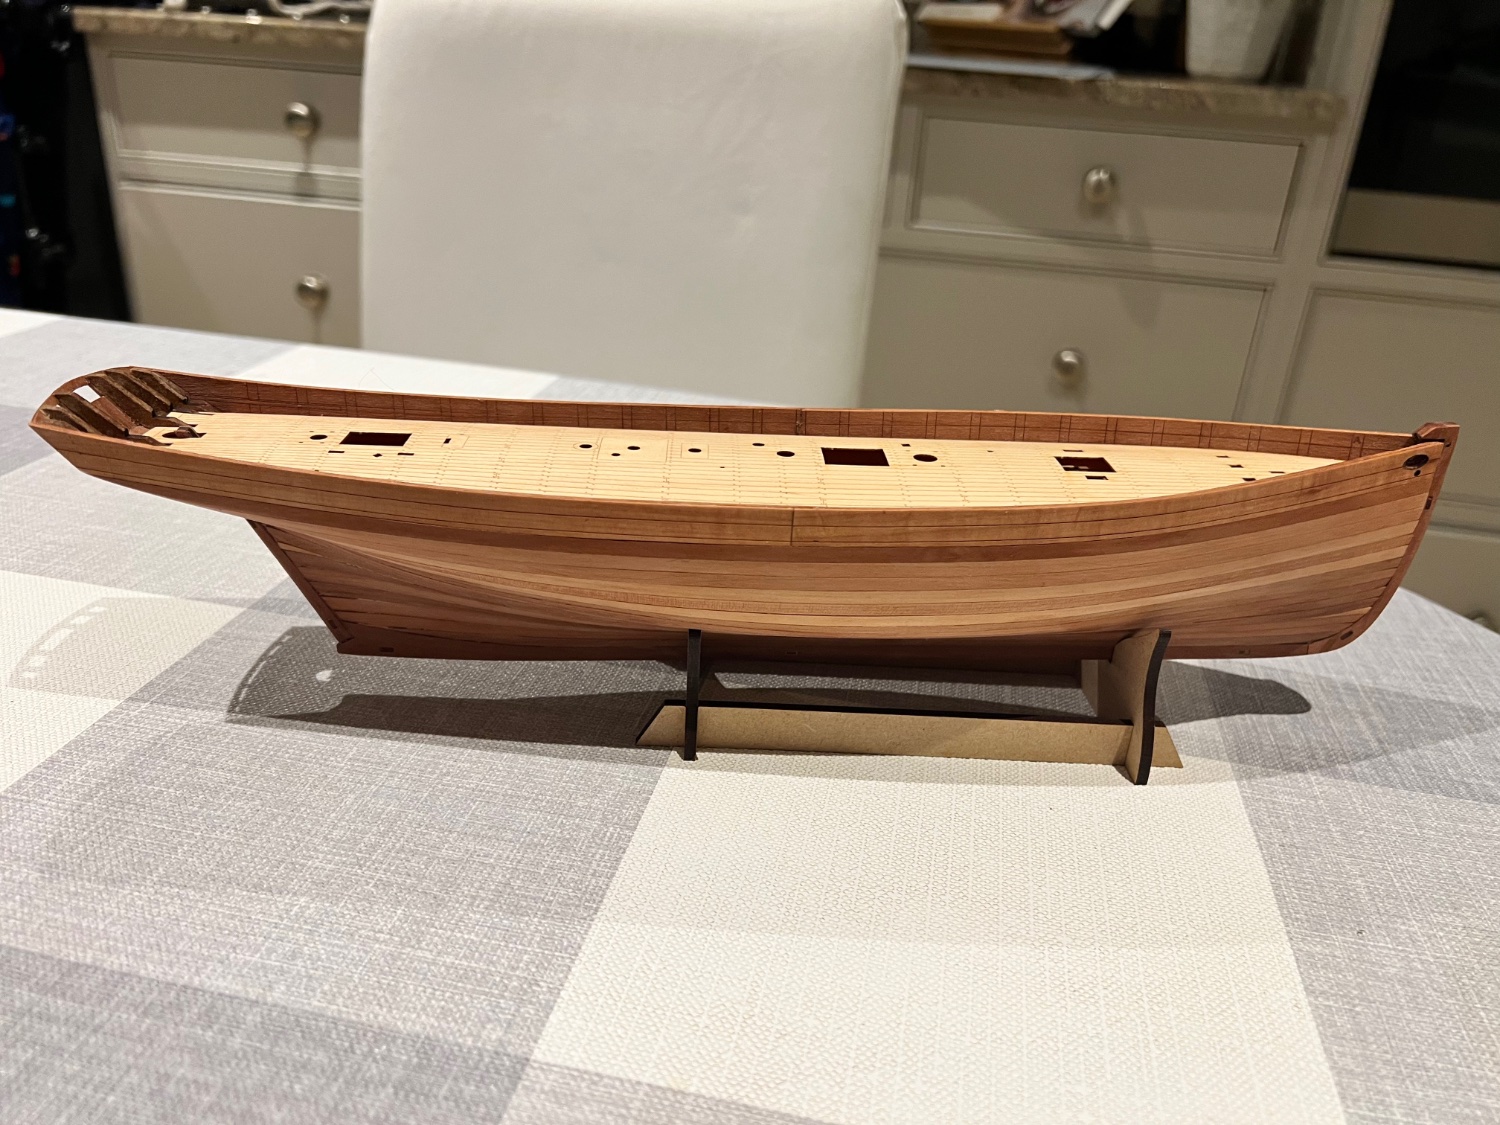
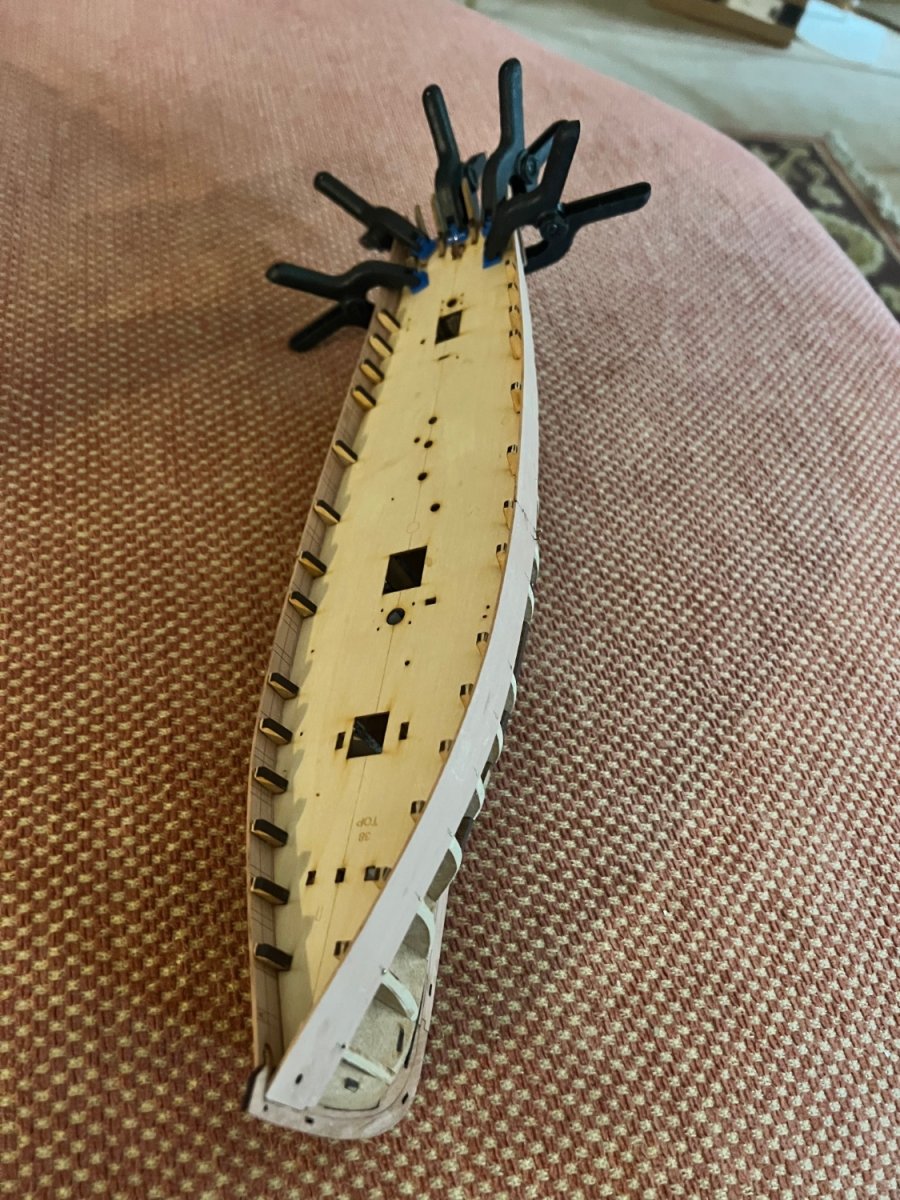
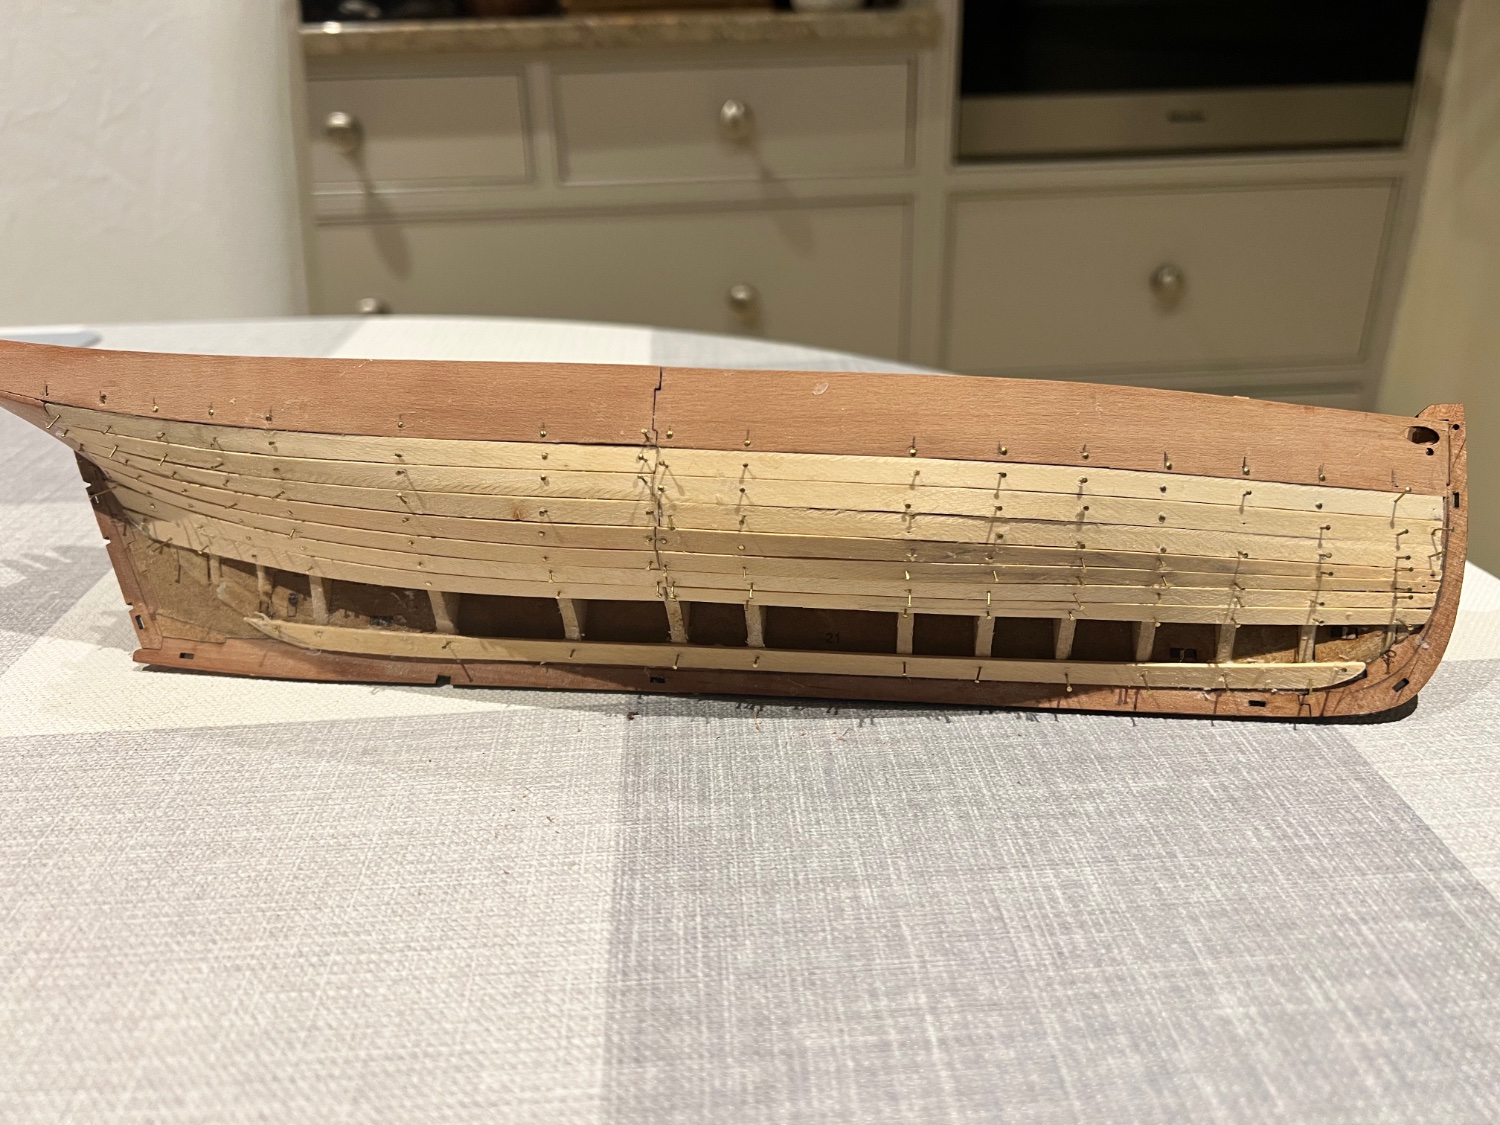
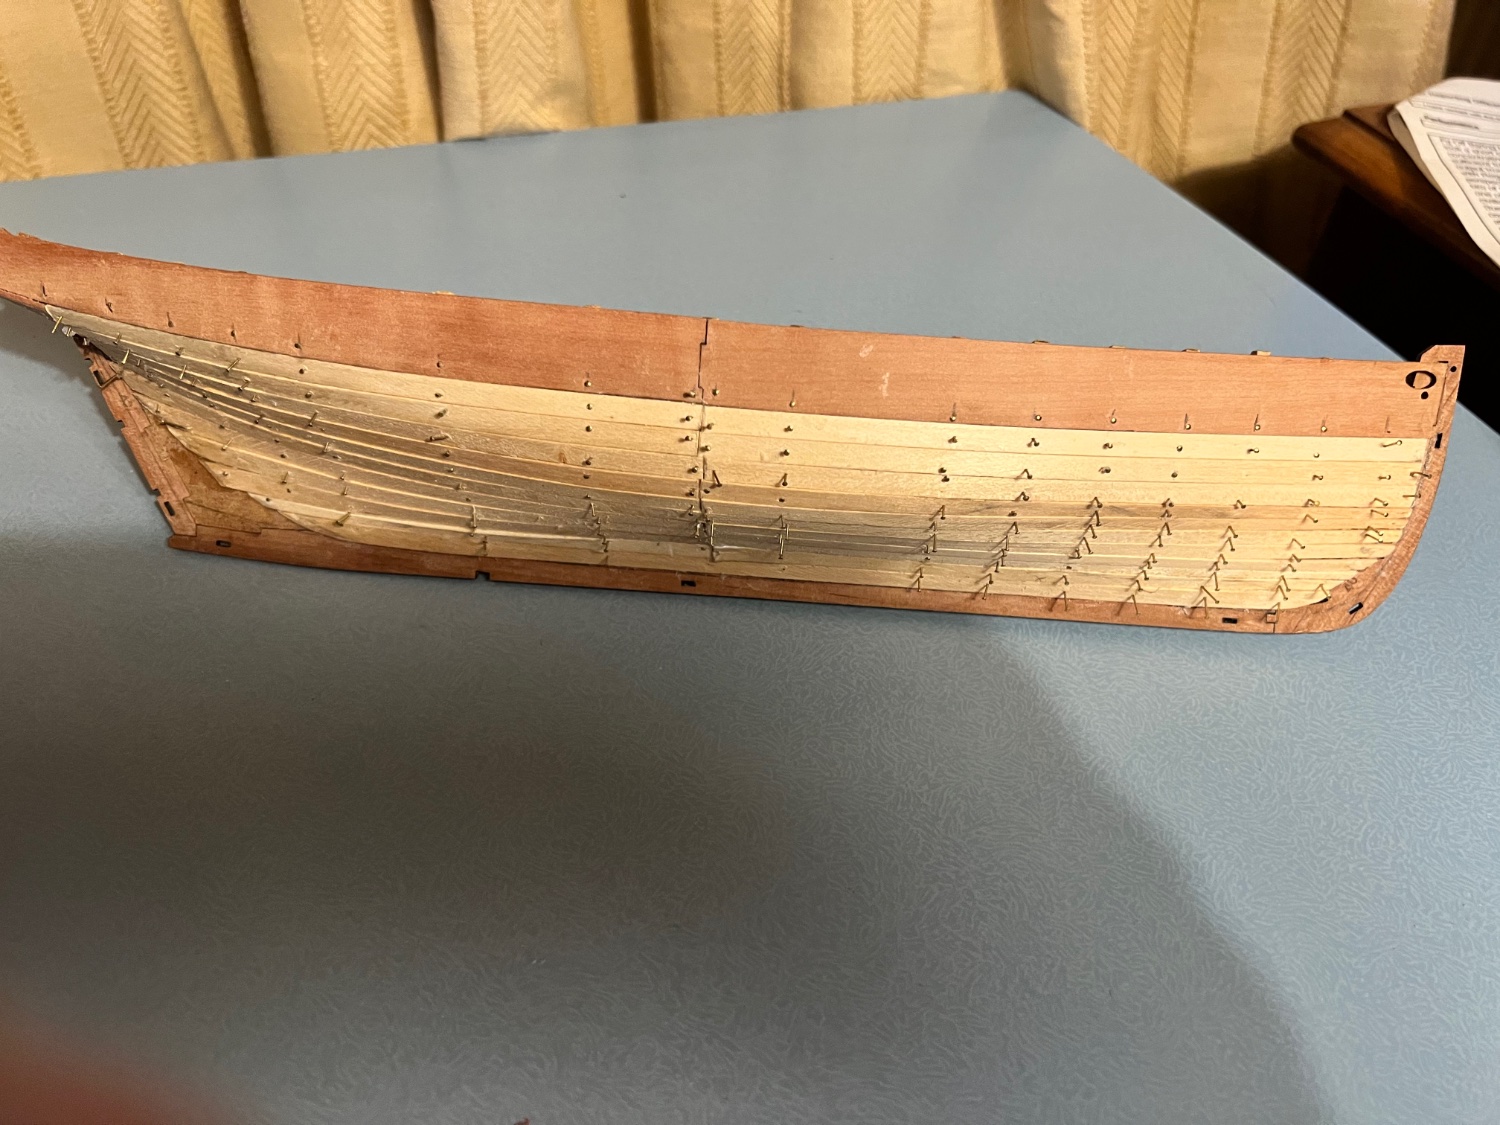
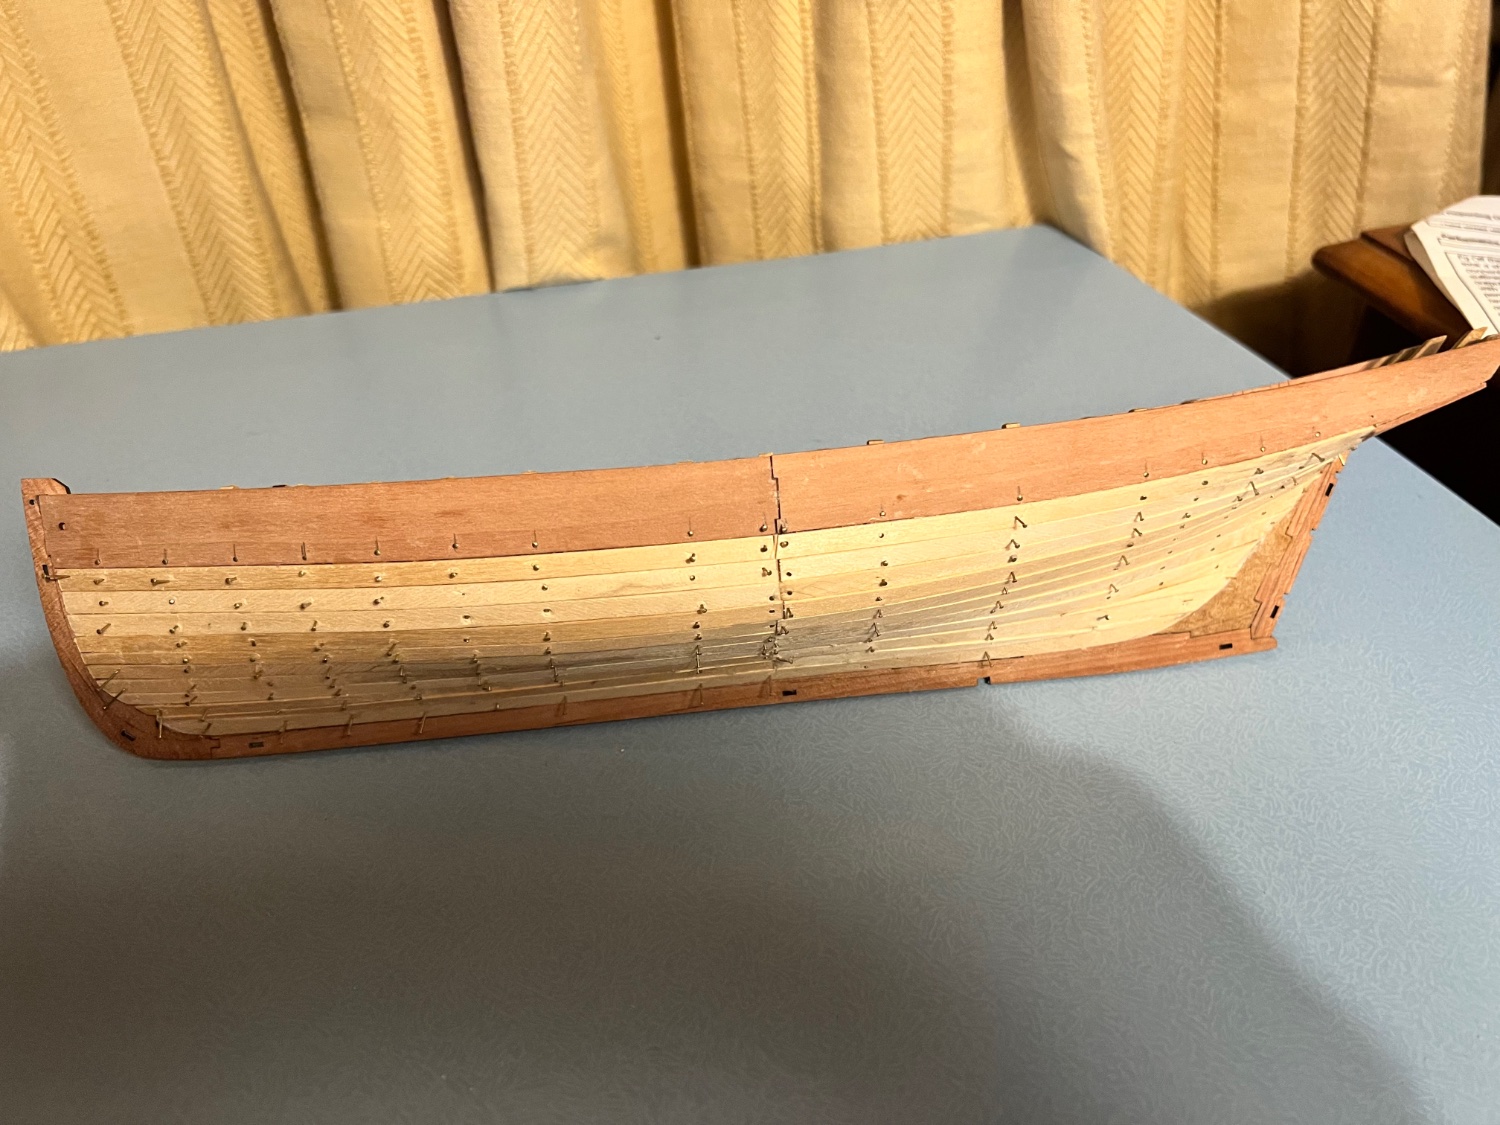
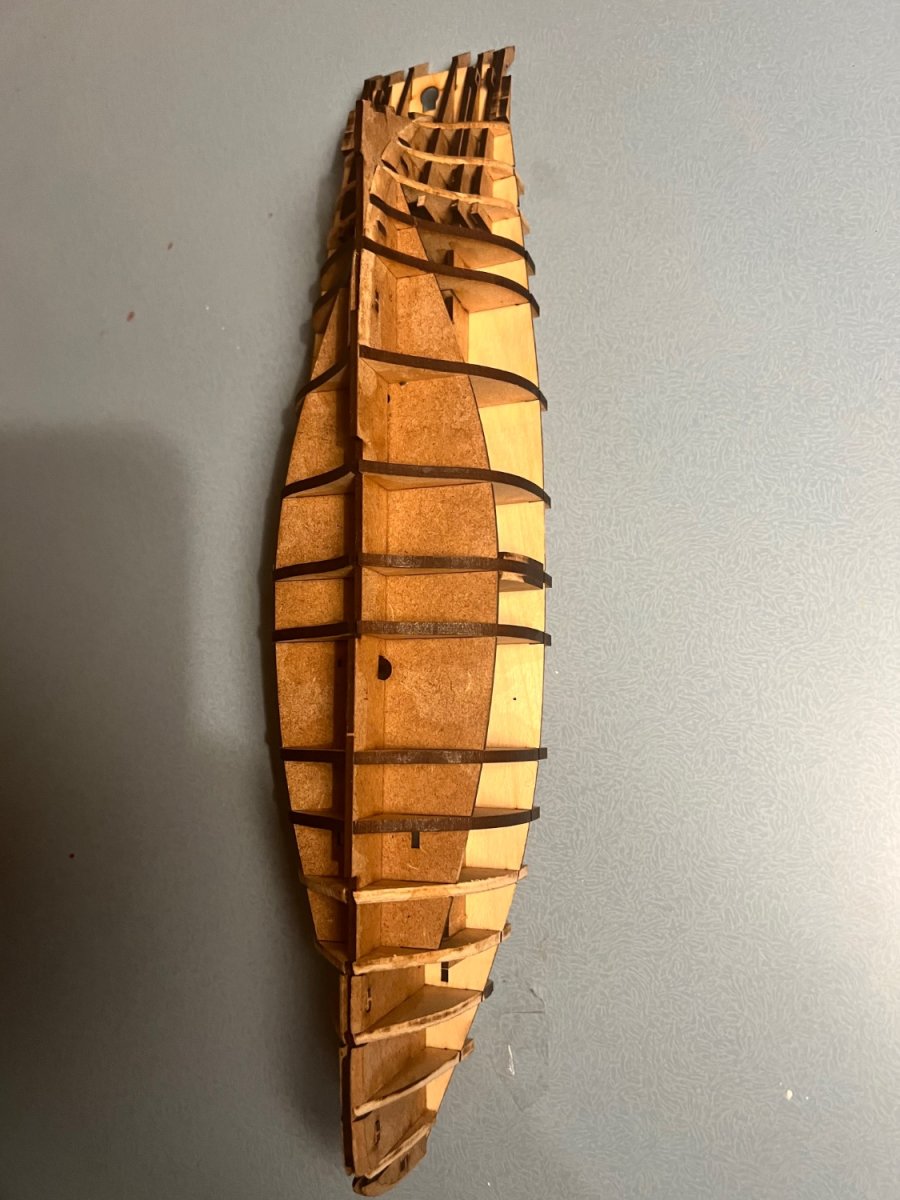
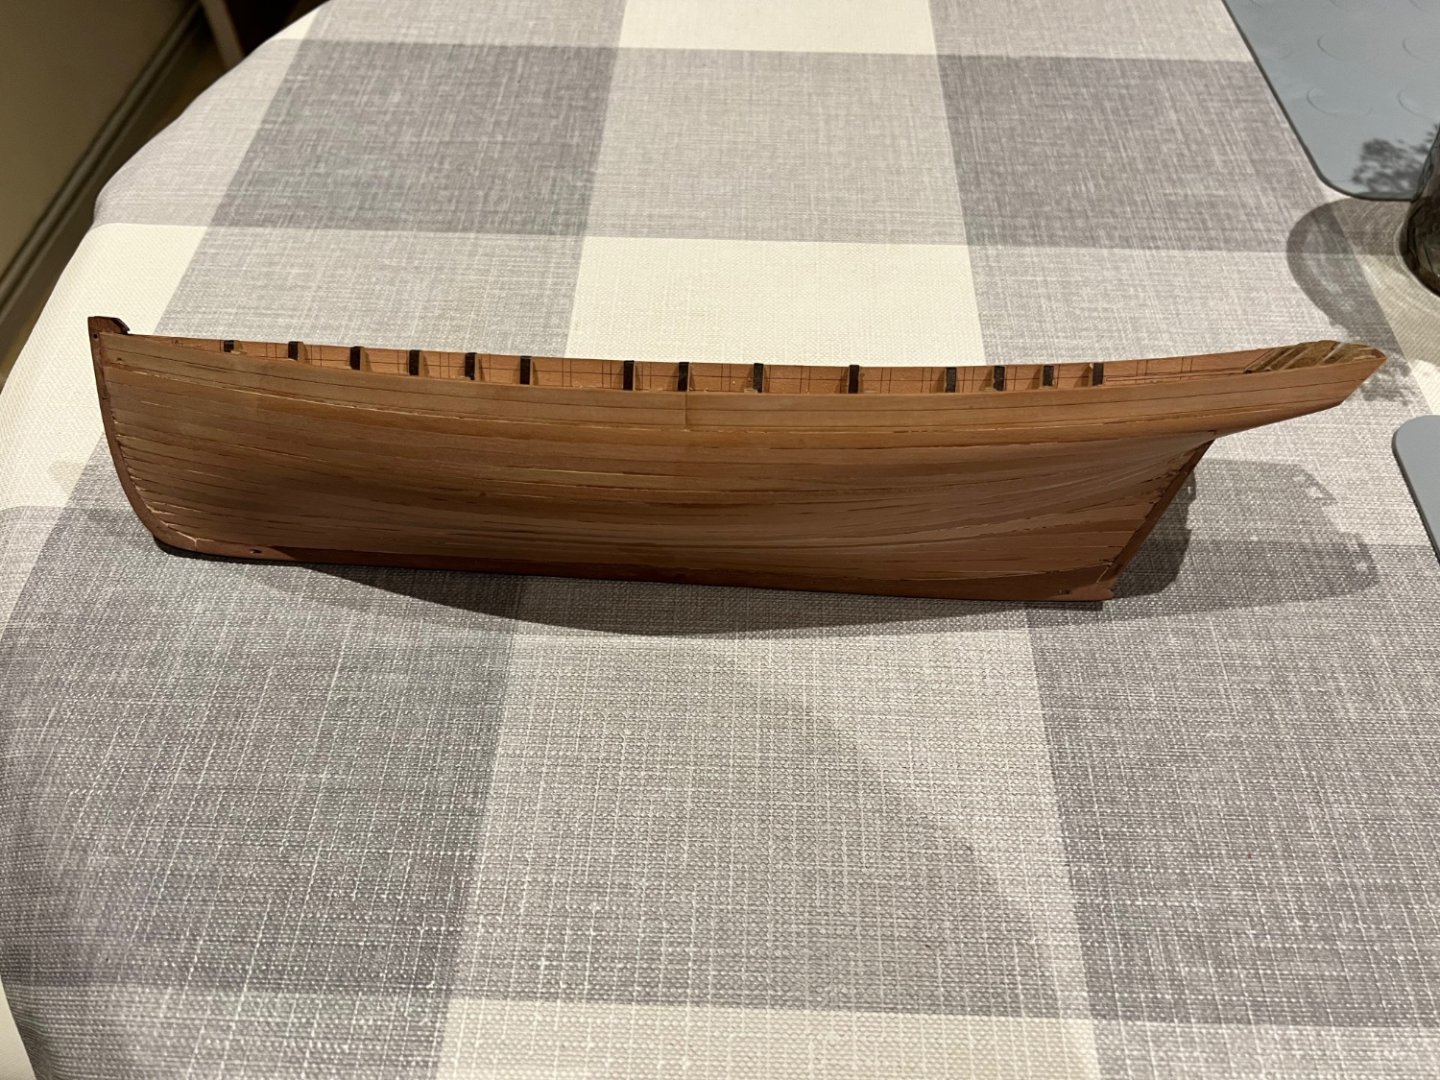
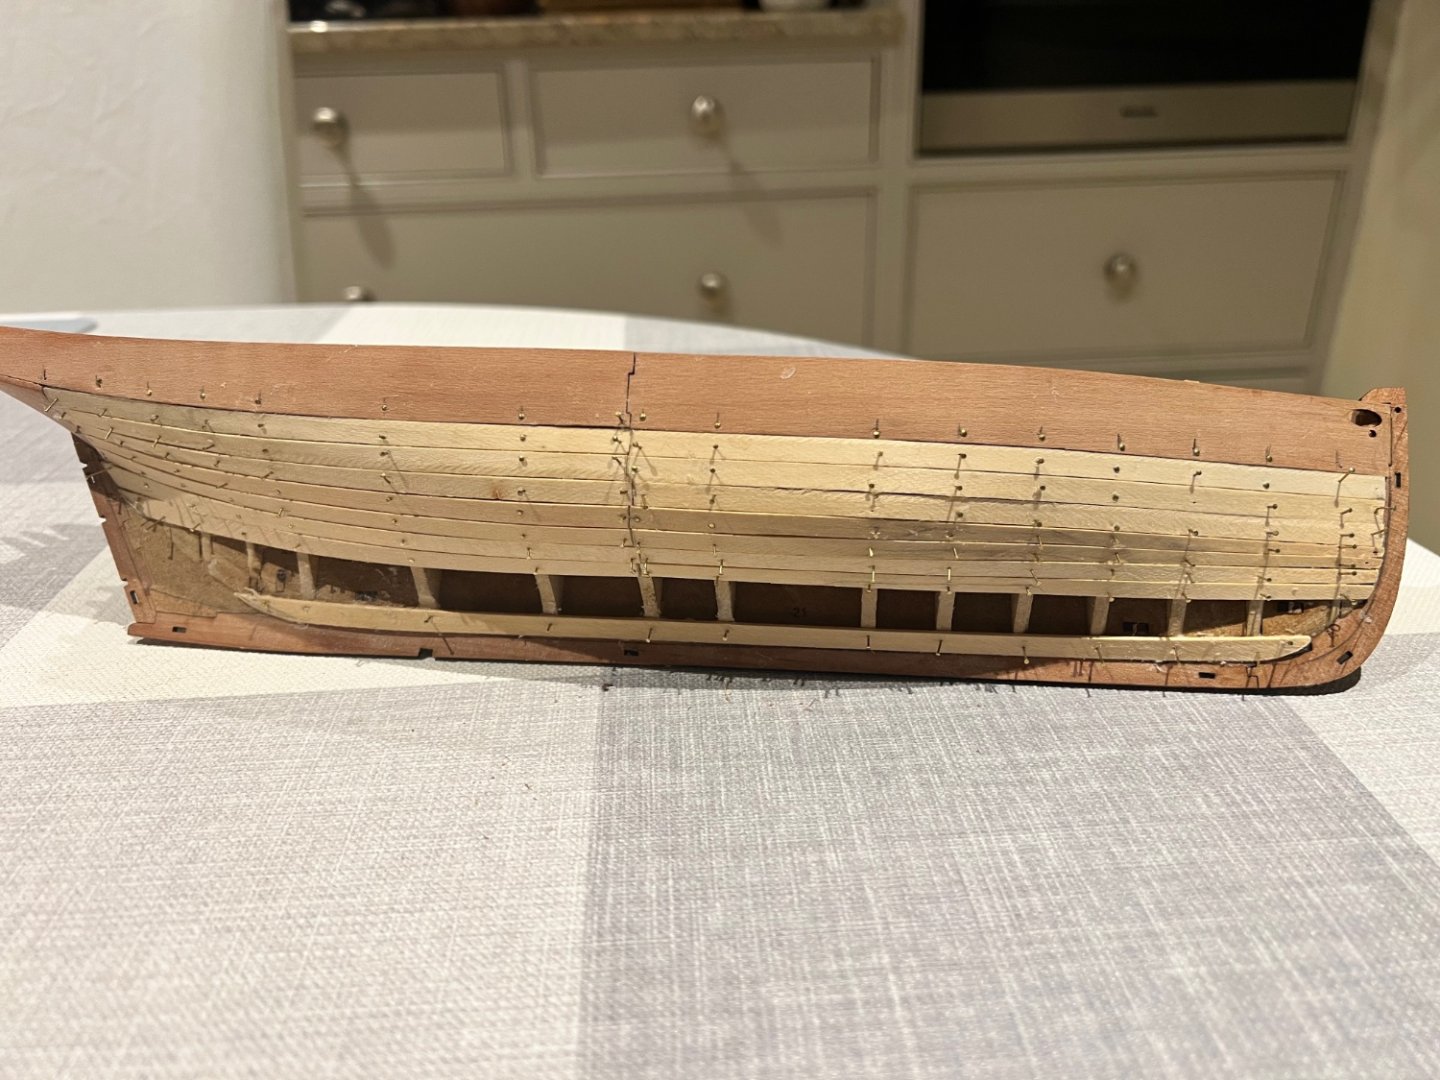
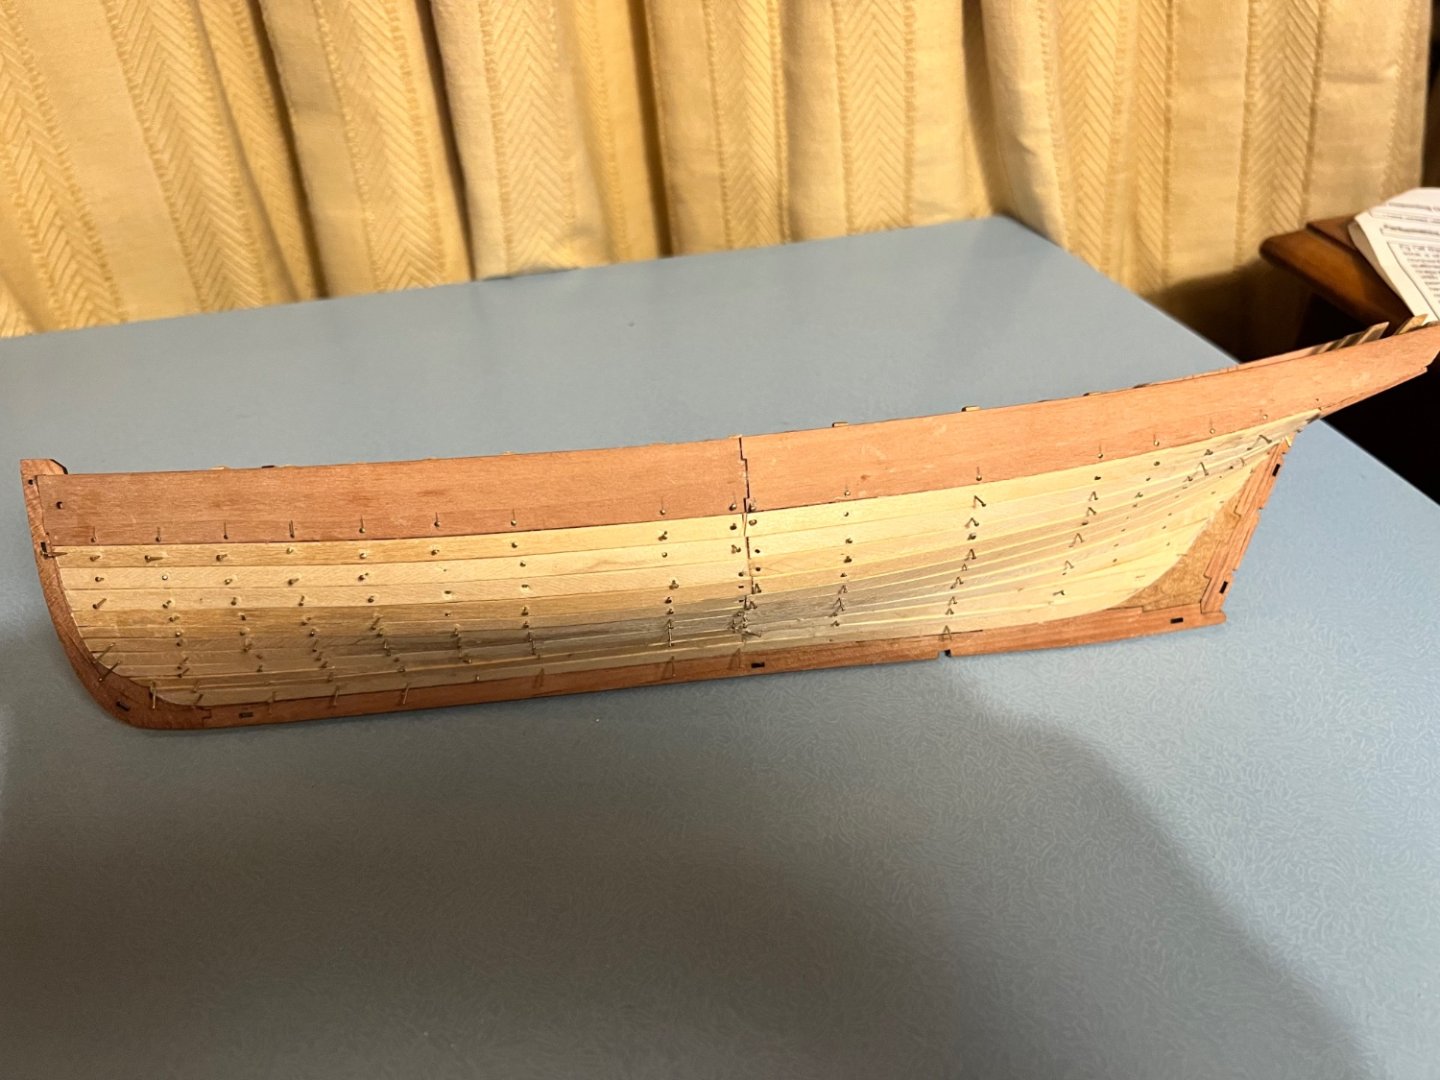
Life has been busy, but I’ve finished the second planking. Starboard side planked below. Note, I’ve broken the middle section of the rear transom - I’ll add it back later. Both sides complete. The planking is tidy above the waterline but will need some fuller and sanding to fill a few small gaps below the waterline. As is typically the case with my planking, there’s stealers and slivers below the waterline too. I don’t mind too much what goes on down there as it will all be painted. I still haven’t decided what to do for the paint scheme. I’ve some Ronseal polyeurethane varnish as recommended by Glennard to make some wipe-on poly arriving on Monday. I’ll see how good the wood looks with that applied before making a final decision.


- 46 replies
-
- 5
-
-
- vanguard models
- Erycina
- (and 3 more)
-
Glenn, thanks for sharing that. It will be a real help to me and looks an easier way of seizing than I’ve been doing up until now. I’ve bought a quad hands on your recommendation and it was excellent to use on Saucy Jack. Your Erycina is looking super. Mine is still in the second planking phase.
- 106 replies
-
- 2
-

-
-
- Erycina
- Plymouth Trawler
- (and 3 more)
-
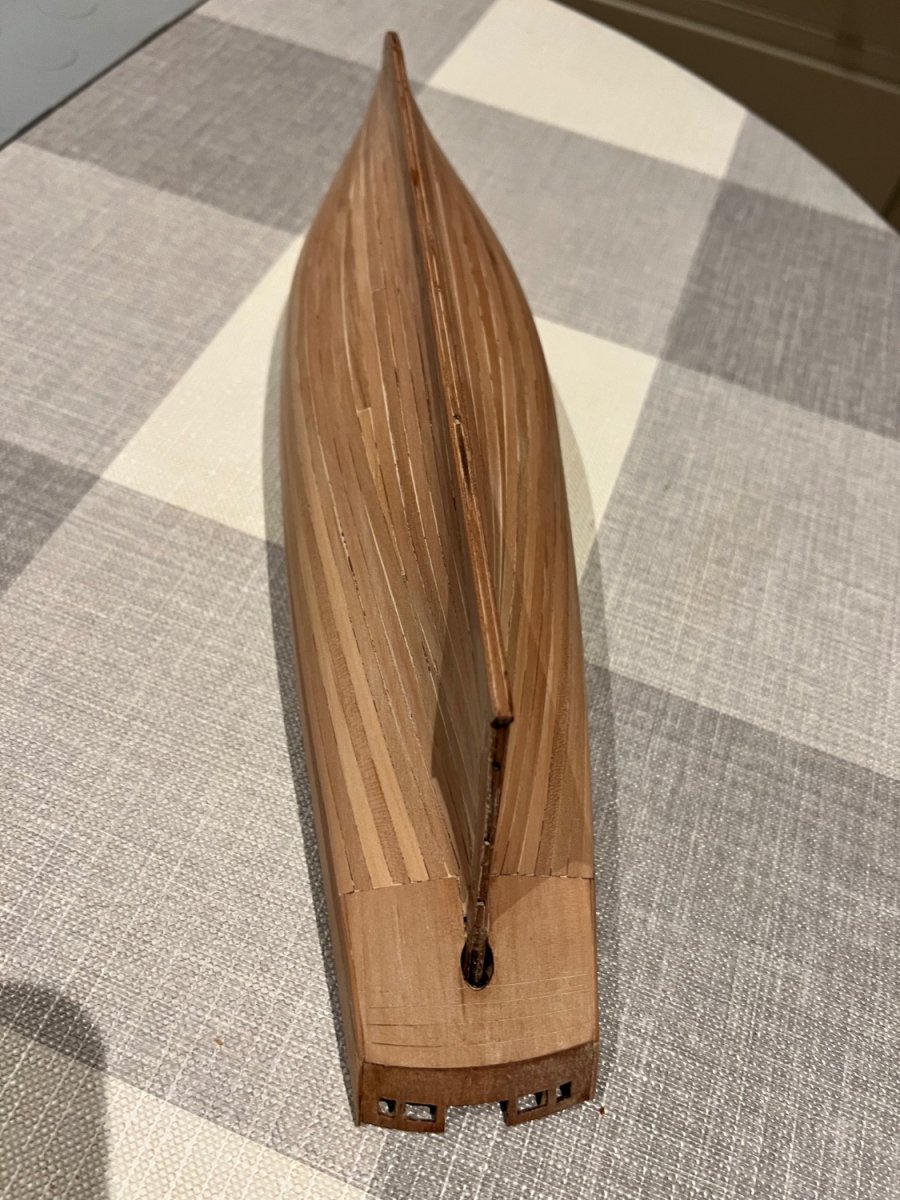
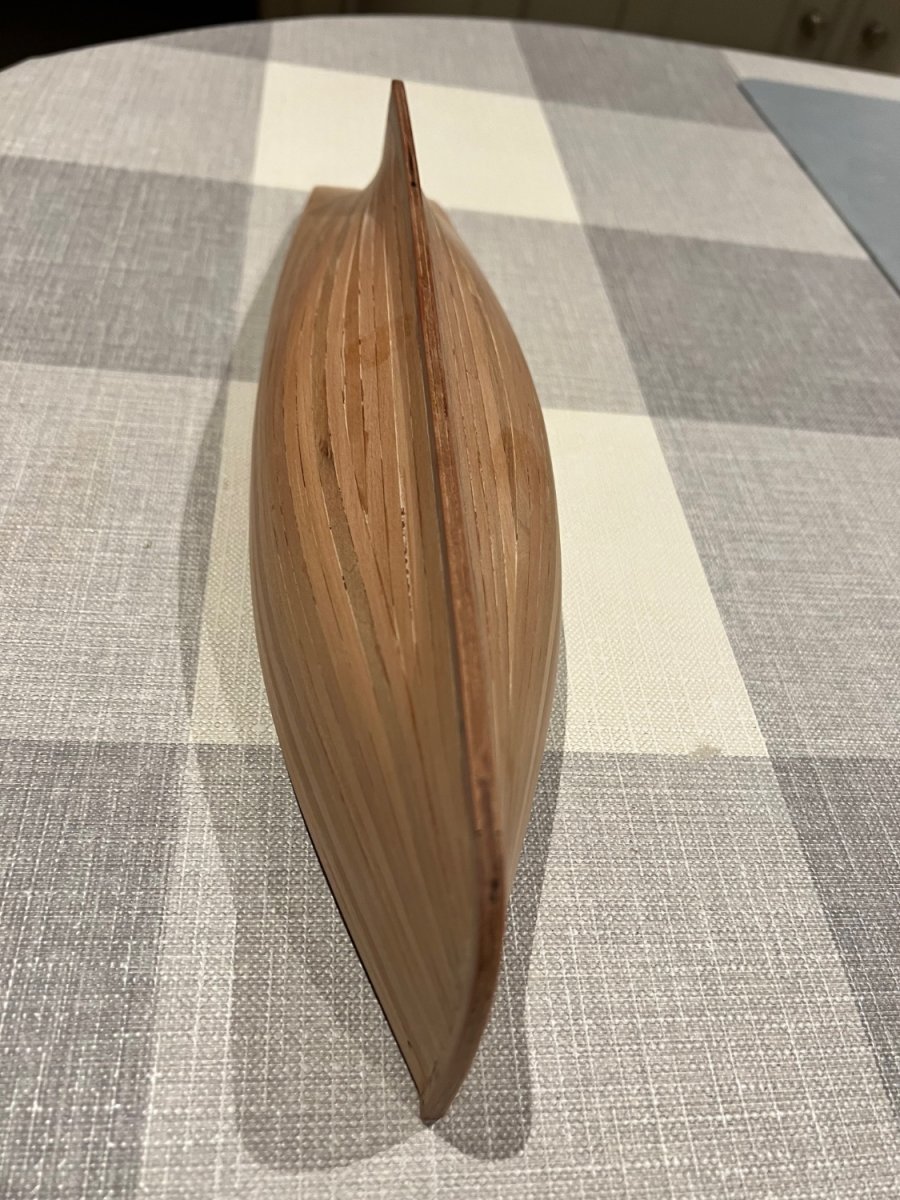
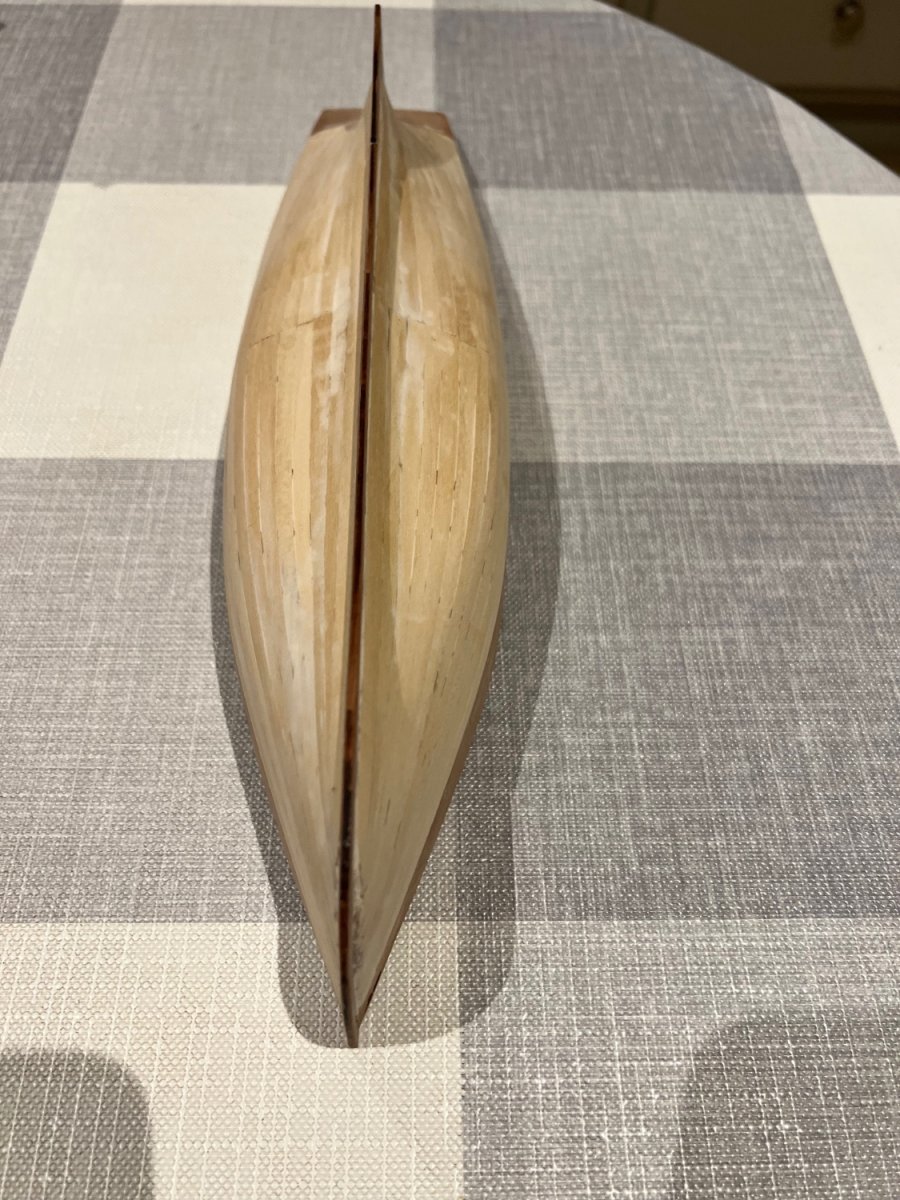
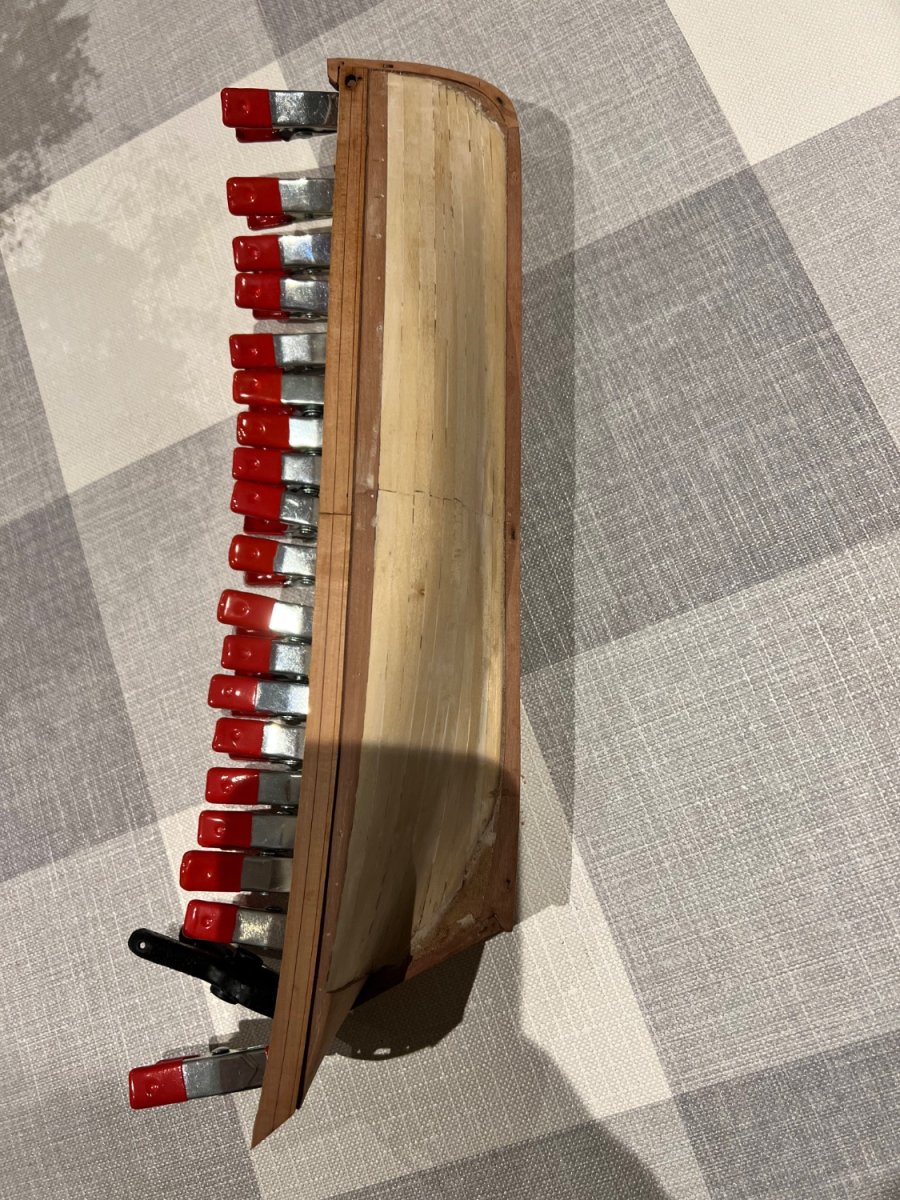
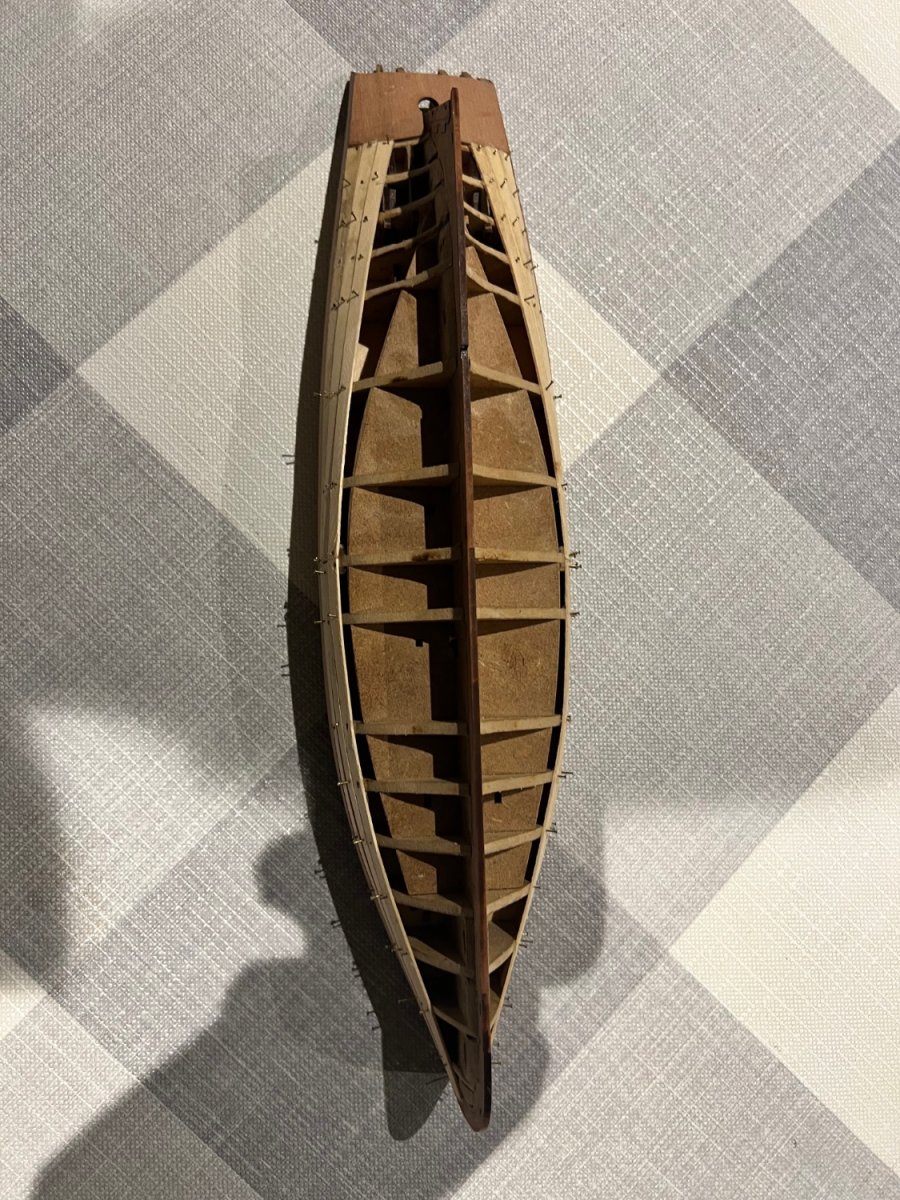
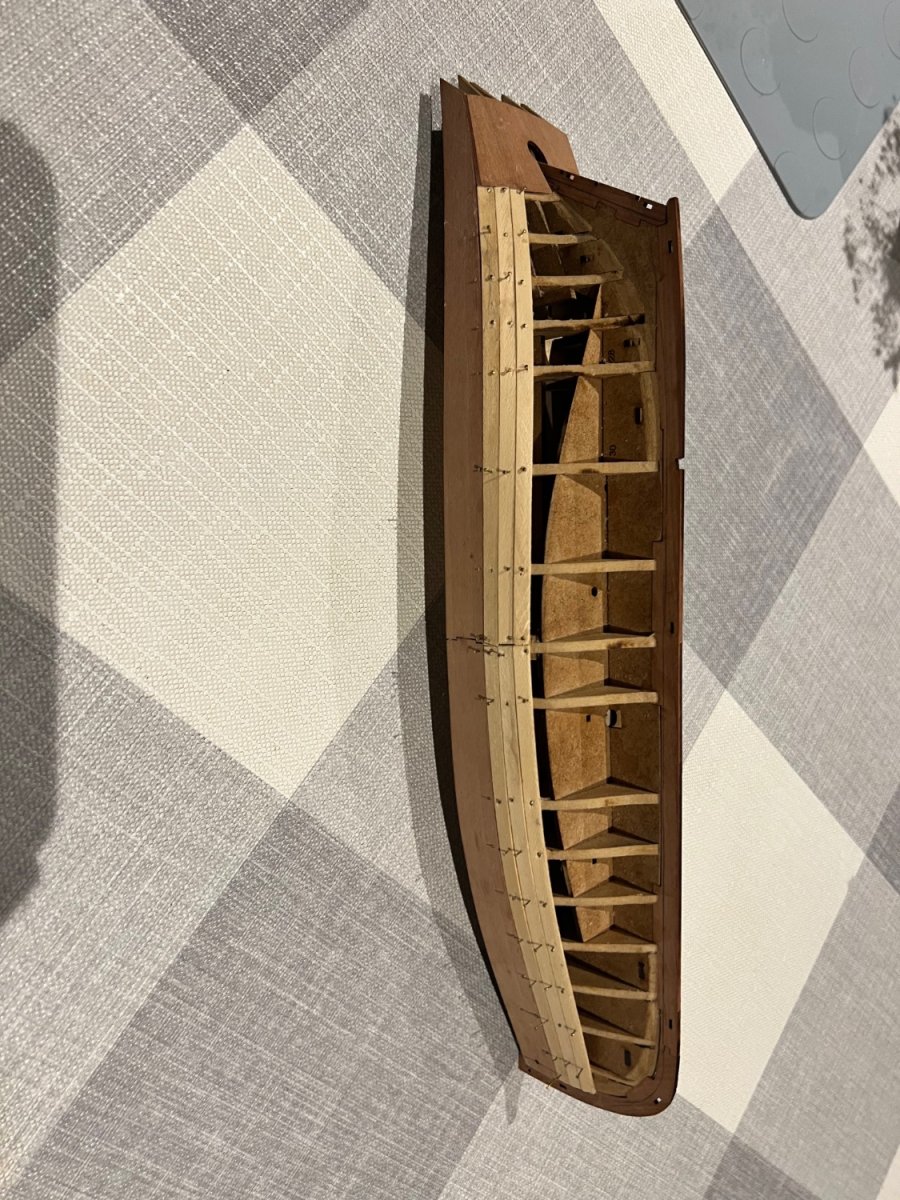
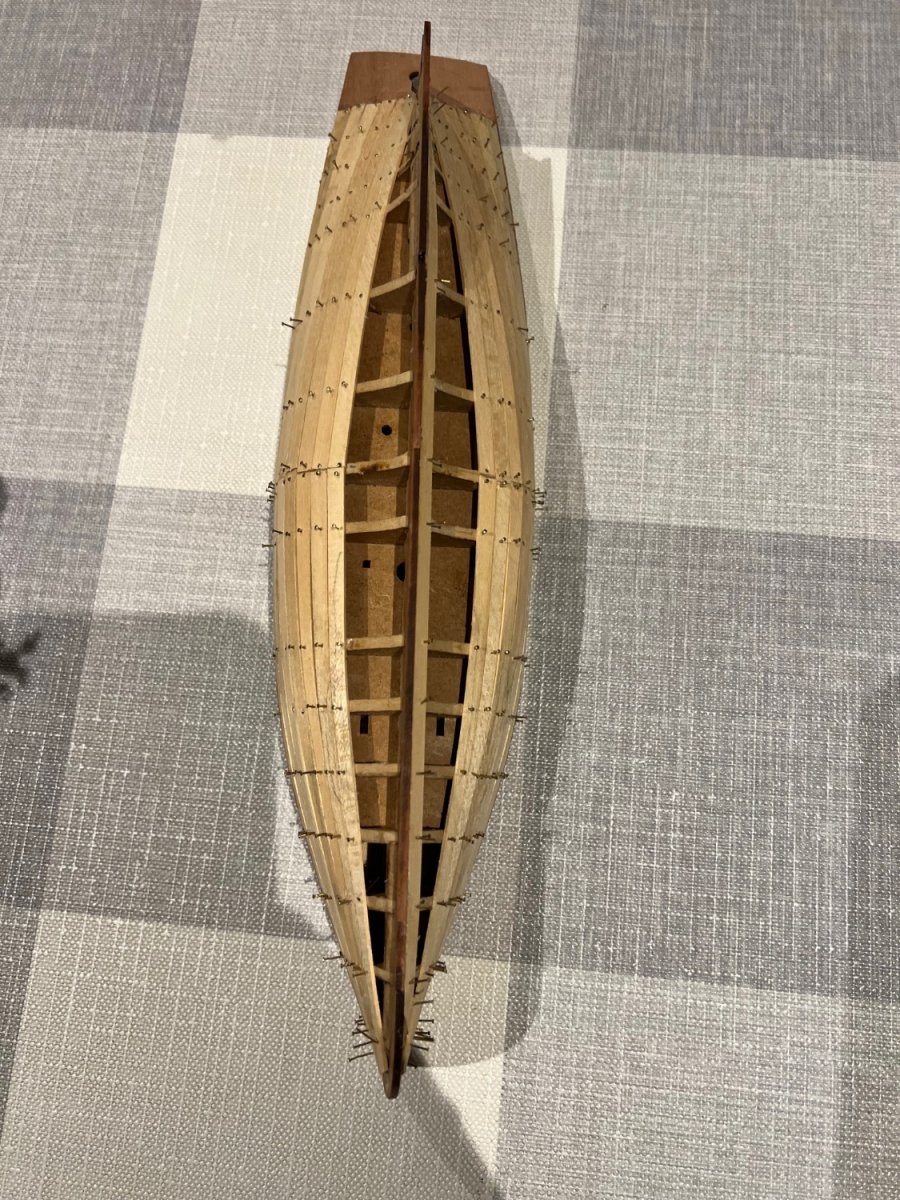
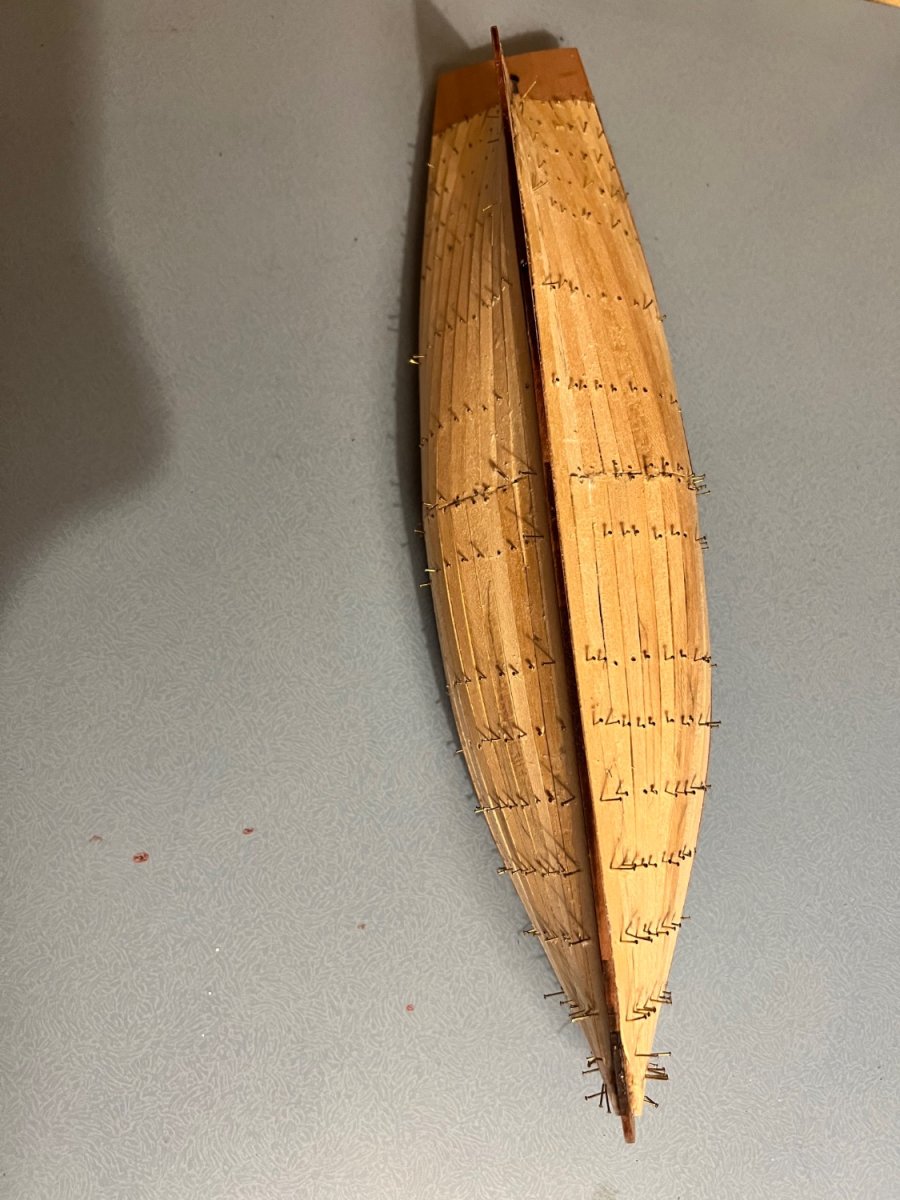
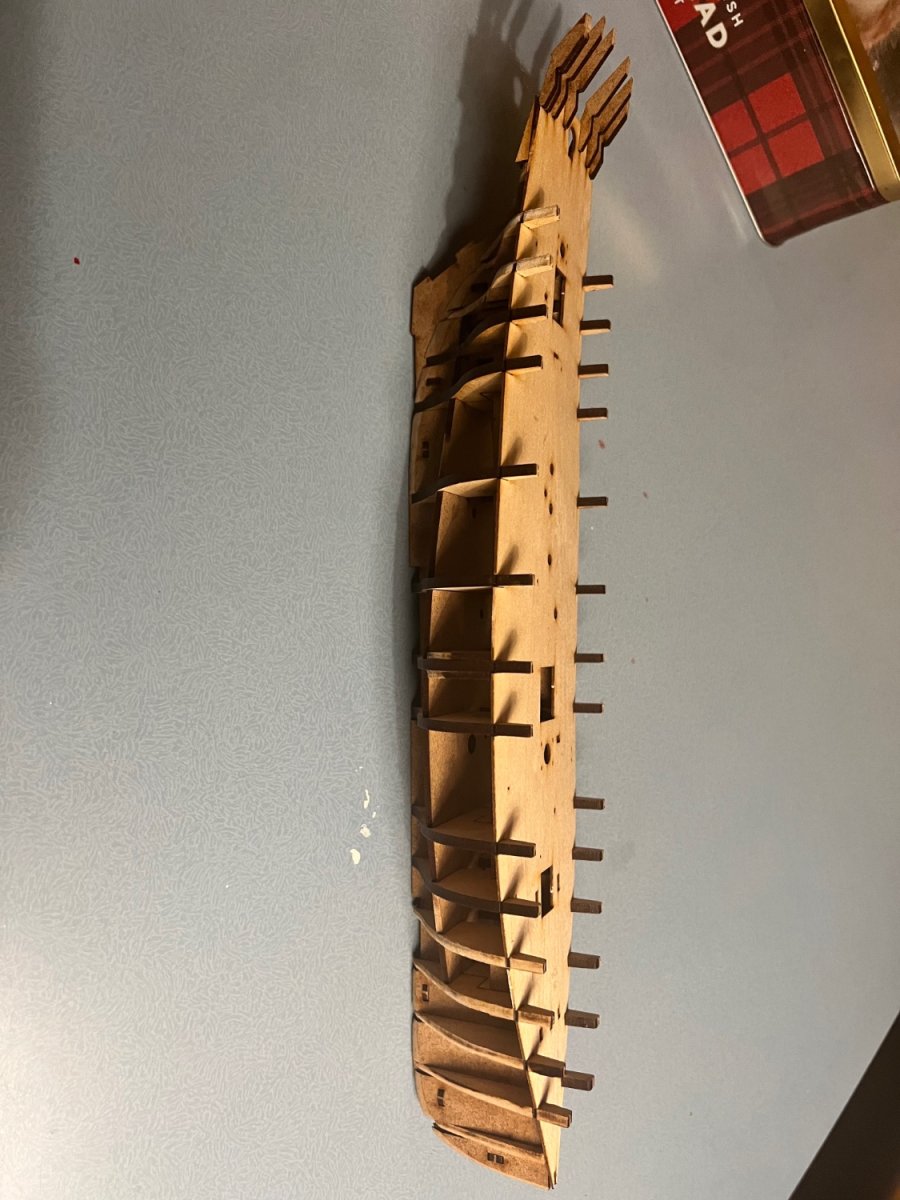
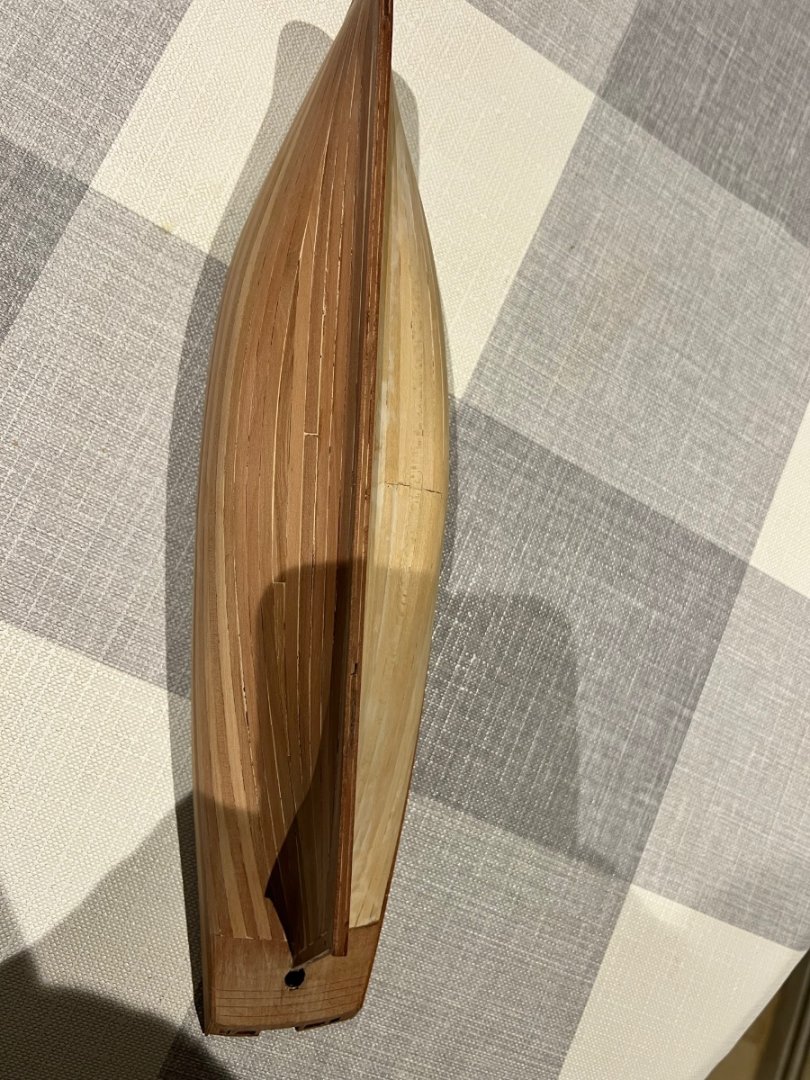
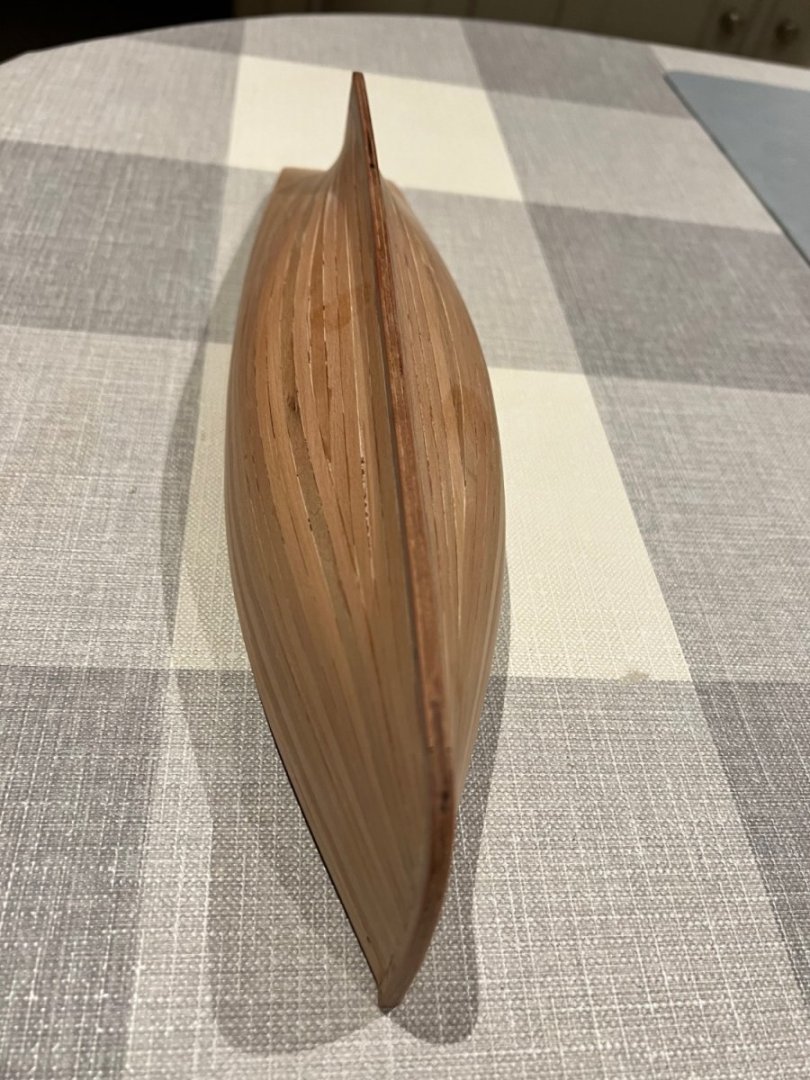
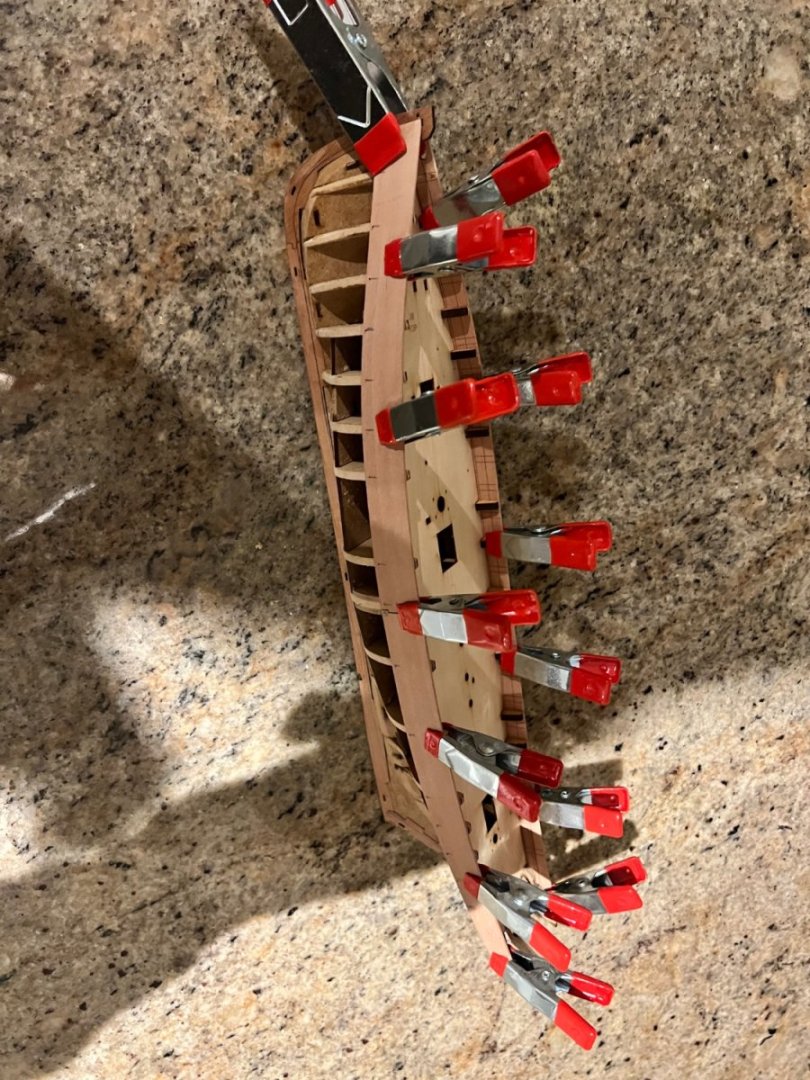
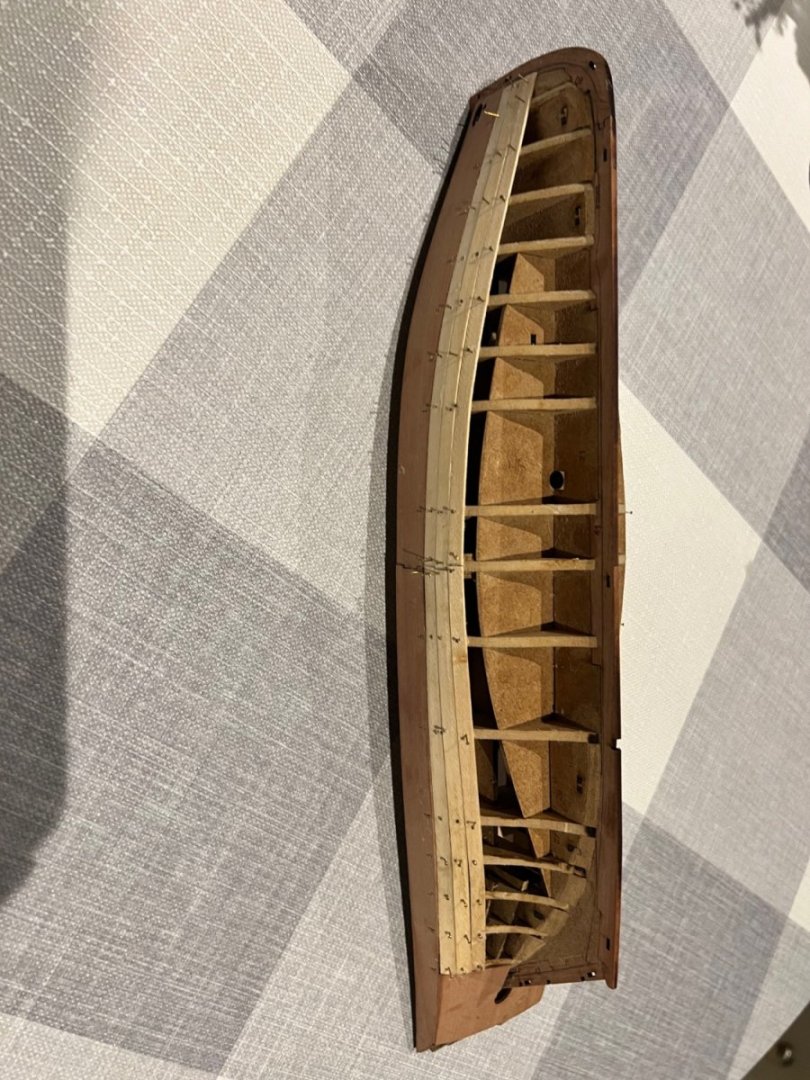
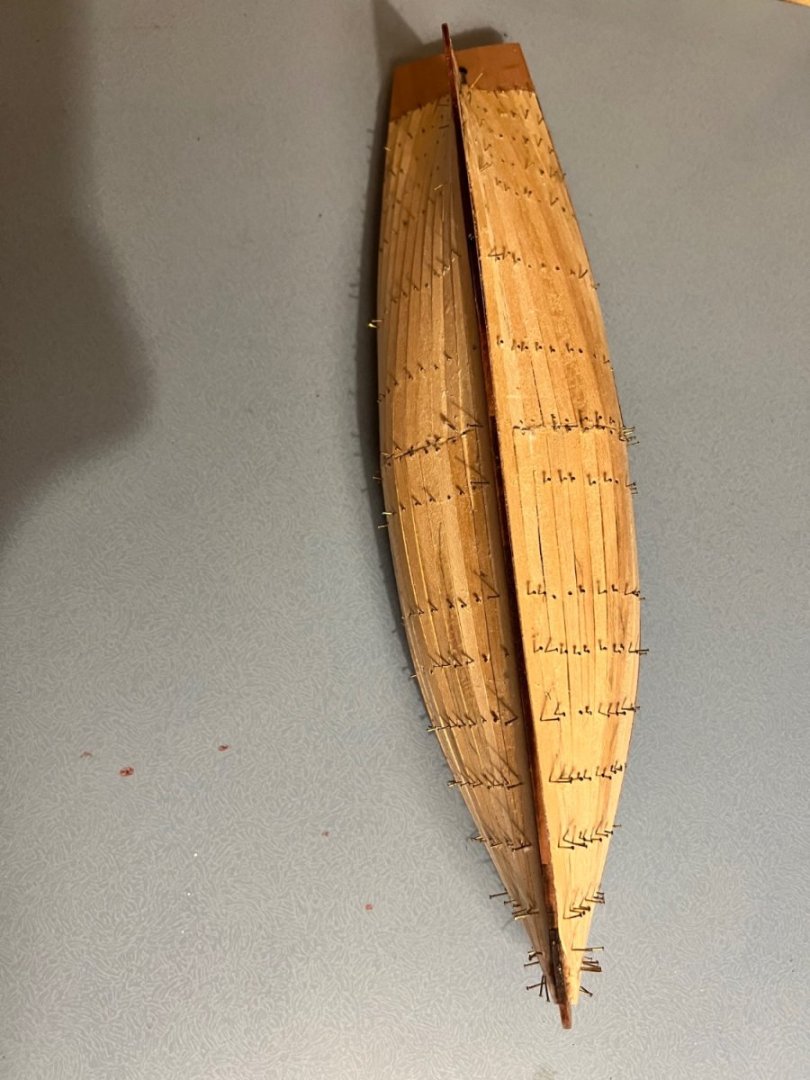
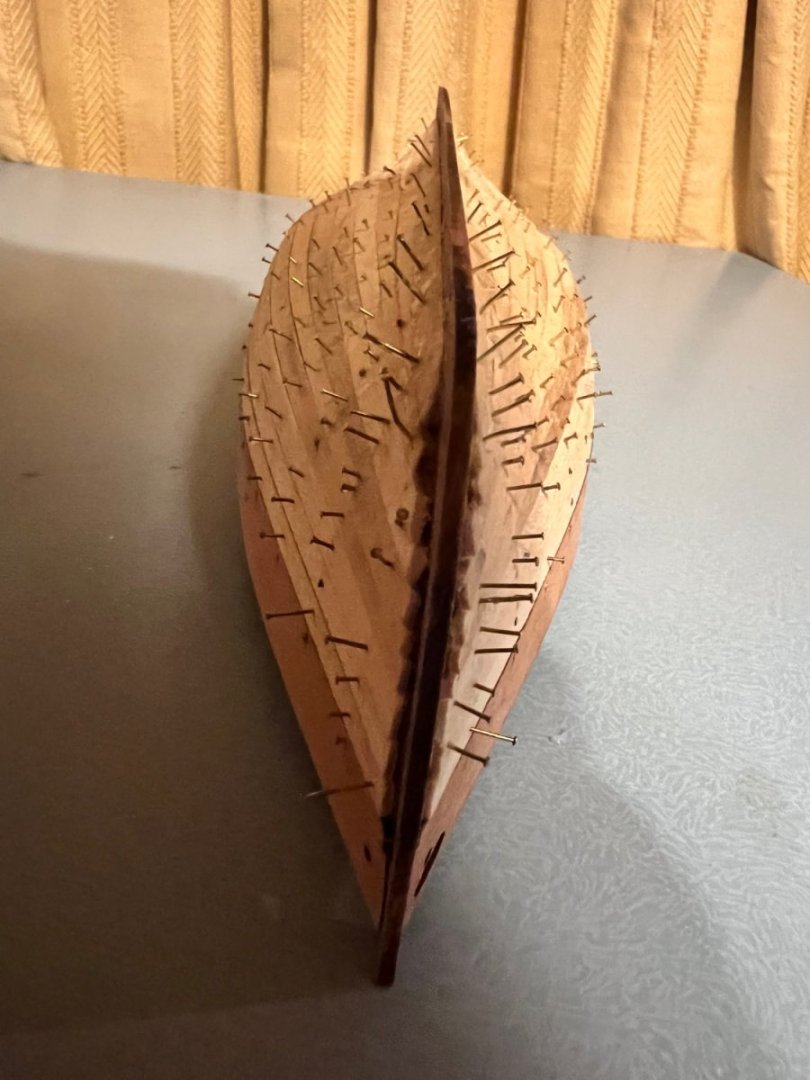
First planking sanded and filled. It’s very smooth to the touch, much smoother than it looks in the photos. Outer keel, stem and sternpost glued and clamped to dry. Stern counter was soaked in hot water for 30 mins. I thought that it had split but it’s just a mark on the wood. Then clamped on to dry overnight before being glued… …and sanded to shape on the sides. Starboard outer bulwark glued in place. Port outer bulwark glued and being held by clamps. As others have mentioned and similar to Nisha the holes at the bow don’t line up up between inner and outer bulwarks. It’s a rare occasion that Vanguard’s models don’t fit together perfectly, but it is very easily resolved. I’ll start the second planking in a few days!


- 46 replies
-
- 2
-
-
- vanguard models
- Erycina
- (and 3 more)
-
Hi Max, thanks. It’s mainly Vanguard - the kits are so high quality and a pleasure to build. They’ve been a fantastic introduction to building model boats for me. I had no interest in British working boats before starting to build these… but it’s amazing how beautiful these old trawlers were. Erycina which is my current build has stunning lines and reminds me more of a racing yacht.
- 32 replies
-
- 1
-
-
- Saucy Jack
- Vanguard Models
- (and 2 more)
-
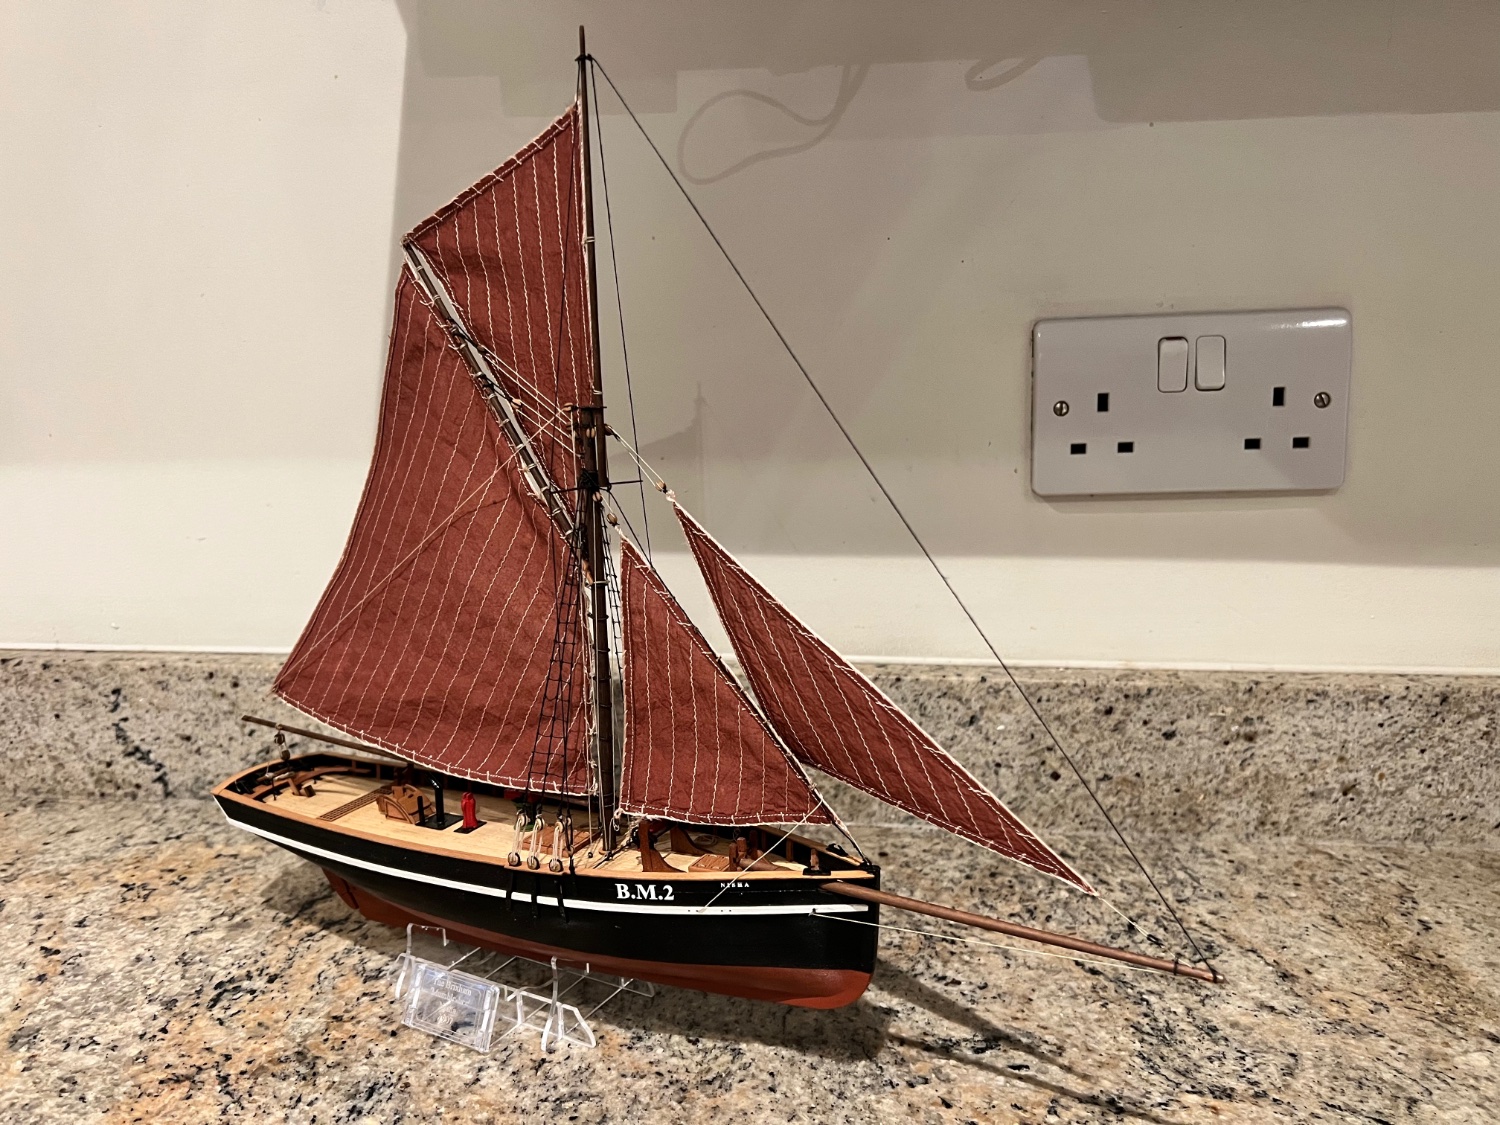
Hi Max, I’ve just finished building Saucy Jack, she’s a super boat to build and the end model looks lovely. My build log is below, hope it’s useful. I strongly recommend James H’s build log of the prototype as well. Good luck, looking good so far. Dan
- 32 replies
-
- 1
-
-
- Saucy Jack
- Vanguard Models
- (and 2 more)
-
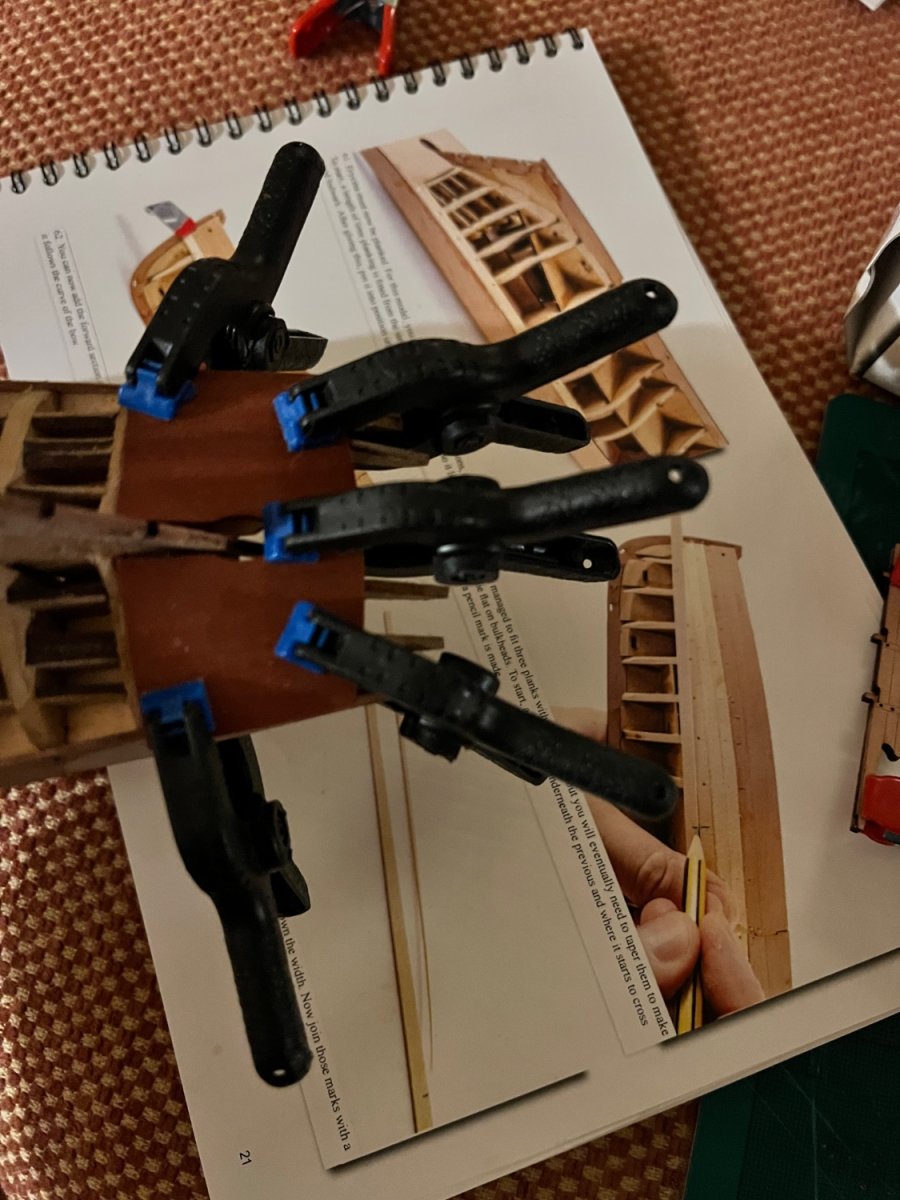
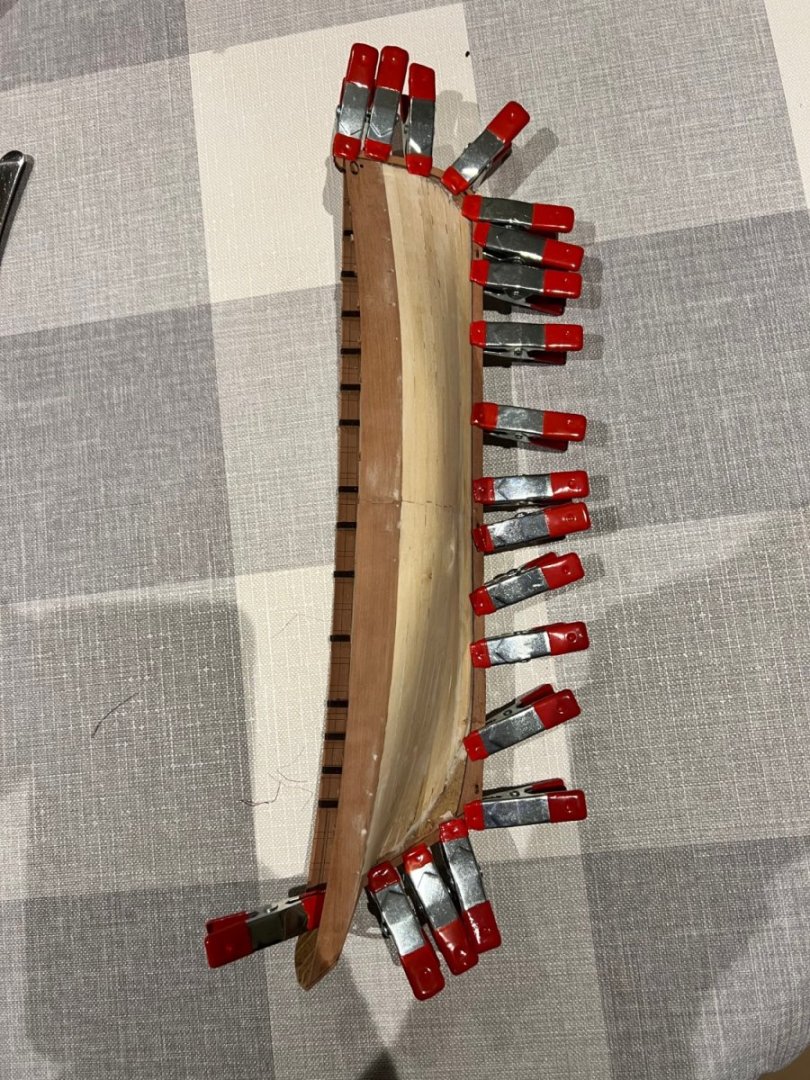
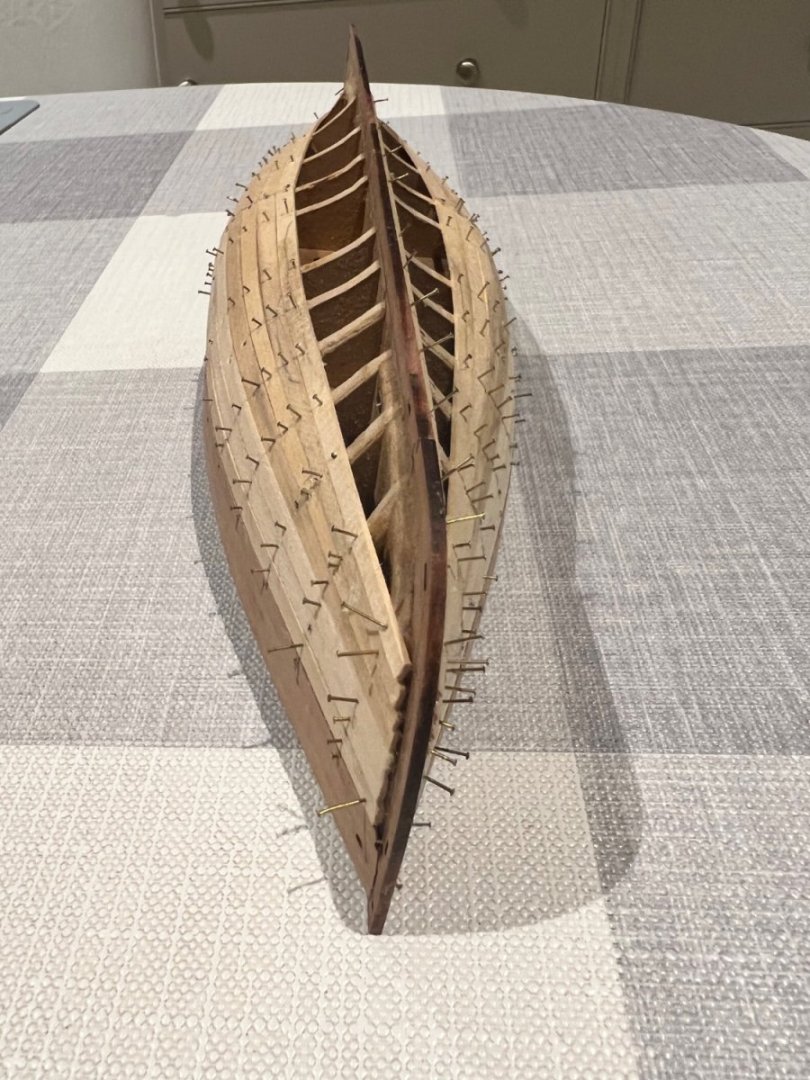
Lots of good progress. Inner bulwarks soaked and clamped to dry for 12 hours. Then glued. Stern counter soaked and clamped to dry. Then glued and sanded in line with the bulwarks. First planking. Doing these in halves. First three planks on each side fitted. No tapering as per the instructions. More planking progress. Erycina has a lovely hull shape which is also forgiving for the planking with no sharp or bluff curves. I’ve stopped the first planking short at the bow so there’s plenty of room for a proper rabbet for the second planking. Looks a bit odd now and will need some sanding. I usually forget to leave a big enough rabbet, hopefully enough this time. Completed the first planking. Bit messy and certainly prickly but should be a good base for the second planking when filled and sanded.


- 46 replies
-
- 3
-
-
- vanguard models
- Erycina
- (and 3 more)
-
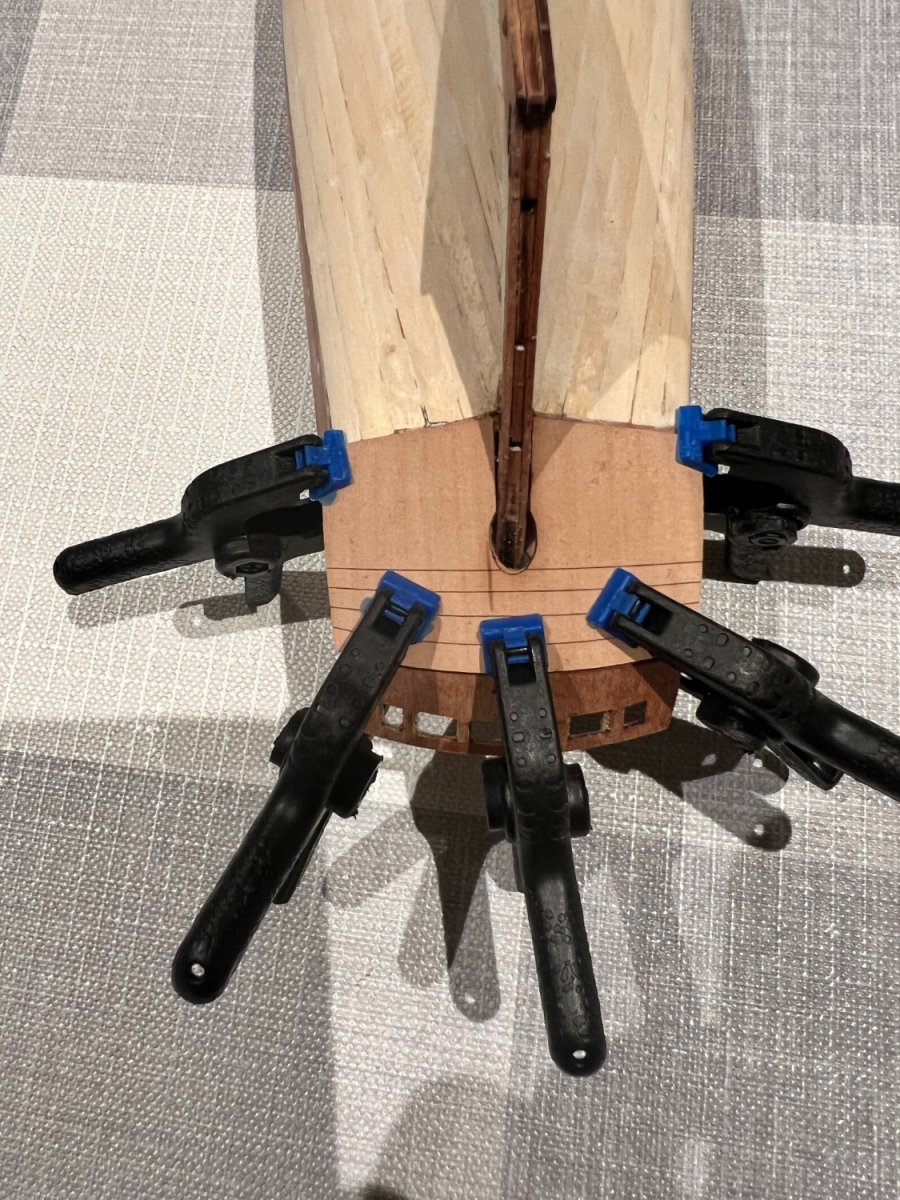
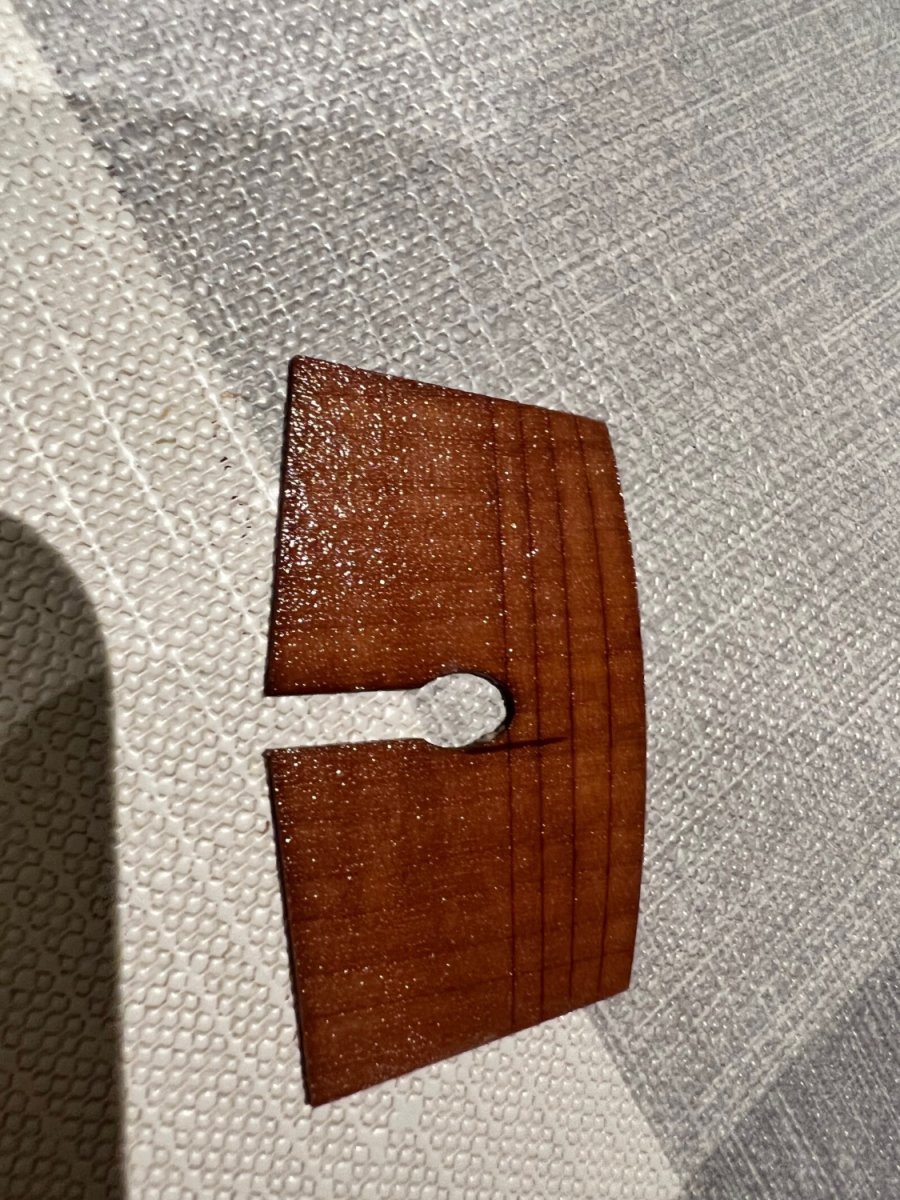
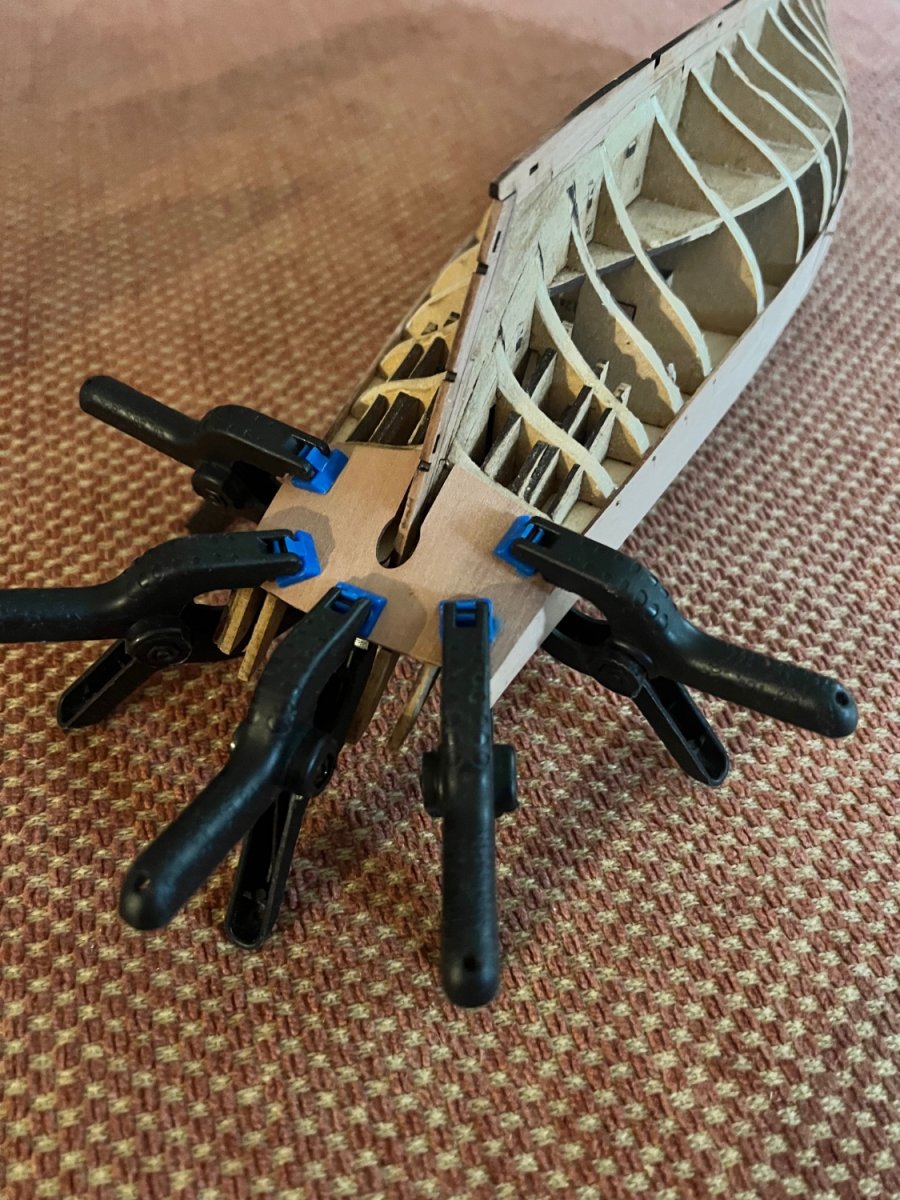
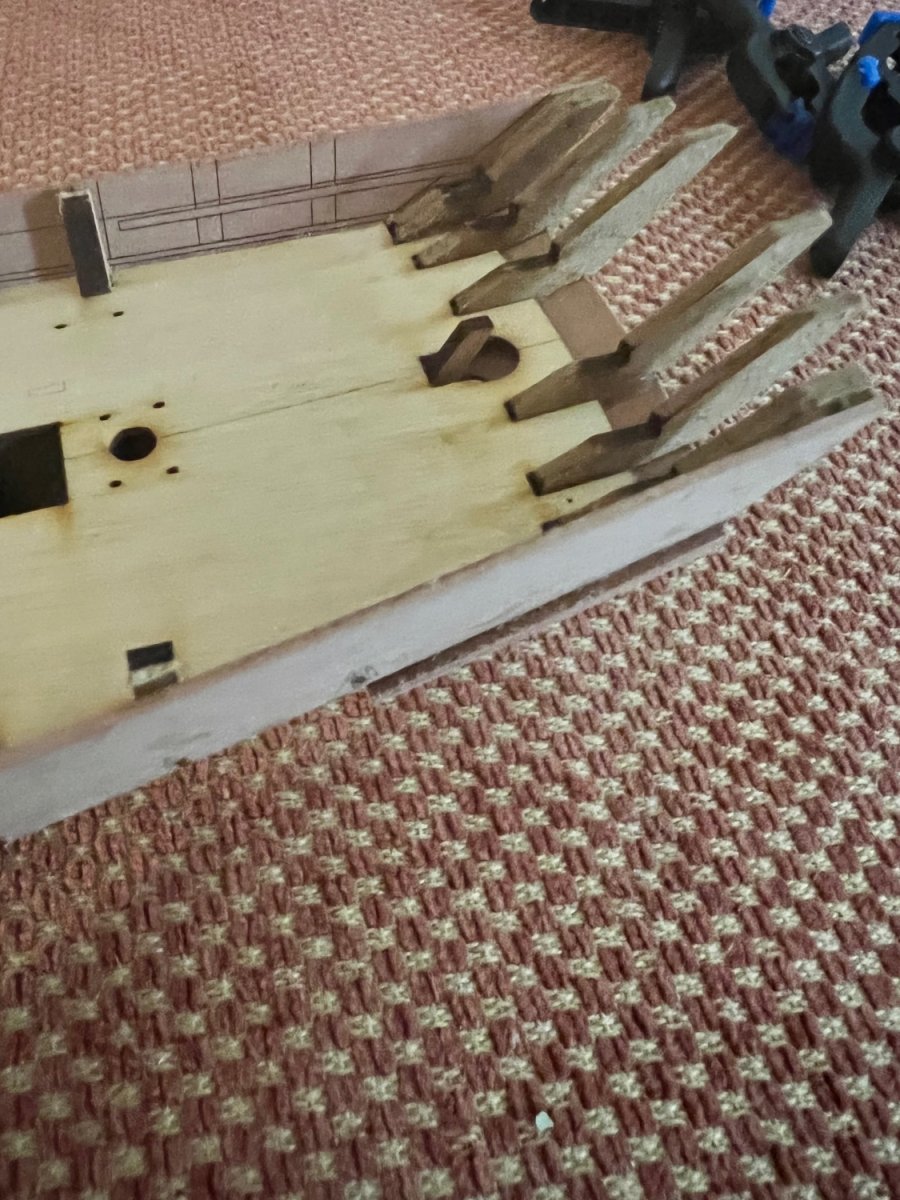
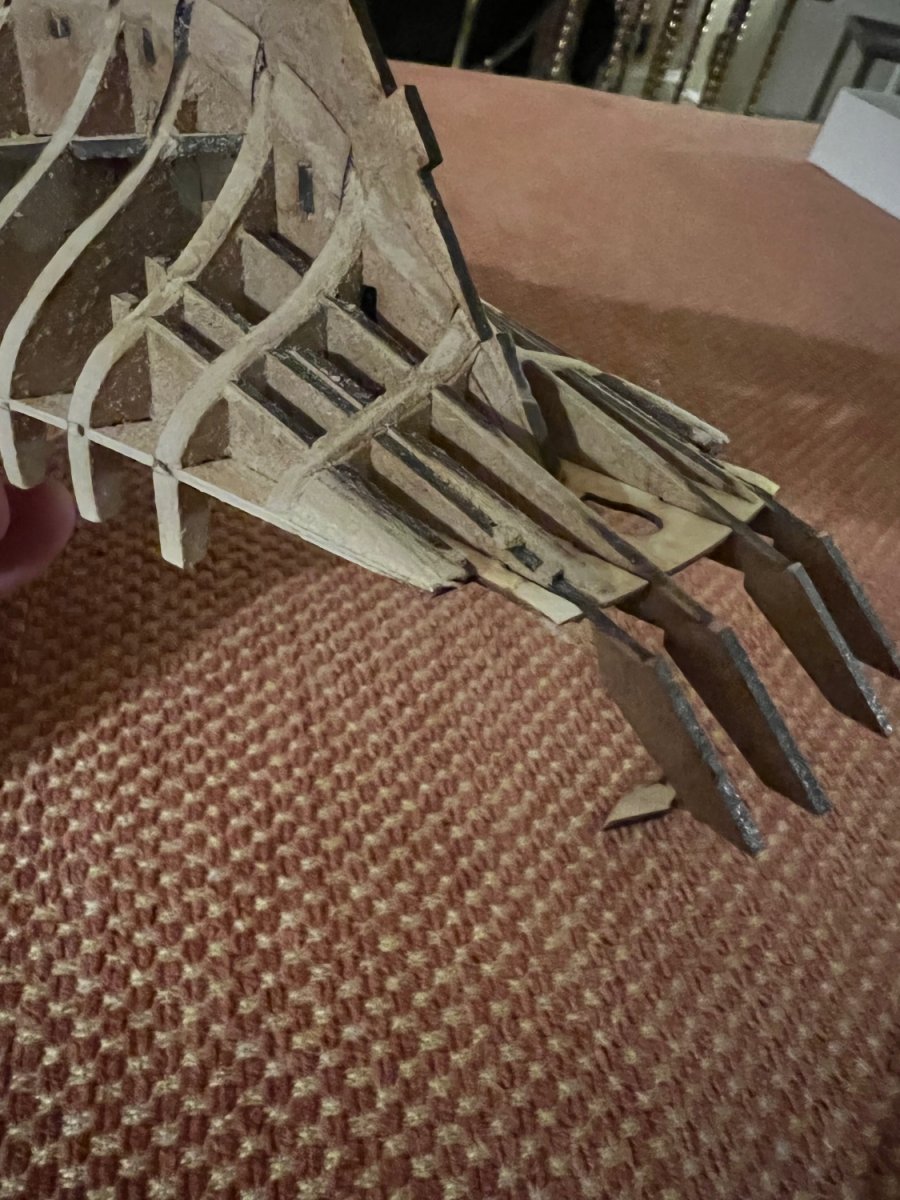
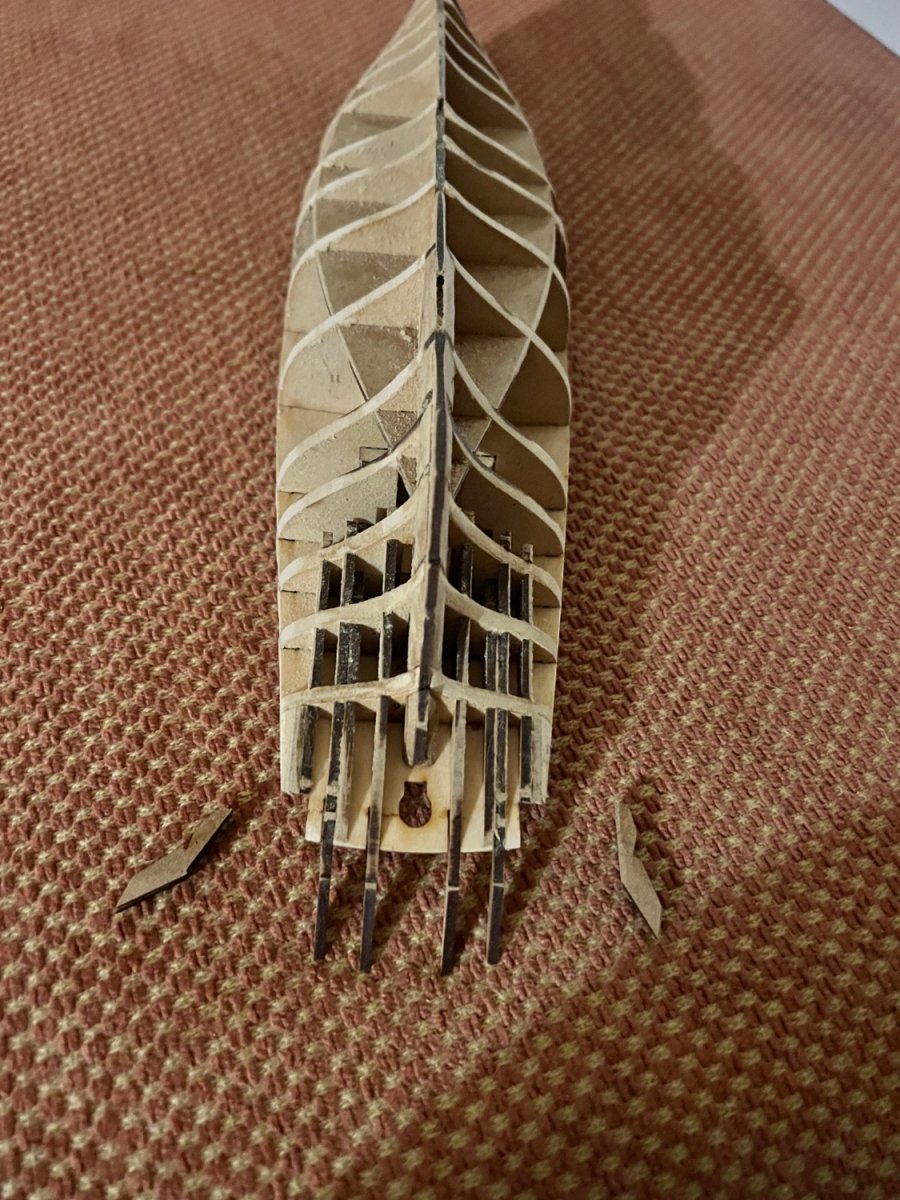
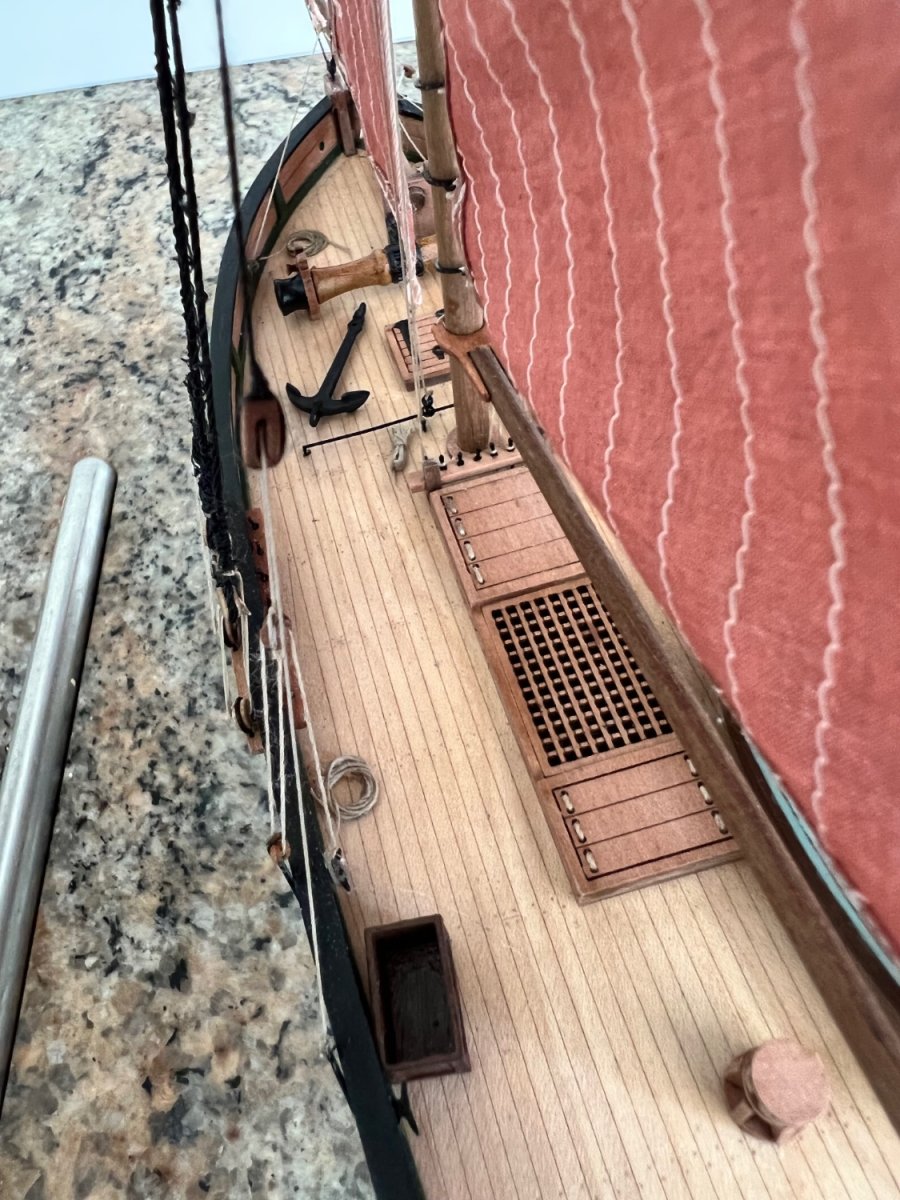
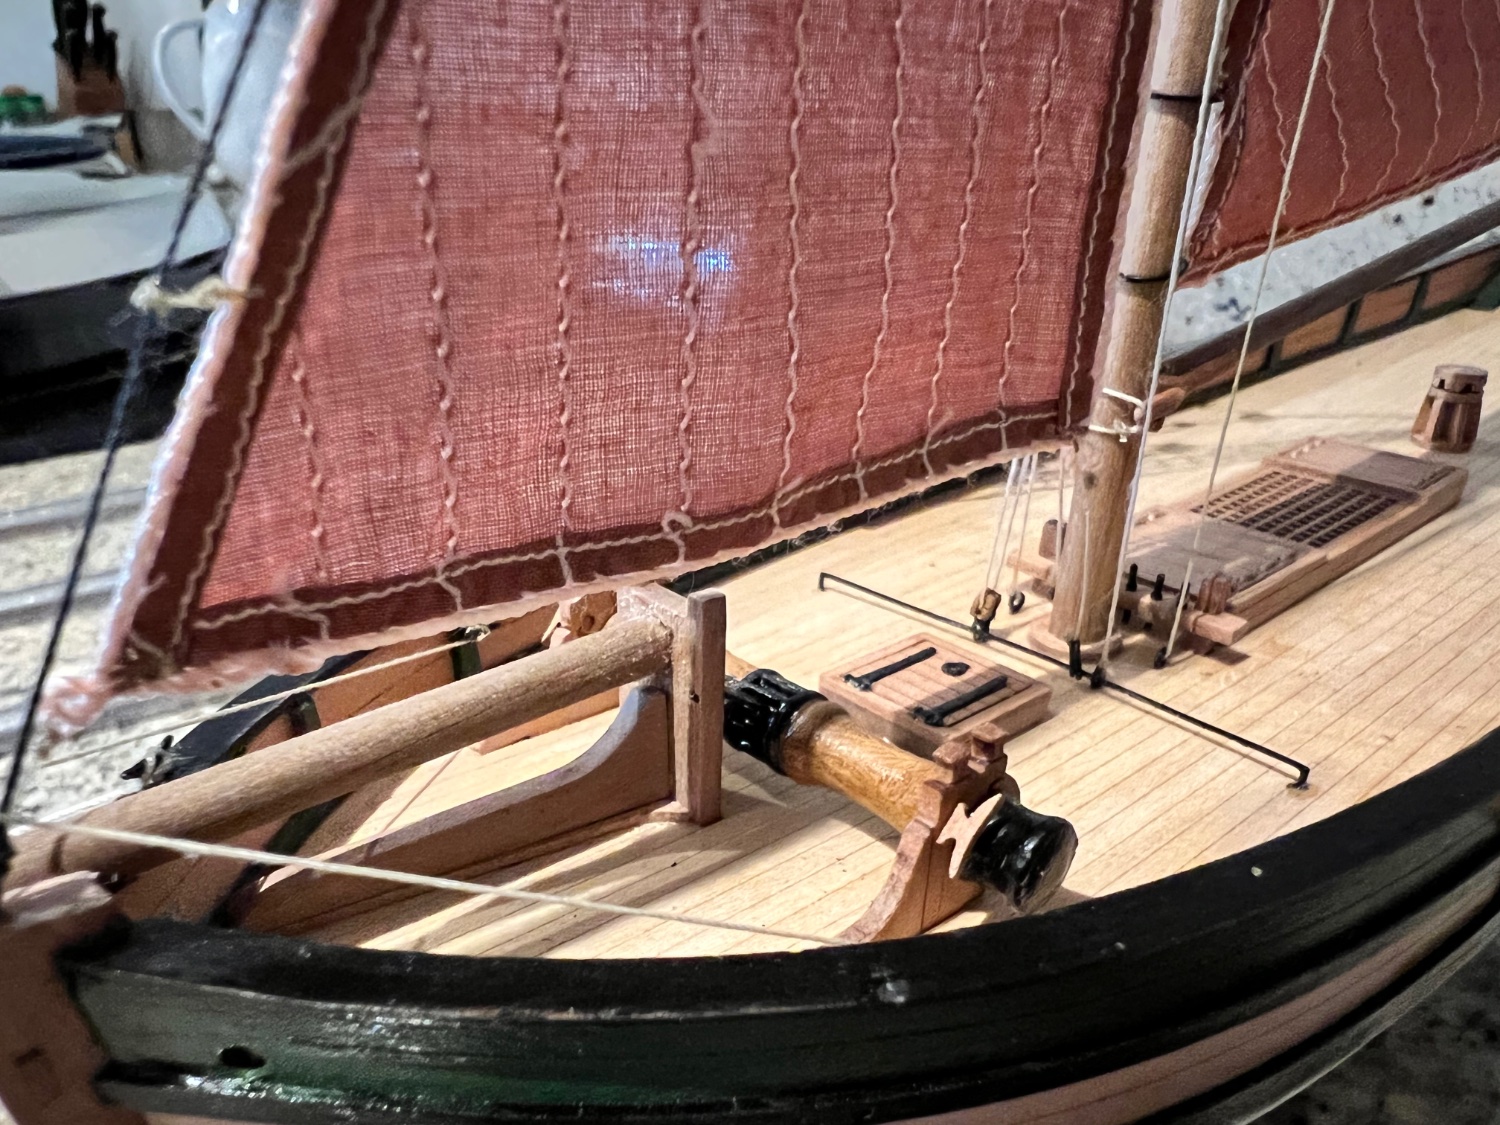
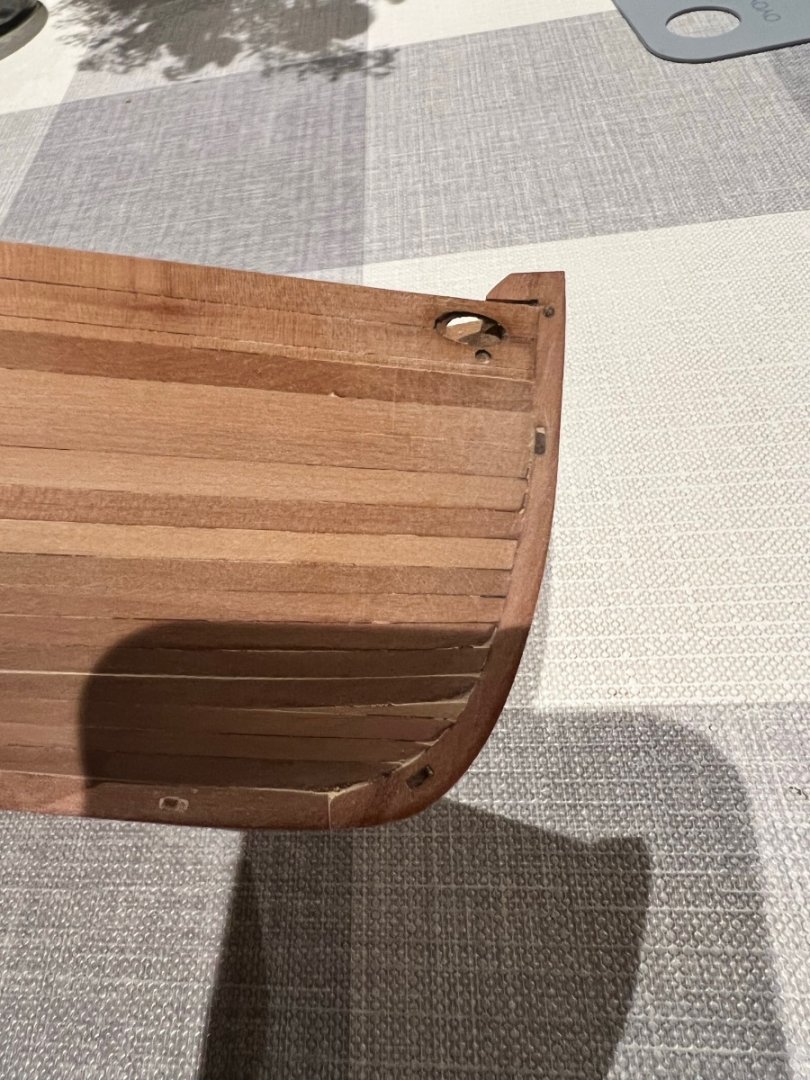
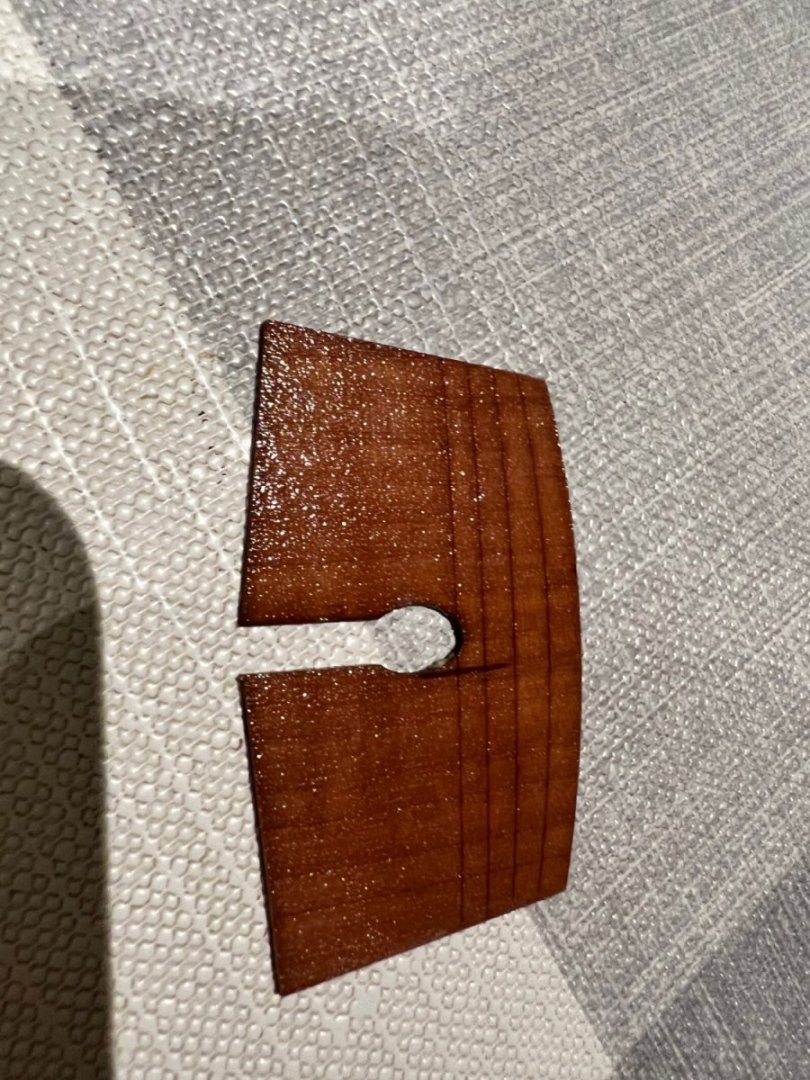
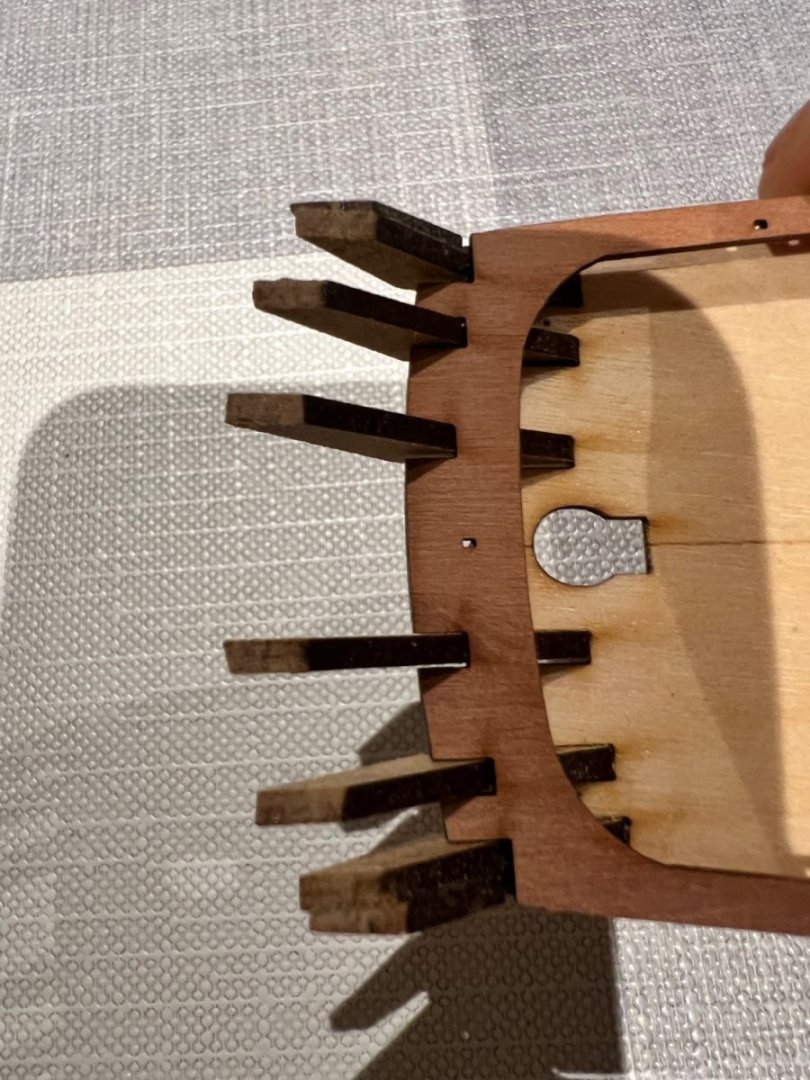
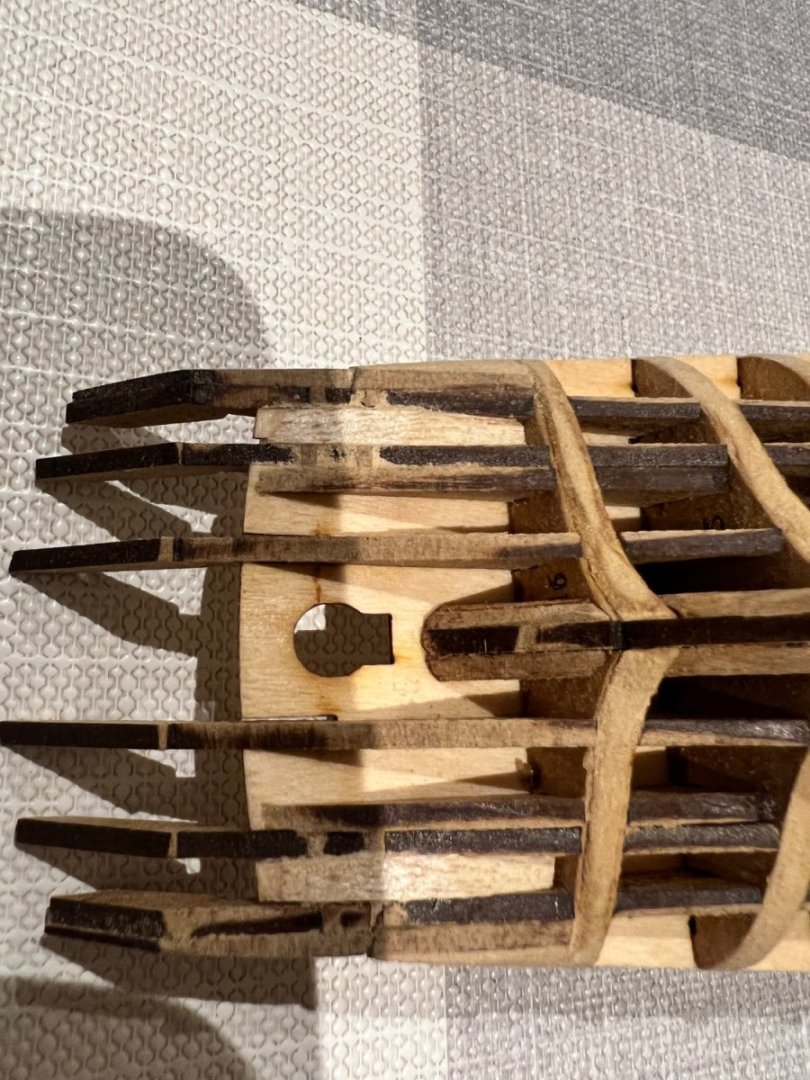
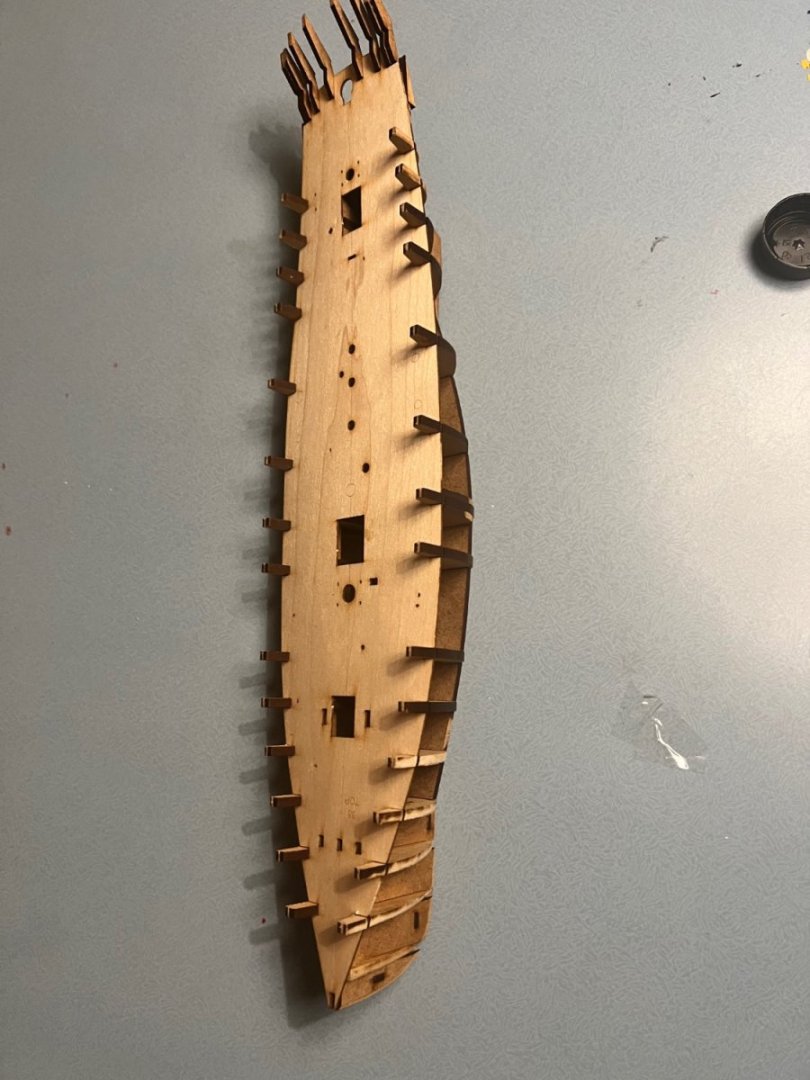
Erycina’s stern frames are very fragile - there’s a very narrow section that breaks easily and is protected by a “safety gate”. Snipping off one safety gate broke one side’s outer stern frame and sanding the stubs of the safety gate on the other side broke that one too. Once they’re broken off there’s not much surface to glue them back onto. So I inserted a piece of balsa wood between the stern frames to provide additional surface area for glue - not much but enough. Then sanded to shape. I hope the repaired frames are positioned correctly. They look about right and fit the stern “bench” insert.


- 46 replies
-
- 3
-
-
- vanguard models
- Erycina
- (and 3 more)
-
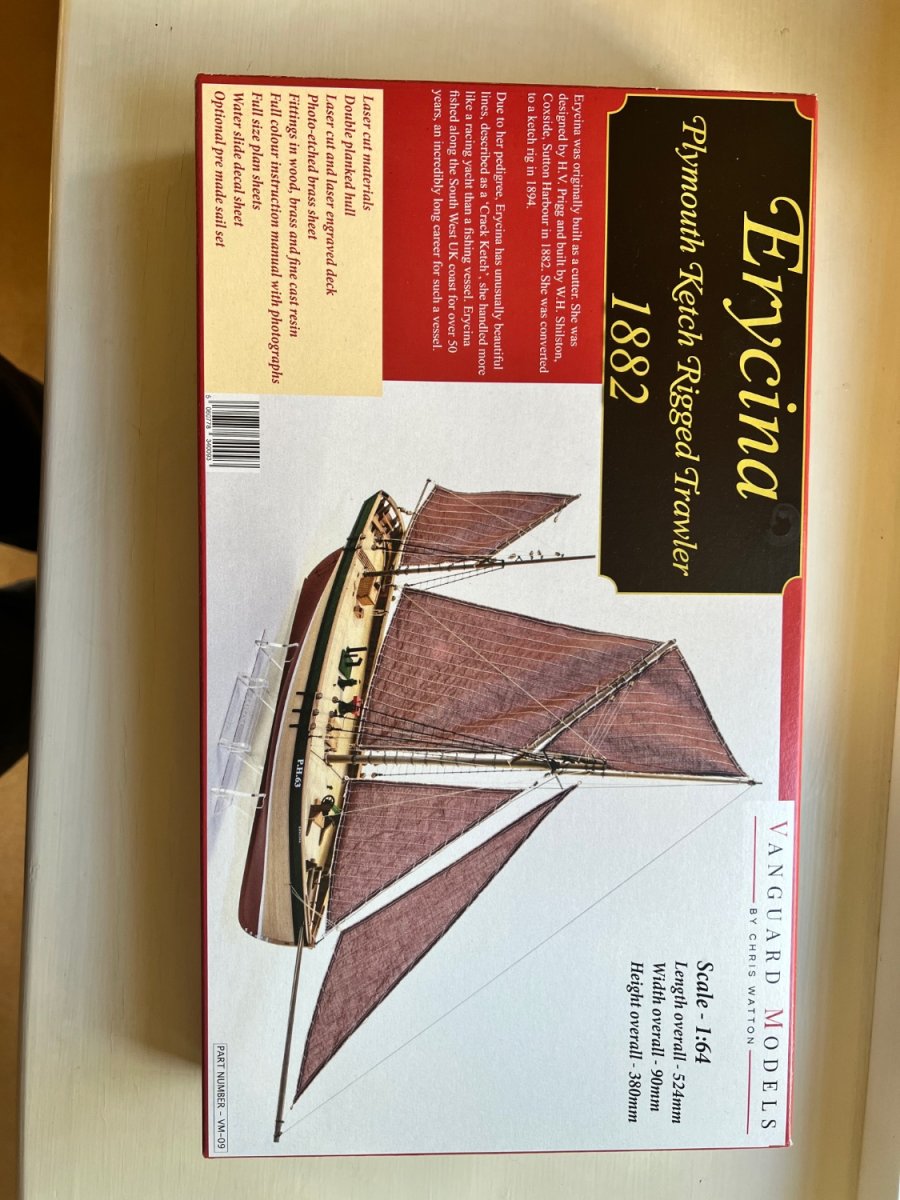
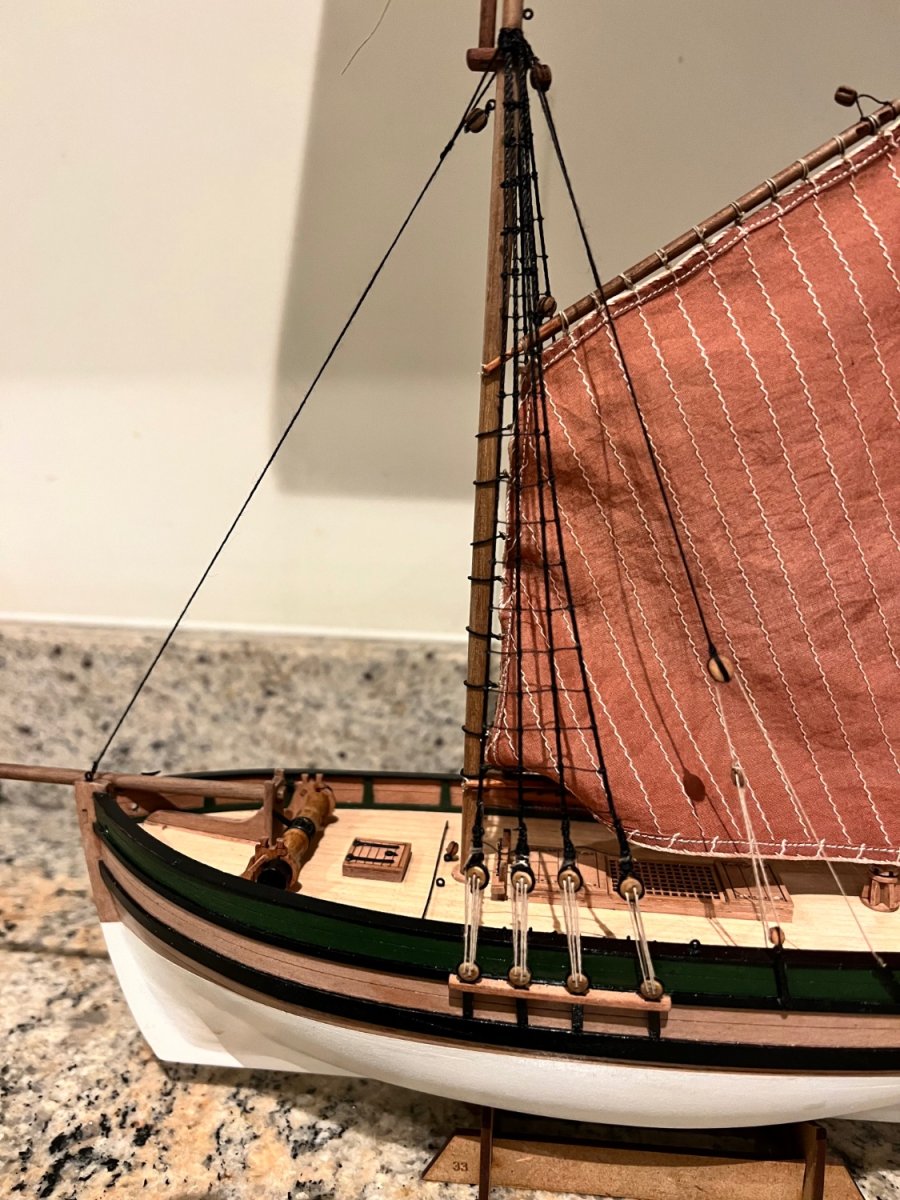
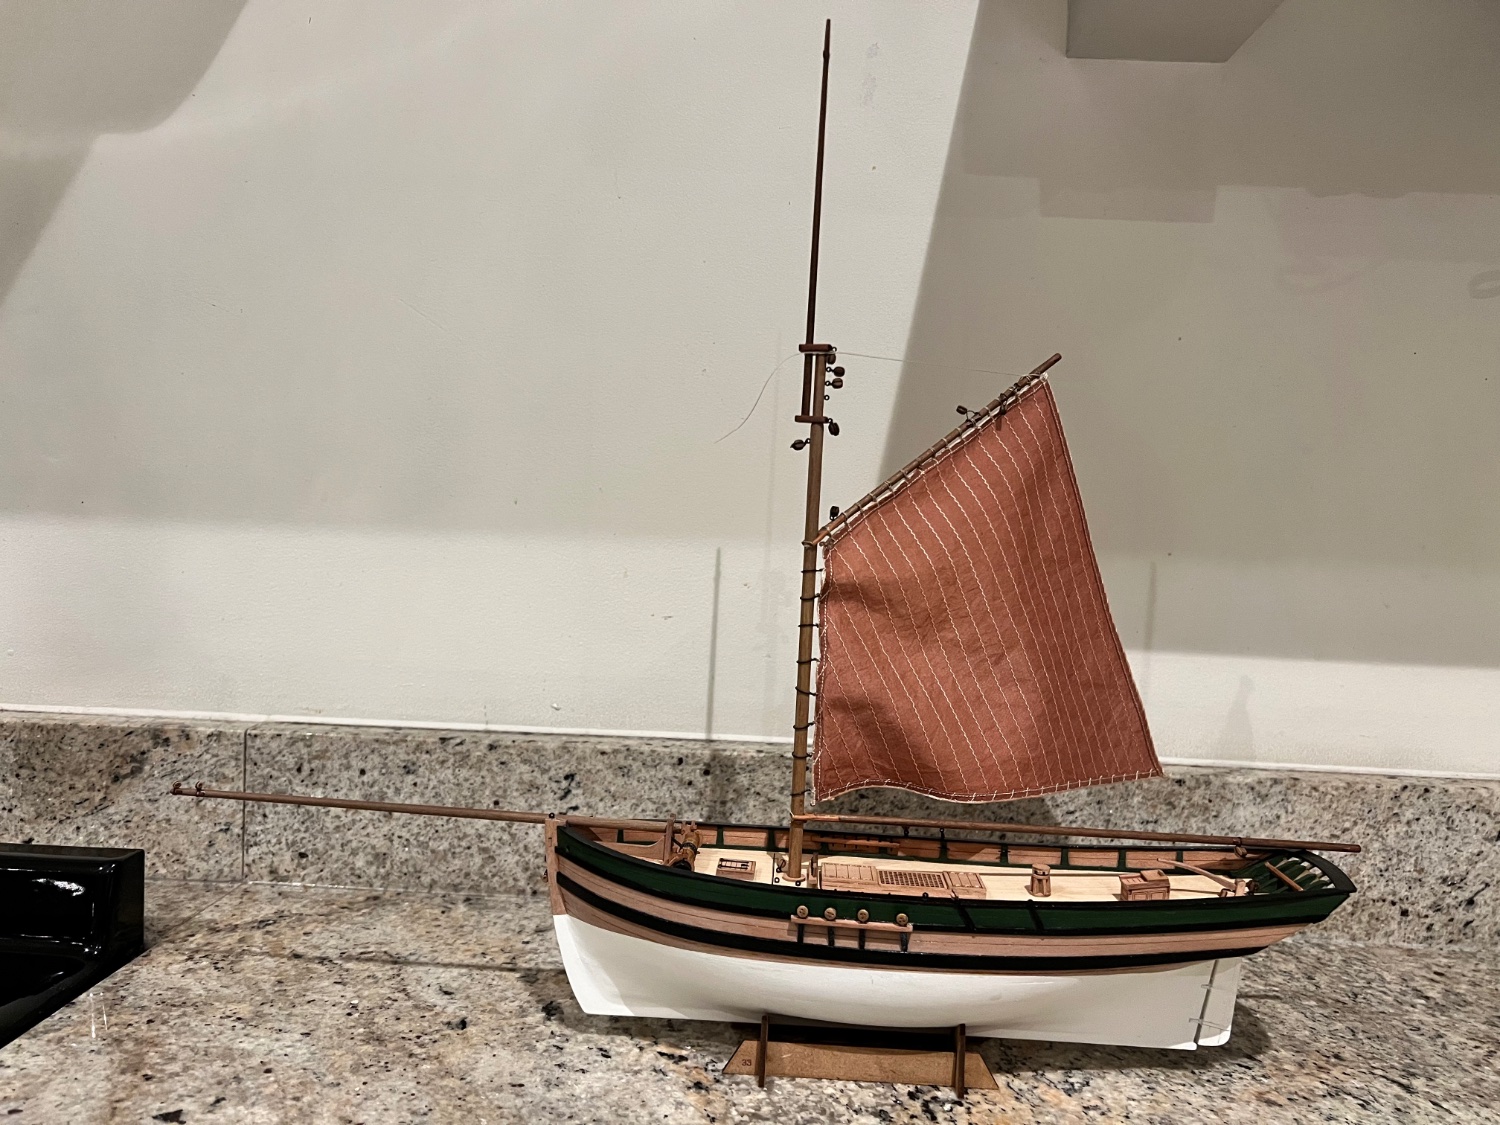
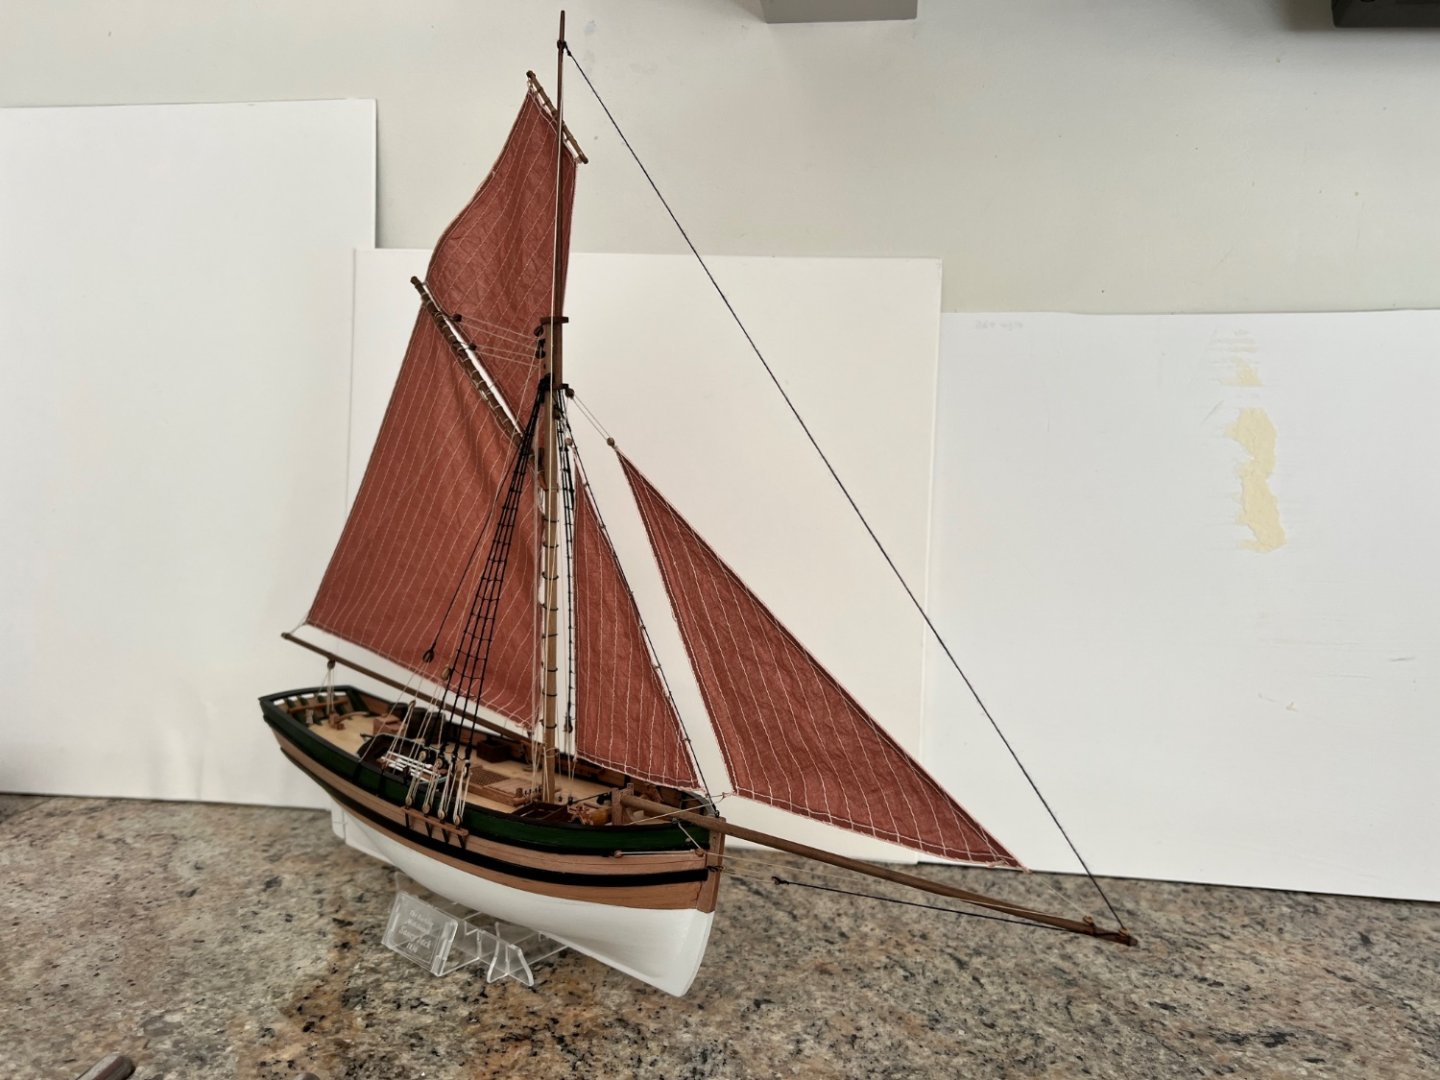
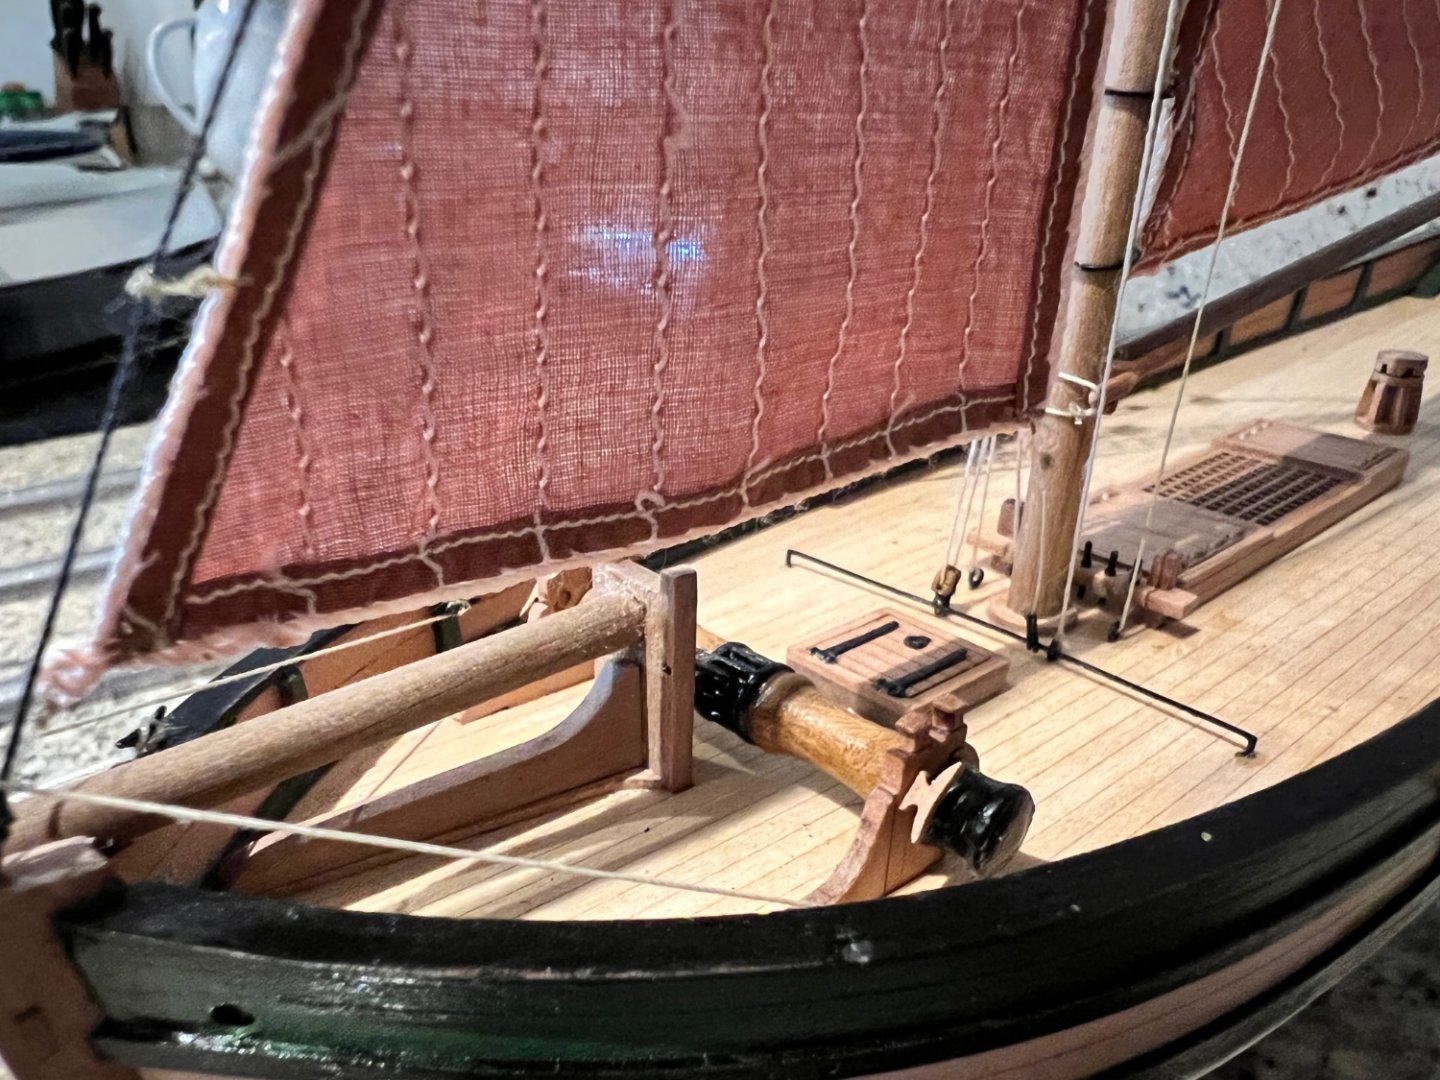
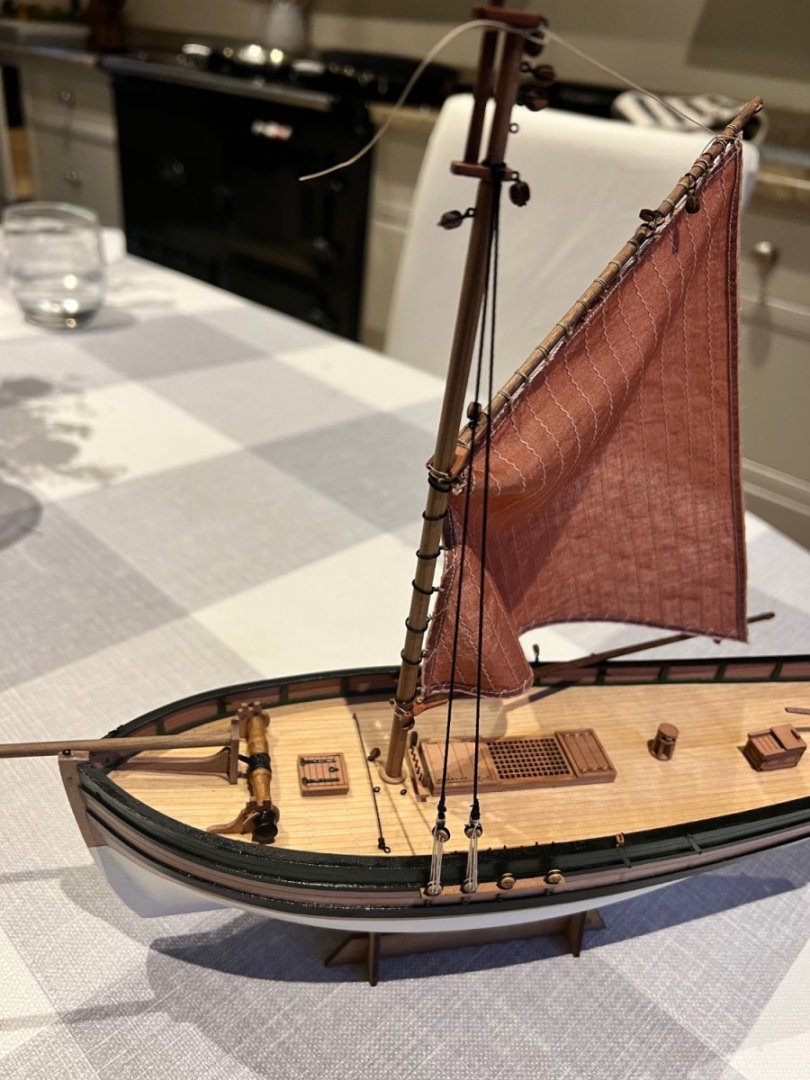
Erycina will be my fifth build and my fifth of Vanguard’s superb range of 1:64 fishing boats. As always the kit lives up to my high expectations from Vanguard. Very good quality materials, instructions and plans. Lots of excellent build logs of Erycina to guide me here too. My log will be less detailed this time as I can’t better those of some of the more experienced builders. I dived straight in yesterday and assembled the basic structure which fits together very easily and forms a firm structure. The deck went on today and fits nicely too. Fairing next when the glue is dry. I haven’t decided what colour scheme to go for. I’m toying with either the James H prototype colours but with the inner bulwarks painted green too. That depends upon how well I plank the hull and whether the wood can be bare. Other options are something similar to Craigie with a black hull and green inner and outer bulwark or just a black hull with white rubbing strake as I did for Nisha (below). Might be quite smart having the pair similar.


- 46 replies
-
- 2
-
-
- vanguard models
- Erycina
- (and 3 more)
-
Thank you everyone for the positive feedback! My next build will be the lovely Erycina. But I’ll take a week or two’s break before starting her.
-
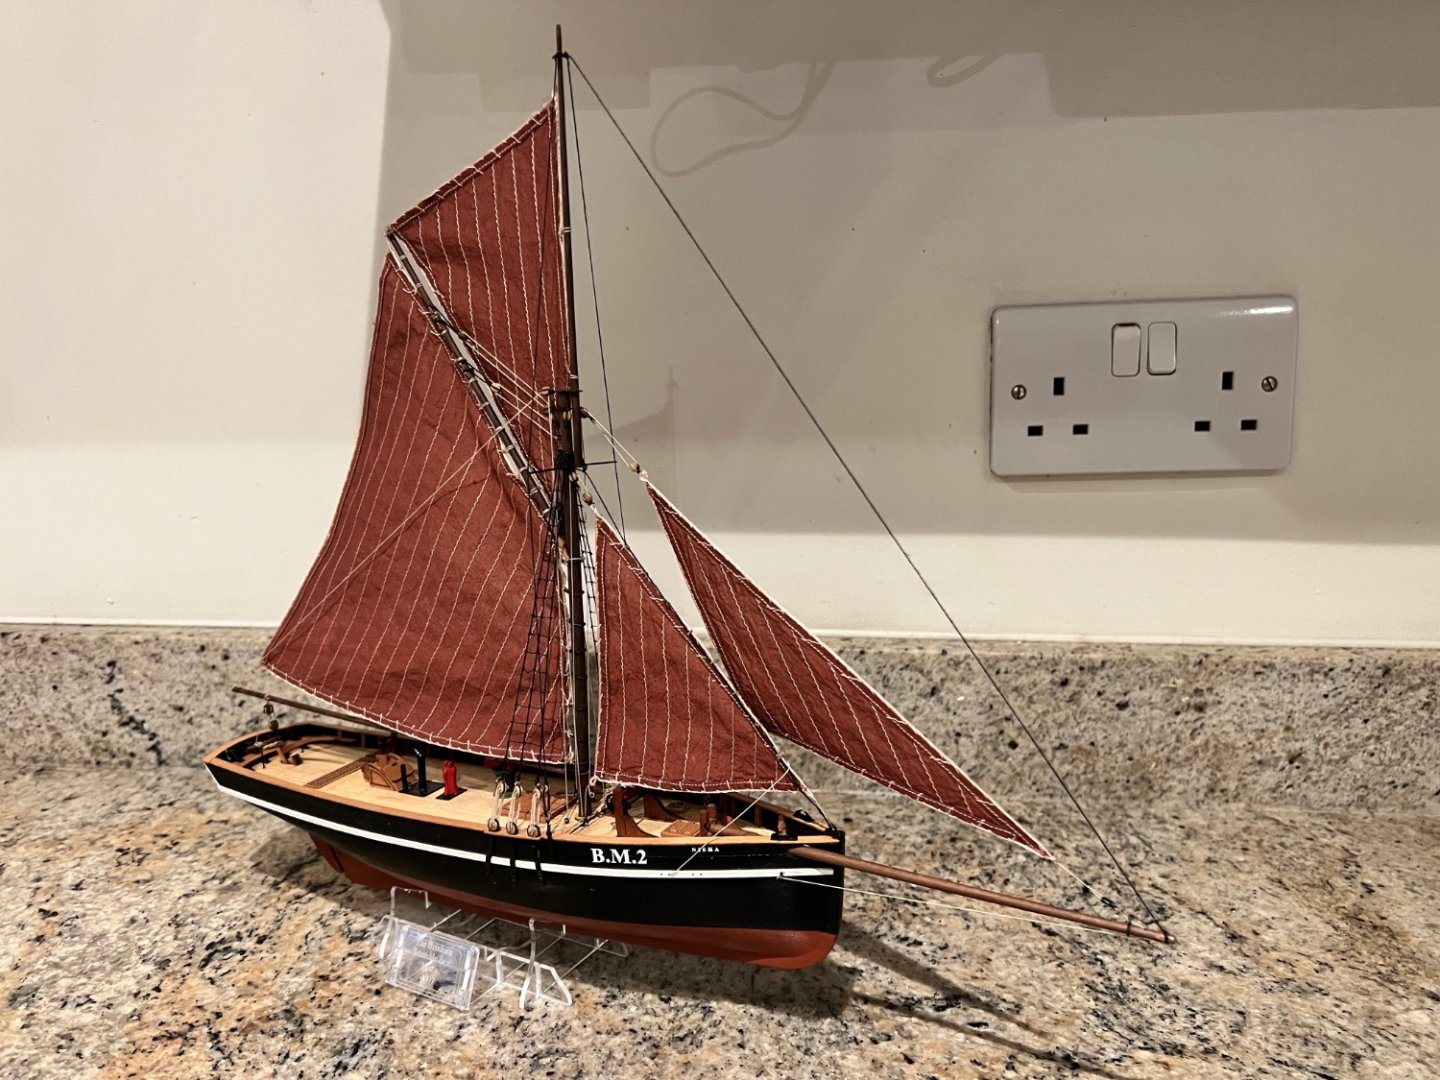
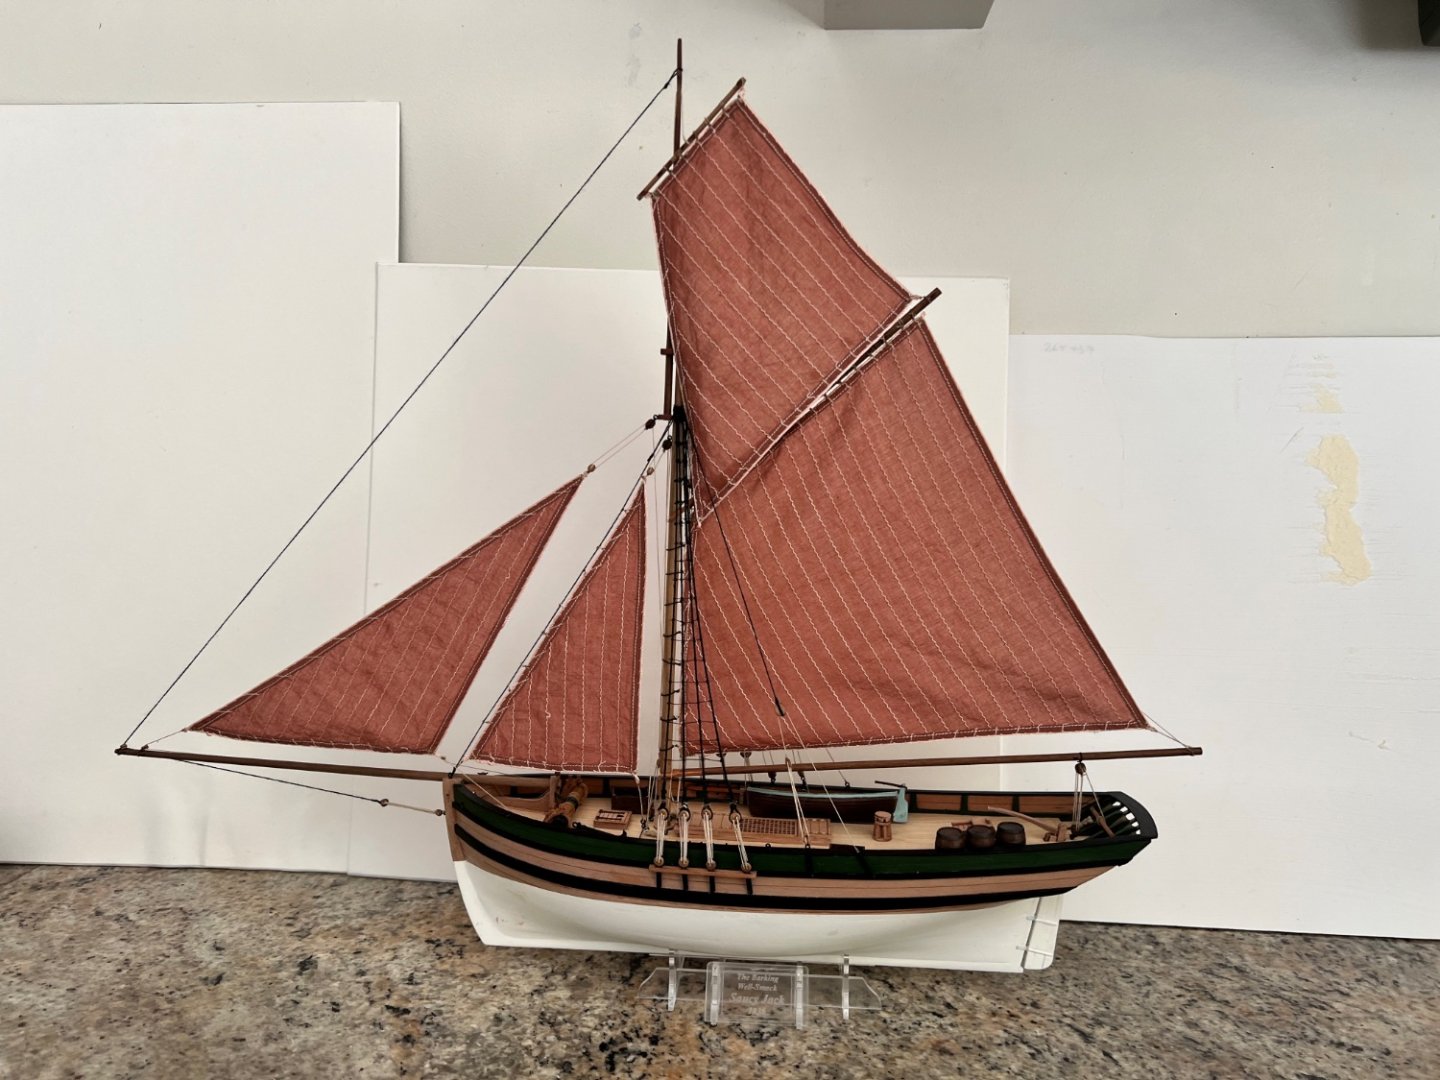
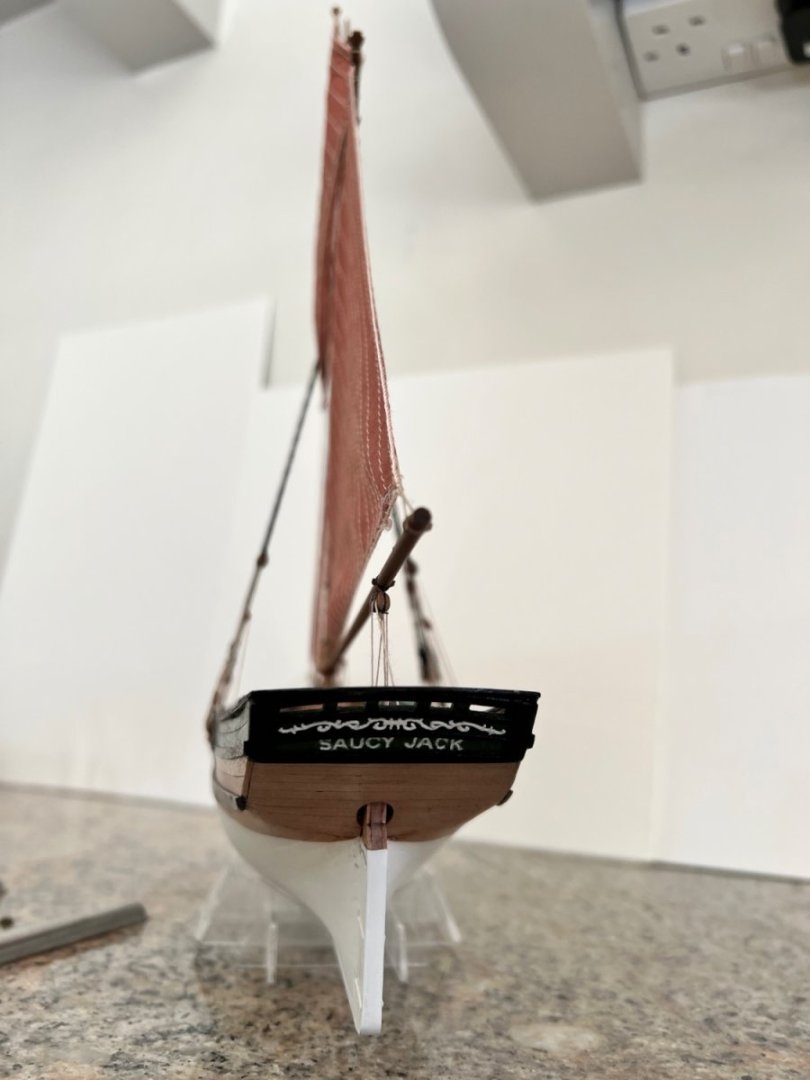
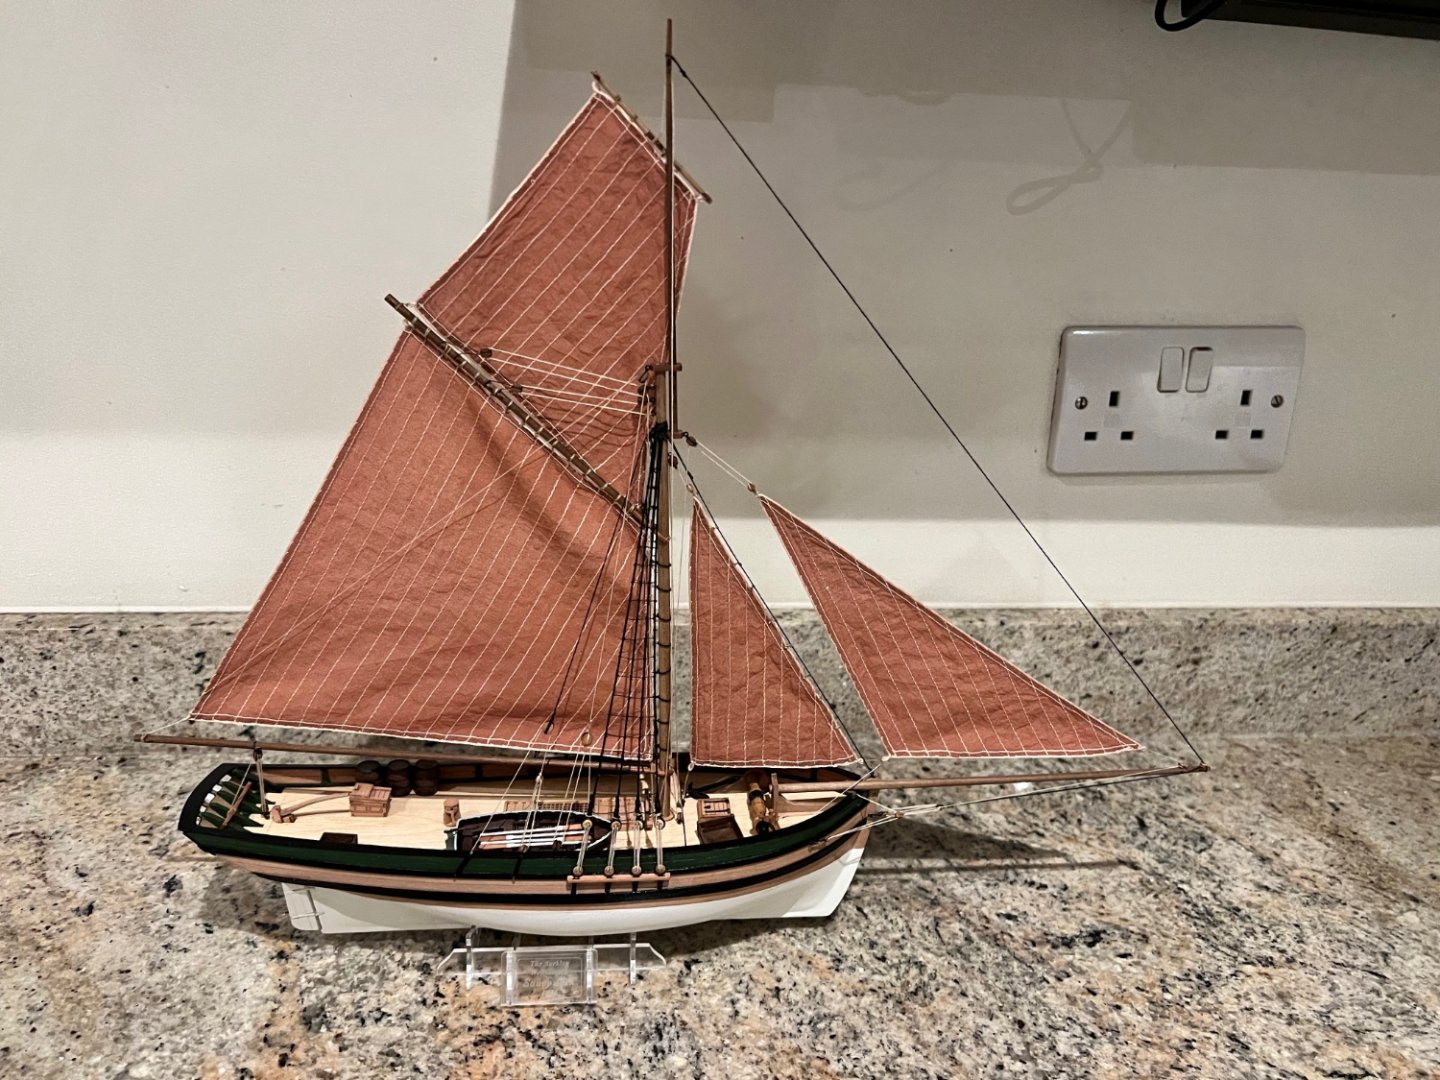
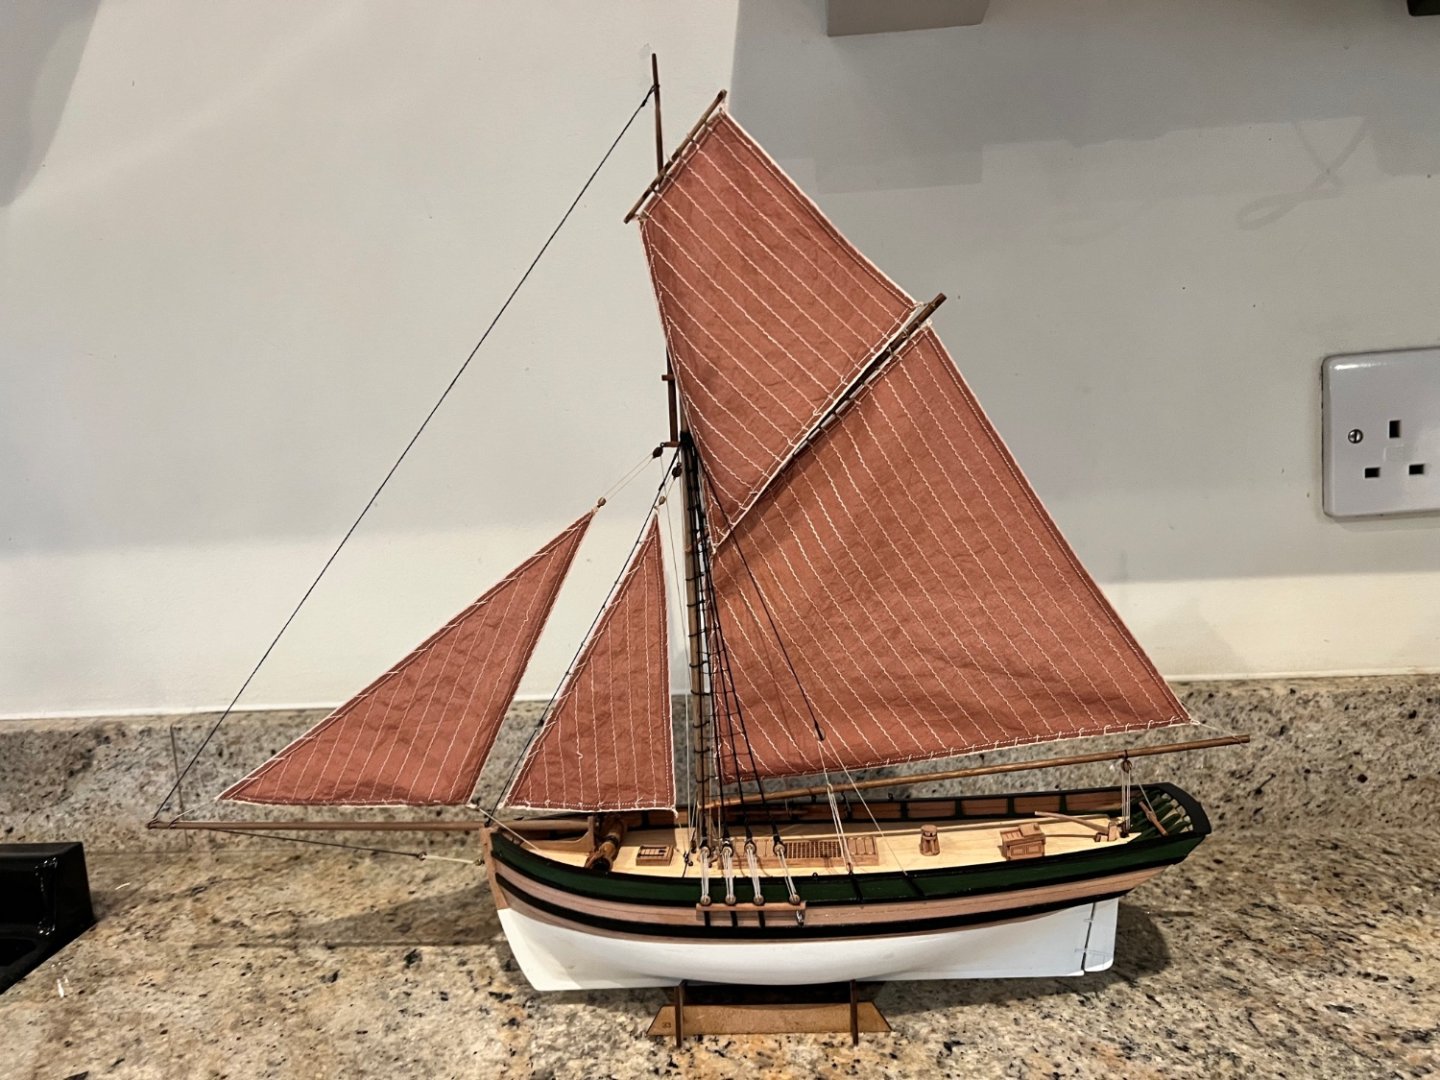
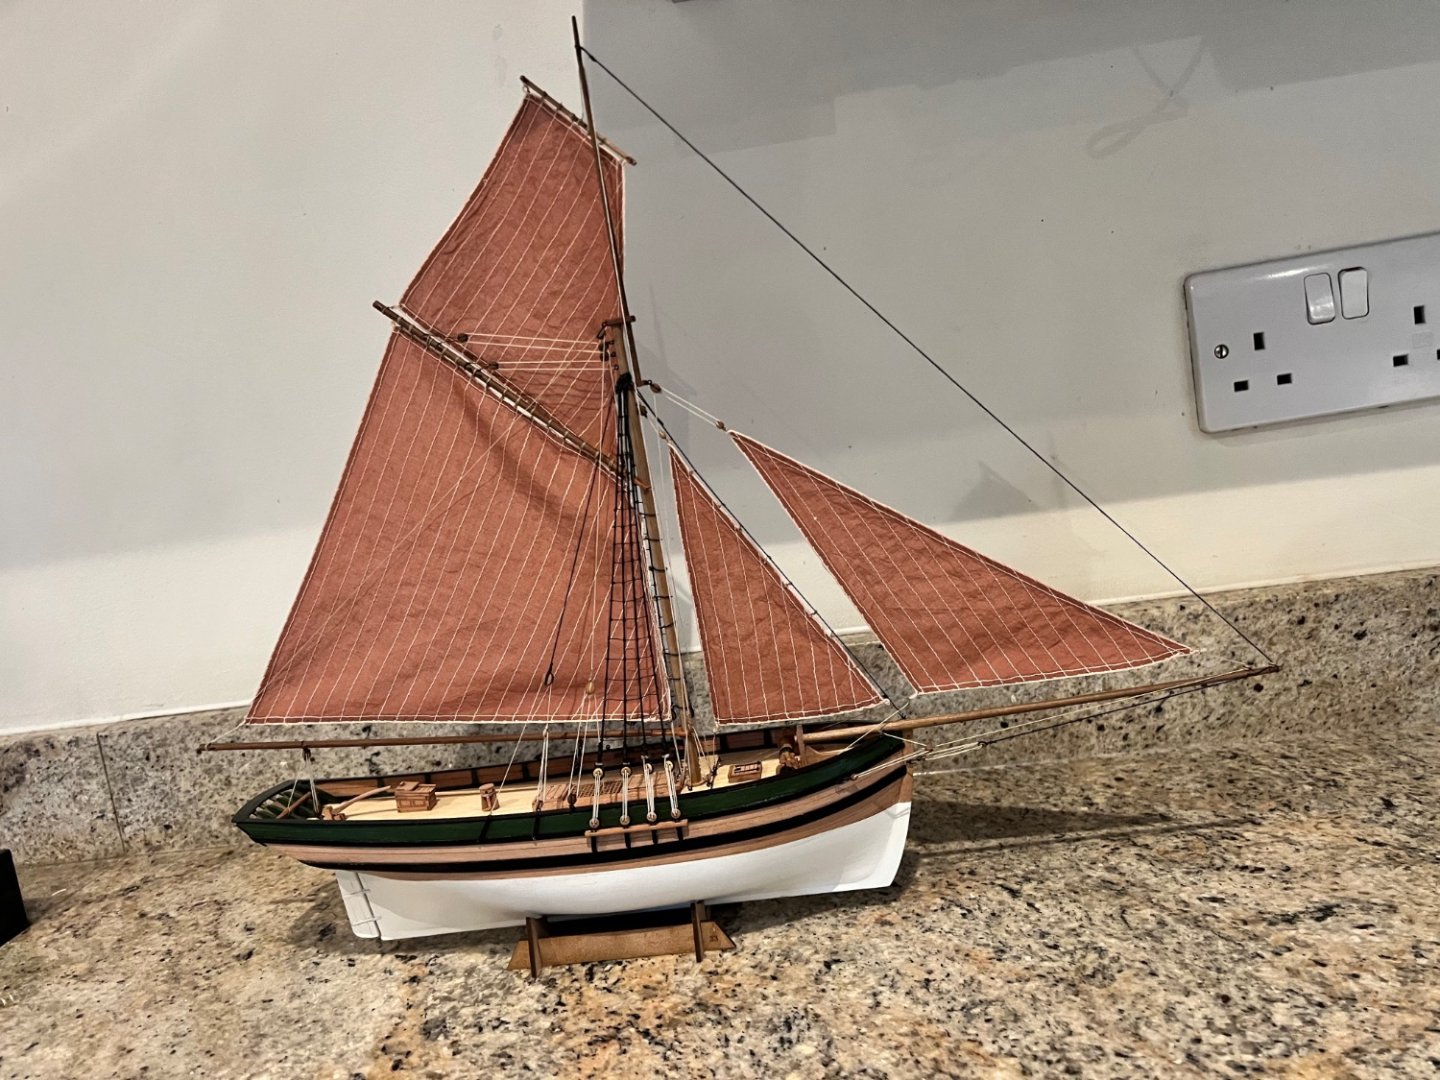
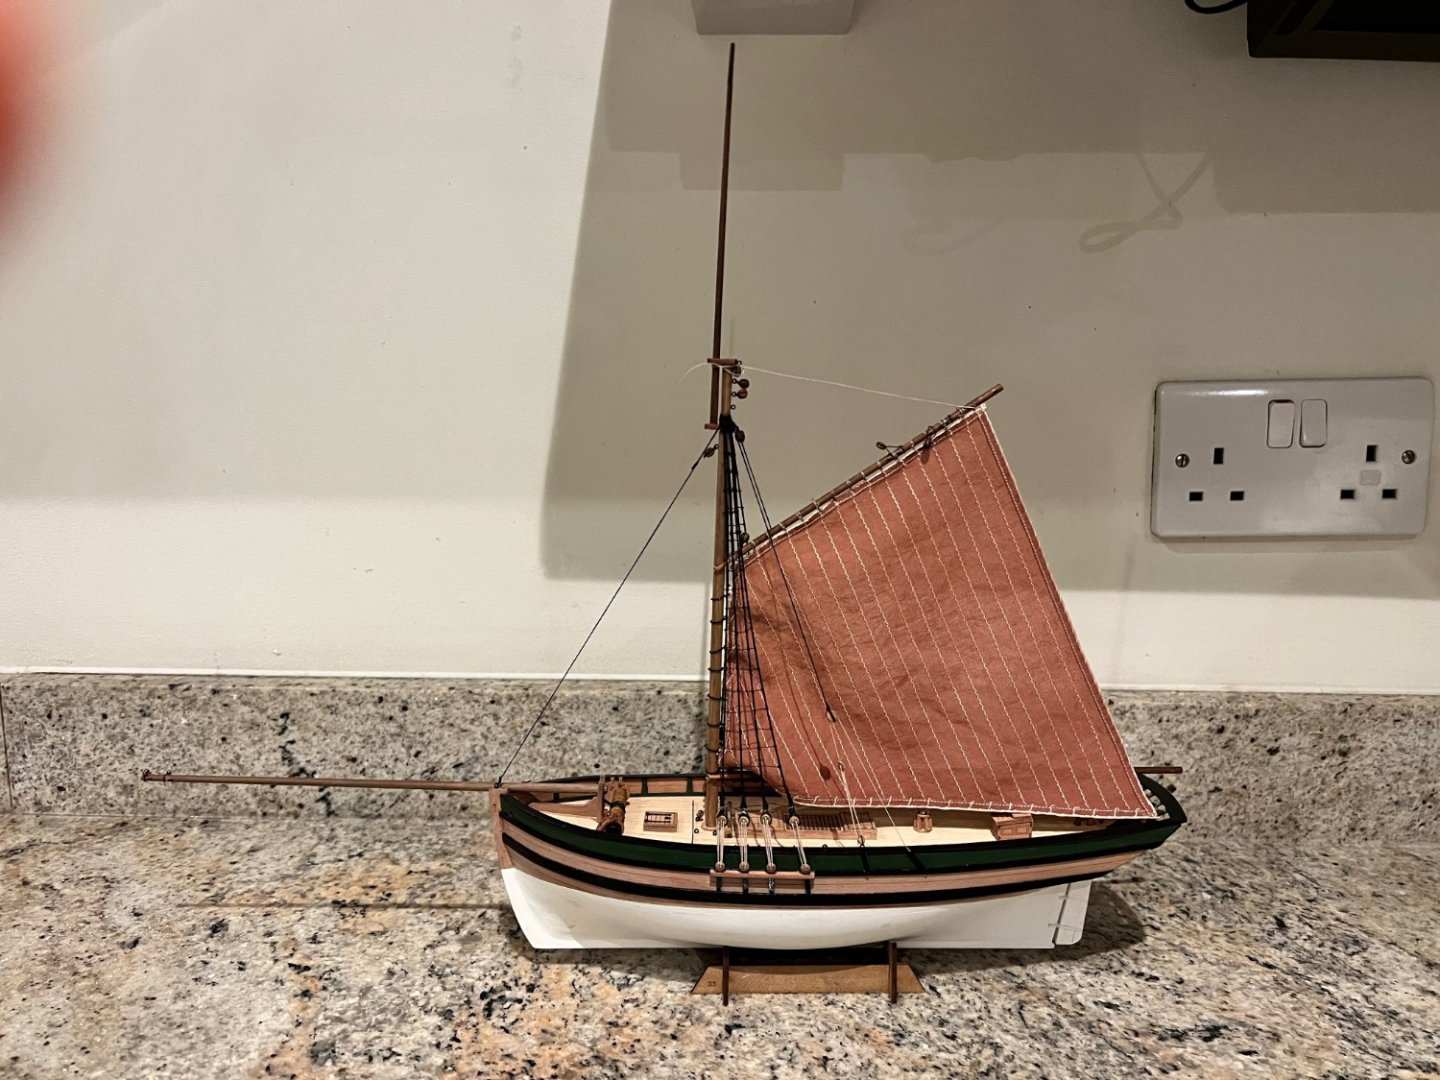
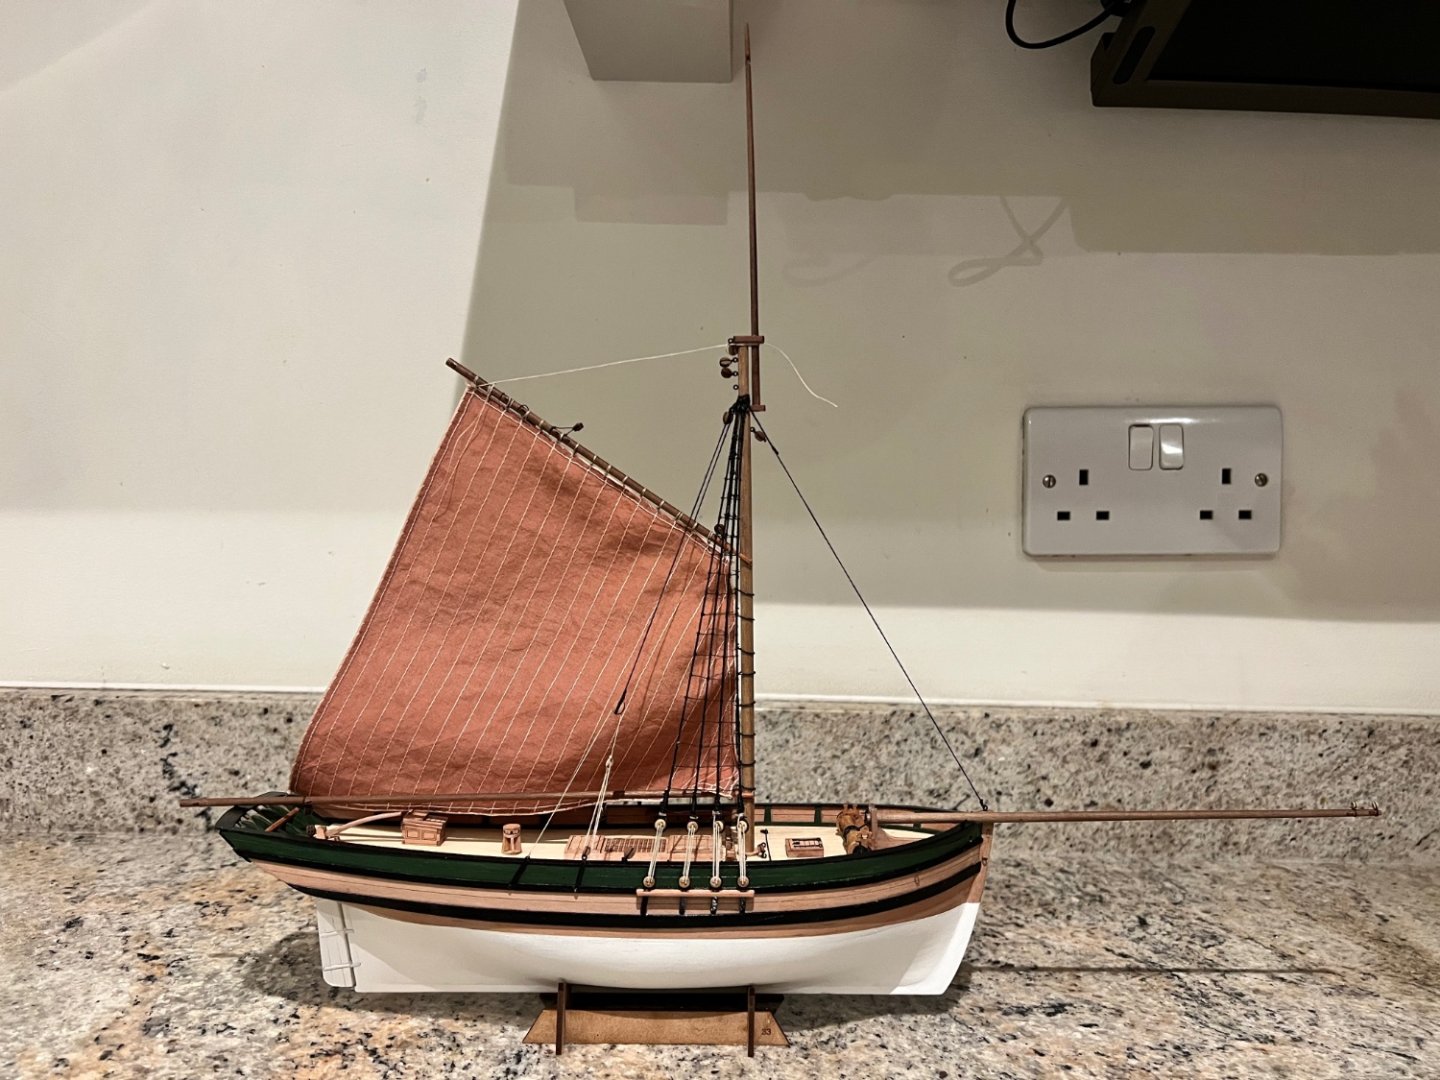
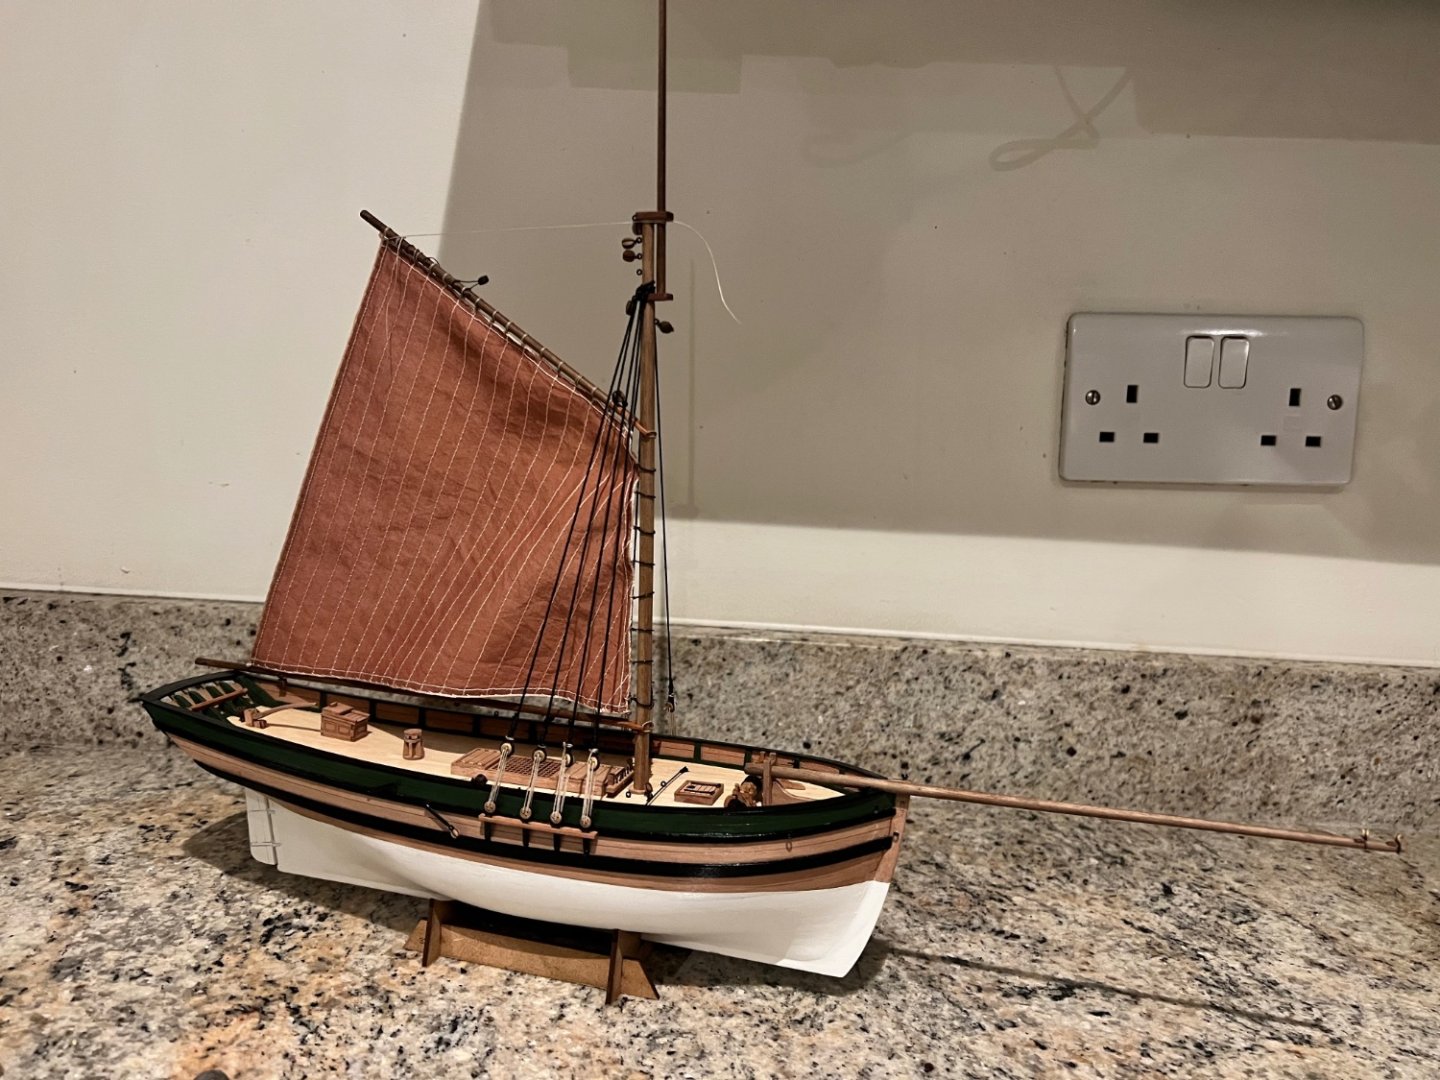
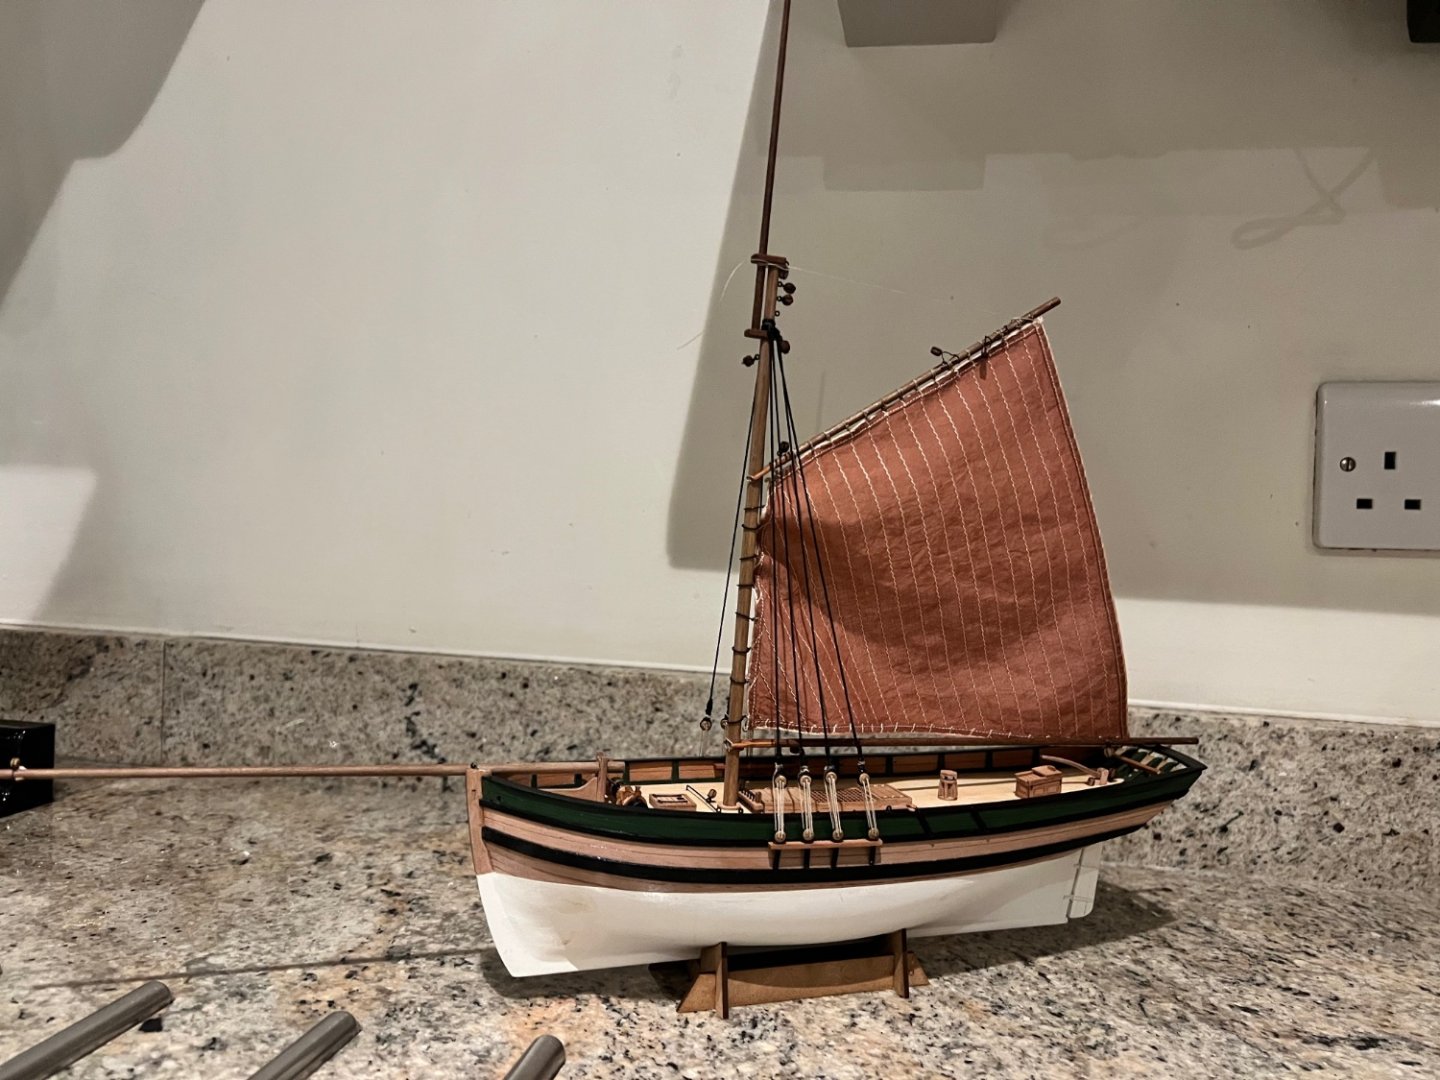
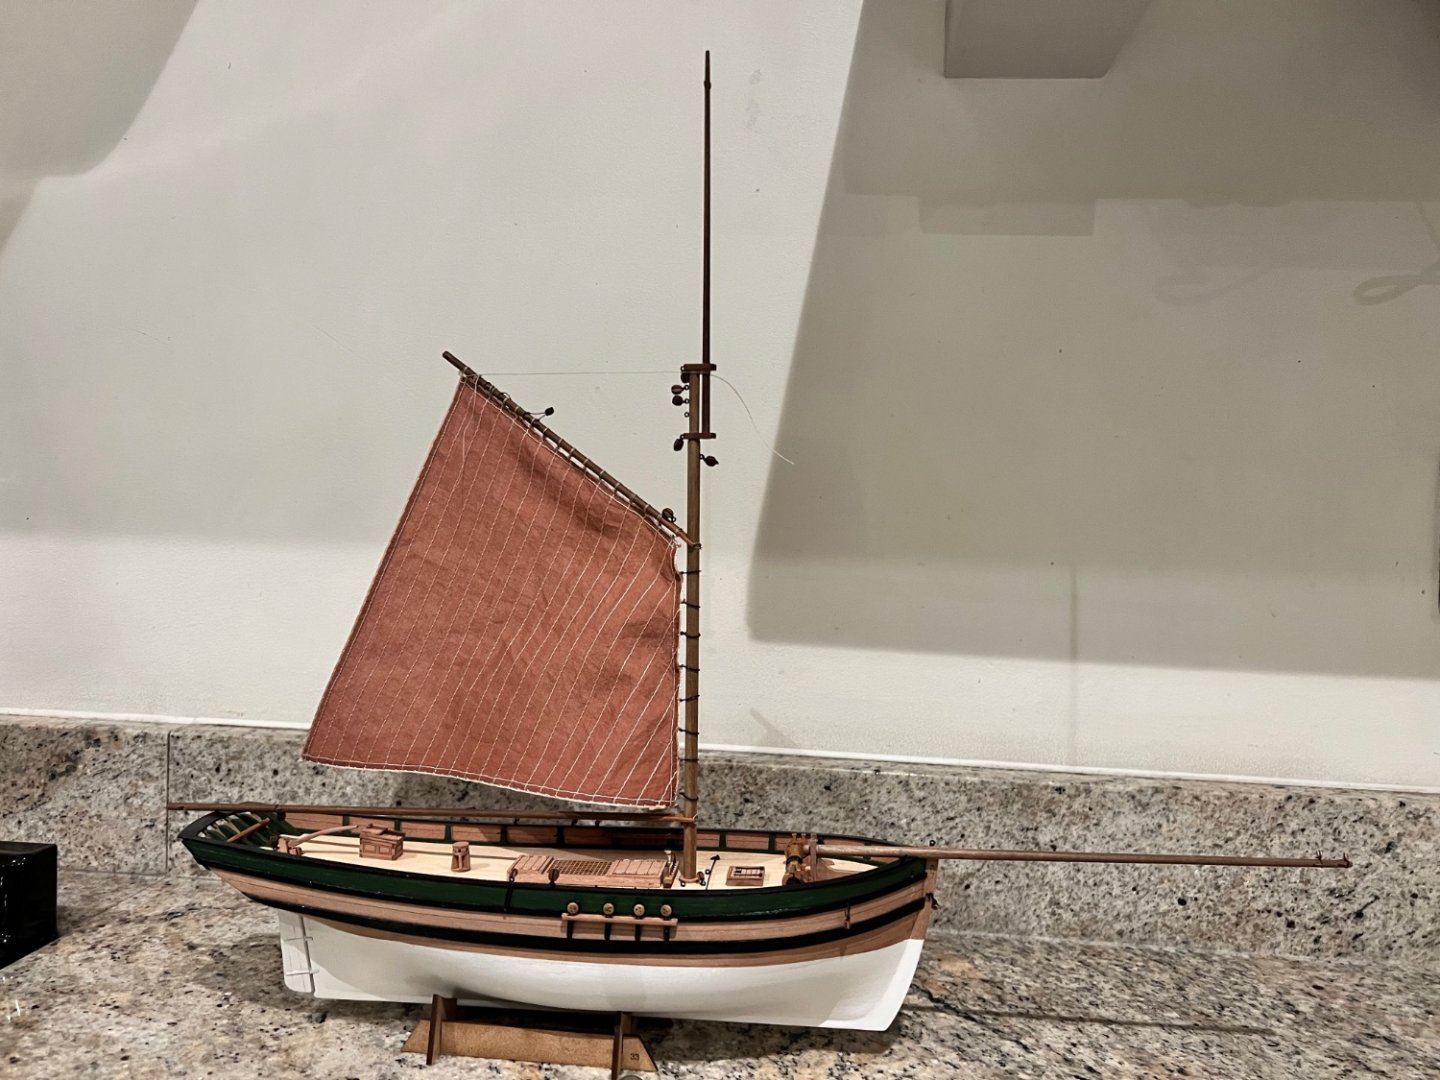
She is now finished. Thanks to Chris for an excellent kit and to James H for a superb prototype build log. Some final photos in daylight (in case you haven’t seen enough already in this log!). Thanks for all the advice from everyone else - hugely appreciated.


- 59 replies
-
- 8
-
-
-
- saucy jack
- fishing smack
- (and 2 more)
-
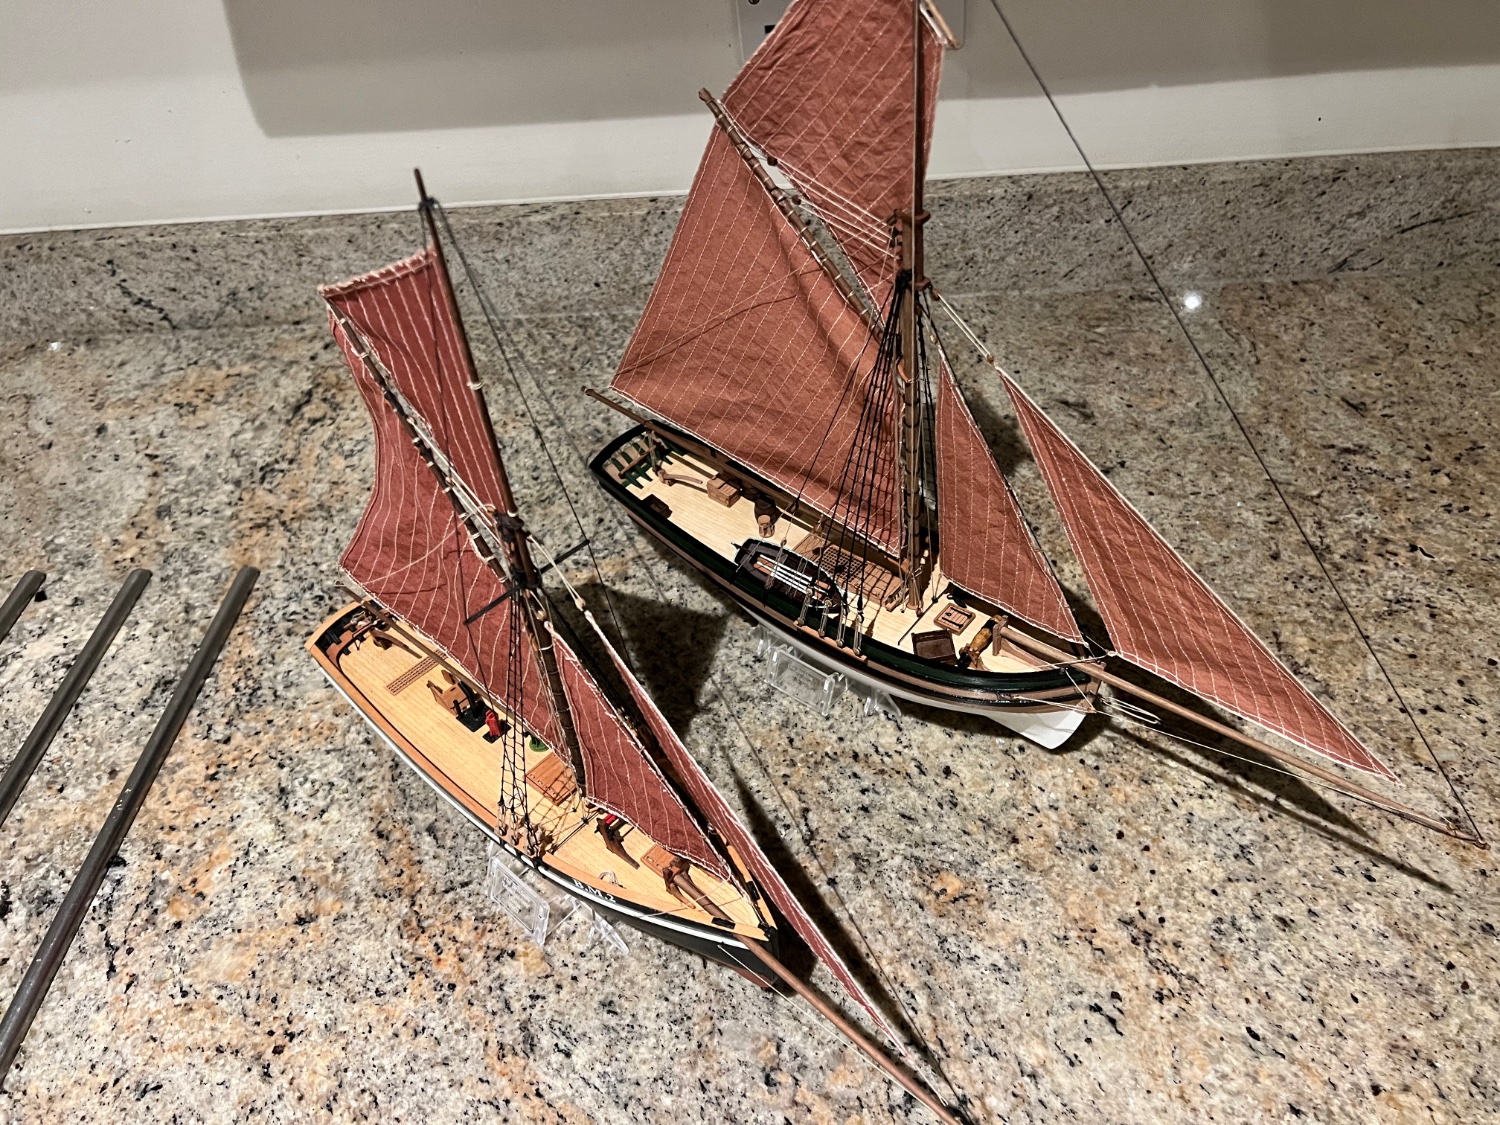
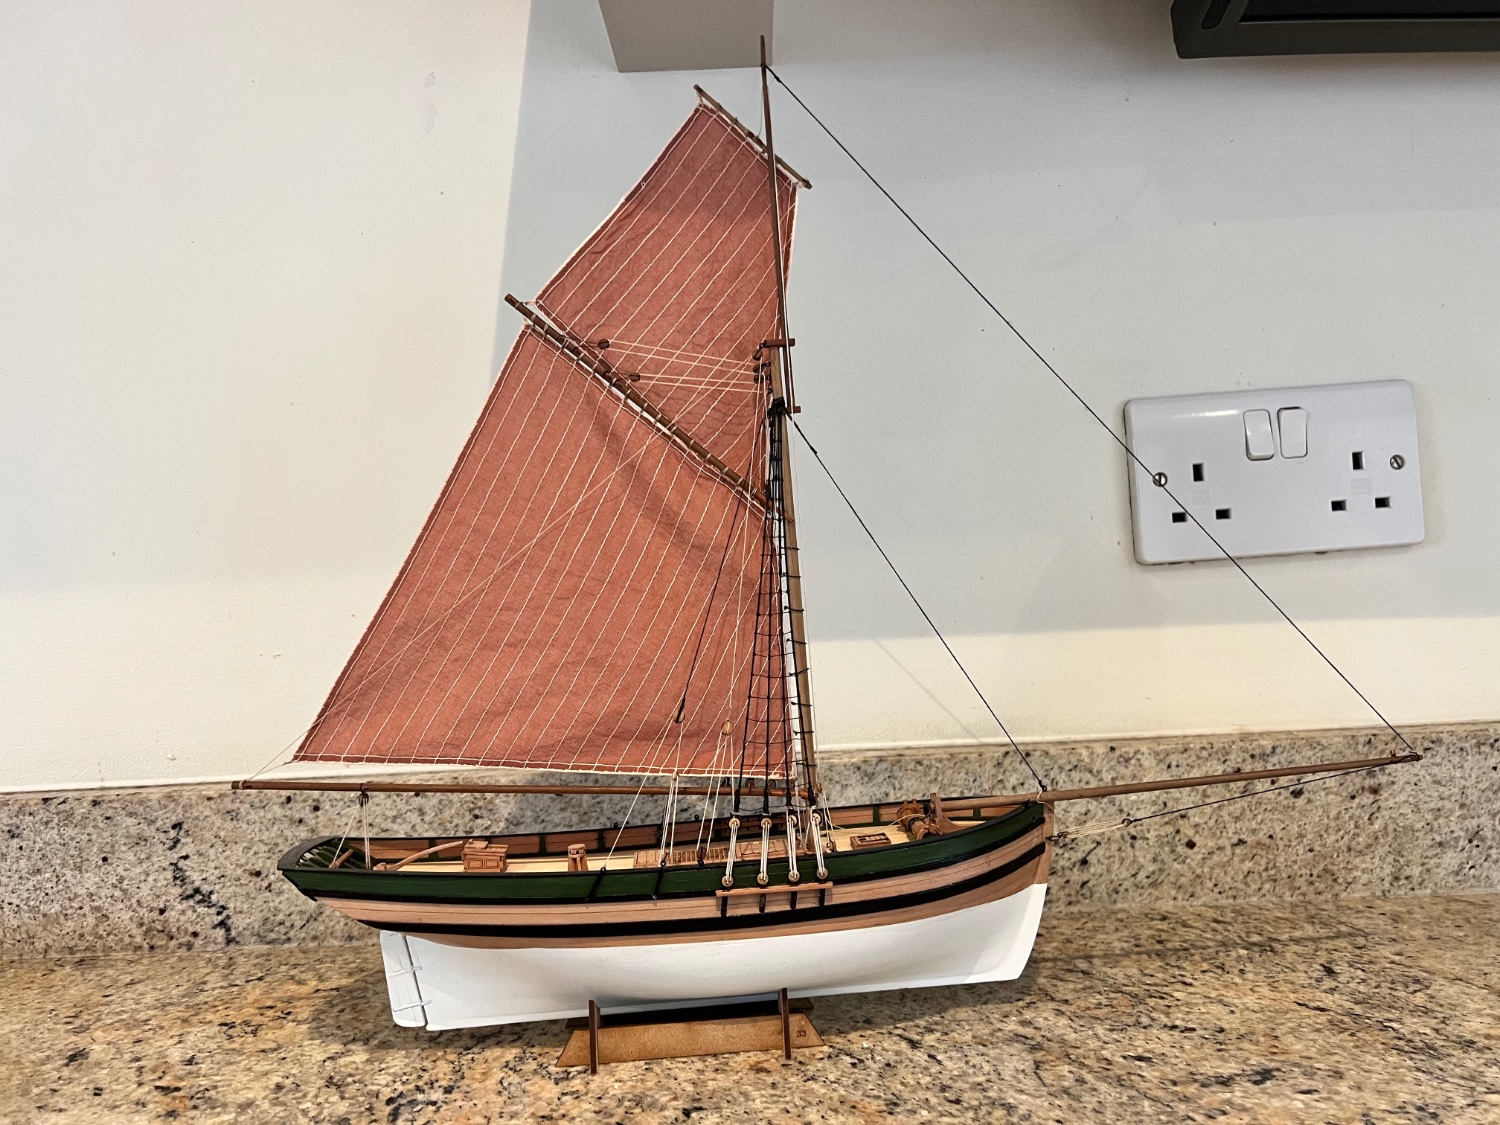
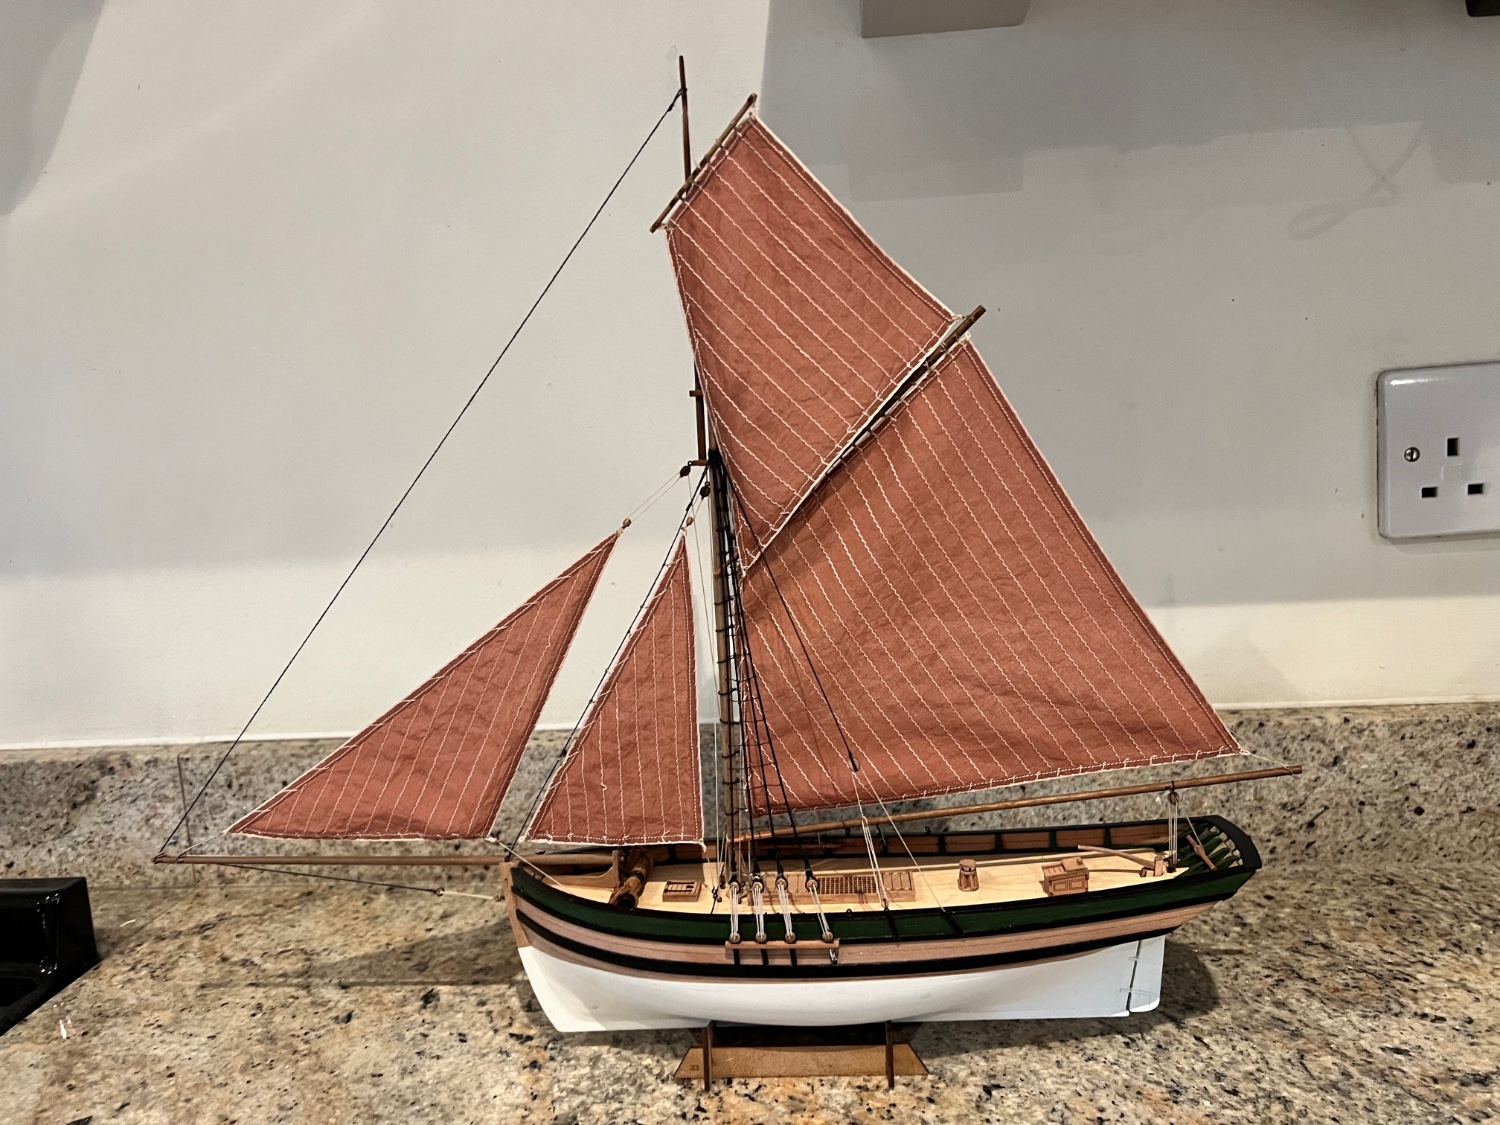
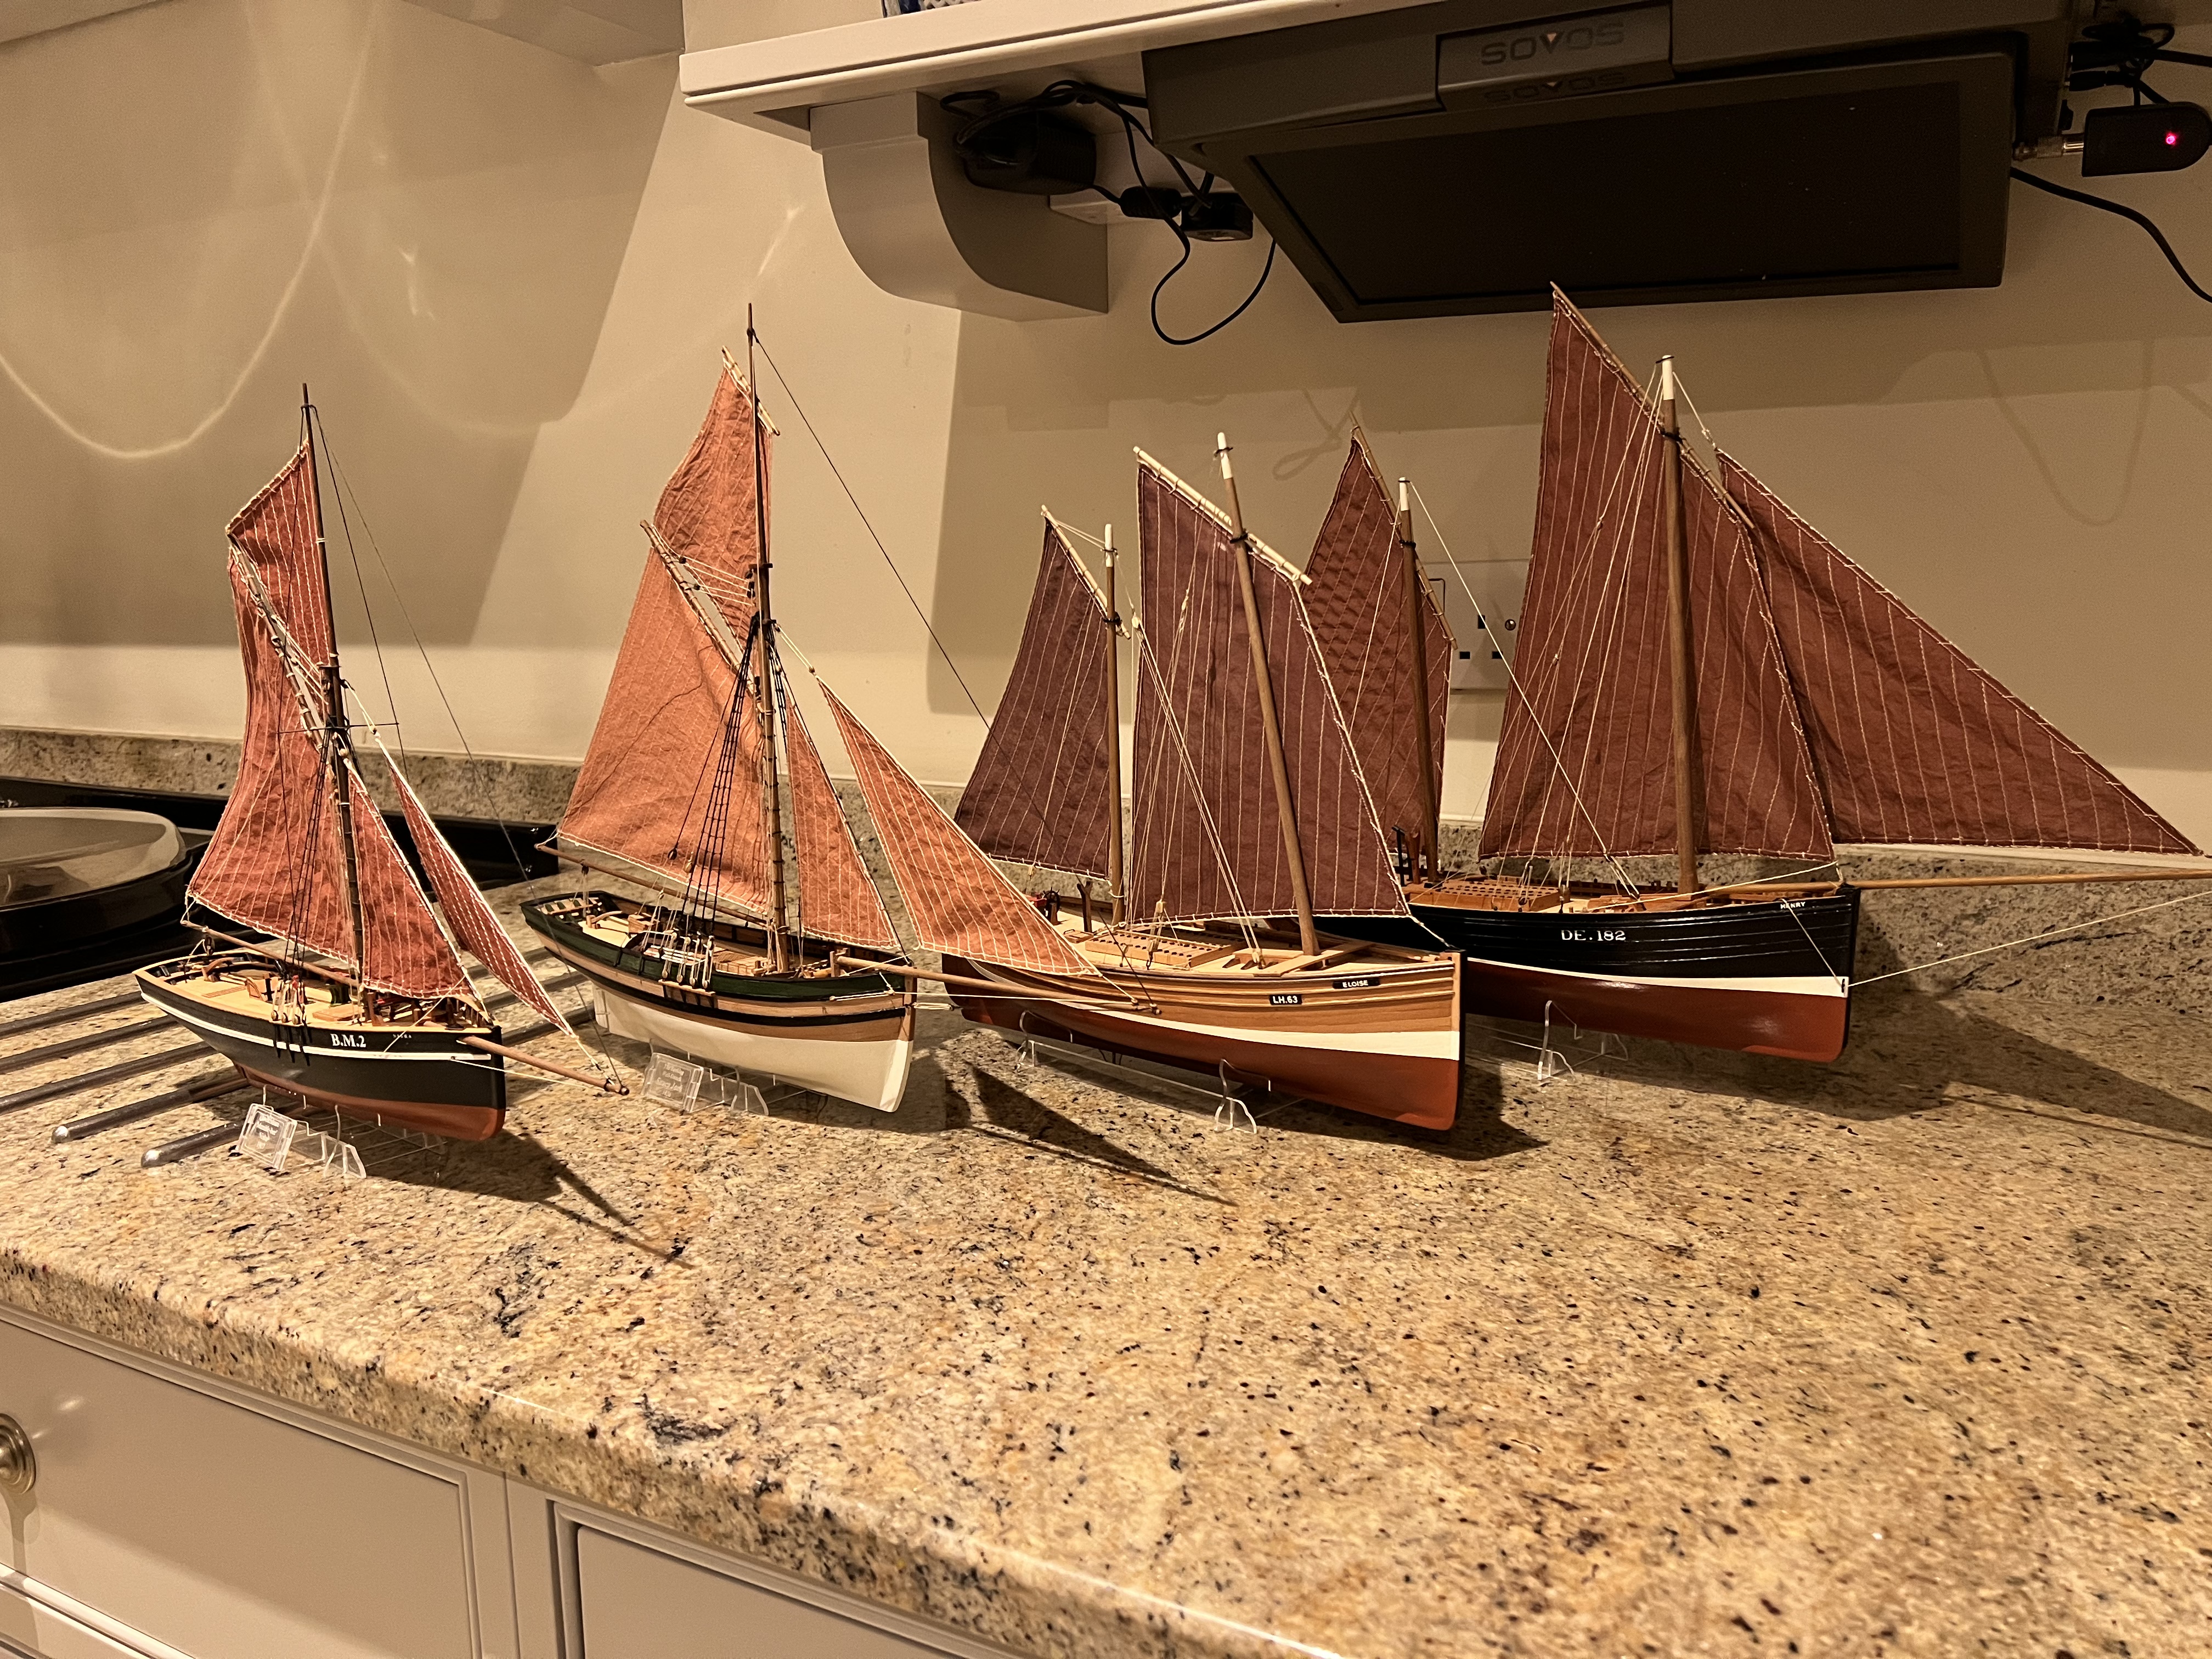
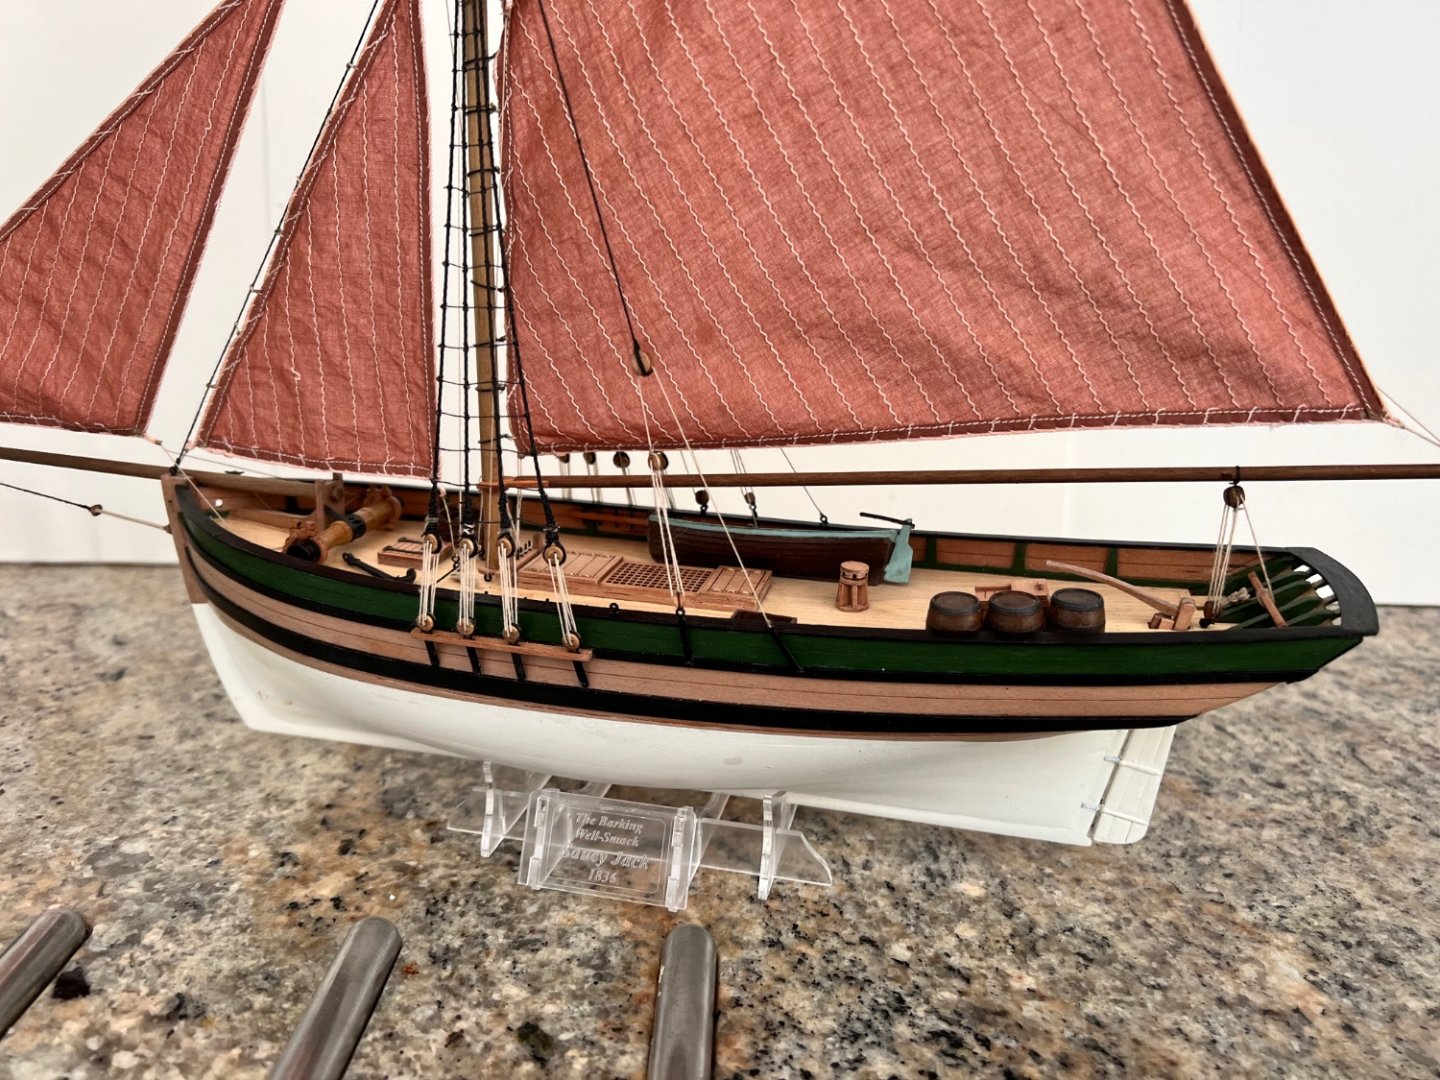
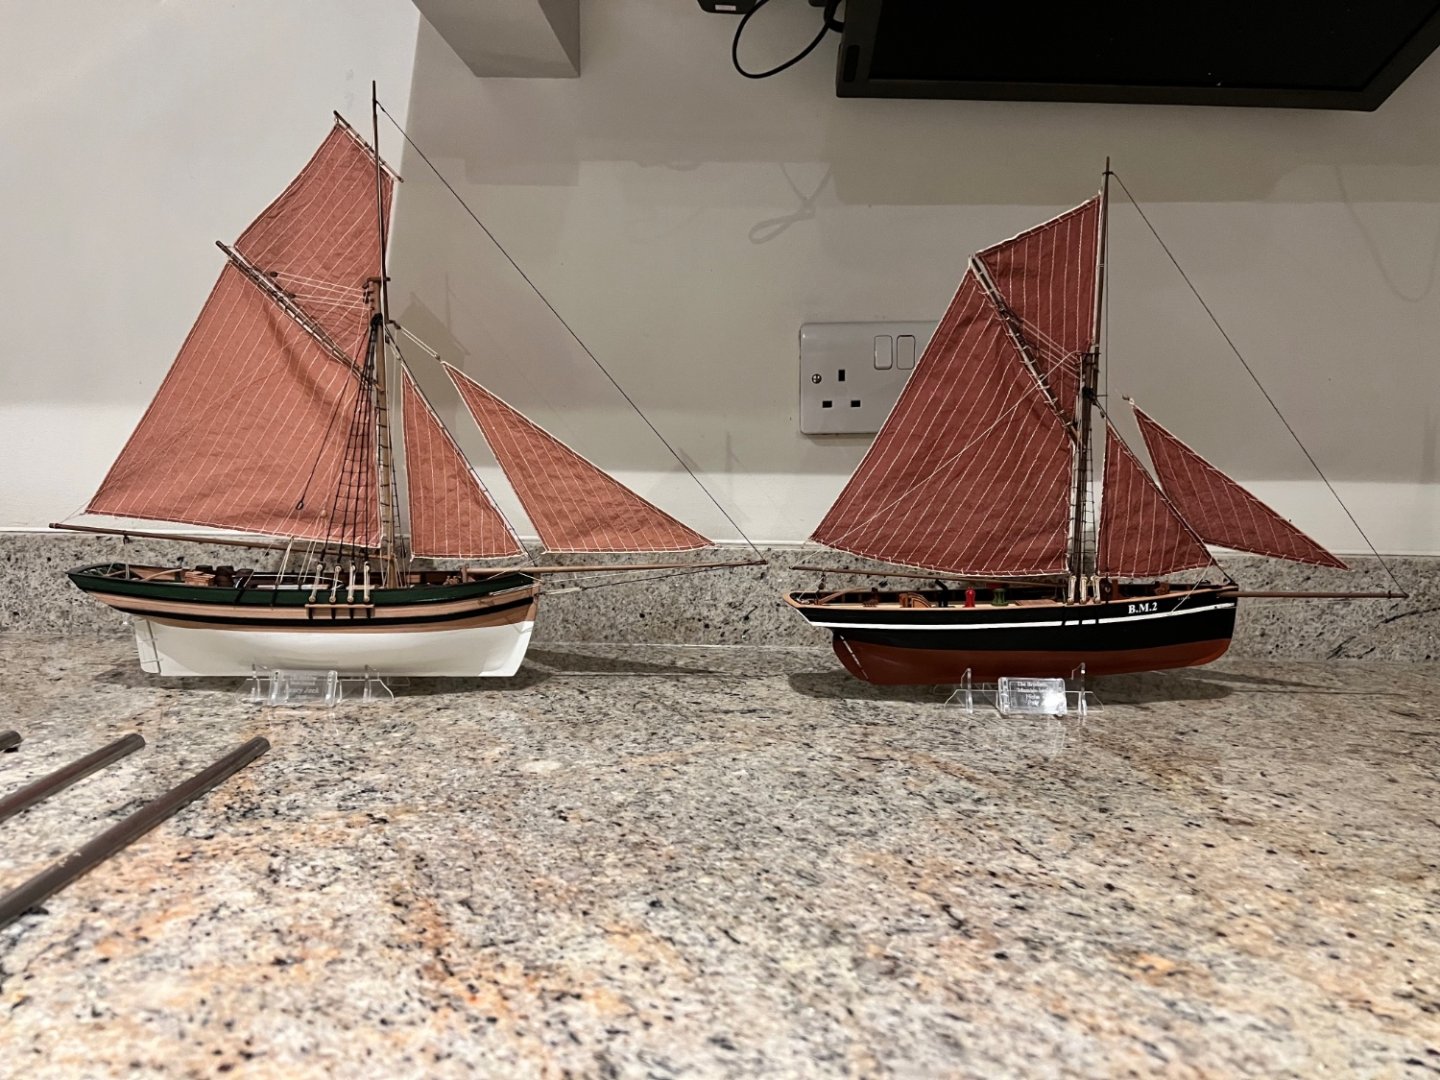
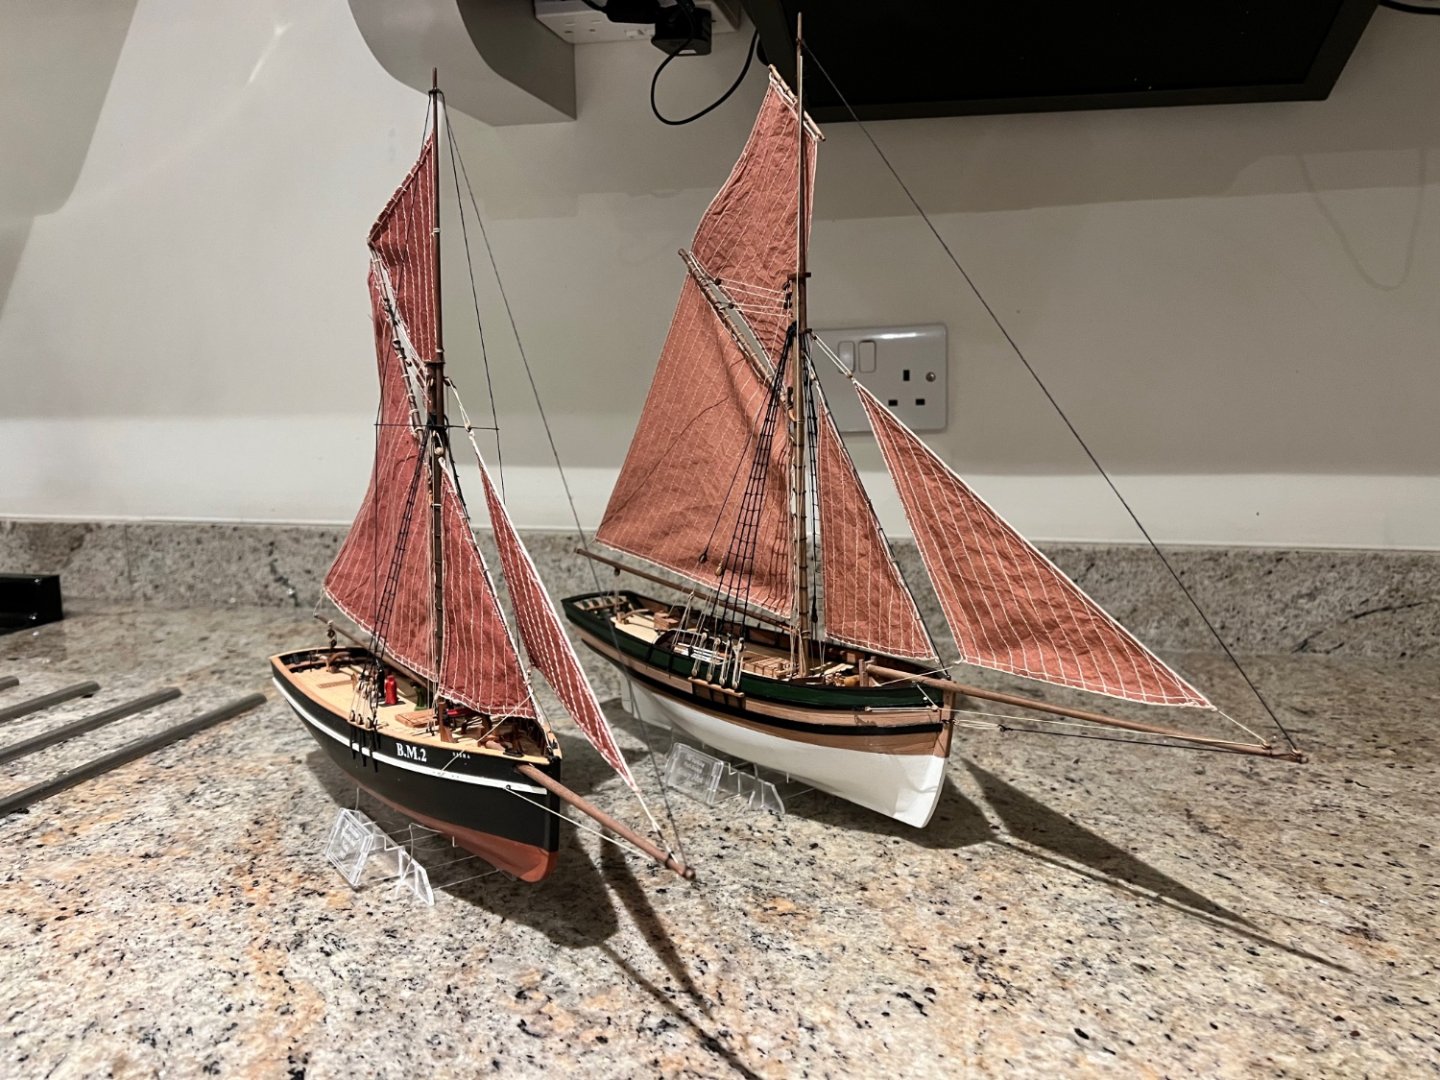
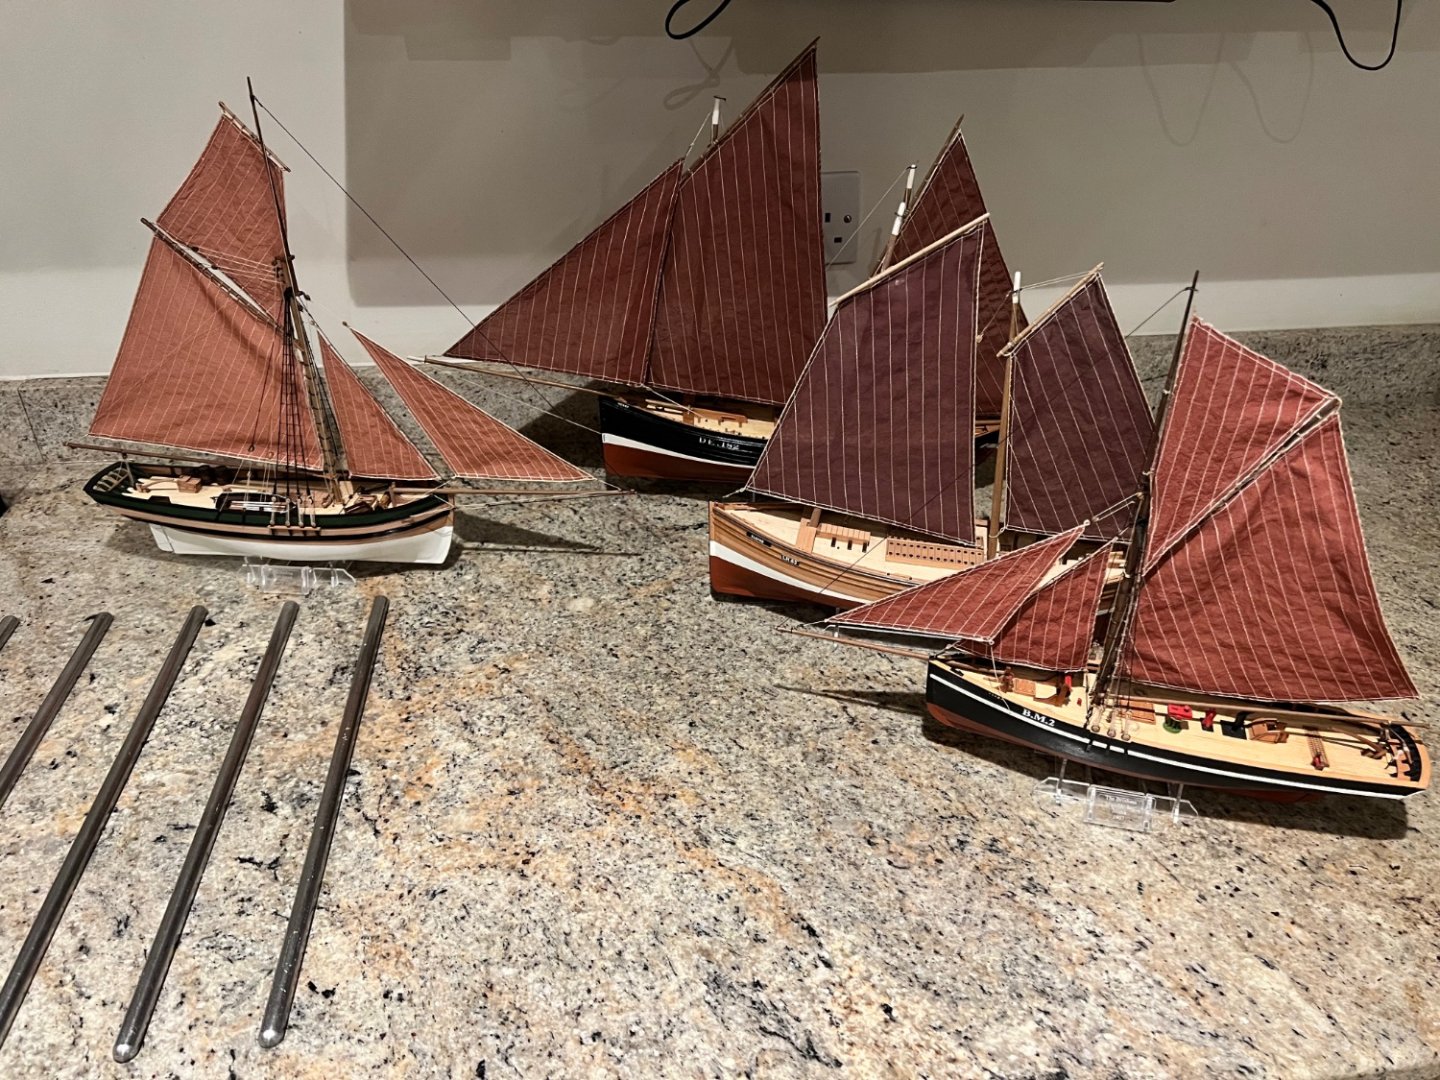
I’m bored of doing the coils so I thought, having built both I’d do a brief comparison of Saucy Jack vs. Nisha her most comparable peer from Vanguard. Whilst hull lengths are similar, the Jack is much chunkier and would have had a much greater displacement. The Jack also carries a larger rig, taller mast and longer bowsprit with a little more sail area. The completed model feels noticeably bigger. Despite both being fishing boats, the hull shapes are very different. Nisha has a sleek hull more like a racing yacht with a raked keel - this would have been to get fish back to port as soon as possible. Jack has a rounded heavy hull more like a small merchant vessel with a keel parallel with the waterline, speed was not such a priority for her as she carried the fish back alive in a water tank amidships. In terms of build, Nisha was marginally easier due to her easier hull shape to plank and slightly less complicated to rig - mainly due to the belaying pin racks on the Jack. Jack took me 2.5x as long to build as Nisha. Partly due to her being a harder build, partly I was busier with other things and partly my taking more care. My breakage count was down massively from Nisha where I broke almost everything. In terms of features, both have nice deck fittings. On Nisha I particularly liked that the companionway could be open with a ladder down into the hull. On the Jack you get more in terms of extras such as the cutter, barrels and anchor. Overall, they’re both lovely models and despite seeming similar (both single masted, cutters with a slightly different type of gaff rig) they’re very different builds and I’d strongly recommend both. Thanks to Chris at Vanguard for producing both of these! Here she is being welcomed to the fishing fleet. She adds some contrast to the fleet with her white hull and lighter sails. She’s much smaller than the two luggers. Aiming to finish off the rope coils and complete her tomorrow.


- 59 replies
-
- 8
-
-
- saucy jack
- fishing smack
- (and 2 more)
-
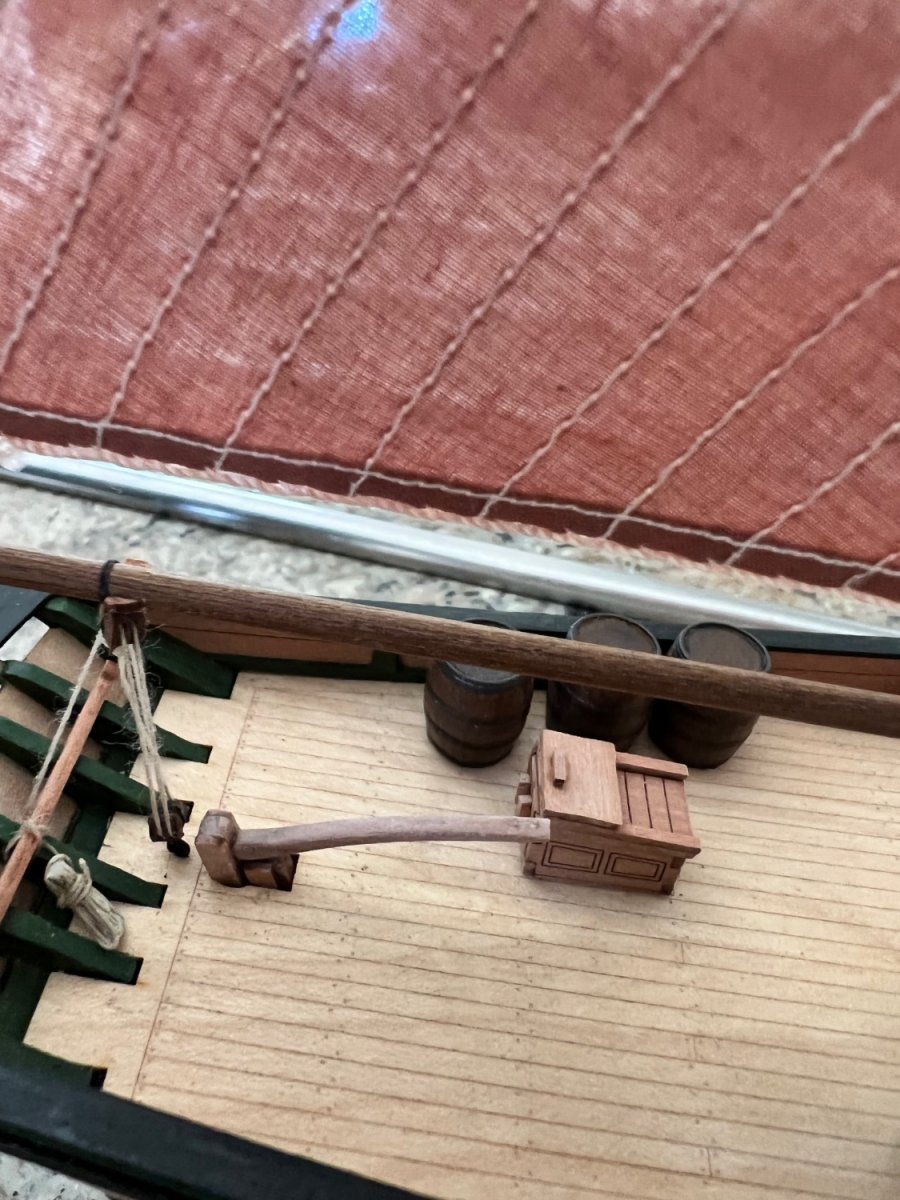
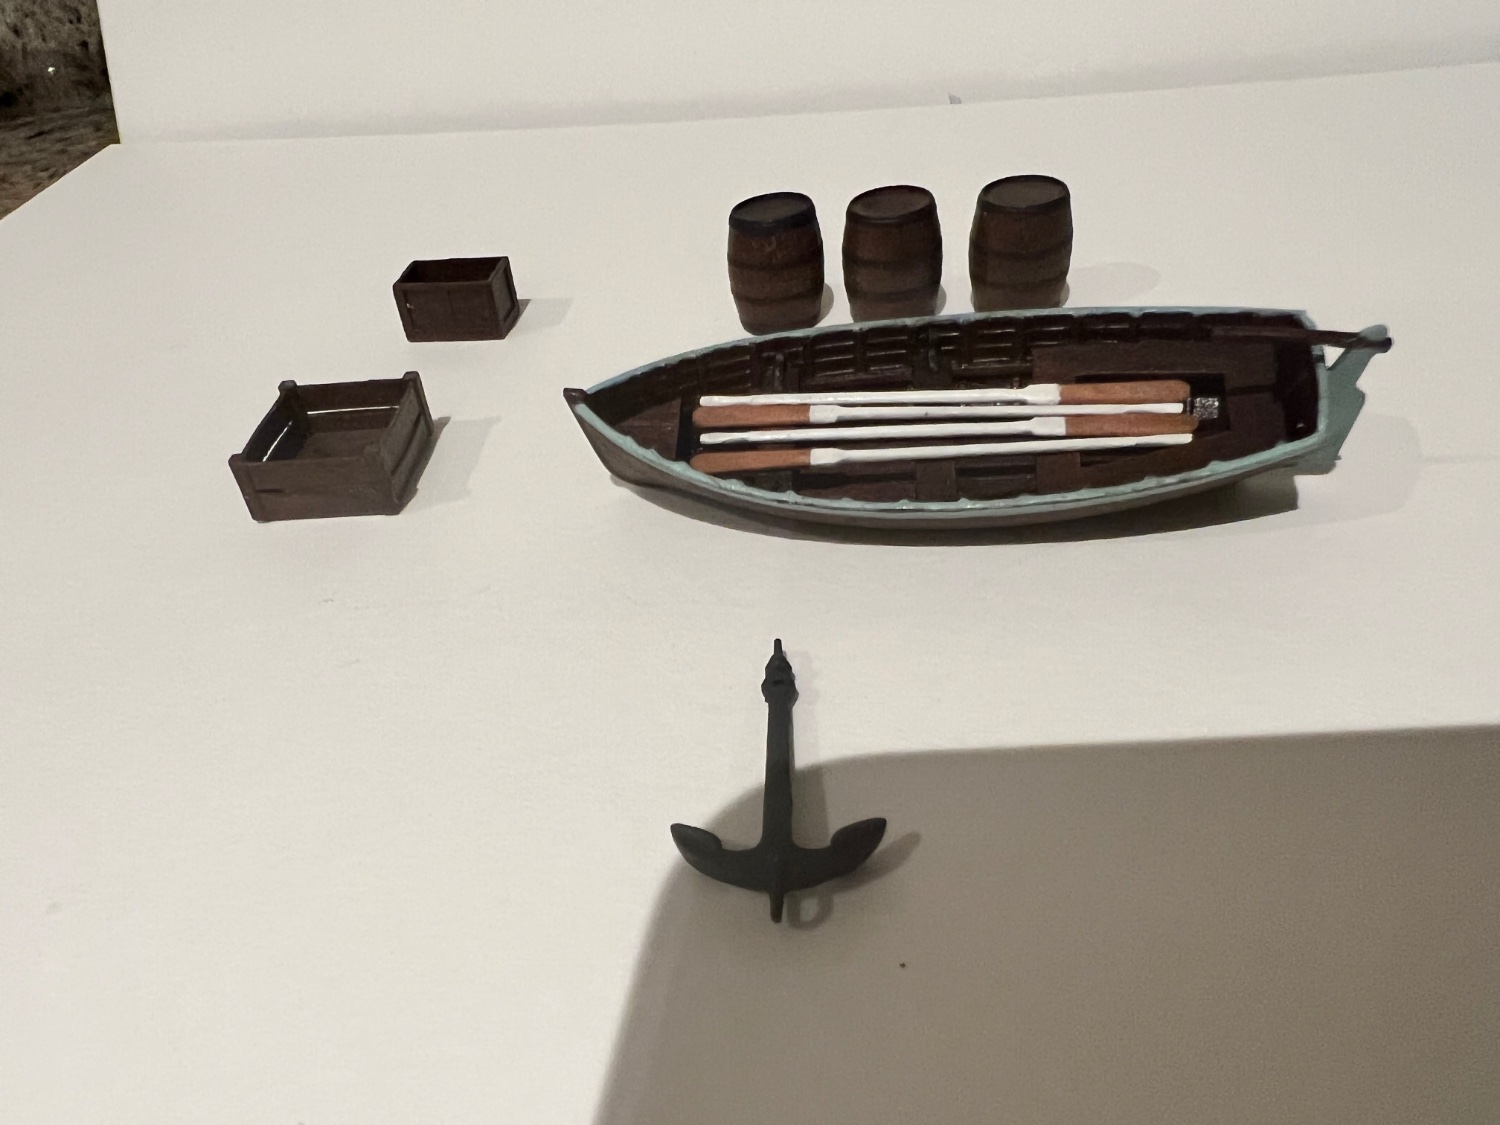
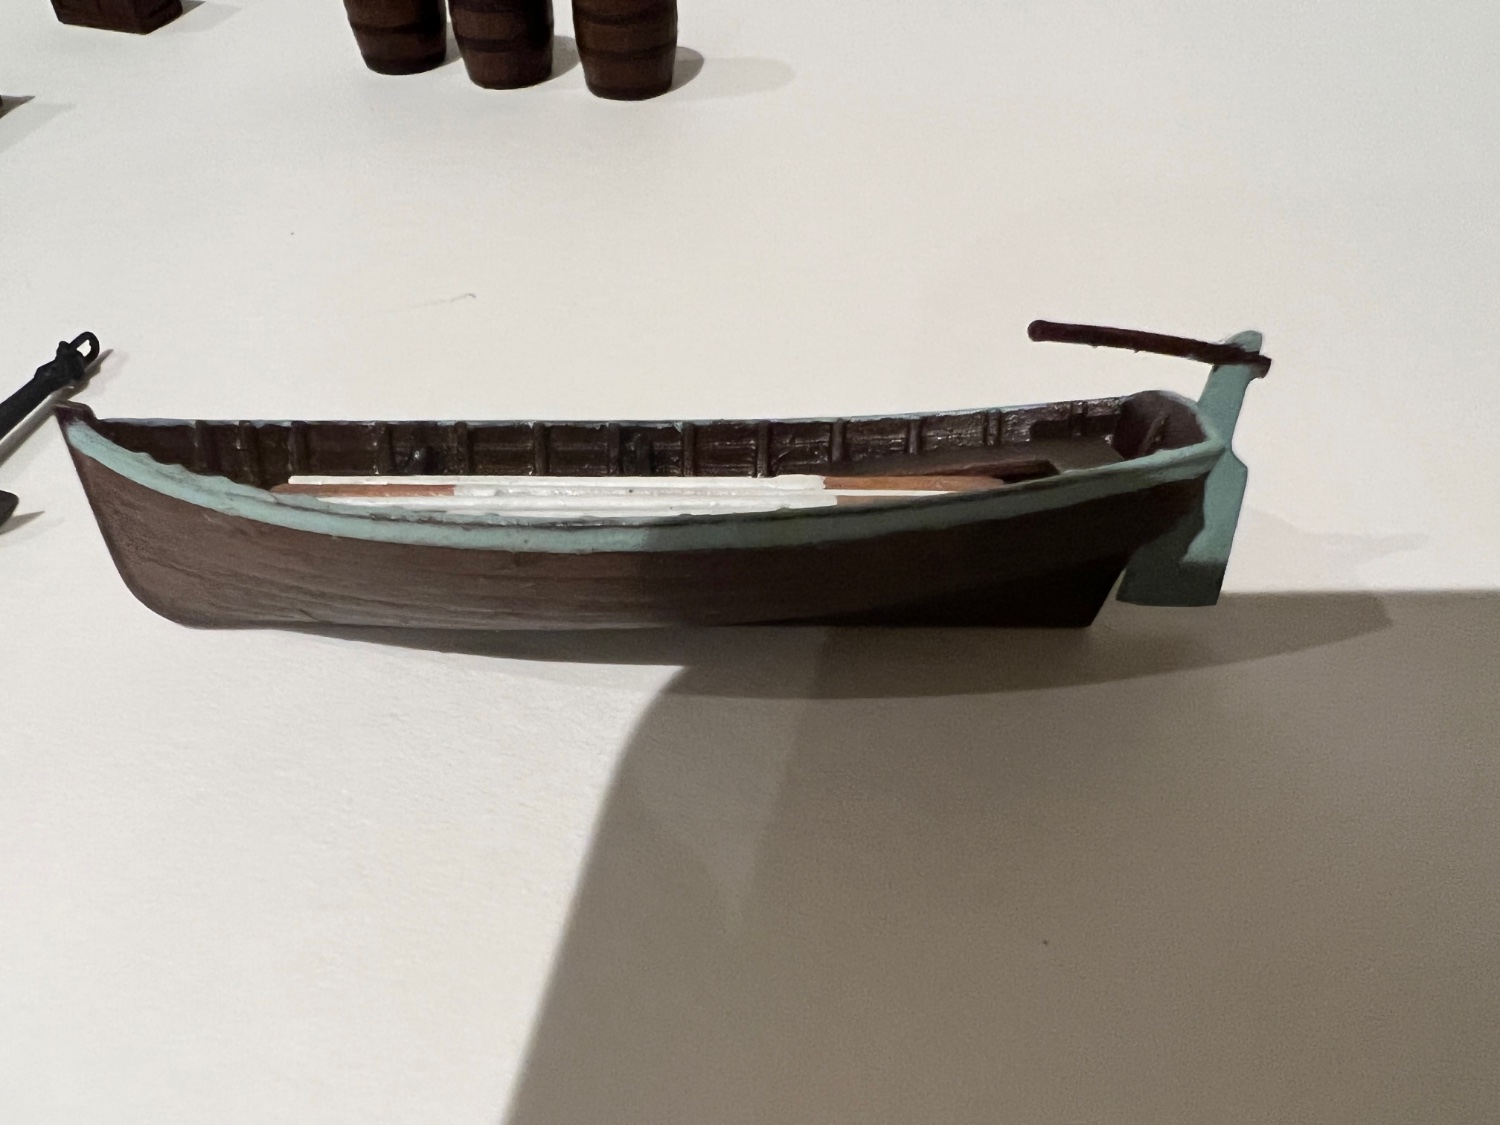
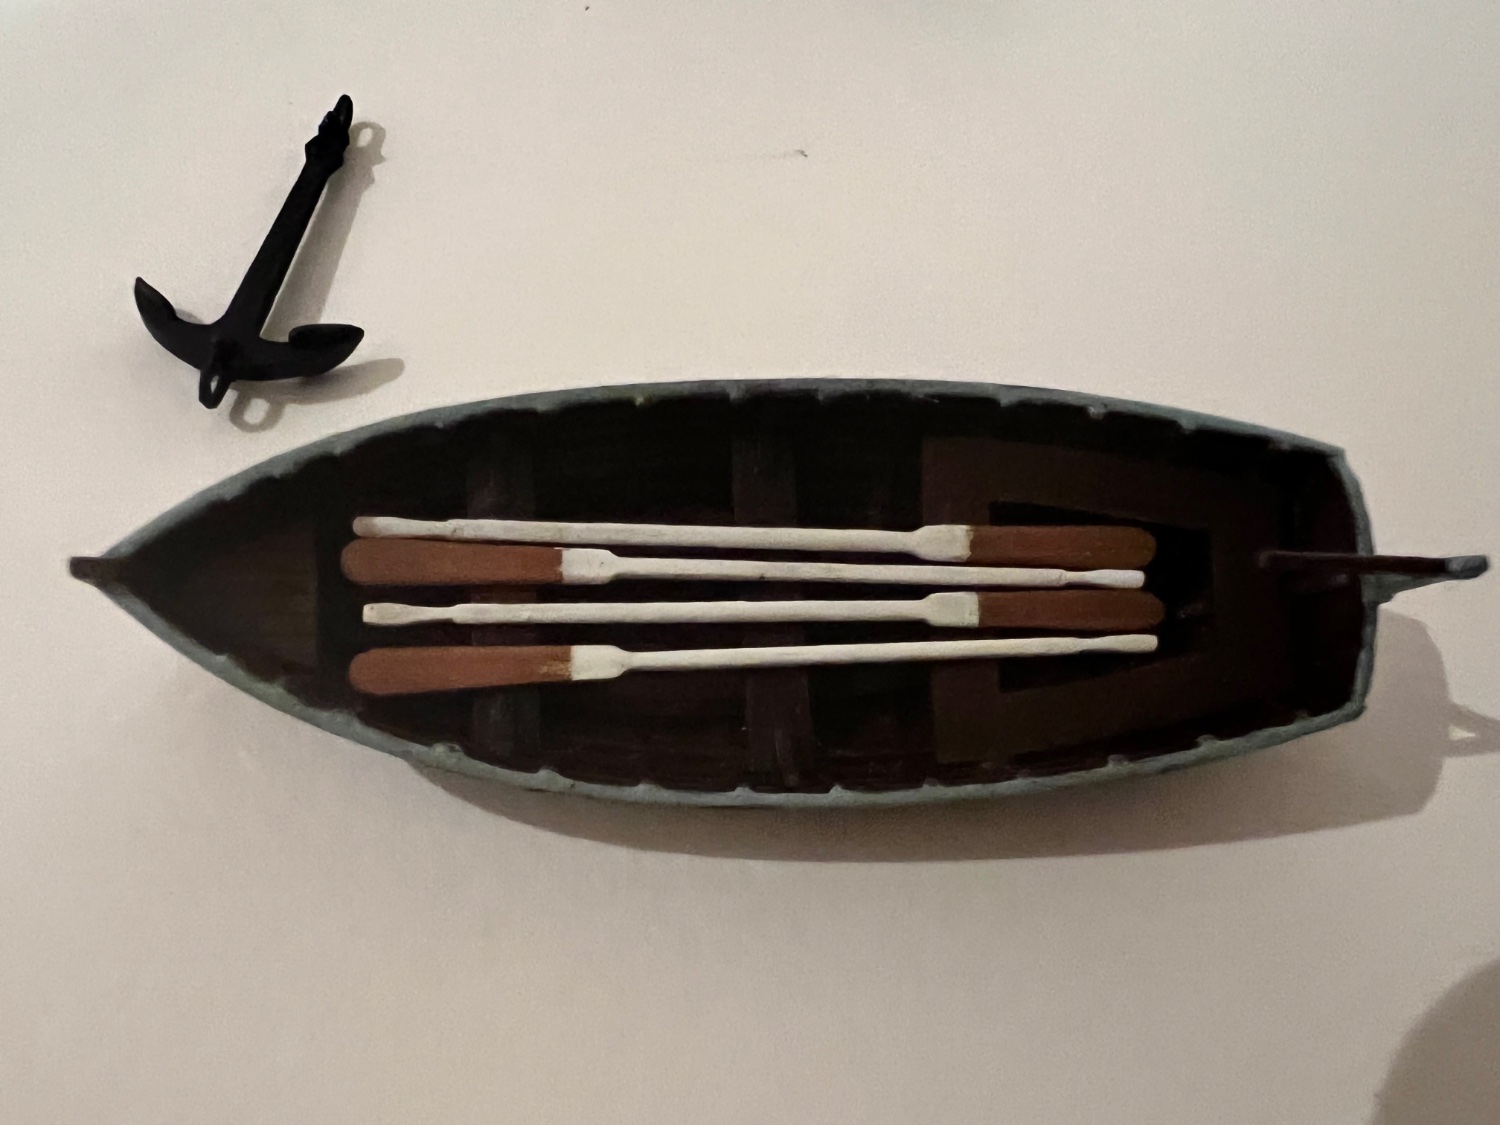
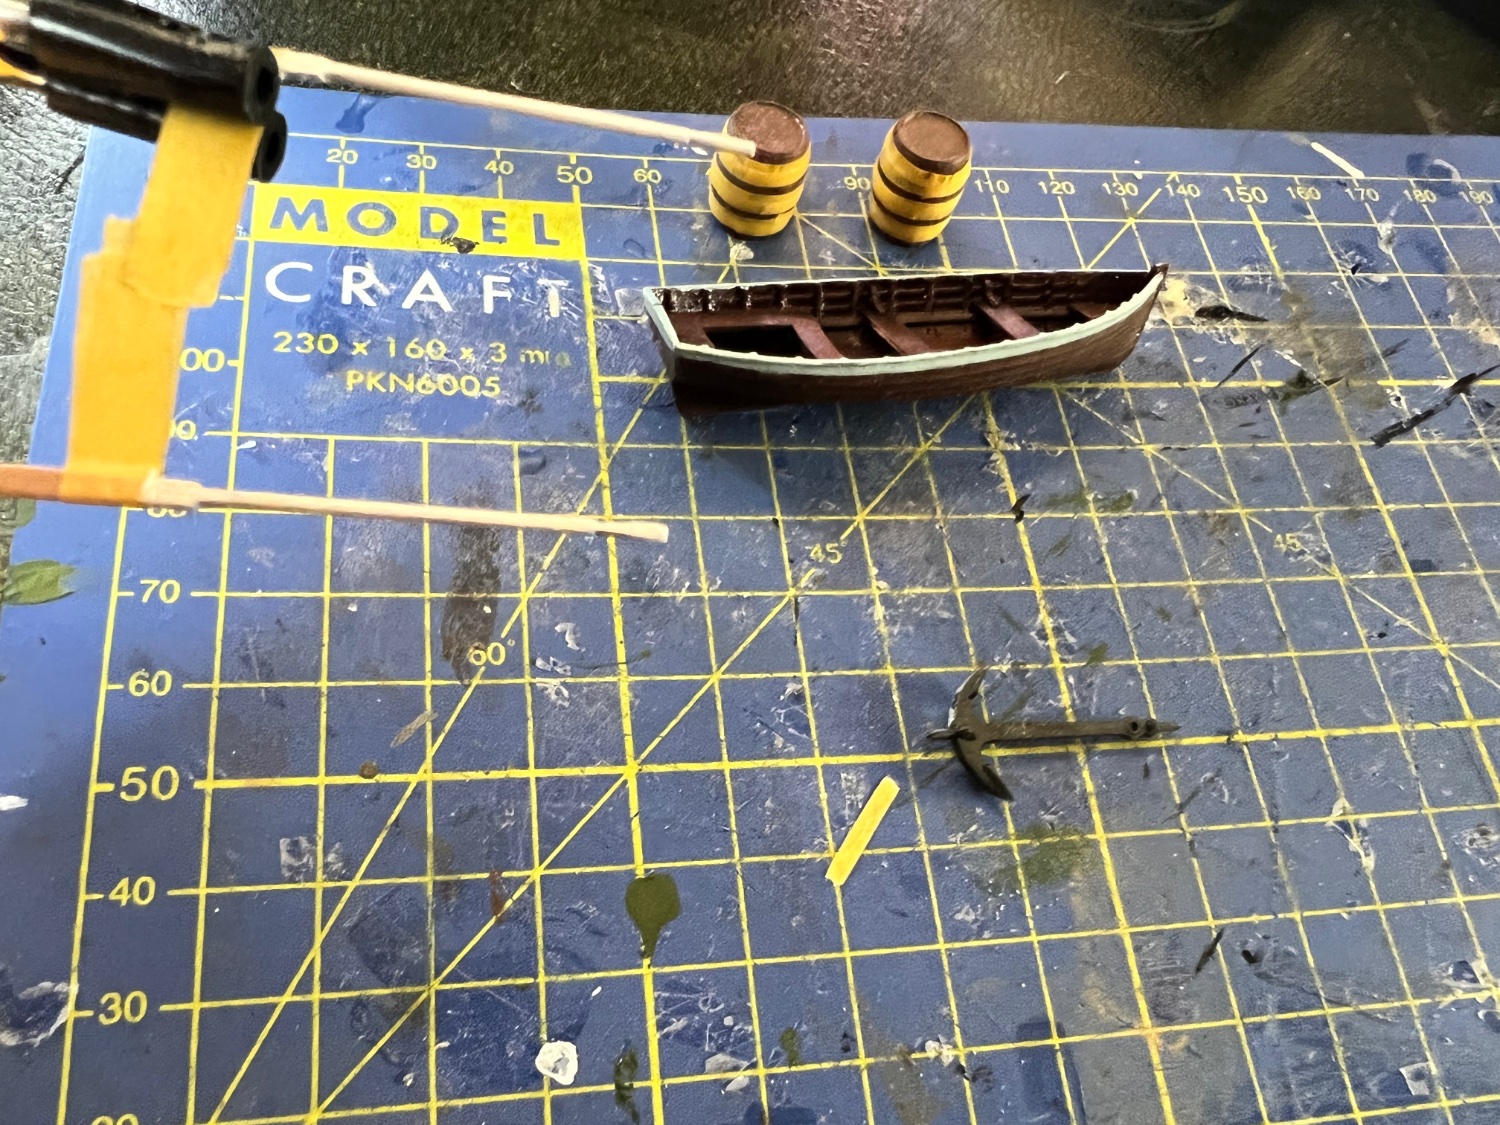
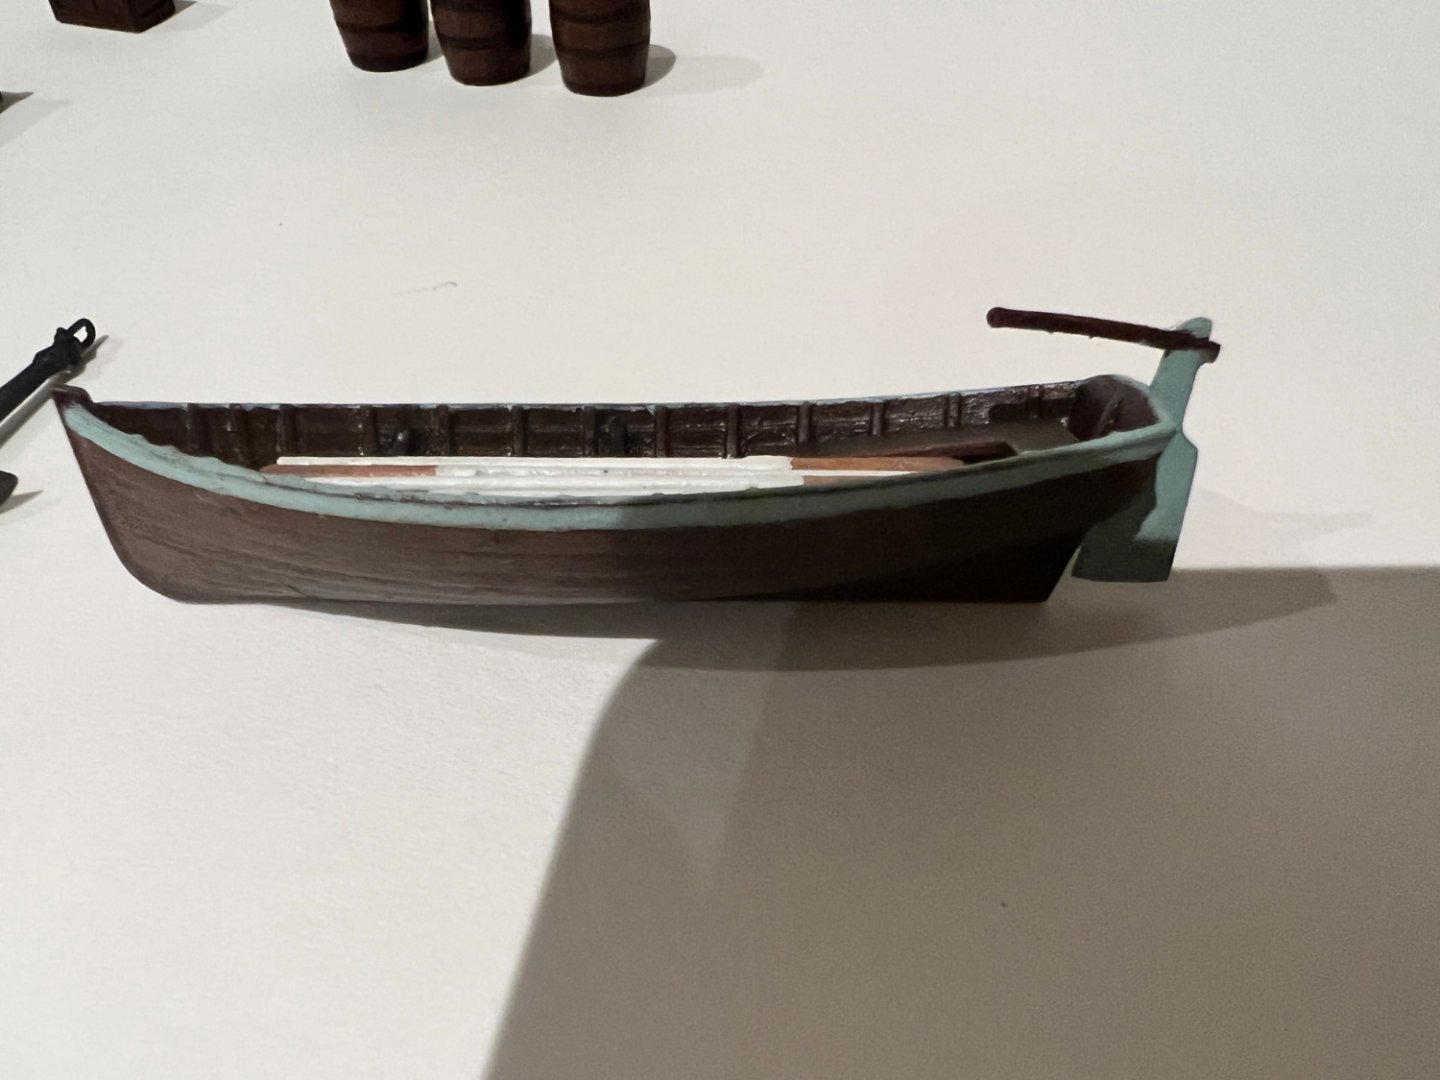
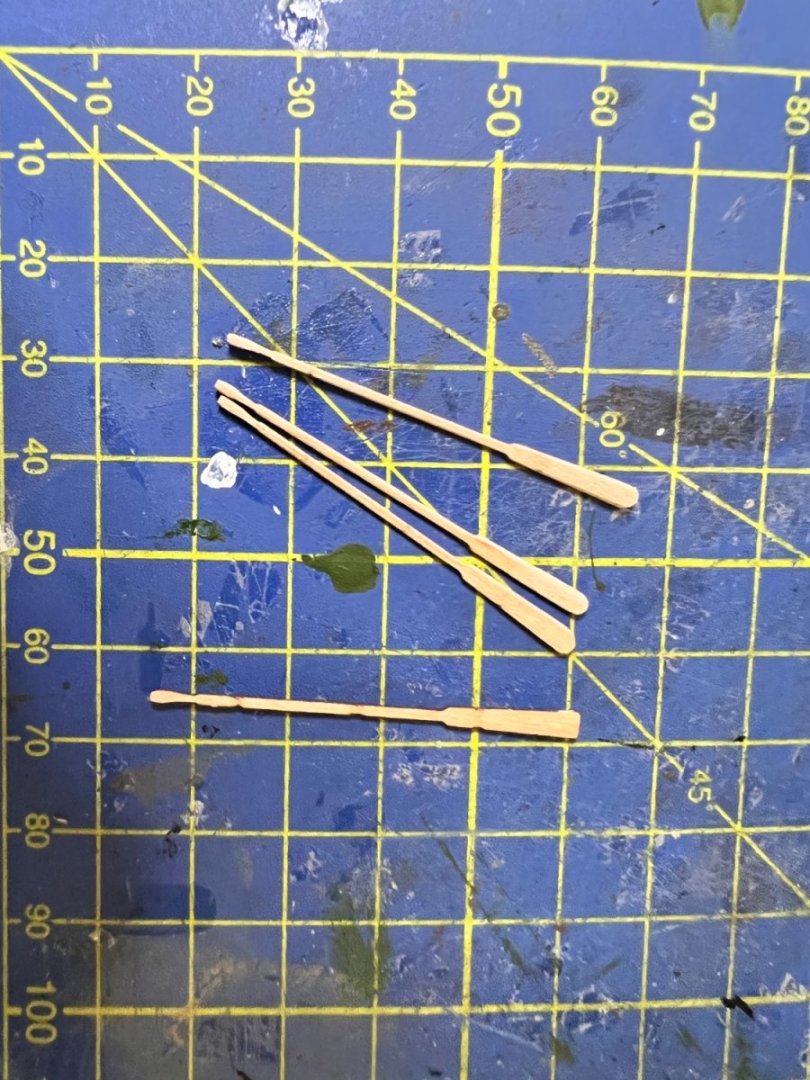
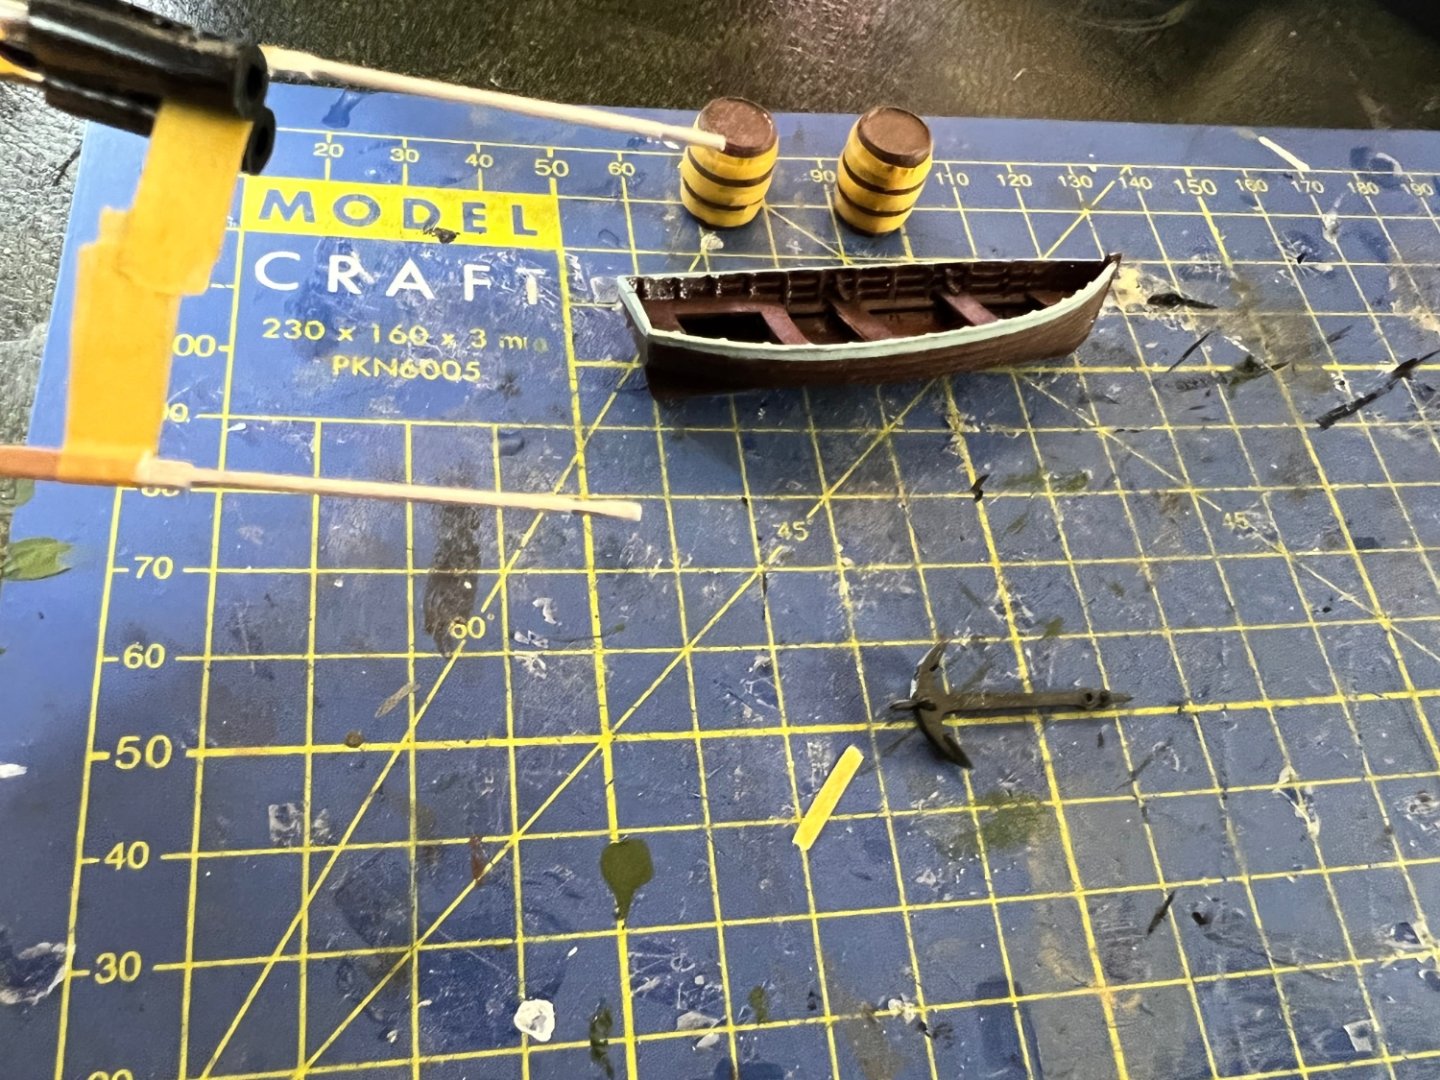
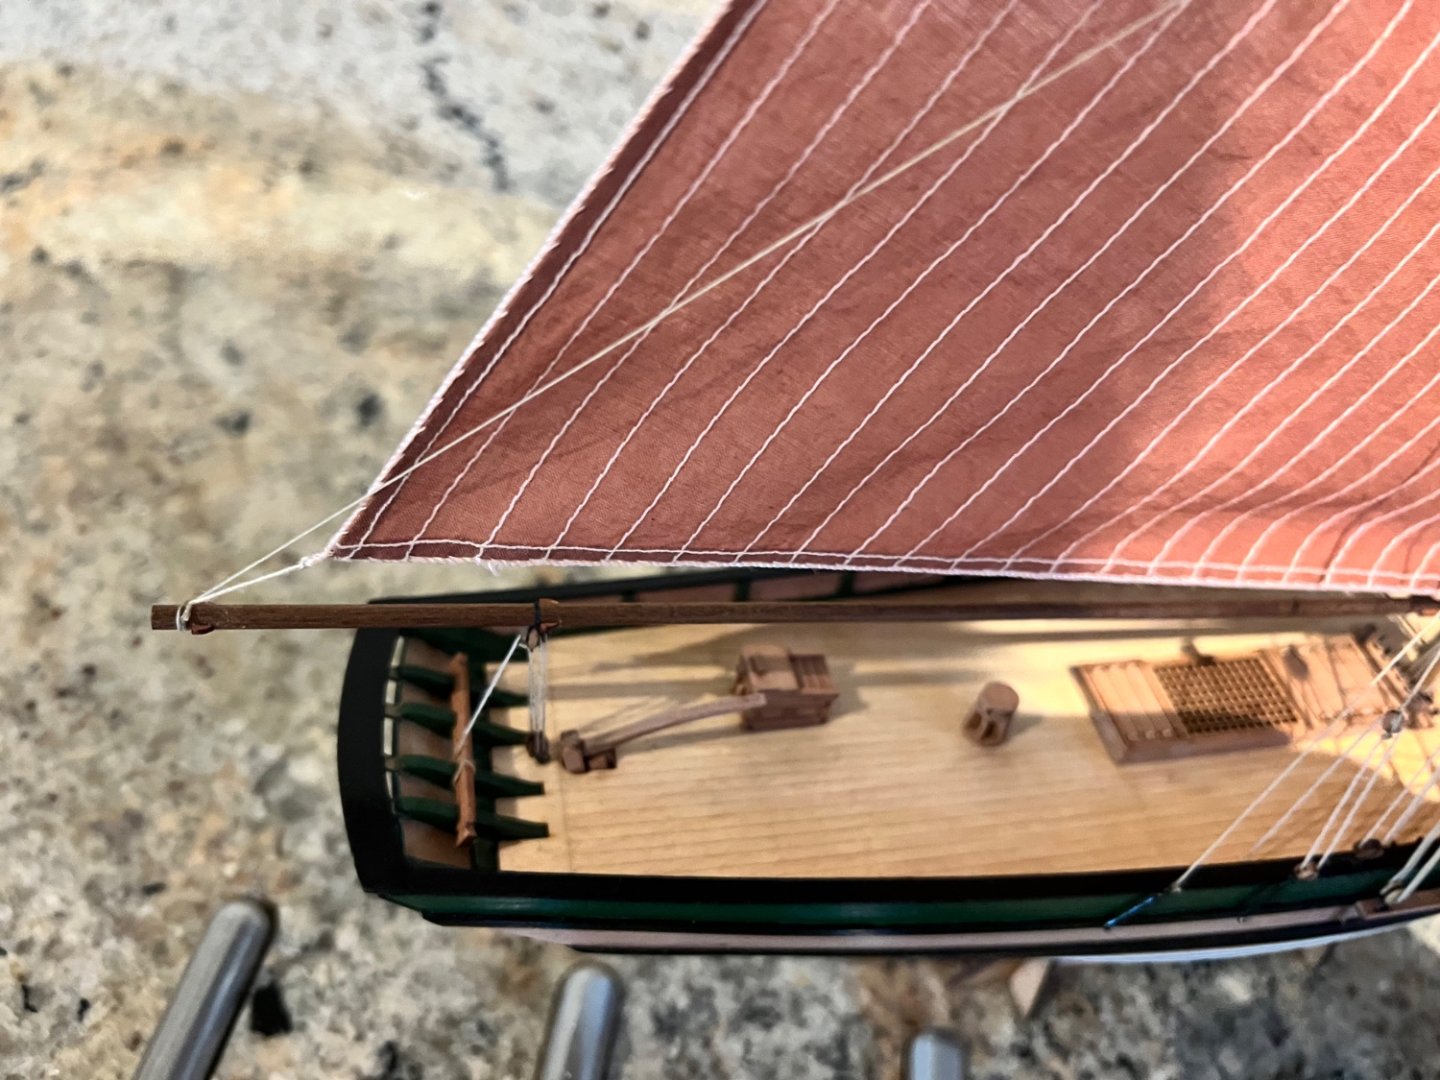
Thanks again Glenn. The Jack is still not quite complete as I have to add the coils of rope where I can. As most sheets and stays run to the belaying pin racks where there is no room for coils I won’t be adding coils to all rope ends, just a few. Completed the deck clutter. Painting the resin hull of the cutter to look like wood was a challenge. So I experimented, firstly all was painted with Tamiya red brown then a coat of raw sienna oil paint painted over the top which was next to invisible on the Tamiya but provided a medium for the burnt umber darker oil paint to be dragged into. All as per James H’s instructions for the winch drum but with a darker base paint. It worked to some extent but the boat is a darker brown than I’d have chosen. - I need to buy some more oil paint colours. I then added the pear wood parts and smeared these unevenly with burnt umber. Then sprayed the lot with a Matt acrylic spray varnish to seal it and painted on a green blue pale enamel paint around the first strake and the top of the edges. The oars needed some very careful sanding to shape them. Its turned out ok enough to include on the Jack but a bit darker brown and given the clinkering on the hull I didn’t think I’d get a clean line to paint white anti-fouling on the hull. Also prepped the barrels and crates in the same way. The banding on the barrels was painted with a Humbrol metallic gunmetal as was the anchor. They look quite good aboard ship.


- 59 replies
-
- 4
-
-
- saucy jack
- fishing smack
- (and 2 more)
-
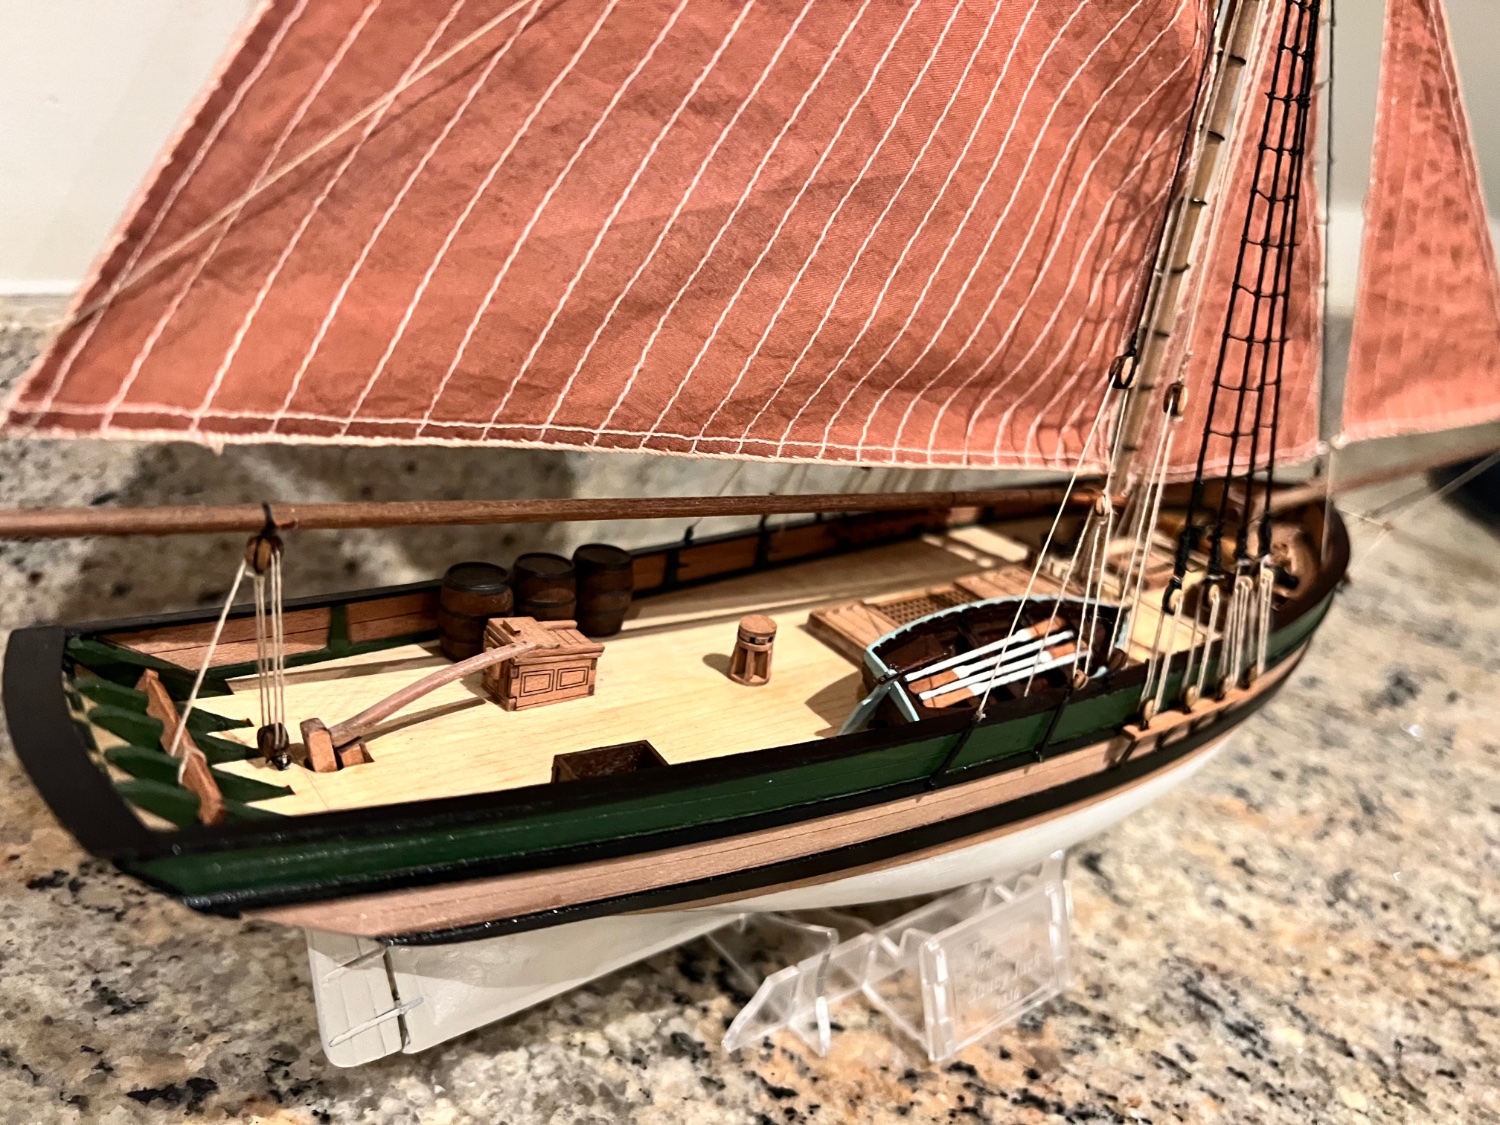
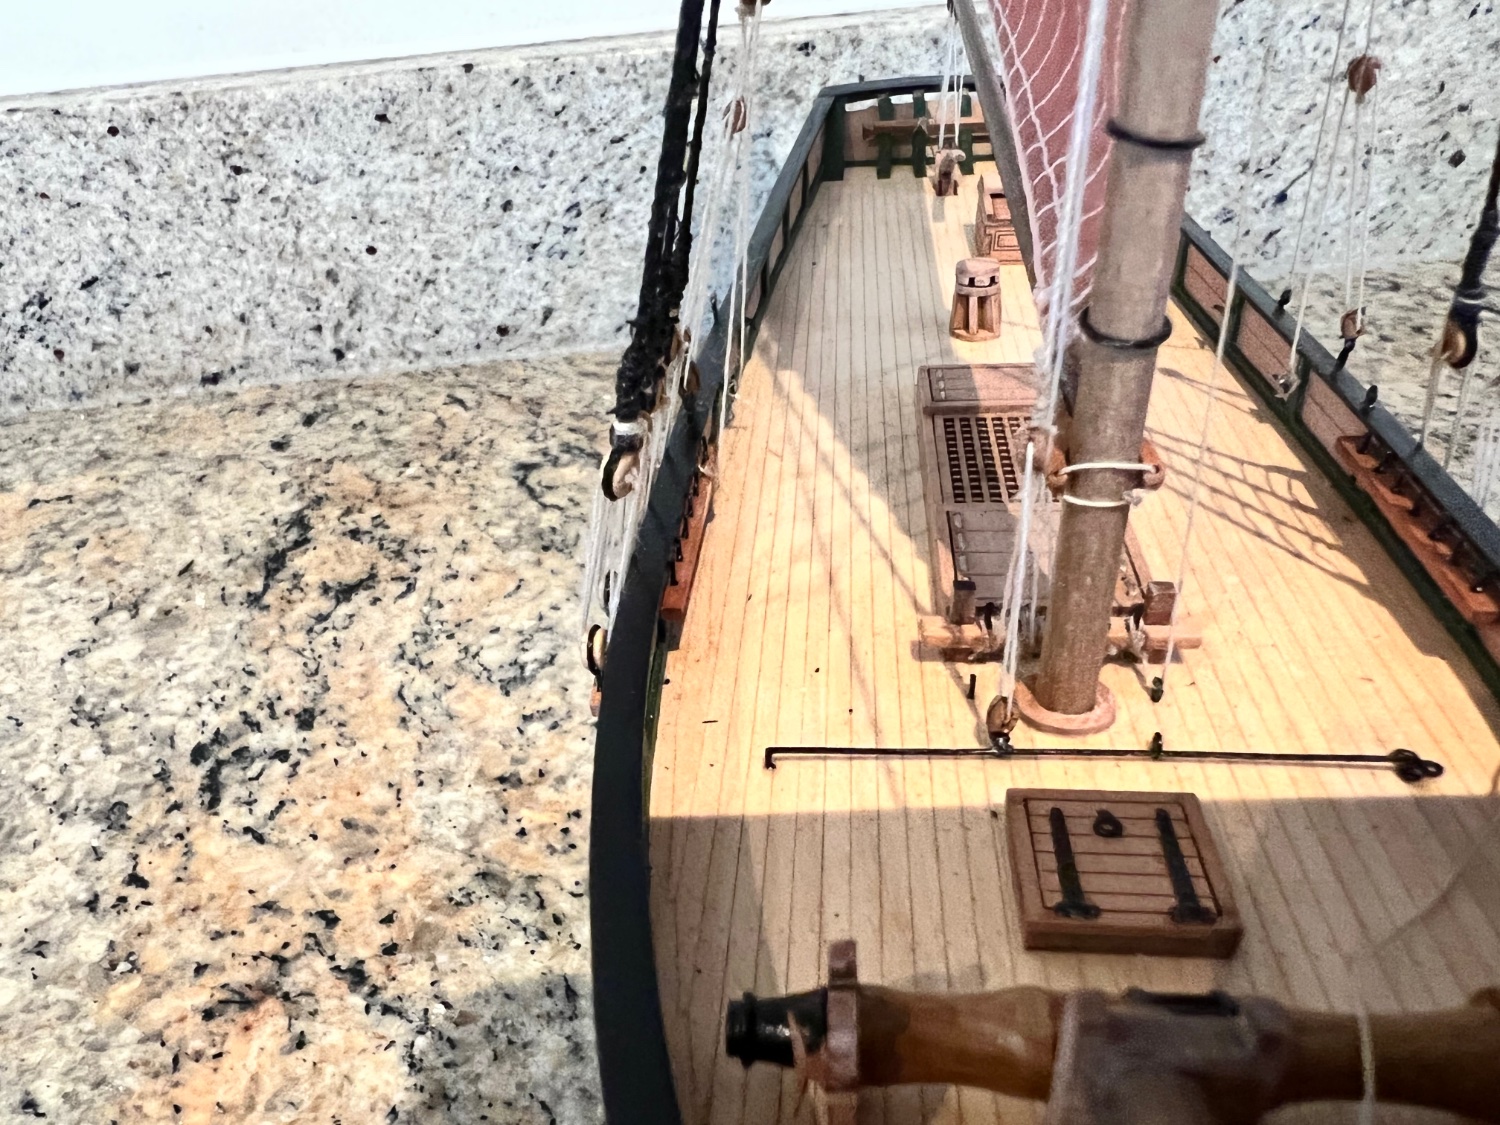
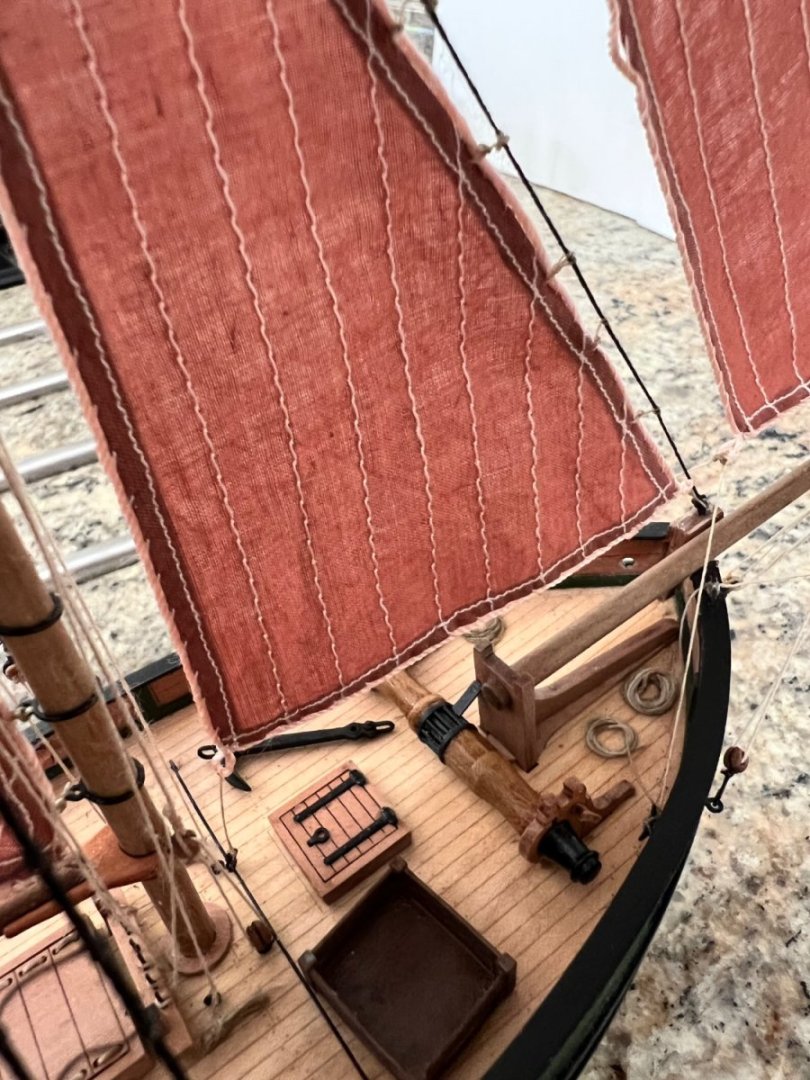
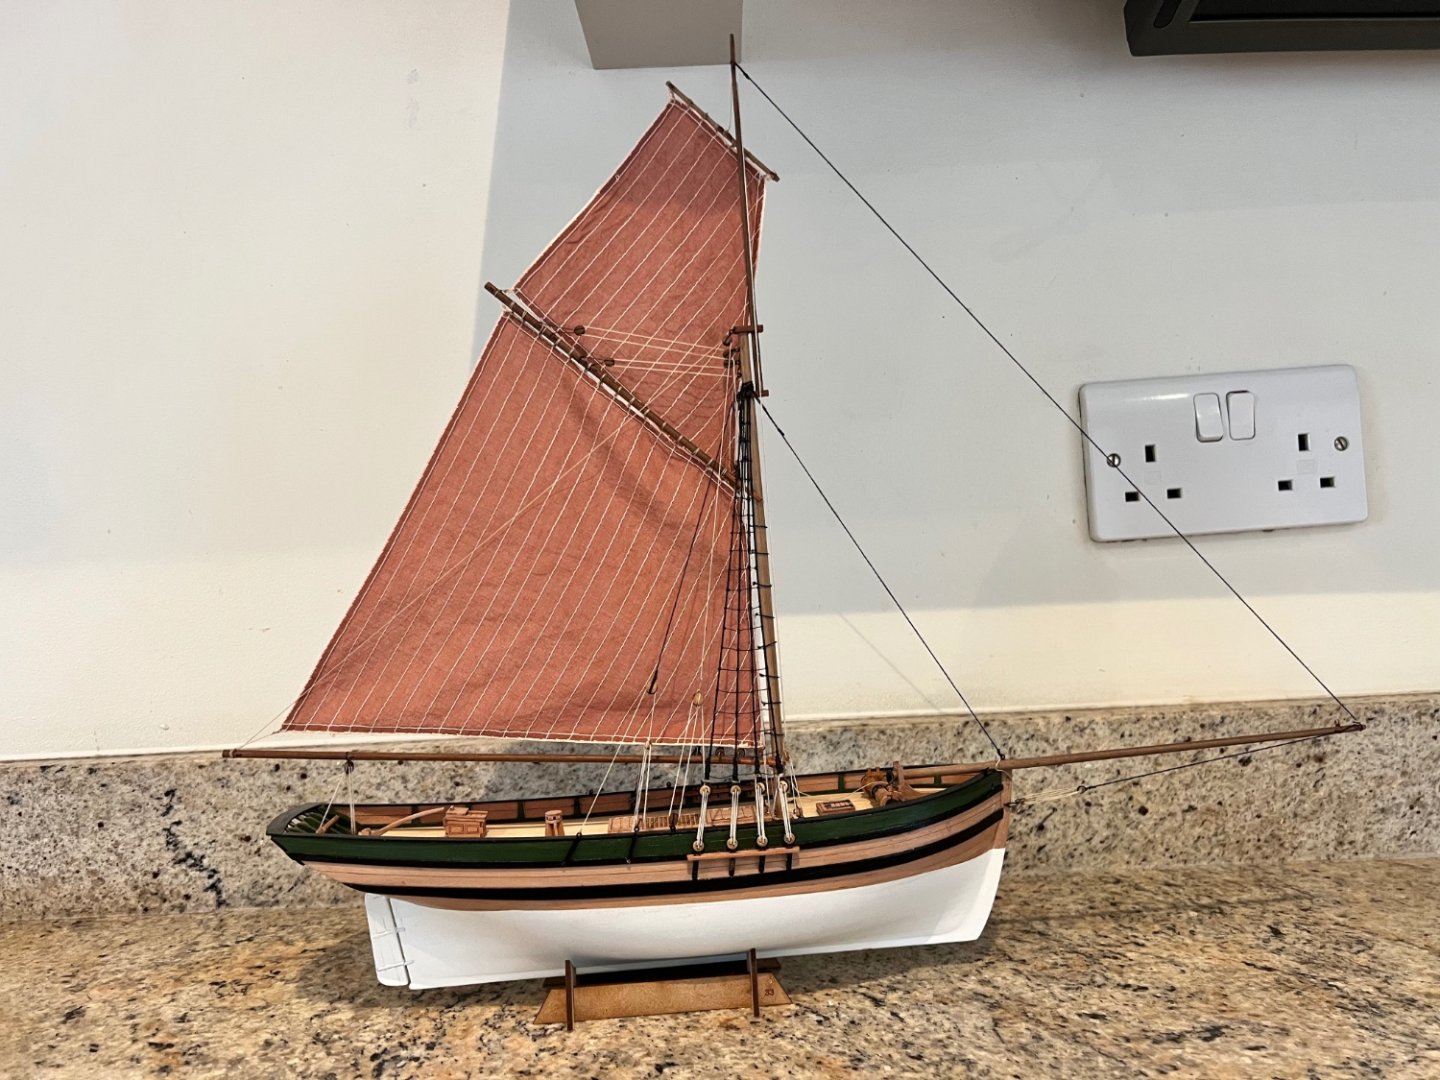
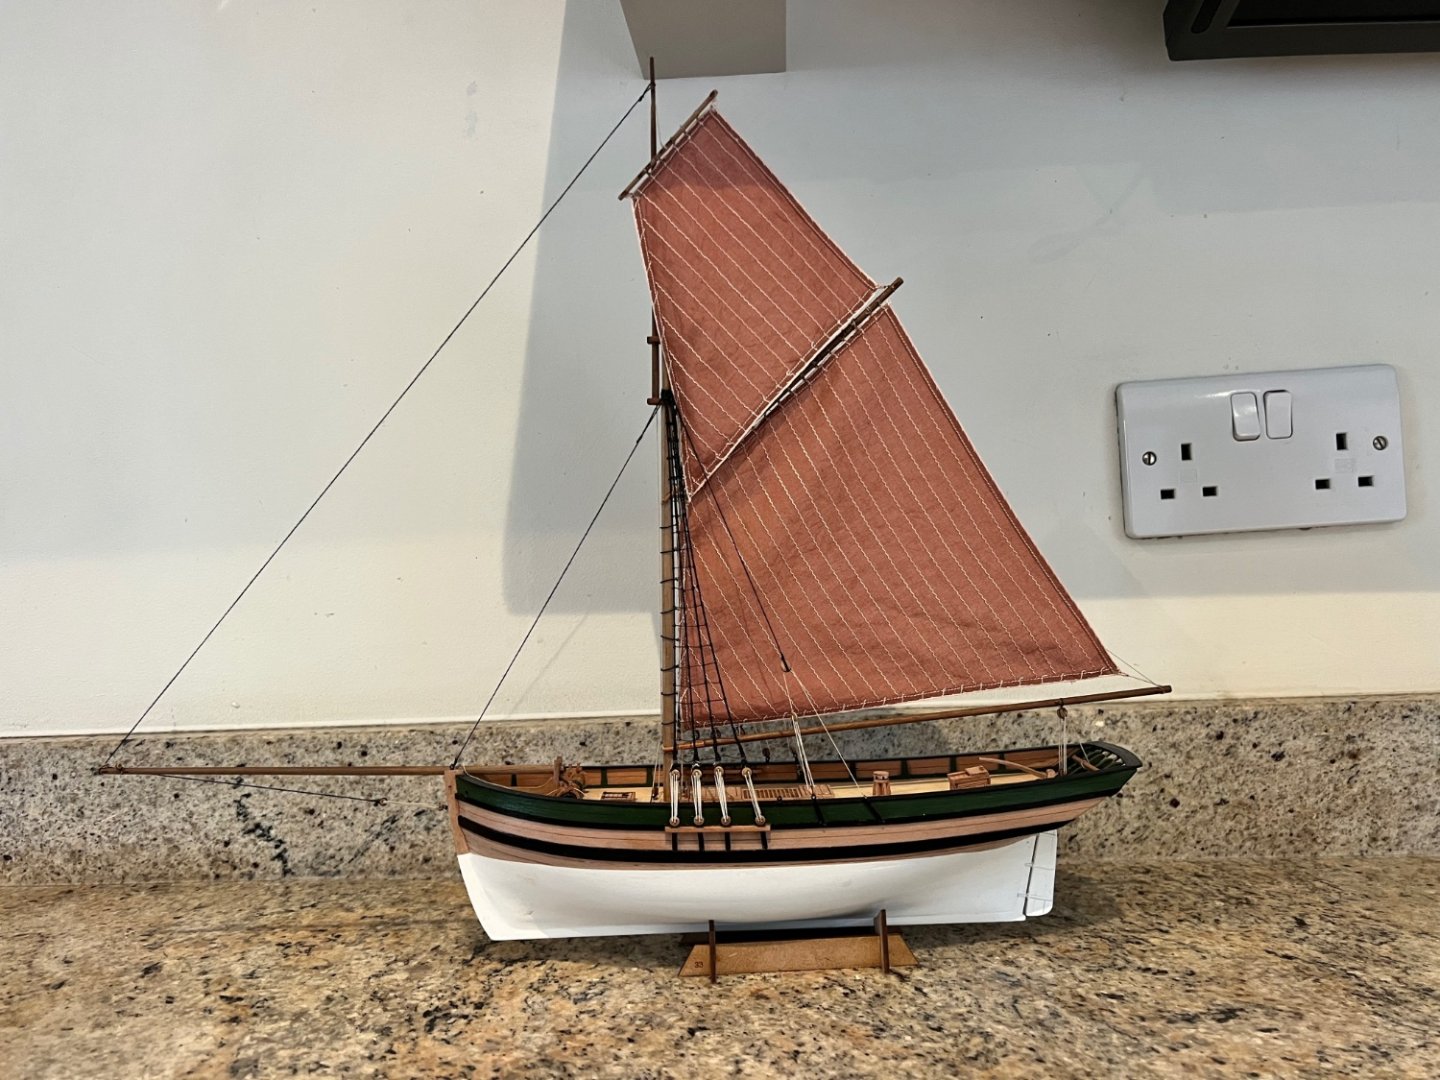
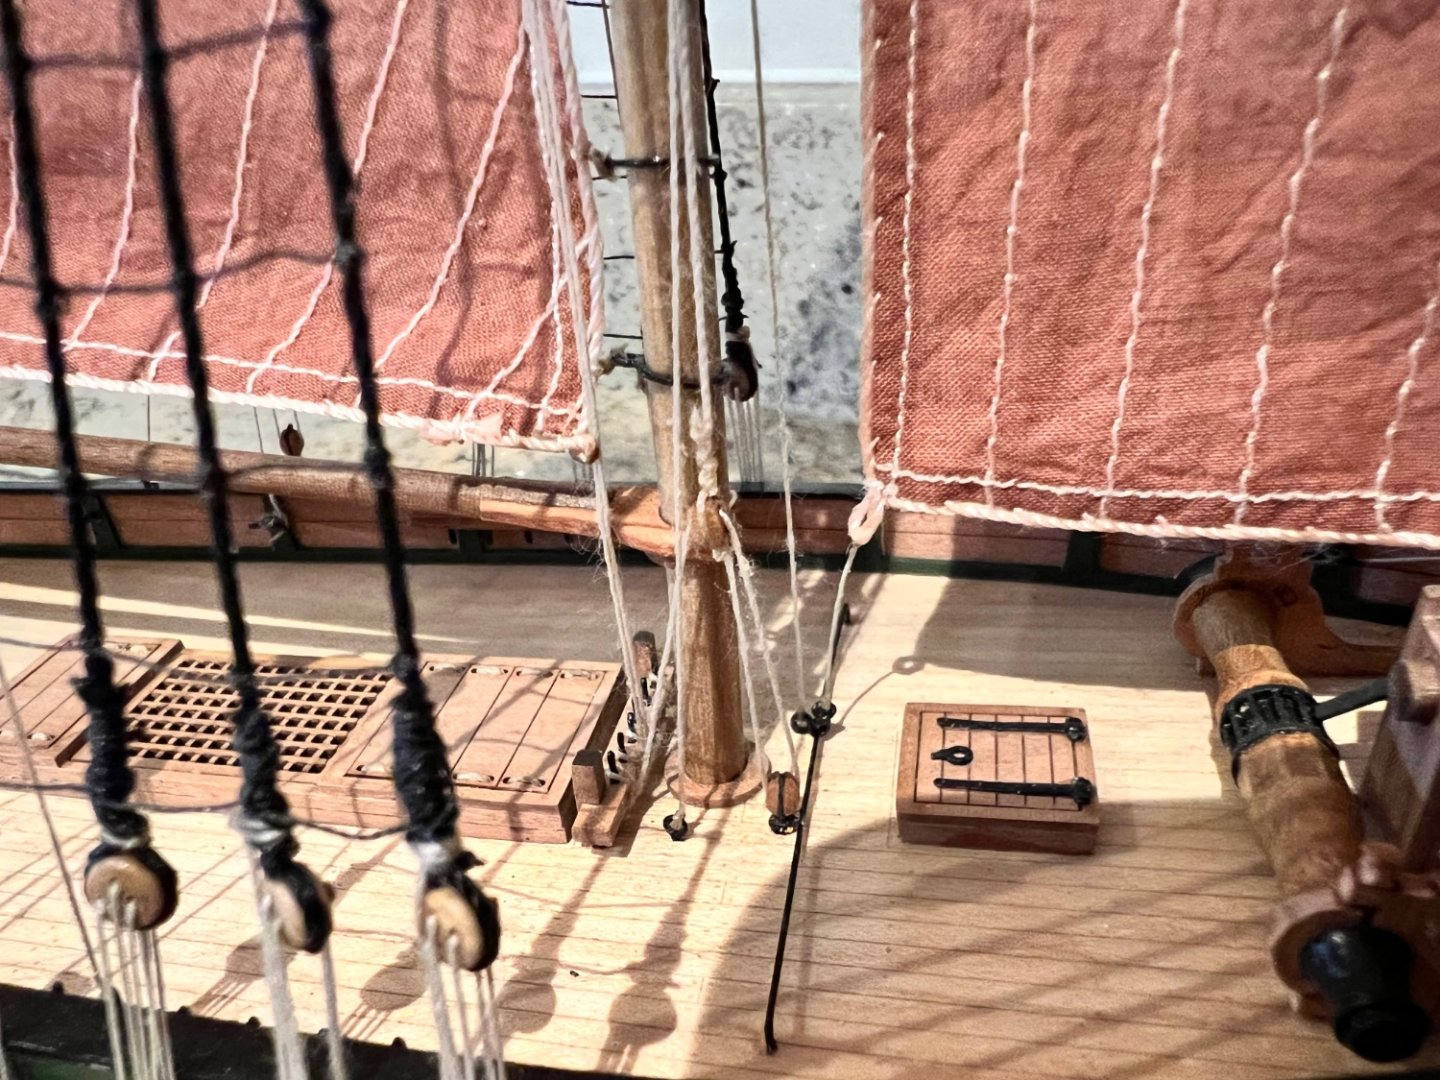
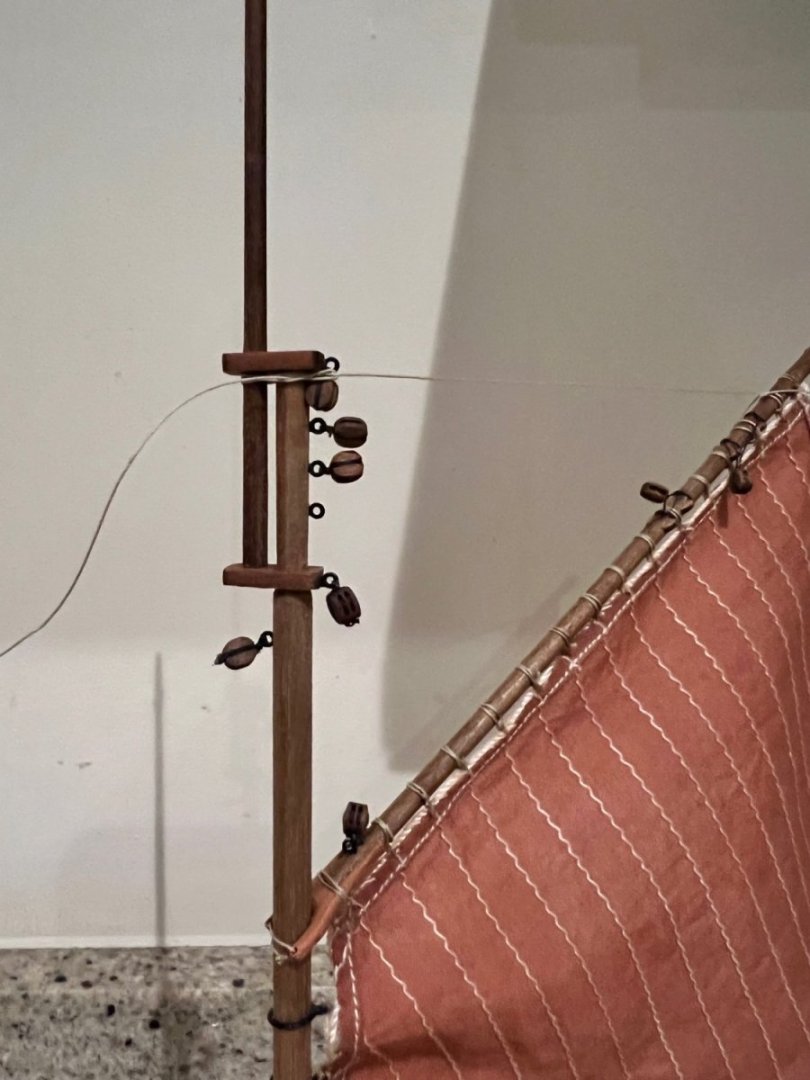
Topsail and topsail yard fitted. I’ve found it hard to use the belaying pin rack behind the mast. Really hard to get the lines to loop around the bottom of the belaying pin. There must be a technique for this, I just don’t know it? Then finished off the rigging and added the jib sails. The rigging was the most challenging I’ve attempted yet, she’s a little more complicated than Nisha and I had some difficulty ensuring that all the lines stayed taught, a few have quite a bit of tension on them which isn’t ideal. She’s largely complete now, so some more comprehensive photos. Yet another excellent kit from Vanguard that’s produced another lovely looking boat despite my building skills. I simply couldn’t get all the lines onto the belaying rack so I tied some off on the loops in the deck at the mast base. I’m very reliant on CA glue to seal each knot, but it discolours the thread and often makes it stiff and straight for the first 3-5mm - is there a better approach to tying the knots? Over the next few days I’ll be adding some coiled ropes and some deck clutter to finish her off. Deck clutter will be the anchor, boat, crates and barrels mostly included in the kit. There’s also a little touching up of paint to be done before signing her off.


- 59 replies
-
- 6
-
-
- saucy jack
- fishing smack
- (and 2 more)
-
Your Sphinx looks stunning. I hope I’ll have the skill and patience to build her one day.
- 476 replies
-
- 2
-
-
-
- sphinx
- vanguard models
- (and 1 more)
-
Glenn, I’ll be following closely as I’ll be starting my Erycina very soon. Thanks for all the advice on Saucy Jack which is nearly complete.
-
Thanks Glenn, that’s a very sensible idea. I’ll do that next time.
- 59 replies
-
- 1
-
-
- saucy jack
- fishing smack
- (and 2 more)
-
Thanks Glenn. Ratlines now complete. Fairly straightforward - only query is whether it’s better to start at the bottom and work up or top and work down? I started at the bottom and by the time I reached the top I’d added sufficient tension to the shrouds that the bottom ratline on each side is sagging and may need redoing. This is the trickiest ratline to adjective as it’s onto the deadeye seizings not not plain shroud. Also added the port and starboard mast stays and one of two forward stays. The standing rigging is mostly complete except for the second forward stay which runs to the end of the bowsprit. Bowsprit is now glued in place. Small clumsy accident in that I managed to catch the top mast on my sleeve and break the tip off where there is a hole in the mast. Slightly messy break but have fixed it using CA glue (titebond wasn’t strong enough for this). You can just about make out the break in the photos above.

- 59 replies
-
- 5
-
-
- saucy jack
- fishing smack
- (and 2 more)
-
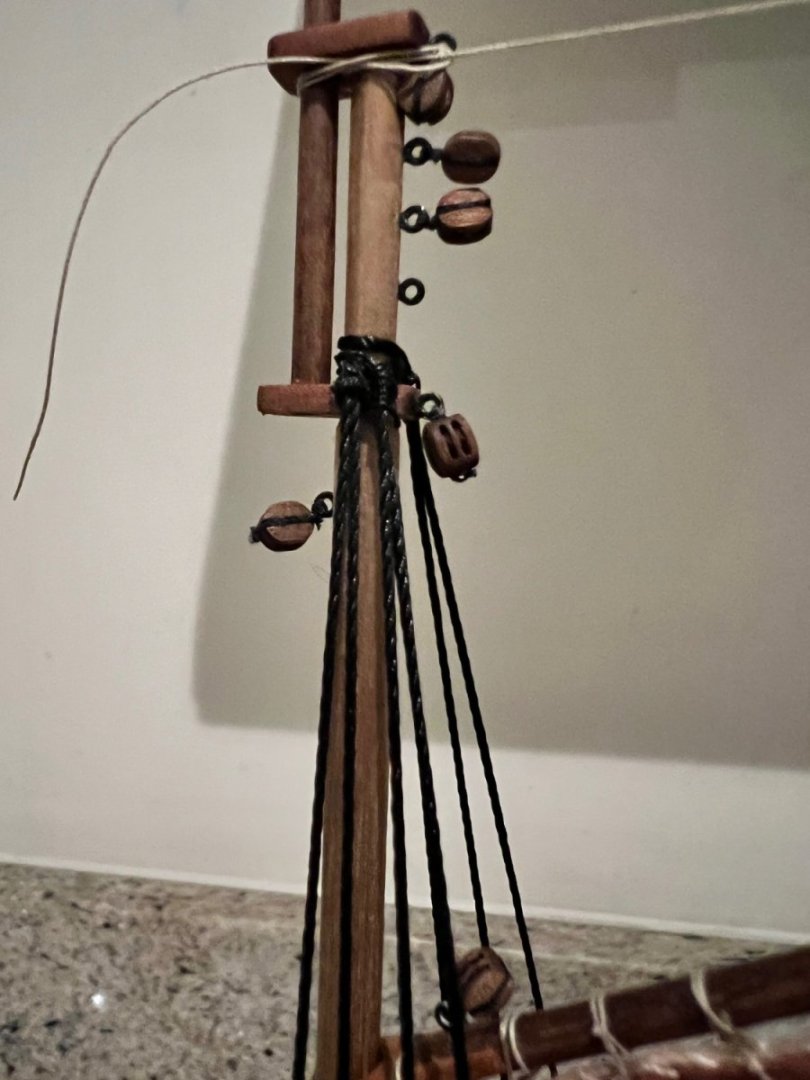
The Jack has her shrouds fitted now. I’ve tried to do these properly on her in the correct sequence using the same piece of thick thread with a deadeye in each end looped around the cross trees in the mast. First pair shown below. Rest of the shrouds fitted. With hindsight the deadeyes are a little too high, the shrouds a little short and the lanyards too long, but not a big enough mistake to warrant redoing them.
- 59 replies
-
- 6
-
-
- saucy jack
- fishing smack
- (and 2 more)
-
Thanks Chris, that’s due to yet another excellent kit from you. Much appreciated.
- 59 replies
-
- 1
-
-
- saucy jack
- fishing smack
- (and 2 more)
-
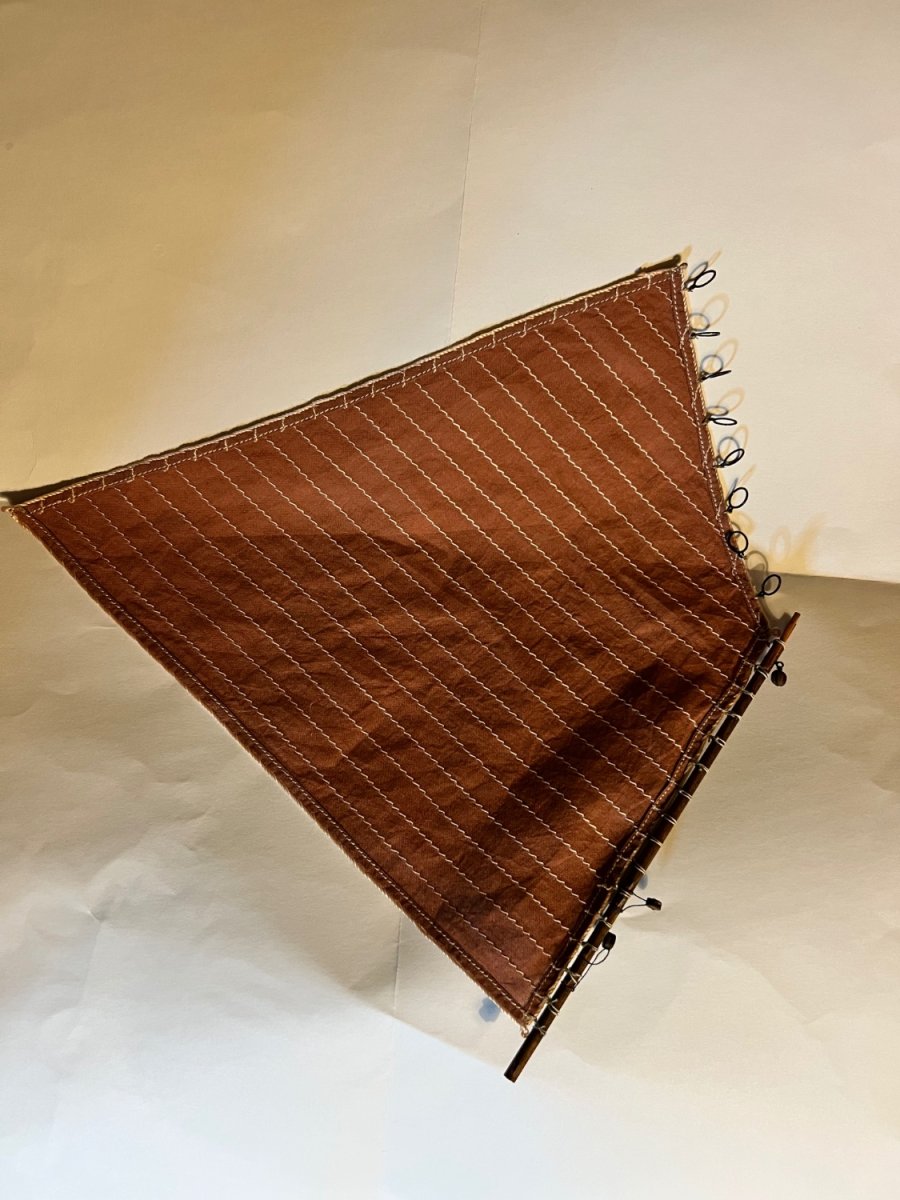
Chris sent me the replacement sails very promptly as always! Once I had these I decided to experiment with the old set to see what happens if I try and dye on top of the brown. So I put the already dyed sails into a litre of hot water with two drops of RIT dye “Scarlet” and stirred them for just five minutes before dishing them out. Amazingly they went almost the colour I was originally looking for which is a pinky orange colour as per the box art. So I didn’t need the new sails after all. I’ve not had much time on the Jack this week but have added all the blocks attached to the hull, mast and spars and today I’ve added the mast rings and attached the mainsail to the main gaff. The photo below is taken in a very yellow light so not the real colour of the sails. I use a clove hitch to attach the main gaff which may be inaccurate as there are two ropes around the gaff at the attachment point but is the knot I find easiest to use. A view of the blocks on the mast. I much prefer Chris’s pear wood blocks which are an extra over the walnut ones supplied with the kit. I don’t always have the right sizes available so some are 4mm when they should be 3mm and some are 3mm, bit of a muddle and not something I thought through before fitting them. Mast stepped. Temporary piece of rigging keeping the main gaff up and sail out of way for when I start the shrouds. Main boom and main gaff fitted. Bowsprit in place but will remove whilst doing the shrouds so I don’t break it by accident. I’ll take some better photos in daylight tomorrow so the new sail colour can be seen, it’s much softer than it appears in these photos.


- 59 replies
-
- 9
-
-
- saucy jack
- fishing smack
- (and 2 more)
-
Thanks Mike great advice, pls do share some photos of your Saucy Jack and the dyed sails on this log. I’d be really interested to see the colour you’ve achieved and how your Jack is progressing. Dan