
DB789
-
Posts
429 -
Joined
-
Last visited
Content Type
Profiles
Forums
Gallery
Events
Everything posted by DB789
-
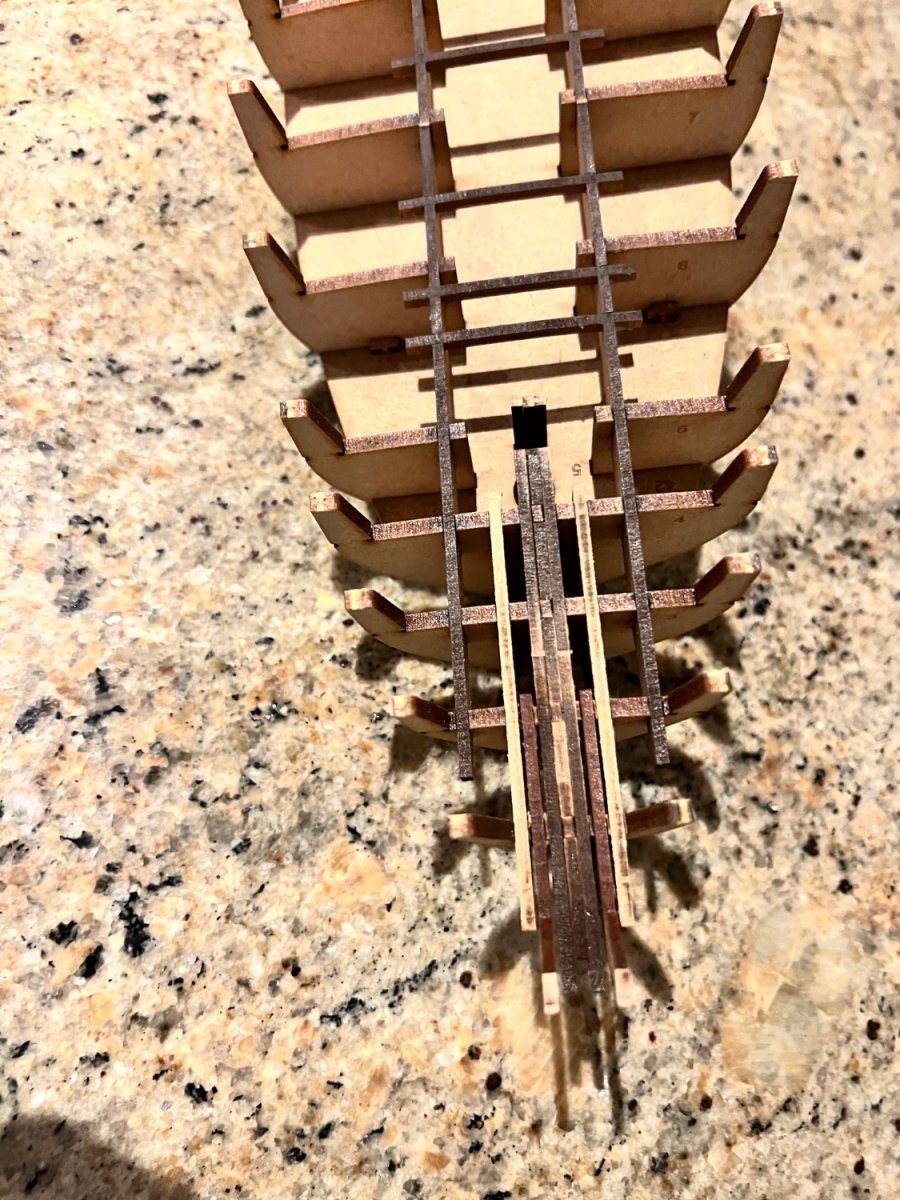
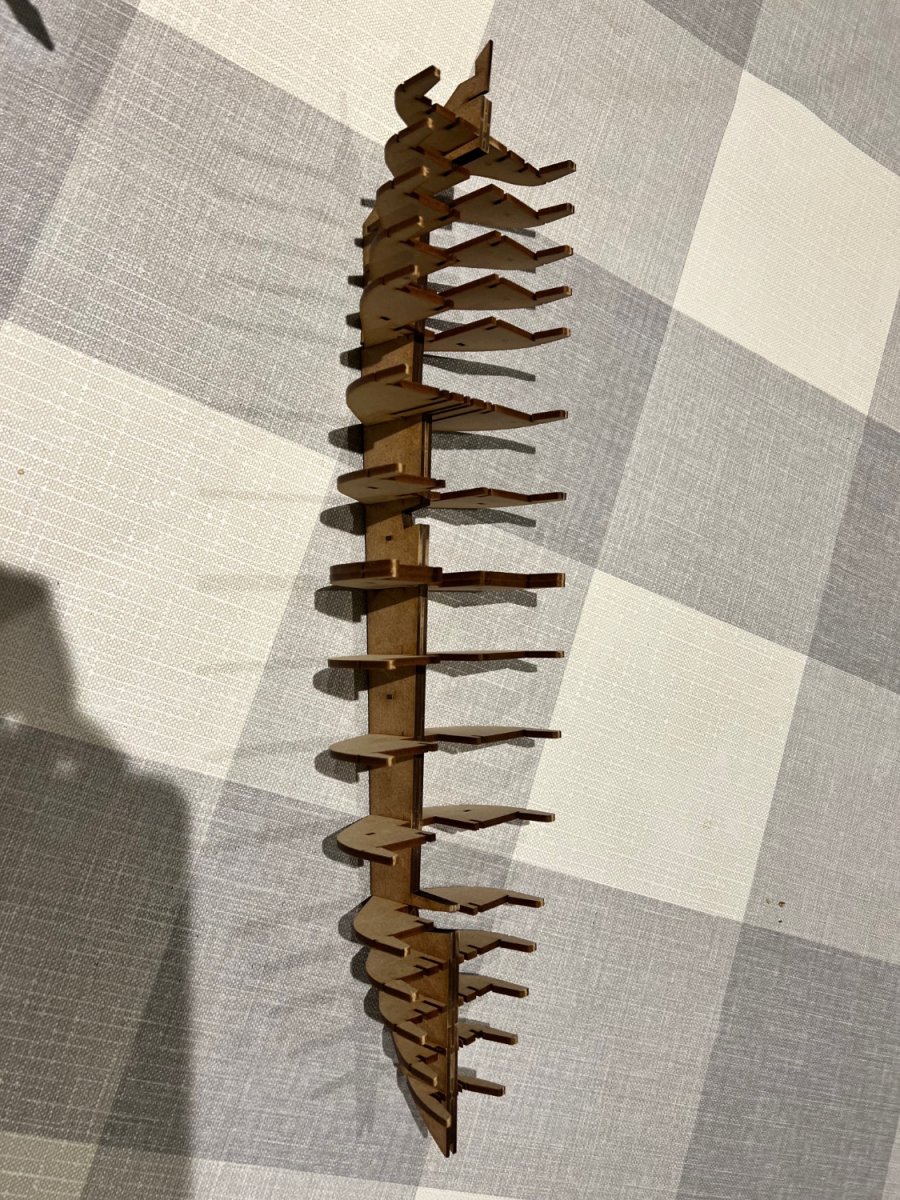
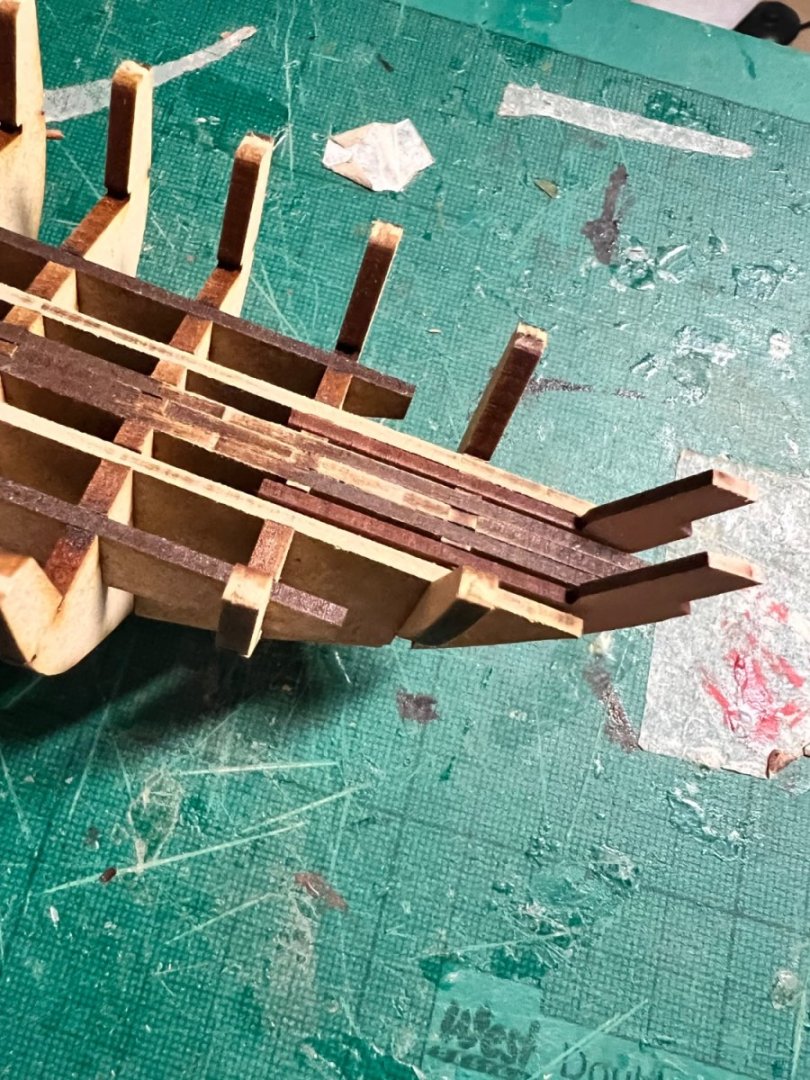
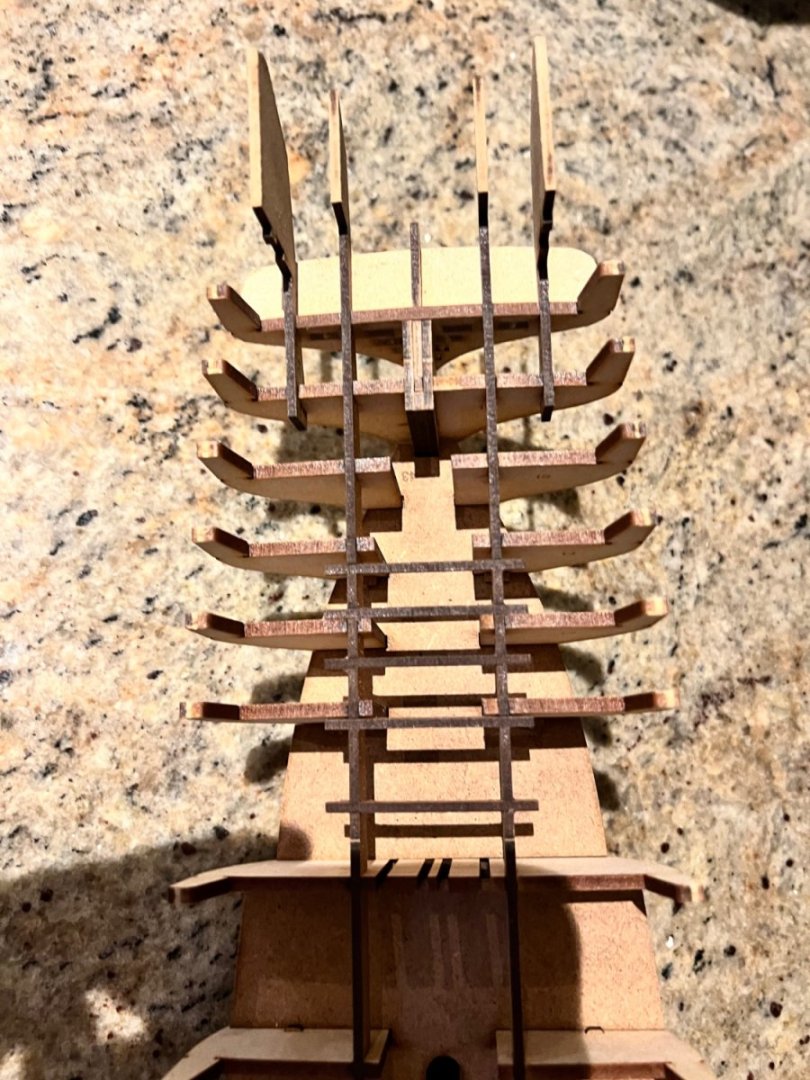
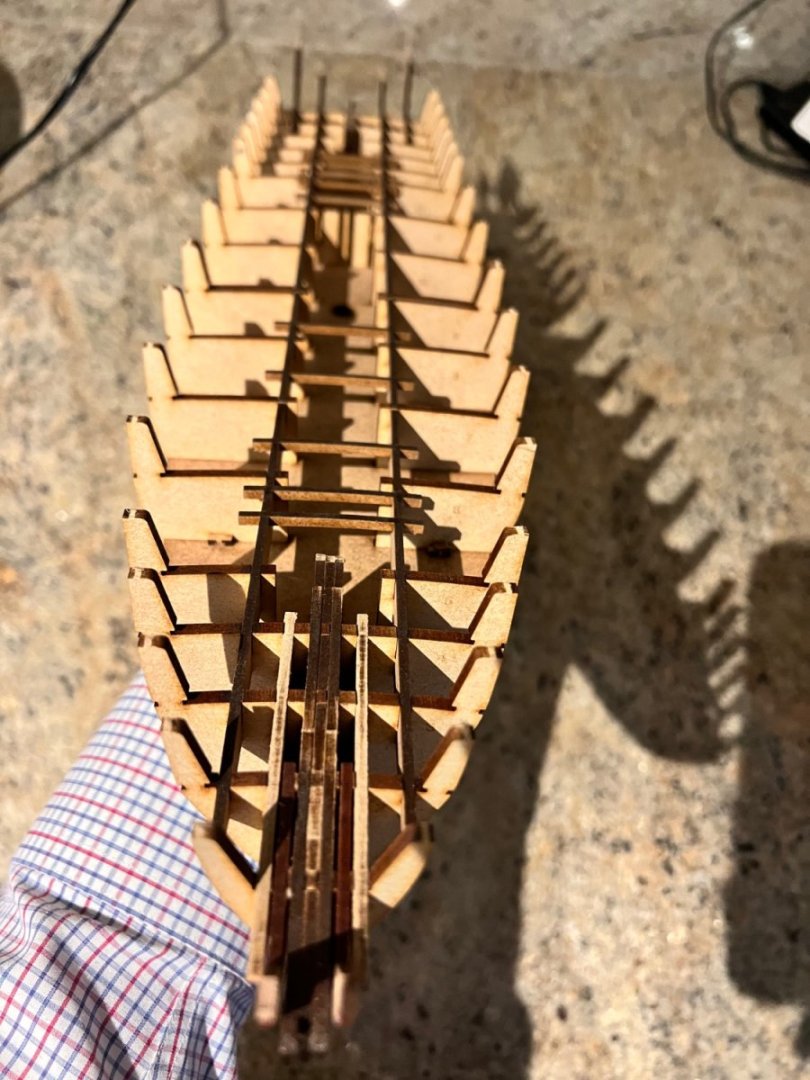
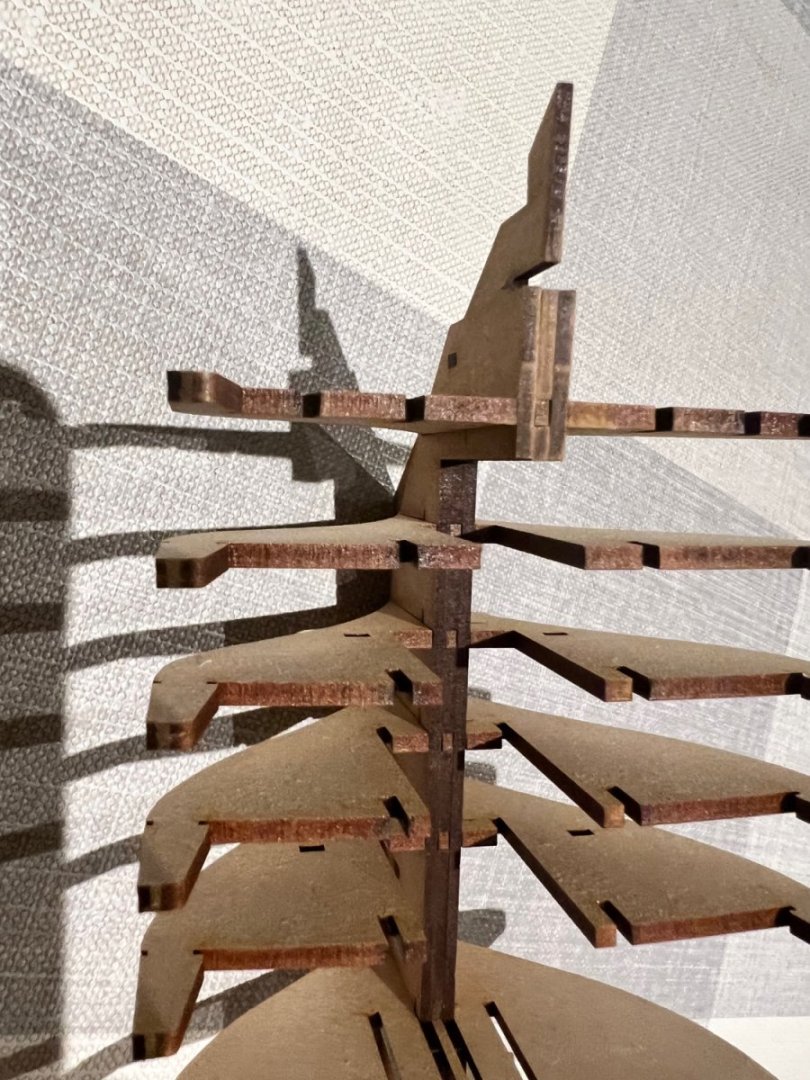
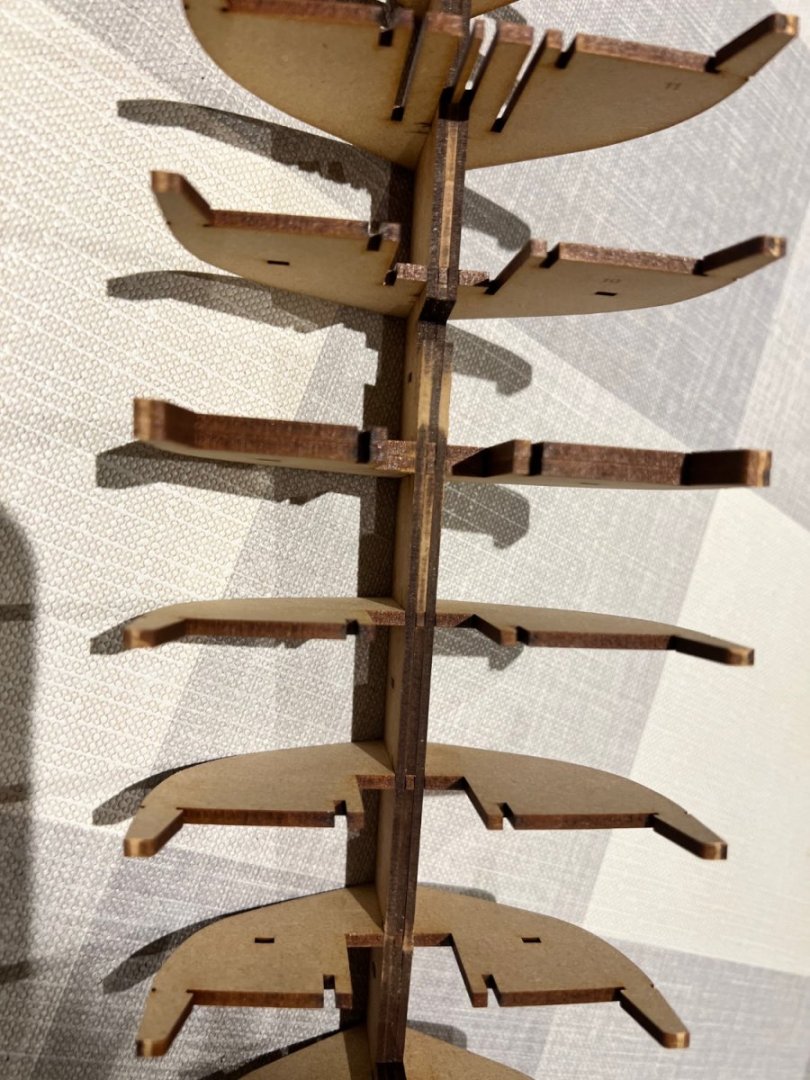
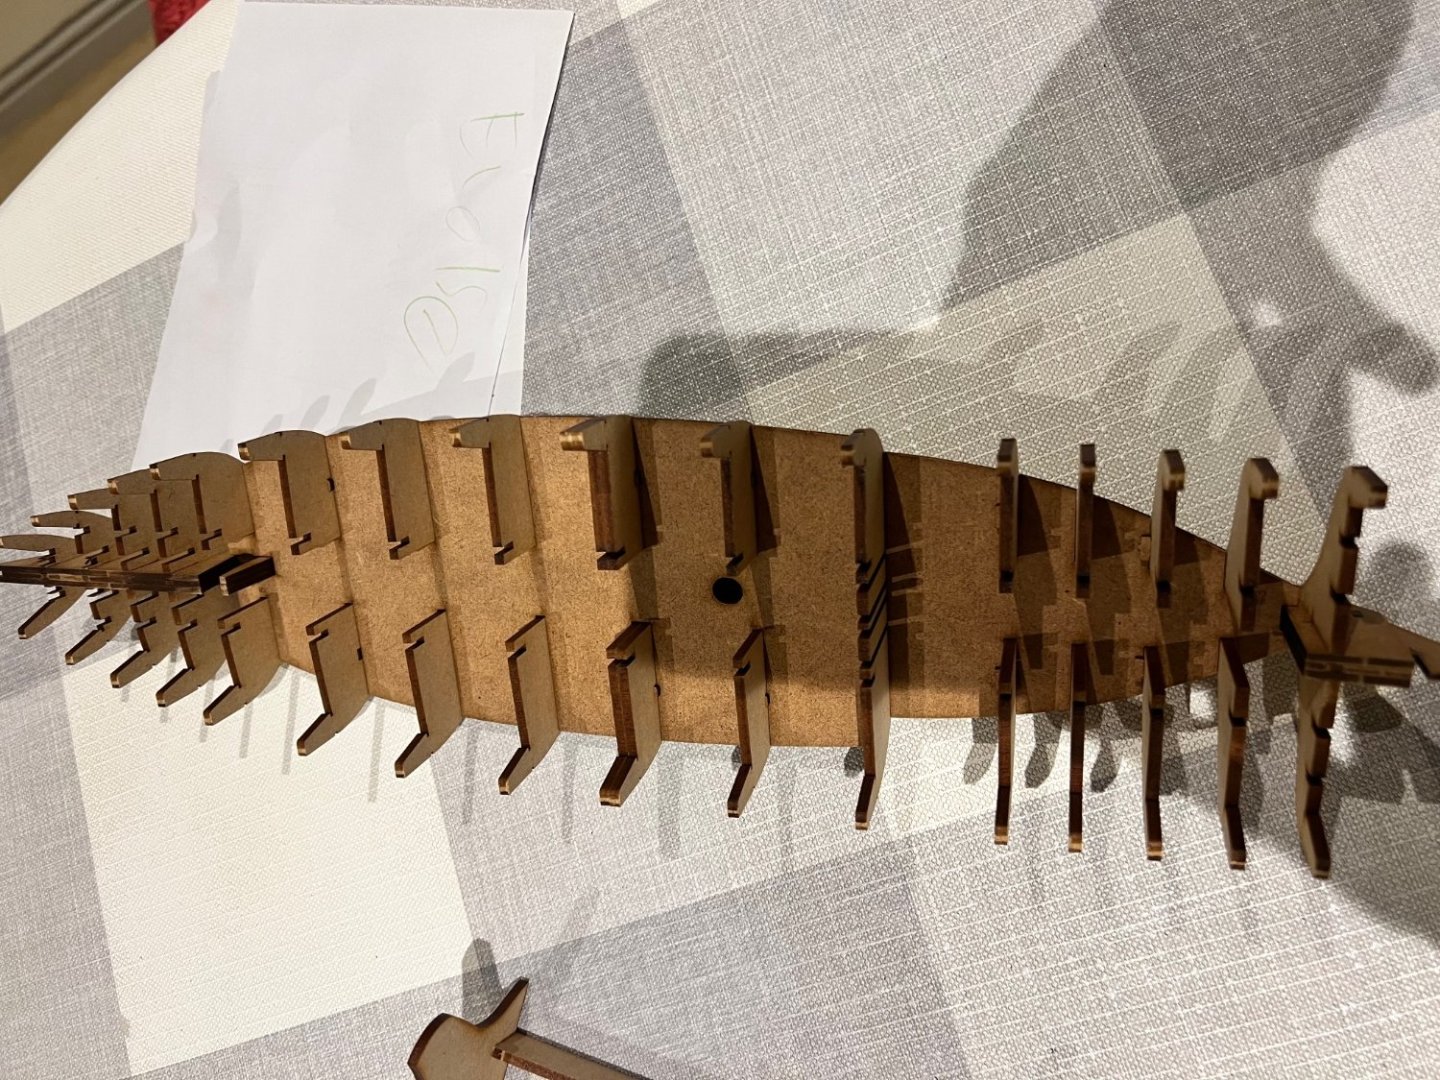
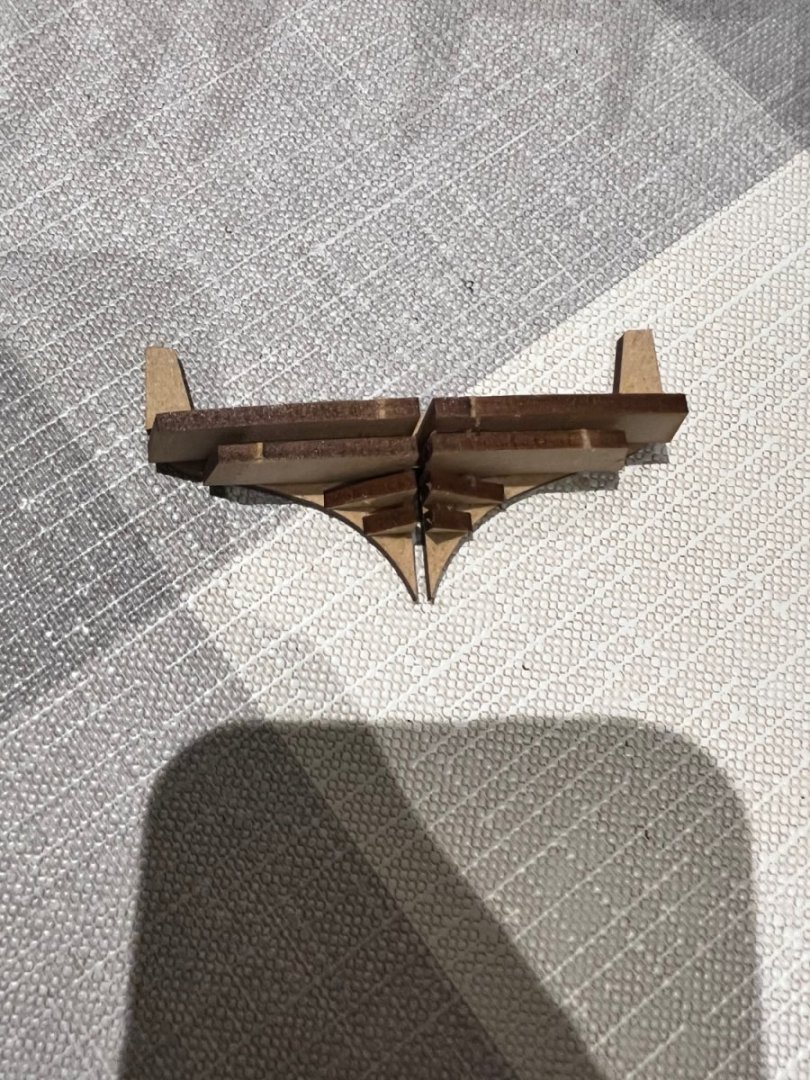
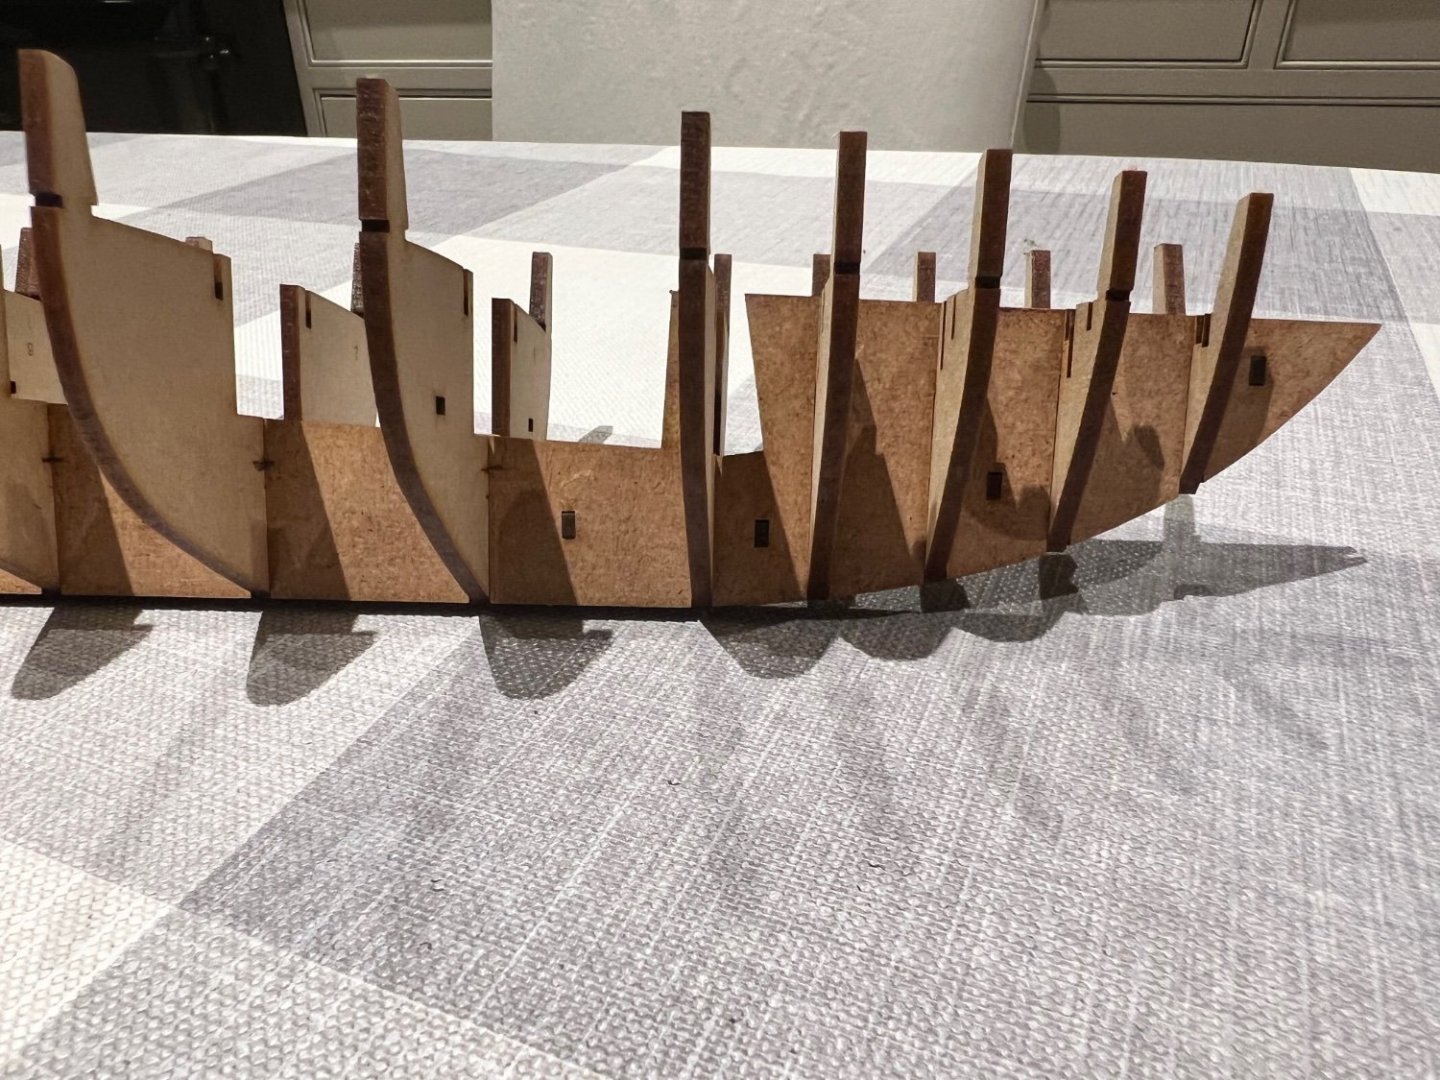
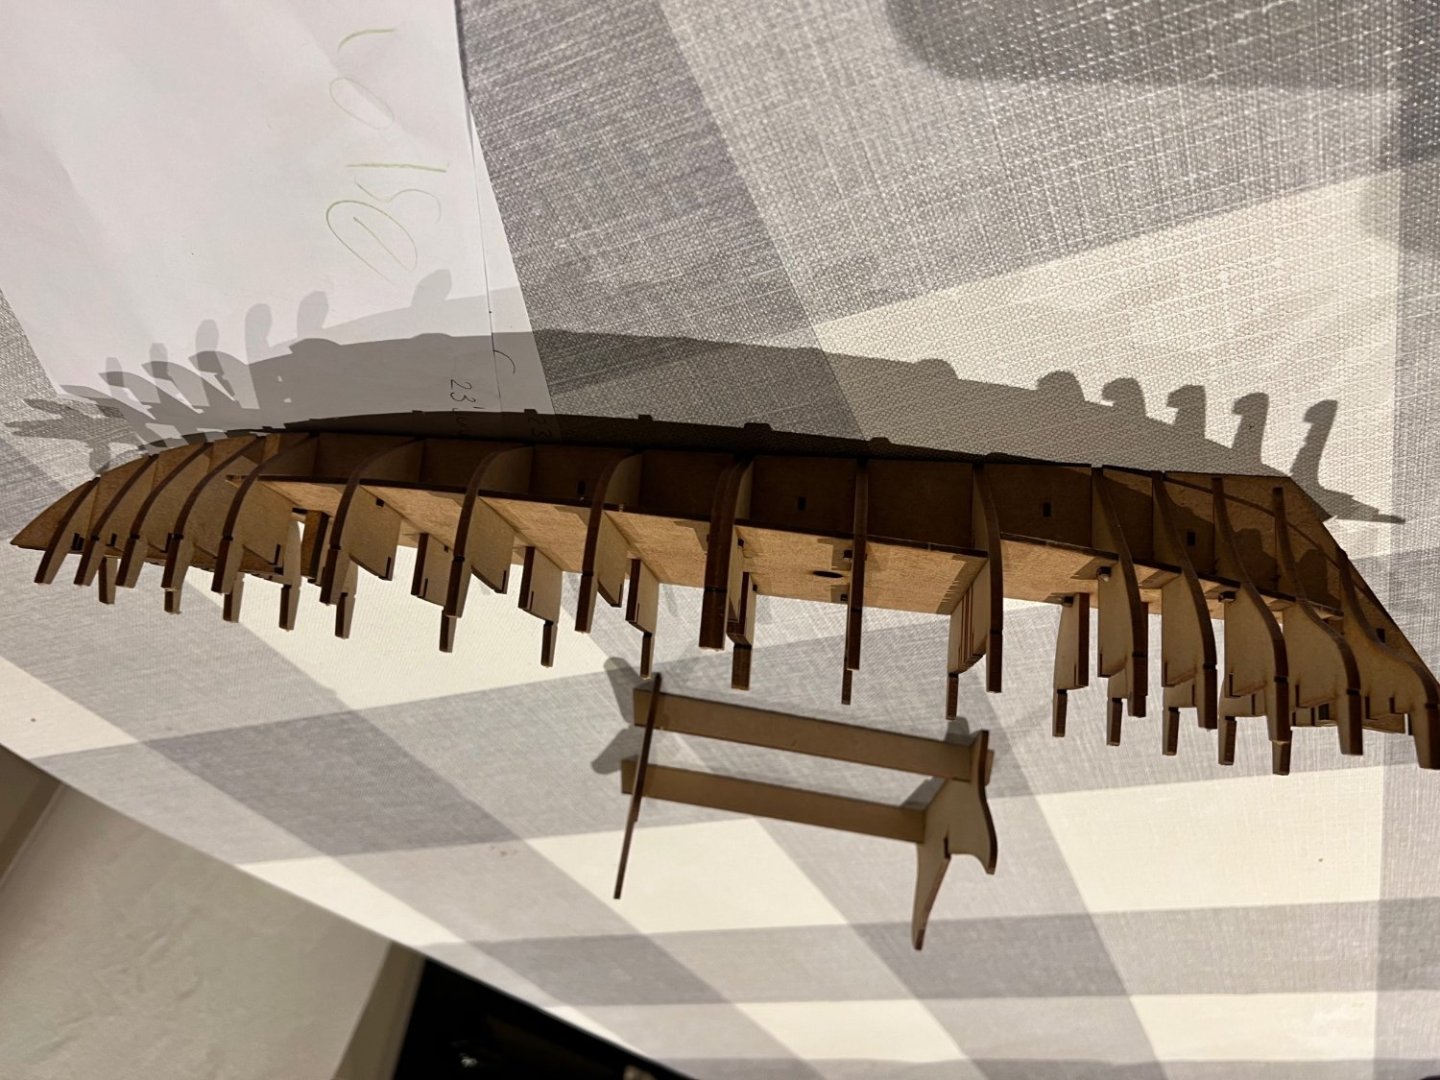
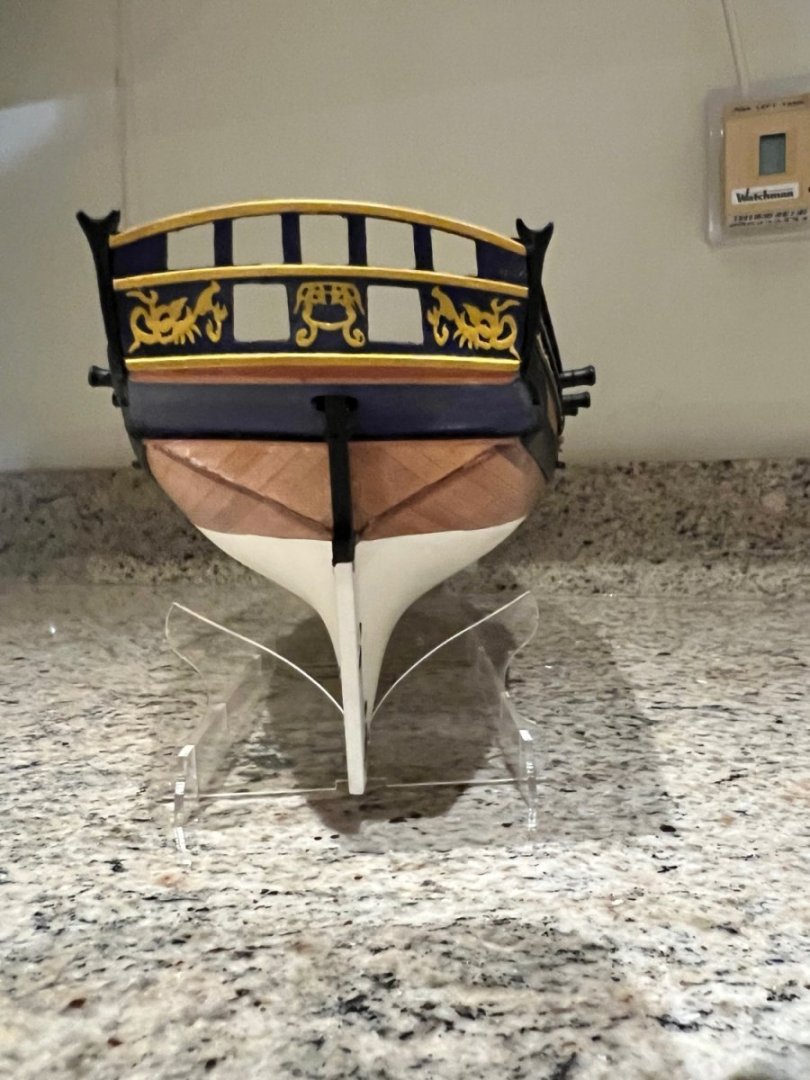
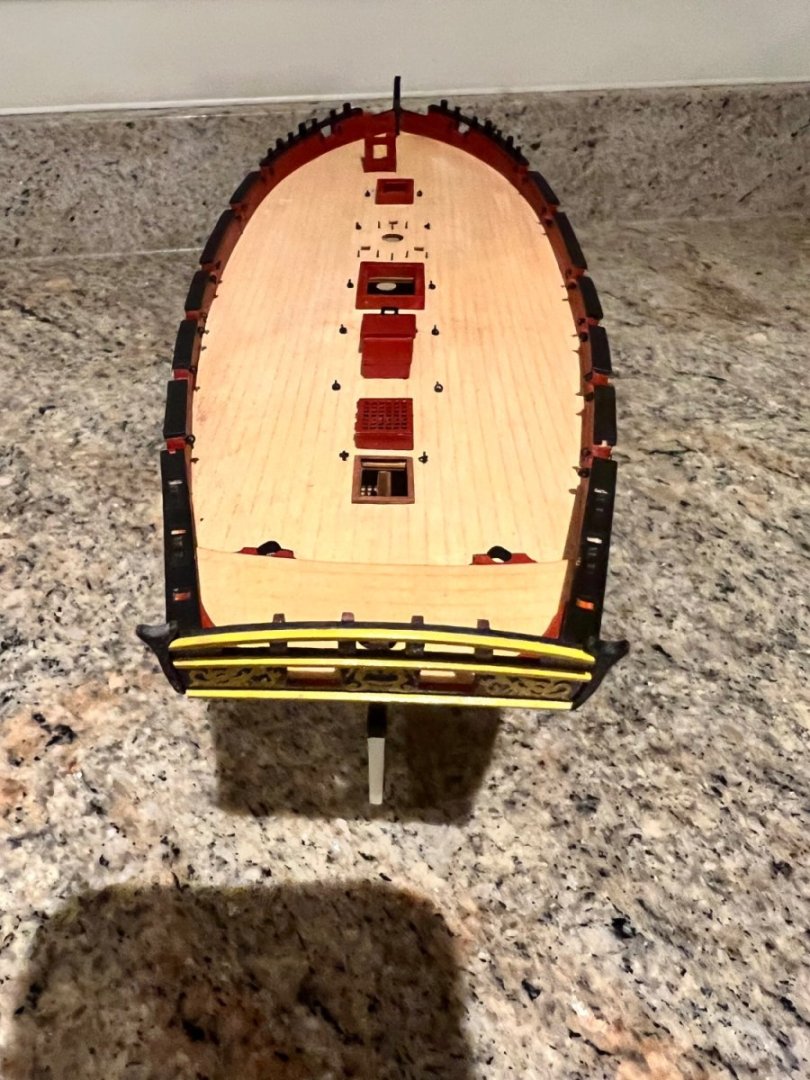
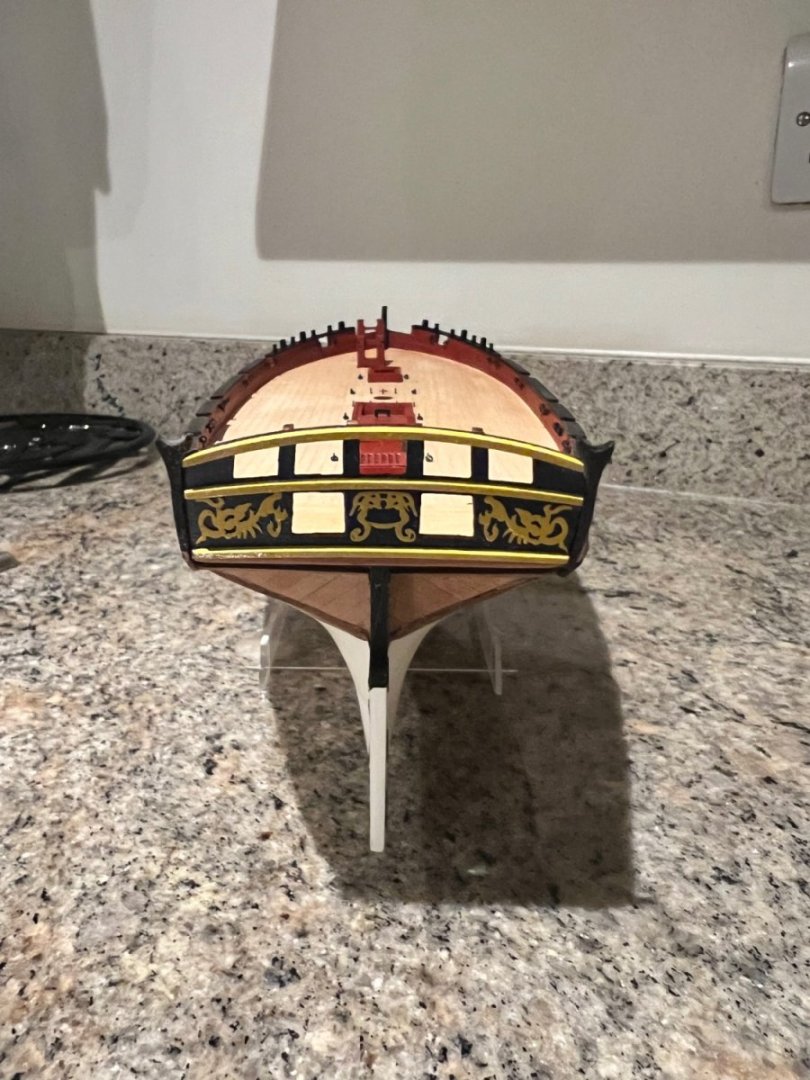
 This is the shaped stern bulkhead. Then I make a mistake which I only realise later, but seems inconsequential. I should have added additional longitudinal beams (parts 33) to brace the aft bulkheads but somehow I missed them despite them being clearly there in the instructions. Instead I went straight for the sub-deck which comes in two pieces. The bow is then built up. The laser cutting of the MDF is wafer thin, I didn’t realise you would be able to cut MDF so thin. Yes I broke one of the slots but that’s me being clumsy. Beams are added across the hull, further adding to the strength of the already very strong structure.
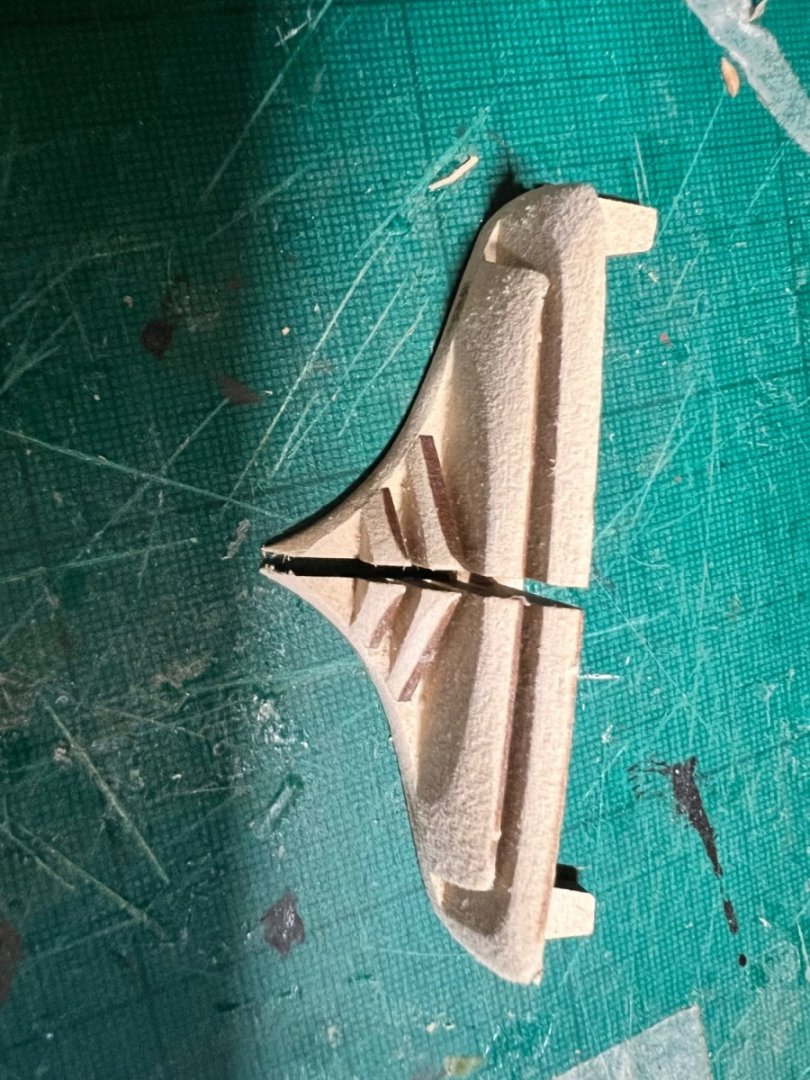

- 106 replies
-
- 7
-

-
- Grecian
- baltimore clipper
- (and 4 more)
-
Thanks Jim, I’ll make more effort to get the photos in the correct orientation. I do most, if not all, of my posting on MSW using a work provided iPhone or laptop which I don’t have admin rights to install a programme on - such as the excellent photo resizer you sent me a link to. Wish I could use it.
- 106 replies
-
- 1
-
-
- Grecian
- baltimore clipper
- (and 4 more)
-
Thanks Andrew, wish I wasn’t and had more build photos to refer to! The instructions and prototype build log are excellent, but having more photos from different angles also helps.
- 106 replies
-
- 1
-
-
- Grecian
- baltimore clipper
- (and 4 more)
-
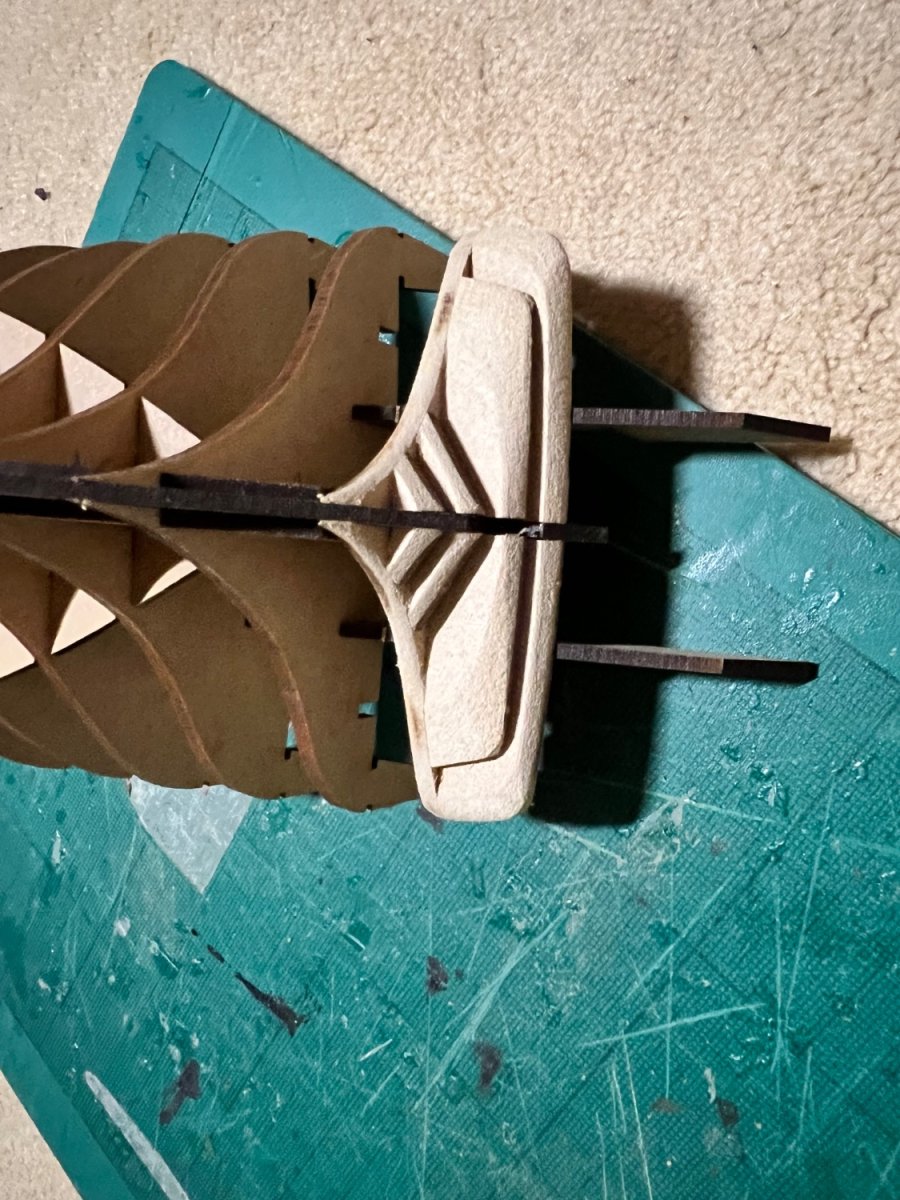
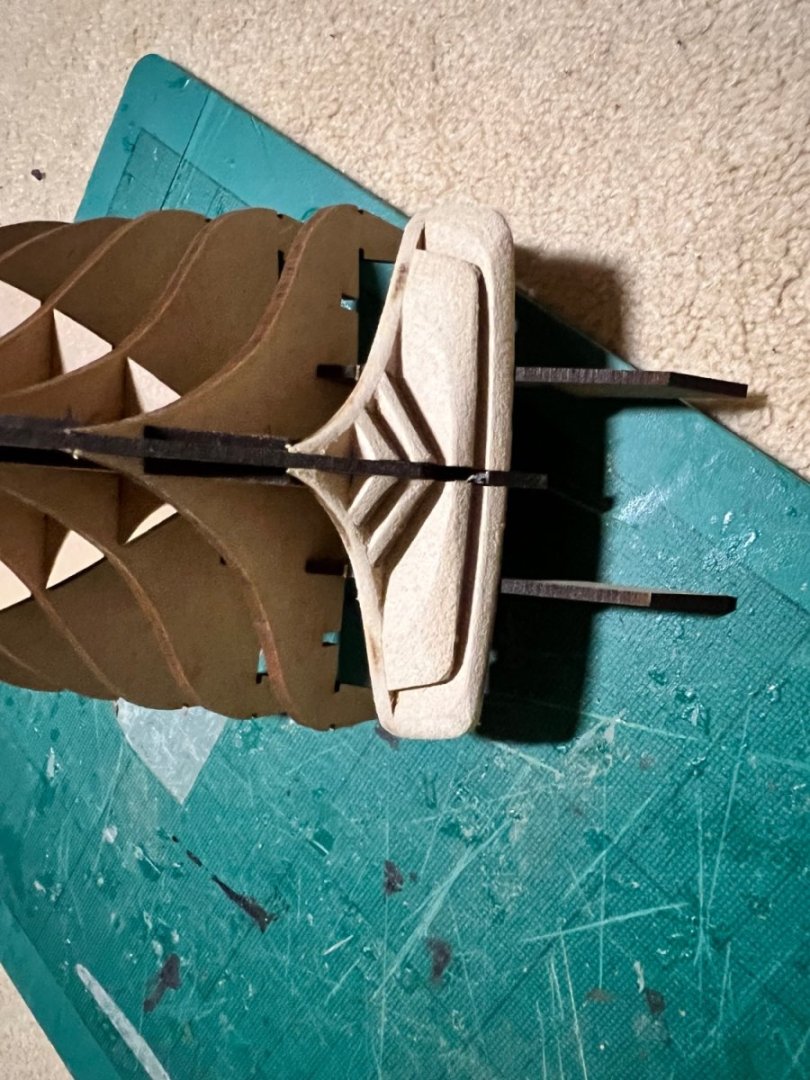
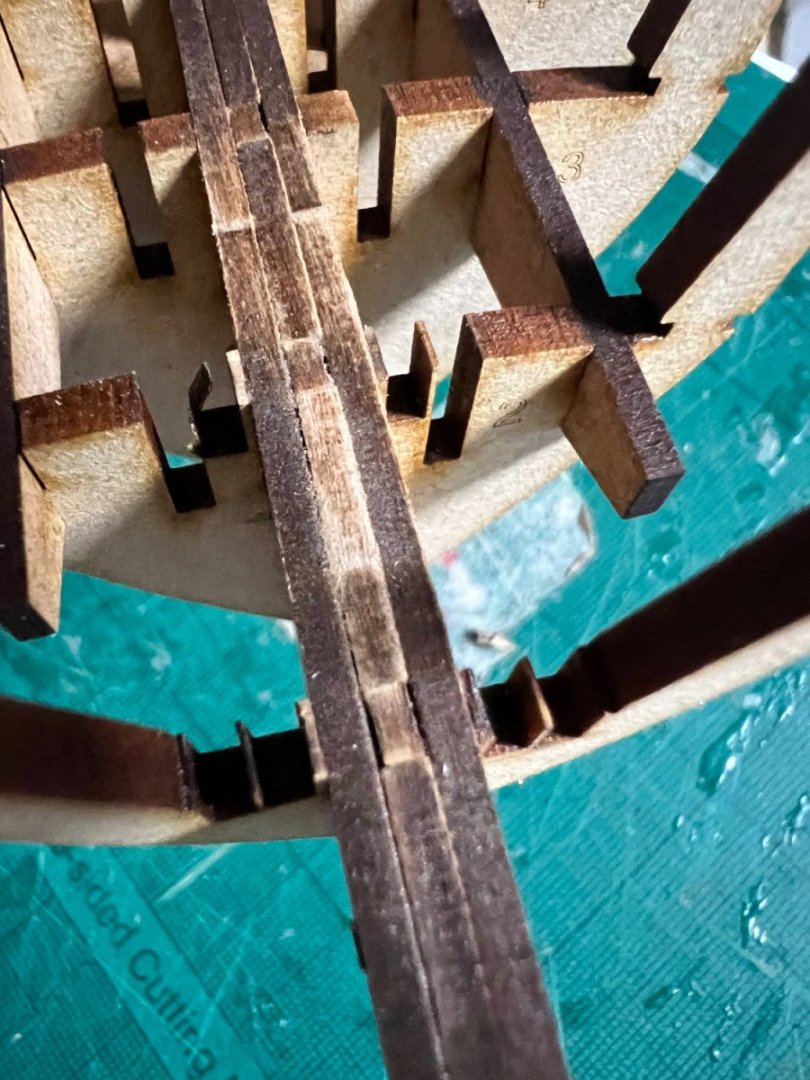
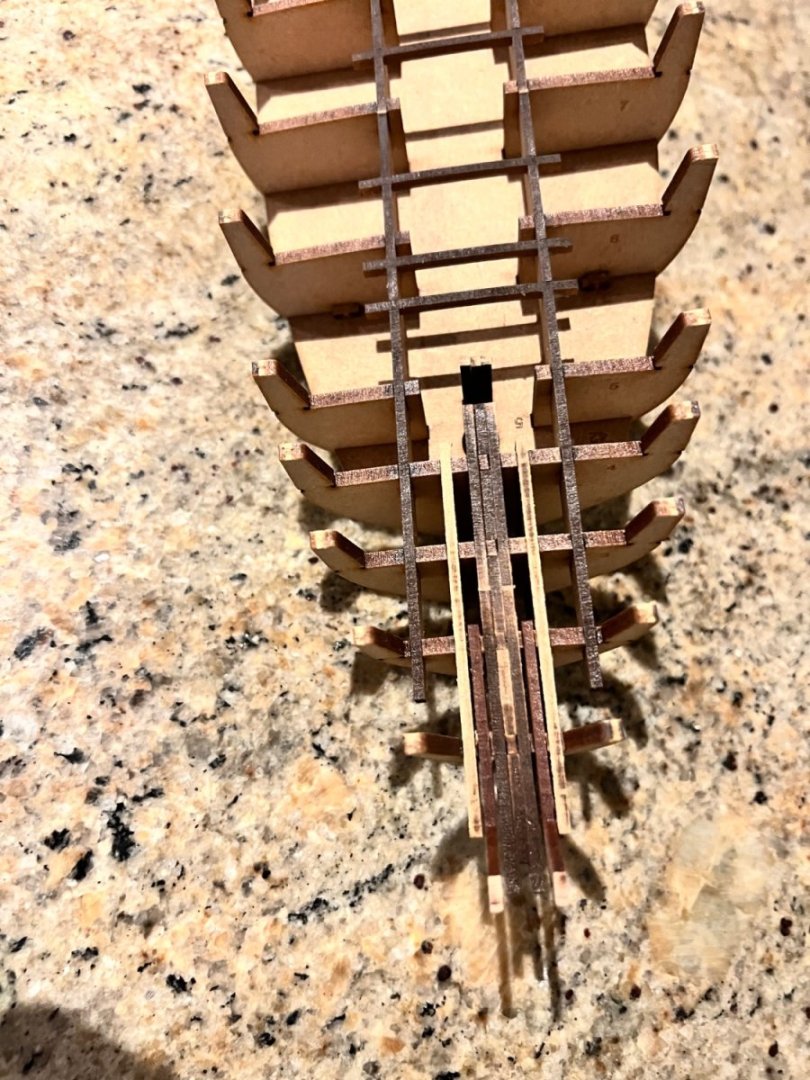
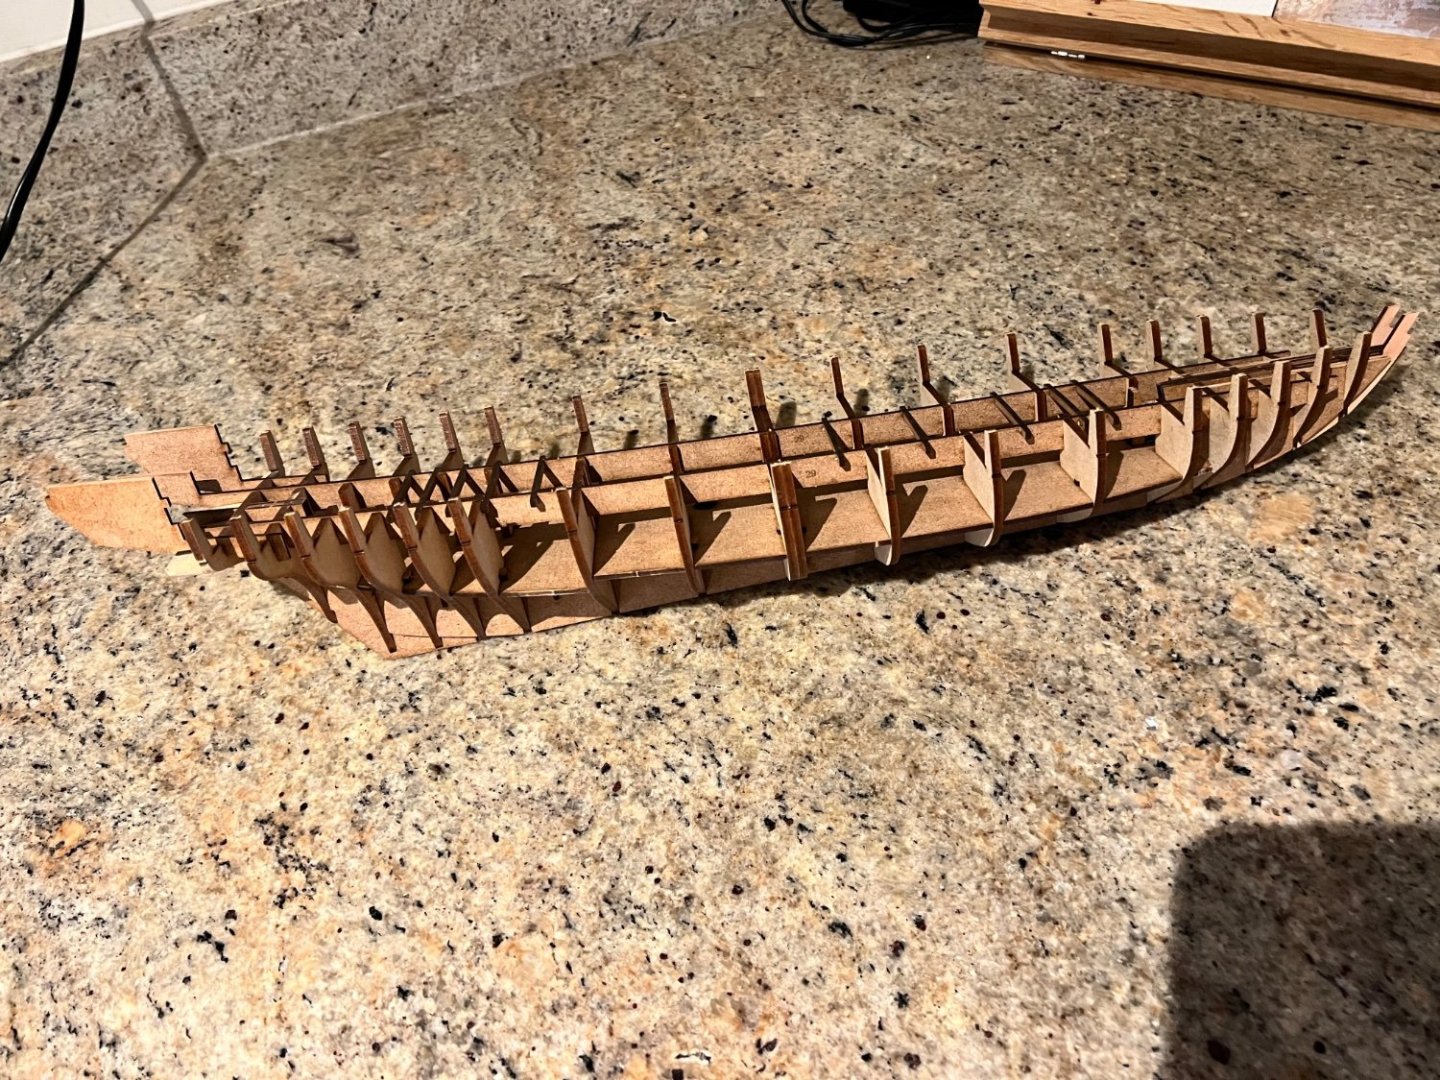
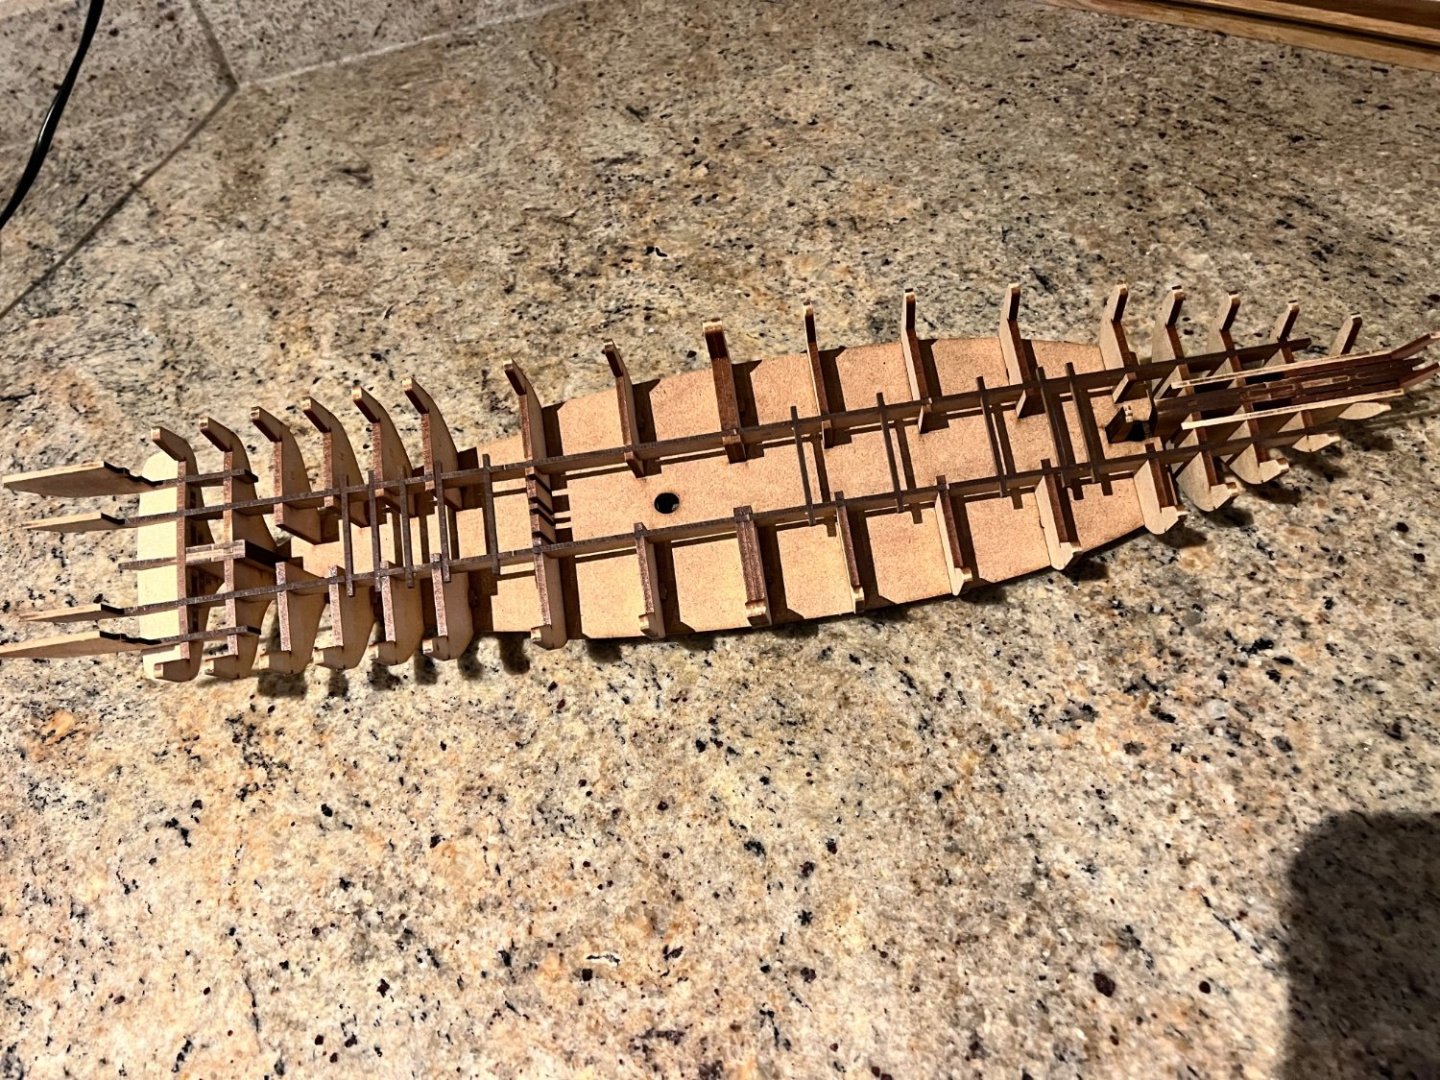
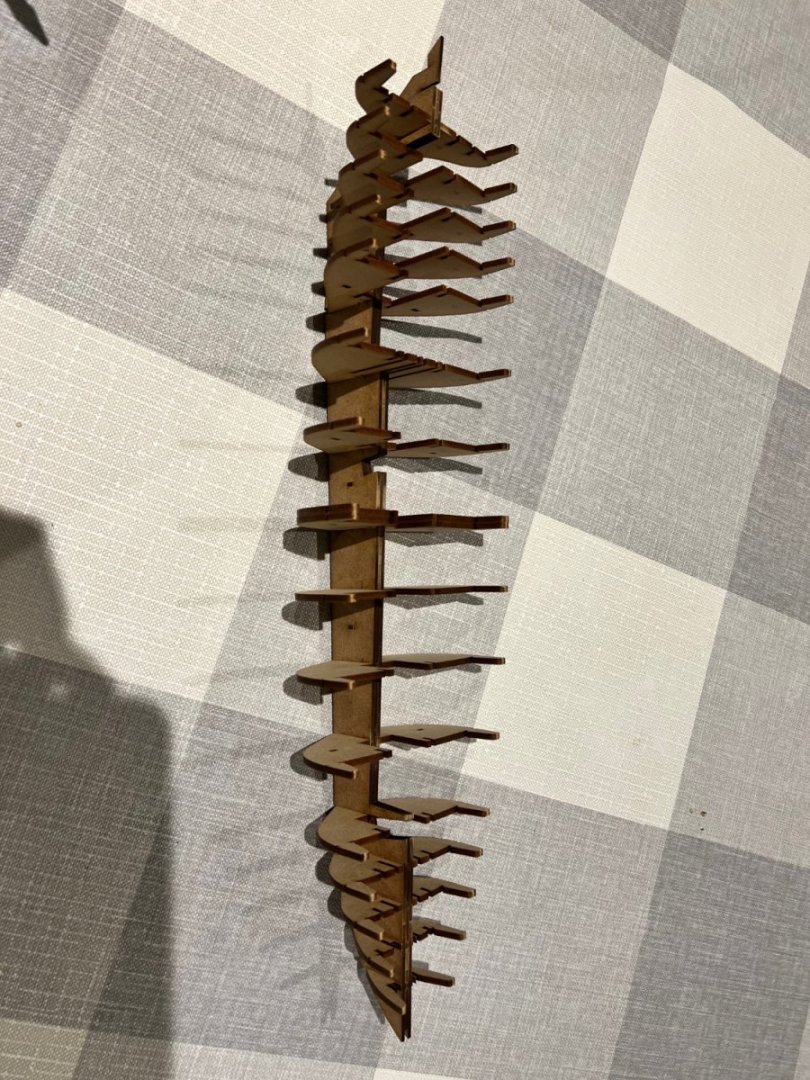
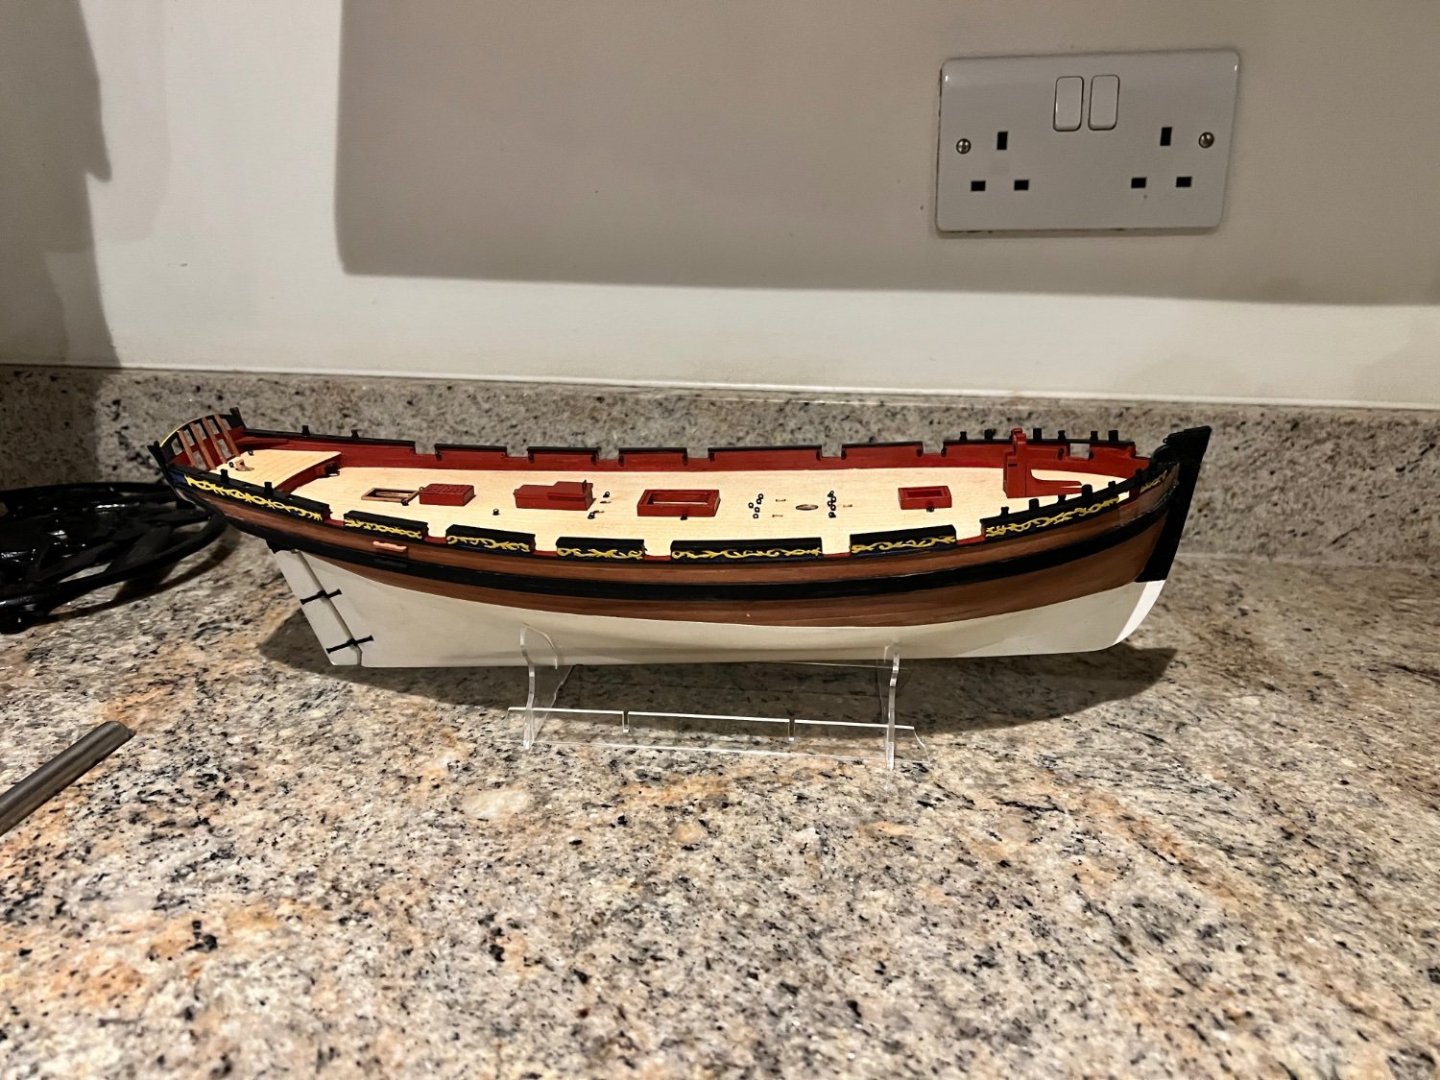
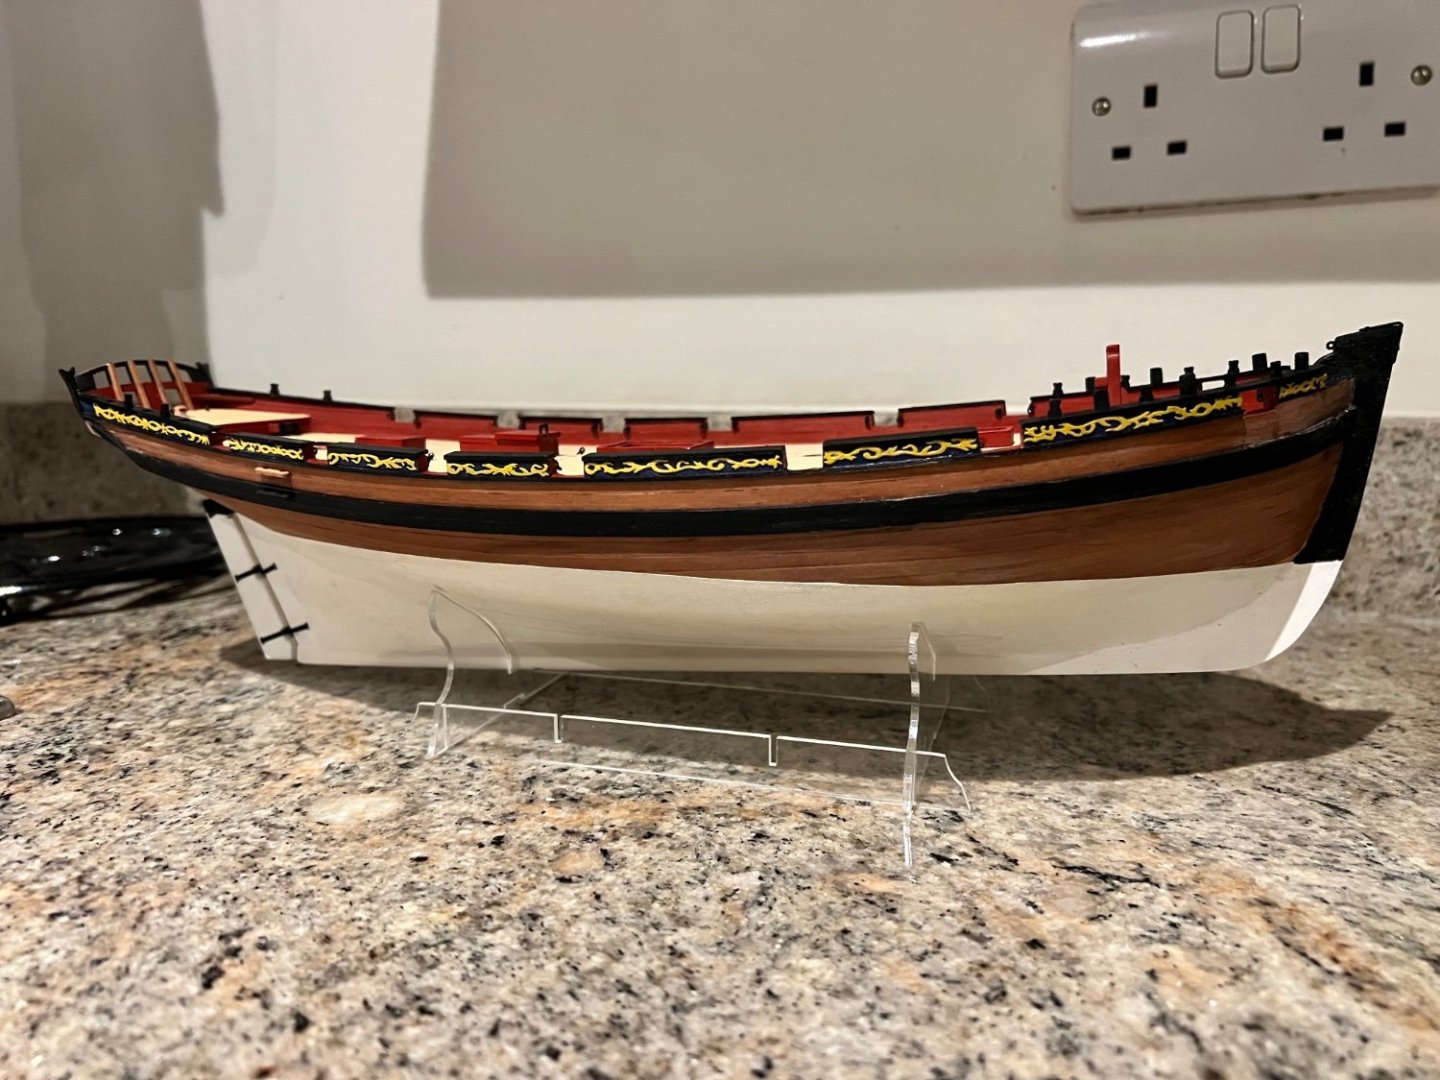
This first stage of construction is where Vanguard’s better design just comes into its own. The process for building the ‘skeleton’ of her hull is just so clever and well thought out, avoiding the alignment and warping risks I read about so often with kits from other manufacturers. Firstly, the bulkheads are slotted onto the false keel, but not glued. Then another piece is slotted on each side of the keel, locking down the bulkheads. As soon as this is done, the structure starts to strengthen. MDF tabs are then pushed through holes in all three keel pieces ensuring that these, and the bulkheads are absolutely aligned. Then the sub-deck is fitted and also held in place with tabs. Further strengthening the structure. Then the aft bulkhead is built up, ready to be faired. I need to shape this next, but the glue needs to set overnight. Once that is done I’ll add it to the hull with additional longitudinal bracing parts. Once those are in the structure will be rock solid, completely aligned and ready for glue.
- 106 replies
-
- 17
-
-
- Grecian
- baltimore clipper
- (and 4 more)
-
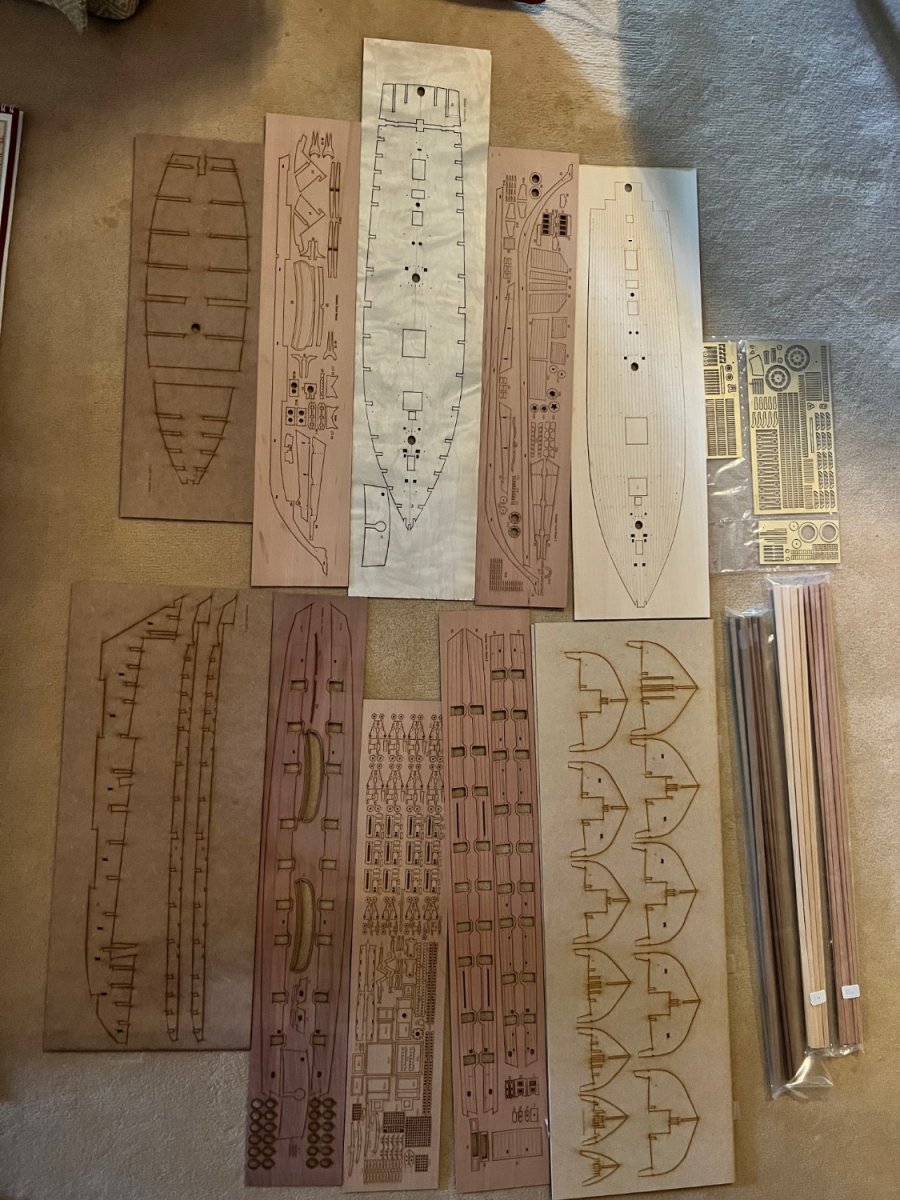
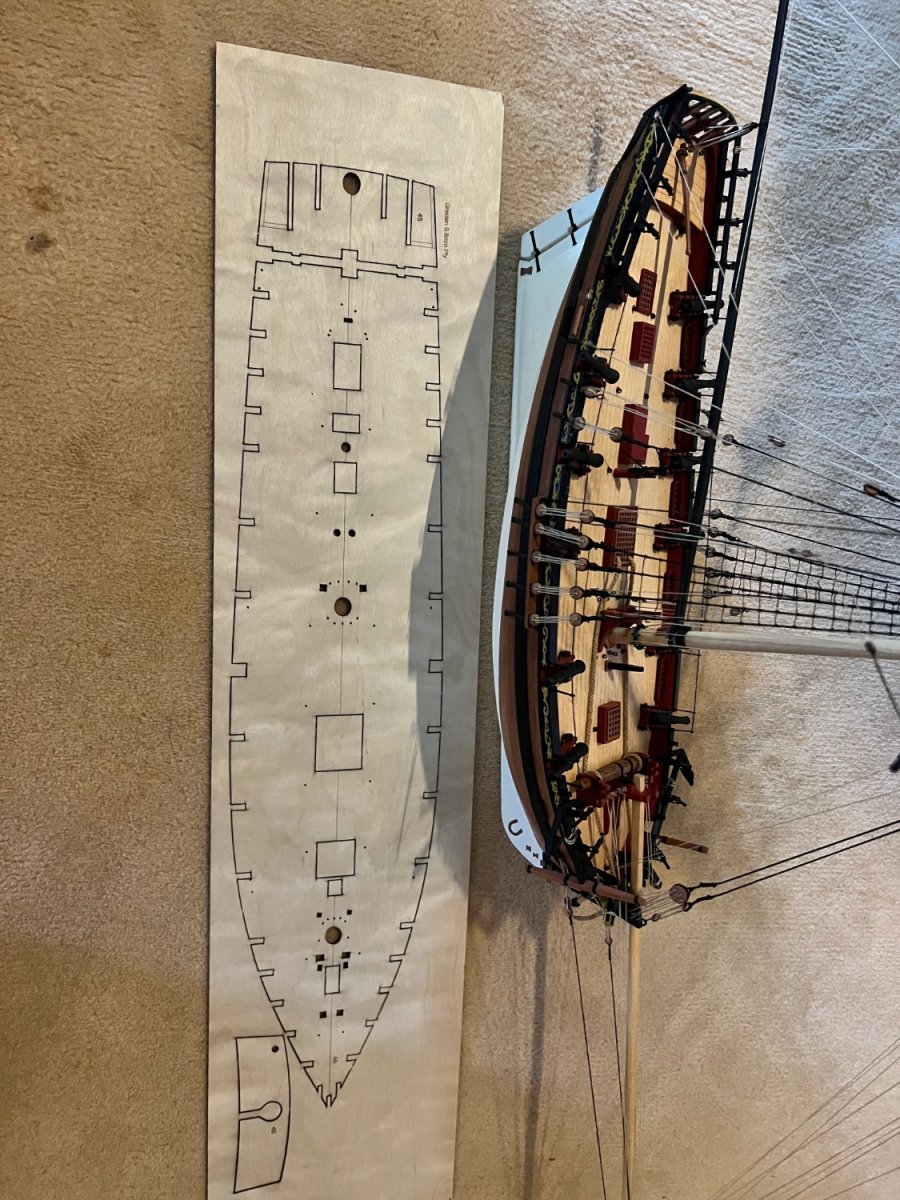
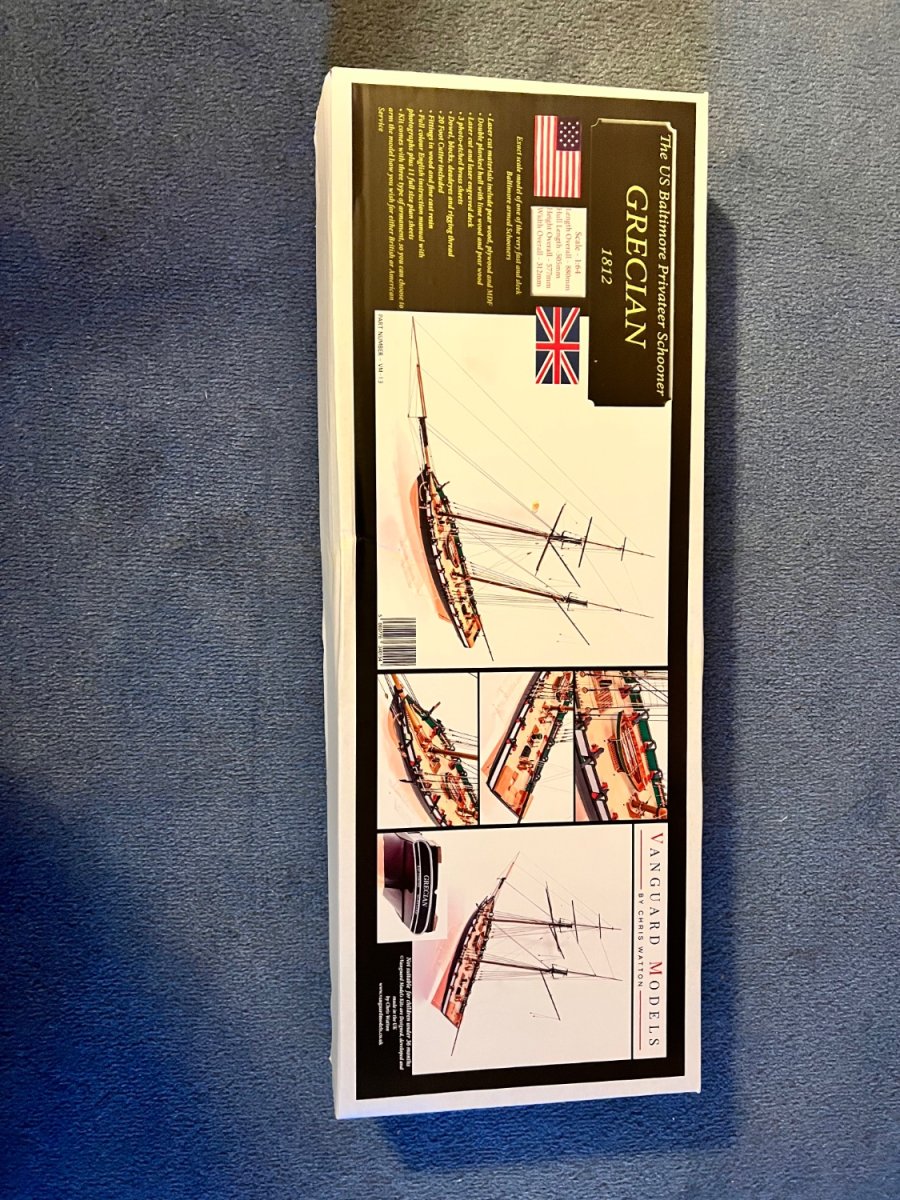
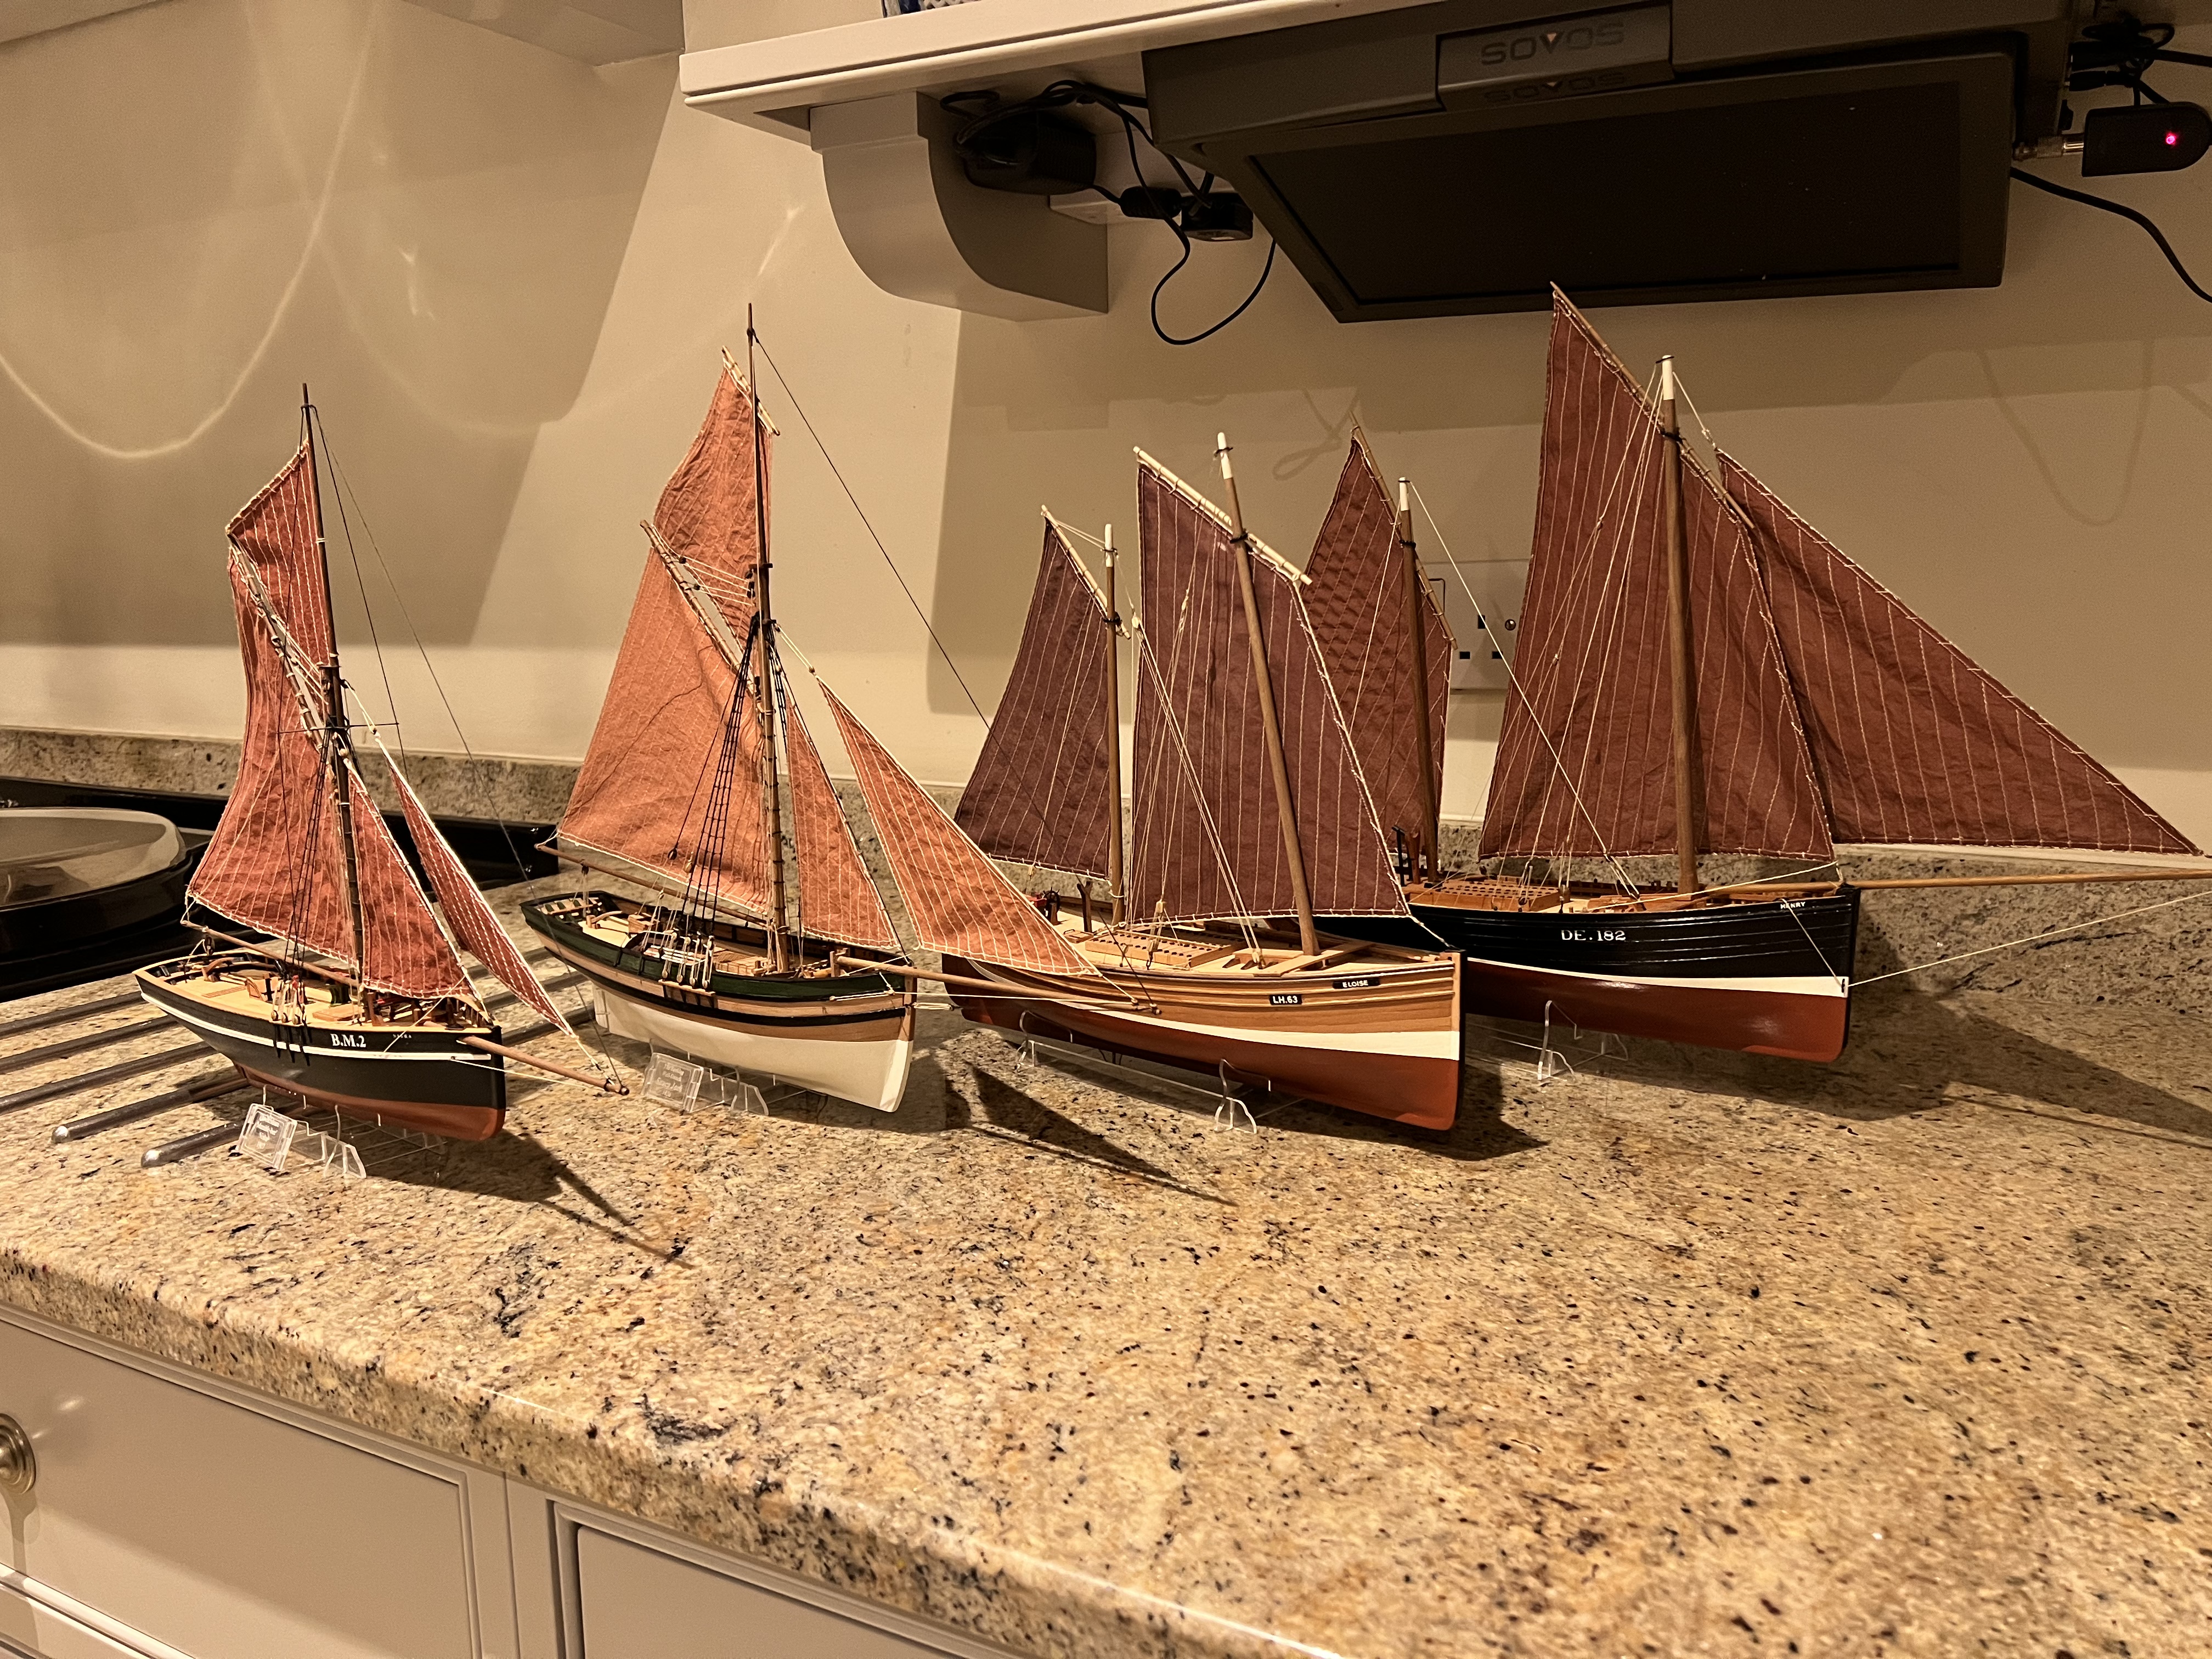
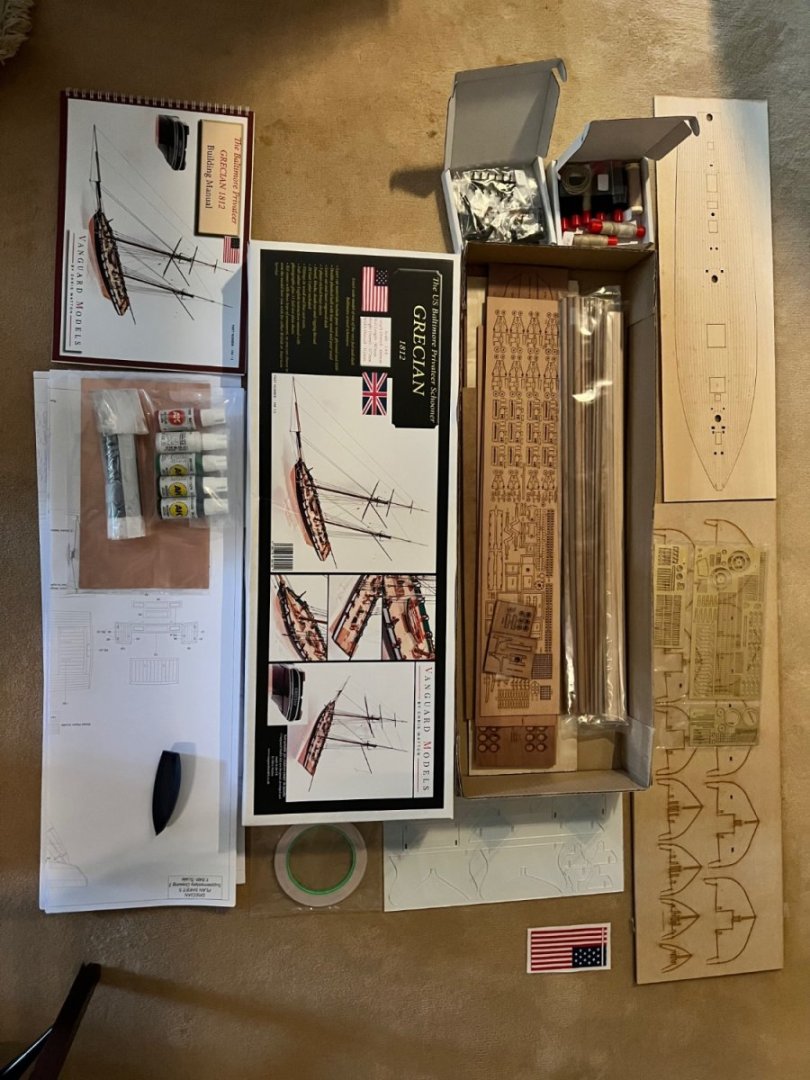
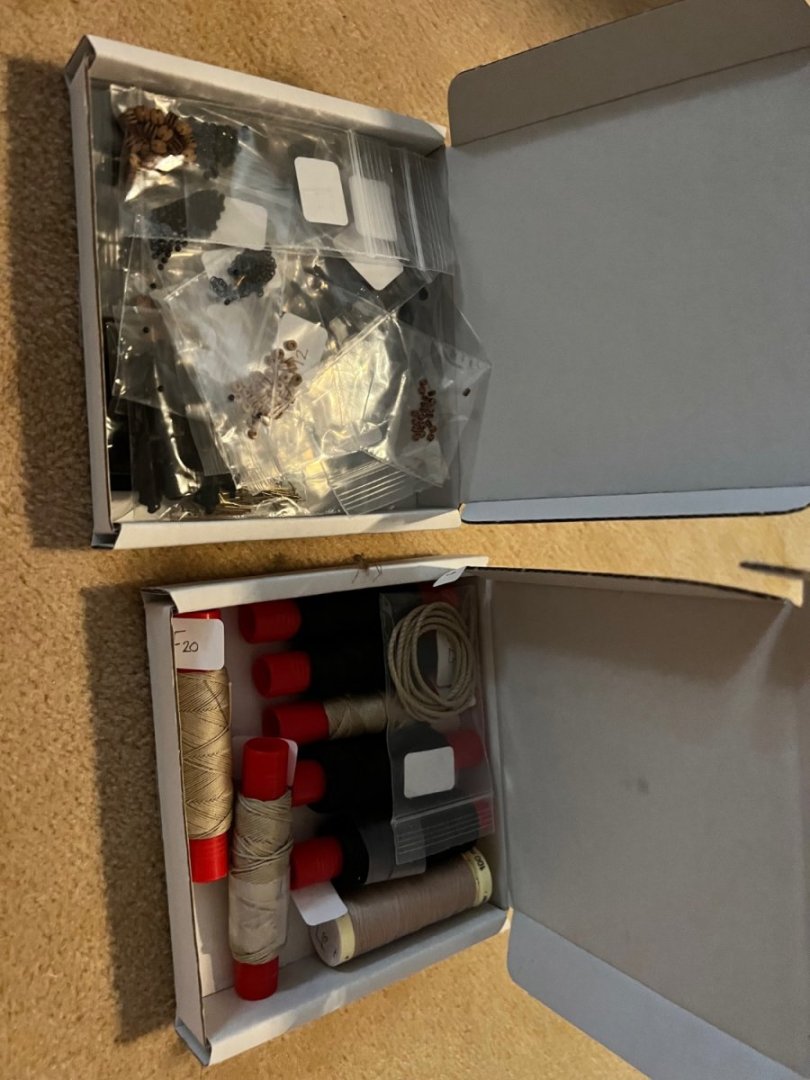
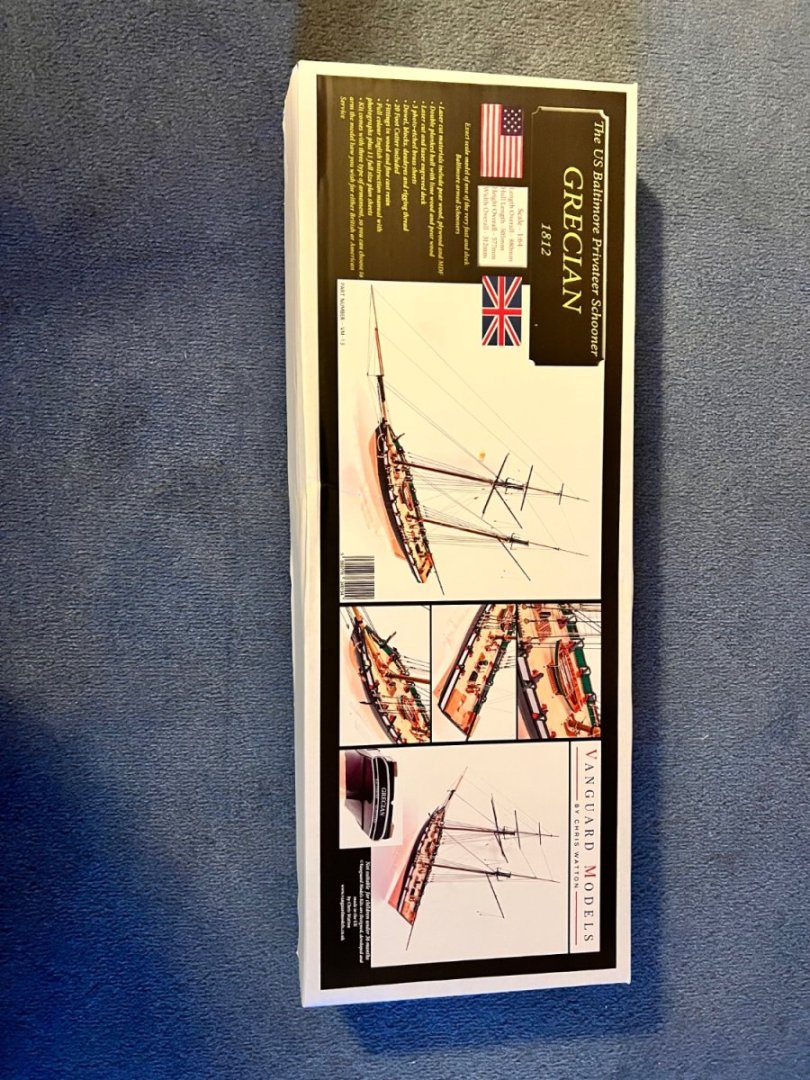
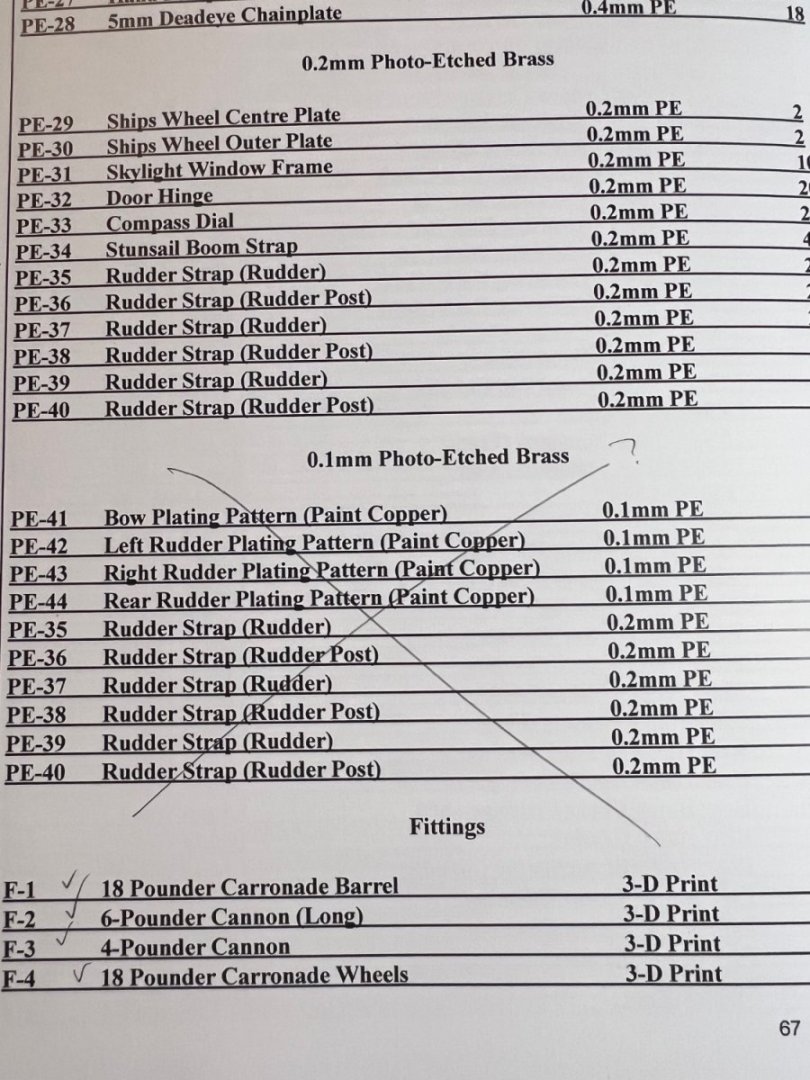
I should be finishing off the last tweaks on Alert, but I couldn’t resist starting Vanguard’s Grecian at the same time. Other than JamesH who builds the prototype and provides an excellent build log too, I think I’m the first to do a build log on this kit, so I’ll try and provide a bit more detail than I did on Alert. The kit came very promptly via UPS and extremely well packaged in a robust, well designed box. Inside the box there’s a large range of laser cut wooden and MDF sheets. Except for the decks the wood is all pear. The laser cut on these sheets is incredibly clean and precise. Not all the sheets are shown below. There’s also a box of fixtures including high quality resin cannon. There’s copper tape for the hull, a resin cutter, 3 sheets of photo etch, box of thread for the rigging, pear and lime planking strips, dowels, Vanguard’s standard but brilliant colour building manual full of step by step photos and instructions, eleven large plan sheets, and a clear acetate cradle for the completed build. I went for all the extras too, so I bought the Grecian paint set, American flag, pear block set and PE copper plate set (not sure yet if I’ll use this or the tape - whichever is easier I suspect). It is all absolutely excellent quality. This will be my seventh Vanguard build and the first time that one of the parts came broken - a dowel. I messaged Chris and within a day or two he’d sent me a replacement. Amazing customer service. There’s one other tiny error in the instructions that in the inventory there’s a sheet of 0.1mm PE listed that wasn’t included. I asked Chris and he tells me that this was for copper sheet to face the rudder, but he couldn’t obtain the copper so it’s not needed for the build. I was curious how big the completed Grecian would be. So here is Nisha and Alert against a plan of her deck. She makes Nisha look tiny. And is bigger than Alert, but by less than I had expected. Cant wait to get building her!


- 106 replies
-
- 14
-
-
- Grecian
- baltimore clipper
- (and 4 more)
-
Thanks Craigie, idea stolen entirely from James H’s Grecian prototype!
- 70 replies
-
- 1
-
-
- Alert
- Vanguard Models
- (and 1 more)
-
Thank you, not as good of your Alert though - I certainly don’t have your patience or painting skills….
- 70 replies
-
- 3
-
-
- Alert
- Vanguard Models
- (and 1 more)
-
Thanks Jeremy, I’m enjoying your Pen Duick build too. I’ve not decked a boat yet!
- 70 replies
-
- 2
-
-
- Alert
- Vanguard Models
- (and 1 more)
-
Thanks Chris, much appreciated. I’ve switched the title back to unfinished as I’ll be tidying up the ropes for a week or two yet. I’ll post some closer ups of the deck then. Hope that’s ok? Dan
- 70 replies
-
- 1
-
-
- Alert
- Vanguard Models
- (and 1 more)
-
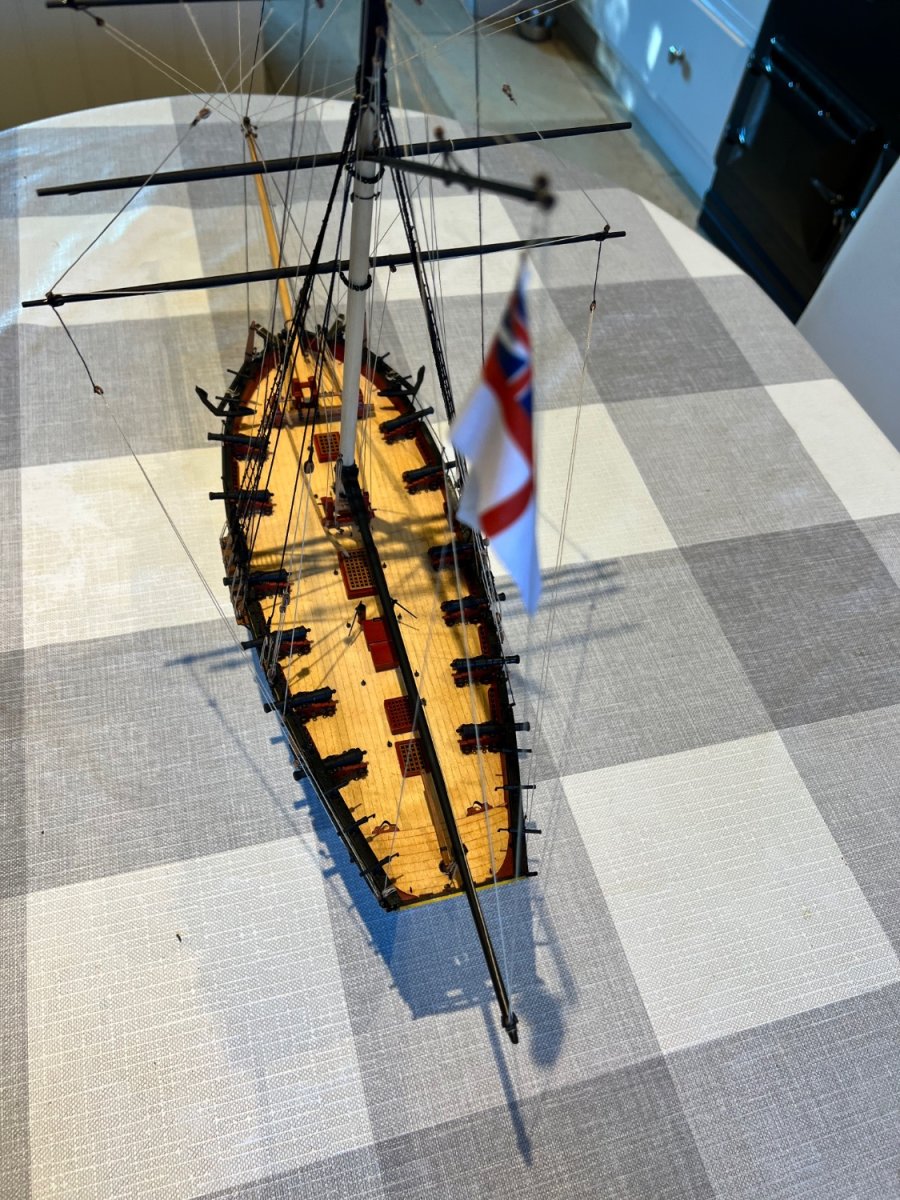
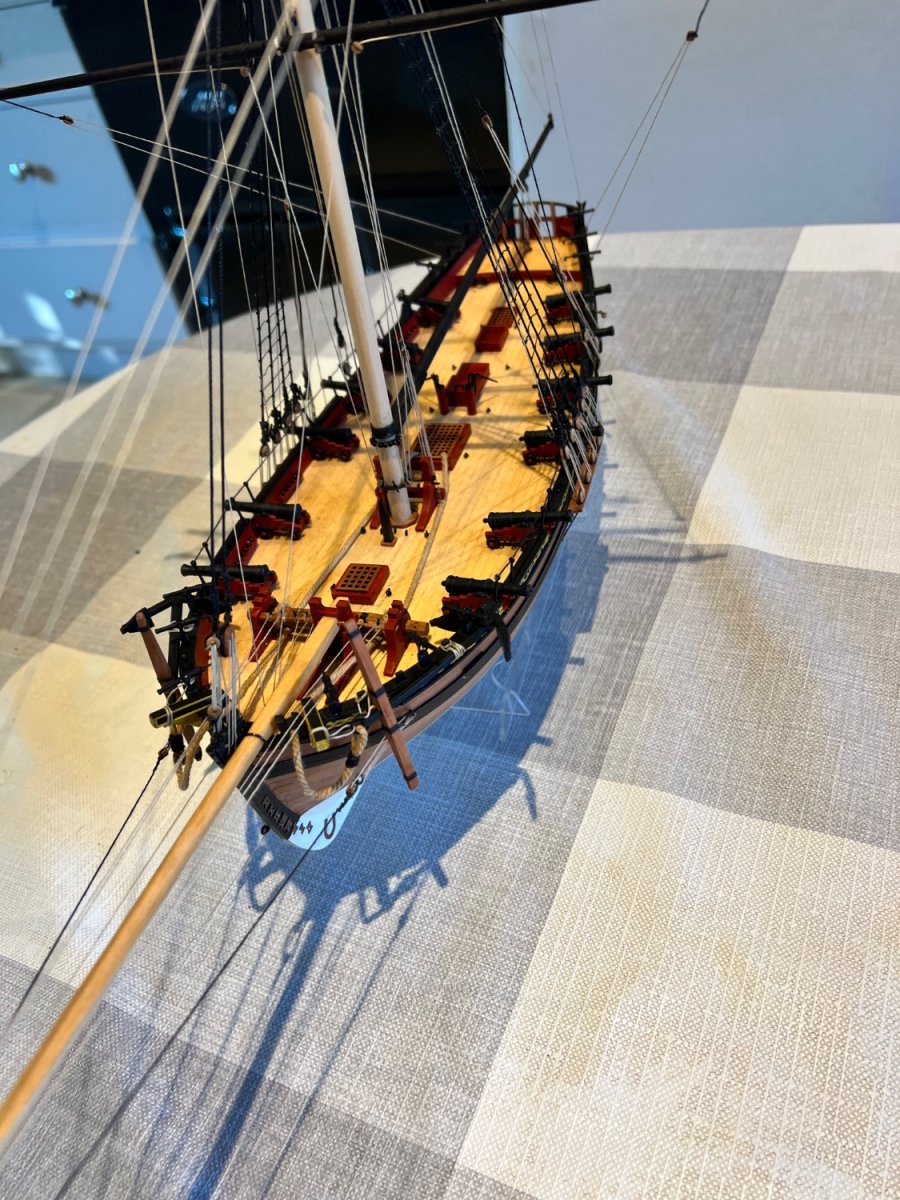
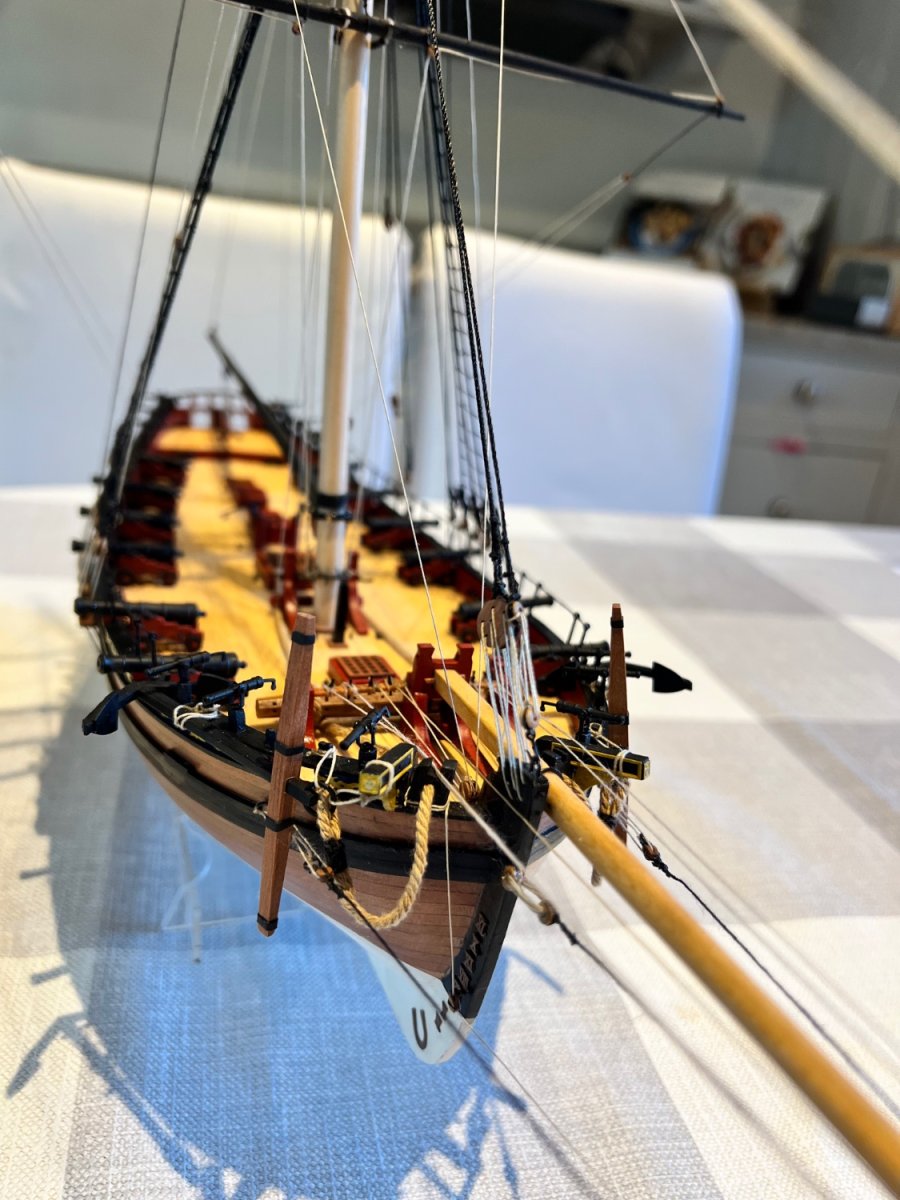
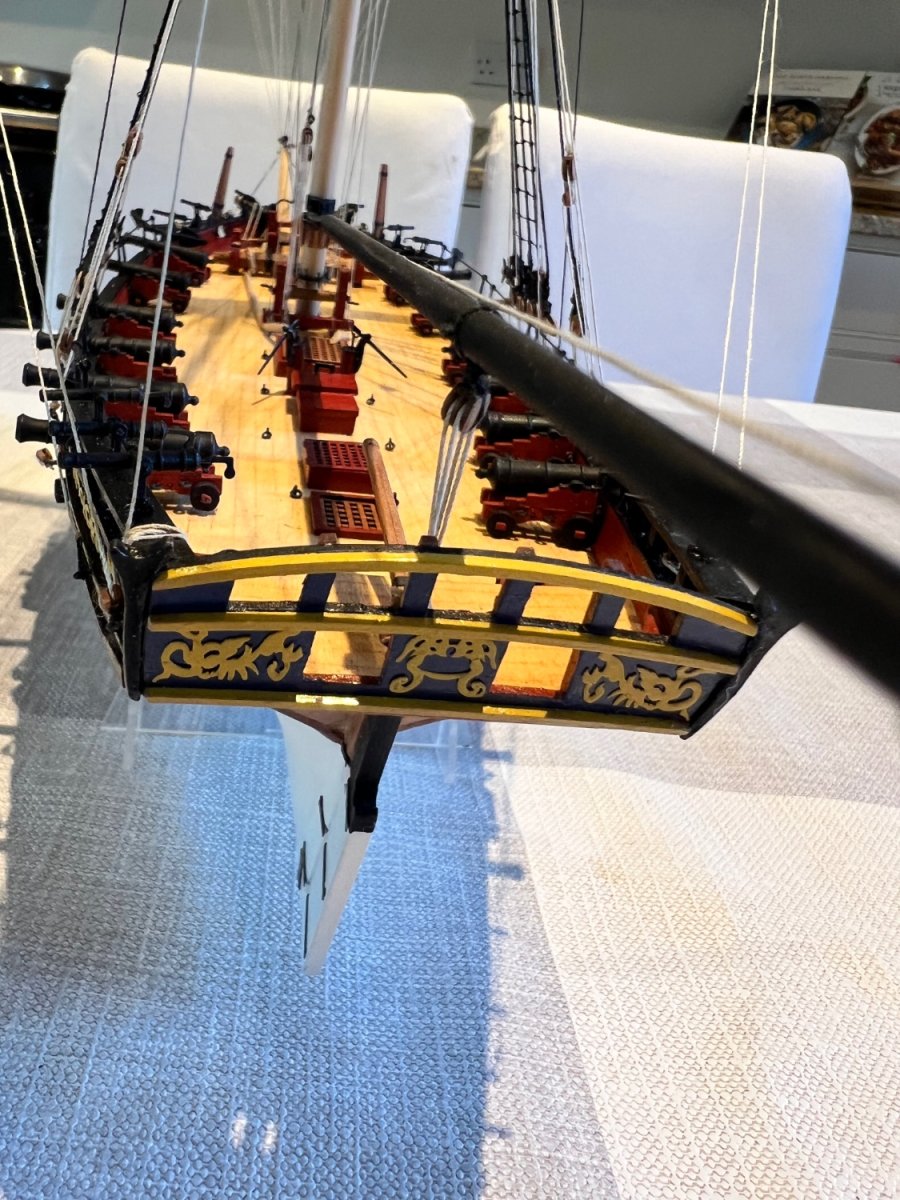
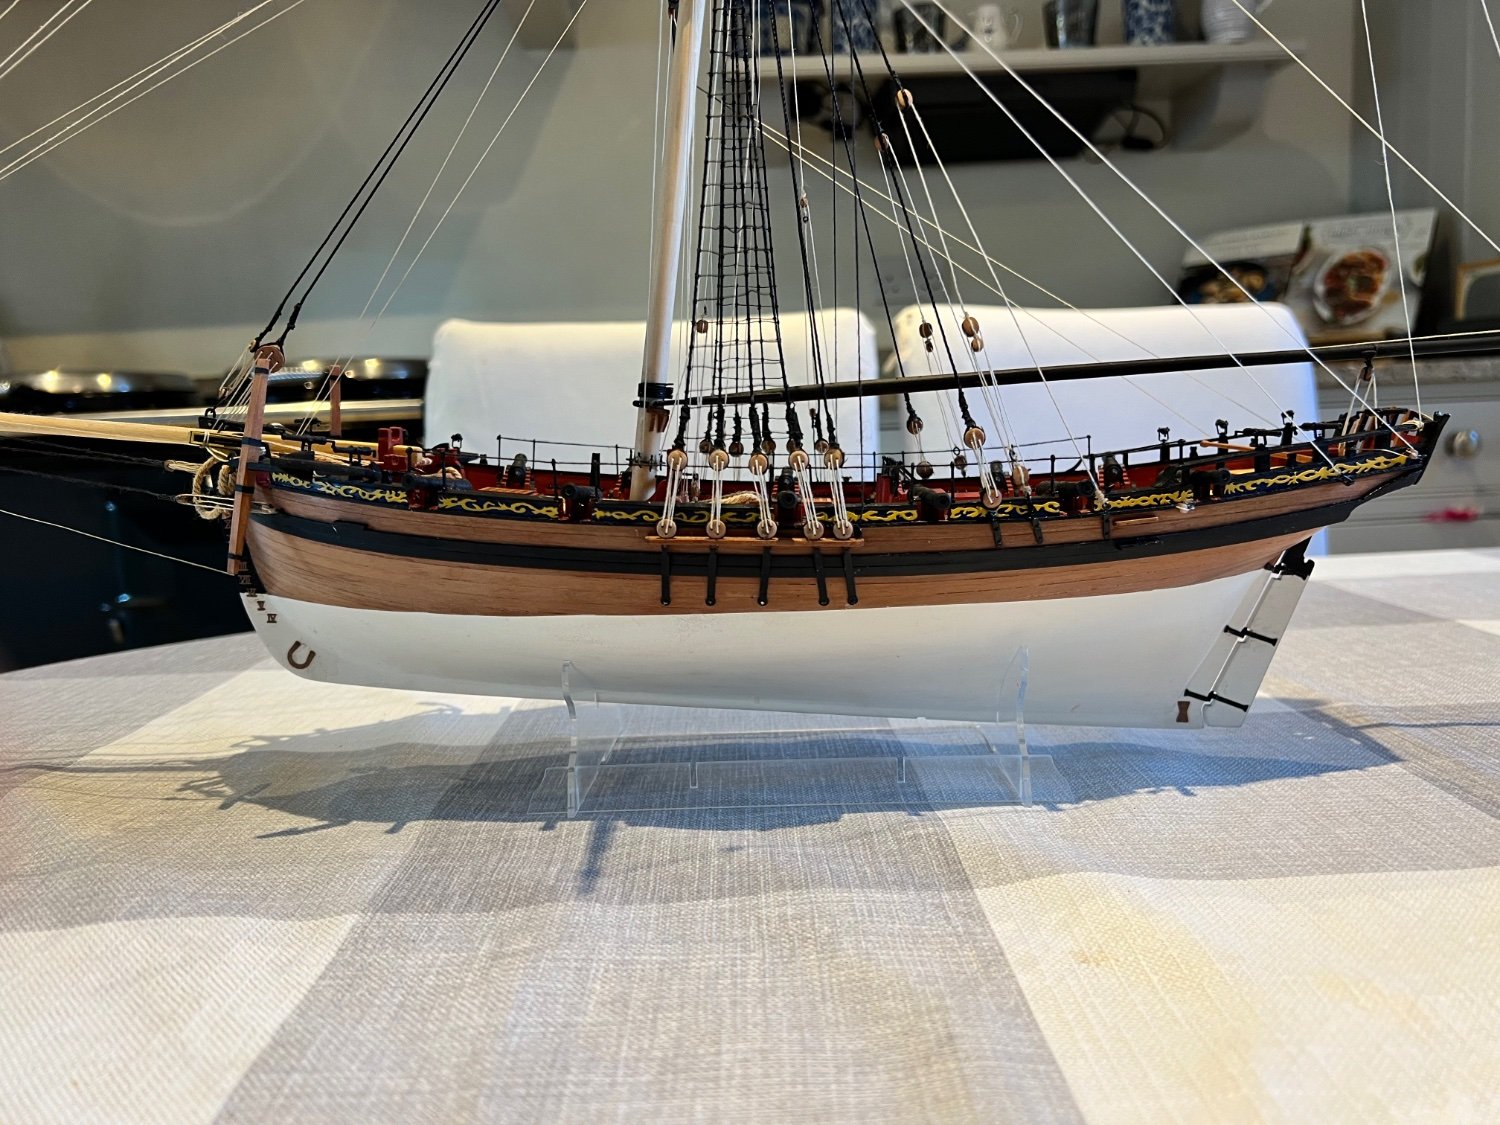
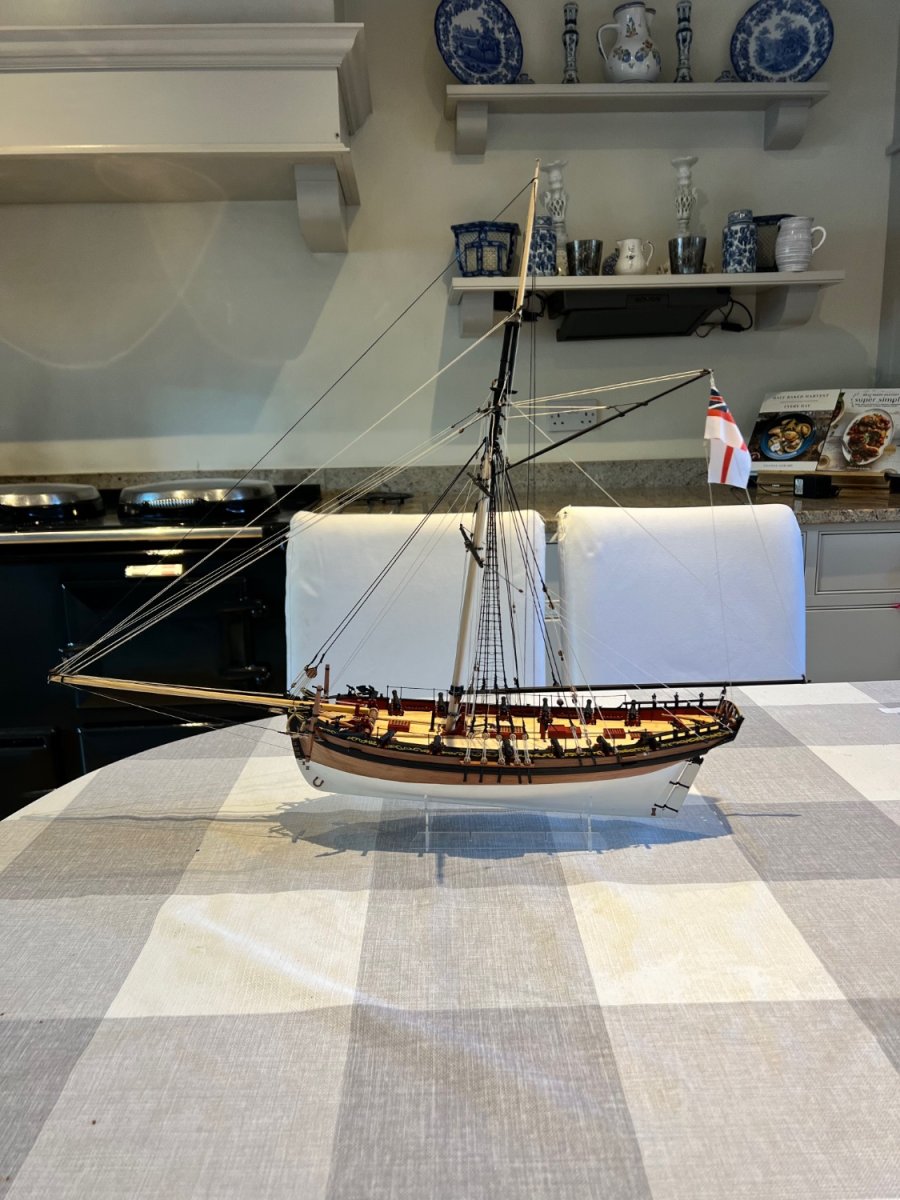
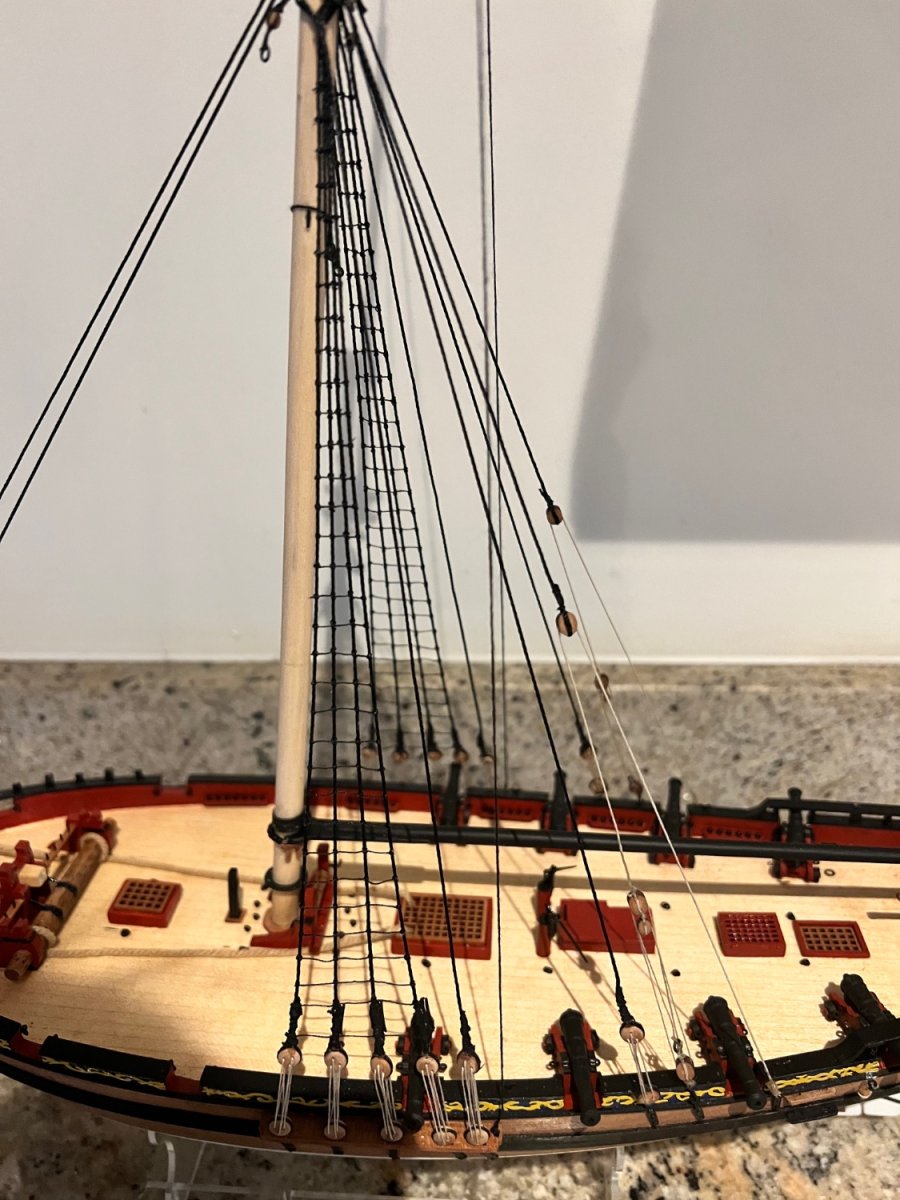
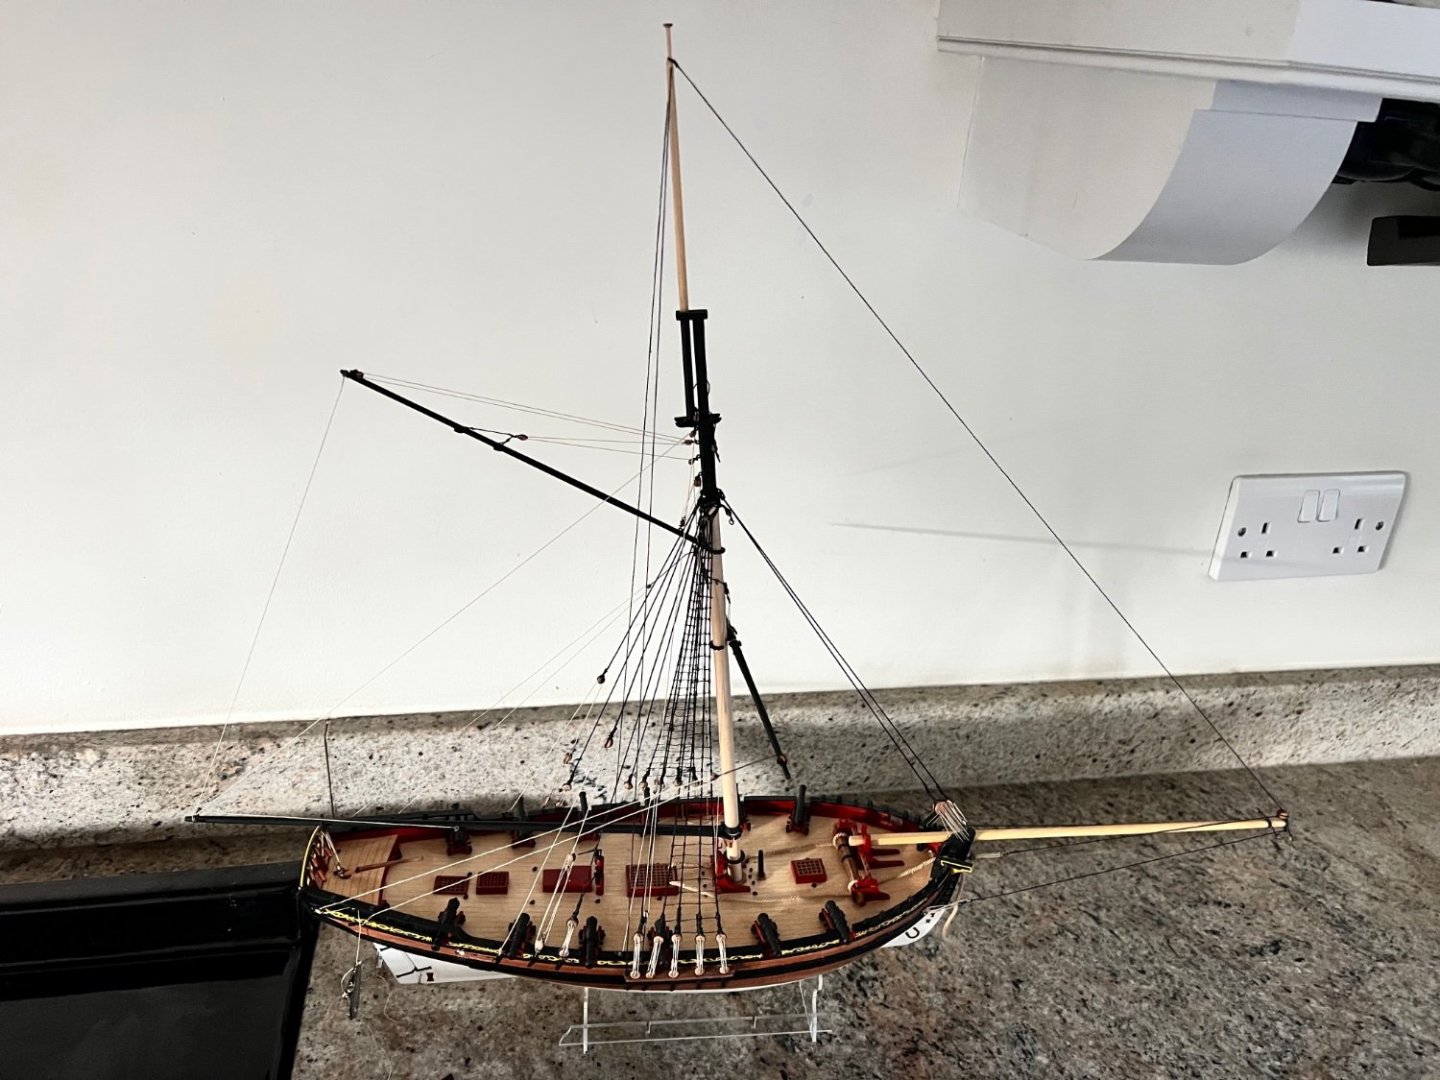
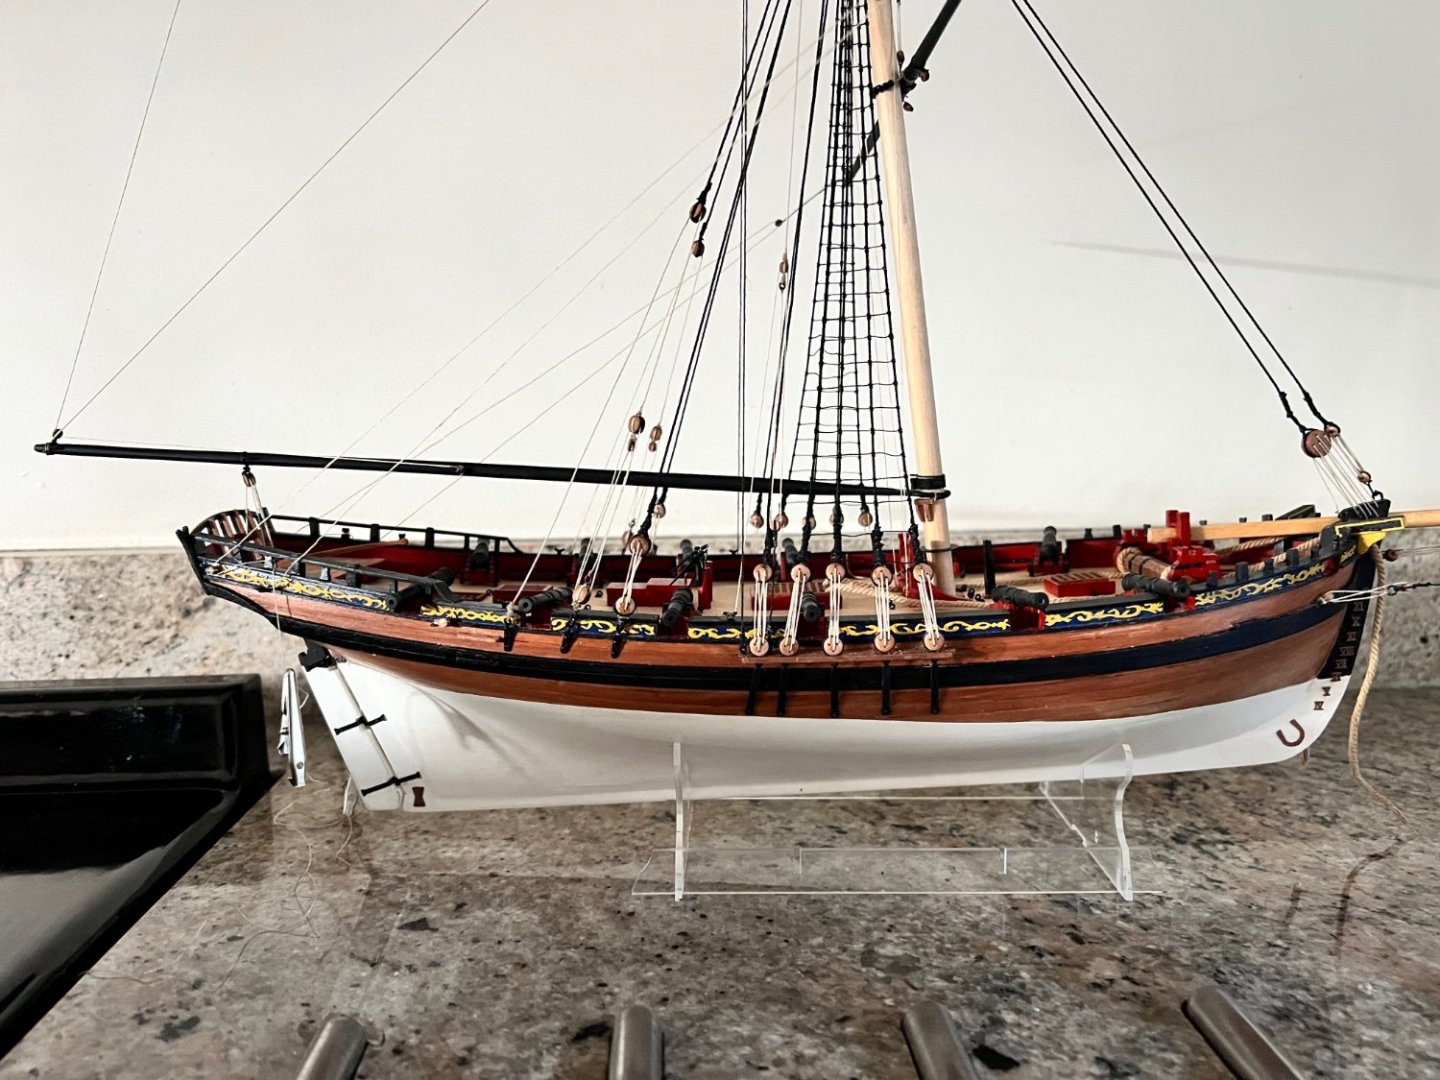
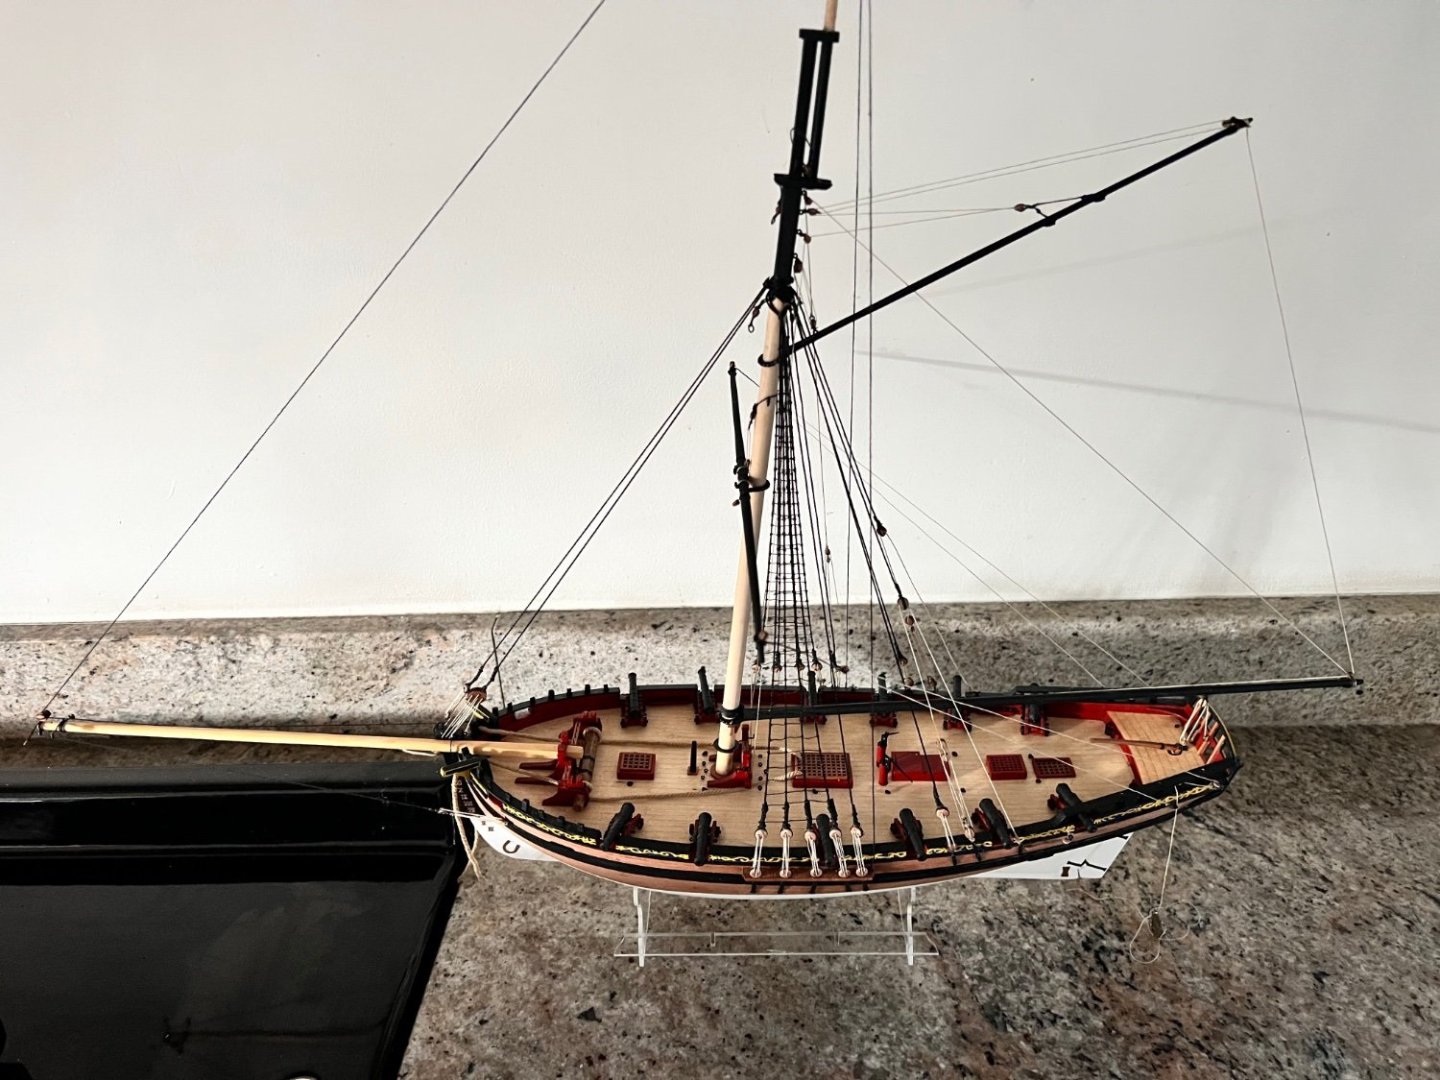
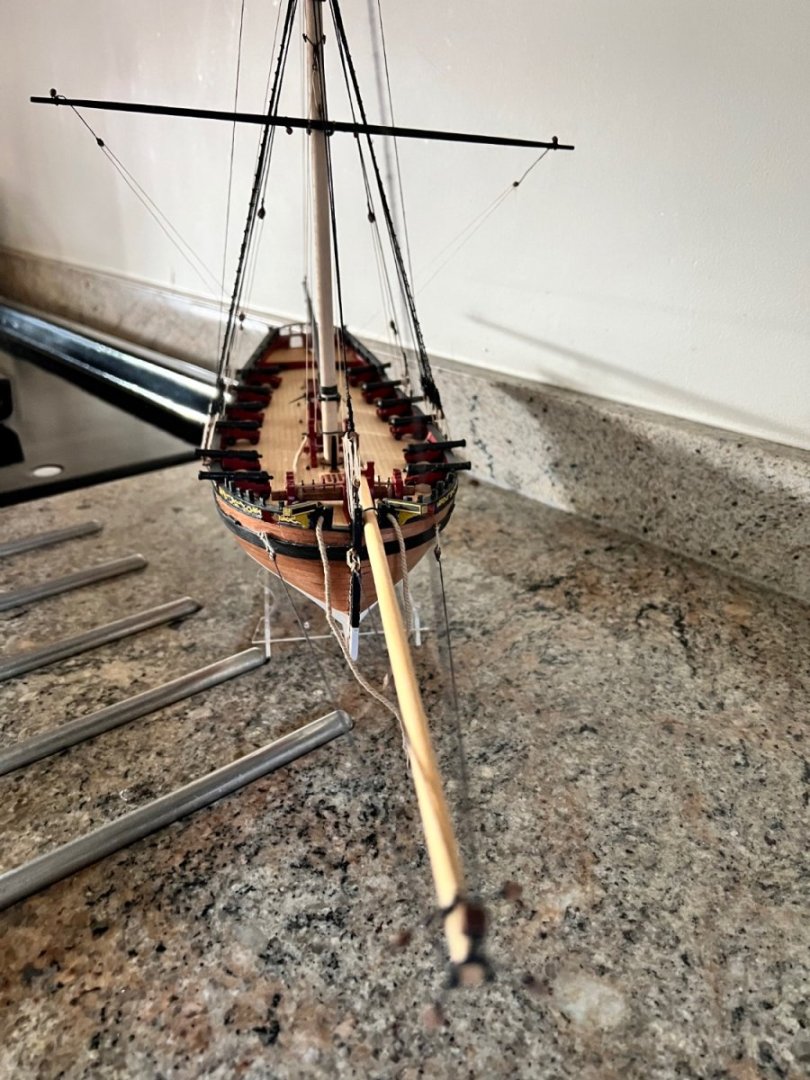
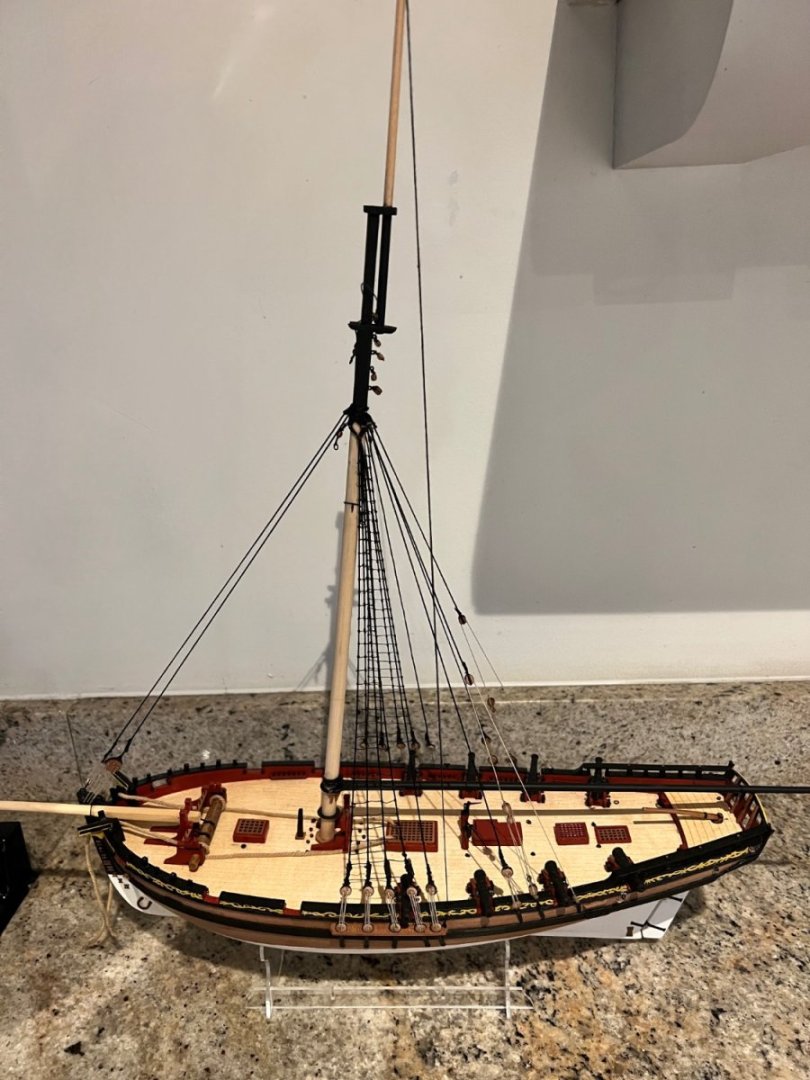
Alert is now almost complete. Just some rope coils to add to where lines are belayed (cover up some of the CA holding the lines in place!). Here are some photos, as it may be a few weeks before I complete the rope coils - one of my least favourite tasks. The ensign is from BECC, dipped into a fabric stiffening solution and then hung with crocodile clips to try to get it to droop. Only partially successful as it’s not very high quality and the fabric is quite thick, especially where it folds over. Didn’t quite achieve the look James H did on Grecian’s flag. The American Vanguard ensign that came with Grecian looks much better quality, but the Vanguard British ensigns are too big for a little cutter like Alert. The rigging became more complicated and challenging on the doing yards for the first time. I think that I have interpreted the rigging instructions correctly, but I may have too many lines going forward on the bowsprit. I have bought both the Petersson books on rigging which are very useful, but the section on the English cutter has simpler rigging on its two yards vs. Alert’s four. Overall, Alert has been a lovely ship to build - quite challenging at times after the fishing boats - but very rewarding. I’m very happy with the end result. Chris - thanks again for another excellent kit.


- 70 replies
-
- 7
-
-
- Alert
- Vanguard Models
- (and 1 more)
-
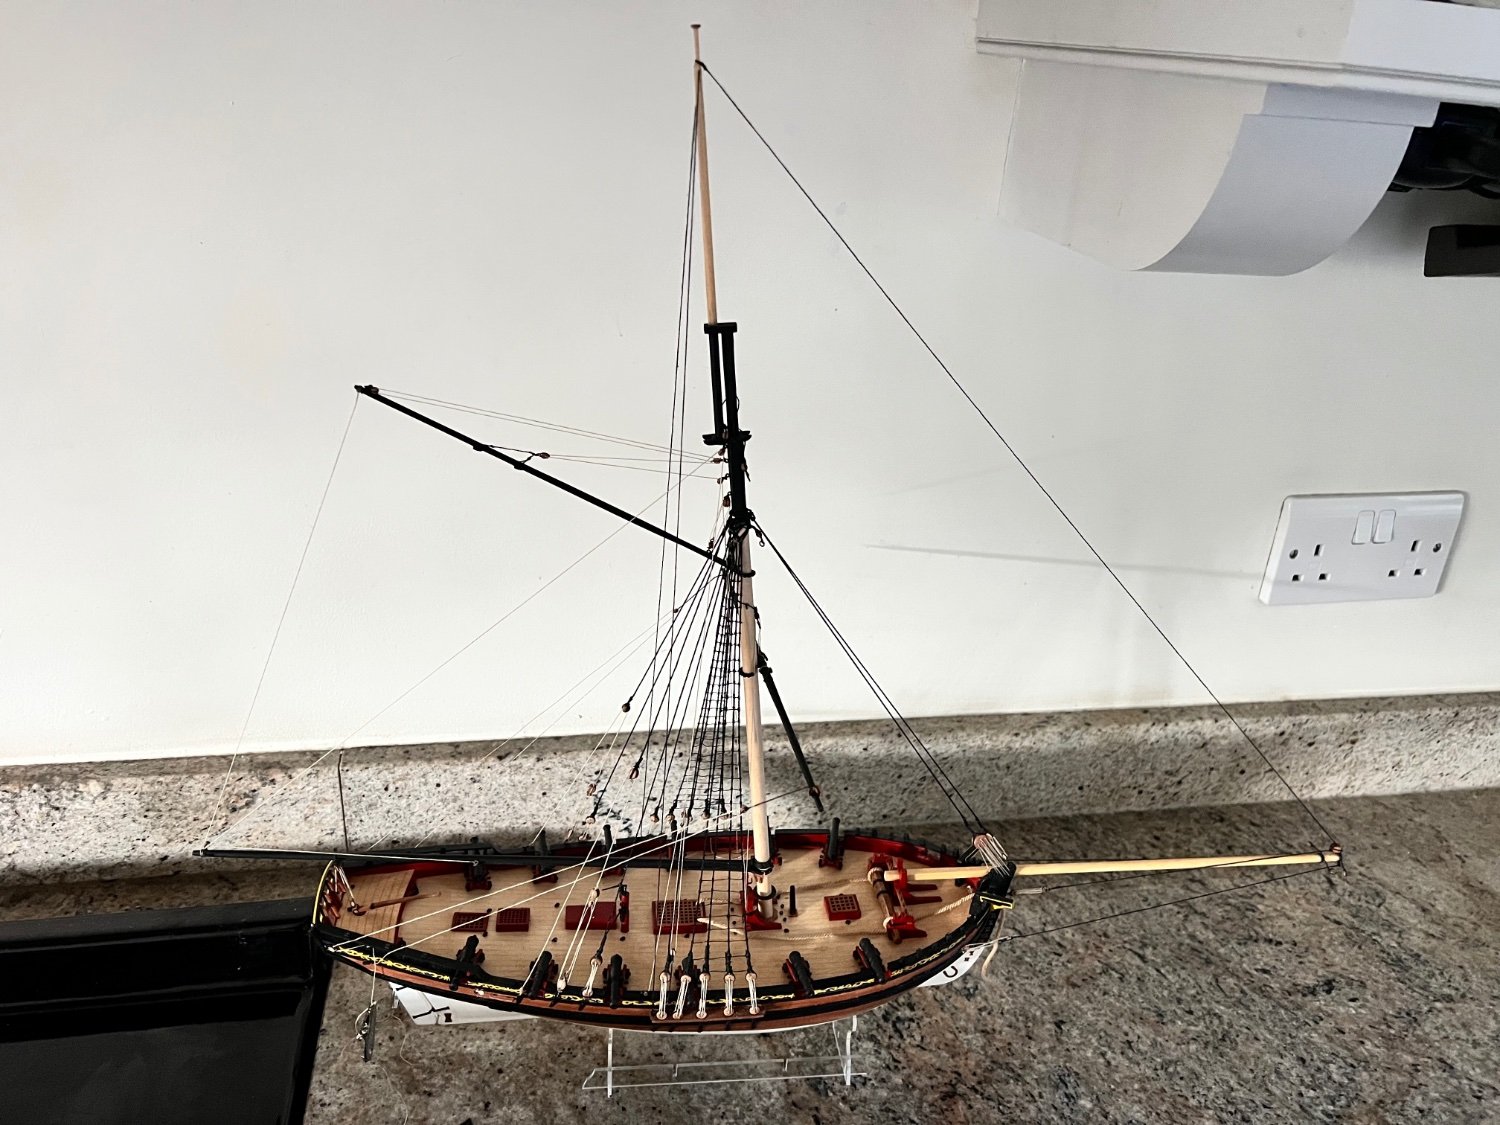
Bowsprit rigging complete except for the bowlines to the yards. Main and driver booms rigged plus the spreadsail yard. That just leaves the following: three more yards, the anchors and refitting the swivel guns. Plus some touching up of paint. Inspired by the American flag added to Grecian by James H, I’ve bought a period white ensign from BECC for Alert and will attempt to get it to hang as elegantly. It’s not as crisply printed or as good quality as the Grecian’s American flag, but at 12 x 7 cm I think the Vanguard ensigns would be too big for a little ship like Alert.
- 70 replies
-
- 8
-
-
- Alert
- Vanguard Models
- (and 1 more)
-
Craigie - thanks for the great recommendation, I’ve ordered the Rigging Period Model Ships book. I’m a few builds yet away from Speedy / Flirt. Gregory - thanks I’ll likely order the Fore-and-Aft book too. I see that it has a section on an American schooner which could be useful for Grecian. From my time sailing modern fire and aft rigged yachts I broadly understand the fore and aft part of the rig on Alert, but much less the squaresails on her mast. Nils - thank you for the encouragement!
- 70 replies
-
- 3
-
-
- Alert
- Vanguard Models
- (and 1 more)
-
Thank you! Yes it’s a very satisfying stage on Alert as the rigging isn’t too complex. One of my next builds will hopefully be Vanguard’s Flirt or Speedy - but I look at the forest of rigging on for example Dfell’s superb recently completed Flirt build and it’s pretty intimidating on a ship that isn’t that much bigger than Alert. I wonder - is the larger Sphinx actually easier to rig than Speedy / Flirt? Sphinx is the ship I’d like to build but not sure I’ve got sufficient skills yet to do it justice.
- 70 replies
-
- 3
-
-
- Alert
- Vanguard Models
- (and 1 more)
-
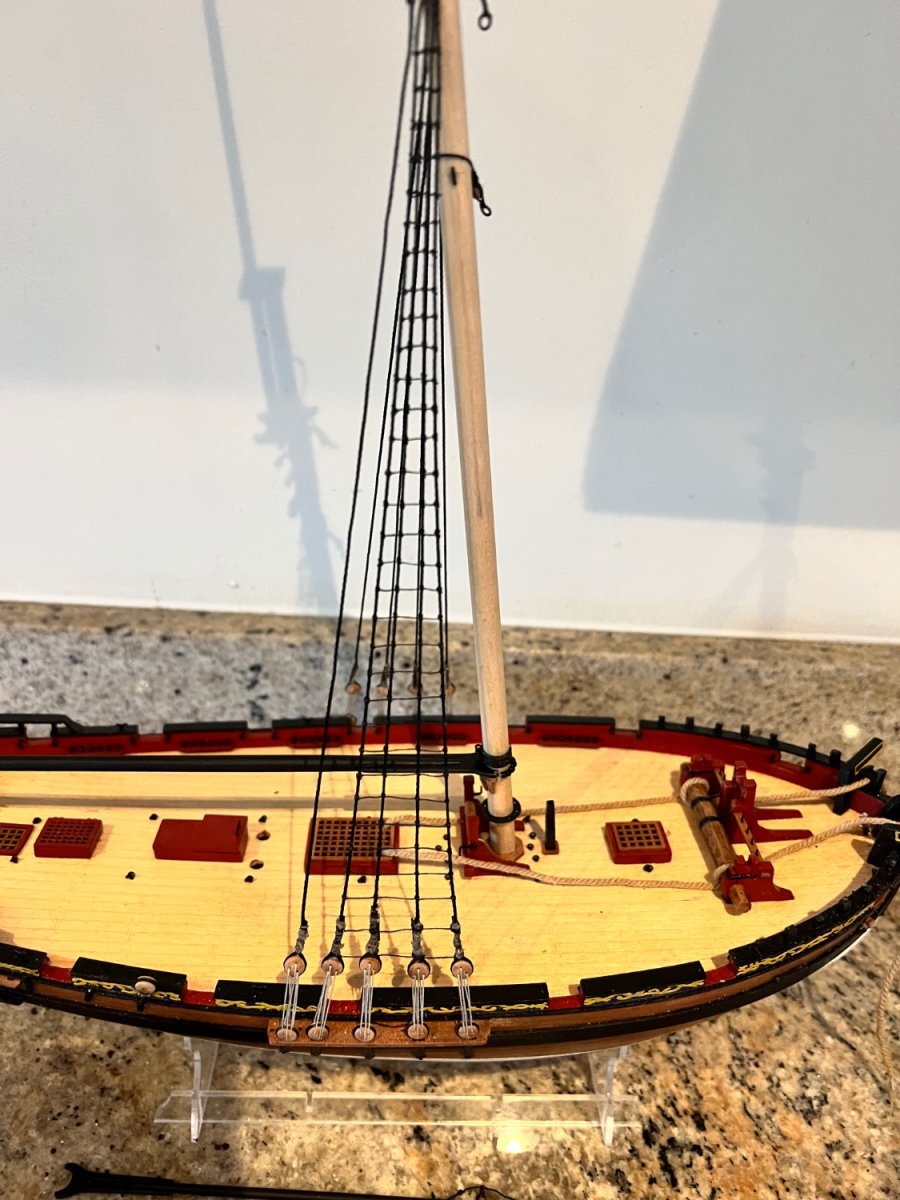
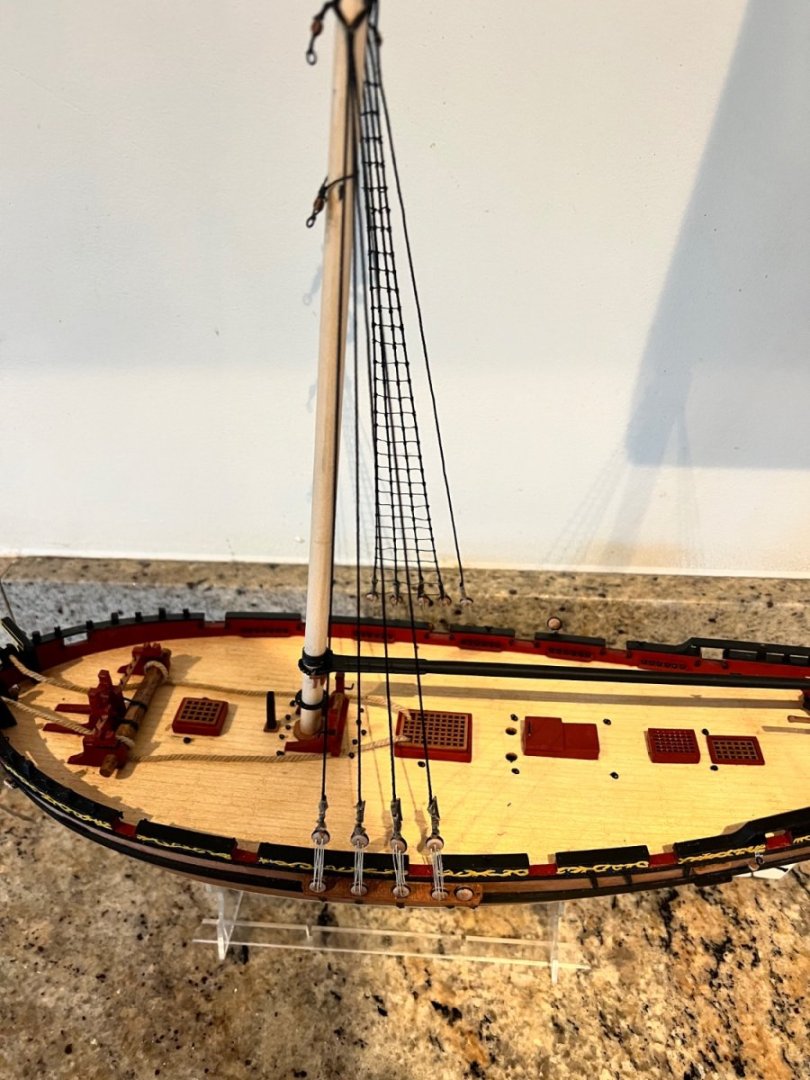
Ratlines and backstays now complete. The two forestays that run to the stem post also in place. Rigging fairly straightforward so far, although there’s plenty I need to improve in terms of technique. One thing I learnt on this build, which gave me better ratlines than on my fishing boats was to tie all the ratlines in place with no glue, just lots of clove hitches and then adjust them all and tighten them when complete and before any glue. I’m sure that’s obvious to any experienced builder on MSW, but it wasn’t for me. I also made the mistake of adding the shroud cleats before the ratlines - thought it would be easier - then struggled to get the lower two ratlines on each side straight. Time to rig the bowsprit next. Hope to finish her by the end of next week.

- 70 replies
-
- 7
-
-
- Alert
- Vanguard Models
- (and 1 more)
-
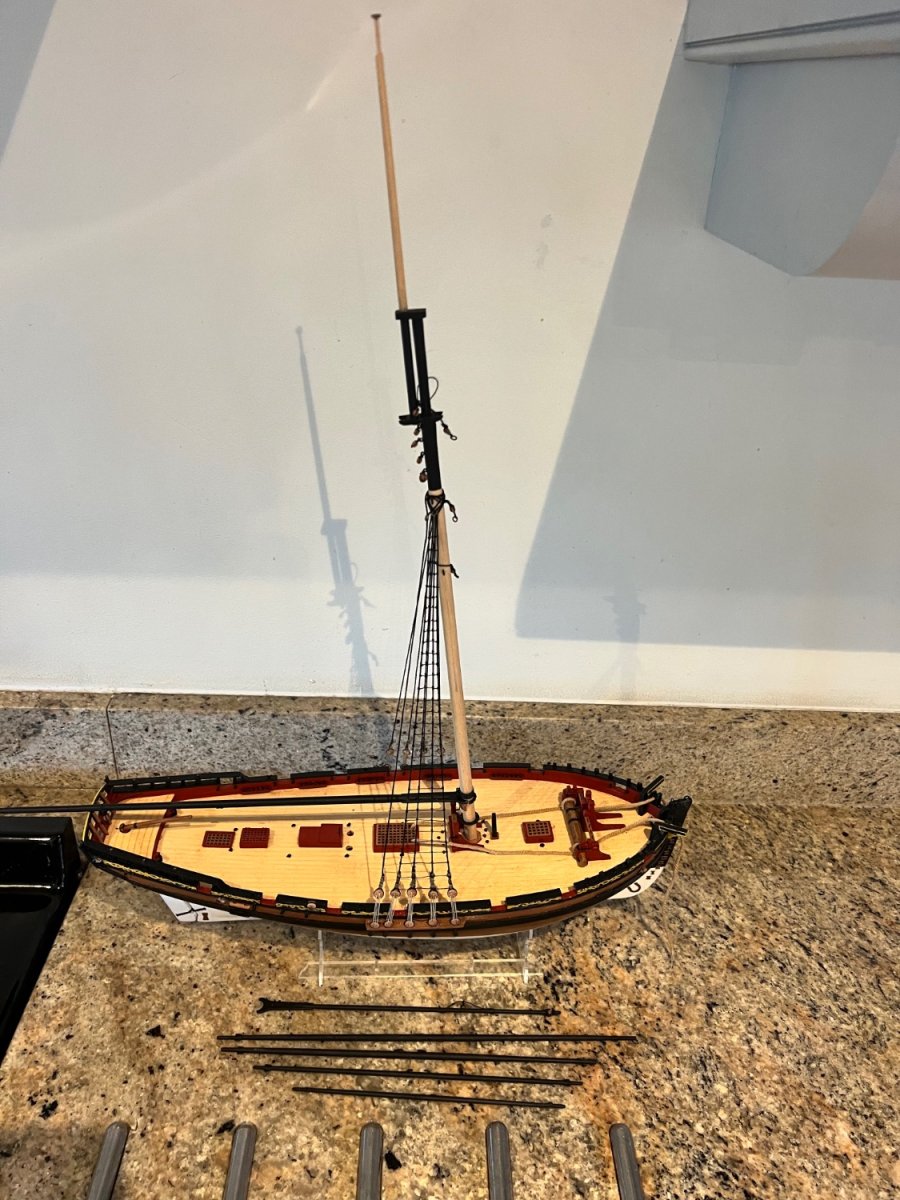
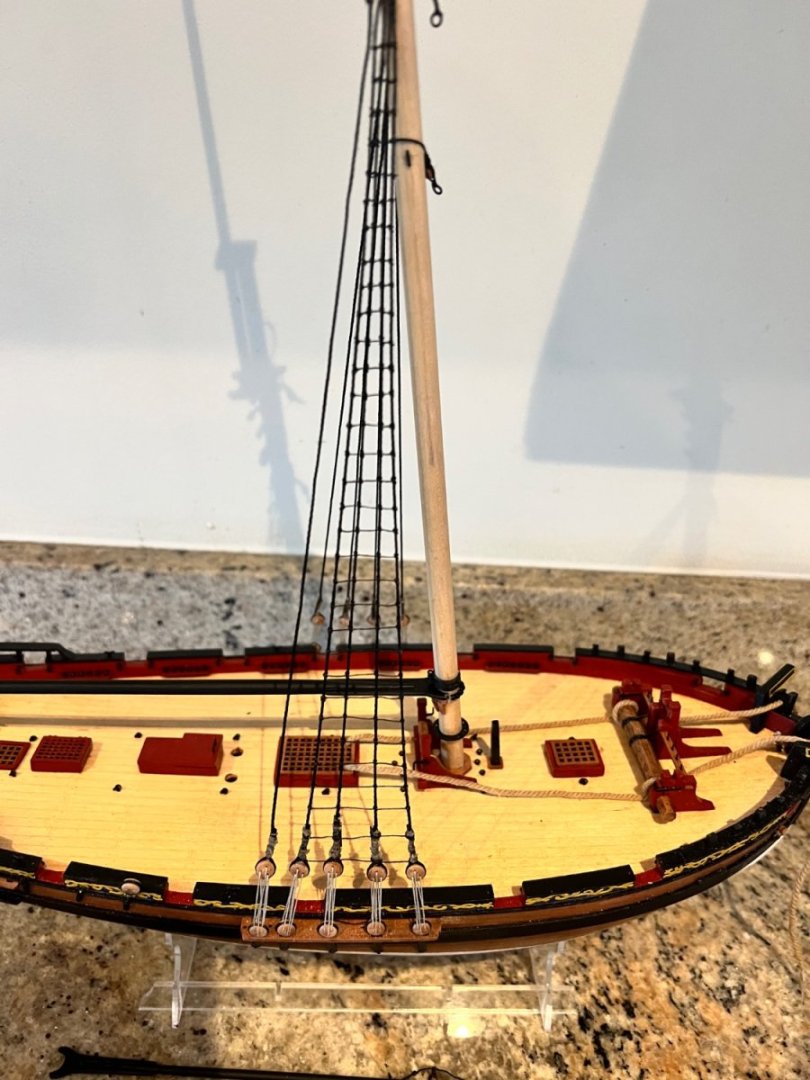
Thanks Craigie, I’ve temporarily stripped off anything loose that I might get in the way of the rigging such as cannons, swivel guns, pumps, etc. Mast is added and all the spars and booms made, although still some blocks to add to these. Bowsprit ready too although I forgot to include it in these photos. I didn’t like the idea of shaping and tapering all of these using a drill as my experience of tapering with a drill is that I quite often break something. So I’ve added a Proxxon mini lathe to the toolkit. Made the spars and mast so much easier. I added the forward four shrouds on each side as these are those that need ratlines. Below I have added the starboard ratlines and afterwards the fifth shroud. Port just the front four shrouds. No ratlines yet. In the meantime, Vanguard’s Grecian has turned up and is waiting to be built. She looks to be a fine model as I’ve come to expect from Chris. I had planned to build Ranger next to complete the set of six Vanguard fishing boats, but I suspect I’ll dive straight into Grecian.


- 70 replies
-
- 9
-
-
- Alert
- Vanguard Models
- (and 1 more)
-
She looks fantastic. Does anyone know a good beginners resource or a log on here on how to copper a ship’s hull? In particular, how do you get the waterline cut straight? I’m very keen to build Grecian, but I need to master coppering. Many thanks Dan
- 80 replies
-
- 1
-
-
- Grecian
- Vanguard Models
- (and 3 more)
-
Thanks, I won’t add the fiddly parts yet. I think the pumps are still removable as the dowel is in tight but with no glue. I’ll follow your Pen Duick build with interest. Many thanks Dan
- 70 replies
-
- 2
-
-
- Alert
- Vanguard Models
- (and 1 more)
-
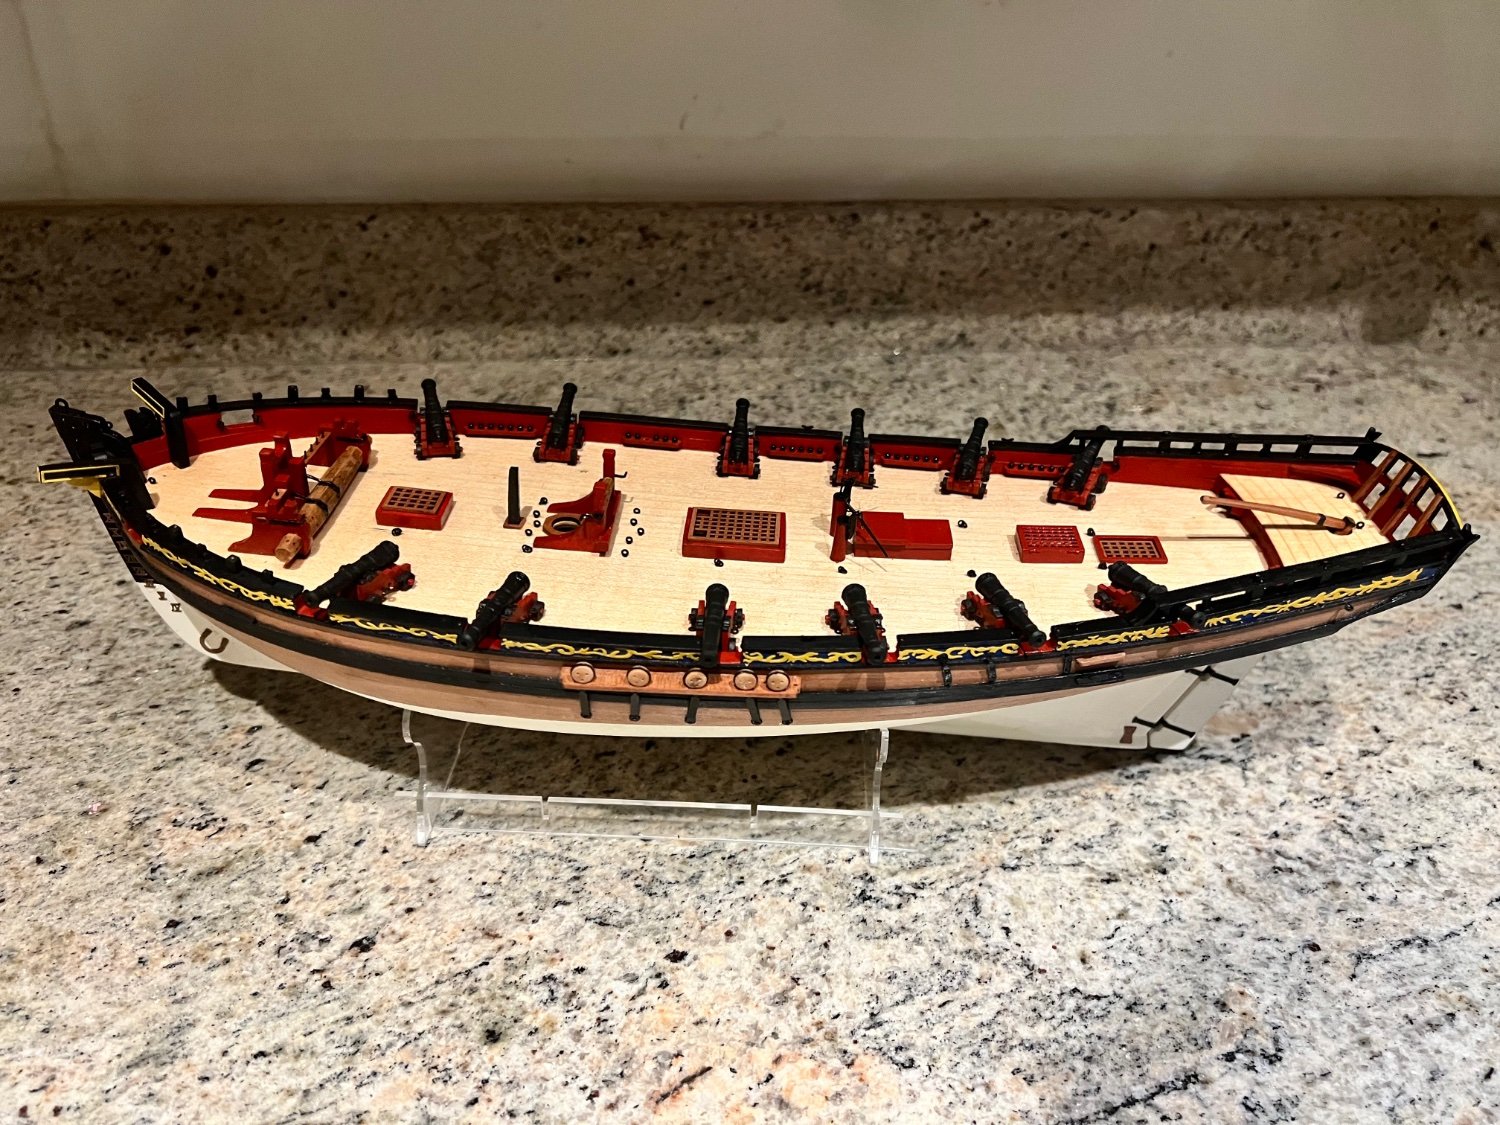
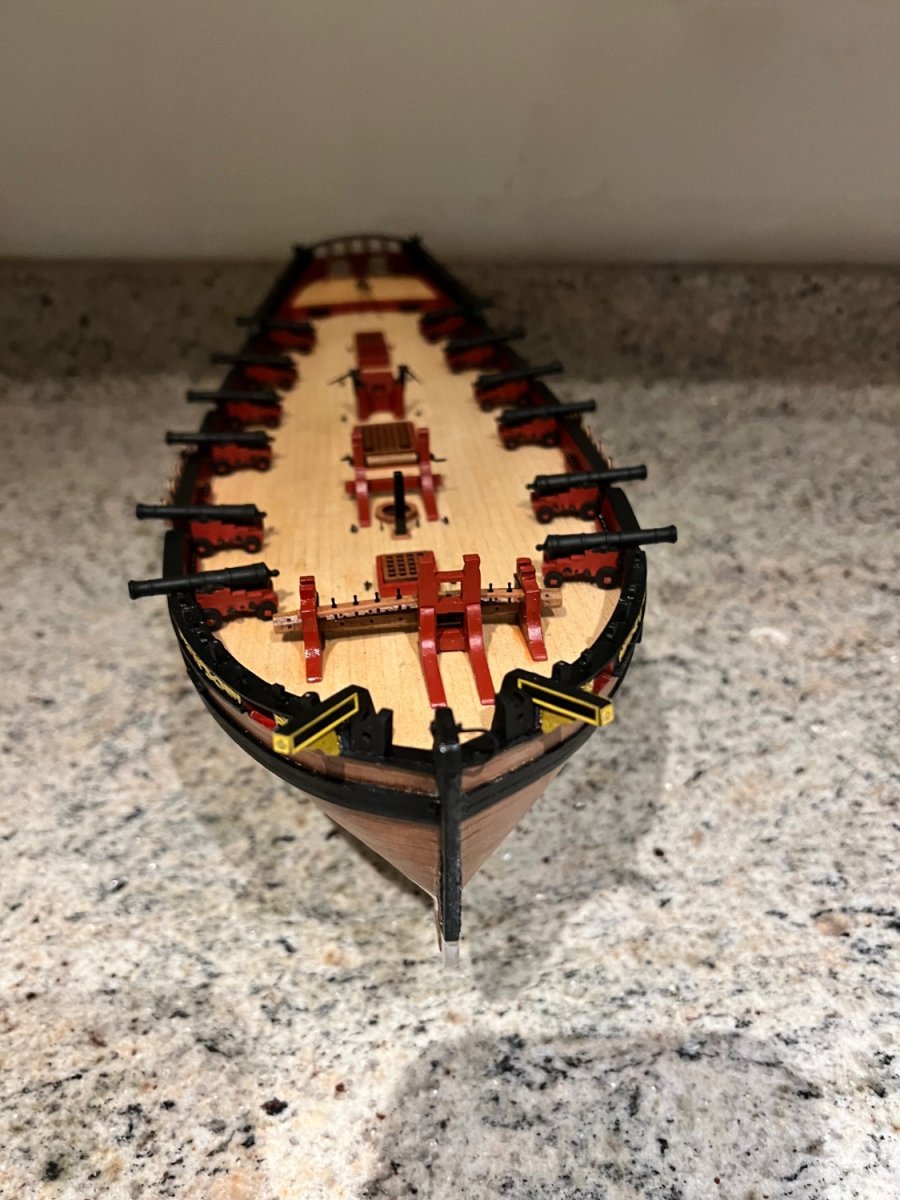
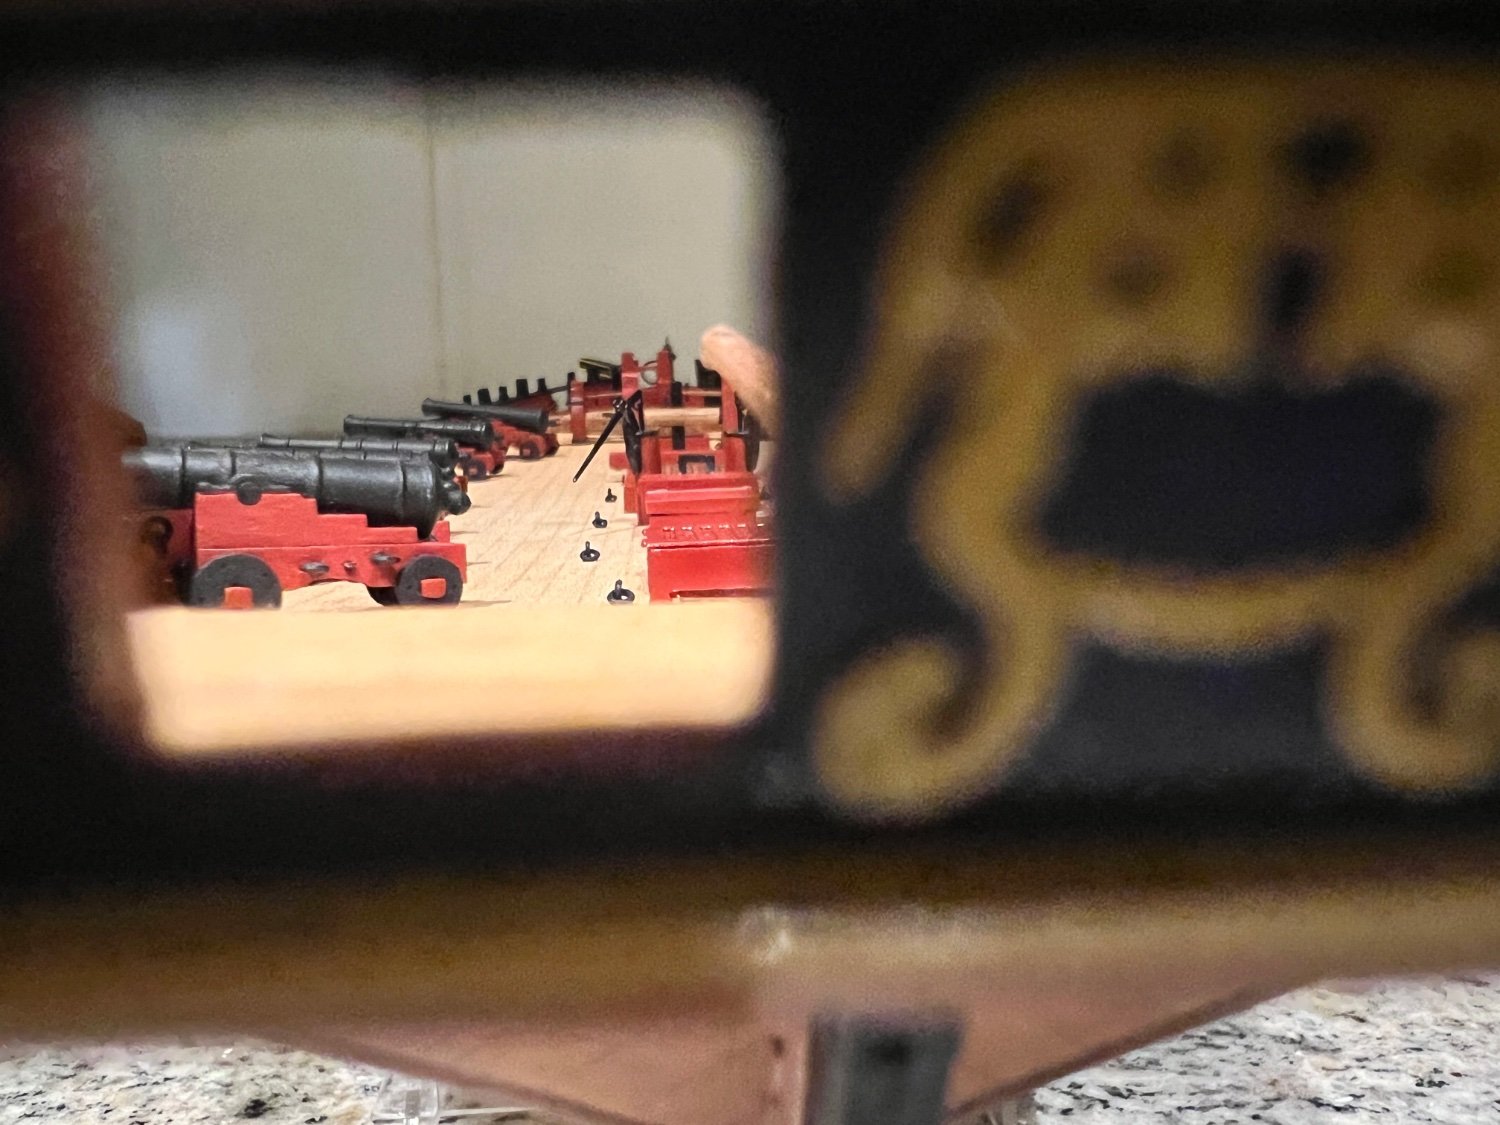
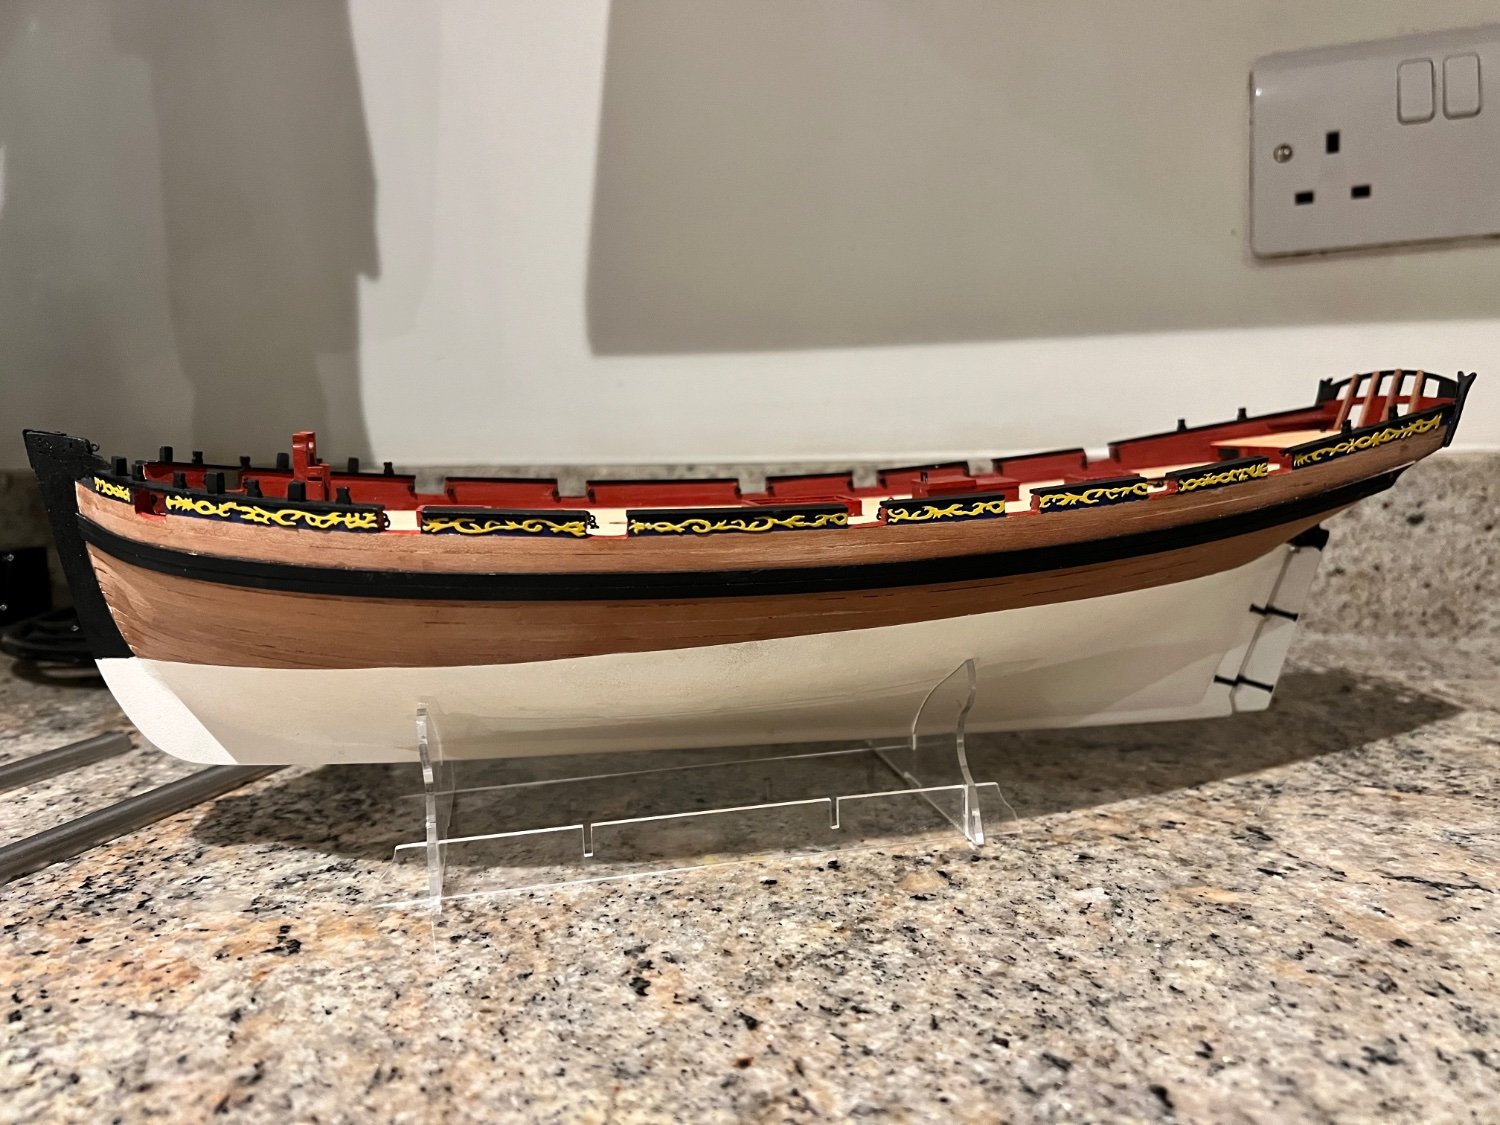
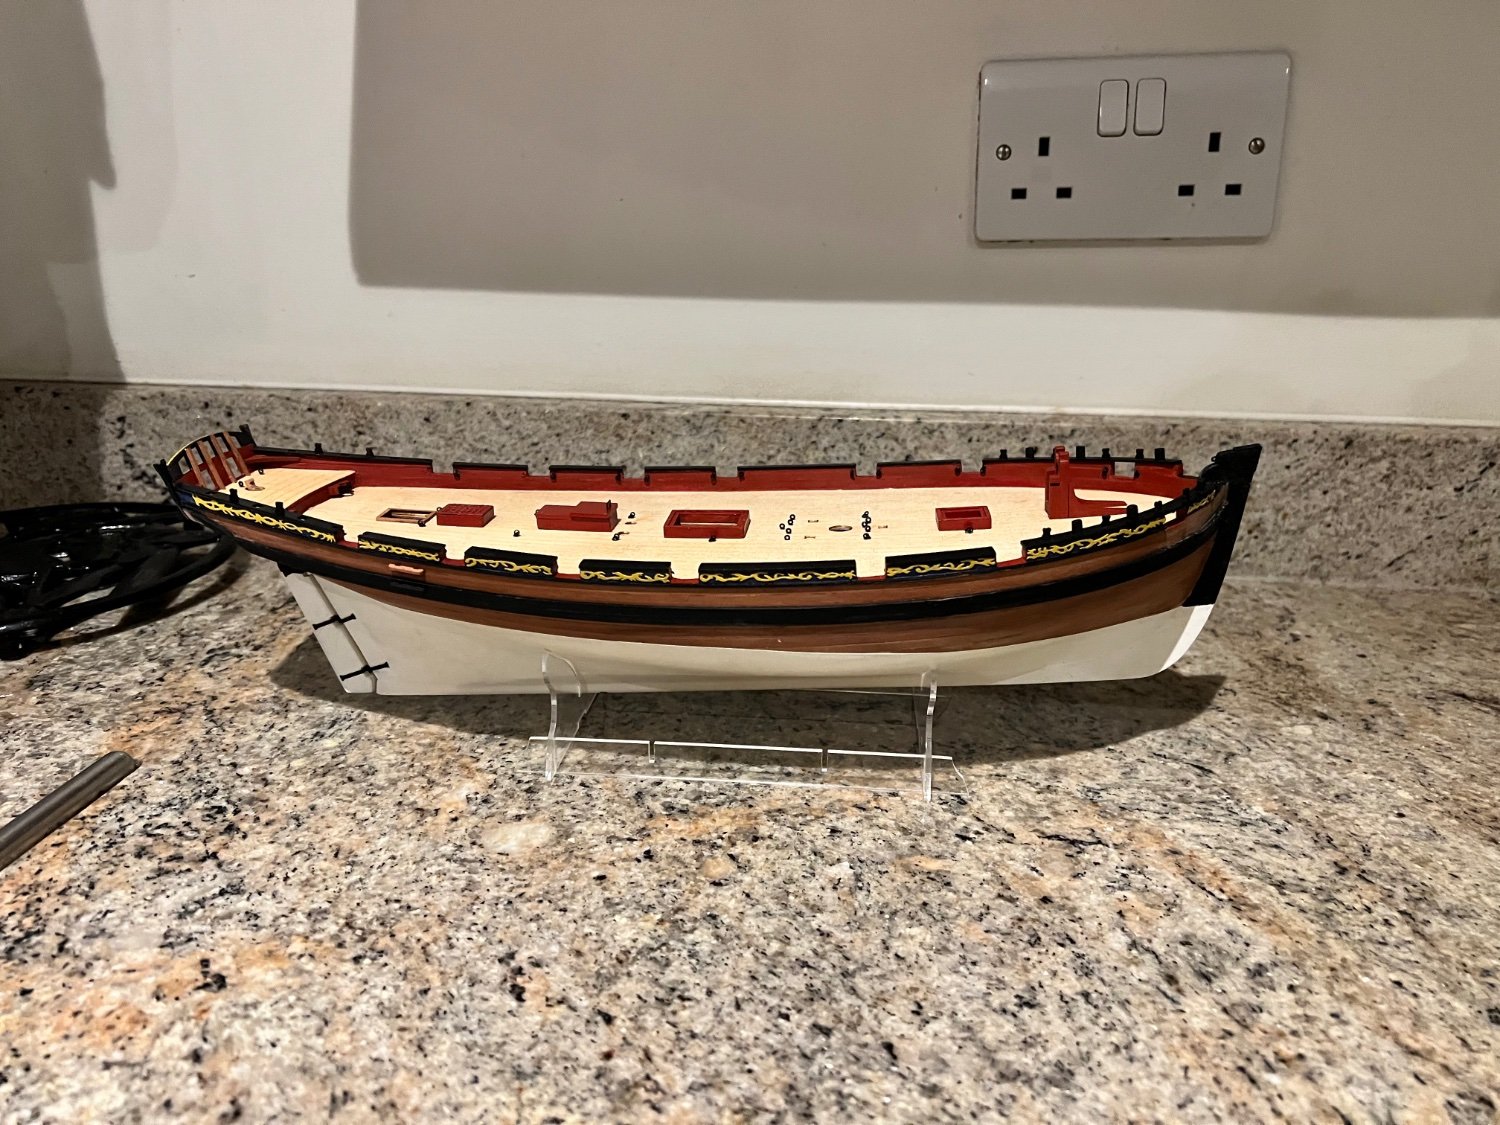
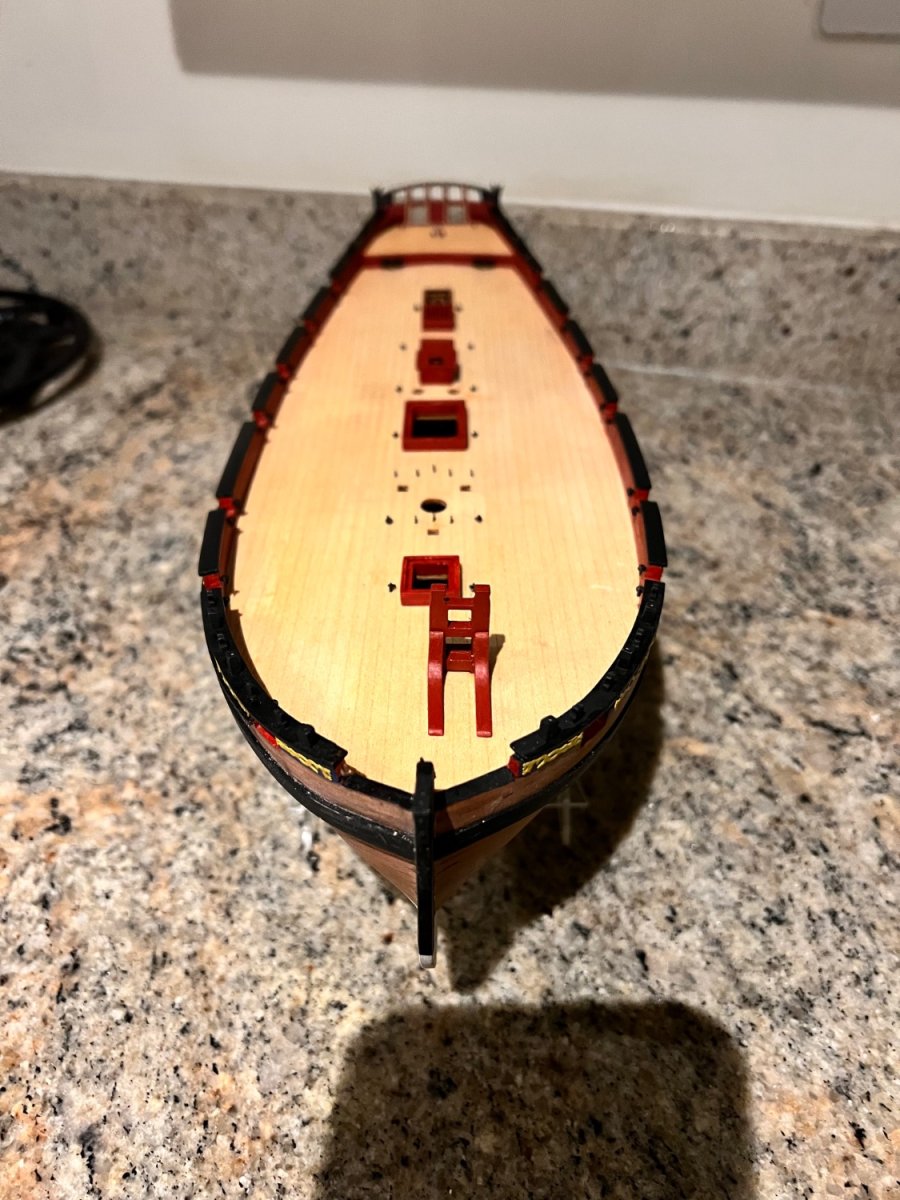
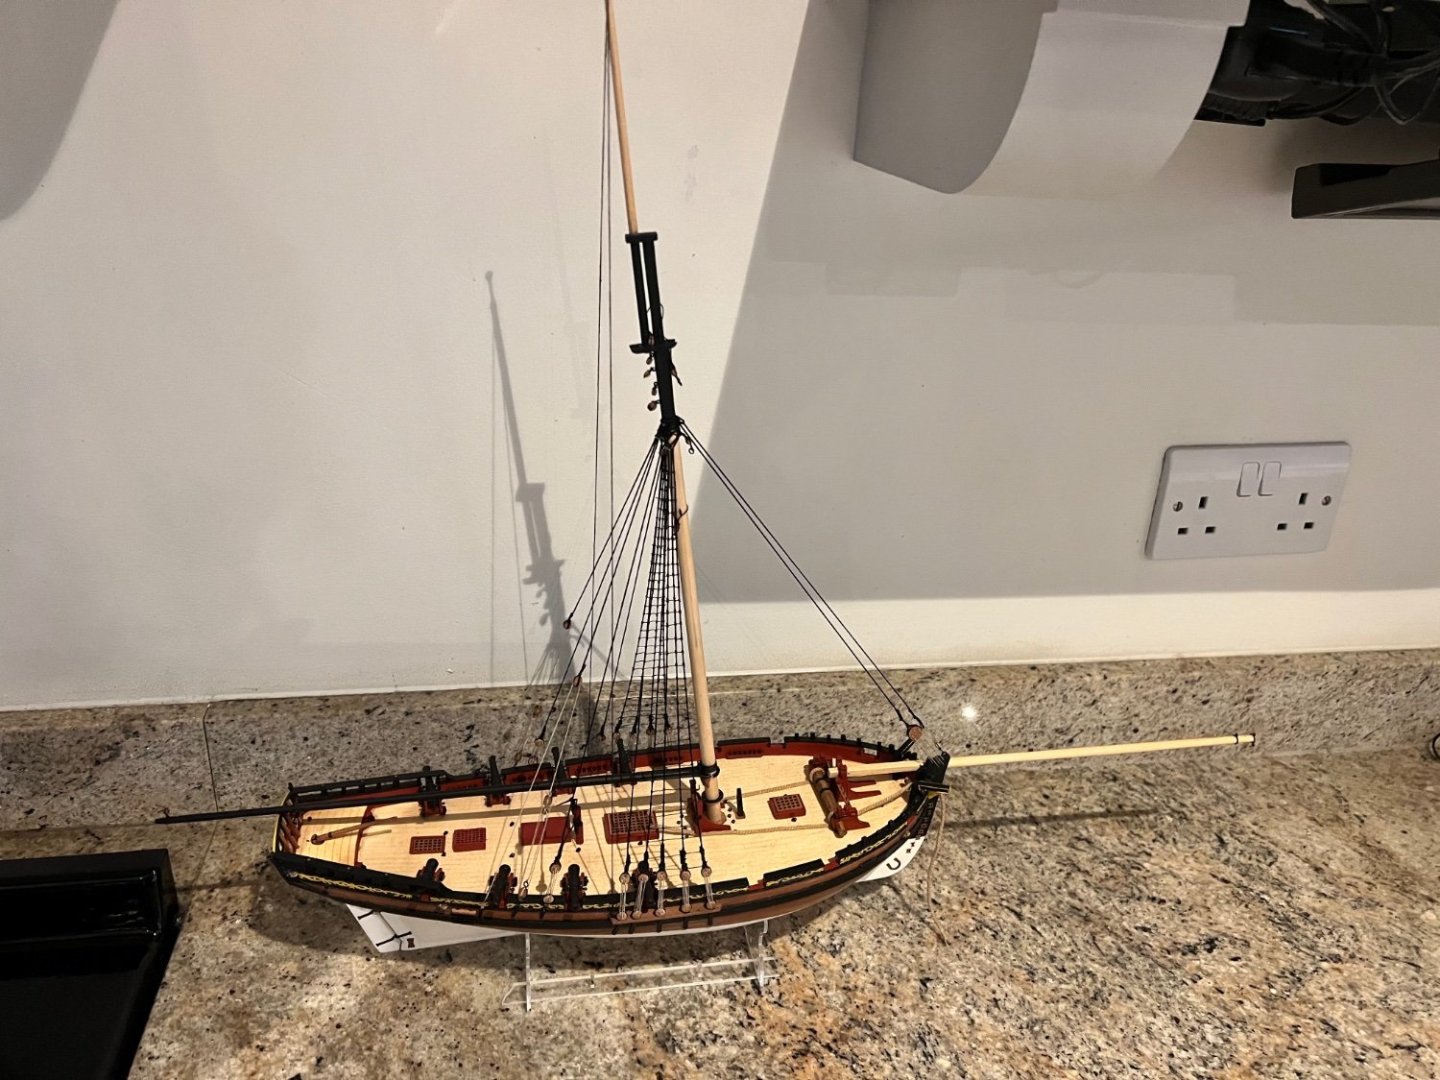
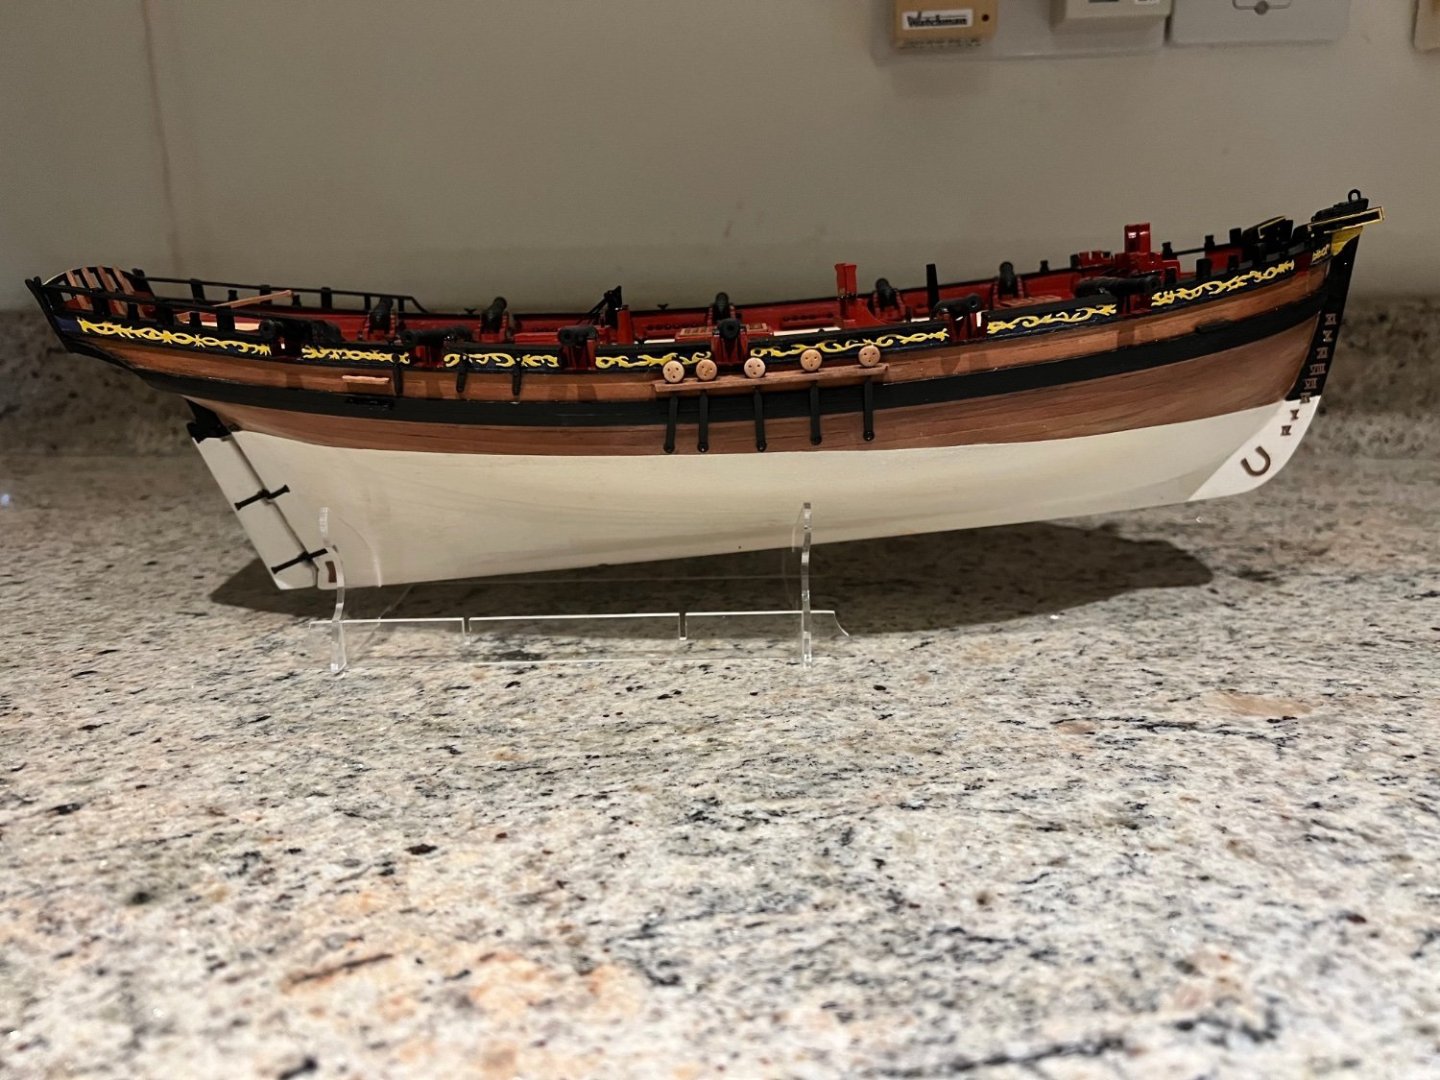
I have been very remiss on keeping up my Alert log. Her hull is largely complete now, except for stanchions, swivel guns and anchors. None of which I’m adding until I have a good idea of whether they’ll get in the way of the rigging. No major issues in building her, but a few idiosyncrasies and lessons learned that I might point out. Firstly, that the pear wood strips came in a pale and dark colour, I thought the pale colour would look better on the exposed upperworks so I planked the stern in this and then later realised that there weren’t enough pale strips for all the upper works so the stern is now a different colour. Furthermore I didn’t select my strips well and the top starboard plank below the wales is very discoloured dark. Good lessons for the future. I decided not to fit the lower counter PE decoration. My lower counter is quite curved so I found it difficult to get the PE to lay flat and decided it looked better without. The PE would have worked fine if I’d followed the kit instructions and kept the lower counter flat. The stove flue, part 108 in the instructions, did not seem to be anywhere in the parts and is not listed in the parts list, so I built my own from excess on the 3mm wood sheet. Looking down the deck. The guns are not glued yet. I wish with hindsight I’d added breach ropes to them, but too fiddly to do now the eyebolts are glued to the gunwales. Also the wood gratings supplied with the kit in (v.3) don’t match up with what’s in the instructions. The numbering of parts is wrong and whilst the gratings are the correct sizes for the front and main hatches, the third grating supplied fits the bread hatch, not the rear hatch / skylight. The bread hatch is supposed to have a solid hatch in the instructions but I’ve chosen to use the grating as it looks better. Whilst for the third hatch I’ve had to use a PE grating and paint it which doesn’t look as good. I see lots of modellers have amended this to be a skylight. These are very much small things and Alert is an excellent kit, as usual from Vanguard. She’s the ideal bridge for me stepping up from the fishing boats to a larger warship from the age of sail.


- 70 replies
-
- 14
-
-
- Alert
- Vanguard Models
- (and 1 more)
-
Thank you very much, I was just curious and hadn’t yet got to that point in BE’s log. I won’t be adding these details, I’m just sticking to the kit. Your Alert looks superb, I wish you’d done a log too.
- 70 replies
-
- 1
-
-
- Alert
- Vanguard Models
- (and 1 more)
-
Thank you. I felt the painting is a complete mess compared to other boats on here. I realise that iPhone cameras are quite forgiving and don’t show all the botched paint and glue stains!
-
That’s what I meant. The instructions refer to “step blocks for the mizzen mast”. Temporary makes sense, but even so it’s hard to see how a mast could be mounted on those? Thanks
- 70 replies
-
- 1
-
-
- Alert
- Vanguard Models
- (and 1 more)
-
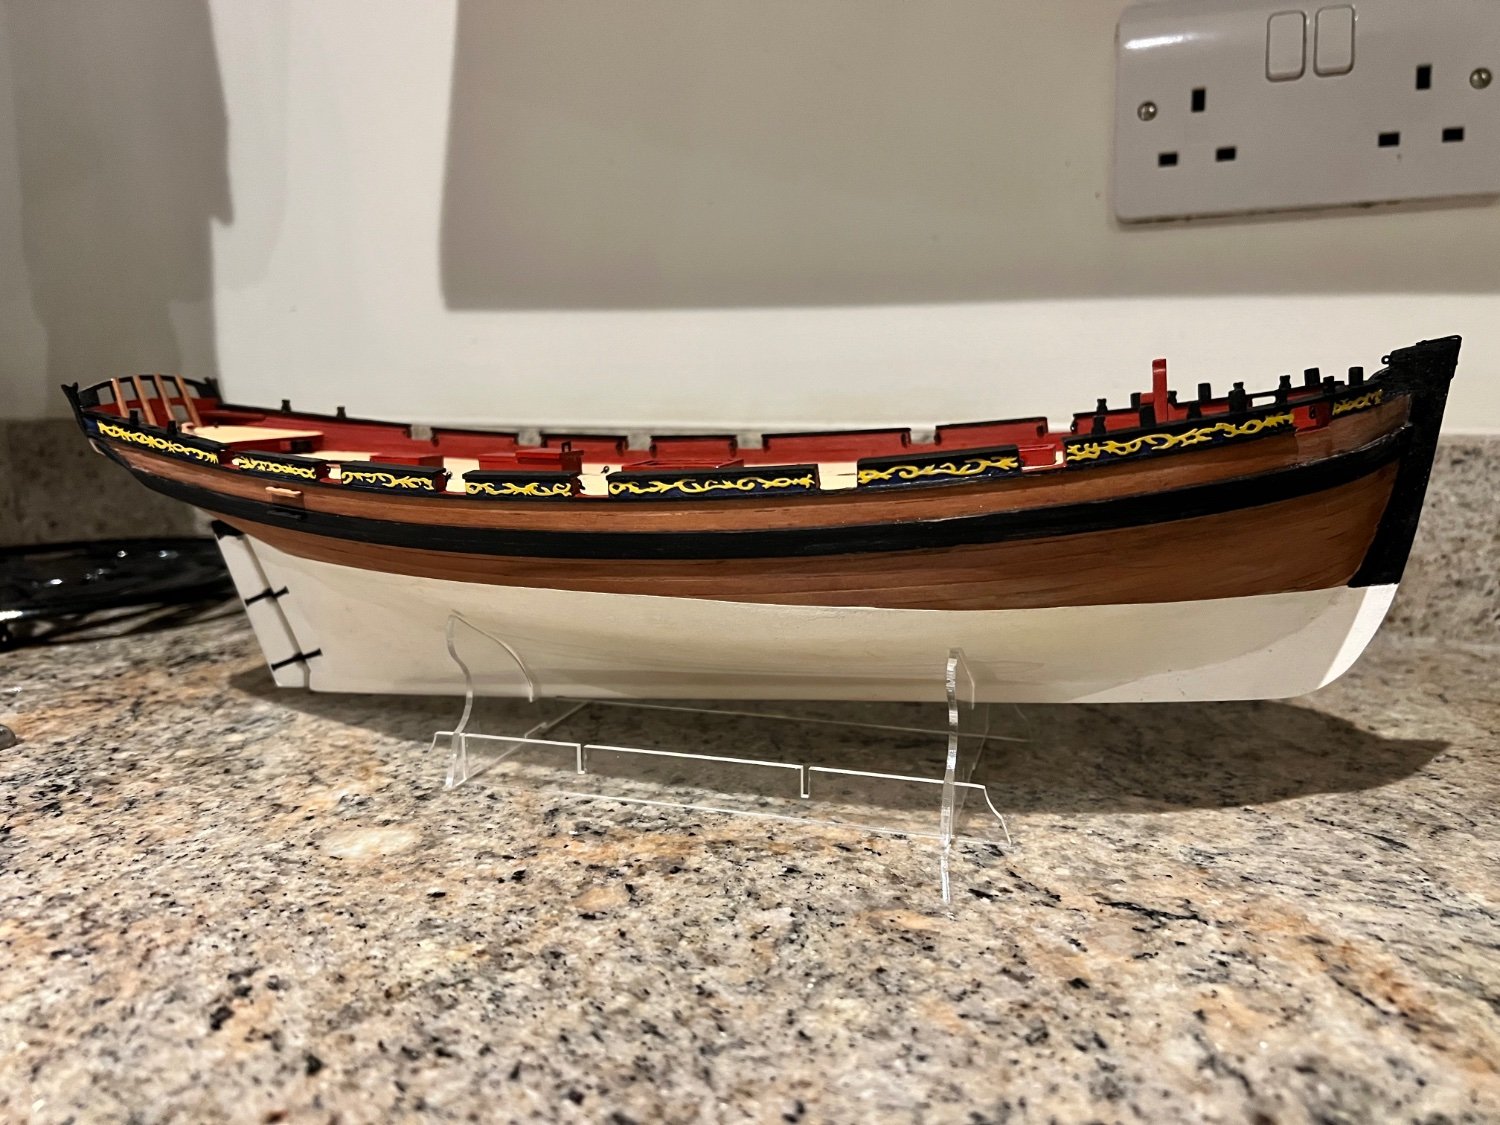
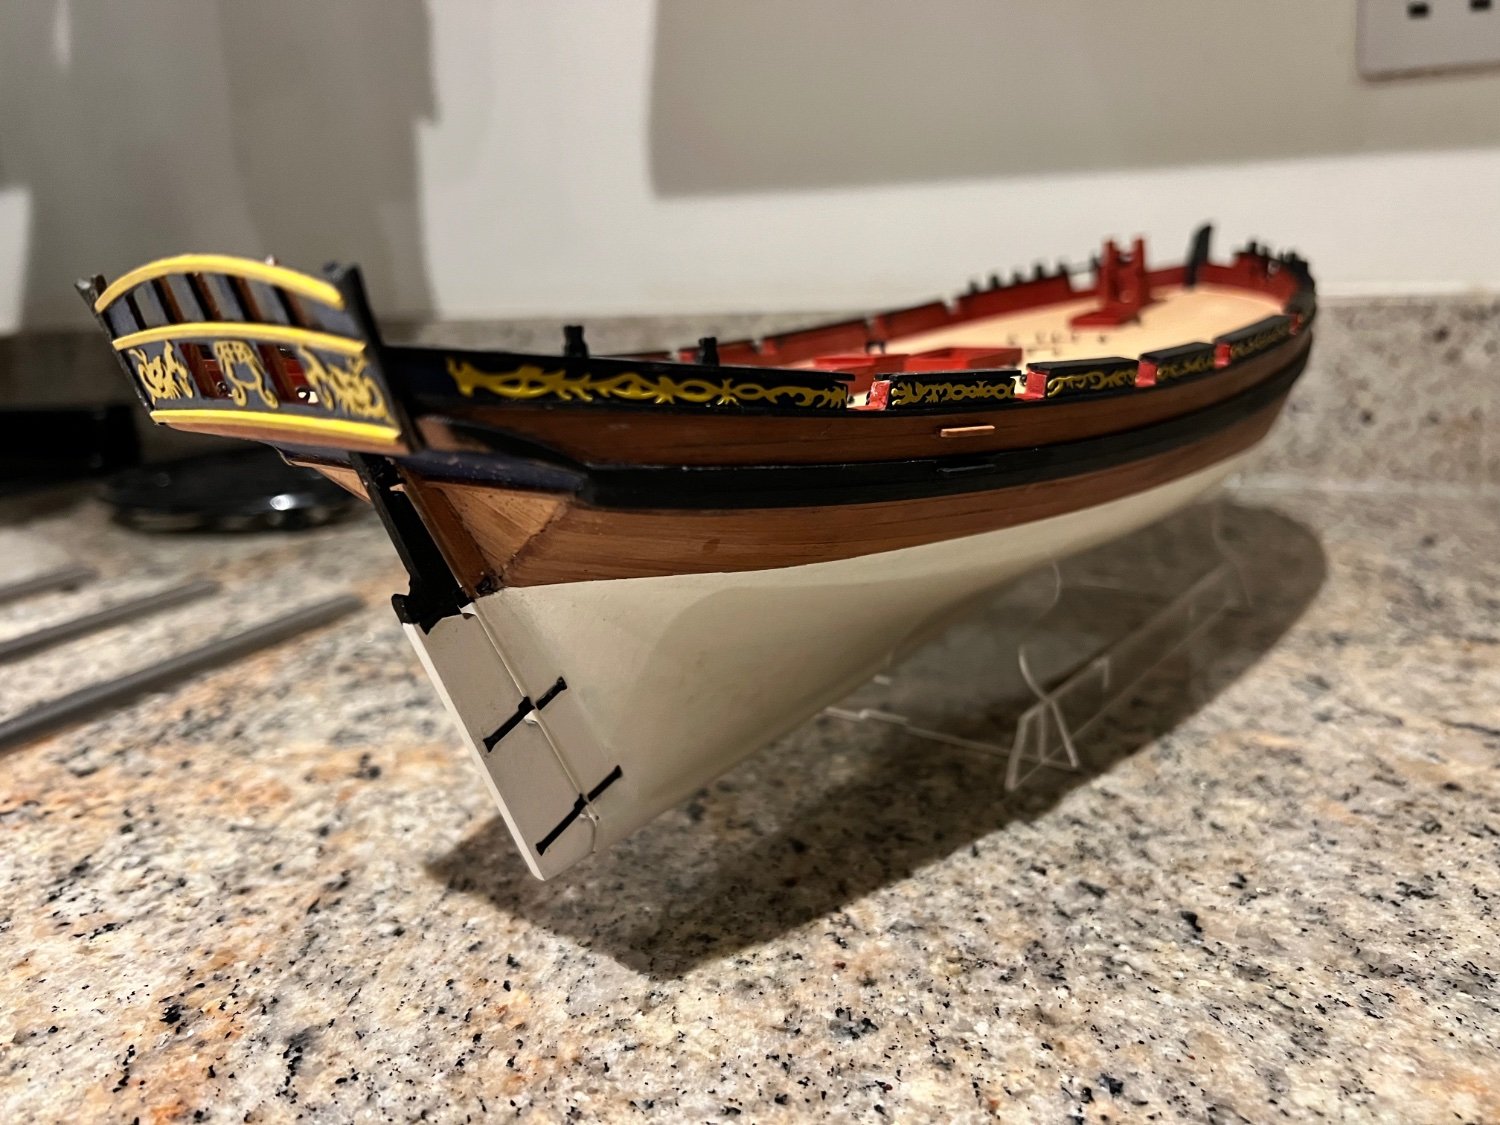
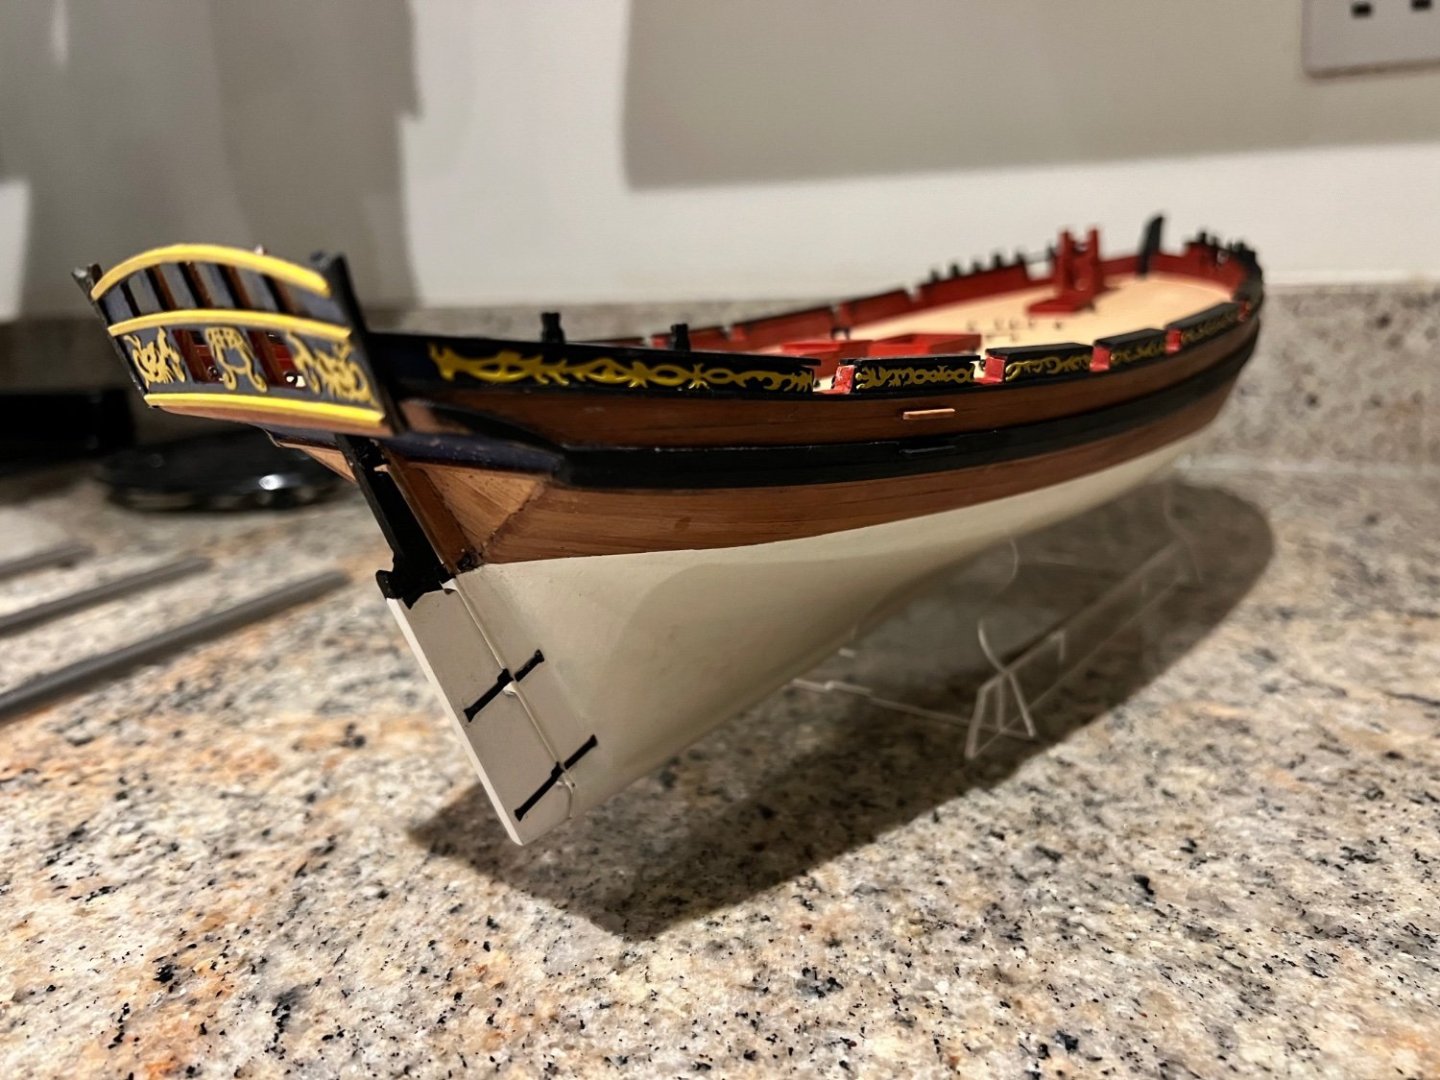
More progress, but still scruffy and needs tidying up. Starboard side with photo-etch decorations, wales, steps, etc added. Wipe-on poly as per Glenn-UK’s recipe on the wood. Port side less progressed and no wipe-on poly and some fittings yet. Stern decoration and the rudder added. PE decoration on the lower counter still to come. Some deck fittings and ironwork added. A couple of the cannon rings on the bulwarks have already fallen out. Please could someone explain to me how the mizzen mast works? I haven’t got the Goodwin Anatomy of the Ship book as I want to stay largely true to the kit (it’s challenging enough for me as it is without modifying!) so don’t want the temptation from a book like that - plus it’s expensive. Thanks! Dan


- 70 replies
-
- 9
-
-
- Alert
- Vanguard Models
- (and 1 more)