Check out our new MSW Sponsor Innocraftsman
×

DB789
-
Posts
425 -
Joined
-
Last visited
Content Type
Profiles
Forums
Gallery
Events
Everything posted by DB789
-
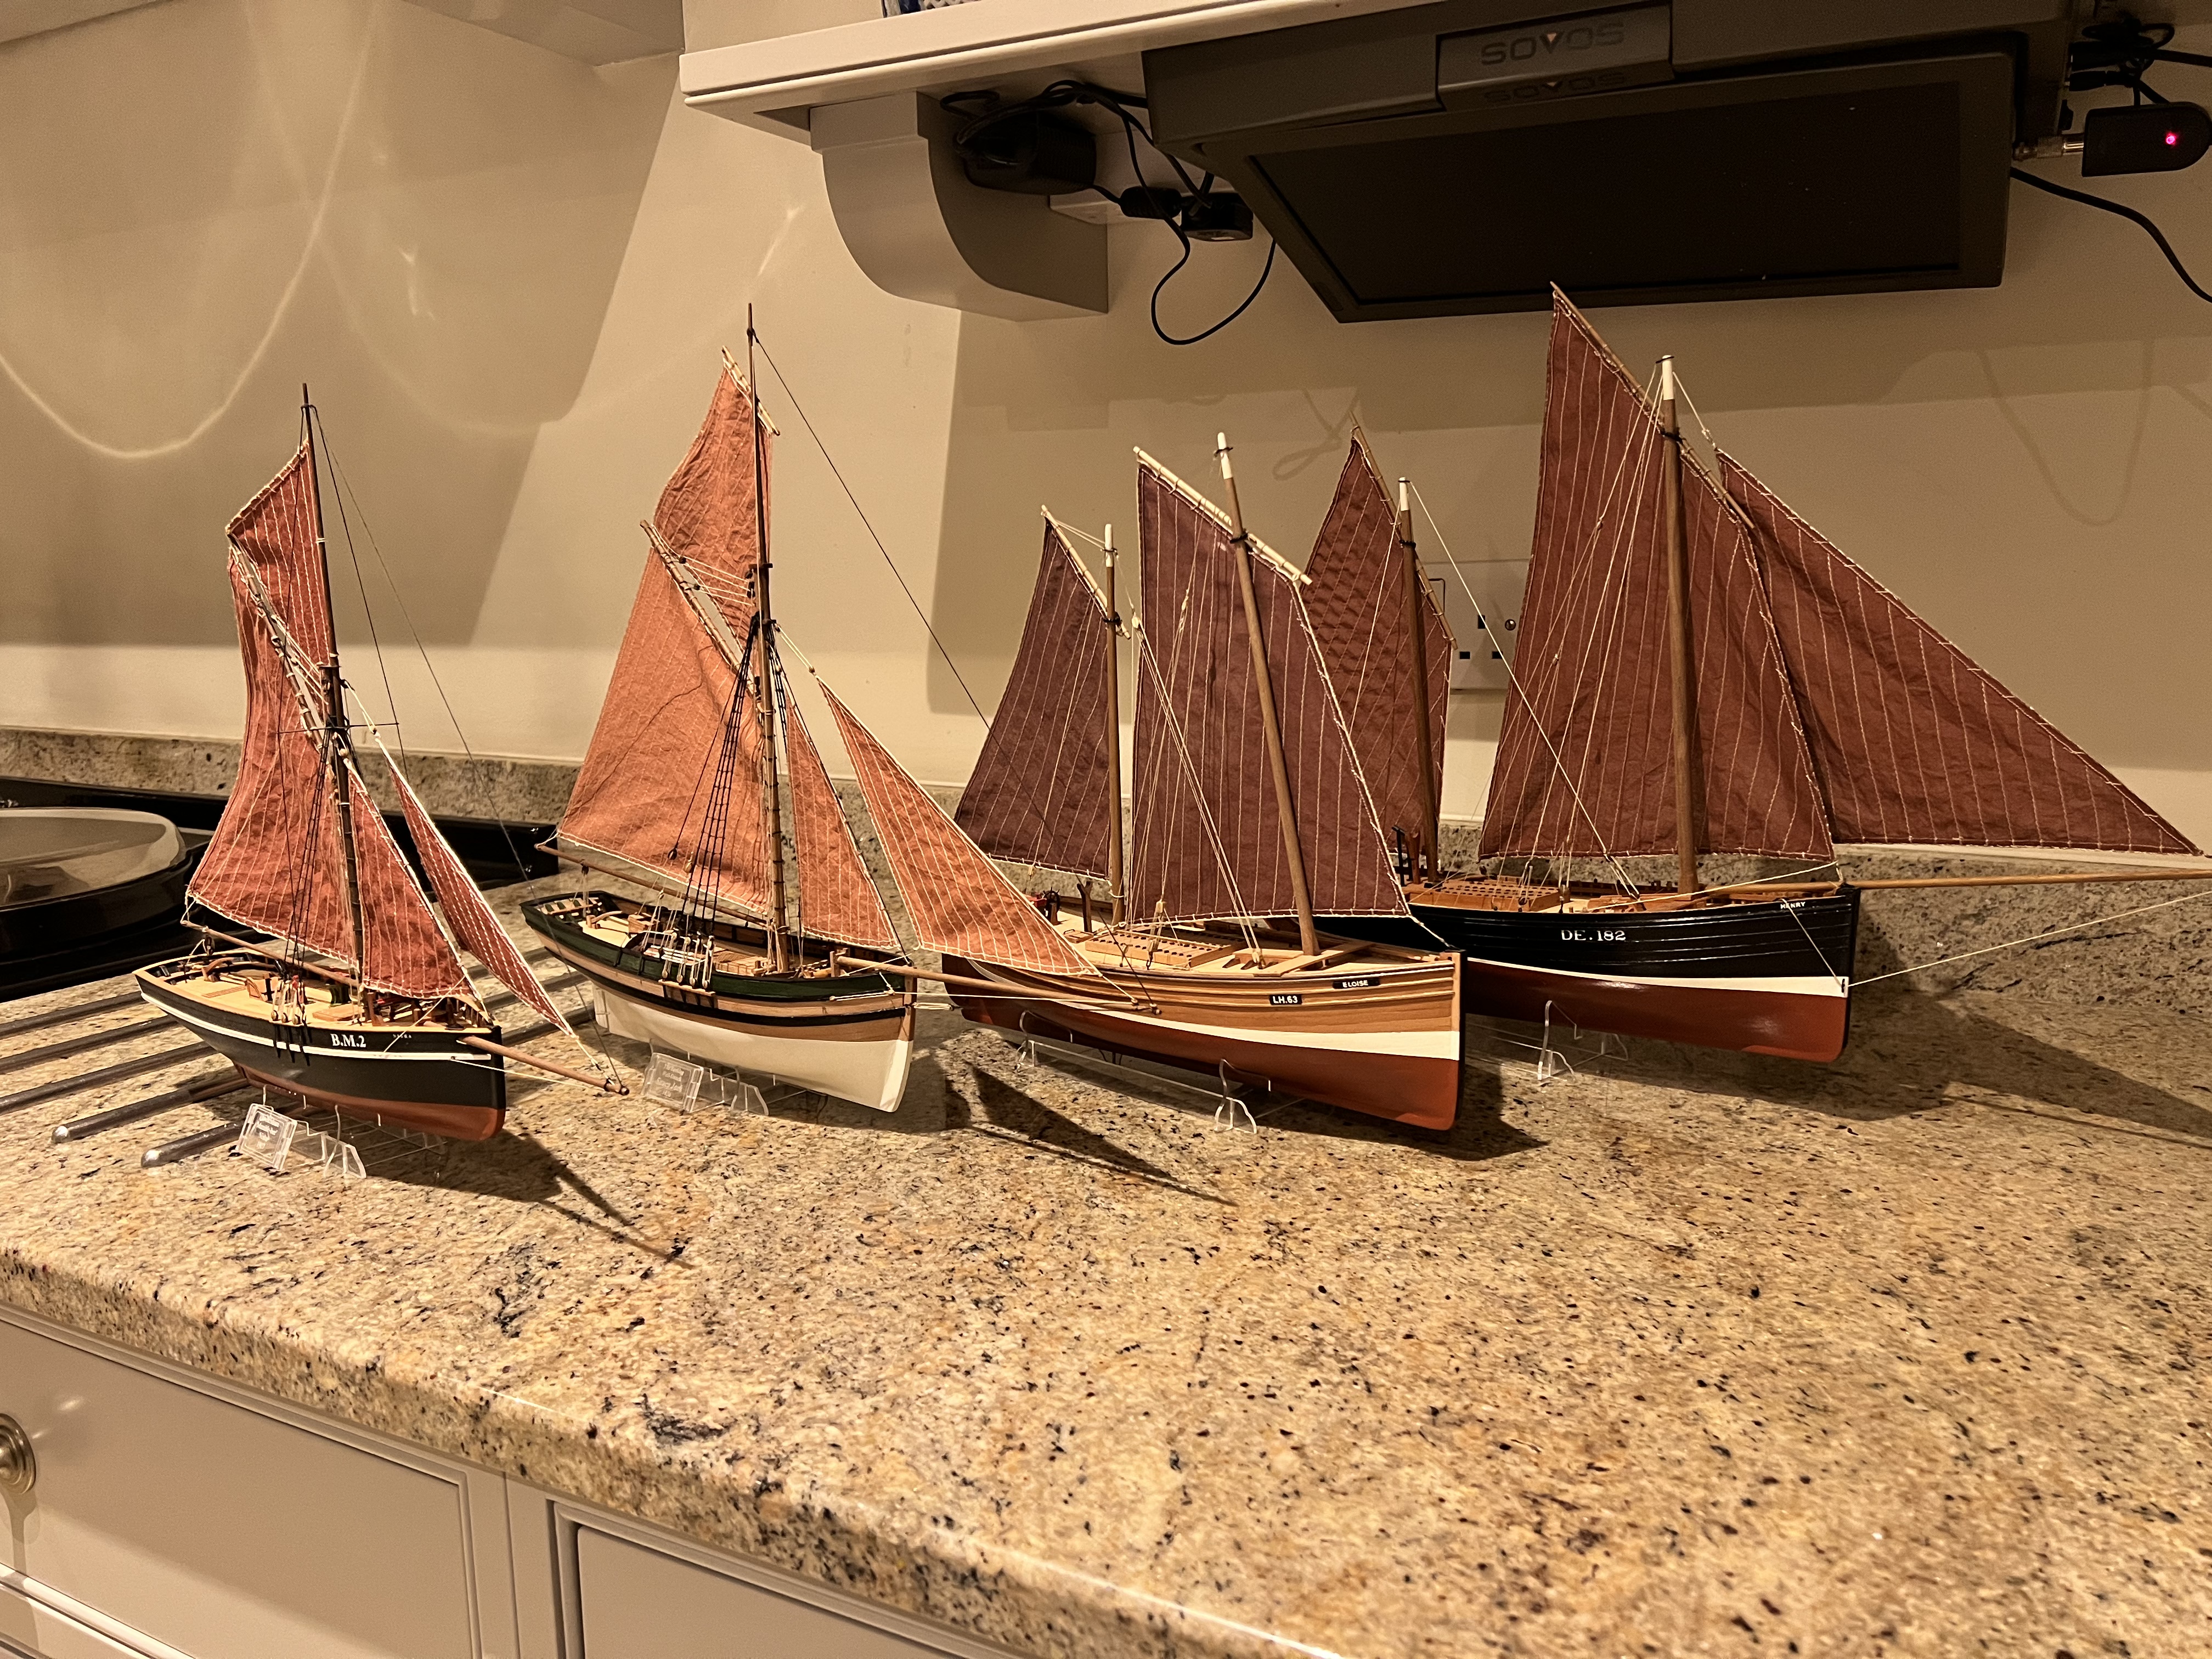
 Thanks Craigie. Debating on what sail colour to go for. I think probably a little redder than the RIT cocoa brown I used on the Fifie. Could go for a very red red such as Andyrew did on his Nisha and looks great. Ideally I’d like somewhere between the two but that involves mixing dyes and feels risky! Or do something completely different such as RIT Tan that James H has used on the prototype Saucy Jack build to great effect. My default is cocoa brown because it’s the safe option and will look good, but I think these trawlers from the south of the UK did typically have redder and pinker sails than the Scottish drifters.
- 62 replies
-
- 1
-

-
- Nisha
- Vanguard Models
- (and 1 more)
-
Thanks Chris - I’ll try that!
-
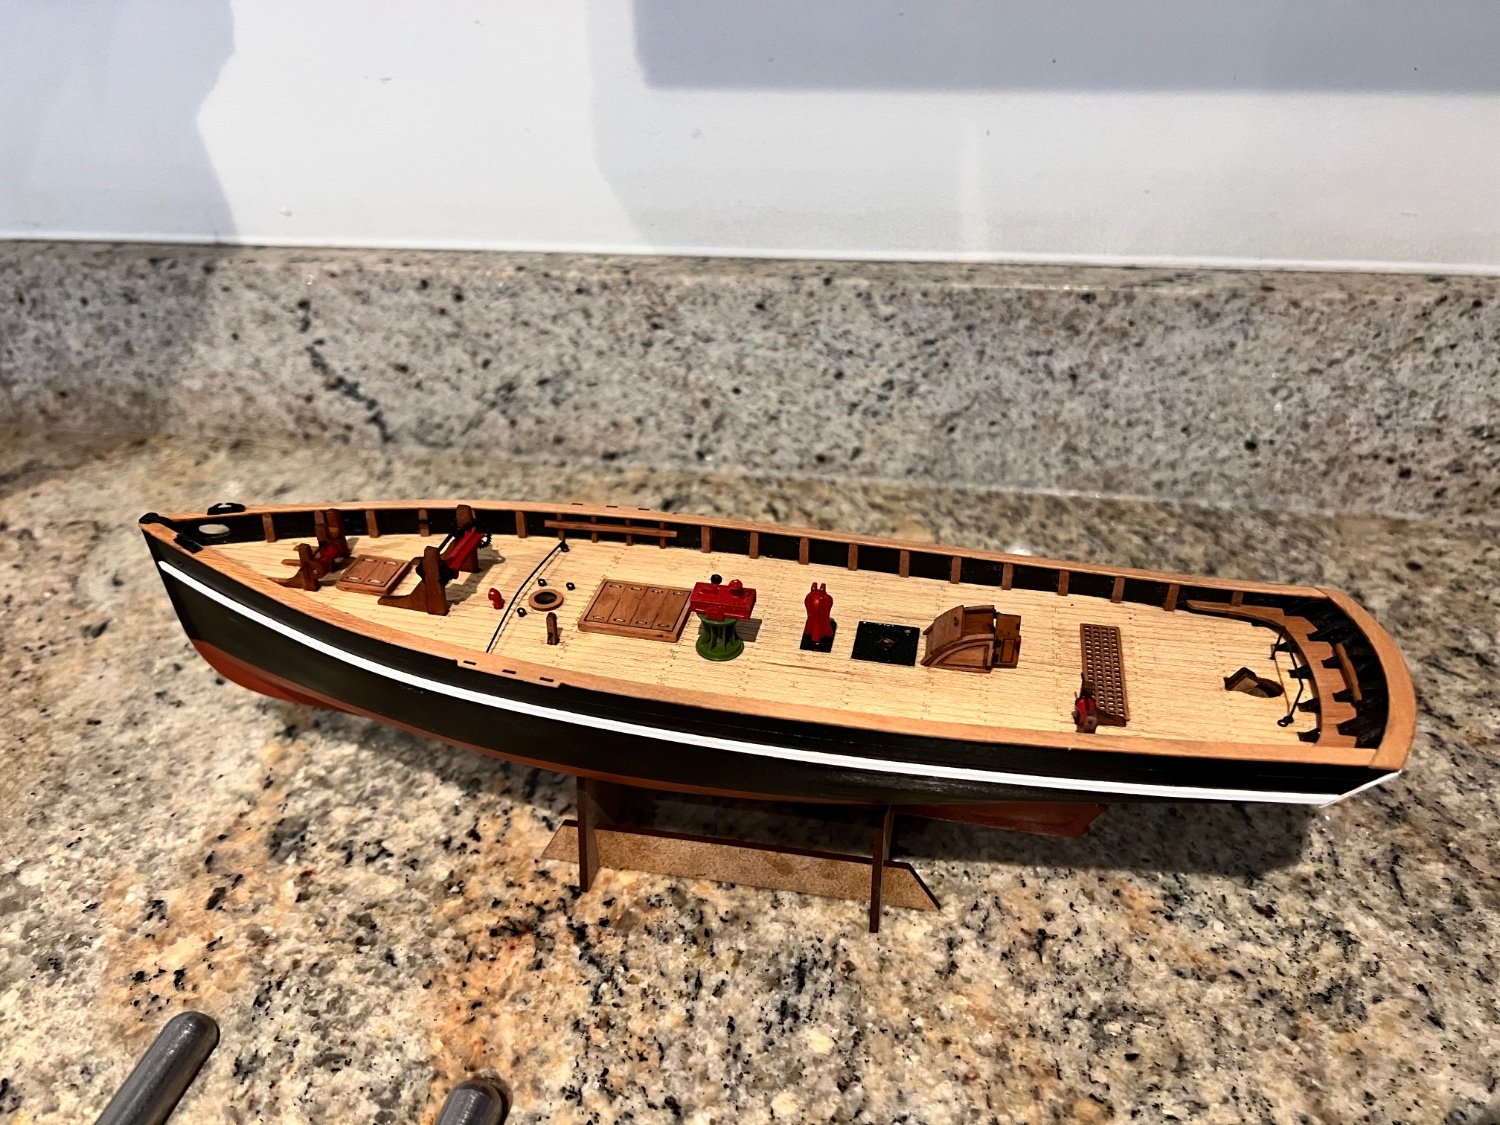
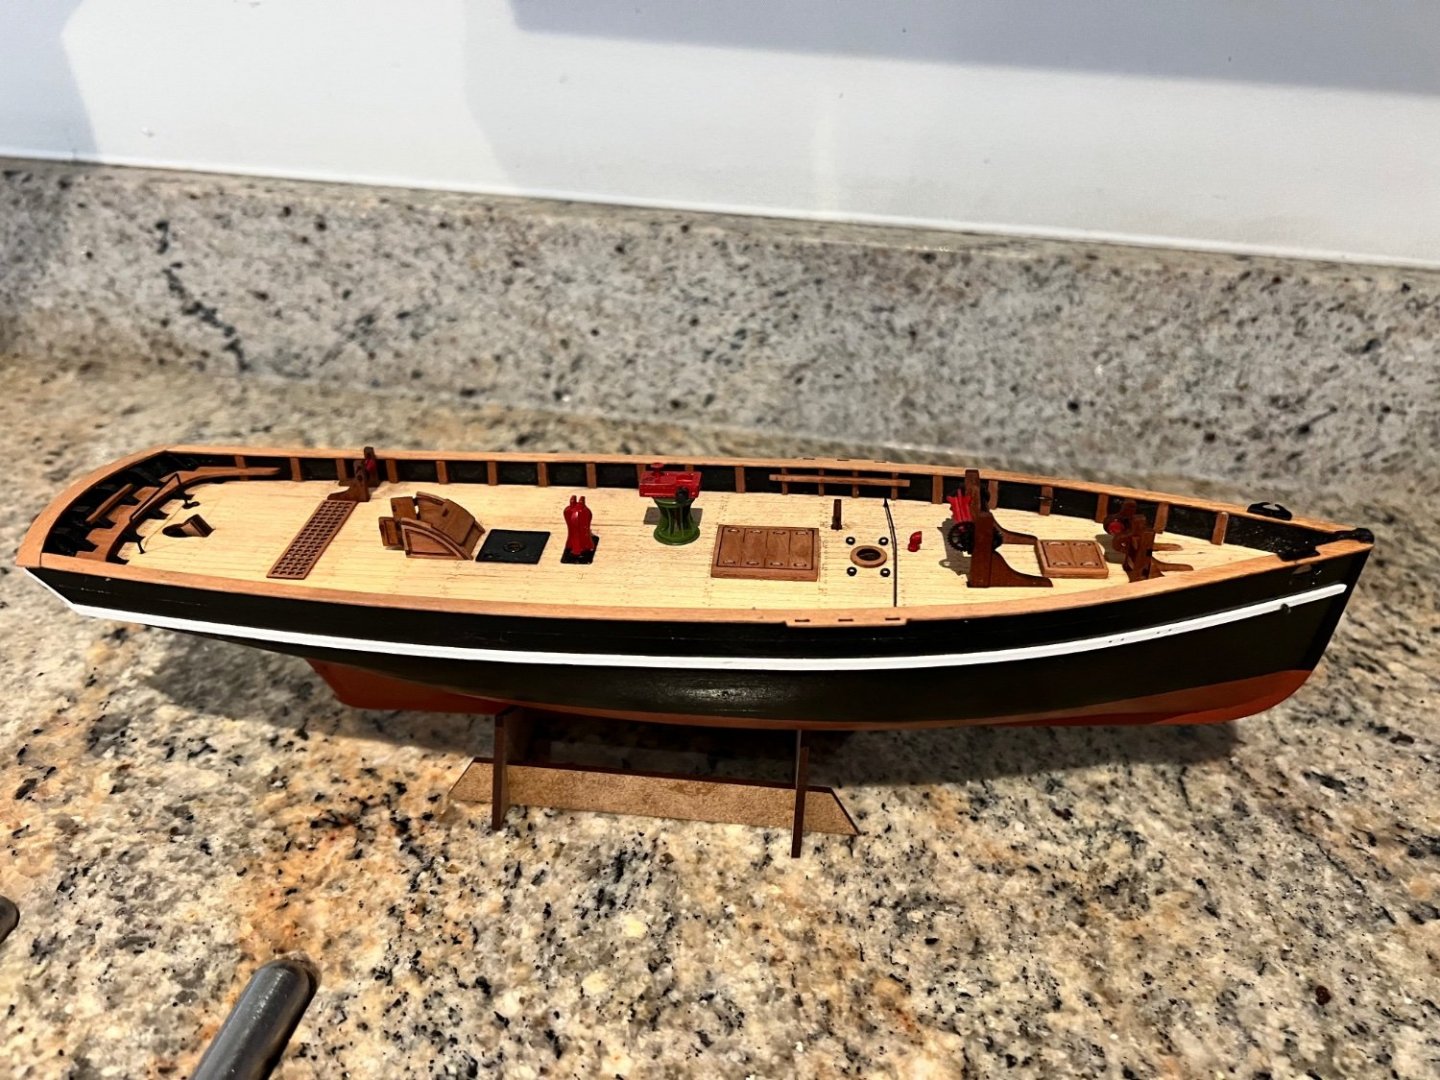
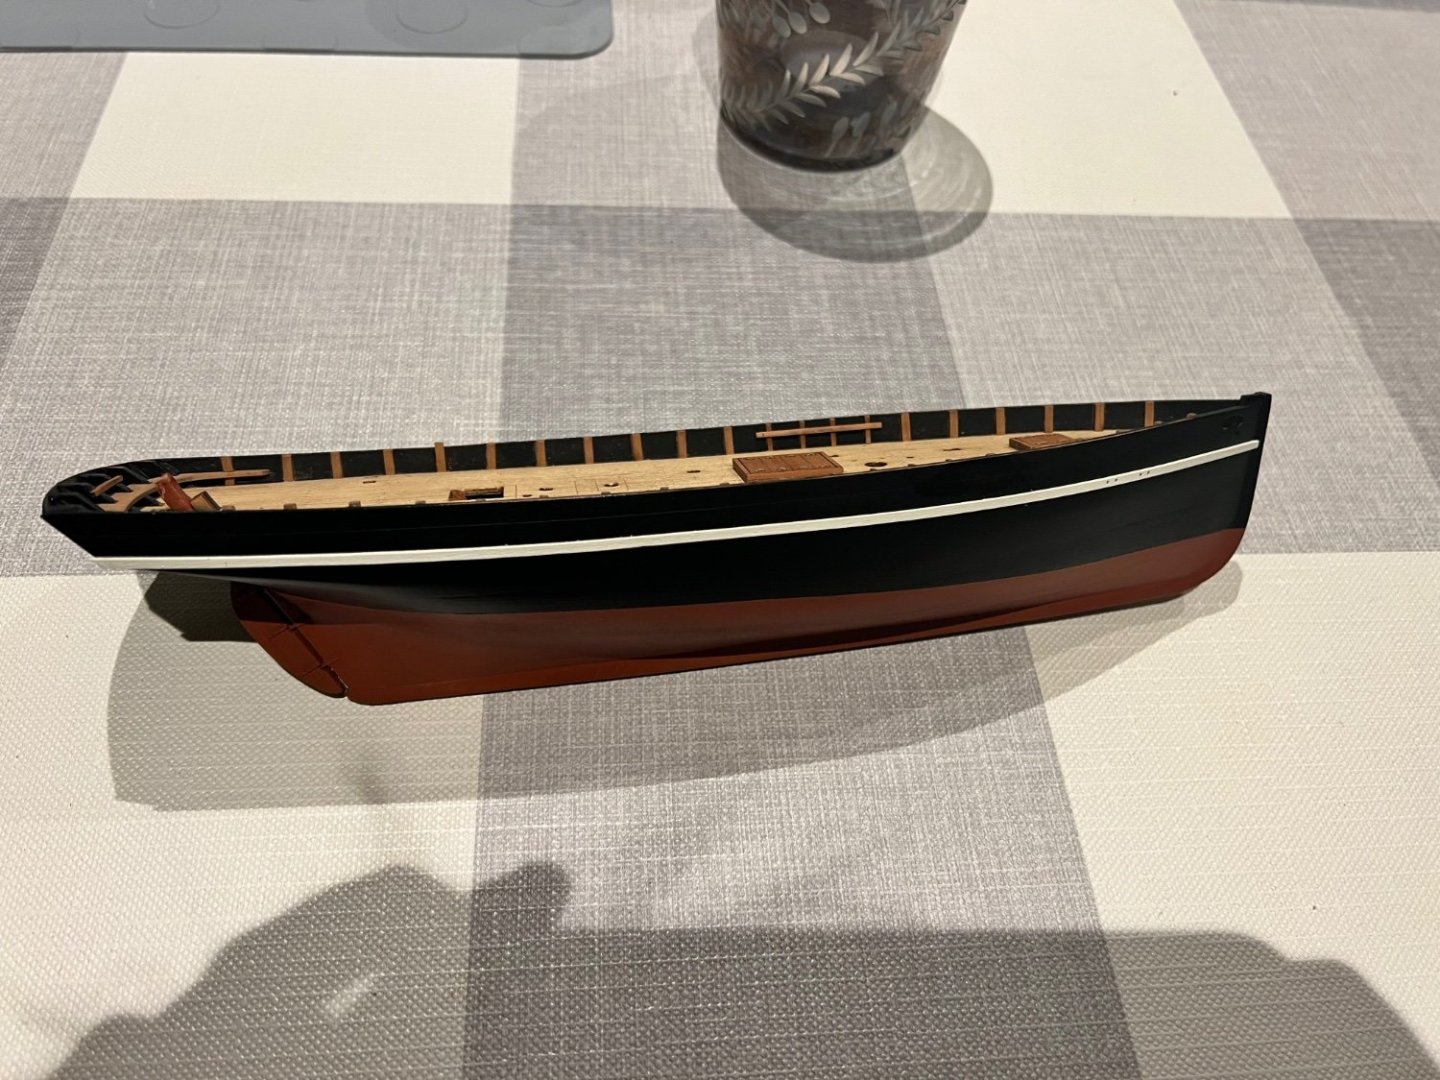
So Nisha’s hull is nearing completion. I’ve deliberately taken the rudder and tiller off as I keep breaking them. I’ll leave them off until she’s rigged now as I’ve broken the wooden spigots that join the rudder to the hull and any repair will remain fragile. I also haven’t done the aluminium chimneys as they need a metal saw which I don’t have yet. I’m waiting for a decals setting solution before applying the decals. The red parts need another touch up too. I’m really pleased by the way she’s turning out, that’s a testament to the quality of this kit. My entire modelling / woodworking experience is the Fifie, one balsa RC aircraft that never flew and a few plastic models as a kid. I never thought that ship modelling would be within the grasp of my abilities but Chris’s Vanguard fishing boats are giving me the satisfaction of producing genuinely lovely looking models. However, despite my best intentions I’ve rushed through this build too. Only just over two weeks into building and the hull is almost finished. But at the cost of so many unnecessary breakages. The companionway was extremely fiddly and I broke the roof into six parts, Chris provides a spare as it’s fragile but that broke into eight parts, but it’s wood and all fixable! Other than the companionway the deck furniture was pretty straightforward.

- 62 replies
-
- 10
-
-
- Nisha
- Vanguard Models
- (and 1 more)
-
Craigie, not my paint scheme, very much influenced by Andrew Johnson, whom I’m shamelessly copying! That would look great on Erycina. I just put the parts briefly into budget Boots nail varnish remover (the one with acetone in) for a minute then straight into the Carrs solution for 10 mins and it seems to come out properly blackened. The problem is that it’s just covered in a powdery coat of black where the reaction has happened, which both comes off whilst the part is fitted and also marks everything else. I need to find a way of sealing it properly.
- 62 replies
-
- 2
-
-

-
- Nisha
- Vanguard Models
- (and 1 more)
-
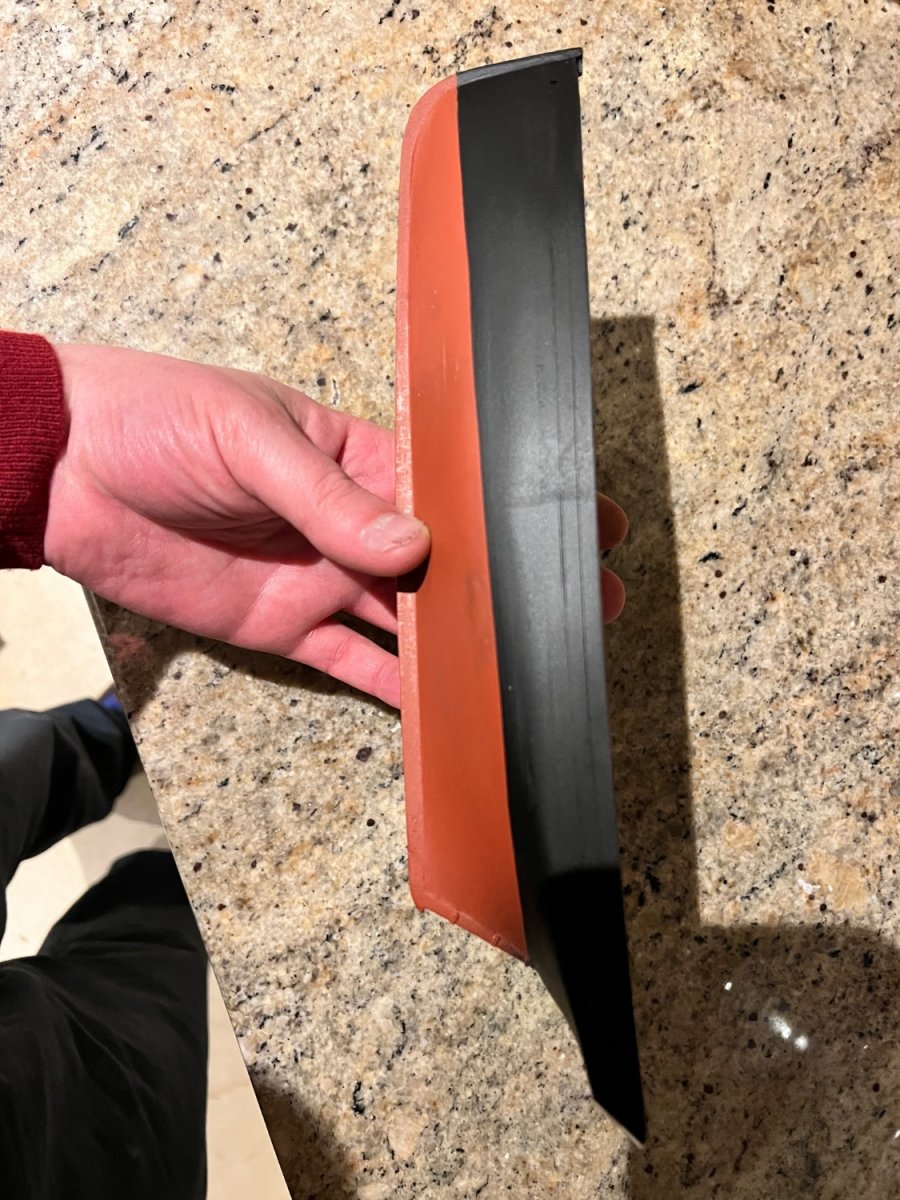
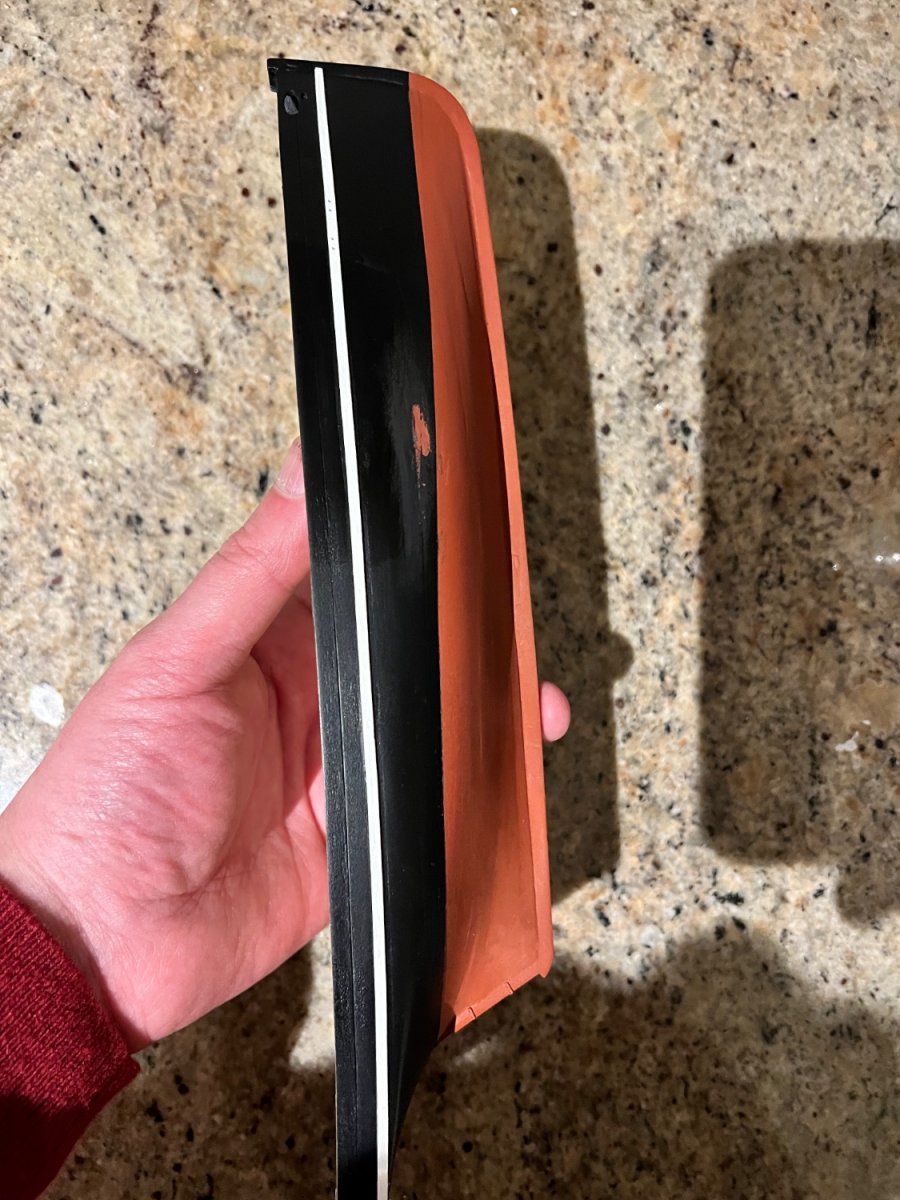
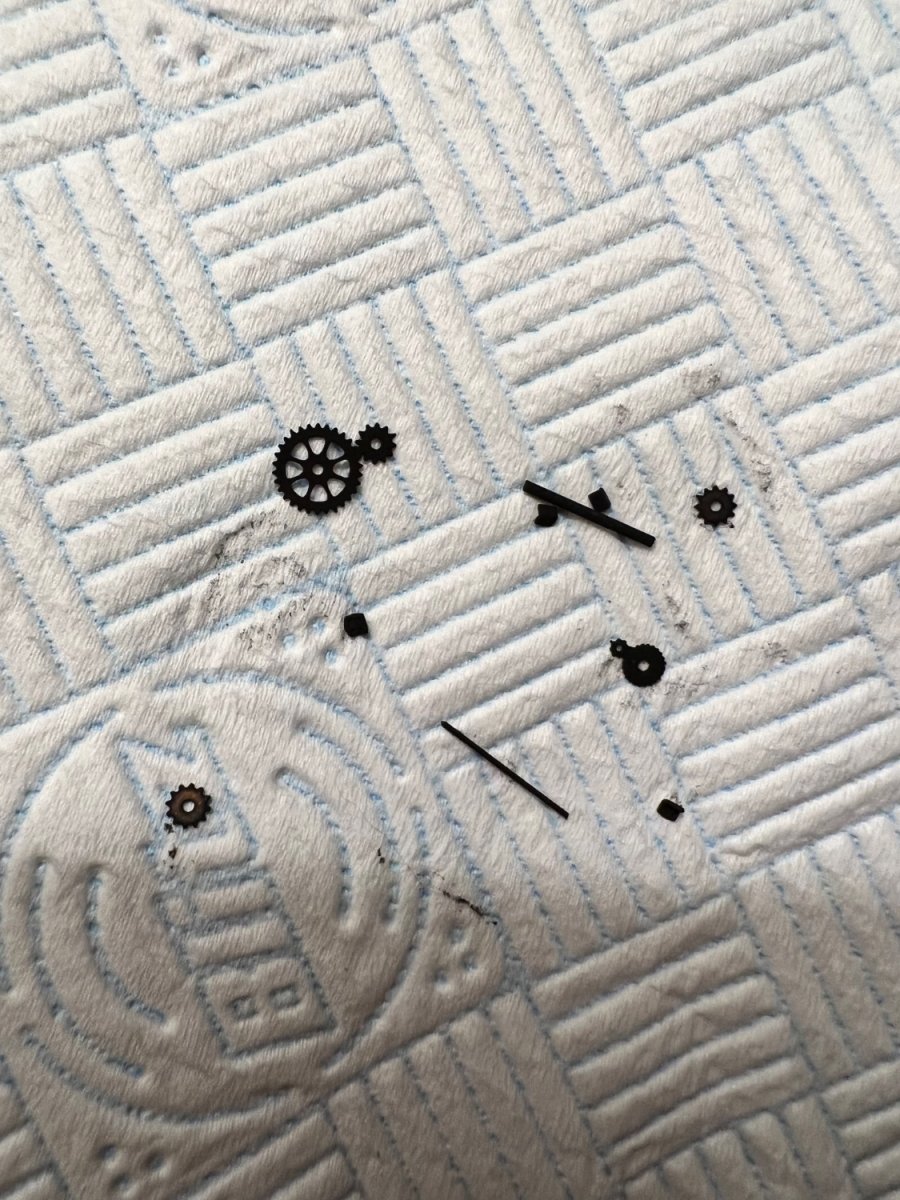
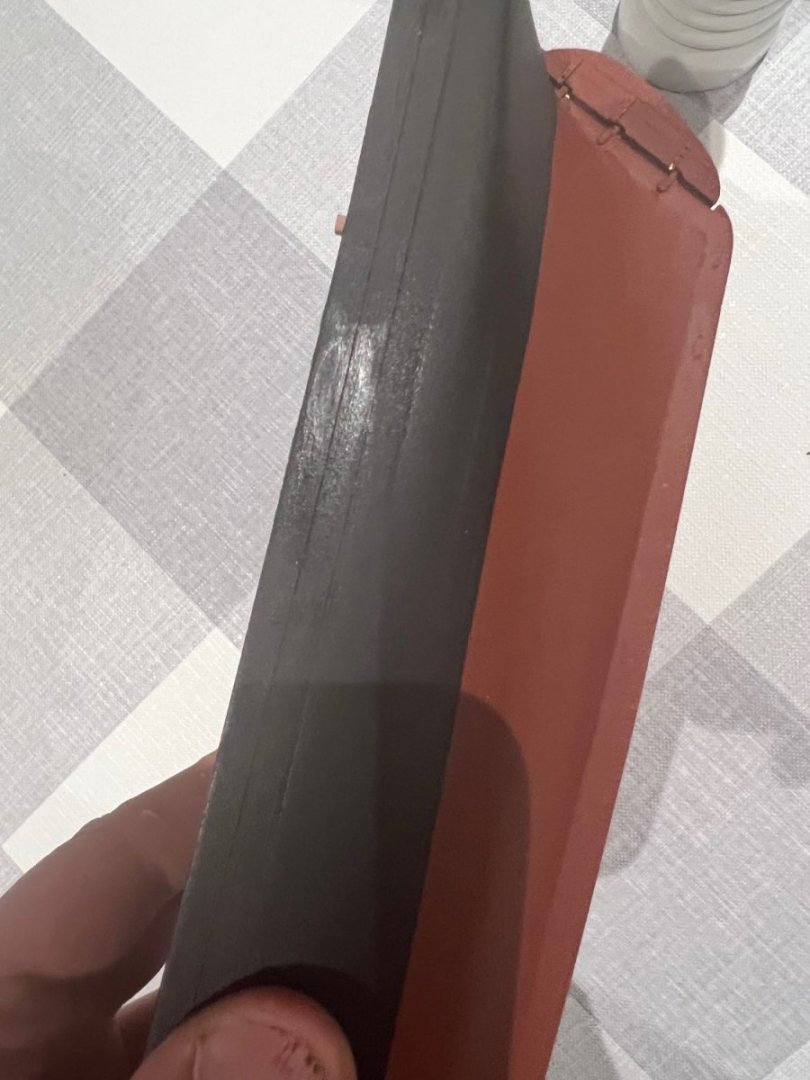
Both Andrew’s and Craigie, thank you very much for the advice. I’ve been playing around to see what works. Sanded down the areas where the paint looked bad first. Then covered most of the model with cling film and only used masking tape to protect the waterline and white trim. I blocked the holes in the bulwark at the bow with blu-tac. Then resprayed the affected areas. The really bad side (port) has cleaned up very well. There’s just a faint line amidships where the two paint jobs meet. I only had a small area on the starboard side that needed respraying. This has resprayed fine, but I’ve learnt the limitation of cling film and painting. I’d pressed the cling film tight against the hull, excess paint went on the cling film and it then fused to the hull. So a new area to respray. I’ll need to leave that until the surrounding paint is dry before repeating the process. Once the paint is fully dry I’ll get some polyurethane varnish on it to protect it. In the meantime I chemically blacked some brass PE for the first time using Carr’s Metal Black solution. Seems to have worked perfectly. Thanks again. I’ll brush paint the upper hull next time so I have paint I can brush on to match!

- 62 replies
-
- 5
-
-
- Nisha
- Vanguard Models
- (and 1 more)
-
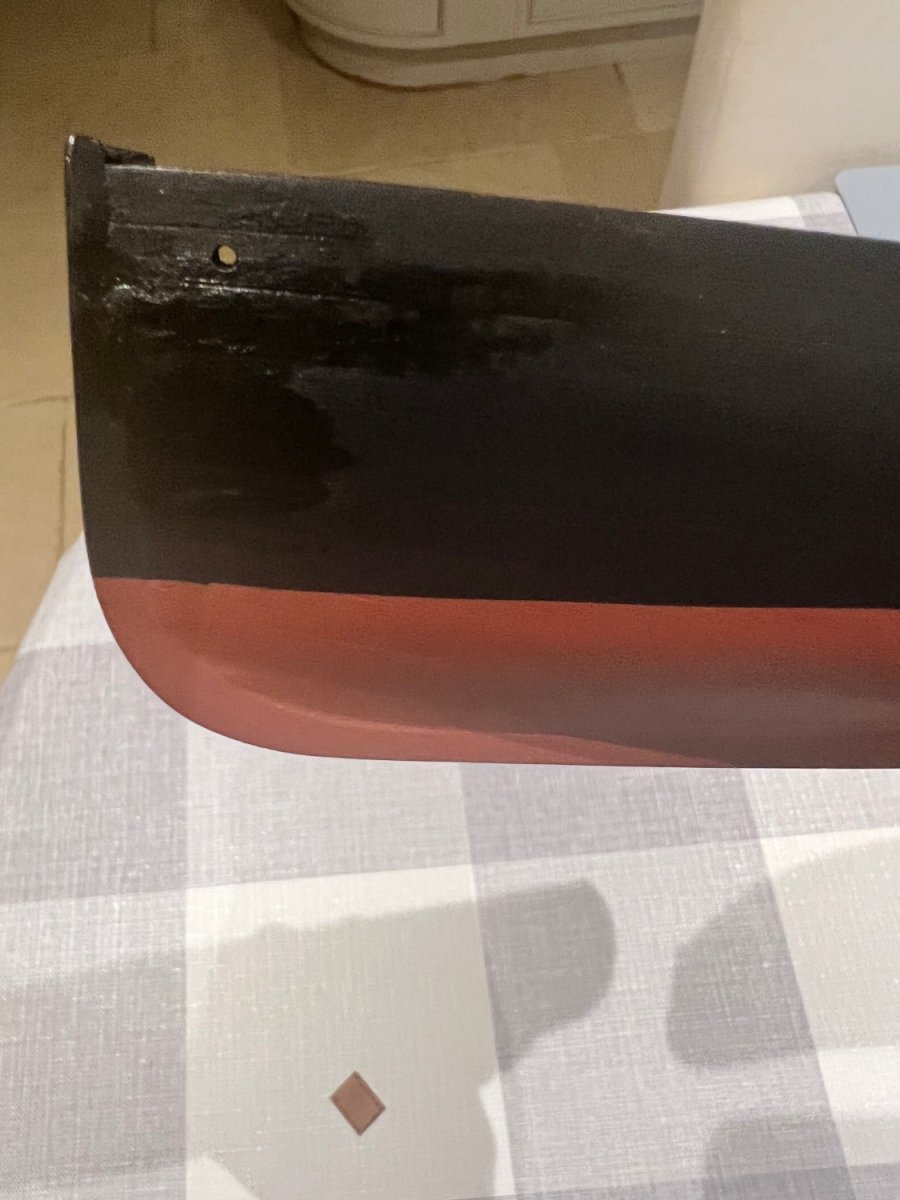
Thanks for all the advice and encouragement. More progress today and a problem. Timber heads fitted. Bench at the stern fitted, annoyingly I broke this and unlike other breakages this won’t be painted so will be visible as a small crack, but minor. Fish hatches complete and ladder in hull installed - both treated with Danish oil and look much better for it. I tied some thread around the top rung of the ladder whilst fitting it so I didn’t lose it in the hull - then cut the thread when in position. White rubbing strake fitted to starboard side. This was painted white before being glued with CA. Same will be done for the stern counter “frame” and the port rubbing strake. Positioning the latter I damaged the black paint on the hull and have taken it off again for now. Elsewhere I’ve chipped the black paint in a few places too. This is where I need some advice. I’ve touched up the black by using a brush dipped in paint sprayed from the Chaos Black can. When sprayed it comes out a lovely smooth satin black. With the brush it looks thick and glossy and is a contrast to the surrounding area. This touch up technique has worked with the red oxide spray paint on the lower hull and isn’t visible, but clearly isn’t suitable for the Chaos Black. Does anyone have any ideas how to do this better? I’m wary of masking around the areas and re spraying partly because I fear the masking tape will pull more black paint off and partly because I don’t want to get black paint on the deck or other unpainted fittings. Any advice very welcome. Thanks Dan


- 62 replies
-
- 5
-
-
- Nisha
- Vanguard Models
- (and 1 more)
-
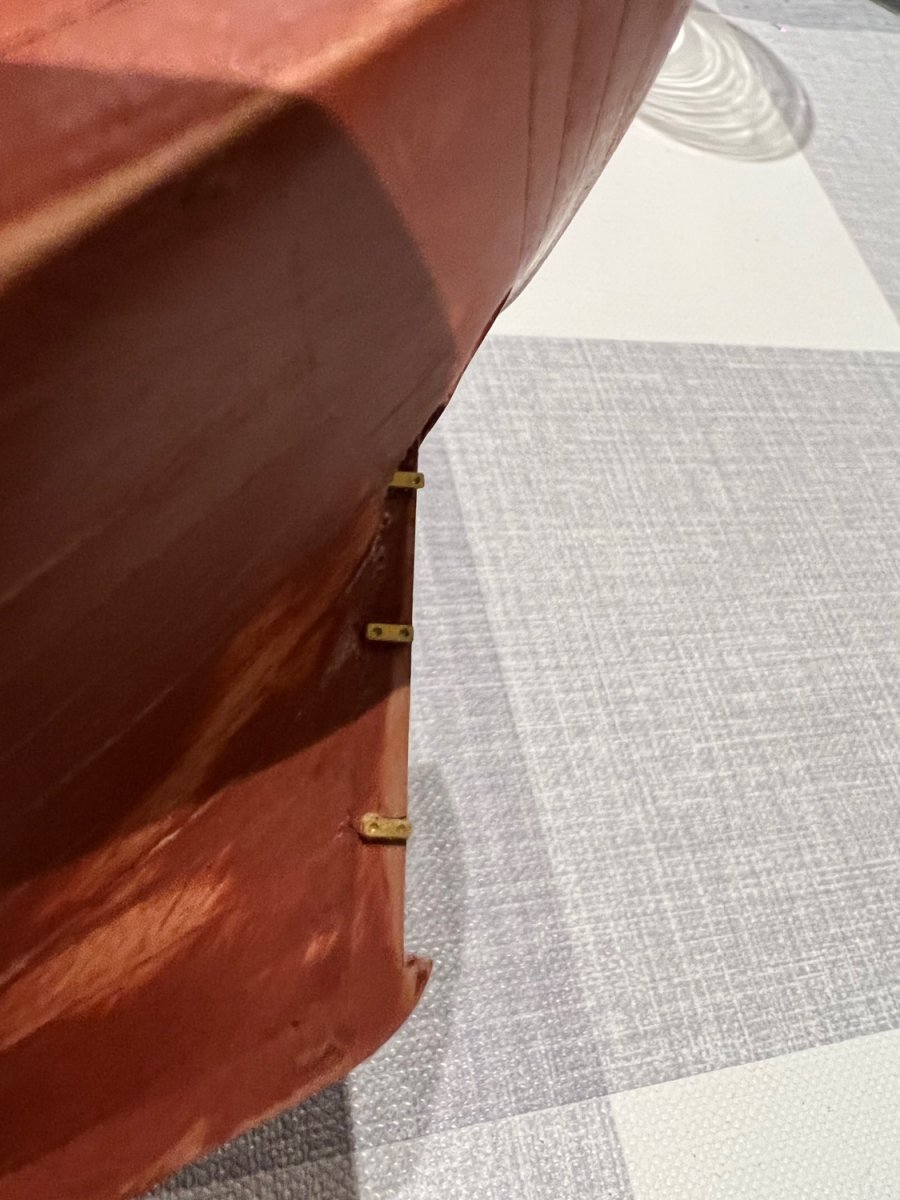
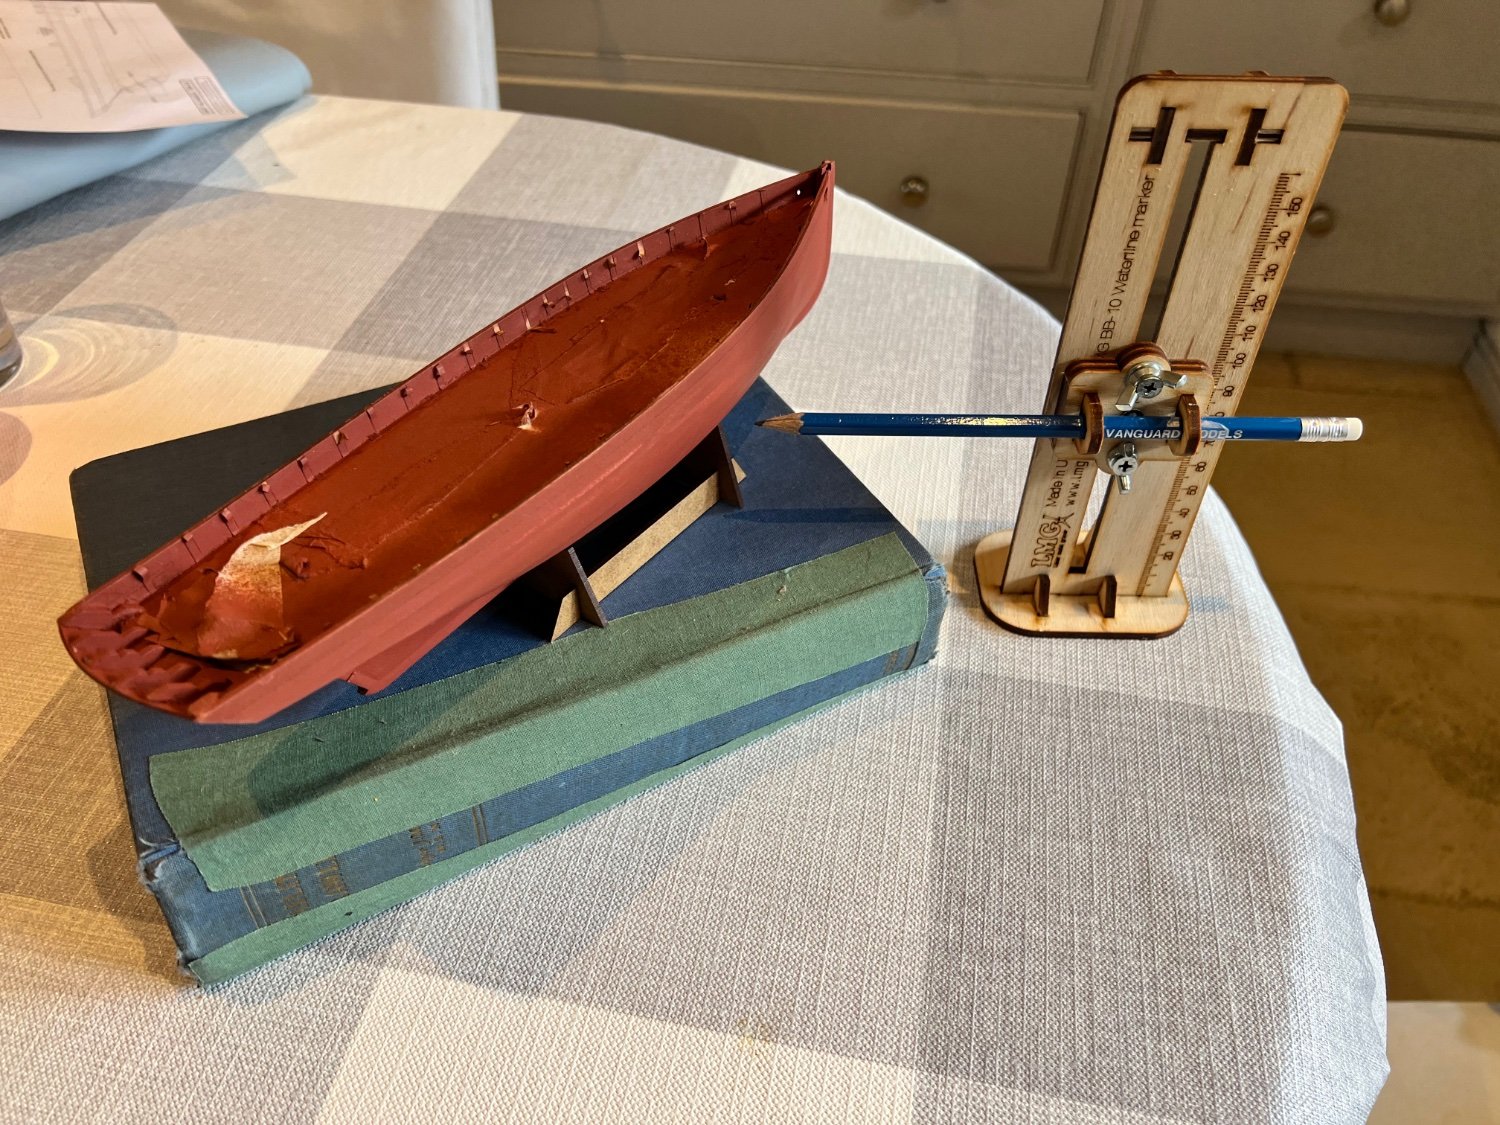
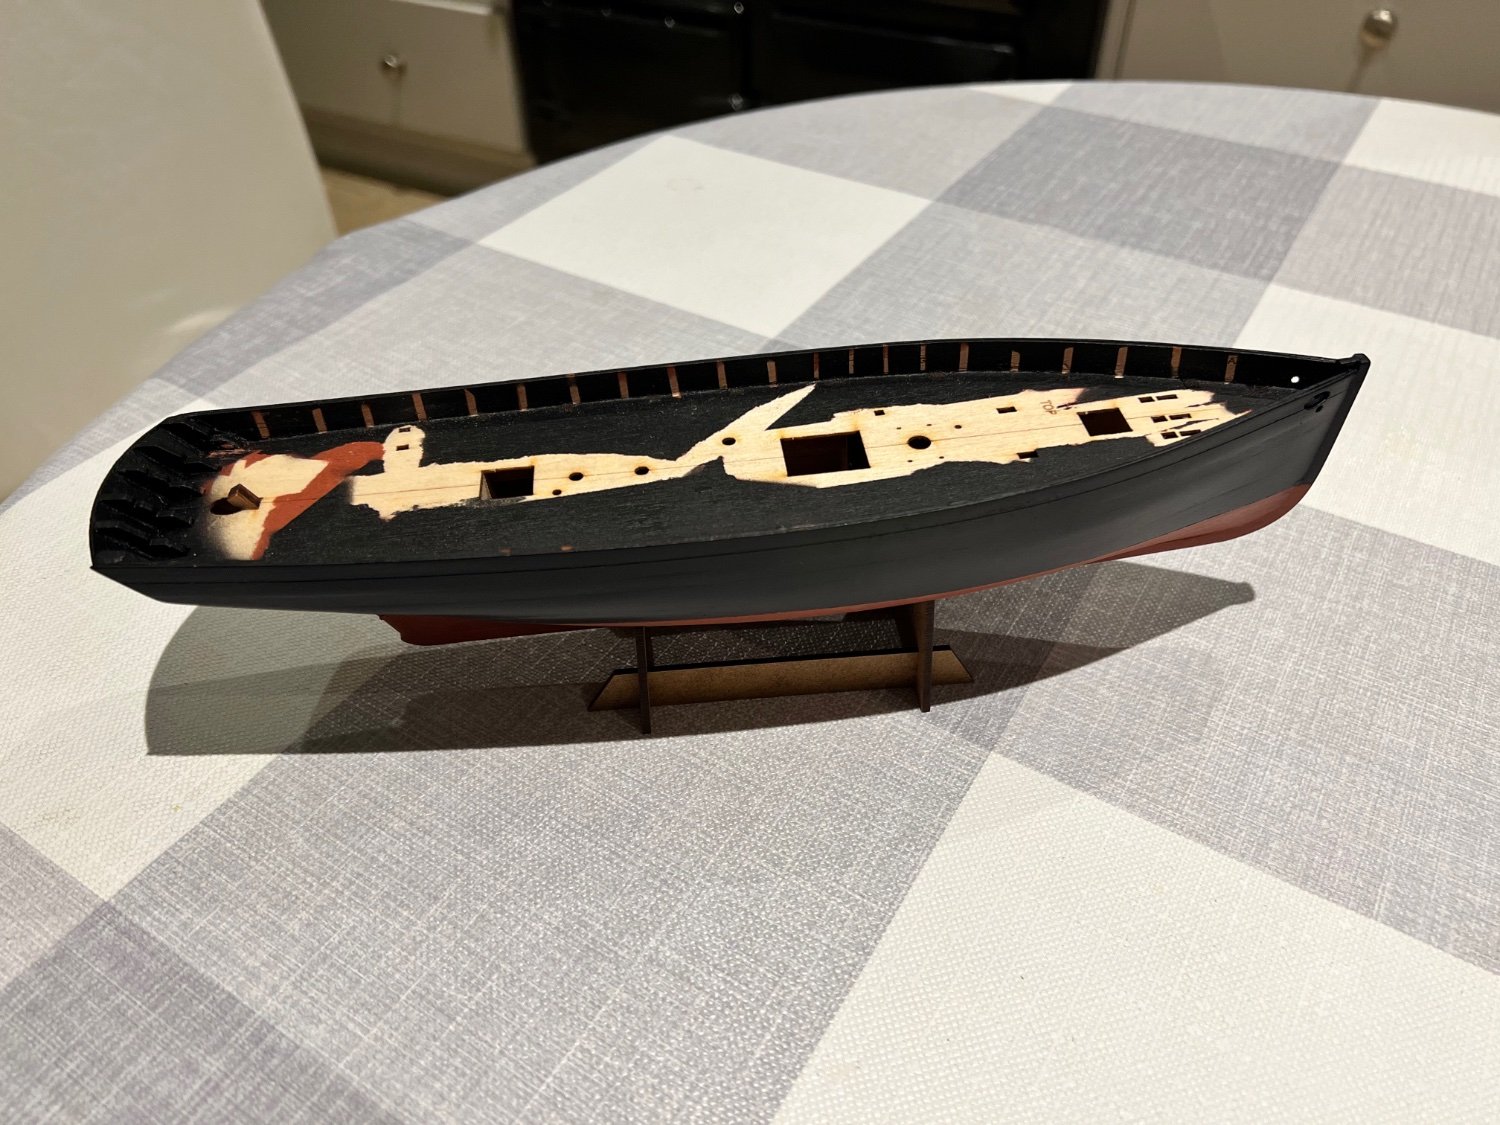
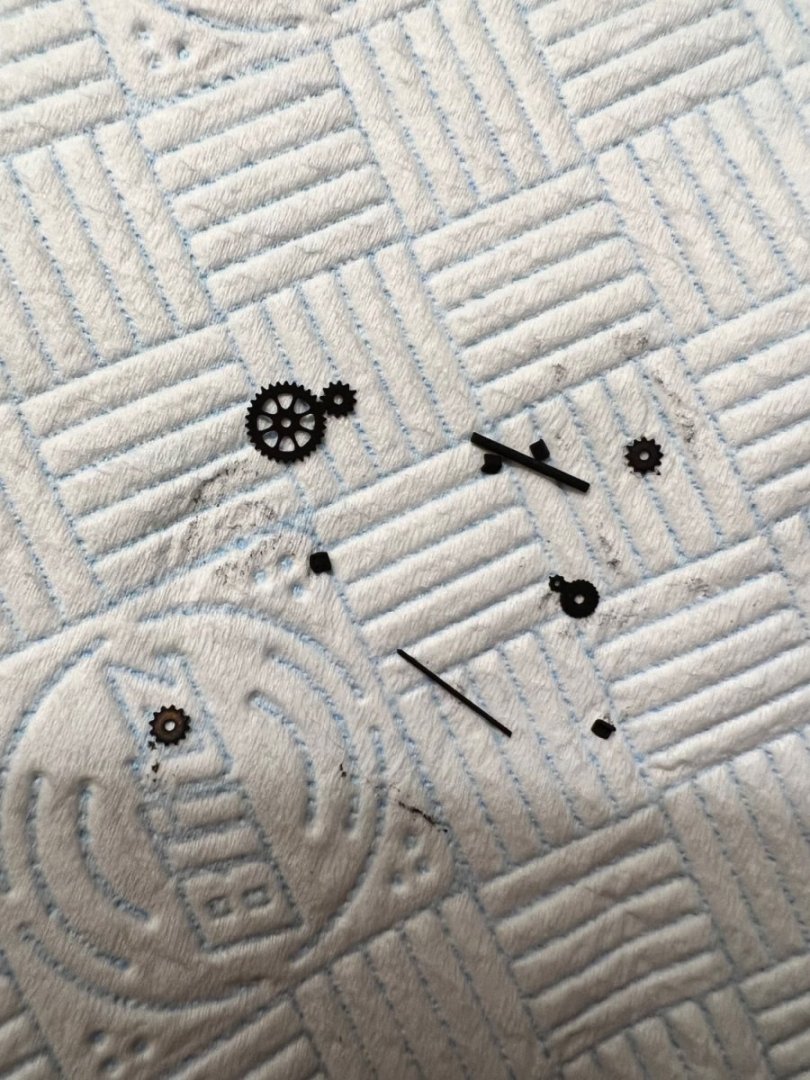
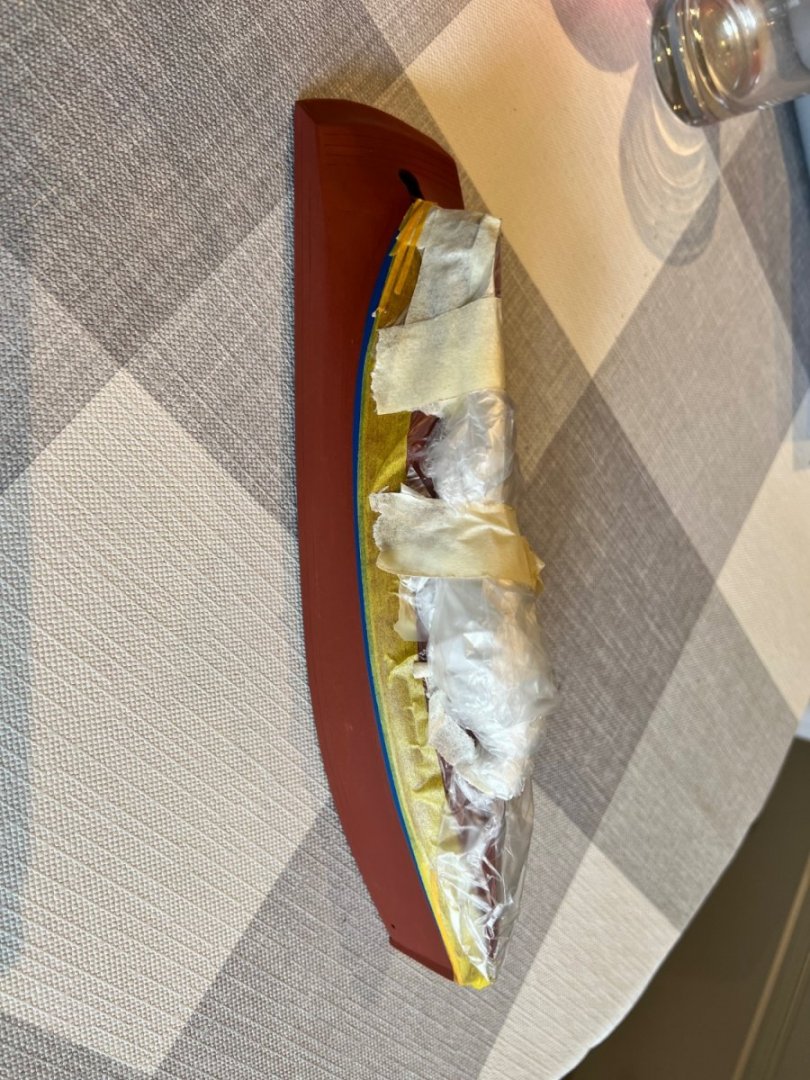
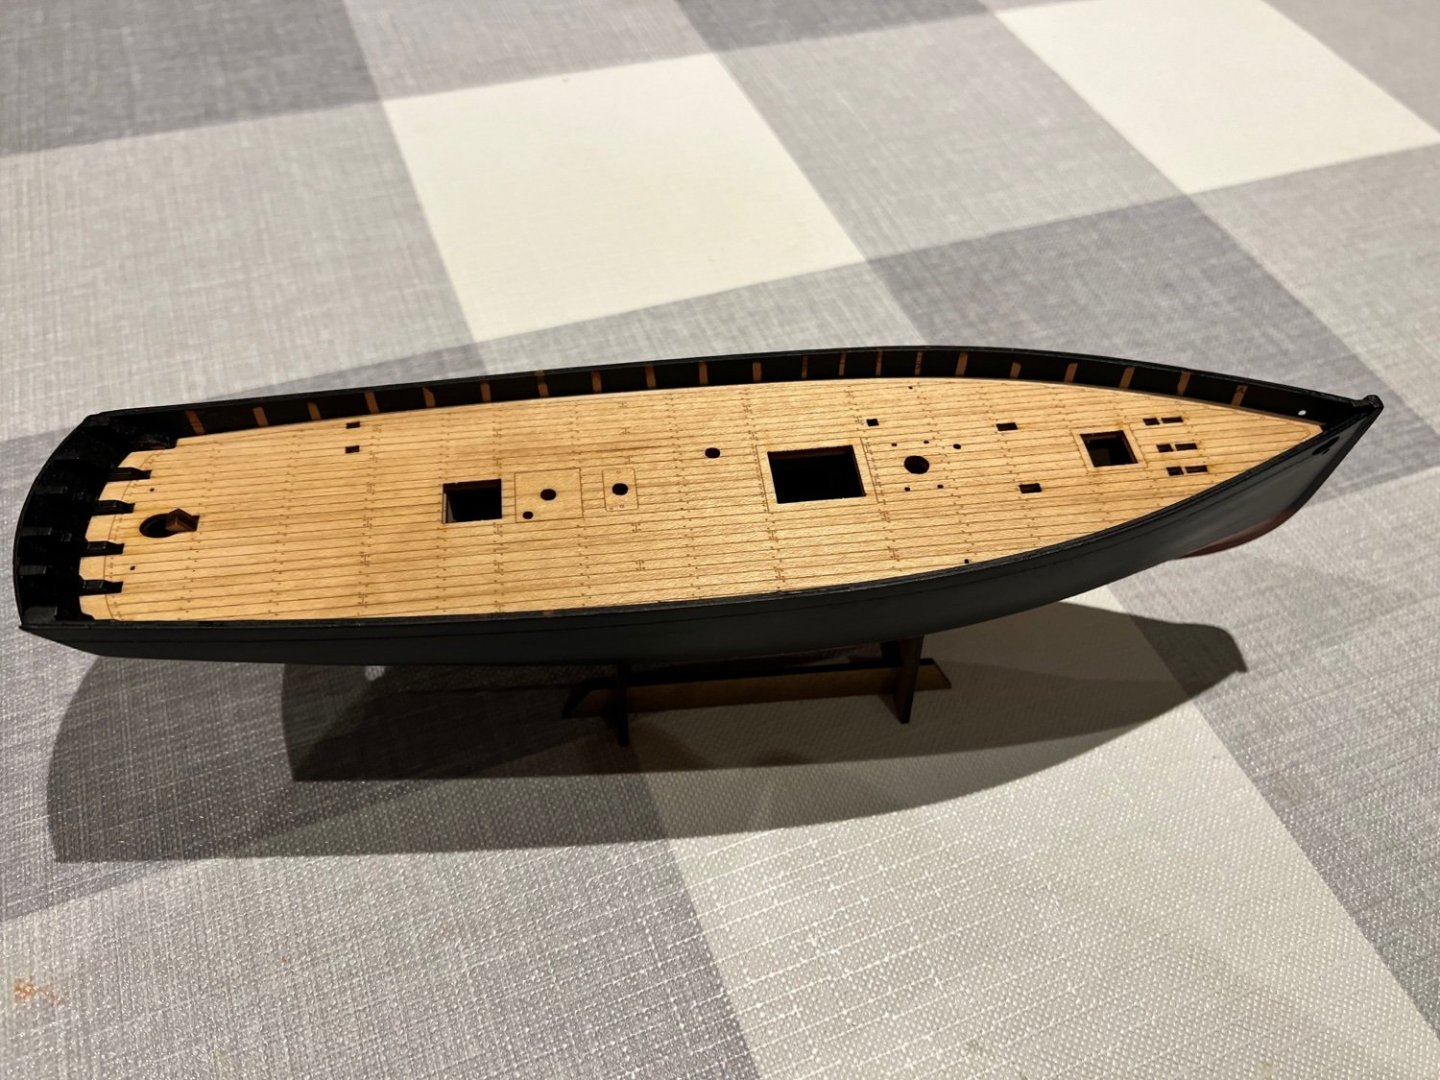
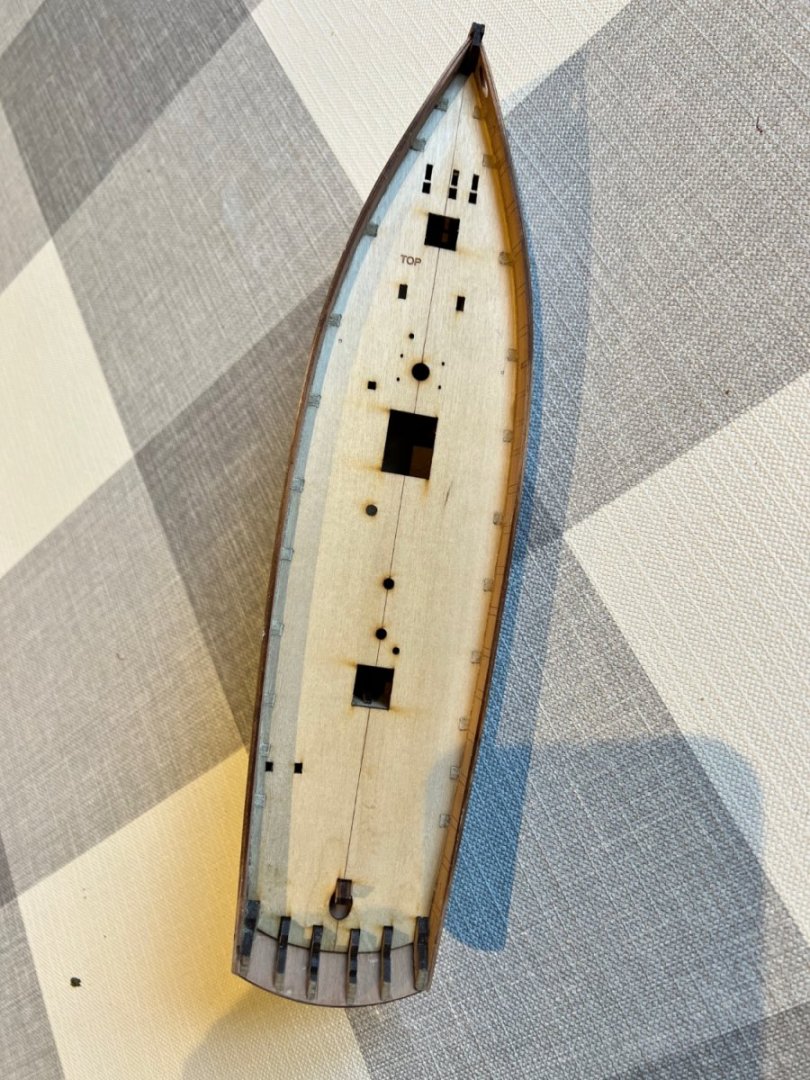
I did fill and sand down one more time, added the rudder fittings. These were very small and fiddly, lost at least one in the carpet. I’m really impressed that Chris includes extras of these easy to lose or break parts in the kit. Marked the waterline. Tricky to get both sides the same, lots of drawing and then rubbing out and starting again. Nisha is sitting on a very battered copy of March’s Sailing Trawlers that I sourced on ABE Books from Germany. The price of the March’s books must have skyrocketed since Chris launched this range of models. Booksellers must be wondering why a book no one wanted two years ago is now in so much demand. Hull taped up for painting. Chaos Black goes on really well leaving a nice satin finish and dries very fast (unlike the horrible Plastikote white spray paint I’m using on the rubbing strip and stern trim). Looks like dazzle camouflage from above. Deck fits really well. Treated it with one coat of Danish Oil so far and it looks better than the untreated deck I have on the Fifie. Darker, but somehow the engraved planking is more defined too. The deck needed light sanding at the edges to fit but very little and I think looks great. I’ll glue it tomorrow in case there’s any swelling / shrinkage from the Danish Oil.


- 62 replies
-
- 9
-
-
- Nisha
- Vanguard Models
- (and 1 more)
-
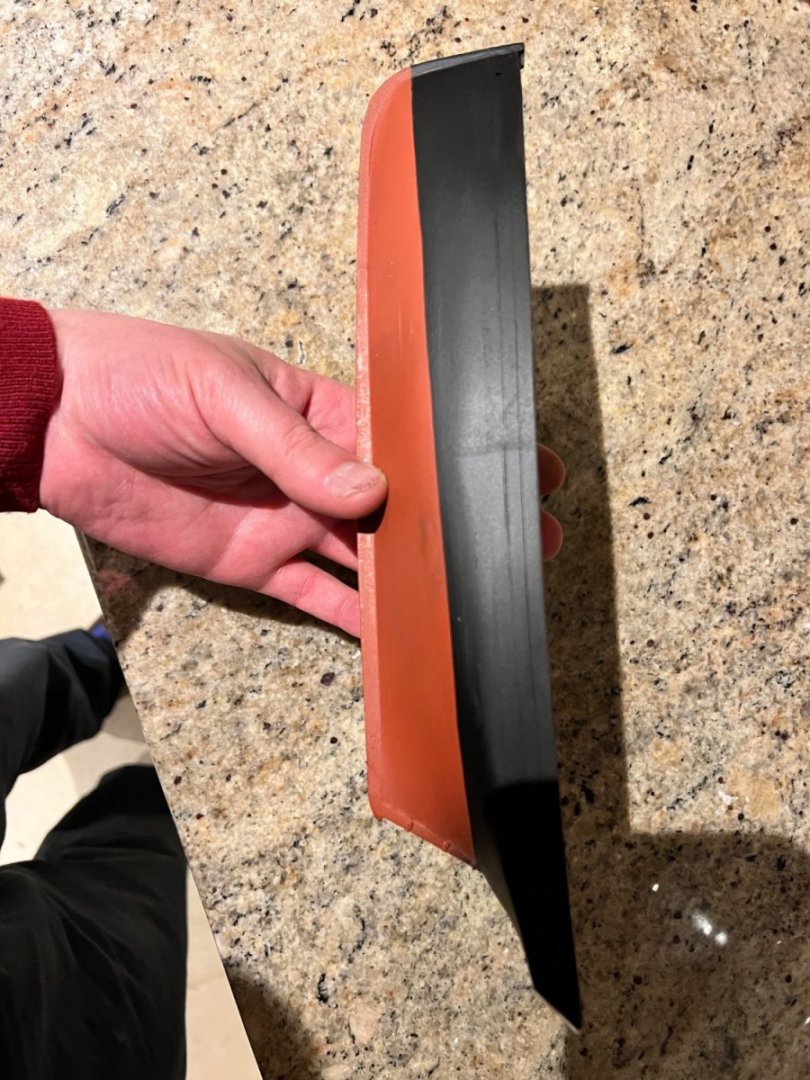
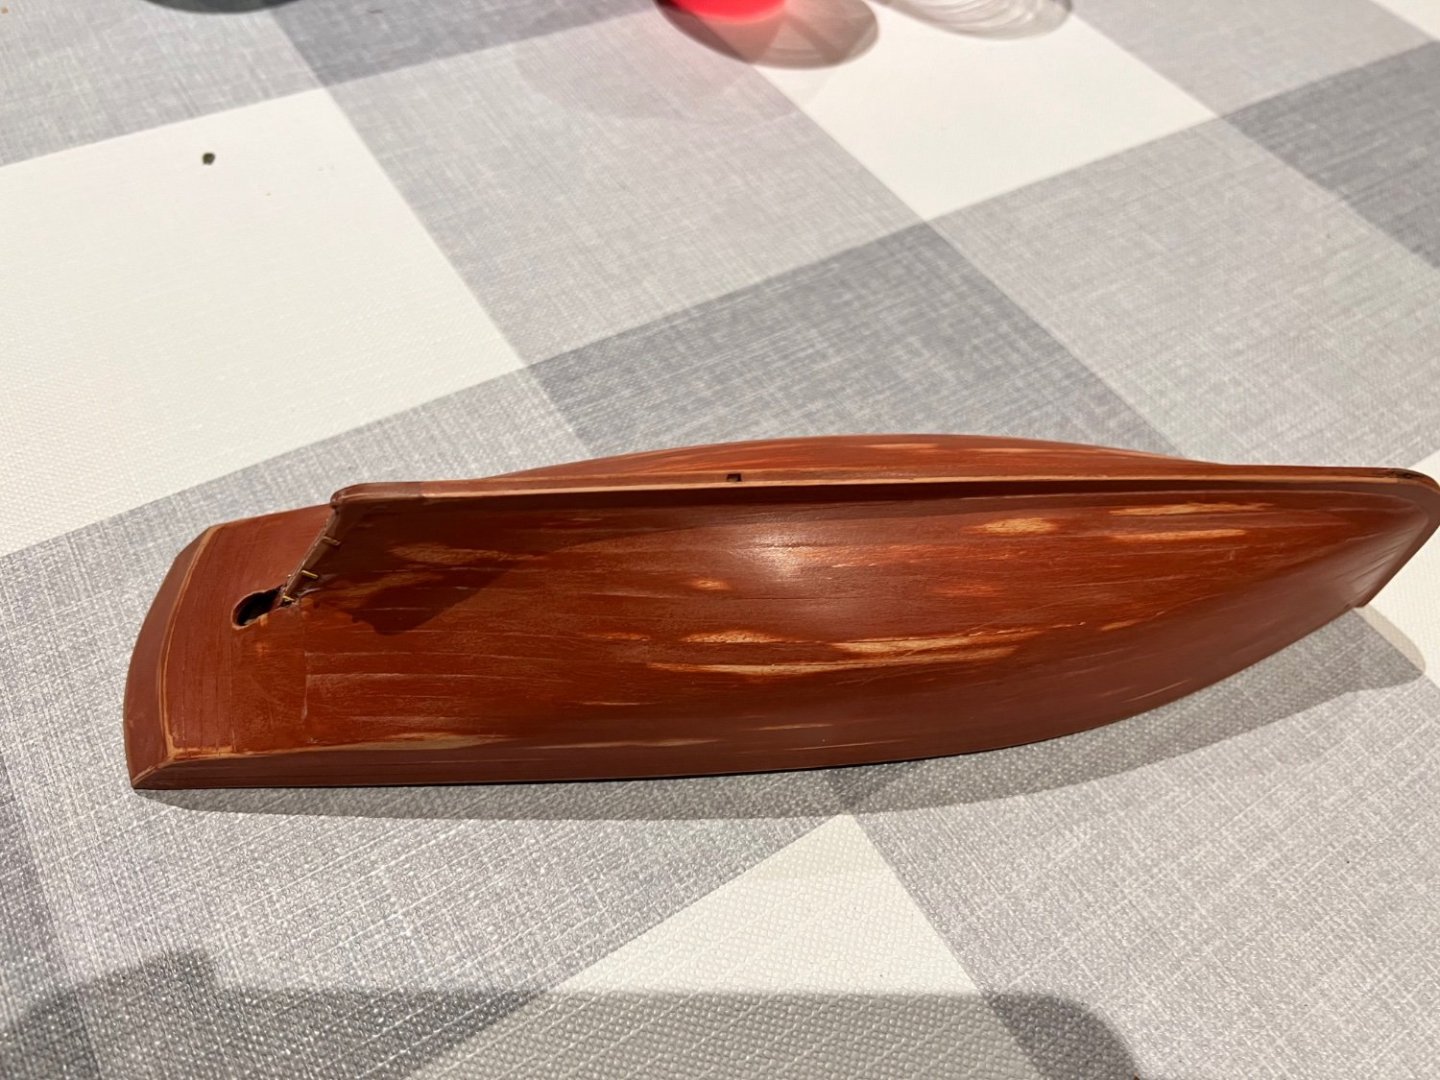
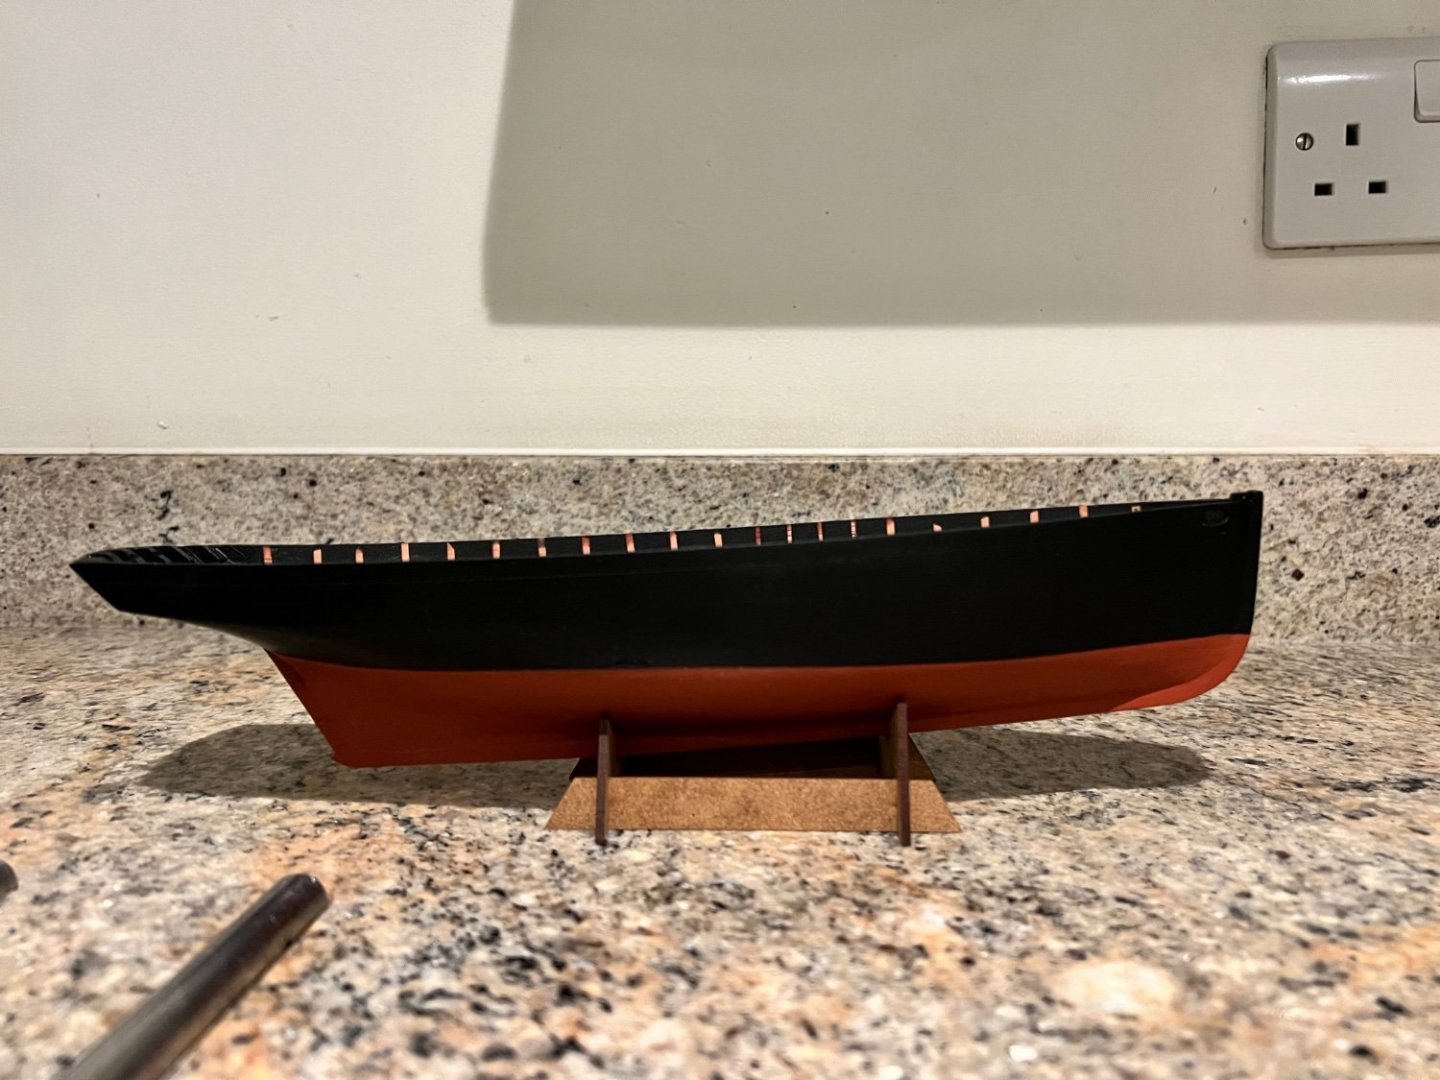
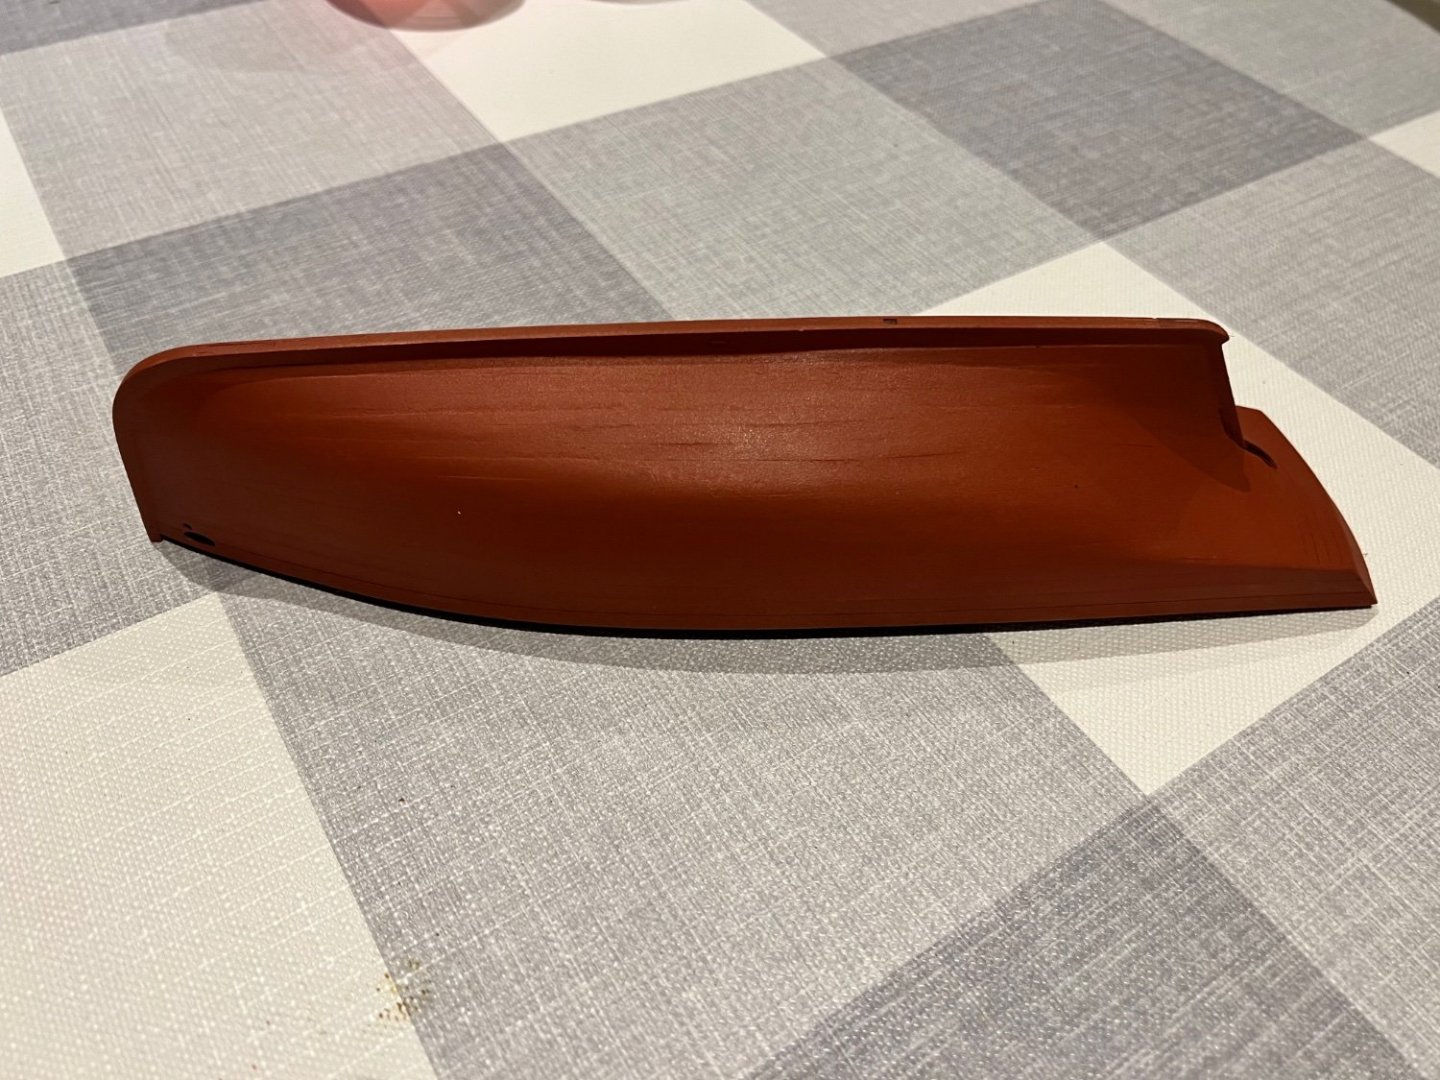
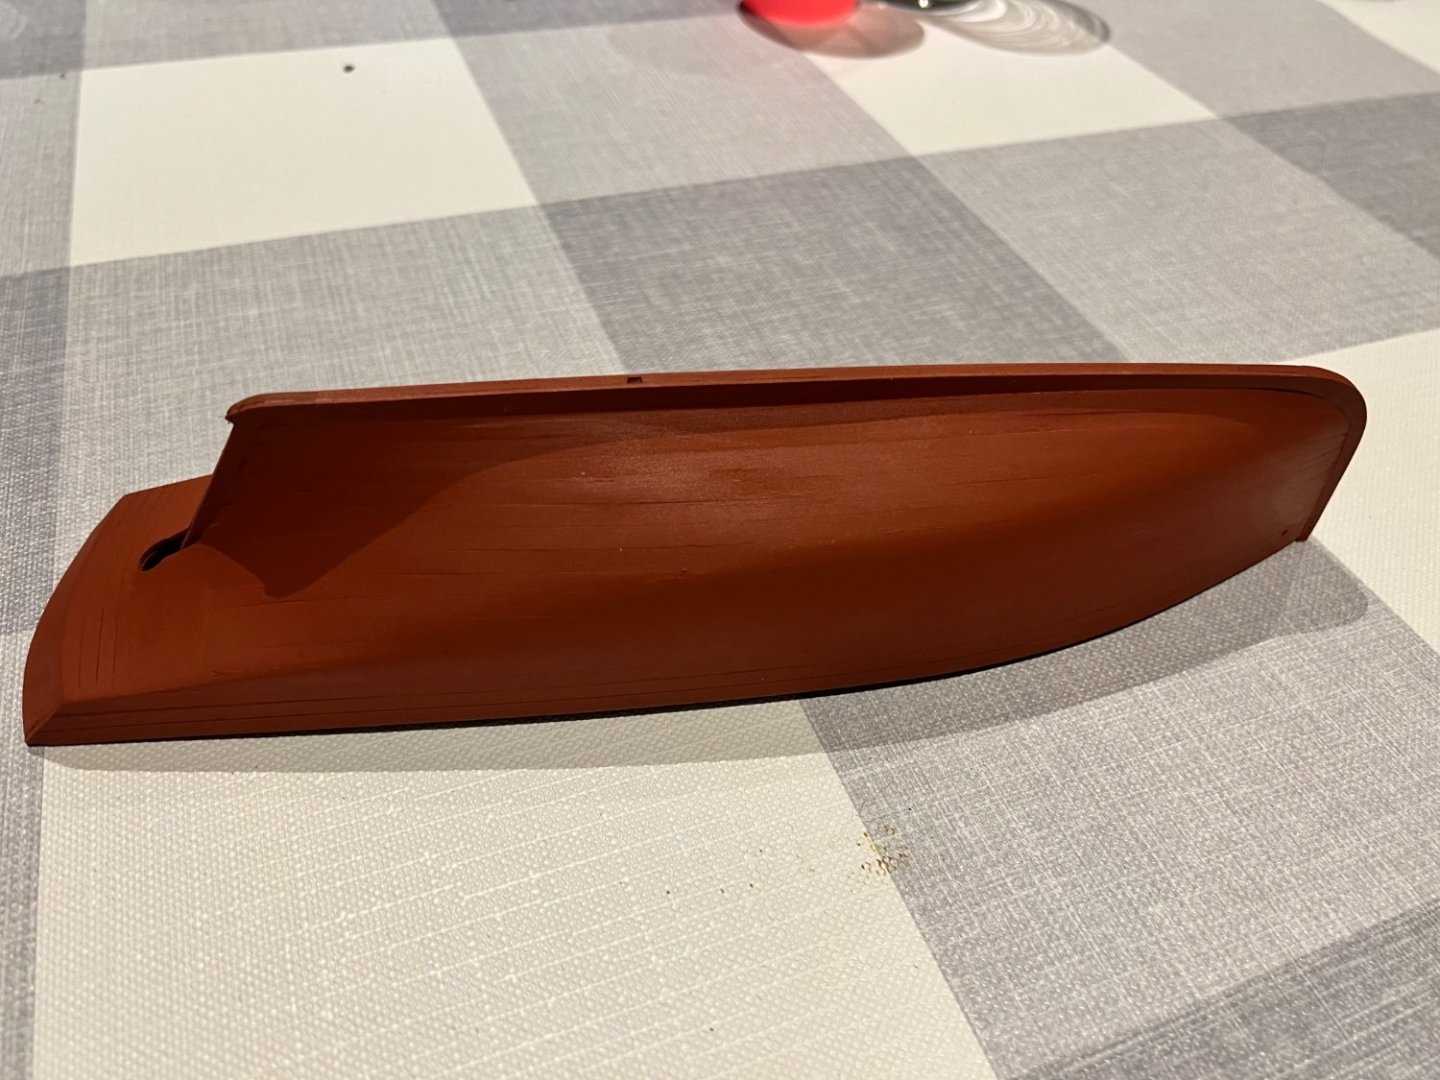
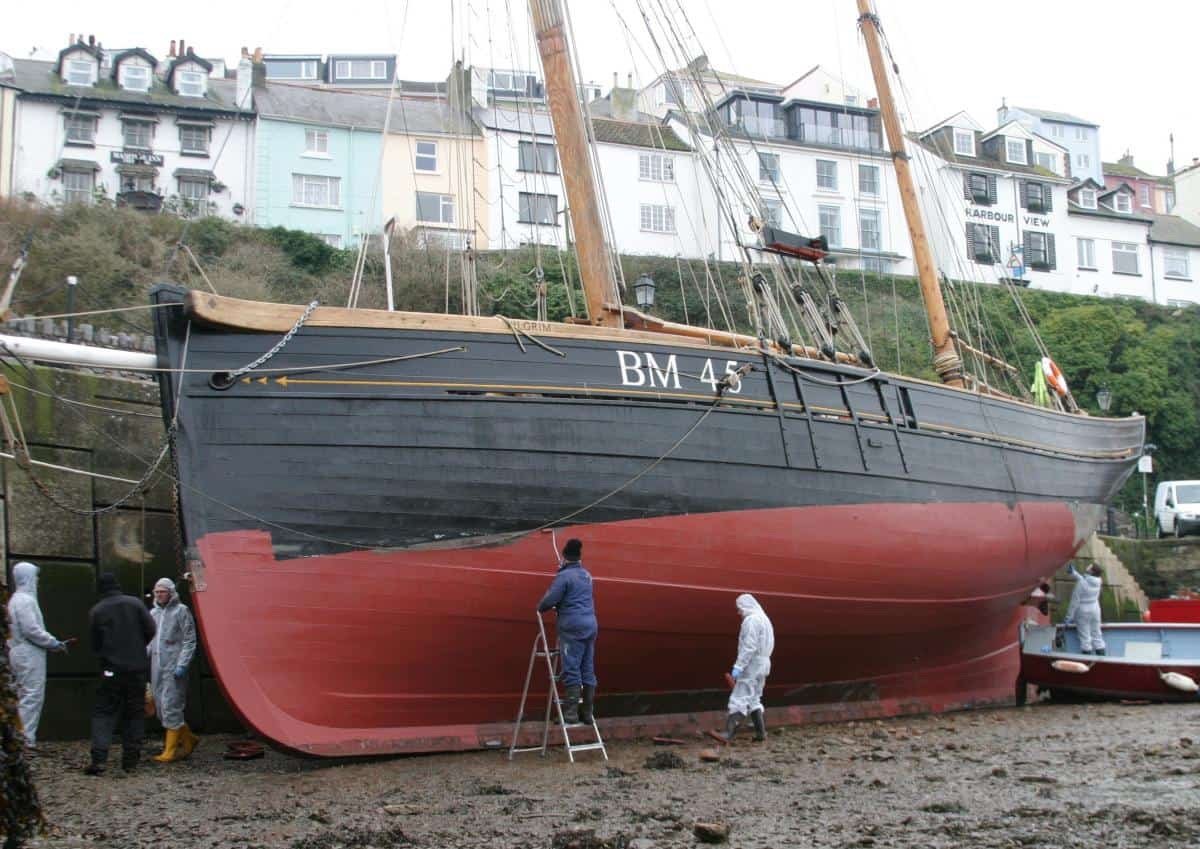
Thanks for all the really helpful advice Craigie. Nisha is now in her “red” phase. Other builds suggest that I should fill, sand and prime Nna couple of times, but surely I shouldn’t be seeking a very smooth finish and the planks should be visible. Photos of Pilgrim show that her planking was very visible below the paint. I’m thinking fill and sand only a few obvious cracks, mainly along the rabbet and reprime just the once.
- 62 replies
-
- 6
-
-
- Nisha
- Vanguard Models
- (and 1 more)
-
Thanks Craigie, Think I’ll go for option 2. I’m bound to make a mess of option 1!
- 62 replies
-
- 1
-
-
- Nisha
- Vanguard Models
- (and 1 more)
-
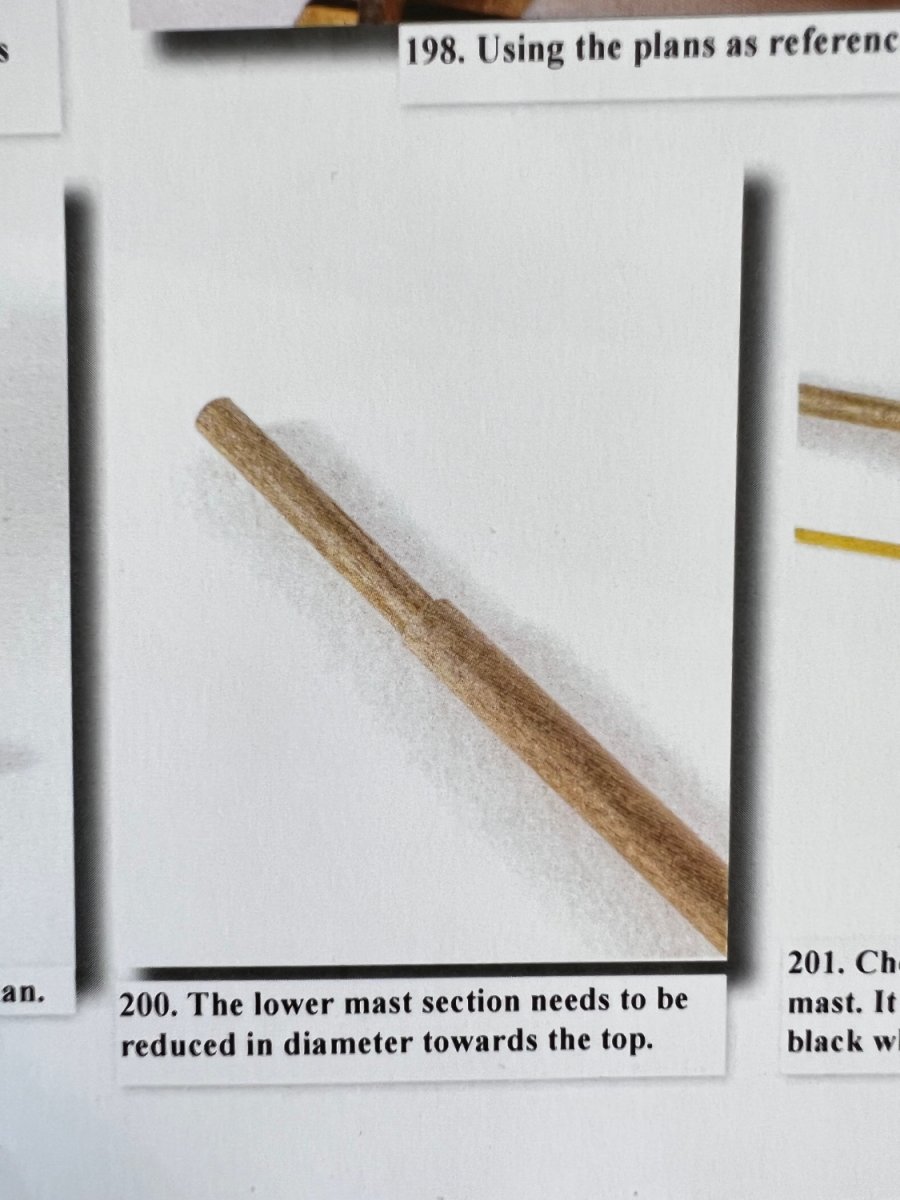
Thanks Andrew. Looking ahead in the instructions - can anyone point me in the right direction as how to reduce the diameter of the lower mast? I can taper with sandpaper but don’t know how to get a step change in diameter such as this without a lathe which I don’t have. Thanks

- 62 replies
-
- 2
-
-
- Nisha
- Vanguard Models
- (and 1 more)
-
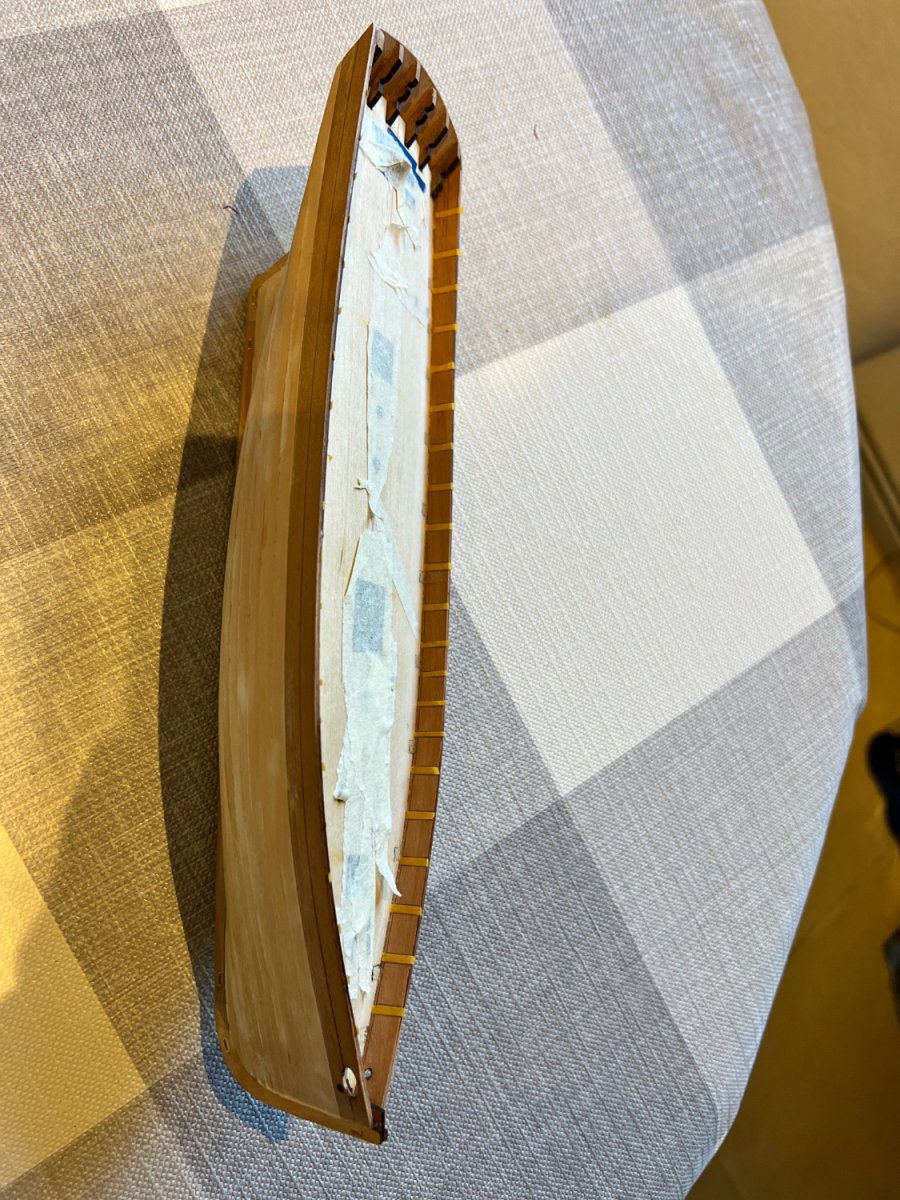
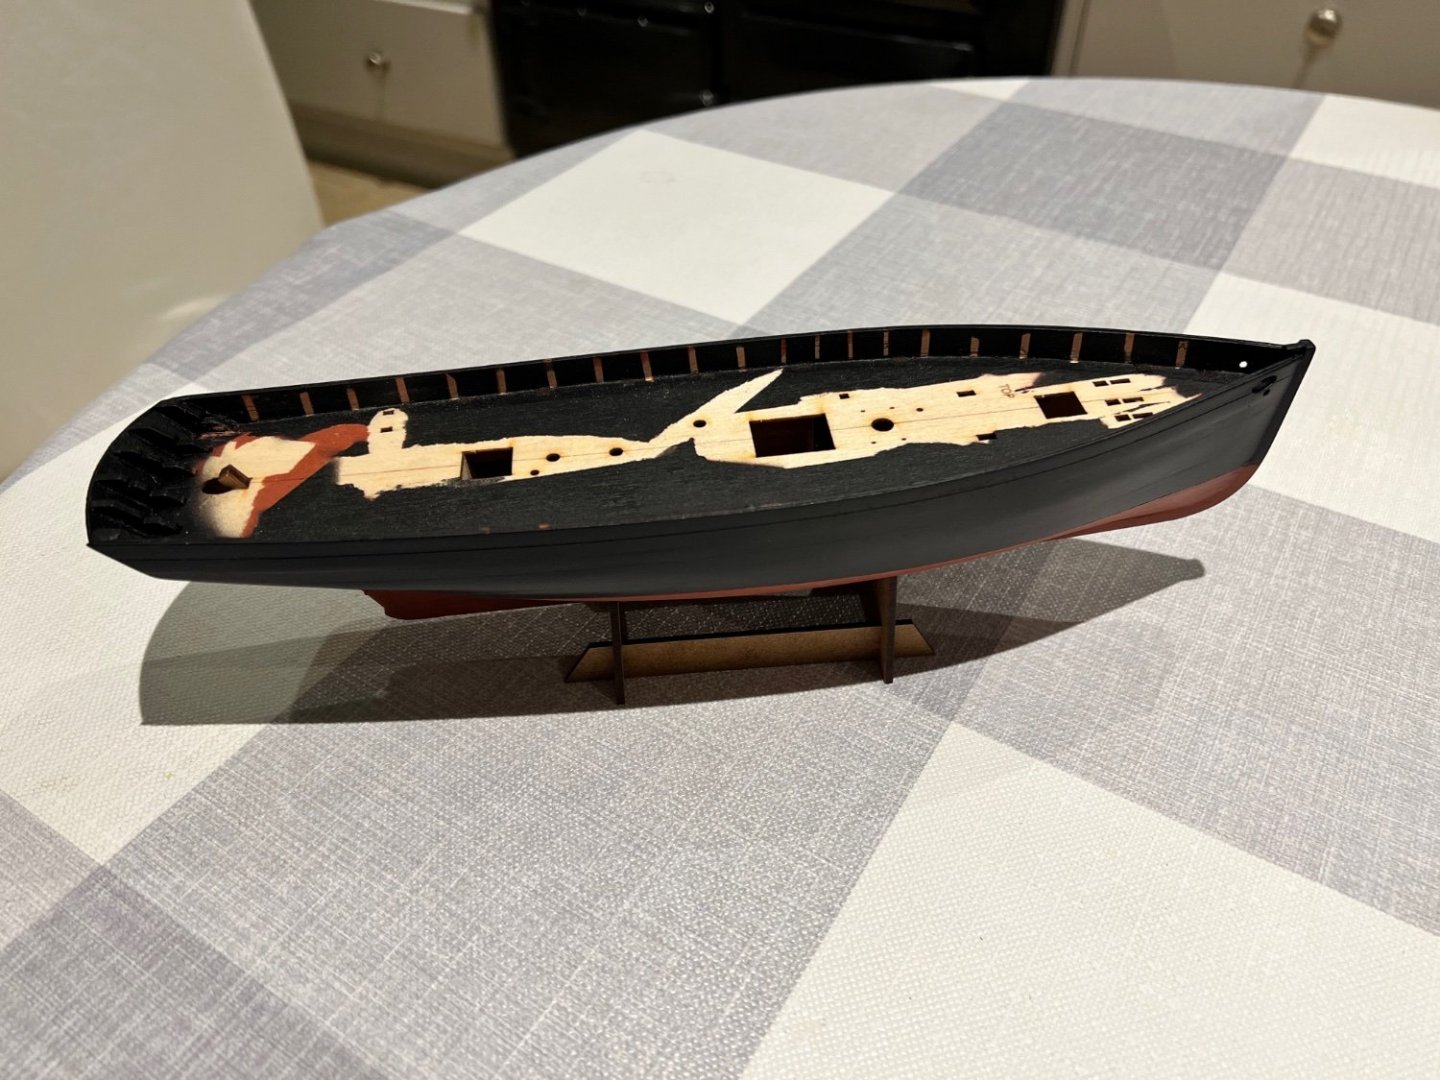
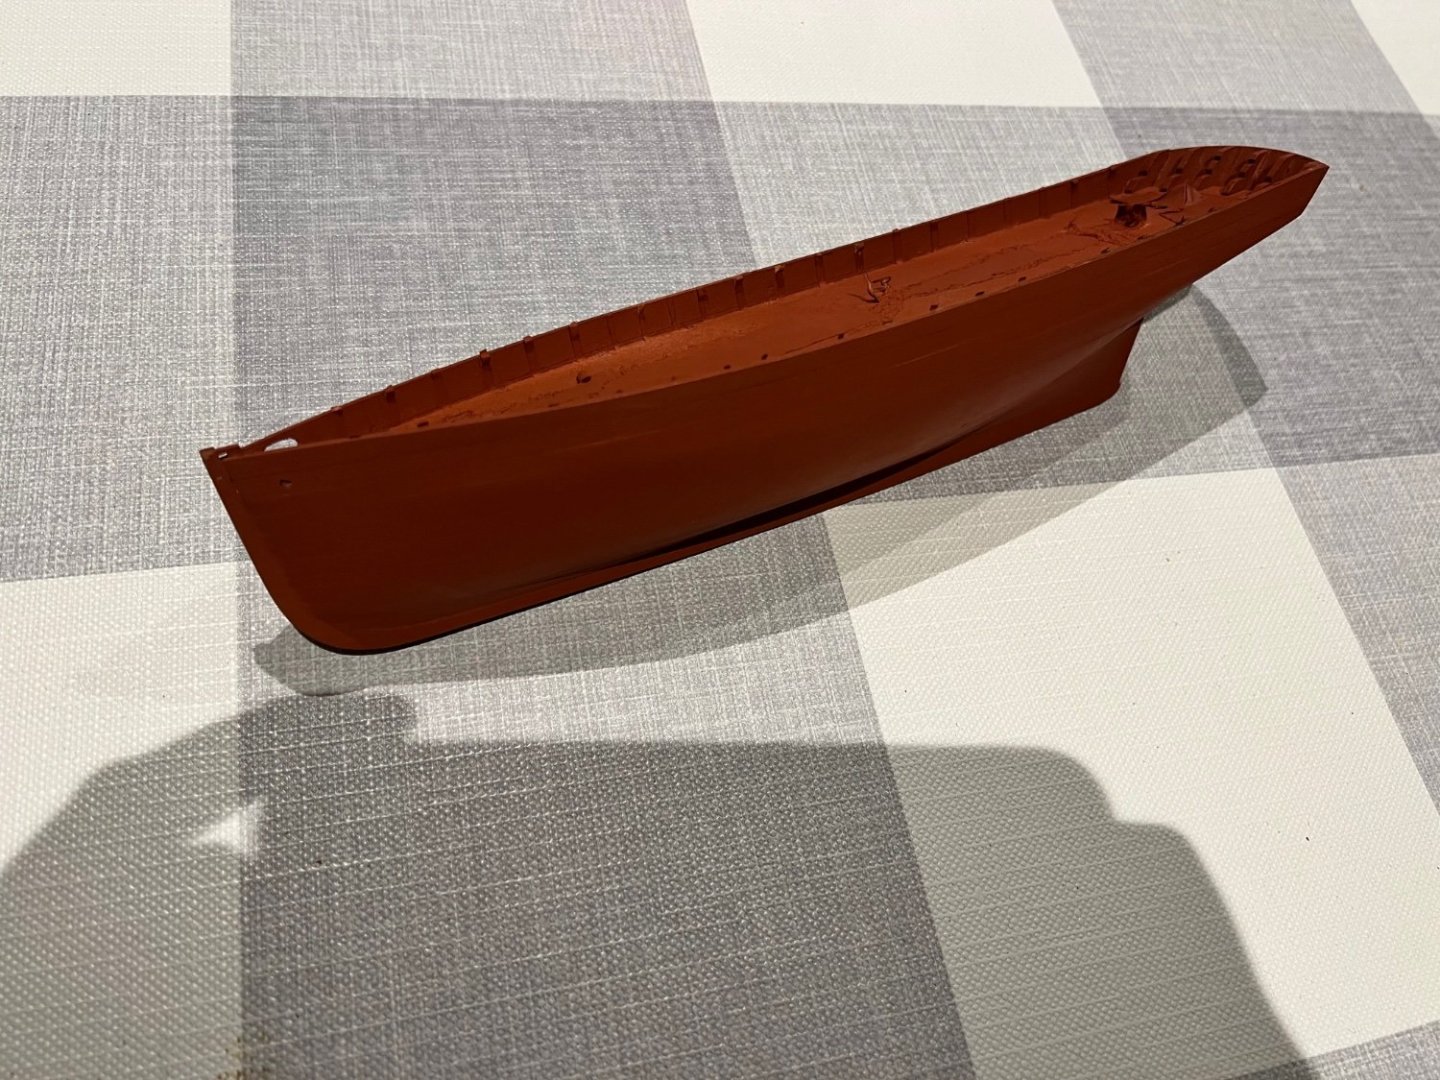
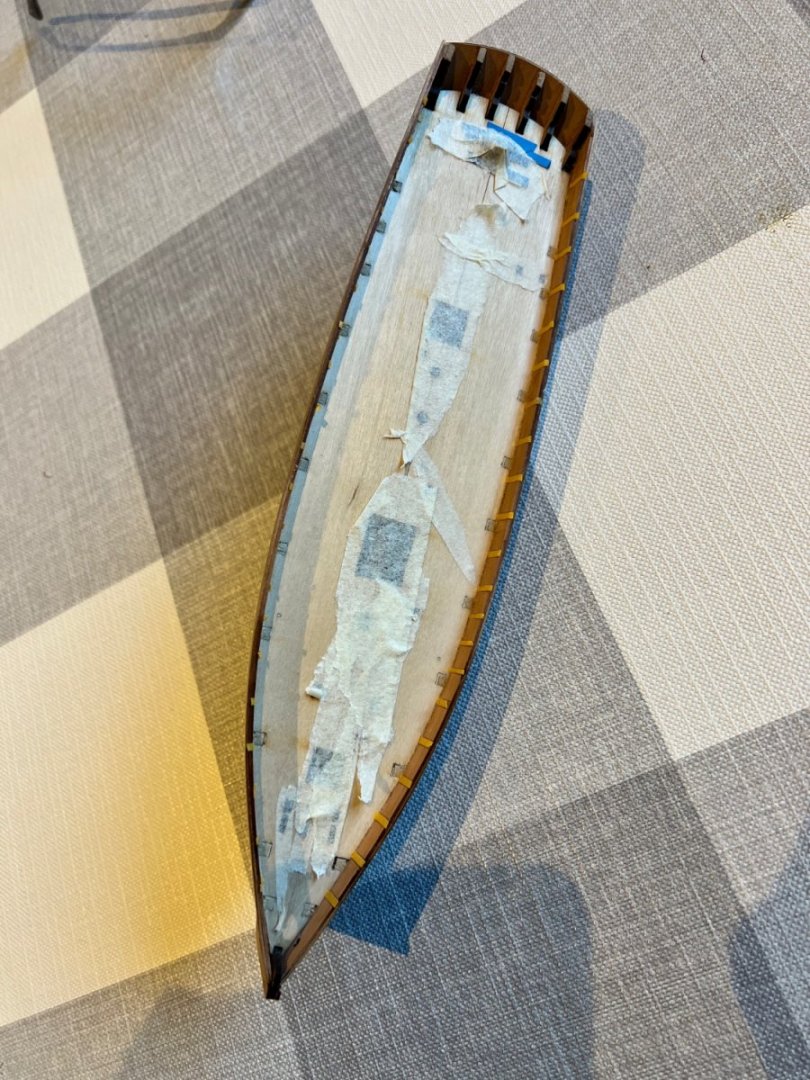
Second planking finished, filled and sanded. Still lots of room for improvement at bow and stern, especially if I’m ever to build a bare wood hull. I’ve decided on a fully painted hull with red oxide below the waterline and black above with no bootstrap. The rubbing strake will be white. So I have used white filler wherever needed and have not yet added part #39 to the stern as this will be white too. The bulkhead “ears” have been removed I’m going to paint the inside of the bulwarks black too, but not the timberheads. I’ve roughly masked off where each of these will be - it does not need to be perfect, just enough that I can see where each timberhead goes after painting. Also masked over each of the hatches and holes in the deck and around the tiller shaft. The only wood primer I have is the red oxide primer I’m using for the lower hull so everything will be painted with that before painting with Chaos Black above the waterline. Using spray cans for both. Andrew Johnson - I hope you don’t mind me copying your colour scheme?!


- 62 replies
-
- 5
-
-
- Nisha
- Vanguard Models
- (and 1 more)
-
What I did was keep the second plank below the bulwark roughly parallel to the first plank and didn’t twist it to fit at all. Then added the third plank at a near right angle with its end against the stern counter. Then sanded the second plank down to shape. Seems to have worked OK on both sides - there’s a tiny fit of filler which could have been avoided if I’d sanded down the second plank to be roughly in shape before fitting the third plank. I’m a beginner too, on my second build, so this might be technically the wrong approach but provides a relatively easy and aesthetically tidy solution. There’s more photos on my Nisha build log and I’m only slightly ahead of you in my build Glomar.


-
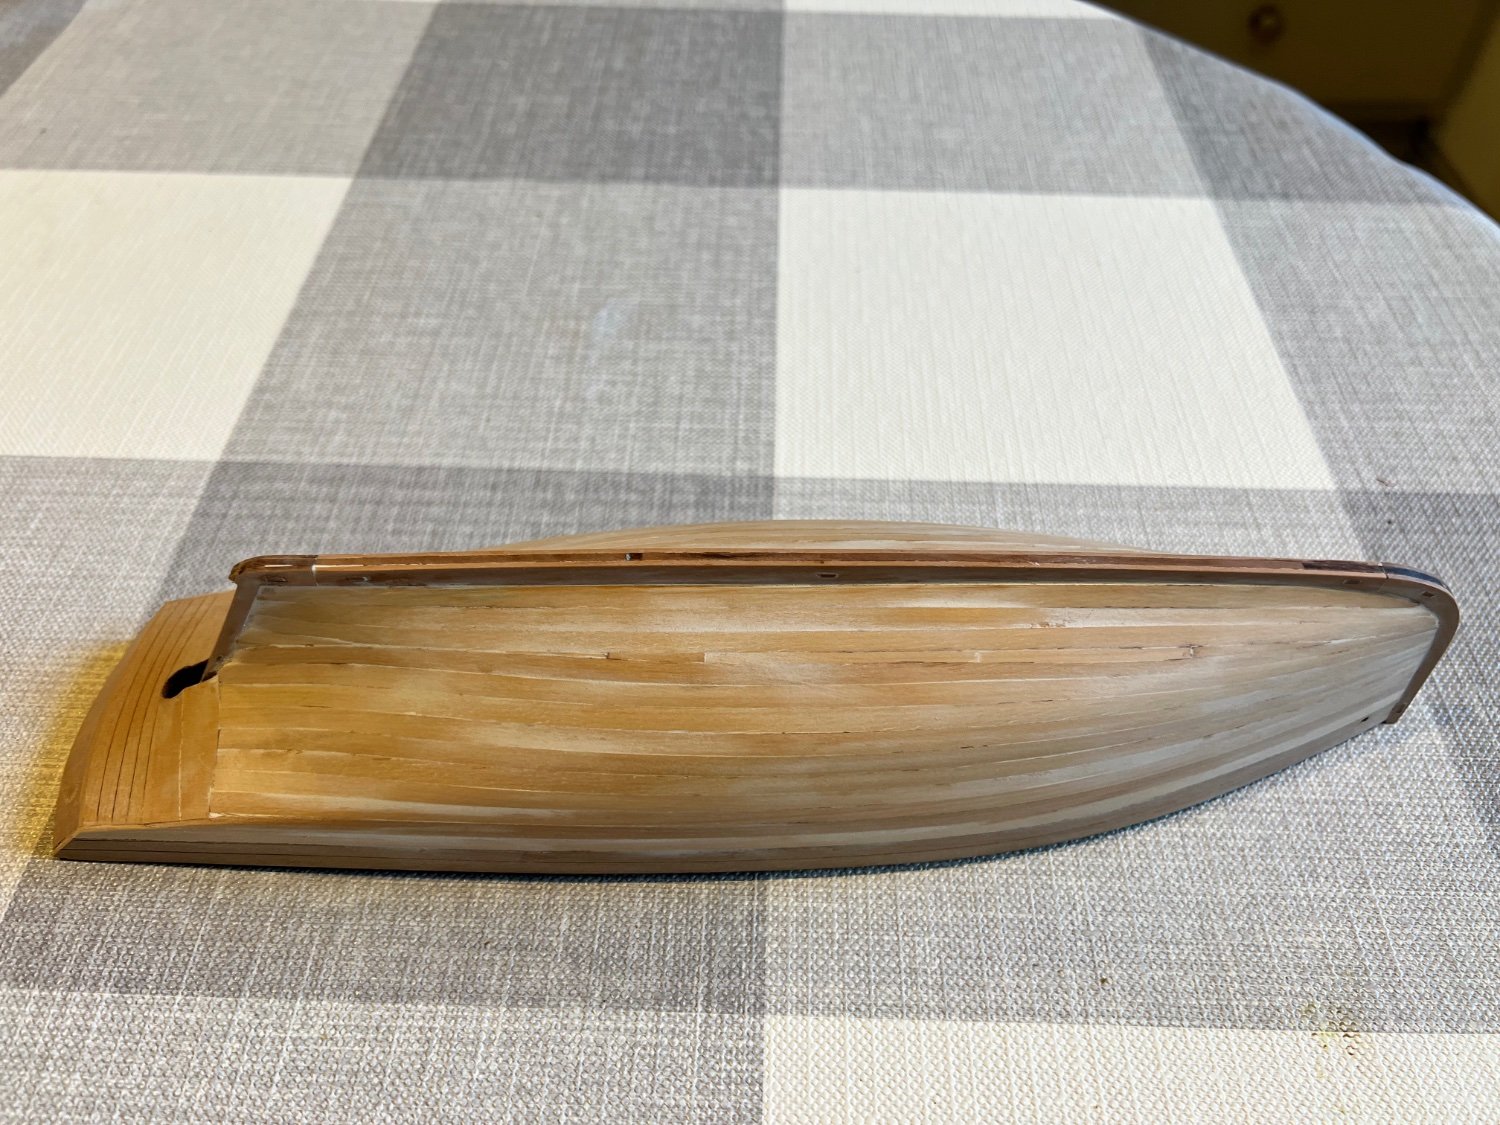
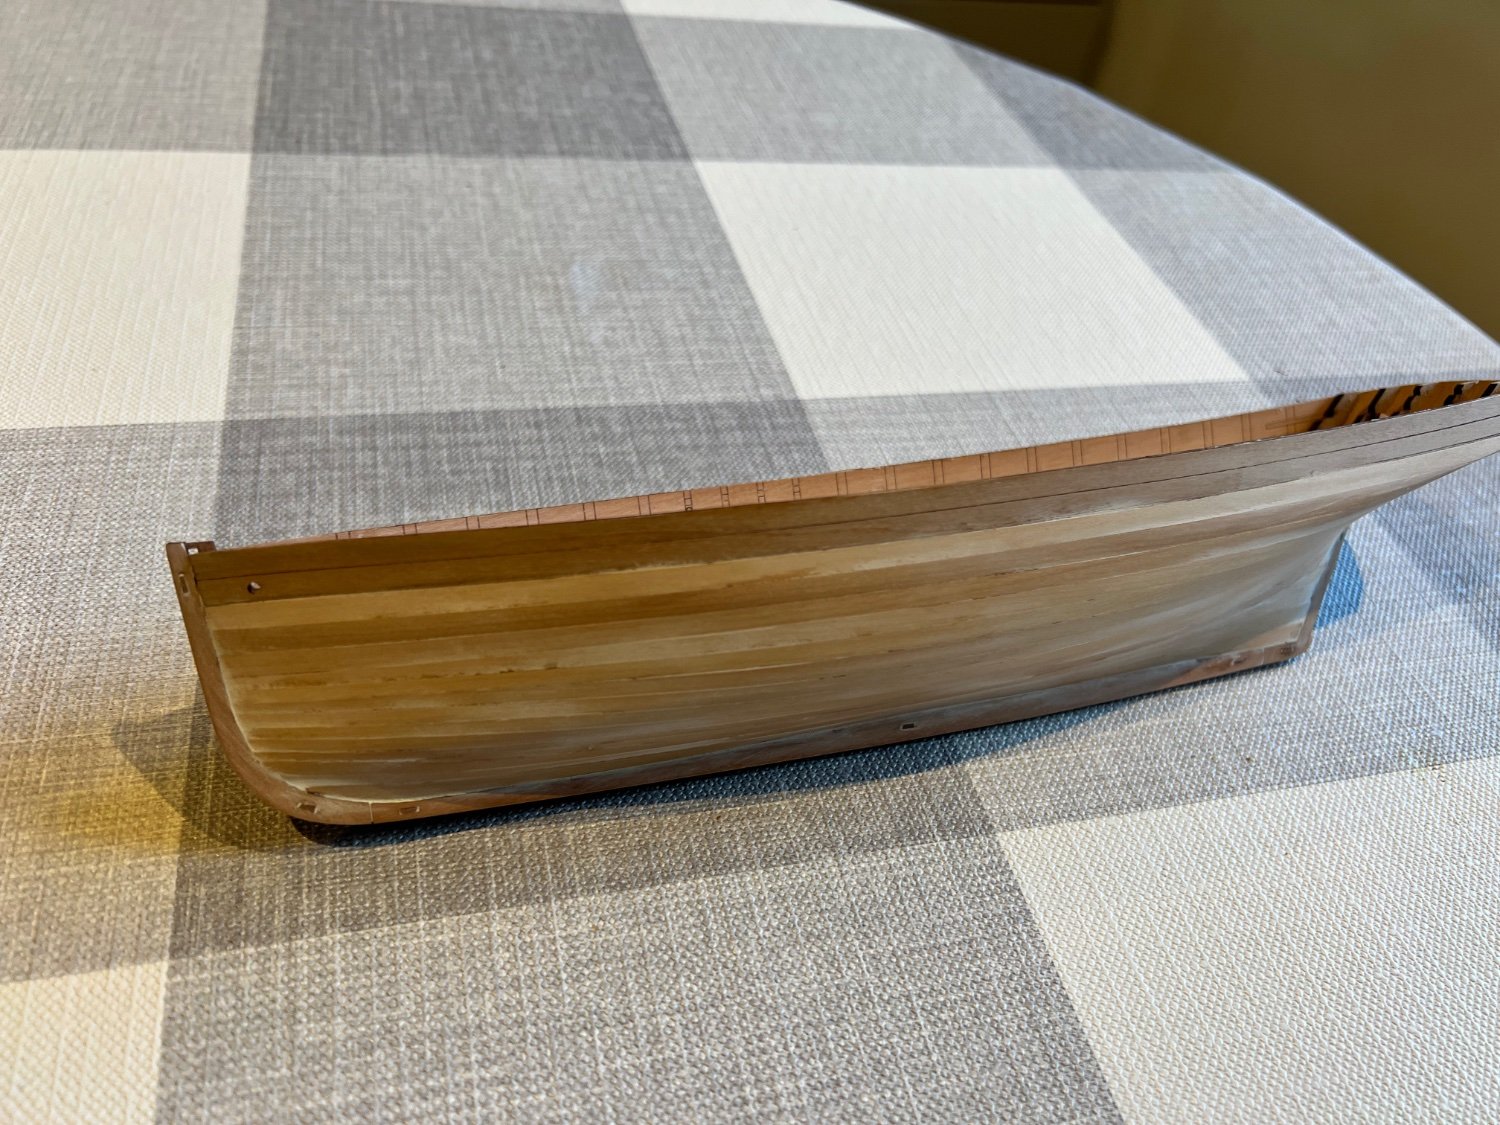
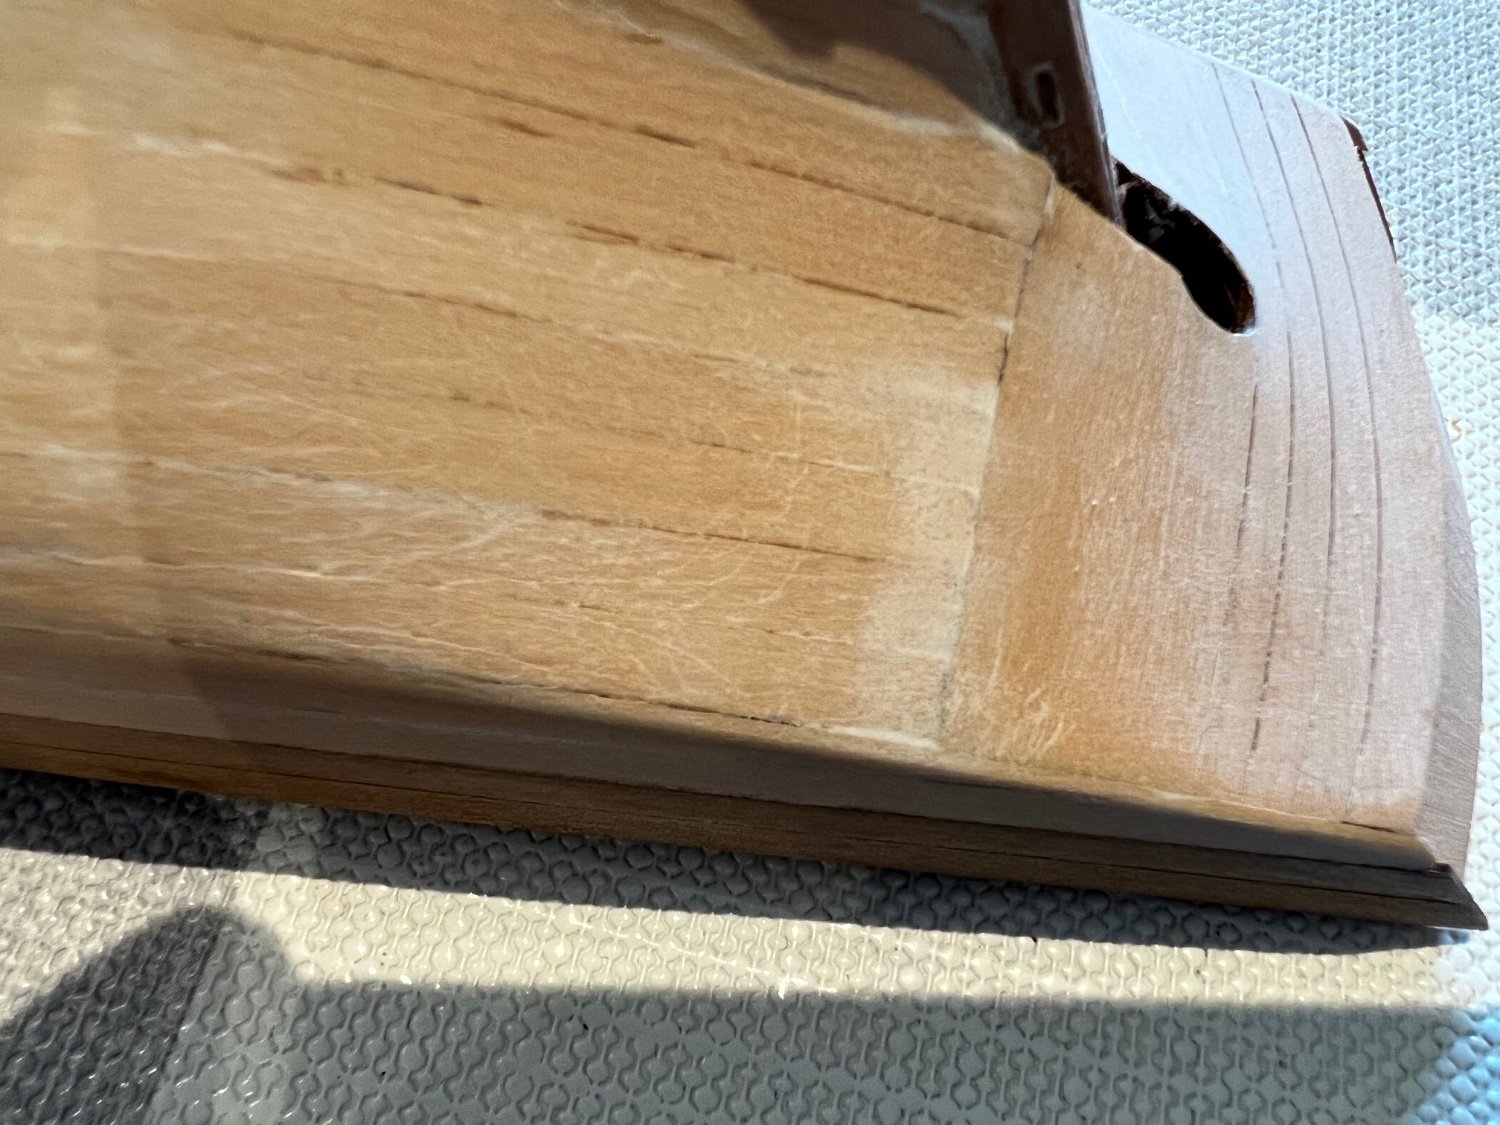
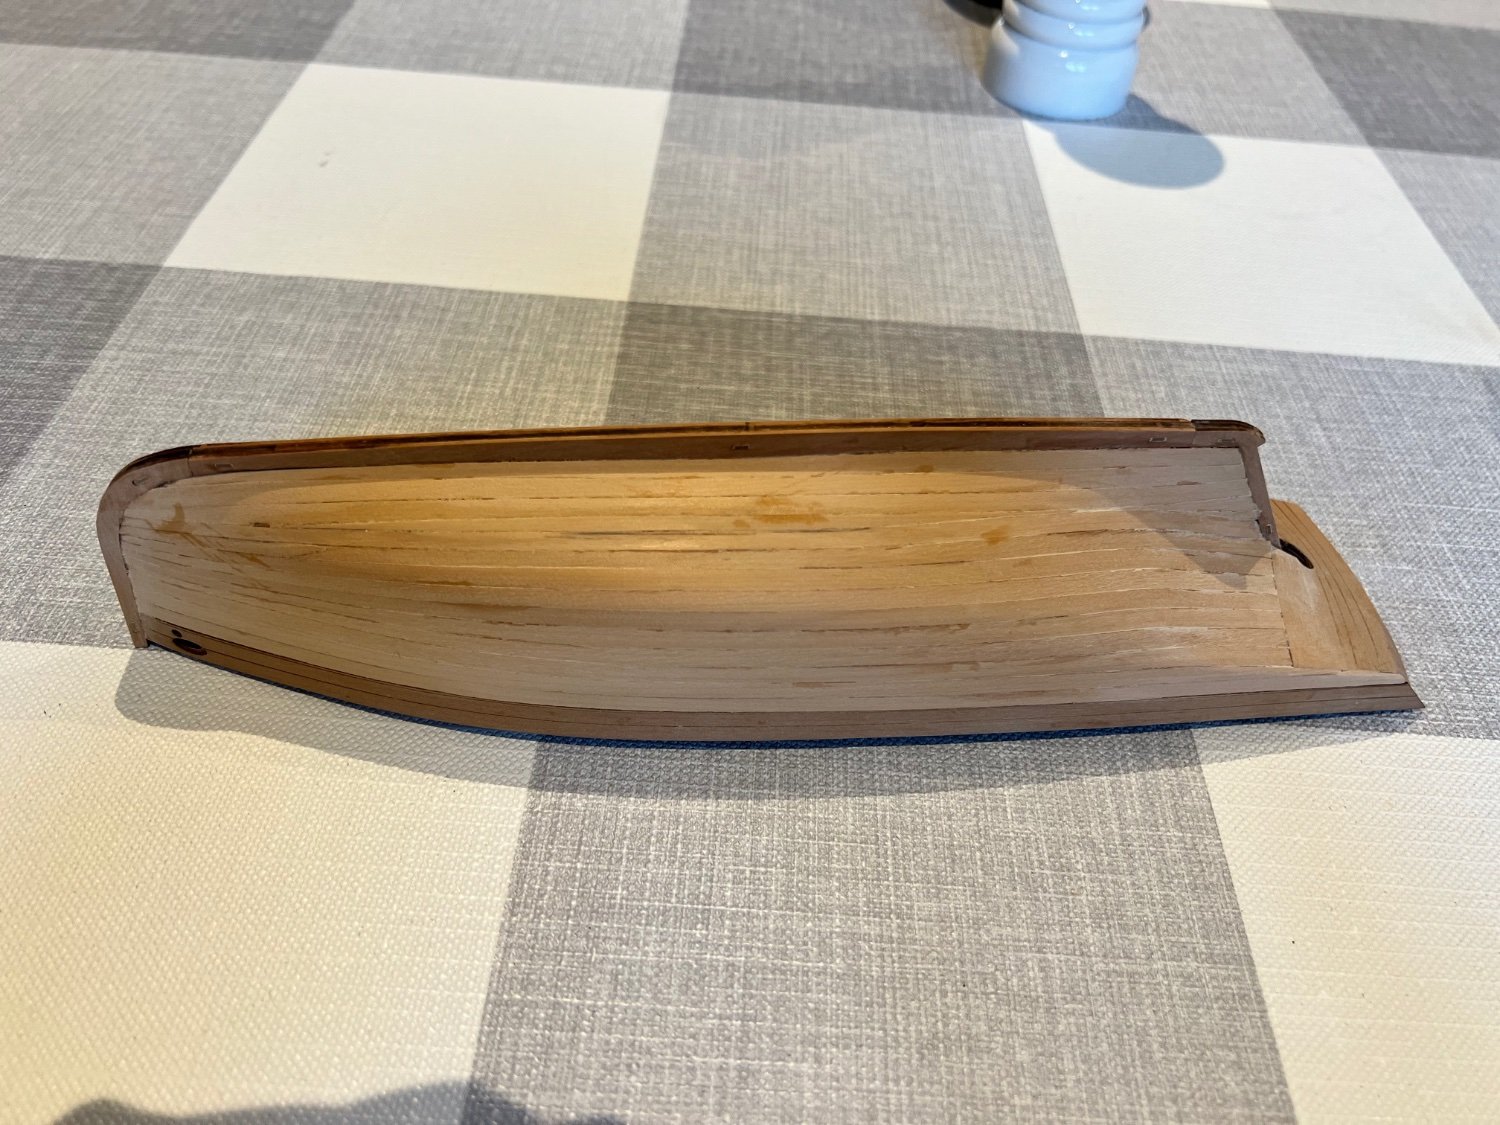
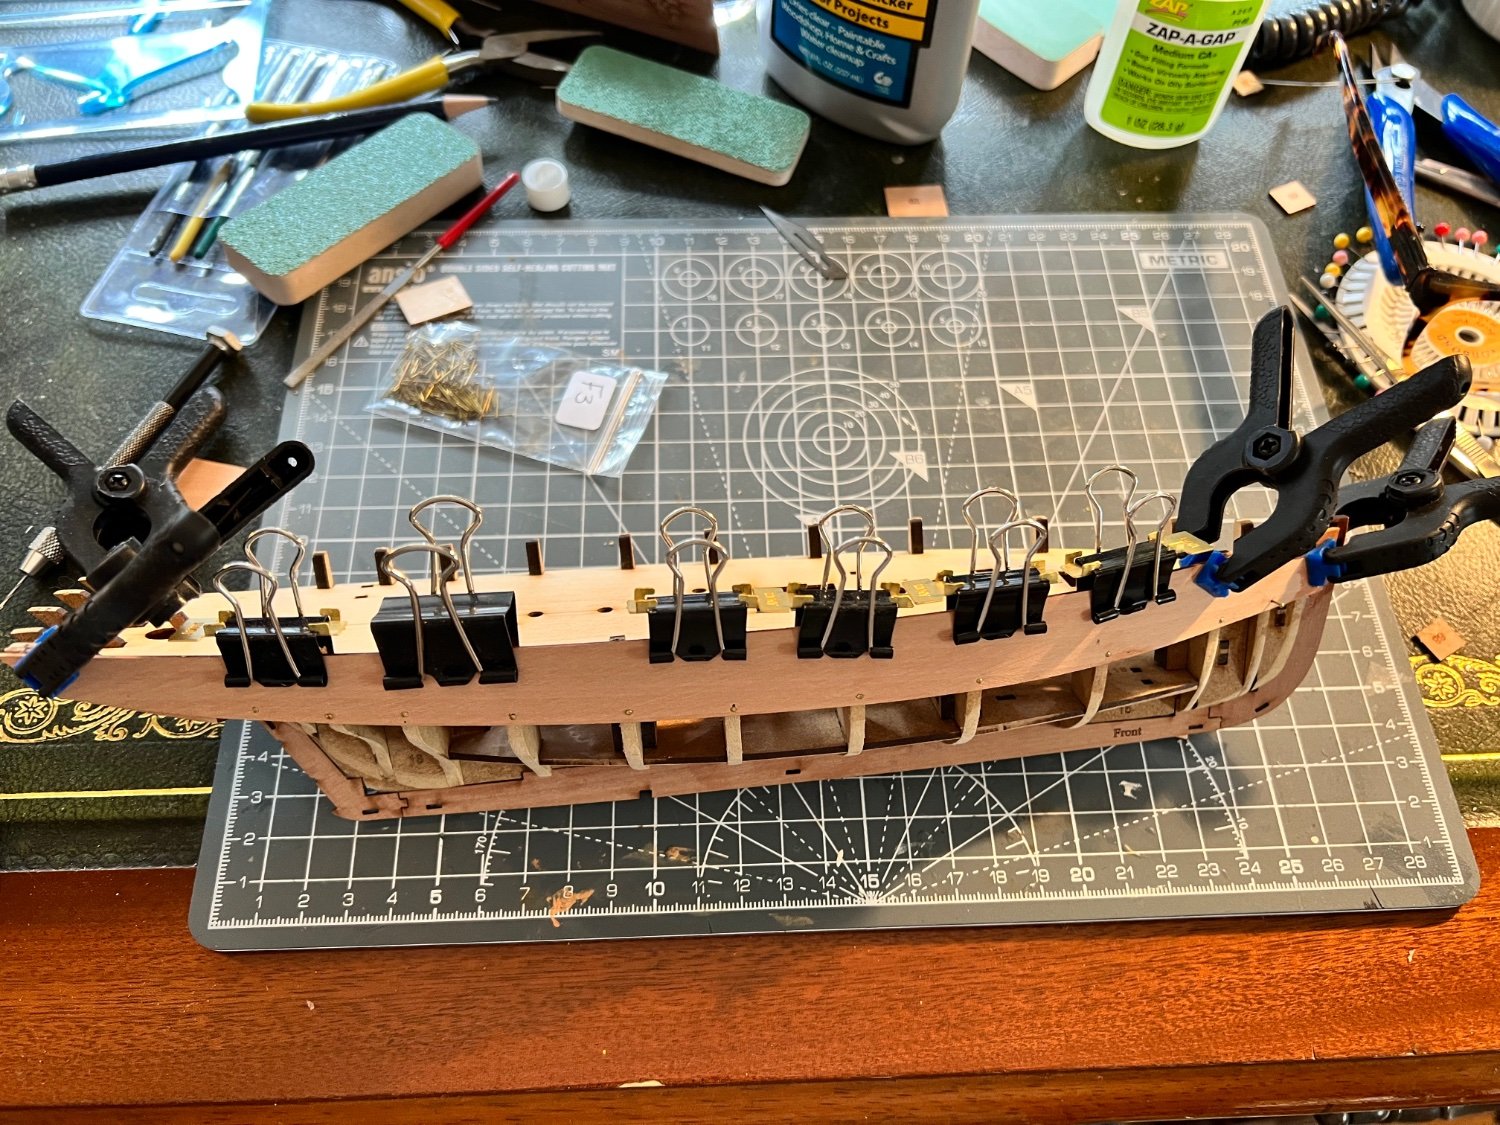
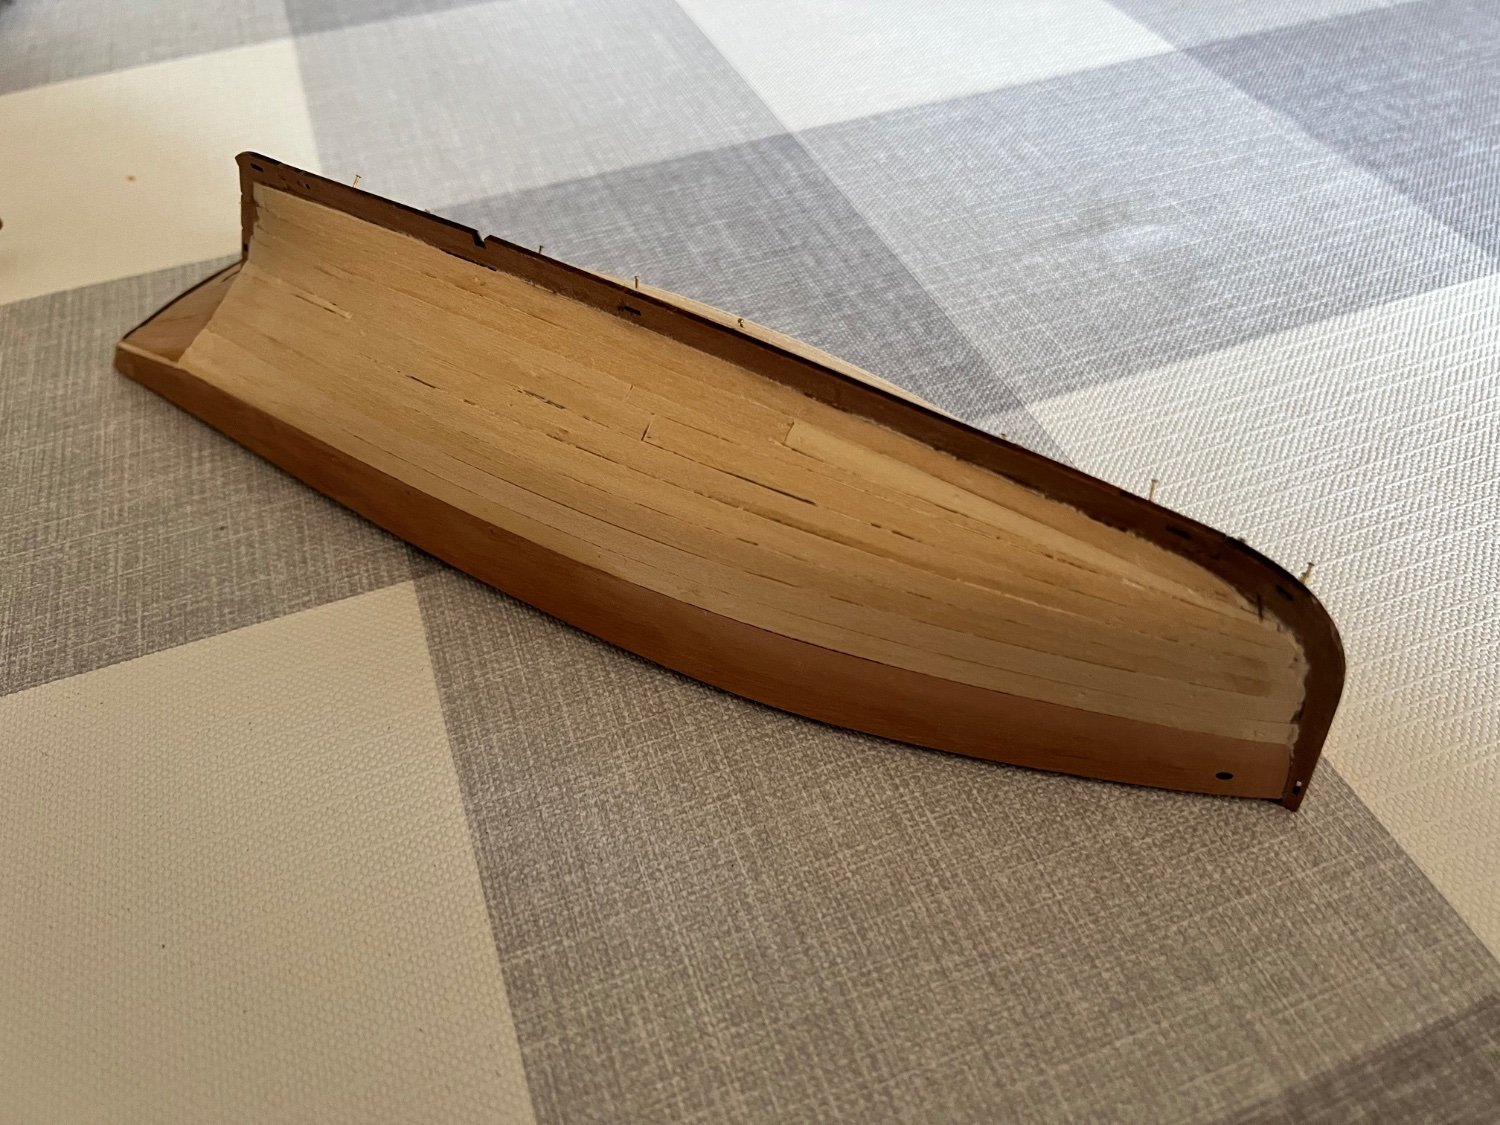
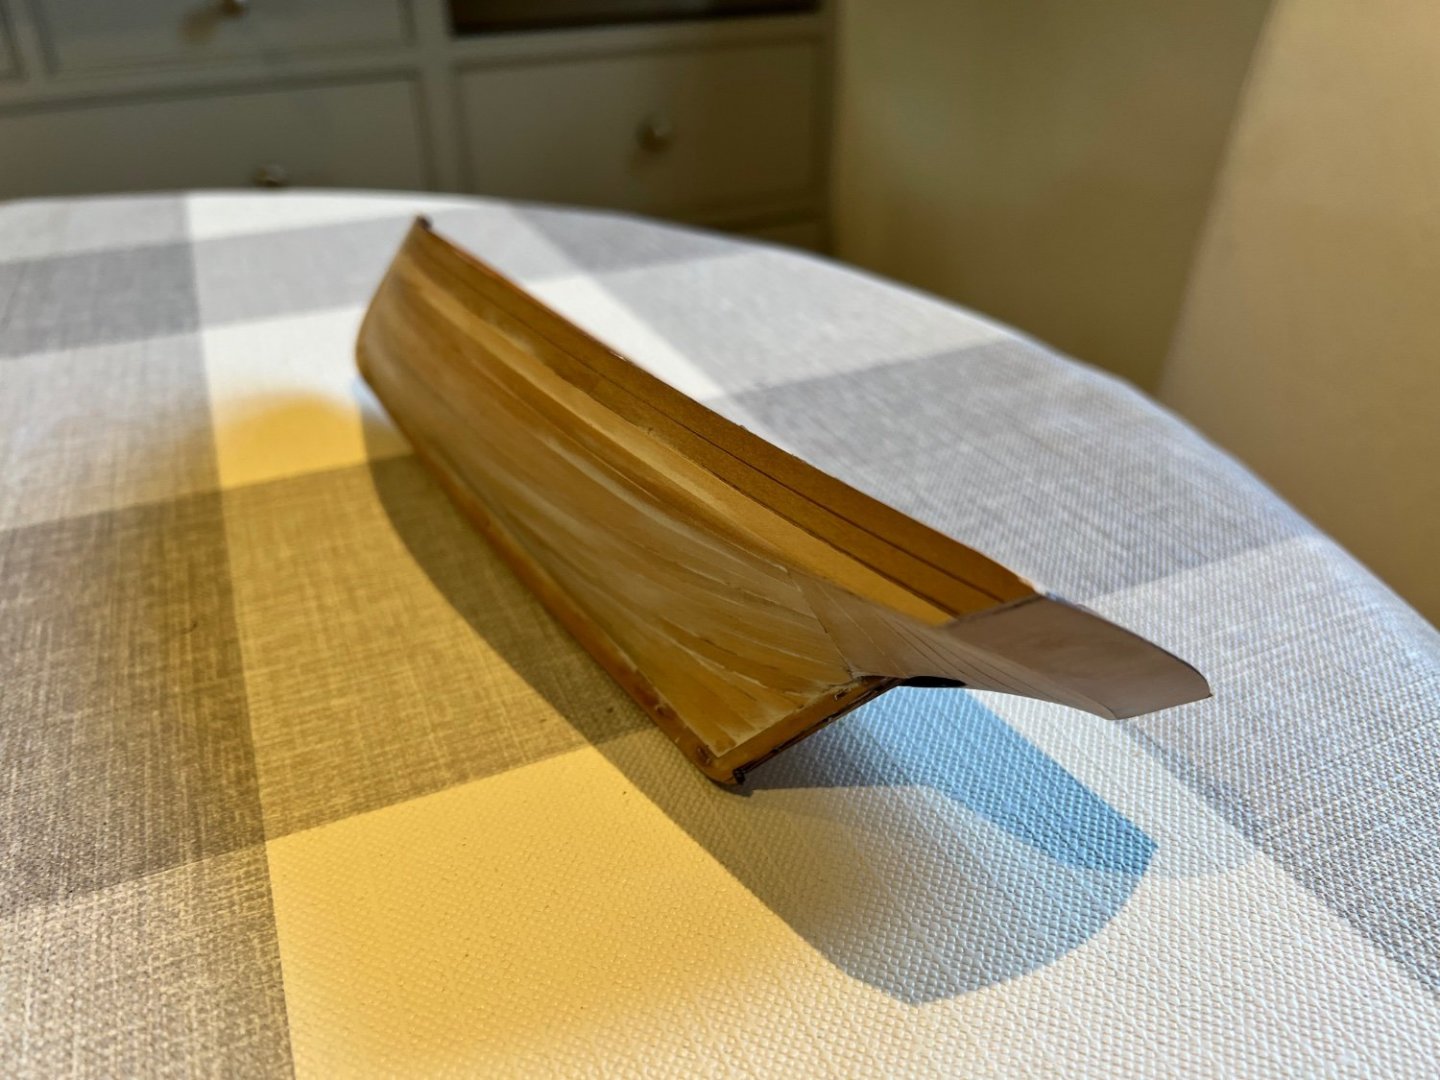
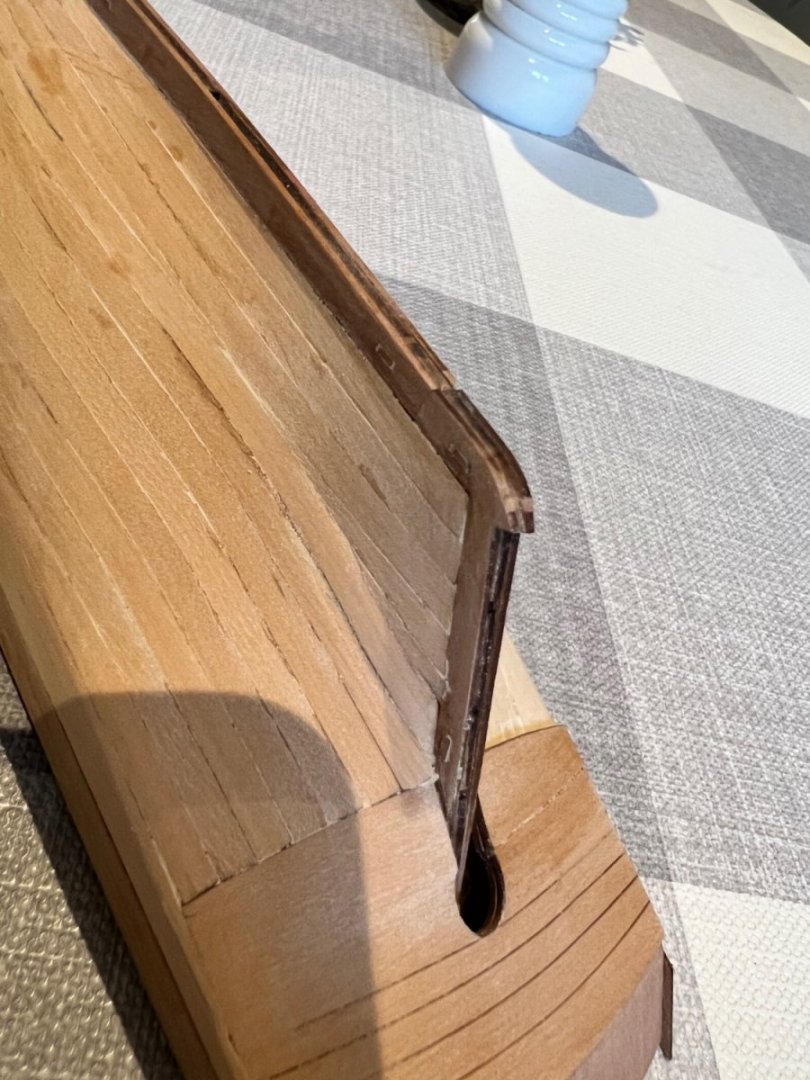
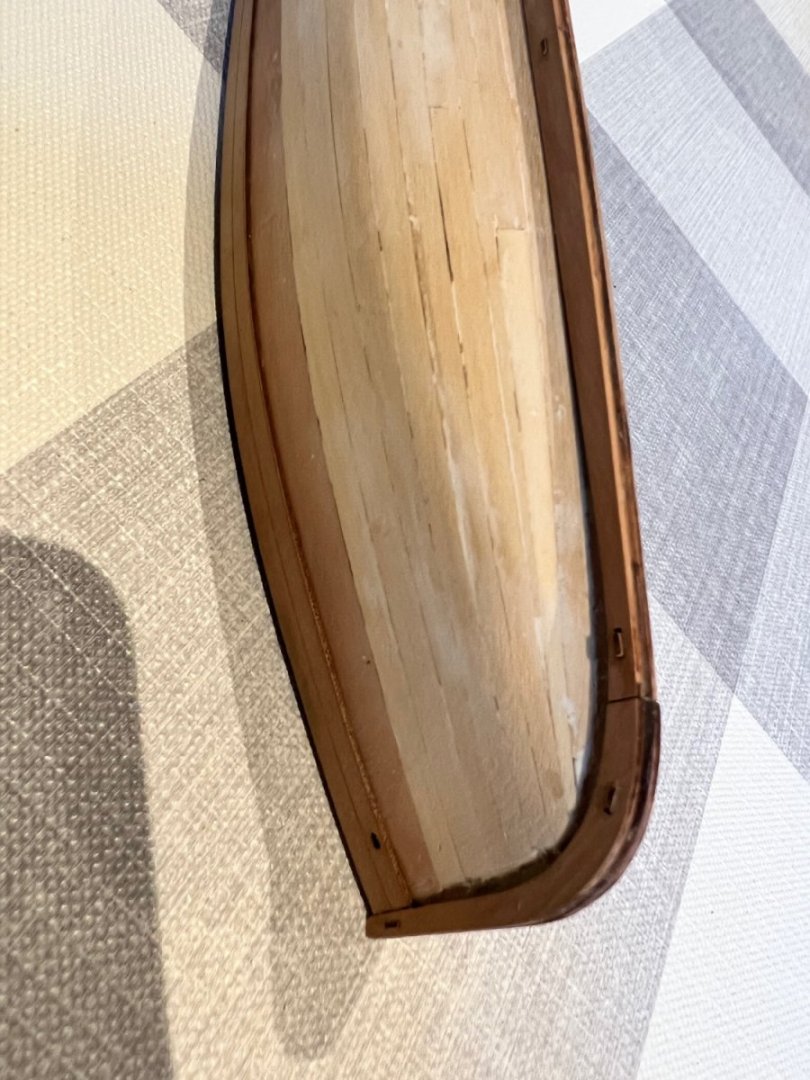
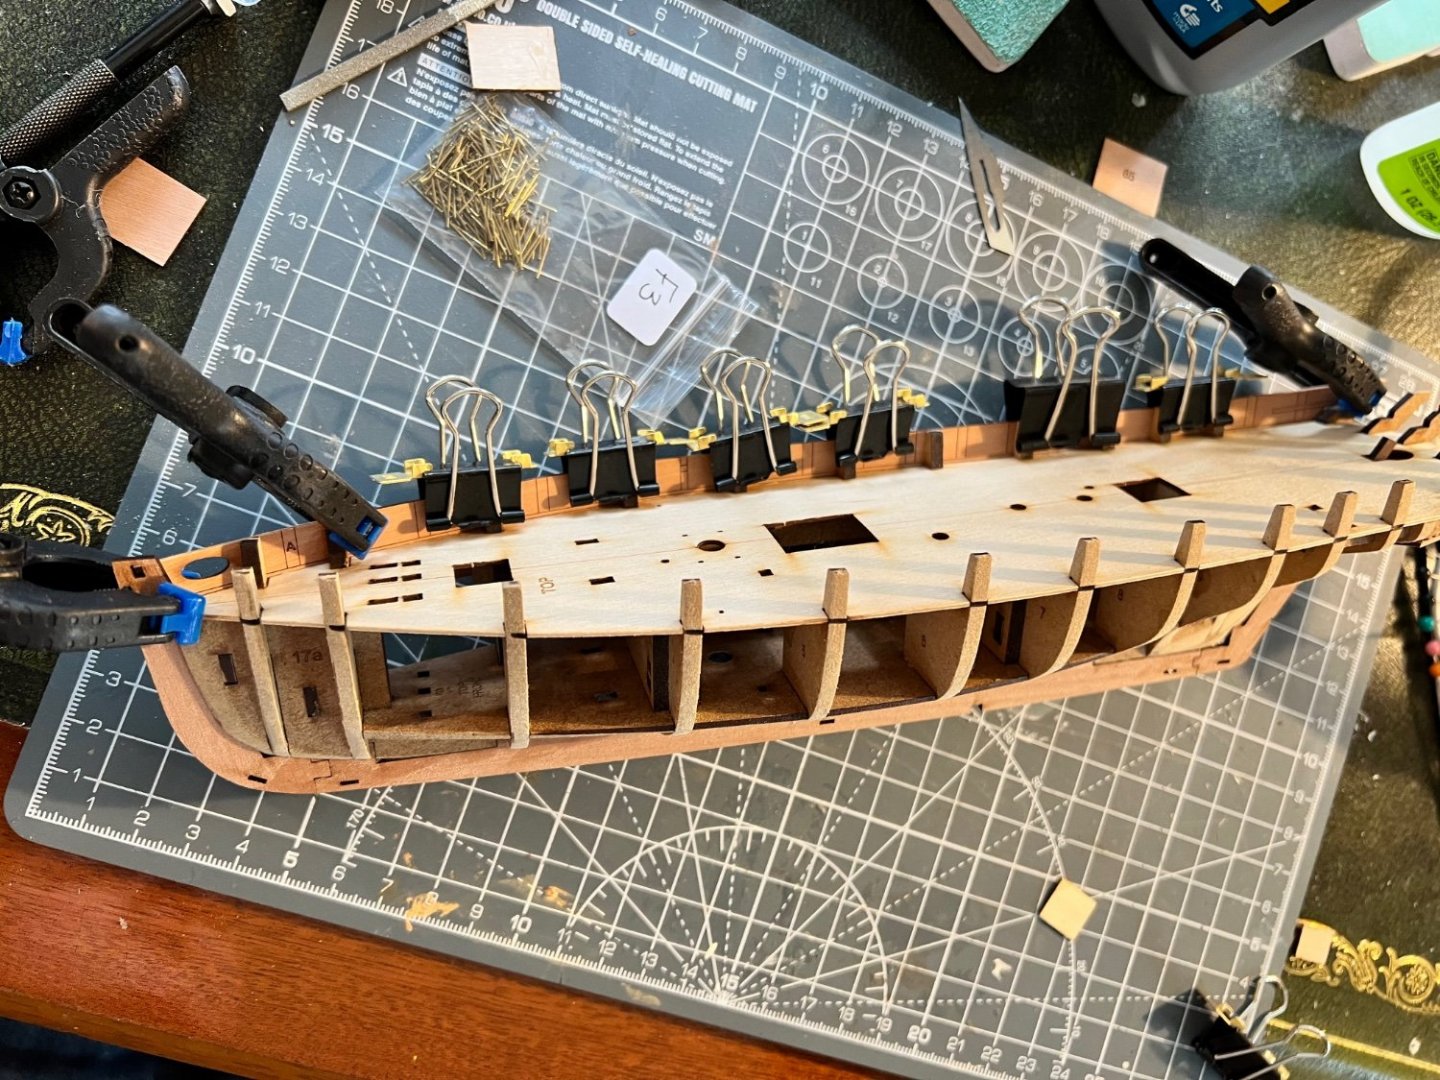
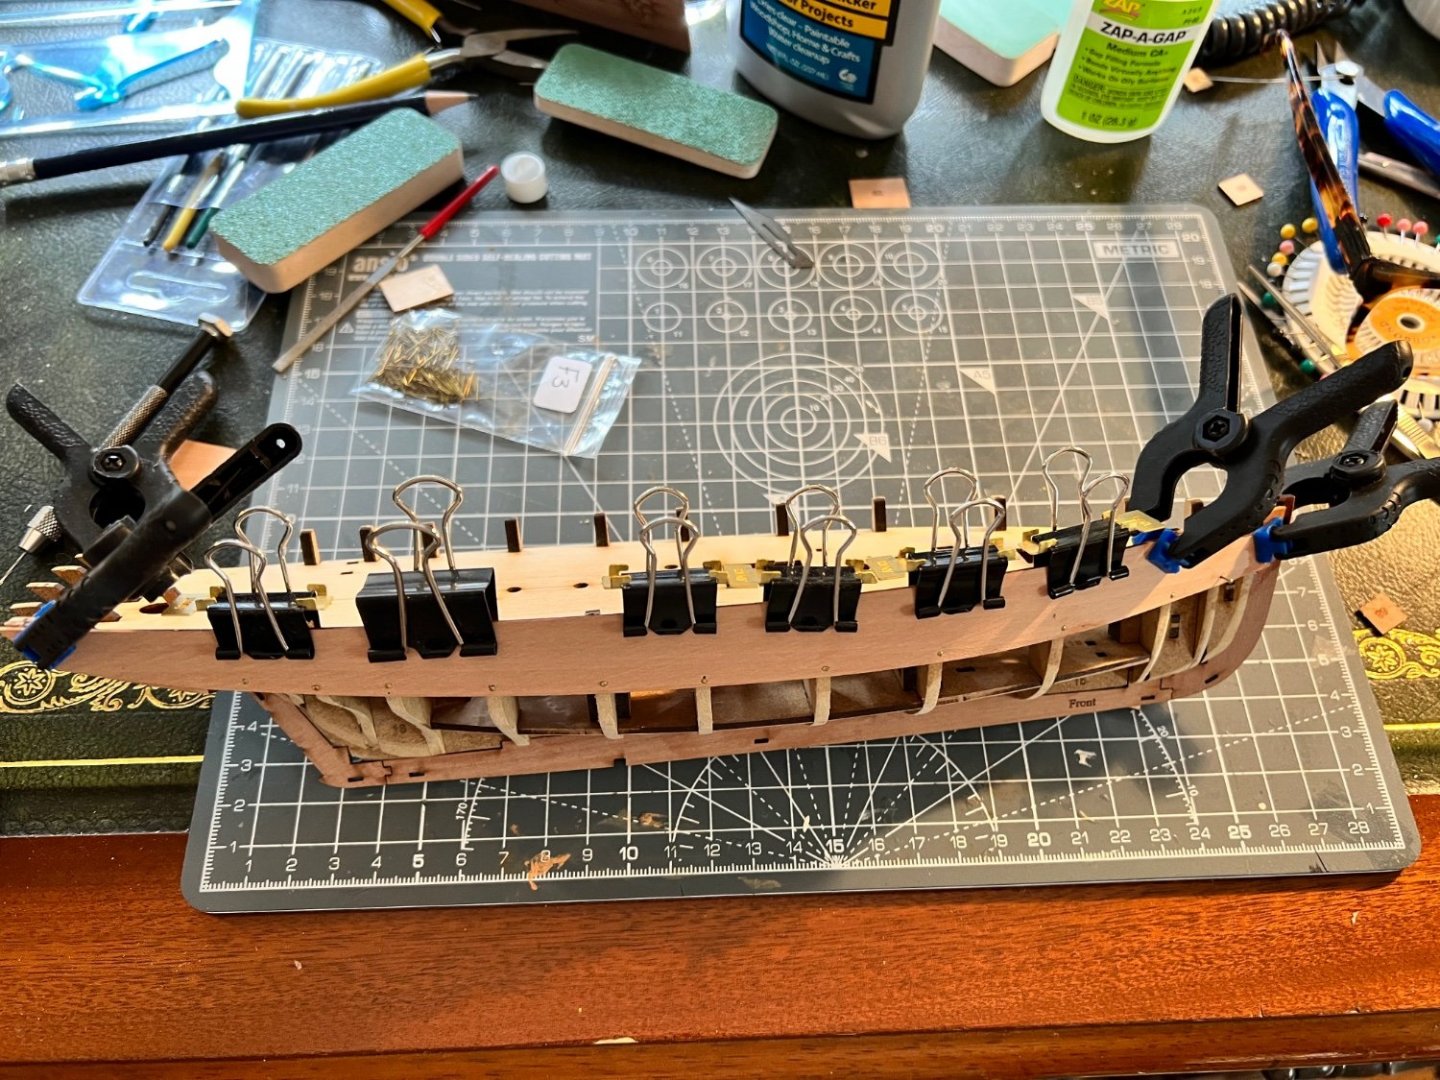
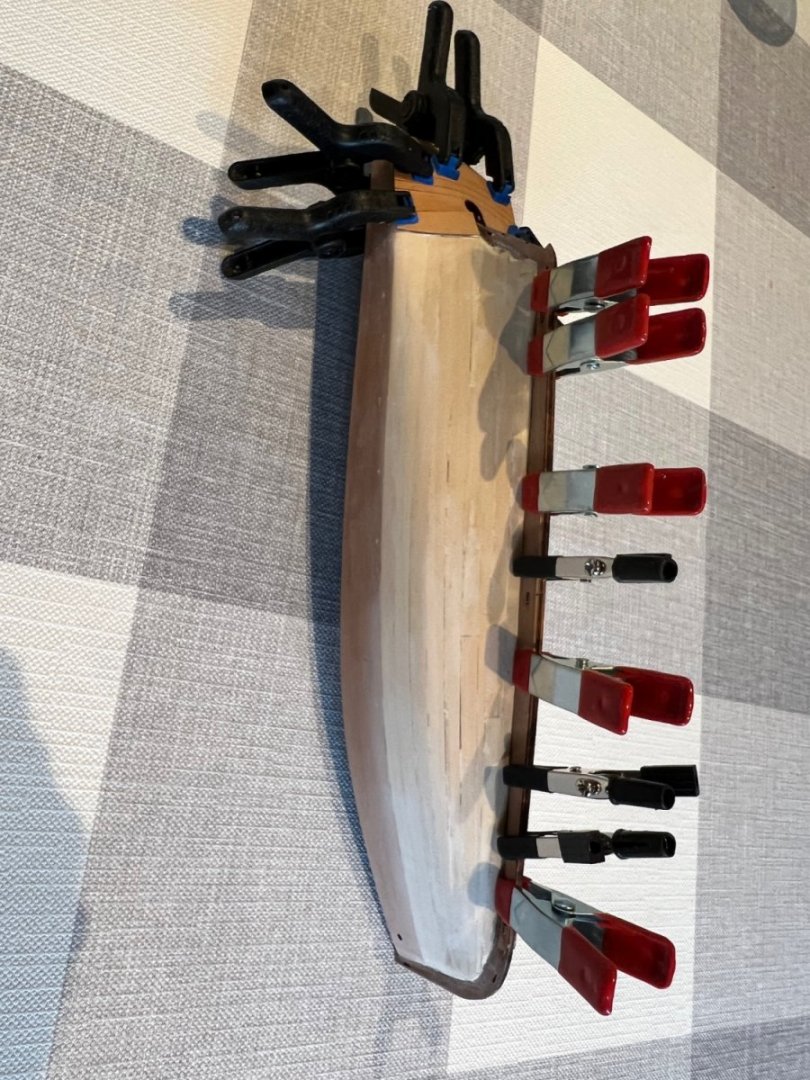
Work on the Nisha continues… The rabbets and outer stern counter were fitted and clamped. Then outer bulwarks went on fine. As others have noted the holes in the outer bulwarks at the bow don’t line up with the inner bulwark. Should be very easy to fix with a little filing. I’ve second planked the starboard side only so far. The photos show it with preliminary sanding but no filler yet. Second planking went on quite easily. The first three planks went on untapered and then the rest were tapered to approx 50% of width at the bow. I still needed two spacers at the stern. Quite a bit of edge bending was required to cope with the curve where the stern flares out. The rabbets were big enough at bow and stern but not amidships for the keel rabbet. The only real difficulty, as in the first planking was trying to work out how to neatly finish off the planking along the sternpost and in particular how to neatly plank the area where the planks terminating in the stern rabbet meet those terminating against the outer stern counter. It’s quite a sharp corner and not the easiest to plank. So the messiest part of my planking. Port side next plus some additional sanding and filling.


- 62 replies
-
- 6
-
-
- Nisha
- Vanguard Models
- (and 1 more)
-
Andy, your Nisha looks really great, I hope my build can look half as good. I see we’re both building/built the same Vanguard fishing boats. Are you going to build more? I’m thinking the Lady Isabella or Saucy Jack next.
- 32 replies
-
- 3
-
-
-
- Nisha
- Vanguard Models
- (and 1 more)
-
Andrew, Thank you very much. I’ll try that on my Nisha too. Dan
- 206 replies
-
- 1
-
-
- Vanguard Models
- Brixham trawler
- (and 2 more)
-
Andrew, Your Nisha is looking superb. I really like the contrast you have between the black inner bulwark and the wooden timberheads. I’m not there yet on my Nisha, but please could I ask how you achieved this? If I paint the inner bulwark black then I can’t see the markings that show where to place the timberheads. On post #50 where you are priming the hull it looks like the timber heads are in place before painting. Did you temporarily install timber heads for painting and then replace them later with unpainted versions? Many thanks Dan
- 206 replies
-
- 1
-
-
- Vanguard Models
- Brixham trawler
- (and 2 more)
-
Thanks Andrew, I really appreciate the advice. Your Nisha is hugely impressive. I think Nisha is perfect for a second build (starting from being a complete beginner), challenging but manageable and I’m learning the whole time. I wholly recommend her as a kit. I’m clumsy and impatient which is the main reason things get broken! Just with the Fifie she’s big boned enough to take it whereas Nisha isn’t. I need to slow down… I’ve sanded back more than in the photos to make sure the rabbet is big enough. I’ll keep an eye on this, but the first planking is now very thin at bow and stern so I don’t dare go too far.
- 62 replies
-
- 3
-
-
- Nisha
- Vanguard Models
- (and 1 more)
-
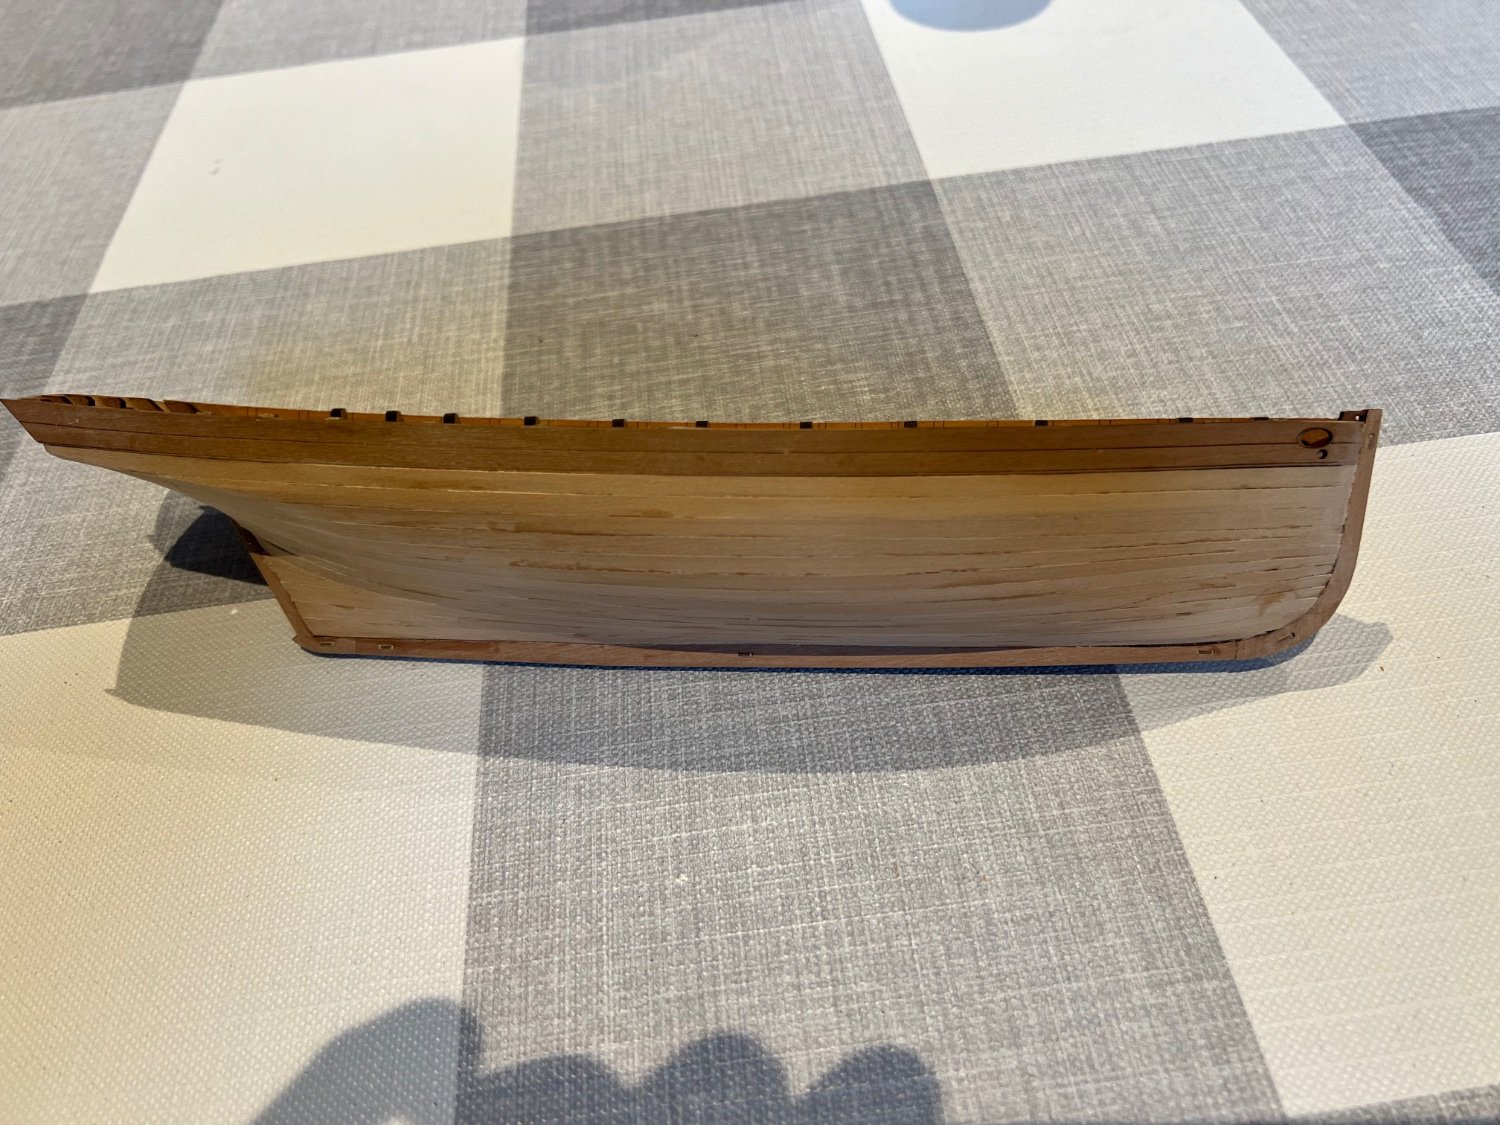
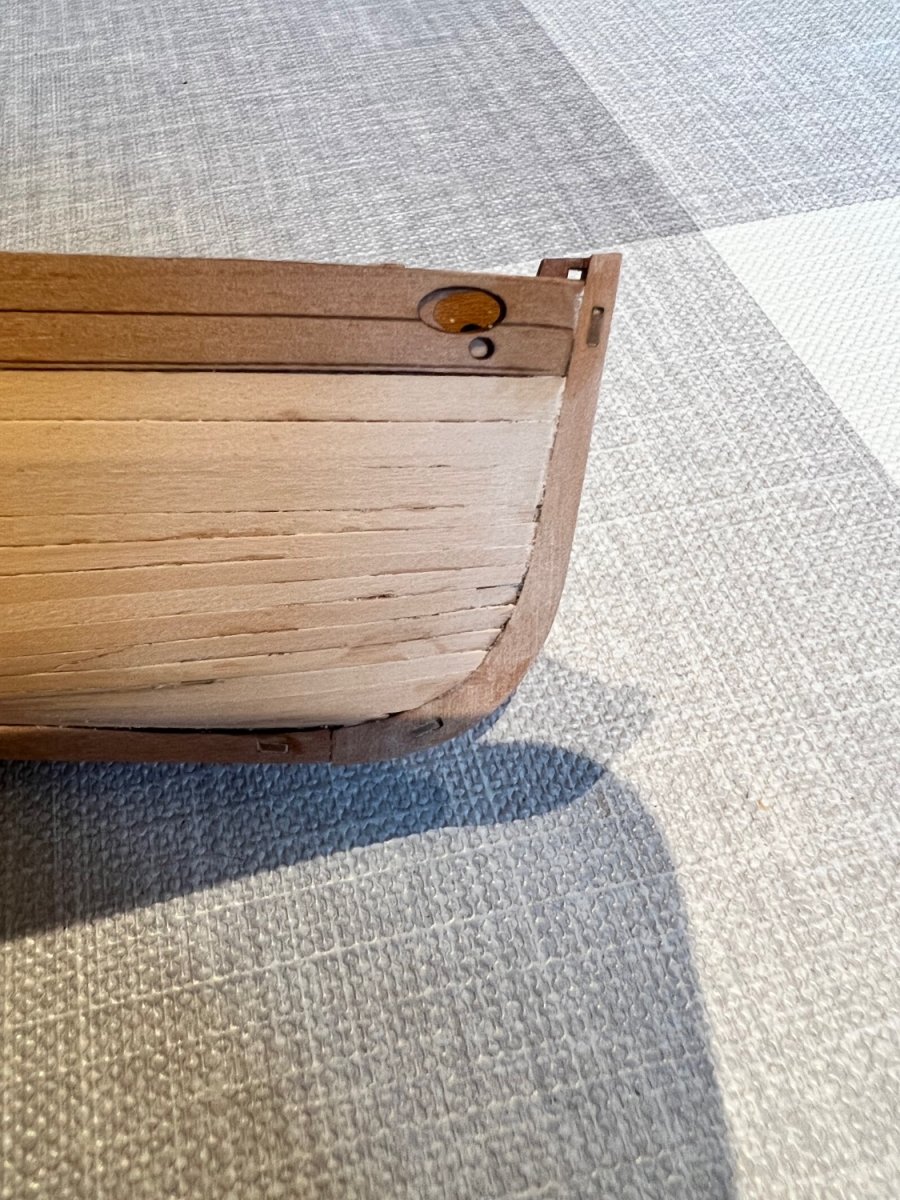
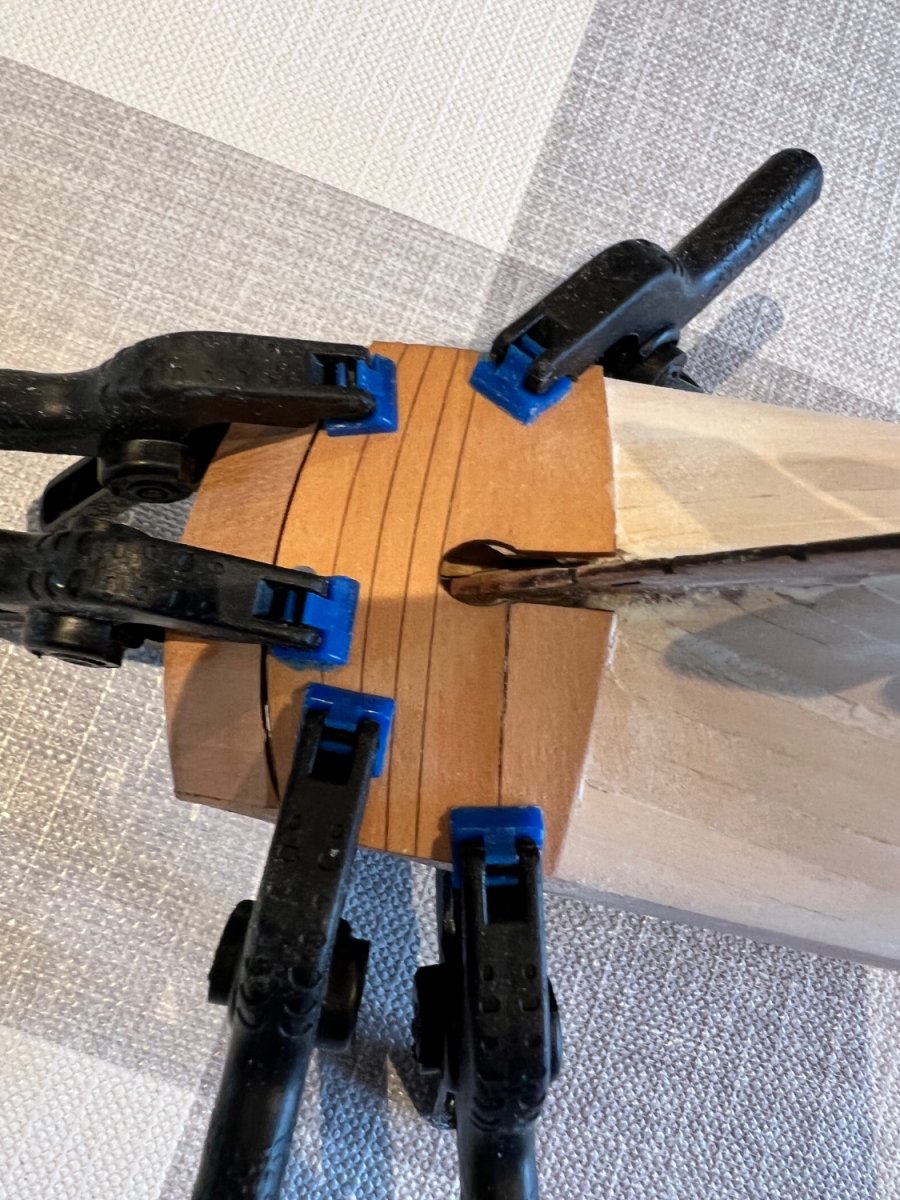
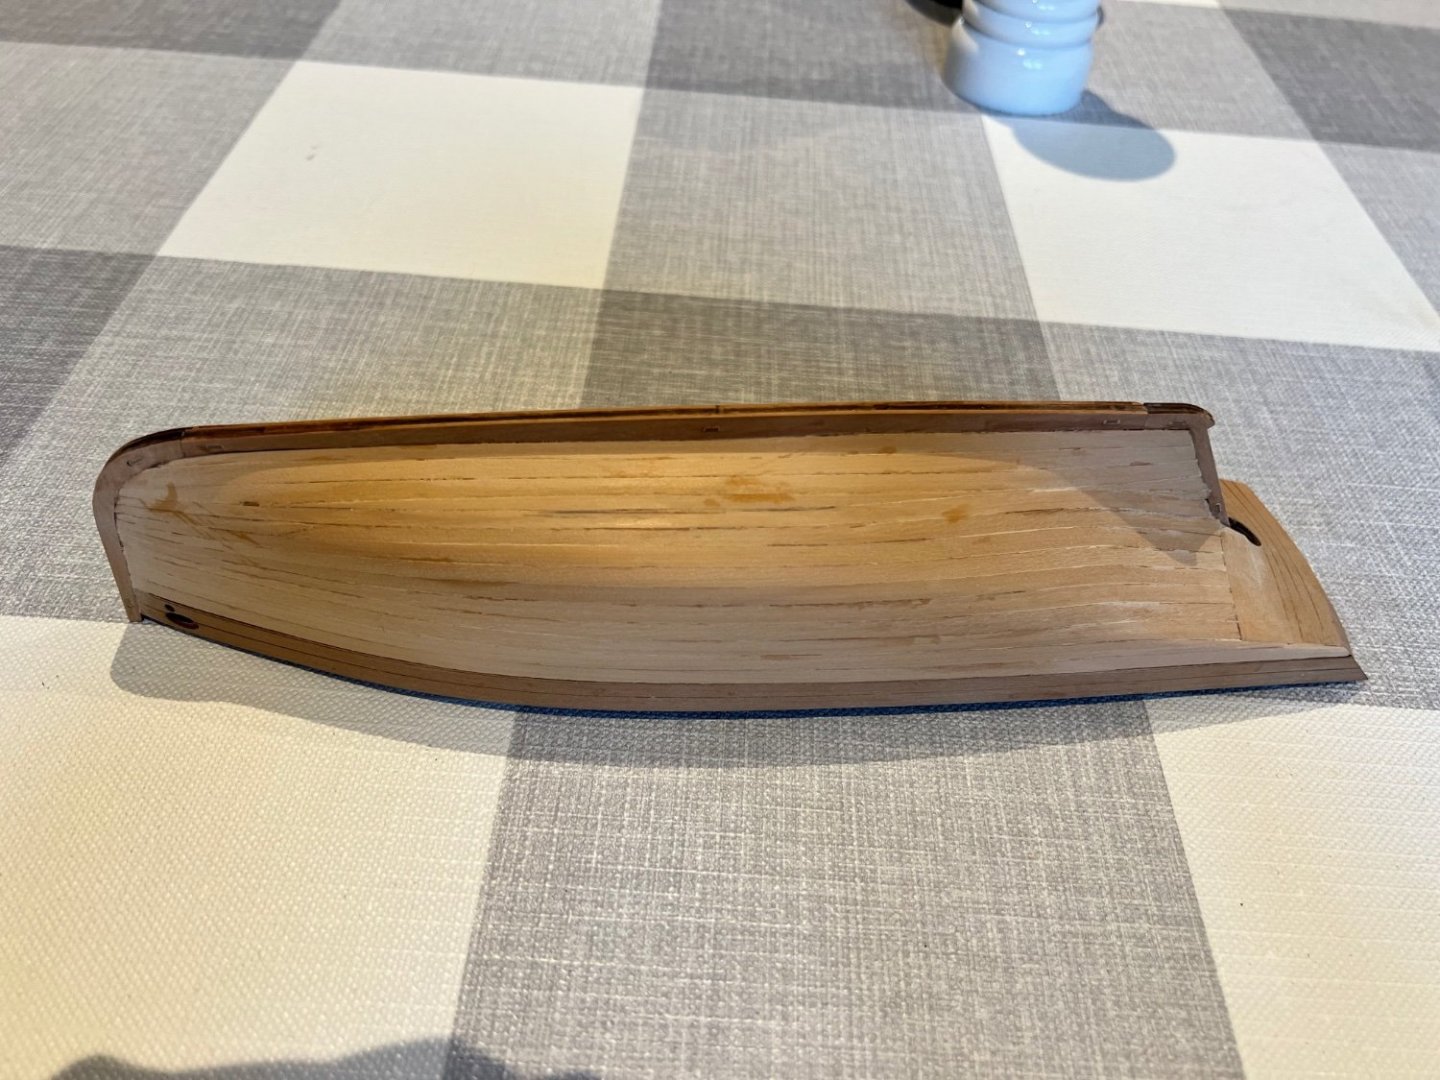
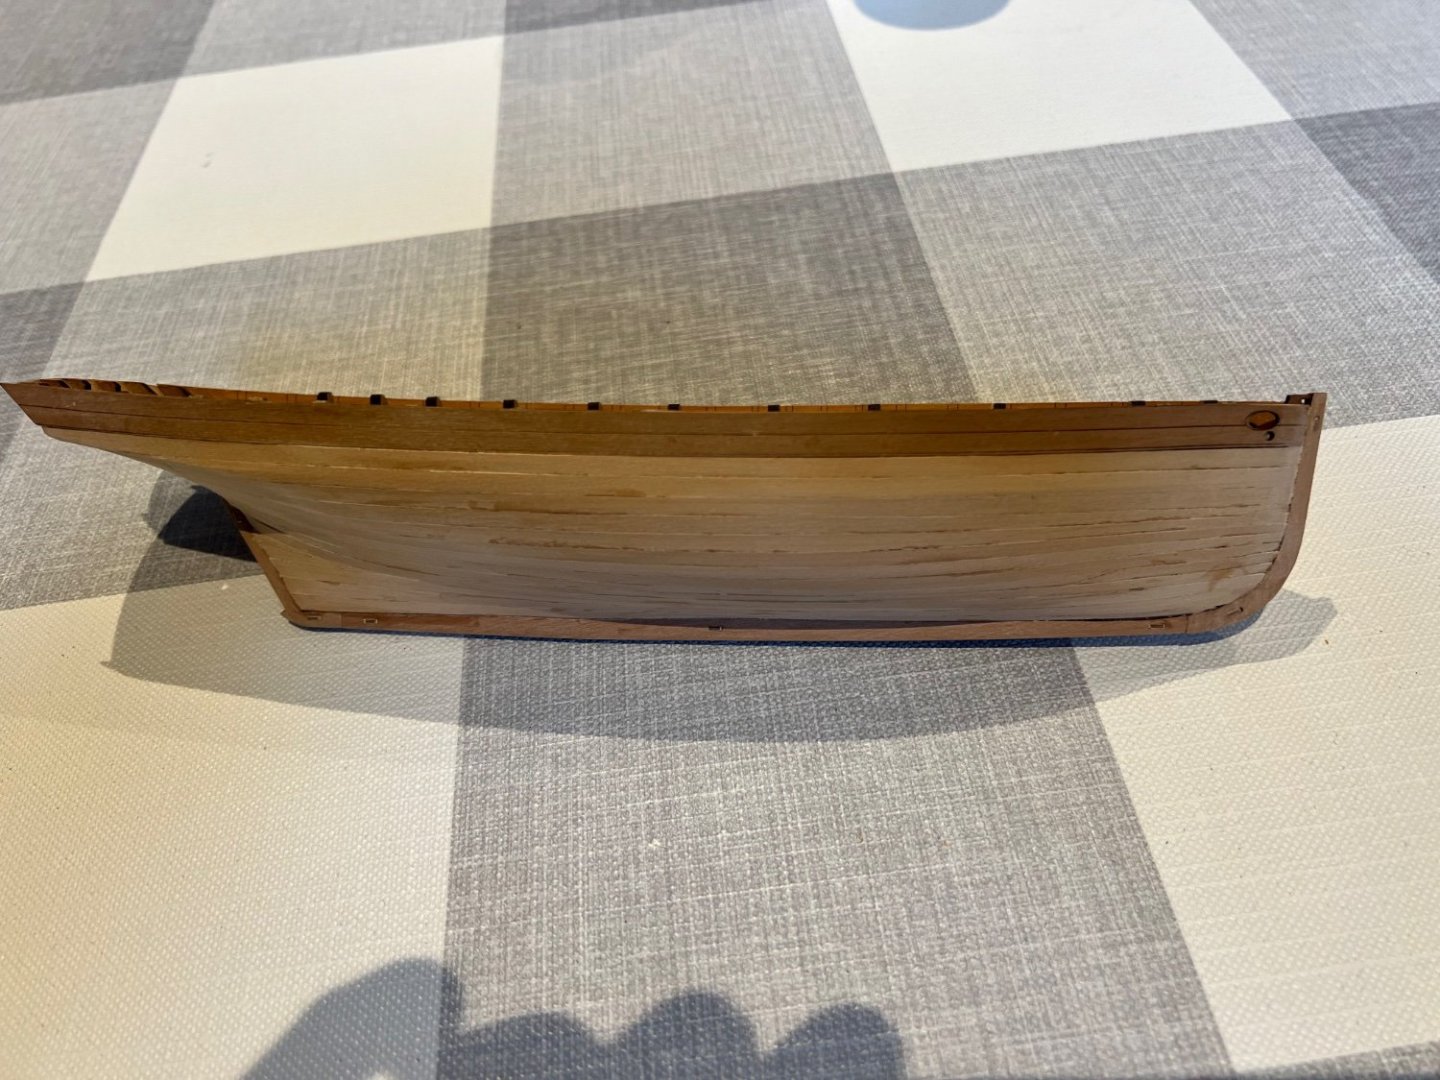
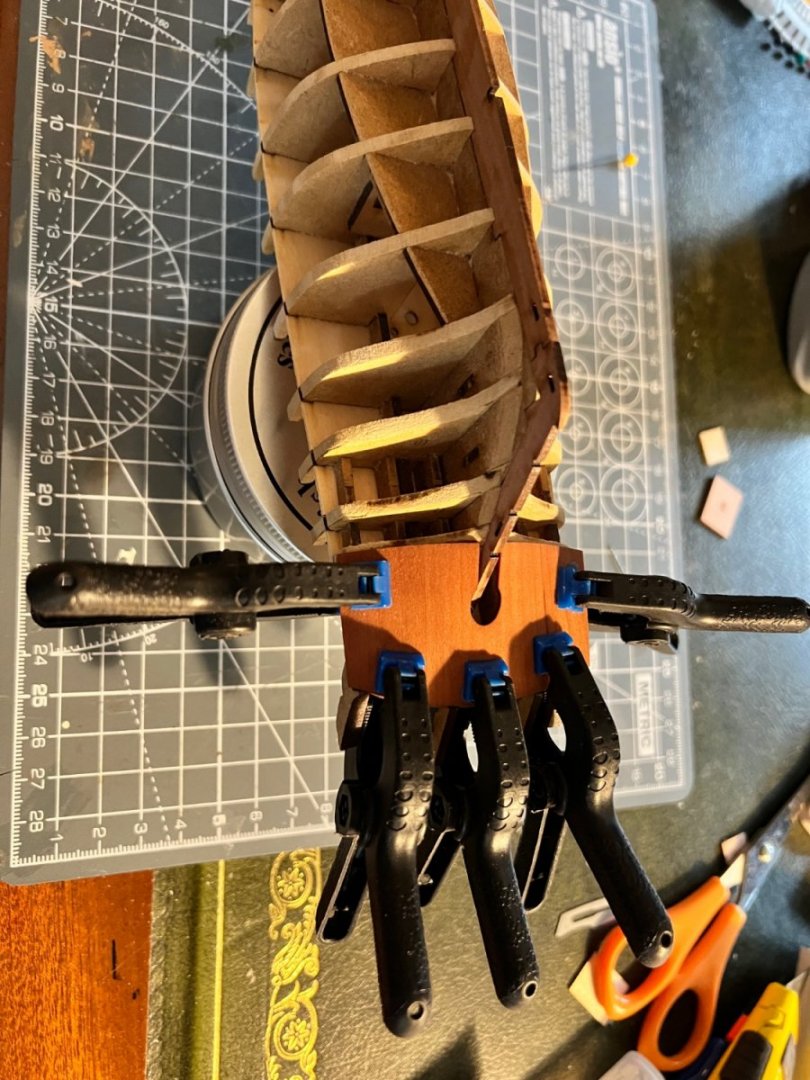
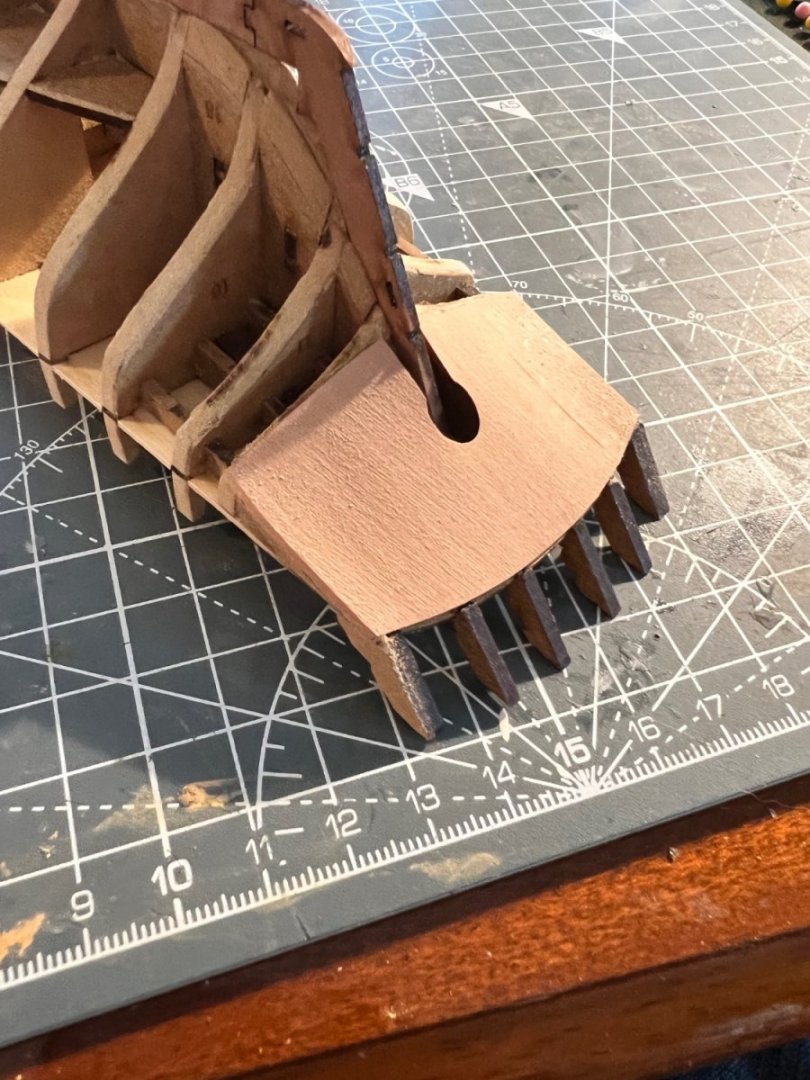
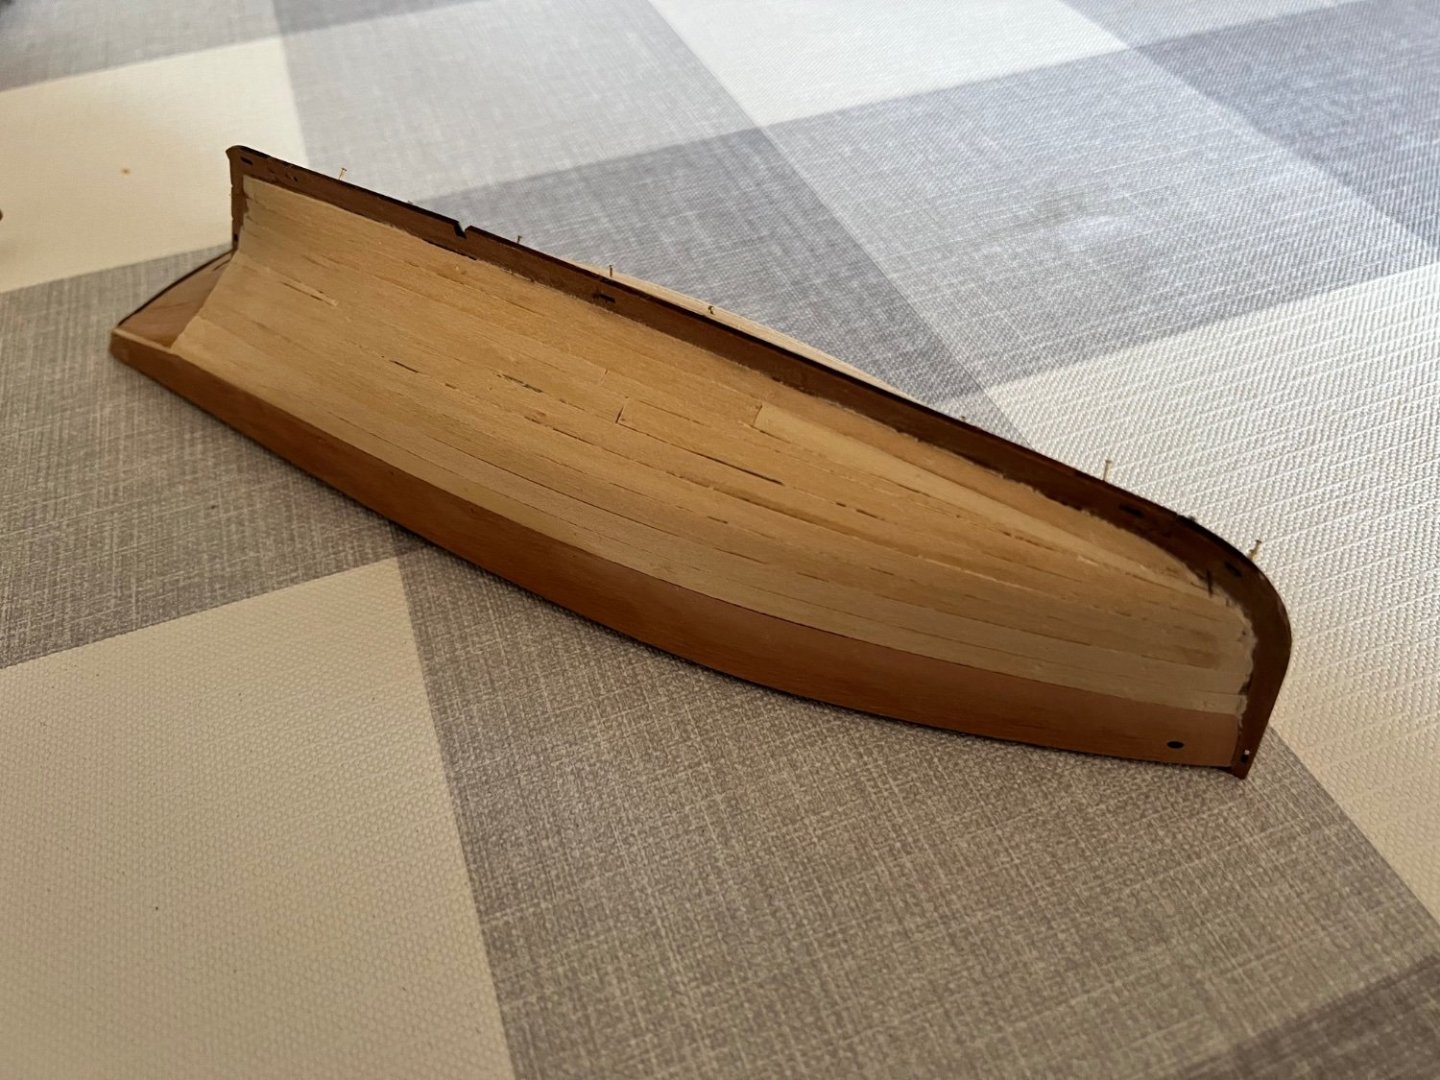
Thanks for all the encouragement! Made some good progress this week. Firstly the deck was added. Went on pretty easily but had to bend the wood quite a bit, seems very strong. Everything is very well made and fits together so well in these kits. I glued on the broken sternpost and it seems to have held. Sanding it to shape without snapping it again needed a lot of care. The inner counter was soaked and then clamped in place to dry before gluing. Luckily it didn’t split. Then bulwarks added. There aren’t many planks on Nisha but planking her has been a challenge compared to the Fifie. Quite hard to assess where each plank should start and end. Ended up with quite a ragged bow and stern finish to the planks but they leave plenty of room for a rebate for the rabbet. The first planking was sanded down and filled, I really enjoy this as its when the hull fuses into a single entity and feels like a boat for the first time. The hull is smooth and should be a good base for the second layer of planking. I managed to break another sternpost whilst sanding but it didn’t snap off entirely so I injected some glue and quickly added the stern board for additional strength. I clumsily broke the stern counter removing it from the sheet of wood. I glued it back together, left to dry for 24 hours, but as you can see in the photos the glue dissolved when I soaked and then clamped the counter to the model. I’m planning to paint the entire hull so gluing and fixing this should be fine. The keel rabbet was also added. I’m having fun but finding Nisha quite a bit harder to build than the Fifie. The parts are more fragile - necessarily so as she is so much smaller - and I have broken 3 already. I’m really glad that I built the Fifie first as it’s given me the confidence to persevere with Nisha. On my experience so far I’d certainly recommend the Fifie as more suitable for a complete beginner.


- 62 replies
-
- 5
-
-
- Nisha
- Vanguard Models
- (and 1 more)
-
Andy, She’s looking amazing. I hope my Nisha can look half as good! Please could I ask what colour dye you used for the sails? I’m looking for a lighter, redder colour for Nisha rather than the near brown I used on the Fifie. Many thanks Dan
- 32 replies
-
- 1
-
-
- Nisha
- Vanguard Models
- (and 1 more)
-
Thanks Andy! Your build log and AJohnson’s are a particular inspiration for my build. I think I’m going to follow suit and paint the upper hull black. Not sure about the rail and inner bulwarks yet.
-
Thanks Wool!
-
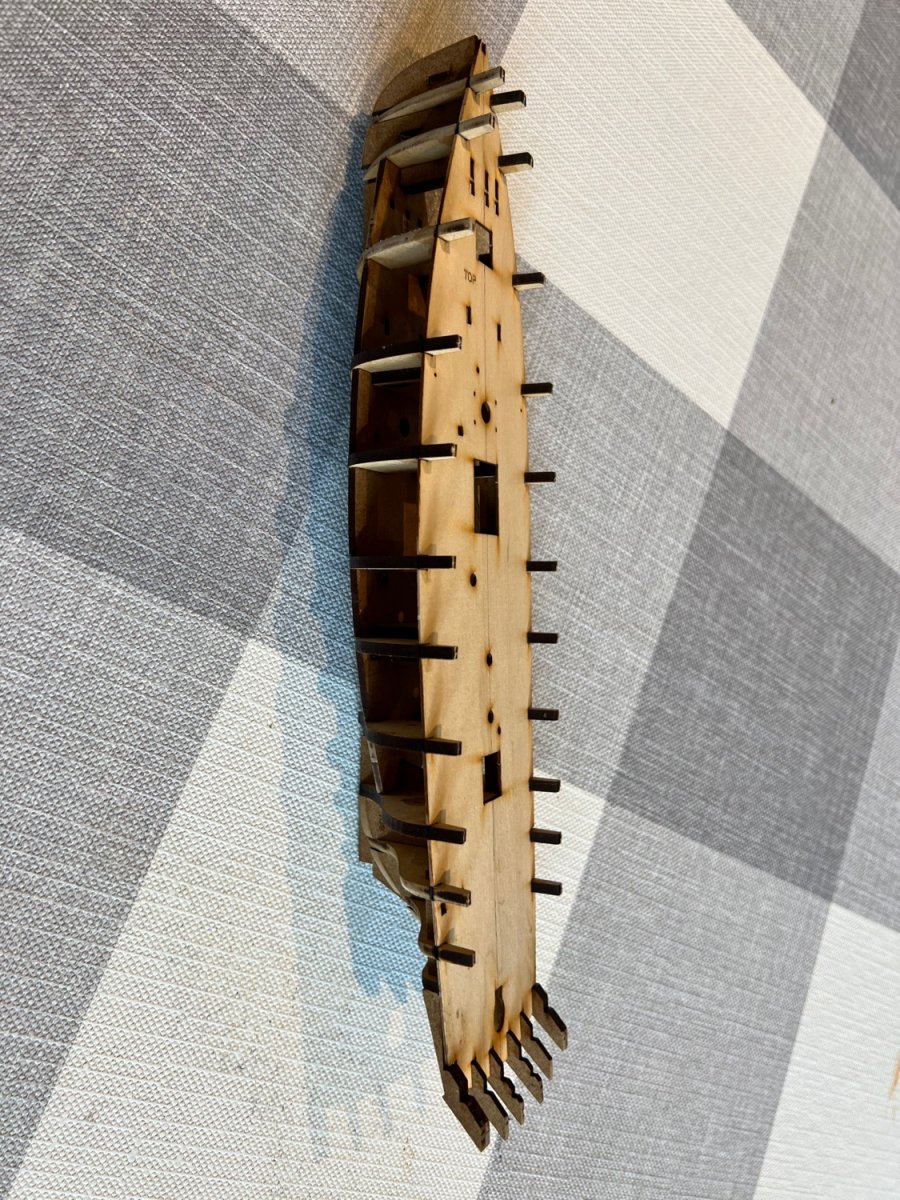
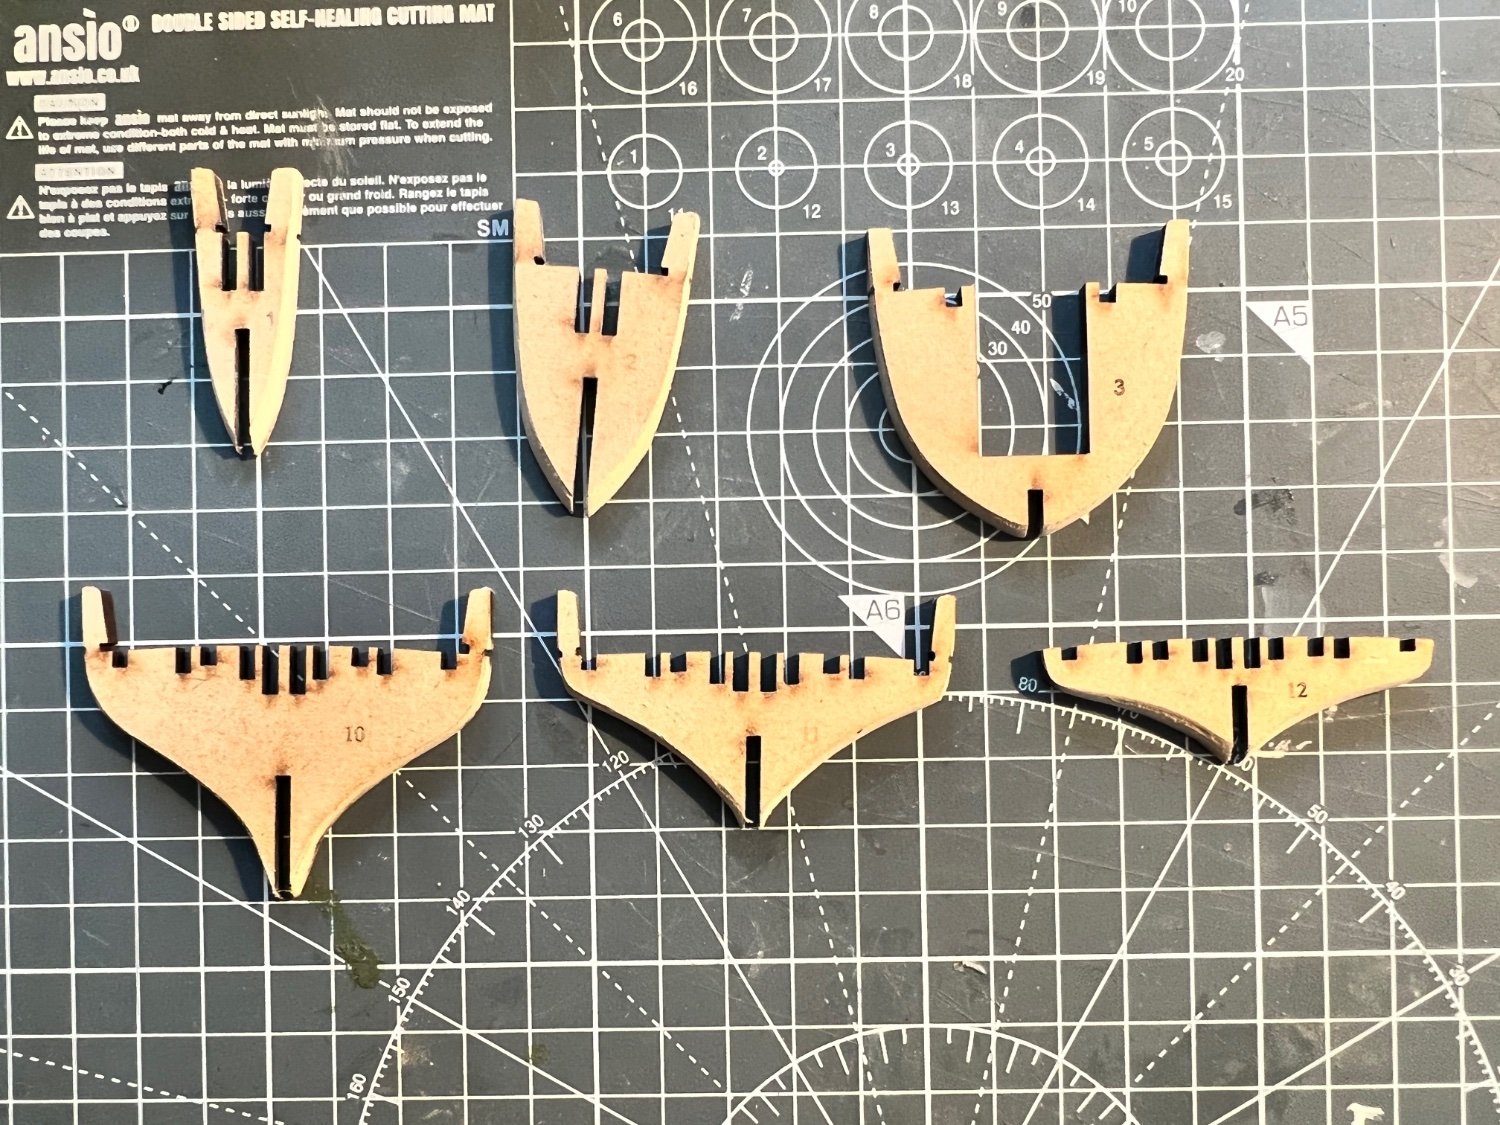
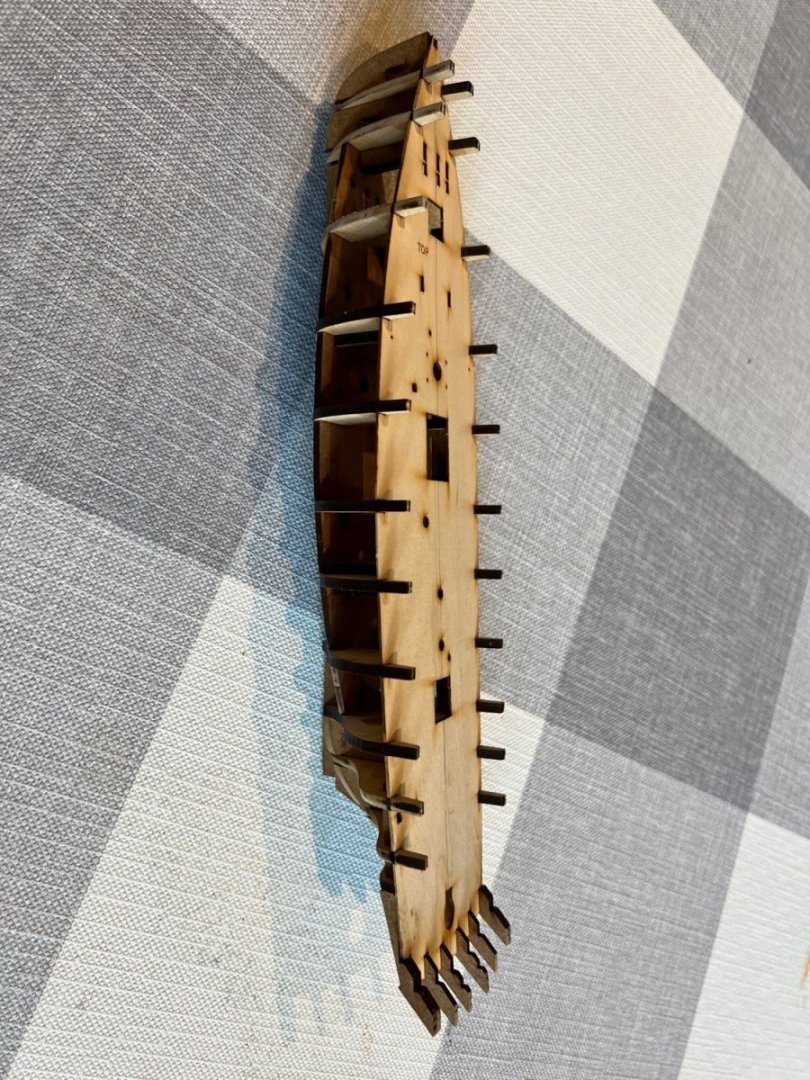
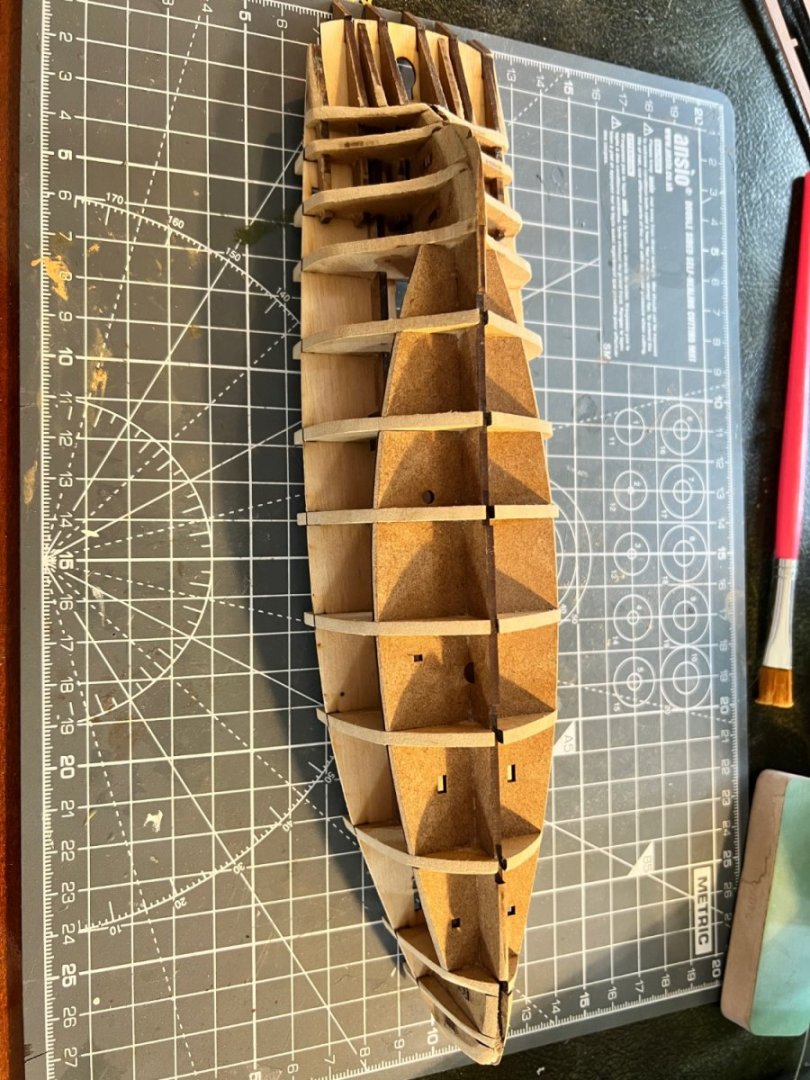
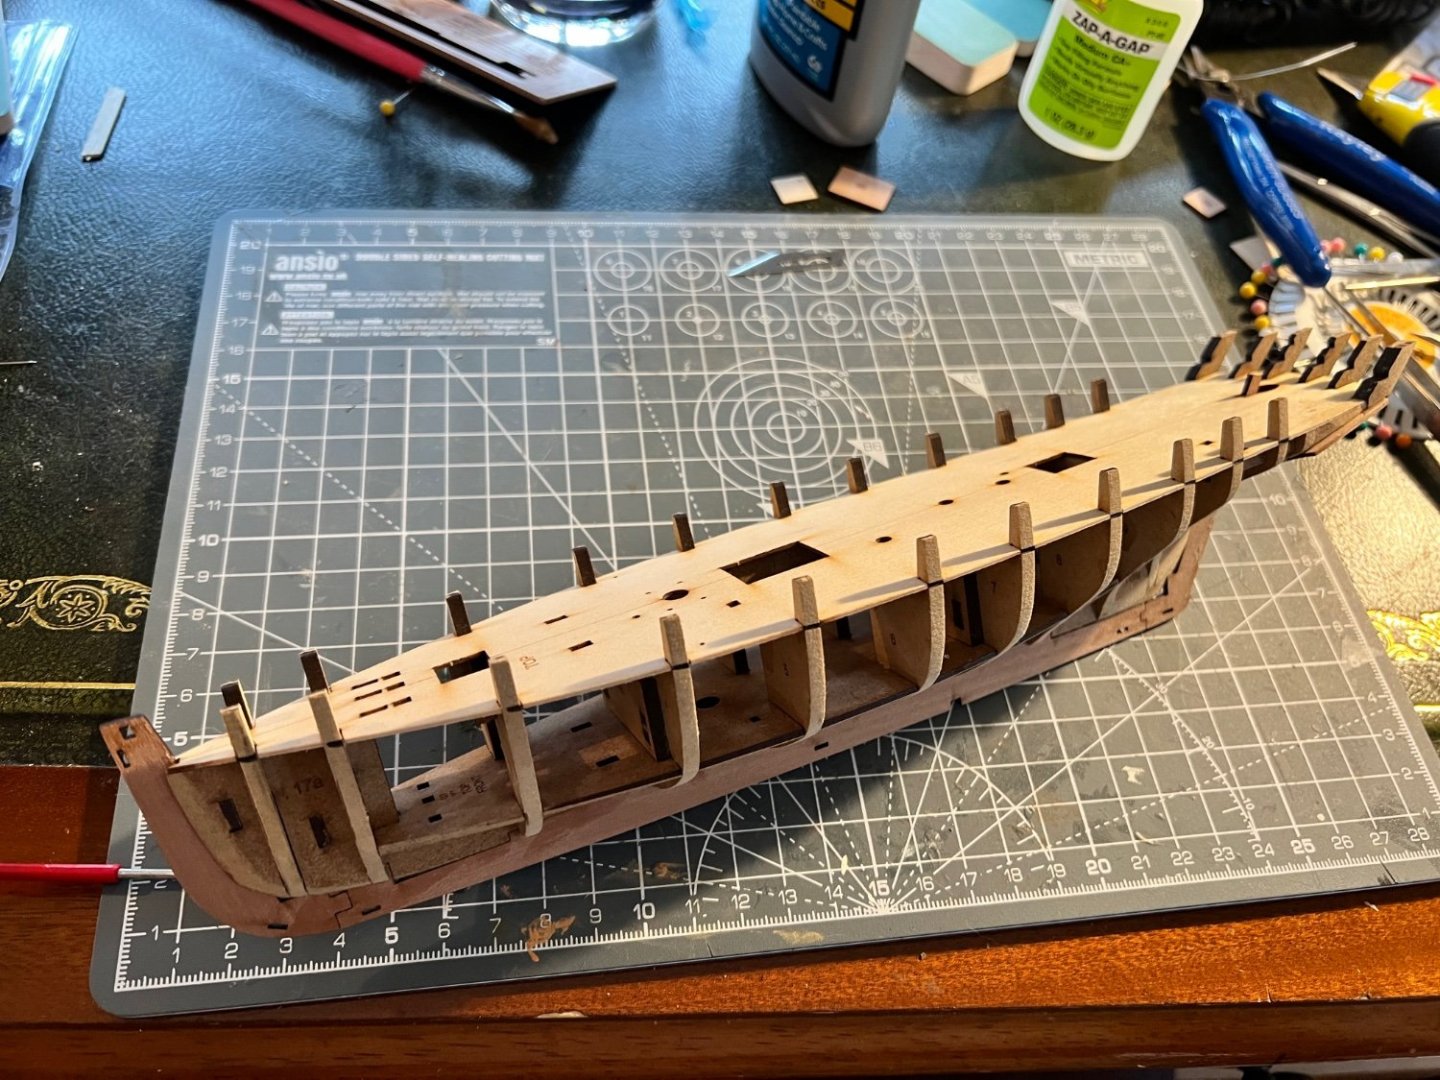
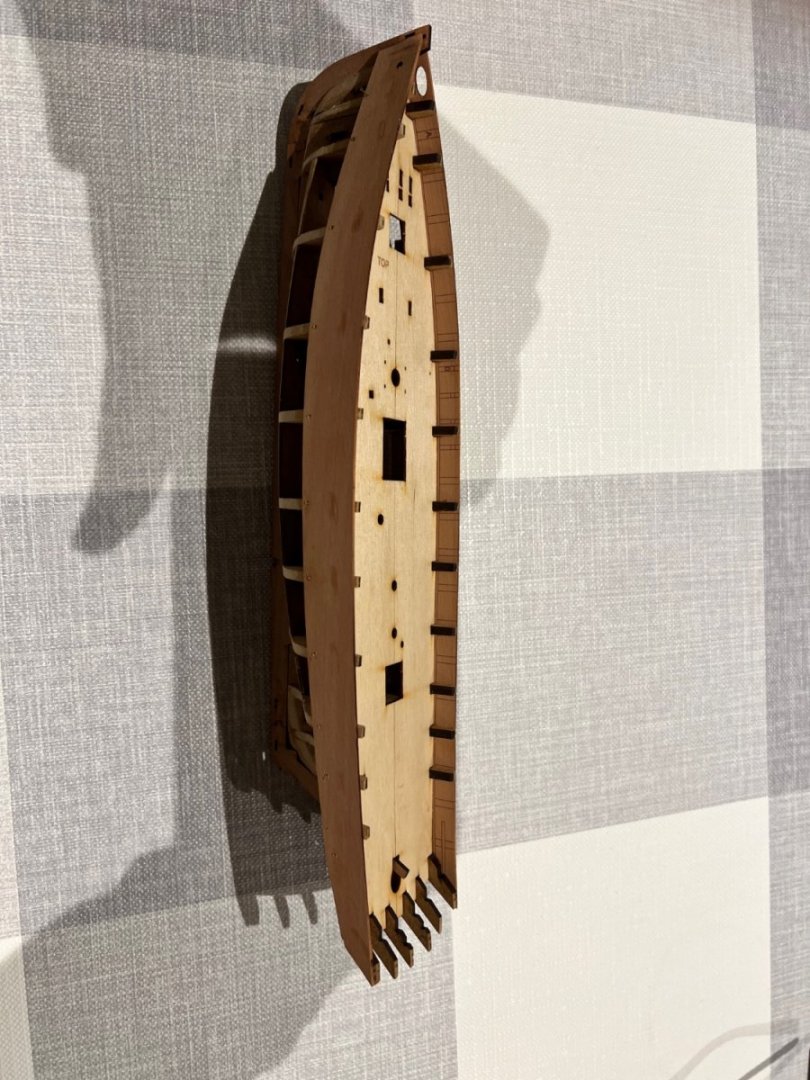
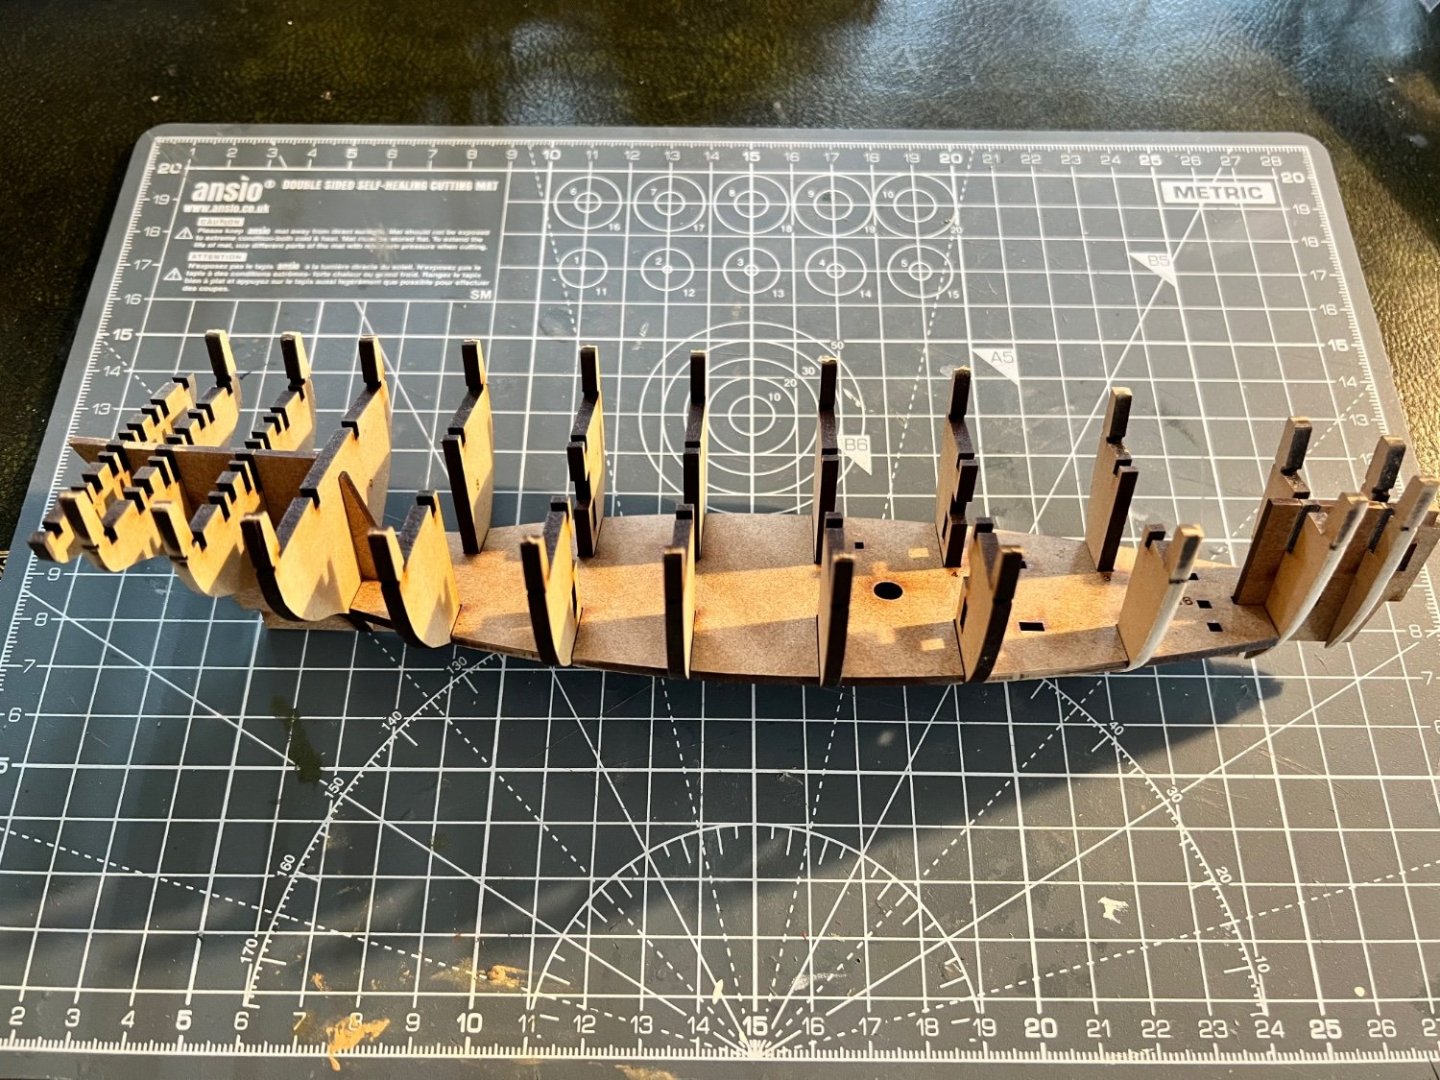
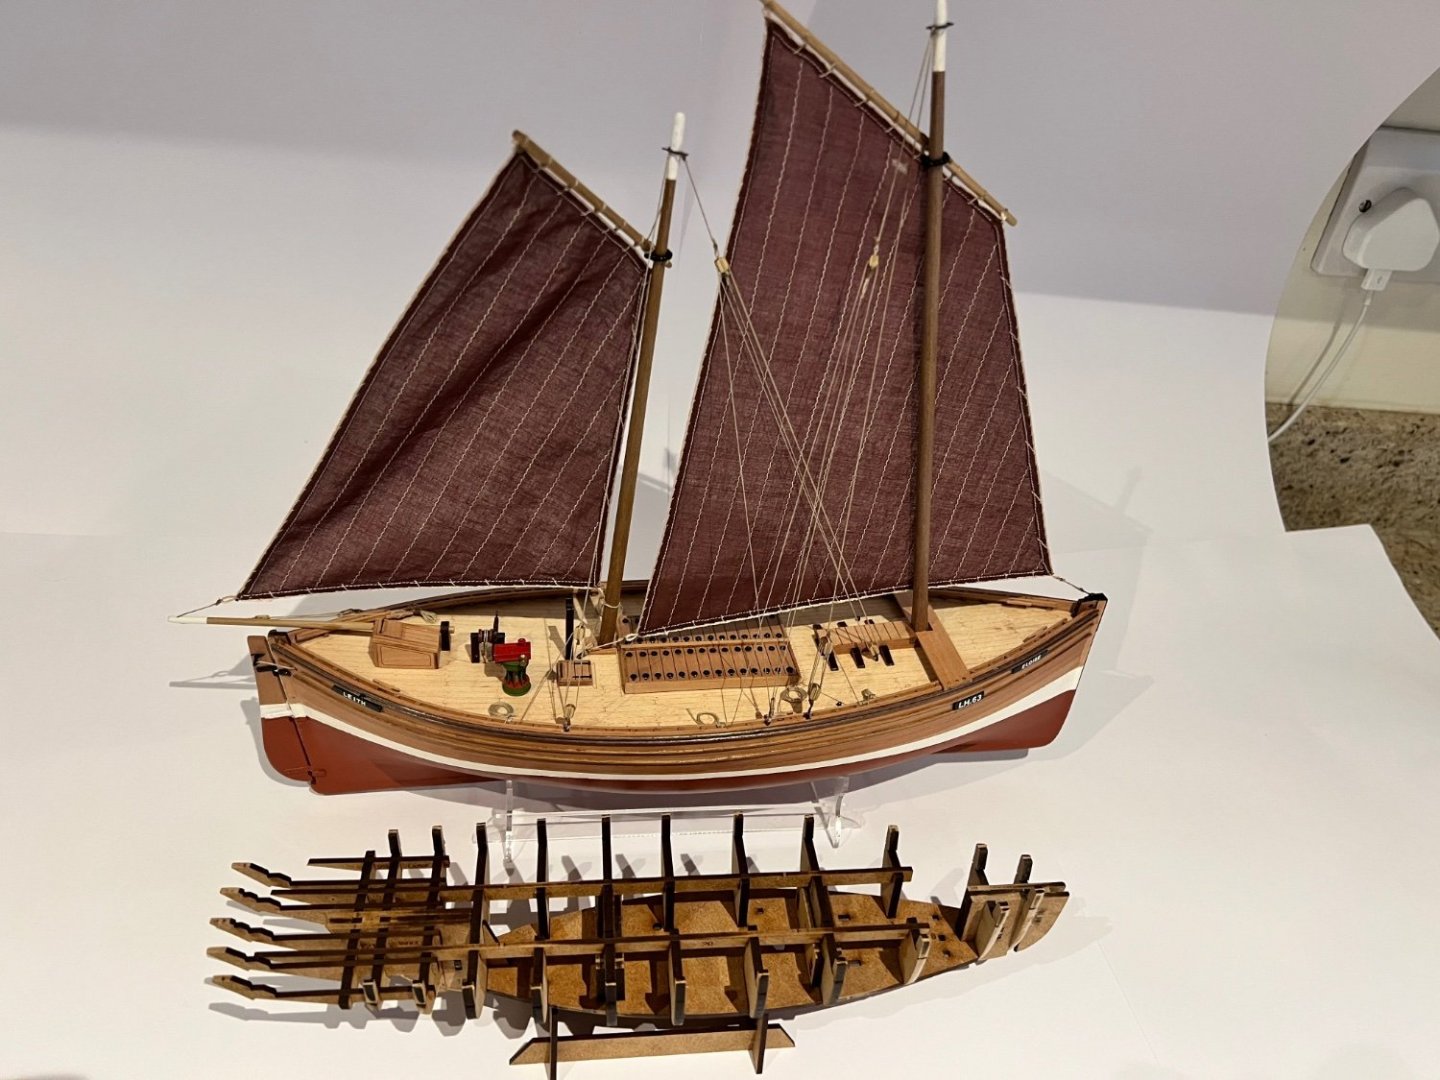
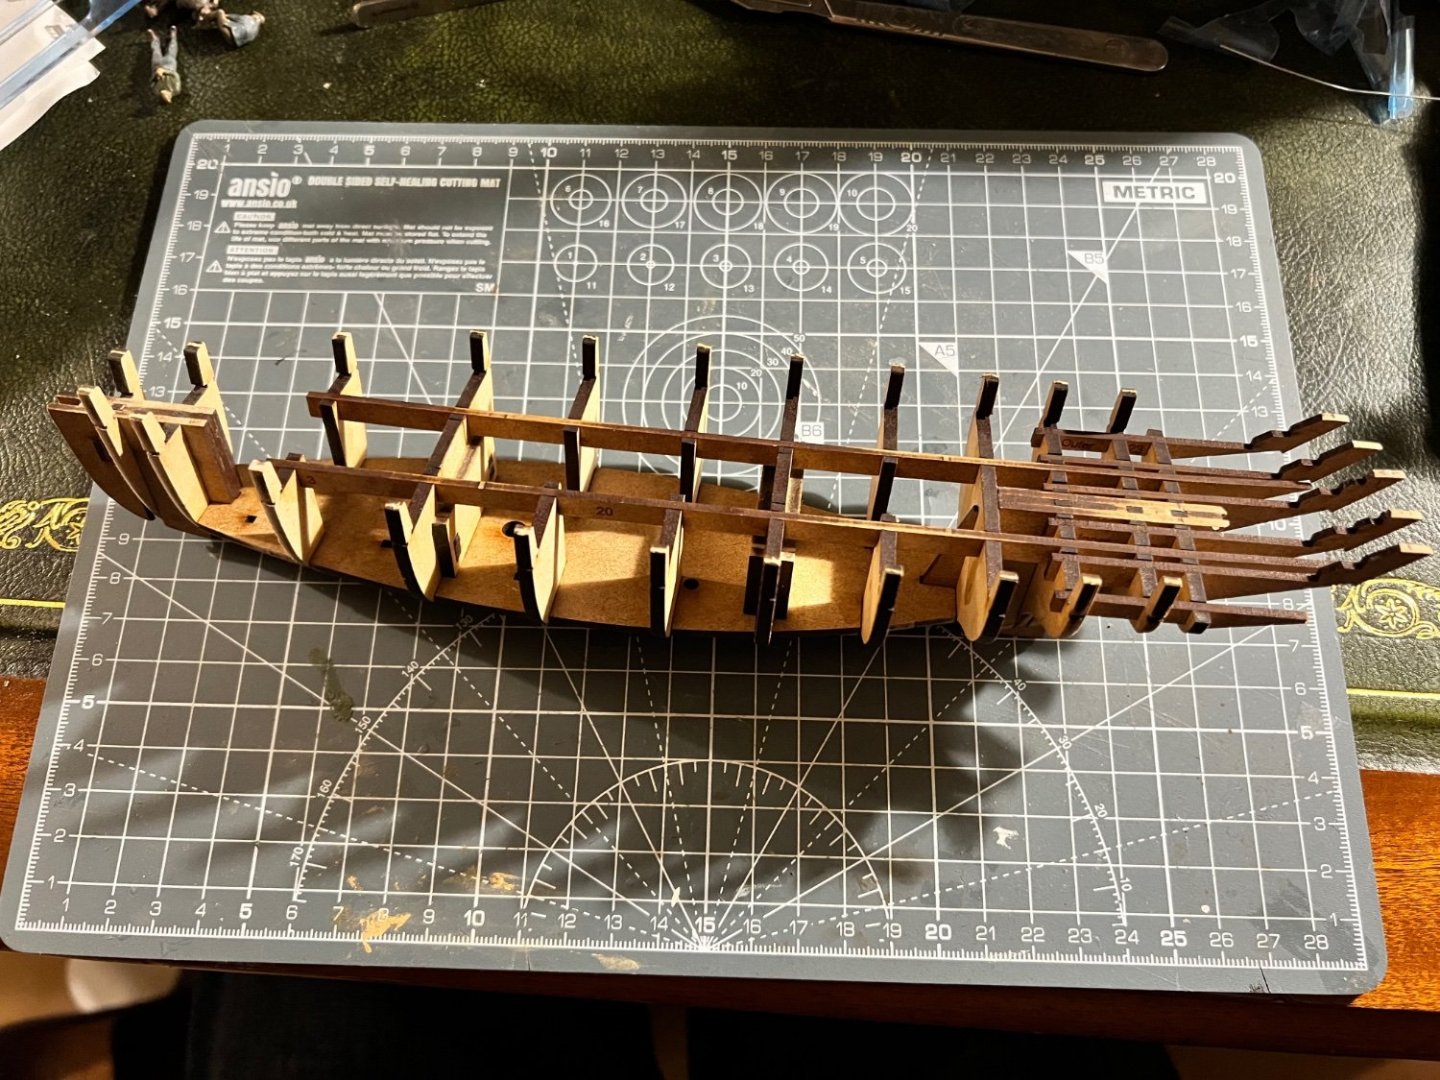
Nisha will be my second build having just completed Vanguard’s Fifie. I’m looking forward to building this little cutter, she’s much smaller than the Fifie. I’m somewhat nervous about the mast and rigging - I found the Fifie’s rigging a challenge and she barely has any. Nisha turned up yesterday morning and was extremely well packed with high quality materials throughout. I won’t cover unboxing as others have already done so very well in their logs. Started work right away. The pieces are immaculately laser cut and the retaining tabs easily cut. Bulkheads first with the first three at bow and stern needing bevelling before fitting. These fit very easily onto the false keel without glue. Followed by the lower deck. Additional supports are then added at bow and stern and between bulkheads 4 and 7 to strengthen the structure. The stern timbers are also added. These are very thin and weak in places and one broke easily with little pressure - shouldn’t be too hard to fix. At this point the whole structure fits together mostly without glue and feels quite loose. Next diluted PVA glue was brushed into the structure and left to dry. Nisha’s skeleton alongside the Fifie below shows how small she will be.


- 62 replies
-
- 7
-
-
- Nisha
- Vanguard Models
- (and 1 more)
-
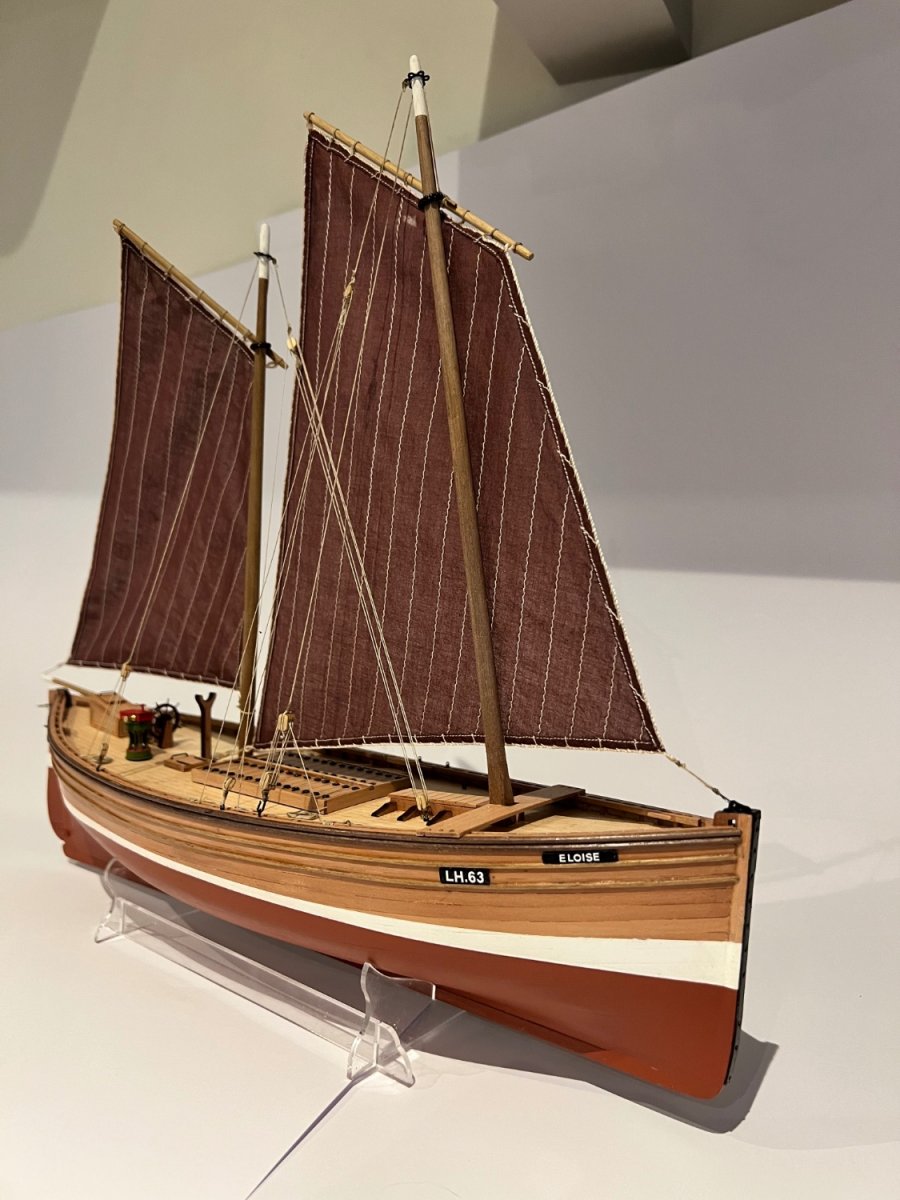
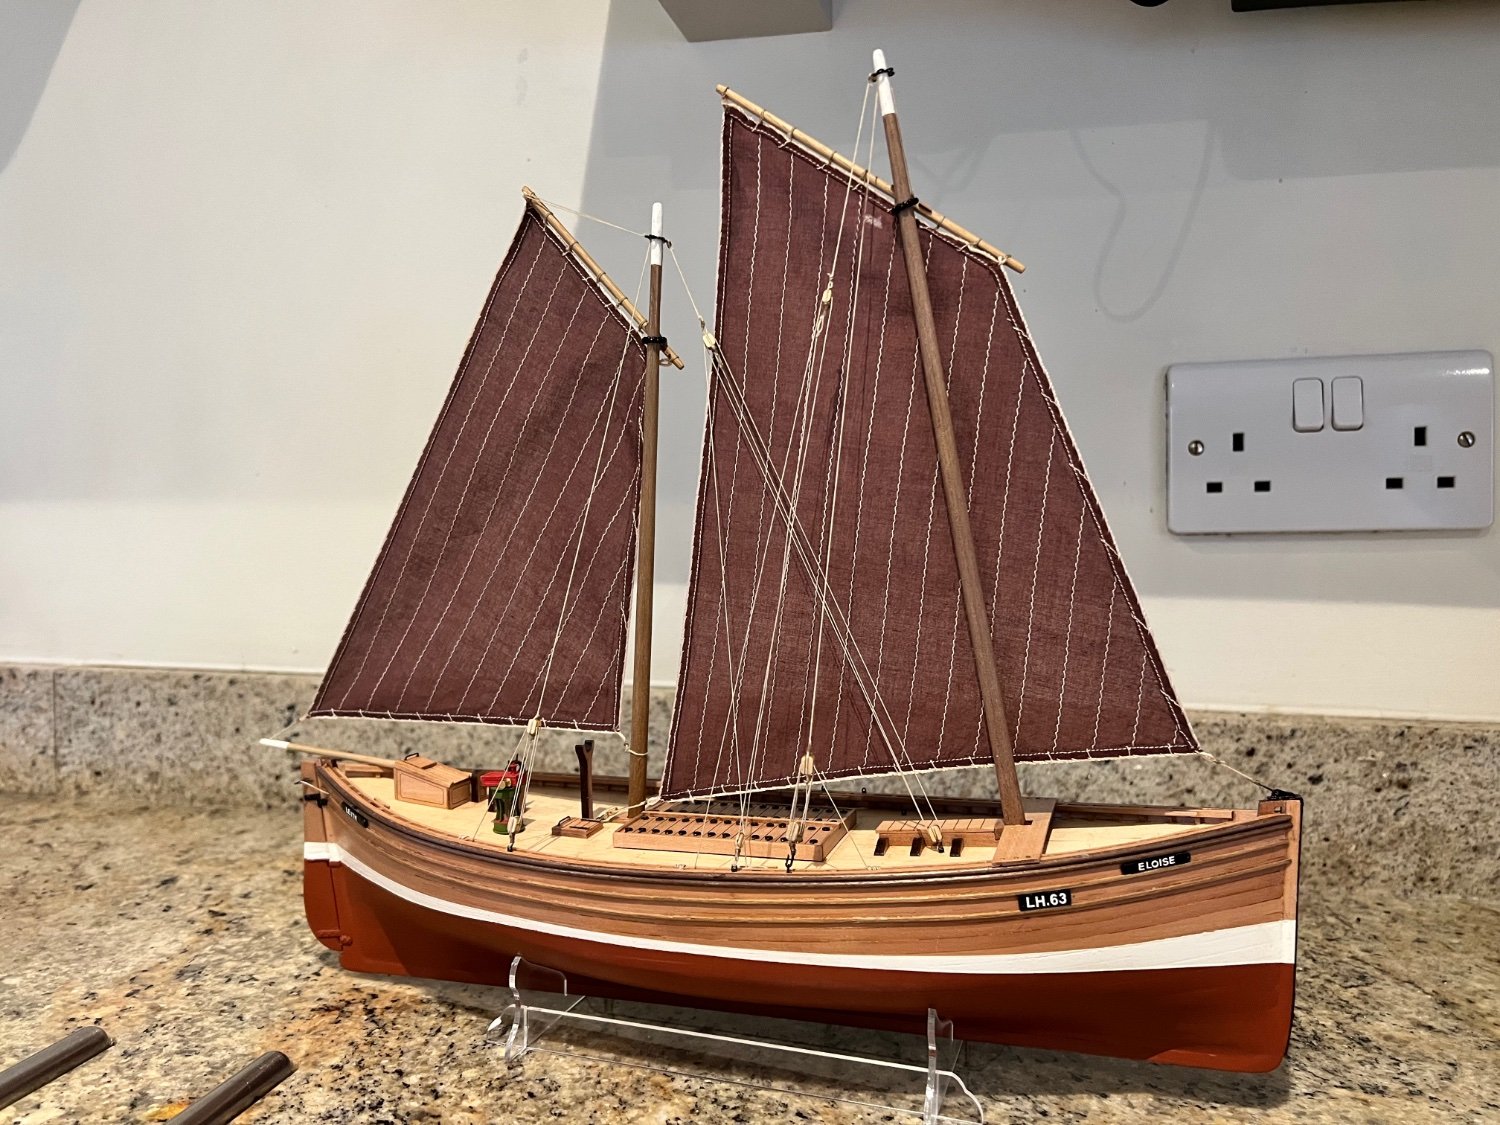
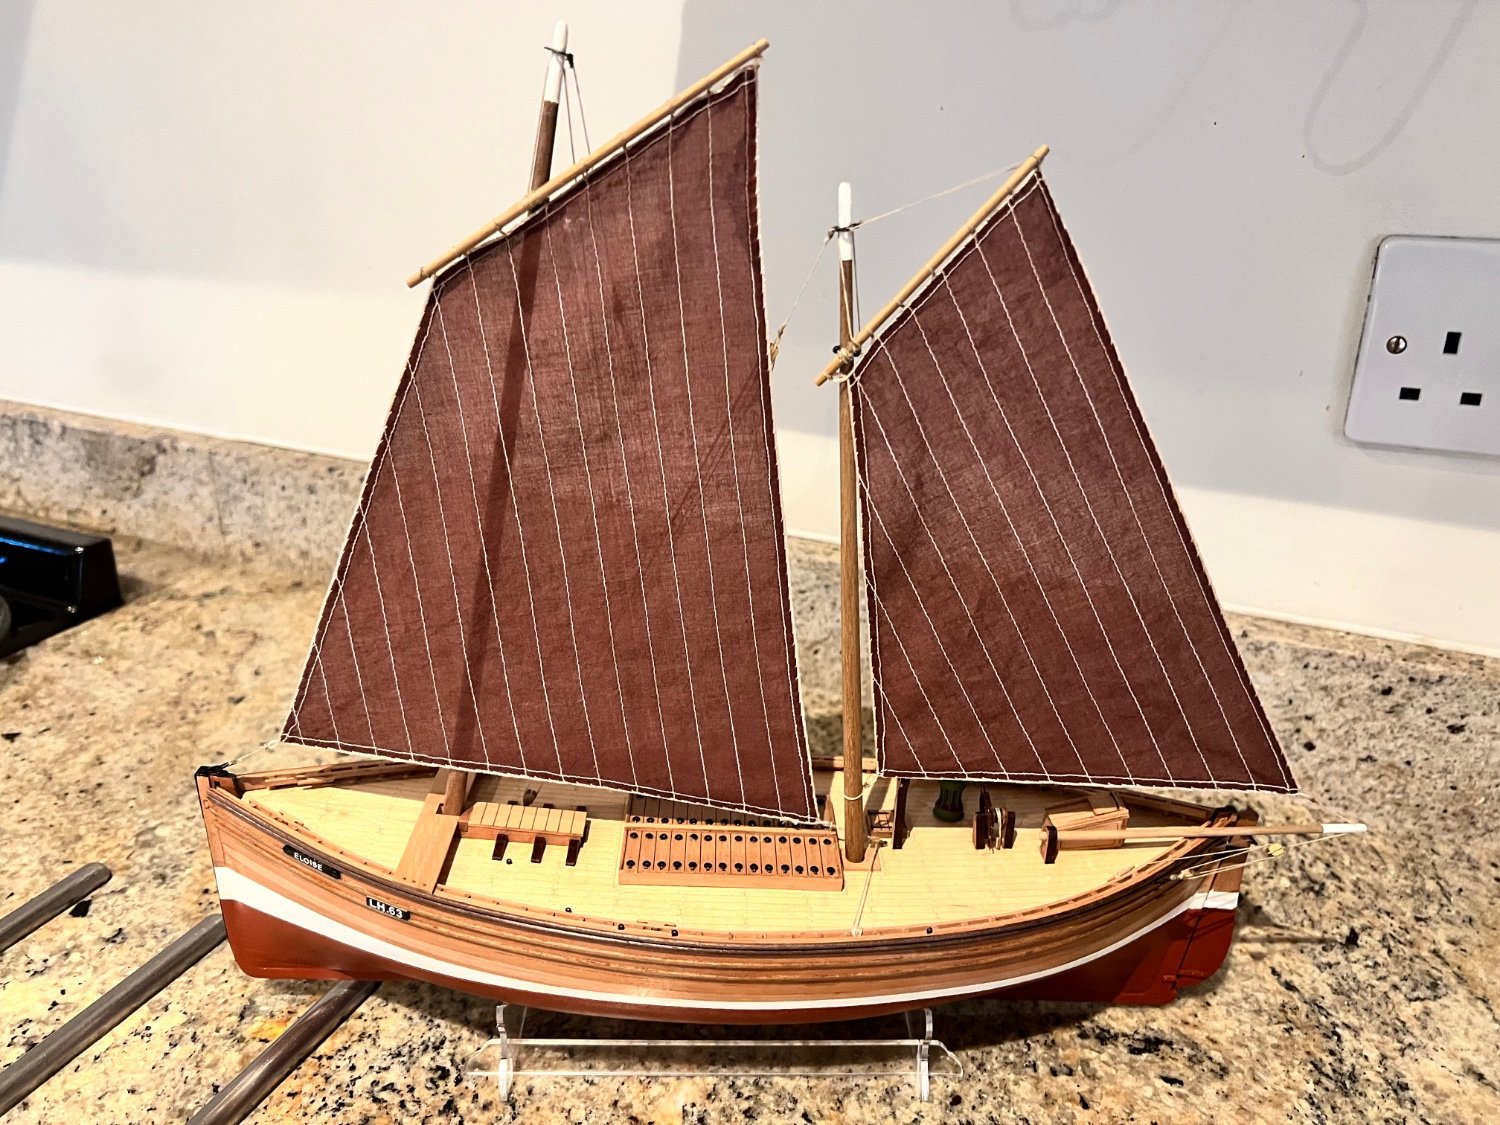
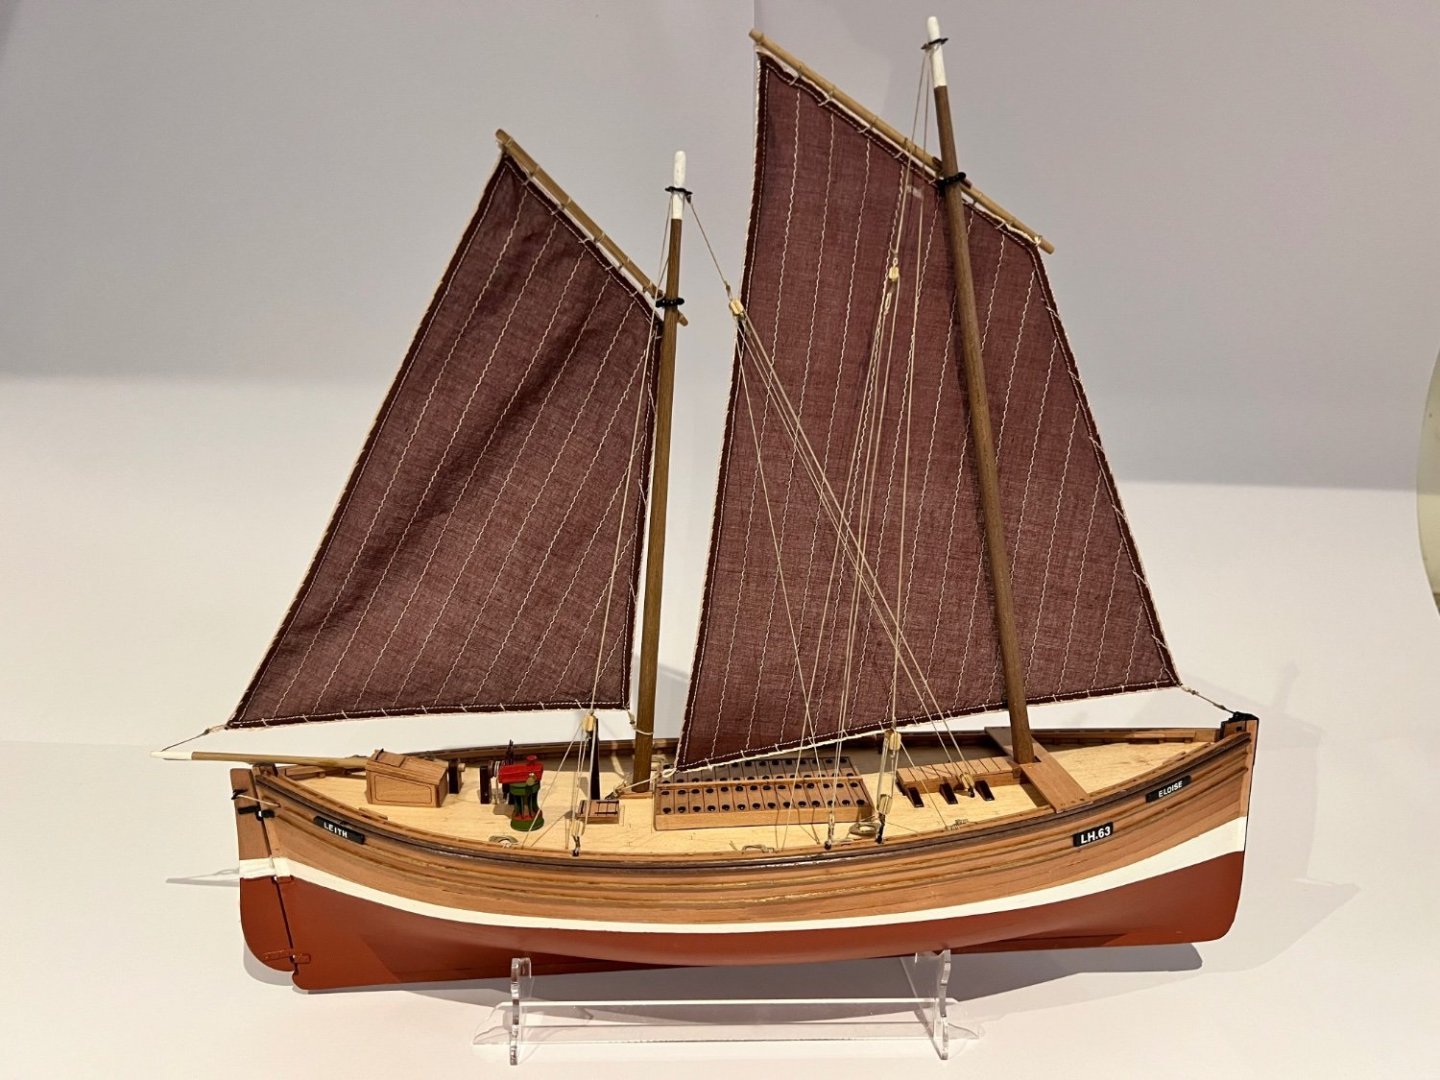
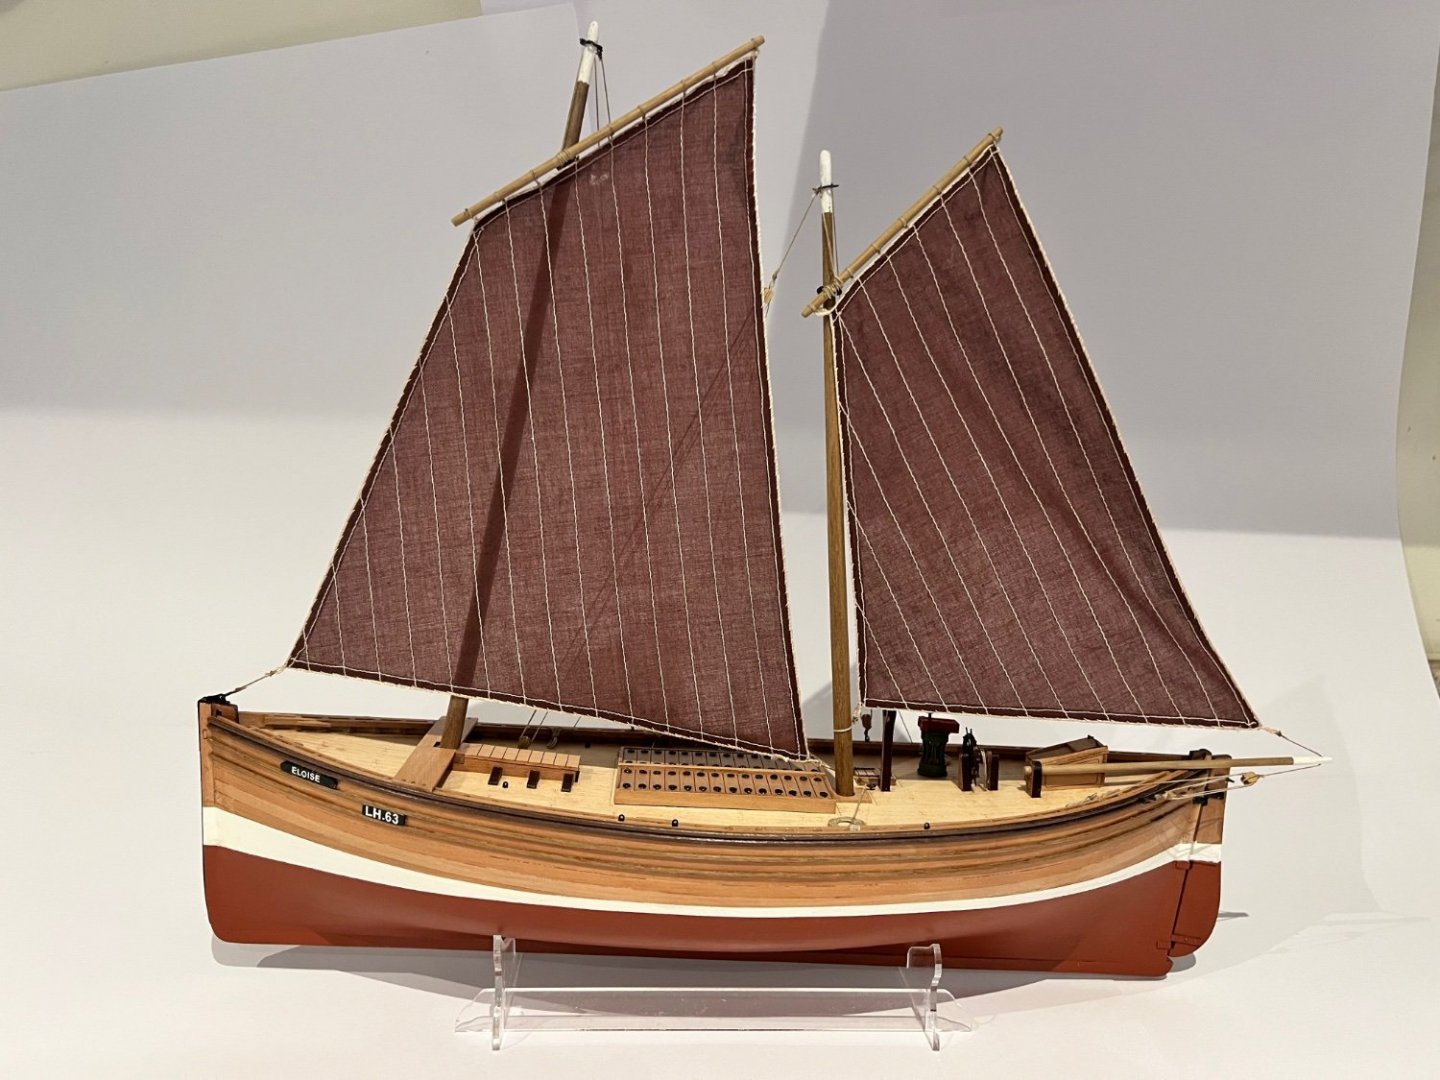
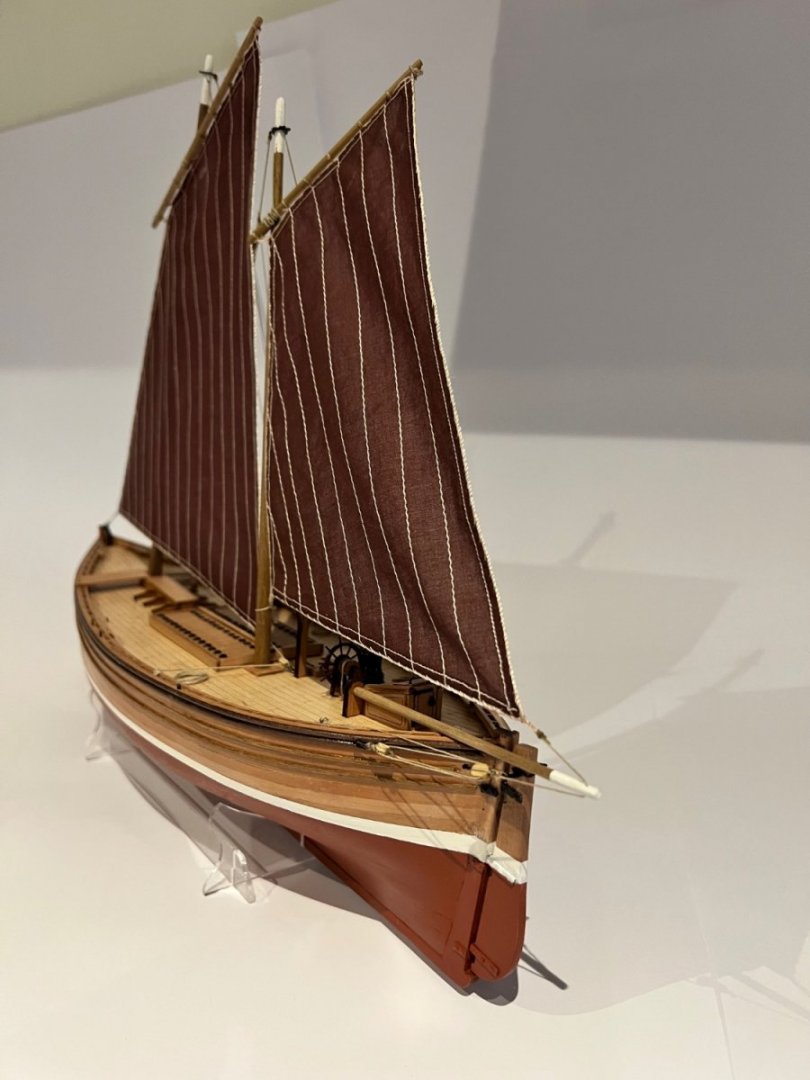
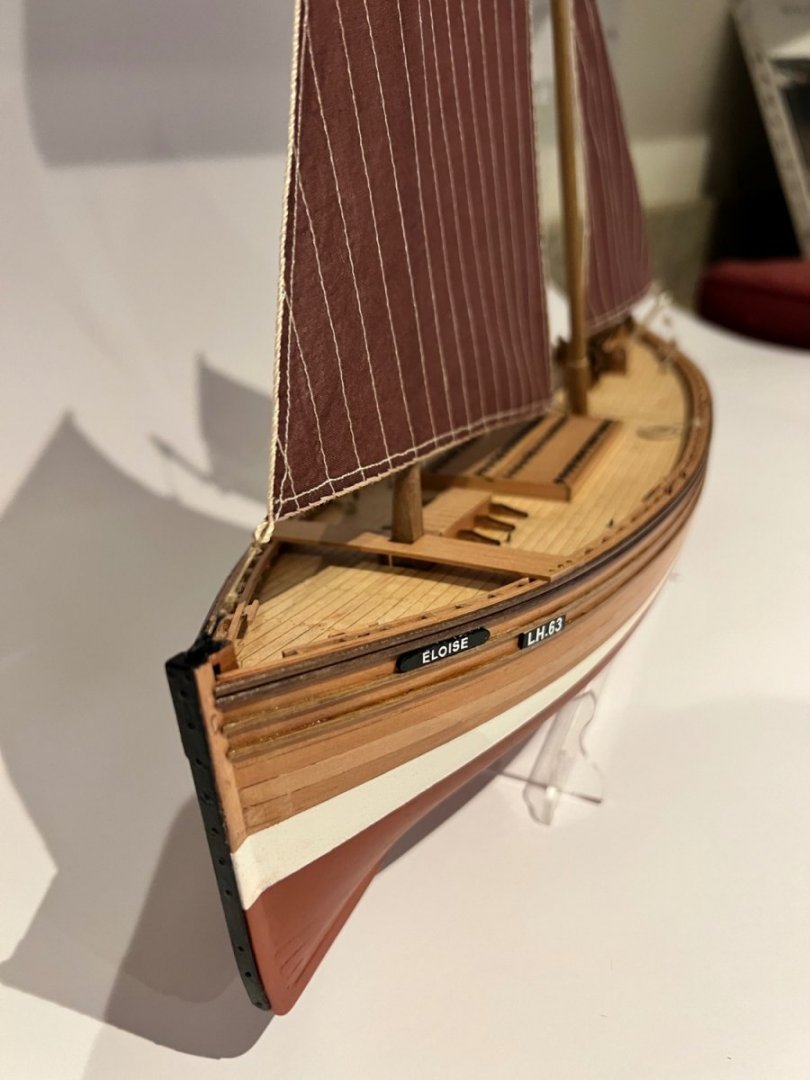
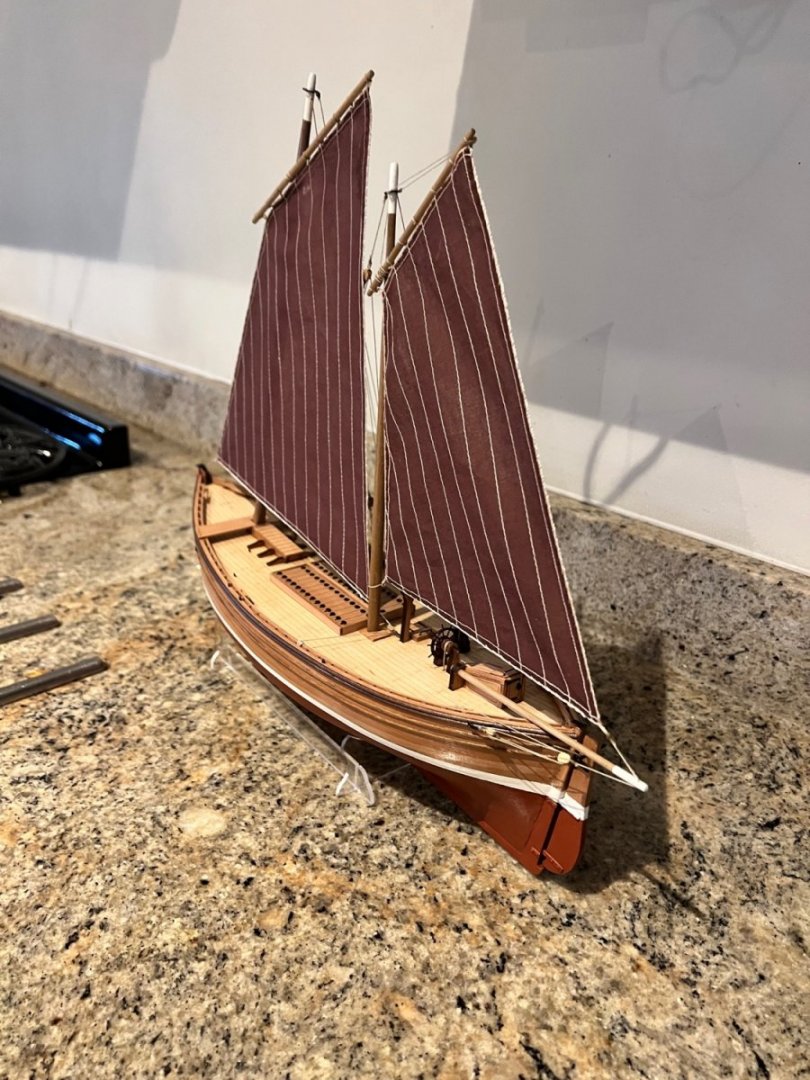
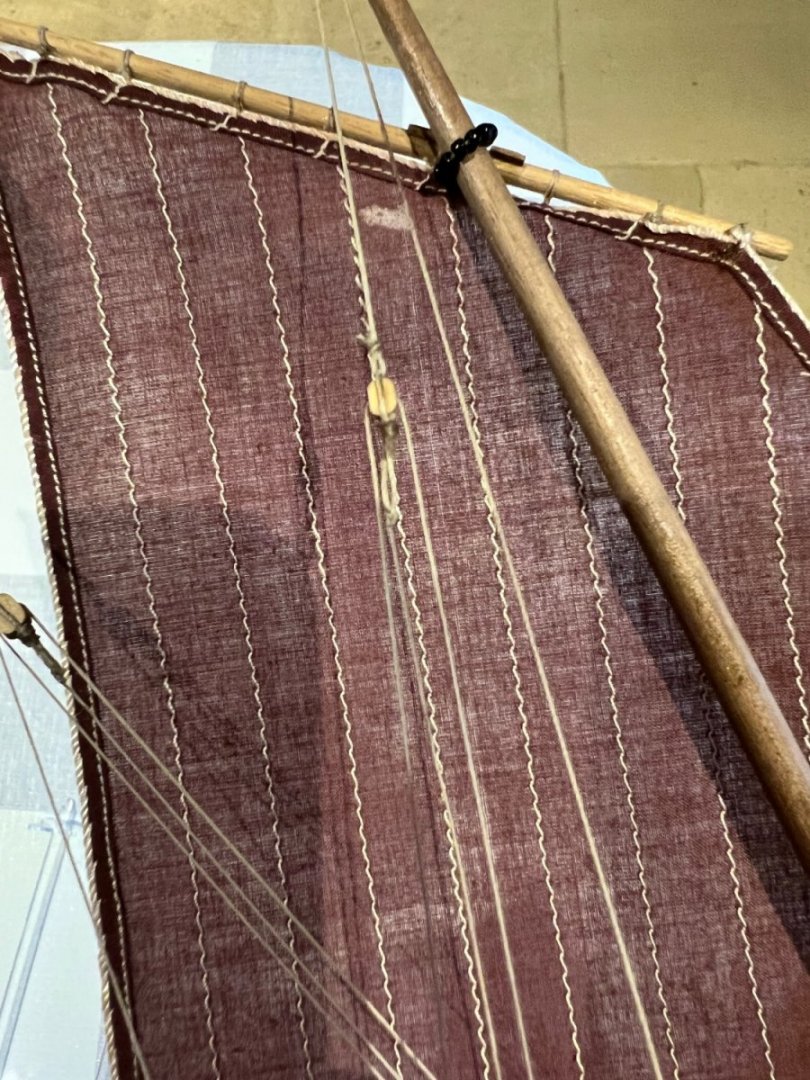
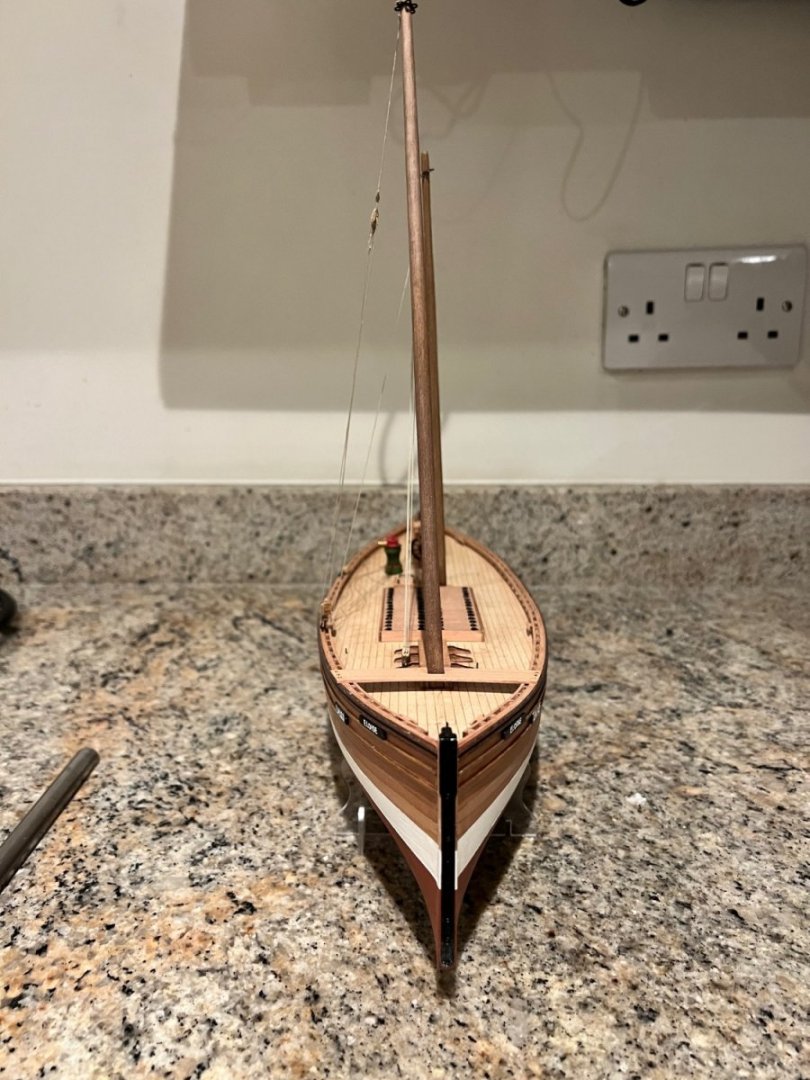
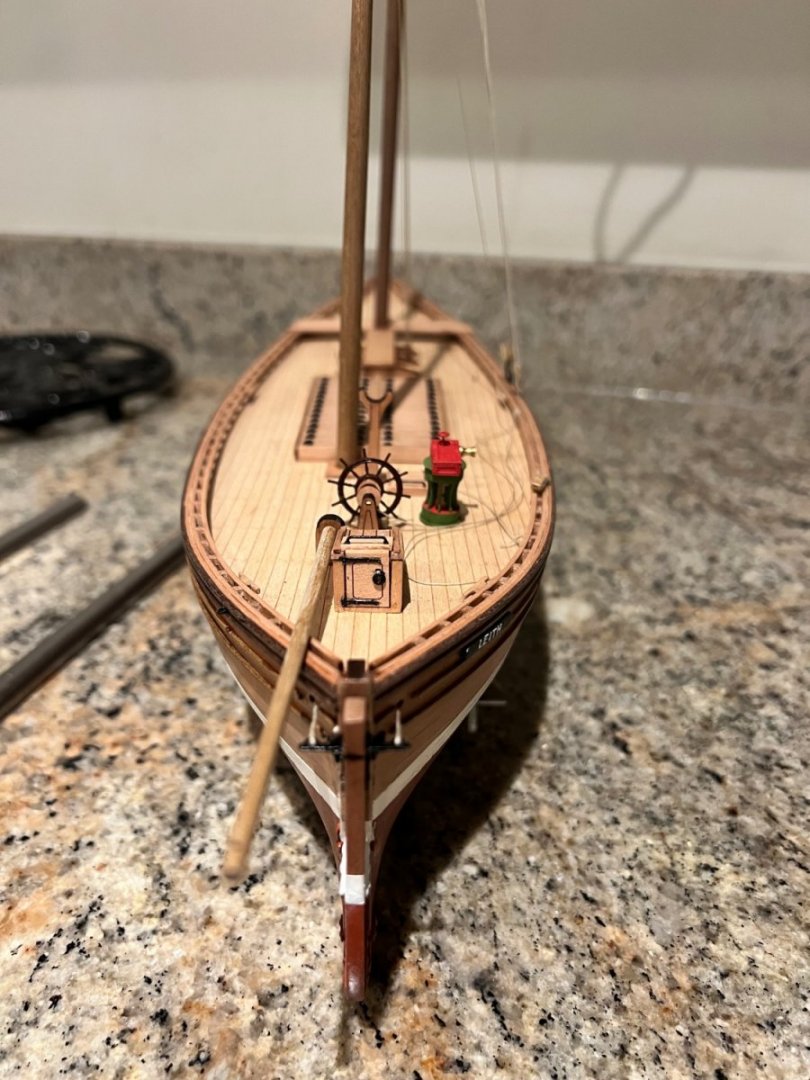
The “Eloise” is now complete. I’ve had a great deal of fun building her and I’m amazed by how well she has turned out as my first ever build - that’s mainly thanks to the excellent kit that Chris produced. I greatly appreciate all the advice and support I have received here and others’ build logs have been an incredibly valuable resource from which I have shamelessly plagiarised. I have inserted steel wire in all four edges of the mizzen sail but I ordered 28 gauge wire and it’s not strong enough to enable me to shape the sail and hold the mizzen yard at the angle it needs to be. I suspect I’ll have to add back the extra length of rigging from the aft end of the mizzen yard to the mizzen mast ring as the current set up is too flimsy.


- 42 replies
-
- 11
-
-
- vanguard models
- lady eleanor
- (and 3 more)
-
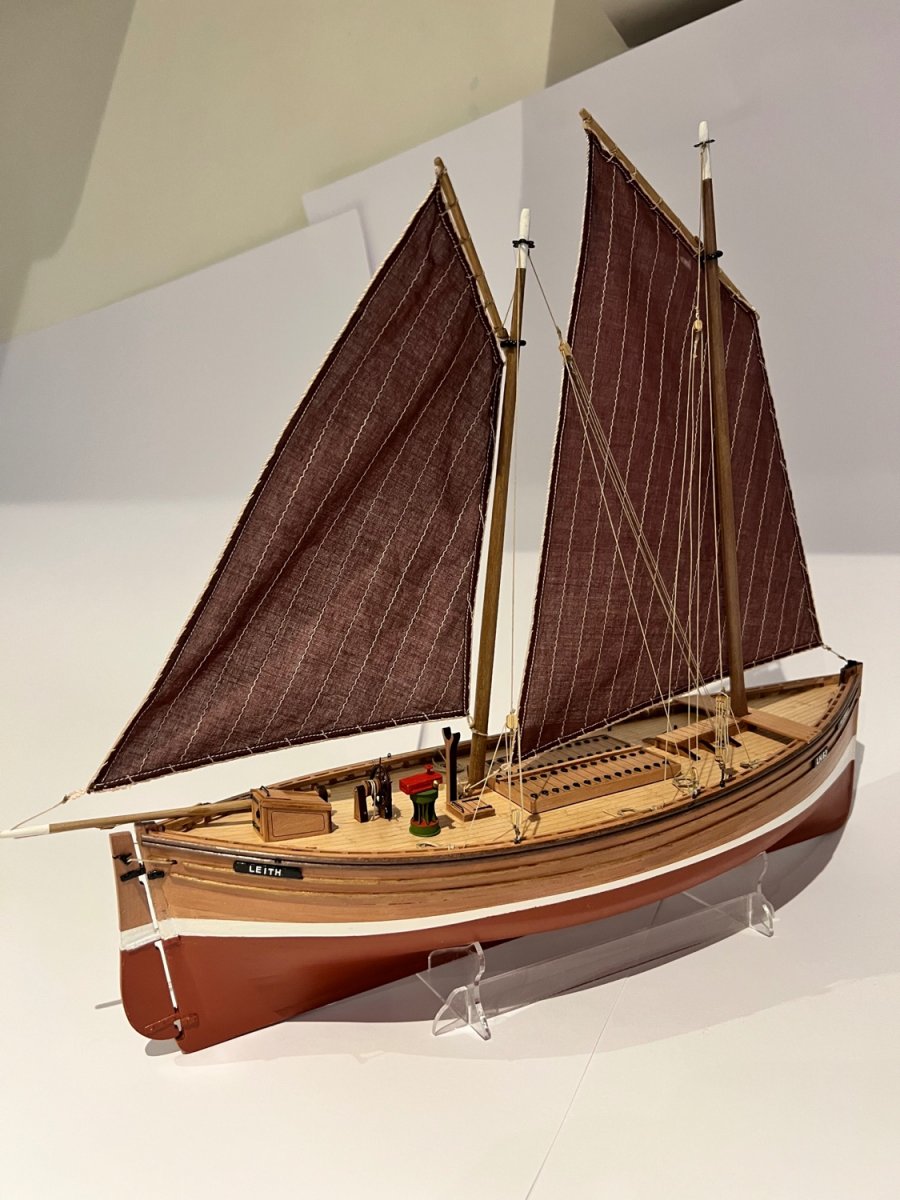
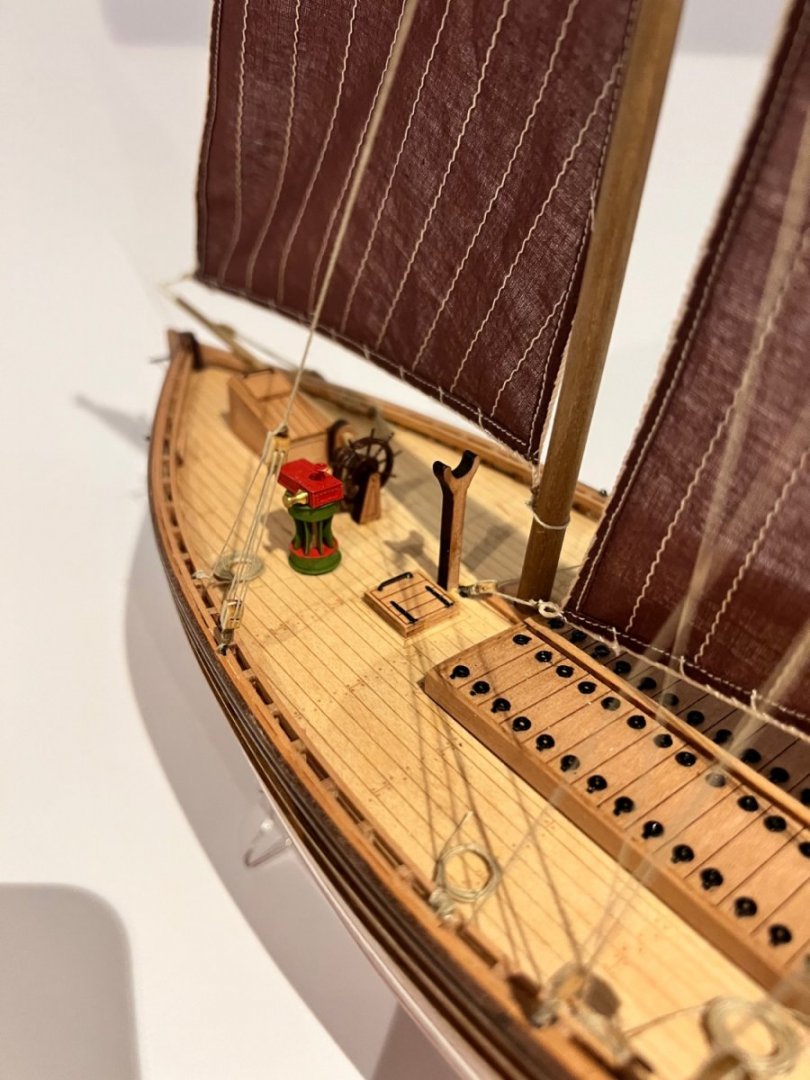
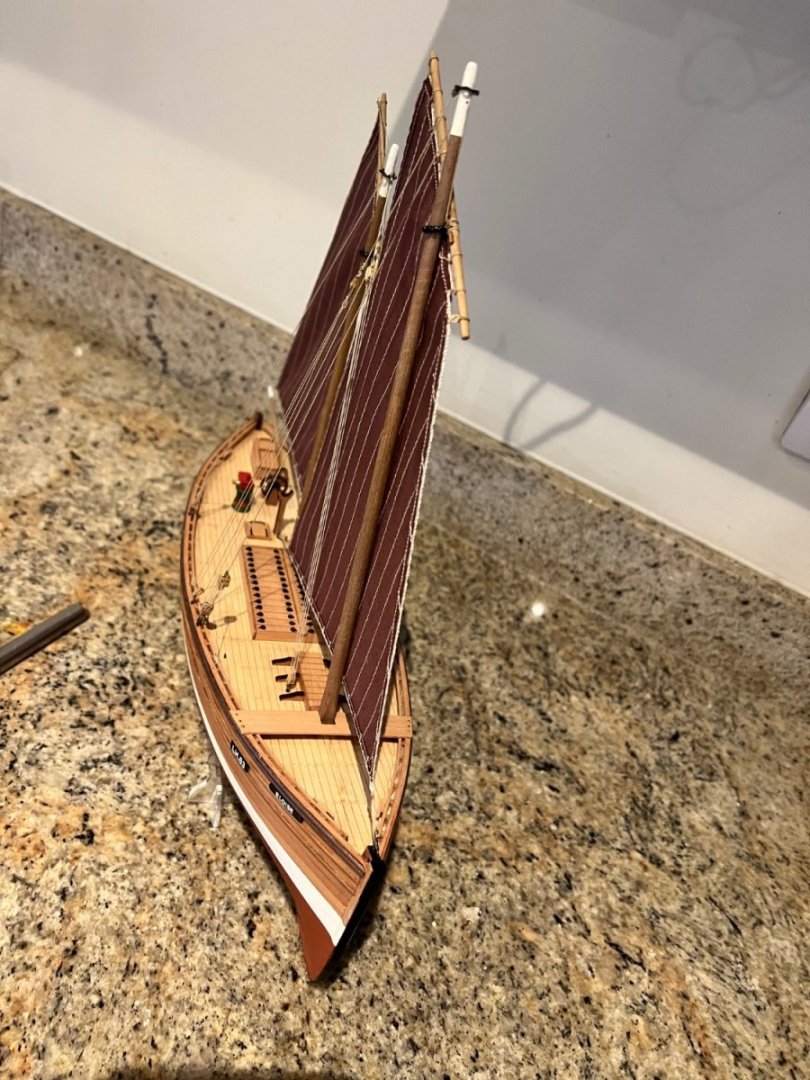
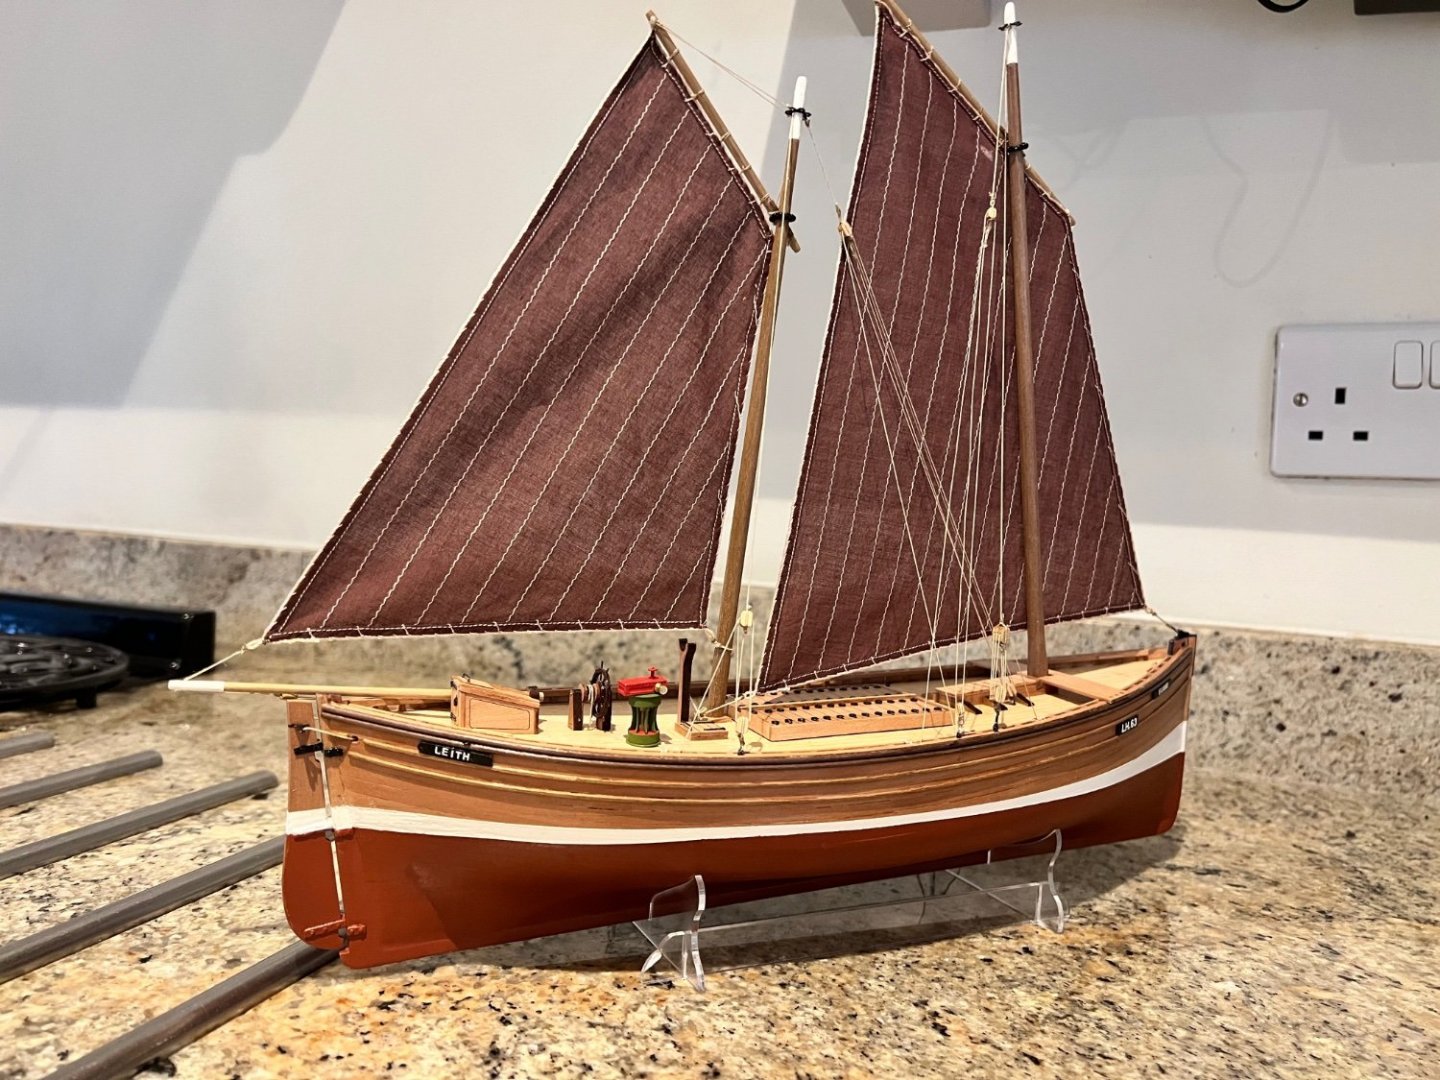
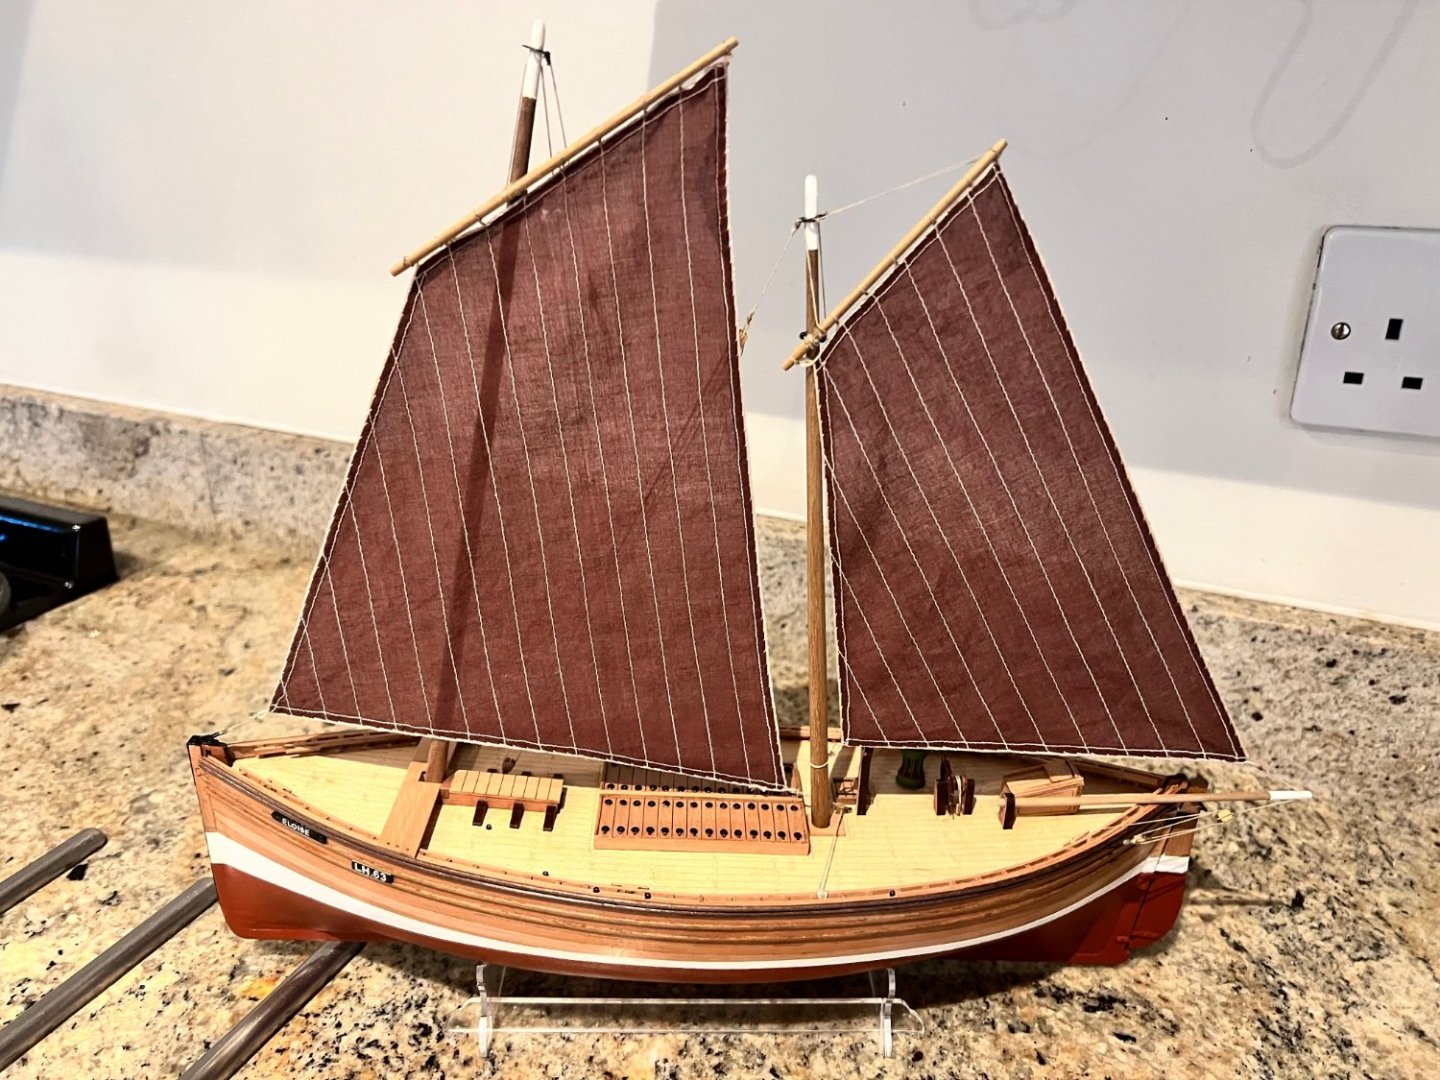
The Fifie “Eloise” is very nearly ready to head out to her fishing grounds. The only things outstanding now I think are: beeswax on the rigging to reduce the fluff, coils on the end of the sheets and halyards - I’m adding these later as Eke did on his Zulu build, and fixing the angle of the mizzen yard (see below). I’ve been away some of this week and spent the time devouring all of the build logs of Vanguard fishing boats on MSW. What a fantastic resource. As a result I’ve made a few tiny changes, most notably the white tips on the ends of the mast and boom. I’ve also added the hard points that the Fifie would have needed to sail on the port tack. Does anyone know how these luggers did actually tack? How did they get that huge foresail around the mast or did they have to drop it completely before tacking? I couldn’t get the mizzen yard to sit at the correct angle so I have added an extra length of rigging from the aft end of the mizzen yard back to the mast ring on the mizzen mast. I appreciate that this isn’t authentic or how a Fifie would have been rigged so I’m trying to think of an alternative. Options are 1) try and insert some very fine steel wire in the seam of the trailing edge of the mizzen sale or 2) CAing the parrel beads into the right position so the yard sits at the correct angle - could become quite messy though. I have some steel wire on order. The sails came very promptly from Chris, arriving on Monday and are superb quality. I dyed them using Rit Dye colour cocoa brown. I used three pints of very hot but not boiling water, a cup of salt and half a bottle of the liquid dye, stirred for 20mins then rinsed under the cold tap before washing in a bowl of warm water with some detergent. This gave me the dark brown with a hint of red colour I was hoping for. When I fished them out they appeared black and was a little worried that I’d gone too far! The sails were tied to the yards with clove hitches and the knots sealed with CA. Unfortunately one splodge of CA dripped onto the sails. I tried to remove it and gently scrubbed it with an old toothbrush and soaked it in acetone based nail varnish remover but to no avail. I stopped after an hour as progress was limited and I didn’t want to discolour the surrounding area of the sail. It’s disappointing but I can live with it. I may try and colour it with a permanent marker so it blends in more, but it’s not that noticeable so I may leave it too. I had been considering adding reefing points but decided against for fear of getting more messy glue on the sails. I was also going to colour the stitching on the sail with a permanent marker but I like the contrast from the stitching and having some other white on the sail allows the glue spot to blend in a bit. The rigging has plenty of room for improvement but I’m happy with it for a first attempt. In the meantime little Nisha finally turned up despite UPS’s best efforts not to deliver her. Chris despatched her very punctually and she was meant to be delivered a week ago on Friday, I was then away Mon to Thurs and UPS were scheduled to deliver this Friday instead but didn’t. I contacted the UPS depot and was told that both times the “driver didn’t bother delivering all of his packages”. I only live 20-30 miles from Chris and could have walked there and back in the time UPS took to deliver. I’m very excited to start building Nisha. She has come beautifully packaged and with the usual excellent quality of materials and instructions… but that’s a story for another build log.


- 42 replies
-
- 7
-
-
- vanguard models
- lady eleanor
- (and 3 more)
-
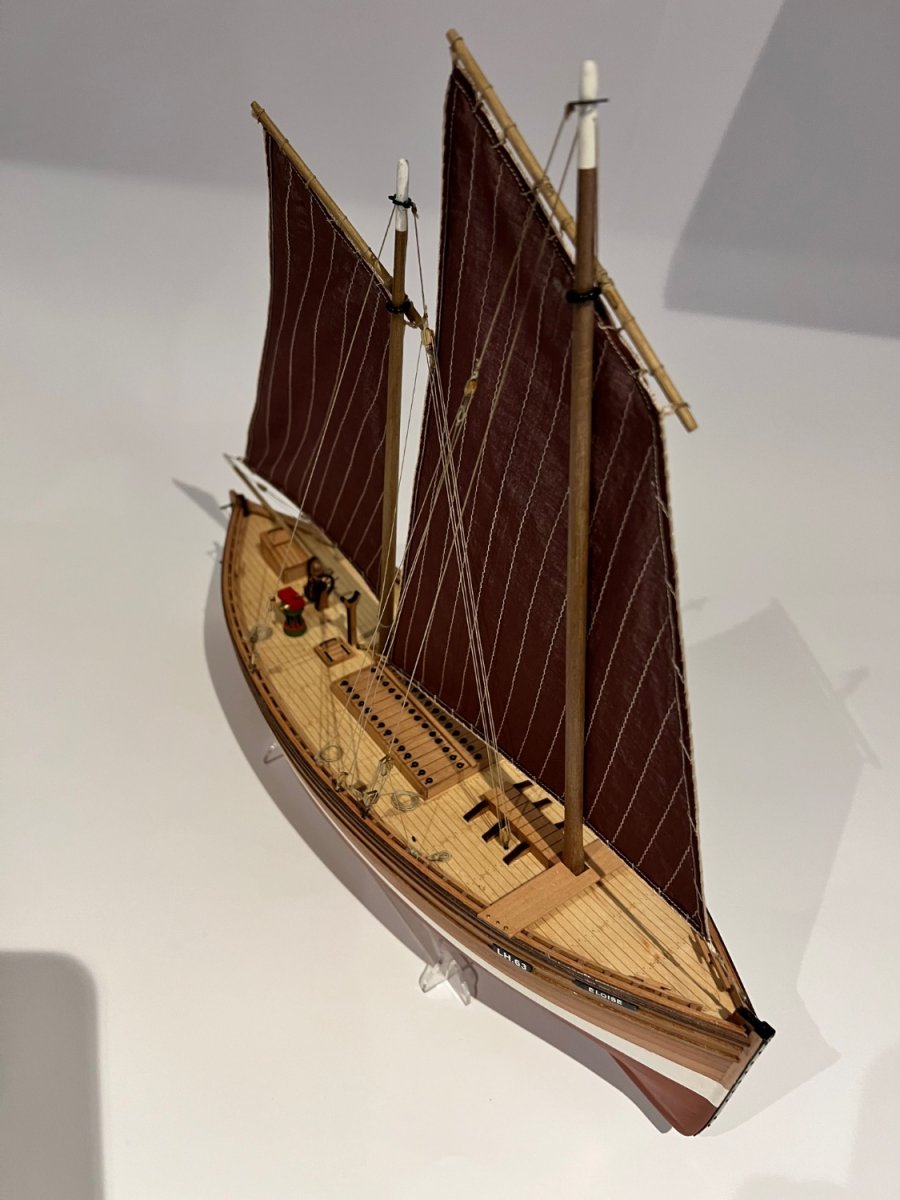
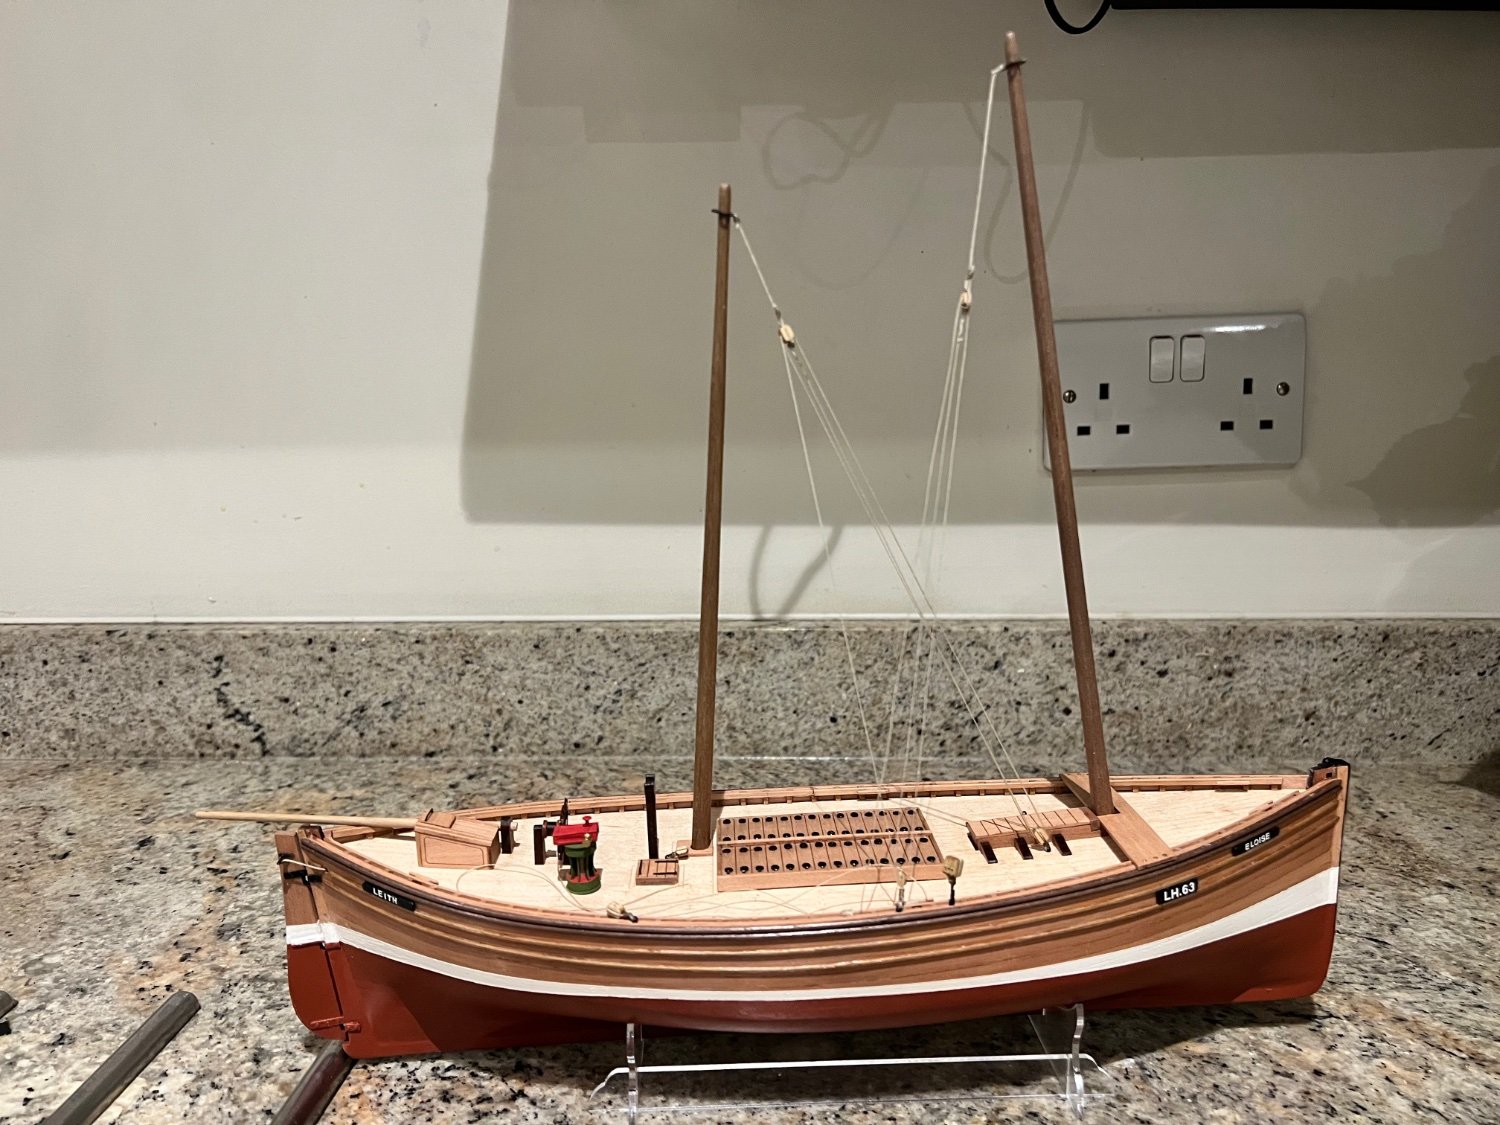
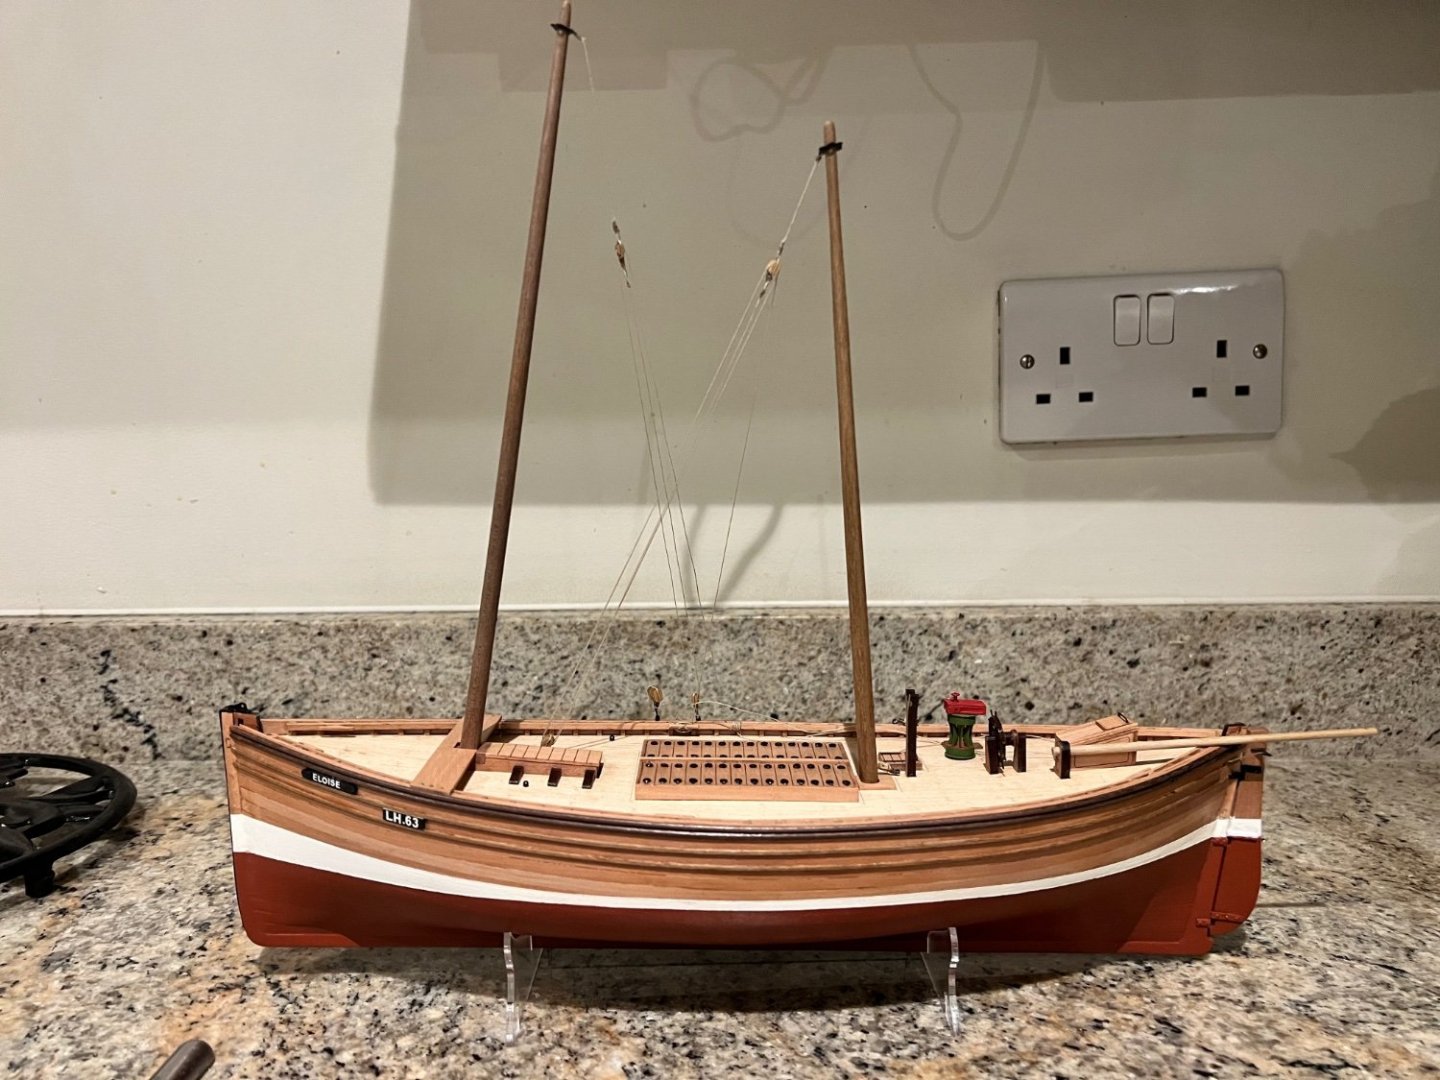
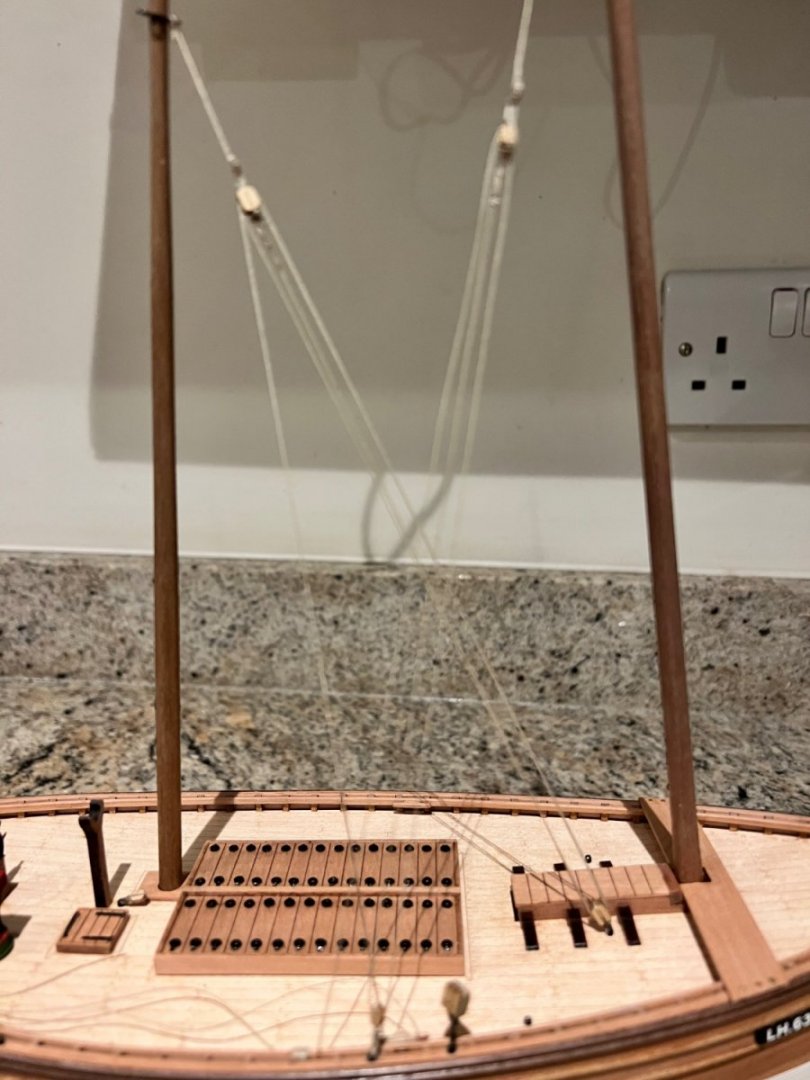
I’ve got about as far as I can on the “Eloise” until Chris gets some Master Korabel high quality sail sets back in stock. Changes since last time are firstly the masts are shaped and seated. The foremast is now straight having filed the inside of the hole and the bench seat at its base added. What passes for standing rigging on a Fifie has been rigged, although it will need to be loosened so the mast rings can be removed and the yards attached later. So I haven’t tied the lines off properly at the deck and that’s what the loose thread on the deck is. Other blocks have been added to the hull too - my rigging is a bit messy but will improve as I get more experienced at it. Eloise now has a Leith fishing number too and lastly her painted lower hull has been varnished with the matt polyeurethane varnish. The kids smashed one side of the Perspex stand by accident but Chris is very kindly providing me with a replacement, thank you - great customer service! Luckily the Eloise was not on the stand at the time. In the meantime I’ve ordered little Nisha as my second build to start whilst I wait for the sails. I next want to tackle a single masted boat with standing rigging including shrouds, deadeyes, etc. I’ve been so impressed by Chris’s Fifie that I’ll be sticking to Vanguard as a kit maker and I’m planning to work my way through the Vanguard range with a distant goal of eventually building the Sphinx, so my plan is a few fishing boats first, then the Alert and then one of the brigs. But even the best laid plans… I’ll be back to this log as soon as I have the sails.

- 42 replies
-
- 8
-
-
- vanguard models
- lady eleanor
- (and 3 more)