MarcNS
-
Posts
31 -
Joined
-
Last visited
Content Type
Profiles
Forums
Gallery
Events
Everything posted by MarcNS
-
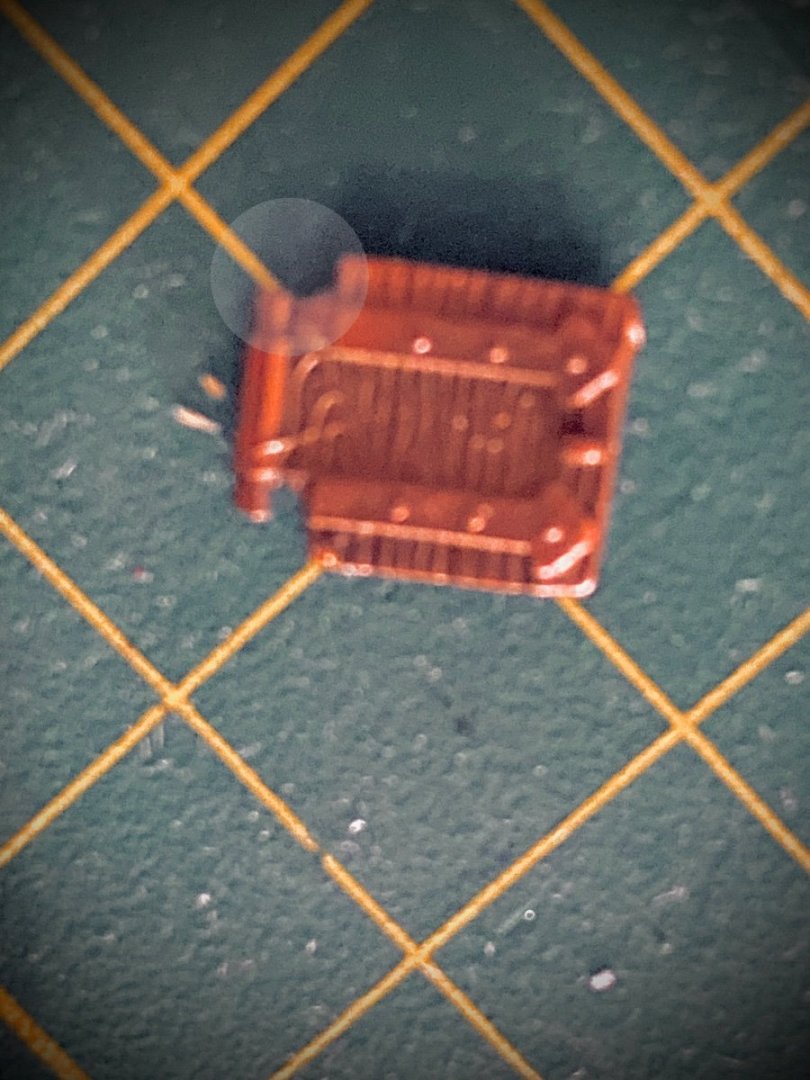
I haven’t posted anything in a while respecting the logs by much more talented builders than myself. I did post on an issue in general discussion on the stern decoration that might be helpful to some attempting this kit. An issue that I ran into in the last couple of weeks was with the gun port covers. There are two parts, a frame and a cover both made of cast material. As I assembled the 100 or so of these, several of the covers were hard to attach. I forced a few resulting in snapping the hinges. Occre customer service was terrific in replacing the broken ones but the issue can be avoided. In the picture below, where circled, you might be able to see that there is a bit of material in the cover where it attaches to the frame. I used my dremel with the fine cut off wheel (on lowest RPM) and carefully removed the excess. The covers then attached without an issue.
-
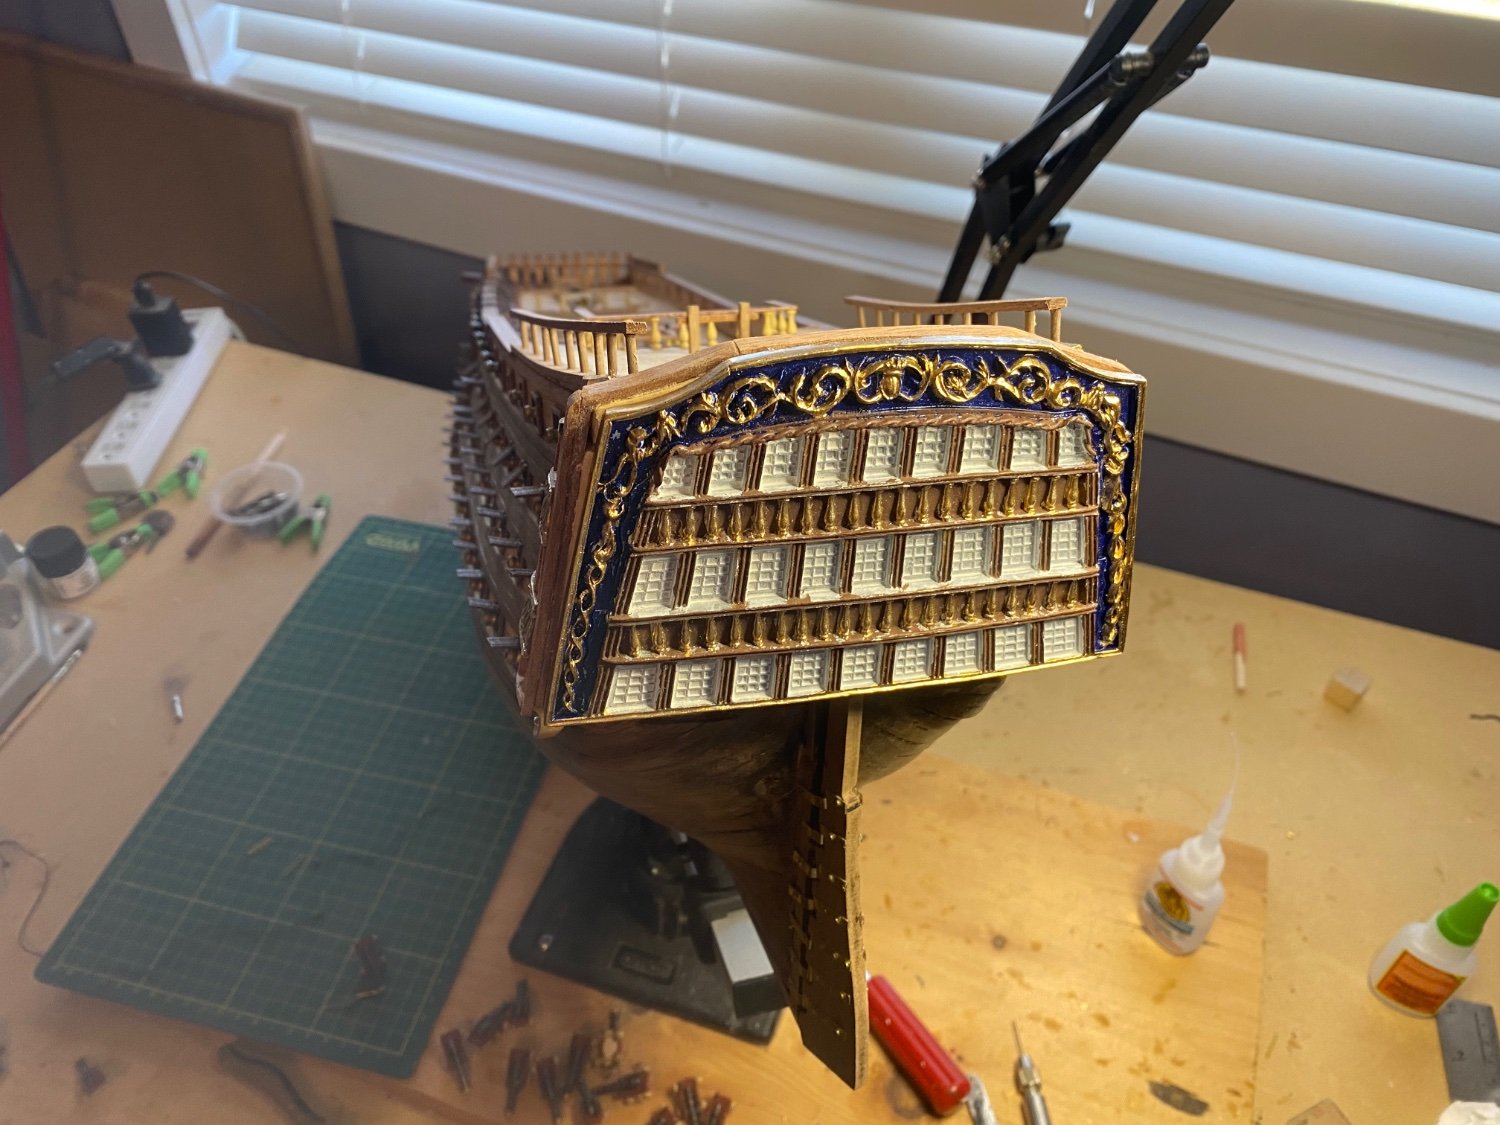
I then painted the assembly as best I could and used contact cement to attach it. I needed to adjust the size of the framing to allow for the extra space. The final result is ok.
-
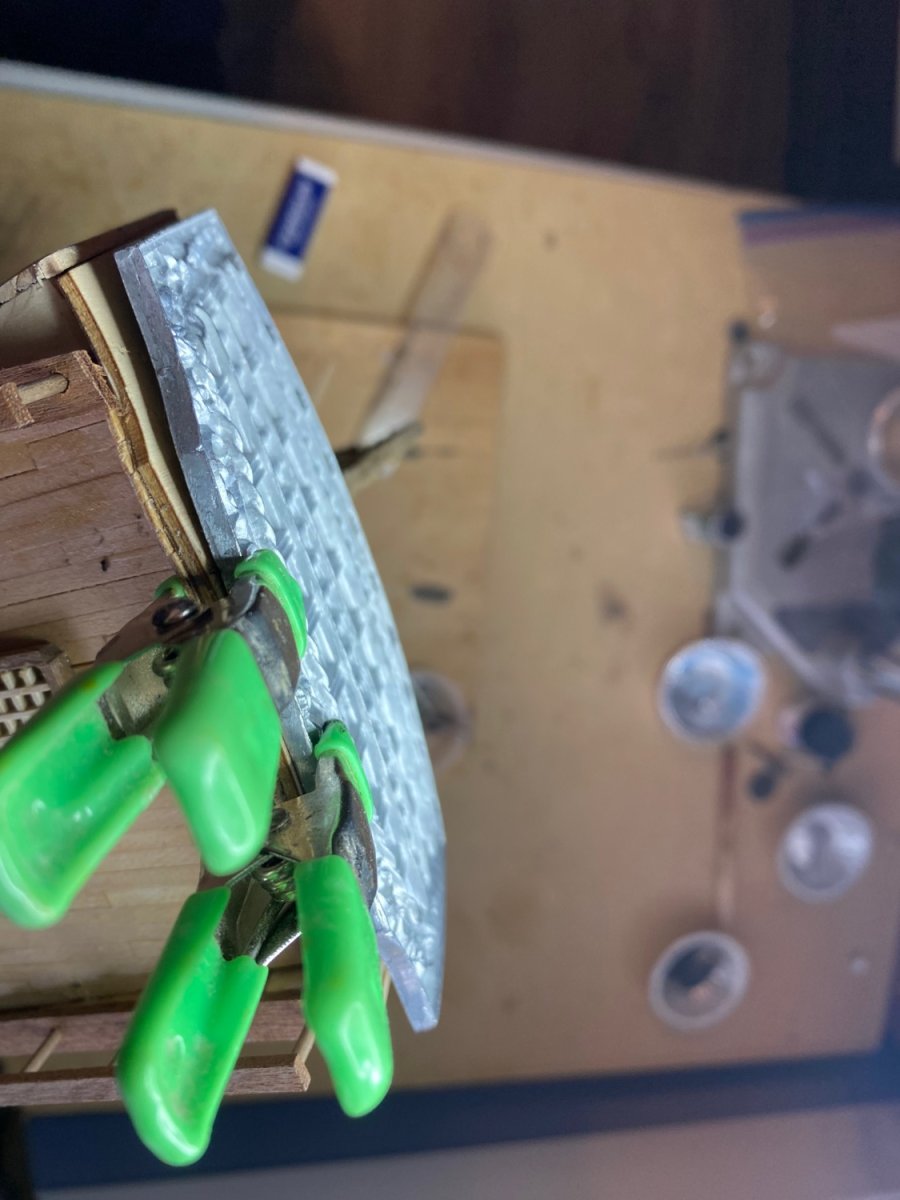
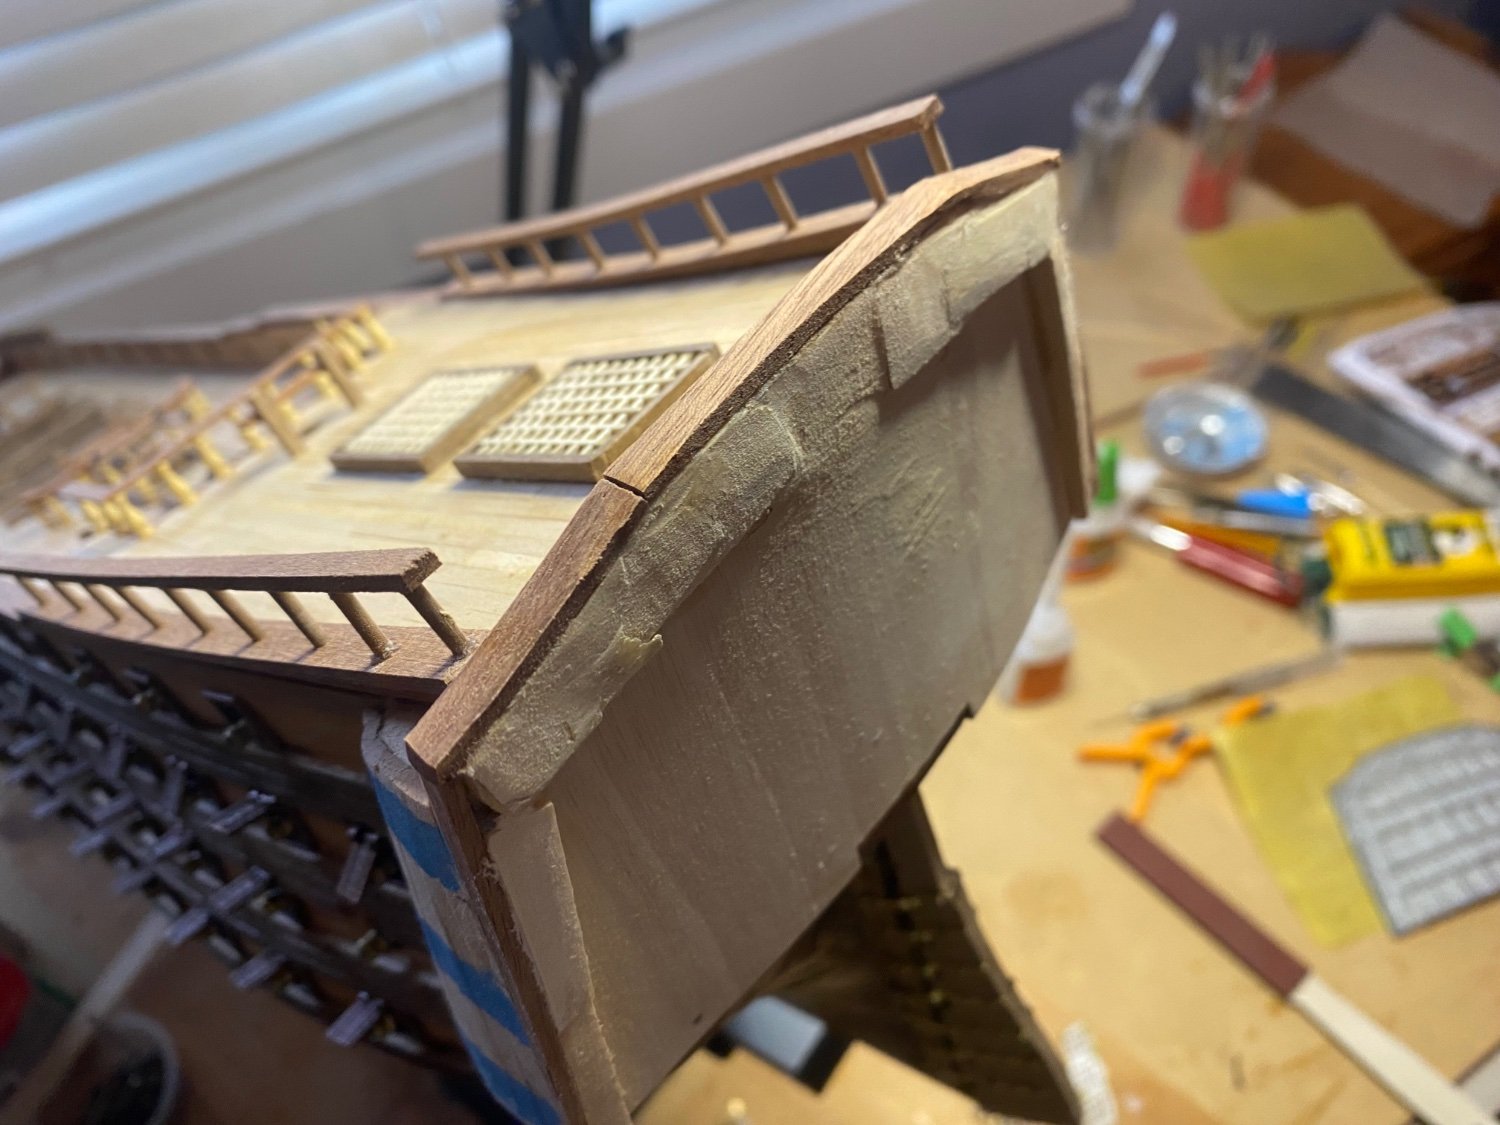
Thanks Cristiano. Not sure why, but I did not get notified of your response and only saw it today. In the interim, I found a build log where someone addressed the issue and proceeded to do my best on it. I built up at the sides of the stern with some spare material to fill the gaps as shown in the first picture.


-
It’s a beautiful ship. You may want to reach out to Chris Watton of Vanguard Models, he has designed a wide range of ships from this era so, assuming it’s not one of his, he may recognize it. He is a member on this site so you may be able to contact him through one of his posts or on line through his website. Good luck Marc
-
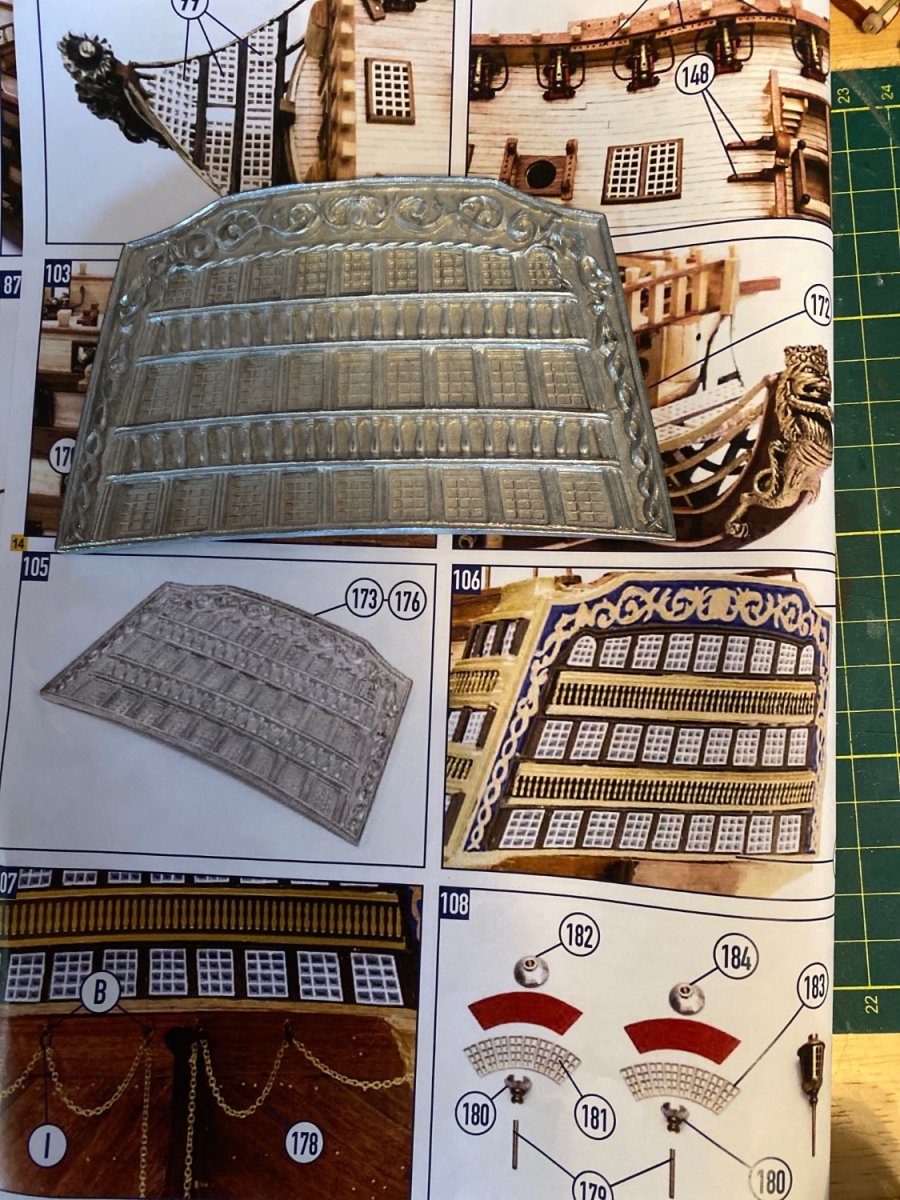
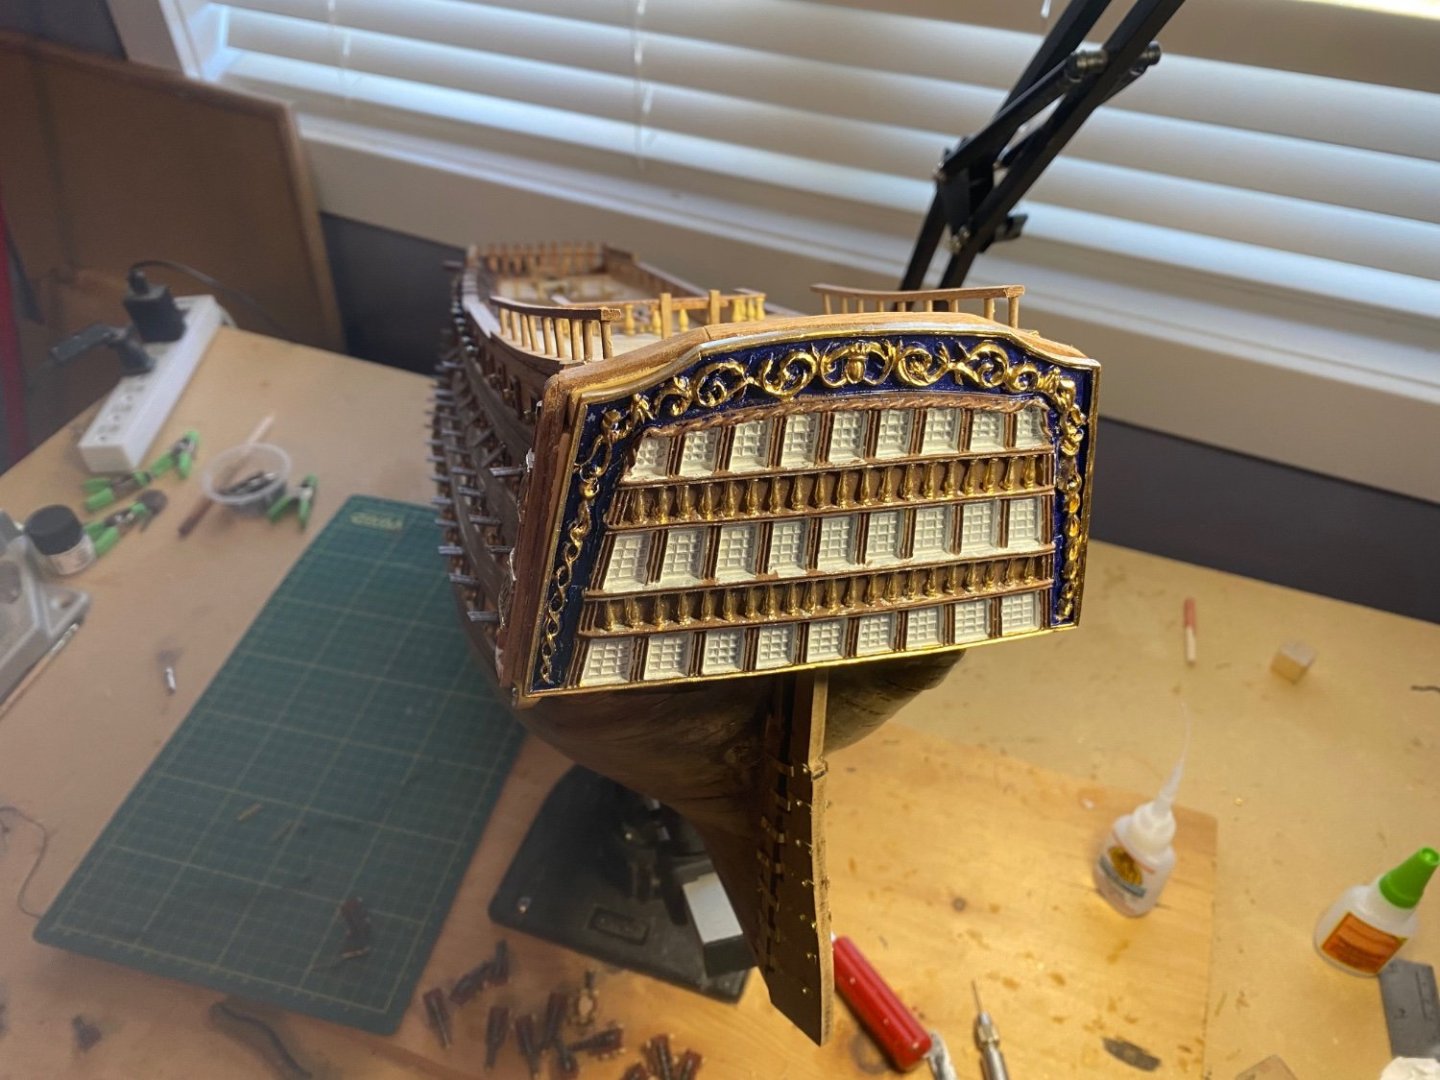
Hi all, I’ve been searching through various logs to find anyone who, in executing this model used the cast stern piece, pictured below. I’ve seen that several people have decided to build this from scratch (which I’d prefer not to do) but the challenges are: (1) the curvature isn’t quite right and I’m stumped on how to adjust it. (2) the painting of this is daunting, I can see several ways to approach it but none that seem to achieve the end results. Would appreciate any thoughts or suggestions.

-
Three weeks of planking are finally in the rear view mirror. Of note, the materials provided in the kit and nice quality and plentiful, the downside is the sapeli (lower part of the hull) is very hard to work with. I ended up soaking the planks overnight before attempting to bend them with my trusty heated bending tool and even so, I still snapped a fair number. This is a single planked kit and I wasn't successful at executing the planking well enough to avoid significant sanding and use of wood filler. Sapeli is not easy to match - the closest I could find was walnut wood filler which didn't look that great in the amounts I needed. To get the best finish I could, I used a coat of pre-stain, two coats of Sapali dye (still wasn't great) so then I decided to darken the whole thing with red mahogany stain. I'll eventually add a coat of clear varnish.
-
Seems like a Canadian barrage started by Tyler. Welcome. I am in Halifax and currently building the Santisima Trinidad (Occre) Marc
-
I am now ready to move on to planking, so I expect it will be a while before my next post. I do have a question though. The inside of the bulwarks are to be planked. I plan to do this early with some left over 0.5mm lime wood and am considering whether or not to paint them red. In my research, I have seen both natural and red for the inside of the bulwarks and it seems that a war ship of this era likely did have them painted red. Does anyone out there have insight on this?
-
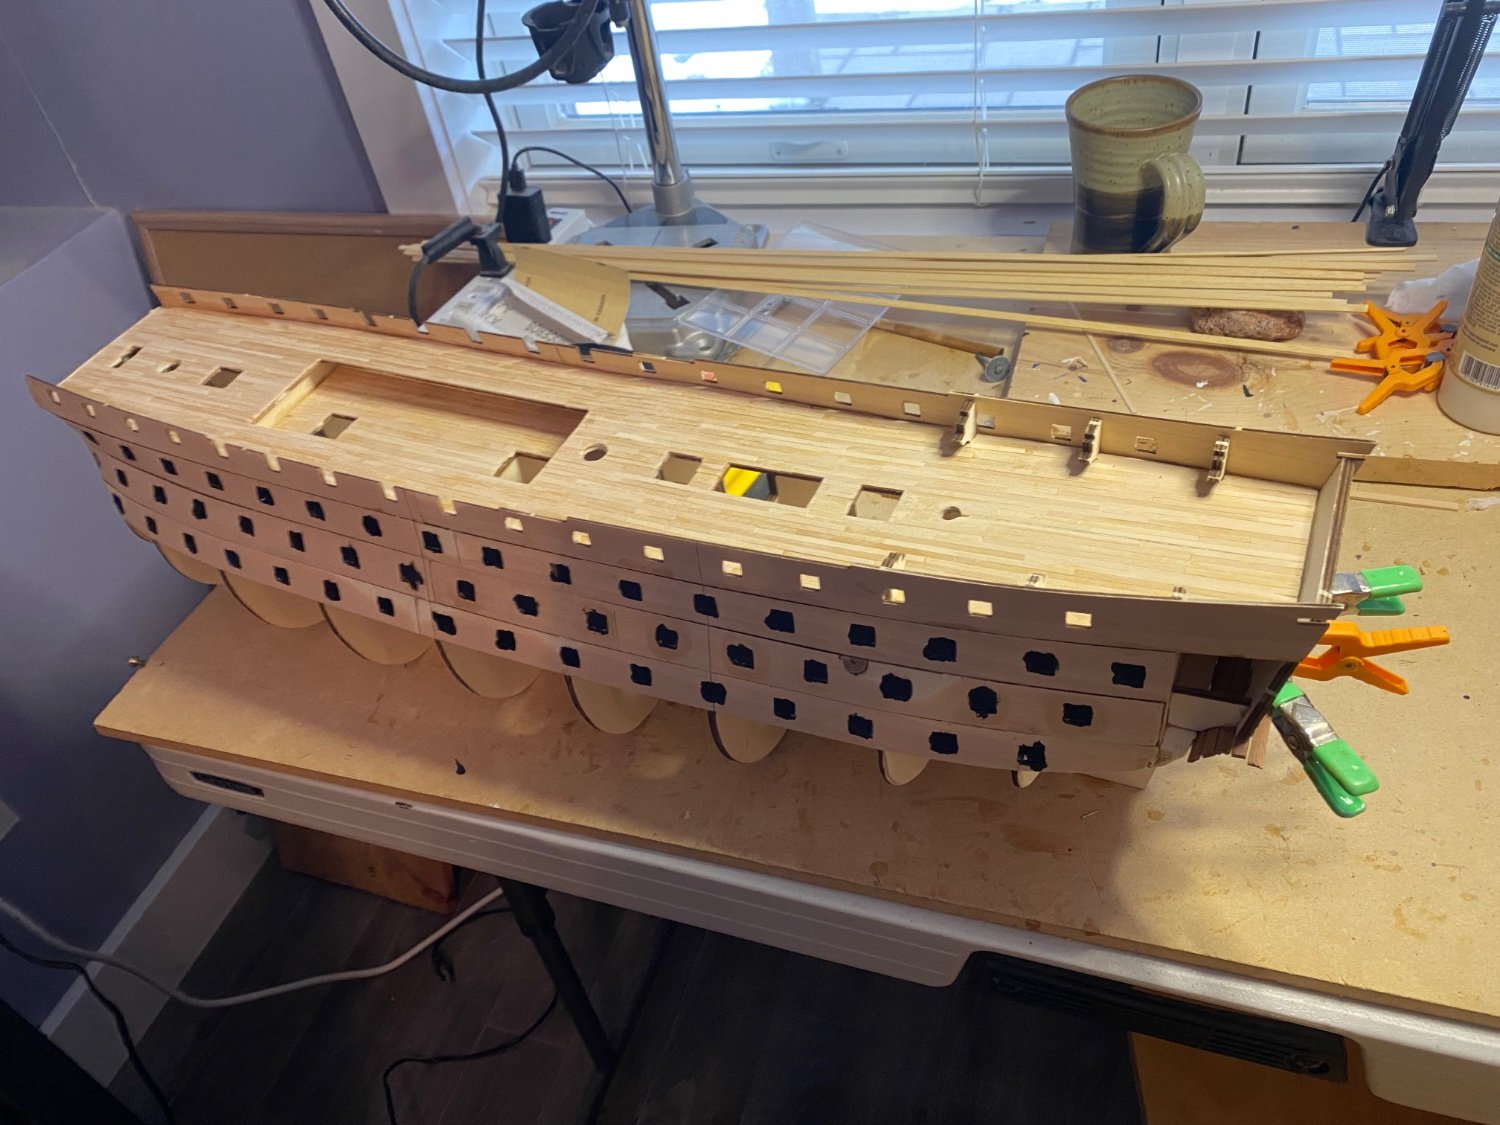
Next step was to install the pre cut bulwarks and gun ports to the frame. There are 15X15 backing to be installed behind the gun ports, some of these are a little tricky and the video build I referred to earlier tipped me off to check on the positioning of them relative to the frames and glue the unobstructed ones on before installing them. Once all were installed, I found that these was work to be done to smooth out the fit. The other good advice from a build log was to paint the inside to the gun ports at this stage rather than after the planking is installed (per the instructions), as it eliminates any slips of the paint brush on a finished area.

-
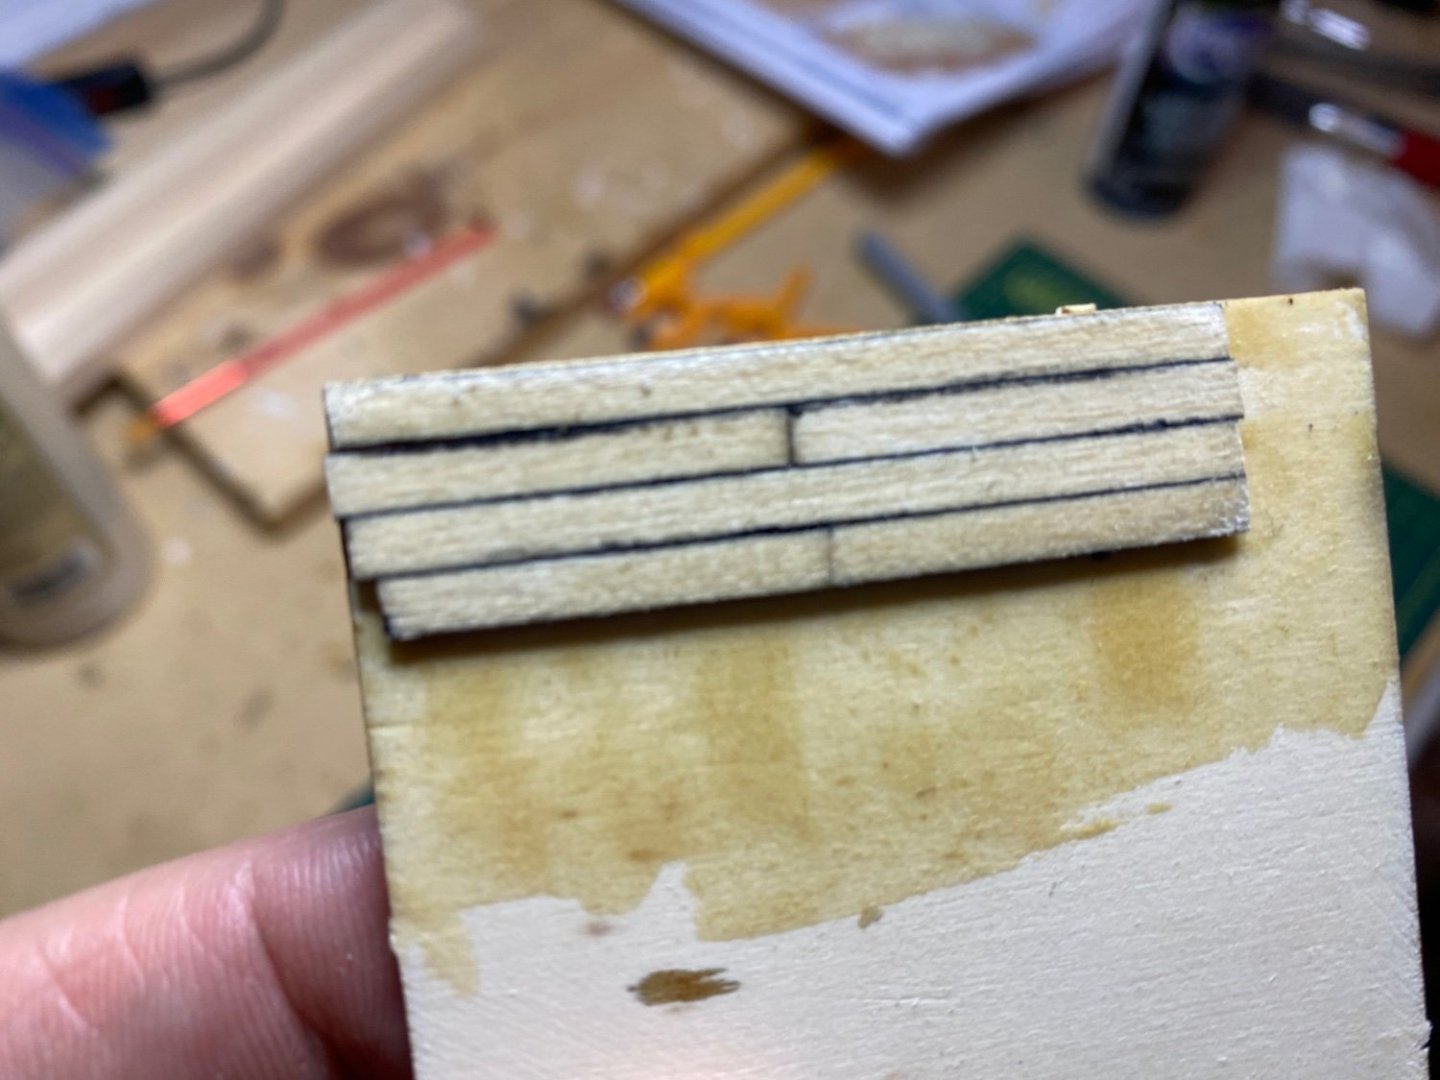
Back at it after the holidays. First, Thanks Allan, I followed your suggestion and abandoned my plan to stain the deck planks. I did however receive the plank cutter that I ordered and cut the deck planks in 8 cm strips (was easier than figuring out how to jig the cutter for 10 cm). and offset them on a 4X2cm offset. I am satisfied with the results but the planked decks had a rather significant seam down the center in the sections that I planked before installing. (see below). I eventually used some wood filler on these and that improved it a bit. (The picture below is before the wood filler)

-
Hi Vinnie. I built the Amati kit a few years ago and as has been mentioned here there were some challenges to work through. I found a series on YouTube by Davos (I think this how it’s spelled) ship builder that was a big help. i have to admit that the finished product was not my greatest achievement but much of that was me not necessarily the kit. i have built several AL kits and if you are still finding your way it may be a better choice - the trade off is I think Amati material quality is generally a little better.
-
I haven't yet decided what to do but I like the stained version with the black painted edges. Not sure I have the patience to prepare all the strips I will need to line the decks but I have time to decide. On a related item, the instructions say to line the false deck sections before installing, John Alprantis on his series decide to line the decks after installing the false deck. I have found that having to work around the uprights at the edges of the deck when planking to be a pain but planking first then installing reduces the flexibility of the section and can make it tougher to glue in place. Interested to hear thoughts on this. I may jump ahead a bit while I wait for my delivery and make some of the deck structures or masts, if not will be back at it in a few weeks.
-
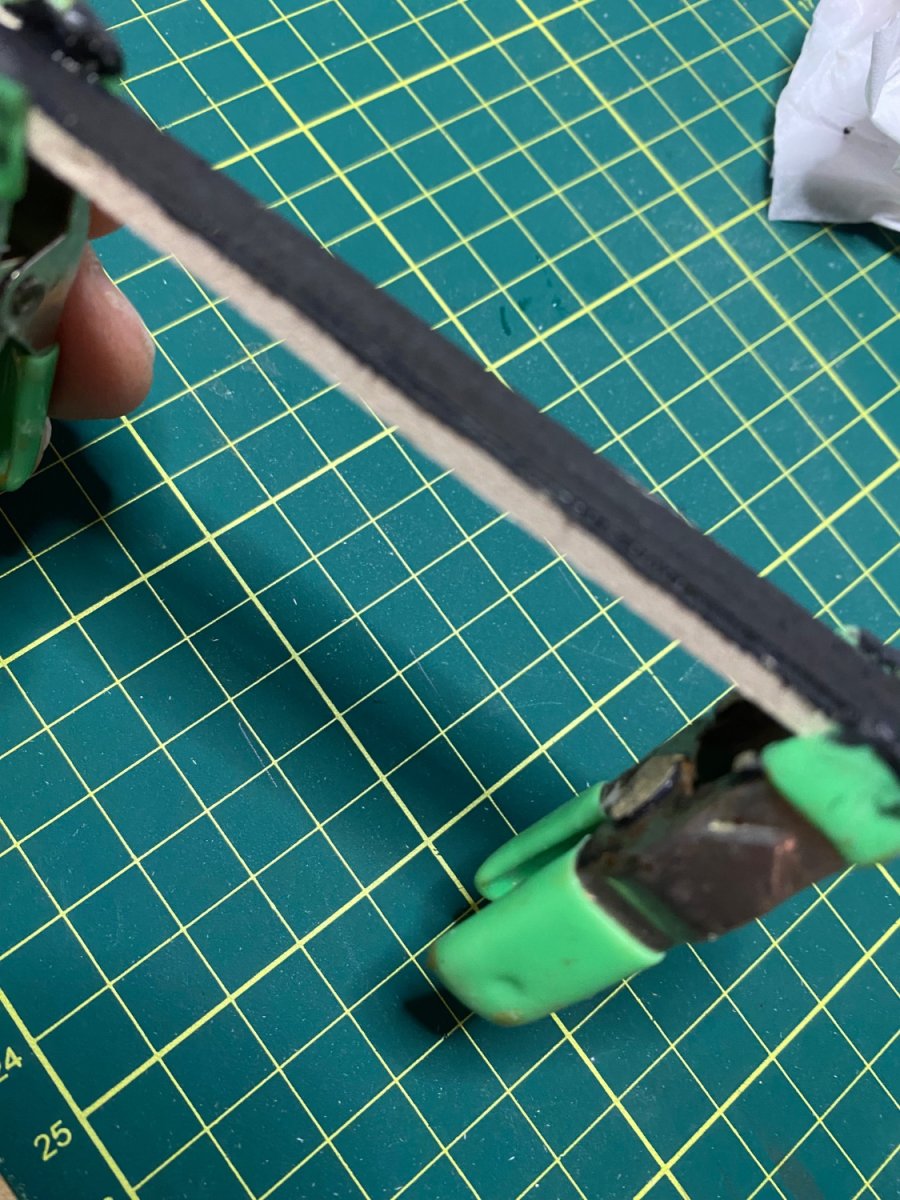
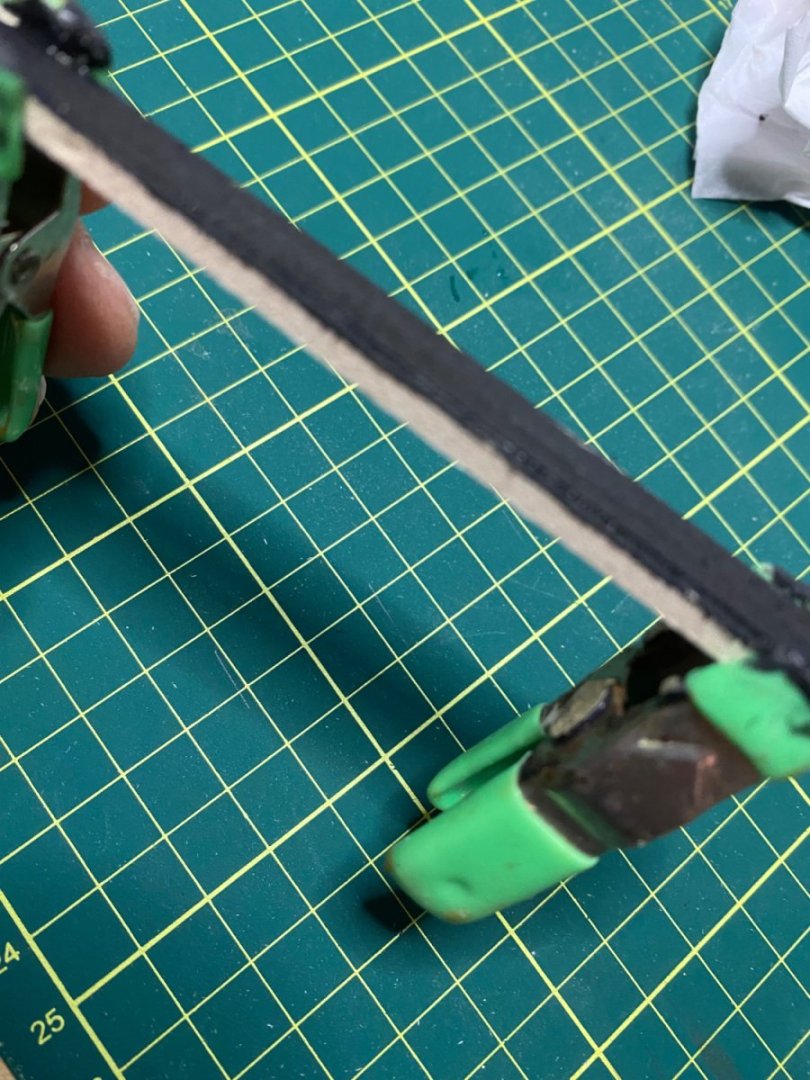
I didn't like the two shades of walnut (too dark) but I thought the Sapelli looked pretty good. (obviously there is no end to options for choosing a stain - I limited my choices to what I had in the paint drawer). One of the videos - I'm sorry but I can't seem to find who did it but it is available on YouTube - shows a great approach to aging the deck. The result was terrific but for me just a bridge too far. However one thing he did was to paint the edges of the planks black rather than using pencil or other ways to simulate the caulking. I did a few planks this way and then applied sealer (to see how that looked) and then put a couple of coats over the sealed sample to see if that looked better, l
-
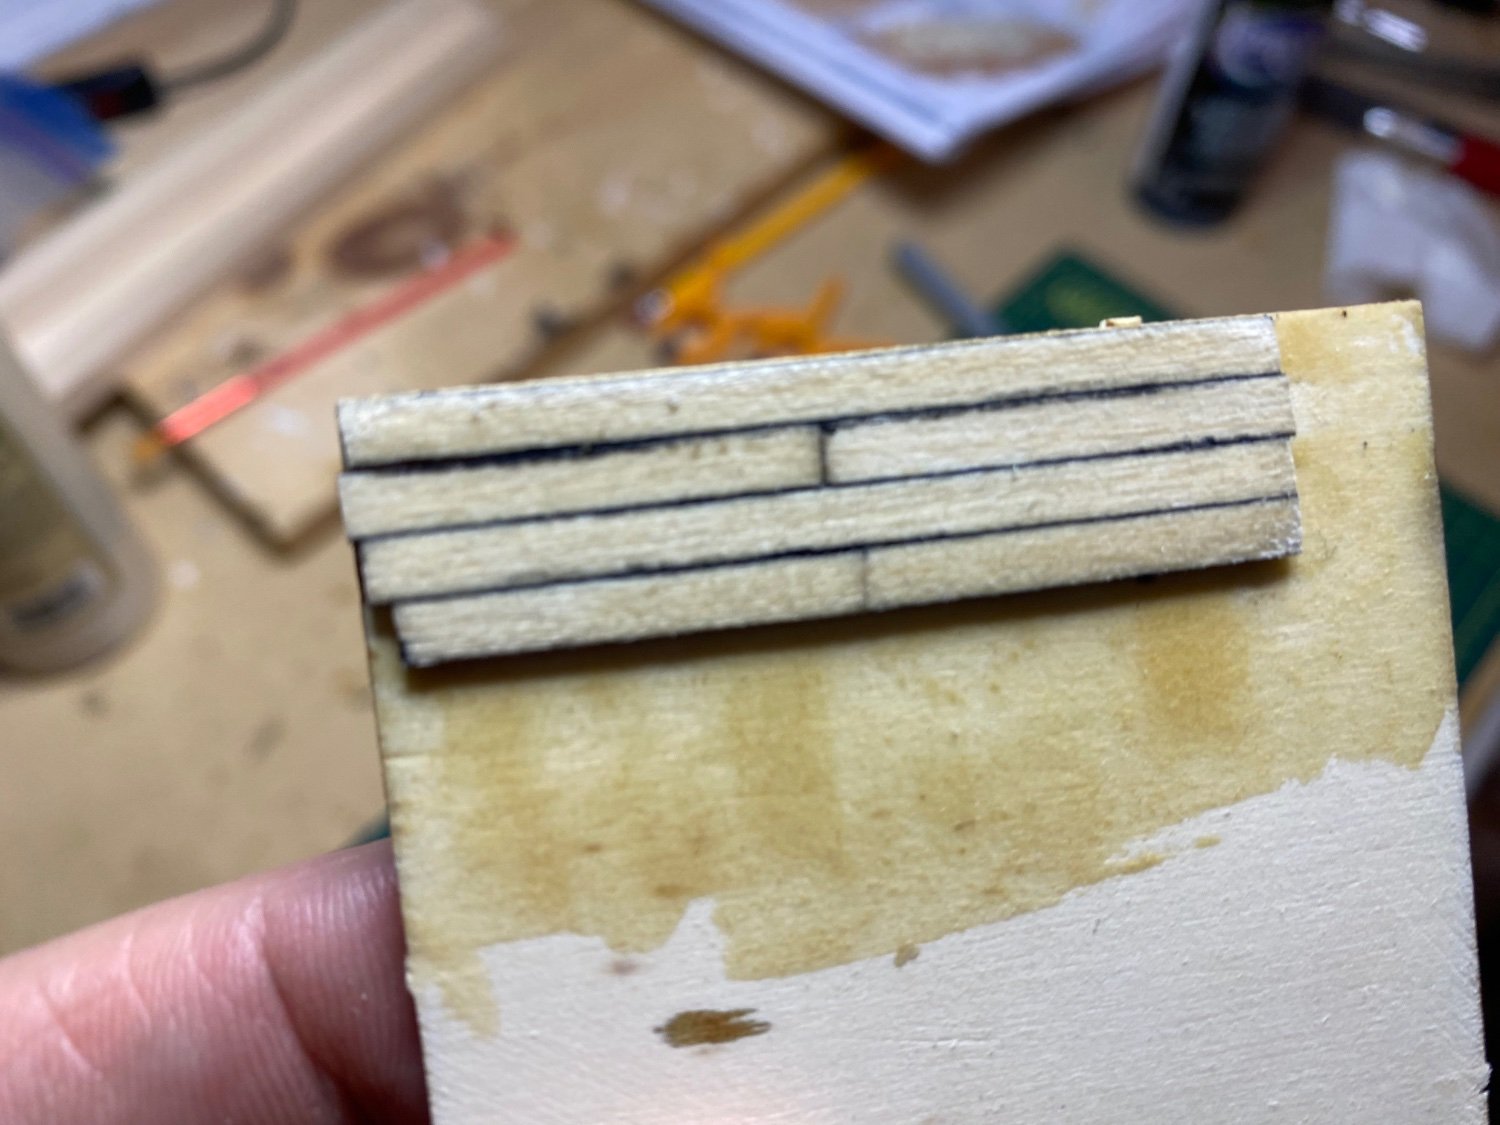
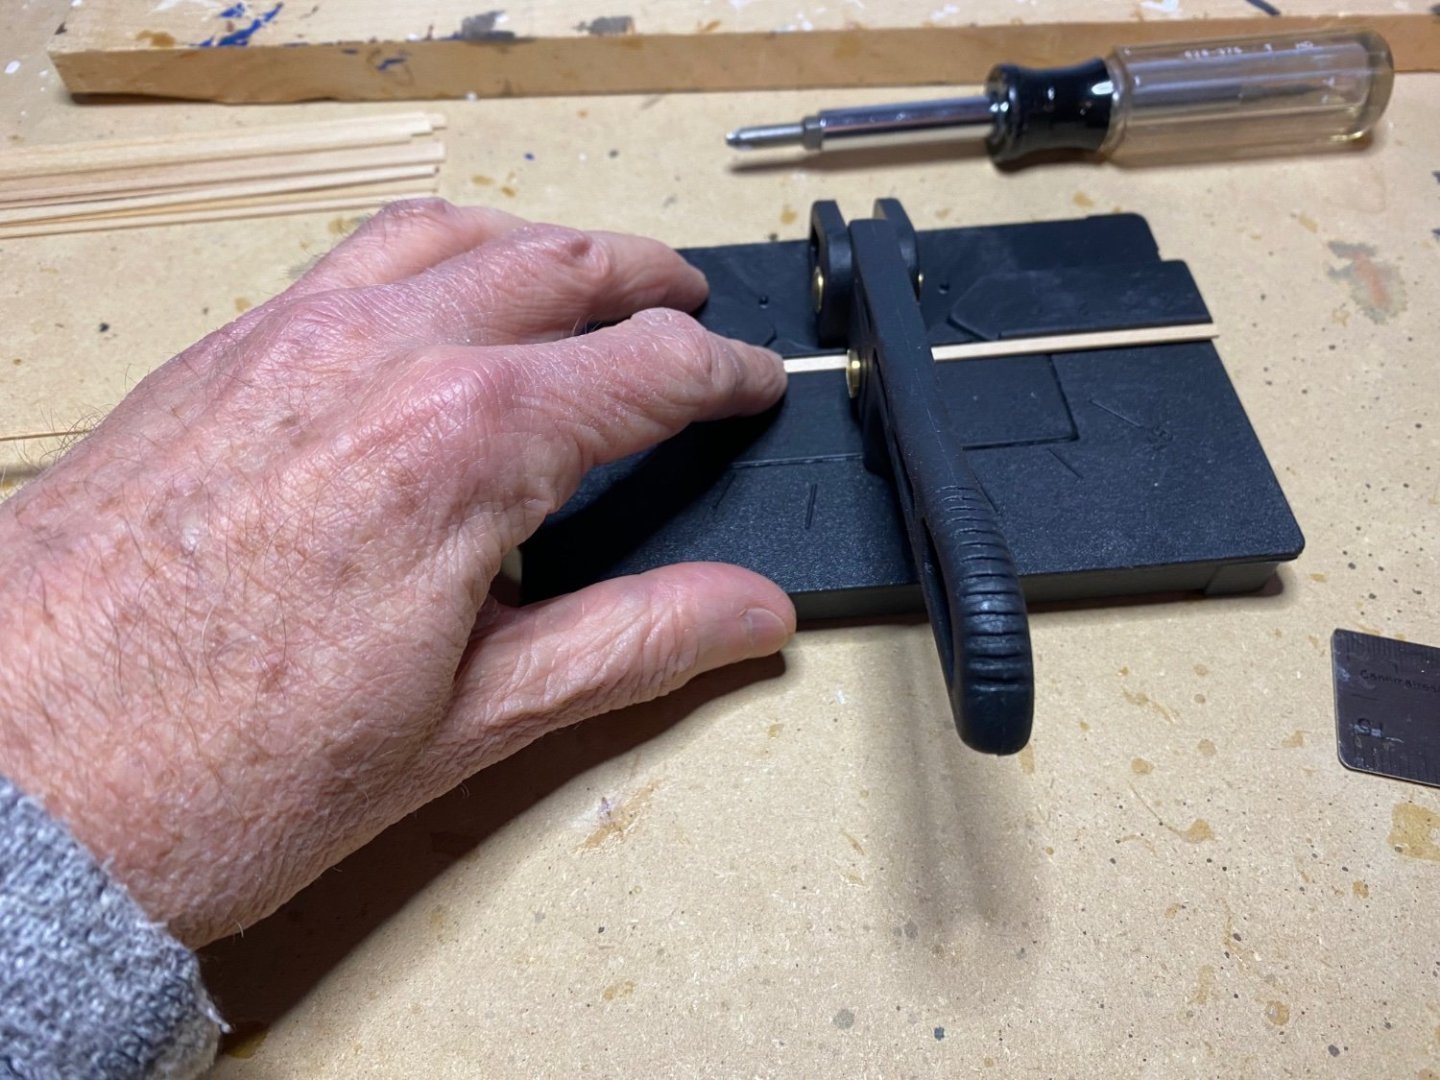
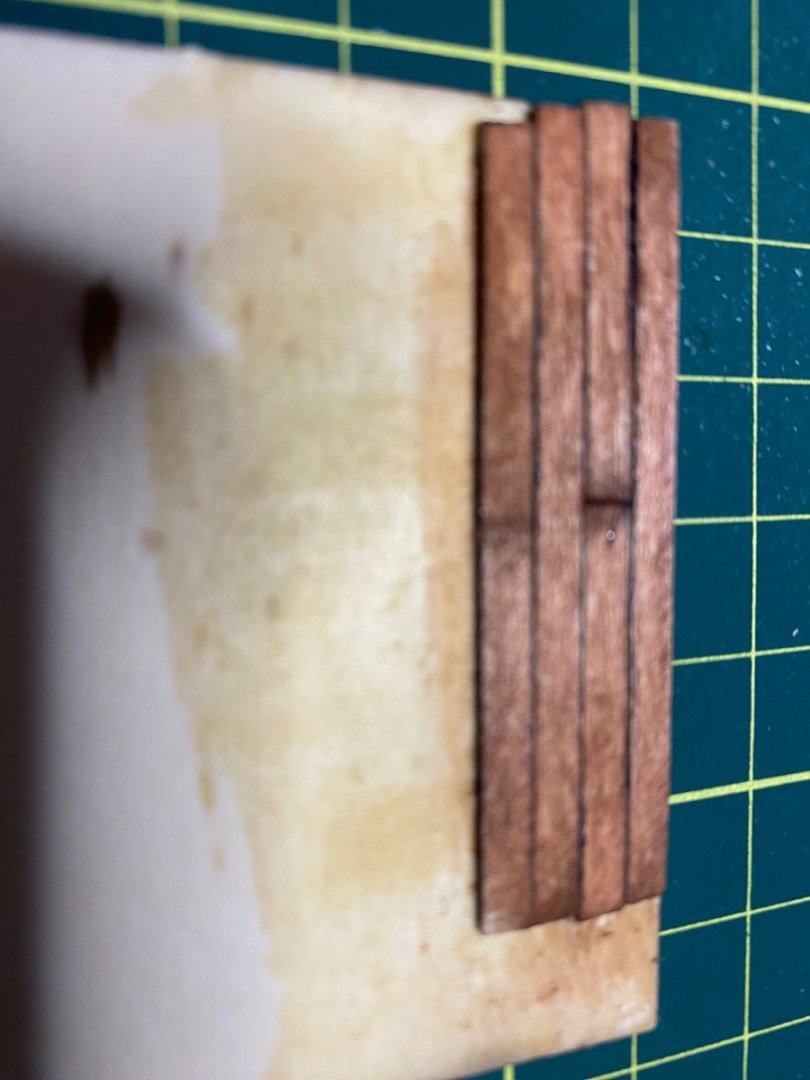
Good Day, I am on a bit of an hiatus right now as I've decided to plank the decks with 10 cm strips offset either at 5 cm or 2.5 cm. I've done this in the past and have cut the strips with one of my xacto blades on my cutting sheets and found it a challenge to get them even. So I bit the bullet and ordered a plank cutter on Black Friday and it will be a couple of weeks to arrive (then the holidays) so it might be mid January before I get back to this in earnest. In the mean time, I've been watching some Youtube videos and looking at some build logs and since I have some time, have been playing around with some options for planking the deck. First off, the kit material is 3X1 lime wood which is fine to work with but sort of boring, I don't have any nicer planking around in enough quantity so I decided that I'd see what stain I could use on them. Below are three samples I made up from extra lime wood and stained with different shades, I
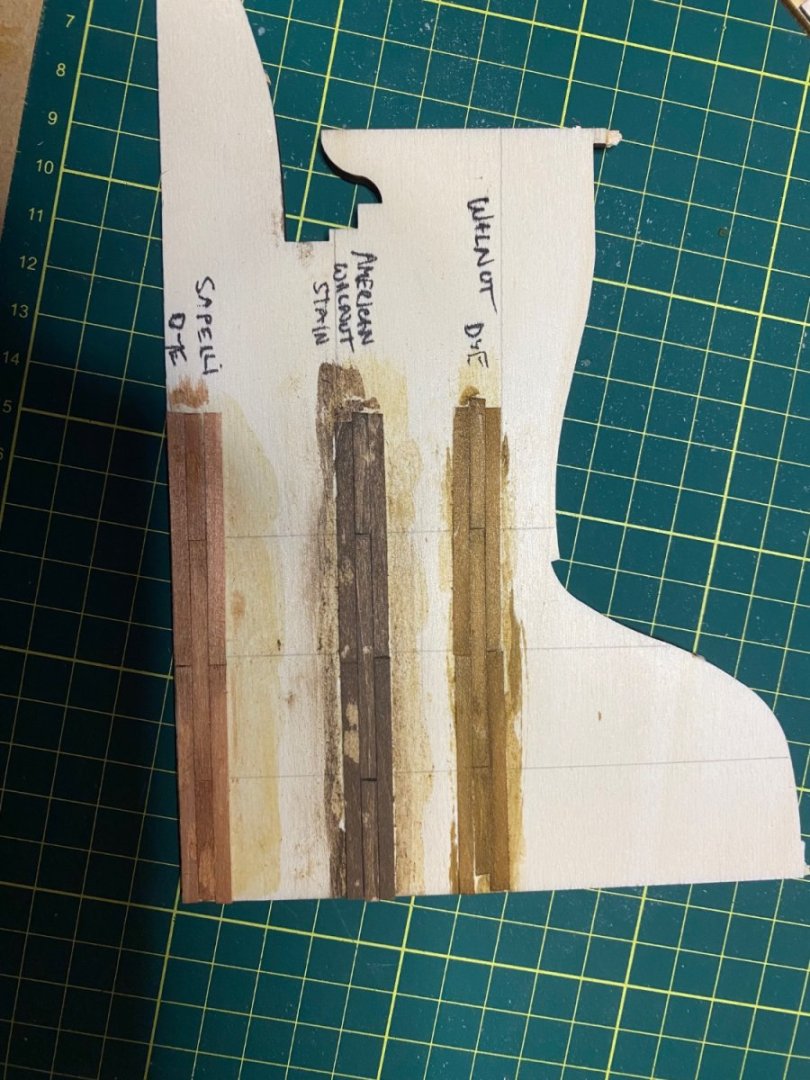
-
I have built an Amati Victory model (Revenge) and it was the best kit experience I've had. All of that series was designed by Chris Watton so you can't go wrong. I have built an OcCre ship (Candelaria) and just started the Santísima Trinidad. Since you have completed a couple of AL models (I've built several including the San Francisco II) you will find the transition to OcCre very easy. I like that they give you hard copy of the pictures instructions and some plans. Also in addition to the pre-made sails I think they always include sail plans so you can make your own, The Victory models give you the plans and some material but also include rigging instructions for sails or no sails - in some cases I personally think that the ships are so beautiful that they look better without but that is very much a personal call. Lots of good advice from others here, Allan is right on, buy what you are comfortable with and have fun.
-
Thanks for that, I was not looking forward to all that cutting and fitting. The Montanes is a beautiful ship, I am hoping you have posted some pictures of your build - I’ll search for them.
-
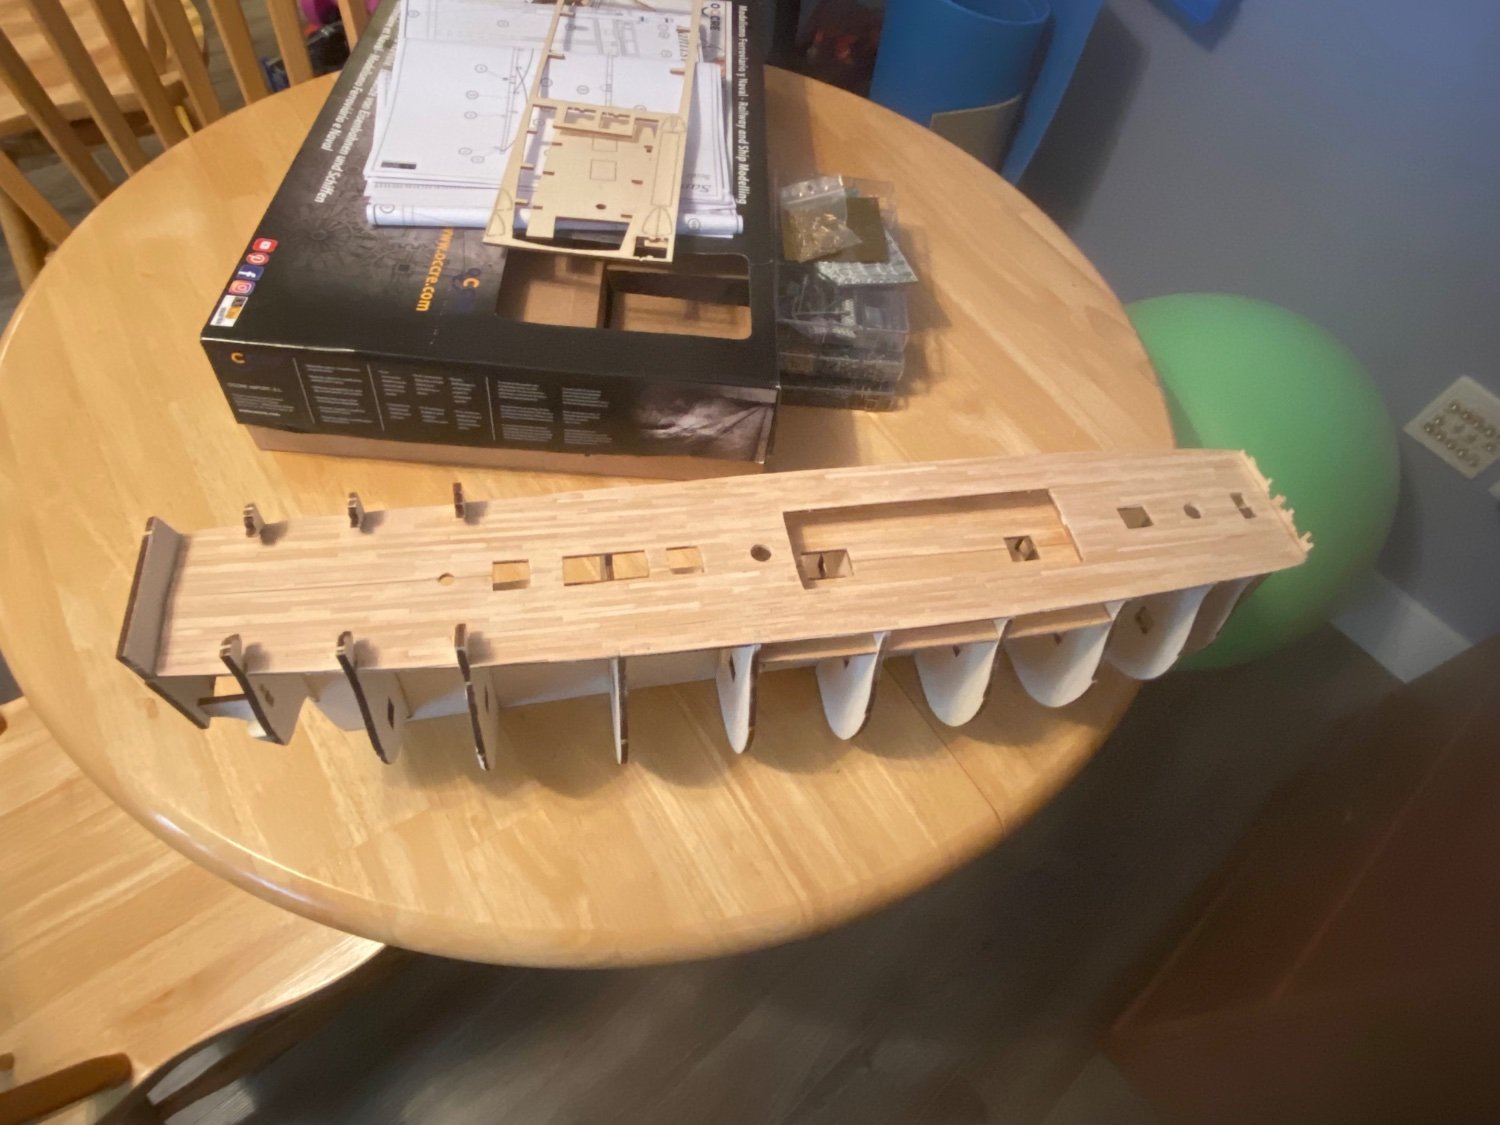
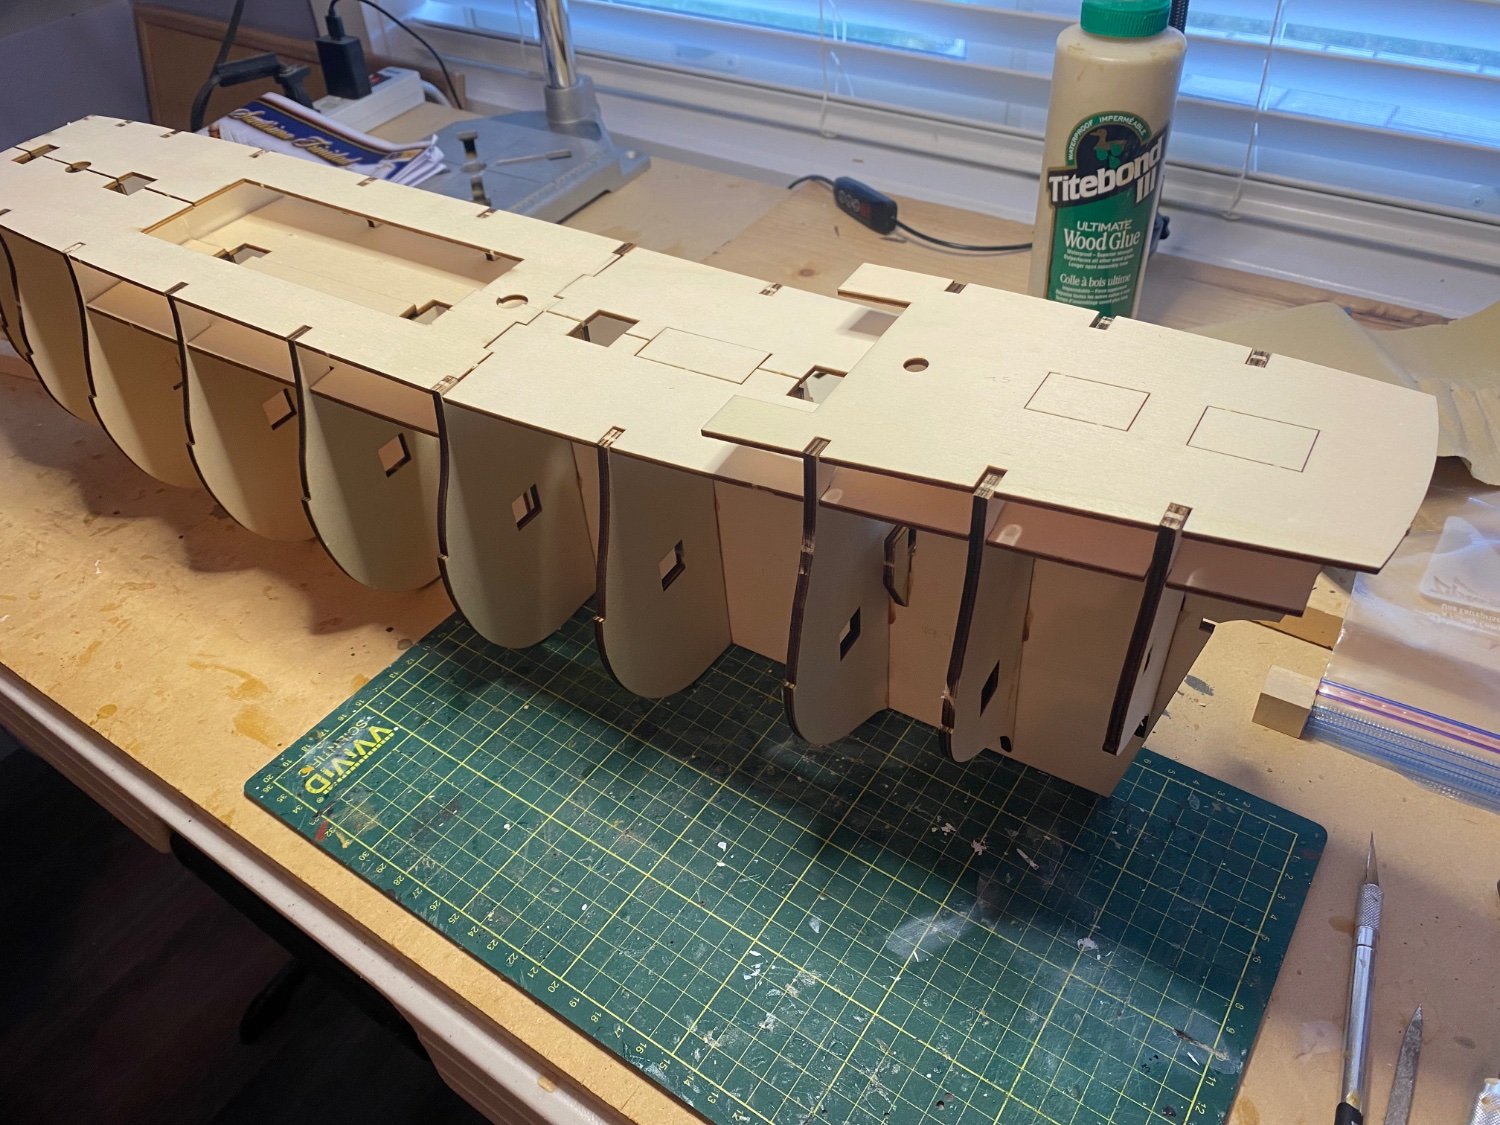
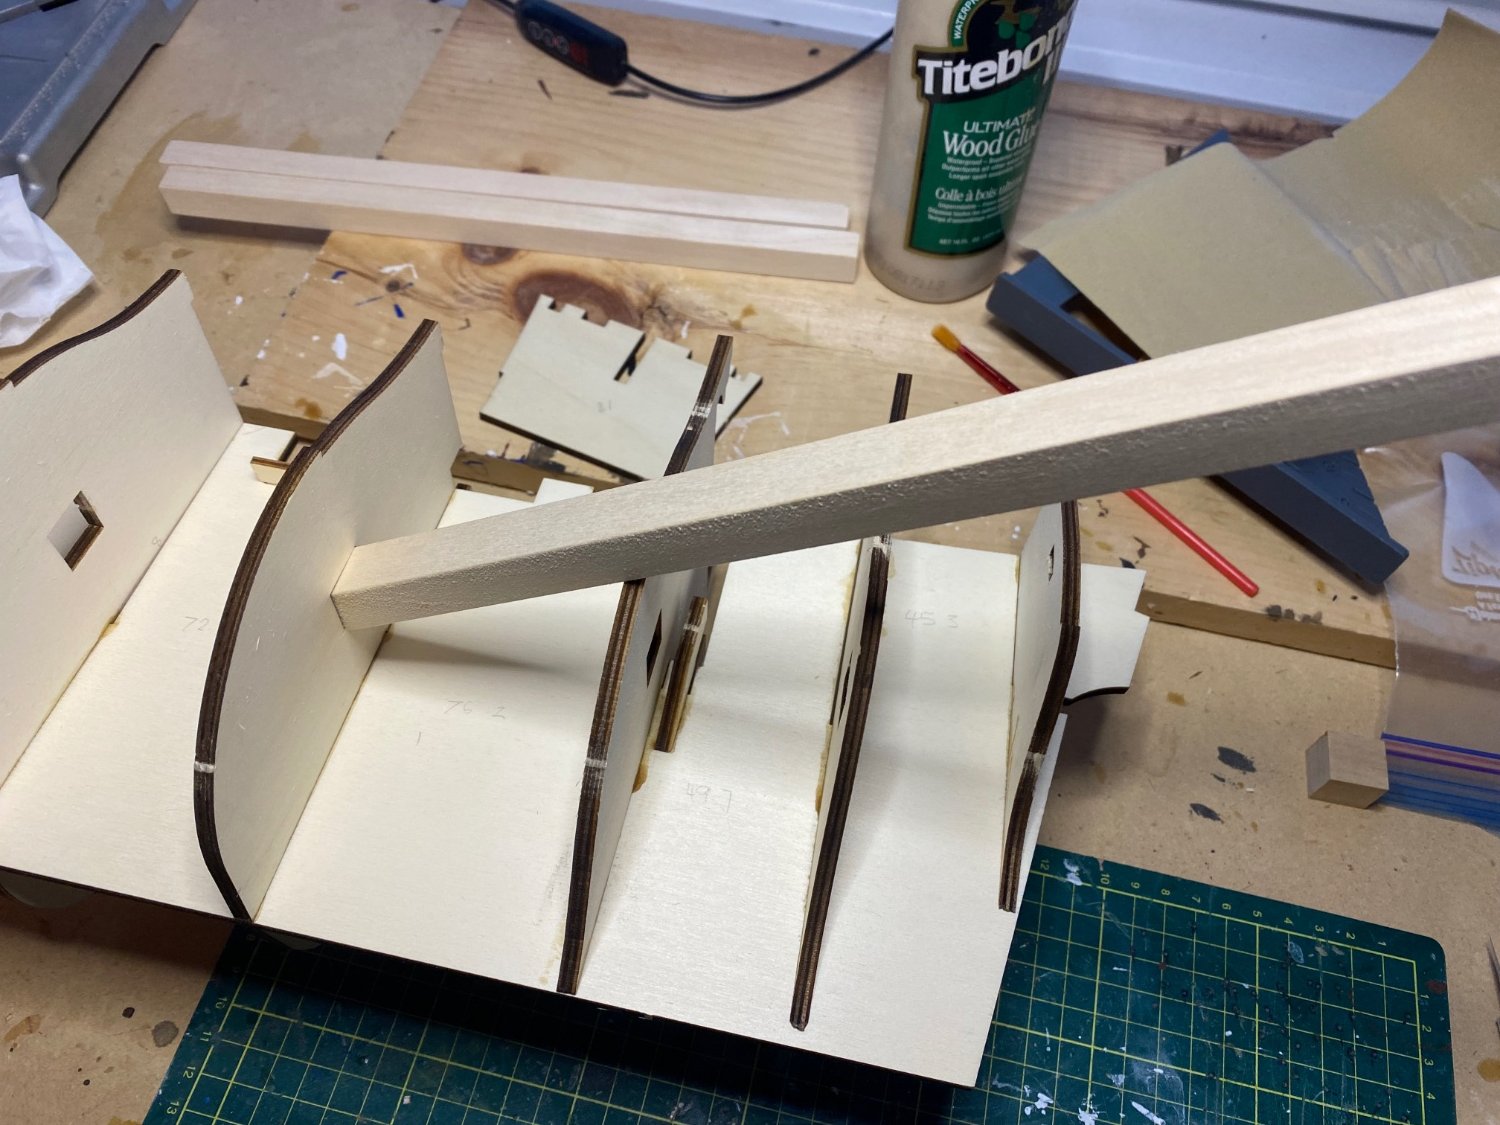
My first picture is of the hull assembly with the false deck pieces dry fitted. I was pretty pleased with this until I realized that I messed up by gluing all the frames in place before inserting the crossbeams. You can see where they fit in the picture below and what they look like in the last photo. The instructions and pictures with the kit don't articulate that you need leave frame 16 unglued until these are inserted but while a notice on that would be helpful, it was also a clear senior moment as if I'd thought about it (or watched John's video) I should have caught it. I see two options here (1) cut the beam into pieces and insert them in between the frames - (see middle picture). Or just forget about it and hope that this is a design redundancy. I'd like to heart thoughts on this - it seems that once the decks are installed there won't be much that will tend to pull the frames fore and aft so I can't see what purpose these crossbeams serve.


-
Hello All; I have just started this project and thought I'd share a few pictures and notes as I go along and requests for advice. As there are several excellent build logs already for this kit (see YouTube for a couple - Timelapse (model ships) and a series by John Alprantis from 3 years ago) so I don't believe another detailed step by step will add value to what is already out there. This is my second OcCre kit, I built the Candelaria last year to see if I liked their models and found that it was designed in a very similar manner to recent Latina kits. What I preferred with OcCre was that in addition to a printed set of pictures (AL wants you to download PDF from their website) they also provide a decent package of drawings. Neither company provides great written instructions (but other than the one Victory (Amati- Chris Watton) model I did, really who does). First off, while unpacking I discovered that one of the wooden part sheets had split and one part was broken; I reached out to OcCre about it and got immediate response and instructions on how to get a replacement. Below is my first couple of pictures (and my first oops) - a new record as I am about 3 days in.
-
All good advice. I have painted a couple of Bluenose models and would suggest that a really good paint choice is model shipways “hull copper red”. It’s acrylic and a little thicker than other acrylic paints that I’ve used. That and the slightly duller finish is more authentic.
-
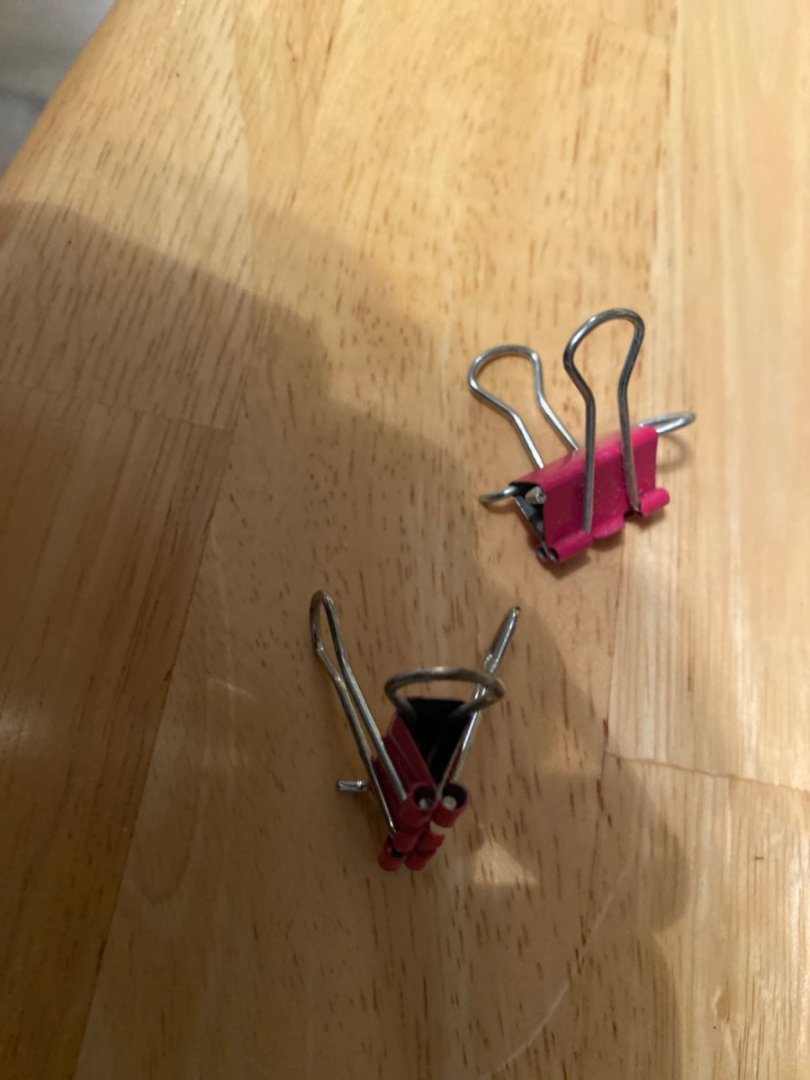
Could they be planking clamps? Attach to the bulkhead and then tighten to hold a plank in place while the glue dries? I have put together some clips (saw this on utube) for that purpose. picture
-
Building models for 30 years. Old projects - Bluenose II AL, Cutty Sark, USS Constitution AL. (None of which have survived our moves that well)
Since retiring- Bounty, Santa Maria, Revenge - Amati; Endeavour -Corel; La Pinta, San Francisco II - AL; Bluenose -MS; La Candelaria - Occre.
Current - Bluenose - Billings
On the shelf - Santanista Trinidad - Occre and MS Rattlesnake (which may never get built).
-
Stumbled on to this thread and was interested in the various viewpoints. Personally, I have been pretty happy with my AL projects (Bluenose II (old), San Francisco II, Pinta) good value, complete kits, instructions ok. I like Amati, though it was Chris’s version of the Revenge was the best (and most expensive) kit I have ever done. My Amati Bounty was a struggle but the Santa Maria was very good, as mentioned in another other post’s instructions are difficult and I made use of google translate a few times to look at the original Italian wording. I just completed the Bluenose from Model Shipways and I need to be contrary to many contributors here. I found the kit to be highly unsatisfactory, the instructions were more of the designer showing off his knowledge of ship terminology than providing helpful info. The materials were basic and random- seems they threw a bunch of stuff into the box and left you to figure it out. In other cases they referenced or showed materials on the plans that were not included in the kits. Regrettably, I bought the MS Rattlesnake before building the Bluenose, not sure I’ll waste my time building it. I also built the Endeavour (Corel), really challenging- not for the new modeller, the instructions aren’t poor they’re just non existent though a large number of drawings, nice materials. It was a struggle but the final result was very nice.
-
Hi Arthur I also just purchased this kit and it was as delivered today. I opened it up immediately to look at the dowels and it seems that all of them are basswood, none were warped. I’d suggest you ask Model Shipways to replace yours. Good luck with your build, I look forward to following along though I don’t expect to start my Bluenose until next fall. My first model was the Bluenose II (AL) almost 30 years ago and it was a perfect first kit to start with. Regards from Nova Scotia where we can never have too many Bluenoses😉
-
Thanks Jeff et al for your help on this, I am not sure why my bow sprit doesn’t seat tightly but I’ll use the measurements that Jeff provided. It’s a wonderful kit, though right now I am waiting on replacement material from Amati (foremast crows nest); strictly my bad, but should never have tried to correct my misalignment of the deadeye holes. Live and learn.
-
Hi Jeff I am new to MSW but have been following your build for a while as a visitor. I am also building this kit at present and while, no where near as ambitious as you, I have appreciated many of the comments and points you have made as its has helped me on numerous occassions. Currently, I am constructing the masts and bowsprit and I do have a question. When I dry fit the bowsprit, it is of course off centre - there seems to be a great deal of play in the fitting so I assume it needs to cross the bow at a particular angle. There do not appear to be any diagrams or pictures from above to guide this. Can I ask how you chose to do it? Your ship is an absolute masterpiece. regards, Marc