


RMillet
-
Posts
24 -
Joined
-
Last visited
Content Type
Profiles
Forums
Gallery
Events
Posts posted by RMillet
-
-
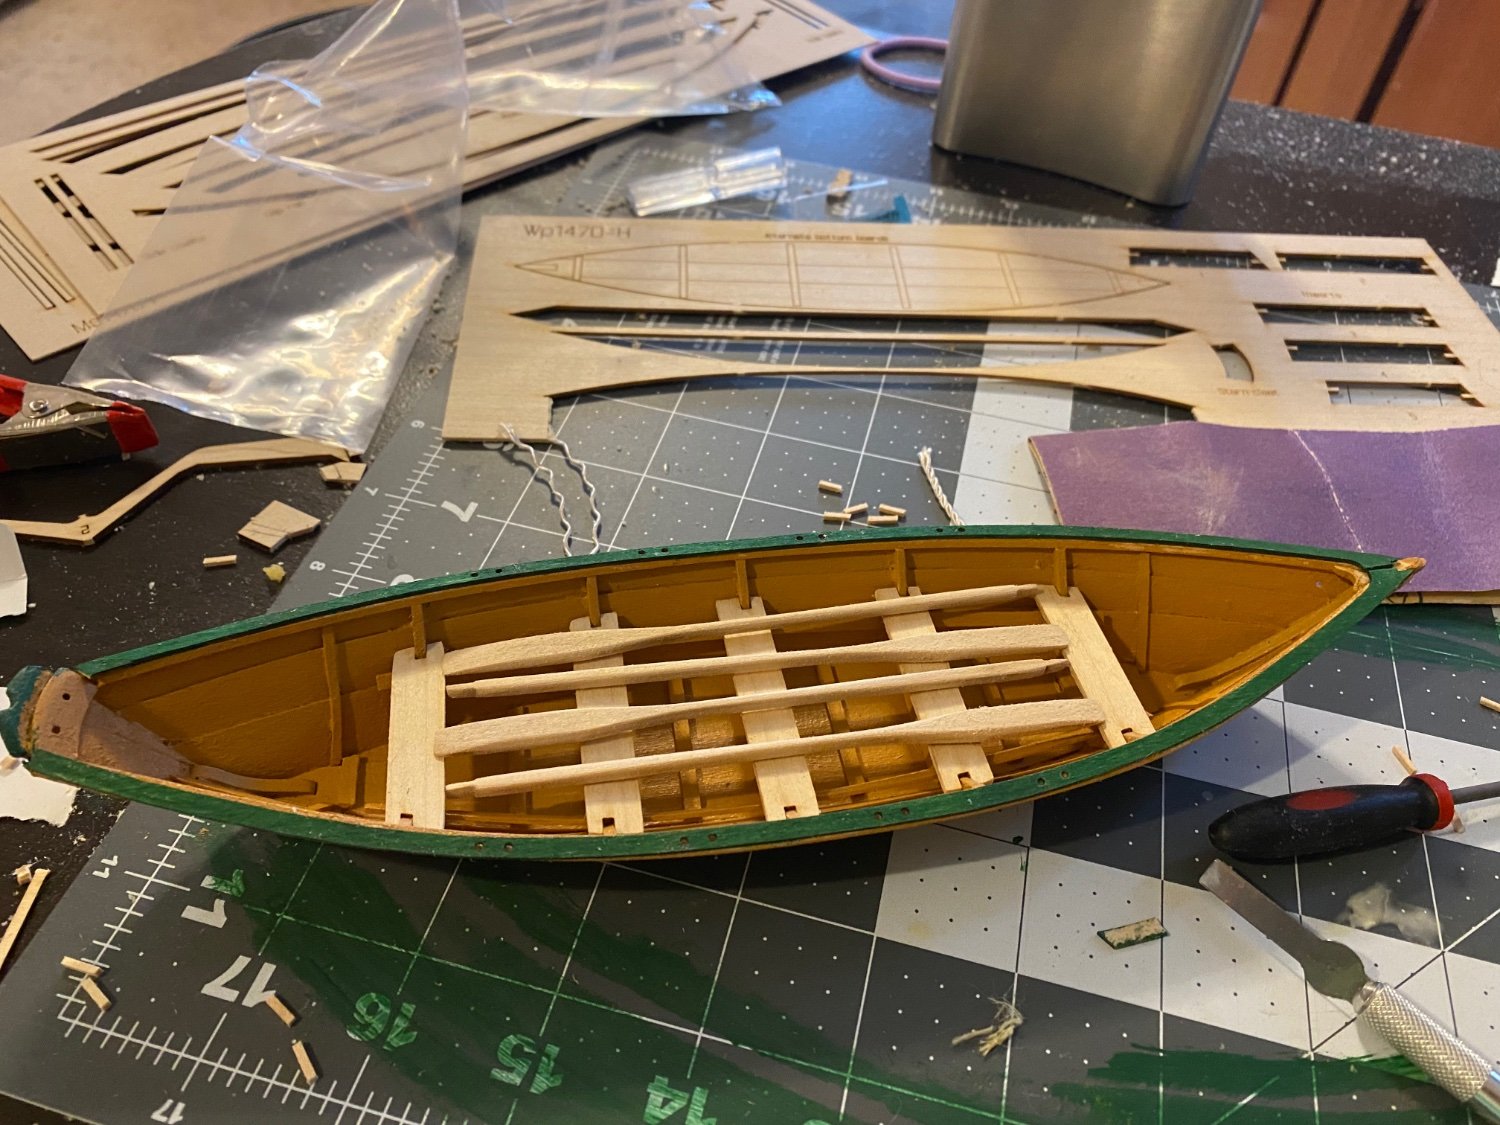
Didn’t plan on working on this anymore today, but I was a little bored, and decided to keep working.
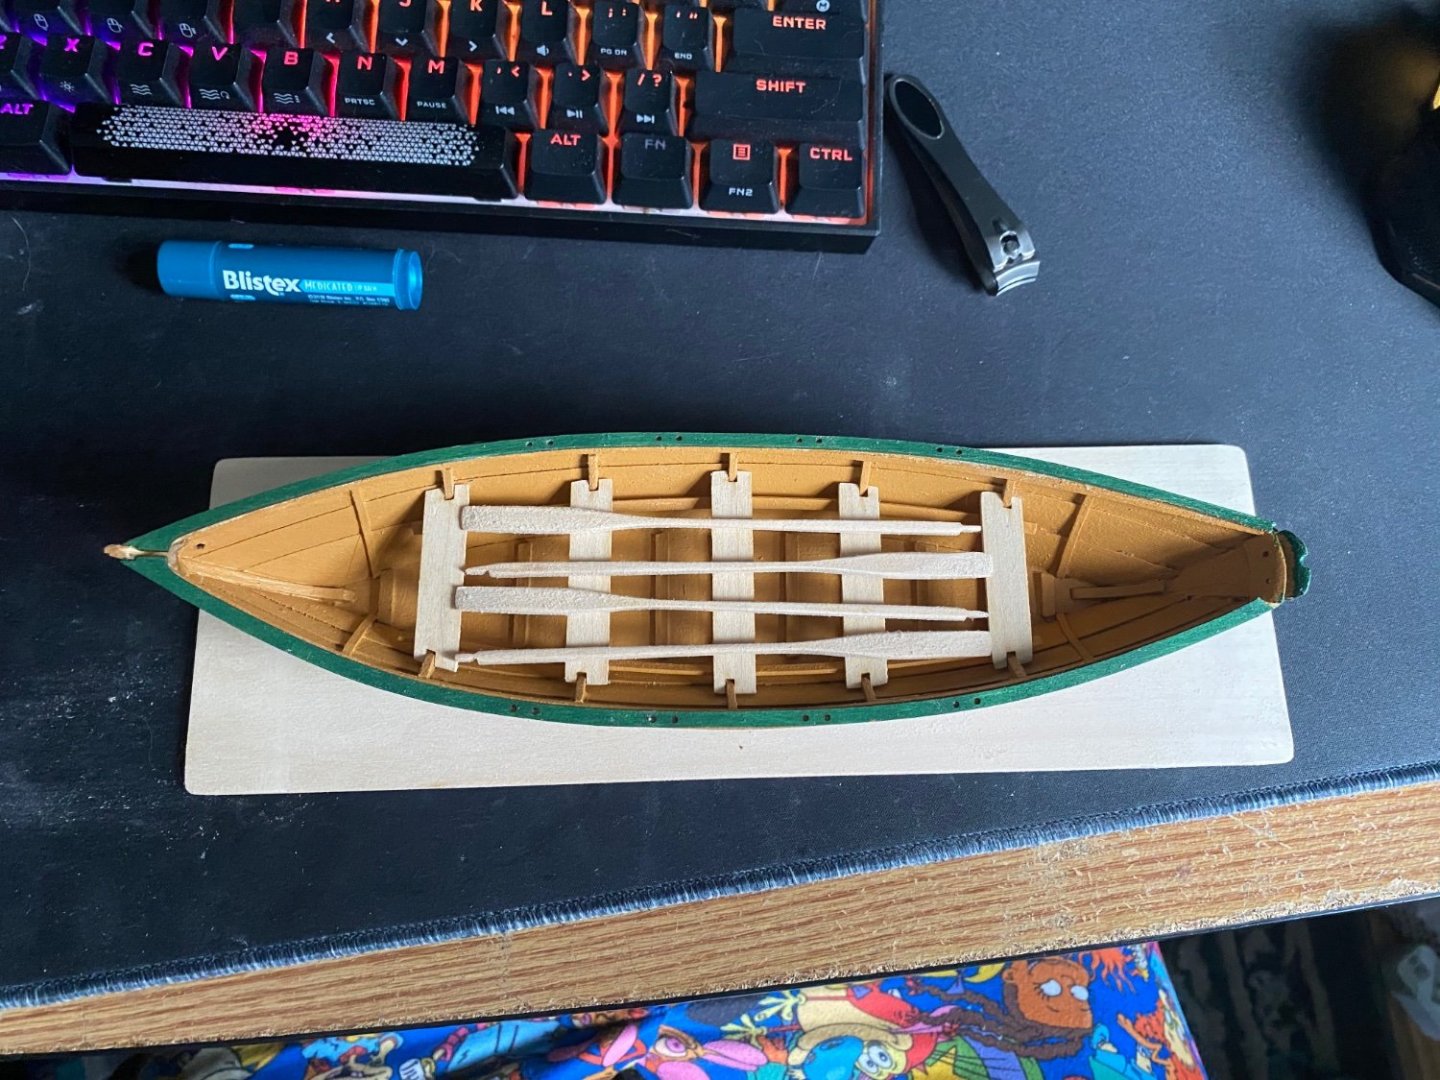
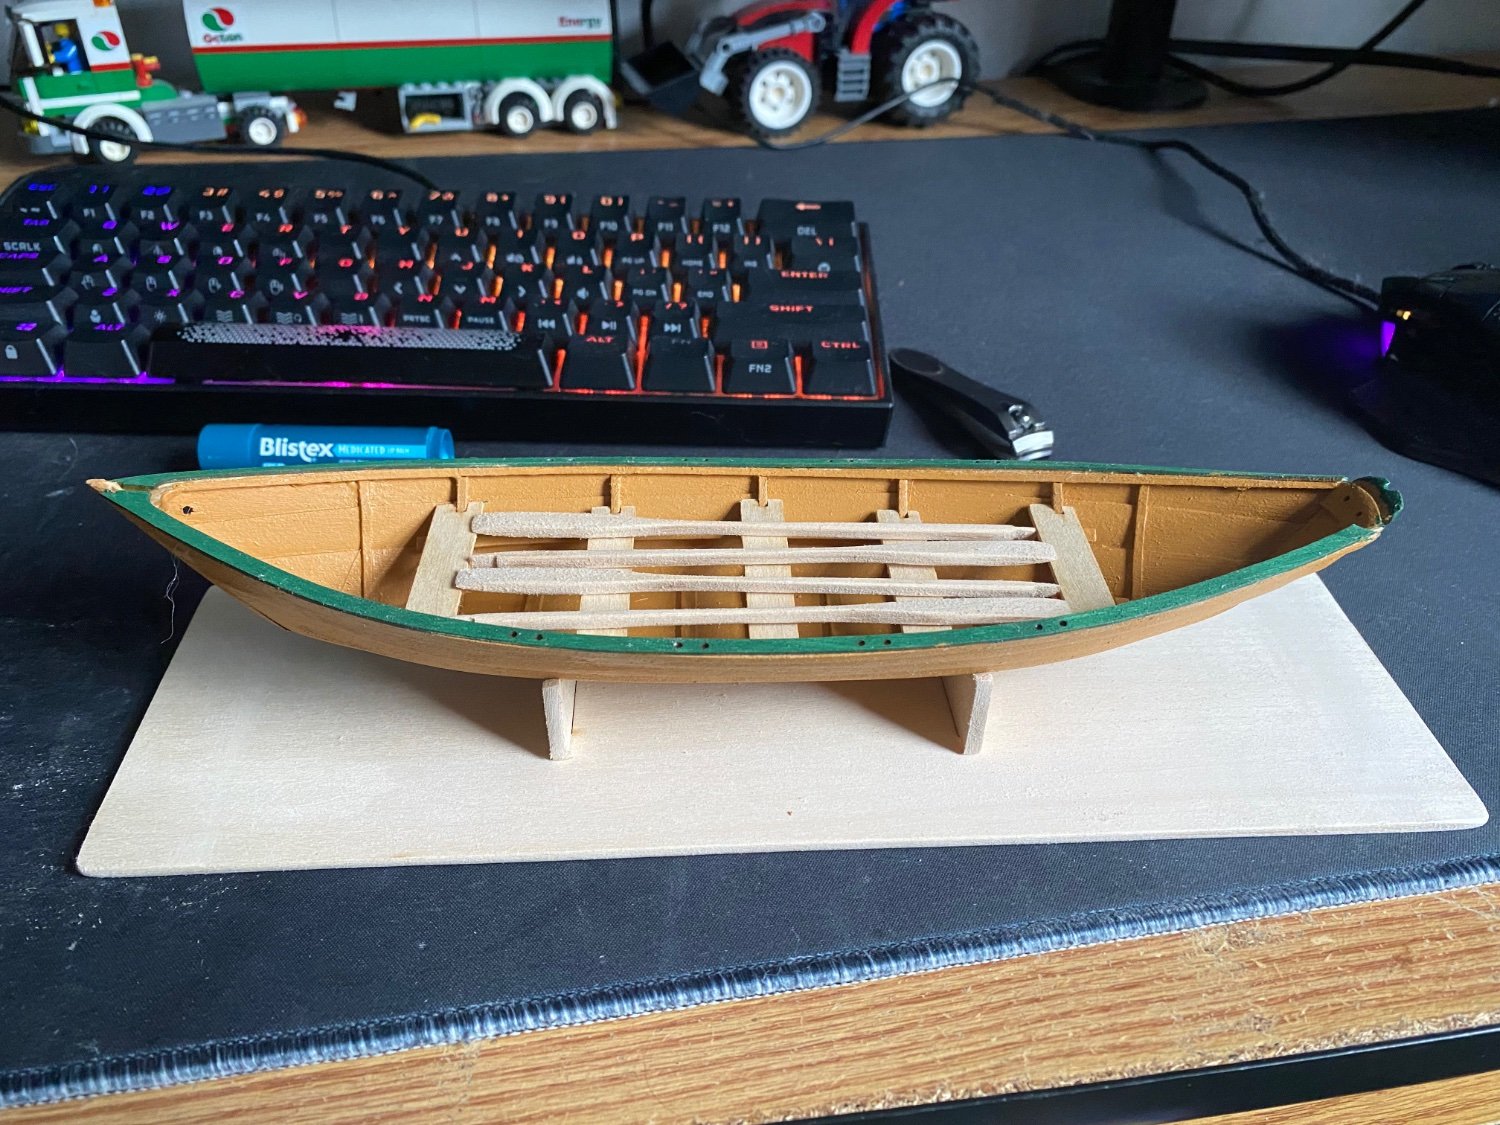
In the process of working, I finished it! I’m very happy with the results. It’s certainly not perfect, but with the supplies I have, and the skill I have, I think she turned out nice.
I did take a couple creative liberties. The slots for the oars will remain not installed. I’ve decided this as trying to get the provided dowel to fit in the holes was extremely painful. Larger square piece trying to fit into a smaller hole, it just wasn’t working. I think it looks just fine without them, and didn’t think it was worth the pain to put them in.
Another creative liberty I took was the beckets. Again, these will remain uninstalled, unless I get some smaller rope. The rope provided is much too large. I tried making it smaller by fraying it. When I did this, I didn’t think it looked good, and it didn’t look the right size still. Again, I think it still looks good without the Beckers. I’ve seen other people have a similar issue, so I was fully expecting this.
I feel I have learned a lot in the time I’ve put this nice little kit together. It’s also been a roller coaster. From the very start, to the breaking, to repair, and now finish. I will most certainly be continuing to build models, and will hopefully order the next in the Shipwright series soon. I will be sure to make another build log when I do.
I’d also like to thank everyone in this community for their support, guidance, and kind words. If it wasn’t for everyone here, I don’t know if I would’ve been able to get to be able to finish this kit, especially with the accident. So I would like to sincerely thank all of you.


- ccoyle, JpR62, Keith Black and 7 others
-
 10
10
-
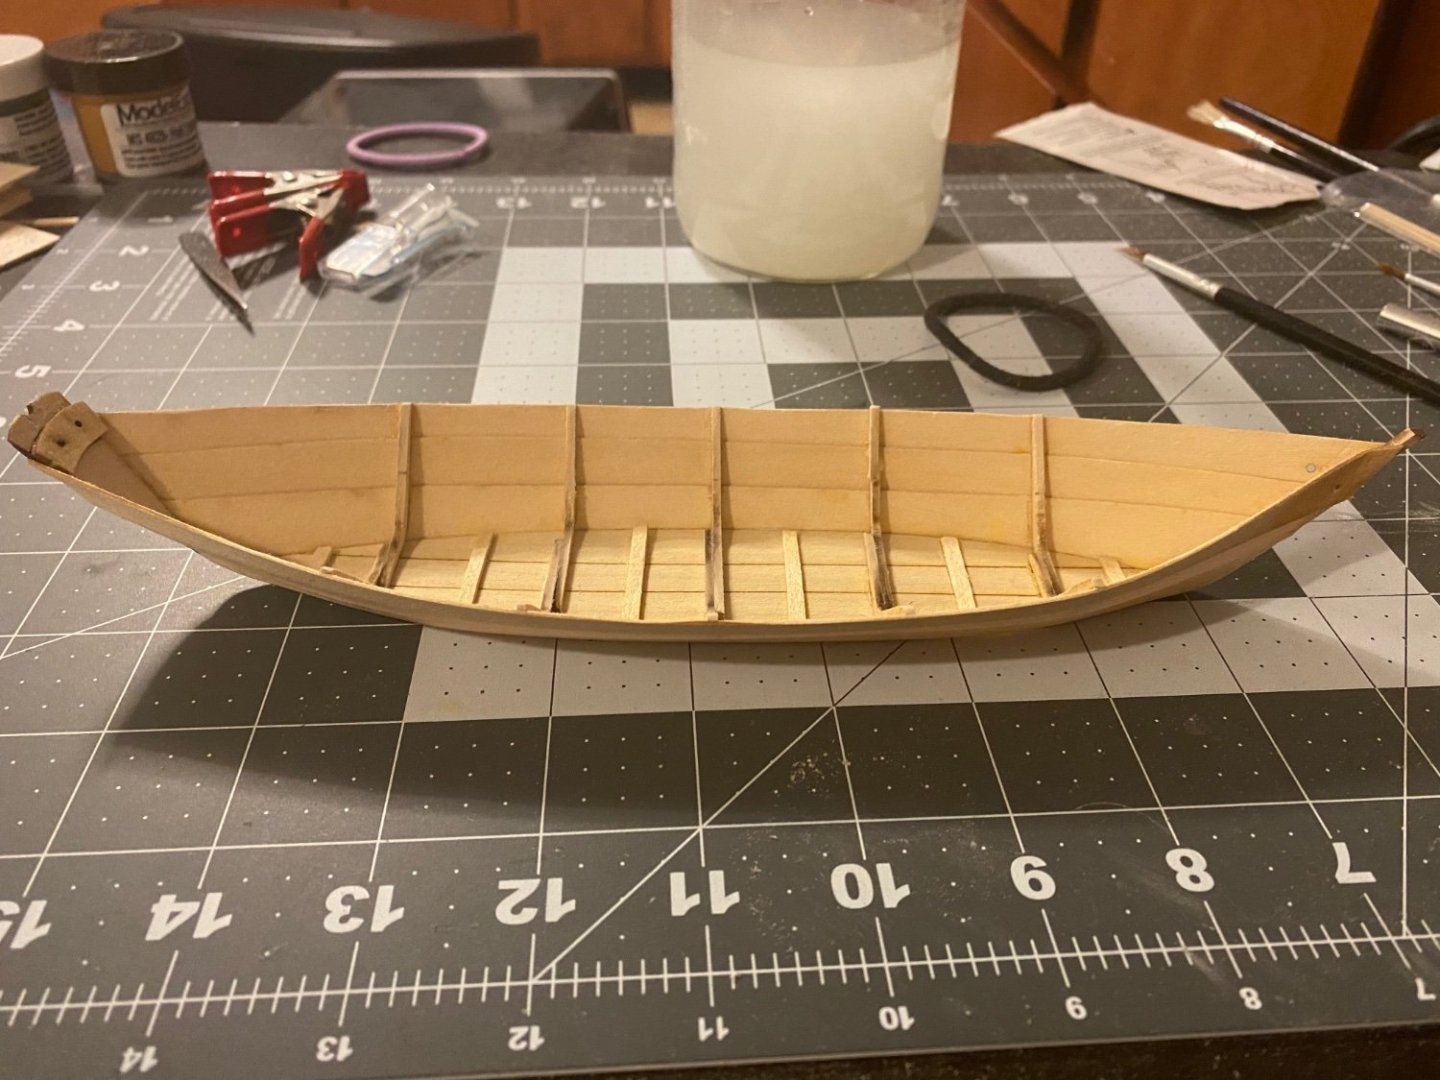
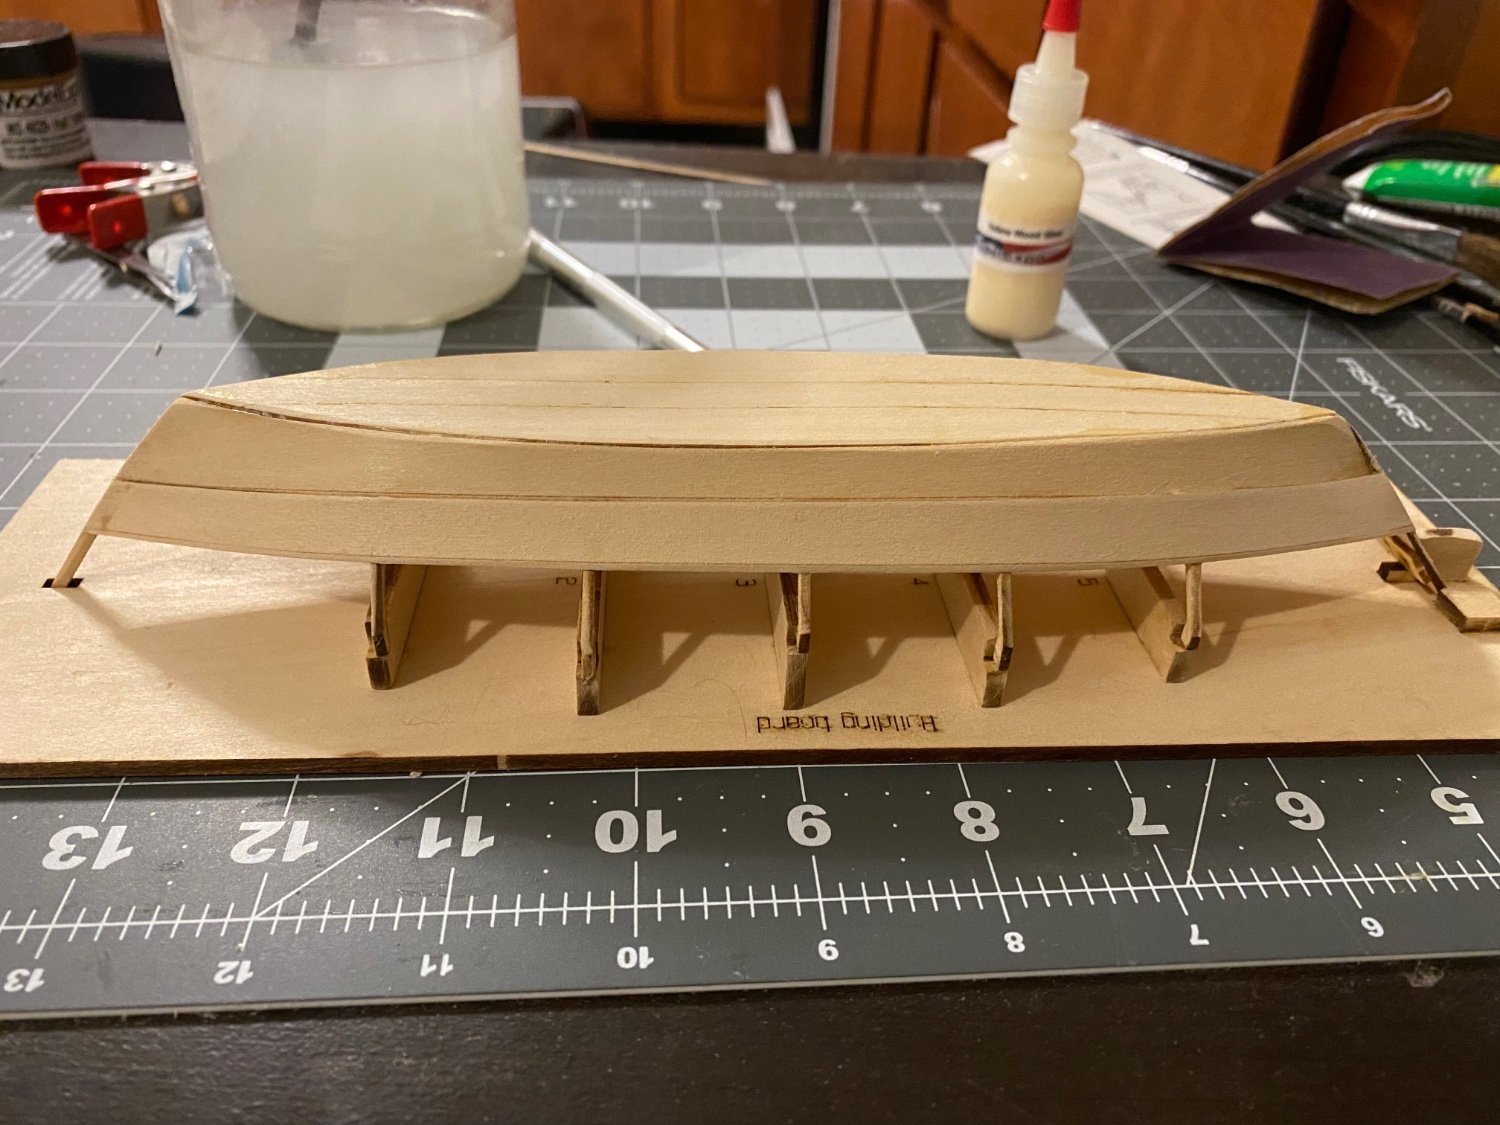
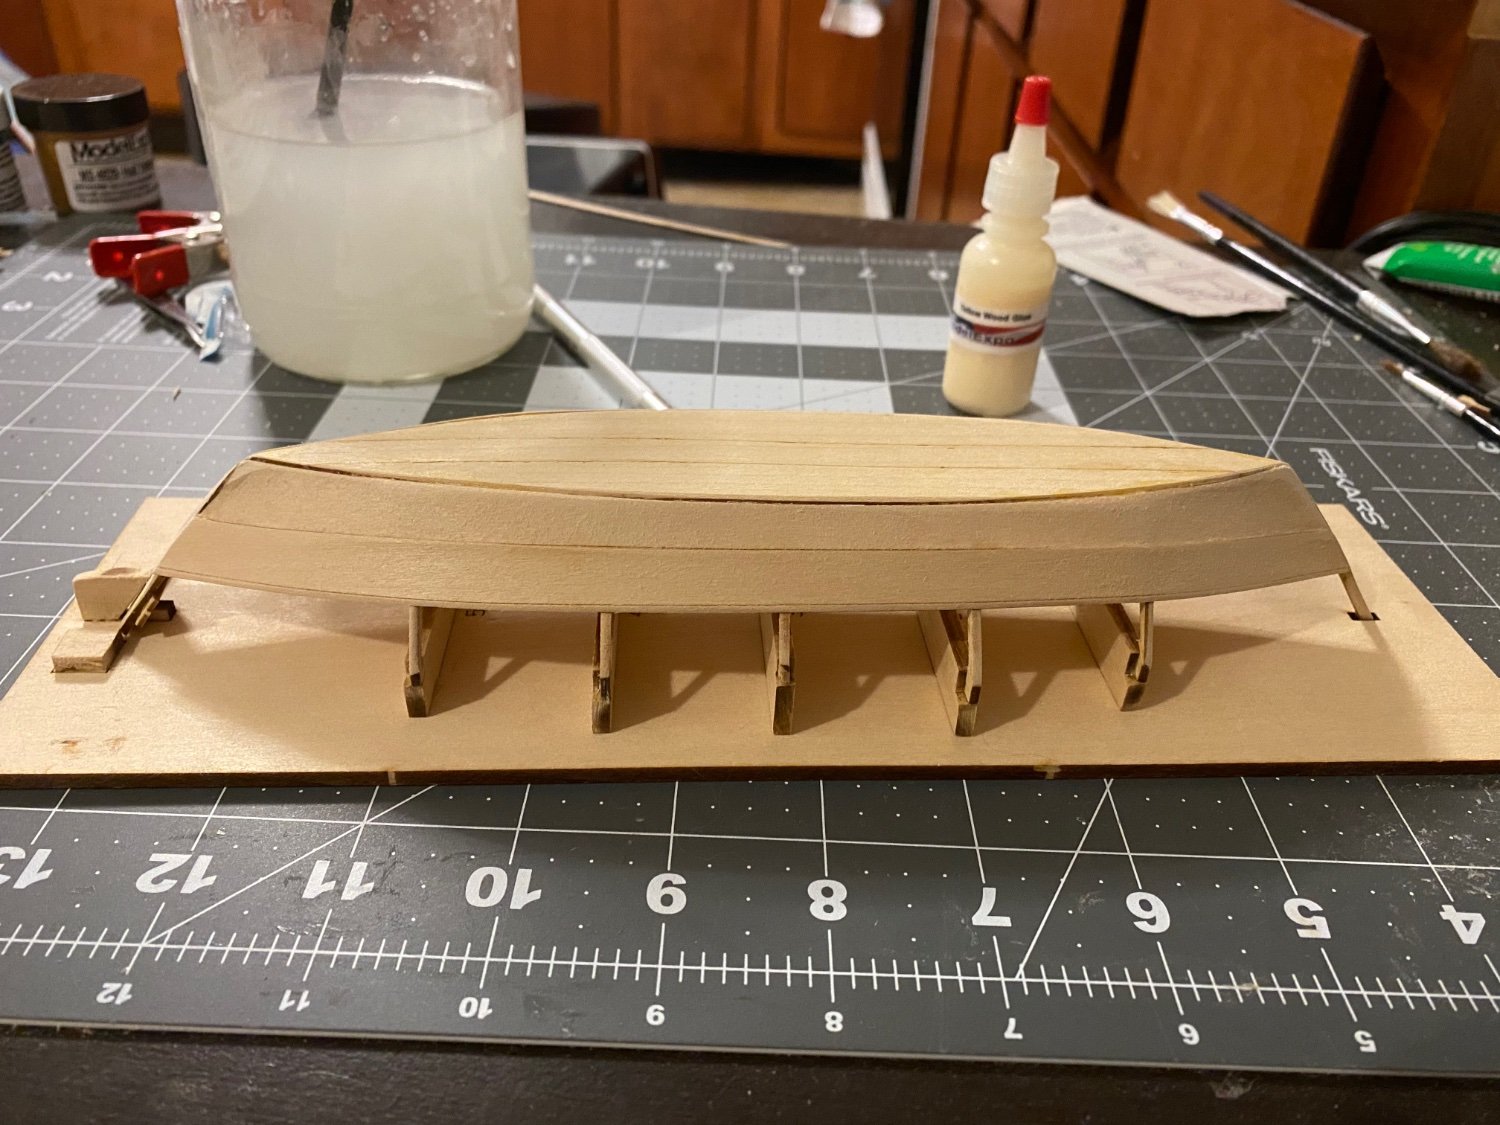
I ended up catching a pretty bad cold, so I haven’t been able to work on my model.
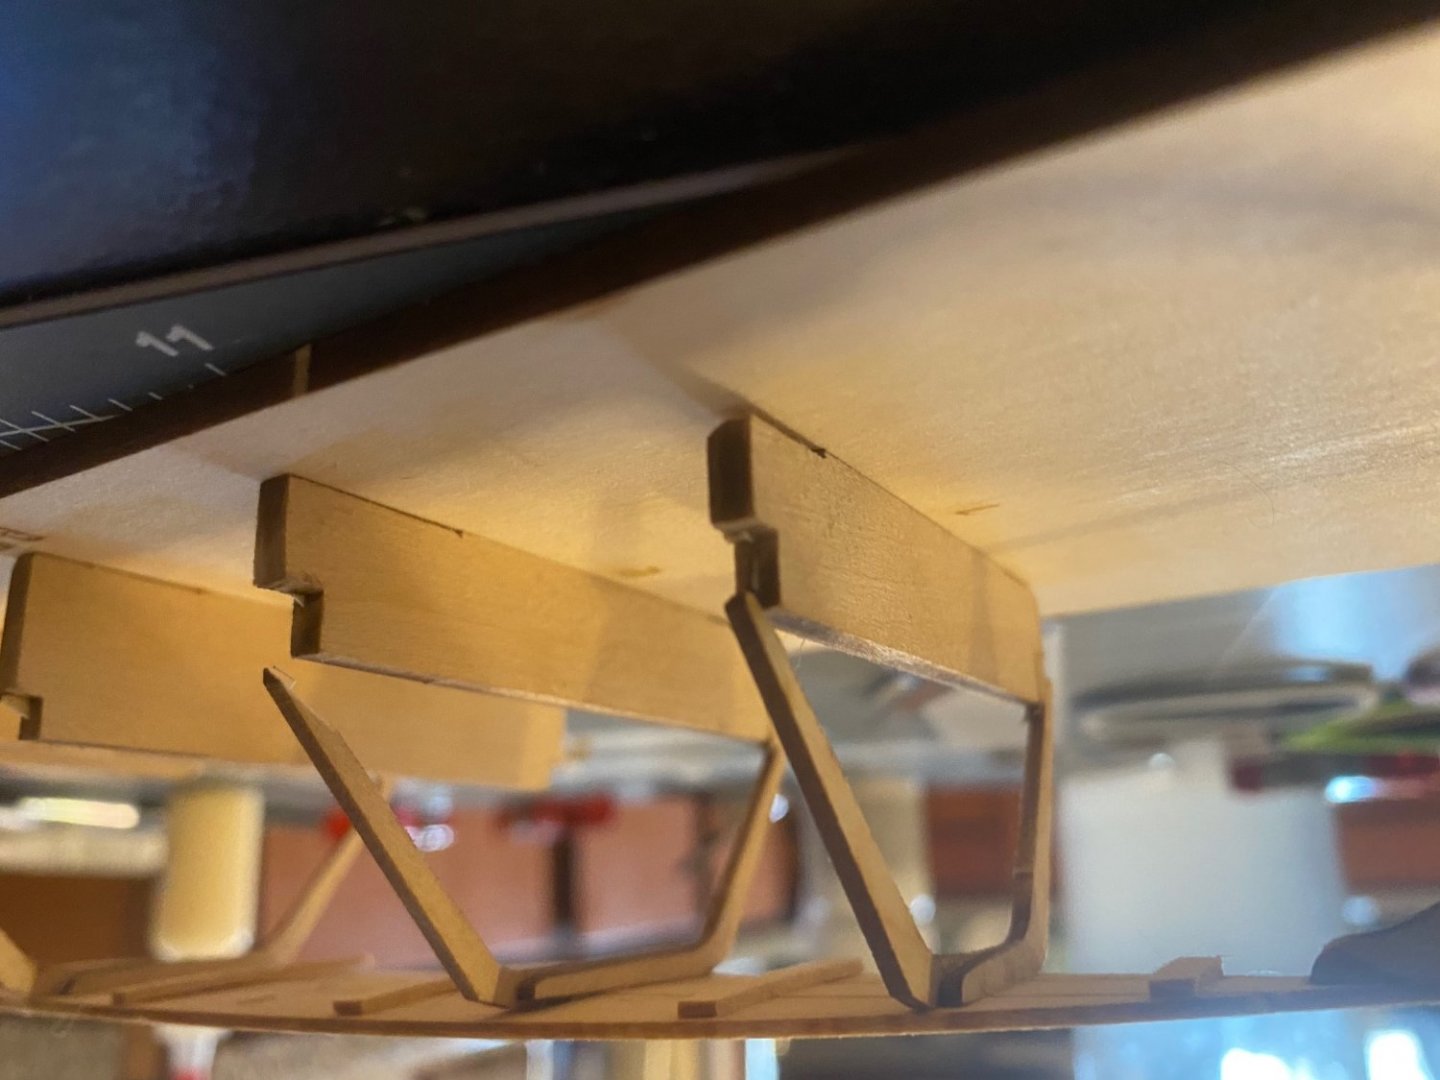
Thankfully I’m feeling much better today, so I’ve decided to do some work. I have gotten the bands, gunwales, and the breast hook all attached. My gunwale placement was fairly poor. I believe this has to do with my dry fitting method? I didn’t bend the gunwales into place prior to cutting. I did some filling in with glue, and I honestly am okay with this. As far as I can tell from the photos provided, this will be mostly, if not entirely, covered up by the cap rail. But, this is a good learning experience.
I also skipped an optional step (step 17a for anyone looking at this while working on their own Dory). This step is to make frame head irons out of card stock. I don’t have any card stock, and I don’t have a way to get any. As this is just an optional step, I’ve decided to just skip it.
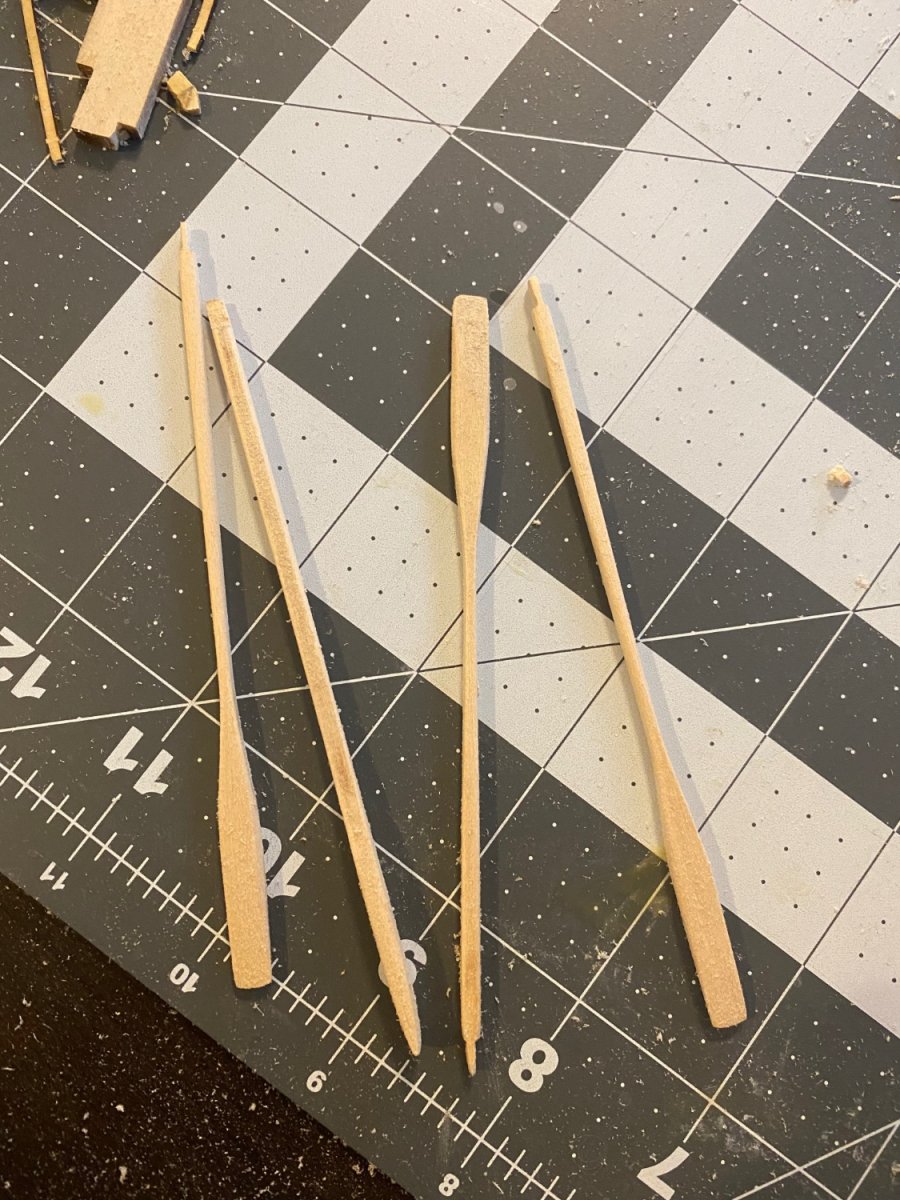
I also completed the oars. I’ve also decided to not leather my oars. The reason I’ve decided not to do it, is because of a personal row boat my wife and I use, and I kind of like having the oars more plain.
Im going to allow everything to set overnight, and tomorrow I will be working on painting.

- ct mike, Ryland Craze, druxey and 1 other
-
4
-
3 hours ago, wool132 said:
The parts list on page three of the manual lists 2 12" lengths of 1⁄16" square basswood, so there should be another piece kicking around somewhere -or- time to get in touch with ModelExpo.
Jonathan
Had to re-read my parts list as I thought I read that it only came with 1, but I must’ve looked down a row when I read through it.
I’ll have a look around for that piece when I wake up, it most likely just got displaced.
-
So, I’m not working on the mode today due to some issues with a sore and inflamed throat, and some breathing troubles.
However, I have been reading a bit of the instruction manual, and doing some dry fittings of small parts, just to give myself a visual when I do come to that step.
Reading step #17, it’s talking about attaching the gunwales. It mentions that 1/16” basswood is used here, but there is only 1 piece that is 12” long that is that thickness. This would make it so only 1 side could have a gunwale, as there is not enough basswood provided to complete both sides, especially with the trimming needed for a proper fitting. This is very confusing to me, as I thought gunwales where fitted to both sides, yet I don’t have enough material for both sides.
Am I wrong in thinking that gunwales go onto both sides? The instructions here are unclear, and the photos provided don’t help as it is such a thin piece of wood.
-
4 hours ago, druxey said:
Yes, coming along nicely, RM. Do wear a dust mask; basswood particles in the air are very fine.
Yeah, I didn’t think it would be an issue. But now that I know, I will be picking up a dust mask asap.
- Ryland Craze, druxey and mtaylor
-
3
-
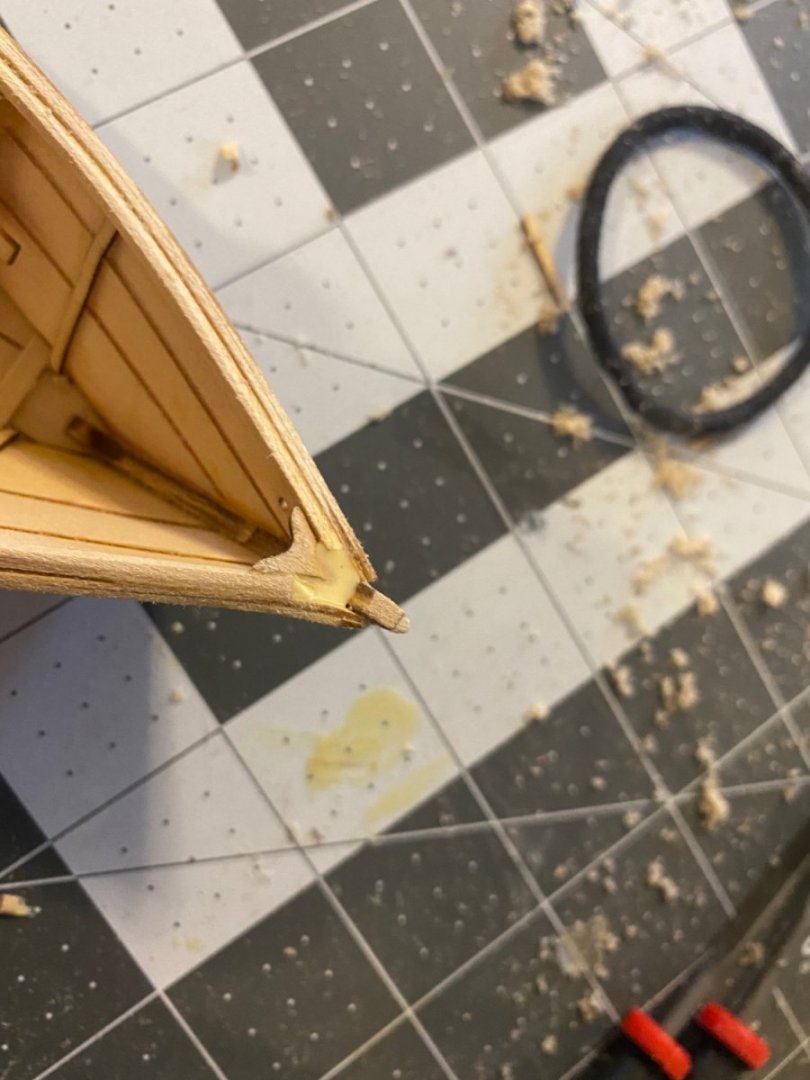
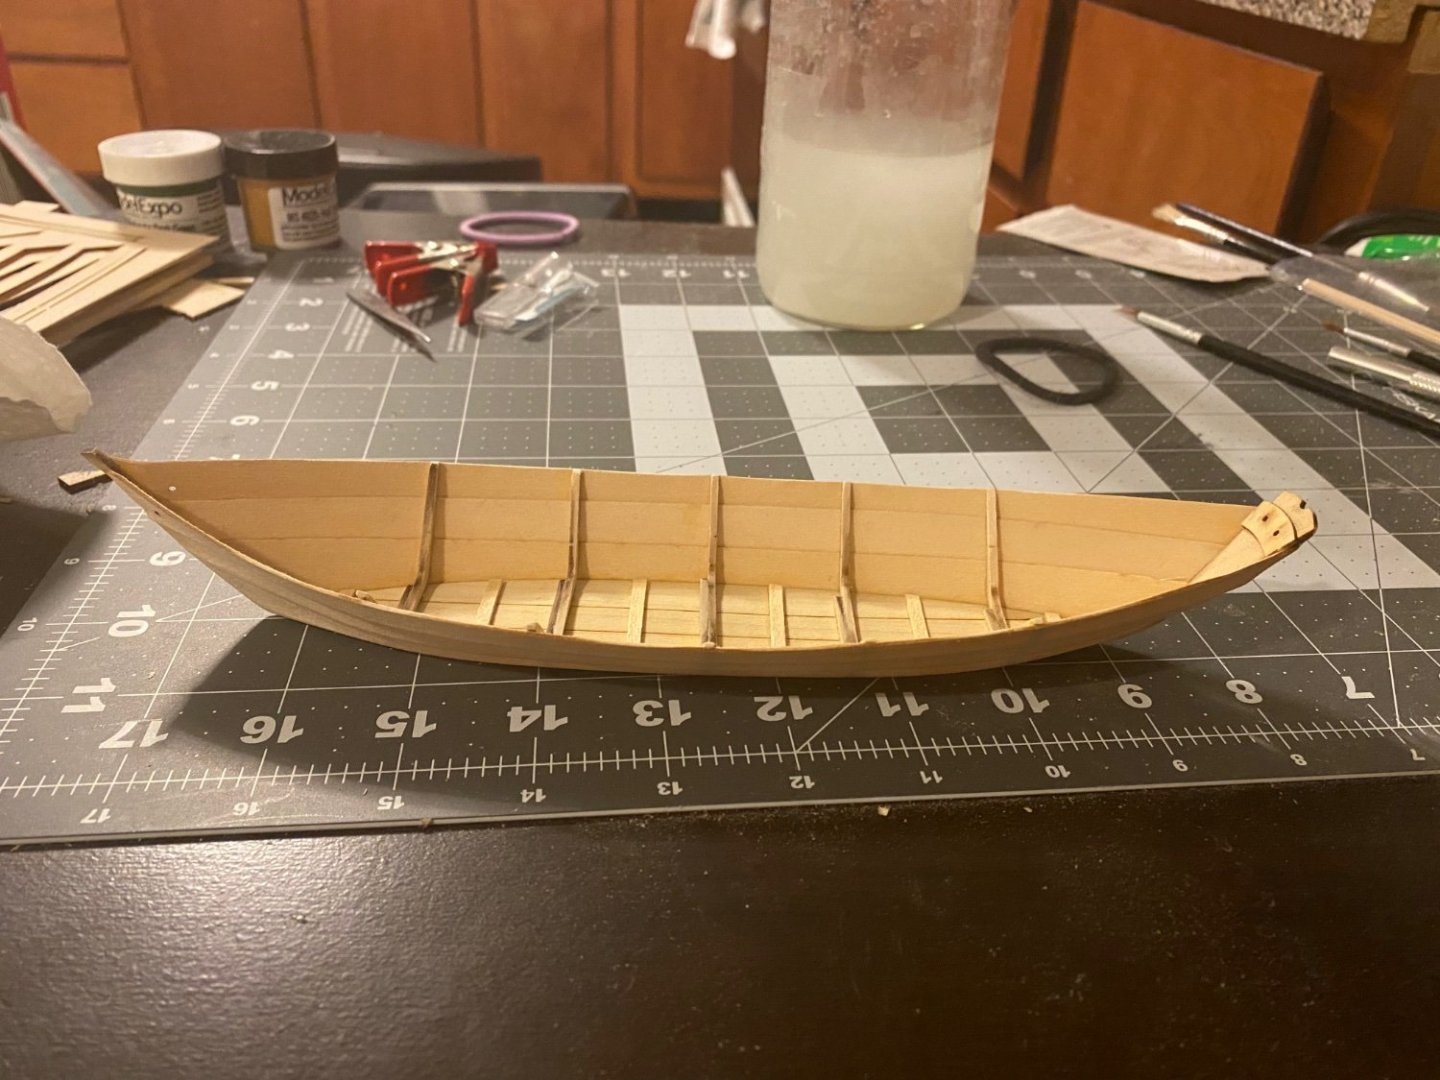
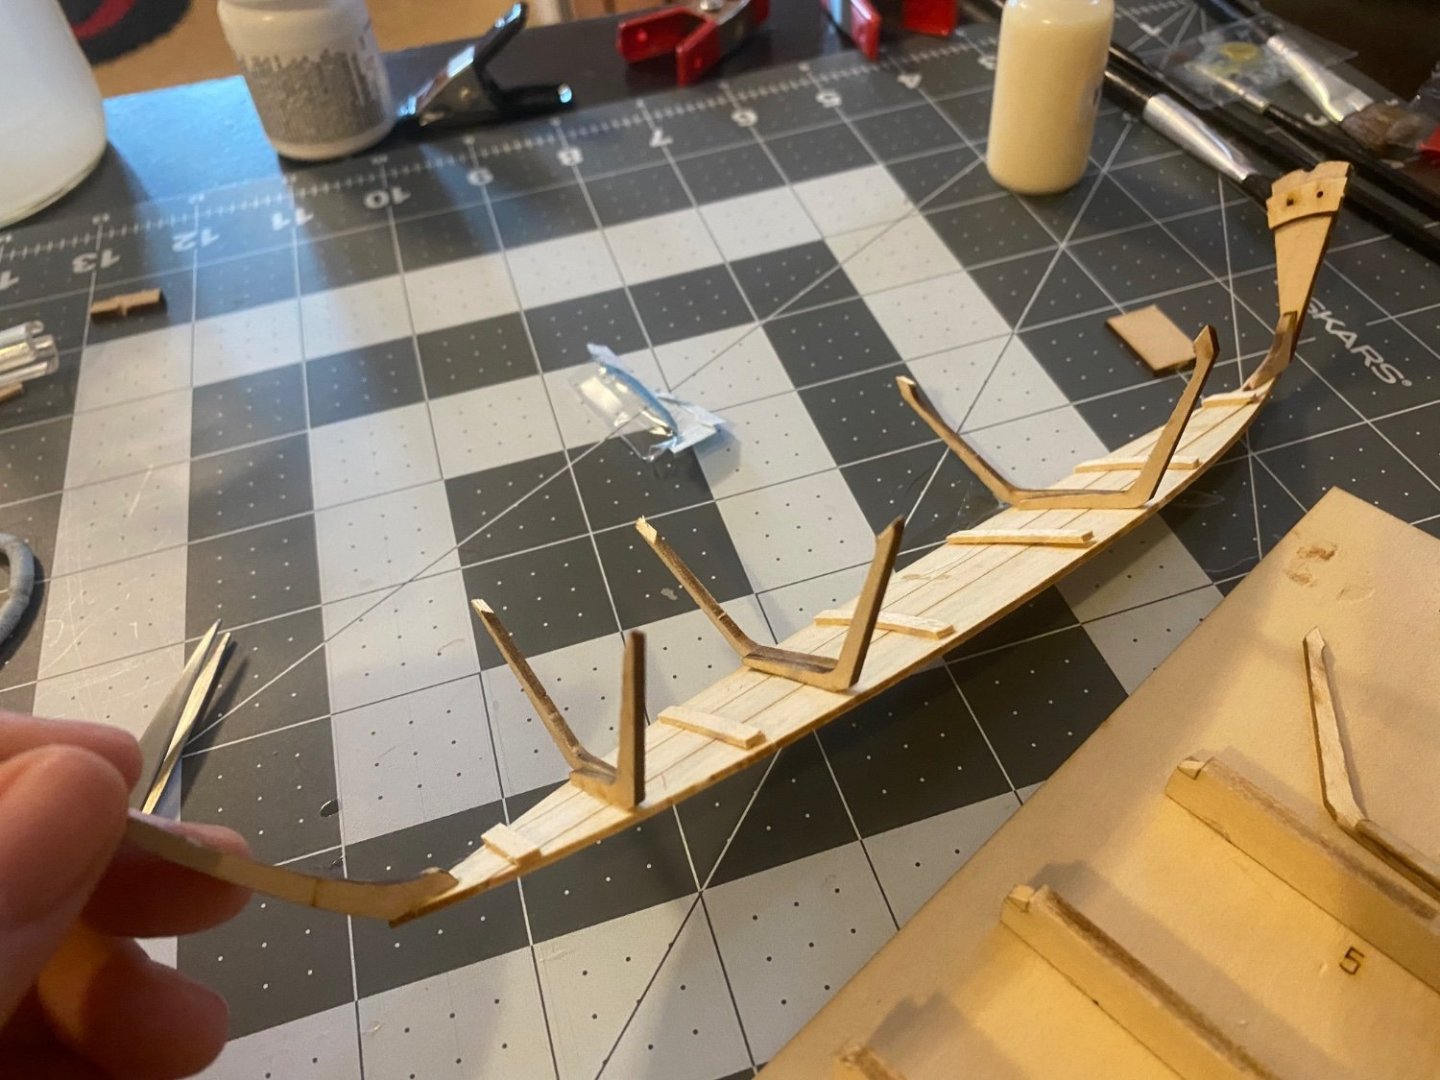
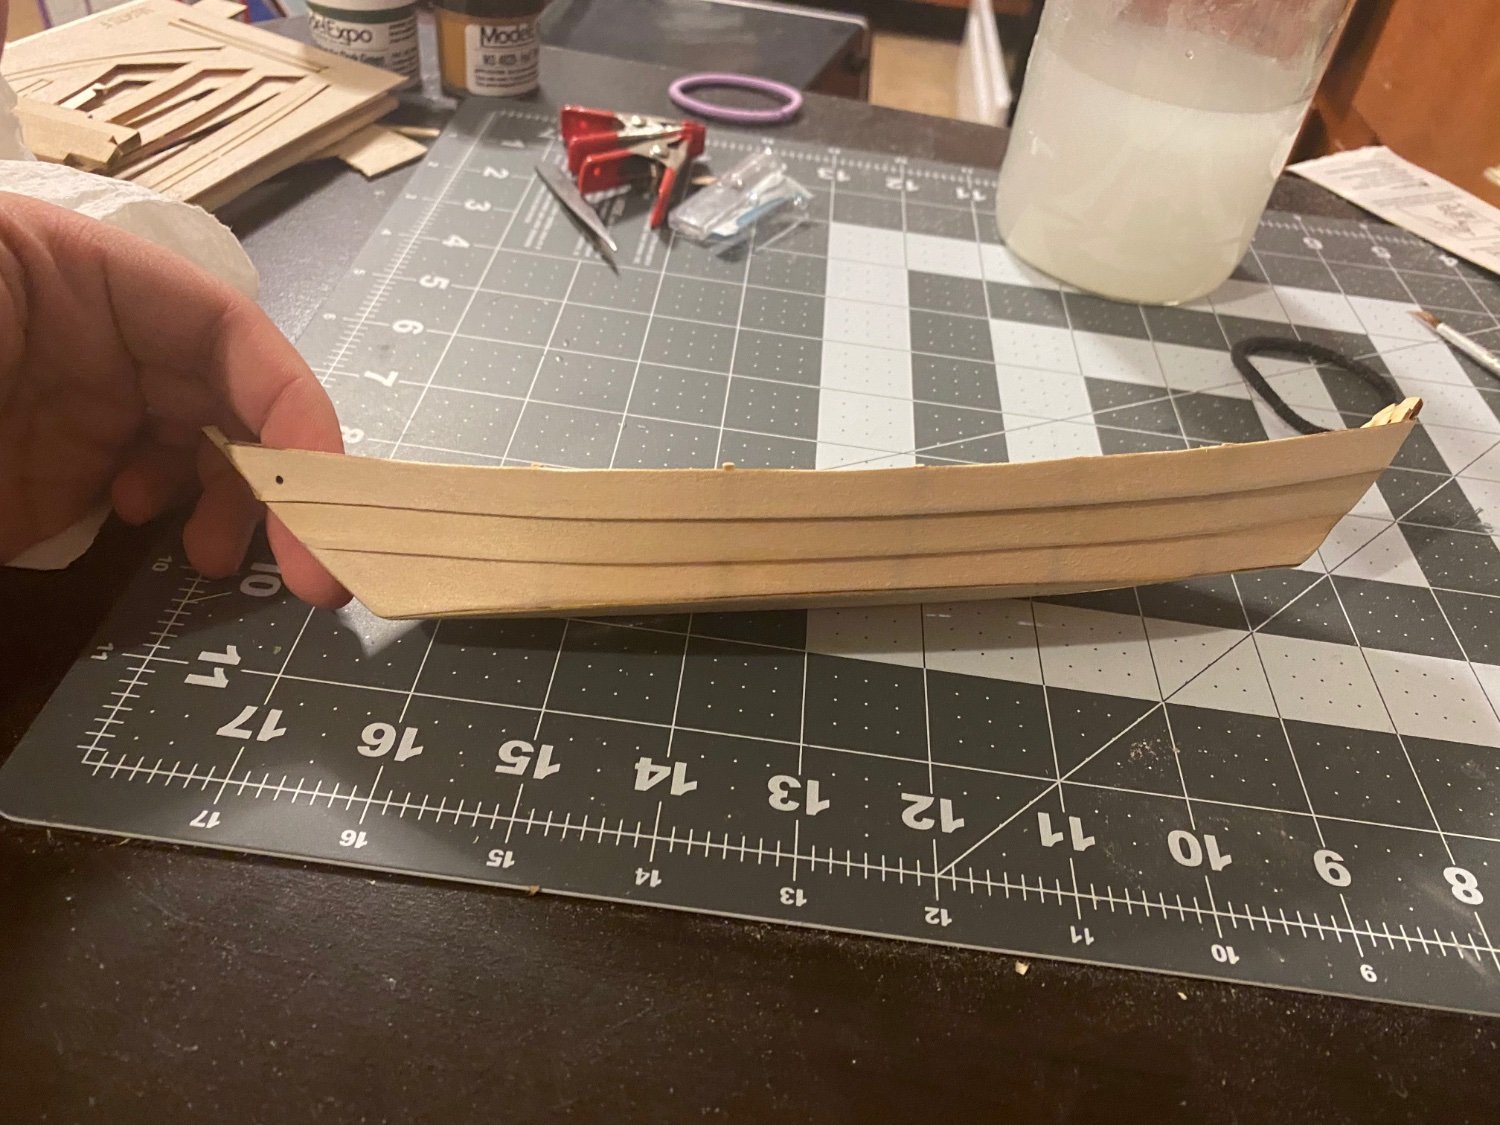
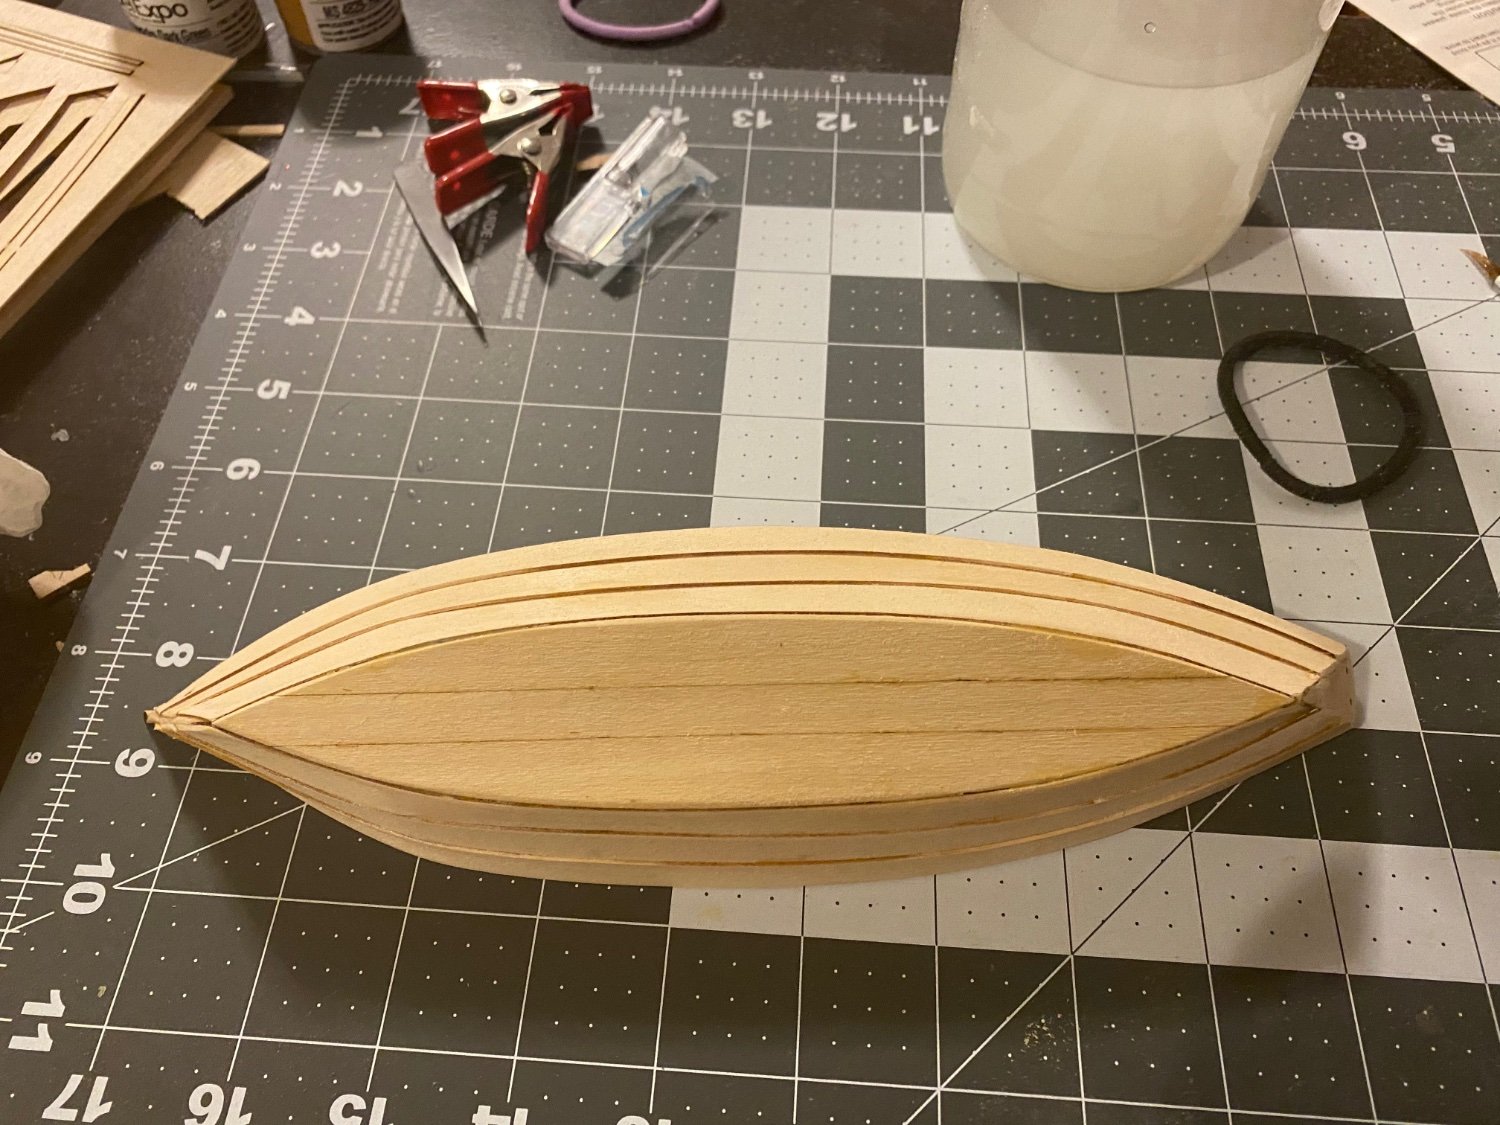
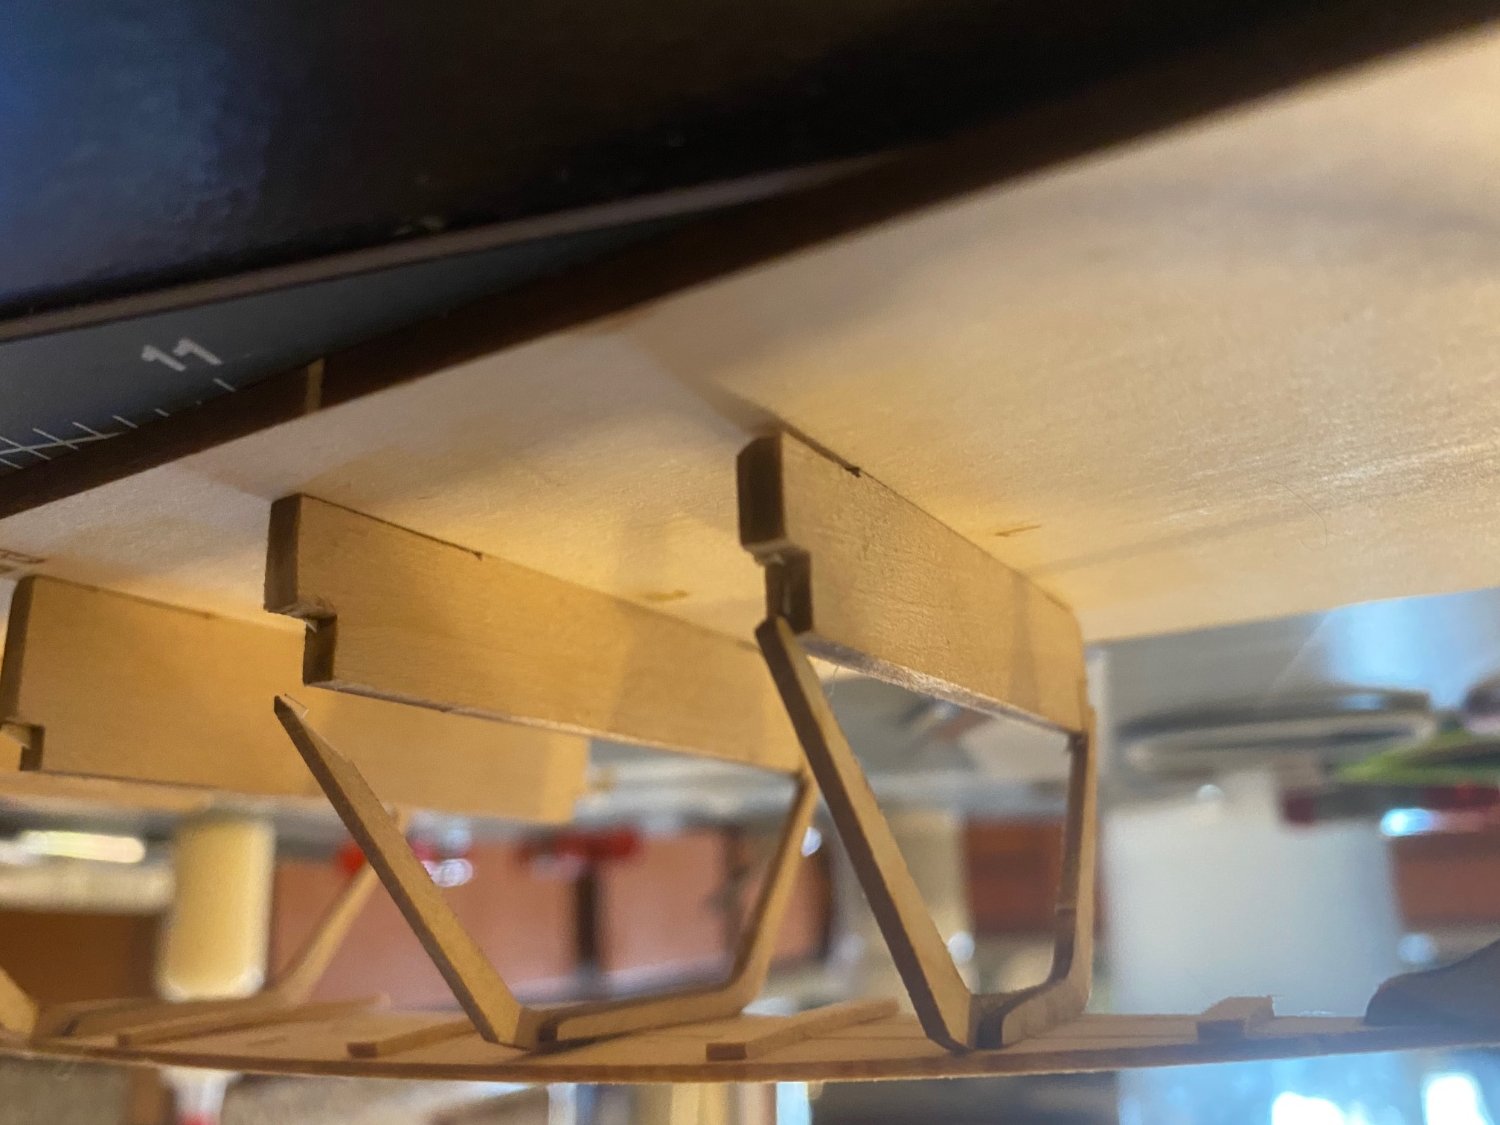
She’s freed from the building board!
That was a fairly stressful, but everything came off without issue.
The stern needed to be trimmed as some of the planks where a bit too long. Trimming the frames was also stressful.
I did do the optional step (12a), as it said it would make one of the future steps just a little bit easier. This step was just a little extra sanding done to the frames after the trimming of them.
I did want to do some more work on her today, but the amount of sawdust really started bothering my asthma, so I will be stopping for today.
I am incredibly proud of myself for being able to make it this far. I feel like I say that with every post I make, but each step is something very new to me. The only woodworking experience I have is making lamps out of logs, so this is very new to me.
So, for now, I will go rest. That sawdust has me feeling pretty dizzy. I would also like to thank everyone again. I don’t think I would’ve gotten this far without the support of this community.


-
Before I make my update, I just wanted to take a moment to thank everyone for their kind words, and for helping me.
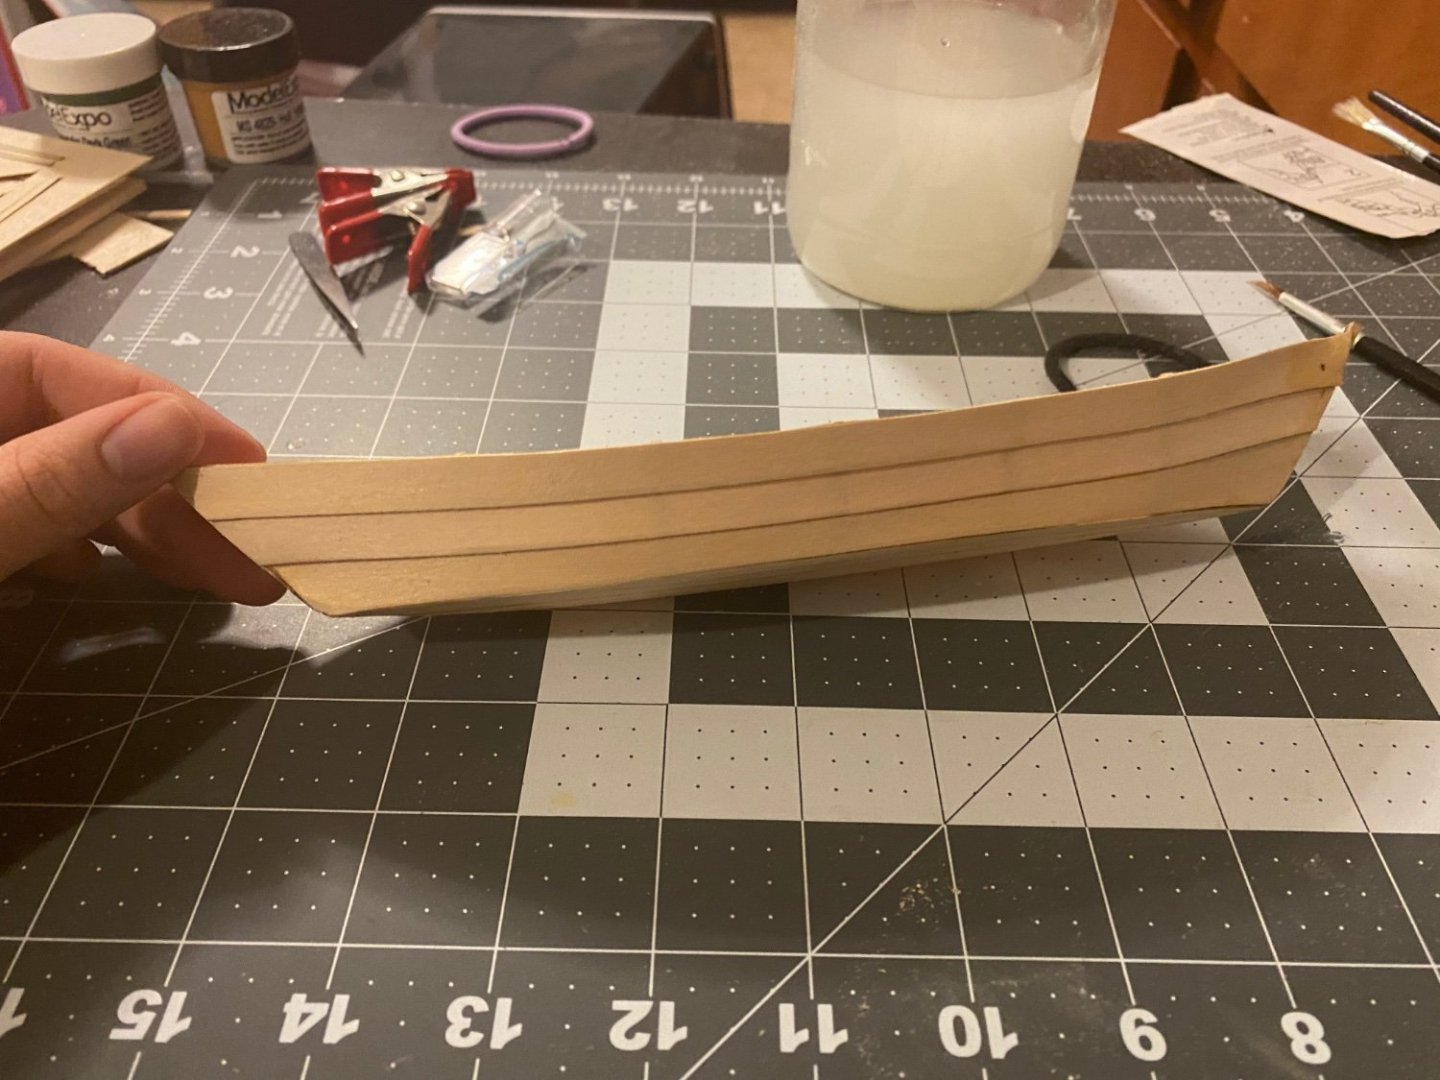
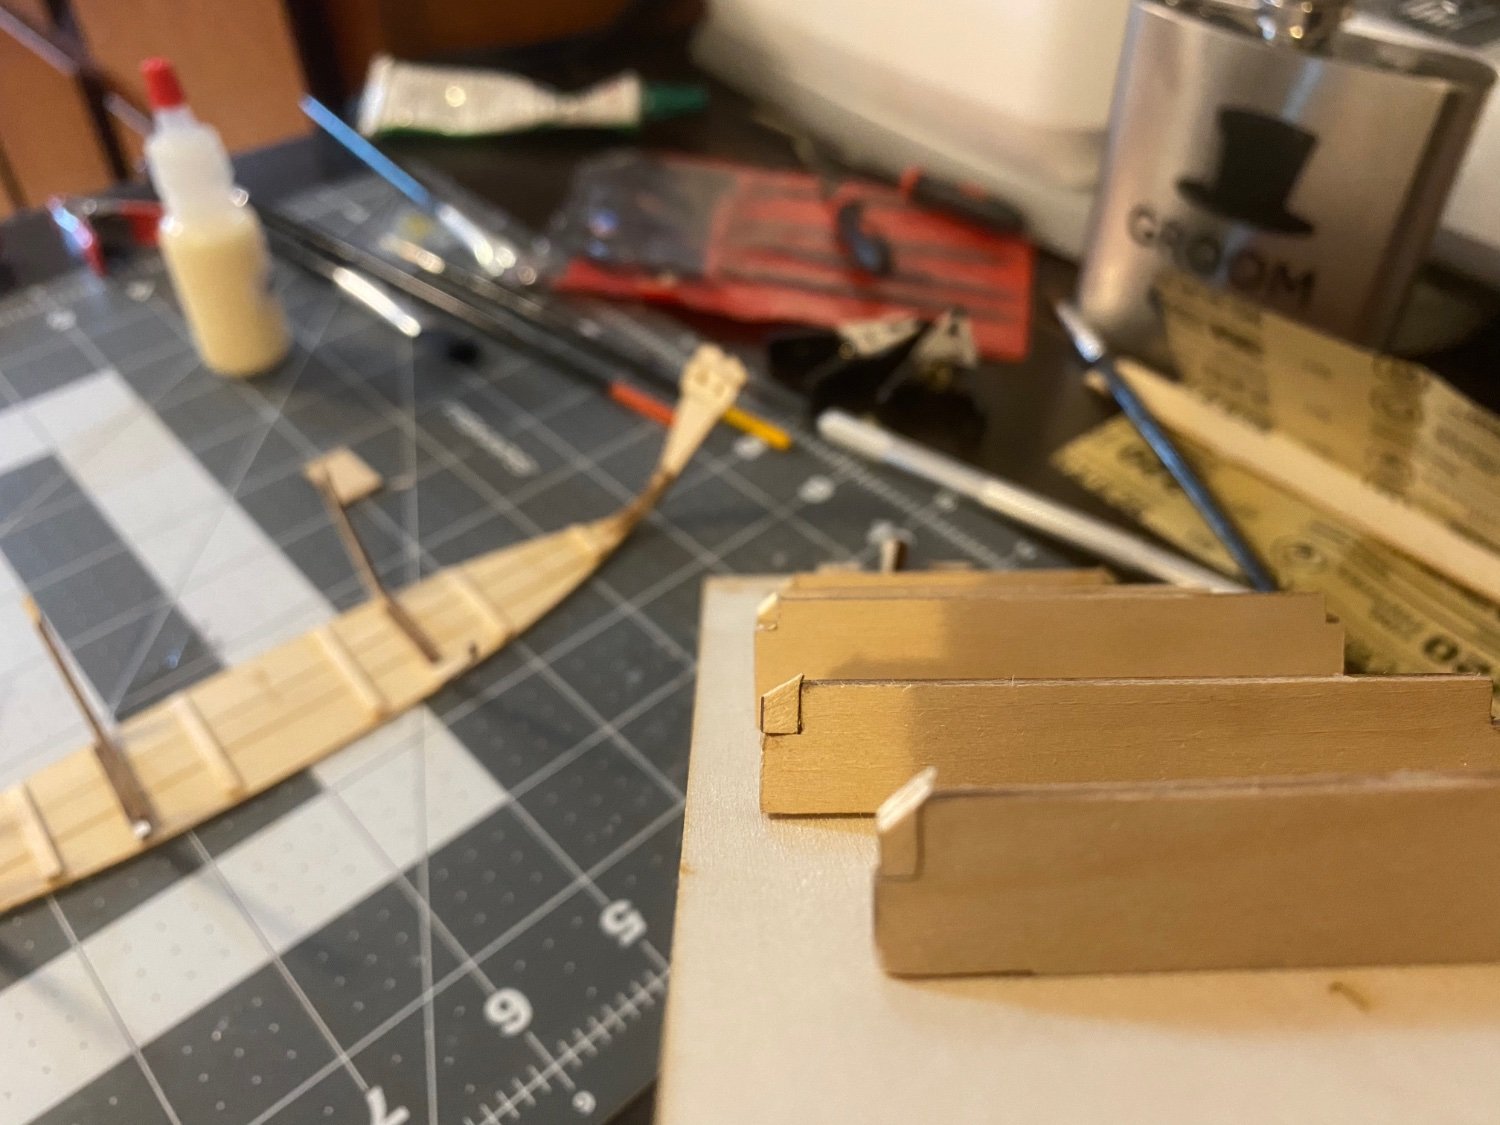
Day 2 of planking. Feeling more confident with it now, sense I have an idea of what I’m doing. Broad planks have been prepared, and glued on today.
Having to take the couple hours for the planks to dry properly is slowing progress, but thankfully I’m not in a model building race.
Really enjoying how this is coming together, and the process of building in general.
I did have some trouble understanding bevel and rolling bevel, and the only woodworking experience I have is building lamps from logs. I still don’t feel I understand this process fully. I believe I have a good enough understanding for now, and will take time to do some research so I understand as much as I can. I’m sure YouTube will help with this.
My hope is tomorrow to finish planking, and be able to get the boat off of the building board. Possibly add the false stem, depending on how I am feeling tomorrow.
I have also come up with a solution for the cats, so I won’t have to worry about another accident. I have a small cabinet attached to my work station, and it fits the model comfortably. I also have to put the glue bottle in there, as it seems to end up on the floor quite often. I don’t think this solution will work for larger models, but I will cross that bridge when I get to it.


-
Not only am I back on track, I am onto planking. Just bending the garboard planks now (1 at a time). As far as I can tell, I did everything correctly, but I suppose time will tell.
I’ve definitely been stressed throughout this process, as I fear messing something up, and it looking poorly. But I think I’m expecting too much out of myself.
My repairs are still holding up, which I am very happy to see.
Overall, I am just happy to see progress being made. I think once I am finished, I will be happy with the outcome.
-
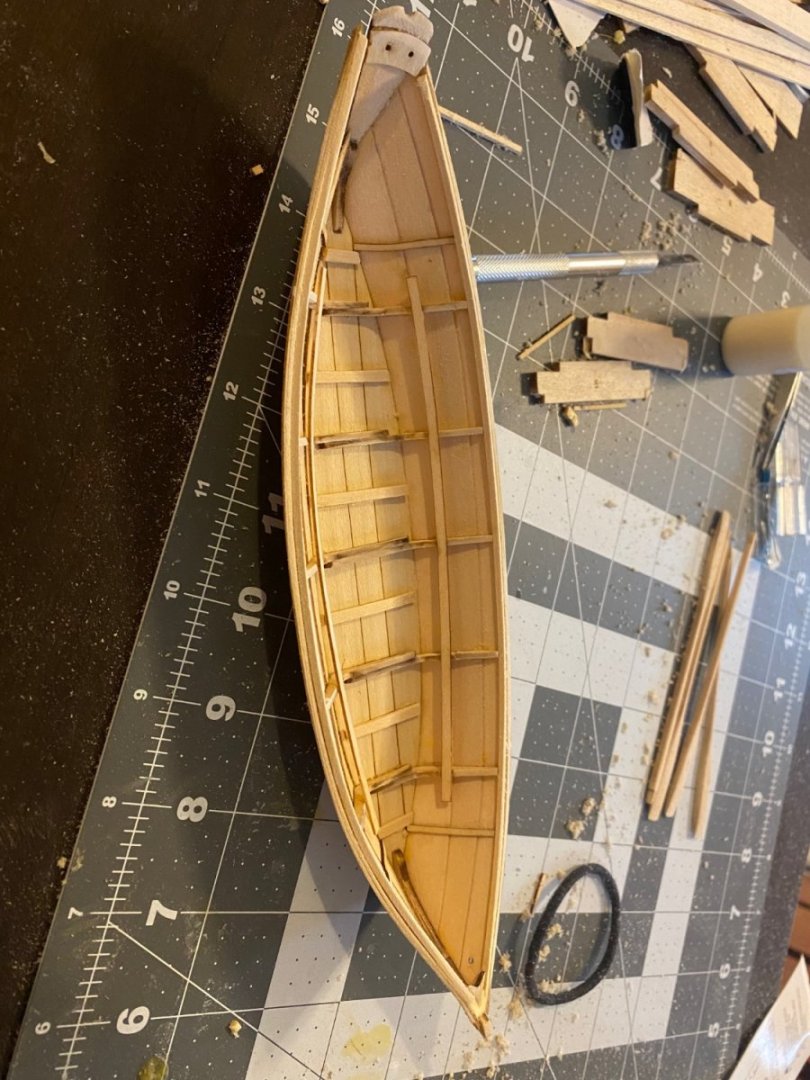
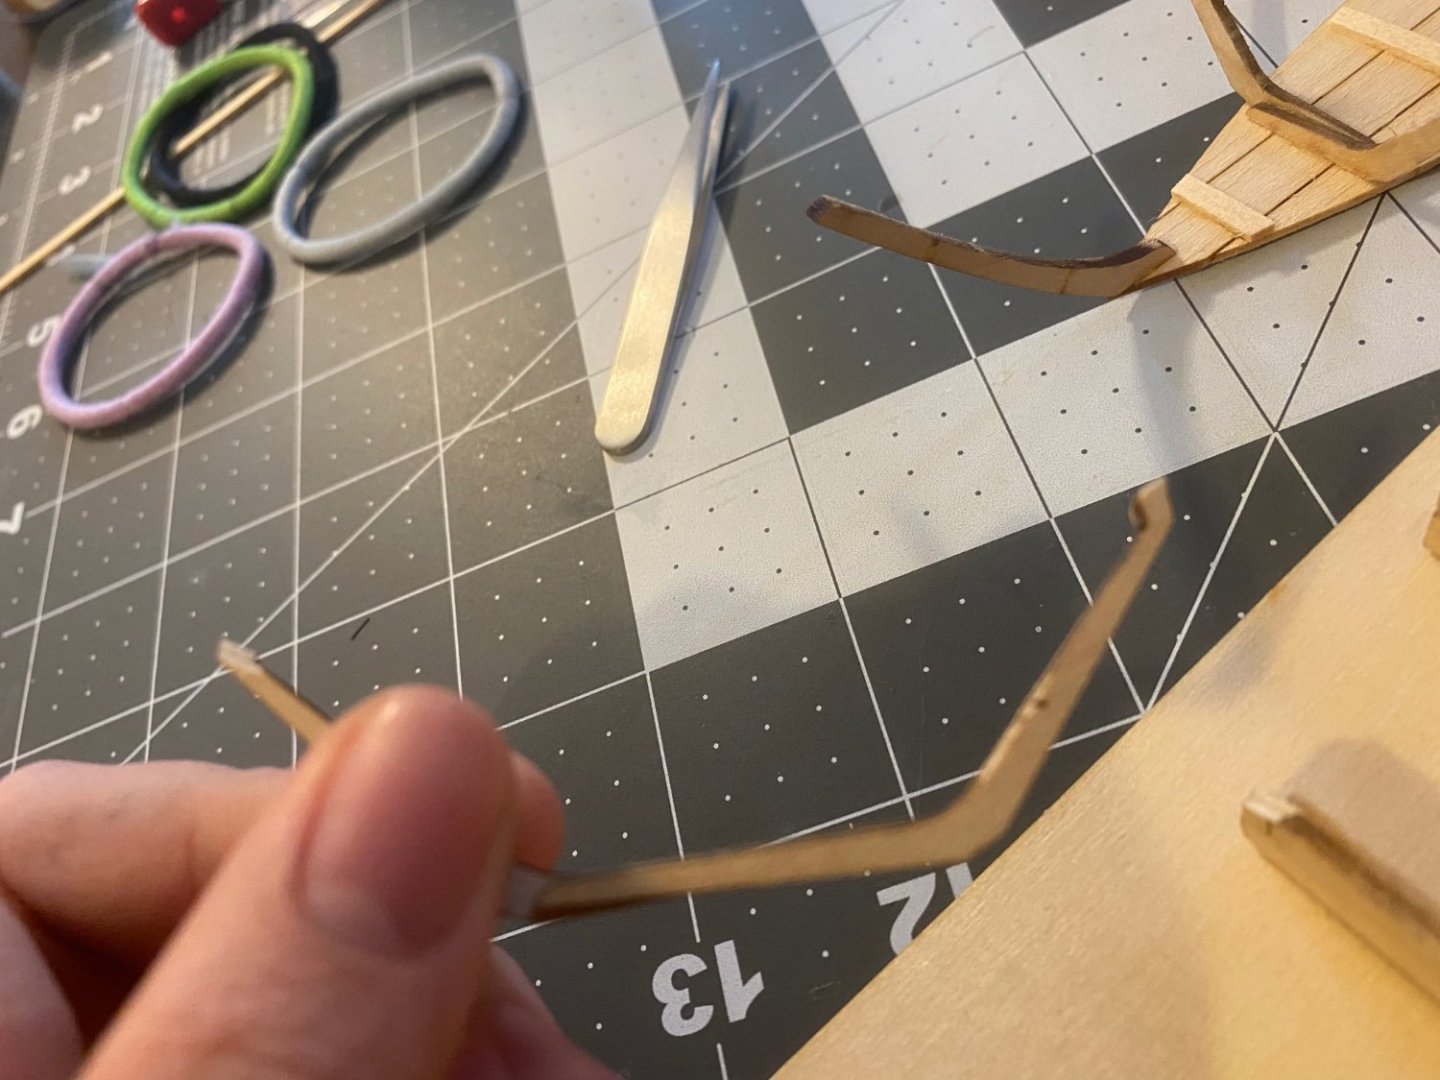
After taking a day off, and some work, I am only 1 step behind where I was prior to the accident. It’s not a perfect repair by any means, but I am proud to be able to say that I’ll be able to finish the model at the very least.
from what I can tell, all the frames are level, and not crooked in any way. They also seem solid enough to be able to finish the beveling of the frames. They feel almost the same as they did before breaking. Which isn’t saying much, as they are very flimsy. Once the bottom board is on and in place, we will be back on track!

-
30 minutes ago, mtaylor said:
Argggghhh!!!!!!! A ship hitting the floor is never good news. I'd suggest you try repairs and making some new parts as a learning effort for possible future scratch builds. If it doesn't work out, then order a new kit.
Okay. I will do some research on how to go about repairs. I do plan to do builds from scratch sometime in the future (when I’m no longer in an apartment, and have the space for the tools needed), so hopefully this will be a good learning experience.
-
8 hours ago, ccoyle said:
Oh, no! Don't worry -- most of us have experienced some kind of disaster during our modeling adventures. Repair or replace may come down to the degree of damage -- based on your last photos, I assume that some of the damage is to the mould pieces?
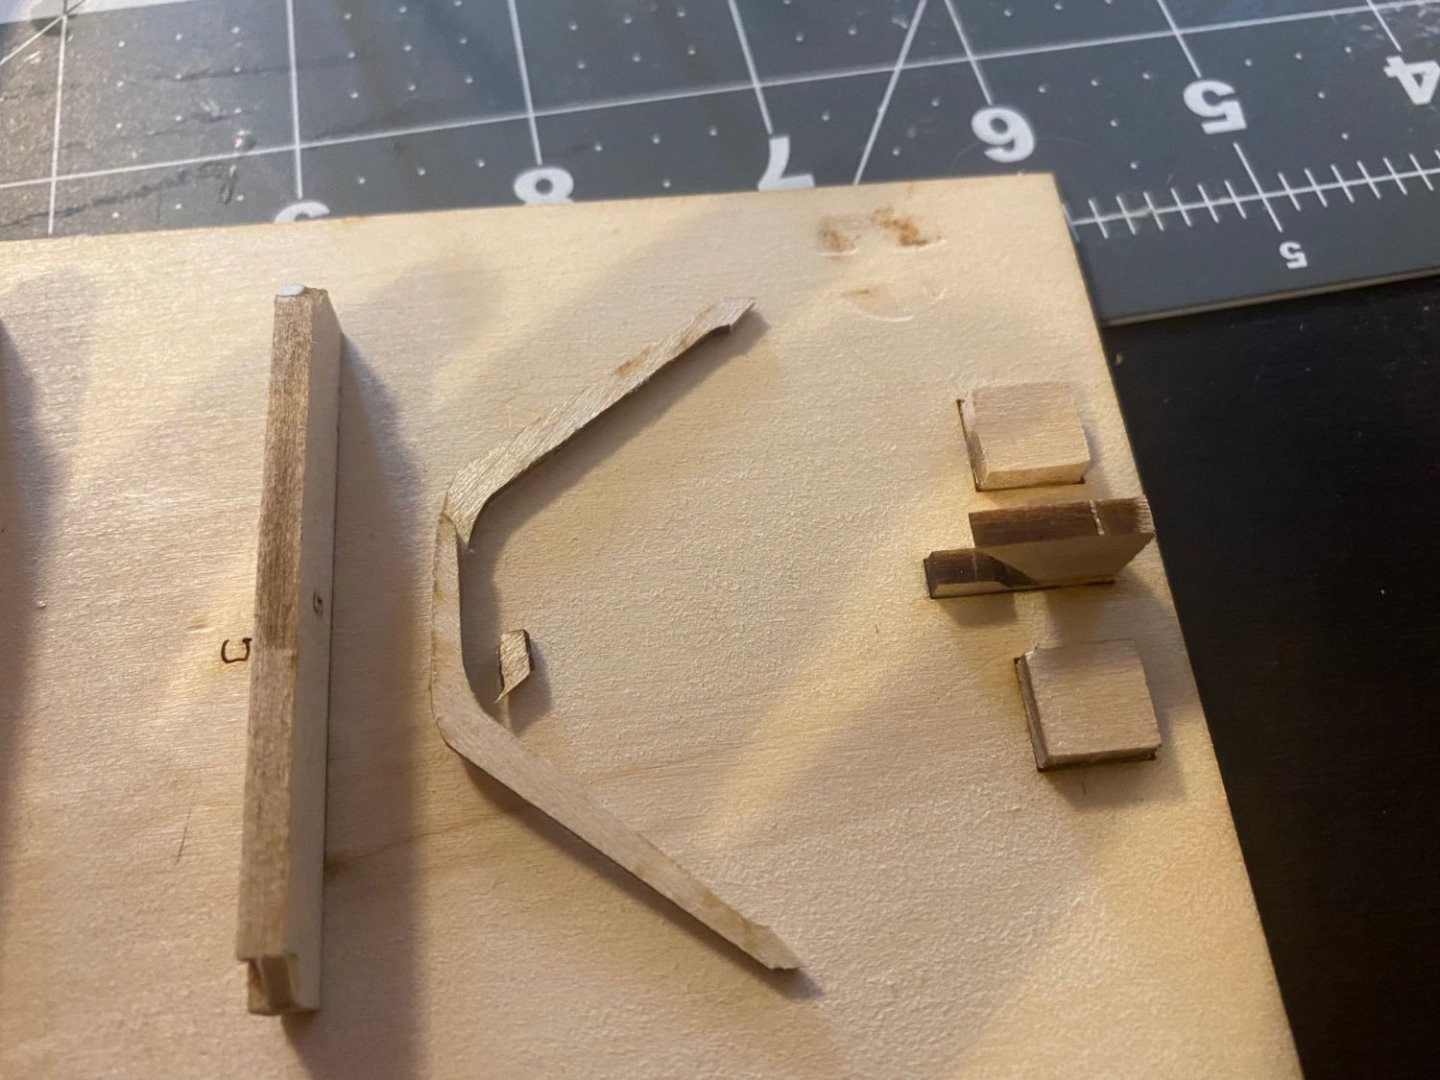
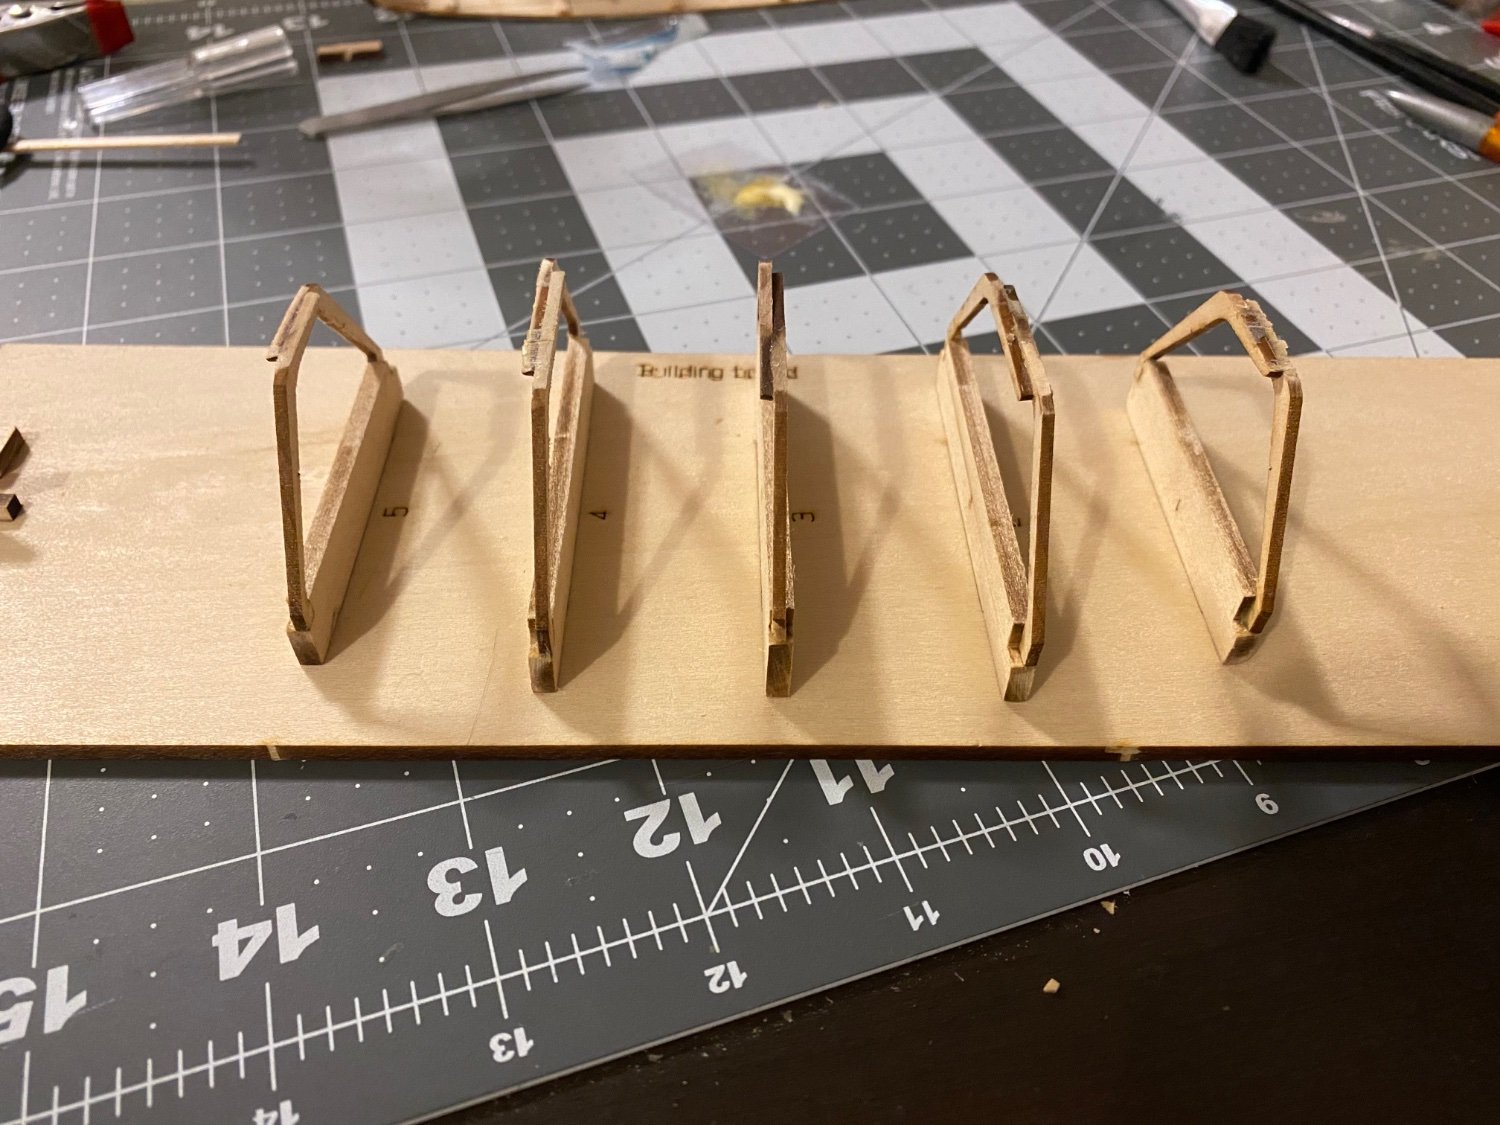
After getting more rest, I’m able to give a proper look over of the damage. I don’t think it looks good. All of the damage is to the frame pieces.
the number 3 and number 5 frames completely broke off the bottom board, but it was just the glue that failed there.
the real problem I am seeing is on frames 1, 2, and 3. They each seem to be missing very small pieces. I do have some spare basswood of the same size, so I could attempt to make things to fit those small pieces that are missing.
I am unsure if it would be worth trying to make these tiny pieces to repair, or if I should just toss it and wait the month or so for a new one to arrive, as this kit is on back order according to the website.

-
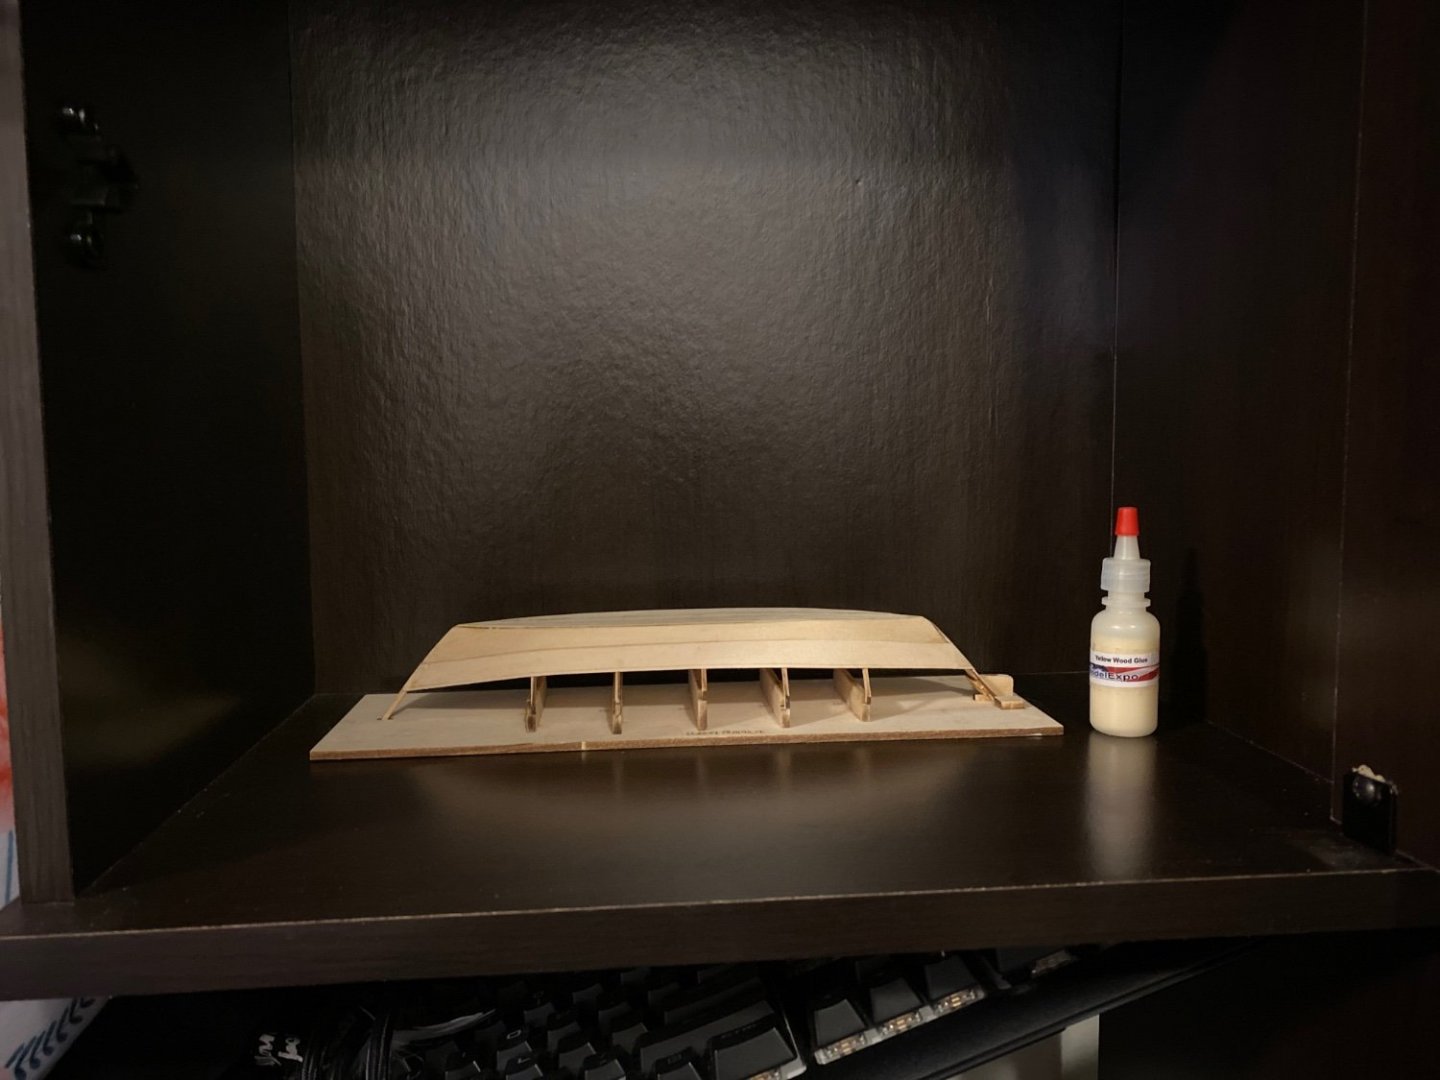
Woke up this morning to the model on the floor, and in pieces. Cats knocked it over. Going to try and repair it, but currently just feeling extremely upset, and defeated.
if anyone has any tips for attempting repairs, or if I would be better off just ordering a new model, please let me know. Any help is appreciated. I will be posting photos of the damage later, but need to step away from it for the time being. I need more sleep as well.
-
24 minutes ago, druxey said:
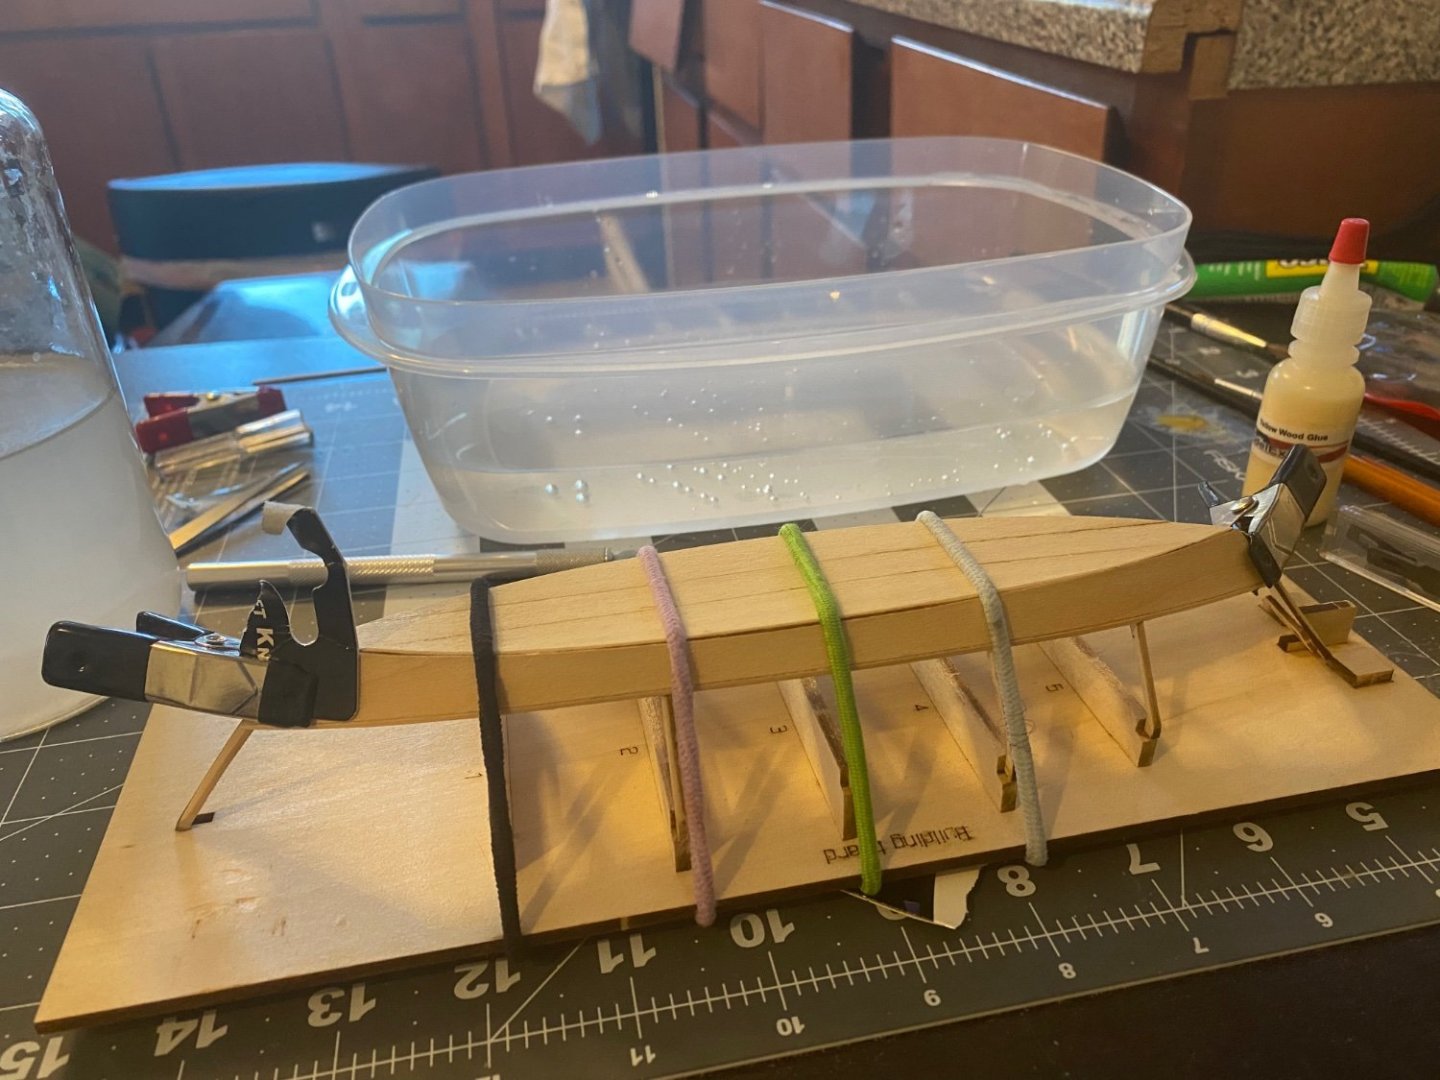
Try to put elastics-etc, over the frames, or the planks will be distorted! Easily fixable by dampening, though.
I was able to get up to take the elastic off. No noticeable distortion. Thank you for letting me know. Everything seems dried as well.
- mtaylor, Ryland Craze and druxey
-
3
-
-
Progress has been made today.
Firstly I would like to thank Dan for the idea on how to fix the dent. The water trick worked like a charm.
I was able to get the framing done today, before my chronic pain started acting up and put a halt to any further progress for now.
This was my first time beveling, which was interesting to say the least. I followed the instructions to a T, yet am still worried I have messed up somehow.
Frame number 4 seems to be slightly taller than the rest? I am unsure of how this happened, or if it is intentional. I followed the instructions when it said to only pop out what you need, and that’s exactly what I did, so I am not sure if I somehow mixed up some pieces, or if this is how it’s supposed to be. My hope is for the latter, but I have a suspicion it is not.
Overall though, I am proud of the progress I have made, and feel like I am learning at a nice pace.

- DanB, Ryland Craze and druxey
-
3
-
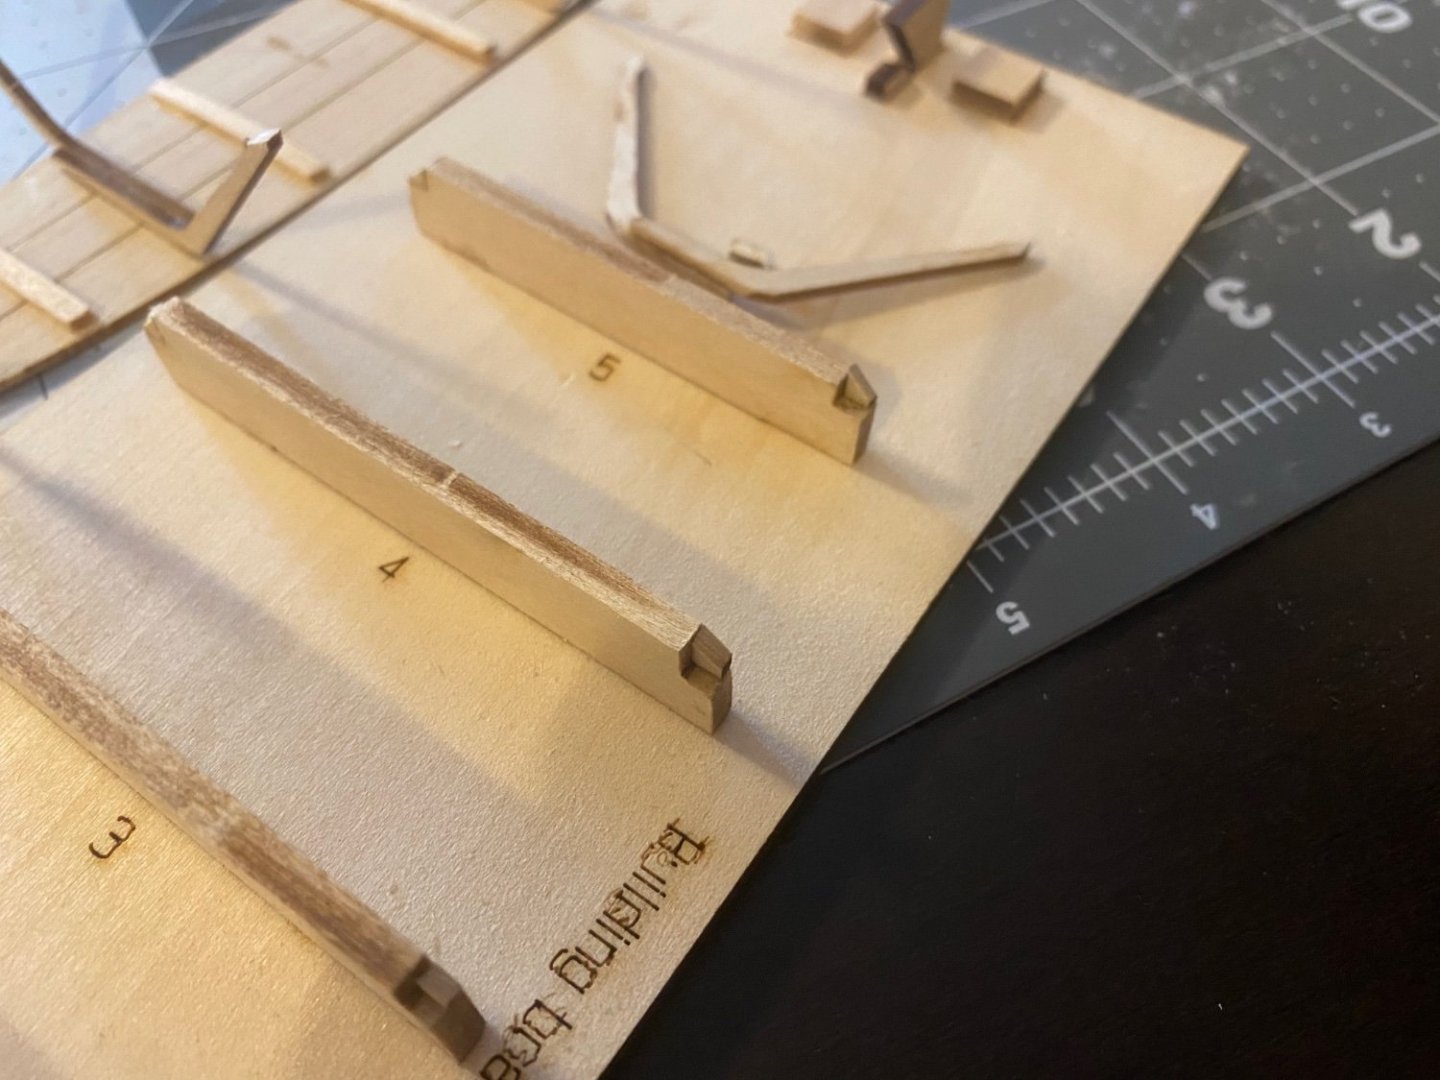
After a little over a week of waiting, my first model is finally here. After some consideration (and recommendations from this community), I settled on doing the Lowell Grand Banks Dory. I also do some light research on these boats prior to making my purchase, because I am big into history.
Once I opened the kit (like a kid on christmas might I add), I was immediately filled with excitement, and some nervousness. But, wanting to get into it, I got my work station set up how I wanted it, and began reading the instructions. Now, in the introduction, it mentions reading ahead, which I have been doing, though I haven't read through the entire instructions booklet just yet, as I much prefer to be able to mix in being able to see progress, along with the reading. My hope is I won't end up messing up by not reading all the instructions, but I think if I read a few steps ahead, I will be okay.
One minor mistake I have already made was I pressed a little too hard with a little too much of my thumbnail on the wood, and it left a small dent. I am not too worried though, as it is just me learning. I am still nervous, but I am having a grand time, even though I have only barely started. I hope to get some more work done tomorrow, but for now I will let the glue dry, and I will take the rest of the evening to relax.
![IMG_8943[1].JPG](https://modelshipworld.com/uploads/monthly_2022_05/1885131789_IMG_89431.thumb.JPG.0cc7b2db5942ccc9f3152567b3825680.JPG)
![IMG_8944[1].JPG](https://modelshipworld.com/uploads/monthly_2022_05/127850483_IMG_89441.thumb.JPG.a88db0176dc83147a97aa2339c11867b.JPG)
-
15 hours ago, Ryland Craze said:
Hi RMillet and welcome to Model Ship World. I am glad that you have decided to start your wooden ship modeling journey with the Model Shipways "Shipwright Series". The are excellent kits for the first time wooden ship modeler. I did a search and found quite a few build logs for this kit. Here is a link to them: https://modelshipworld.com/tags/Lowell Grand Banks Dory/
Many thanks for the link! I have already been looking through the build logs. I am hoping to order the model sometime within the next week or so, which gives me plenty of time to read through them. I want to read at least a few of them, as to know ahead of time what to expect. Again, thank you for the link, as it will make it much easier to get to the build logs for the Dory.
- Keith Black, Ryland Craze and mtaylor
-
3
-
5 hours ago, Chuck Seiler said:
Don't get me wrong, LONGBOAT is a great kit, just not a "basic" kit as it appears. It may one where you buy now, set the kit aside for later and use the tools. ALSO, Model Expo has sale all the time, so there is a good chance it will be on sale later down the road, (SPOILER ALERT: If you get on Model Expo's mailing list, you are guaranteed email for life. 😁 )
If you search "first kit" or "recommended first ship model" you will find a couple great threads.
After doing some more research, I think I have decided on the Model Shipways "Shipwright" Series. Starting with the Dory, and working my way up to the Lobster Smack. I also found a beautiful French fishing boat I would like to take a crack at after finishing the Lobster Smack. I feel the Dory would be a fairly good decision, as a lot of what I've seen on here recommends it for absolute beginners. It also comes with the tools needed to get me started, and is only about $50, which is fairly less than what I was expecting to spend. The small size is also nice, as I feel it would make a lovely piece for my computer desk. Thank you for your input again, and would love to hear your thoughts on my plan if possible
")
- Ryland Craze, Keith Black, LyleK1 and 2 others
-
5
-
8 hours ago, Chuck Seiler said:
RM,
Greetings from the lower left hand corner of the USA. Where in the USA are you from?
It sounds lime you are new to wooden ship modelling and planking. With that in mind, I would NOT recommend the 18th century longboat as your first project. Since it is single layer planking and you can see both sides of the planking, there is zero room for error. There are many good first models list elsewhere in this forum. If you have your heart set on the longboat, I recommend the NRG half hull planking model, sold on the NRG web site.
Hello, and thank you for your warm welcome. I am from the north-east of the states.
One of the main reasons I am considering the longboat is because it comes with a set of tools as well, and for a fairly good price. Though, with your suggestion (as well as someone else agreeing with you) I will do some research on a different model, and make a decision from there. I am looking for something that isn't too terribly expensive, as I don't want to sink a large sum of money without knowing if I will truly enjoy the hobby yet. Though I truly believe I will enjoy the hobby, I don't want to risk spending a lot of money, only to never finish a project. I also want to start small for the same reason. Again, I will do some more research on some ship models, and hopefully find the list on this site as a good starting point. Thank you for taking the time to inform me.
-RM
- mtaylor, Keith Black, Ryland Craze and 1 other
-
4
-
3 minutes ago, Jim Lad said:
Hello RMillet and a warm welcome to MSW from 'Down Under'.
John
Thank you for you warm welcome.
- Keith Black, Dave_E, Ryland Craze and 1 other
-
4
-
2 hours ago, mtaylor said:
Welcome to MSW, RMillet. When you're ready to start building, do open a log as it's the best way to meet others and also get help.
Will do! I am very excited to open my first build log when I purchase the longboat model. Thank you for your warm welcome!
- mtaylor, Dave_E, Ryland Craze and 1 other
-
4
-
2 hours ago, LyleK1 said:
Welcome, R!
You’ll find a wealth of experience and help with your new endeavors.
Ask questions, any questions!
And spend some time looking at the build logs before jumping in, lots of logs to help you through the rough patches.
Good luck!
Many thanks for the warm welcome. I’ve already been looking through some of the builds, and I am amazed at the amount of detail, and care you all put into these! Very excited to start my first. Hoping to pick it up by the end of the month!
- mtaylor, Dave_E, Ryland Craze and 2 others
-
5
-
Hello everyone, I am RMillet. I am 23 and from the USA. I am disabled, so I have much time to spend on model ship building. Though I haven't bought my first wooden model yet, I plan to purchase the 18th century longboat from Model Shipways soon. I have absolutely loved ships for most of my life, spending much time researching cargo ships. I also enjoy playing video games, 3D modeling, and cooking. I am excited to document my experience being a beginner modeler, and hope to learn from everyone here.
- Keith Black, mtaylor, CDR_Ret and 4 others
-
7


![IMG_8943[1].JPG](https://modelshipworld.com/uploads/monthly_2022_05/419464440_IMG_89431.JPG.b3a40818d9f890b4b068e7582fb8ba67.JPG)
![IMG_8944[1].JPG](https://modelshipworld.com/uploads/monthly_2022_05/715202765_IMG_89441.JPG.683ceca145374b1b34e50637bc50f887.JPG)
Norwegian Sailing Pram by Eric S. - Model Shipways - 1:12
in - Kit build logs for subjects built from 1901 - Present Day
Posted
This is coming along nicely! Nice job on the replacement mast holder as well. I plan on building this kit next, and will be following your logs.