DocRob
-
Posts
1,296 -
Joined
-
Last visited
Content Type
Profiles
Forums
Gallery
Events
Everything posted by DocRob
-

1960 Corvette by gsdpic - MFH - 1/12 - Multimedia
DocRob replied to gsdpic's topic in Non-ship/categorised builds
I was in the same situation and tweaked my too small spray booth with a cheap Ikea plastic container. This was the original booth, way too small for a 1/32 TA 152: The plastic container, much bigger: Cut out the backside and used duct tape to mount it to the old booth. I also wrapped led strips around for better lighting: Cheers Rob


-
1960 Corvette by gsdpic - MFH - 1/12 - Multimedia
DocRob replied to gsdpic's topic in Non-ship/categorised builds
Nice start Gary, I do more or less the same, using organizer boxes for the white metal parts, which helps a lot during the build. You are right about drilling holes, there are zillions. Make sure, you don´t forget to drill some, which may be hard or impossible to reach later. Check, if the parts, which fit into the holes really fit. I prefer HSS drill bits, because they are more forgiving and not as brittle as tungsten carbide ones, which also tend to eat into the material more aggressive than HSS bits. Make sure, that you drill adjoining parts together for better fit. The casted holes in resin or white metal are only guiding holes, which needed to be drilled with the correct diameter. Bummer that your engine proves troublesome with the fitting from resin to white metal, I haven´t experienced something like this during my MFH builds. Cheers Rob -
Current builds: Brabham BT45 by DocRob - Model Factory Hiro - 1/12 Duchess of Kingston - paused Finished builds: F4U-1A Corsair - Tamiya 1/32 USS Arizona 1/350 Eduard Caudron C.561 French Racing Plane 1/48 Nachtigall on Speed Arado 234 B-2N by DocRob - 1/32 - Fly Renault RE20 Turbo - Tamiya - 1/12 P-38J Wicked Woman - Tamiya - 1/48 AEG G.IV Creature of the Night - WNW - 1/32 "Big Tank" Crocker OHV motorcycle by DocRob - Model Factory Hiro - 1/9 MaschinenKrieger Friedrich by DocRob - Wave - 1/20 - PLASTIC - Another one bites the dust McLaren Mp4/6 - Ayrton Senna - Fujimi - 1/20 Shelby Cobra Coupe by DocRob - Model Factory Hiro - 1/12 Honda RC166 Mike Hailwood by DocRob - Tamiya - 1/12
-
I was not even a teenager, when this kit came out in `73, but even half a decade later, I couldn´t afford these type of kits from my pocket money, but pressed my nose flat against the shop window. I know the feeling though, gluing together fingers, brush paint everything with thick Humbrol colors,... Fond memories. For this build, I actually used a lot of CA, which I prefer for pre-painted parts. My personal development over the decades led to less adhesive caused accidents, luckily . Cheers Rob
-
Thank you Gentlemen, most of the build was a pleasure, but the end was a bit anticlimactic. I´m happy to have it done now, nonetheless because of your encouraging posts here. Cheers Rob
-
Thanks Gary, but I have to question your arithmetics . The Lotus 77 would be the logical follow up, which I indeed possess from MFH in 1/12. I don´t own a 78, but a 1/20 Tamiya 79. I have not decided, what to build next, but will travel for some weeks and decide afterwards. Cheers Rob
-
1960 Corvette by gsdpic - MFH - 1/12 - Multimedia
DocRob replied to gsdpic's topic in Non-ship/categorised builds
Nice choice of color, Gary. When I built the Cobra Coupe, I primed the body parts with Mr. Surfacer 1500 and airbrushed Number 5 paint on top. I found the adherence of paint and primer not too good, it was easy to chip off paint during sanding and polishing, not to speak about final assembly. With the Brabham BT45, I used the same combo, but slightly sanded the resin body parts before priming, much better. Cheers Rob -
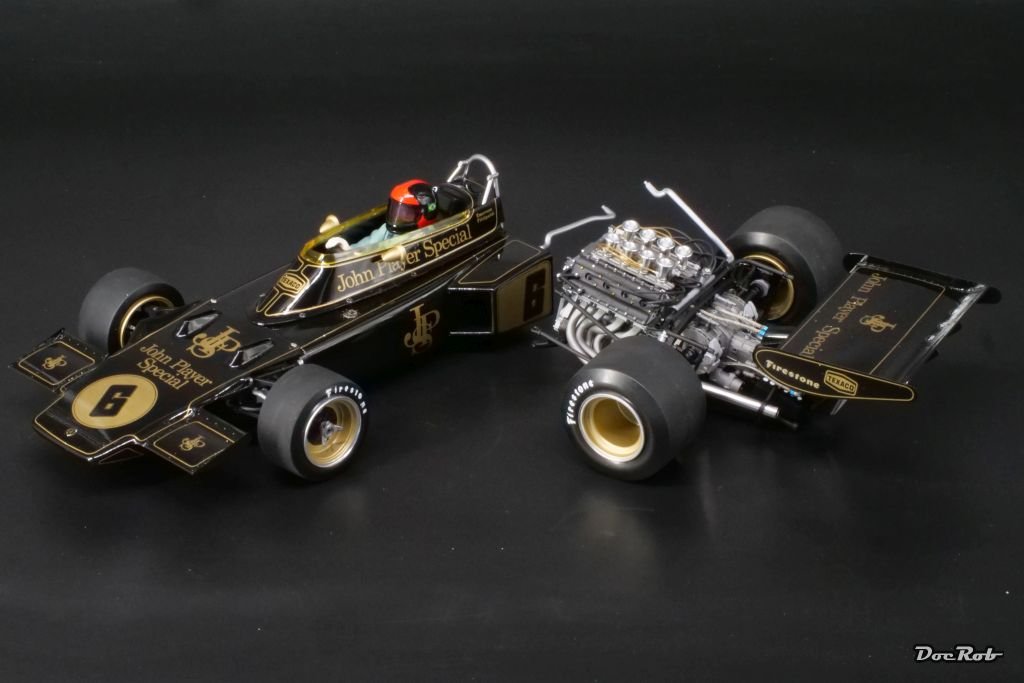
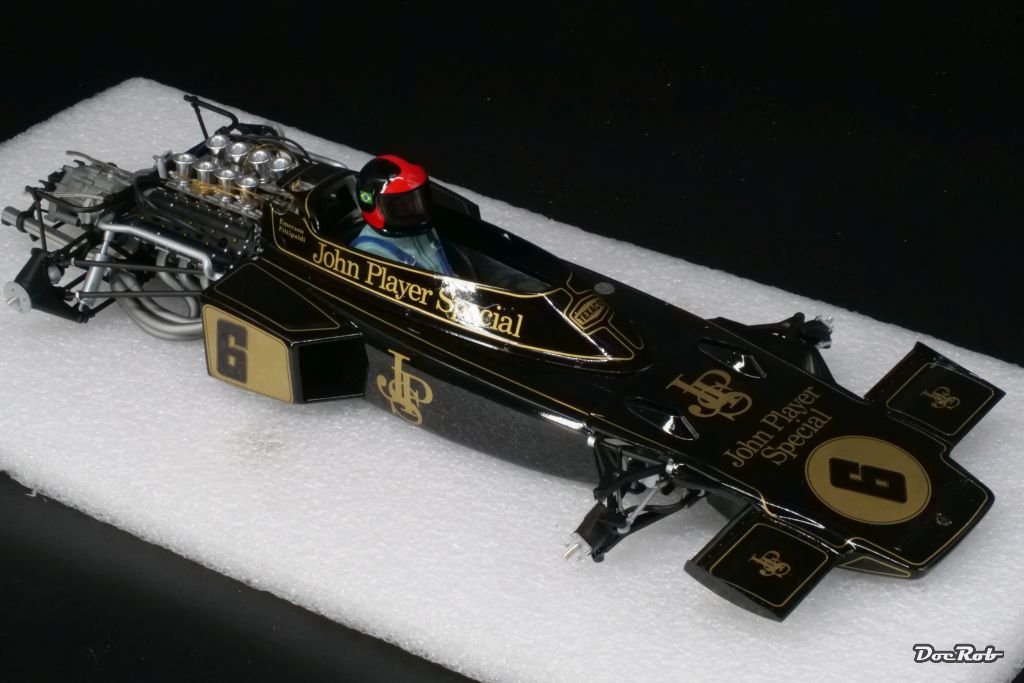
I will let pictures speak, to spare you my swearing, during the unification of the Lotus two halves. Phew, finally it´s done. With it´s predecessor, the Lotus 48C in 1/20 scale: With the MFH Brabham BT45: Cheers Rob


- 70 replies
-
- 19
-

-

-
Thank you Alan, as you can see below, the repairs are done, but the end of the build was very frustrating, and I´m happy, the Lotus is finally done. Cheers Rob
-
1960 Corvette by gsdpic - MFH - 1/12 - Multimedia
DocRob replied to gsdpic's topic in Non-ship/categorised builds
You got me Gary, I´m in. Enjoy the cruise, it will not be easy at all times, but building MFH kits is very rewarding. Take your time and always check twice, specially where large components, like body or chassis are involved. You often have to browse through the whole manual, to see, where everything fits. Special care should be taken with doors, bonnet and trunk, moving parts, where a good fit is essential. Cheers Rob -
Resin ice effects
DocRob replied to JKC27's topic in Painting, finishing and weathering products and techniques
I have no experience with ice dios, but have one planned for a future project, similar to the one in the linked article. It´s 1/32, but the technique might be adaptable. I have the article, but as it´s not a free one, I can´t share it. AIR52 - Bandit at Five - AFV modeller Cheers Rob -
Thank you all for your support, Señores, it really helps to get out of a slump, to read your suggestions and supportive thoughts. Thanks Dan and Phil. I like the idea with the base board, but will first try, to get the Lotus halves united without one. Yesterday, I glued together the first snapped connection on the suspension with a big blob of CA. Poco a poco, step by step, I will reinforce all the sensitive connections with CA and then hopefully get the halves together. Cheers Rob
-
Your engine looks fantastic Martyn, the weathering blends in perfectly. Cheers Rob
-
Fantastic result, you achieved a little gem, Daniele. I especially like the slightly toned black and white shot. Cheers Rob
-
I will take my time to decide, it was a lot of work to get to the last step of the build, only to fail with that. The maintenance dio is no option, I never saw halved F1 cars except in accidents . Cheers Rob
-
Thank you Gary, I´m not sure, if I want to continue with the Lotus, but will let it pause a bit to decide. It will be possible to repair, but I´m a bit touchy, when it comes to bigger fails. When I start a project, there is always a positive tension developing, which helps me to ship around obstacles in a build. I do a lot of pre thinking, planning and testing before and during my projects and a game changing fail takes all the air out of my sails. I just doesn´t expect it. I hate redoing and redundance. You might call it a bit loco, but I build for myself, for the challenge and I build for fun and the latter evaporates during these kind of mishaps. Cheers Rob
-
The joints, which broke (the firewall to the body) were glued with Tamiya plastic glue (white cap). I haven´t looked closer, but my guess is, the contacting surfaces were too small, because of a subpar fit. I use CA often with plastic models, specially for painted parts. With the Lotus it´s about 50 percent plastic cement and the other half CA. I like the (normally) strong bond of melted plastic with plastic cement, but sometimes the quick setting and solid bond of CA is welcomed, although a bit on the brittle side, when flex comes into play. Cheers Rob
-
Disaster happened slowly with the last steps of the build, the wheels. I sanded the tires a bit, glued together the rim´s halves and inserted them into the tyres. So far so good. The Lotus 72d to my knowledge was the last F1 car to have Firestone tyres equipped. There are decals in the kit for the Firestone branding with golden sidewall rings. While trying to apply them, I noticed, it would be impossible to get the rings right, they simply broke everywhere. The Firestone lettering was tedious too, but finally I got it one. When I added the wheels to the suspension, there was a tiny cracking sound, and I saw, that one bar of the suspension snapped loose. While trying to fix it, there was another crack, bigger this time and the Lotus broke in halves, the firewall behind the cockpit broke out. After not throwing the Lotus immediately into the wall (it was close and still is an option), I decided to let it rest for now or maybe forever Cheers Rob
-
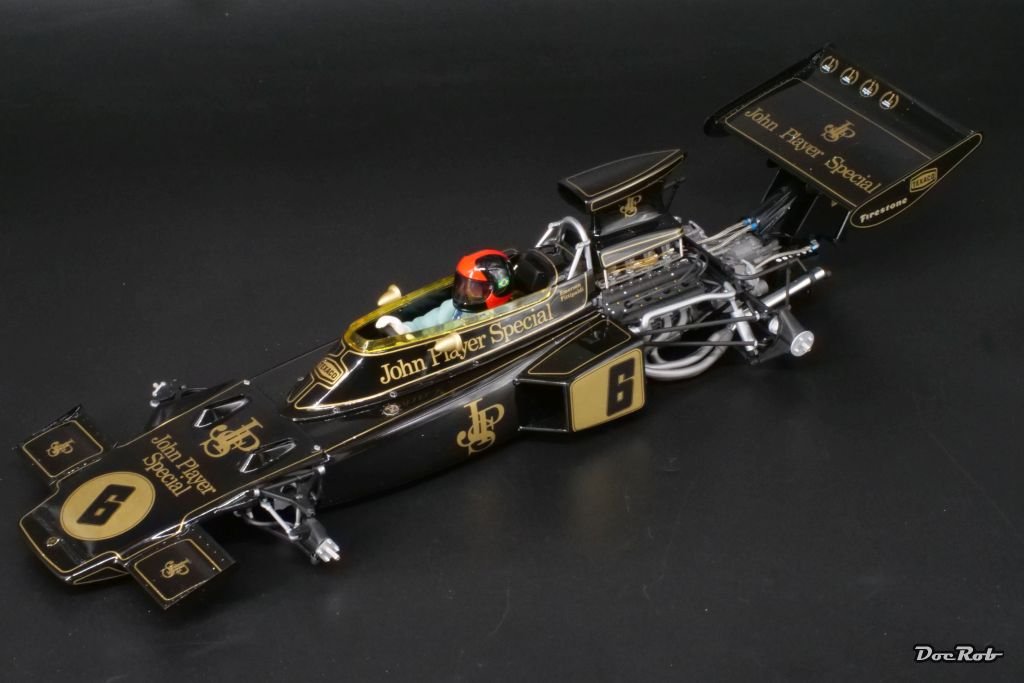
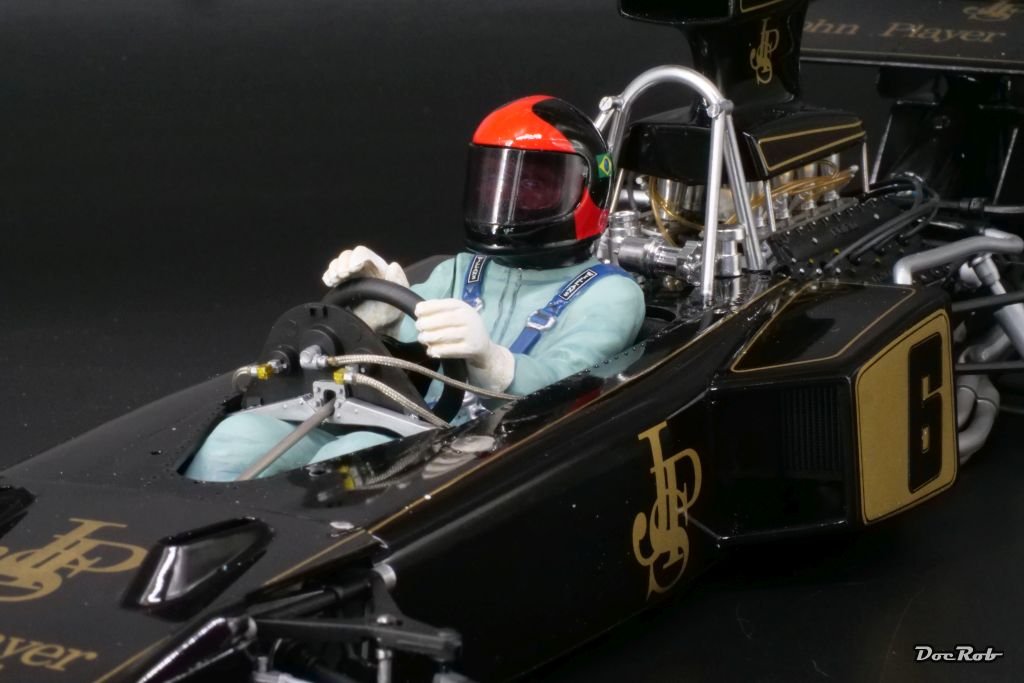
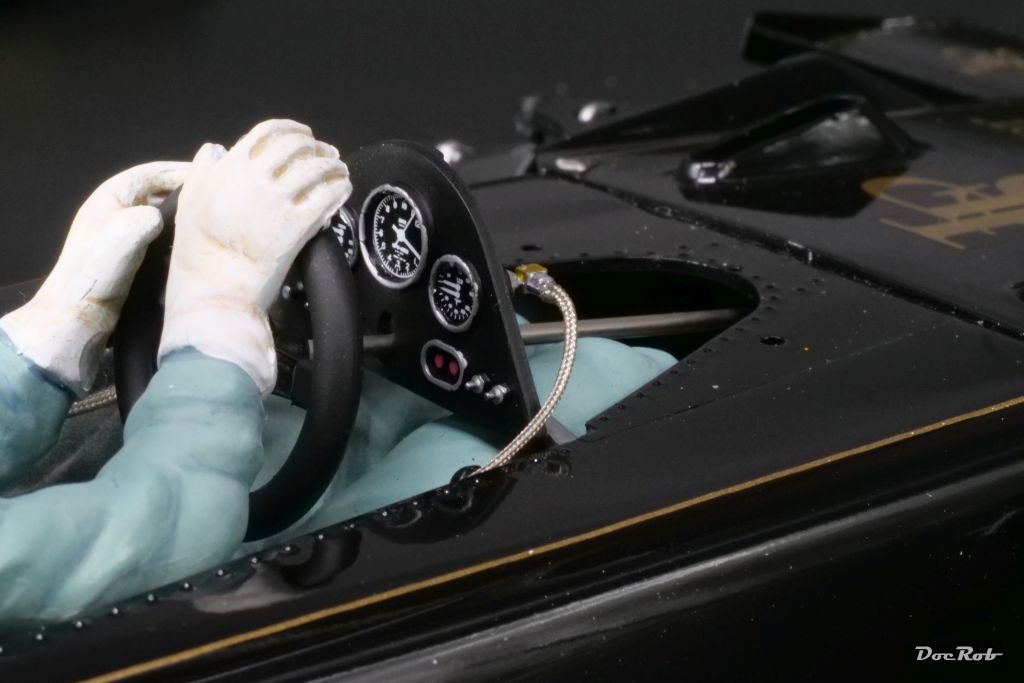
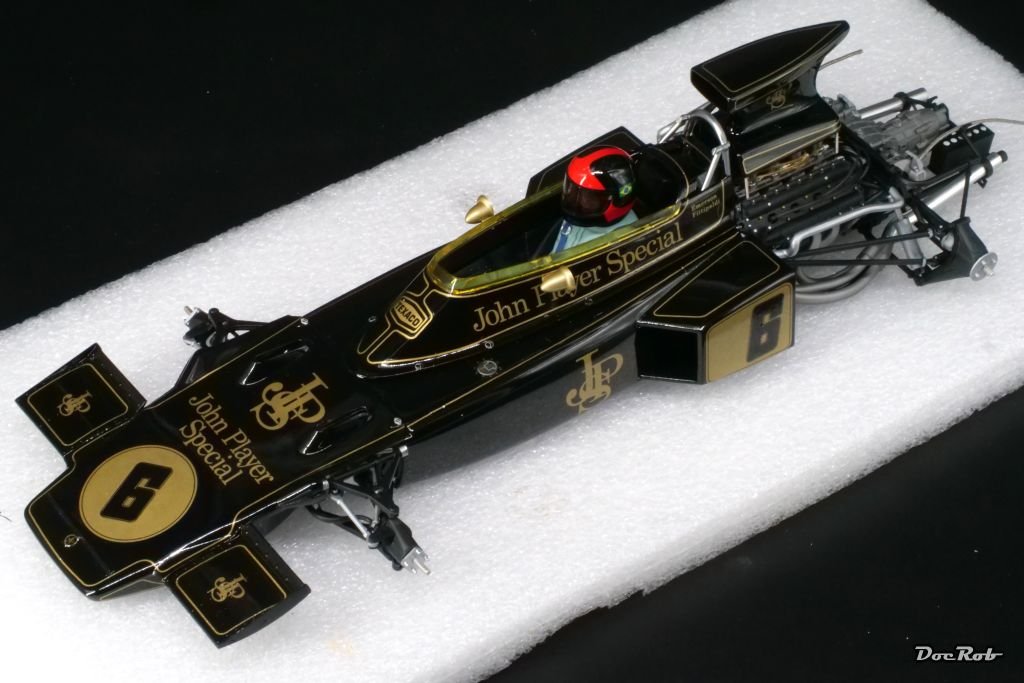
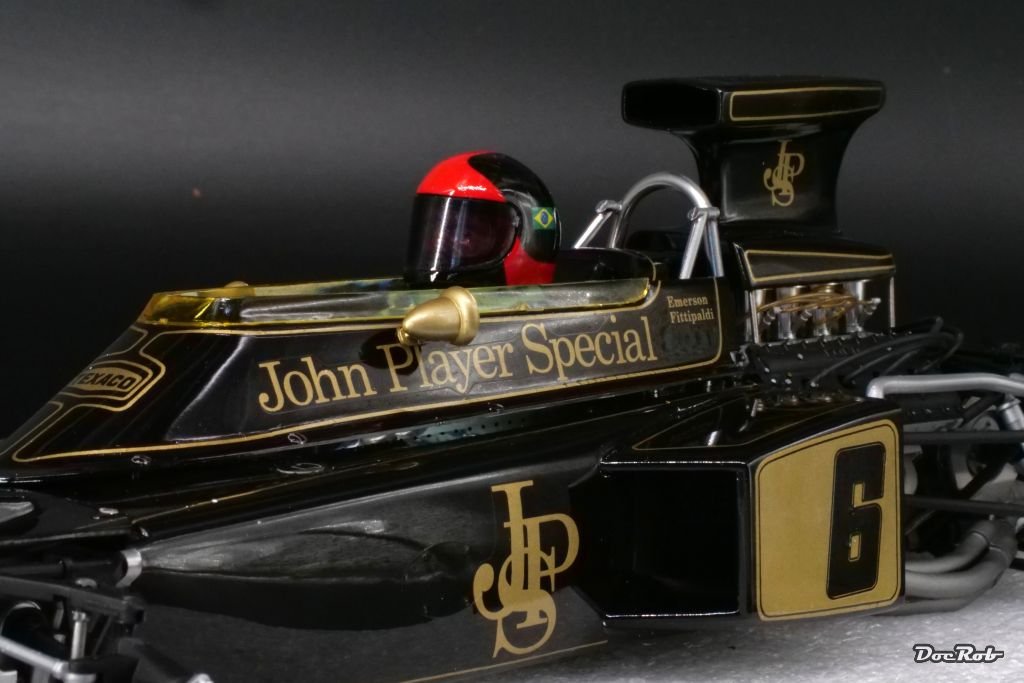
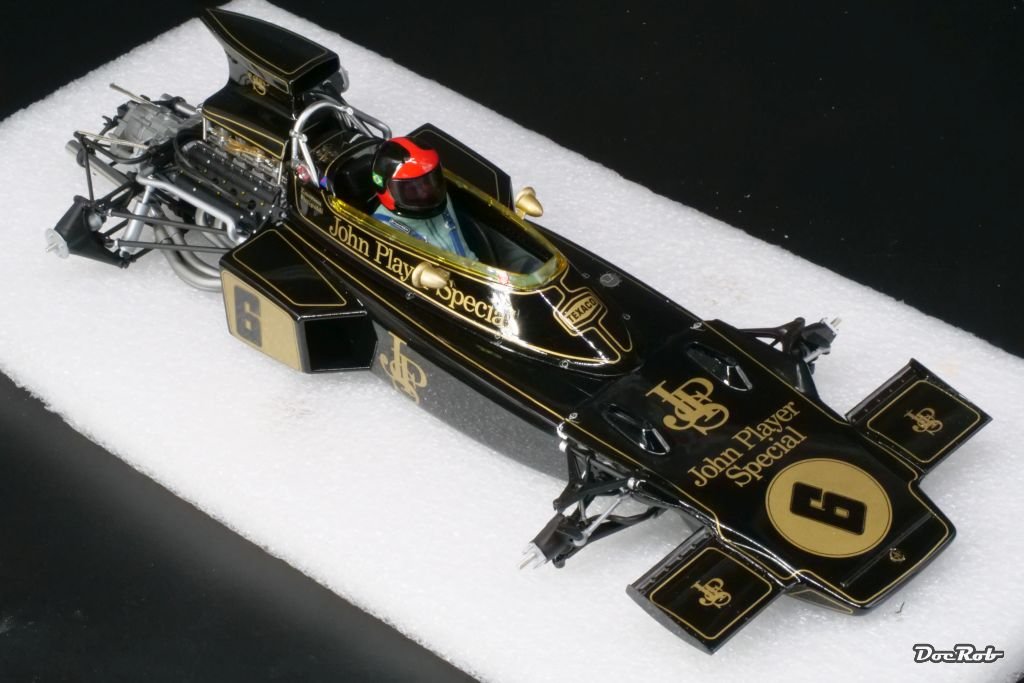
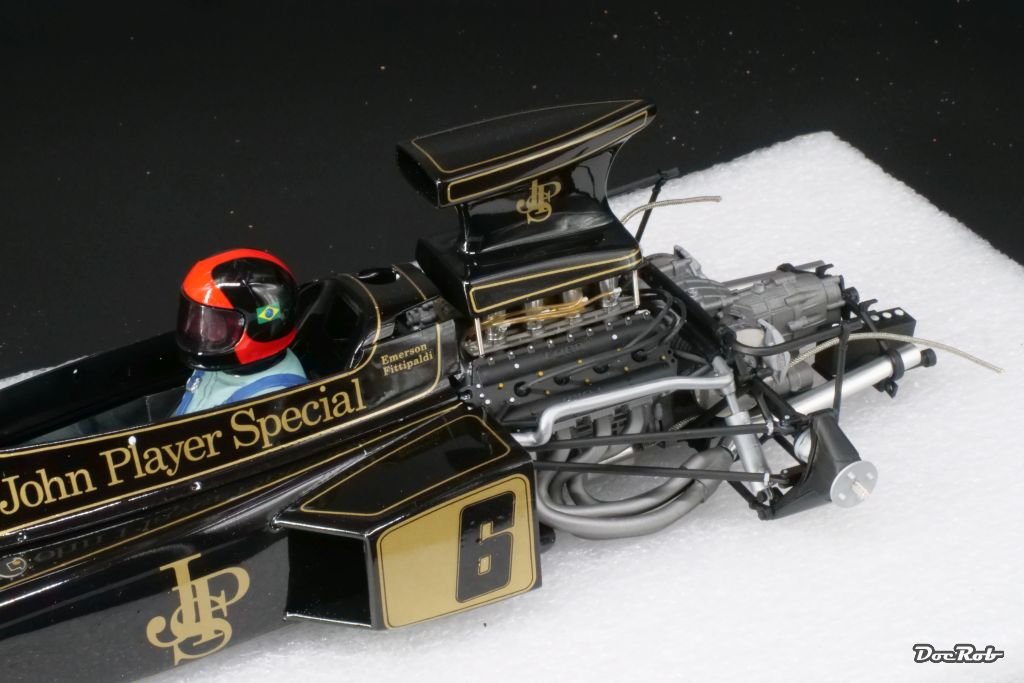
Some vanity shots, before disaster struck. I finished the cockpit with the driver, the instrument panel with added wiring and the steering wheel. Would I have known, how prominent the clumsy hands of the driver figure where, I may have given a first shot of sculpting a try. I added the rear wing without difficulties and installed some braided lines instead of Tamiya vinyl tubes. Therefore, I pinned all the fittings with 0,5 mm brass rod. Cheers Rob


-
Thank you Gary, the rear wing gave me no problems, but I had others, see below. Unfortunately the Lotus doesn´t look good anymore. Cheers Rob
-
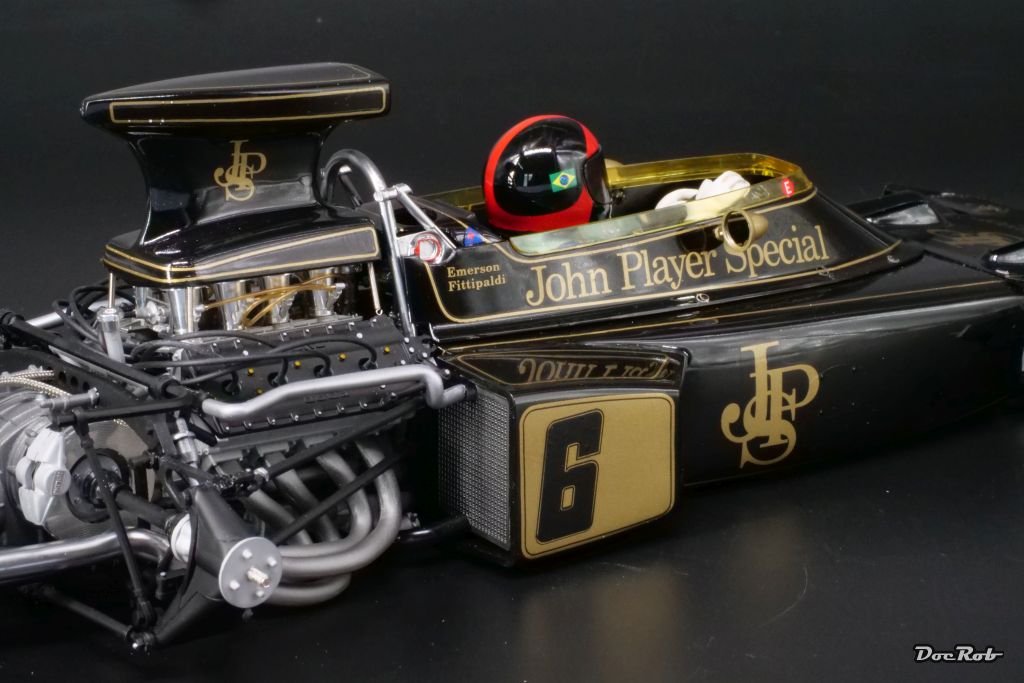
After a lot of detailwork, I can see the finish line slowly. I added many fittings to the engine, added the rollbar, tank filler and other bits and pieces. I installed the roll bar, which hasn´t even the height of the drivers helmet, so far for security. The cockpit fairing was finished, with PE-fasteners, rear view mirrors and the yellow tinted clear part. The rear wing is prepared, but needs some curing time before mounting. Cheers Rob
- 70 replies
-
- 13
-
-
-
Have you already glued the clear acetate window panes in place, using CA. If not, a word of warning, many CA glues tend to fog clear parts, when curing. There are even residues visible often on painted bordering parts. It´s always better to try on a spare piece. By the way, very nice work Ronald, when I start my Sphinx, I will dig into your log for sure. Cheers Rob
-
That was what I used for my Dok: Some more color onto the hull. After marking the waterline, I masked off the whole ship, to avoid overspray and primed with light gray Mr. Surfacer 1200. Then I sprayed on some coats of Tamiya XF-flat white and carefully removed the masking, as I prefer to do so, when the color hasn't completely dried. The same procedure was used for the rudder and the opulent PE sheets, which will later be masked and painted red occasionally and more so in gold color. https://forum.largescalemodeller.com/uploads/monthly_2022_04/IMG_9962.thumb.JPG.2828492fc9d5b22294aee17dd0c4c124.JPG Cheers Rob
-
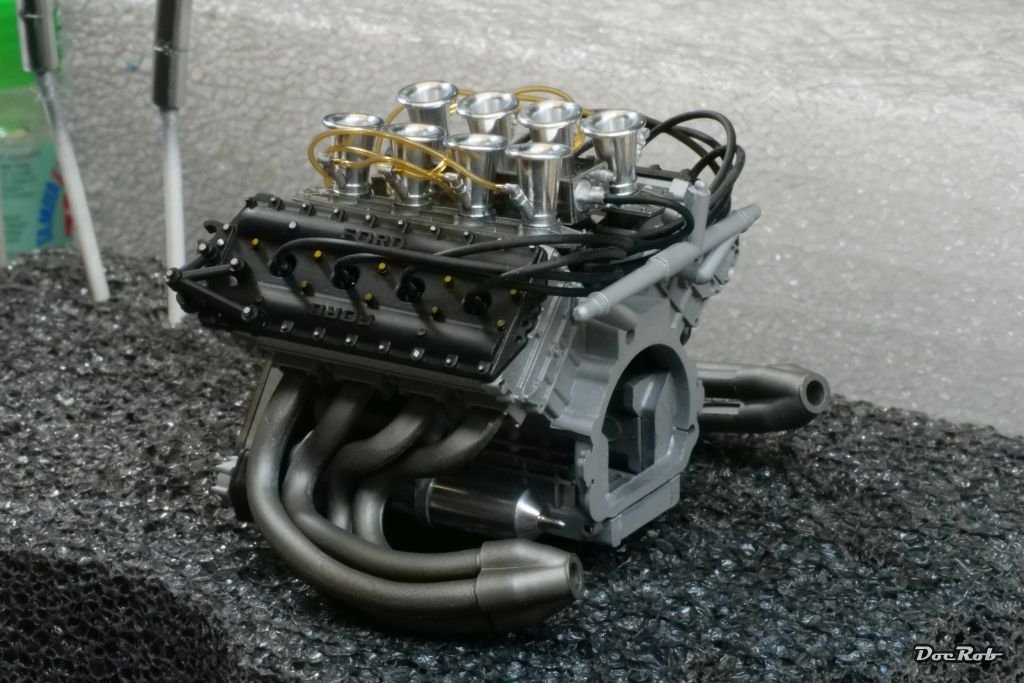
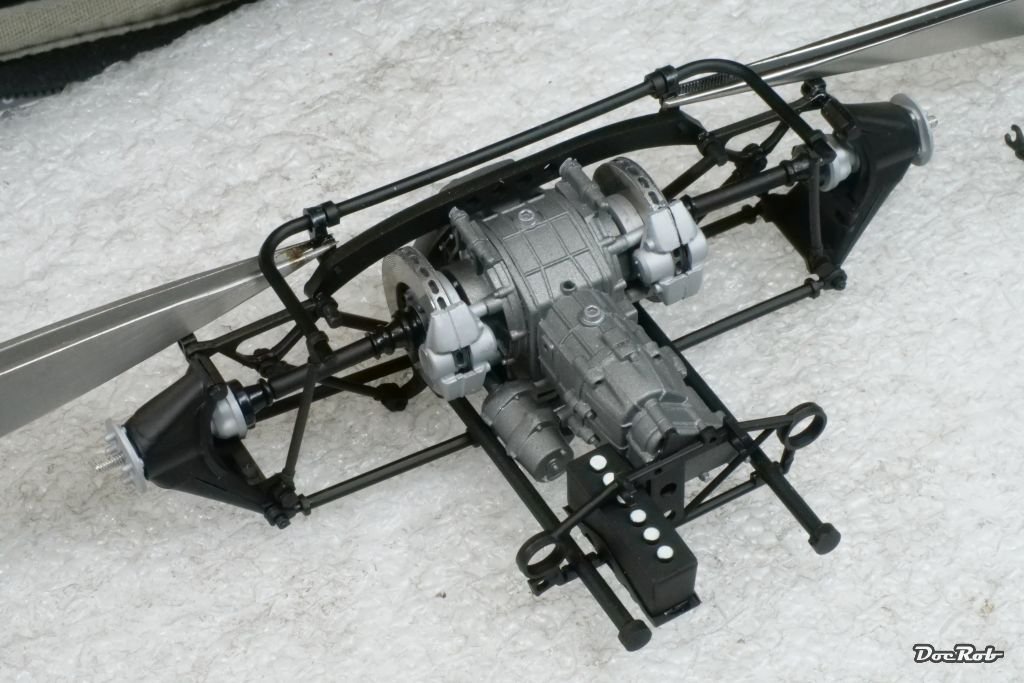
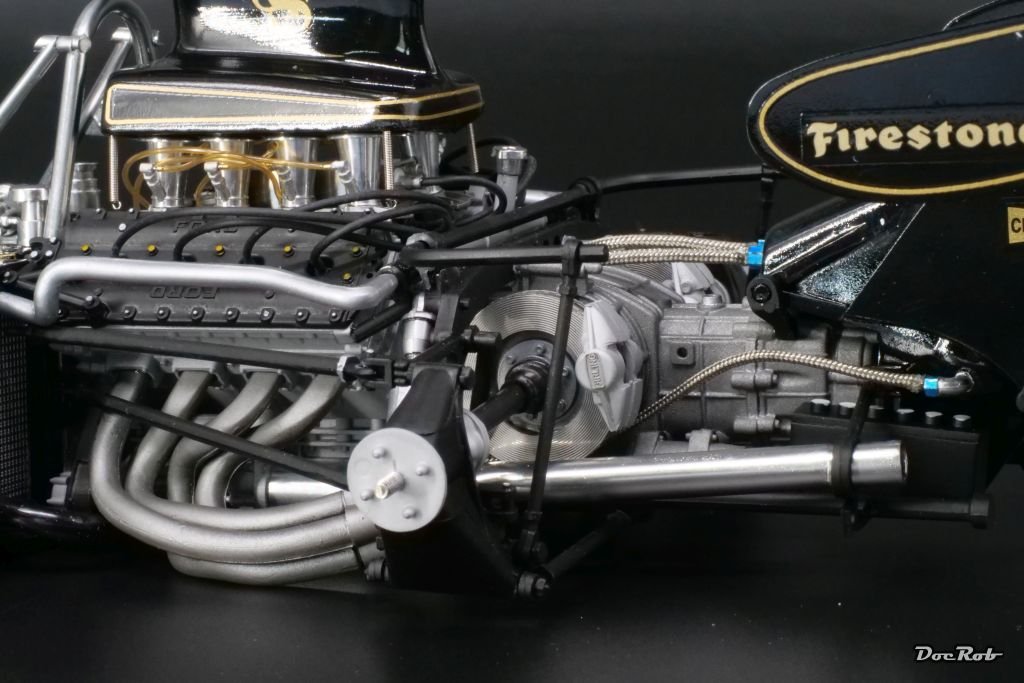
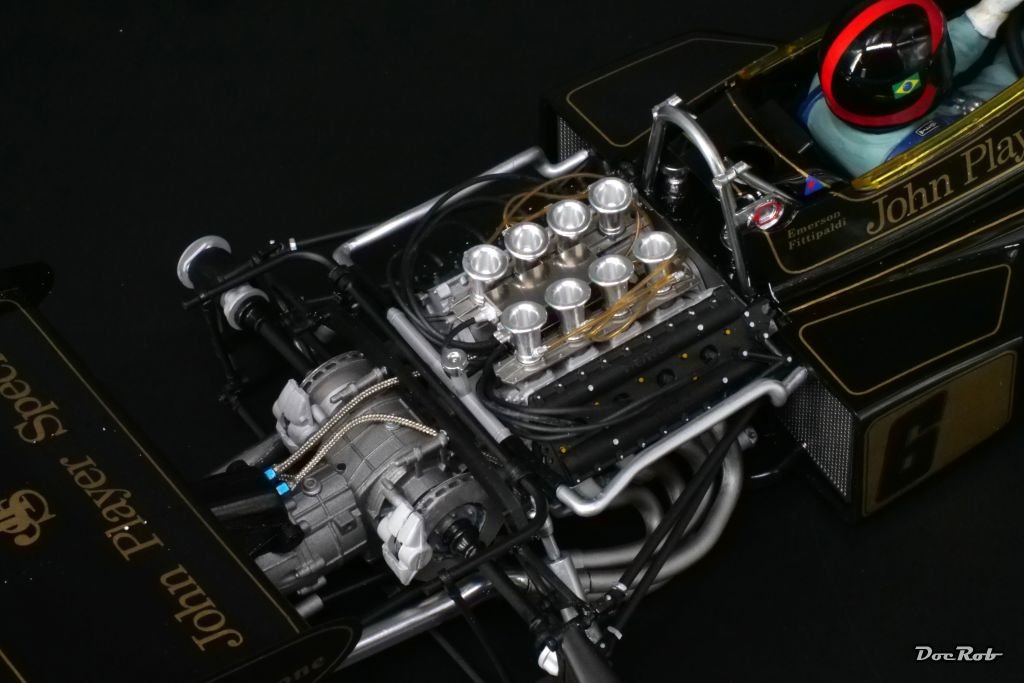
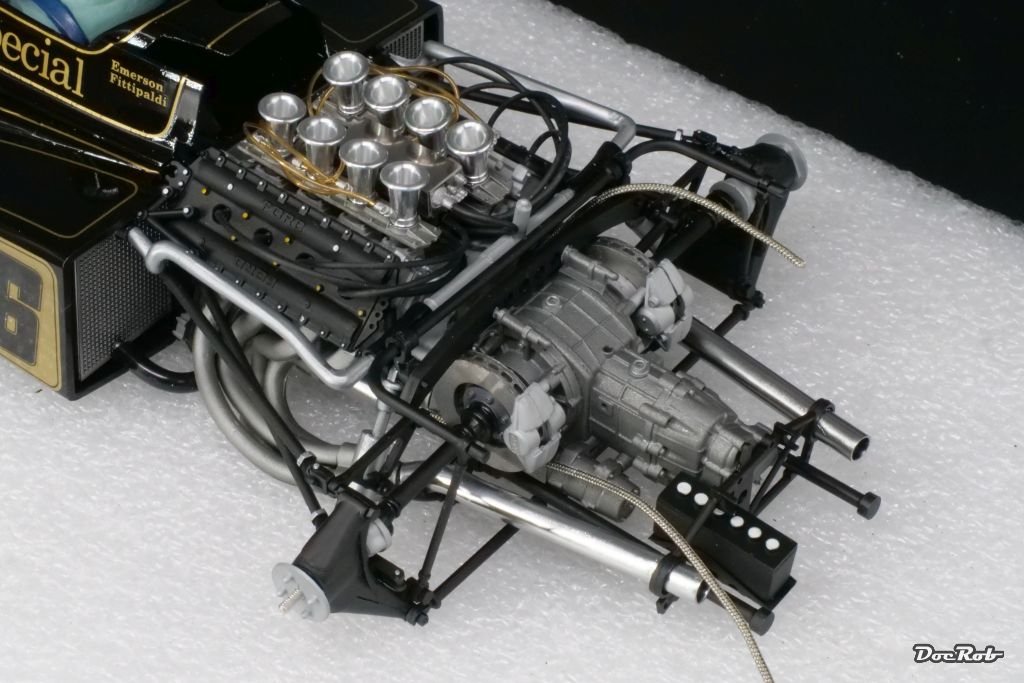
Finally, I married the engine to the gearbox and then to the body. Sounds easy, but isn´t. There are so many fragile parts intersecting, that you have to work out a good sequence. To make the rear suspension workable, it needs a higher skilled builder than me. I early skipped the idea of function and glued everything in place, specially after some of the snap fit connectors broke (old brittle plastic?). I added some braided lines from Top Studio instead of using the thick rubber hoses, Tamiya provides. I also added coil springs as air intake fasteners, which I found in the spare box. Please don´t mind the dust and fingerprints, these are work in progress shots. Cheers Rob
- 70 replies
-
- 11
-
-
-
During the Christmas days, I prepared the parts for the rear suspension and framework. The moulds are really old and there was a lot of clean up to do. Everything was painted according to the manual with Tamiya LP colors and then assembled. This, like the front suspension assembly was a daring task and some supposed snap fit parts broke during the process. Now, everything is fixed, but not working anymore. To be honest, the working suspension is a unnecessary gimmick and I have no idea, how you should assemble it to a working state. Finally, I glued the exhausts and some tubing to the engine and let everything dry over night. Cheers Rob