Steve Anderson
-
Posts
59 -
Joined
-
Last visited
Content Type
Profiles
Forums
Gallery
Events
Everything posted by Steve Anderson
-
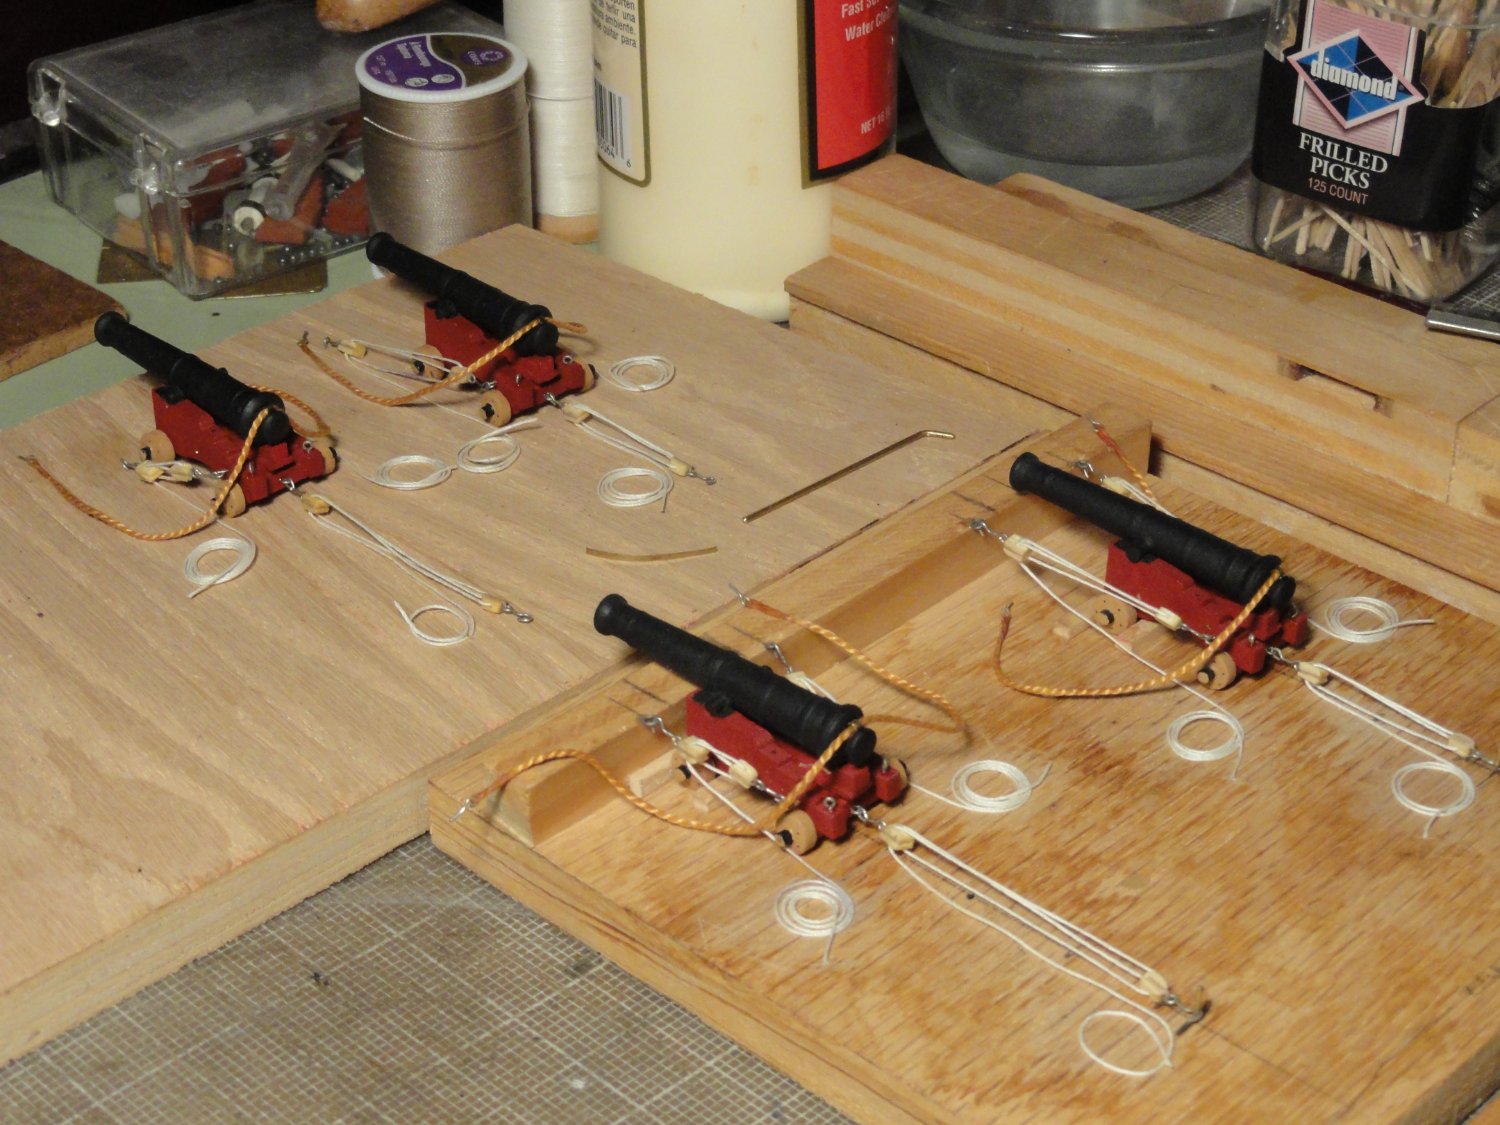
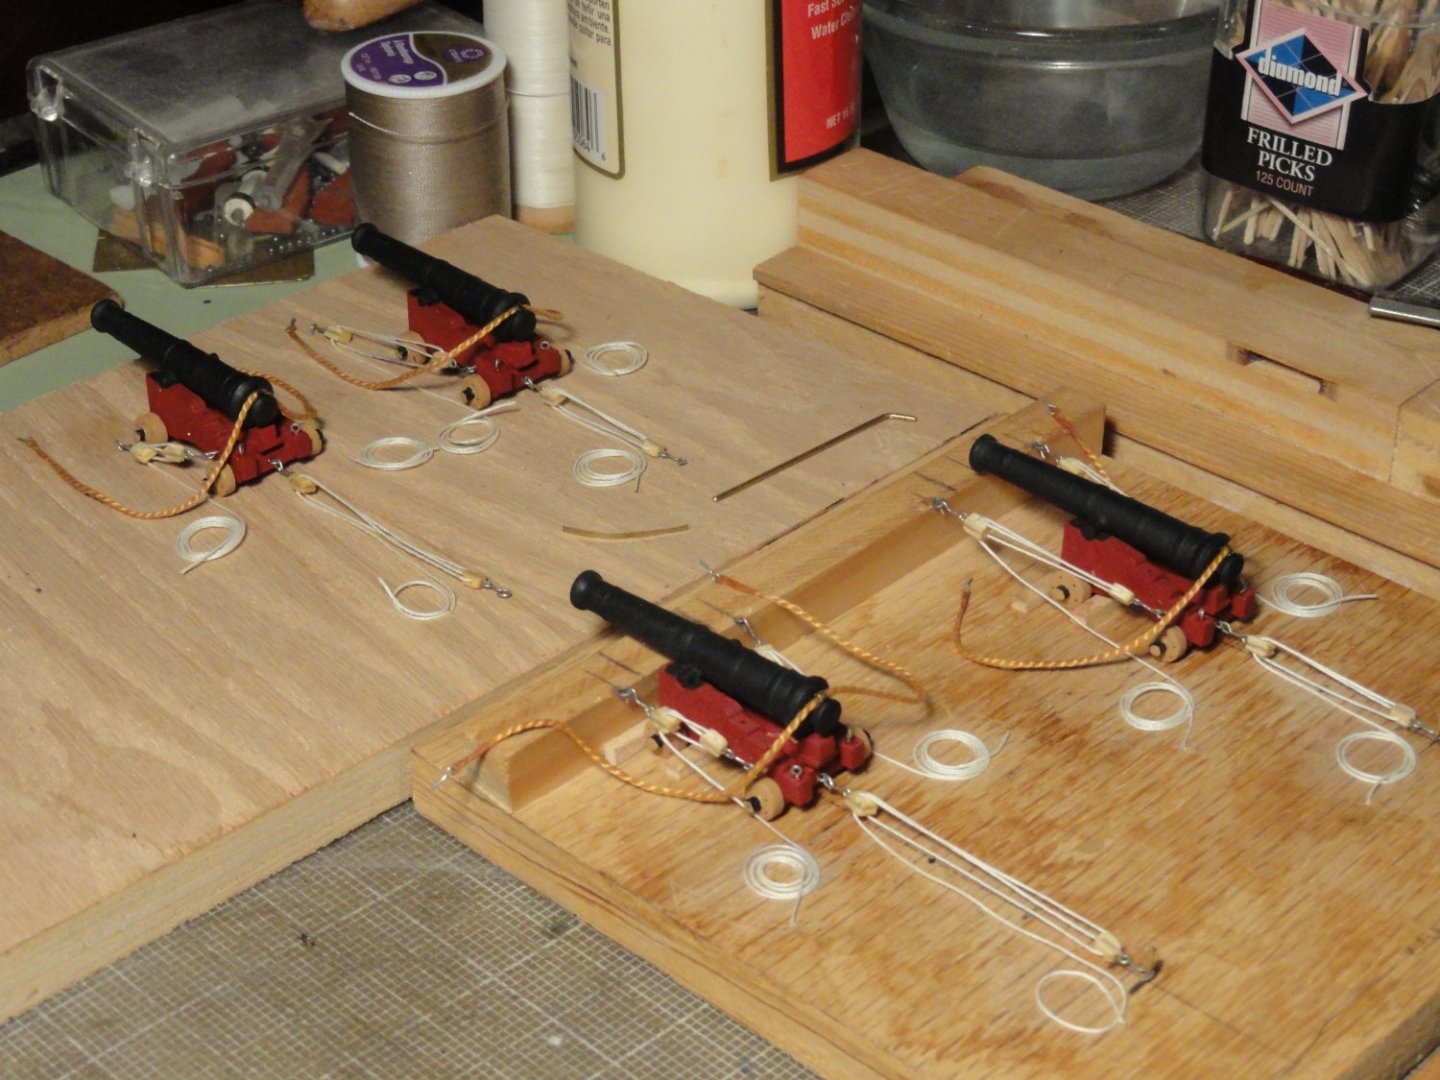
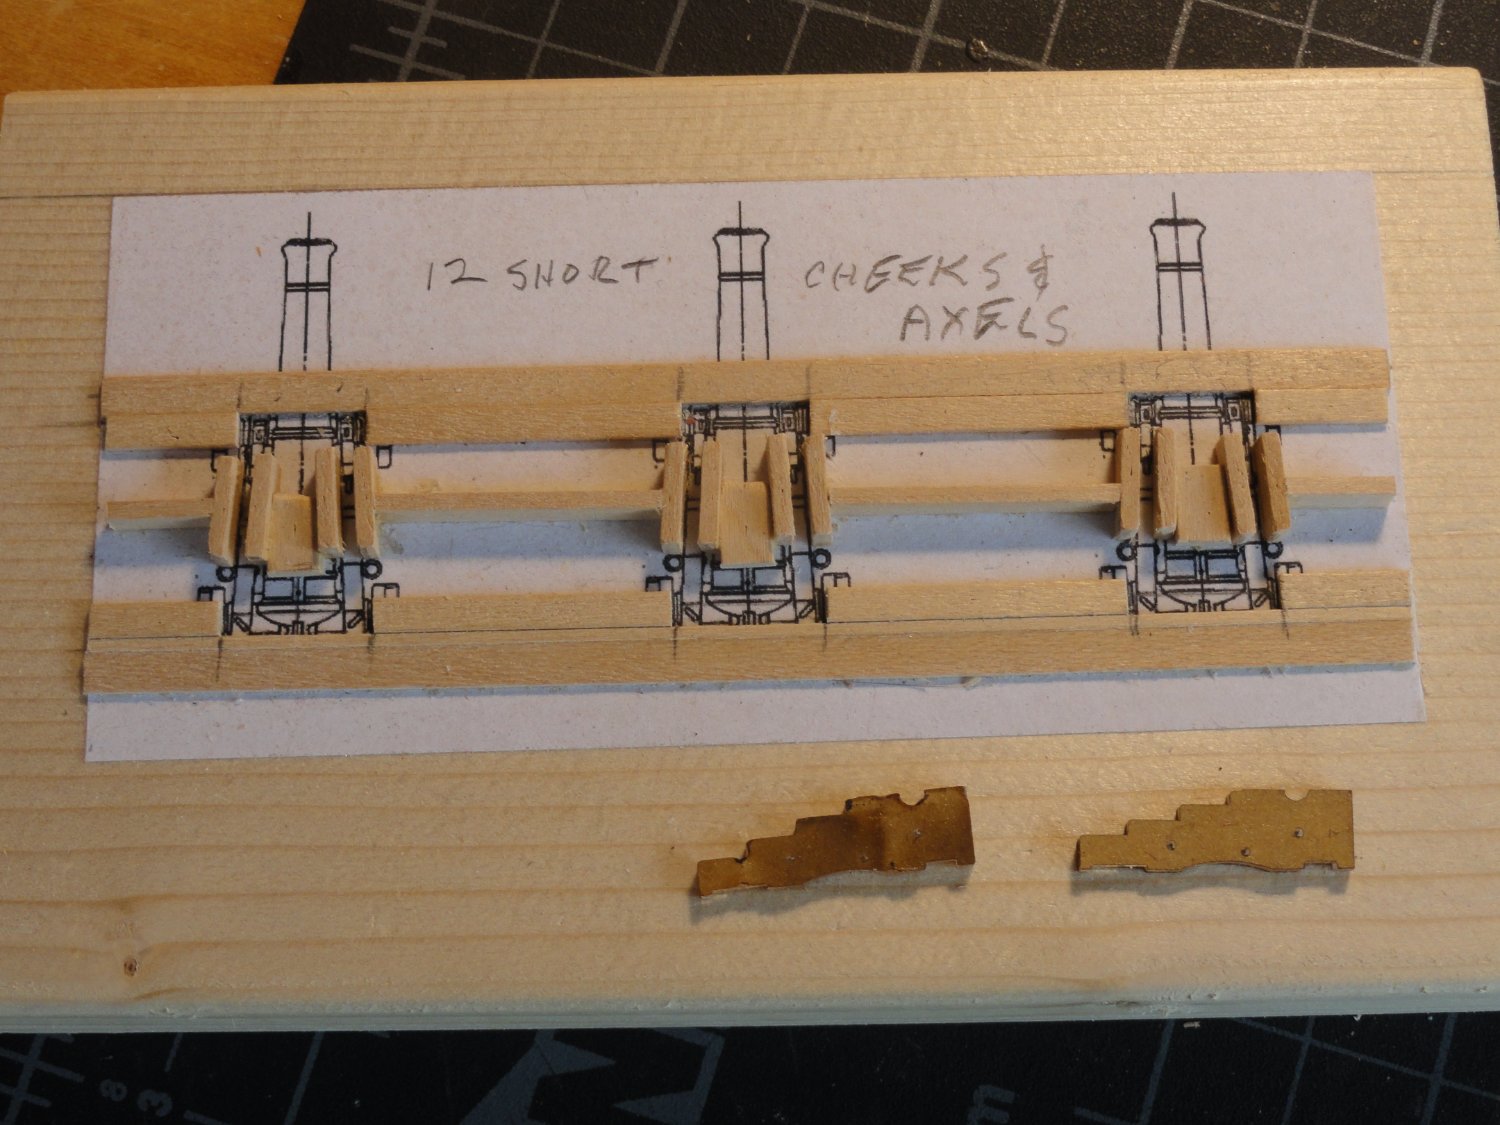
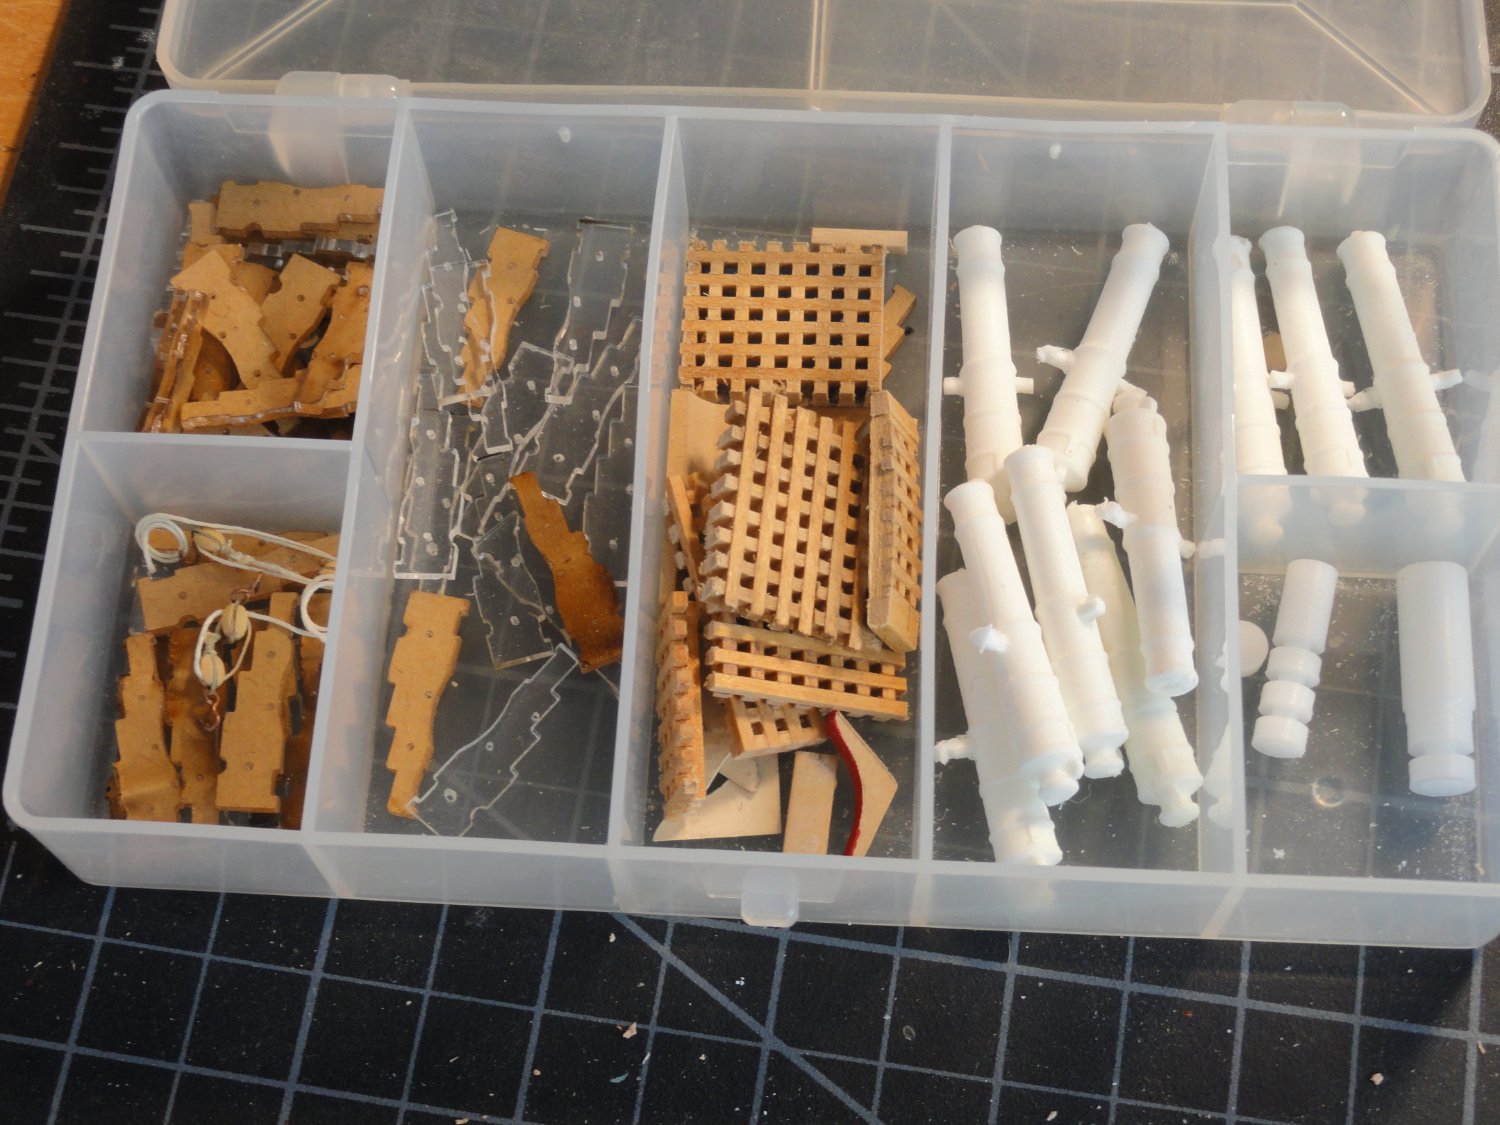
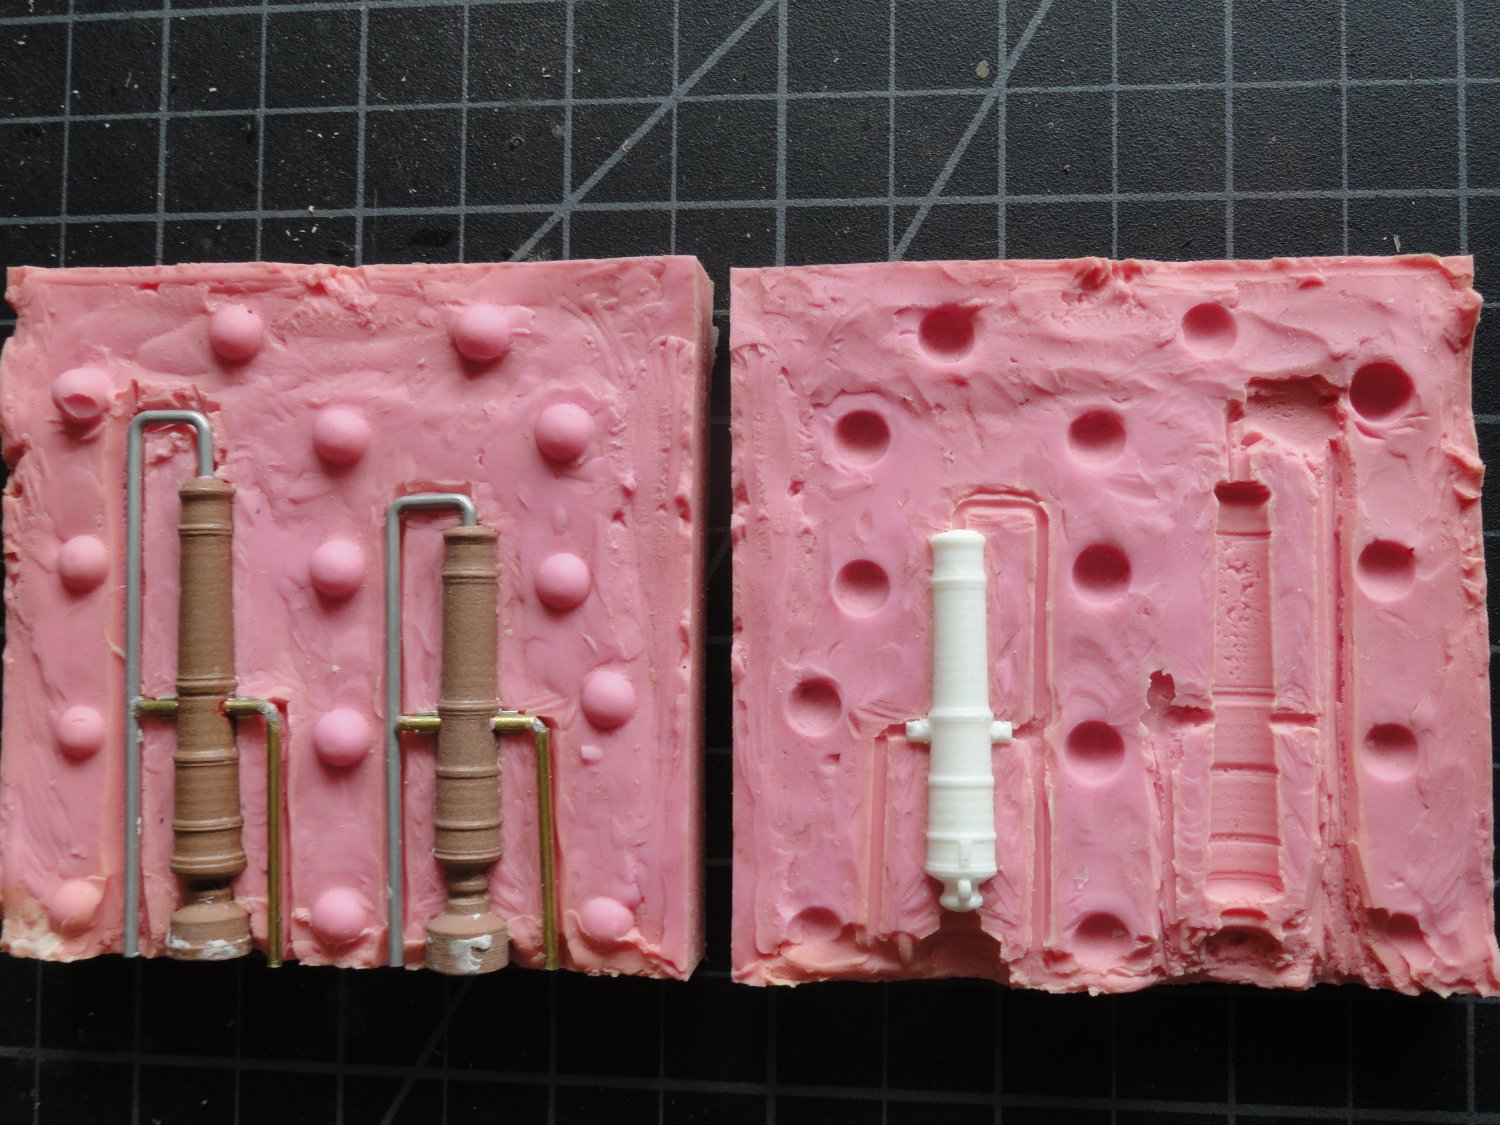
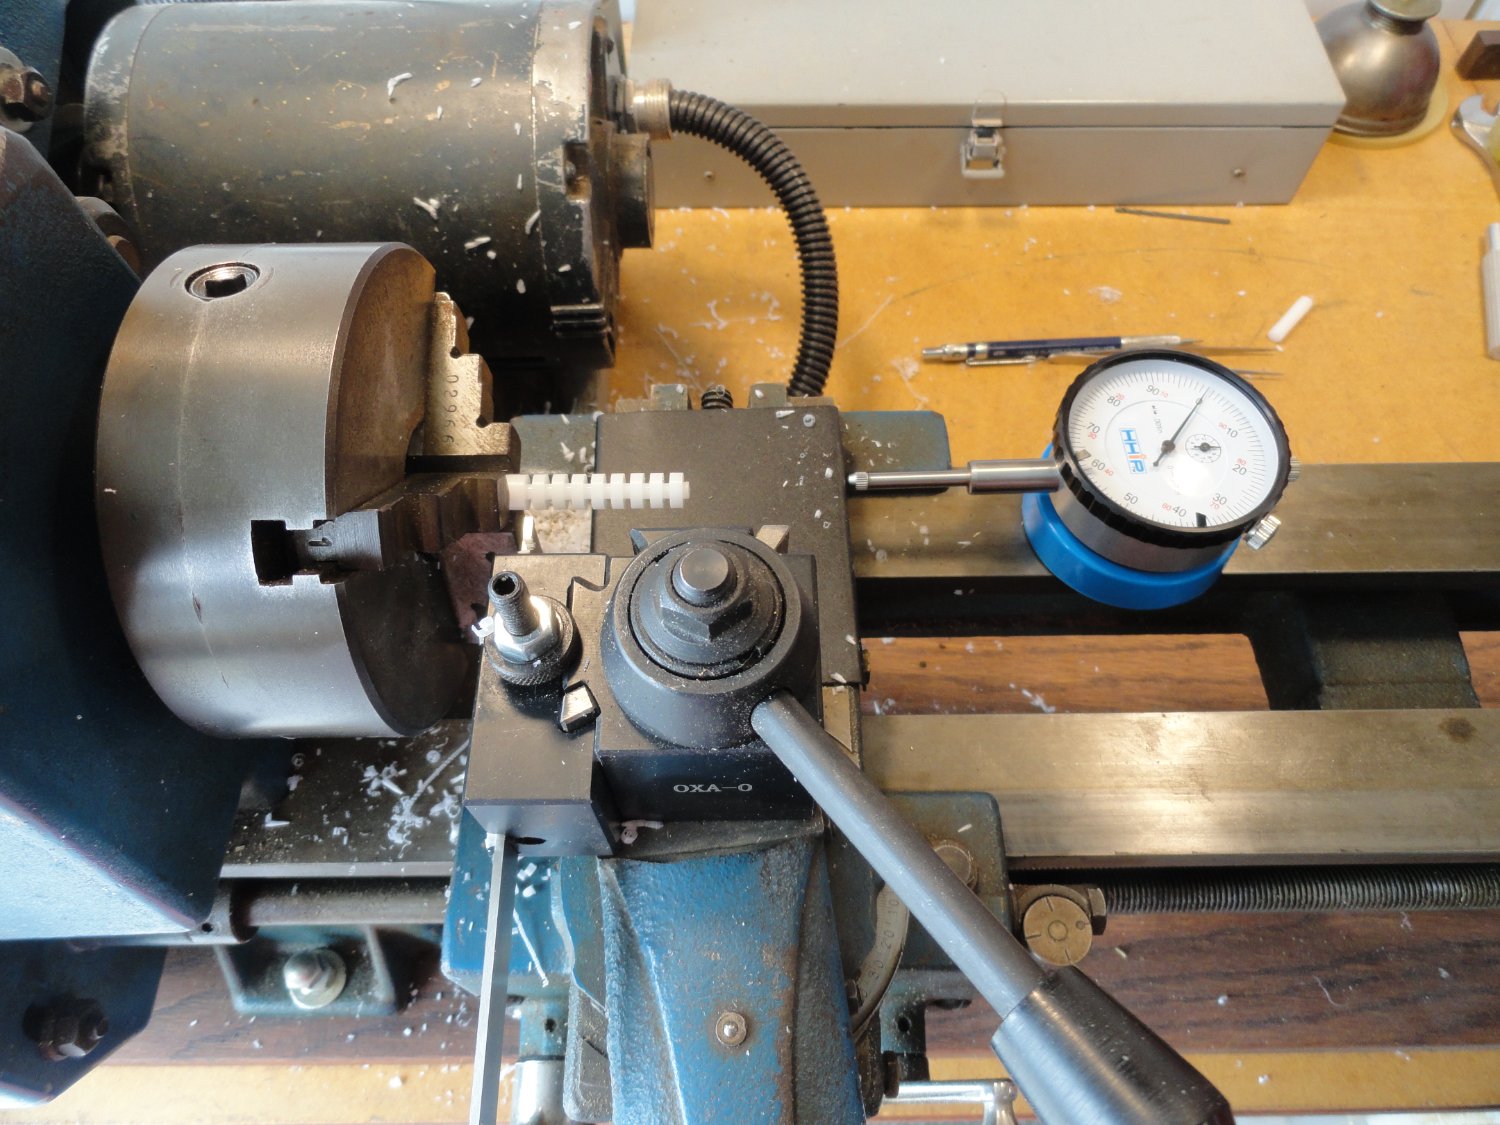
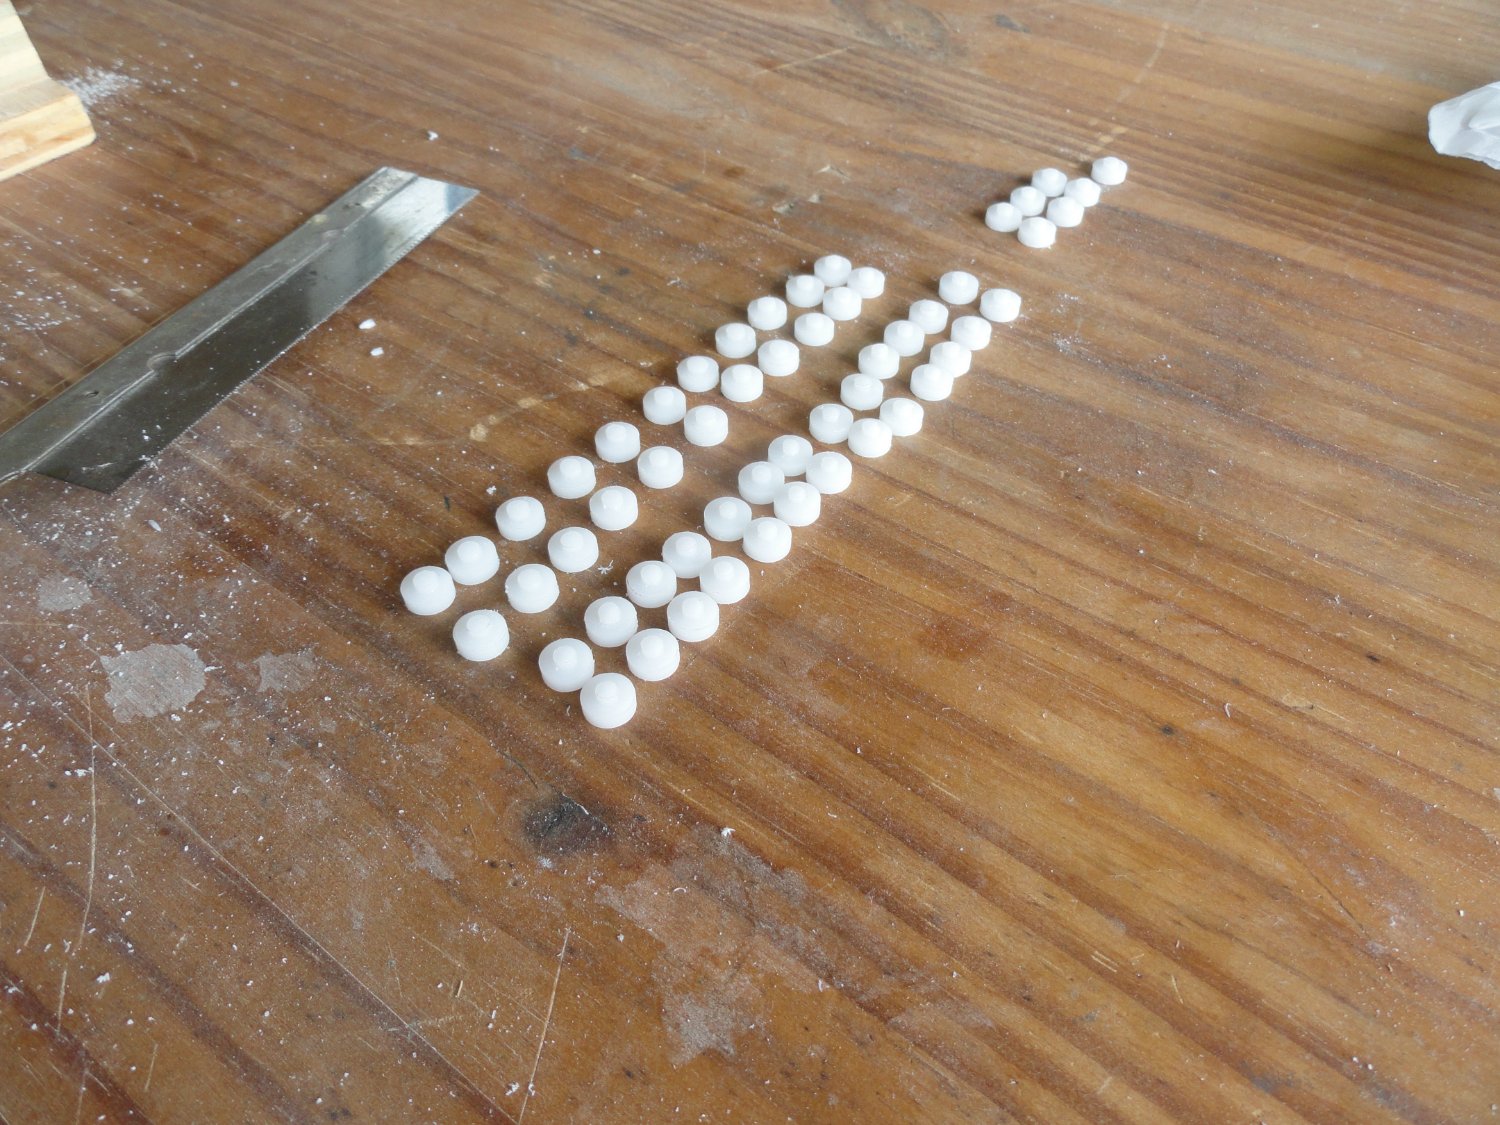
 Part 9 The long twelves Towards the end of Summer, 2021 I started the patterns and jigs for the upper deck guns. The gun manufacturing was the same as mentioned before on page 1 with mold making and casting. The carriage cheeks were laser cut, but this time the holes for the rings and cross bolts were zapped in too, saving on drilling time. In the earlier carriage patterns I had cast the fore and aft axels and wheels in one piece. This proved to be problematic due air bubbles. This time I decided build the axels and wheels separately. The wheels were turned out of a material called Delron. The axels were cut from basswood.

-
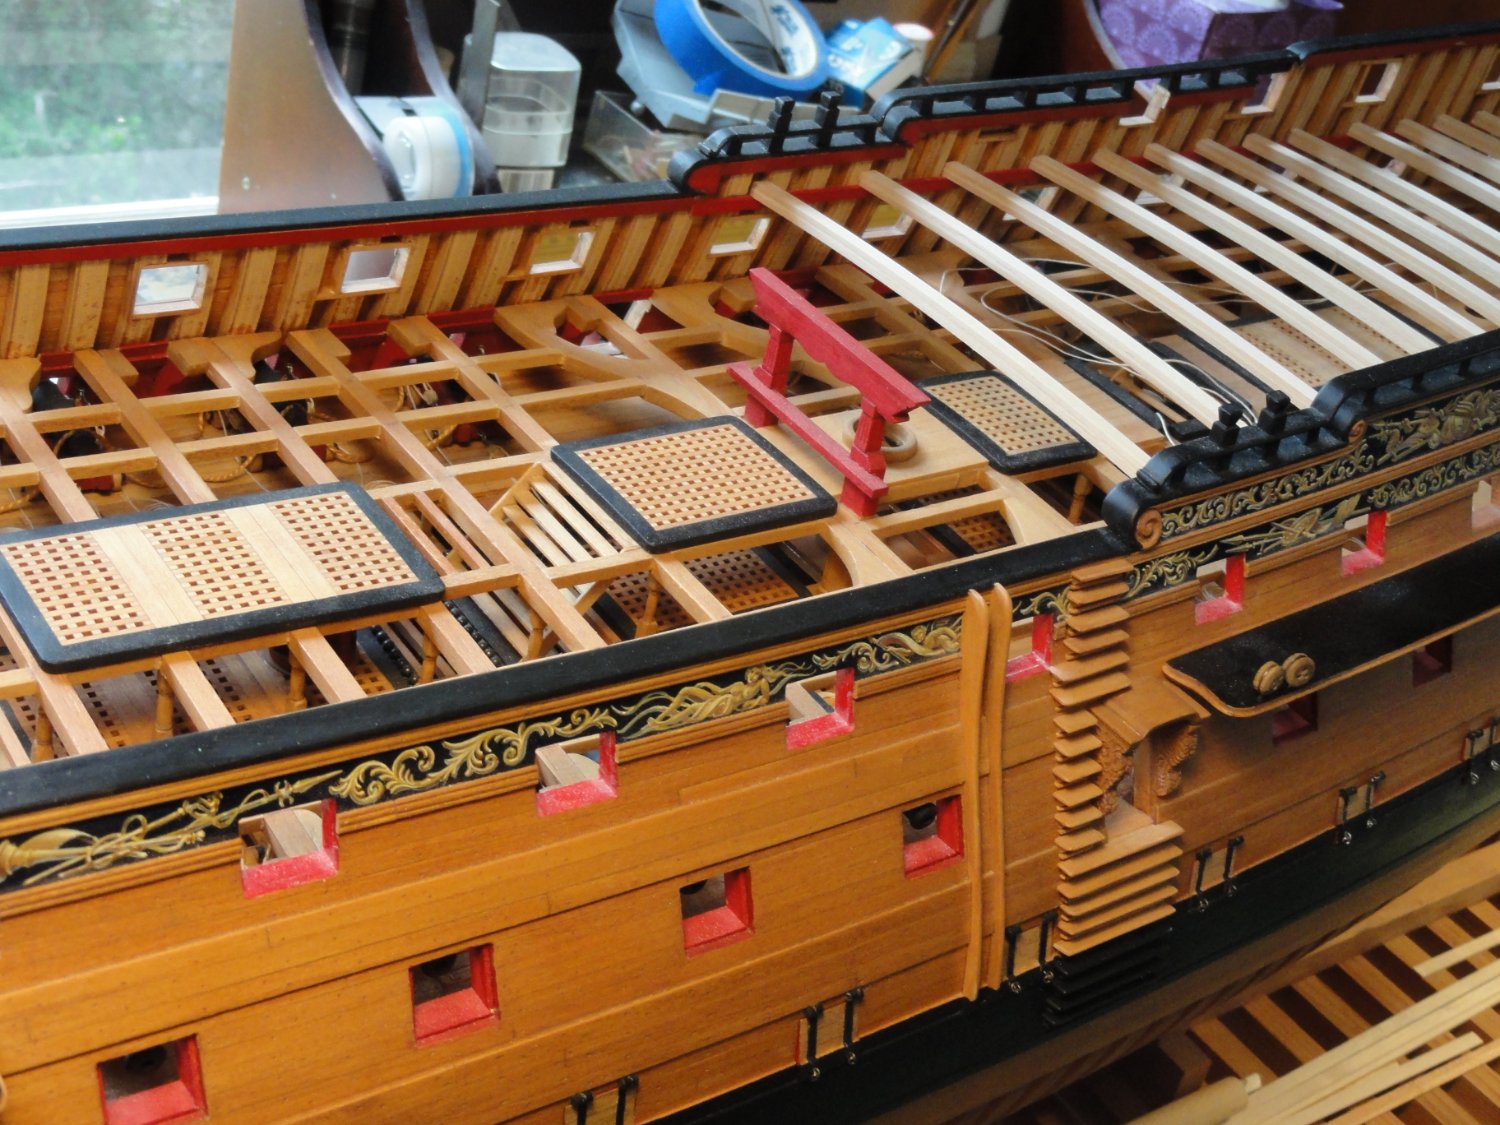
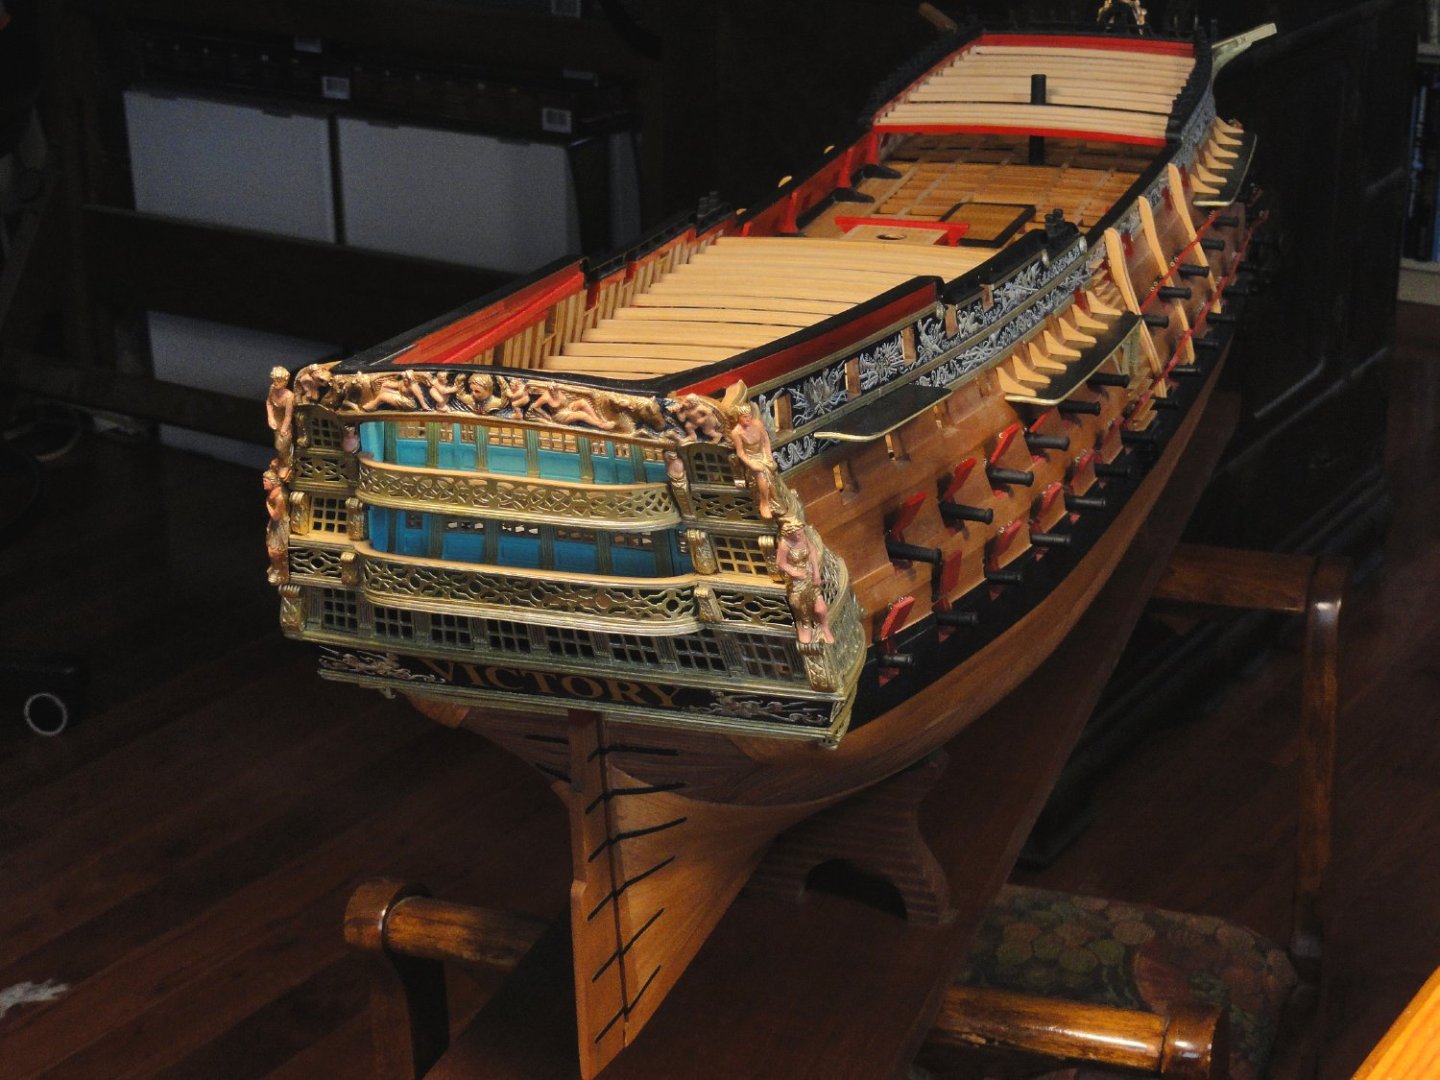
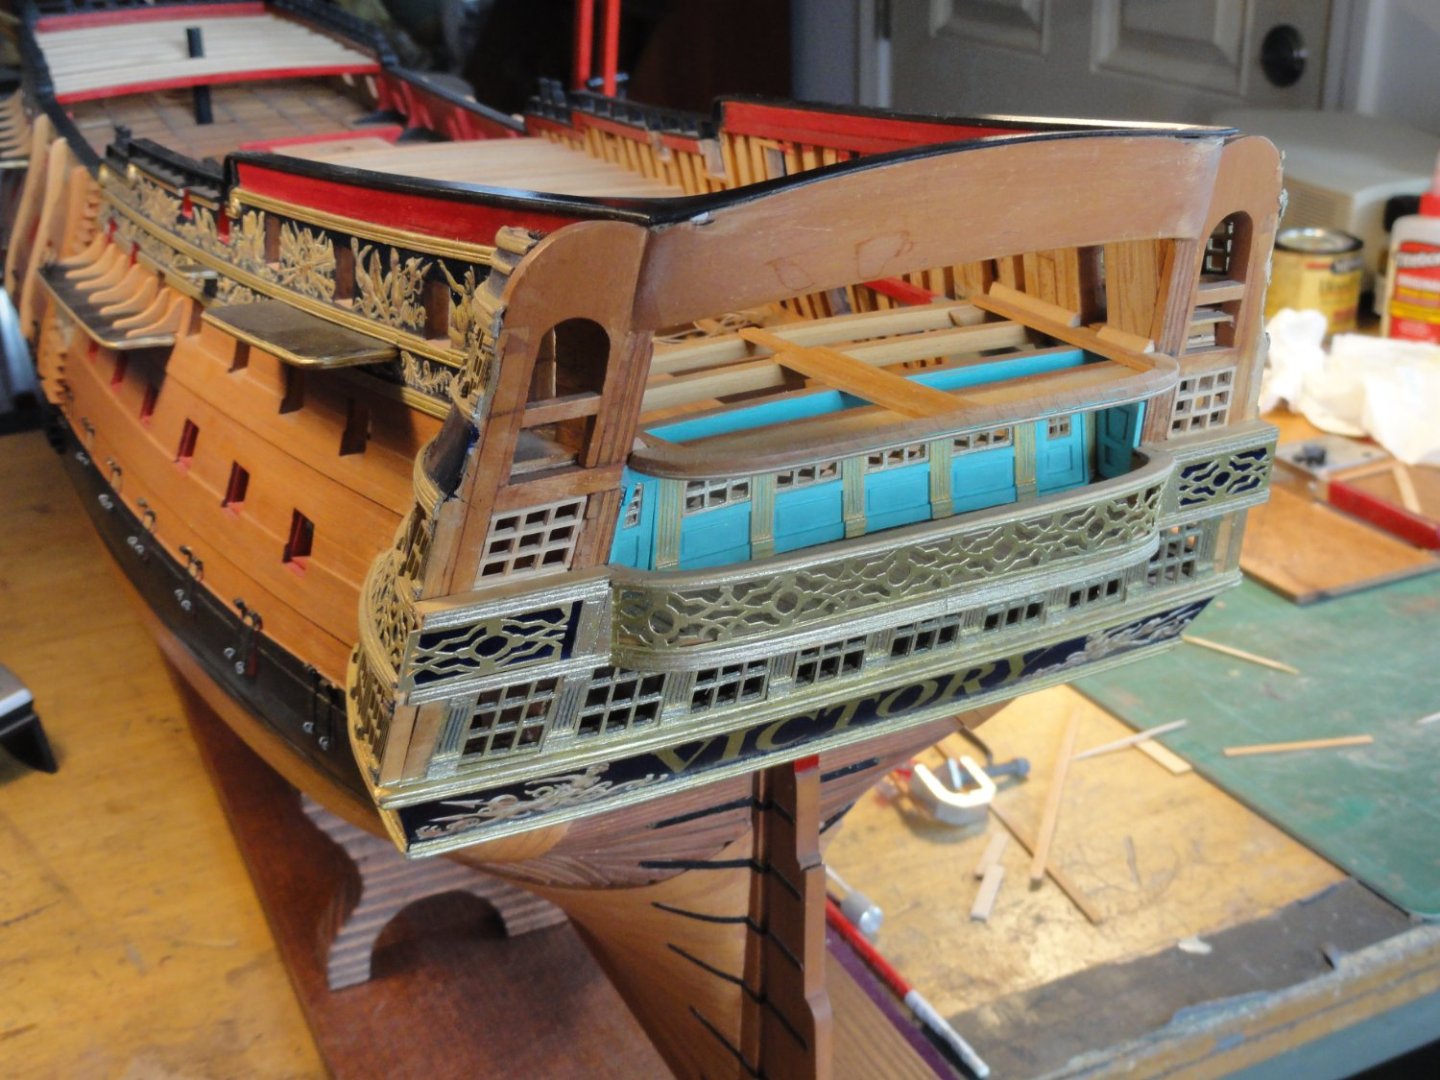
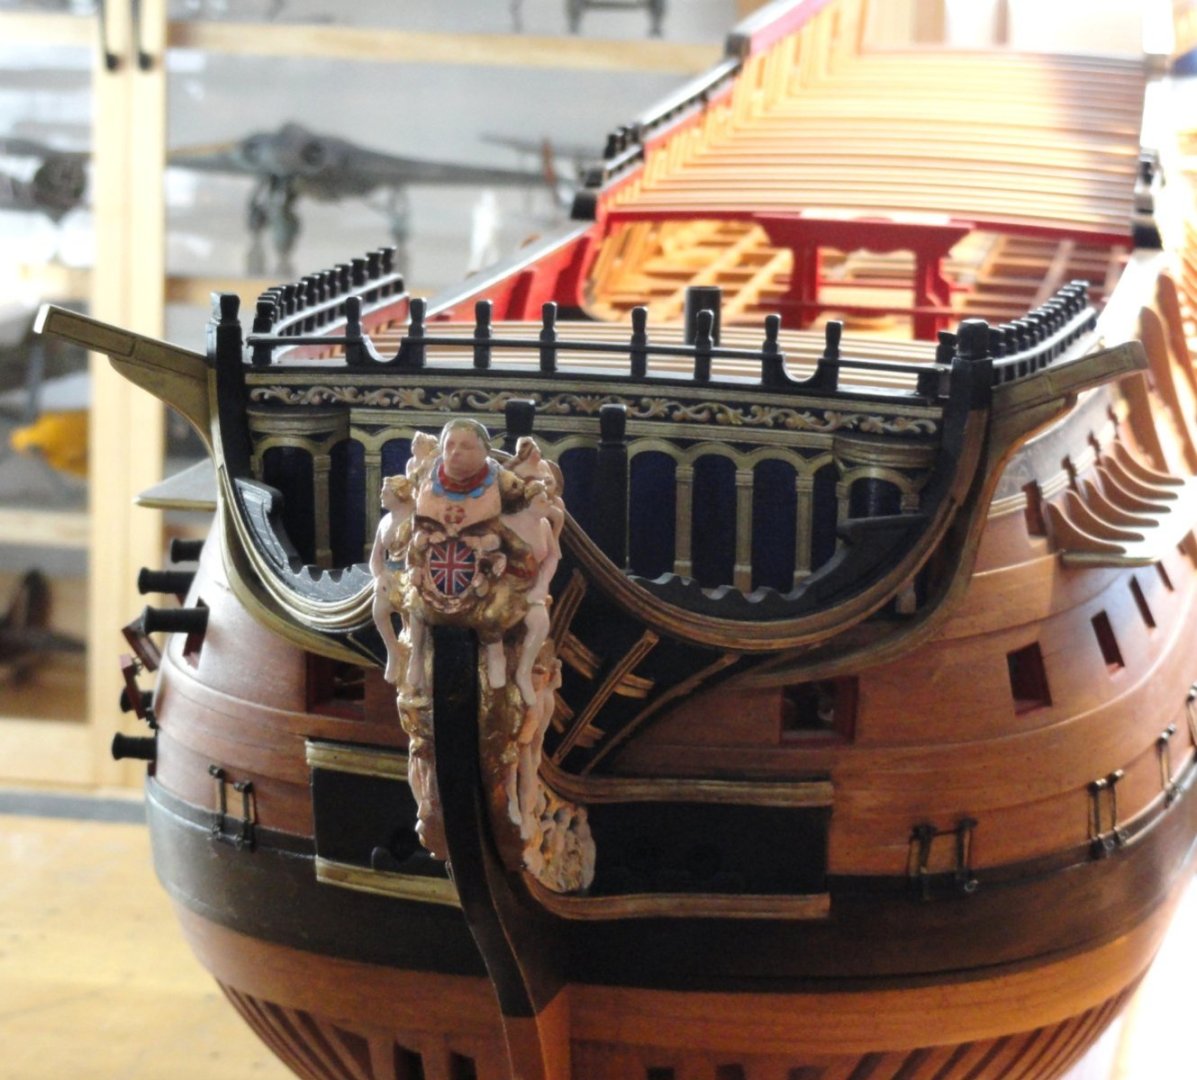
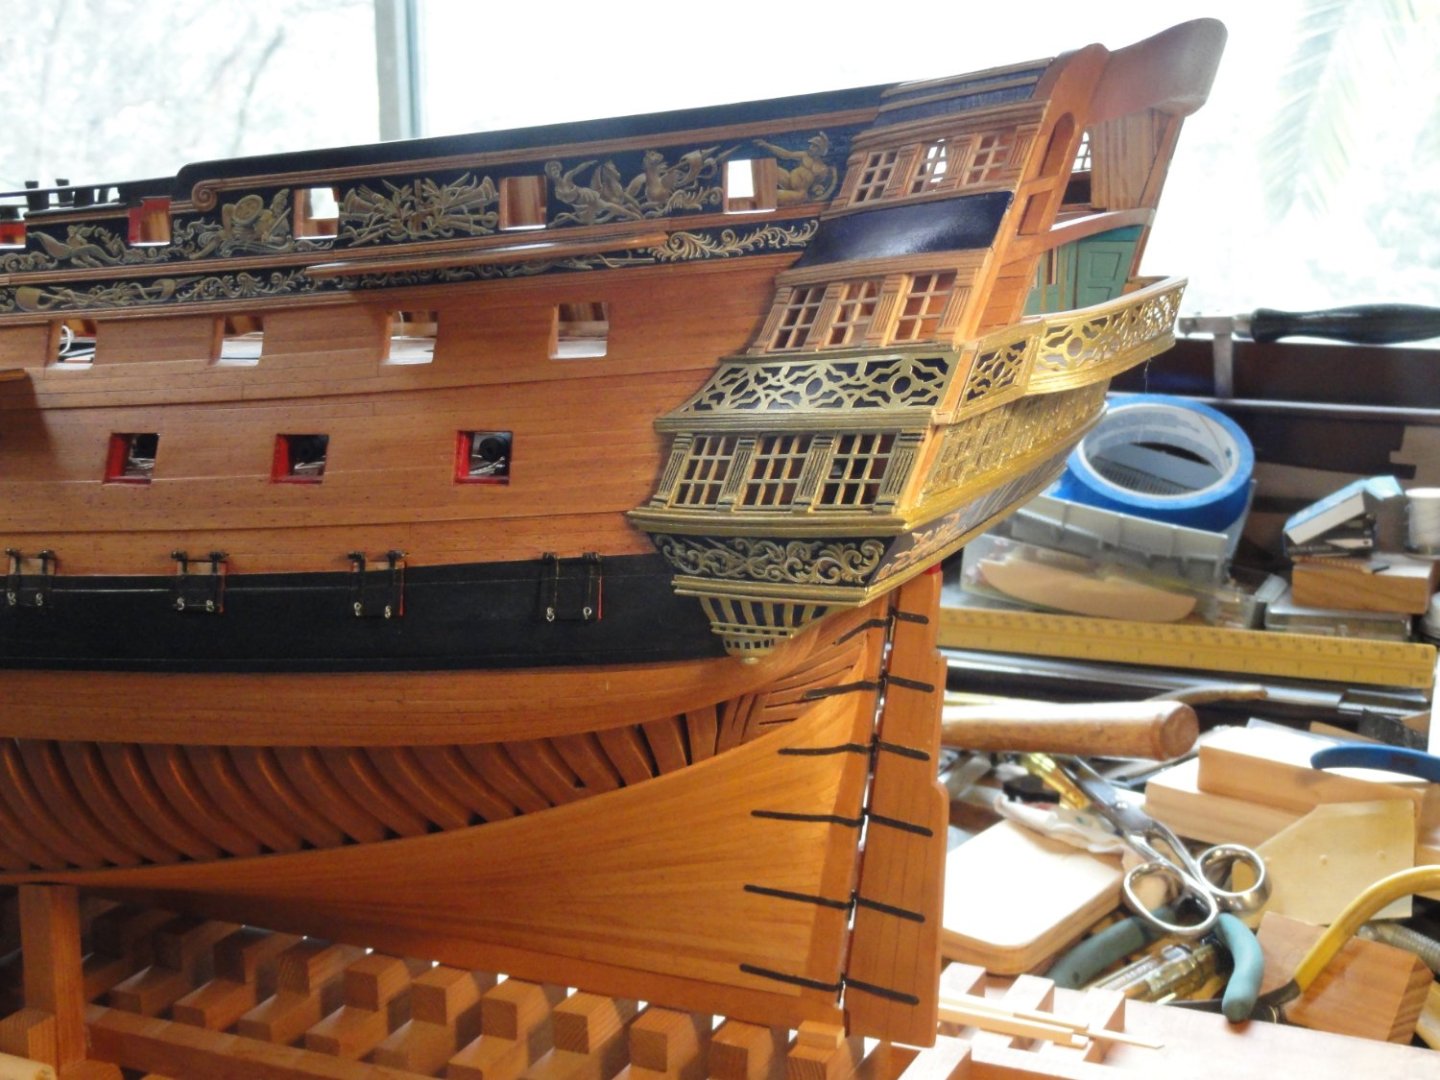
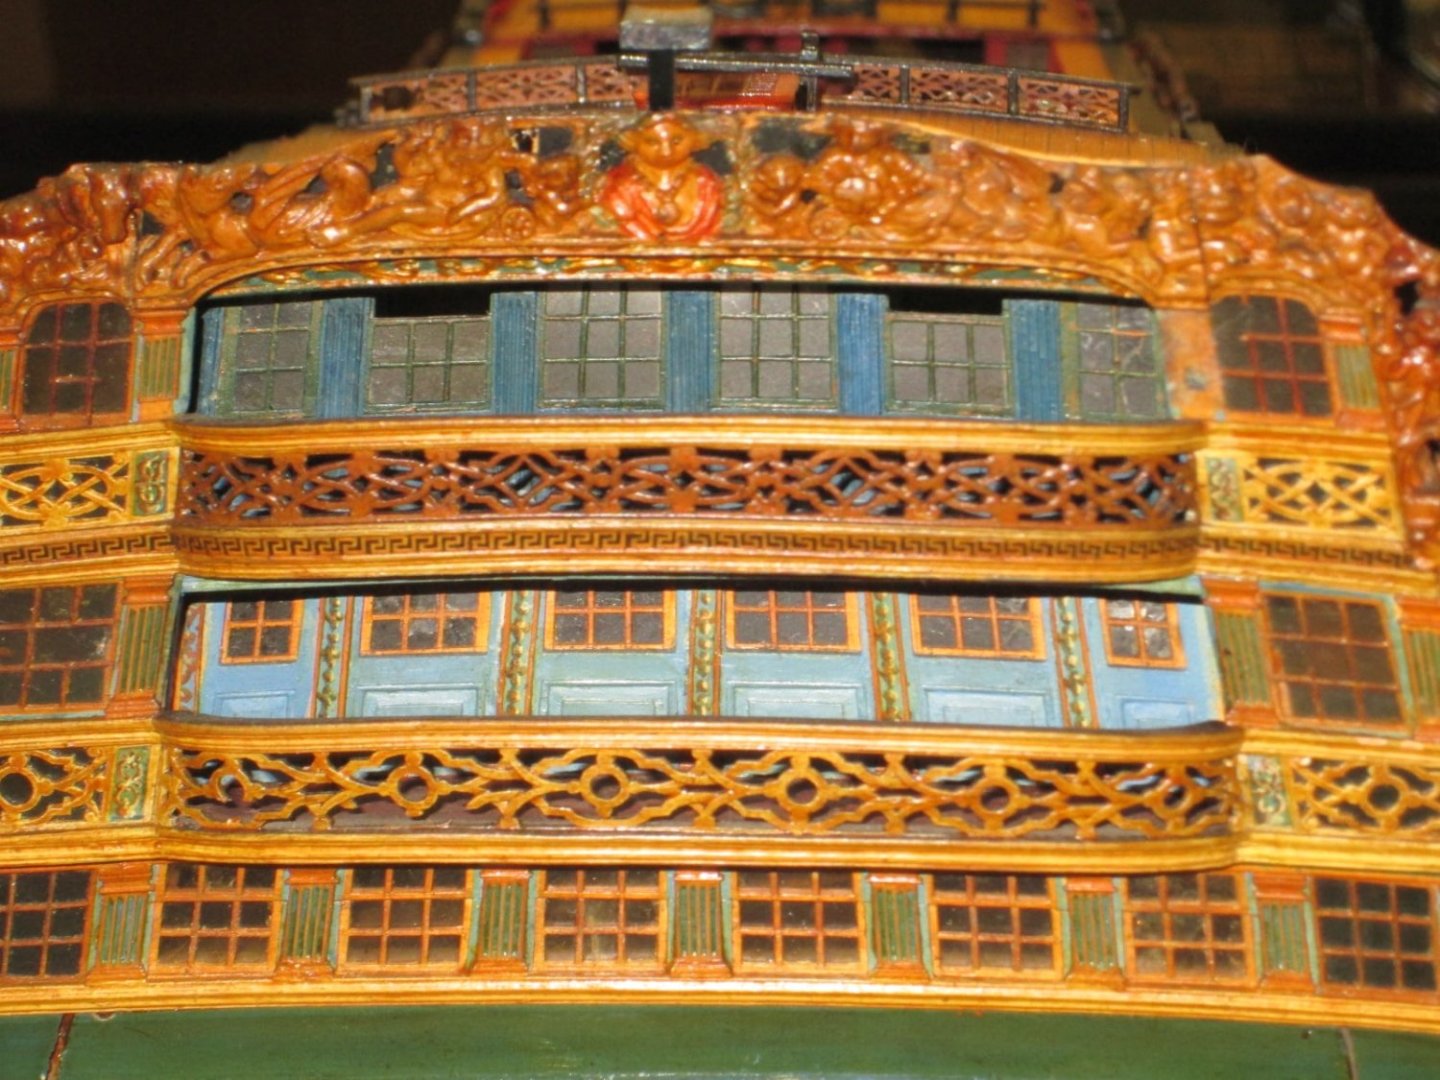
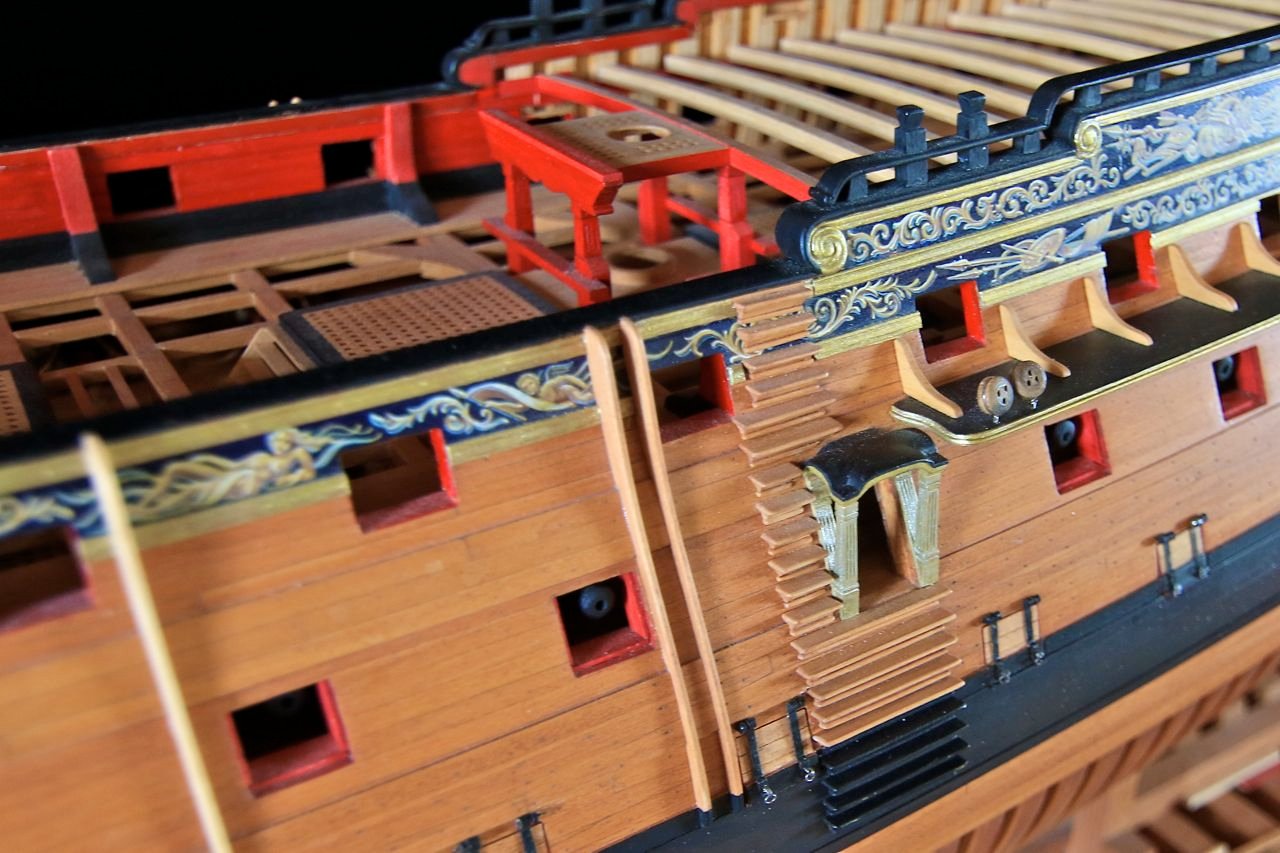
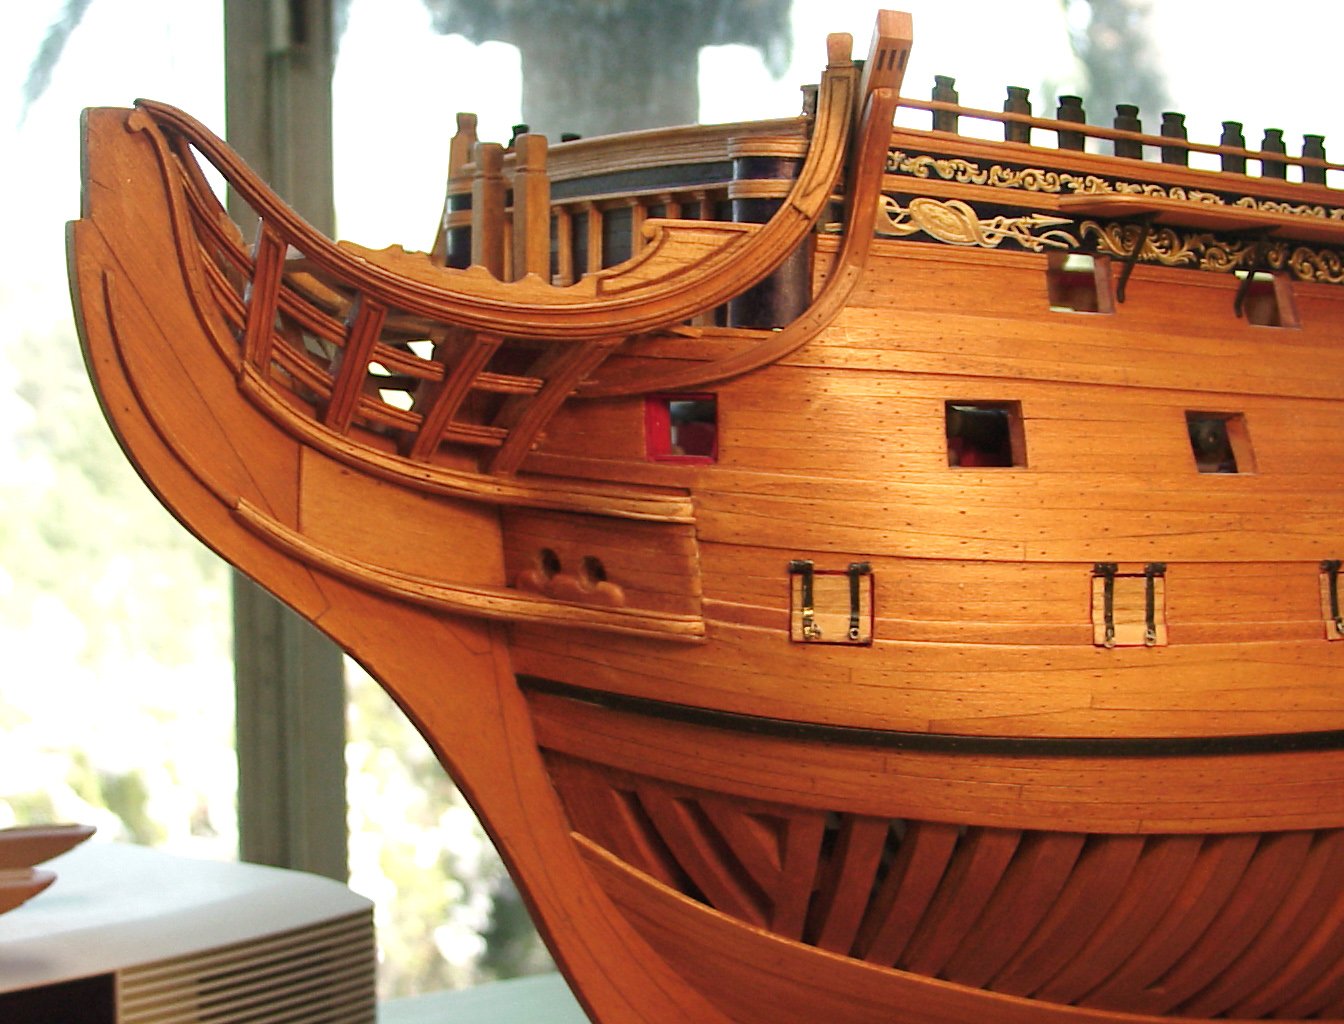
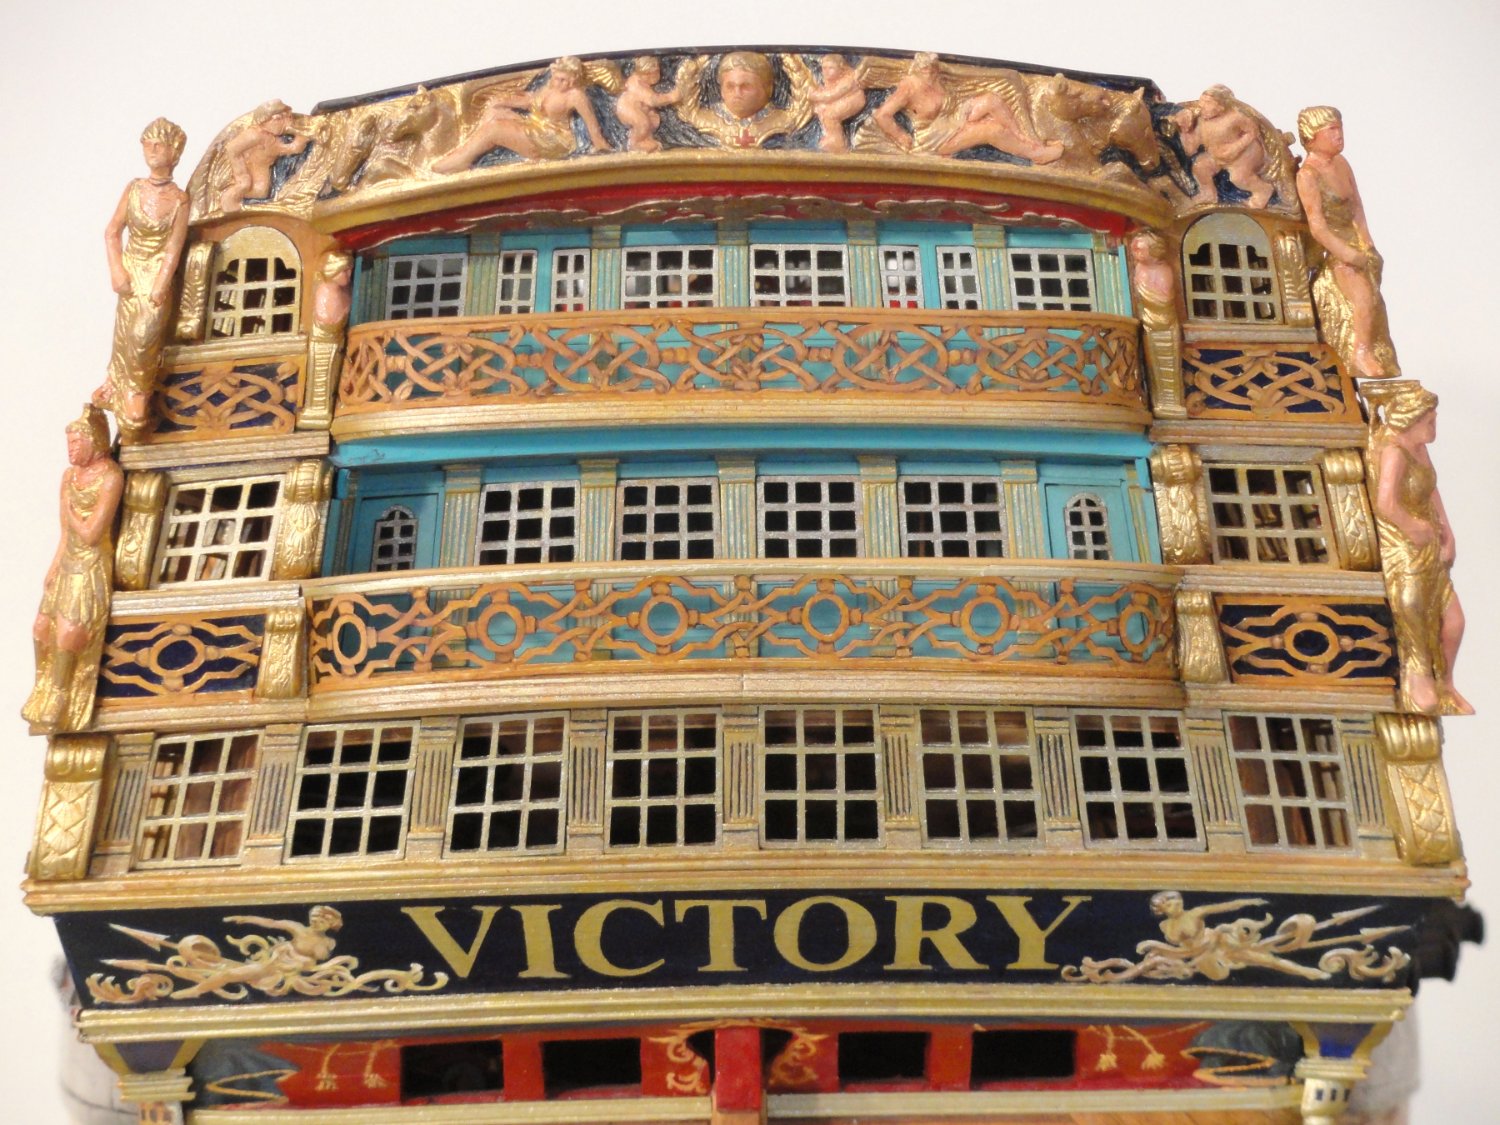
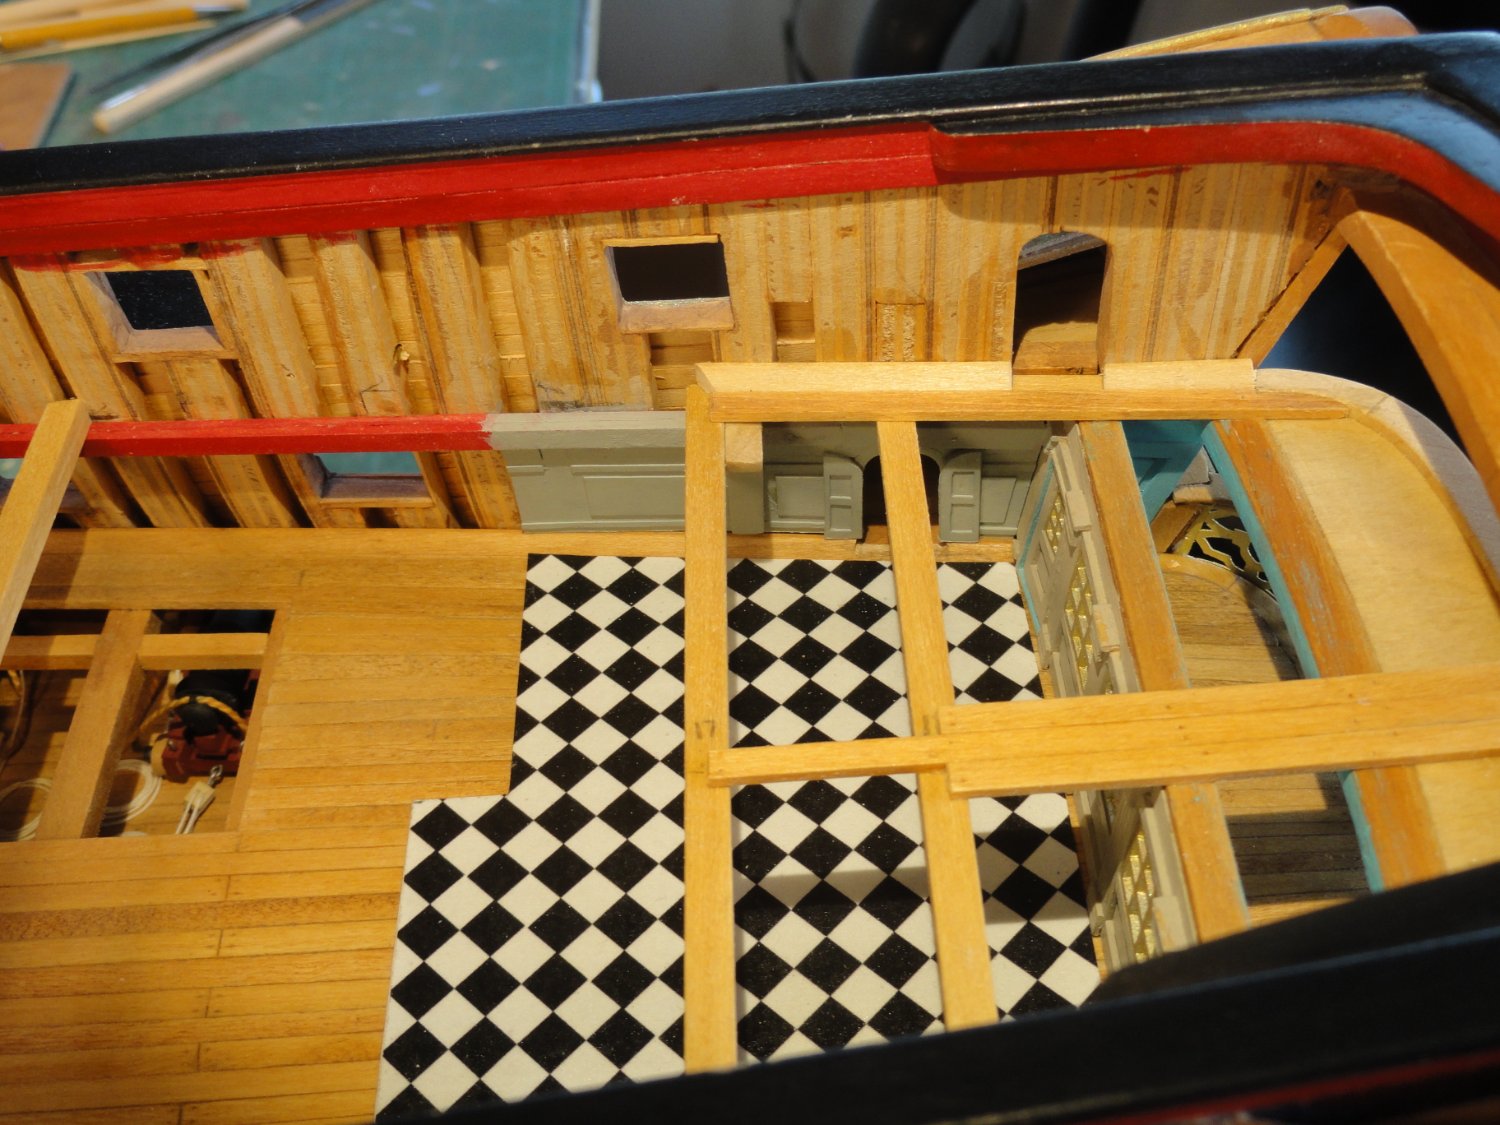
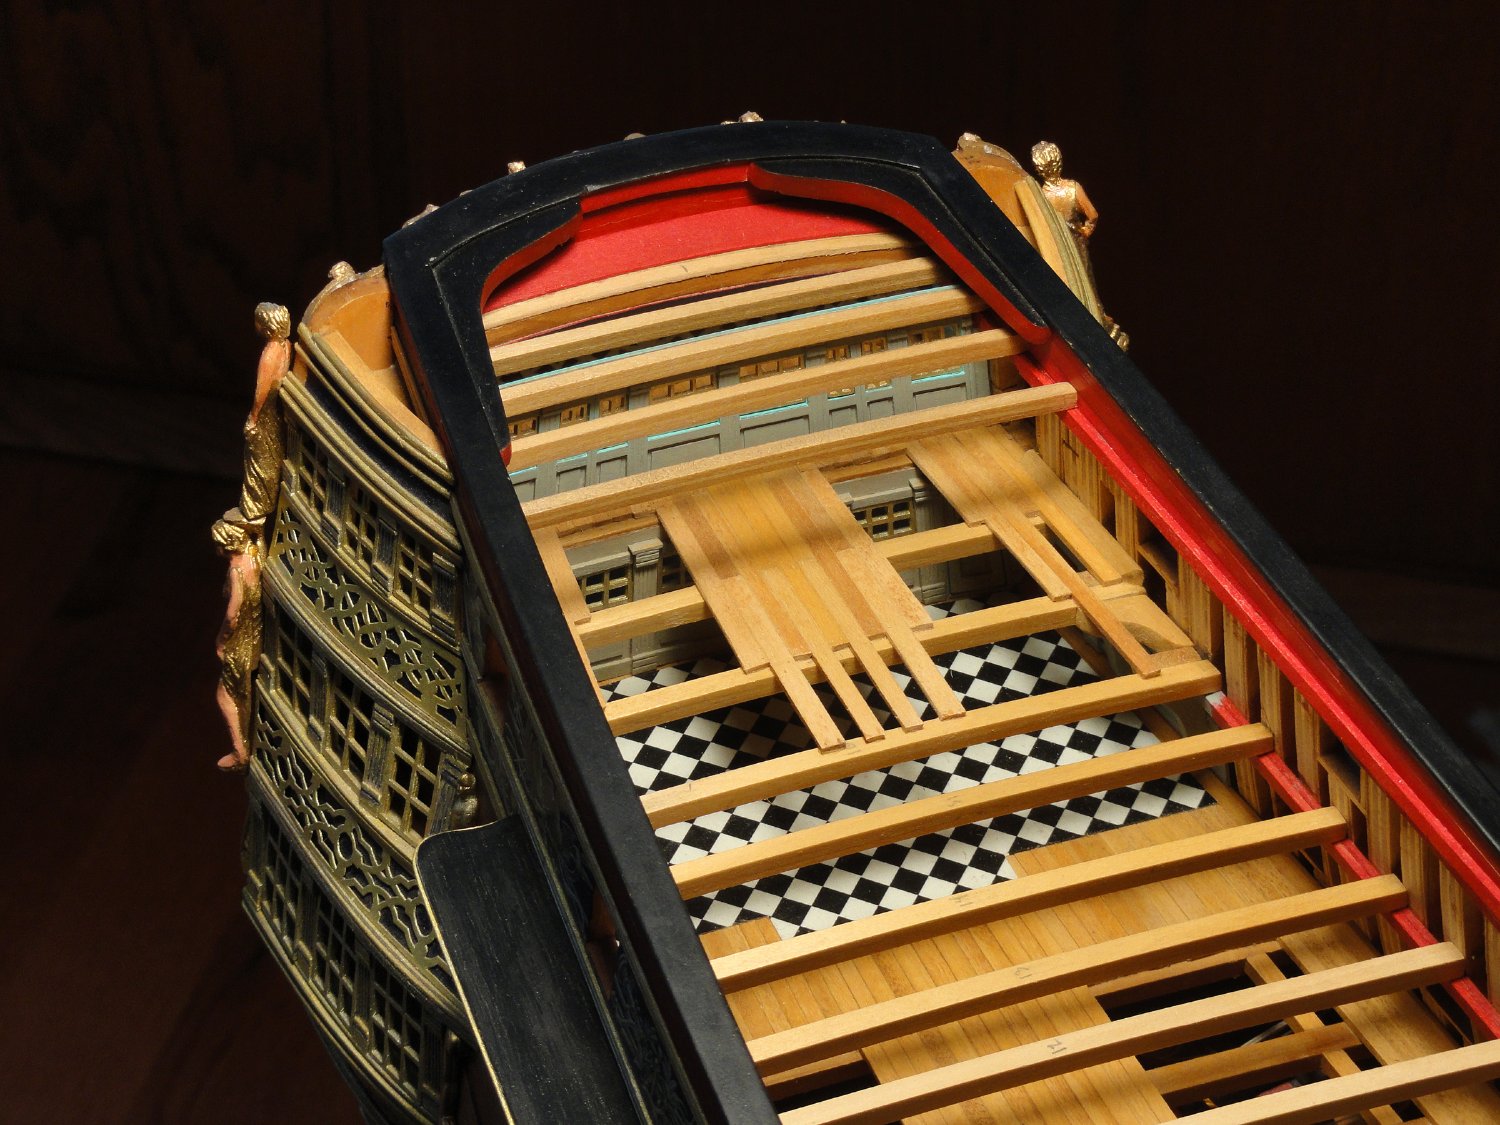
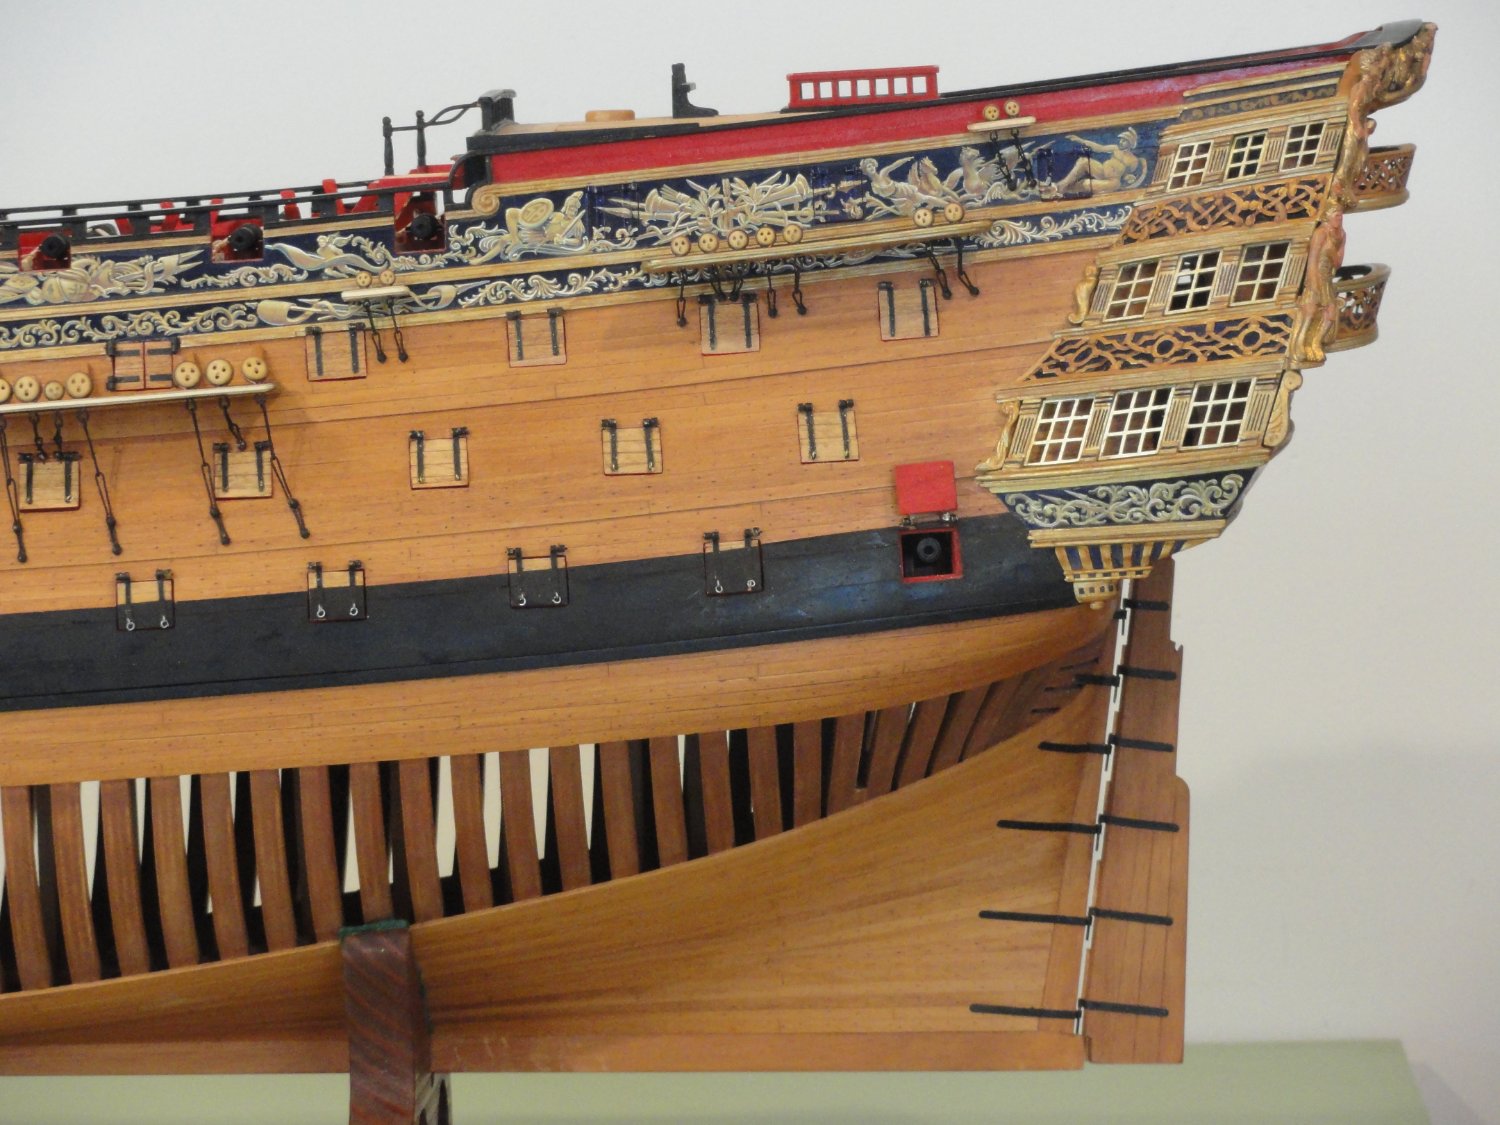
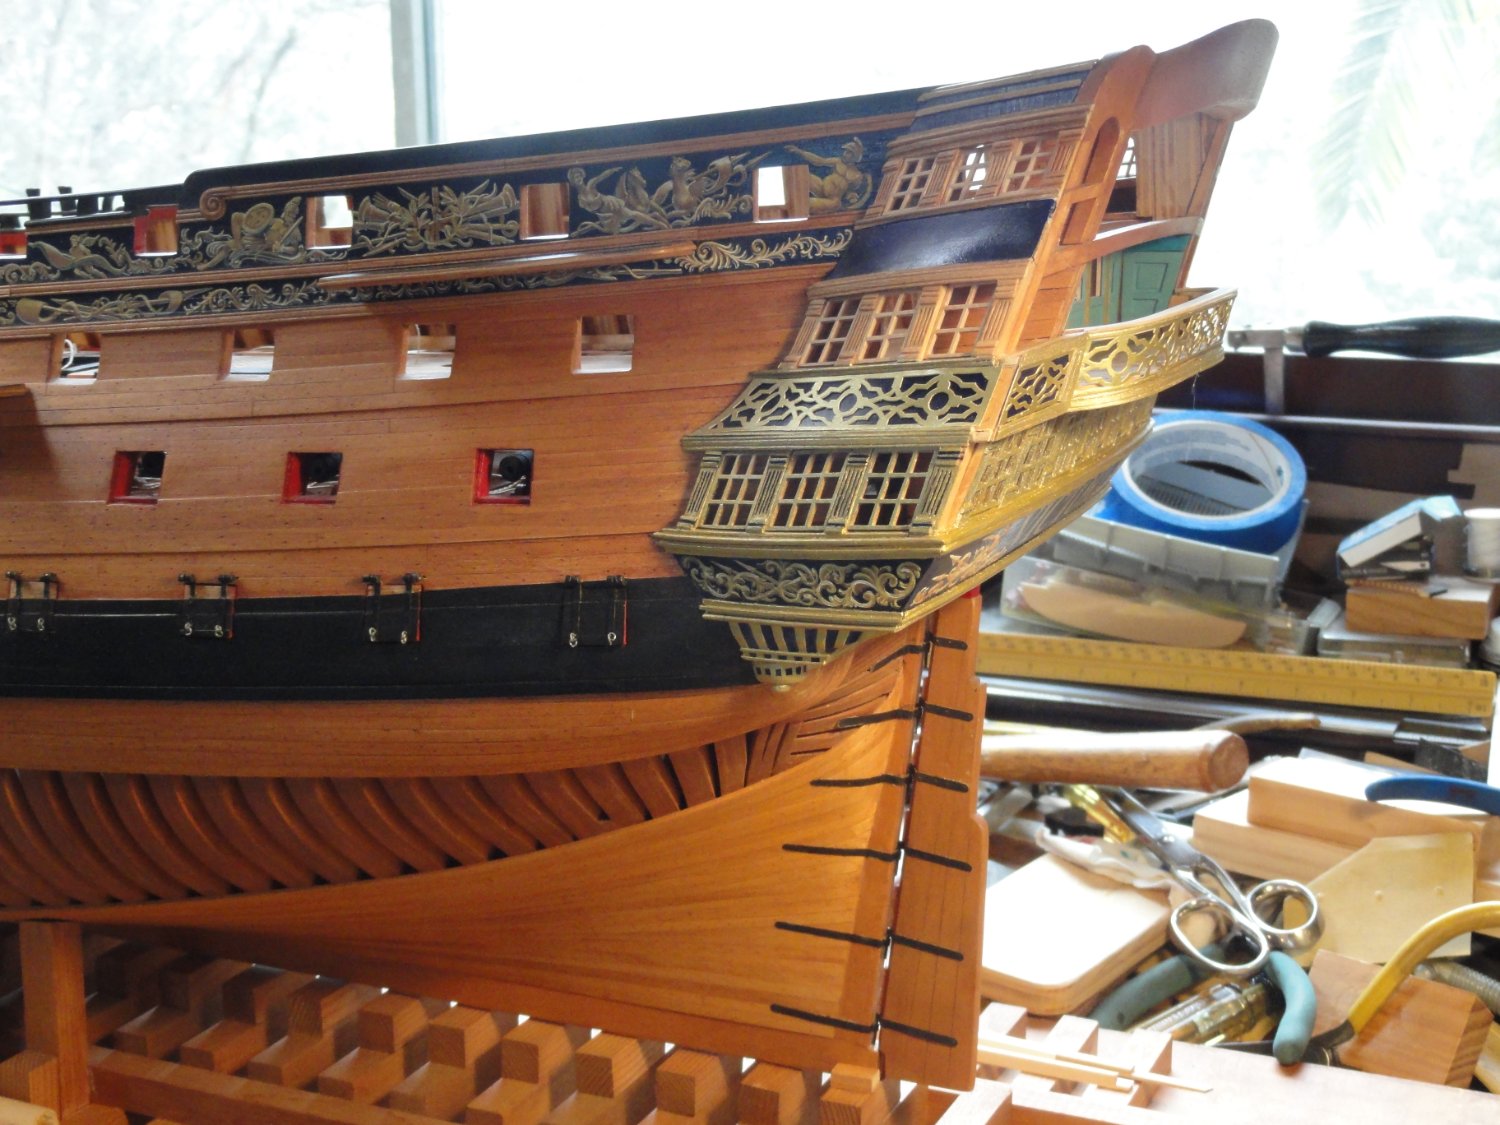
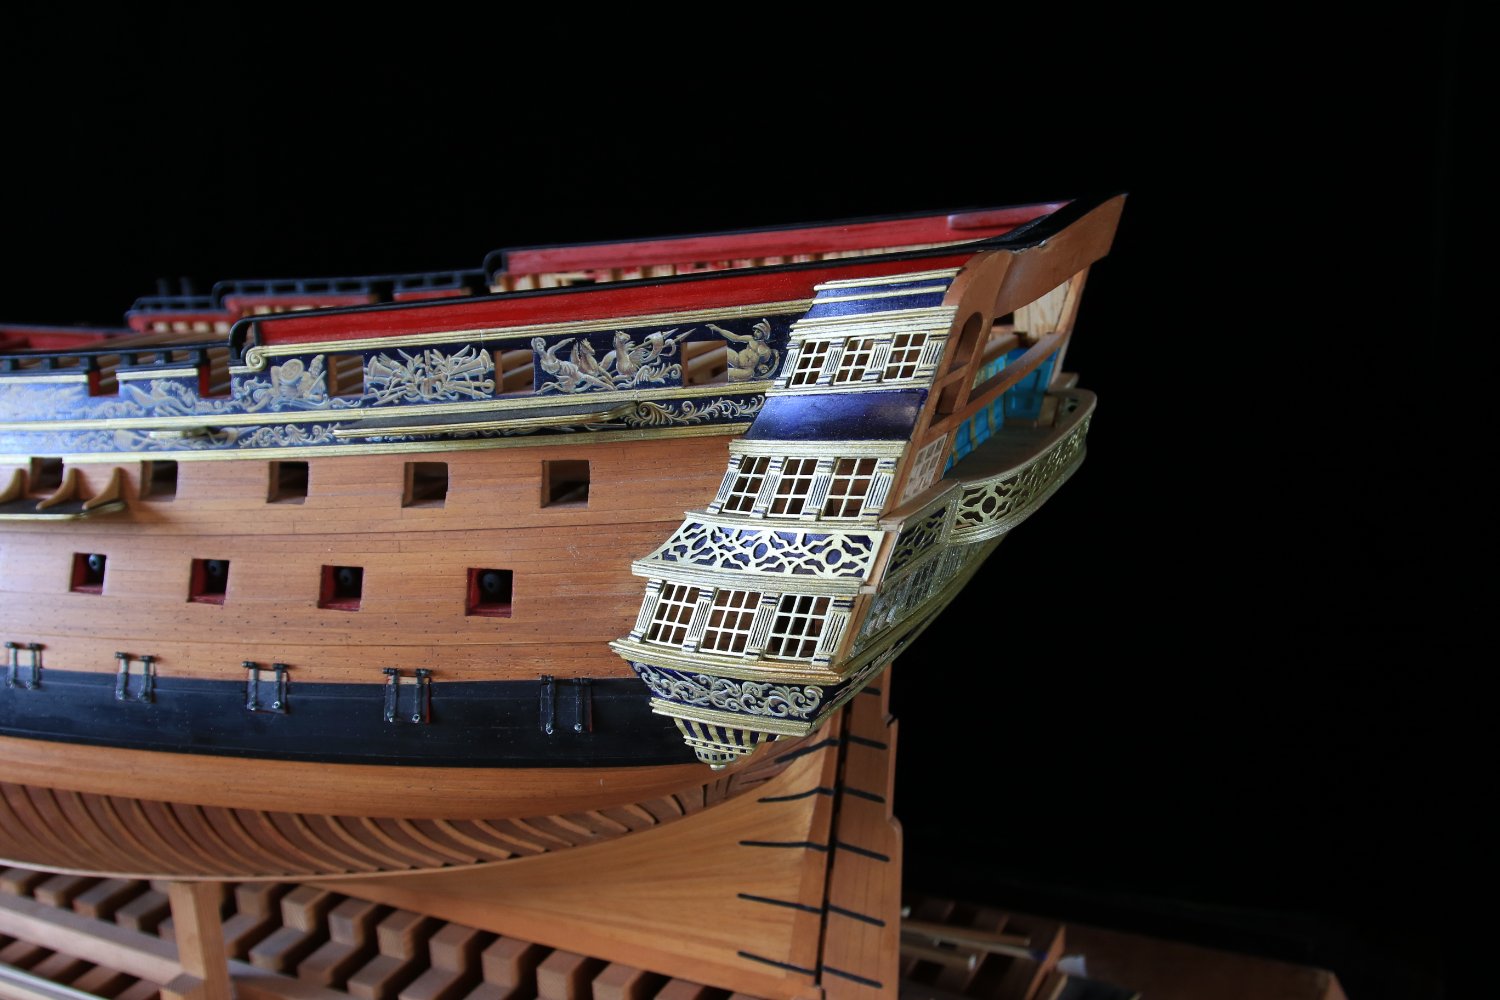
At this stage I was able to complete the upper balcony and close in the stern. The windows are made from thin strips of basswood. The bulkheads are made from lacquered manila file folder stock framed out with basswood for the pillars and cross piece moldings. The same process was used for the interior panels as well.
-
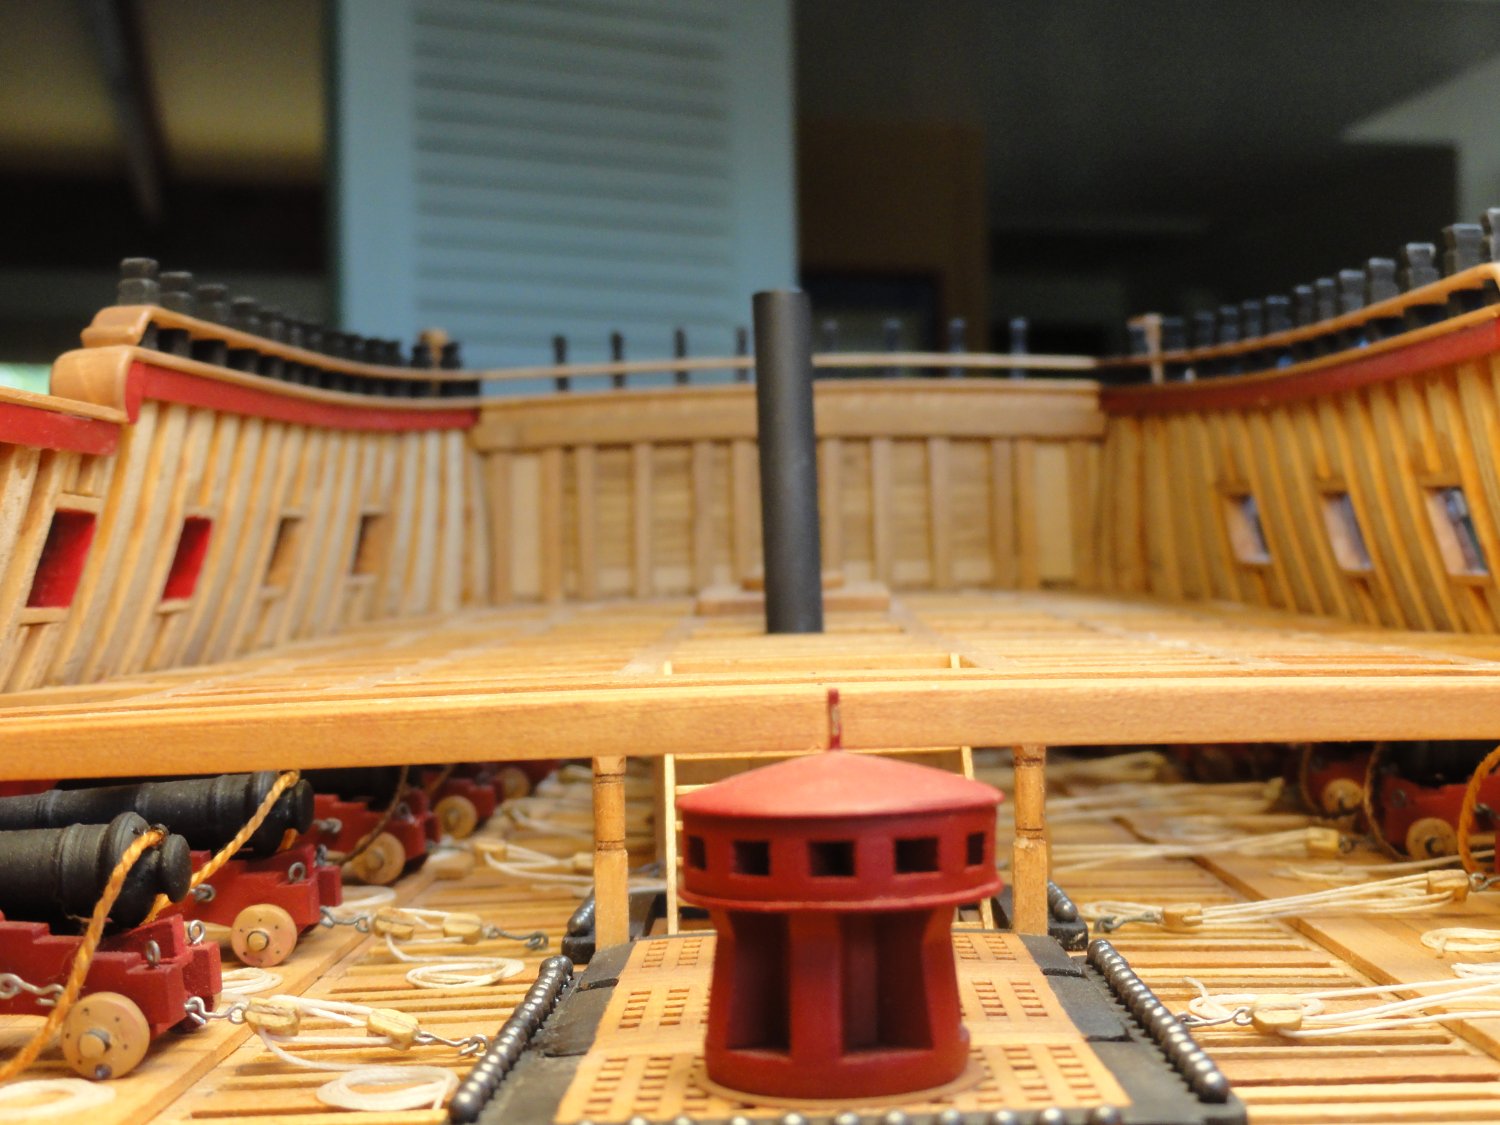
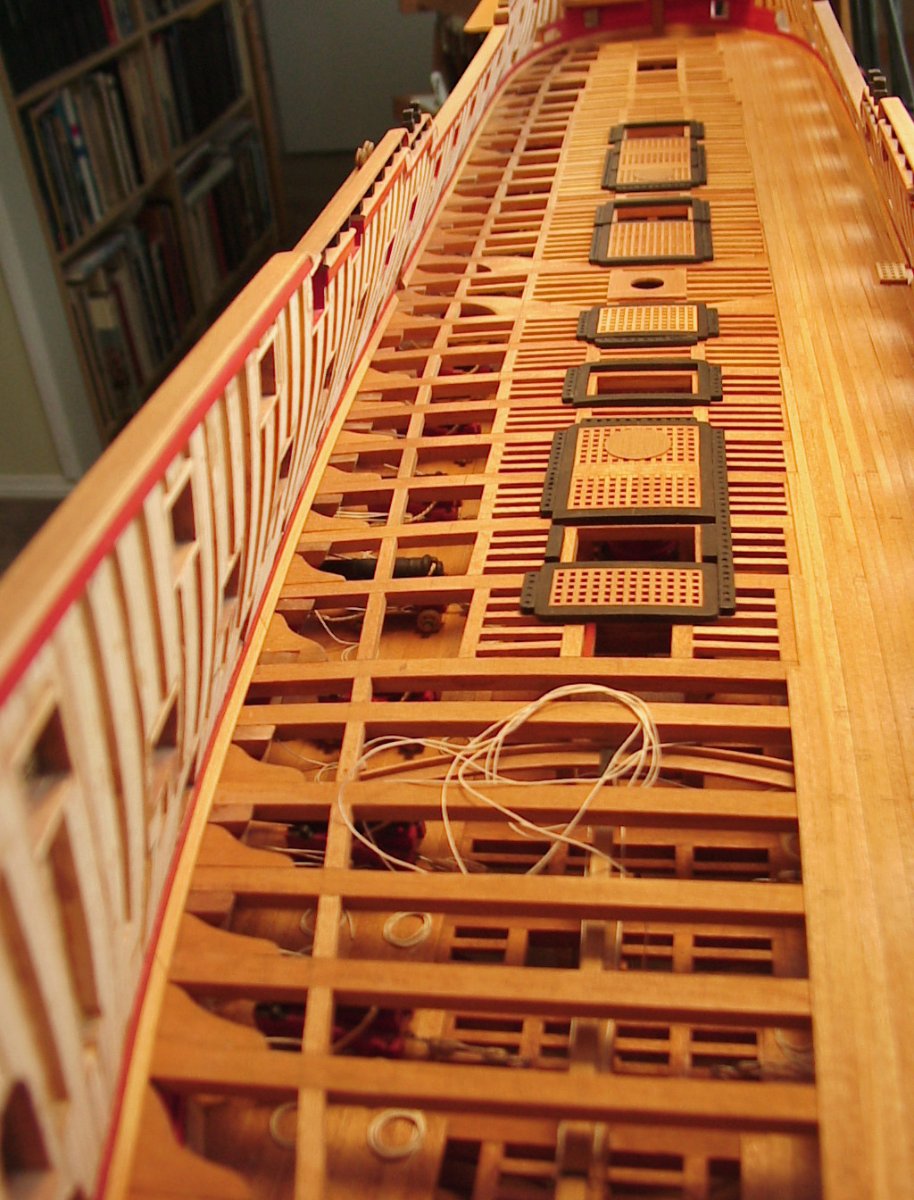
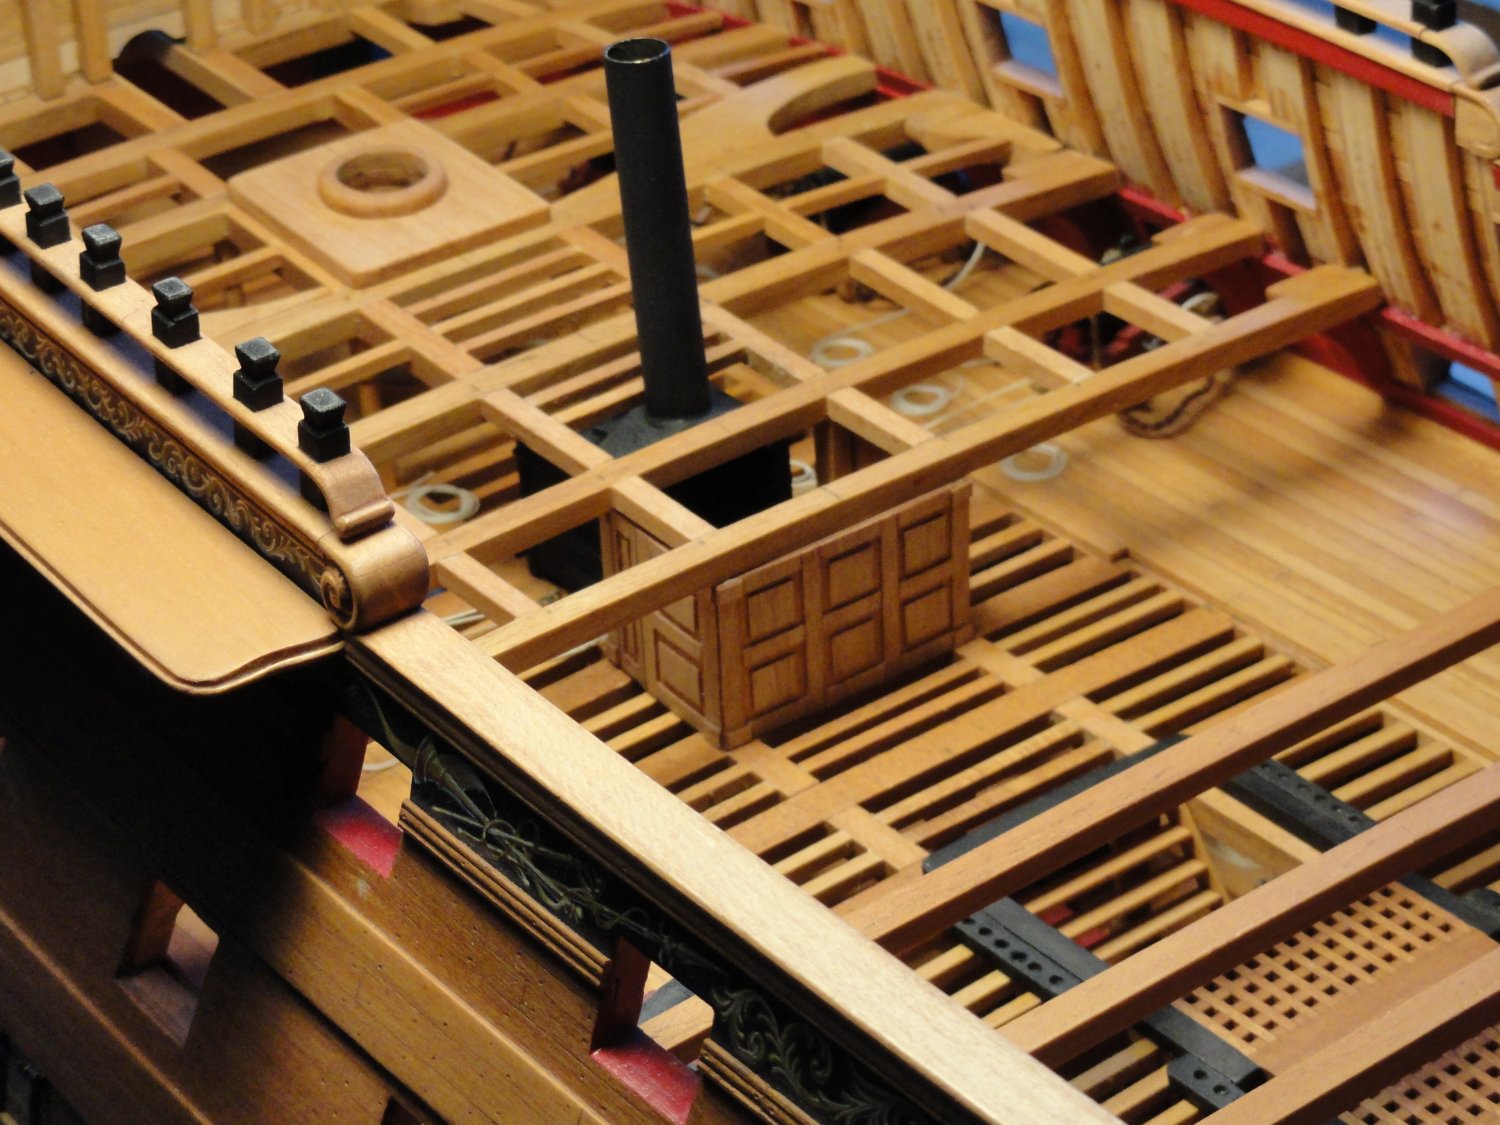
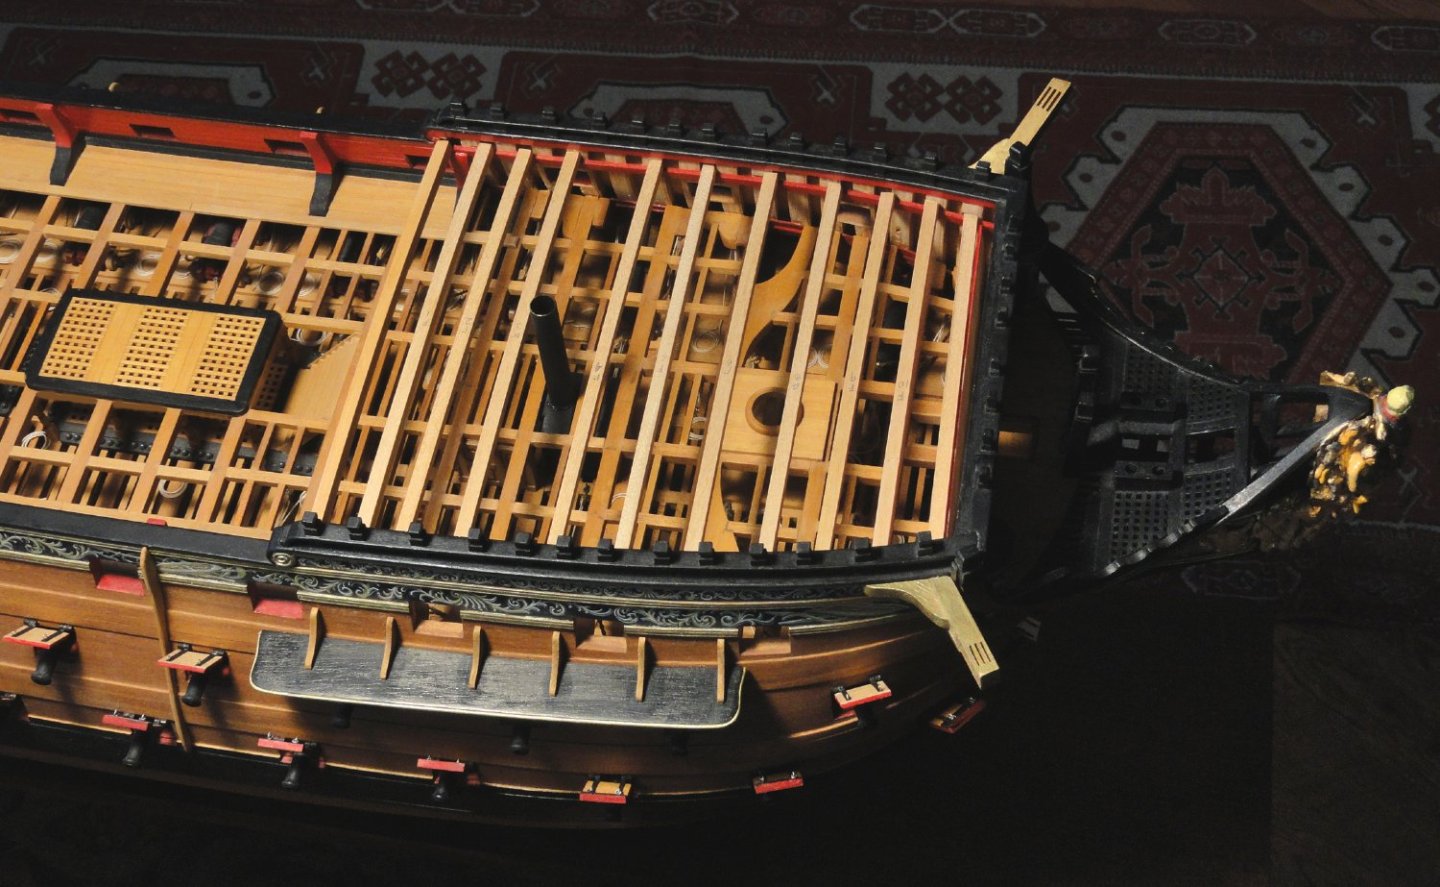
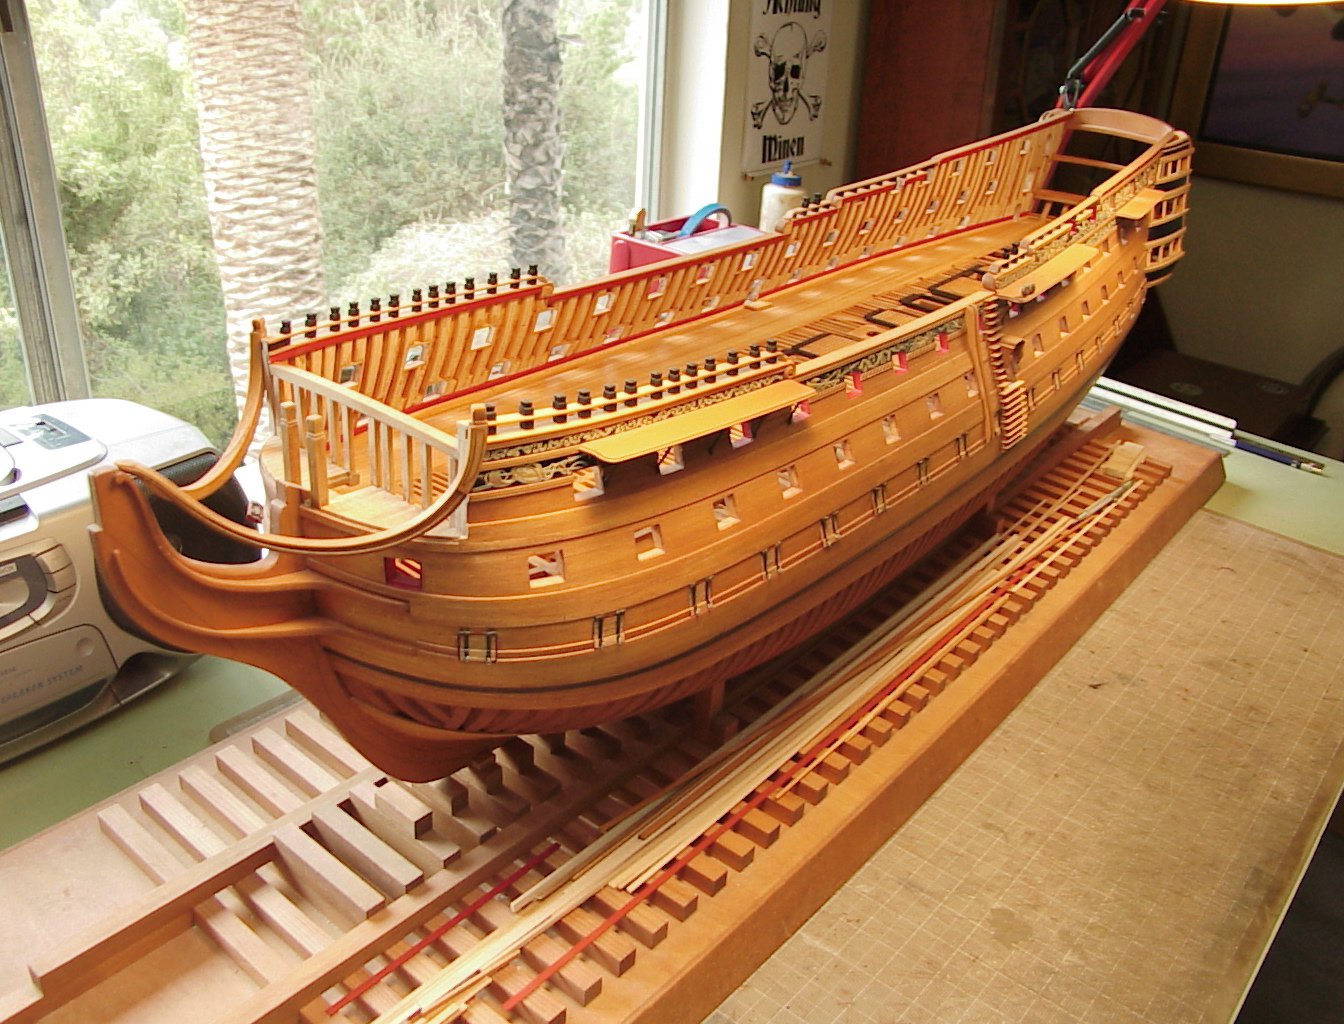
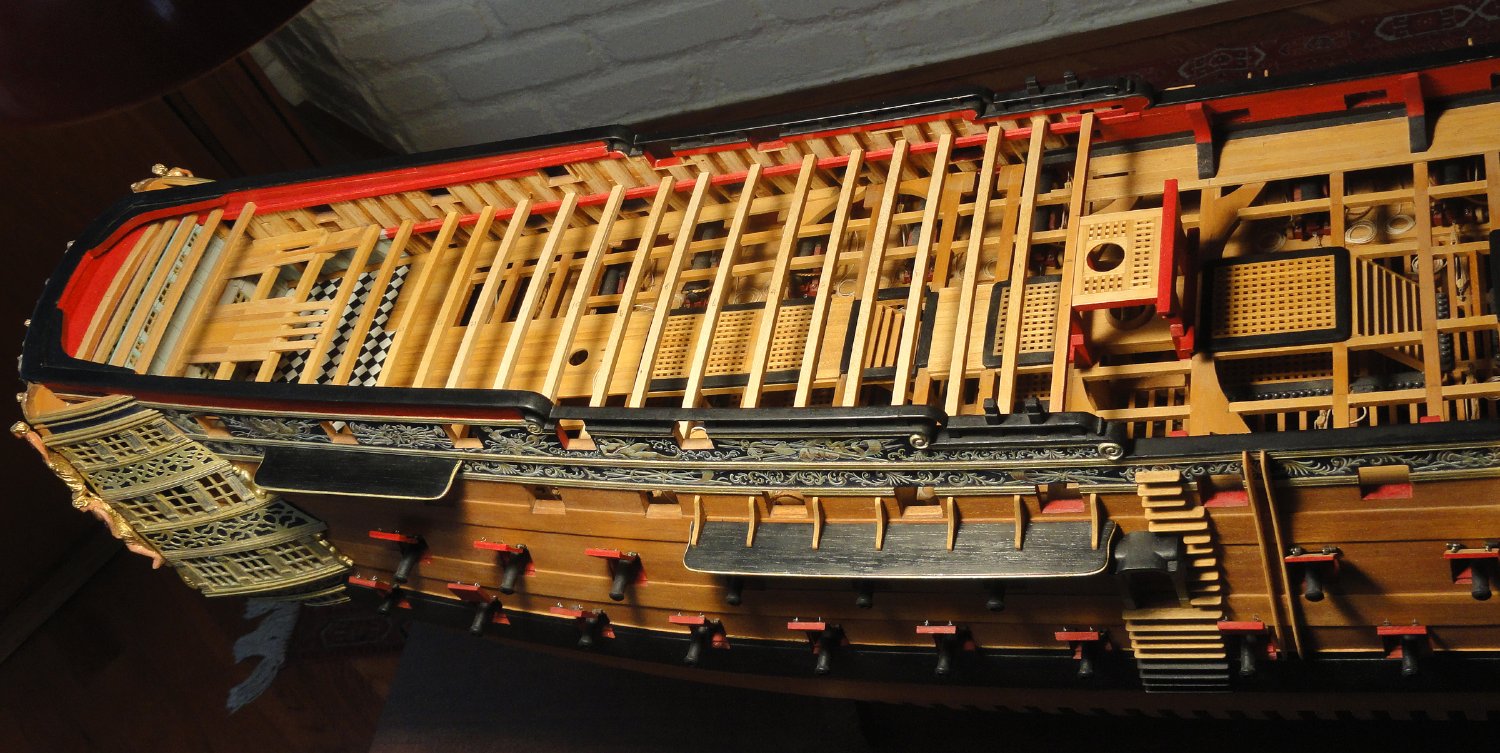
Part 8 The upper deck. As of May, 2020, this is where Victory stands. A very long journey from April,1991, with still a long way to go. I'm starting to feel like Marco Polo and Ferdinand Magellan combined. And, oh yeah, lets not leave out Captain Cook for the sake of England's interests. All the beams for the quarterdeck and forecastle are loosely in place on their ledges. First thing to do was to lay in the checkered floor in the Admiral's day cabin. I made the pattern in Photoshop, scaled it to the proper size, and printed it out on white bond. Since paper is a wood bi-product, I consider it compatible with the structure. I spray several coats of clear lacquer on each side to completely impregnate the paper, sealing it from any future moisture. Cut to fit and spray 777 contact cement to the underside and fit in place.


-
Thanks, Mic, Mark, Scrubby, and Albert.
-
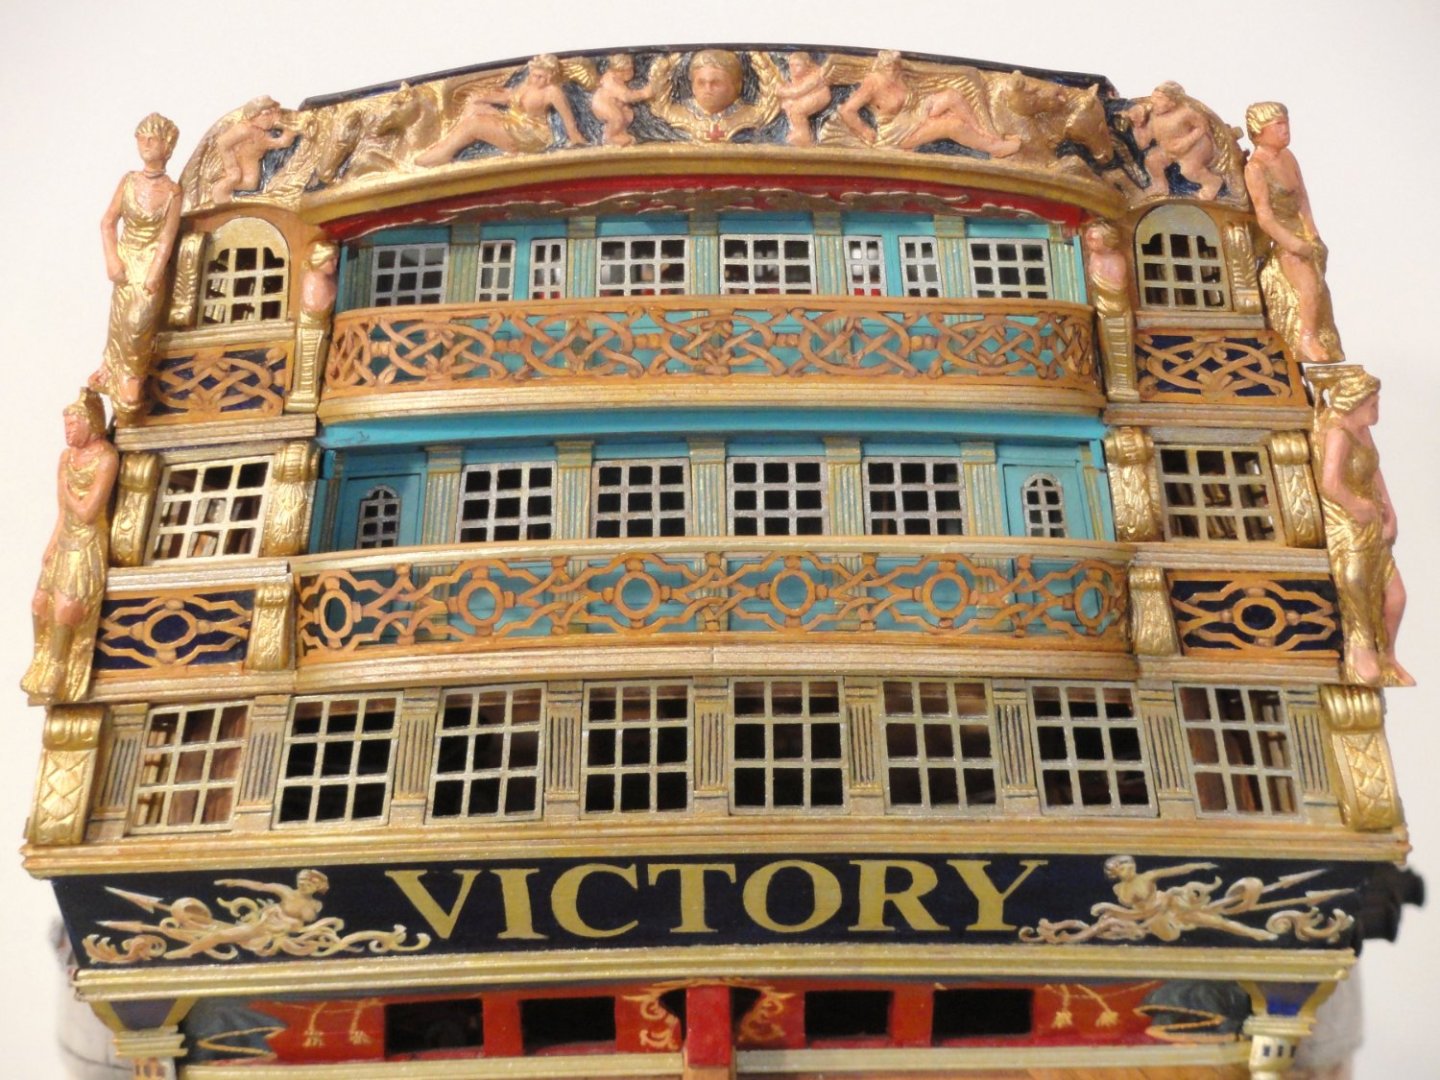
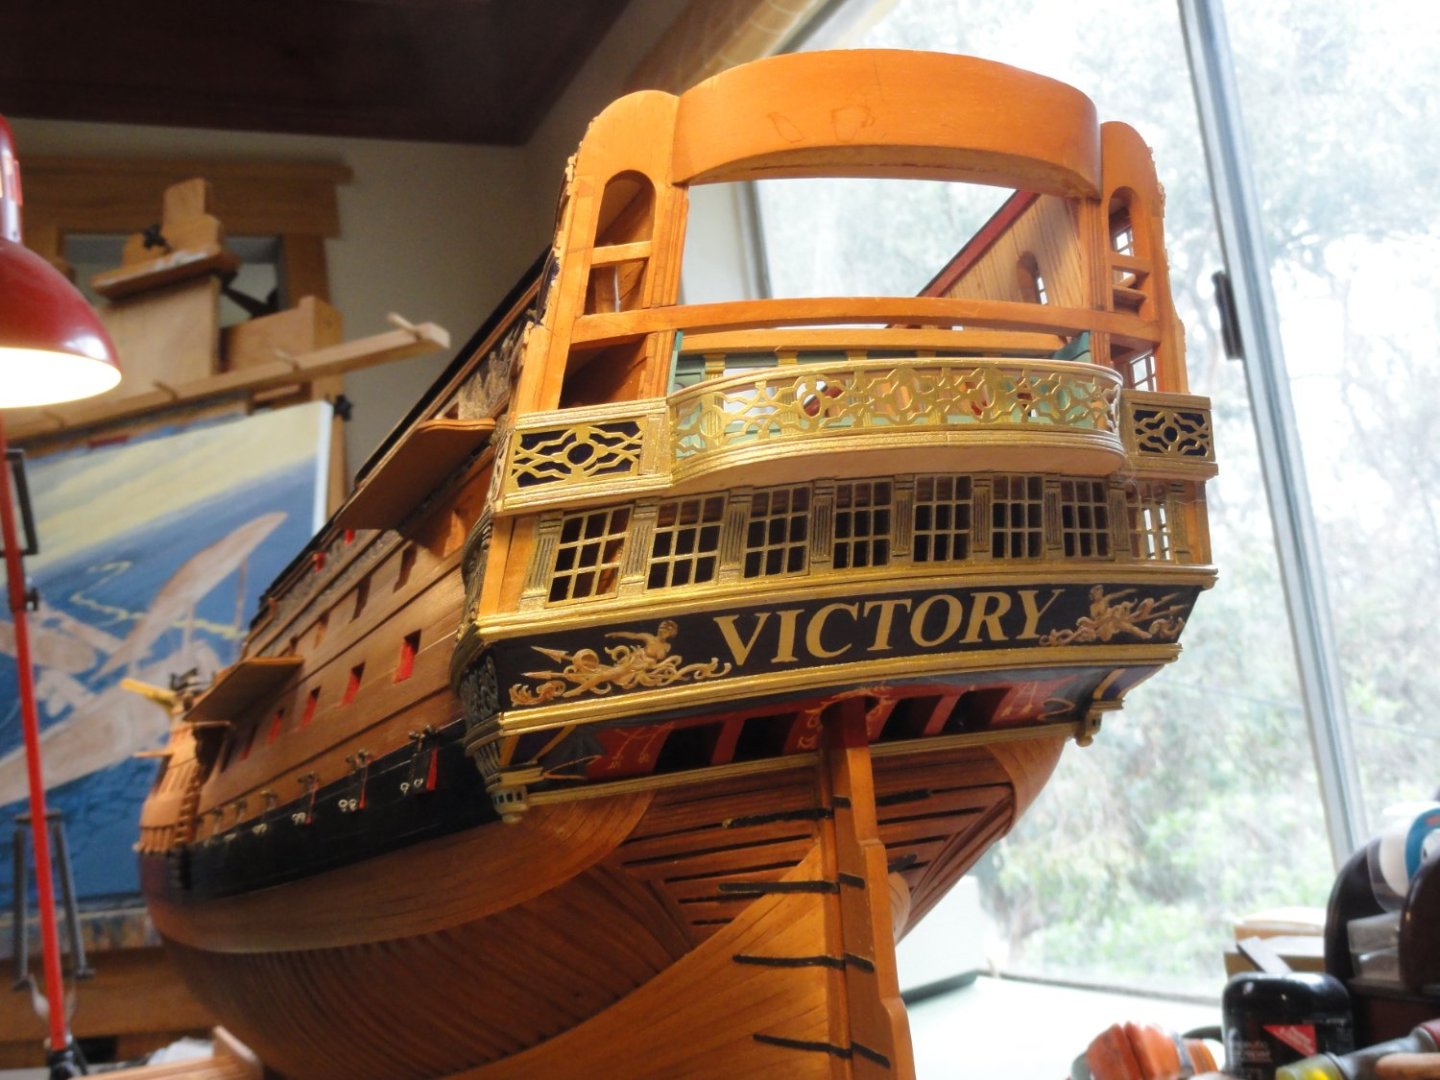
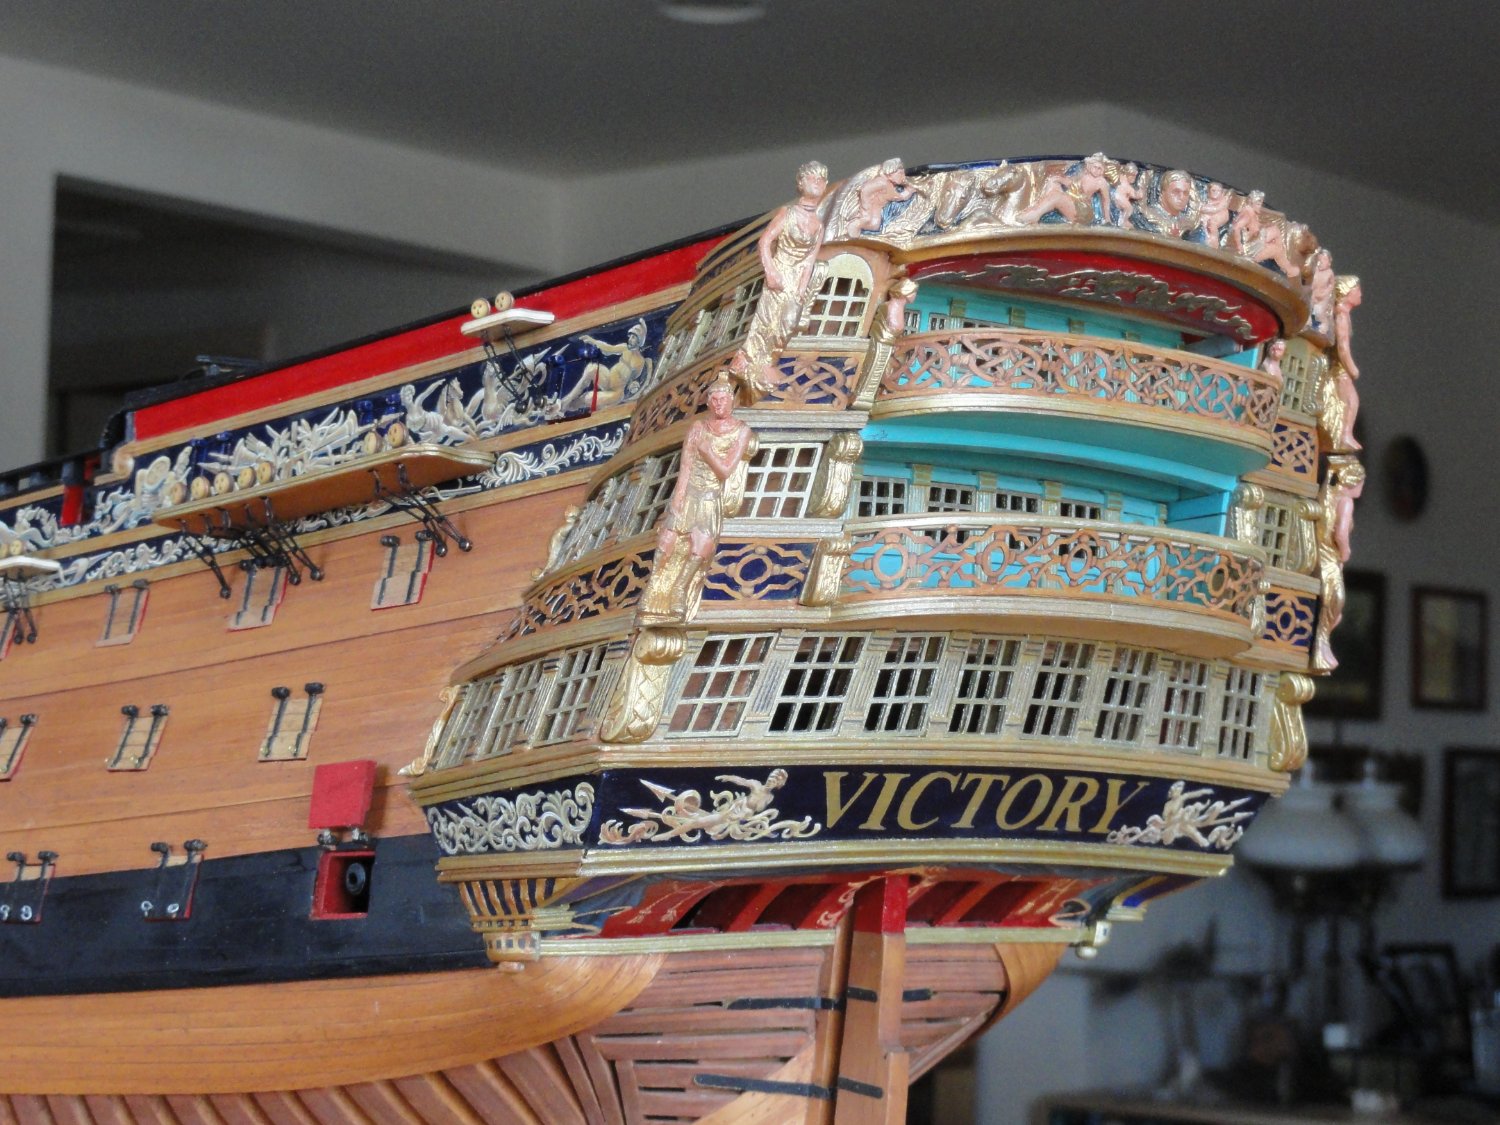
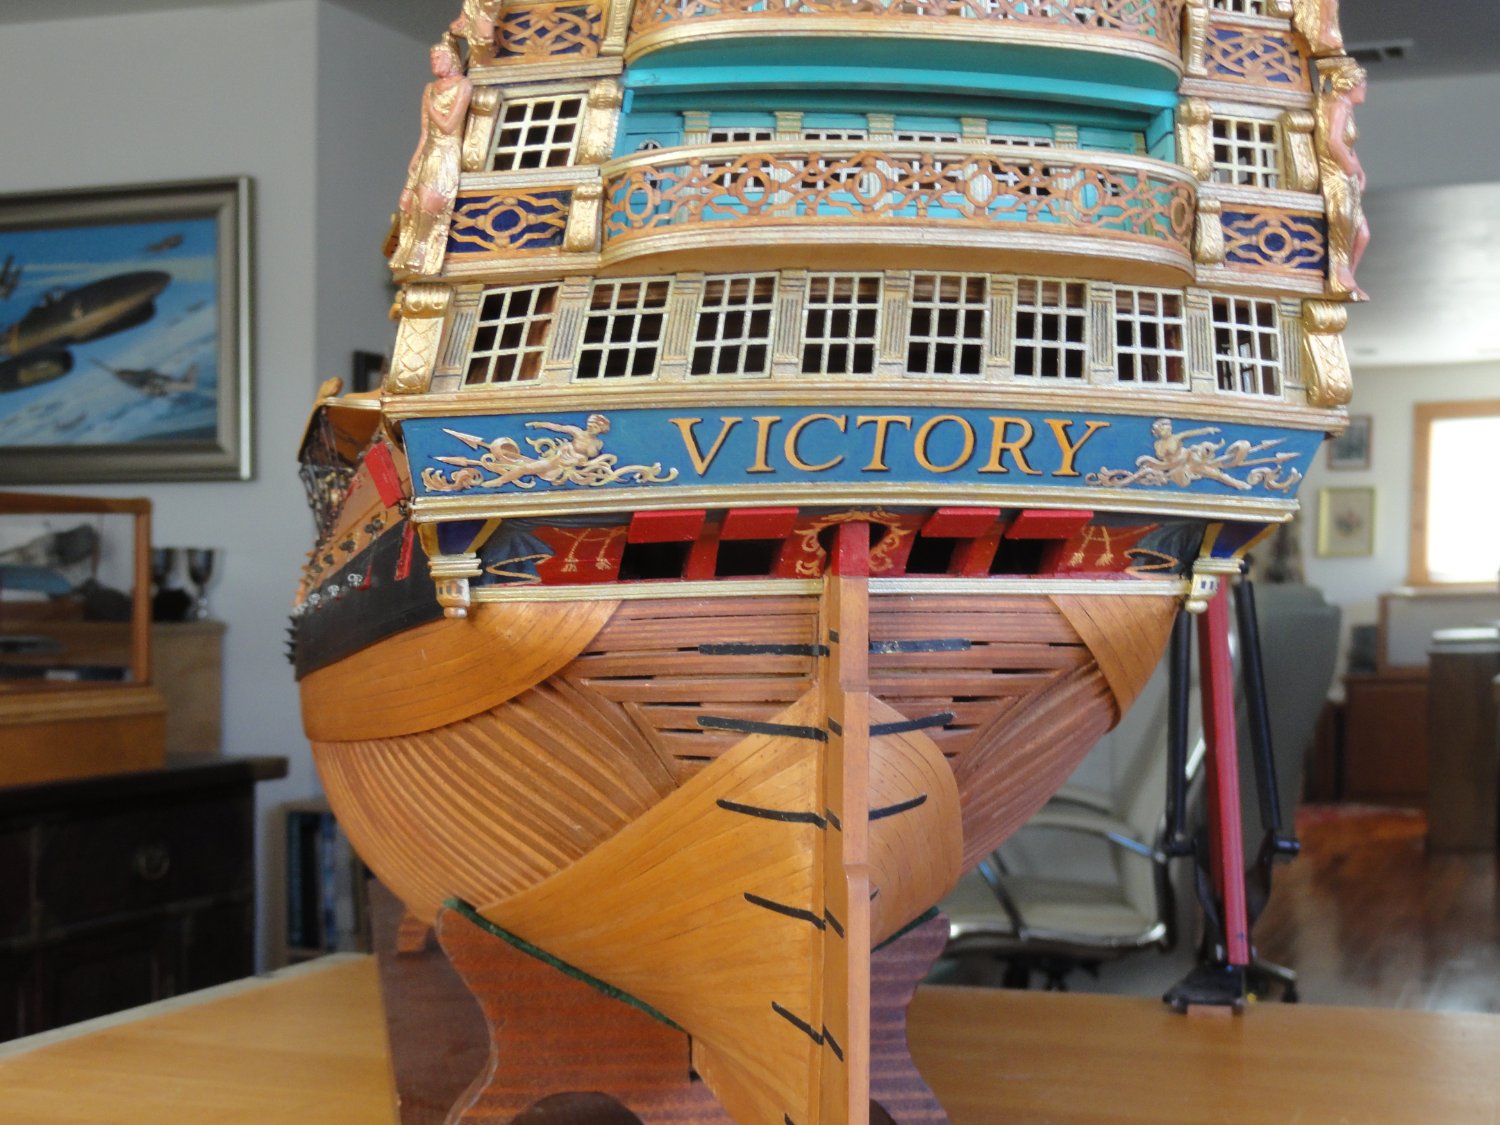
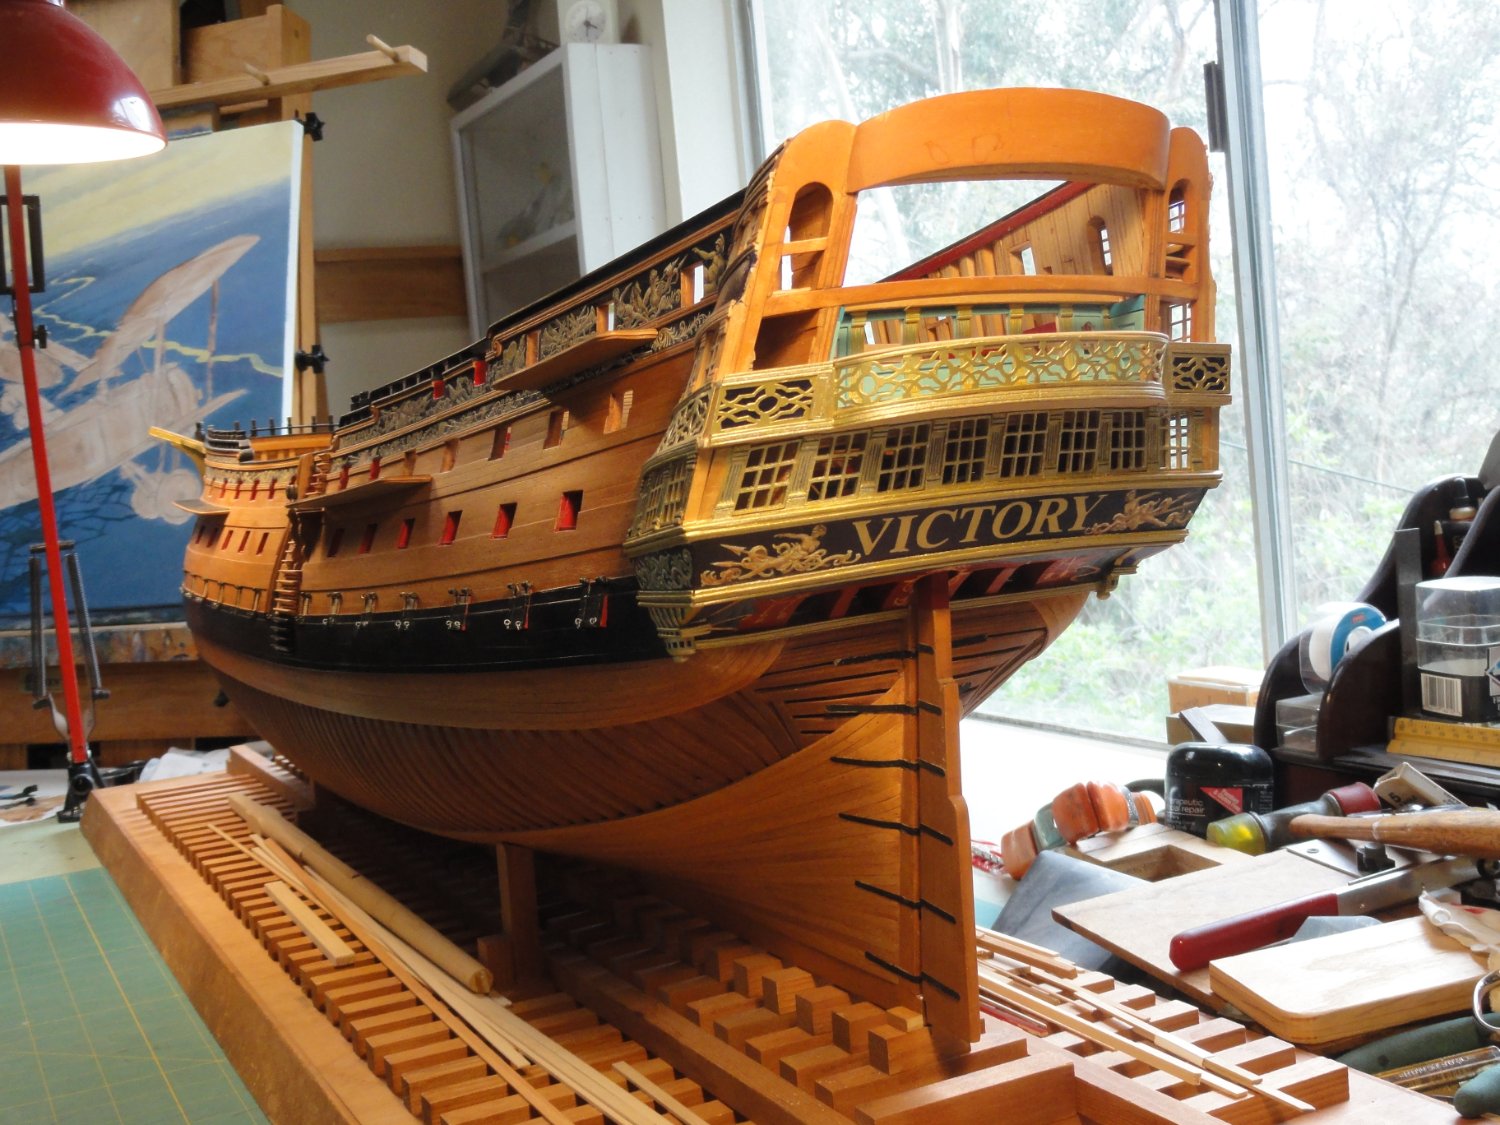
On a side note, Druxey very kindly pointed out that I had used New Times Roman for "VICTORY" which is a 20th Century typeface. Here is the re-painted version, which I'm much happier with. BTW, all my painting is directly on the wood, not on paper and glued on.


-
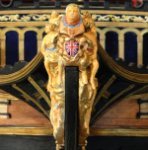
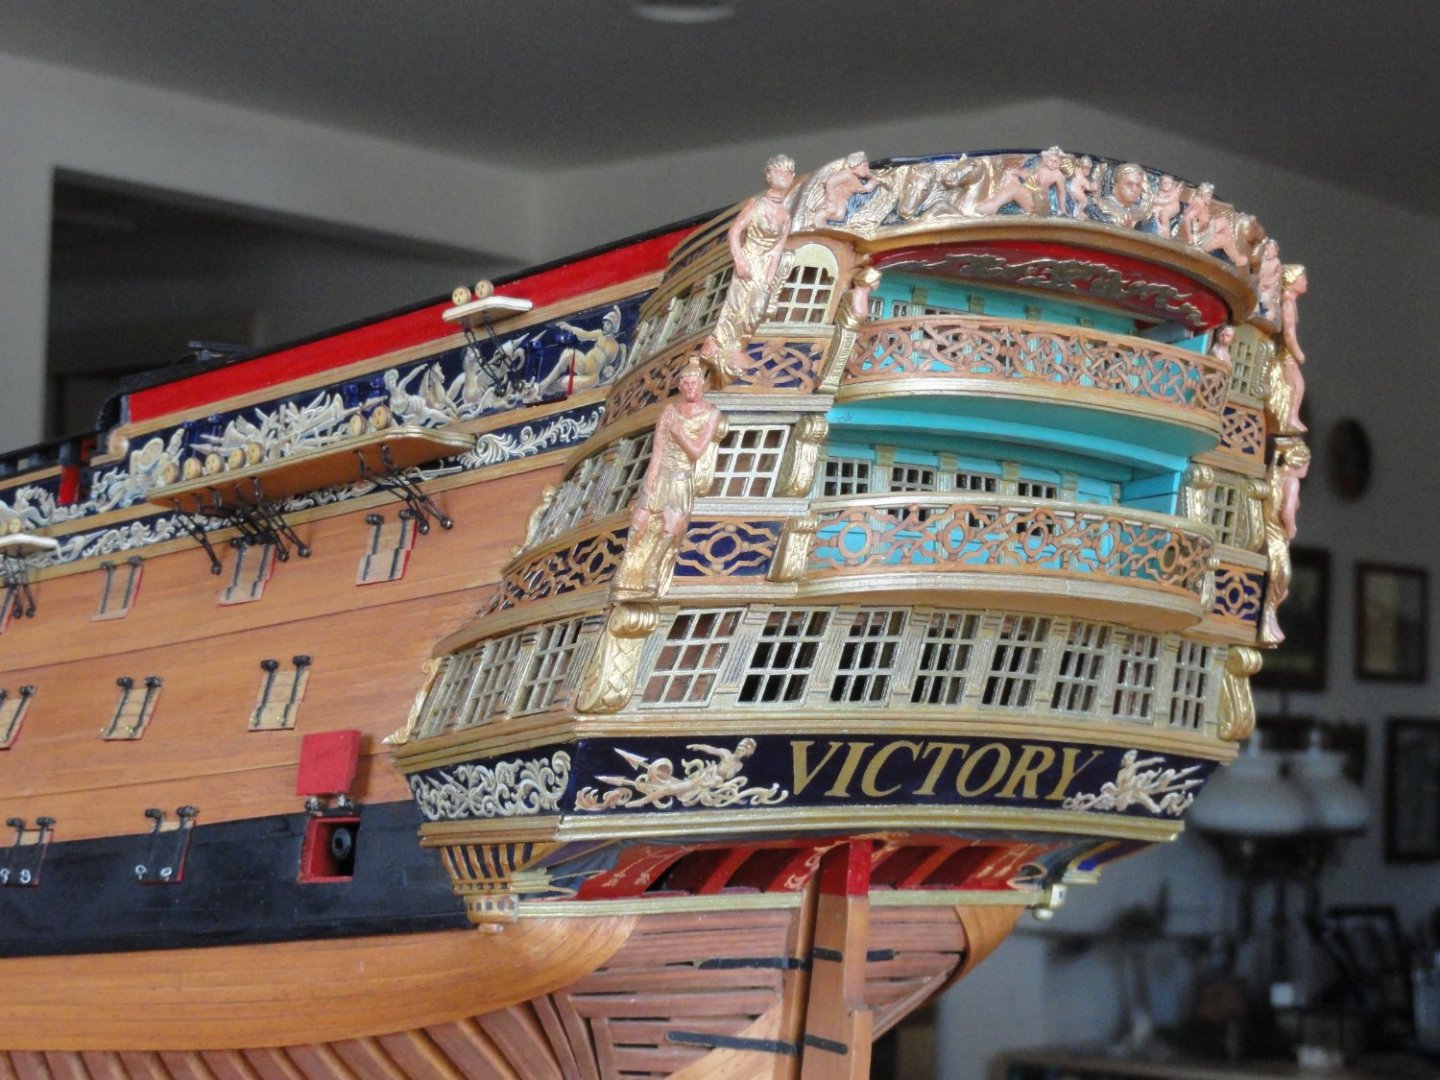
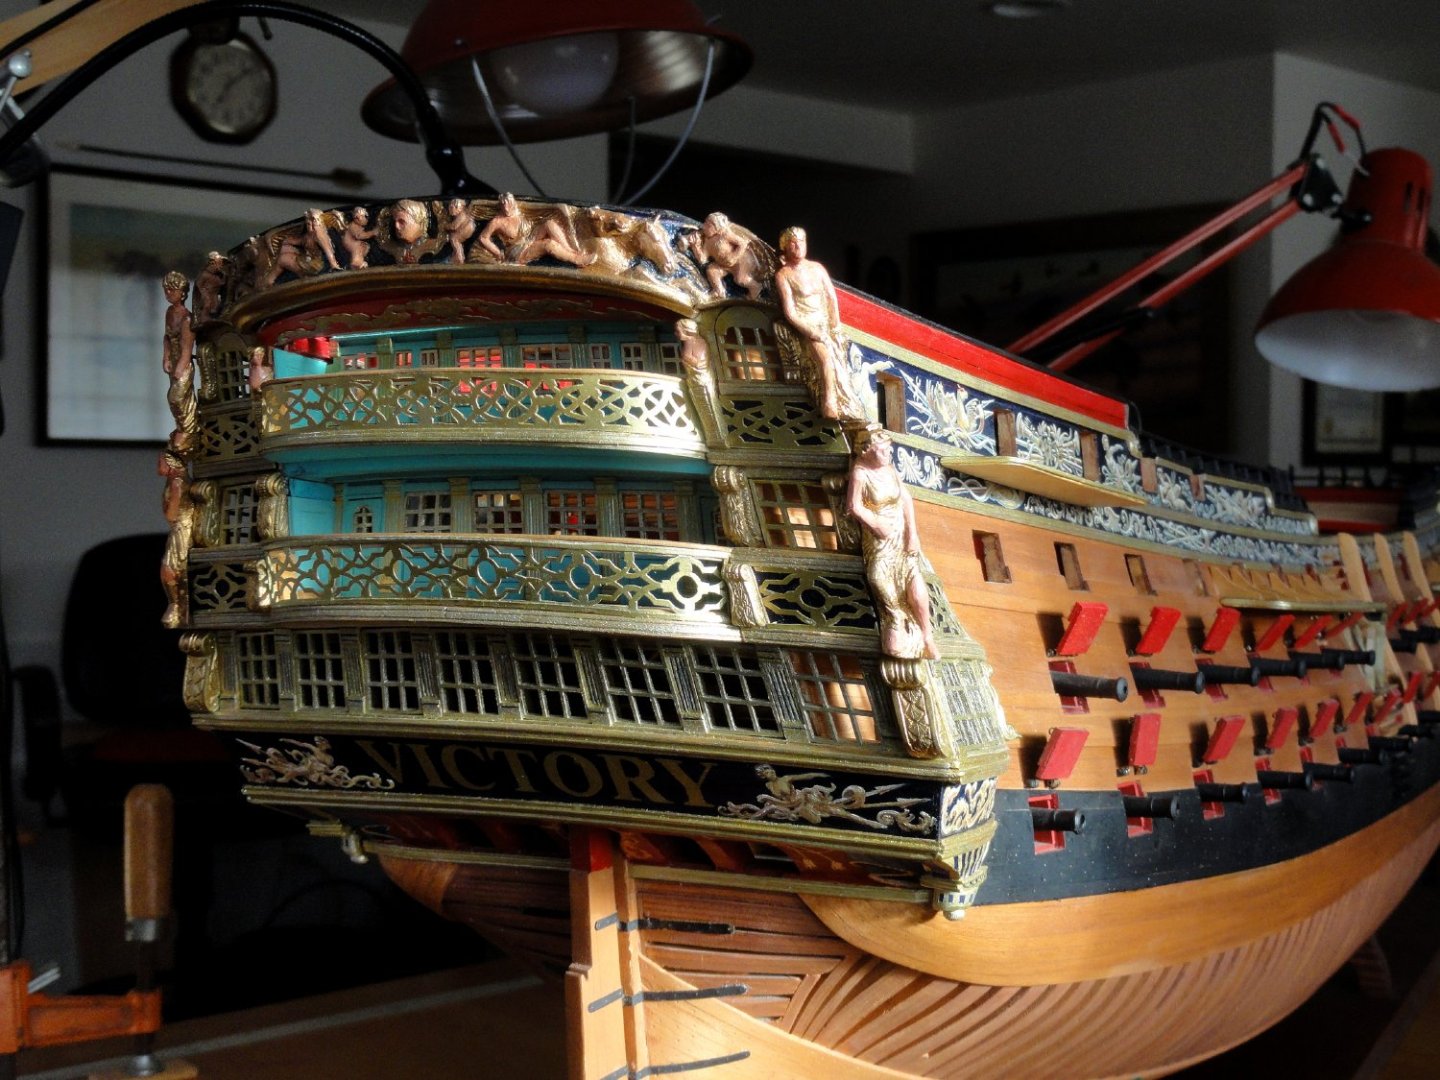
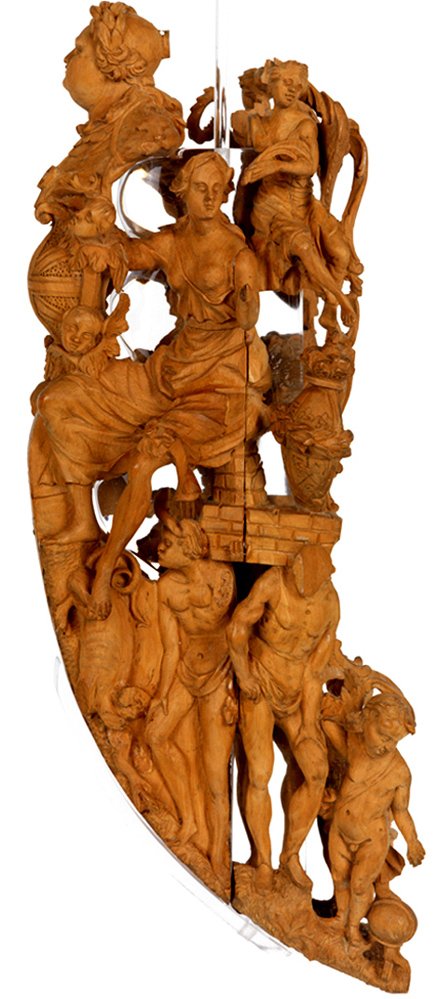
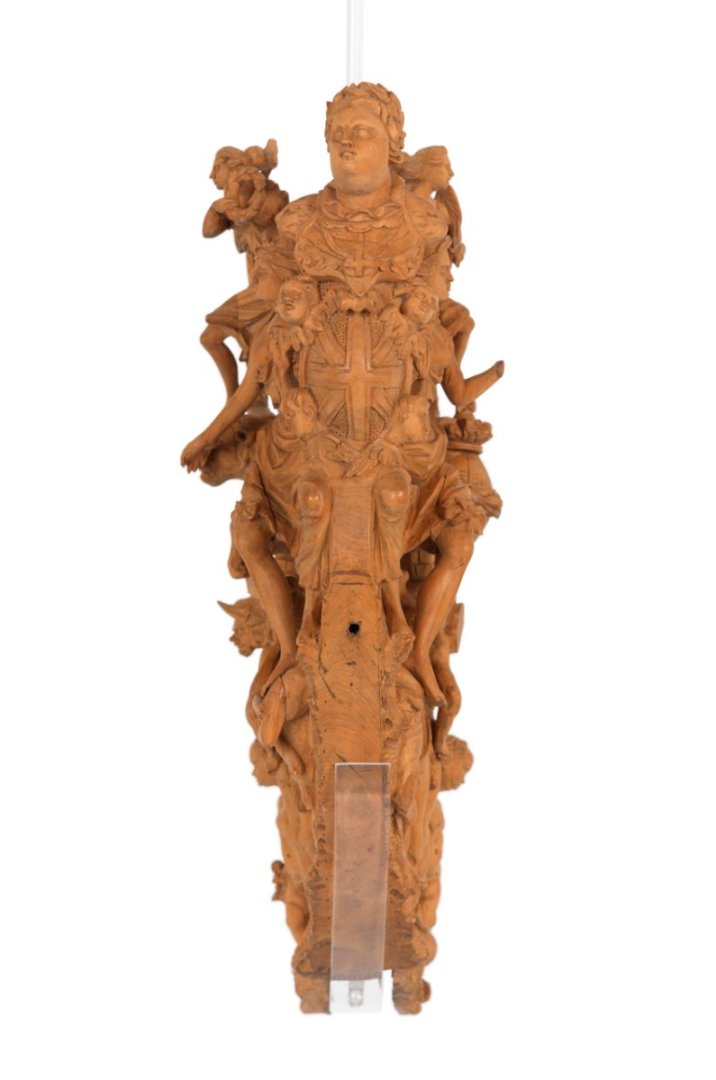
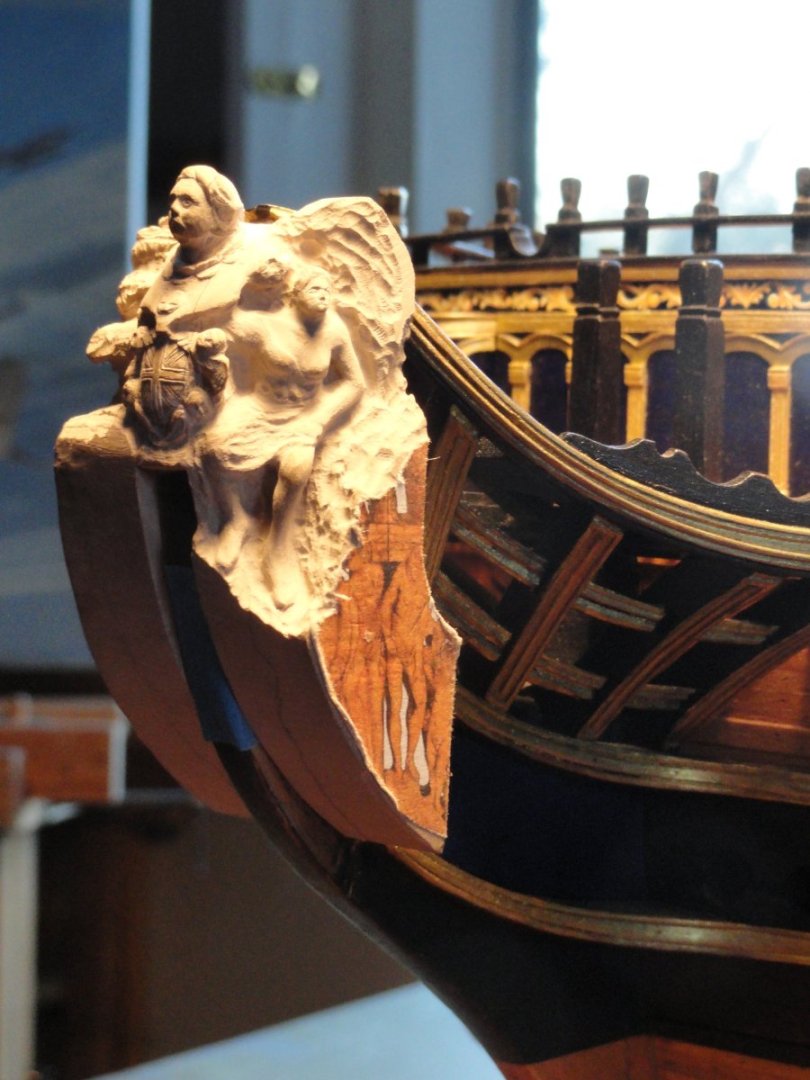
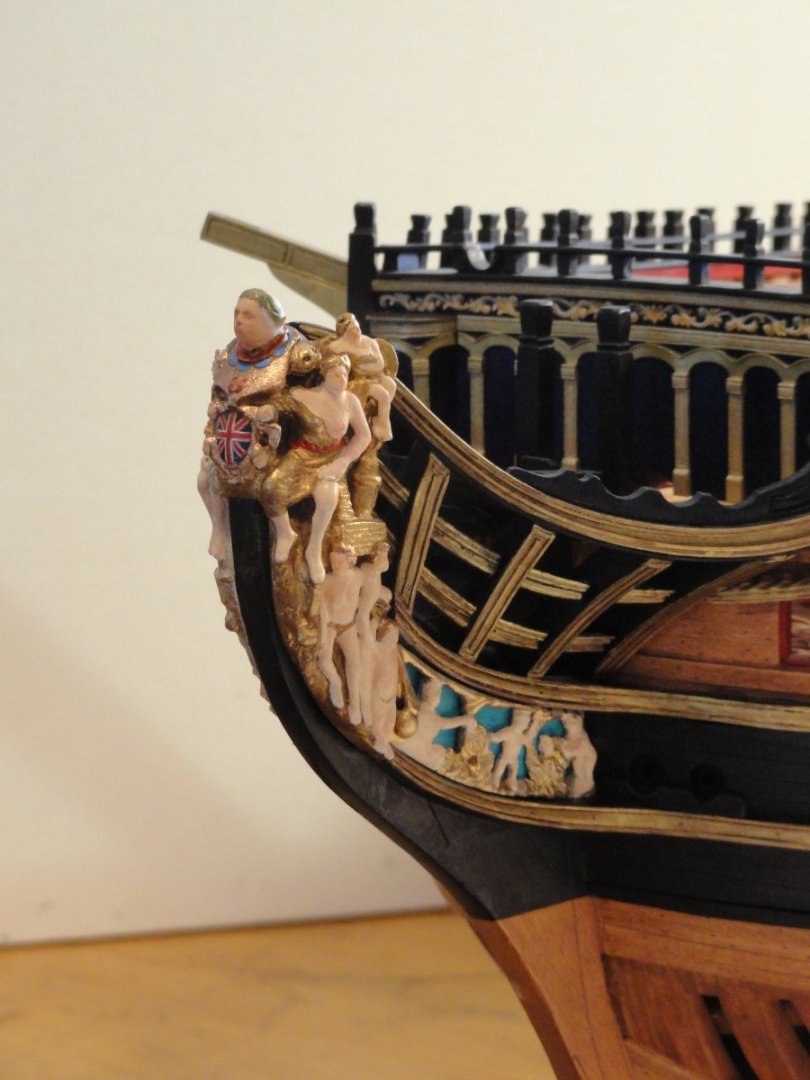
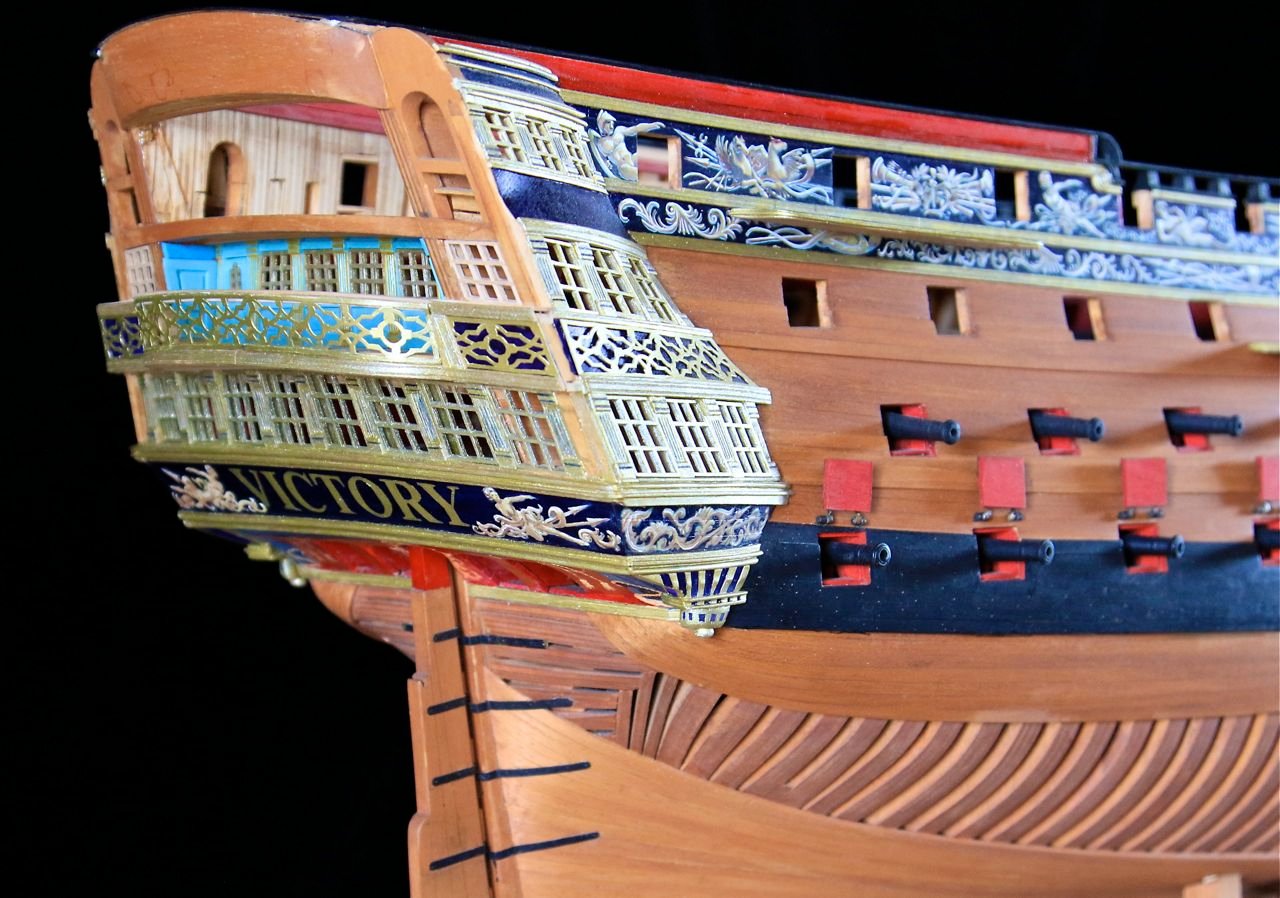
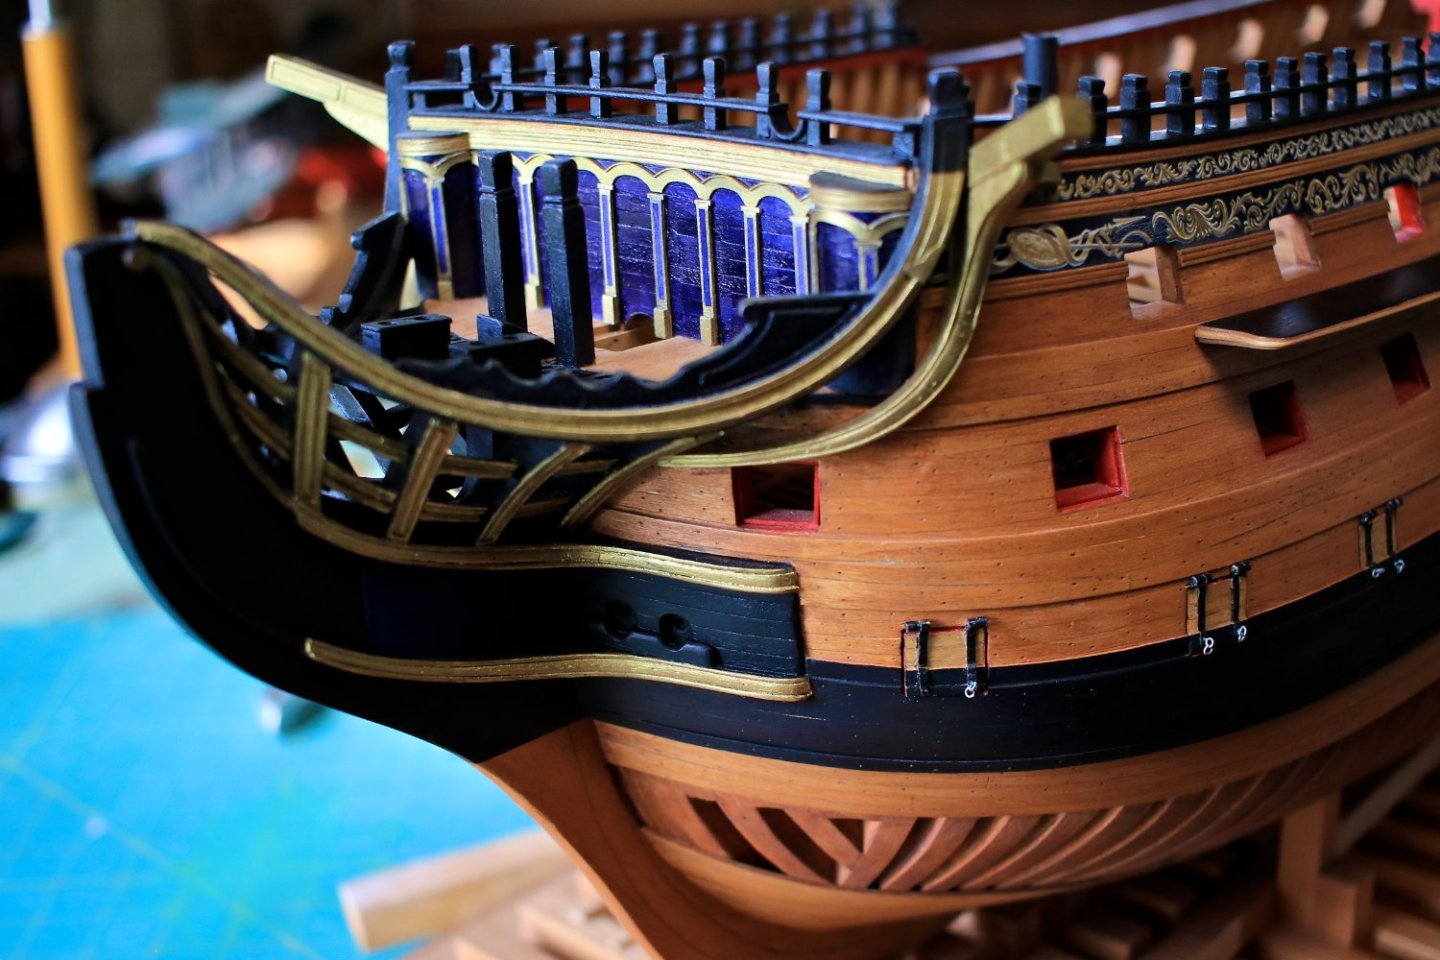
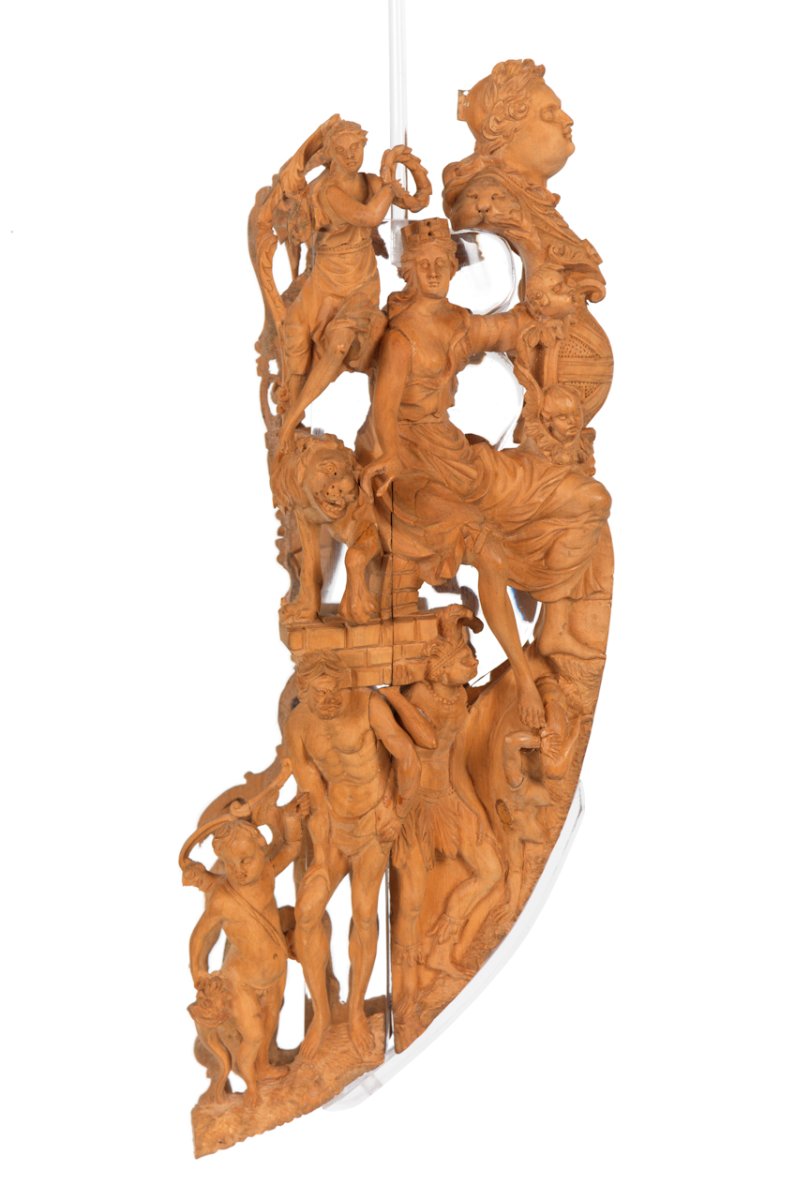
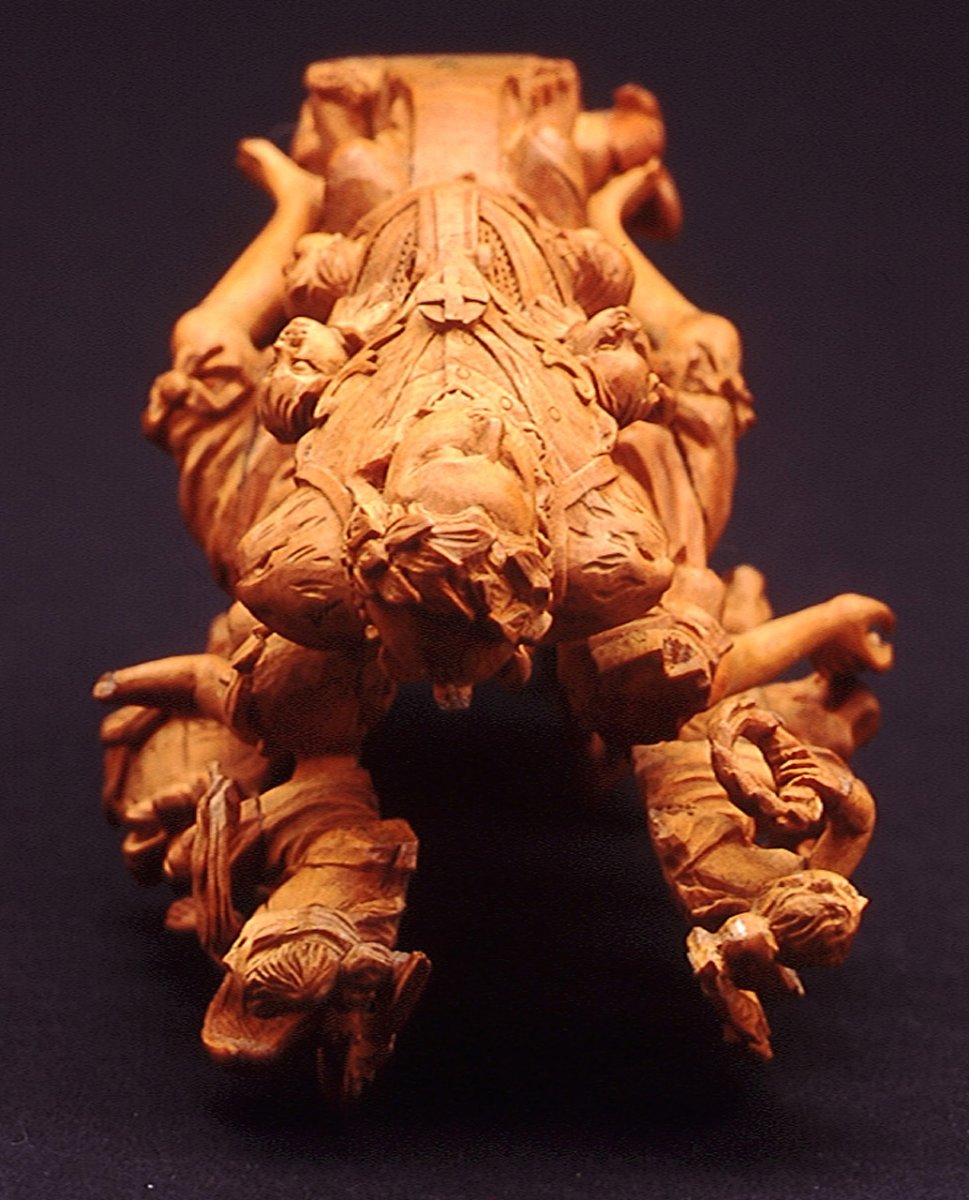
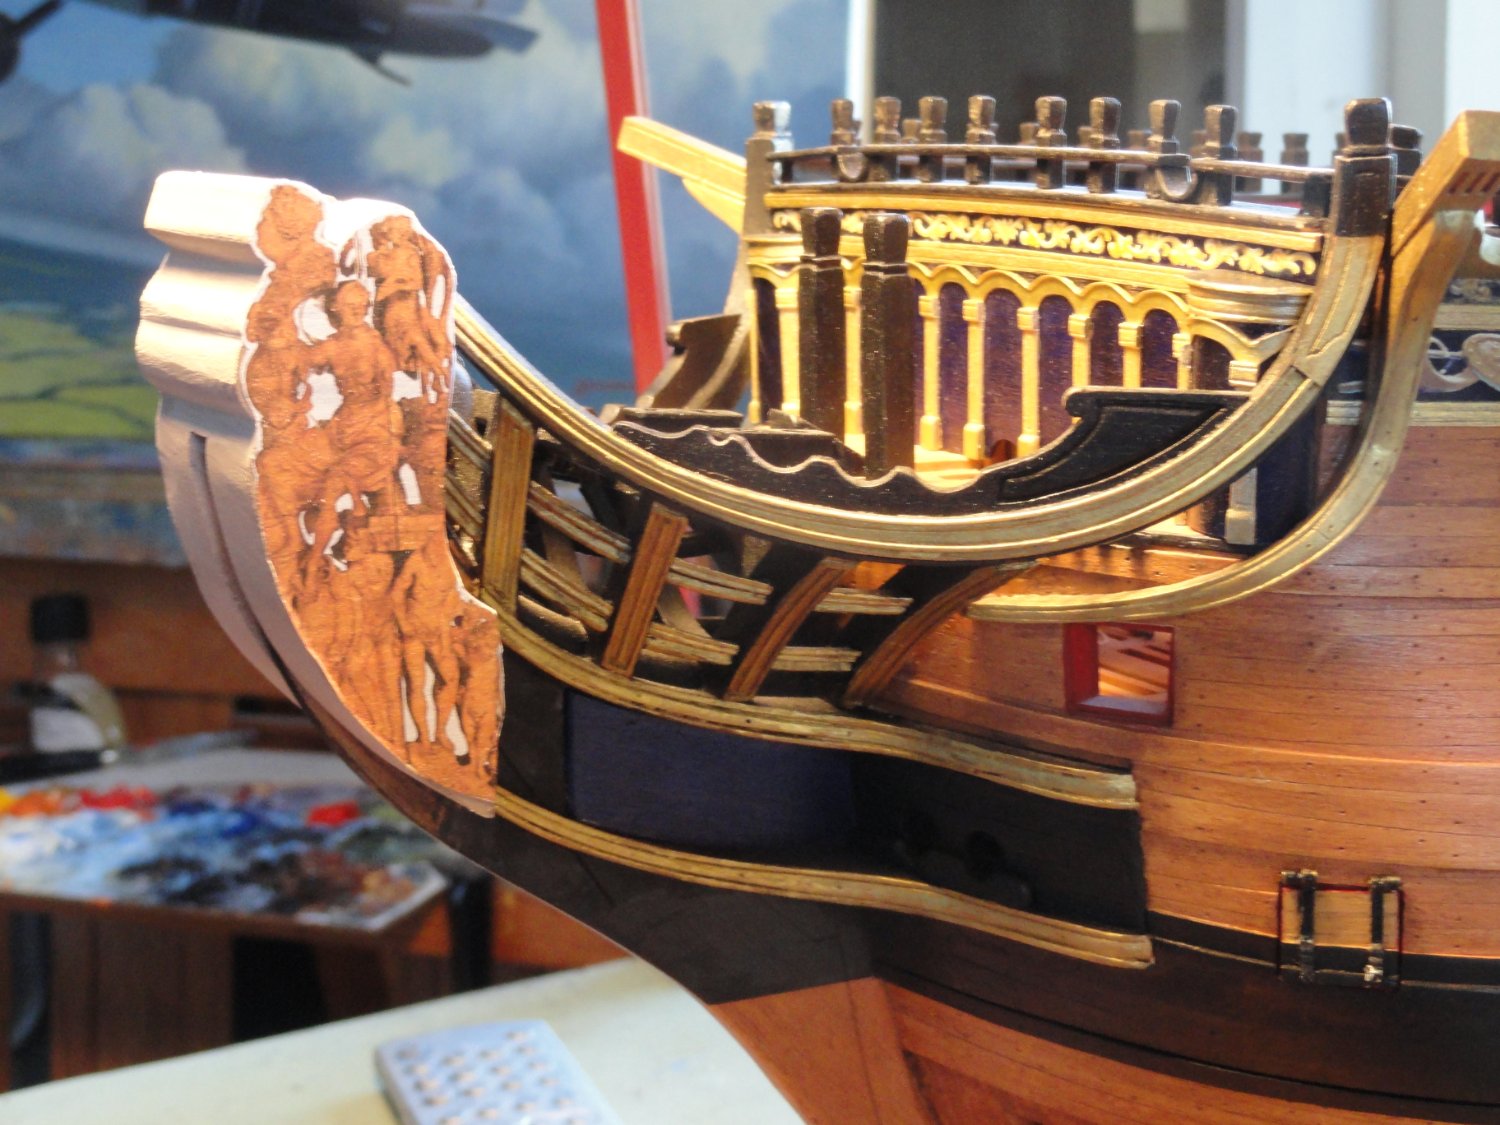
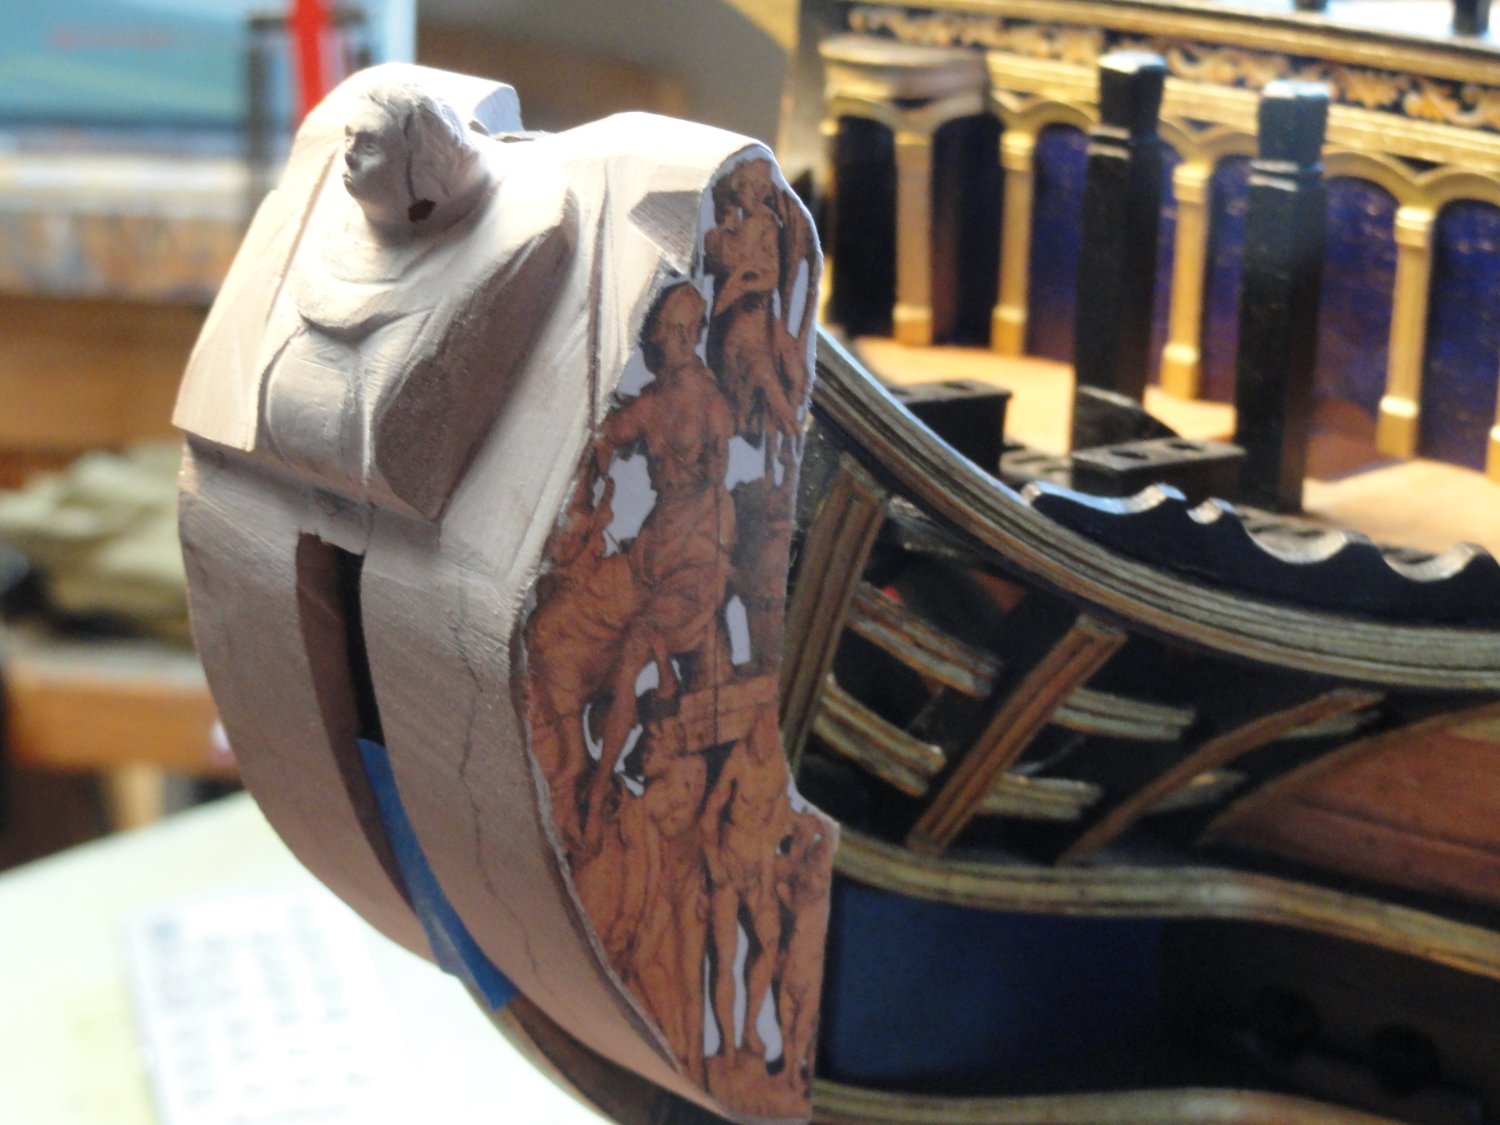
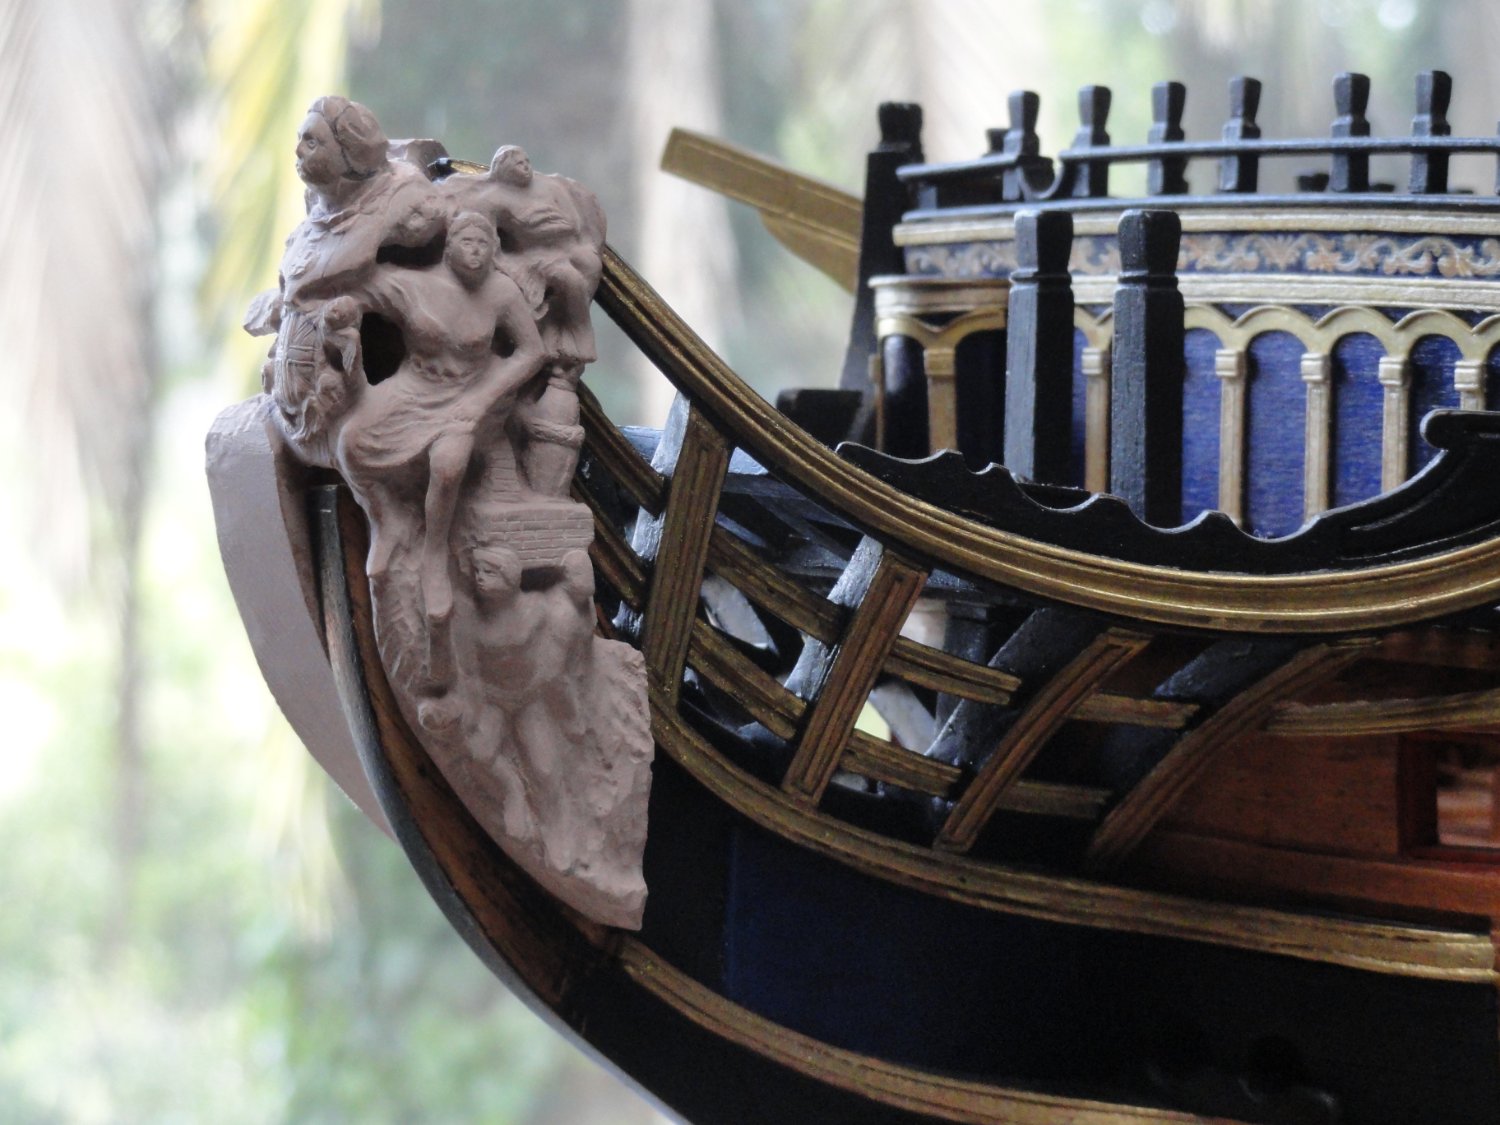
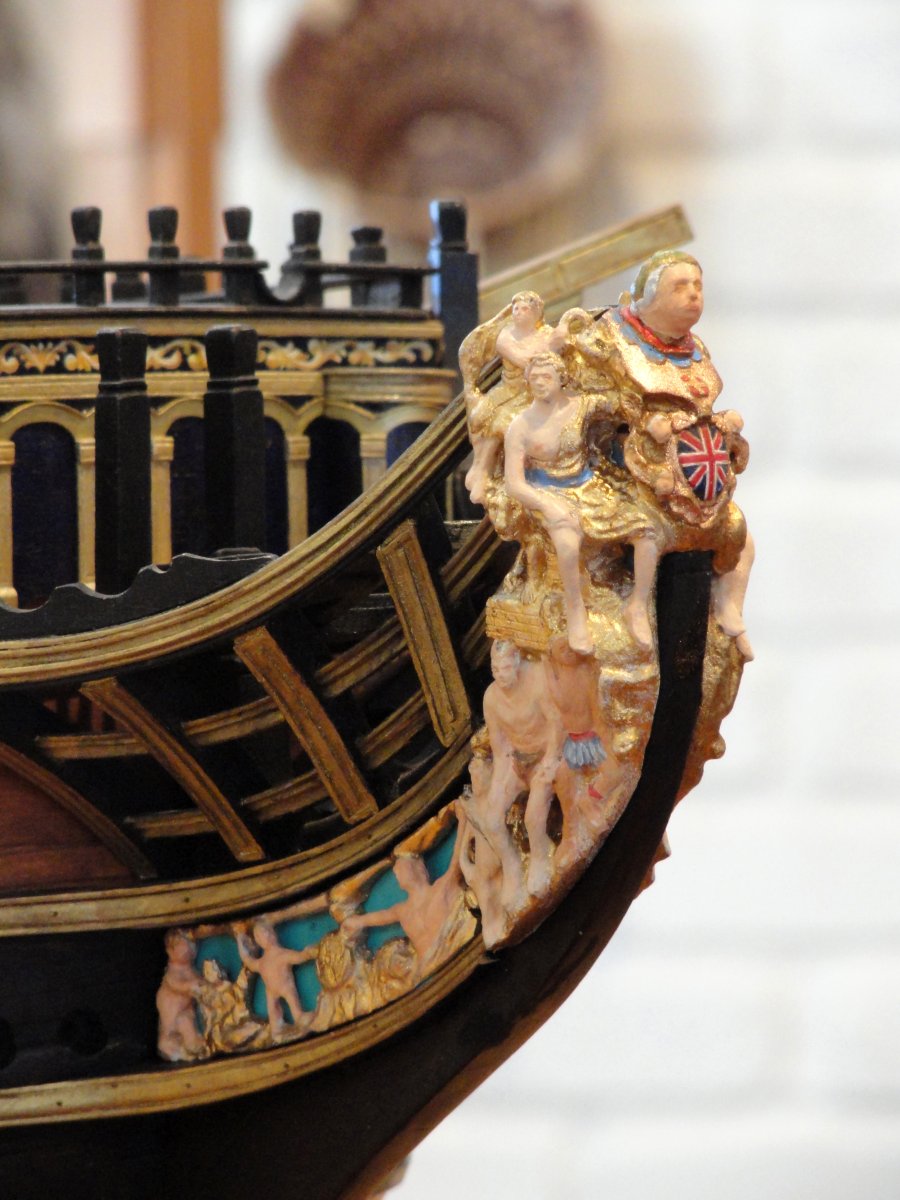
You can see this figure on the lower starboard side. The middle section, below the taffrail, is one shaped-to-fit piece with the figures carved in relief.
-
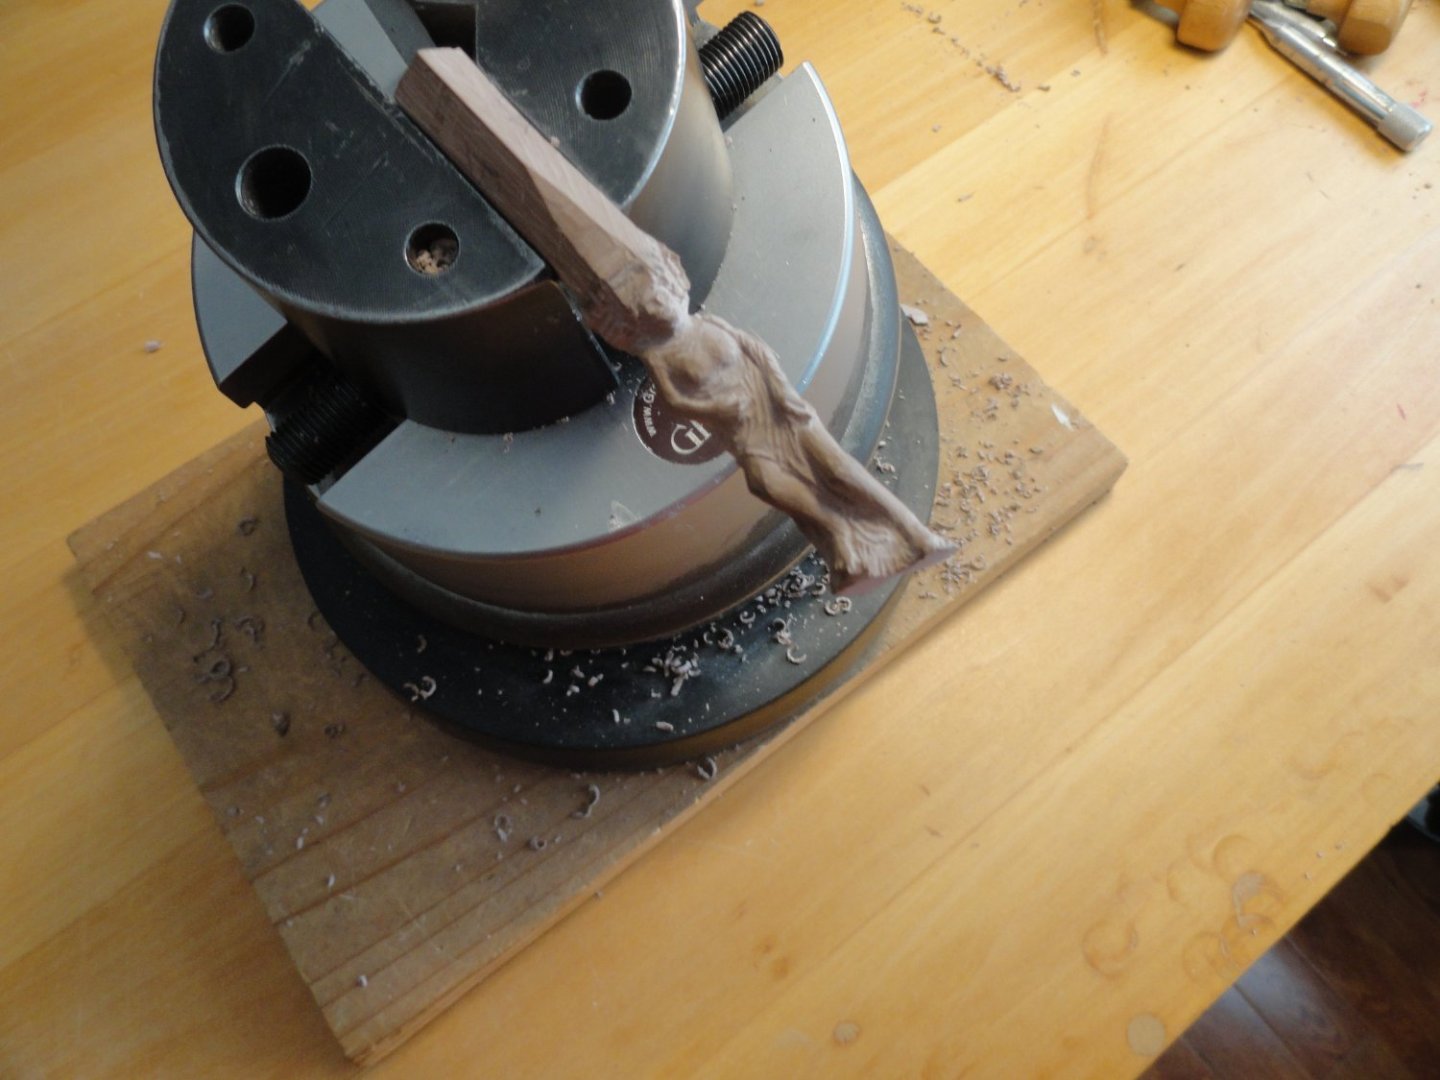
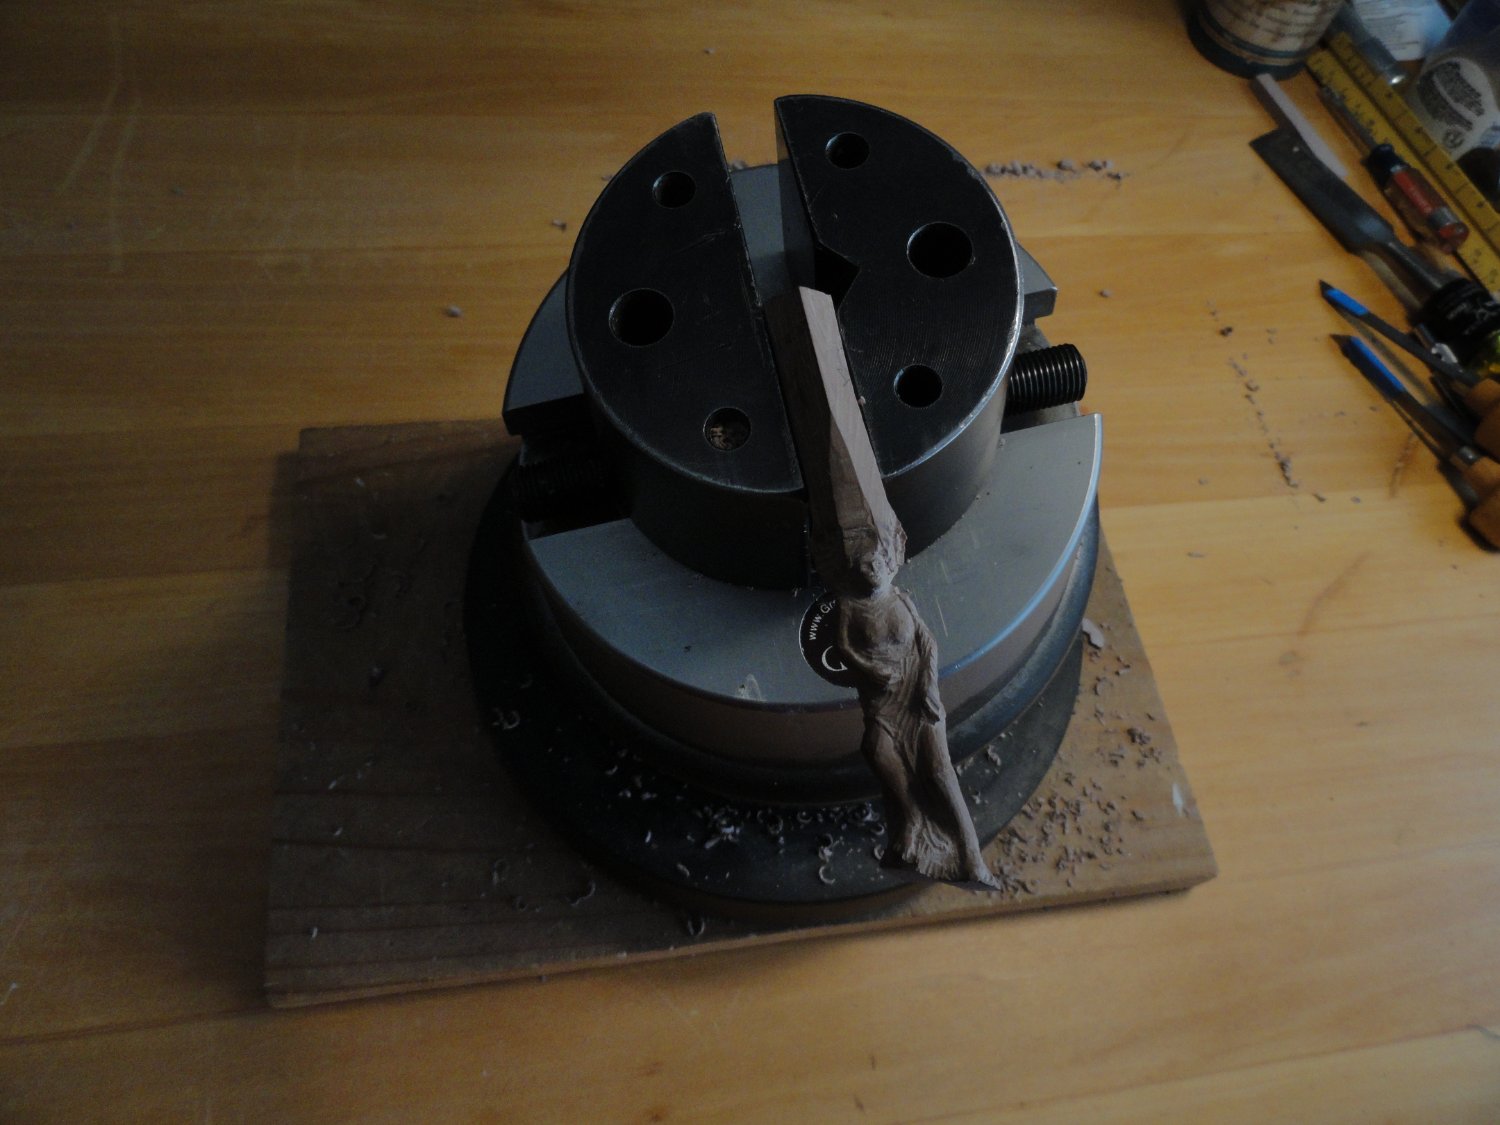
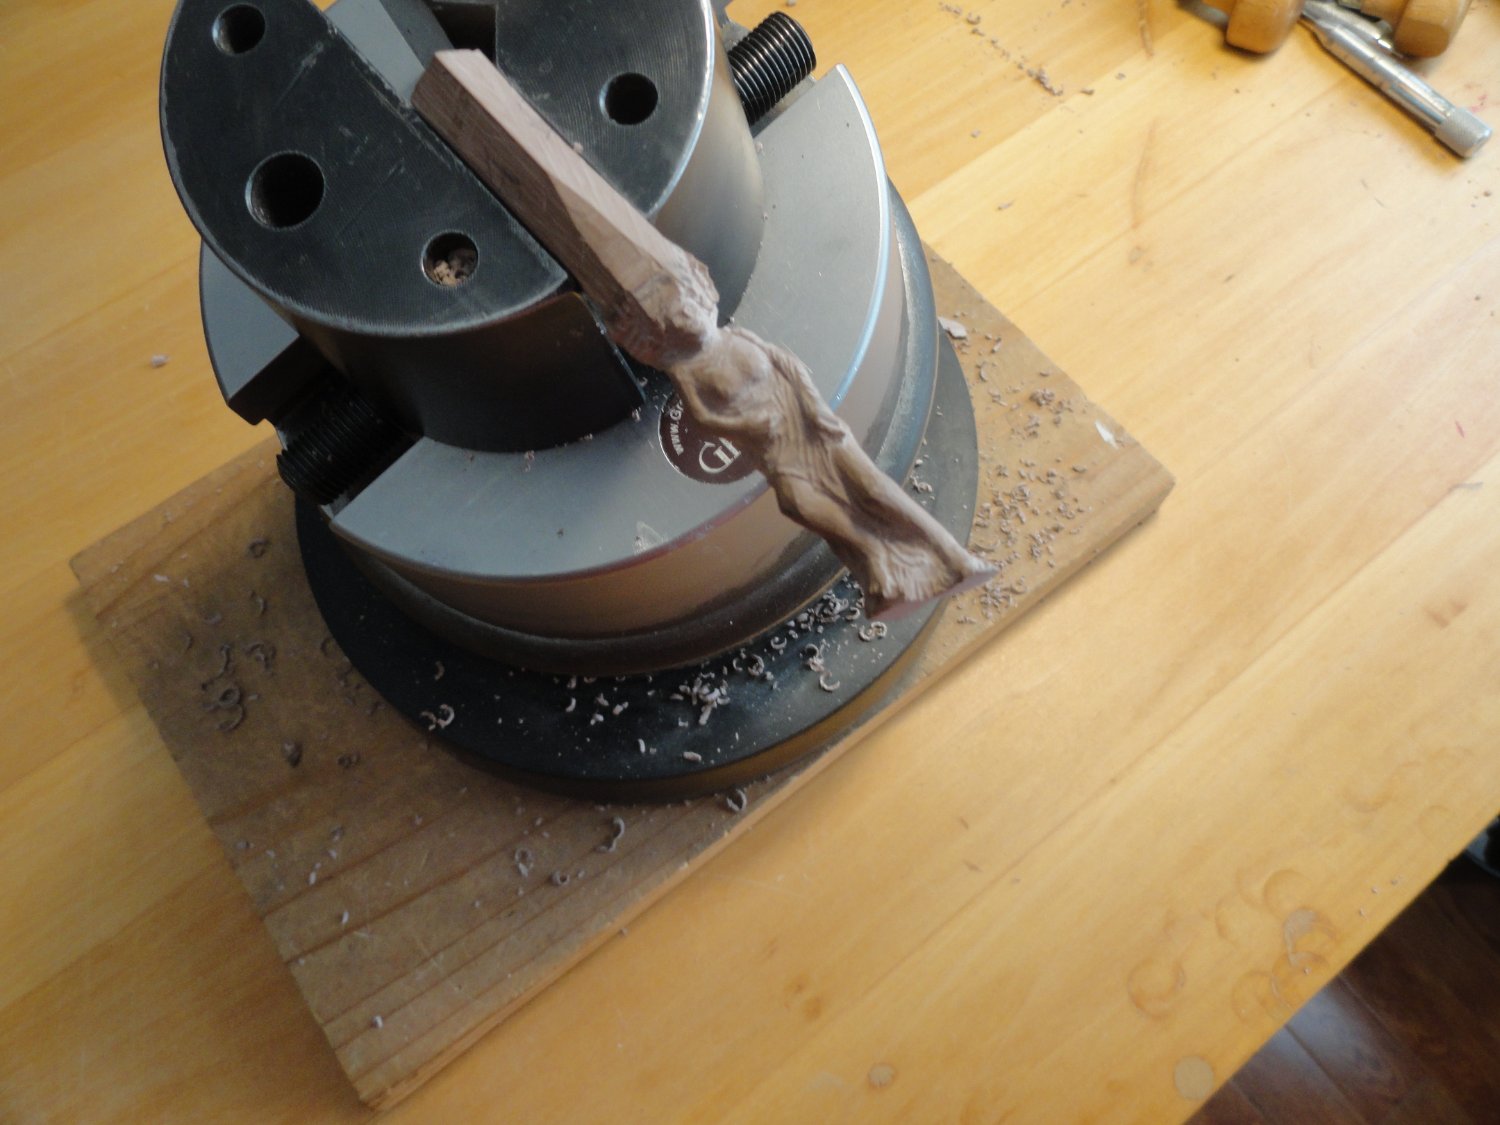
There is a total of six large figures on each side of the upper and lower galleries. One of the figures is clamped to my rotating 30 lb. engraving ball vice. the great advantage of a ball vice is you can rotate the material into the cut for more precise control. I have a pneumatic gravure that I use for engraving steel and I use that to rough out the excess material. Then I modified some hand gravures into miniature chisels to refine the work. T

-
Part 7 The stern galleries and carvings. Thanks again to all for your encouragement and comments. I've been remiss in keeping up with the log to match the rate I'm building. Here's where I left off after finishing the figurehead.
-
Magnificent work and craftmanship. Stunning is all I can say.
-
New to Model Ship World
Steve Anderson replied to Steve Anderson's topic in New member Introductions
Thank you all for your very kind welcomes. -
Thanks fellas.
-
Part 6 The Figurehead. Pictures say more than words on this phase of "Victory". The material I used to carve this is called prototyping foam, also known as butterboard. It is a urethane fine cell structure that can be carved, milled, and sanded. It's available through McMaster-Carr. The huge advantage is there is no grain to contend with. That said, lets get down to the carving and painting of Victory's original figurehead. For the tools I used a Dremel with a small ball cutter for removing large areas of material. Since I'm an Engraver I modified a few cutters into miniature chisels. Finally riffler files to smooth things out. Side note: I repositioned what I call the "Rose Parade" waving of arms and hands. From NMM the 1/2 scale sculpture of the figurehead which I scaled to 1:64. Next Part 7 The stern galleries and start of the upper deck long 12 pounders.


-
Hi Gary, 14x 50".
-
Thanks, Kevin.
-
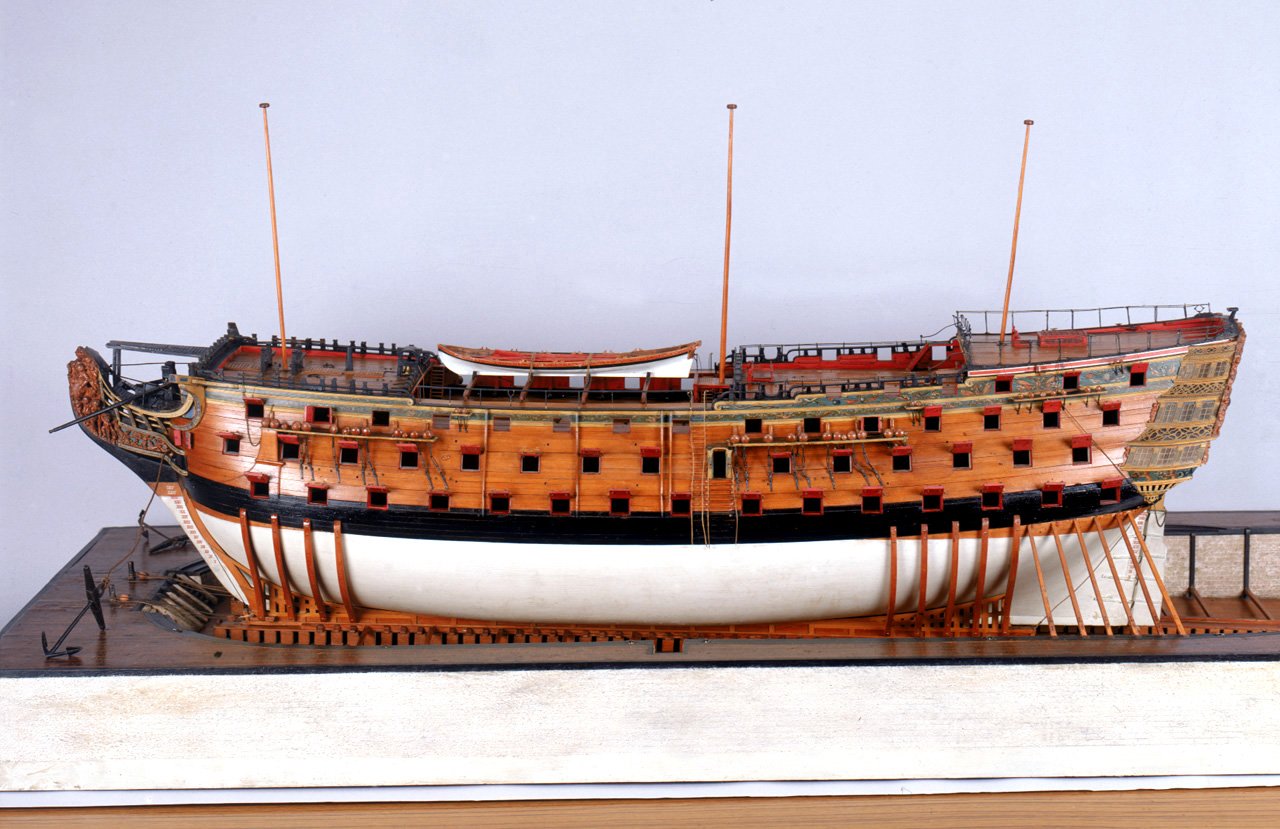
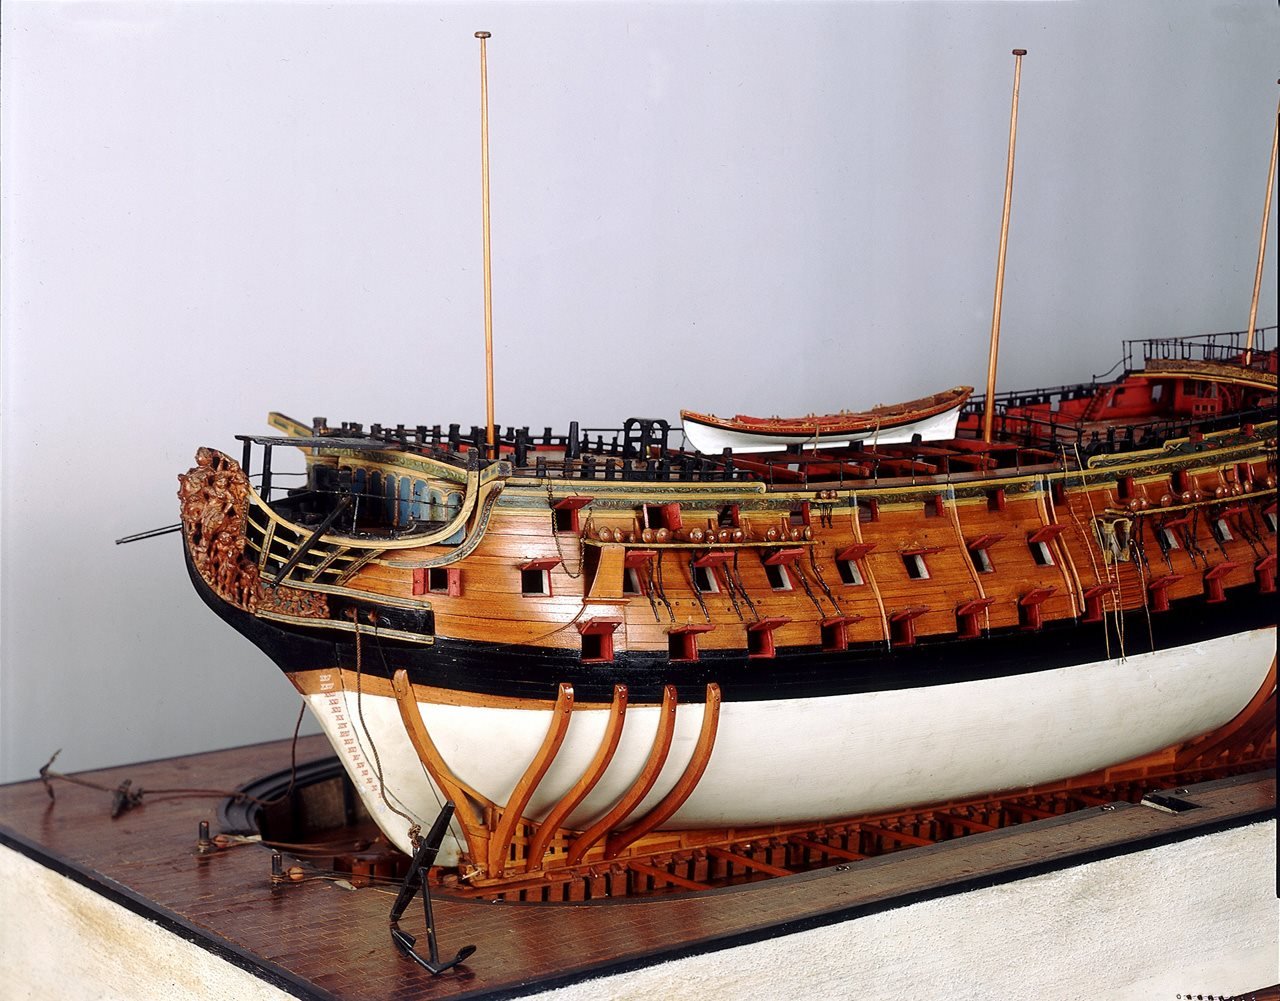
Hi Gary, That's my building/display base while working on the ship. Victory was not launched. She was floated in a drydock at Chatham. Anobium, Friezes are hand painted with a very small round pointed brush. Thanks to all for your kind comments.
-
Thanks, Grant. Much appreciated.
-
Very impressive.
-
Thanks, Scrubby, Pirate Adam, and Albert.
-
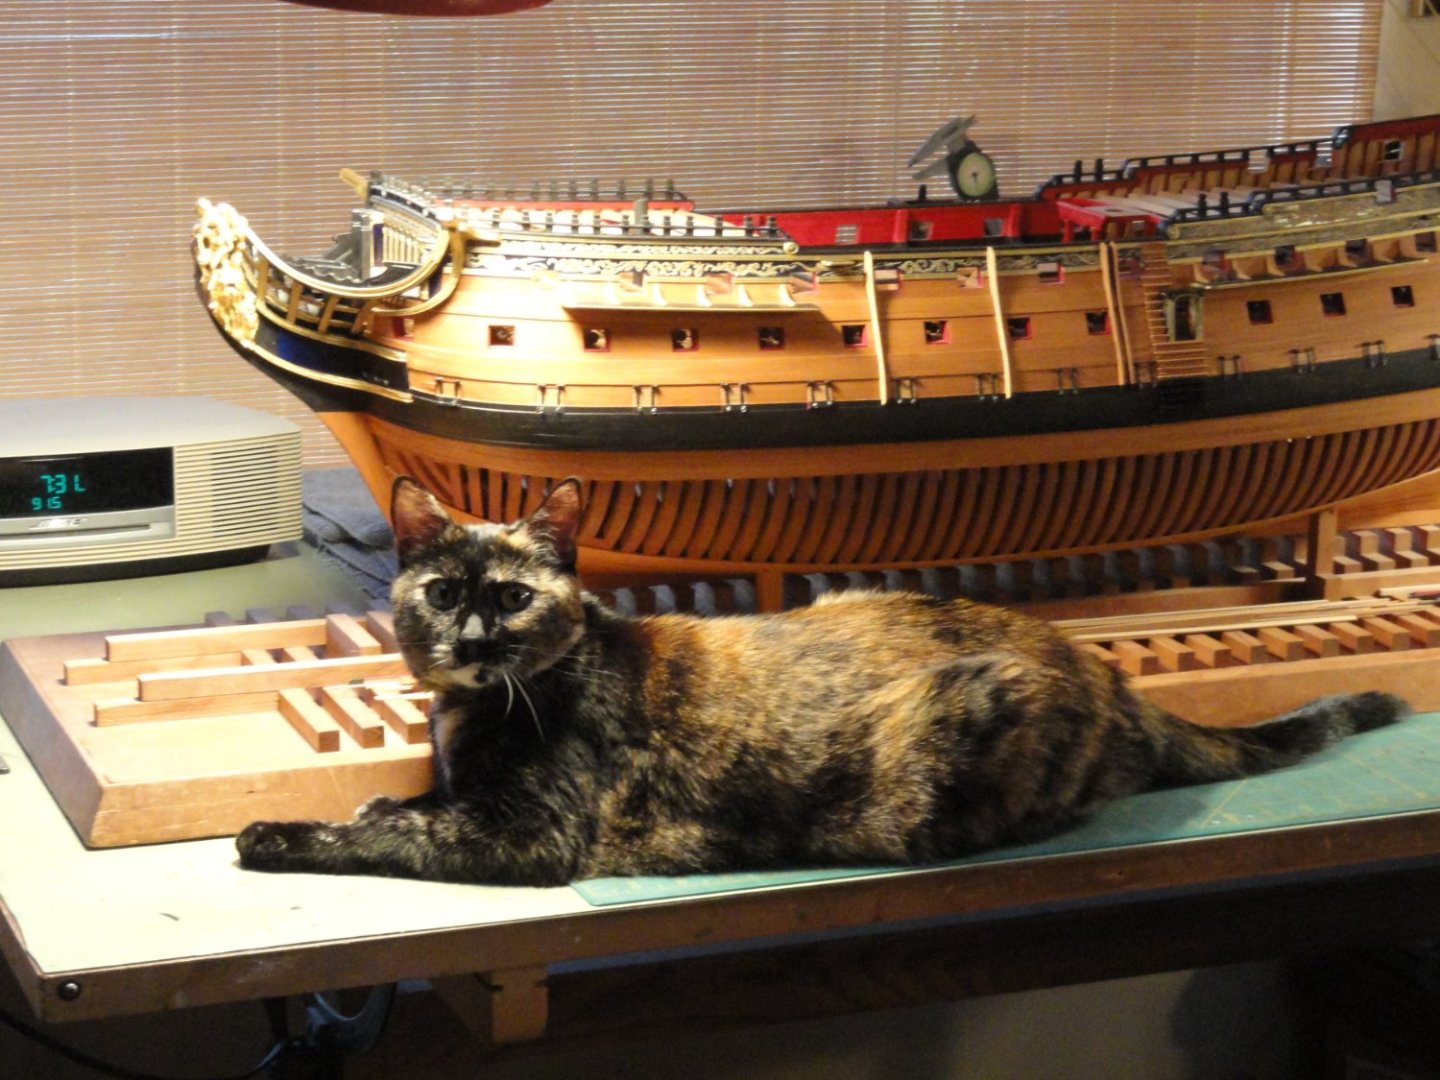
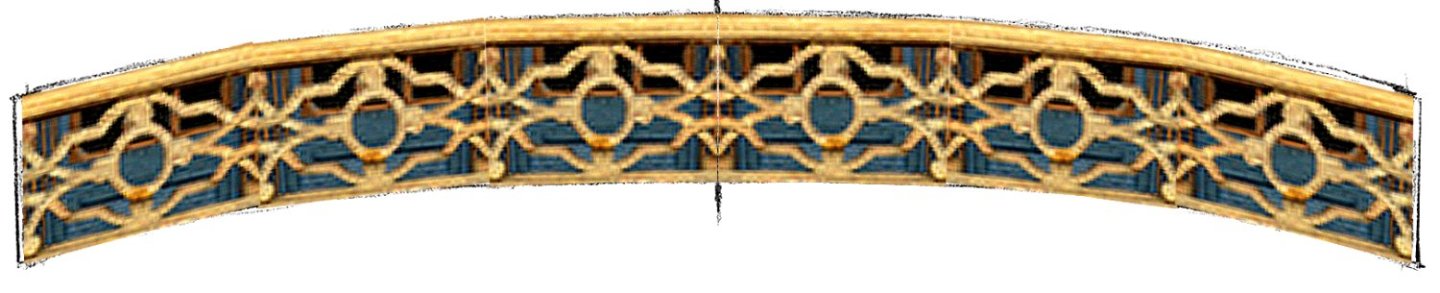
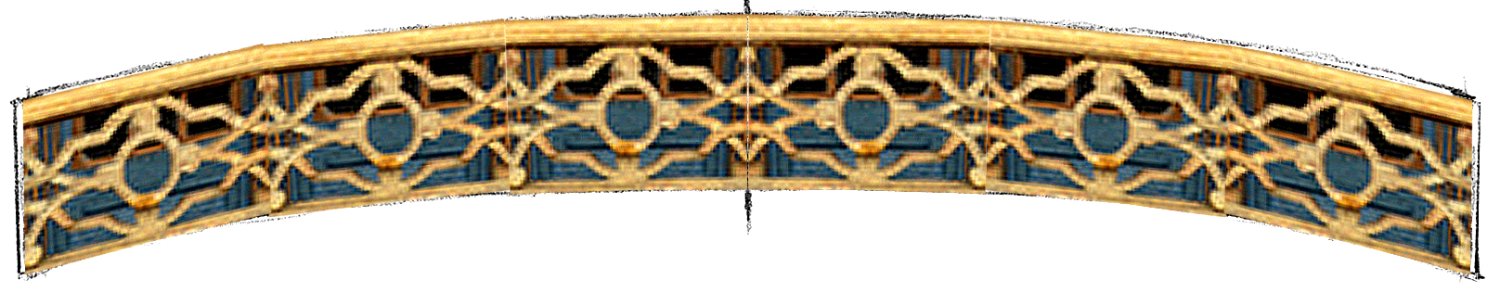
Part 5 The Stern Galleries Once more thanks to for interest and encouraging comments. First off, I'd like introduce the ship's cat "Pogo". Project manager, little best friend, and lays on the exact tool I'm looking for. Been on job just about 15 years. (Bottom photo) This is what Victory looked like for years, so after finishing the middle deck with the 24 pounders, it was time for a sanity break to start closing in the back of the ship. Each of the middle deck windows consists of 32 individual pieces of wood. I made templates for all of them. The upper deck balcony was especially fun to build. "Victory" was painted by cutting a mask and then sprayed with my airbrush in gold leaf lacquer. The ladies are hand painted with a brush in oils. I had to chuckle at the drawn stage curtains revealing the gun ports. This is the pattern I made in Photoshop for the balcony balustrade using the 1765 model for reference. Next, in Part 6, the magnificent figurehead that was removed in the 1800-03 rebuild.


.thumb.JPG.2449b49f3da6a5713173dcf98c9a2ca0.JPG)
-
Thanks, Starlight. You are correct. The modeling techniques of the '90's are closer to the 18th Century than now, with exception of electric power tools.
-
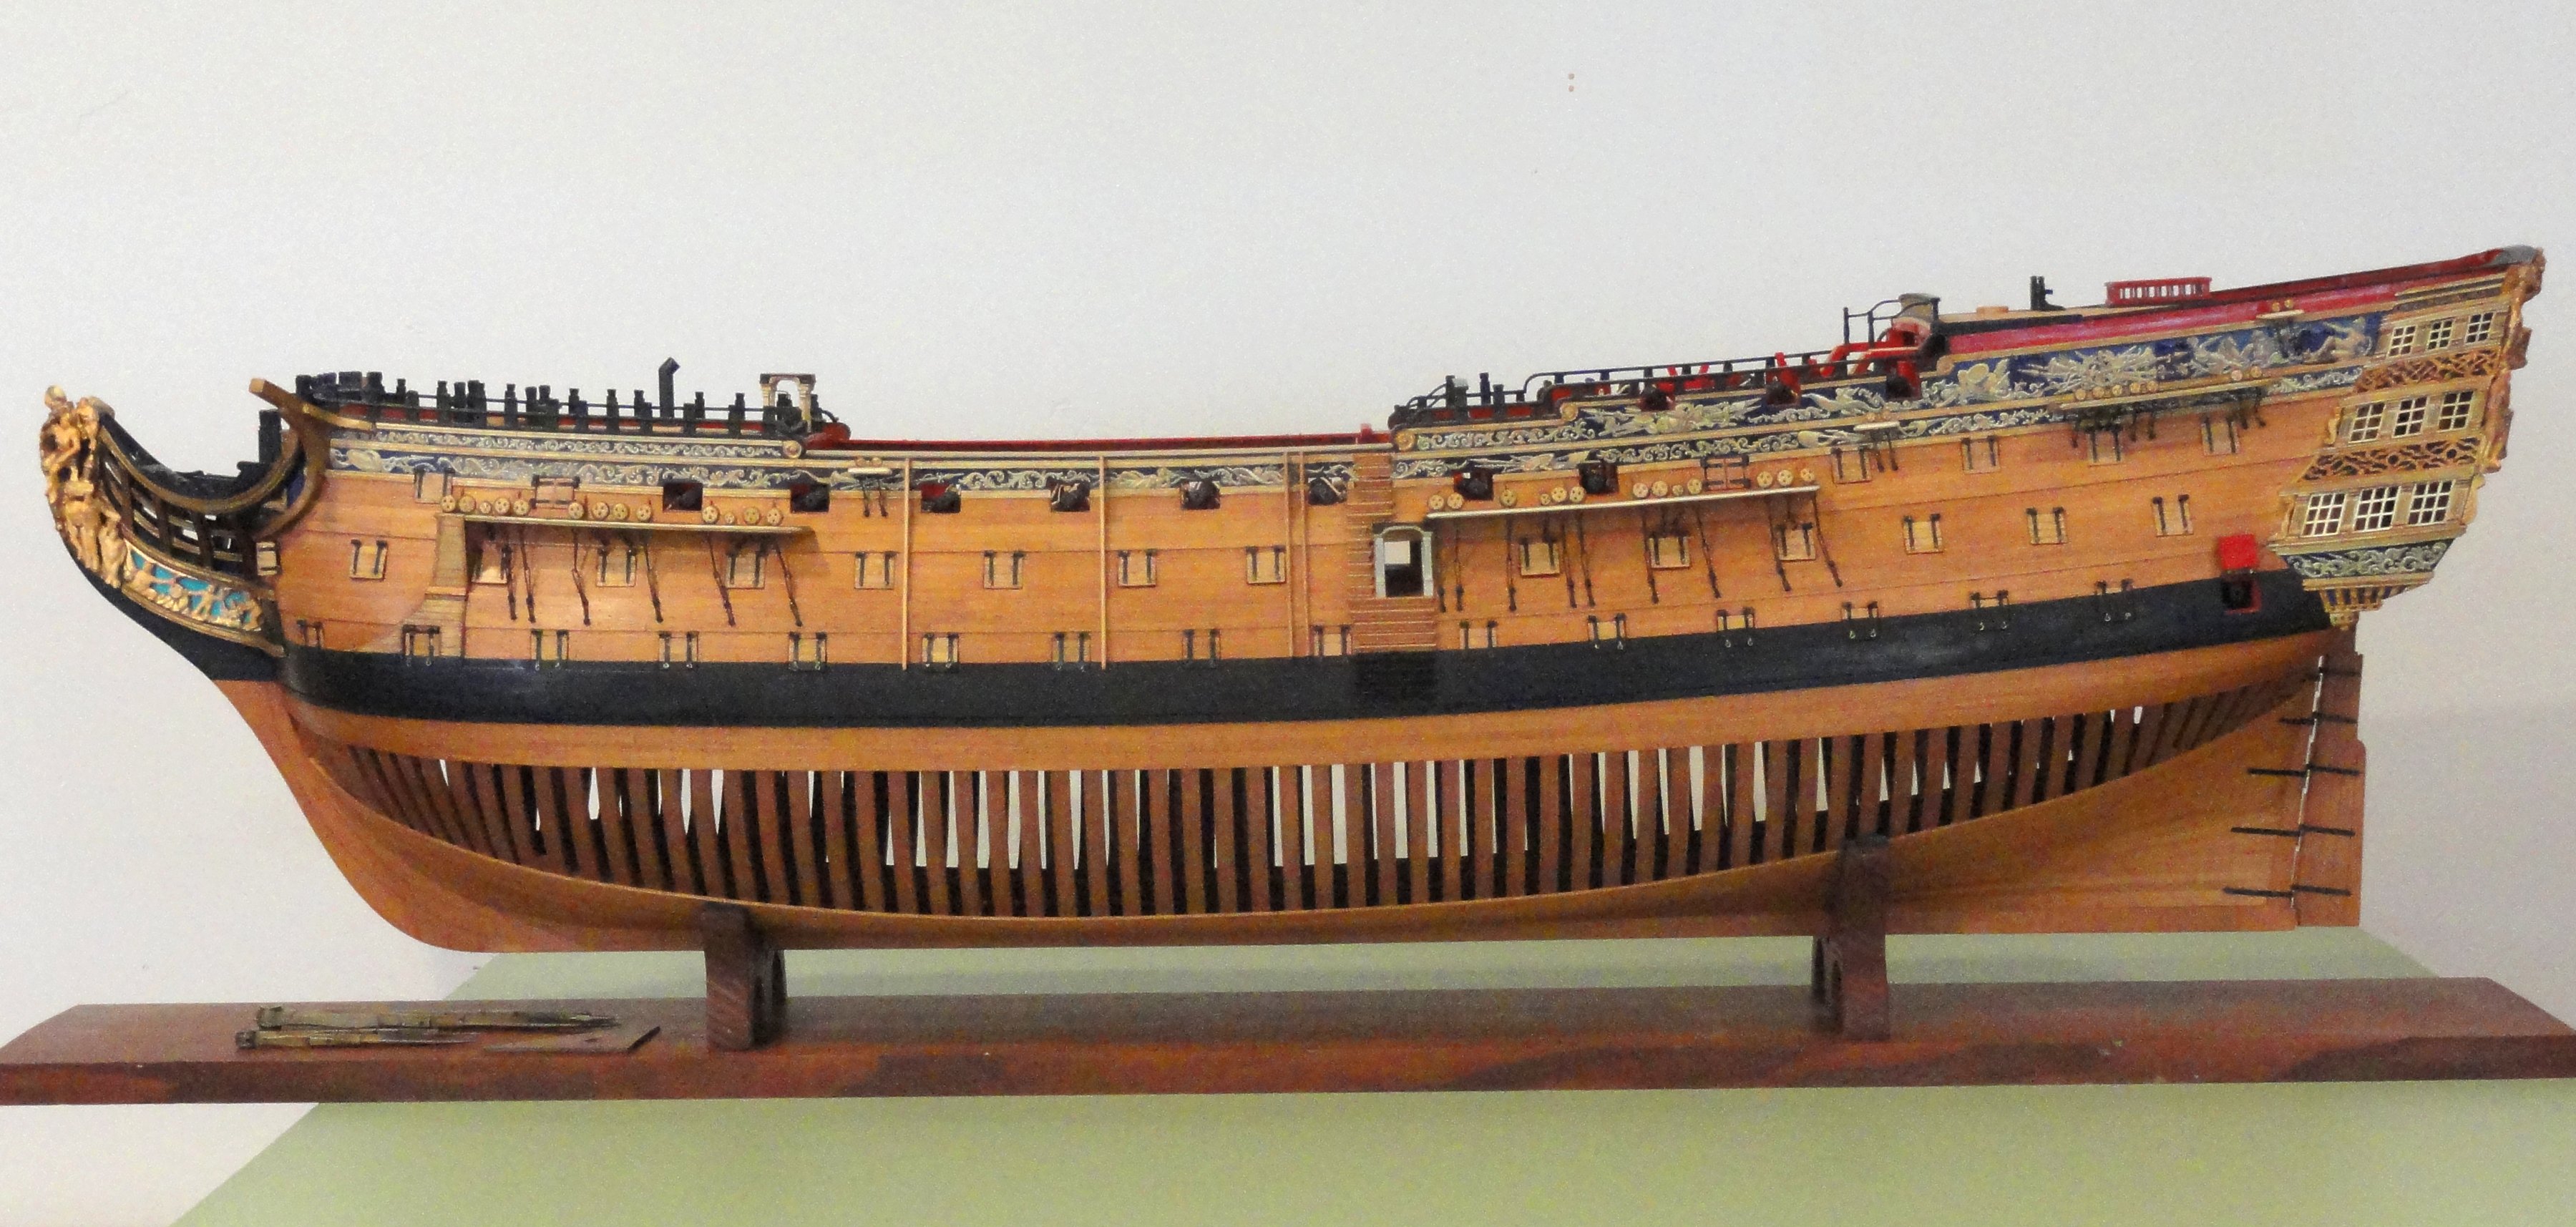
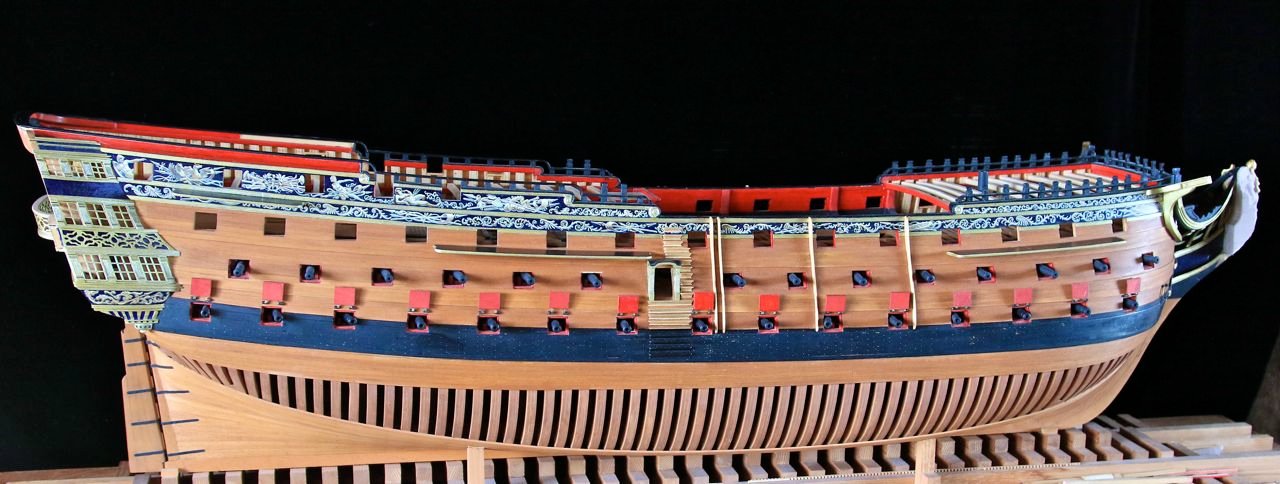
Part 4 When I started building HMS Victory there was no Internet. All research had to be done through print media and involved years of building your own library. Centuries-old treasures lay in display cases in museums available only to visitors, and at that, only about 10 percent of their entire collection is on display. In 1994-95 along came the World Wide Web (www). That's what it was called. The term, Internet, did not exist yet. In its cave drawing days it was like a bad set of Encyclopedias, but it was a start. As Dr. Watson says, "After all Holmes, we are men of Science," and a giant network was born that expanded with light speed. In 2014 I discovered the National Maritime Museum's website. http://collections.rmg.co.uk/collec...8;collectionReference=subject-90308;start=260 Up to this point I was working in the blind as to what the actual details for the pre-1800 period of the ship. I eagerly went to the ship models collection, which is the link above, and found two contemporary Victory models in her 1765+ configuration. These models were not on display when I made multiple visits in 1988. The NMM is under an umbrella called the Royal Museums Greenwich or RMG. This is only one snowflake on the tip of the iceberg. The wonders of the Internet, and thanks to the staff of RMG, are showing us not only what is on display, but the other 90 percent as well. I finally found what I needed to complete the build I wanted. Original plan drawings are in a section too. With new inspiration I started back on the build and what changes had to be made. The first and most obvious was the fore and main channels had to lowered to below the upper deck gunports. I used brass pins to hold these in place so it was a matter of relocating them and replacing the missing moldings in their previous locations. Following: a series of before and after the changes. You'll notice other areas of progress between the below photos. Next thing on the list was the beakhead bulkhead and round houses. I had used contemporary model photos of another three decker for reference and the dimensions and moldings were too high. So this was cut out and newly constructed. Again before and after photos. Changes include entry ports and additional fenders. The last four photos are from 5-2016 to 5-2017. Next, Part 5 will cover the stern galleries.


.thumb.JPG.5f5b83a44fff378eb17a758debc2429c.JPG)


-
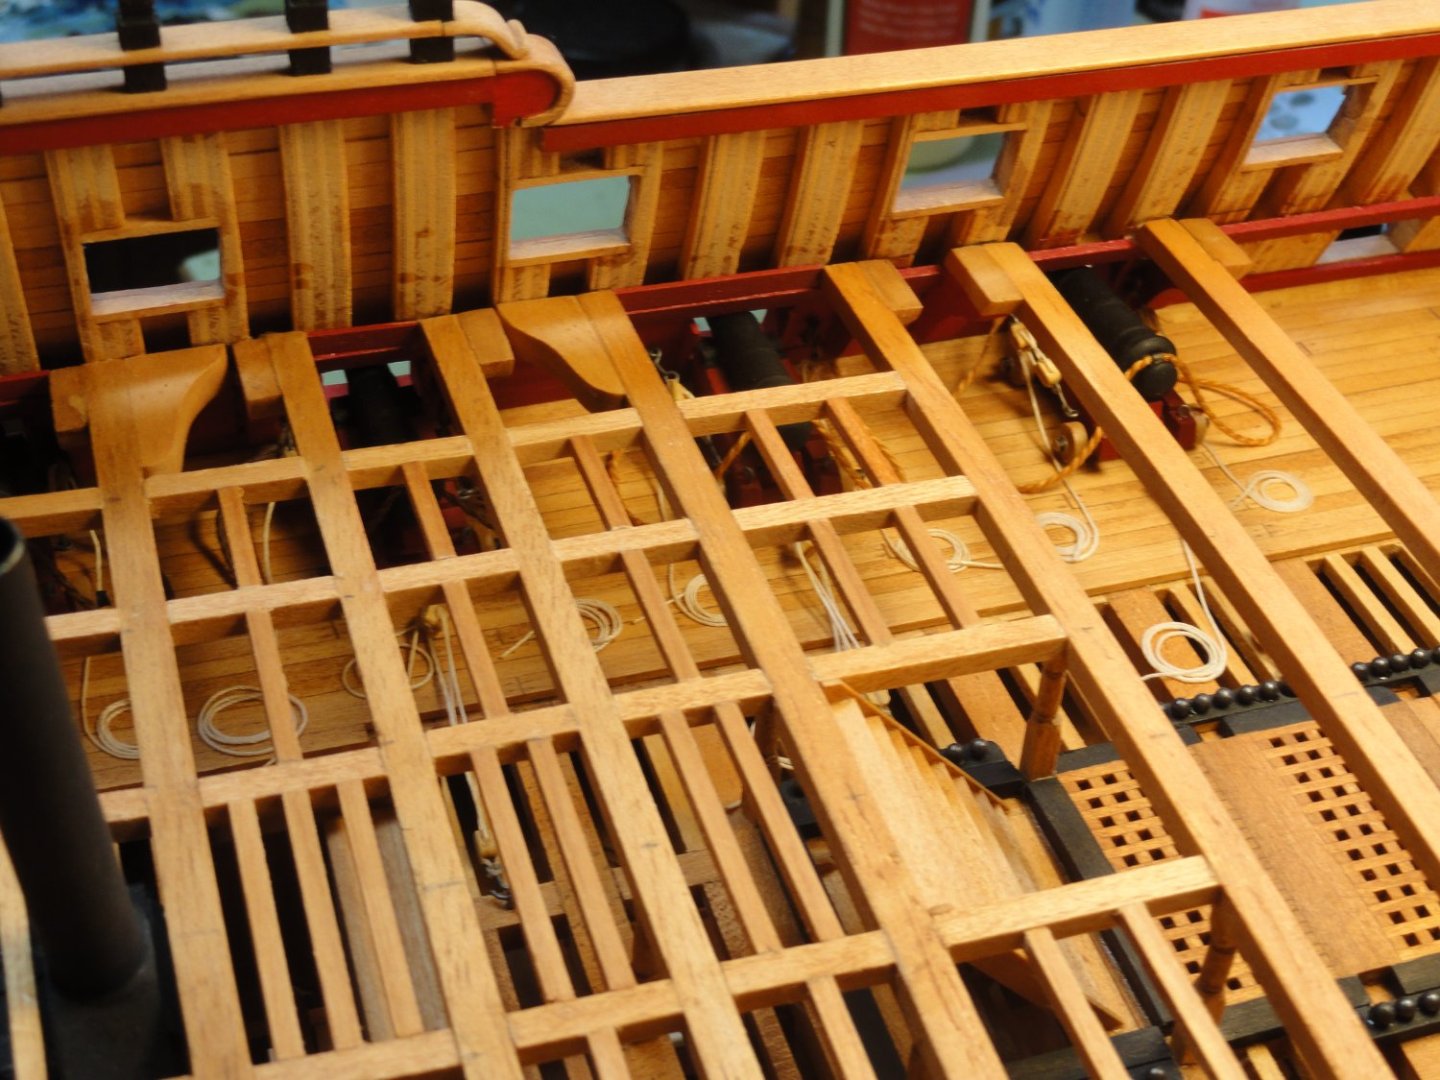
Part 3 One thing about building a ship model is, that no matter what stage it's in, it's cool to look at. In 2002 my father-in-law built an oak and lexan case for the ship which fit over the building cradle to protect it from dust. The addition of the removable case made the ship construction look more museum like. It was the catalyst that got me motivated again to work on the project. Below are the rigging stations for each port and starboard gun sets. These are the middle deck 24 pounders. The lower gun 32's were done by the same method. I cut and installed the hanging knees, inner planking, and ring bolts. The beams were fitted but removed for installation of the guns in sets of four. After installation the middle deck area beams for that section and lodging knees were installed. And finally the gun port doors with hand fabricated brass hinges. Then on to the next set. By switching tasks I was able to keep my sanity and the progress was more rewarding. During this period of time the rudder, tiller with ropes for the helm were installed, and the chain pumps on the lower deck. The Galley stove and pantry were fabricated and installed too. As a working artist most of my weekday times, with some exceptions, are spent painting aviation art. (I specialize in the First Air War of 1914-18.) So construction on Victory has been confined to weekends if I'm not building something else. After the finish of the middle deck framing and planking it was back to guns again. This time the 24 pounders. Again I divided up the tasks and started on closing up the bow. The forward forecastle bulkhead and the top head rails set the tone. The head timbers and rails are probably the most complicated structure on the ship. You can just visualize them cutting through the enemy's line of battle. The finished head rails and timbers really stoked the fires of my building frenzy. As C. Nepean Longridge writes in his book, The Anatomy of Nelson's Ships, "One can light one's pipe at the end of the day and rest assured that the job was done properly." So British! Still cracks me up. Next: Part 4 The ship project gains momentum.


-
Thank you Albert.


.JPG.4c39effbe9d96bb1abf1897d8dadf04a.JPG)

.JPG.a1fd58384643c5553e6e363da586e228.JPG)