MisterSteele
-
Posts
16 -
Joined
-
Last visited
Recent Profile Visitors
239 profile views


-
 druxey reacted to a post in a topic:
Lowell Grand Banks Dory by MisterSteele - FINISHED - Model Shipways - 1:24
druxey reacted to a post in a topic:
Lowell Grand Banks Dory by MisterSteele - FINISHED - Model Shipways - 1:24
-
druxey reacted to a post in a topic:
Lowell Grand Banks Dory by MisterSteele - FINISHED - Model Shipways - 1:24
-
druxey reacted to a post in a topic:
Lowell Grand Banks Dory by MisterSteele - FINISHED - Model Shipways - 1:24
-
druxey reacted to a post in a topic:
Lowell Grand Banks Dory by MisterSteele - FINISHED - Model Shipways - 1:24
-
Ryland Craze reacted to a post in a topic:
Lowell Grand Banks Dory by MisterSteele - FINISHED - Model Shipways - 1:24
-
iMustBeCrazy reacted to a post in a topic:
Lowell Grand Banks Dory by MisterSteele - FINISHED - Model Shipways - 1:24
-
ccoyle reacted to a post in a topic:
Lowell Grand Banks Dory by MisterSteele - FINISHED - Model Shipways - 1:24
-
wool132 reacted to a post in a topic:
Lowell Grand Banks Dory by MisterSteele - FINISHED - Model Shipways - 1:24
-
JacquesCousteau reacted to a post in a topic:
Lowell Grand Banks Dory by MisterSteele - FINISHED - Model Shipways - 1:24
-
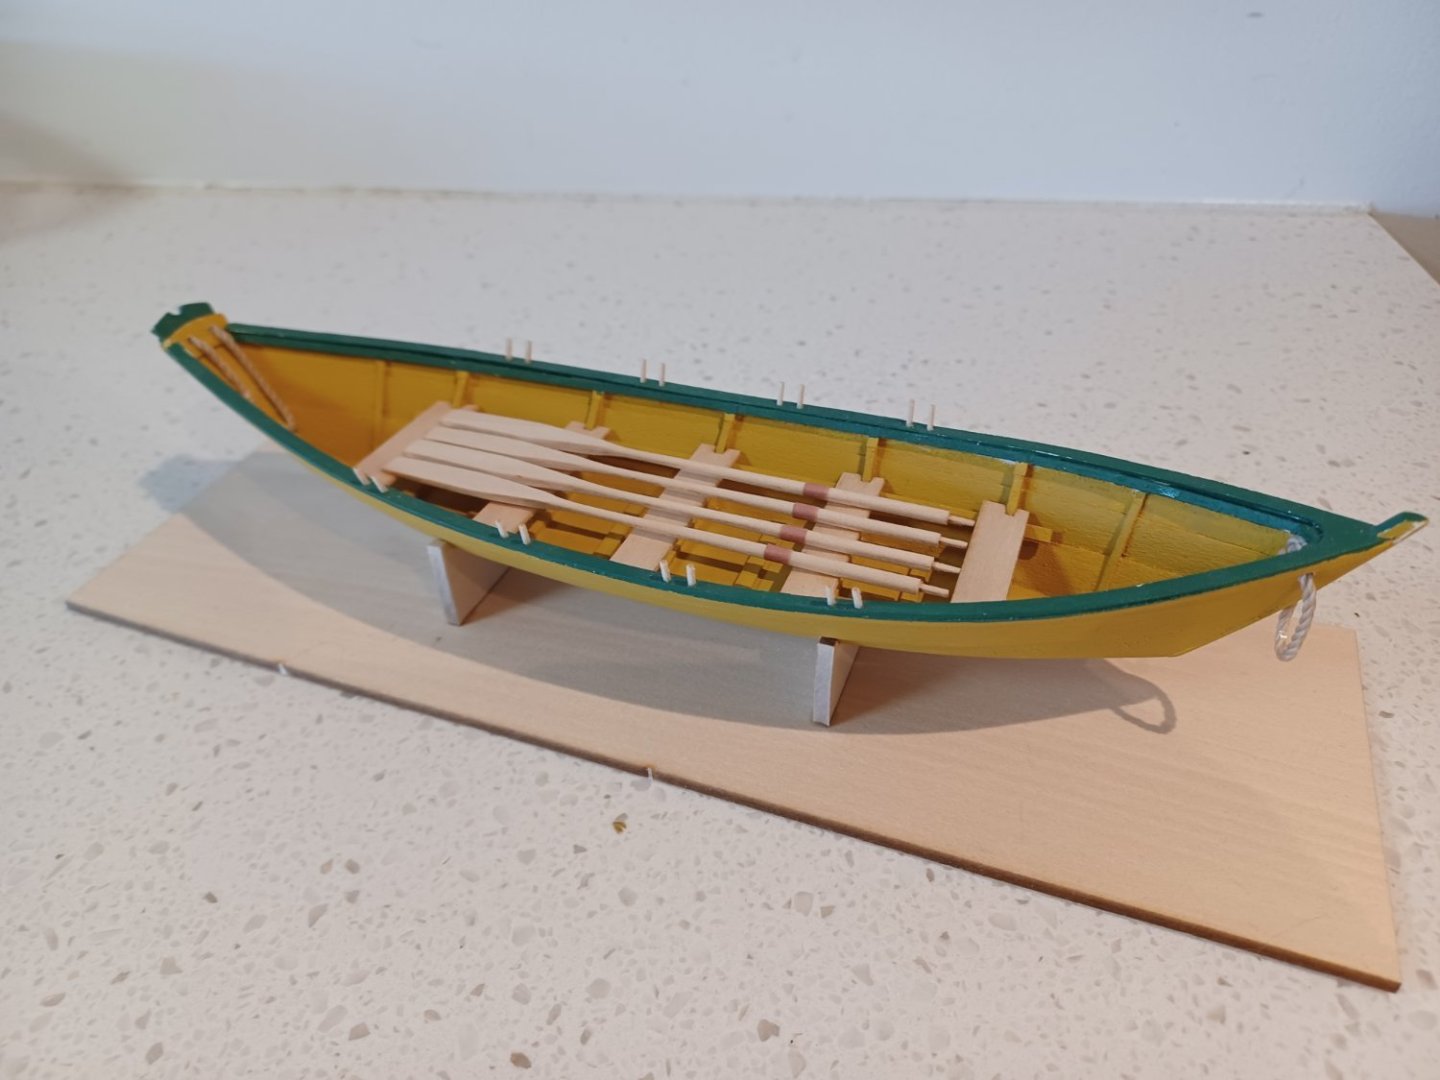
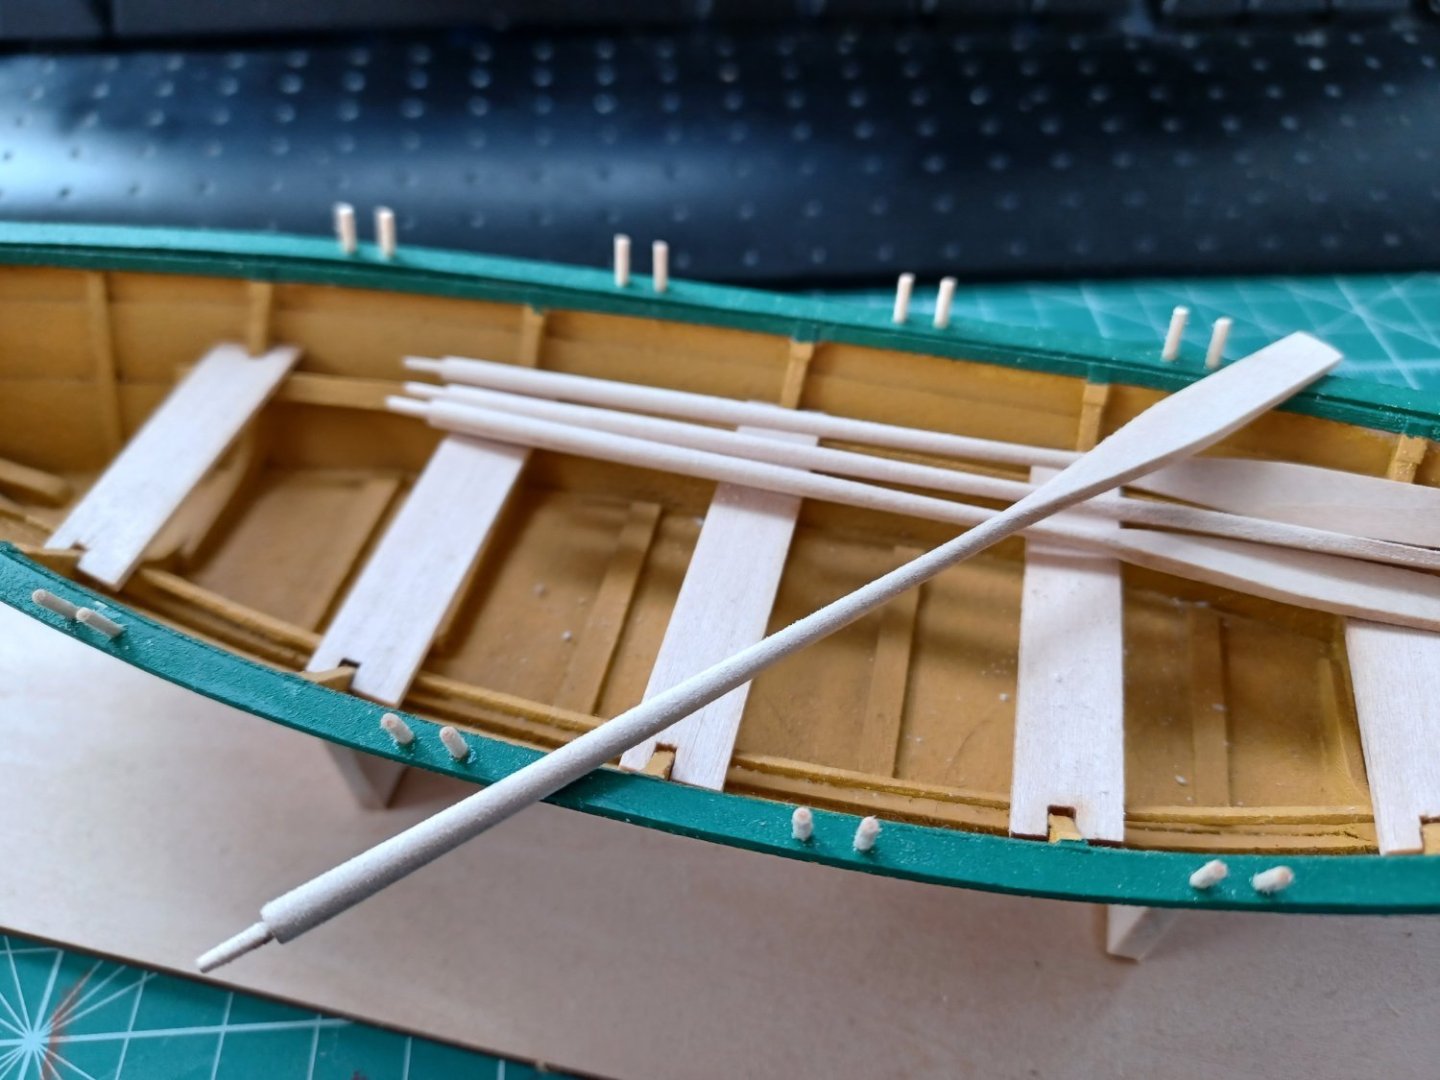
After much delay the Dory is finished! Last few steps were applying the leathering to the oars and weighing down the beckets with white glue.
- 25 replies
-
- 6
-
-
- Lowell Grand Banks Dory
- Model Shipways
- (and 2 more)
-
GrandpaPhil reacted to a post in a topic:
Lowell Grand Banks Dory by MisterSteele - FINISHED - Model Shipways - 1:24
-
More progress after a long break. Got the bow becket installed and the four oars shaped. The oars blades are all slightly different thicknesses, but I think they're close enough.

- 25 replies
-
- 5
-
-
- Lowell Grand Banks Dory
- Model Shipways
- (and 2 more)
-
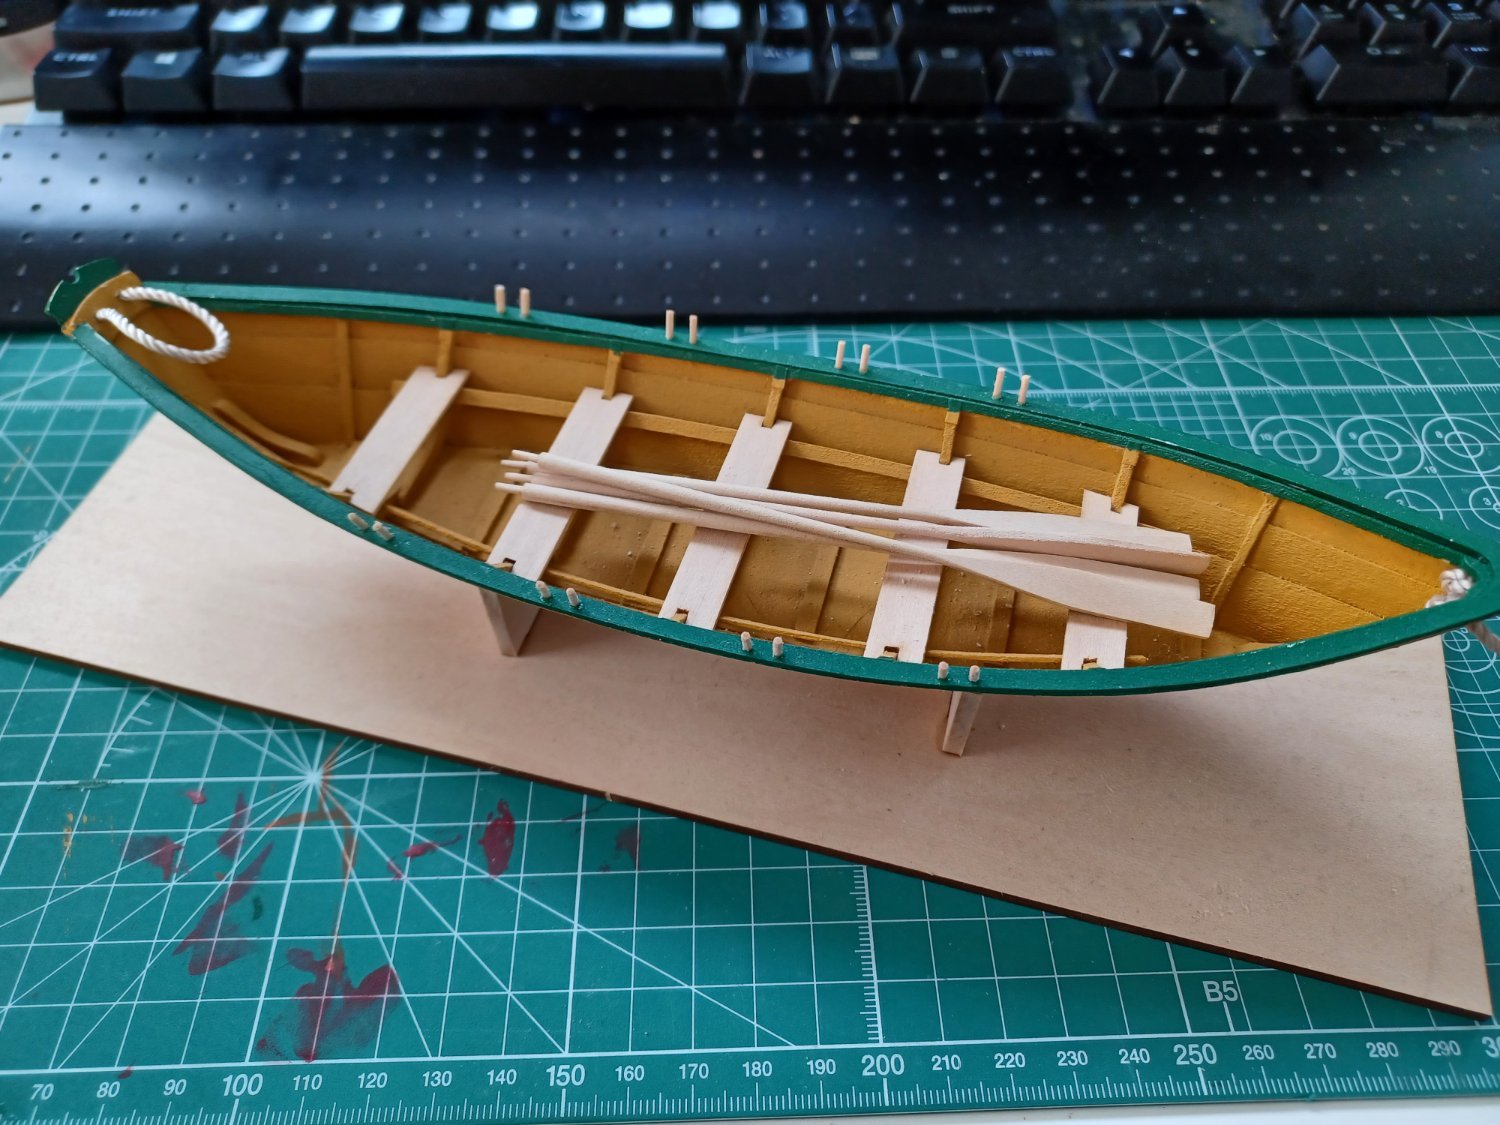
Sorry for the lack of updates. Life has been busy so progress has been slow. My plan is to leave the seats natural and give the whole model a coat of varnish when I'm done... although as I'm typing that out I realize I'll need to check that the ropes can be varnished without discoloring. I have installed the thole pins, started work on the stern becket, and started work on the oars. I'm choosing to install the stern becket with the loop towards the inside. This was mentioned in the instructions and more of the photos I could find online showed it reeved this way around. I also installed the thole pins (roughly) parallel to the hull instead of perpendicular to the gunwale. This is how photos showed them and it makes sense to allow dorys be stacked inside each other.

- 25 replies
-
- 4
-
-
- Lowell Grand Banks Dory
- Model Shipways
- (and 2 more)
-
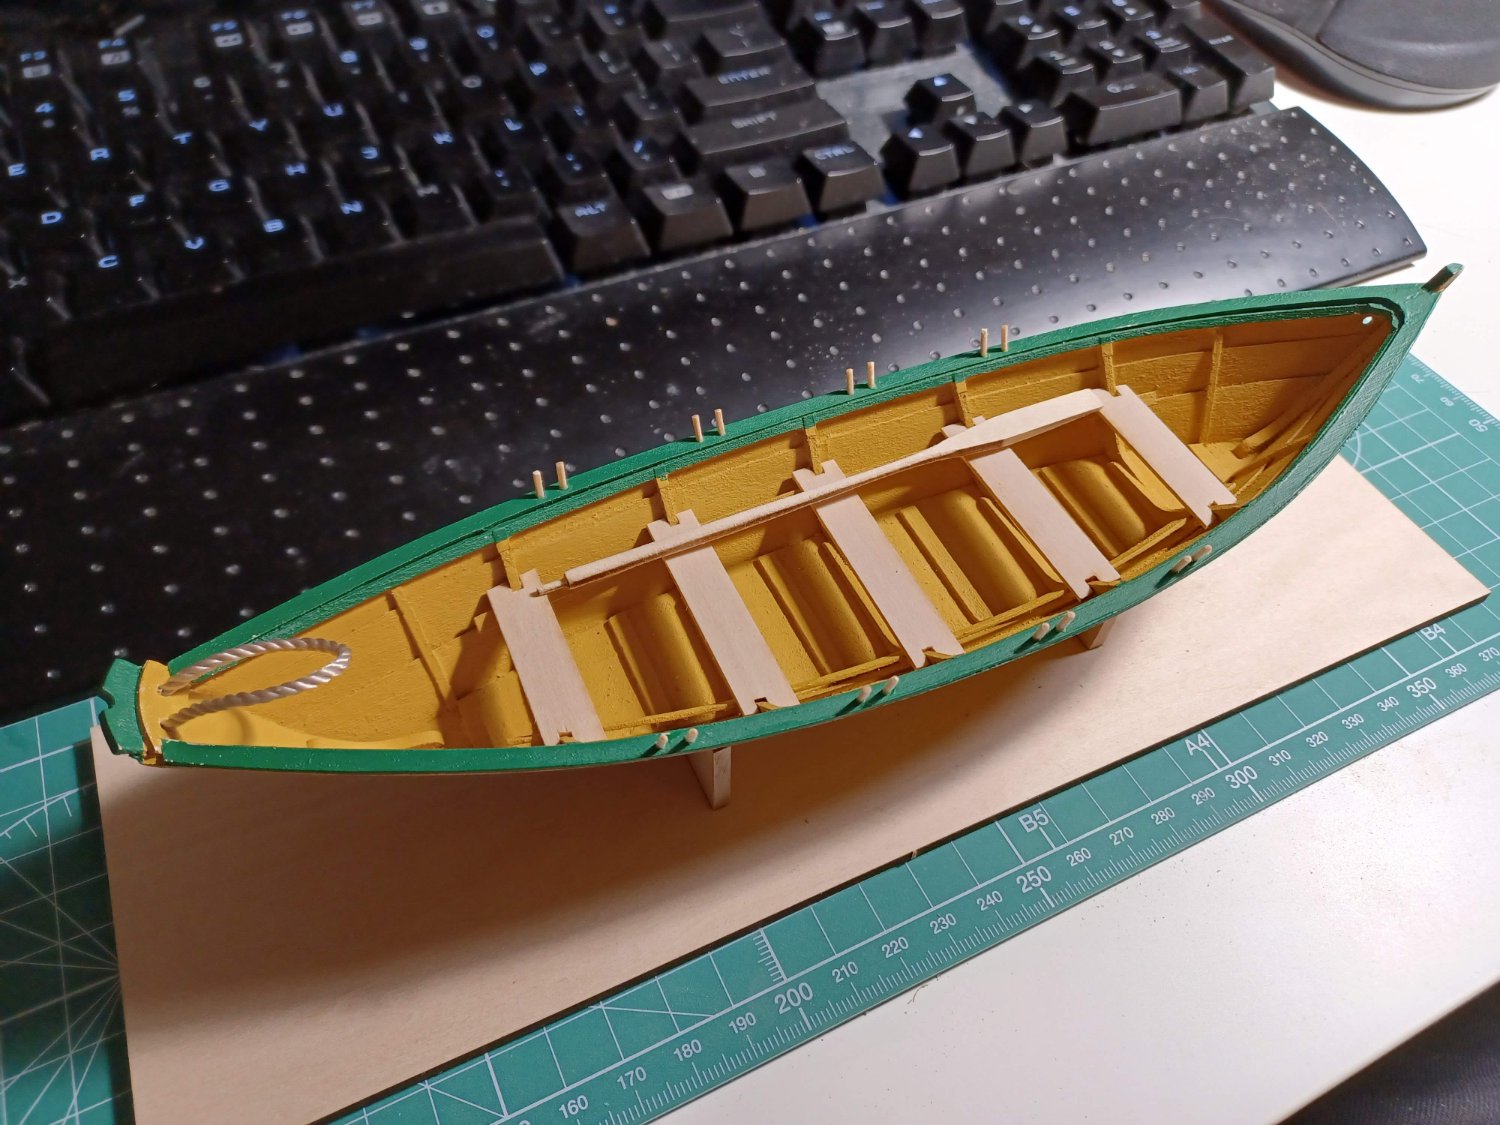
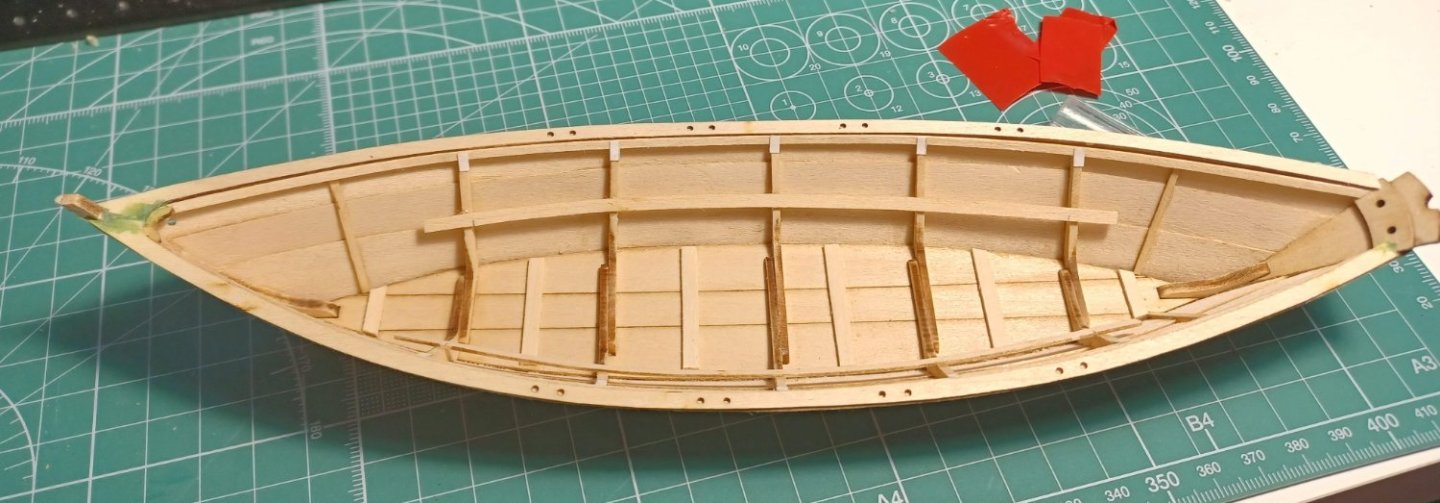
I haven't had much time to work on the dory, but I fit and glued the in the thwarts. Most of these needed trimming to fit, especially the most fore and aft ones.

- 25 replies
-
- 4
-
-
- Lowell Grand Banks Dory
- Model Shipways
- (and 2 more)
-
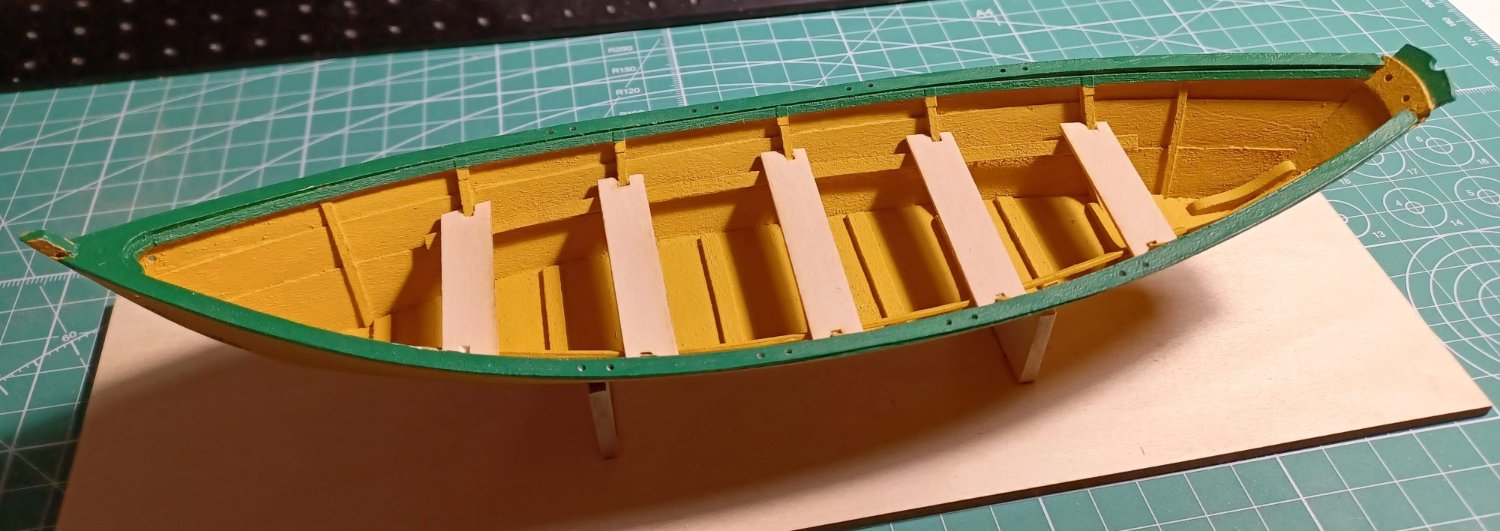
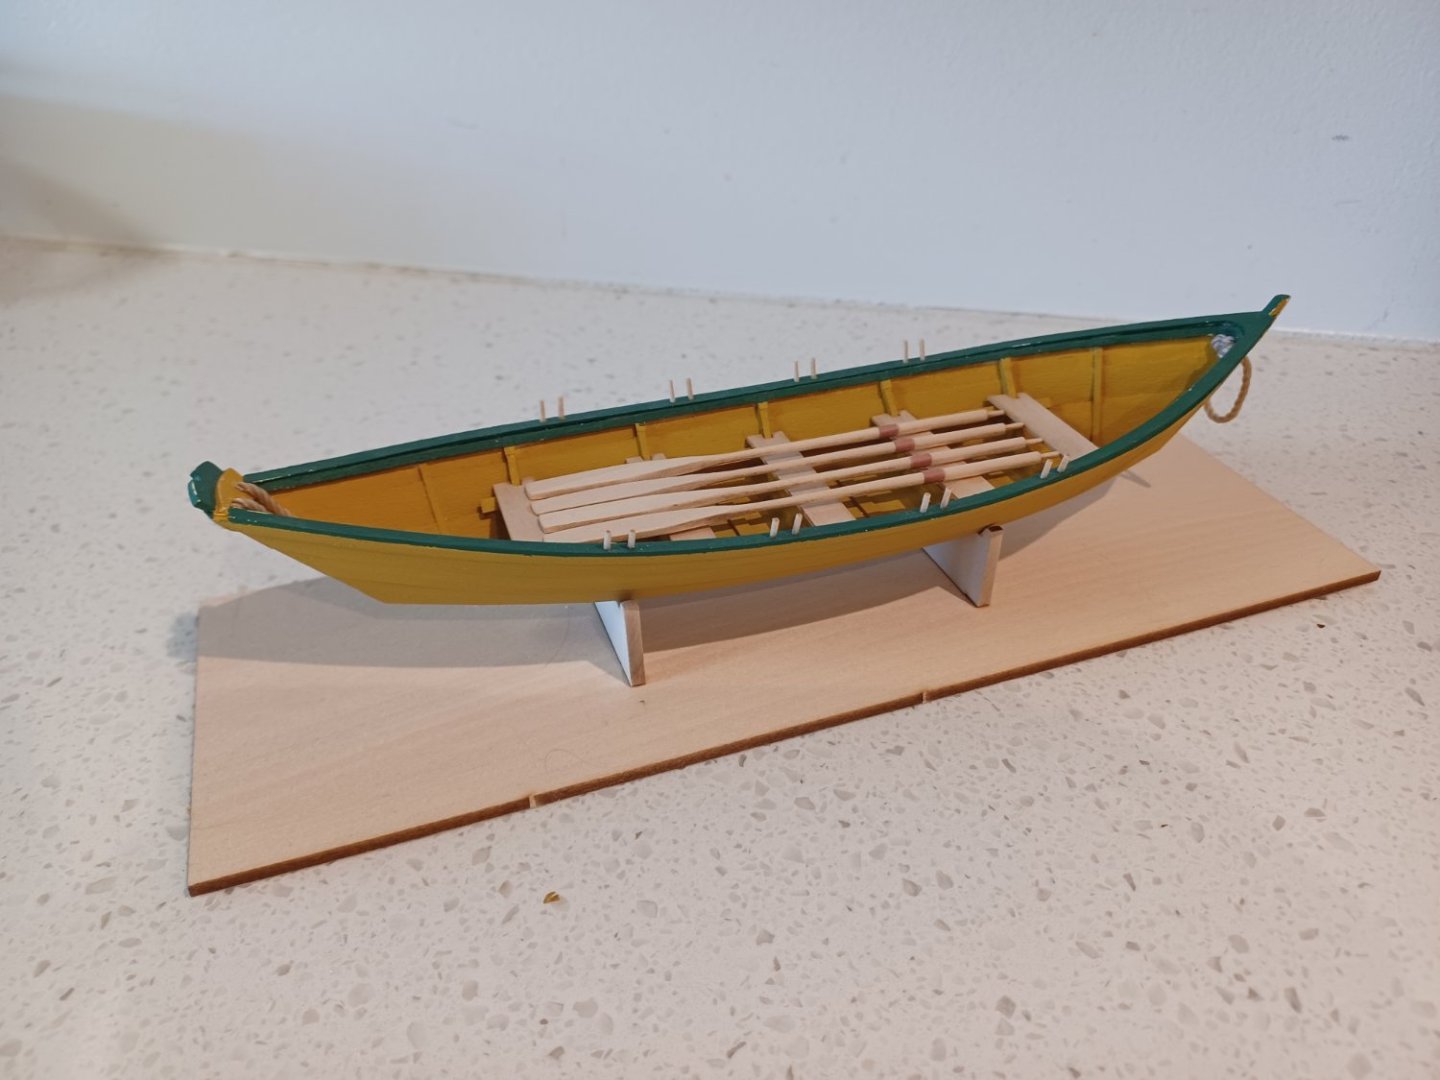
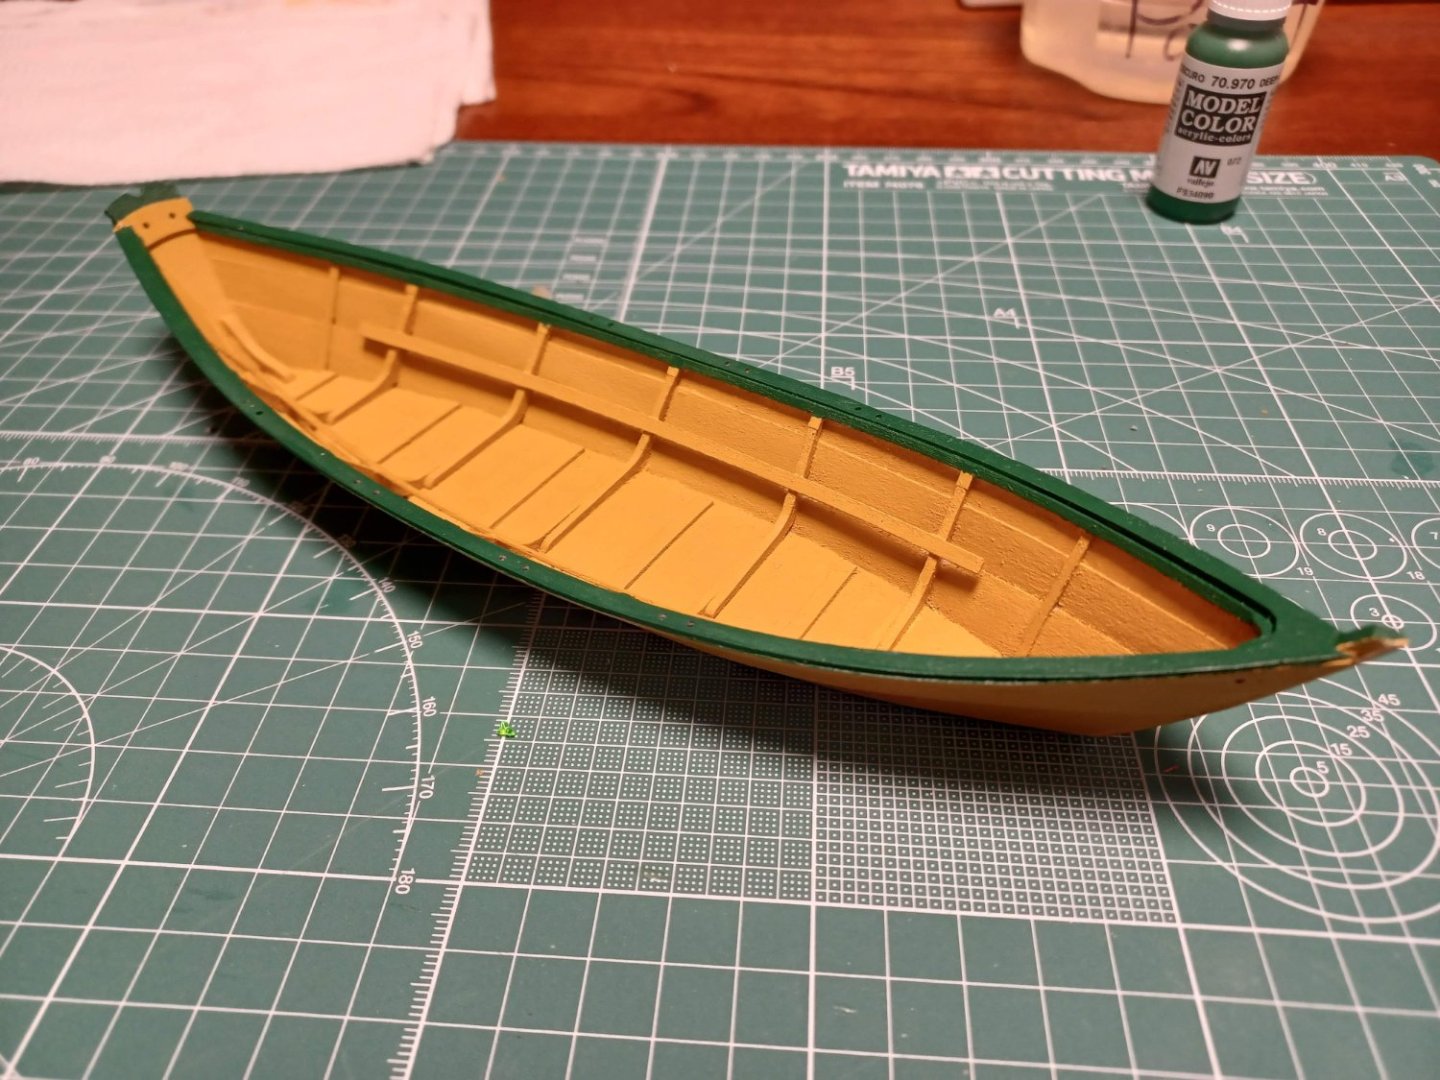
Painting is mostly finished. I first painted the yellow in ~3-4 coats then masked around the cap rail and gunwale and painted the green. I chose to deviate from the instructions and paint down to the bottom of the gunwale as this matched a few reference photos I've found, and I prefer that look. There are a couple spots that need touch-up, but I may do those after I prep the thole pins in case I need to touch up around those as well.
- 25 replies
-
- 4
-
-
- Lowell Grand Banks Dory
- Model Shipways
- (and 2 more)
-
Added the cap rails and did a little filling at the bow where the two sides didn't quite meet. The instructions say to add these after painting, but I could see that I was going to have to do some filling and so I chose to attach them first. I was thinking of reworking the transom as well, but with the cap rails on it doesn't look as bad as I thought it would and I don't think I have the skill required to make any improvement. Next step is prime and paint.
- 25 replies
-
- 3
-
-
- Lowell Grand Banks Dory
- Model Shipways
- (and 2 more)
-
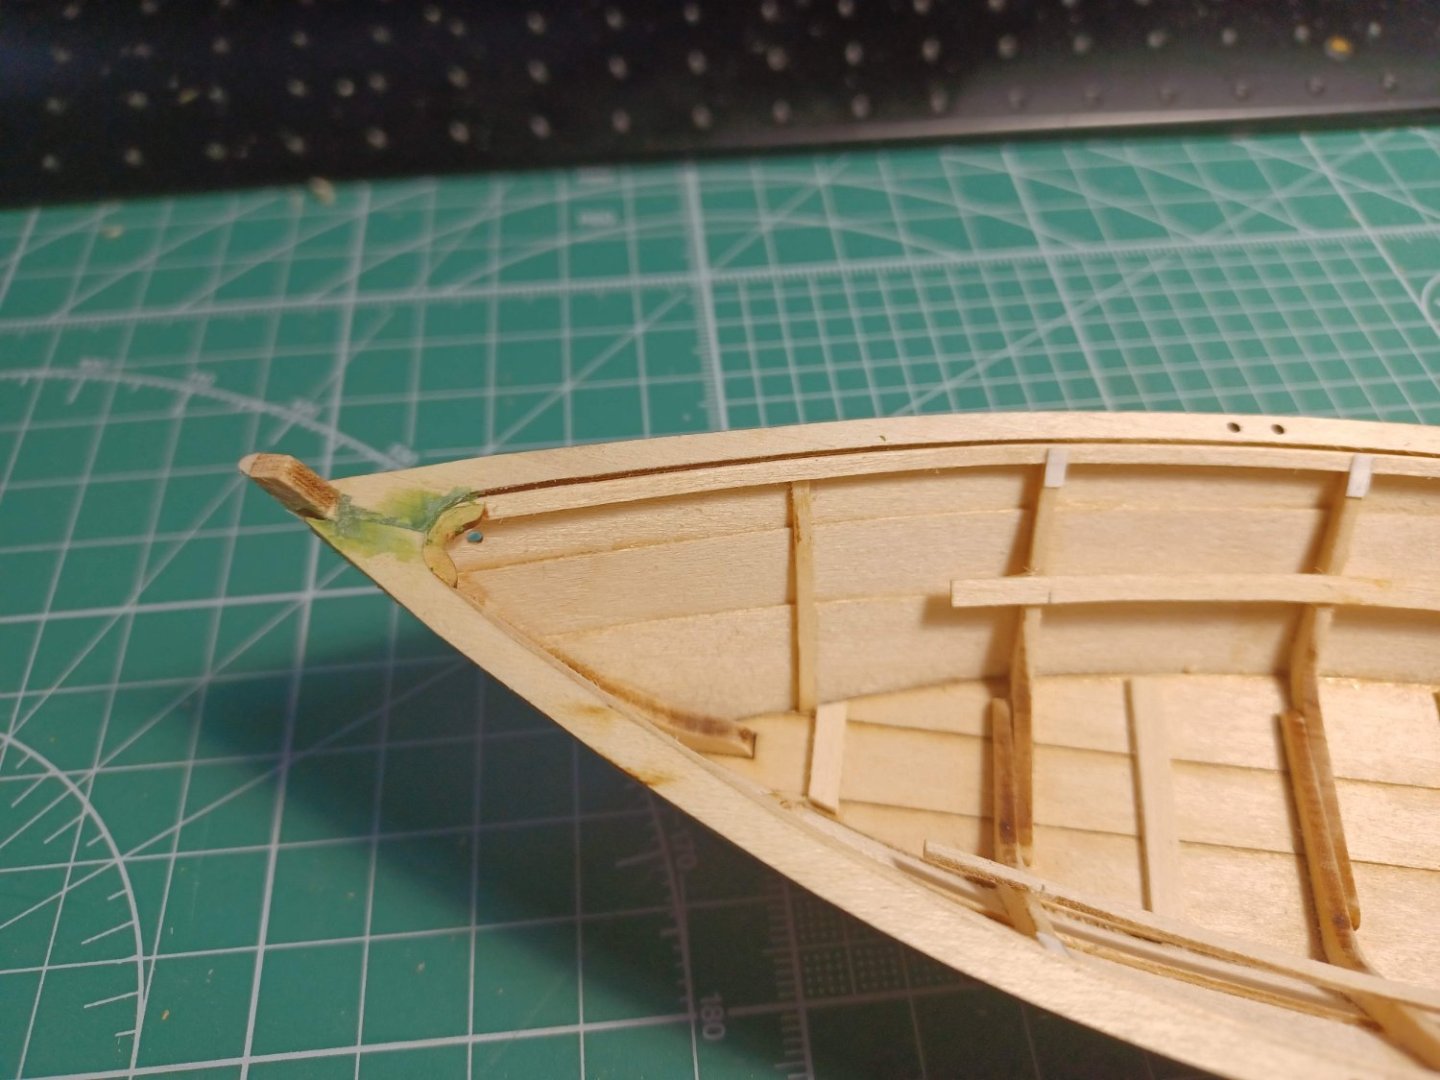
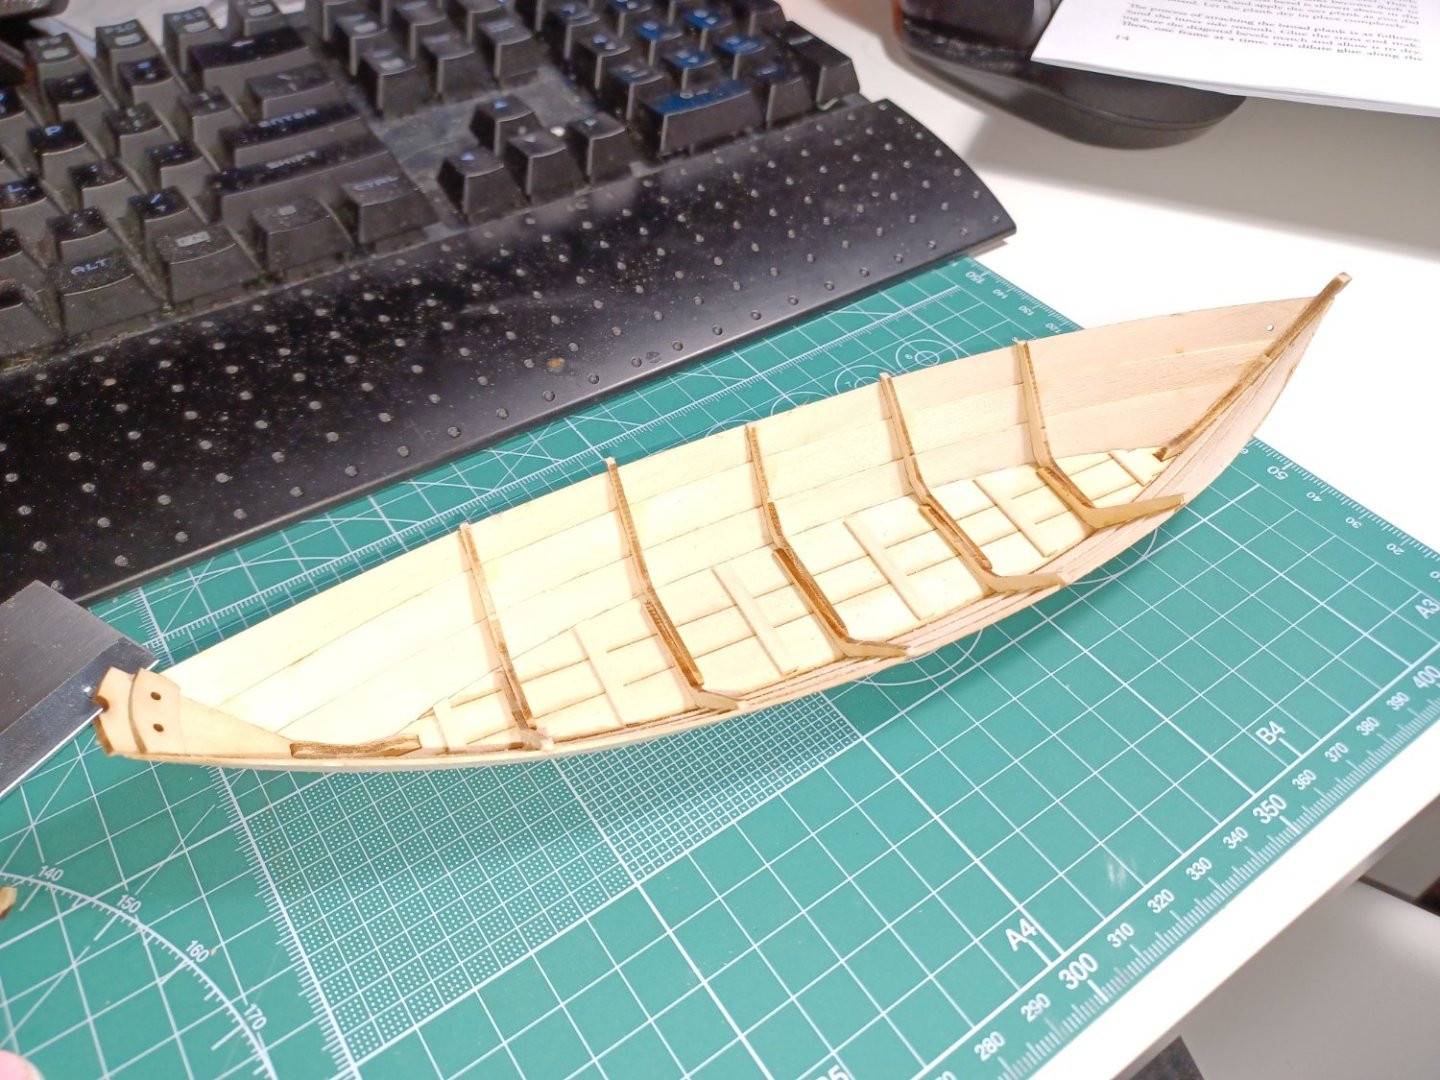
I've added the frame head irons and added the breast hook. The next step is to shape the transom and stern cleat. My transom pokes out a lot higher above the shear strake and gunwale than they do in the photos and plans, so I'm going to have to rework them a bit.
- 25 replies
-
- 3
-
-
- Lowell Grand Banks Dory
- Model Shipways
- (and 2 more)
-
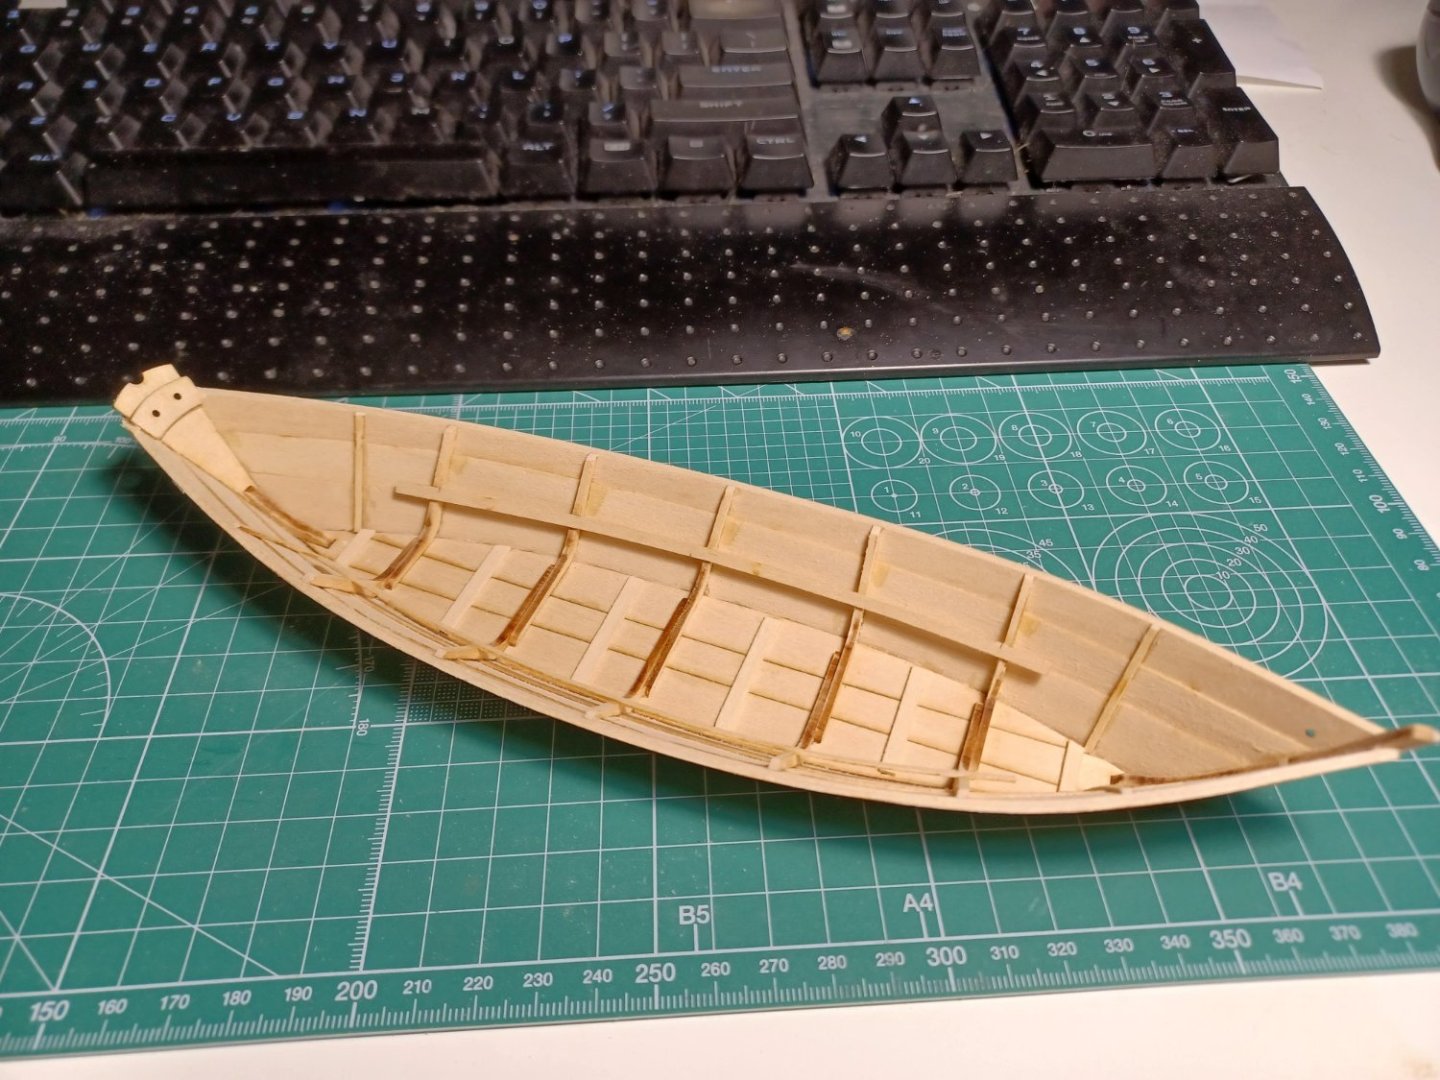
I've added seat risers to the inside of the Dory, added the bands reinforcing the top edge, and sanded the top edge level. For the seat risers I ended up installing them with the bottom edge lined up with the top edge of the garboard plank. This matches the little section diagram shown in step 17 and lines up with the plans close enough.
- 25 replies
-
- 4
-
-
- Lowell Grand Banks Dory
- Model Shipways
- (and 2 more)
-
Thanks for the kind words. I have some white Army Painter primer that I'm planning on using and then I'll be painting with Vallejo Model Color Yellow Ochre and green (I forget what the green that I picked is called).
-
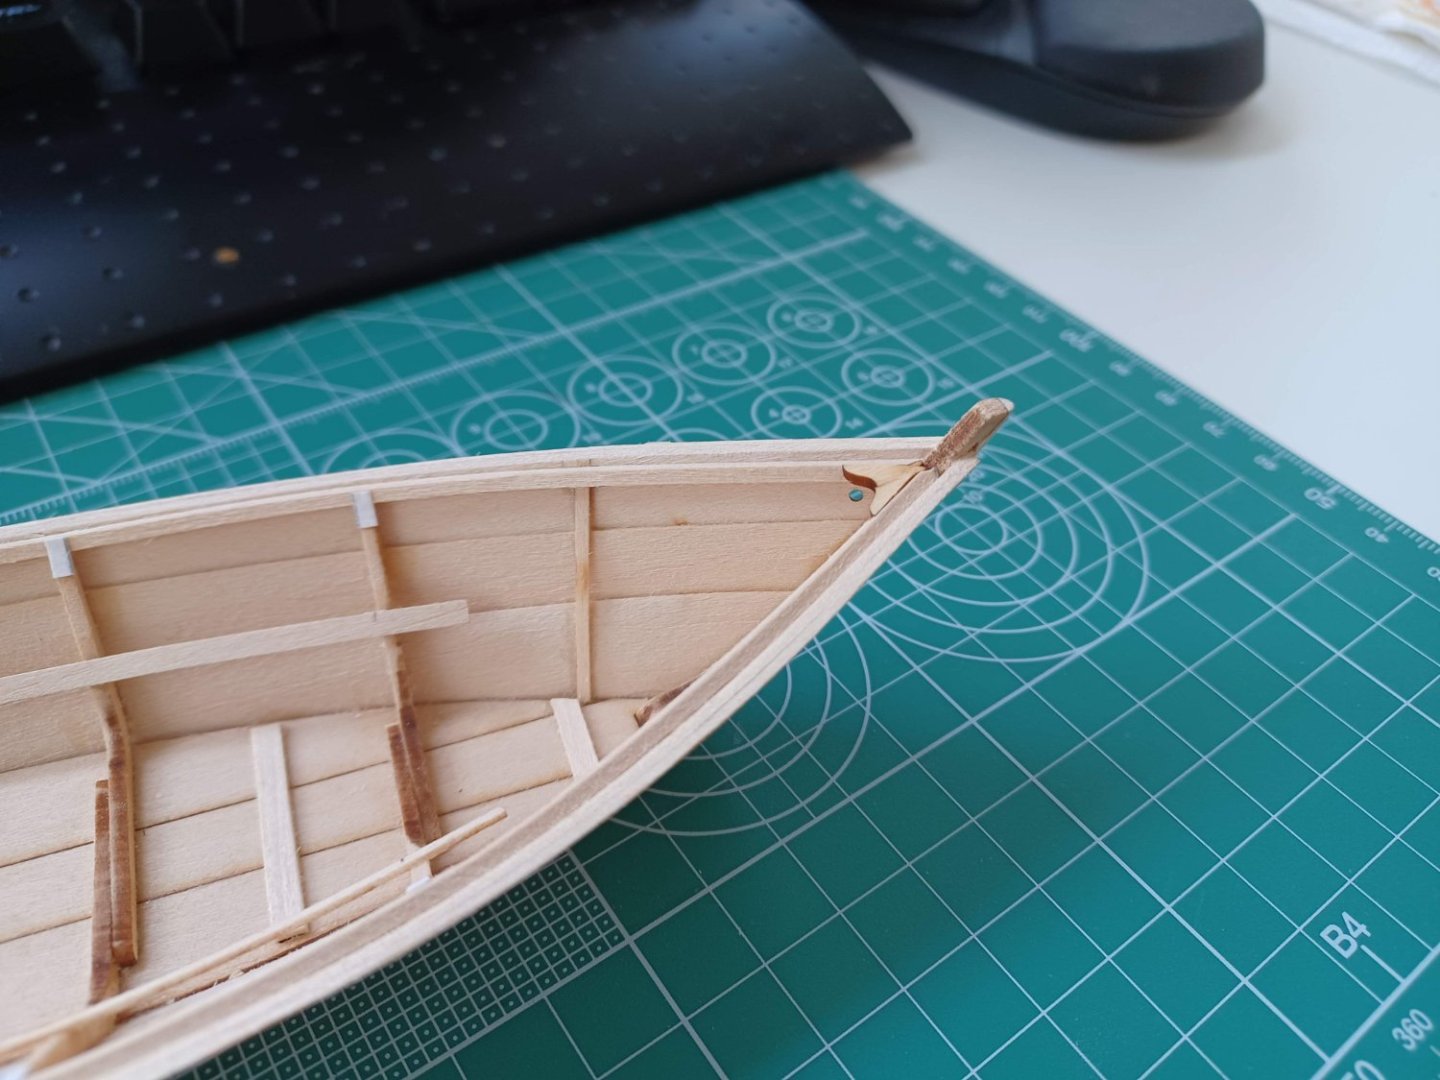
I've bent and attached the other sheer plank, freed the Dory from the building board, and added the false stem. It took me a bit to figure out the false stem. There's no reference to a size of plank to use in the instructions and there isn't a labeled part on the laser cut boards but there's an appropriate sized plank included that doesn't seem to be used anywhere else, so I used that. The next step is to install the seat risers. The instructions mention marks provided on the frames, but these seem to be missing on my kit (or I sanded them off in a previous step) so my next task is to measure the seat riser position off of the plans and transfer the locations to the Dory.
- 25 replies
-
- 3
-
-
- Lowell Grand Banks Dory
- Model Shipways
- (and 2 more)
-
When I test fit the sheer plank on the Dory, the two ends were high by about 3mm. I had a similar problem on the broad strakes (although less extreme) and noticed that the edge of one had buckled after I'd bent it and glued it in place. To avoid buckling this plank when forming it to the frames I bent it using a crude version of the method Chuck describes here: https://www.youtube.com/watch?v=atXqH0GWLL8. This worked out really well and the first sheer plank is now glued in place. I also experimented with using CA glue on the frames because I couldn't figure out how to clamp the sheer plank in place for PVA to set. This worked but I would've preferred a bit more working time. On the other side I may experiment with using CA glue on the stem, transom, and middle frames with PVA on the rest.

- 25 replies
-
- 4
-
-
- Lowell Grand Banks Dory
- Model Shipways
- (and 2 more)
-
MisterSteele reacted to a post in a topic:
HMS Winchelsea 1764 by Stuntflyer (Mike) - FINISHED - 1/4" scale
-
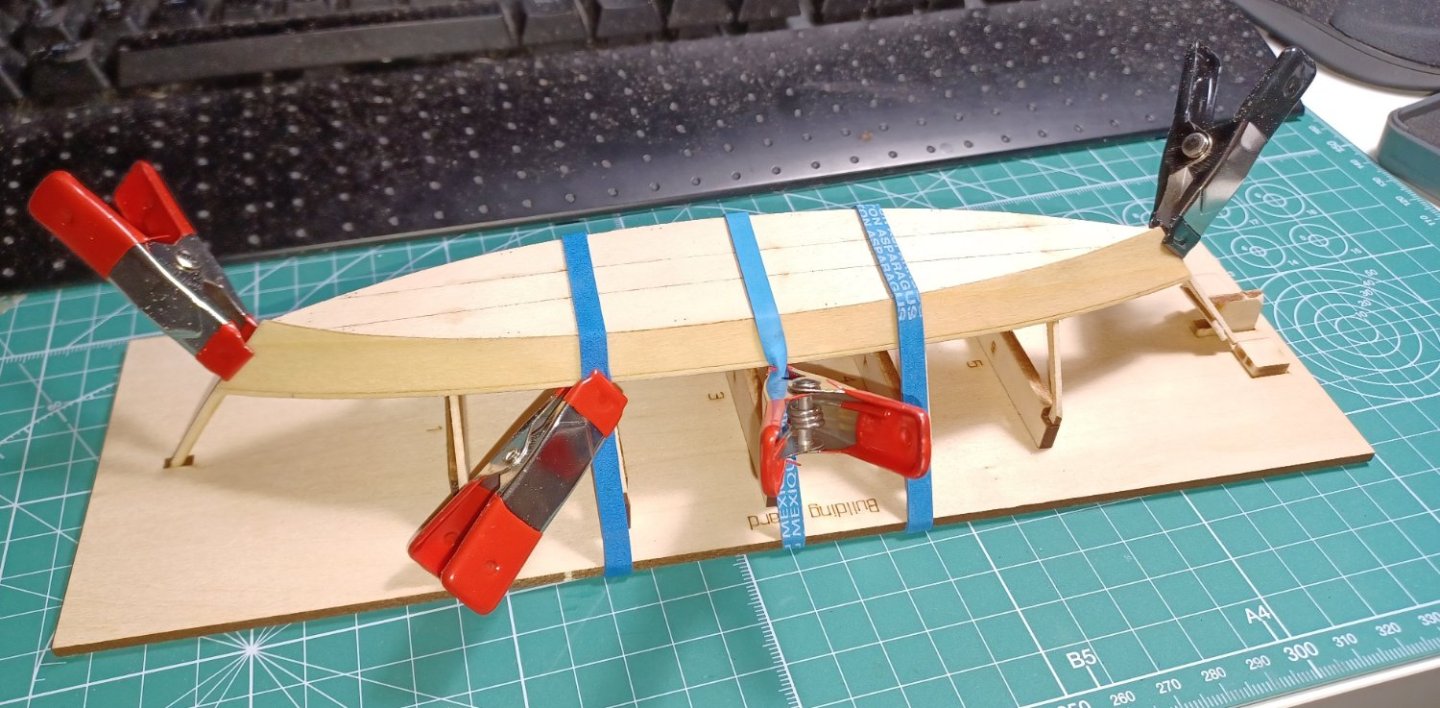
Progress on the dory. I fit the two garboard planks and the two problems I'd noticed earlier with the base slightly off-center and one of the frames being not quite vertical didn't really seem to be a problem, so I glued them in place. I've continued to prepare and glue on the broad strakes. The first is in place and the second is in progress. I definitely need to work on my clamping. Using the clips that came with the kit worked OK for the garboard planks, but they don't really fit when bending or gluing the broad strake and bent out the edge in a few places. Fortunately wetting the damaged spots restored the plank to its original shape. ×


- 25 replies
-
- 3
-
-
- Lowell Grand Banks Dory
- Model Shipways
- (and 2 more)
-
I beveled the edge of the first garboard plank and have bent it to shape by soaking it in hot water and then clamping it to the frames. It's dried now but I'm going to do the same to the garboard plank on the other side before I glue either of them in place.
- 25 replies
-
- 3
-
-
- Lowell Grand Banks Dory
- Model Shipways
- (and 2 more)
-
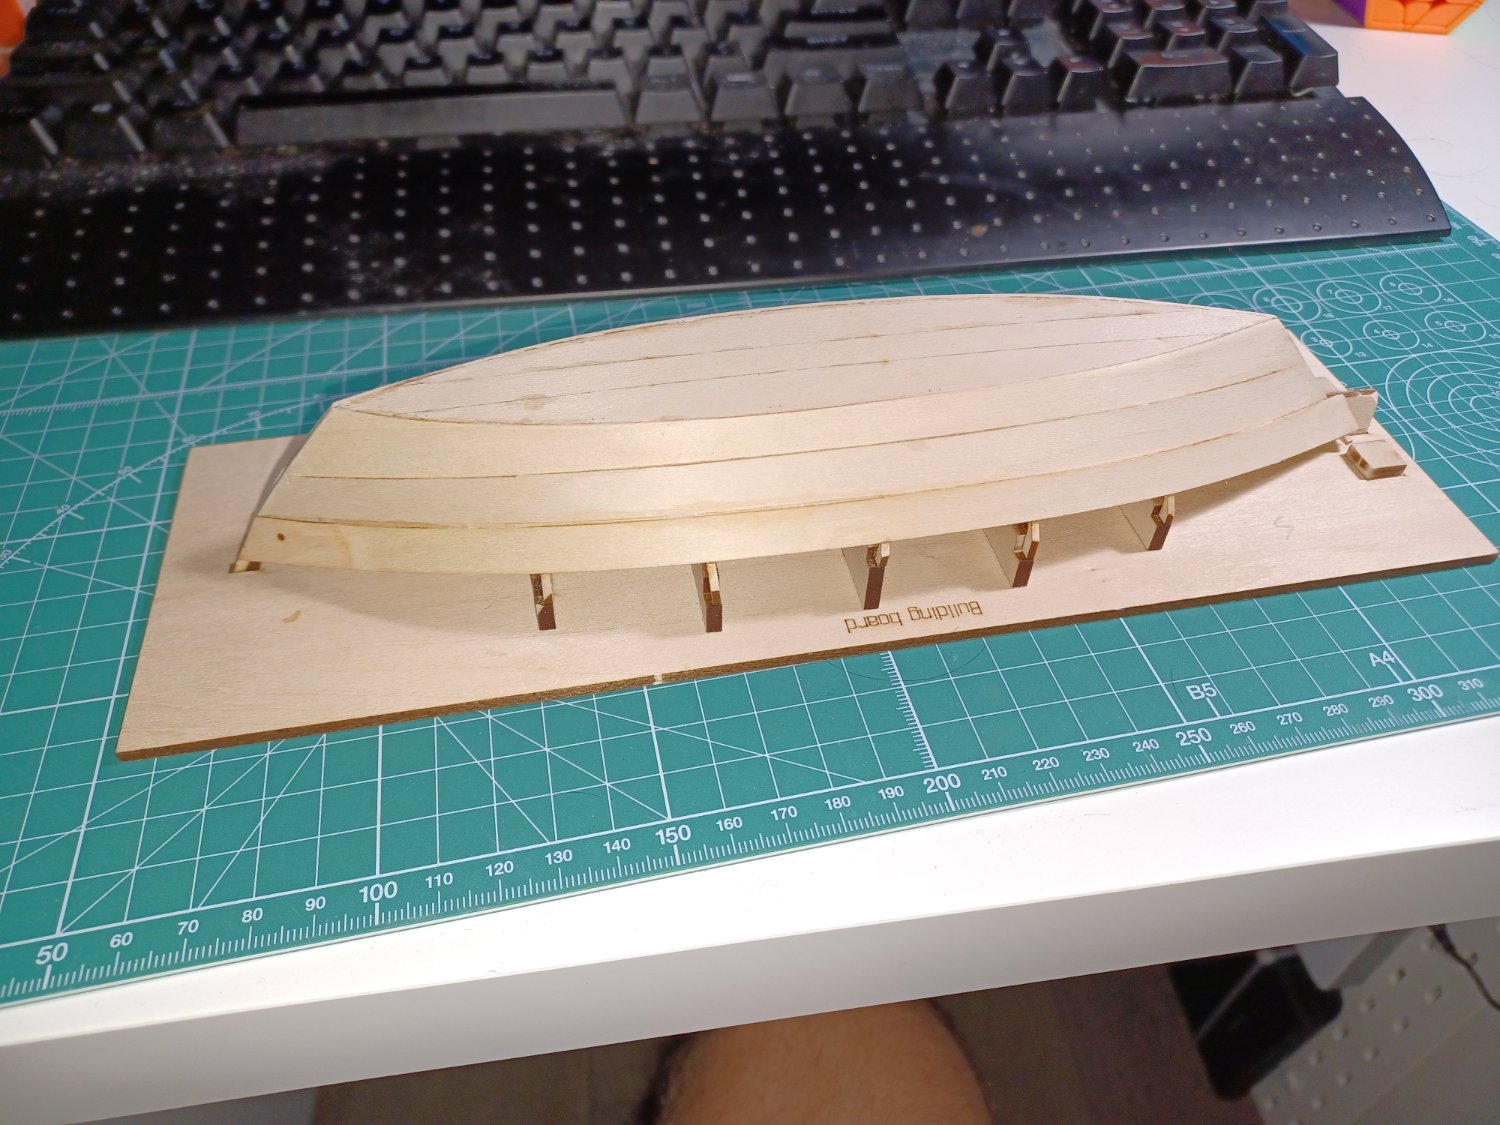
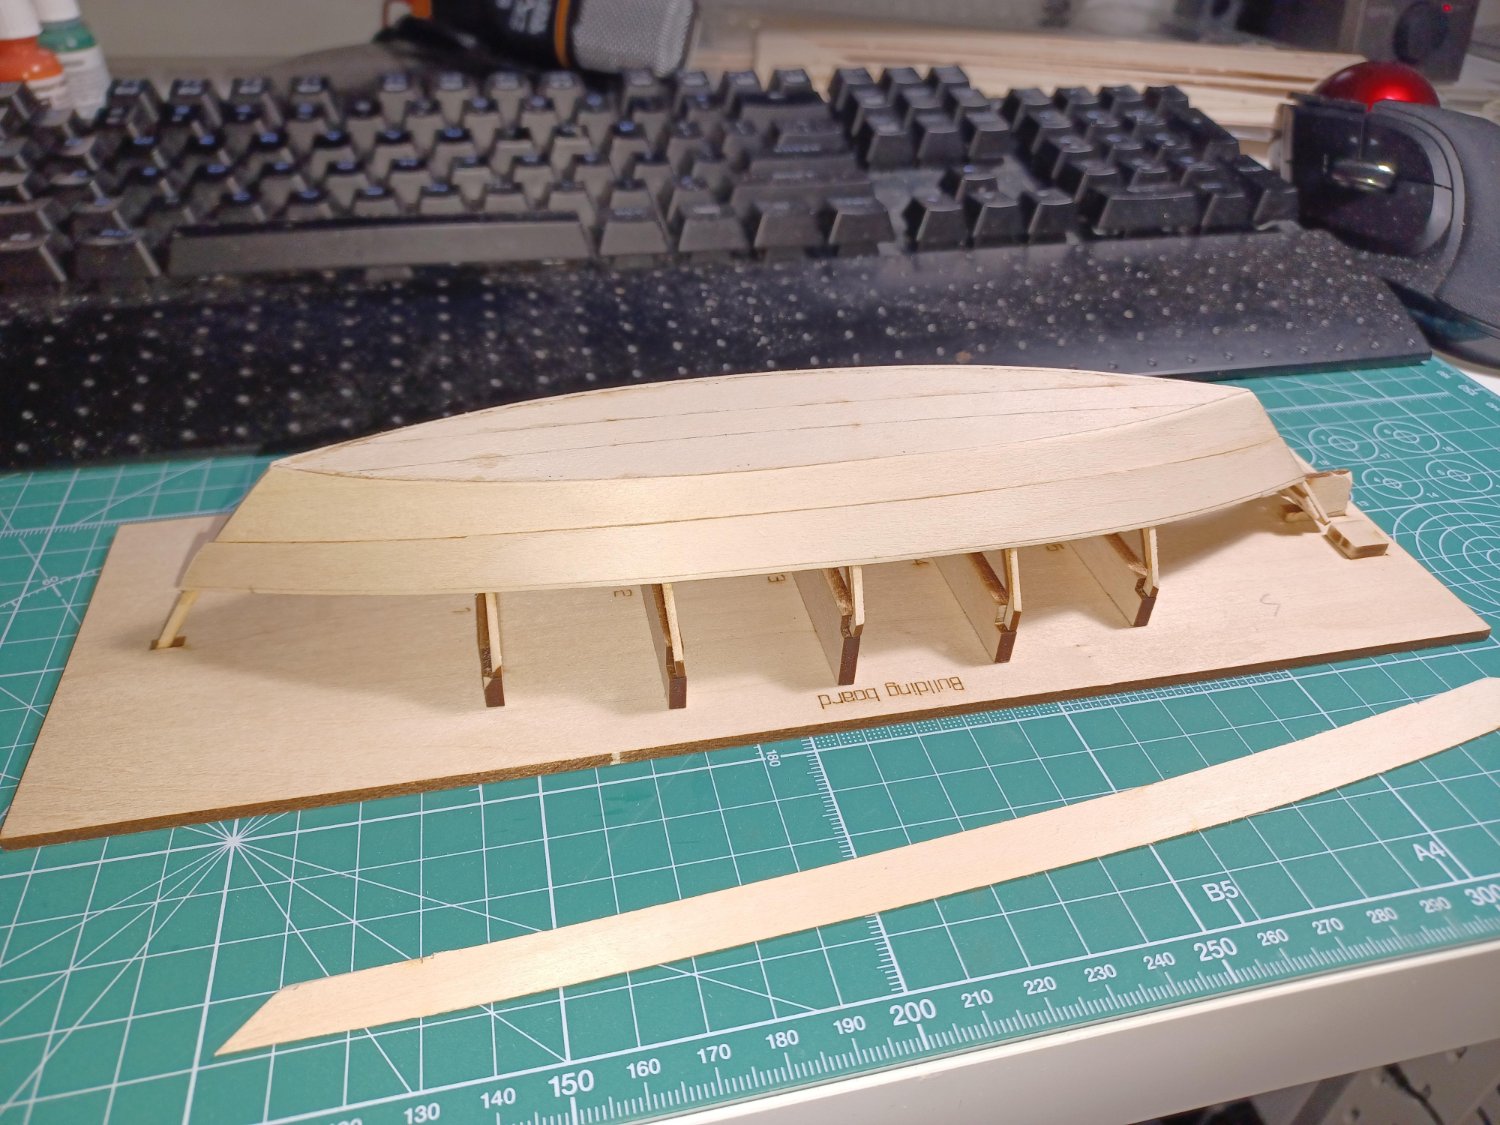
A bit more progress on the Dory. I glued the bottom onto the frames, let that dry, and then started fairing the frames. I forgot to take a photo of the finished result. During fairing I noticed that one of the frames isn't vertical (#2 I think, you can see it a bit in the picture) and the bottom is a little bit to one side. I think I'm going to dry fit the garboard planks and then decide if I'm going to fix either of the problems depending on how that works out.

- 25 replies
-
- 6
-
-
- Lowell Grand Banks Dory
- Model Shipways
- (and 2 more)
-
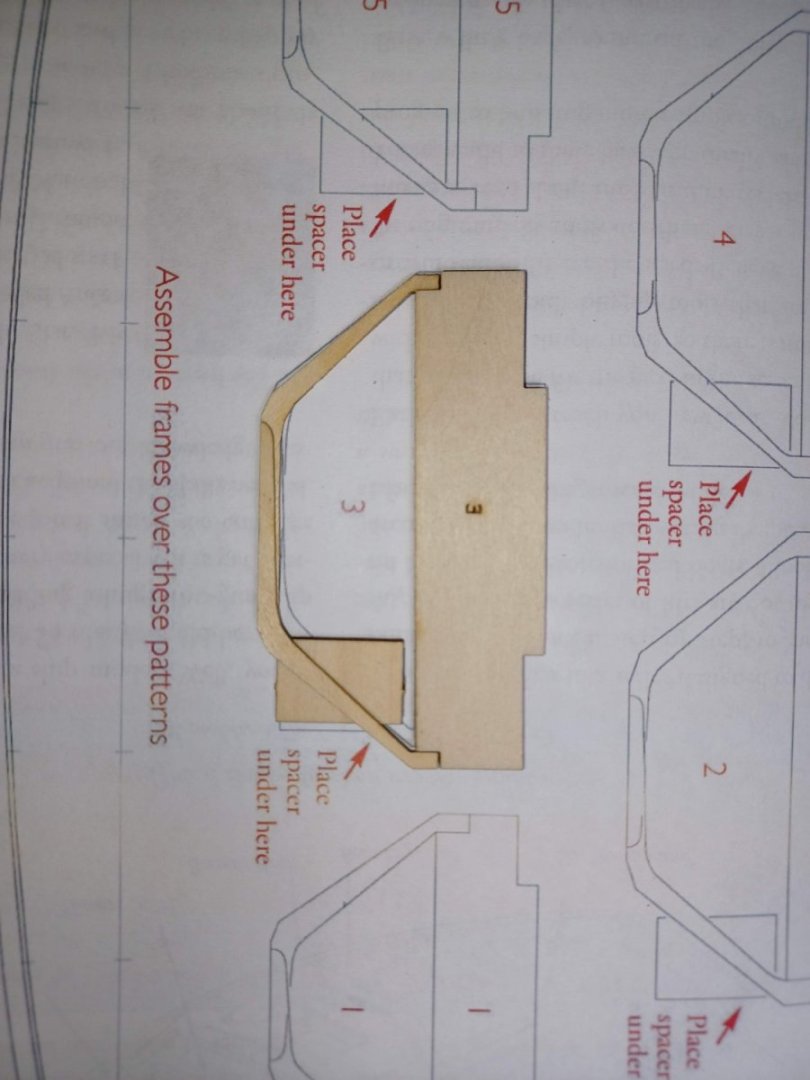
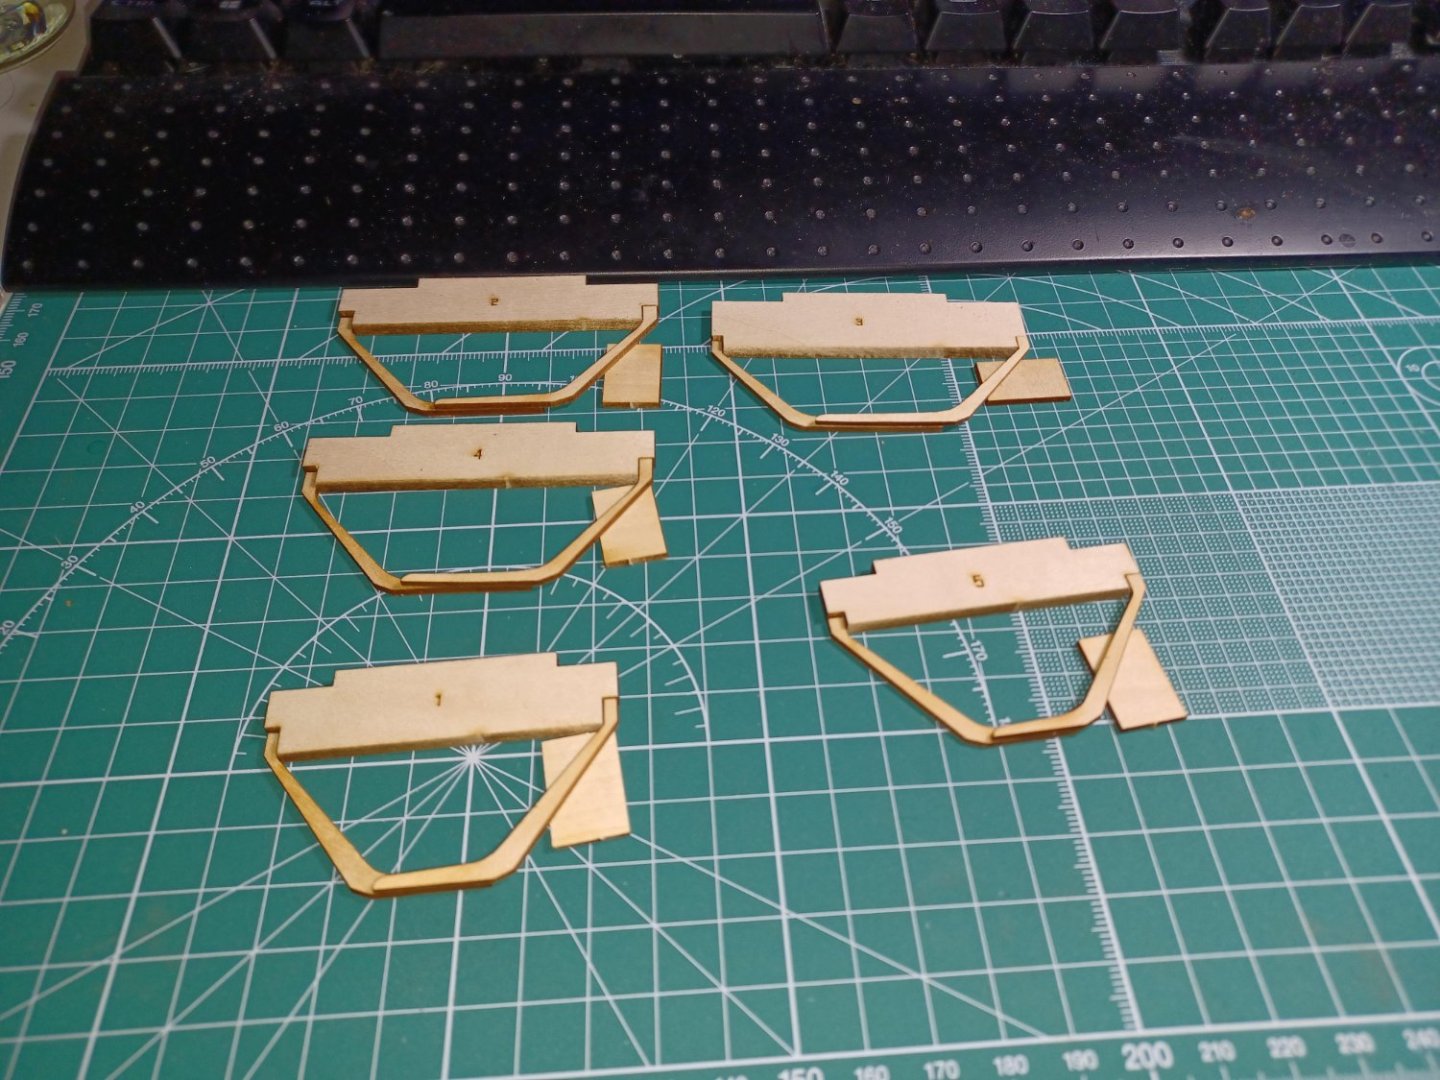
A bit more work on the dory this evening. As others mentioned in their logs the printed plans aren't to scale with the laser cut parts, so I just tried to glue up the frames as best I could keeping the lower edges of the two frame pieces aligned. I got a little over enthusiastic trying to press-fit the transom holder into the building board, so that's gluing up too. I really appreciated the gluing method described in the instructions. It's such a simple thing but the method of painting on the glue and then washing off excess with the paintbrush seems to me to do a great job of making sure there's enough glue in the joint without squirting blobs out all over the place. I tried to capture some pictures of the steps, but they were out of focus/too small to see what I was trying to show so I won't include them here. This is off-topic, but I couldn't find an answer anywhere else: is there a guideline for maximum picture size/dimensions in posts?
- 25 replies
-
- 5
-
-
- Lowell Grand Banks Dory
- Model Shipways
- (and 2 more)