Rik Buter
-
Posts
63 -
Joined
-
Last visited
-
 Rik Buter reacted to a post in a topic:
L'Artésien 1764 by Cpt.Barbossa - 1:48 - 64-gun ship from plans by Jacques Fichant
Rik Buter reacted to a post in a topic:
L'Artésien 1764 by Cpt.Barbossa - 1:48 - 64-gun ship from plans by Jacques Fichant
-
Rik Buter reacted to a post in a topic:
L'Artésien 1764 by Cpt.Barbossa - 1:48 - 64-gun ship from plans by Jacques Fichant
-
Rik Buter reacted to a post in a topic:
Speedwell 1752 by giampieroricci - Scale 1:96 - from Antscherl & Herbert monograph
-
Rik Buter reacted to a post in a topic:
Dutch heavy frigate ca. 1700 – engineering or carpentry ‘snowman’ making?
-
Rik Buter reacted to a post in a topic:
2nd rate London 1656 – the art of the shipwright
-
Rik Buter reacted to a post in a topic:
2nd rate London 1656 – the art of the shipwright
-
Rik Buter reacted to a post in a topic:
2nd rate London 1656 – the art of the shipwright
-
Rik Buter reacted to a post in a topic:
Samuel 1650 – a Dutch mid-17th century trader
-
Rik Buter reacted to a post in a topic:
The Dutch 72-gun ship ca. 1690 – the apogee of Dutch ship design of the Classical Age
-
Rik Buter reacted to a post in a topic:
HMS Montague 1779 by garyshipwright - 74-gun Alfred-class
-
 Hi Dick, Great build! I like your building style a lot. I am always looking forward to new posts from woodrat so alas you are going off line for a while. Good luck with the rest of the hull.
 -
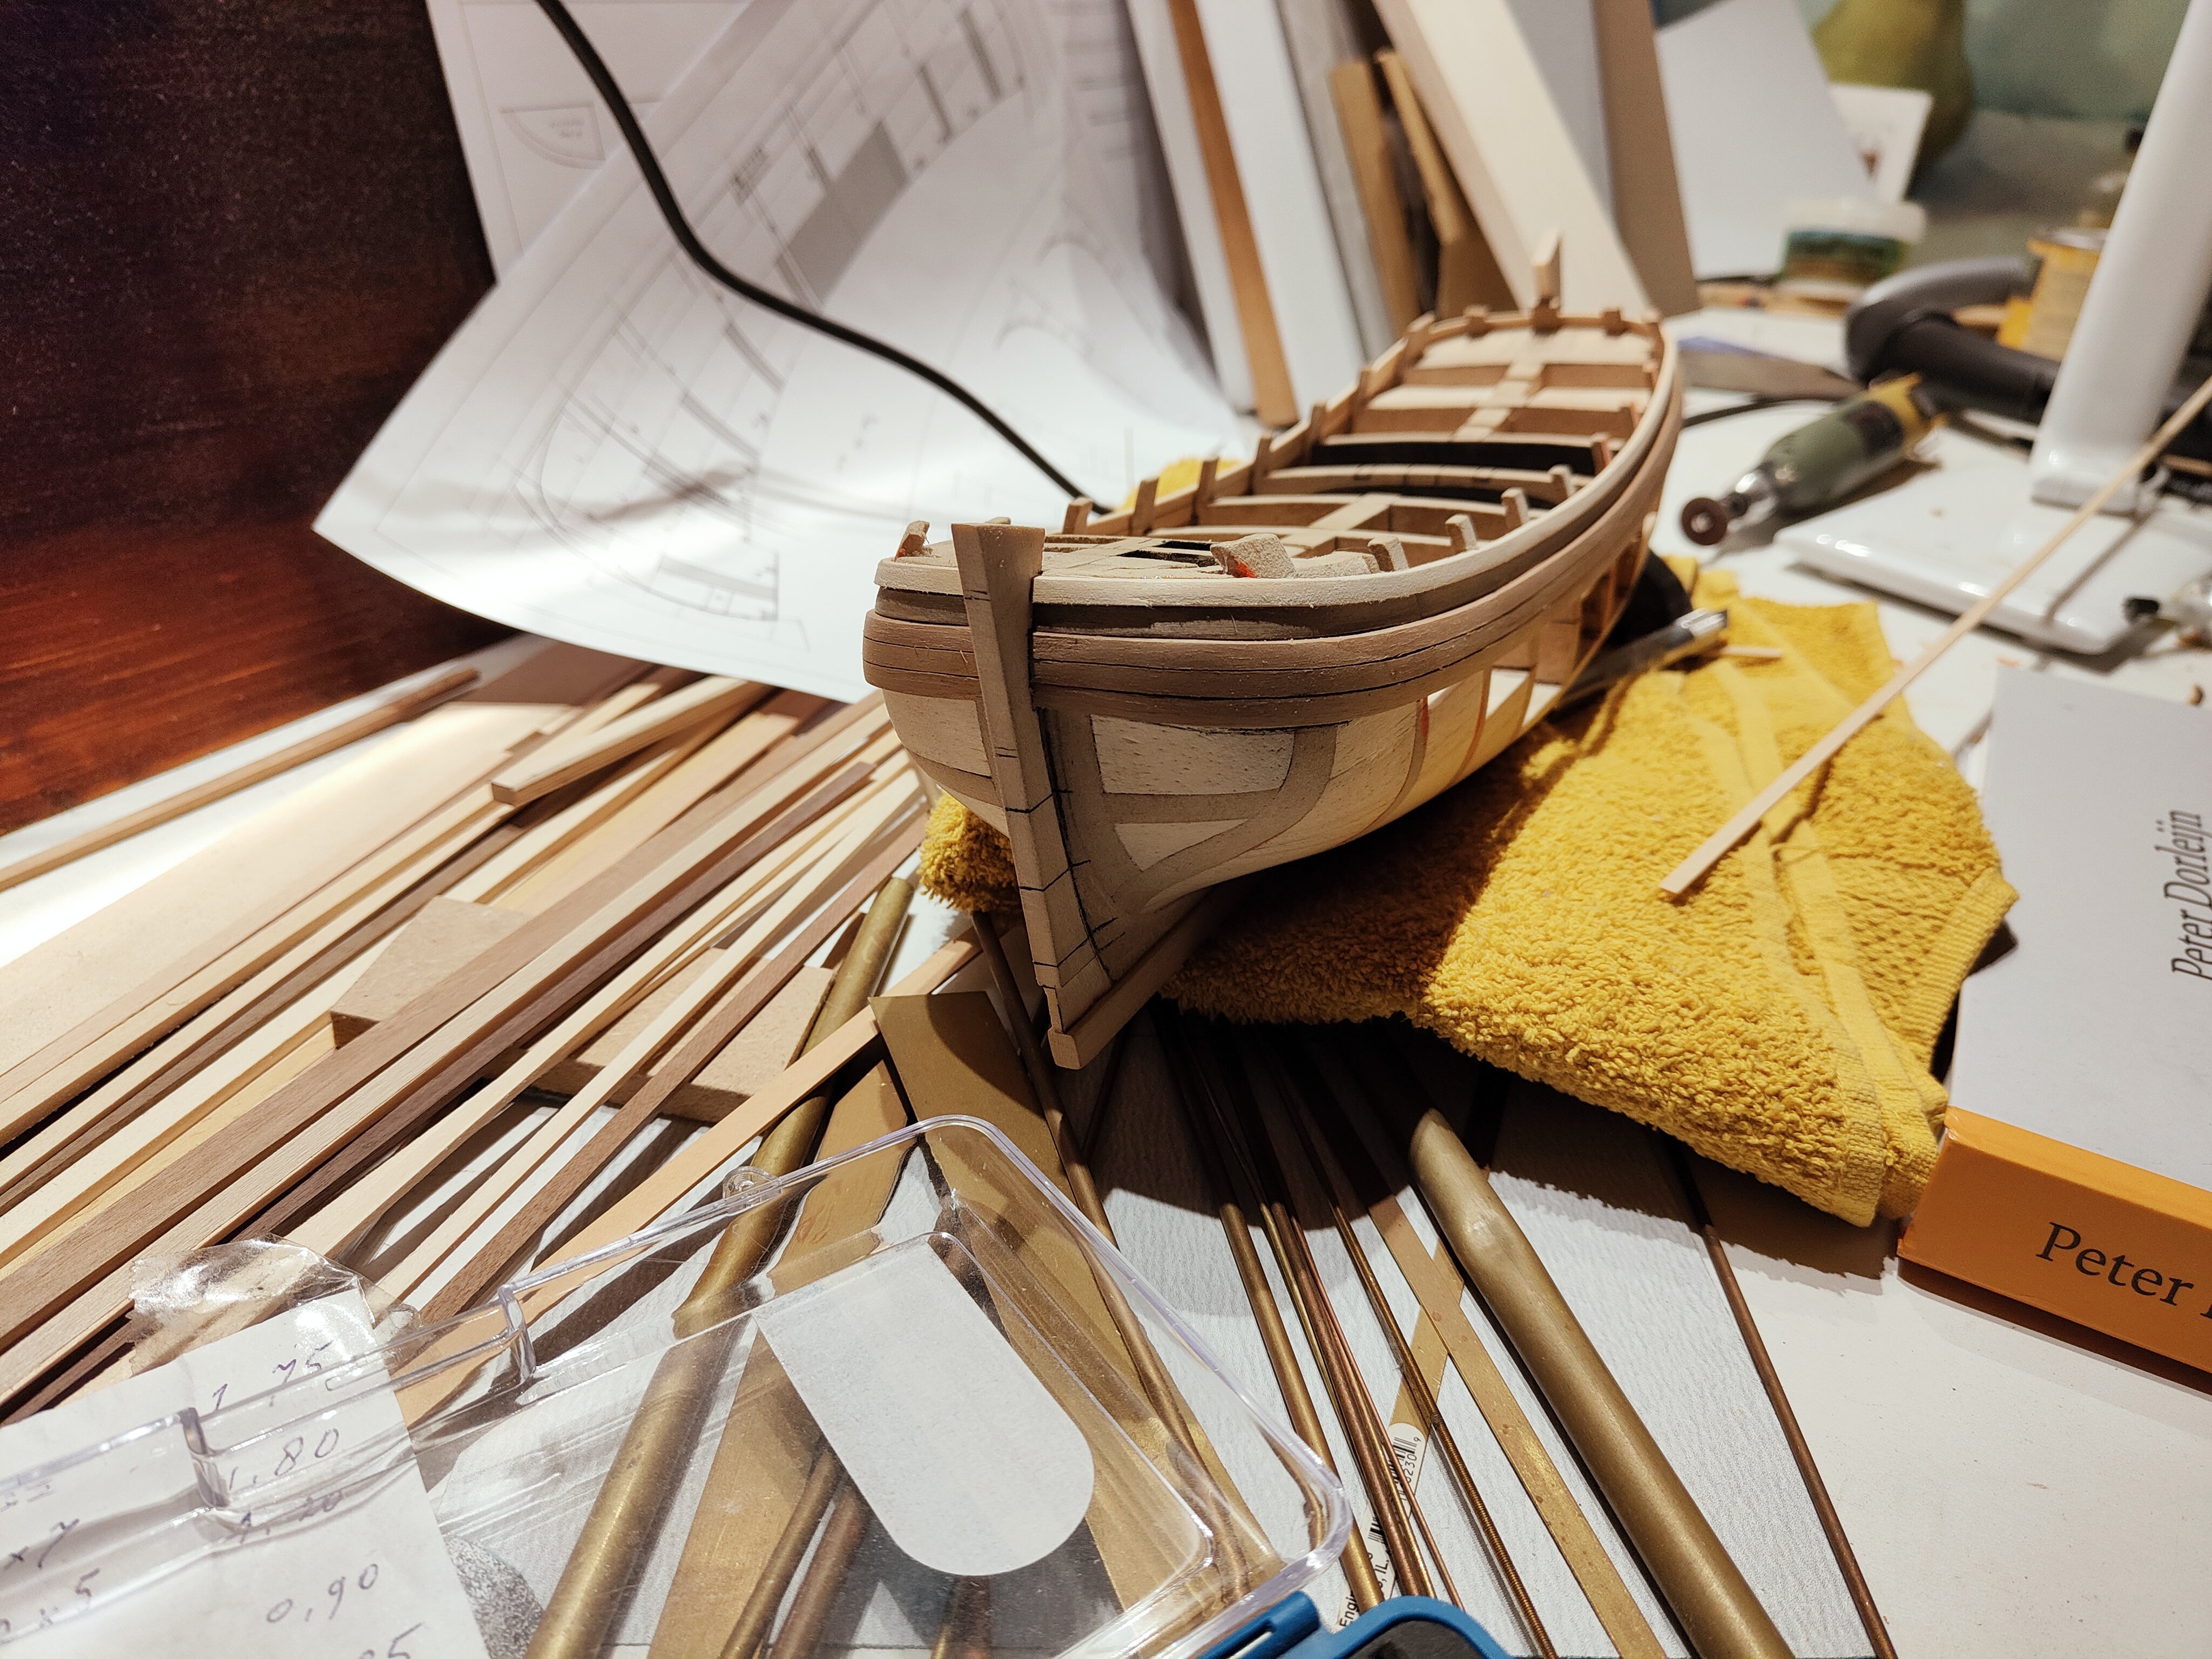
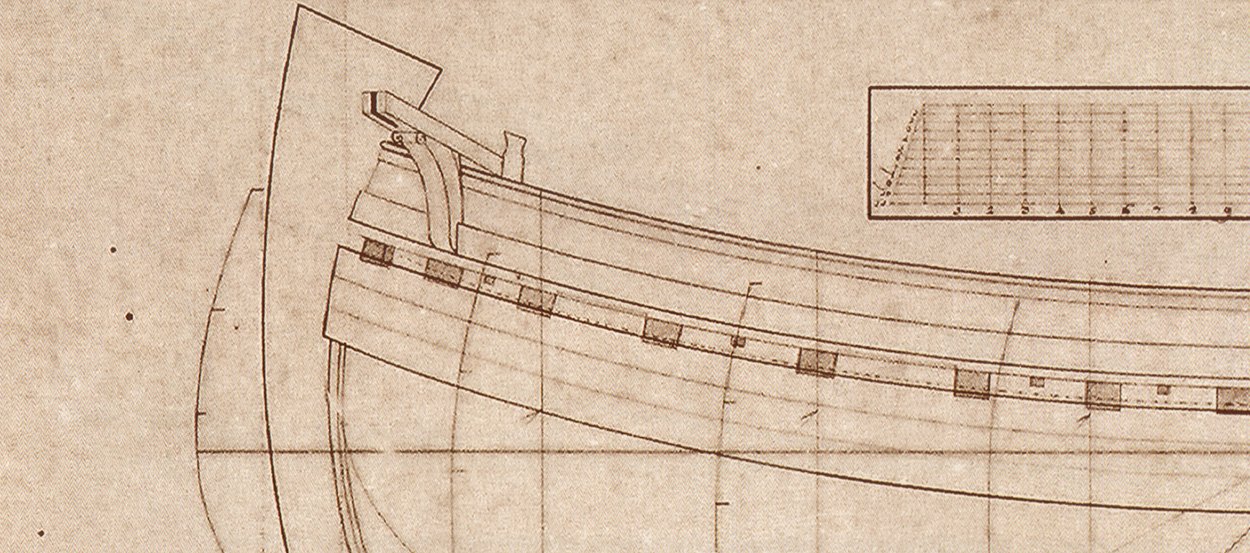
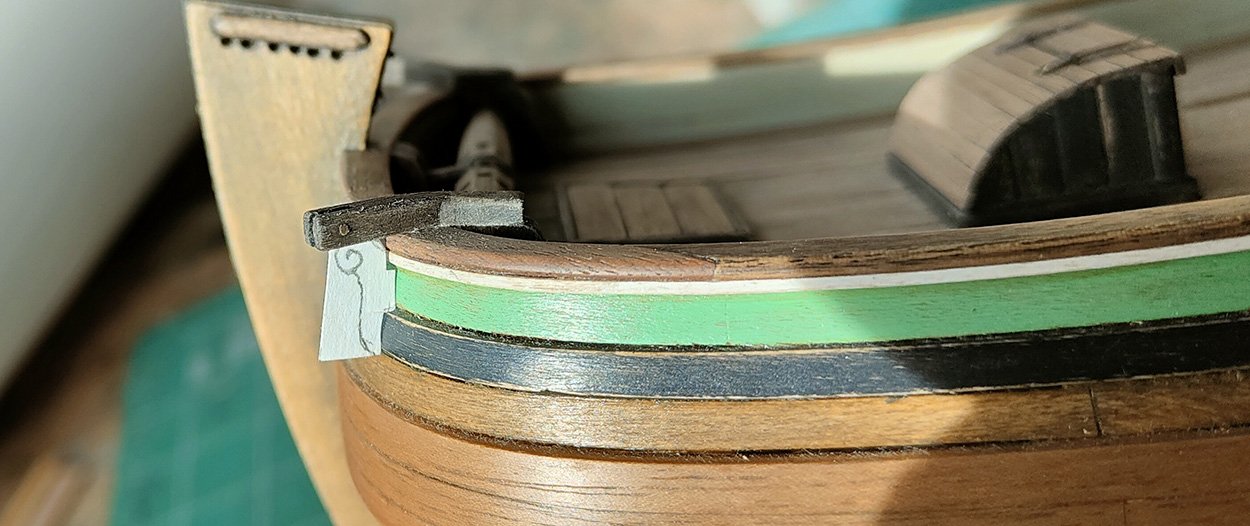
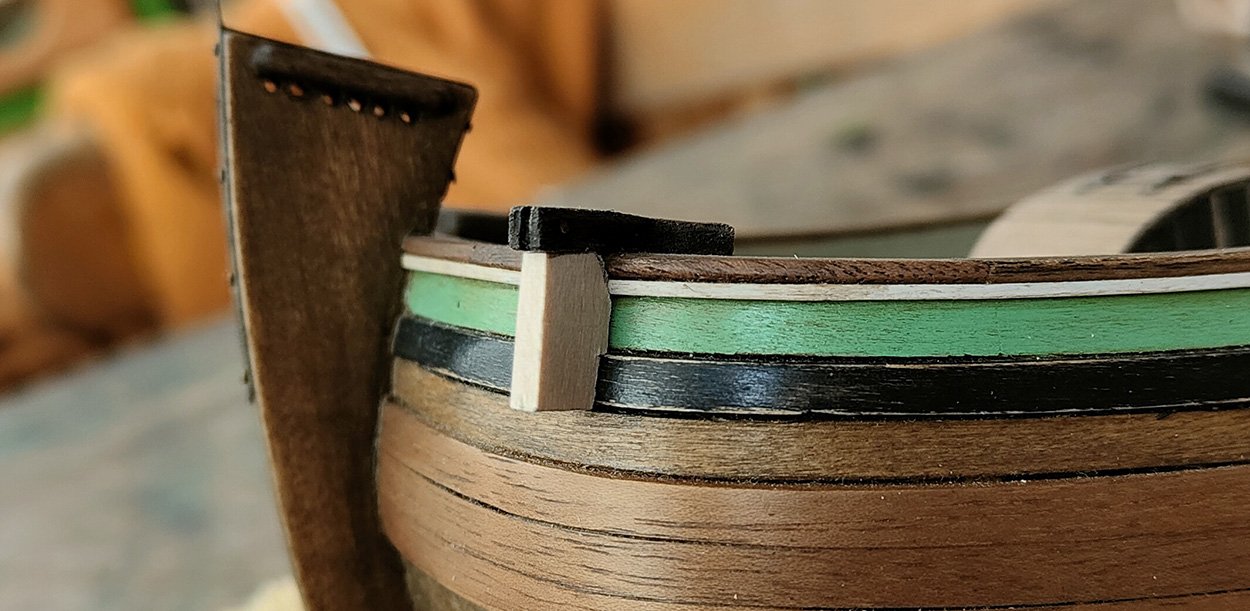
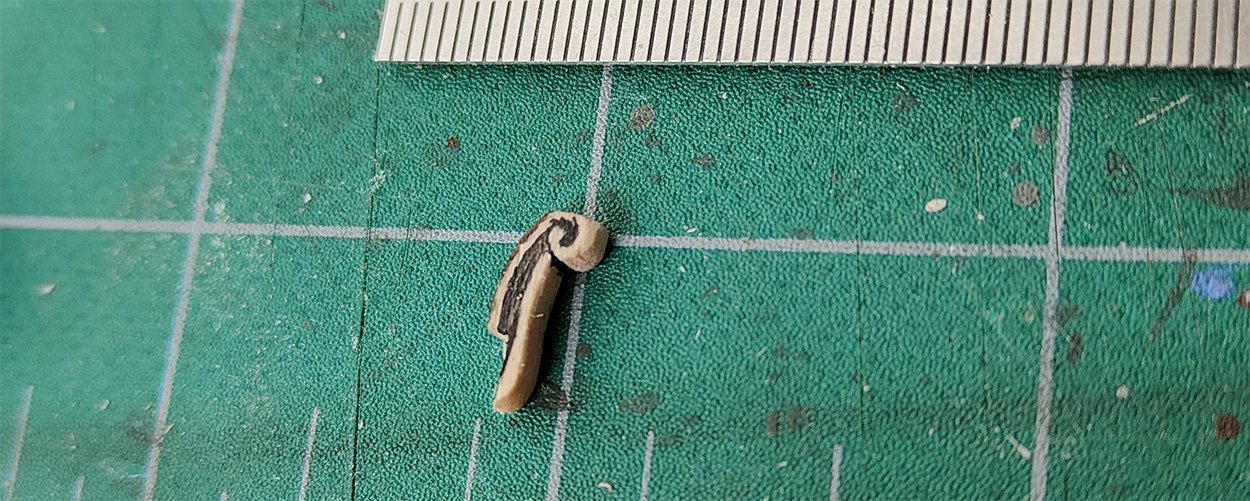
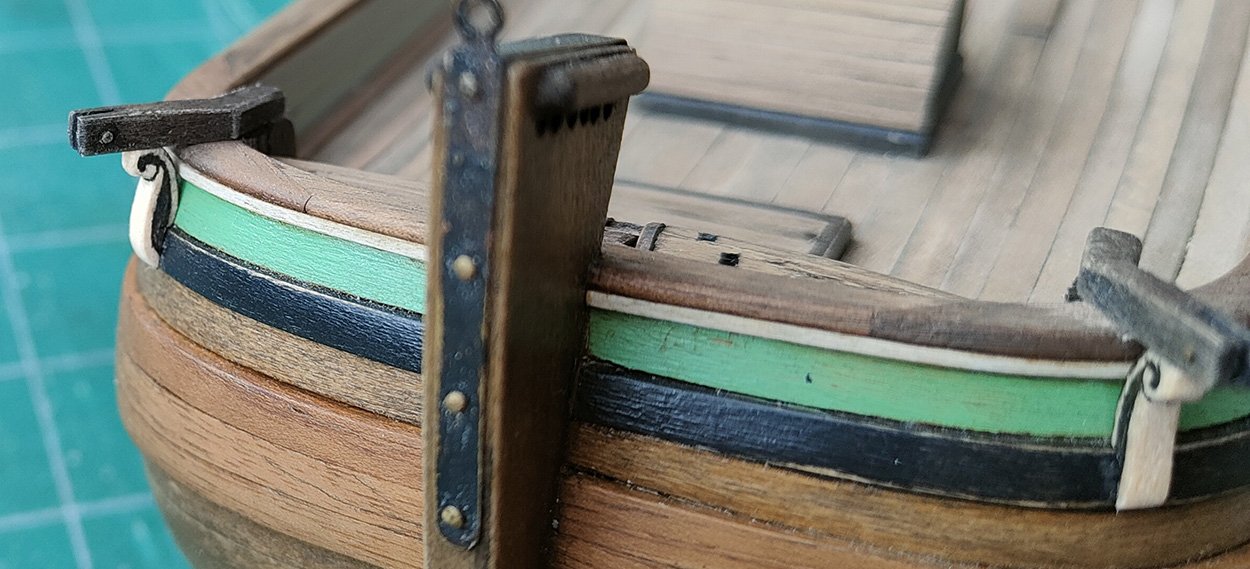
Next is a short update, the cathead supporter. Here a zoom-in on the construction plan. First I made a paper jig. Then I took a piece of wood and made it slightly thinner than the cathead itself. the port side one best regards
-
Oh wauw, that is great! What a weird looking model, it looks pretty experimental. I wonder what the story behind it is. Thanks Rutger.
-
I don't know, it could be. It could also be that the model was of Dutch design but was build somewhere else. And if the exact position of the coamings was not specified, the modelmaker did not execute it according Dutch fashion. I spoke to Ab a few weeks ago and he told me something similar about the model in the Rijksmuseum that is also linked with van Zwijndregt. It is a mix of Dutch design and British interpretation... By the way, do you have a picture of that model in Vlissingen? I am very curious.
-
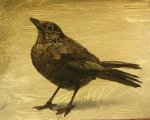
Thanks Chris. Actually the Dutch marine painting is what got me into modelmaking in the first place. As a big fan of that category I used to study all the books on that subject. Some of the books were also about sailing and sailing ships and contained construction plans. So one day I tried and see if I could build one. Here is one of the early models, build with black and white cardboard. I think it is a Gloucester schooner.
-
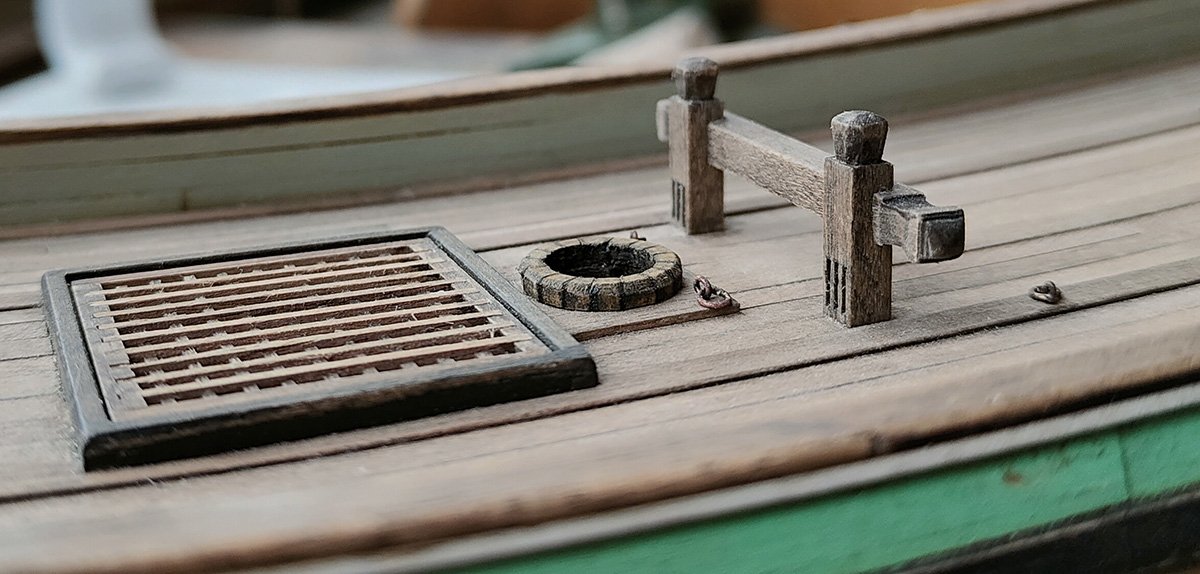
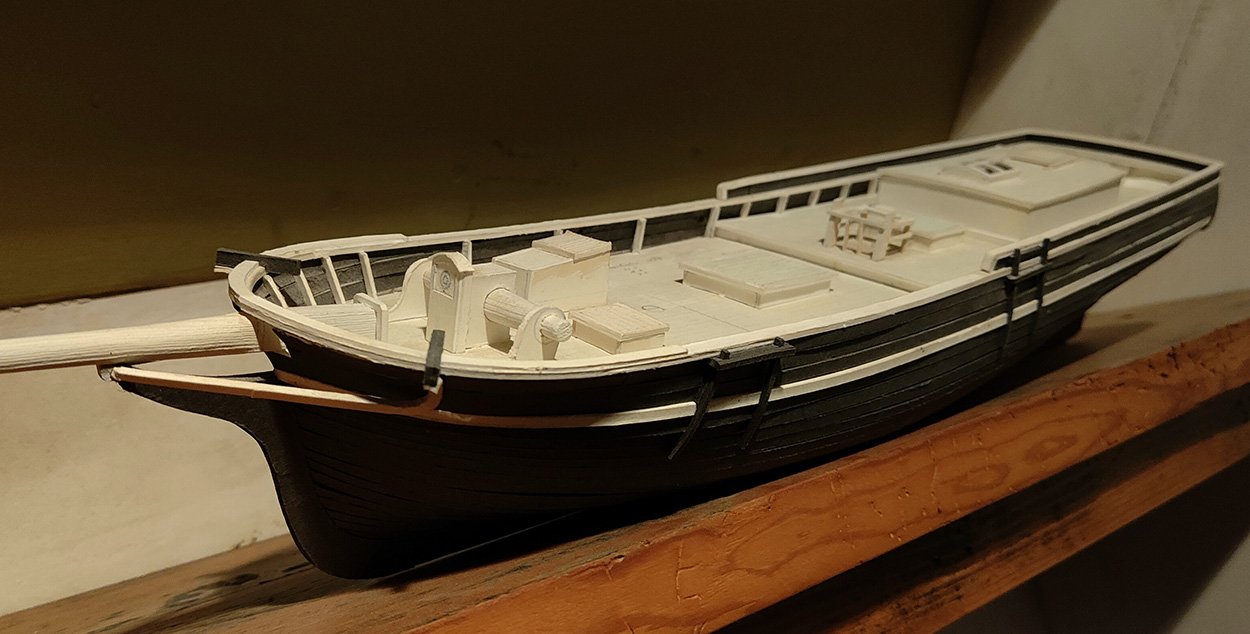
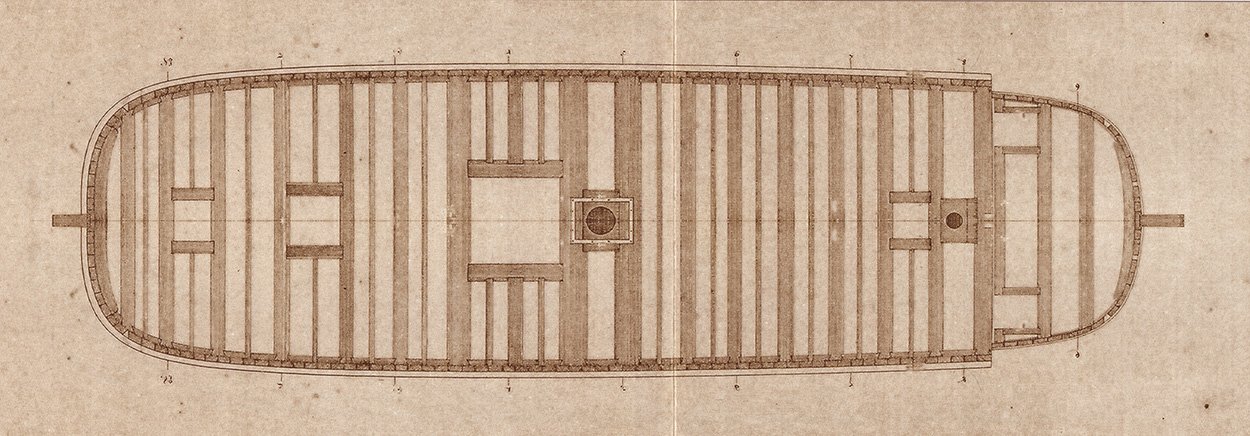
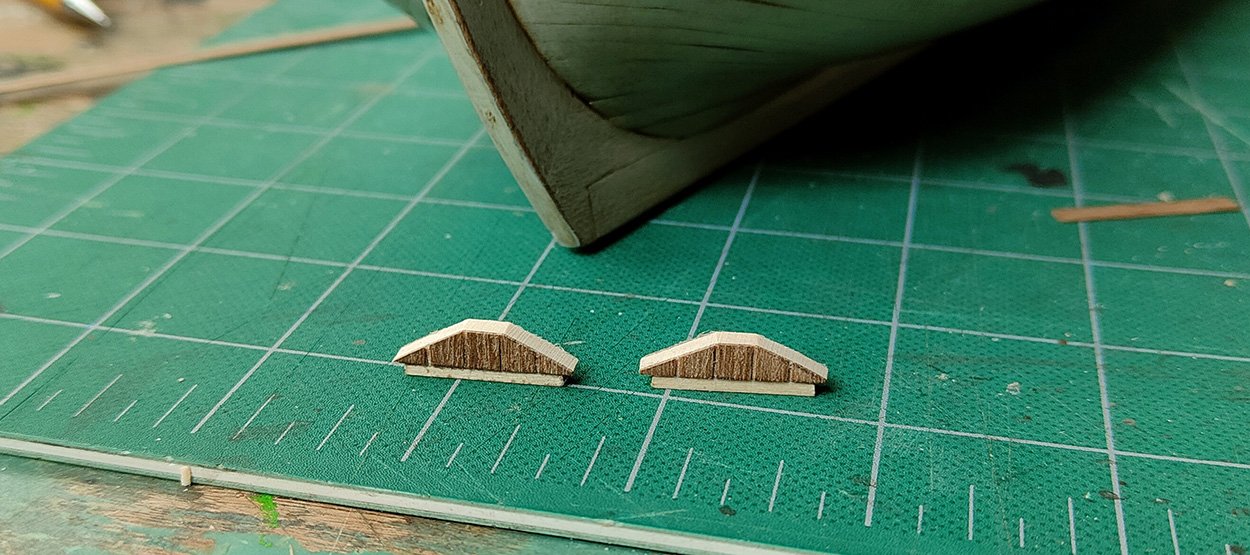
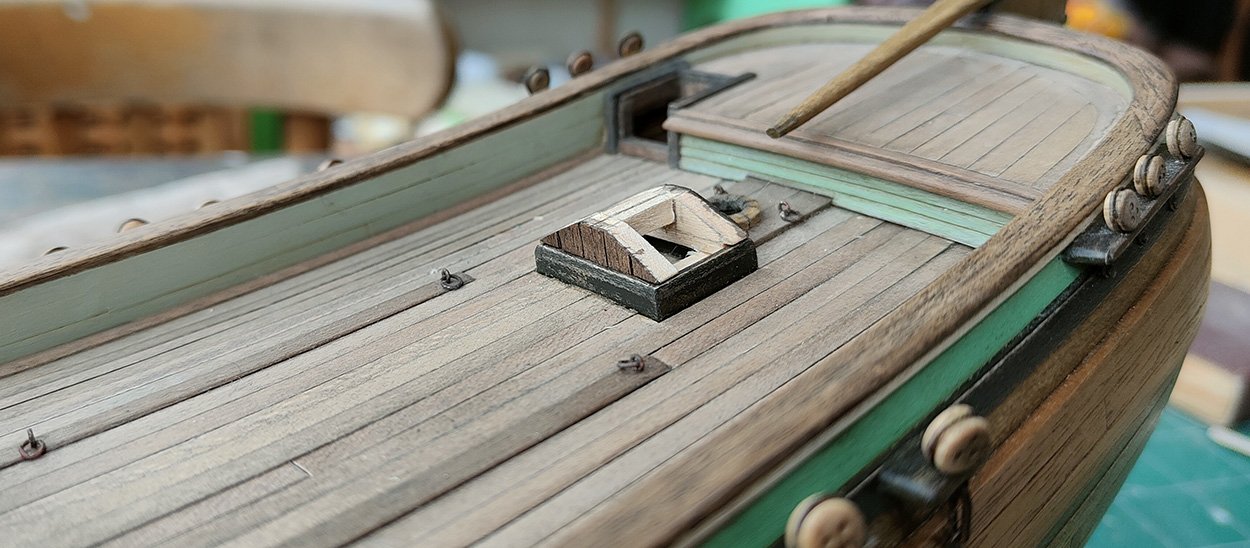
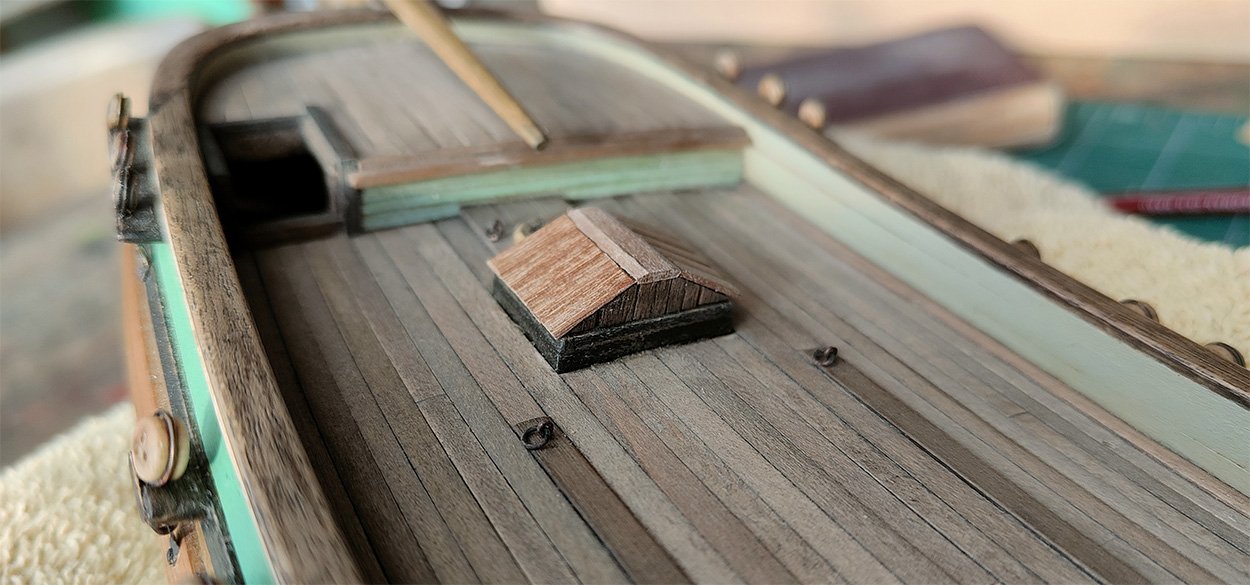
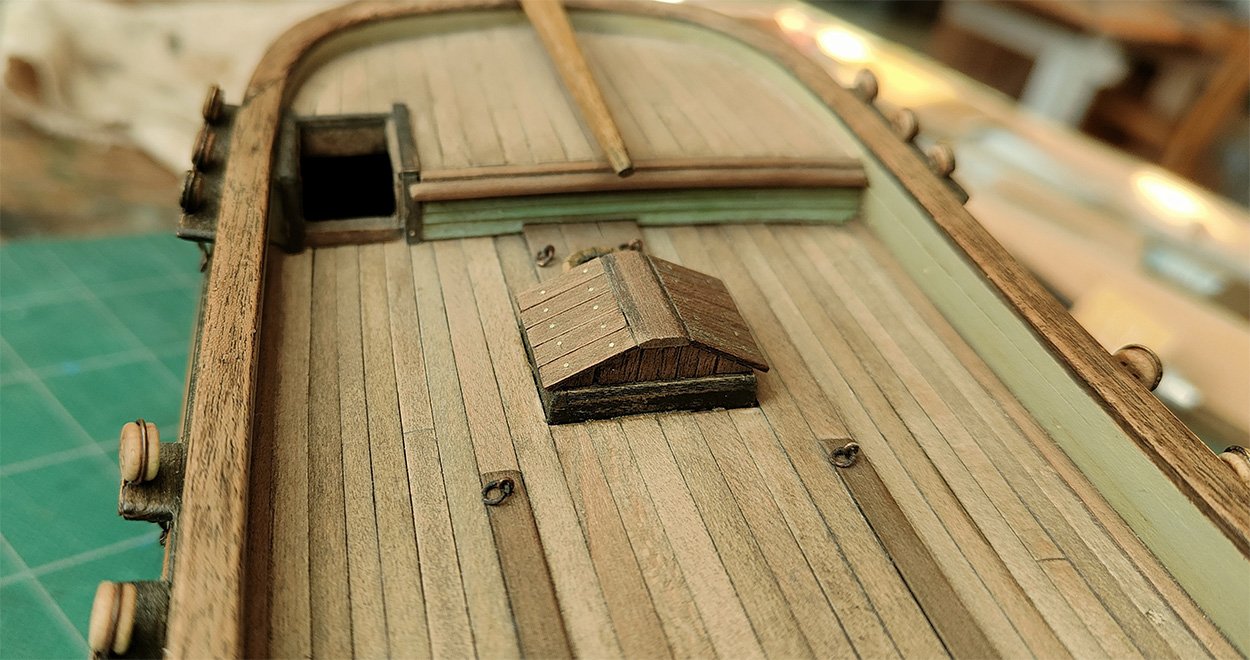
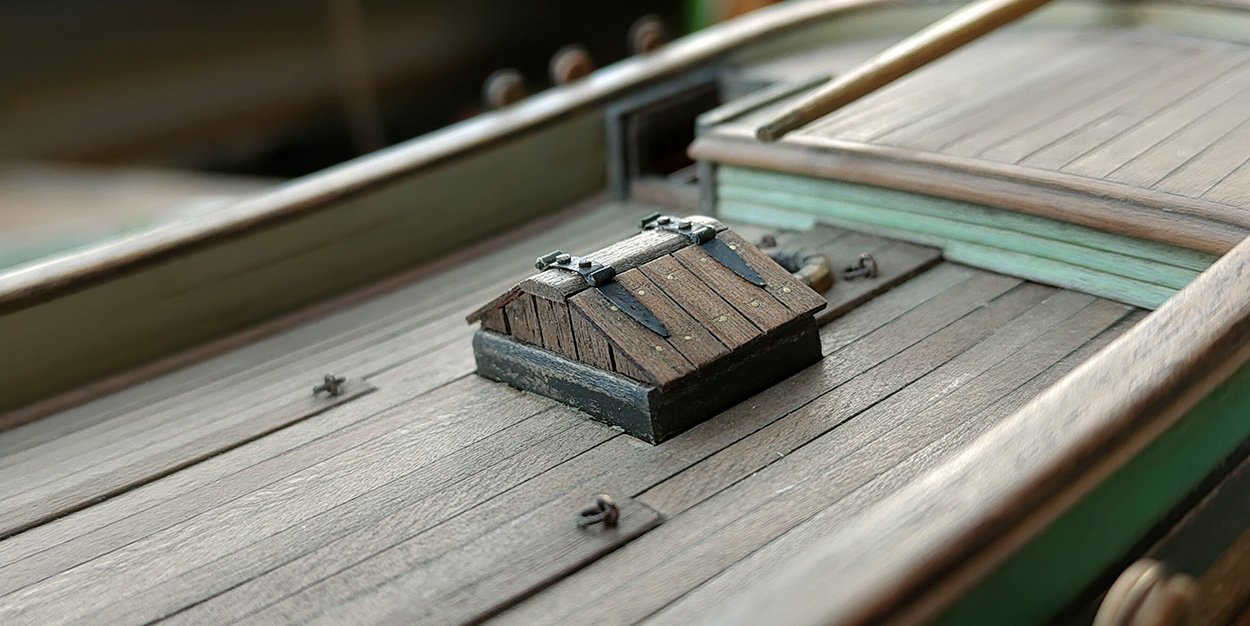
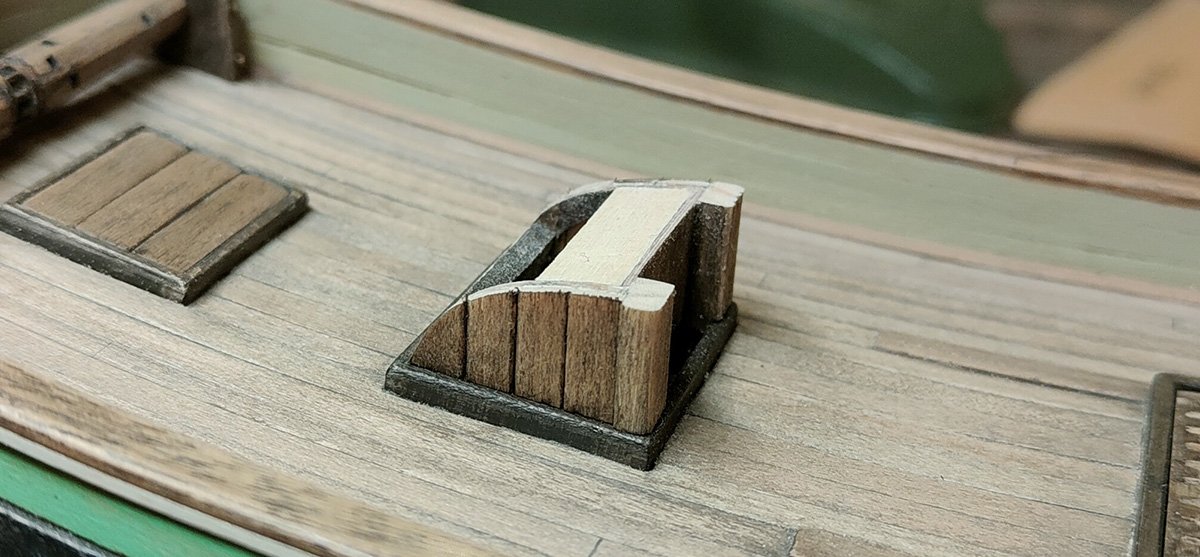
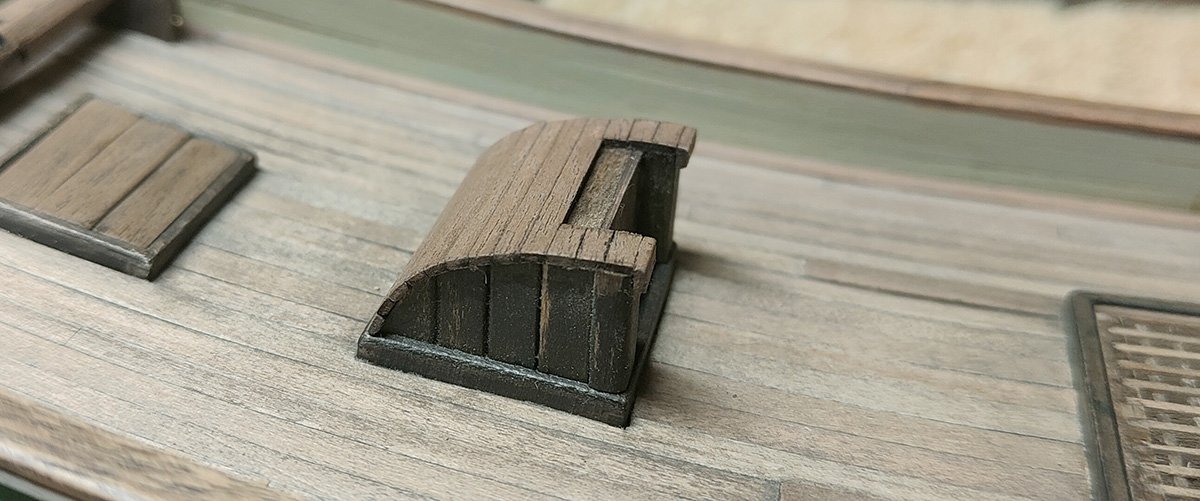
the Skylight The construction plan of this hooker ship does not feature any deck furniture. There was a deck plan though, so I could at least determine the exact size and placement of all the hatches. I already put all the coamings on the deck. The area of the ship right underneath the rear hatch, was probably used as living space that would need ventilation and light. So I think the hatch cover was build as a skylight. But because it was a fishing boat, it can't have been very fancy. A butterfly-skylight with plain wooden covers. Best regards

-
Hi Paul, I was at the National Maritime Museum in Amsterdam last Saturday and they had a model on display that reminded me of your sharpie. Of course there are a lot of differences and it doesn't have the straight sides like a sharpie has but it did have a very shallow draft. Anyway here is a picture: greetings

- 201 replies
-
- 7
-
-
- Oyster Sharpie
- first scratch build
- (and 1 more)
-
I am afraid it doesn't. But by all means Keith, apply the paint thickly.
-
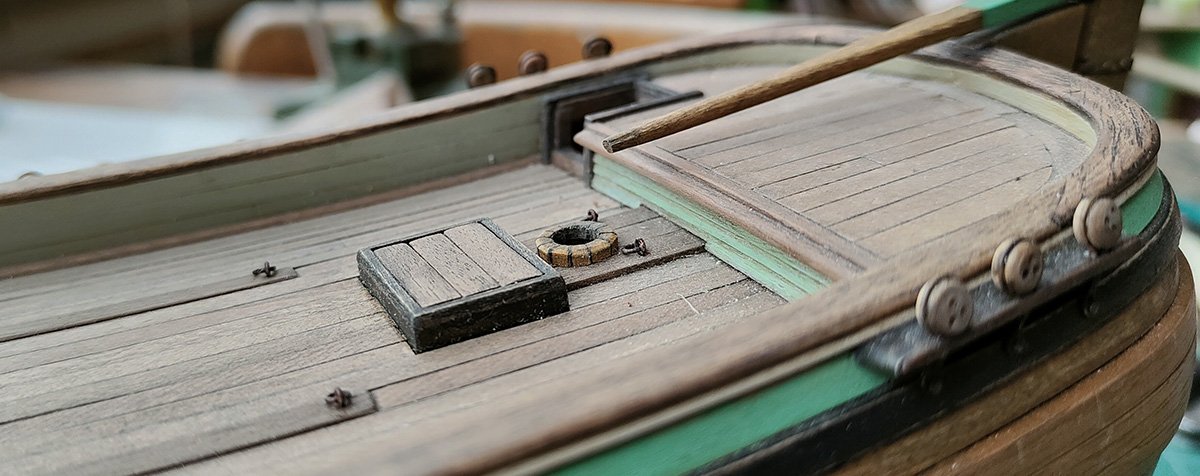
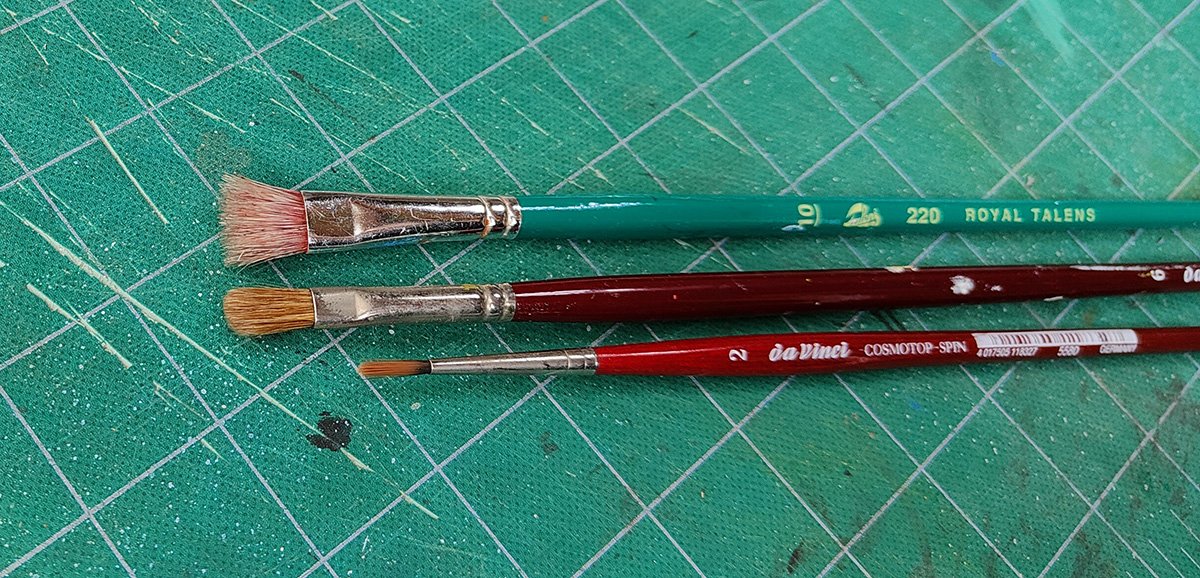
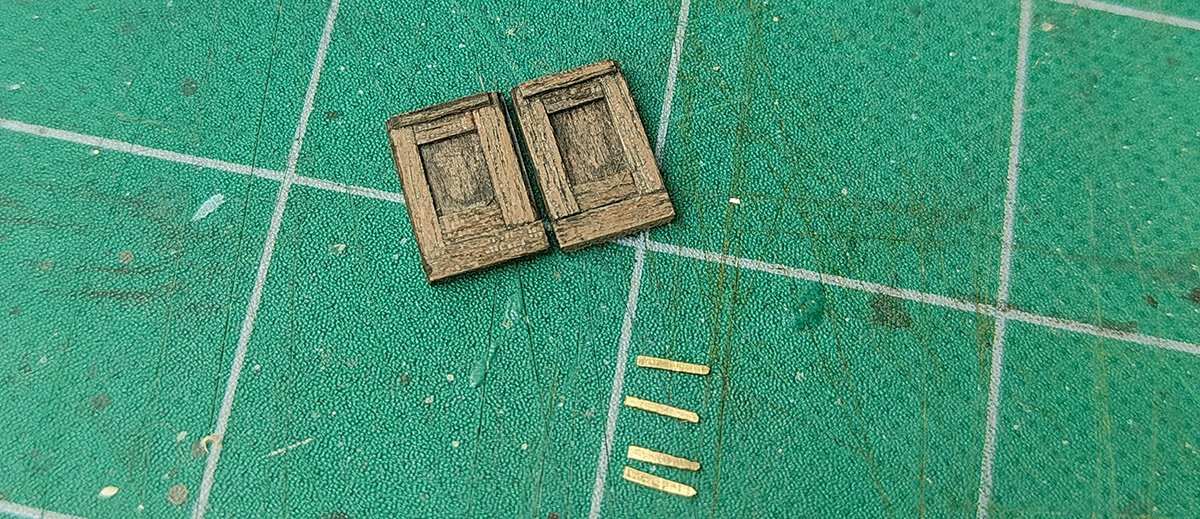
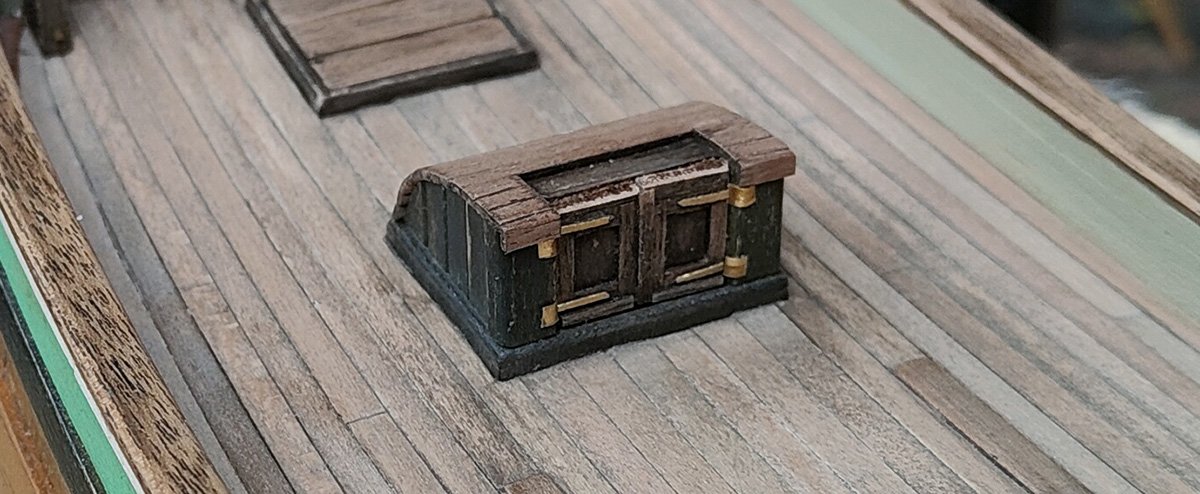
Thanks Rutger, I 'm glad you like it. How are you doing with that Twikkelo? For finishing or colouring the wood on this ship there's a very simple product that I use all the time. It's a dark brown, almost black acrylic paint. But there are three different ways of applying the paint that makes it so versatile. The first one is to apply the paint very thinned down with water and immediately afterwards wipe it off again with a piece of cloth. That is what I used on the deck planks. With larger areas you have to be careful though, because the paint has to be wiped off before it dries. With the deck for instance I only did two rows at a time. The second one is to apply the thinned down version and let it sit. An example would be the doors of the companionway. The paint is used as a glaze. The third way is to use the paint as a covering finish. That one is being used on the side of the companionway and the coamings for instance. I still dilute the paint considerably though. And it might be obvious but I would like to add that the quality of the brush plays an important role in this process. I only use the two at the bottom. They are brushes ment for painting with watercolour or ink. It doesn't have to be top quality but the brush needs to be soft. The one at the top is very useful for painting on canvas but definitely not on a ship model. It is made out of pigs hair or it can be synthetic but it is too stiff to make a smooth coating. I hope this is somewhat useful.
-
Thanks Keith. I think you are not doing so bad yourself with that floating steam donkey. The only thing I would suggest, if I look at post #230, is to apply the paint much thinner.
-
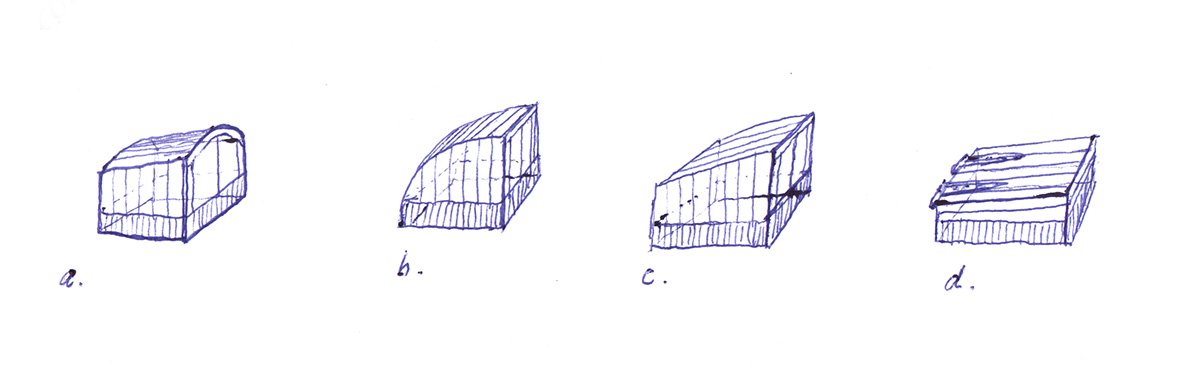
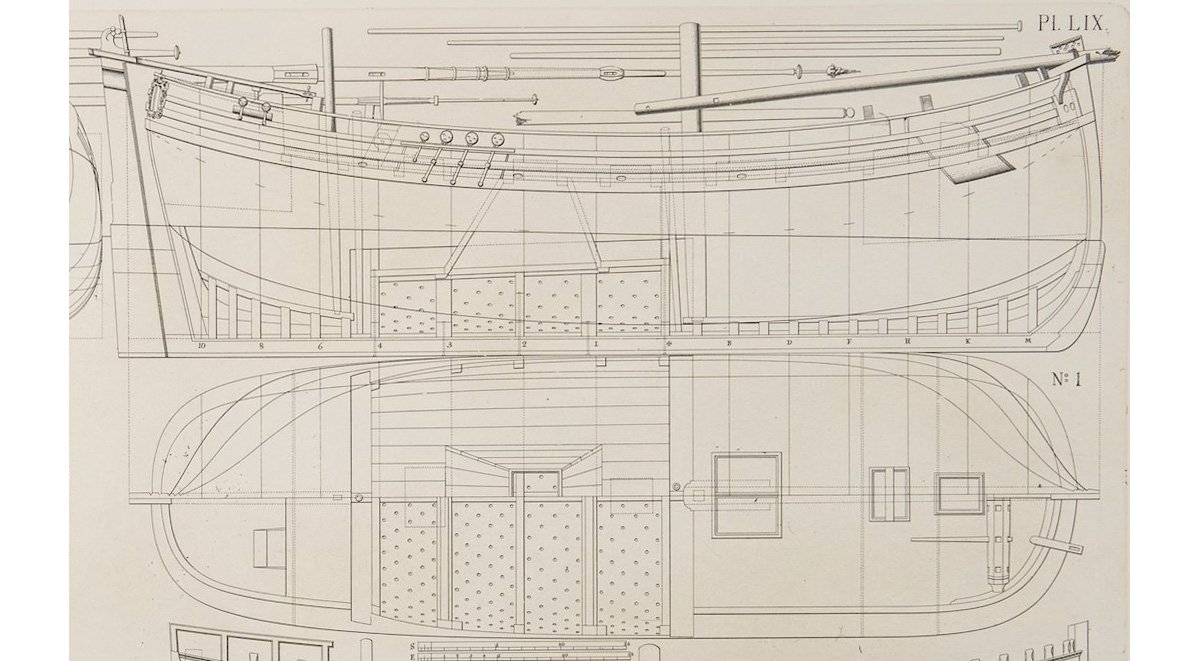
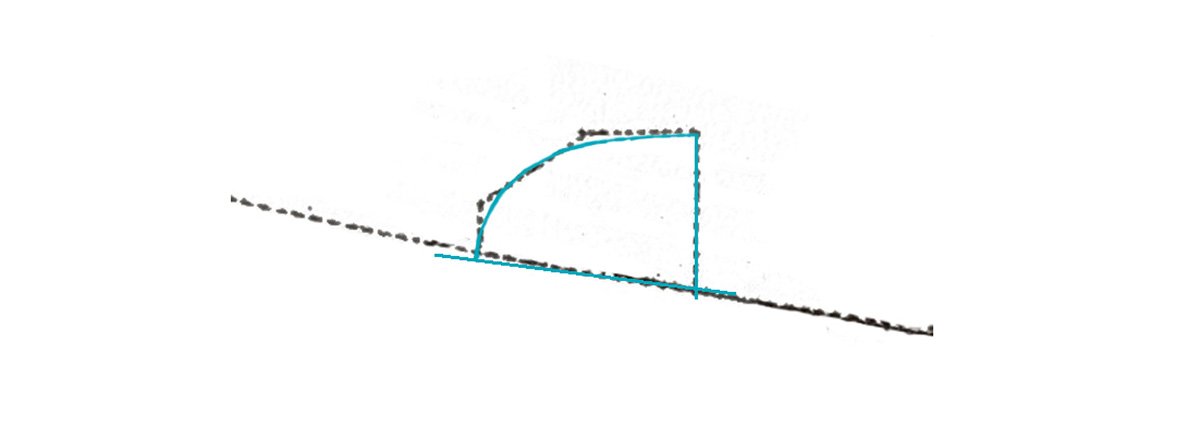
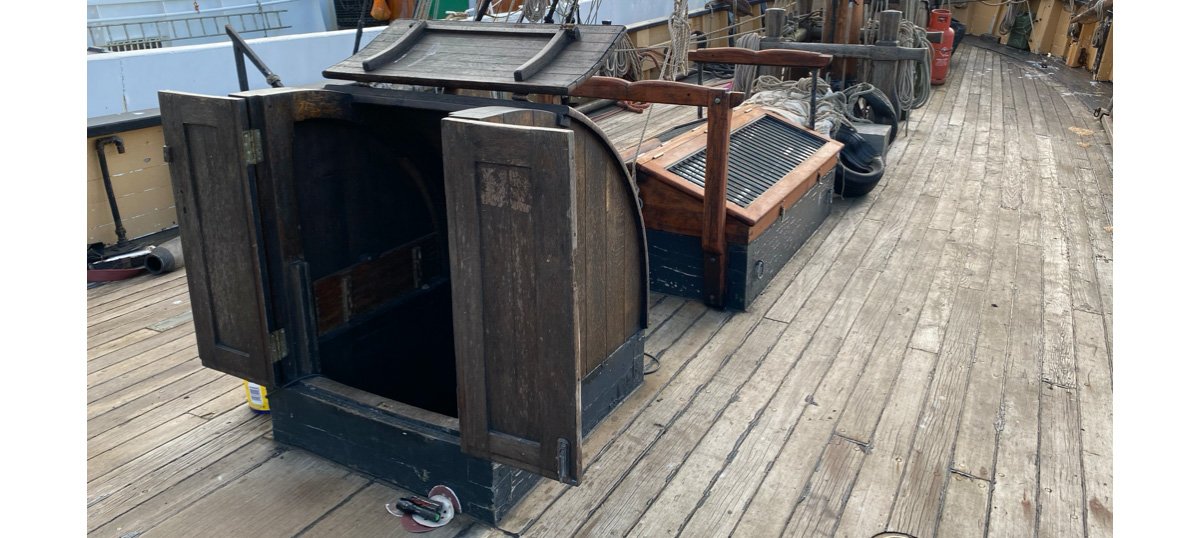
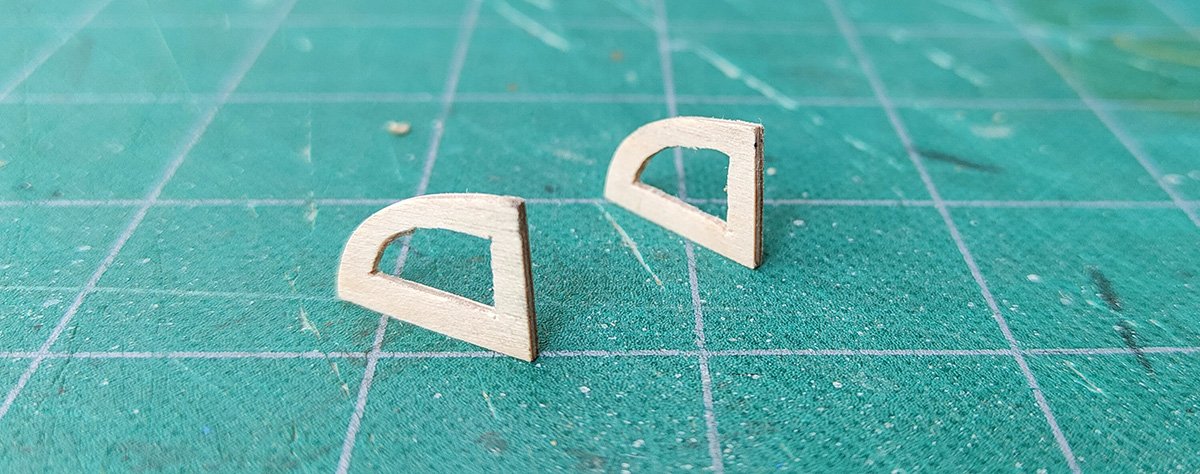
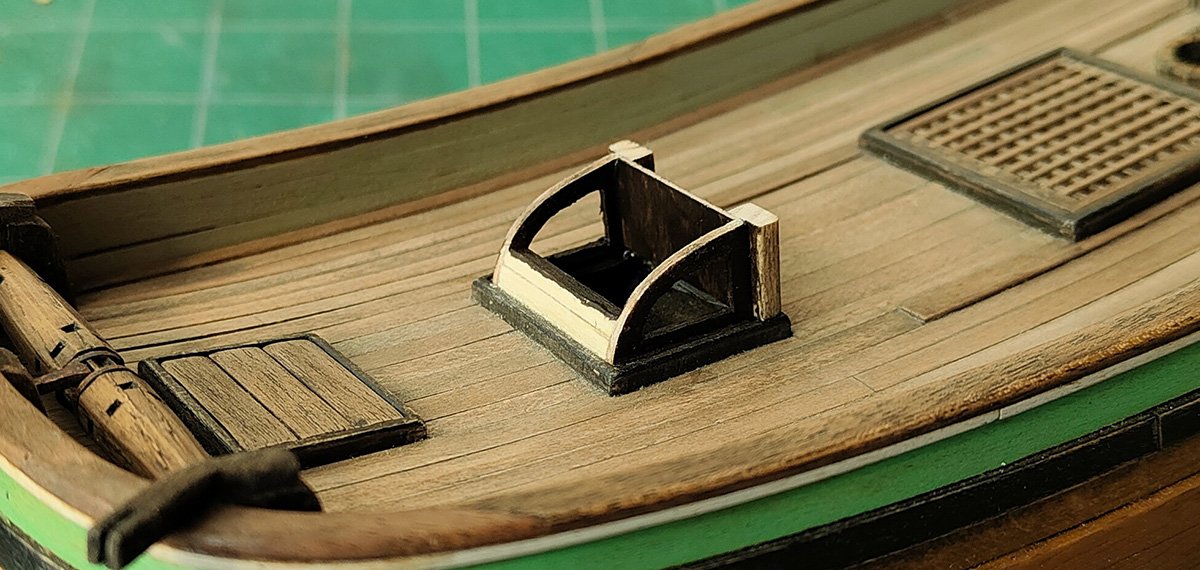
the Companionway The companionway, like most of the deck furniture, was not on the construction plan. However the location and the exact size of the hatch were. So I had to come up with a shape. After scanning through a bunch of paintings and drawings and models of roughly that period, I sketched a few of the possibilities. In order to get a bit more specific, I took the plan that Ab Hoving used for his fishing hooker by Fredrik Henrik Af Chapman. It is a bit hard to discern but there is a faint dotted line describing the shape of the structure. After I subtracted that small shape from the Chapman-plan, I made it fit on the side-view of the van Zwijndregt hooker. After that I modified it slightly into an arched roof (blue line) without deviating too much from that original shape. In the search for contemporary companionways I came across pictures of a wooden sailing ship called 'the Phoenix' which had a version with an arched roof I thought would match the hooker ship nicely. The reason I used the Chapman-shape as a base, was that by now I knew that hardly anything on a sailing ship is designed randomly. The companionway on the Chapman hooker is much lower than the one on the Phoenix. Probably because the bowsprit starts at the main mast in this type of rigging so everything in front of the mast had to stay under it. best regards, Rik

-
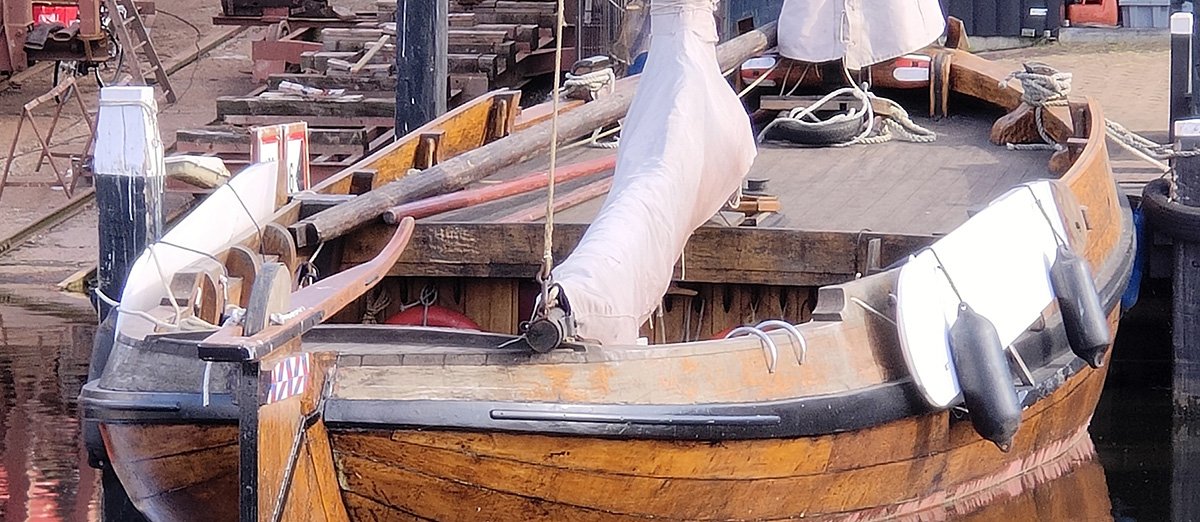
Thanks guys for your response. Andrew, about that detailing I 'll have to say I wished I had done the build in a 1:48 scale in stead of 1:64. All the elements get really really tiny. And the camera on my telephone can see them much better than my eyes can. A phenomenon probably most of you will recognise. Thanks Keith! Thanks Doreltomin, yes 'pawl' would be the word I was looking for. Thanks Jacques, I used lime wood for the deck planking. I have a dark brown, almost black wash that I apply to it. But very briefly. Before it dries I rub it off with a piece of cotton. This is to accentuate the fibers of the wood and gives it a light grey hue. Here is a traditional ship in the harbour where I come from. It is called a 'botter'. These are the colours I trie to emulate. The deck is not made out of oak and it is not varnished like the rest of the hull. Thanks Rich.
-
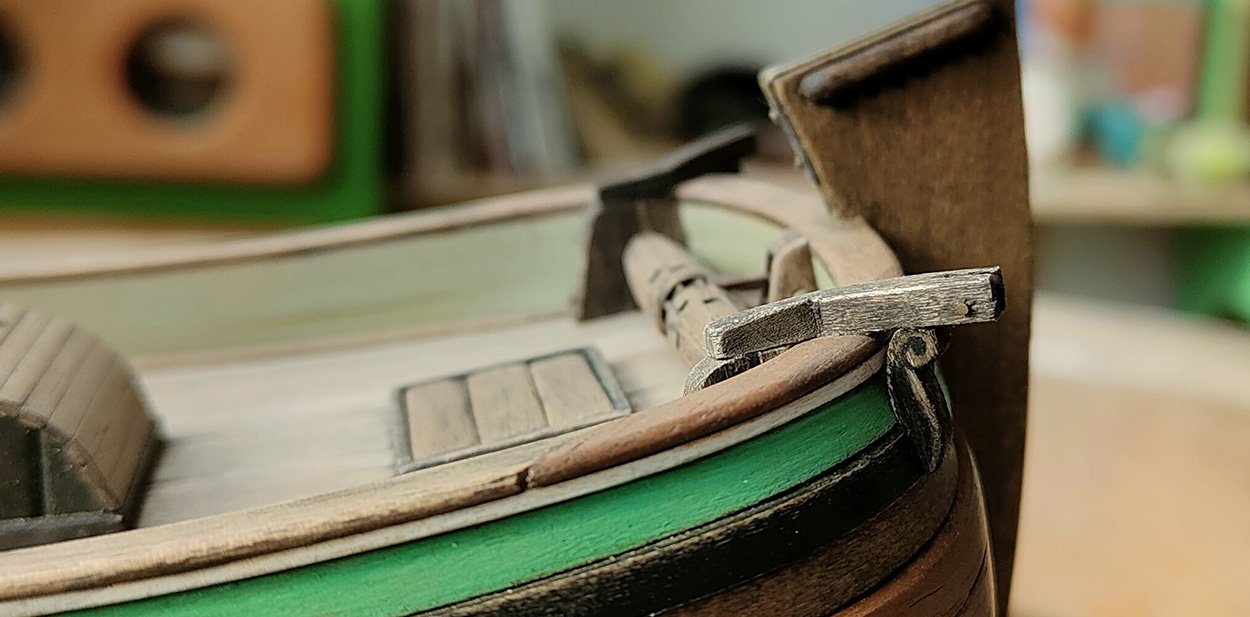
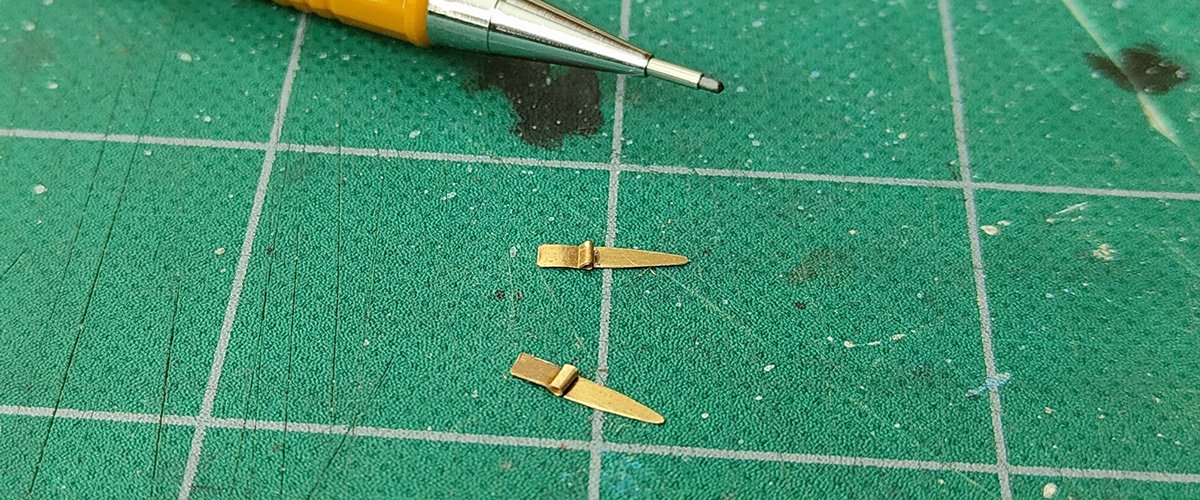
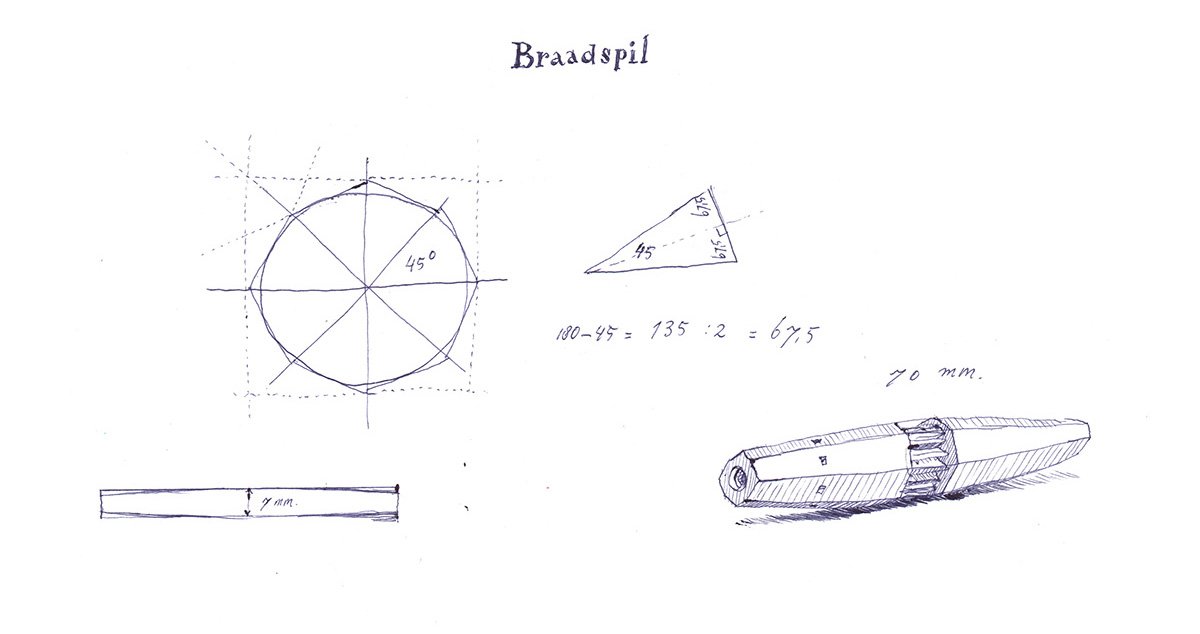
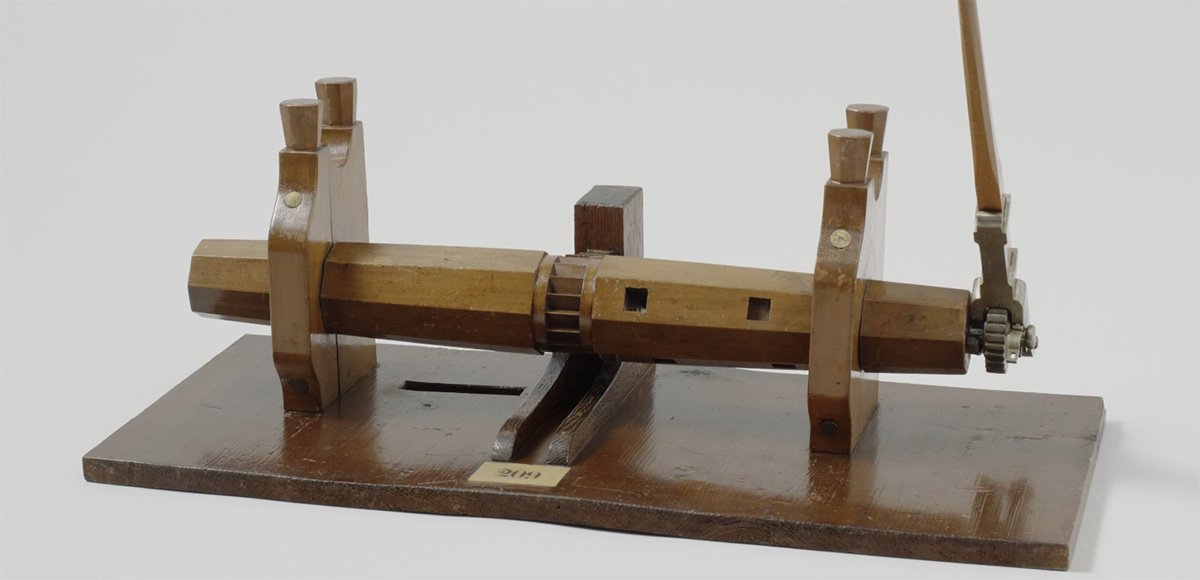
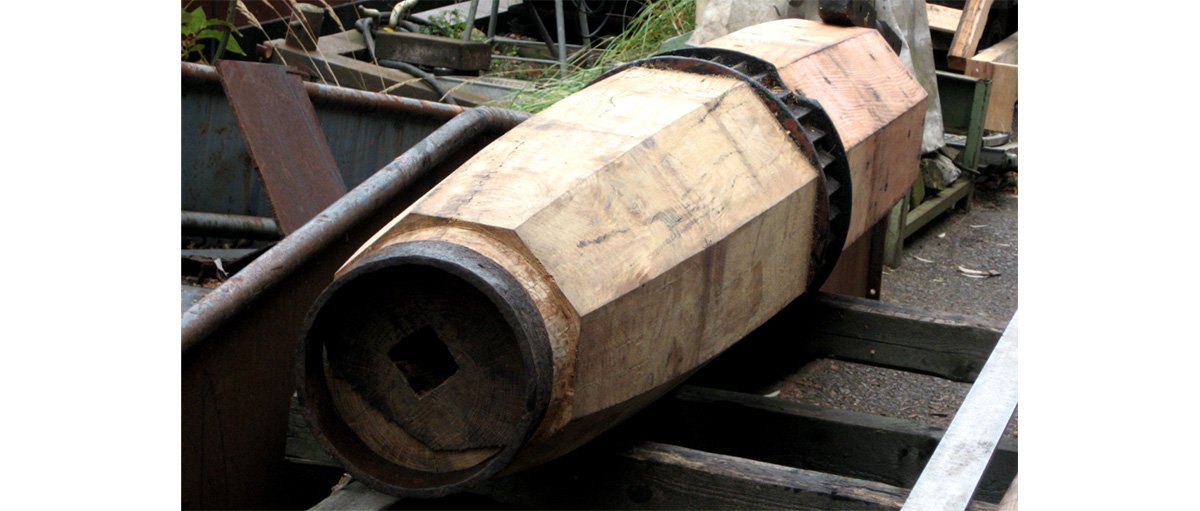
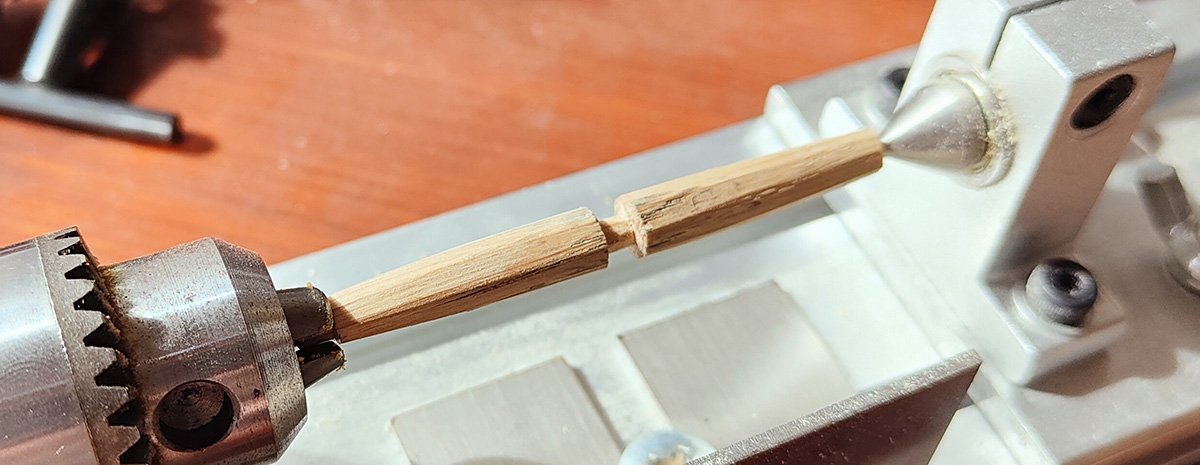
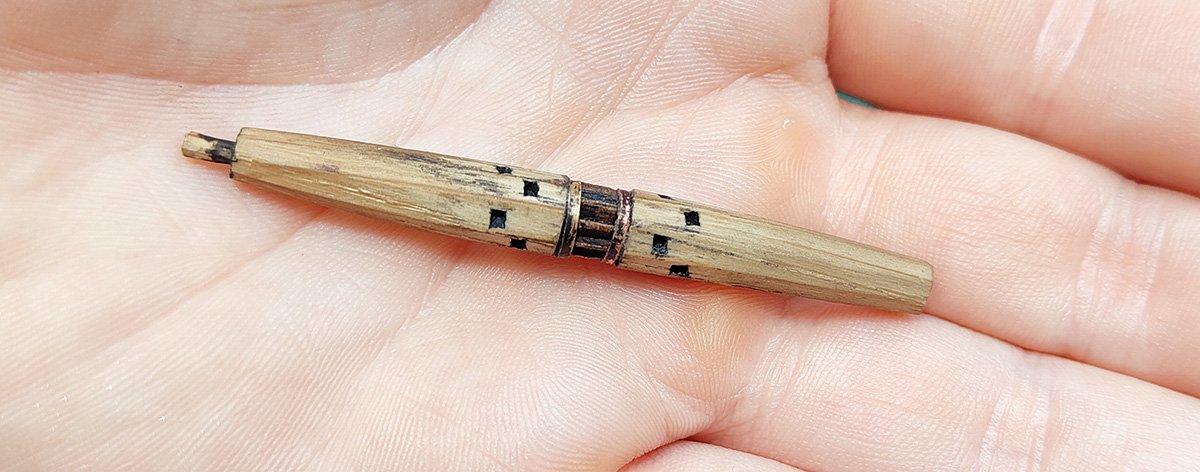
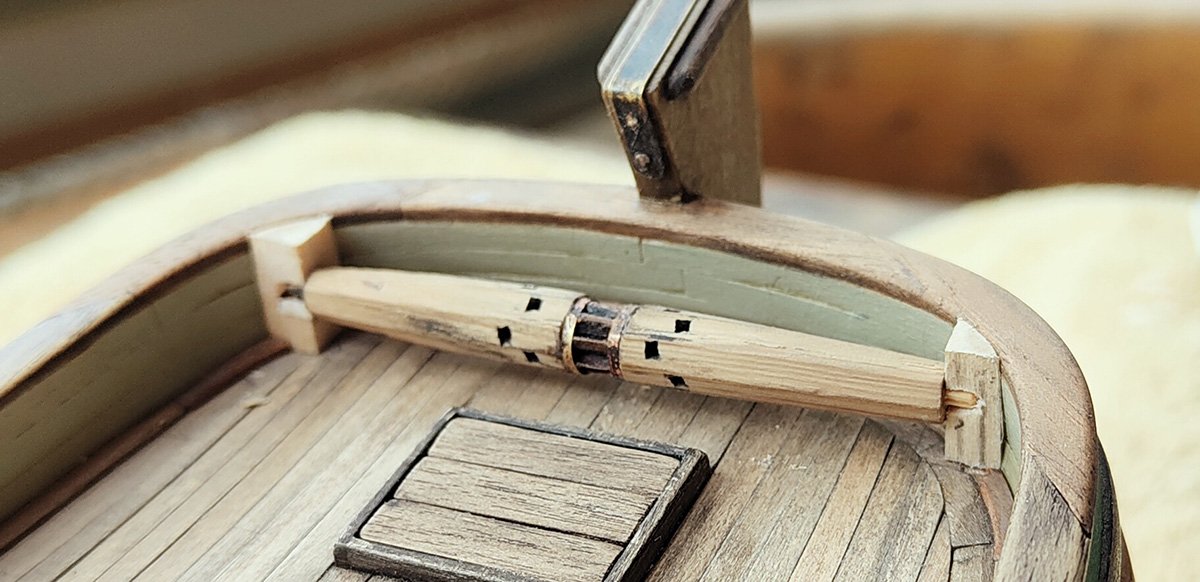
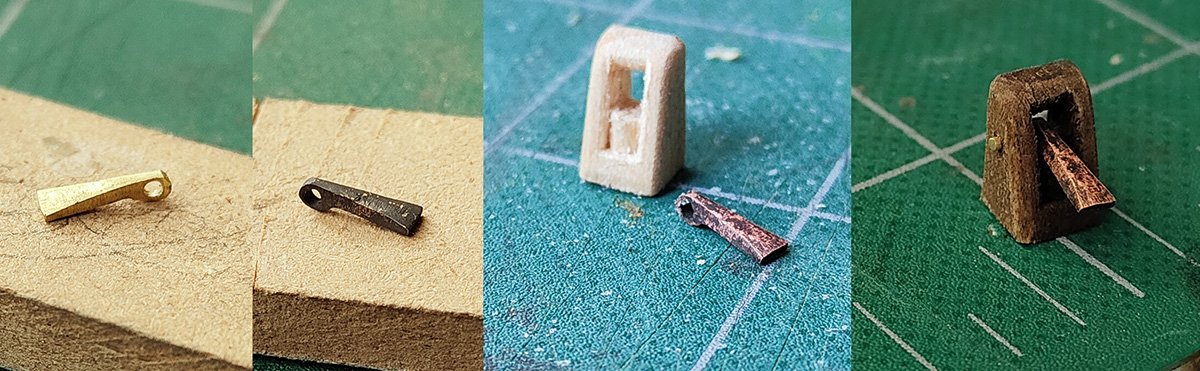
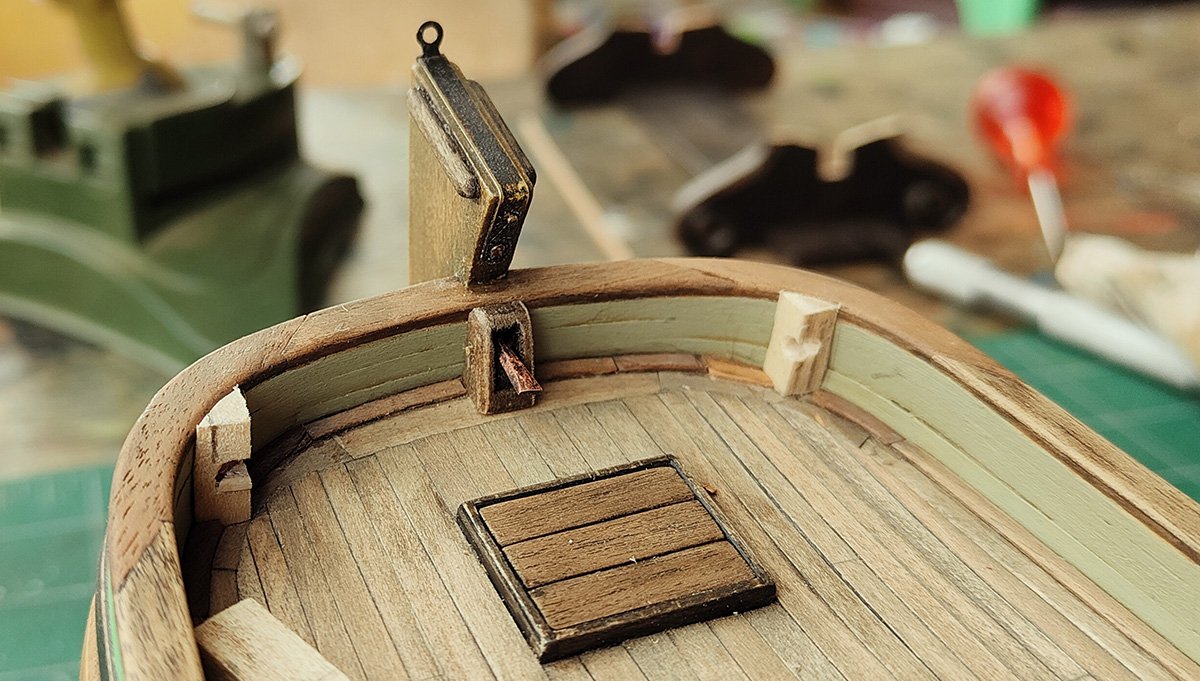
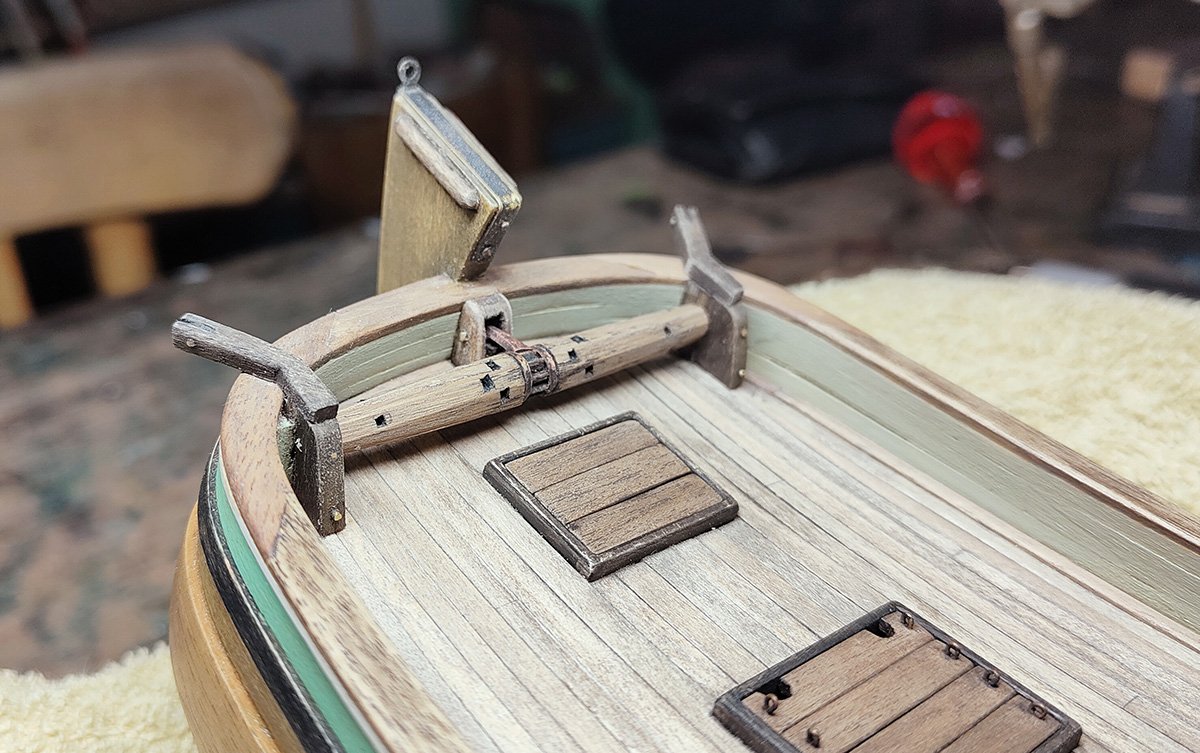
Then onto the windlass. In the case of this hooker ship, the windlass does not show on the plan but from pictures, like the ones in post # 41 above, I knew it had to be there. I had consultation with Ab Hoving about it and he assured me the ship would have had one and he advised me to take a look at his building log of a similar ship at this forum. In the pictures as well as in Ab's log I noticed the riding bitt was sort of integrated with the bulwark. That 's probably why it wasn't drawn in the van Zwijndregt plans (while on other occasions he does include the riding bitts). Ab told me that the curved shape of the bulwark at the bow was filled up with pieces of wood which are called cheeks. The next picture shows you a piece of the deck plan and where the winch is supposed to be located. Based on this I could determine the length. For the specific shape there are a few great examples of windlasses at the Rijksmuseum. Here is one of them. I read somewhere there are even differences between windlasses from place to place. Apparently the Dutch ones often had a slight curve, like the one in the next image. That is not surprising since everything on Dutch ships seems to be round and bulky. Like it is their style. If you look at the grain of the wood, it looks as if it is made out of one piece instead of being composed out of eight parts. So now that I had an idea of the size and the characteristics, I made a test version from a piece of oak. Here you can see it with the ratchet wheel and square wholes for the bars. Then I installed the cheeks to the bulwark and did a test run. I decided that the test version was actually good enough and I made it the final version. Then I made the peg that stops the winch from rolling back (I couldn't find the proper term for it, please fill me in if you do know it) and its casing. Here are the pieces that lock up the windlass. There is probably a name for them too (once again don't hesitate to fill me in). And here is the whole assembly mounted on, including catheads. best regards, Rik Buter


-
Here are two photos of the mast wedges in place, for the main mast and the mizzen.