HOLIDAY DONATION DRIVE - SUPPORT MSW - DO YOUR PART TO KEEP THIS GREAT FORUM GOING! (Only 13 donations so far - C'mon guys!)
×


willz
-
Posts
98 -
Joined
-
Last visited
Content Type
Profiles
Forums
Gallery
Events
Everything posted by willz
-
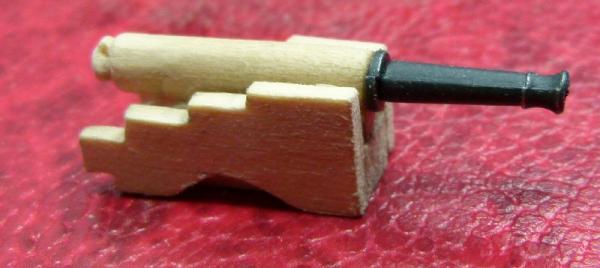
the cannon in the turorial is pointing out leve, you can raise the barrel by cutting the base at a different angle

-
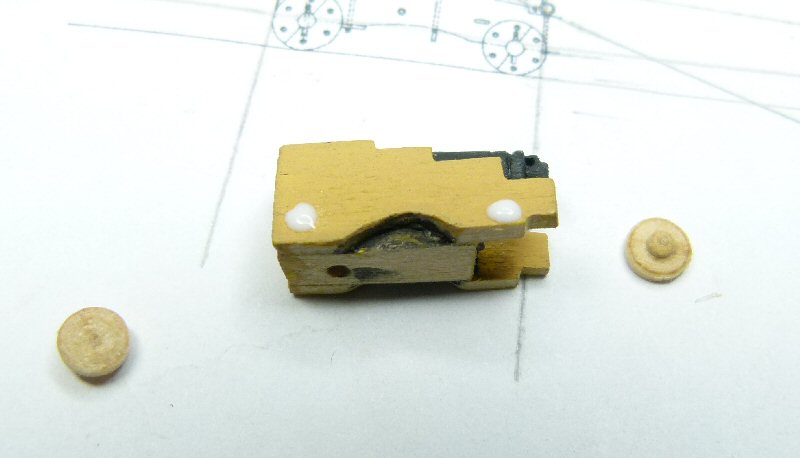
no need for this extravagance you can just slice them off with a razor saw at the thickness needed, then just glue to sides flush with the bottom, you dont want the wheels lifting the carriage off the floor, finally you can drill a hole in the base for a secret steel or brass dowel to decure the carriage in place

-
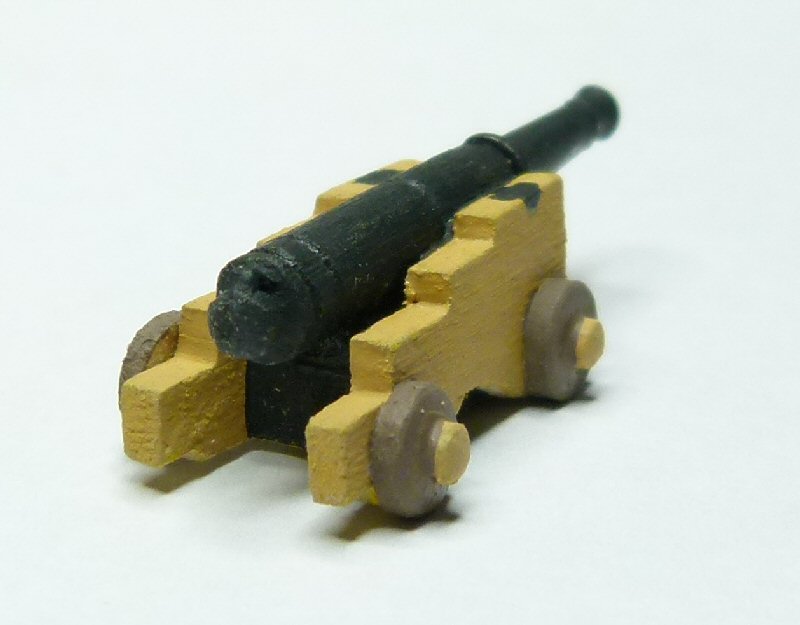
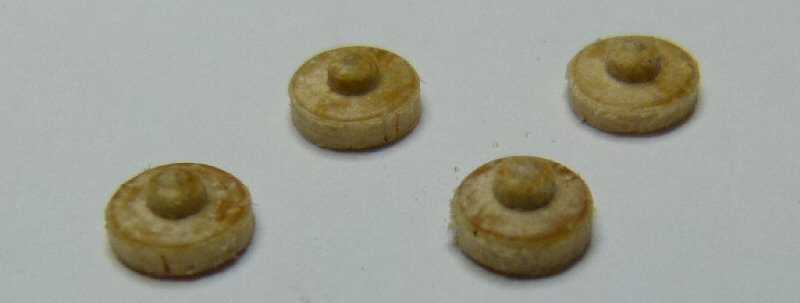
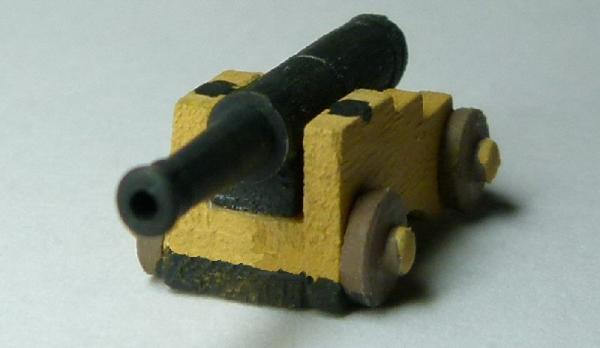
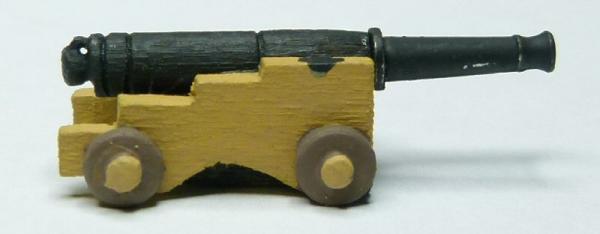
after looking at the finished cannon decided it needed wheels, got some 5 mm dowel and set to work on the lathe


-
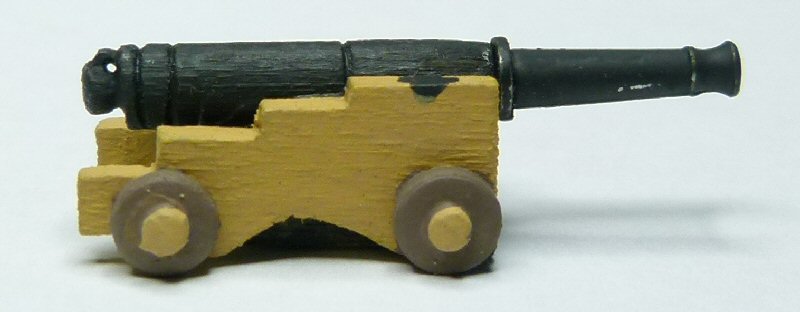
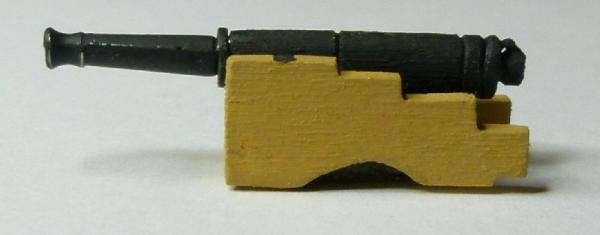
then with the base and sides flush at the front i glued them together and left to dry, with the extra thick base this is easy to do gave the barrel a dry fit and tried in the dummy, decided to run my triangular file round the barrel as to make it look like rings then painted

-
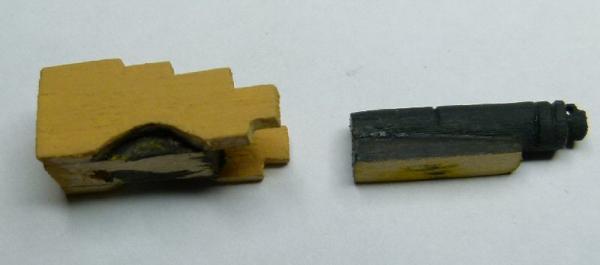
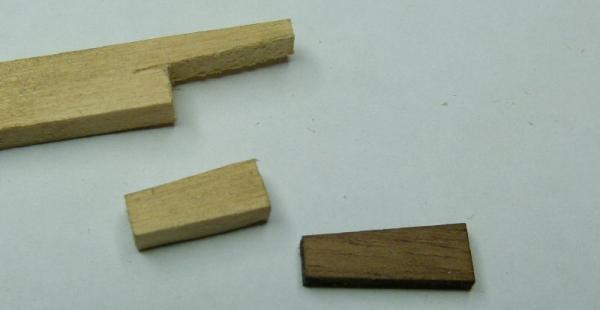
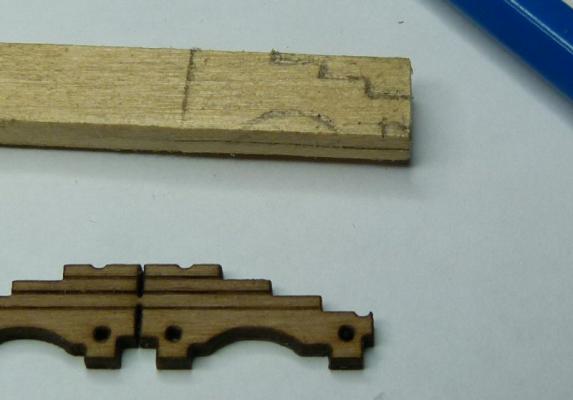
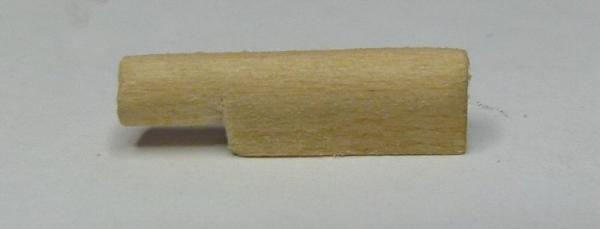
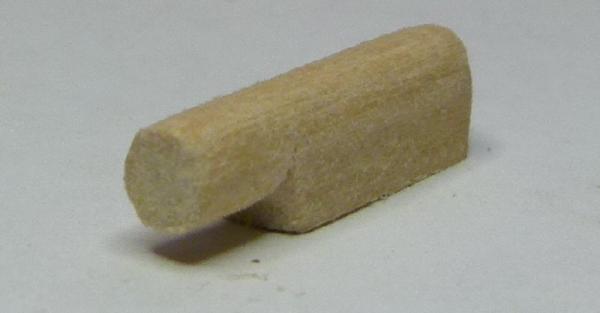
on with the base, still using the dummy cannon beam i used the de ag carriage base as a template, notice i didn`t go right to the rear of the base, this saves on material and with its bulk wouldn`t look right at the rear
-
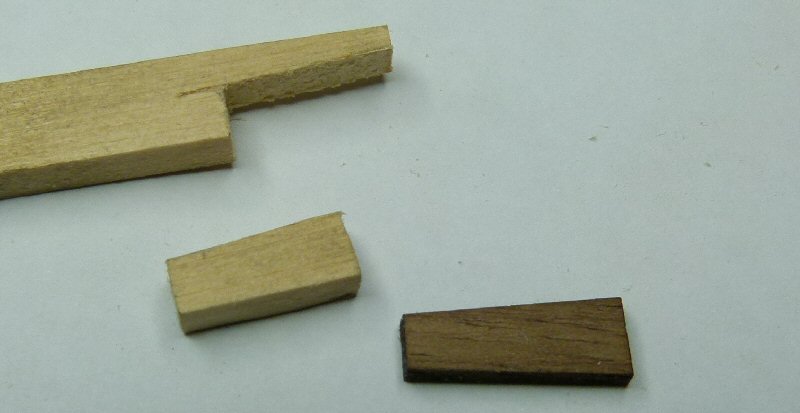
before we cut the pieces off the beam we will shape the carriages, the first pic shows just one cut dow the steppy shape of the carriage with a razor saw, this is all thats needed with a model with no lights but again its simple to carry on and add more detail. second pic. when happy with shape cut them both off the piece leaving you with two identical halves

-
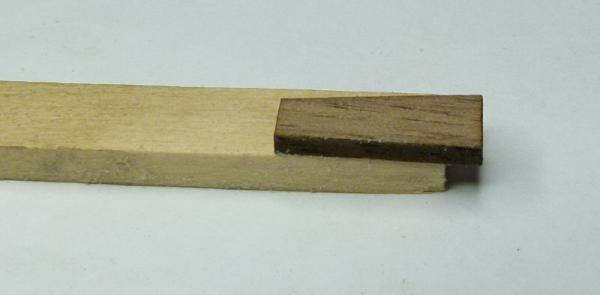
next look at the cuts in both sides of the piece, one is usually more central than the other, if so the one more central will be the top of our carriage. the next pic shows the de ag part works hms victory carriage i used for the template, your will be from whatever ship your building.
-
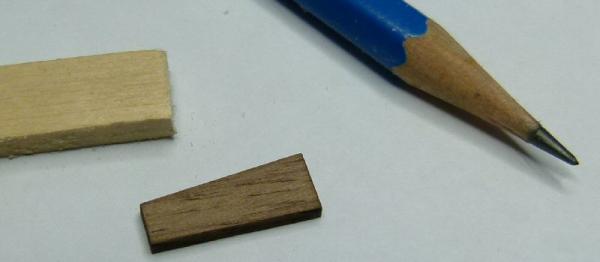
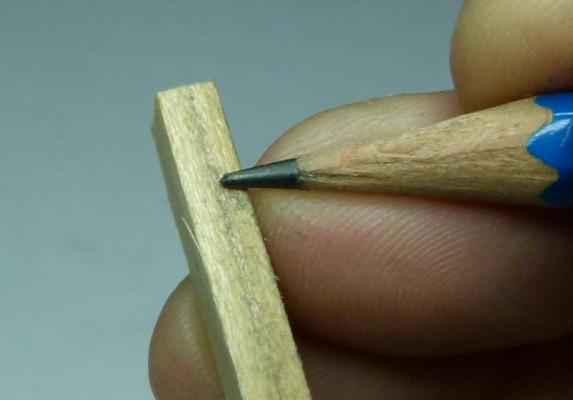
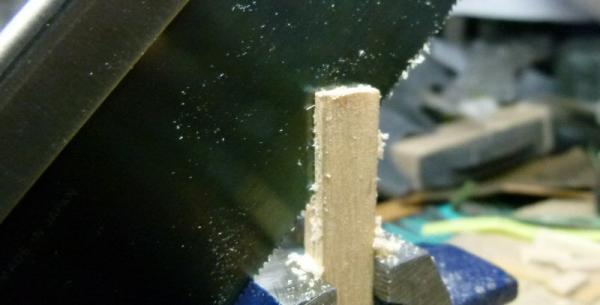
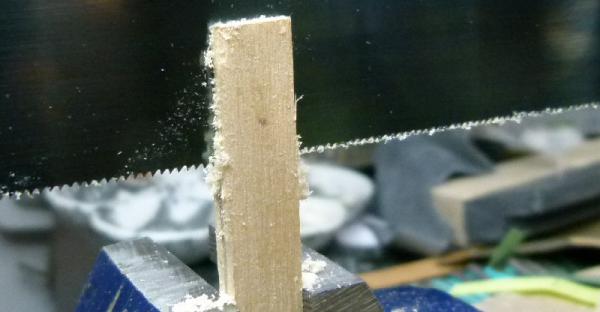
onto the carriages. with a clean piece of cannon beam (no radius) i ran a pencil down the sides and over the top using the old finger and pencil routine. then with the piece in a vice cut the front with the saw tilted upwards following the line. when the front was cut turn the piece around in the vice and cut the back letting the razor saw follow the cut in the other side
-
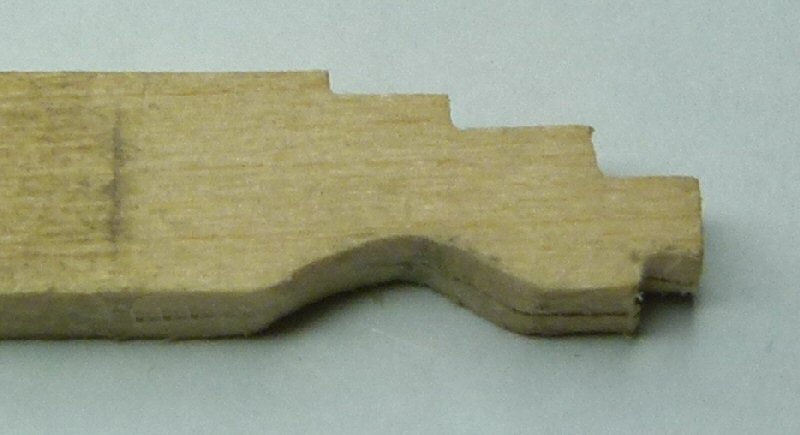
for those lighting up the model you can always add more detail, in the next pic i shaped the rear and cut in a thimble, no real need for a thimble but got a bit giddy. Also ran my triangular file down the side to shape the barrel
-
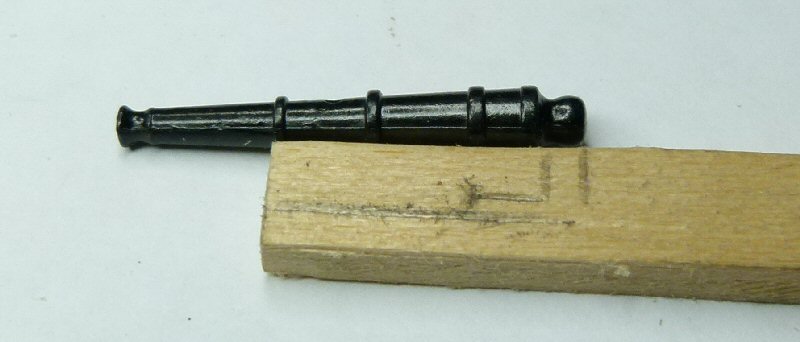
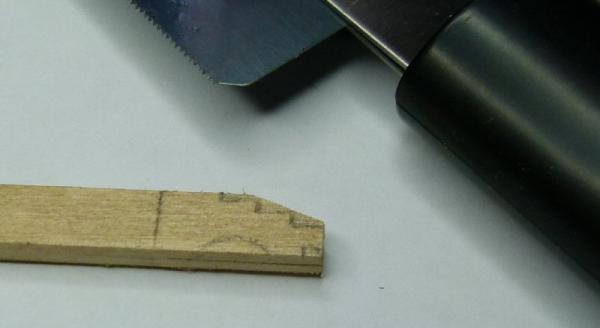
next with a full cannon mark out where to cut your piece and round the back down, the next four pics illustrate this. this is enough detail for the barrel in a model with no lighting

-
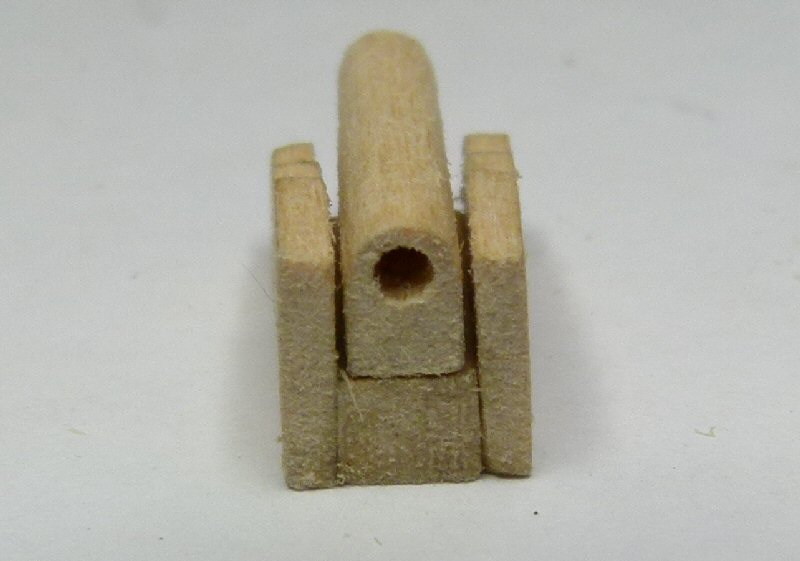
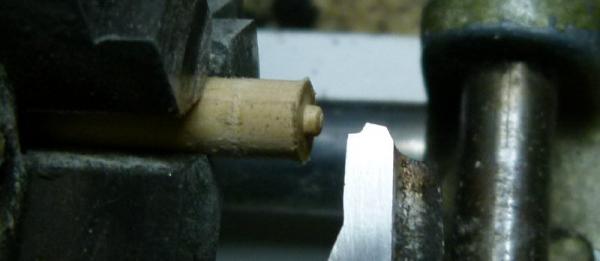
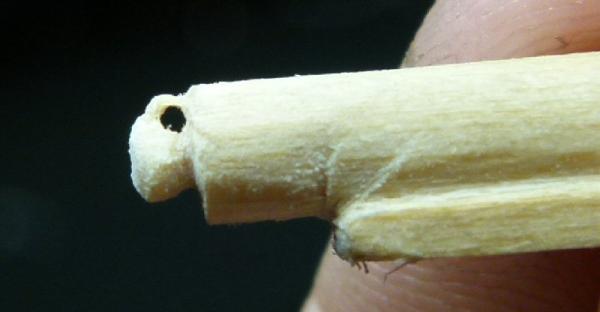
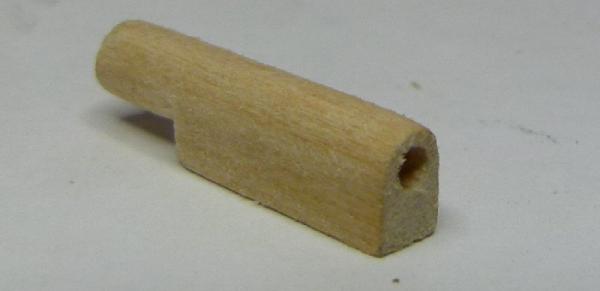
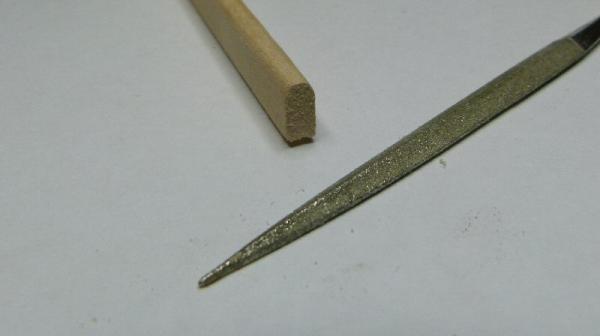
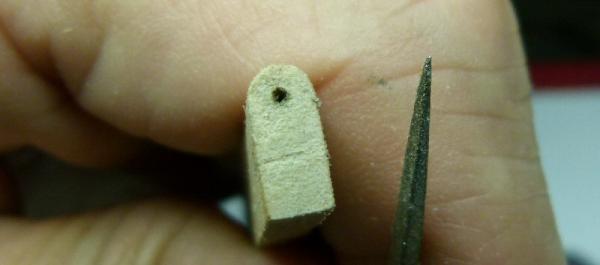
care is needed when drilling the hole, take your time and keep it straight and true. then try in the dummy cannon to see if all`s OK
-
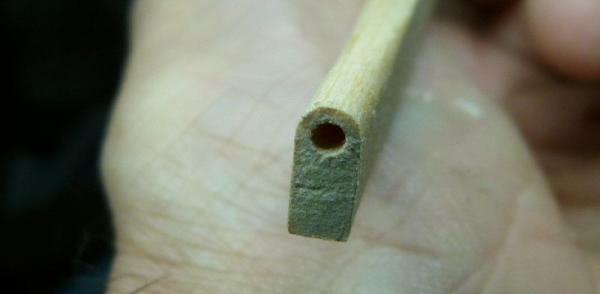
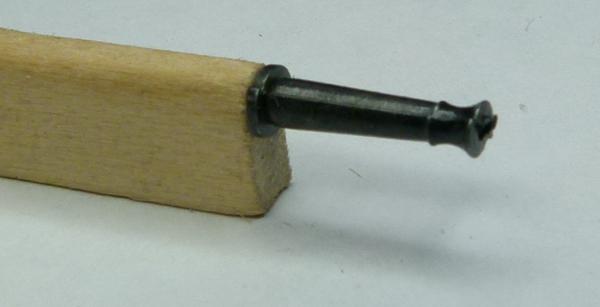
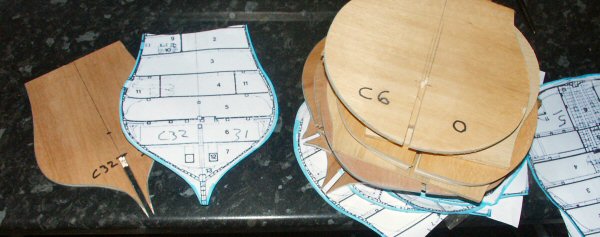
some ships have full decks thoughout only to be covered up by the black wall of dummy cannons, here is a tutorial on how to rid the ugly dummies all we well use is the timber thats used for the dummy cannon beam, this tutorial is for the deag or AL HMS Victory so all using this method will have to adapt accordingly first we half round the top of our material and drill a 2 mm hole (the 2 mm being the size of the dummy cannon pin (in my case)
-
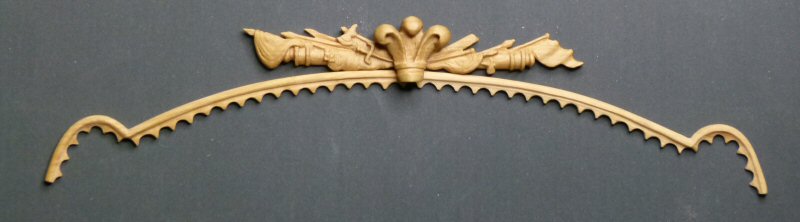
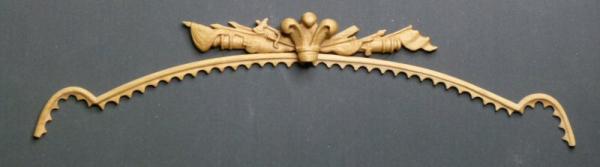
a true scratch build now theres a question, think to be honest theres very few. personally i think if everything is made by the modeller then thats a true scratch build no matter what tools they use electric or not, to prove a point the pic below shows the victory emblem and the band that splashes across the stern, they were both made with hand tools and the aid of a dremel, the are both unique and one offs, so in my opinion they are 100% scratch
-
Microlux Tilt Arbor Saw Problems
willz replied to capnharv2's topic in Modeling tools and Workshop Equipment
just a shot in the dark here, with it being a 230 tooth blade try putting it in the wrong way round as we know it, it will not do any harm if it doesn`t work. When i need a fine cut on my box wood strips i.e. no splintering i turn the blade the wrong way round and it works. (stops those little grabbing moments) -
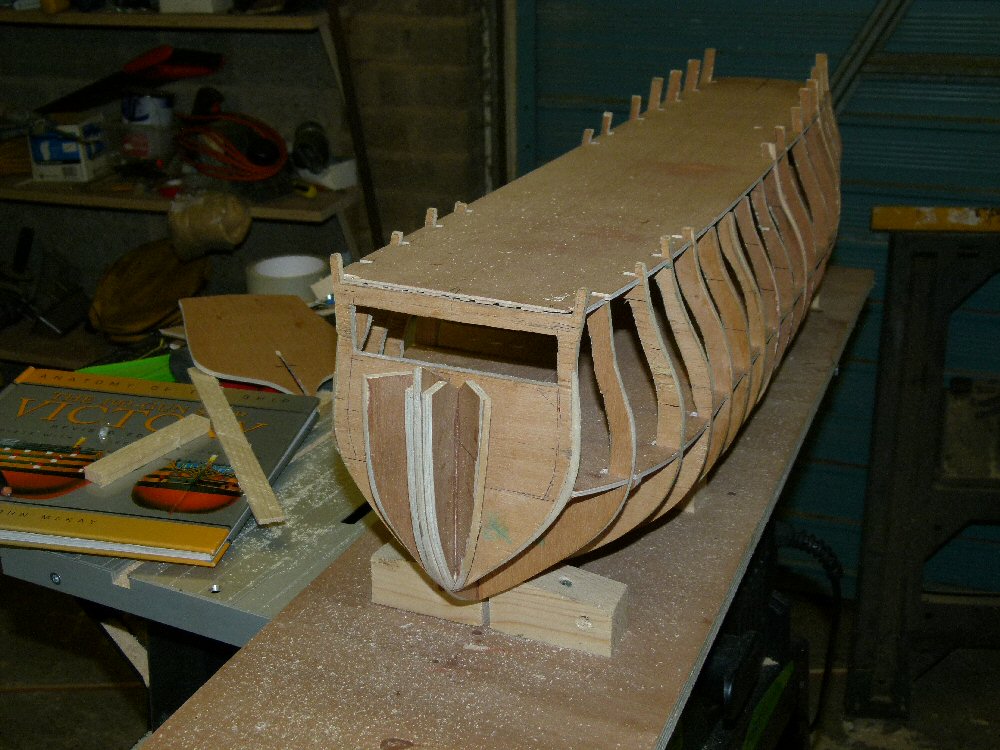
Hi everyone, been building a 1/72 scratch Victory for quite a while now. keep going off the boil and back again (is this normal) and at the mo I`m building or trying. I picked the Victory at 1/72 simply for the fact that jokita do a fine example at that scale thus giving me a wealth of top notch parts to add to my scratch, cannons, photo etch, e.t.c. It will be made as simply as possible with no fancy interior although i am toying with the idea of full cannons on all decks but we will see


-
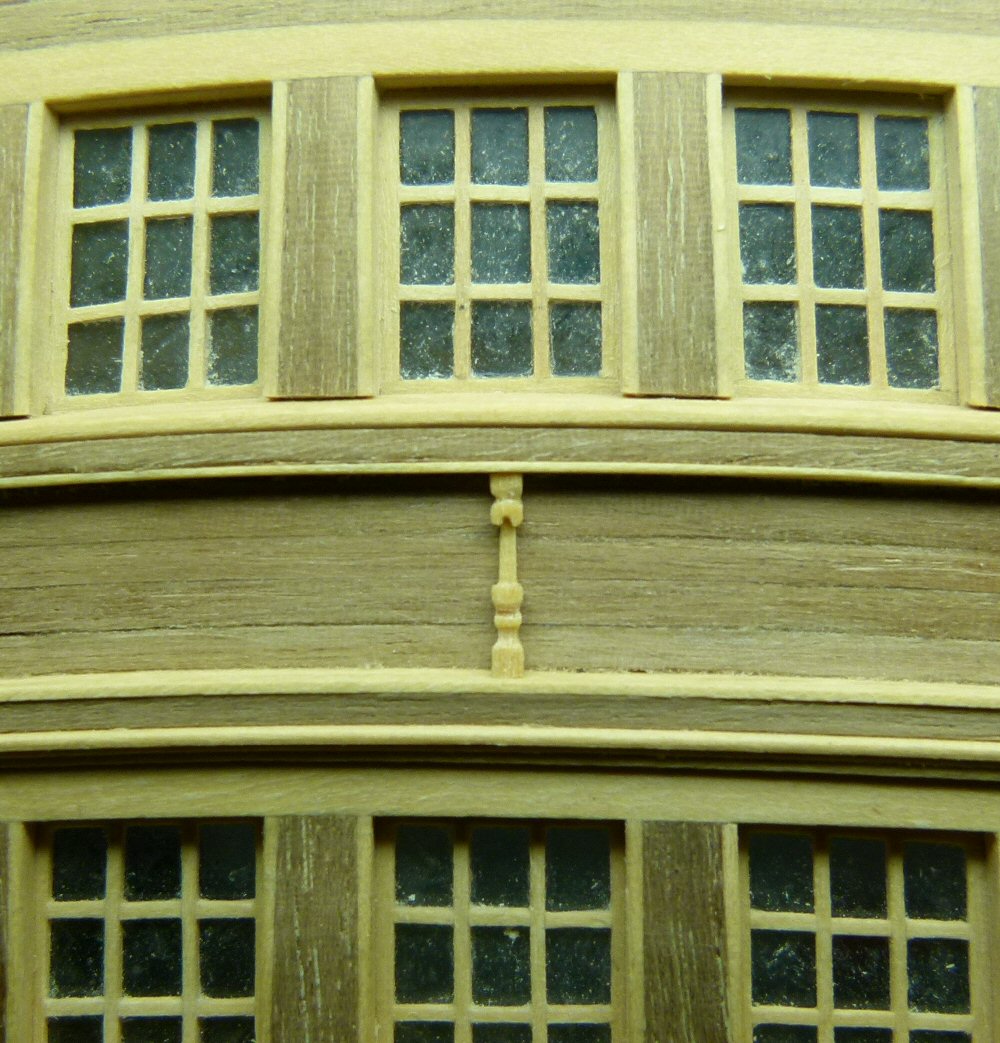
sorry Chris, didn`t mean to be brash, its just that at the mo i am myself constructing the stern on my 1/72 scratch Victory, and digging around found it very difficult to find info, the best i could find was on page 94 in john mckays book, i must say at this point that your stern is the best i`ve seen, i am a complete novice and this is my first build and the time it takes is unreal, so when it came to scale my balustrades i counted them and as a cross reference i counted other models, when i counted jokita`s i noticed there was only 67 per row but didn`t think much of it till i counted yours, so then started to think is there a drawing of the stern that i haven`t seen, so again i am sorry i was just curious. heres a pic of my balustrades

-
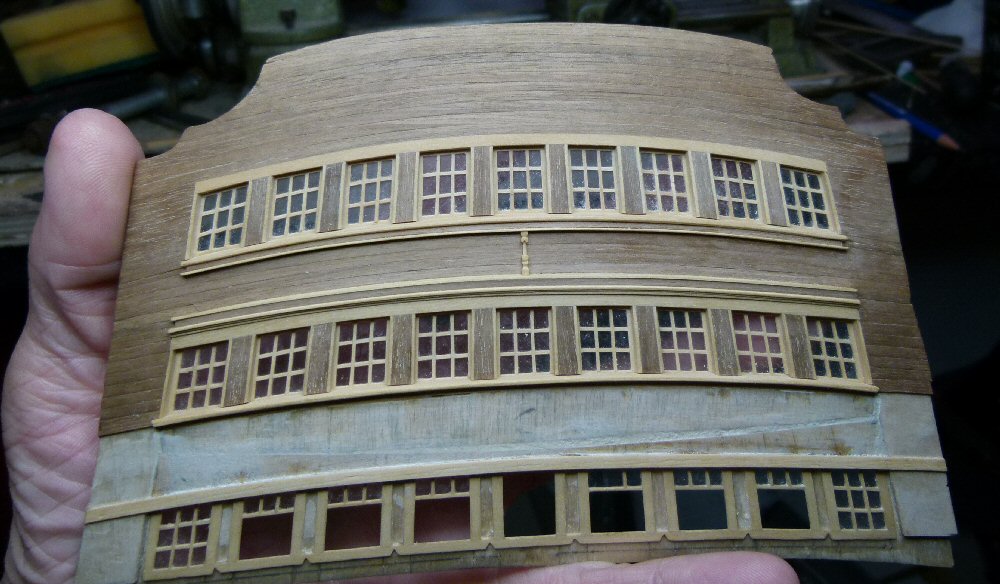
just been looking at this wonderful prototype model, and no disrespect but can i ask why like Jokita you only have 134 balustrades on the stern instead of 138, every wooden model I have ever seen seems to get the stern wrong, for some reason or other they all have the top balustrades smaller than the bottom ones (even the plastic heller) when in fact they are the same size at only 2 feet
-
great work, after looking at the front of your marvelous model it looks like the top rail is too high, it shouldn`t be that close to the middle gun port, at 1/48 scale i get the gap between (not centres) the top and bottom rail about 27mm, i am myself building a 1/72 scratch Victory at the moment and i know how difficult it is to put something right after errors, anyhow the best of luck with your masterpiece. Willz