HOLIDAY DONATION DRIVE - SUPPORT MSW - DO YOUR PART TO KEEP THIS GREAT FORUM GOING! (Only 13 donations so far - C'mon guys!)
×


willz
-
Posts
98 -
Joined
-
Last visited
Content Type
Profiles
Forums
Gallery
Events
Everything posted by willz
-
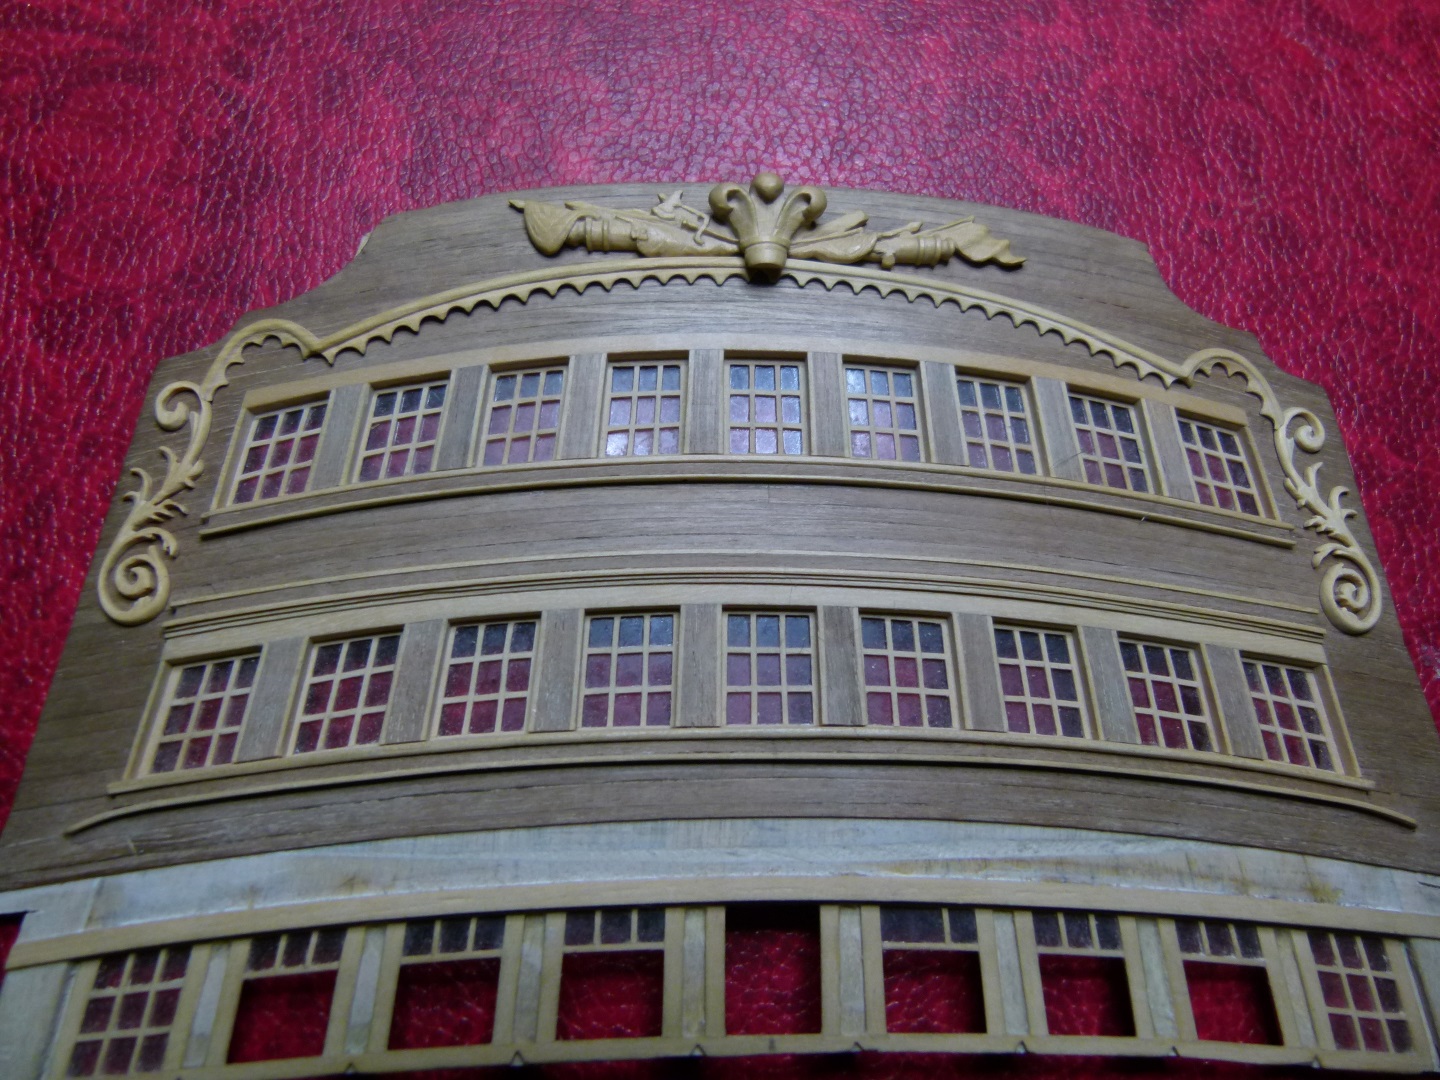
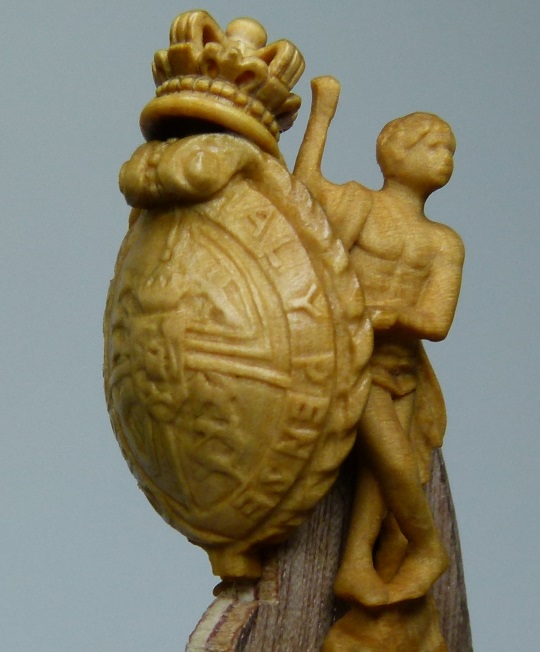
hi Moxis, dont have much on the main emblem on the stern, but found a few pics finishing the left hand side as you look at it, as i go i use a wet toothbrush for cleaning the piece


- 40 replies
-
- 24
-

-

-
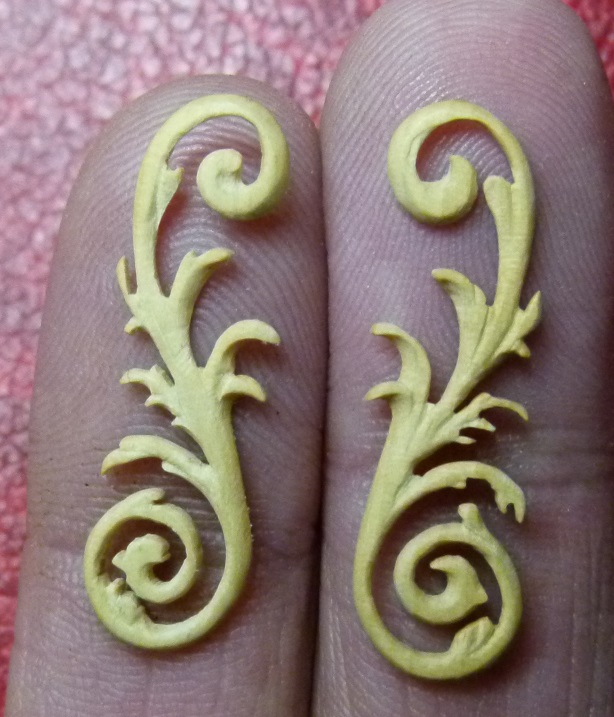
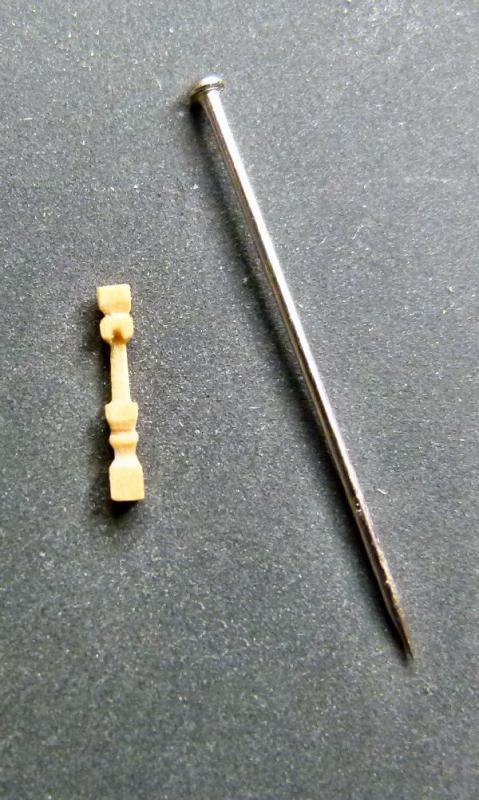
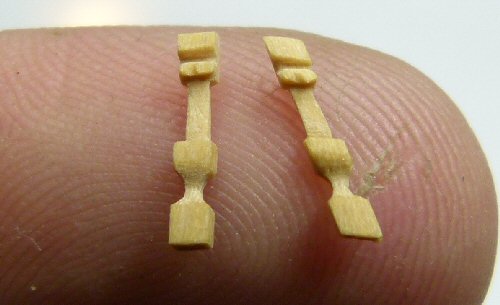
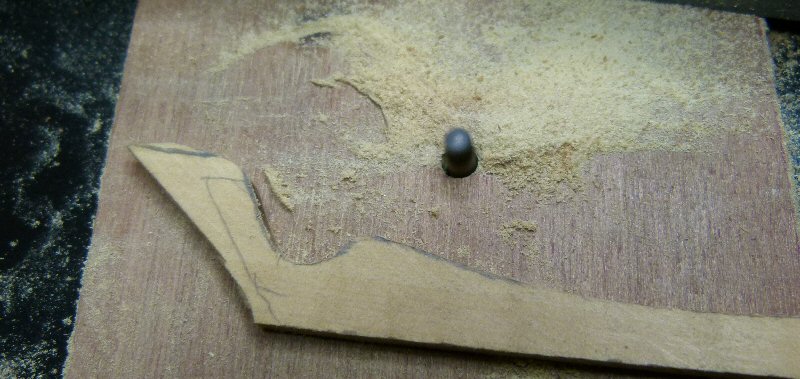
as for the balustrades Greg i have dabbled with them, the problem is that they are not round and they are all cut at different angles. so heres a couple of pics of the different shapes, one is of the centre balustrade next to an ordinary pin for scale the other is of the centre balustrade and the other is the extreme right one rules there is no rules
- 40 replies
-
- 12
-
-
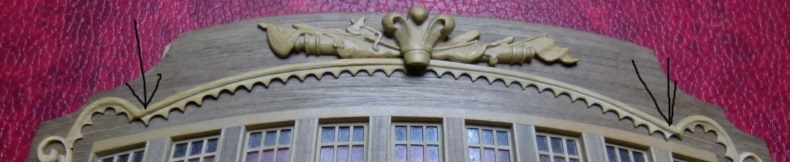
this is the marked point where i started the teethy things. so when you look at the finished band it looks perfectly symmetrical, and its not bad, but any discrepancy would be at the centre hidden behind the main emblem rules there is no rules
- 40 replies
-
- 14
-
-
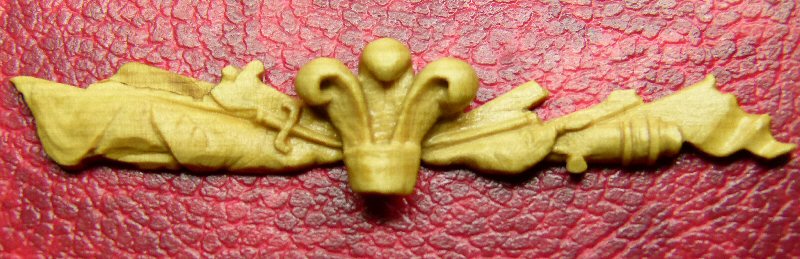
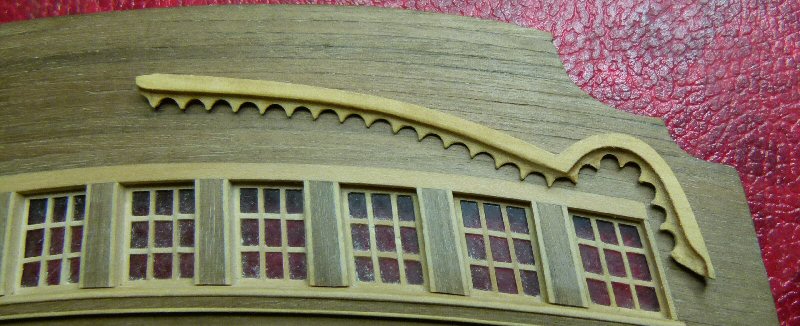
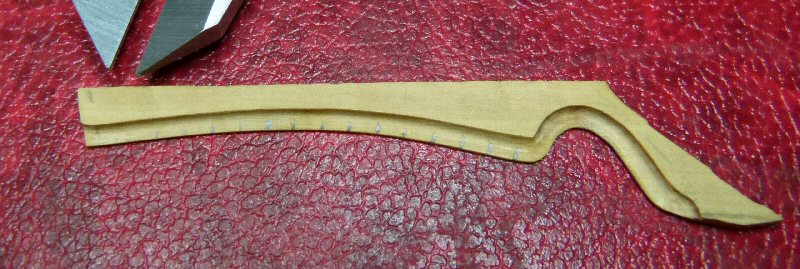
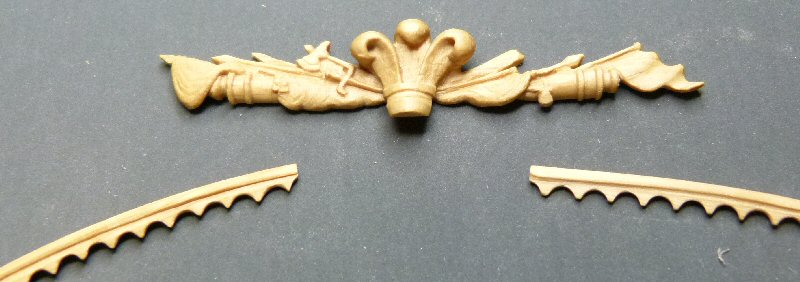
next just kept cutting away at the top side till happy with the thickness then simply drew round my finished piece to make an exact mirror image
- 40 replies
-
- 18
-
-
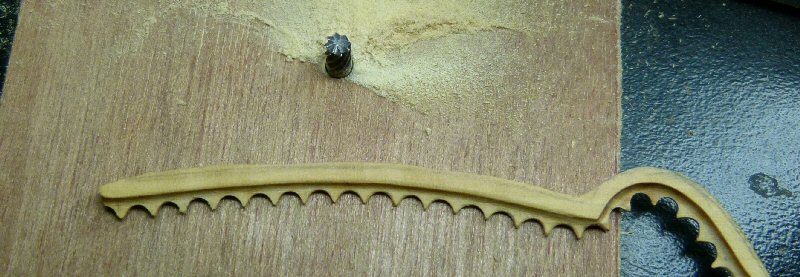
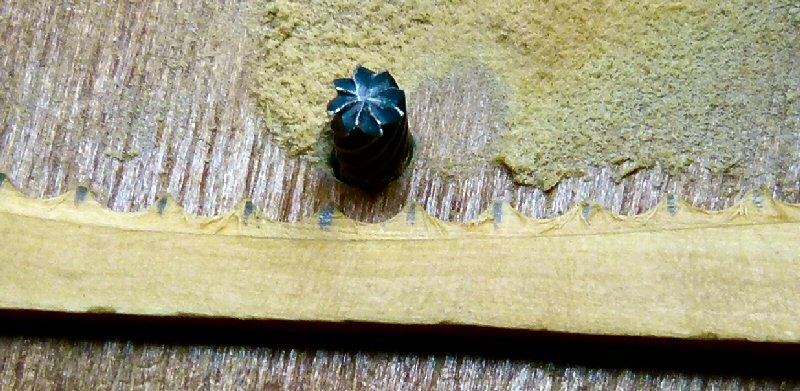
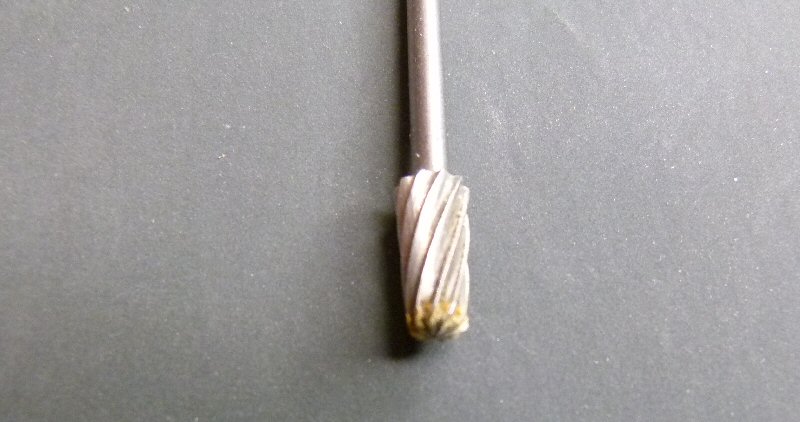
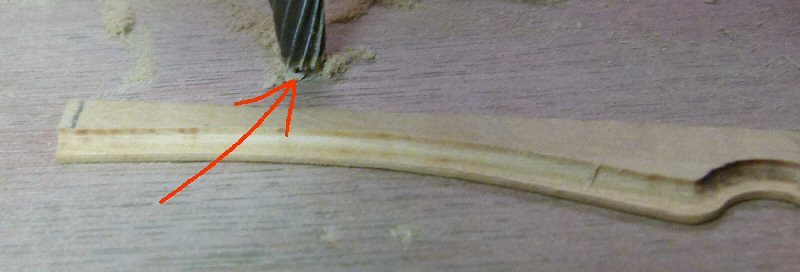
when happy with the gully I simply marked out the teethy cut outs, started at the marked area in the pic , to emulate the one on the real Vic. Then with my trusty dremel again in the spindle attachment I simply cut out the teethy shapes
-
to get the gully shape i put a brass rod into some ply and left it sticking up 2mm,, then with rounded type cutter in the dremel I ran my piece down the edge of the brass rod,, (the ply with the brass rod was fixed to my dremel drill attachment)
-
I used a dremel in the spindle attachment to get the basic shape
-
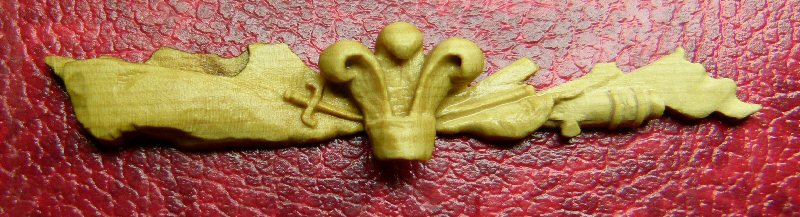
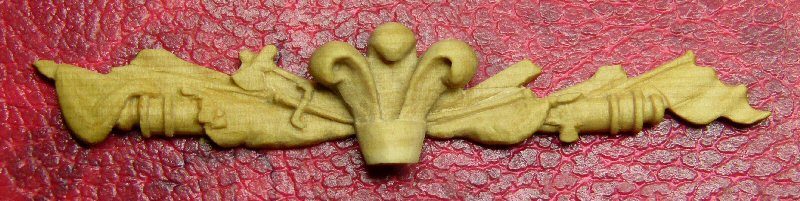
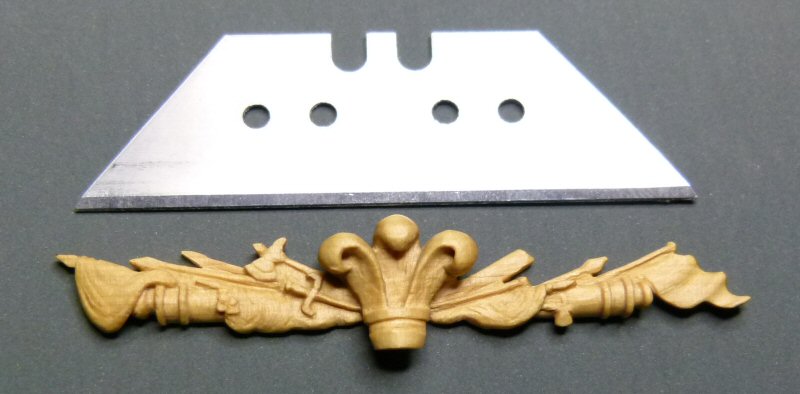
All my carvings are made of boxwood Ok lads n lasses, the stern band. I thought a lot about how to do this, it seemed to me to be very tricky to get right with its symmetrical and fragile shape but when I came up with this idea of how to make it it turned out to be the easiest piece i`ve carved. The band passes under the stern emblem in the centre, this allowed me to make it in two pieces
- 40 replies
-
- 12
-
-
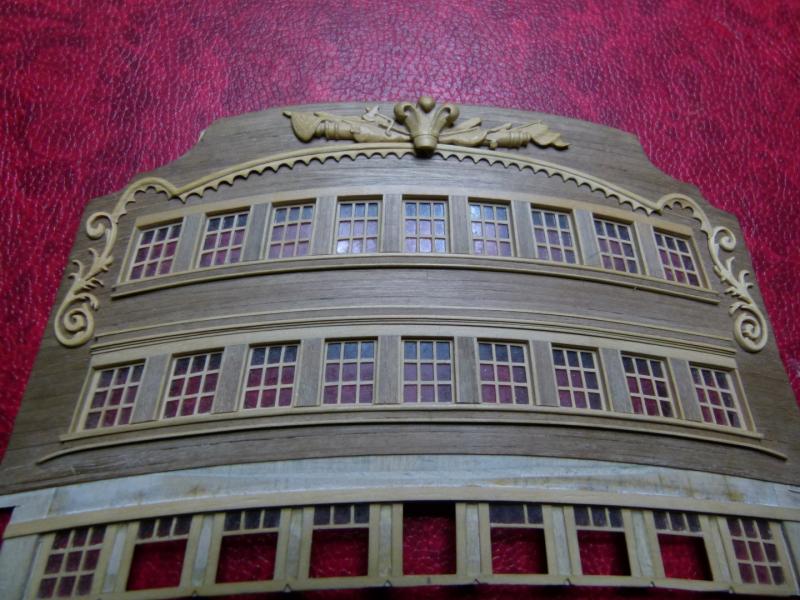
heres a pic of my Vic stern, all carvings done with a stanley blade except for the band that goes all the way across, think i may still have a tutorial on how i did that if anyone is interested, cheers lads.. rules there is no rules
- 40 replies
-
- 19
-
-
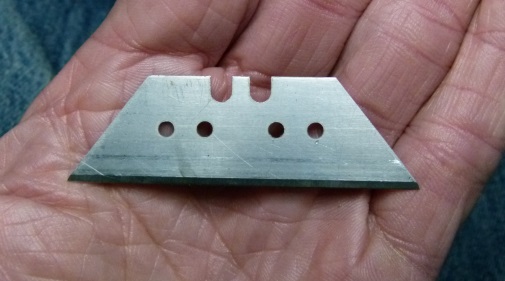
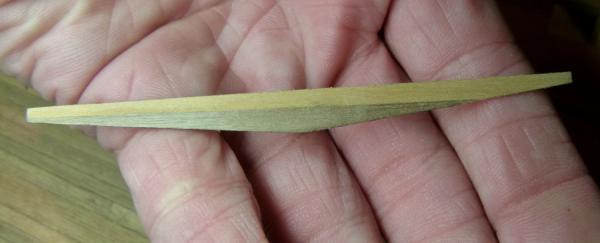
this is a stanley blade, i find it easier to sculptor than a blade fixed in a pencil thingy.. rules there is no rules
-
i would glue a piece of paper with pva to the mounting block then glue your piece to the paper again with pva, after you finish you just leave it in water and your piece should fall away. i havent tried this method but i have never used a mounting block, i just dive in and carve
-
all i use is stanley blades, i sometimes grind them into a more pointed shape if needed and i do sharpen them. i use a diamond stone.
-
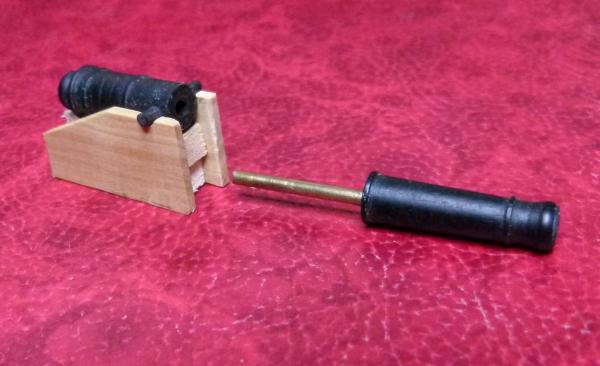
I havent posted on here for over a year but my build is still going, it is my first scratch build, a 1/72 HMS Victory. My problem lies in the lack of challenge, It all started with a monthly subscription of the AL HMS Victory 6 years ago, it was well advertised in Britain. Started the kit along with many others at the time on a slowly but surly monthly build, time went by and I started to feel a lack of challenge that I was expecting from the kit, so I bought McKay`s book and jumped into a scratch build. I decided to make it at 1/72 simply because I could buy 3rd party cannons anchors and all the stuff I couldn`t make, as I merrily carried on with my build not hitting any problems. So I decided to have a go at making the cannons, turned them out of ebony and found yep I can do that. So thinking a little deeper I split the cannons in two so I could build the entire cannons on every deck then remove the bit of the barrel that sticks out any replace it when the build is finished. Then my old mate the LACK OF CHALLENGE was again tapping on my shoulder so OK going to have a go at carving the stern decorations and again did that, next carved the figure head, built a the barge with anchor and oars and again no challenge, so as the challenges fall so does my enthusiasm. So advice for a beginner… dont think one day, right gonna build a wooden model ship, no keep the idea in your head and let your enthusiasm grow, and when your really keen and ready thats the time to jump in, as for the rules there is none. Pick as big a scale as you can this makes the detail much easier but keep in mind the space you need to build it, another point is the time it will take to finish the build, the longer it takes the more your mind will go through different phases, so I think a 3 to 6 month build would be ideal, one last point and I use this one, is if you find you need a break, cover you build up with a towel, this stops you catching sight of your model on a regular basis, then when your ready to start again, you will find removing the cover will give the model a fresh look..
- 241 replies
-
- 13
-
-
Tools and Supplies for My "Shipyard"
willz replied to daveward's topic in Modeling tools and Workshop Equipment
i found that when things go wrong on the model and it gets you into a state of complete frustration a nice big hammer comes in handy -
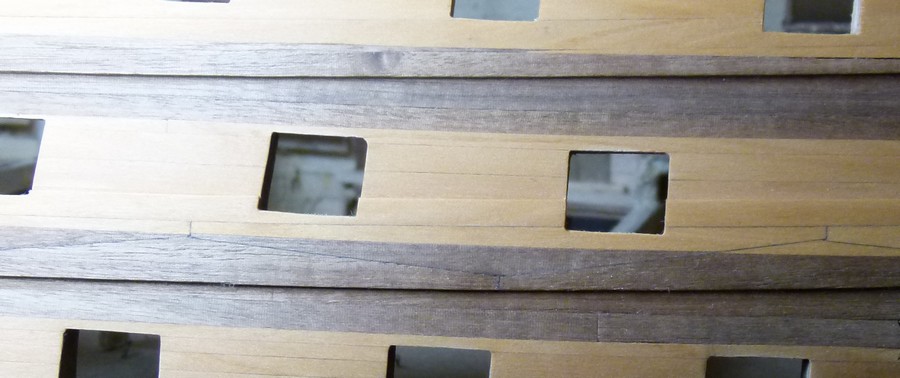
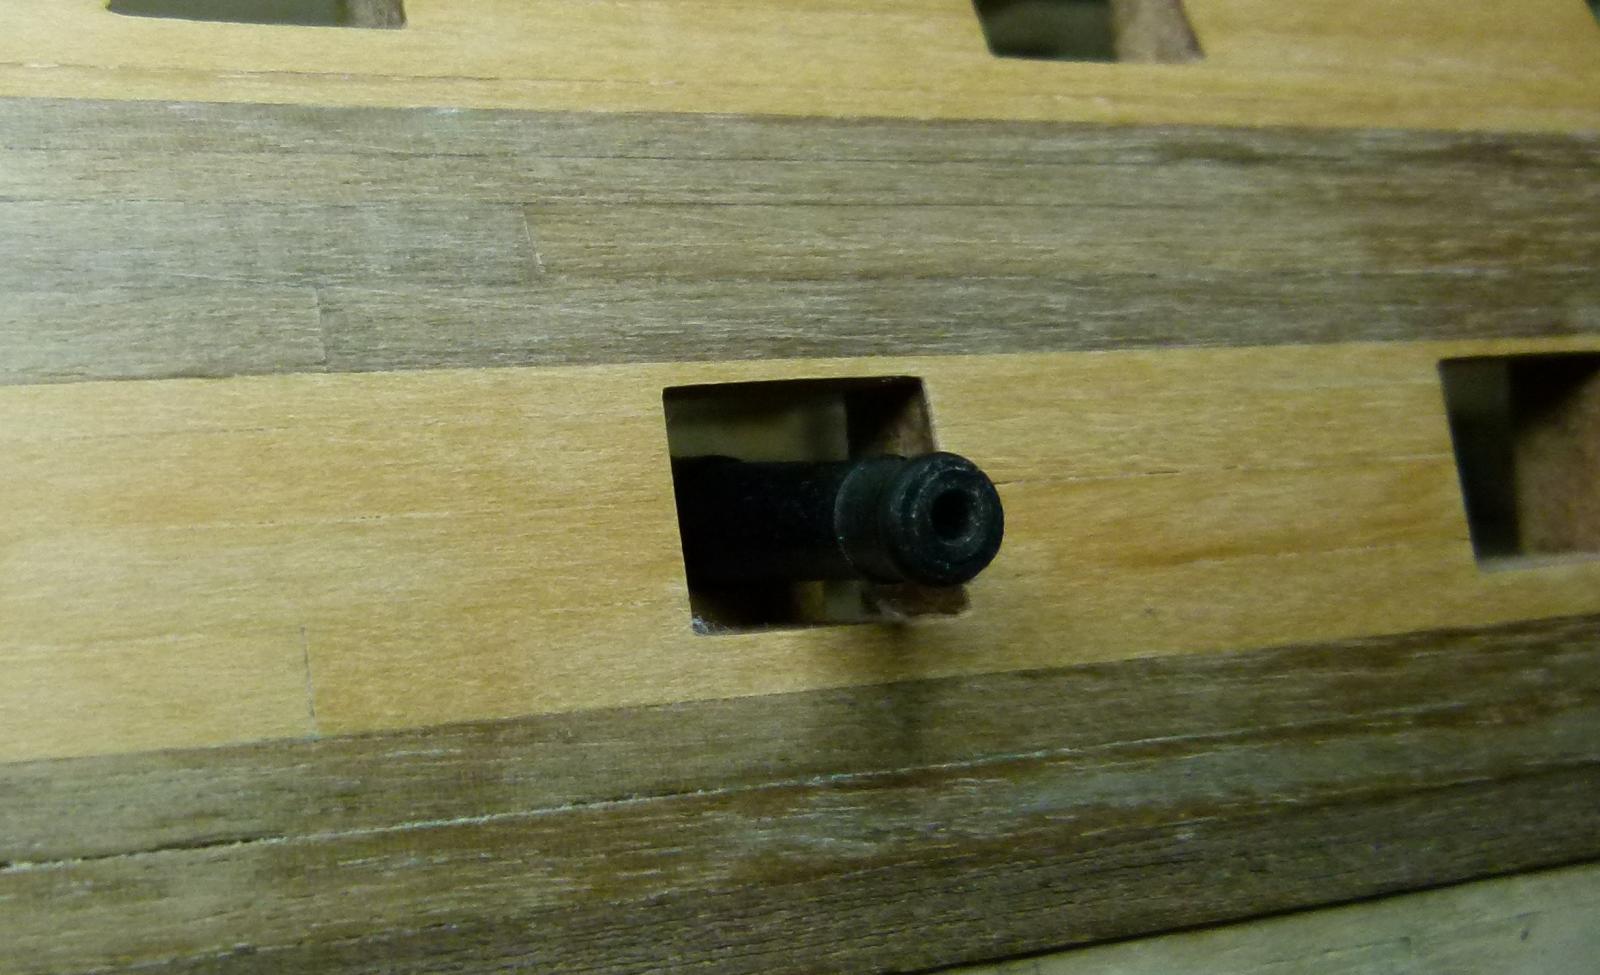
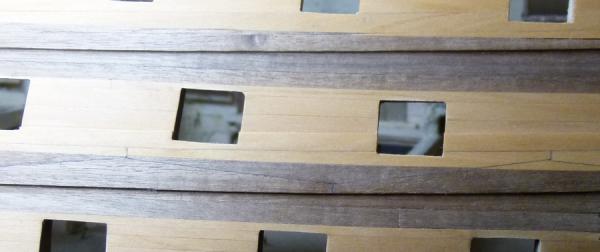
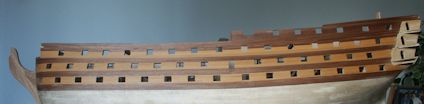
Had a break and starting to delve back into it !!! Started to tackle the ships wales ! found this very tricky on a natural finish ship. I’m using two types on wood to create the striped pattern, the difficulty lies in the fact that the stripes don’t follow the wales, so ended up splicing some of the anchor stock shaped wales together ( the ones that overlap the striped pattern), one photo shows one centre wale spliced and the other shows the same wale fitted .
-
understand now, sober today lol
-
i may be stupid but it doesn`t make any sense. for example ratio for 1/8 of an inch = 1/125 but the ratio of 1/8 of a foot is still 1/125
-
dont understand this one but 1/4 = 1/25 so 5/32 = 1/64 so if you building a model thats 7/32 of the real thing then the scale would be 1/4571. you simply divide the second number by the first, but not quite sure if thats what your asking
-
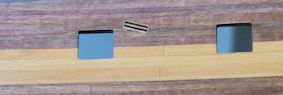
correct Michael, some kits have full decks all through the ship and it seems a shame to block them out with dummy wall cannons, i did a tutorial on the AL Victory to make dummy cannons out of the material supplied for the dummy walls and the dummy cannons, here`s the link http://modelshipworld.com/index.php/topic/2704-dummy-cannons-by-william-butler/#entry73179
-
cheers lads for the comments appreciated, done the second planking on the top half of one side, close up of the sheath
-
3D Printing - Not Just Yet!
willz replied to dvm27's topic in CAD and 3D Modelling/Drafting Plans with Software
personally i cant see the point of 3d printers, for me building model ships from wood is the way to go, for the price of a 3d printer you could buy a small lathe and turn out cannons, but again thats just me -
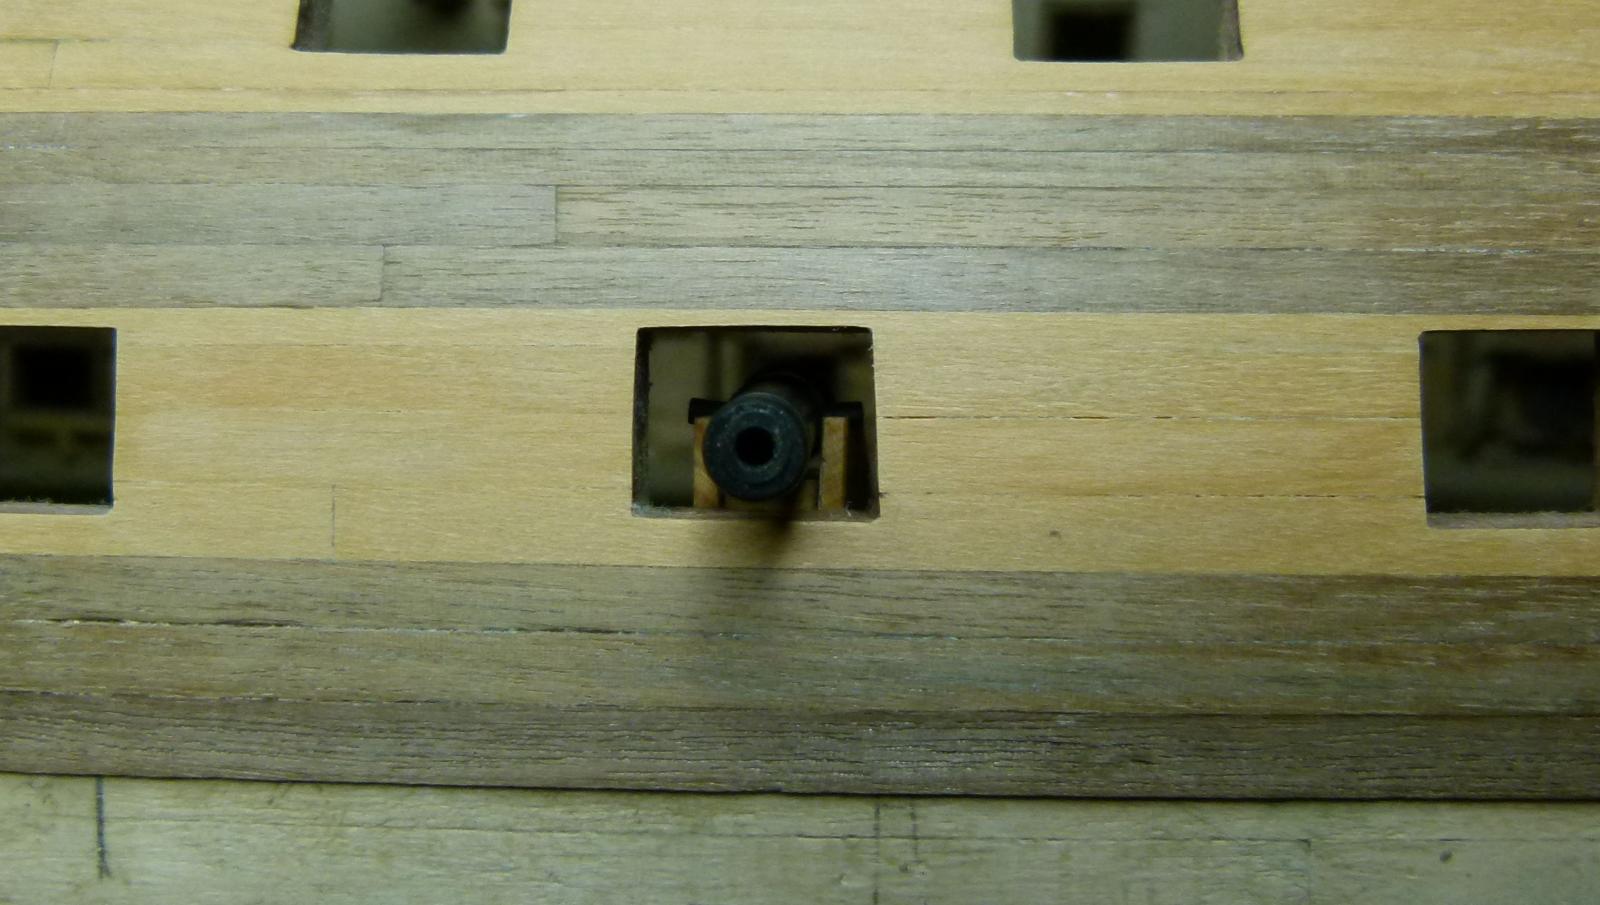
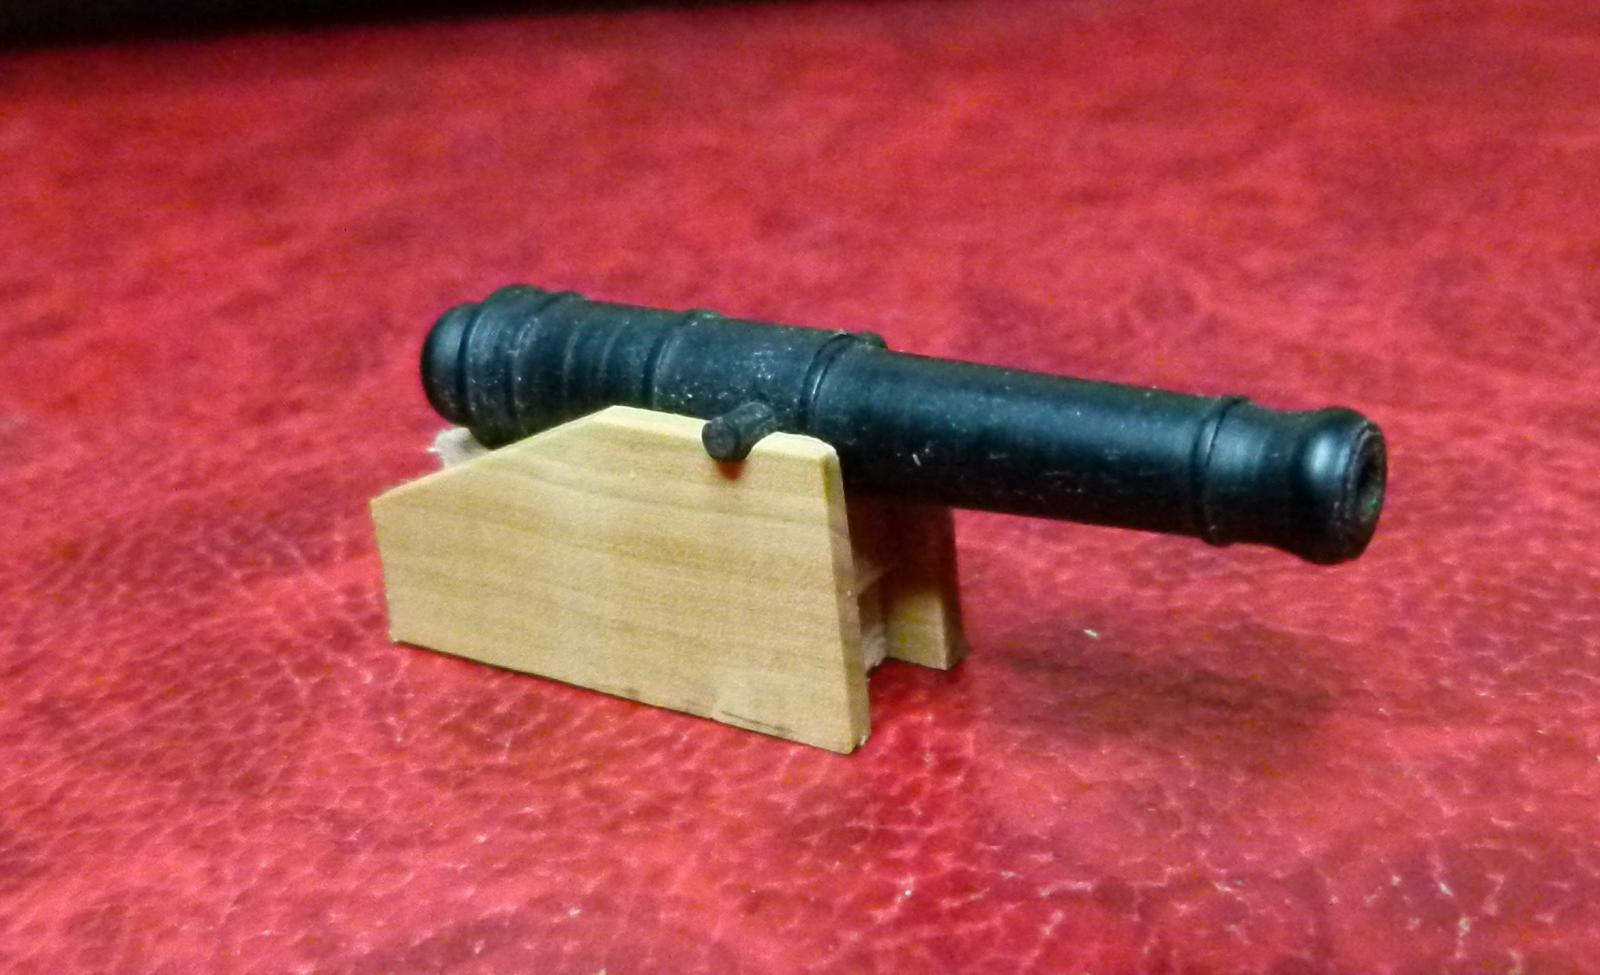
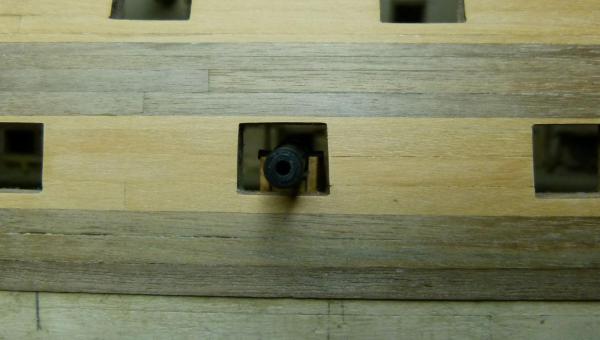
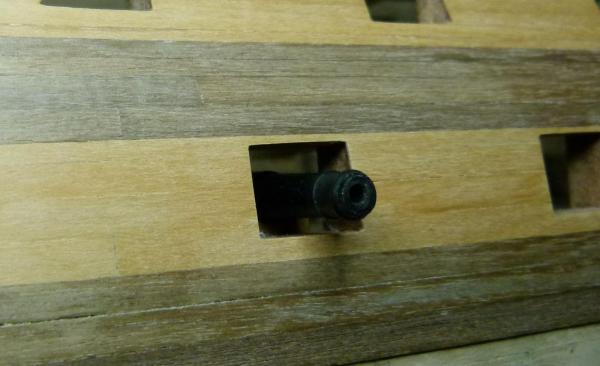
cheers all for the comments. OK on with the build, started the second planking on the Vic had to replace one plank but apart from that all going fine, at this point decided to try in my split cannon, as you can see by the photo there is no need to up the detail on the carriage , i`ve looked from all angles and happy with it

-