HOLIDAY DONATION DRIVE - SUPPORT MSW - DO YOUR PART TO KEEP THIS GREAT FORUM GOING!
×


turangi
-
Posts
276 -
Joined
-
Last visited
Content Type
Profiles
Forums
Gallery
Events
Everything posted by turangi
-
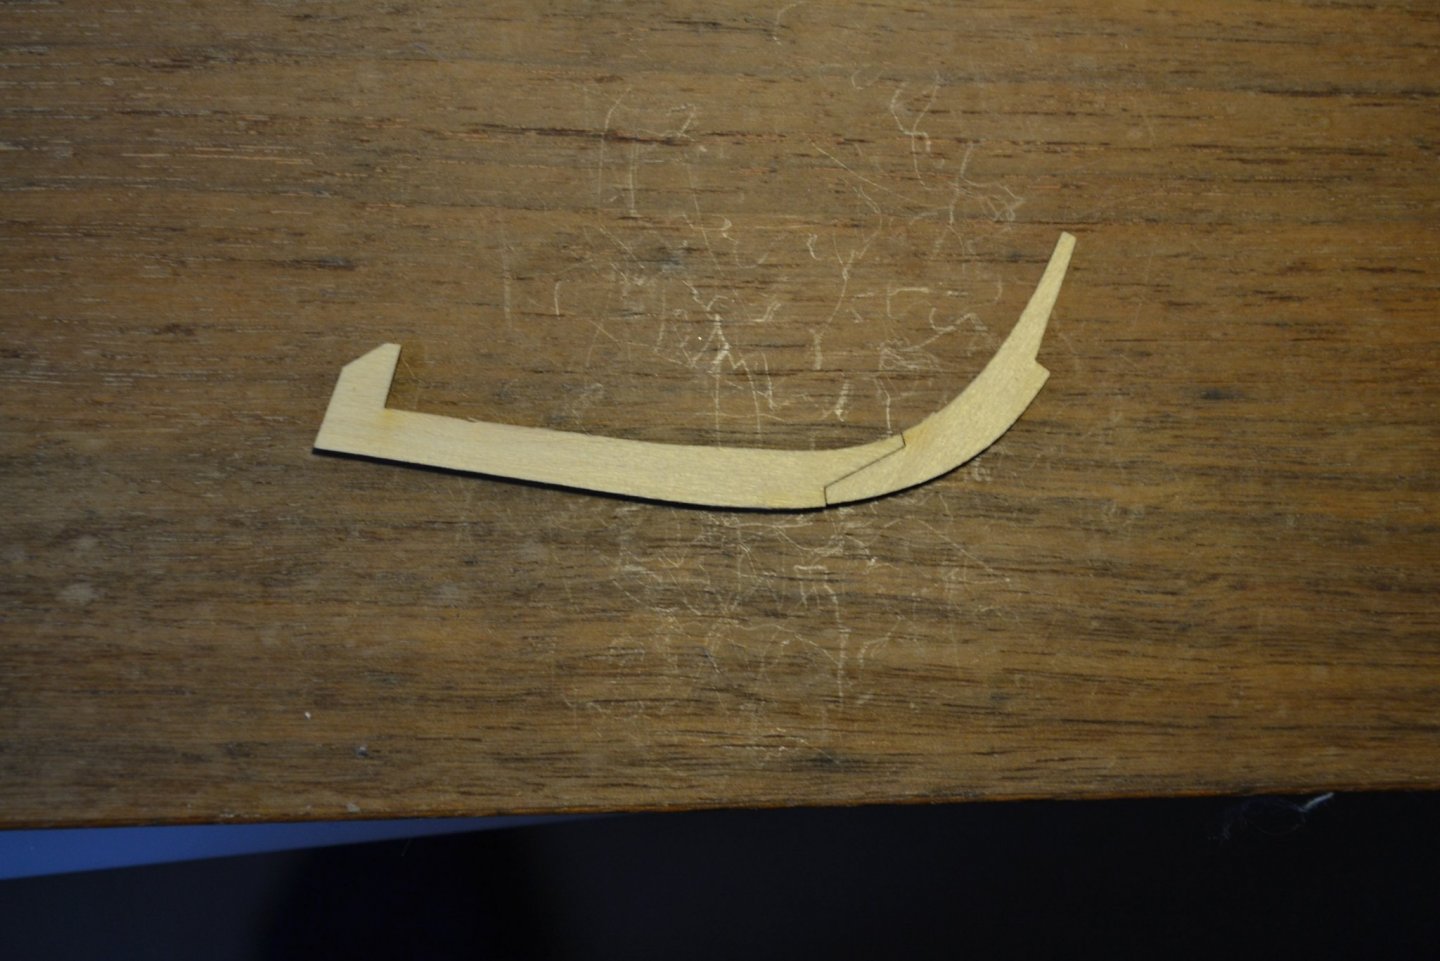
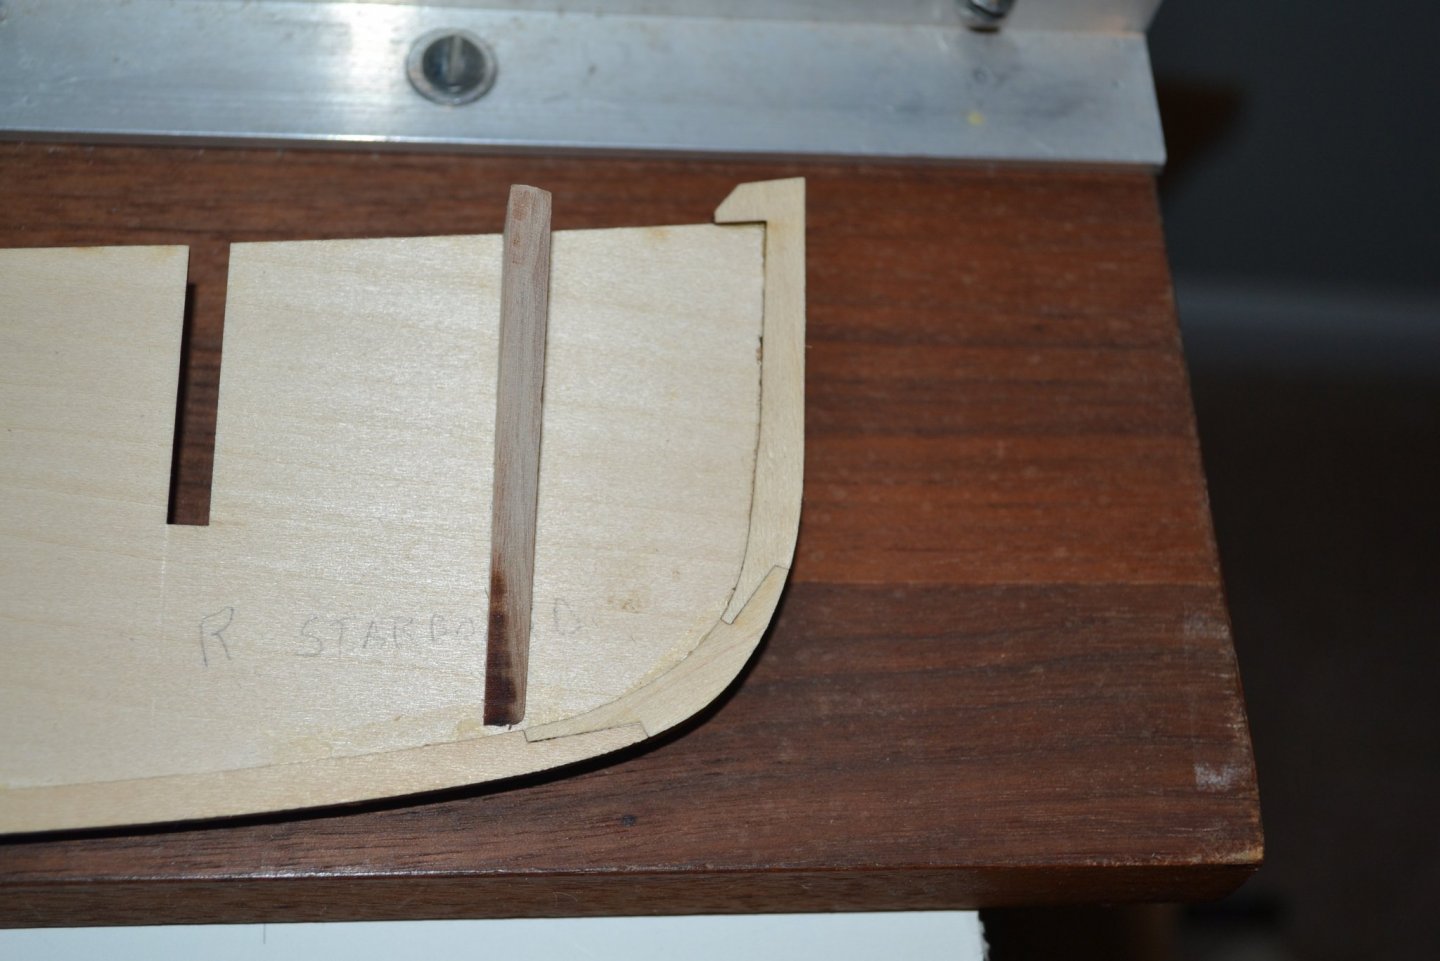
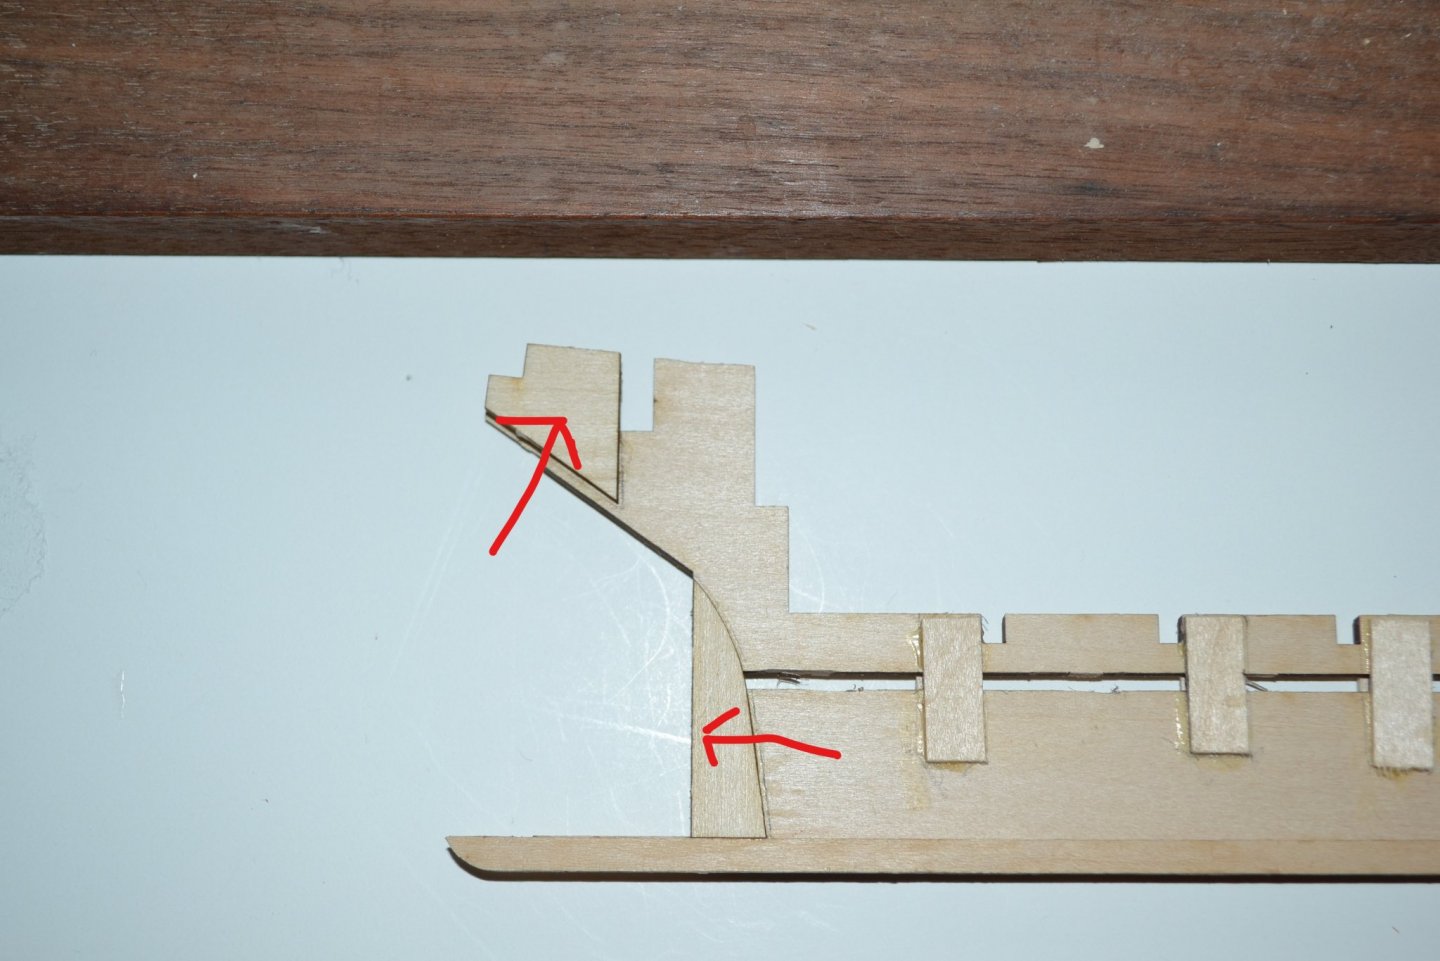
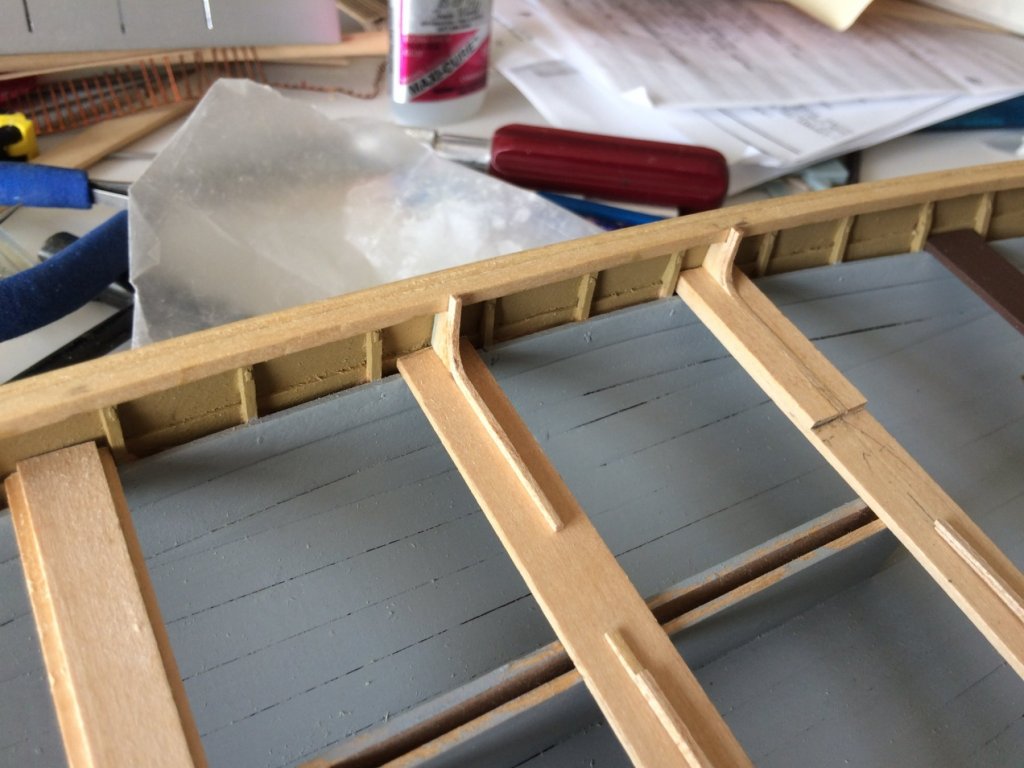
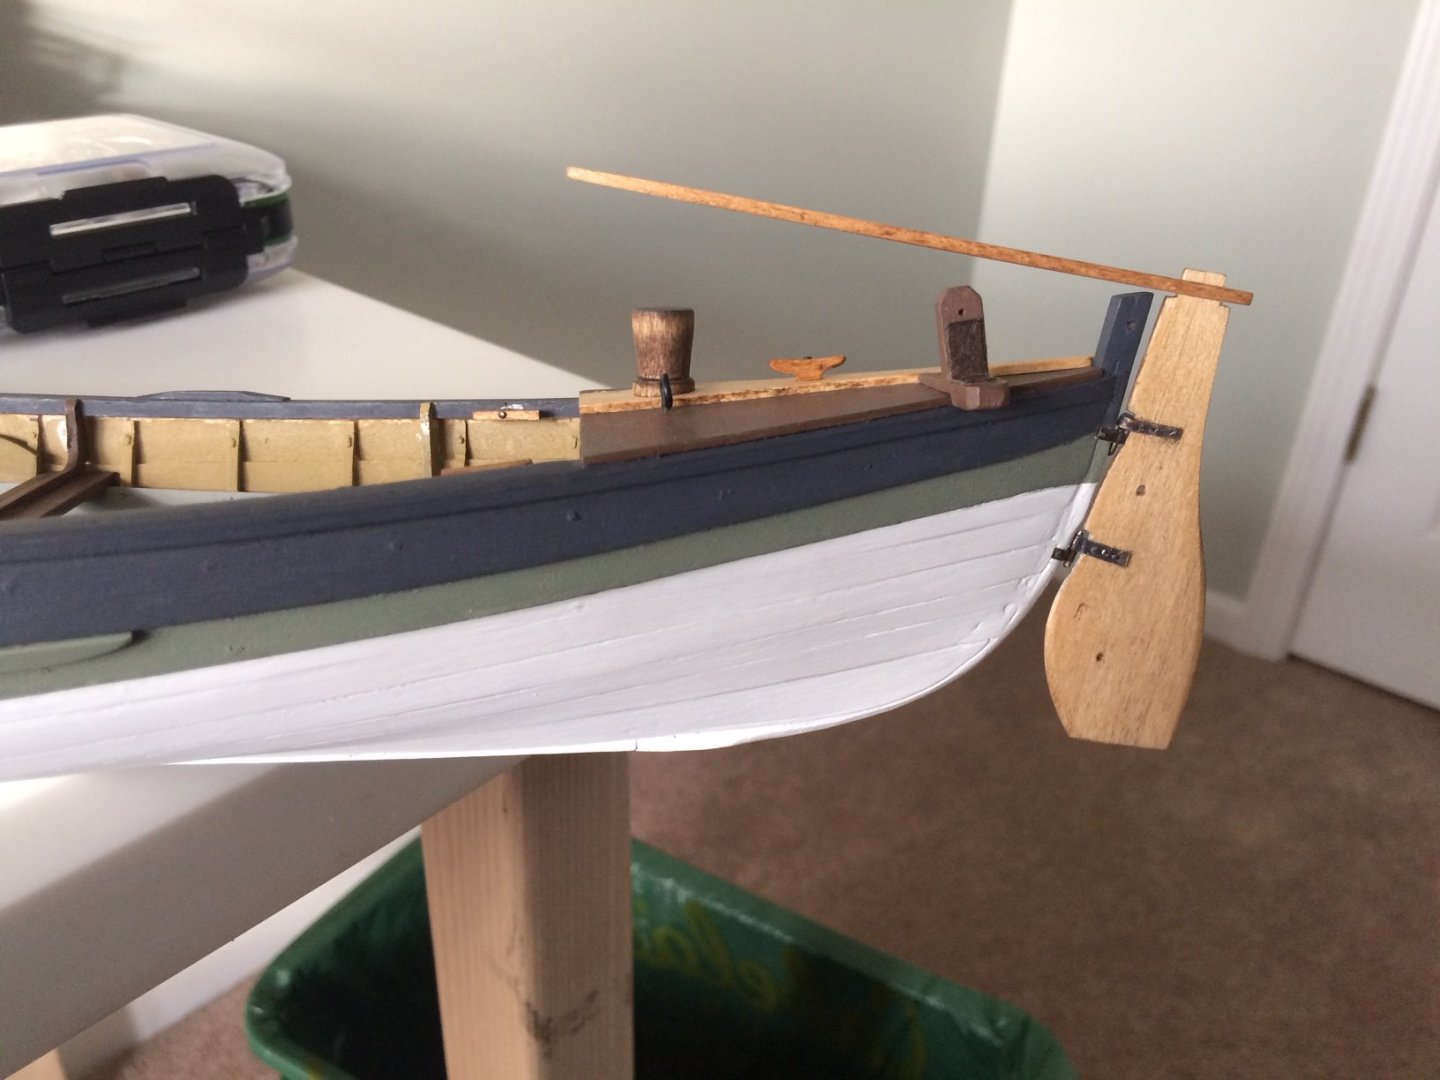
 Moving along the next step was to apply the two parts to the bow. As I prepared the parts to do this I noticed that was a very small gap at their seam, I considered sanding them for a tighter fit but was sure I would either break them or change their dimensions making matters worse. I happened to flip them over and discover the seam much tighter. It appears the laser cut is not exactly 90 degrees to the face of the wood sheet. Not sure if it was a setup issue or more probable that a tiny bit more material is burned away at the initial point of contact of the laser. Not a big issue at all but interesting. The parts went on well with a great fit. My next step was to apply the strips over the propeller shaft tunnel and cut away the bridges in the keel, very straightforward. The two bitts with the red arrows pointing to them gave me a bit of pause as in my mind at least the plans didn't give an exact location for parts 23 and 24. I looked at the log for this kit by GuntherMT and his excellent photos sorted me out. https://modelshipworld.com/topic/13246-usn-picket-boat-1-by-gunthermt-model-shipways-scale-124/
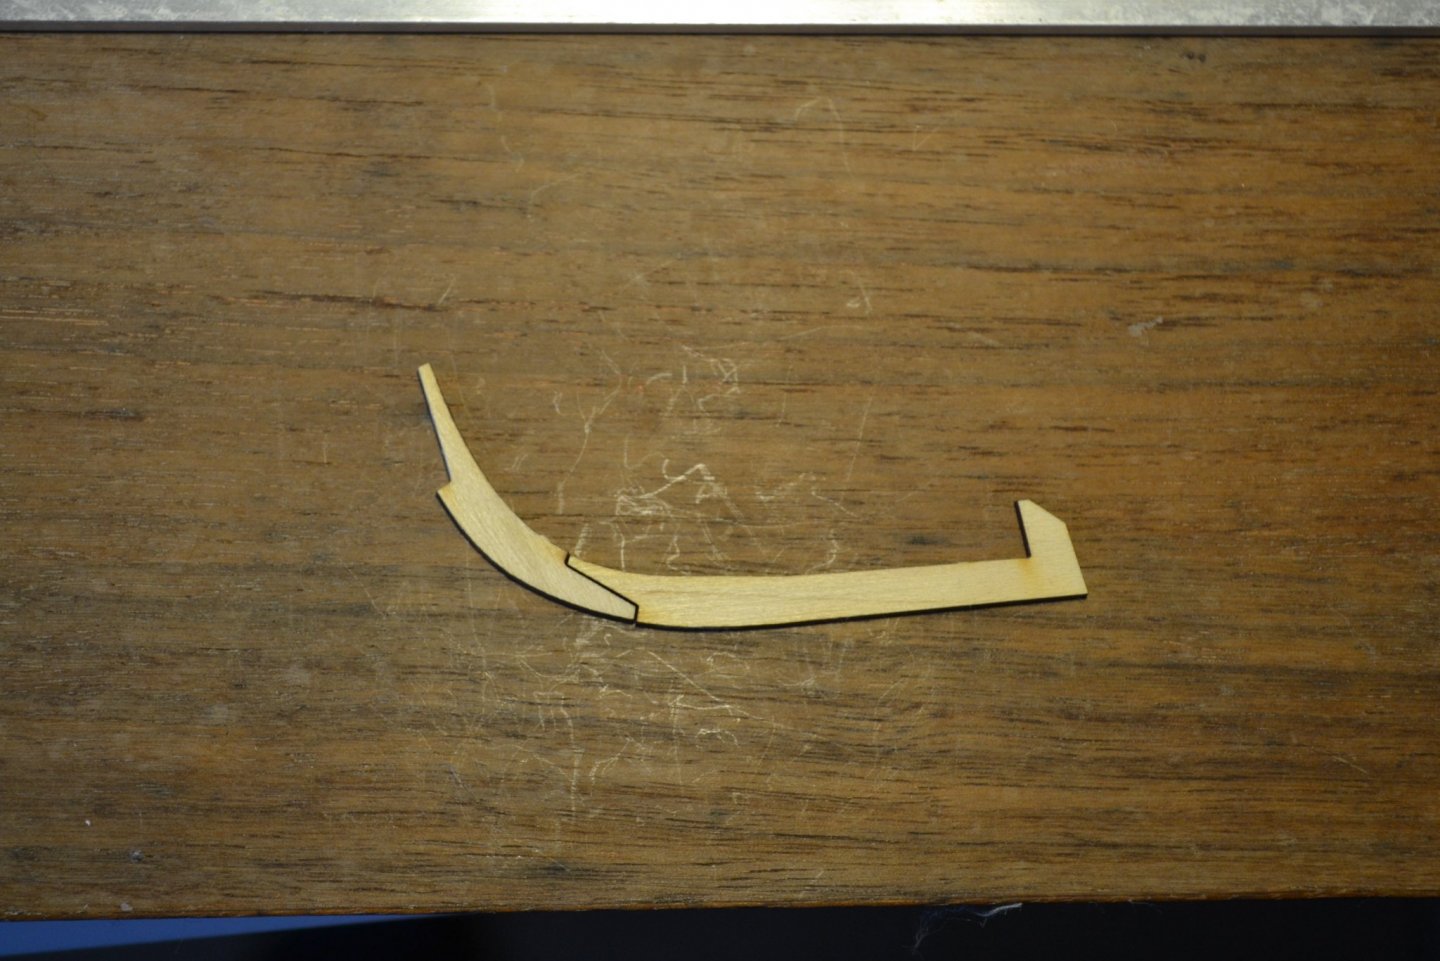
.thumb.JPG.cf61589fb4aafa53e0e9b276d714a829.JPG)
.thumb.JPG.2b044eb7d521d586c4068bee0be6ad40.JPG)
- 54 replies
-
- 3
-

-
- picket boat
- model shipways
- (and 1 more)
-
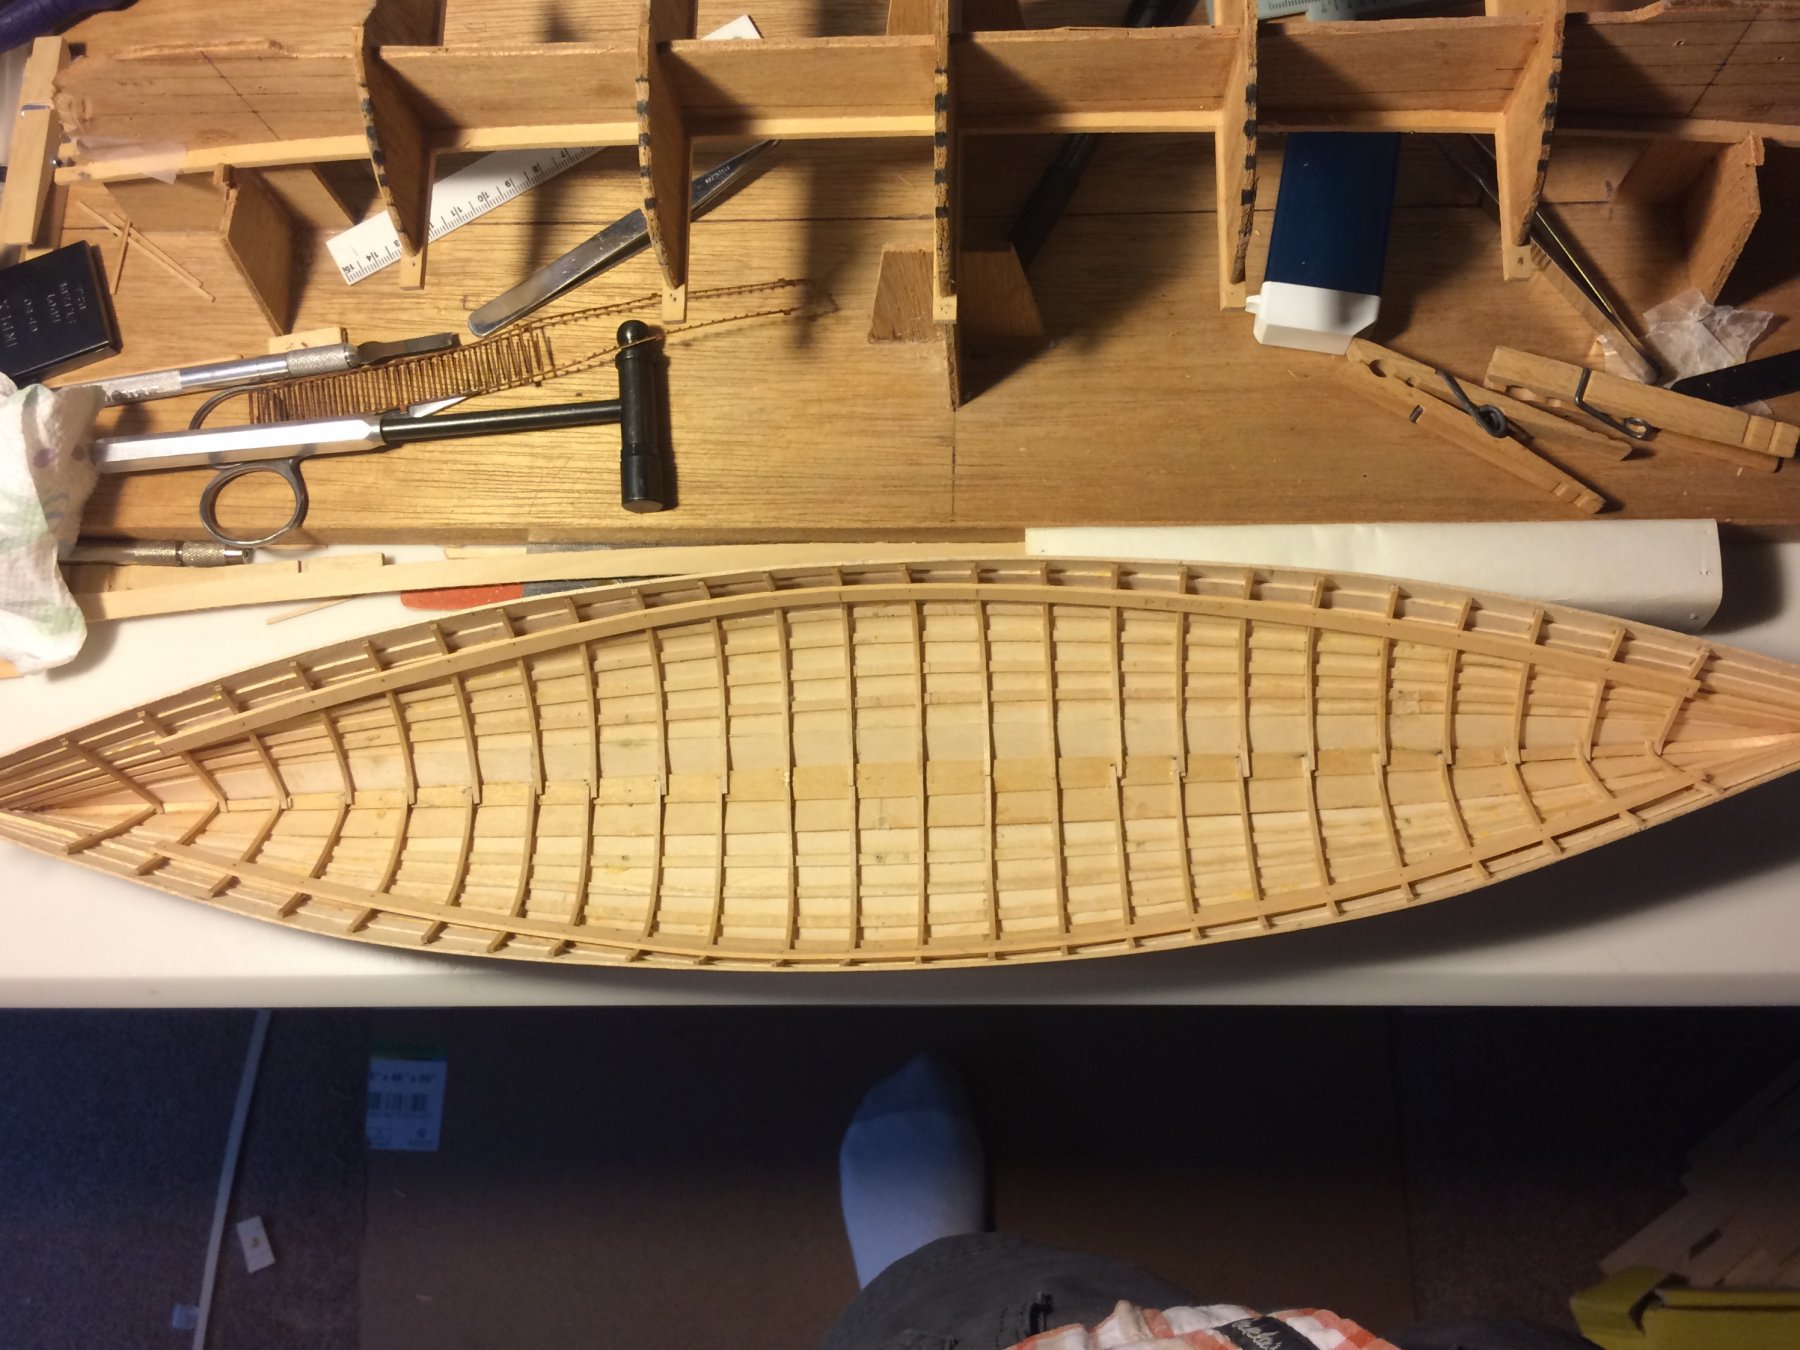
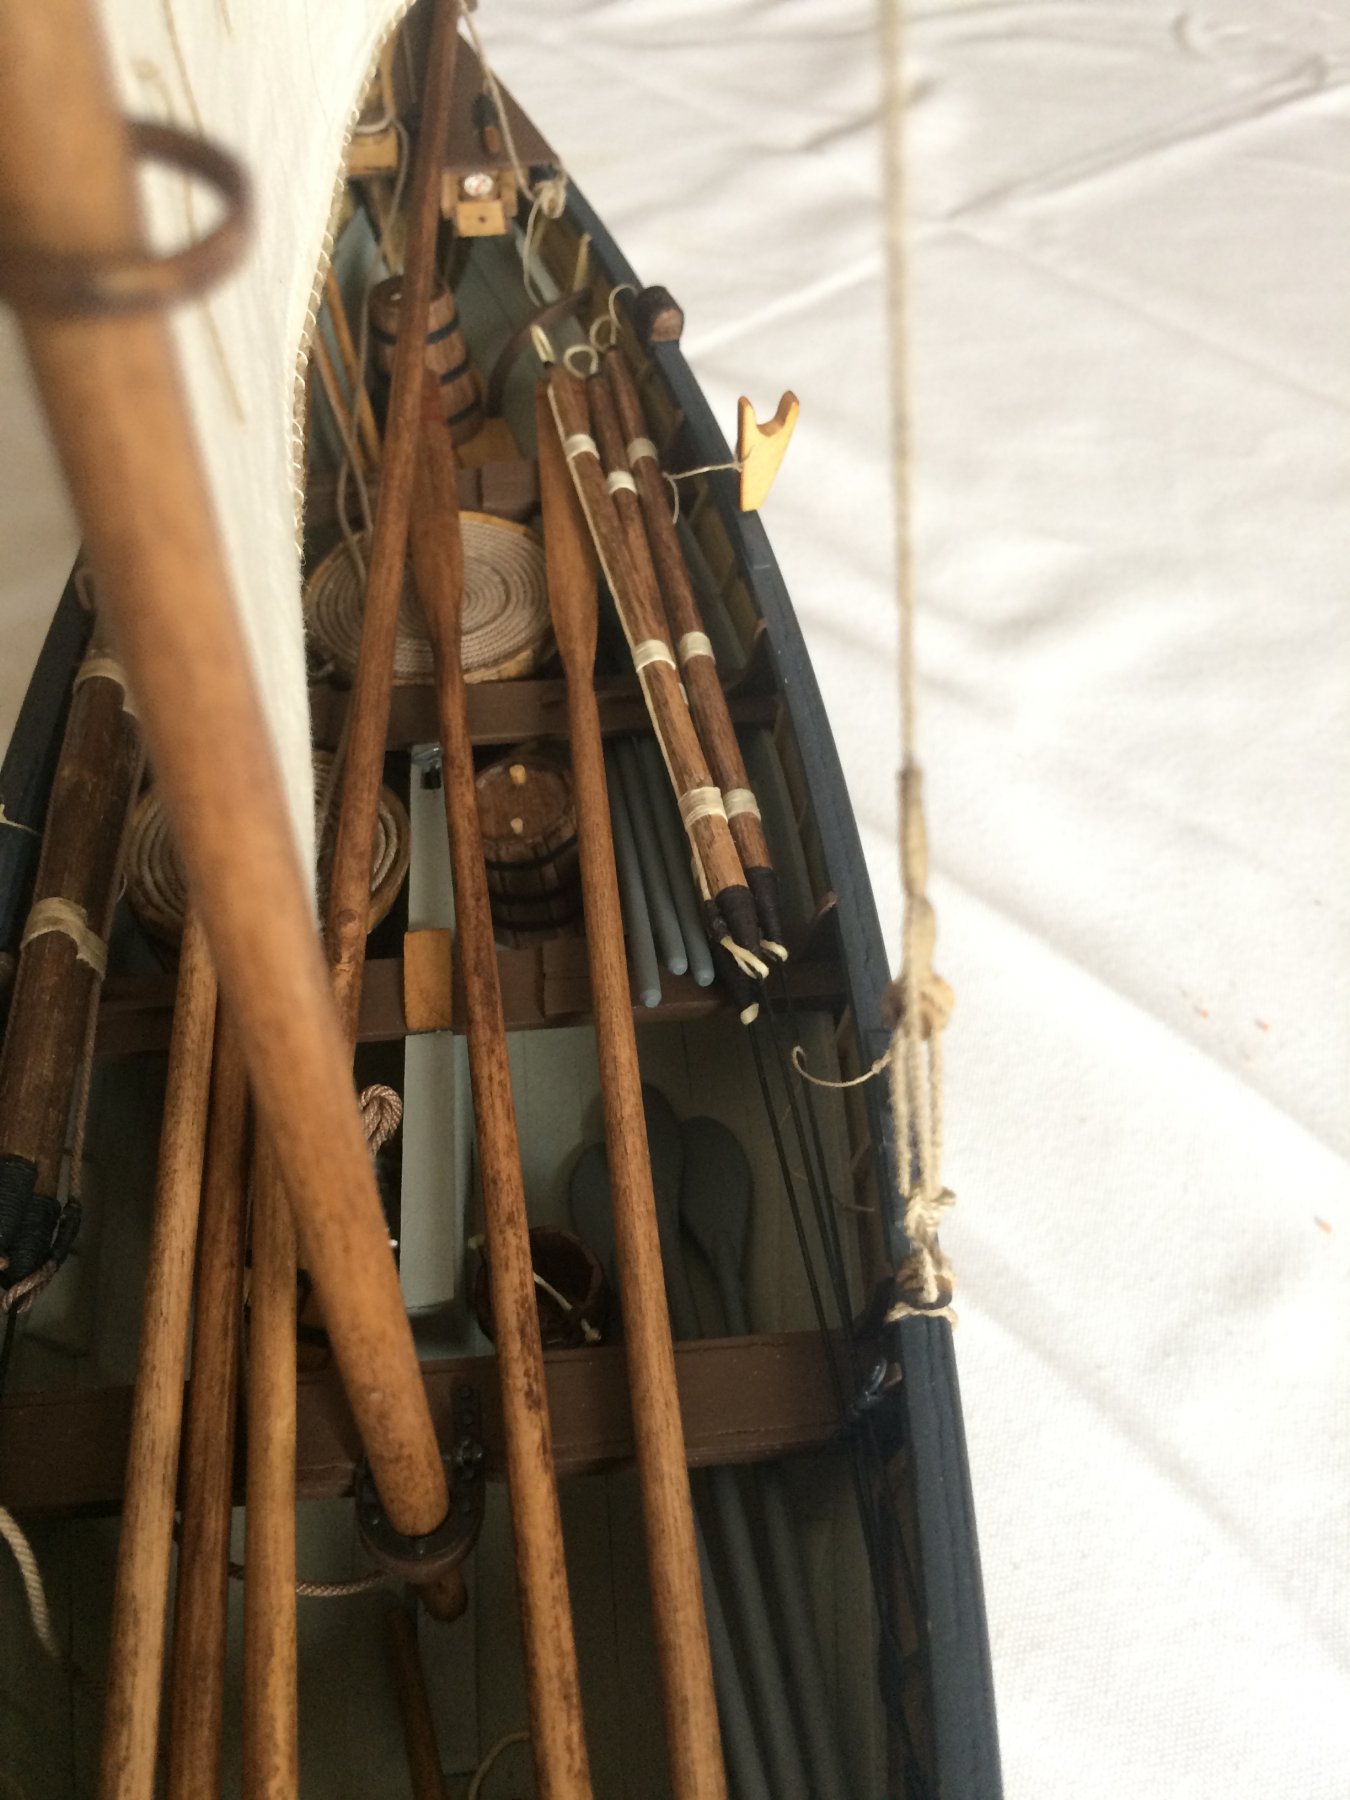
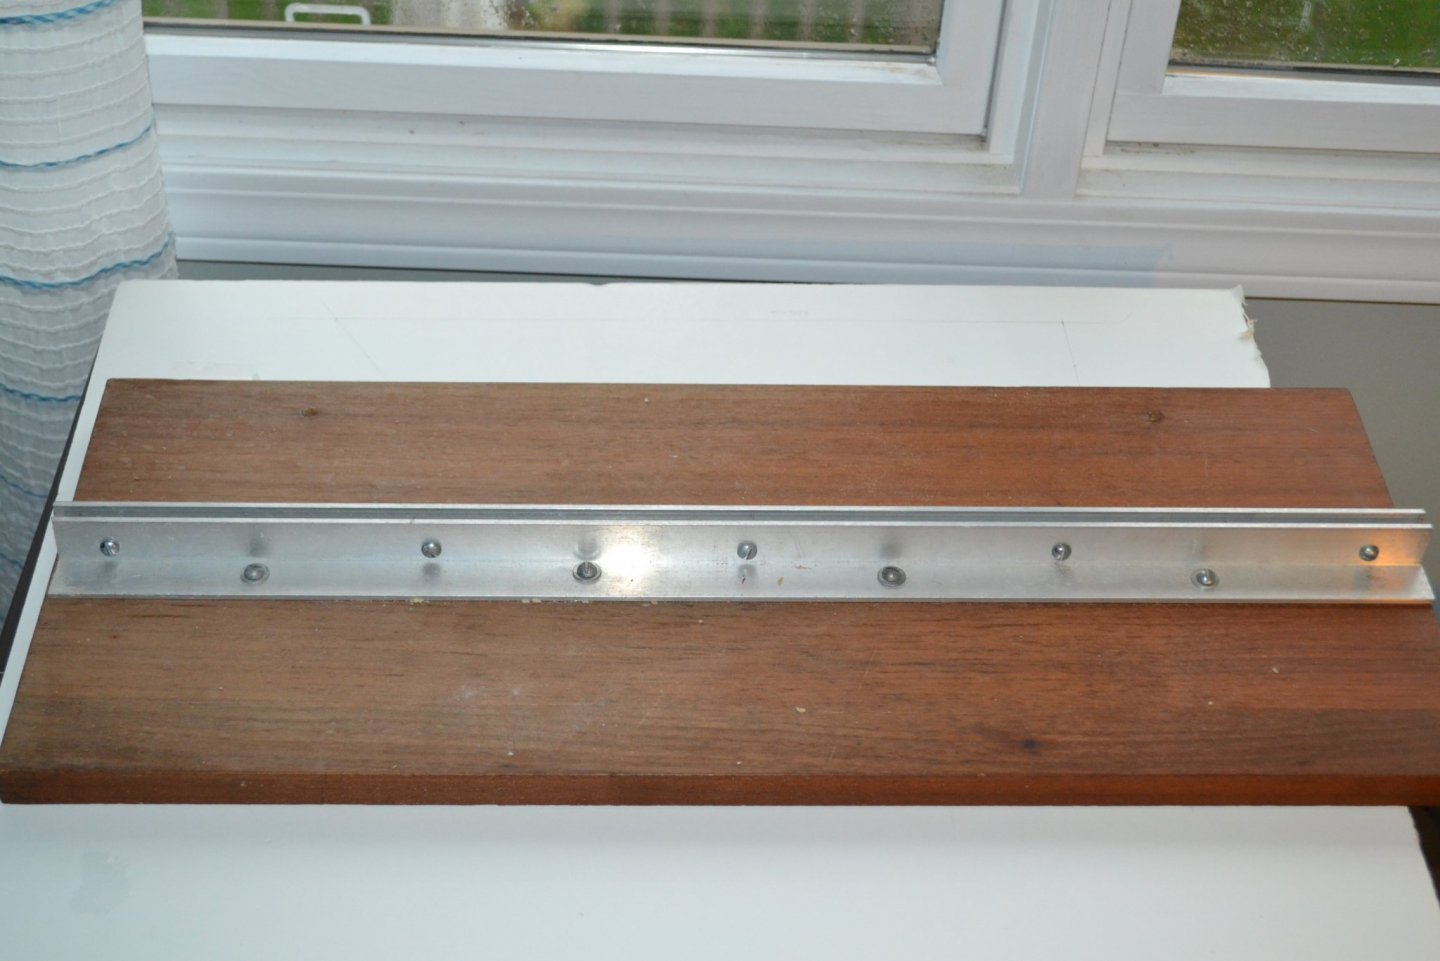
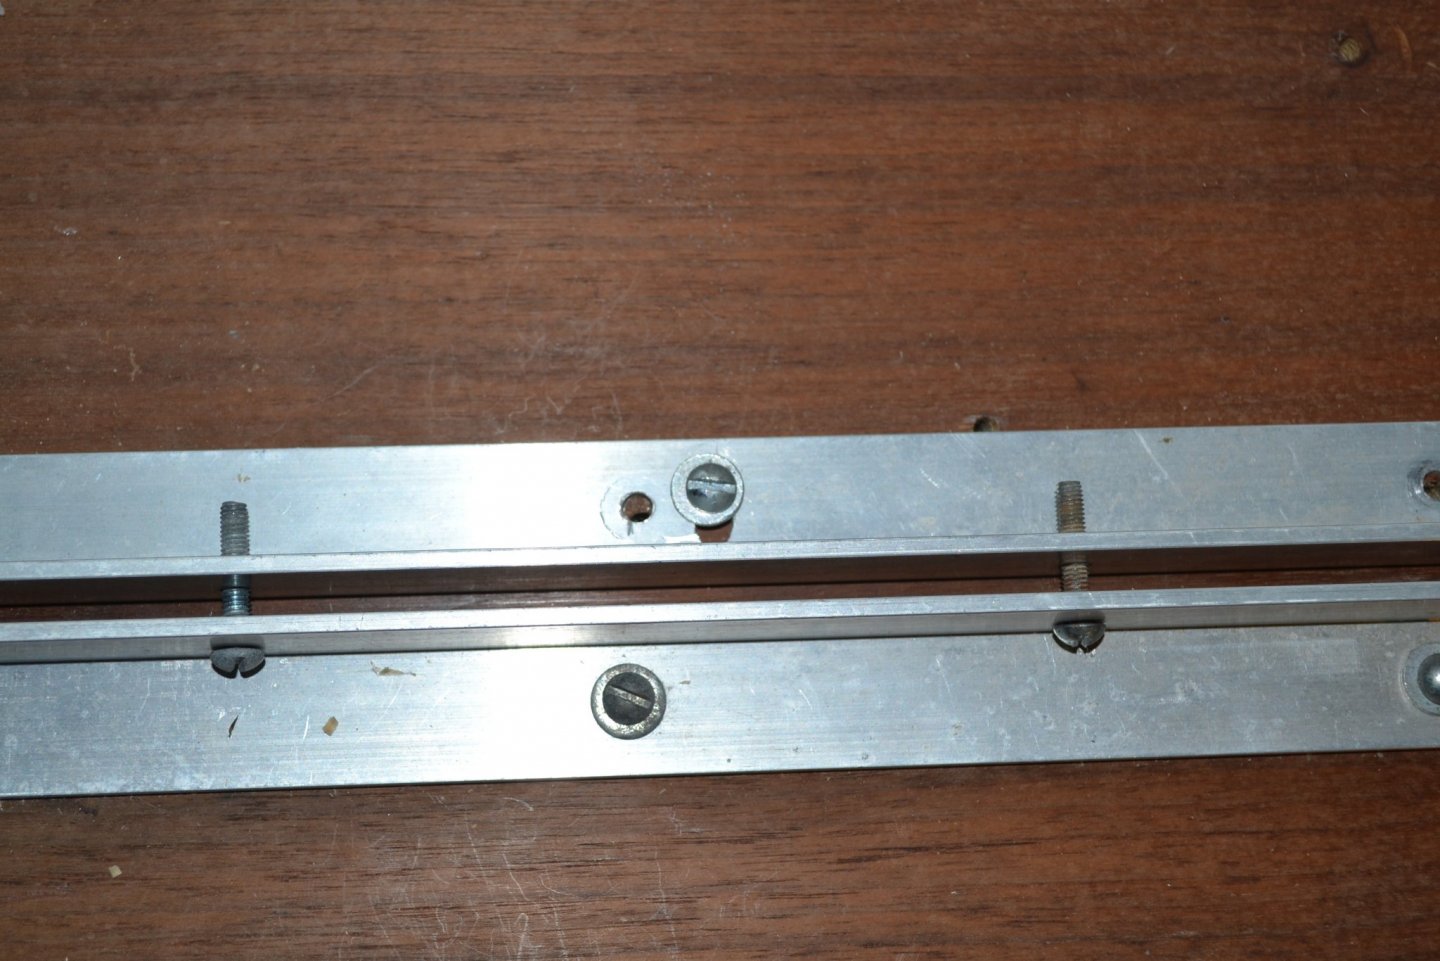
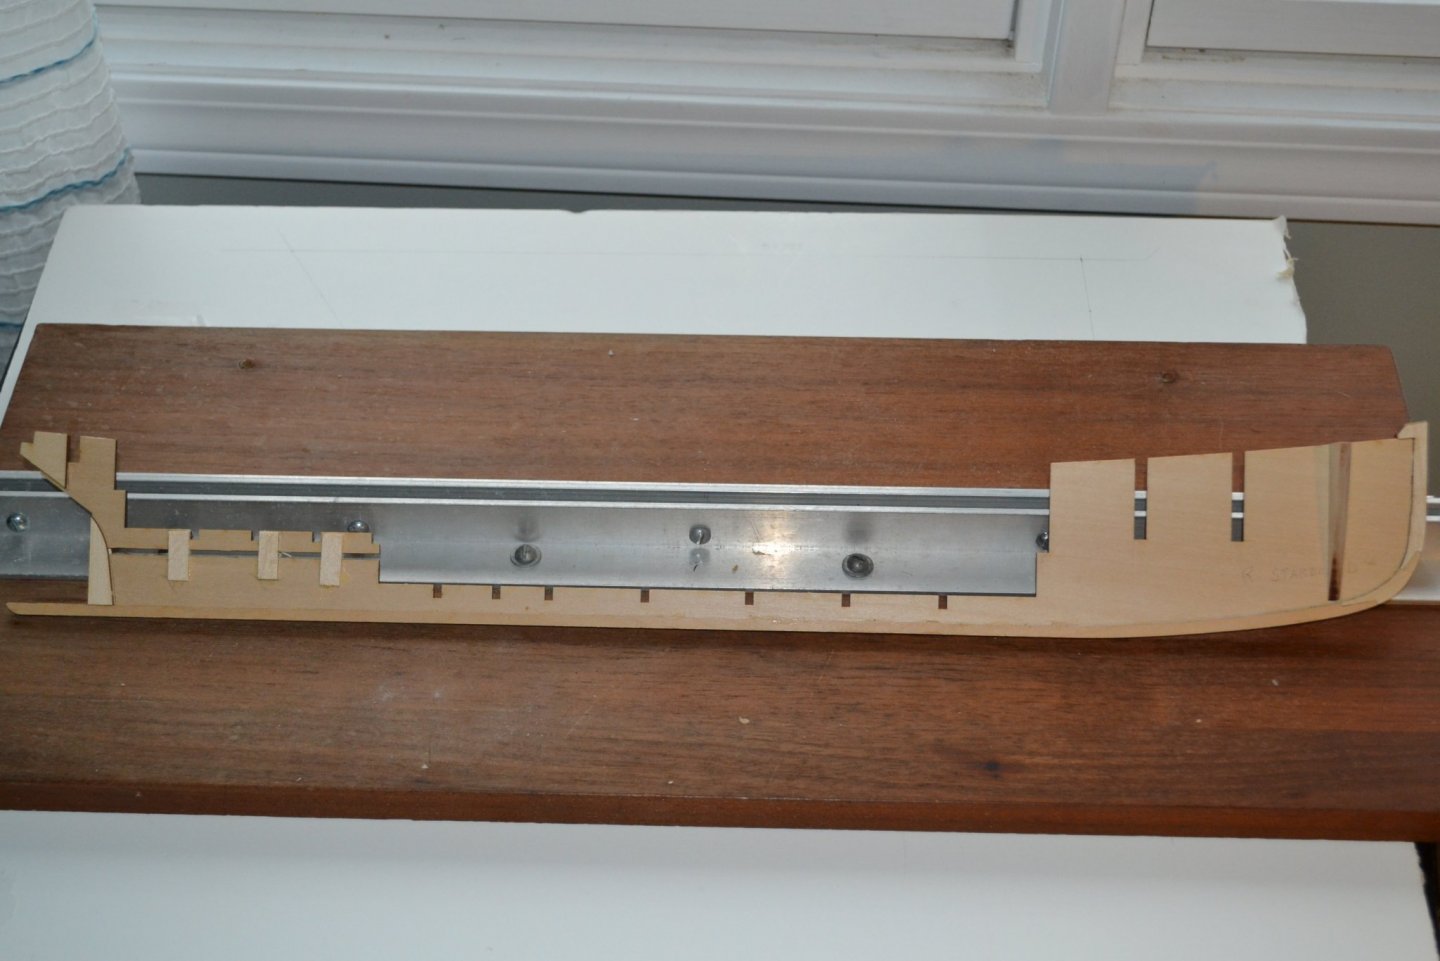
I am undertaking building the Model Shipways Picket Boat as my second foray into model ship building. I previously built their New Bedford Whaleboat with a modicum of success so thought I would give this a go.https://modelshipworld.com/topic/20442-a-novice-at-age-70/ As seems to be the tradition on this forum please feel free to pull up a chair and laugh along with my neophyte mistakes. One word of warning, make it a comfortable chair, a recliner would probably be best as suspect I will be plodding along at a snail's pace! Another warning, my photography and graphic skills are on a par with my modeling skills, hopefully I may see some incremental improvement in both as this project progresses. Cast off, we are underway. First the obligatory picture of the box. I didn't take pictures of the contents as there are several other logs showing these. First impressions of the kit: The laser cut parts seem very crisp and well done, my other build was an old kit with die cut parts and this is a vast improvement! The photo etched parts all look very well done and the cast parts look very usable. The various wood strips seem to be of good quality also. The instruction sheet was a surprise as my last kit had a rather nice book with essential step by step instructions but this kits instructions seemed to have been pared to just the essentials. I did separate the instructions, place them in sheet protectors and then into a binder. I am sure I will refer to them often and thought they needed some protection. The plans are very nicely printed but perhaps not as detailed as the whaleboat plans. I constructed a building base out of some old shelving and Aluminum angle. One side I permanently fixed to the base and the other I slotted to allow for adjusting the width, I also drilled and tapped one side so that when I slide the movable portion into position I can tighten it down to the base and use the other screws to snug it reasonably tight. I then attached the wood strips to the bottom of the keel using spots of wood glue about every inch per the instructions to avoid excess moisture warping the keel. Rather than weighting it down to dry I put it in the build board, tightened it down and allowed it to dry and then did the other side, worked very well. Being a belt and suspender guy I followed up with an application of thin CA adhesive along the bottom seams.
.thumb.JPG.134bf4bfd77d5360659489e488aa8706.JPG)
- 54 replies
-
- 3
-
-
- picket boat
- model shipways
- (and 1 more)
-
Hello Paul, I don't recall a specific cap strip. I built it per the plans and sheet 2 shows cross sections of the hull. I built mine in accordance to those views.
-
Excellent job! I recently completed this kit and found it was very satisfying albeit at times frustrating. As to colors I searched the web for pictures of boats and completed models and finally chose to paint it to please my eyes. I look forward to following this build. John https://modelshipworld.com/topic/20442-a-novice-at-age-70/
-
I am curious if this is a banned kit on this site? Not sure exactly who who the manufacturer is. https://modelexpo-online.com/Falkonet--Imperial-Russian-Steam-Launch-Dagmar-in-148-Scale_p_1937.html
-
Not to be argumentative but CA used on human body wounds may degrade due to the fact that the body constantly sheds and replaces cells and the "failure" may be due more to this process rather than a moisture issue. The CA in wounds adheres to the outer layer of cells in the wound when applied, but is shed along with those cells as part of the normal cell replacement process. As an example, if you happen to get an adhesive of any type on your fingers and cannot completely remove it it will be gone in a few days due to normal epithelial cell replacement. This applies to CA, PVA, epoxy etc. whether they are affected by moisture or not.
-
Thanks very much for the warm welcome and gracious comments! This is a very impressive site with lots of extremely talented members. I look forward to staying here. I think I will have a go at the Model Shipways Willie Bennett next.
-
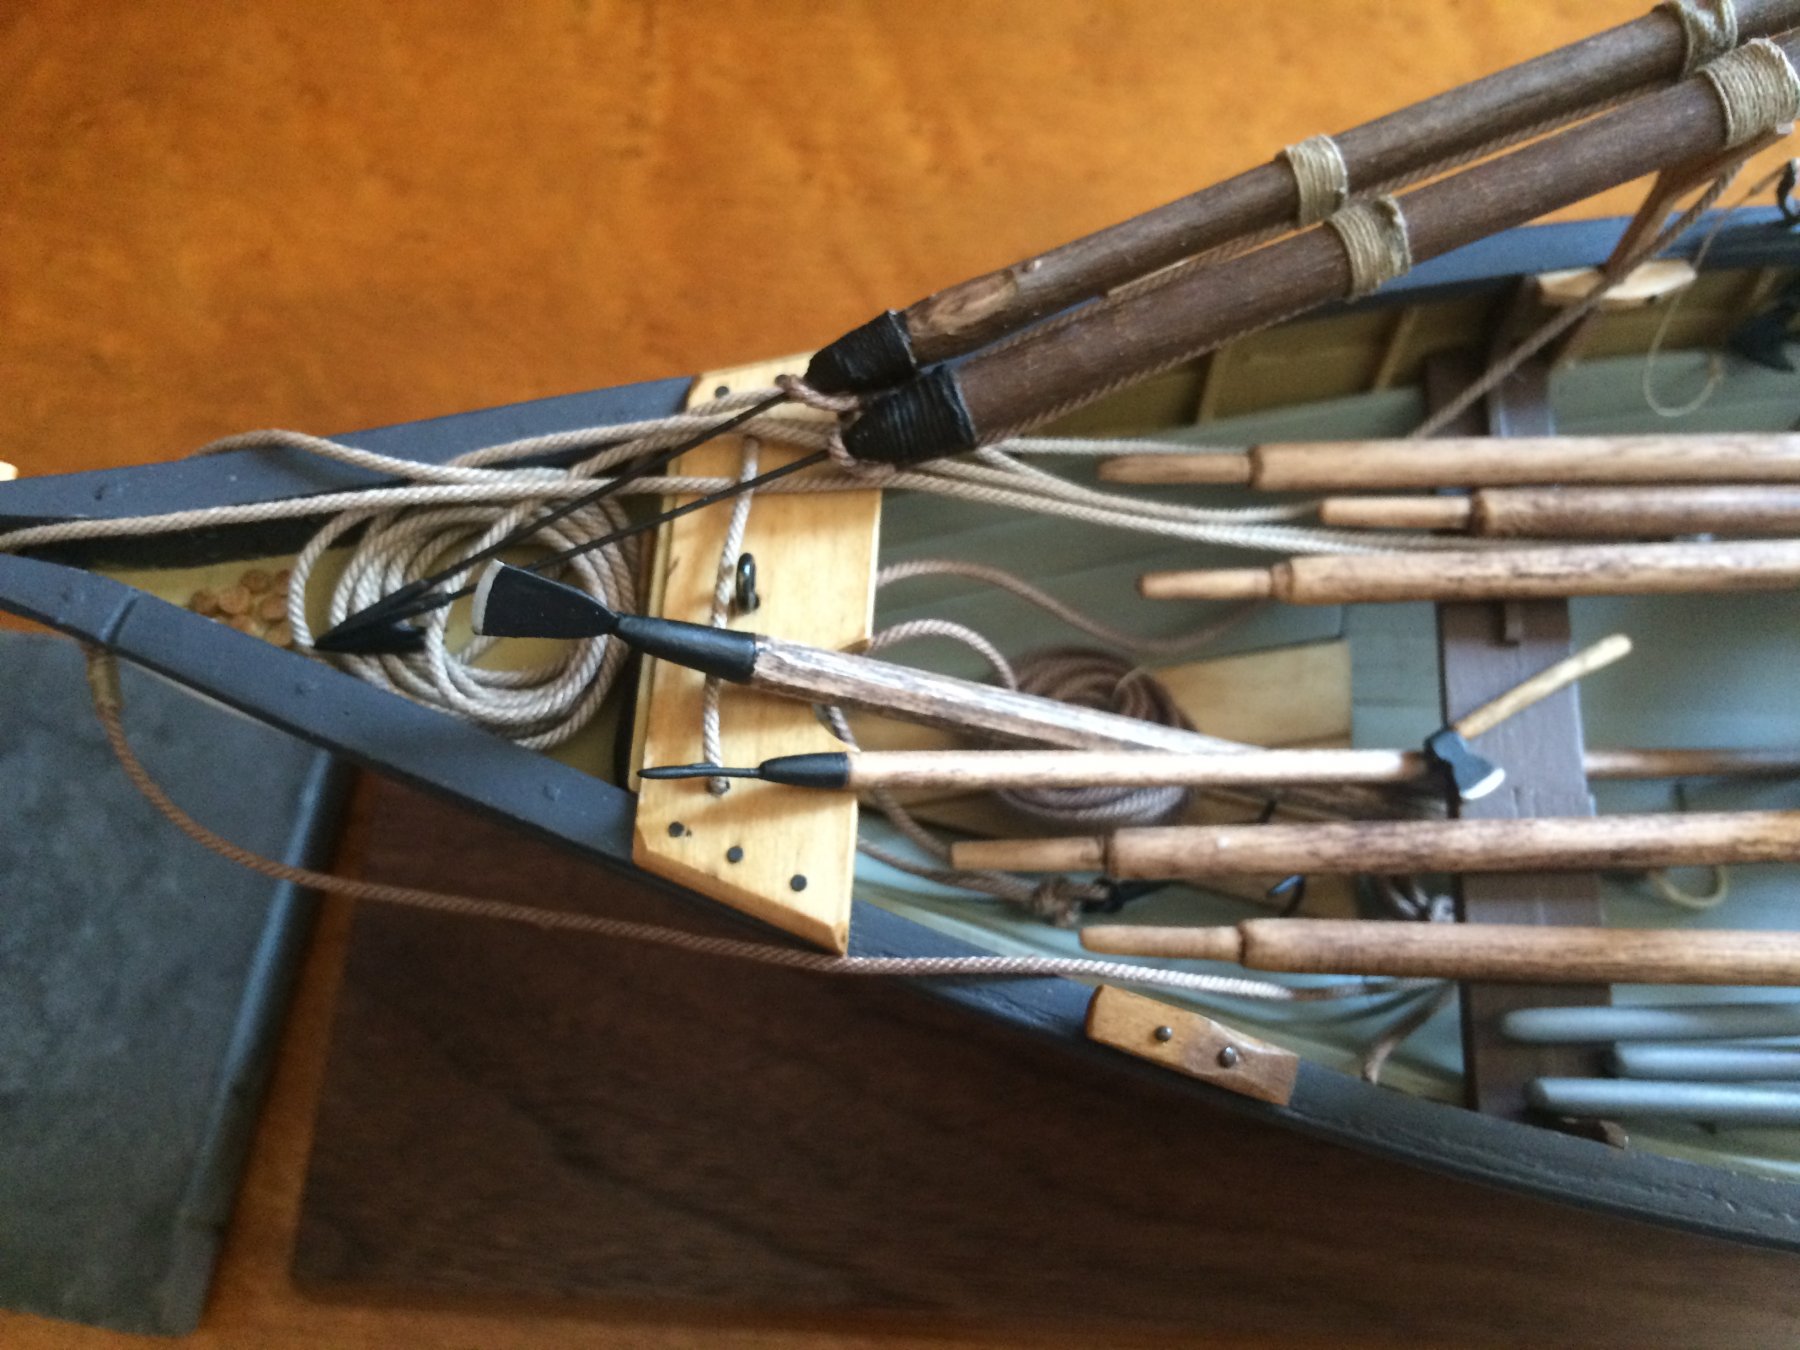
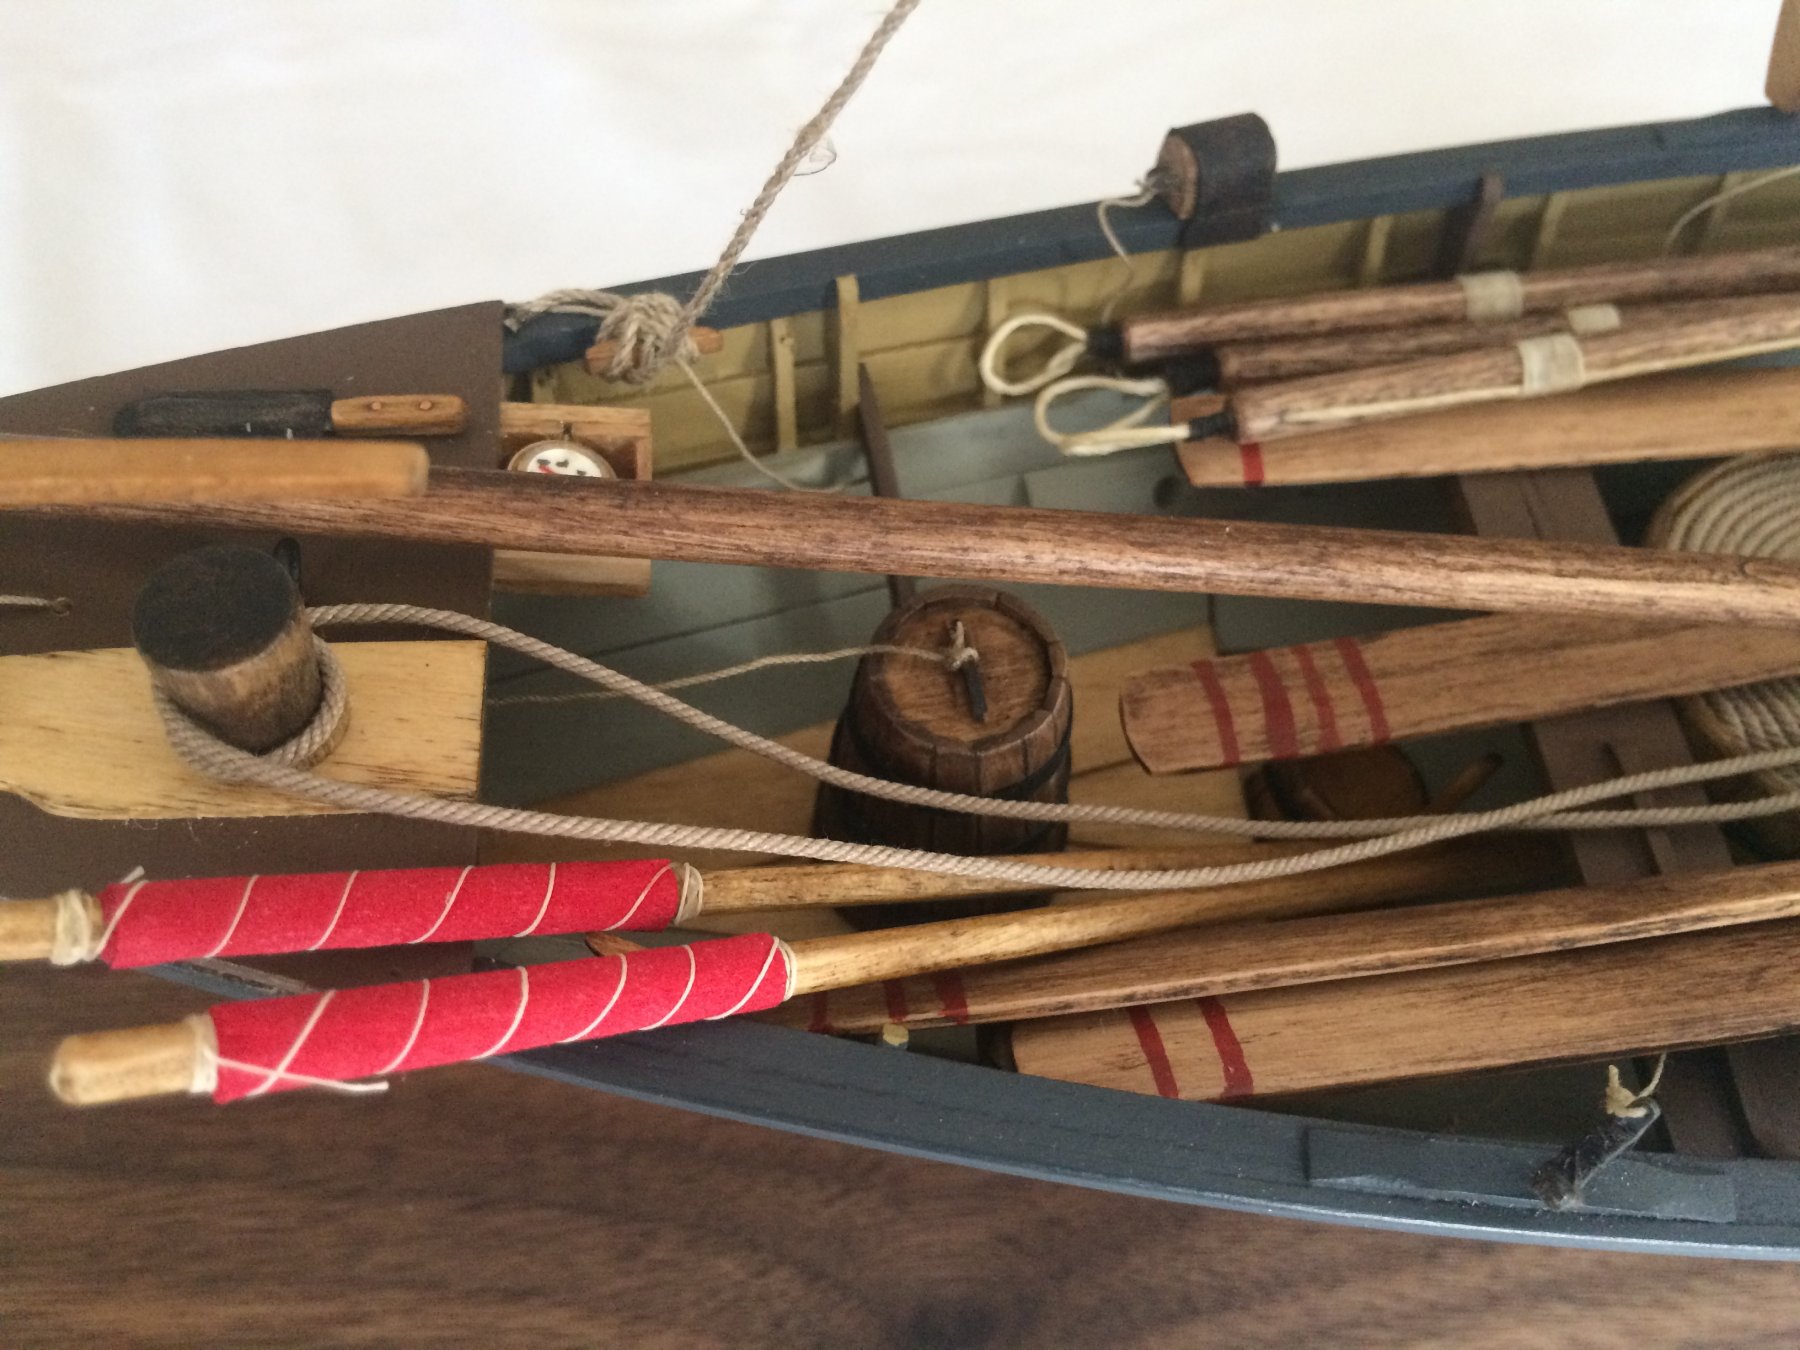
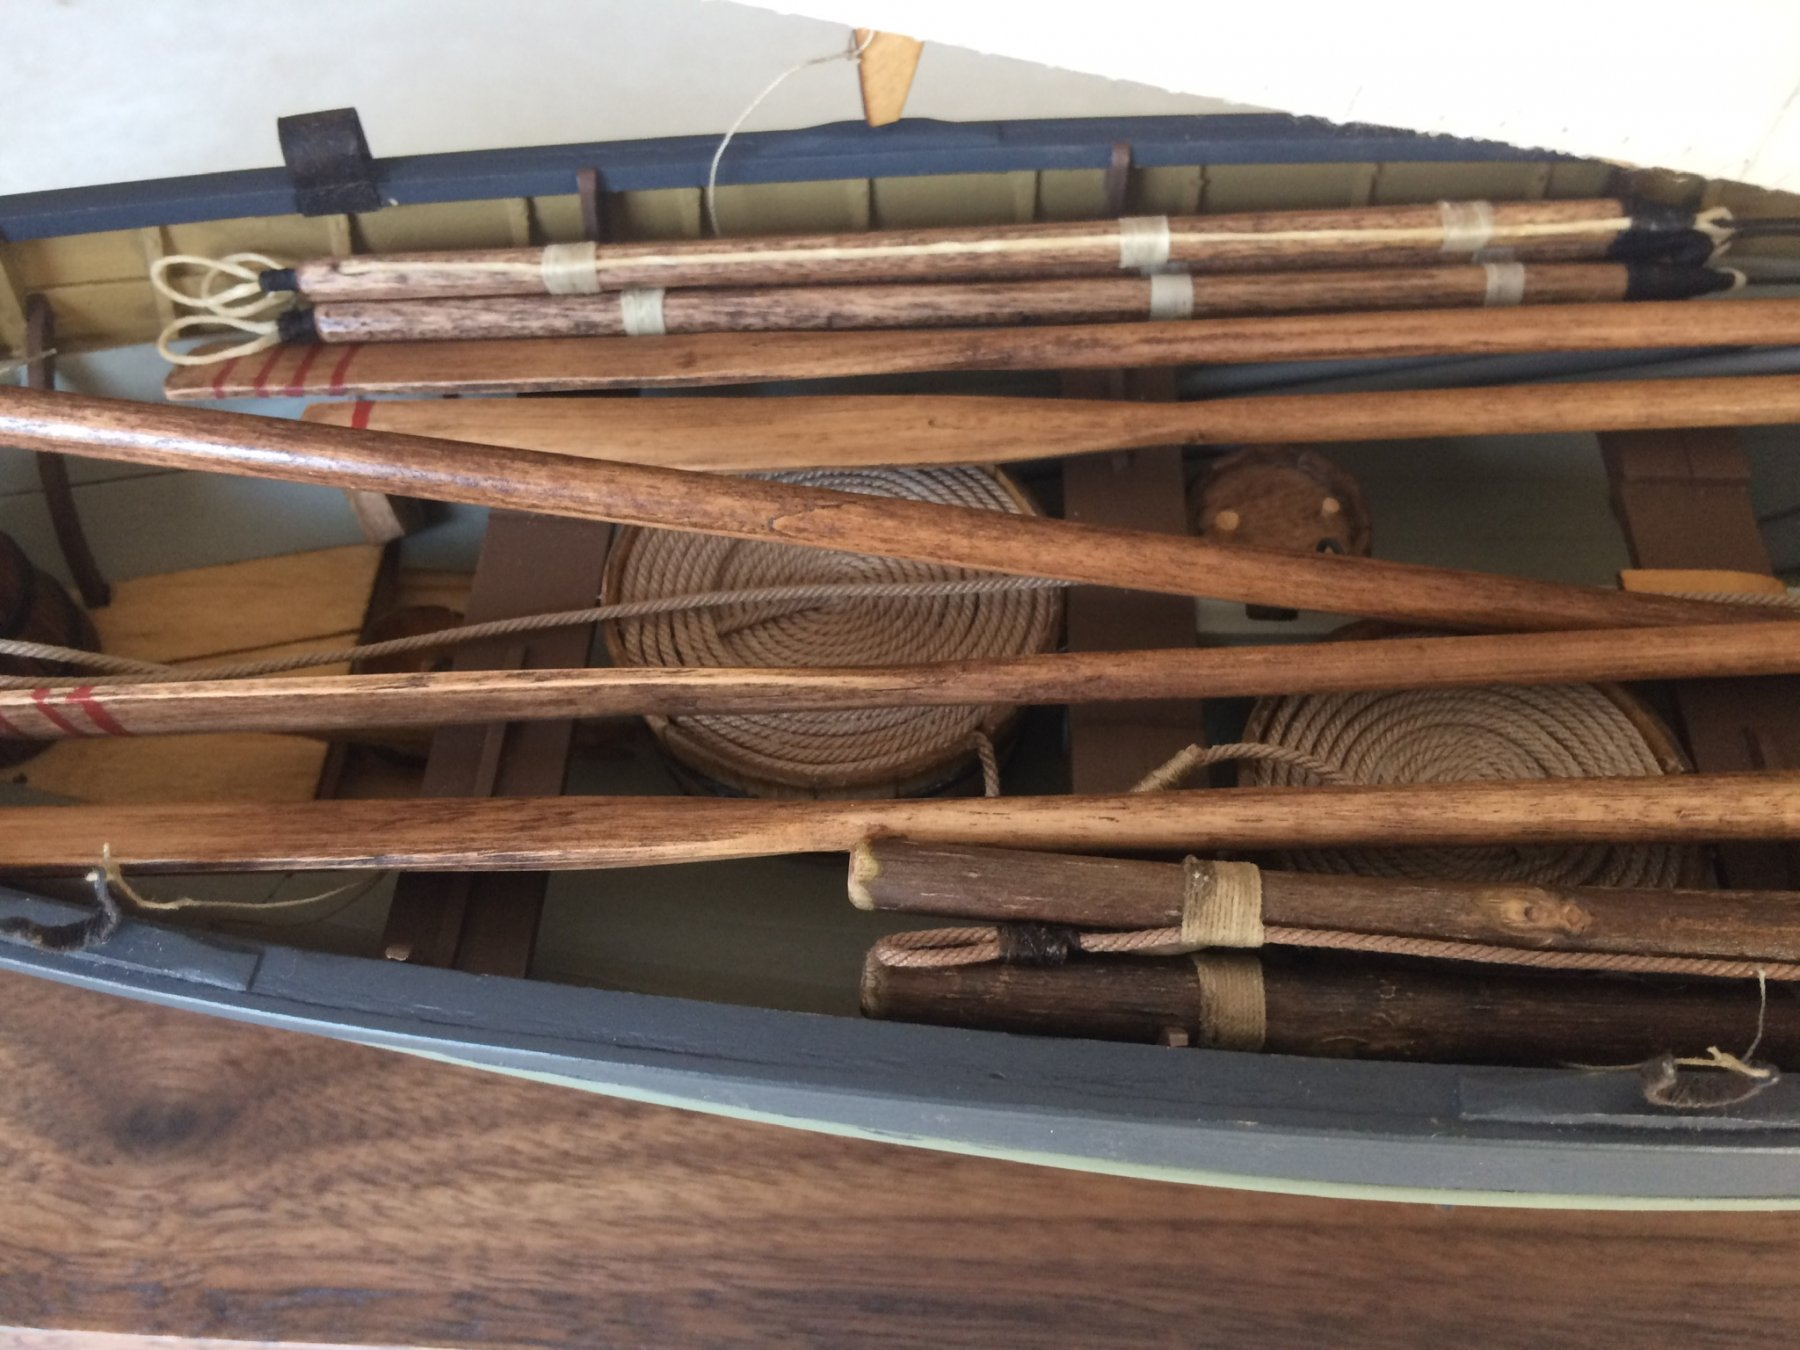
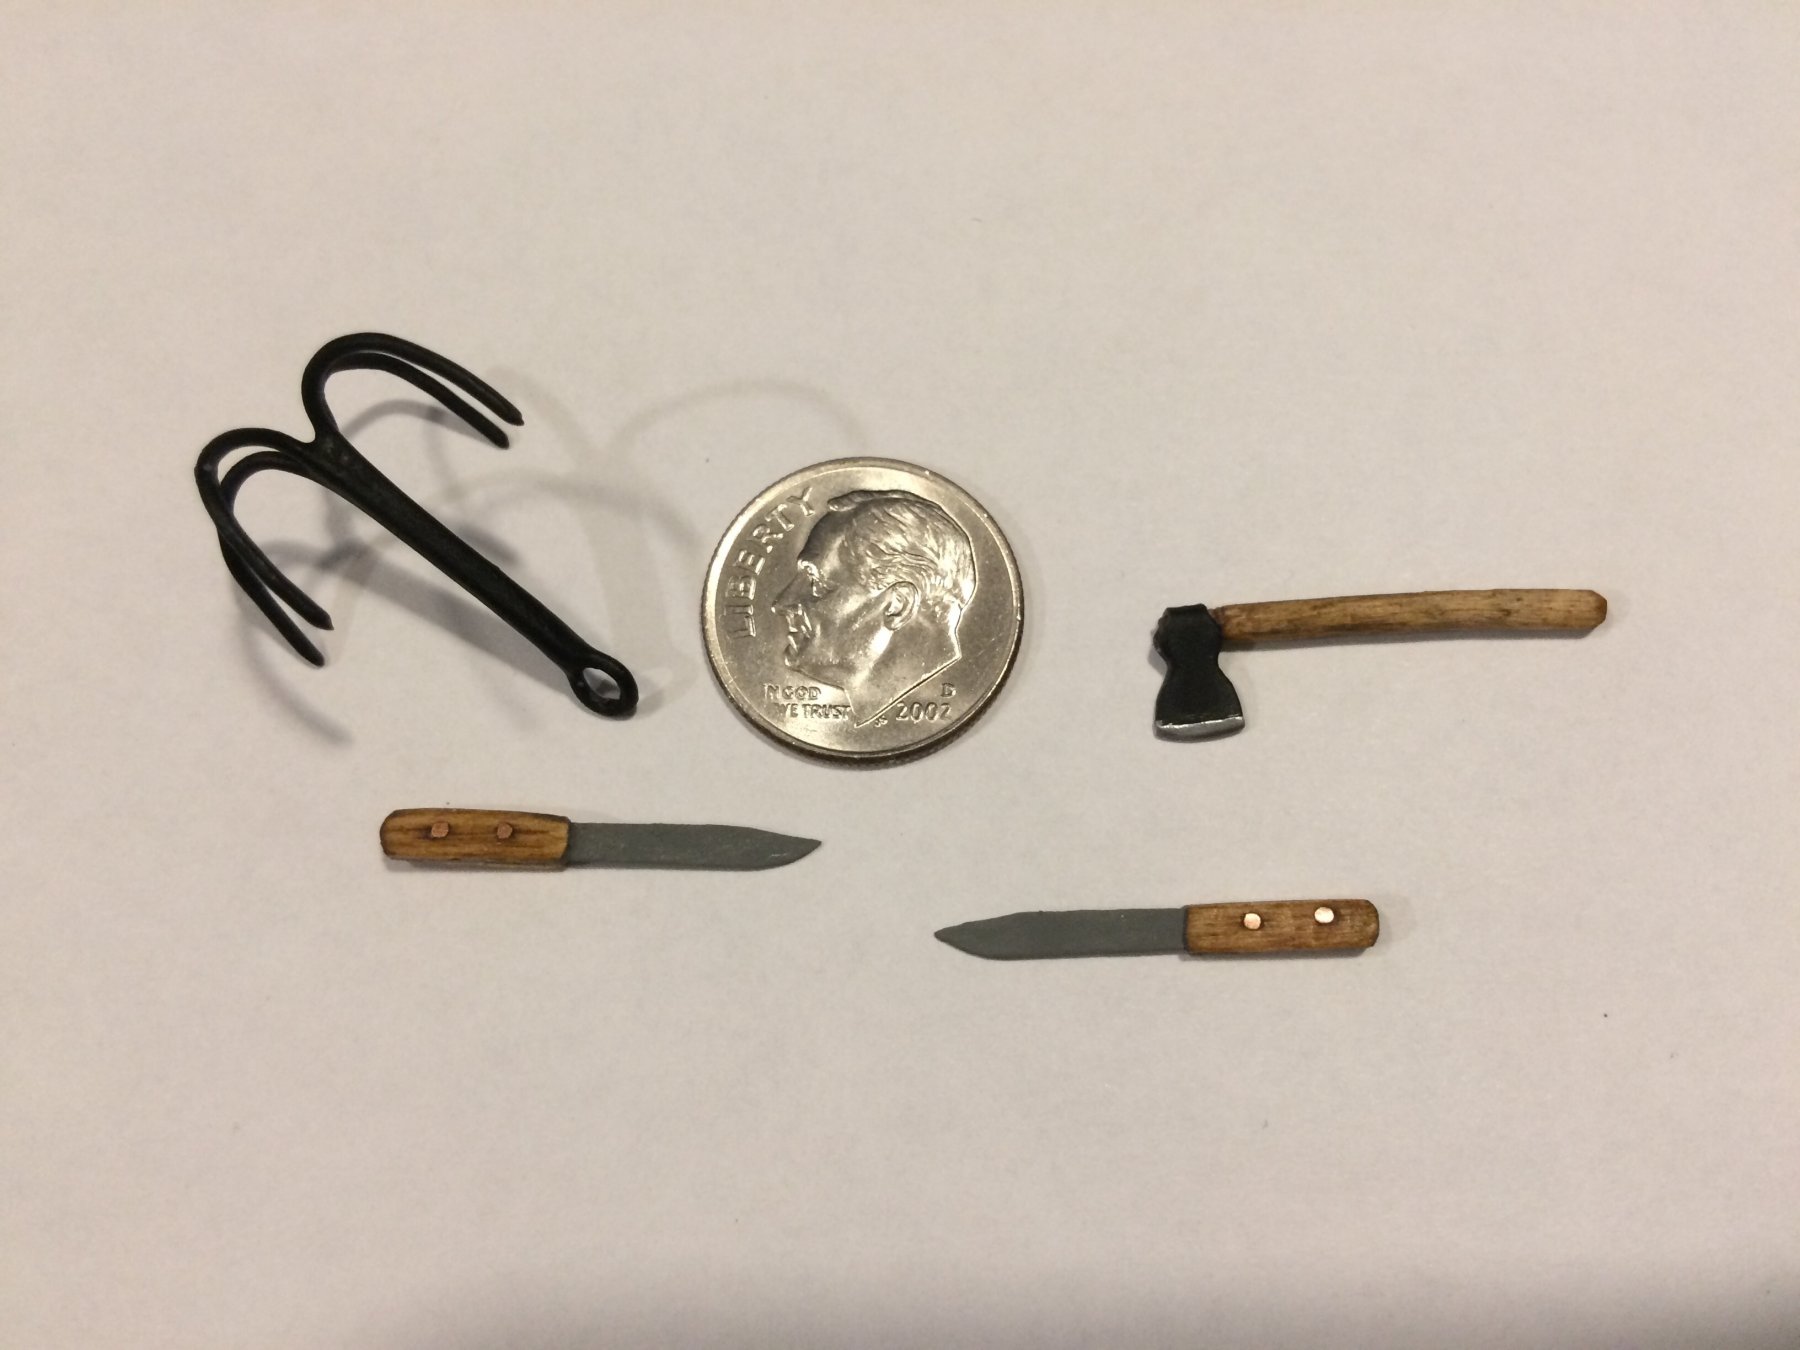
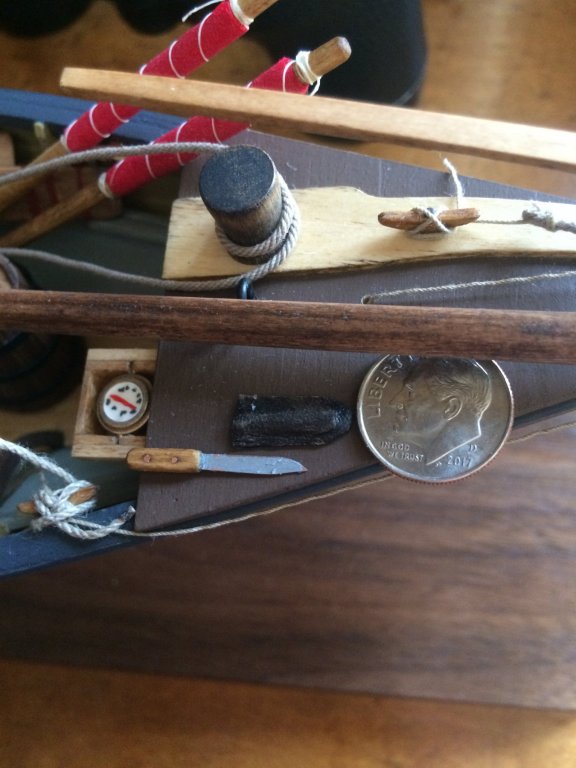
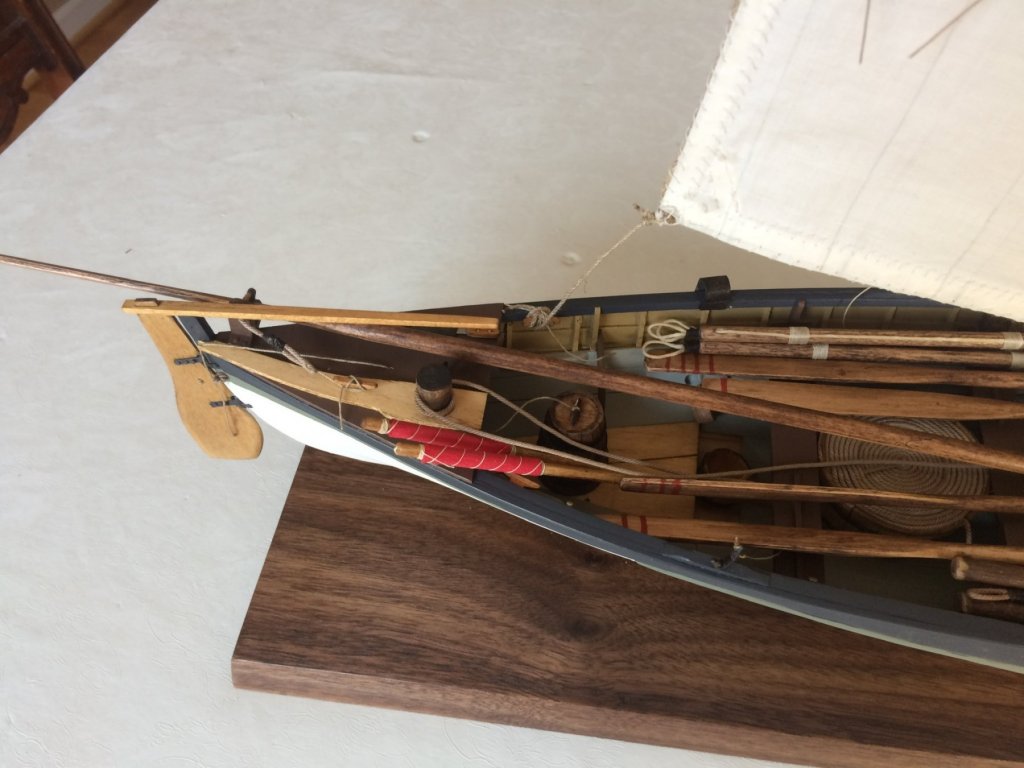
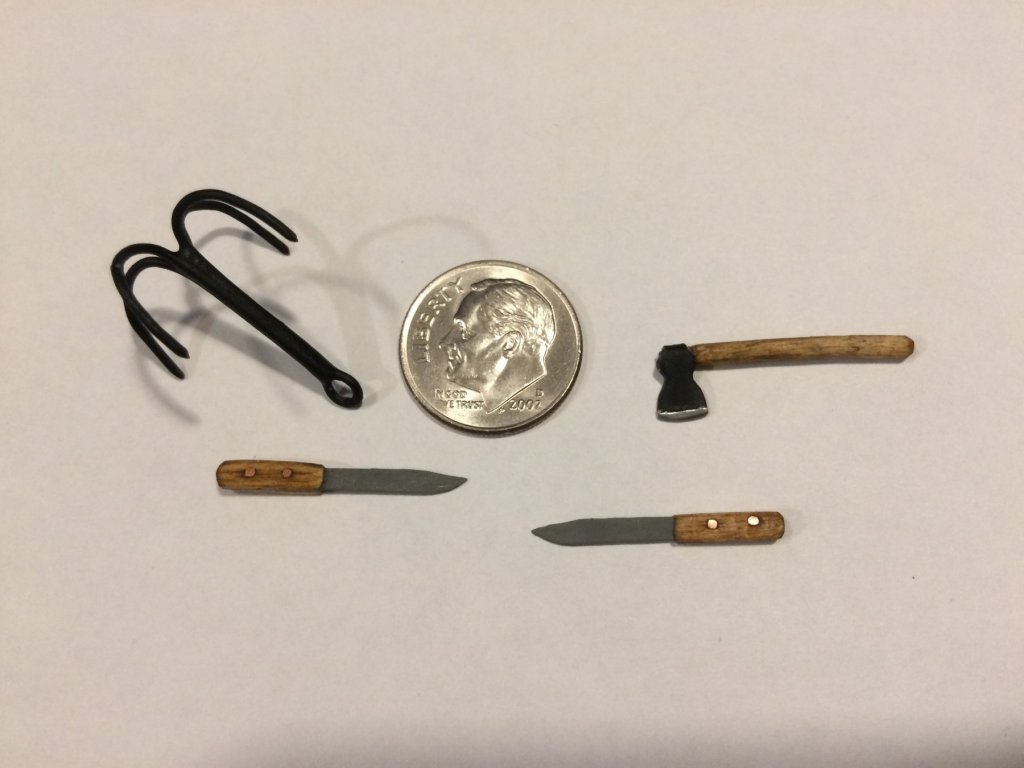
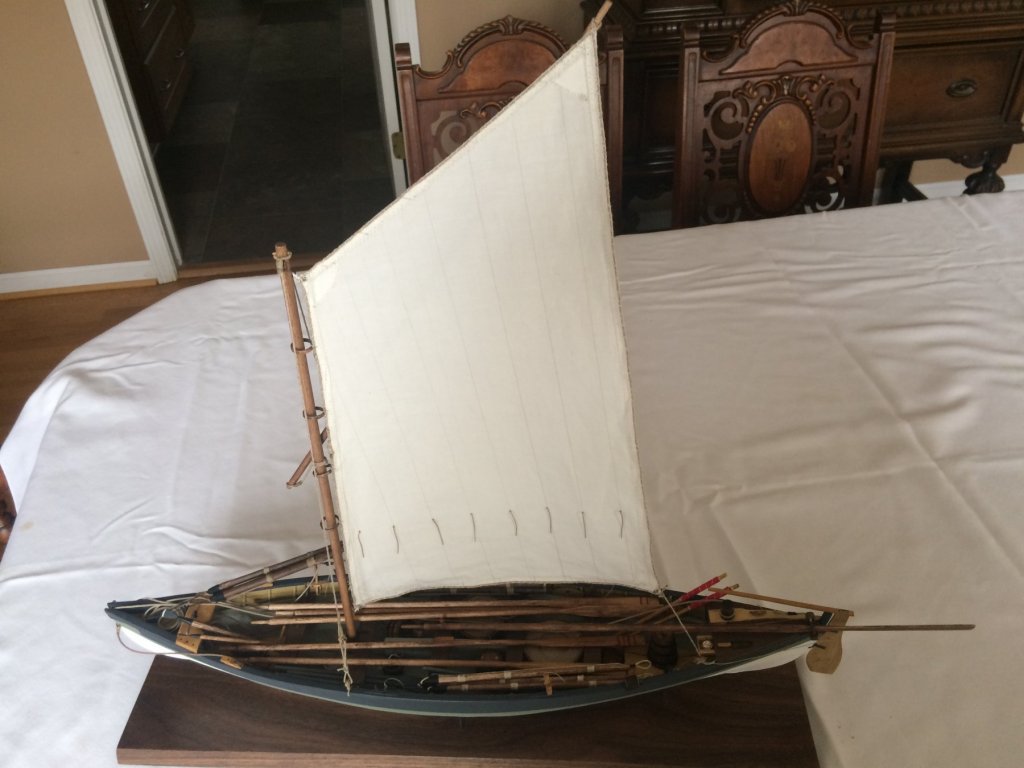
Hello all, what a wonderful site. As a bit of introduction I just completed the Model Shipways New Bedford Whaleboat. I started building this while undergoing 6 months of chemotherapy that caused the loss of feeling in my hands. I thought it would be good therapy and it did seem to help. I worked on it when I felt able and found it relaxing and fun as I was essentially on home confinement for many months. Due to my neuropathy and inability to feel the small parts I made extensive use of hemostats, forceps and tweezers. I am included a few photos and any comments, suggestions or criticisms would be welcomed! John


- 18 replies
-
- 24
-


.JPG.1c4c95fc9f2a8504cab7a66ad31980e6.JPG)
.JPG.5fee6d19c9d54f8036ed42eb426eb6ad.JPG)
.JPG.af5ed9e110cce047e1d376313c7e4426.JPG)