HOLIDAY DONATION DRIVE - SUPPORT MSW - DO YOUR PART TO KEEP THIS GREAT FORUM GOING!
×


turangi
-
Posts
276 -
Joined
-
Last visited
Content Type
Profiles
Forums
Gallery
Events
Everything posted by turangi
-

A question about varnish.
turangi replied to danbloch's topic in Painting, finishing and weathering products and techniques
I'm not sure if that's residue from the tape but I would rub down the area with Alcohol and see what happens. You could even do the whole deck and just reapply the shellac. If it is tape adhesive residue the alcohol will probable remove it, if it isn't the rubdown should even out the finish and another coat could be applied. The beauty of shellac is it is very forgiving and problems quite easily corrected unlike some of the solvent based finishes. Don't panic or get discouraged, you will sort it out. -
Often I drill an undersized hole and use round files to finish it to proper dimension and angle.
-
Thank you all for your comments and likes!
-
Magnifique!!
-
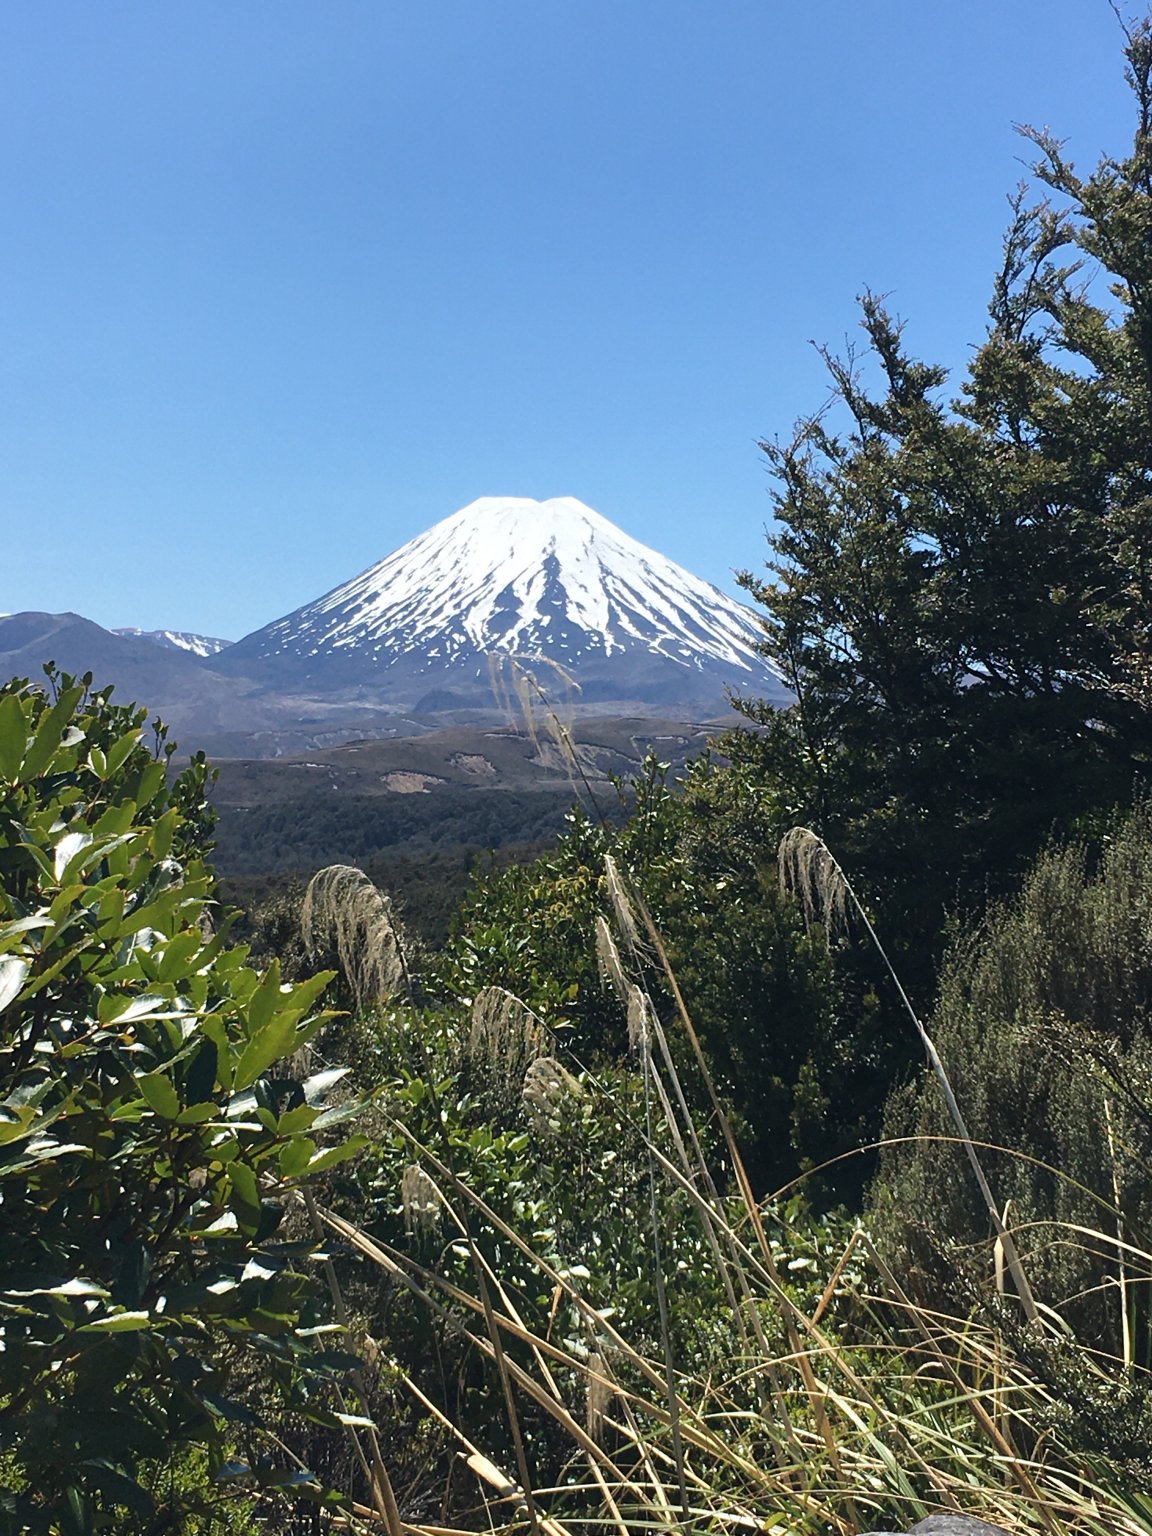
Thanks Stu! Lake Taupo is magnificent, it is always a thrill to round the bend on SH 1 and see the lake with the mountains as a backdrop. I'm no great fisherman, took it up 4 years ago at age of 68 but I can flog the water and scare the fish with the best of them. I think I sometimes I catch fish because they are angry at me disturbing them. Best wishes for your travels, stay safe an well. John
-
Very glad to see you here! I think you will have fun doing boat models while confined to quarters. A bit of an interesting story (to me at least)! I frequently travel to NZ for fly fishing on the Tongariro River. I went over in February and my only cares in the world were fly selection, which meat pie I wanted for lunch and should I order a flat white or long black. Come March, a couple of days before my return home, I decided to look at the news and check my flight home as I travel standby my late wife was an airline flight attendant. I had purposely avoided both as I was so much enjoying my time on the river and loving the magnificent scenery. The news and the flight information were not good. The virus had really exploded and the the flight from Auckland to America was oversold. I was able to get a flight up to Sydney on the West Island, spent the night and made my way home. As a high risk individual because of age and previous chemotherapy I was the antisocial old man hiding in the most quiet corner of every airport. I got home, went into immediate 14 day self isolation and the day it was over our governor announced a mandatory stay at home home order so I was well practiced! I had hoped to return to my beloved Turangi a couple of more times this year I don't think that will happen. I am very impressed how well NZ and Australia have handled this pandemic. Stay safe and be well! John
-
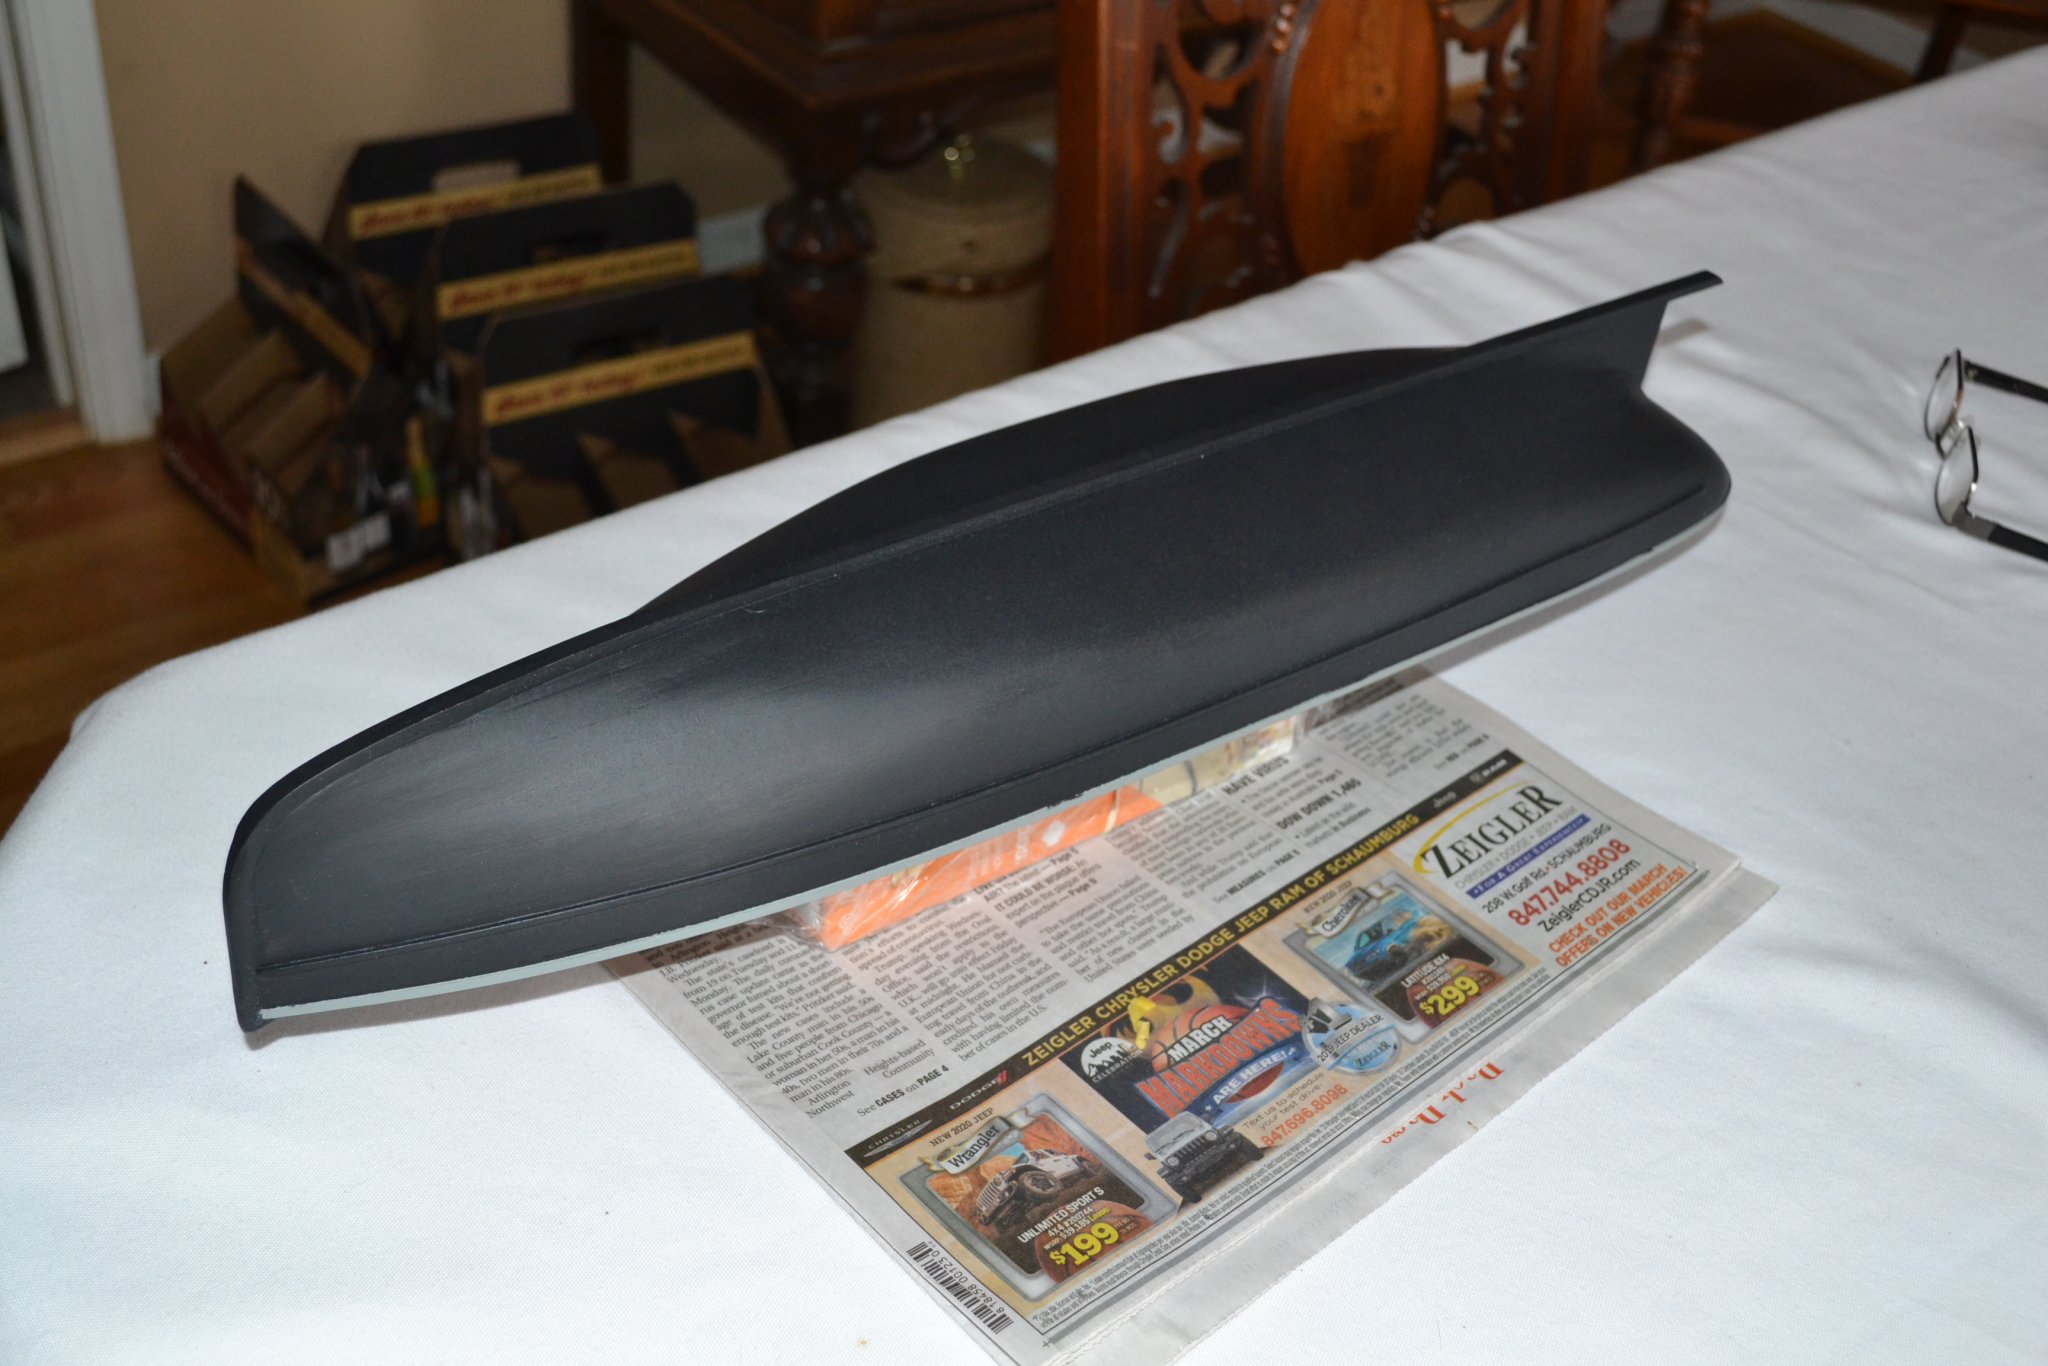
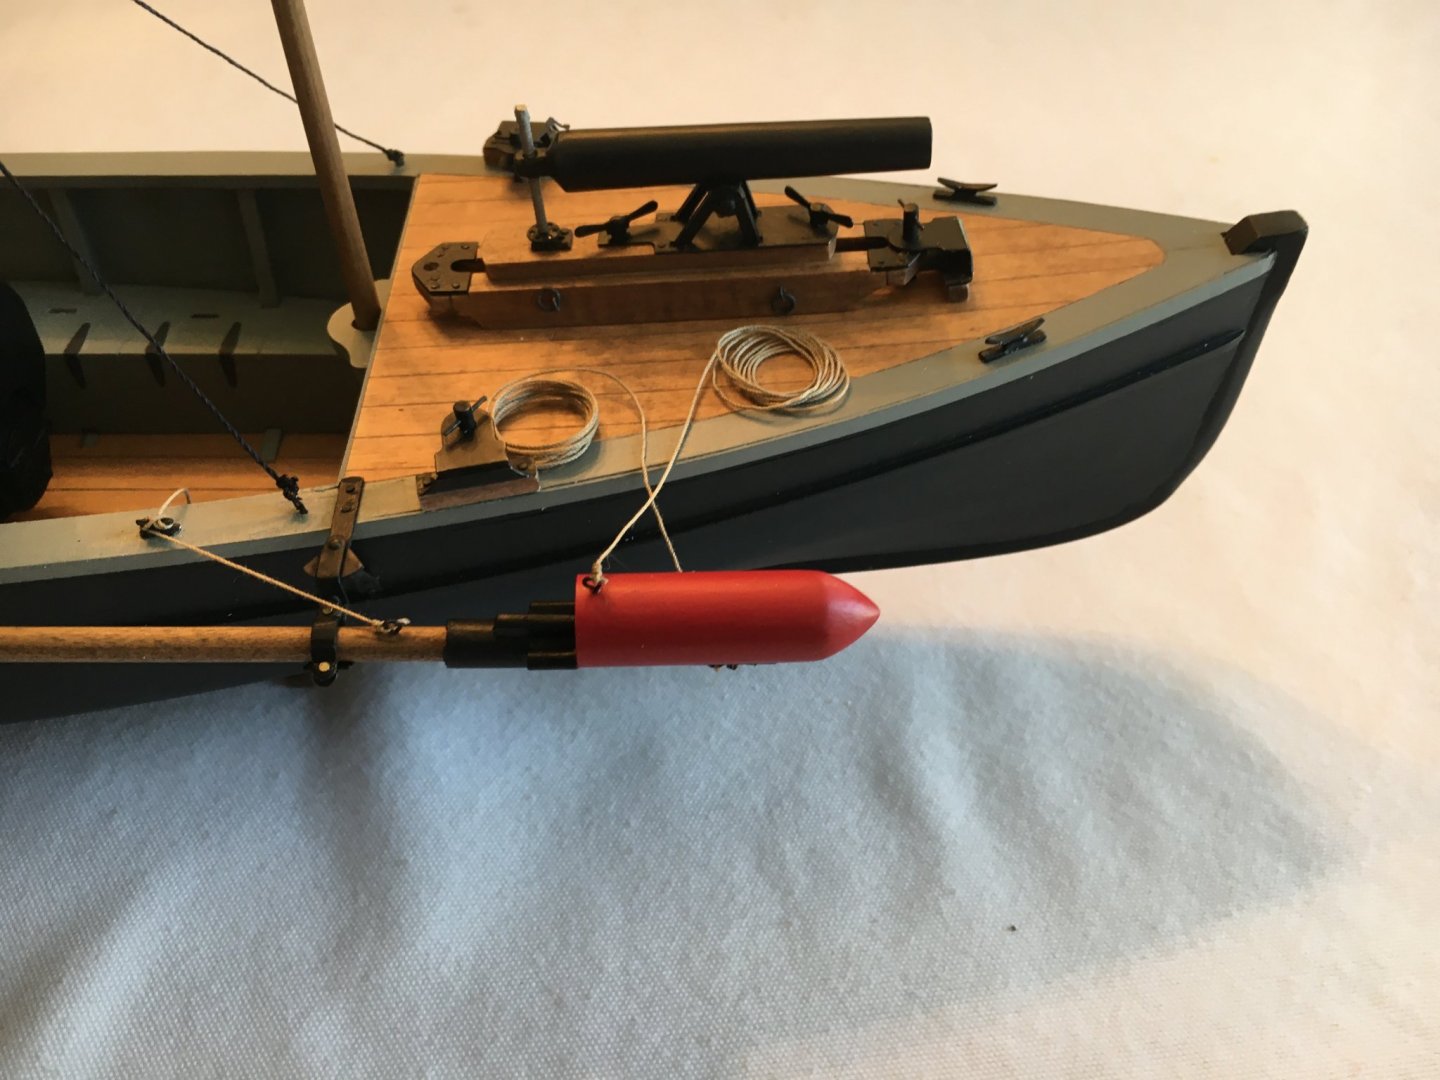
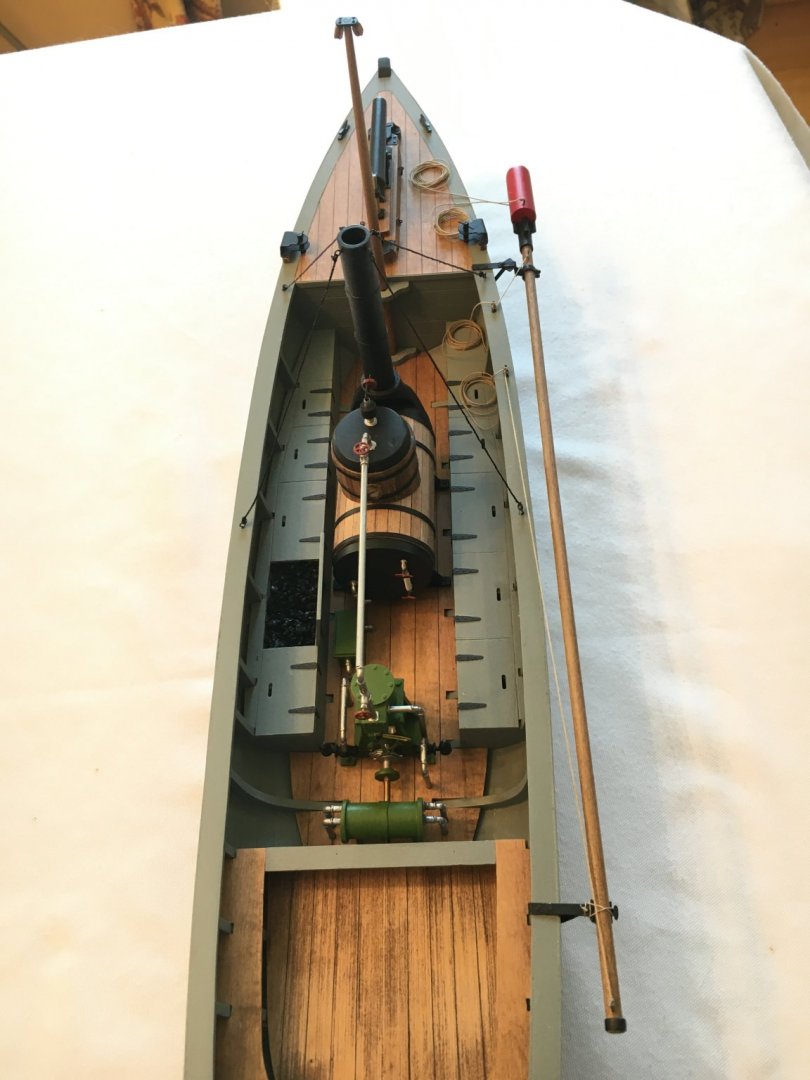
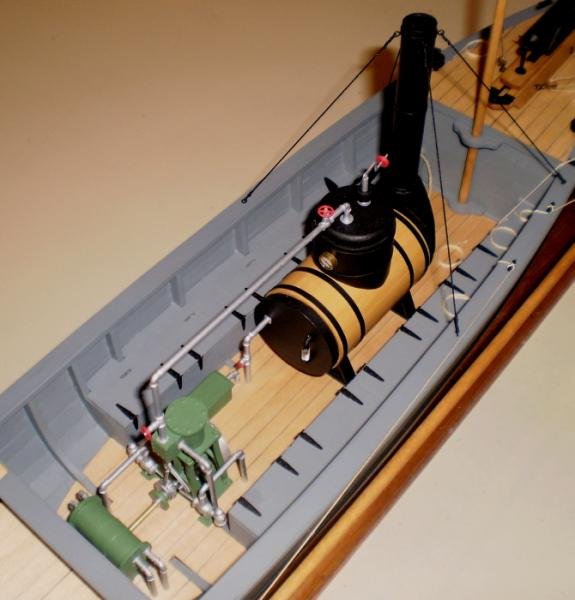
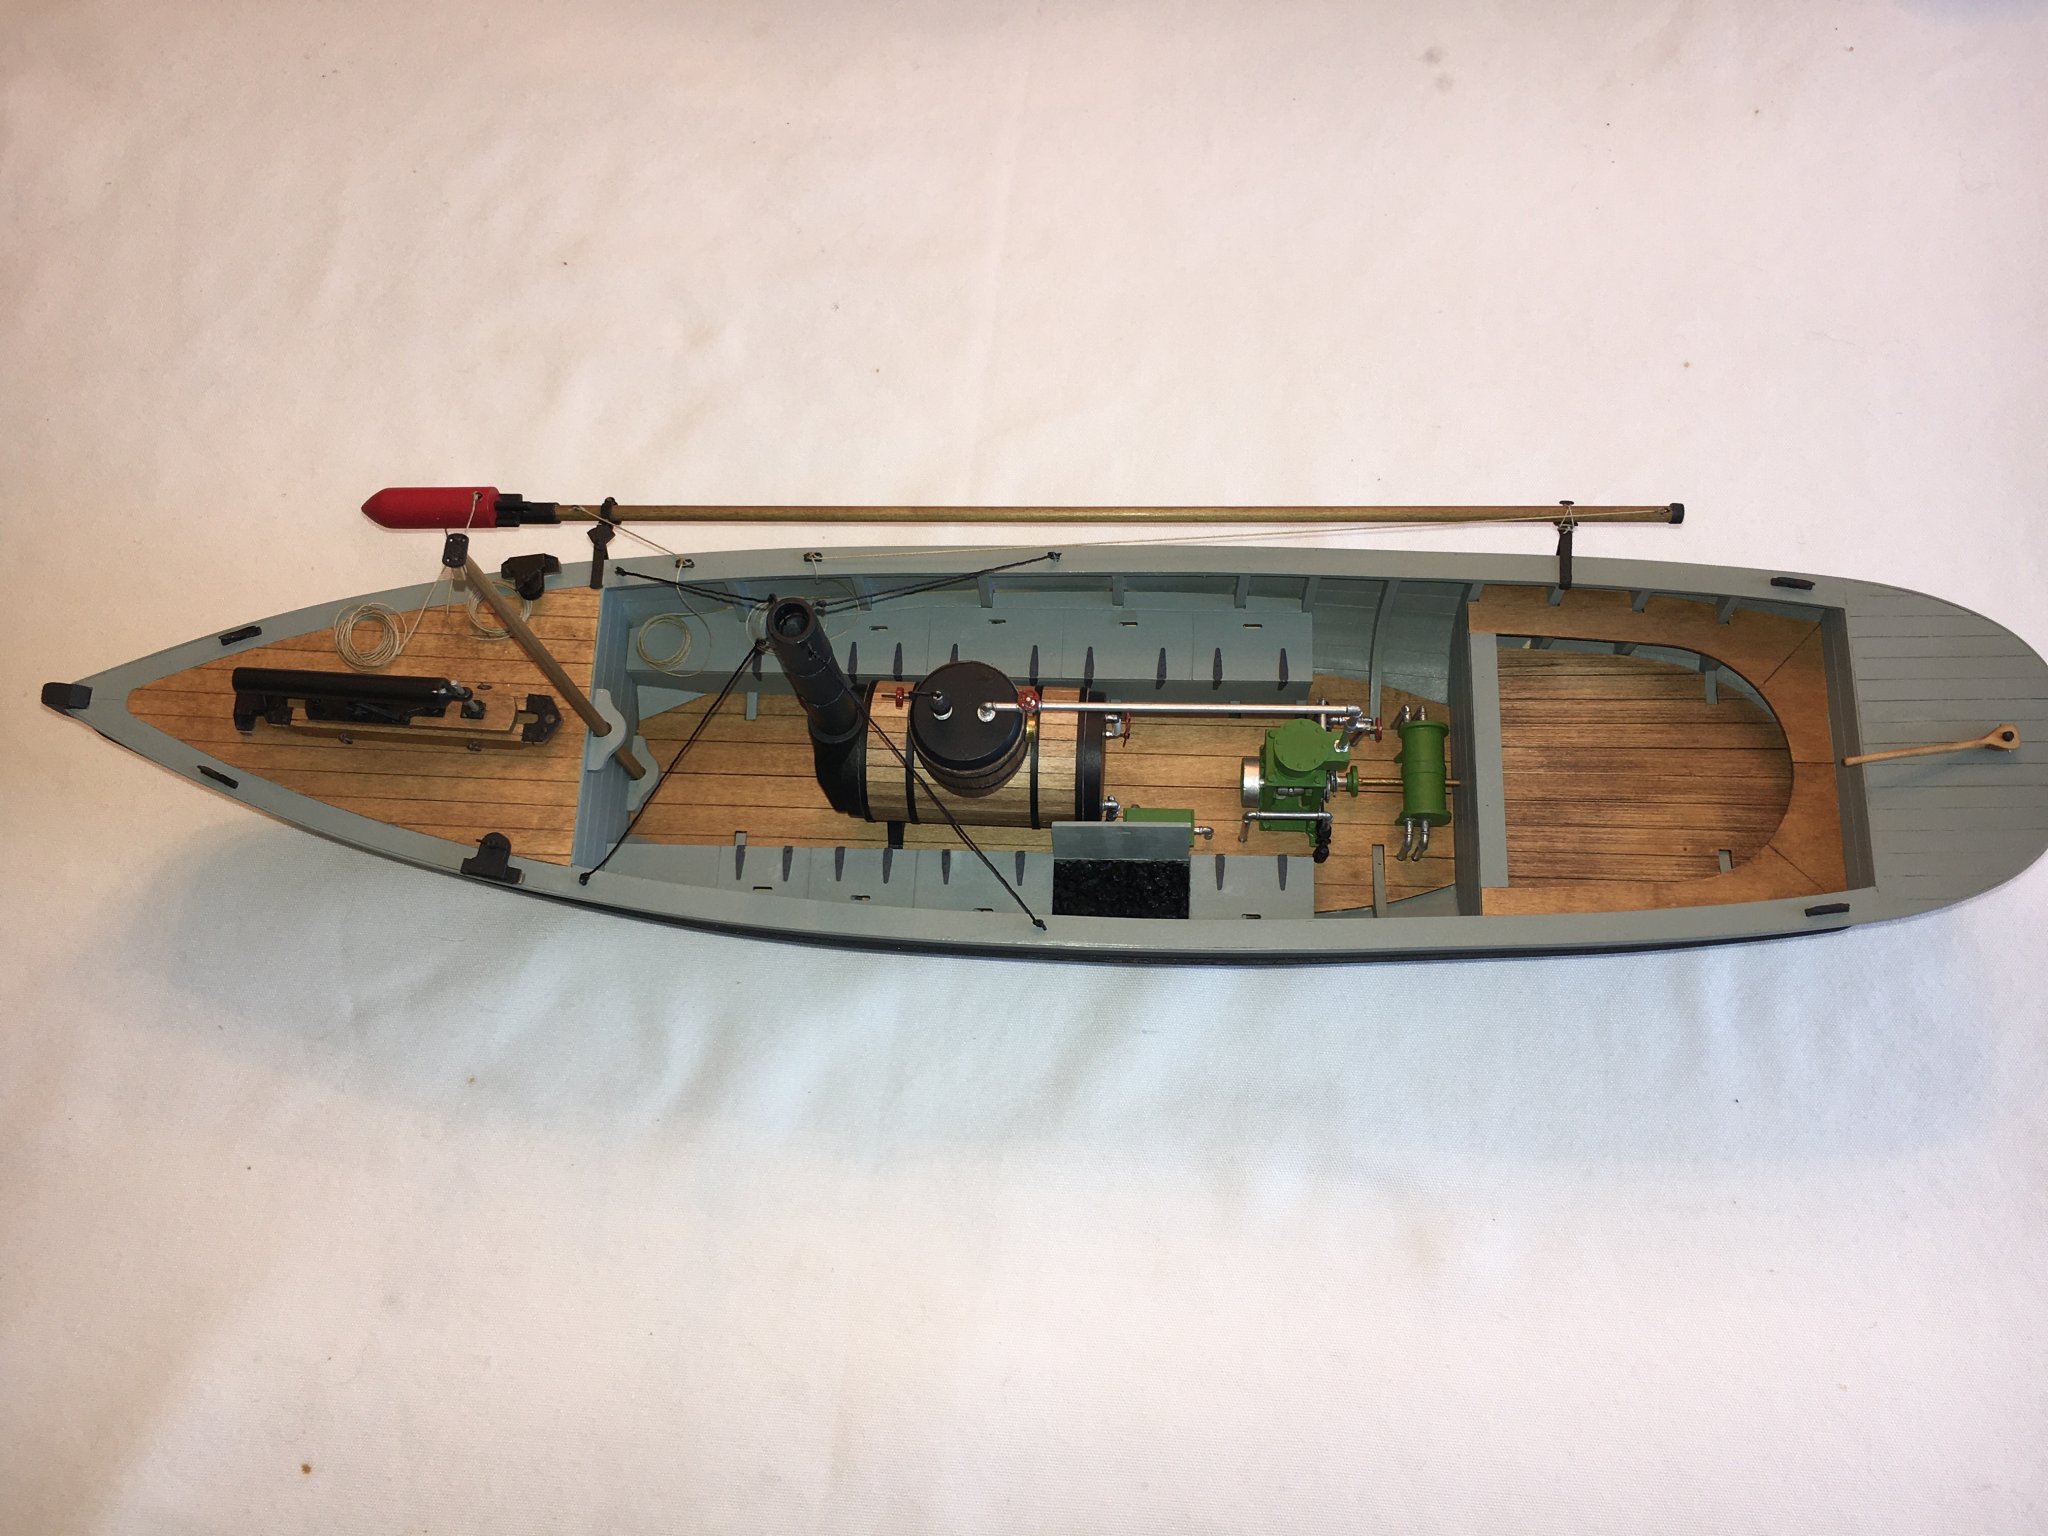
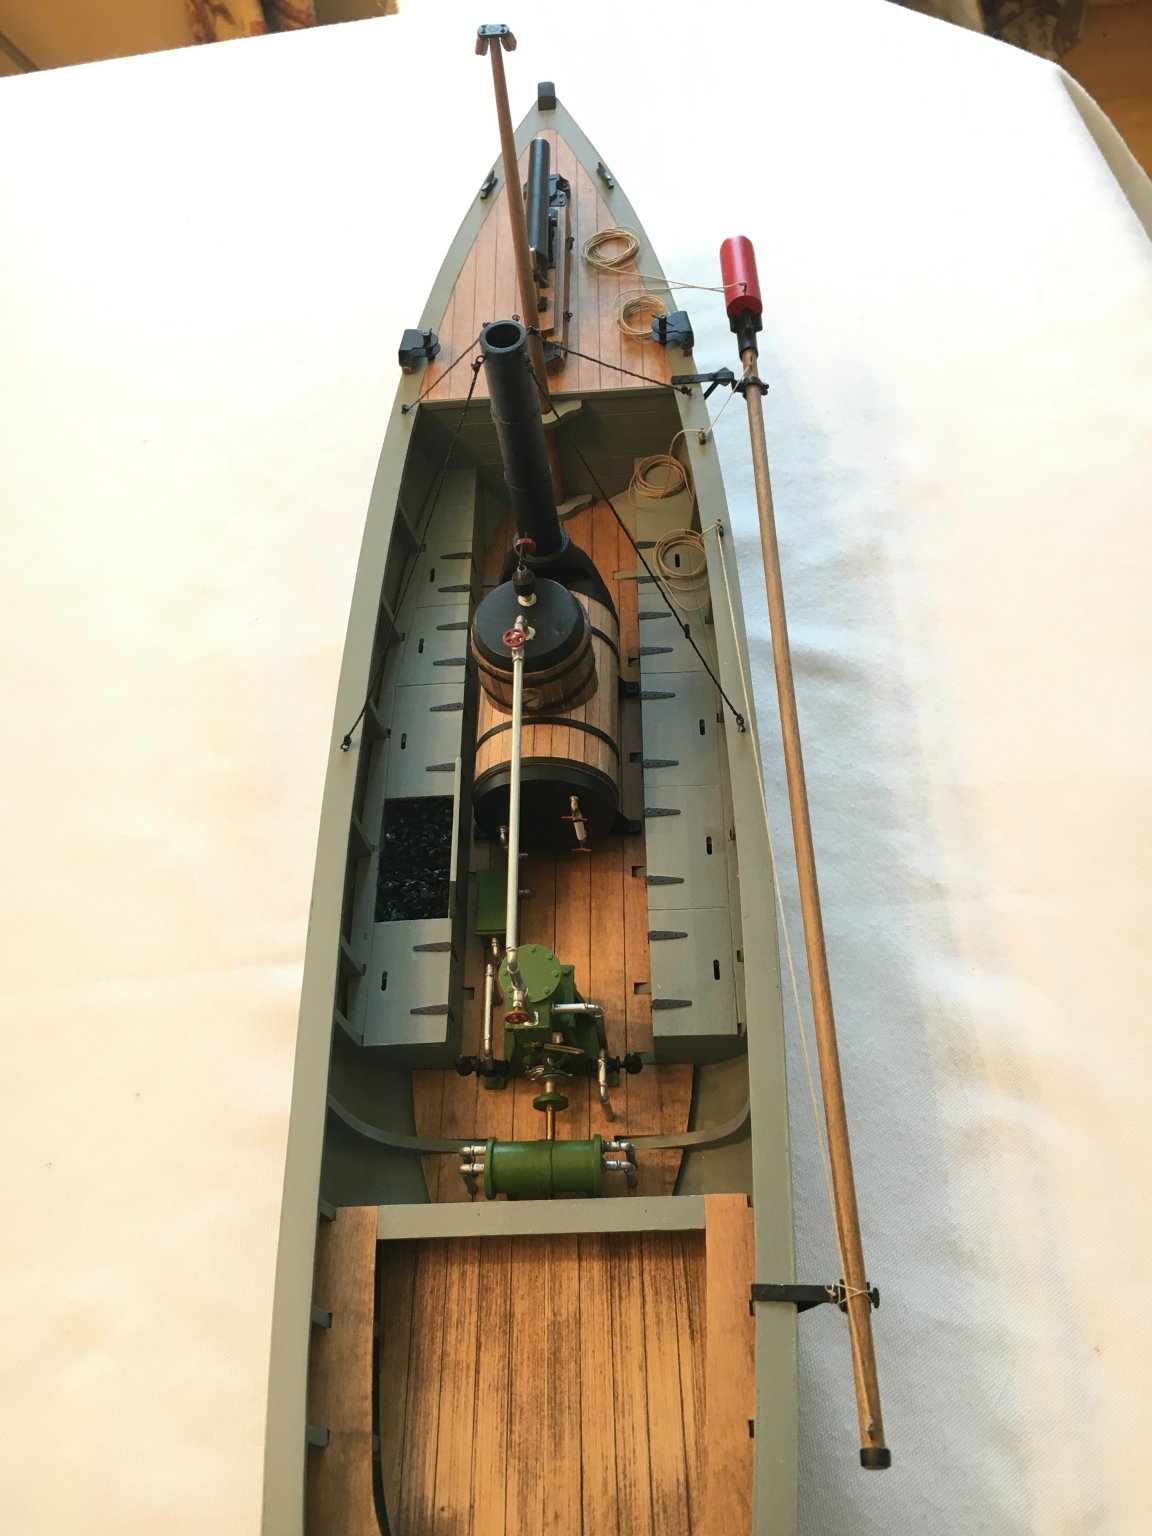
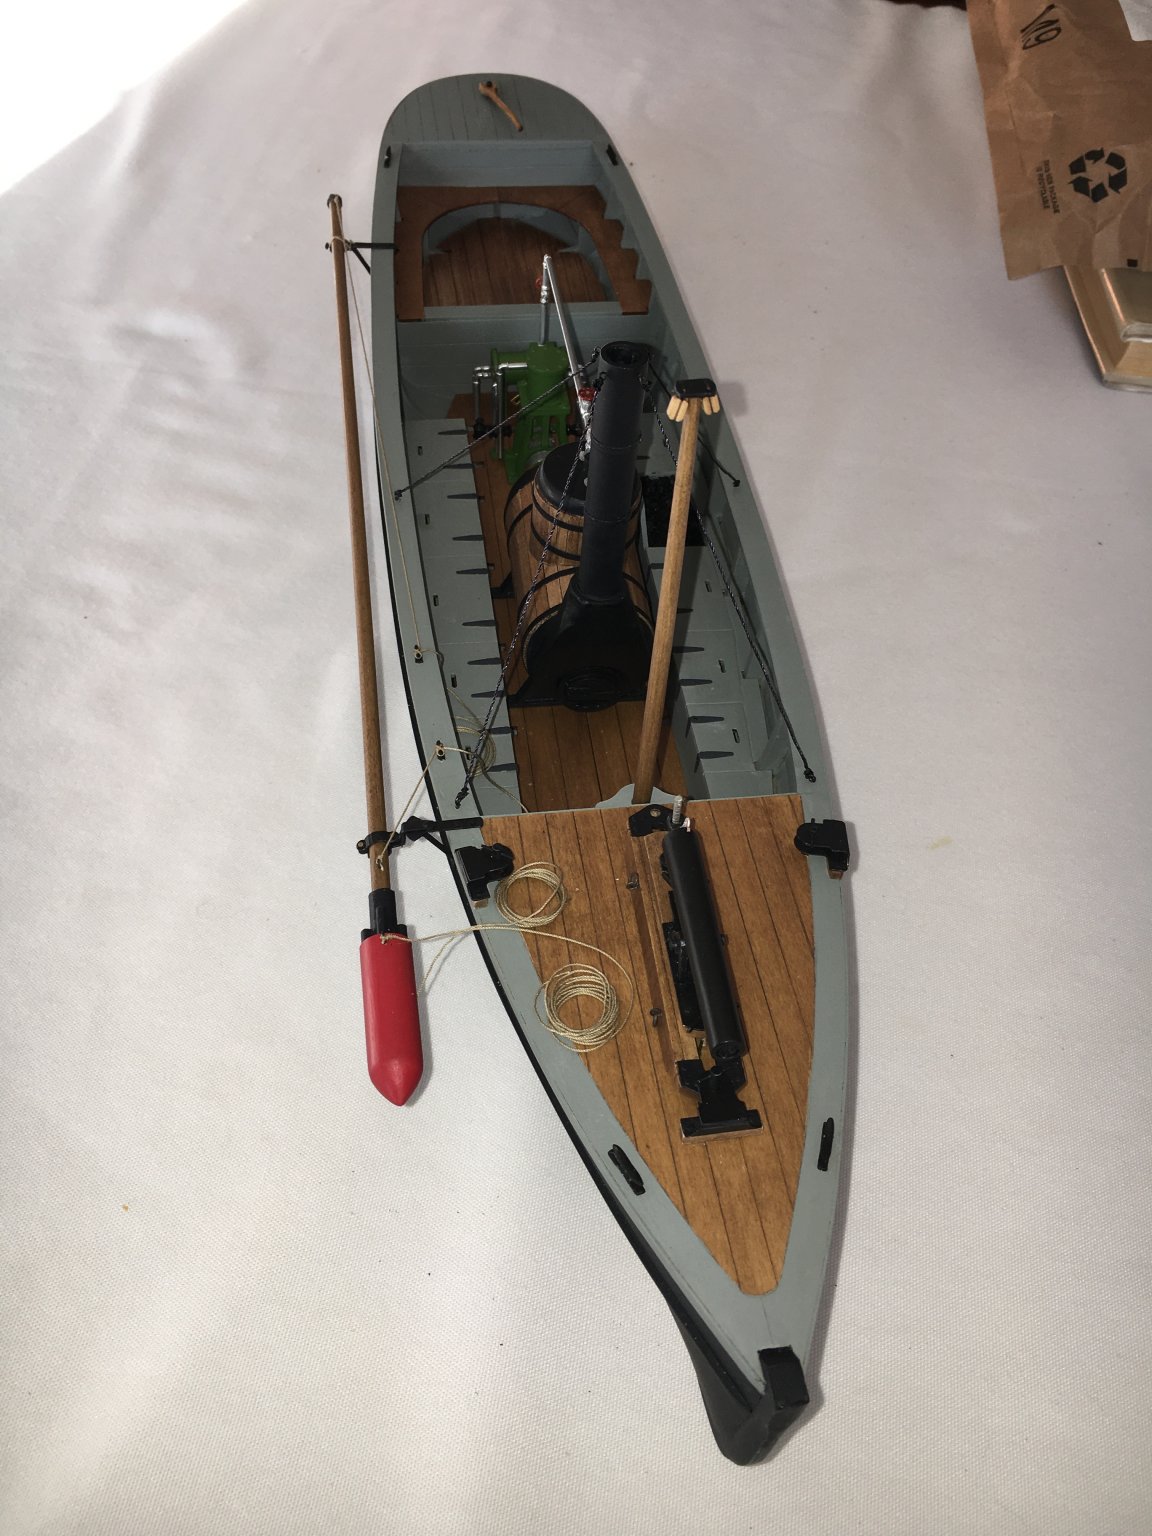
I have reached the point I am calling the model finished. At some point in the future I may add some detail such as tools, crates etc, but for now the basic build is completed and I am pleased. A few thoughts about the build: The kit is my second build, my first was the New Bedford whaleboat from Model Expo which was a kit I bought many years ago and finally got around to building. This kit was also from Model Expo and a great improvement! The laser cut parts were far easier to work with and more precise than the die cut parts in my previous build. The photo etched parts were brilliant, very well done and required minimal work. The cast metal parts were clean and didn't require too much work prior to fitting and finishing. The wood strips were of good quality and no issues were found in terms of warping etc.. The Aluminum tubing and Brass wire were easy to use and appropriate for their intended use. Also included was a supply of brass pins and the included drill bits were a nice touch. The pins were perhaps a bit oversize so I filed done the heads as suggested when needed. Luckily I had a small supply of smaller pins that I also used in addition to those supplied. Also included was a supply of hexagonal plastic rod to make simulated bolt heads. The plans were very clear and well done, the directions a bit sparse but adequate, more photos would have helped but the great build logs on this site were relied upon heavily by me. The kit was very well packaged and no missing or shortage of material was encountered. My only quibble was the rigging material provided, it was quite shiny and didn't seem to be of best quality. I was spoiled as I had ordered line from Syren for my last build and there was no comparison. I used the supplied line to rig the smoke stack but used other material I had on hand for the rest of the model. I found the kit to be of high quality and was well pleased with it based upon my experience of one other build. Construction was quite straight forward following the plans and instruction. All parts fit well and my only advice is check the vertical edges of the laser cut parts. Apparently the laser process causes a bit of a bevel on the edges, more pronounced on the thicker pieces so you should probably square them up before assembly. Almost all the wooden parts were glued using Titebond. I would occasional use CA for a difficult to hold or clamp part or a combination of Titebond and CA. I primarily used epoxy for the metal or wood to metal joints. I also used epoxy to mount the smoke stack as I thought it would be stronger. I reinforced a few joints with pins if it seemed appropriate. In terms of painting and finishing I gave all wood parts an initial scraping or sanding and then applied a sanding sealer before final sanding and finish. As to the exterior hull prior to sanding I used cabinet scrapers to level them before sanding and was pleased with the result. I also used Elmer's wood filler on the hull and those wooden parts that were to simulate metal such as the boiler ends. I used Model Master enamel paints with the exception of the Grey areas where I used Tamyia Acrylic as I happened to have a bottle of a color I liked. I top coated all parts with lacquer for a bit of protection. I also primed all the metal parts prior to finish application. All painting was done by brush with the exception of a spray can of Testors Dullcote applied to the hull and interior areas. The natural wood areas were also finished with a sanding sealer, light sanding, stained with Minwax Gel stain and a clear coat. The vast majority of the work was done with standard hand tool such as files, hobby knifes, clamps etc. as the only power tools I have are a Dremel tool, household power drill and I also used a small belt sander disguised as a knife sharpener to rough bevel the frames as outlined in an earlier post. I bought a few tools during the build and am well pleased with them. I had two pin vices that were a challenge, slipping bits etc. so I purchased a pair of Starrett pin vises, amazing how a simple, but well designed and manufactured tool can reduce frustration and make a mundane task enjoyable! I purchased a set of cabinet scrapers and was extremely pleased how nicely they worked to initially fair the hull. I also bought a sanding apparatus and it sure made squaring up parts easy. Another purchase was a detail sanding kit and very highly recommended. I had previously obtained a Veritas miniature block plane and has become a favorite tool. I found this build very enjoyable for my level of non-expertise. Sufficiently challenging and with enough detail such as the engine, boiler, gun and torpedo to be a learning experience, but no complex and frustrating rigging to try your patience. I have probably bored the wonderful expert modelers on this site to tears with my long winded synopsis so apologies in advance!


.thumb.jpg.5b93ef113c2daf25ce768470c3995d41.jpg)

- 54 replies
-
- 16
-

-
- picket boat
- model shipways
- (and 1 more)
-
I am not sure you need to remove all the char completely, just the heaviest of it to create a good surface for gluing. At least that is what Model Expo advised in the instructions for the Picket boat I worked on. The exception would be if you are going to stain the wood or leave it natural and the char would show.
-
You might consider this I am currently building. A nice kit, no extensive rigging but still interesting and lots of detail. I think it is on sale at present! Instructions were a bit sparse but plans great and as a relative beginner I had no problems. https://modelexpo-online.com/Model-Shipways-USN-PICKET-BOAT-1-124-SCALE_p_998.html
-
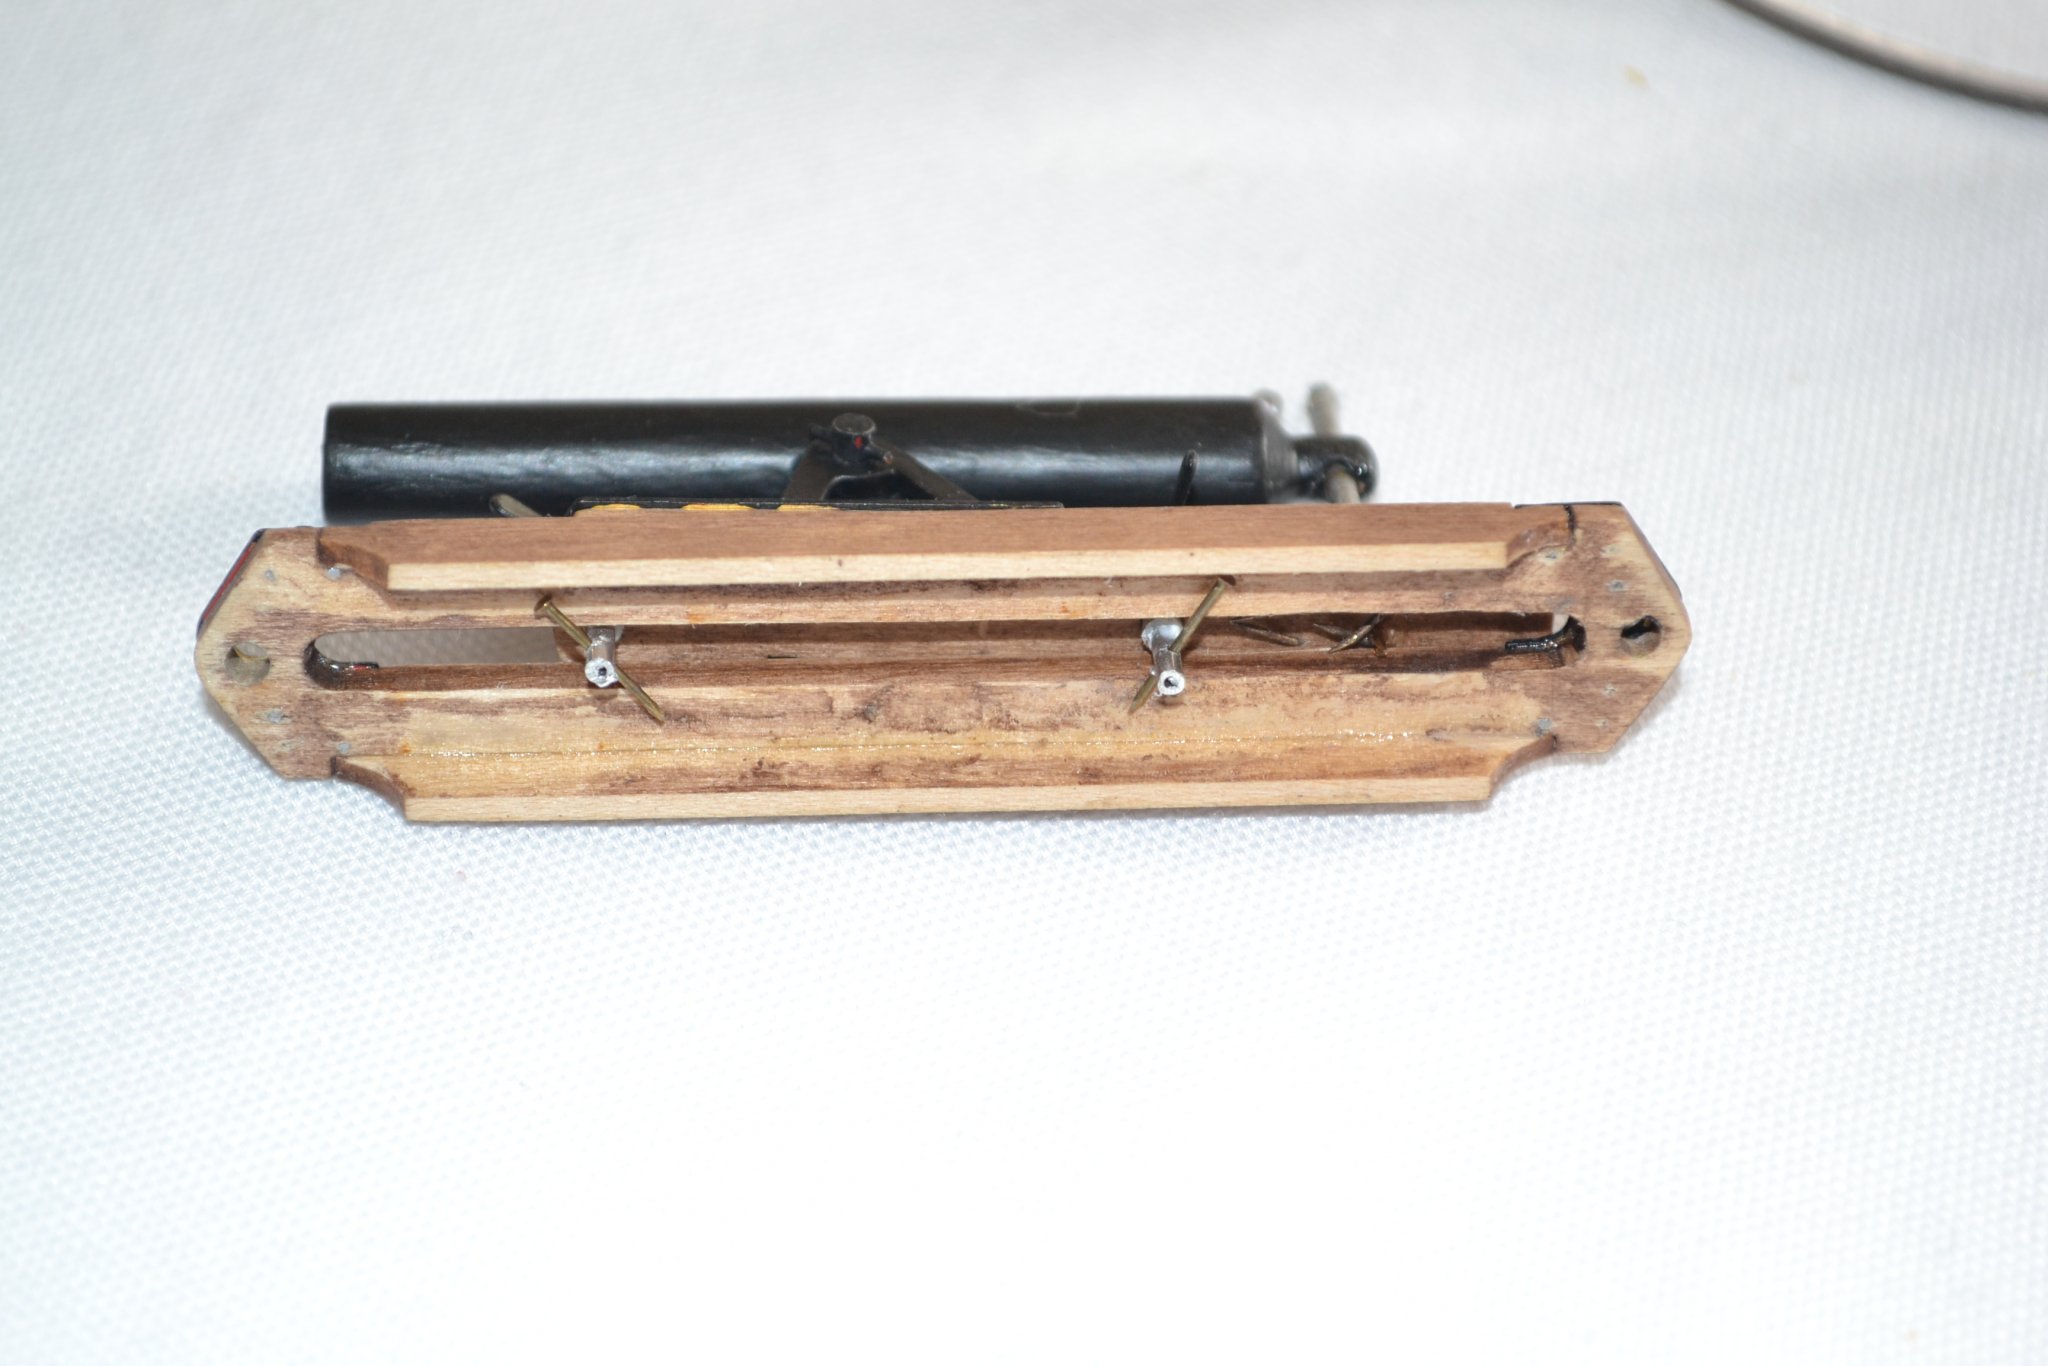
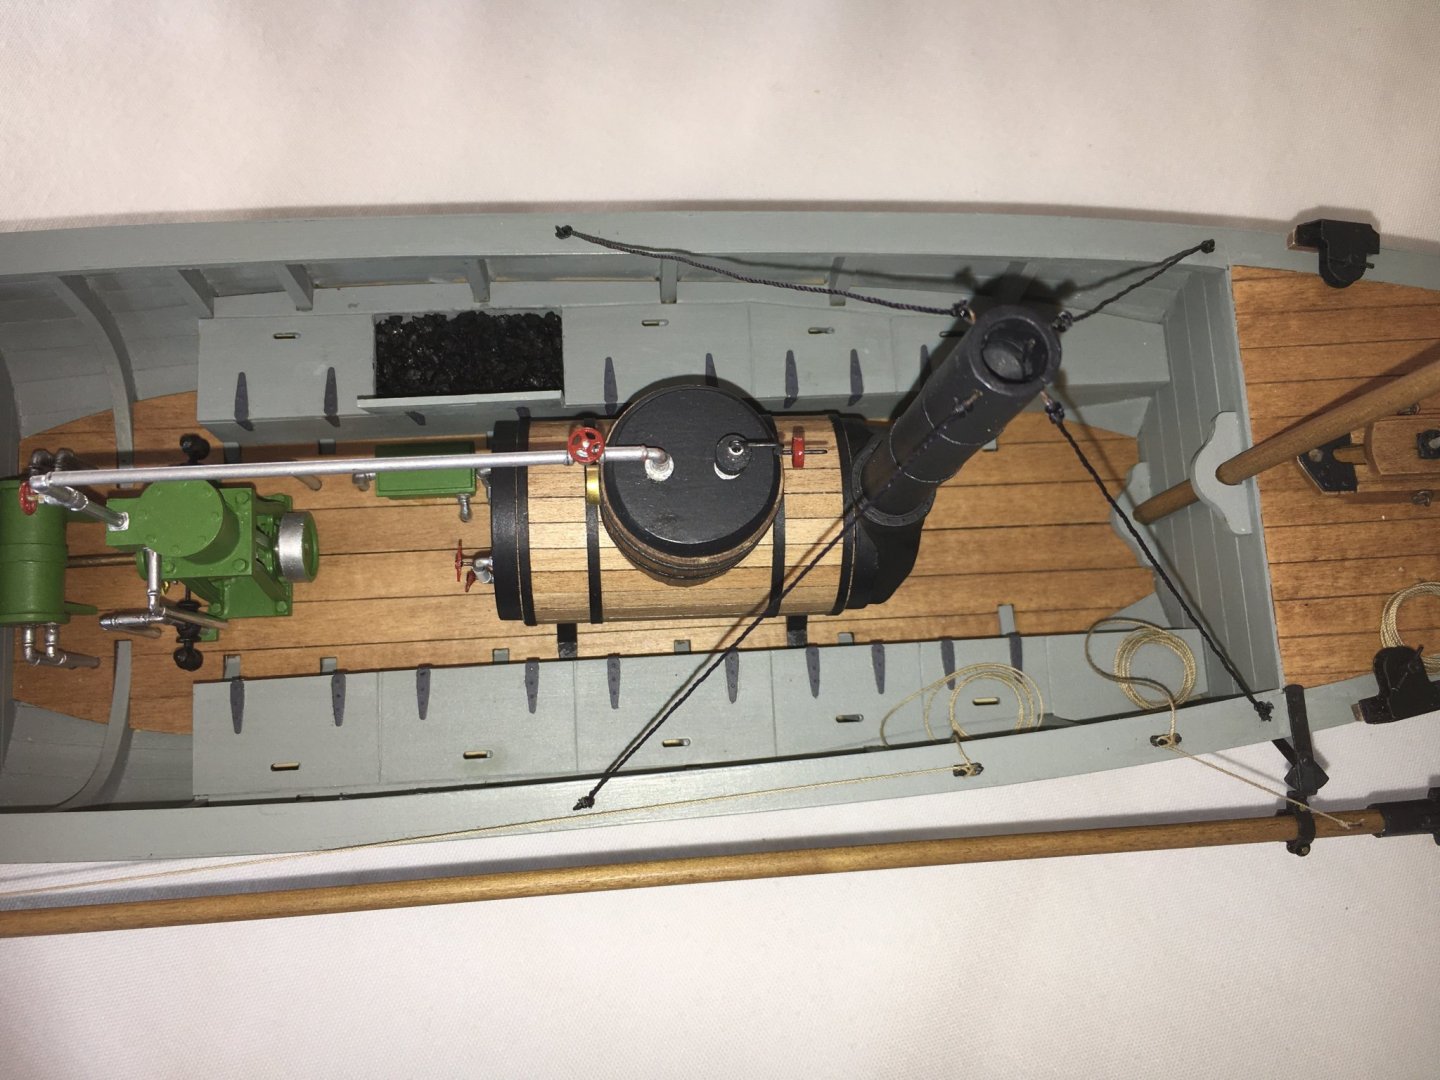
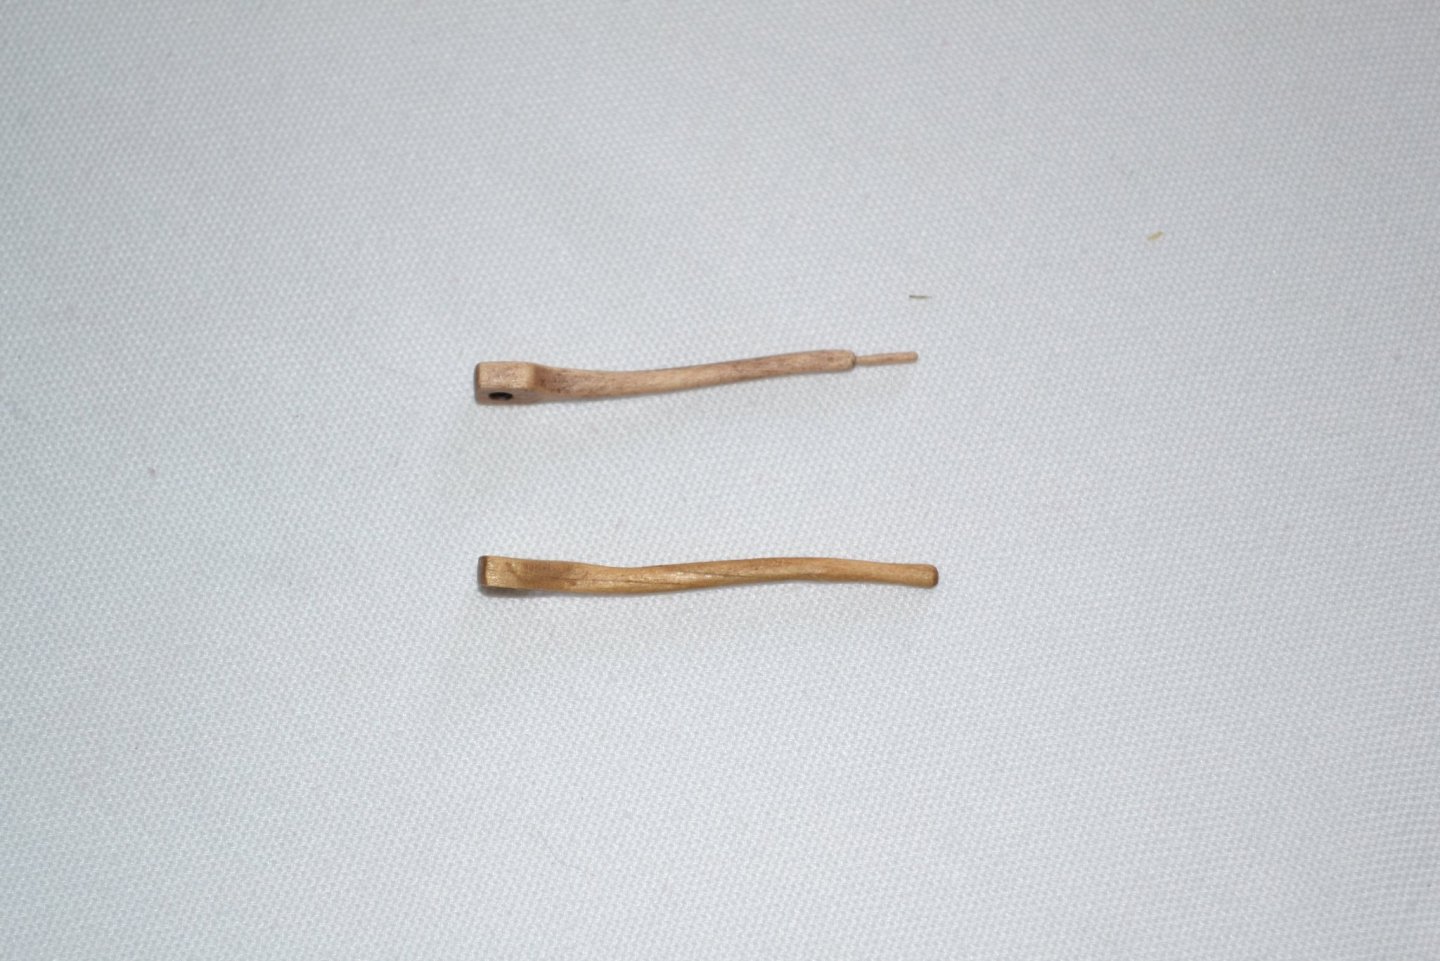
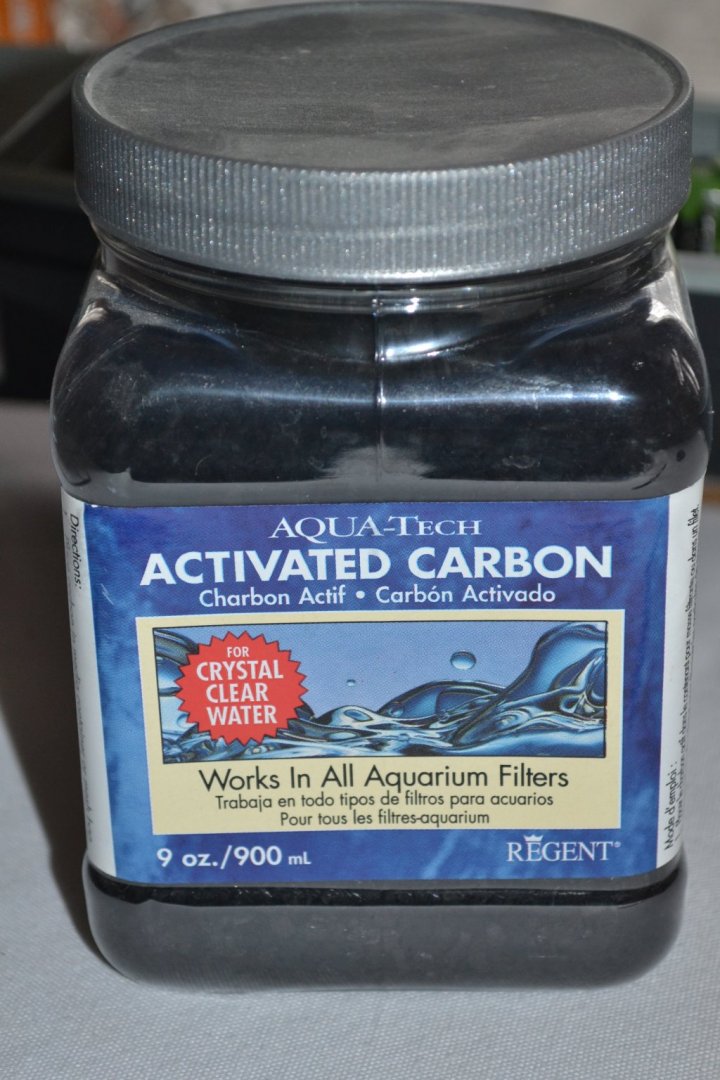
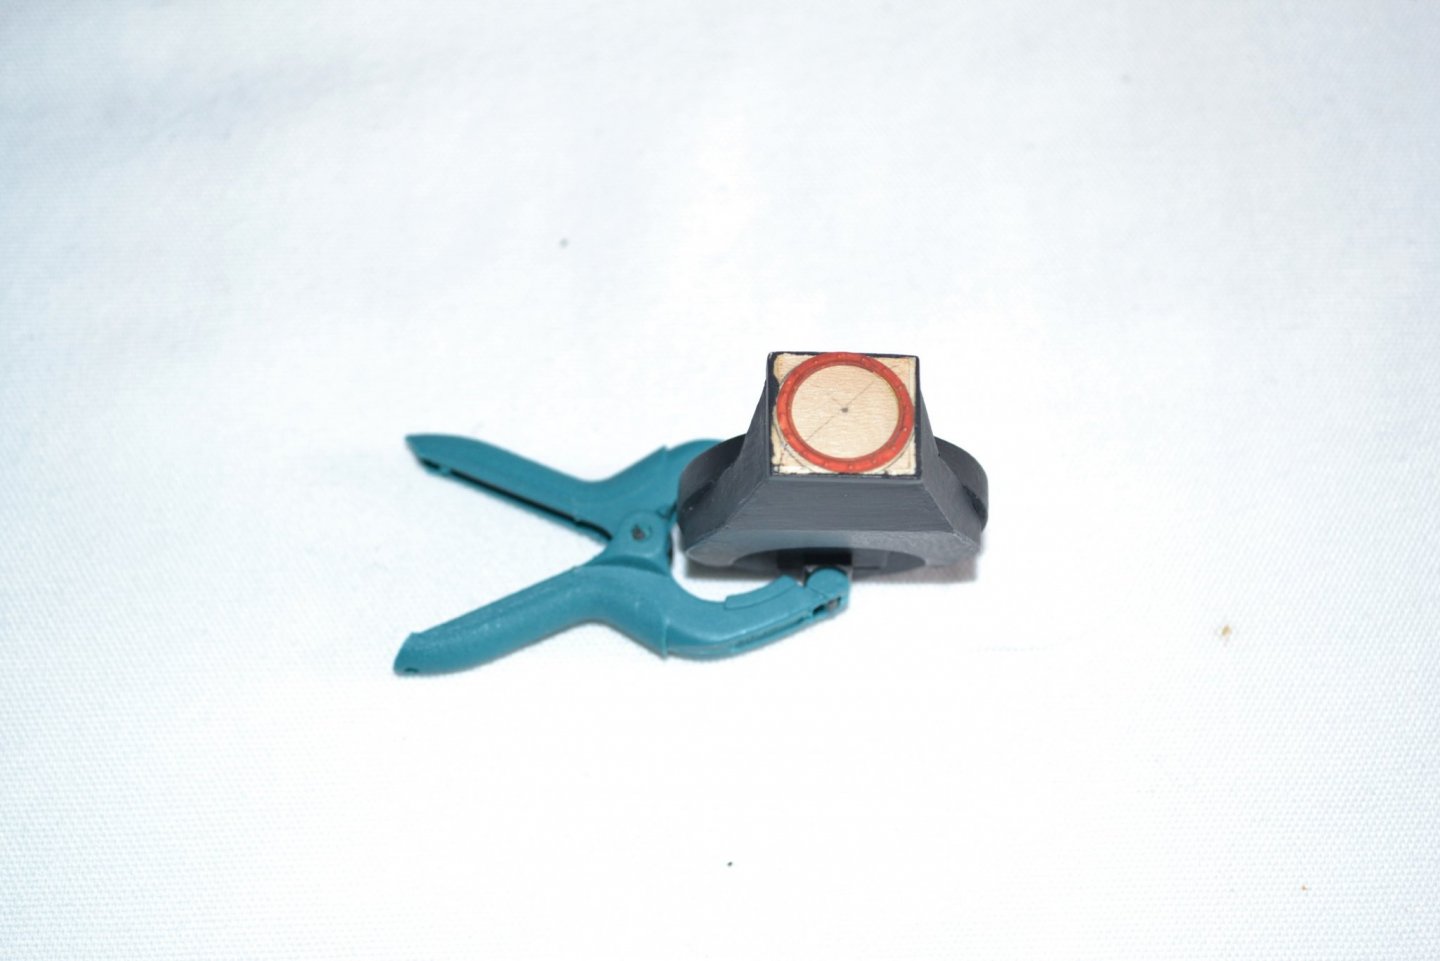
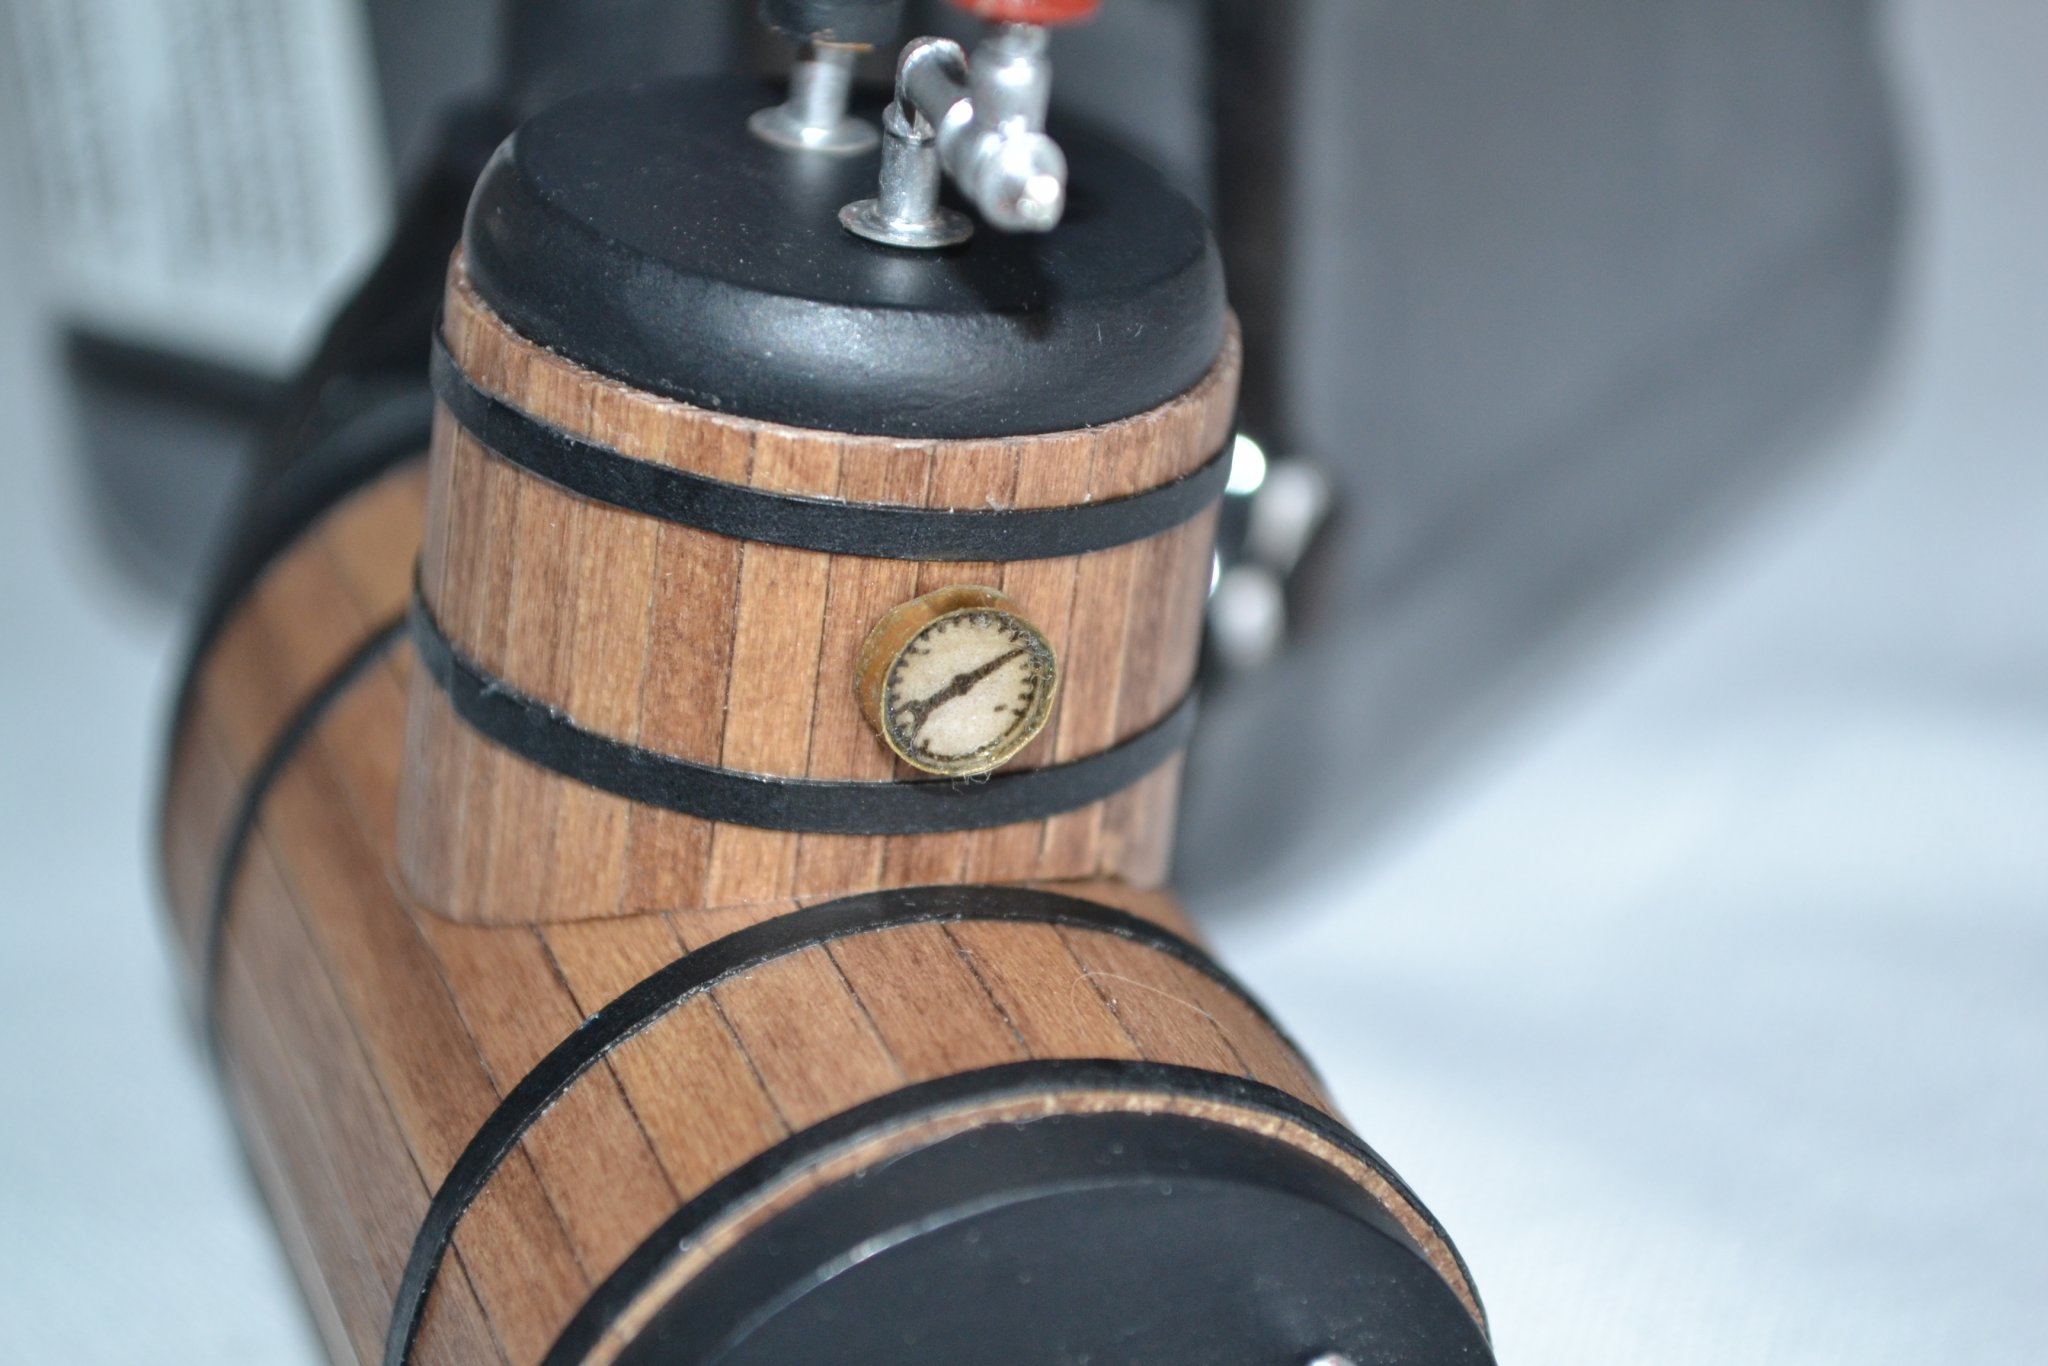
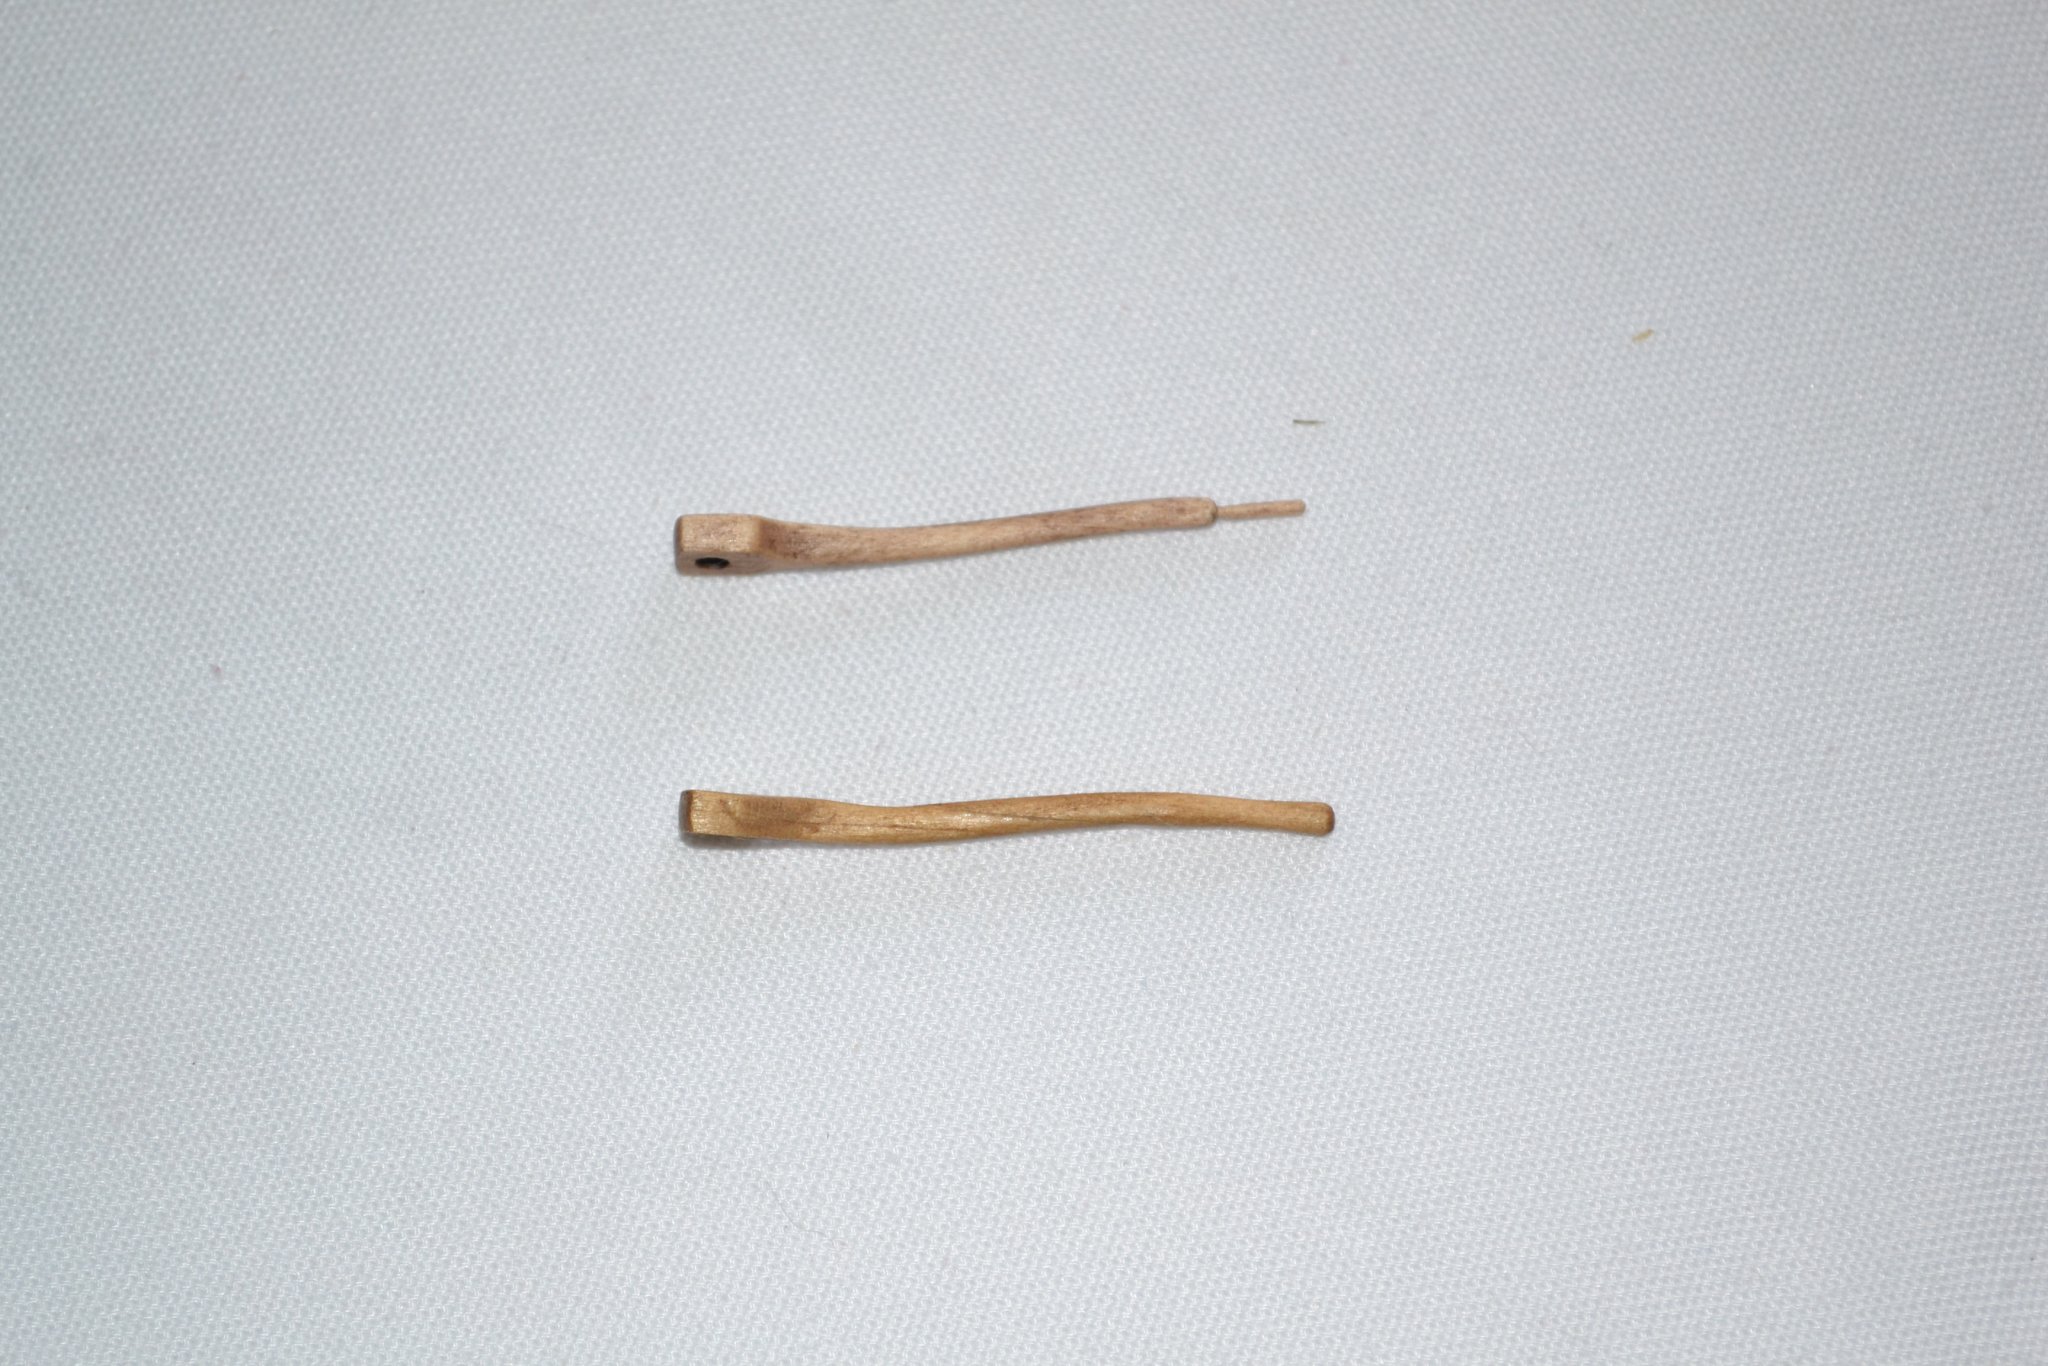
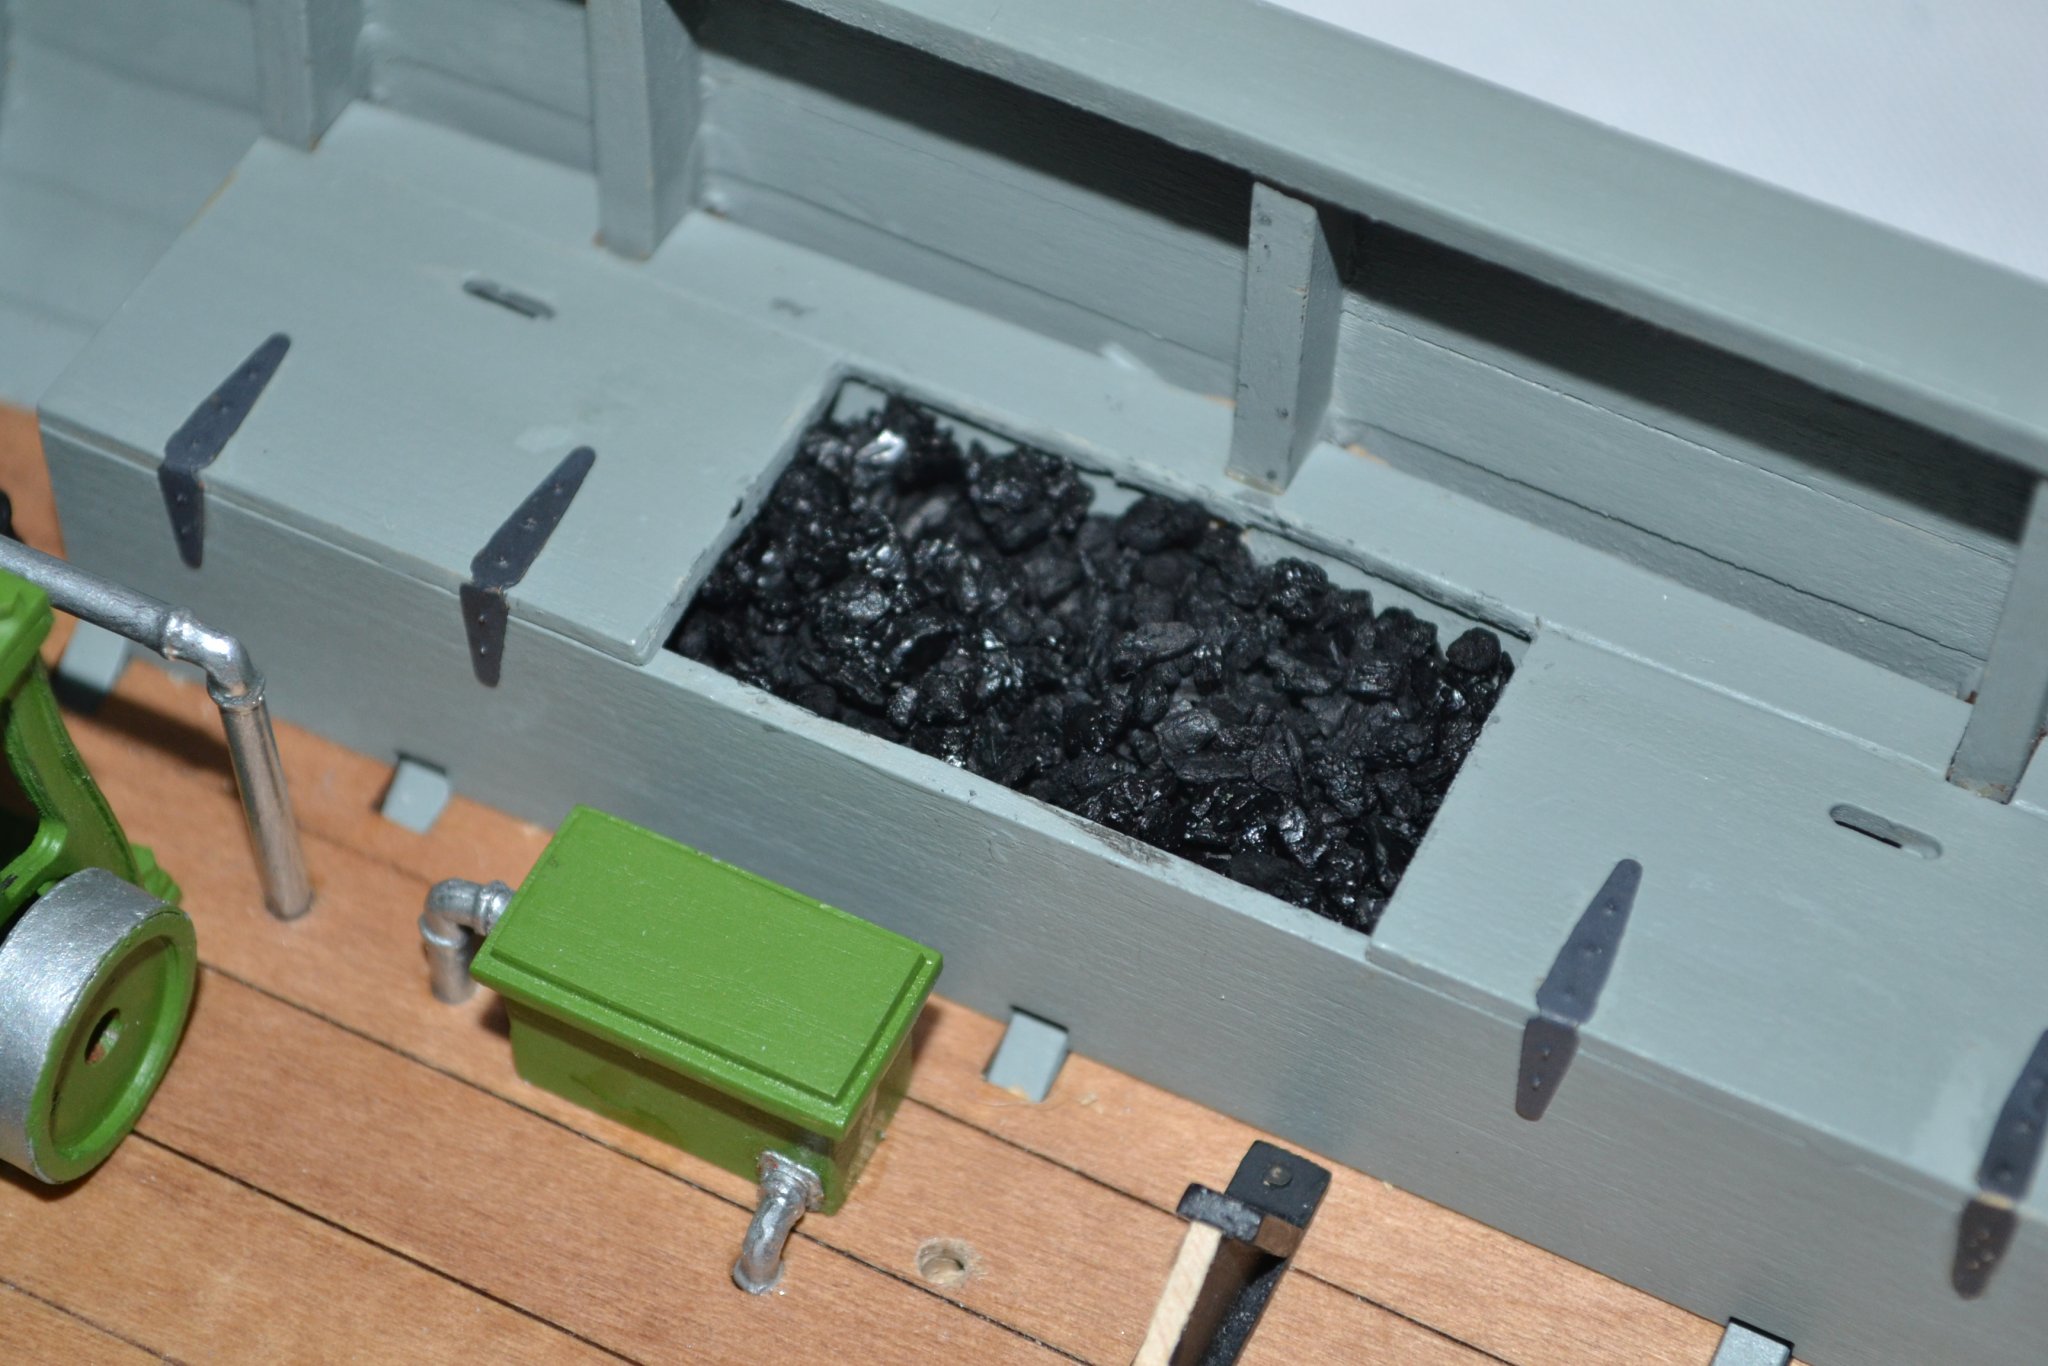
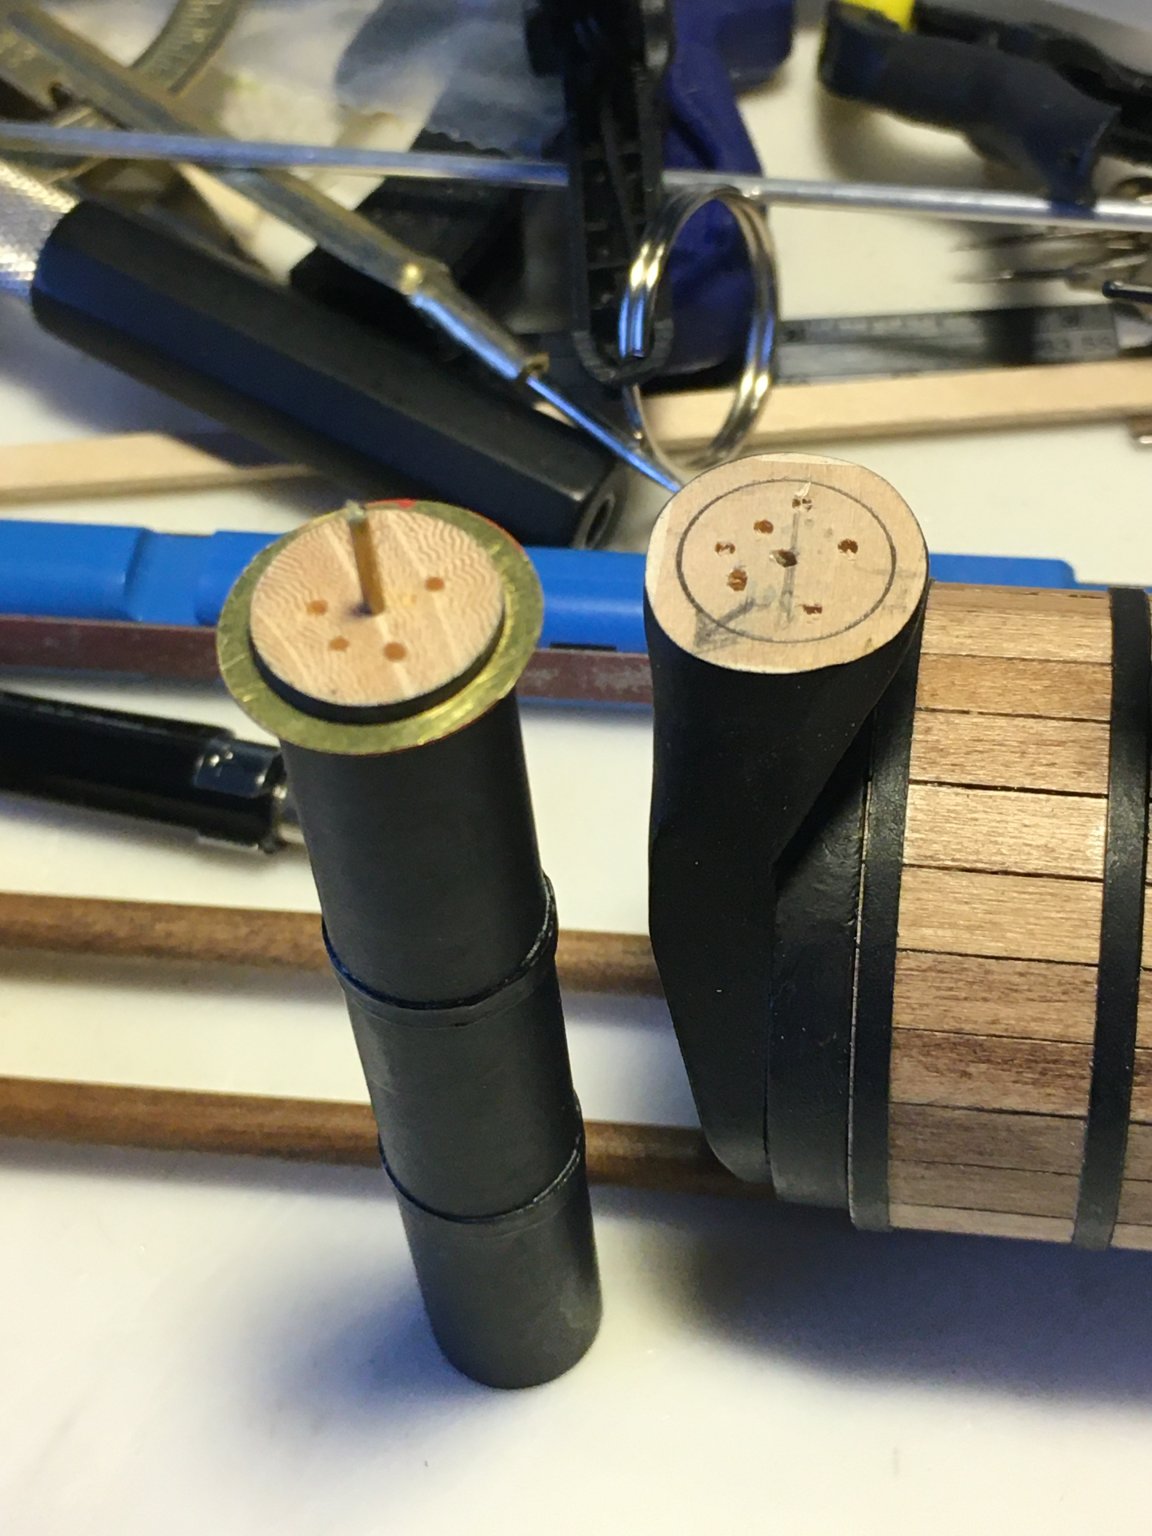
A few missteps of late but nothing fatal. I thought it time to make the pressure gauge that attaches to the boiler. The kit provided a flat round wood disk that the printed paper gauge is mounted on then it is glued to the boiler. I thought it would look better with a brass bezel so I cut a strip of brass and attached it to the perimeter of the disk with epoxy. I then glued in the paper disk and applied a few drops of UV curing resin and it promptly turned yellow. I will live with it and ascribe the dirty glass to a lax crew member. Next I worked on the tiller, jct made a beautiful one in his log so I choose to try and do the same. All was going well until I got too heavy handed and broke off the end. I tried a repair but was not satisfied so made a new one, the bottom one in the photo. Not nearly as elegant as jct's but acceptable to me. Lastly I had left a bunker open so as to be able to simulate it as full of coal. I had put some scrap wood in the bottom so as not to have to fill it completely. I made the coal using aquarium filter carbon I had from a long departed aquarium. I mixed it with moderately diluted white glue and put it in. Alas I could see bare wood under the coal so I scooped it all out before it set and after the wood in the bunker dried I painted it black and mixed up more coal and put it in, I am well pleased with the result.


- 54 replies
-
- 7
-
-
- picket boat
- model shipways
- (and 1 more)
-
Looks great! As an aside I have passed through Hamilton many times on my way to Turangi for some trout fishing.
- 28 replies
-
- 1
-
-
- frigate
- enterprize
- (and 2 more)
-
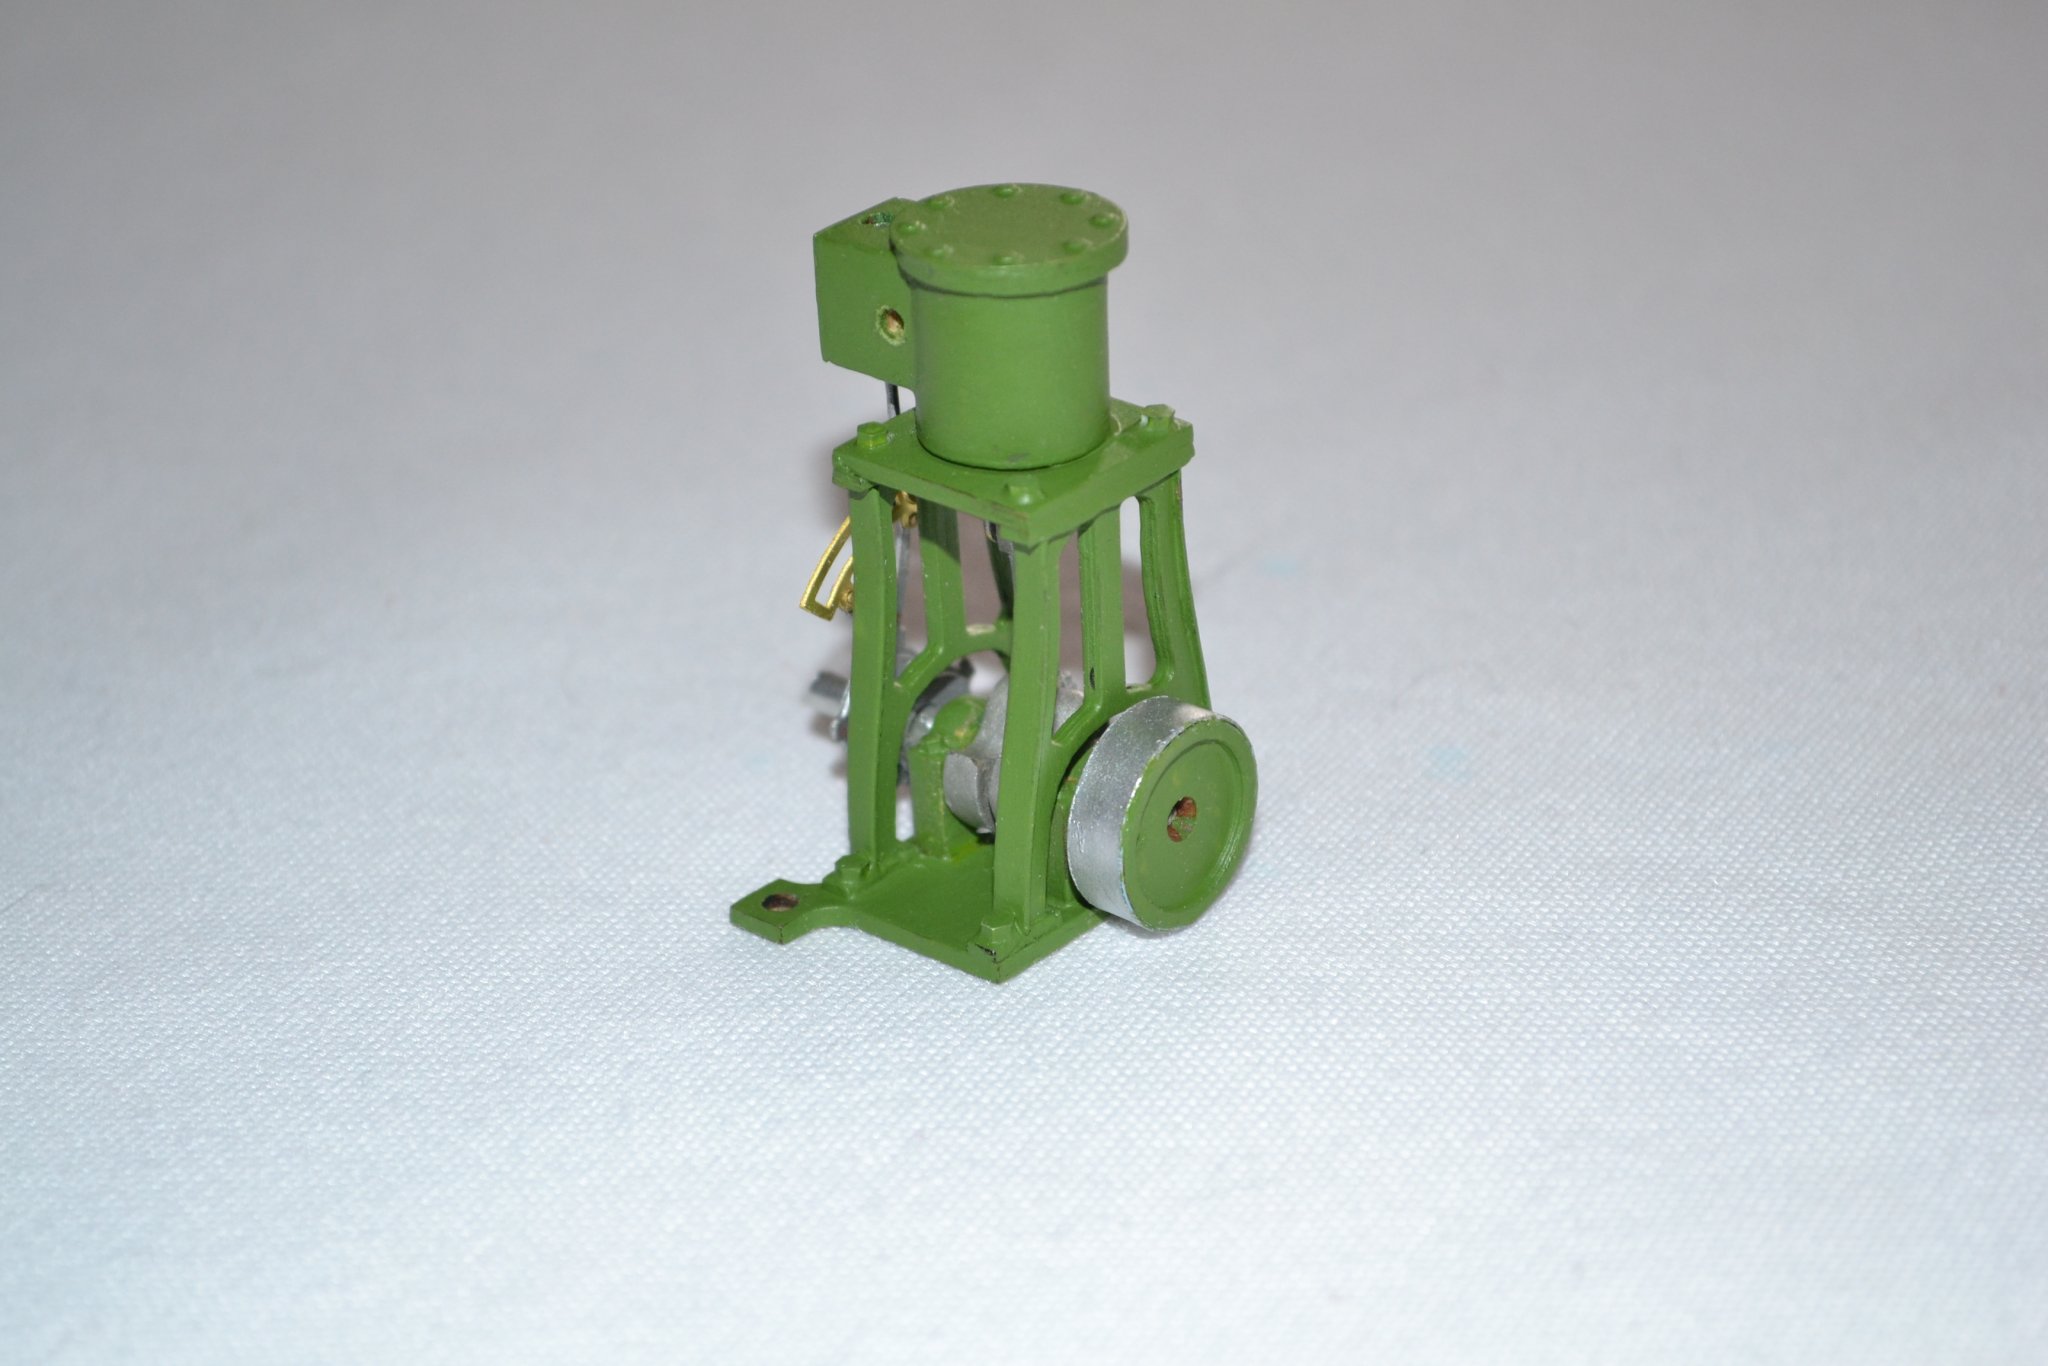
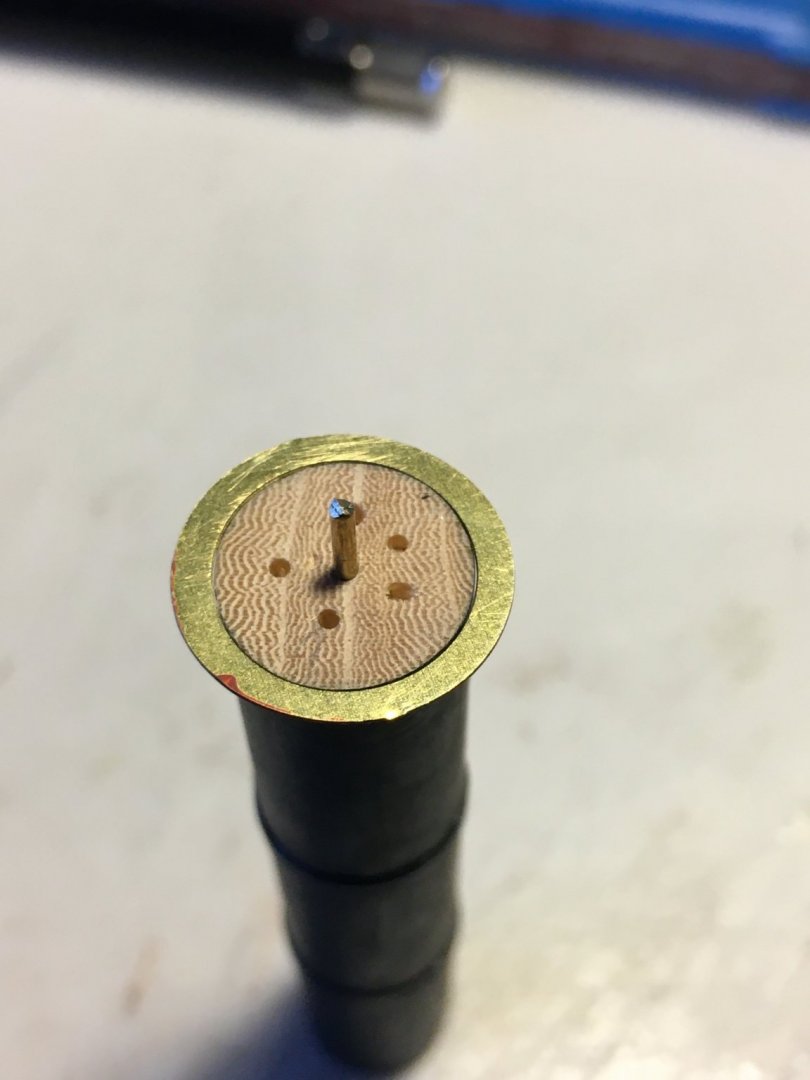
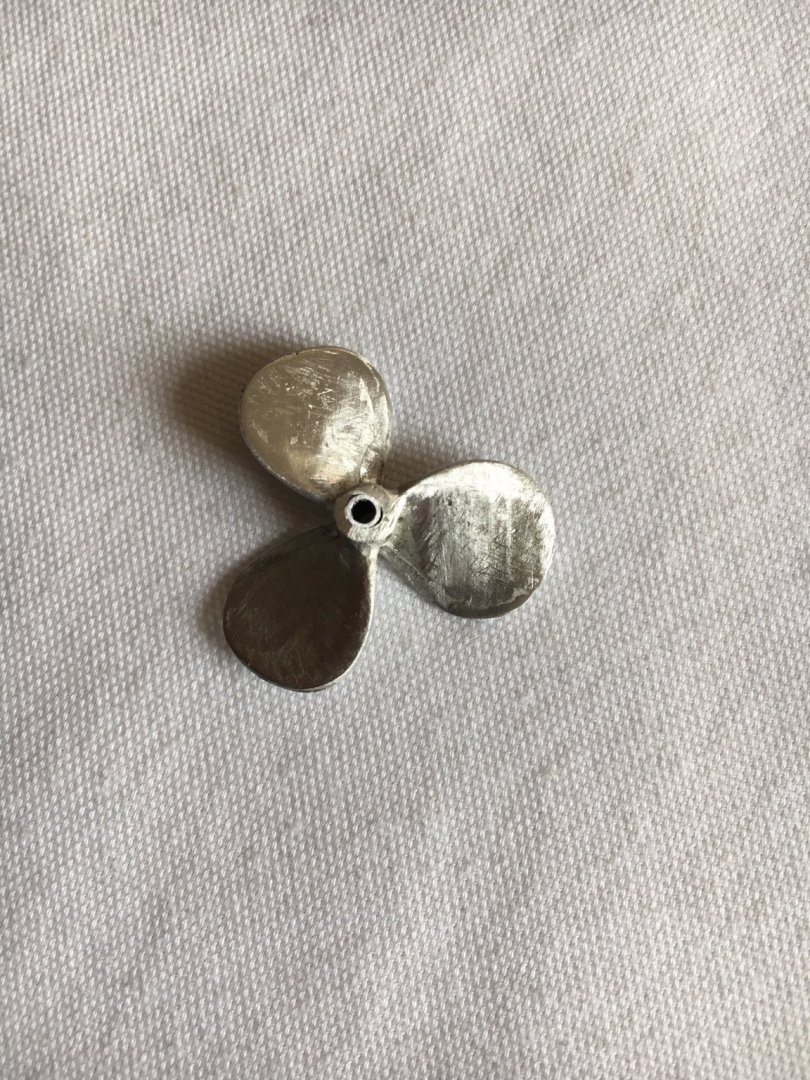
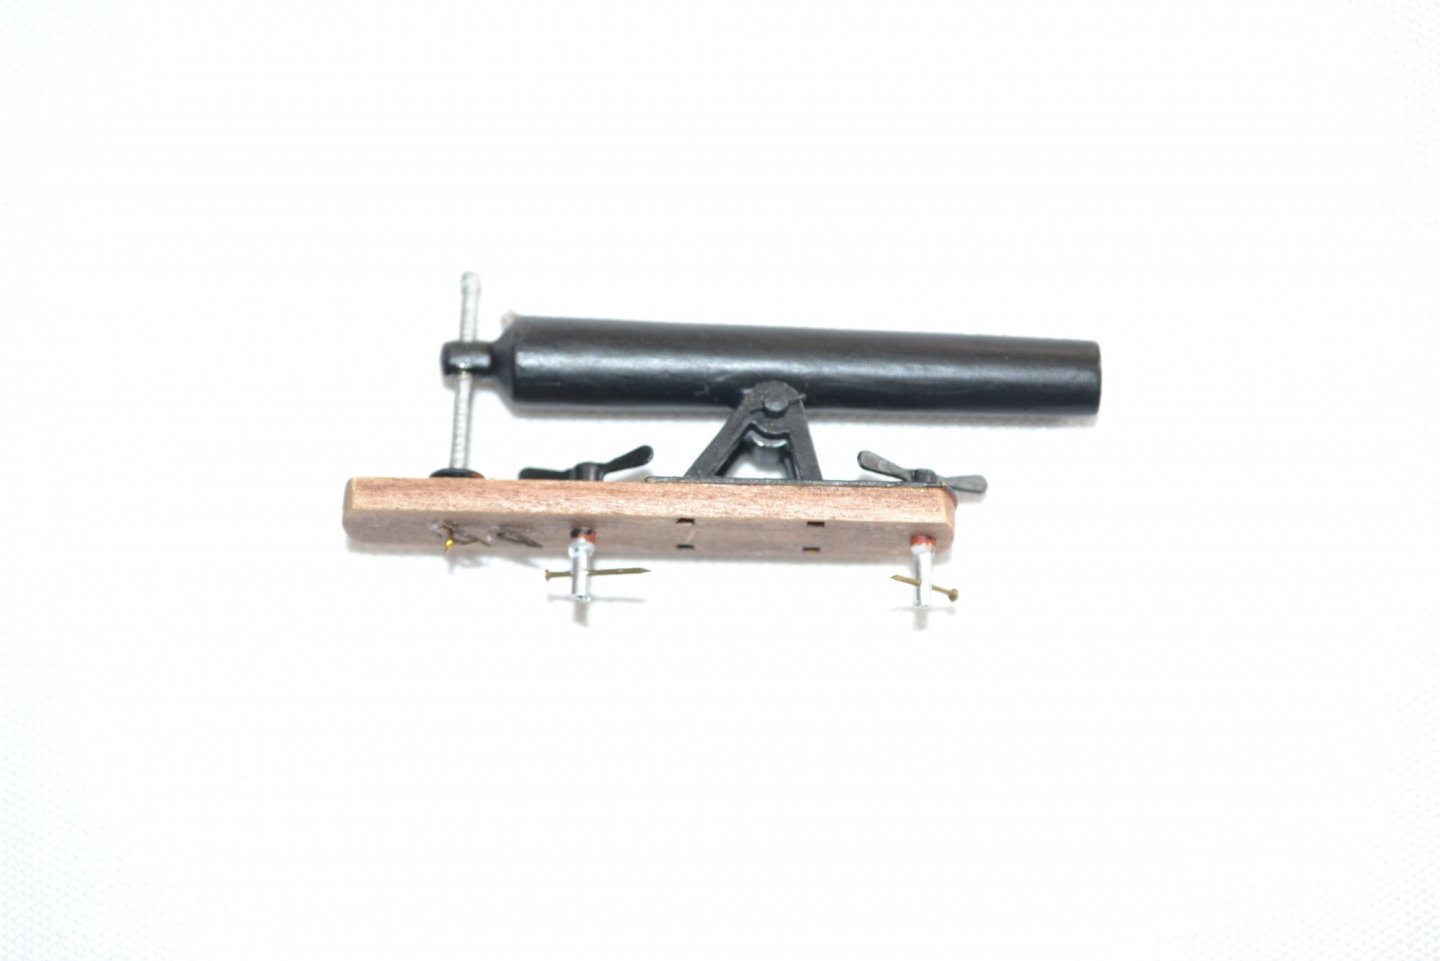
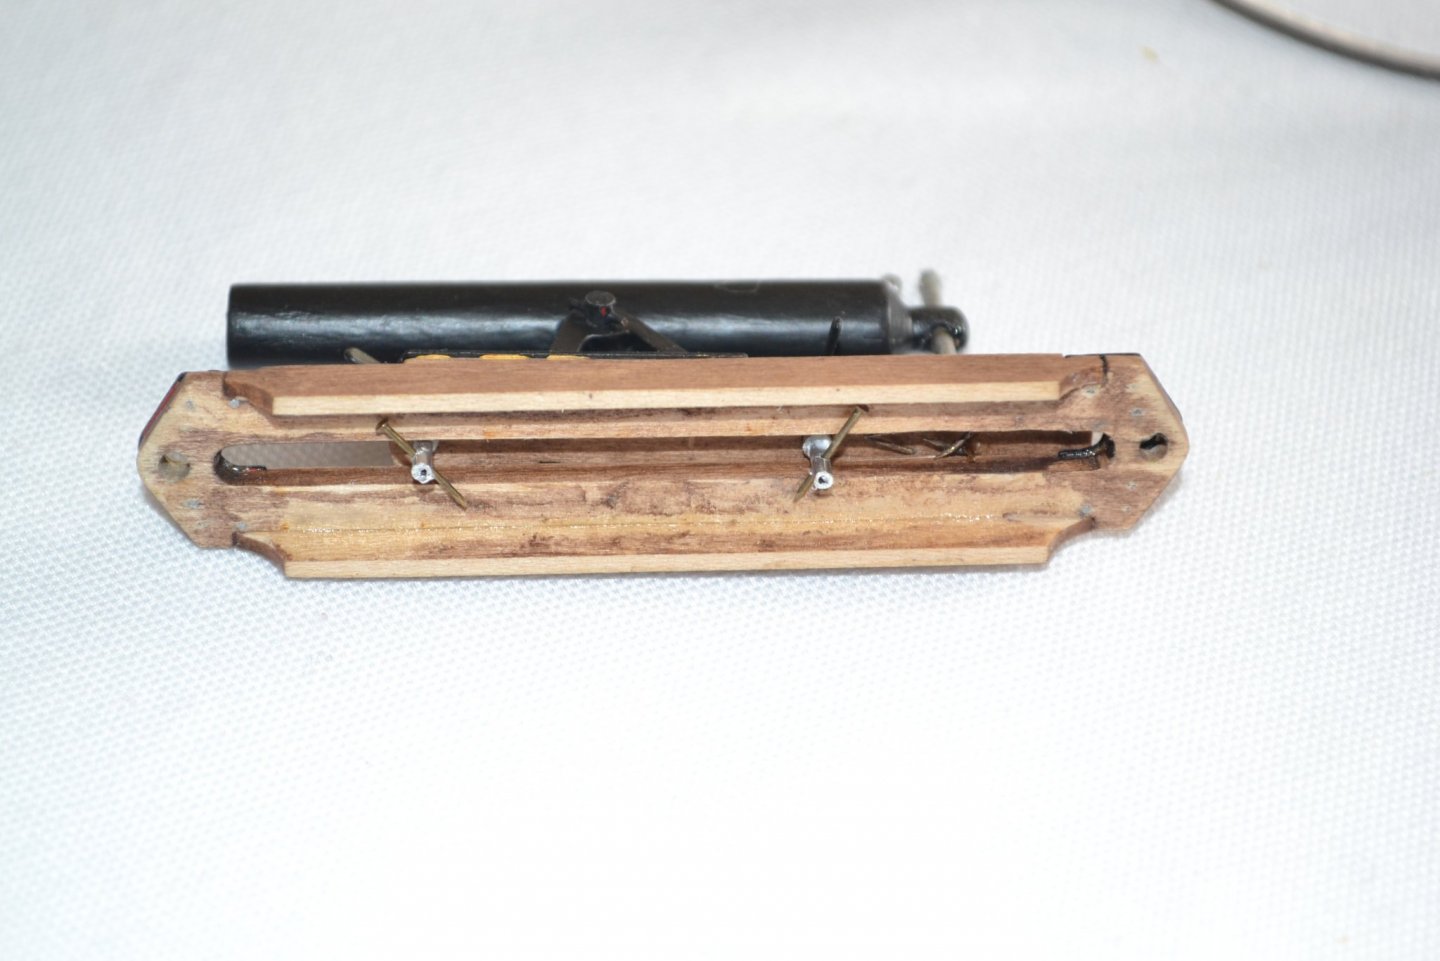
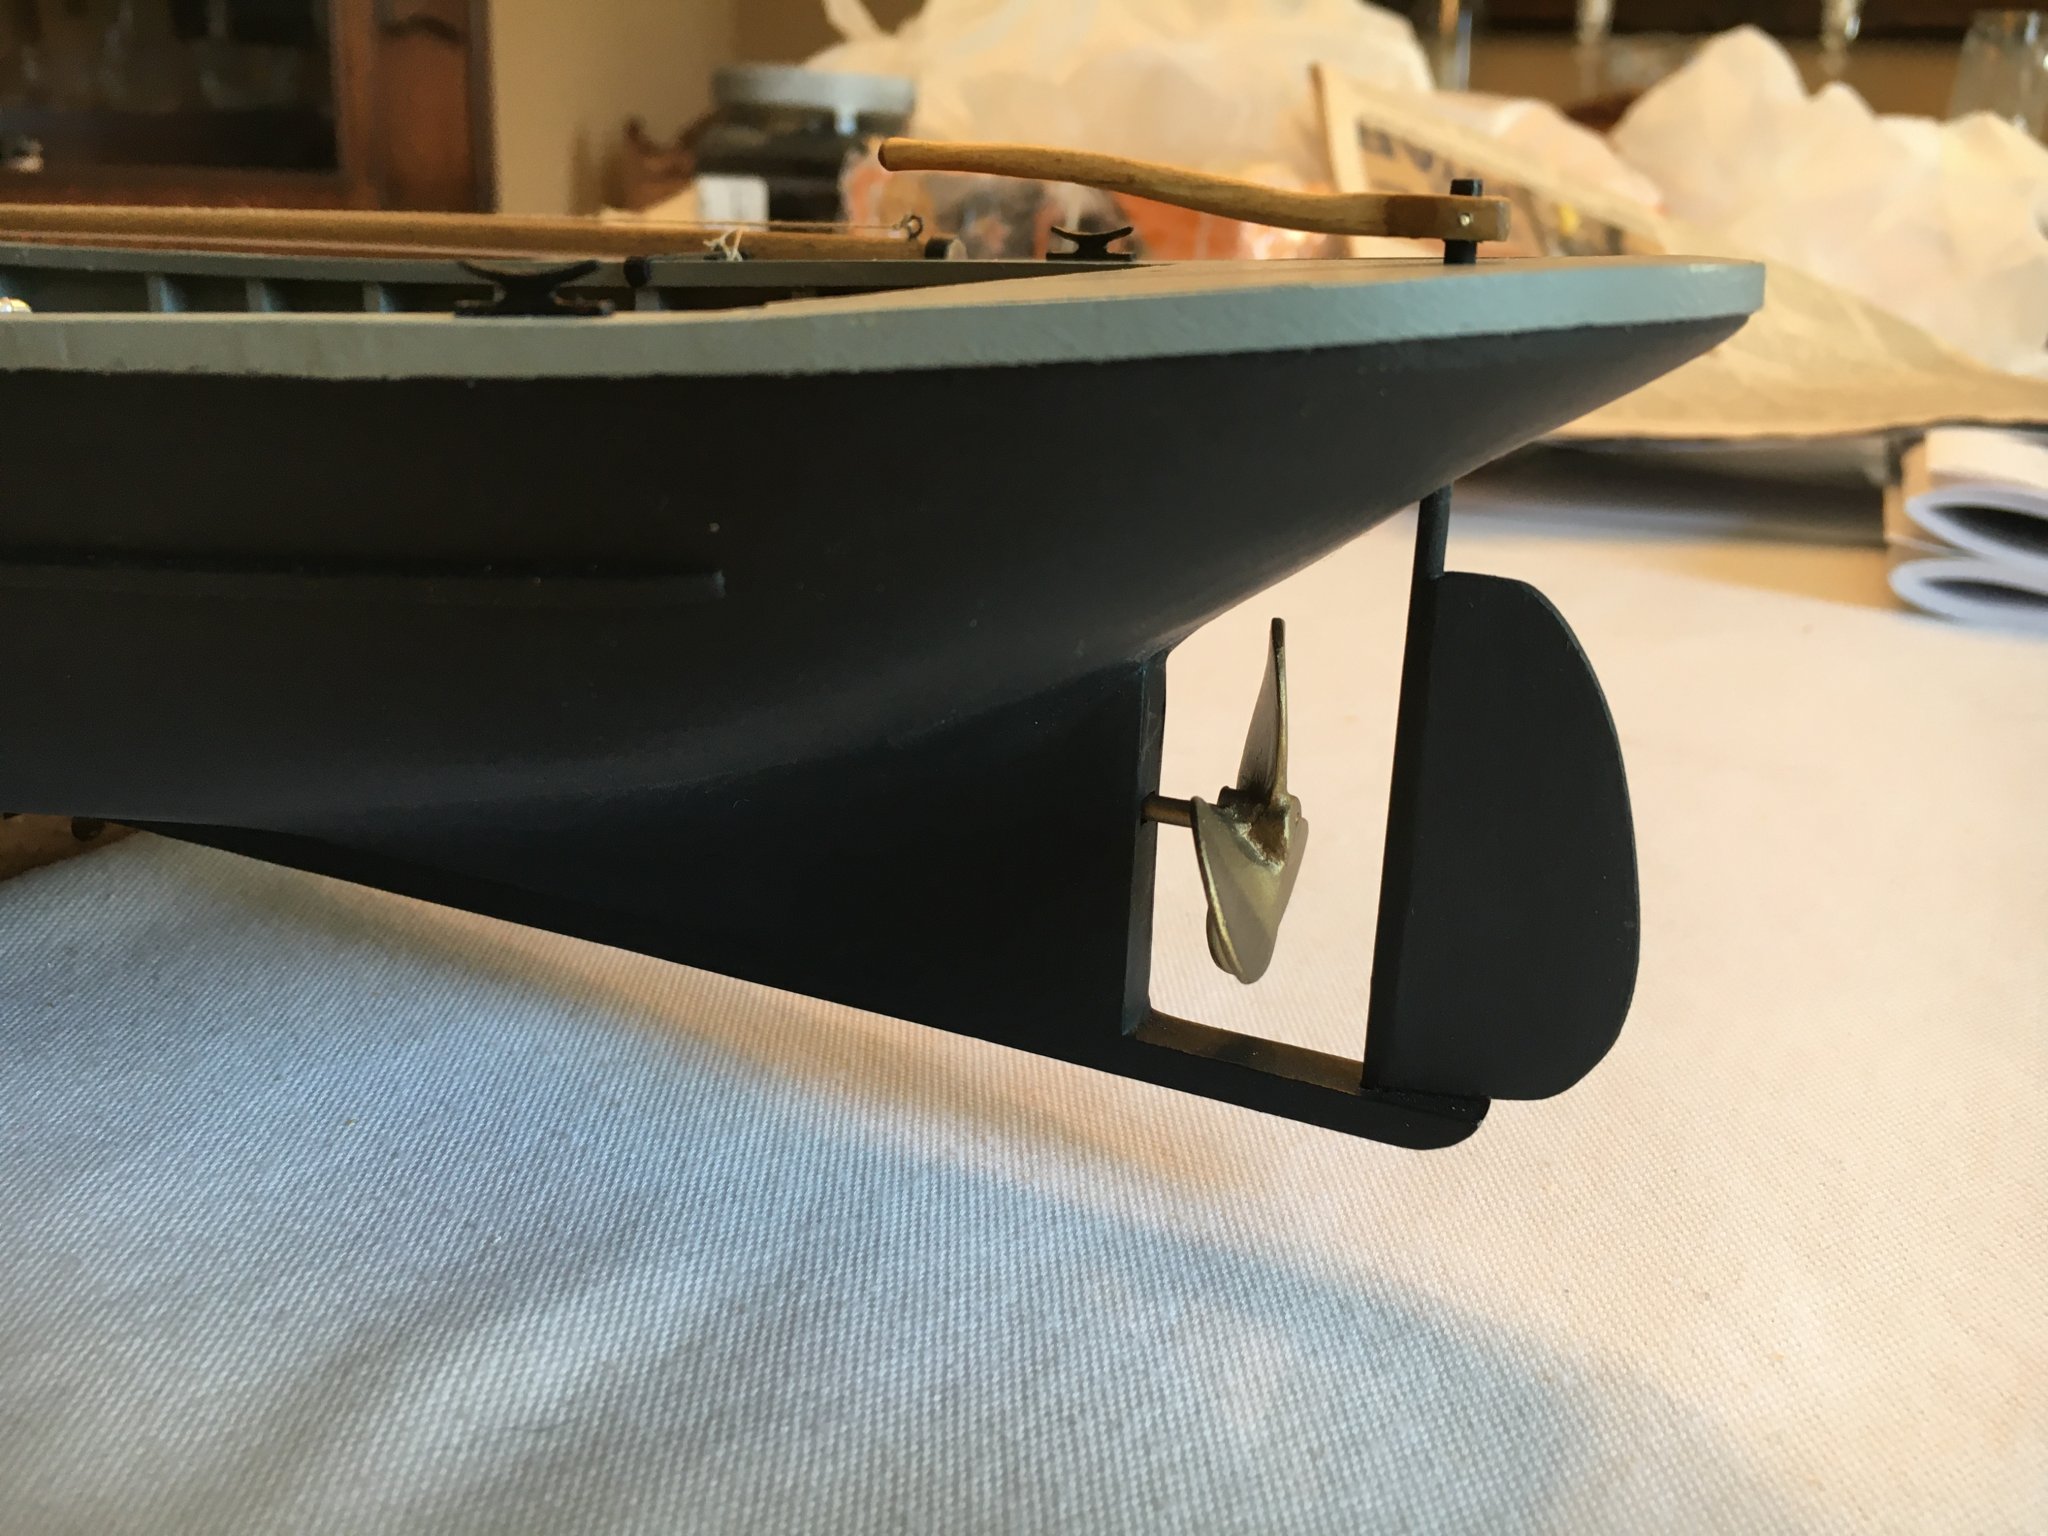
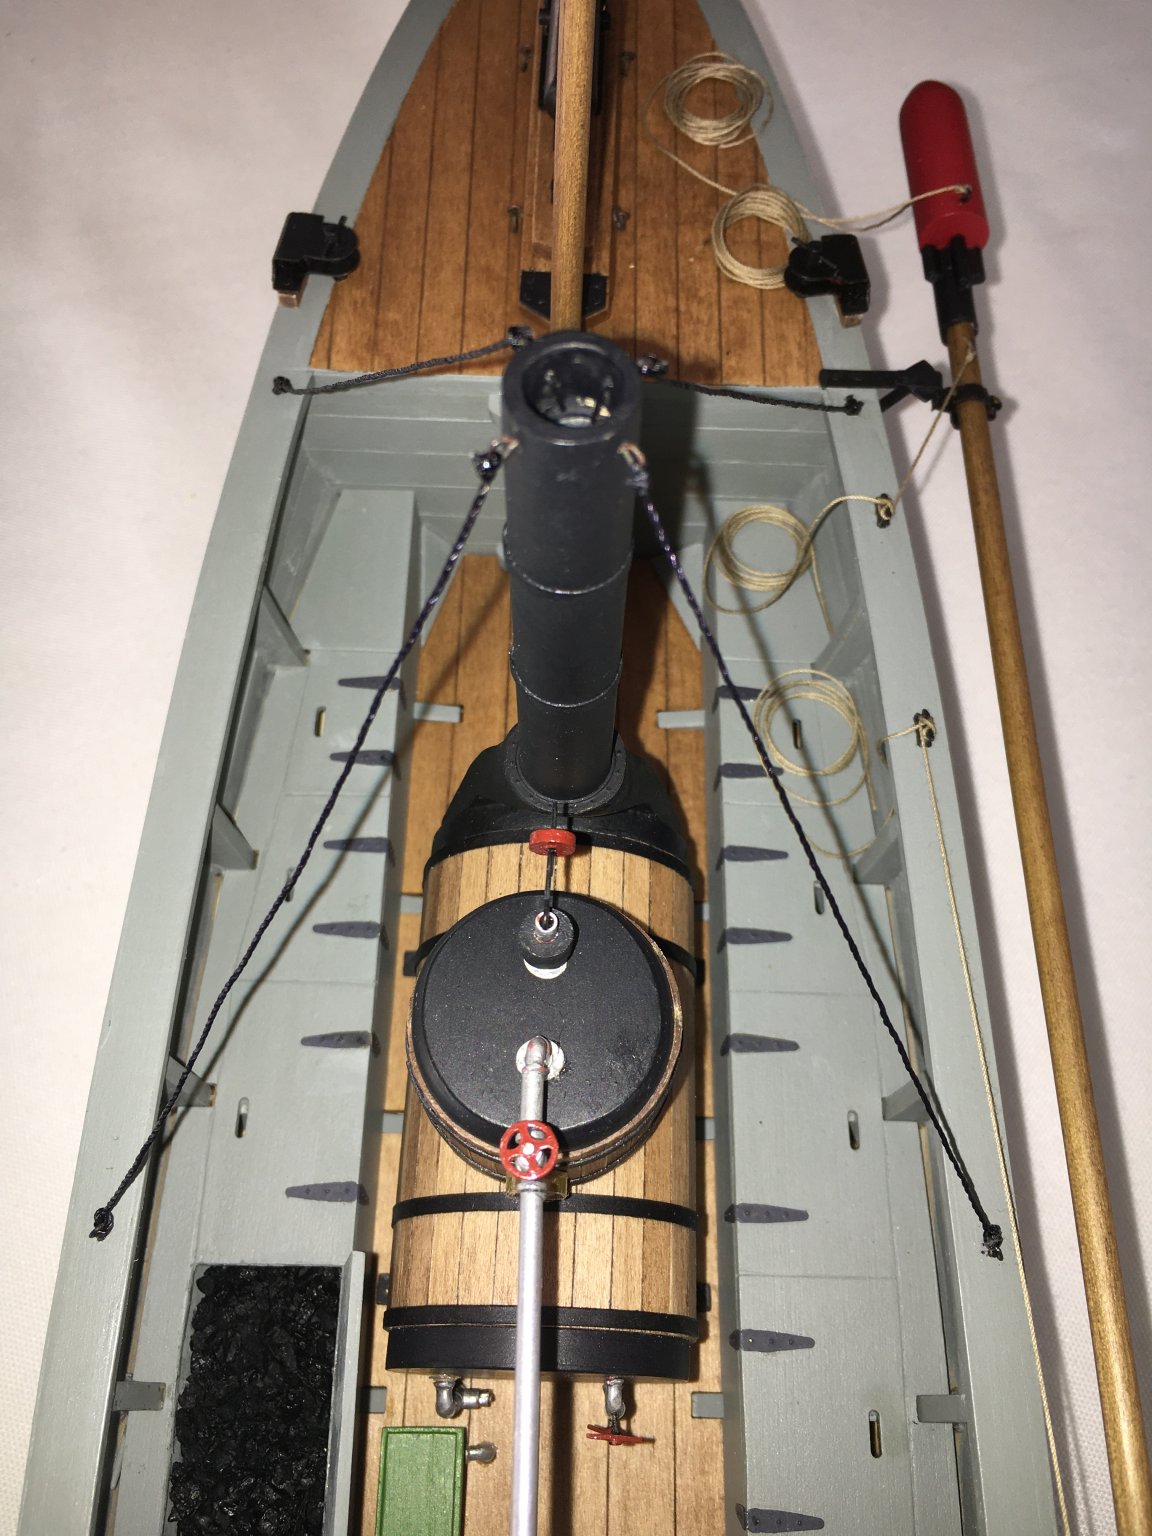
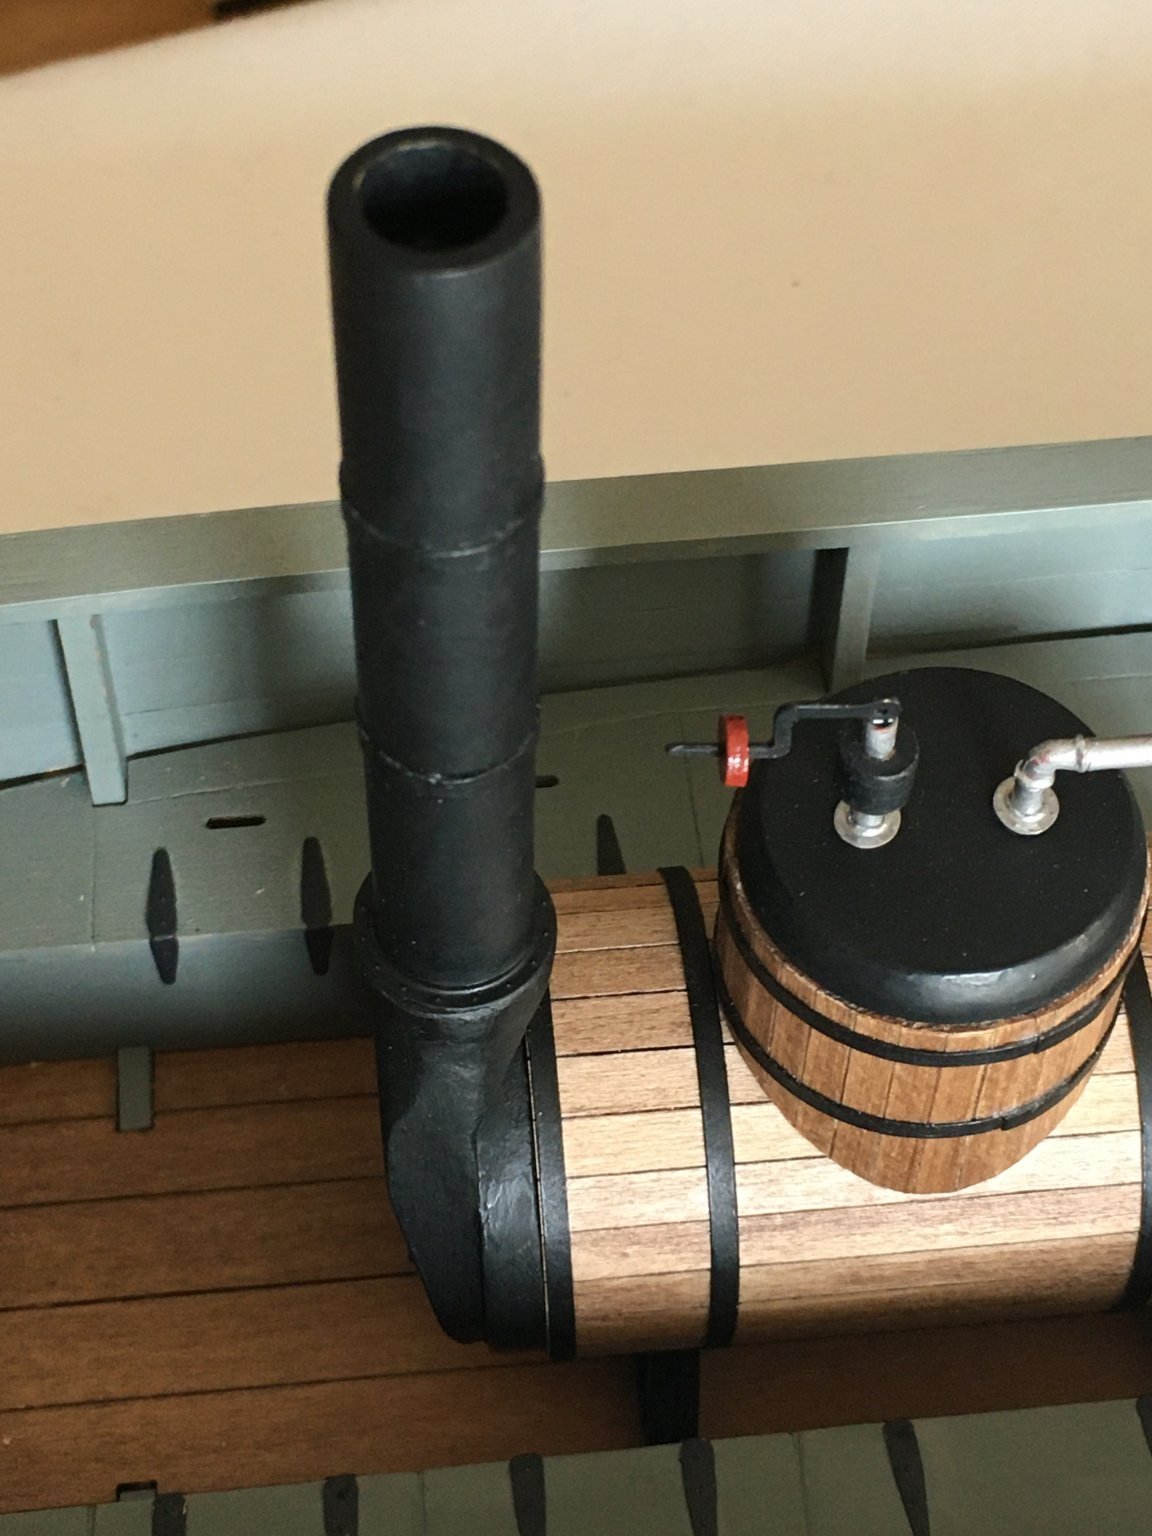
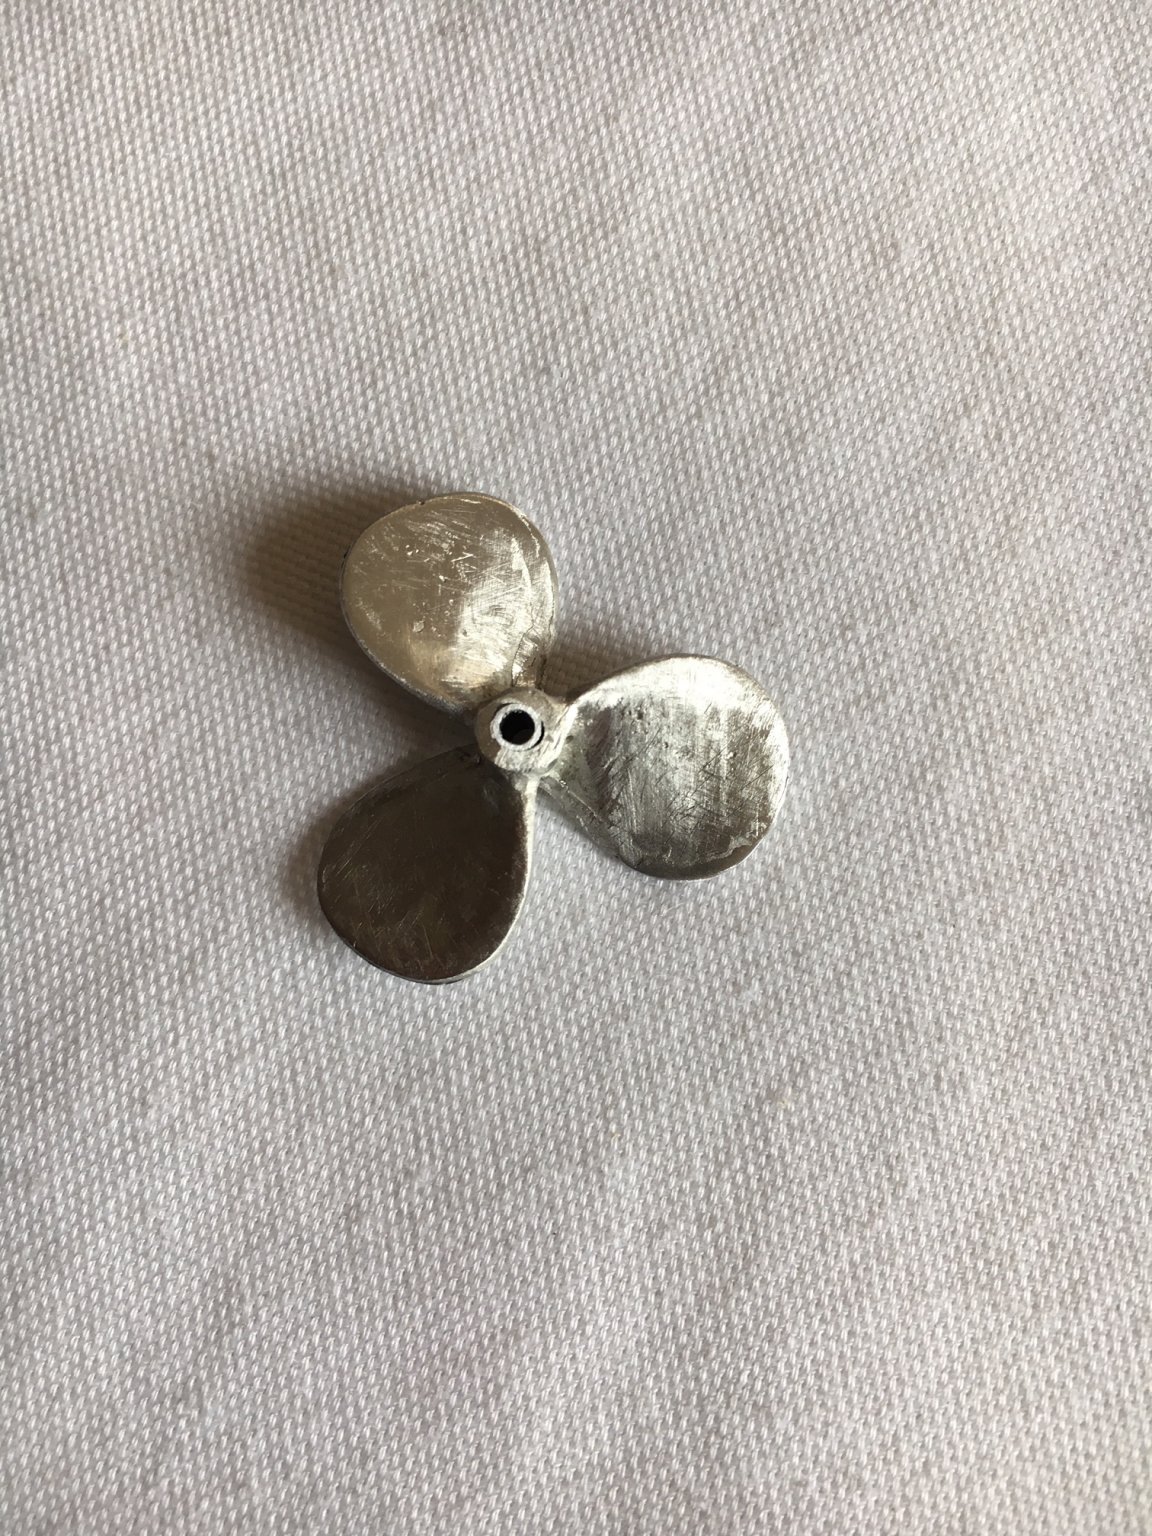
Moving along I decided it was time to attach the smoke stack to the boiler but was concerned that this would be a piece easily knocked off by clumsy me. To reinforce it what I did was to insert a brass pin into the stack with a corresponding hole in the mating surface, I also drilled several holes at various angles in both mating surfaces to allow the glue to enter and perhaps create a keying effect. Hardest part was determining the center on both parts to align the pin properly. I was concerned that PVA glue would not be very strong on the end of the stack as it tends not to hold onto end grain well. I mixed up some epoxy and used that on the pin and the mating surfaces forcing it in to the other drilled holes also. Probably a bit of overkill but it seems quite strong and I am pleased. While allowing the glue to set up I turned my attention to the propeller, filing down the rough areas and then wet sanding it in preparation for priming and painting.

- 54 replies
-
- 6
-
-
- picket boat
- model shipways
- (and 1 more)
-
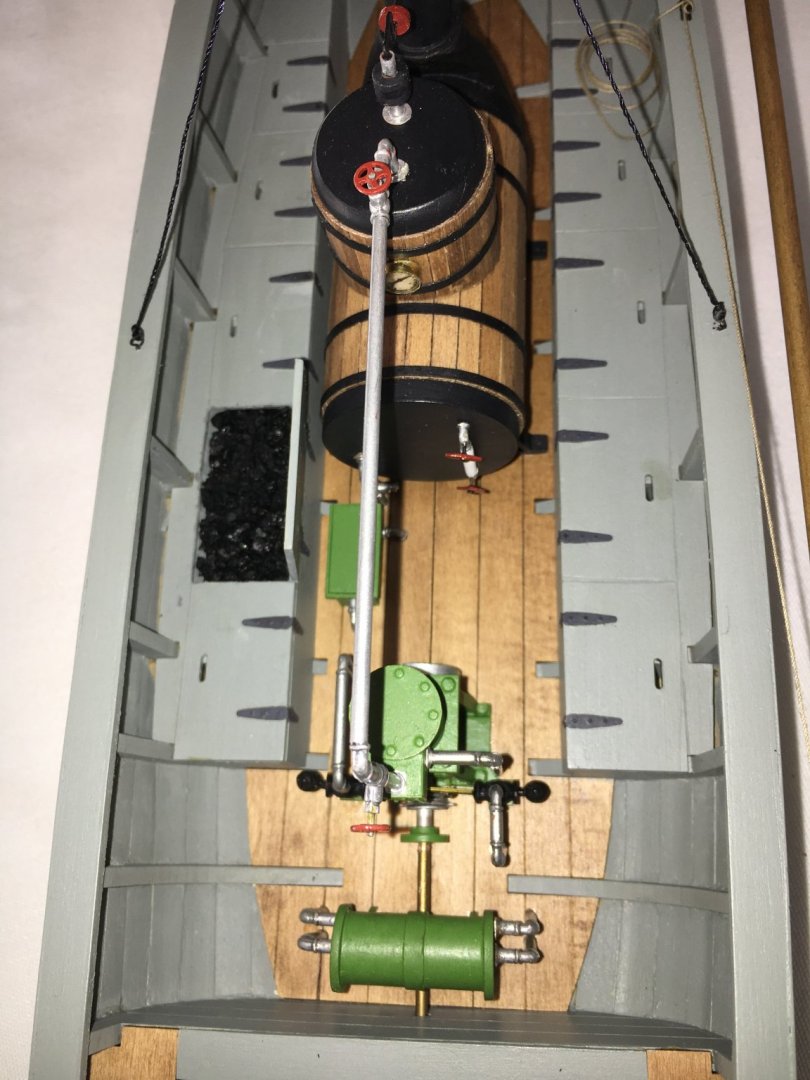
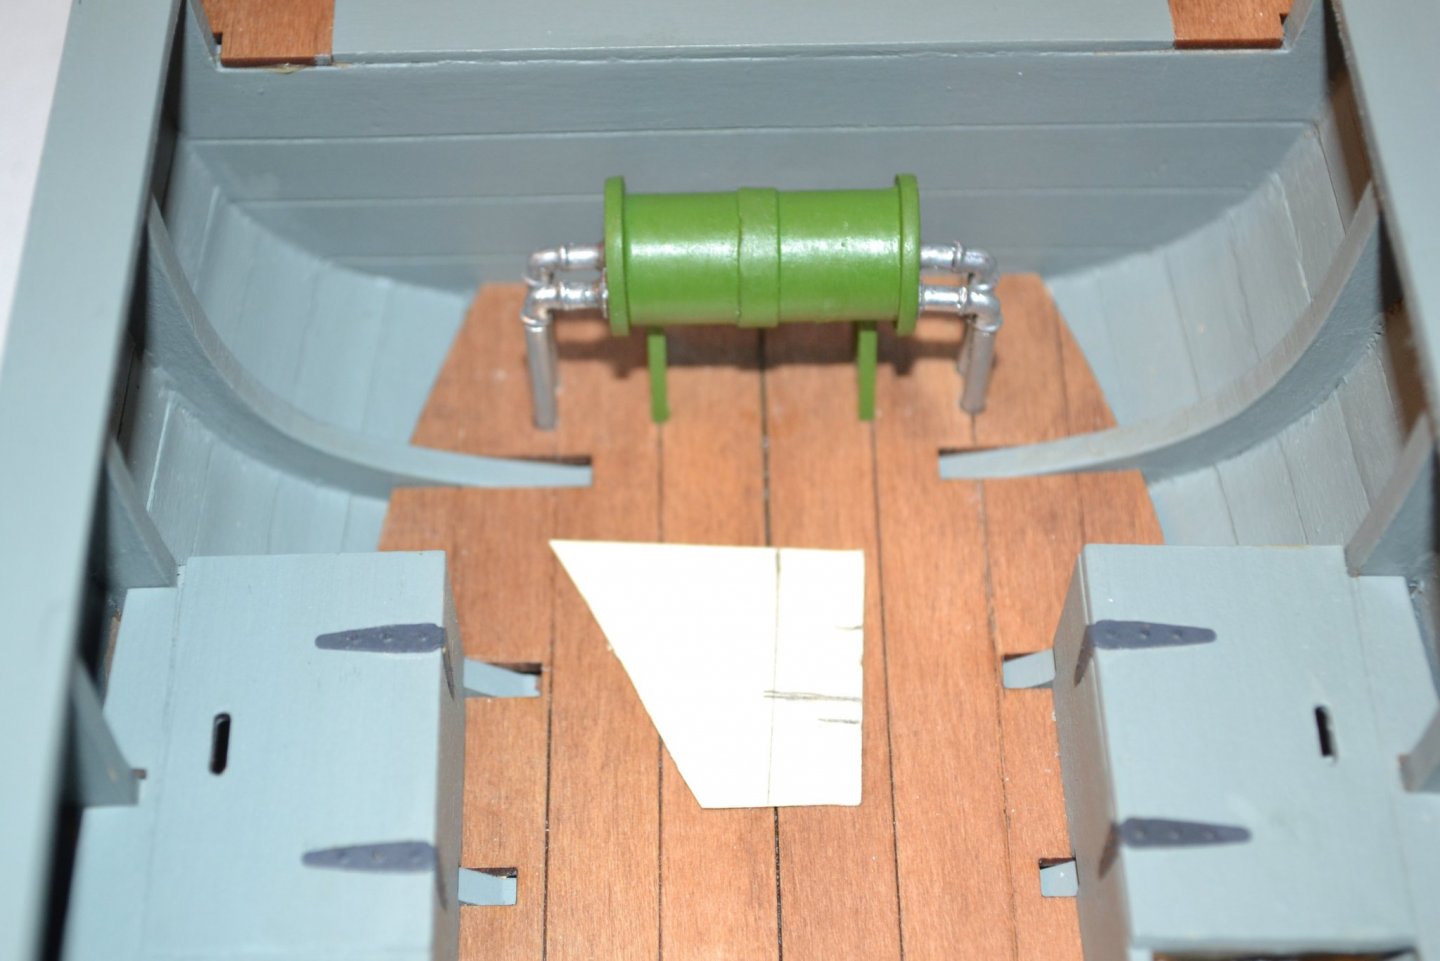
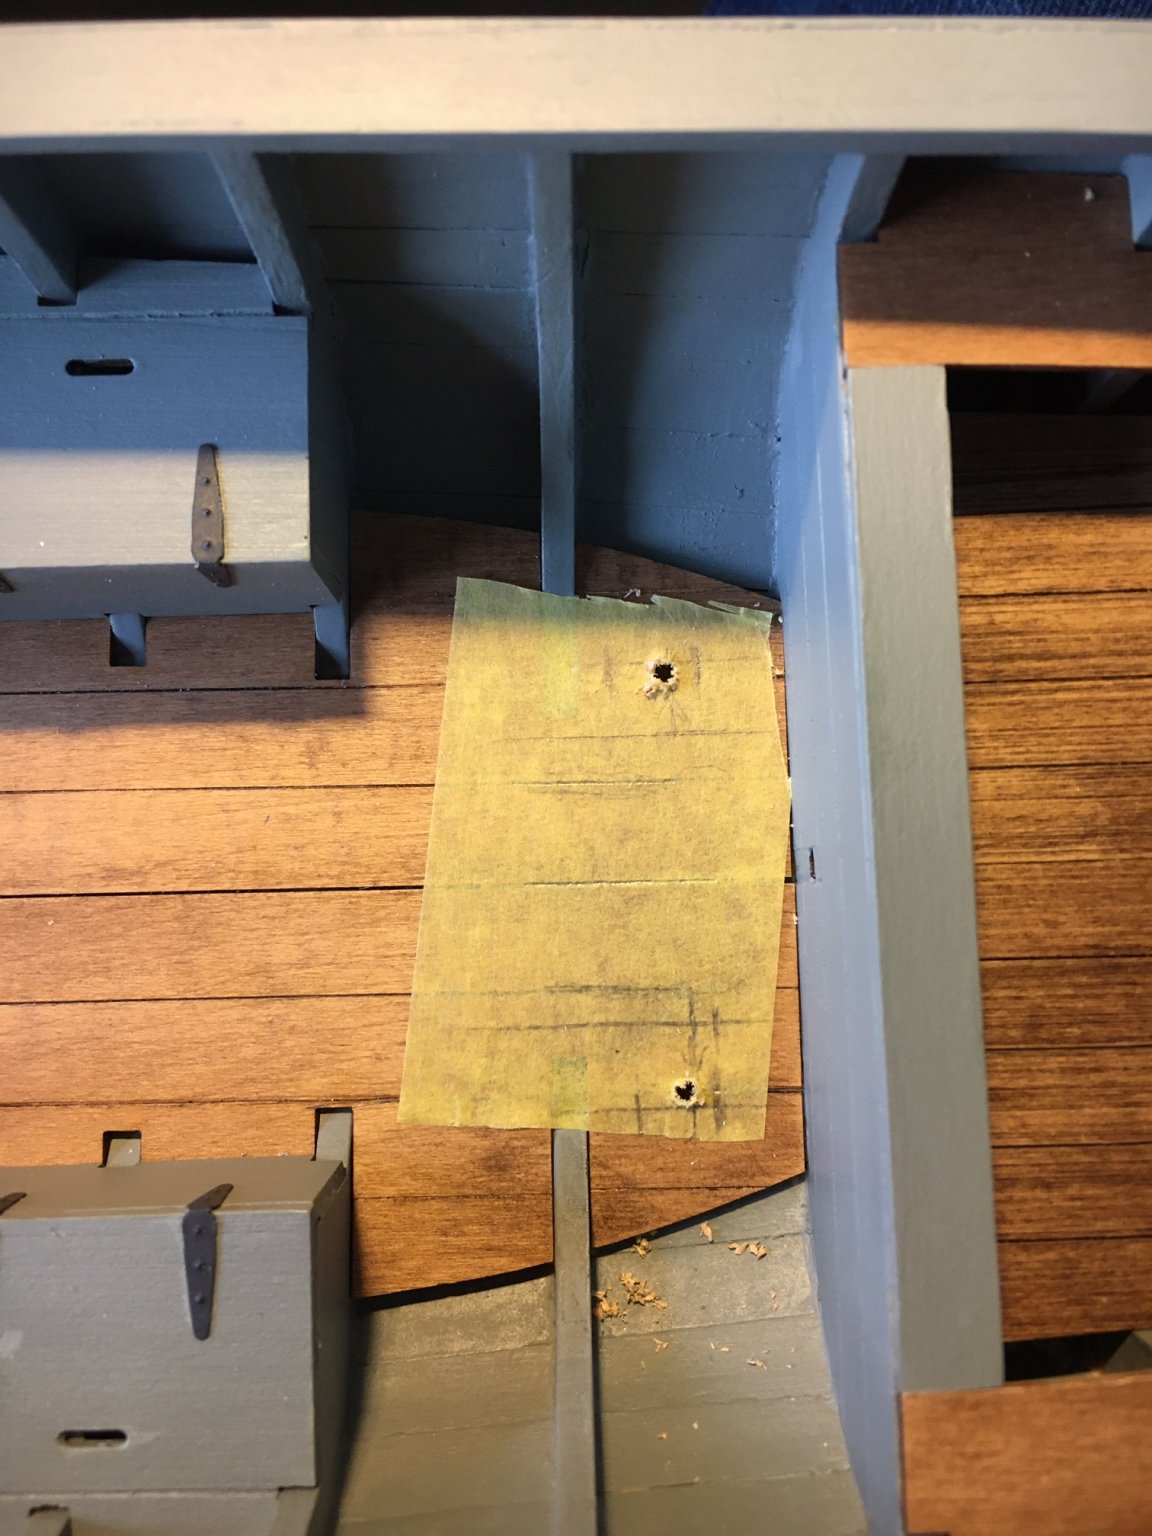
I made more progress and started installing machinery and plumbing. I applied tape to the deck and used a cut off corner of card stock as a square as none of my usual squares would fit in the confined space. The tape and cut off allowed me to take measurements and transfer them to both to determine a proper layout. I also cut the down tubes long so they would go through the deck, I thought it would look better. The tape also served to prevent splintering around the drilled holes. Once everything was in place and reasonably aligned I applied thin CA to the deck and condenser tubing connections, seems very solid. I'll just have to mind the boiler pressure so I don't blow it off the deck. Next, on to installing the engine as it's lateral position will be determined by the propeller shaft.

.thumb.JPG.a20892029500e56fb5cf0069070e5f93.JPG)
- 54 replies
-
- 5
-
-
- picket boat
- model shipways
- (and 1 more)
-
Thanks Art! I will be following your Napoleon Cannon and Limber build closely as that is next in my queue.
-
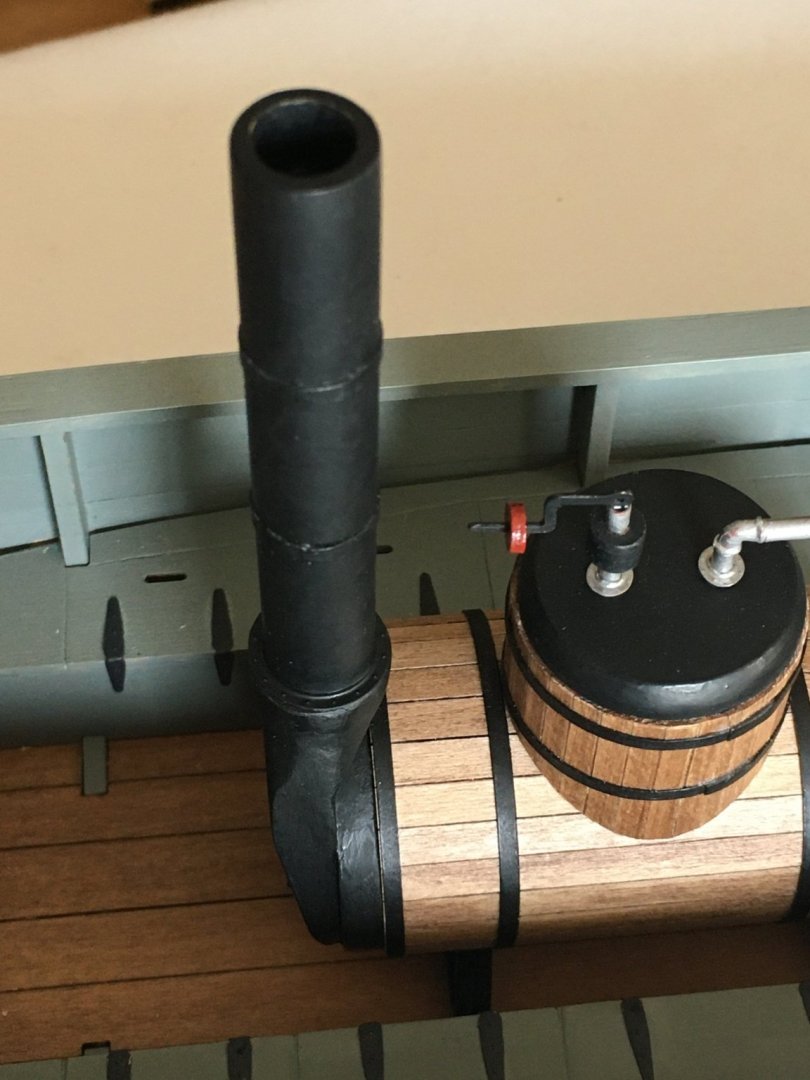
I threw caution to the winds and went ahead and rounded the area where the chimney attaches to the boiler and am well pleased with the result, looks much better. I cut off the corners with a fret saw and then filed and sanded the areas to a reasonable shape. Turned out fine so I can still talk to myself. I have finished the machinery and other bits so it is time to break out my pipe wrenches and start on the plumbing. I primed all the metal parts and tubing with some Floquil Zinc Oxide paint I happened to have. I have no idea if it is actual Zinc Oxide primer or that is just the color it represents?? I don't know if priming helps but it probably doesn't hurt. I dislike plumbing as I always end up with leaks, but time to grab the bull by the tail and face the situation.
.thumb.JPG.3a797c35f99b4f922d70edf498986b43.JPG)
- 54 replies
-
- 10
-
-
- picket boat
- model shipways
- (and 1 more)
-
Here you go. https://shop.birchwoodcasey.com/products/aluminum-black-metal-finish-3-fl-oz-bottle.html
-
Fascinating project!! I was born in Hamilton Ontario, also lived in Toronto and many of the family were CP employees. The family joke was we didn't have blood in our veins but CP smoke. I will follow with great interest.
-
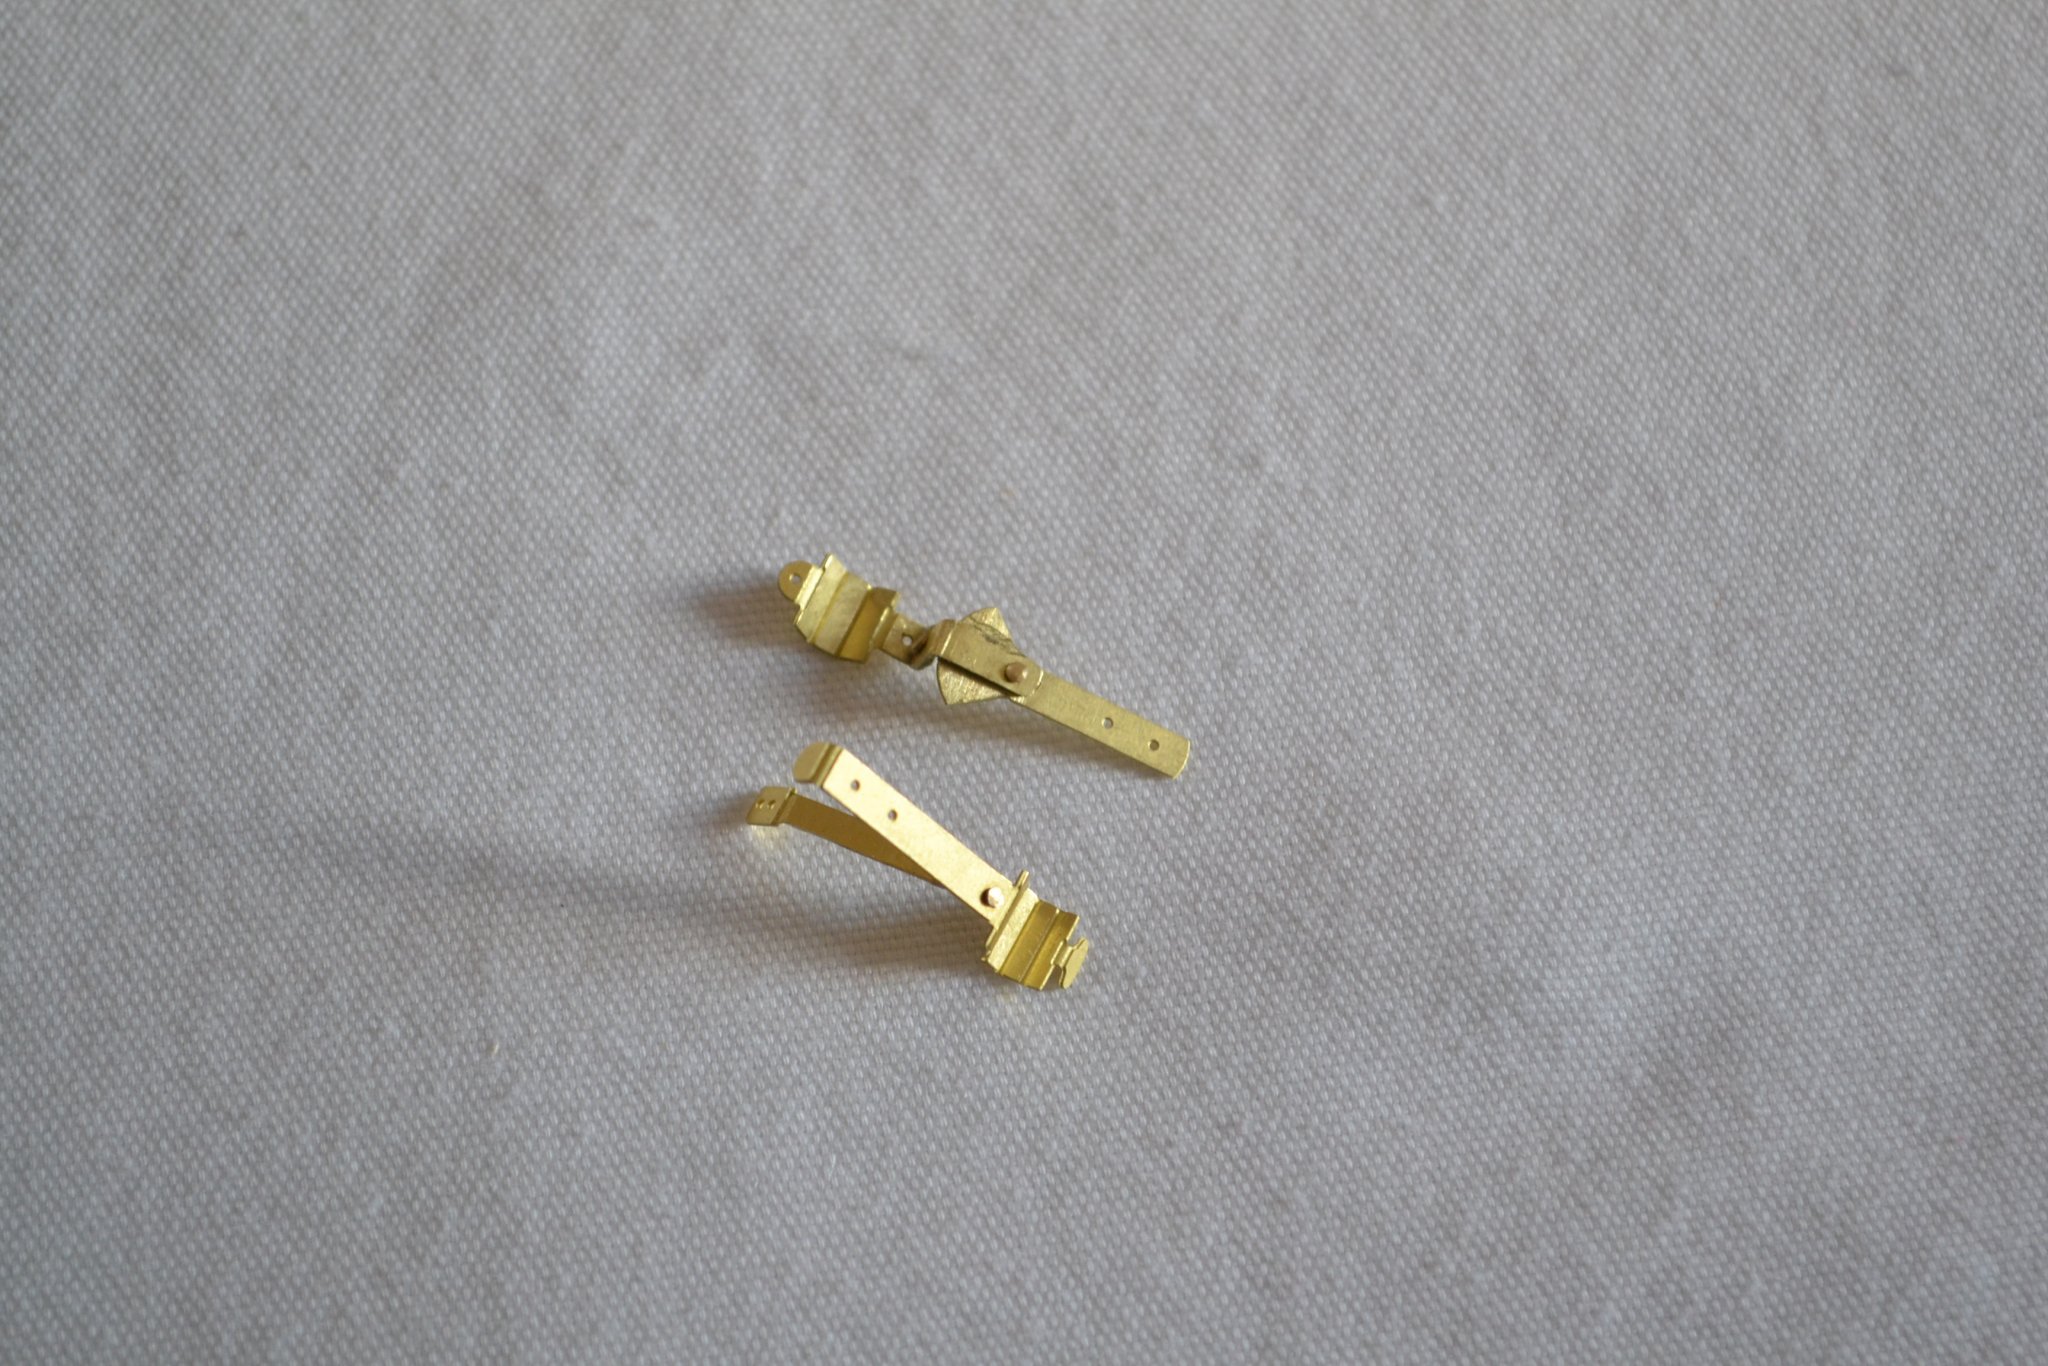
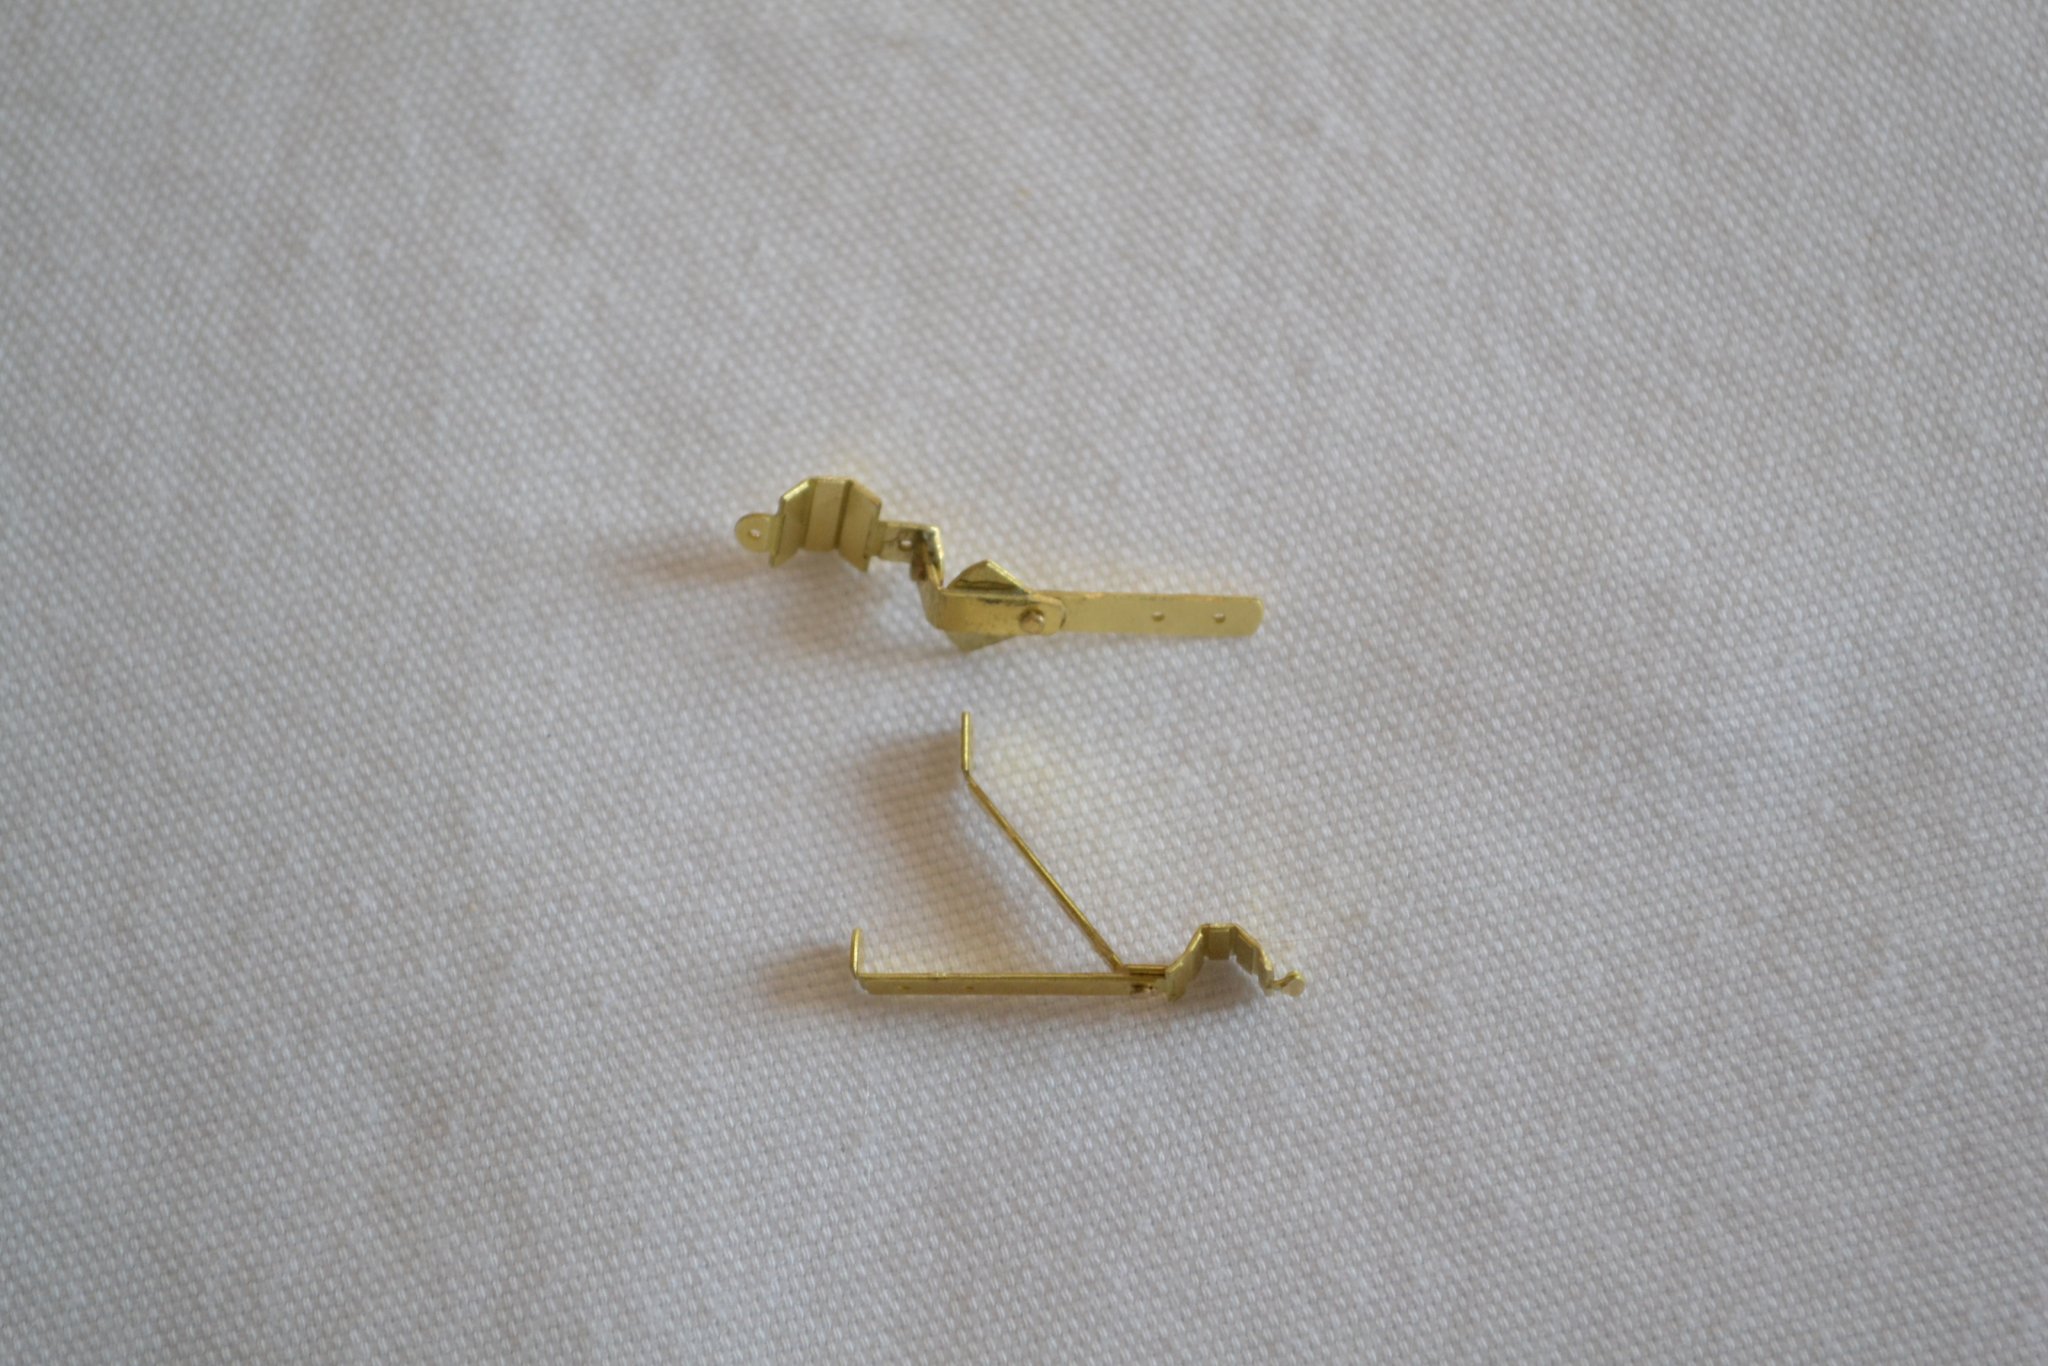
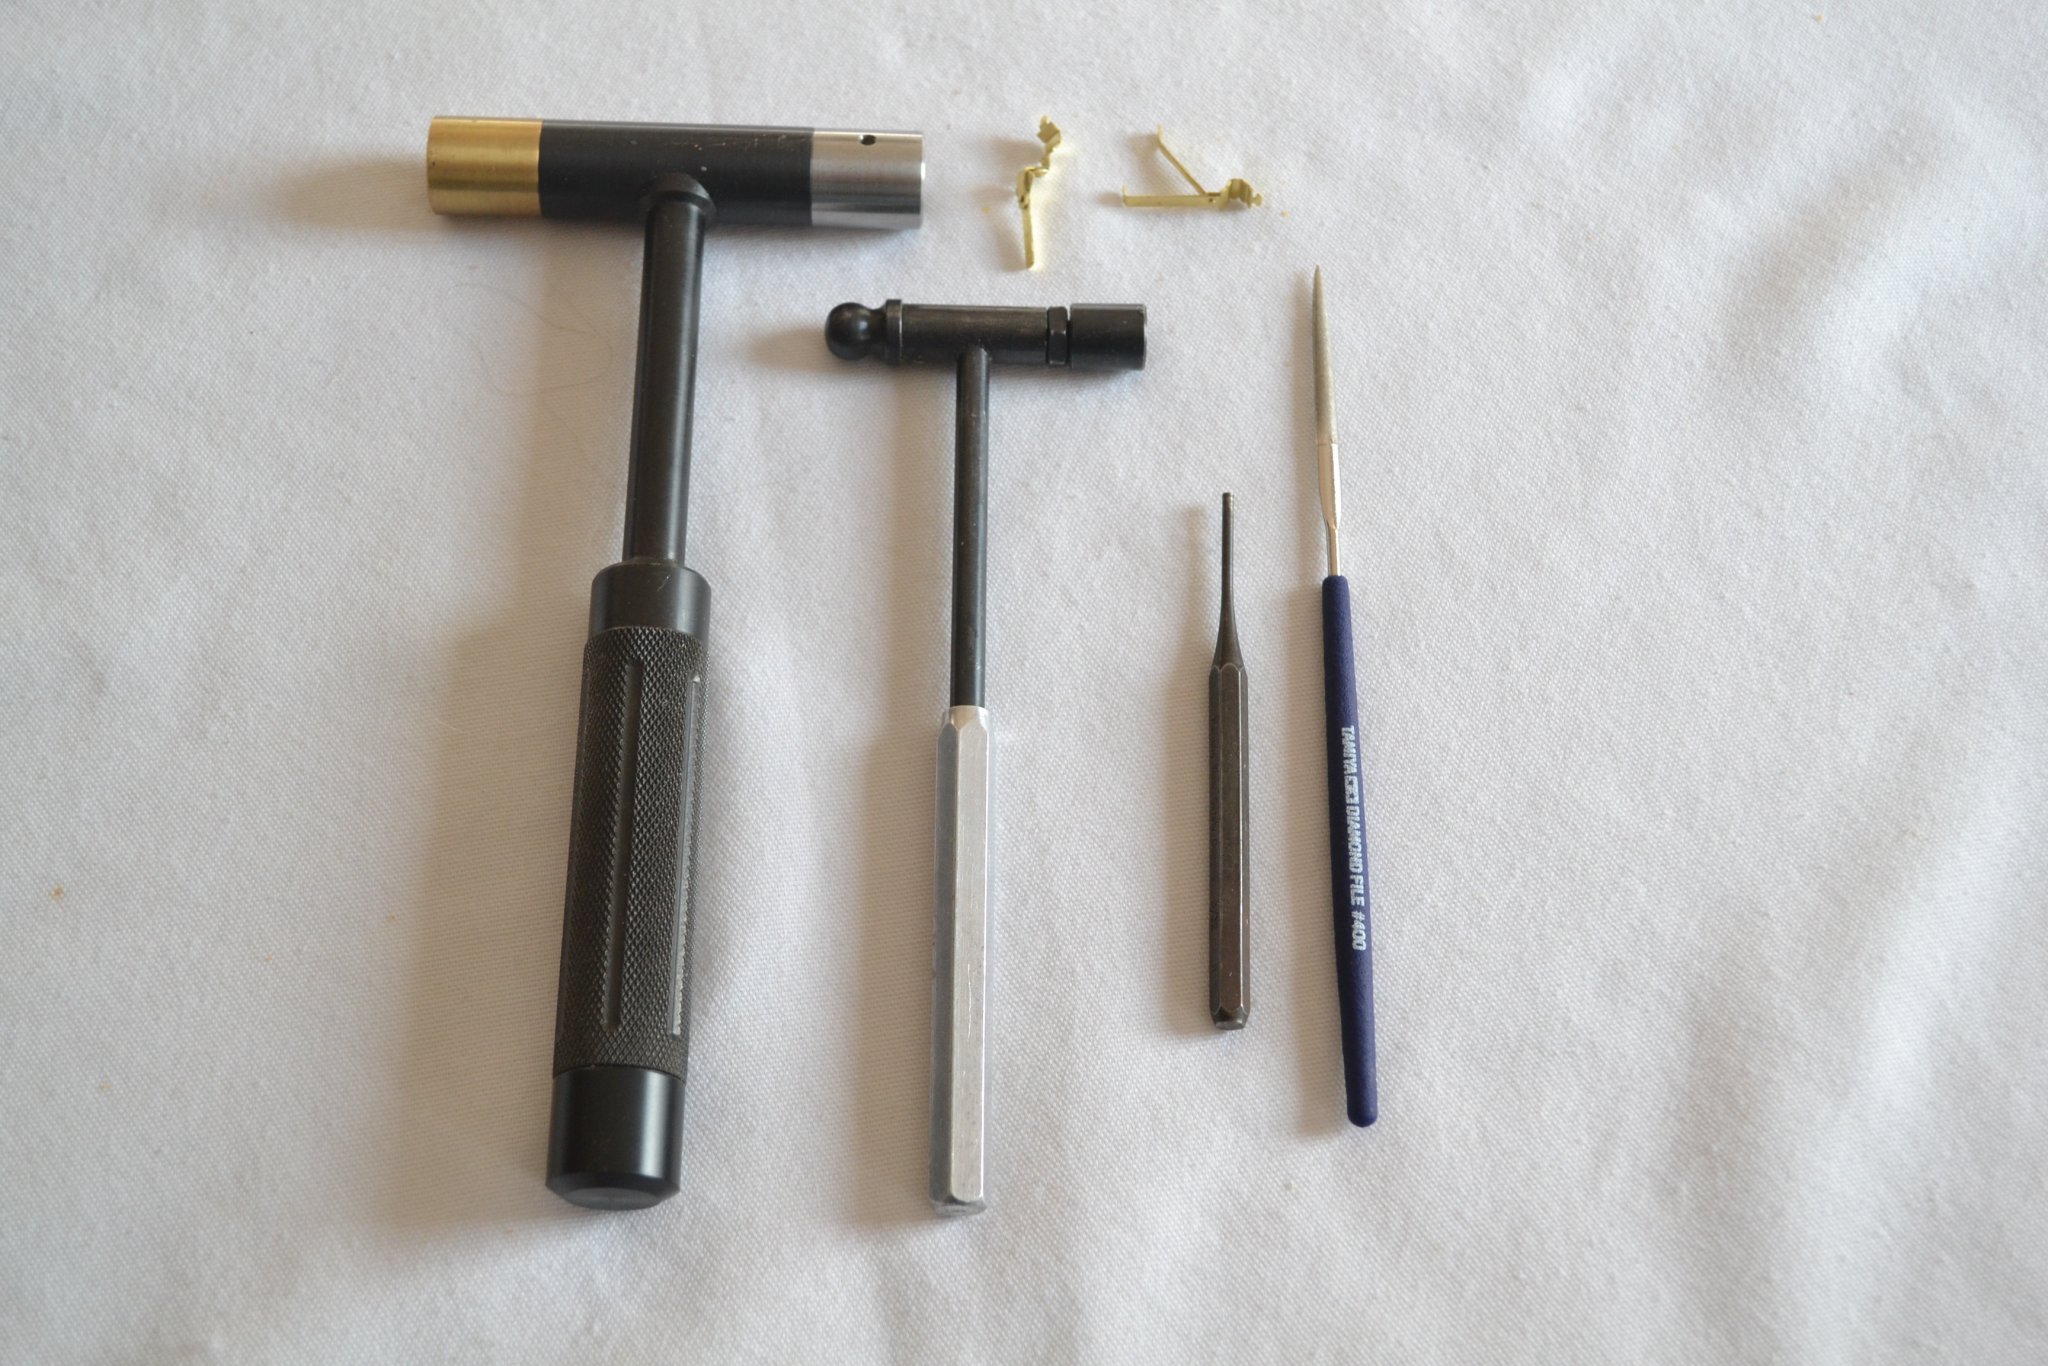
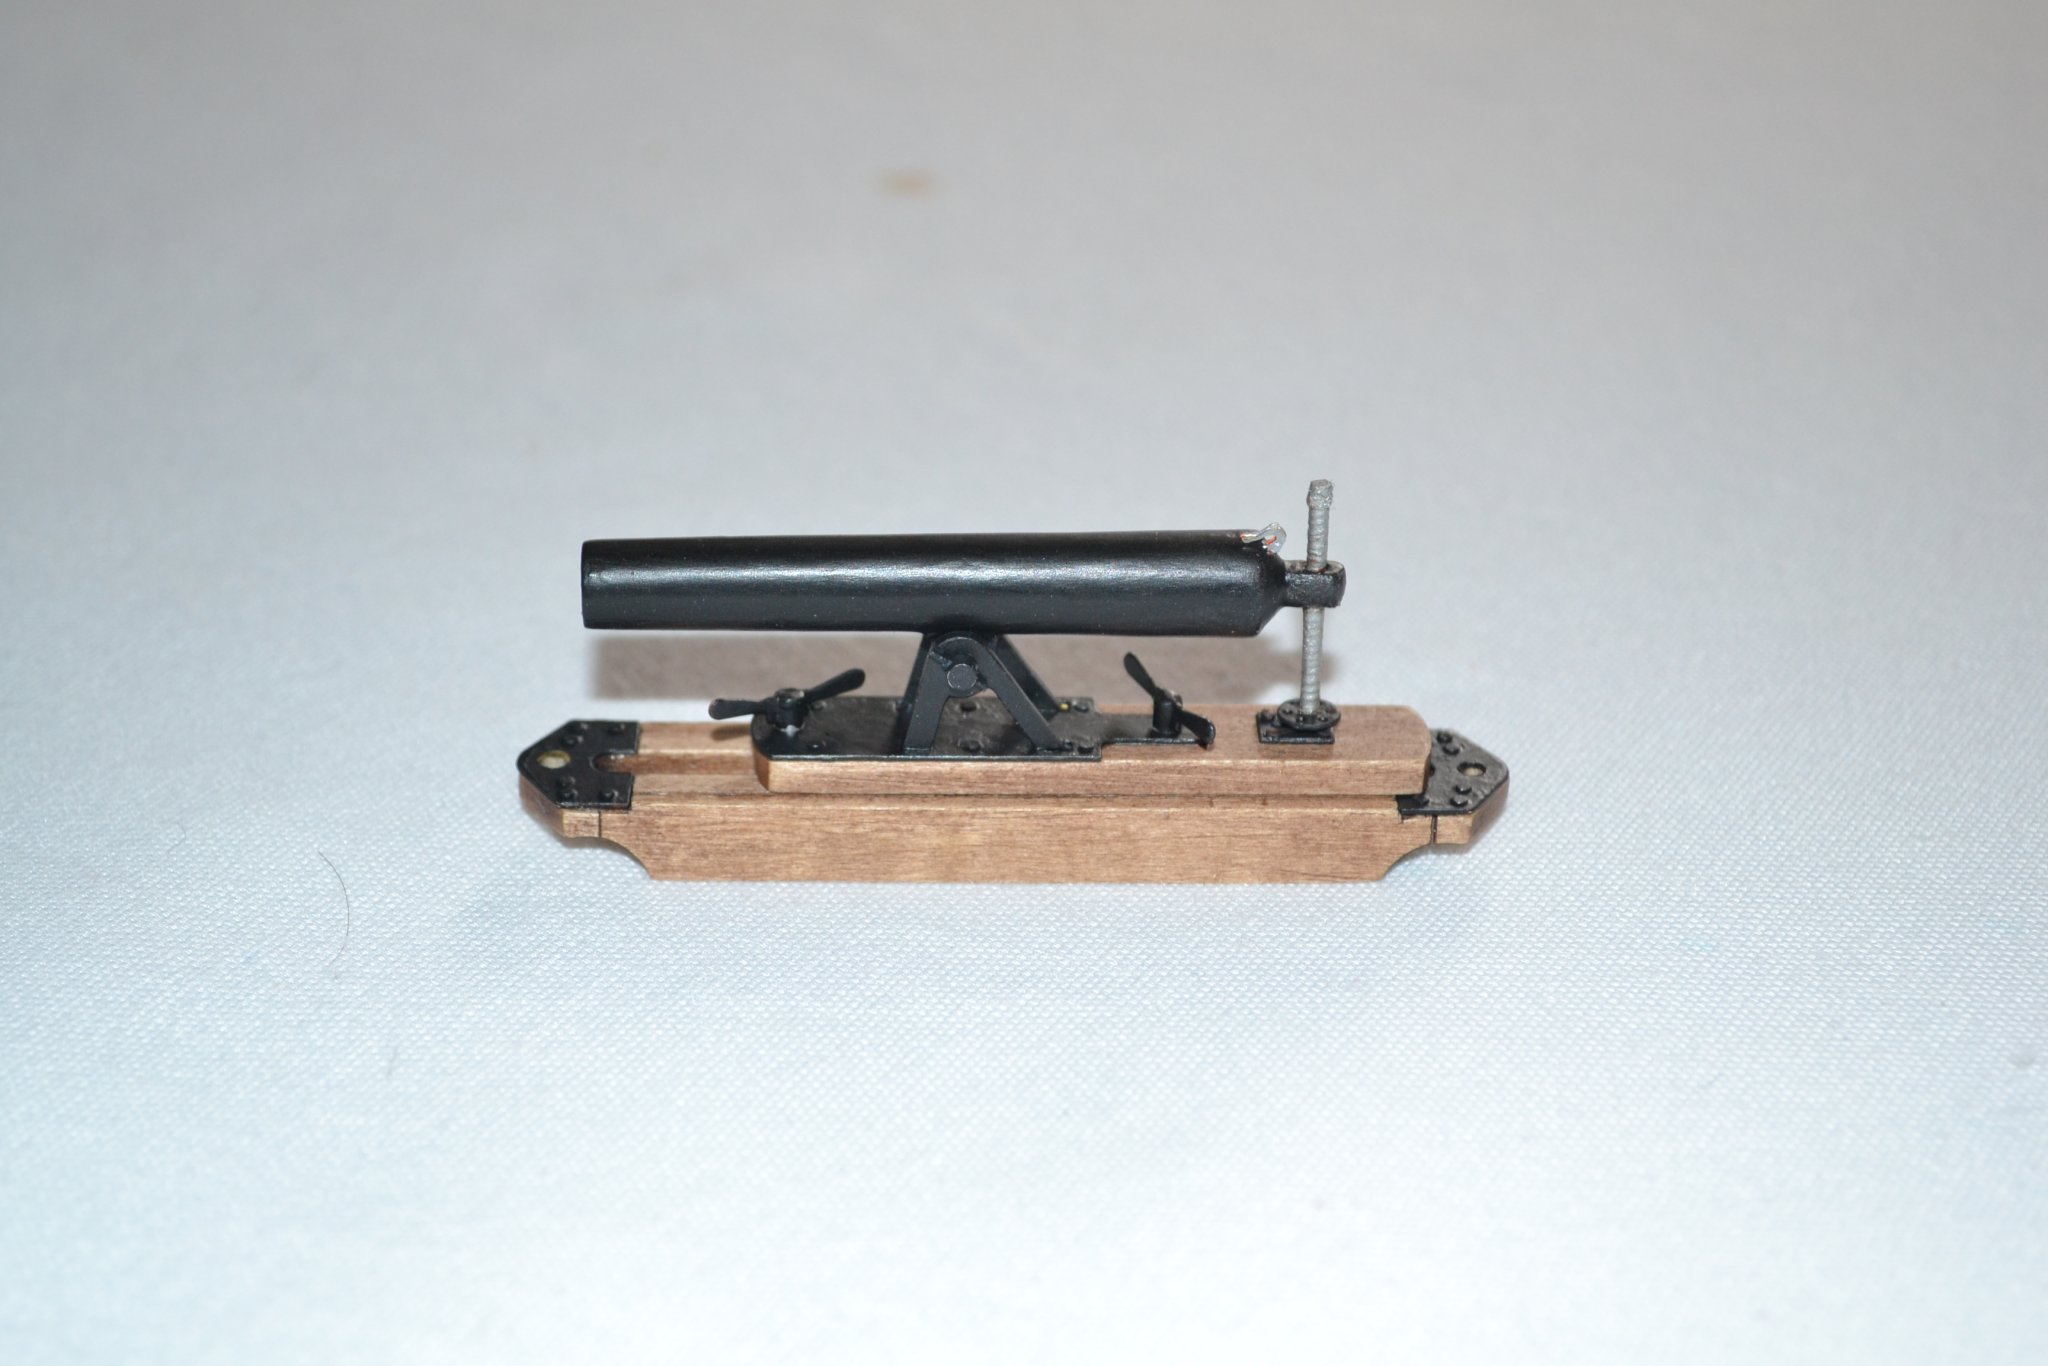
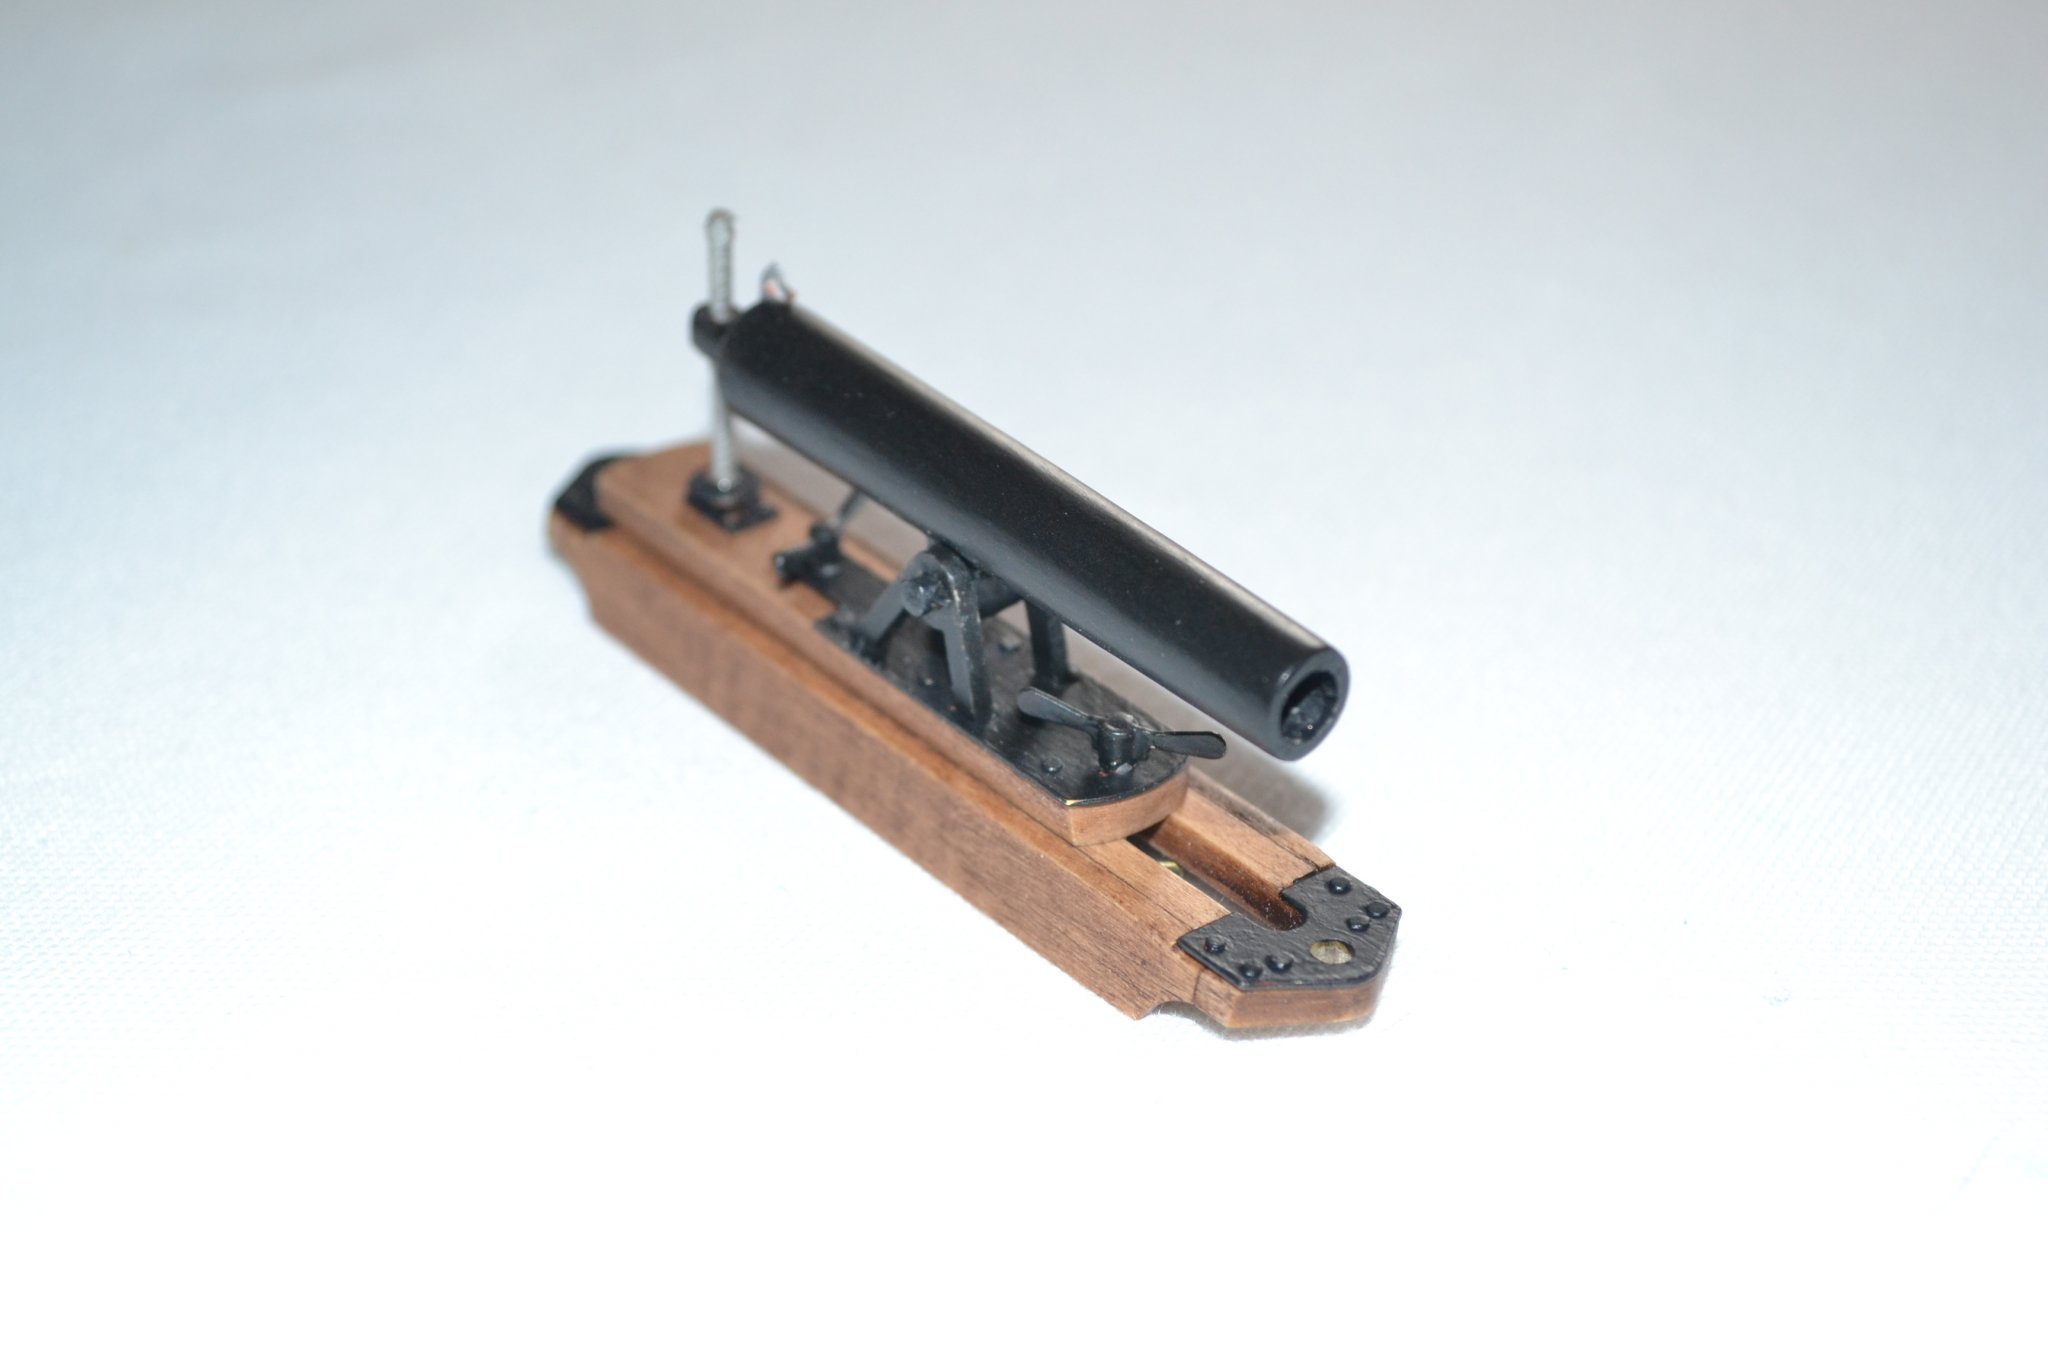
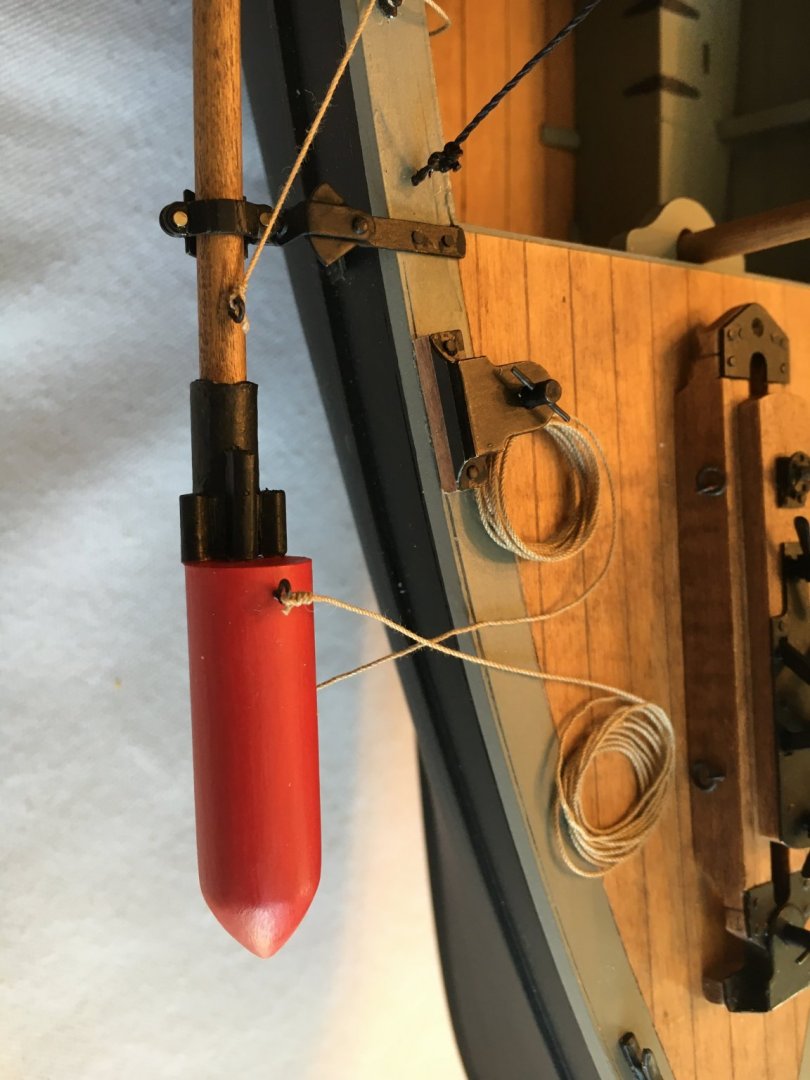
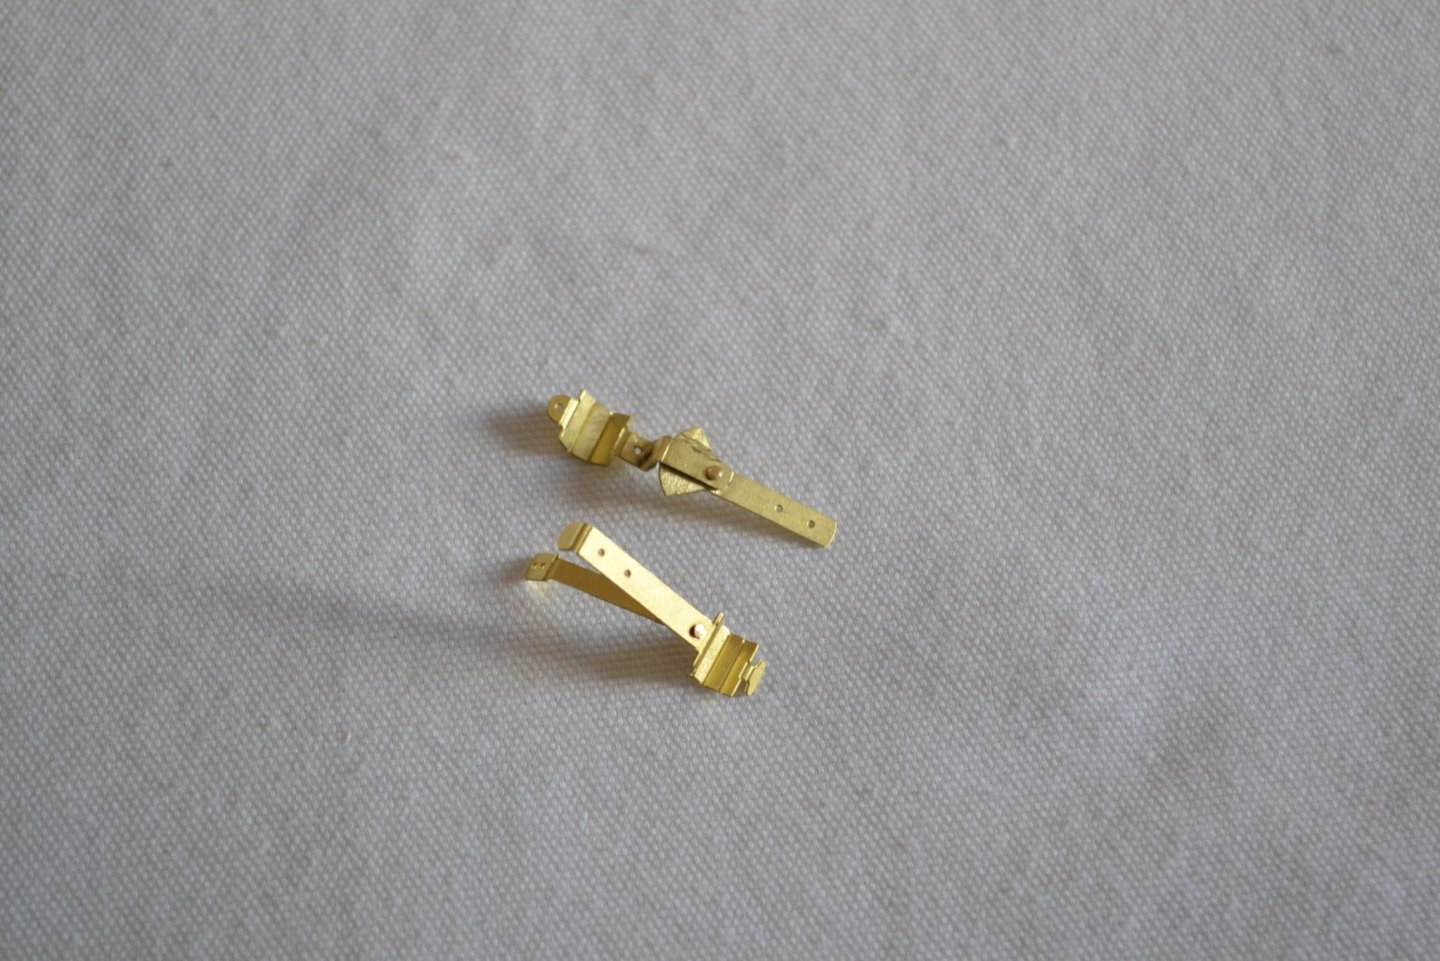
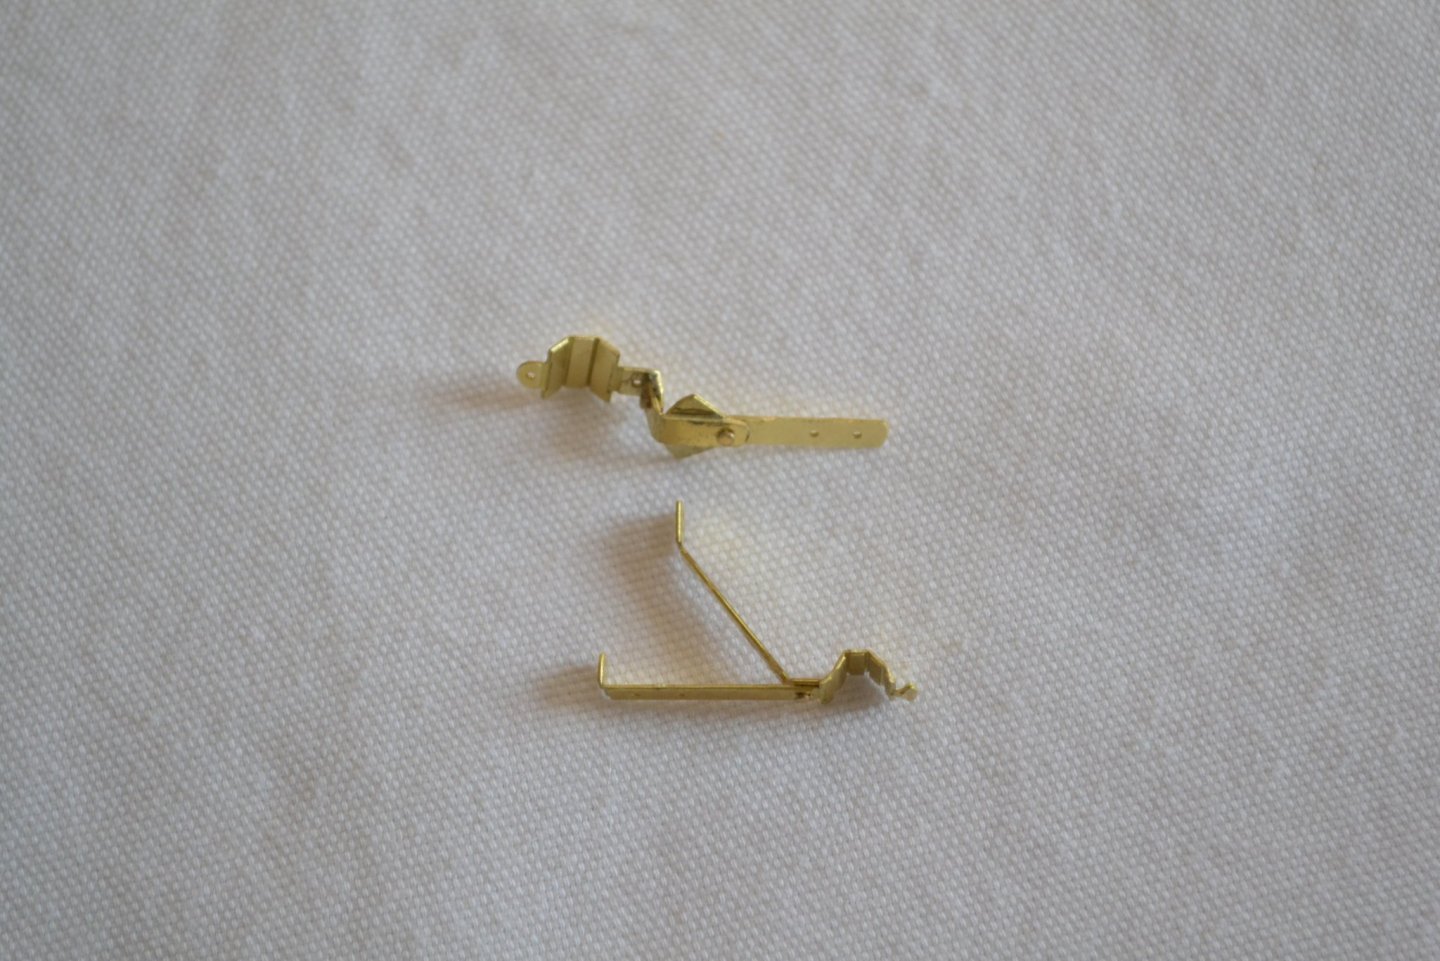
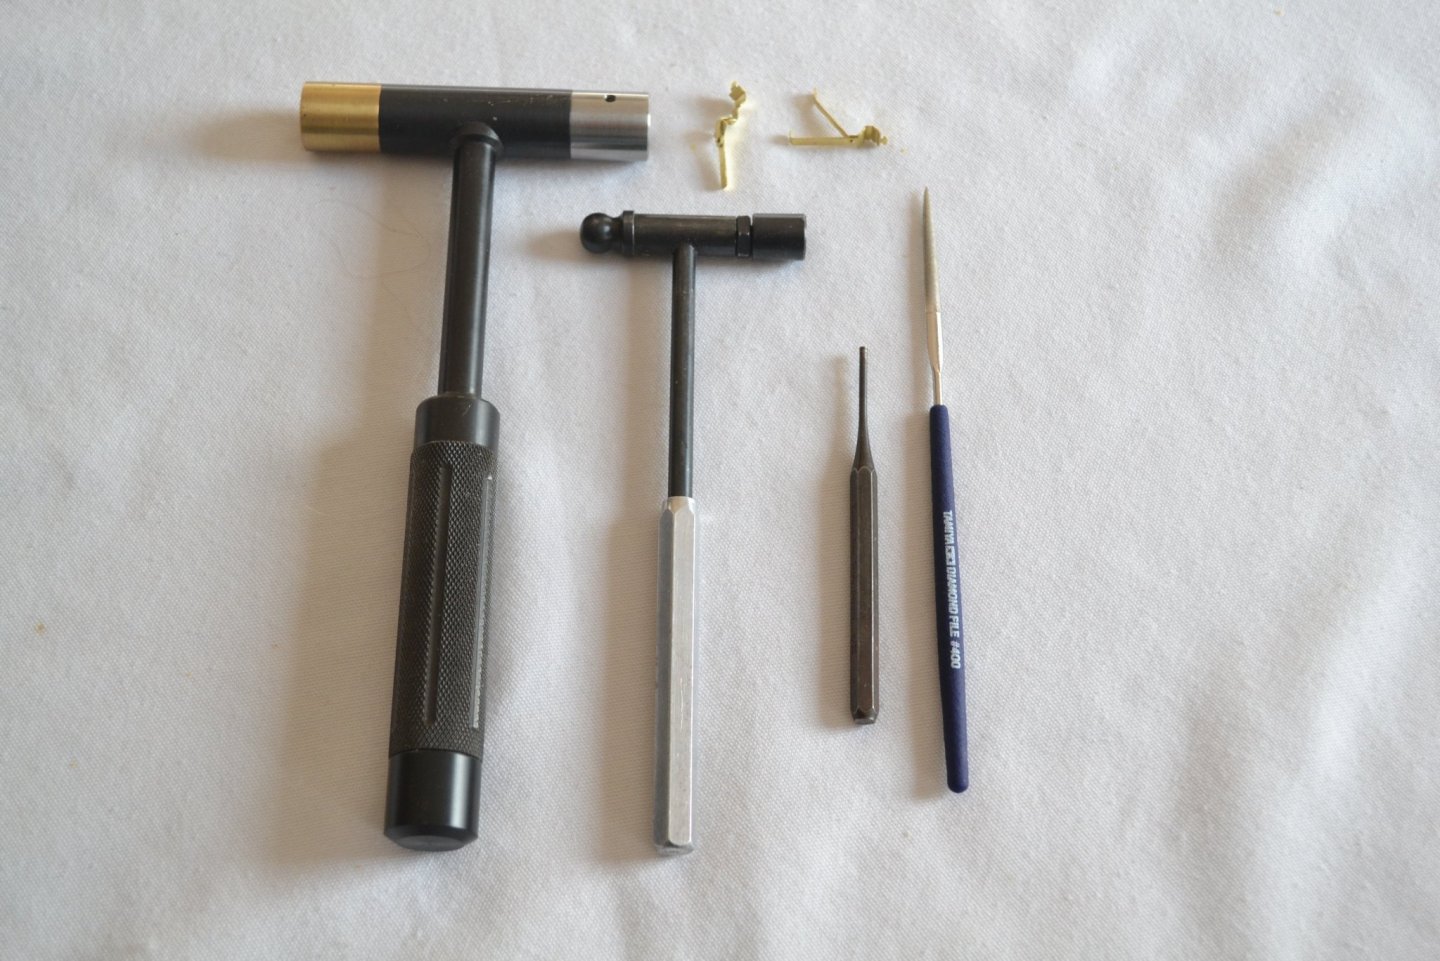
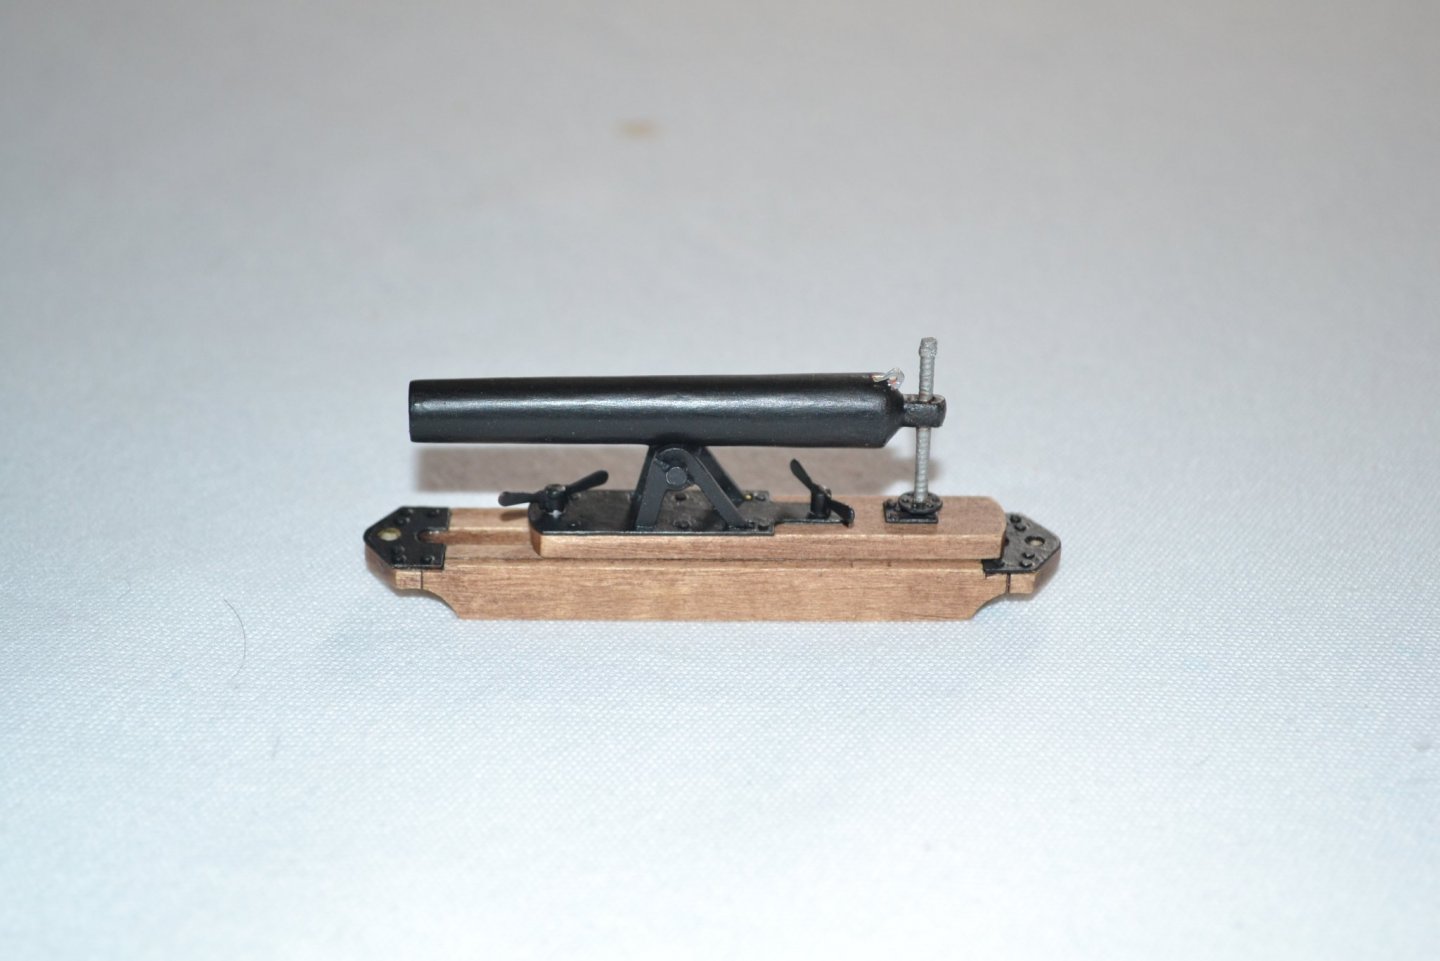
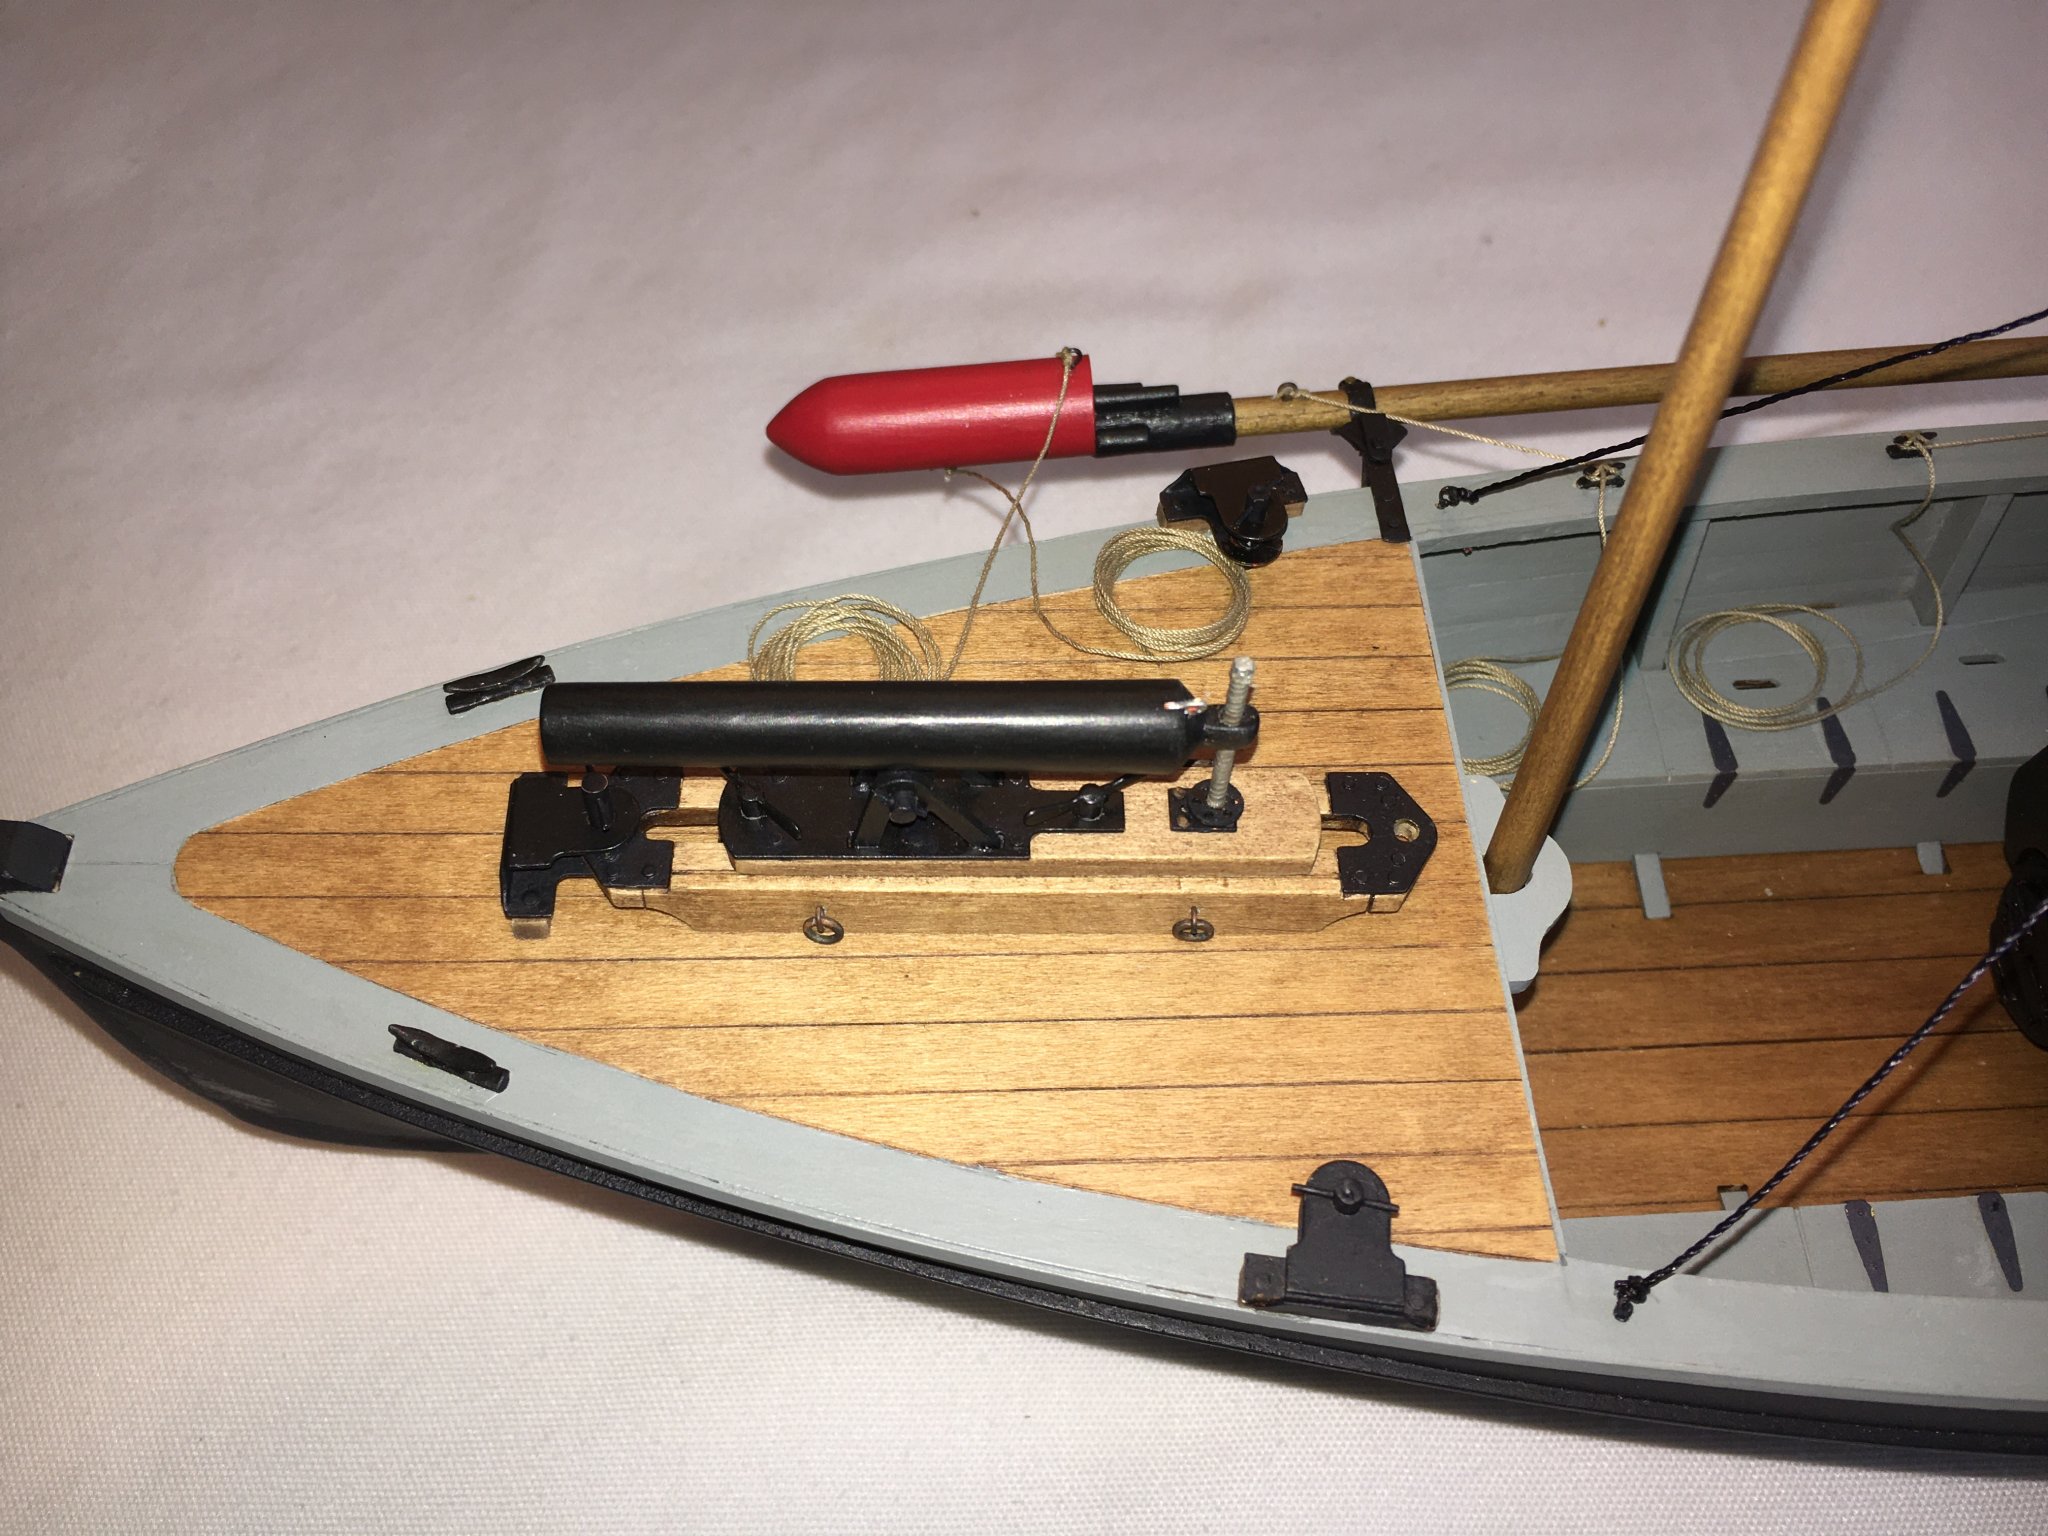
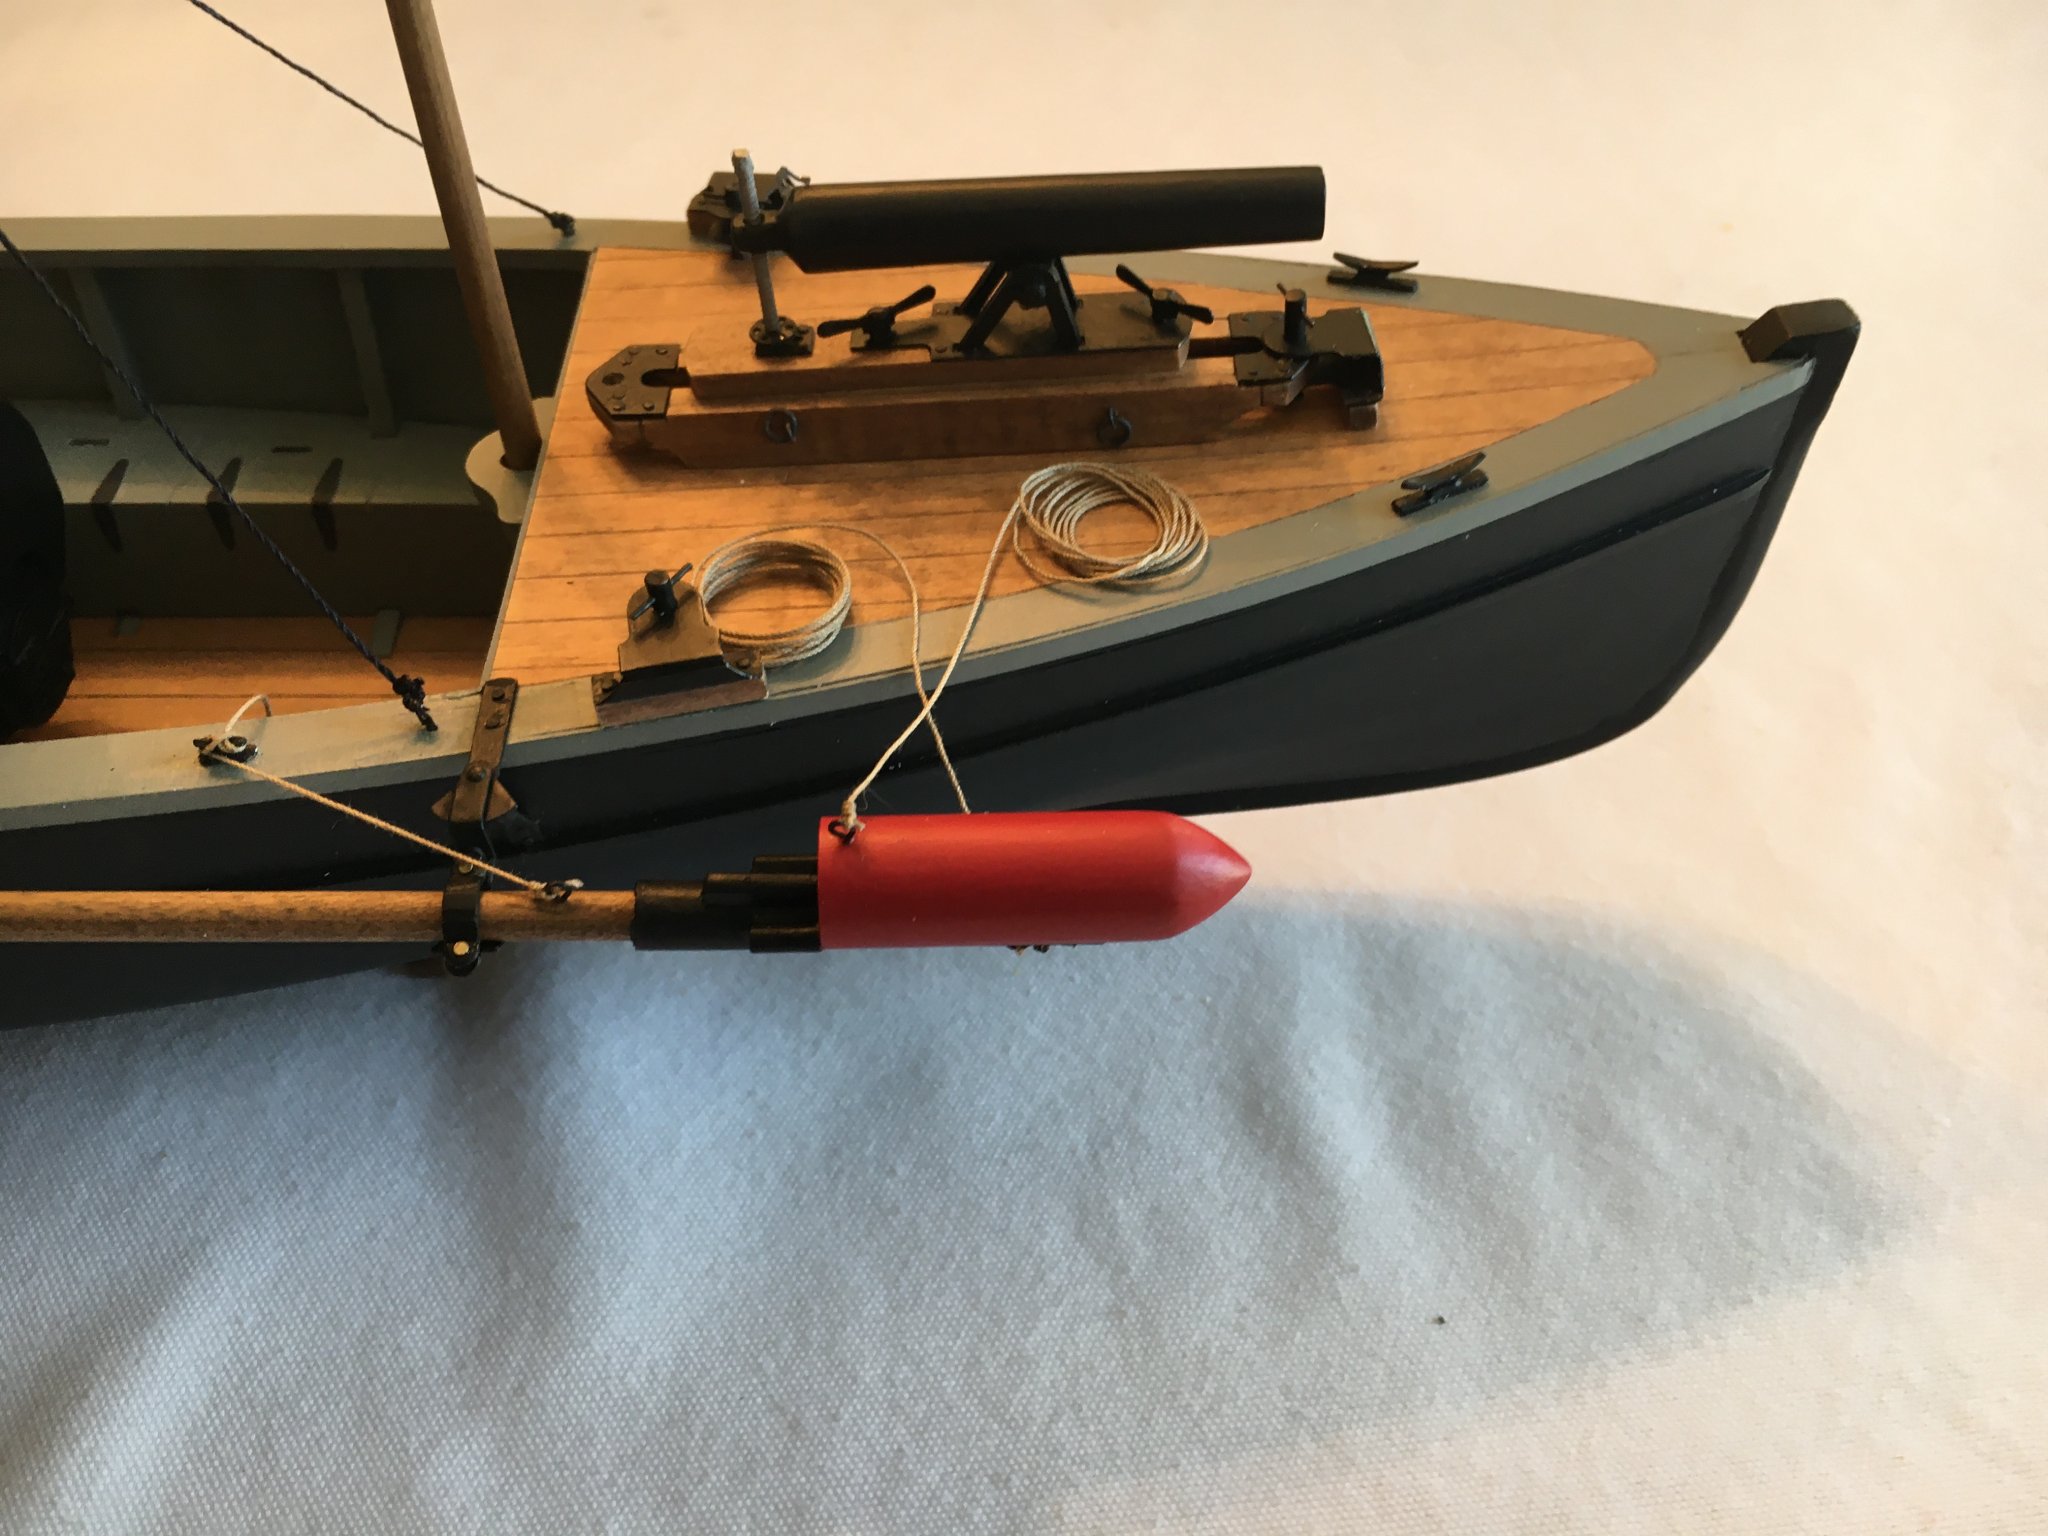
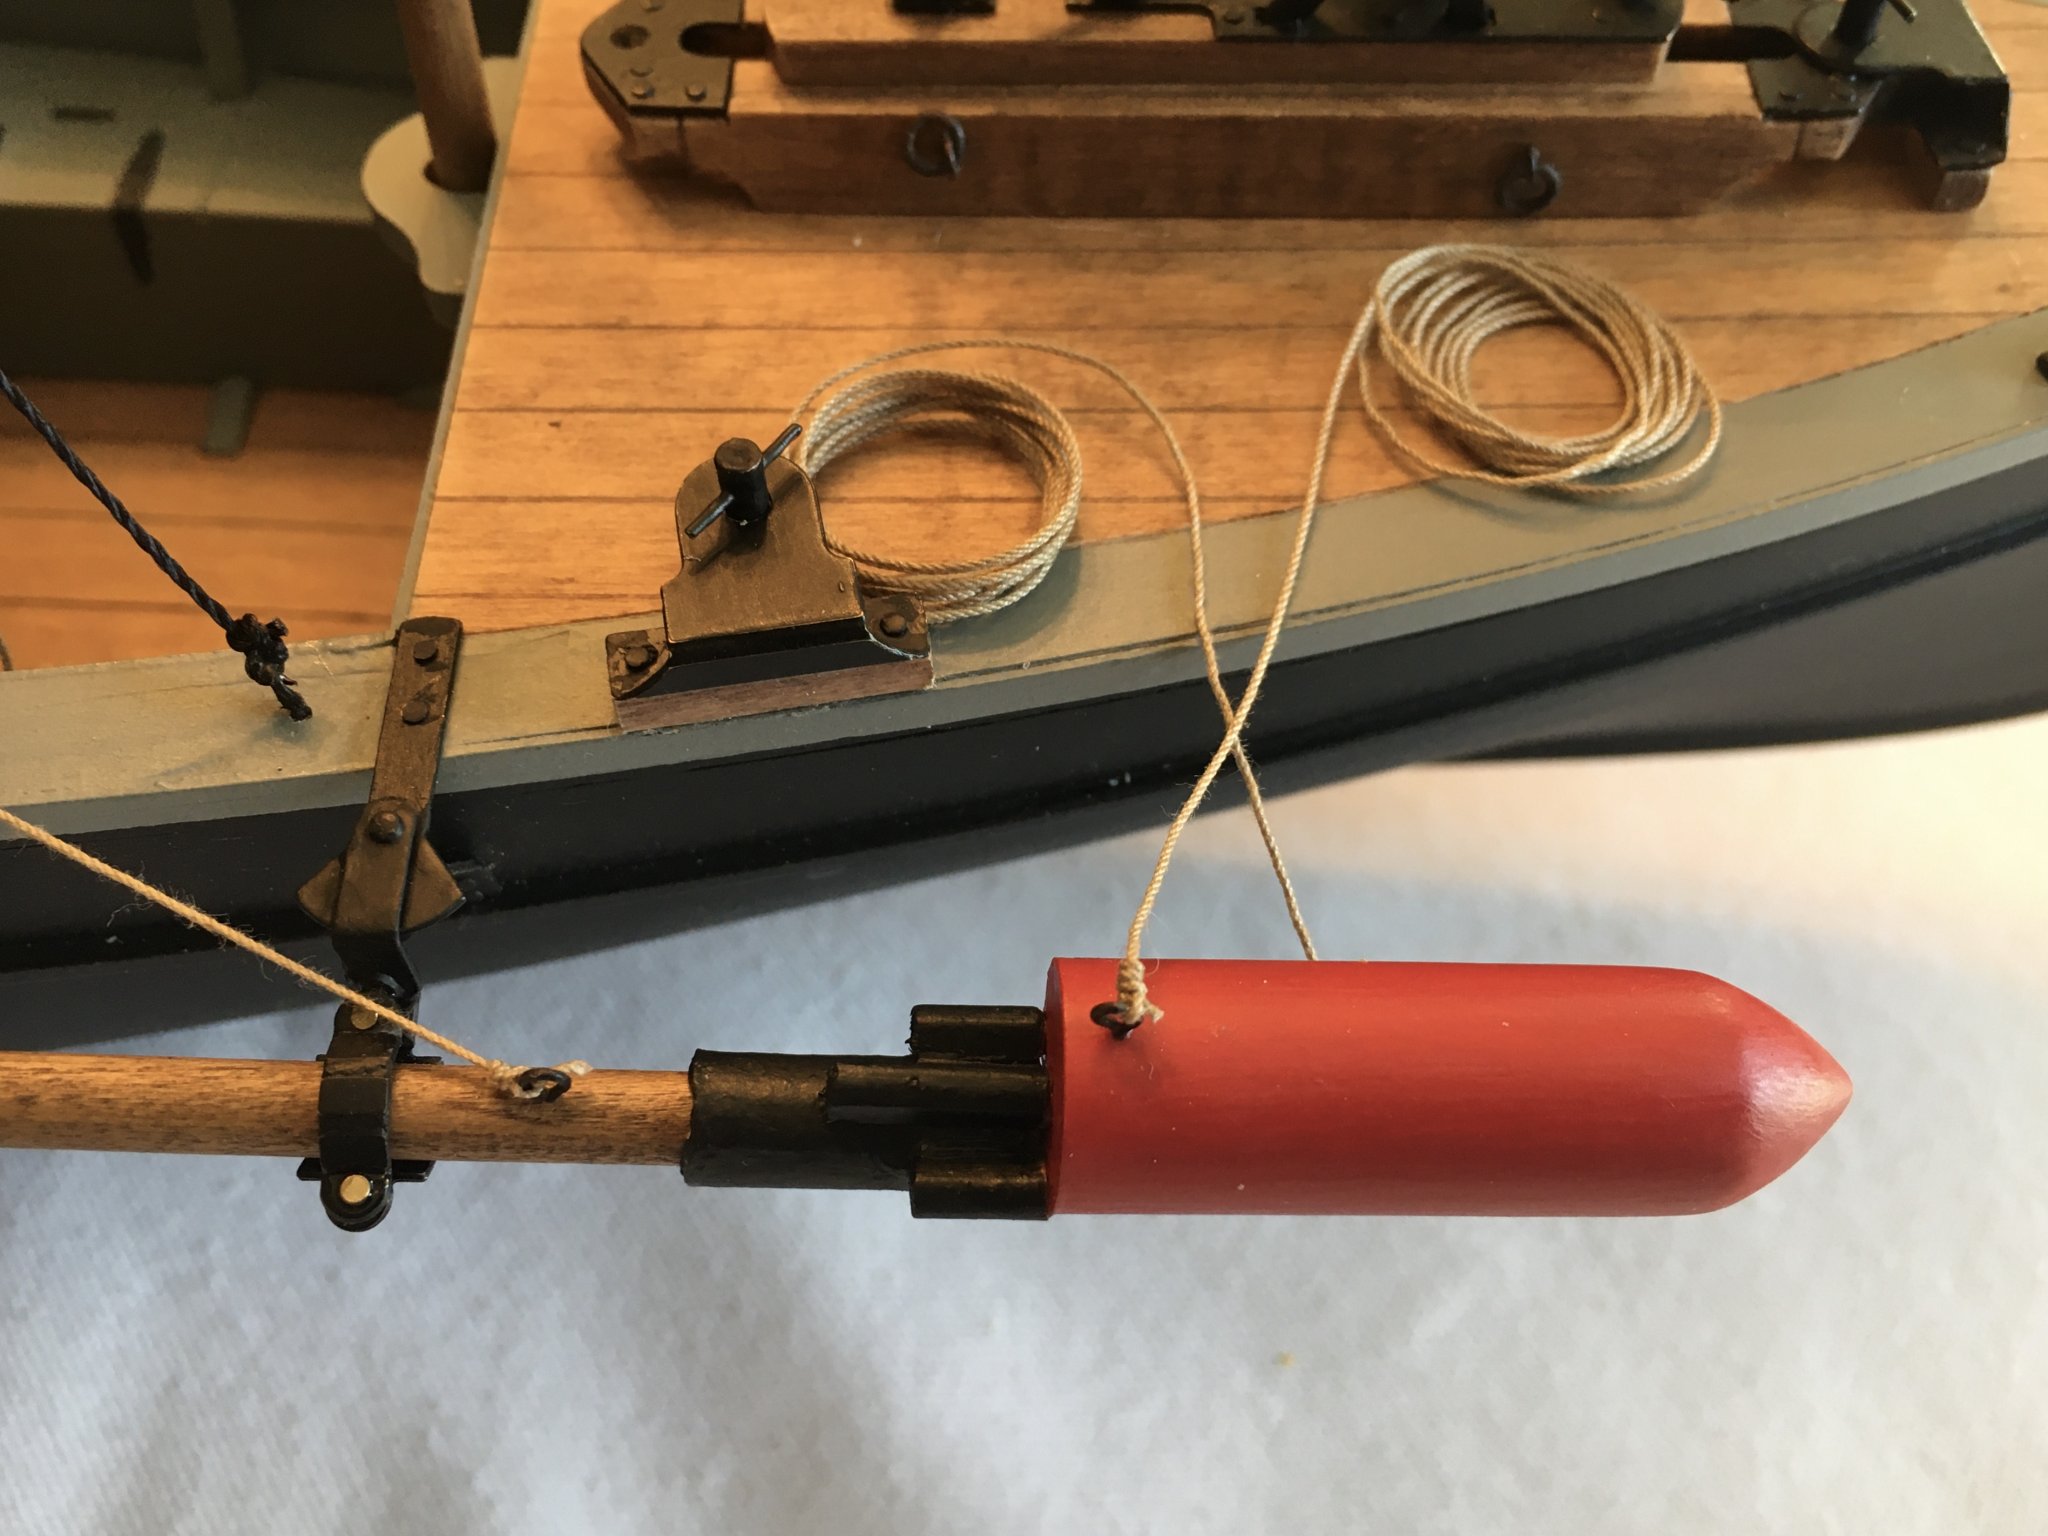
Some more progress to report. I made the hangers for the torpedo, perhaps the most challenging task so far. As others have mentioned using the suggested method of riveting the parts together with a brass pin was quite difficult. At first I was using the light hobby hammer with little success so I switched to a heavier hammer and punch. cut the pin barely above where it protruded and gave it a substantial blow and it seemed to work somewhat better. I also managed to break a part by over bending it but fabricated a new one using brass from the PE matrix. I also included a Tamiya Diamond file in the tool picture, great for cleaning up PE parts! I am having a disagreement with myself whether to round the area of the boiler end where the chimney attaches. I am afraid if I muck it up I won't talk to myself for a week. I'll let you know what happens. I also included a couple of photos of the method I used to attach the gun to its base. The wings on top are constructed using a brass part mounted to aluminium tubing, after building them I thought it would be useful to put a pin through the tubing to attach the mount to the base. Alas I had cut them too short so I inserted a smaller diameter tube inside the larger and put the pin through it. Worked well.
- 54 replies
-
- 10
-
-
- picket boat
- model shipways
- (and 1 more)
-
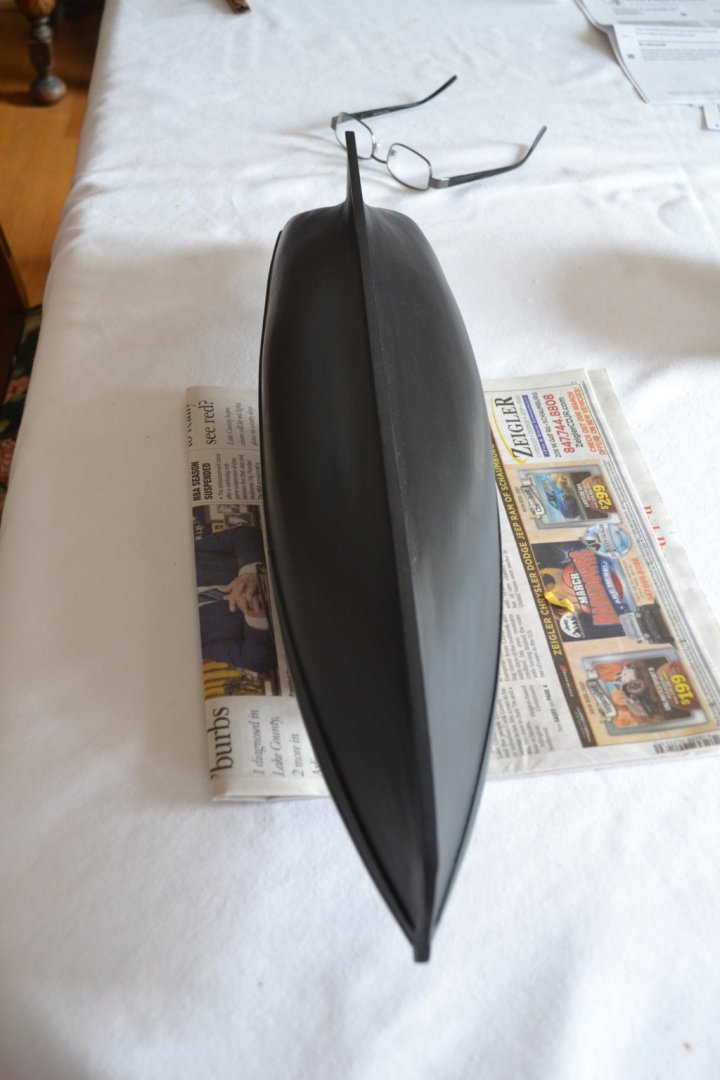
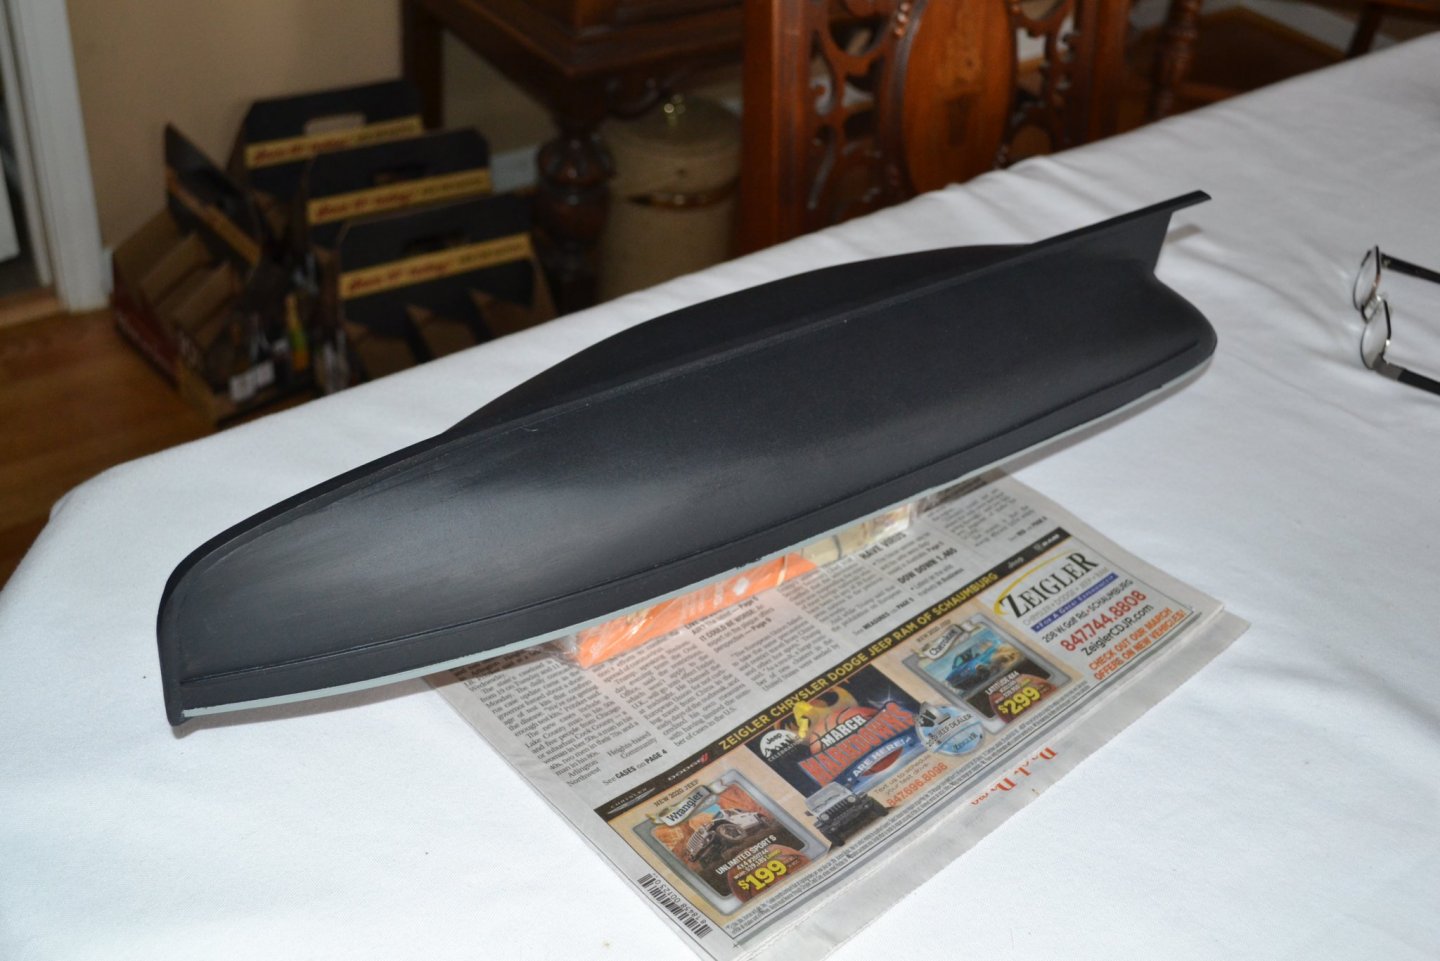
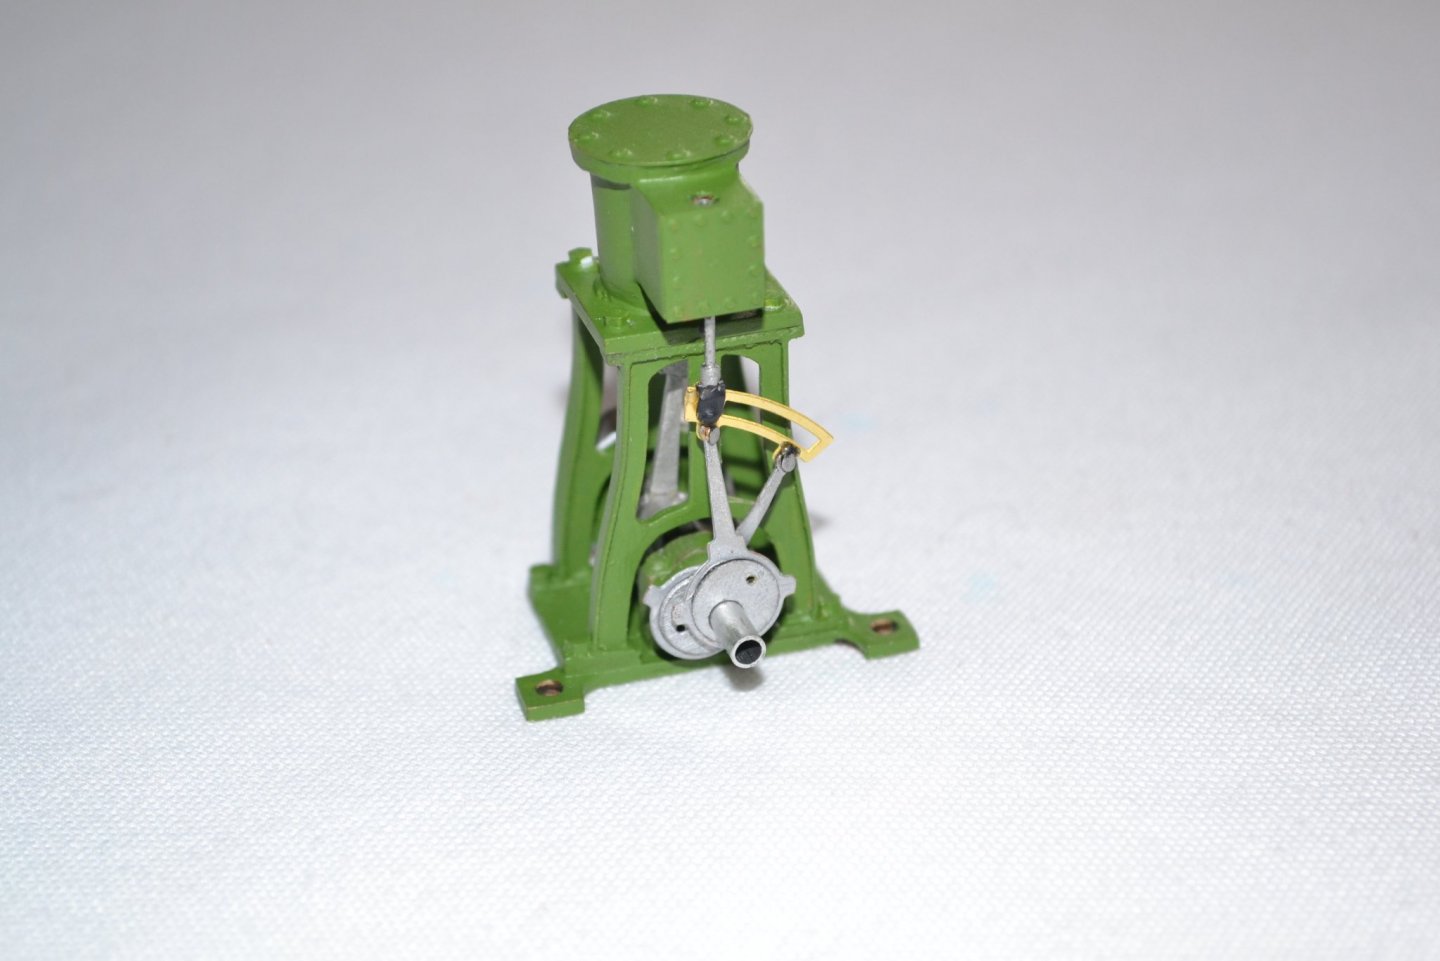
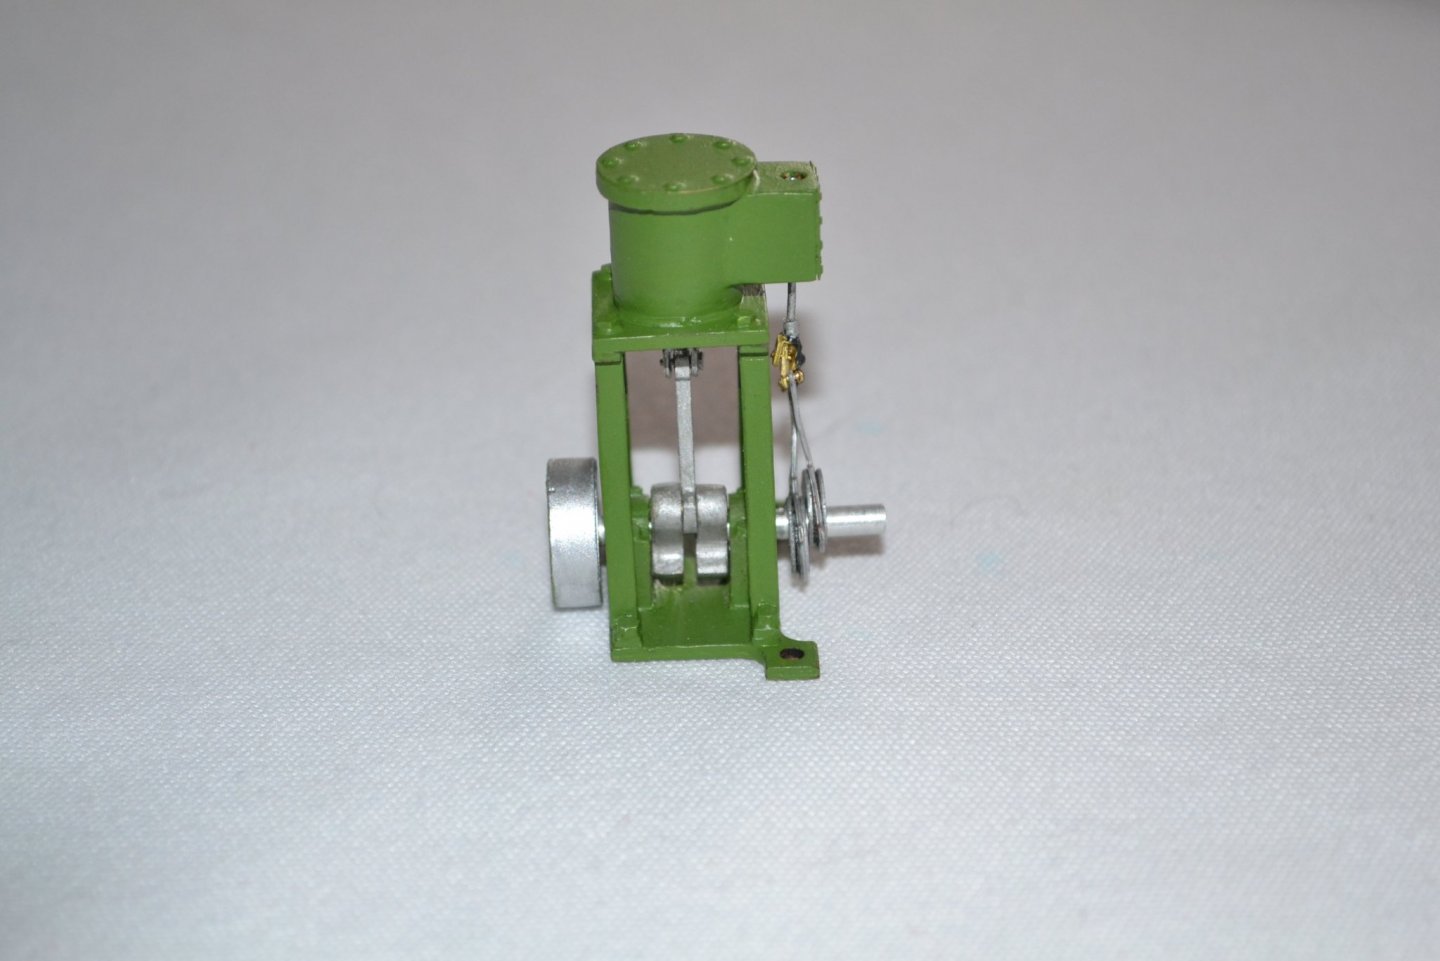
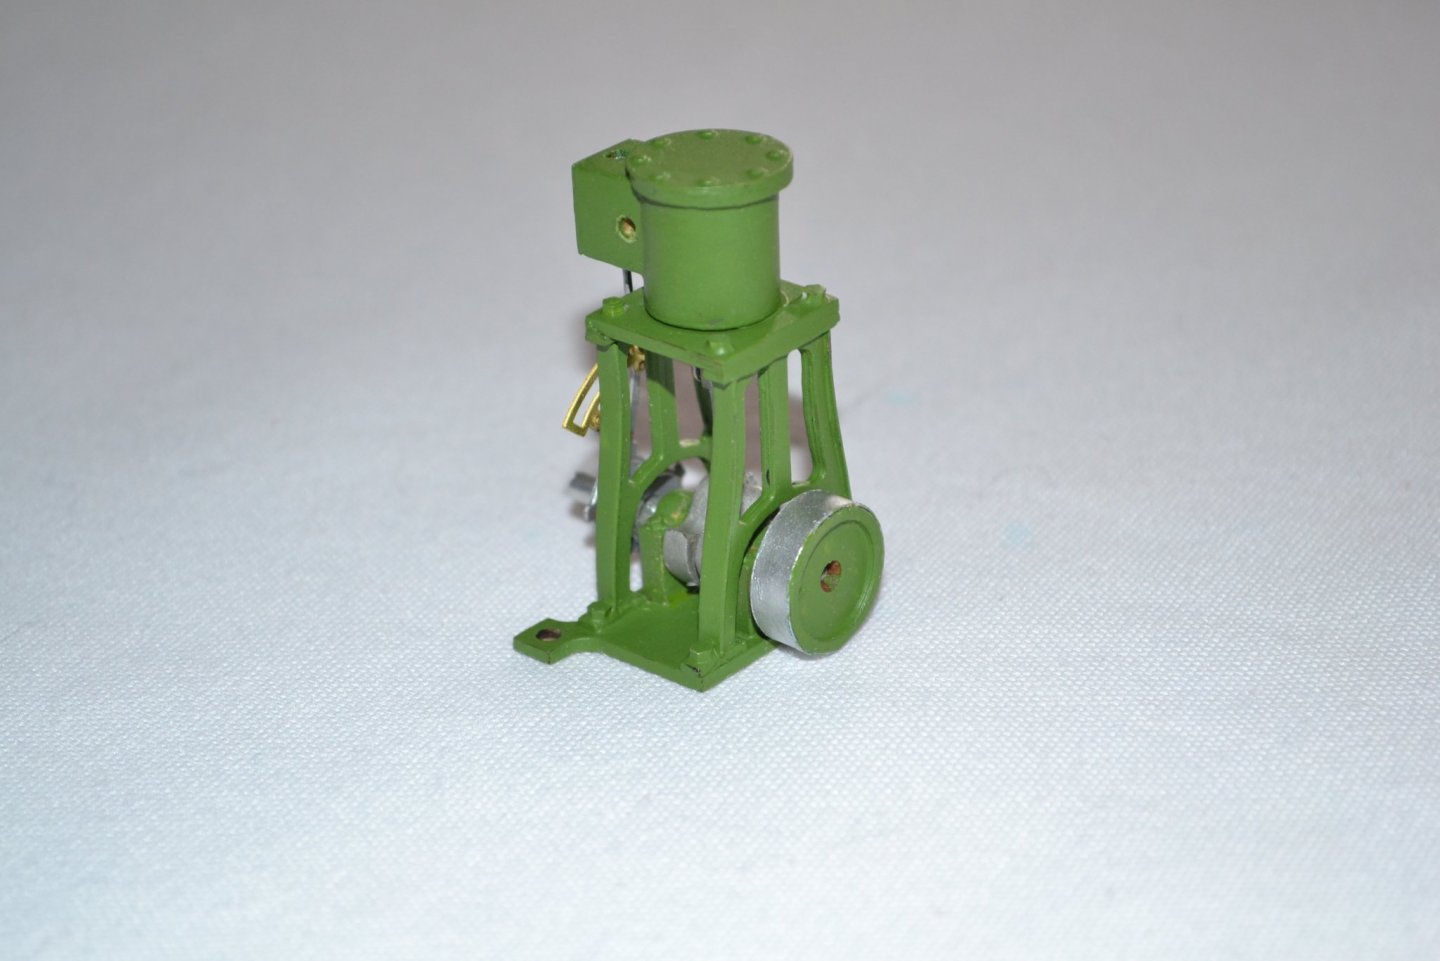
A bit more progress to report. I have filled sanded and painted the hull. I gave it one coat of lacquer and ran out so more is on order as I am sheltering in place right now. I finished the engine and gun and am happy with the results. I will start work on the torpedo and hold off on installing boiler, engine etc. until I put a couple more clear coats on the hull, don't want to damage the paint. I hope everyone is well and staying safe!

- 54 replies
-
- 7
-
-
- picket boat
- model shipways
- (and 1 more)
-
Welcome! Flew into Sydney last Friday from Auckland, just in time, today I would be in isolation for 14 days. Hope you all stay well and get through this!!
-
Straightening aftermarket rigging line
turangi replied to DonInAZ's topic in Masting, rigging and sails
I'm no expert but I have had some luck wetting the line a bit before hanging with weight and when dry apply a bit of beeswax. I use this to apply the wax, very easy to pull the line through. https://www.amazon.com/Dritz-622-Beeswax-with-Holder/dp/B00AQ7CVPO/ref=asc_df_B00AQ7CVPO/?tag=hyprod-20&linkCode=df0&hvadid=216539702338&hvpos=1o1&hvnetw=g&hvrand=2393104508206025834&hvpone=&hvptwo=&hvqmt=&hvdev=c&hvdvcmdl=&hvlocint=&hvlocphy=9021508&hvtargid=aud-801738734305:pla-350804685305&psc=1


.jpg.99174511387a51e1b4f8ea66e99a3dbd.jpg)

.JPG.0d99a7d48b338106536392101bf3c54a.JPG)


.JPG.b8dd6360f65c5e70843fbaaf4ba70721.JPG)
.JPG.9c299e7bda68abaa0b7cdefdf2aabe4f.JPG)