HOLIDAY DONATION DRIVE - SUPPORT MSW - DO YOUR PART TO KEEP THIS GREAT FORUM GOING!
×


turangi
-
Posts
276 -
Joined
-
Last visited
Content Type
Profiles
Forums
Gallery
Events
Everything posted by turangi
-
Very interesting thread! I have a small stash of kits, four. I don't build kits with any anticipation of selling the completed model or selling the unopened kit for a profit, I buy them for my own pleasure and satisfaction. I don't own any $1,700 kits and have bought all on sale at a great discount at a modest price because the subject interested me. I don't want a huge stash and only buy those I think I can complete in a reasonable amount of time. My wife passed away suddenly in 2015 and the following year I went through six months of chemotherapy. Due to the chemo I suffered neuropathy and lost the feeling in my fingers and started wooden ship building as a form of self-prescribed therapy , it helped immensely with both my physical issues and filled many empty hours especially with the last pandemic year. I thoroughly enjoy the hobby and am very glad I undertook it. I have purchased a modicum of tools and no power tools but manage to muddle through. I will never reach the point of scratch building but occasionally do a bit of custom work, usually due a mistake I need to correct!
-
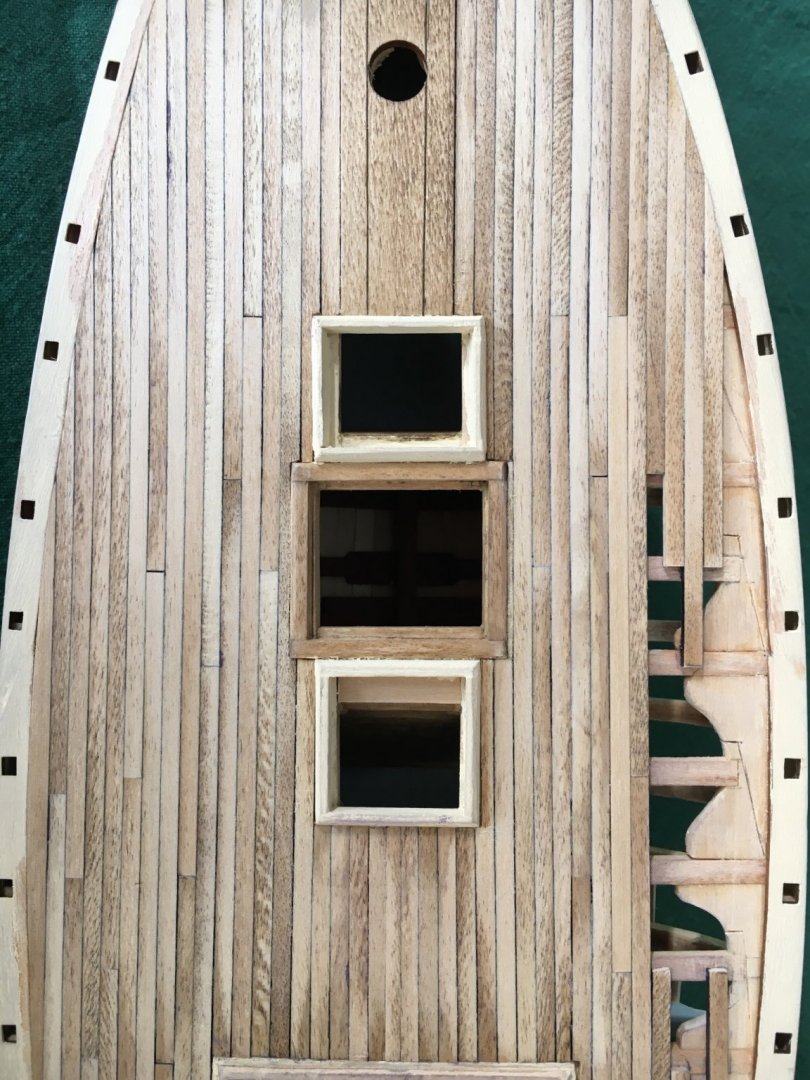
 I have cast the die and decided to leave the deck as pictured and did some work on the king plank to match the deck. I am currently working on the open frames and experimenting to make them look like planks are being replaced due to damage after many seasons at sea. Pictures will follow whether my experiments are successful or a total failure. I see some weathering in my future.
 -
Thank you! Exactly my thought.
-
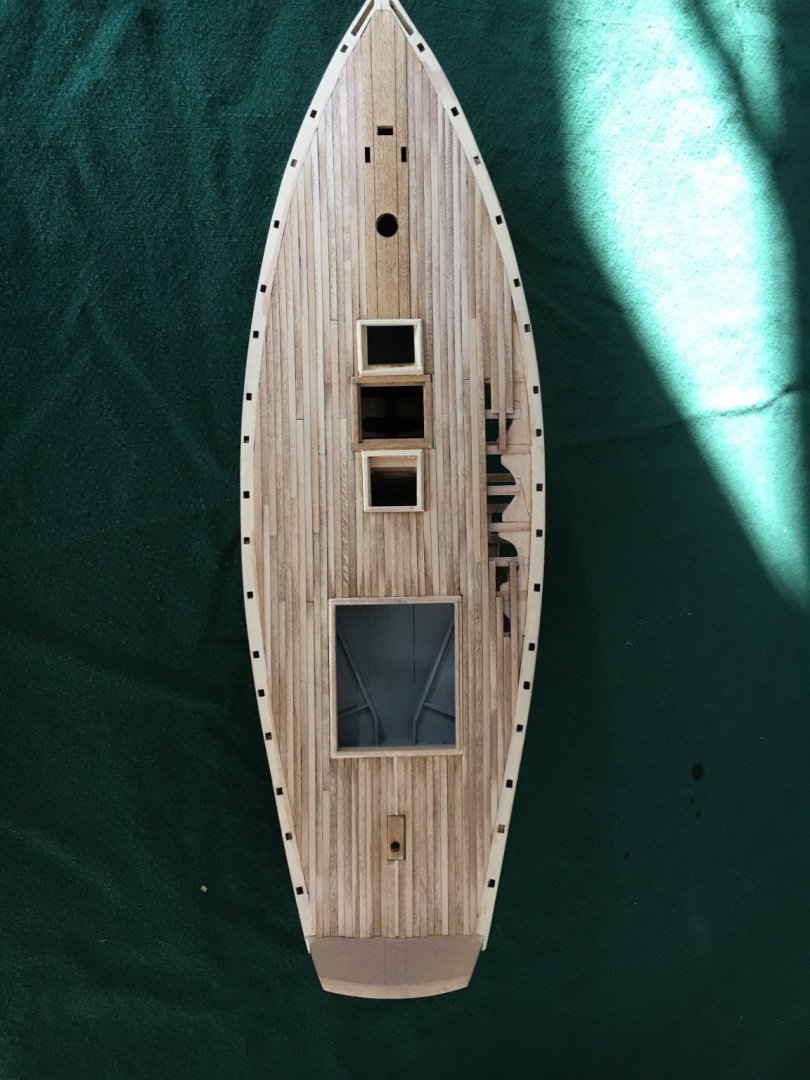
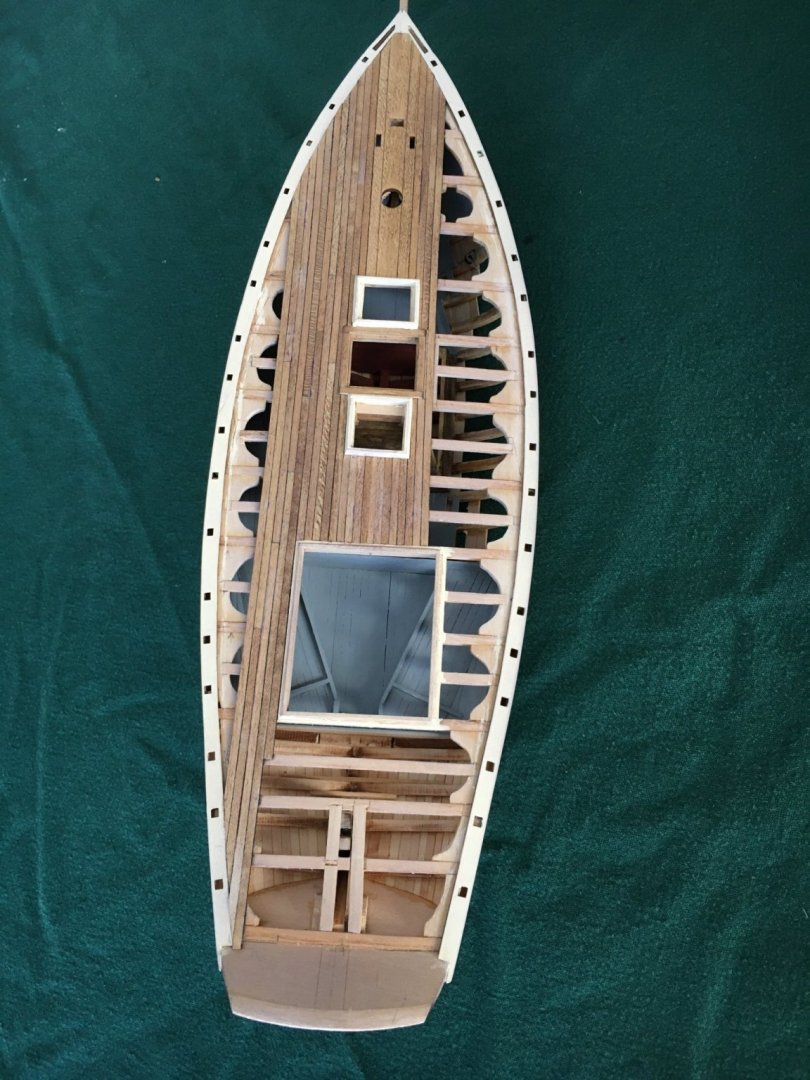
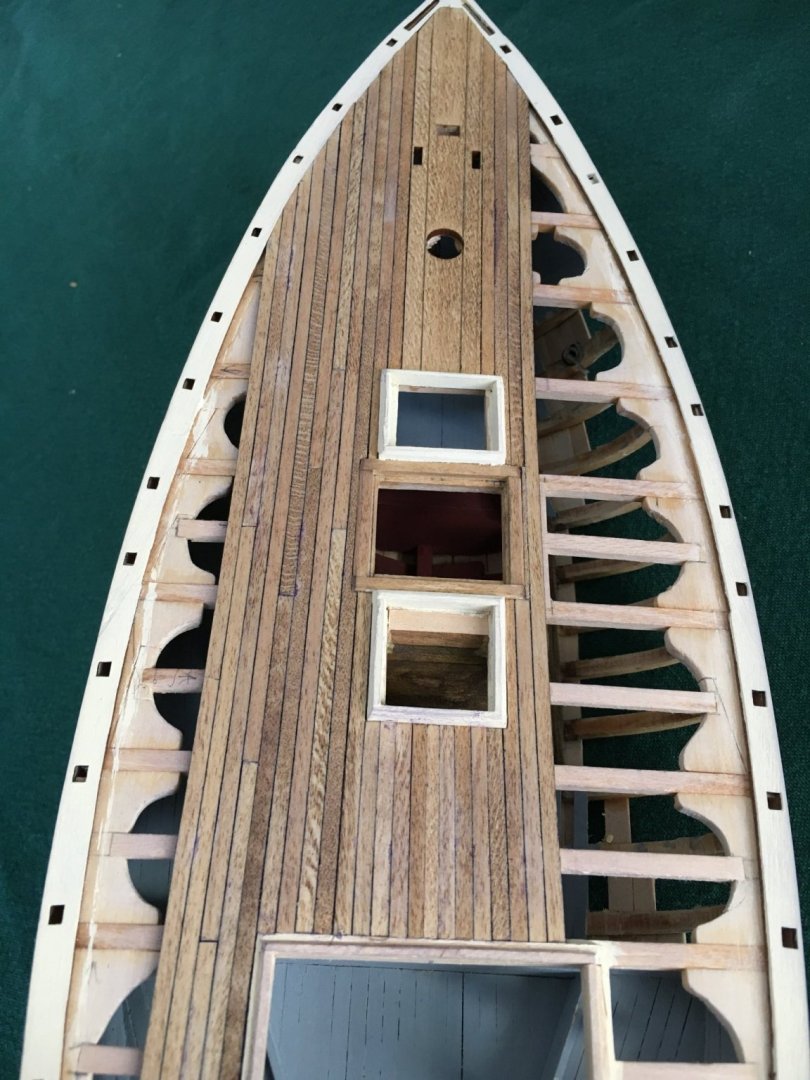
As anticipated I had to scrape and sand the deck as mentioned previously. My intent was to restain it but I admit I rather like like the look now. To me it looks like a worn deck undergoing repair and refinish. I am tempted to just leave it as is with perhaps a colorless sealer applied. I would welcome any and all opinions or suggestions!

-
Great post! Another thing to remember is that CA is available in different formulations and not all are super thin. The thicker formulations include an additive (rubber?) to create a different characteristic and possible help with sheer strength if that is a consideration. I have recently used a gel formula to do deck planking and it is easy to apply a small amount that will spread out as pressure is applied to the plank without excessive squeeze out and is easy to control. When planking the hull If I encountered a small gap between planks I applied medium viscosity in the gap, wiped away the excess, and immediately sanded the area and it filled the gap wonderfully. This is to be a painted hull so I had no concern with stain issues. I had occasion to remove an already installed deck plank and was impressed with the holding power, wood was left behind, perhaps not an desirable thing in some situations but easy to remedy in mine. I prefer to use wood glue if possible if possible but often CA obviates the need for clamping and the quick set time is a blessing.
-
I have moved on to installing the deck. I find it an enjoyable process with a couple of issues, as usual the lesson is delivered after the test was given as we used to say in the fire service. First problem was that I stained all the planks prior to installation thinking that I would smear some glue on their tops making staining difficult to obtain a reasonably consistent color. Of course, some were a tiny bit thicker than others so sanding and refinishing is in my future to achieve a smooth deck. Second issue is that I used permanent black marker on the plank edges to simulate caulking. It seems the CA glue I am using to fasten the planks is a perfect solvent for permanent marker and any squeeze-out resulted in a purple blob, I did learn to be very judicious in adhesive application! I did install one plank that turned out to be be a bit narrow in width and didn't look right so I tore it out and replaced it. I am not sure I am too keen on the color, but I am using what I have on hand as due to the pandemic, my age and other conditions I am not too willing to haunt hobby shops or hardware stores to look for alternatives. I also pre-painted the coamings, covering board and the cabin base prior to planking.

-
Miniature Drill Bit Chuck for Dremel Tool?
turangi replied to turangi's topic in Modeling tools and Workshop Equipment
Thanks all for the replies! I will do some research based upon them. -
Does anyone know of a source for a quality chuck for size 60-80 drill bits? I bought a 4 jaw model a few years ago but the bits wobble like a Hula dancer. Ant help would be greatly appreciated!
-
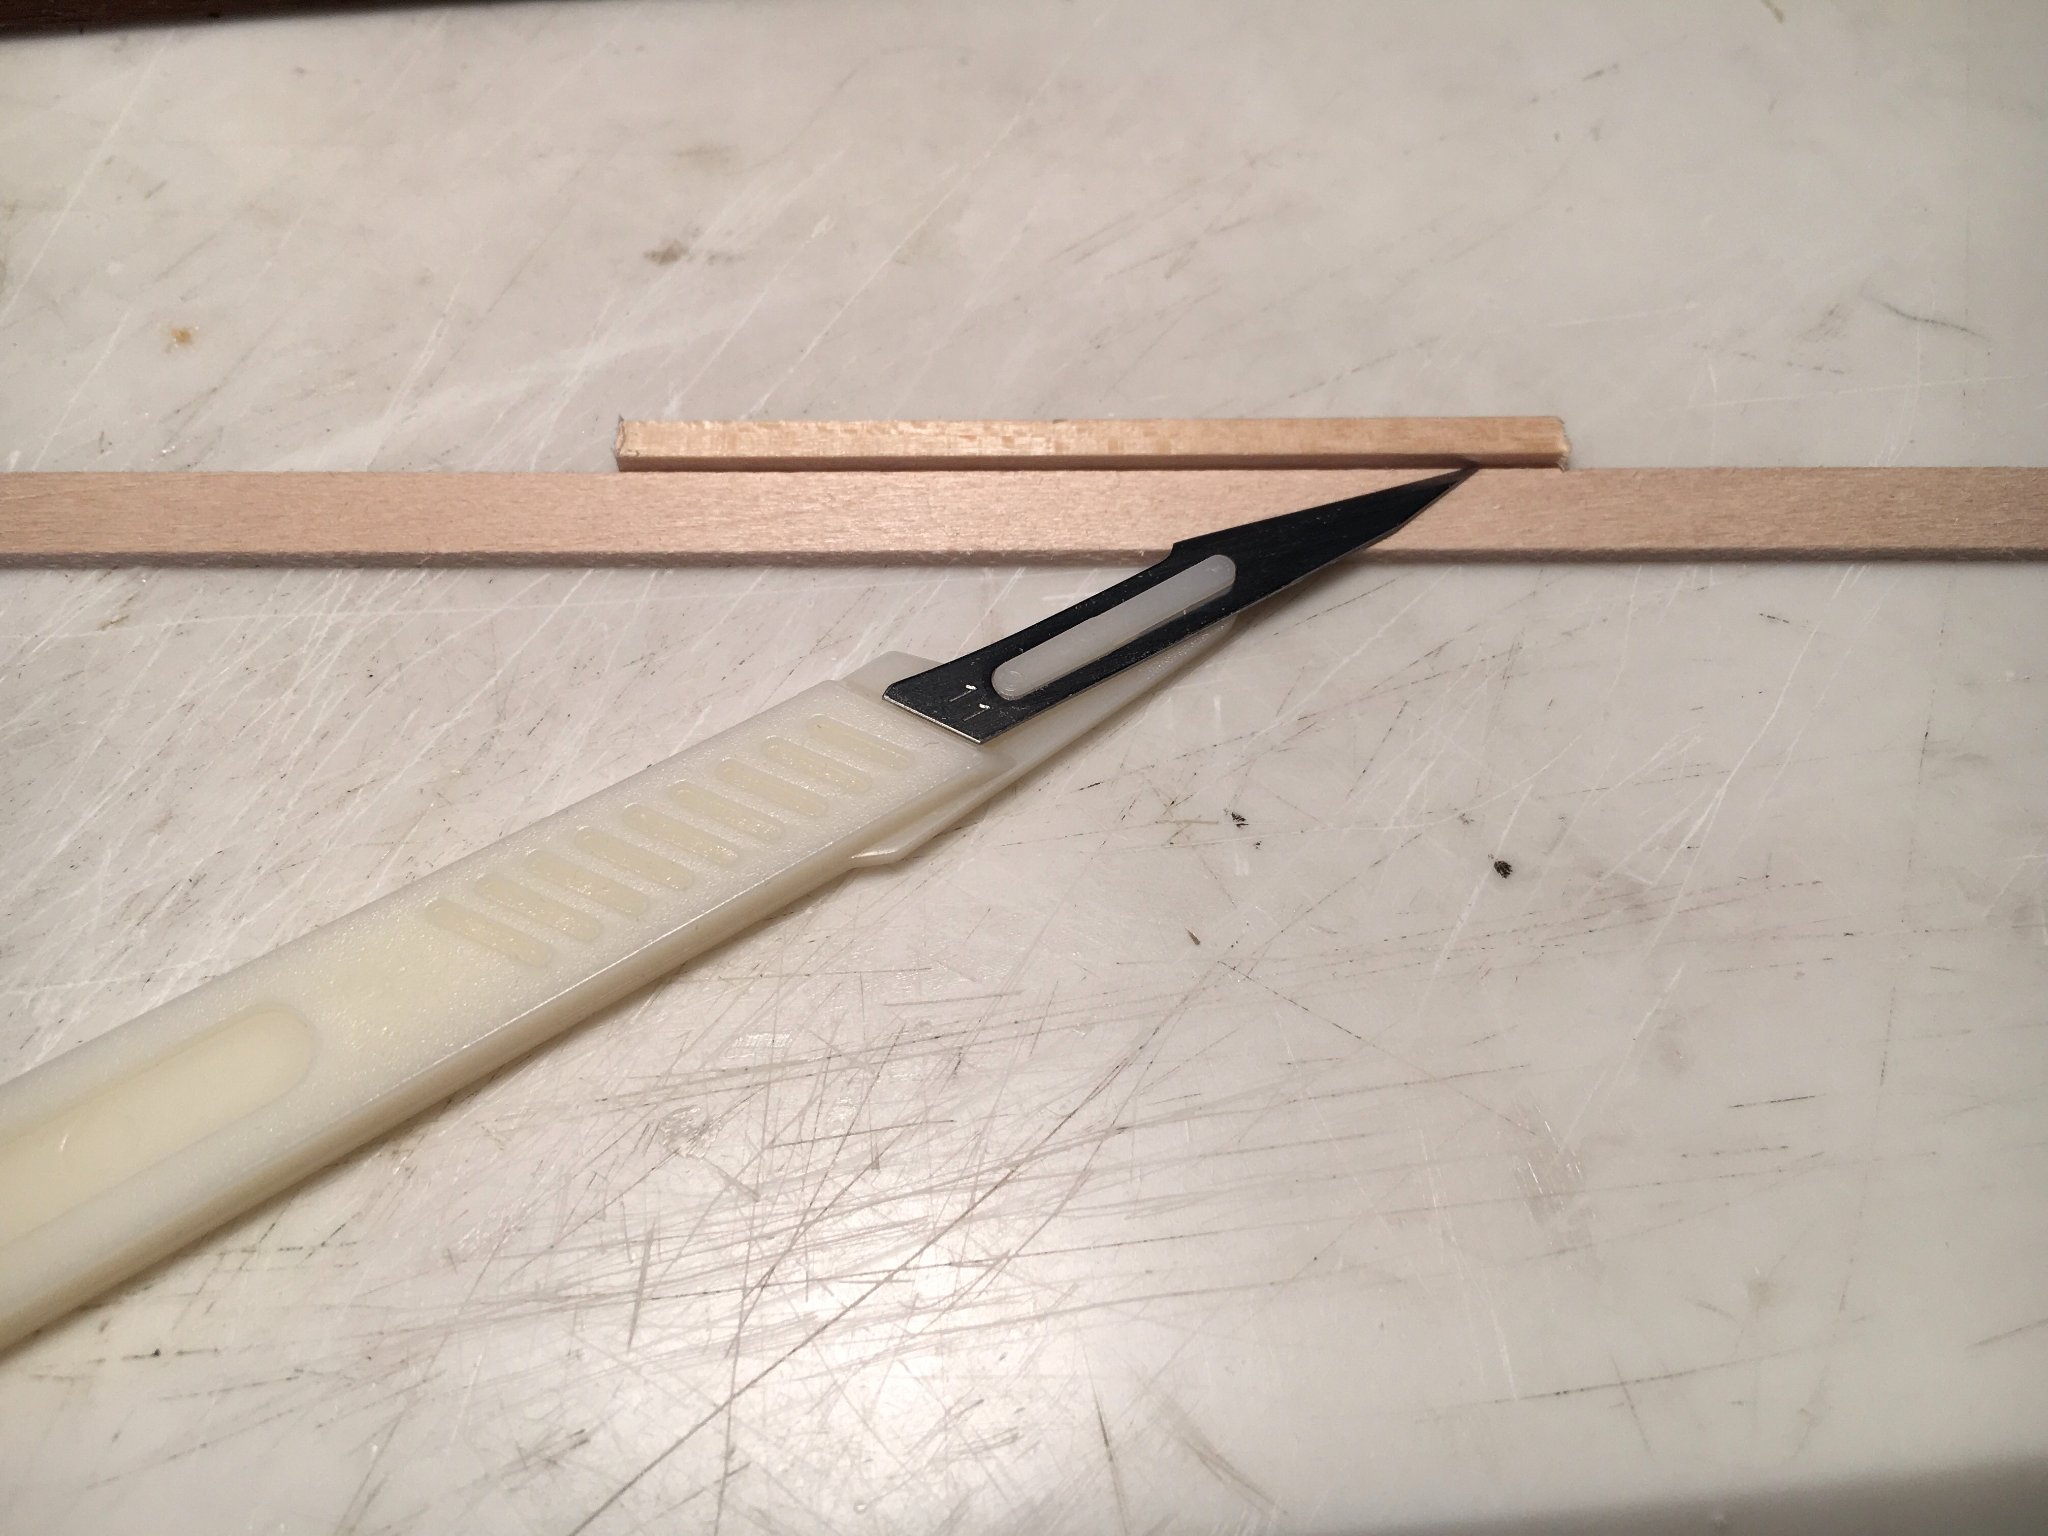
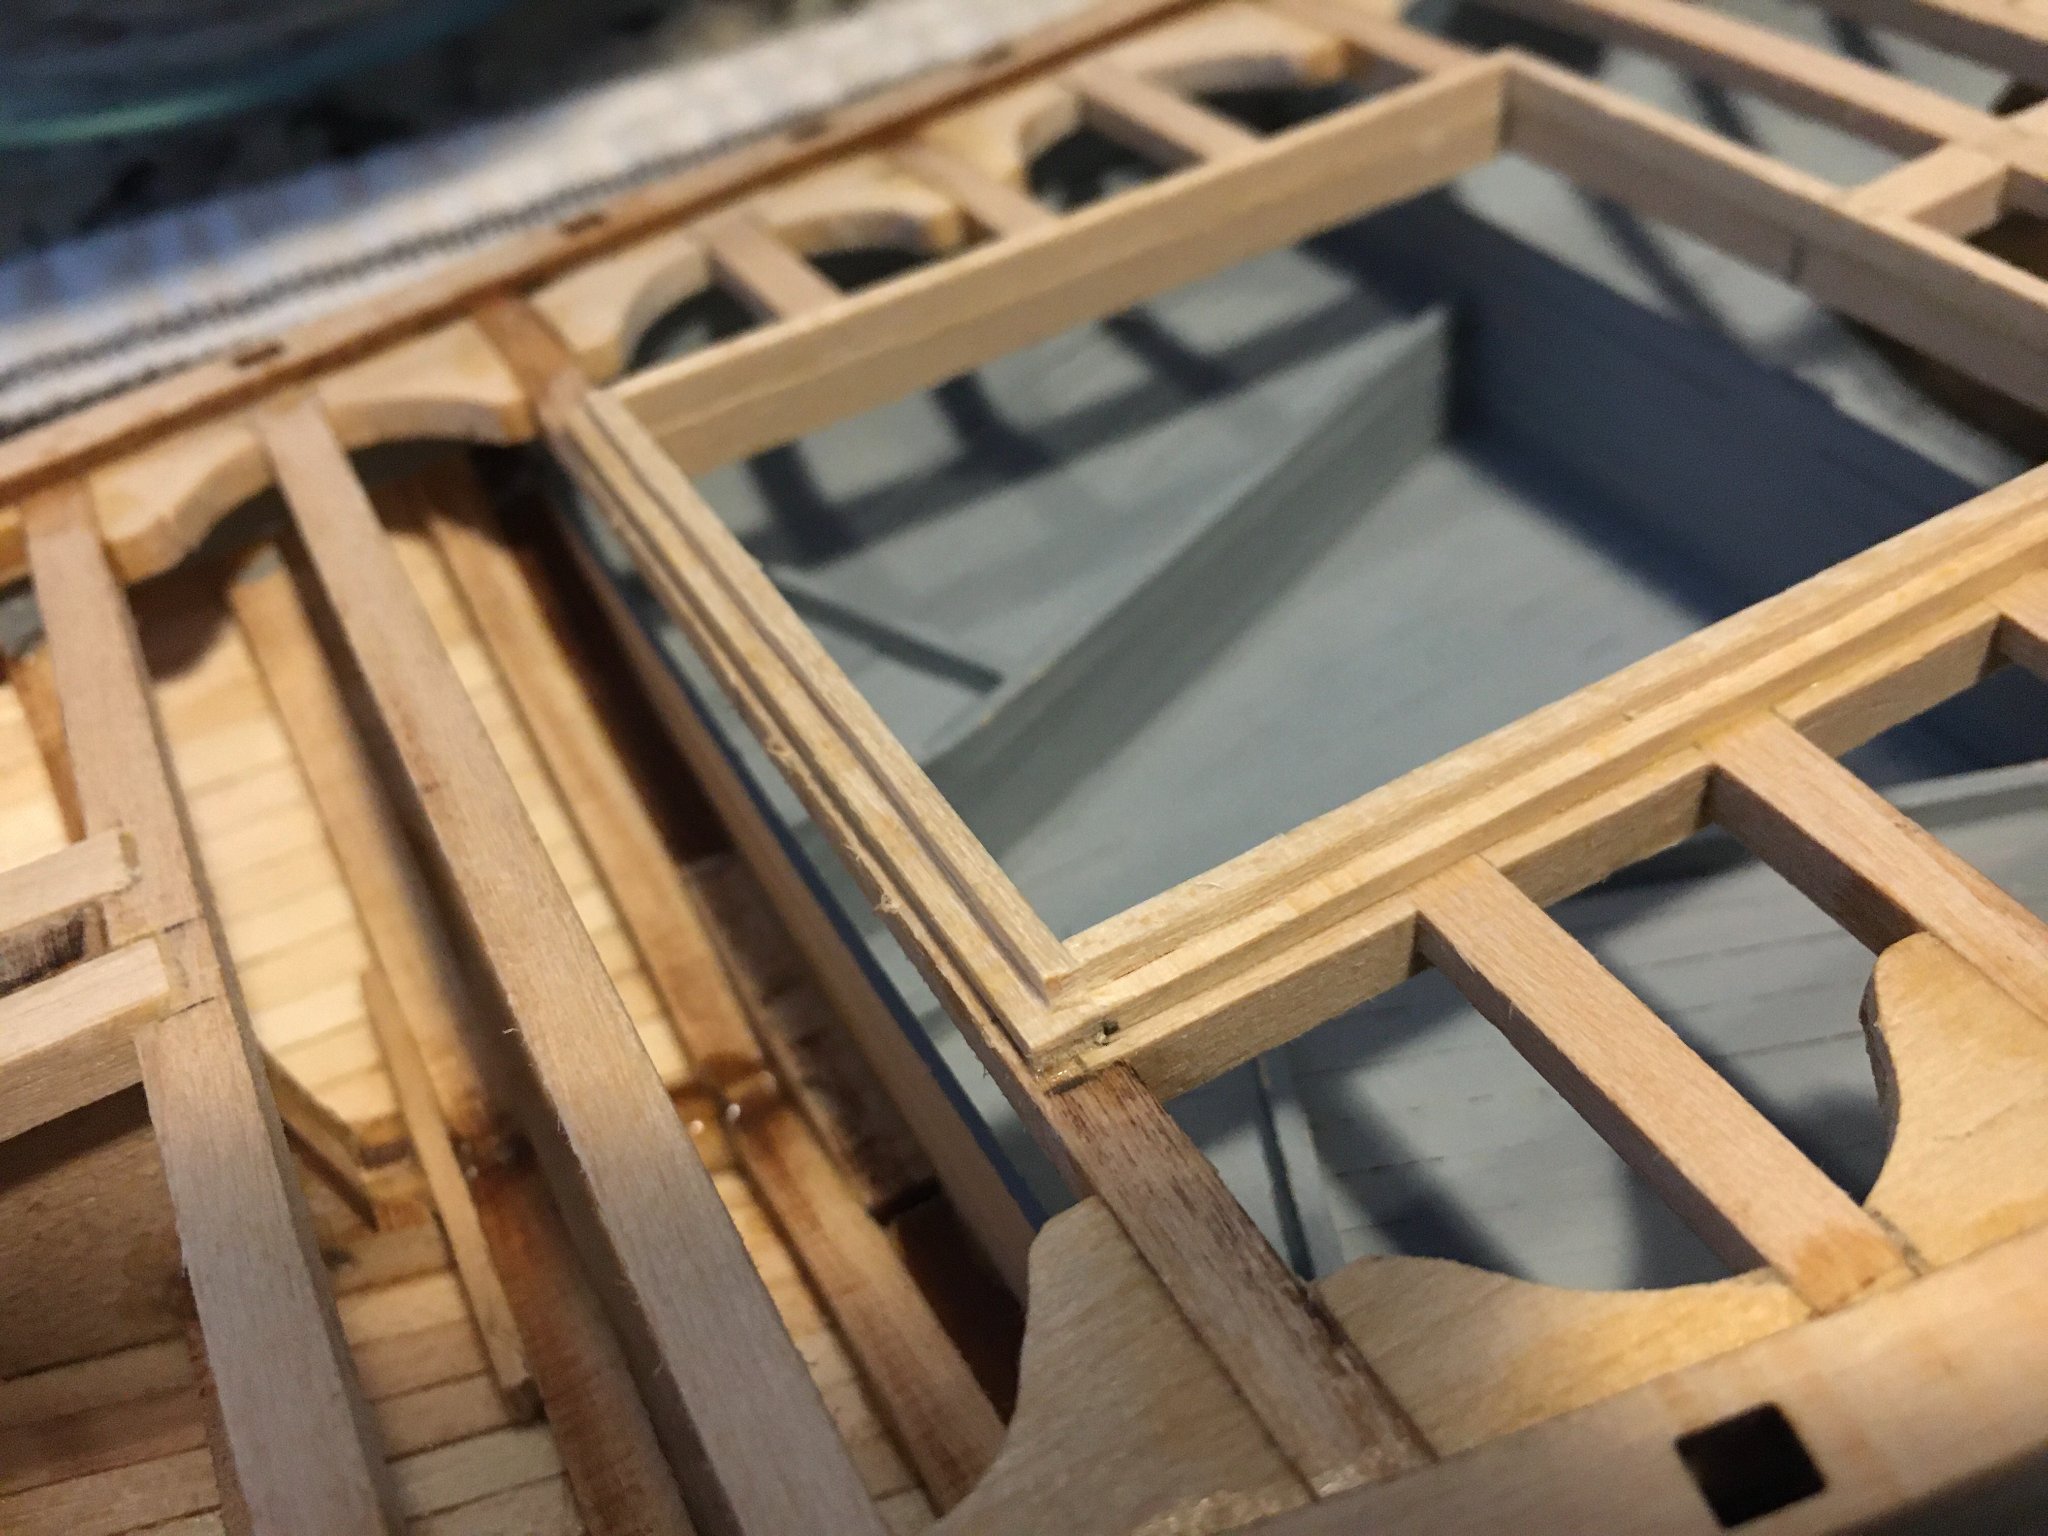
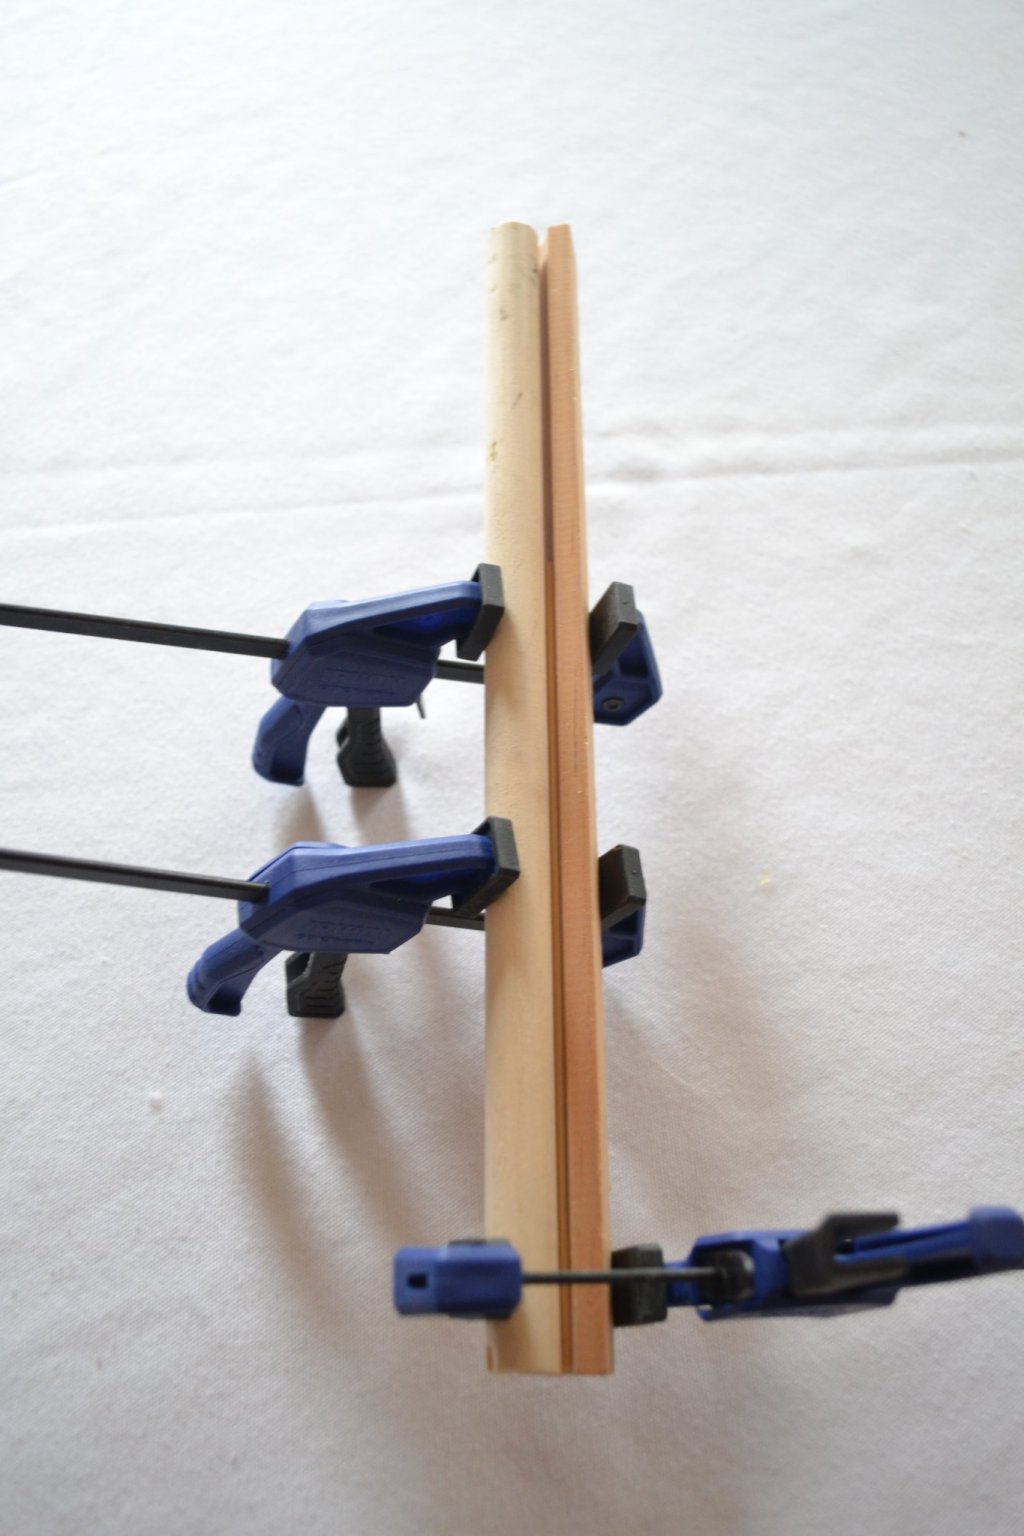
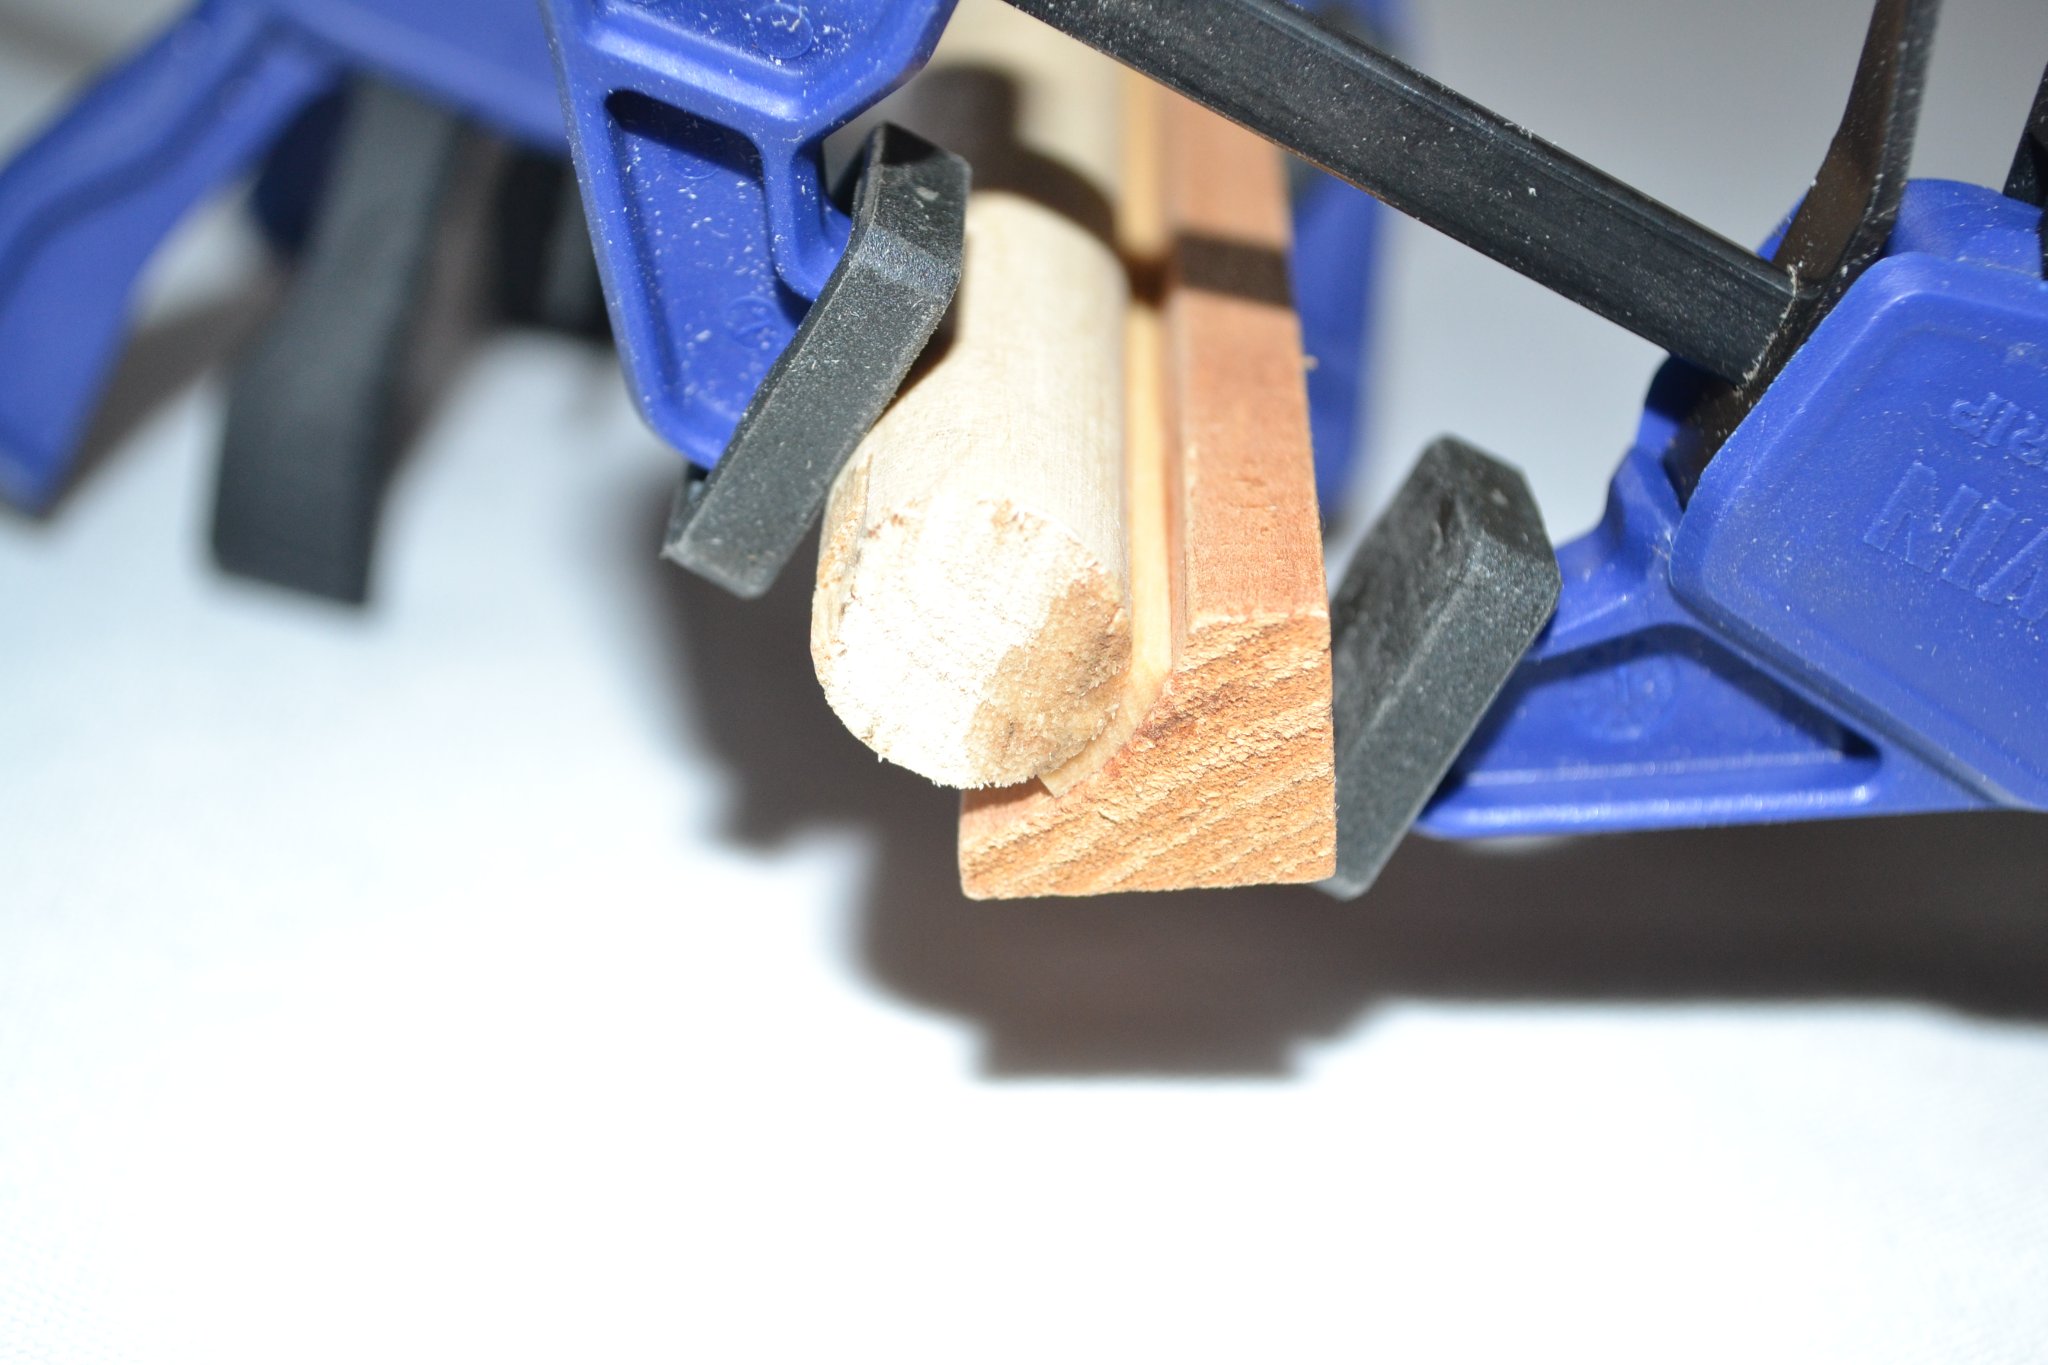
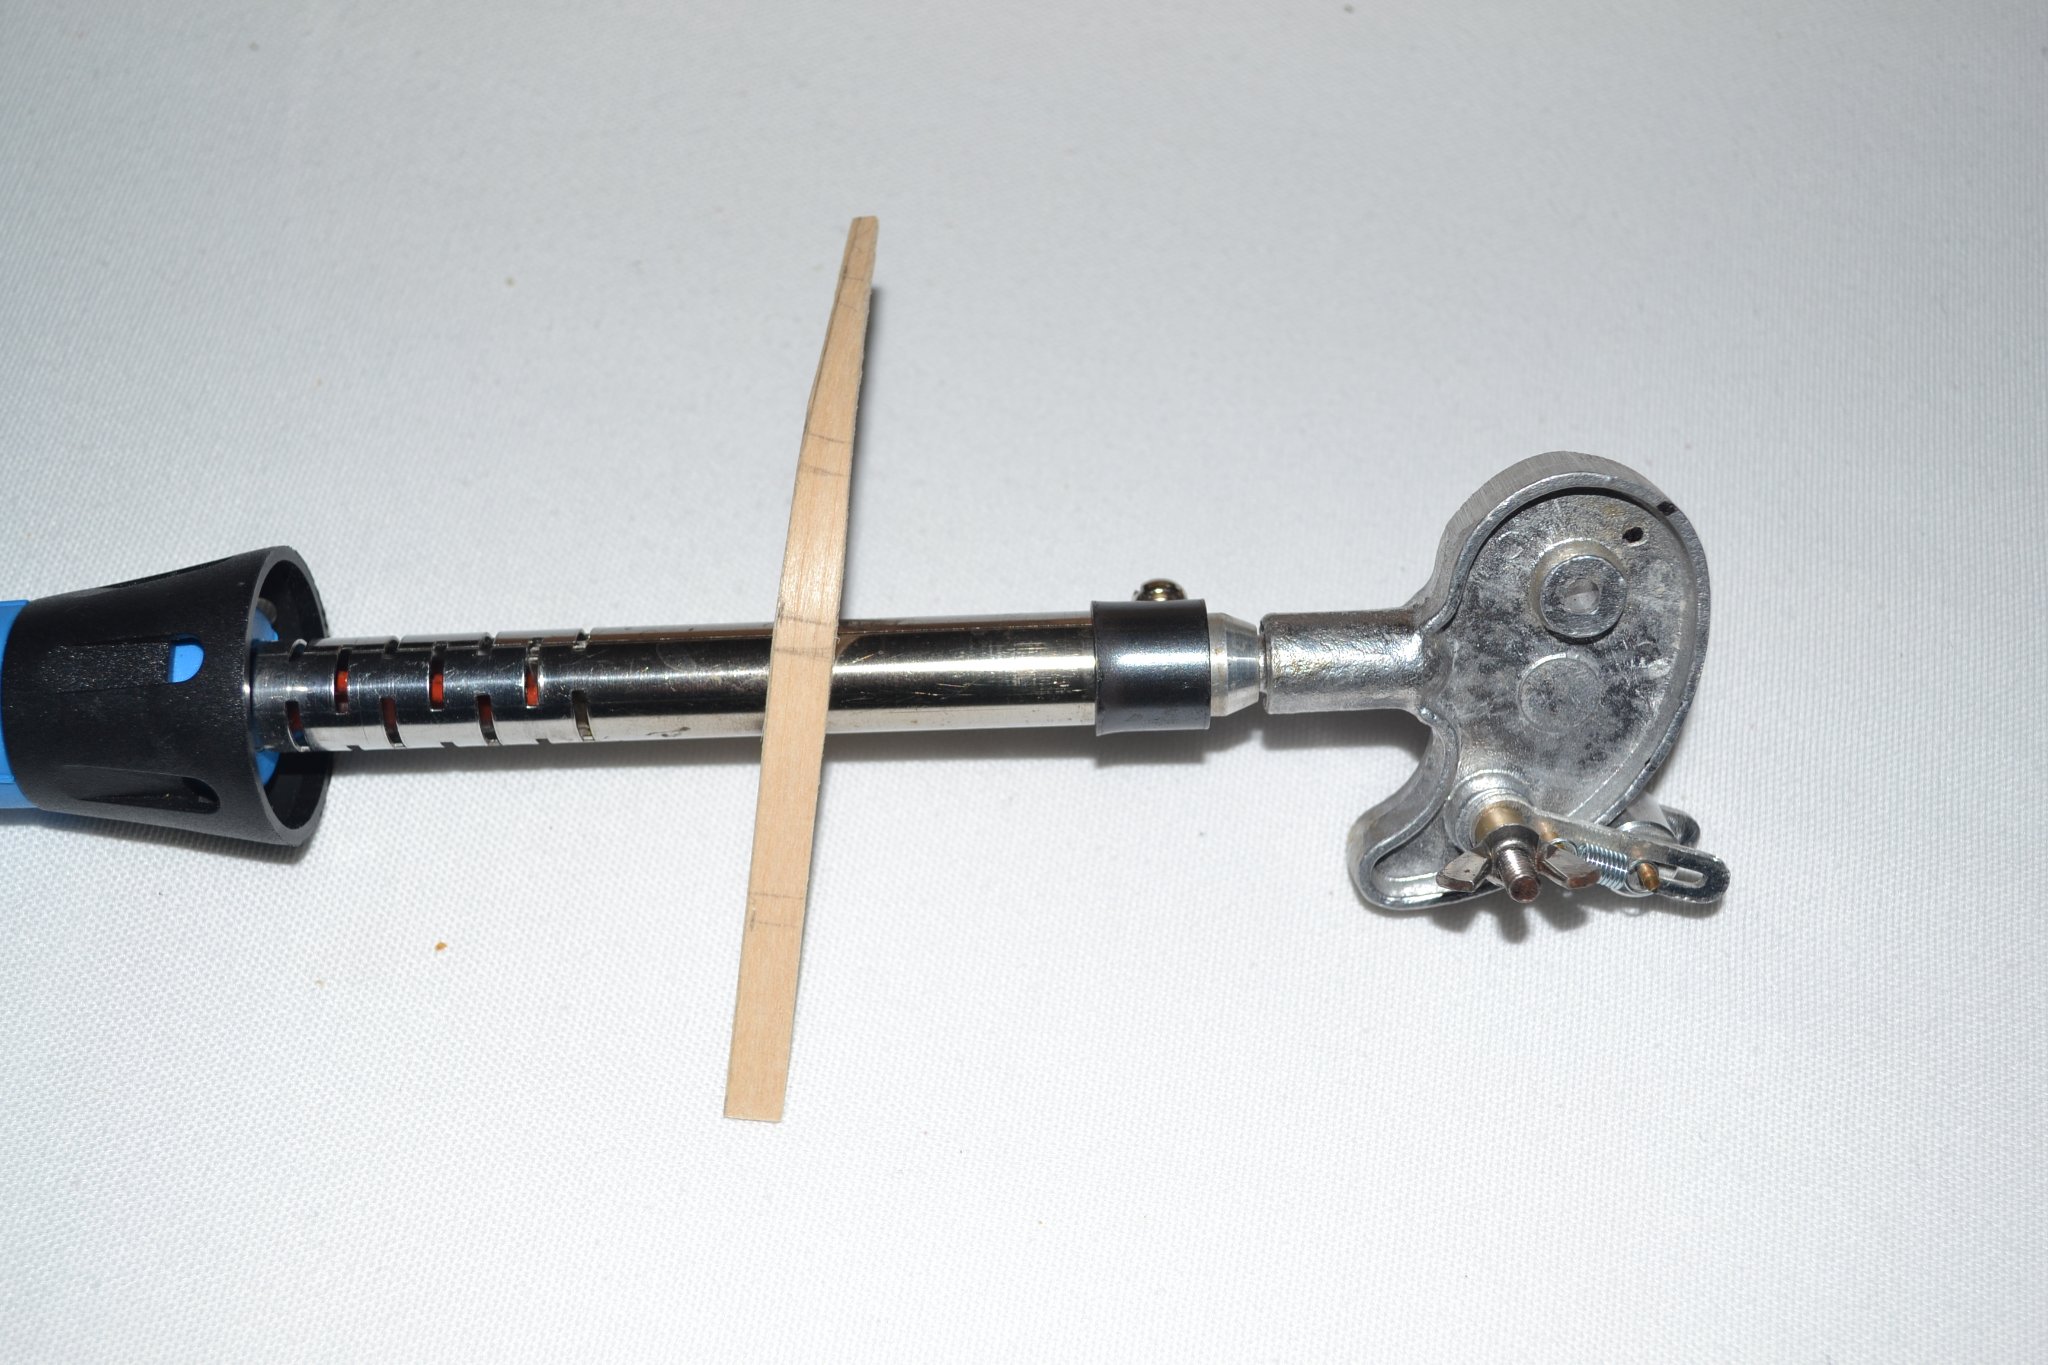
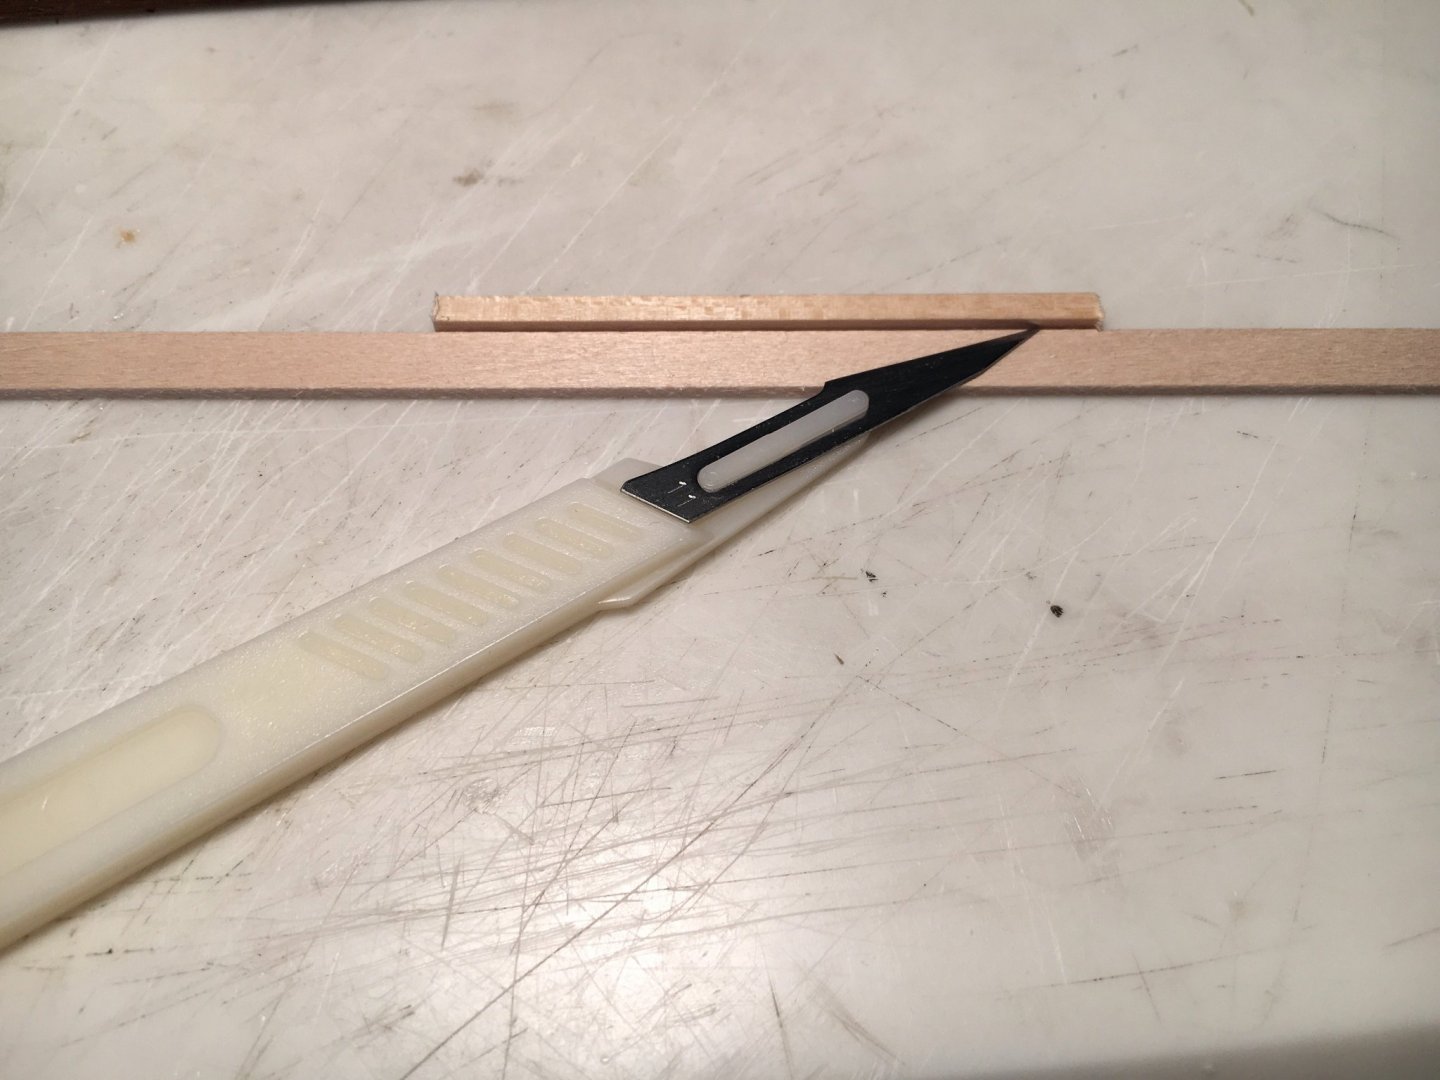
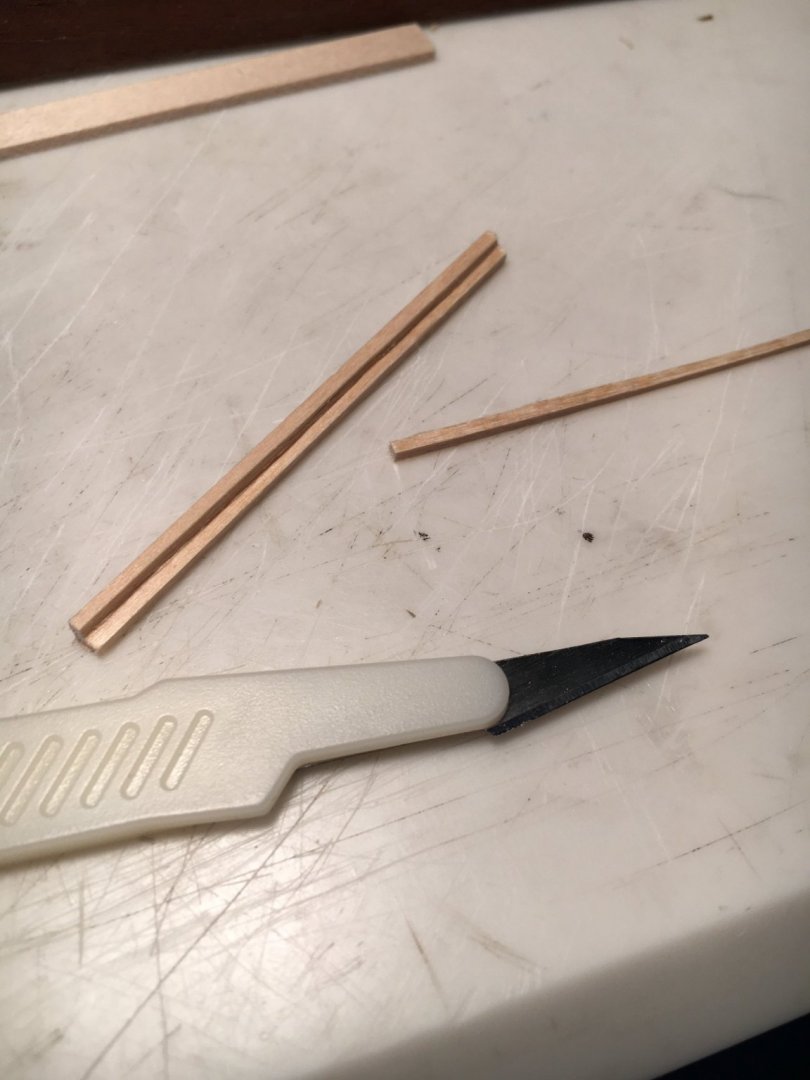
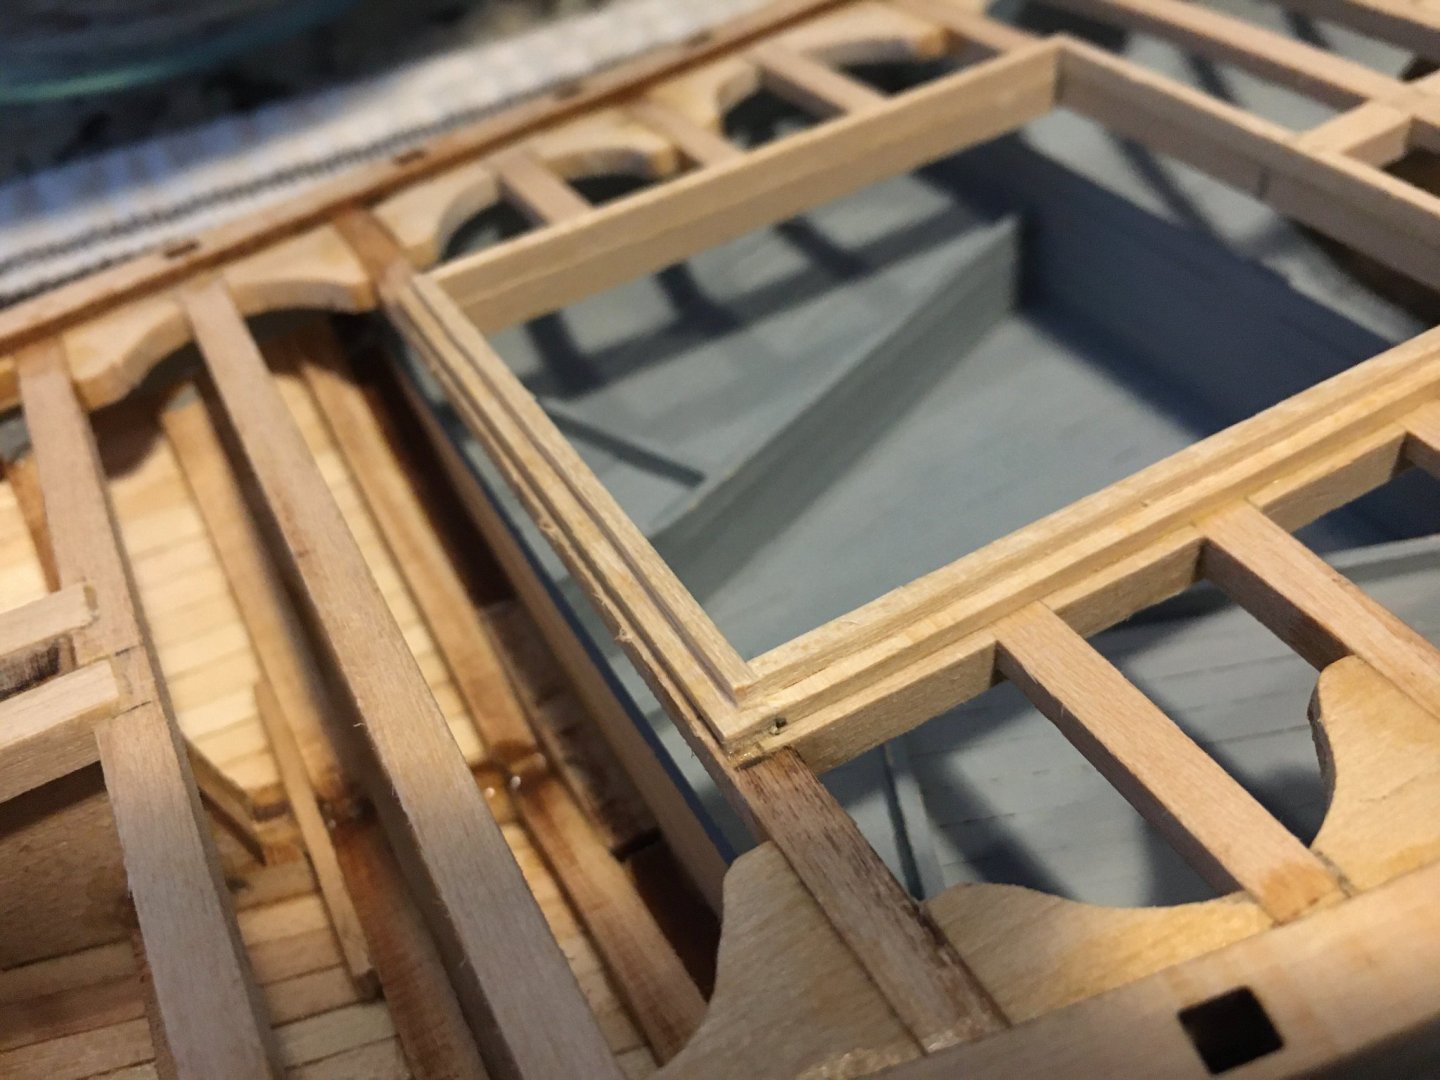
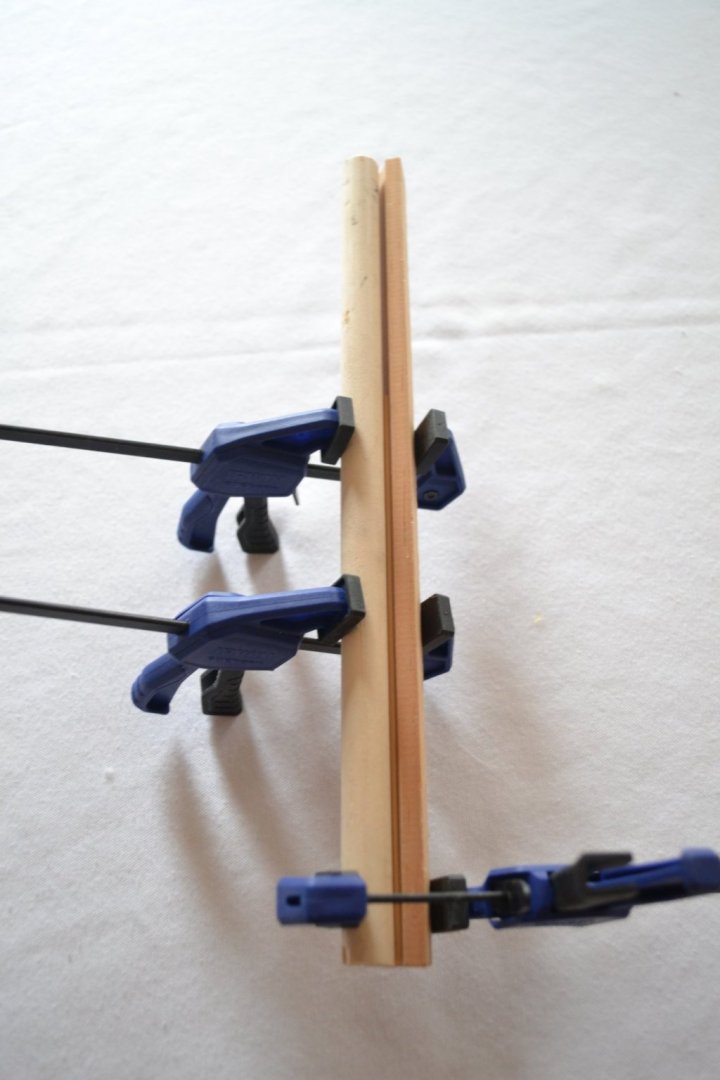
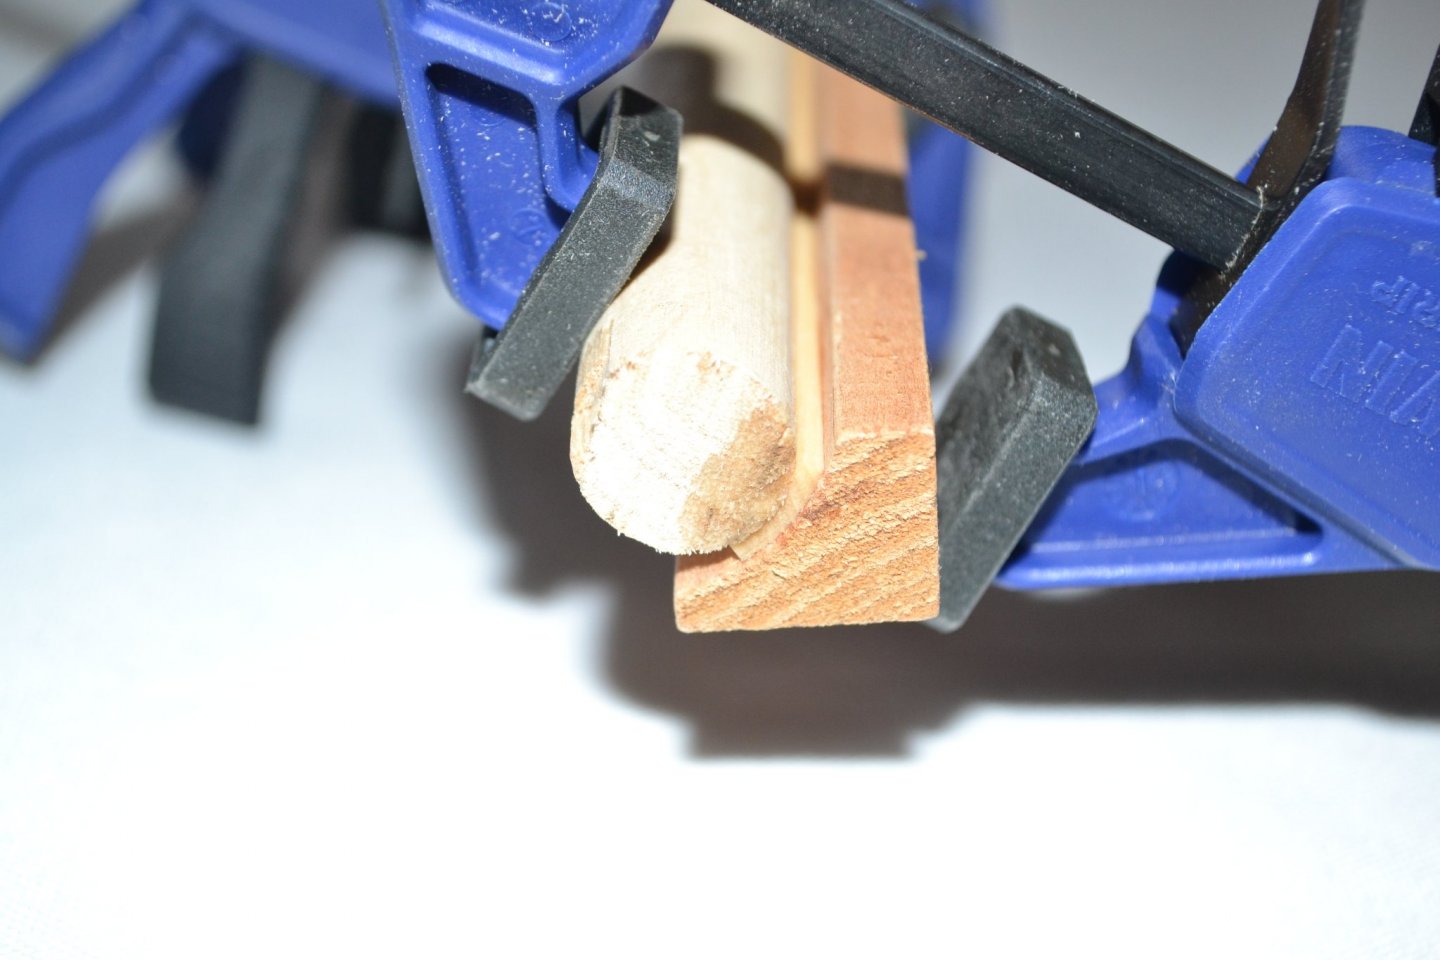
A bit more progress to report. The hull has been sanded, filled then sealed so I turned my attention to some of the deck work prior to planking the same. I constructed and installed the coamings for the hatches and wet well, they were quite straight forward tapering each to meet the deck planking so no photos. I turned my attention to the cabin coaming and the plans called for 1/8" stock with a 1/16" rebate to accept the cabin sides flush. I initially tried planing the stock at a 45 degree angle and then cutting out the waste by hand, that didn't work out well. The best laid plans of men and mice apparently came into play. I then struck upon the idea of using a 1/16" piece of wood in front of the 1/8" stock as a guide for my blade. It worked wonderfully. I cut one side and turned the stock over to cut the other side, I am very pleased! As you will see in the photos I used a disposable scalpel for the cuts, these were recommended on this forum and are wonderful inexpensive tools, I like them much more than hobby knife blades for cuts in small wood.
-
A wonderful project to undertake! I look forward to your progress.
-
Your model looks great! I am glad the hair dryer worked out. I use Elmer's Wood Filler to fill any problem areas, it is used straight from the container with no two part mixing. It applies easily, is easy to sand and blends smoothly into the existing structure. It has a tendency to dry a bit in the container but a bit of water and mixing sets it right.
- 26 replies
-
- 2
-

-
- Model Shipways
- Norwegian sailing pram
- (and 2 more)
-
Looks great! I am presently working on the same kit and will follow with great interest.
-
Beautiful boat and outstanding work on the model! I built the Model Shipways New Bedford whaleboat kit recently and am struck by the similarities between the two. Perhaps form follows function or some sharing of design? Great work!
- 86 replies
-
- 3
-
-
- whaling
- clinker built
- (and 2 more)
-
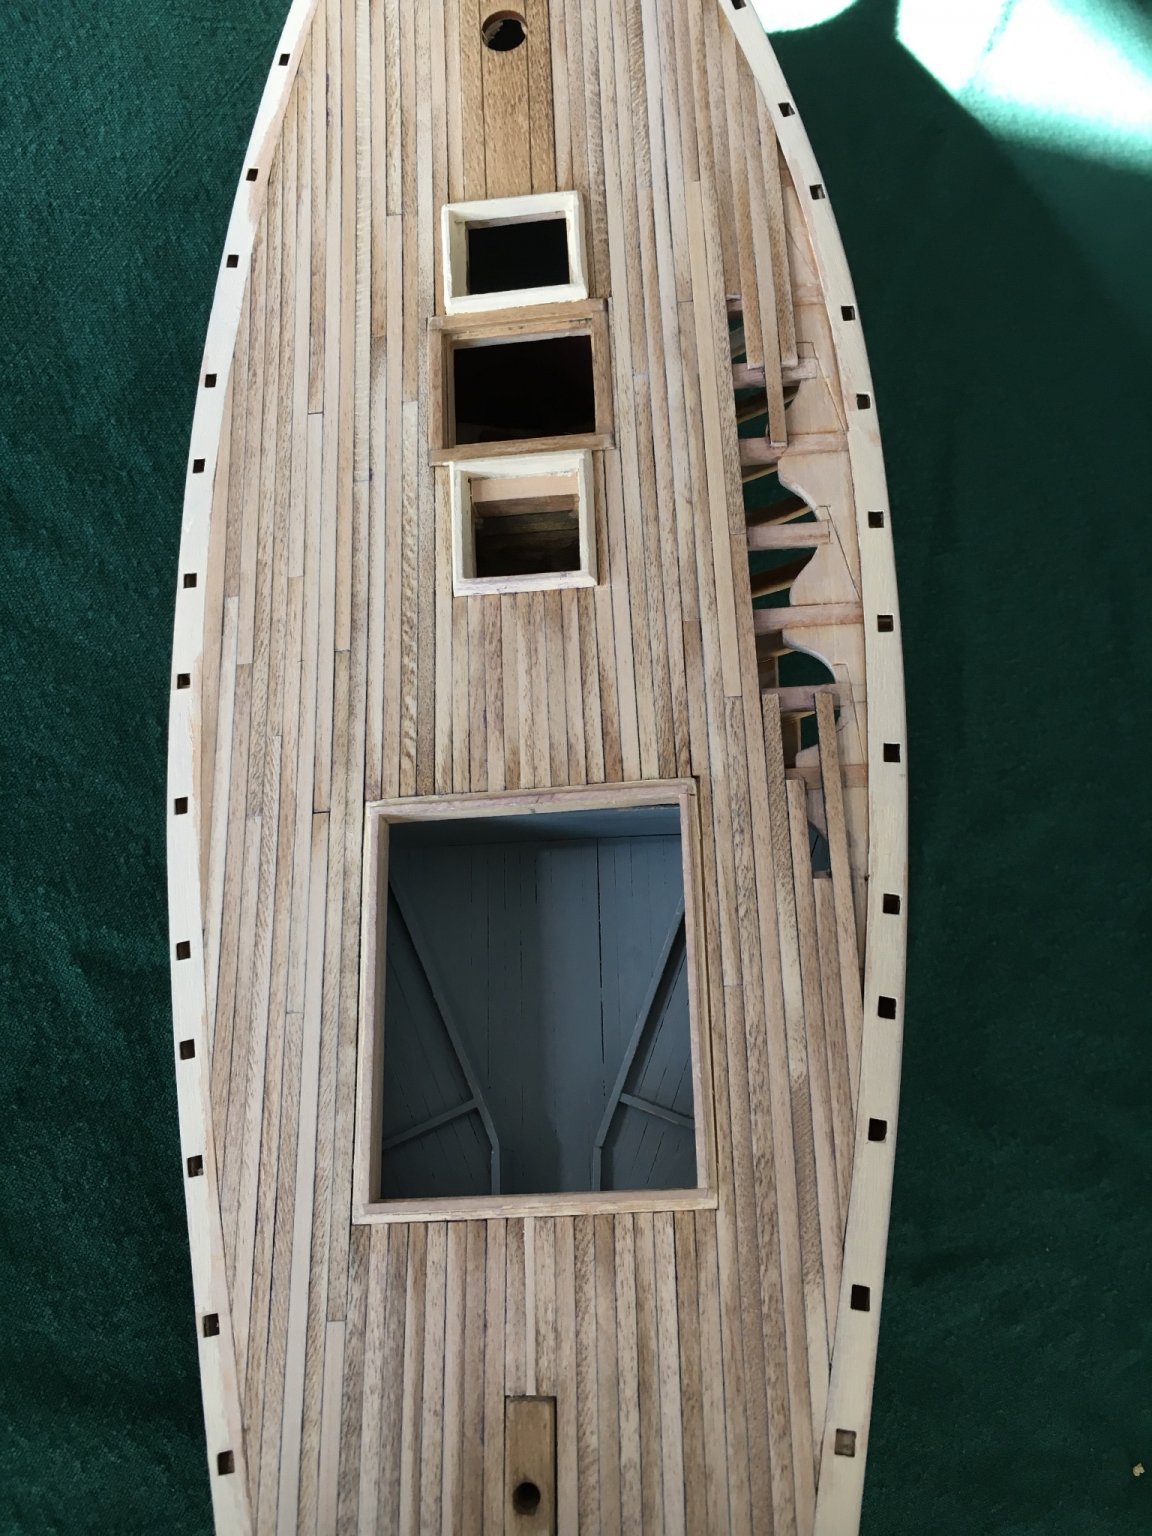
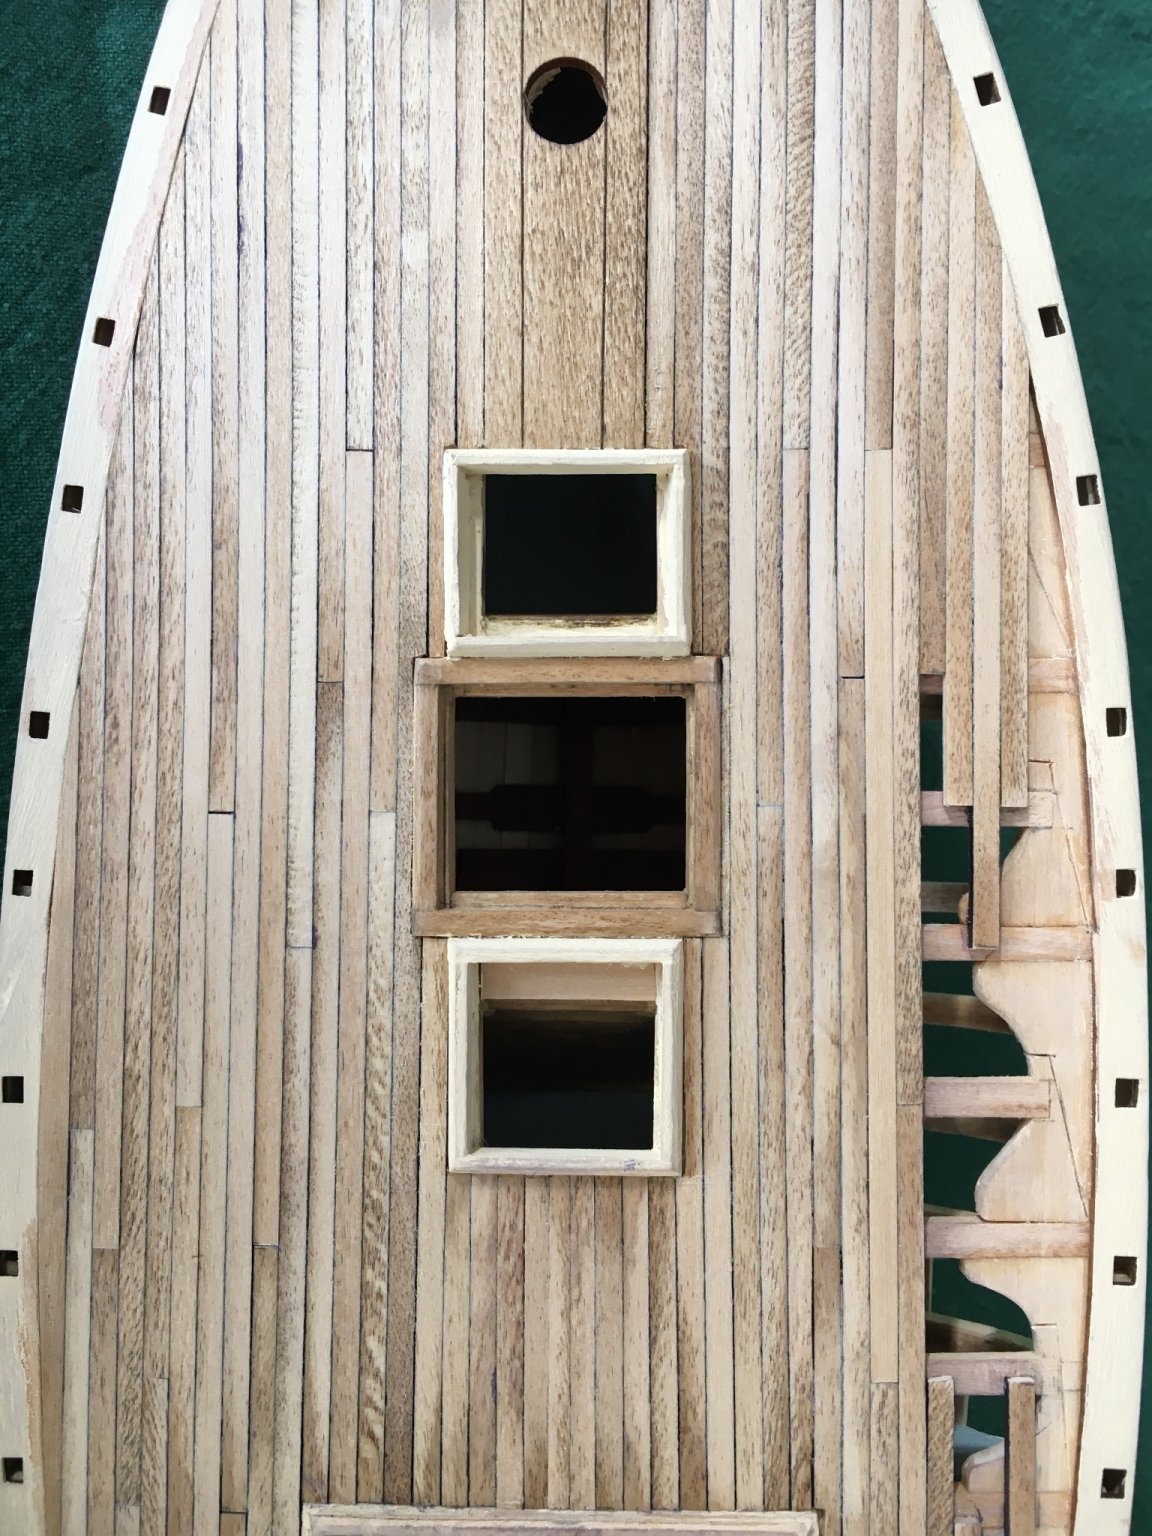
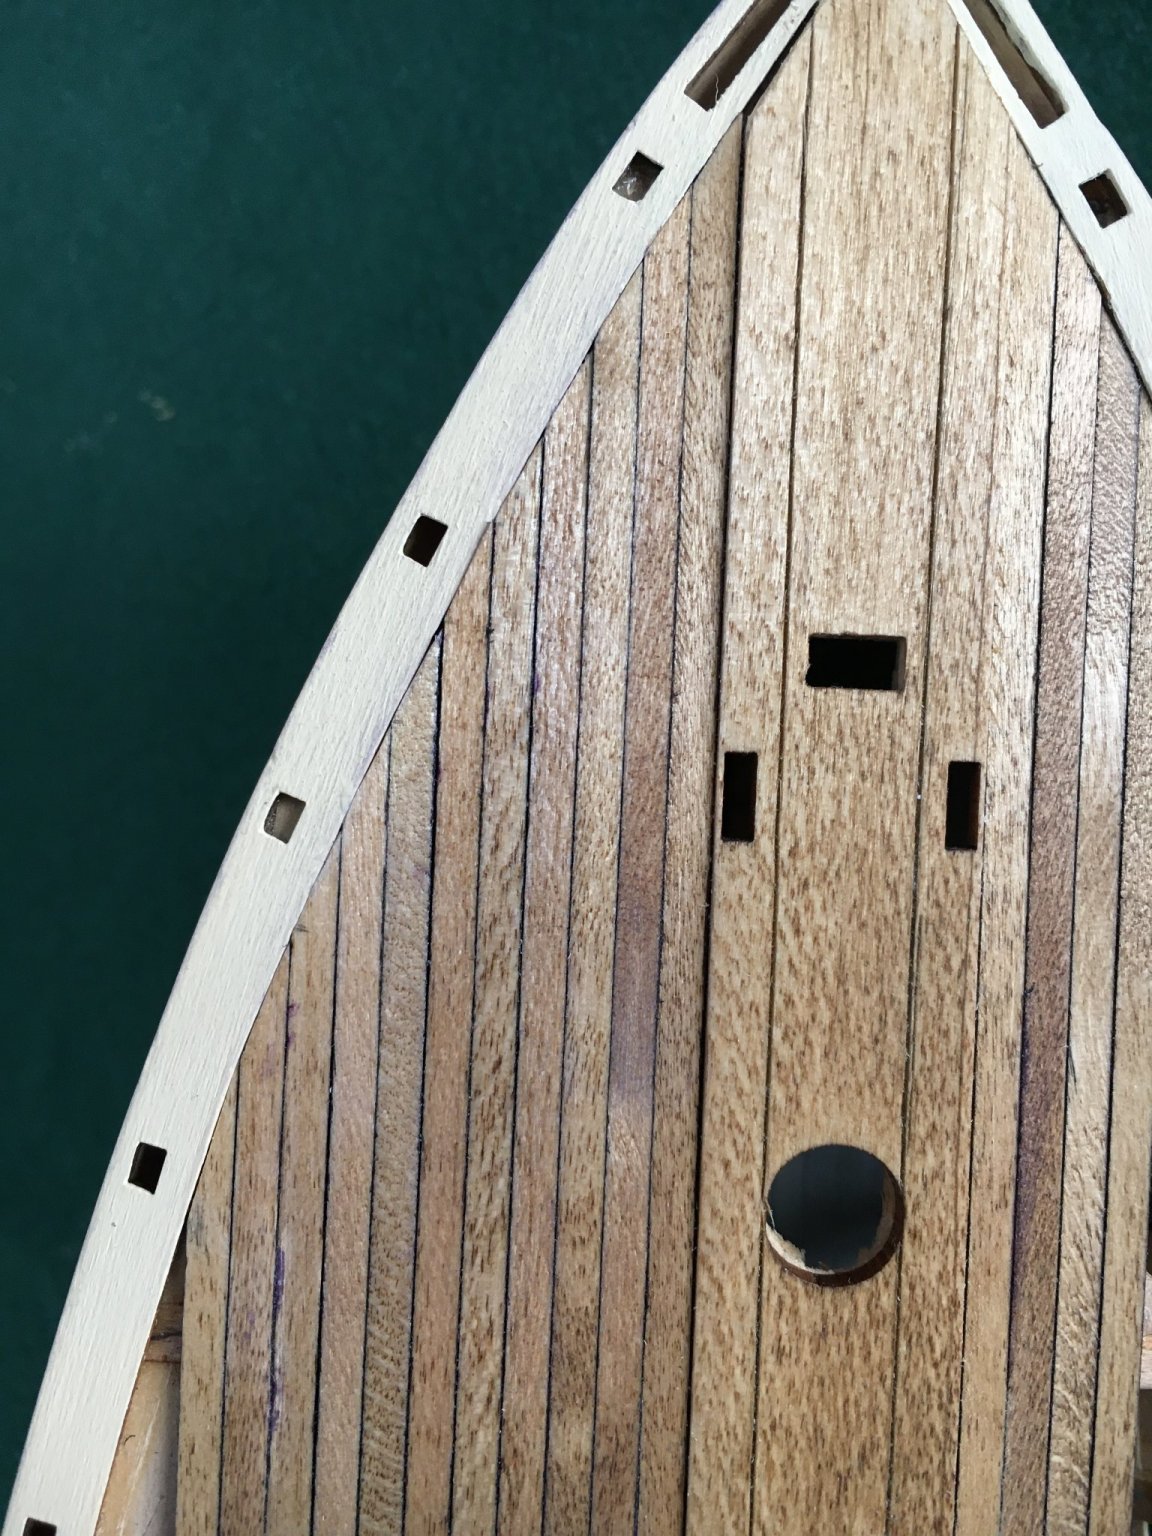
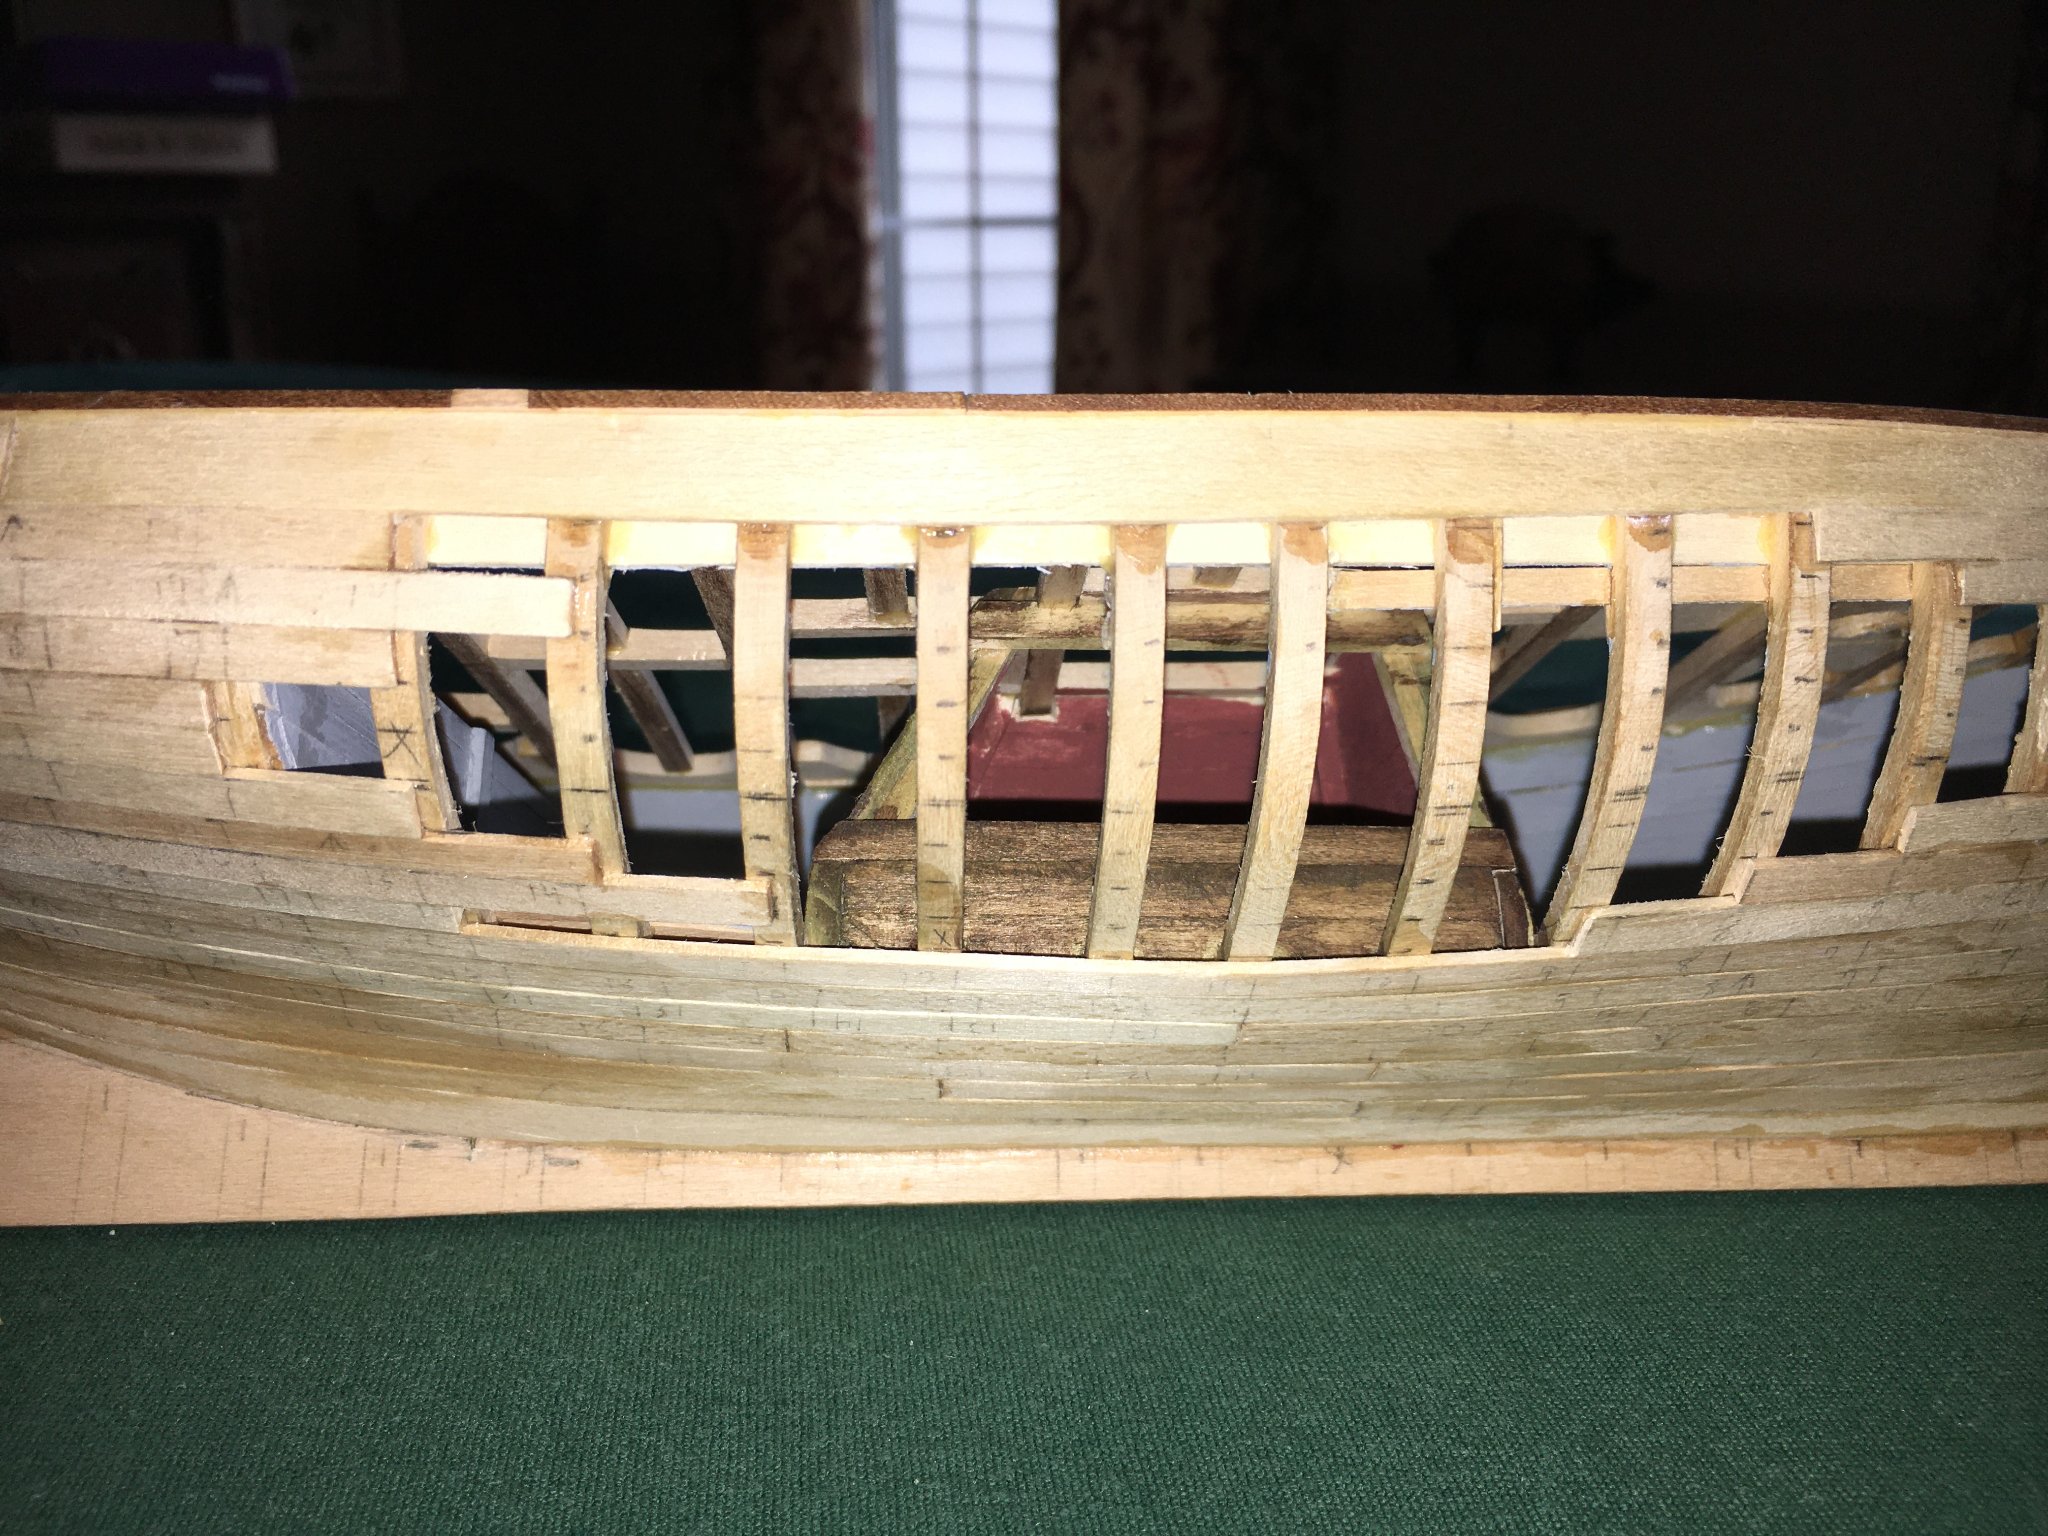
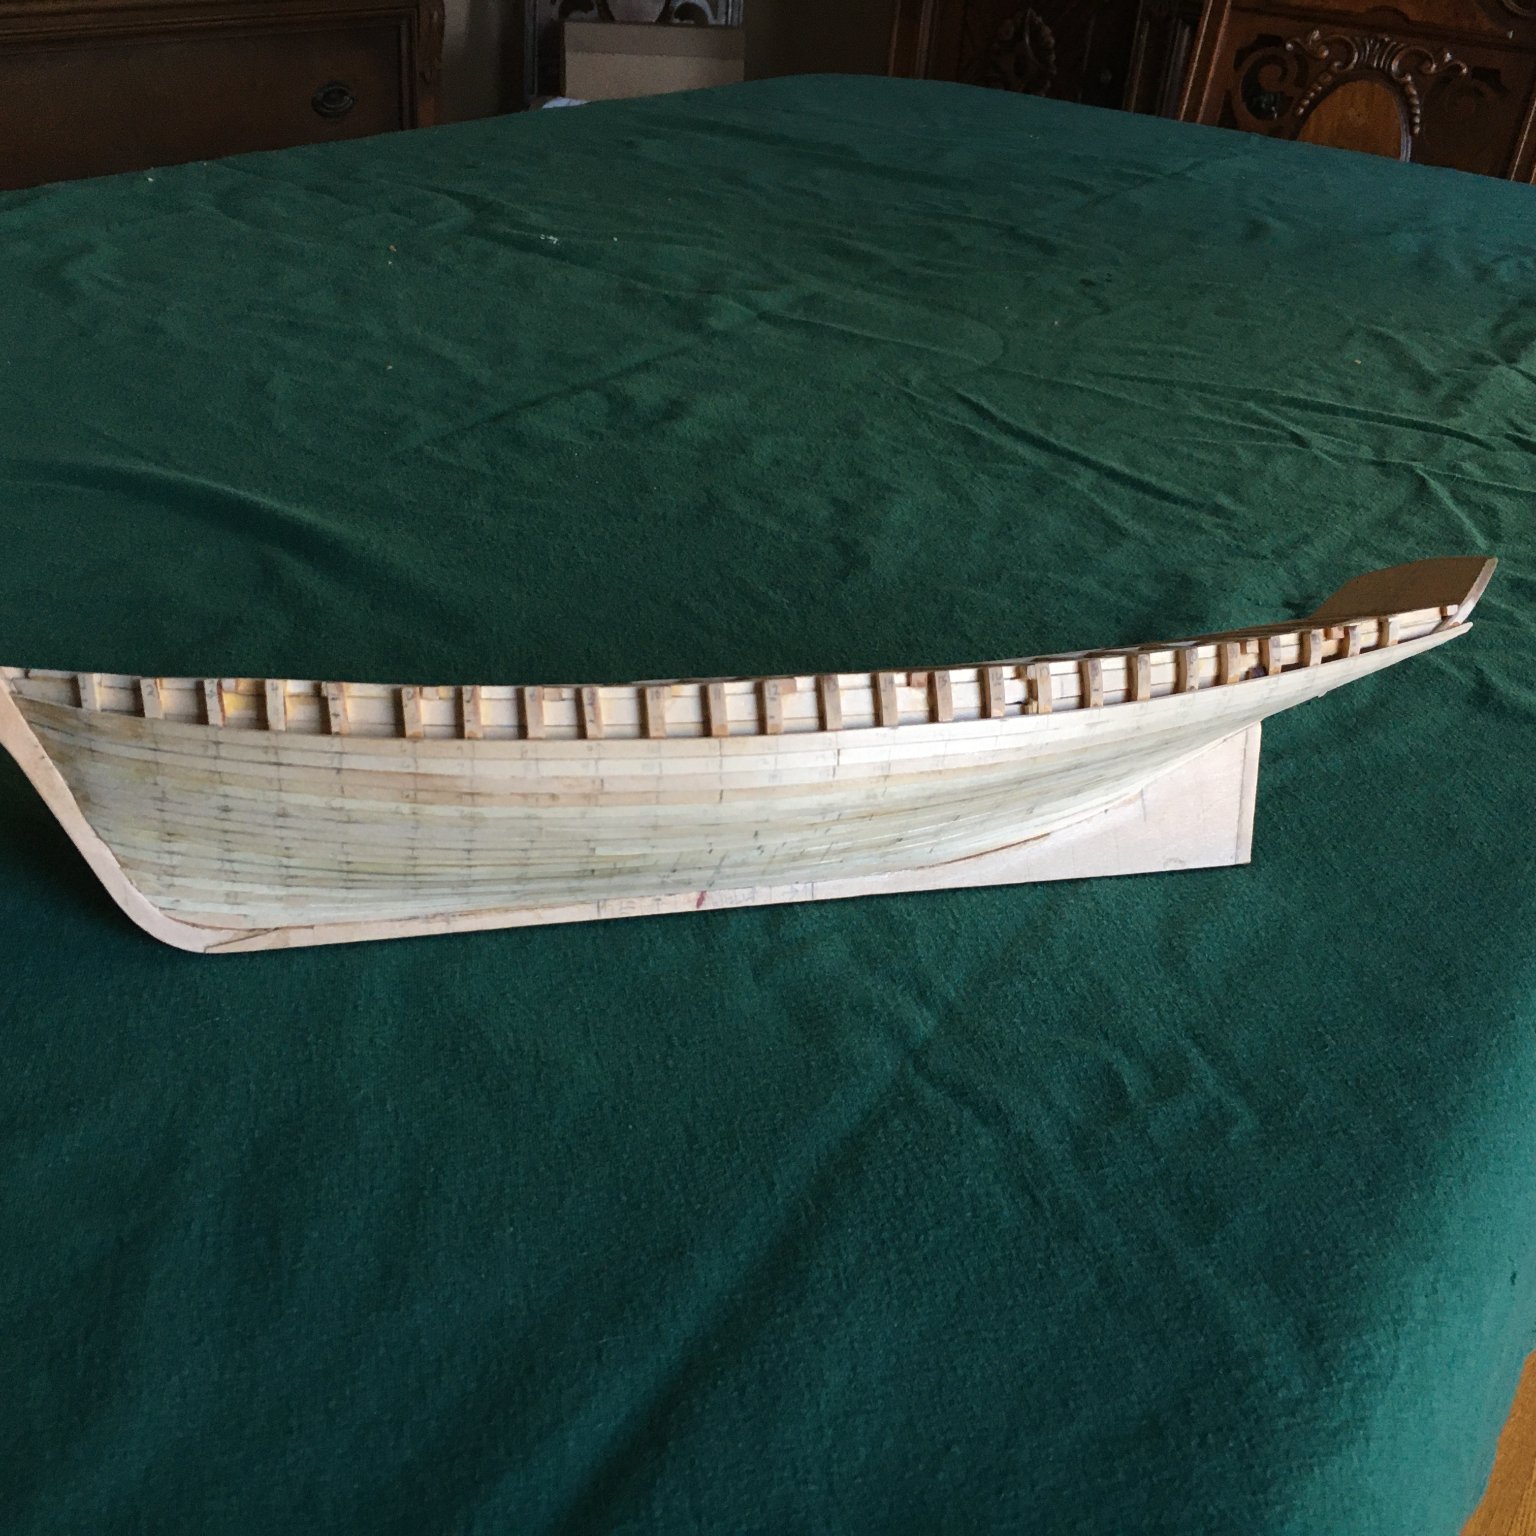
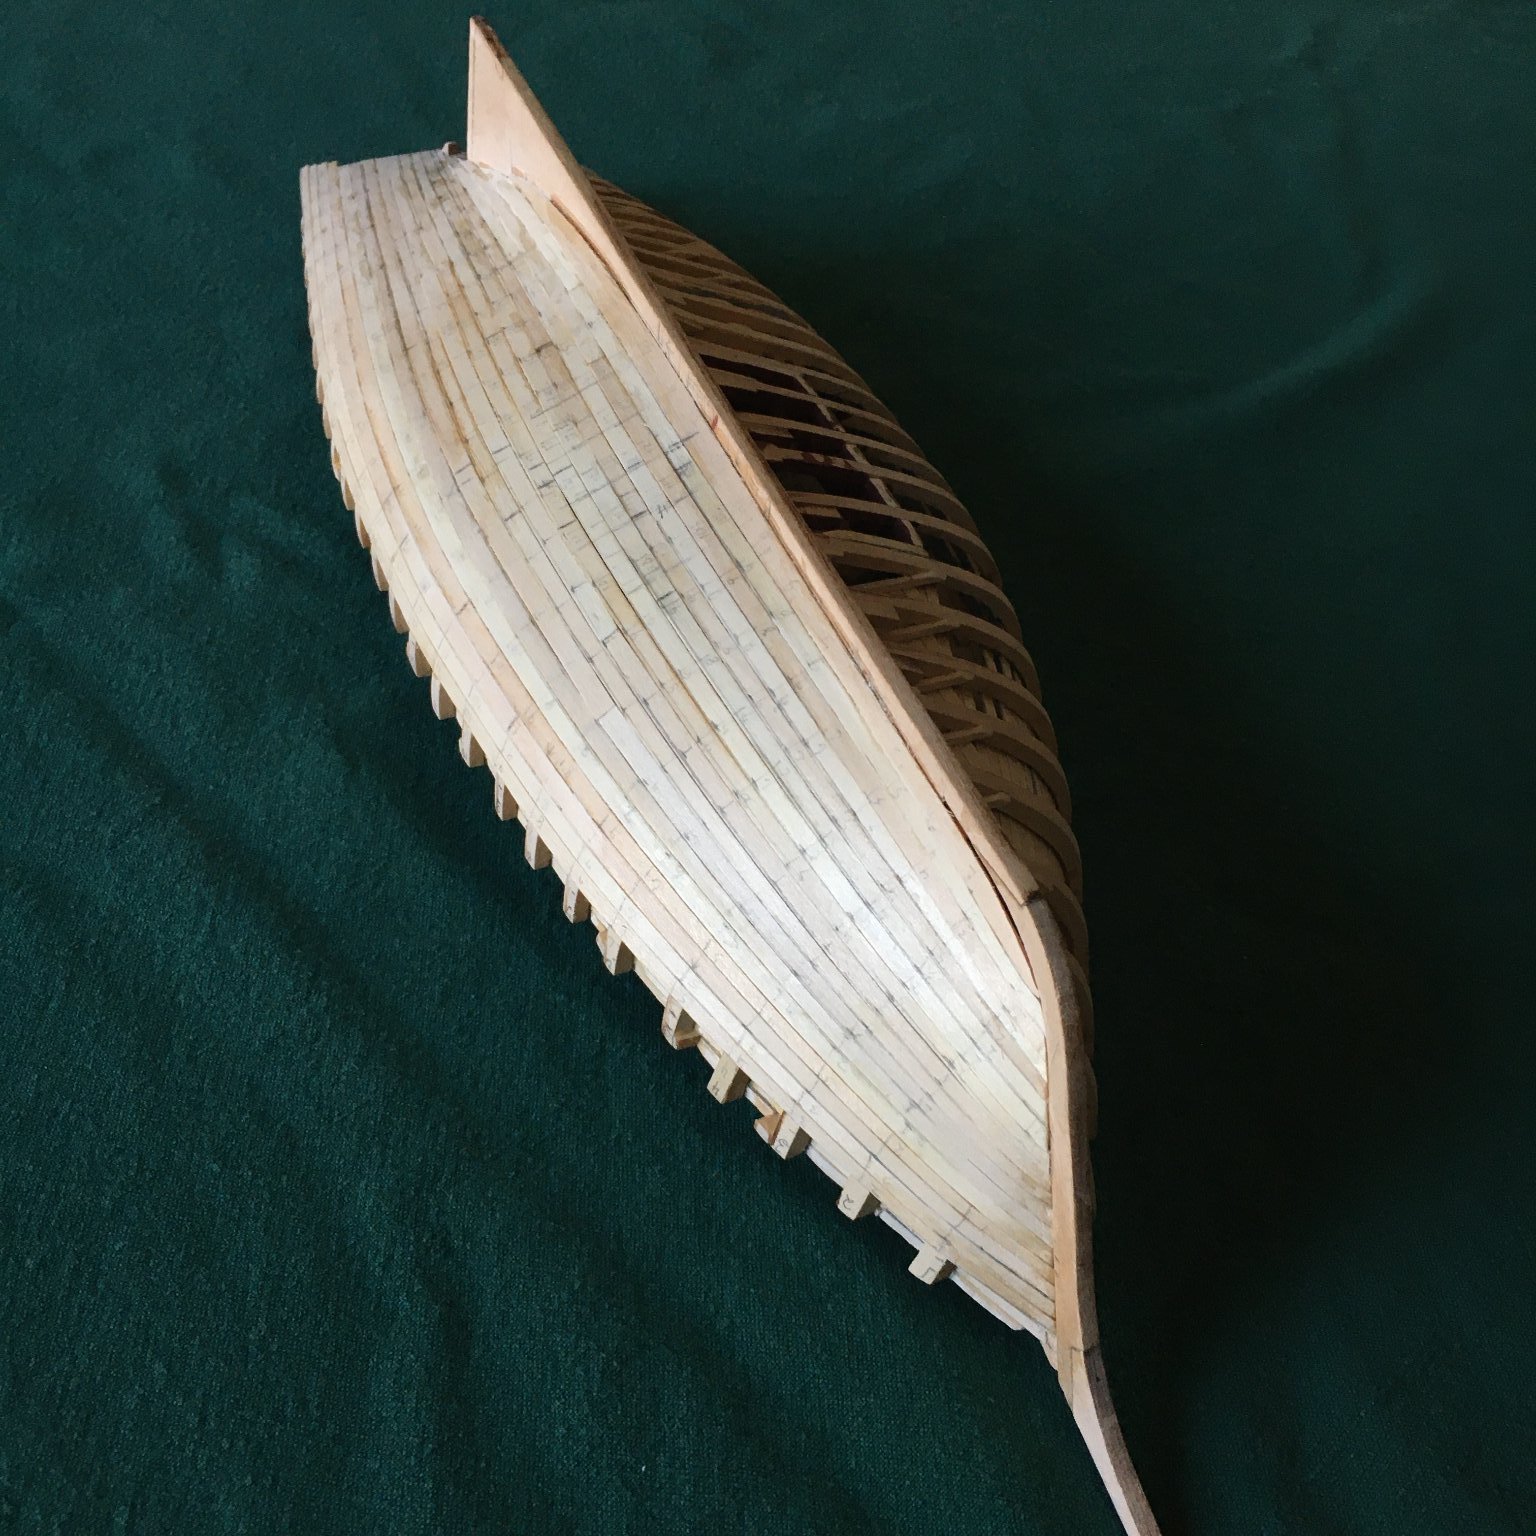
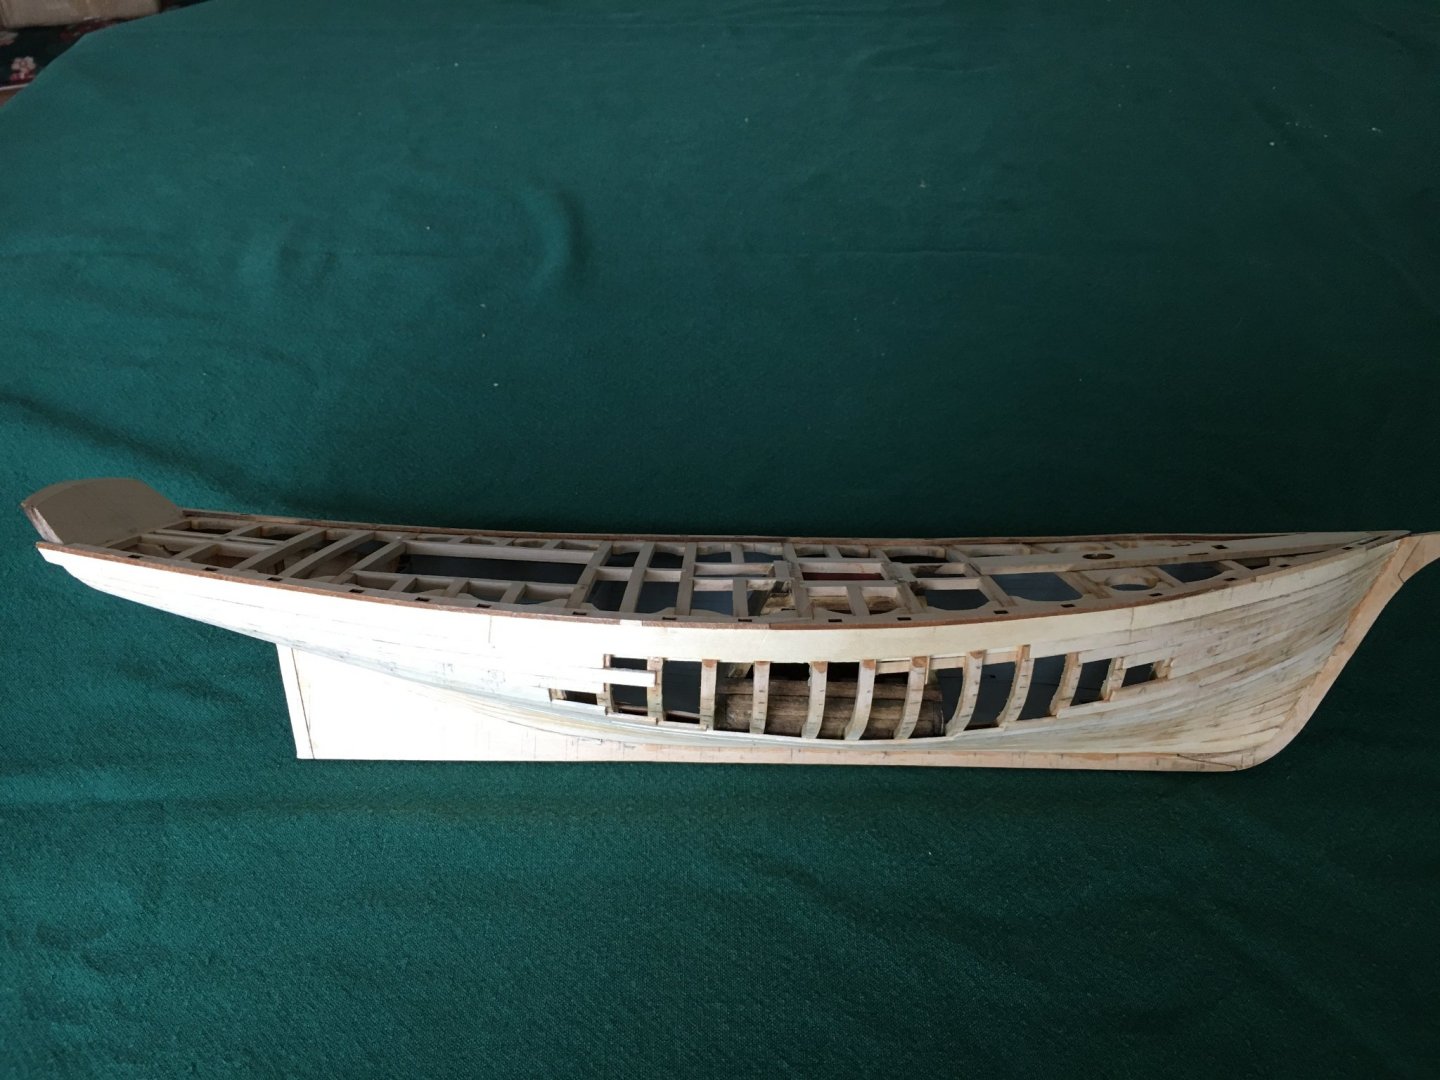
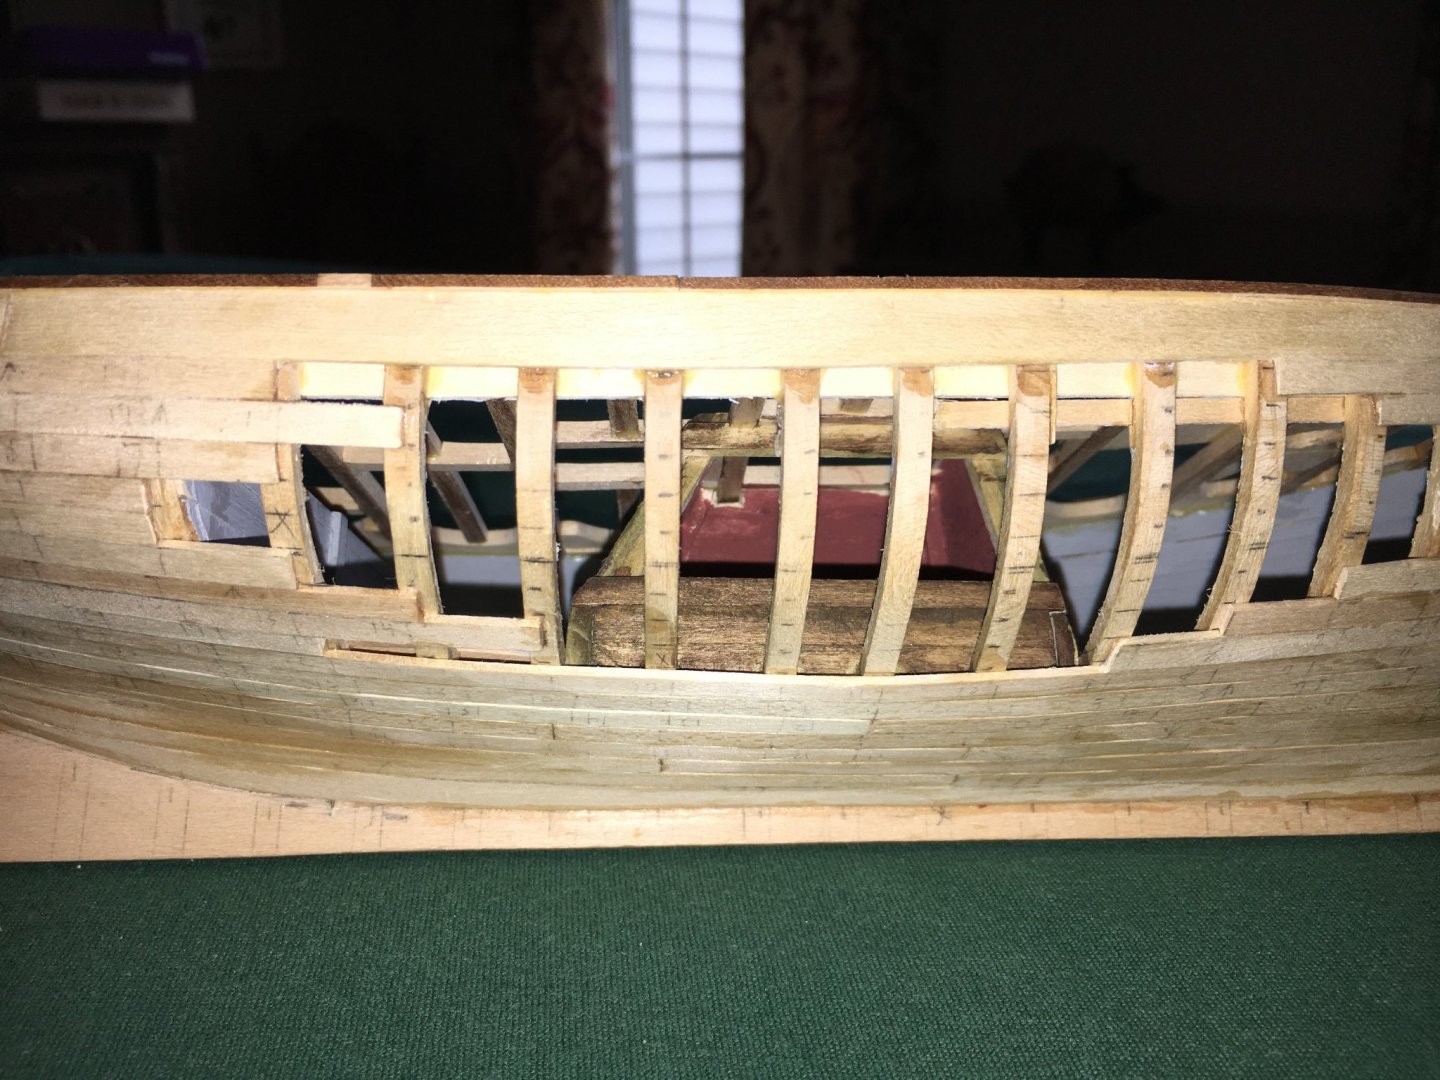
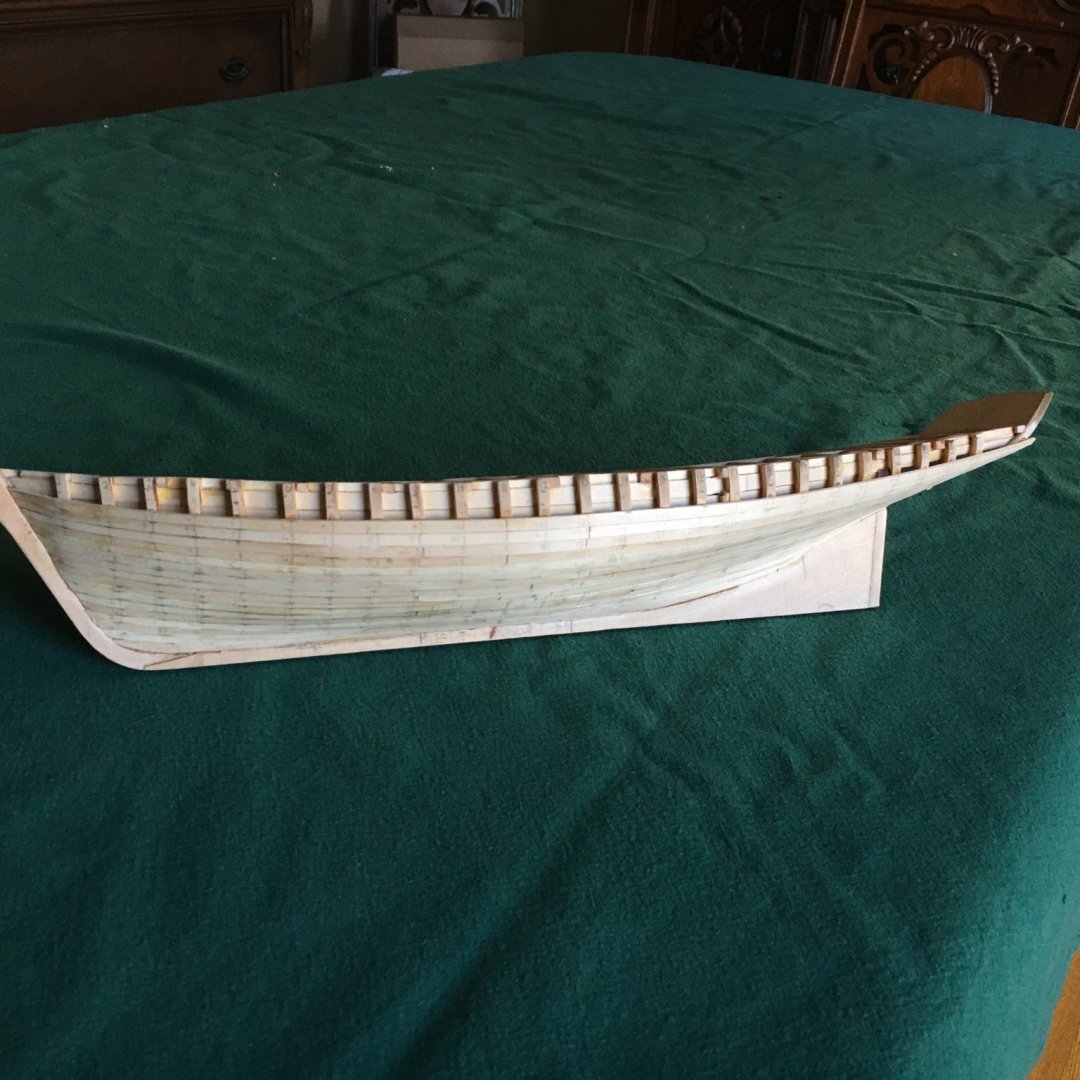
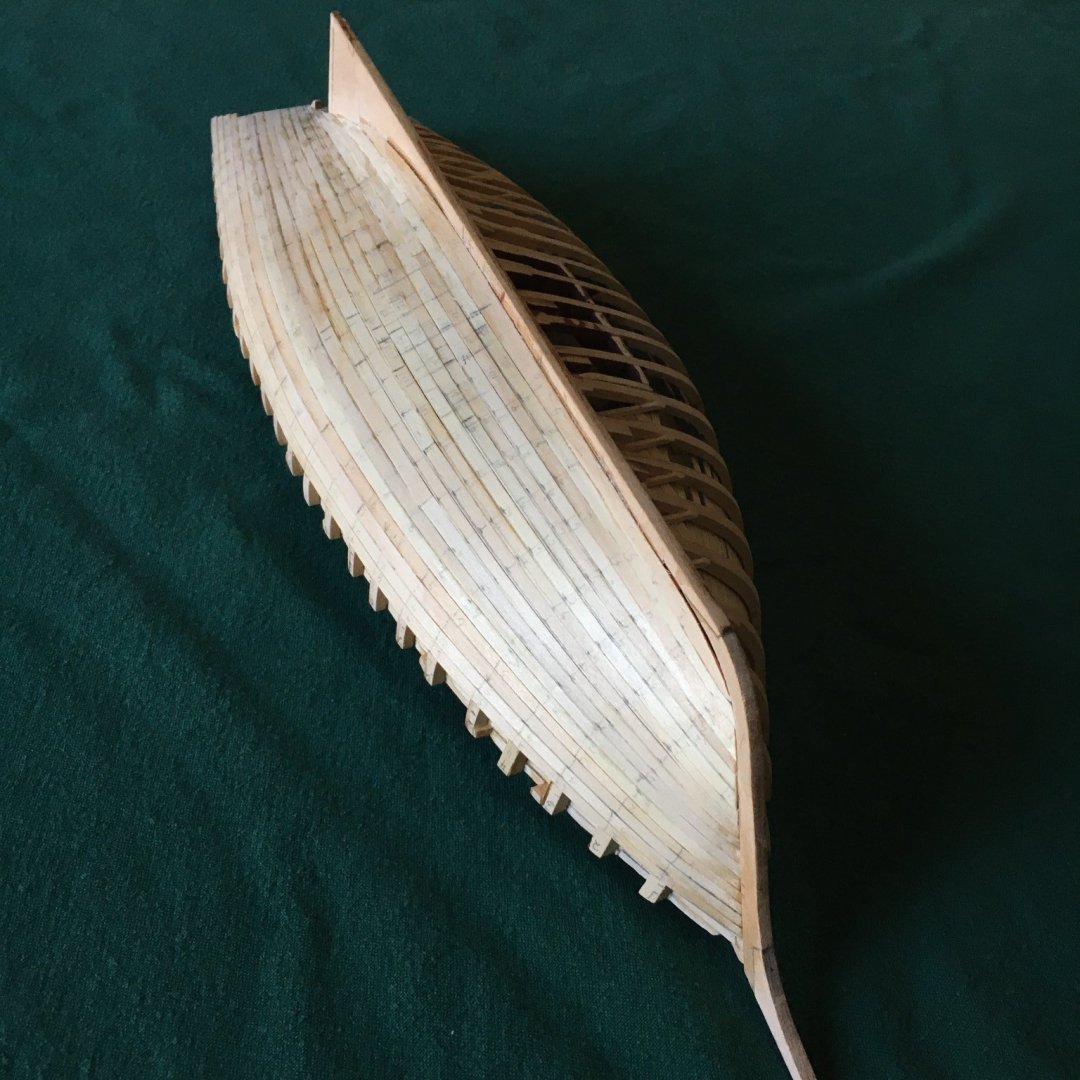
This old snail has made a bit of progress. I have finished the planking and installed the covering boards. I left a gap as others have done to enable a view of the wet well, after the hull is painted I will add a couple of bare planks to illustrate a rebuild in process. My next step is to smooth the hull using cabinet scrapers, a technique learned from others on this forum and used successfully on my previous build. I then do a light sanding, fill any gaps, scrape again, seal the hull and do a light final sanding and then apply paint. A few pictures.


-
Good plan to re-wet and re-clamp. Unfortunately wet bent wood has a tendency to rebound a bit from as clamps are released. You might try wetting the planks, clamping them in place and use a hot hair dryer on them immediately to set the shape. Some use a heat gun but too easy to scorch the wood. Clamp or rubber band the the middle forms first and do the ends last.
- 26 replies
-
- 1
-
-
- Model Shipways
- Norwegian sailing pram
- (and 2 more)
-
I know others dismiss these as toys but I have used them to great effect. Used them in the last couple of days to clean up a badly cut rabbet and other issues. Remarkably sharp and easy to control for miniature work. I also use their miniature block plane to spile planks, remarkably suited to that job. If there is any interest I will take photos of my process. https://www.leevalley.com/en-ca/shop/tools/hand-tools/miniature-tools/chisels/72391-veritas-miniature-chisels?item=05P8501 https://www.leevalley.com/en-ca/shop/tools/hand-tools/miniature-tools/planes/70138-veritas-miniature-block-plane?item=05P8220
-
This is probably contrary to most advice but I started planking about 1/3 of the way up the hull and down to the garboard strake area. I then measured out the garboard area, made a cardboard template, rough shaped the garboard and then finish sanded it to shape, worked great. I pinched the idea from here in post #57 and beyond.
-
Welcome aboard! The kit doesn't look terribly complicated but no need to aim for perfection on your first try, it is a learning experience! Ask for advice at any time, most members are very willing to help. I am a relative newcomer here and have received tremendous encouragement and advice. I look forward to your progress. Cheers
-
Good progress and looking great!
-
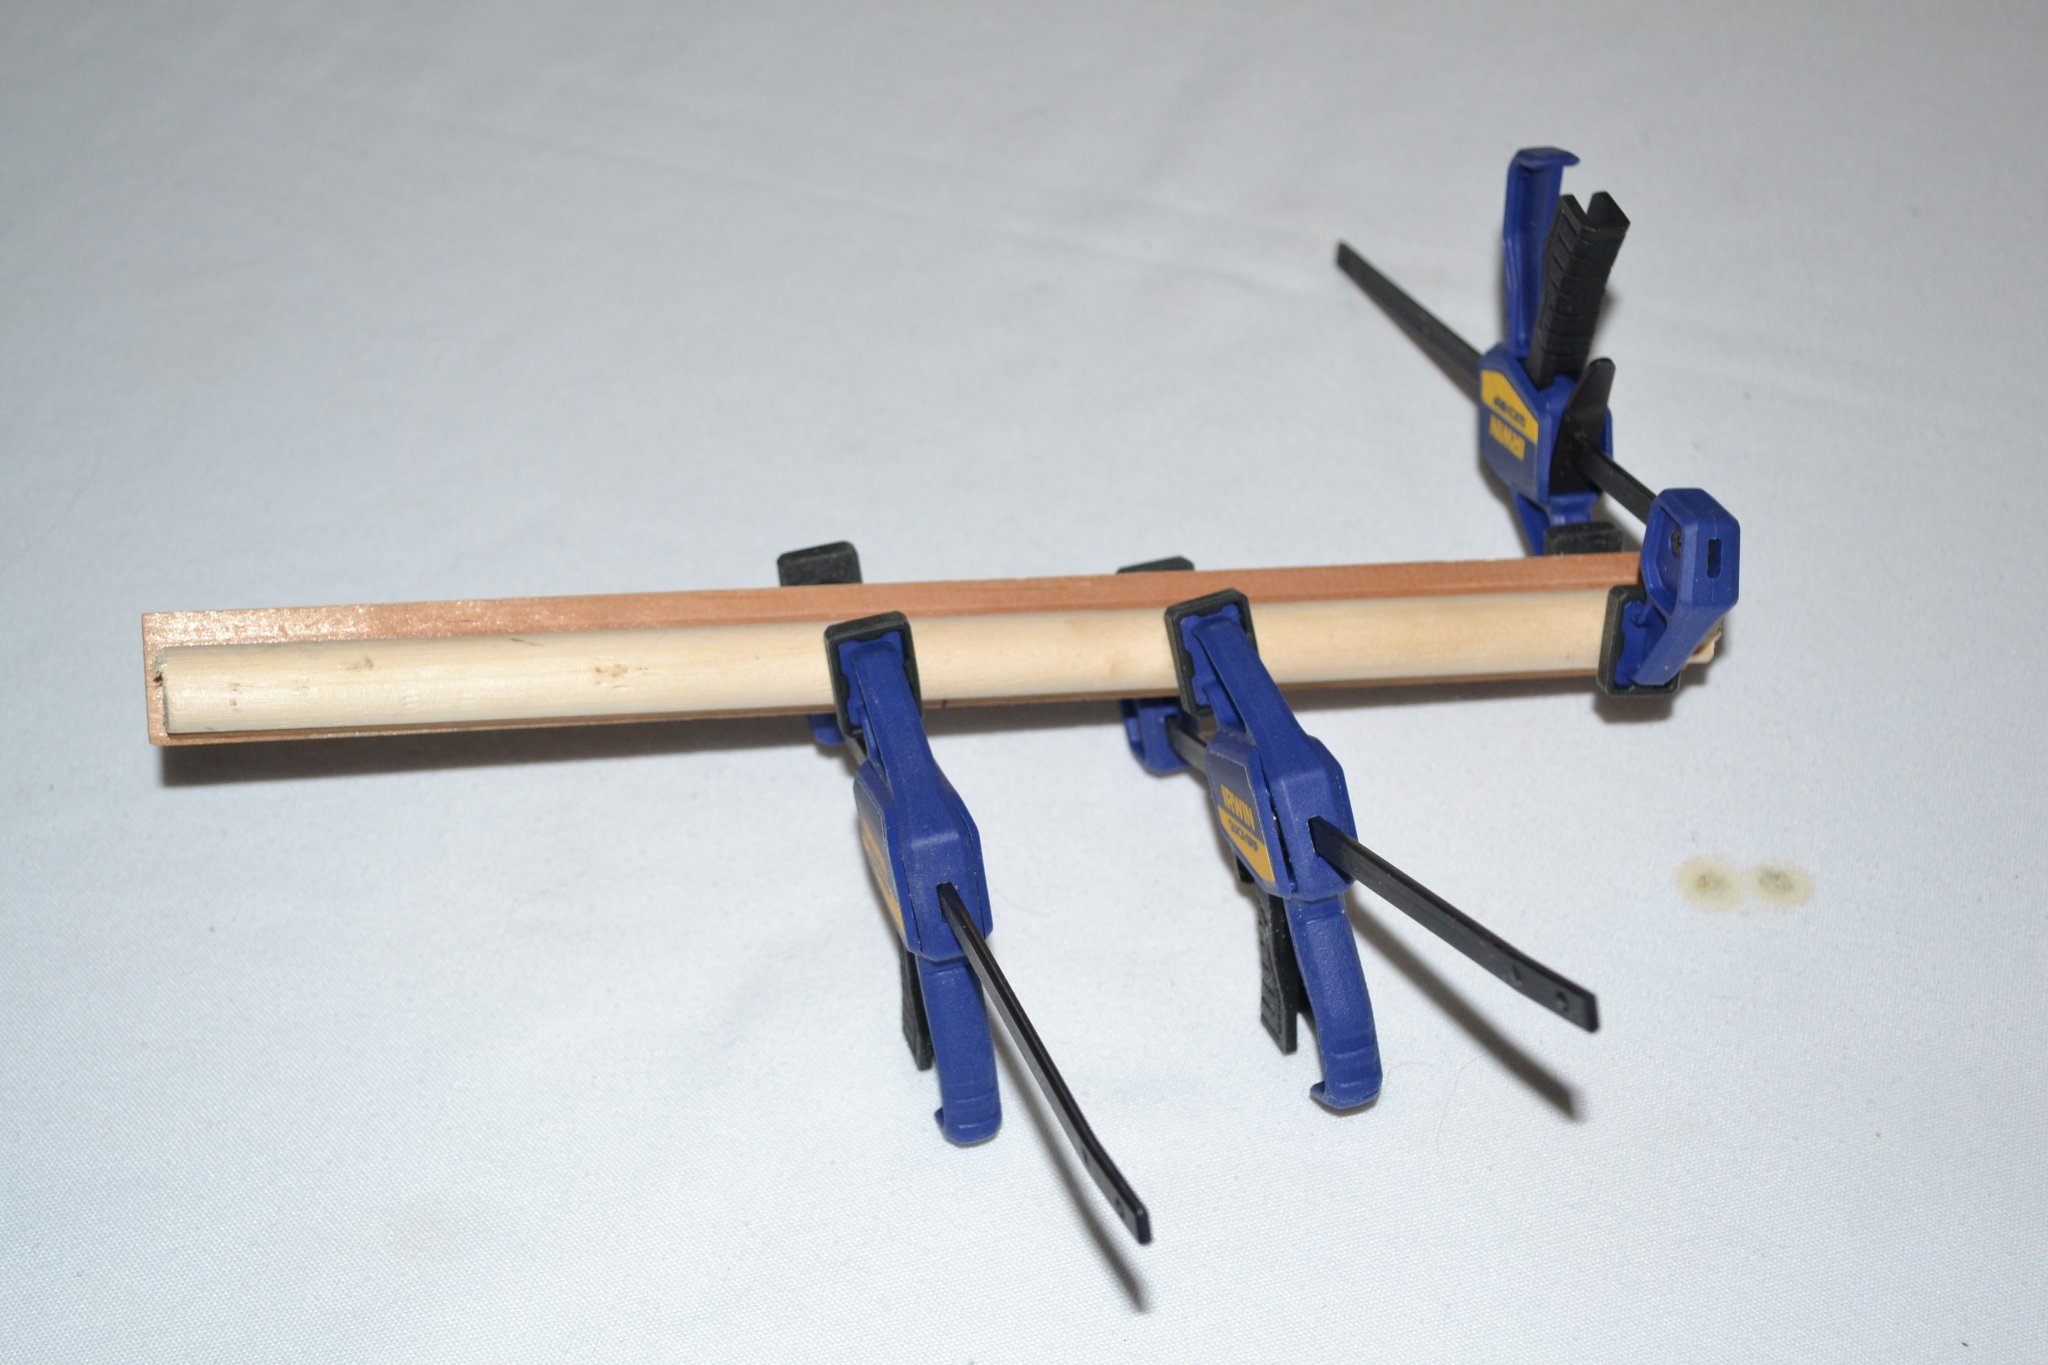
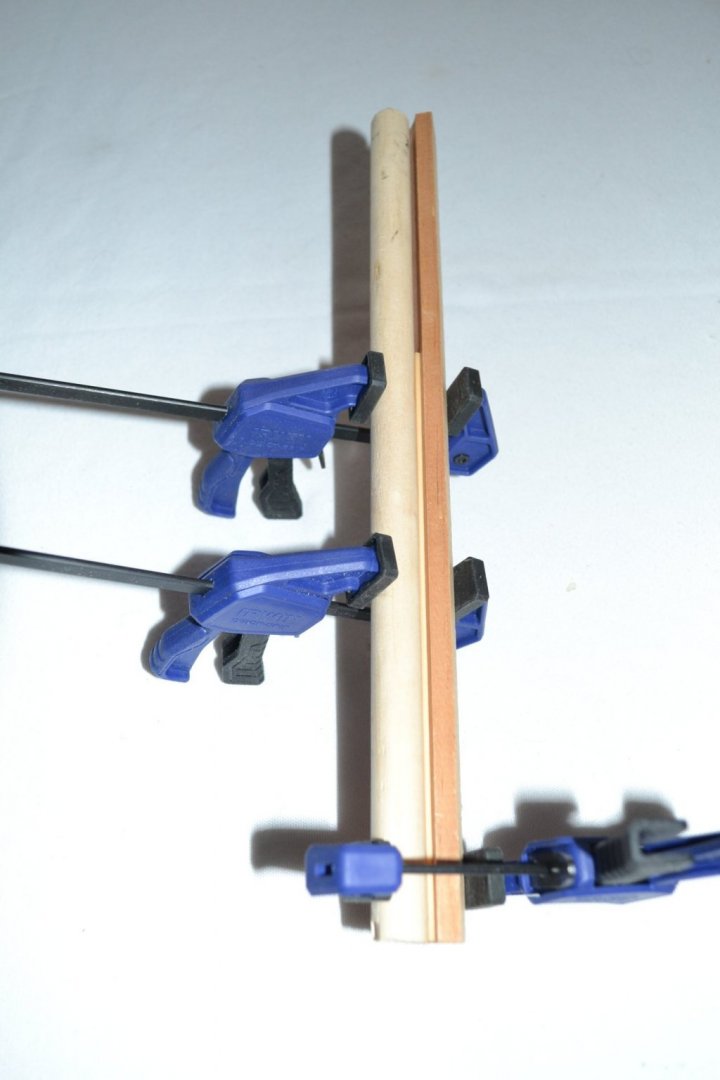
It looks to me that there is a rather severe curve to the bulkhead and the plank needed to be bent to to conform to the curve. Probably too late now but a method I have used involving a length of cove molding and dowel on a soaked plank. Soak the plank well and clamp it into the molding, the curve can be adjusted somewhat by the amount of clamping pressure. The planks often have to be bent not only on their length but also on their width to meet the bulkheads fairly.

-
I love the boiler stack idea! Wish I had thought of that.
-
Thank for the complements! This is my third build and I am strictly a wood butcher but try to learn as I progress??
-
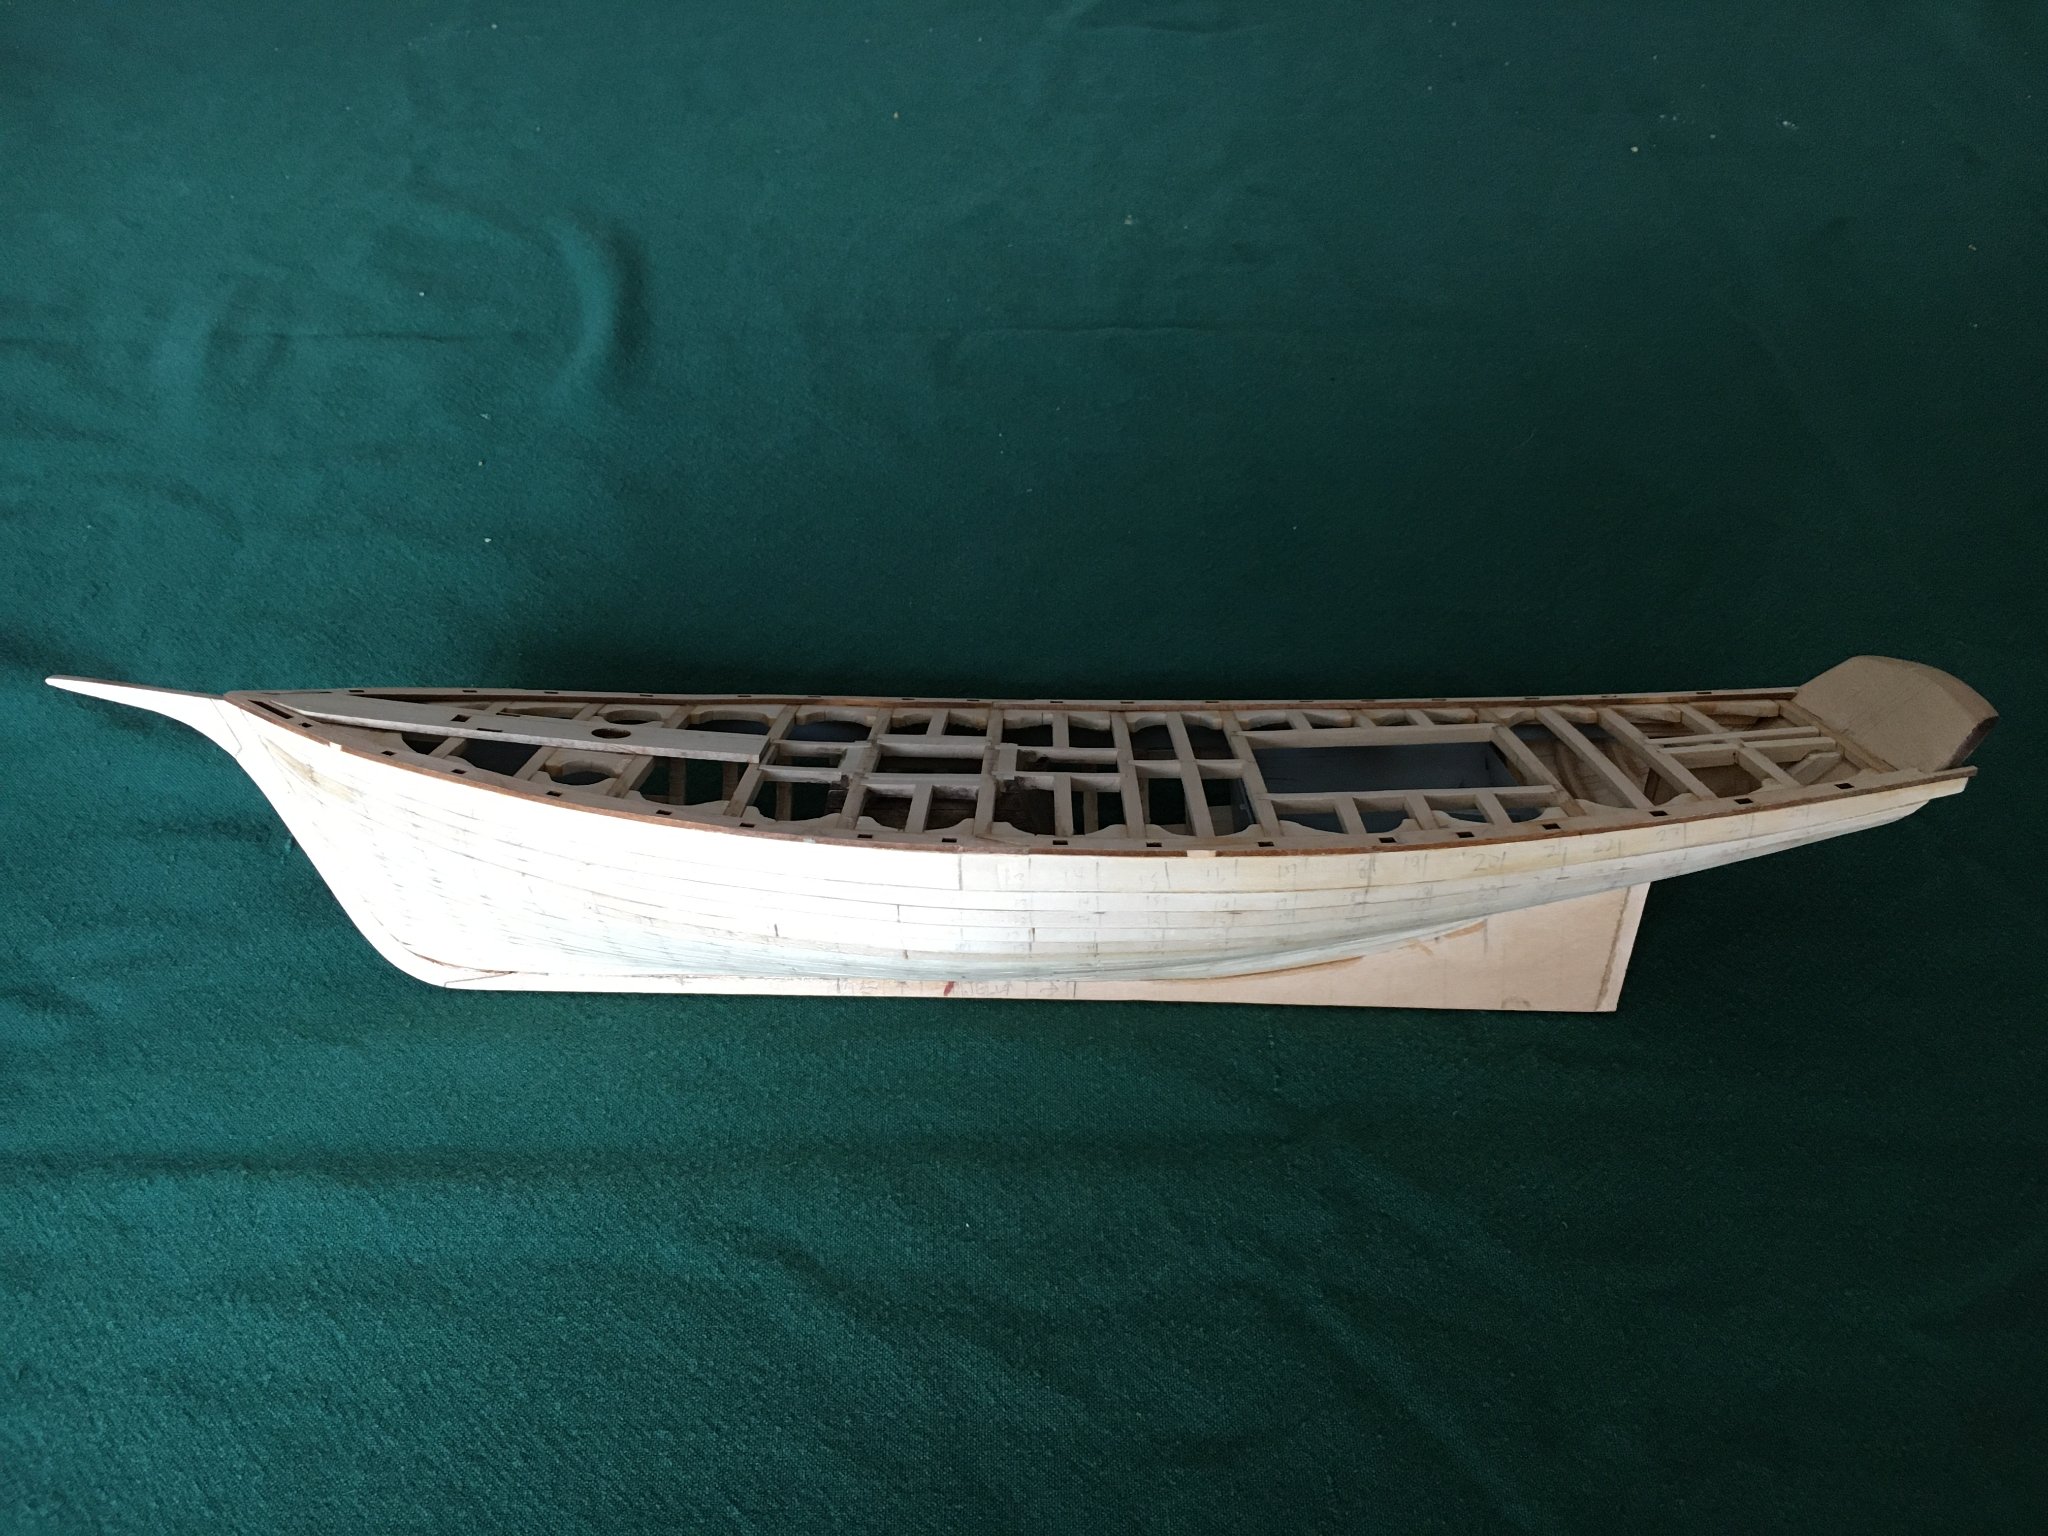
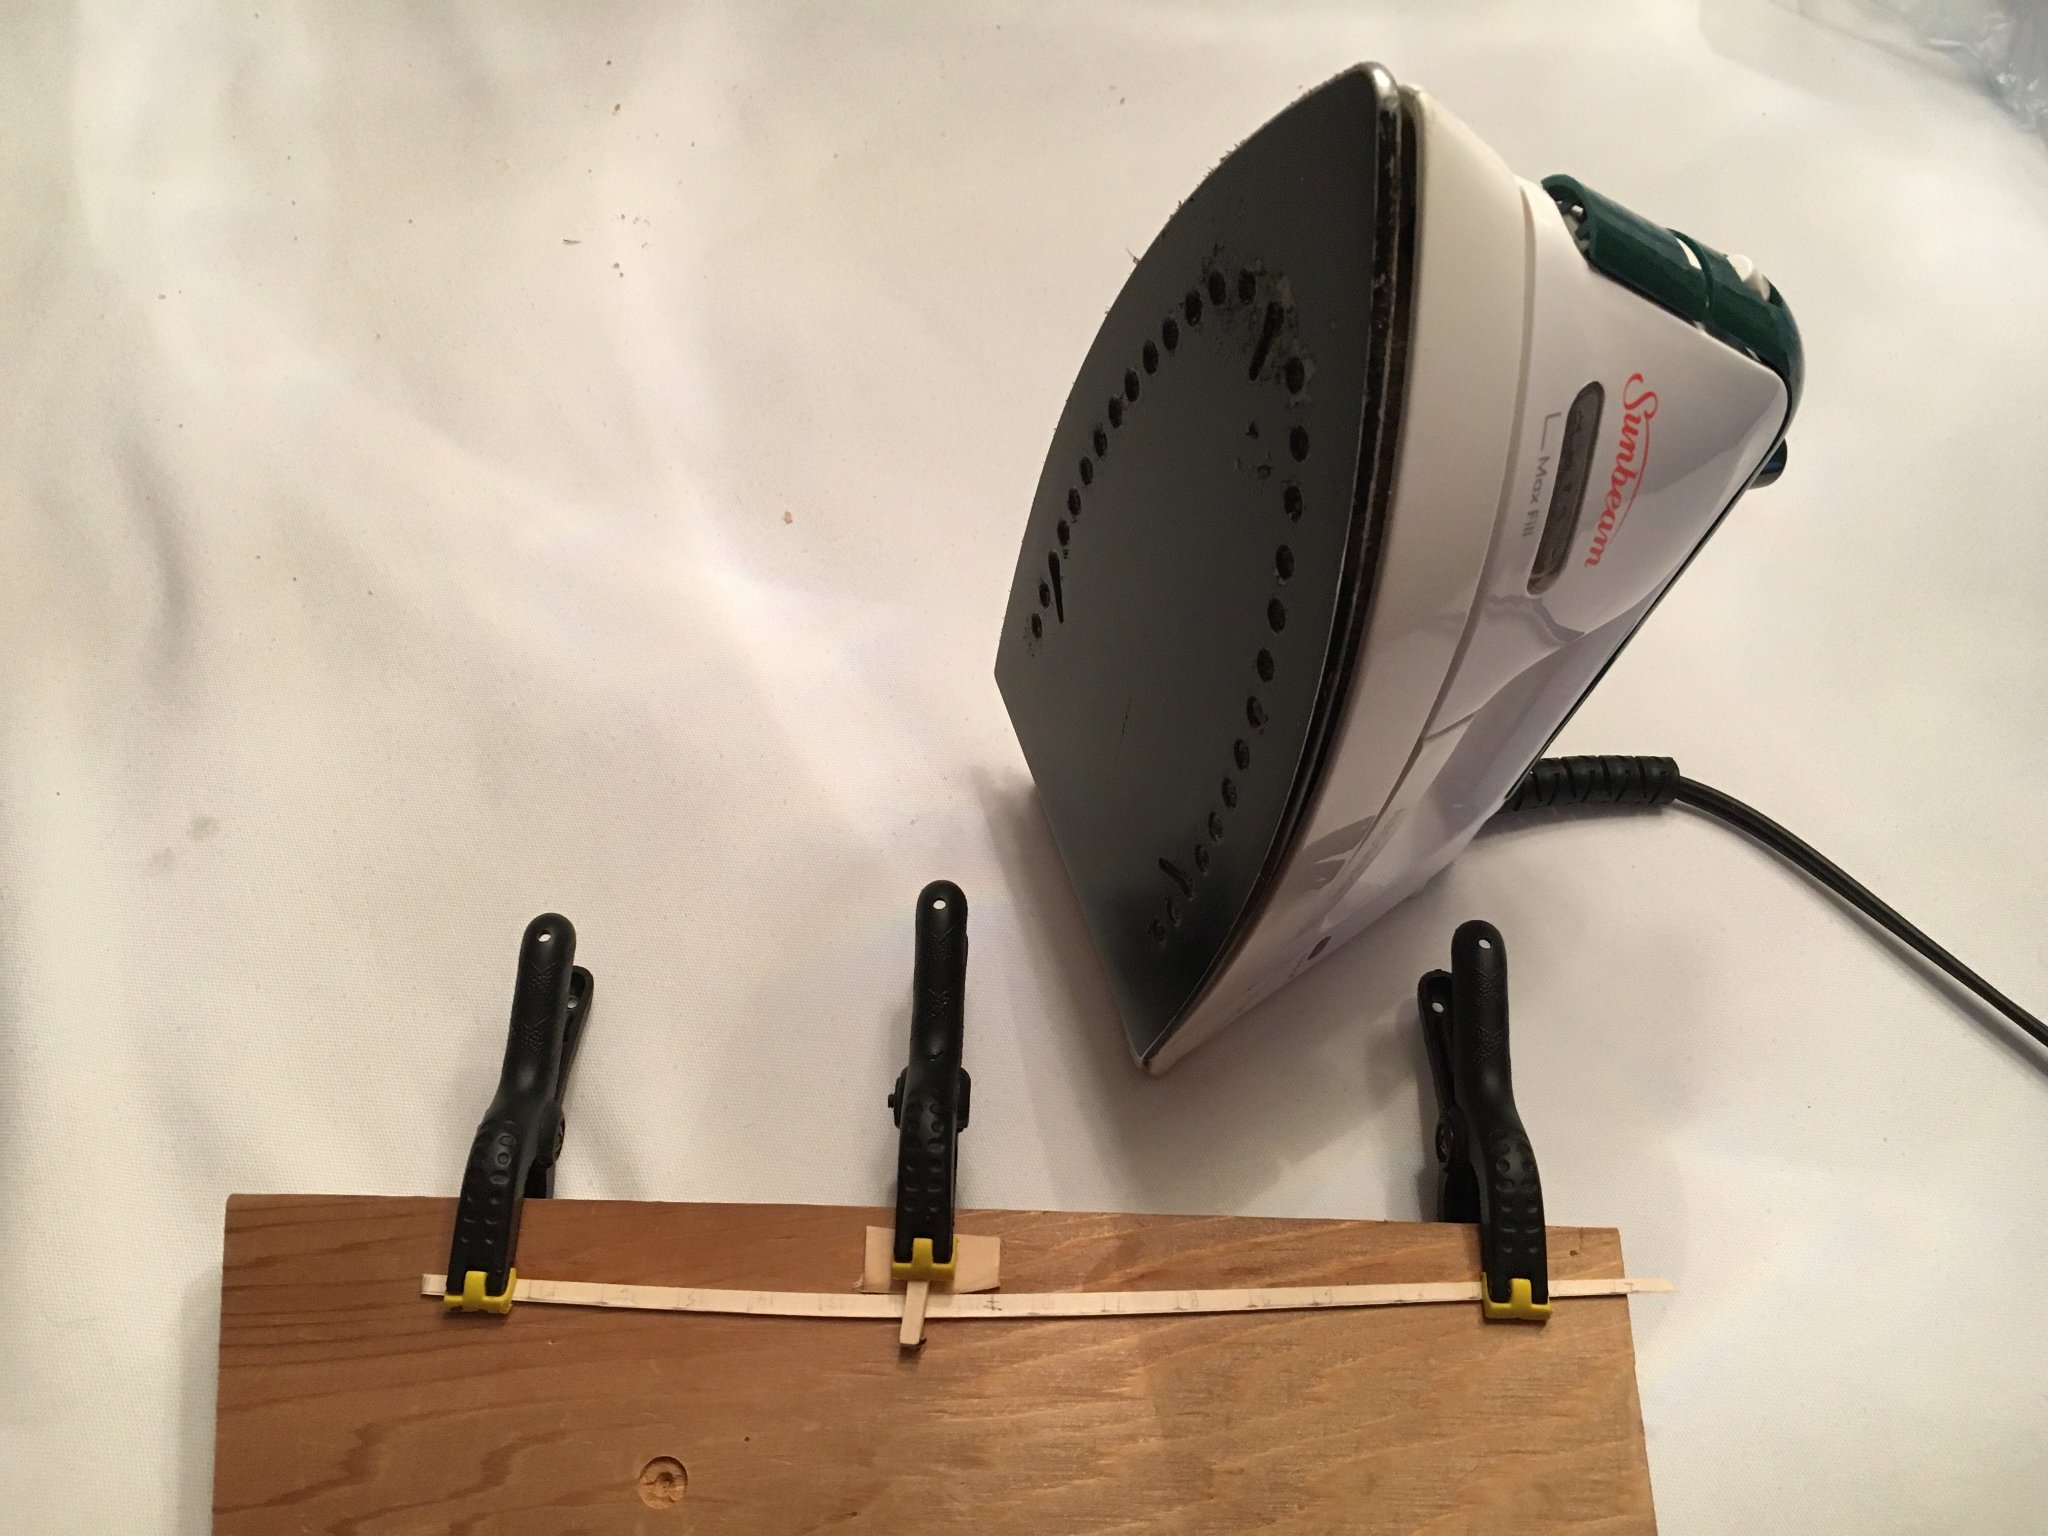
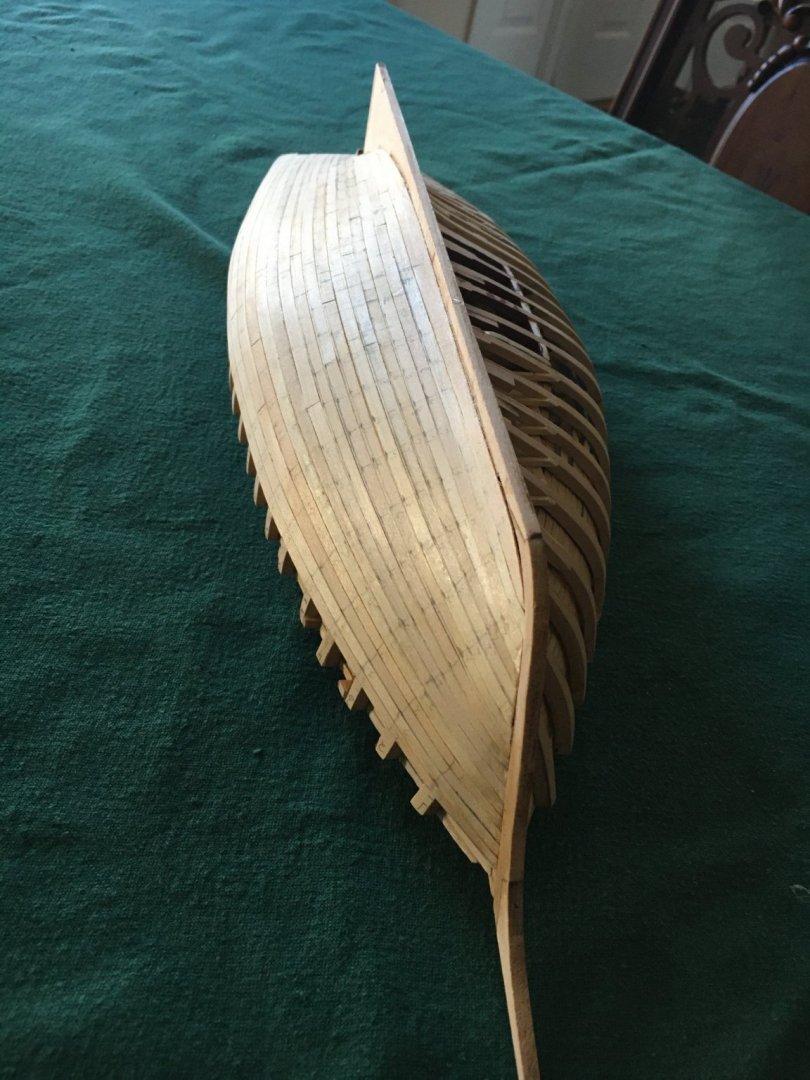
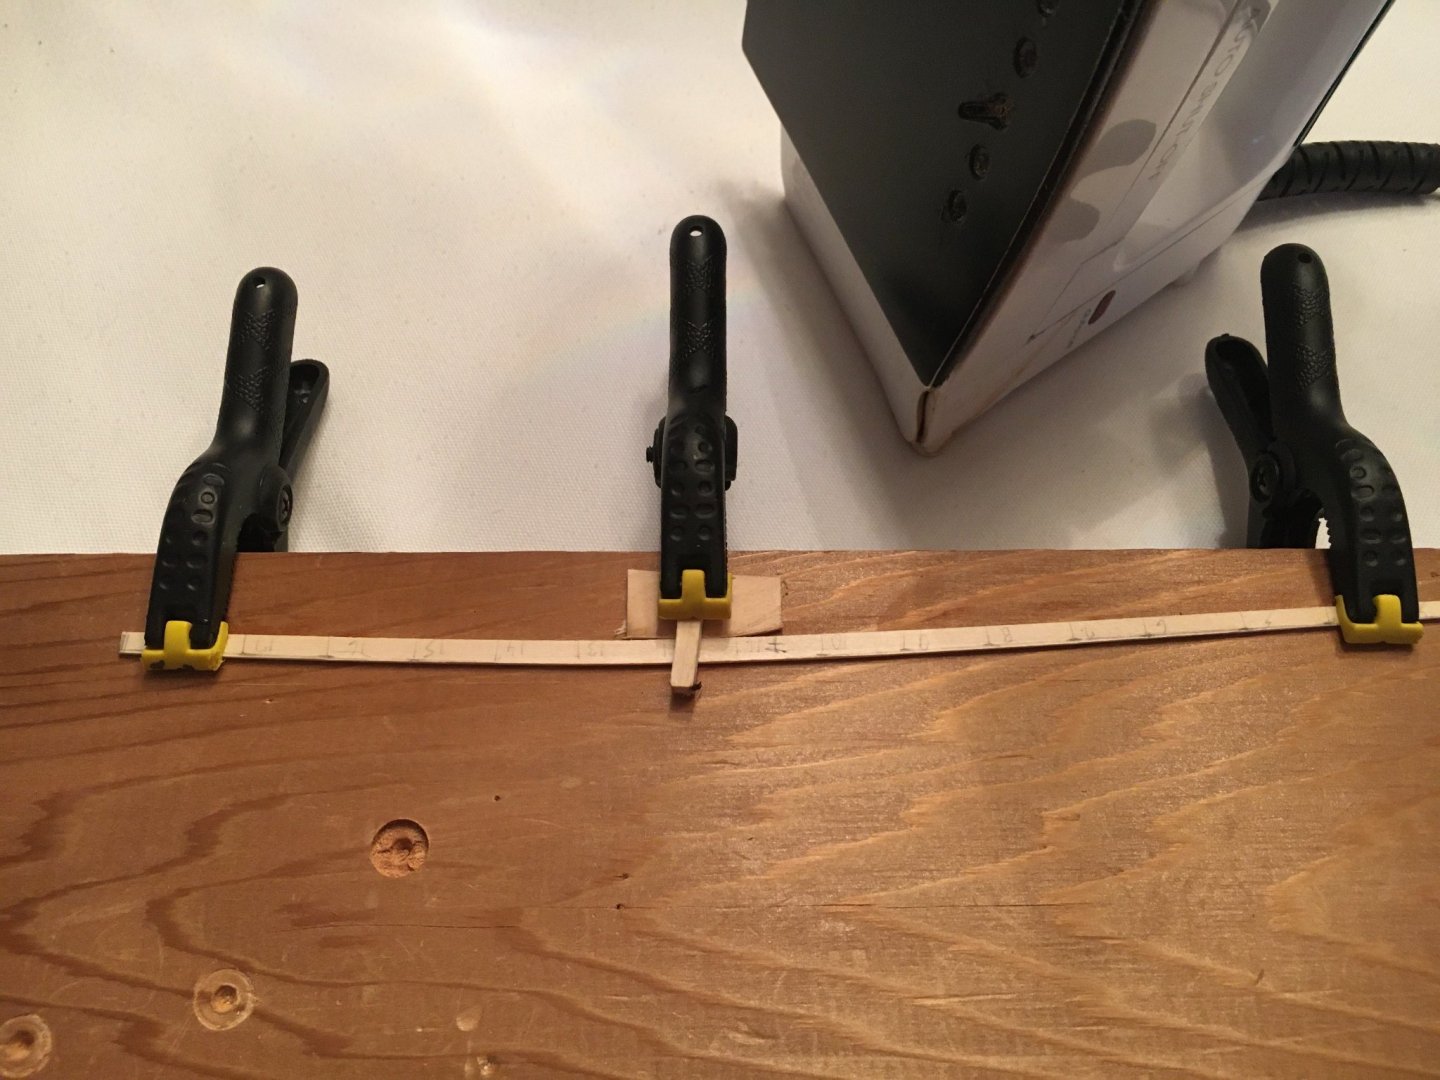
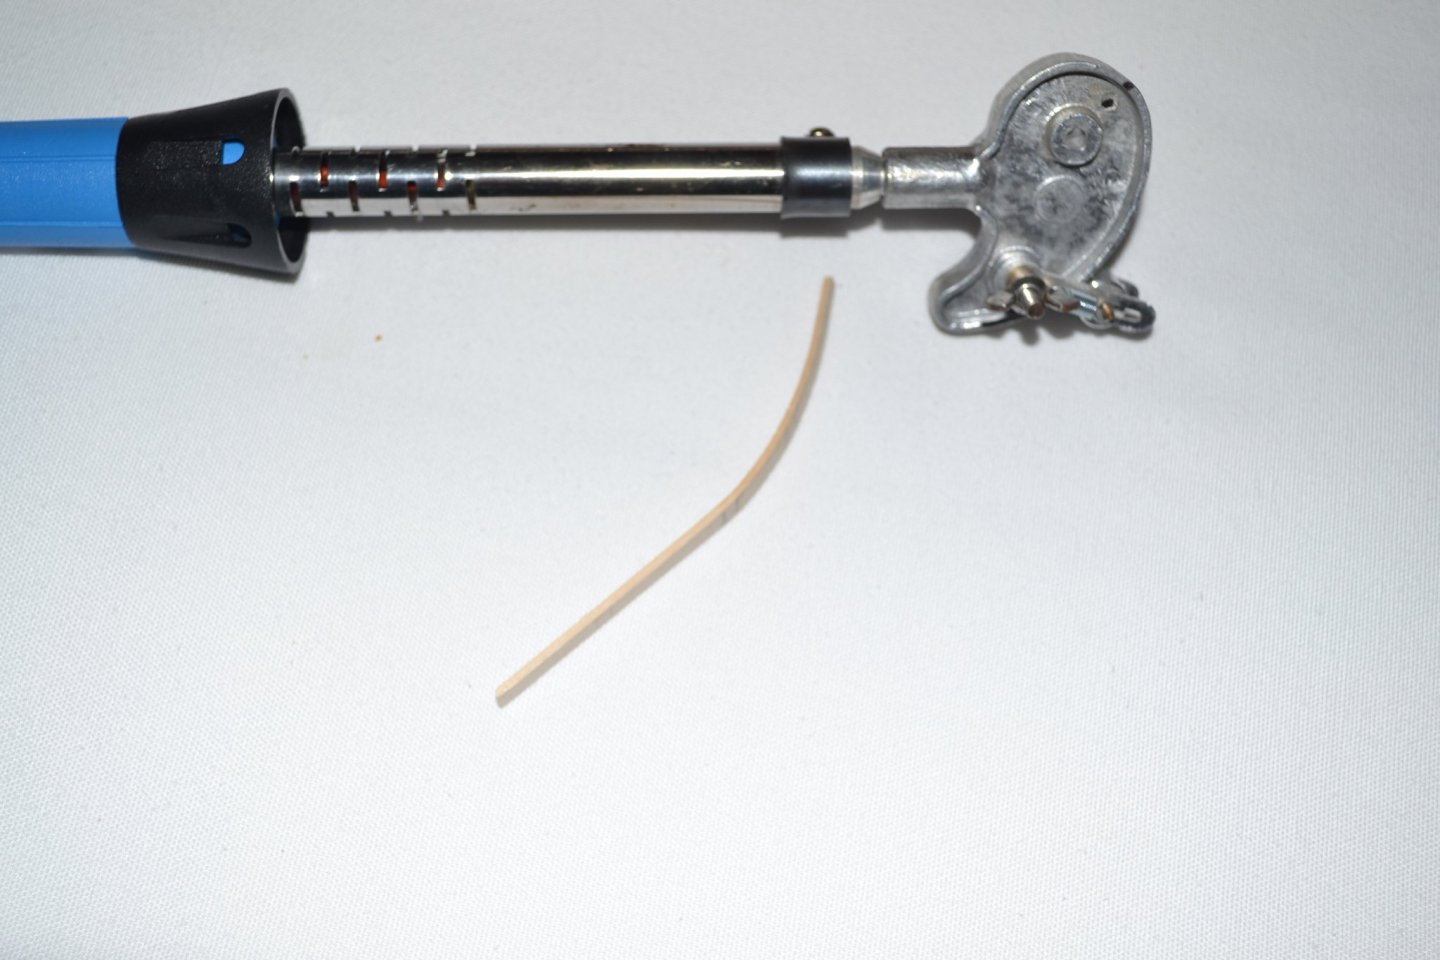
A quick update. I have essentially completed the deck framing and moved on to planking. I used Chuck's method presented in his video to edge bend the planks and it worked a treat! Thanks Chuck. I didn't soak the planks but just applied a bit of water with a brush to the upper surface after they were clamped in position then used the iron, they were finished in minutes after I used a hair dryer on them after bending to completely dry them. When the edge bending was done I used the heat of the barrel of a plank bender to form the curve to meet the stem and stern at the proper angle. The planks were secured with medium CA and it seemed to work well not withstanding the ongoing debate about the proper adhesive. I chose to plank one complete side of the model despite advice sometimes seen to place one plank on each side alternately to avoid possible frame movement problems. I choose to do this as I intend to leave off some planks for a view of the wet well on the opposite side and that job seems a bit fiddly so I thought a bit of practice on the fully planked site was wise. As I had installed the deck beams and ceiling the whole structure is quite rigid and the properly bent planks required virtually no stress on the frames. I am fair pleased with the result so far.


-
Do you have a link to a website where this kit can be purchased?
-
I look forward to following this project!