
HOLIDAY DONATION DRIVE - SUPPORT MSW - DO YOUR PART TO KEEP THIS GREAT FORUM GOING!
×


turangi
-
Posts
276 -
Joined
-
Last visited
Content Type
Profiles
Forums
Gallery
Events
Everything posted by turangi
-
 Your model looks fantastic!! Looking forward to seeing the final product!
 -
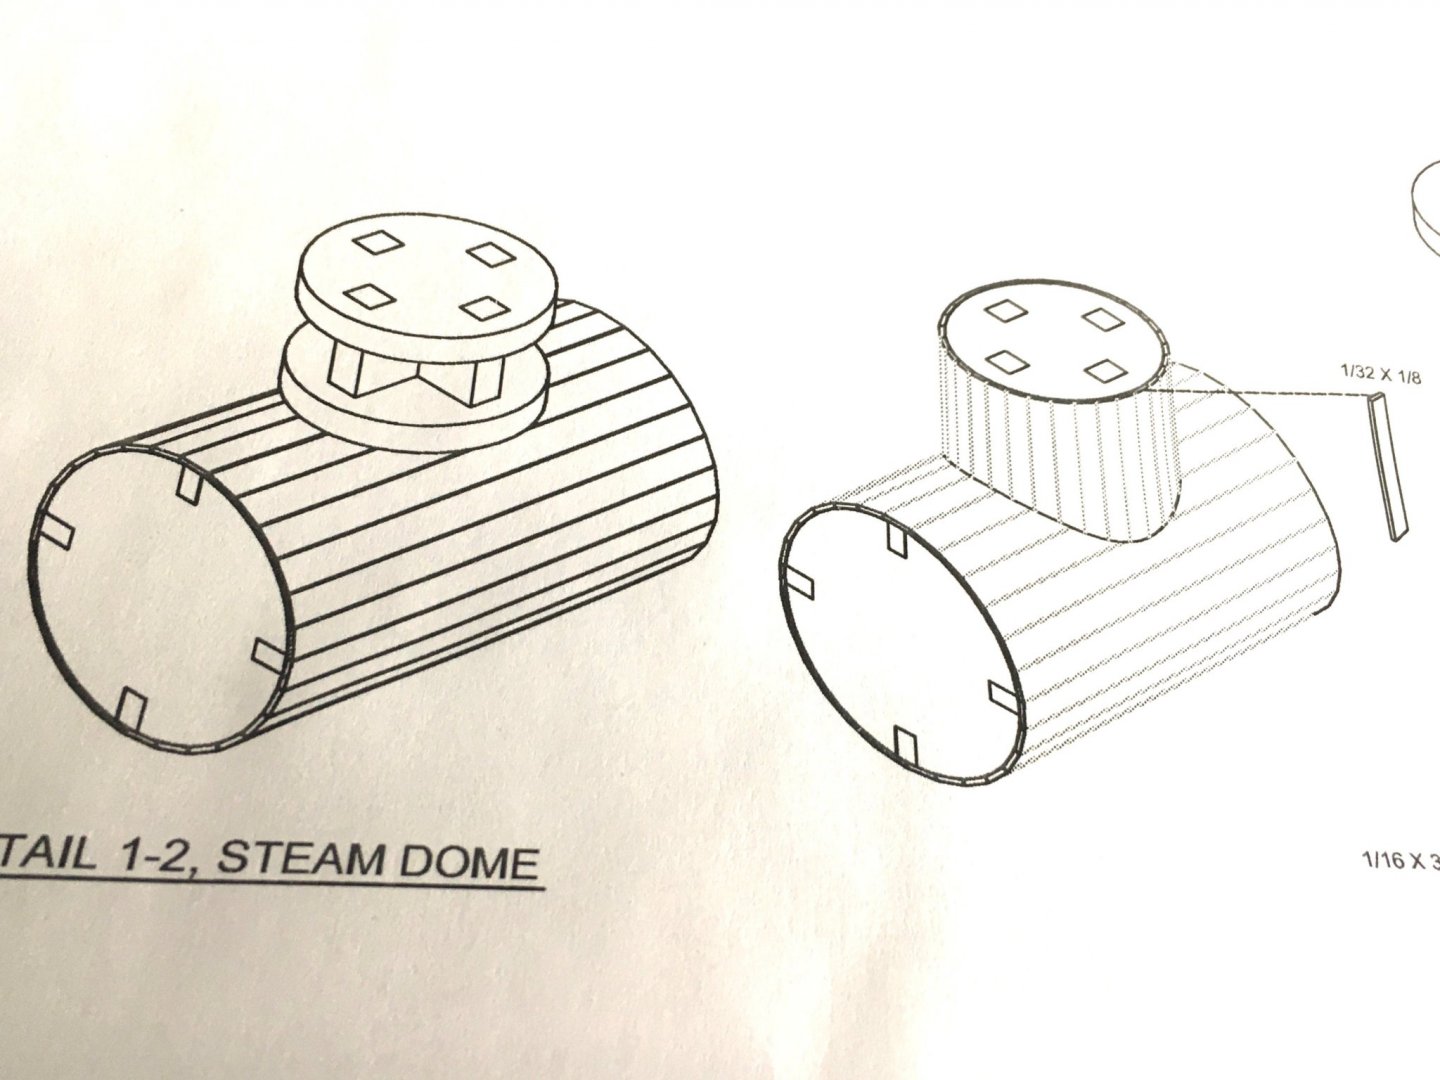
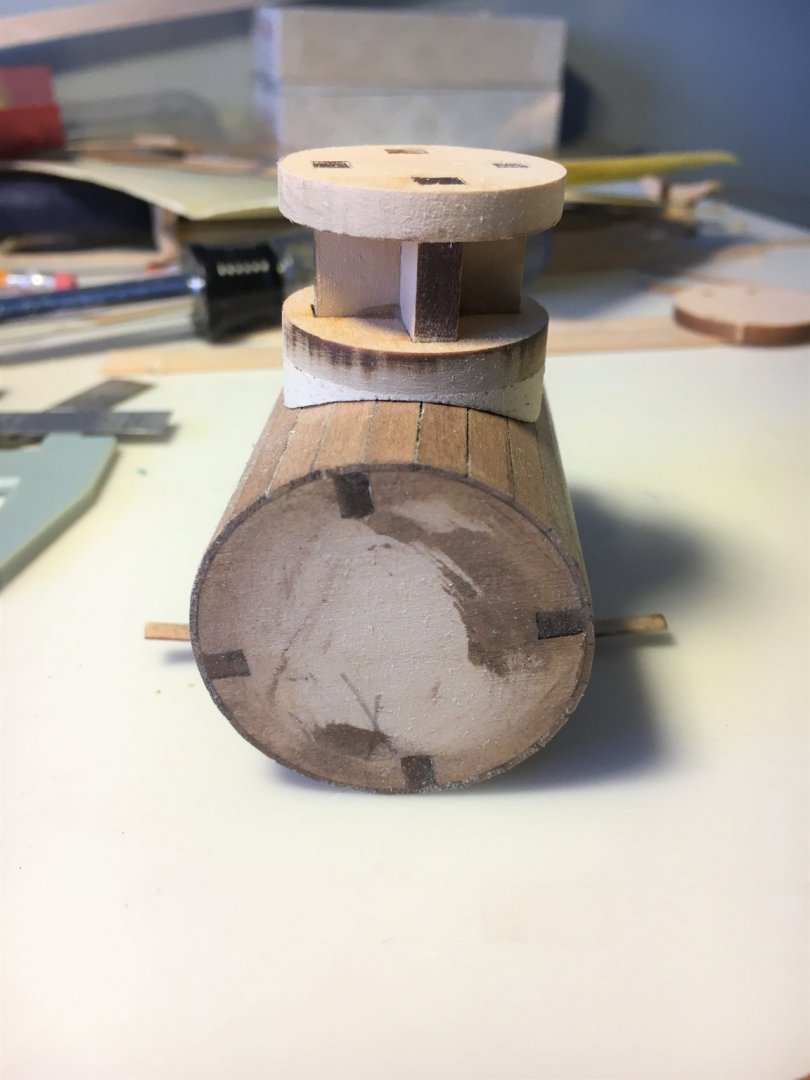
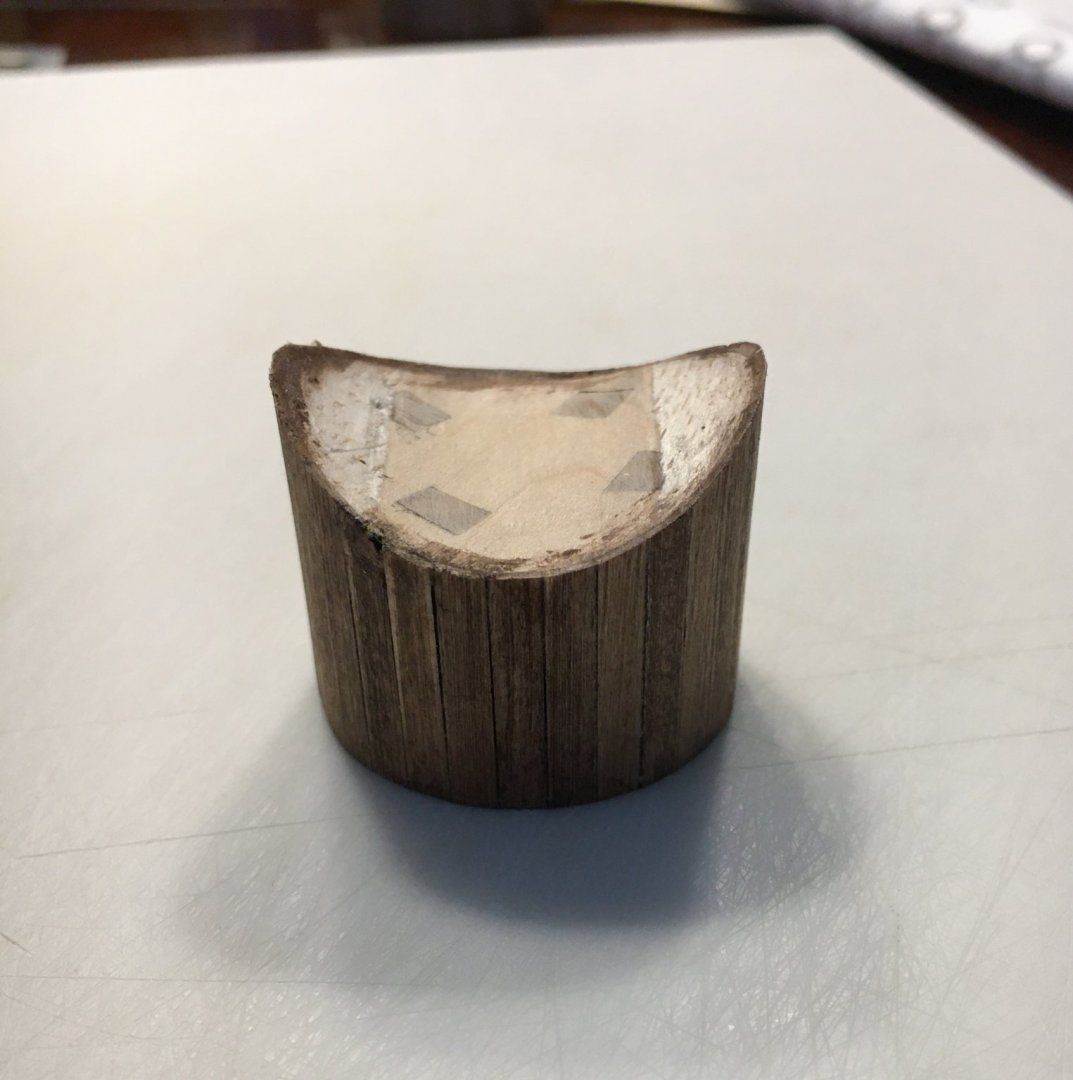
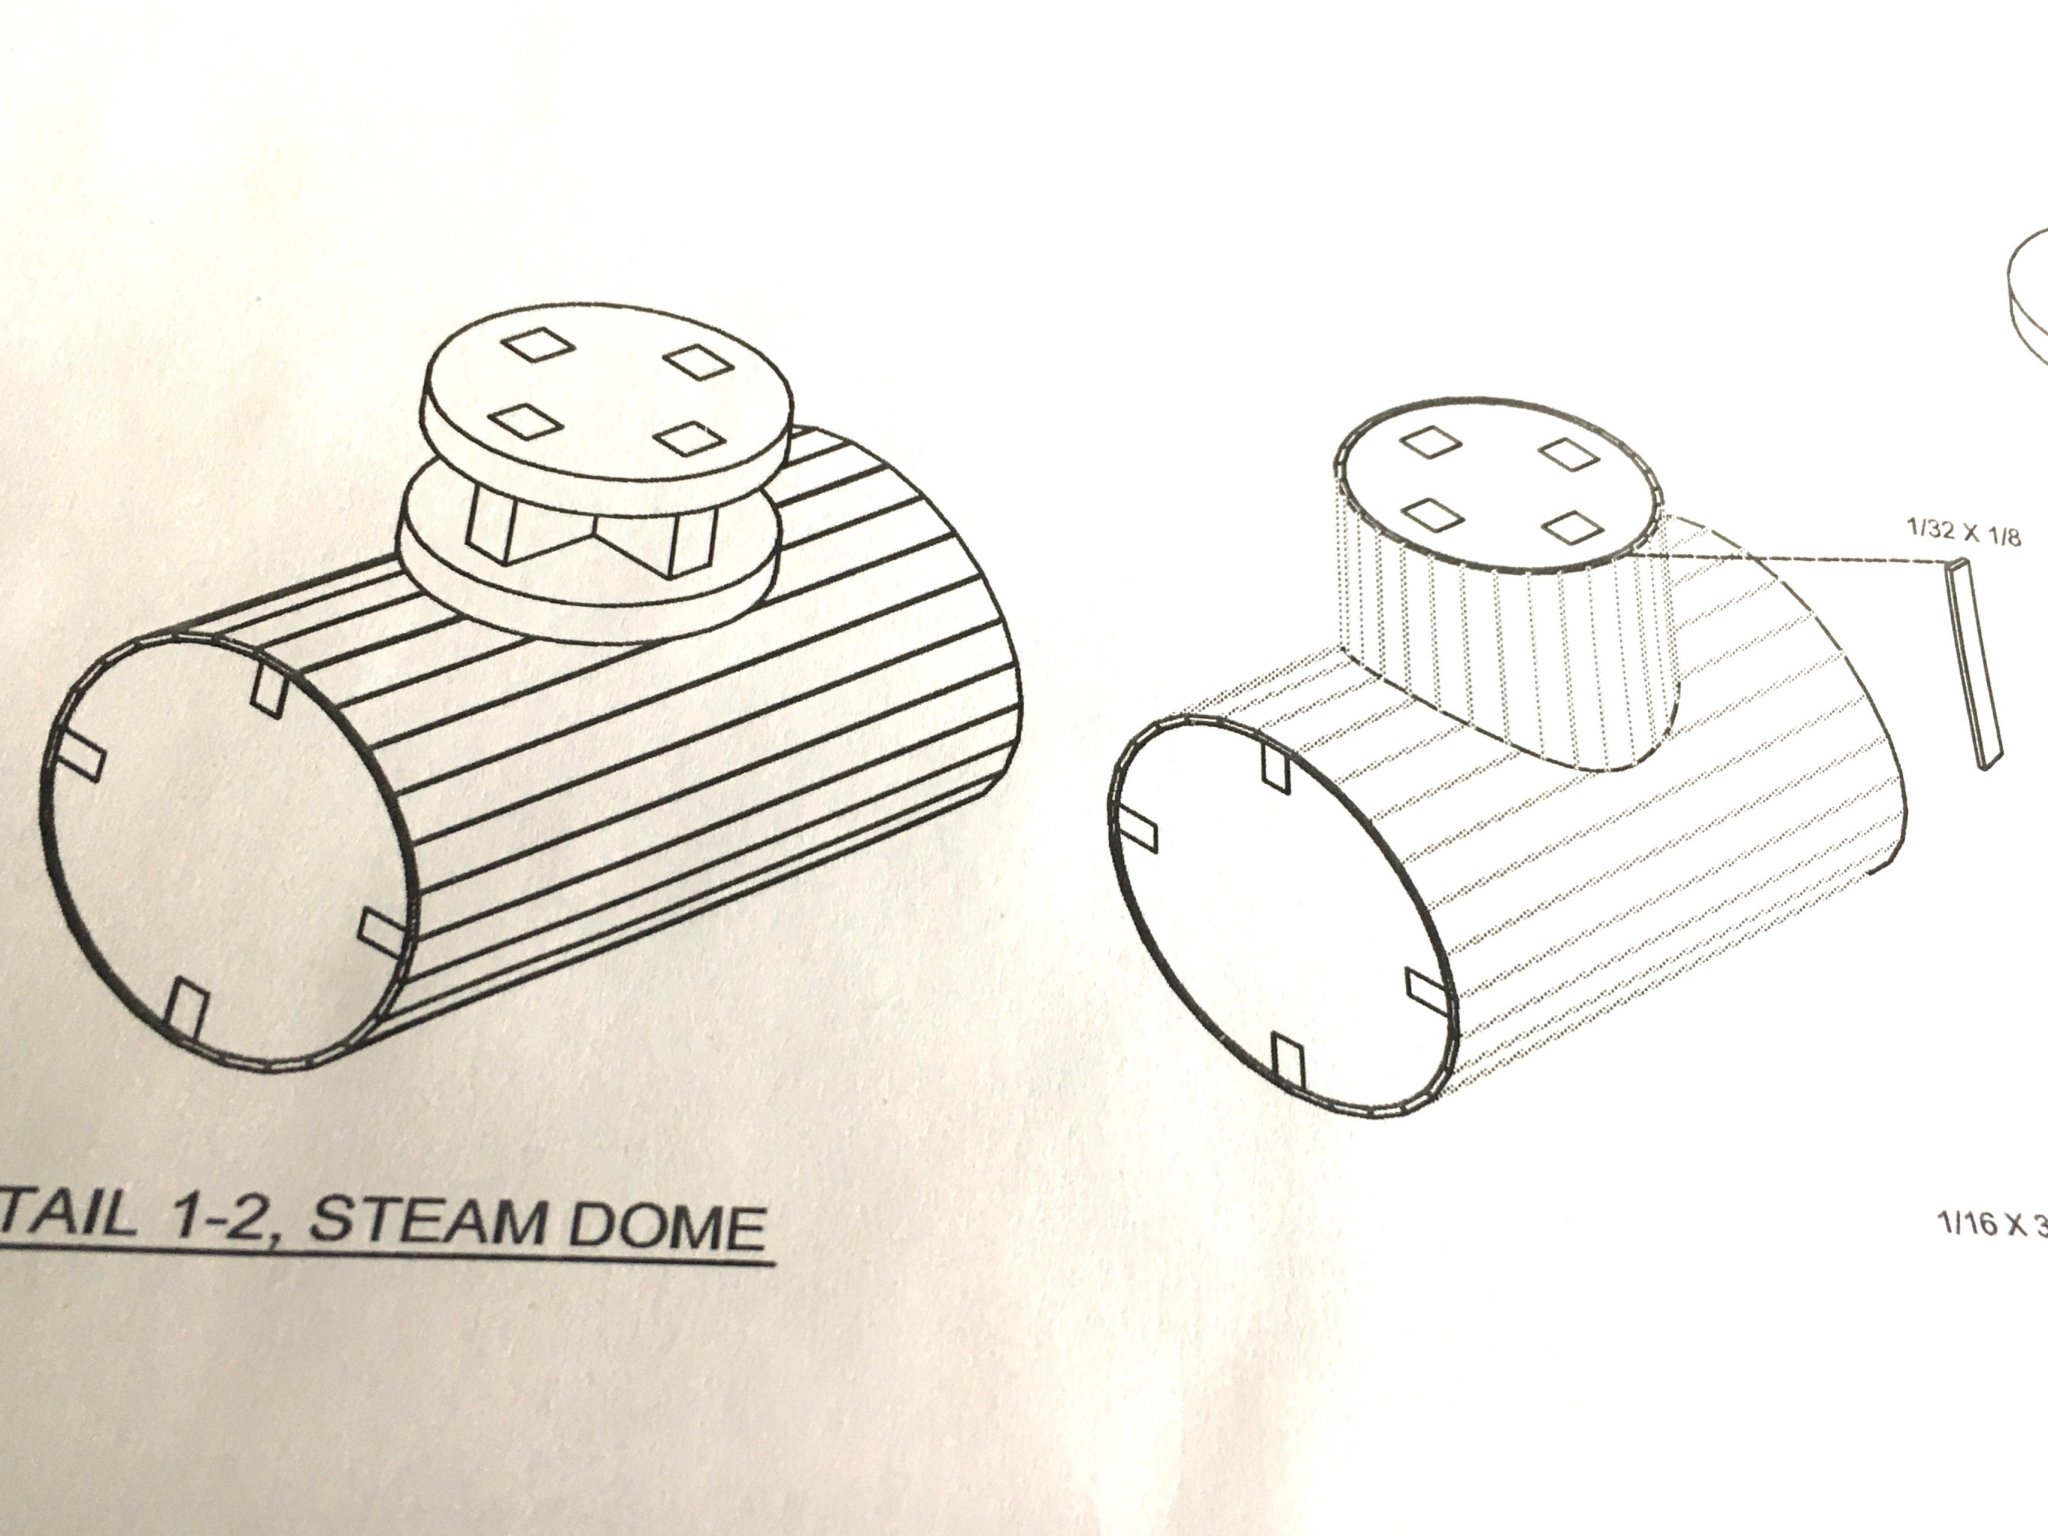
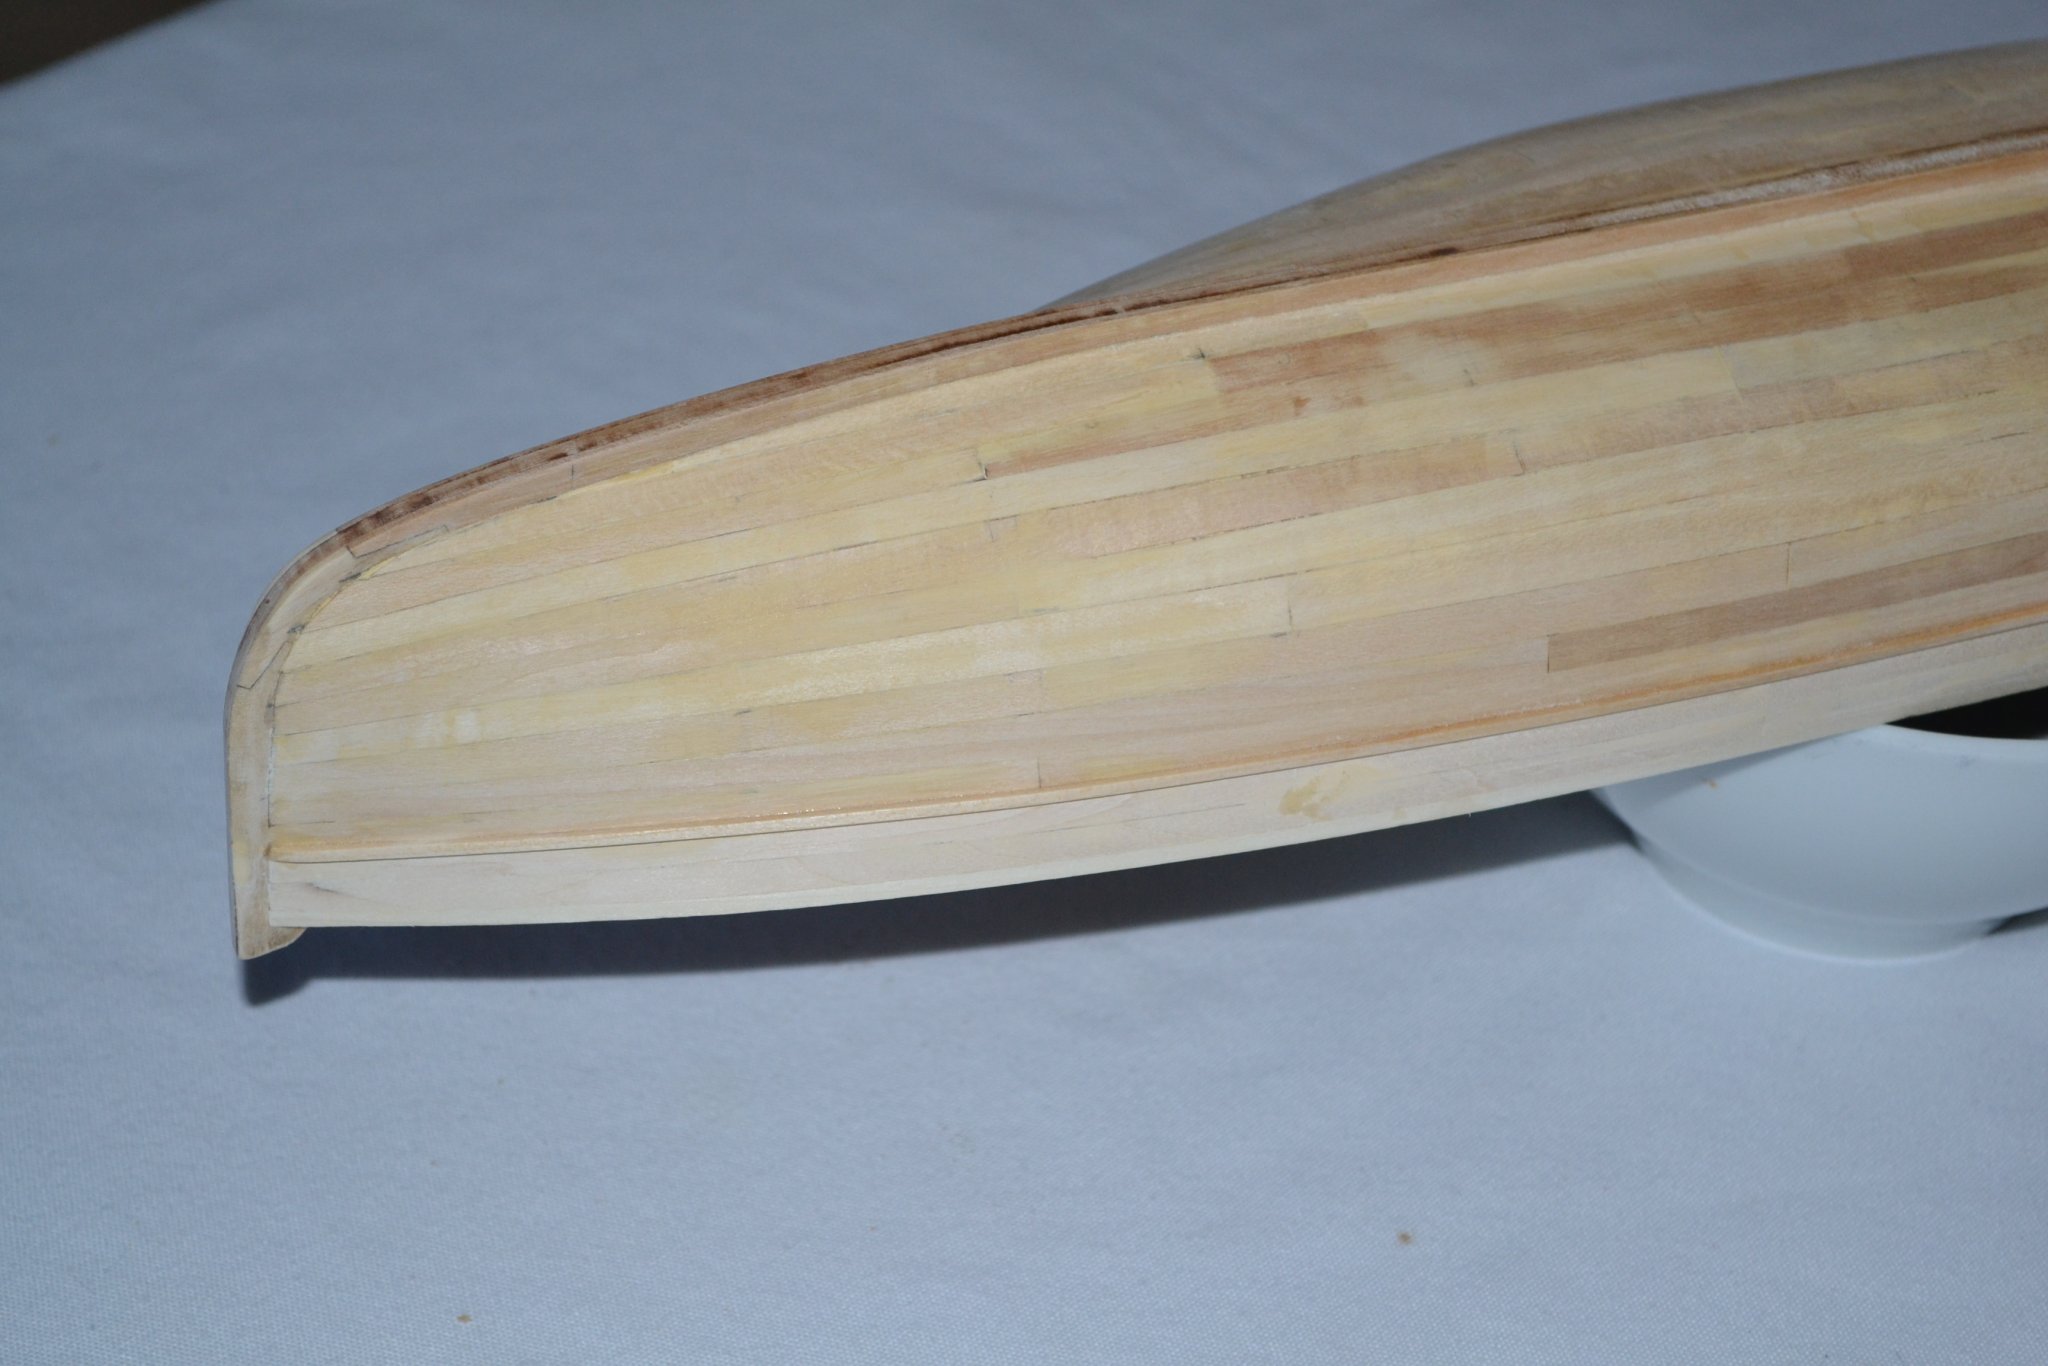
Did some more work on the boiler. The instructions showed the steam dome perched on the top of the boiler and the wood strips going down to the boiler, it seemed to me a rather tenuous connection. What I did was glue a piece of balsa to the bottom of the dome and then carved it roughly to shape. I then wrapped sandpaper around the boiler and slid the dome along the length to get a better shape in fit. I then attached the wood strips to the dome and did a final sanding and installed it. I am pleased with the way it turned out and it seems very strong.

- 54 replies
-
- 7
-

-
- picket boat
- model shipways
- (and 1 more)
-
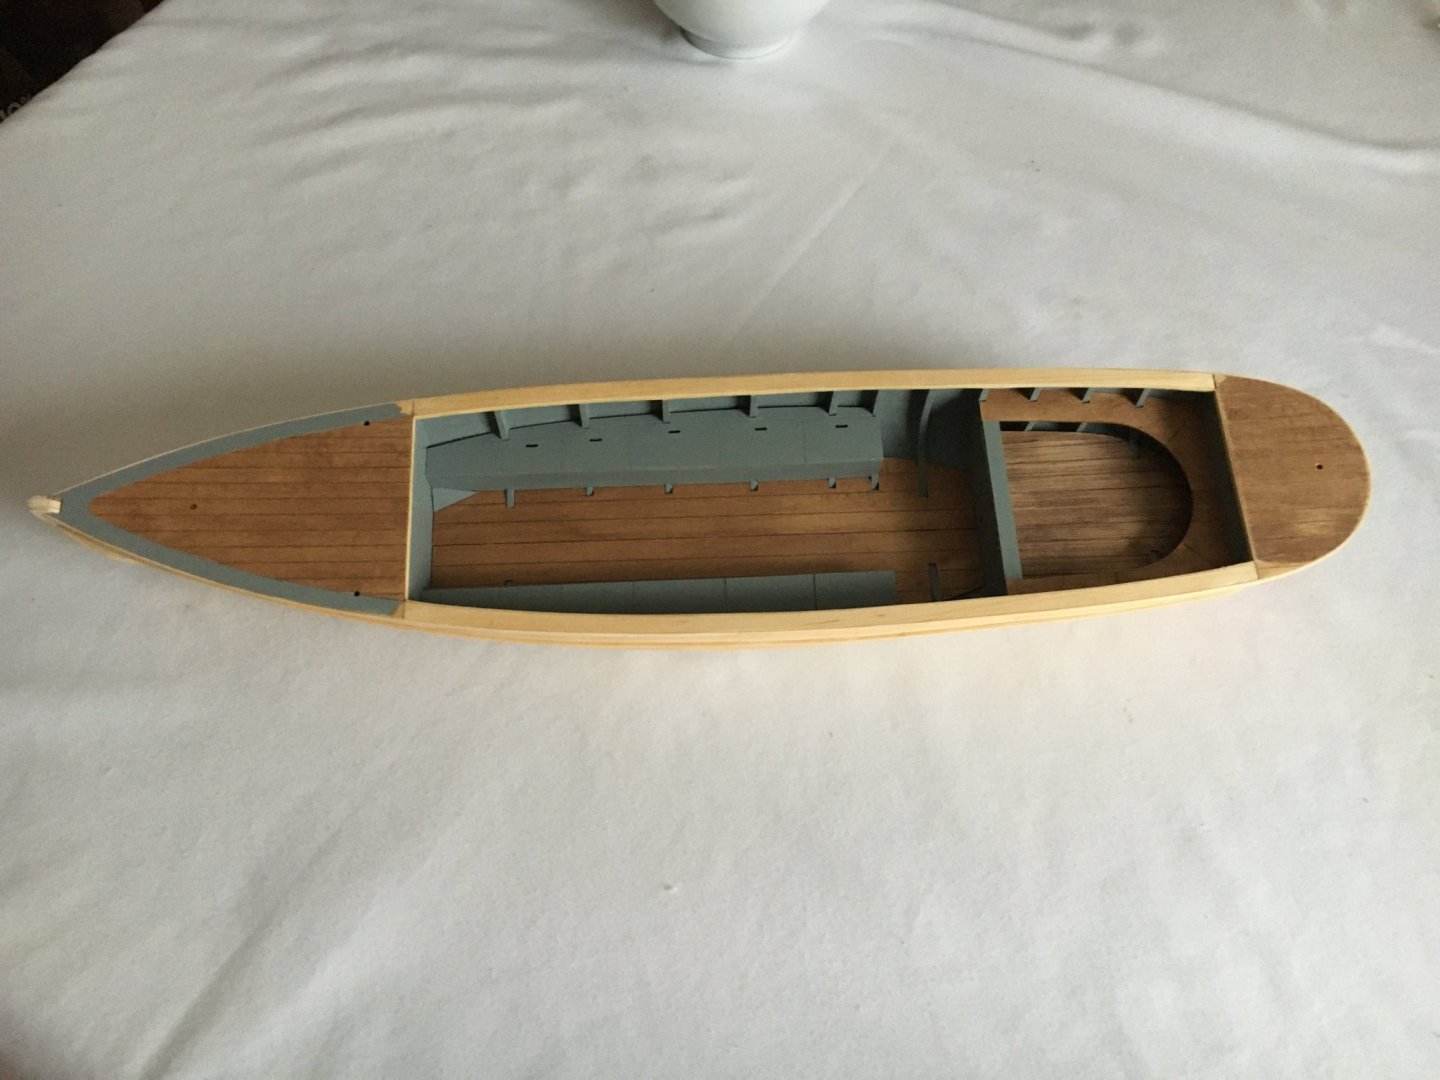
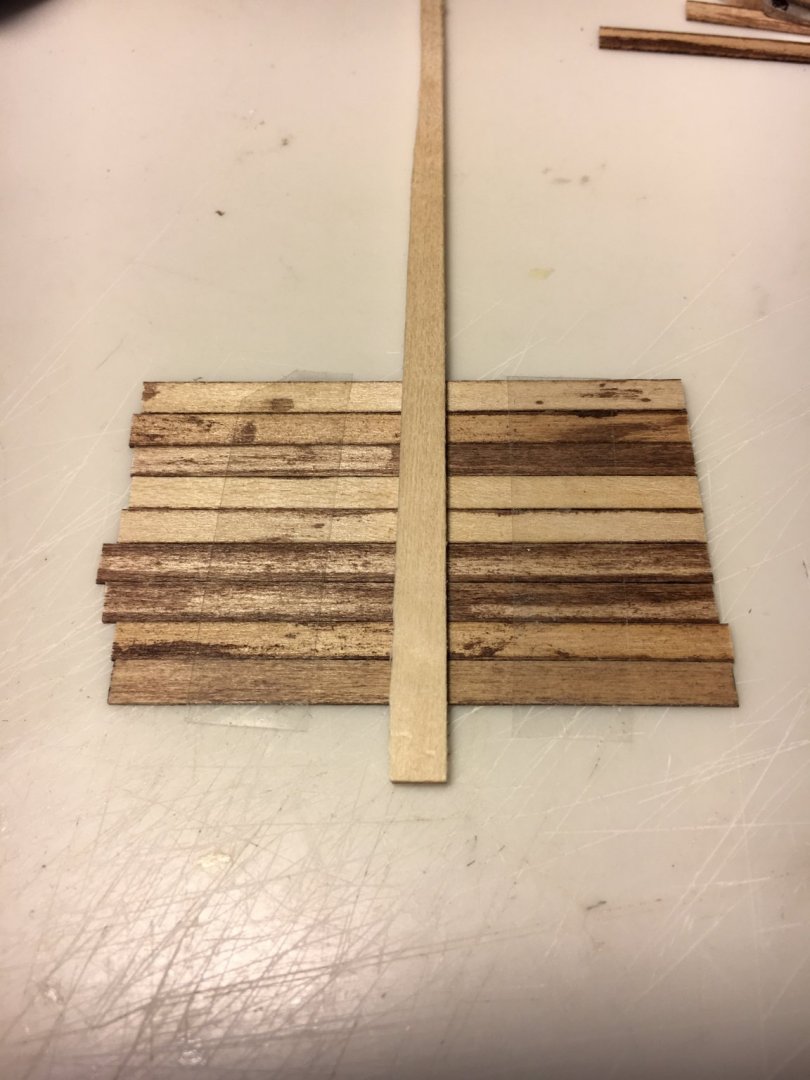
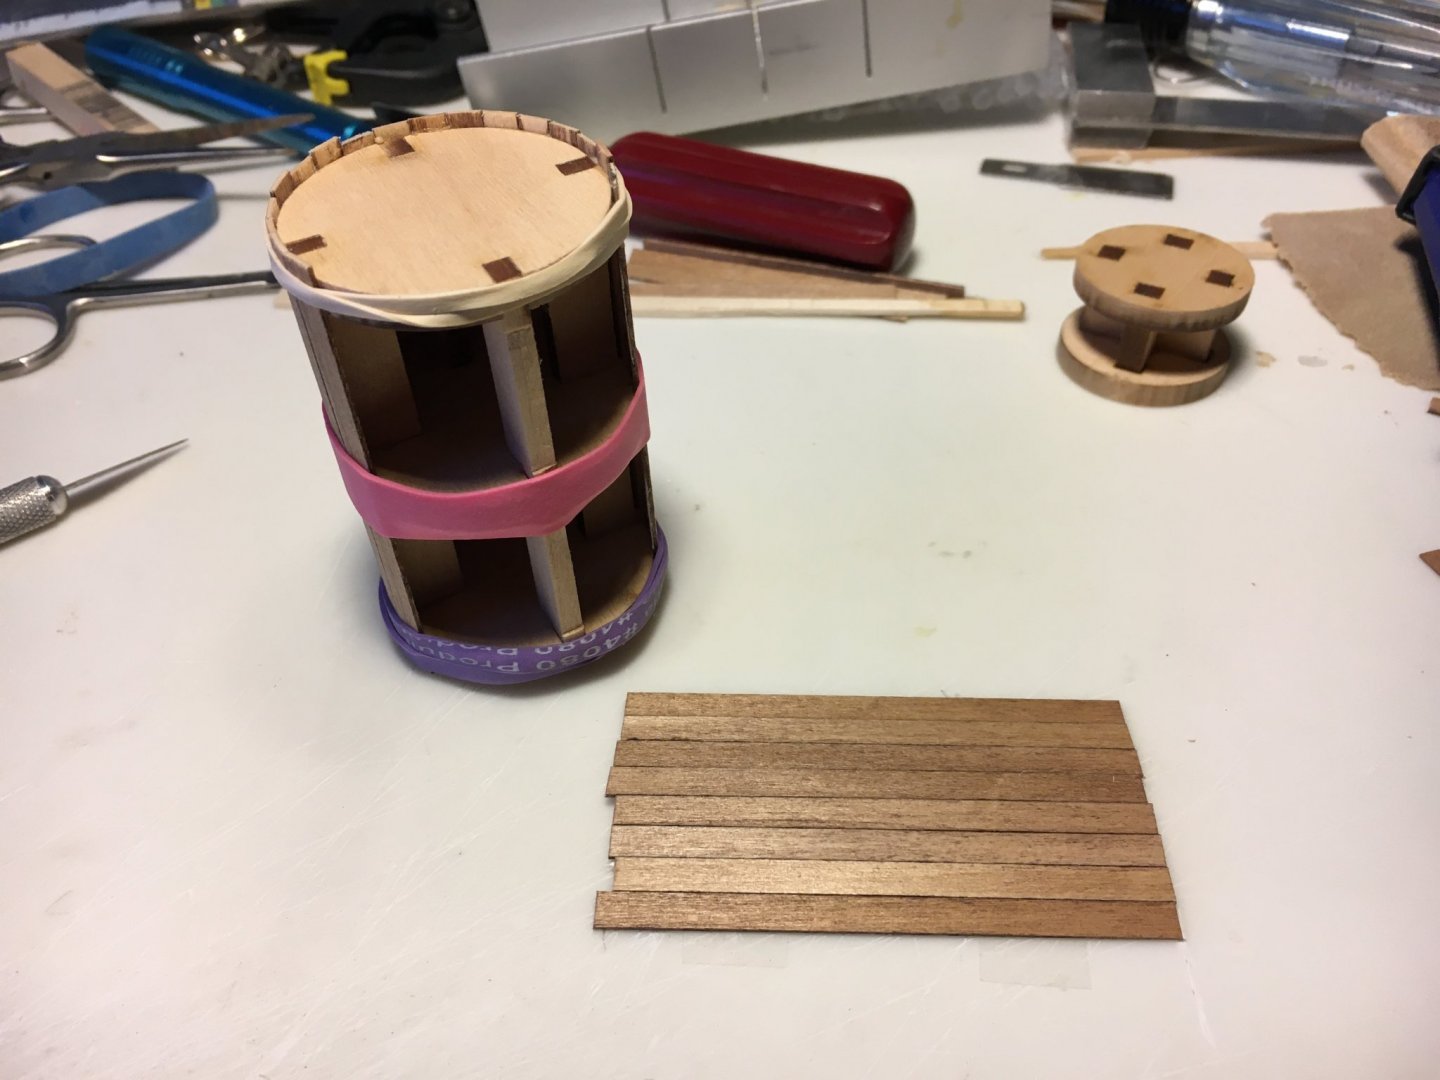
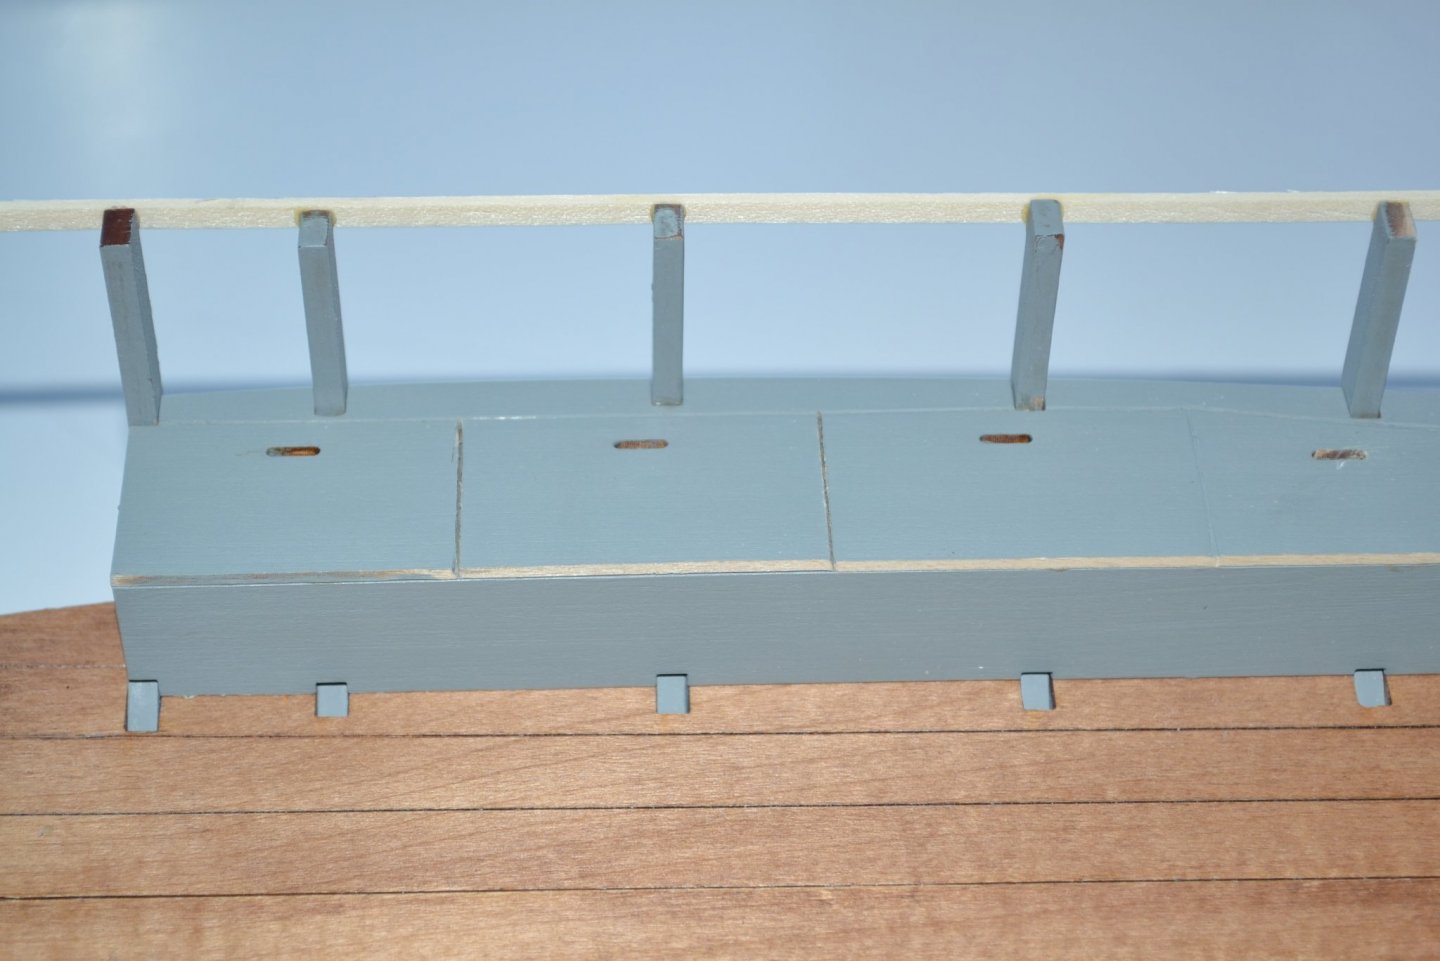
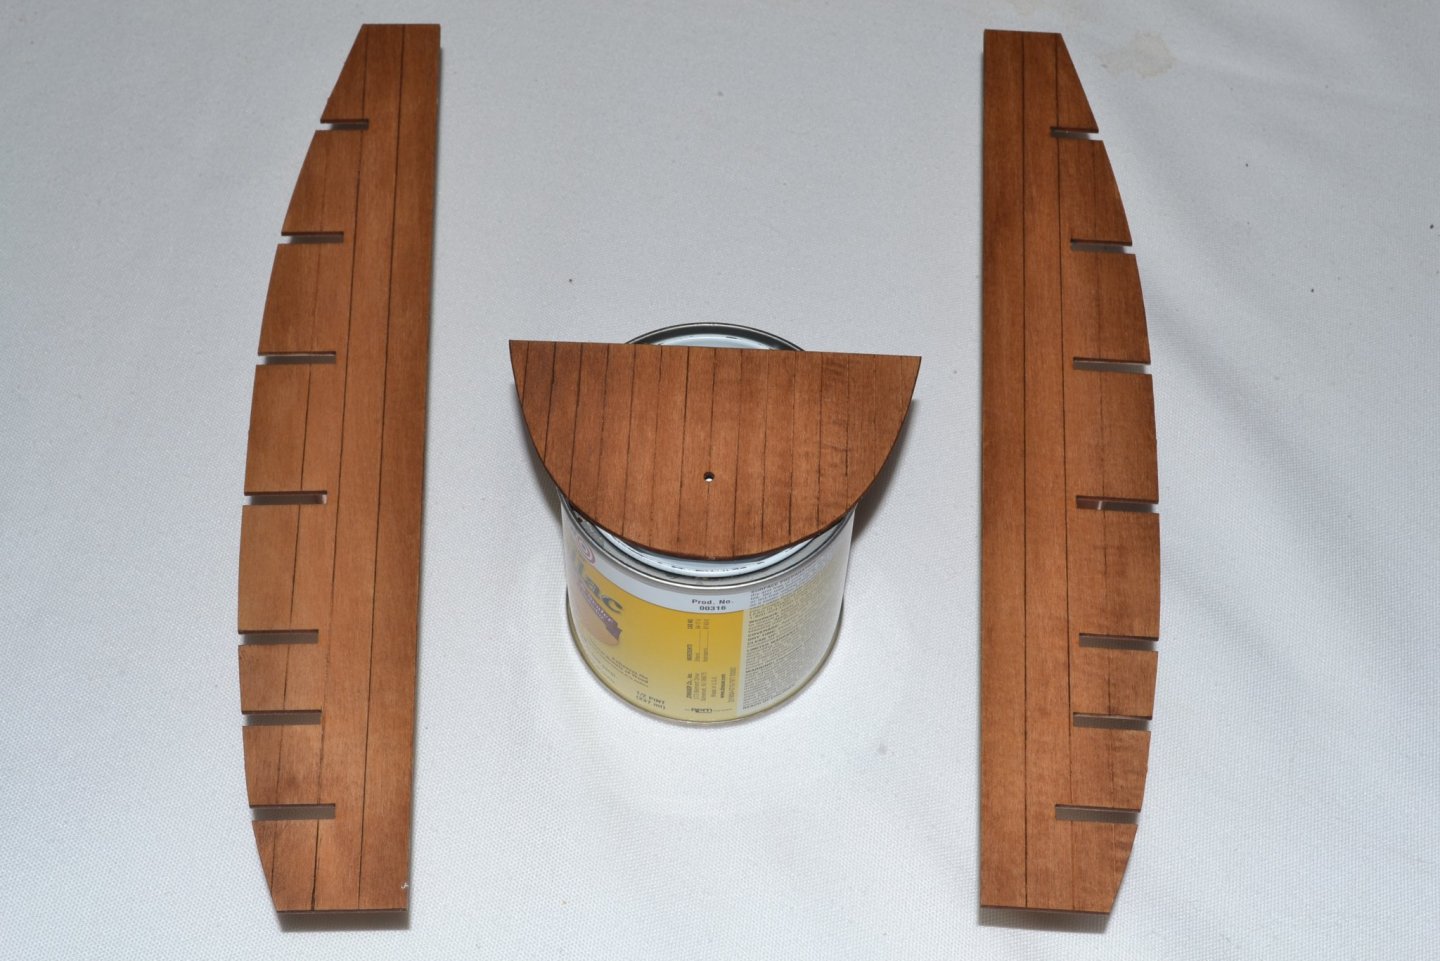
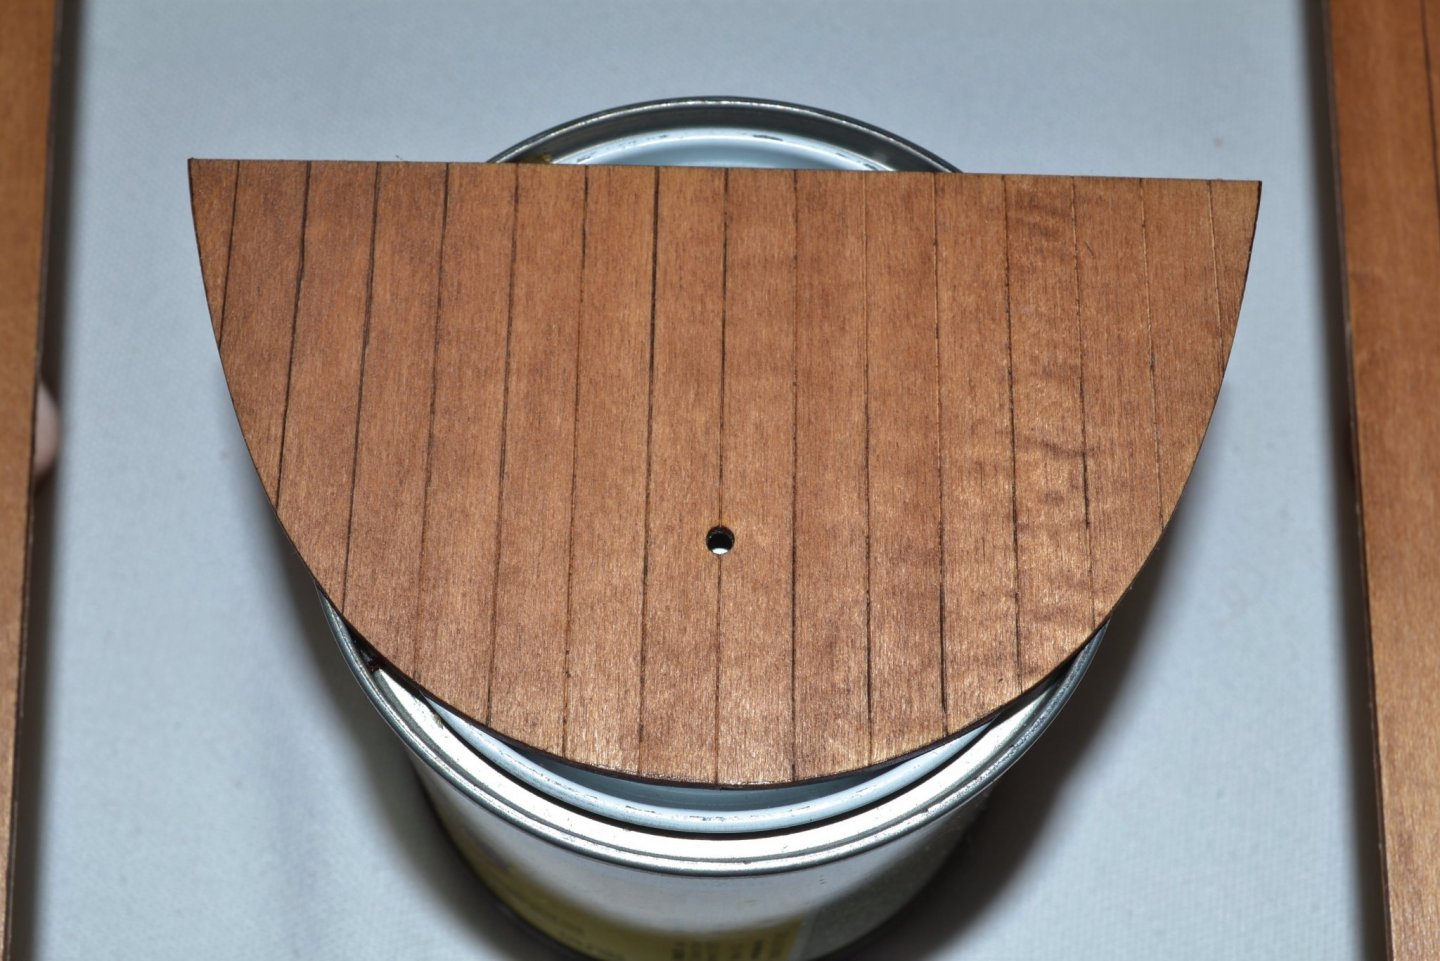
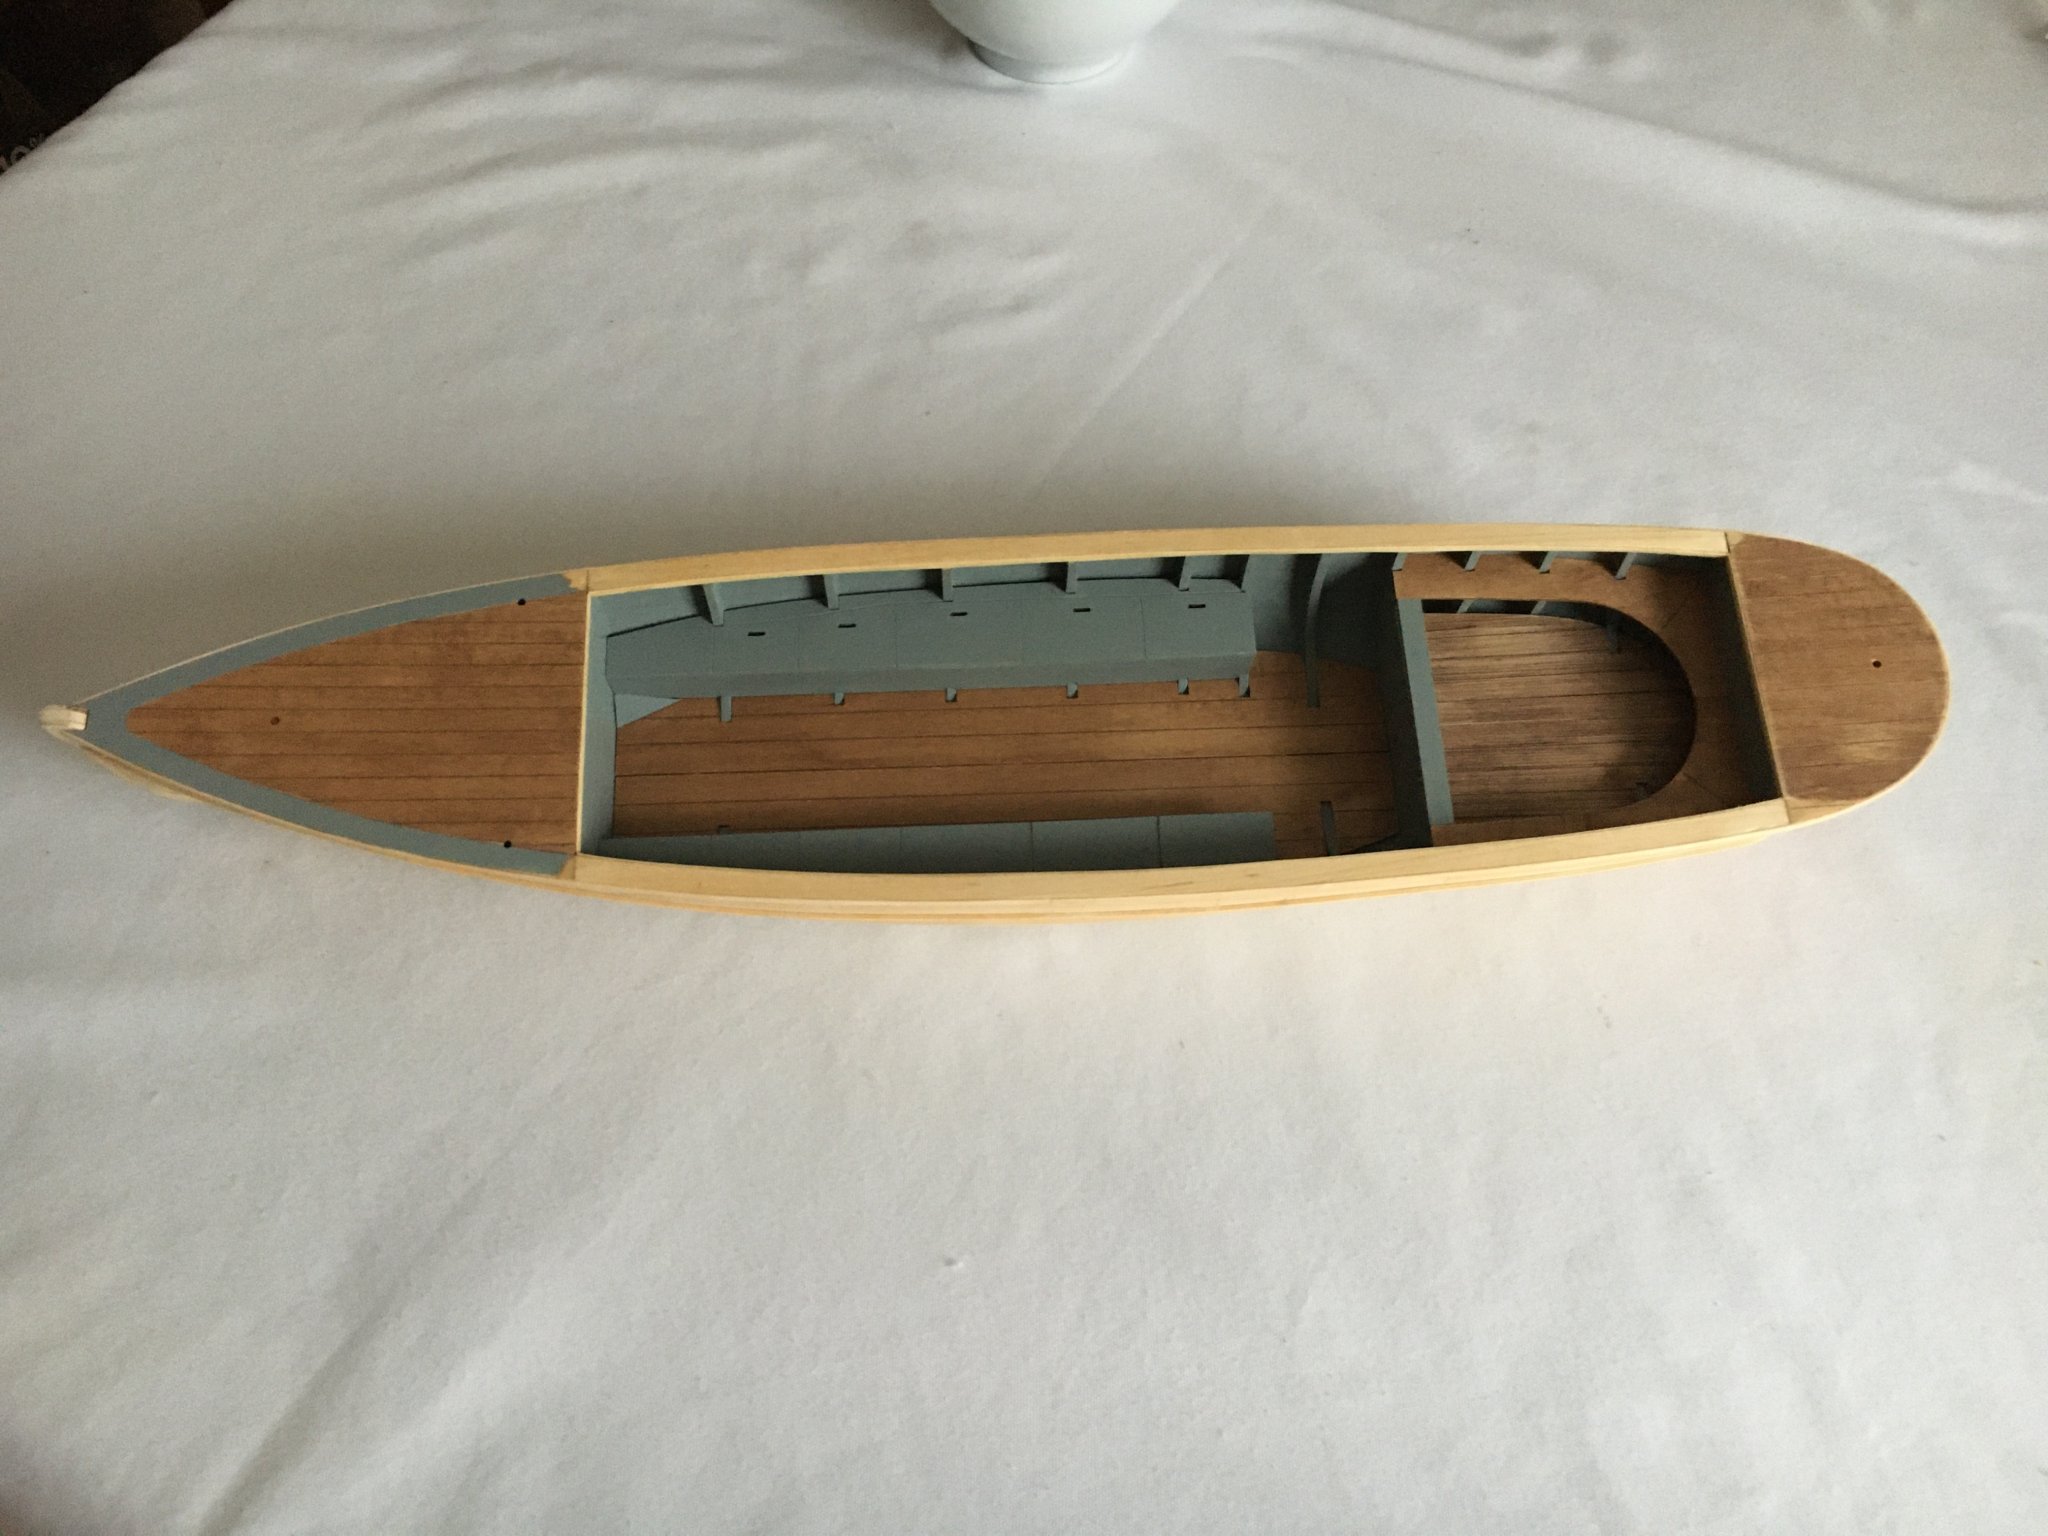
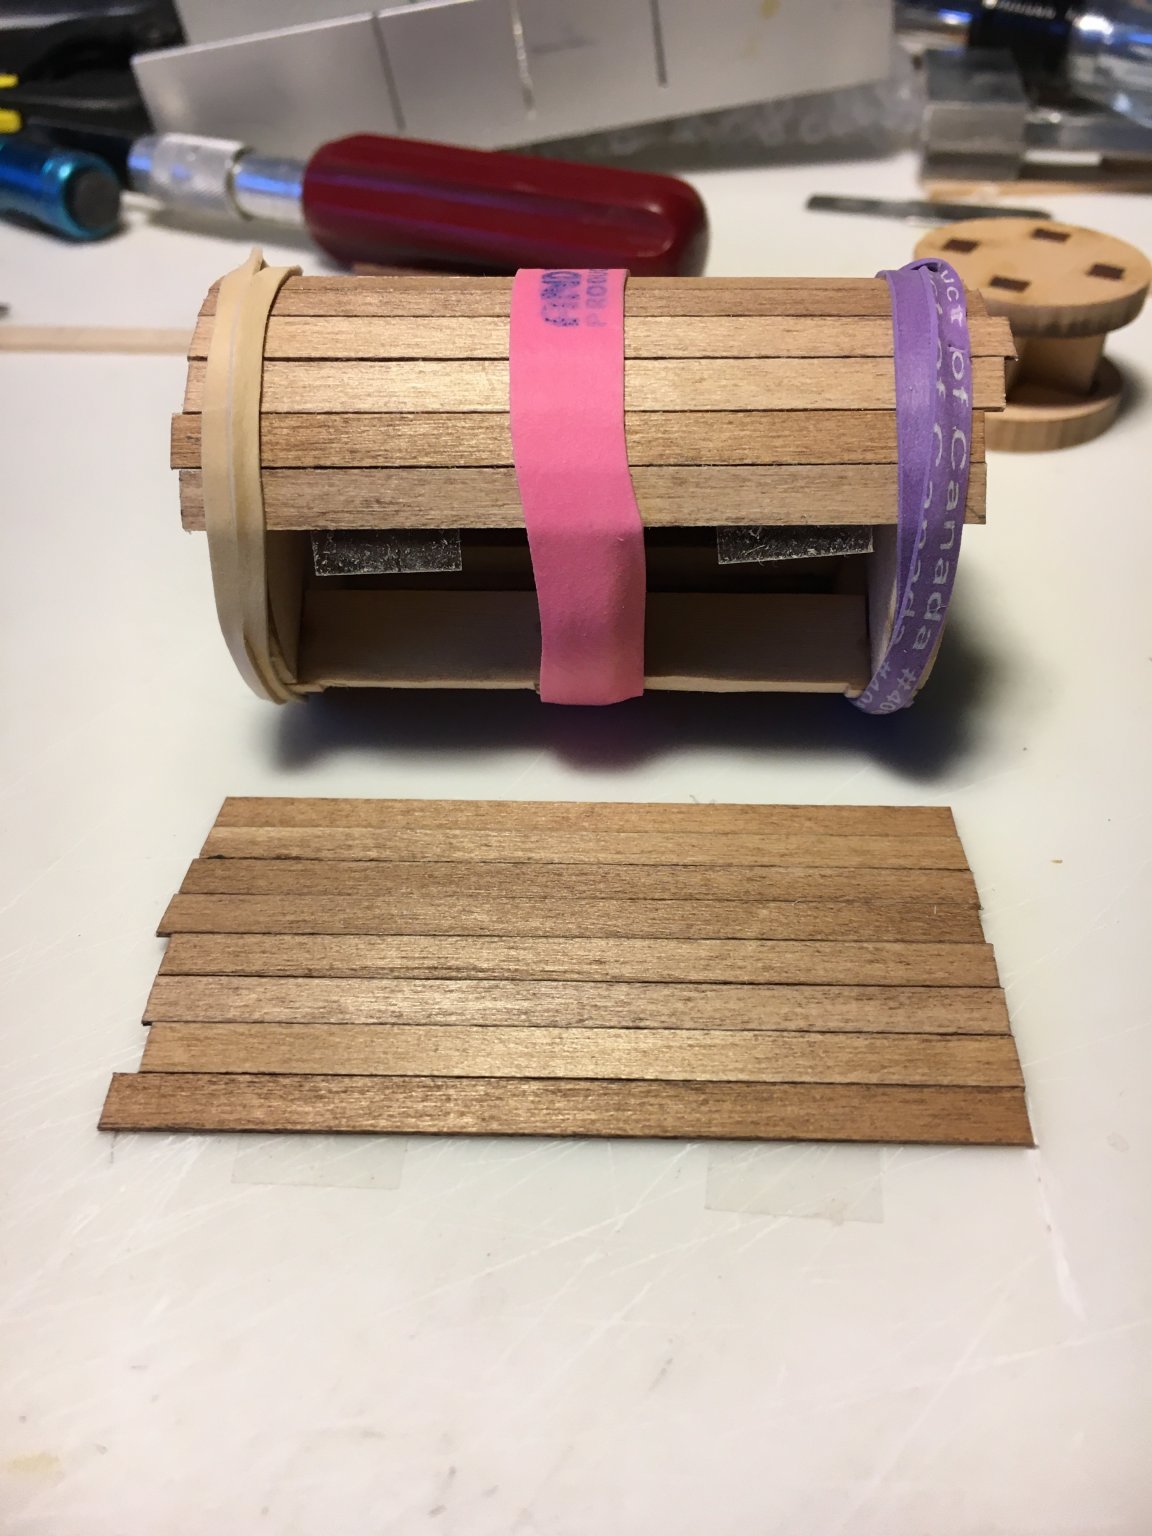
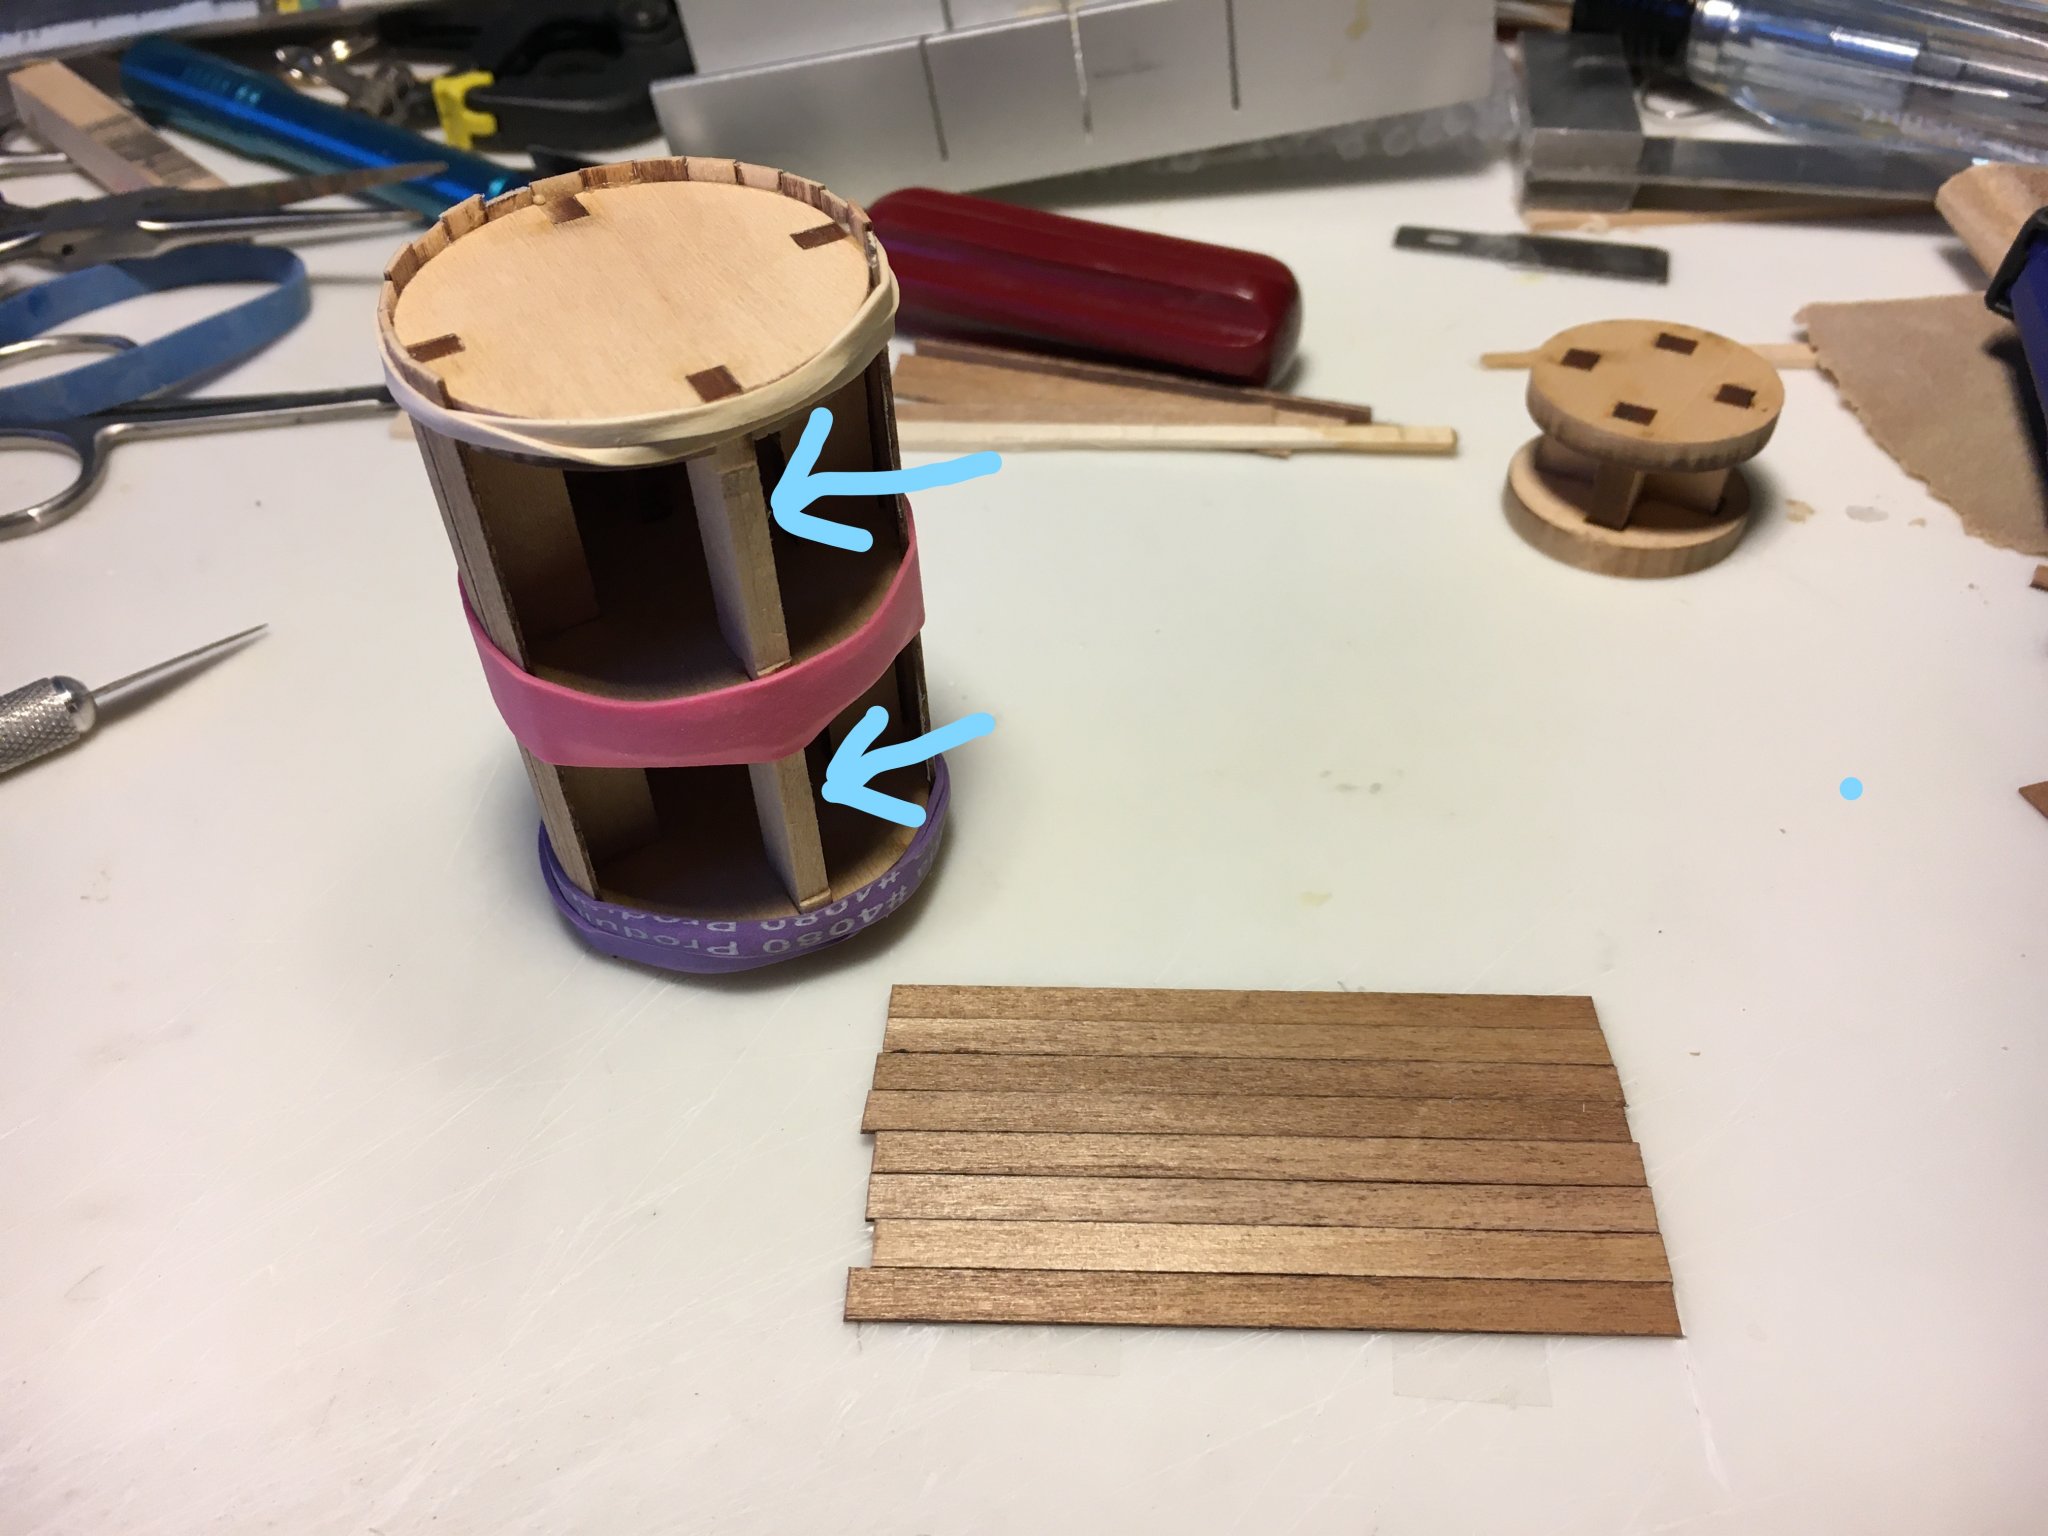
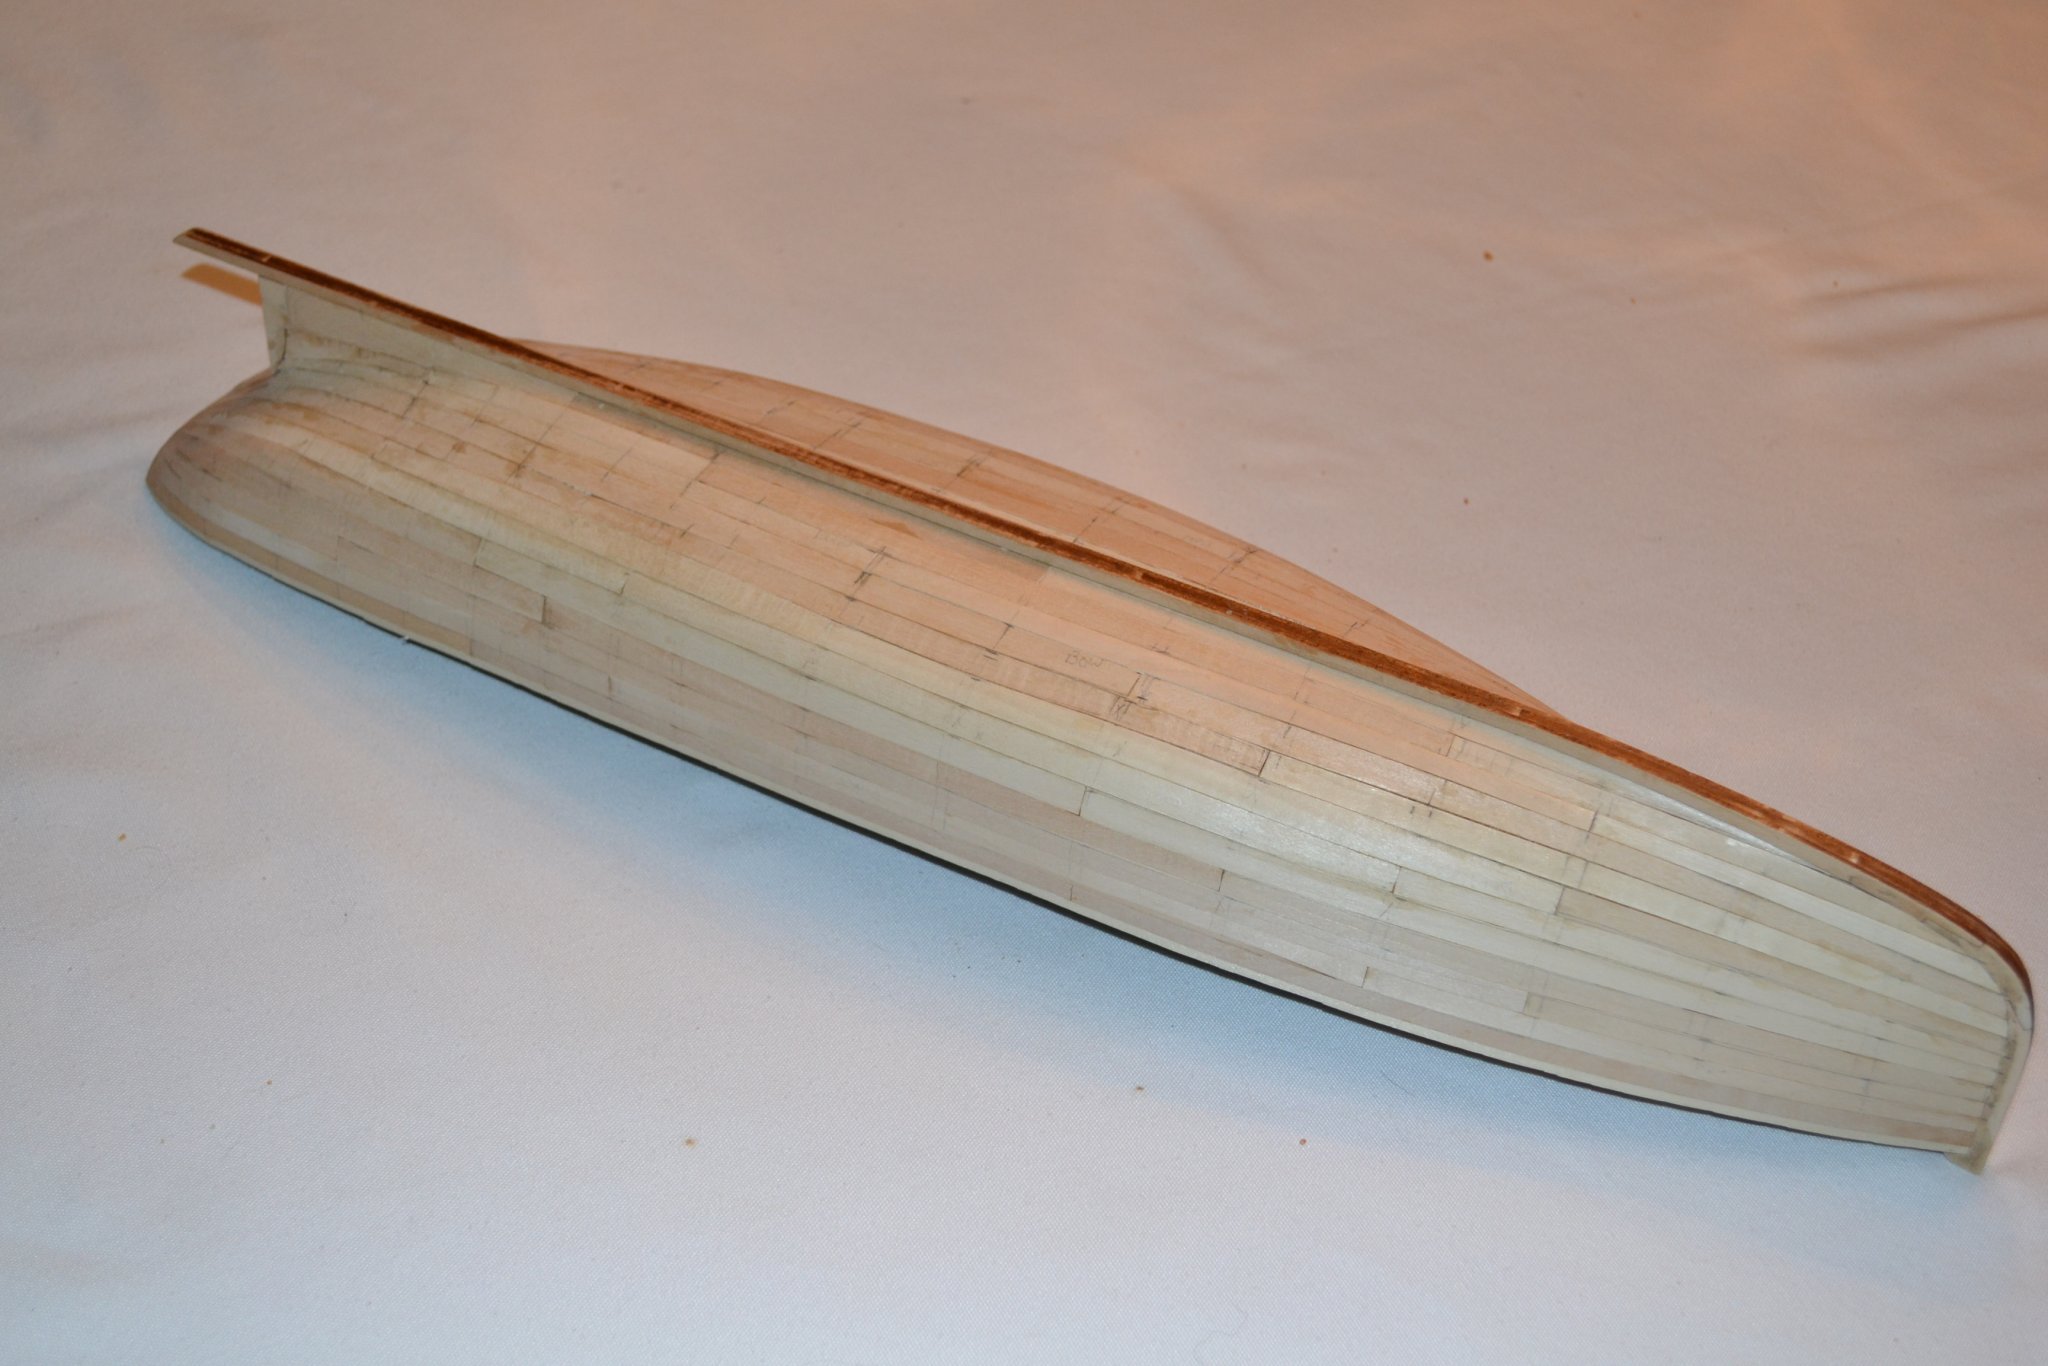
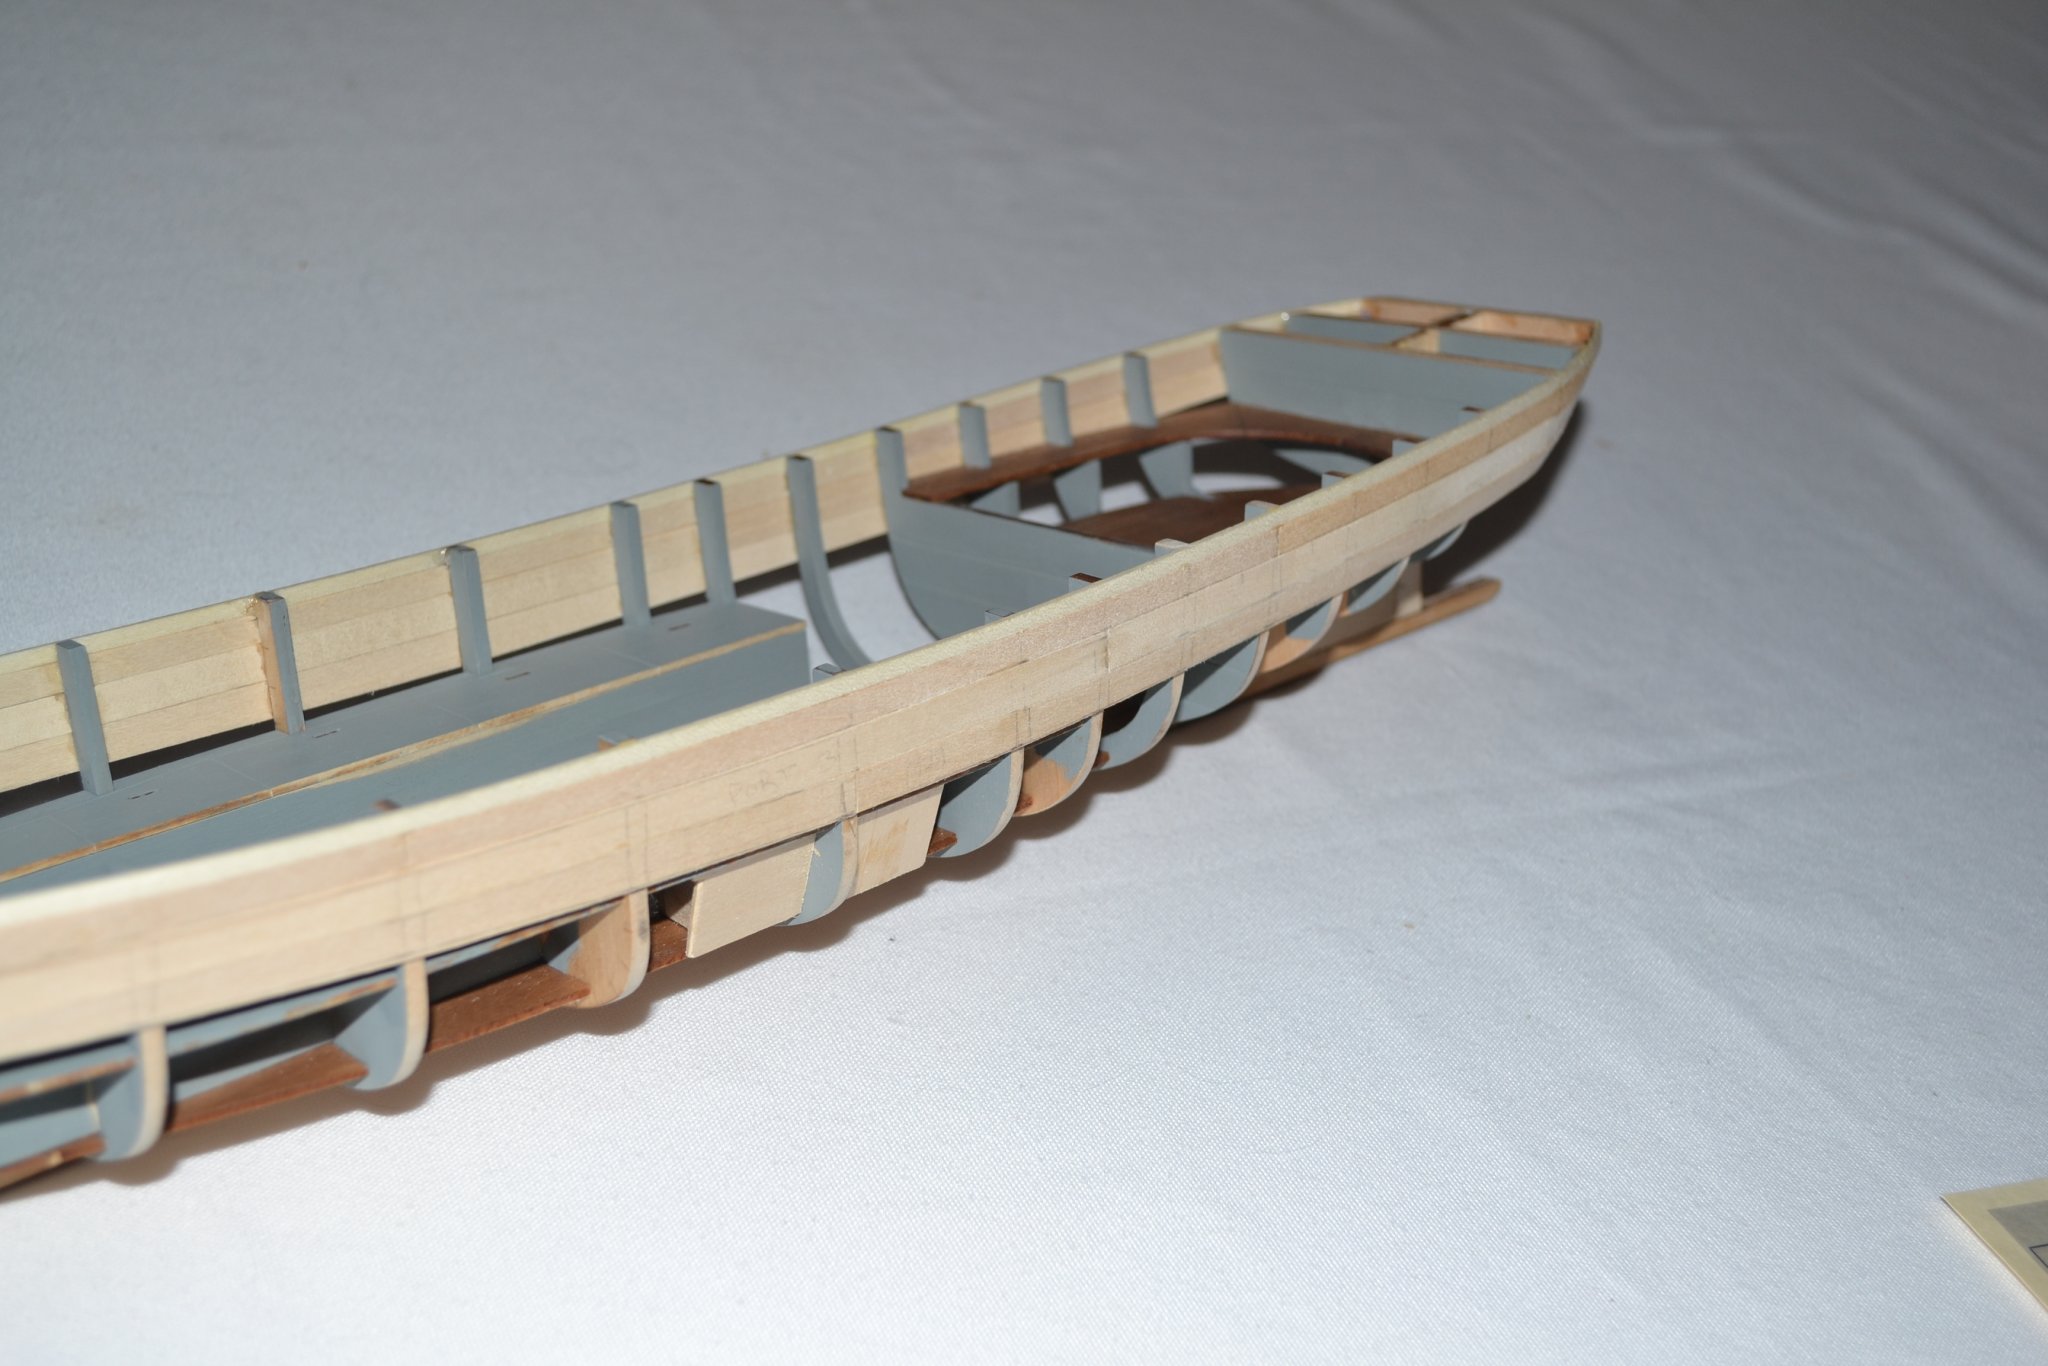
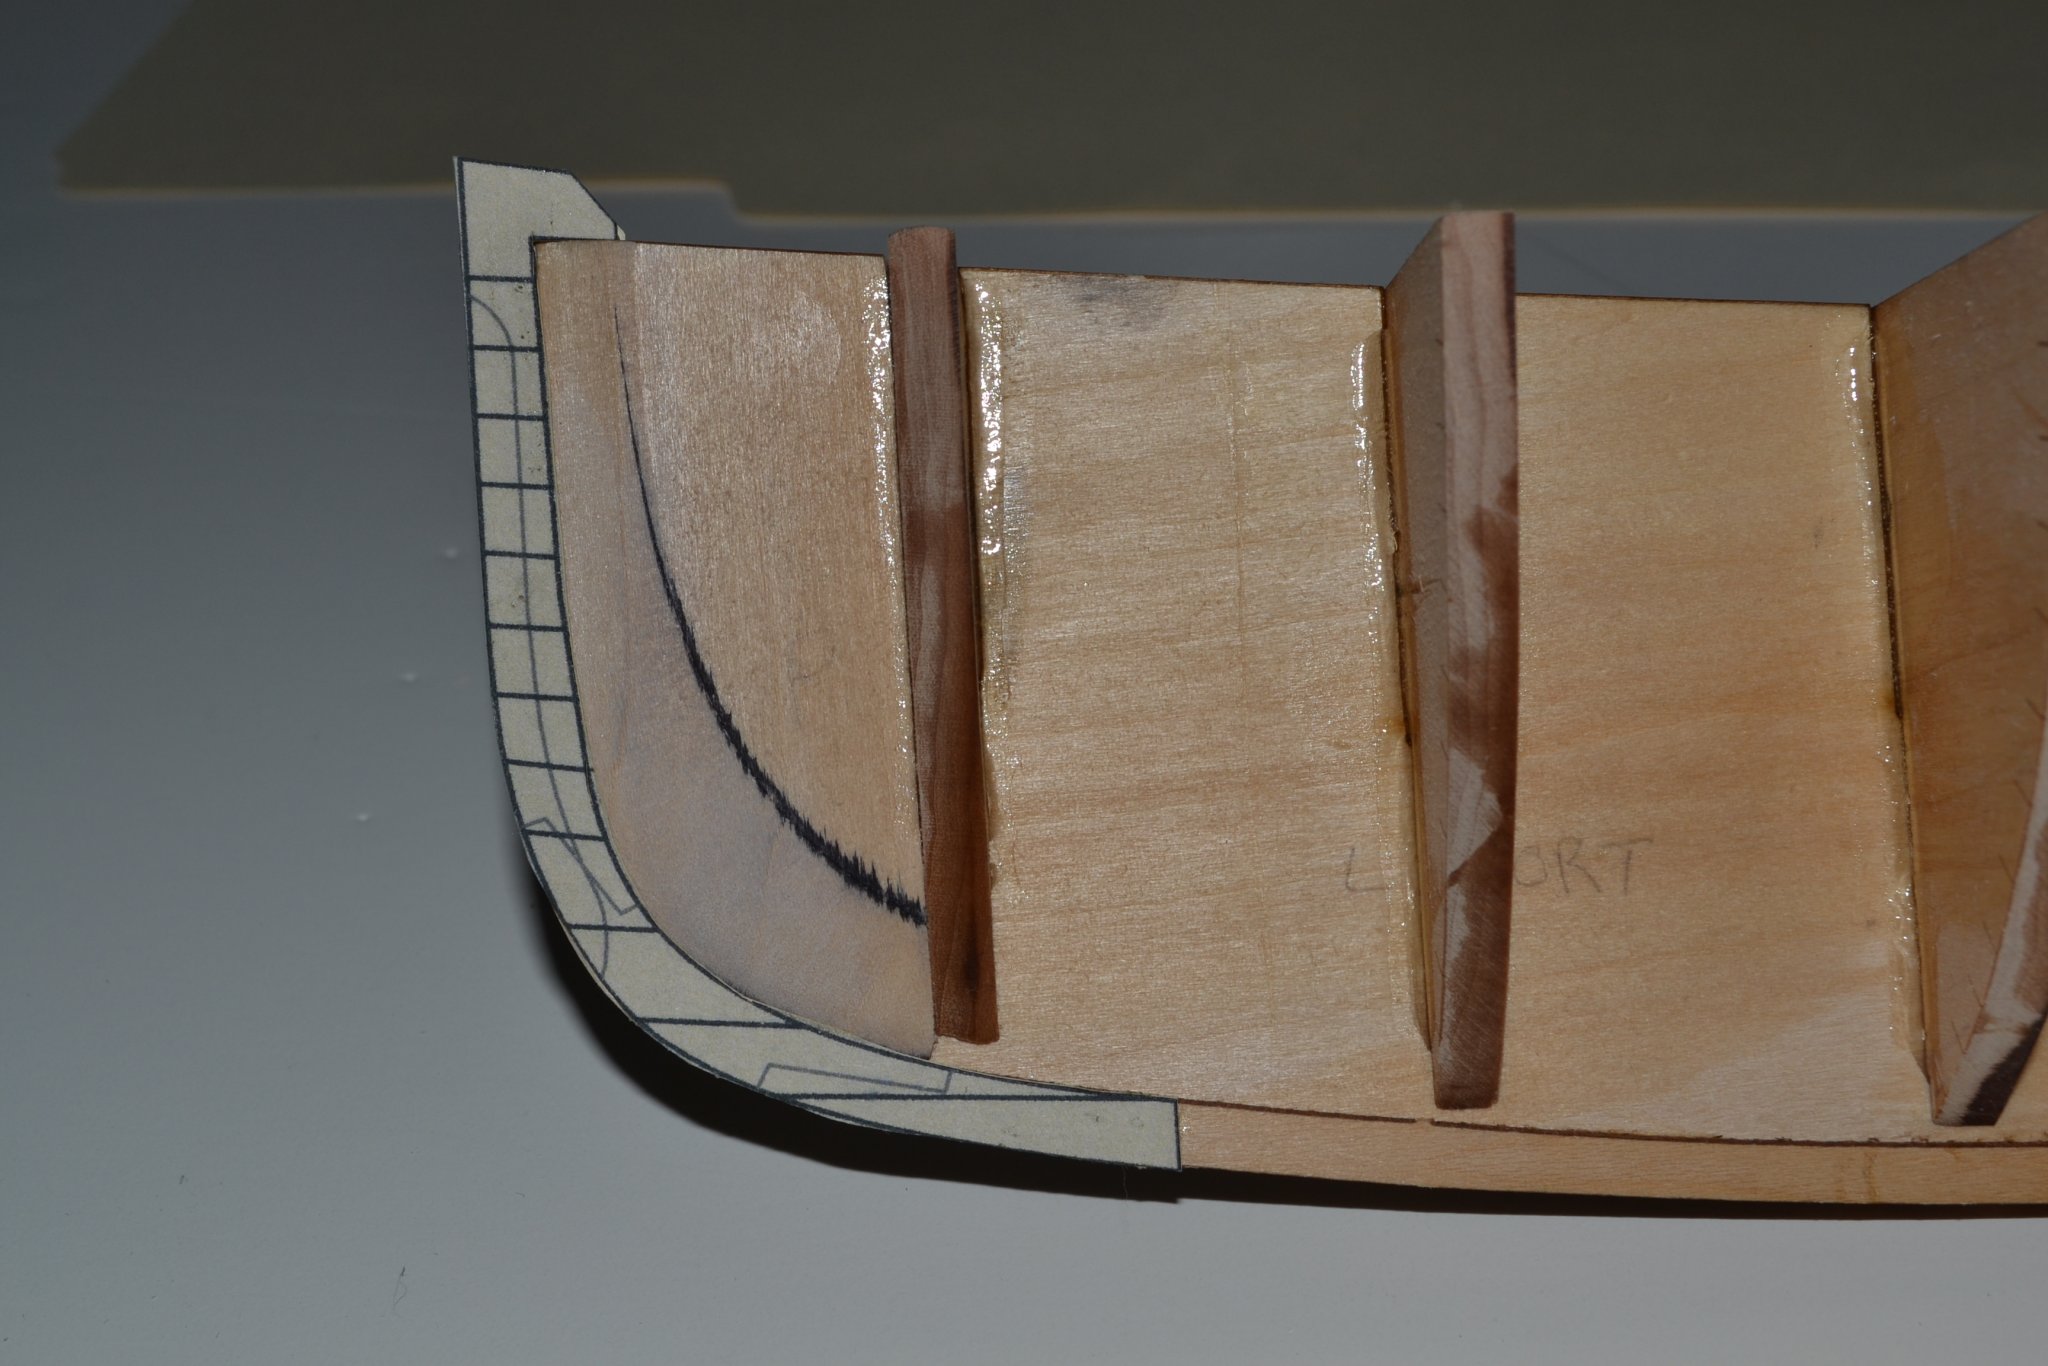
I have made a bit more progress. I have added all the rubbing strips to the hull, added the trim boards and finished painting the interior. I have started on the boiler and rather than installing the wood on the exterior of the boiler one bit at a time used the following method: I sealed and stained the the 24" strips then cut them to rough length. I then lined them up and applied packaging tape to their rear and glued them in place in sections of 8, rather less tedious than doing one at a time. I secured them with rubber bands while the glue dried. I did relieve the frames a bit where the tape was to prevent the strips from being a bit high at the gluing area above and below the tape, relieved areas indicated by arrow, the tape actually was quite easy to remove after installation. I sealed and sanded them first as I was afraid that any glue squeeze-out would negatively effect the application of stain. I didn't bevel the strips on the edges as there was no a need to be waterproof and I suspect the boat was not built to yacht standards. I also installed triangular pieces at the forward end of the lower deck, looks better I think and prevents a crew member from falling in the gap and turning an ankle while rushing to load and fire the gun!


- 54 replies
-
- 5
-
-
- picket boat
- model shipways
- (and 1 more)
-
Exquisite model with wonderful details!
-
I have made some progress since my last post that I had finished the planking. I did an initial smoothing of the planks with cabinet scrapers. Great tools! I then did some filling and another light scrape followed by an initial sanding. Did some more filling and sanding then then applied sanding sealer and sanded again with fine paper. It feels quite smooth to me but I guess the proof of the pudding is in the eating so when I apply paint I'll see how well I did!
- 54 replies
-
- 5
-
-
- picket boat
- model shipways
- (and 1 more)
-
I have found that using a pre-stain wood conditioner to allow the even penetration of the stain really helps. I also use the Minwax gel stain and it is easy to control the color. I rub it in with like shoe polish with a cloth and it allows me to to make it as light or dark as I desire.

- 54 replies
-
- 6
-
-
- picket boat
- model shipways
- (and 1 more)
-
Thanks Stuglo, I do intend to use a sanding sealer after an initial fill and sand and then a final sand with fine paper. Acrylic has a propensity to raise the grain also if a sealer is not used I have found. Like you, I miss Floquil paints.😪
-
Edge Gluing Planks?
turangi replied to turangi's topic in Building, Framing, Planking and plating a ships hull and deck
Thanks to all for the replies! -
Edge Gluing Planks?
turangi replied to turangi's topic in Building, Framing, Planking and plating a ships hull and deck
Thanks for the replies! The hull will be painted and some of the joints are so tight that I fear PVA will not enter them hence I thought of CA as an alternative. -
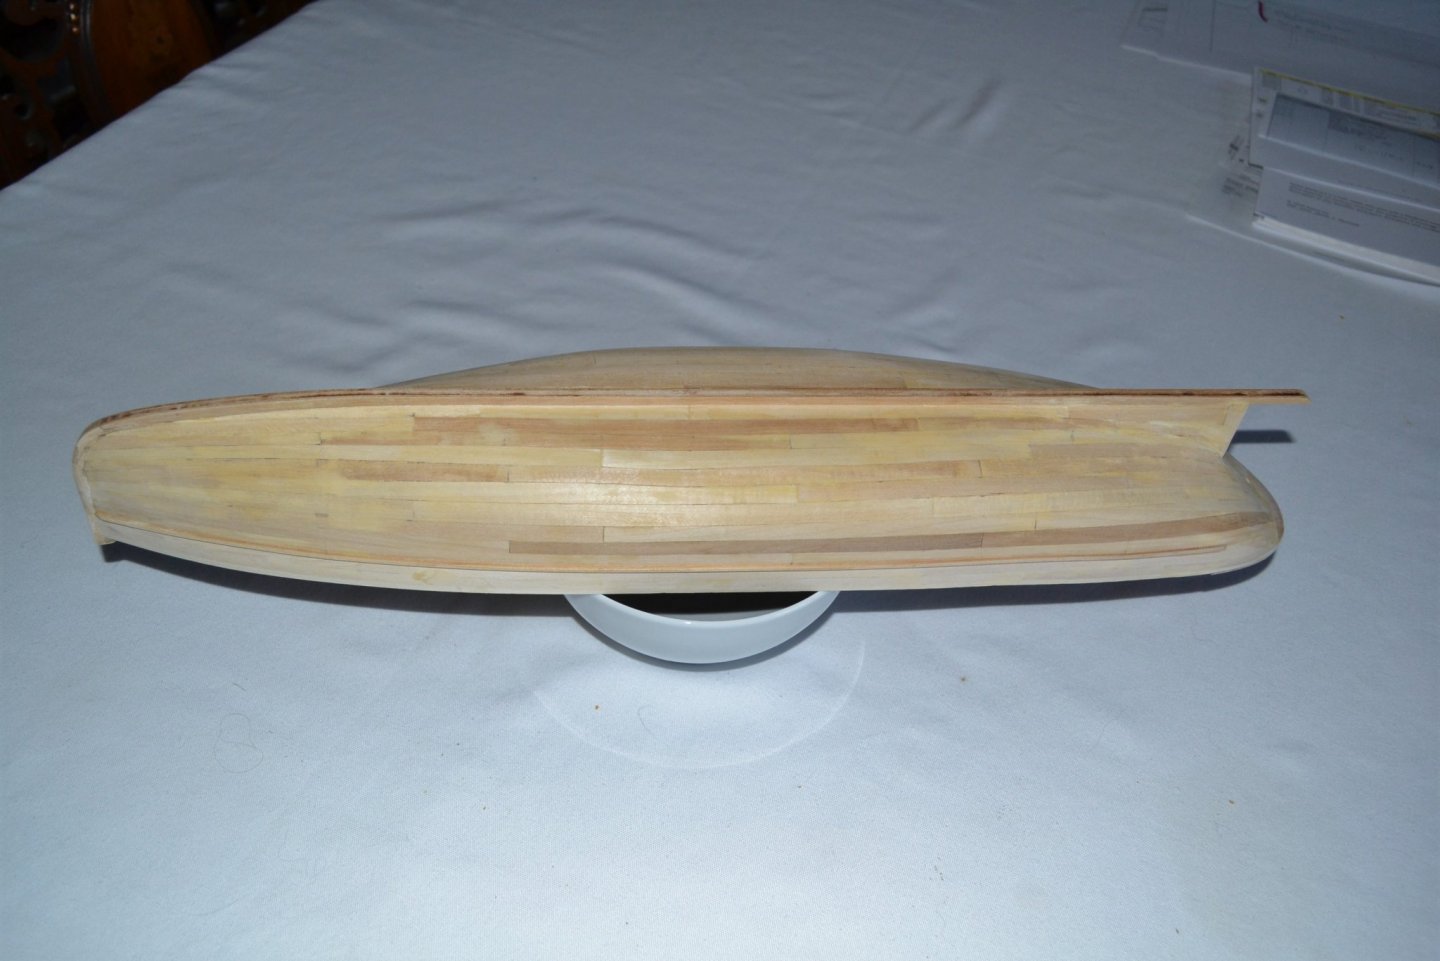
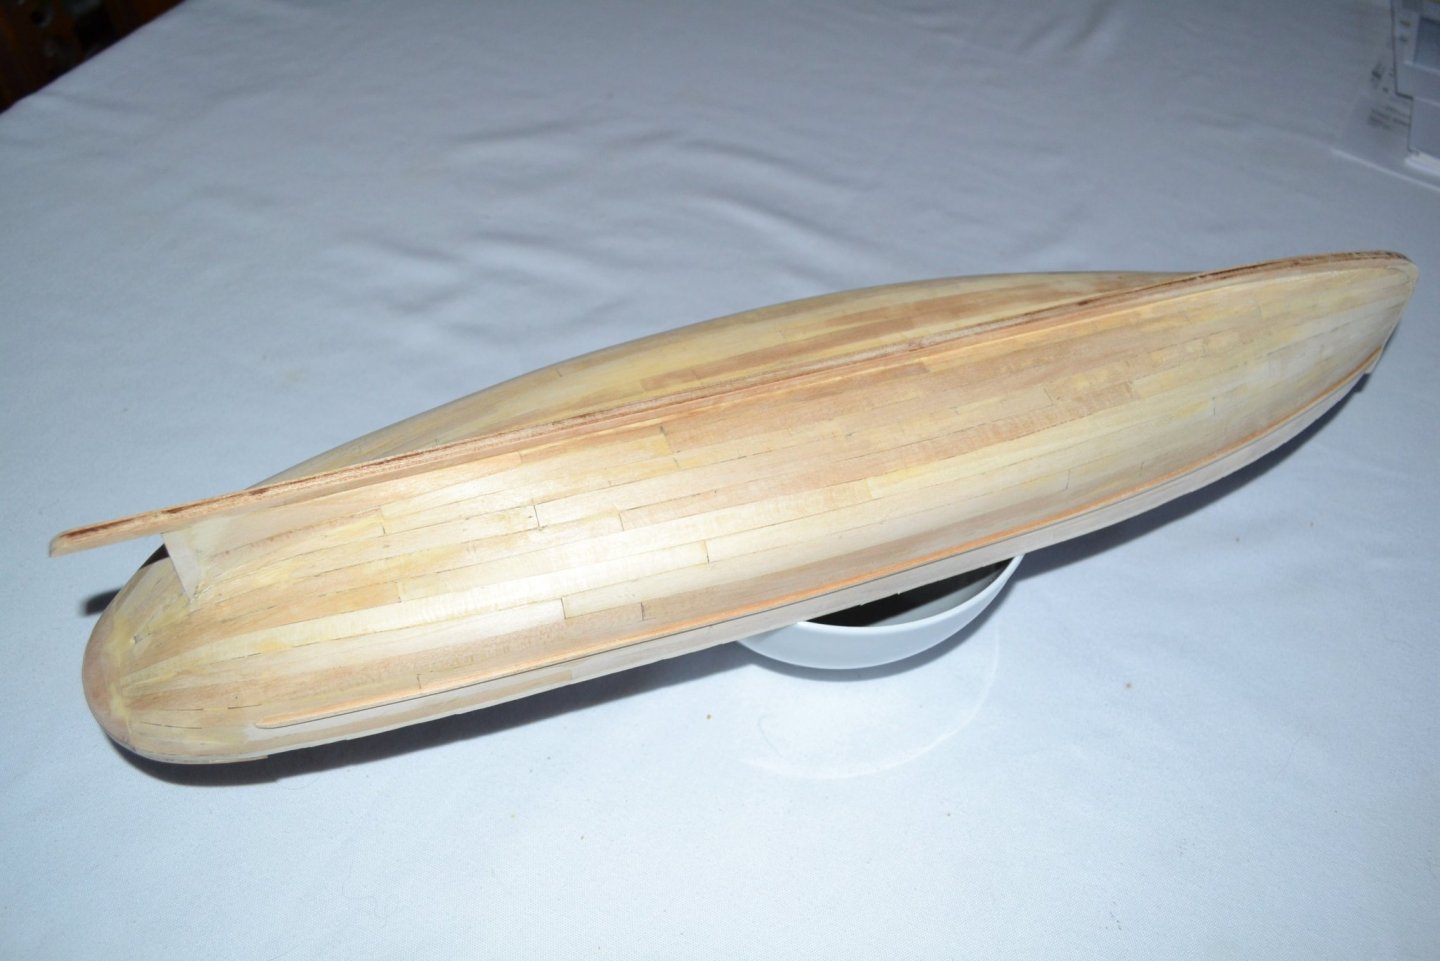
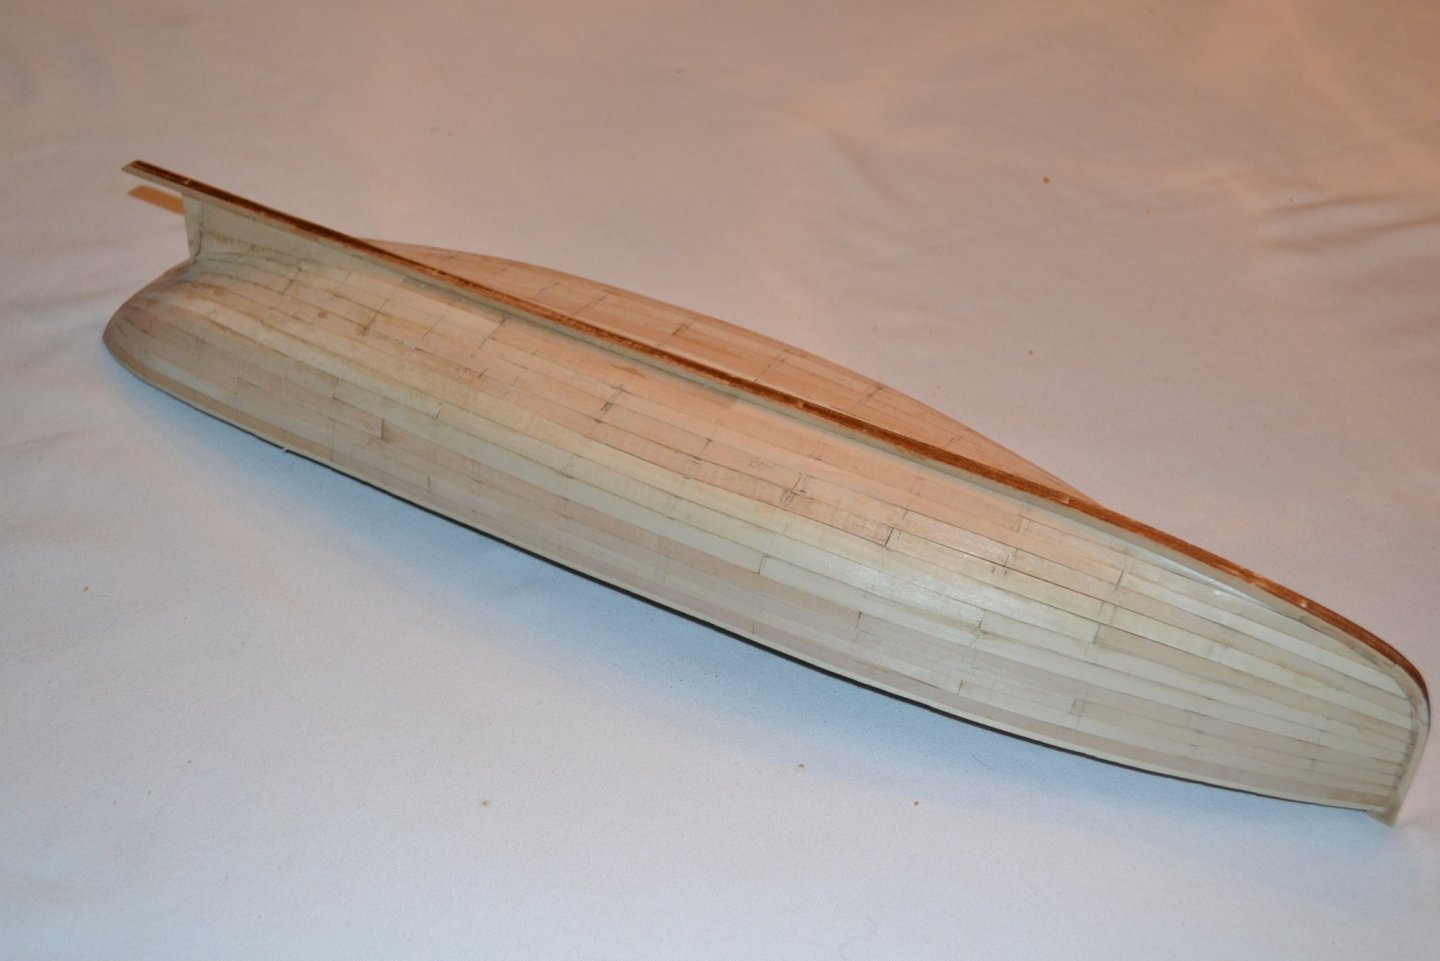
Oh happy day! I have completed the planking on this model. Time to move onto smoothing and sanding the hull. I purchased a cabinet scraper and during the trial run sure seems to speed up the process! I posted a query in the Planking section so as to not double post here is a link,
- 54 replies
-
- 6
-
-
- picket boat
- model shipways
- (and 1 more)
-
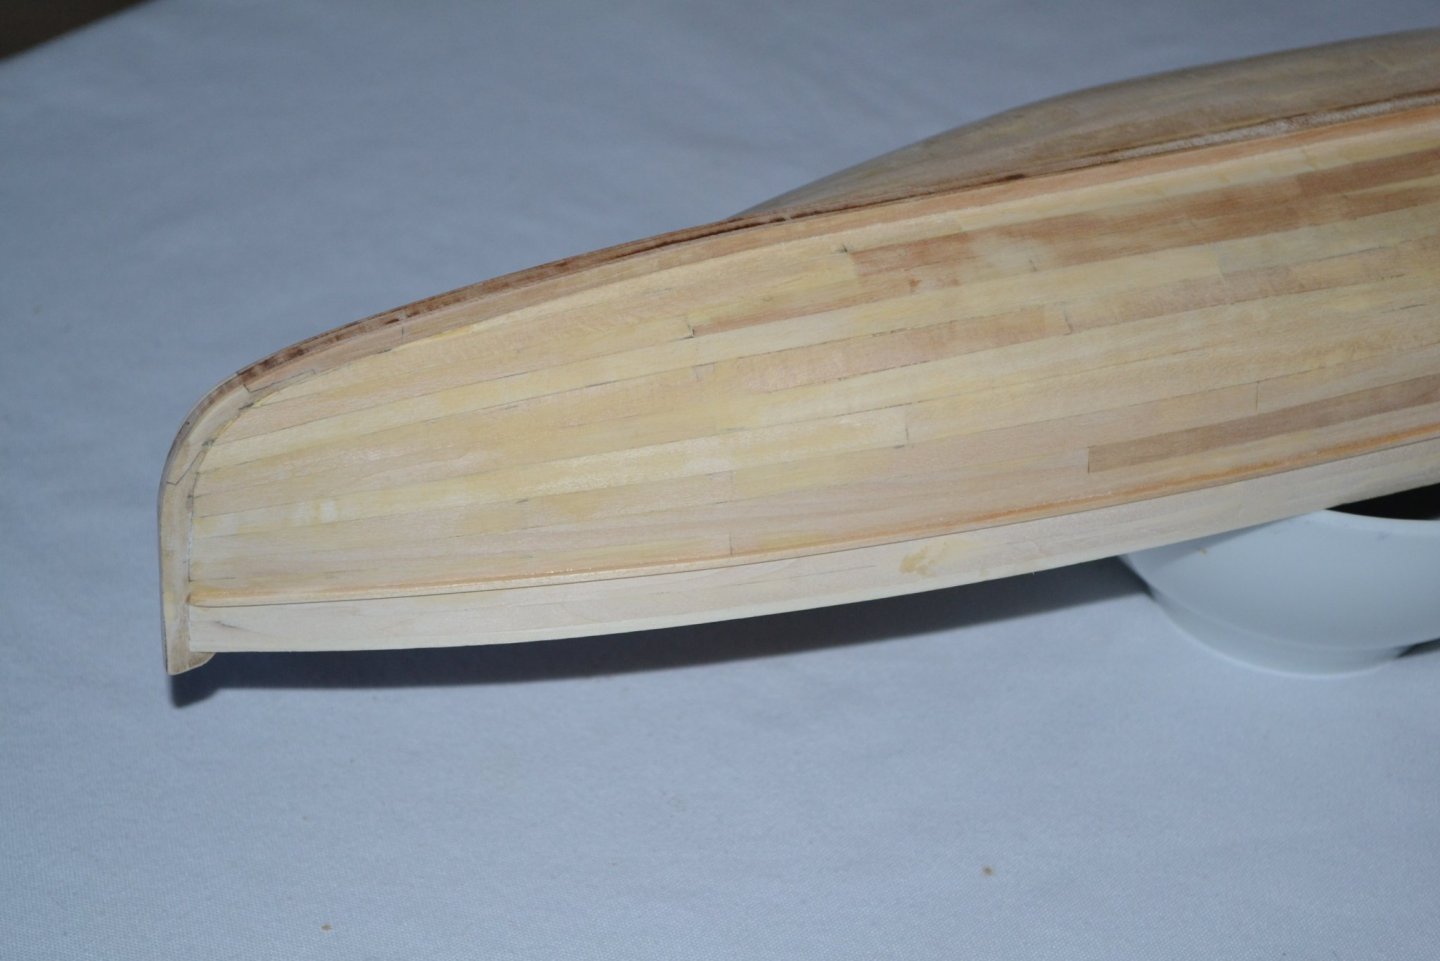
I recently finished planking the MS Picket boat, about 1/2 way through the planking I realized I should probably be edge gluing the planks so about 1/2 of the planks are edge glued and the others not, only glued to the frames. I wonder if after smoothing the hull if I should apply a thin line of CA along the seams of the non-edge glued planks? I am afraid if I applied it prior to sanding the CA would harden the wood along the seams and make sanding more difficult. Any advice for this beginner welcomed!!

-
You are welcome!! Glad to help with my meager experience and knowledge.
-
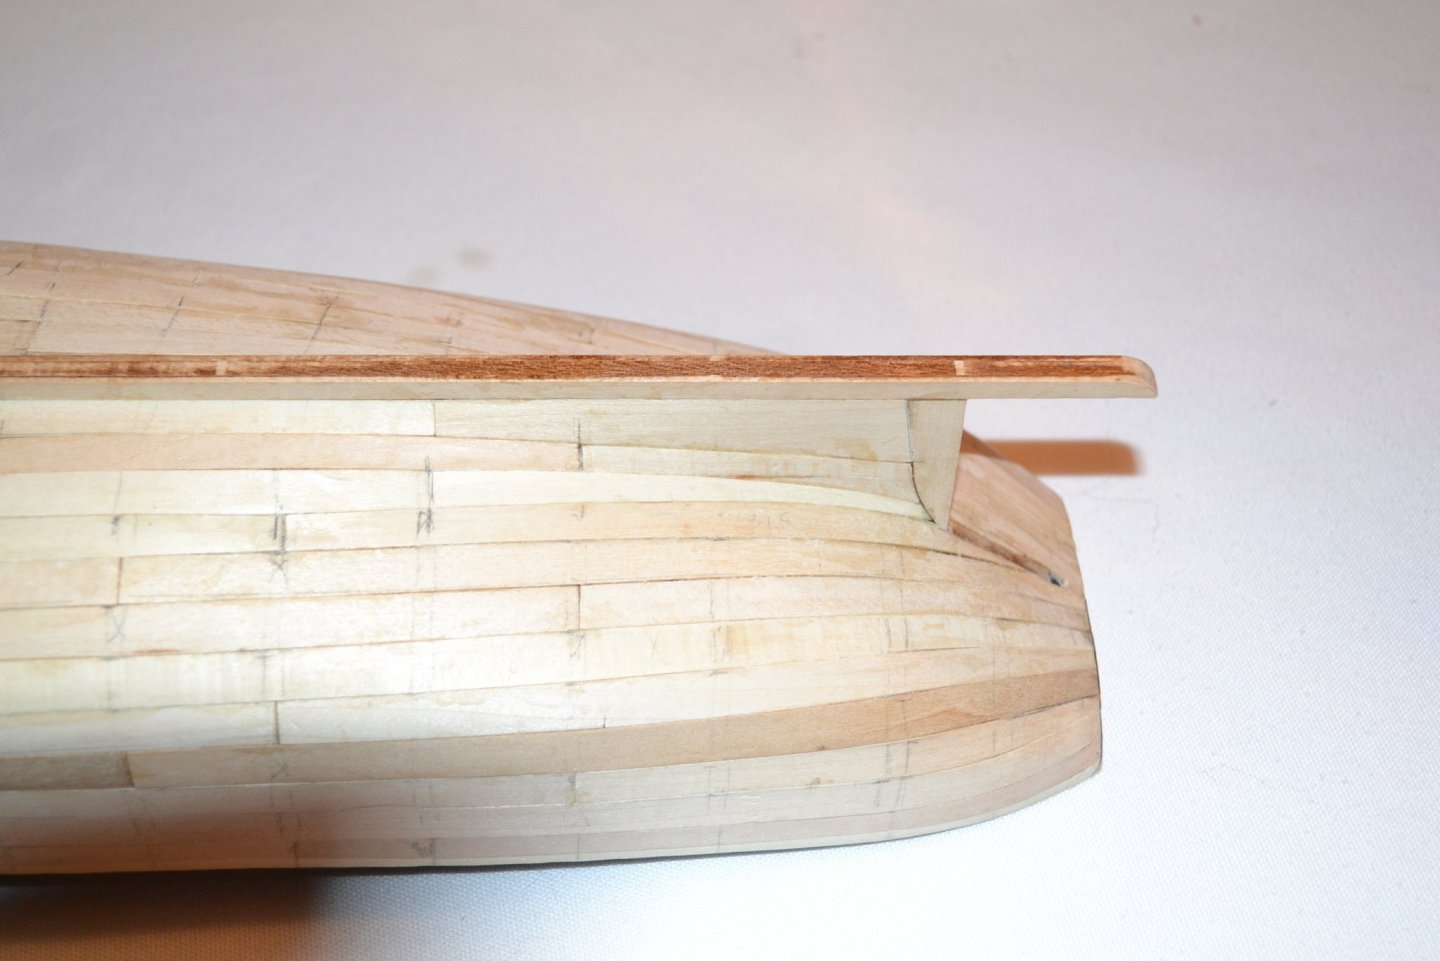
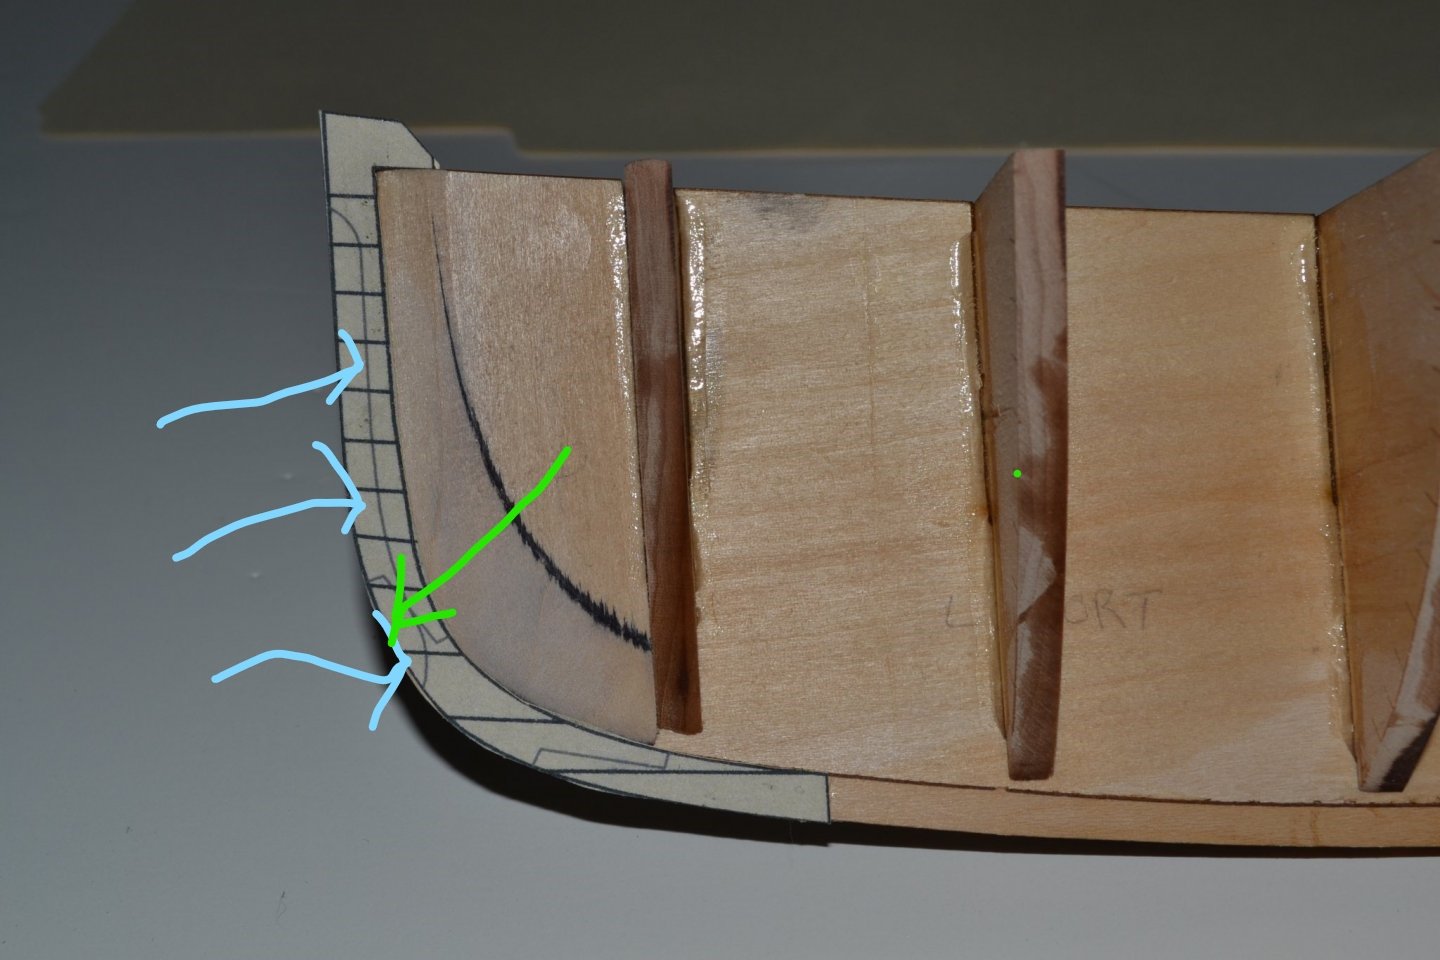
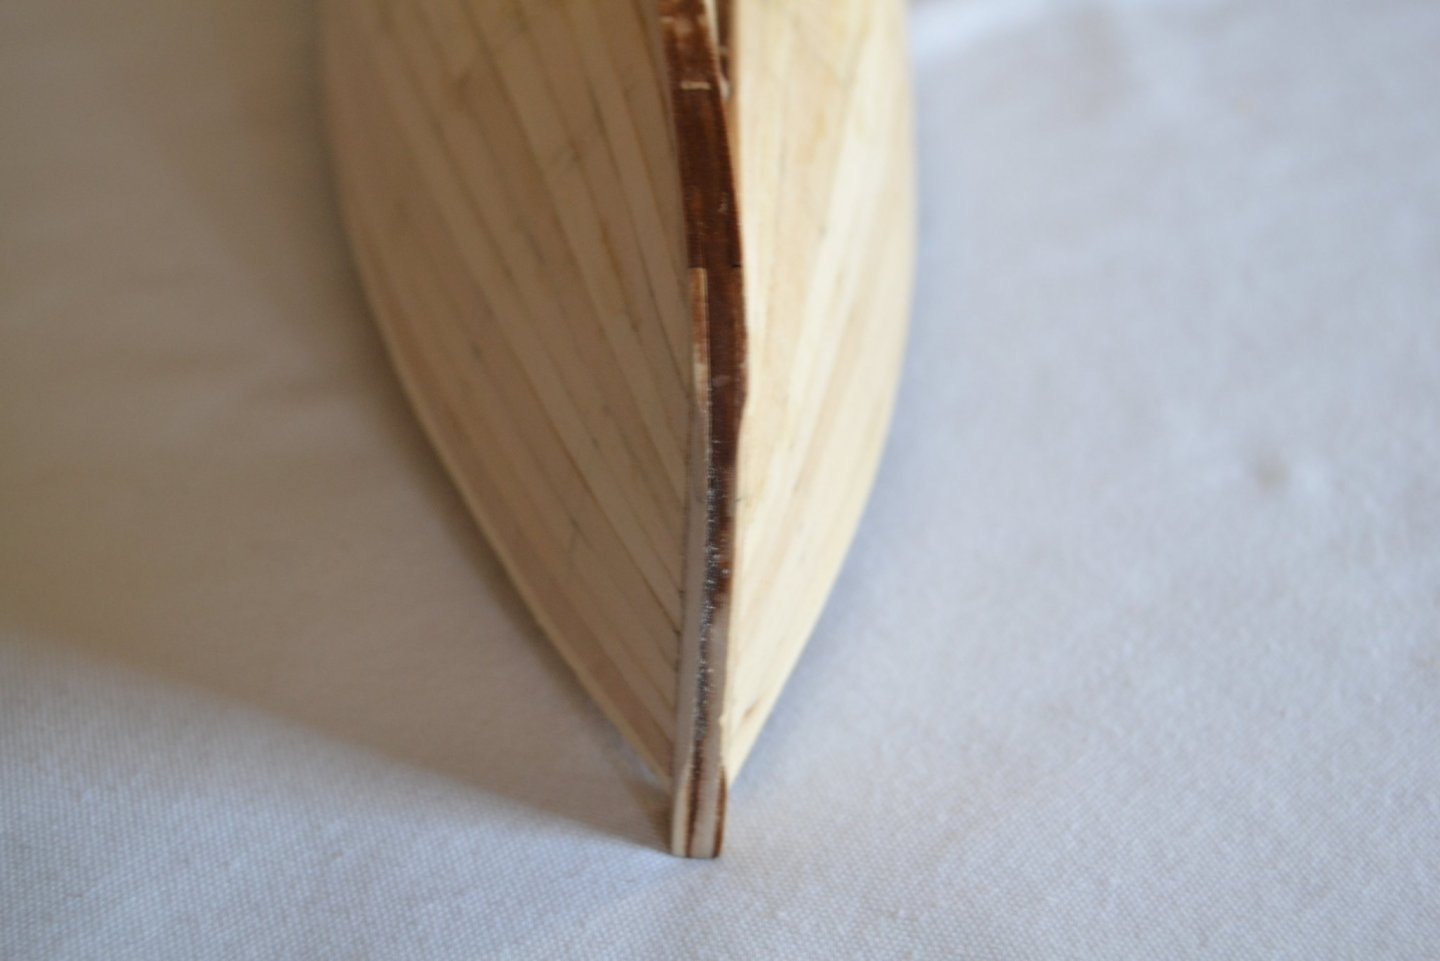
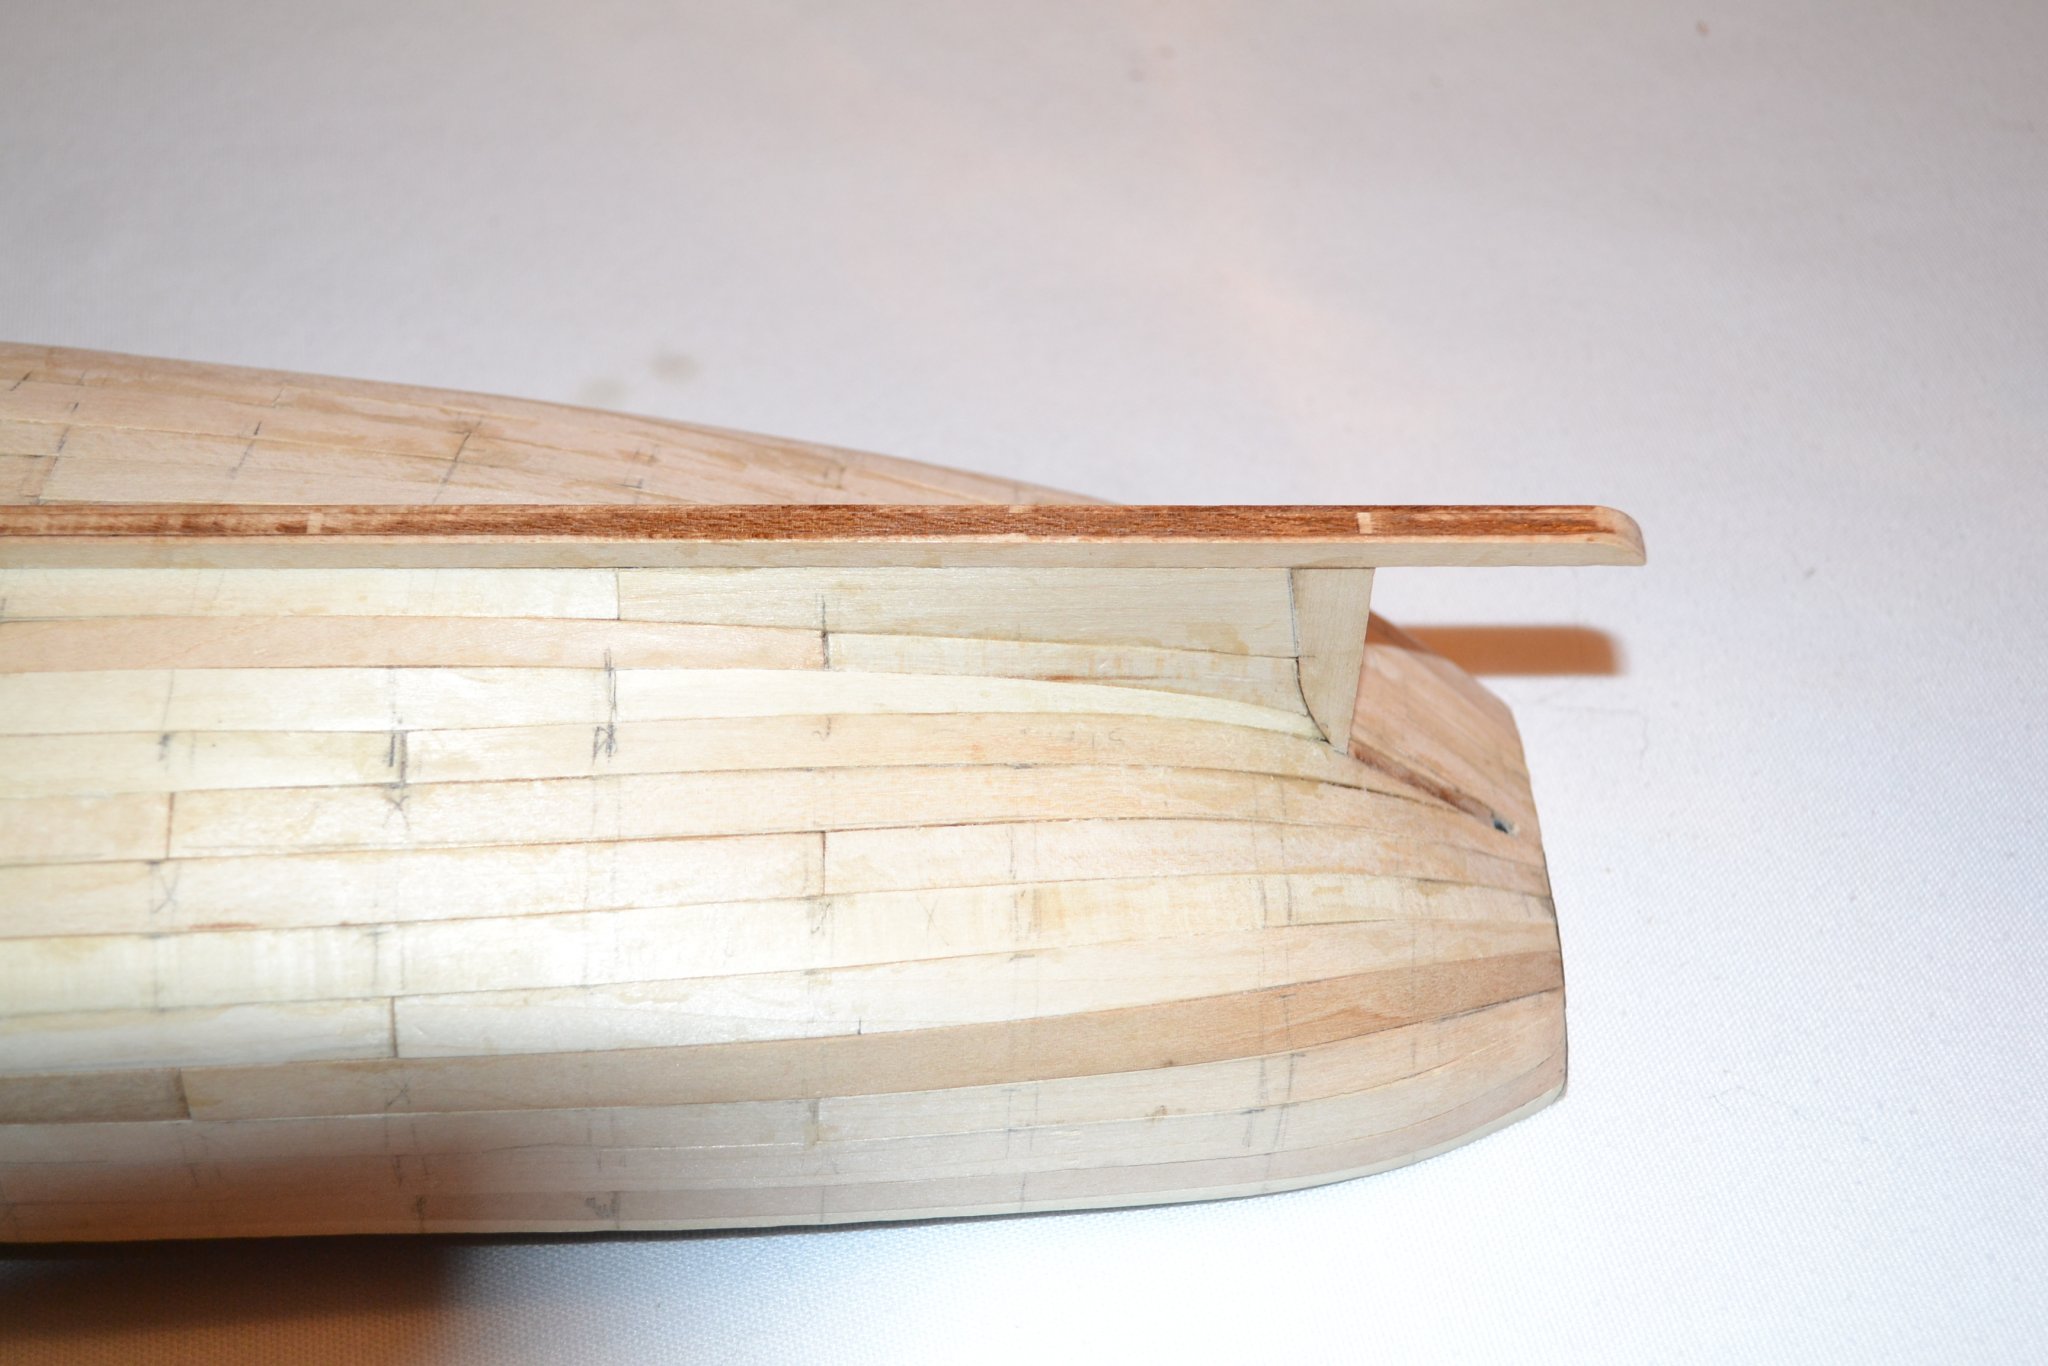
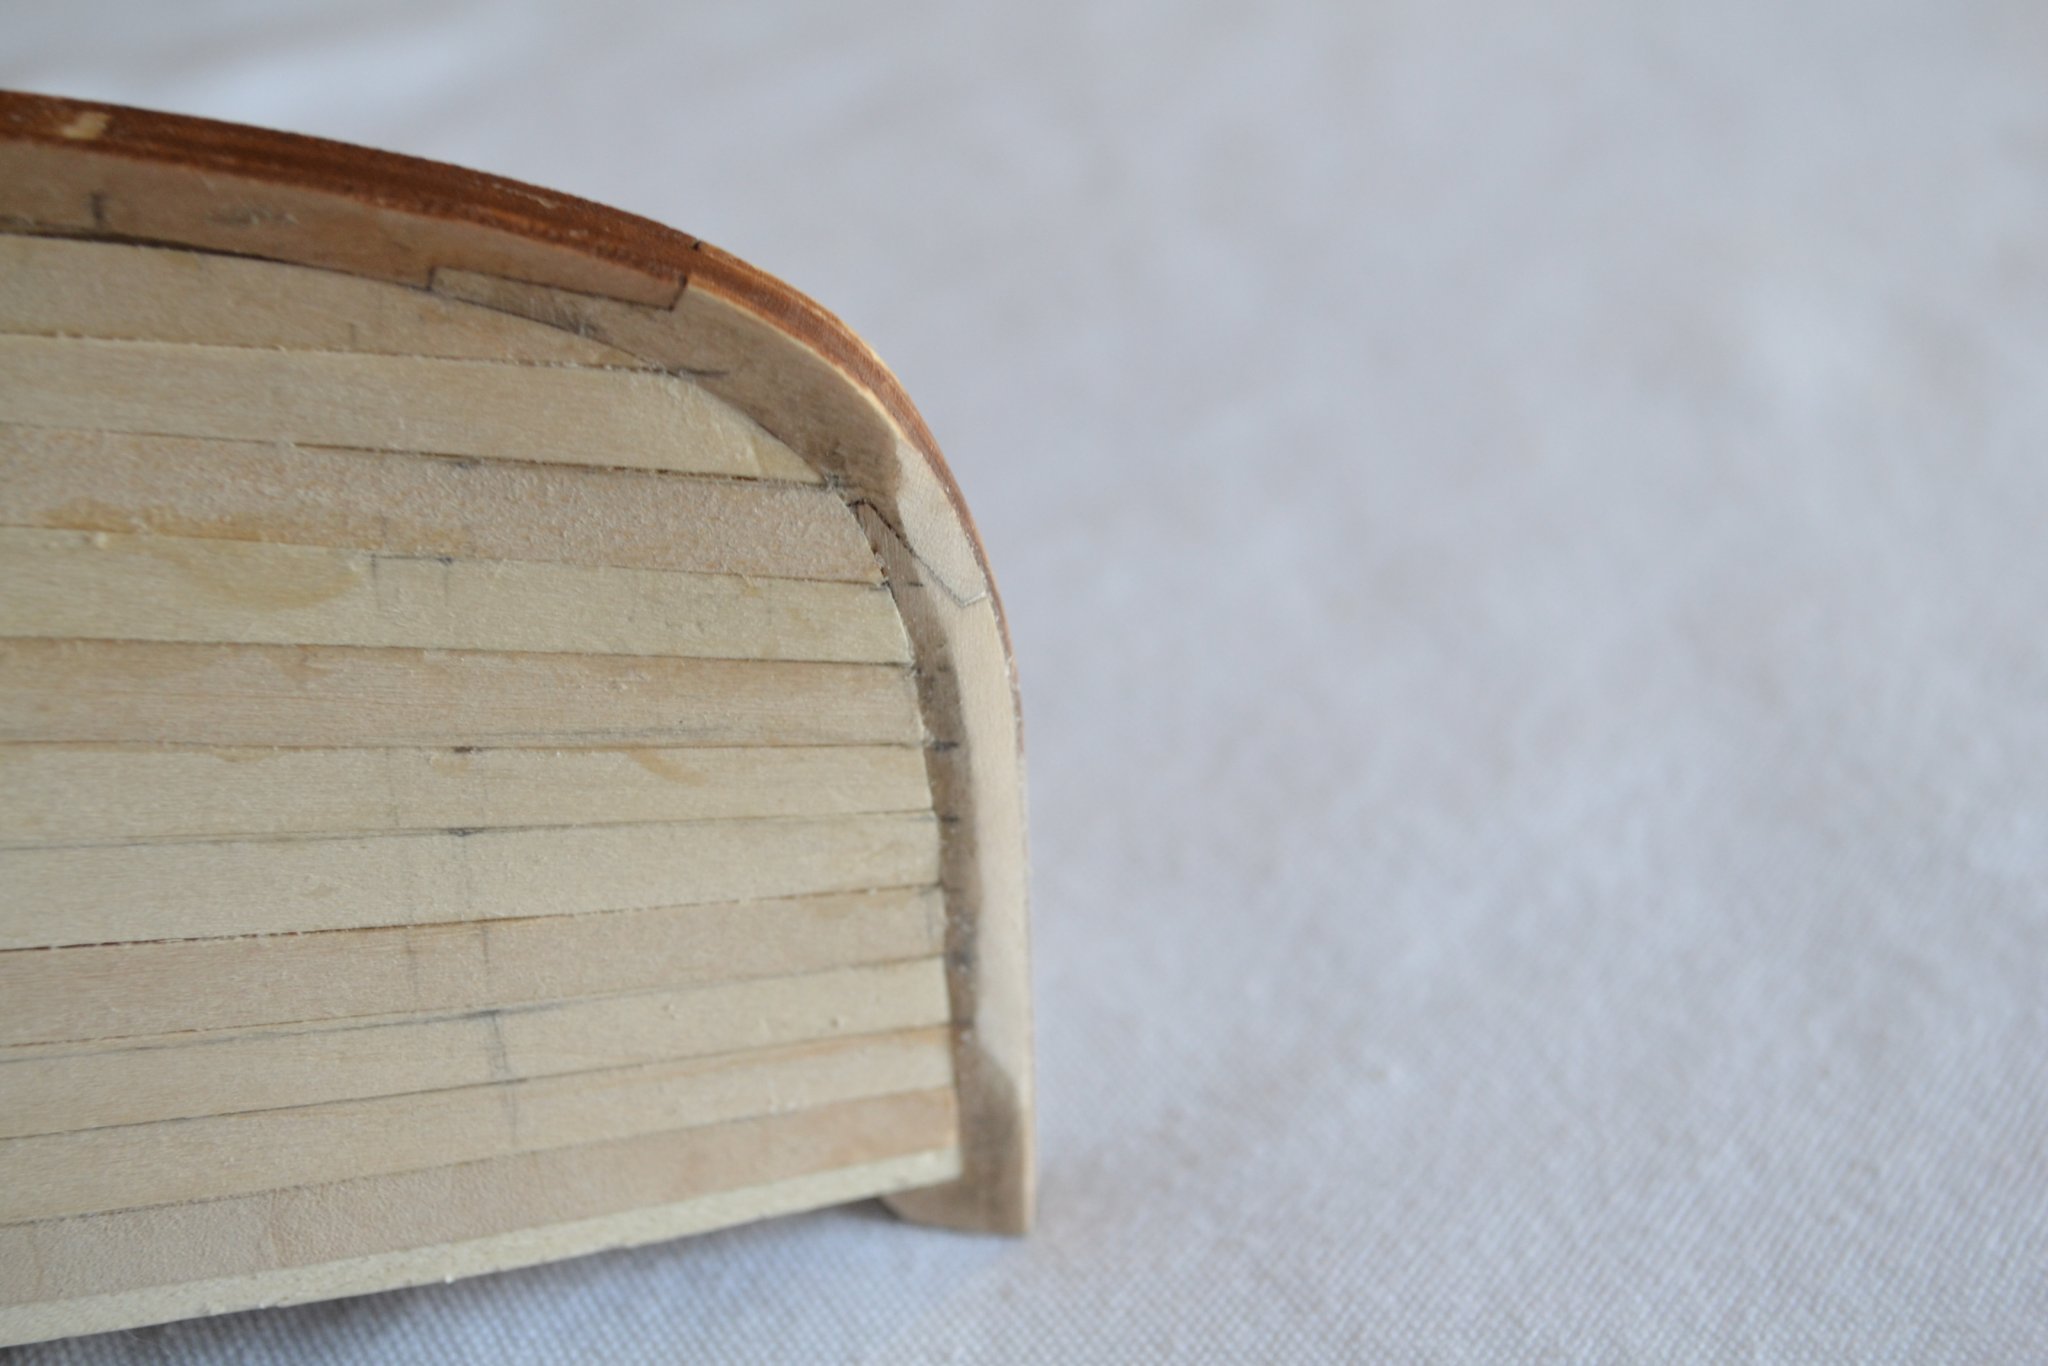
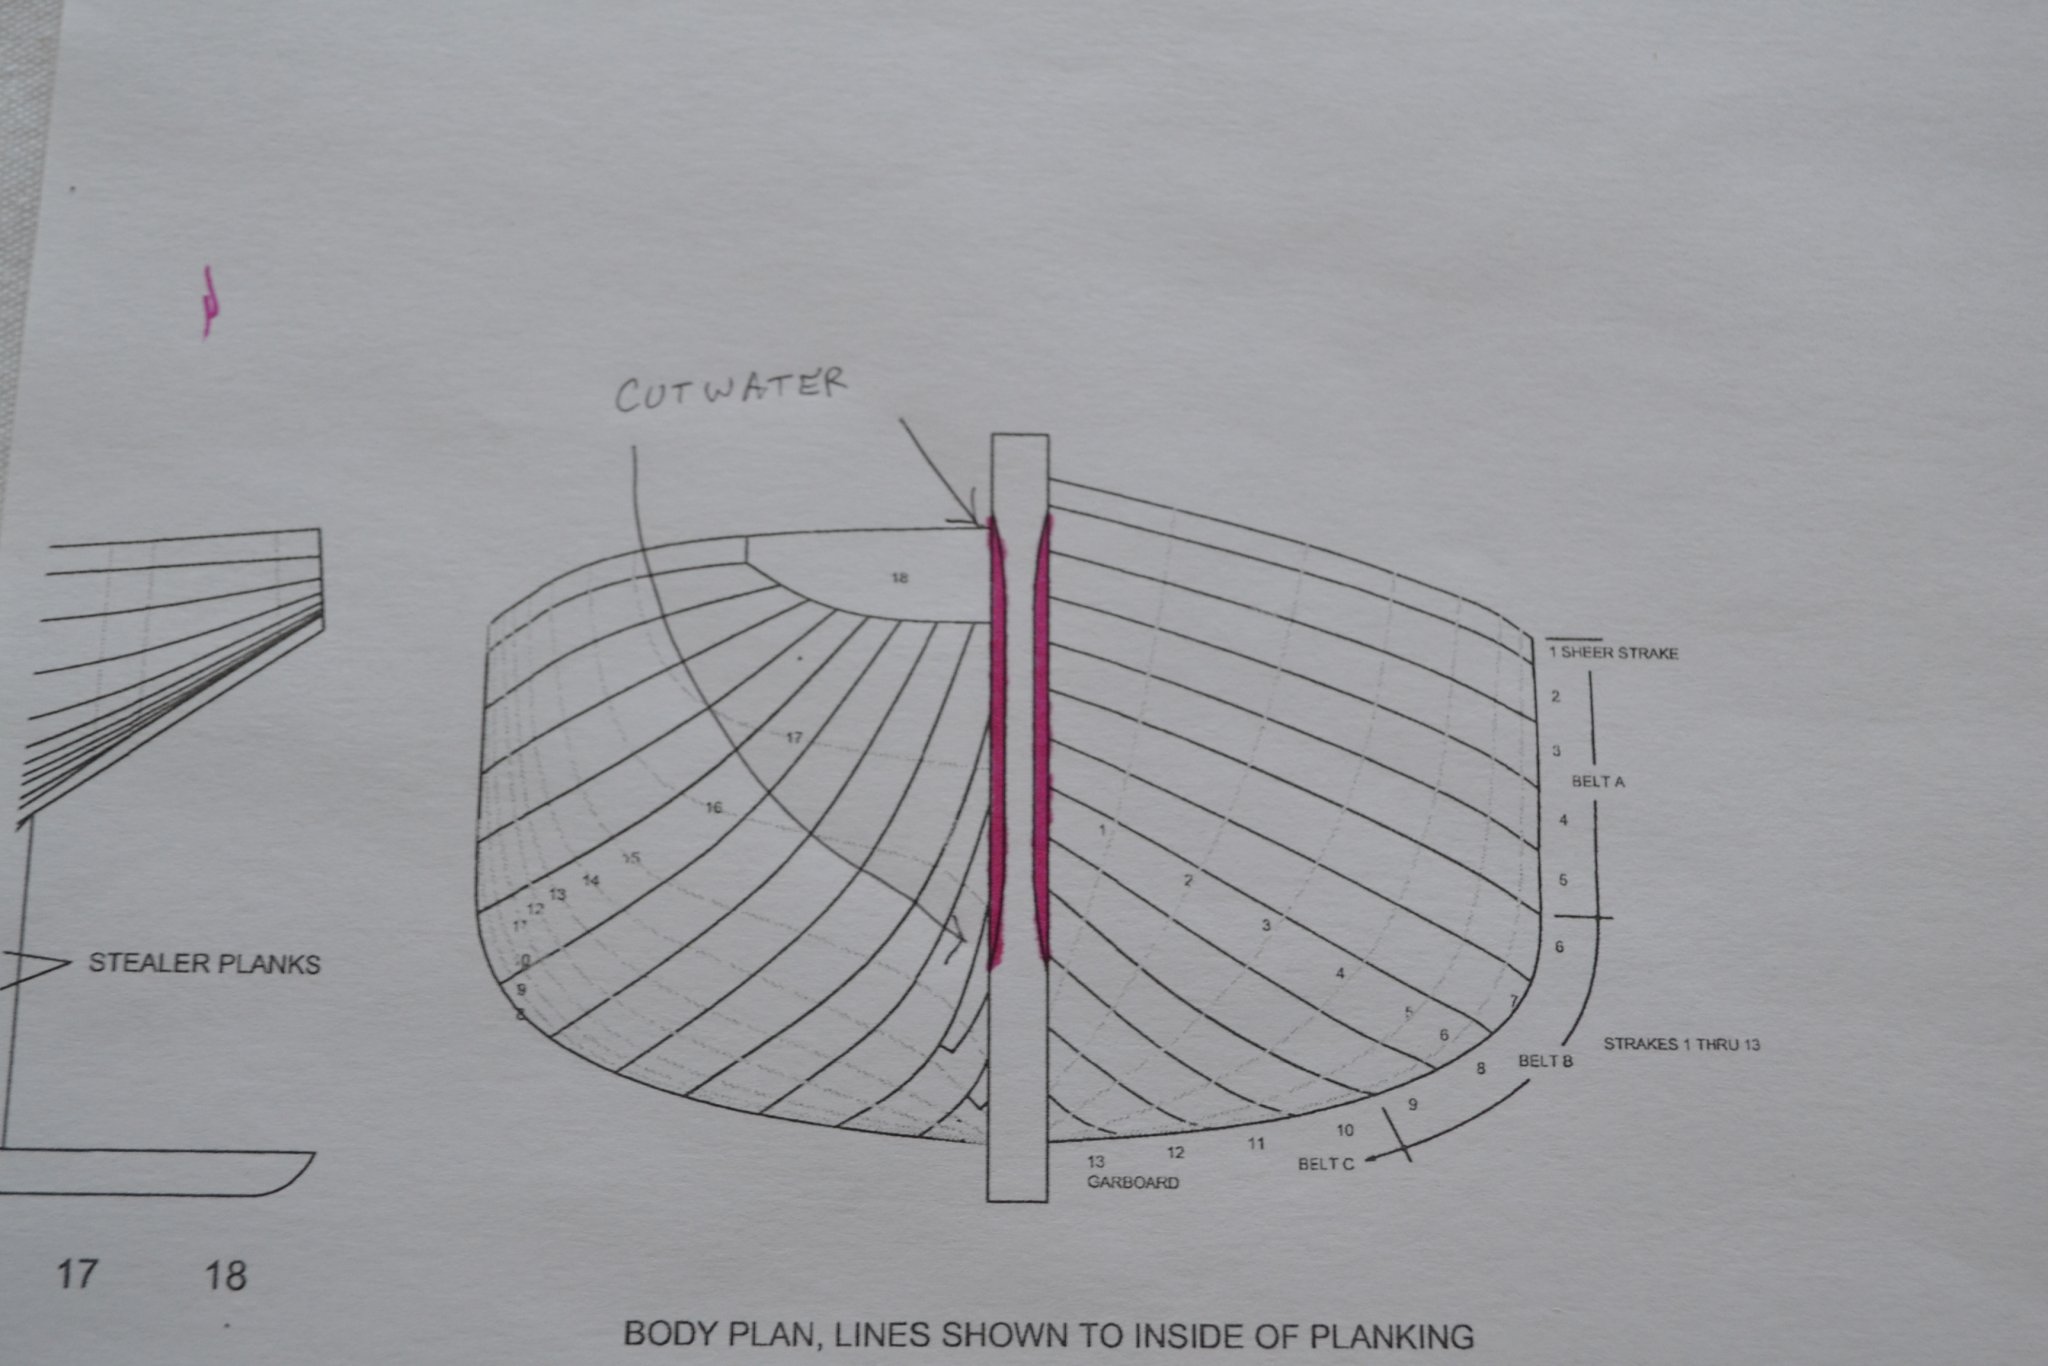
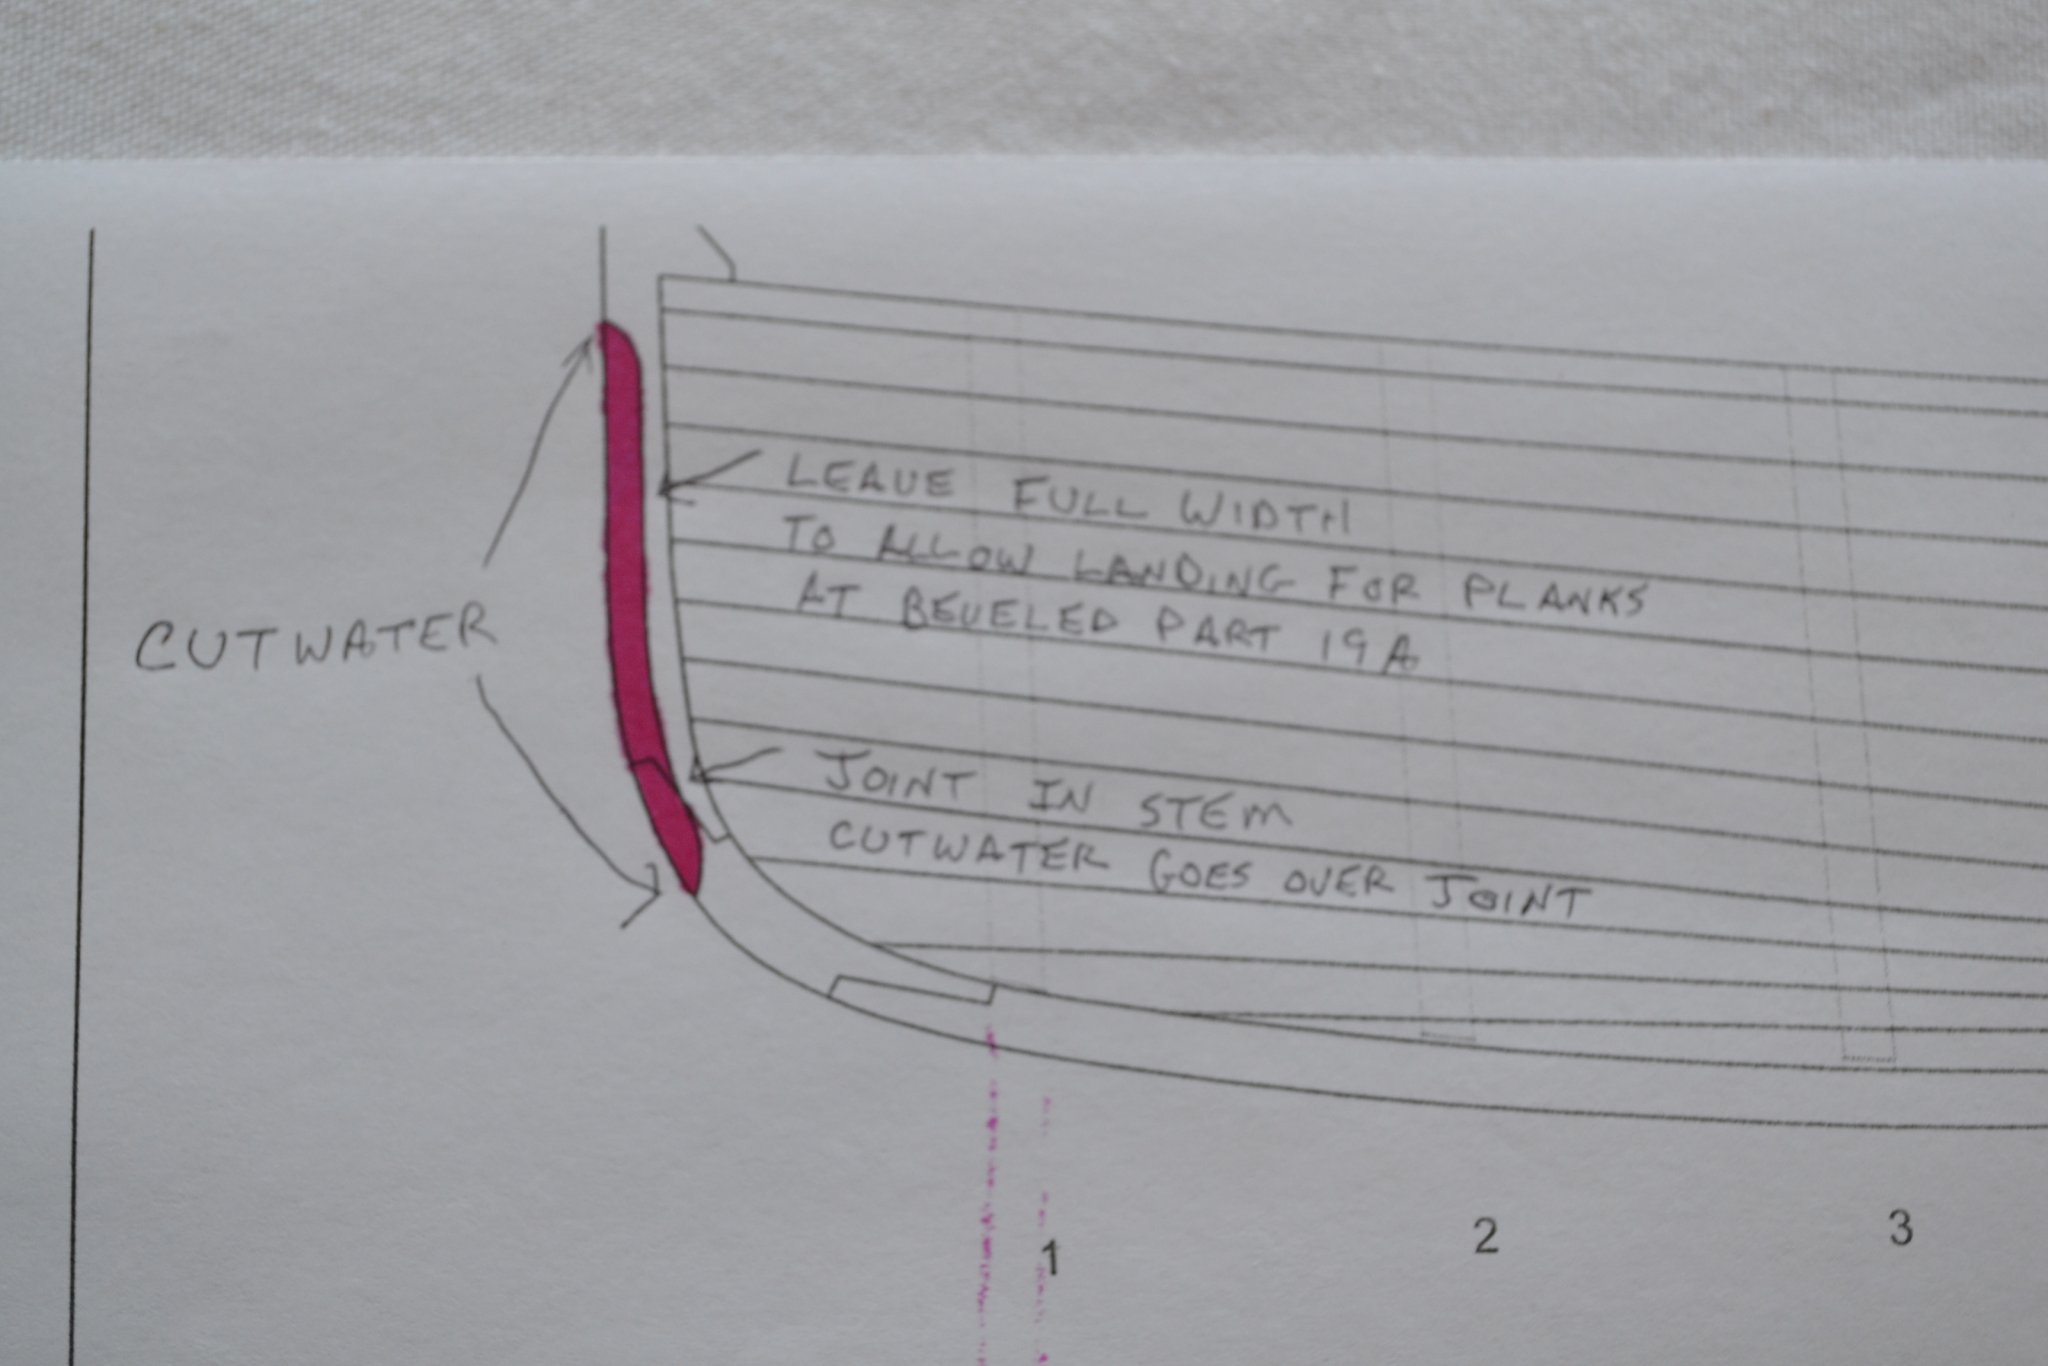
Thank you Sea Hoss! Still not sure about the notch, in the photo the blue arrows point to the cutwater outline, the green arrow points to what appears as a notch but is actually the intersection of the stem joint outline and the cutwater line that crosses the joint and terminates below the joint. The second picture with the terrible drawing shows the outline of the cutwater and the green is the stem joint., the cutwater continues below the joint. In post #12 above the 3rd photo shows the cutwater goes through the joint.
.jpg.c5df81b74e6fca0638dab42a59b4fa87.jpg)
- 54 replies
-
- 2
-
-
- picket boat
- model shipways
- (and 1 more)
-
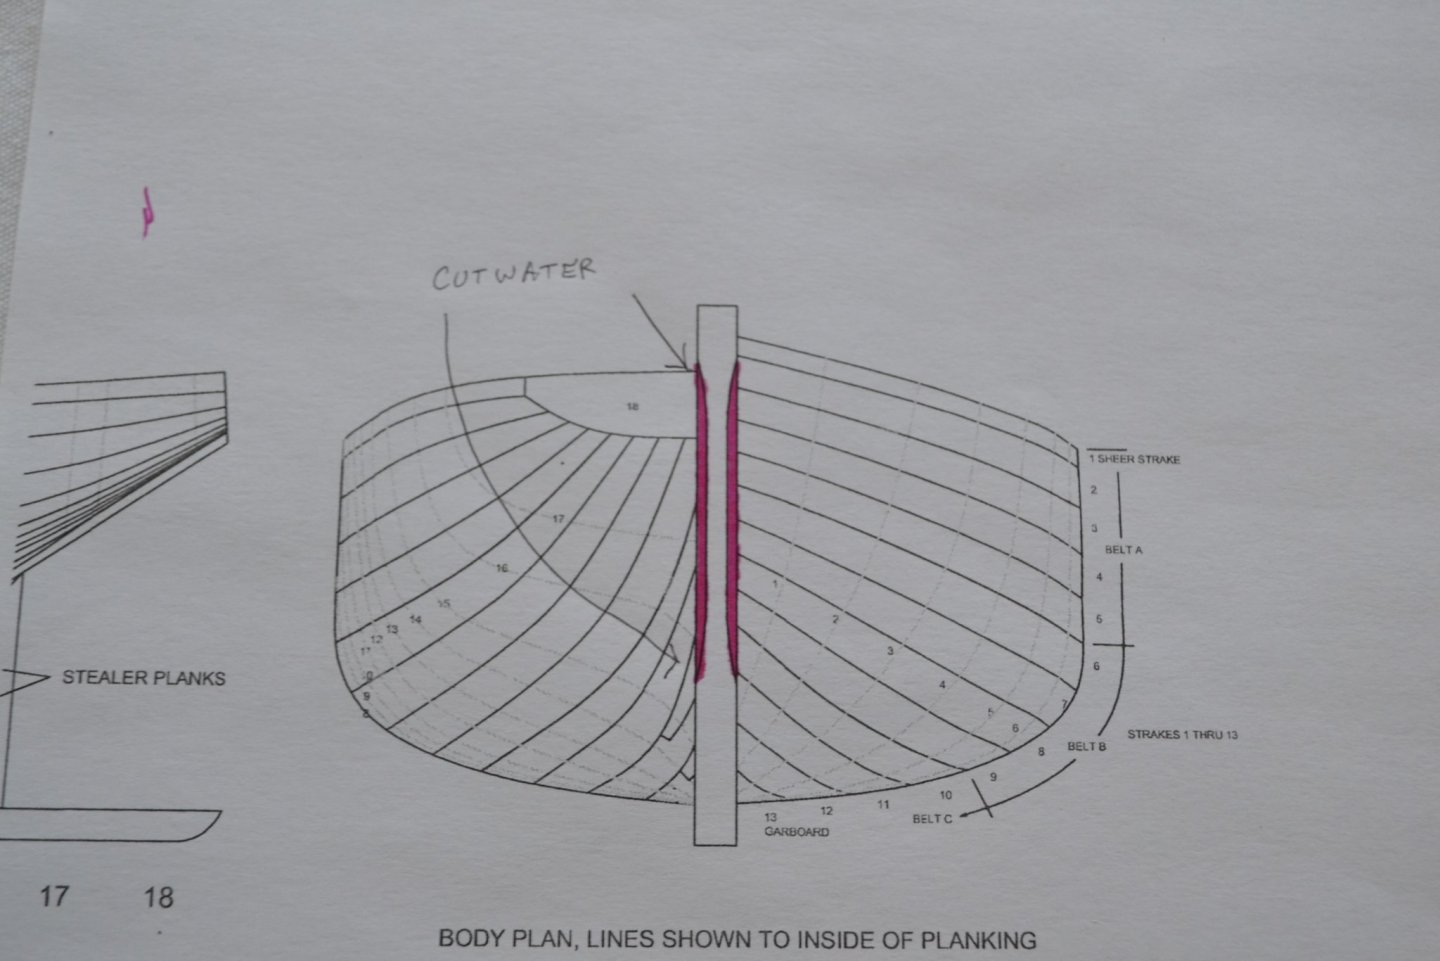
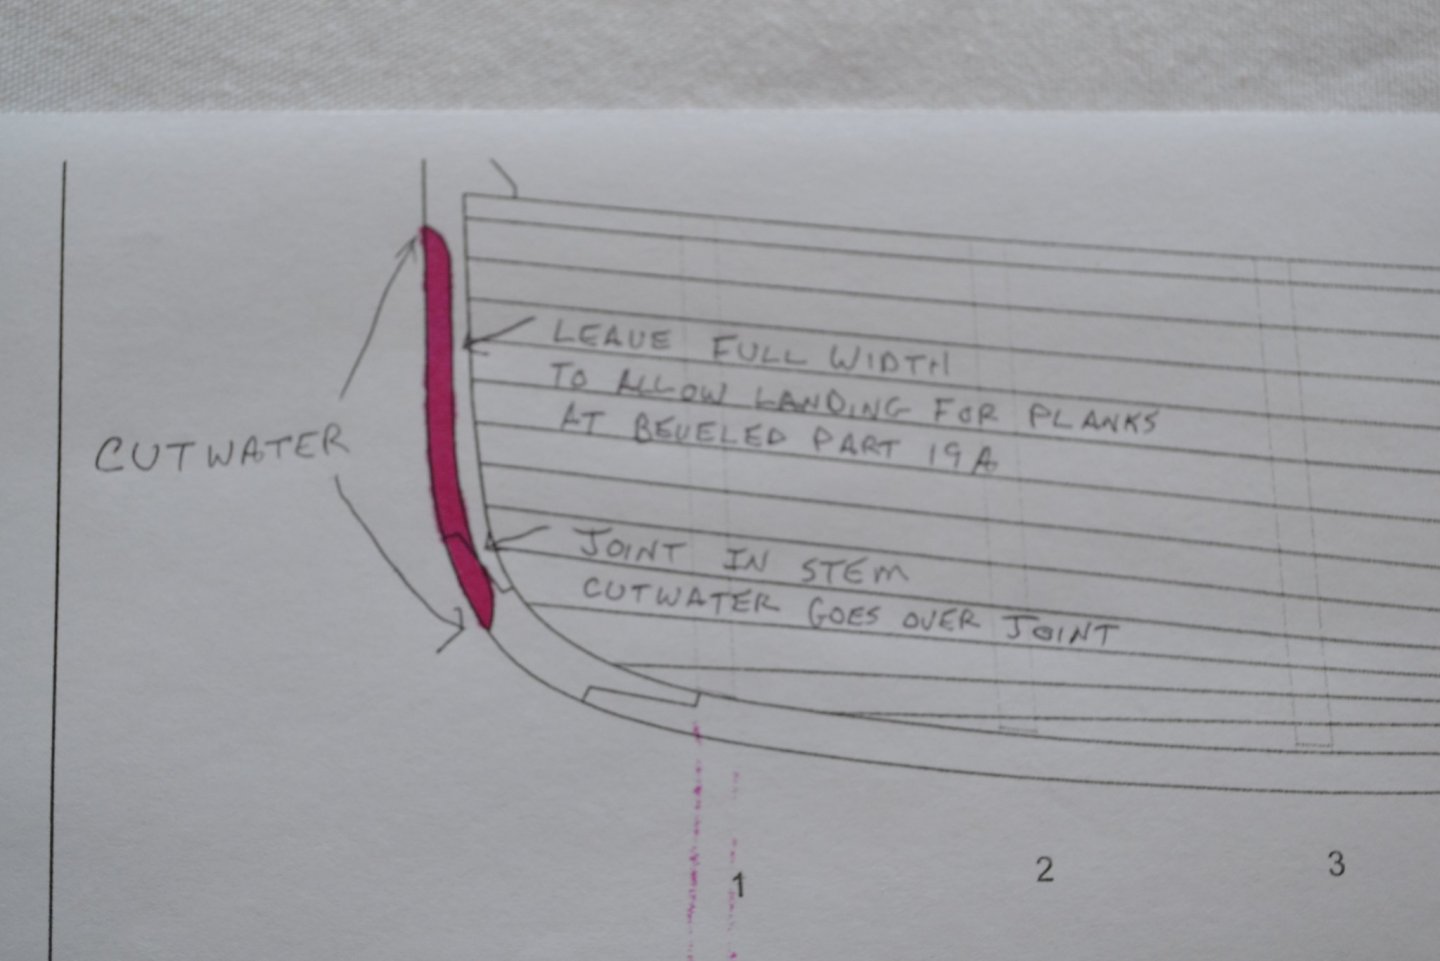
Hopefully I understand the question and this may help. In the first two pictures the pink area is the cutwater. The cutwater does overlap the joint in the stem. The aft side of the stem needs to be left full width so that when the beveled part 19A is attached there is an area for the forward ends of planks to land and make a smooth transition to the stem. A word of warning, I am a beginner and no expert but this is how I interpreted the drawings and rather sparse instructions.

- 54 replies
-
- 5
-
-
- picket boat
- model shipways
- (and 1 more)
-
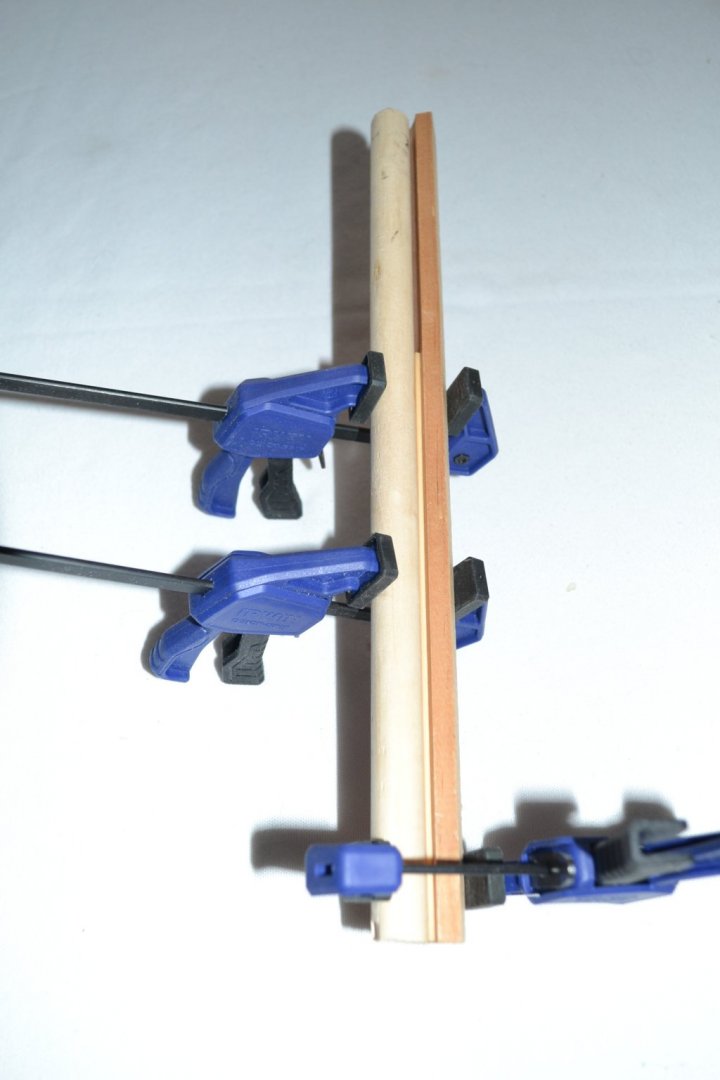
A bit more progress with the planking. I reached the point where the frames have a pronounced radius so I used a technique I learned on my other build to put a curve in the planking to better match the frames. I soaked the plank, put it into a piece of cove moulding and clamped a dowel over it until it dried, worked quite well. It makes a nicely curved plank across its width and creates a good contact area for installing on the frame.

.thumb.jpg.98aceac36fff7c8b22703d274aea6a9b.jpg)
.thumb.JPG.03535aeb19ab08b5fe4c525f197a8392.JPG)
- 54 replies
-
- 9
-
-
- picket boat
- model shipways
- (and 1 more)
-
Thank you! Terrific and painstaking work.
-
Beautiful work on the gun and particularly the engine! The engine deserves a build log, I would be interested to see how it was created.
-
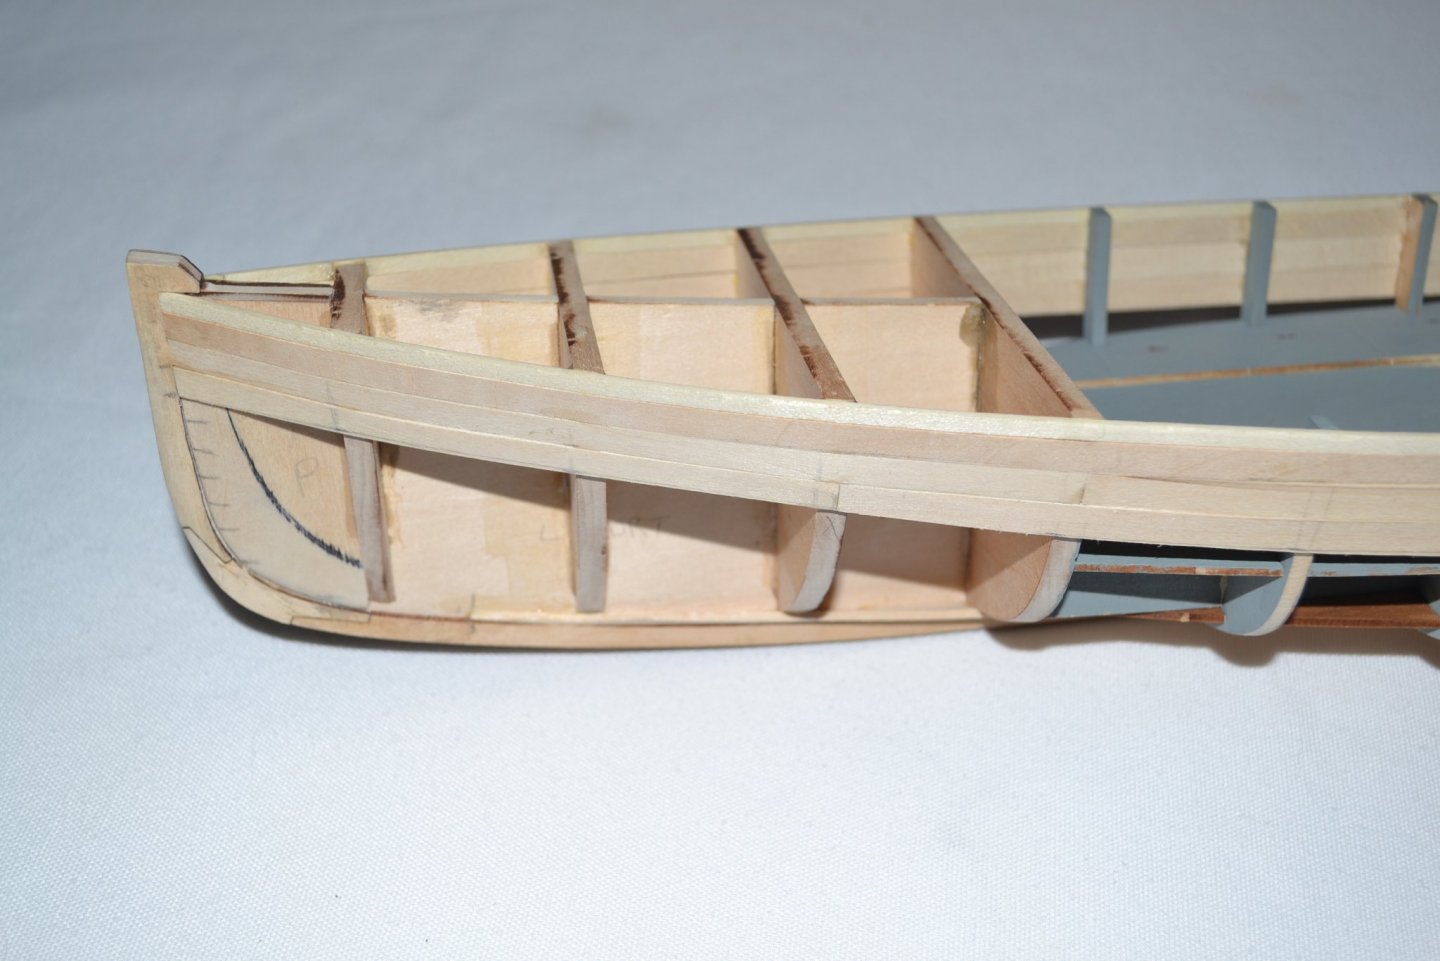
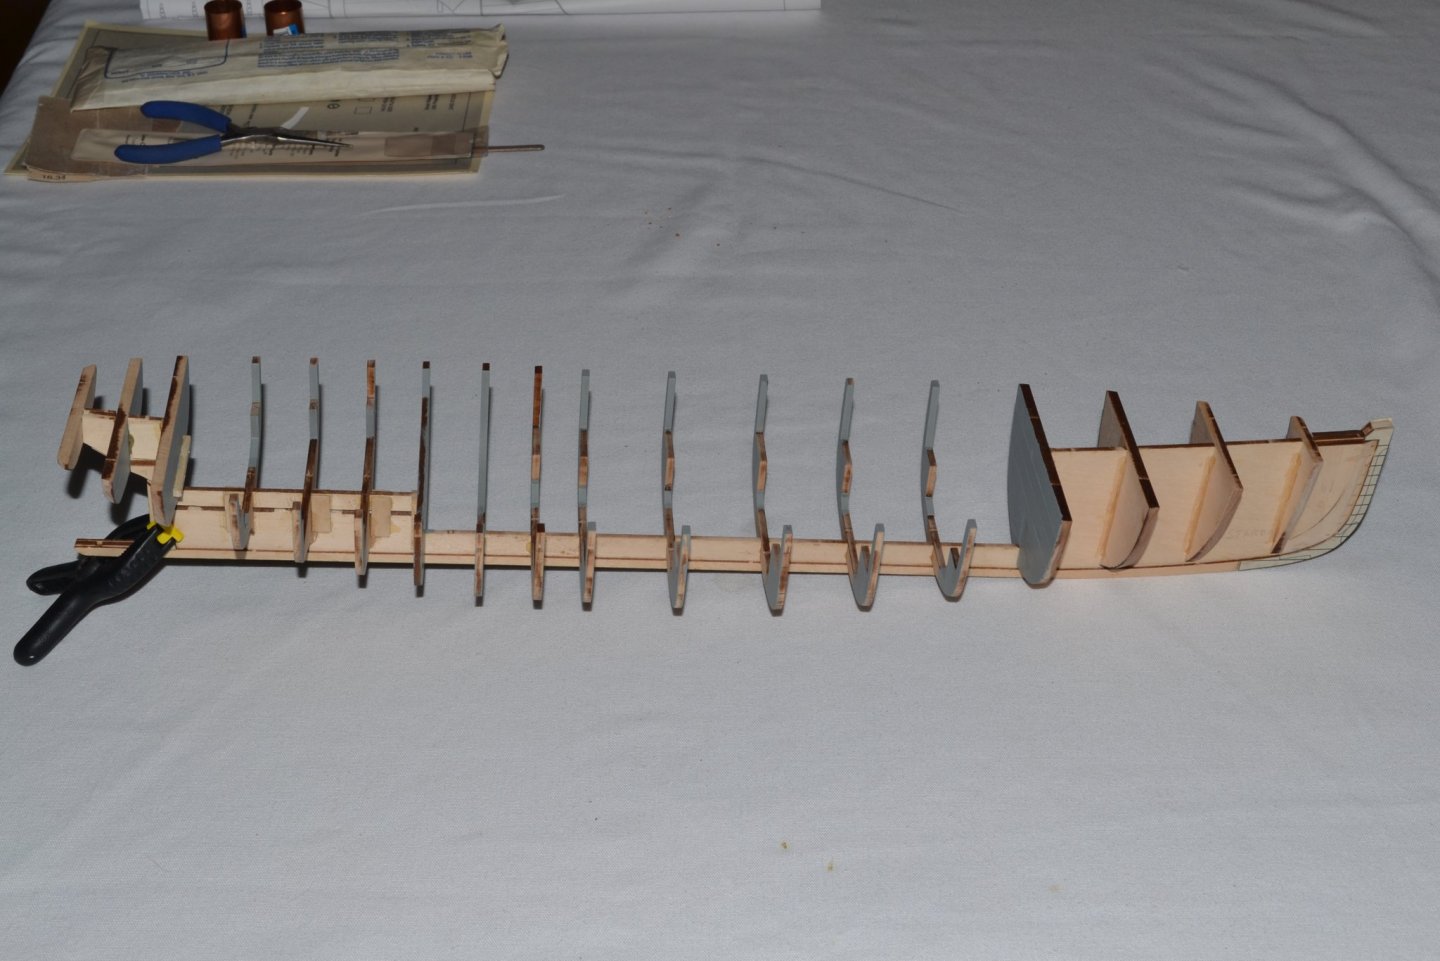
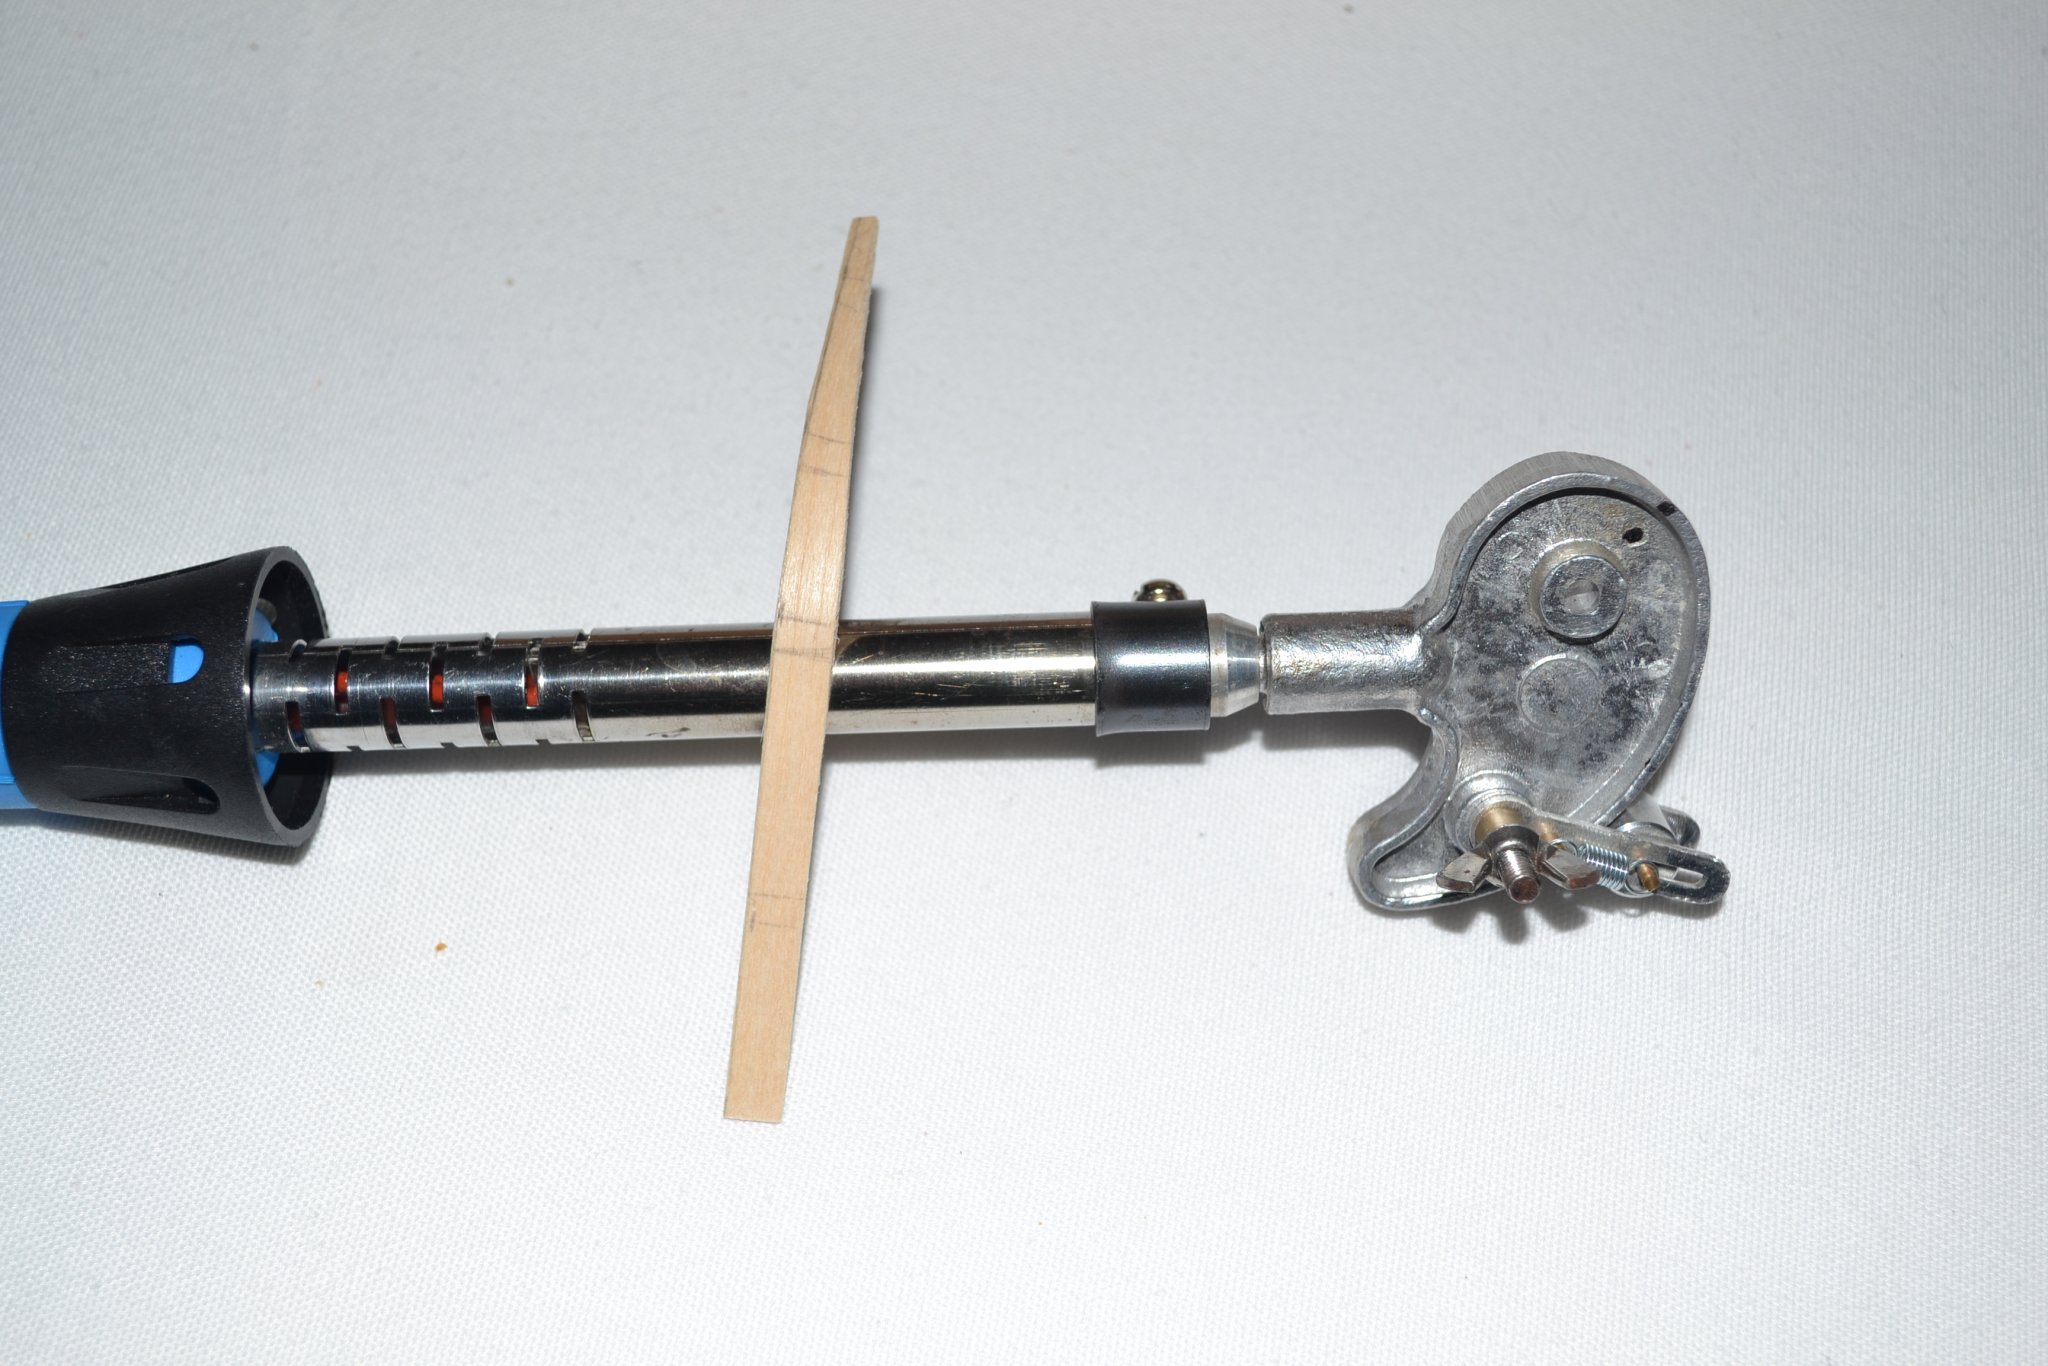
Made a bit of progress, I warned it would be slow, like me! Added the coal bunkers and did decide to leave one open with simulated coal inside. I will finish the cut and open it at a later stage. Faired the frames and started the planking. I wet the planks and bend them to shape using a plank bender I bought many years ago but only used occasionally as this is but my second build. I jury rigged it to hold steady and bend the planks over the barrel of the tool rather than using the apparatus at the end, seems faster and easier. I will have to make a proper stand at some point but it works for now. I am reasonably satisfied with the planking, wood filler will be my friend I think. I sanded the inside of the planks to provide a smoother surface for finishing. I was concerned with the small surface area of the planks at the stern so glue them initially with Titebond and follow up with a bead of medium CA on the inside, probably not necessary but makes me feel better. Again, as a beginner, I would appreciate any suggestions or criticism!


- 54 replies
-
- 7
-
-
- picket boat
- model shipways
- (and 1 more)
-
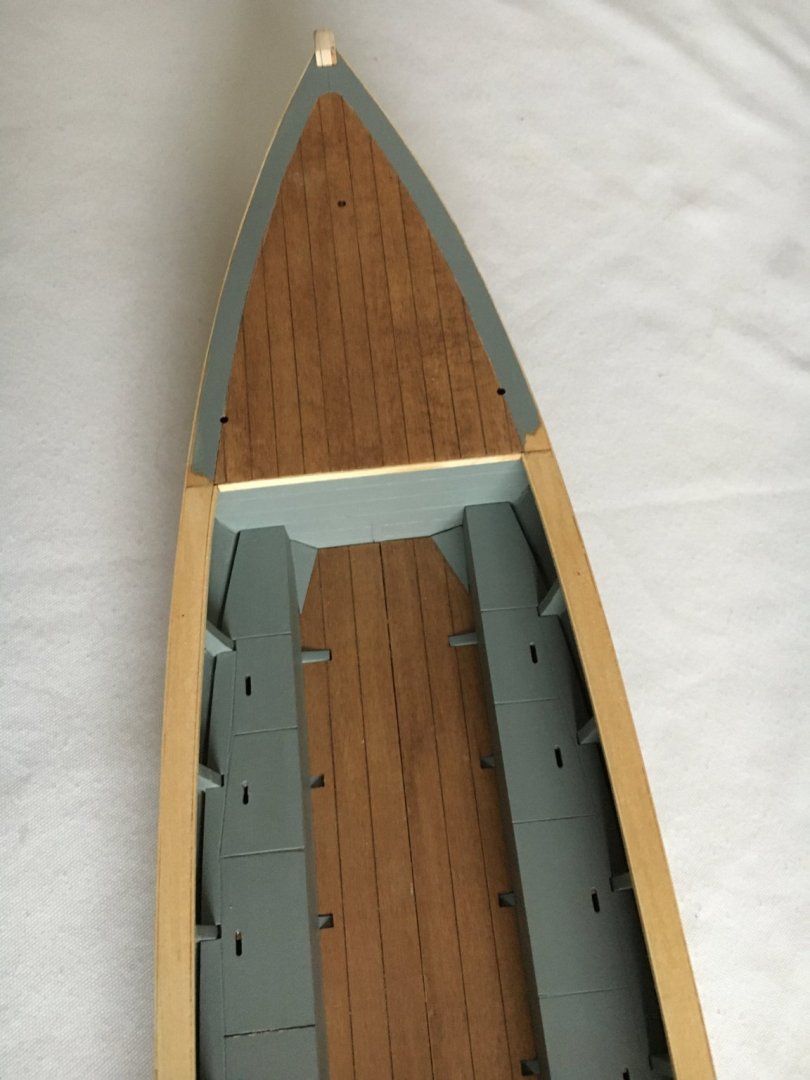
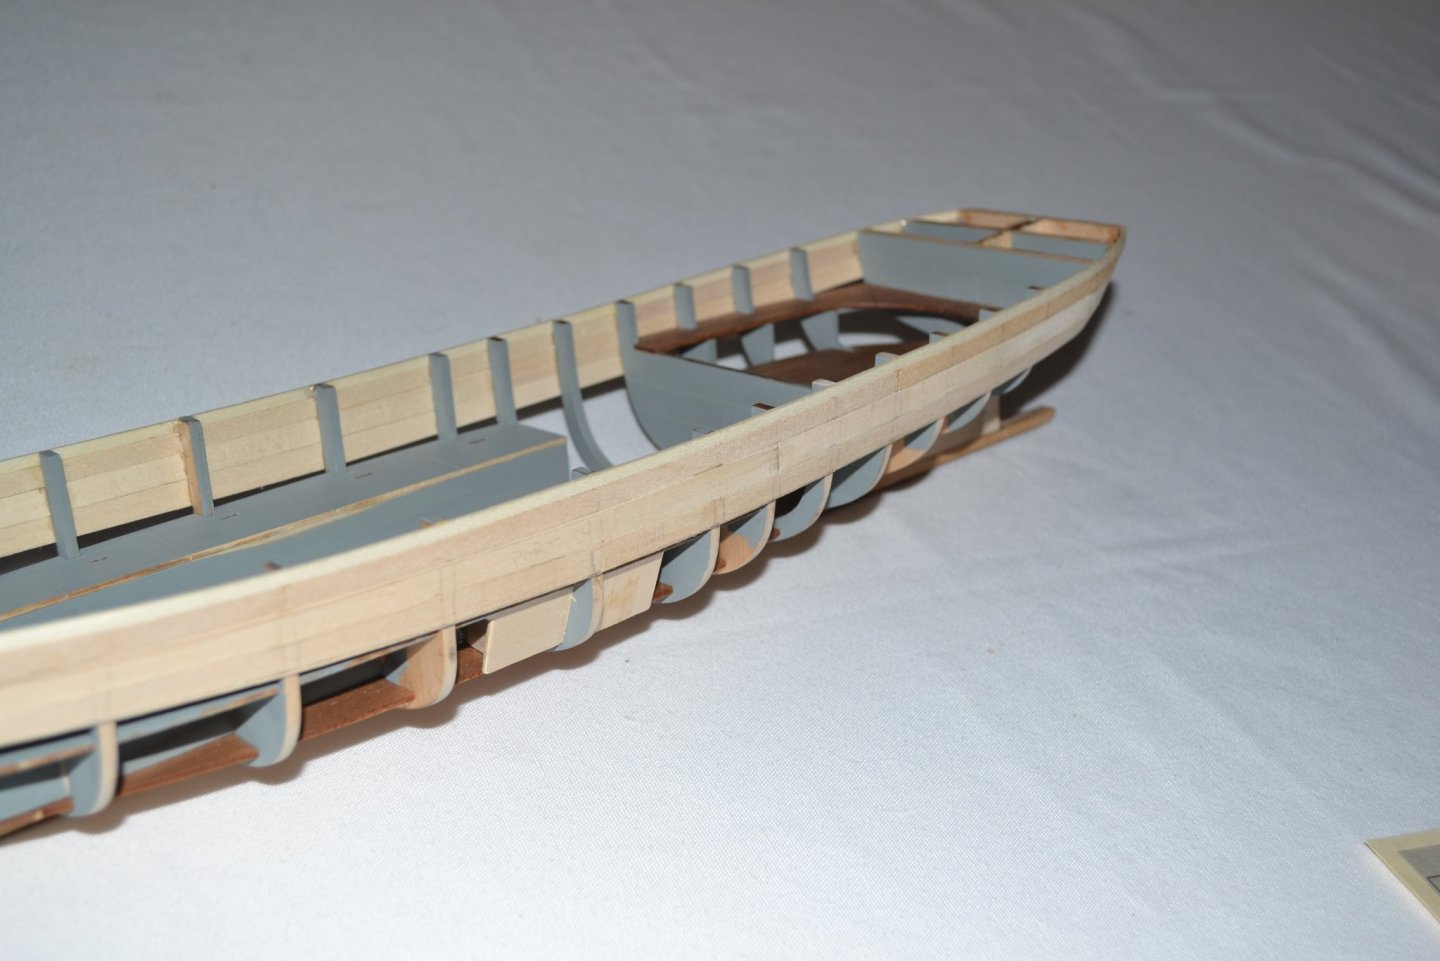
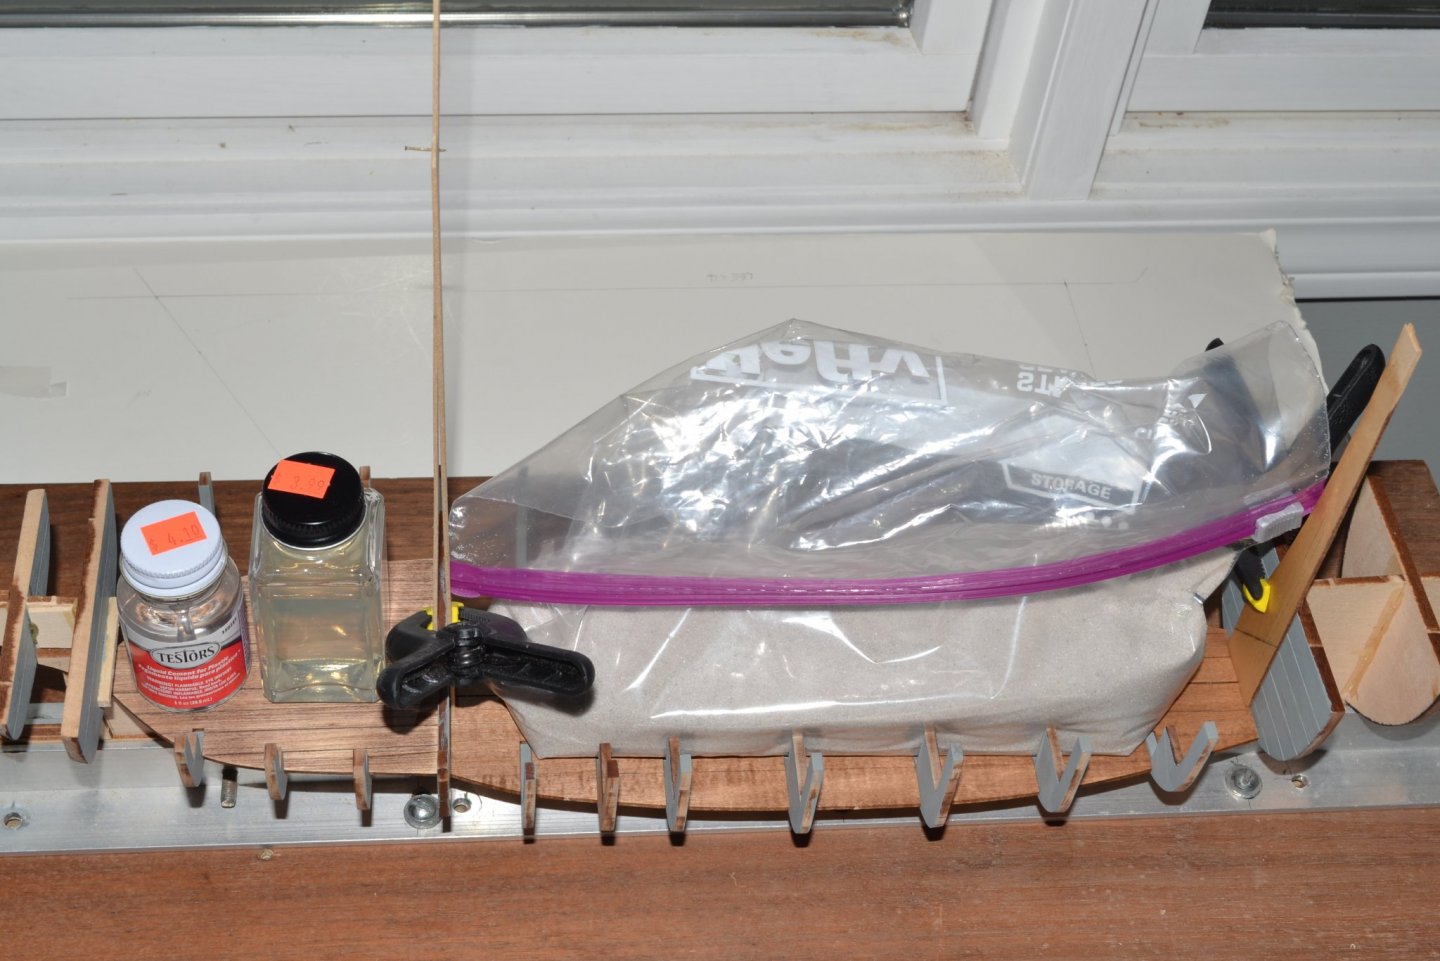
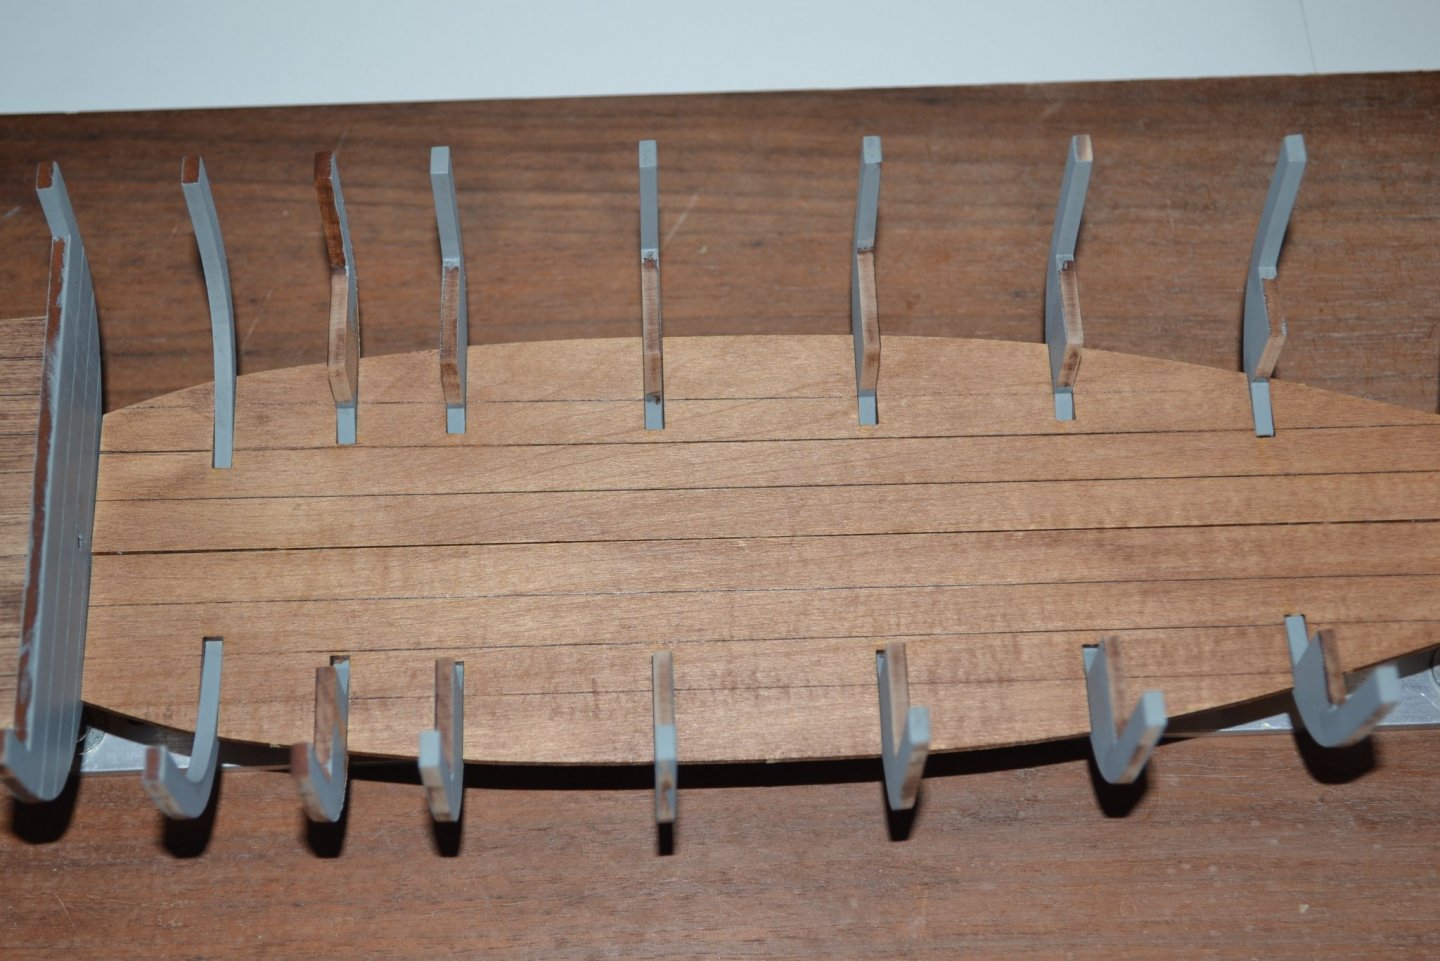
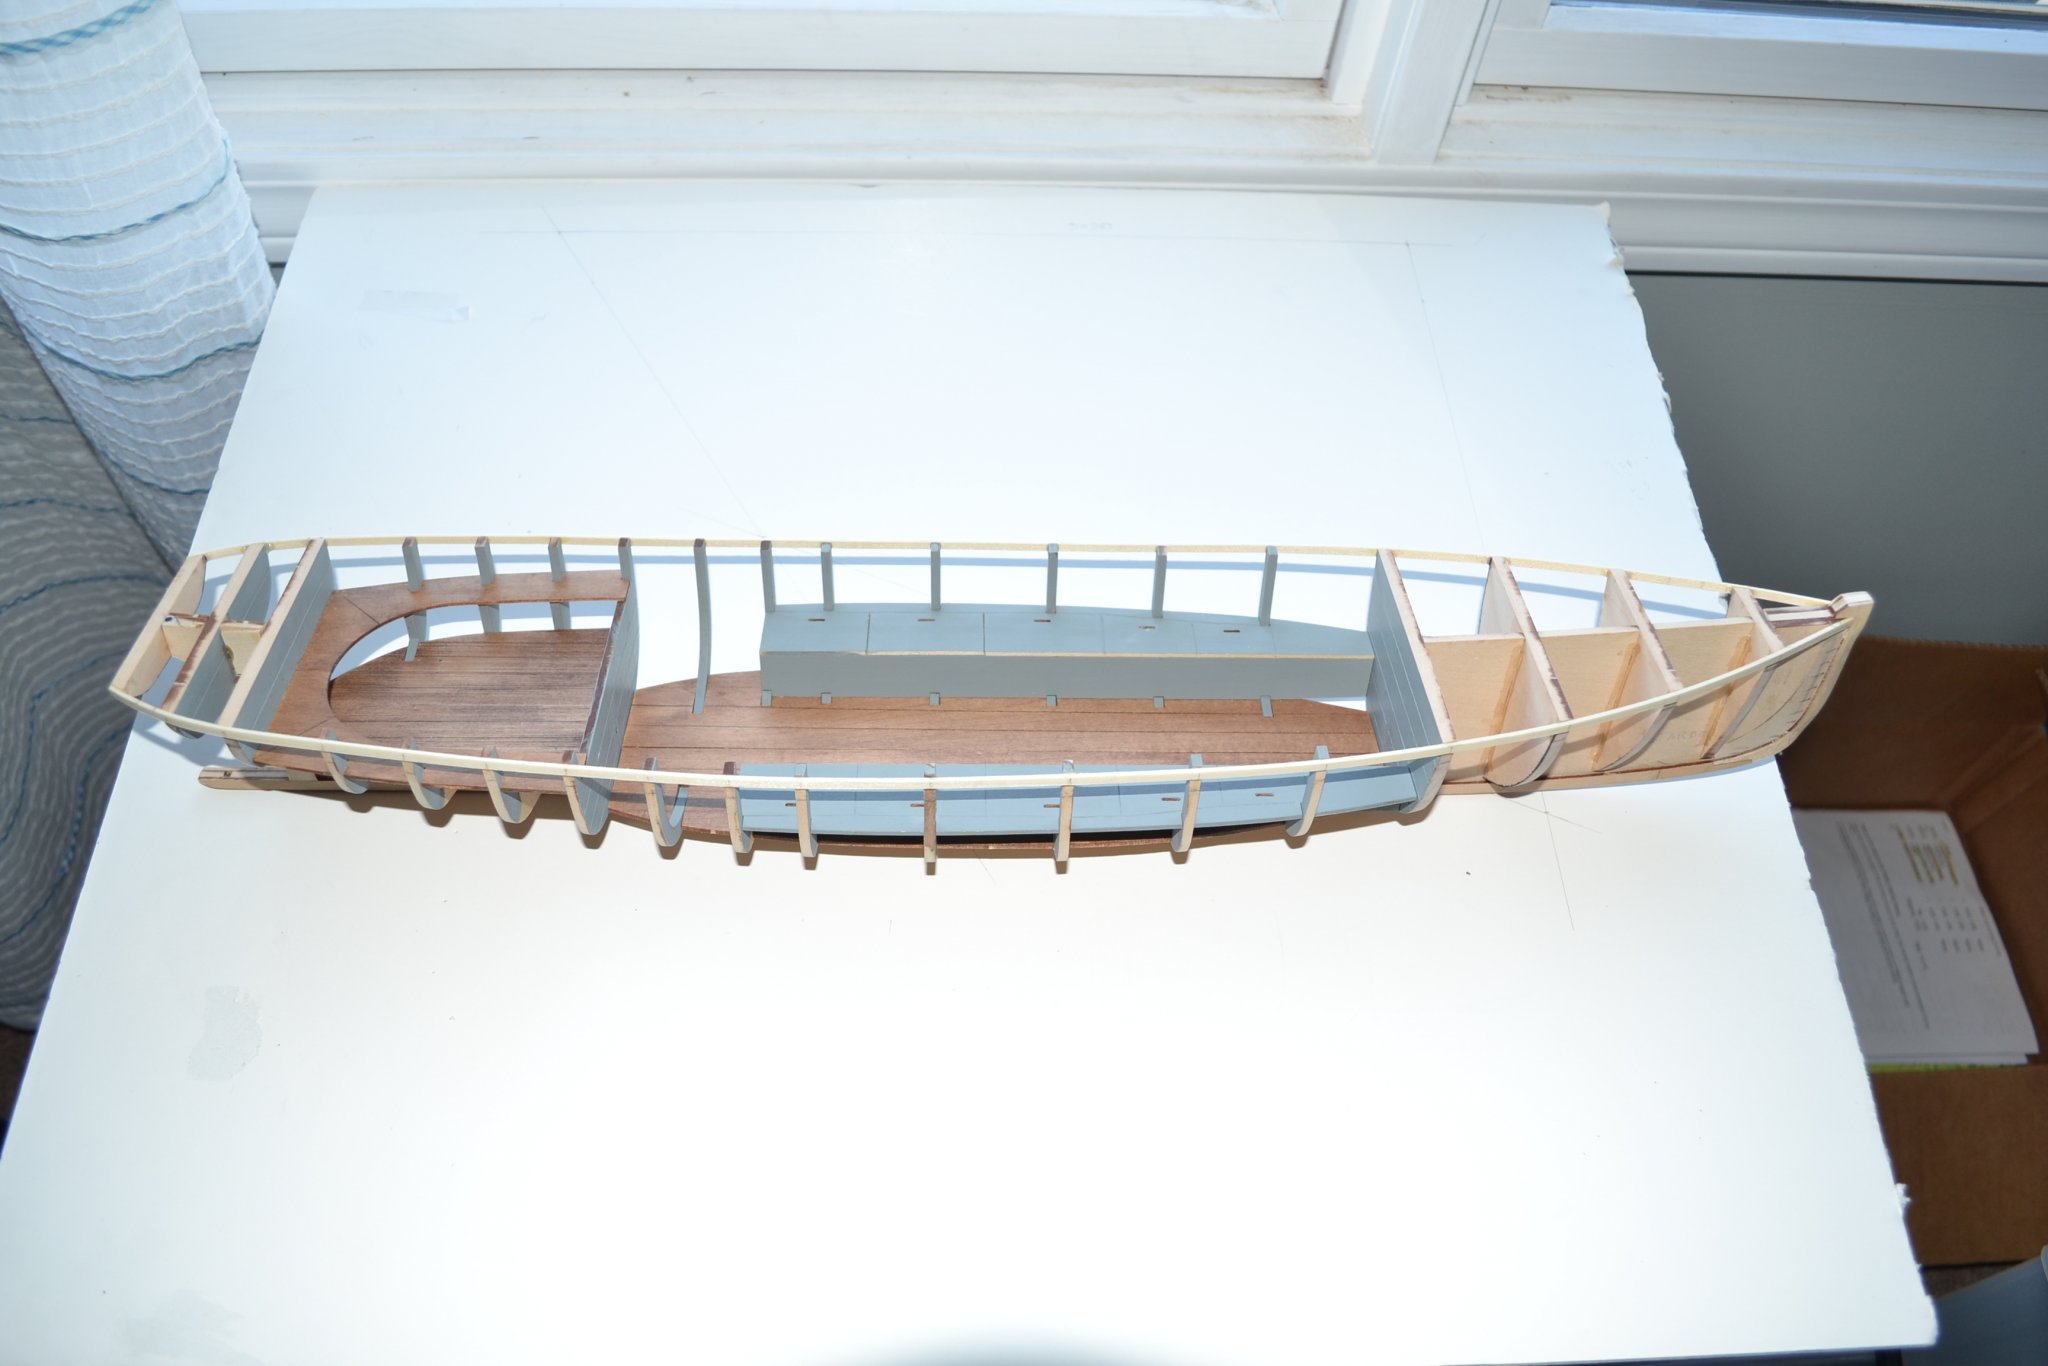
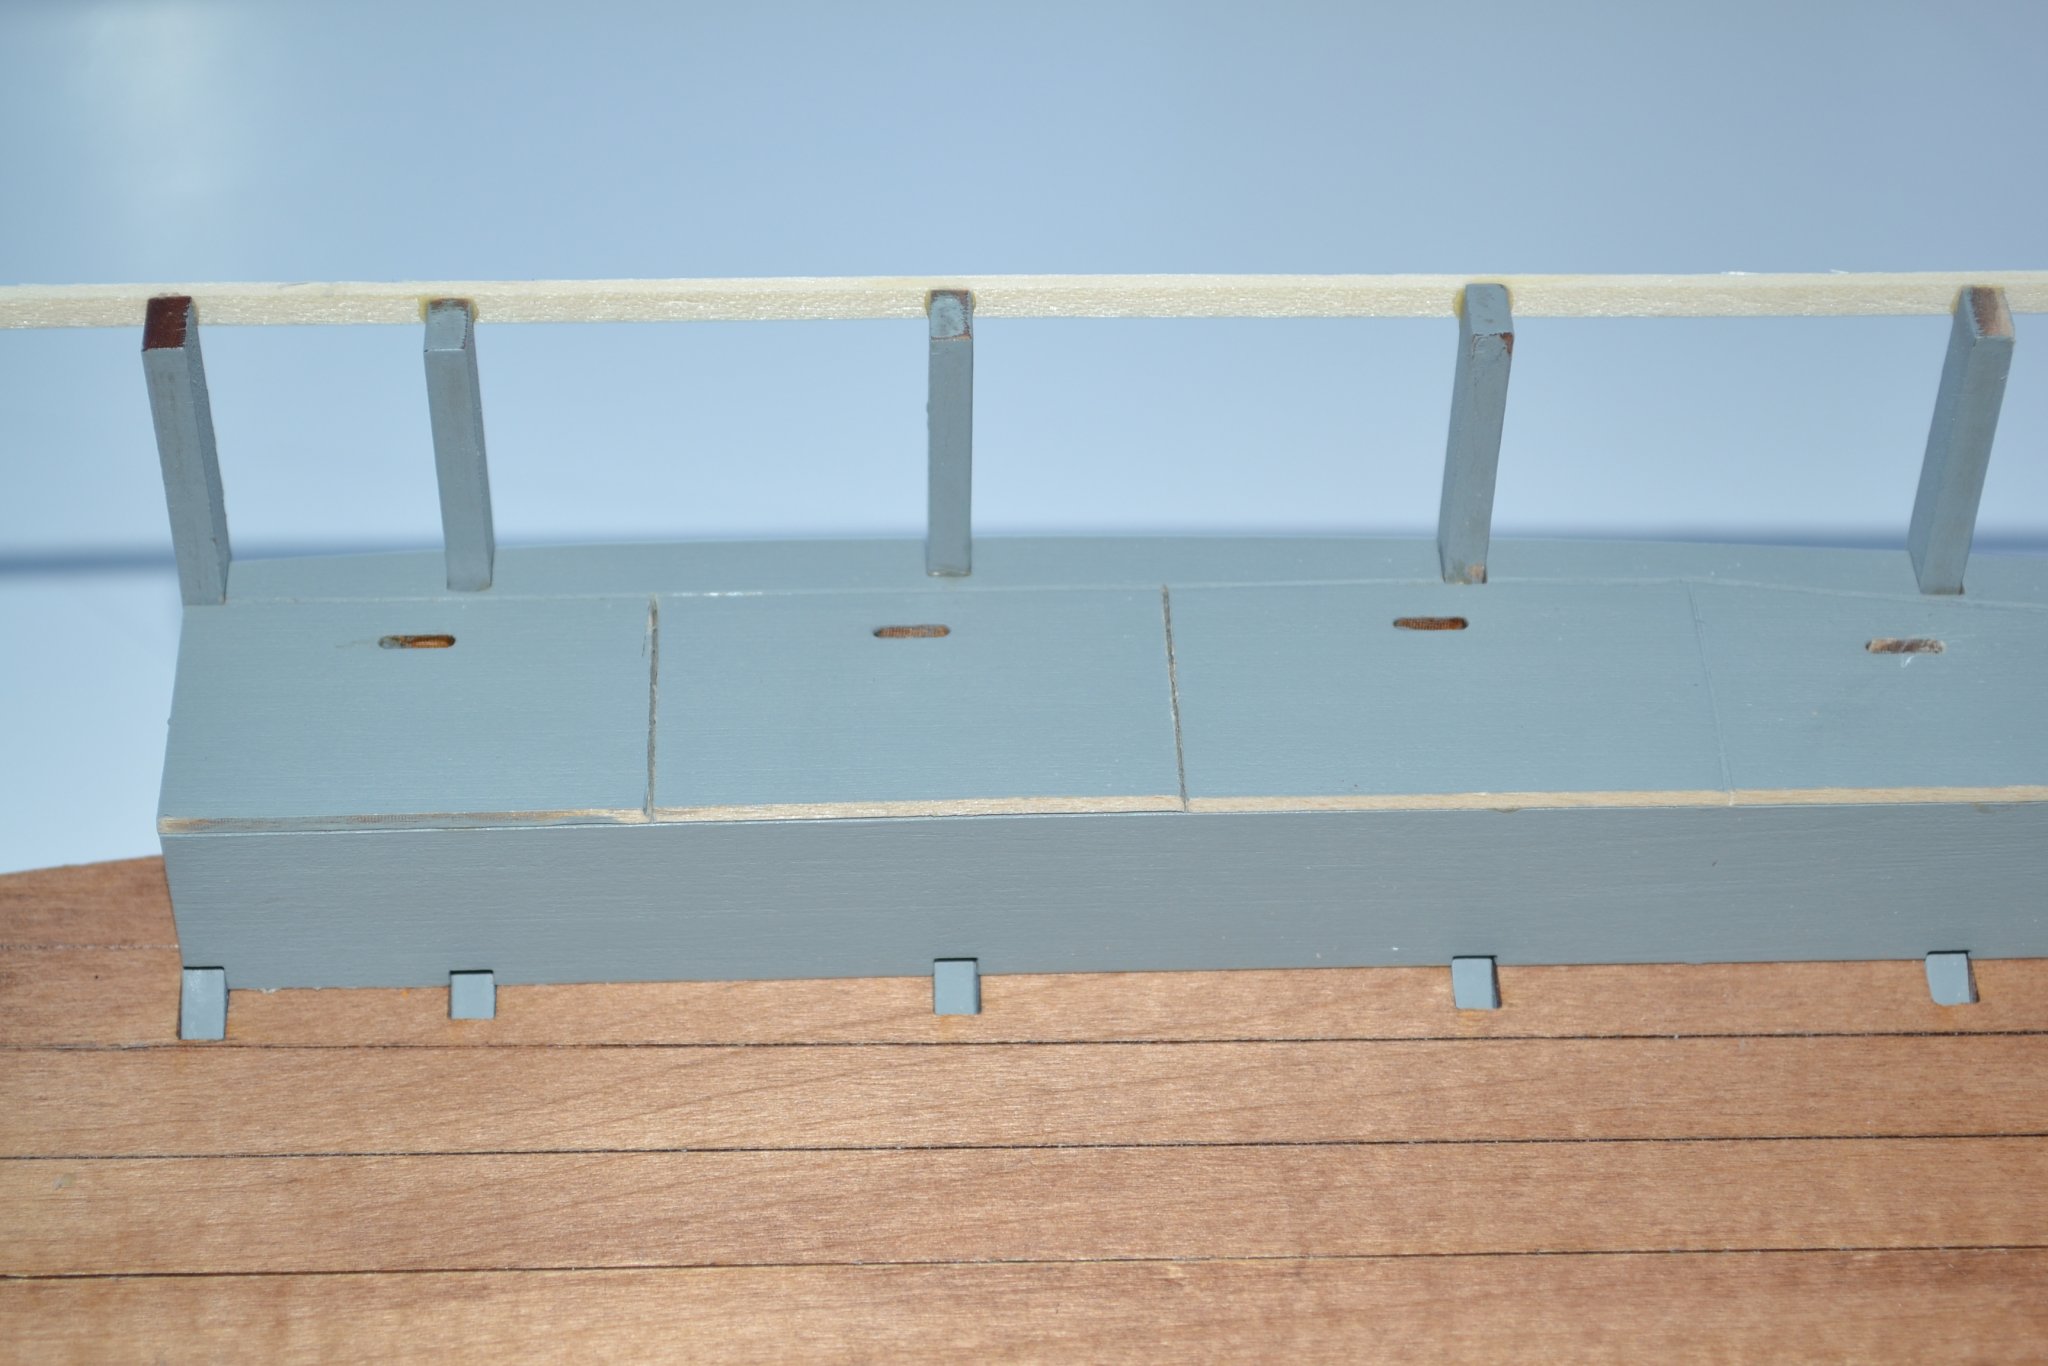
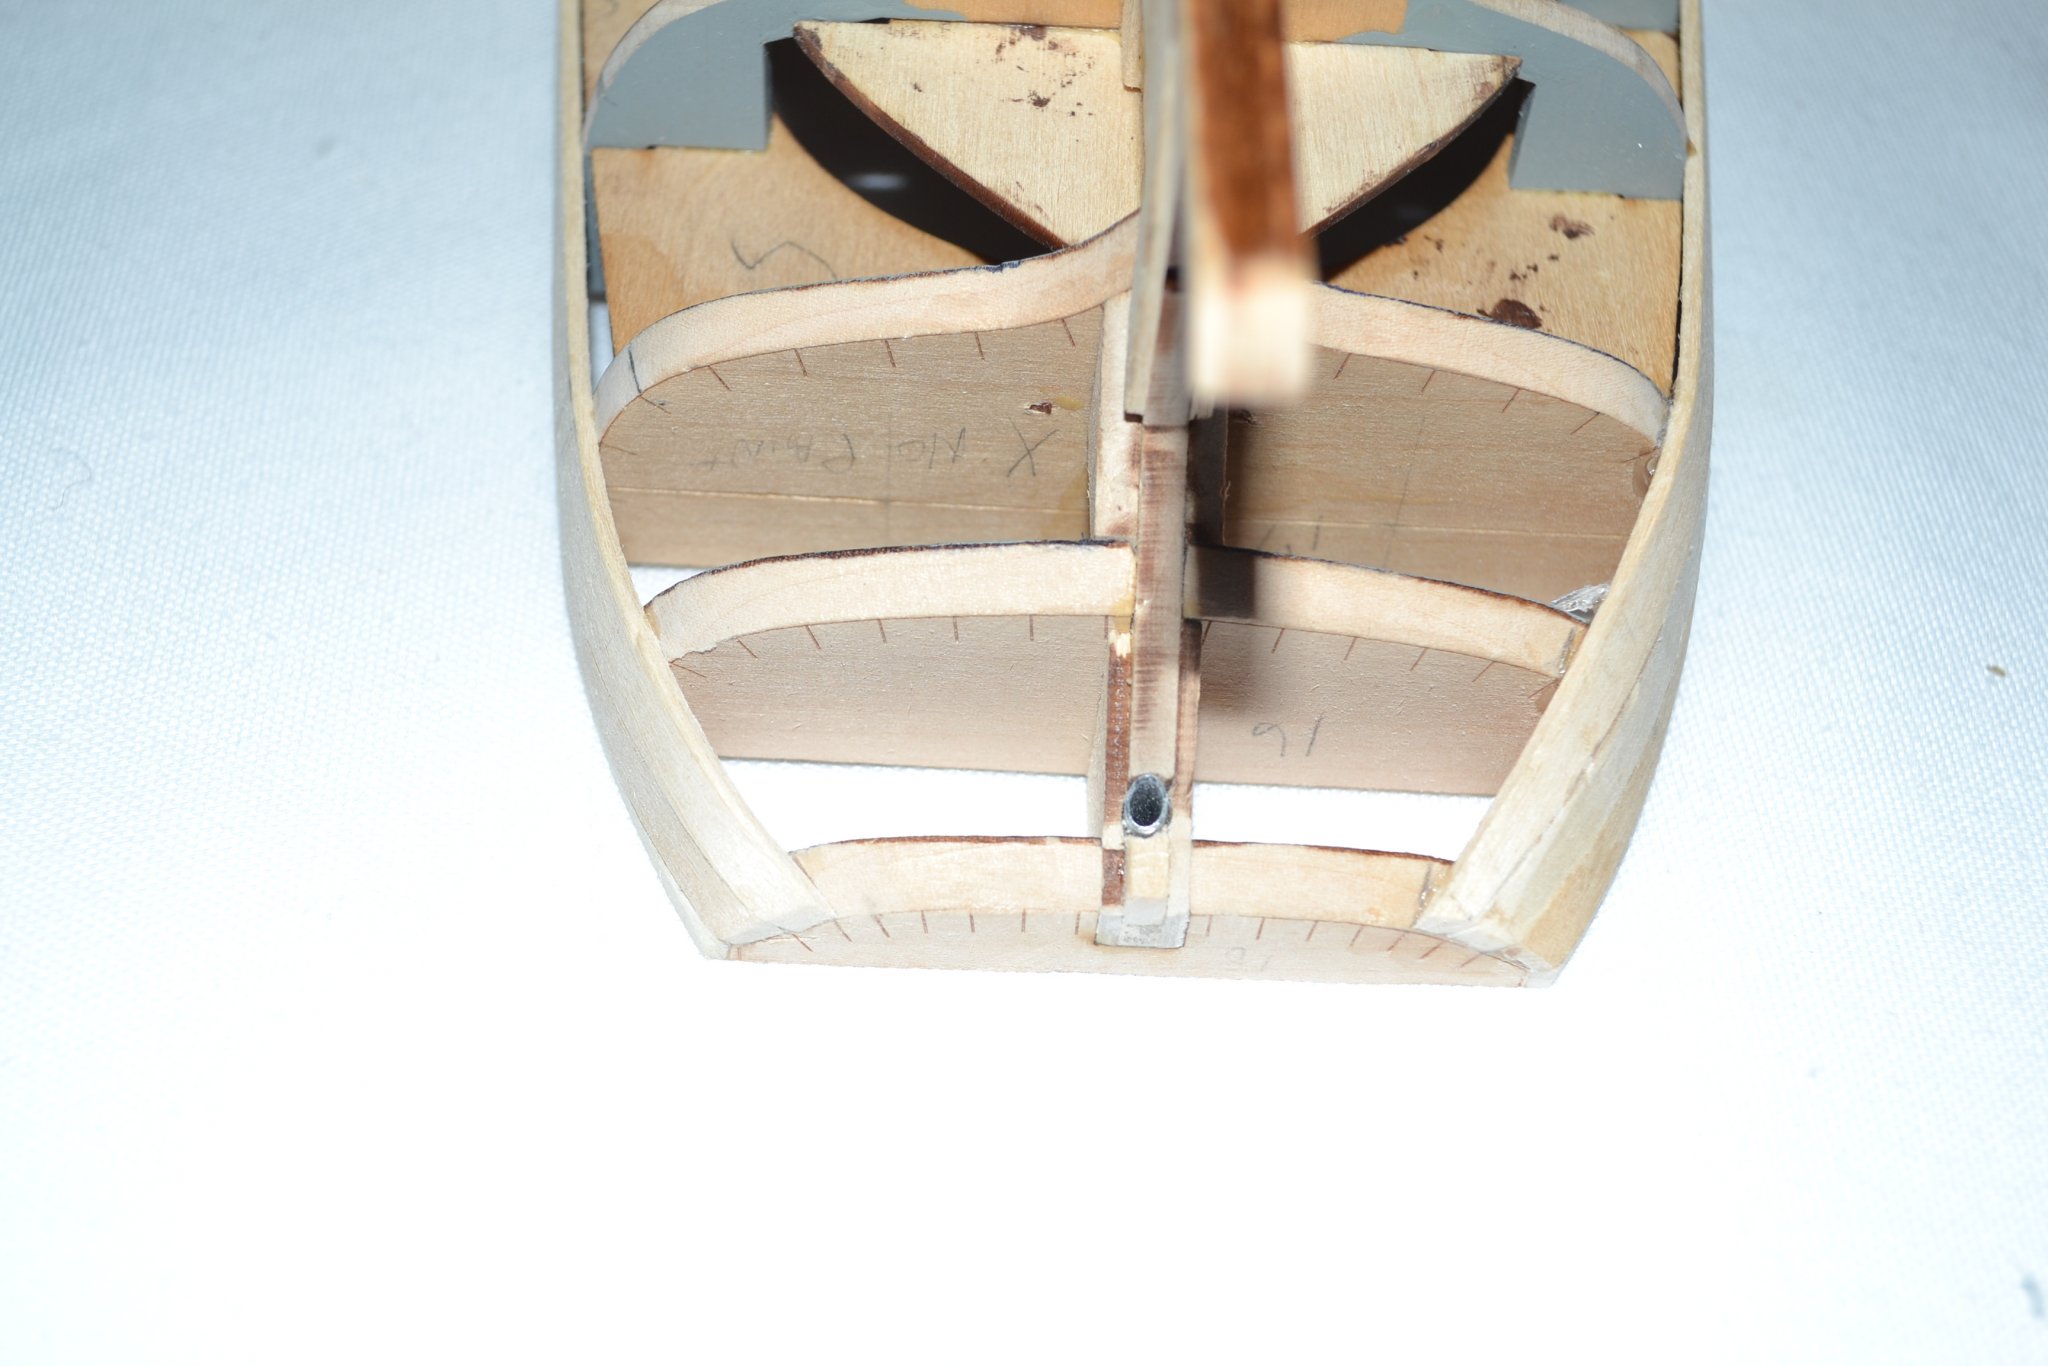
Did a bit more work today, attached the center frames using the deck and coal bunkers as an alignment tool per the instructions. Ater they were dry I installed the main and cockpit deck. I used a food storage bag filled with sand to weight down the main deck and a couple of bottles for the cockpit deck. The frames appear well aligned and I am reasonably happy with the decks although I notice a bit of a gap at the fore and aft ends of the main deck. Live and learn. at least the aft end will be covered by machinery, should have sanded the center portion a bit. I have prefinished the coal bunkers and am still debating whether to leave a couple of lids open and fill them with coal. I also included a bonus picture of sunset from my hobby room. Cheers, John.


.thumb.JPG.d4344b47c79650990be1b067aa02a362.JPG)
- 54 replies
-
- 4
-
-
- picket boat
- model shipways
- (and 1 more)
-
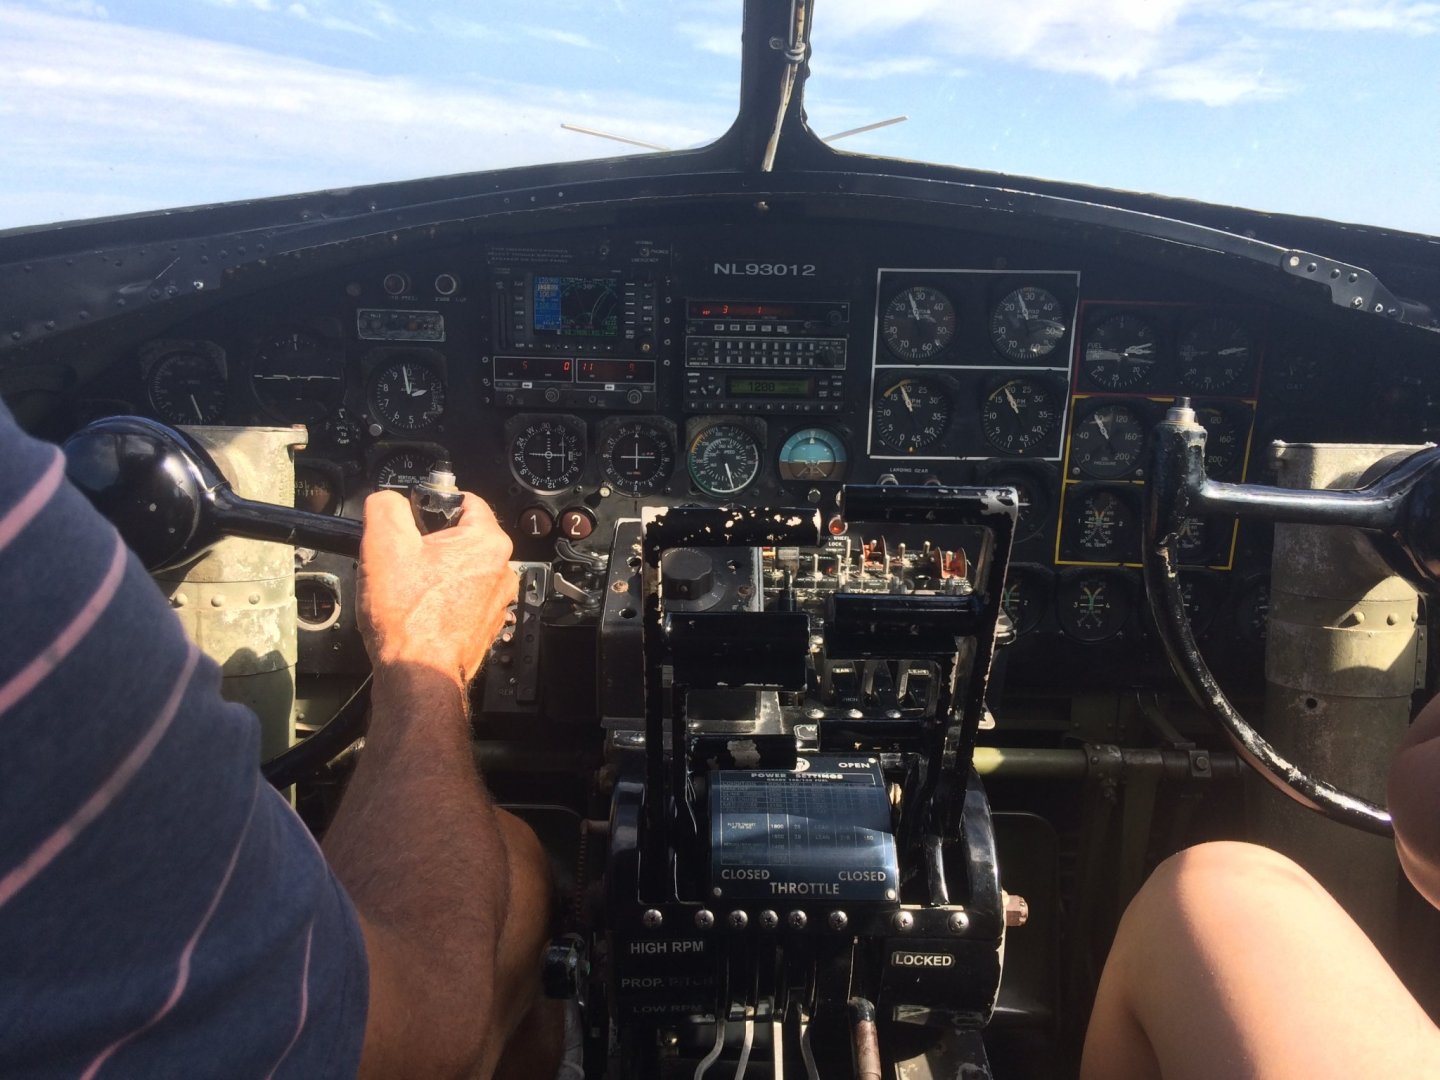
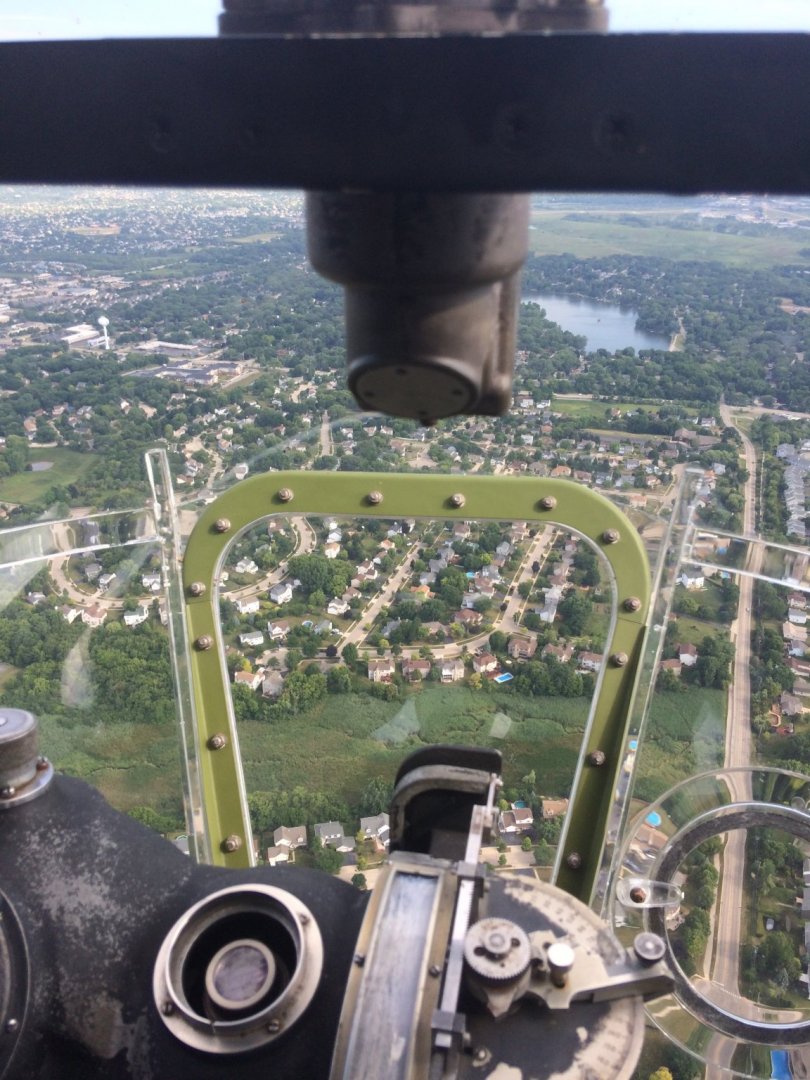
The crash was extremely sad and tragic, I flew on that plane last summer. IMG_1677.MOV


.thumb.JPG.822e60bdb64b1bc767848f24fd0c4c83.JPG)
-
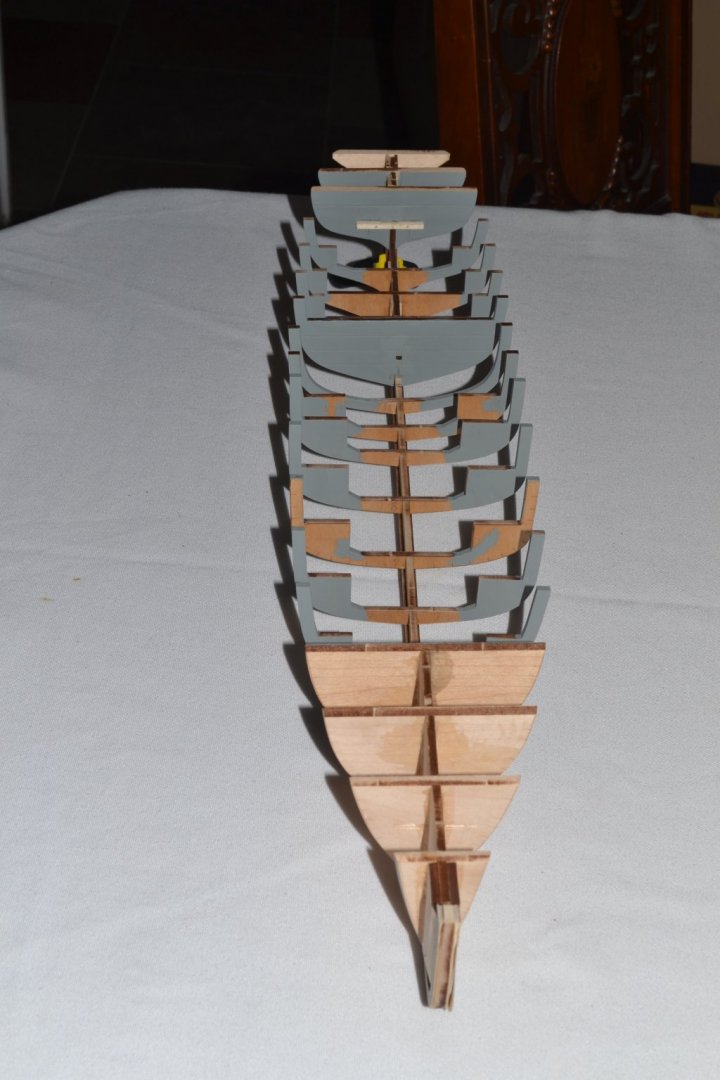
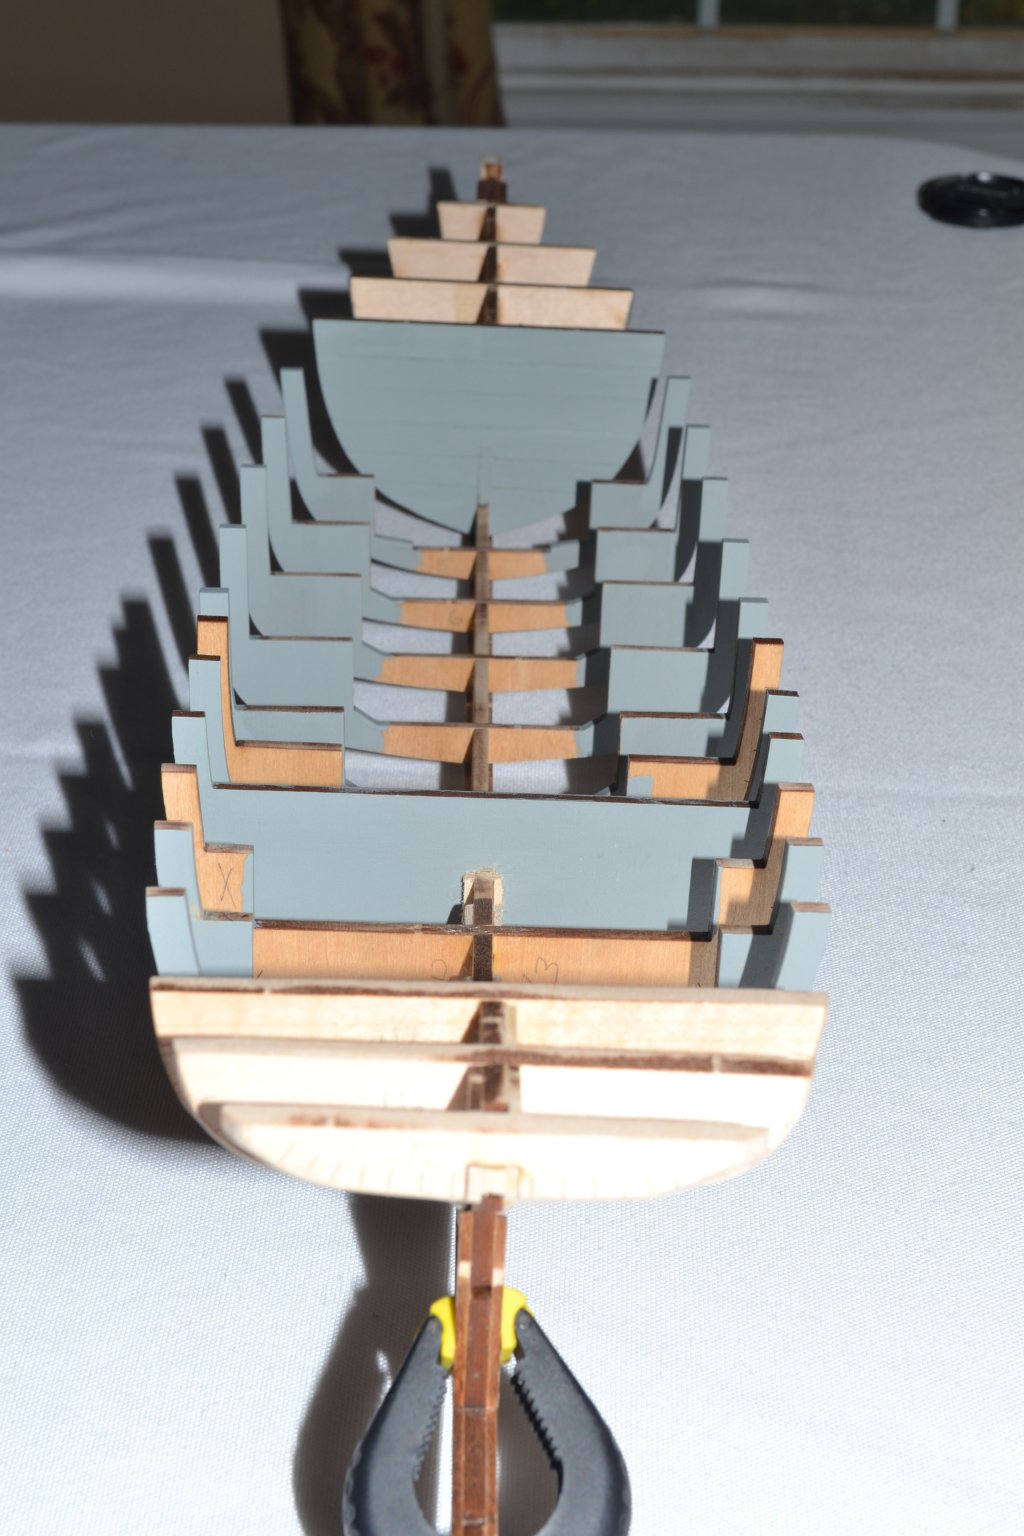
Made a bit more progress. Painted frames prior to installation and installed them in the rear portion of the boat. As mentioned in other logs and also in the kit instructions the center frames are very delicate and I did manage to break a couple. I glued them back together and used a nub from the matrix lightly glued to span the broken area. I applied glue to the char area of the nub and attached them to the char area of the frame. I experimented first and the extra piece will easily pop off once the frames are in place and well supported by the surrounding structure but provide extra strength during assembly. I started finishing decks, seats etc.. For the floor and rear floor I took measurements from the plans and scored the wood to resemble pank seams. I used a sanding sealer to try and keep stain even and less blotchy, I will finish them with a mixture of Testors Dull and Gloss coat for a bit of sheen. I am using Minwax Gel Stain and find it much easier to control than their normal liquid stains. I just rub it in with a cloth until I achieve the desired result. The first couple of parts I finished were not great but I am improving.
.thumb.JPG.796d5a53a0a2f92a26fa74e3e1cb196a.JPG)
.thumb.JPG.52606d7afa324103964ca81f2bdbbf87.JPG)
- 54 replies
-
- 5
-
-
- picket boat
- model shipways
- (and 1 more)
-
I would suggest just keep soldiering on. Experience is a tough task master, but it seems we learn more from our errors than successes. I am new at the hobby and working on my second build, learned a lot on my first and it is really helping on my second. I am still making plenty of errors and hopefully my third build will be even better. I suspect that every build teaches all of something useful even to the masters of the craft on this forum, seems the test is given first and the lesson follows! Keep us updated with more posts and pictures.
-
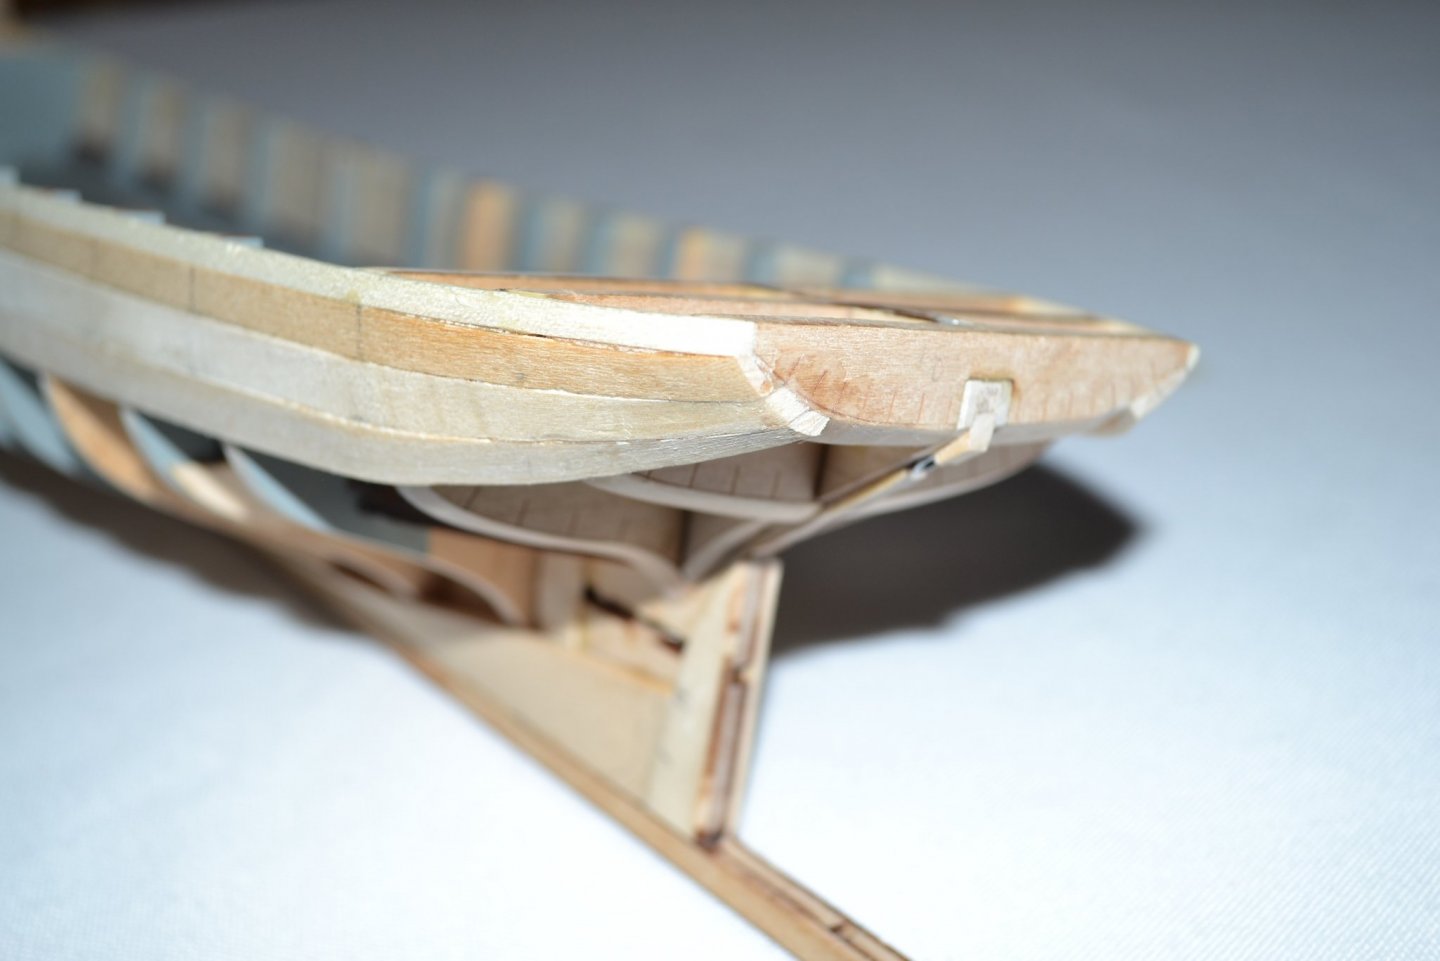
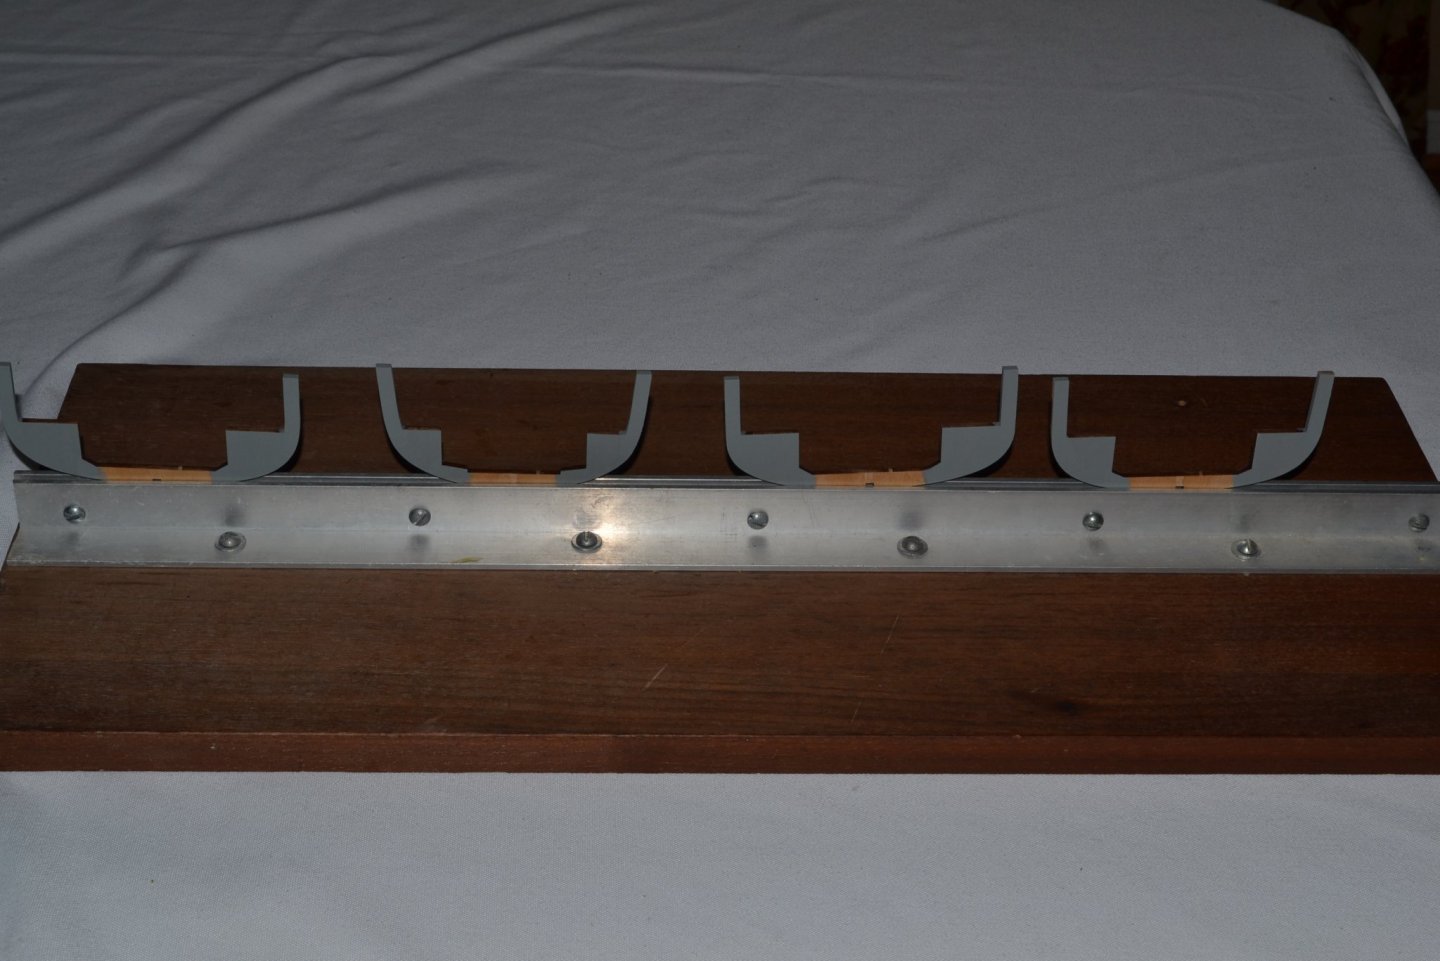
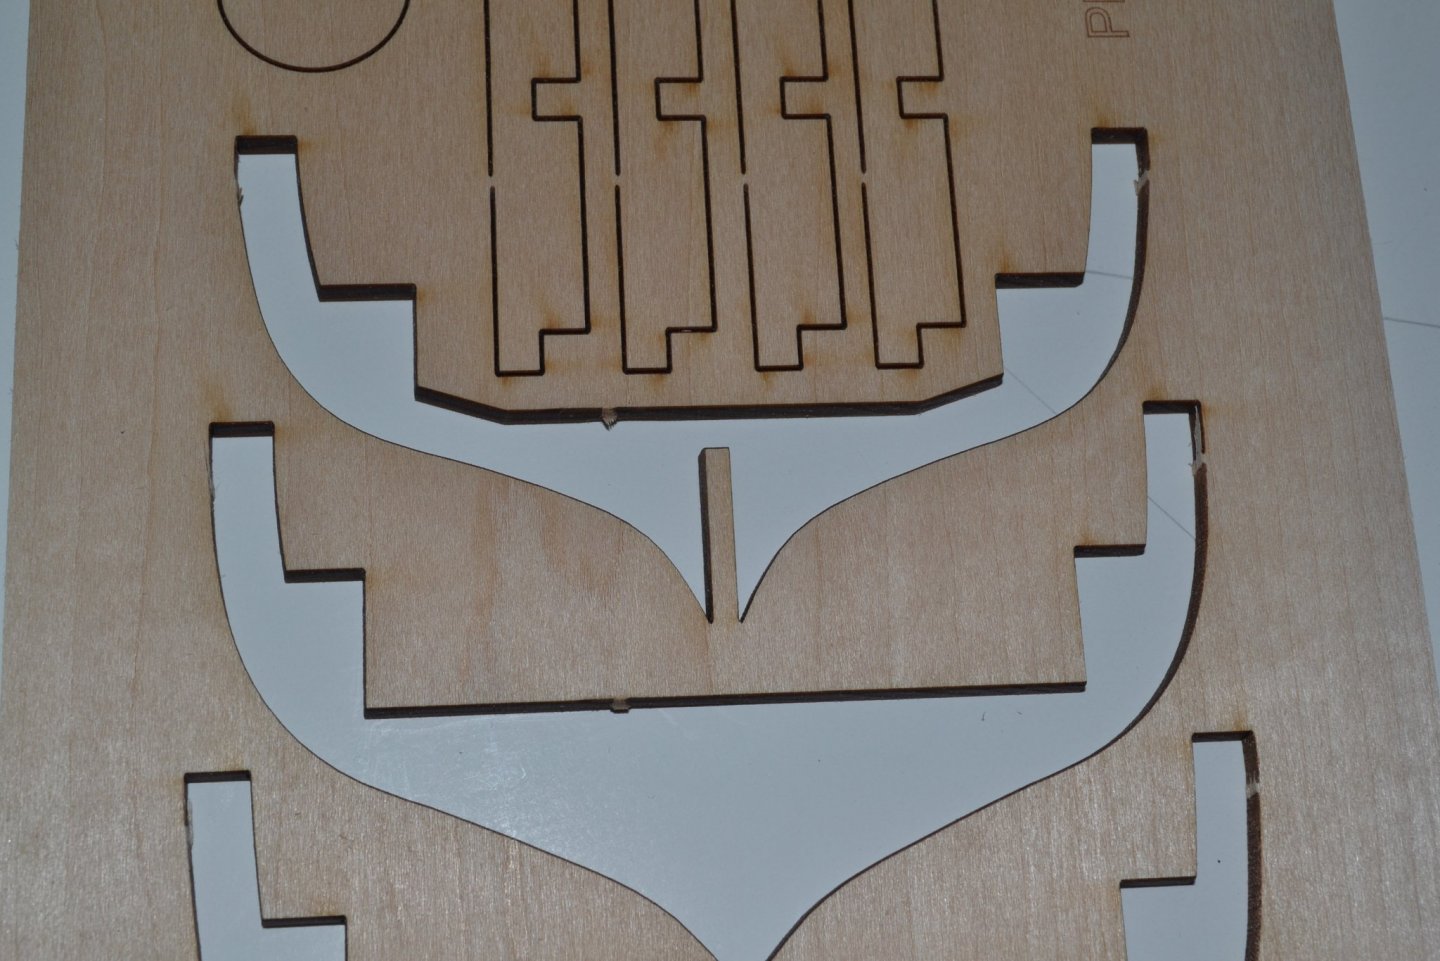
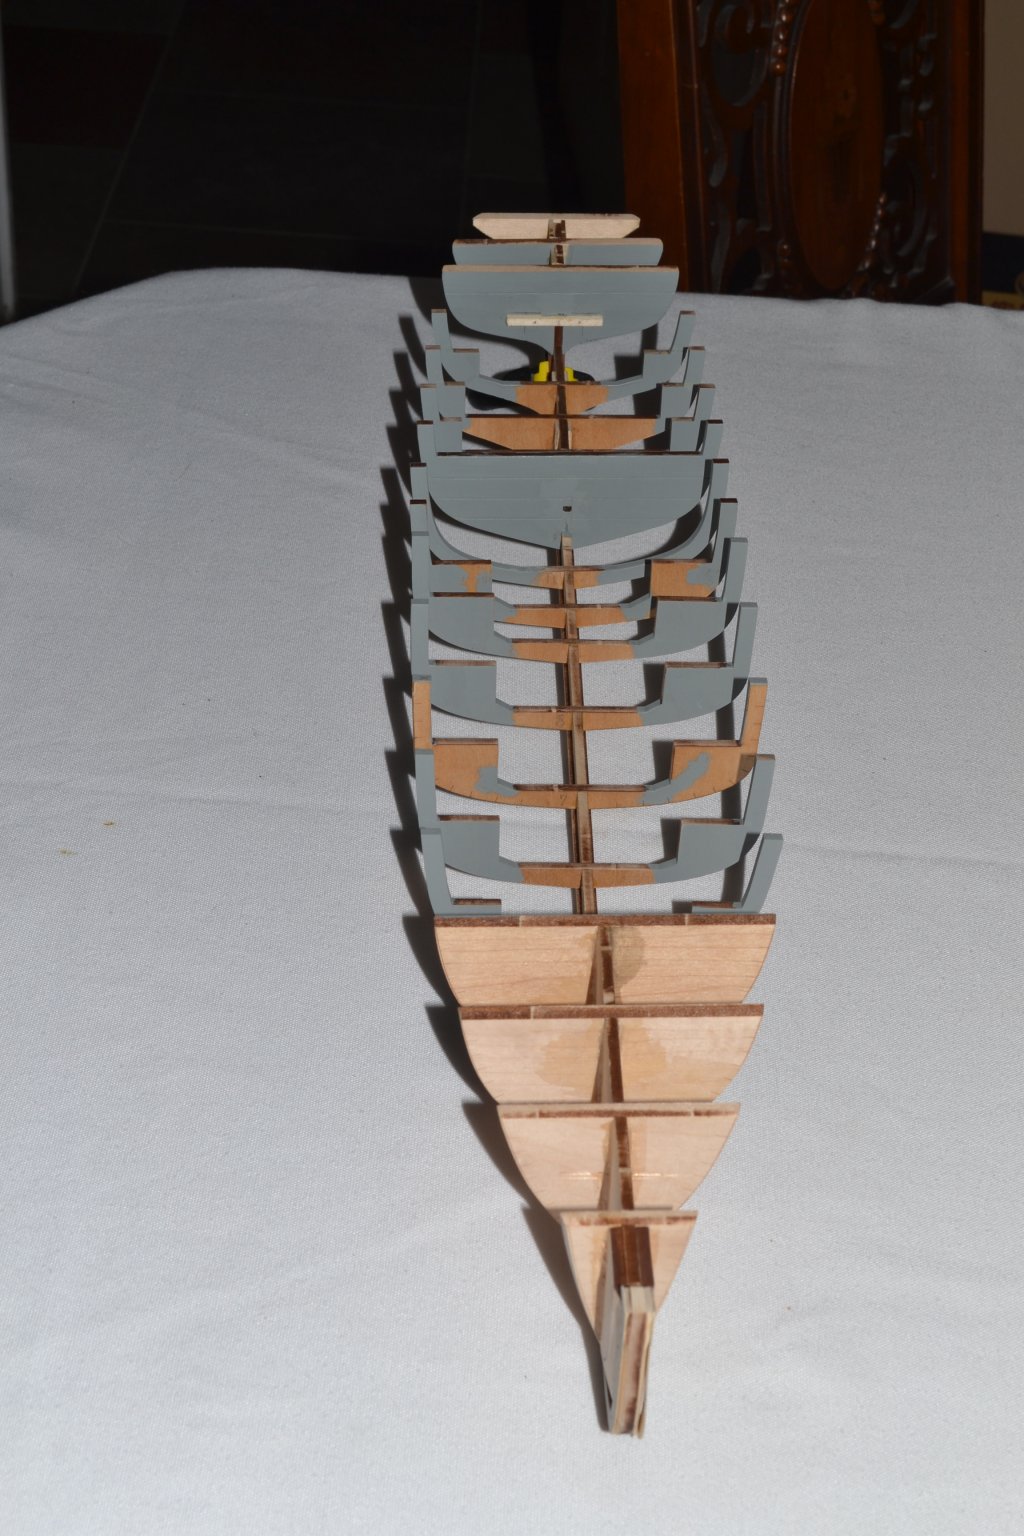
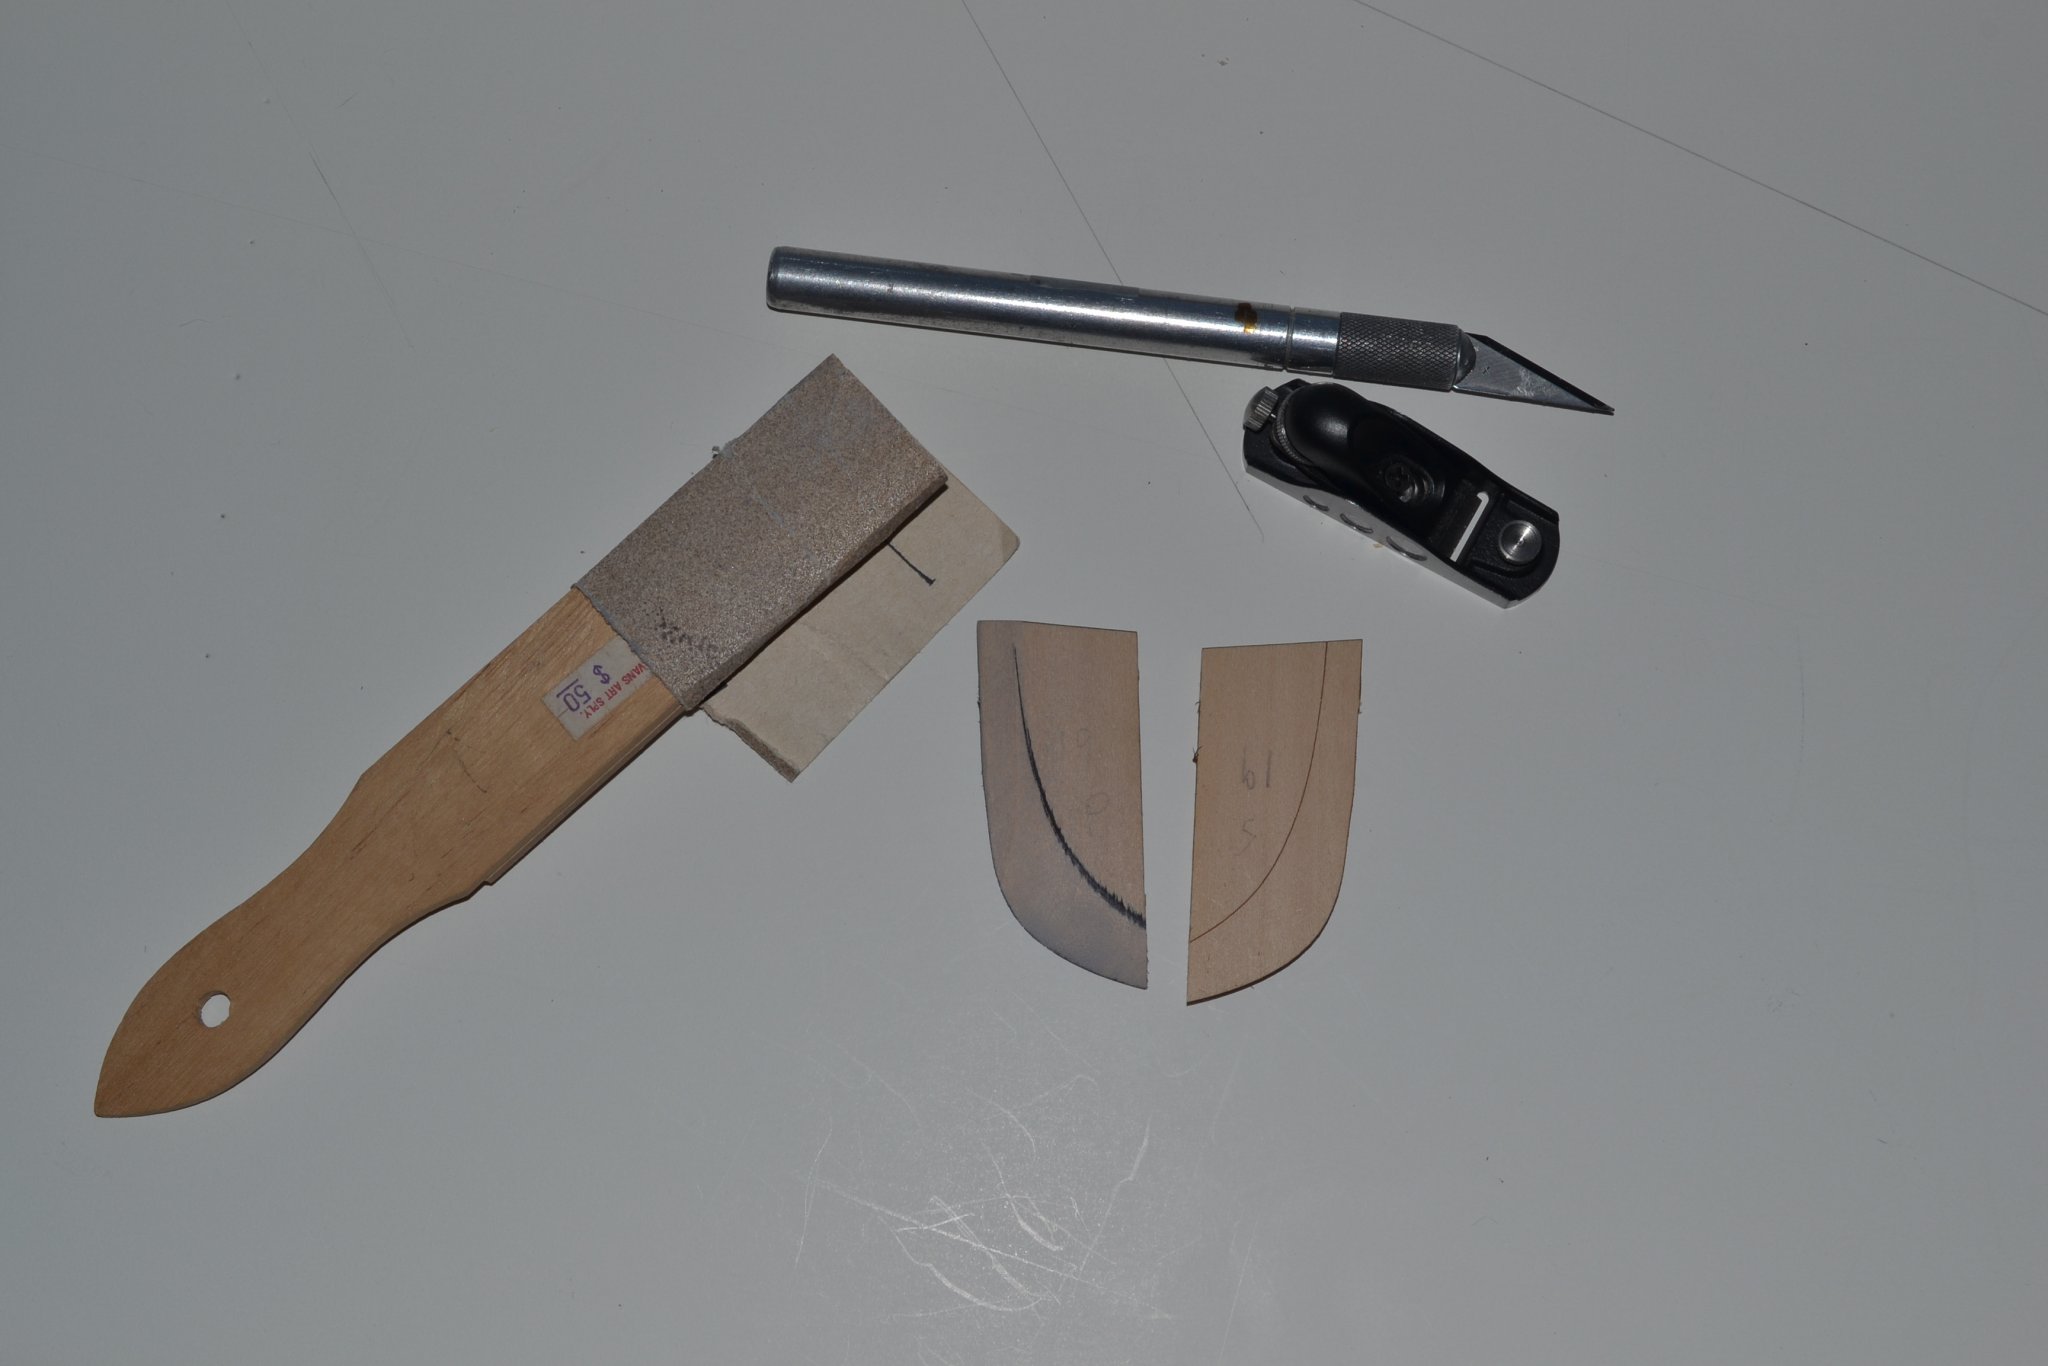
Made a bit more progress, shaped the blocks at the stem according to the plans. I started using a bobby knife to carve them but quickly switched to my Veritas miniature block plane to hog out the wood and then used sandpaper on a block to finish it. The plane is a great little tool and highly recommended and easy to control. I thought it preferable to shave away excess wood rather than reduce it to sawdust by sanding alone. I copied the templates onto heavy stock rather than cut out the originals included with the kit so as not to sacrifice the original if a mistake was made. I did check my copier to insure it copied at 100% rather than enlarging or reducing the image, it was spot on. Used a Dremel with a sanding drum to rough cutwater out and finished with hand sanding. Starting mounting bulkheads using a square and clamps to keep them square. Used PVA glue and added a bead of CA when dry, probably not necessary but a bit of insurance.


- 54 replies
-
- 6
-
-
- picket boat
- model shipways
- (and 1 more)
-
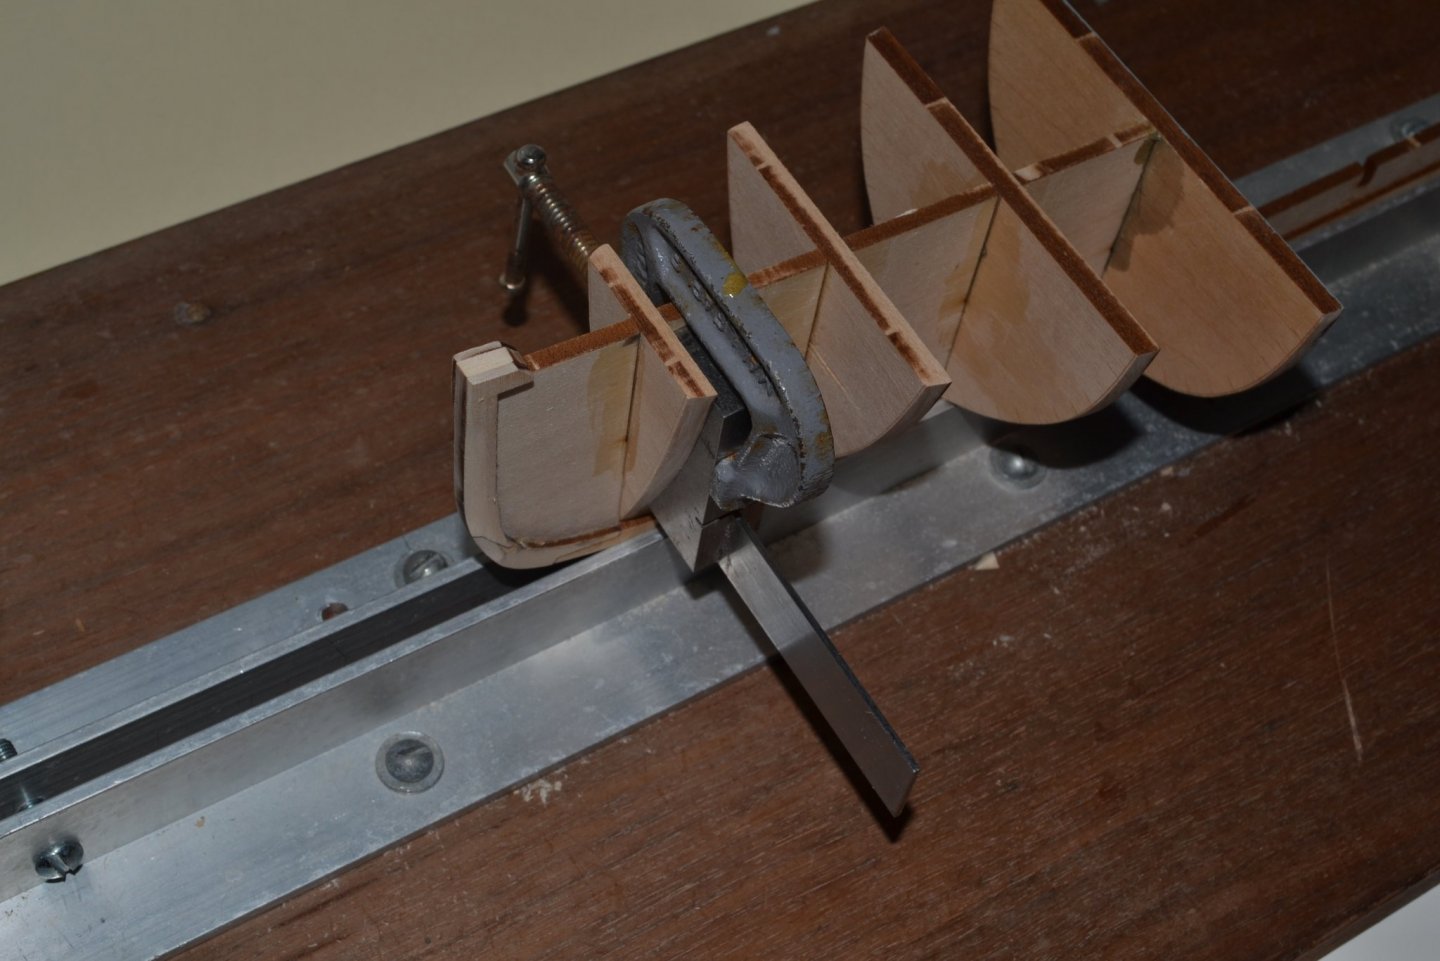
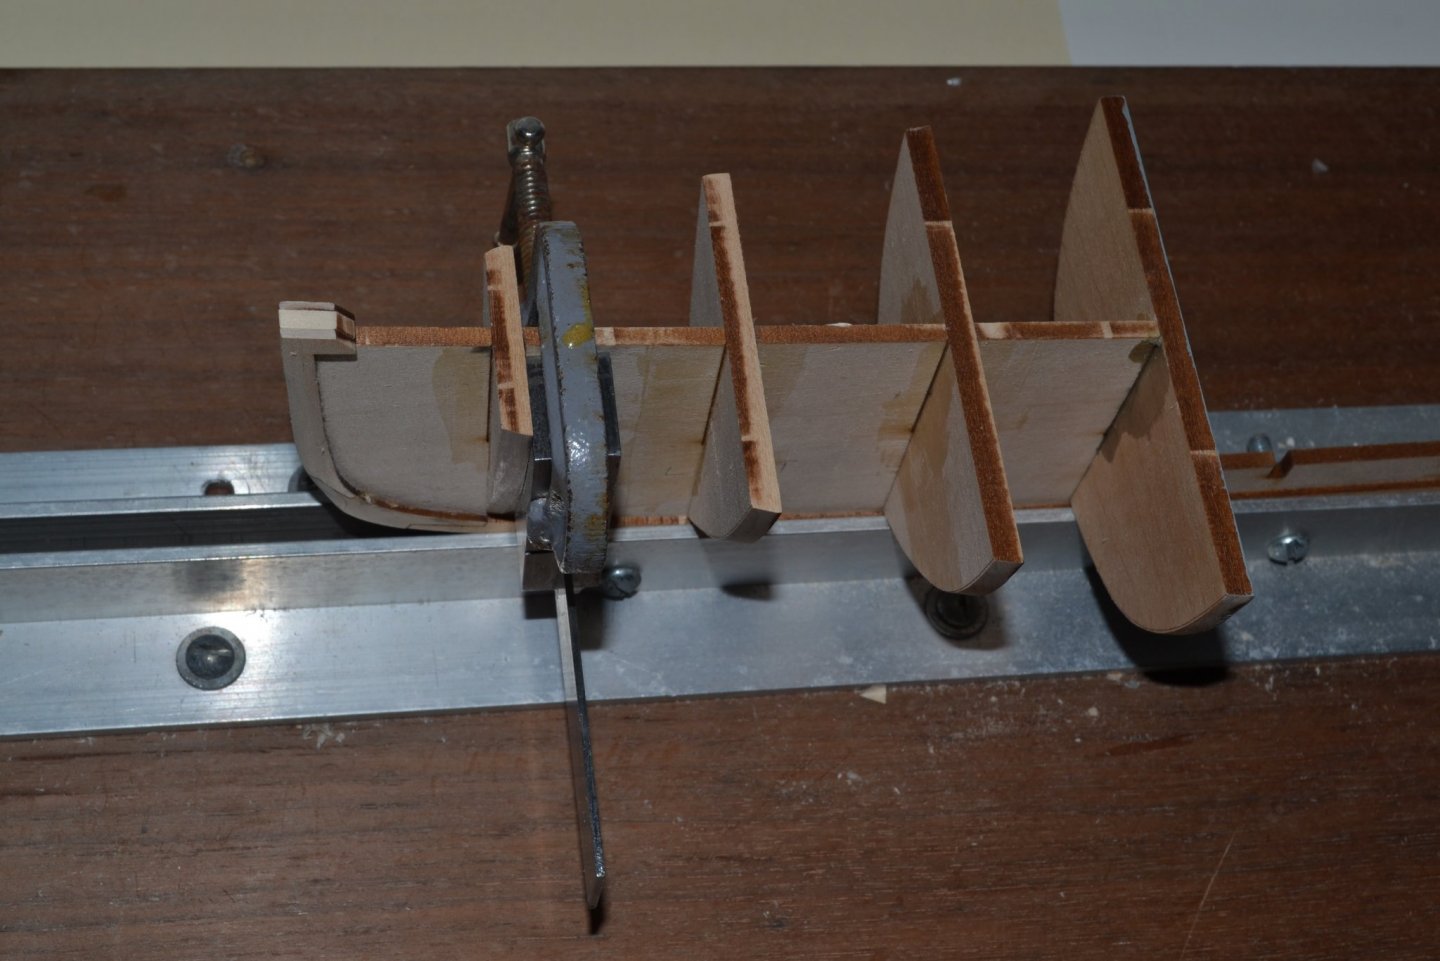
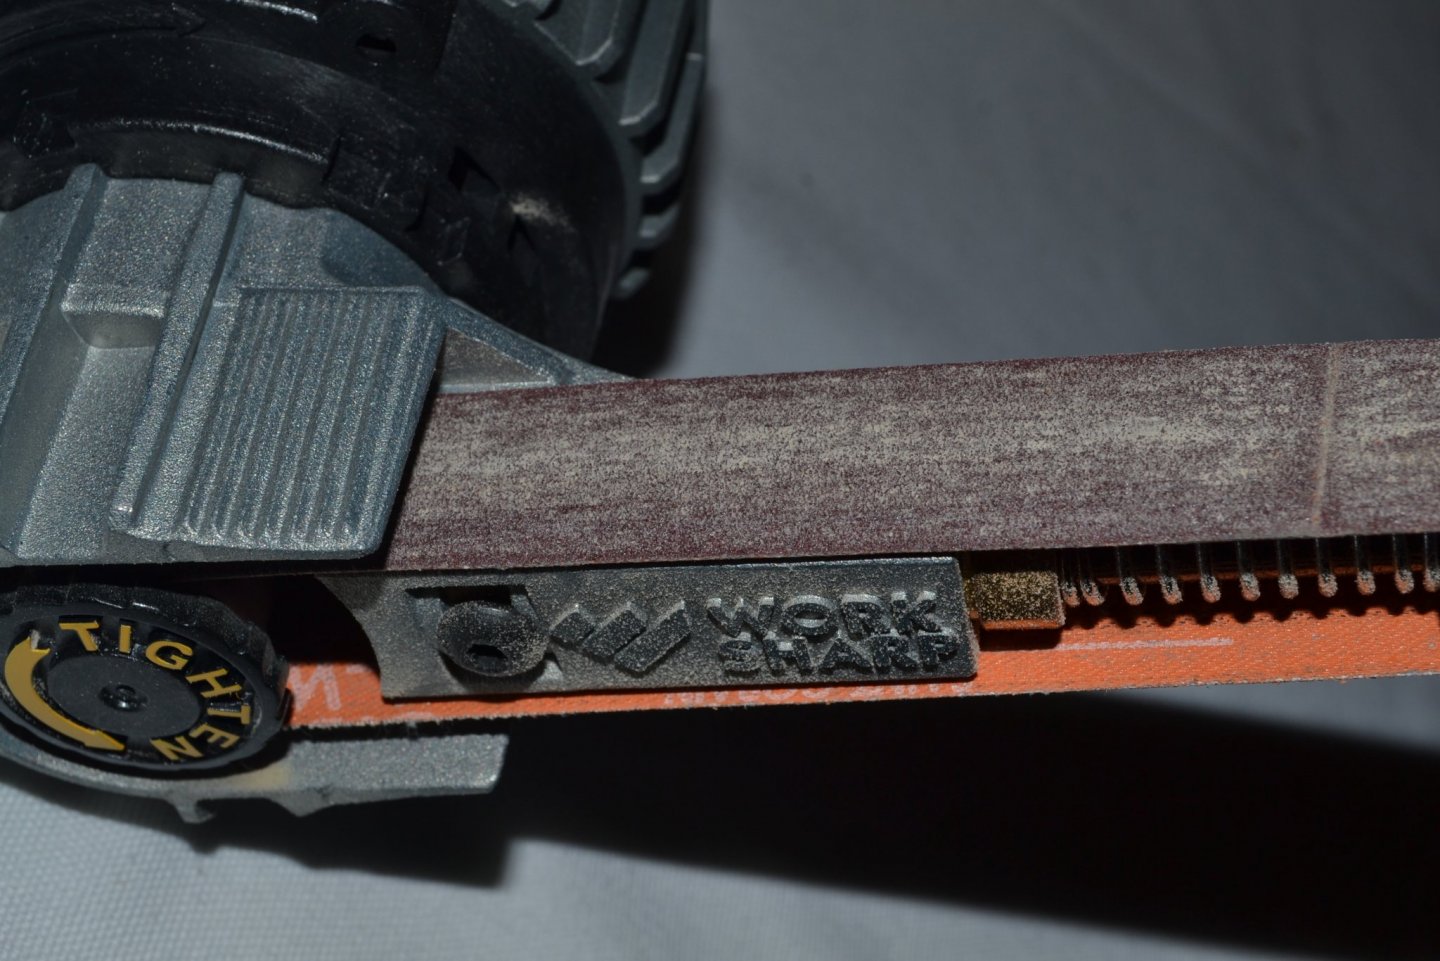
I next moved on to making the bevel on the forward bulkheads, I found the engraved line in the part worked well as a guide. I first tried cutting the bevel with a hobby knife but found that a bit inaccurate, I then tried hand sanding but that was slow going. I then remembered I had a Work Sharp tool for sharpening knives that had an attachment for grinding lawn mower blades ets.. It is essentially a small belt sander with a small platen area so I tried it to sand the bevels. It worked great! I sanded not quite to the reference mark on front and outlined the back edge of the bulkhead with a marker so I wouldn't oversand it. I thought once they are mounted to the keel I can do hand sanding to finish fairing them. The tool is a Work Sharp Ken Onion model, I'm not sure all the models accept the tool grinder. The tool works great for sharpening knives and I think I will try sharpening some hobby knife blades rather than just tossing them, I'll let you know how that works out.
.thumb.JPG.55282a2d532496d9152ec77f013cb19b.JPG)
.thumb.JPG.9ba0a3438d1923c8b438dbe1a58e3147.JPG)
.thumb.JPG.37409a01eb57b79ed2e349b05e2ba85f.JPG)
- 54 replies
-
- 5
-
-

-
- picket boat
- model shipways
- (and 1 more)


.jpg.6eda7feee32366a03a986879d53bee16.jpg)
.JPG.6d6c41dba10617c55aed2b46de5414b5.JPG)


.JPG.0f6d67628c43a4315598fc9b083e5397.JPG)


.JPG.b54ed7719a3d312d0c213ffbf94db2e2.JPG)

.JPG.7fc267f3c58a771c6b6d1697210f0b3e.JPG)

.JPG.5a4bc79a2bc416896fce8724a54aff95.JPG)


.JPG.d1b296f30fa3b9a62afd9b01997cf4bf.JPG)

.JPG.3a4bc2265fe8a2139ccd31acd8685d1e.JPG)
.JPG.a80e3c0b6355ed889f58c9d4fe4dced2.JPG)