
HOLIDAY DONATION DRIVE - SUPPORT MSW - DO YOUR PART TO KEEP THIS GREAT FORUM GOING!
×


turangi
-
Posts
276 -
Joined
-
Last visited
Content Type
Profiles
Forums
Gallery
Events
Everything posted by turangi
-
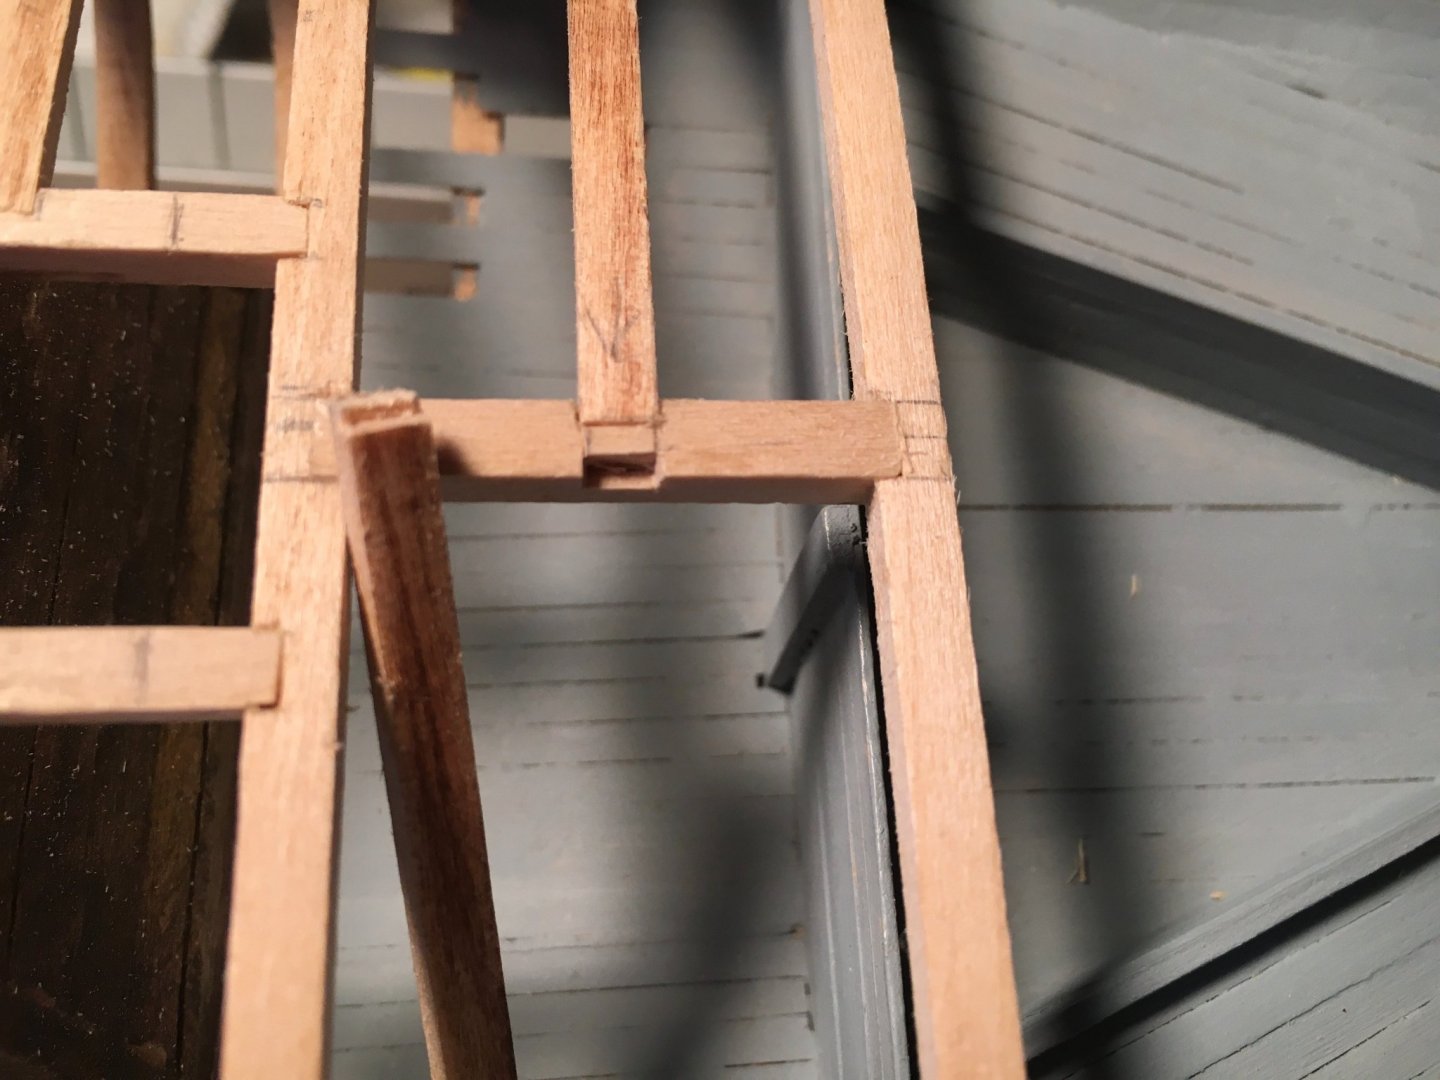
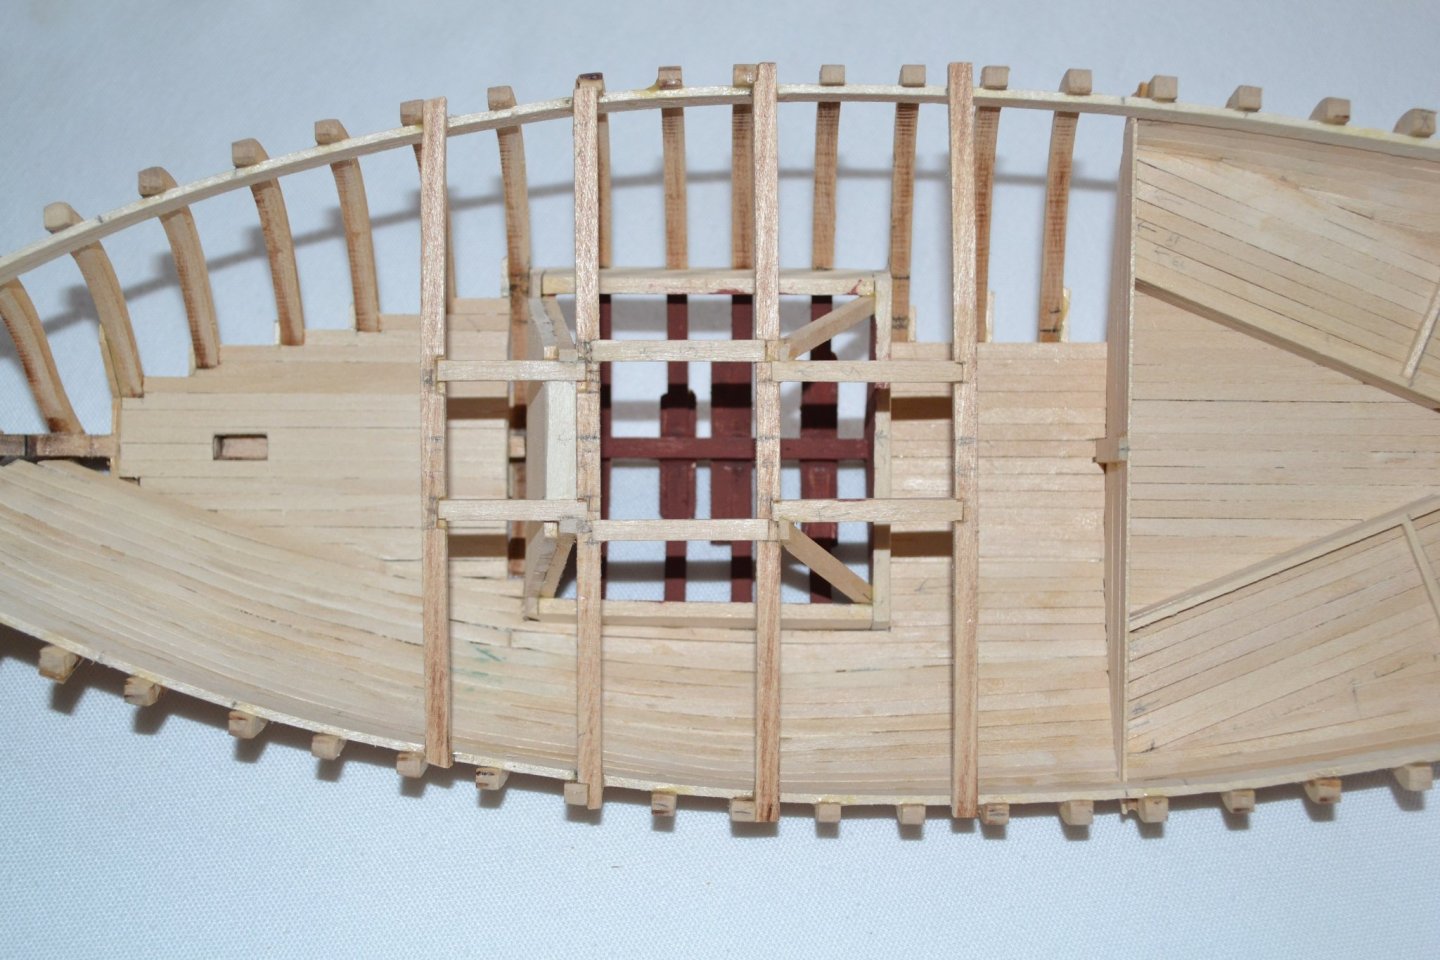
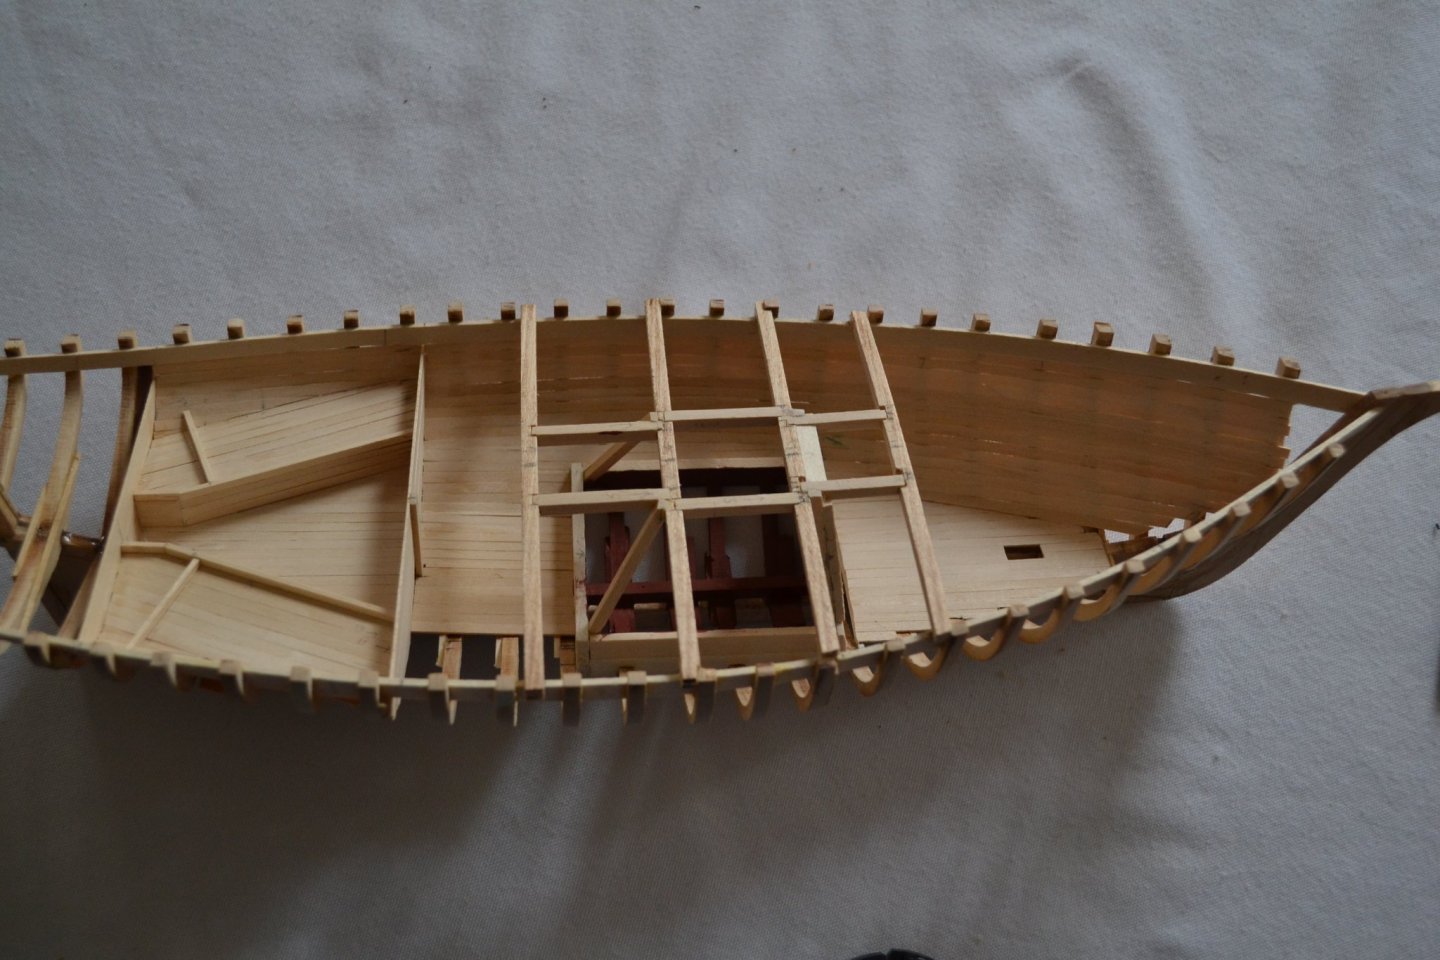
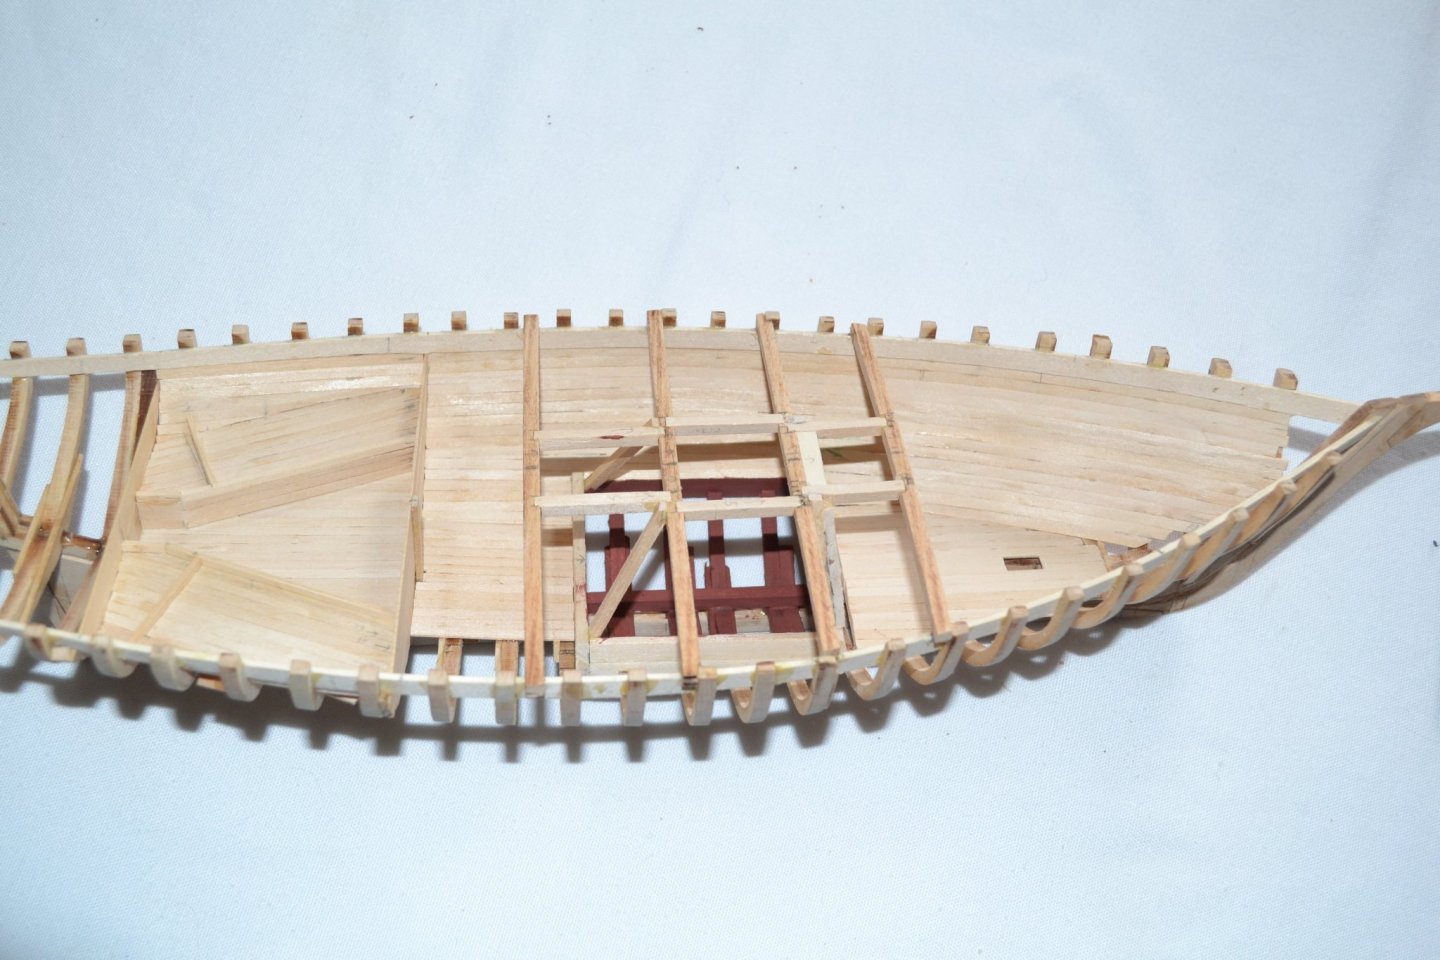
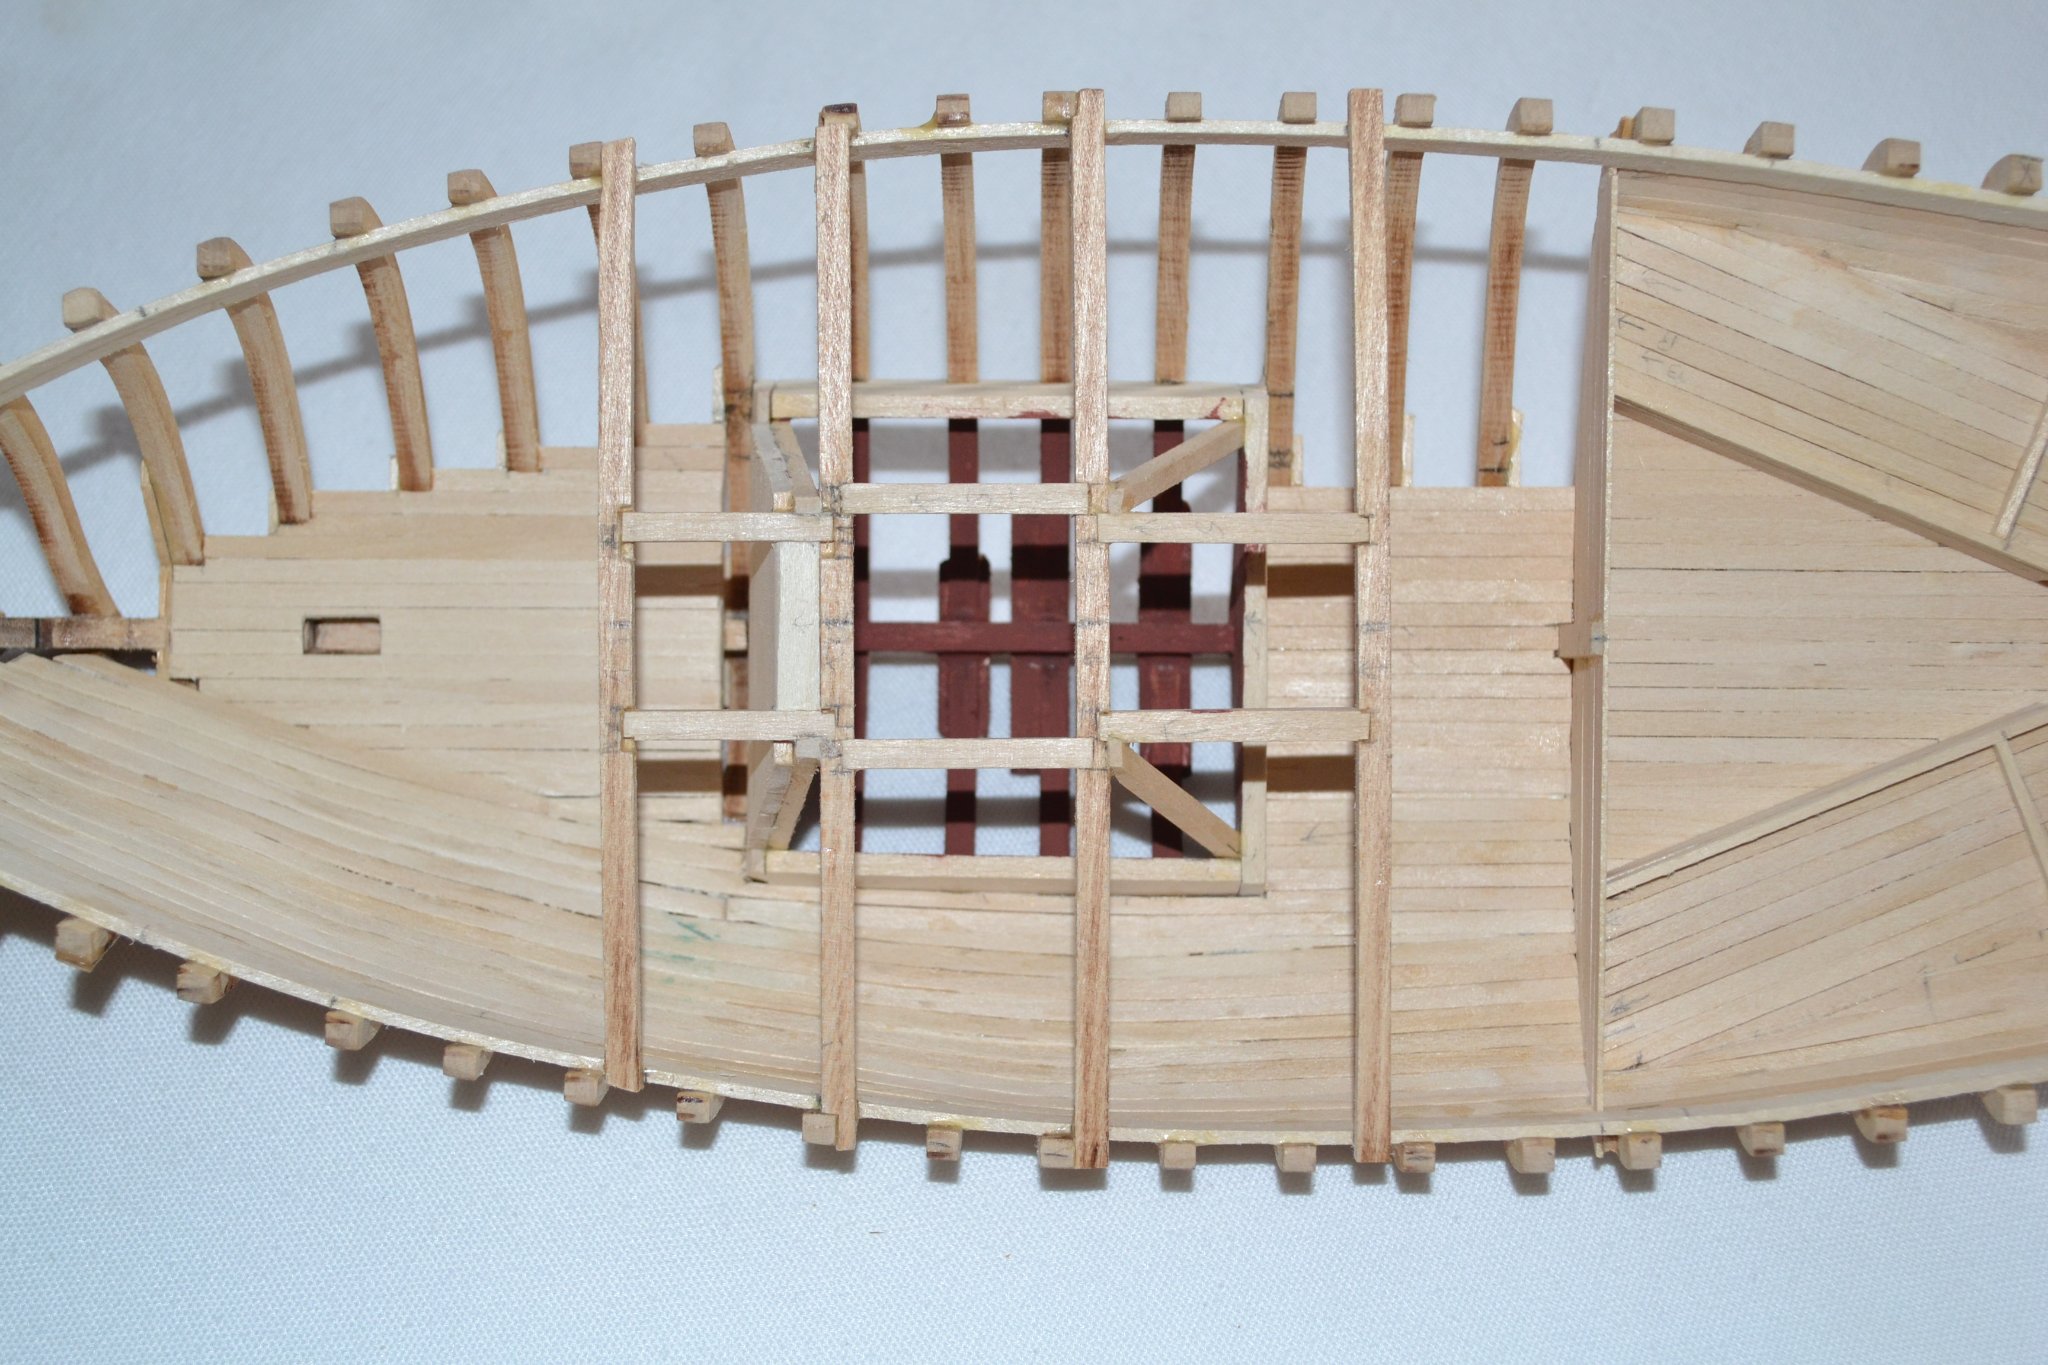
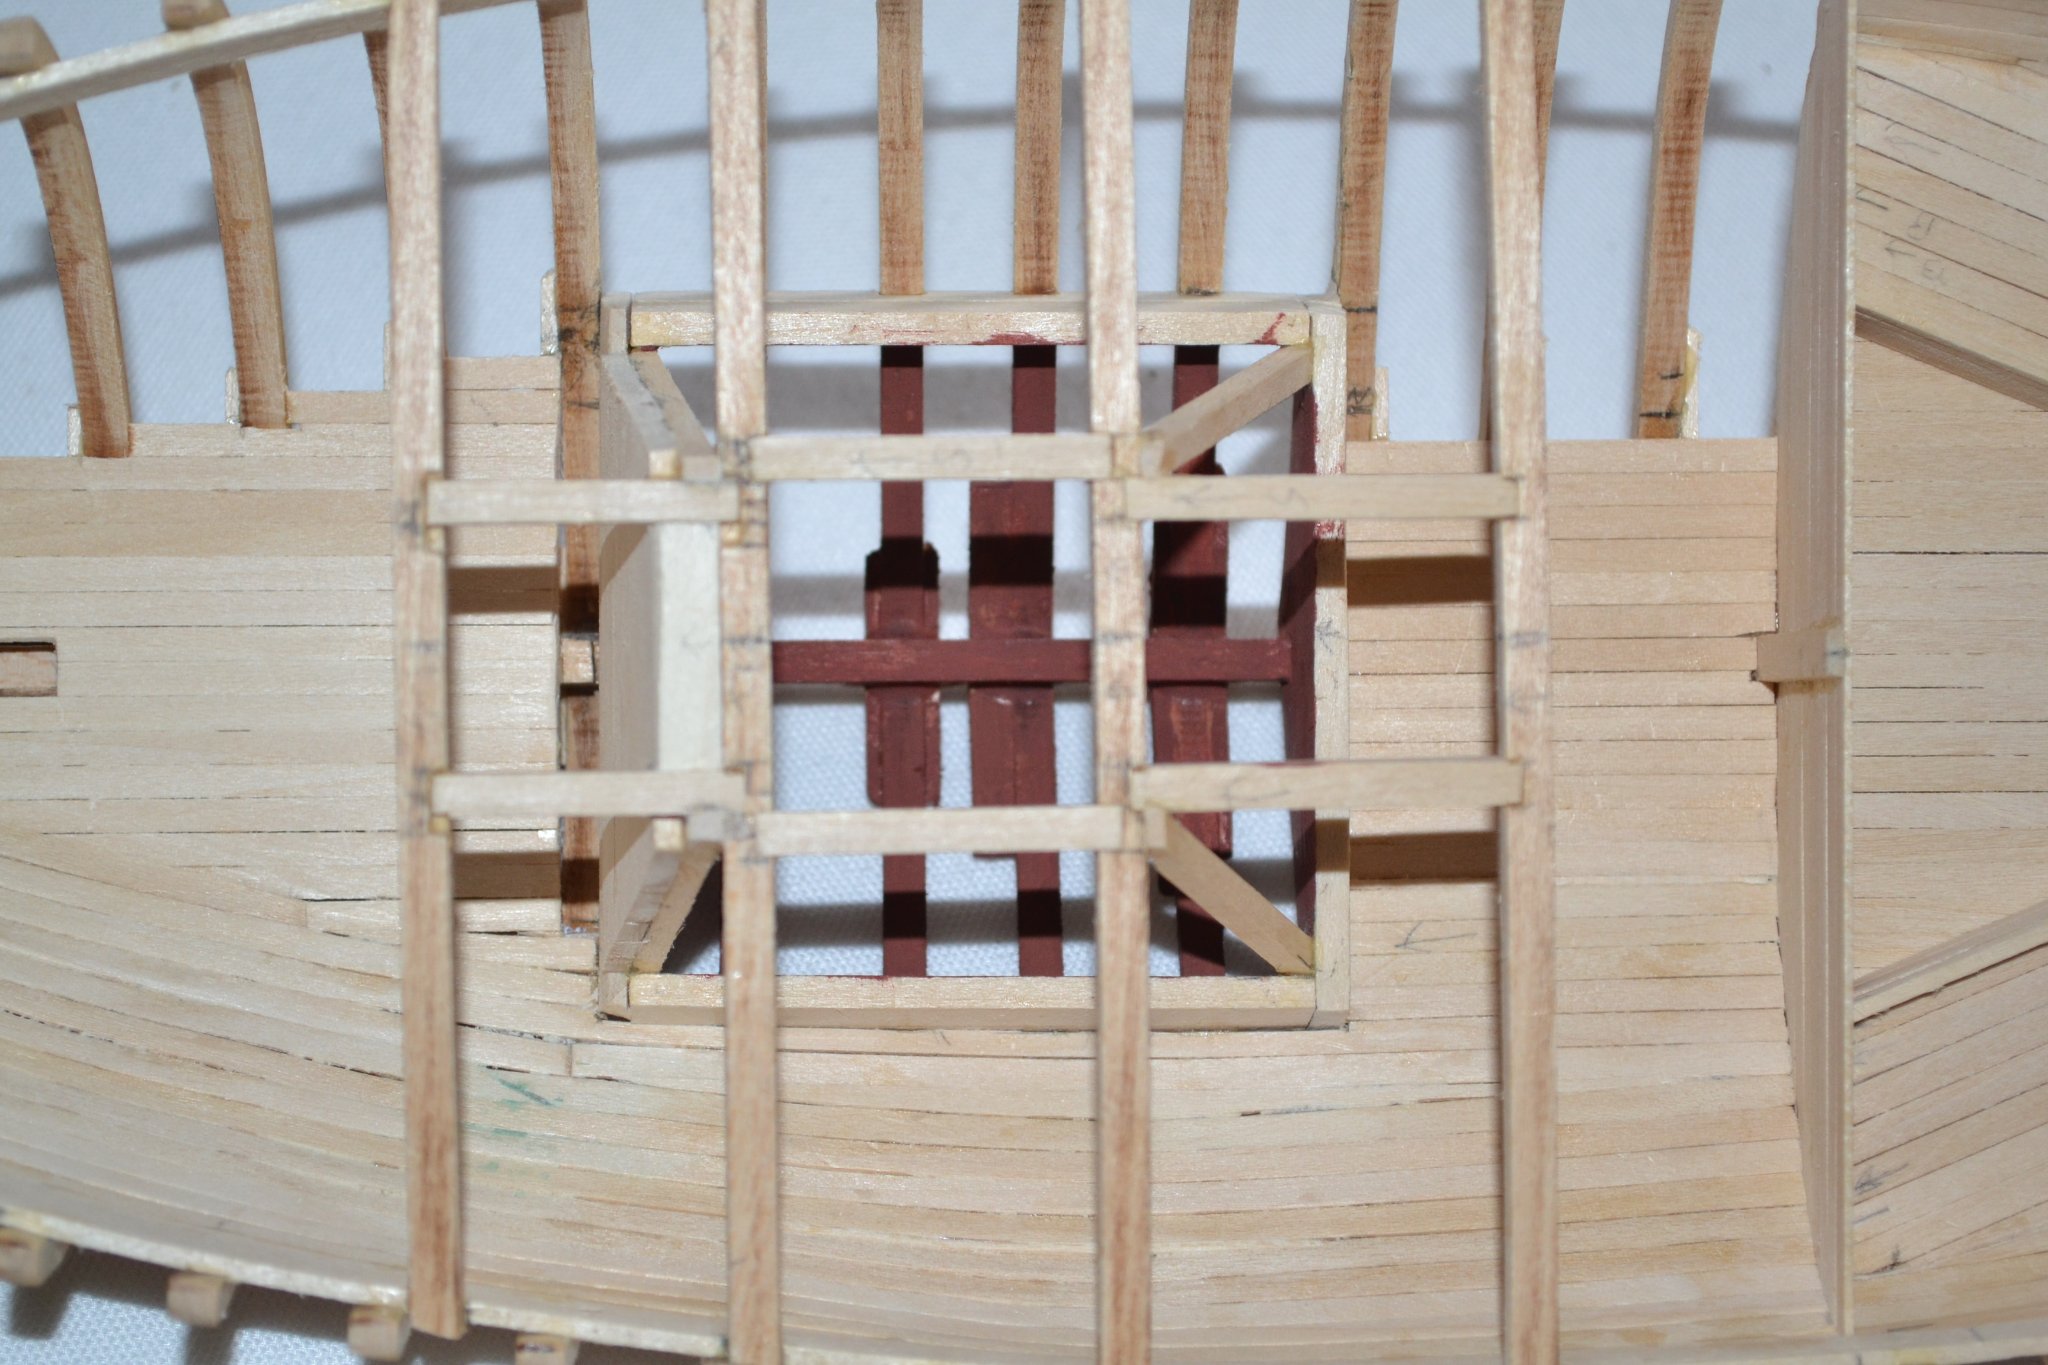
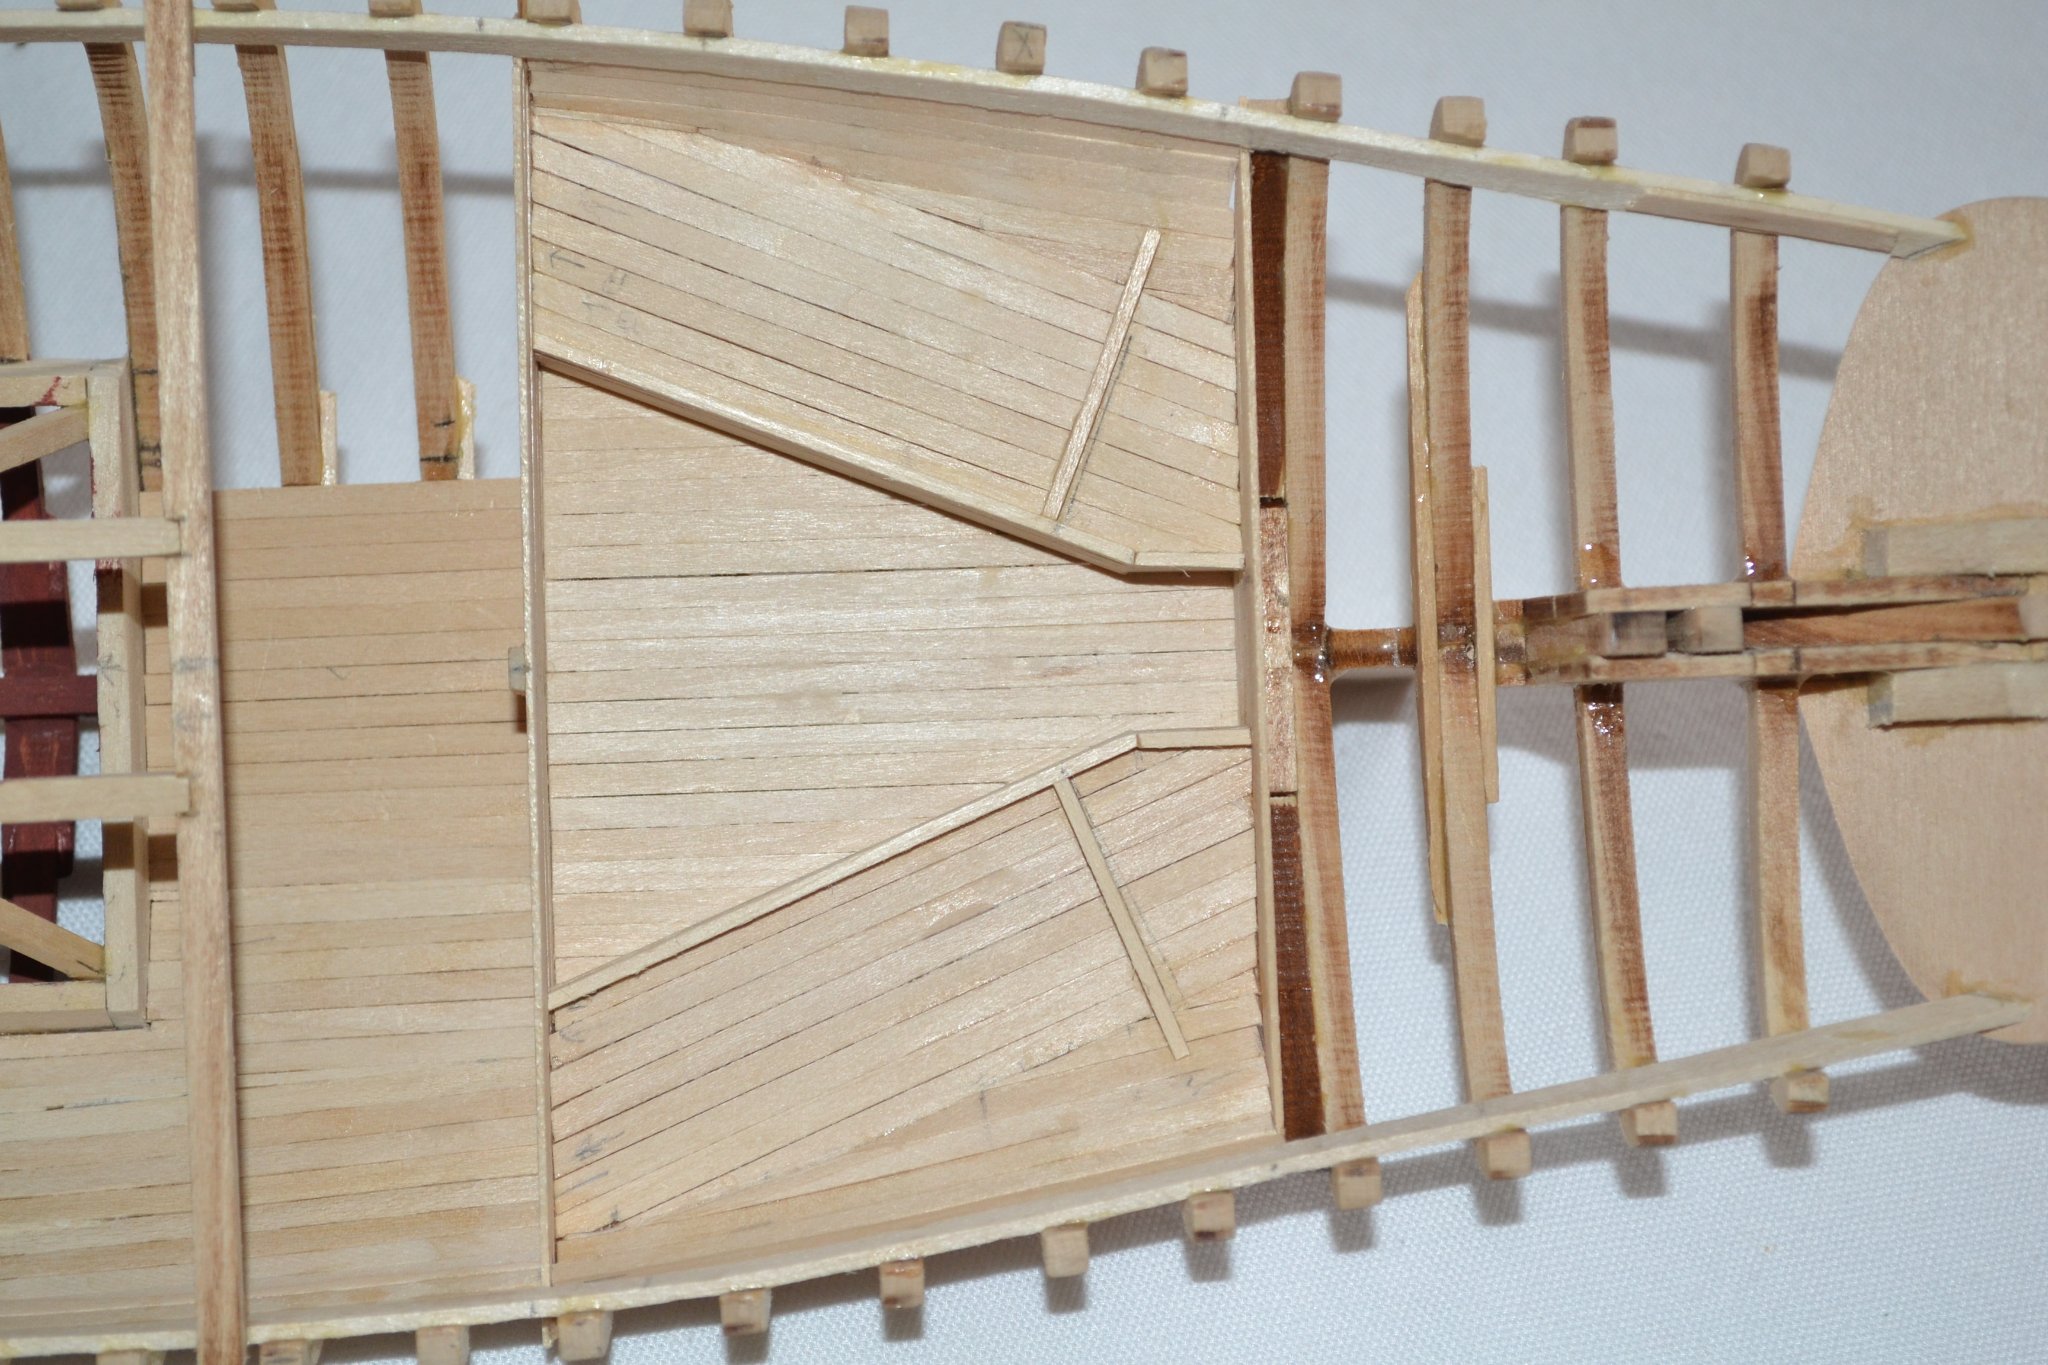
 An update. I have continued doing painting on the interior and progressing with the deck framing. I find framing the deck a very enjoyable task! I was concerned that the rather tenuous connections between the beams and clamps were very weak but as I installed the lodging knees it became a very strong and stable hull. As to the lodging knees: I measured between the beams, cut the raw wood a bit oversize and sanded them down to a snug friction fit. I then took measurements from the plans for the concave areas, marked that area, cut it out with a fret saw and did a final sanding to smooth the cut area. I then placed them in position to determine the proper shape where they land on the clamp, cut that and once all was well I applied wood glue to them where they met the clamps and any frames. As they were a snug fit to the deck beams I applied thin CA to that joint, worked well. I then moved on to other deck work, using directions from the kit I planed the supplied wood for the fore and aft longitudinal beams to the correct size and installed them. I deviated from the the kit material for the intermediate athwart ship beams and as suggested in another log and used the waste material from between the main beams in their matrix to construct them. As a previous poster mentioned the supplied intermediate beams do not match the camber of the main beams. The waste material is a bit wider than the supplied smaller beams but since it will all be covered by the decking I could see no issue. All the beam to beam, carlin to beam, and lodging knee connections were done using a blind lap joint, the mortise filled with PVA glue and are very strong. The directions suggested a plain butt joint could be used but that seemed rather weak to me. It may seem a waste to spend so much time to be careful with the deck structure as it will be covered but I found it very enjoyable and the practice will probably help with any future builds. I may also leave an interesting section of the deck unplanked to reveal the structure.
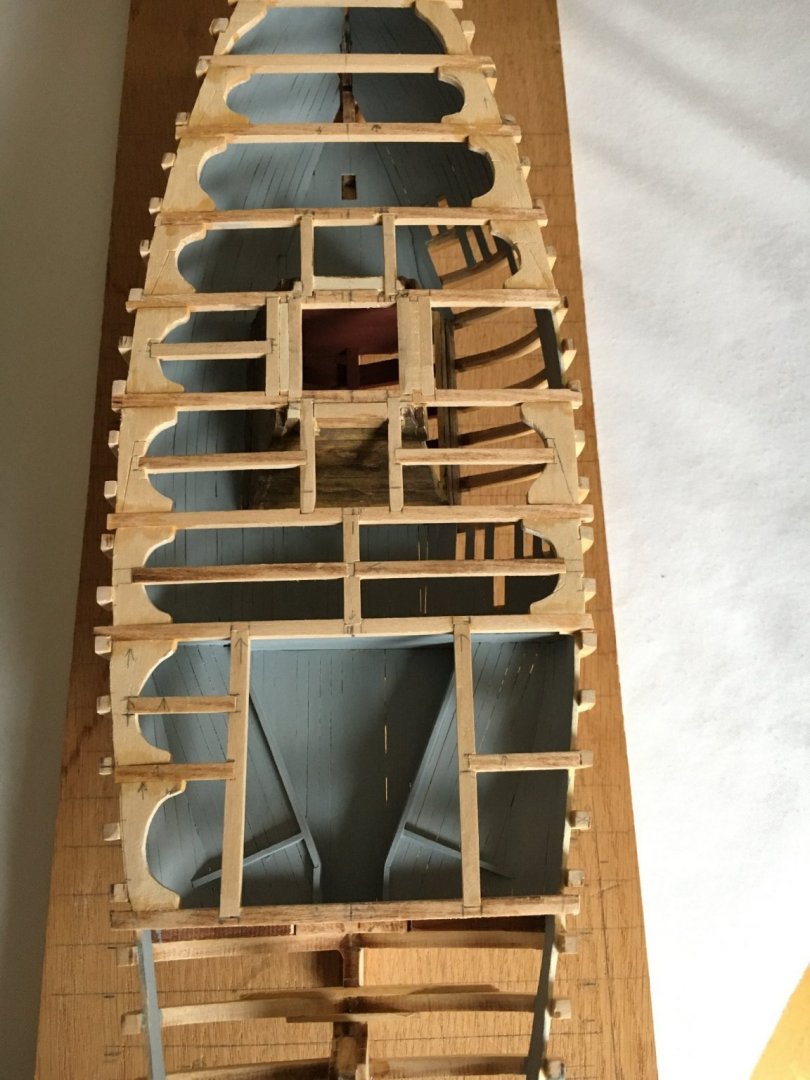


-
The boat is looking good.
-
Wow, that turned out great! Wonderful job.
-
Thanks!
-
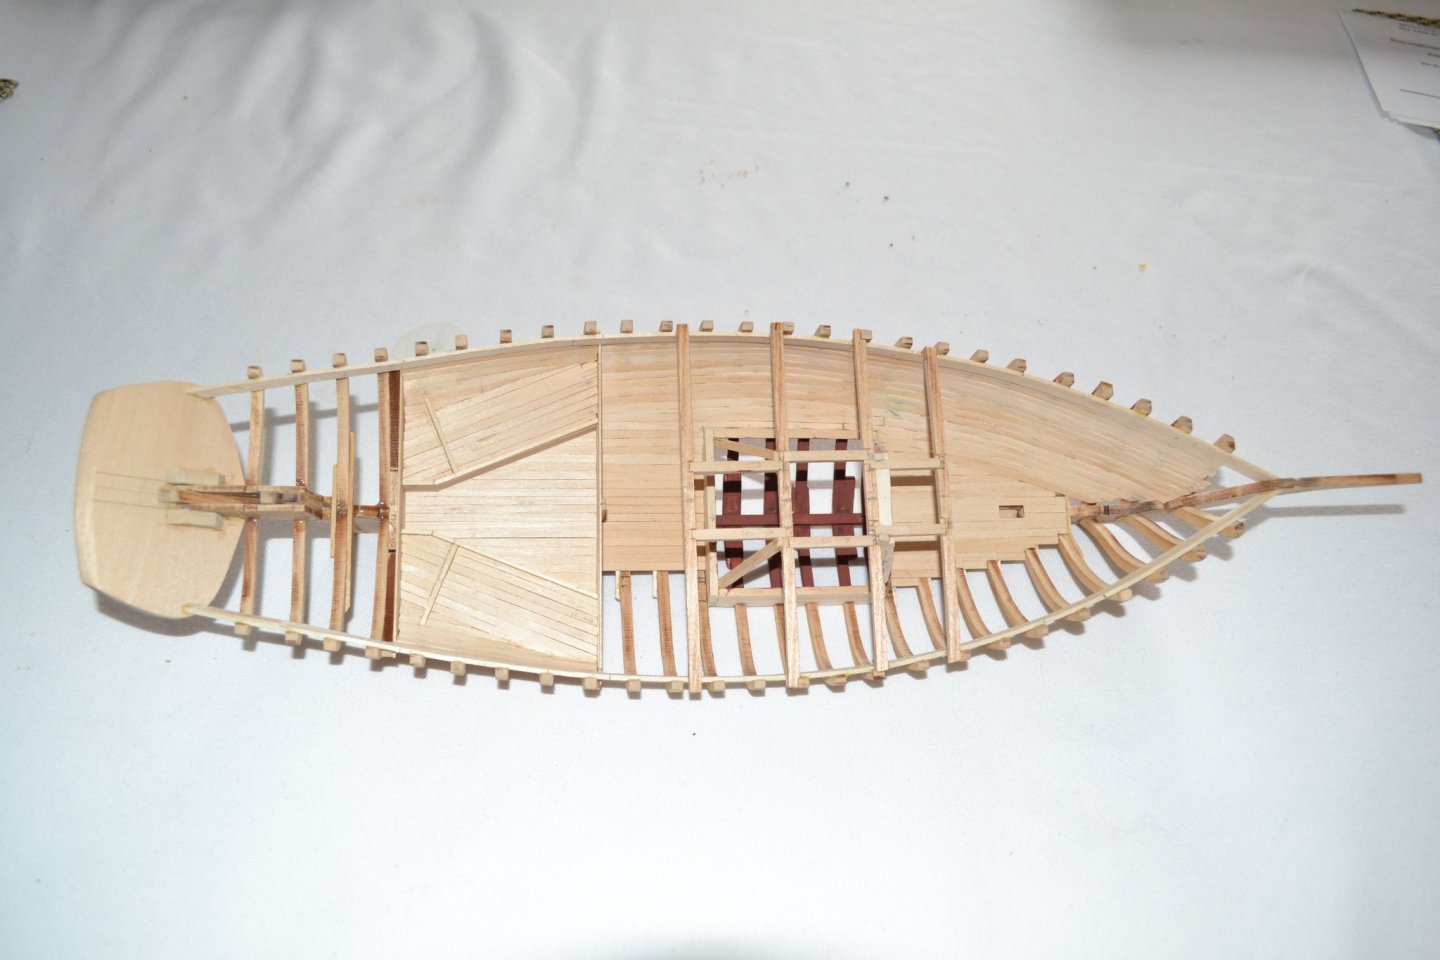
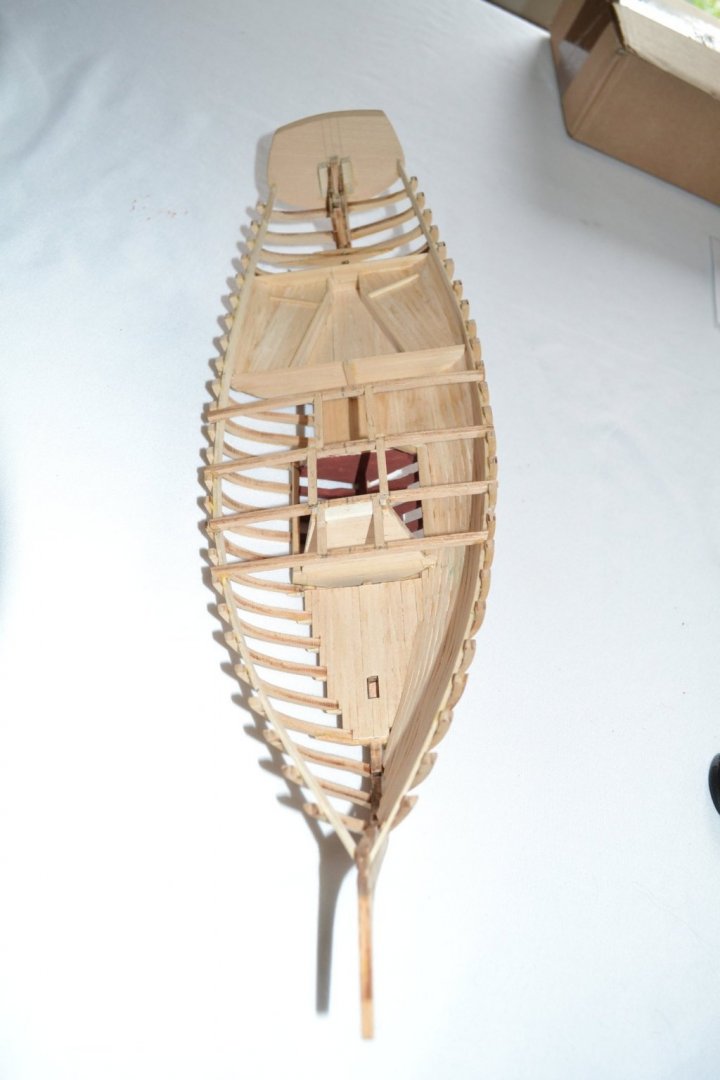
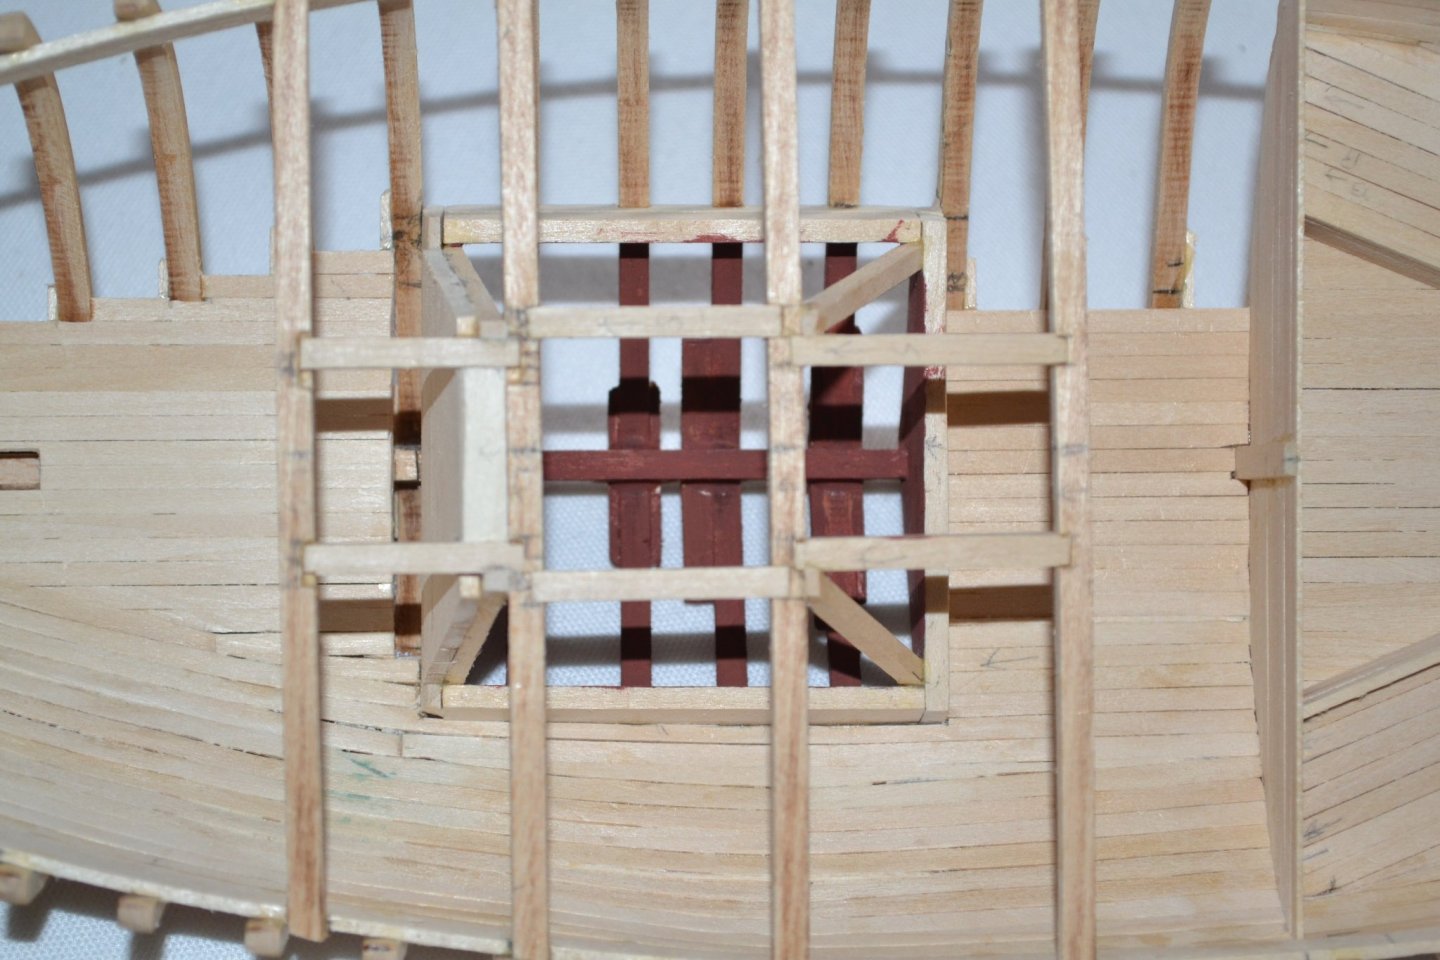
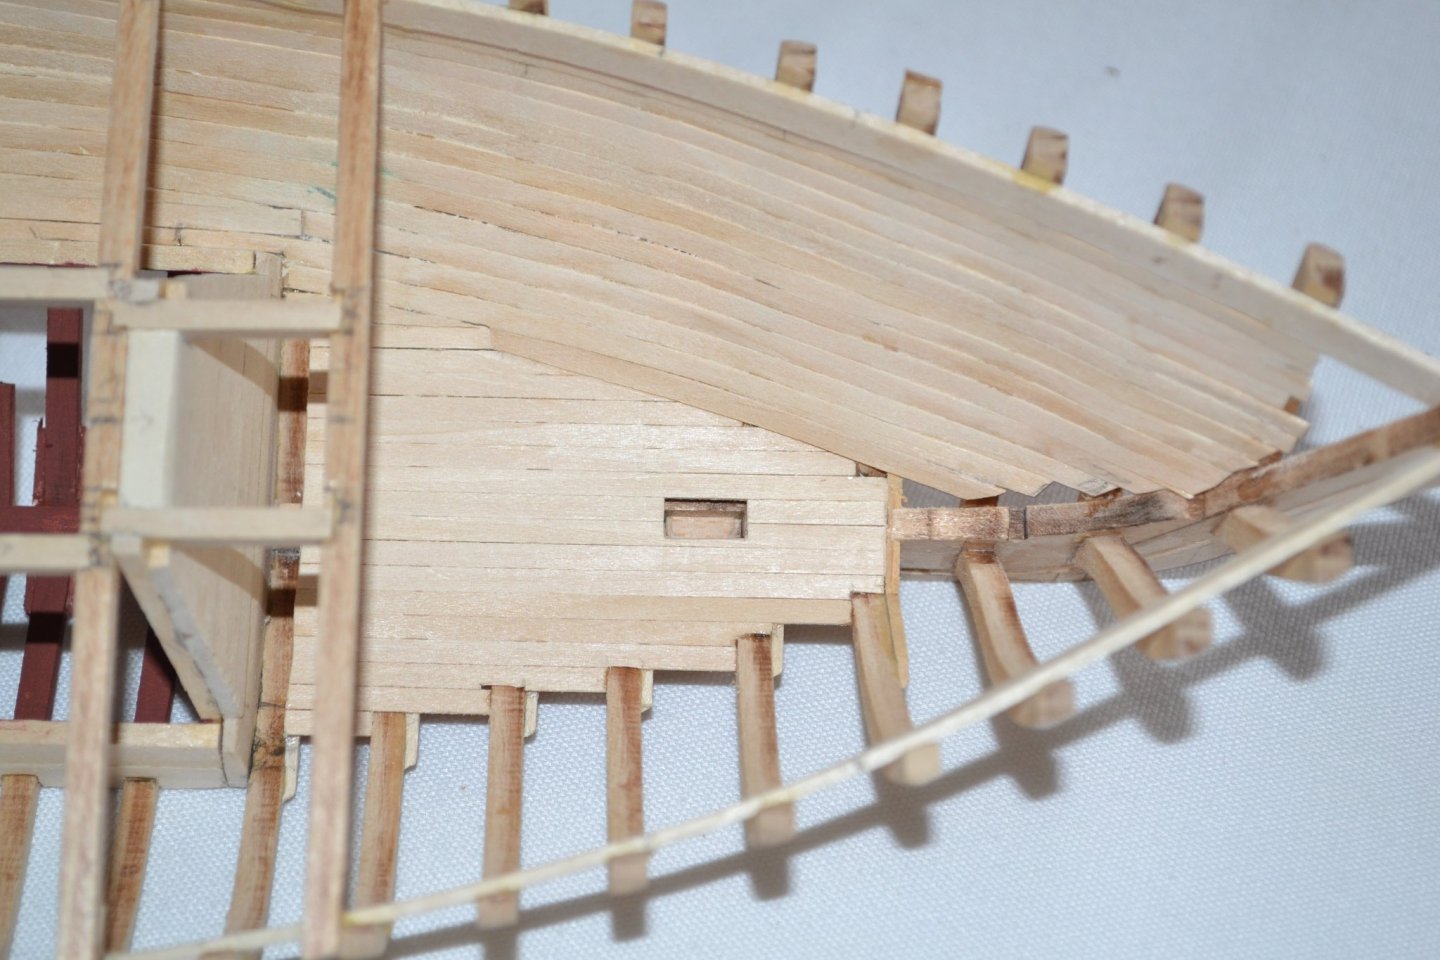
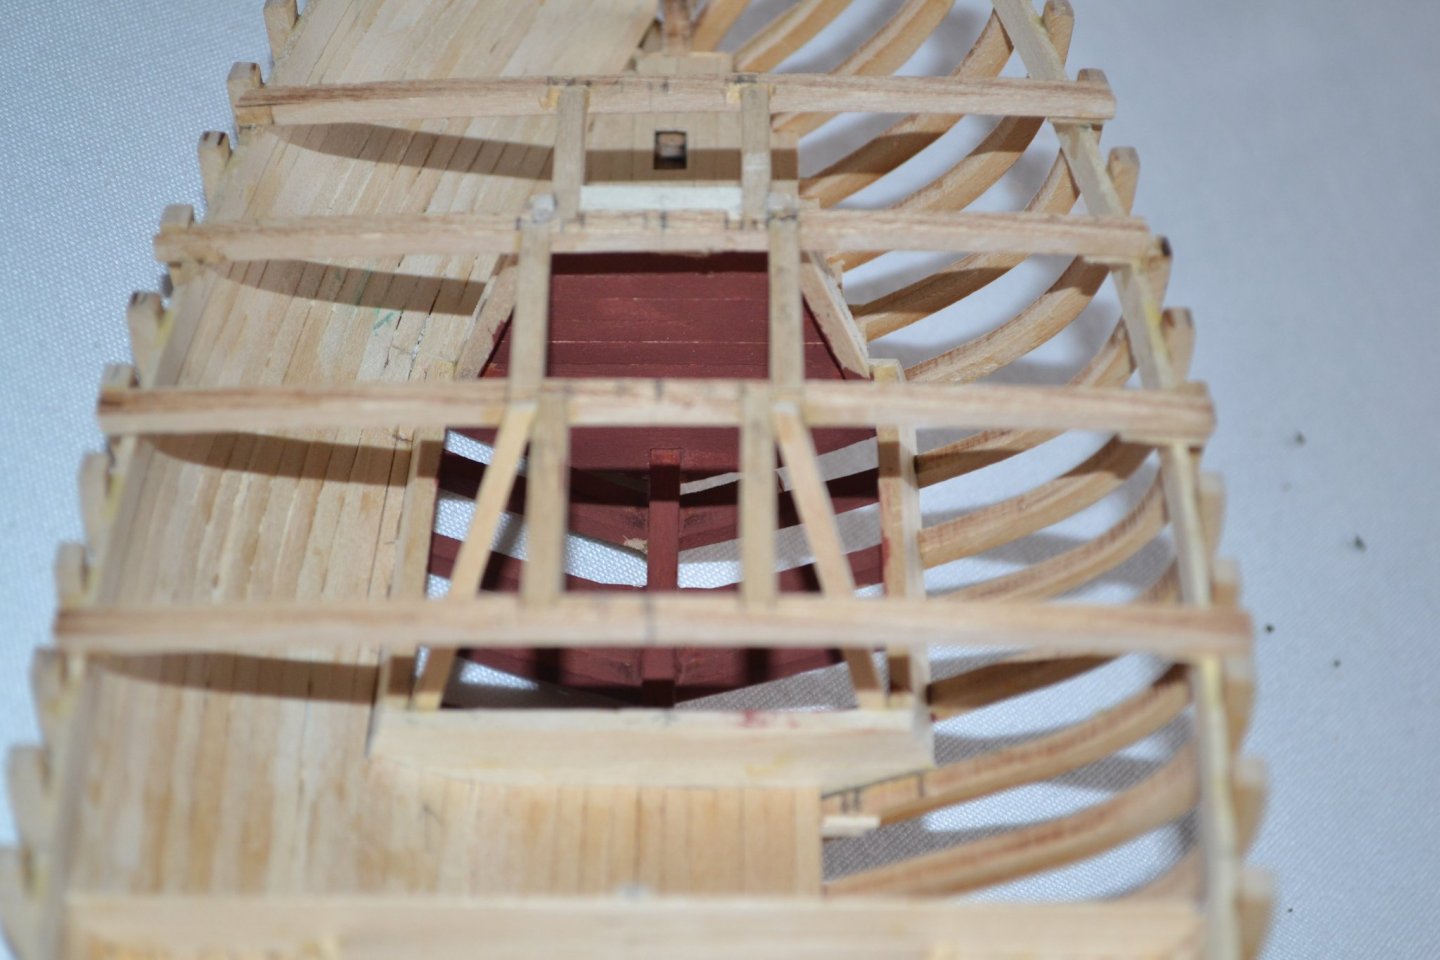
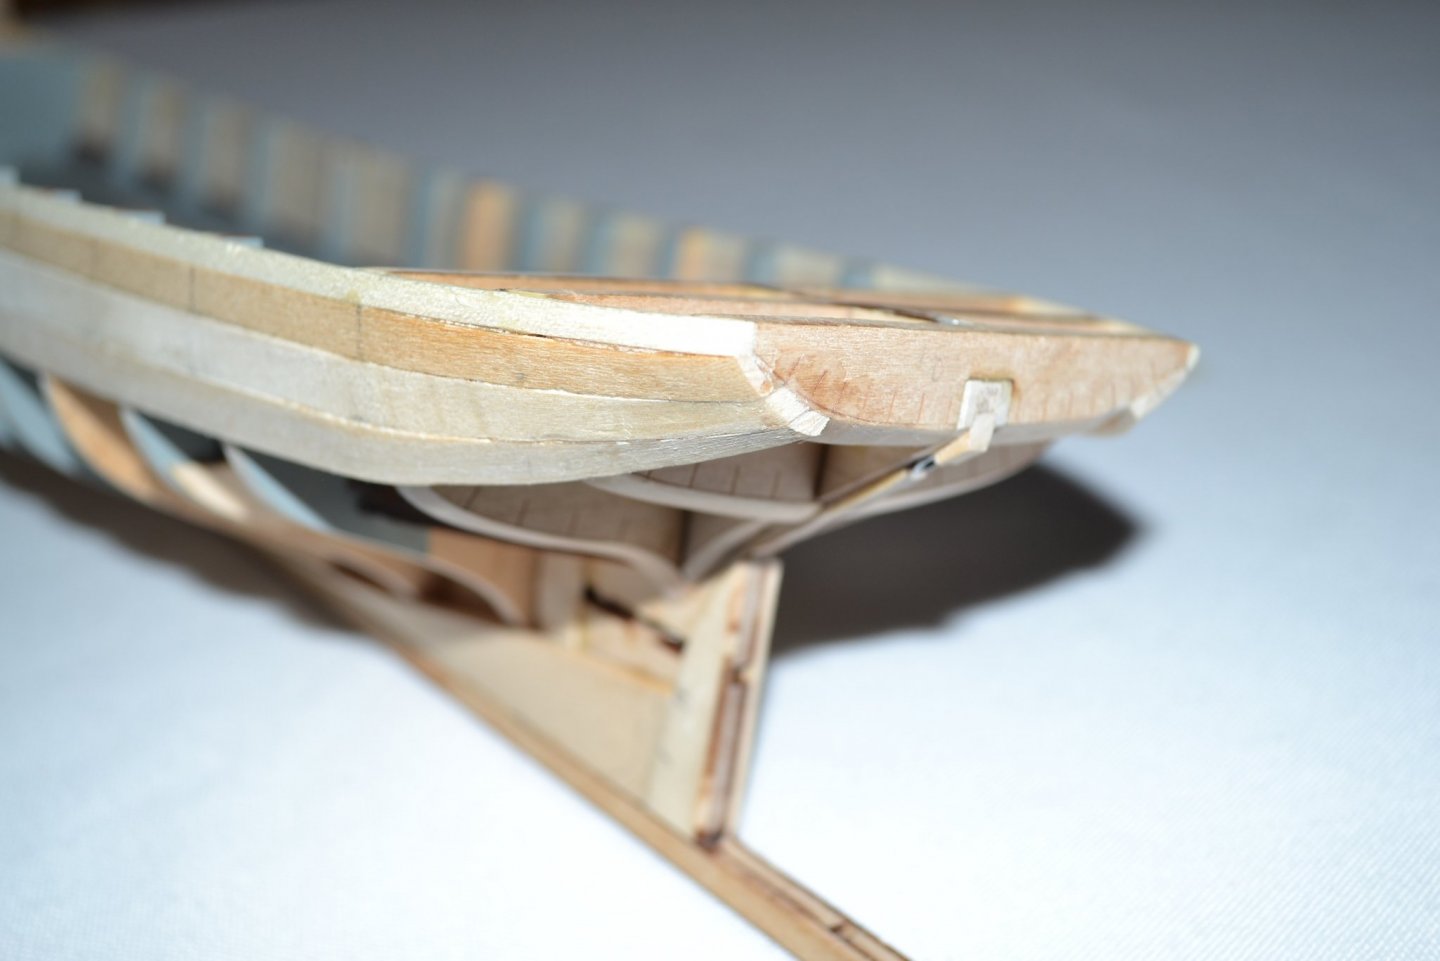
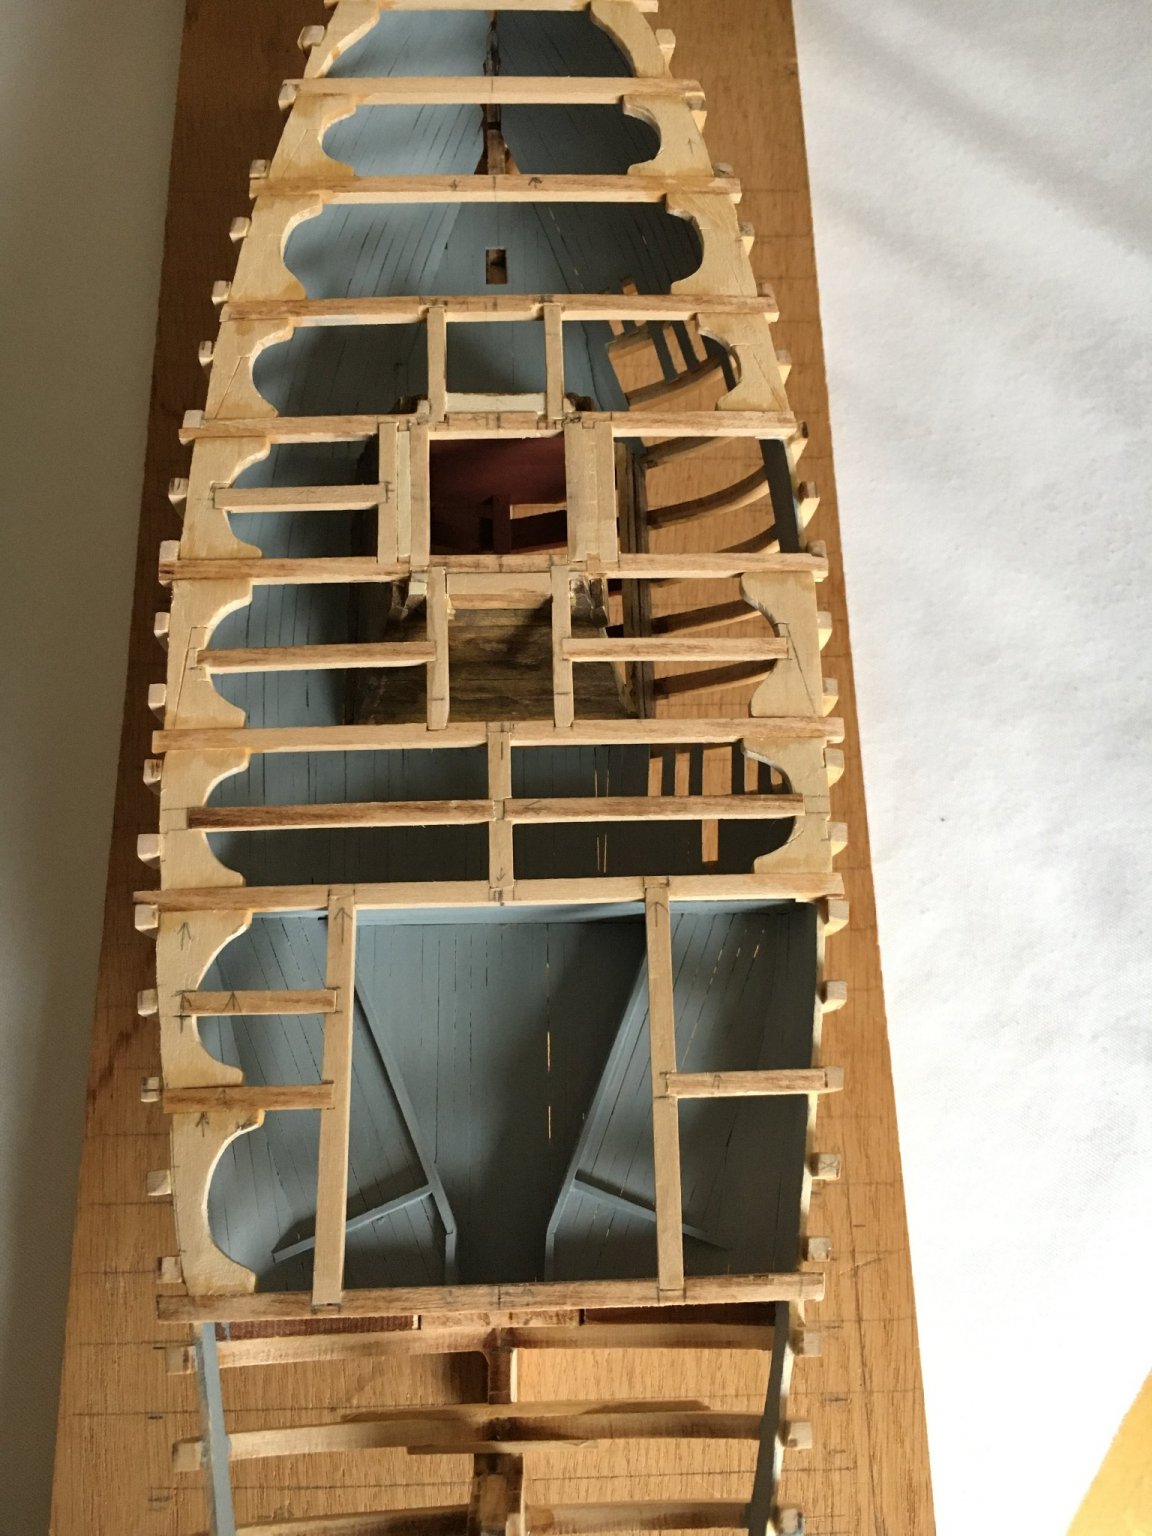
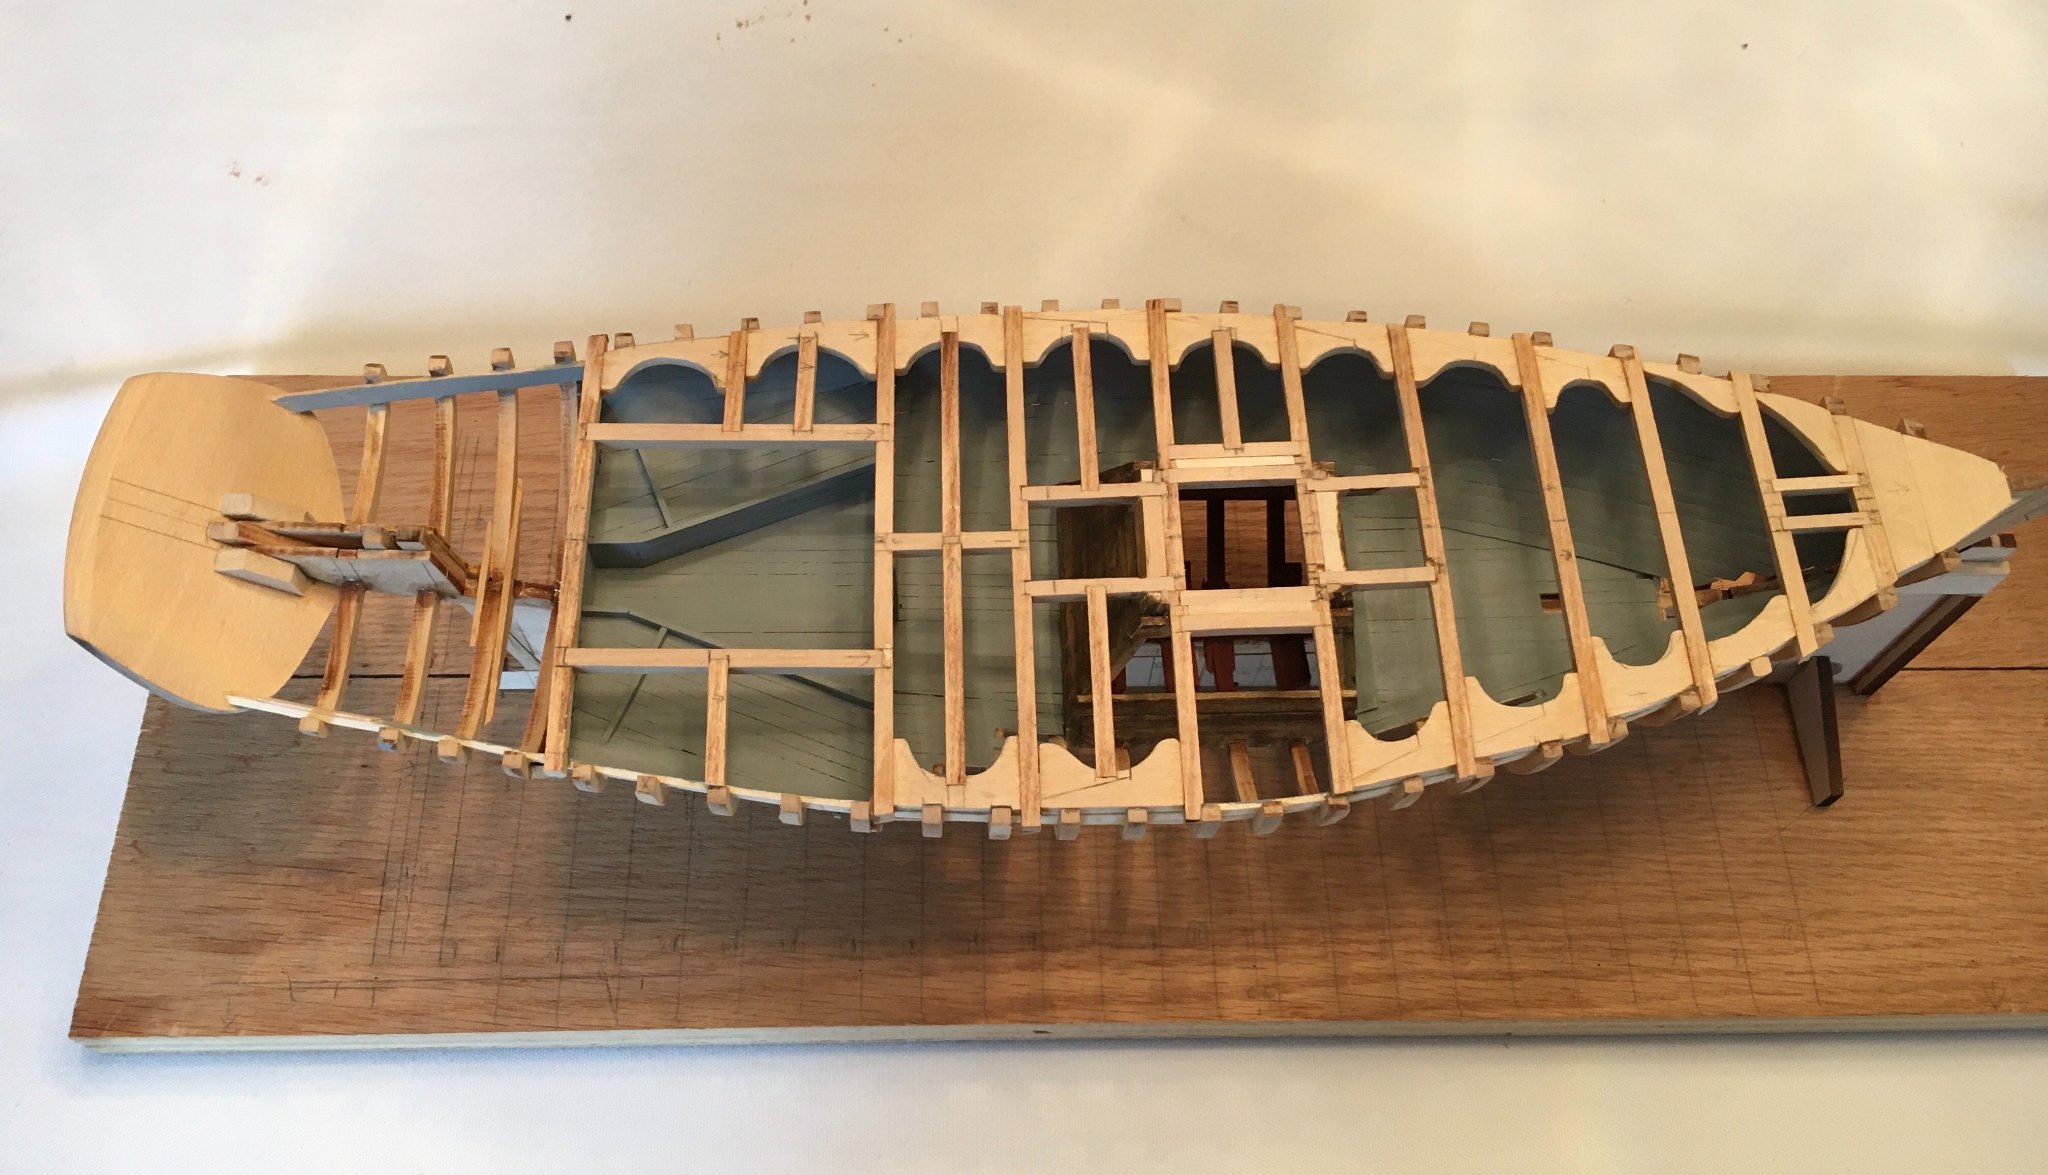
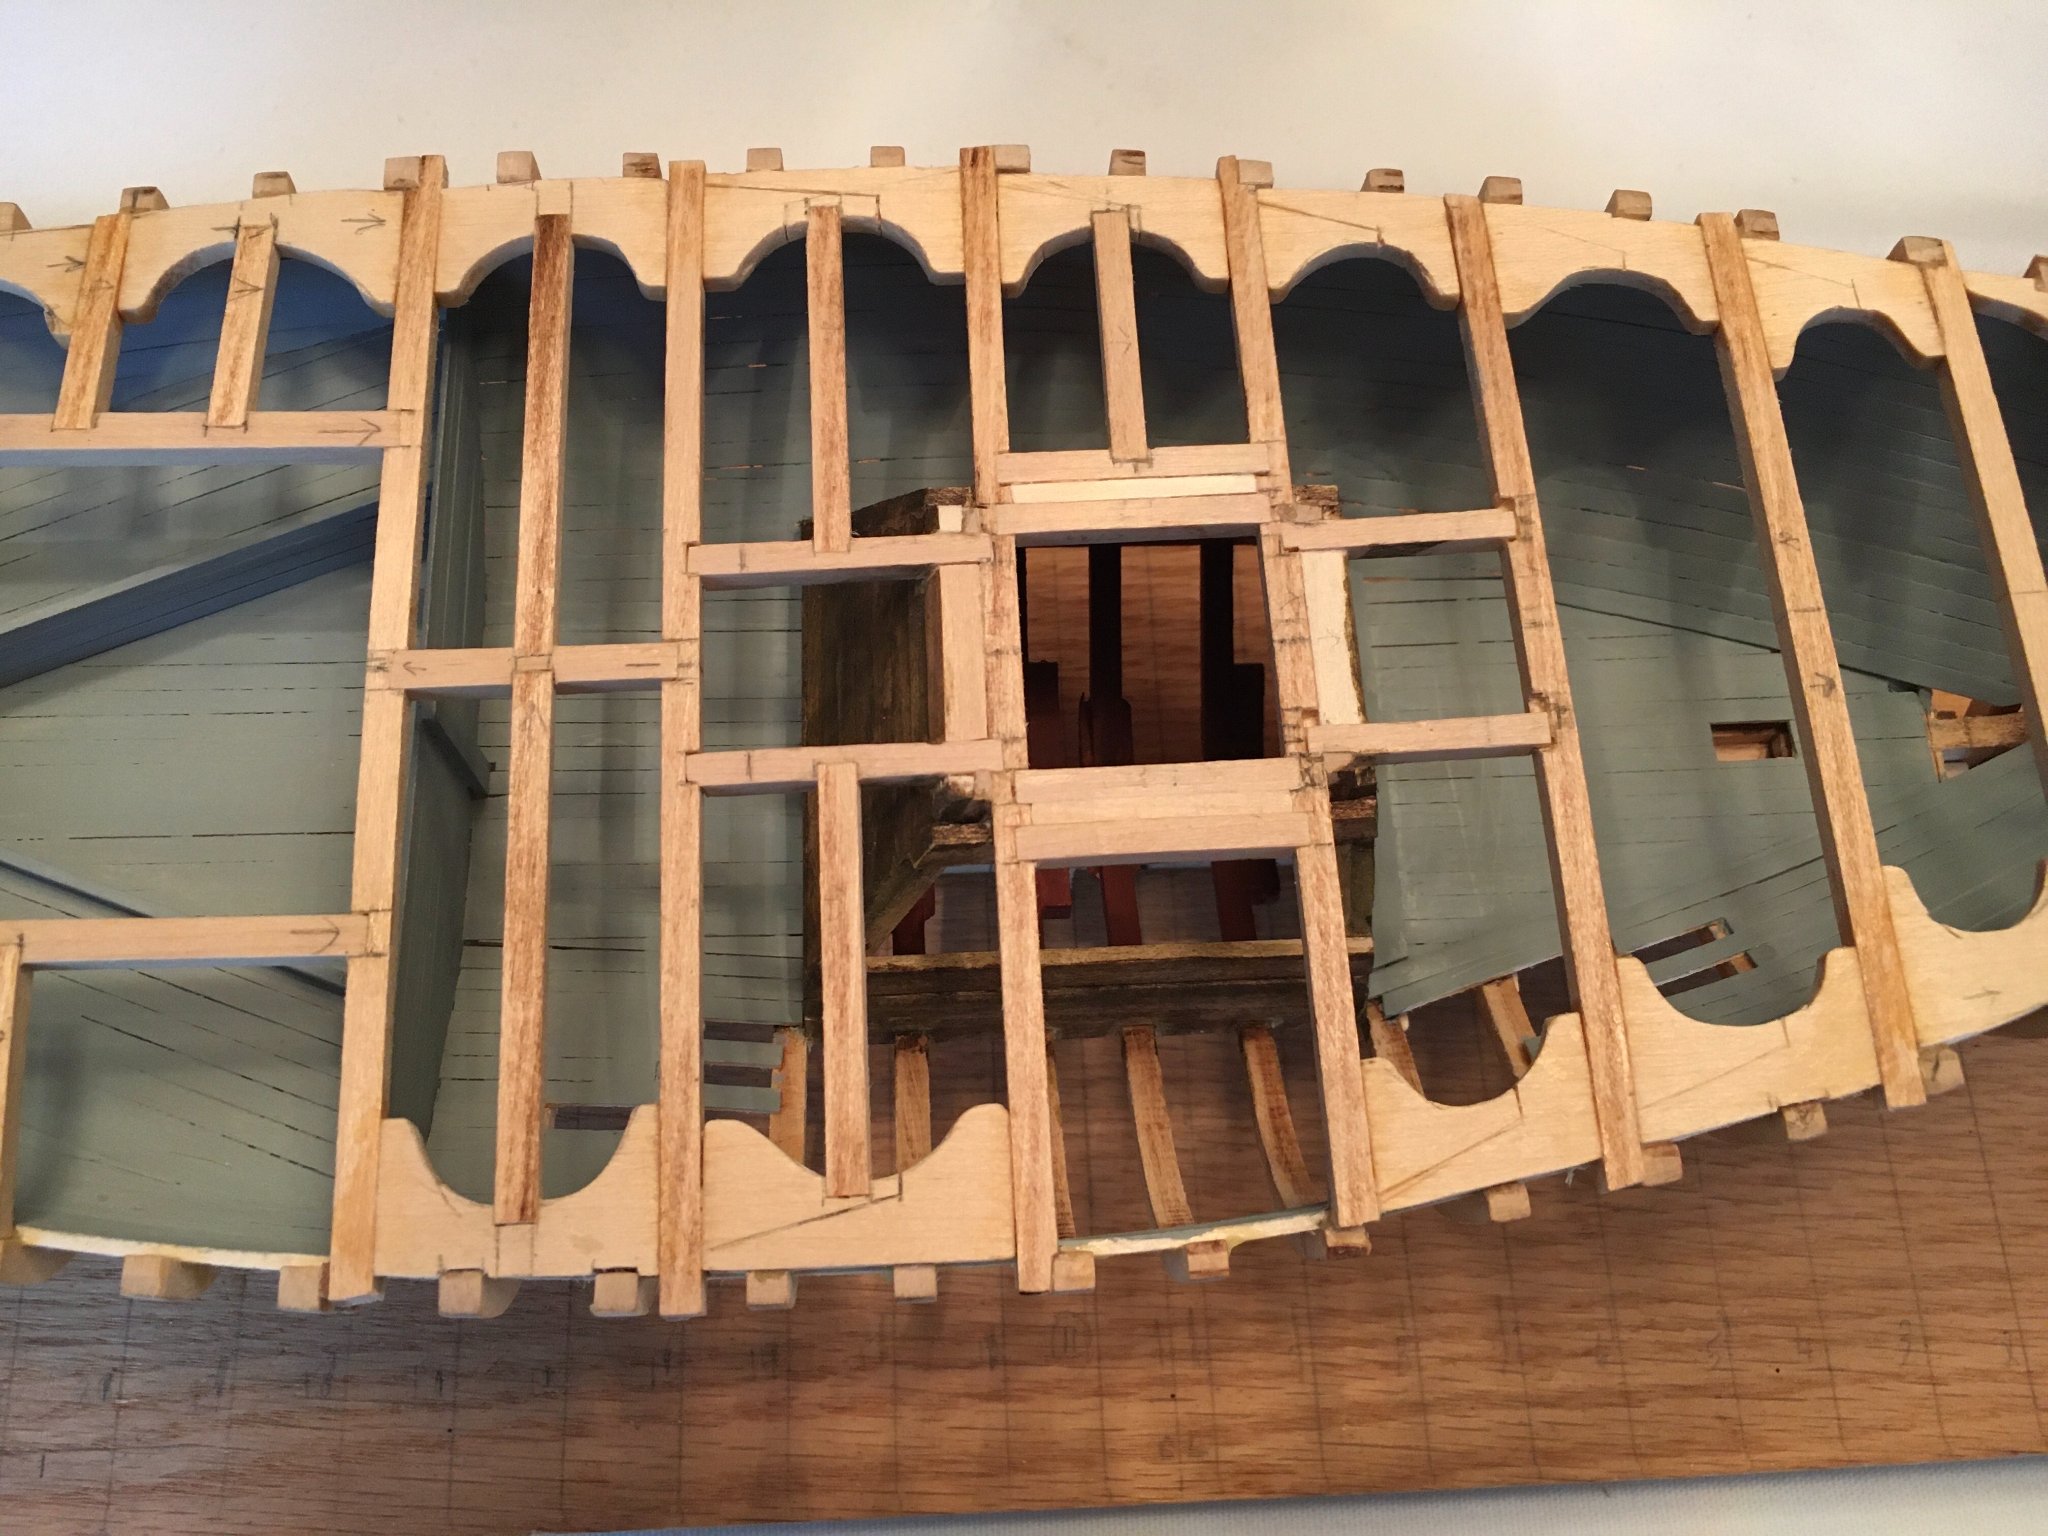
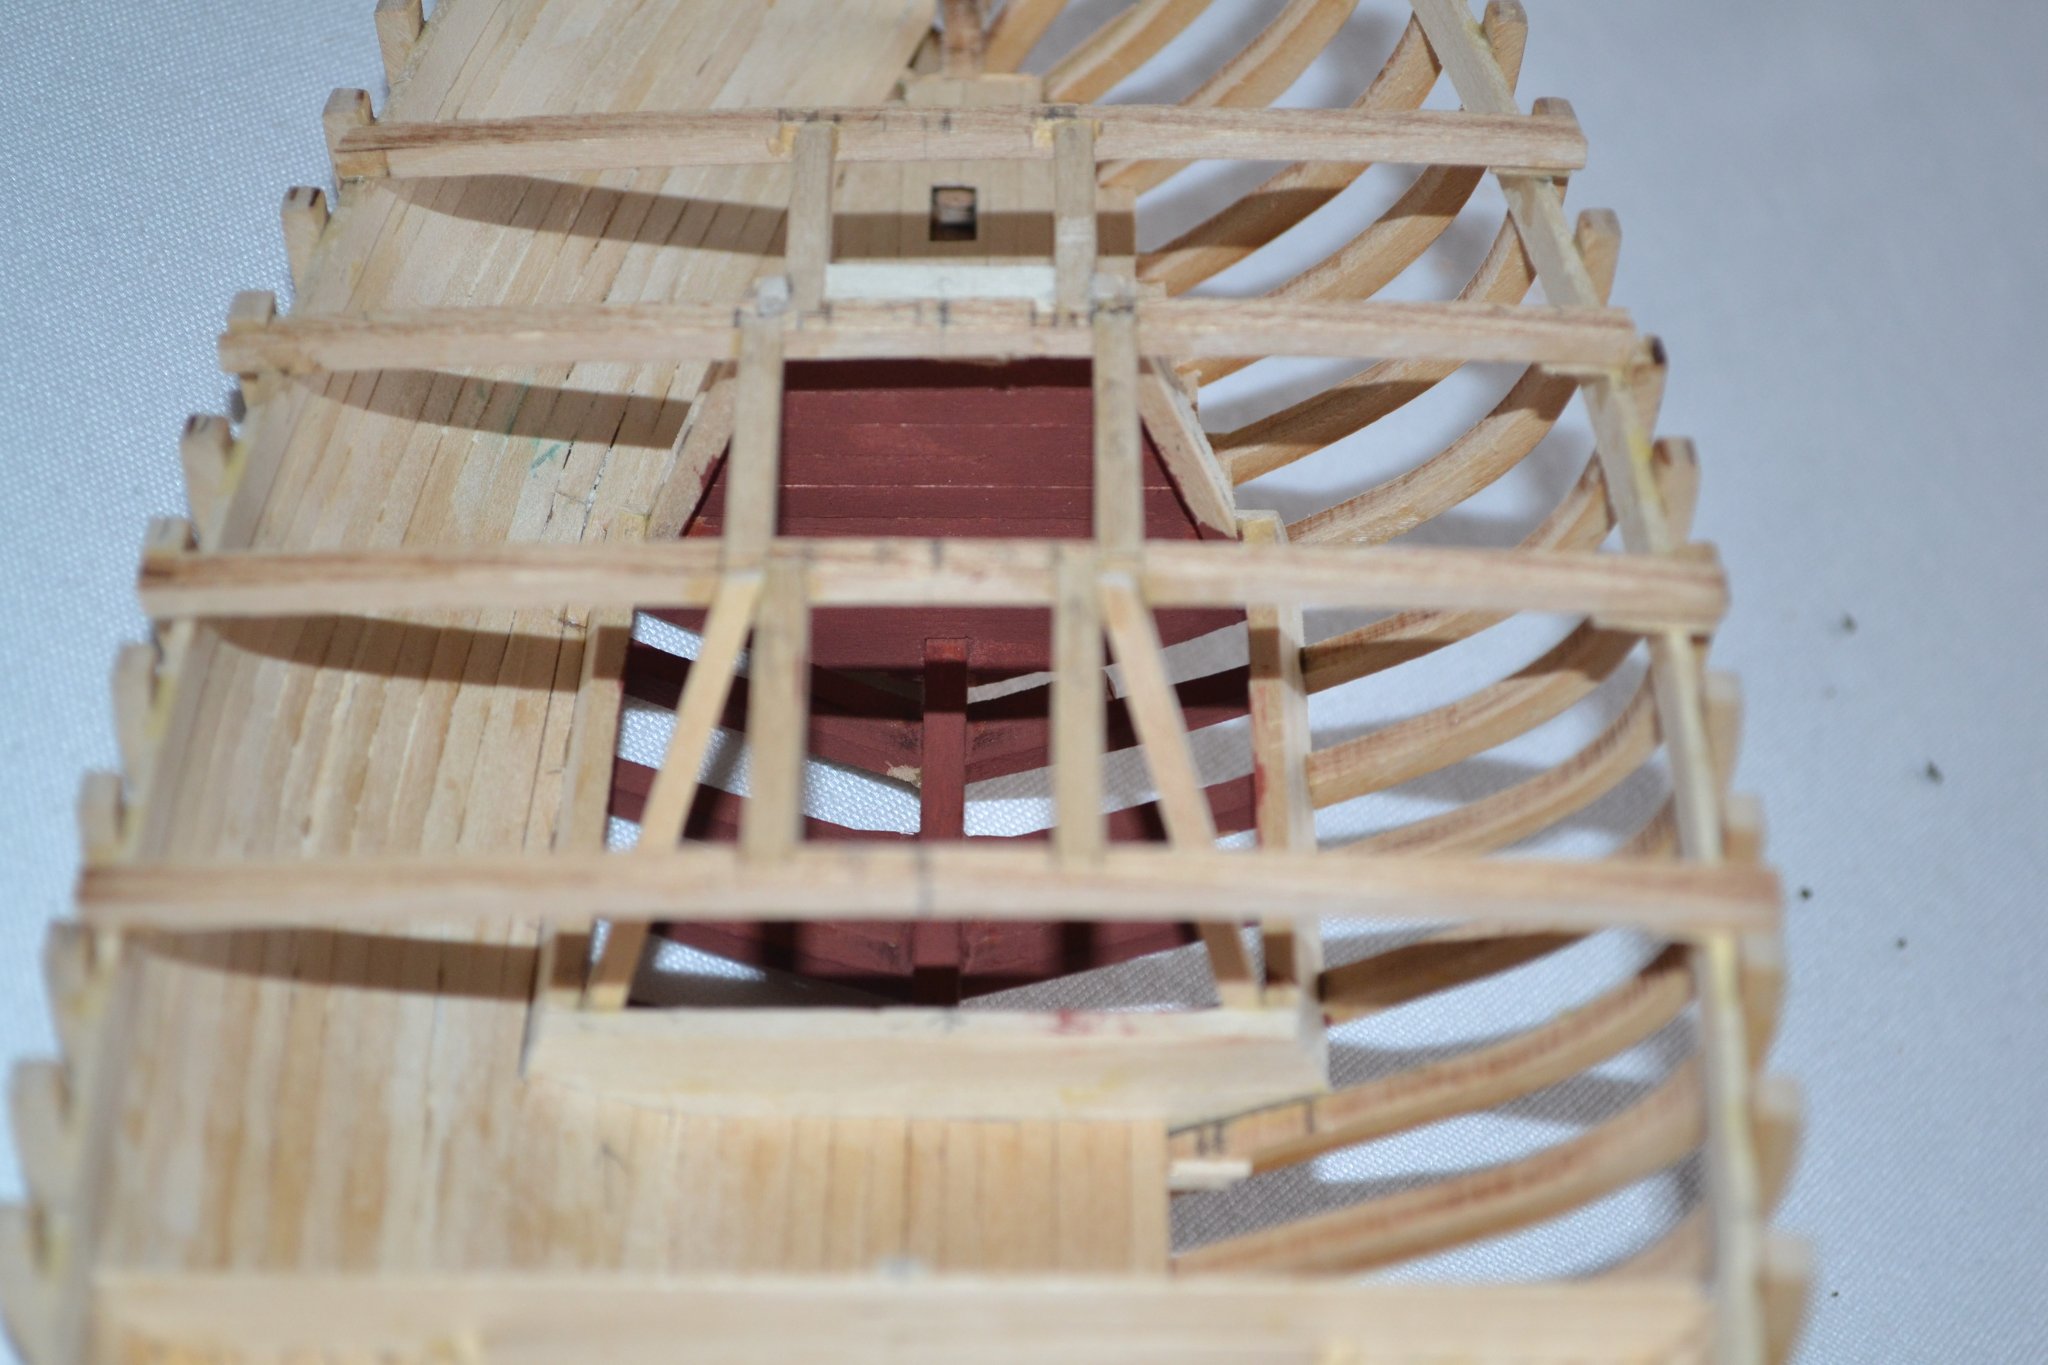
A long delayed update on this thread, I have been sidelined by some other issues. Unfortunately, in my working time I was more interested in building than taking photos and documenting the build but here are a few things I learned and a couple of tips (use them at your own peril from this relative neophyte)! 1. Take great pains to set all the frames at the correct height! I thought I had done so but a mm low or high crept in and sure made a difference. I spent some frustrating time sanding or shimming frames to achieve a relatively fair landing for planks and ceilings. In the photos you can see the deck beams laid are going to require some frame additions or subtractions on their upper ends. In setting the beams I took pains to be sure that they were level on both sides so the boat doesn't appear to be listing. 2. Setting the clamps: When setting the clamps I took a strip of sandpaper and placed it grit side to the frame between the clamp and frame in the approximate location and pulled it up and down to create a full contact surface before gluing the clamp, seemed to work well. 3. The wet well: I placed the lower logs using the supports going to the beam to ascertain the correct angle for the port and starboard logs before gluing them in place. I then attached the supports inside the logs when they should have been on the outside of the logs. Created a bit of an issue according to the plans but not major in my mind although the naval architects will probable be after my hide. I thoroughly enjoyed building the cabin and bunks as well as as installing the soles and ceilings. I have only done the port side so far as I may leave some planks off the starboard hull to show the interior as show in the box photo. This has been a challenging project, as is said "don't sacrifice good for perfection". I am of an age I don't suspect I will ever remotely attempt or try to achieve perfection or even good, I'll accept decent at least in my eye and those of unsuspecting viewers. I am enjoying the build and I guess that is what we all want to do?

-
Beautiful build and the spreadsheet idea was brilliant, although I didn't see labor on there! Look forward to your next build.
- 34 replies
-
- 1
-

-
- grand banks dory
- bluejacket shipcrafters
- (and 1 more)
-
Faring the Frames
turangi replied to acaron41120's topic in Building, Framing, Planking and plating a ships hull and deck
Excellent advice Allen! -
You might want to try a cabinet scraper on the decks to remove the excess black on the planks. Sanding tends to smear the color but a scraper removes a bit of wood and leaves the simulated caulk.
-
Tool Price Public Service Announcement
turangi replied to turangi's topic in Modeling tools and Workshop Equipment
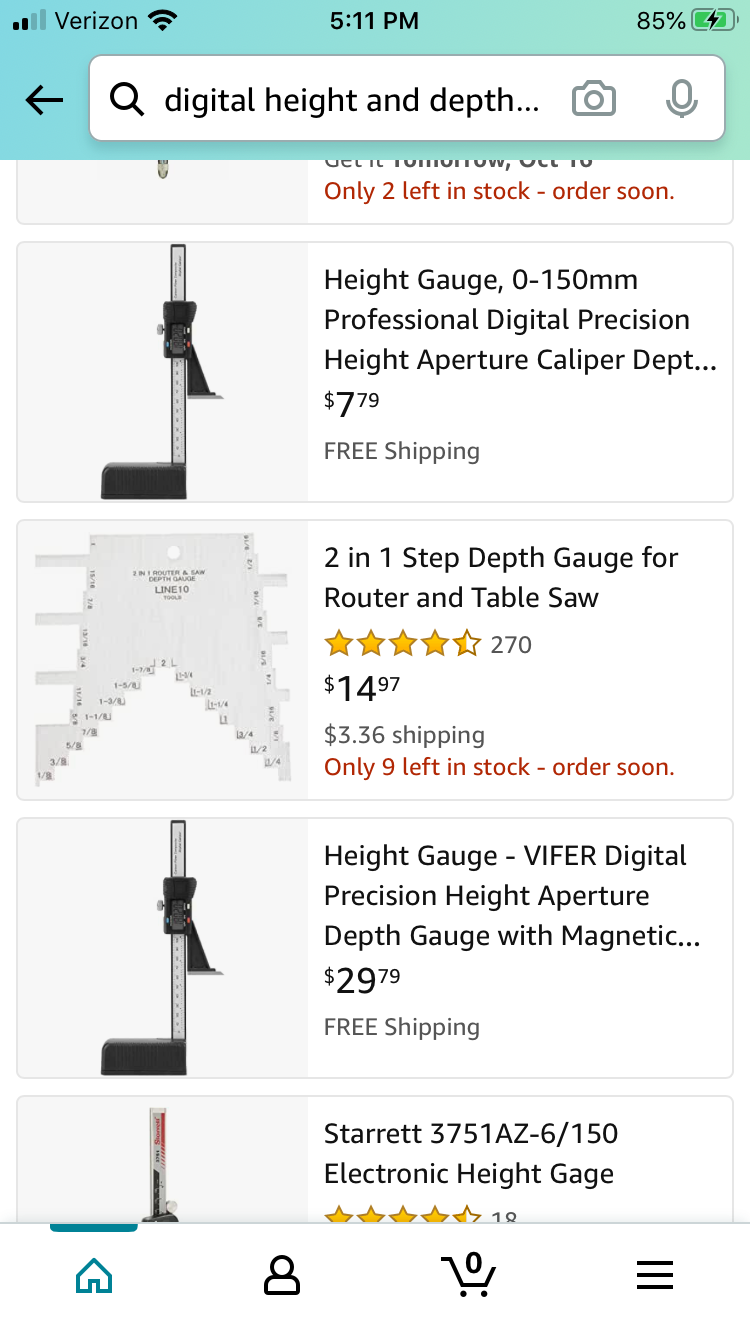
Sorry the photos didn't post as expected but I purchased the $7.79 one rather than the exact same tool for $47.89. -
I recently decided I wanted a digital height gauge for setting frames etc.. I went on Amazon to check prices, I certainly didn’t need a top of the line but something with good reviews and reasonably accurate. I found one I liked and was astounded at the different prices for the exact same tool! If you search for something in Amazon it is worth your while to scroll through the pages to check the prices offer by the various venders! I bought the lowest price one and received it in 5 days with free shipping. I did test the tool against a known accurate scale it it seems very accurate. No battery included, but a minor issue.


-
I don't own a Veritas spokeshave but have found their miniature block plane one of my favorite tools. I have used it often and to very satisfying results. It fits my hand perfectly and I would not hesitate to recommend it for appropriate miniature model work. The blade was very sharp upon arrival and it is very easy to adjust unlike other hobby planes I have tried. I also have a set of their miniature chisels that I really like for making very precise cuts when needed. I recently used them to clean up a rabbet and they were far superior to a scalpel or a hobby knife with a chisel blade. I am not a tool junky but really do like these tools I mentioned and have found them very useful.
-
Better late than never I guess, I am working on the Emma C. Berry.
-
Great idea for your log, I look forward to following it! Probably won't get so heavy you will have to use those jack stands though.😏
-
Edge Gluing Planking
turangi replied to Neil10's topic in Building, Framing, Planking and plating a ships hull and deck
I edge glued the planks on my last model and tried to be careful not to use excessive glue. I then used, and highly recommend using a cabinet scraper for the initial removal of excess glue and unevenness in the planking followed by sanding. My caveat is that I painted the hull and did not leave it natural so I have no idea how my efforts would have turned out using stain. Cabinet scrapers are available in many profiles and I have found them an extremely useful tool. Other areas I stain such as decks I always use a pre stain conditioner to even out stain color and use gel stains as they make it very easy to control the color. I have found that using a pre-stain wood conditioner to allow the even penetration of the stain really helps. I also use the Minwax gel stain and it is easy to control the color. I rub it in with like shoe polish with a cloth and it allows me to to make it as light or dark as I desire.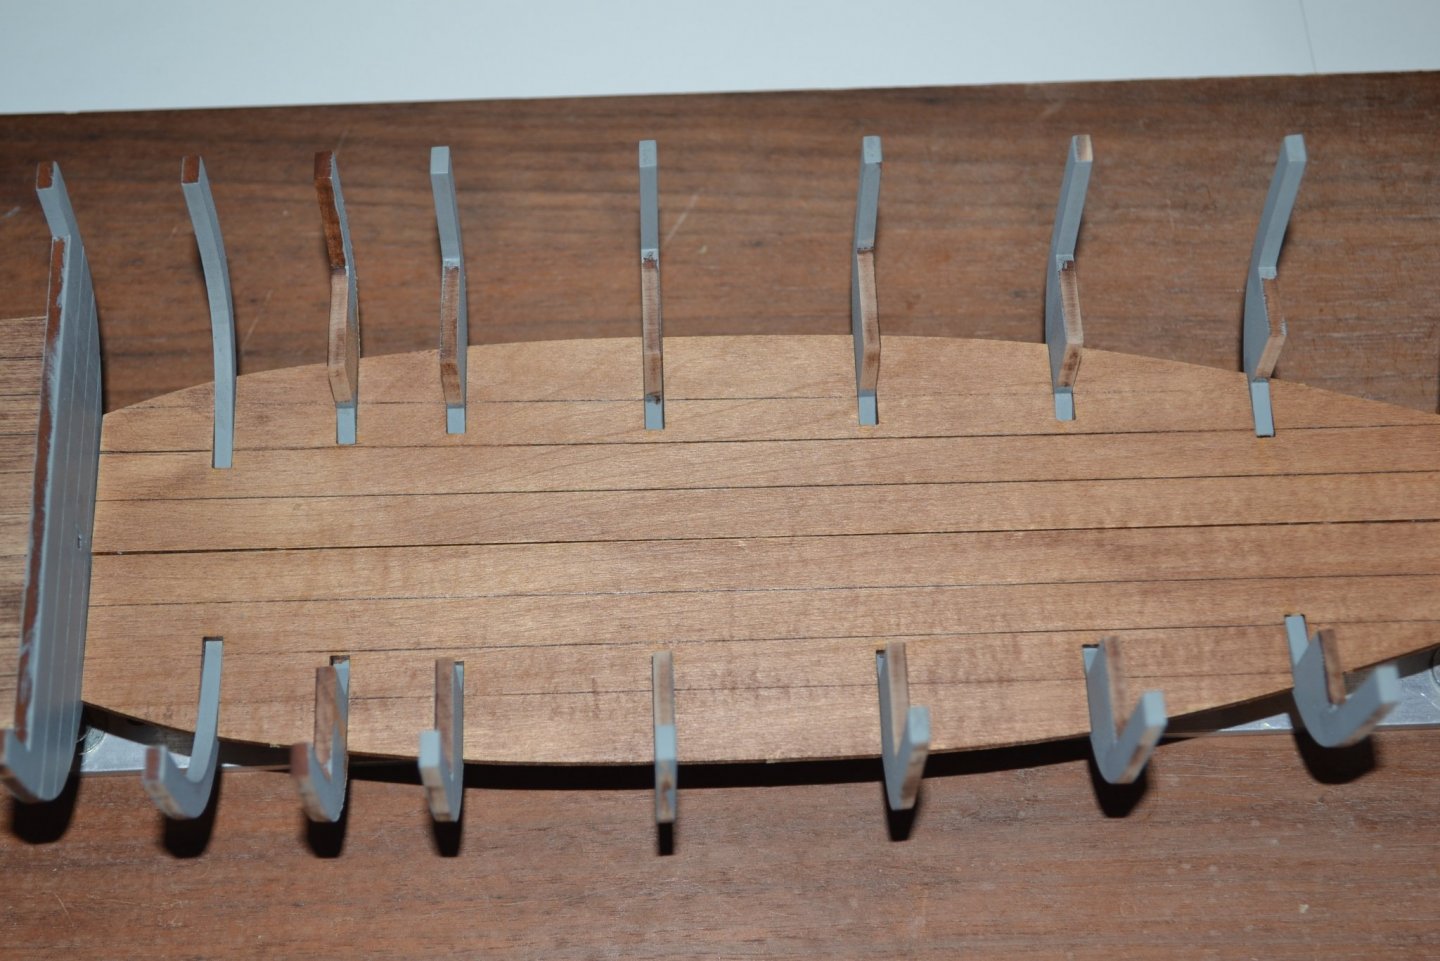
-
Looking at that rigging kit sure makes my teeth hurt! Excellent job though.
- 41 replies
-
- 1
-
-
- artesania latina
- dallas
- (and 1 more)
-
Looking great! The cheek pieces were a challenge but after many looks at the illustrations and much trepidation turned out to my satisfaction.
- 104 replies
-
- 2
-
-
- model shipways
- new bedford whaleboat
- (and 1 more)
-
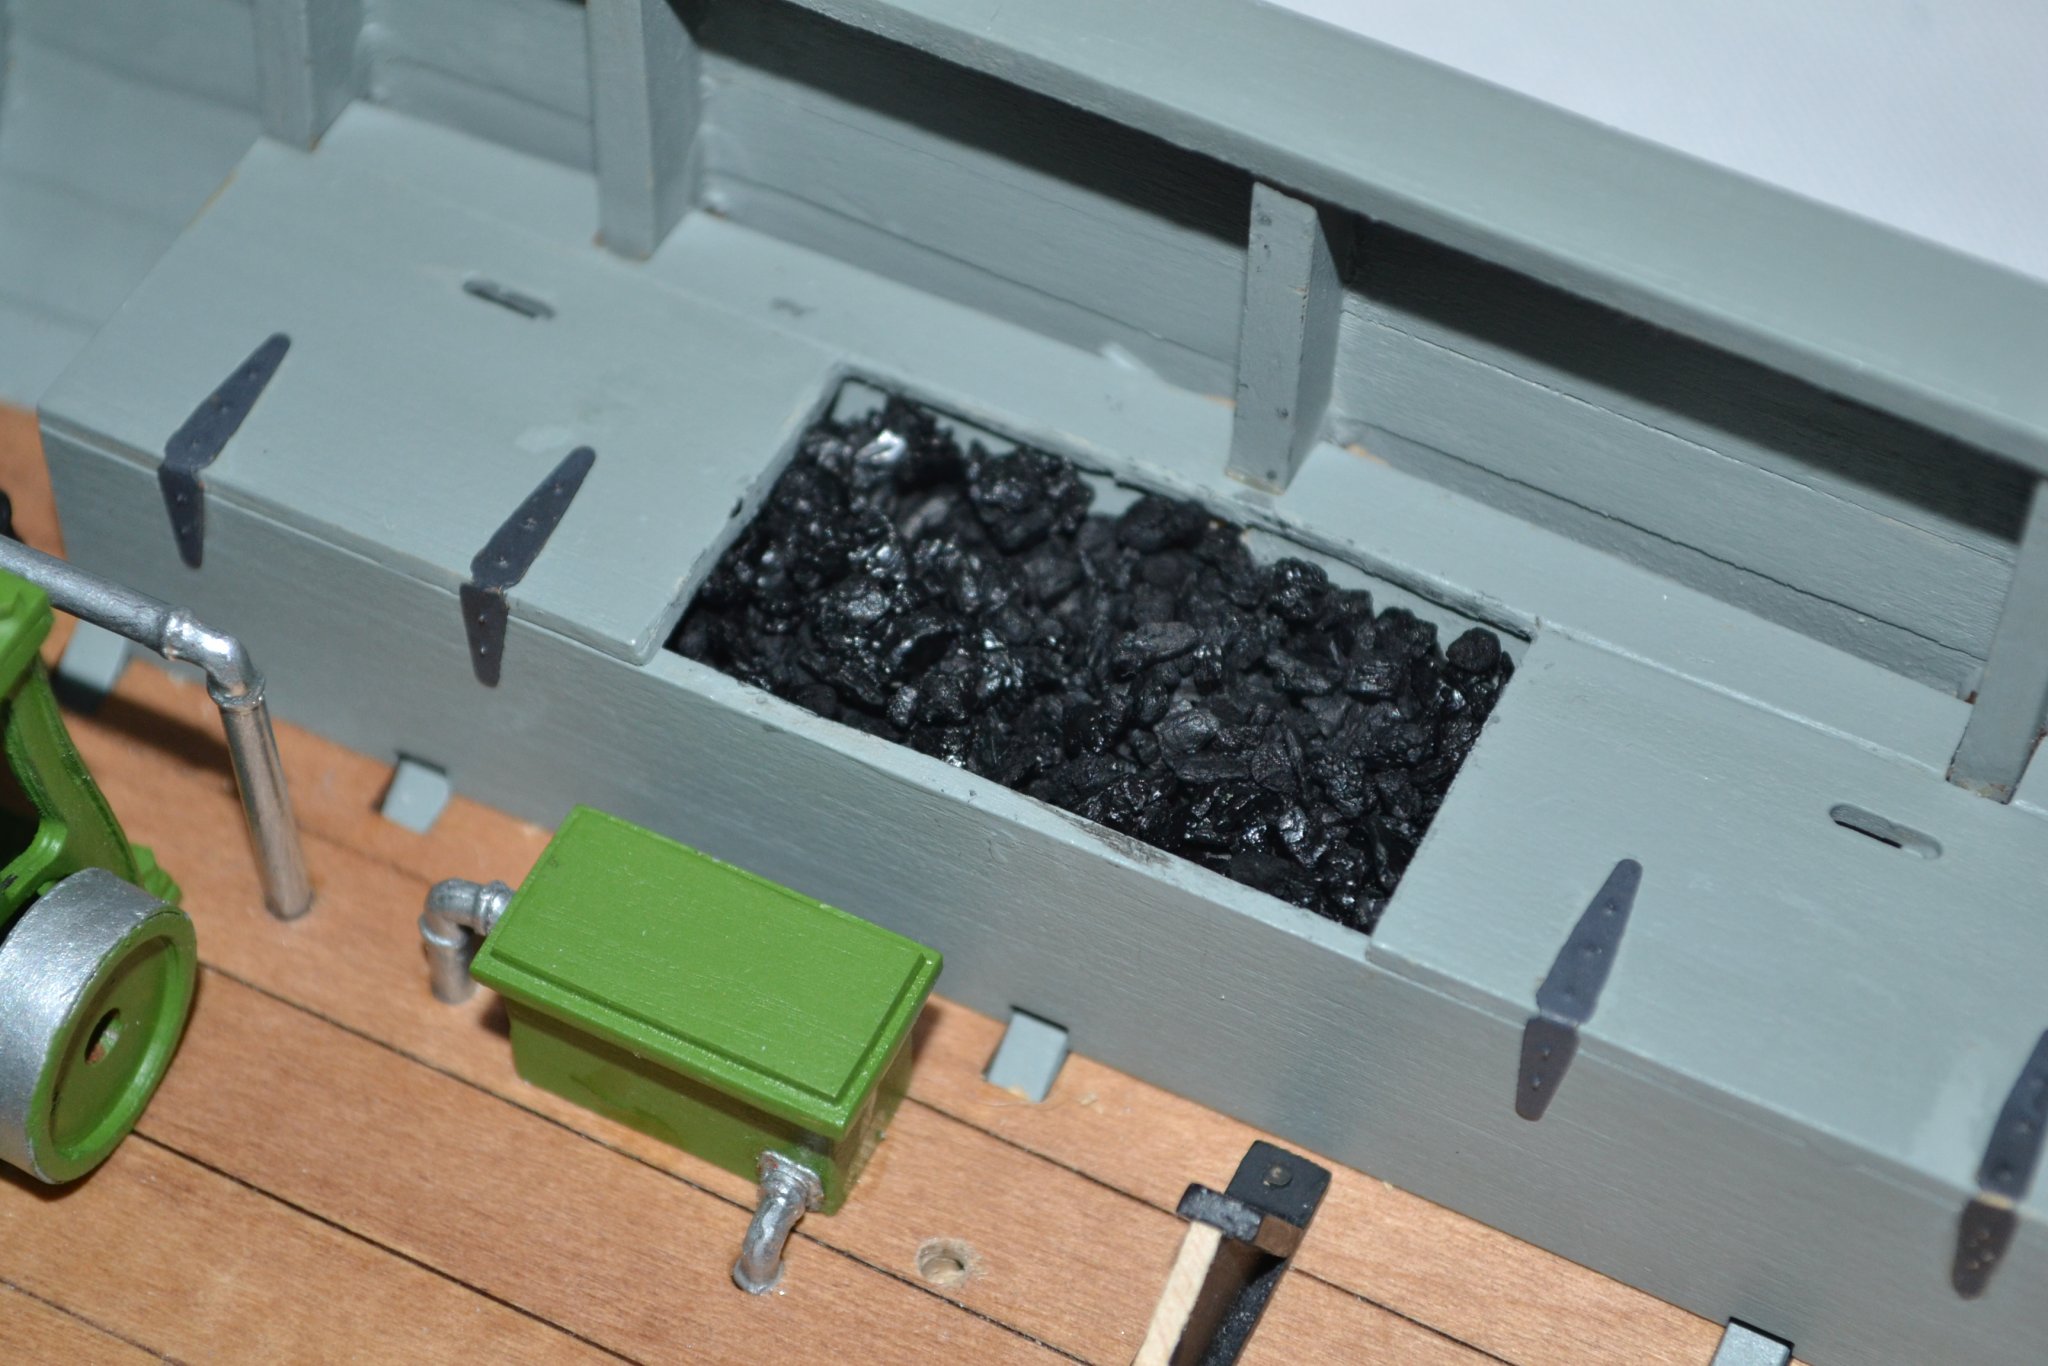
re: the coal bins, not sure if it an issue you will face but I had to redo mine. I had left a bunker open so as to be able to simulate it as full of coal. I had put some scrap wood in the bottom so as not to have to fill it completely. I made the coal using aquarium filter carbon I had from a long departed aquarium. I mixed it with moderately diluted white glue and put it in. Alas I could see bare wood under the coal so I scooped it all out before it set and after the wood in the bunker dried I painted it black and mixed up more coal and put it in, I am well pleased with the result.

- 51 replies
-
- 2
-
-
- model shipways
- picket boat
- (and 1 more)
-
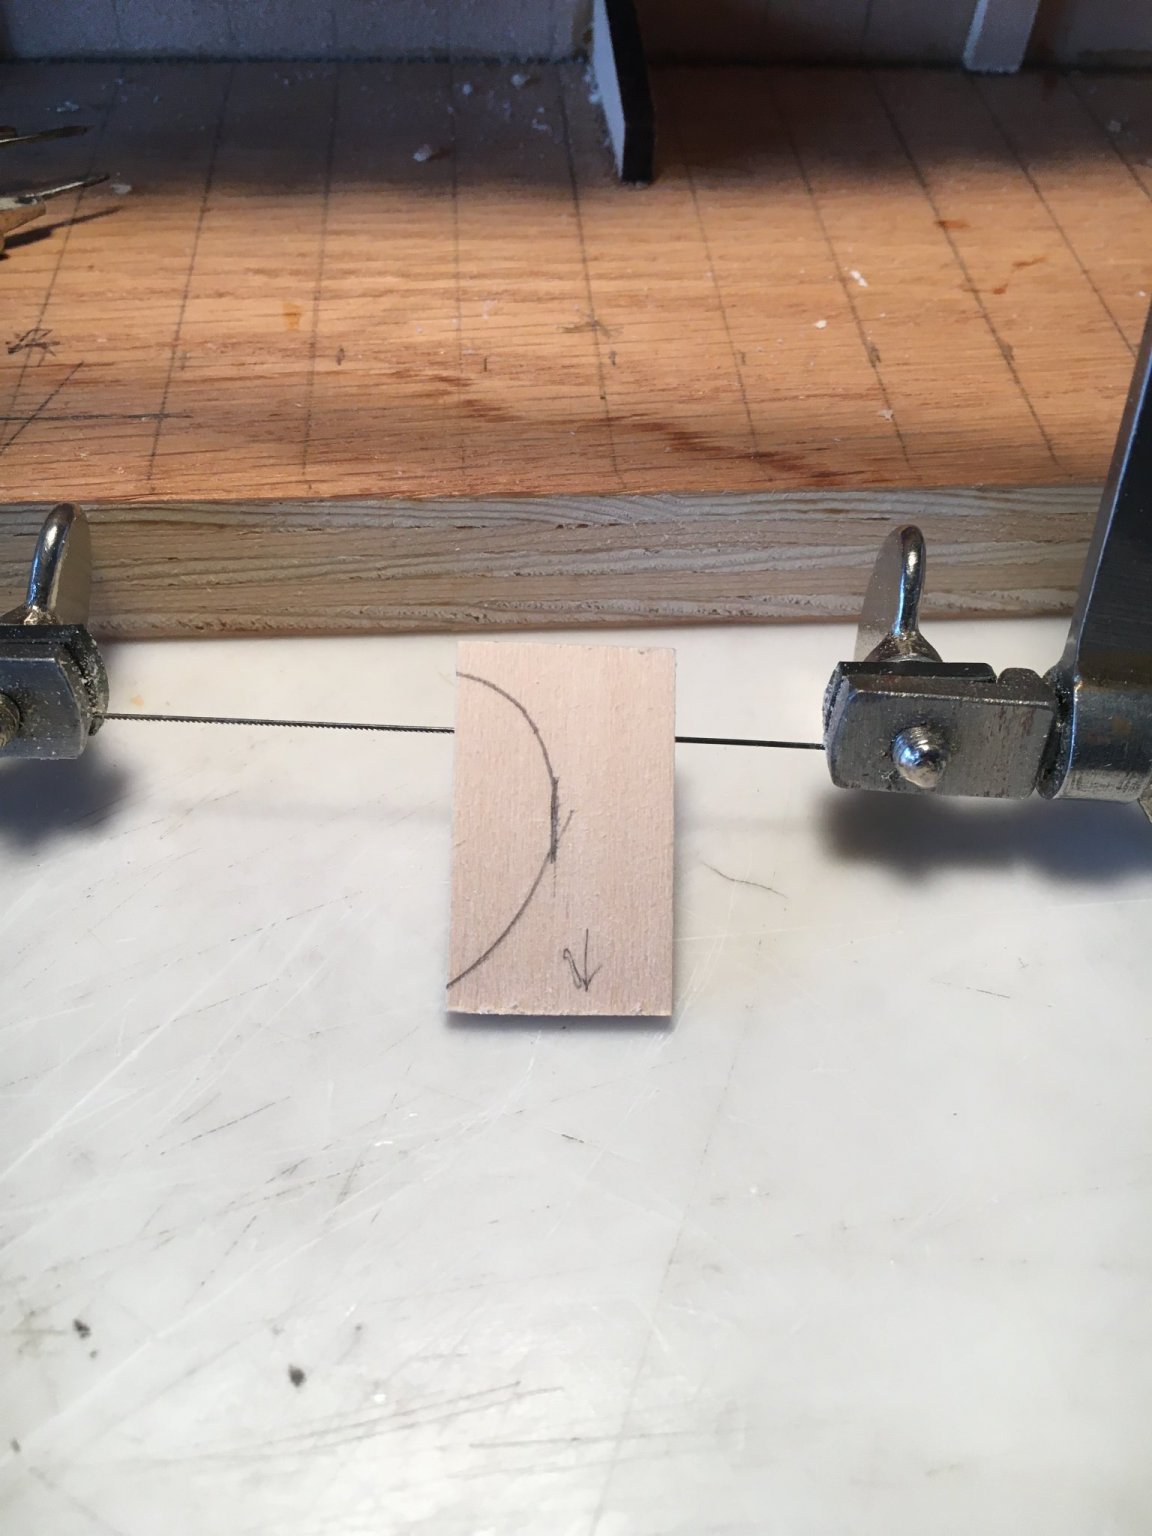
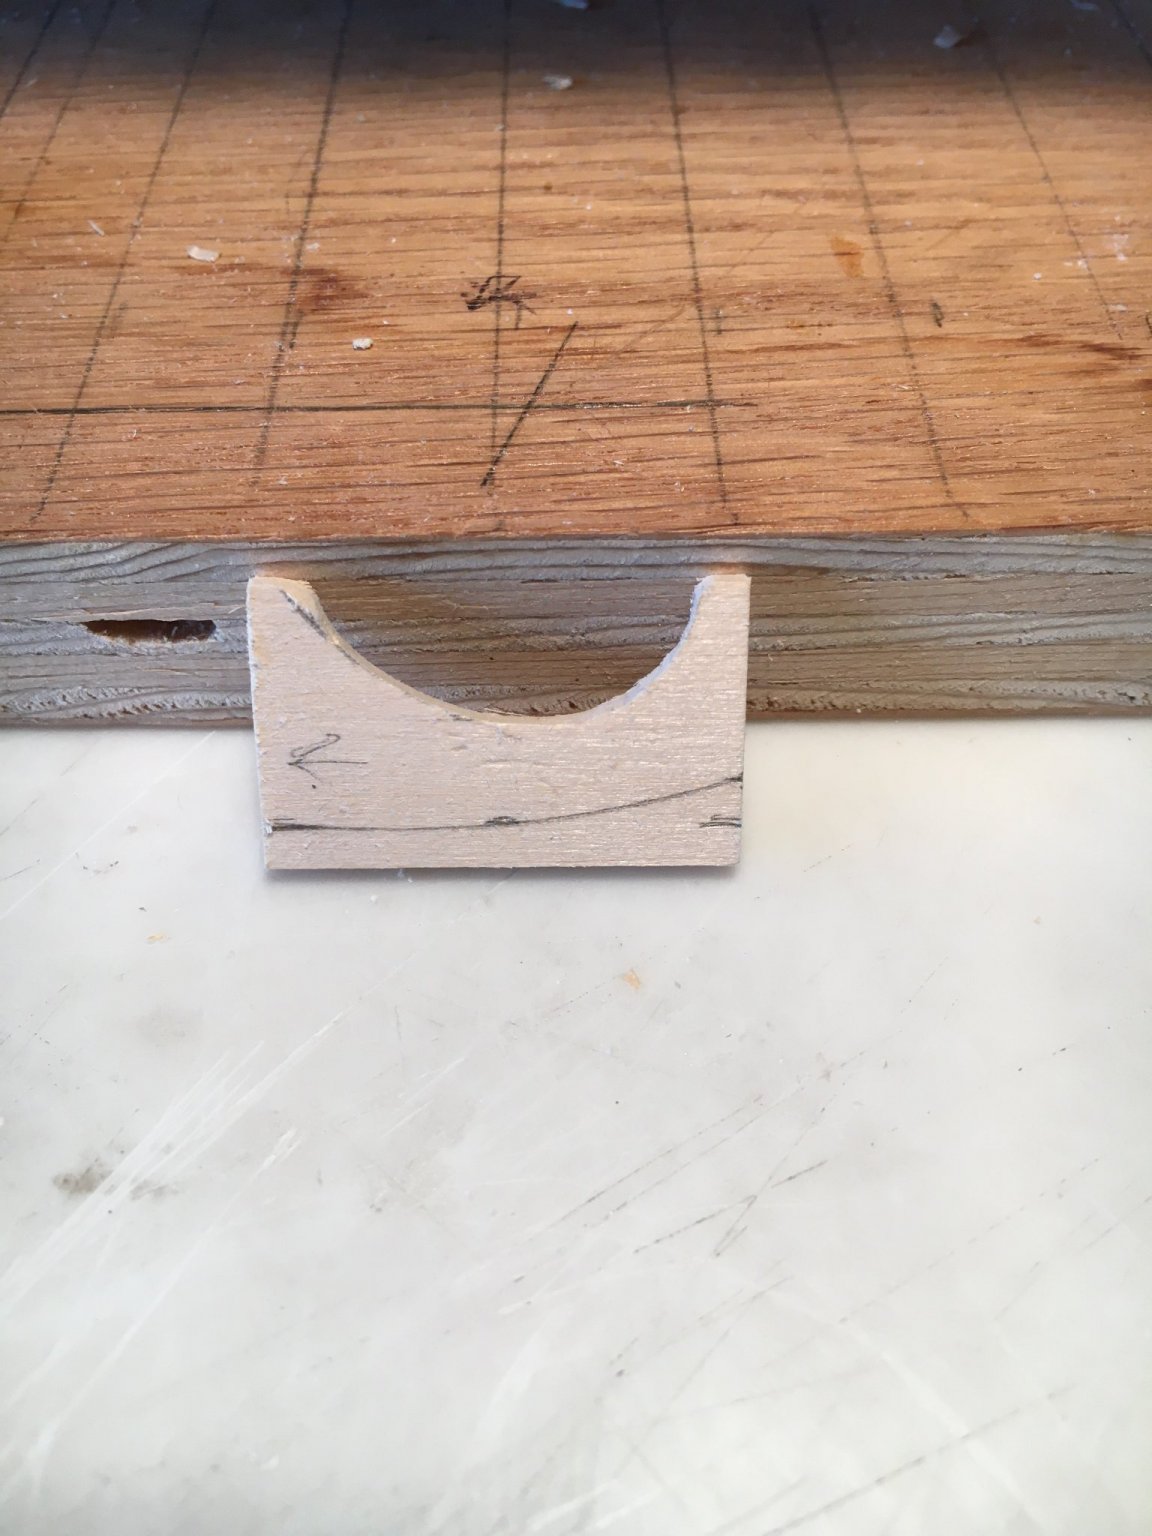
You can barely make out the filler piece you referenced in your post but this is how I shaped mine.
- 51 replies
-
- 1
-
-
- model shipways
- picket boat
- (and 1 more)
-
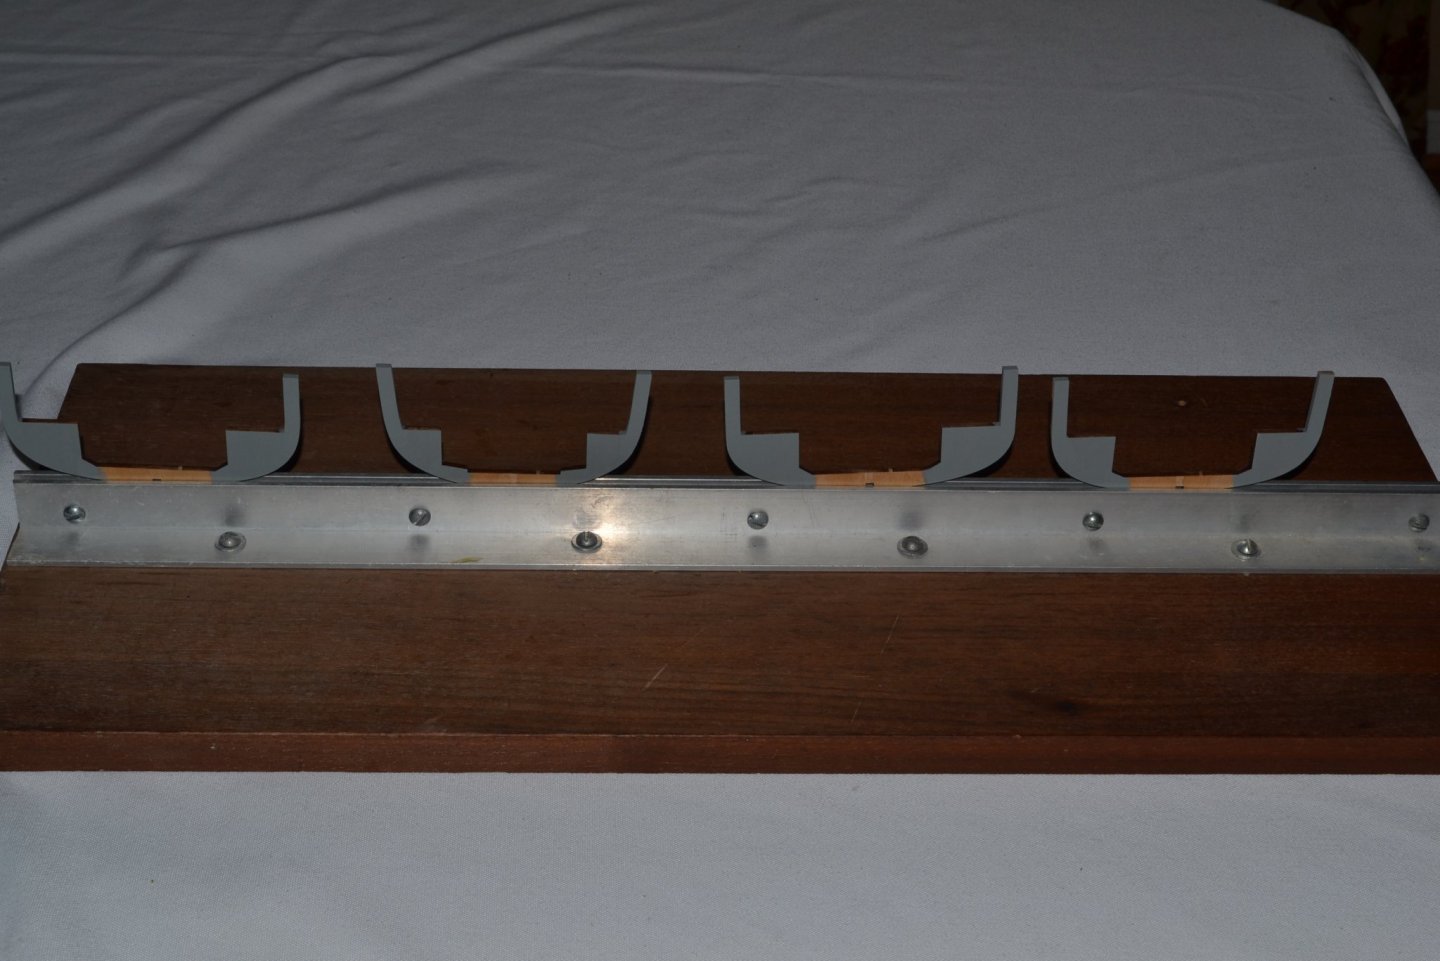
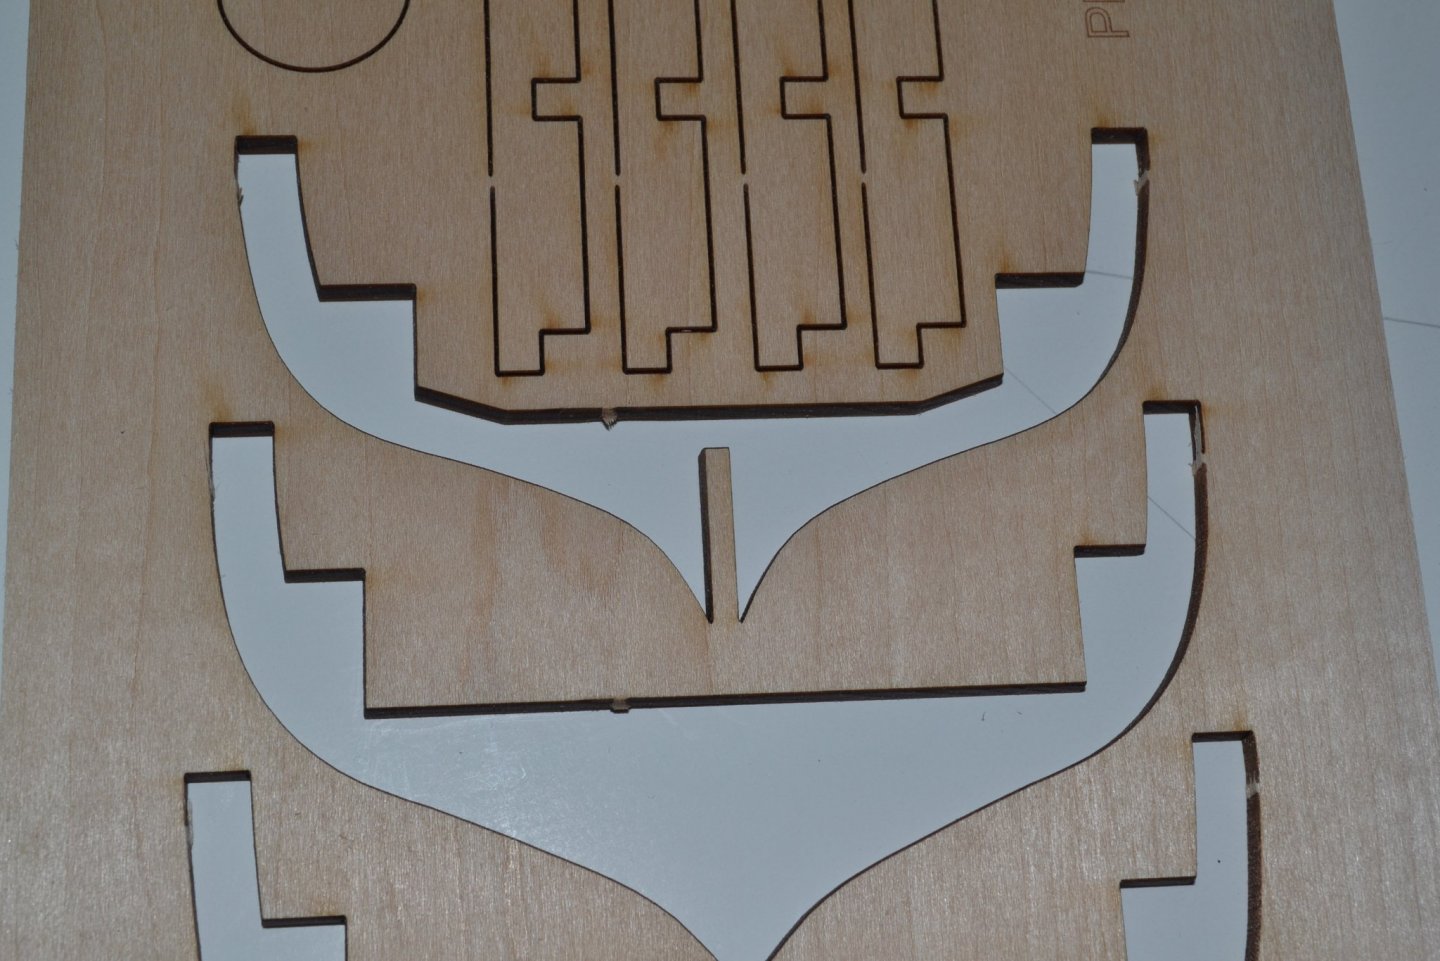
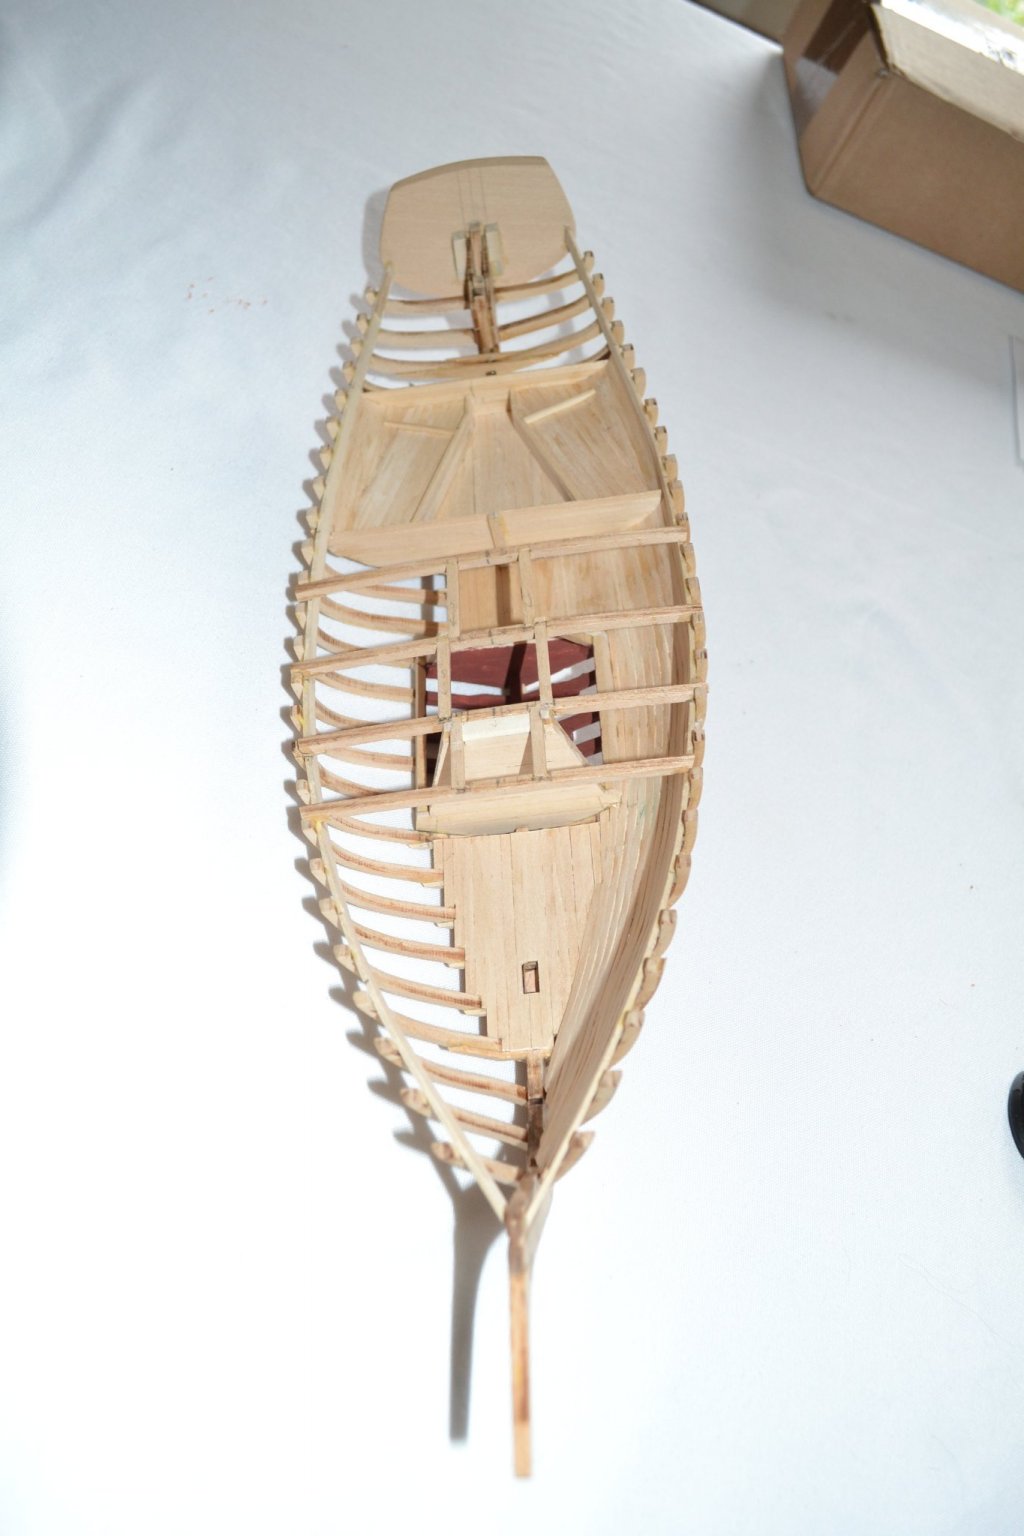
I took a little different approach to broken frames that seemed to work well but you seem to have solved your issues. Posted October 2, 2019 Made a bit more progress. Painted frames prior to installation and installed them in the rear portion of the boat. As mentioned in other logs and also in the kit instructions the center frames are very delicate and I did manage to break a couple. I glued them back together and used a nub from the matrix lightly glued to span the broken area. I applied glue to the char area of the nub and attached them to the char area of the frame. I experimented first and the extra piece will easily pop off once the frames are in place and well supported by the surrounding structure but provide extra strength during assembly. I started finishing decks, seats etc.. For the floor and rear floor I took measurements from the plans and scored the wood to resemble pank seams. I used a sanding sealer to try and keep stain even and less blotchy, I will finish them with a mixture of Testors Dull and Gloss coat for a bit of sheen. I am using Minwax Gel Stain and find it much easier to control than their normal liquid stains. I just rub it in with a cloth until I achieve the desired result. The first couple of parts I finished were not great but I am improving.
.thumb.JPG.796d5a53a0a2f92a26fa74e3e1cb196a.JPG)
.thumb.JPG.52606d7afa324103964ca81f2bdbbf87.JPG)
- 51 replies
-
- 1
-
-
- model shipways
- picket boat
- (and 1 more)
-
Looking good! Seems no good deed goes unpunished re: the modifications you had to make to accommodate the planking. Some of the frames sure are fragile and I repaired a few myself.
-
John, looks like you enjoy a challenge! I too have copied parts of plans or actual parts. Before doing so I would copy an accurate ruler with the copier and compare the copy to the actual ruler. Luckily my machine copied 100% accurately. There is probably a setting on your machine to adjust the copy size. Good luck!
- 51 replies
-
- 1
-
-
- model shipways
- picket boat
- (and 1 more)
-
Looking good! I will eagerly follow your build.
-
Looking great! Mine is on a bit of a hold now as I have a couple of non-hobby related issues to deal with at present🤥
-
Greetings from Chicago and winter is coming
turangi replied to ThirdCoast's topic in New member Introductions
An another welcome from suburban Chicagoland! -
Following your build with interest. Since the Admiral passed away 5 years ago it does get lonely but it is nice to have a hobby room and my dog doesn't seem to mind the dust or mess. Certainly not a substitute for my wife but I try to find a bit of happiness where I can.


.JPG.7fc267f3c58a771c6b6d1697210f0b3e.JPG)

.JPG.5a4bc79a2bc416896fce8724a54aff95.JPG)

