
DanielNG10
-
Posts
25 -
Joined
-
Last visited
Recent Profile Visitors
590 profile views


-
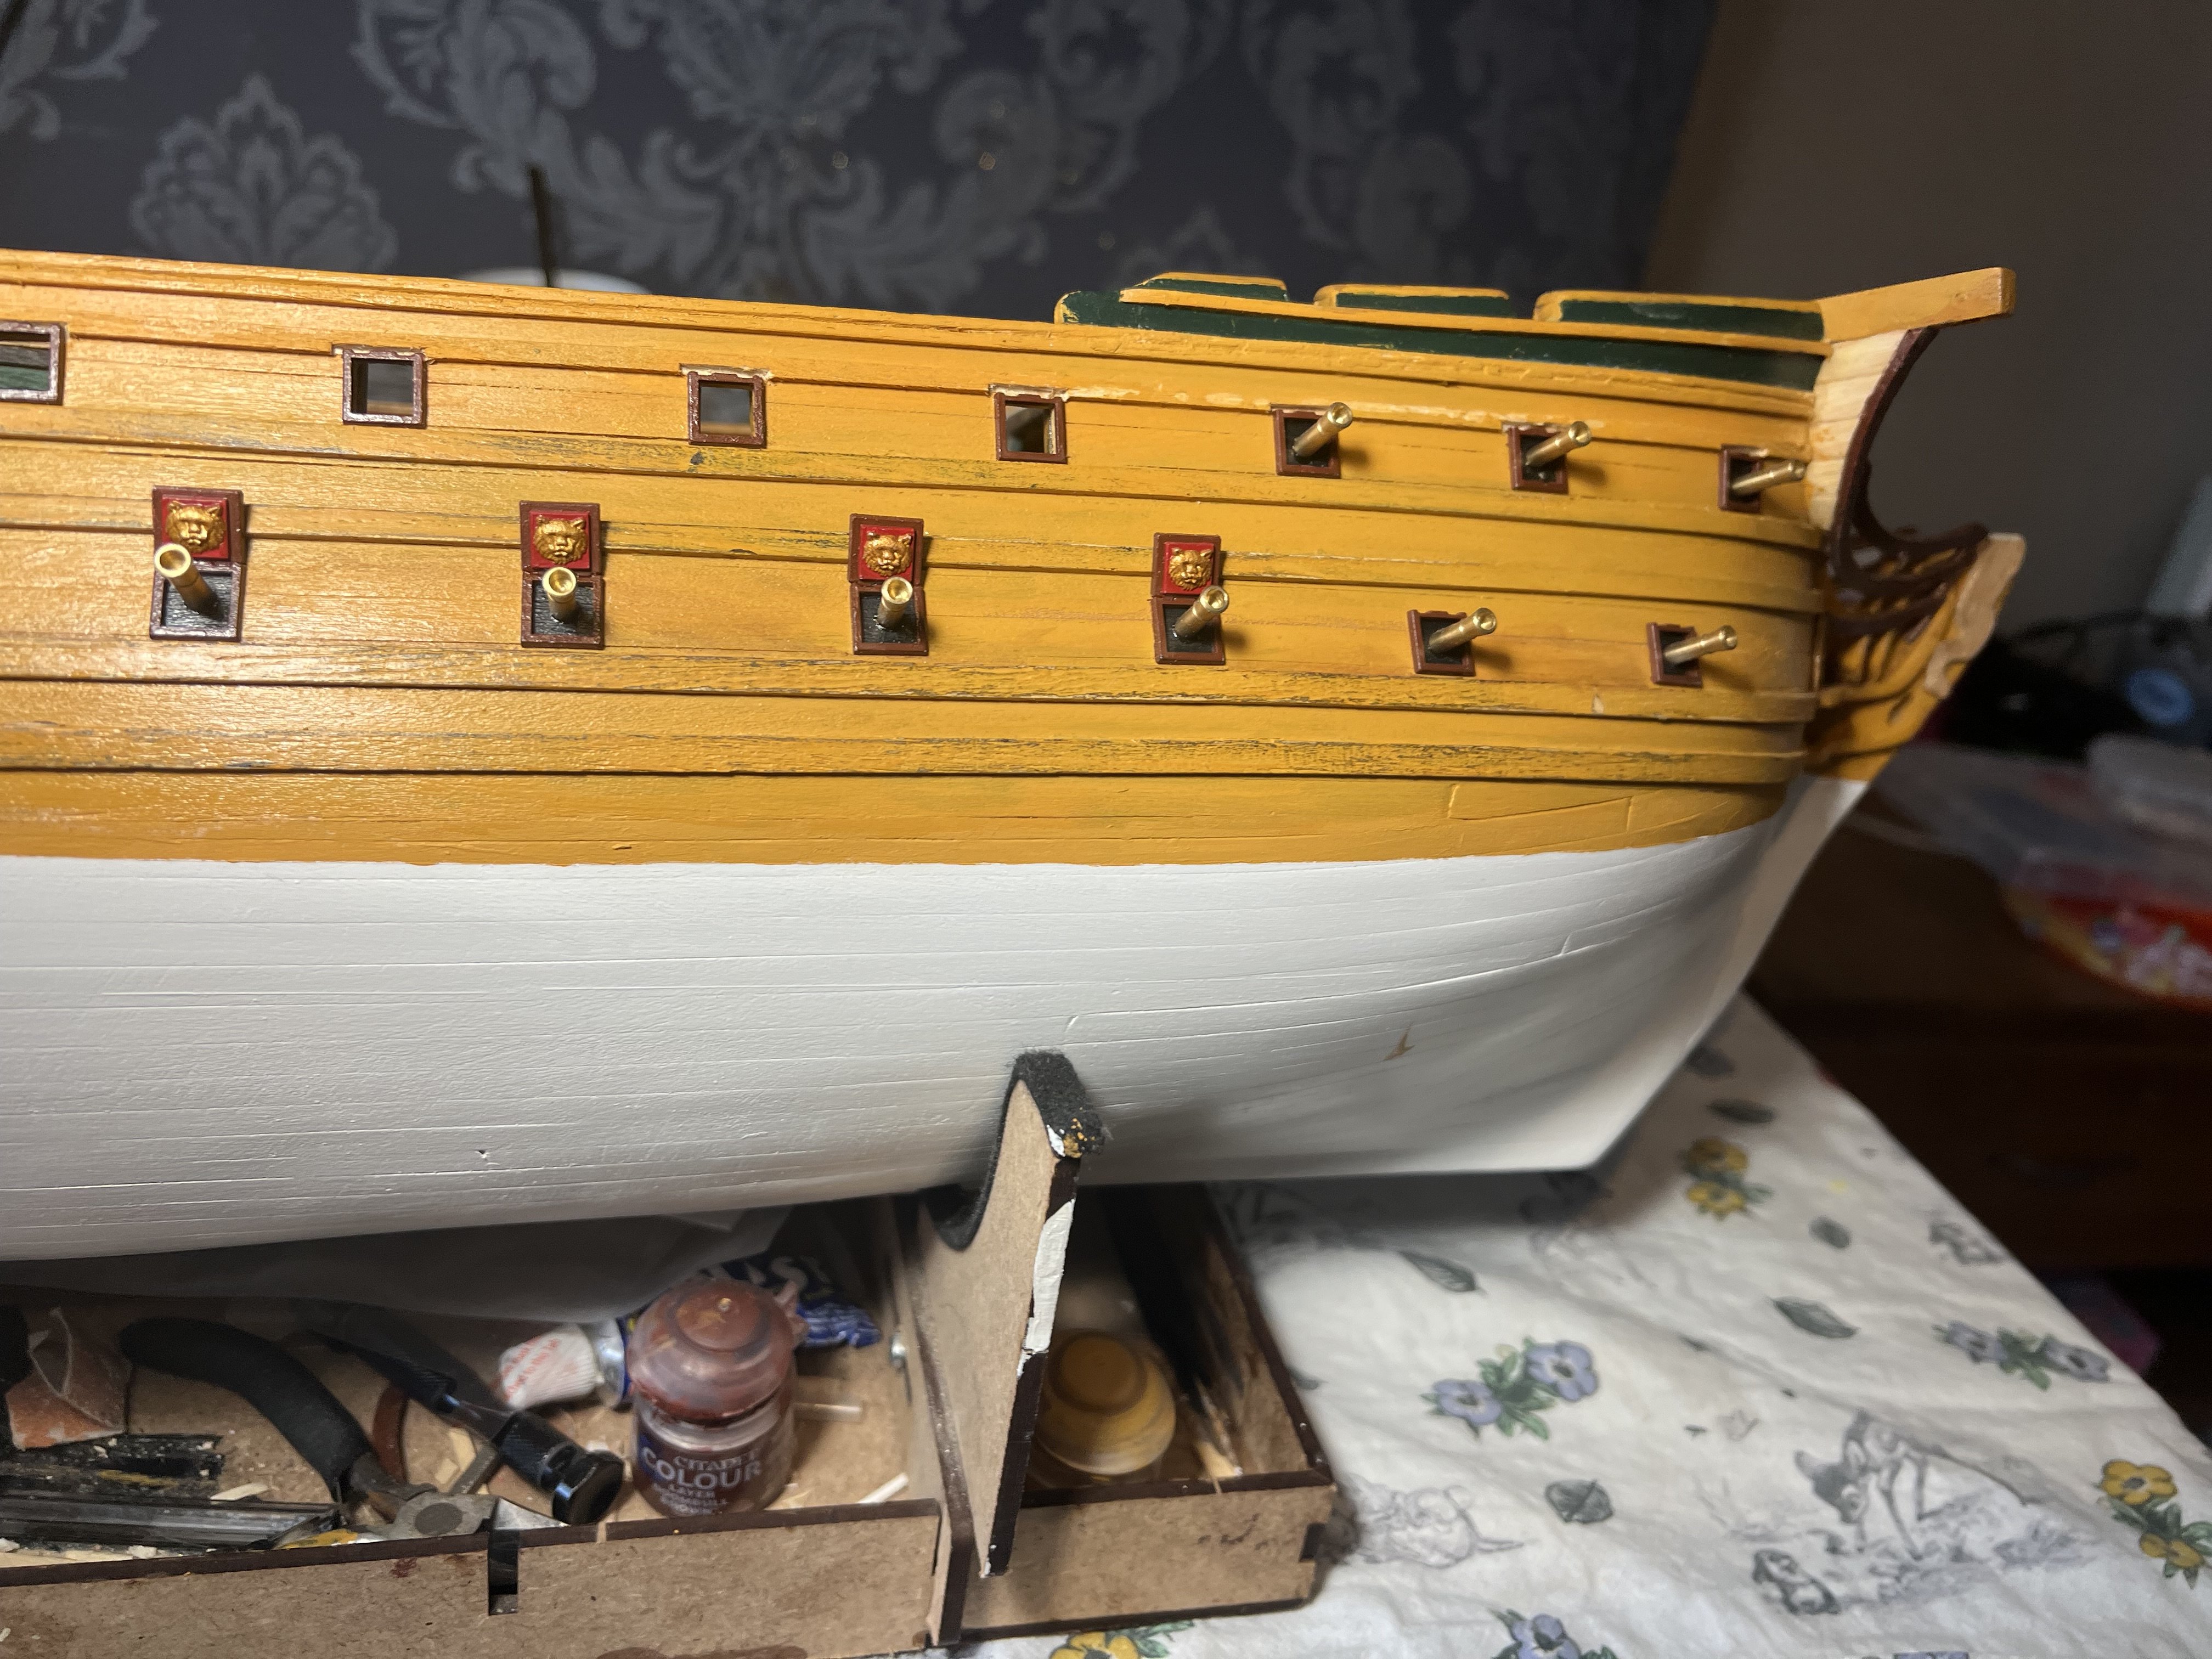
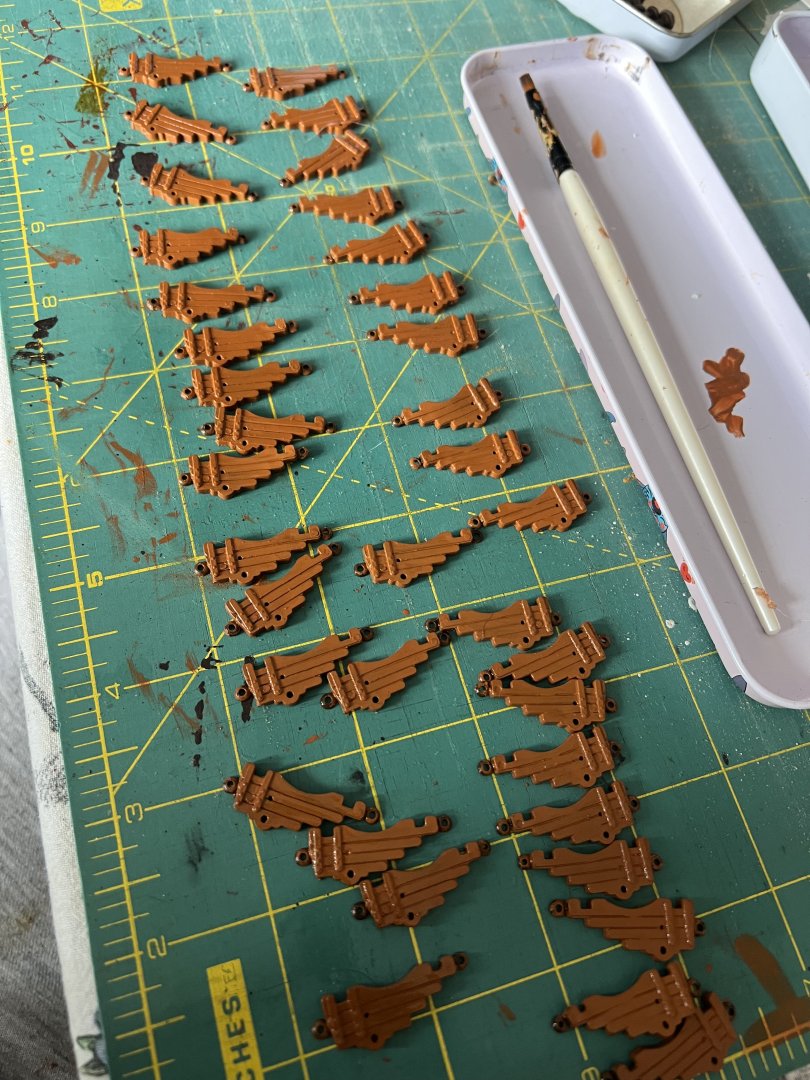
 Painting some of the canons for the Billing Boat Norske Love. Brown layer first. The a coat of hair spray to seal everything. Then I put some shading on it to give it some depth then finally the black for the metal work. Paint list is included in the photos
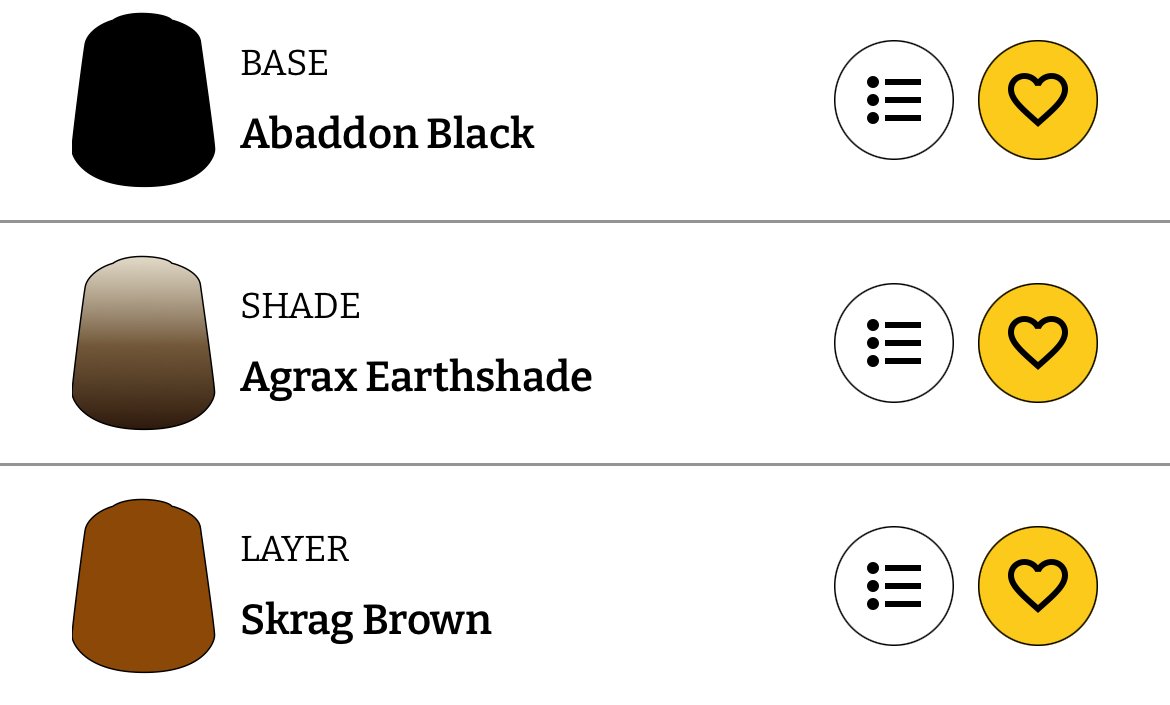

-
 ccoyle reacted to a post in a topic:
Norske Love by DanielNG10 - Billing Boats - 1:75
ccoyle reacted to a post in a topic:
Norske Love by DanielNG10 - Billing Boats - 1:75
-
ccoyle reacted to a post in a topic:
Norske Love by DanielNG10 - Billing Boats - 1:75
-
Knocklouder reacted to a post in a topic:
Norske Love by DanielNG10 - Billing Boats - 1:75
-
Knocklouder reacted to a post in a topic:
Norske Love by DanielNG10 - Billing Boats - 1:75
-
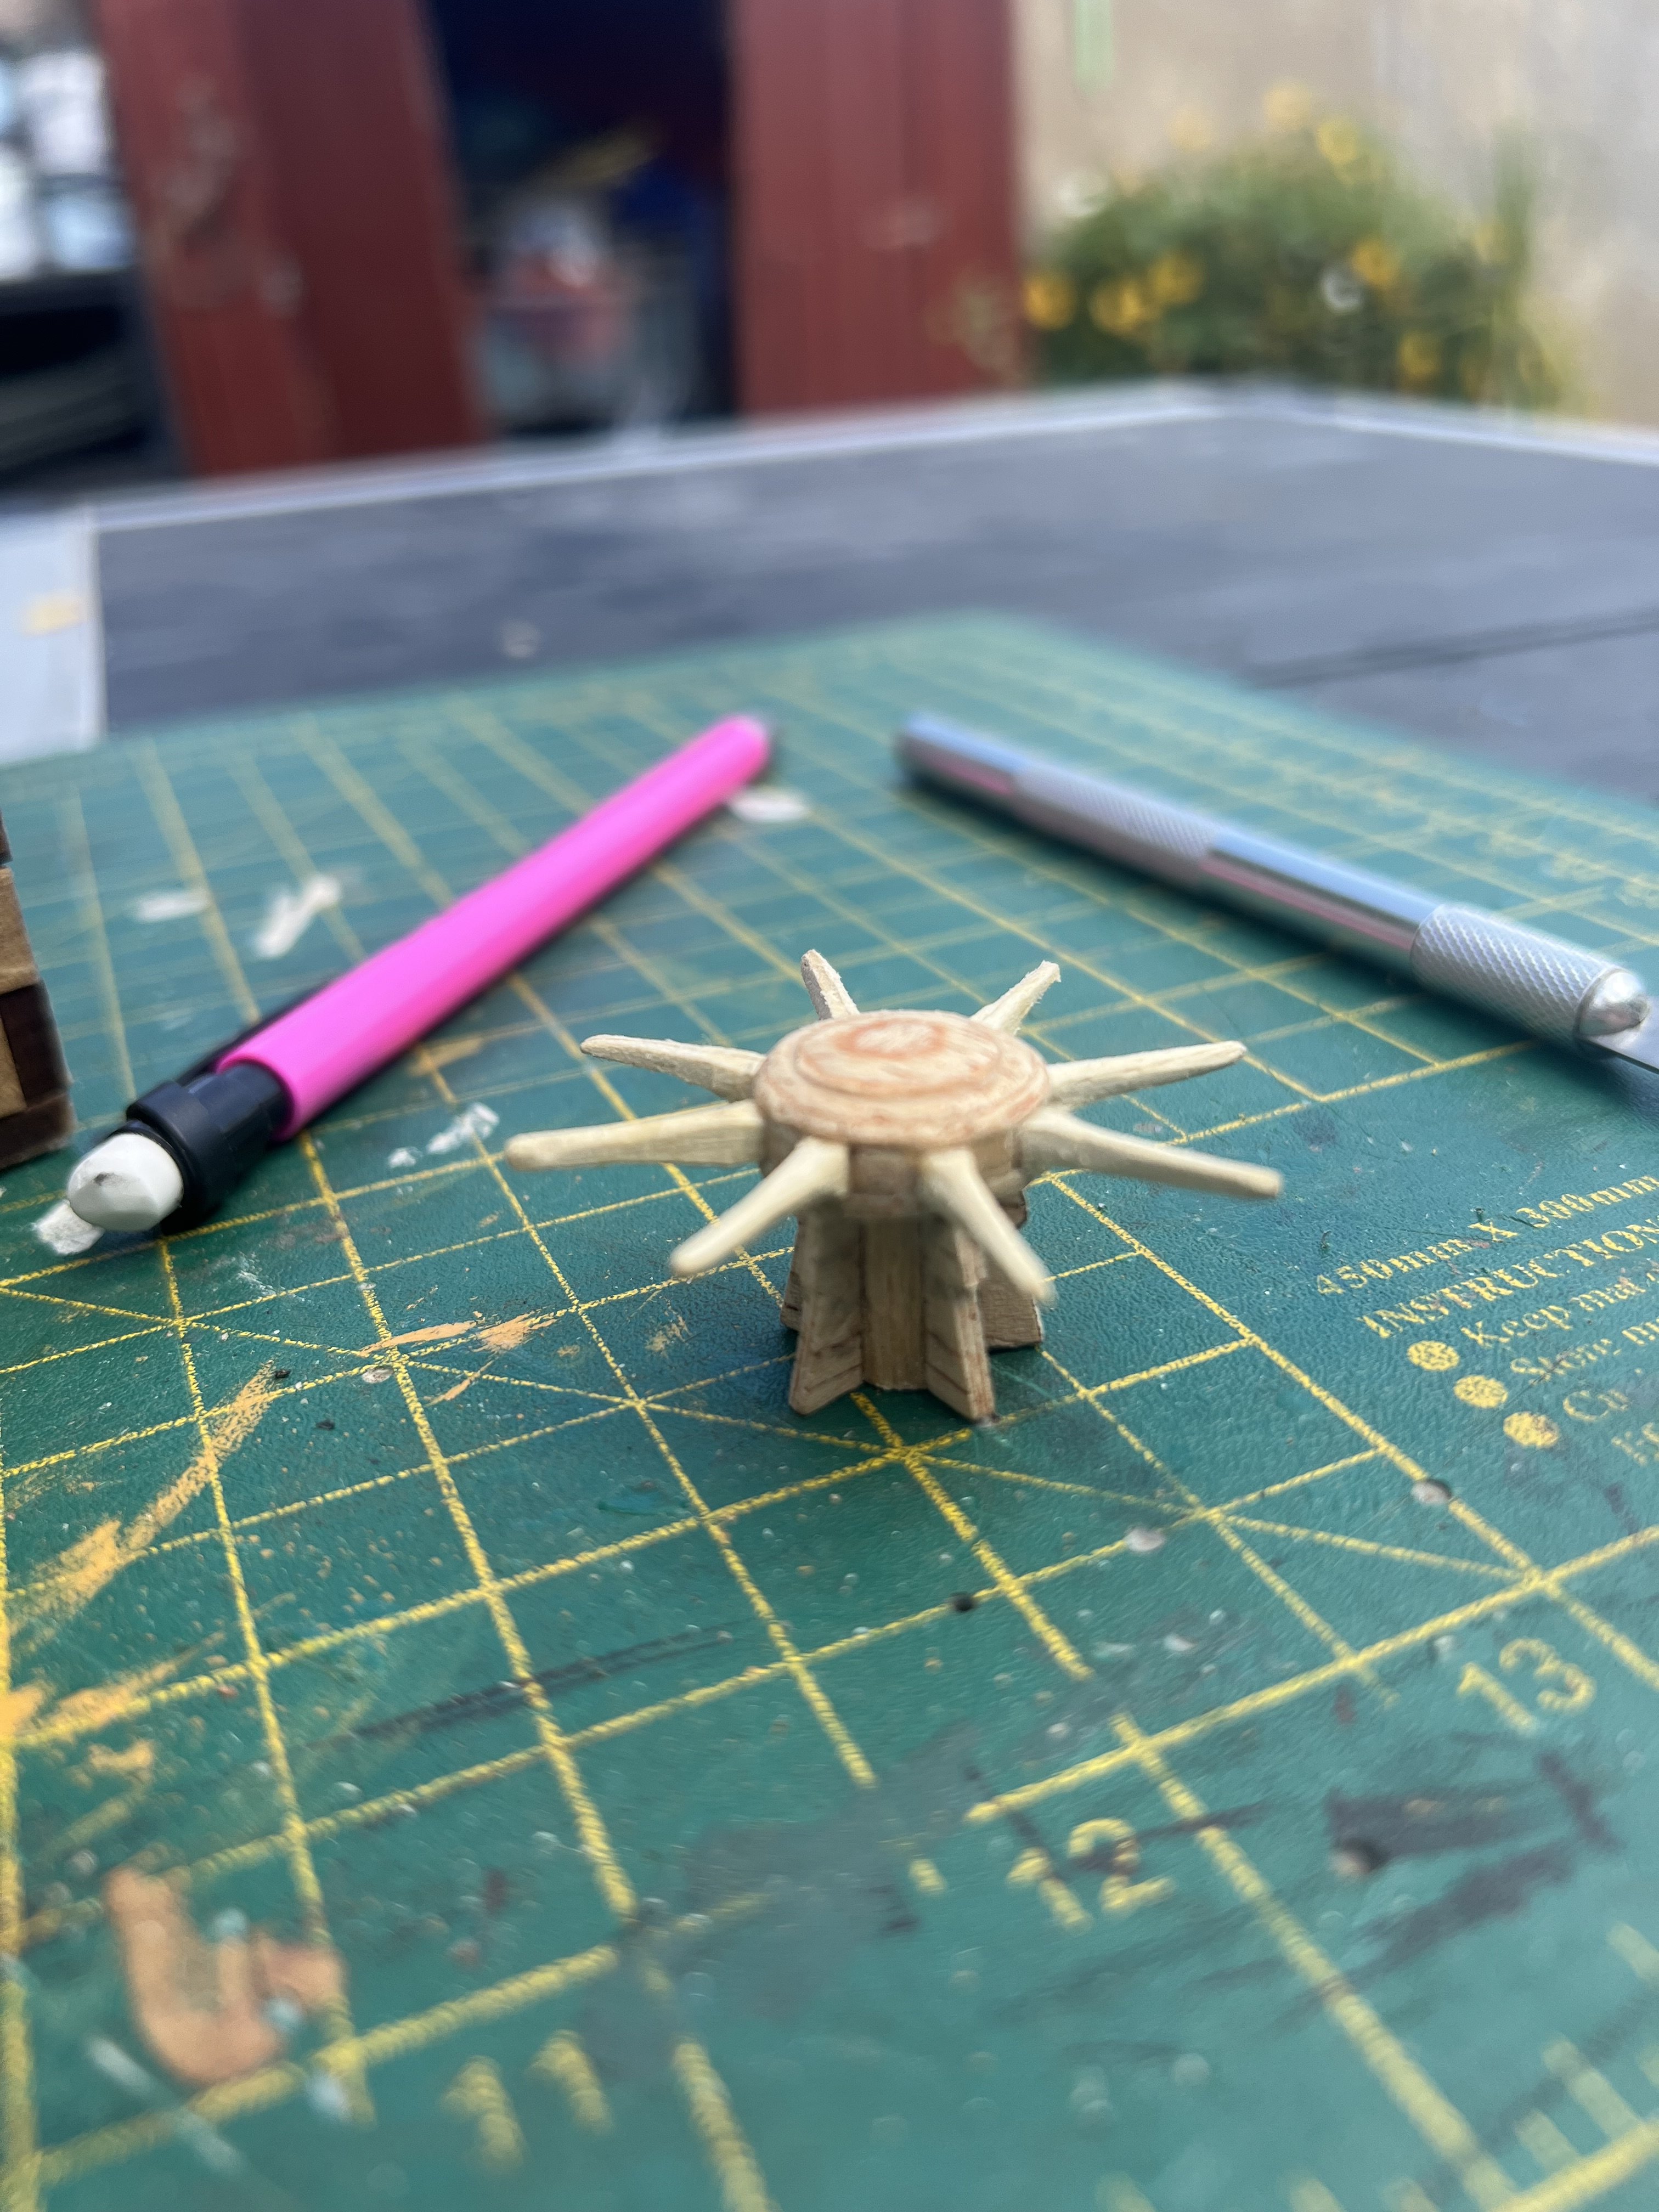
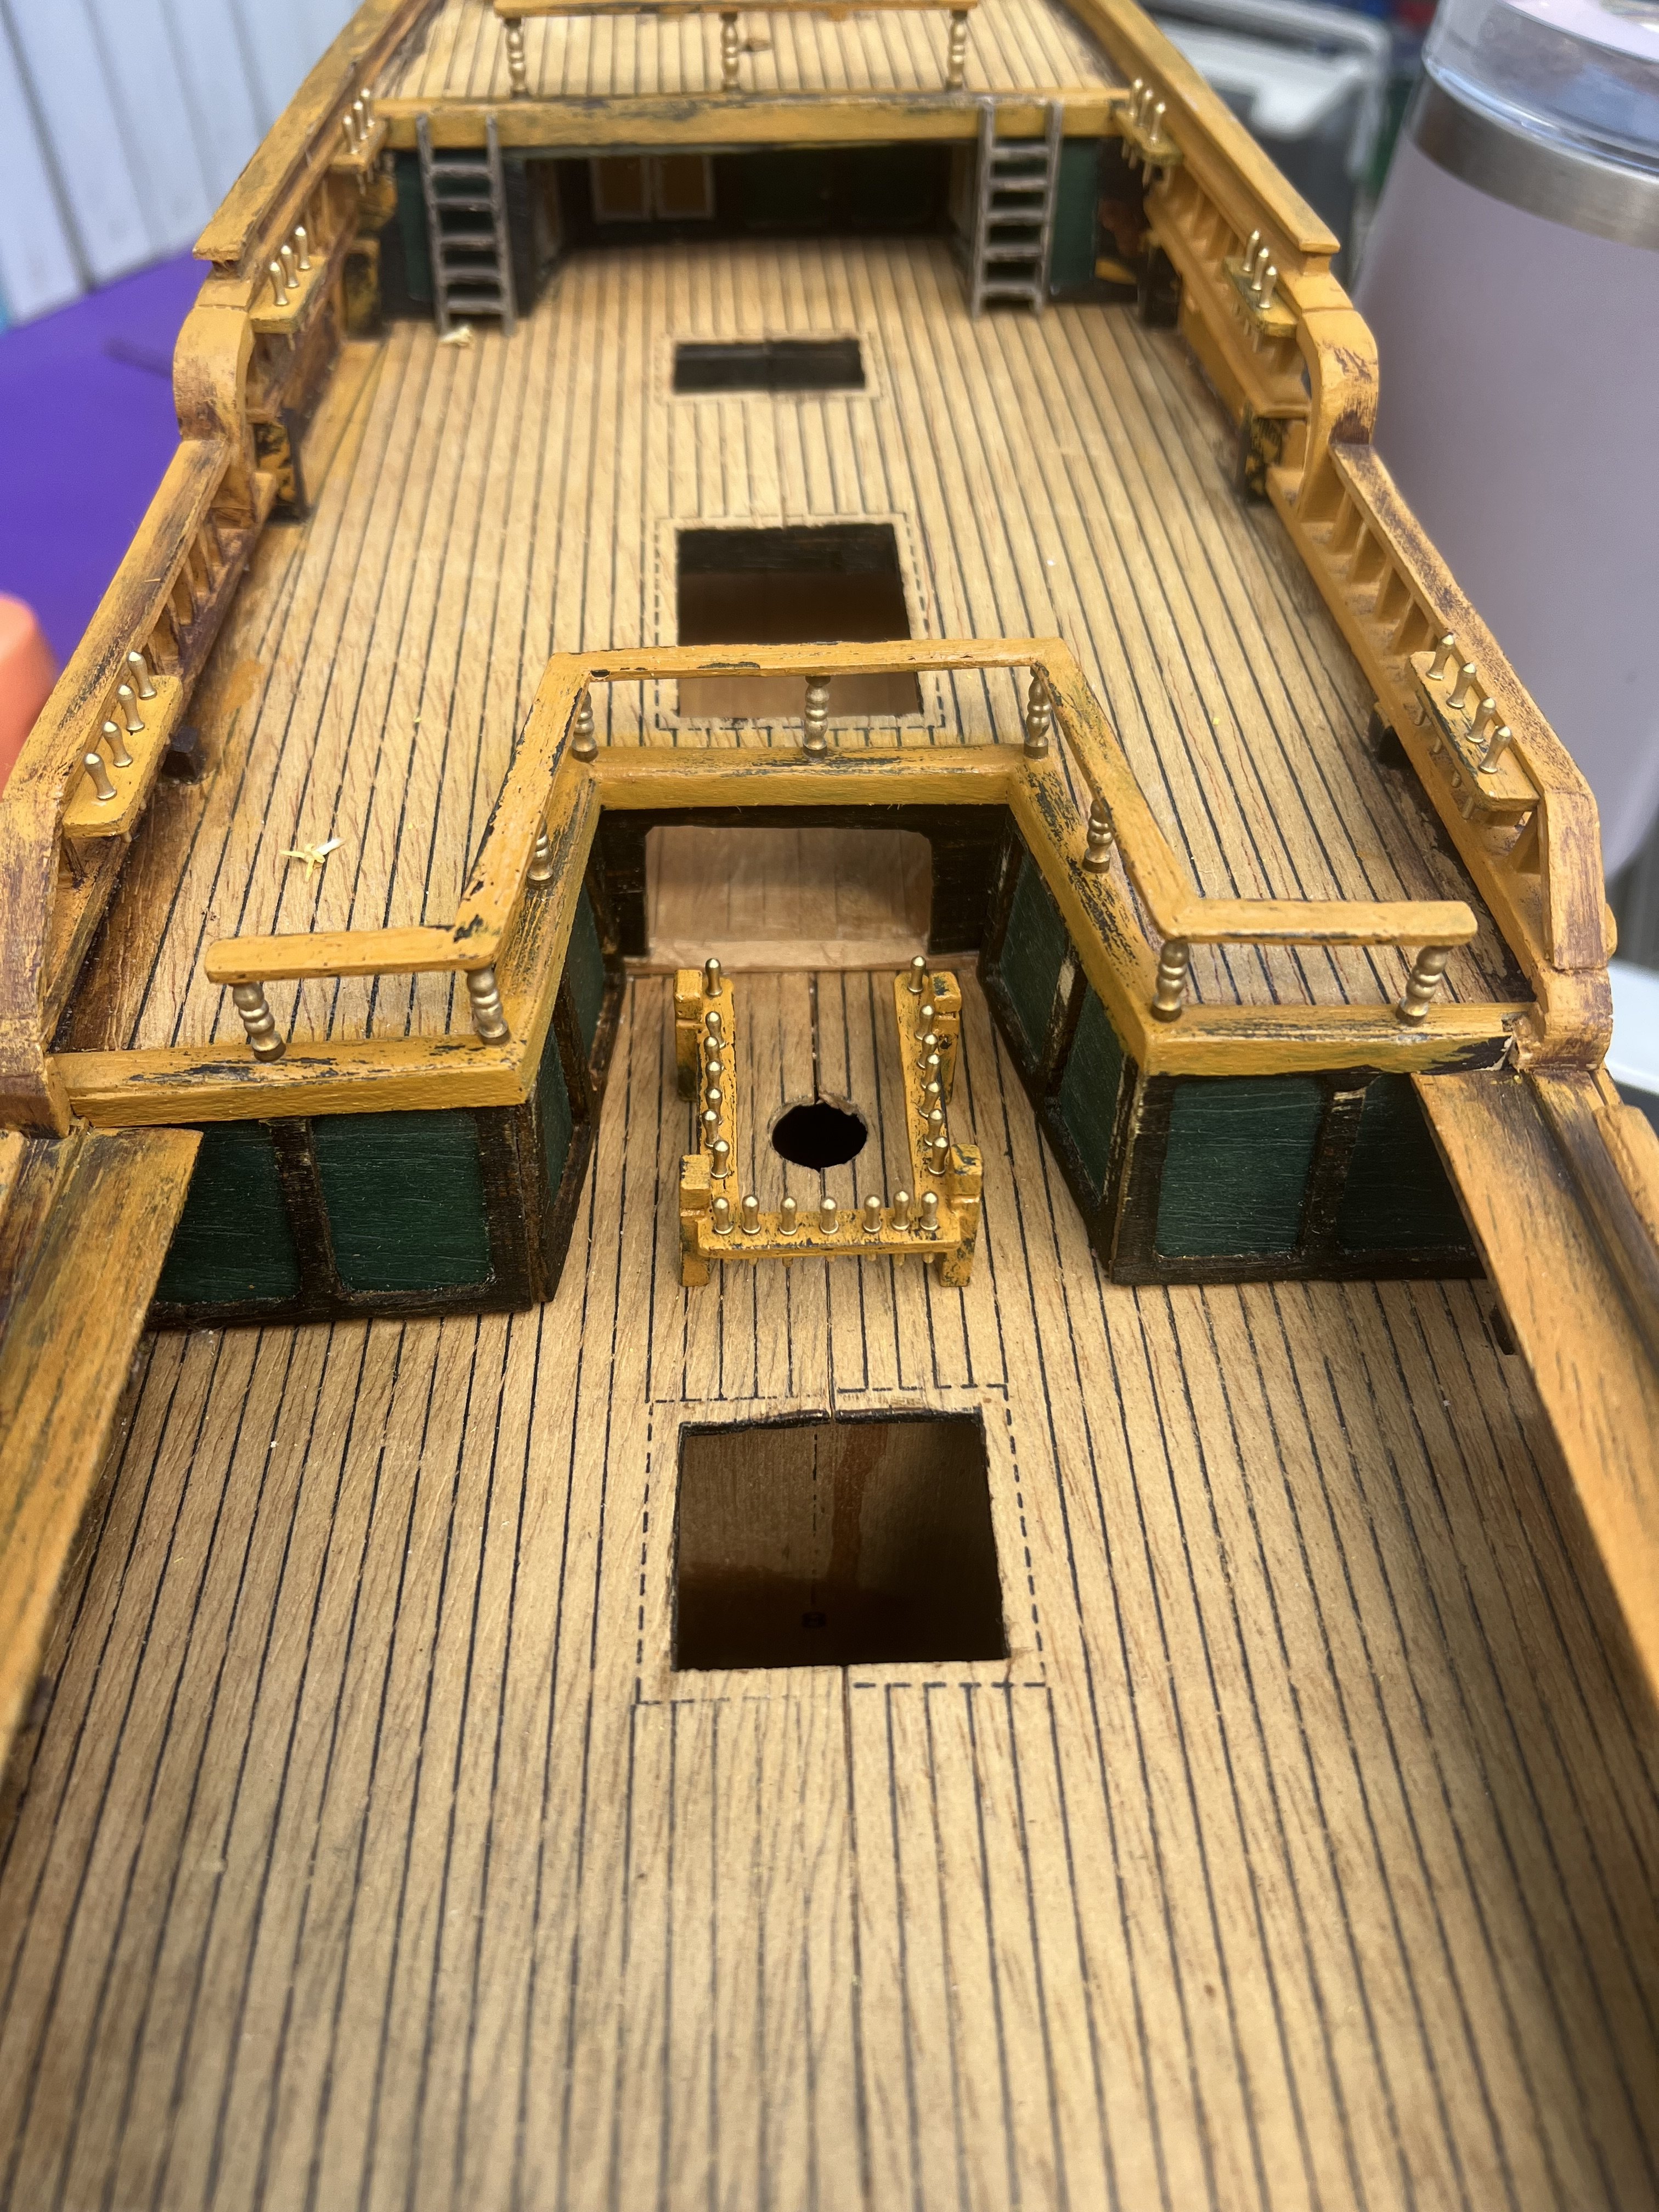
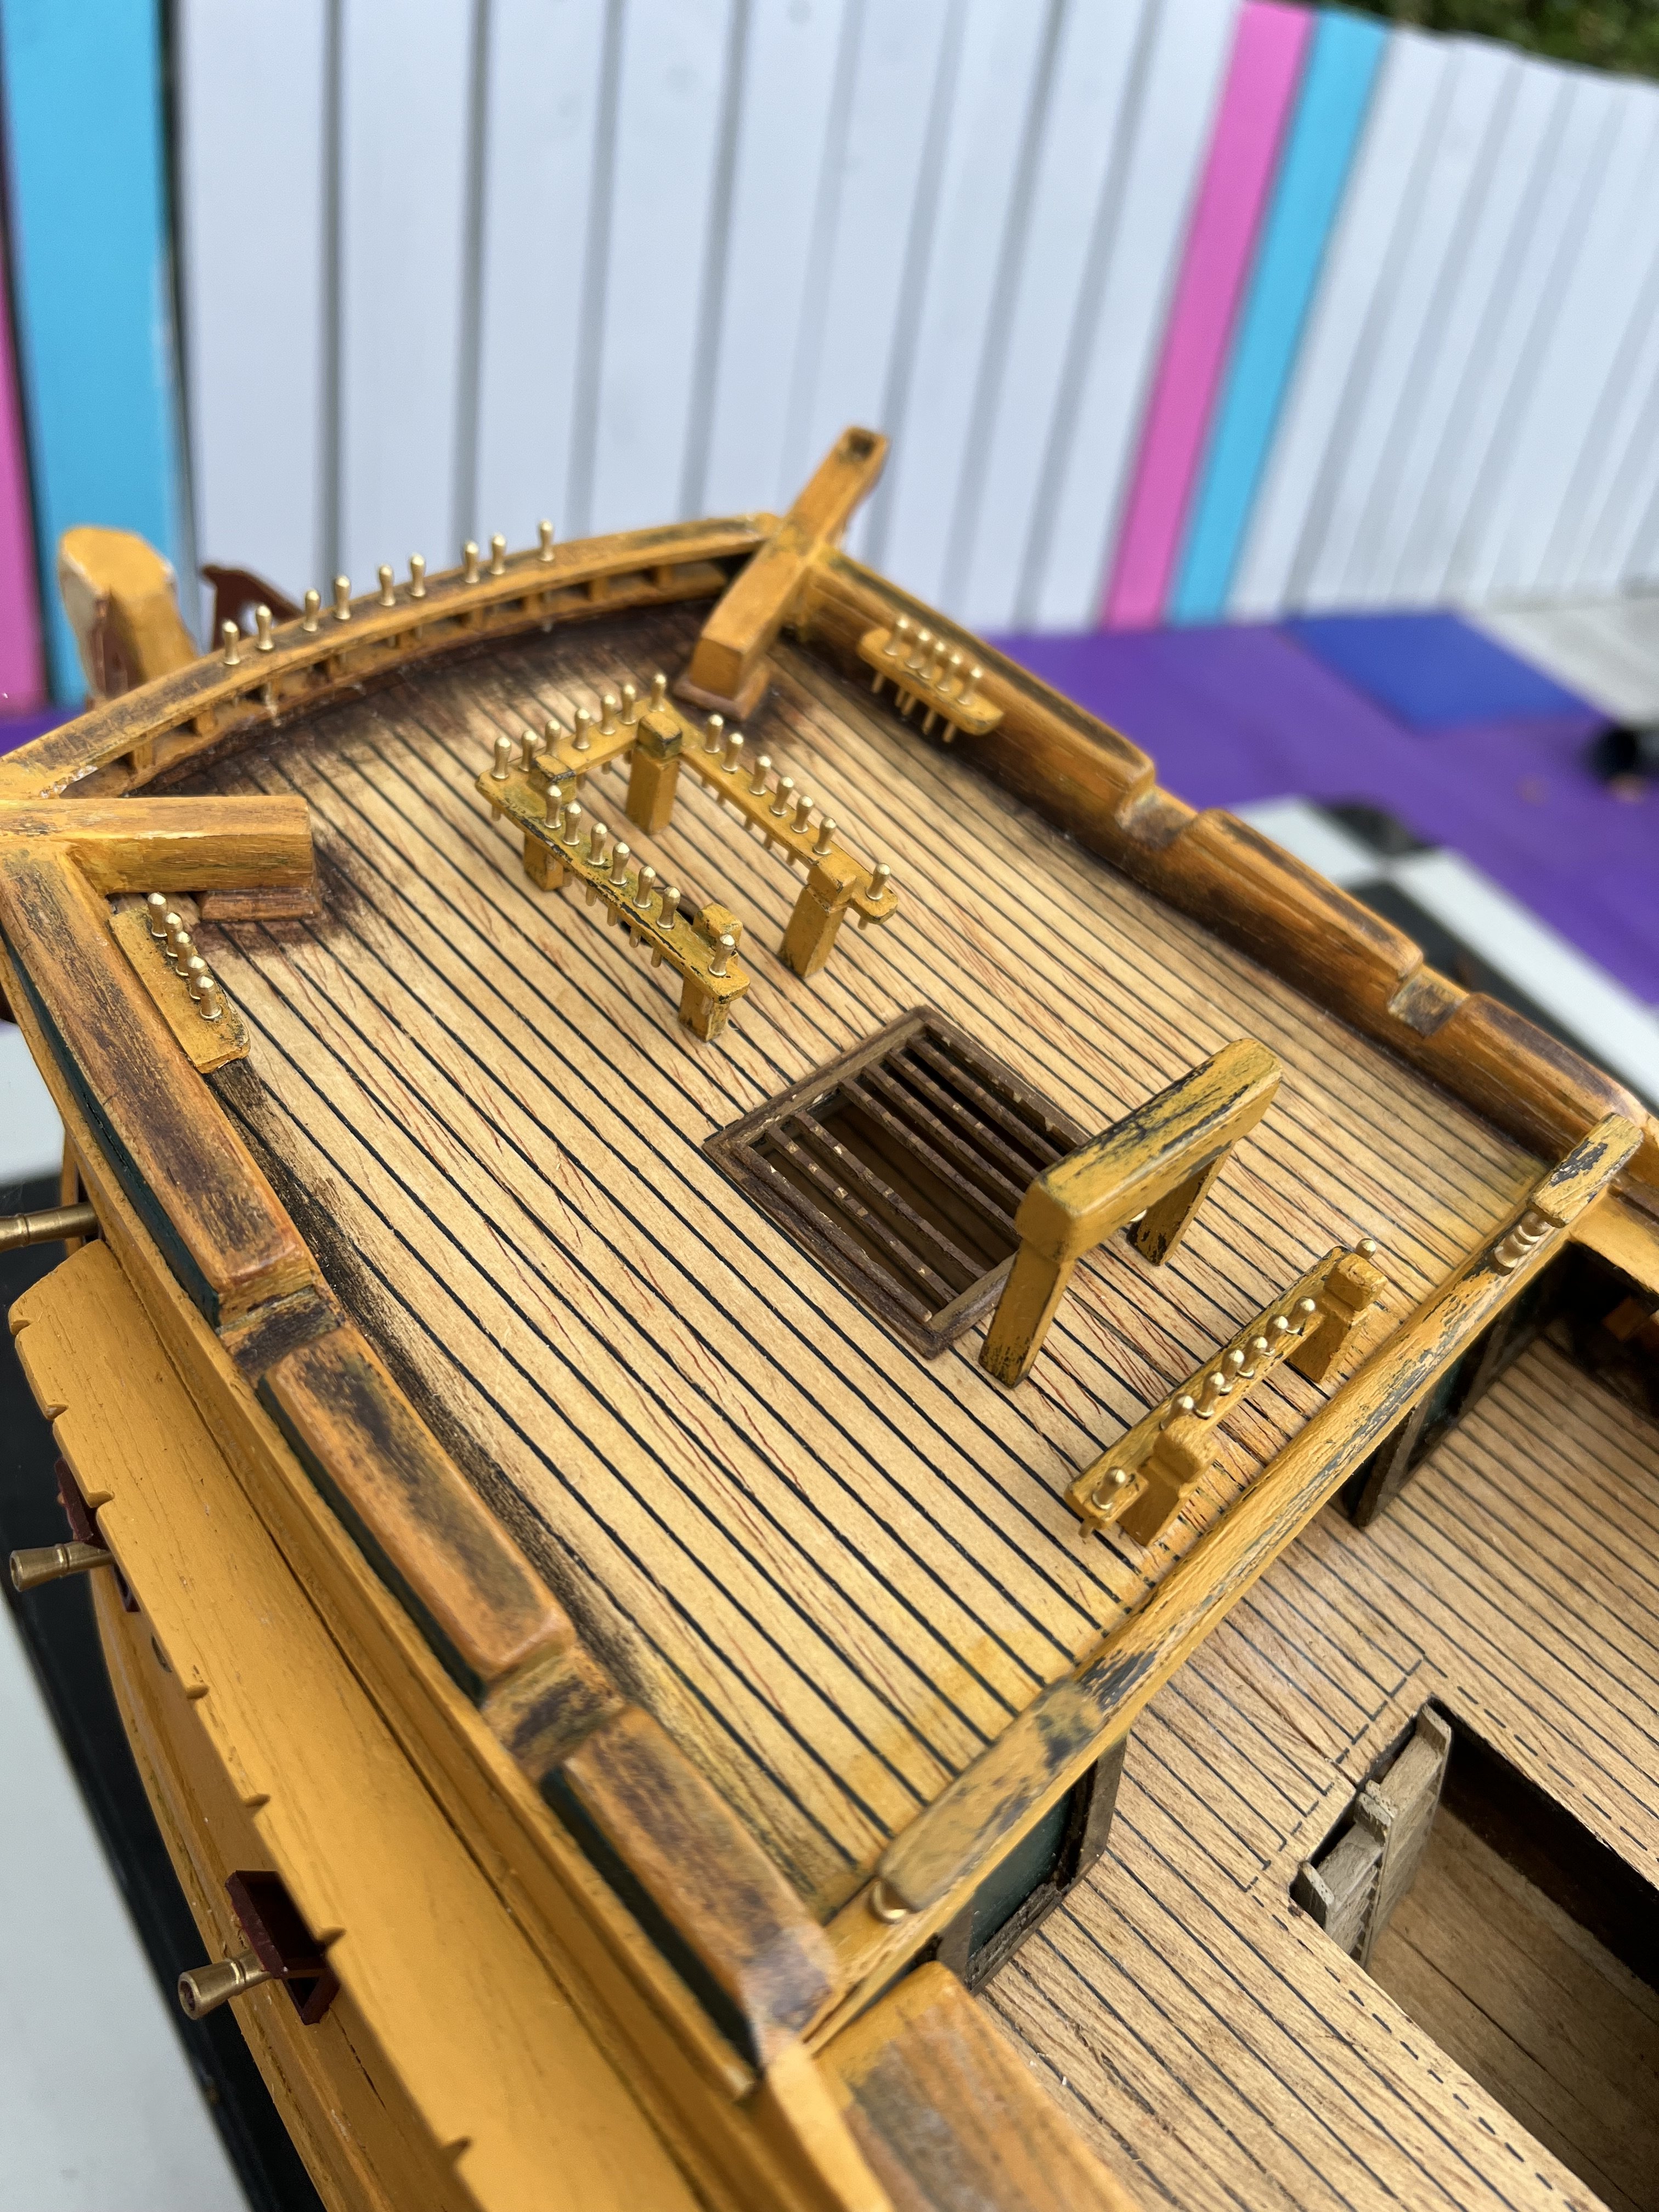
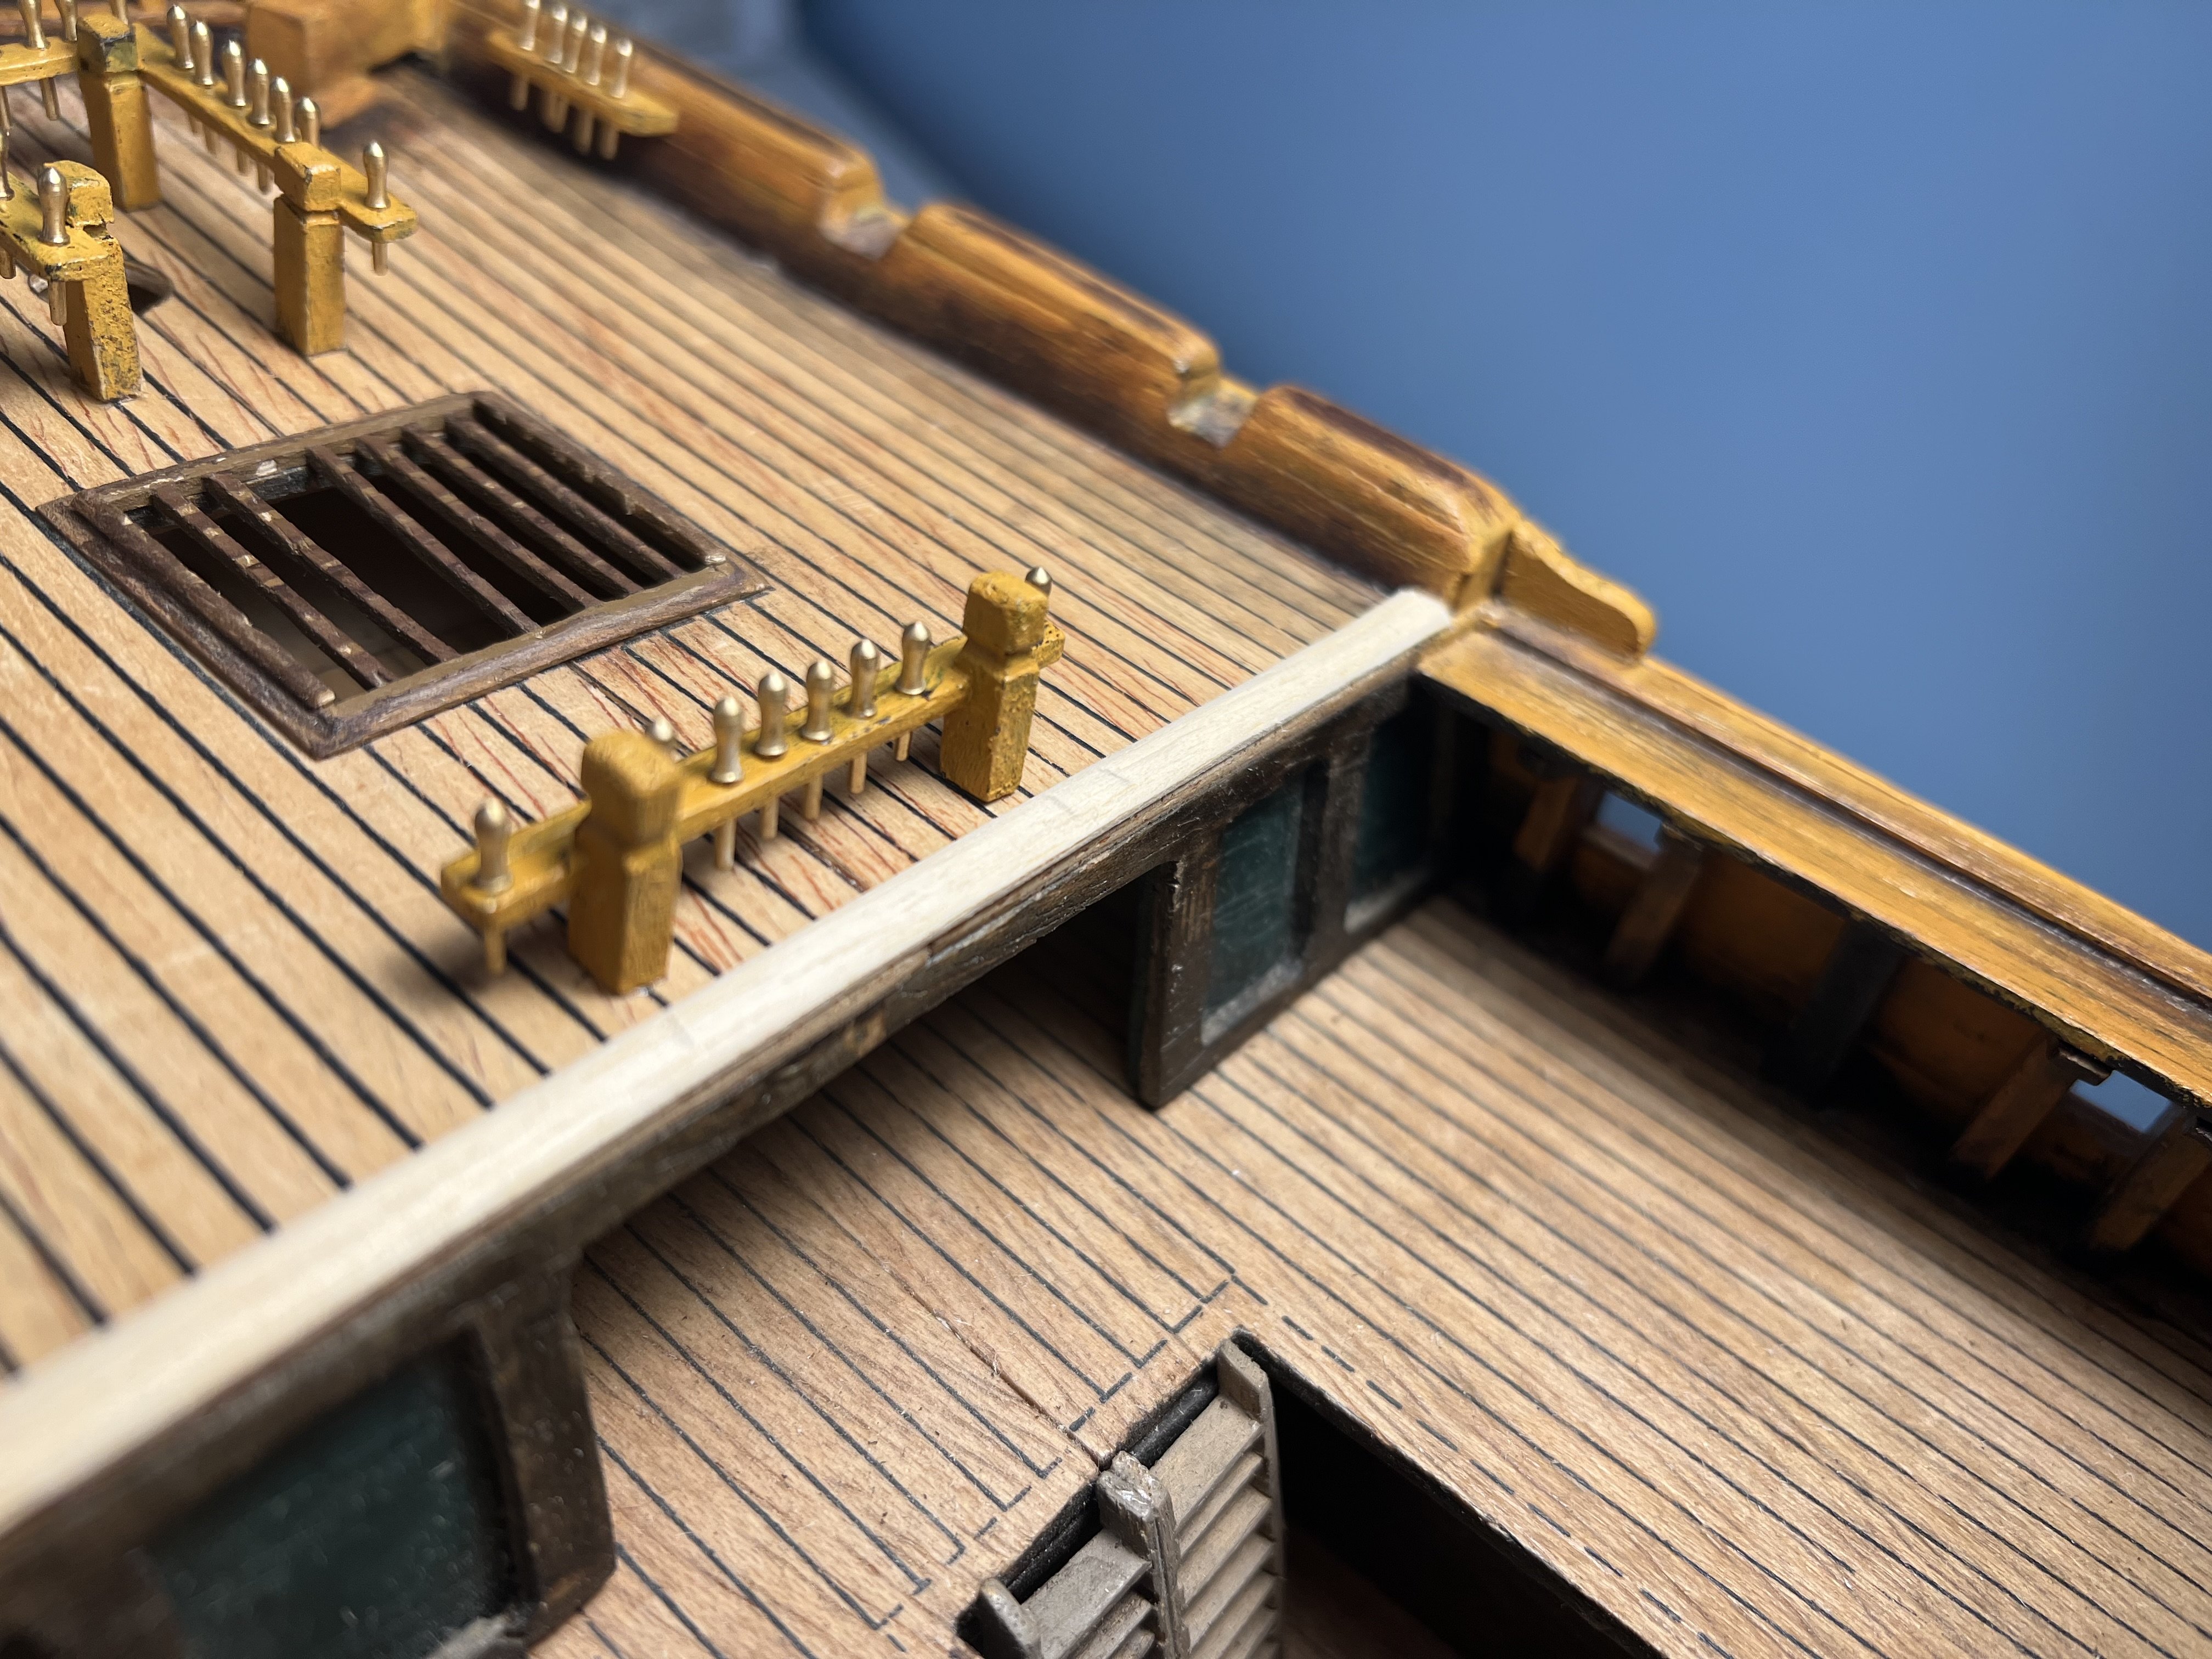
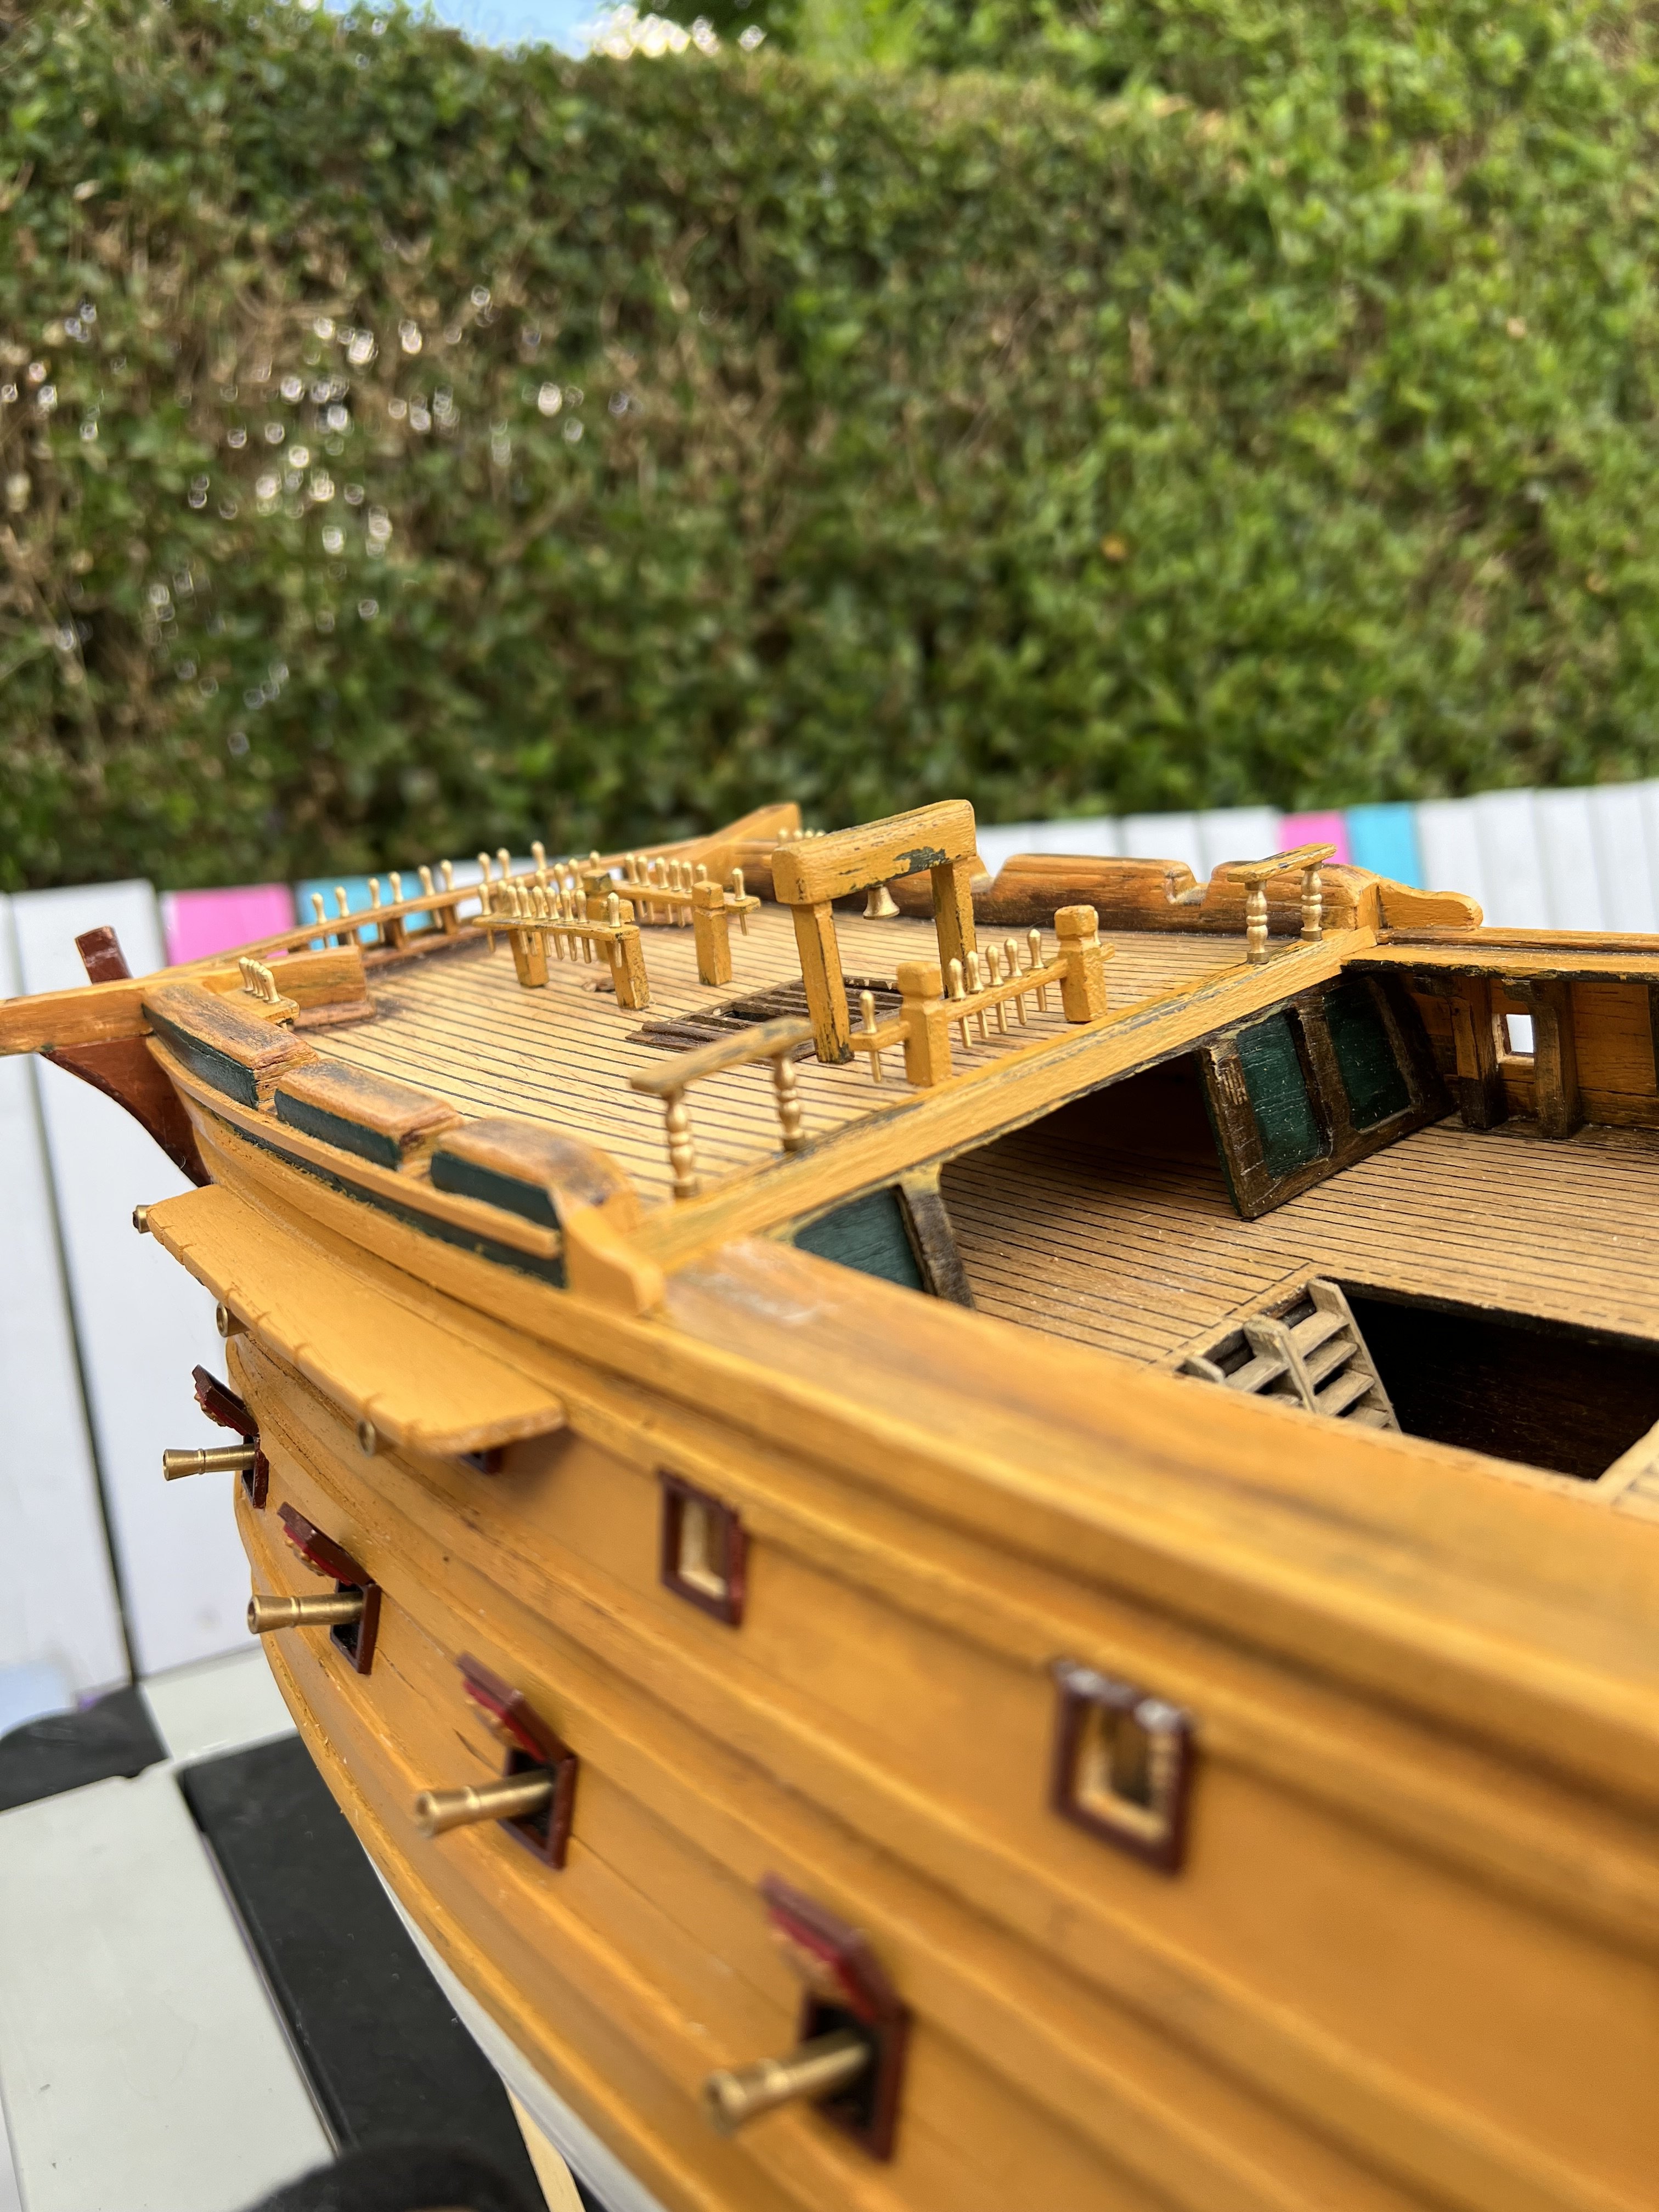
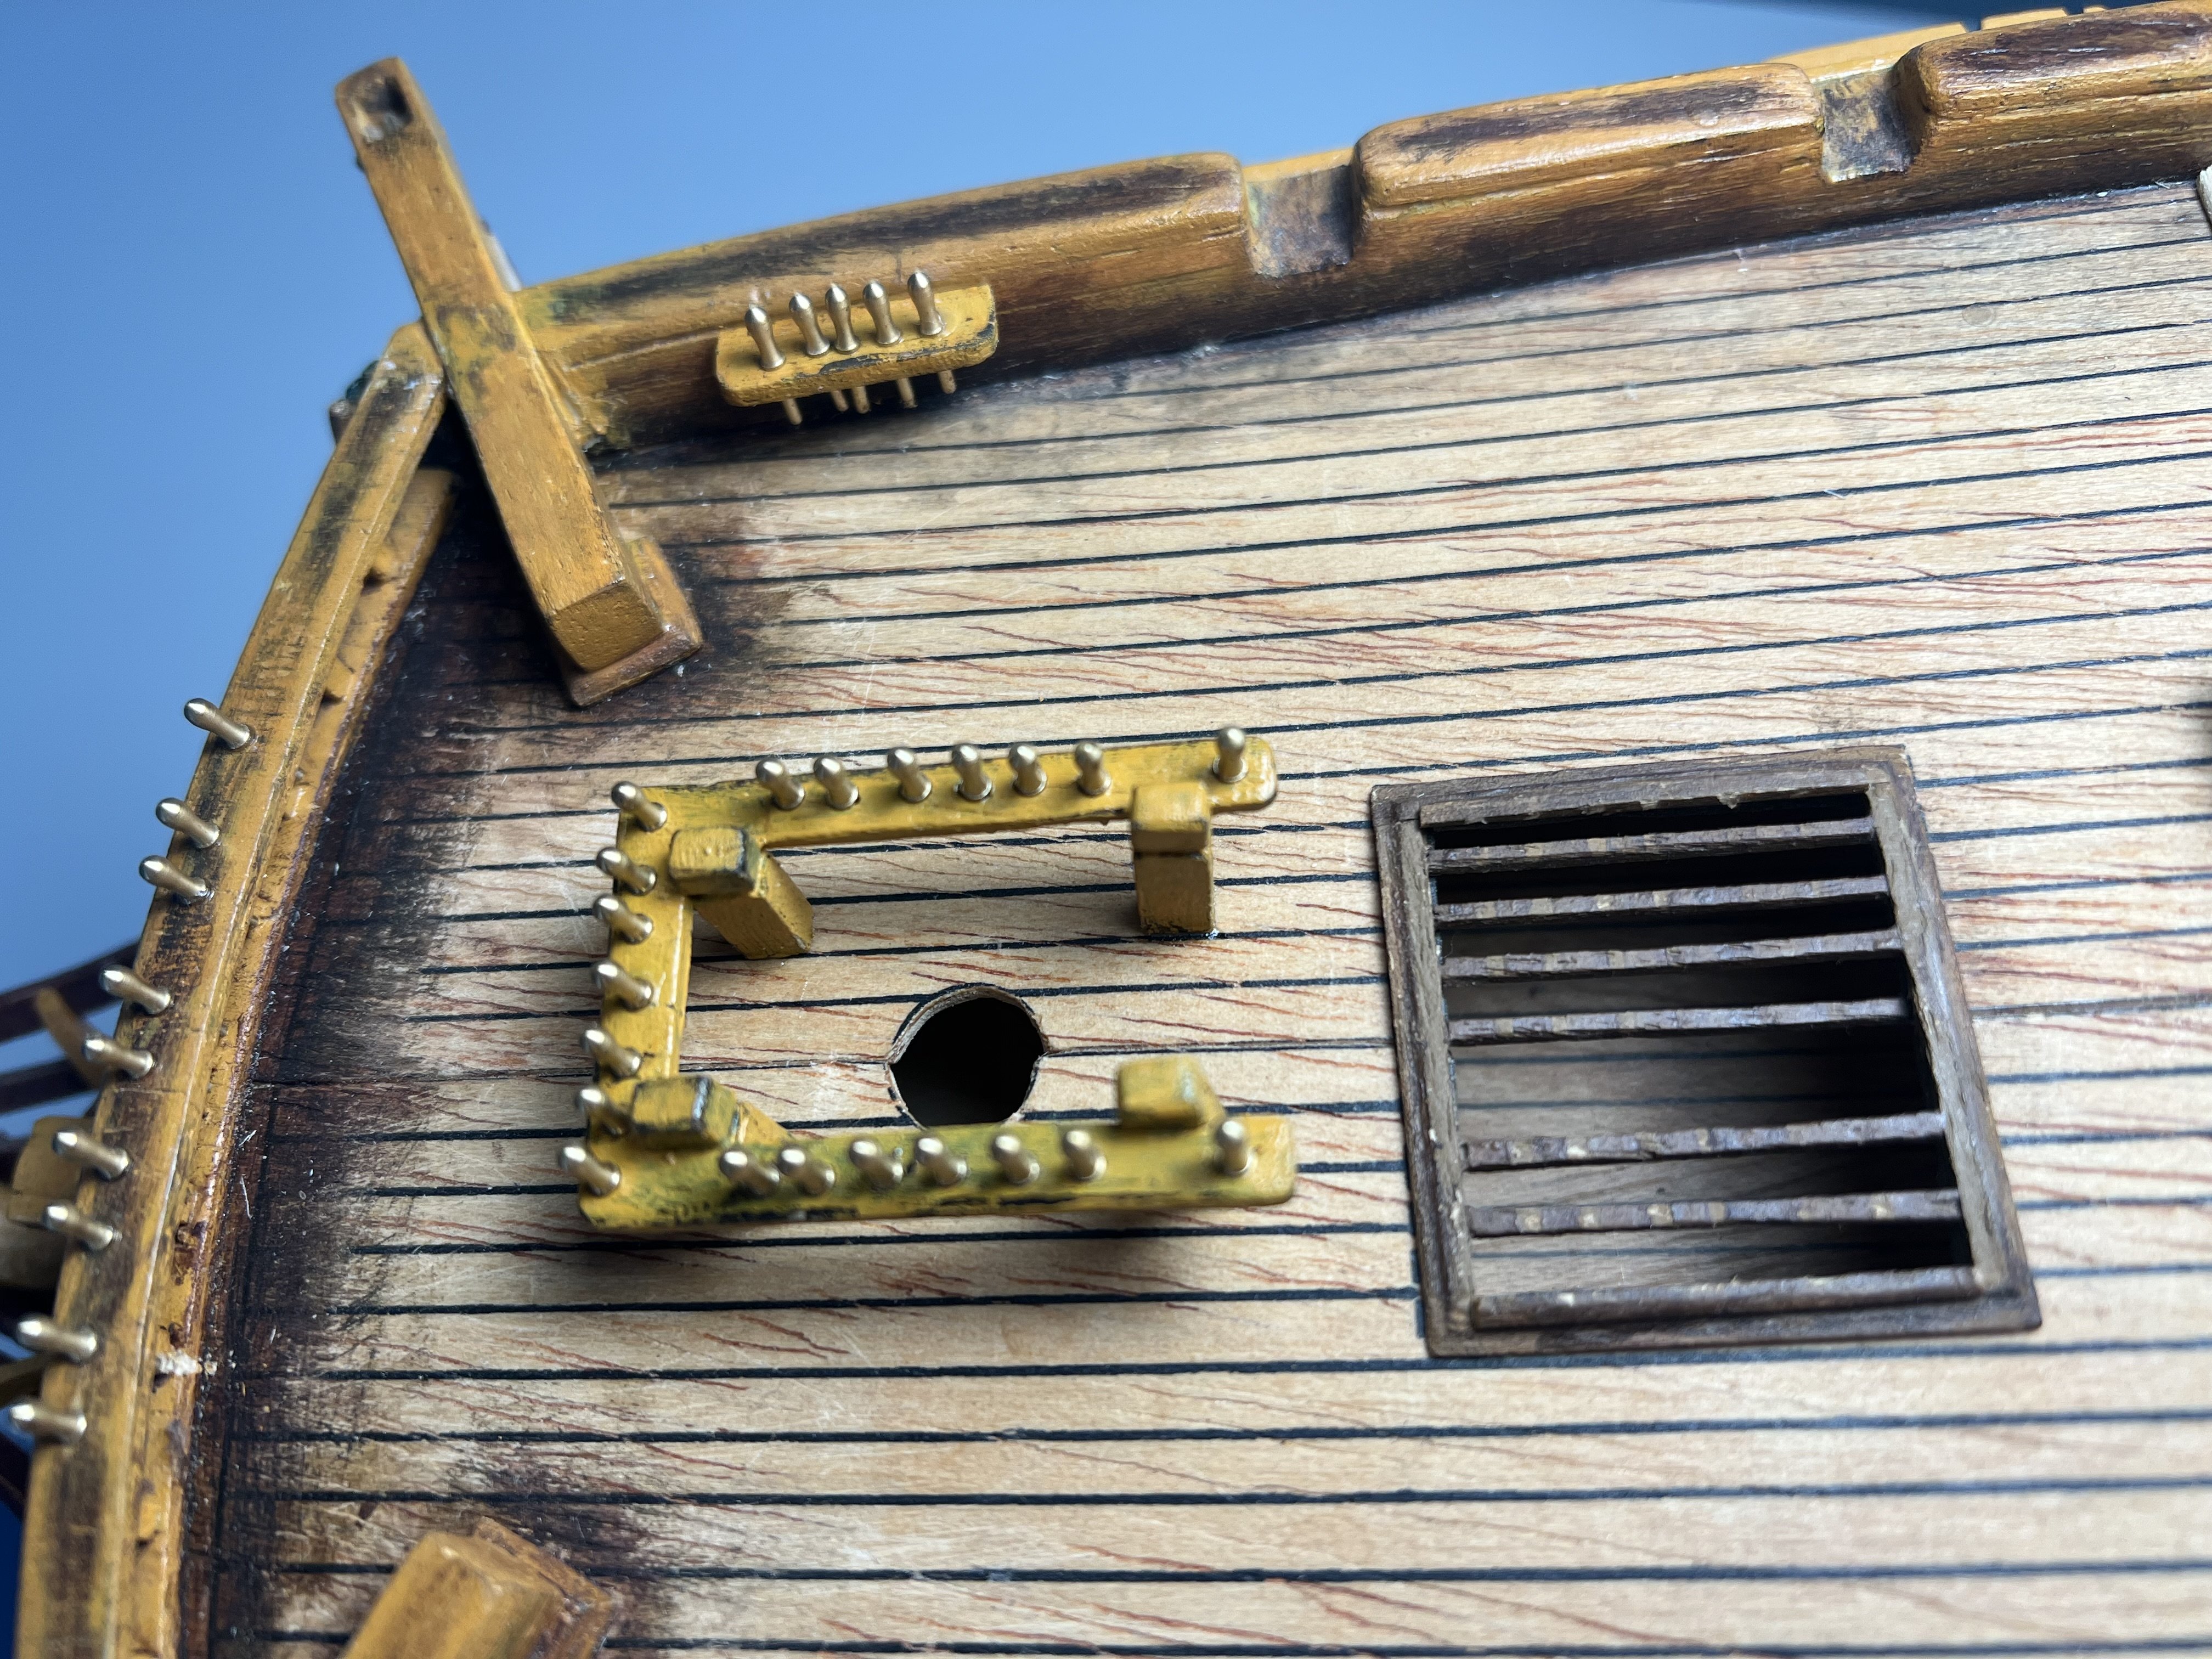
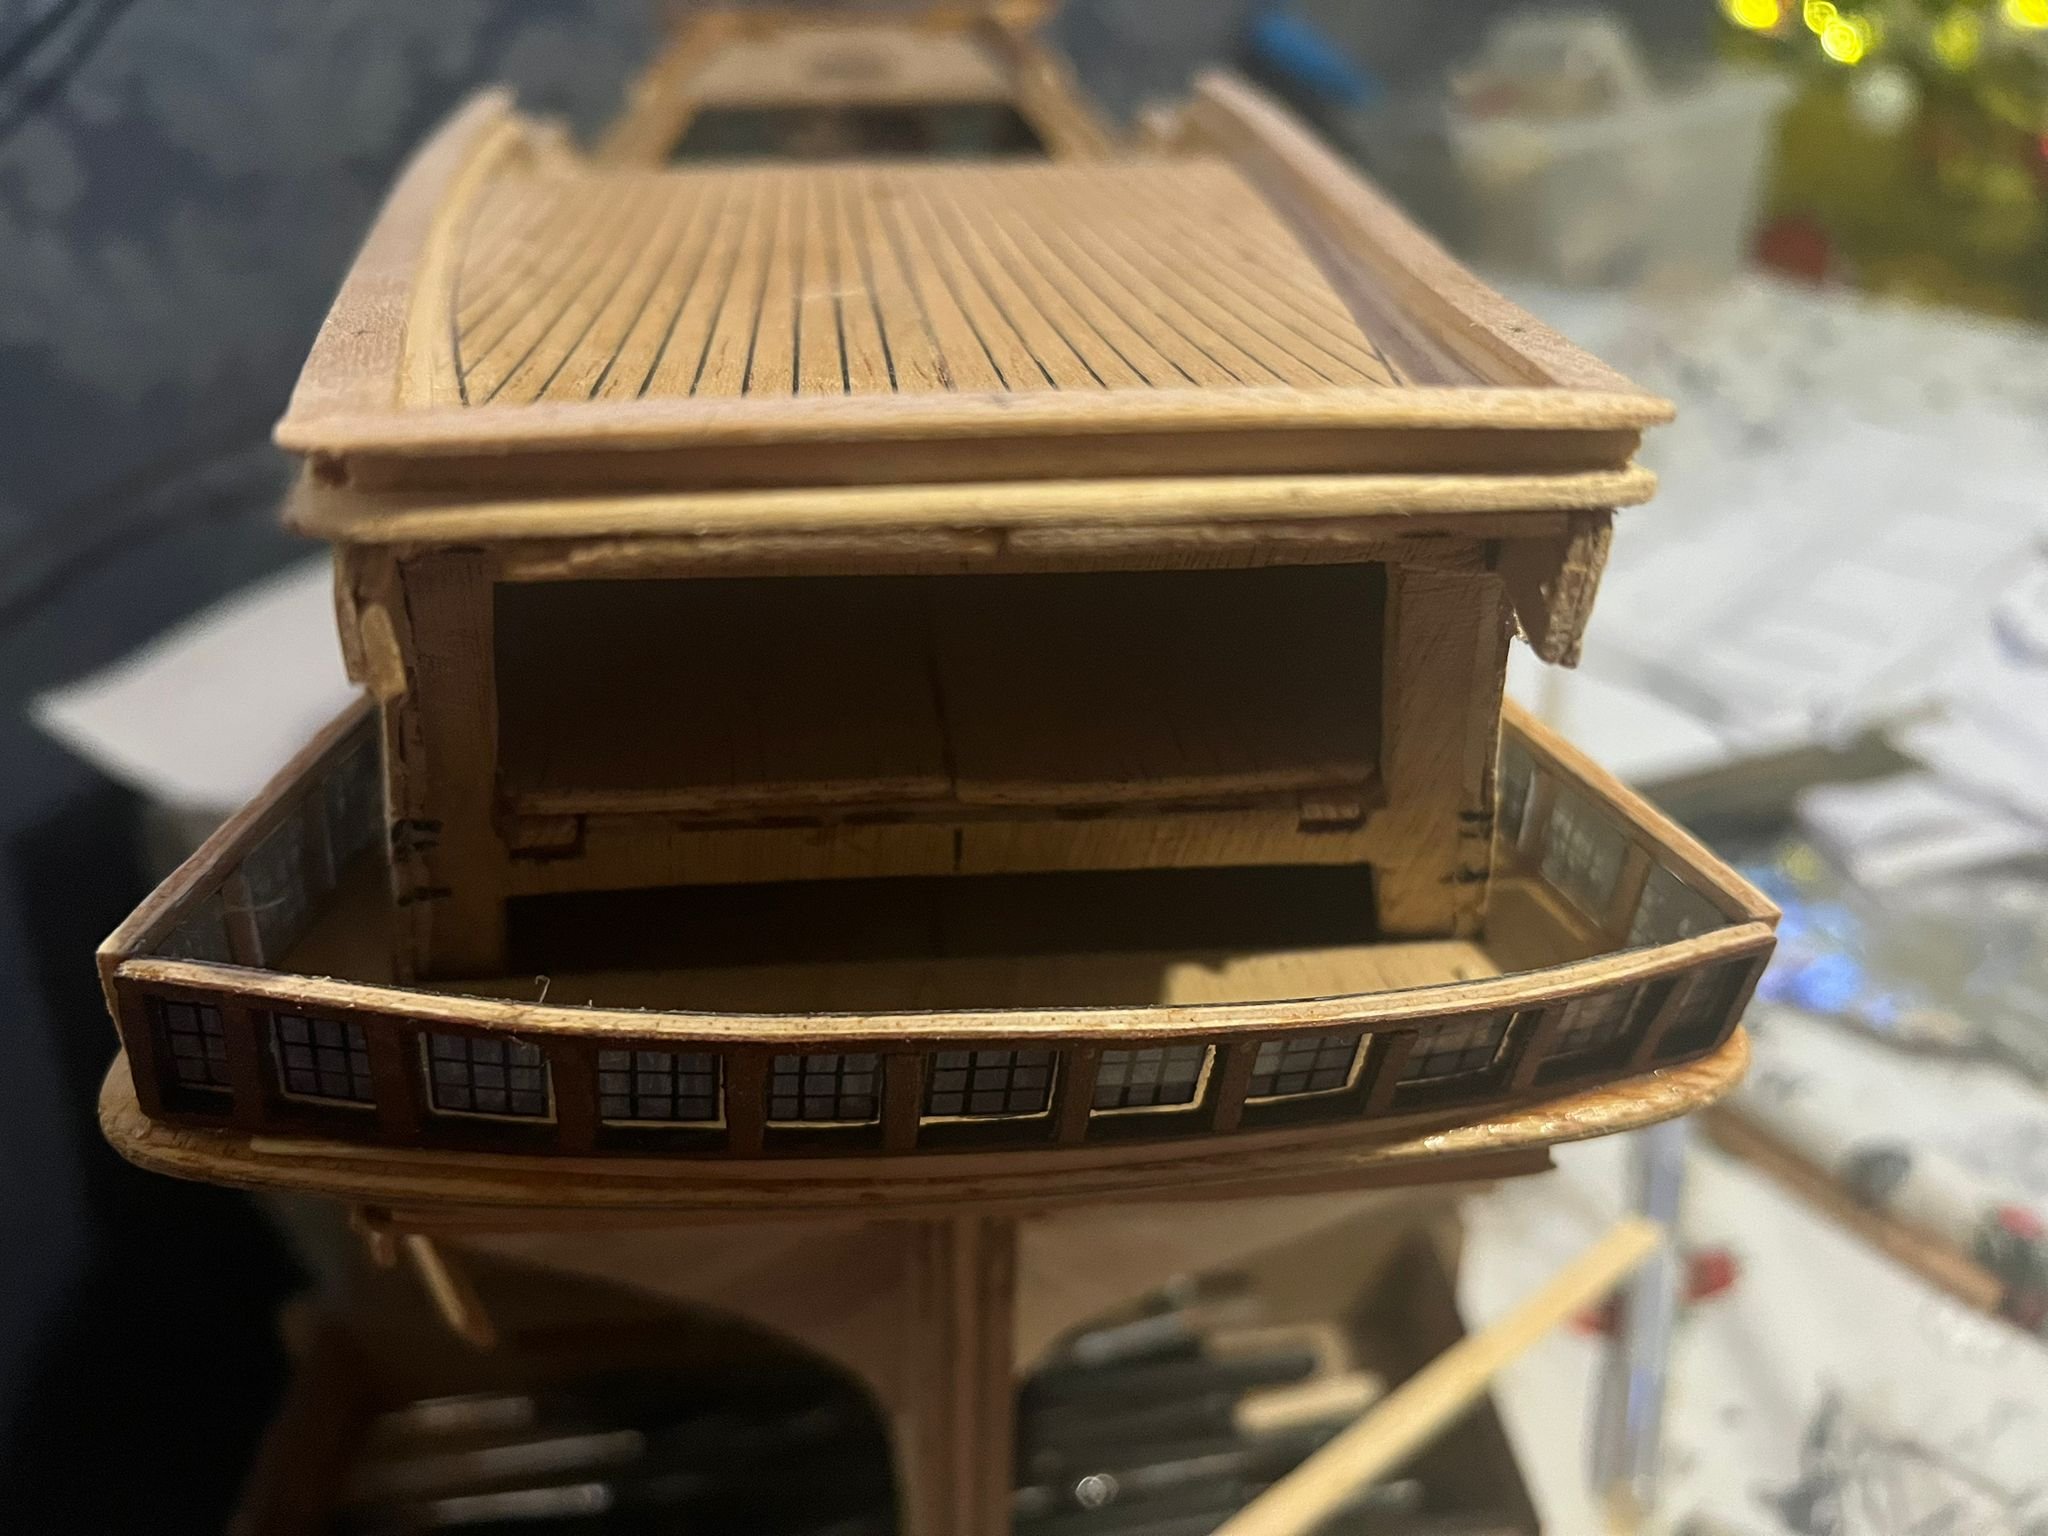
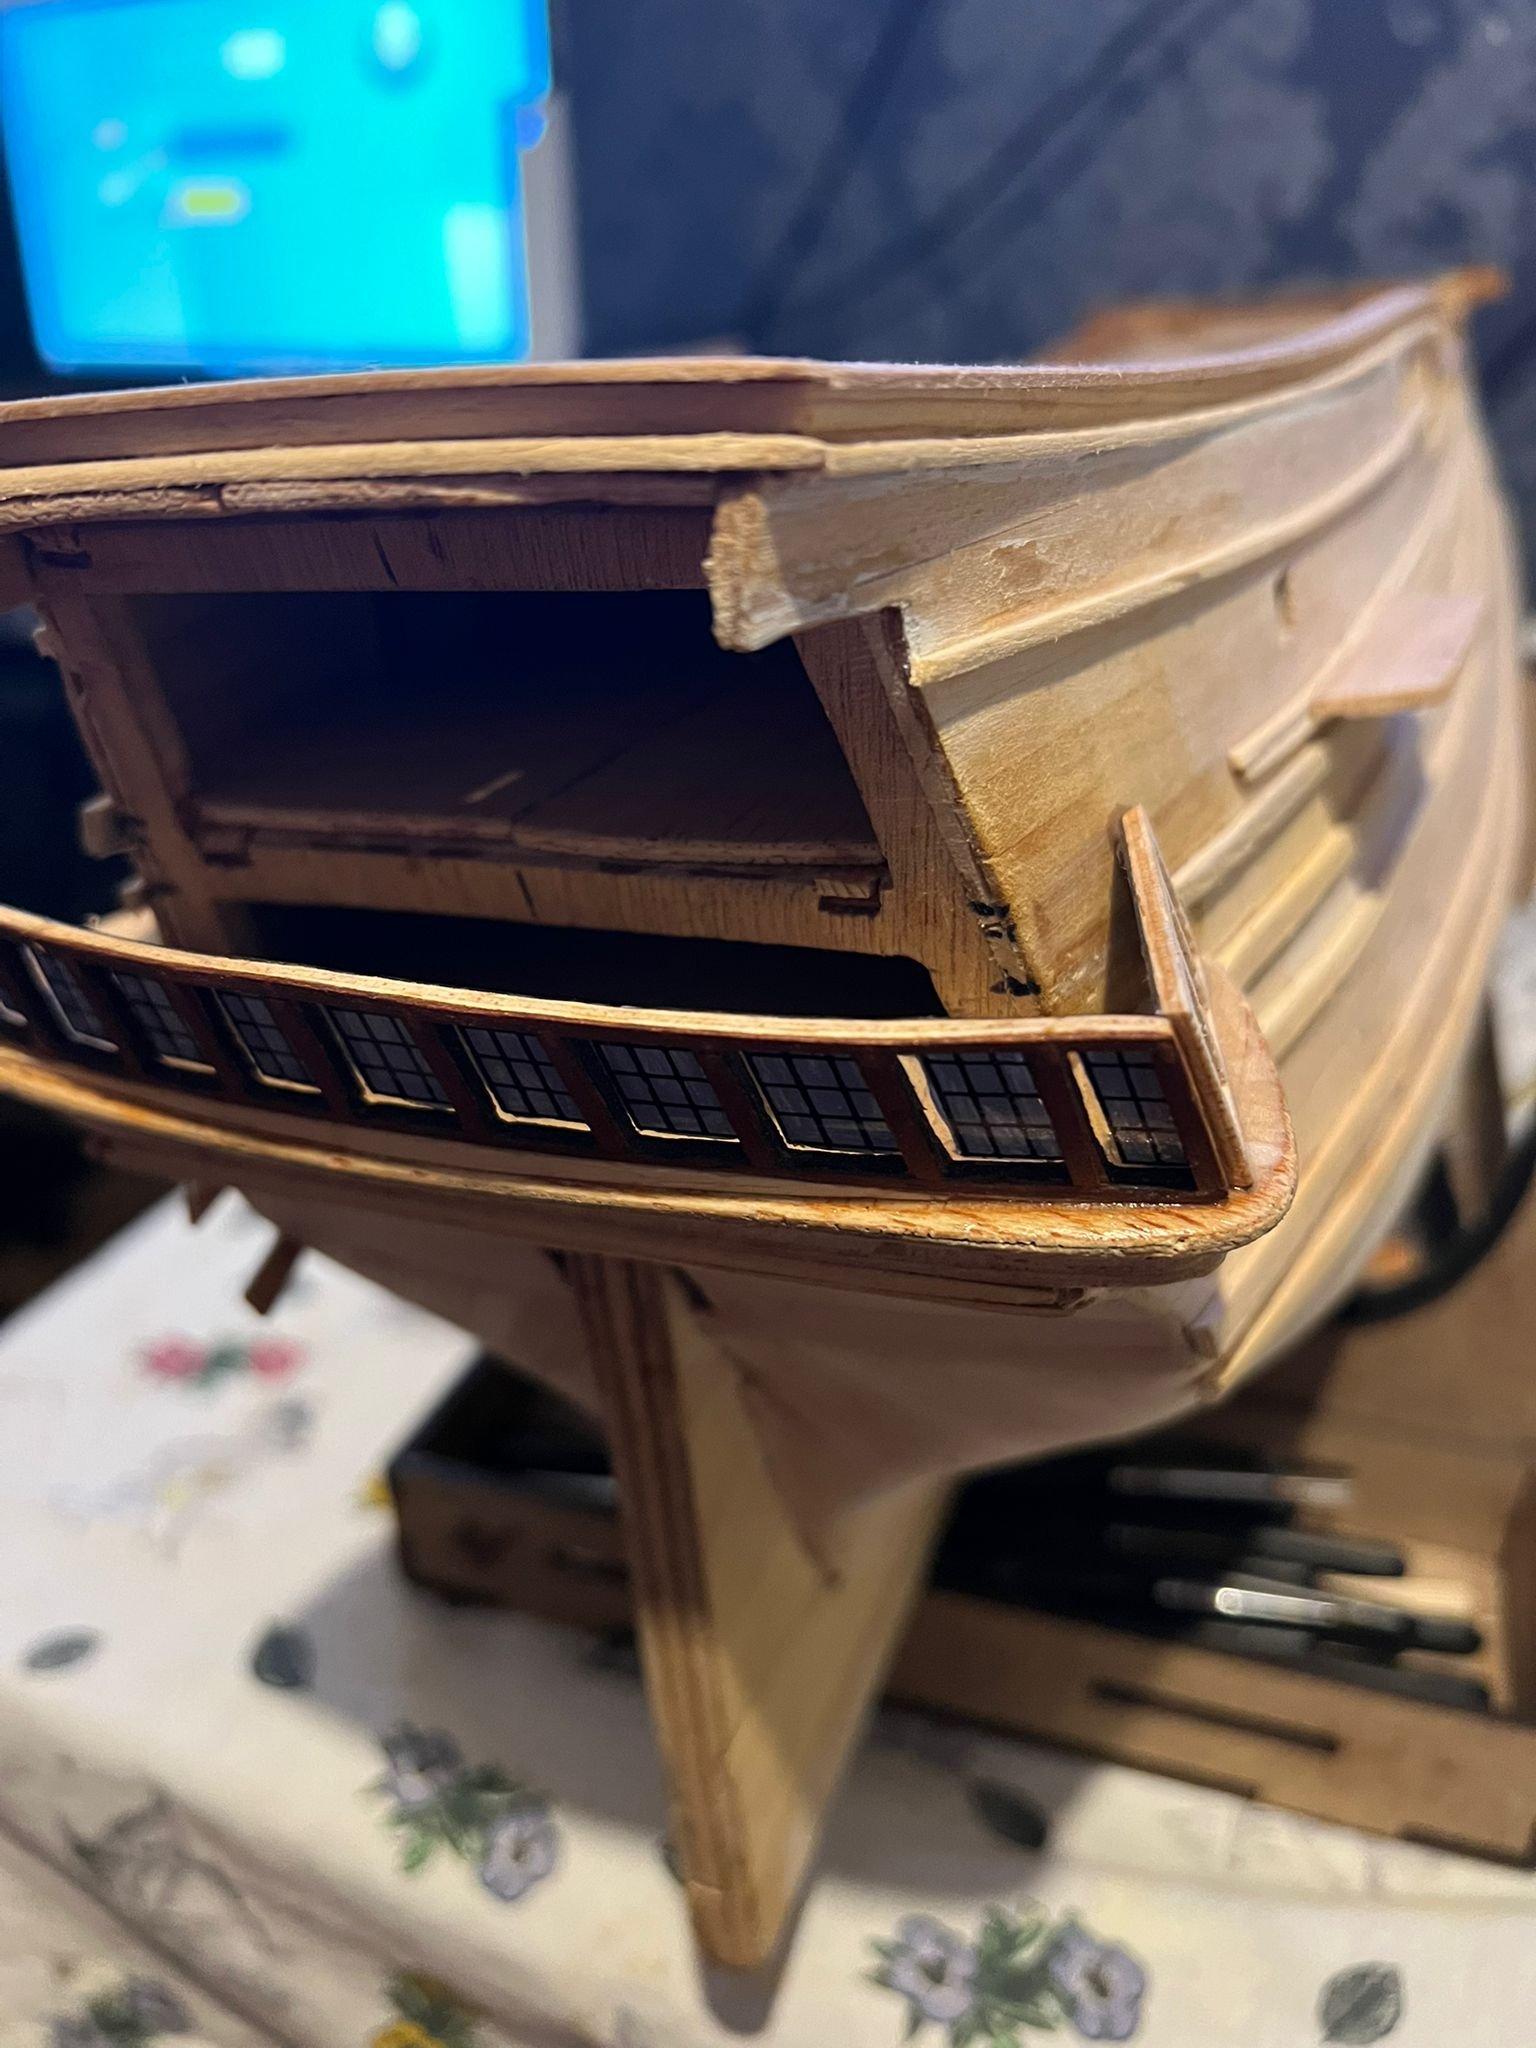
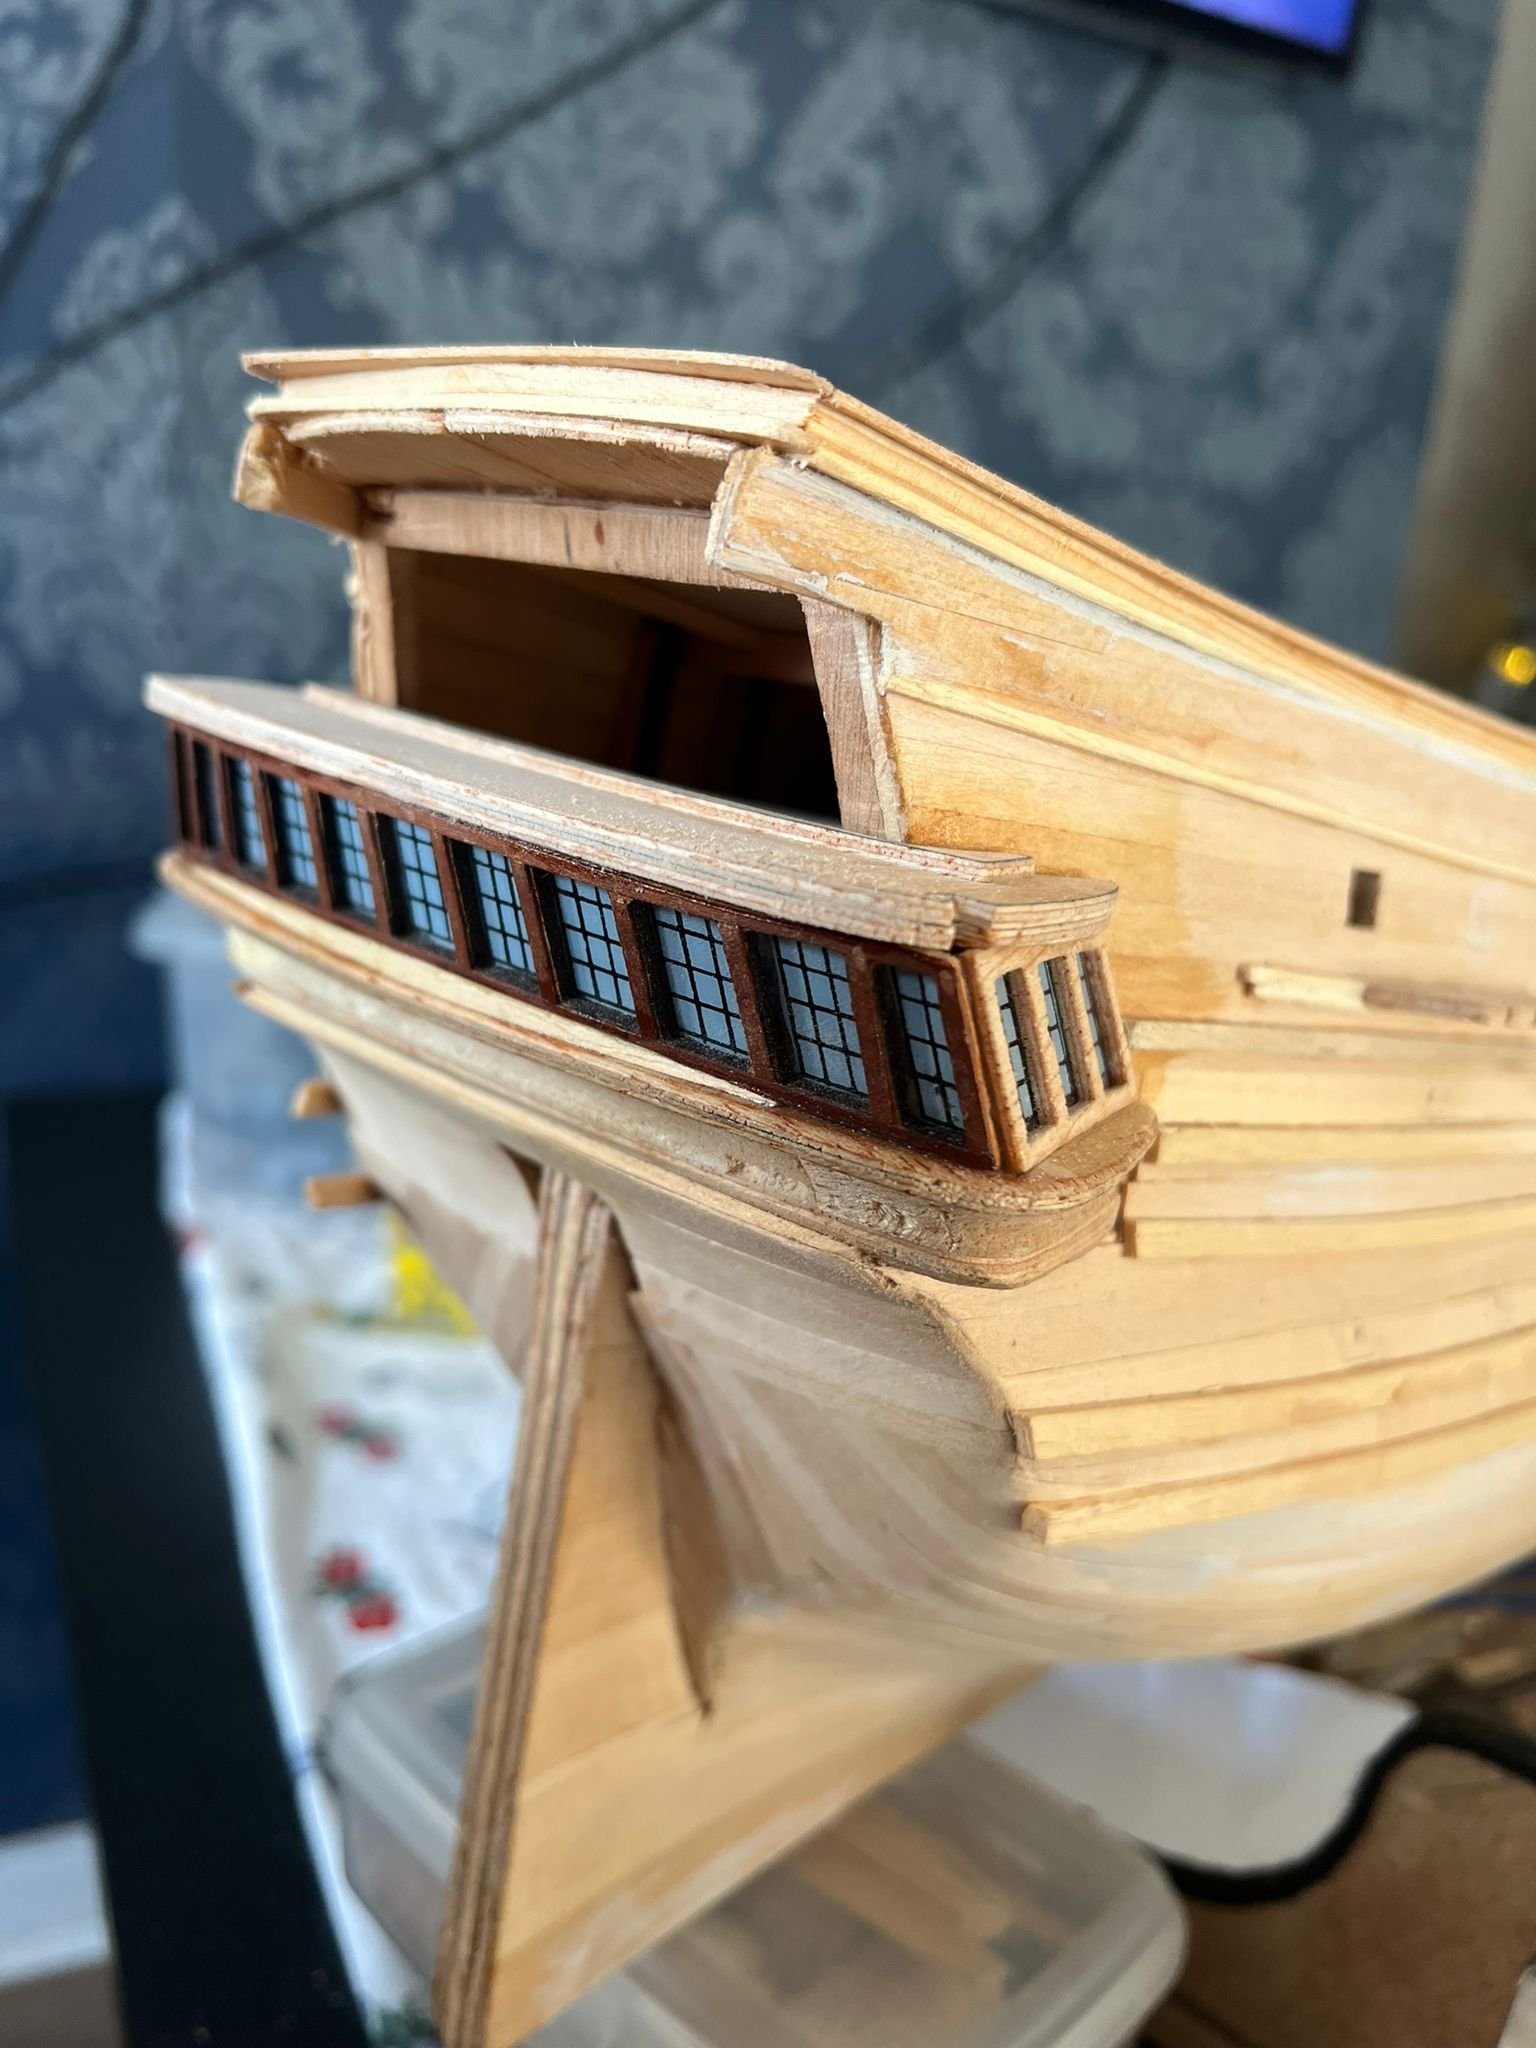
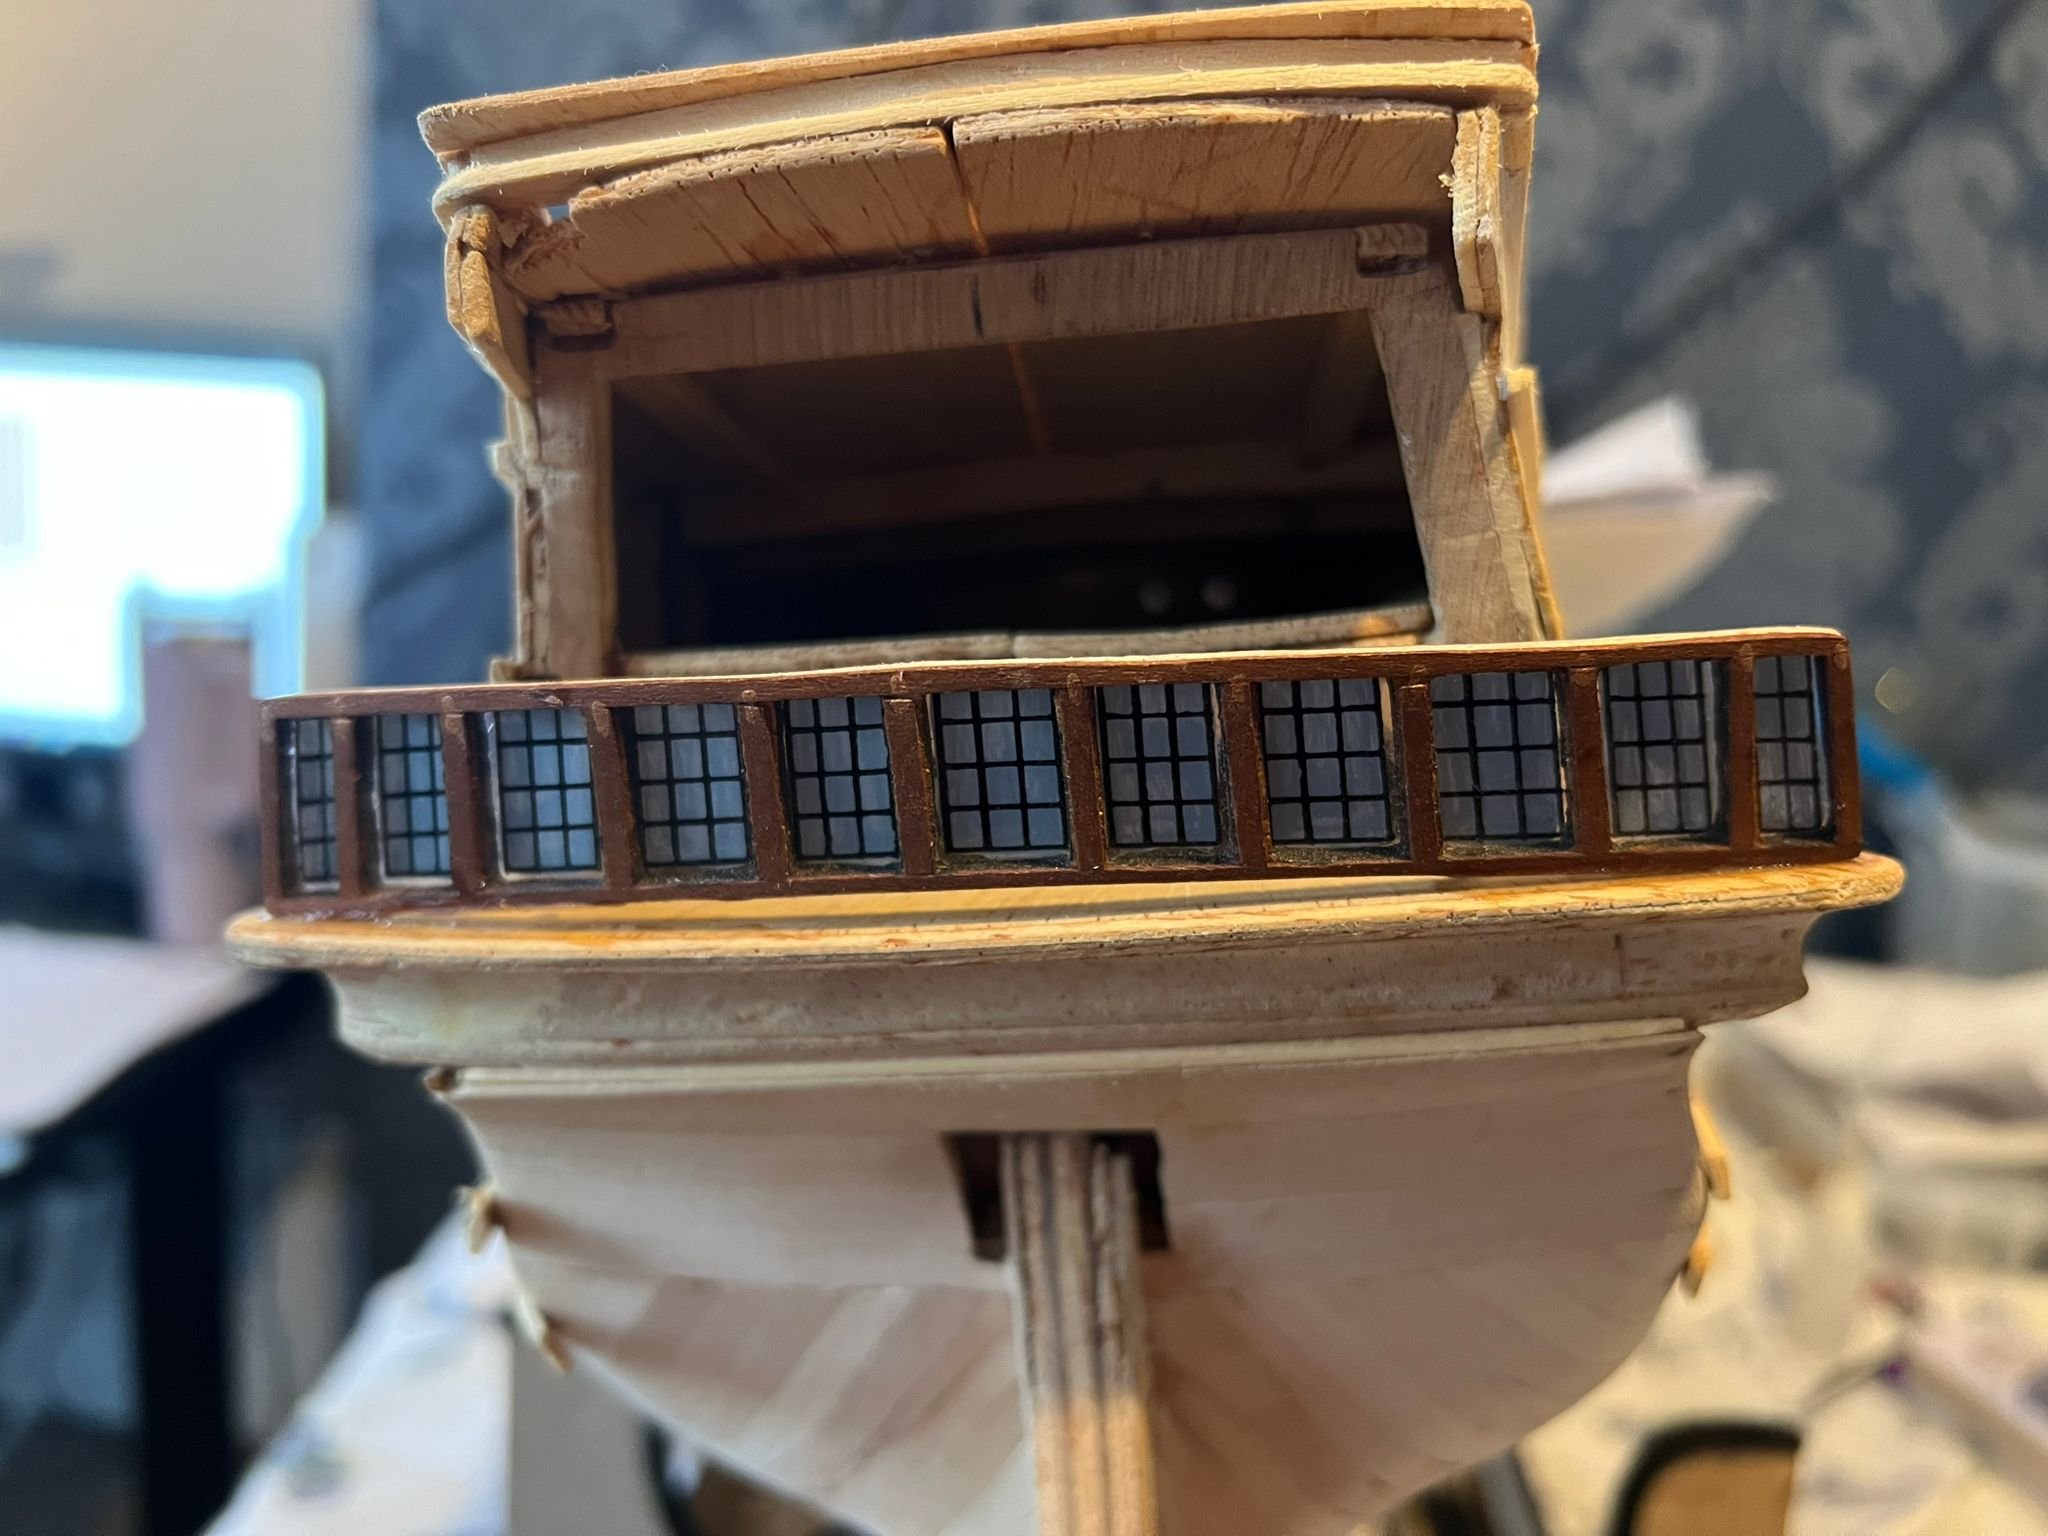
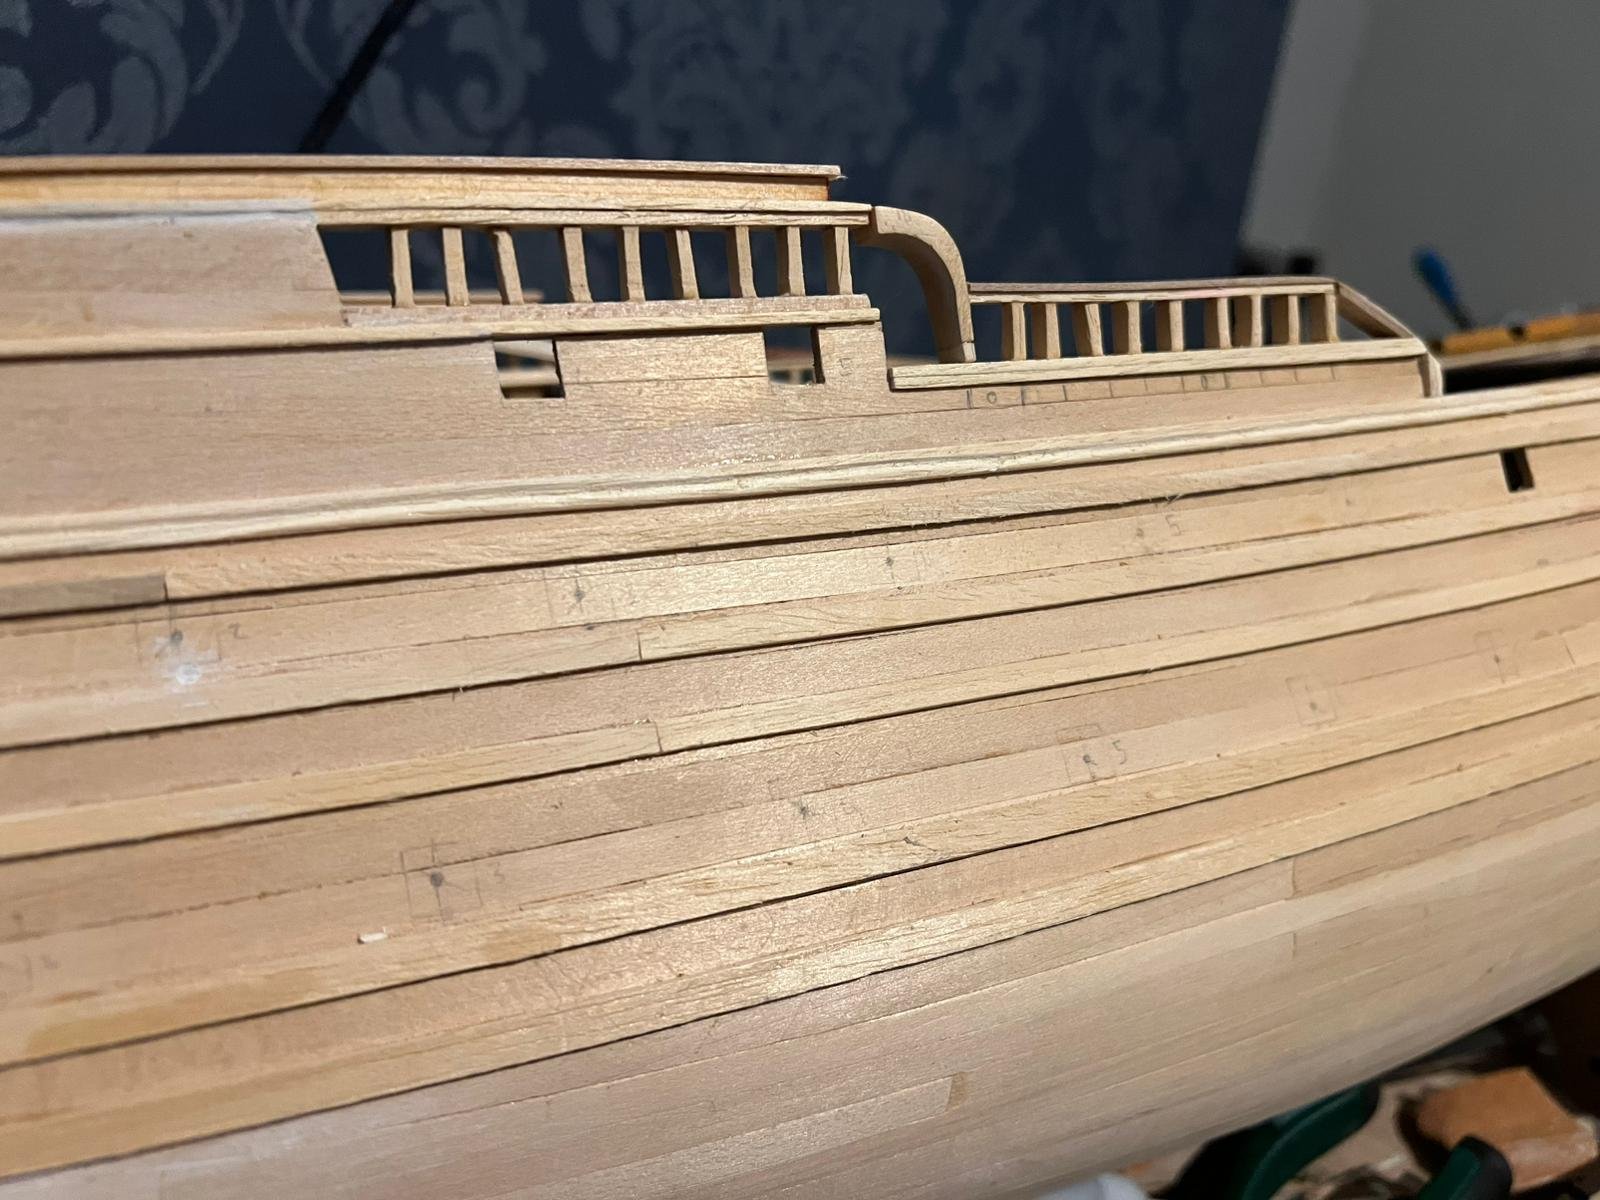
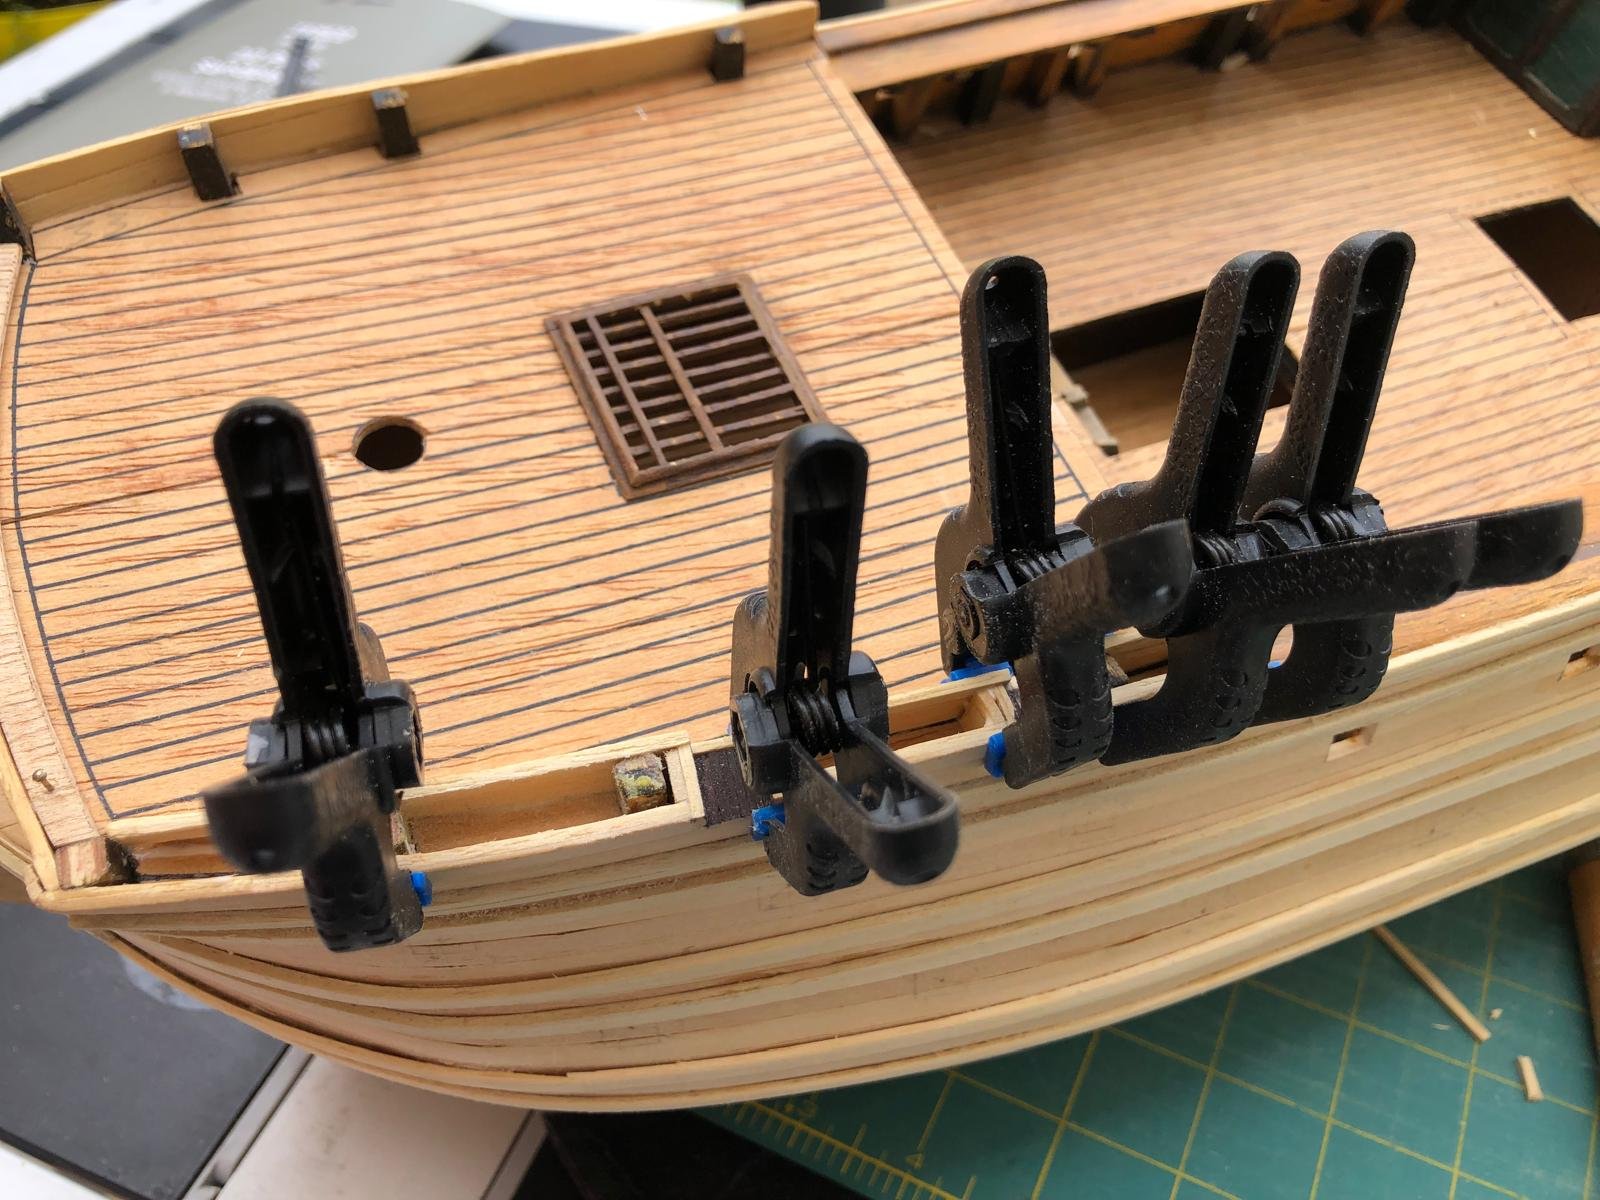
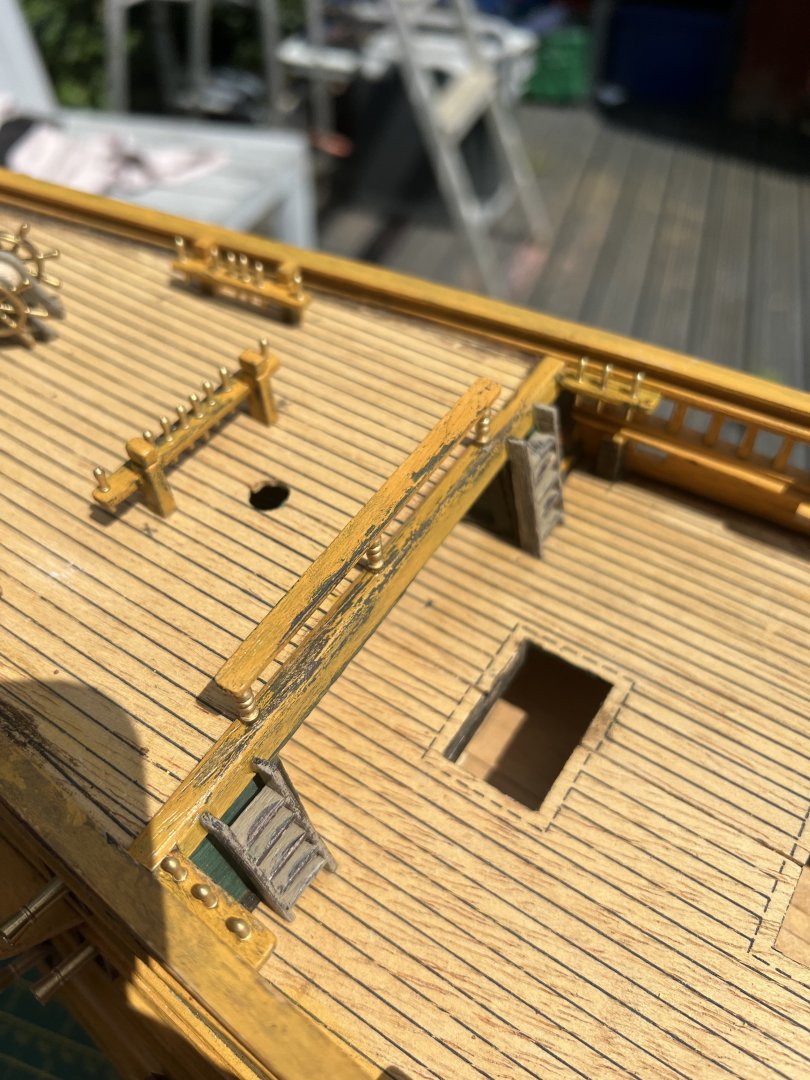
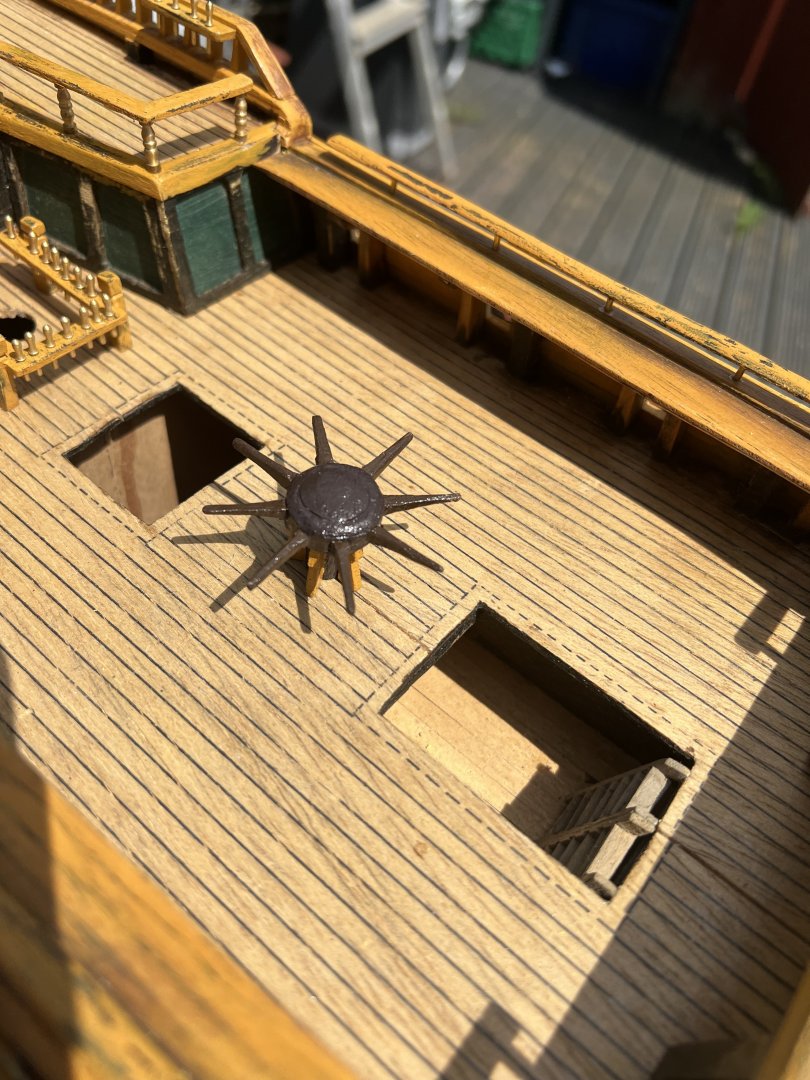
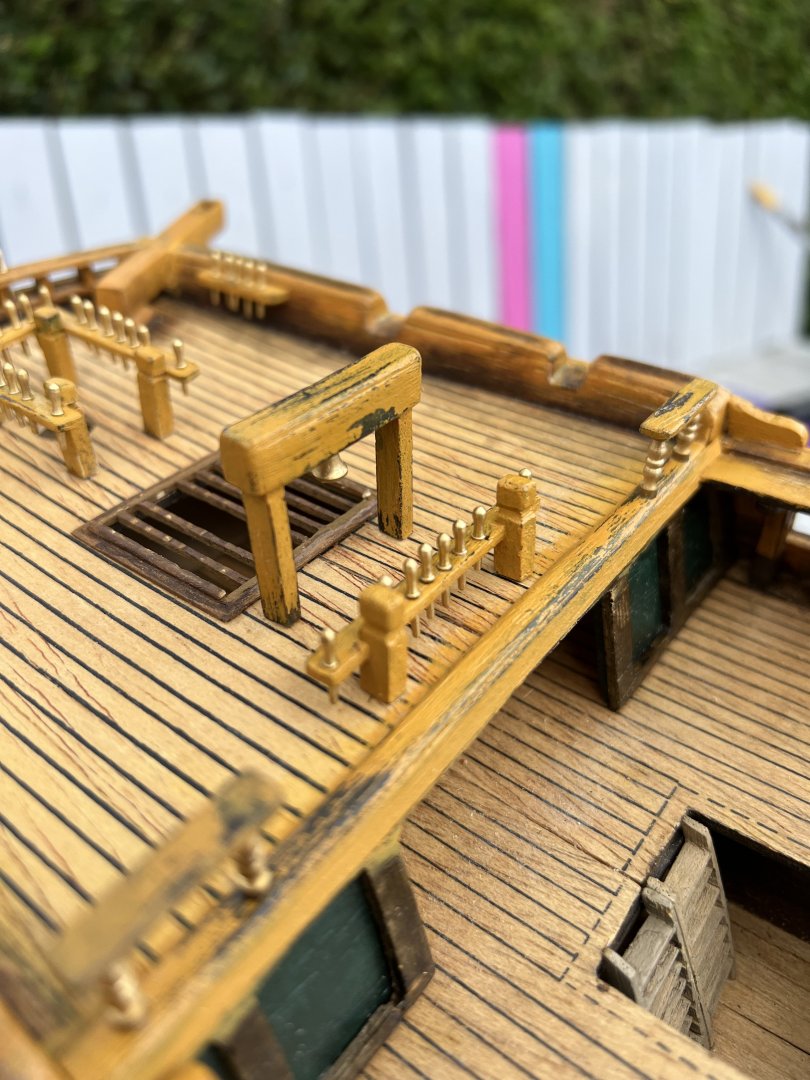
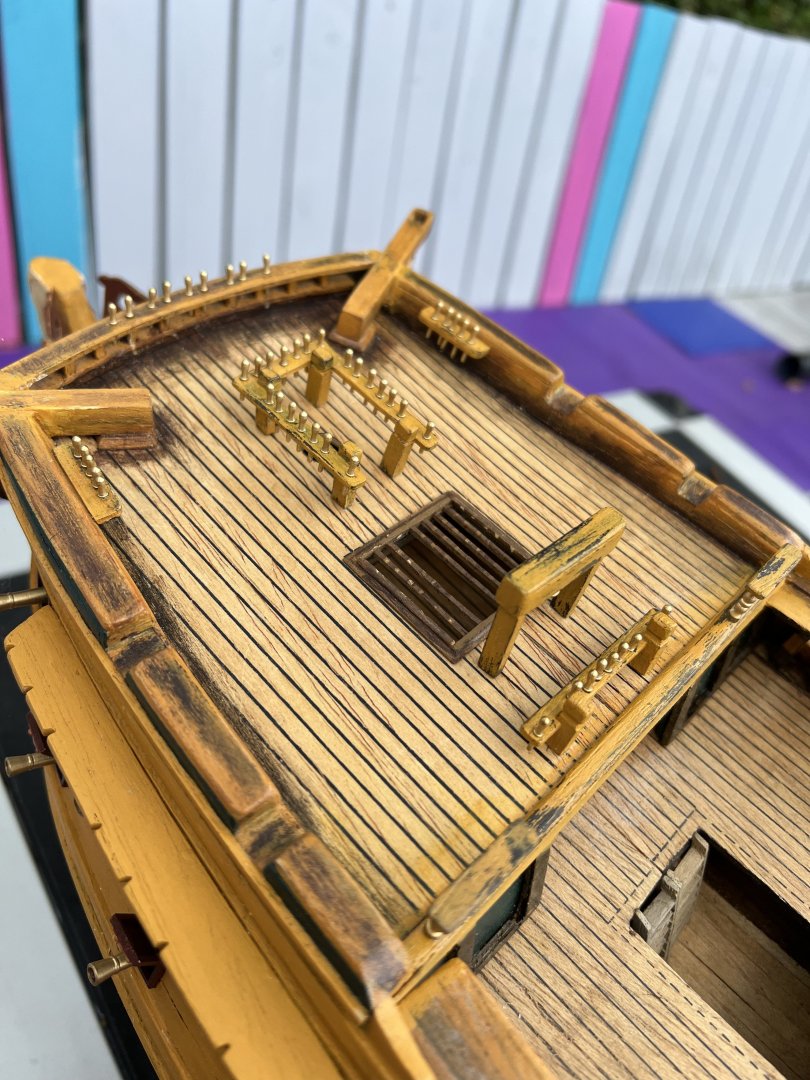
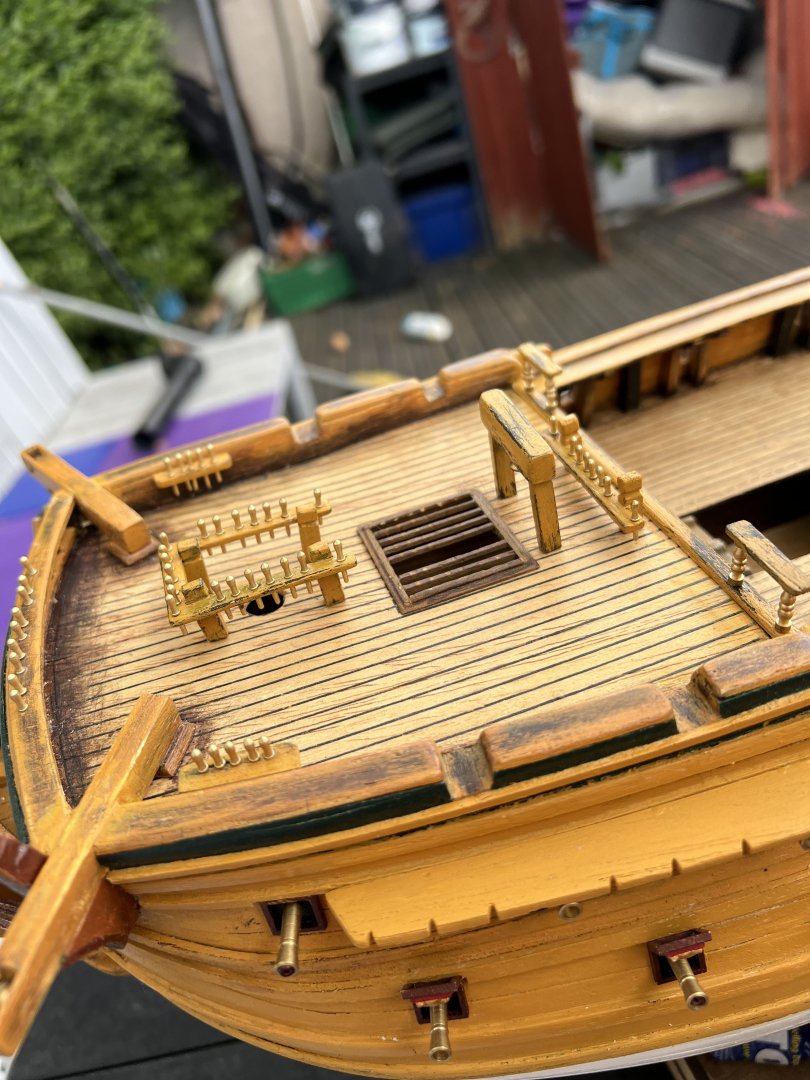
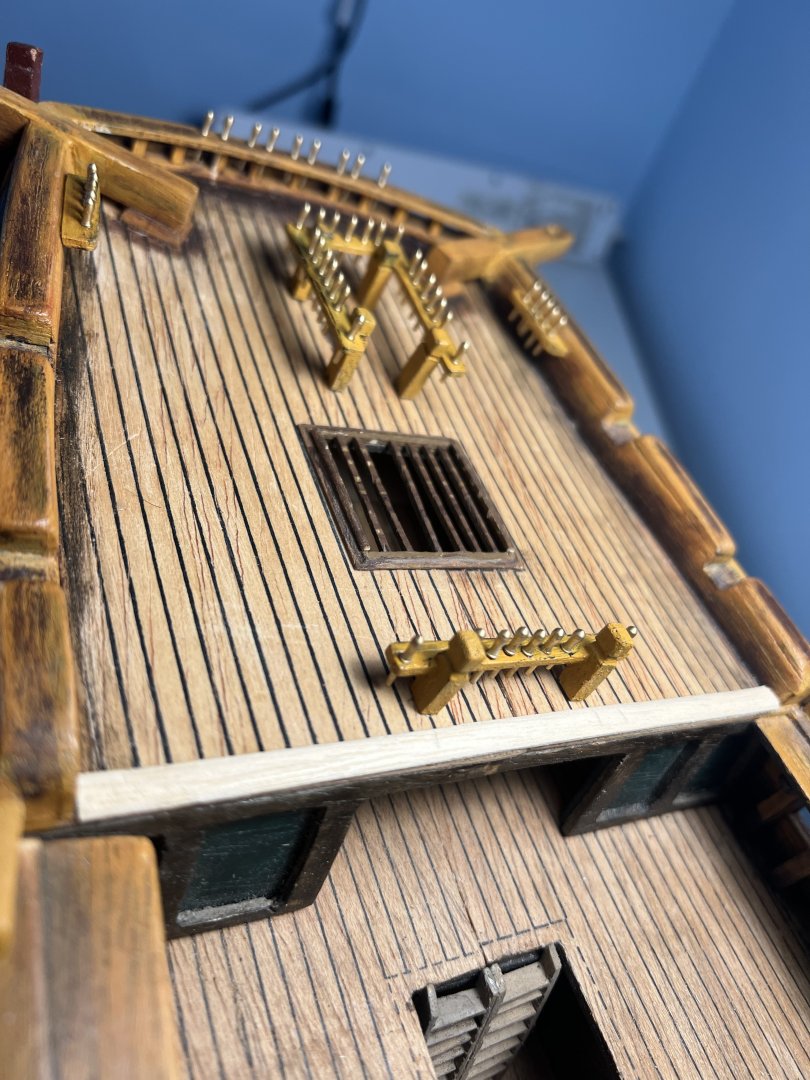
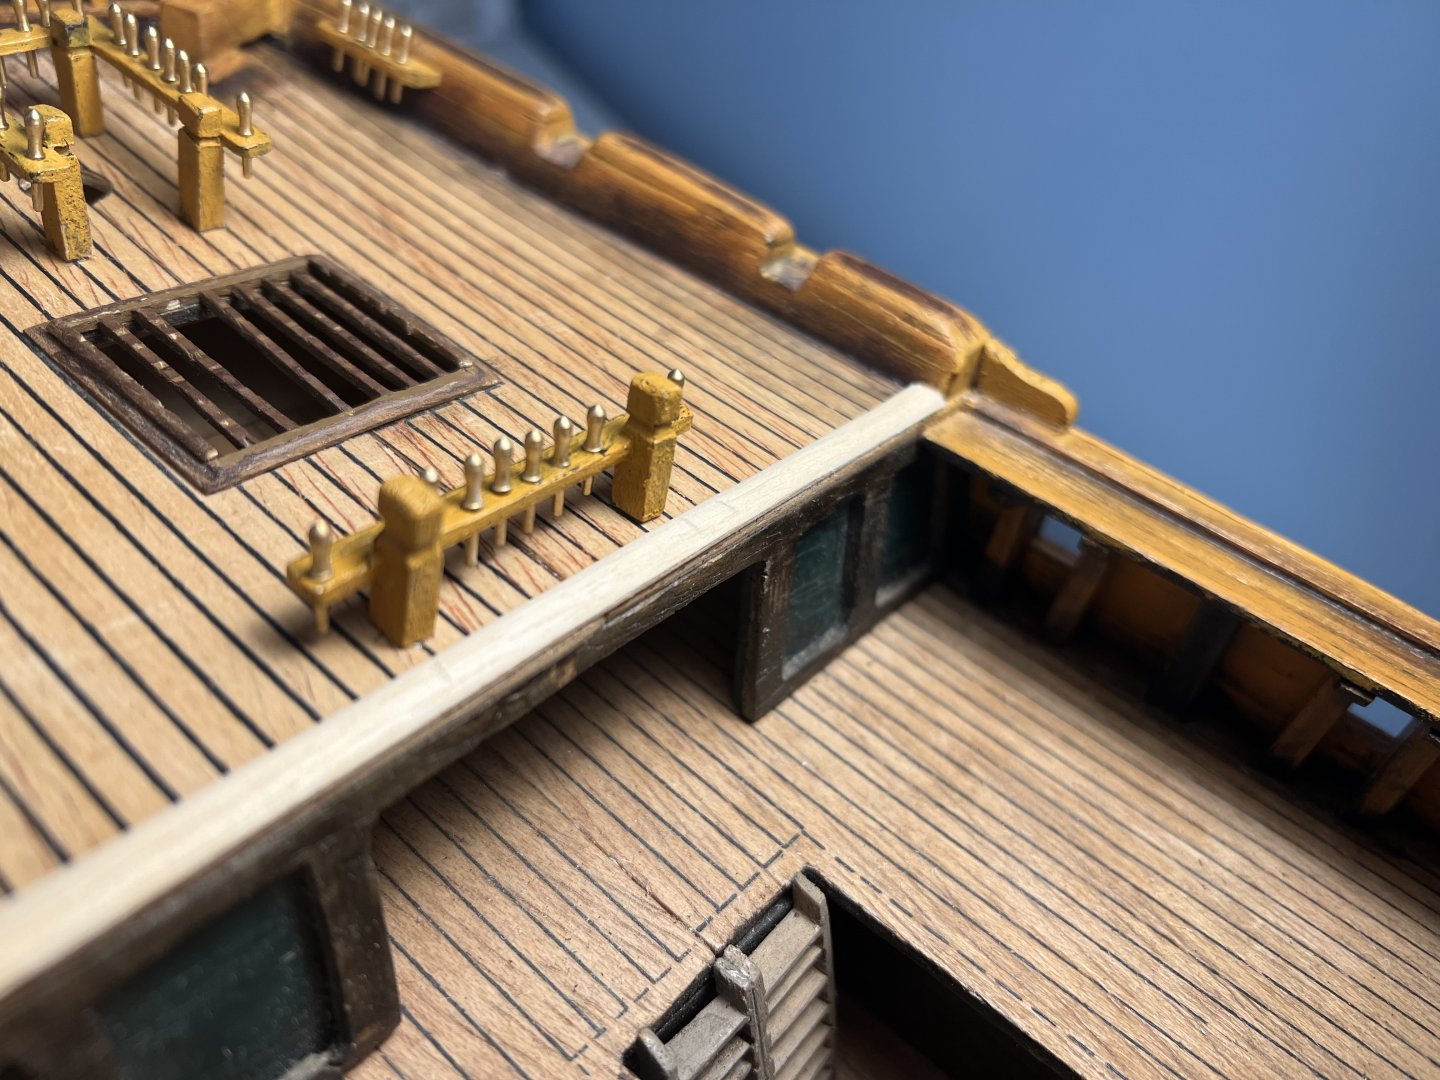
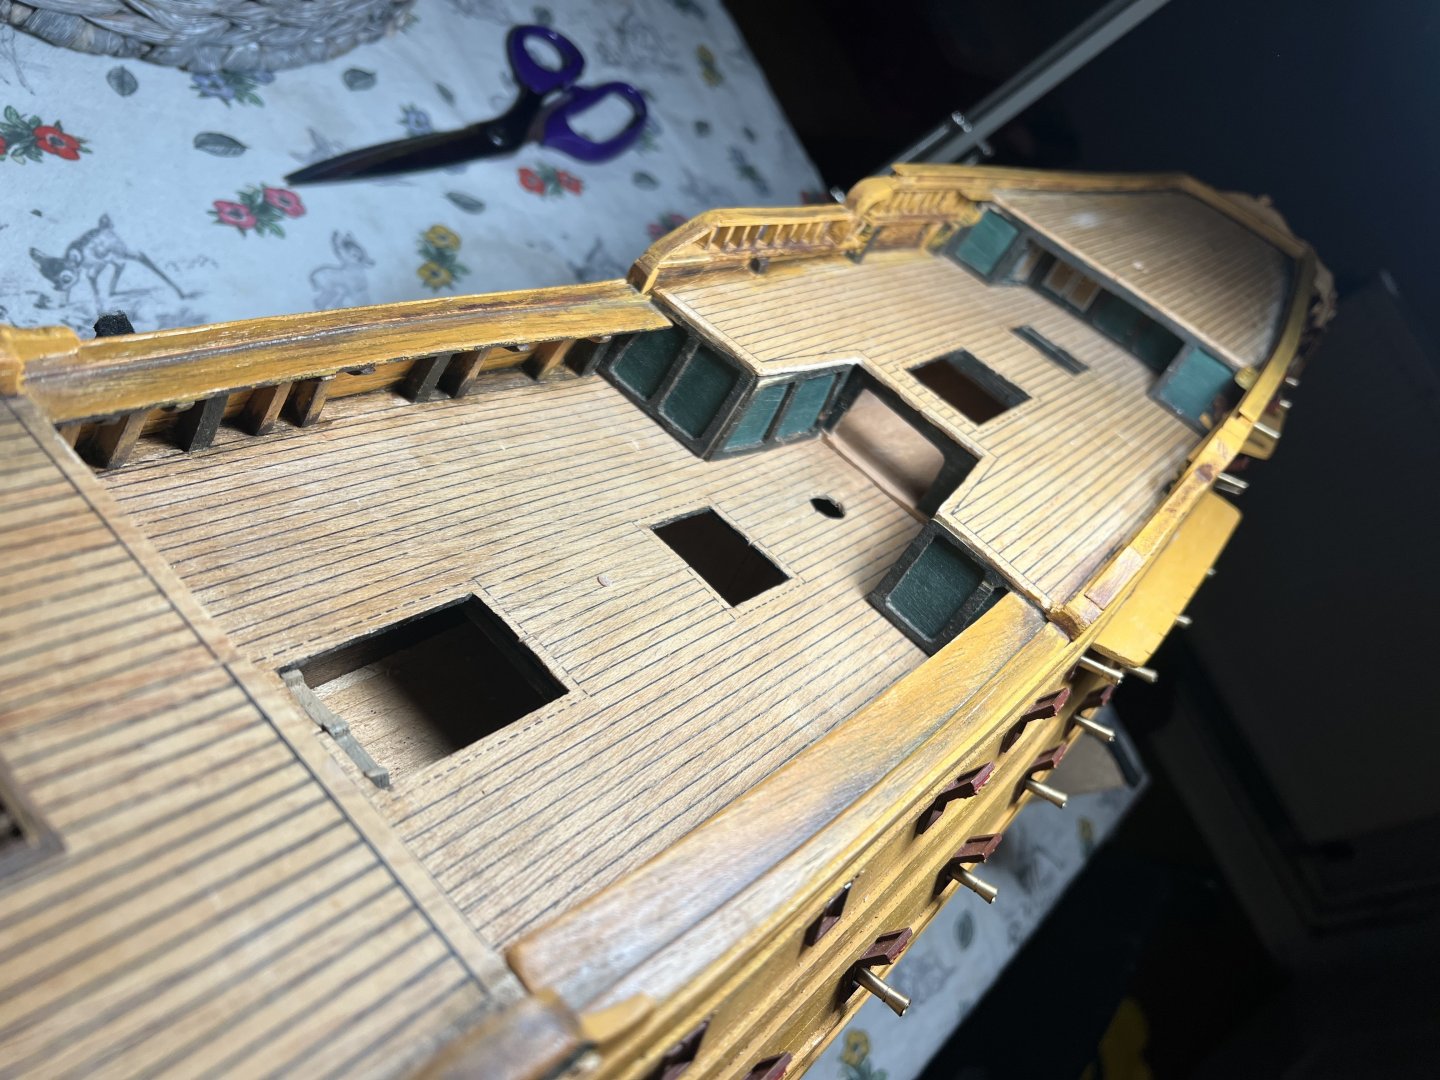
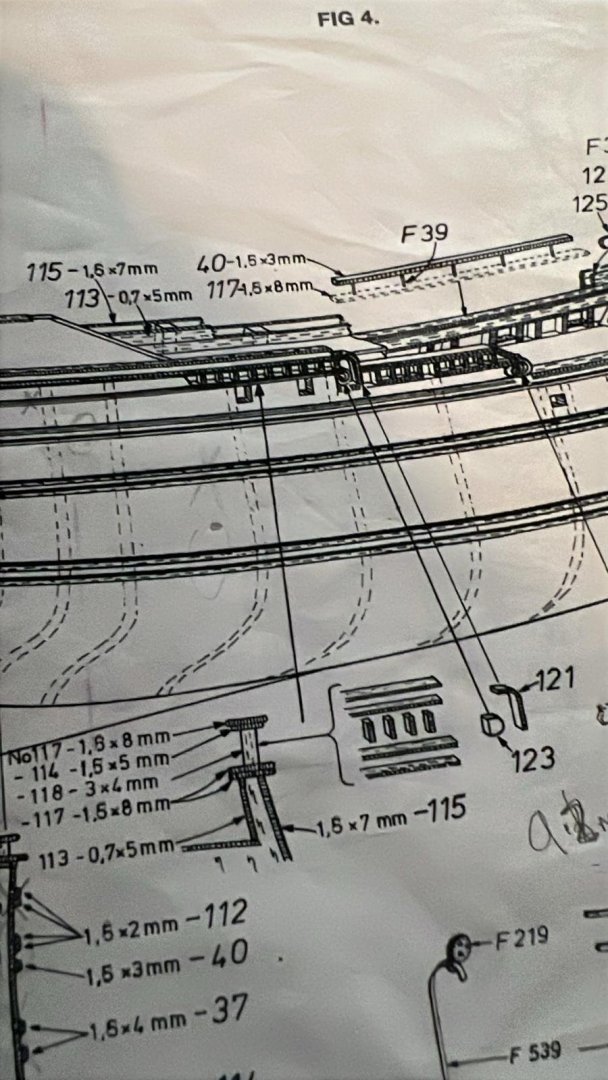
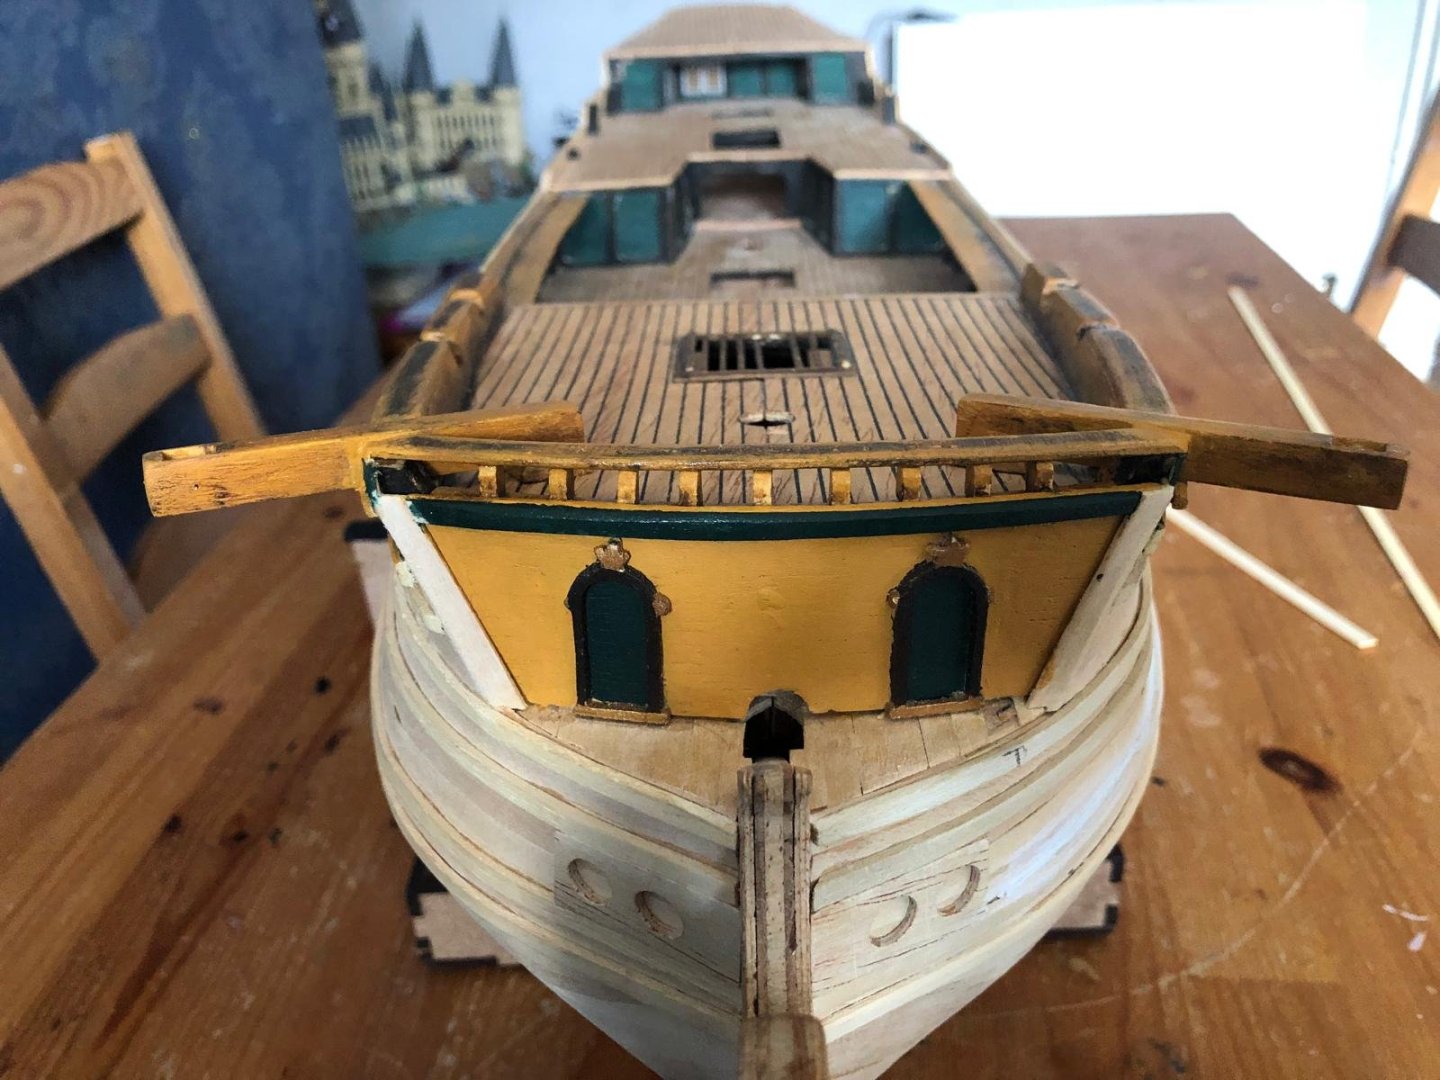
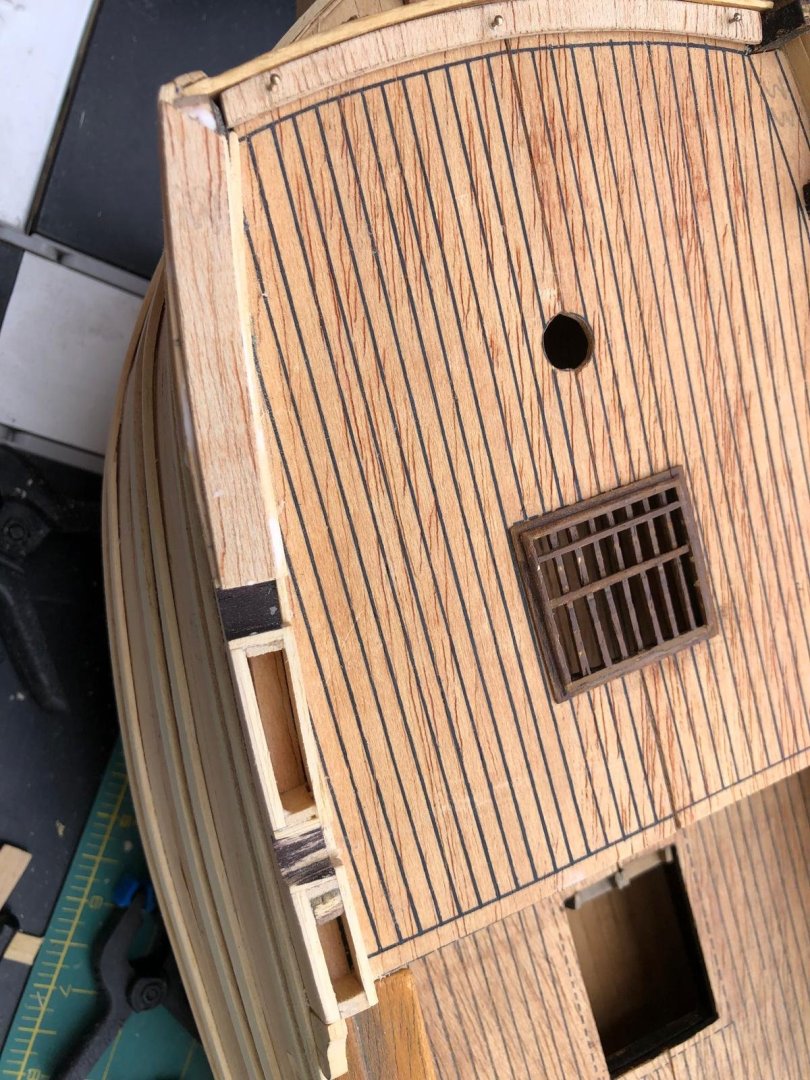
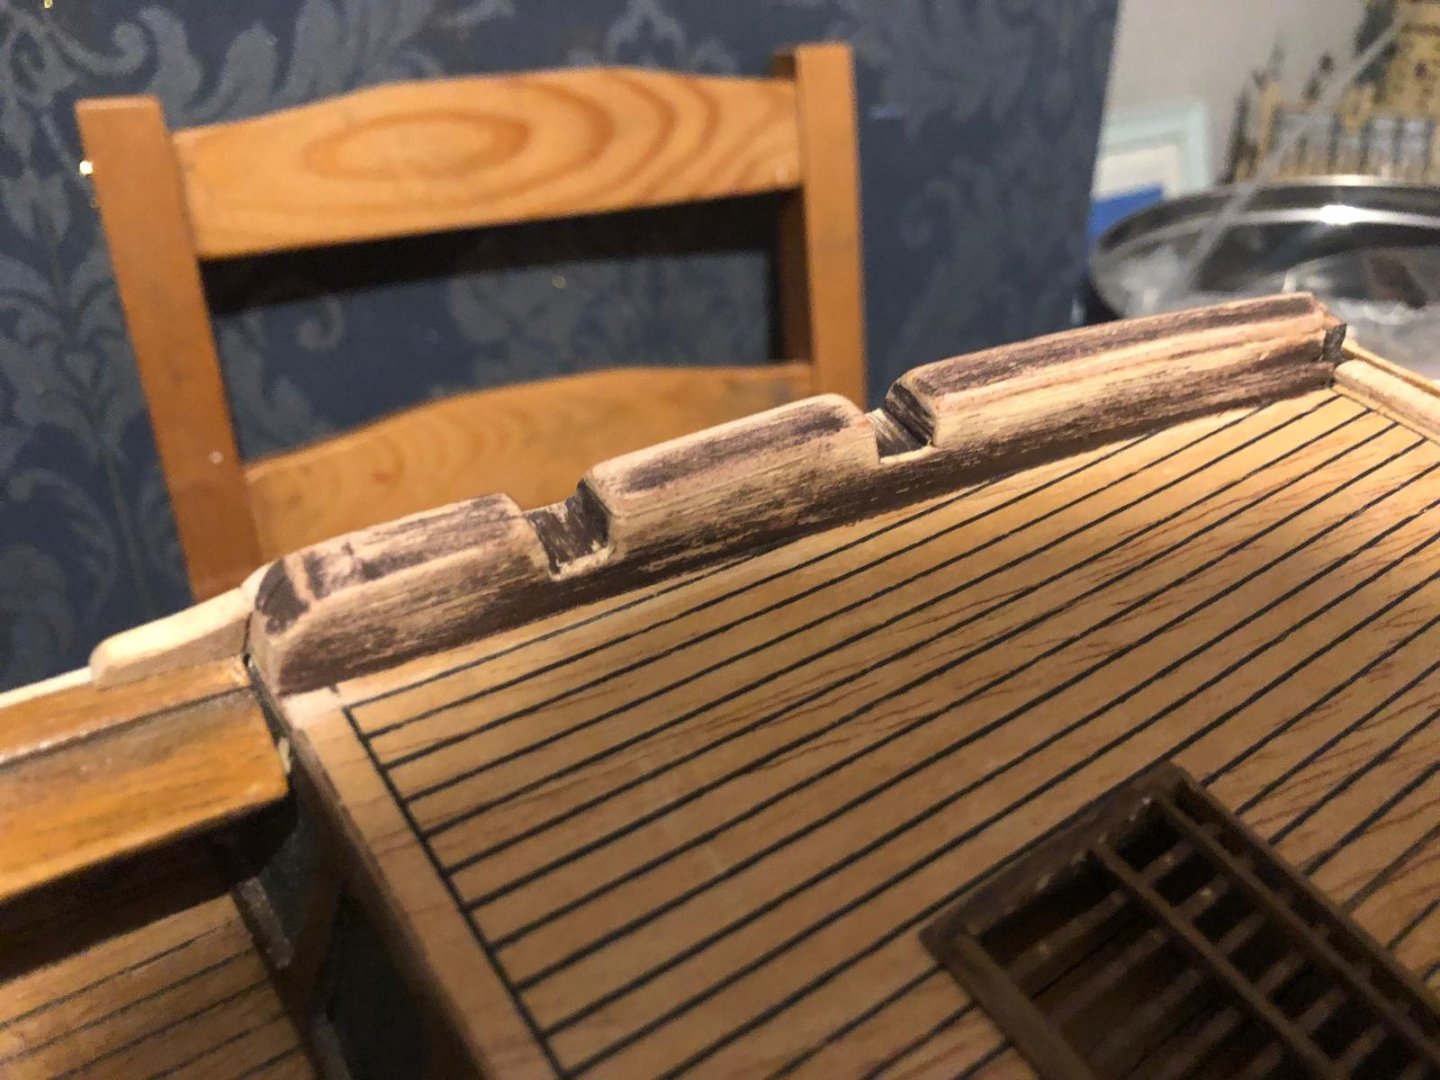
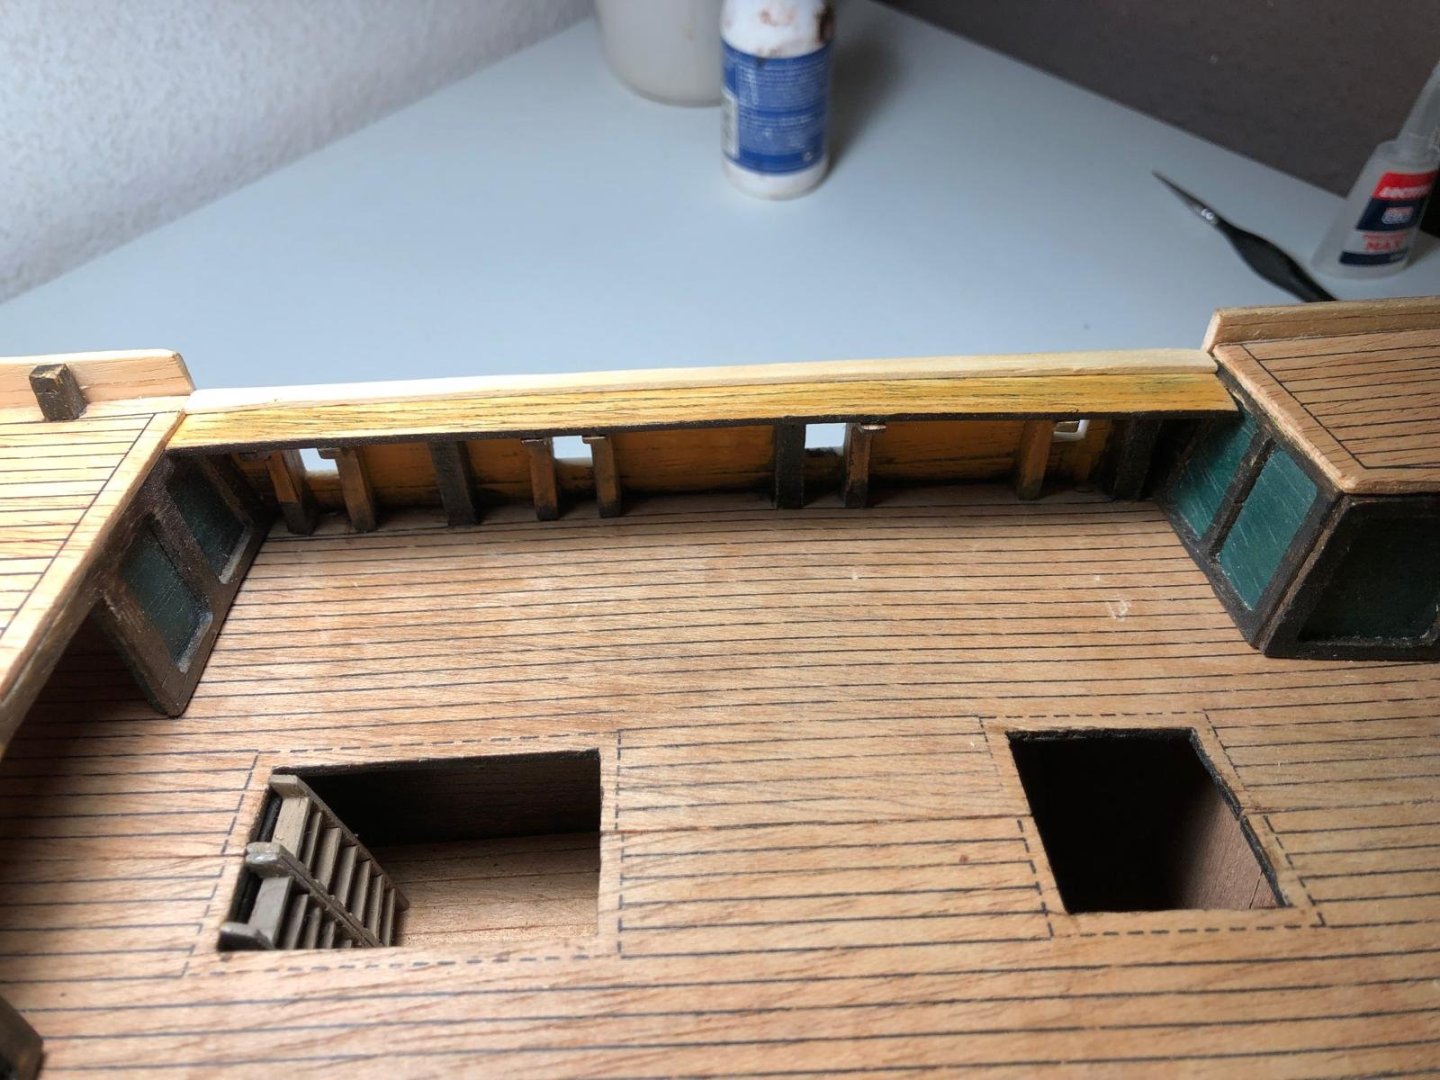
BILLING BOAT. NORSKE LOVE. UPDATE 19 I created the capstan and then painted. This was quite enjoyable to build. There were no real dramas while creating this. I’ve added the bulwark railings, and other railings around the deck. I used a strip of wood on the floor which was painted. Then attached the railings. To make the railings, I photocopied the 1:1 plans. I then used this to ensure that measurements were correct. I photocopied to ensure that original plans don’t get tatty. Completed the steering stand and the wheel. I’ve wrapped some string around the stand. It’s held in place with a tiny dap of super glue. Should you be interested, I’m on… https://www.youtube.com/@Byrondockyard https://www.instagram.com/byron_dockyard/ Appreciate and support. Daniel


-
DanielNG10 reacted to a post in a topic:
Apostol Felipe by travis - OcCre - 1/60
-
Kevin reacted to a post in a topic:
Norske Love by DanielNG10 - Billing Boats - 1:75
-
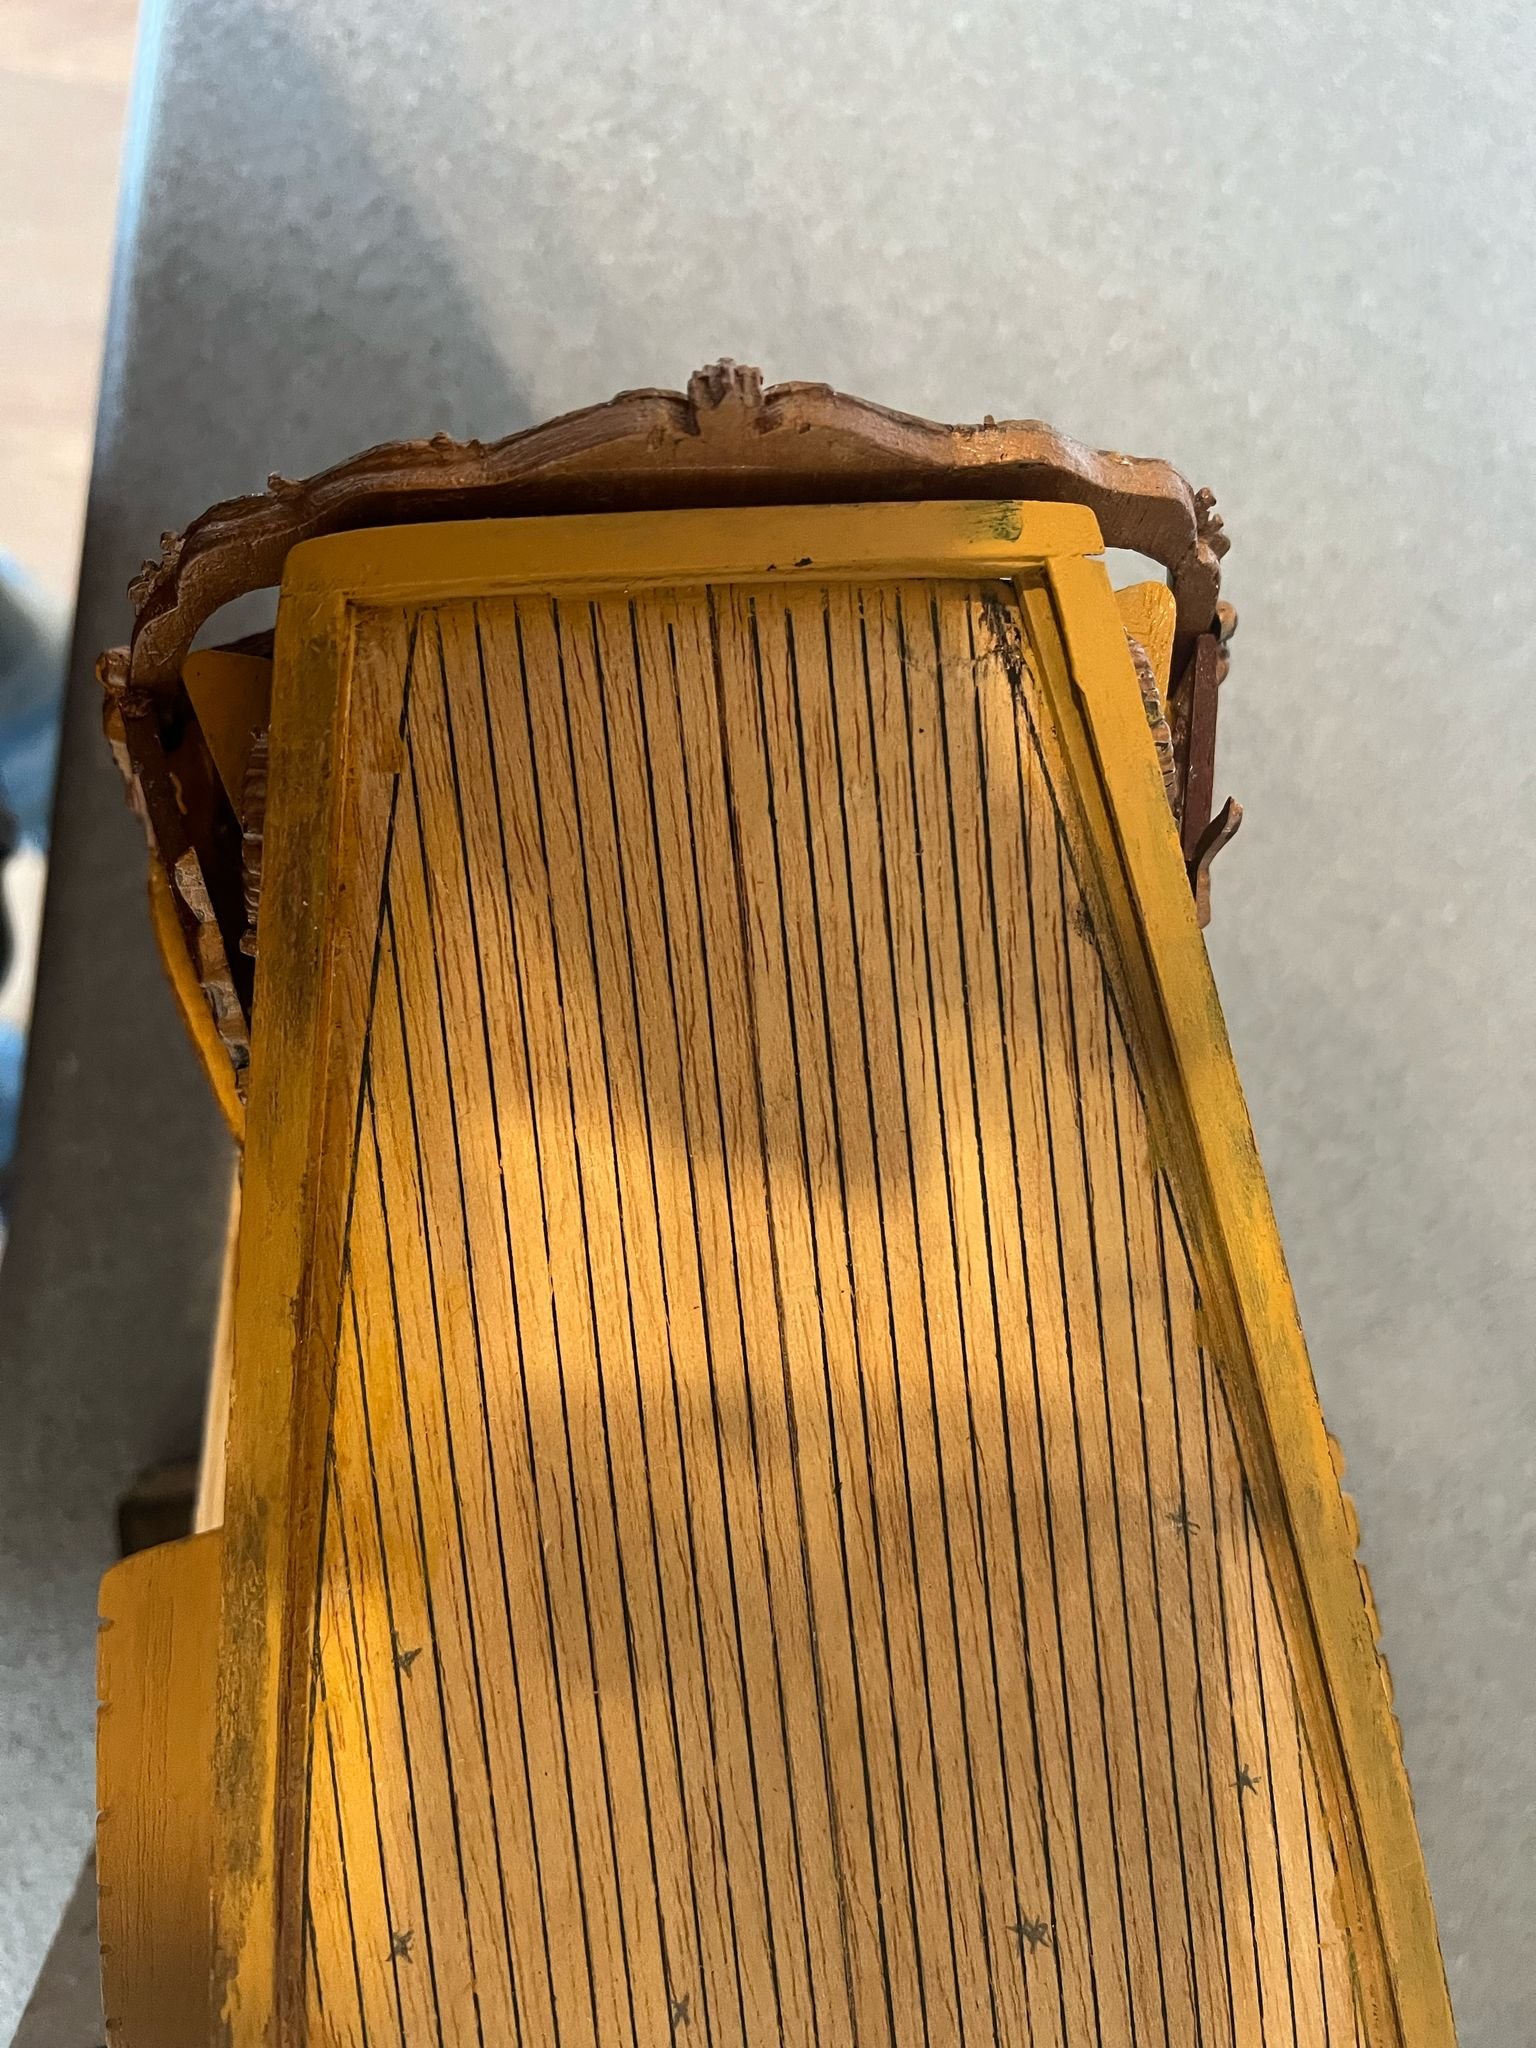
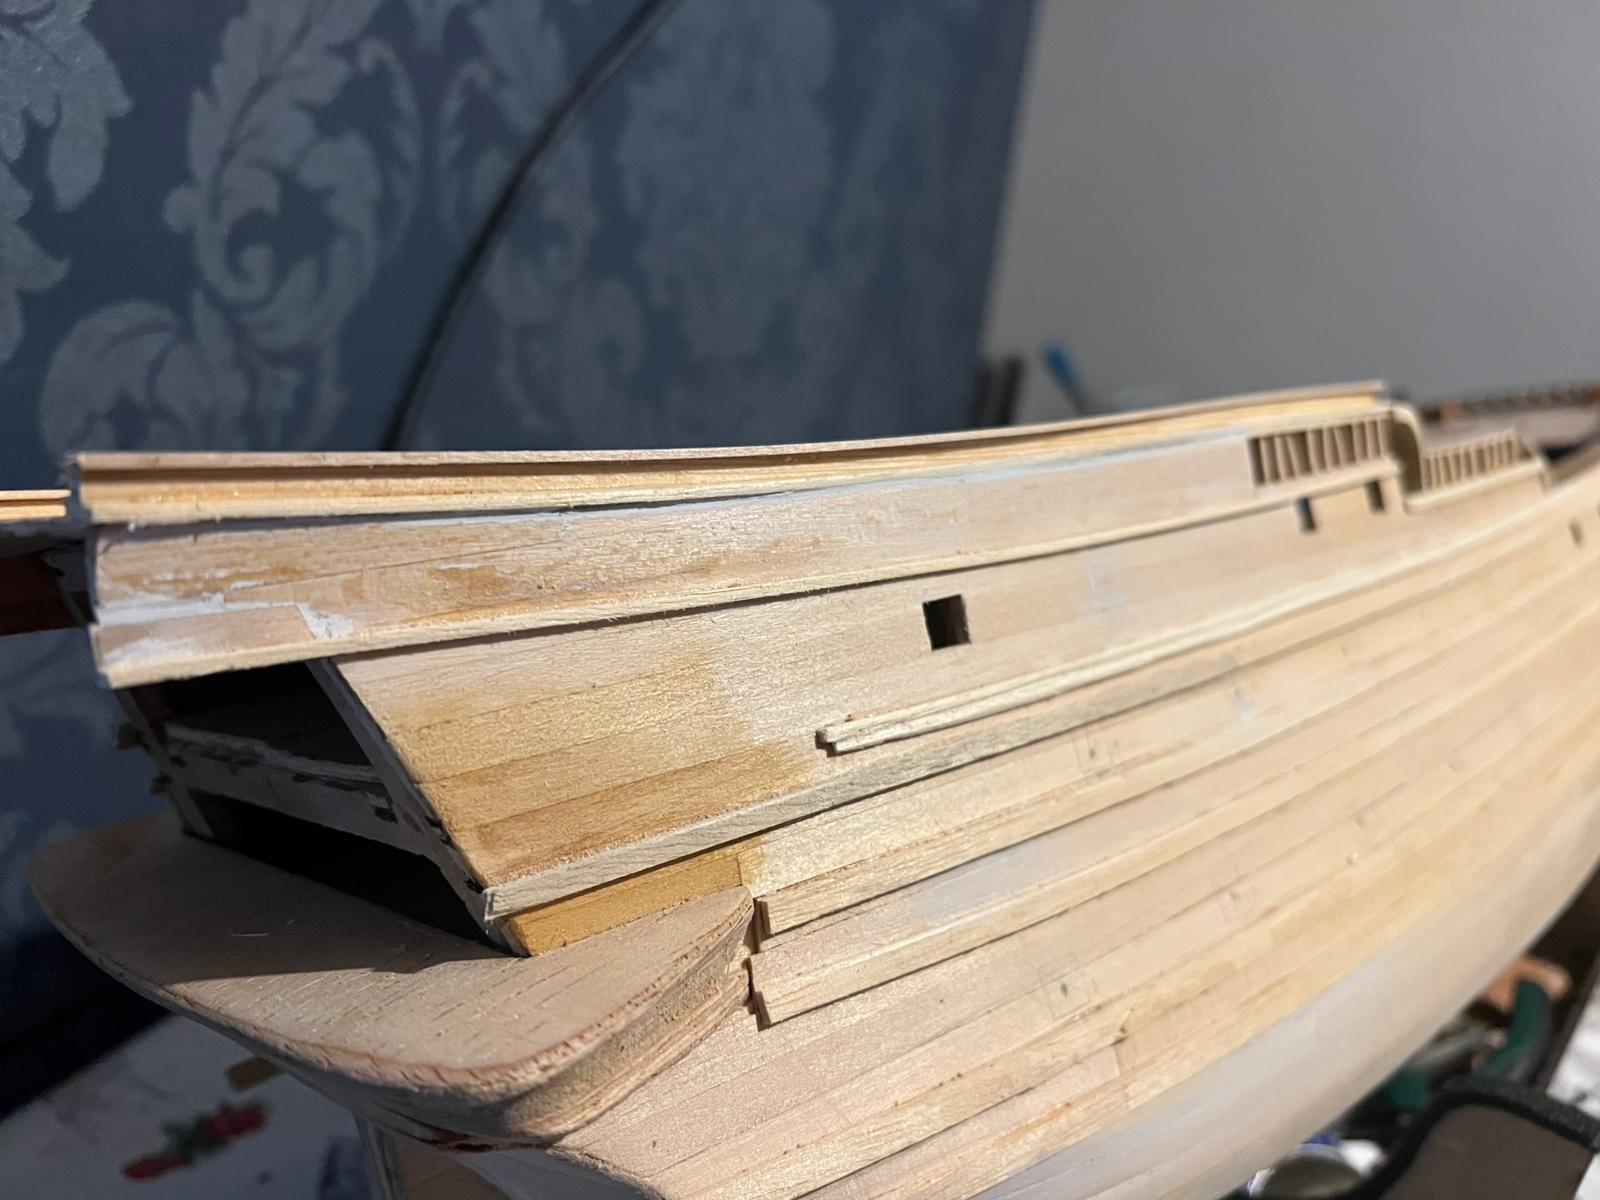
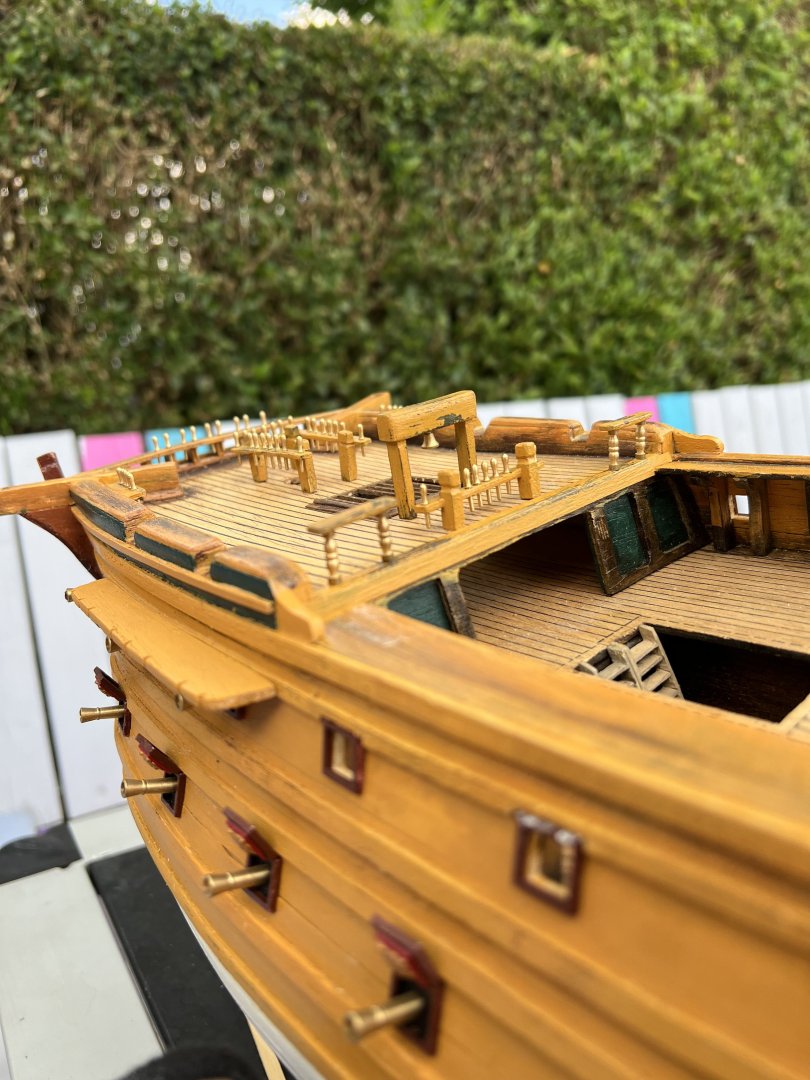
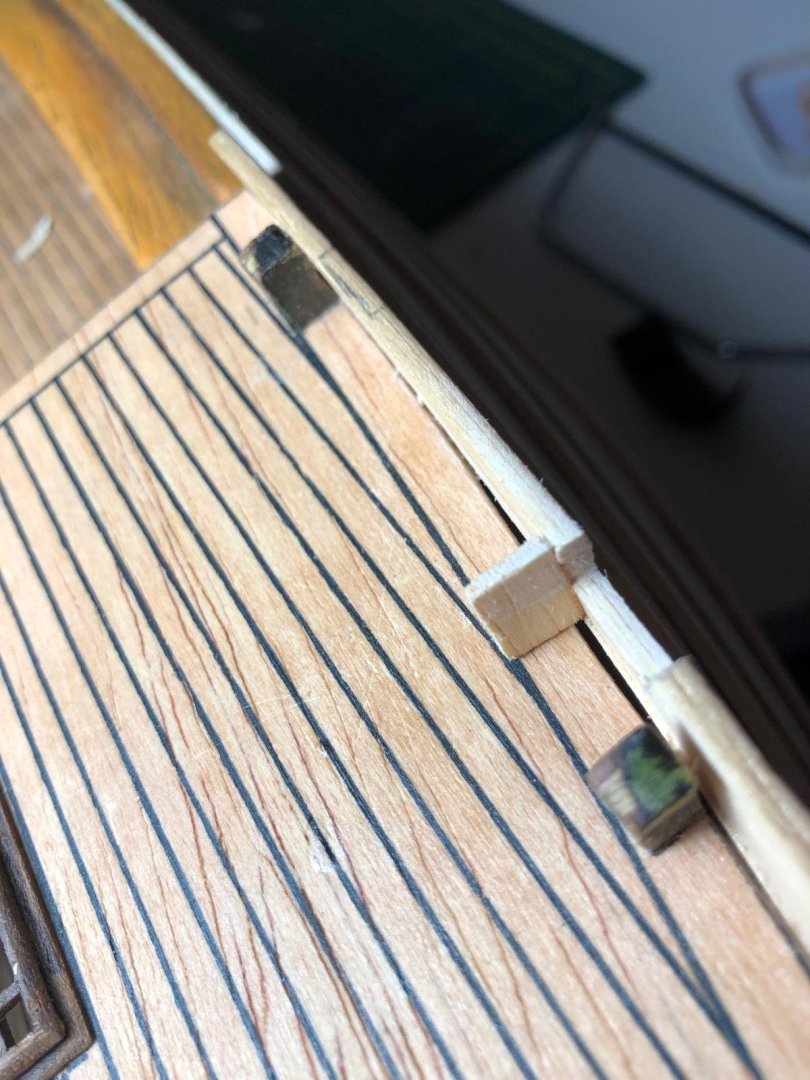
BILLING BOAT. NORSKE LOVE. UPDATE 18 I’ve painted the rudder to match the ship and the water lines match. I used super glue and then slotted in a pin to attach the rudder to the ship. You can buy these ready made, which I think I might do next time. Getting this bit sorted took a long time. Once this was attached I started attaching some of the things on the deck as you can see in the photos. I have added a plank of wood which I painted at the edge of each of the deck levels. This was just to tidy it up as you could see the top of the walls where the floor sat. I just didn’t think it looked nice. Added the brass pins. These were secured with a dab of superglue. Daniel NB: The photos didn't upload in the correct order for this post!


-
petervisser reacted to a post in a topic:
Norske Love by DanielNG10 - Billing Boats - 1:75
-
petervisser reacted to a post in a topic:
Norske Love by DanielNG10 - Billing Boats - 1:75
-
ccoyle reacted to a post in a topic:
Norske Love by DanielNG10 - Billing Boats - 1:75
-
ccoyle reacted to a post in a topic:
Norske Love by DanielNG10 - Billing Boats - 1:75
-
Snug Harbor Johnny reacted to a post in a topic:
Norske Love by DanielNG10 - Billing Boats - 1:75
-
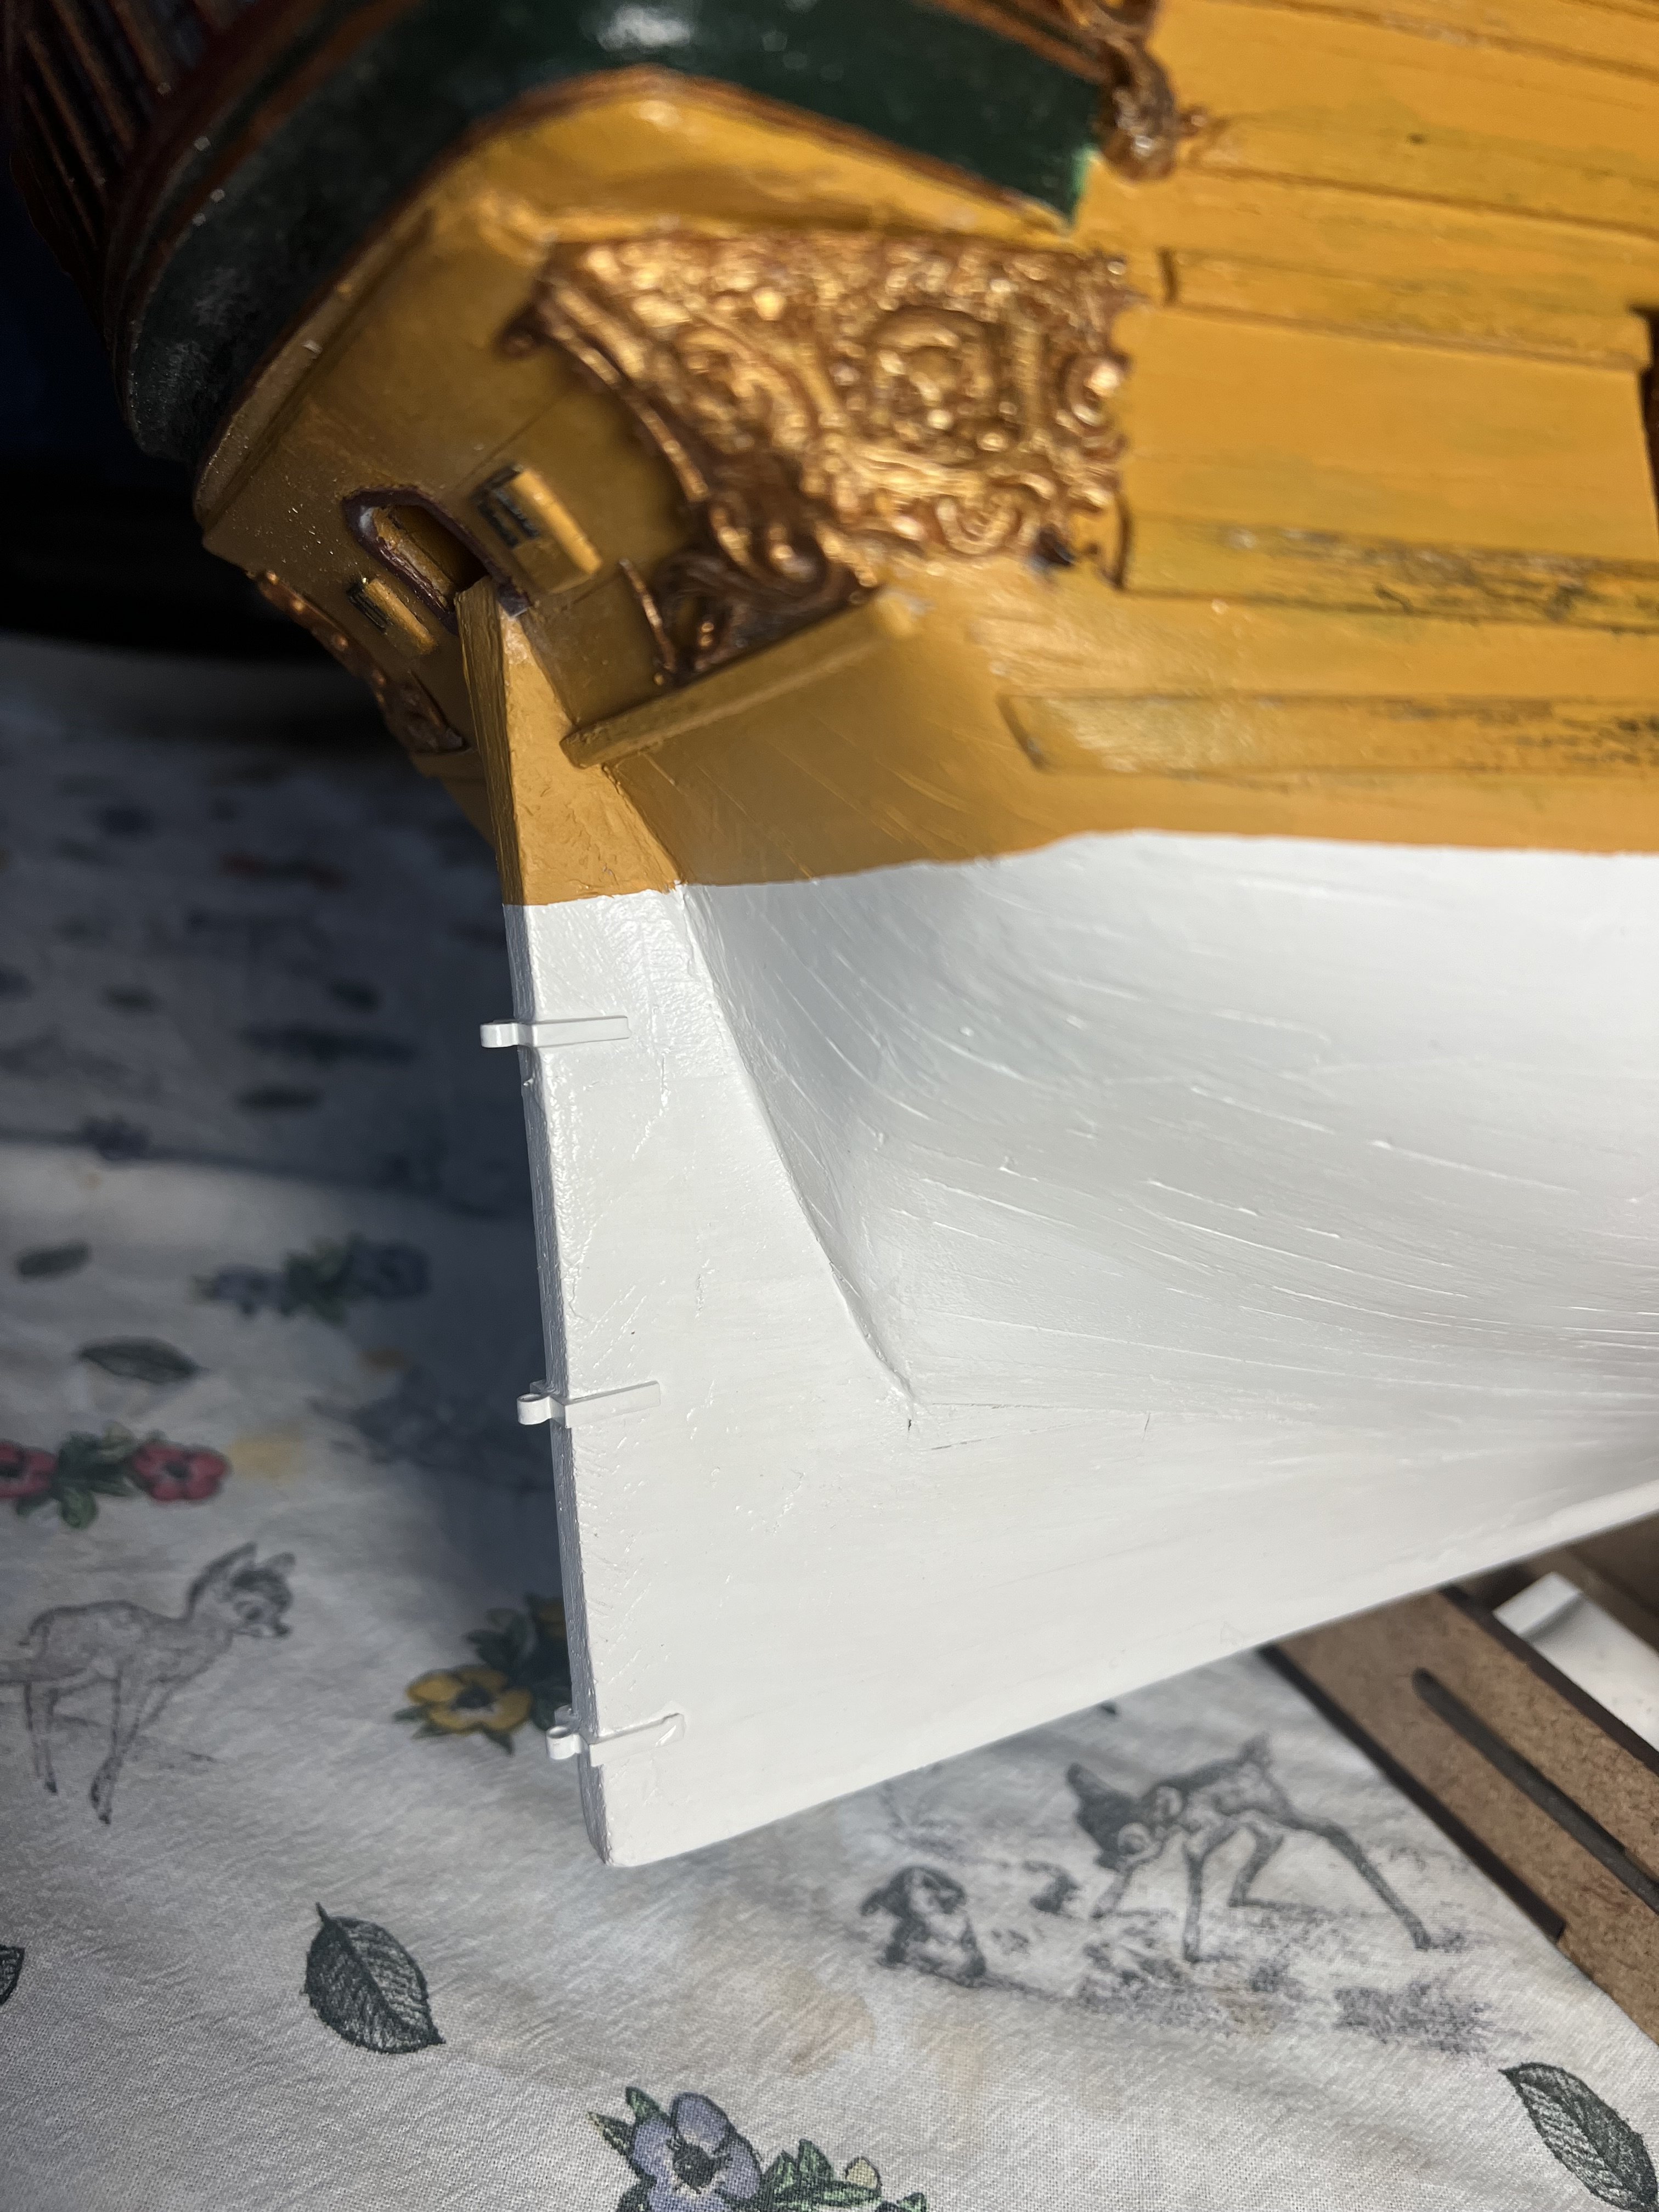
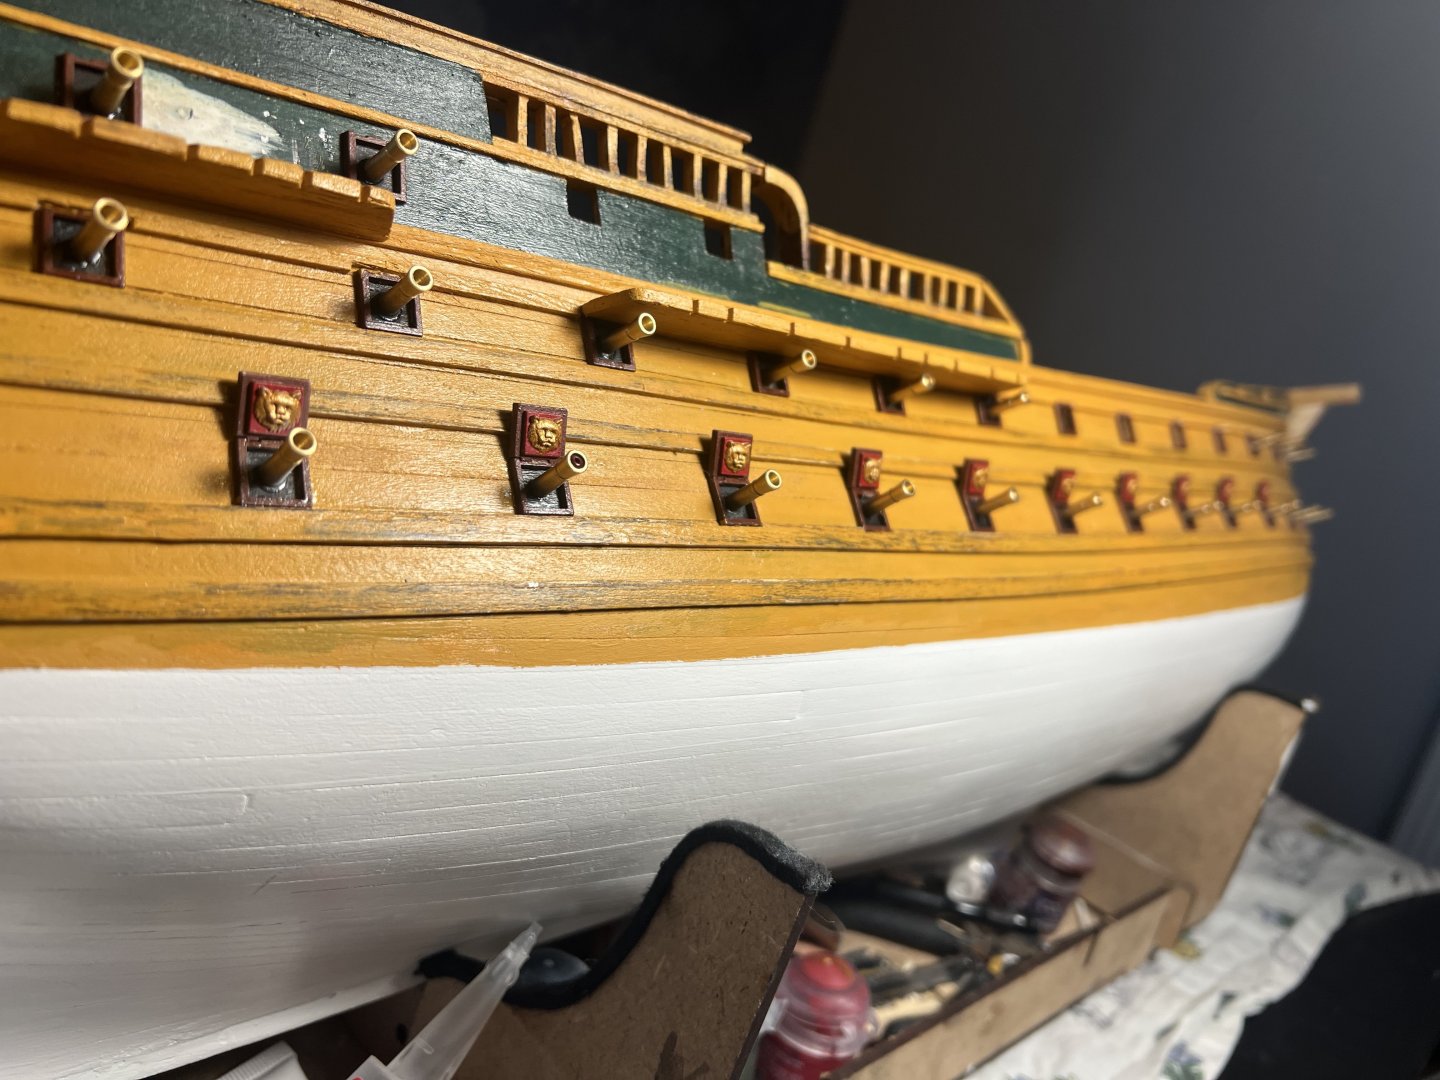
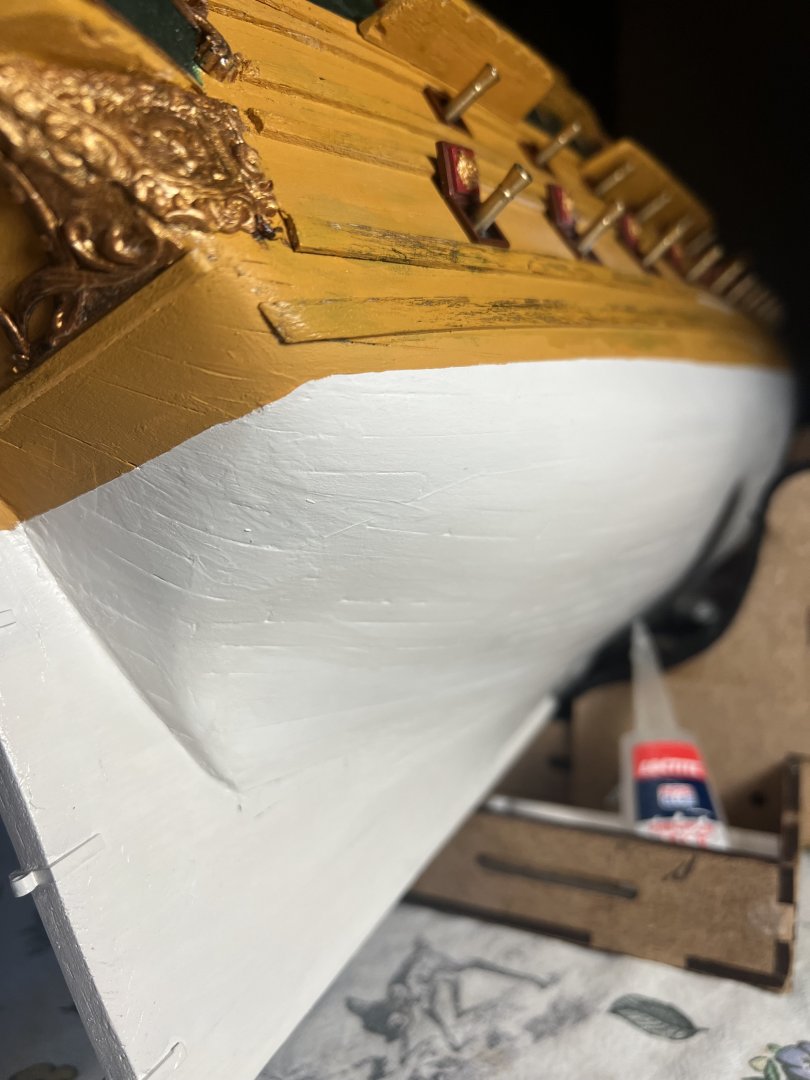
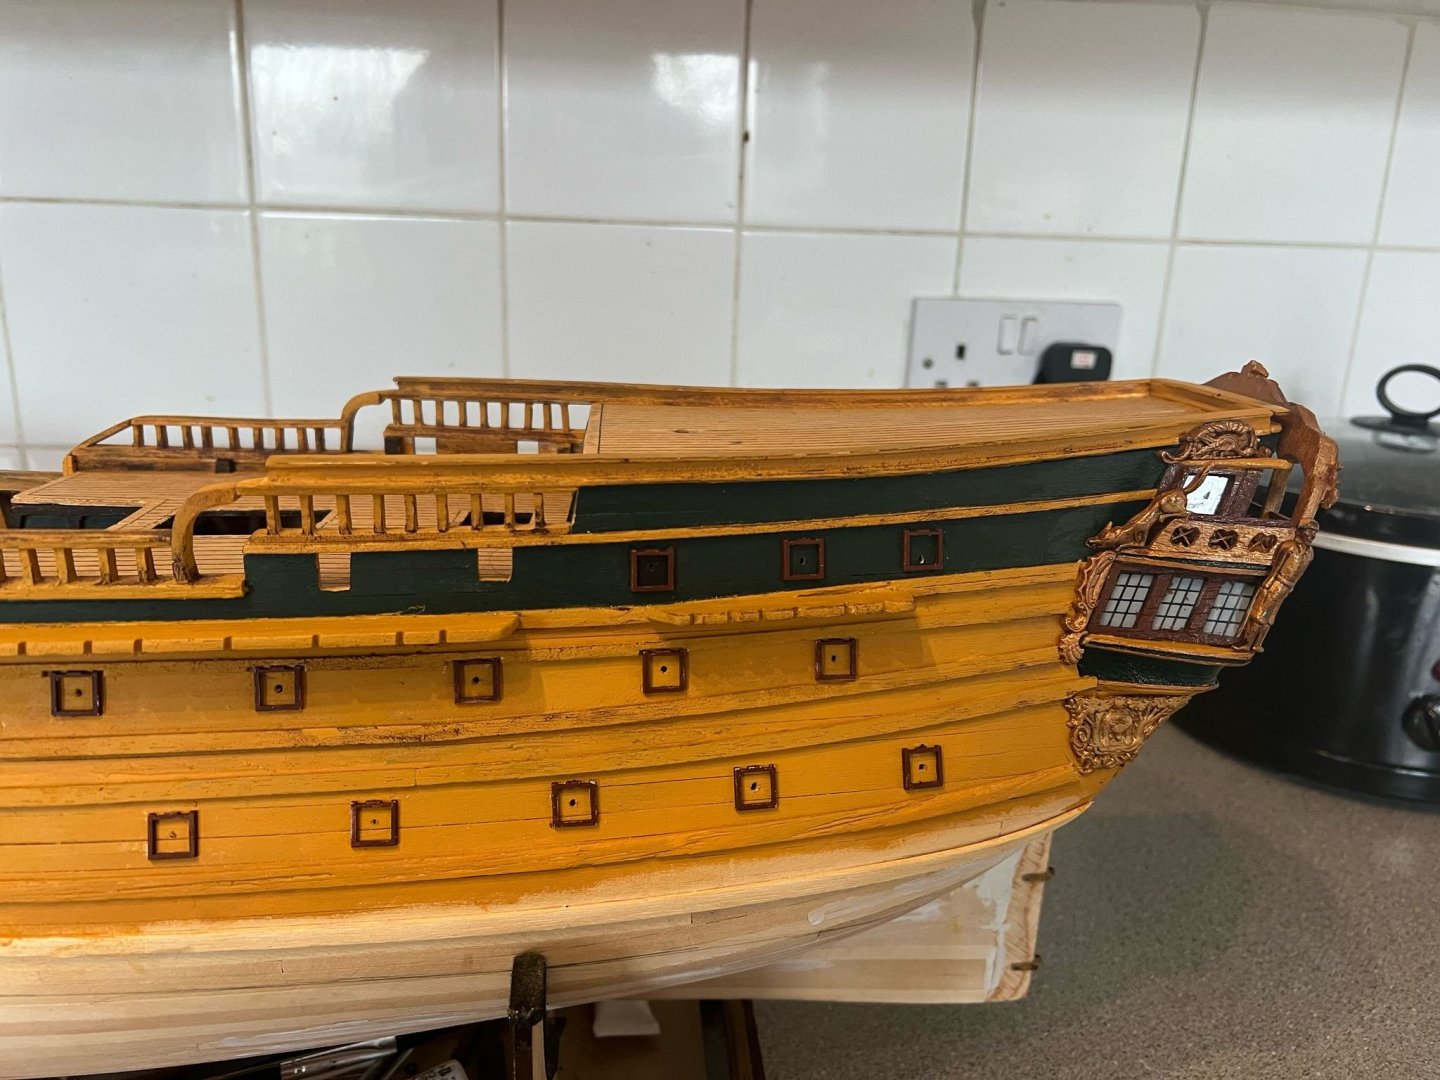
BILLING BOAT. NORSKE LOVE UPDATE 17 I've just finished painting the hull below the waterline in White Scar from Citadel's range. I opted for the spray version for a smooth, even coat, and followed up with a fine sanding.


-
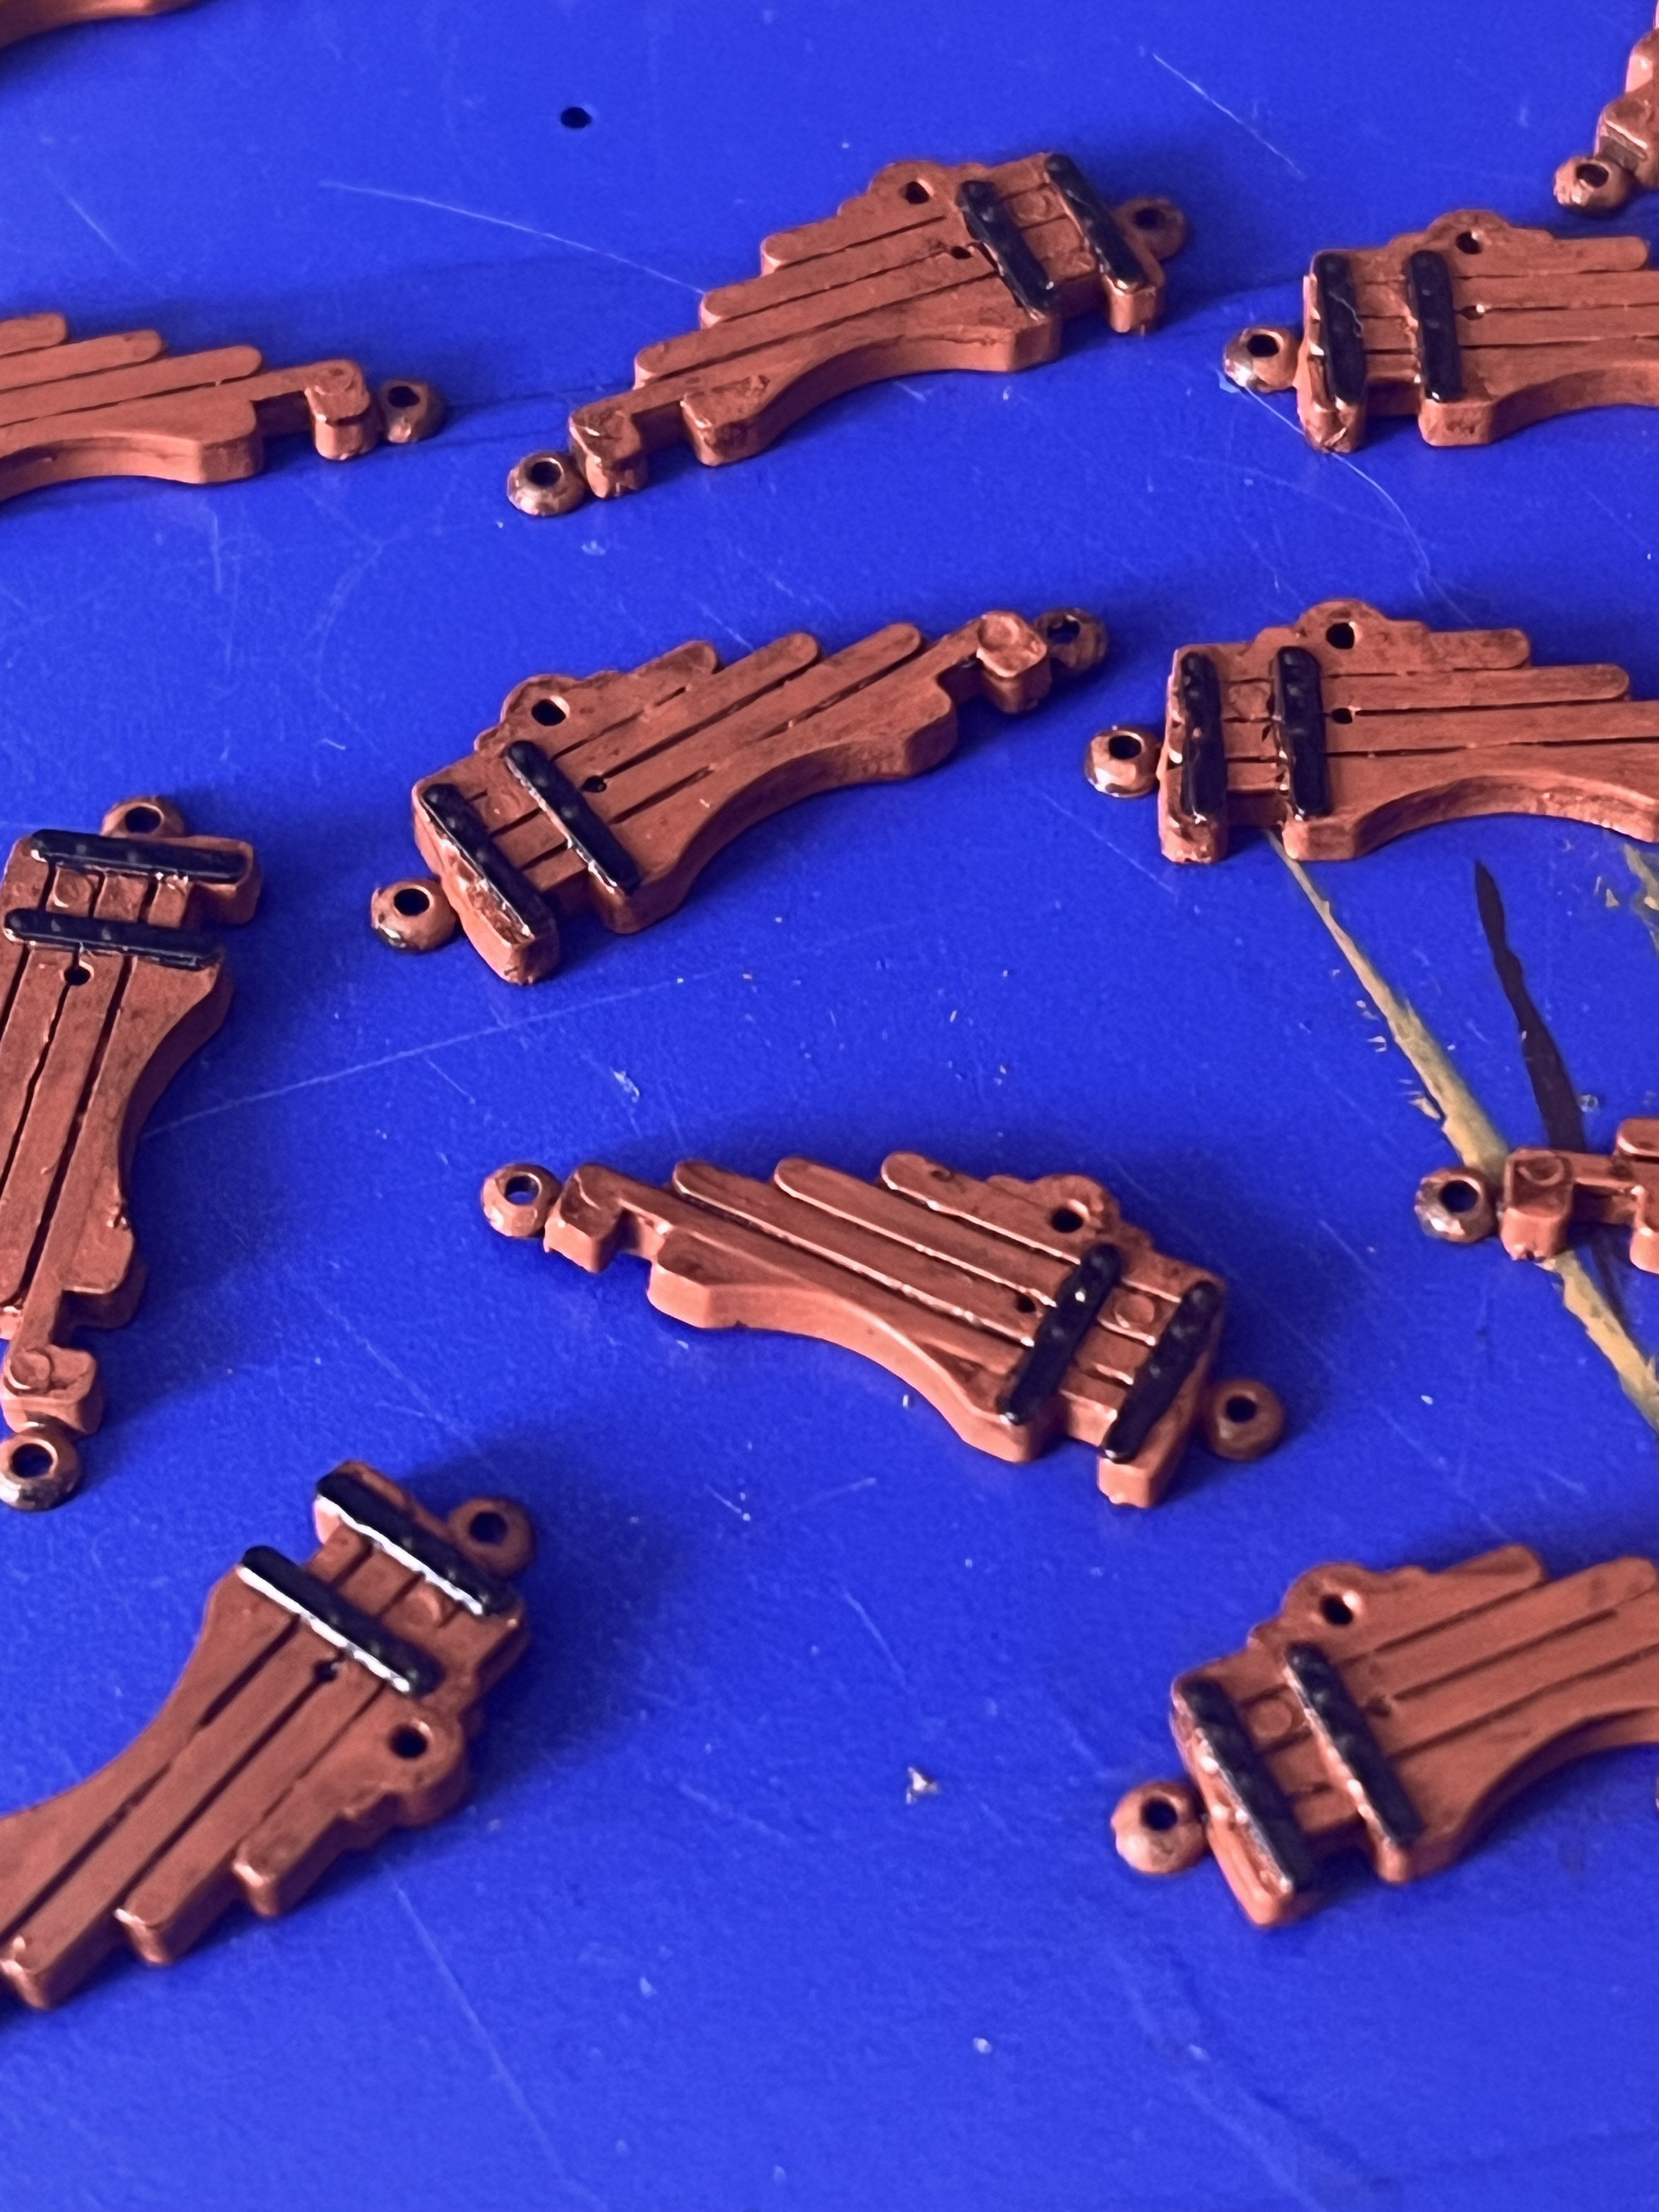
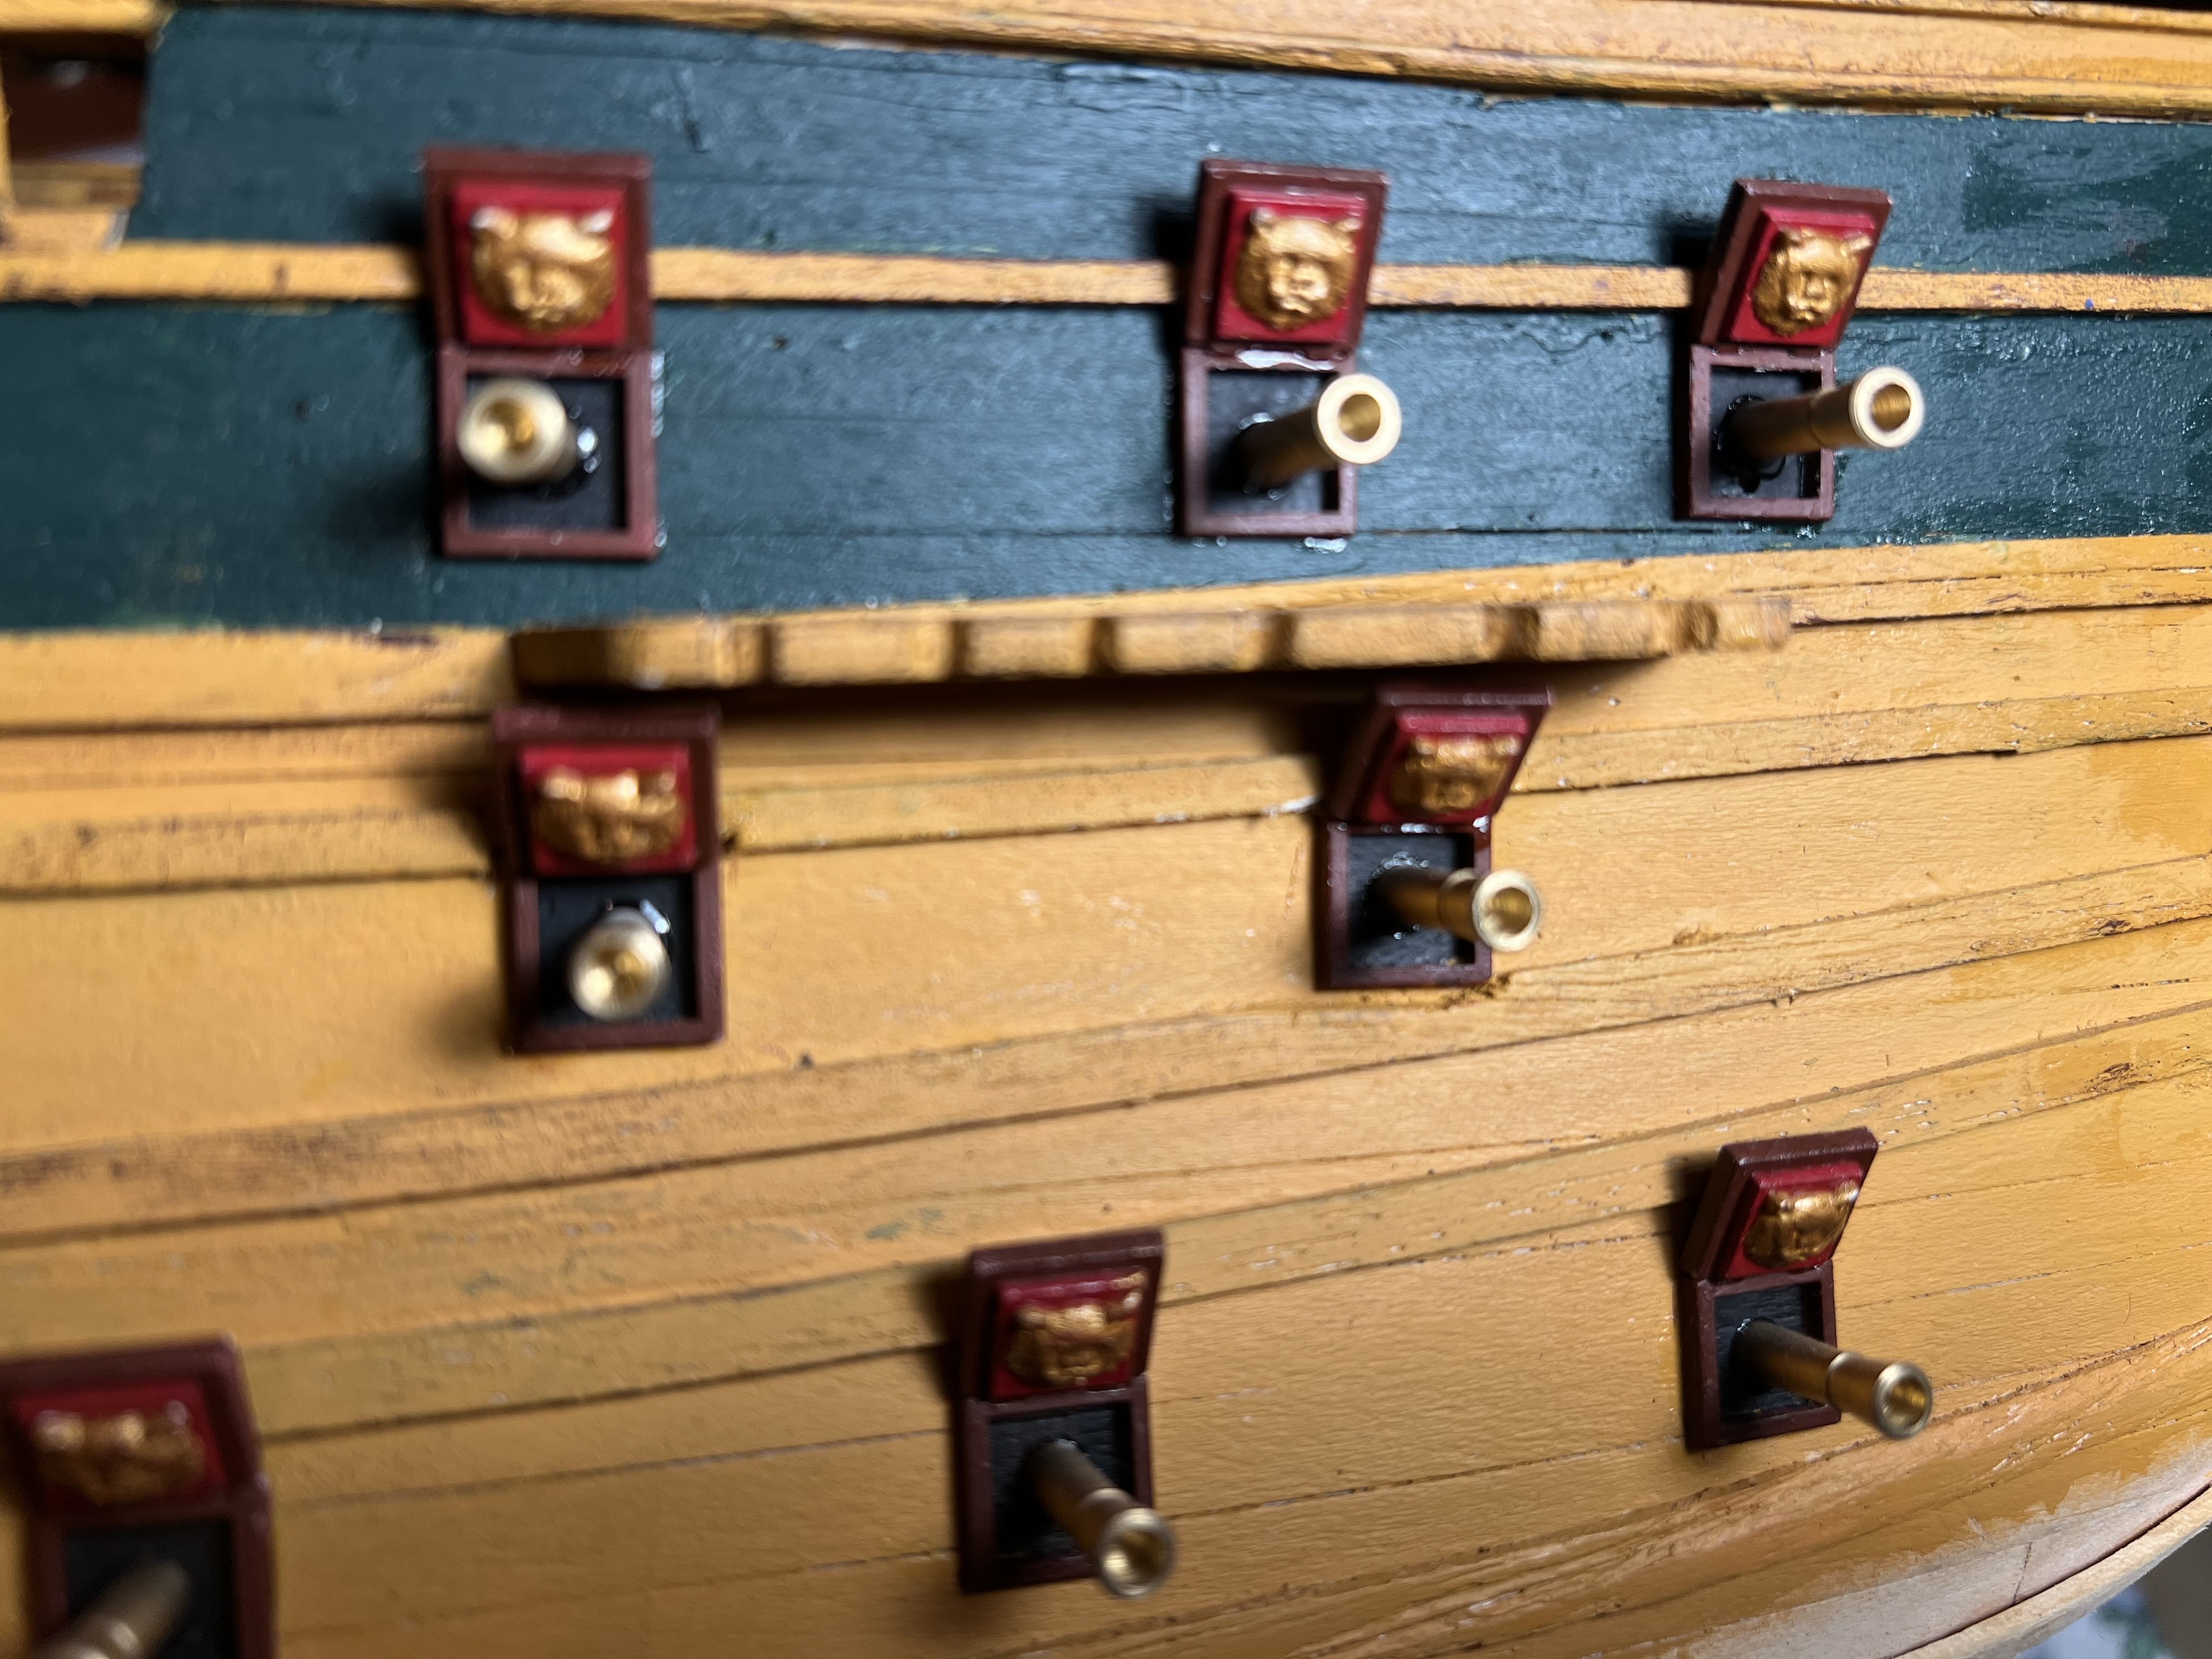
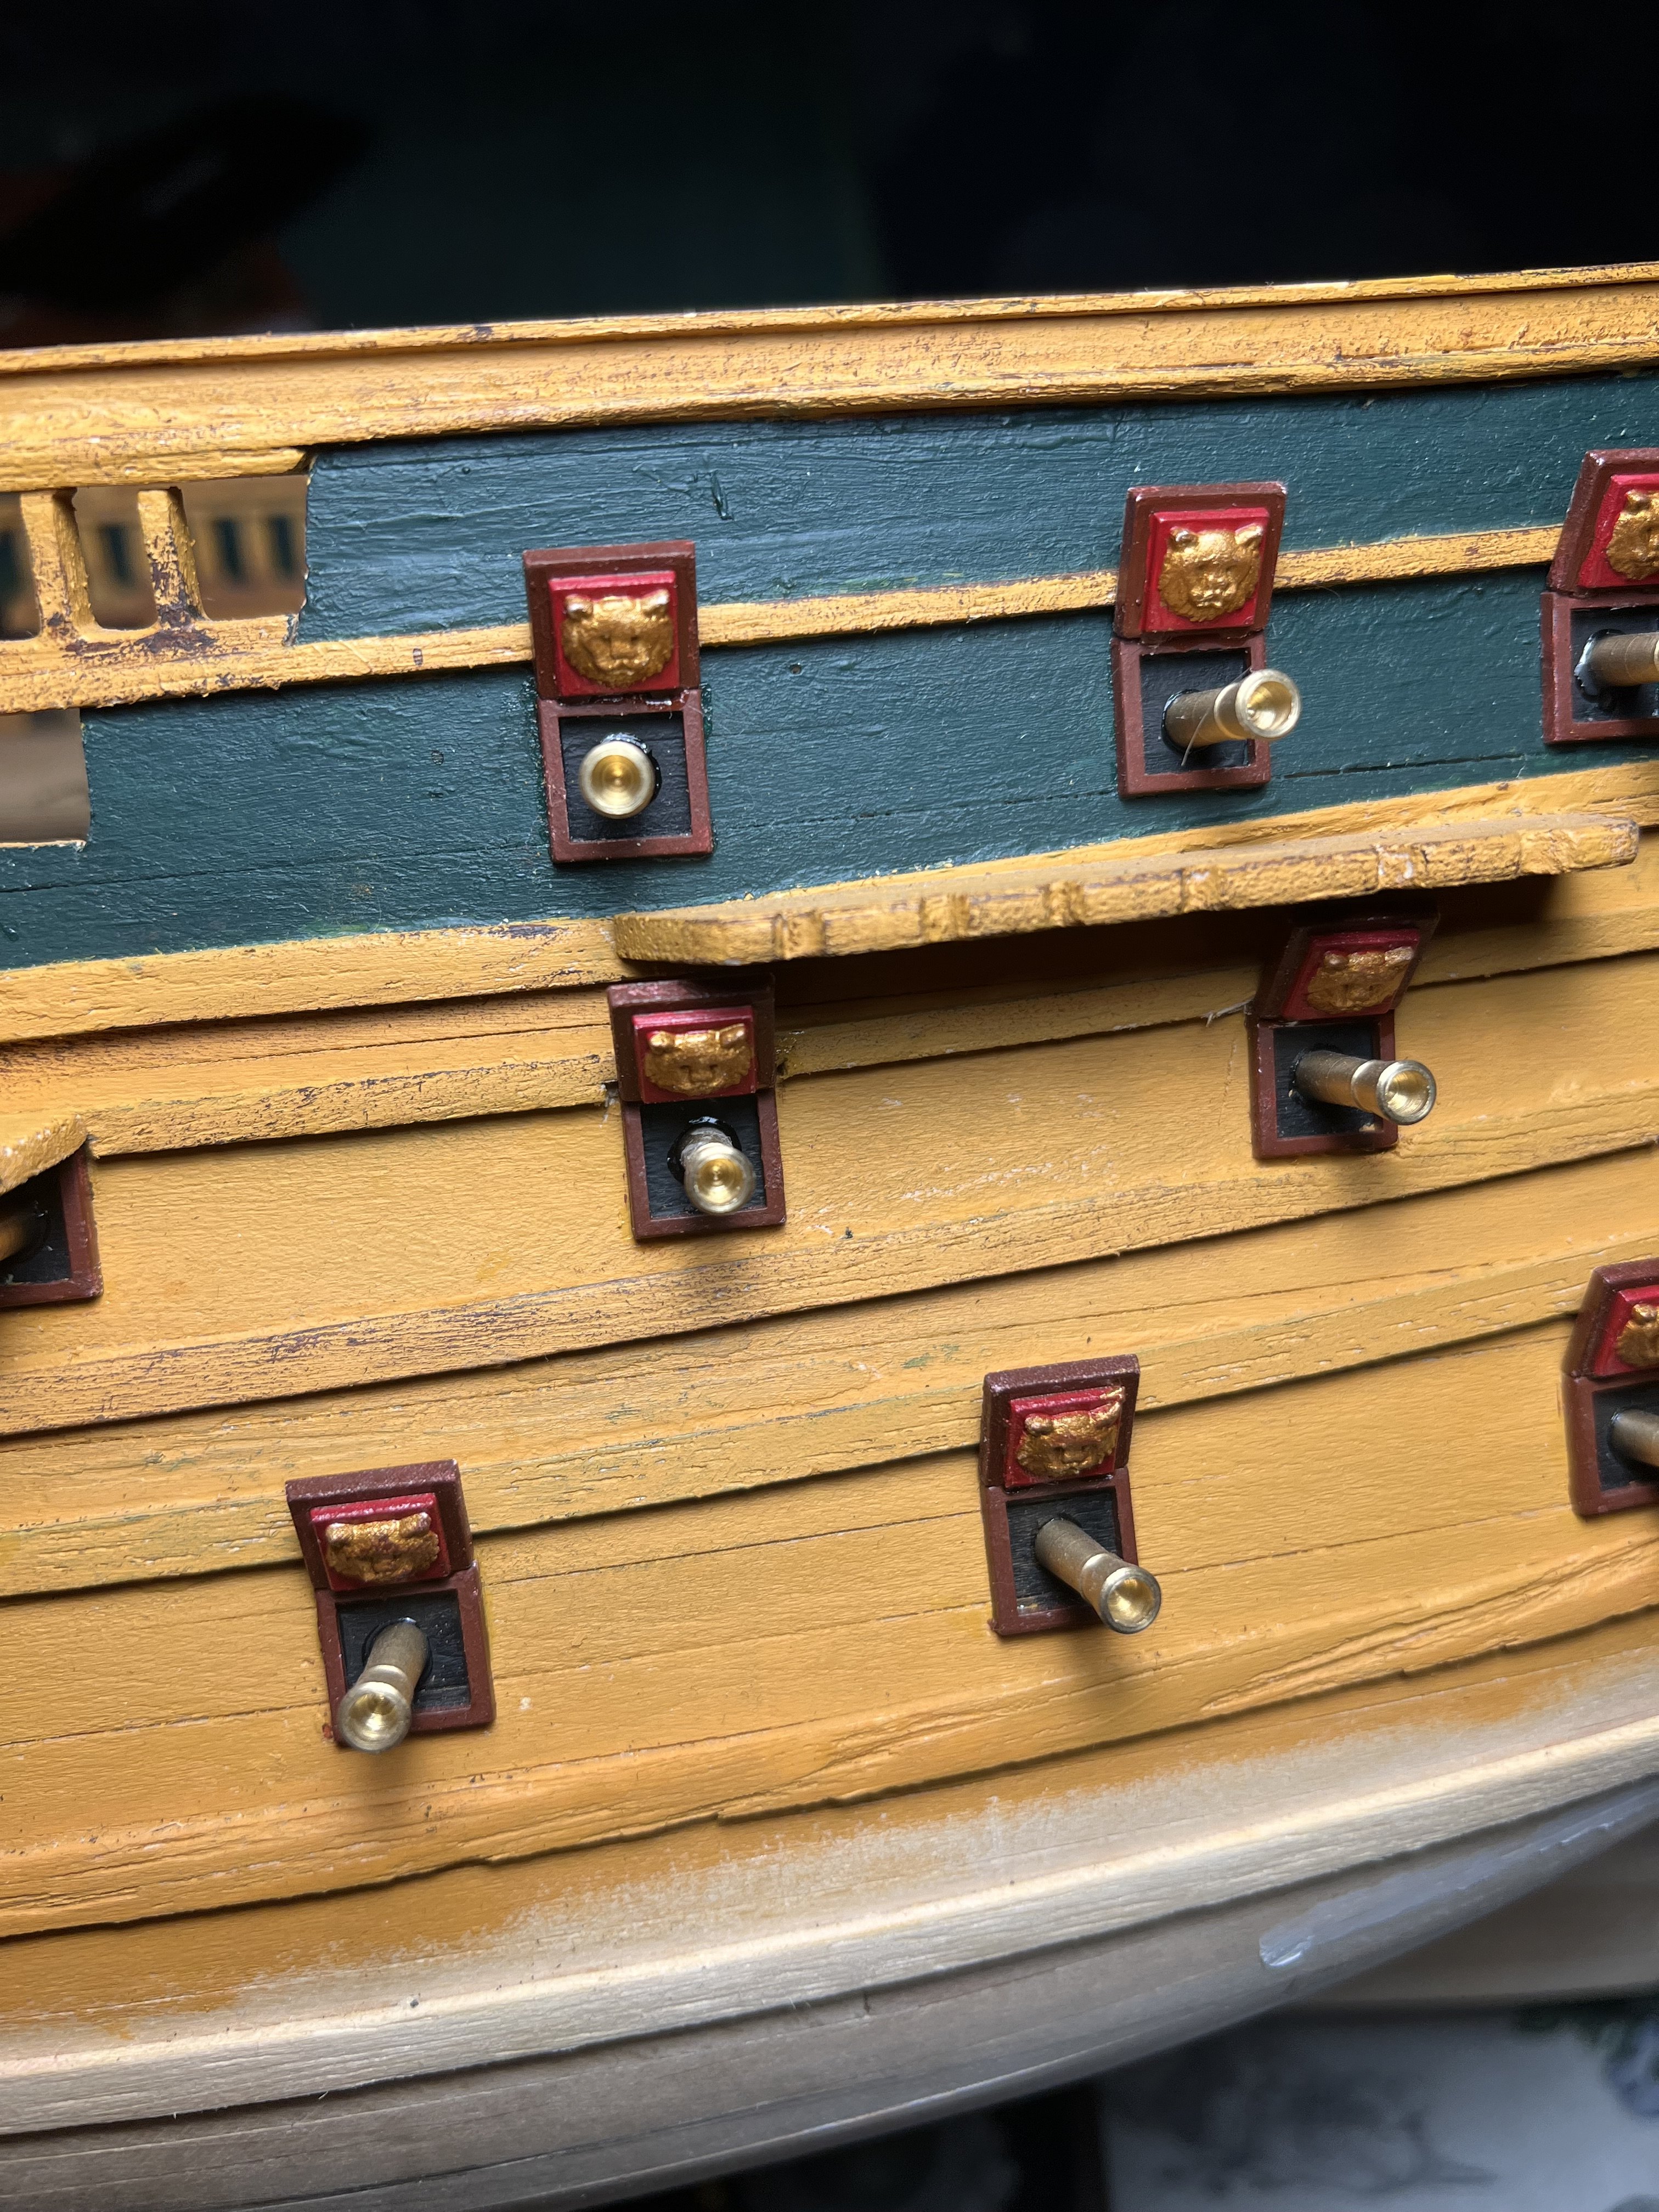
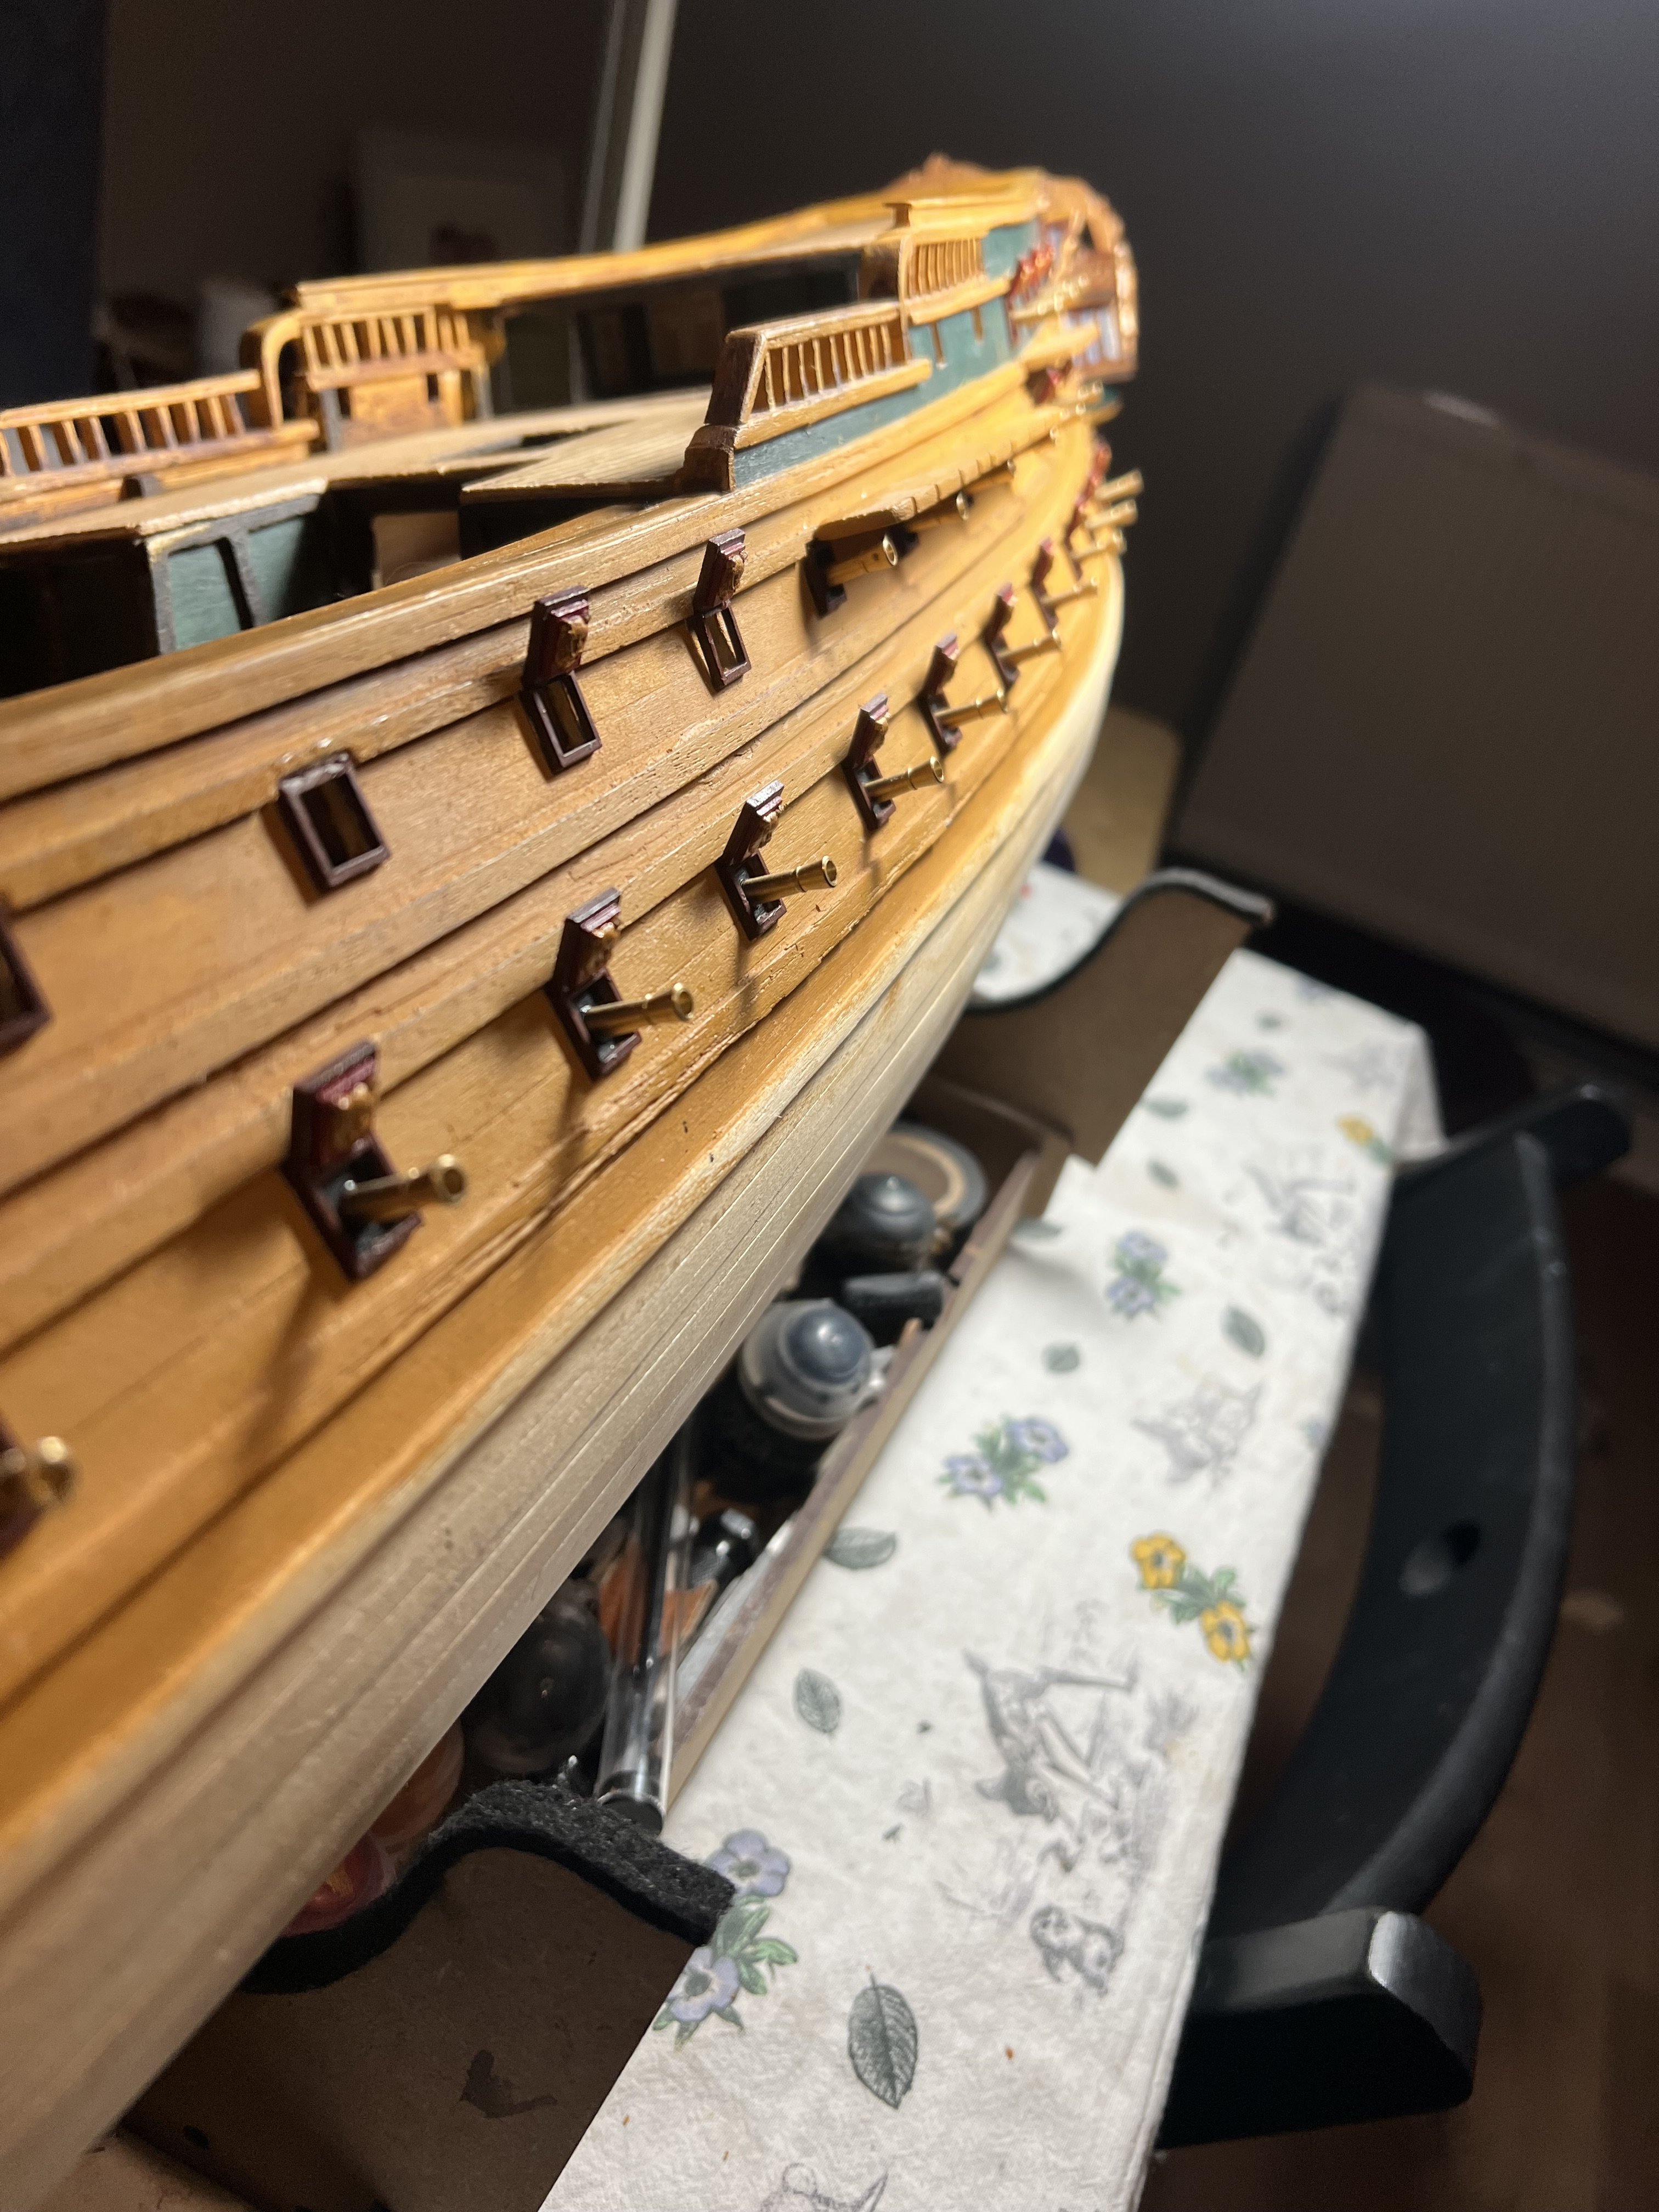
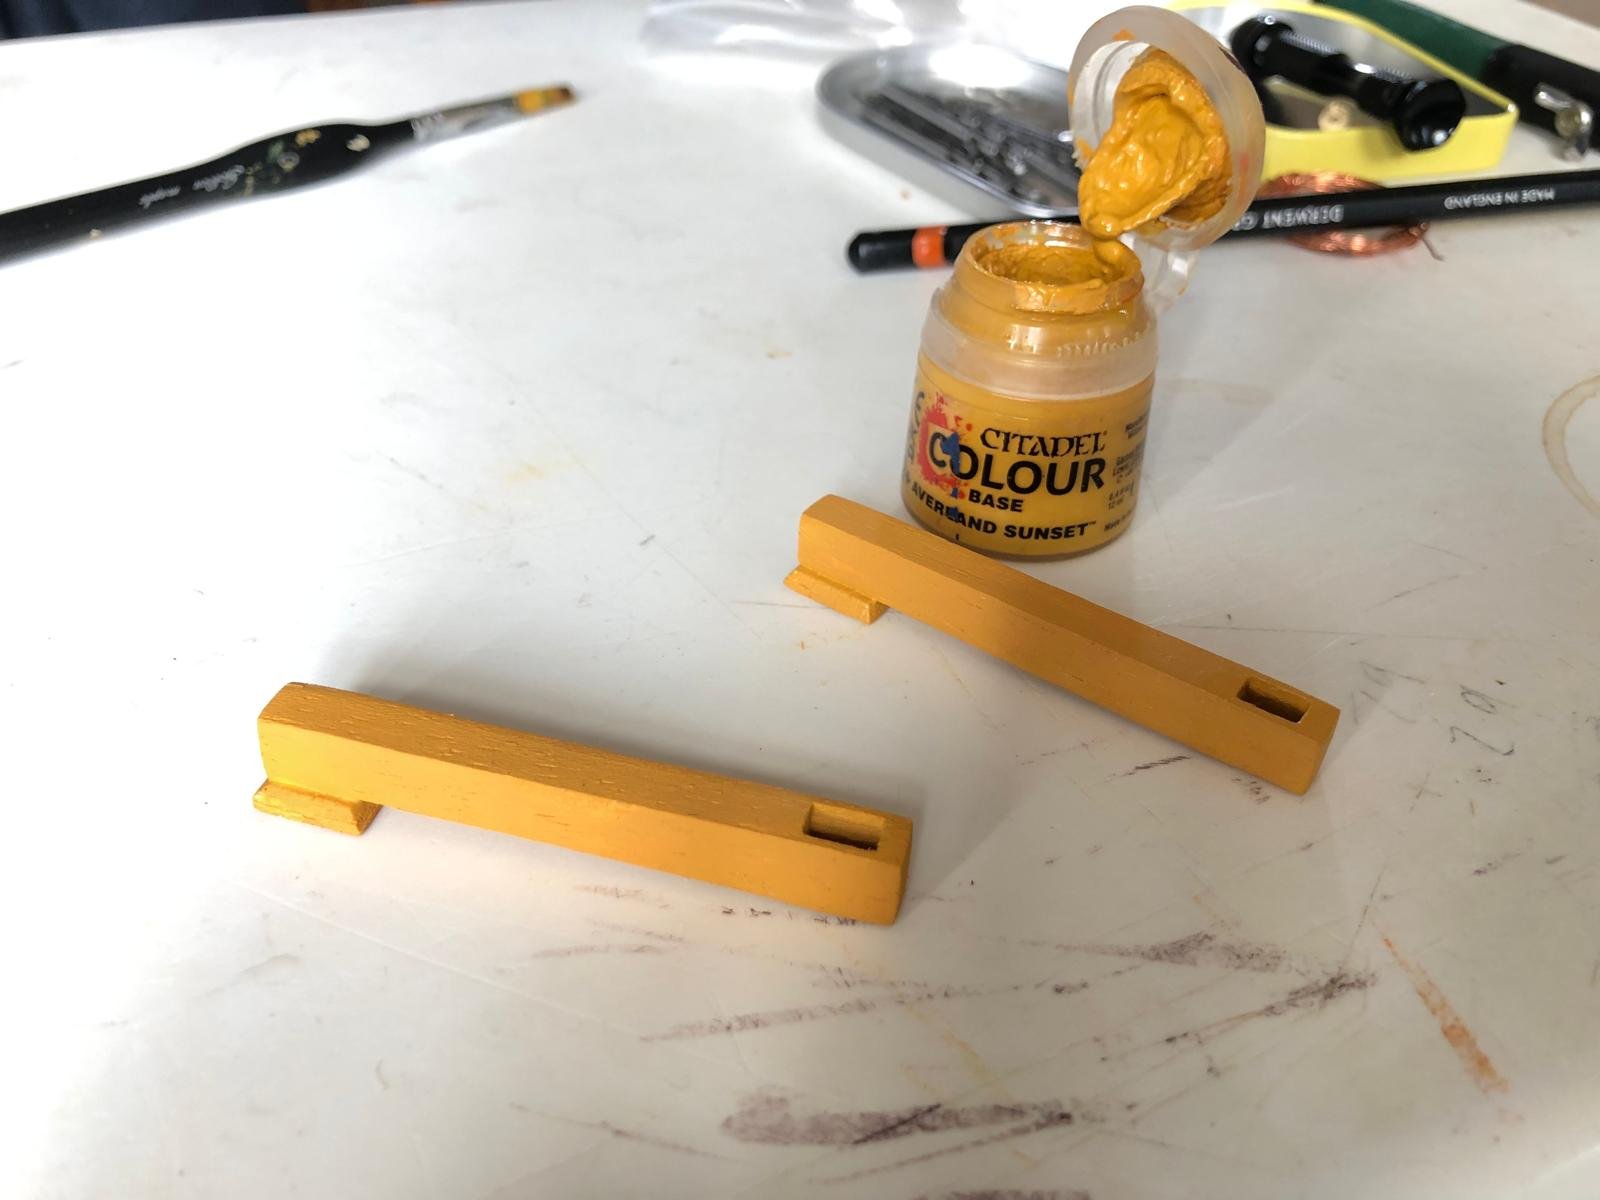
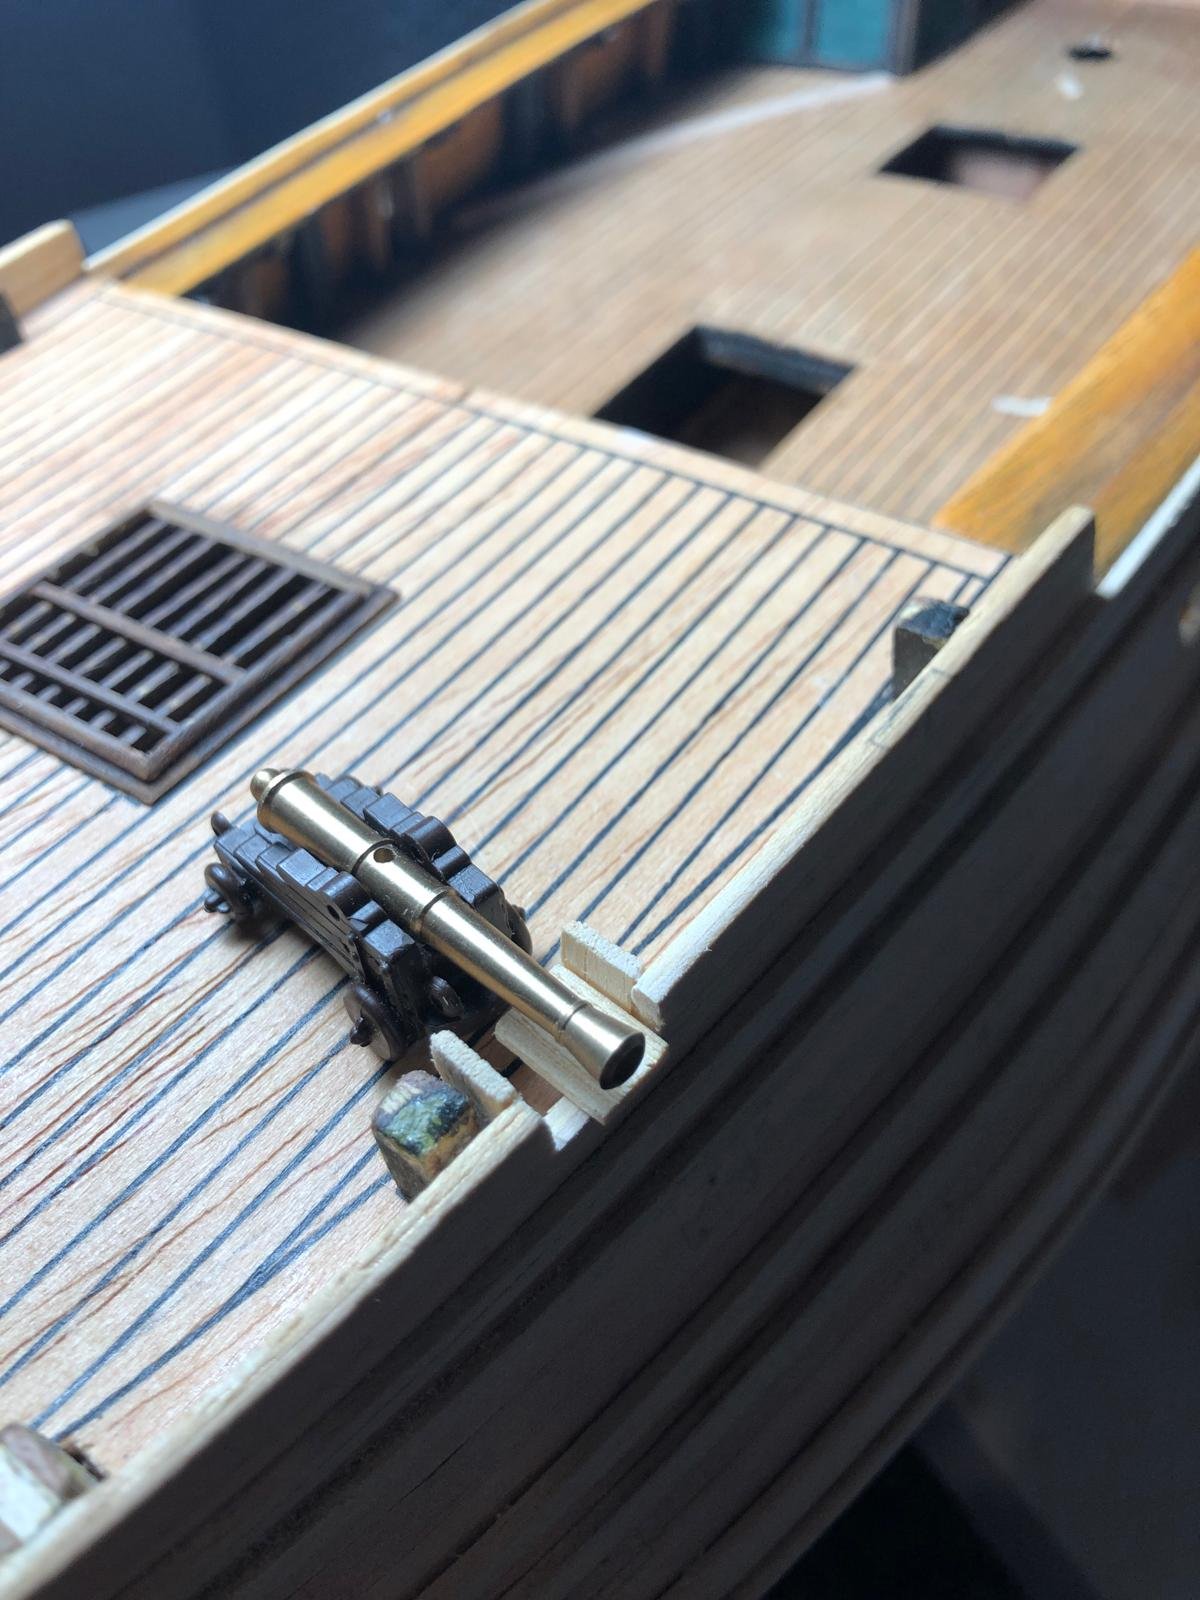
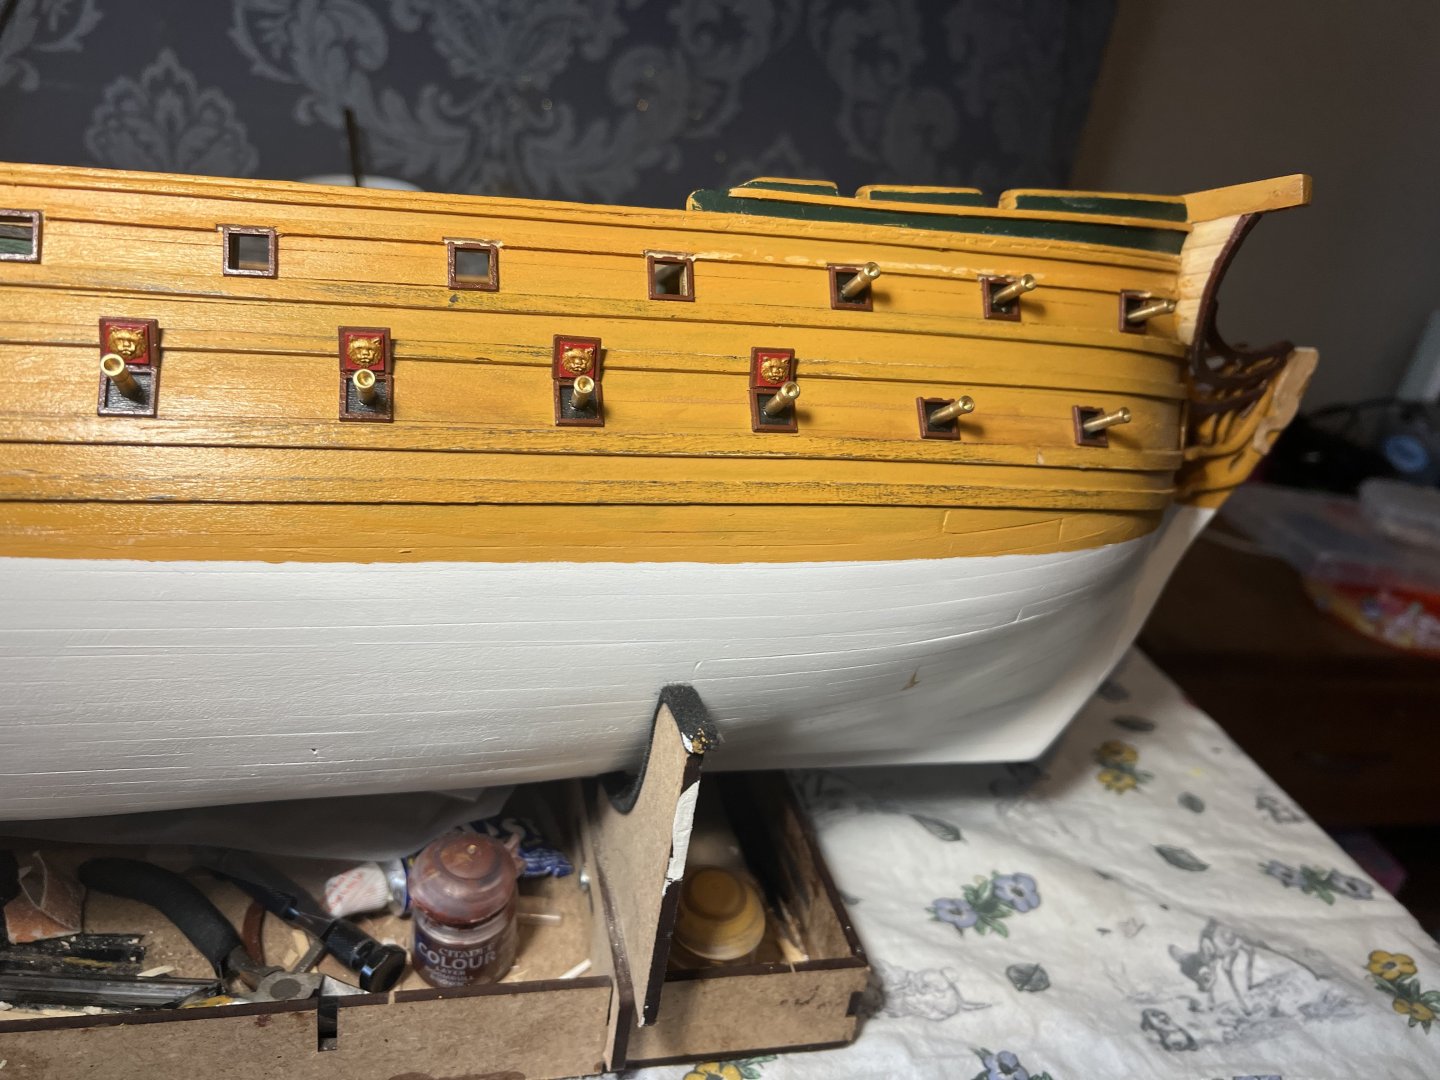
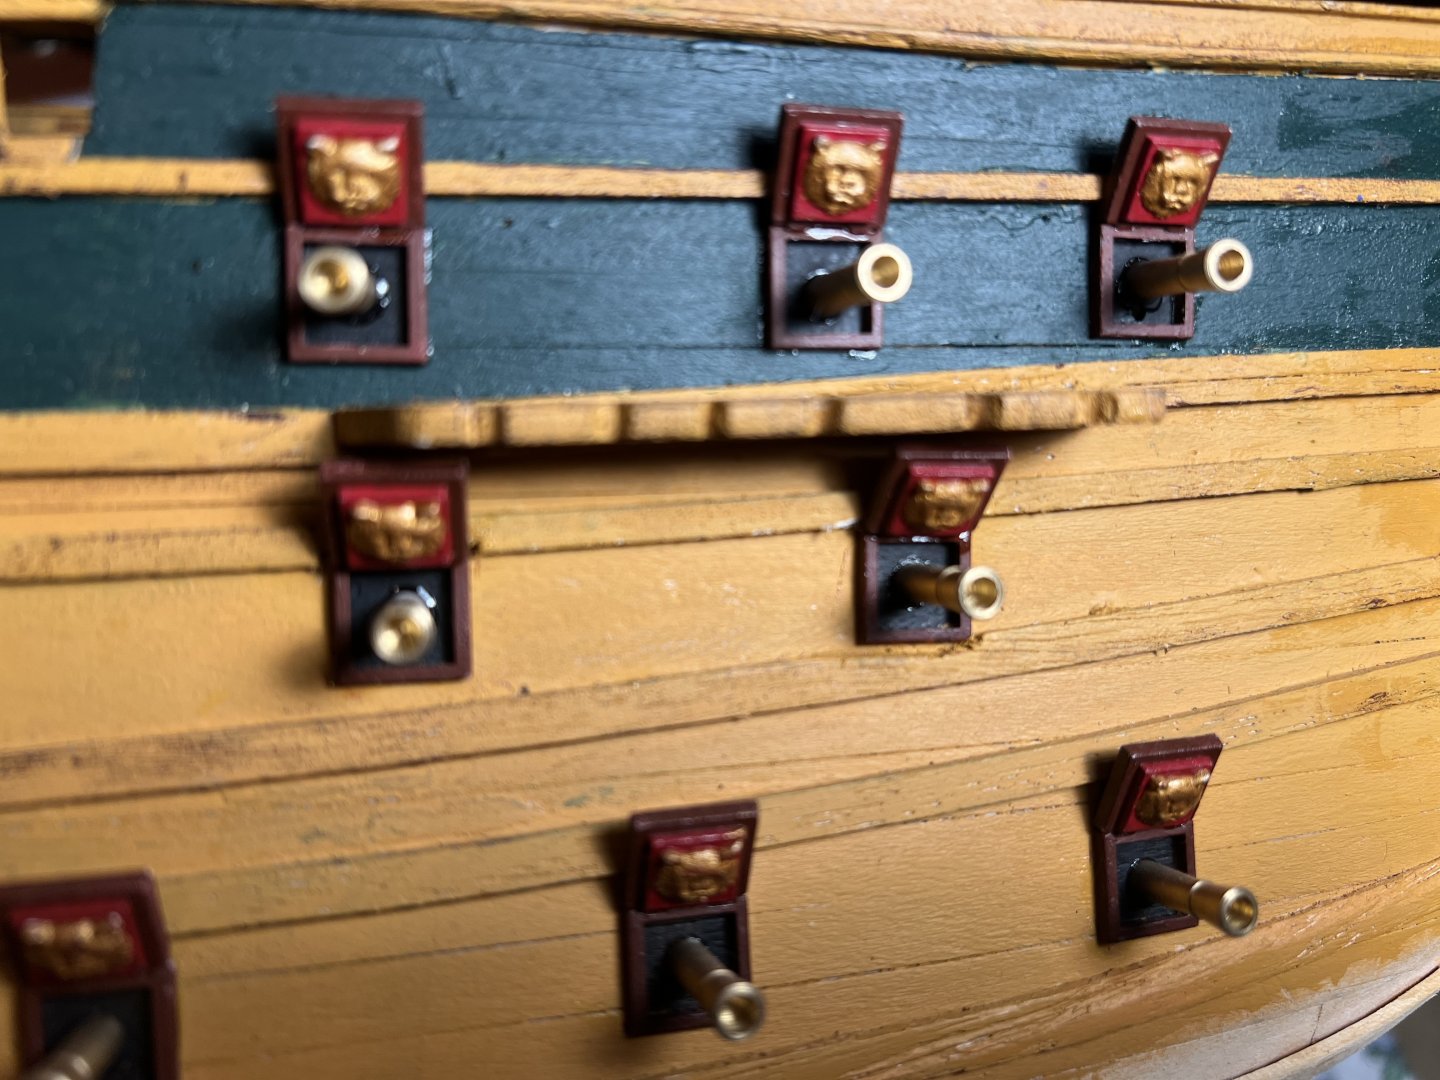
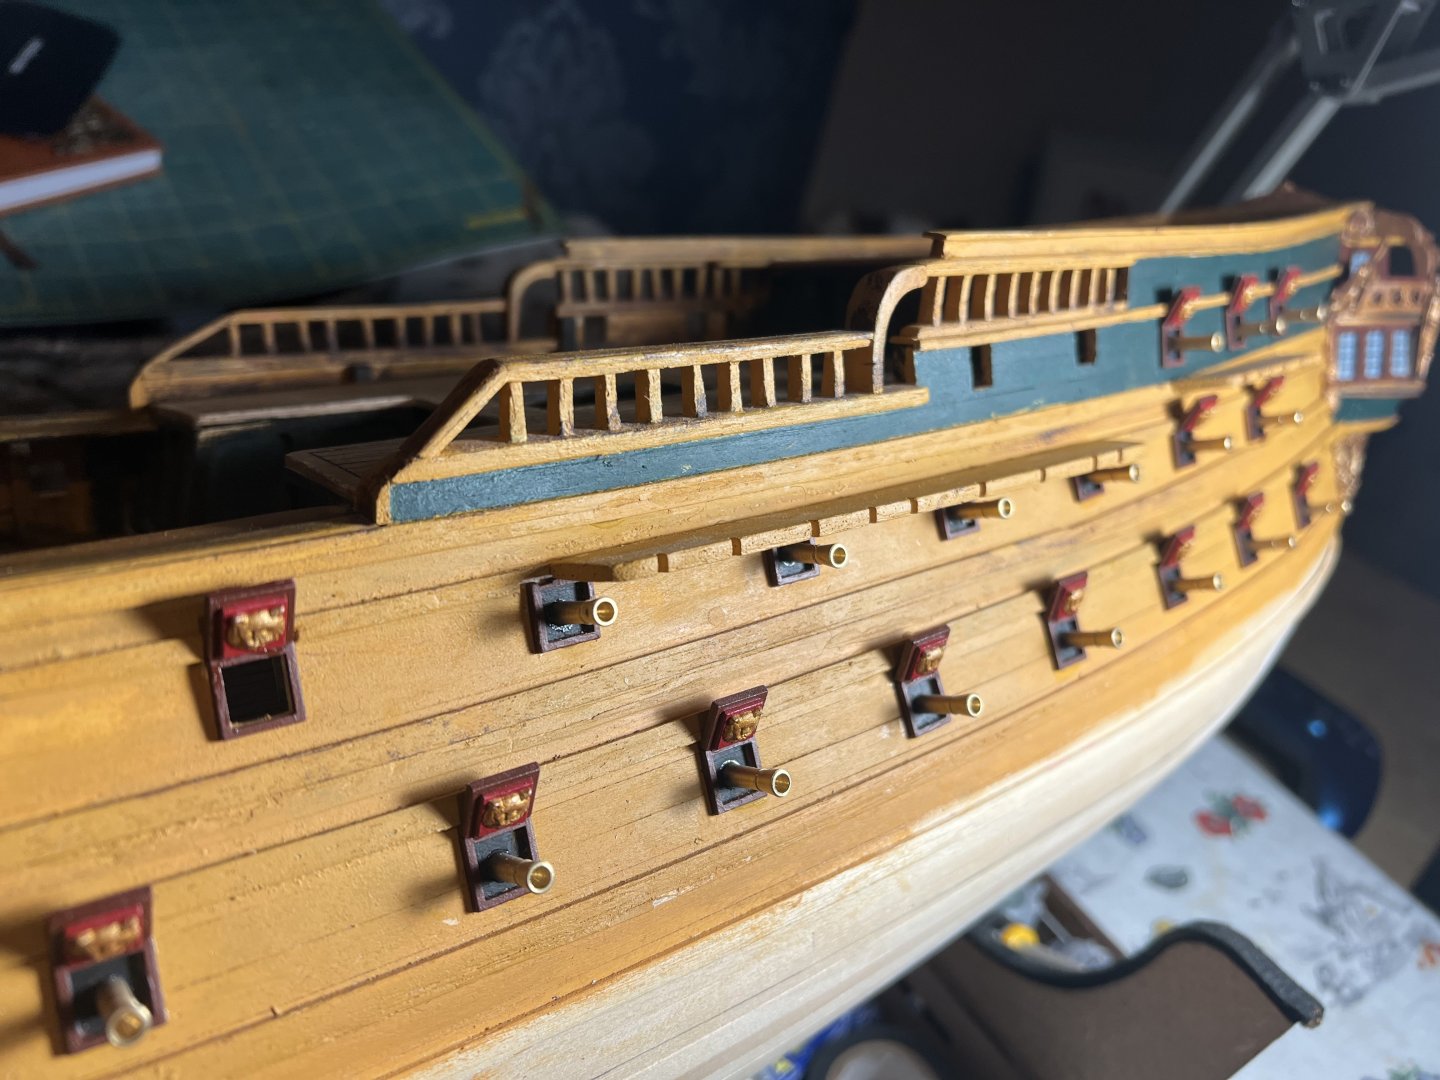
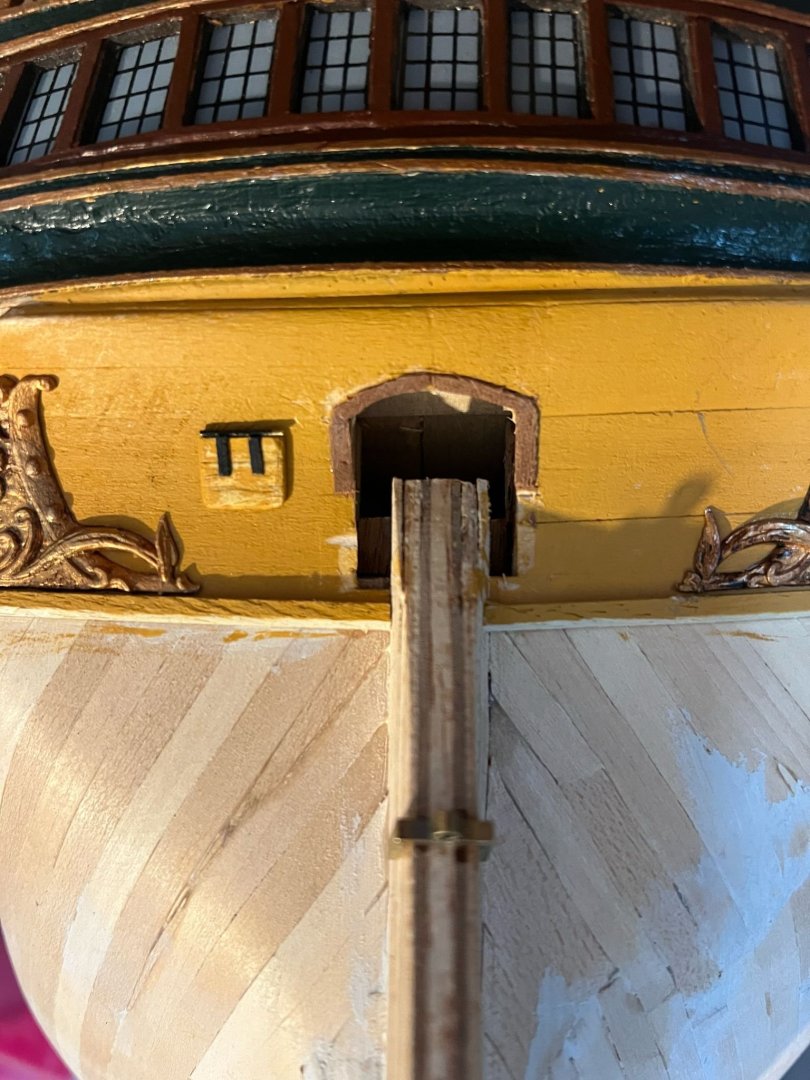
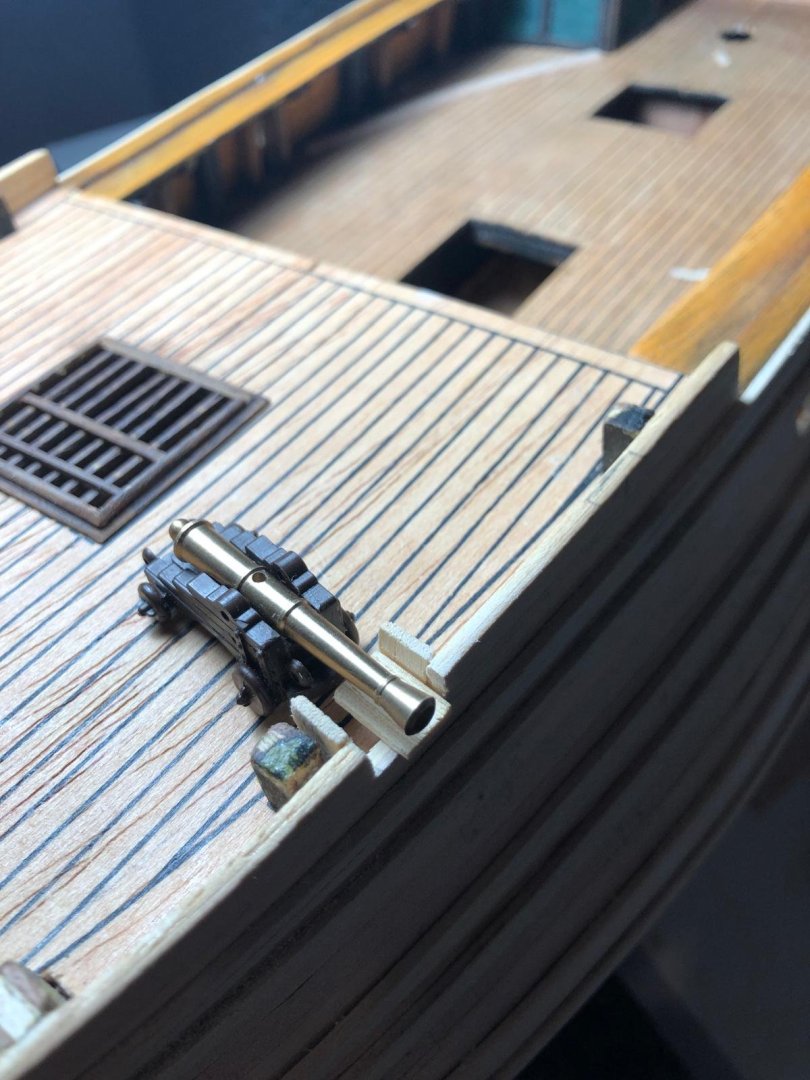
BILLING BOAT. NORSKE LOVE UPDATE 16 I’ve added the canons! And mostly gun hole covers. I’ve also smartened up some of the yellow paint work as well. The painting took a while as there are a lot of there was a lot to paint. Not much to explain this time. I’m moving onto the deck work next, so should start to see some progress on there. Paint used: Citadel Colour: Layer Doombull Brown. Base Mephiston Red Base Retributor Armor and Base Overland Sunset.


-
Thank you for your message. I've been chipping away at it - it seems like it's taken ages! When I looked online I couldn't find many finished build logs, which served as some of the motivation to get one done. If you do share your journey, I'll be sure to follow you along the way.
-
DanielNG10 reacted to a post in a topic:
Norske Love by DanielNG10 - Billing Boats - 1:75
-
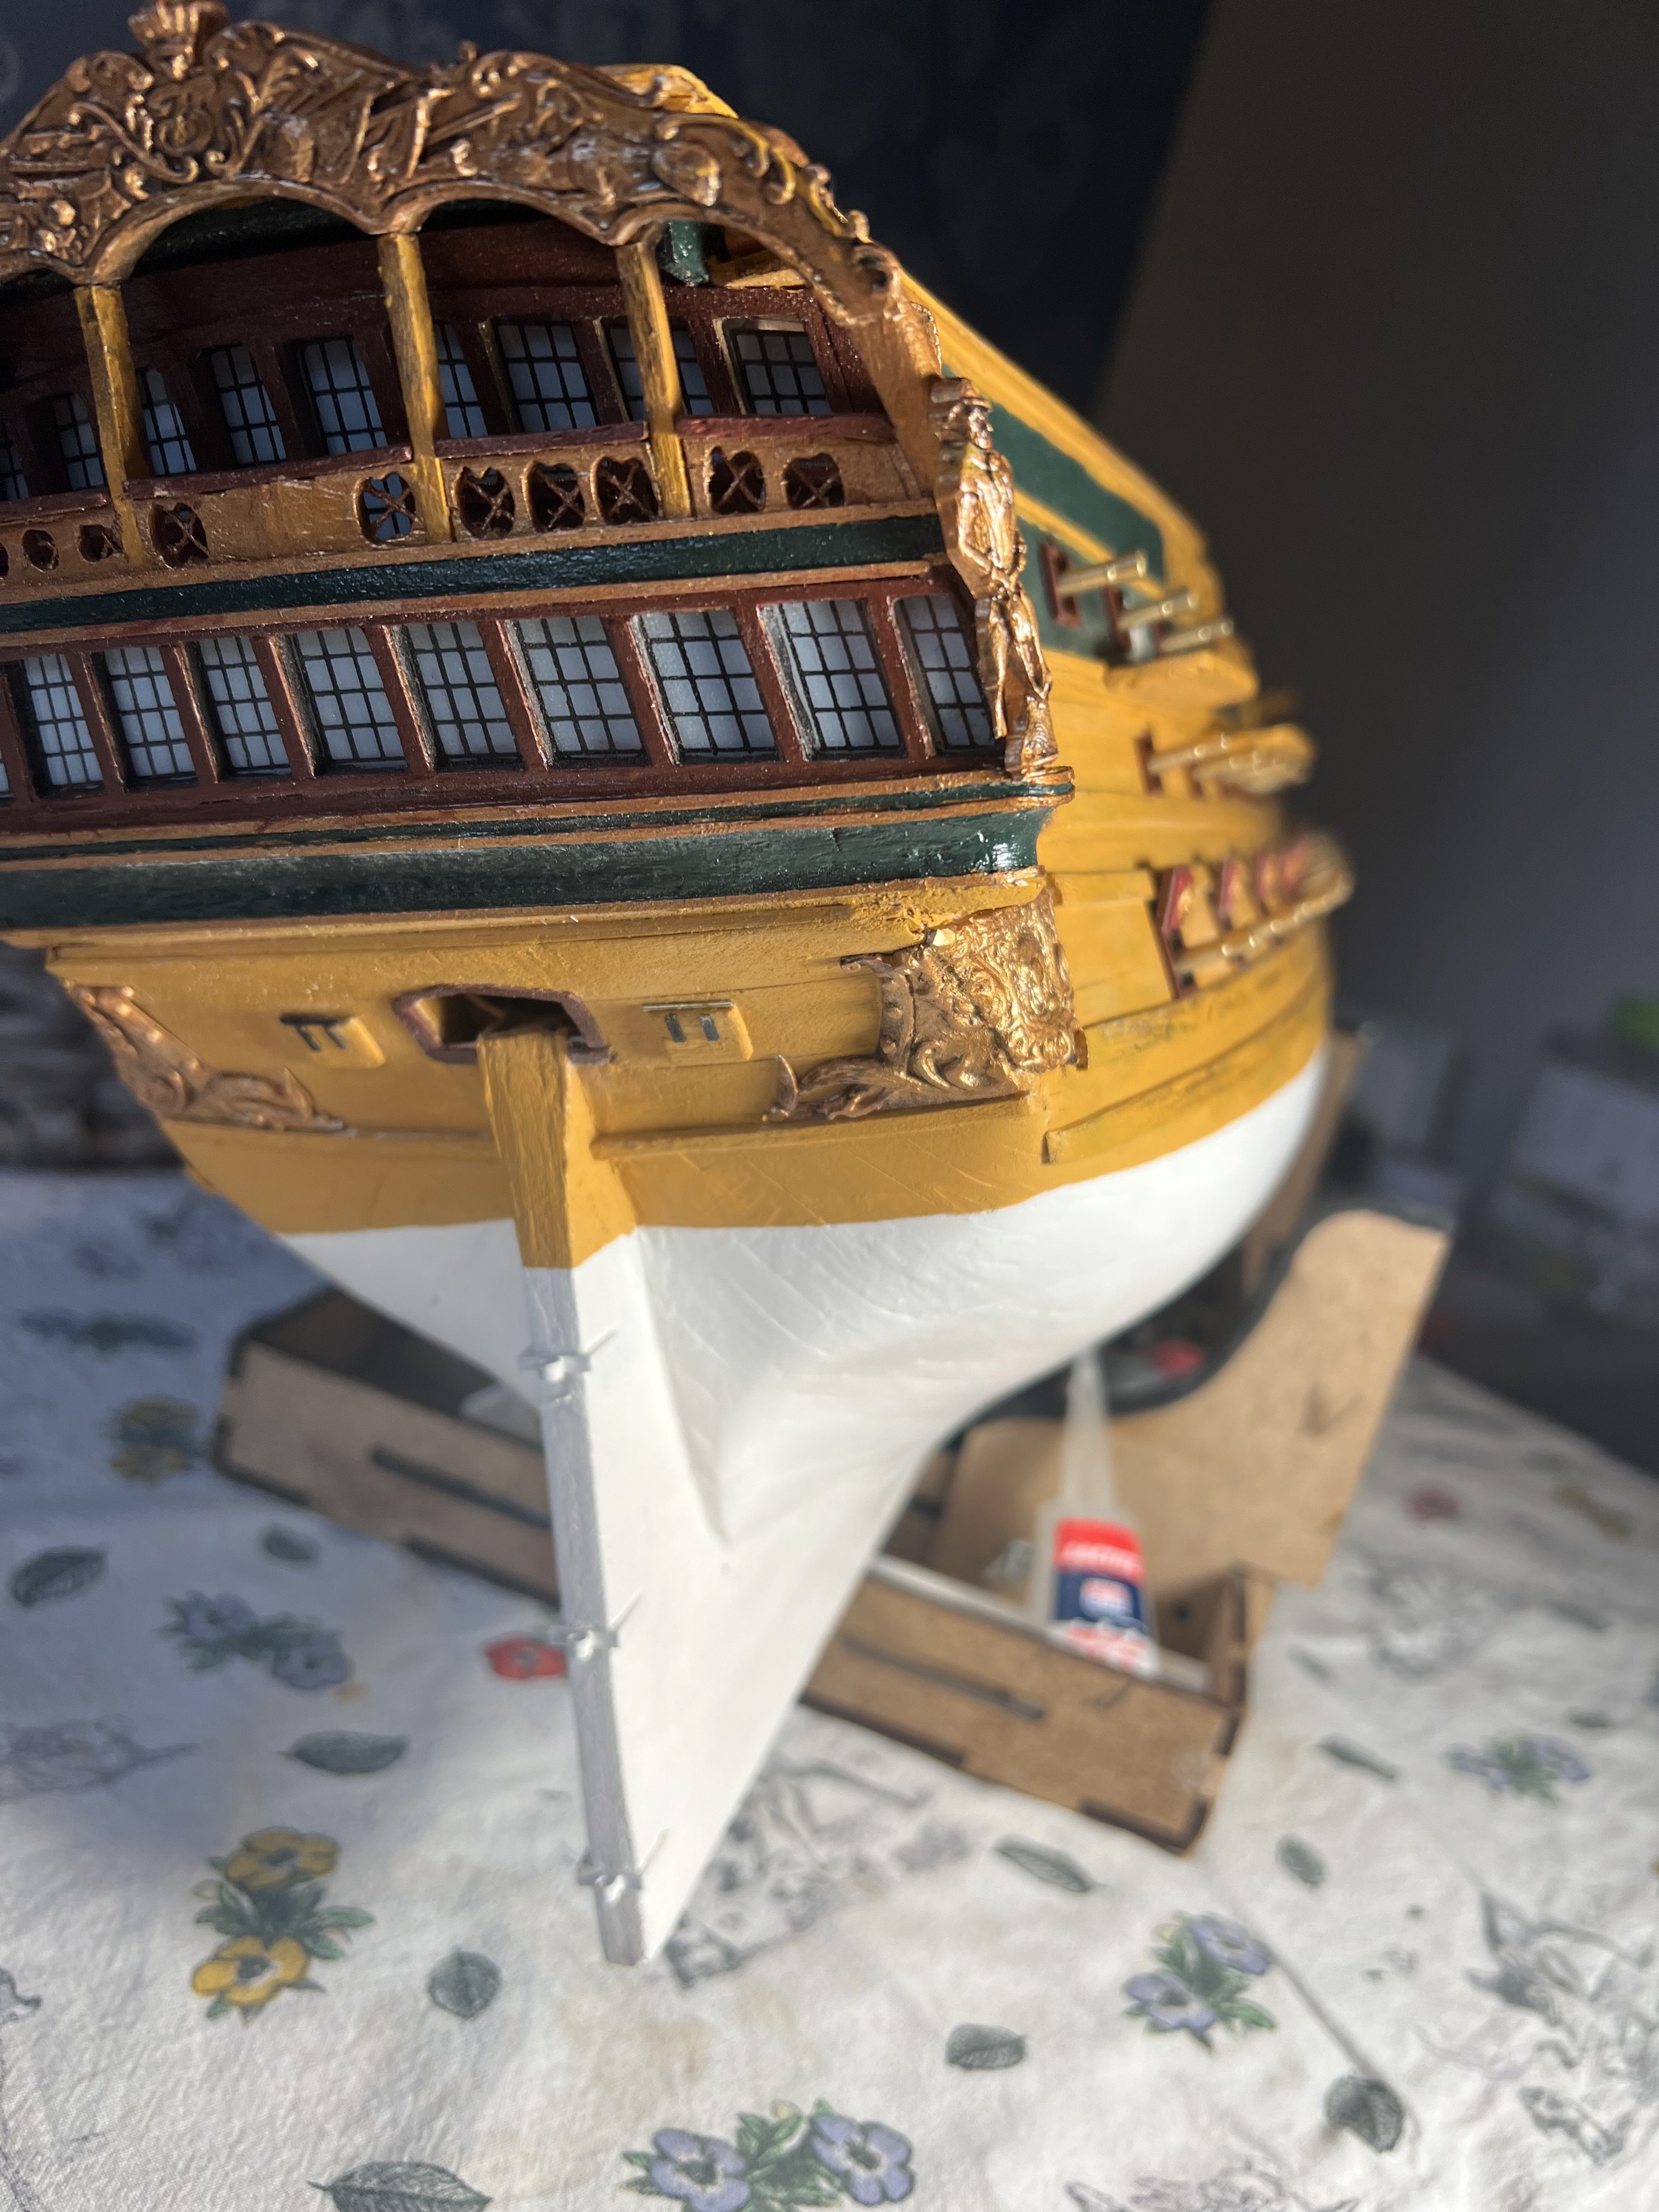
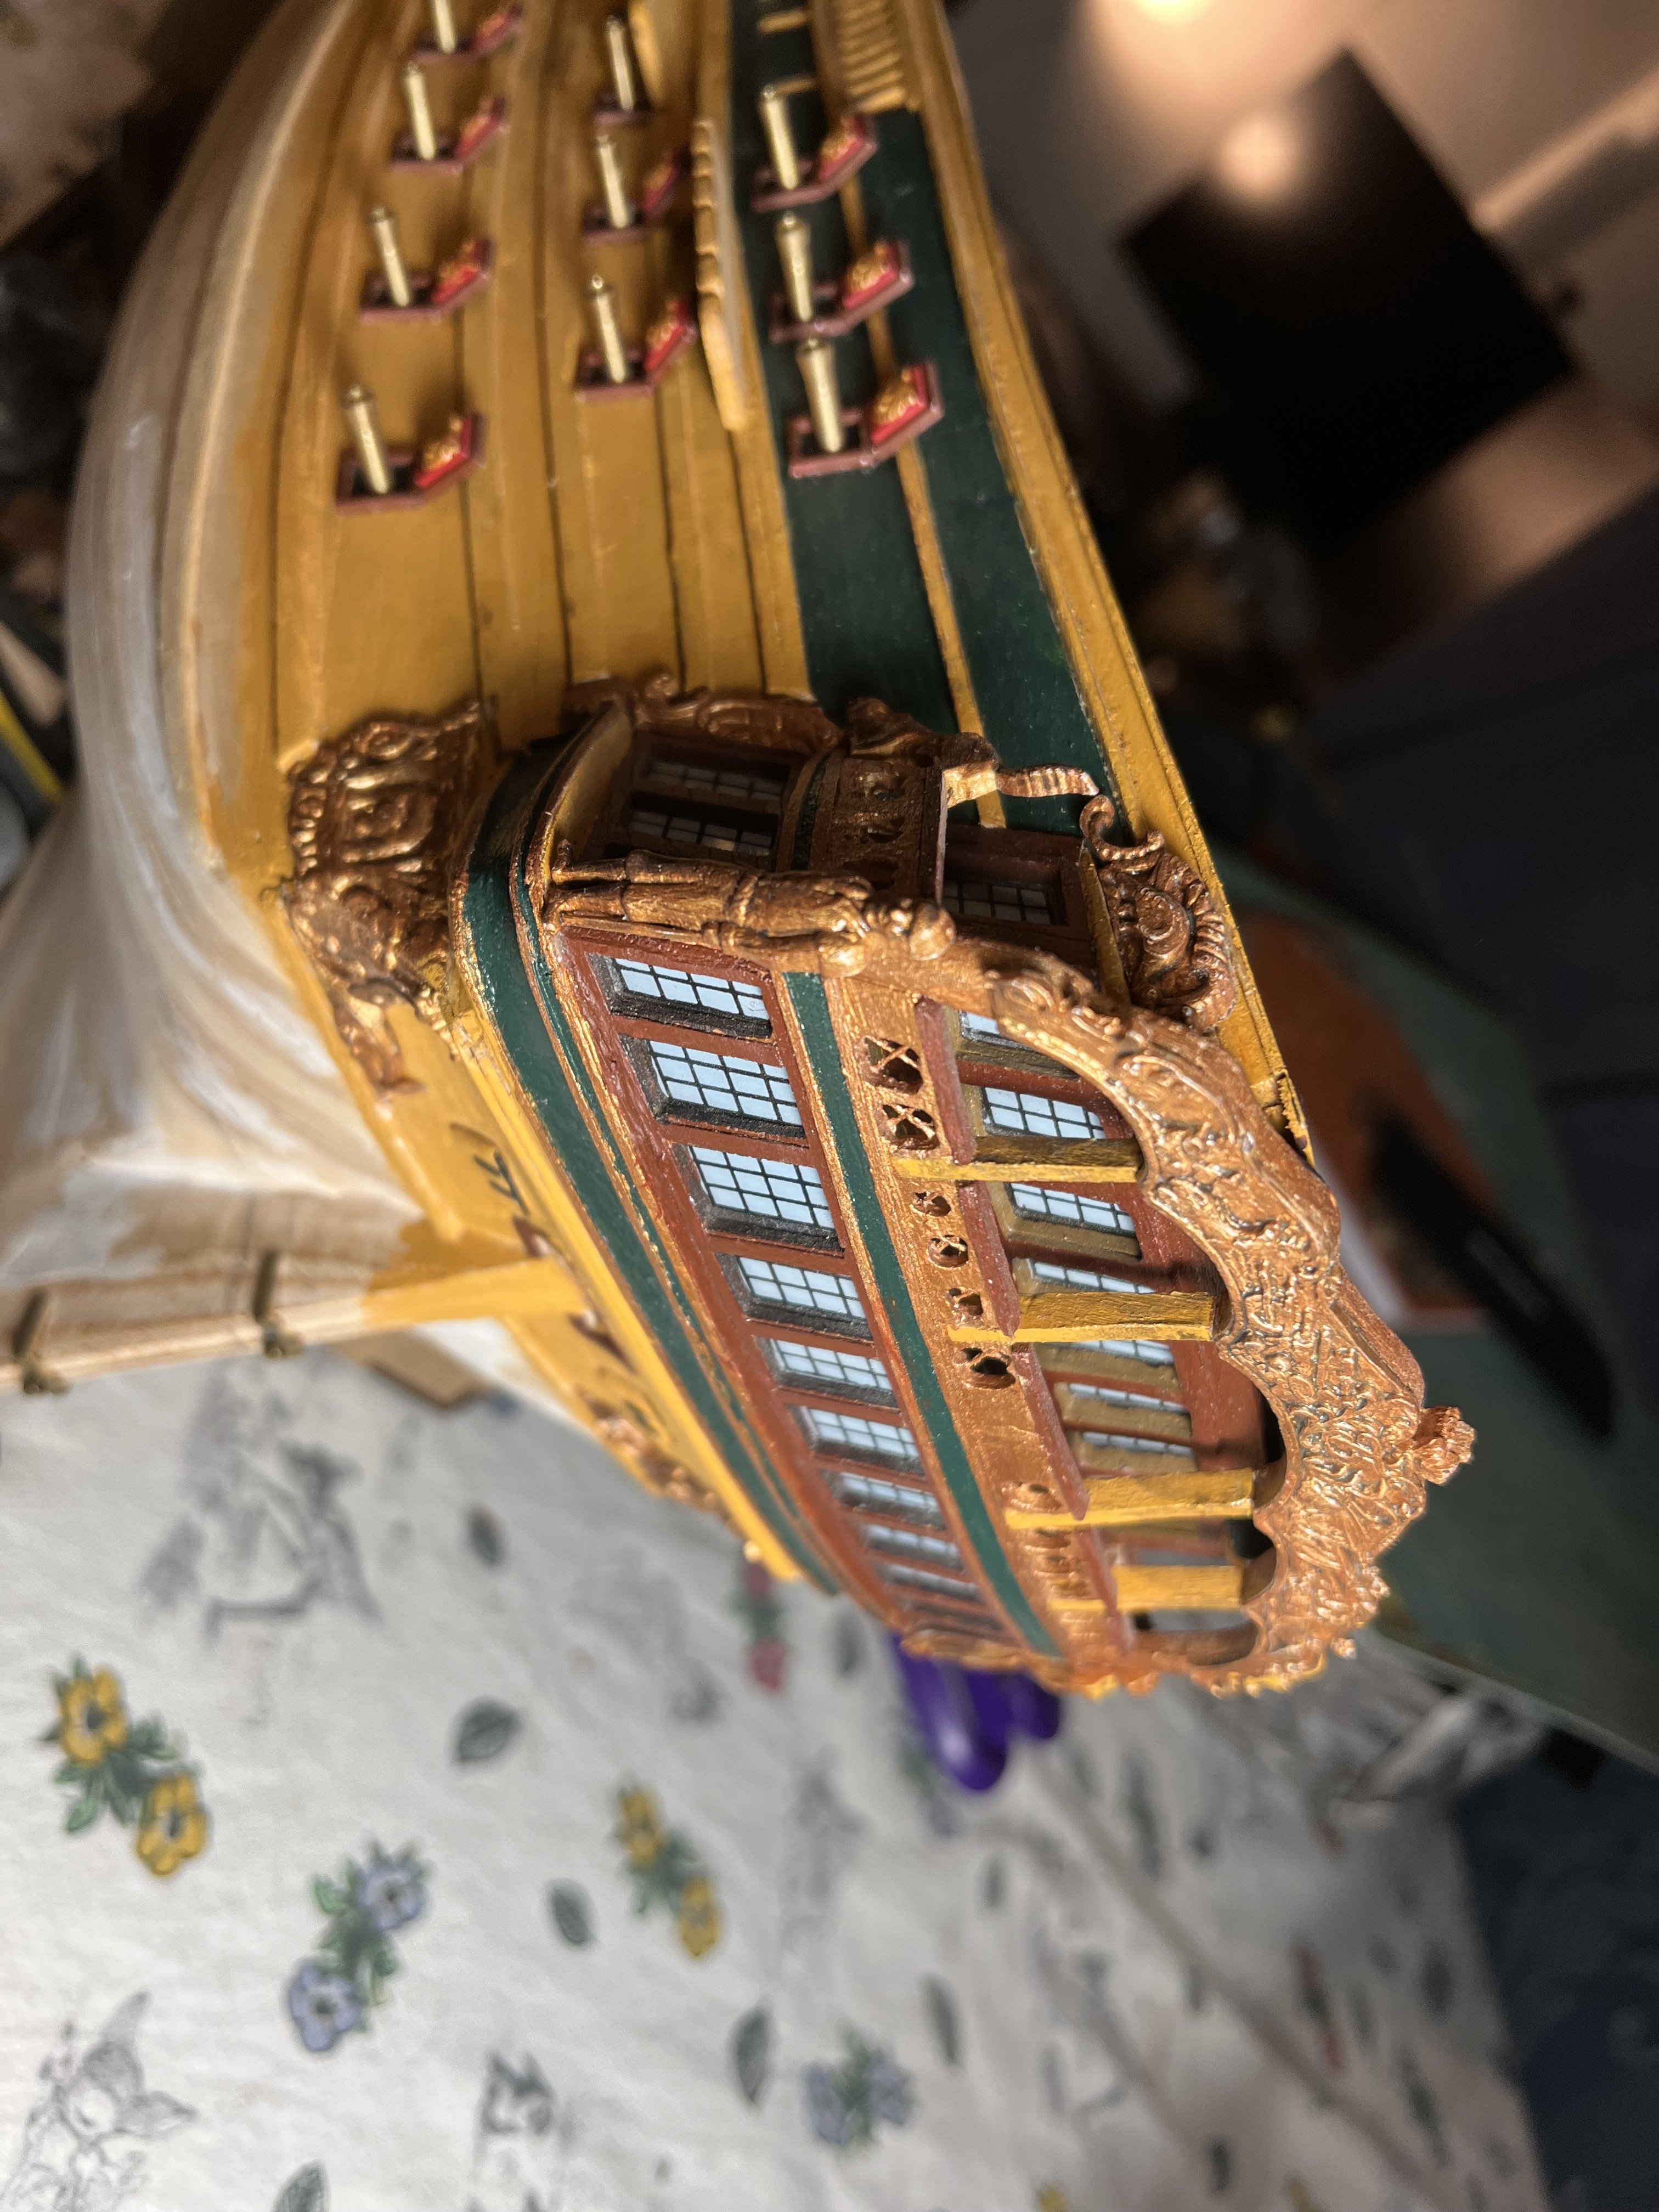
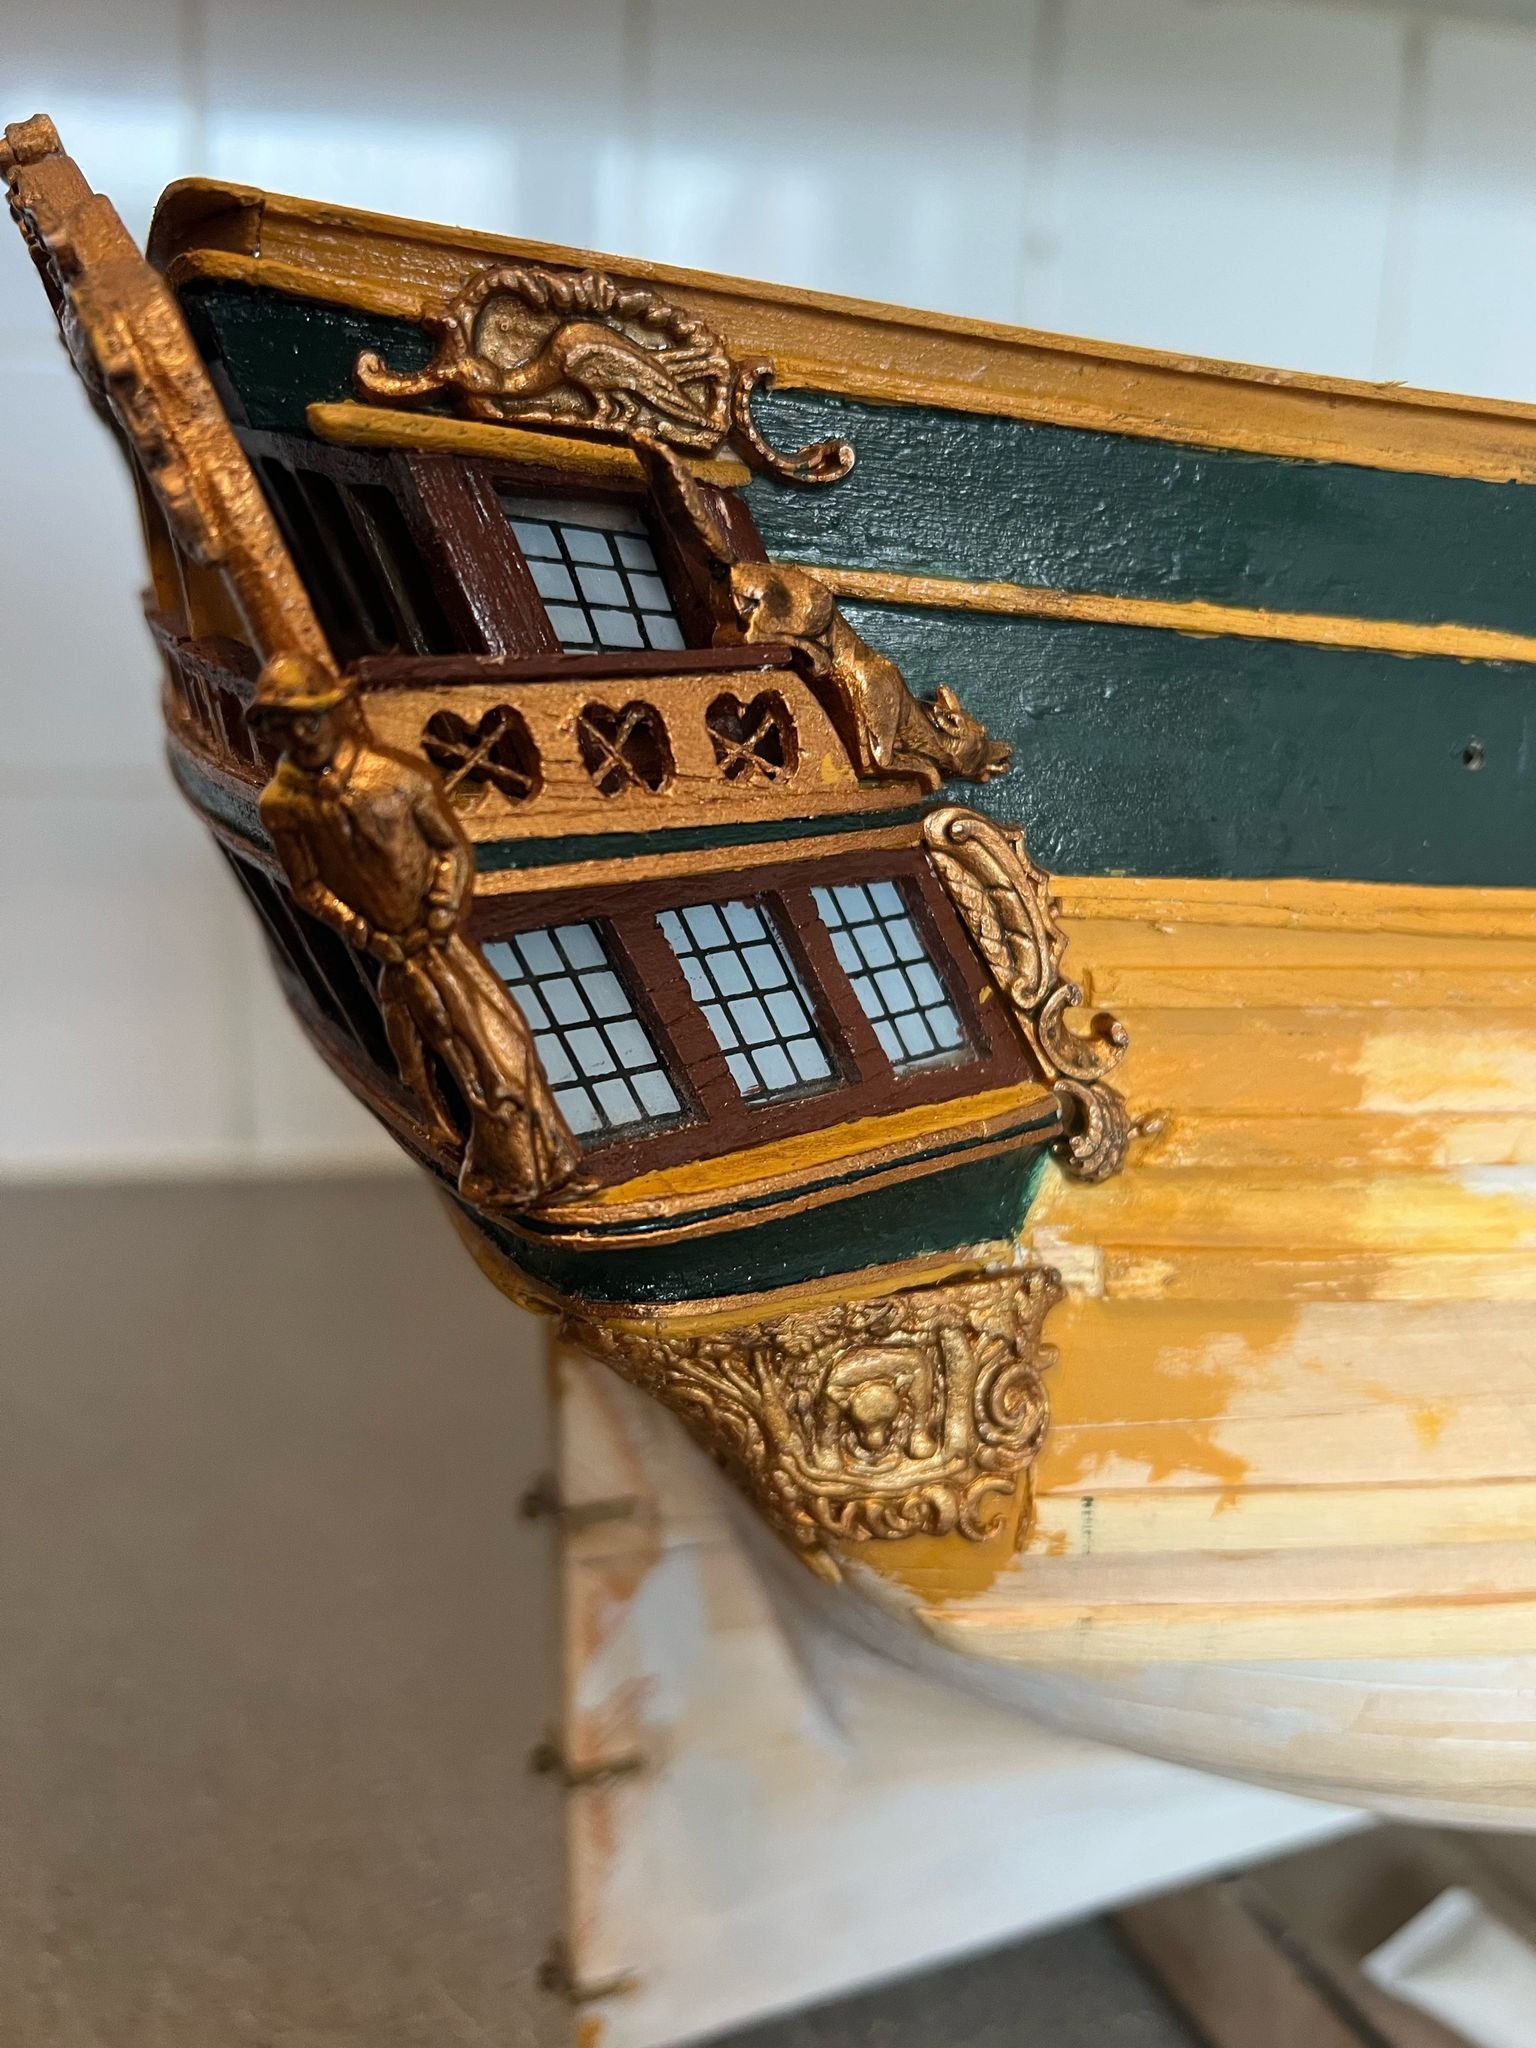
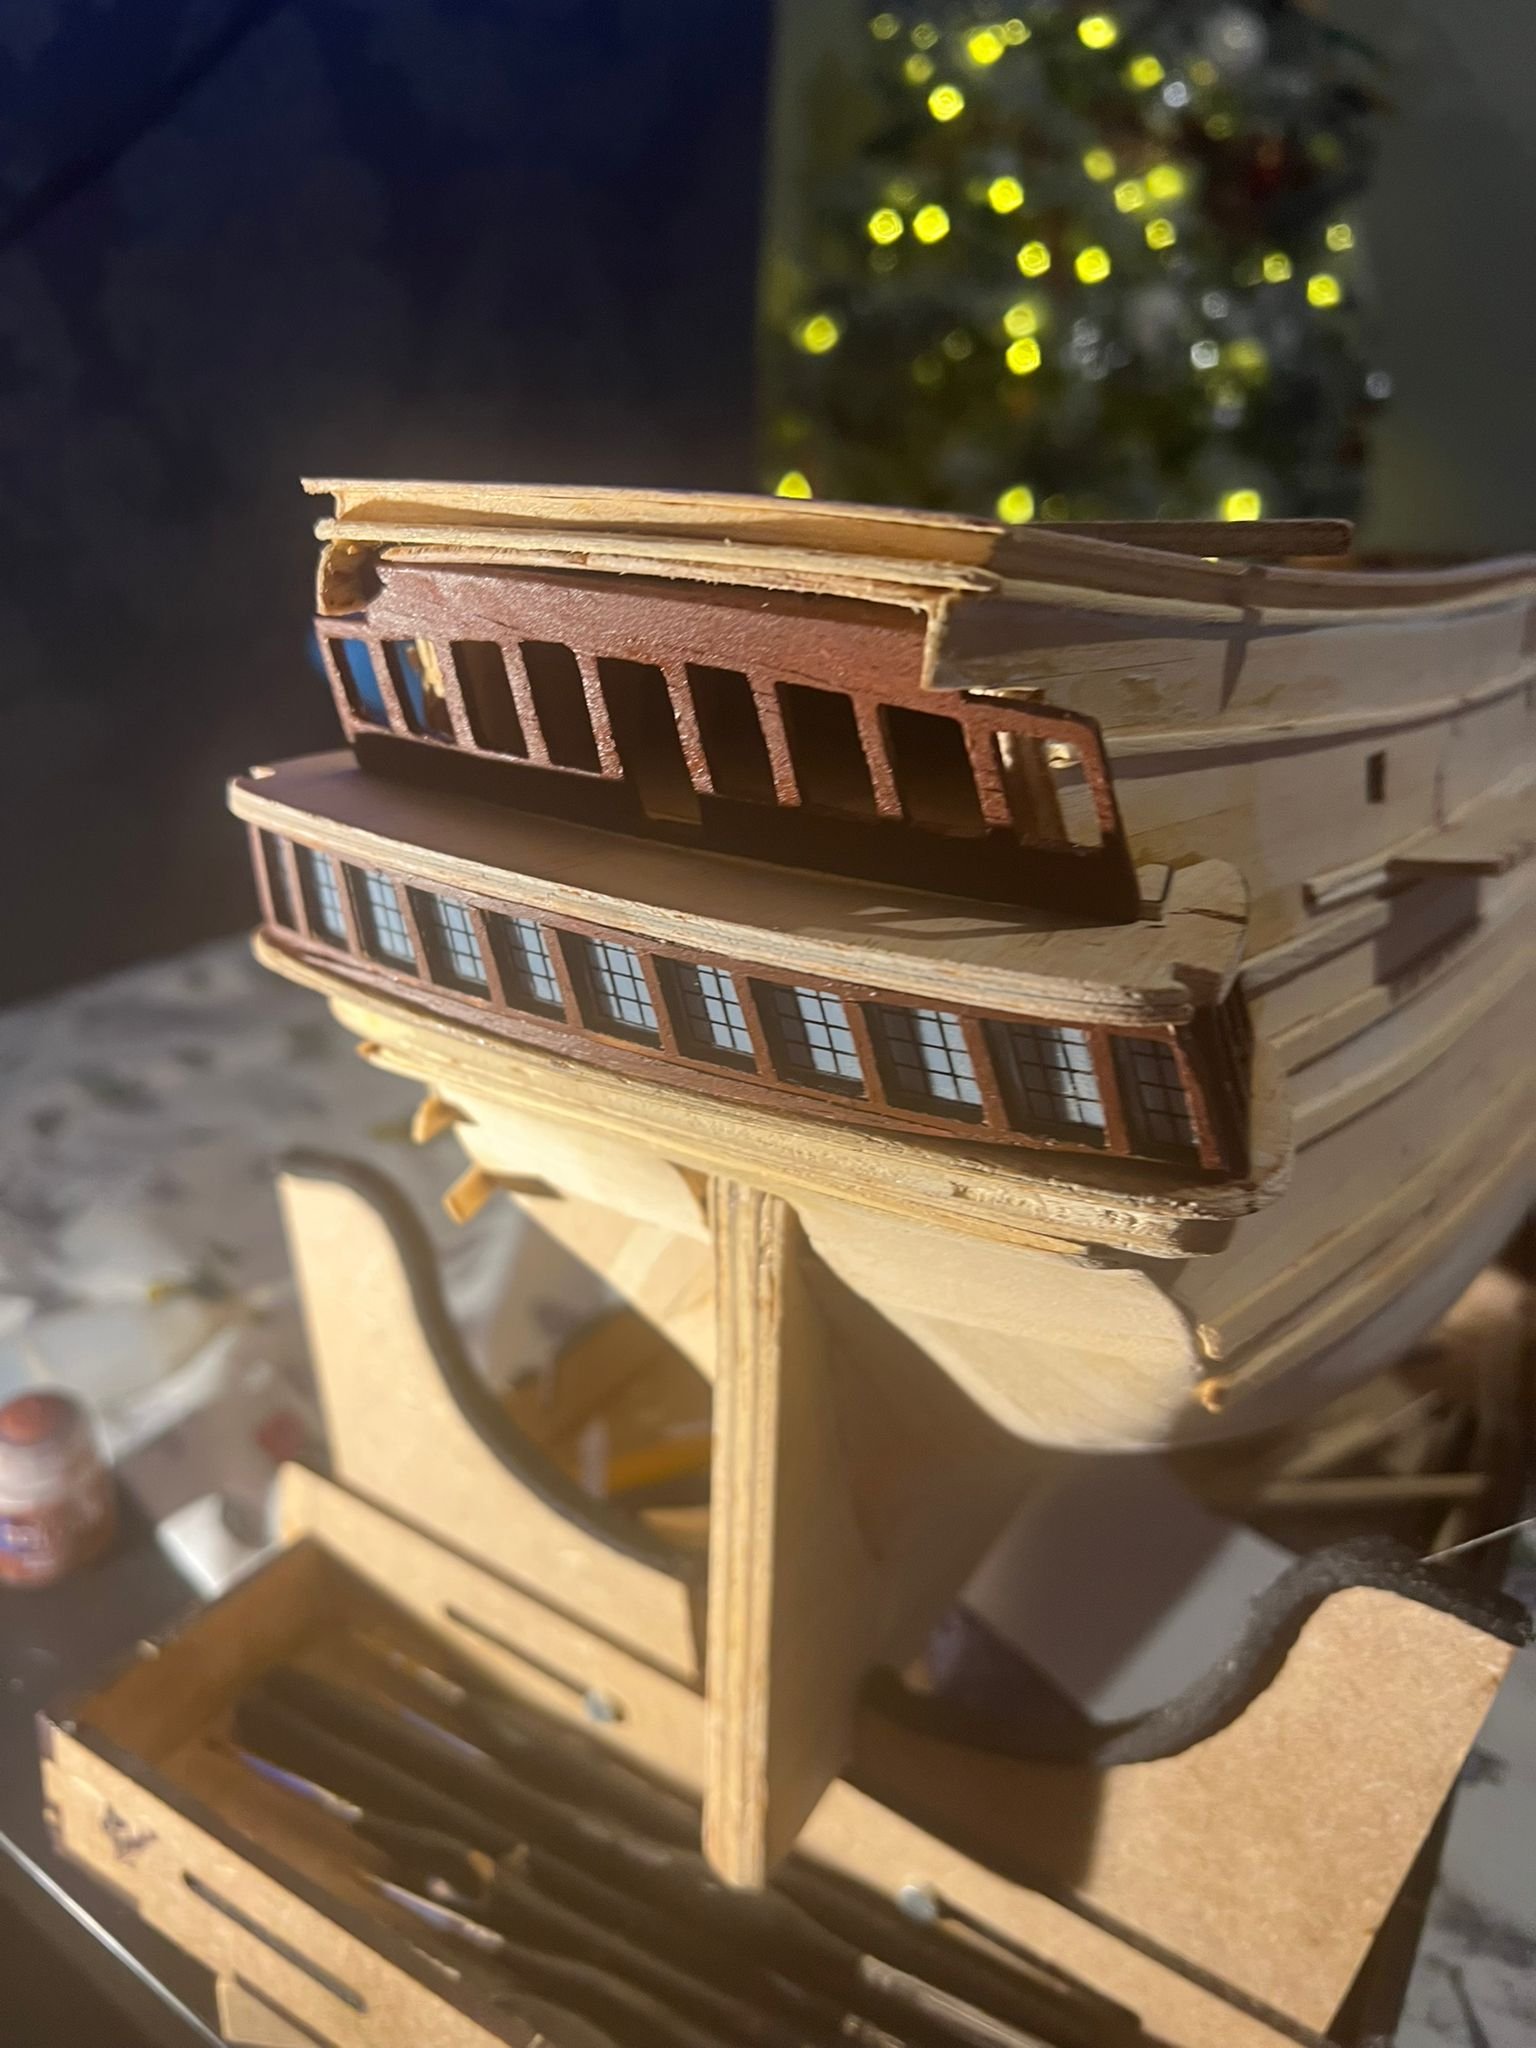
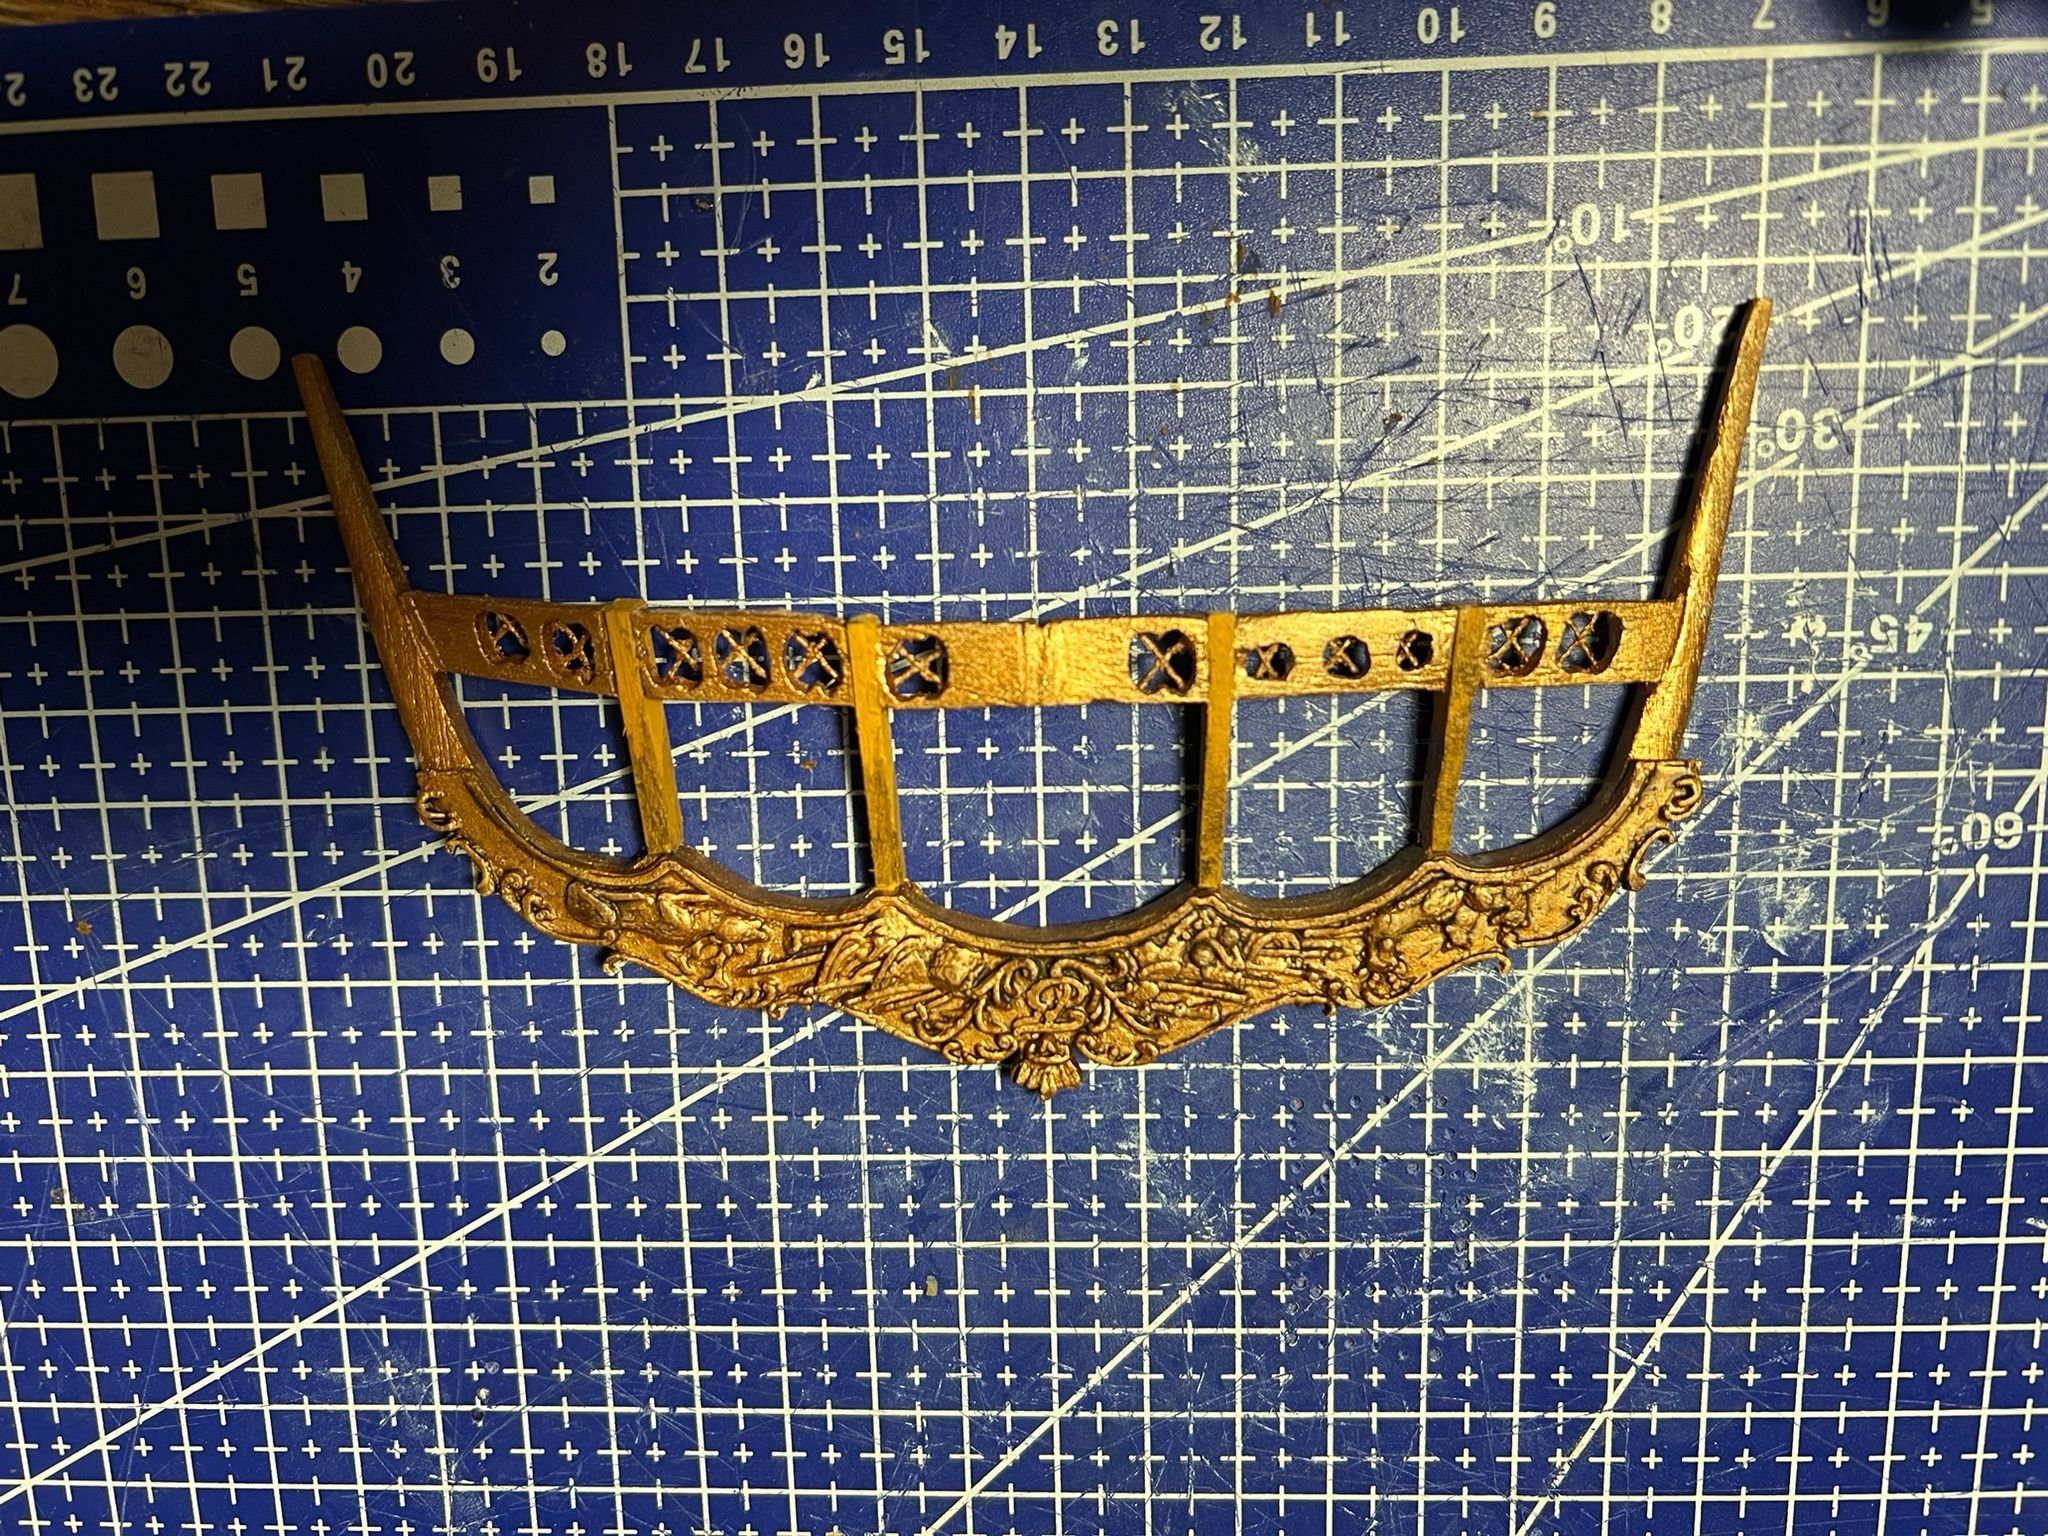
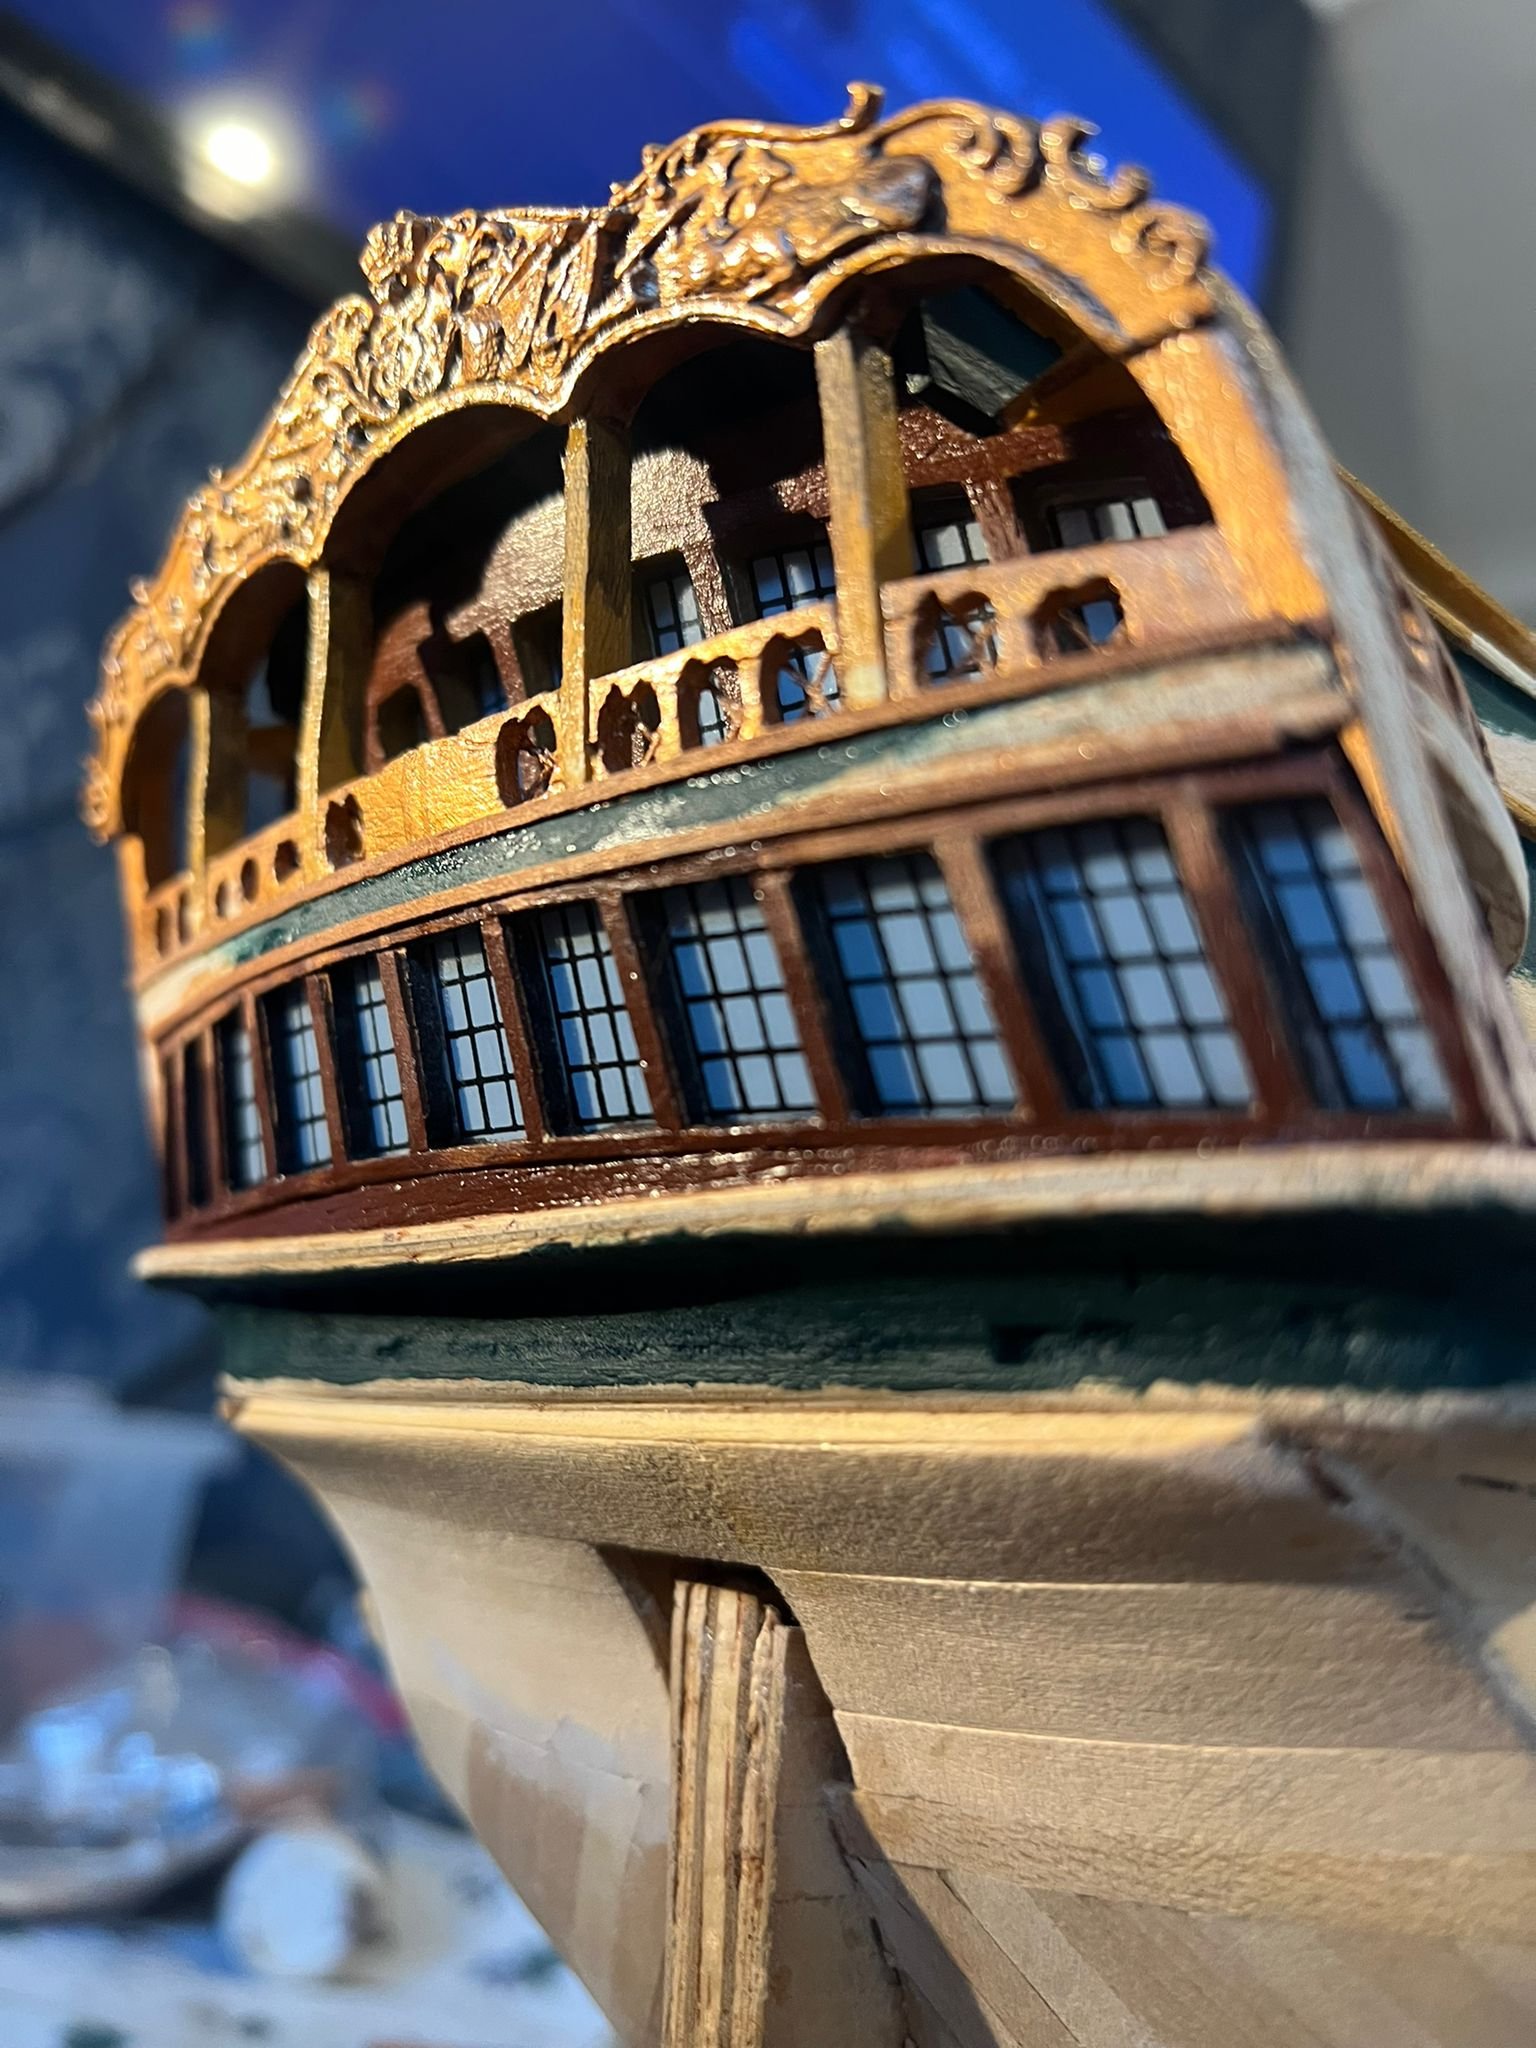
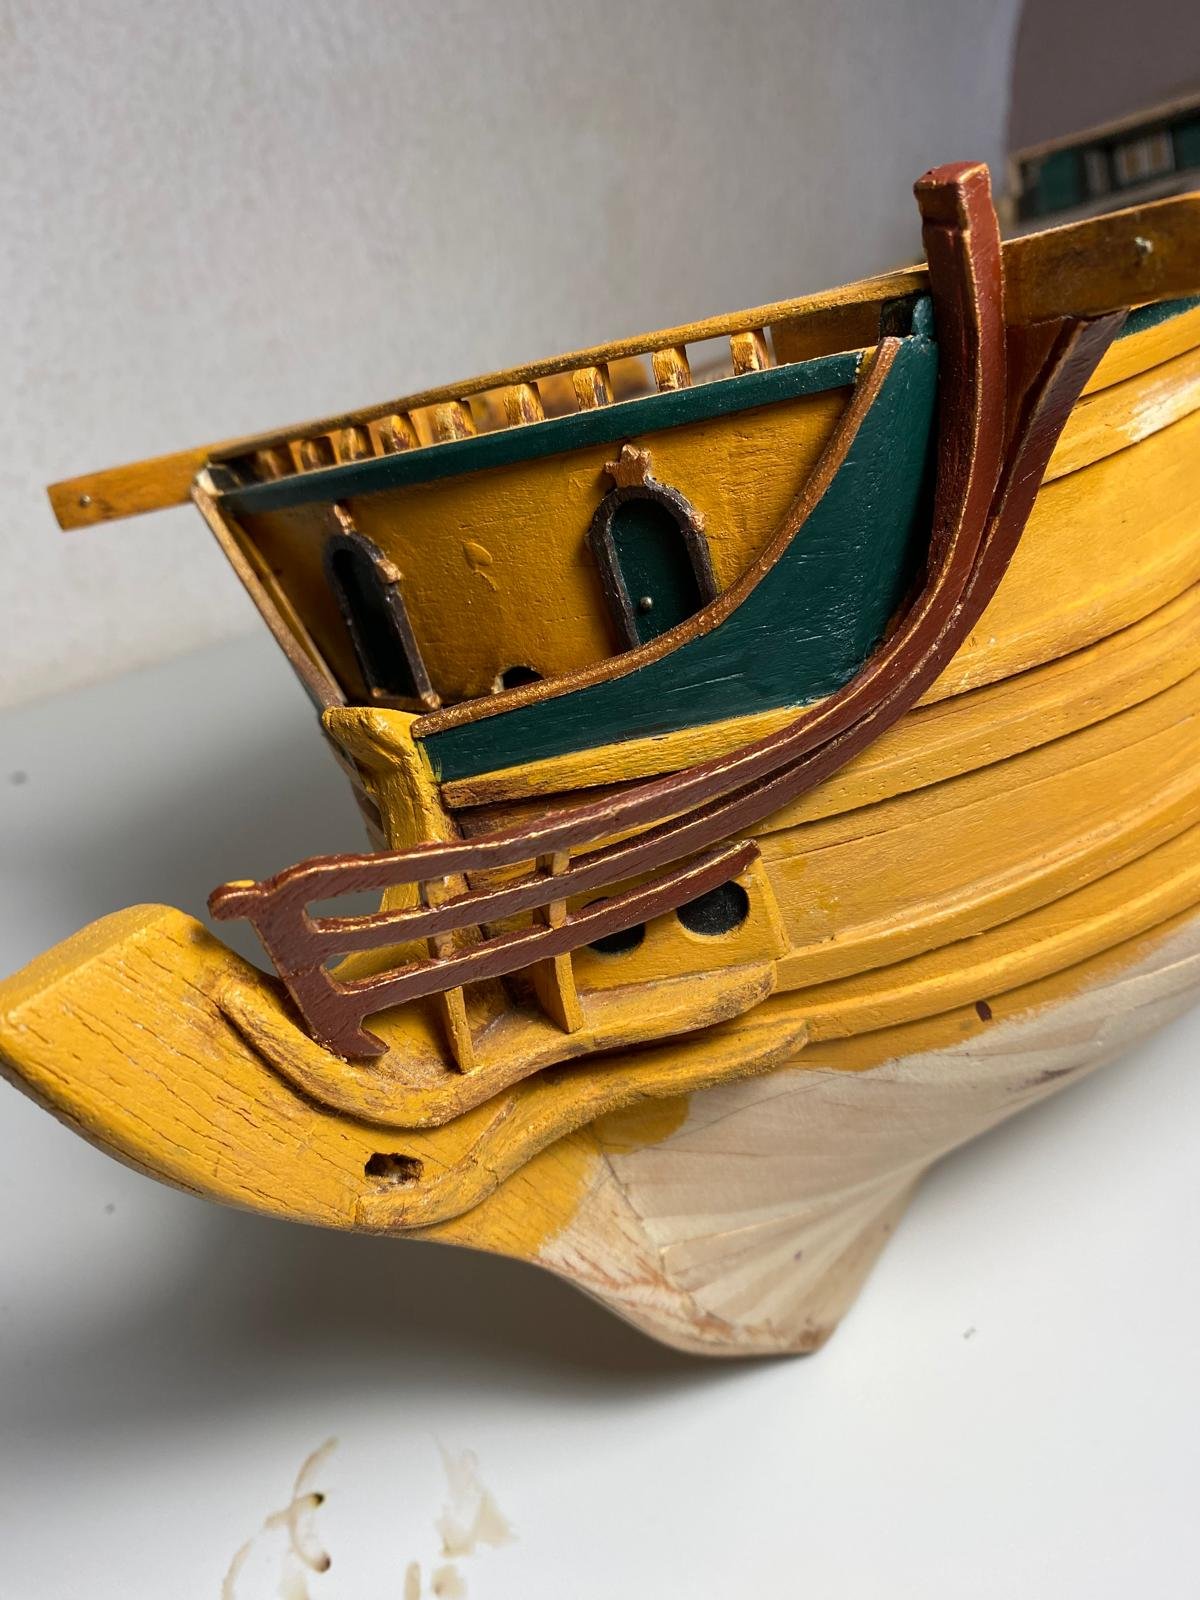
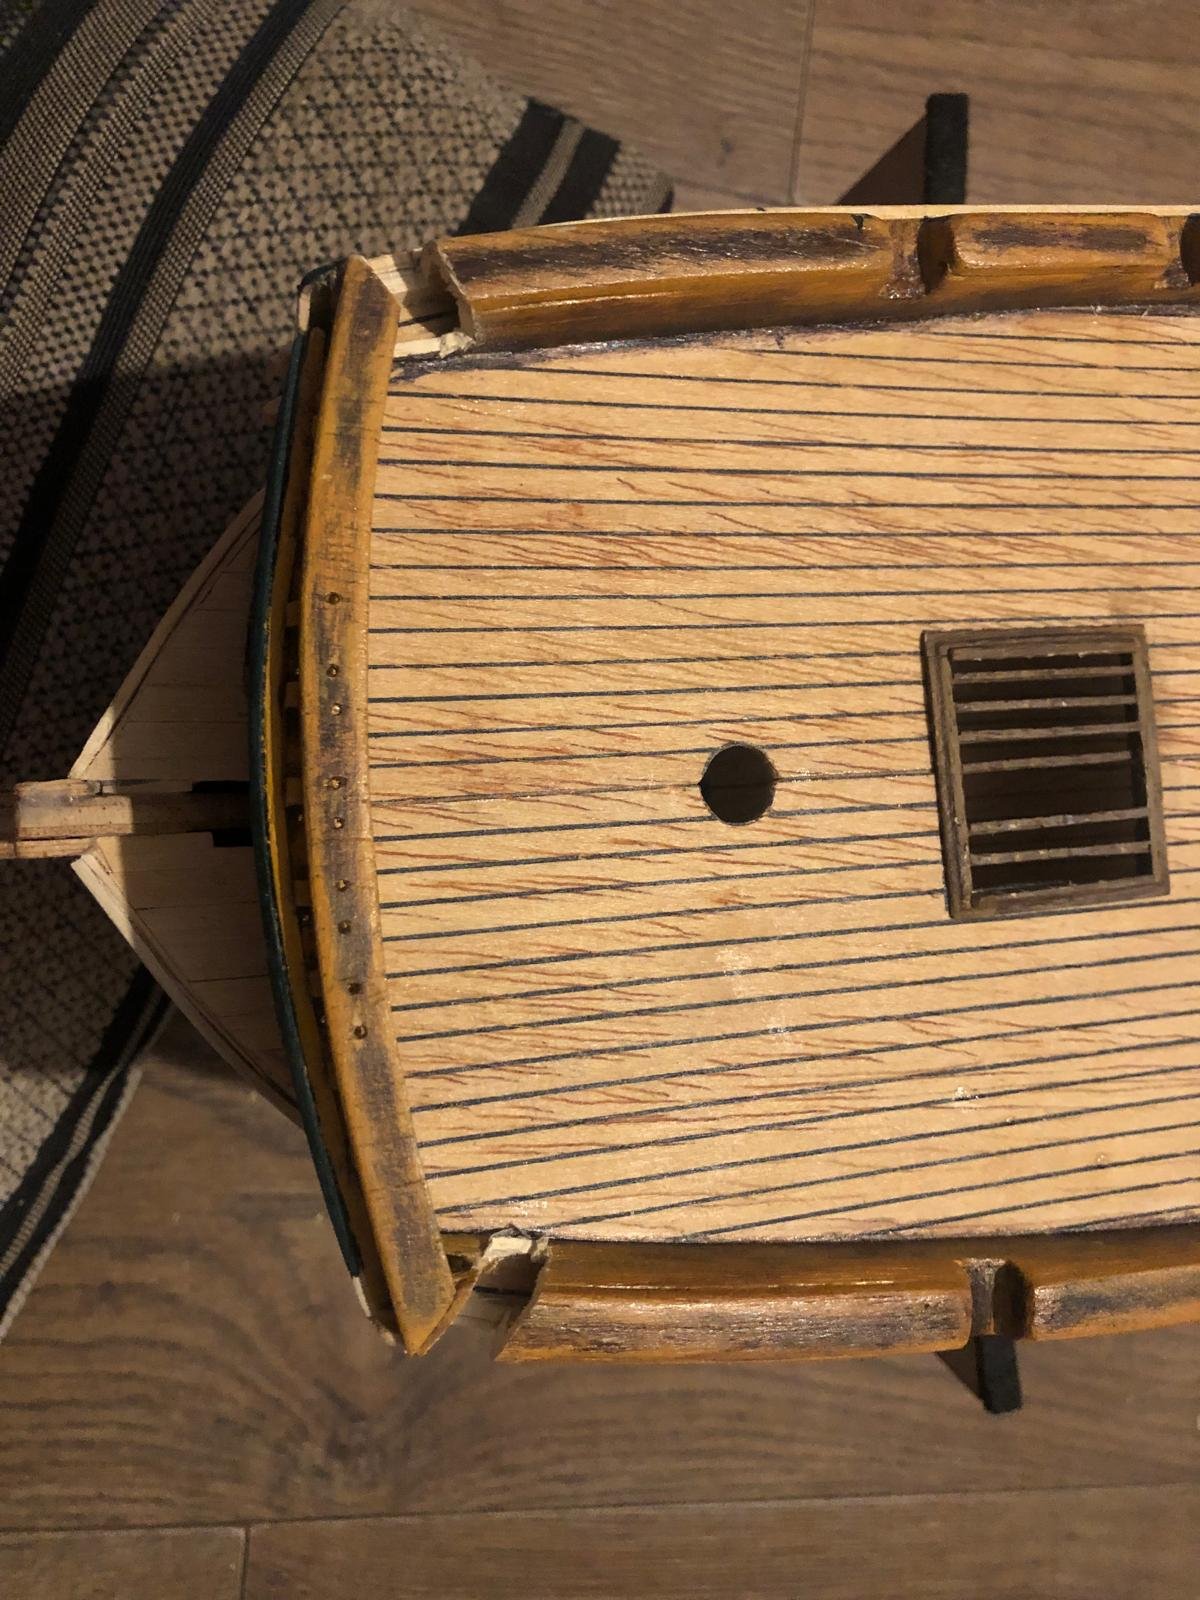
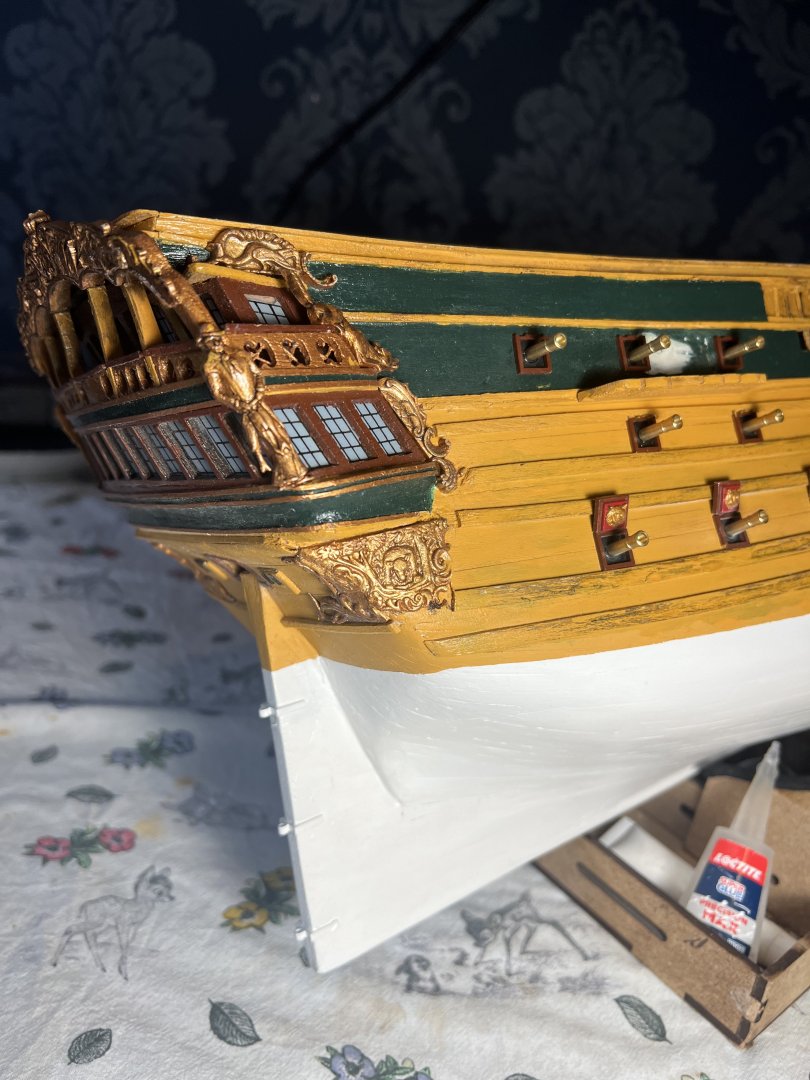
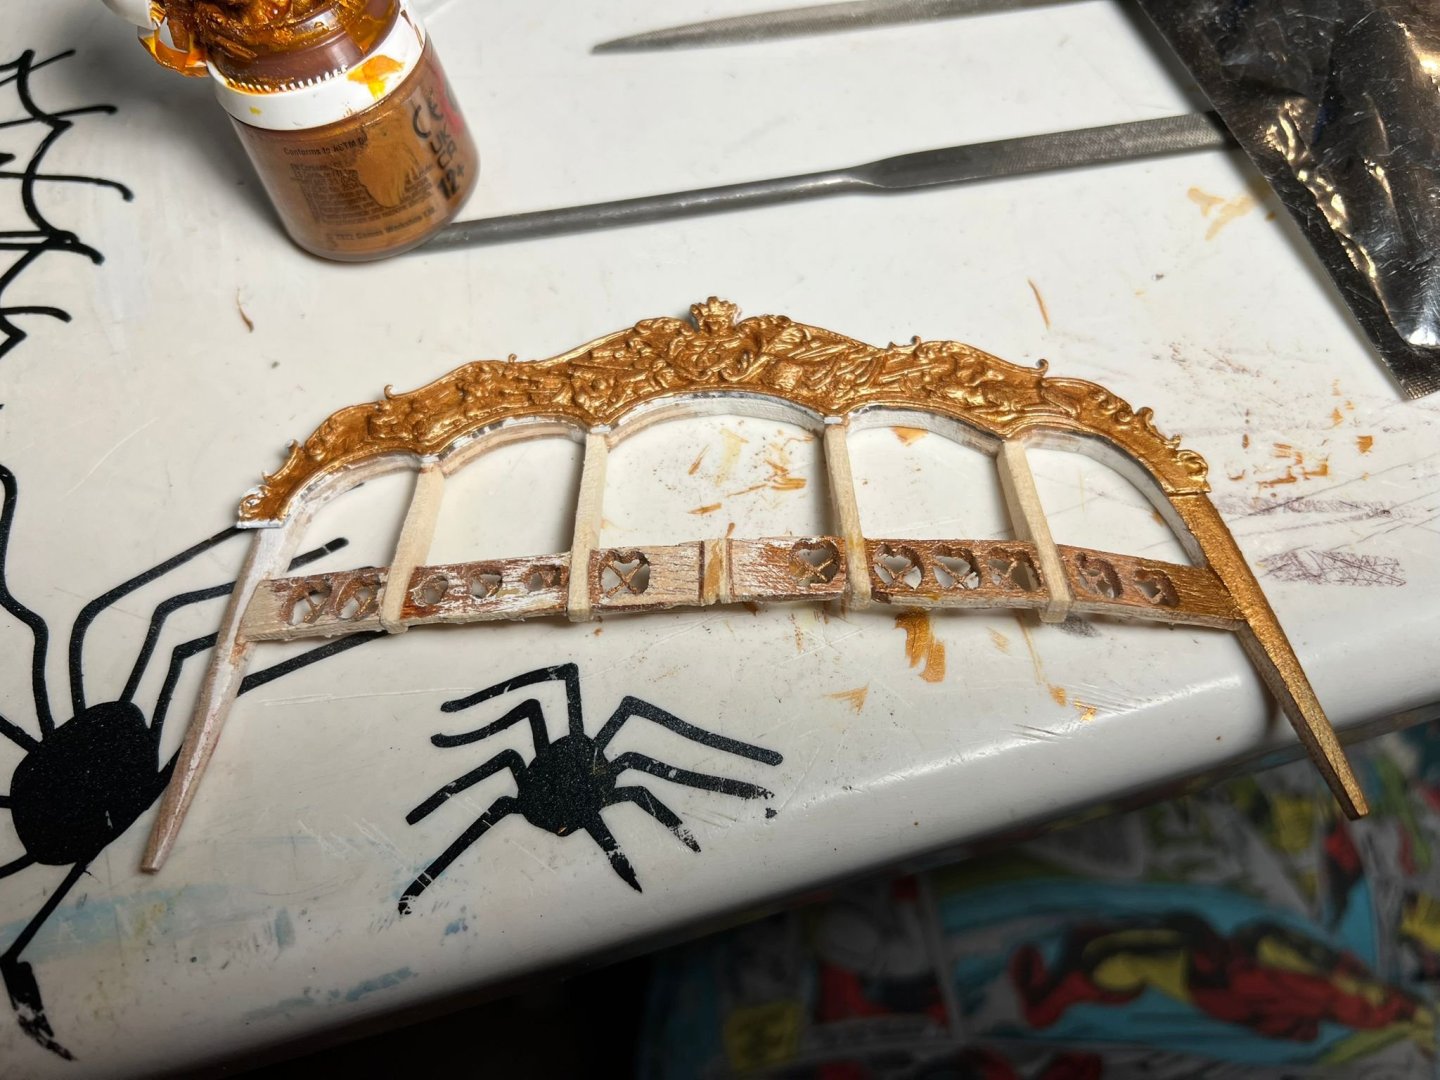
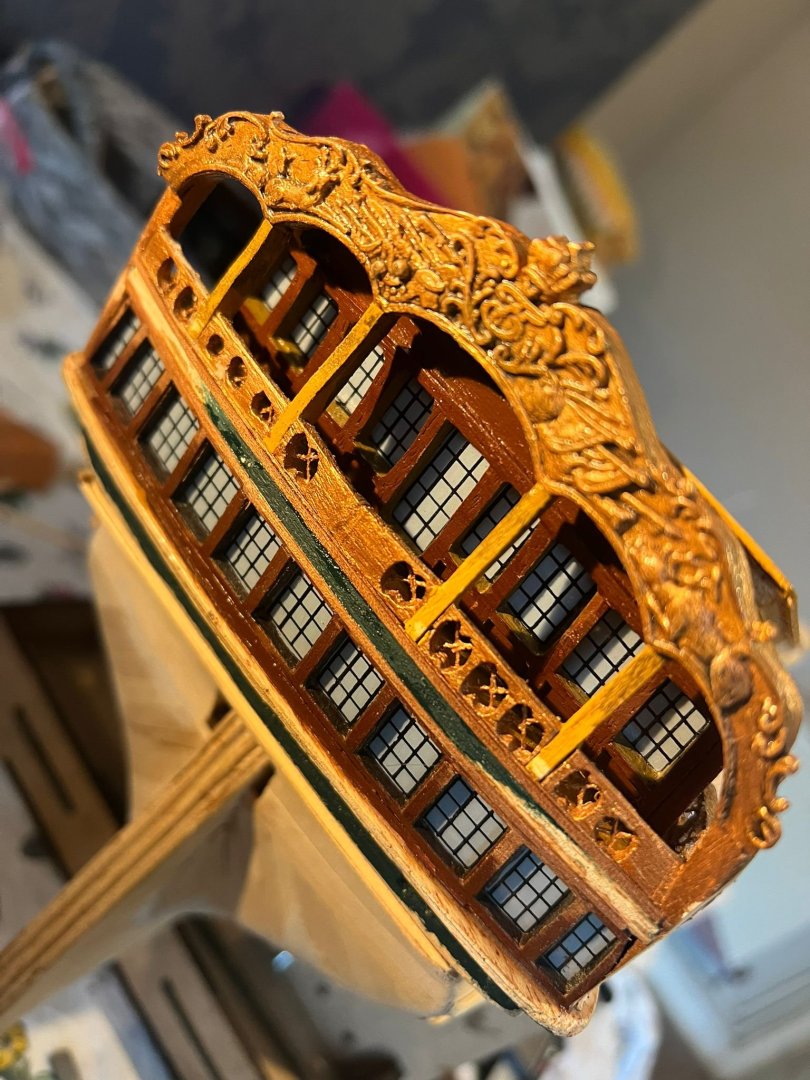
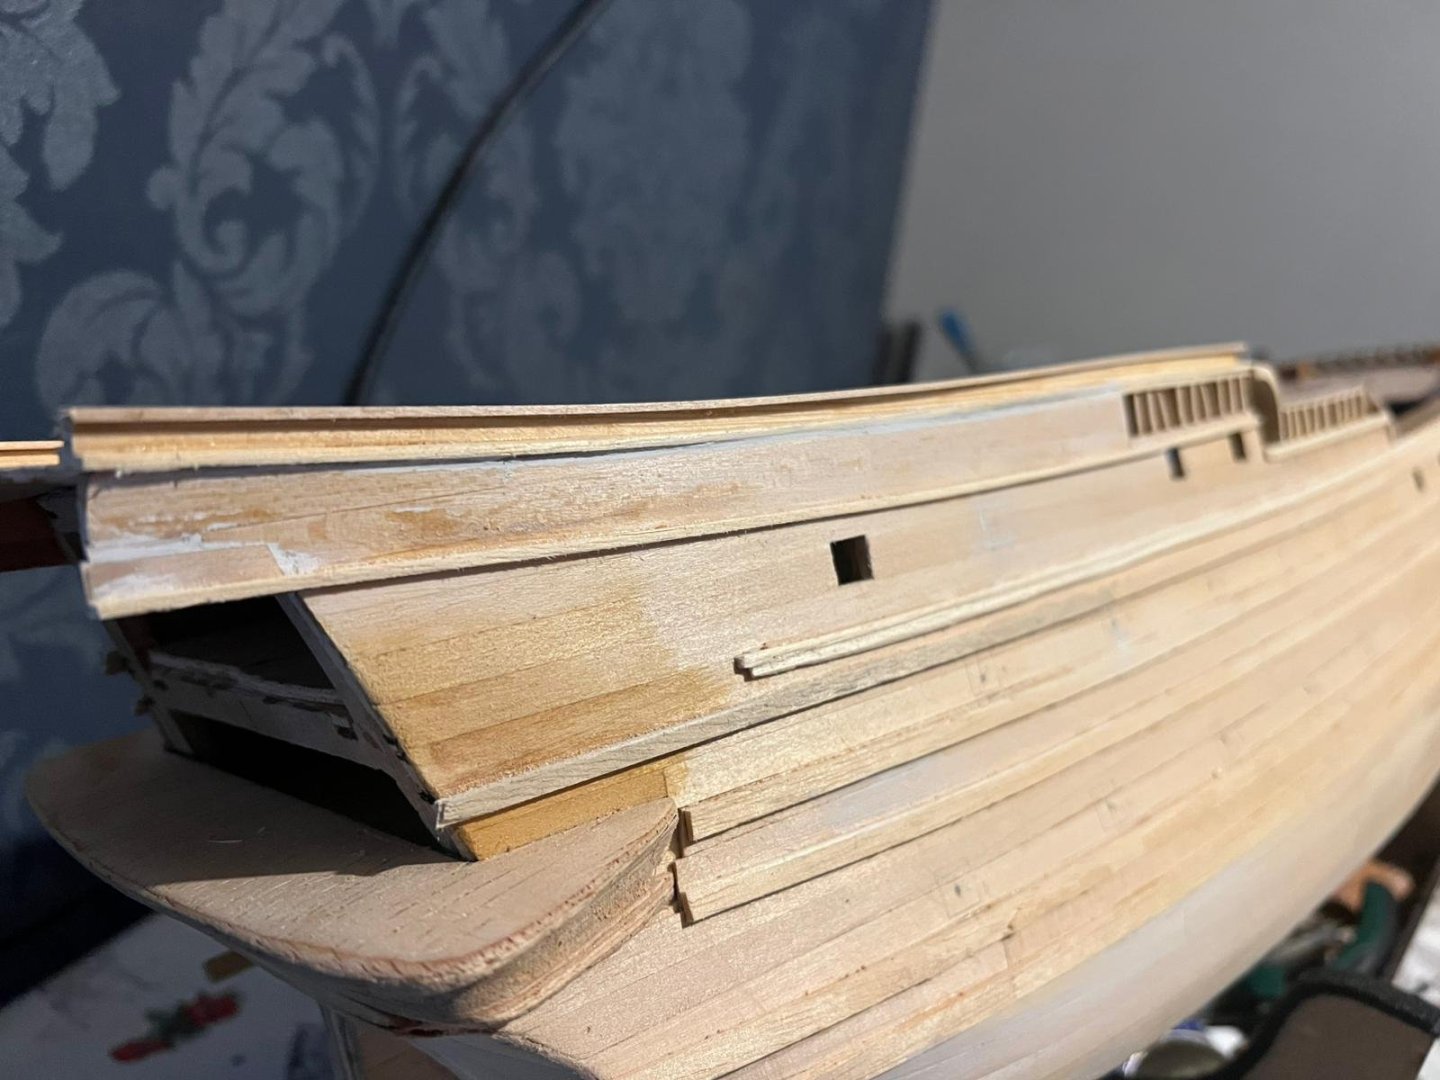
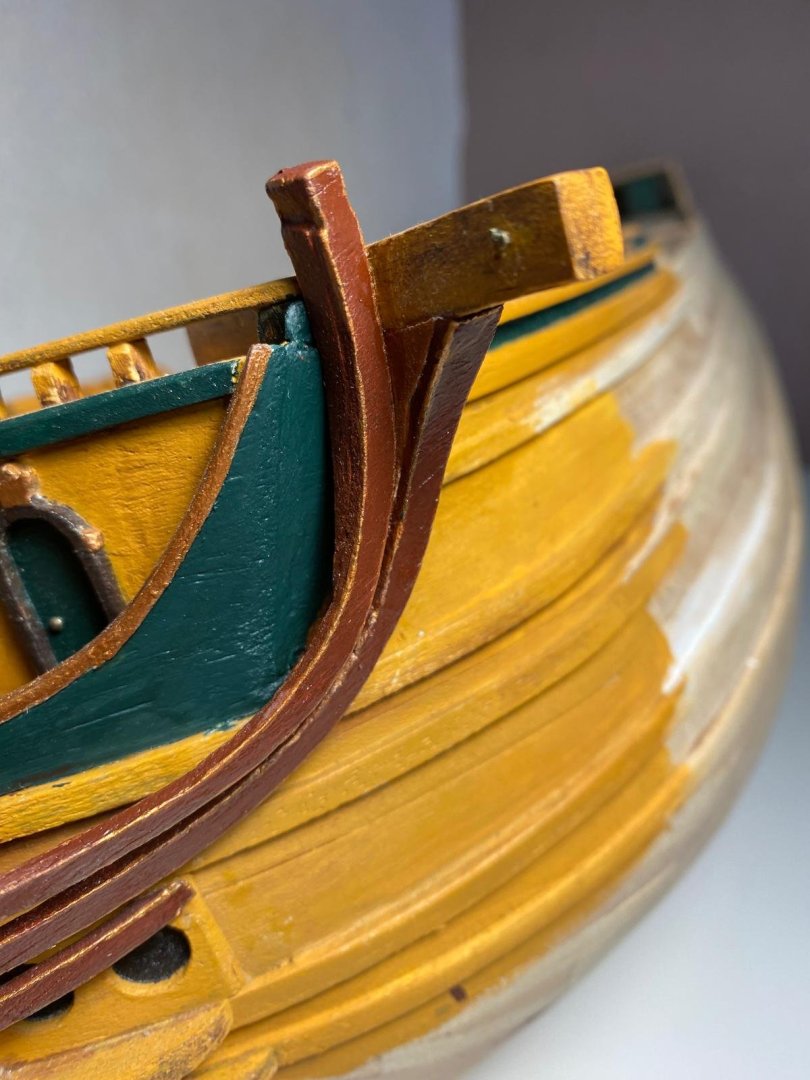
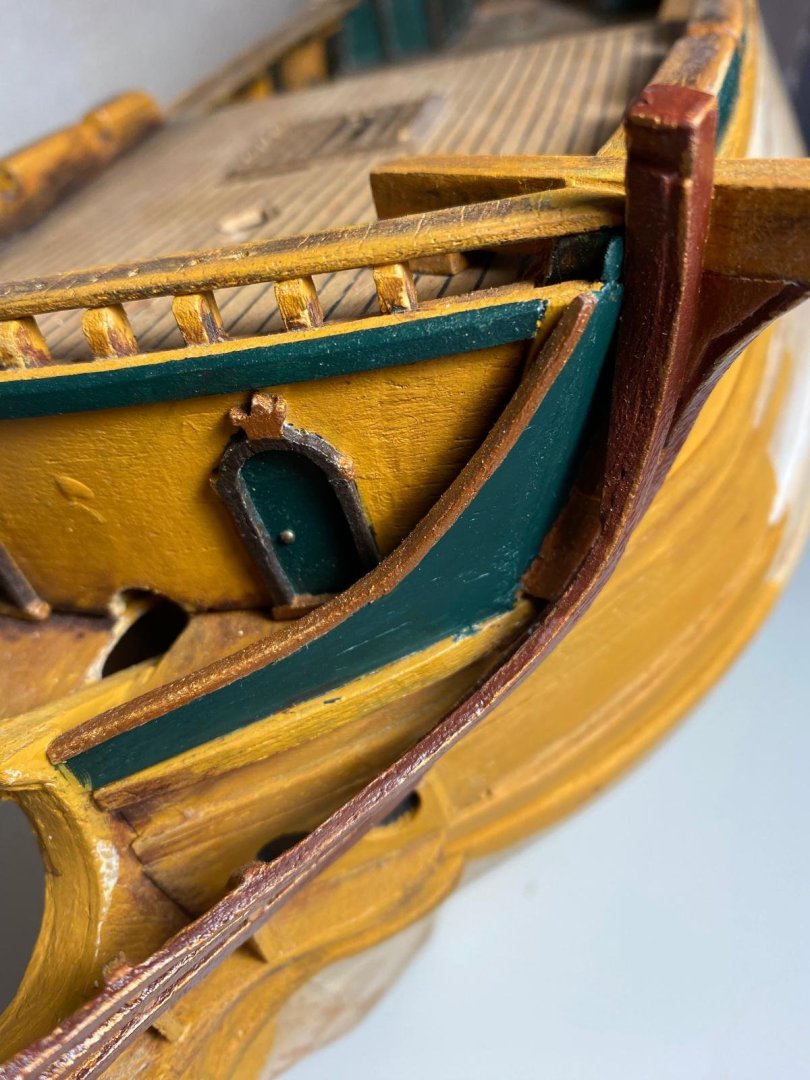
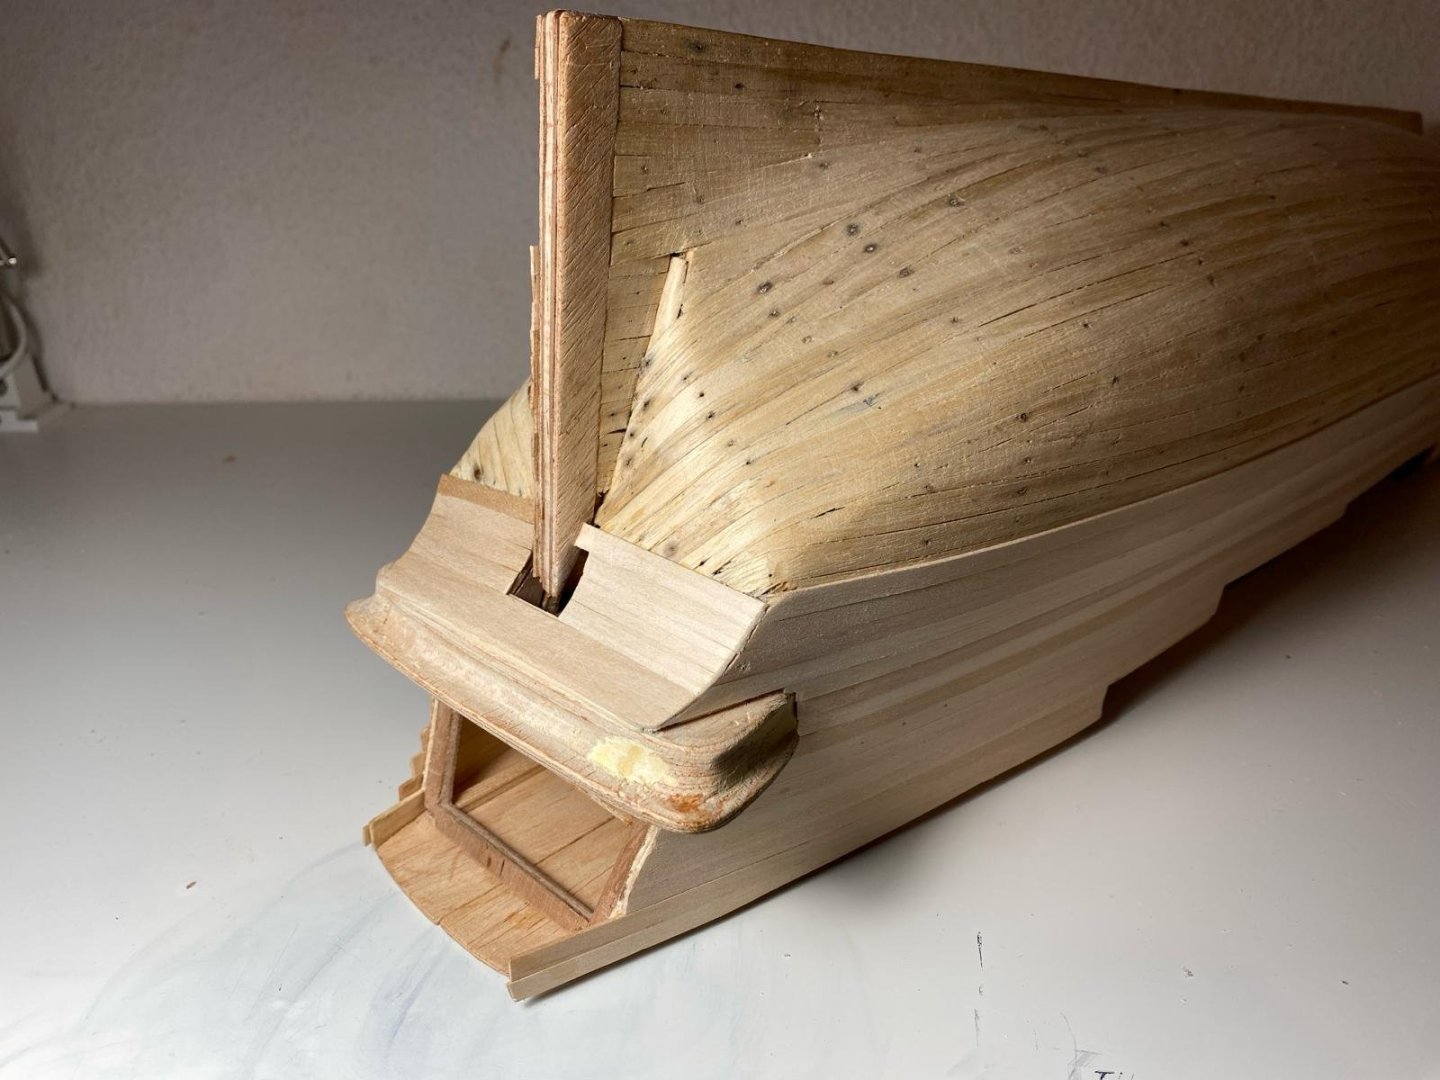
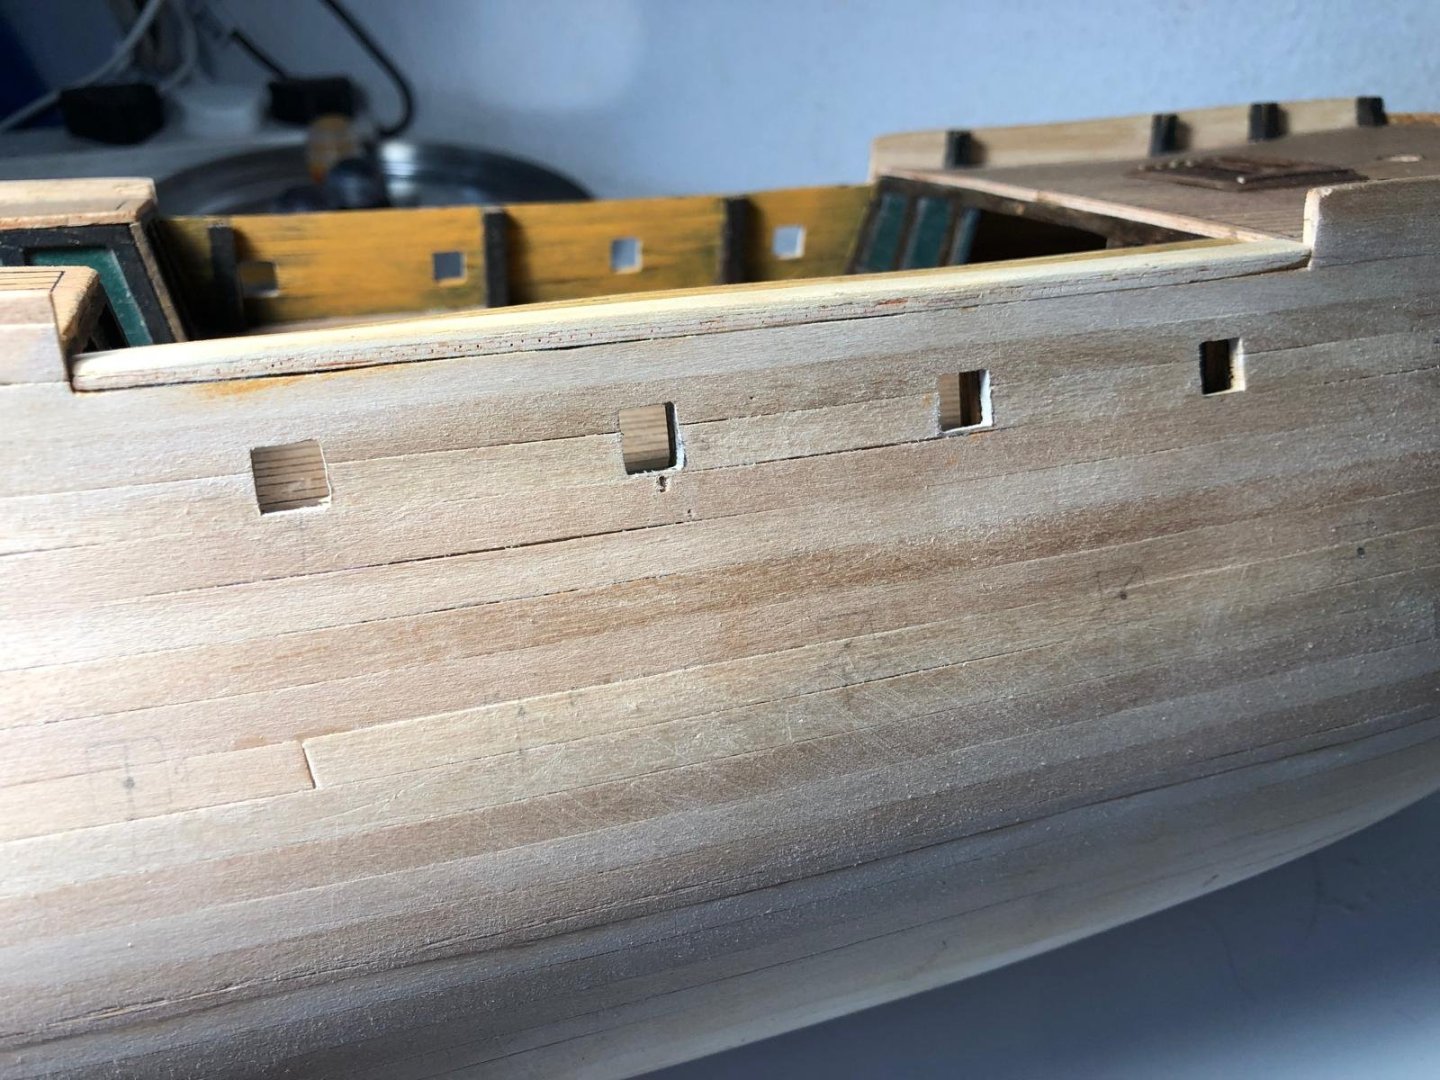
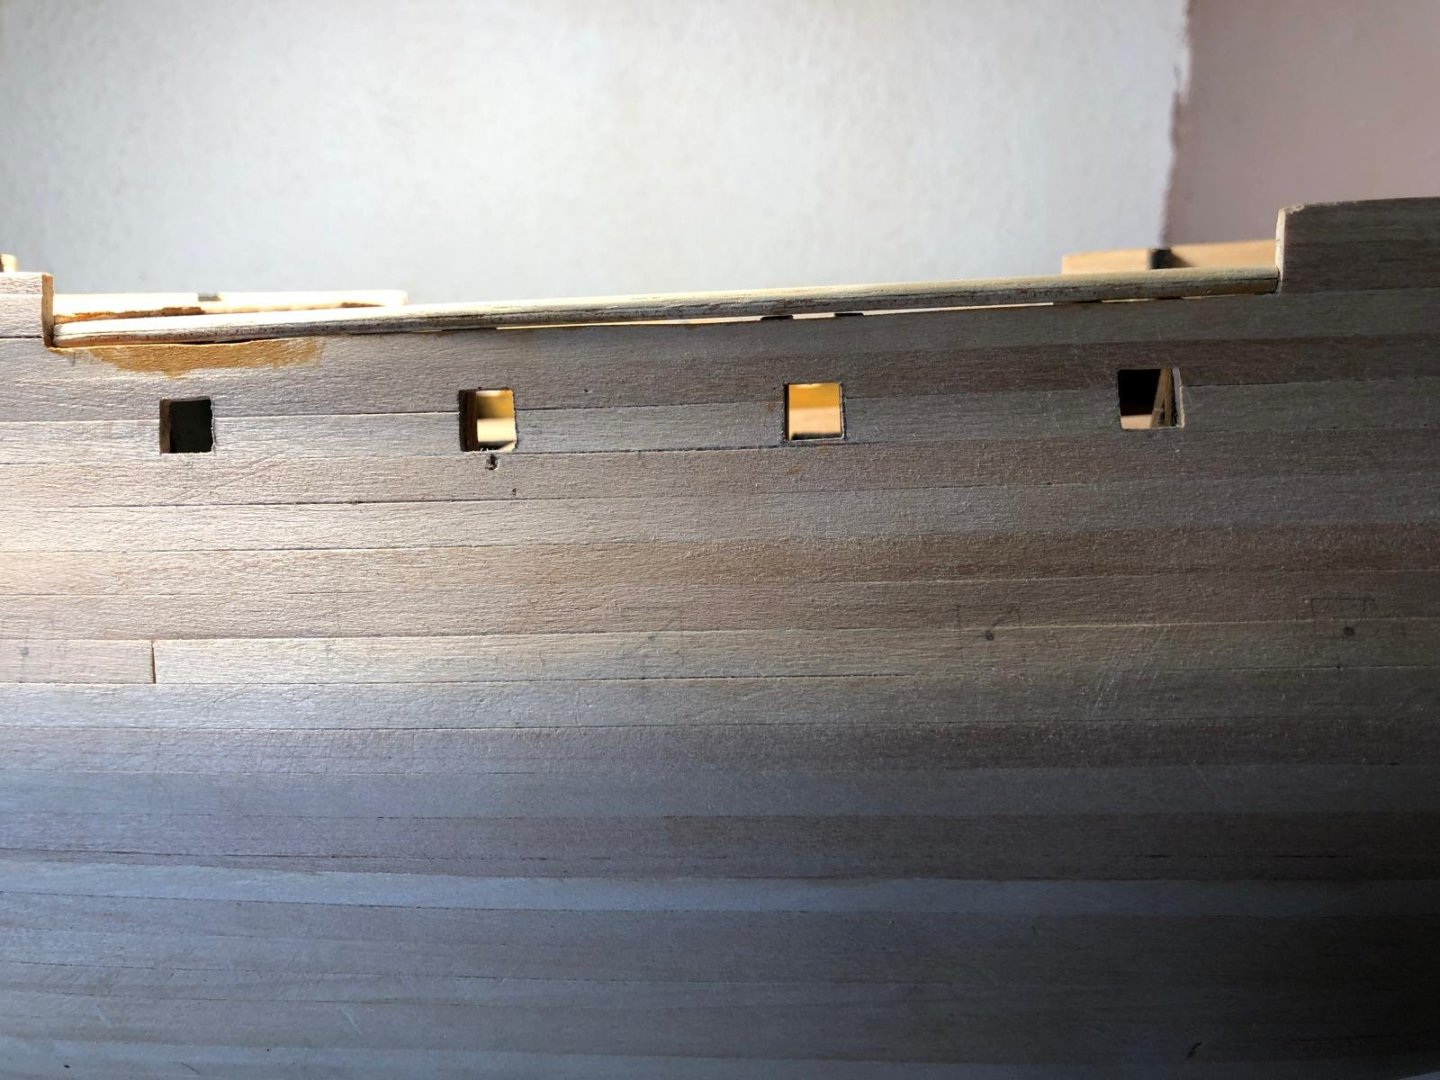
UPDATE 15 I have been working on the stern of my ship. Most of it has been paint work. I painted some sections in yellow (Citadel Evaland Sunset), Im sure by looking at the photos you can work out which parts. I also painted the gunport frames and attached them. At the top of the transom where the rudder will be mounted, I reshaped it according to the plans and added decorative trim. There were some gaps between the hull planks which I have filled with filler. A lot of paint work at the moment which I will varnish over at the end to protect it and make it look shiny. On the stern there is some gold decorative bits. After painting them gold I added a coat of Nulin Oil (Citadel) to add some depth to it. https://www.instagram.com/byron_dockyard/


-
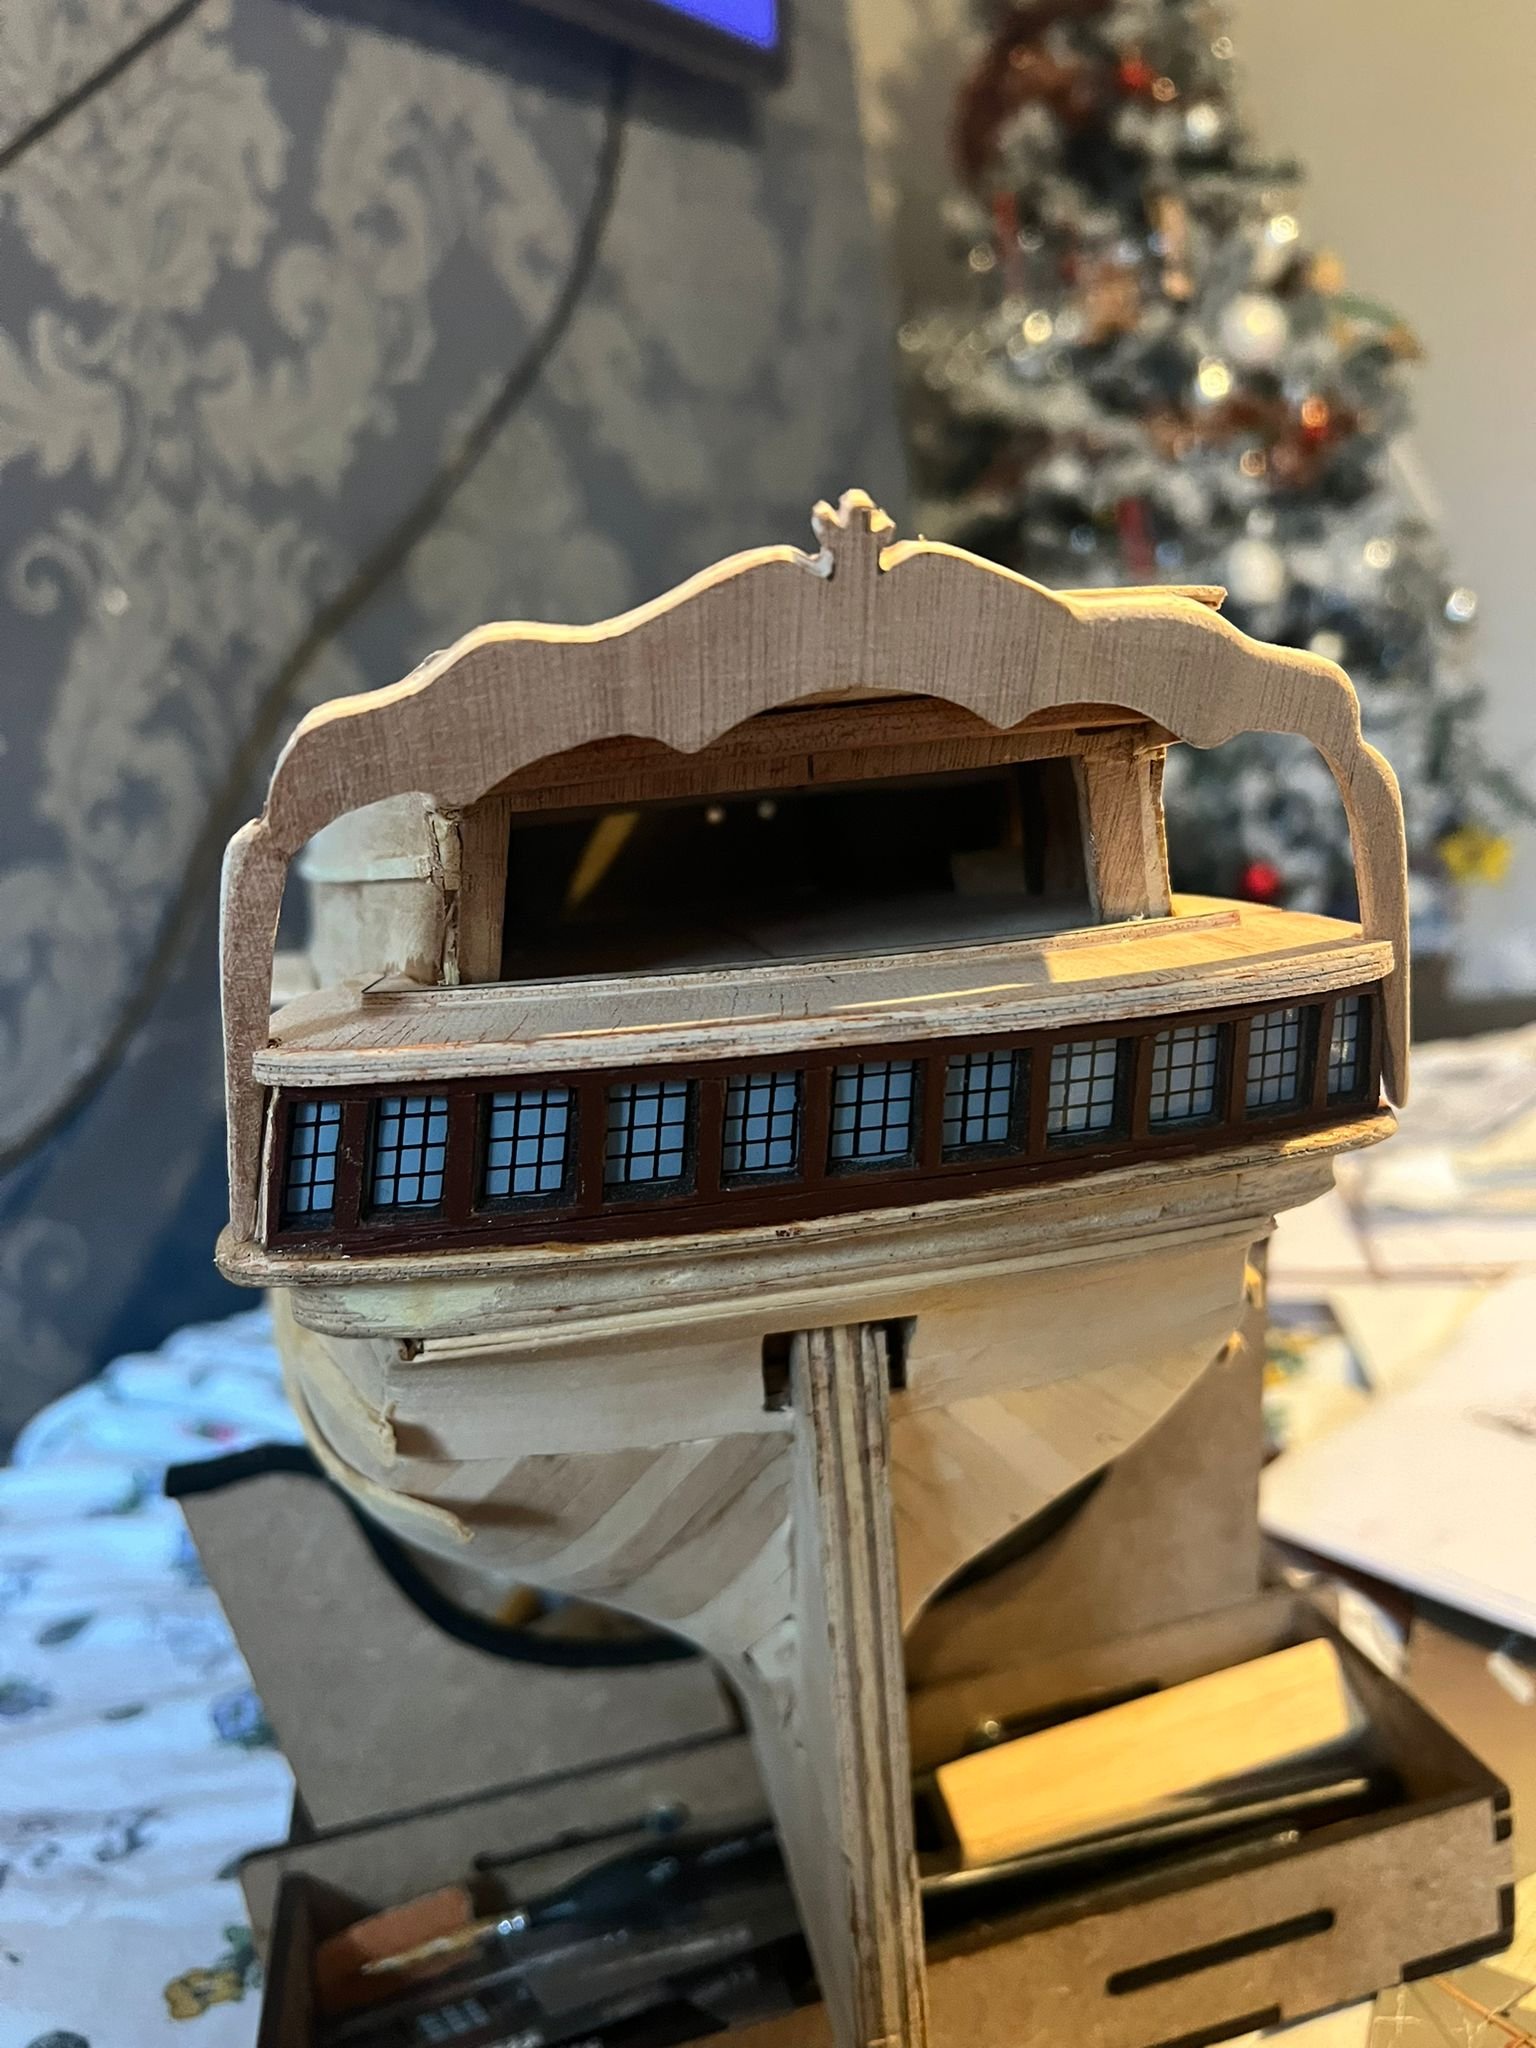
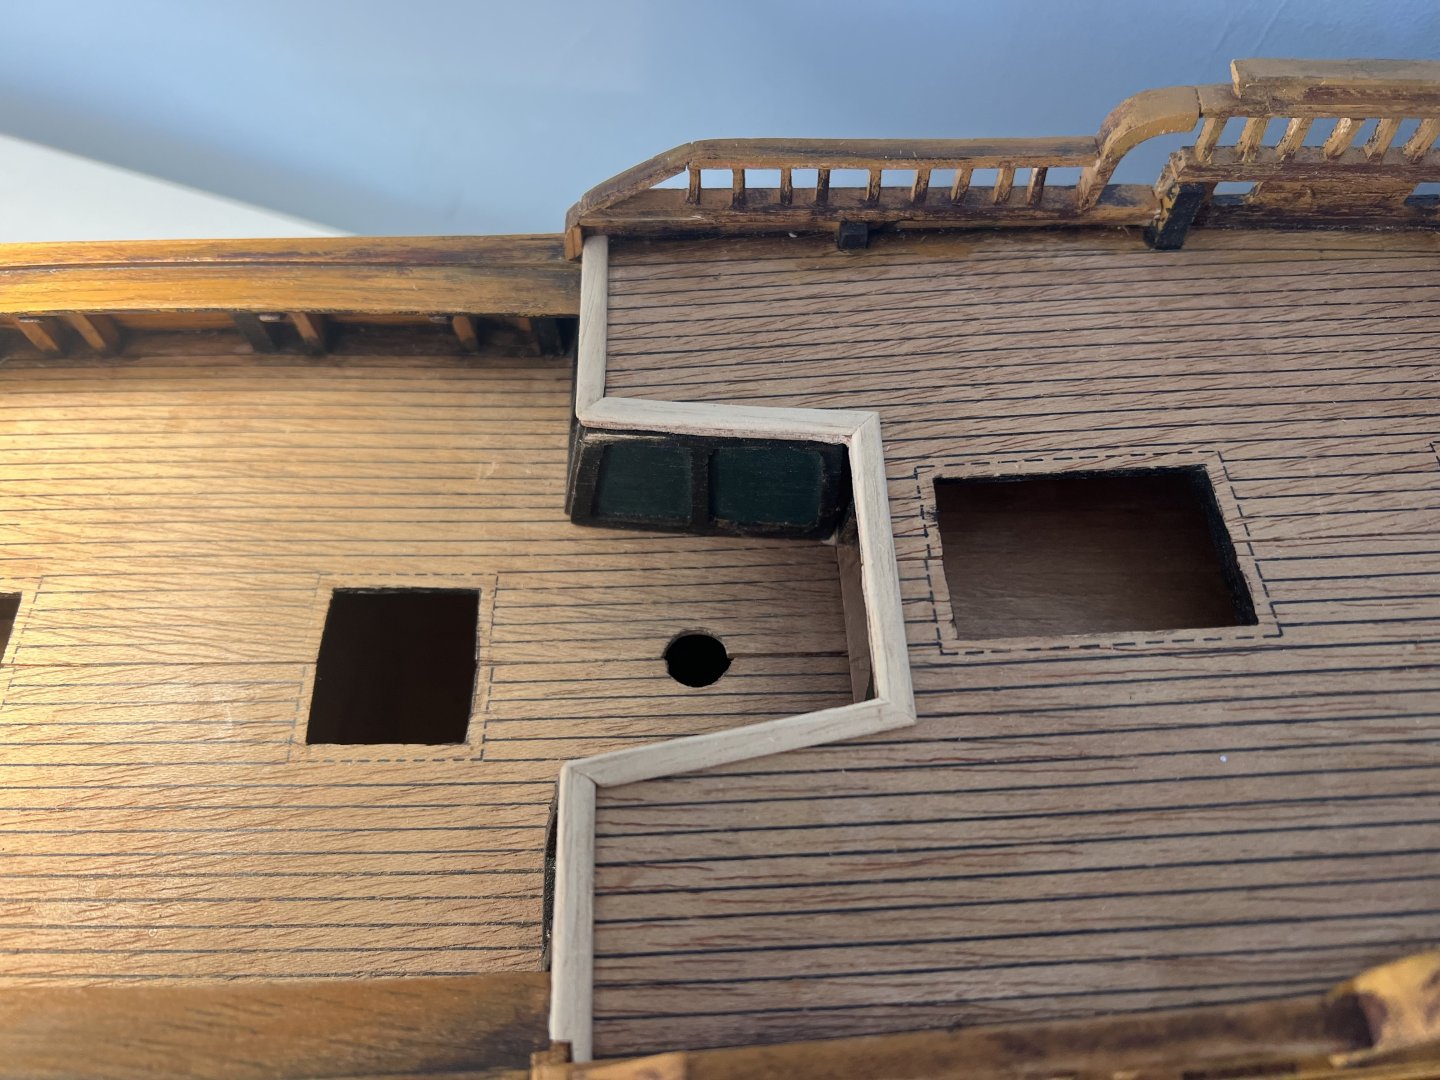
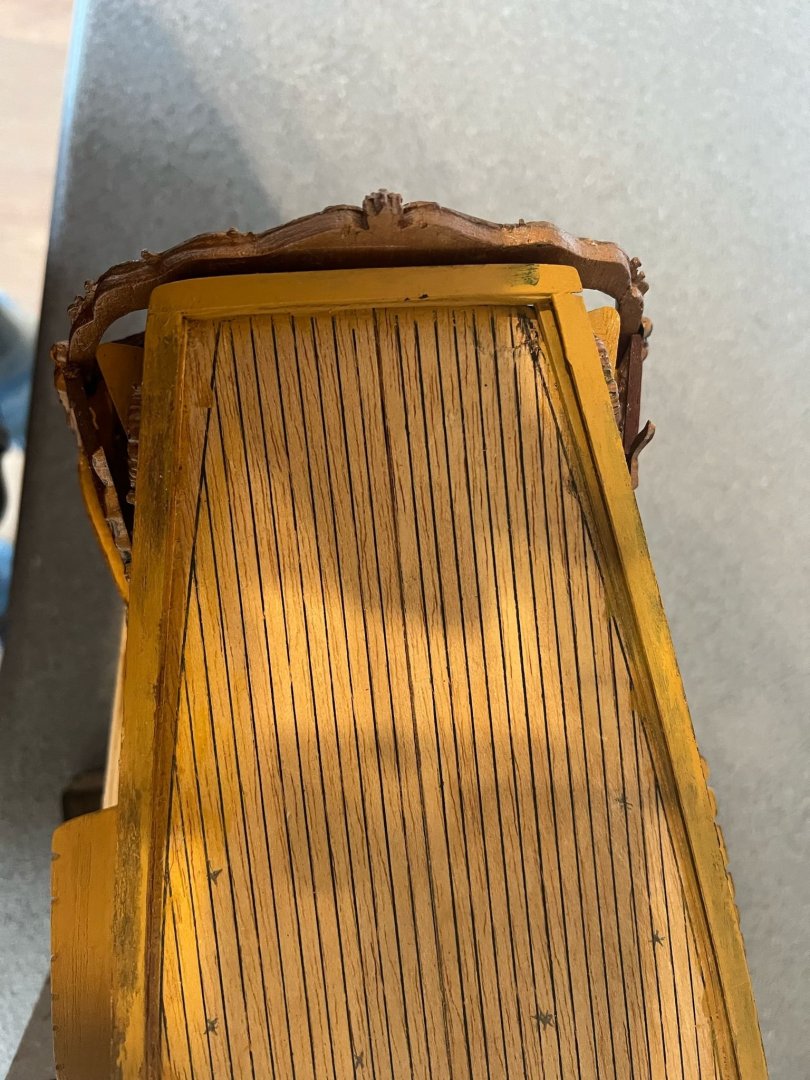
UPDATE 14 I've been working on the stern of the ship. As I painted the windowframes earlier in the build, I was a bit nervous about fully bending the frames as I’d already worked on them, so when I tried to fit the frame to the boat, I was left with a gap at the bottom, which isn't in the instructions. I used a spare plank to fill the gap. The colour is Doombull Brown (Layer) from Citadel (Warhammer). I added the level (yellow bit – not sure of its name?) and sanded it back to be level with the window frame. The yellow colour is Averland Sunset (Base) by Citadel. I have been using some Nuln Oil (Shade) by Citadel for a bit of weathering. On the upper window frame, there was a gap between the main one and the ones that run down the side. I used a plank to fill this gap and then sanded it down. Next was to add the arch – but to do this, I needed to complete the wood rim that goes around the deck. This deck came pre-marked, and I'm not sure that I bent the wood enough to follow these lines. However, if I did, the windows and other planks didn't quite fit, and that would have required a lot of undoing to correct. I opted to sand the deck a little and remove the pre-marked lines, then I'll lengthen the plank lines that it has given me. With that done, I started the fancy arch. It was sanded and shaped, and I added four wooden supports. I have some plastic décor which I spray-painted with a white base coat (Citadel White Scar – Spray) so my paint has something to grip onto. I then painted the arch and plastic (not the support planks) in Citadel Retributor Armor (Base). Once dry, I gave the plastic section a wash of Nuln Oil to add some depth to it. I've added a couple of thin strips between the two levels (on the green – Citadel Caliban Green (Base)). When looking at the ship from behind, the left side is slightly higher than the right by a millimeter or two. Yeah… I think I'll just have to tilt my head 1-2 mm when I look at it at this stage. Daniel. Instagram: https://www.instagram.com/byron_dockyard/


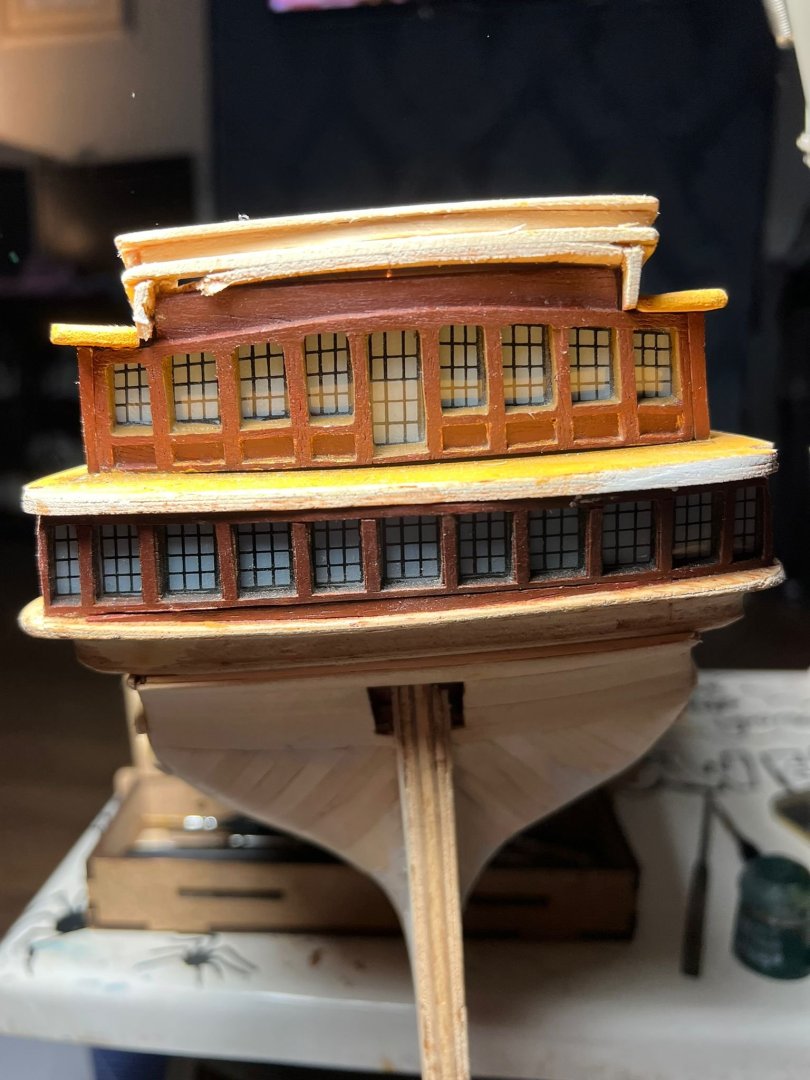

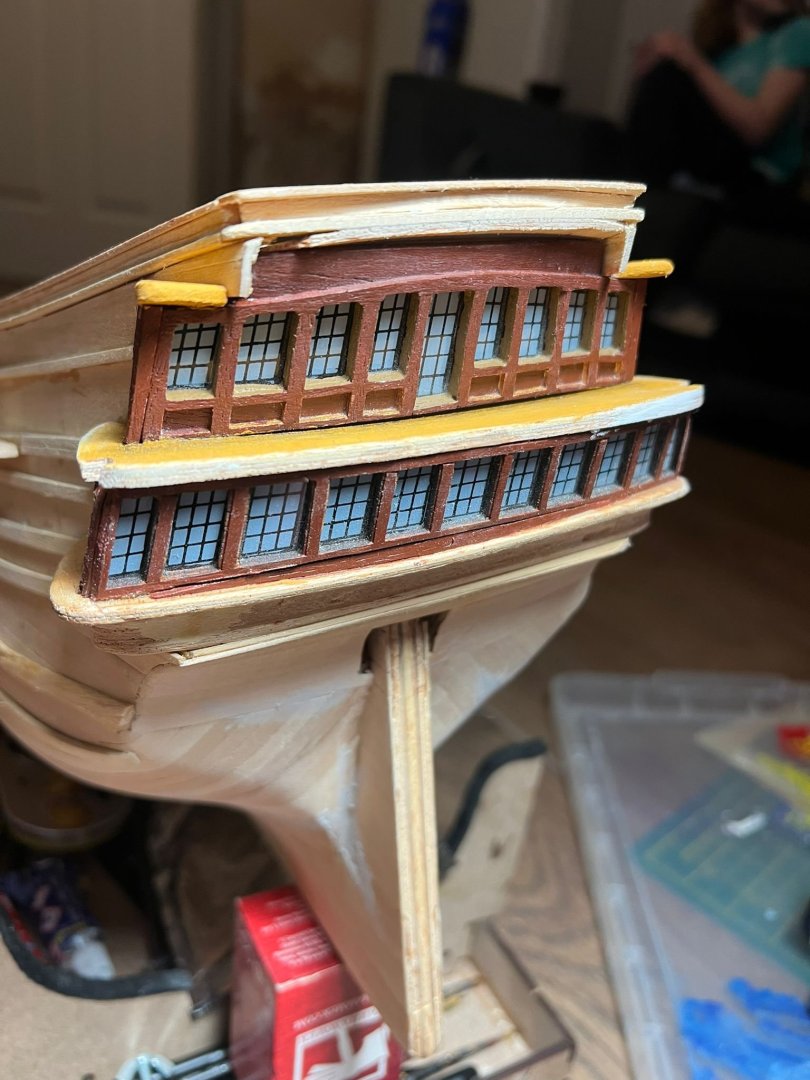


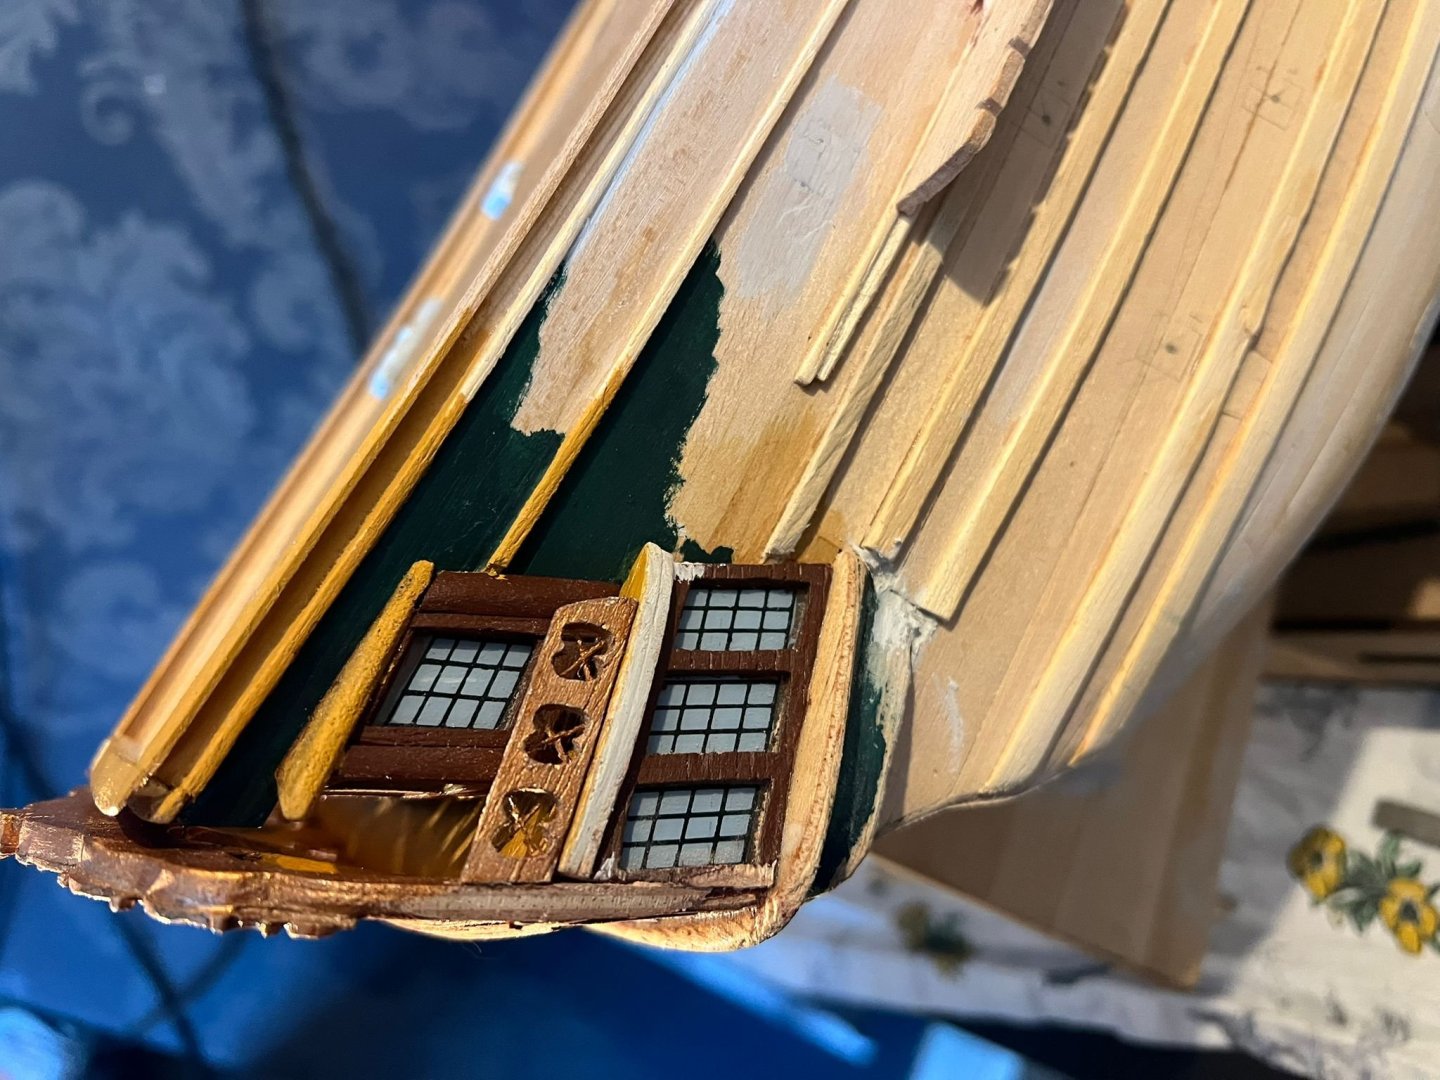
-
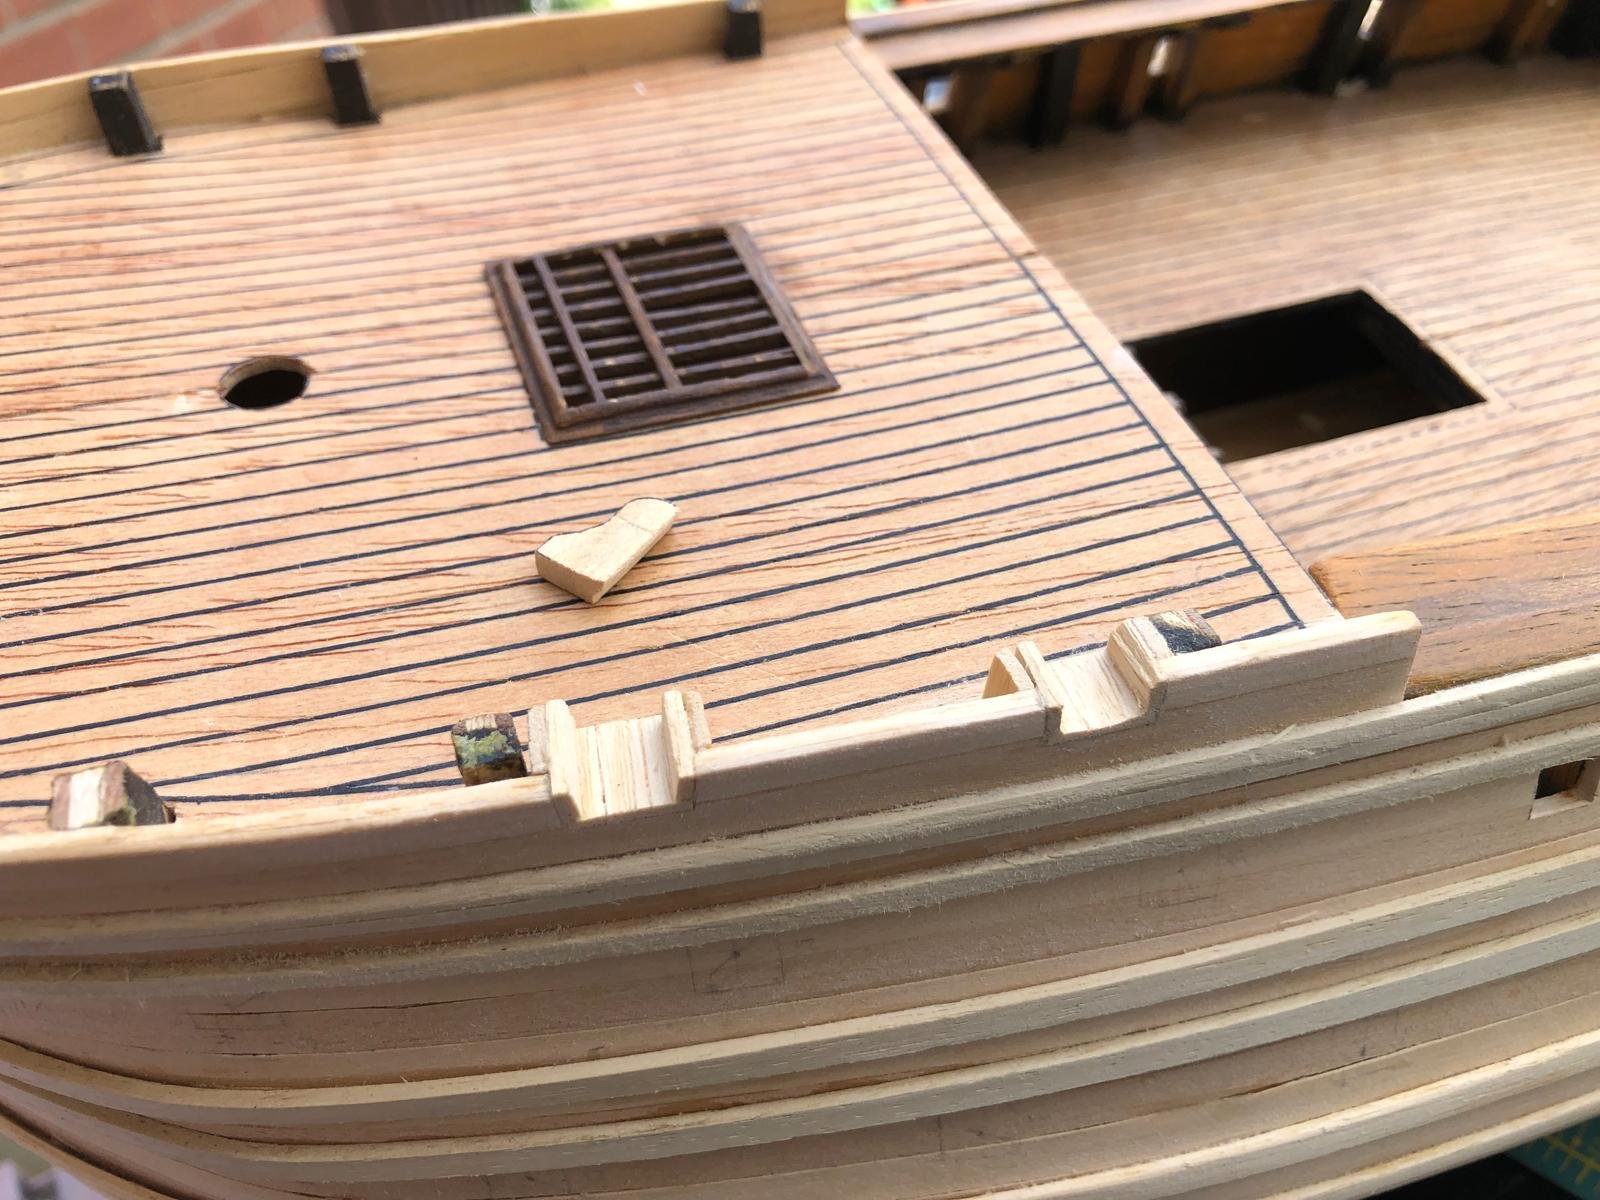
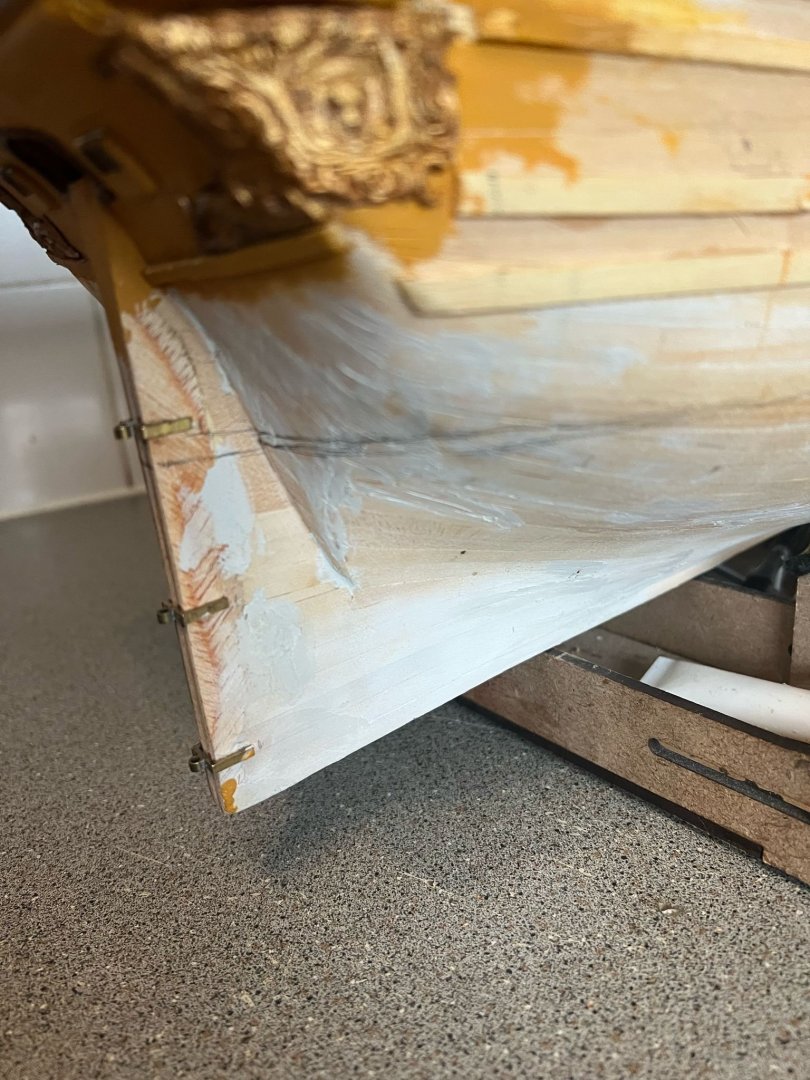
UPDATE 13 Time for another update. A bit of a fiddly bit. I think the pictures make it quite self-explanatory, so I’ll point out some of the mistakes that I made along the way and how I’ve attempted to cover them up. Towards the stern of the ship, I made a hole where a cannon would go. Turns out I didn’t need to do that! I’ve not filled it in yet; I’ll put some wood in and then filler around the edge to try and hide it. I’ve had to use some filler to hide some of the gaps where the planks were stuck to the deck. I did glue them down, so I’m a tad frustrated to see the gaps. https://www.instagram.com/byron_dockyard/

-
DanielNG10 reacted to a post in a topic:
Norske Love by DanielNG10 - Billing Boats - 1:75
-
Ah, thank you. I found this as well which I thought was useful Glossary-of-ship-and-boat-building-terms.pdf (iims.org.uk)
-
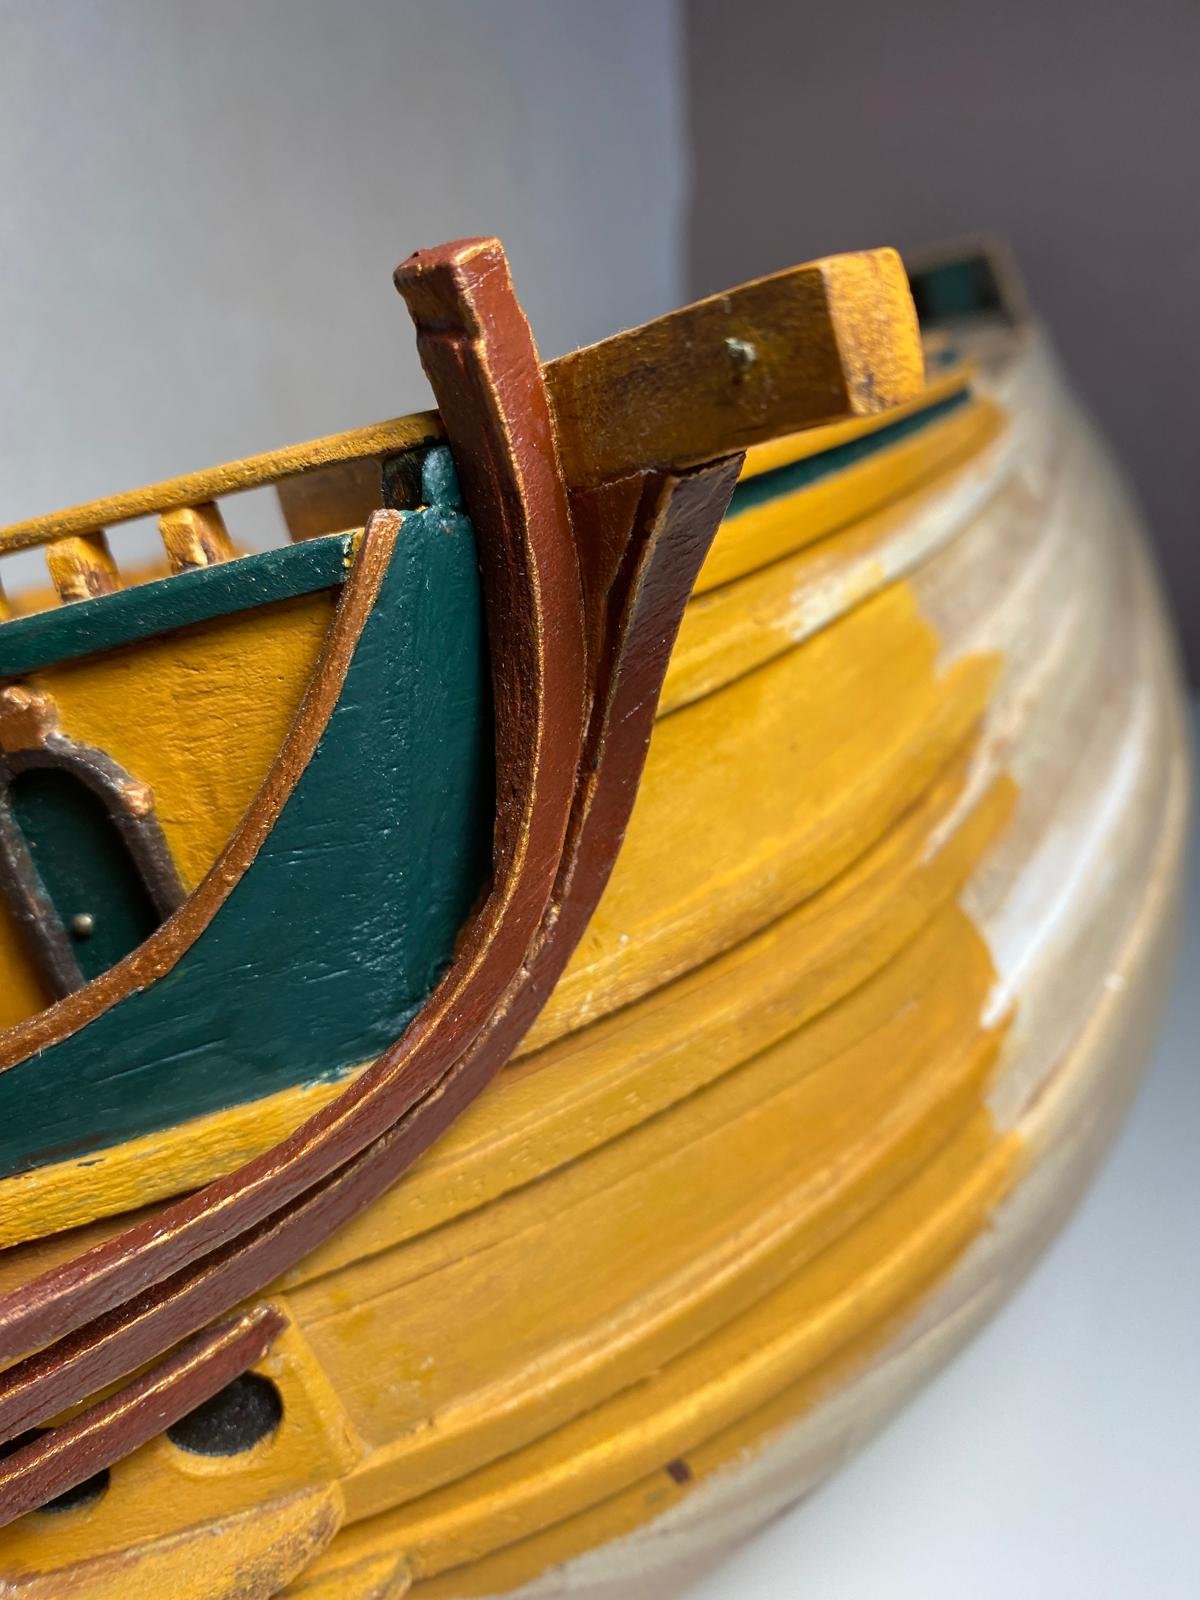
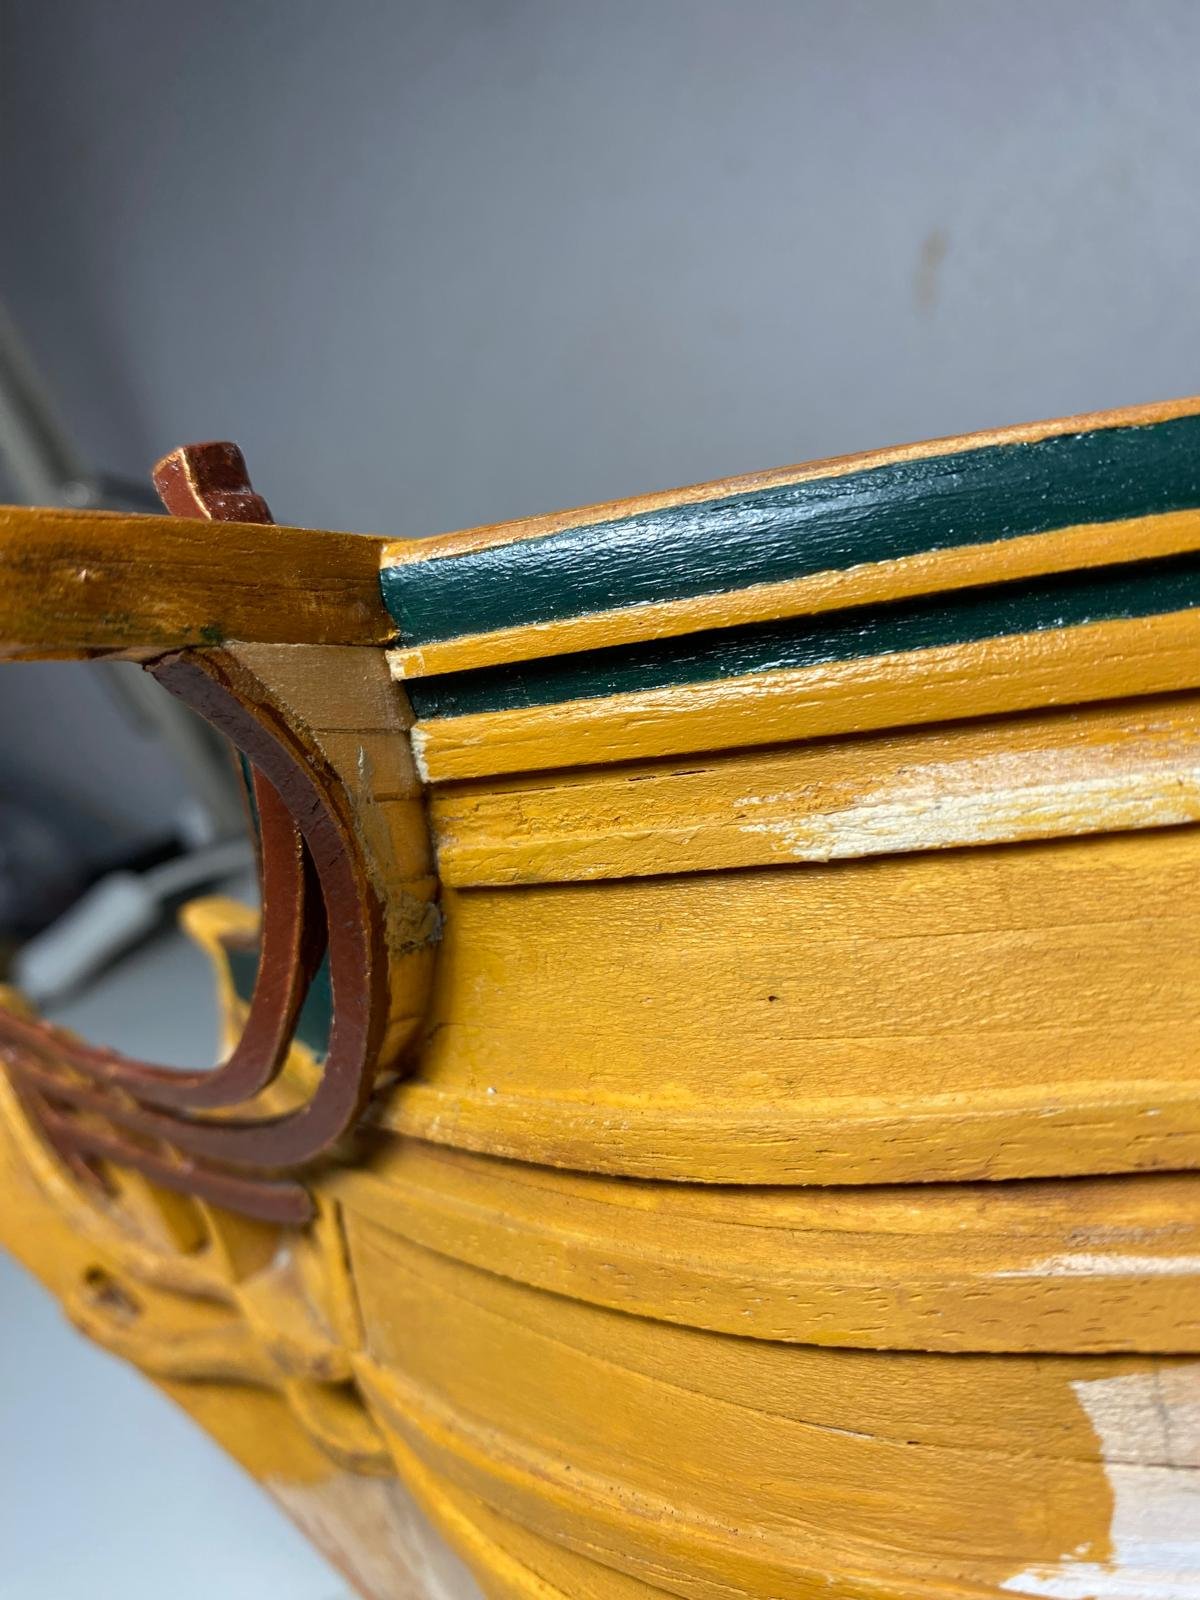
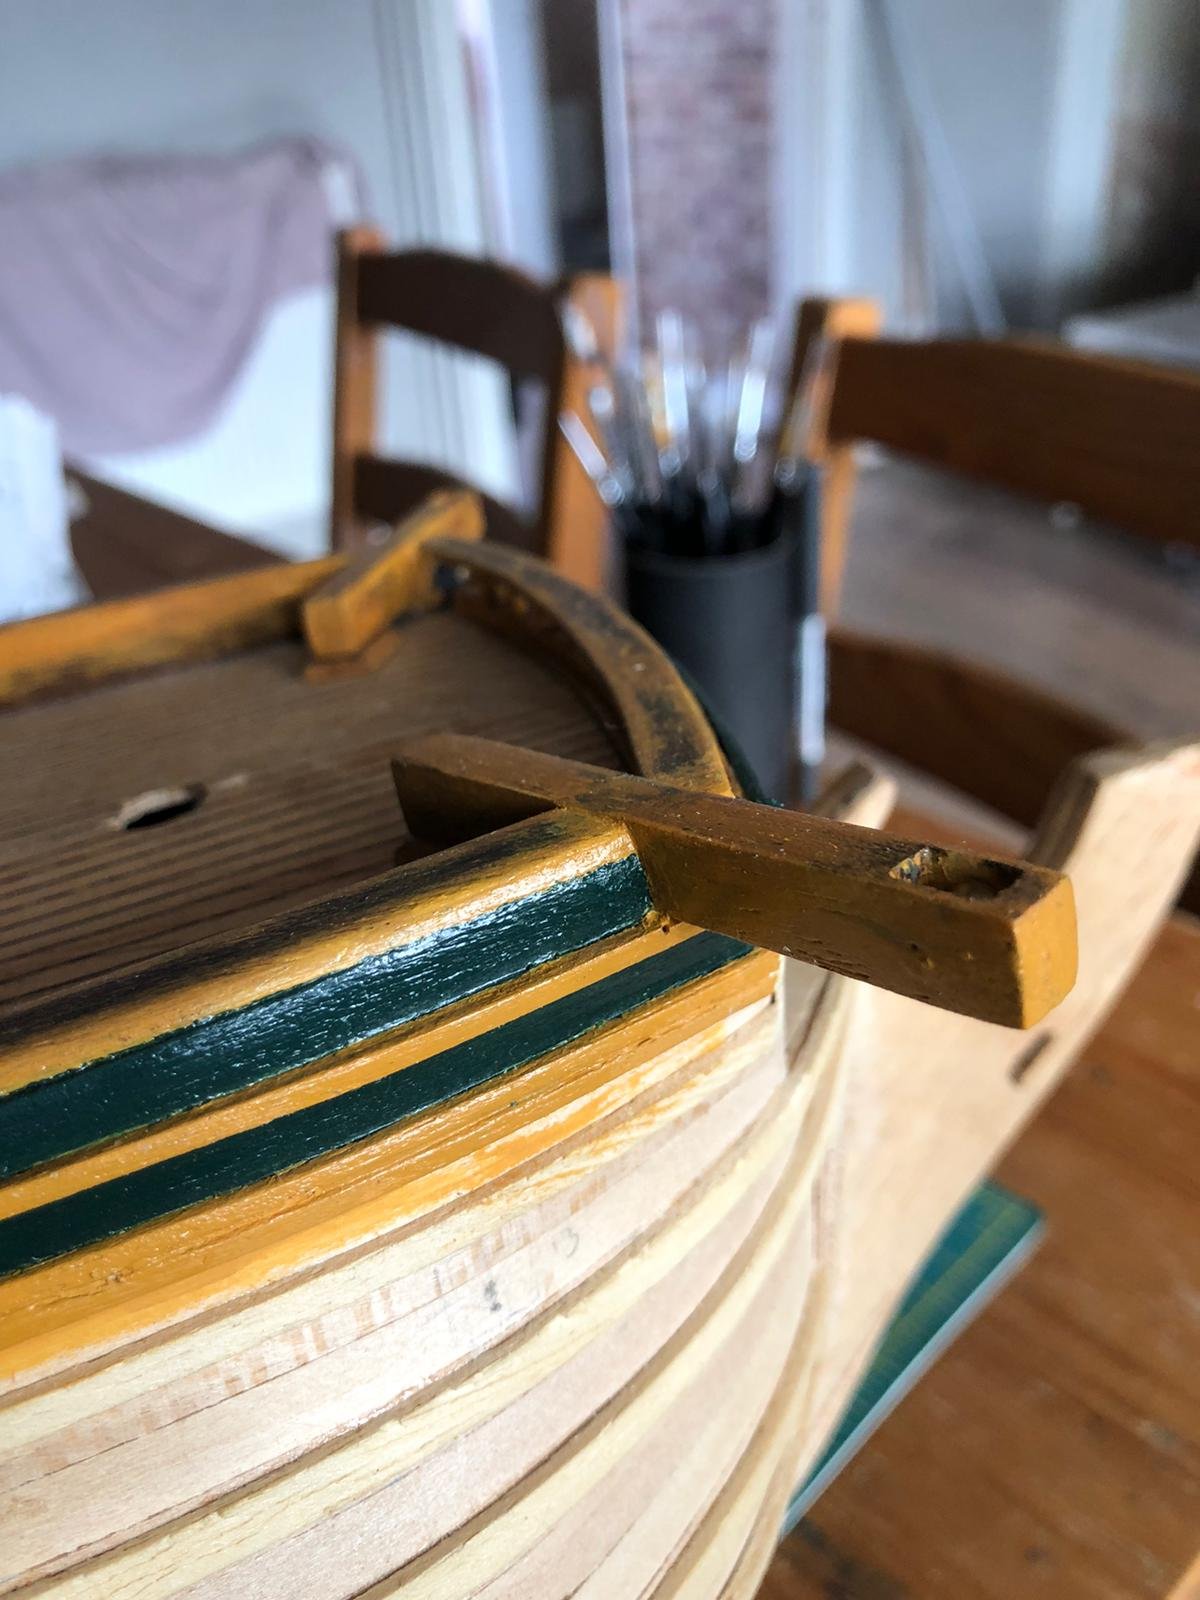
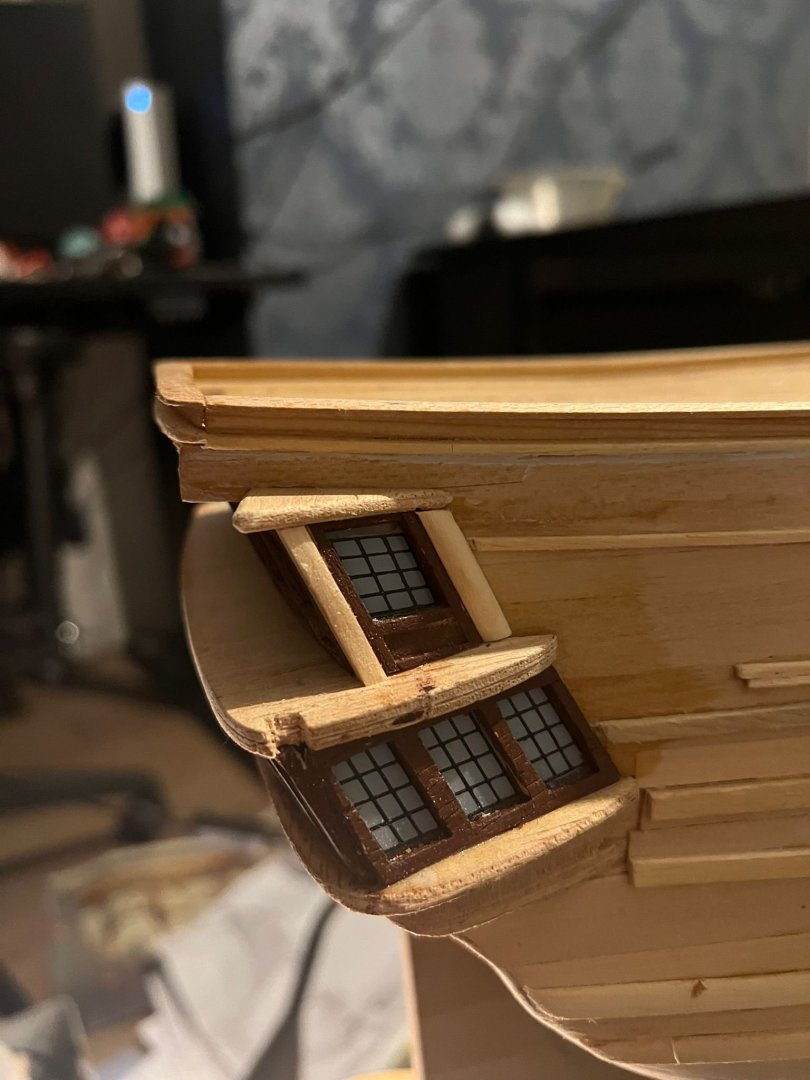
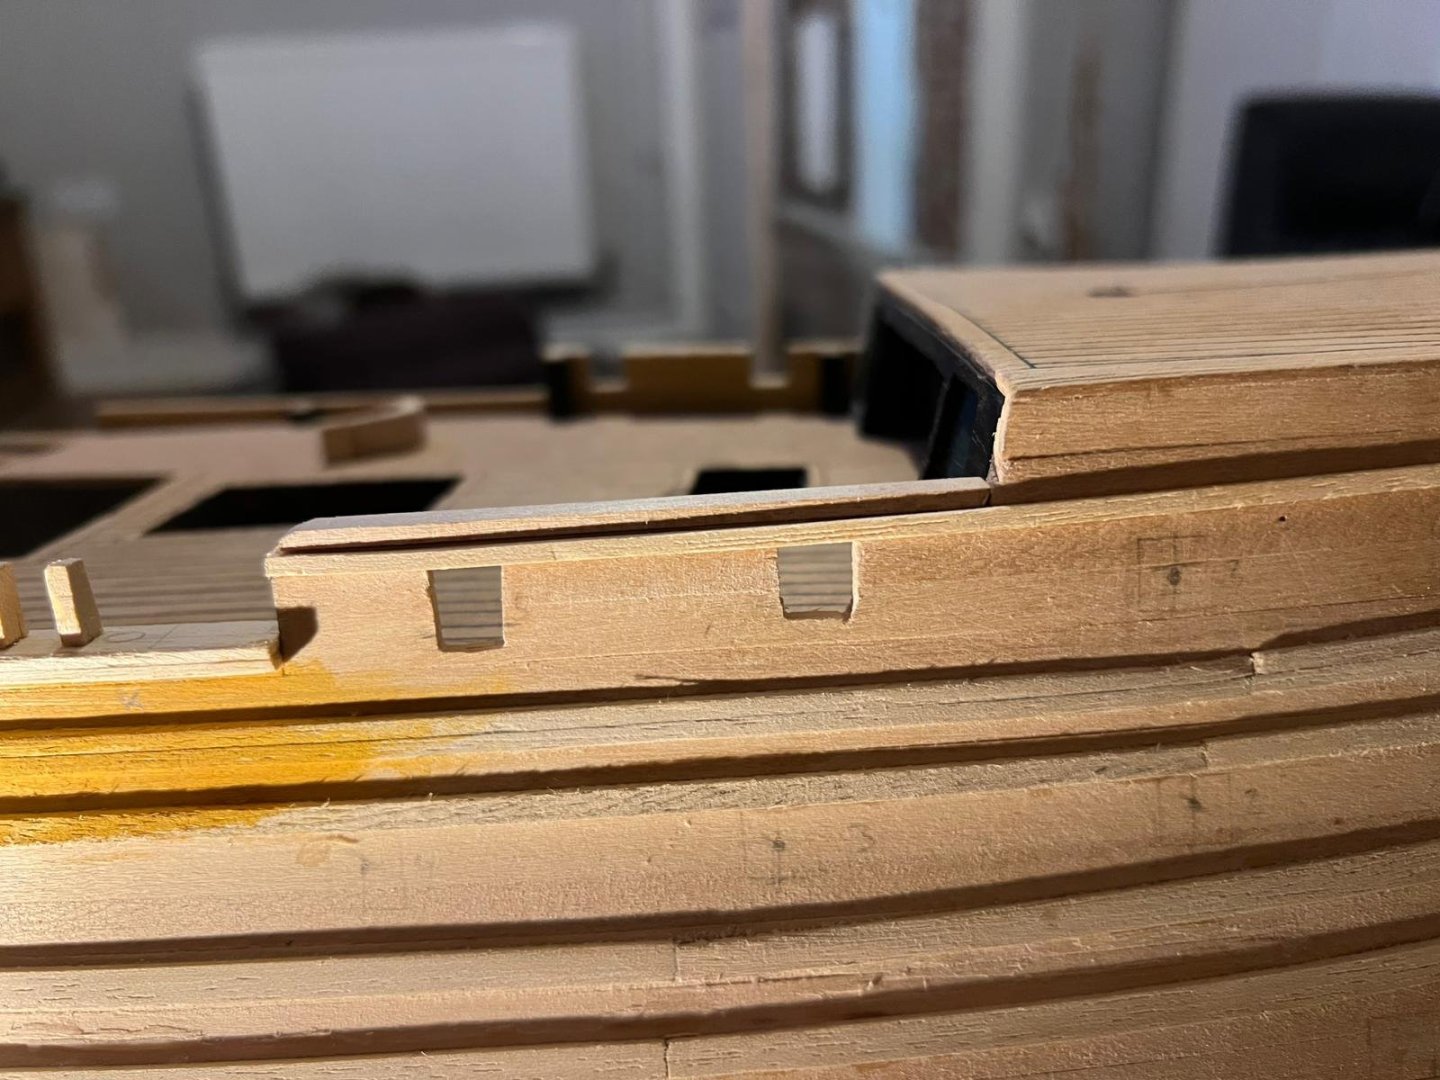
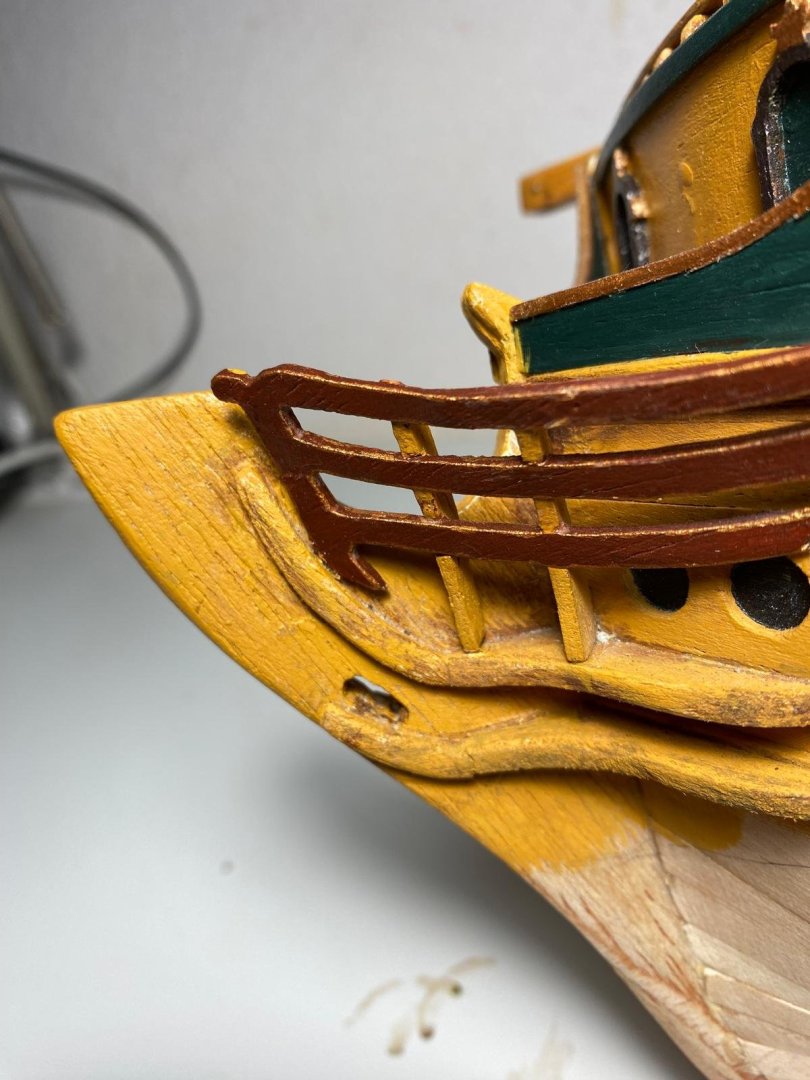
UPDATE 12 I’ve been working on the front of the ship these past few weeks – as well as fighting off a sickness bug and decorating the bedrooms before the weather changes. - So, trying to learn some ship parts. Cathead and Hawseholes. Let’s see if I use them correctly! - I’ve been working on the Bow of the ship. I’ve filled in some gaps in the wood with putty and painted over. The colour seems rather ‘yellow’ on the photos, although in real life the colour is a little paler, I think the light I used did this? - I couldn’t find the name for the brown thing with gold trim. It was supposed to be gold. I altered it slightly. - Just above, the green barrier with gold trim (does it have a name?). This was made using planks for the side of the ship. Some photos of models have them, some don’t? It tidied up the bow having it, so I thought it was worth the time making them. I attached the trim on the top and bent it into place using the ol’ plank bender. - New word! Cathead! Which are the two beams leaving the Forecastle which will hold the anchor. I filled in the gap between the brown thing with gold trim. Then painted it a lighter brown. I put a pin in the end of the Cathead. - A little bit of the paint needs touching up. It’s my intention to come to that and then varnish. I think that is everything. Instagram: https://www.instagram.com/byron_dockyard/ If you can follow my Instagram that would be rather nice. Thank you for reading. Daniel #smallboat #wood #kit #shipmodelling #kitbash #modelshipworld #shipmodeling #shipmodel #scalemodel #ship #modelship #modelkit #shipmodels #handmade #scaleship #modelships #modelmaking #woodmodel #handcraft #woodenshipmodel #billingboats #viral #woodship #citadel #citadelpaints #occre #billingboat


-
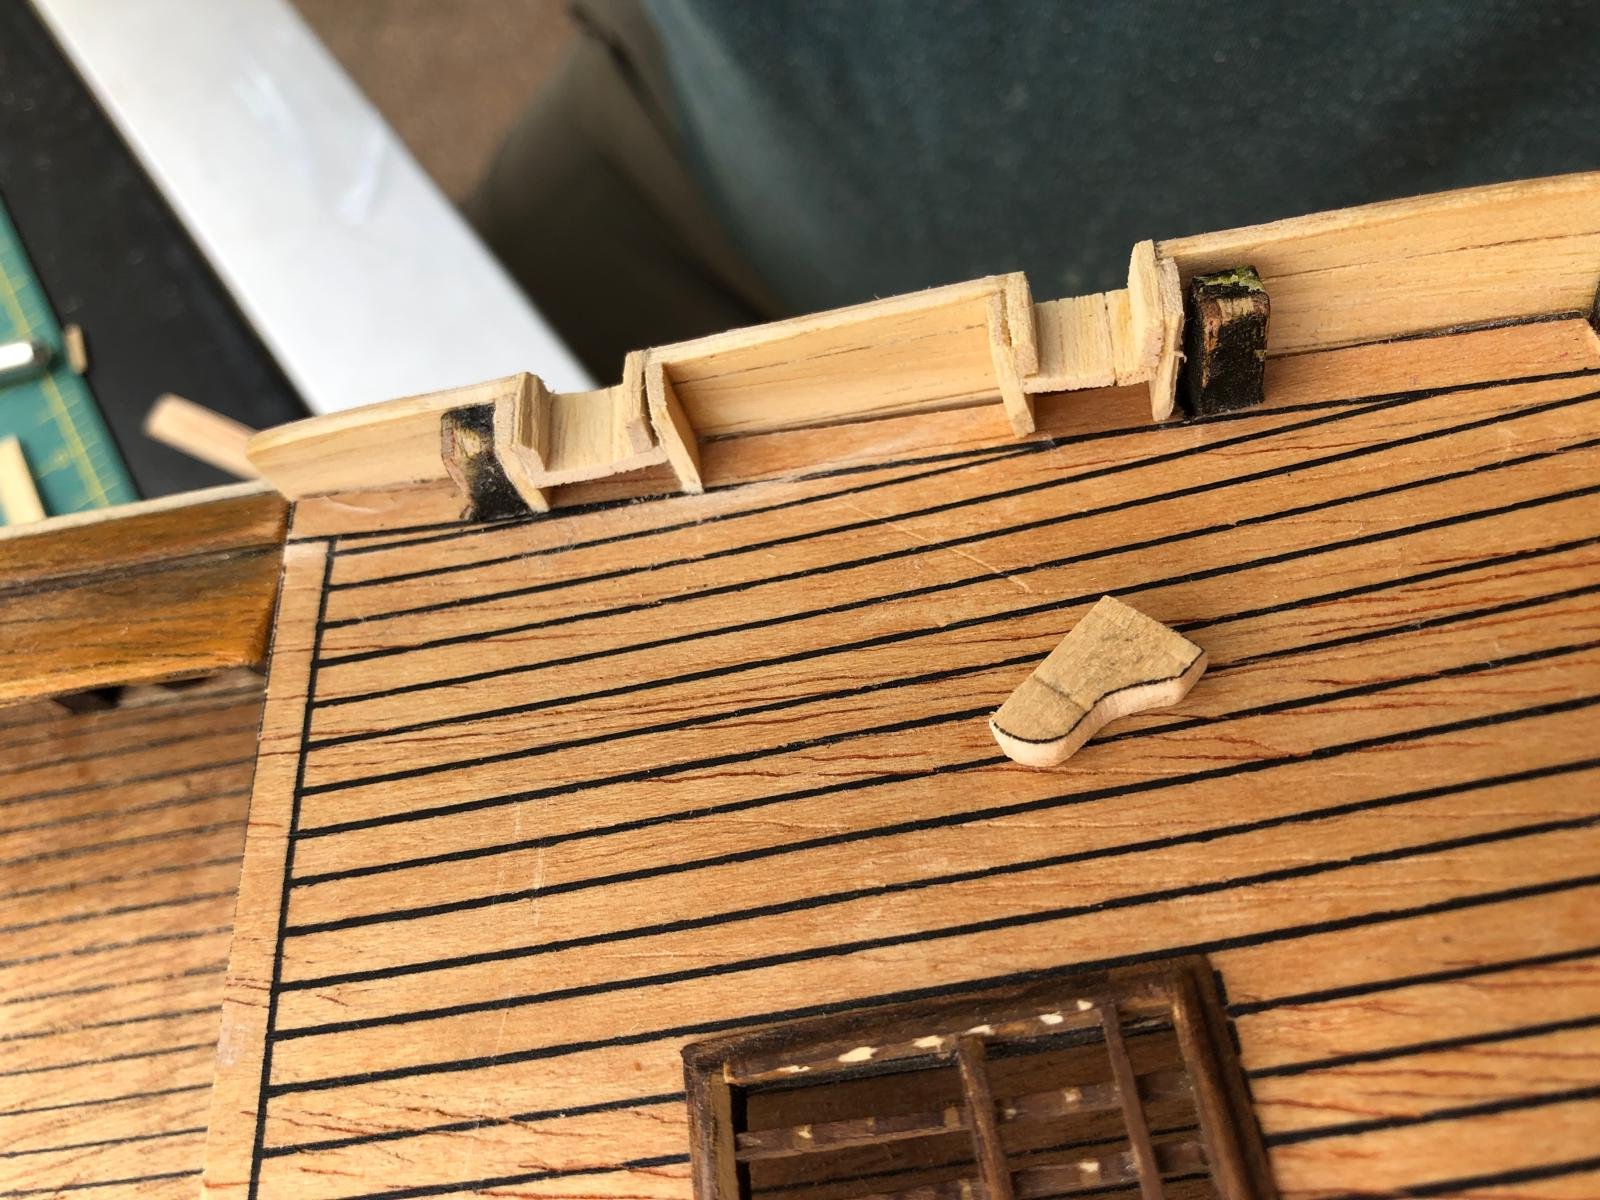
UPDATE ELEVEN Continuing the work on the bow of the ship. So theres some gun ports that I need to make for the forecastle? (working on my boat terminologies). I did this for the length of this front deck, however, as you can see on the later photos this was a mistake. I needed to leave a gap for the large wooden support which later holds the anchor. I measured and cut the hole. I seemed to get away with the mistake. There was a couple of holes under the anchor support thing, but I filled it up will filler and painted. This blended everything in really well. I then varnished over the top. If you’re able to give my Instagram account some love, they’ll be pretty amazing! https://www.instagram.com/byron_dockyard/ Thank you for checking this out. Daniel


-
DanielNG10 reacted to a post in a topic:
HMS Pegasus by Blue Ensign - FINISHED - Amati/Victory Models - 1:64 scale
-
DanielNG10 reacted to a post in a topic:
HMS Pegasus by Blue Ensign - FINISHED - Amati/Victory Models - 1:64 scale
-
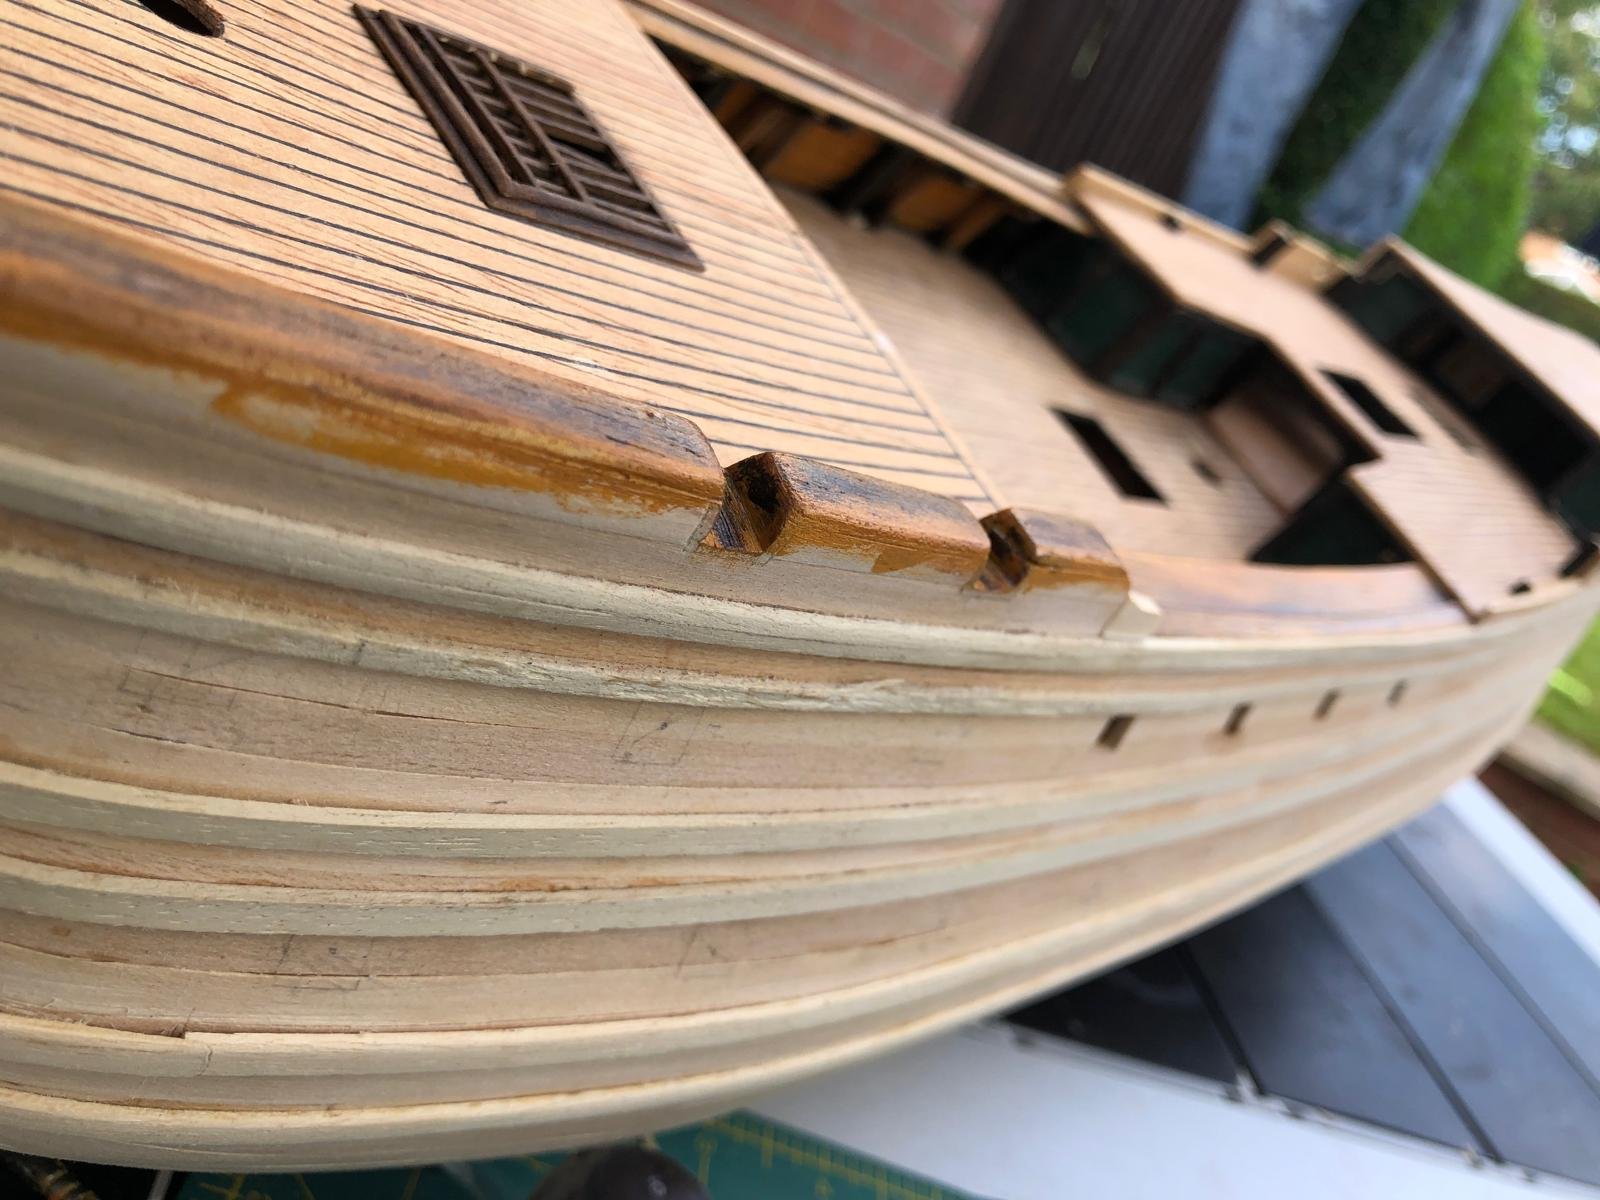
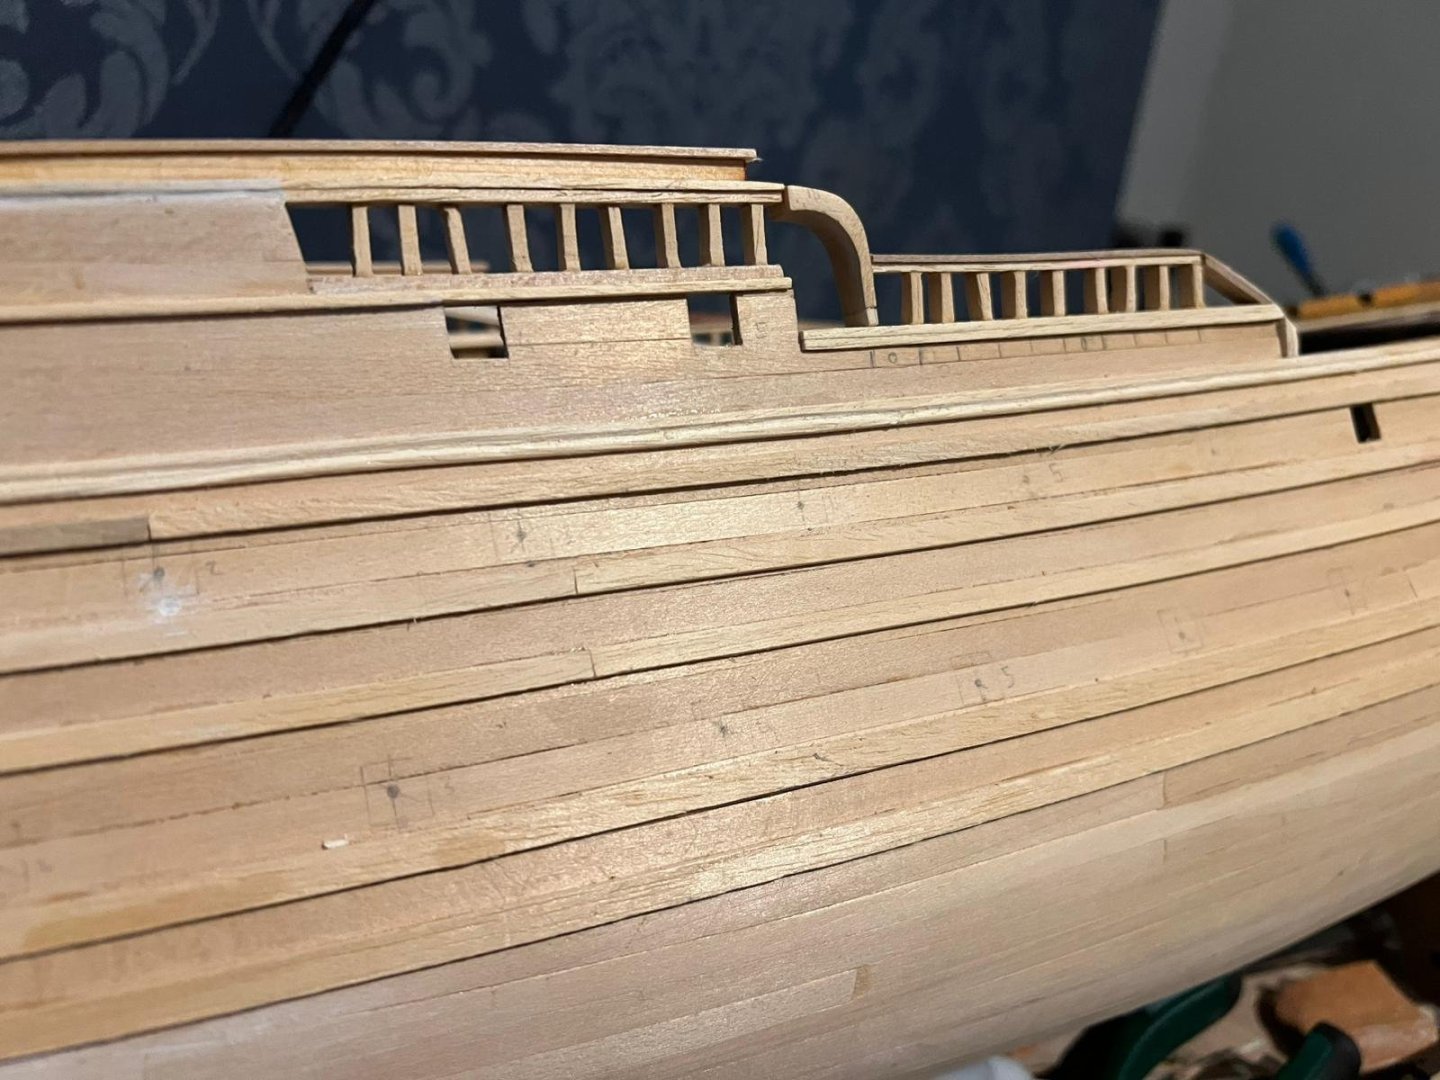
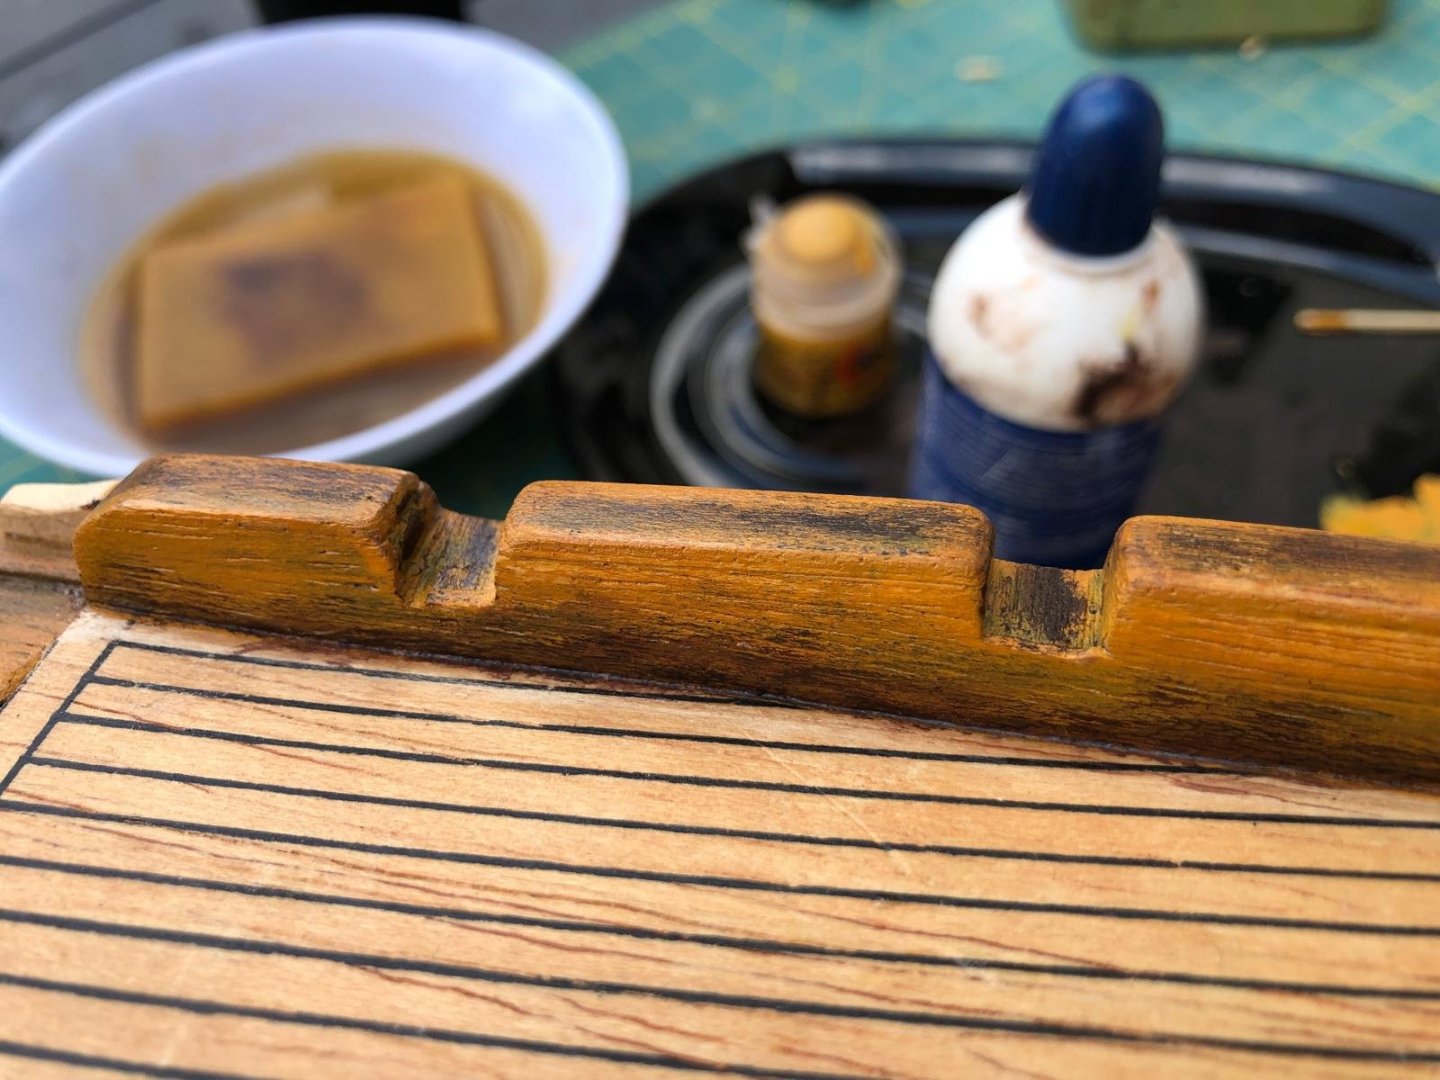
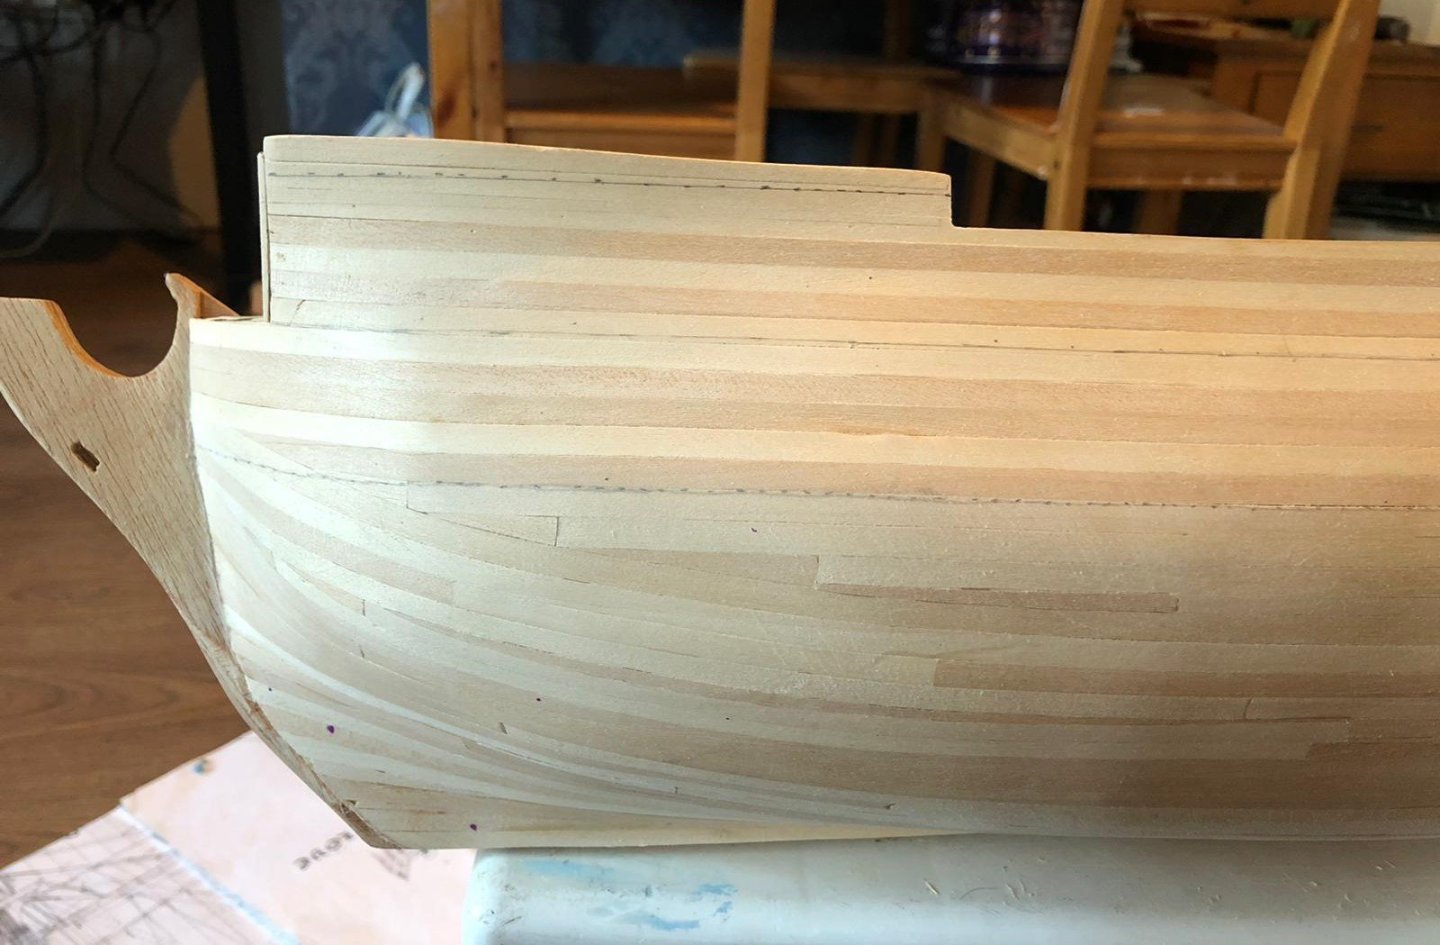
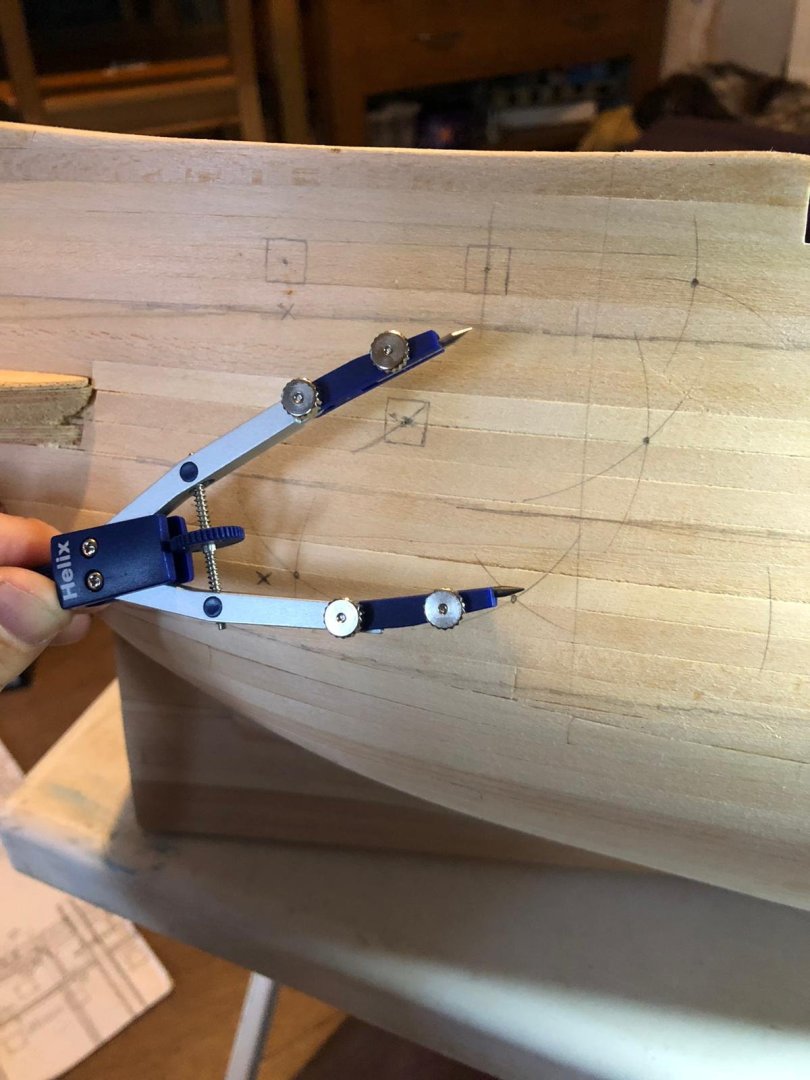
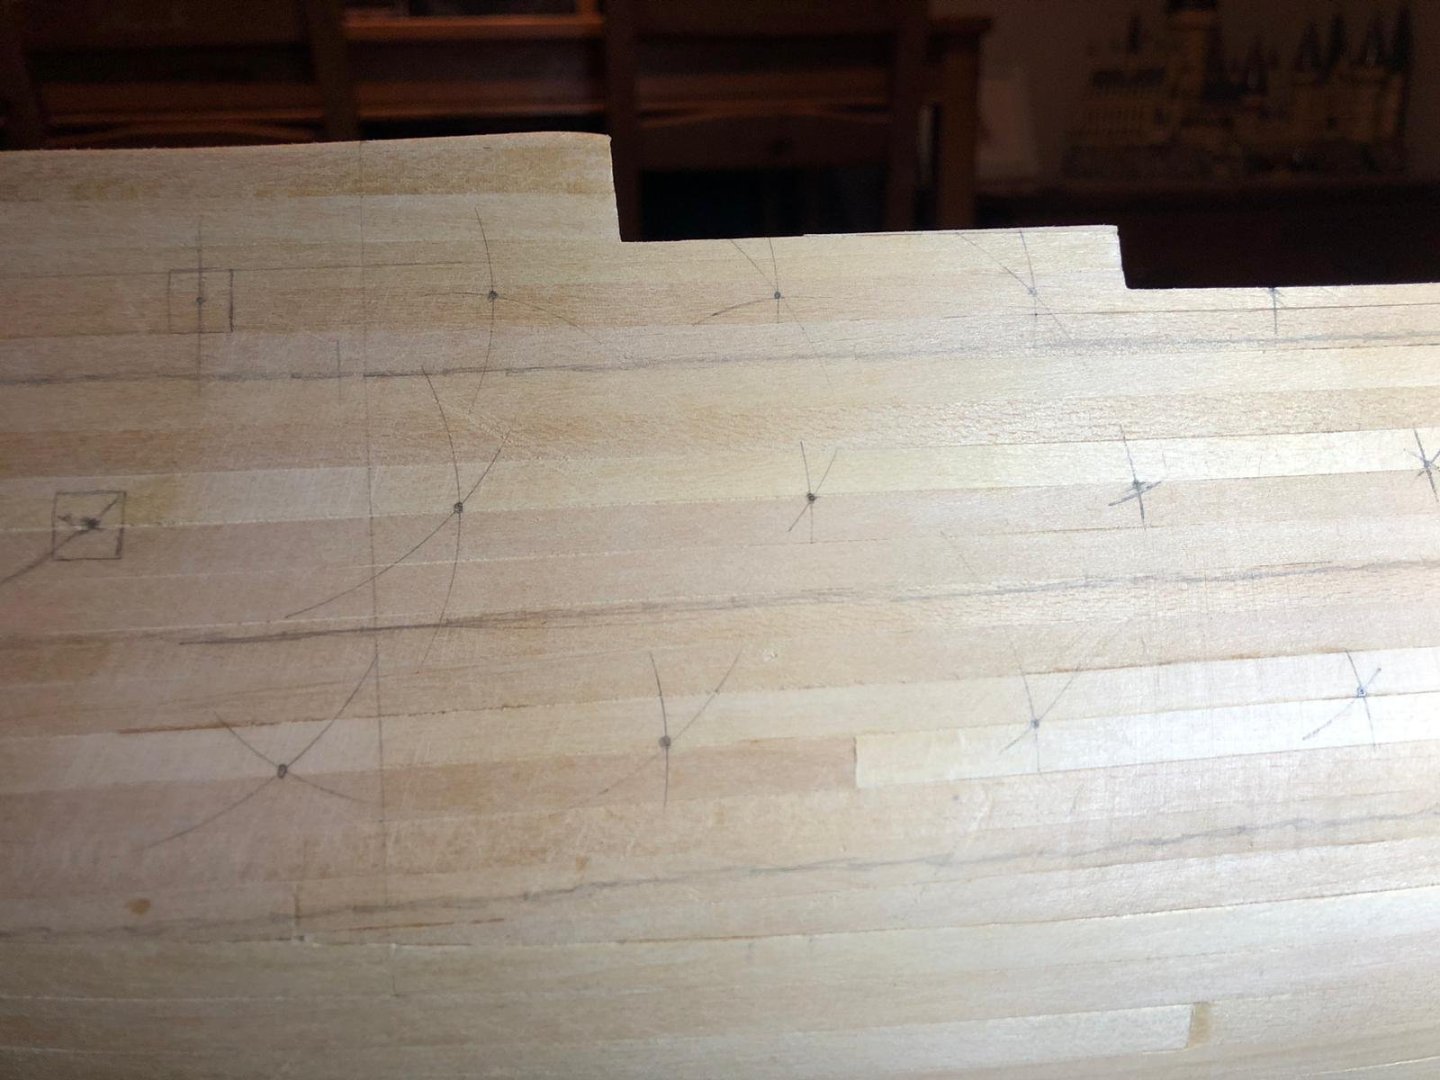
UPDATE TEN So, finished the top layer of planking. I’ve brought these extra (not included in the kit). So I initially lined the top planks alongside each other then attached with super glue. I bent the planks and all that, however I changed approached about half way through and started filing a 45o angle into them. This allowed the planks to overlap, I found that it was easier to avoid gaps this way. Because I used superglue in attaching the planks, it prevents me using varnish to stain the hull. So I’ve used the Citadel paint range (Warhammer). The yellow I’ve used is Averland Sunset, and the brown is Rhinox Hide. Where I painted on the inside of the ship, I used the RH first, let it dry, sanded it down. Then used a watered down AS and washed over it. I then varnished over the top. The model comes with to scale plans. So using a compass, I was able to work out where the cannon hatches quite accurately. Used a small drill piece to go through so I know they were in the right place. I made one of the cannons. Everything lined up, so committed to making the hole. I’m not sure what they are called – support joists on the side of the boat, the ones next to the cannon holes? Sanded them down. Painted them in the same way as described above, only exception is I touched up the brown at the bottom. I sanded down the tops of them to level them out, then attached the walkway type thing to the top of them. I used one of the planks and attached it to the top / outside of this walkway. Sanded down. Daniel Please check out my Instagram if you can. Really appreciate any love sent. https://www.instagram.com/byron_dockyard/


-
DanielNG10 reacted to a post in a topic:
Palamos by SiriusVoyager - FINISHED - OcCre - 1:45
-
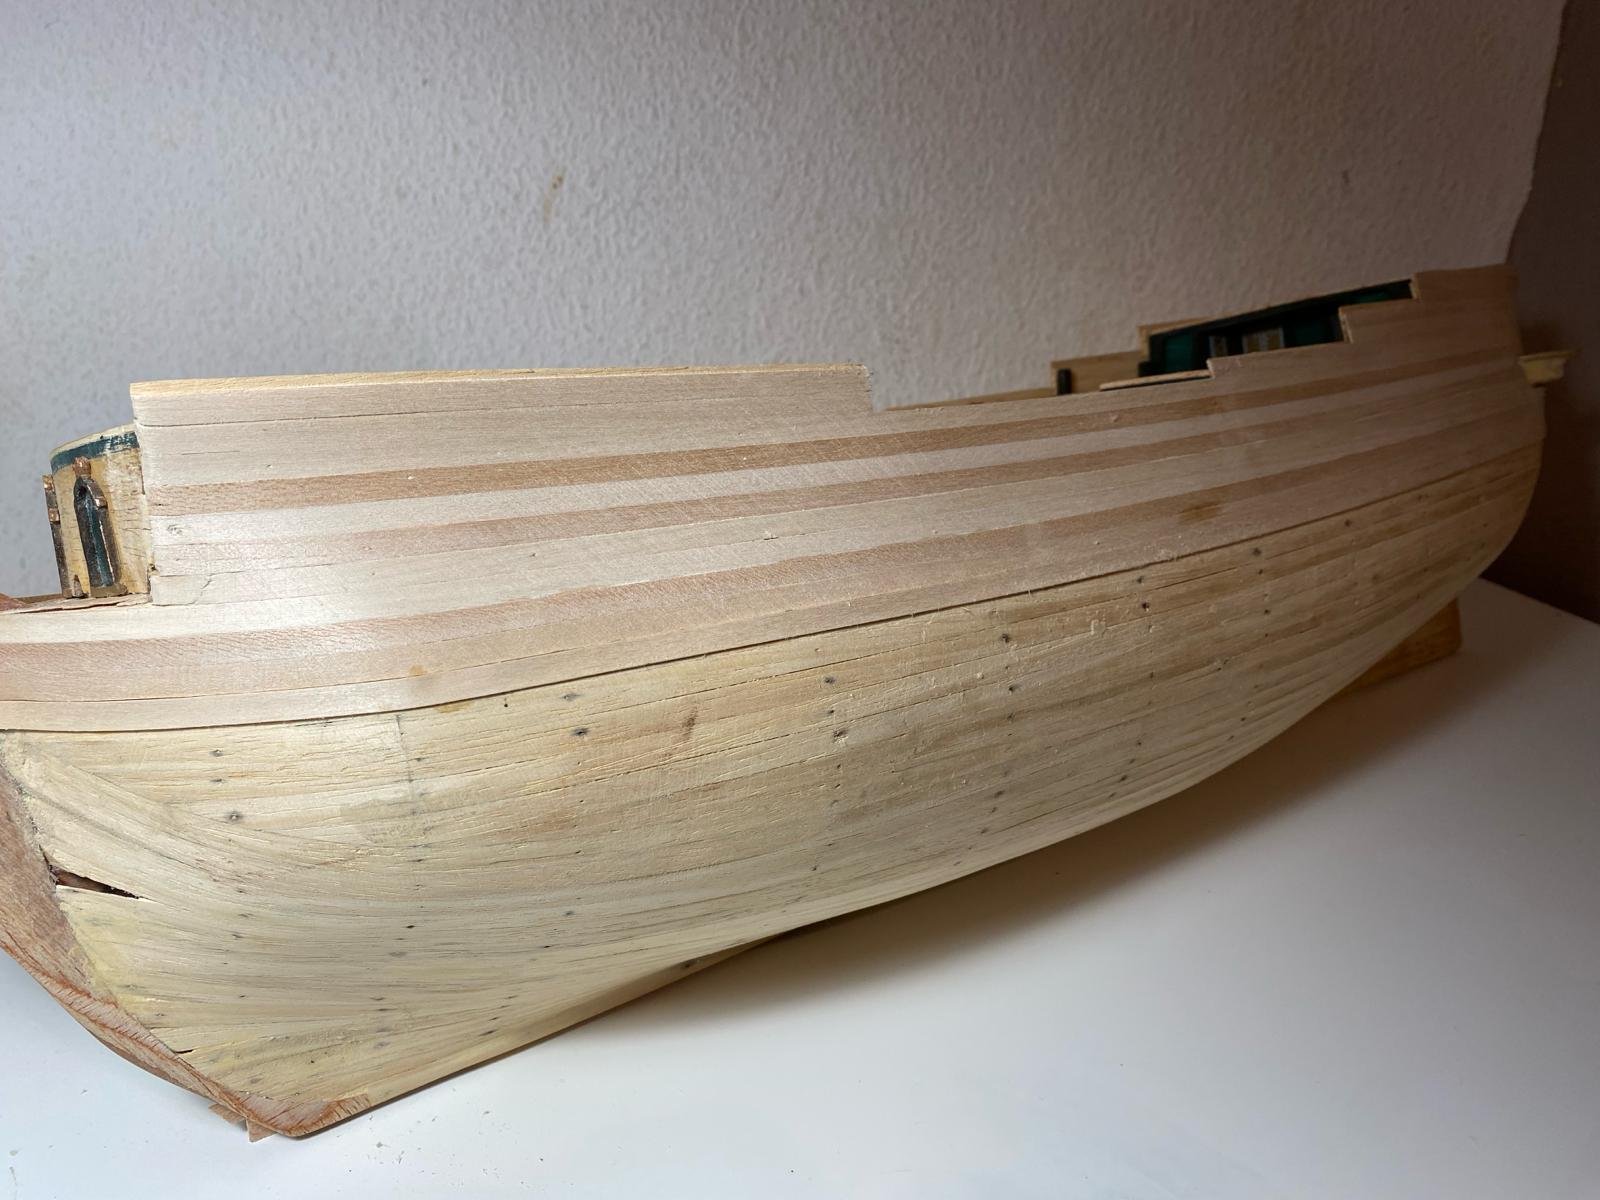
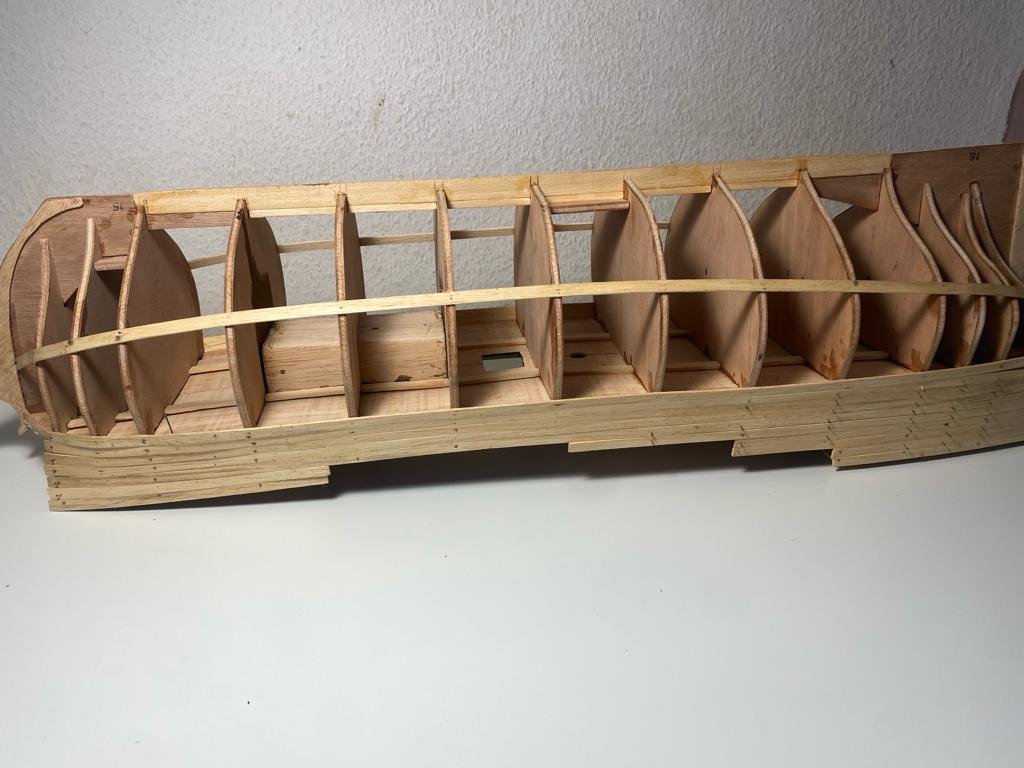
UPDATE NINE The progress is less dramatic at this stage, however, I hope you can see the progress in smartening up the planks. So…. I’m not a fan of Billing Boats. Granted, this is an older model which I brought from EBay, so maybe the more recent ones have fixed these problems. I’m not a fan of the one layer of planks. I attached the planking around the ship, yeah it’s a messy job and I’m sure people more skilled than me can do a jolly good job first time of asking. I’ve sanded and filled in some of the gaps, but even doing this, it doesn’t do the model justice. Having those finishing planks going over the top would make a difference. Additionally, the plastic fitting aren’t the best so I’m going to have to replace them, but that’s for another post. So, I couldn’t find finishing planks online, everyone was sold out annoyingly. I brought some thin planks which would be used for the initial layer. Then I’m sanding them down. The photos show my progress so far. I’m massively apricate you checking out my Instagram page: https://www.instagram.com/byron_dockyard/


-
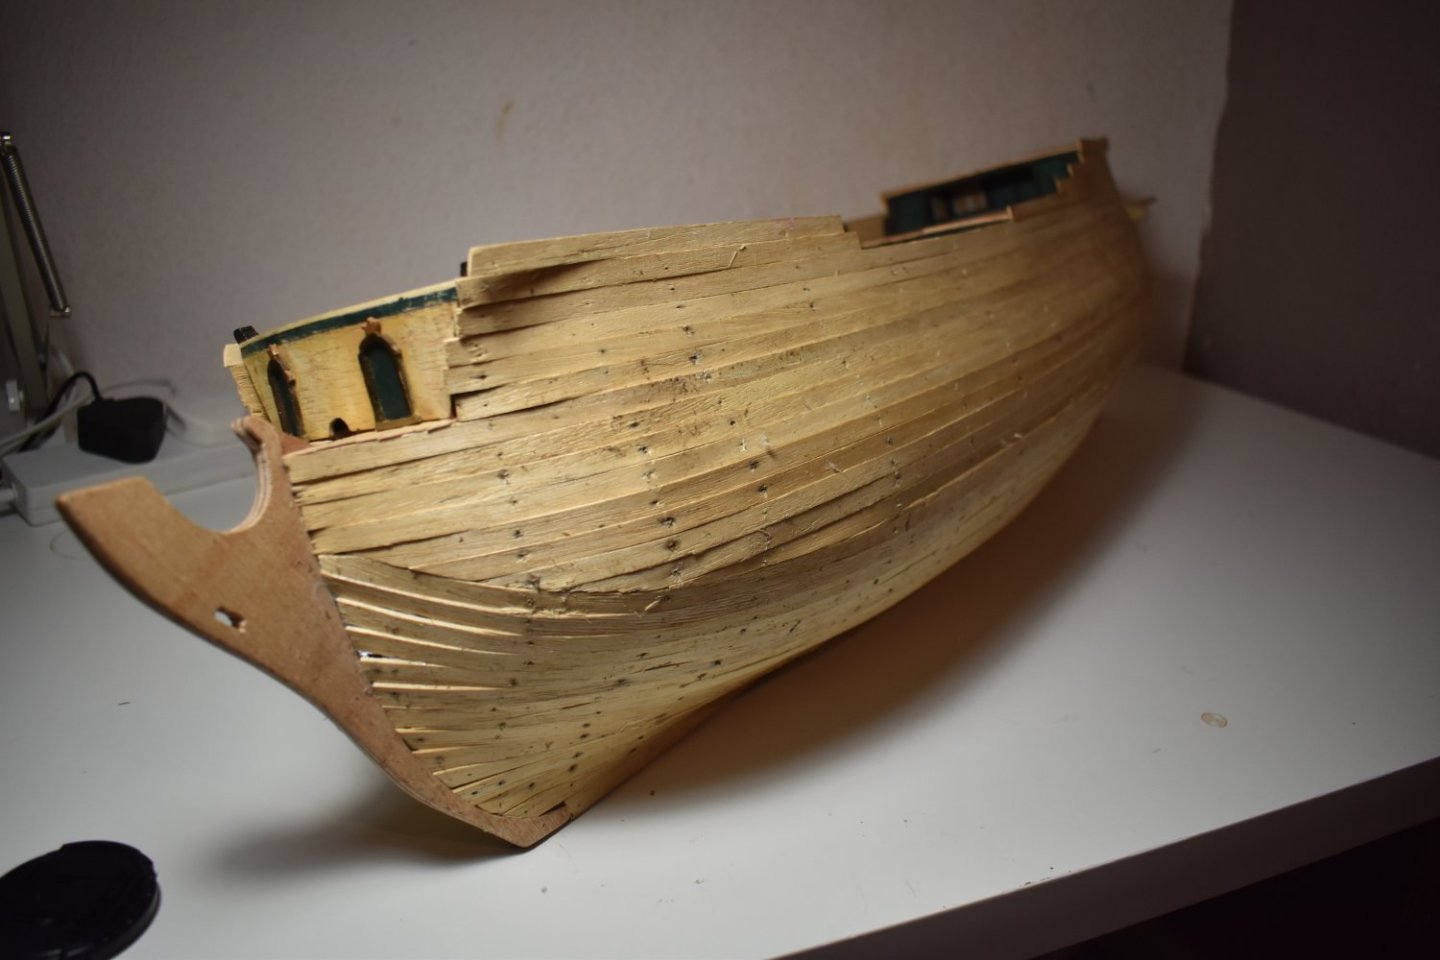
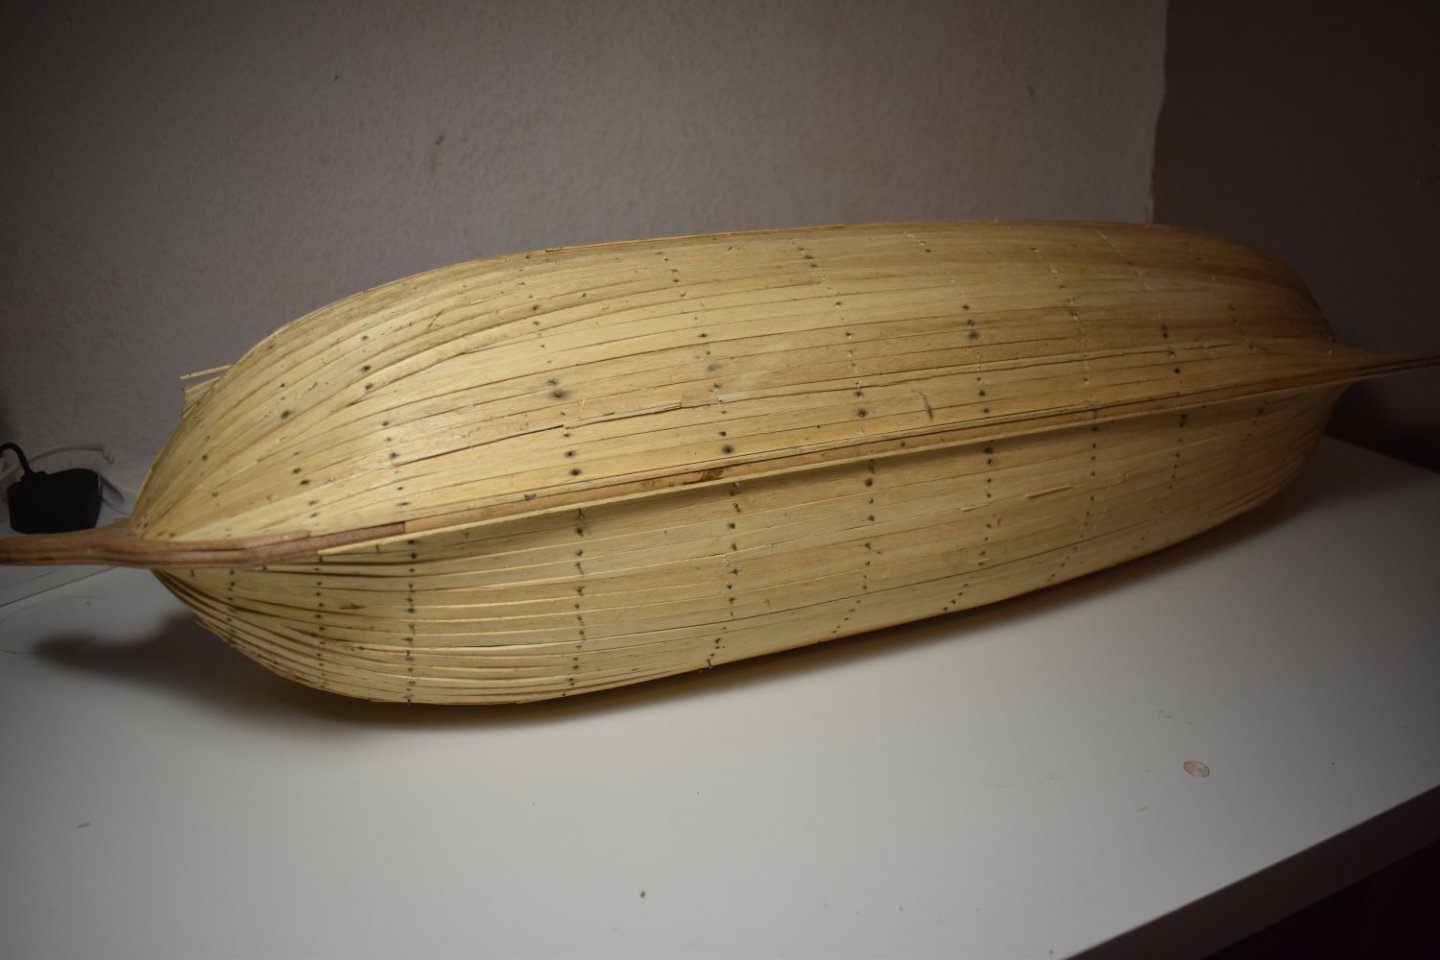
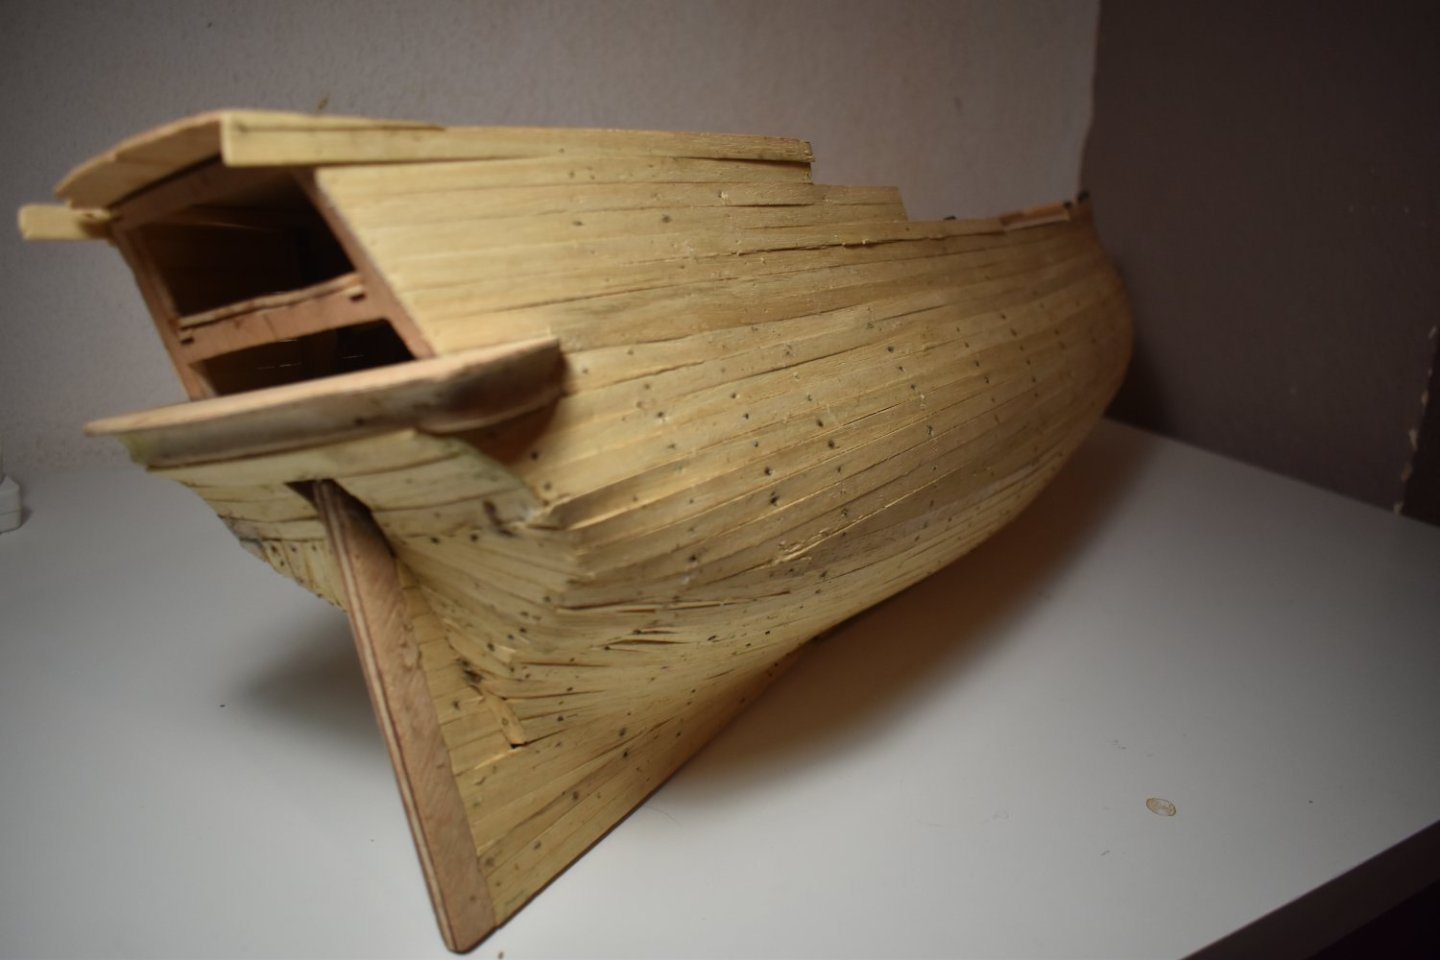
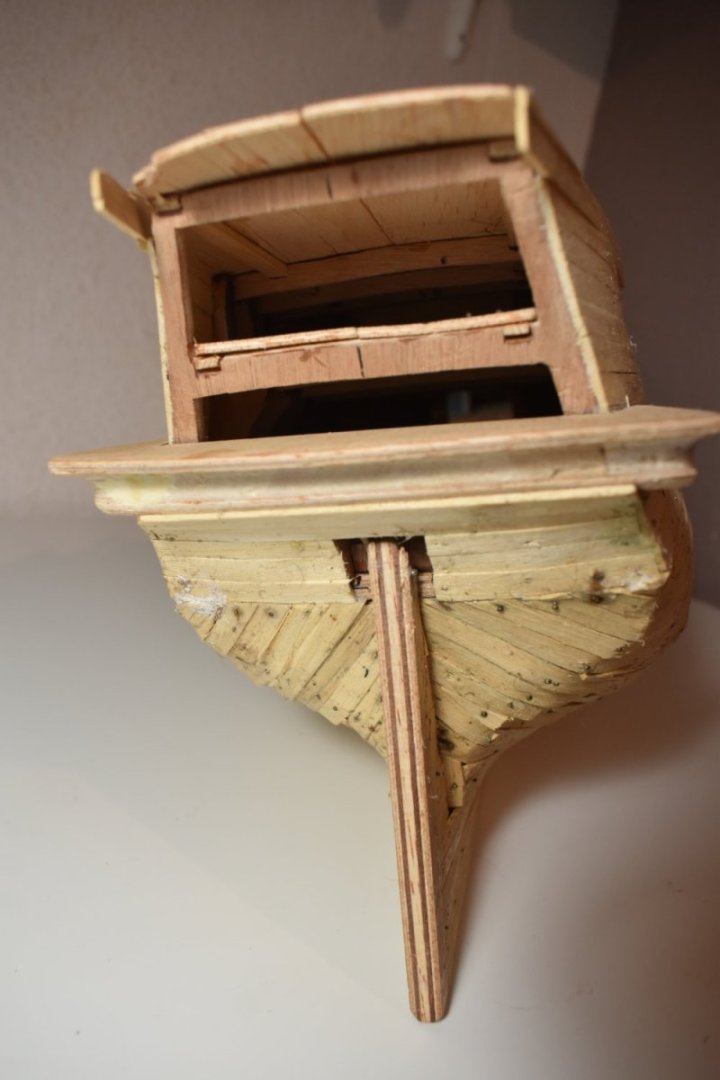
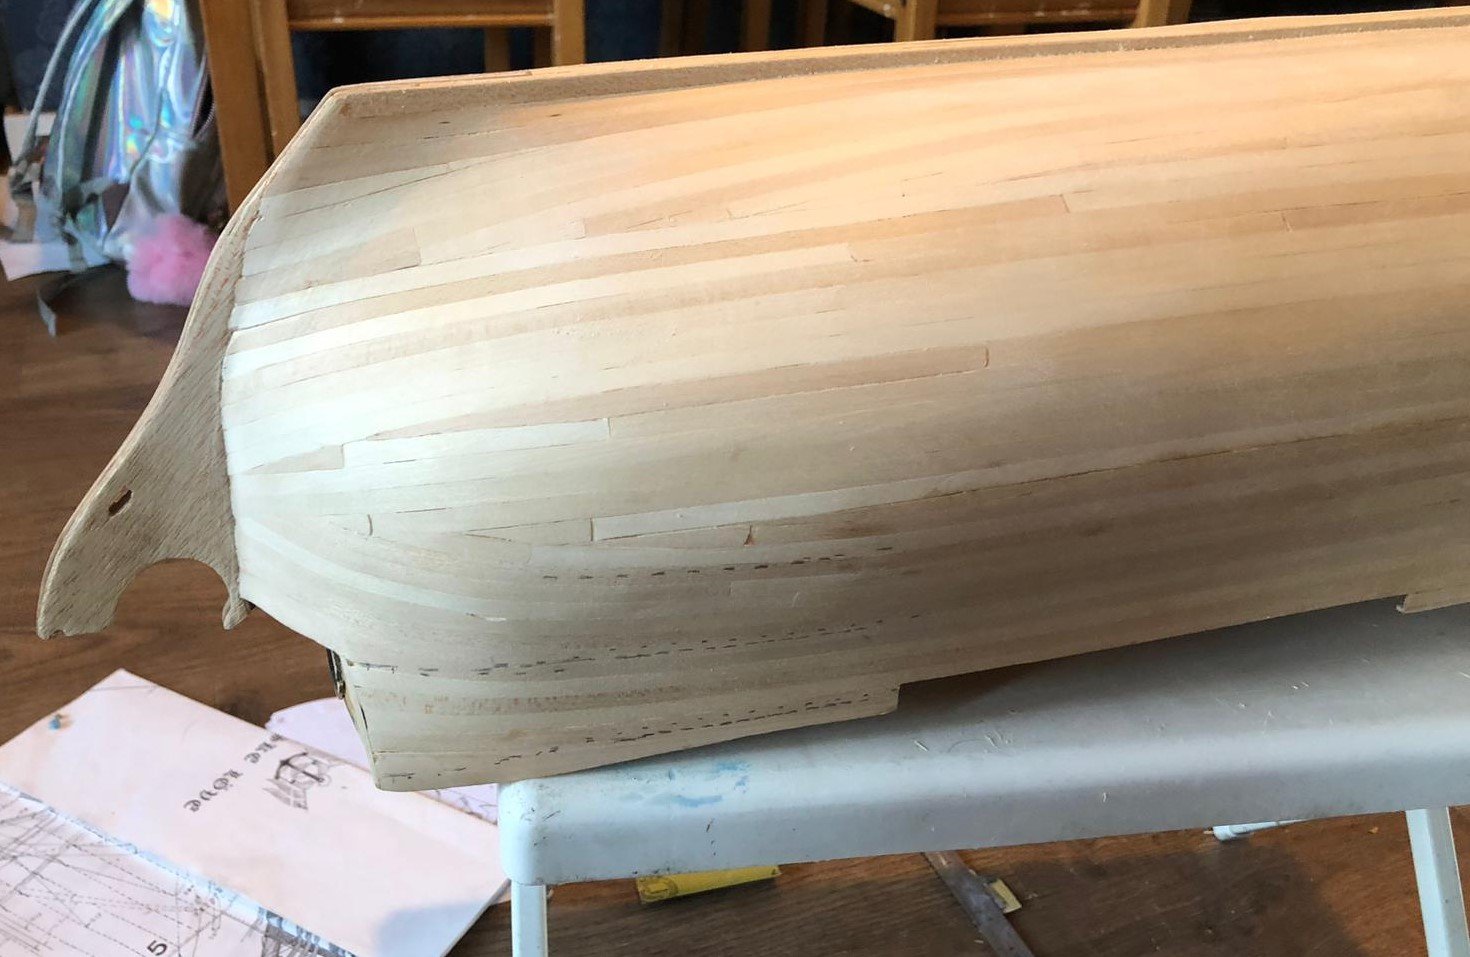
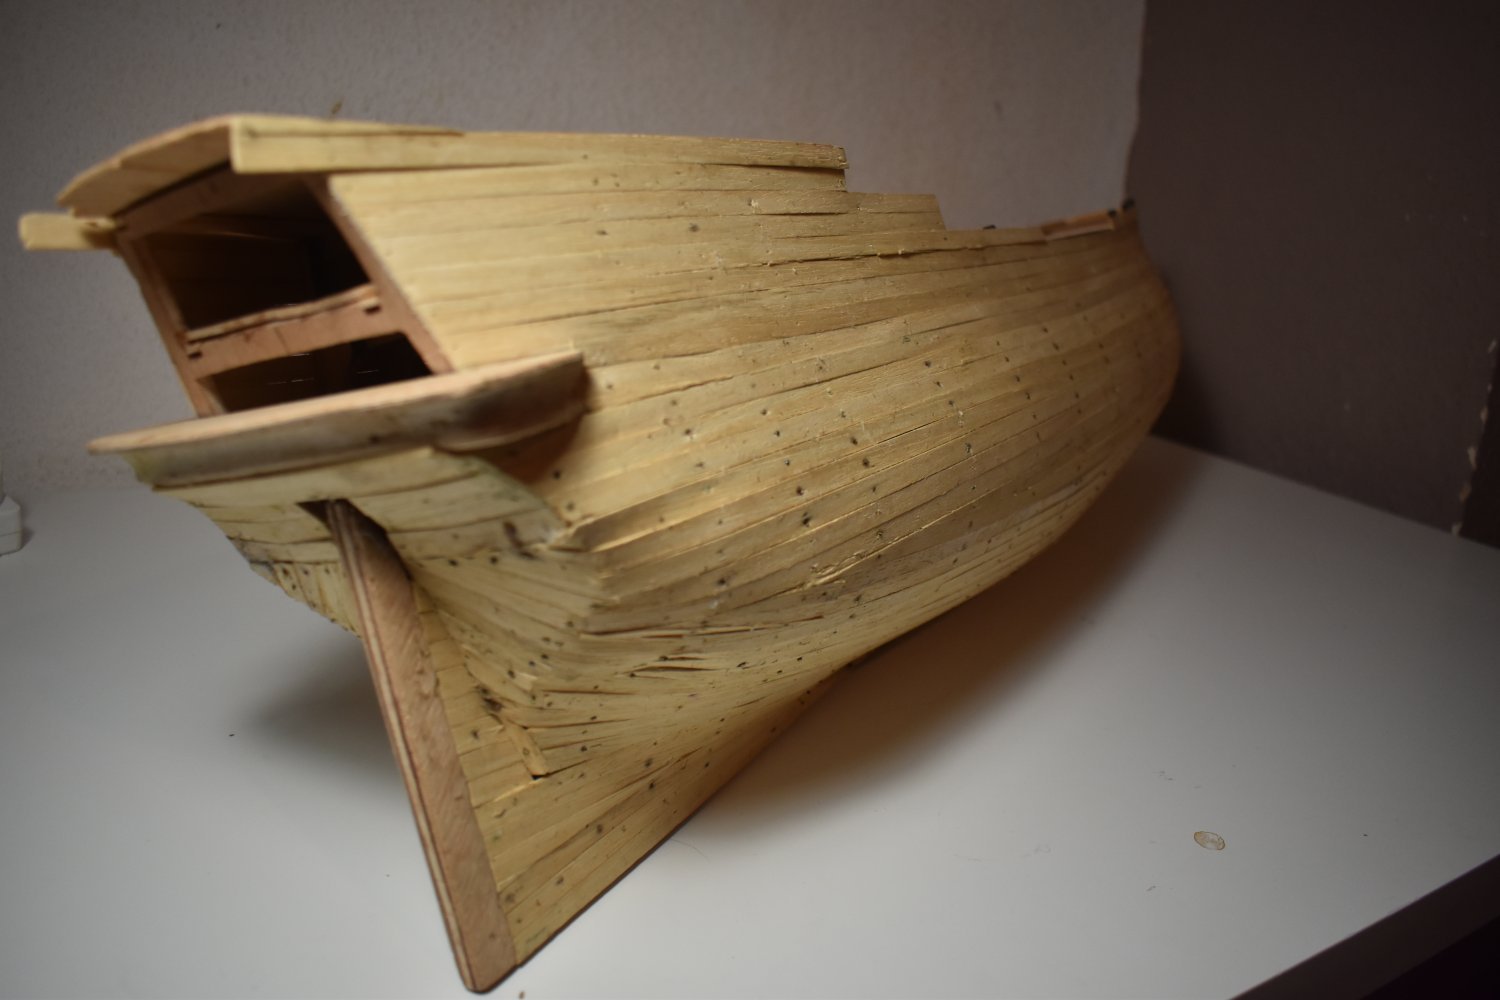
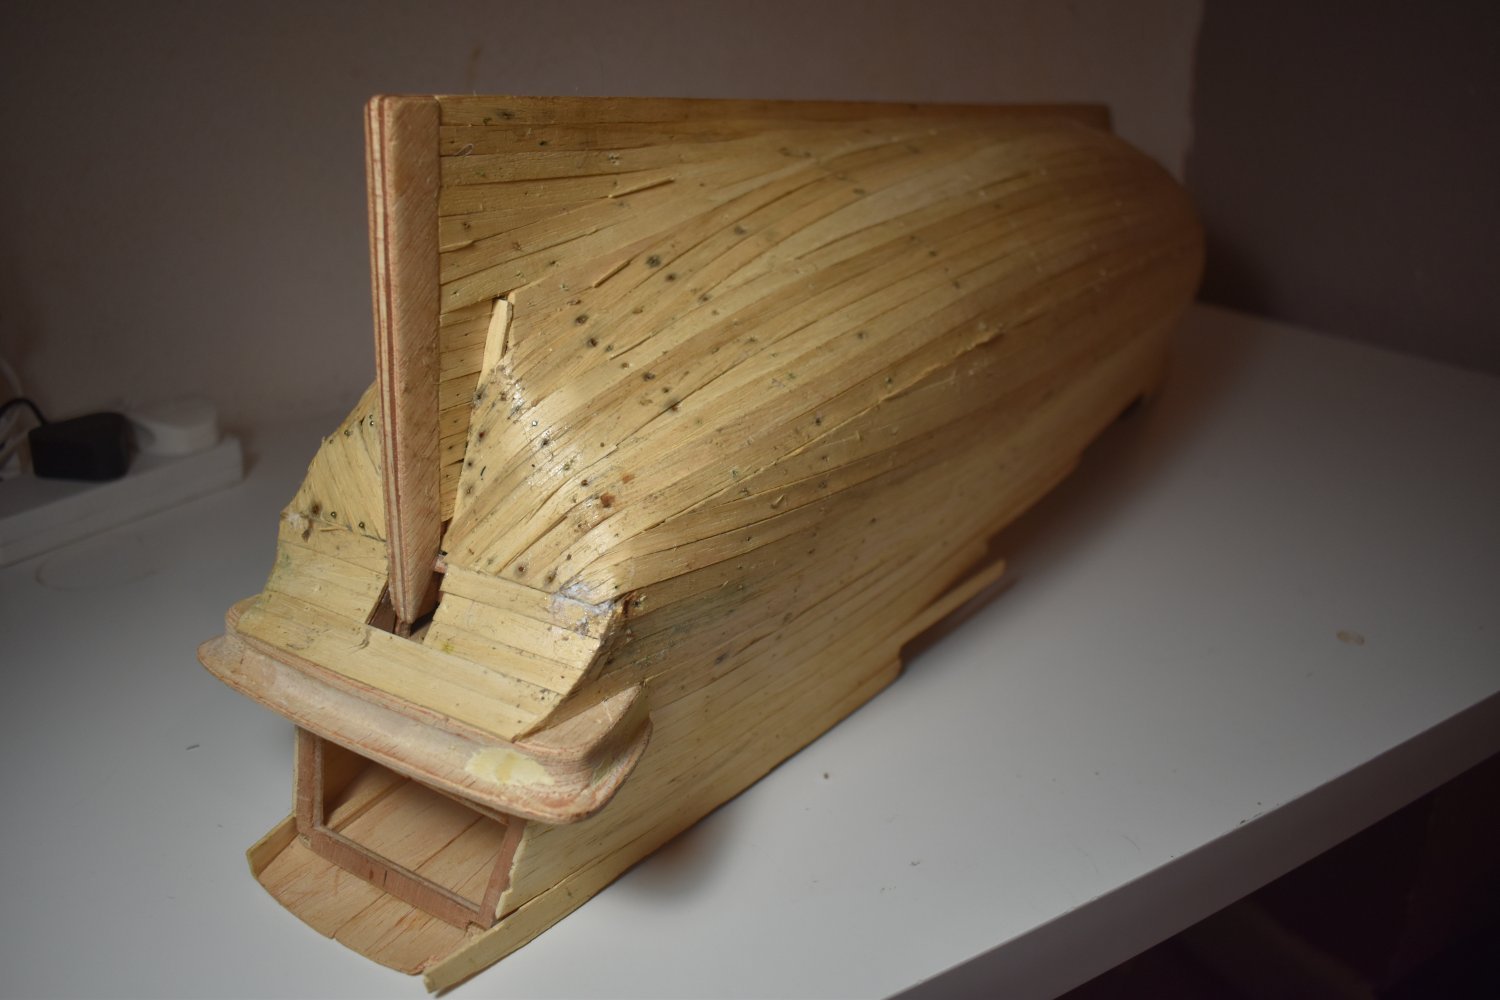
Not a full update, but I've about completed the planking. This is the unedited version - before sanding and filling in a couple of the gaps. I've taken half of the pins out already so you might notice some still. A couple of the planks are slightly damaged around the deck, but we'll see what we can do with them or whether they need to be replaced. It'll be interesting to have a before and after shot! https://www.instagram.com/byron_dockyard/