

MajorChaos
-
Posts
300 -
Joined
-
Last visited
Content Type
Profiles
Forums
Gallery
Events
Posts posted by MajorChaos
-
-
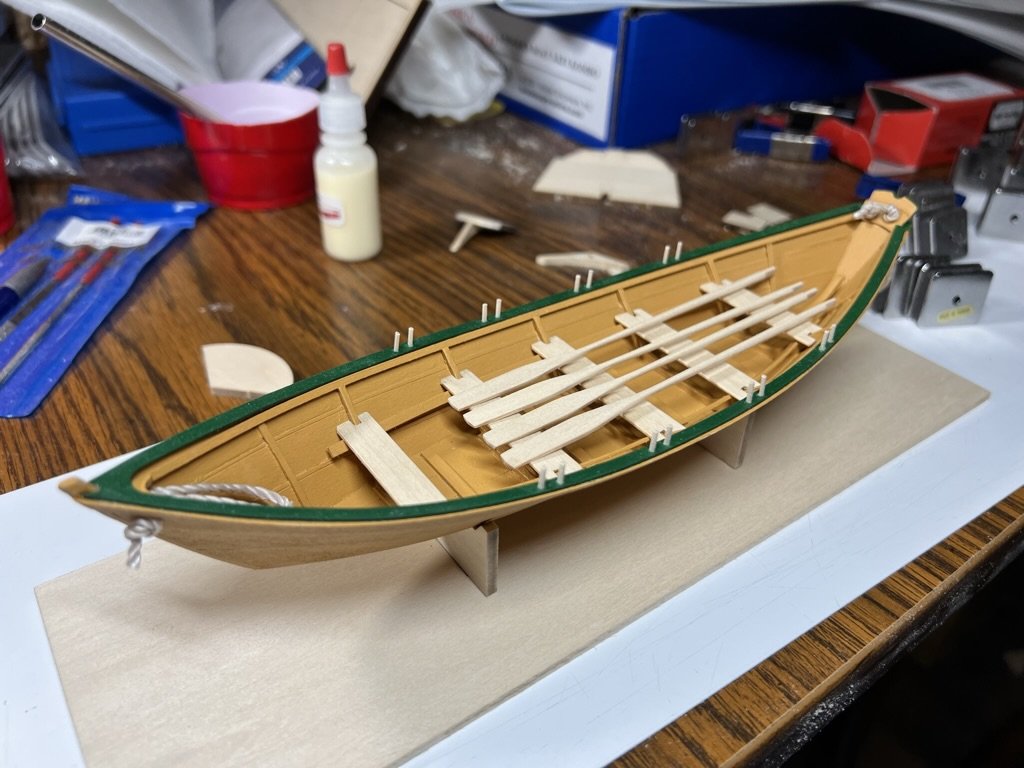
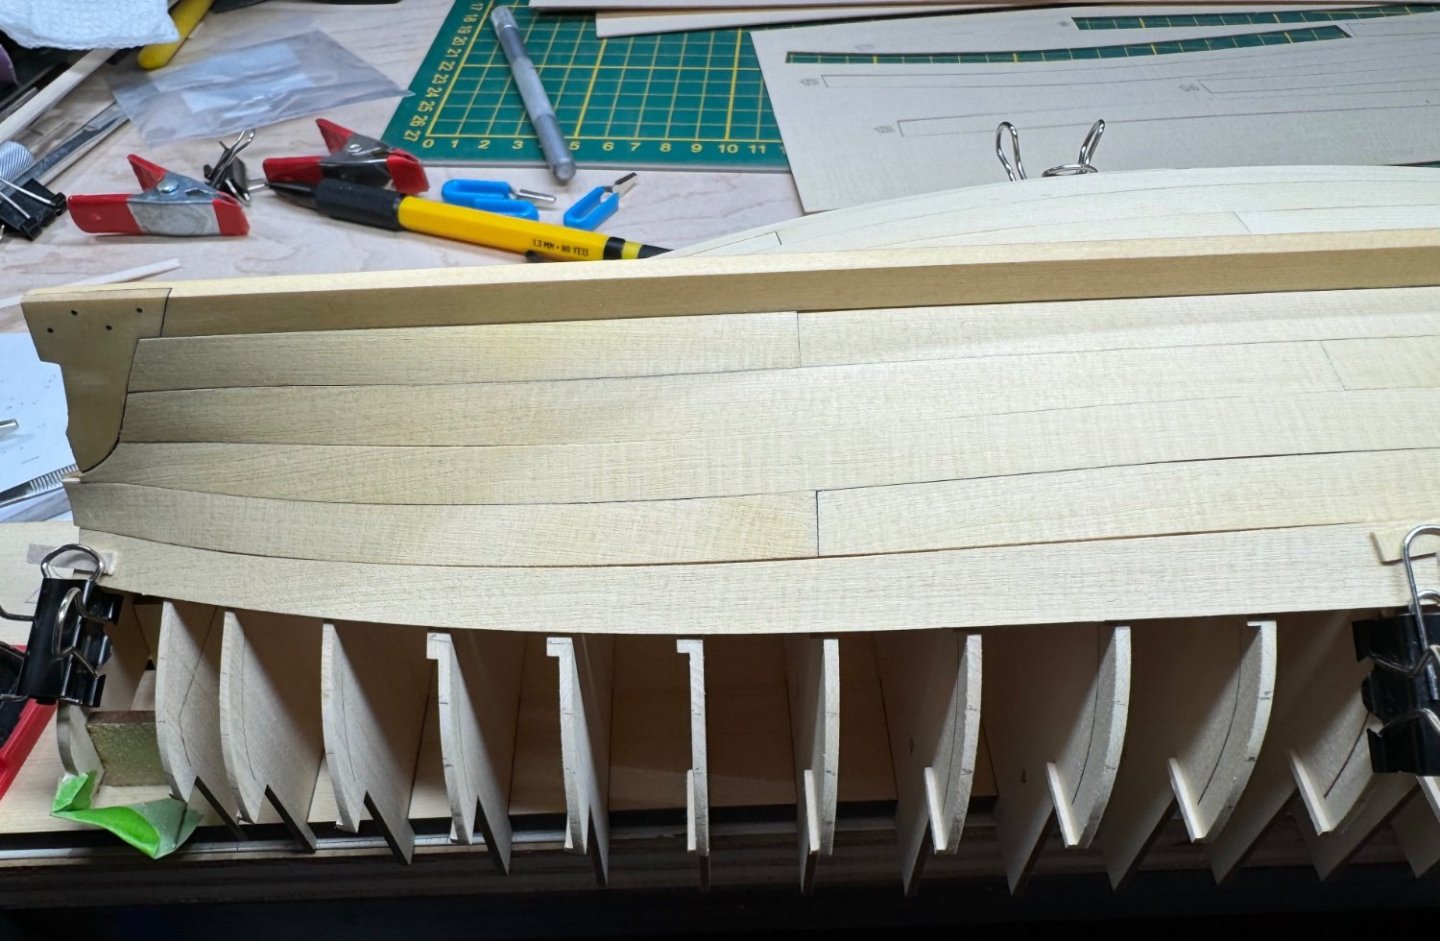
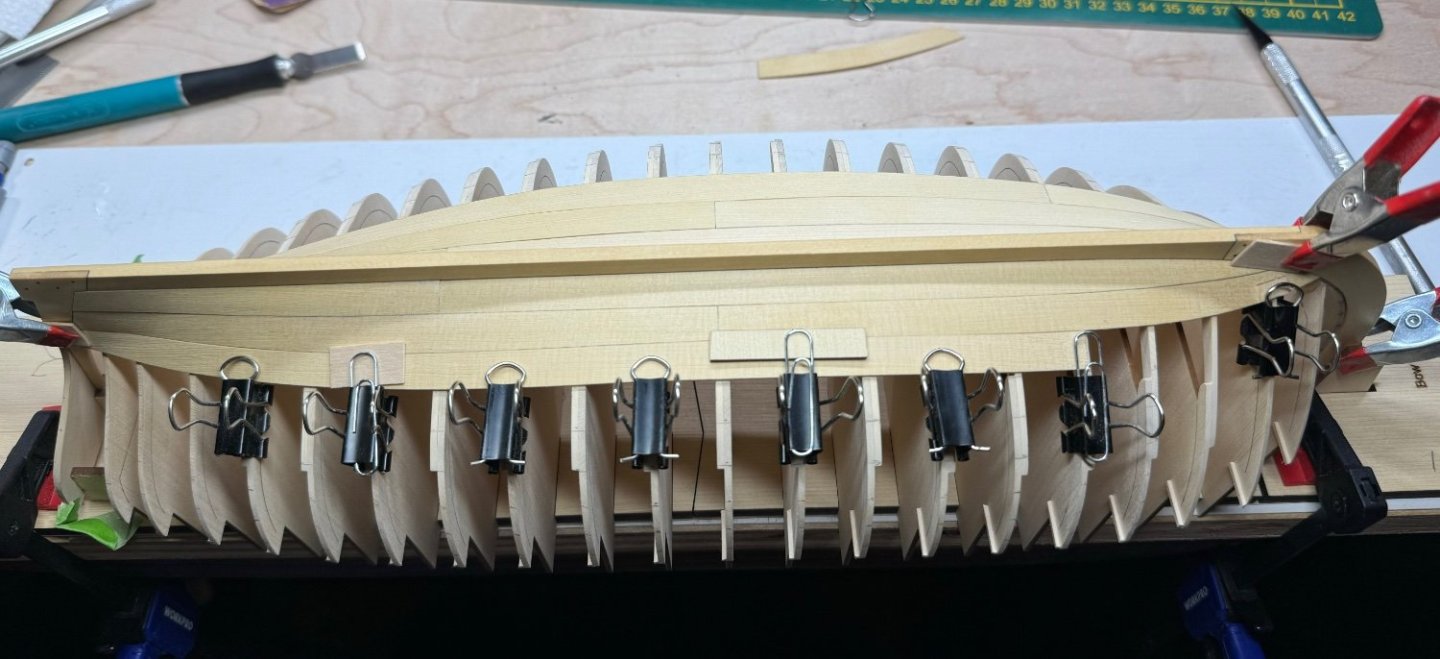
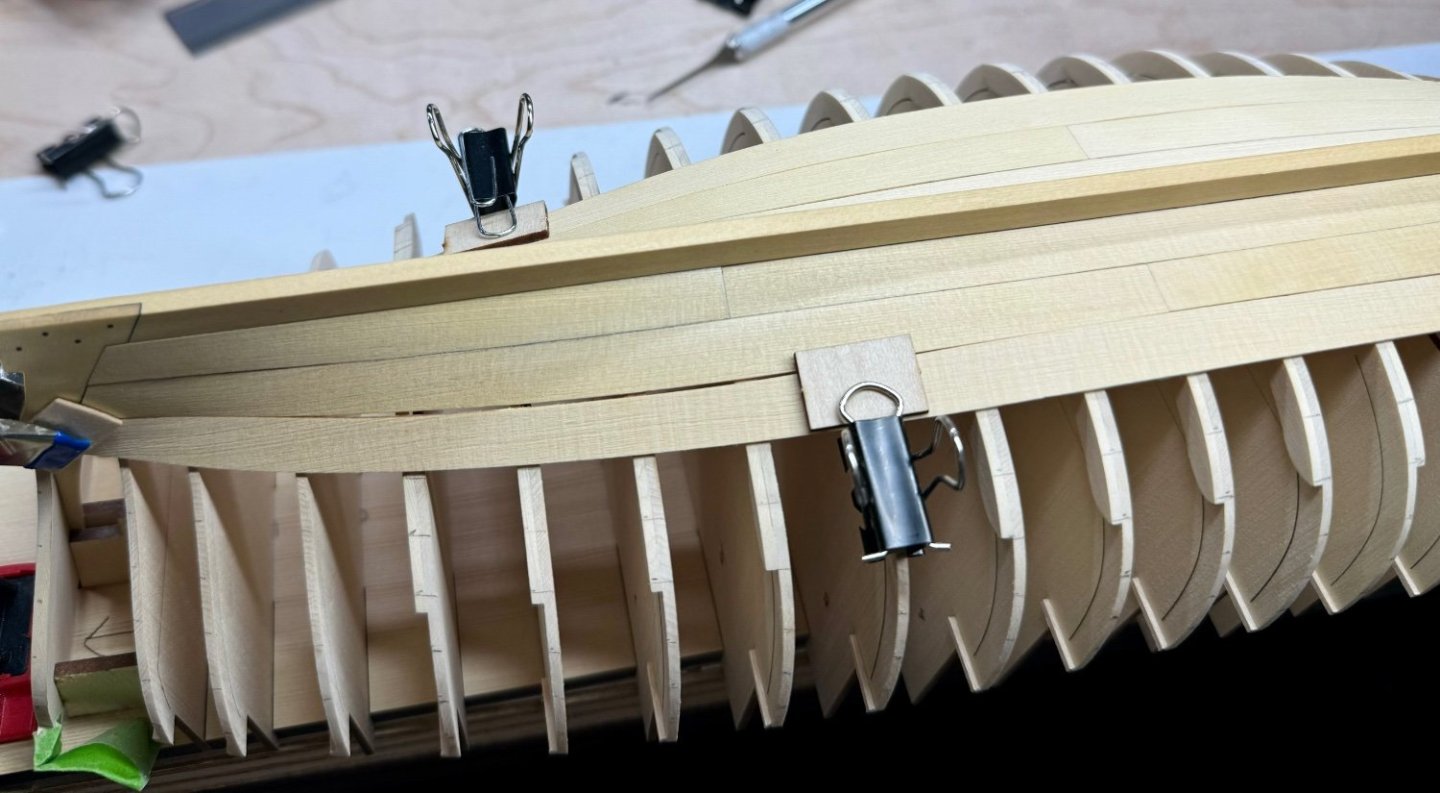
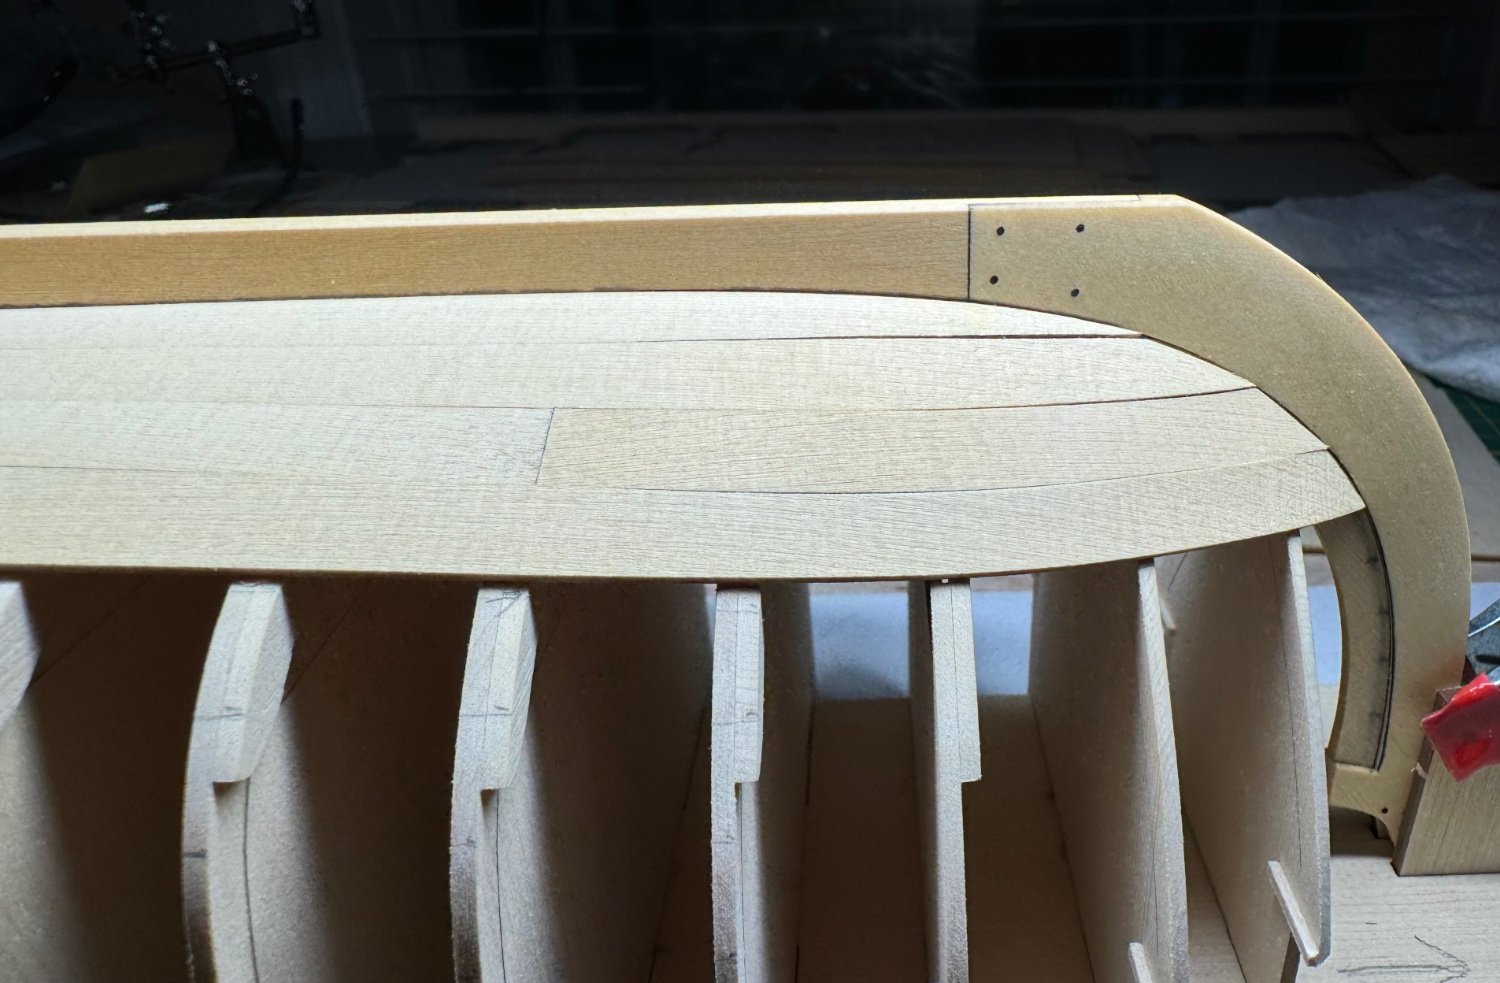
I made it stay. It looks good. 12-2 complete.
I’ve started training 13-1.


- Diver and JacquesCousteau
-
 2
2
-
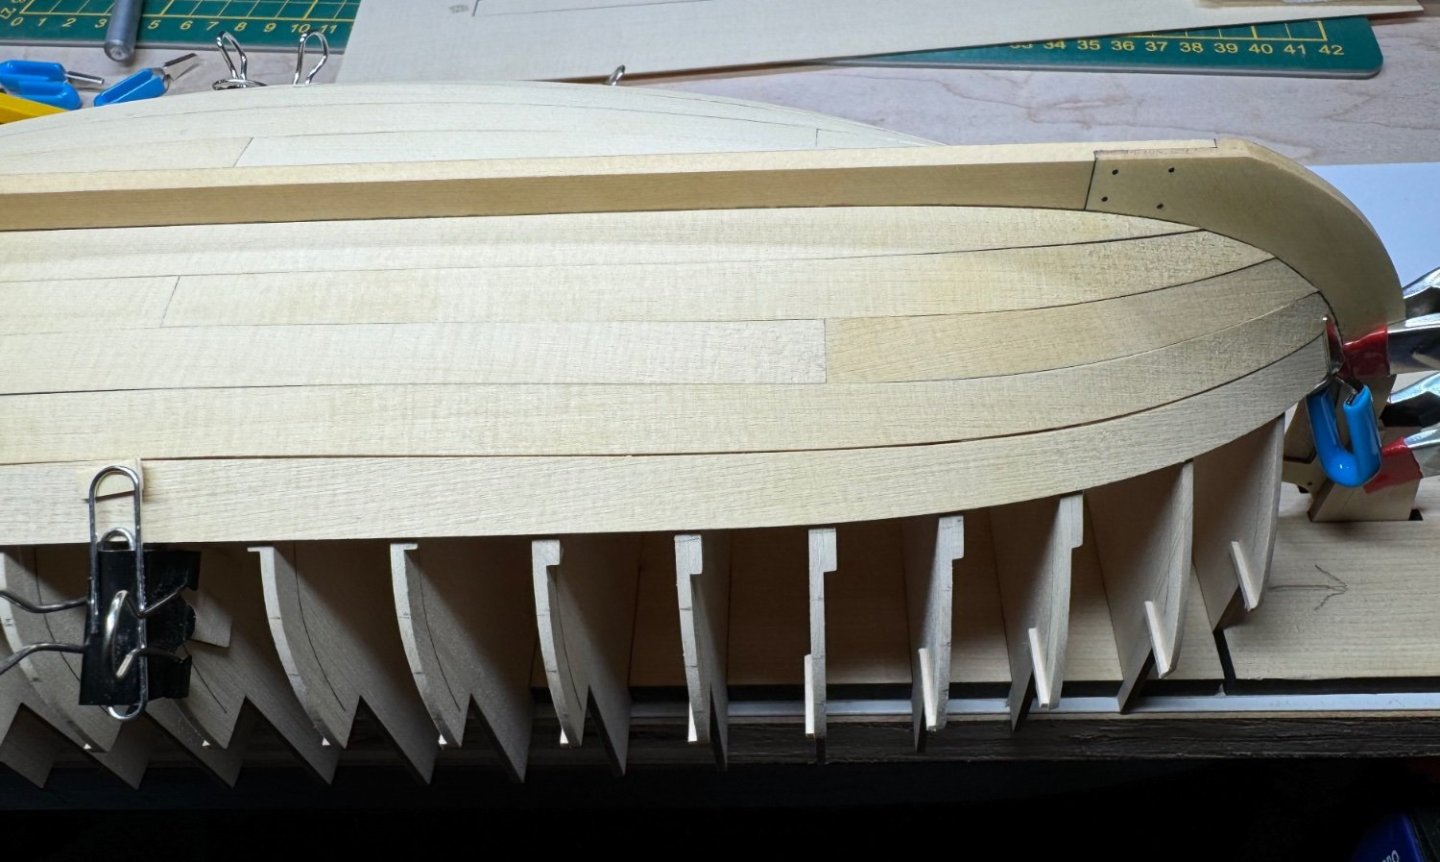
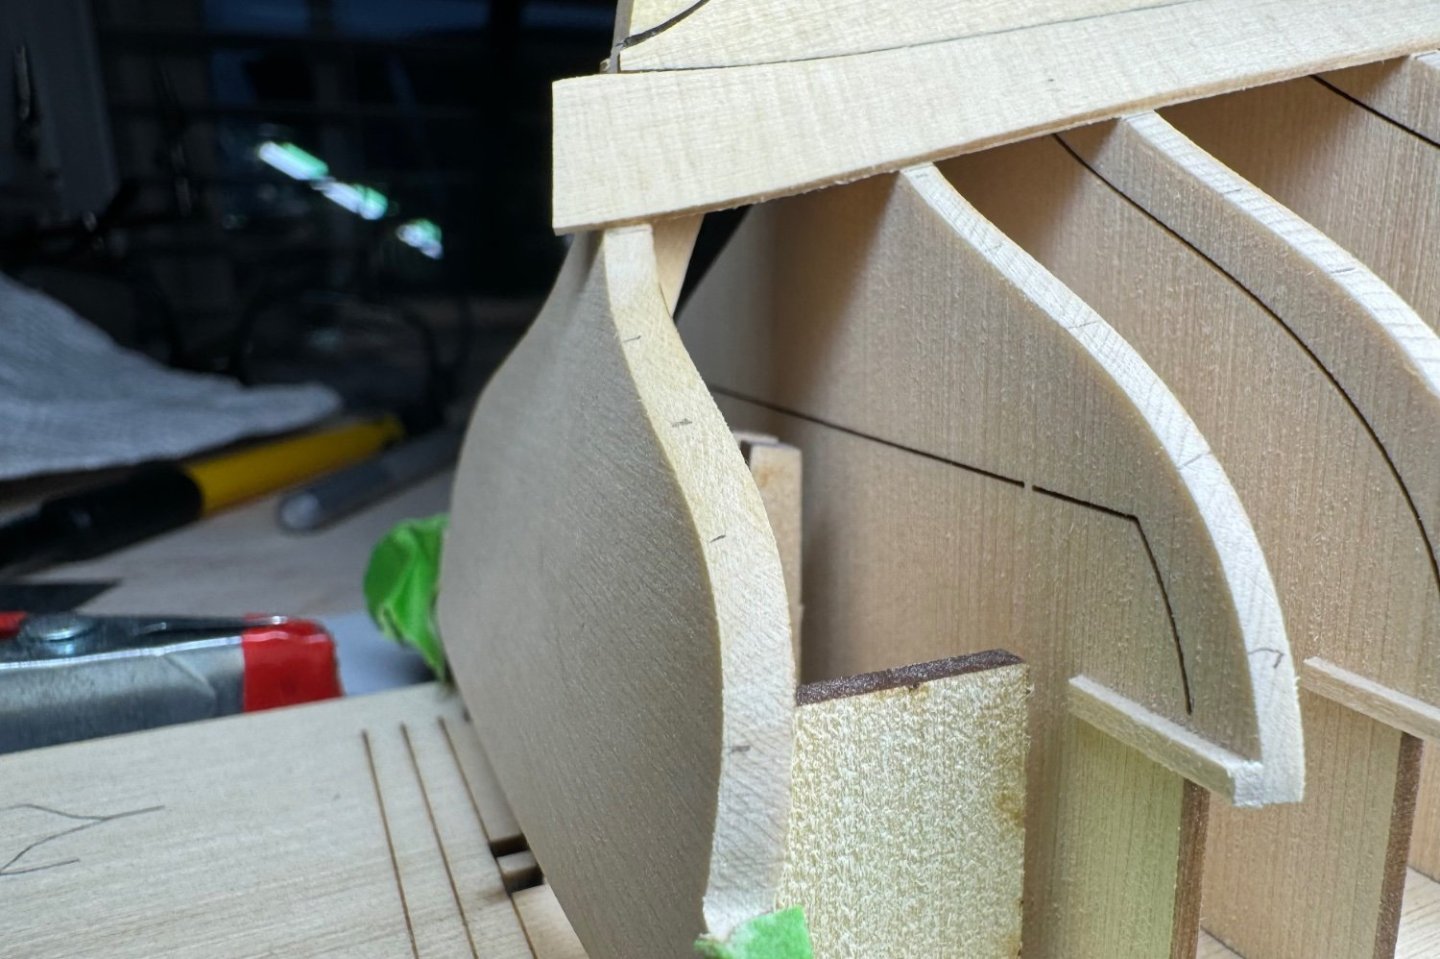
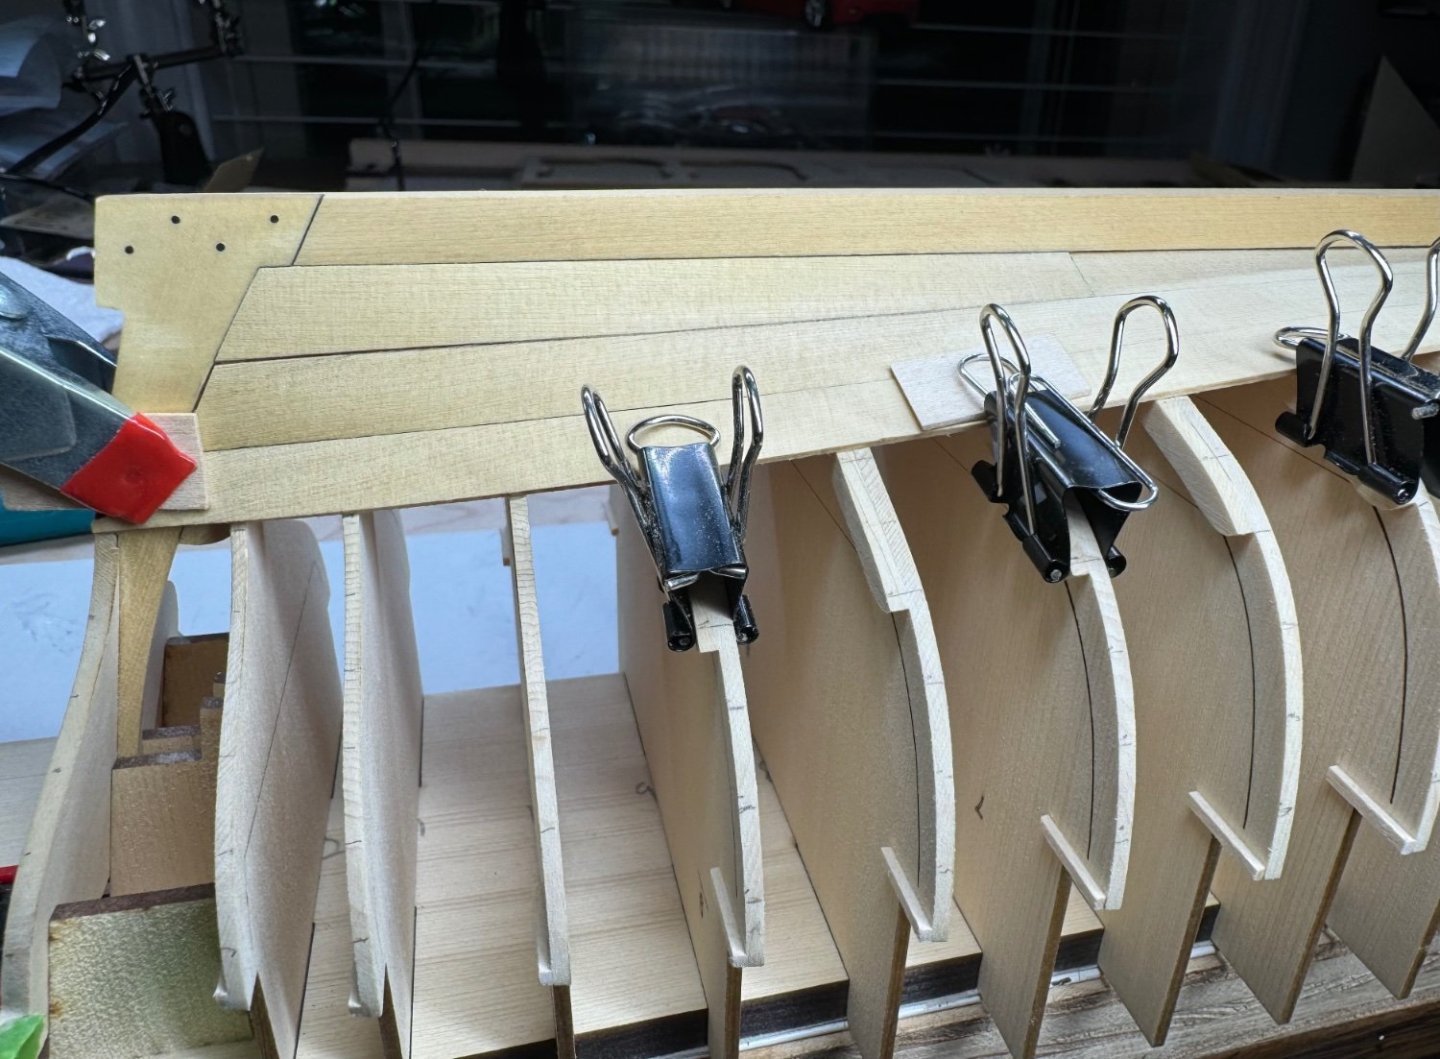
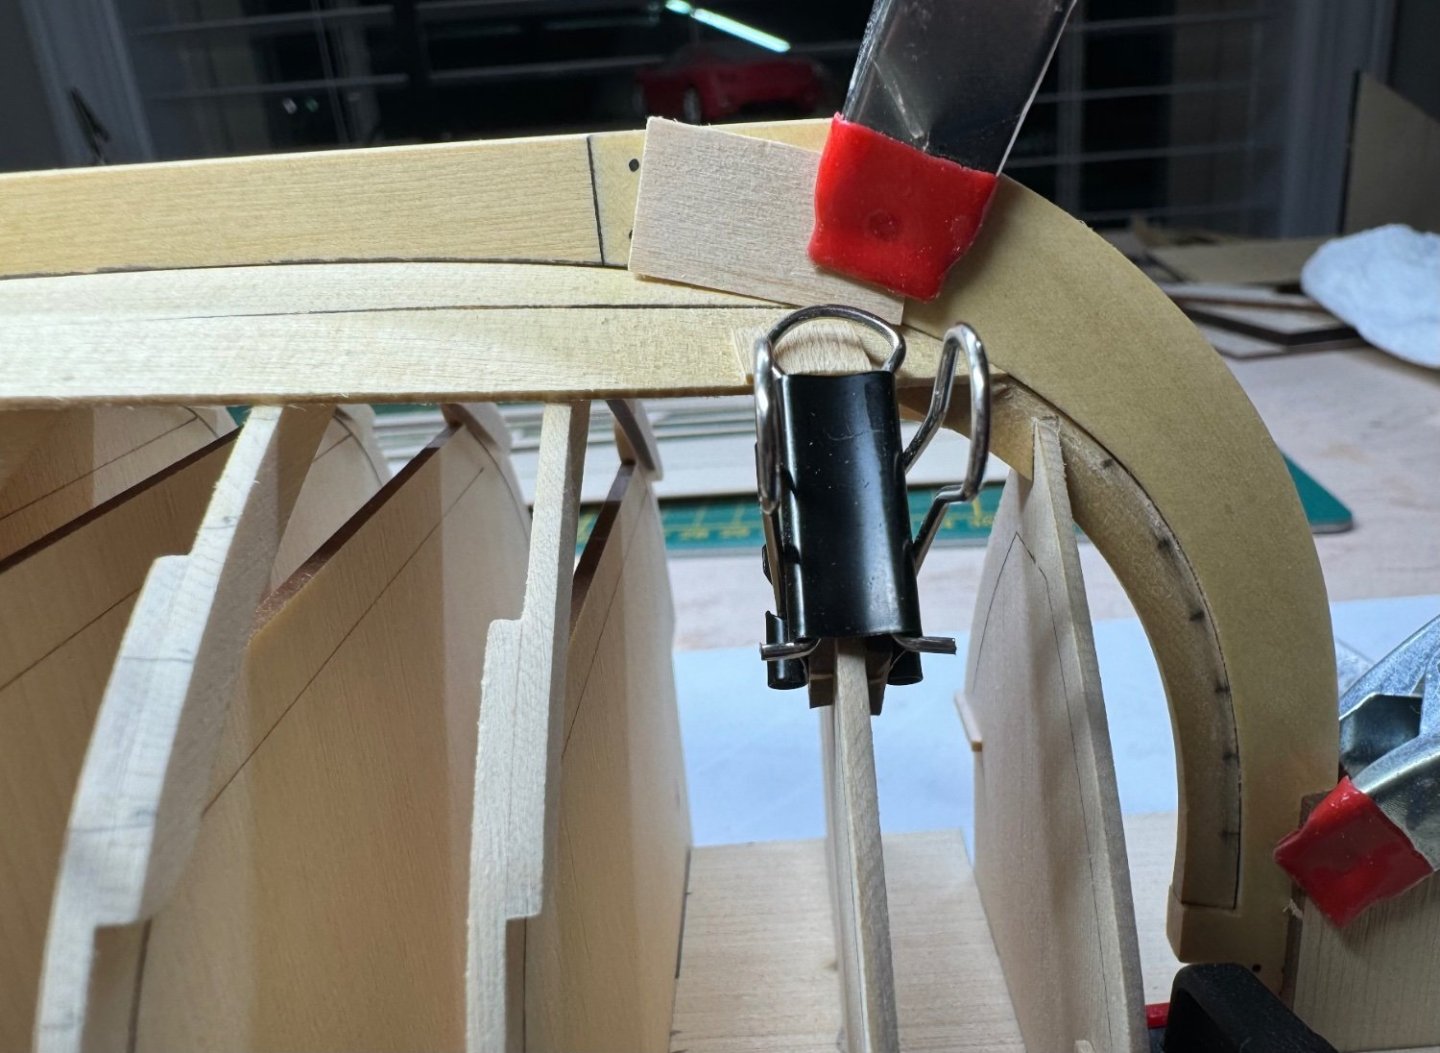
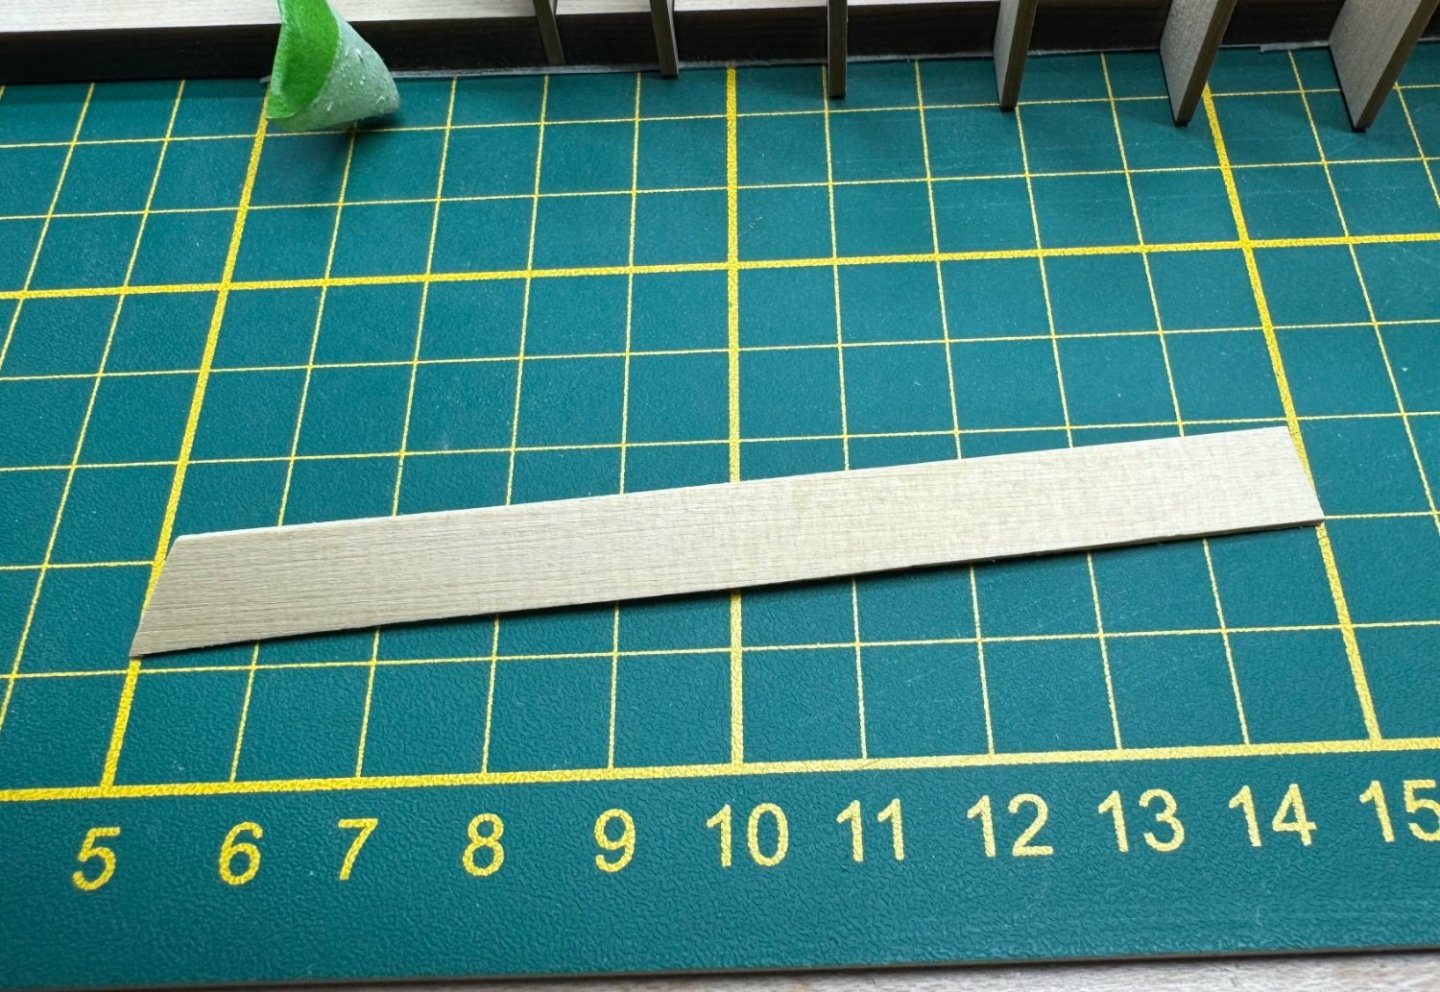
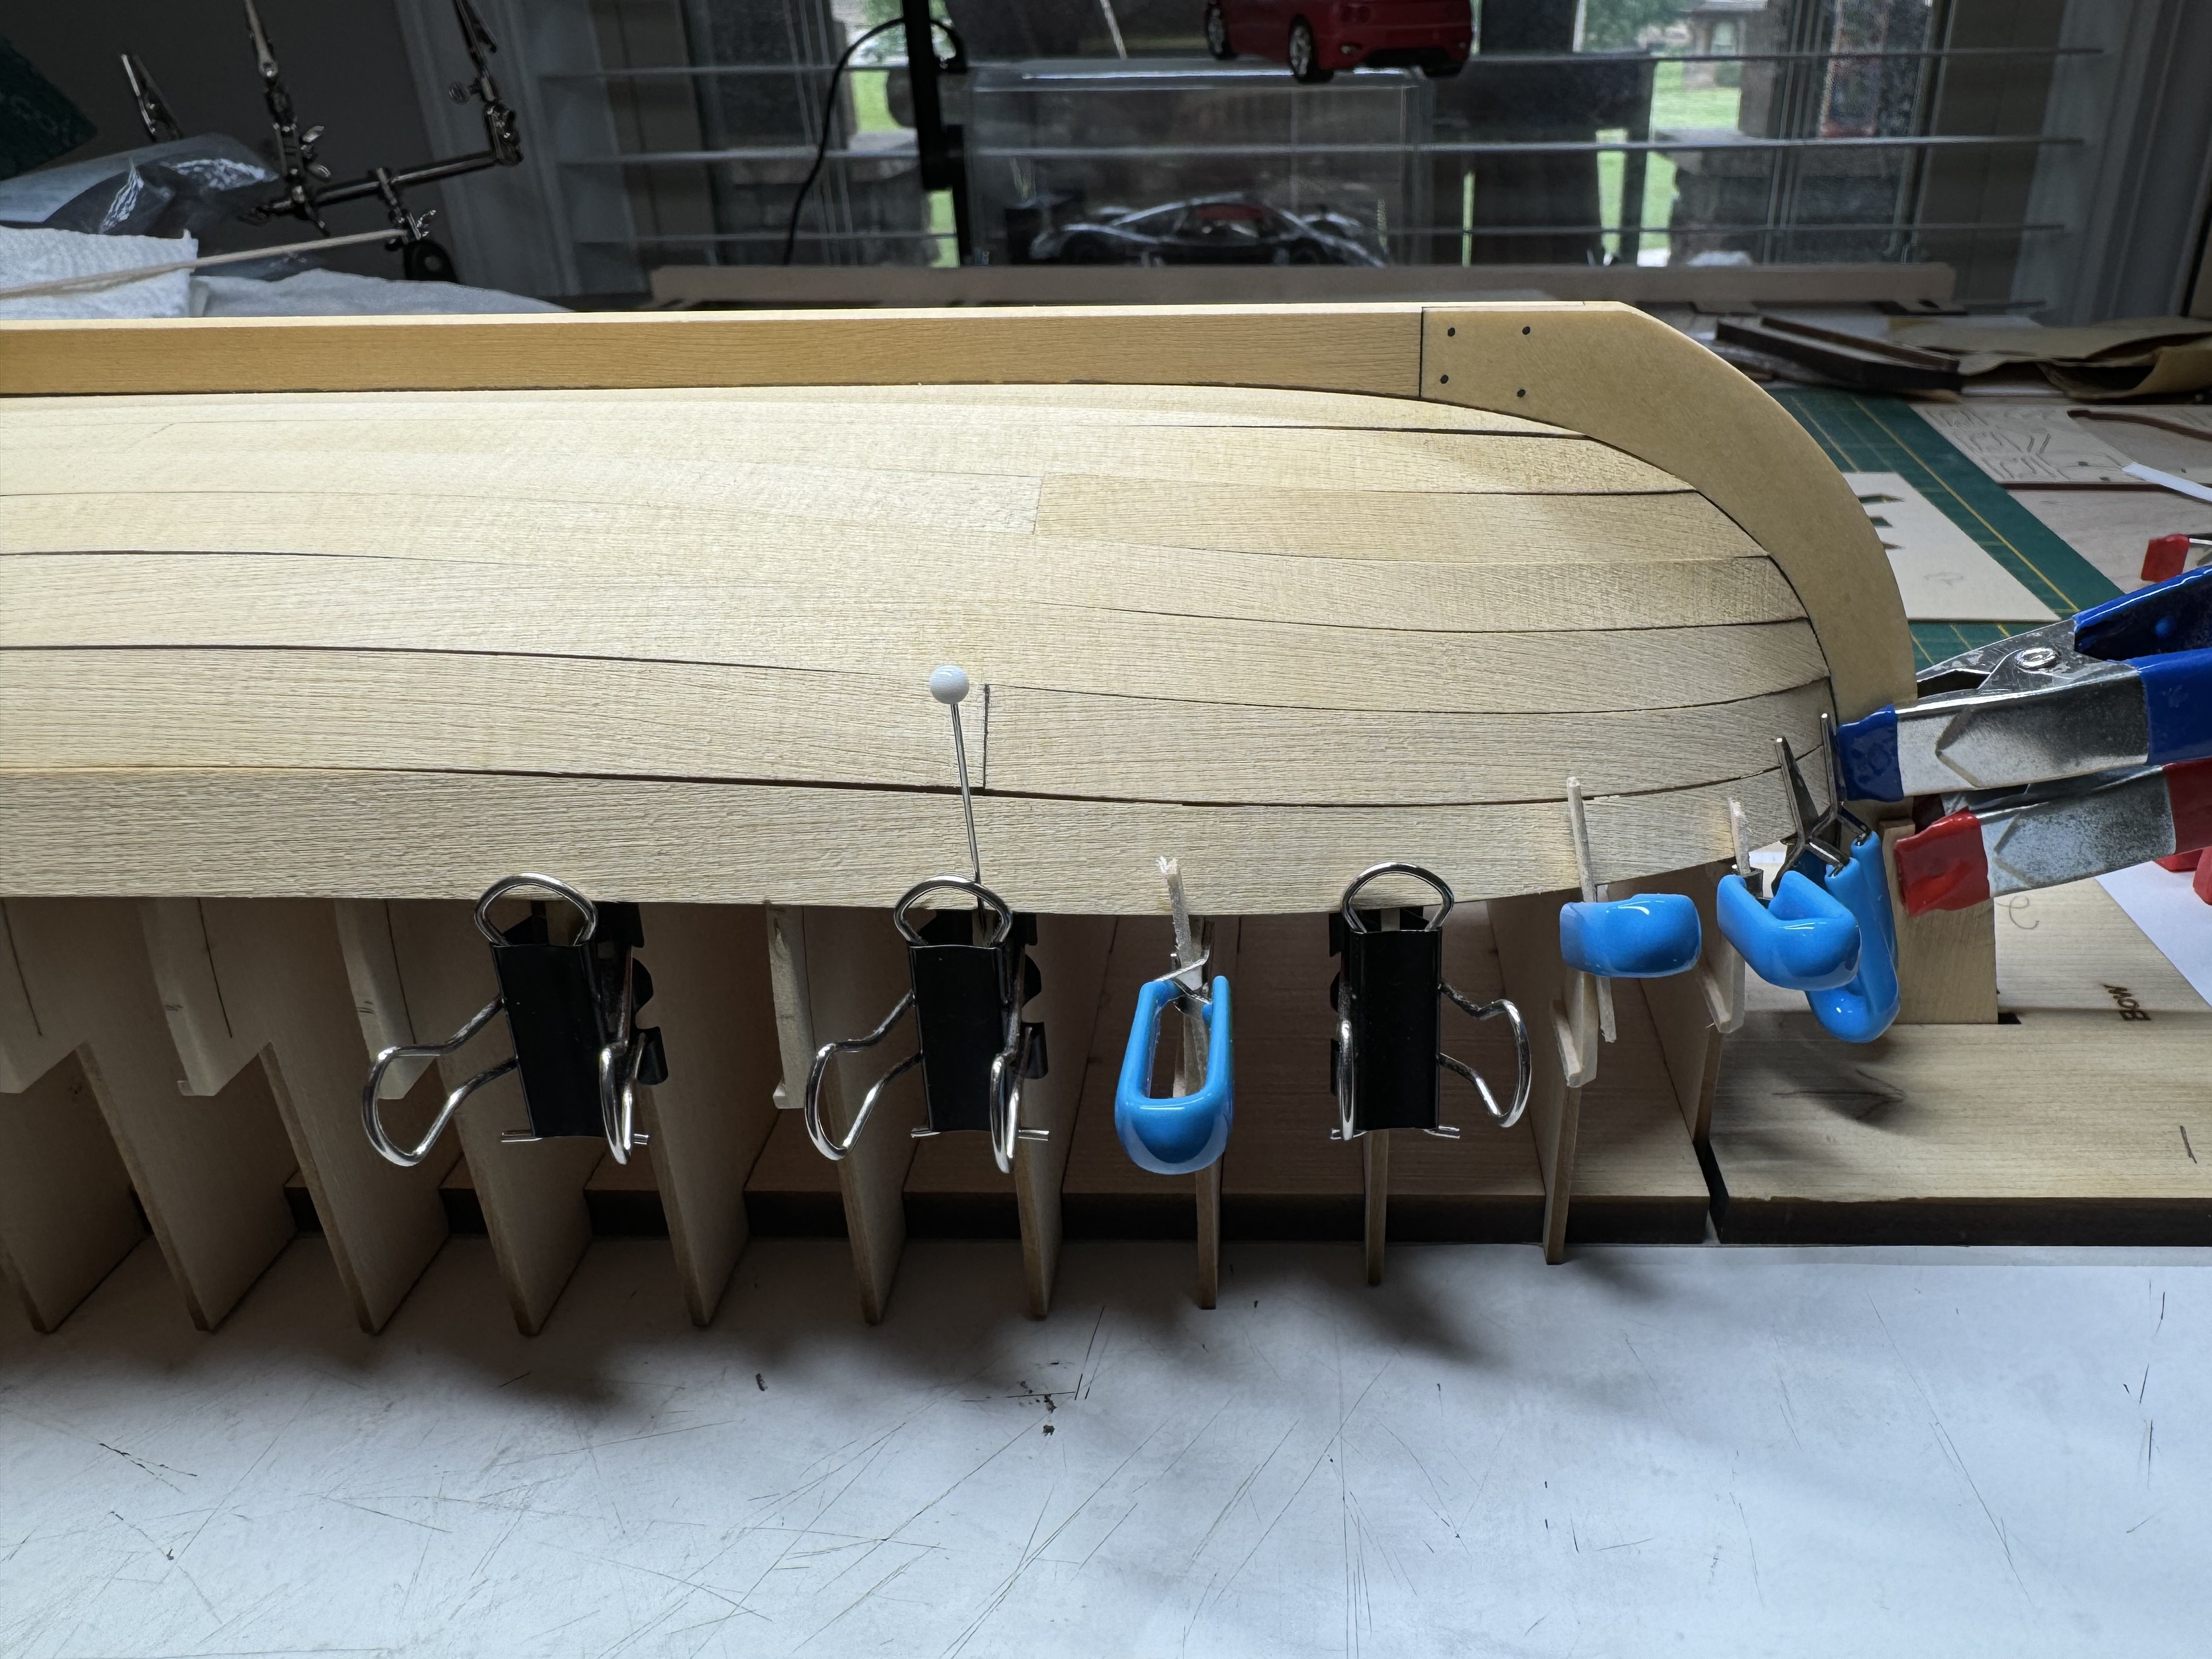
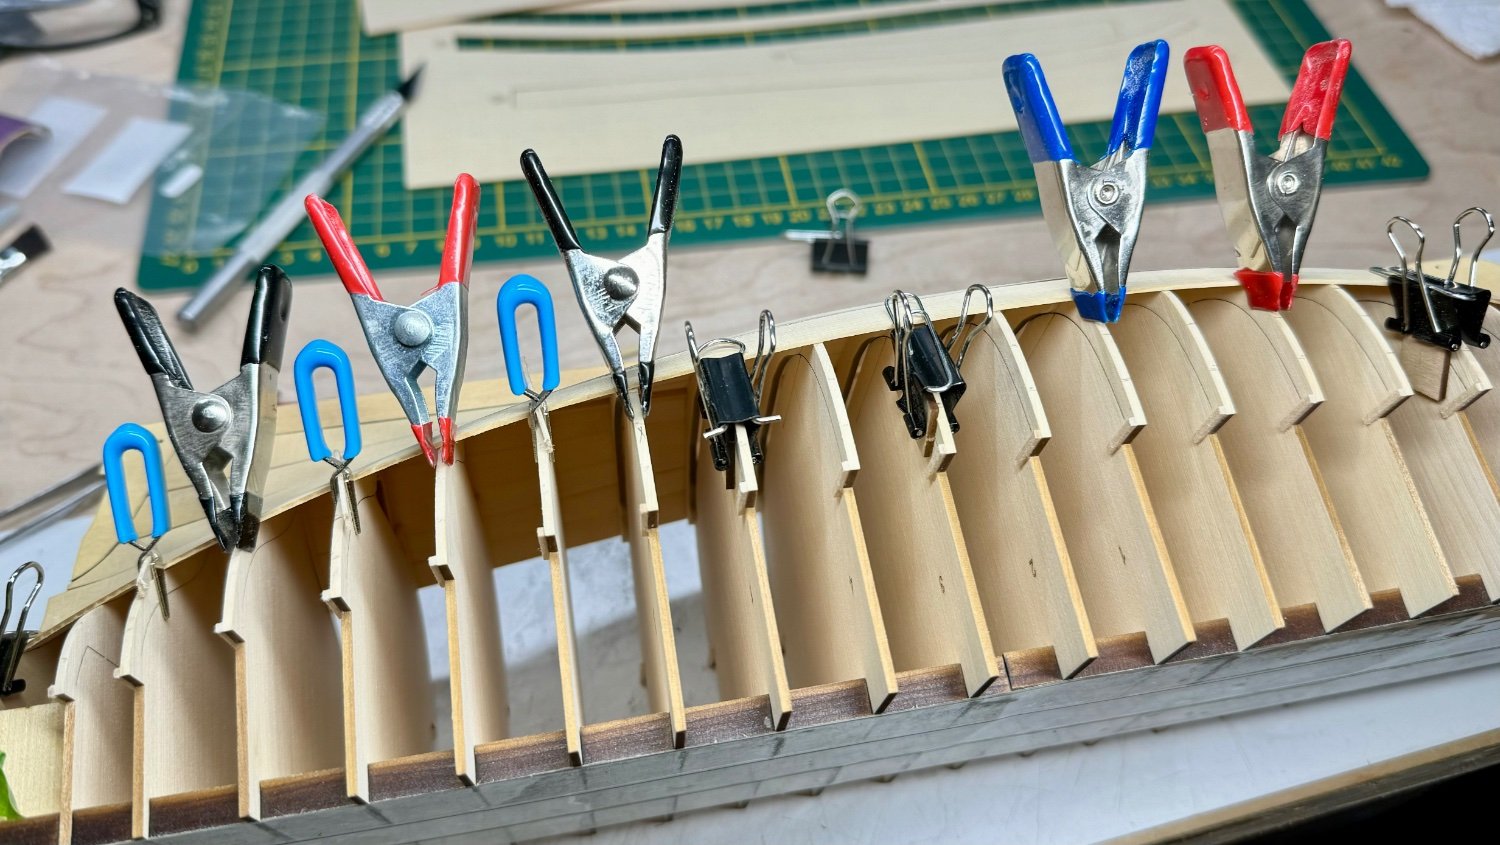
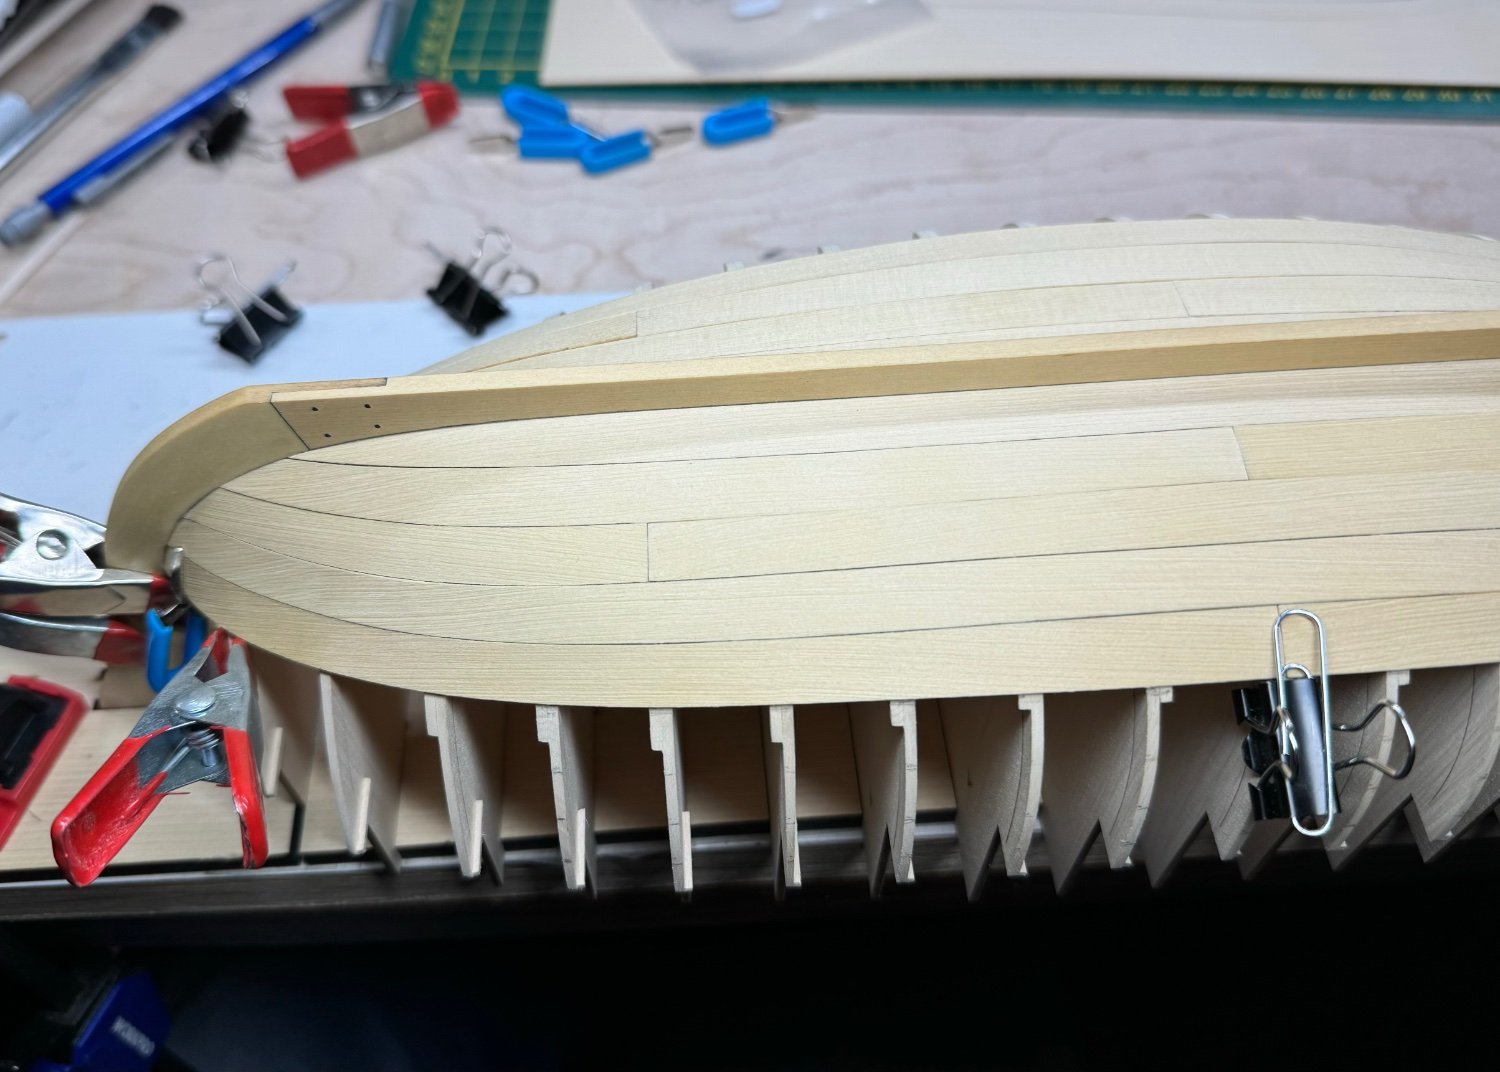
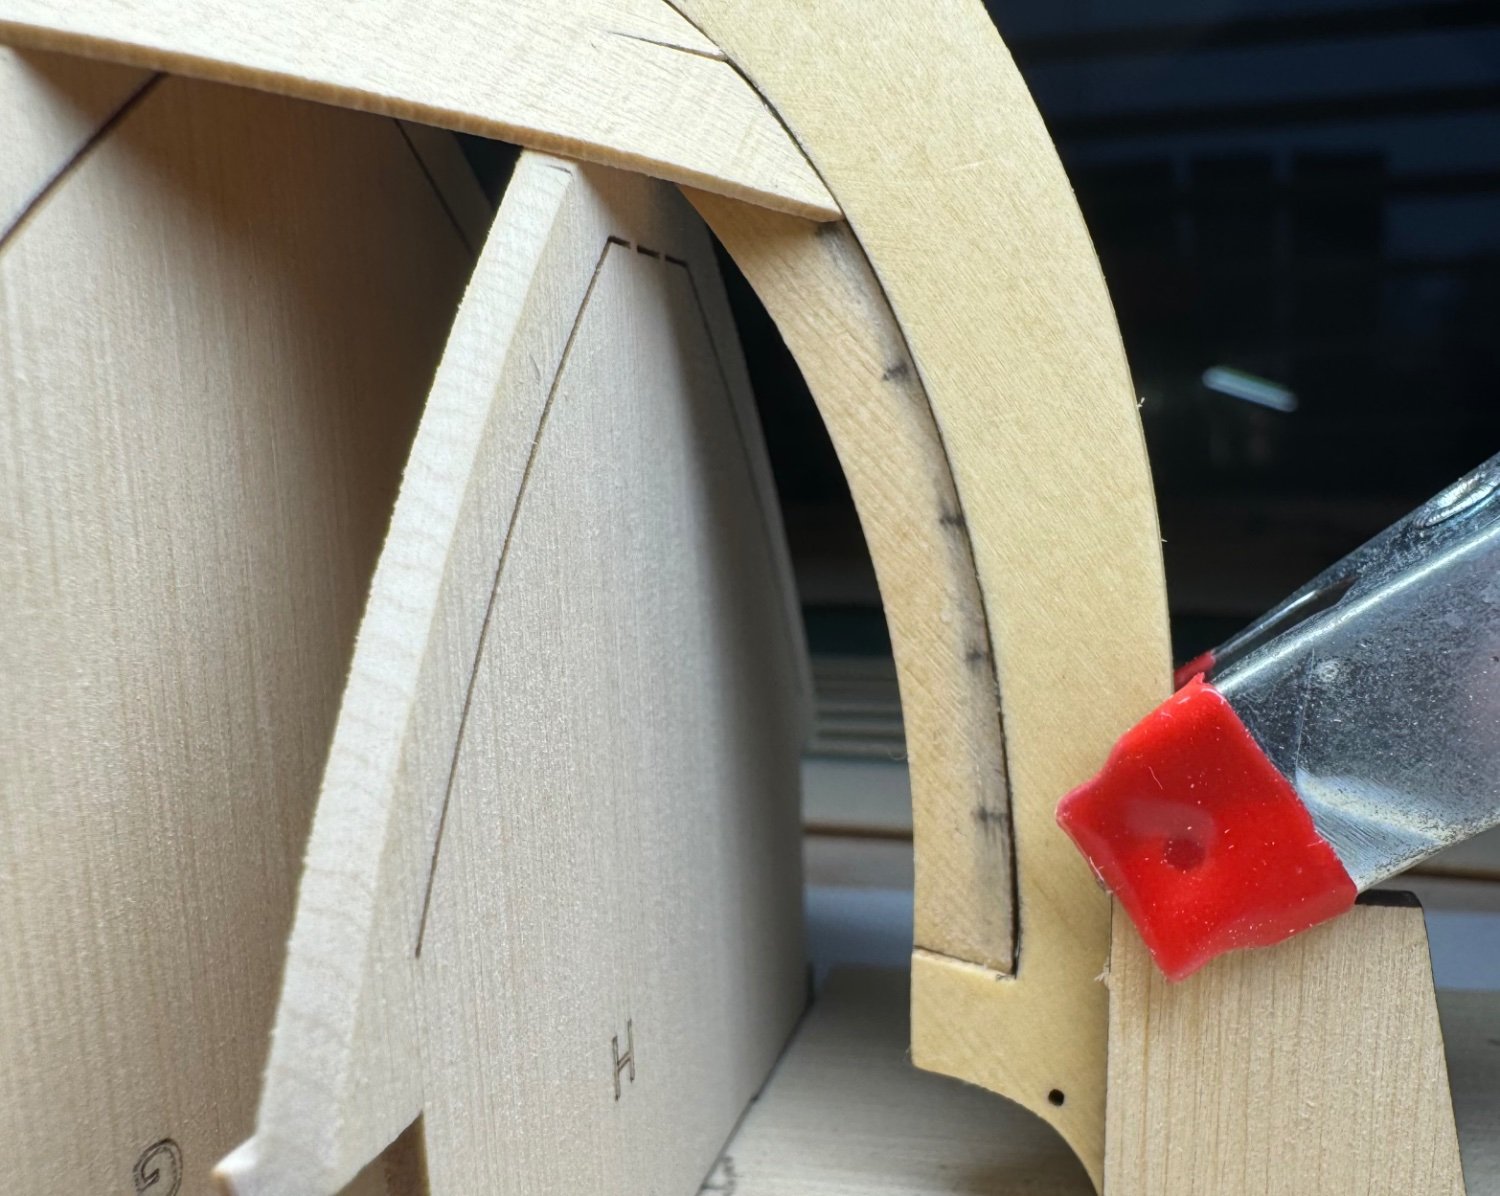
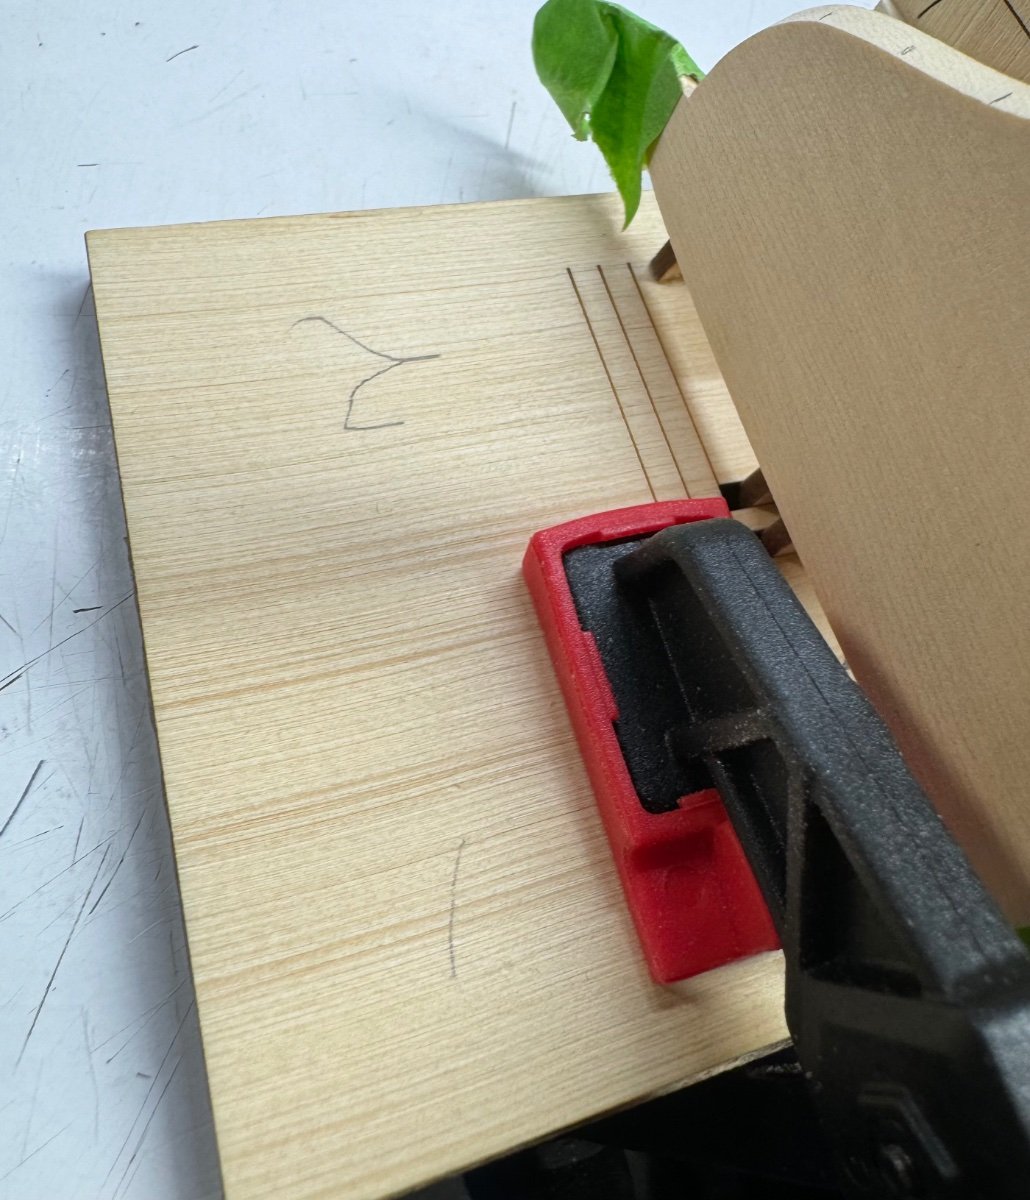
Well, 12-2 took just a bit longer than I planned.
Because of all the curves and bends for this one, I glued the bottom side and left the top run loose. Glued on both ends. I’ll pull it down on the top to shape it. I’ve tried water and heat, I just can’t make this one stay formed. I tried to use super glue and I clearly don’t have the technique down for that. The Titebond works good the way I work, it gives me just a bit longer work time and holds quick when not loaded.
Sometimes life just doesn’t cooperate.
I have learned if I don’t want to do something I shouldn’t force myself. Parts of this wonderful kit looks nice with my work and other parts look like I should take a belt sander to the whole thing. I’m learning and having fun.
Let’s see if I can string a few days together with work on the Medway.
Thank you for the likes and the follows in this project.

- Diver, JacquesCousteau, robert952 and 2 others
-
5
-
The nails in my kit were big as pencils! Looking good!
- robert952 and SiriusVoyager
-
2
-
I’m still here. I’m getting back to fixing plank 12-1. After being away from it and looking it over, I’m making a mess of it. Slowing getting the edges back down, I had to clean the up some, just short of taking the plank off.
I’ve got a plan after I get it off the board to secure some stuff better.
Life and work has been kickin my butt.

-
Its looking great!
I did the same thing with the extra cut, I made patches to fill it in. I wonder how many OcCre boats are built with this mistake. It was very easy to miss.
-
-
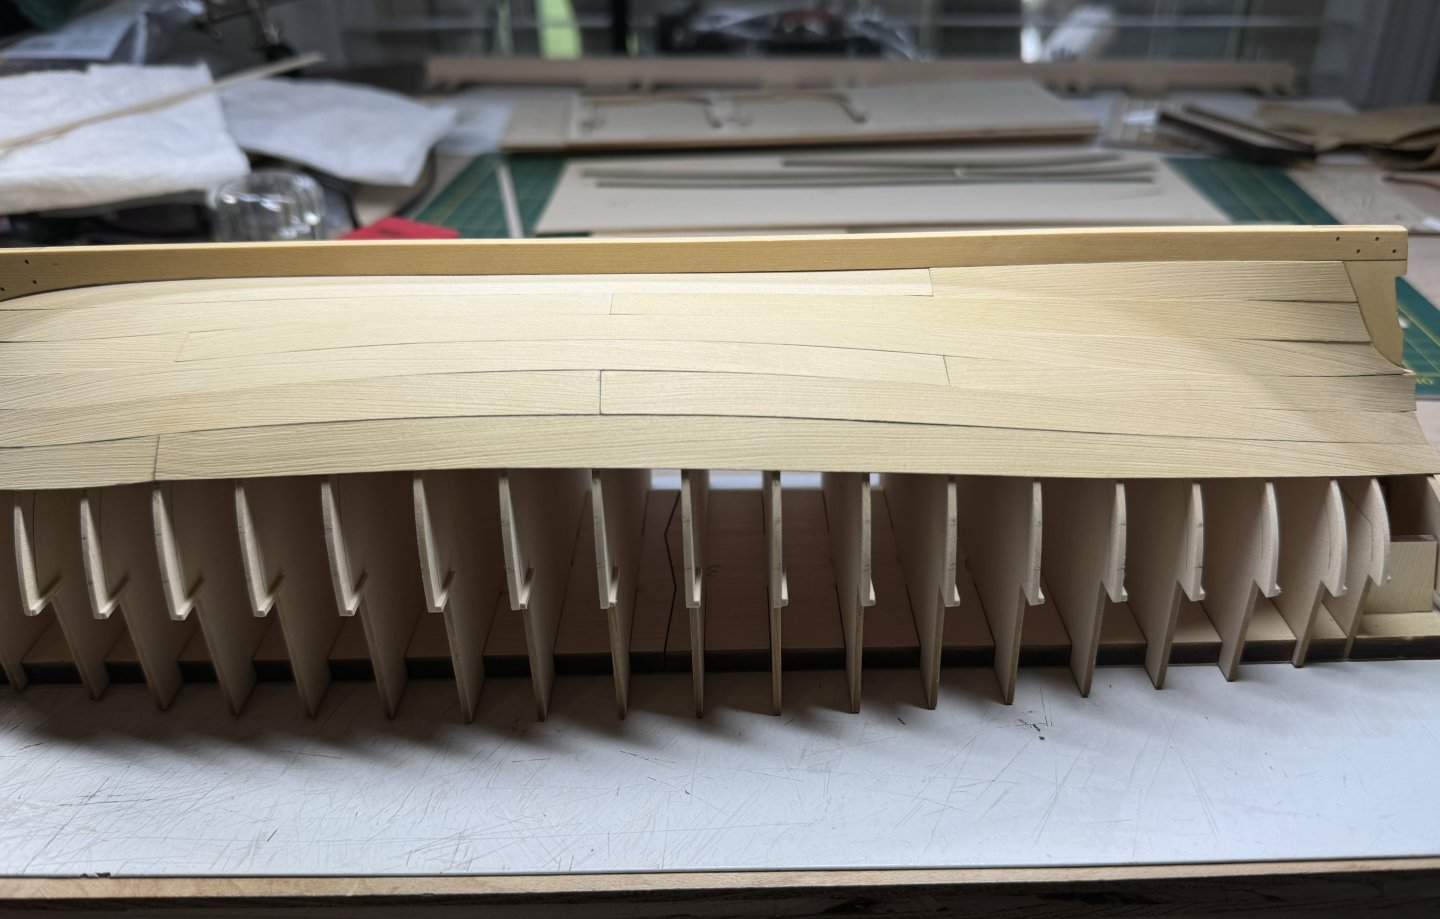
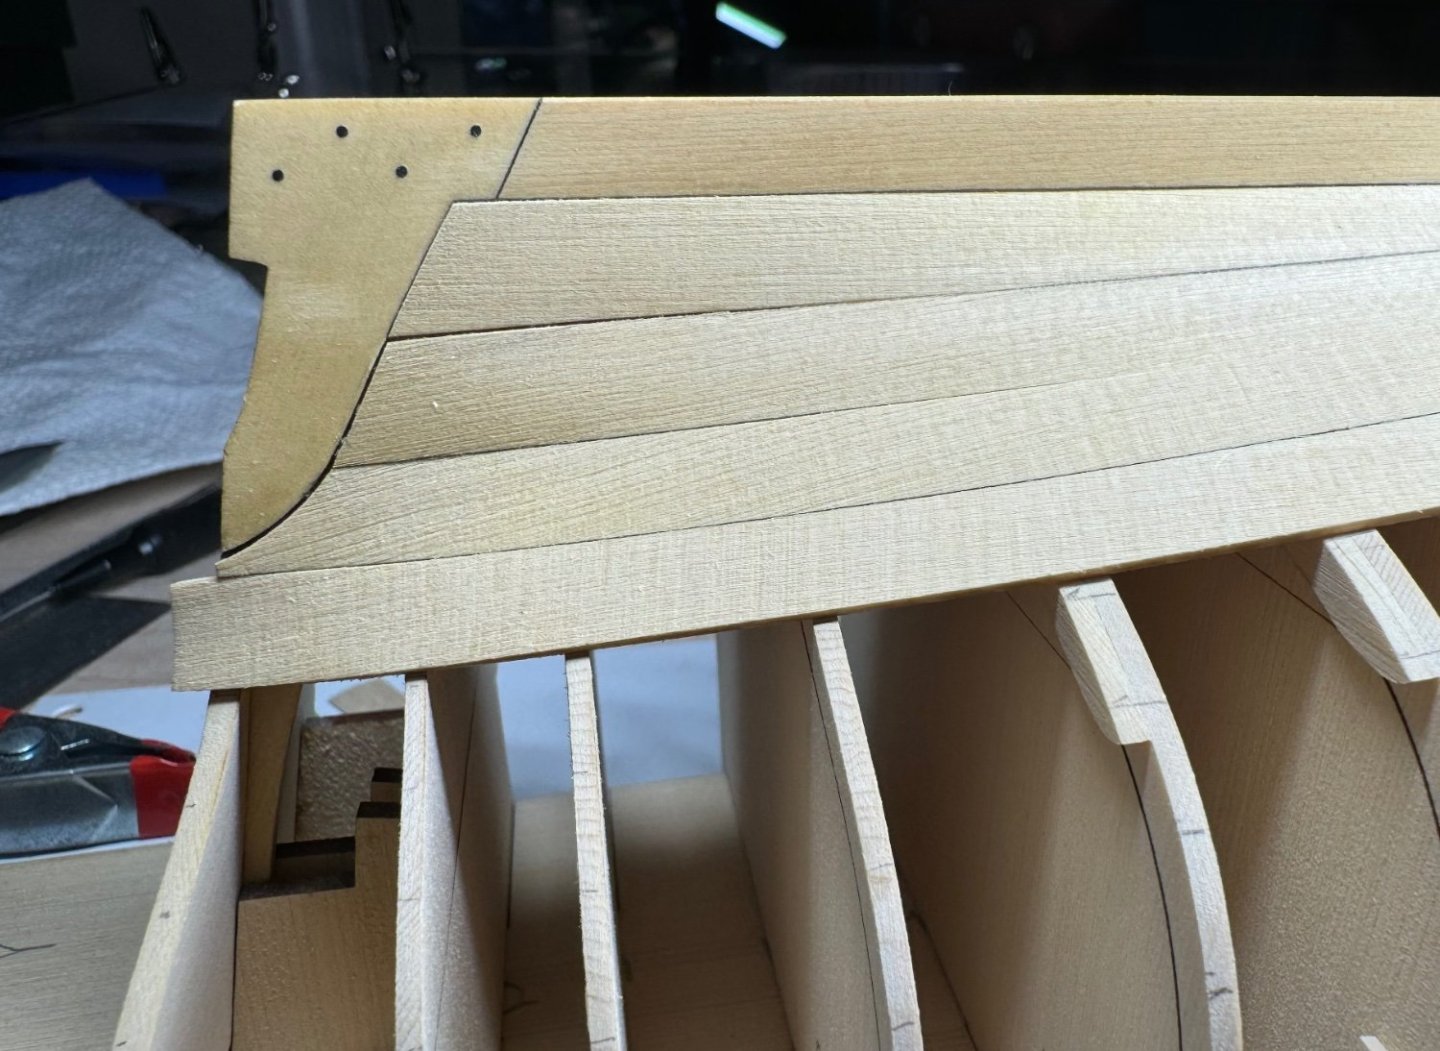
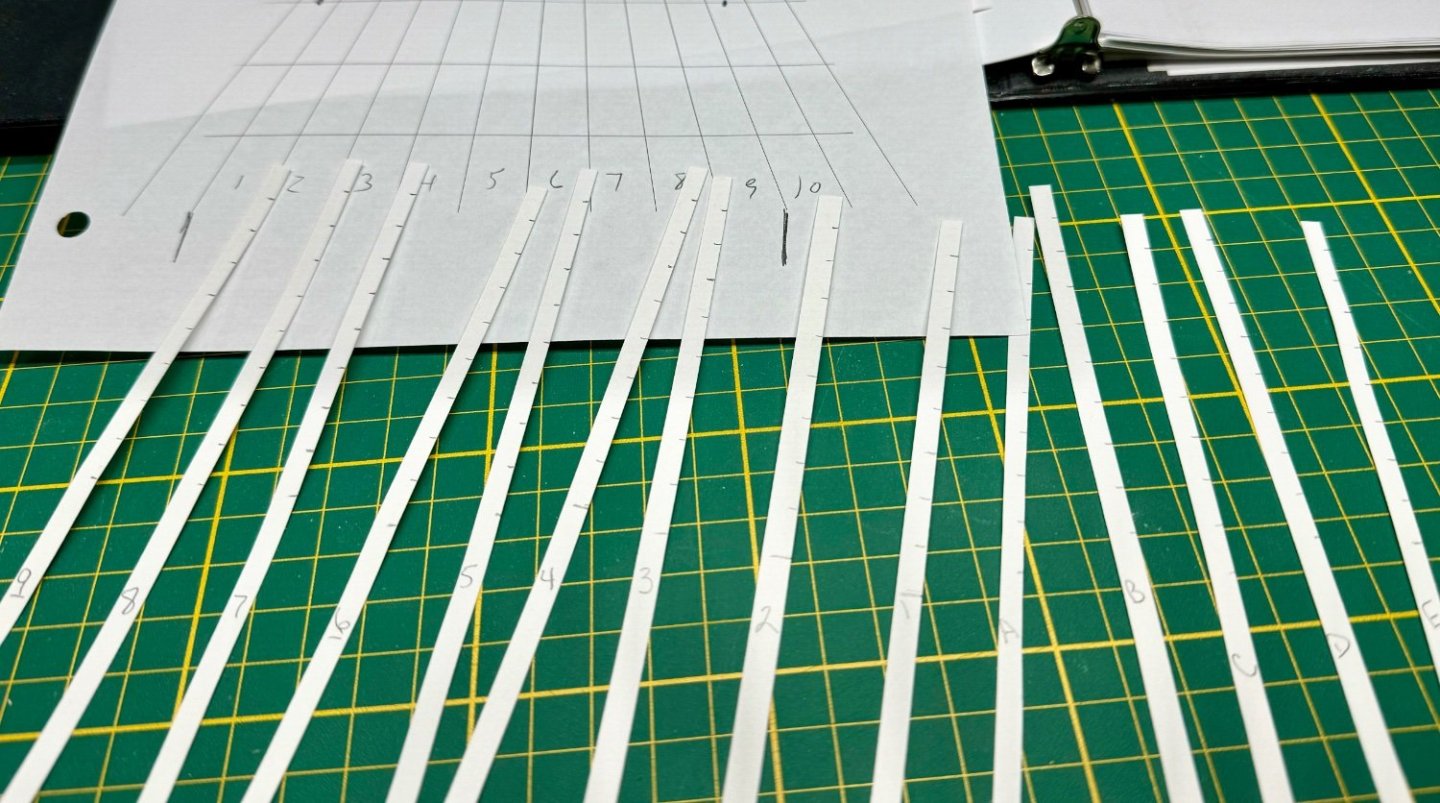
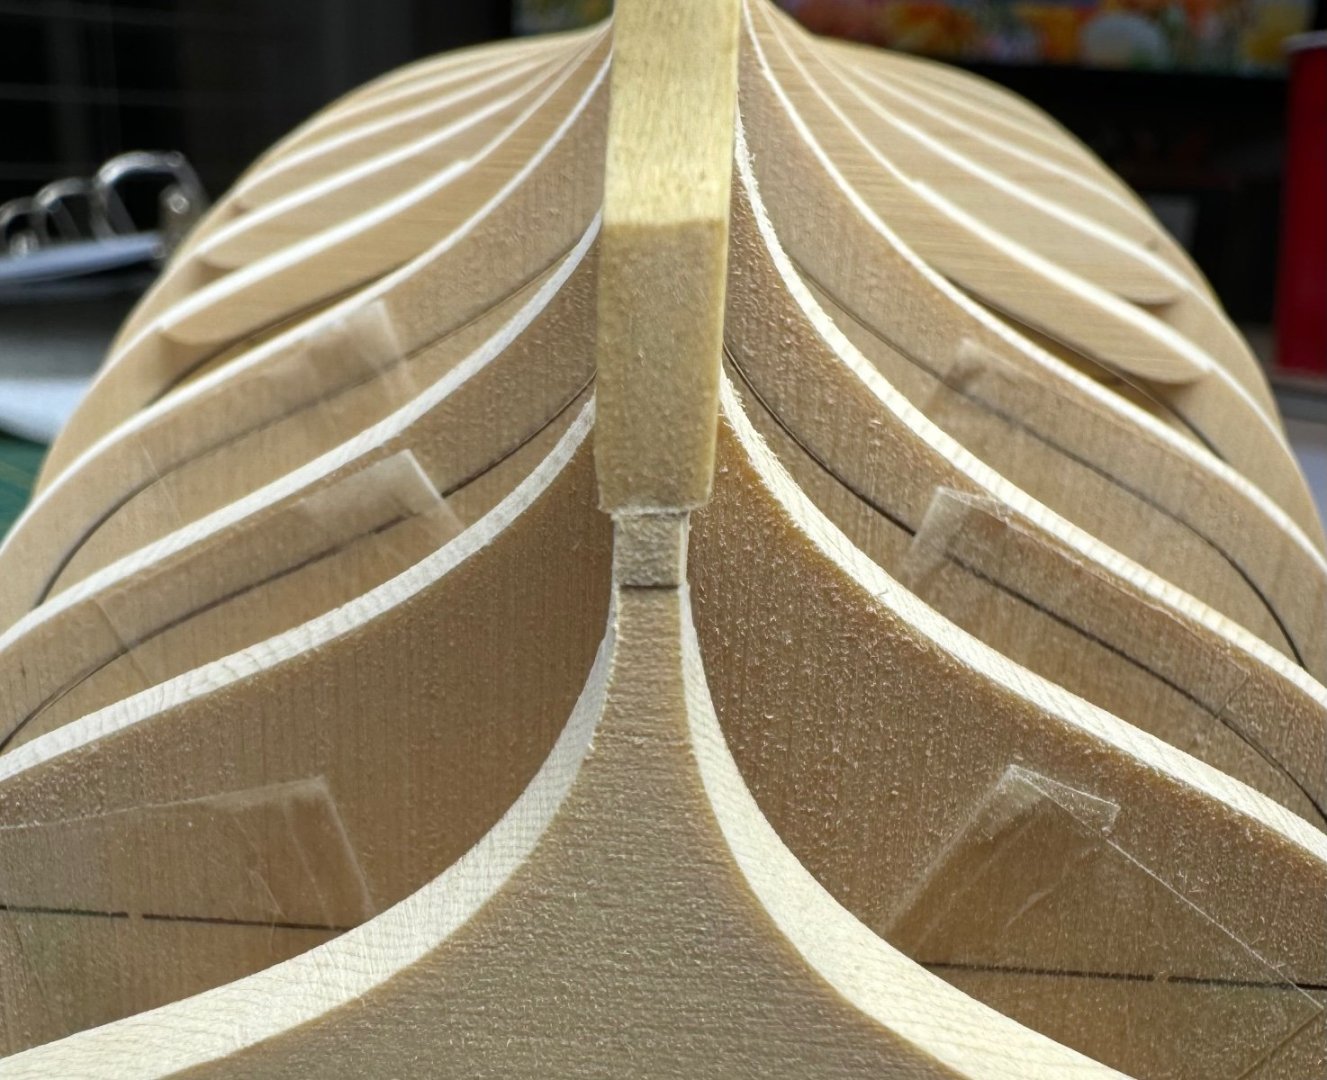
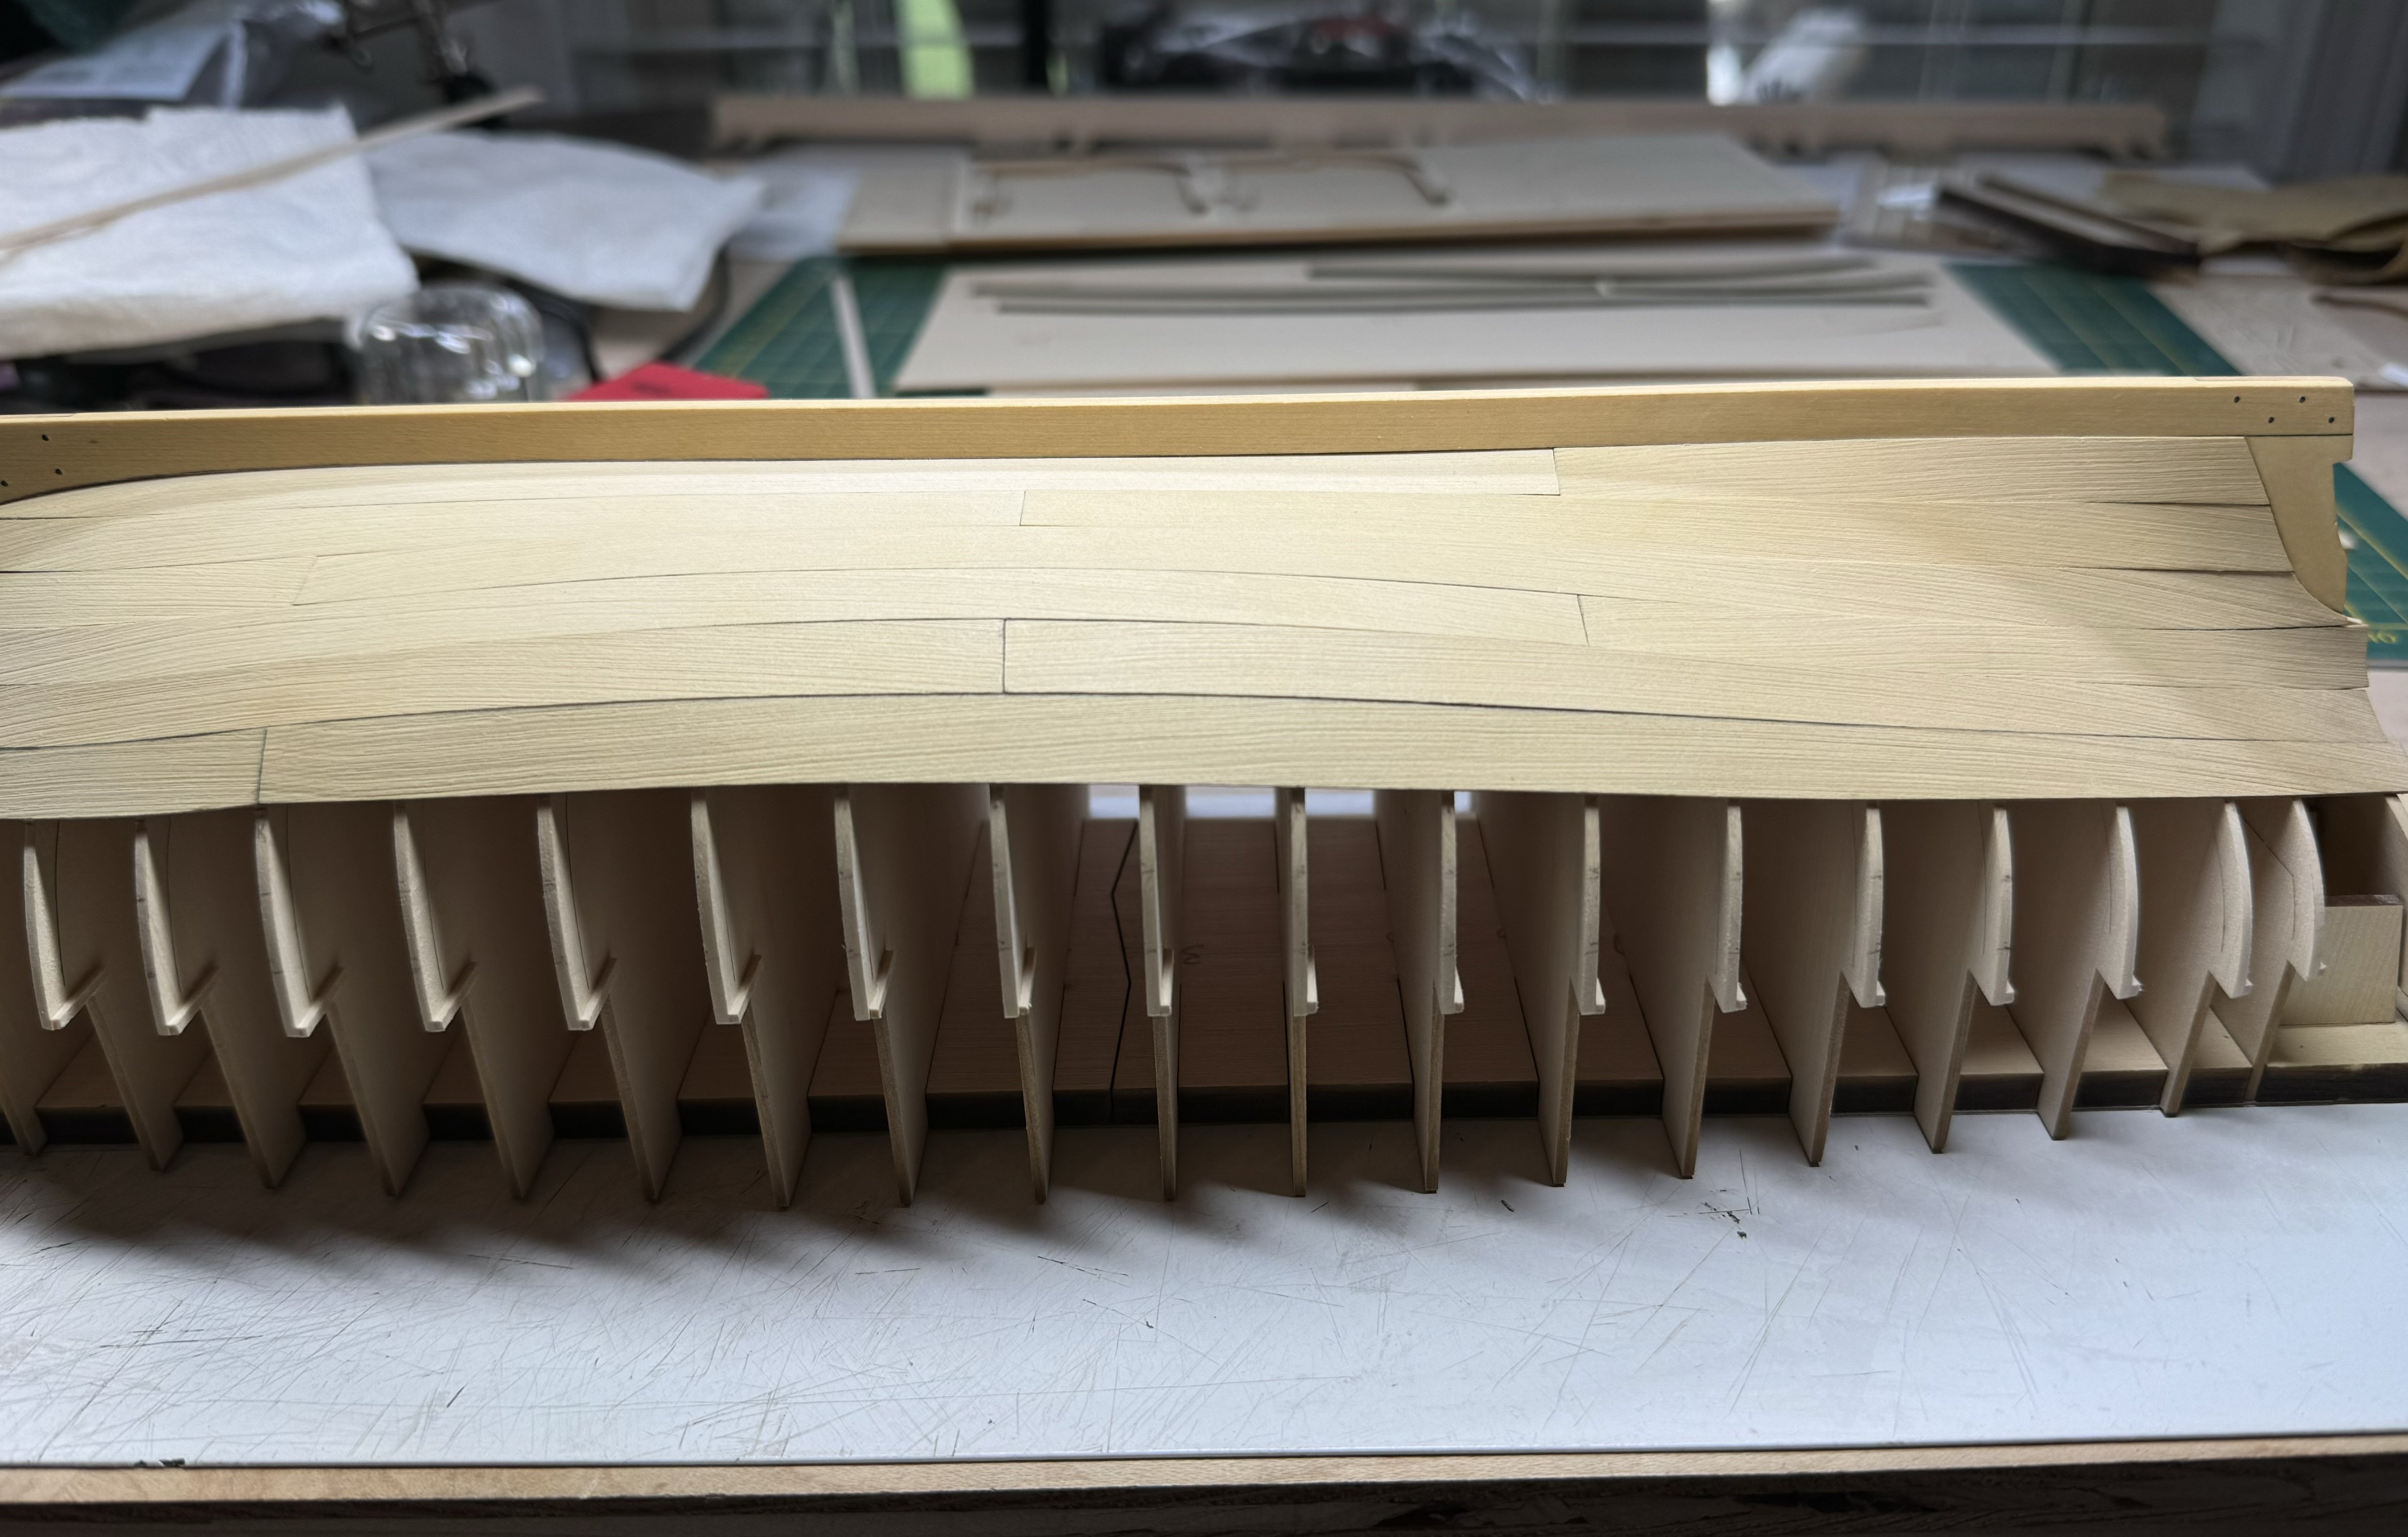
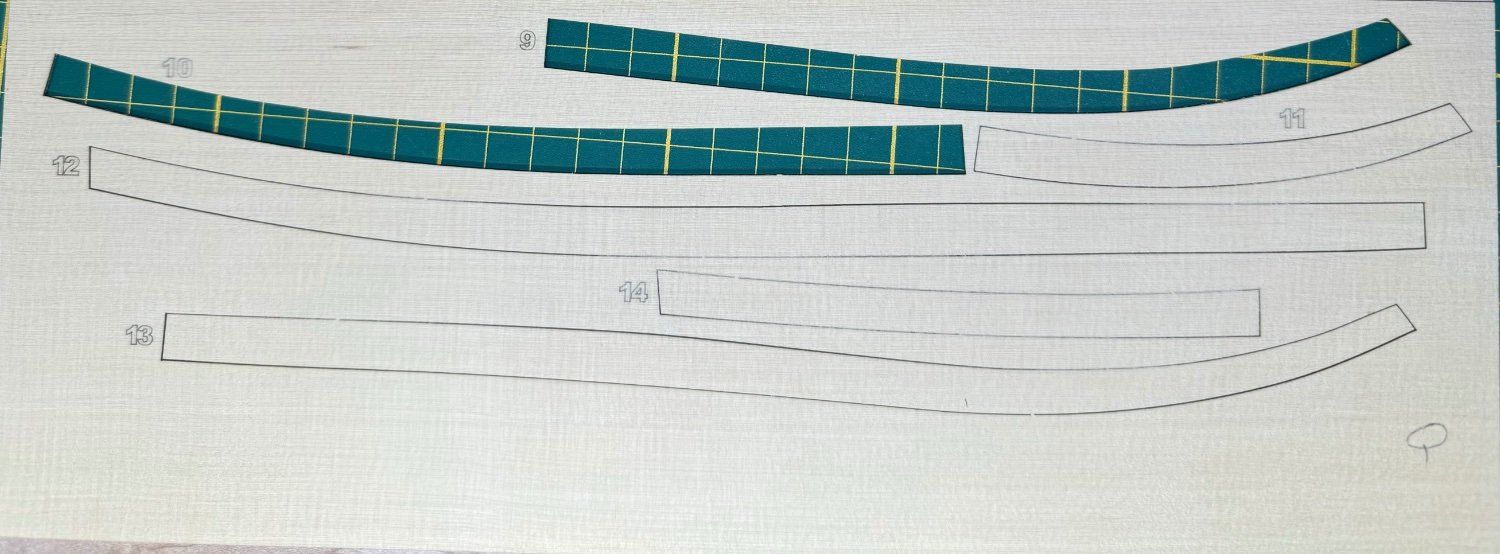
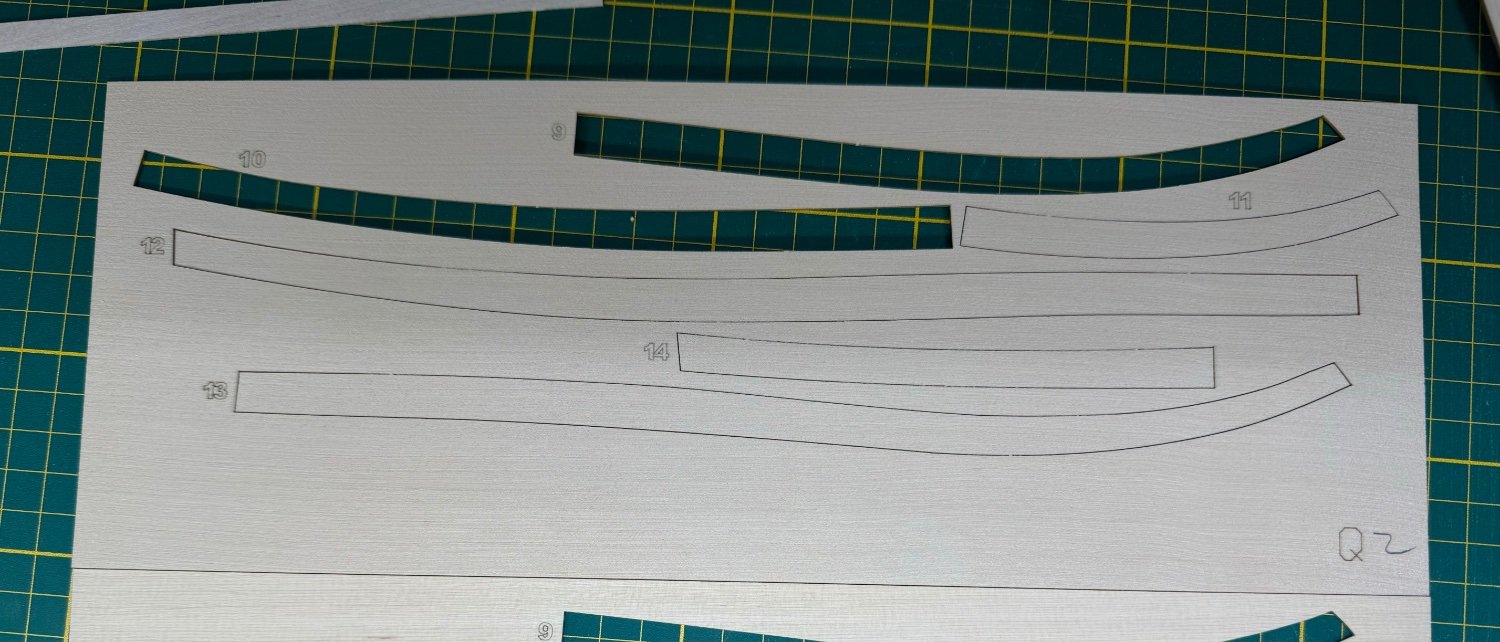
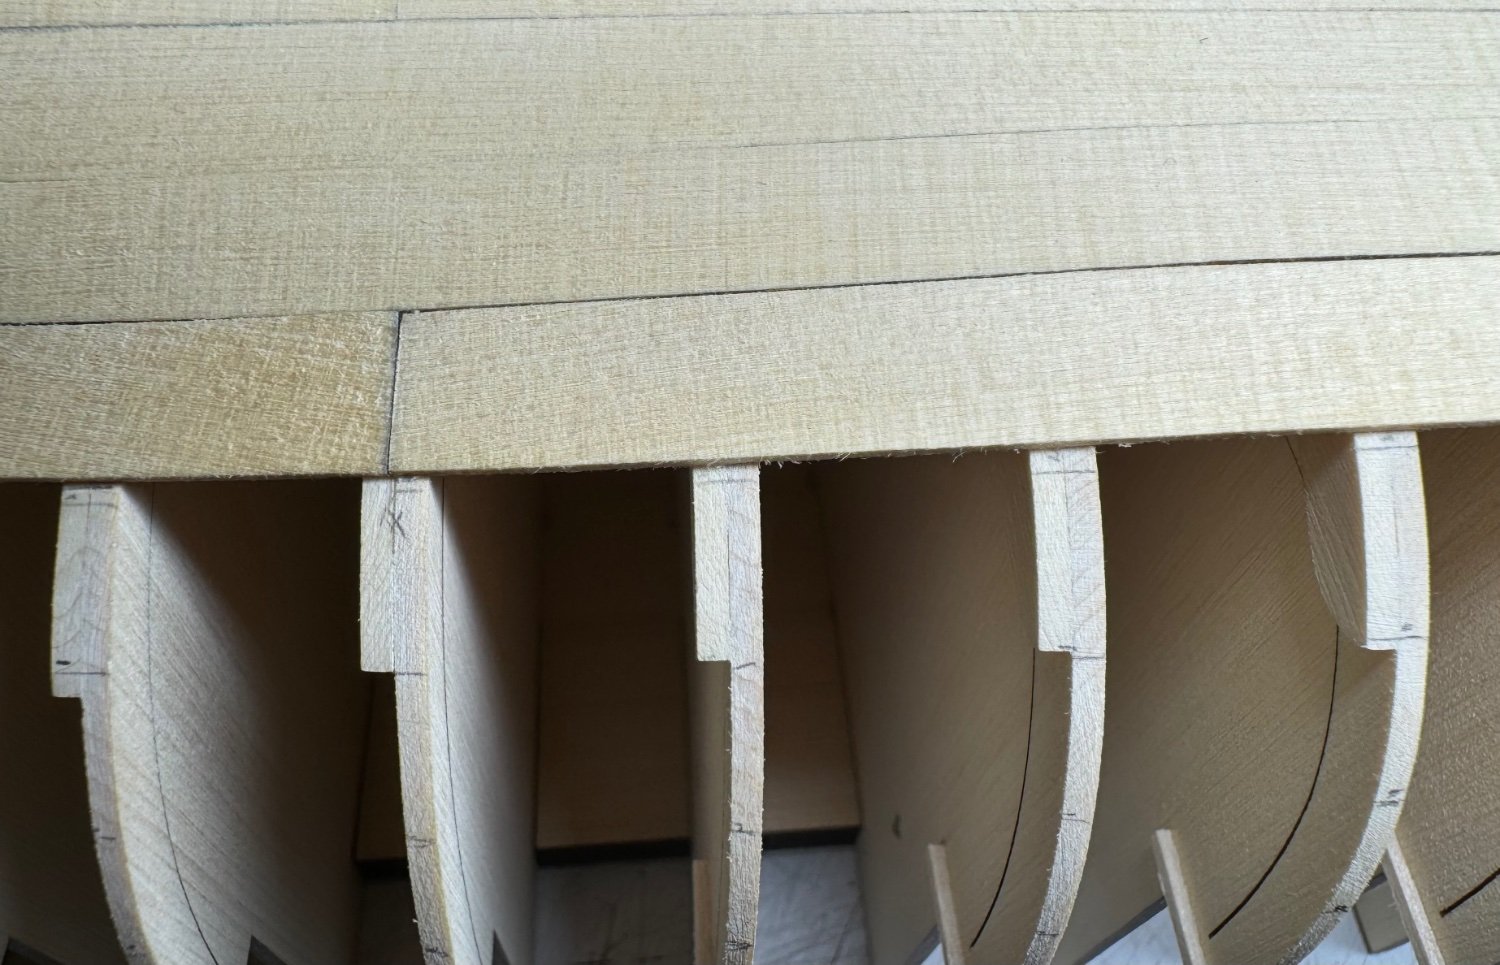
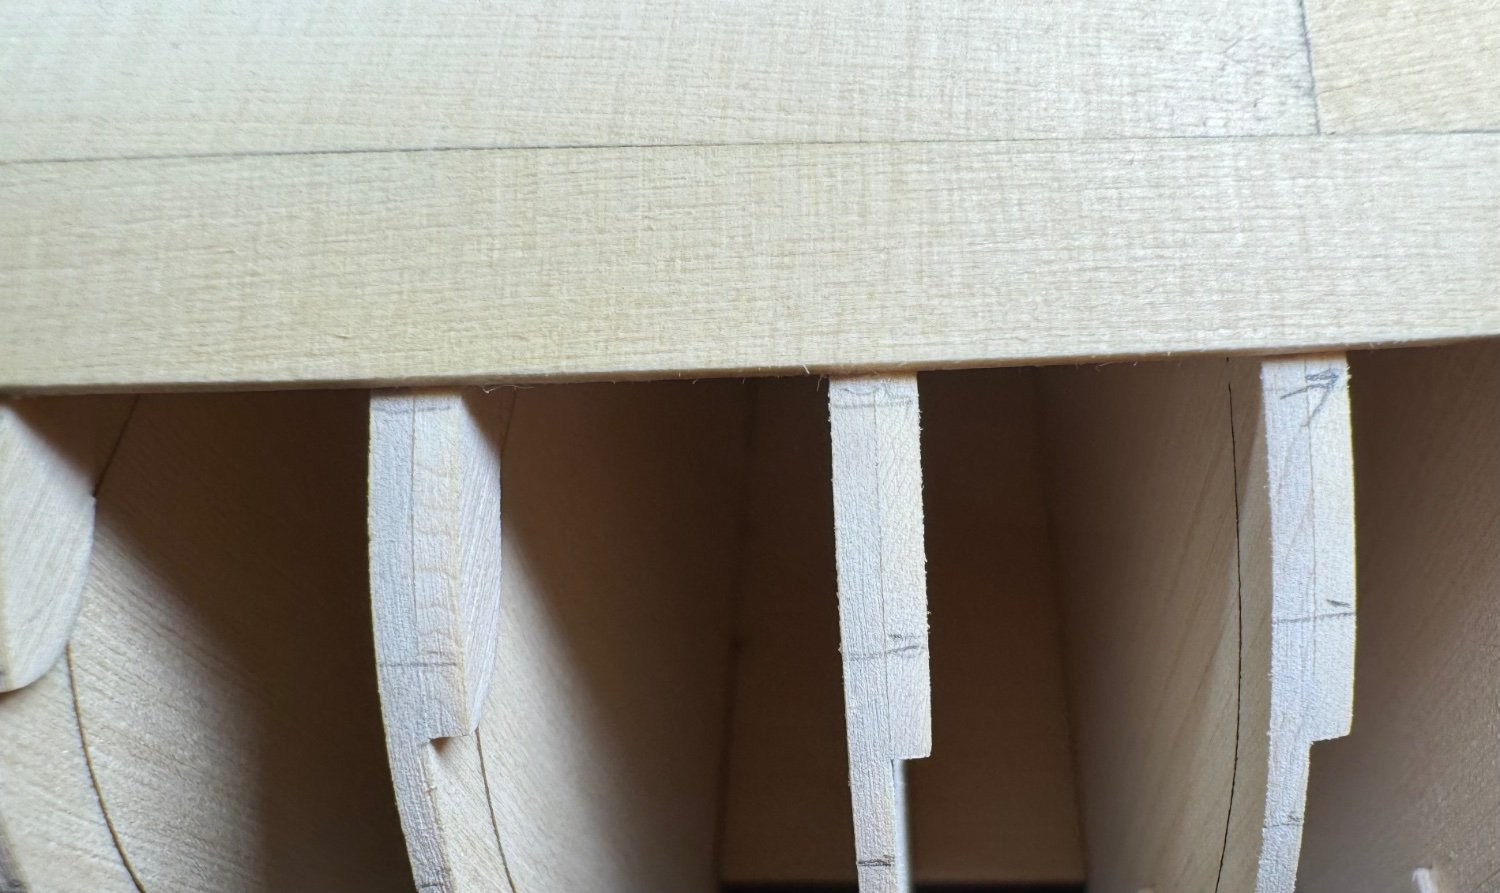
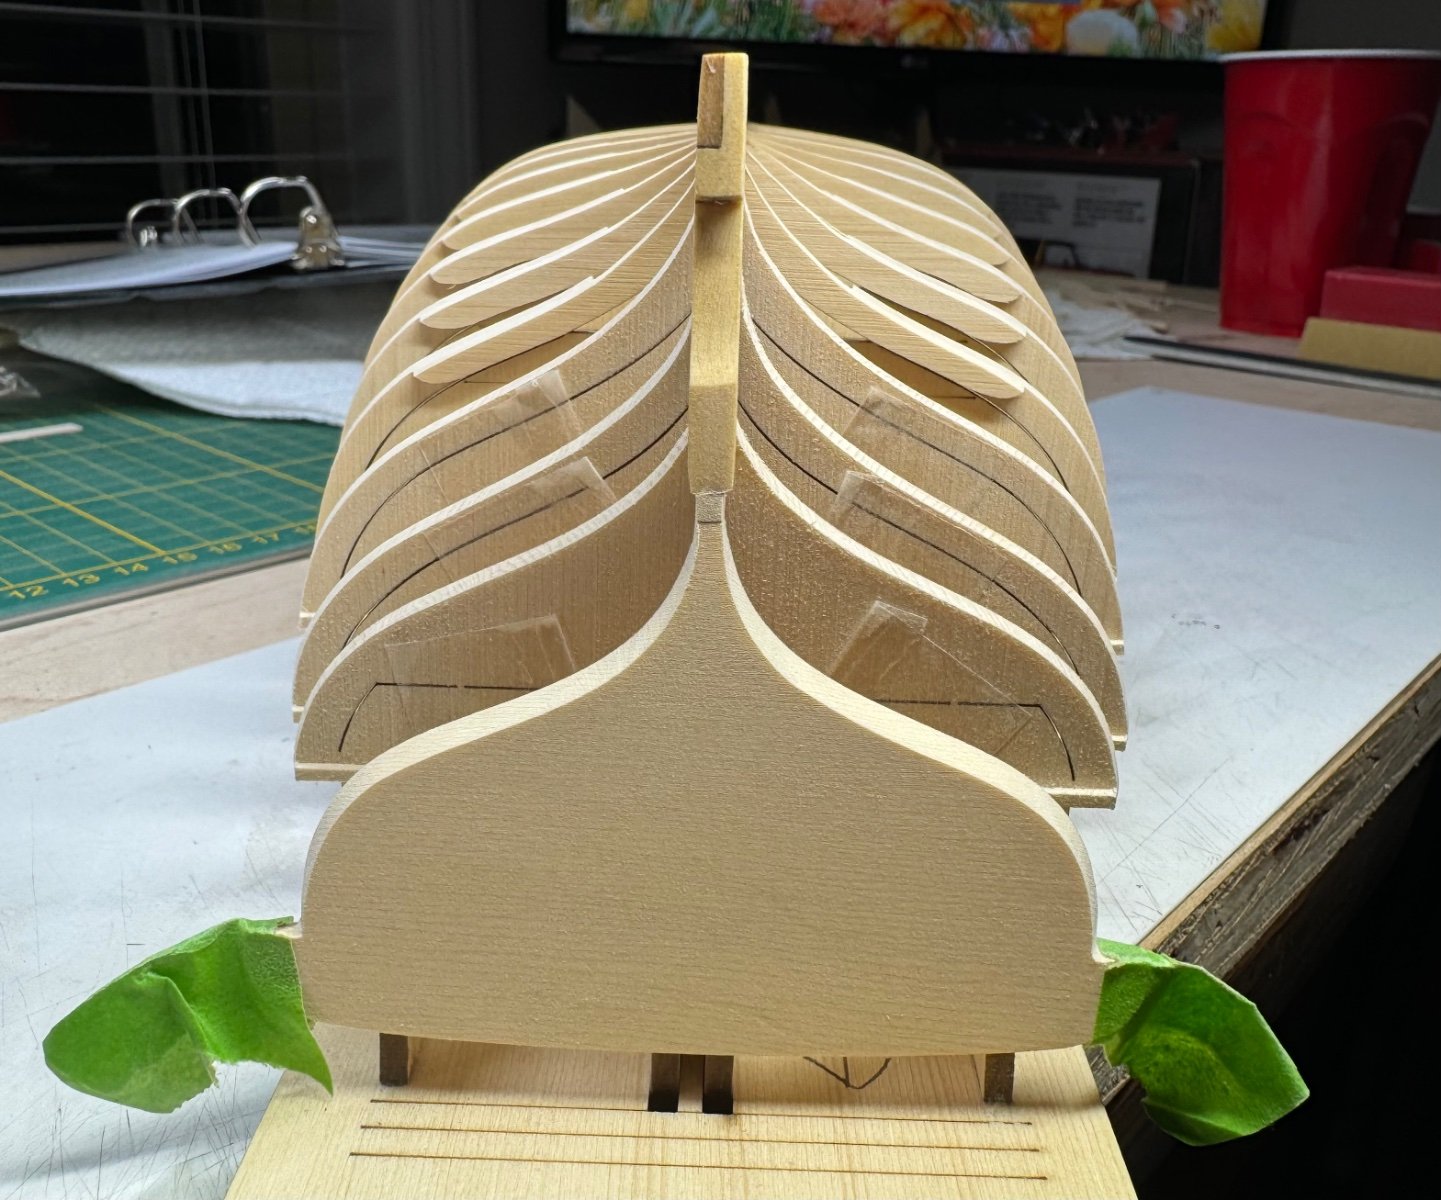
Anyone that has built this boat won’t see anything new, if you have not and are looking thru this log, the sheets are lettered and strakes numbered. The last picture here. Q and Q2 are the same sheets.
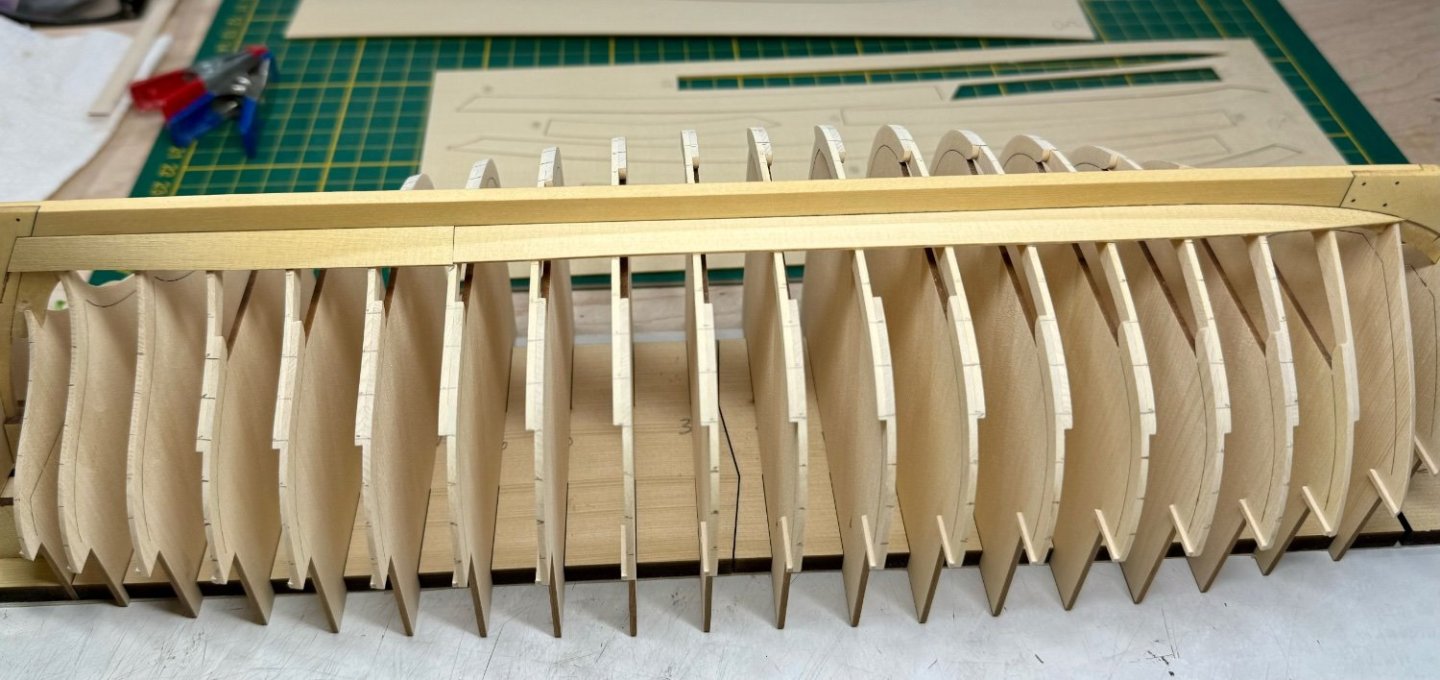
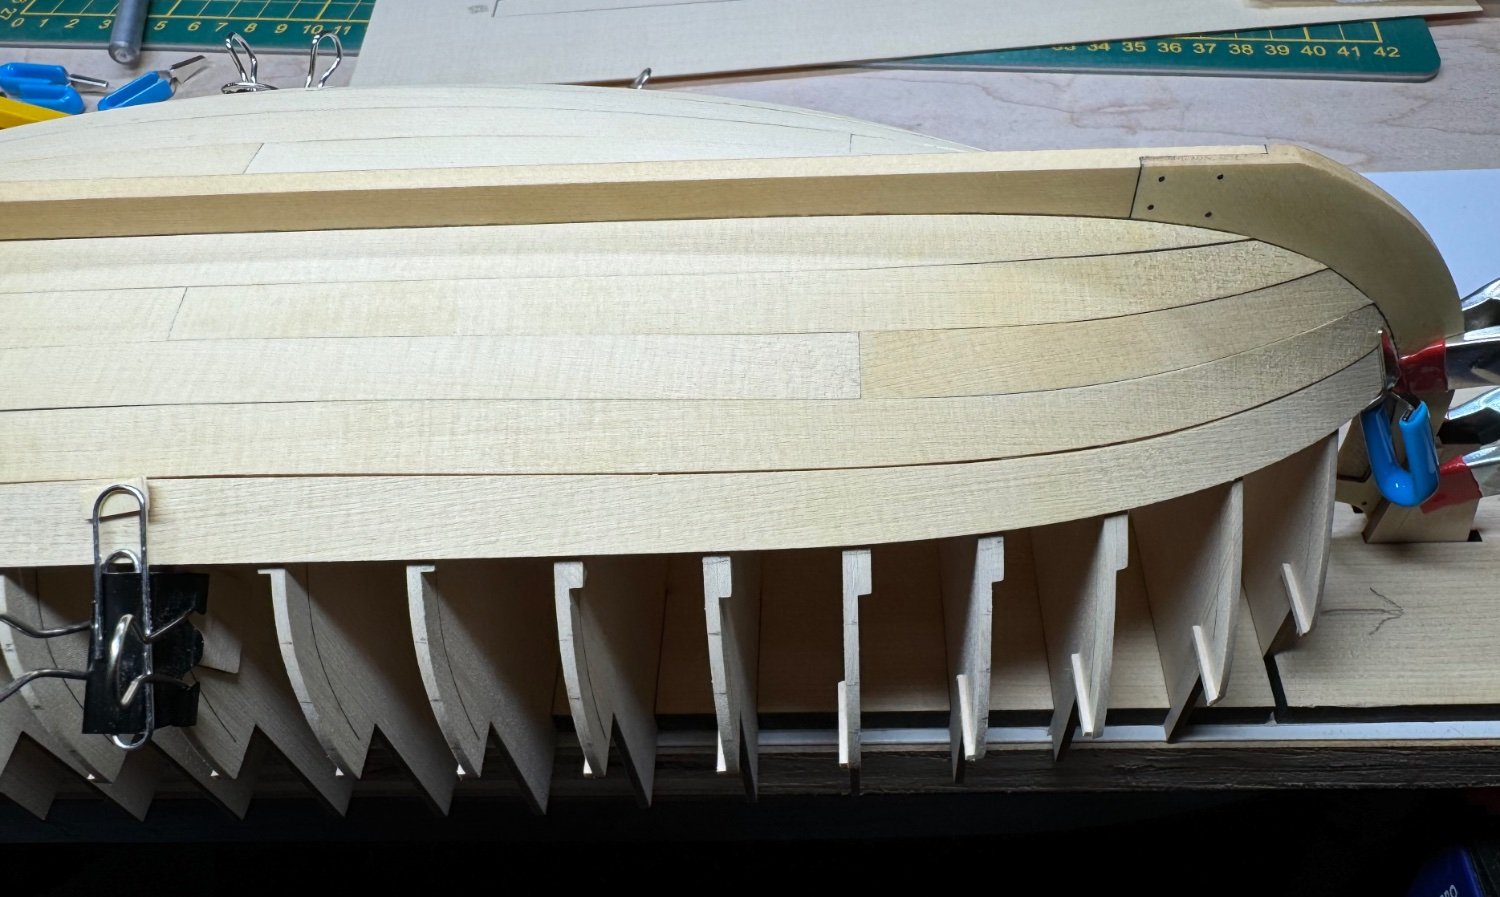
9 and 10 are placed. They fit close without any trimming/fitting/sanding. Which I thought was working out nicely. After a bit of fitting they look good glued in place. When I flip this over I’ll post what it looks like inside untouched after the frames are cut free. I’m getting quicker placing the strakes, maybe not to long.


-
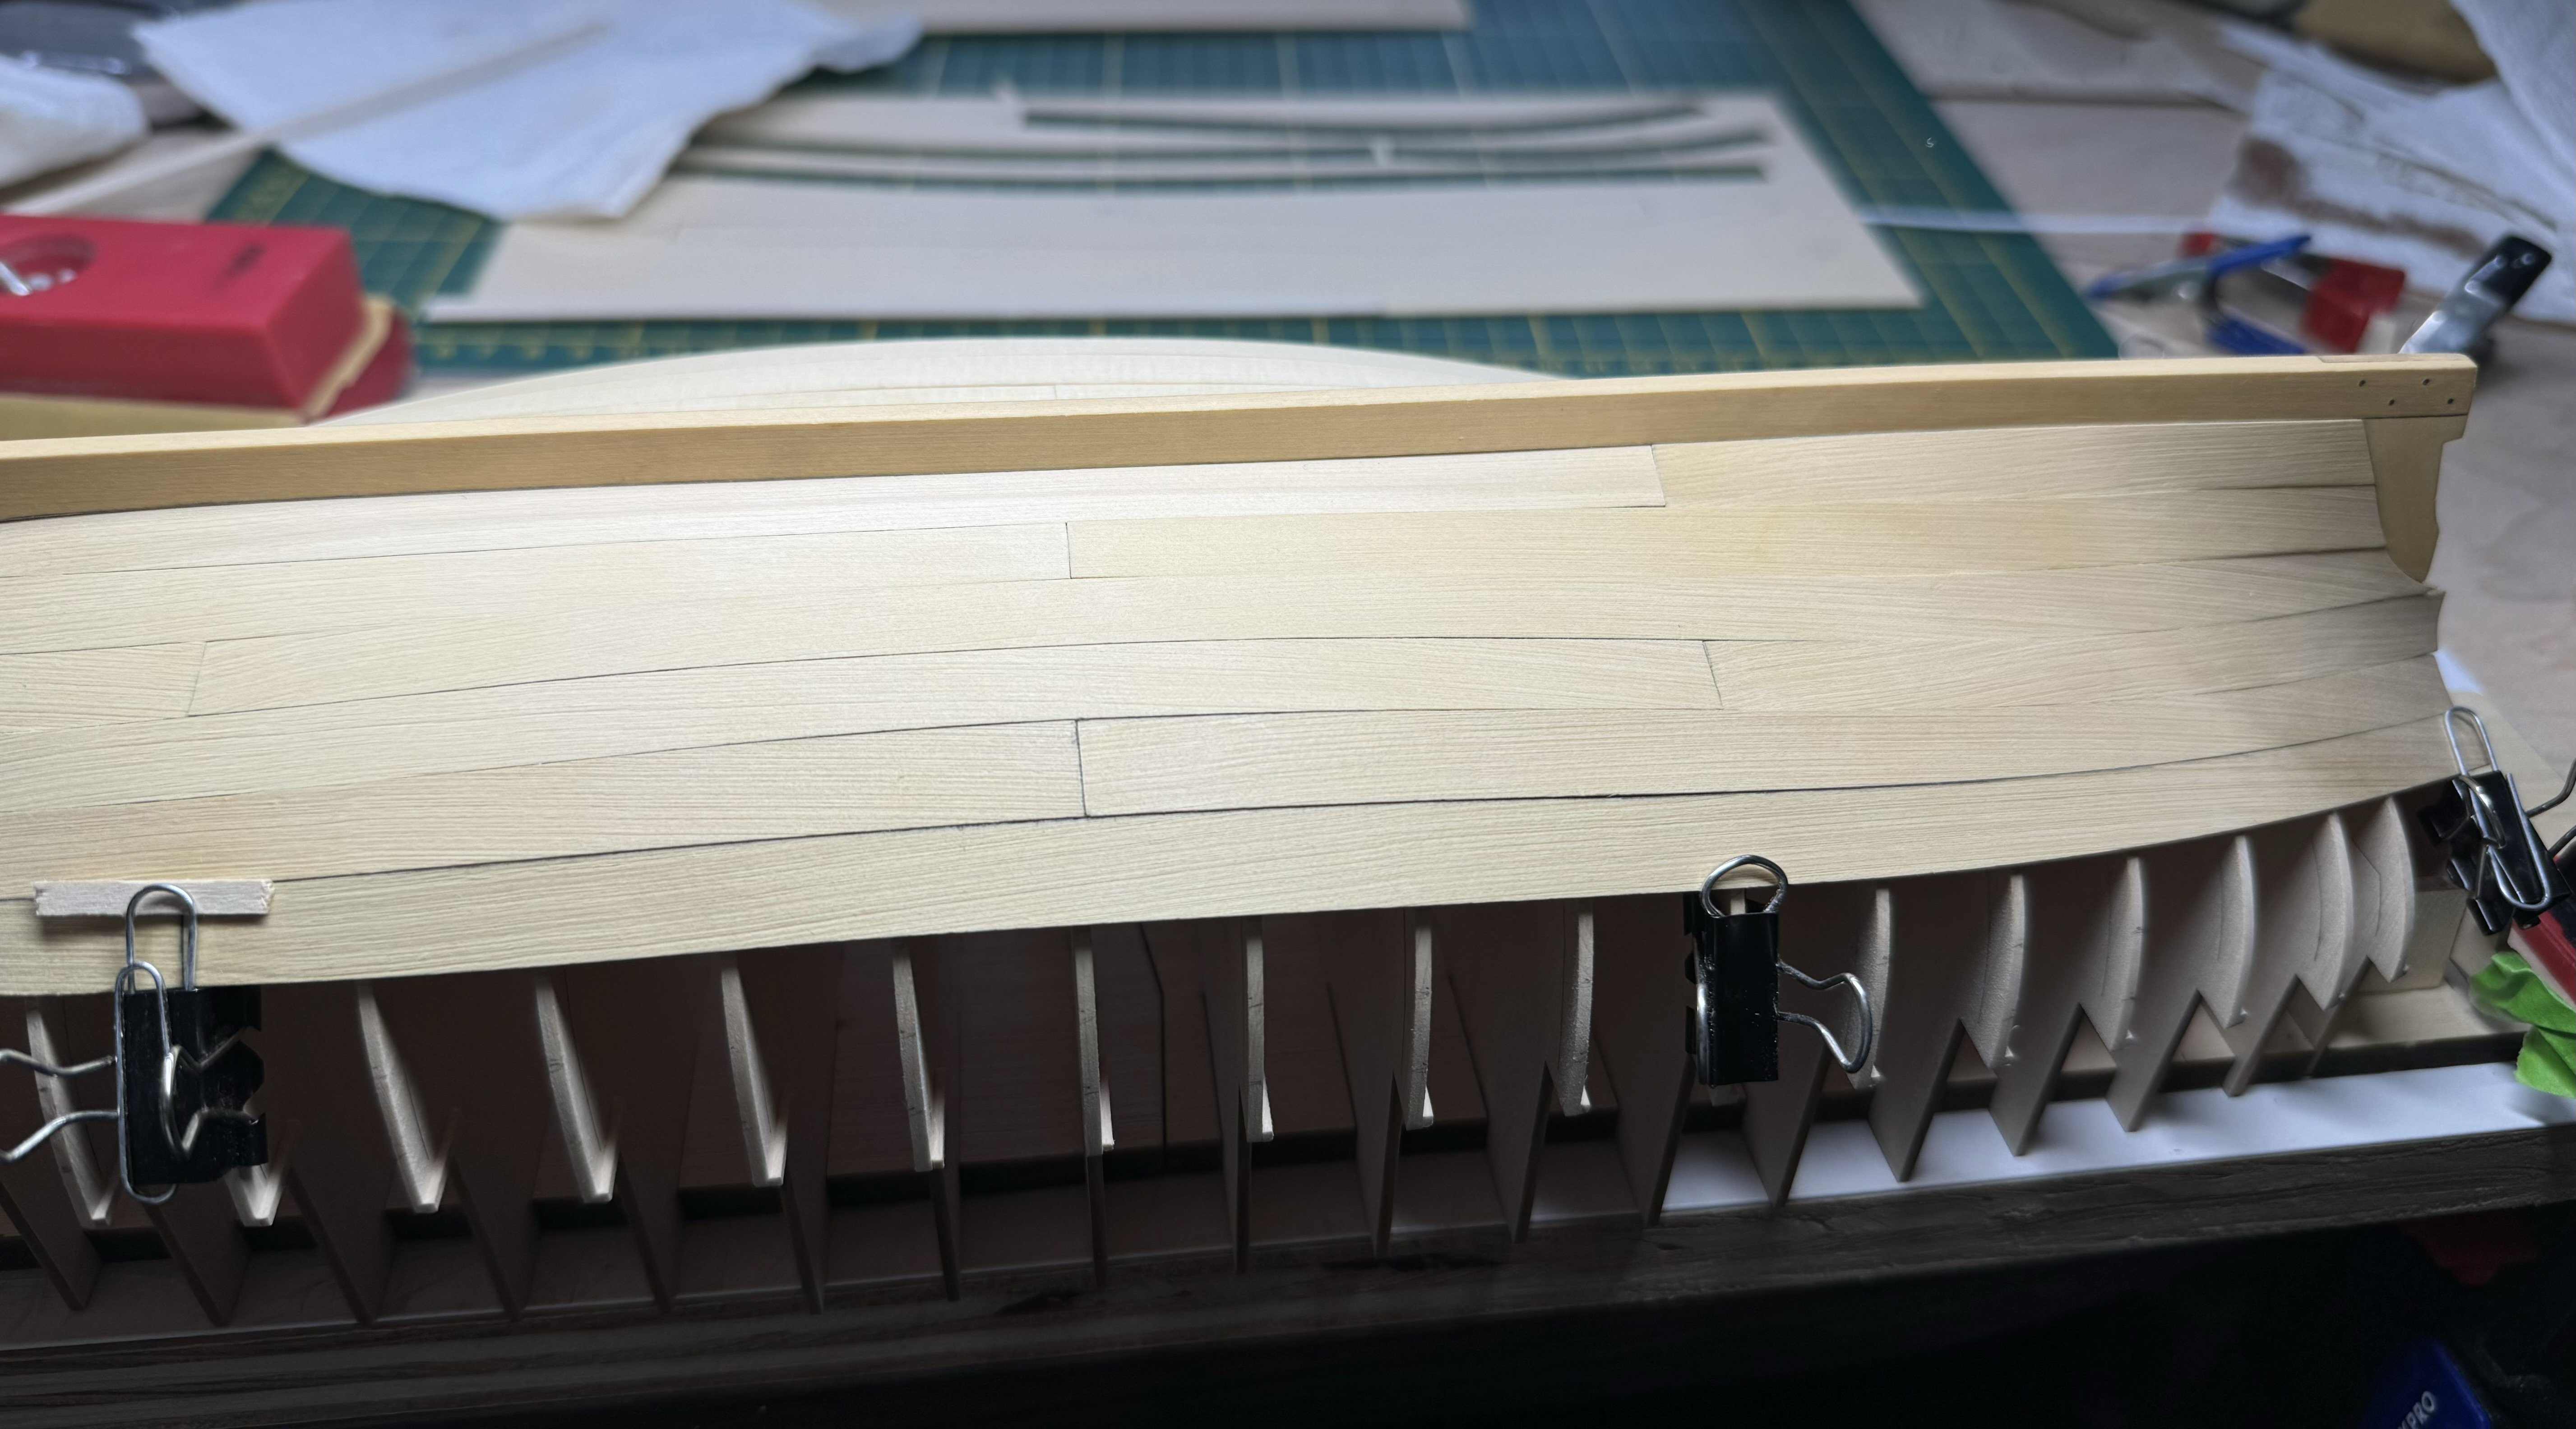
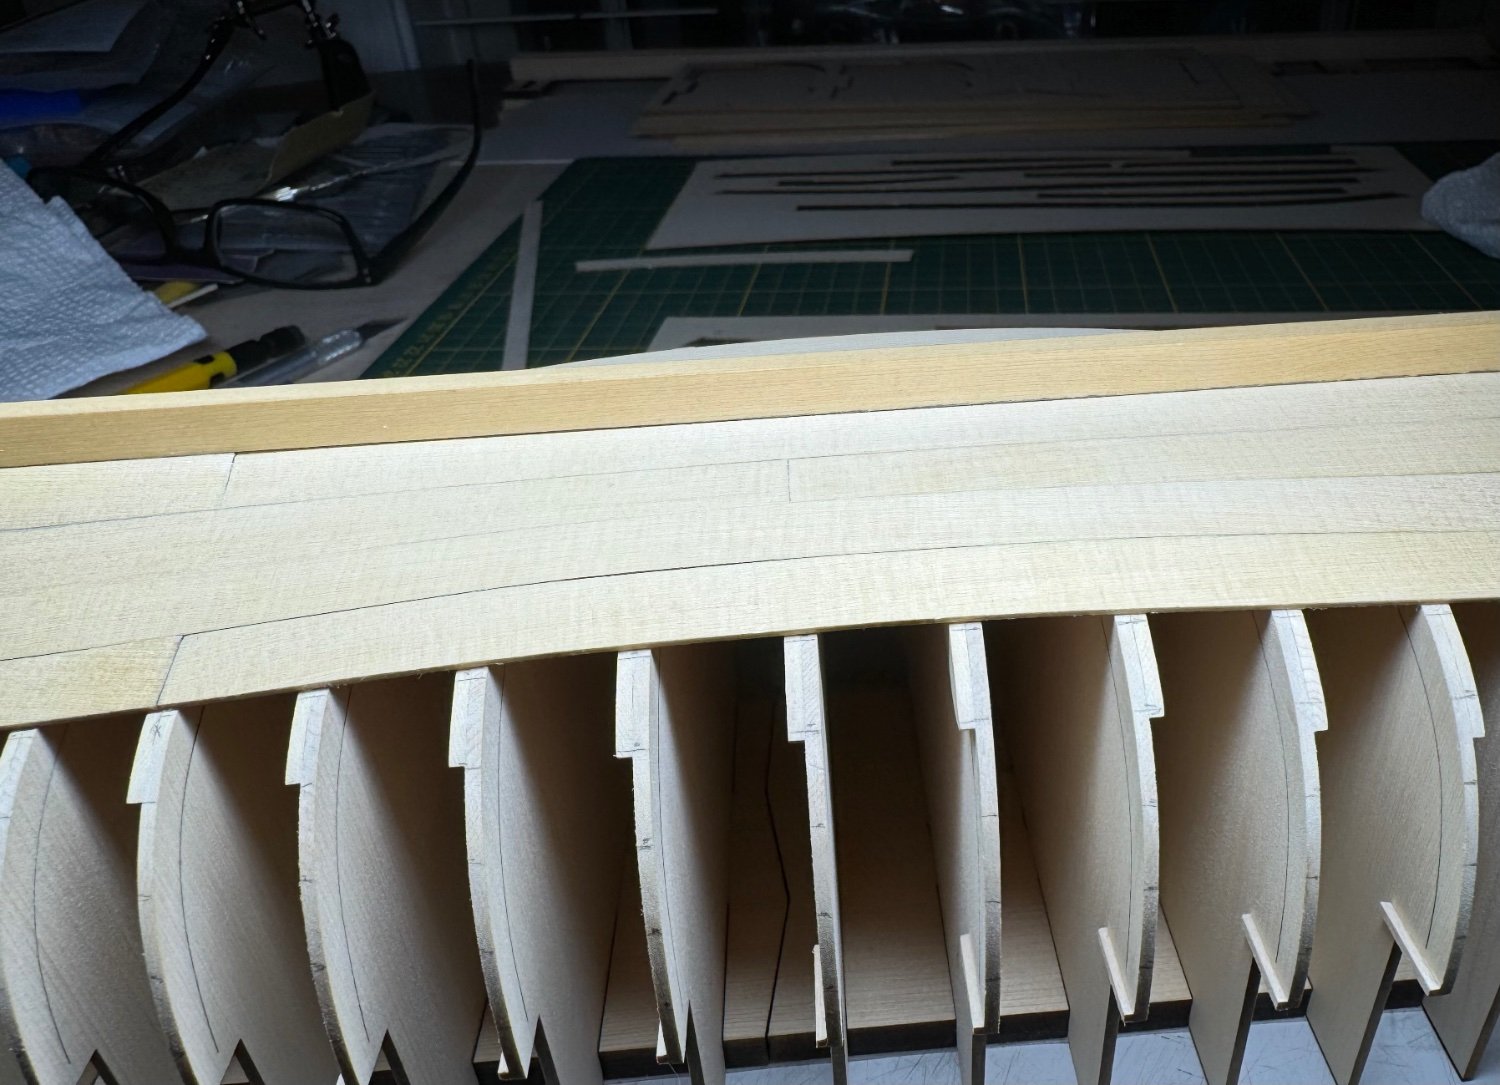
7-2 and 8-2 glued in placed.
Changed to sheets to Q2 and Q.
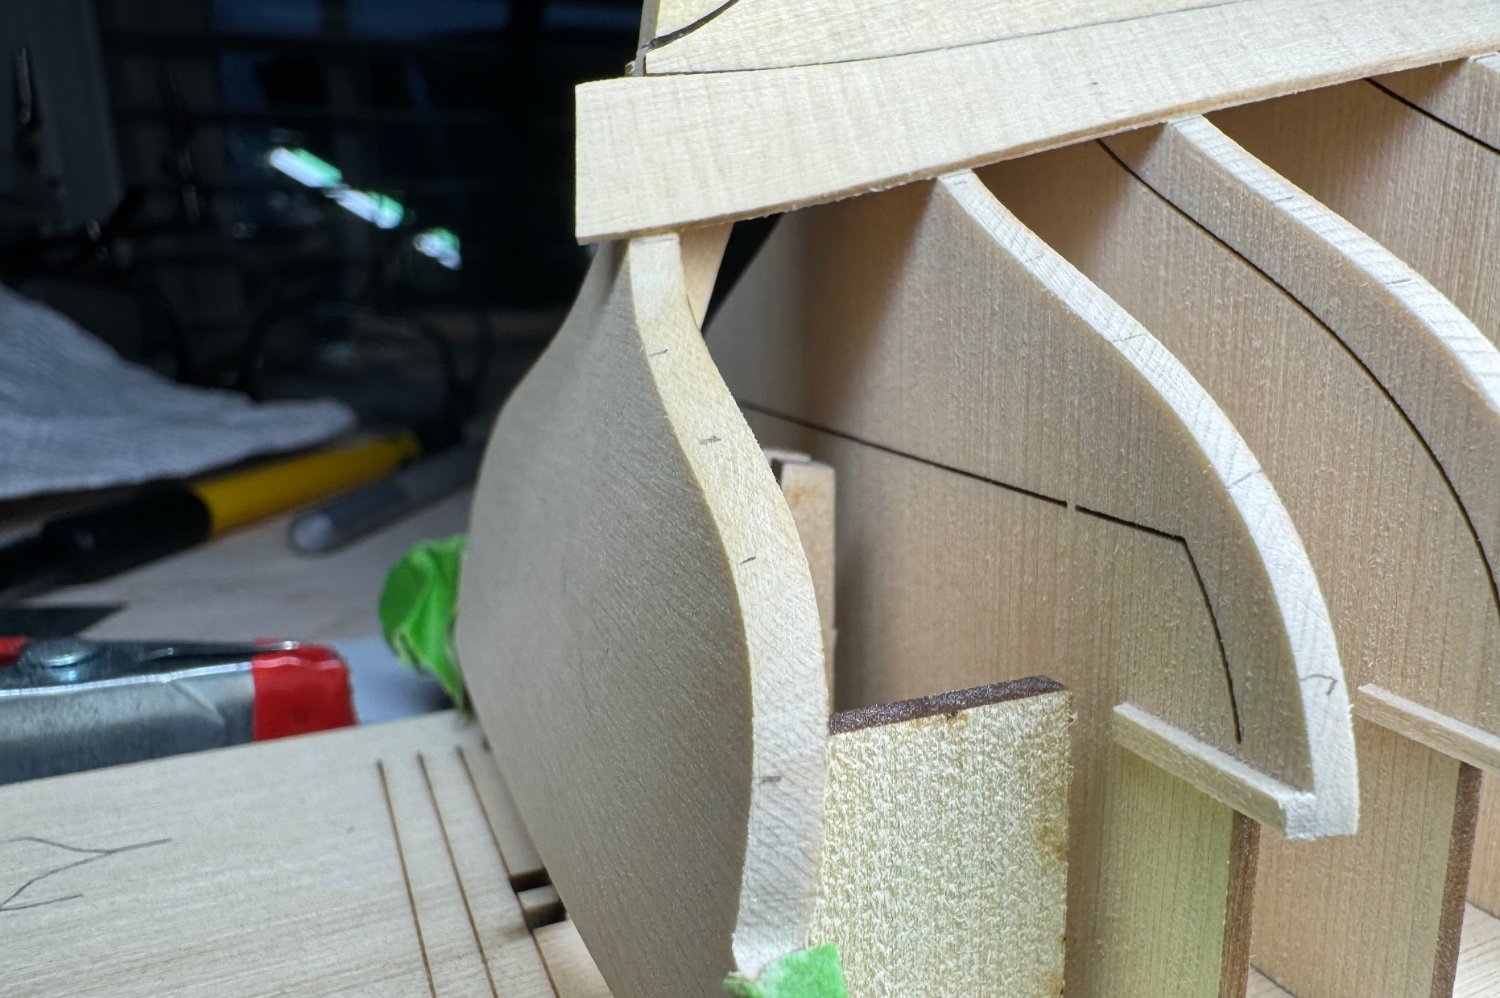
9-2 placed. 10-2 hanging out wondering when it might get glued, it’s waiting until it might hold that curve good.
I guess everyone hopes the inside looks ok when it’s gets flipped.
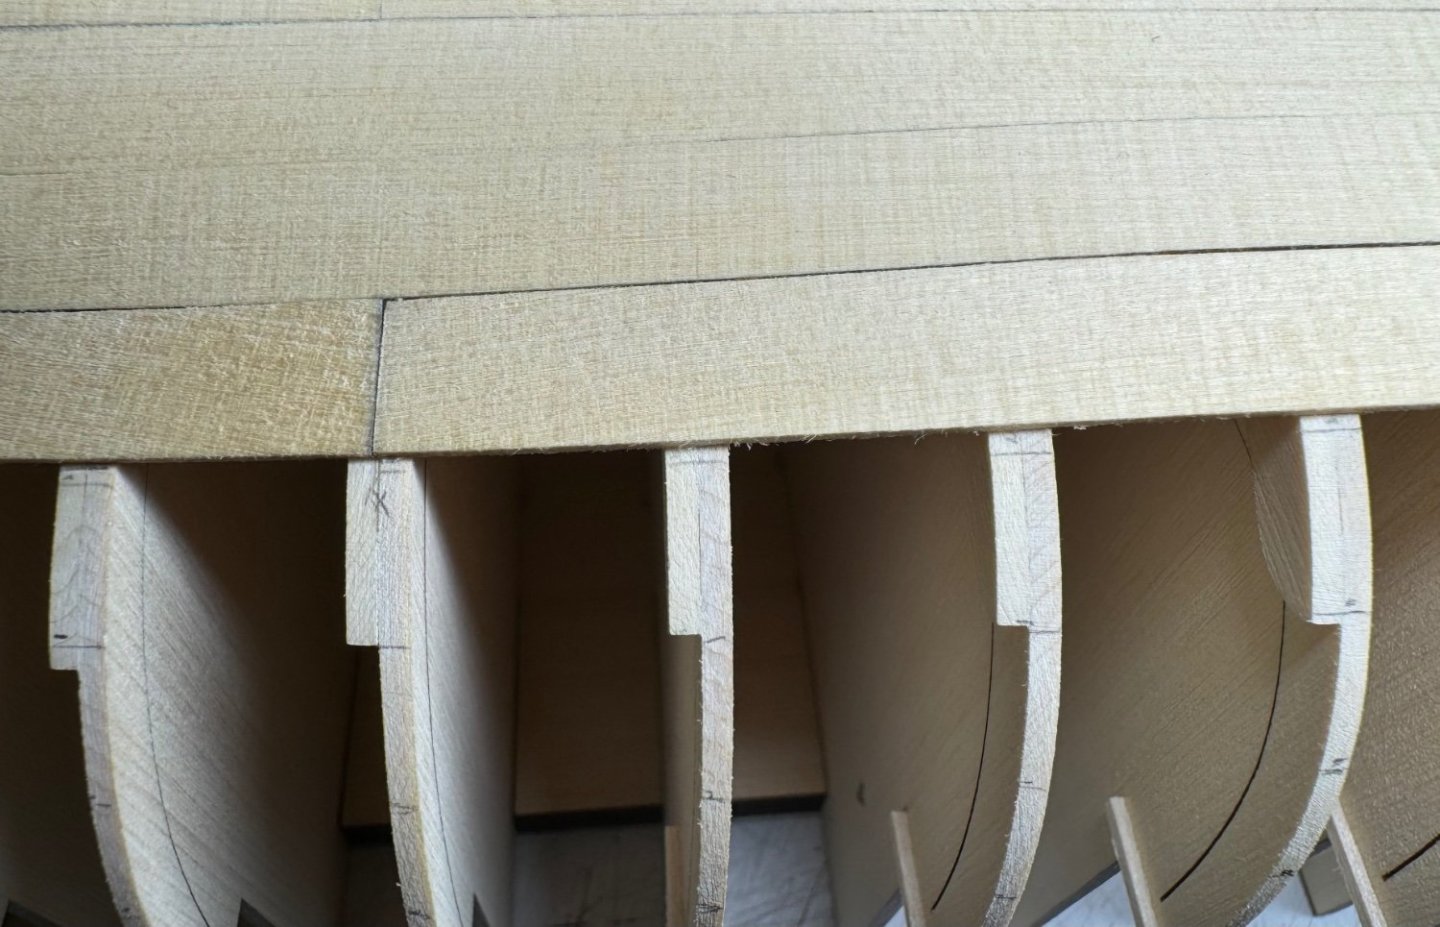
The 9-10 strake is less than 1mm away from the tick marks, at least on the 2 side.


-
-
-
Thank you for the likes and the follows. Hope everyone enjoys the visit. Thank you for stopping in. I don’t like wordy build logs so I made my own lol. Focus.
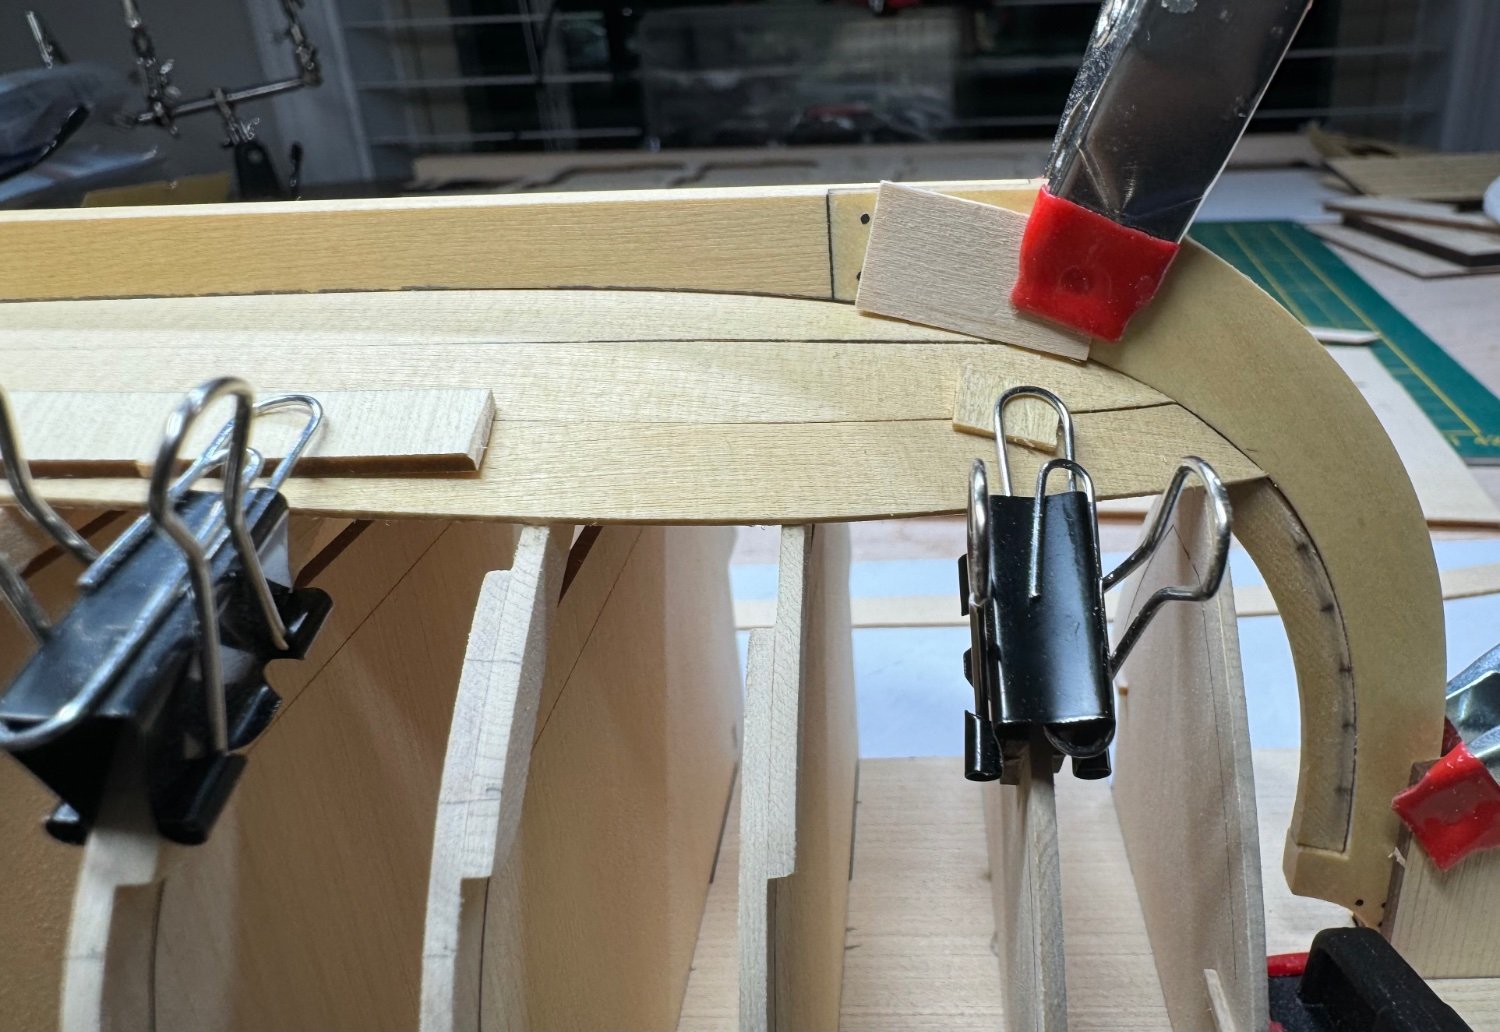
Planks 7-1 and 8-1 went well. I did not use much for clamps, I tried to glue part of 7-1 and then the other section later. I worked to get it laid down without spring up on its own. It went in very well and held the frame curve nicely. I was able to bend a spot with just heat and it held, that was neat. And I burned my fingers, or at least got them hot lol, it takes commitment to hold it, can’t use clamps or tools because it will mar the wood. Good news a drop of water makes it look brand new again if dinged. The cedar responds to water very well. But does smell like wet dog fur when damp haha.
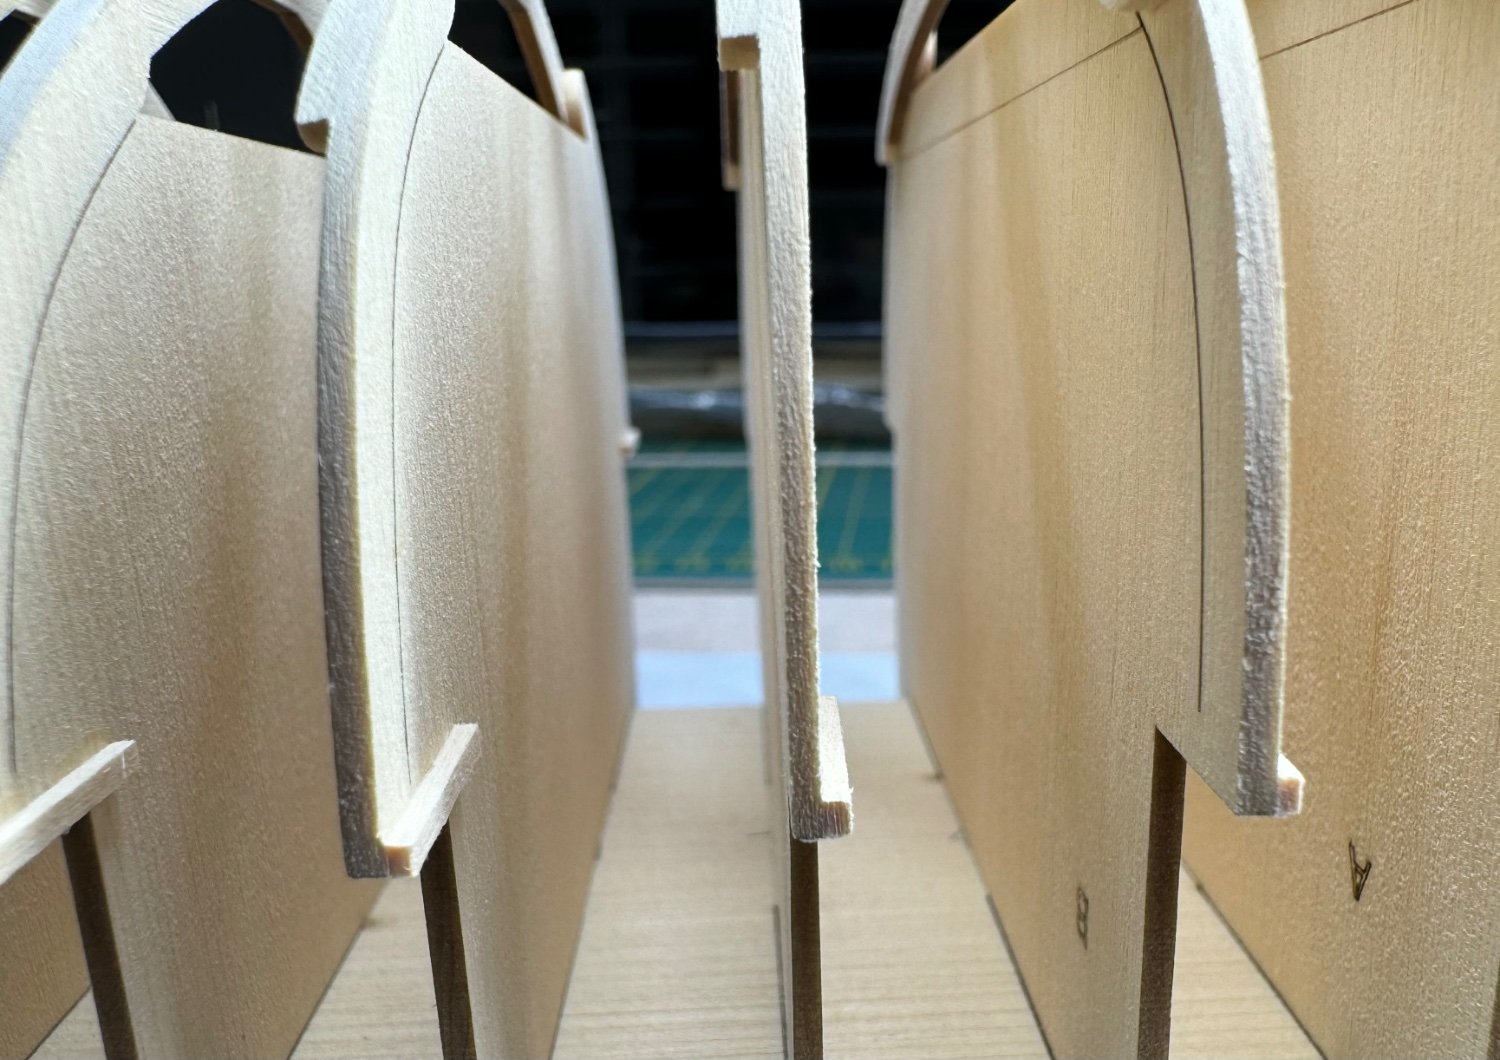
I can see some spots I need to pull down when I get it flipped over. I should make notes but it wont be hard to find them. Some spots are springy, not much but some. I see the keel spot I need to wedge back into the rabbit. I can’t get to it well with the frames in place, it will have to wait, but it will clean up.
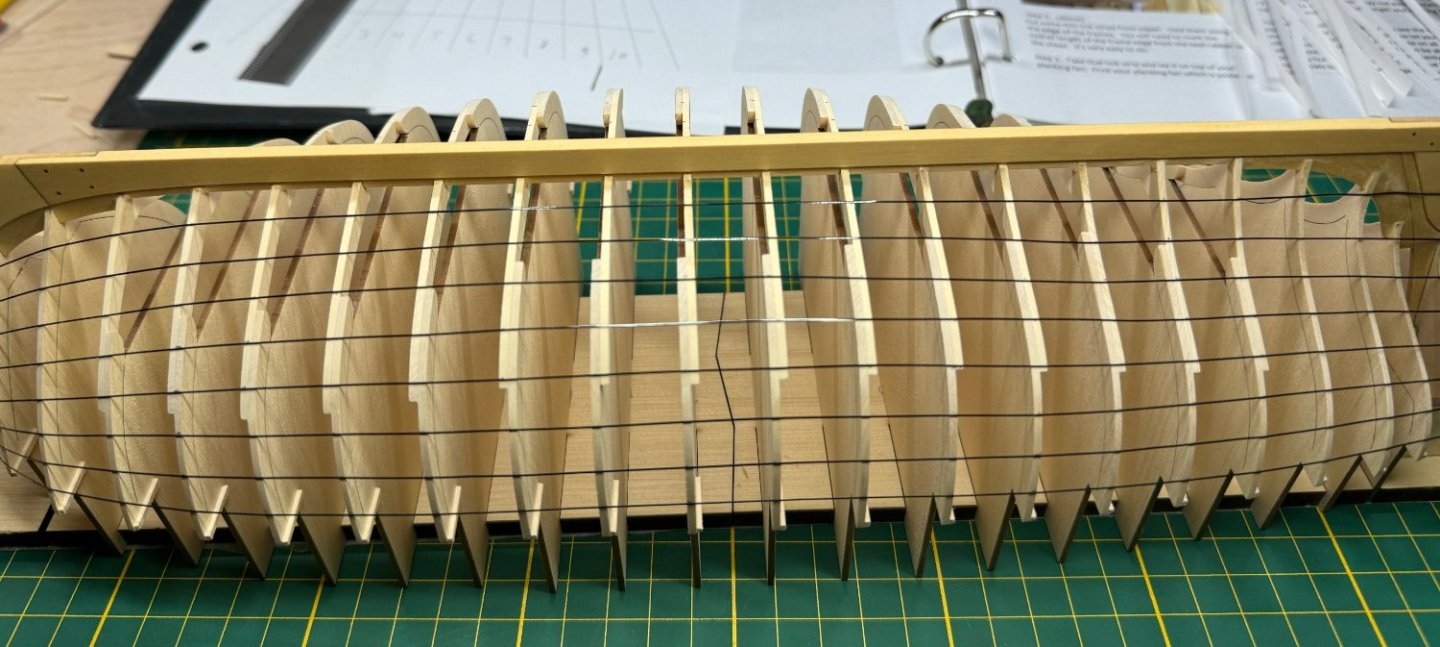
The tick marks front (bow) and back (stern) are working out well. The tick marks in the middle are getting slightly wider, but not bad, it is consistent. We won’t tell anyone if we don’t make the sheer line correctly, will we….
I figure the marks in the middle are marked wrong by me or I’m sucking the middle line of the boat in slowly plank by plank. It’s not growing, it’s just short. As long as the sides match what can I do.
EDIT, the tick marks are the transfers, the lines are below the 1/64 tape line. I marked it below so when I placed the planks the lines could still be seen. I did not extend the small tick marks once marked, so I knew what they were. The older solid lines under the planks are the glue line, don't go below. I'm used to marking on the planks to line up stuff. As it will be WOP finished I'm avoiding marking on the inside or outside face of the plank, I'm flying blind from my normal planking method but its going ok. So far the keel planks have kept me on track. 4 floating ends on the next planks might trip me up but its not enough to matter sliding a plank fore and aft in placement.
8-1 is laid up tight against the transom with no gap. Last I looked. Happy about that.
The build board had a small twist in it when I got done with planks 5 and 6 on both sides. I’ve held it down with clamps on both ends so I can push against it and it not go flying around on the table. When I pulled it up to flip it for 8-2 and 7-2 planks it was flat again. As I come up the sides the twist will lock and or not flex anymore. Hopefully it’s not a banana when I’m done lol. Highly recommended to hold the build board down flat.
I’d like to not people and keep doing the boat but my business doesn’t run well without me. I might be done with planking by April, slow and steady. About 1.5 hours per plank. I figure I’m out 35-38 hours in right now. That’s around $5291 in labor cost for my business. I’ll be gone for a week this month so I might not make it unless I get a good day or 2 on the weekend.


-
-
Thank you for the words of encouragement and the likes and follows.
I always see something I could do better, after the glue sets. Plank 6 side 1 didn’t curve at the bow. It’s flat against the bow rabbit. On a normal mortal boat I could fill it with some filler.
I wish it was a little bit better in places. Some places look great.
I’ve been very careful with the hull. So far I’ve hammered on the keel with the sanding block, the clamps, finger nails, sanding files and my pencils. None of it on purpose. WOP seems darn durable.
I know. Clamps.

-
Lots of trimming to make #5 fit both sides. But the trimming lines it up with the marks, so feels right. #6 looked great on the 2 side. I labeled them 1 and 2 side so I can keep track of the sheets and parts.
I’ll need to rig up shock therapy to the glue bottle with a sign that says use the pencil on the edges first. So far I’ve missed a few pencil runs on the edge, it’s the bottom so maybe it won’t be noticed. I get so excited about the part fitting and get brave enough to grab the glue I spaz out and miss the pencil edge. Sigh.
The planks look good with no gaps then I glue them down and small gaps show up. I either didn’t see them or didn’t get the plank exactly where it goes. I’m building another boat that won’t float, at least I’m consistent. lol. It’s probably the Titebond letting go on 20% of the plank after I think it’s set.
- mgatrost, Dulrakk, Ryland Craze and 2 others
-
5
-
This is wonderfully time consuming. I did take a break and went the store for a few hours.
Six of 36 planks glued. I tried to use the heat only and I can’t make that work. I used my water and bending rolling the wood to break the bond structure method, then held it in place while drying it with heat. I tried lots of just heat and all I did was burn my fingers. And the plank went back flat. Wet cedar is not pleasant smelling, am I’m being punished using my method lol.
I used the Titebond Quick and Thick. Sparingly. Just on the frames. It drys clear and is easily to clean off on the inside later, if I get much gone wild.
The tick marks are great. I’ll call the planking line up best 7 out of 11 method. Some are right on, others are way off. Law of averages should keep me straight. The ends are lining up with the supplied templates close.

- Chuck, robert952, Ryland Craze and 4 others
-
7
-
-
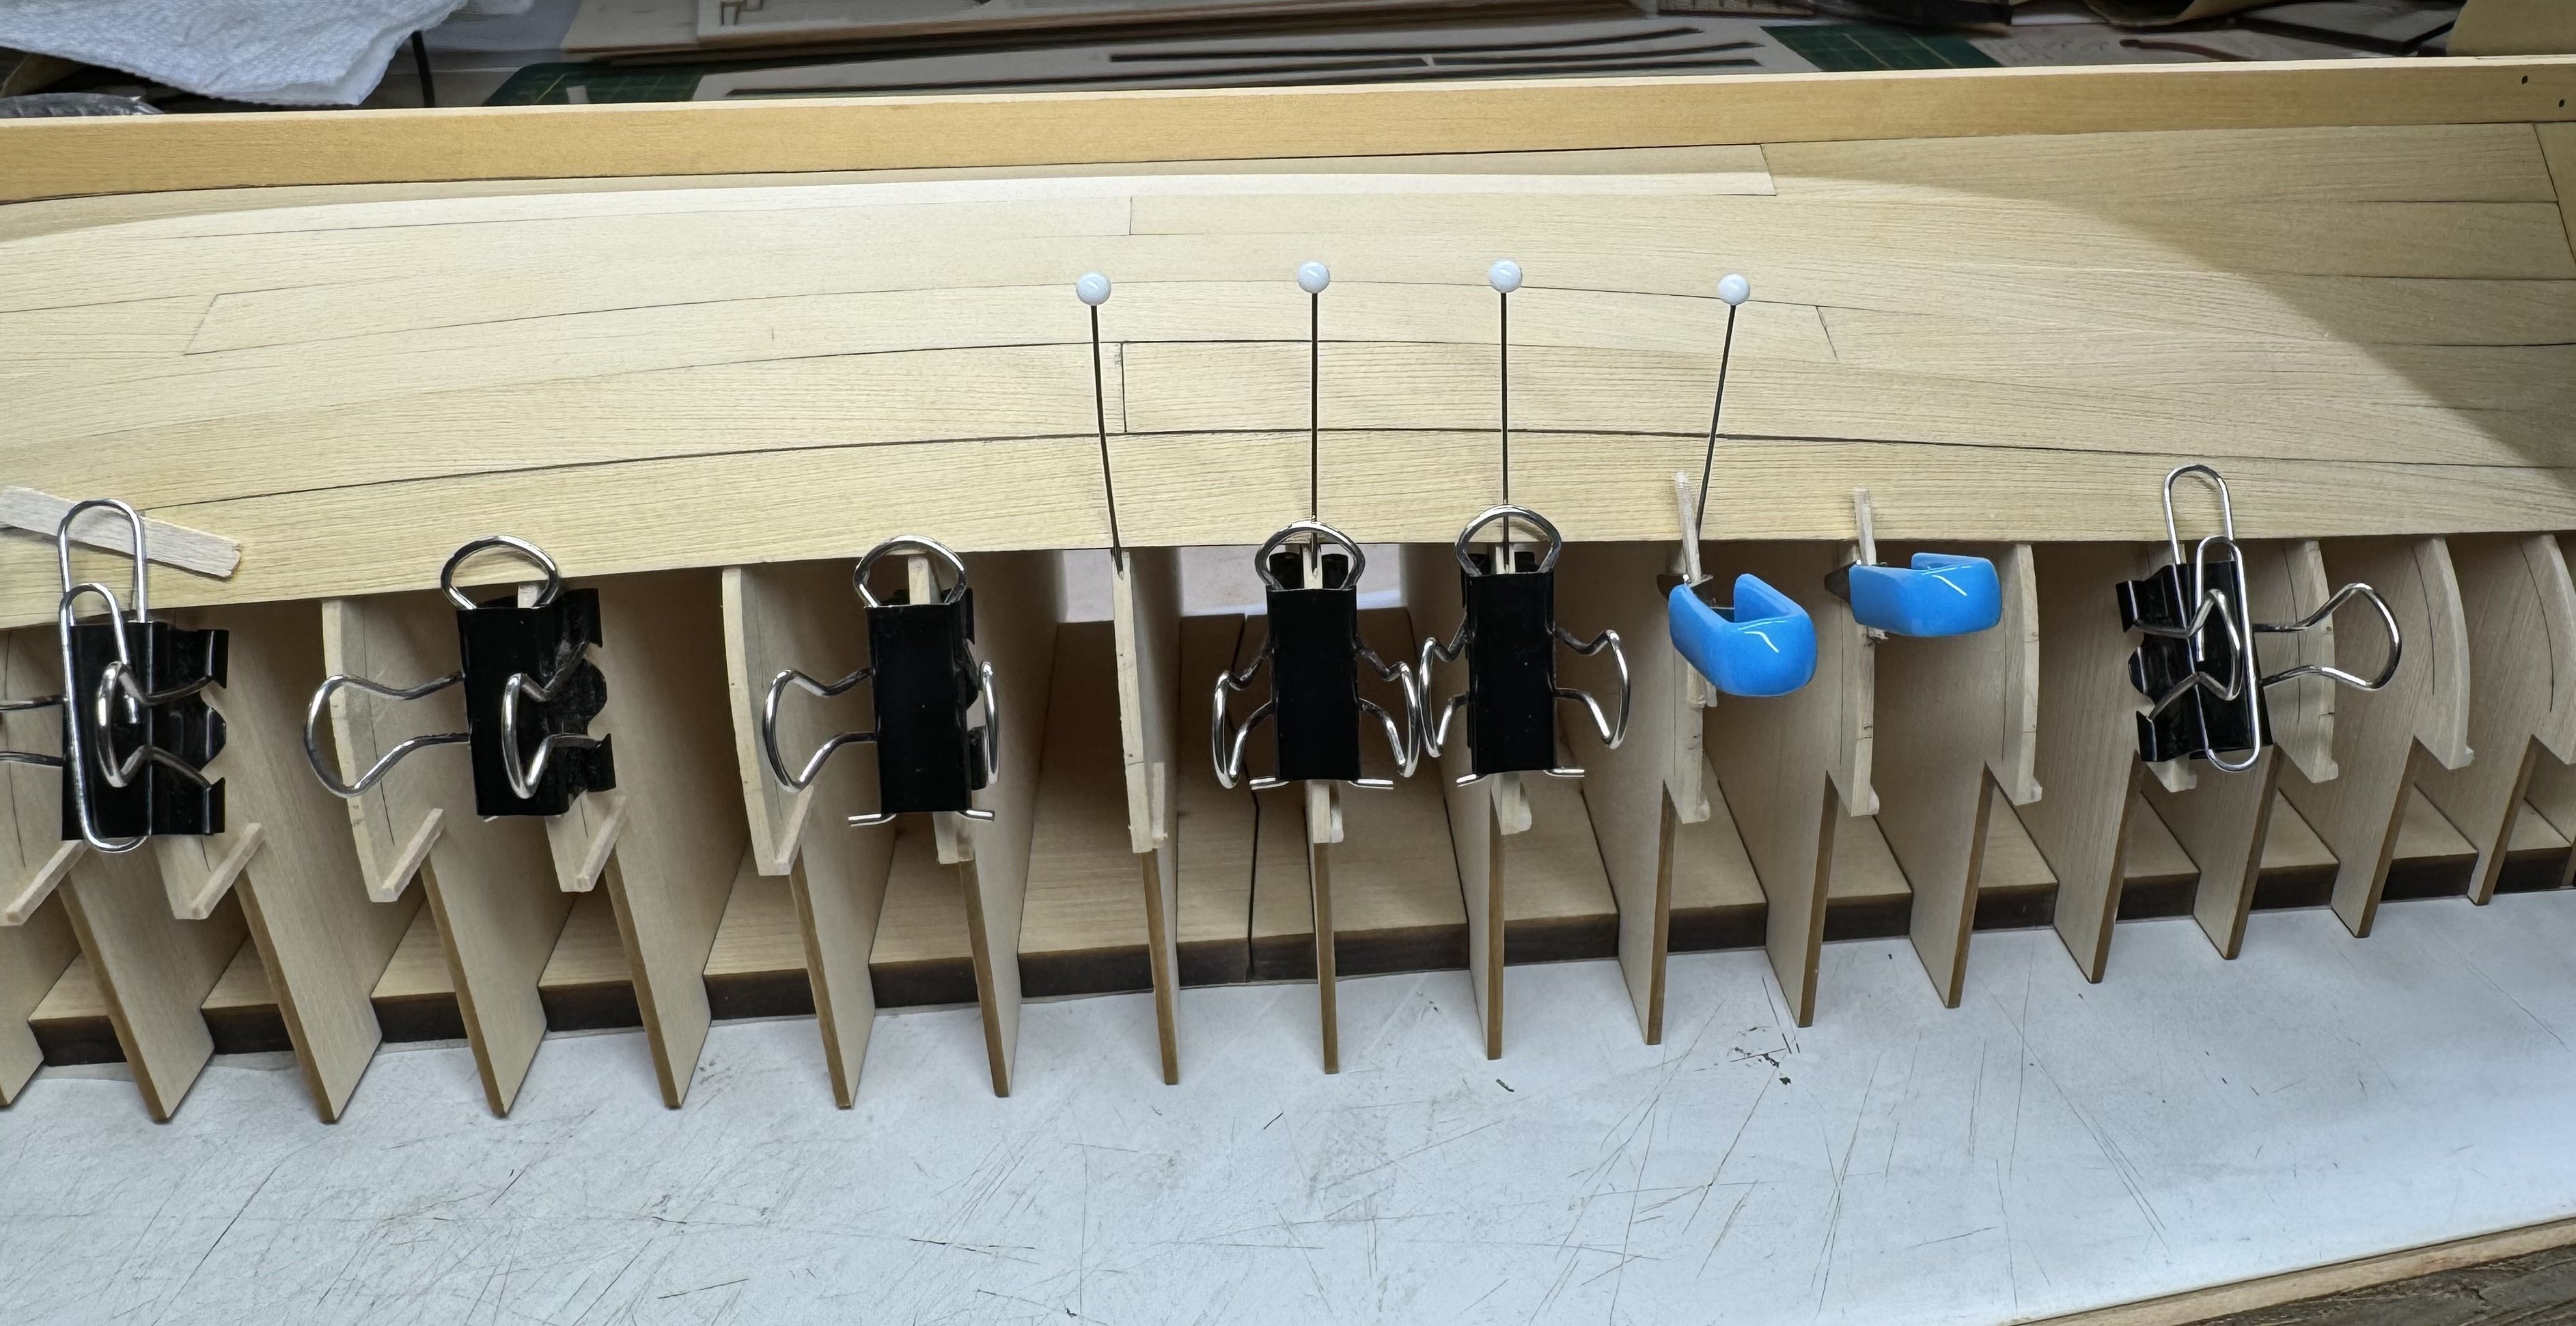
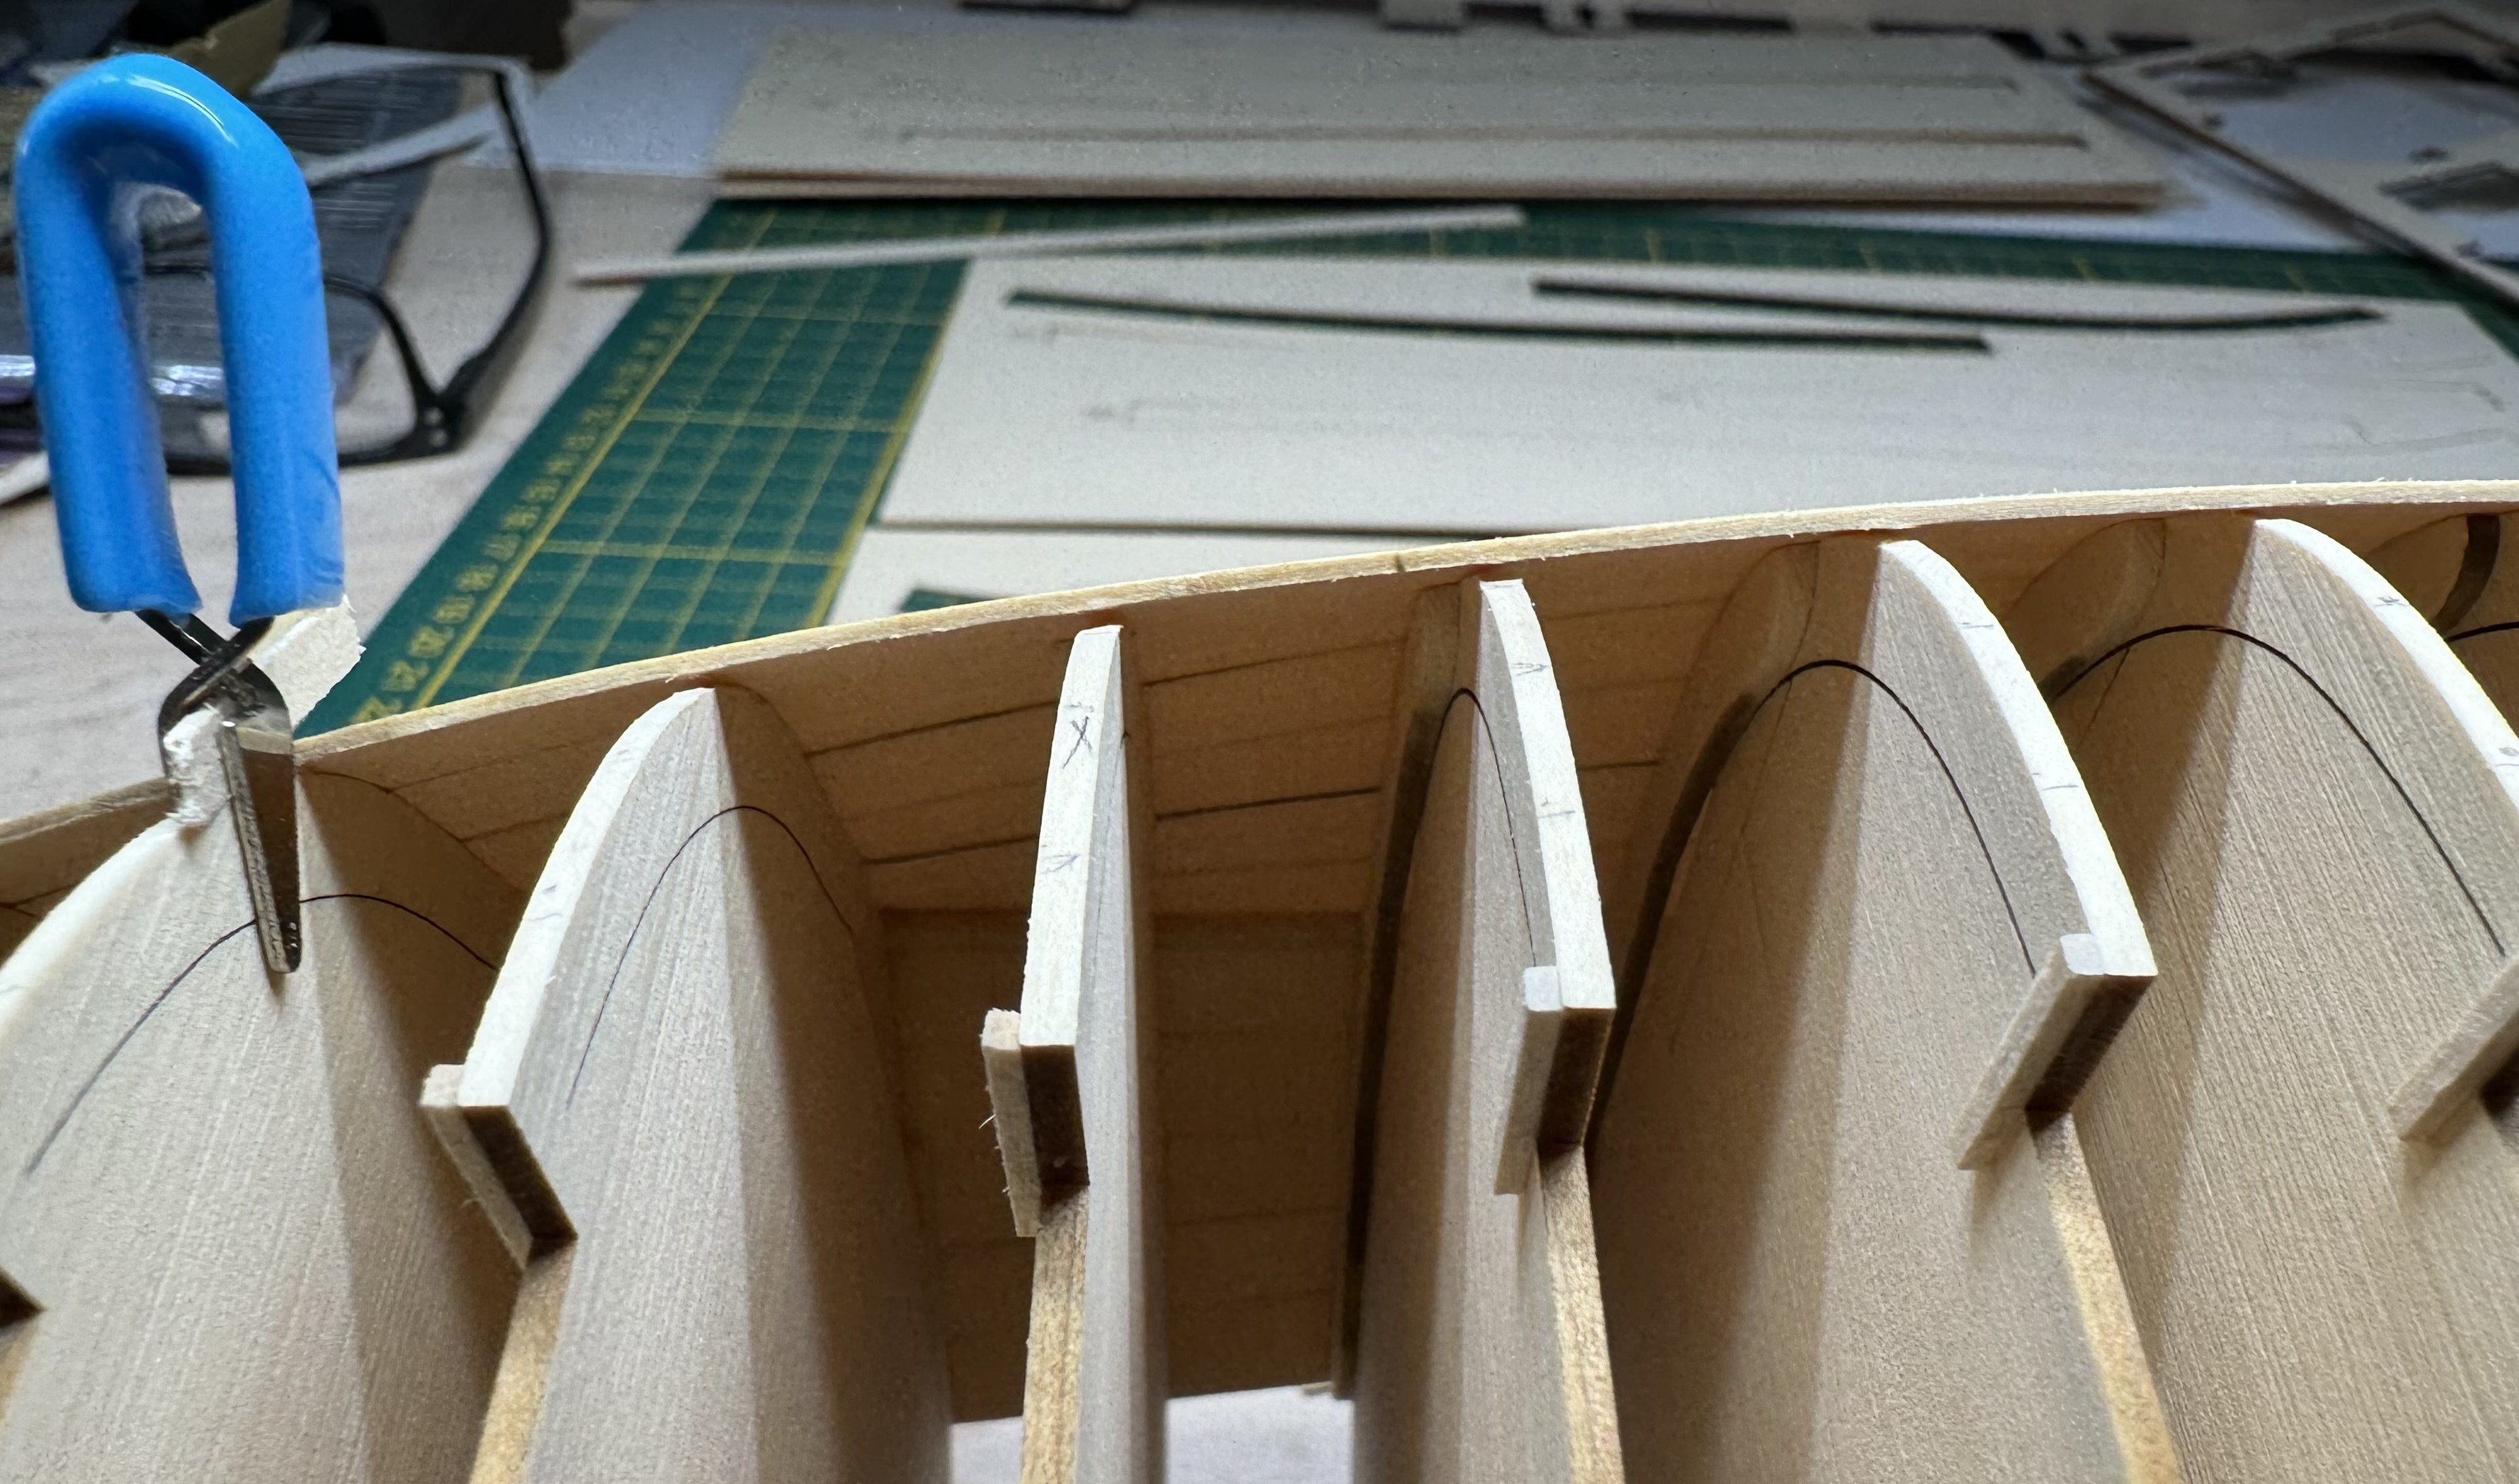
Hull lined off on both sides.
I spent at least 3 hours on these 2 planks. I still ended up with a result I didn’t expect or notice. I do have a plan. I’m in no hurry.
- Ryland Craze, Chuck, Tossedman and 2 others
-
5
-
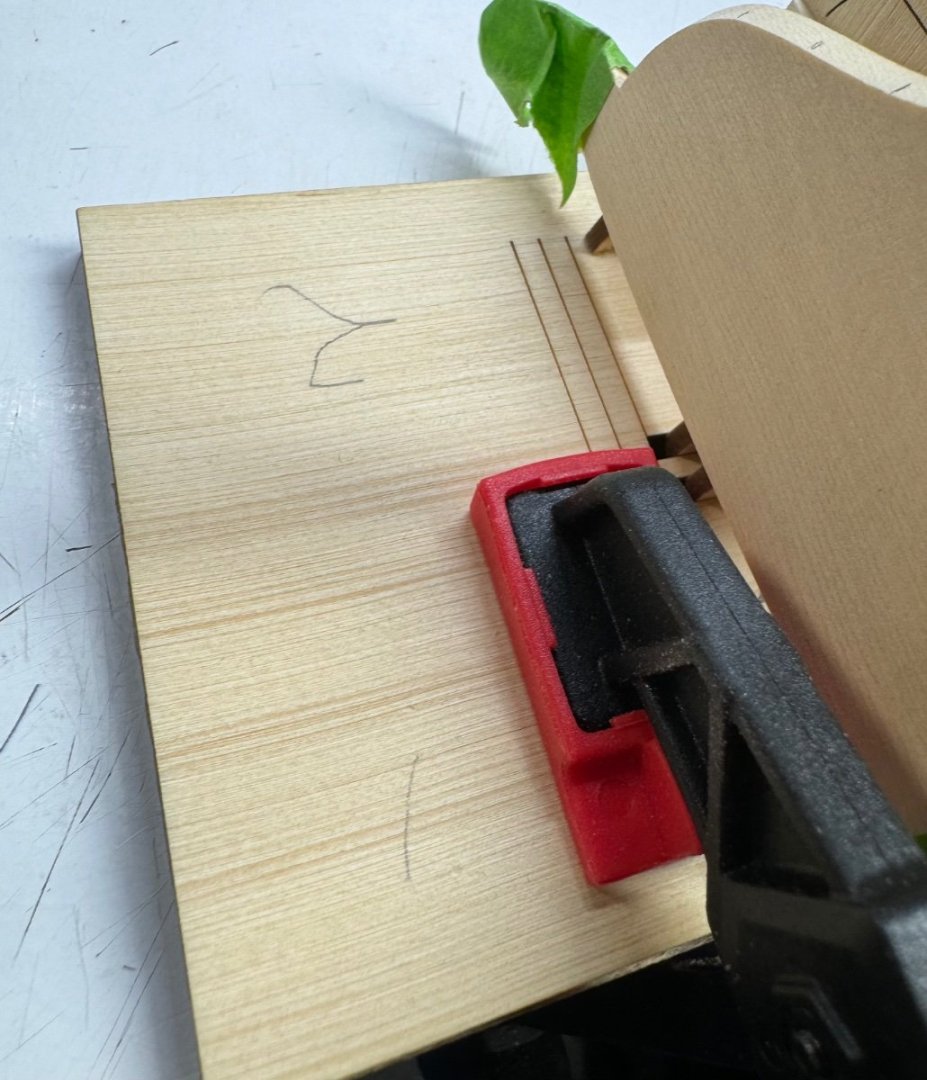
The chartpak 1/64 tape is entirely too much fun to work with. It’s sooo tiny. I don’t even remember why I have it. I’m still studying this part to be sure I understand it before I mark it up more.
- Dulrakk, Ryland Craze, Chuck and 2 others
-
5
-
As I learn how to line off a hull. It dawns on me I planked the Bluenose blind. I think I understand belts now too. I planked the whole hull on the Bluenose without any markings. It turned out pretty good lol. Which right now seems like it was dumb luck.
I made frame tick templates with 9 planks each. Both sides seem close to center equal. I did take care to center the frames and make sure they looked good before and after sanding/fairing.
-
-
On 2/27/2024 at 7:05 PM, robert952 said:
Personally, I like the amount of detail and number of photos. Nice close up work on the images.
BTW, I found it useful to look at the assembly instructions that Chuck posted for this group build. They help tie your progress with the process.
Thanks for sharing the details.
Good advice. Chuck’s build pictures look a lot like the parts to print from PDF. Only I can save them and zoom in on them!
My printer at work took 110lb card stock (didn’t jamb up), I printed the templets for lining the hull, I got it very close to 1” exactly. I’m excited to see how it all works out.
I need to read part two a few times before I get started.
-
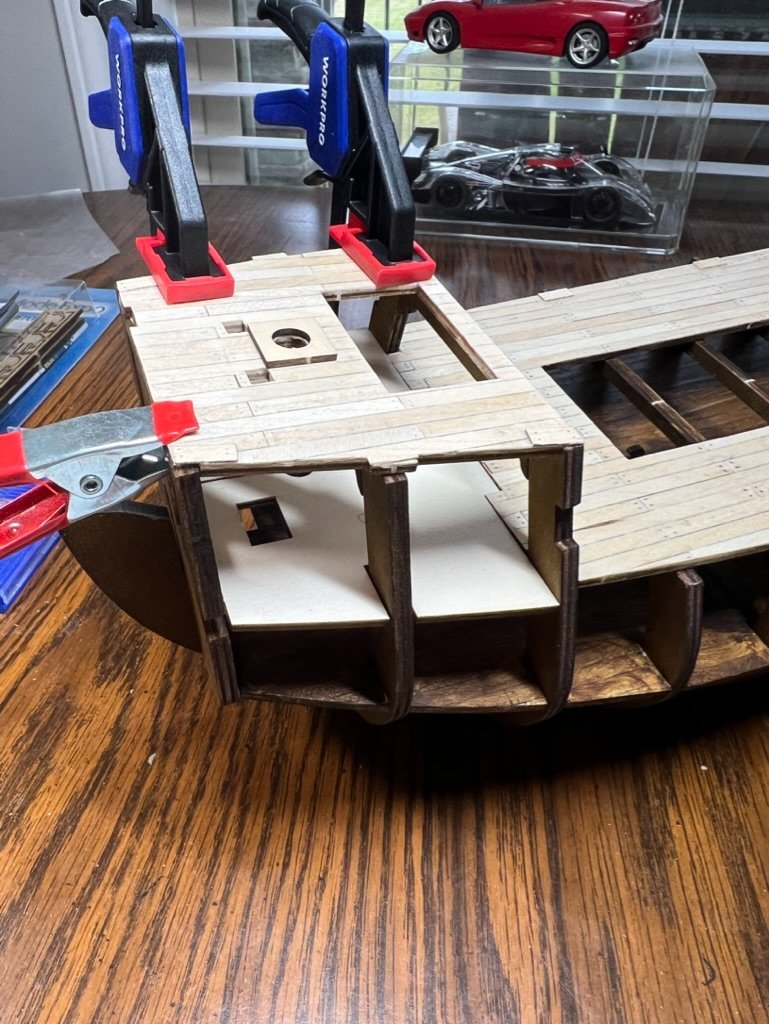
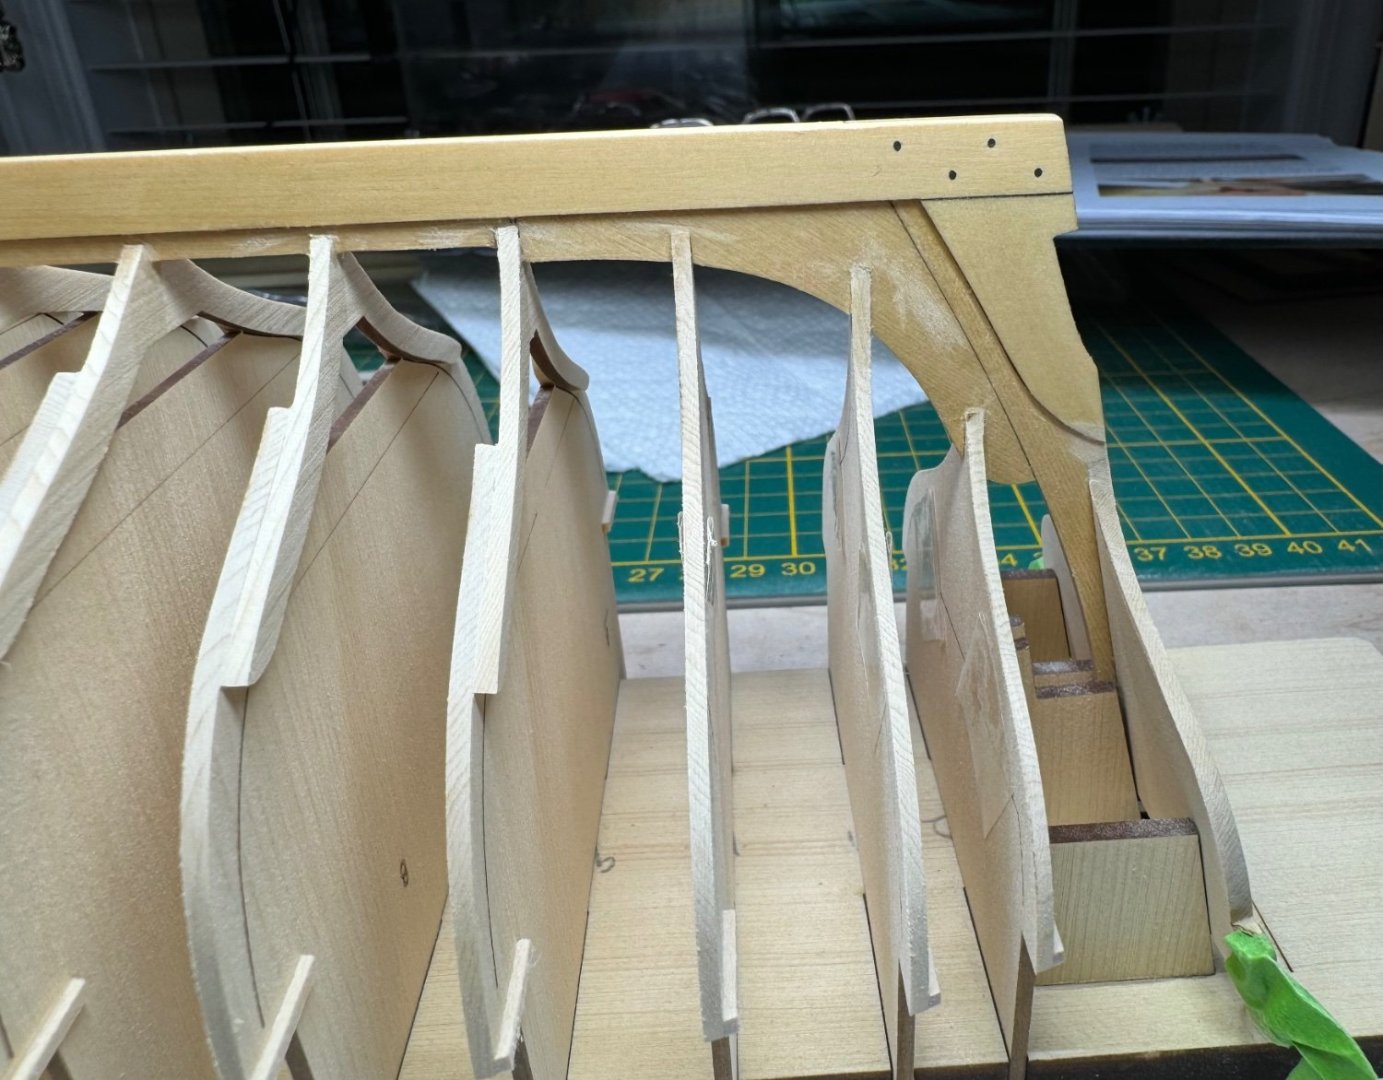
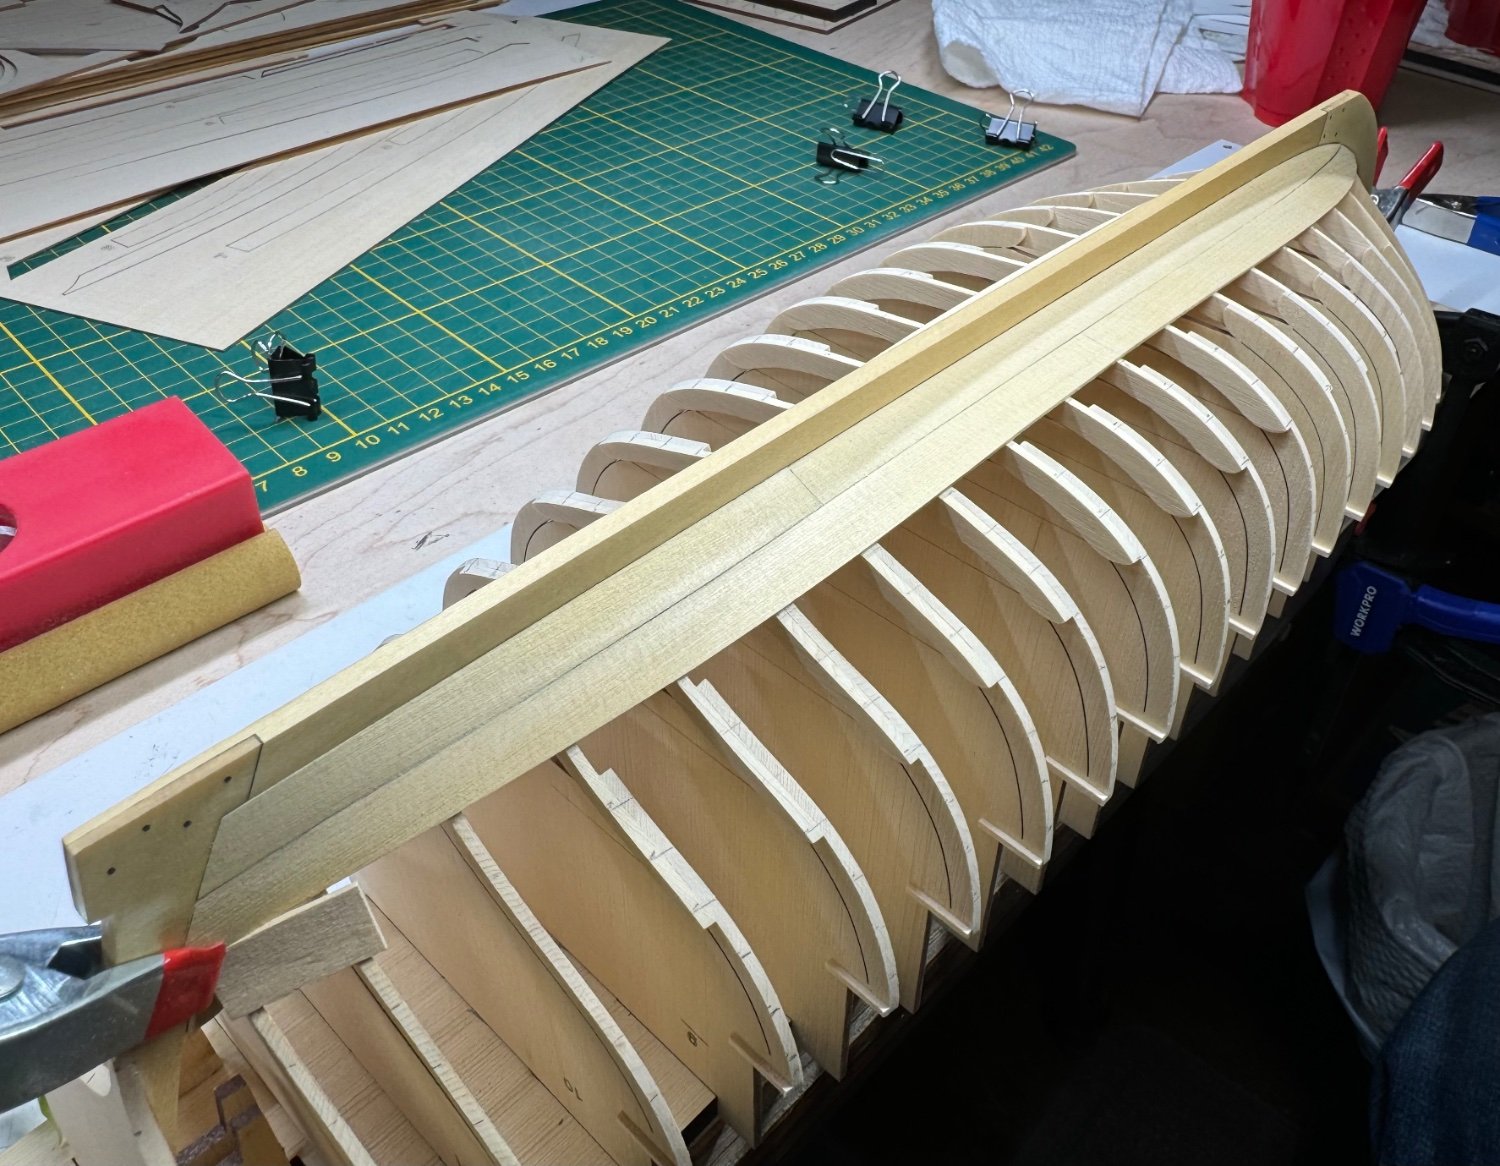
Fairing of the hull is completed. I’ve fussed over it for a bit, tried to find all the fuz to sand off.
I clipped the keel at the stern with the sanding block, I got it about even on both sides, not much I can do about it now.
Frame C thins from .063 to .049 at the top. I didn’t see it until I looked over each frame carefully for fuz and char. My boat will have character.
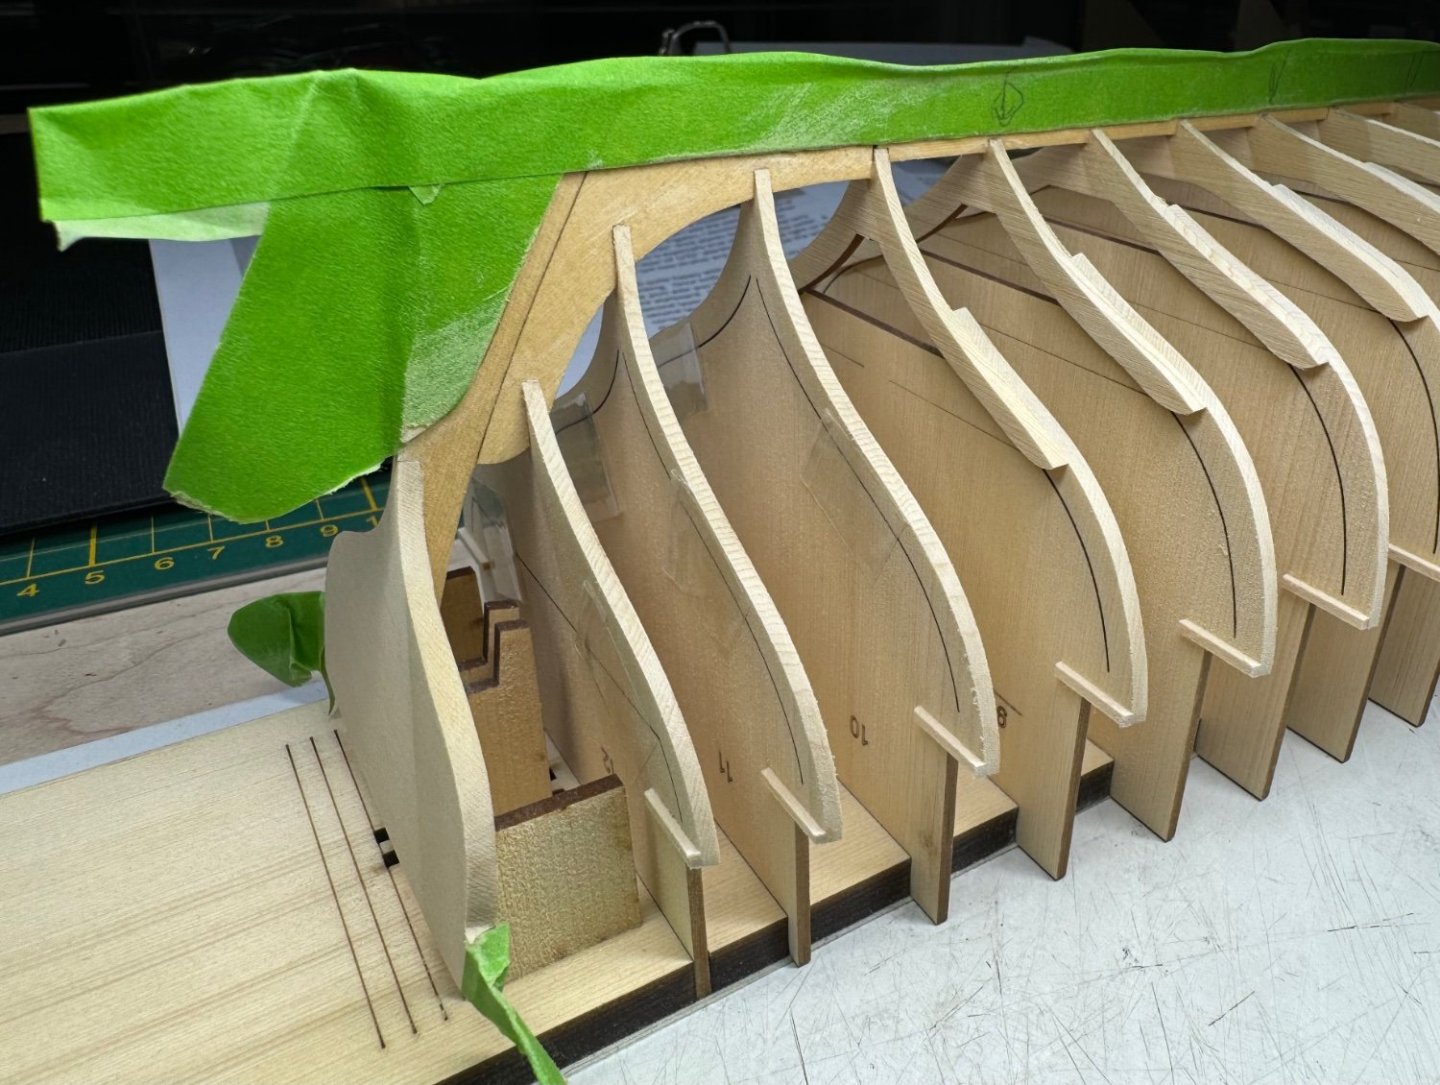
Part One is completed. Not sure when to remove the tape supports, feels like now. I’ve not seen the words to do it. I have to read each section a couple of times so my mind doesn’t skip over stuff. I actually underline and highlight stuff that’s important to not miss. That way I don’t forget when I’m scanning the write up. I still put the transom on before I did the bolts. Oops.
The planking is what I really want to get right. I’m used to wetting and forming planks. Setting with heat. Seems like just heat will help form planks from what I’ve read ahead for. Slow and steady, reminding myself. The keel looks good with my 1/32 fairing stick test fit.


-
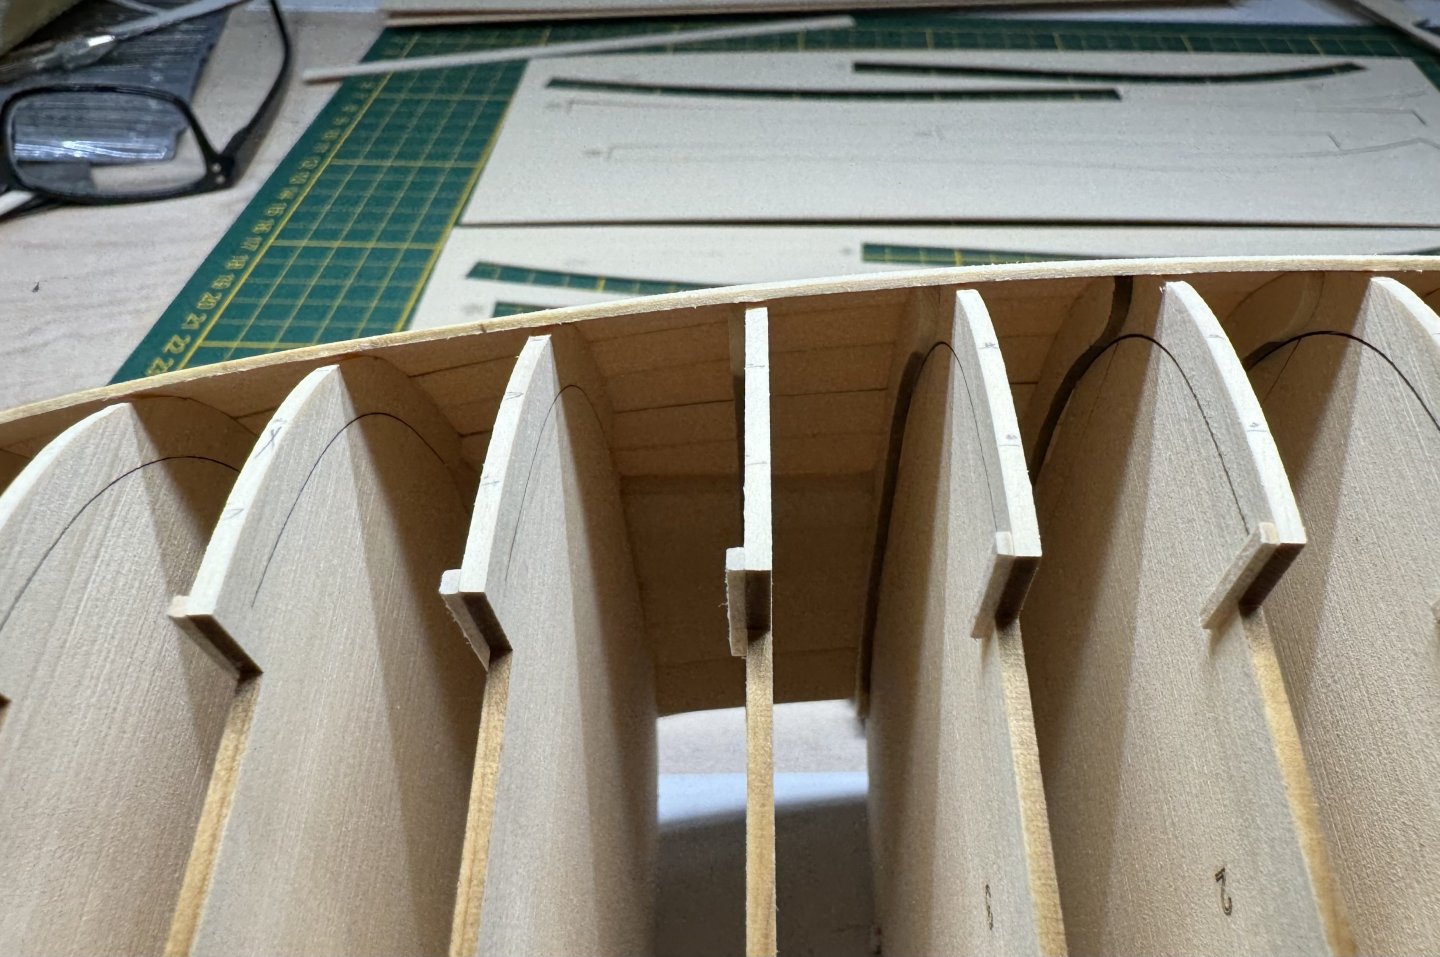
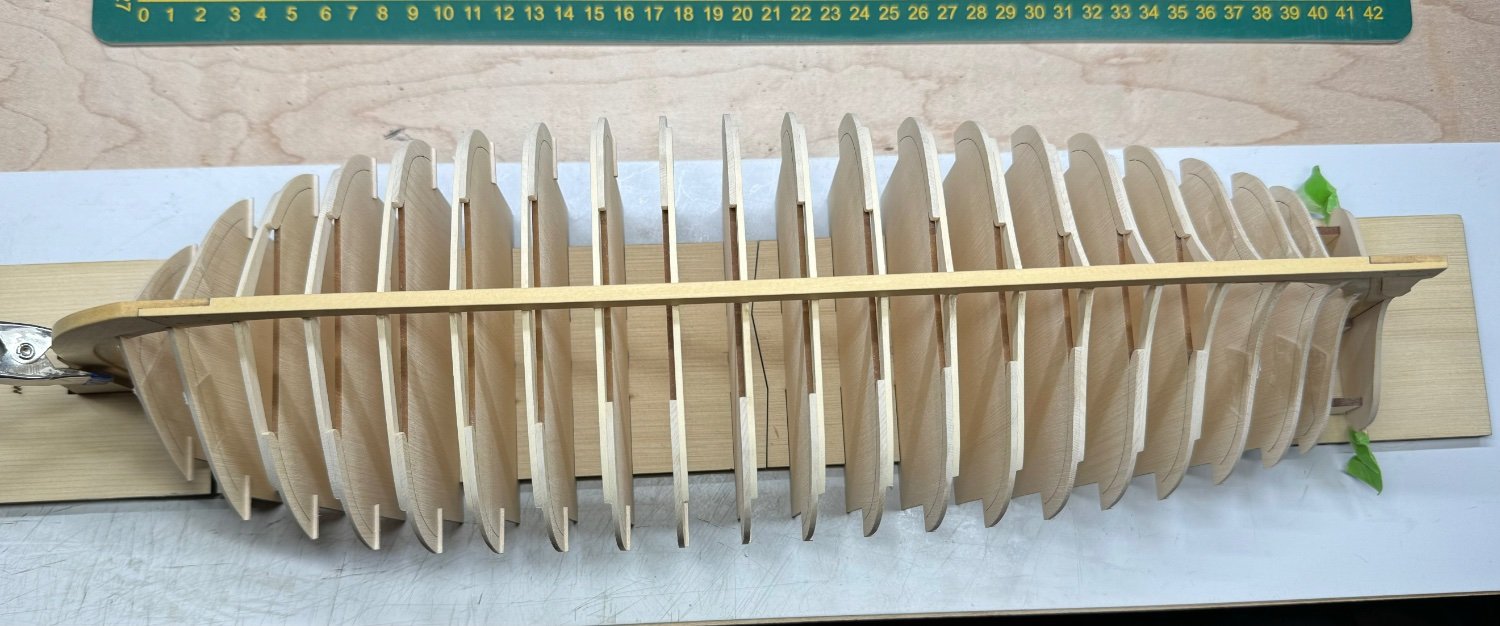
It feels like I’ll break every frame fairing them.
It's kinda neat to realize the front middle and back have the same number of planks. I faired it trying to follow the lines of the planks, like they would flow. Fairing the stem always gives me trouble, my fairing stick lays down well.
Too many updates? Too many pictures? I go in short spirts. I’m happy with the fairing of the left side.
- davec, Knocklouder, Diver and 6 others
-
9
-


Medway Longboat 1742 by MajorChaos - 1:24 scale
in Medway Long Boat - 1742 - Public group project.
Posted · Edited by MajorChaos
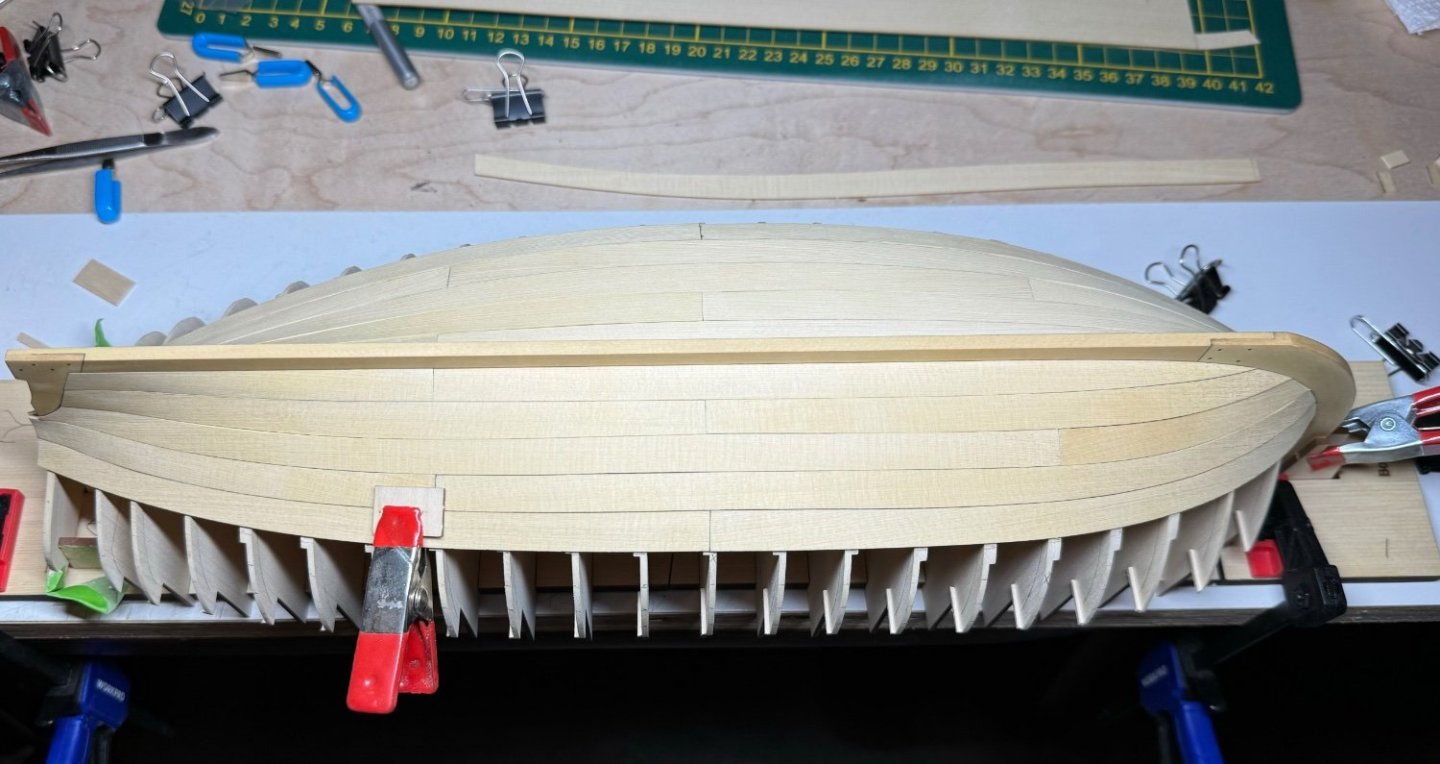
I'm seeing the dents. I’m getting most of them out. I’m able to bend the planks well with water. They hold there shape well, it’s the curve of the frame I’m struggling with. 13-1 it’s laying down nice so far. I’ve tried the heat, I can’t get the plank to stay bent/shaped. I’m struggling with the pieces staying springy. I can get some areas great and others spring up. I’m getting better with each plank. Maybe I’m not getting the plank hot enough. With the water I can break the structure of the wood and can’t feel it go limp. Kinda like a wet noodle. It becomes very ply able. Then I use heat to set the curve. I’m not able to reproduce your results with heat only, my lack of skill for sure.