HOLIDAY DONATION DRIVE - SUPPORT MSW - DO YOUR PART TO KEEP THIS GREAT FORUM GOING! (Only 36 donations so far out of 49,000 members - C'mon guys!)
×

MajorChaos
-
Posts
301 -
Joined
-
Last visited
Content Type
Profiles
Forums
Gallery
Events
Everything posted by MajorChaos
-
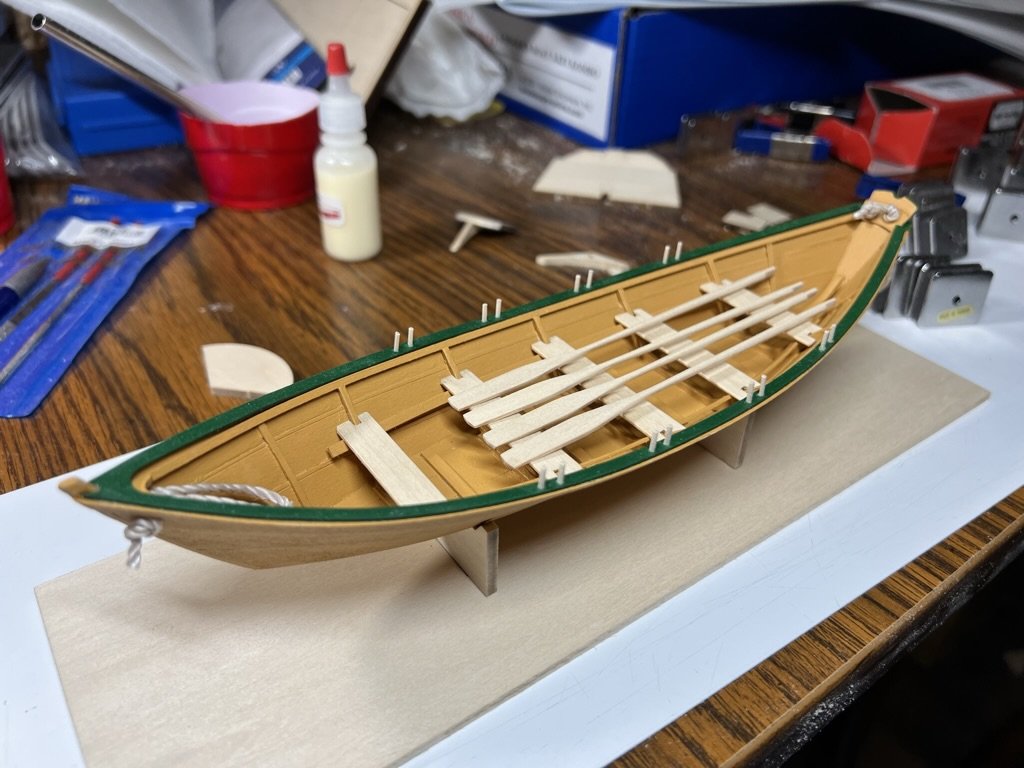
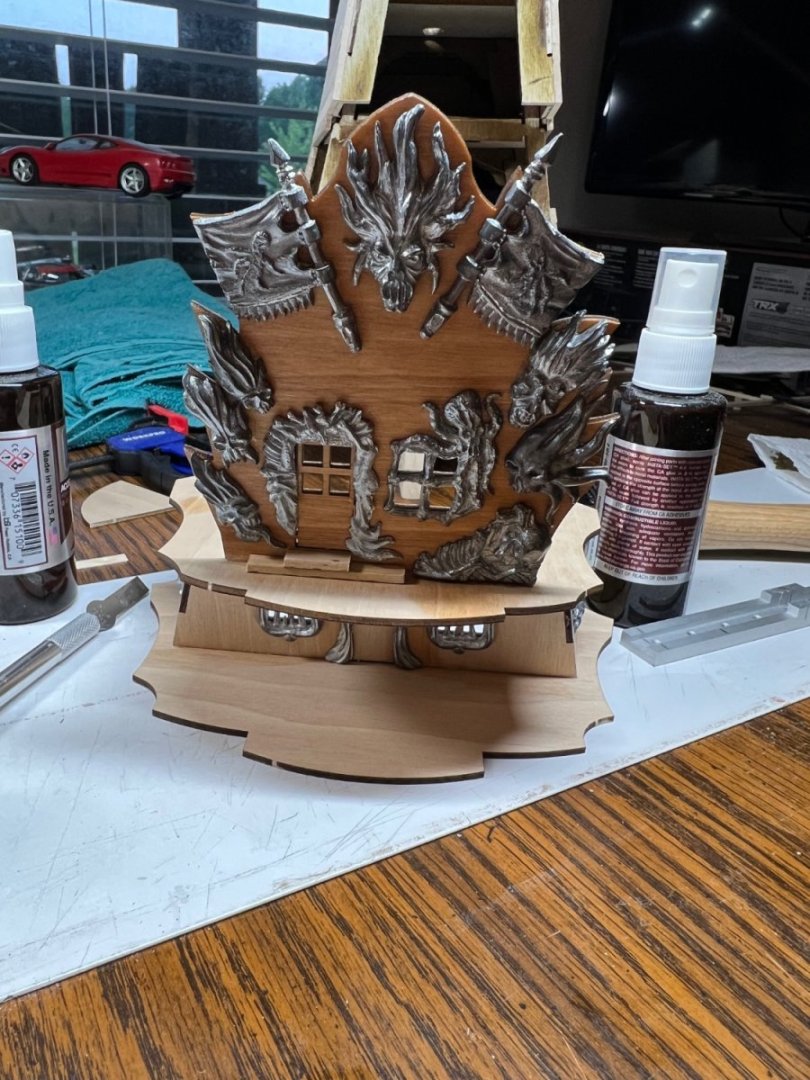
It hard to not rush these steps, it’s starting to look like something.


-
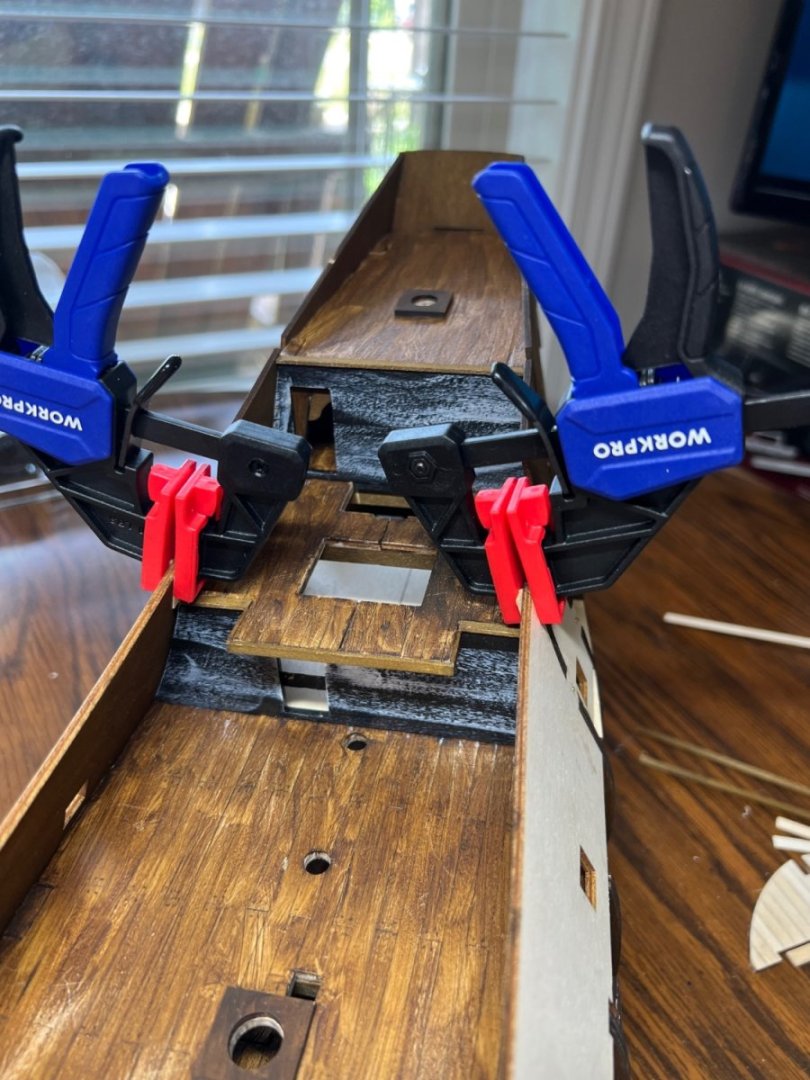
A little bit completed everyday. Super glue and some kick it to make it cute fast seems to work on the metal to wood bond.


-
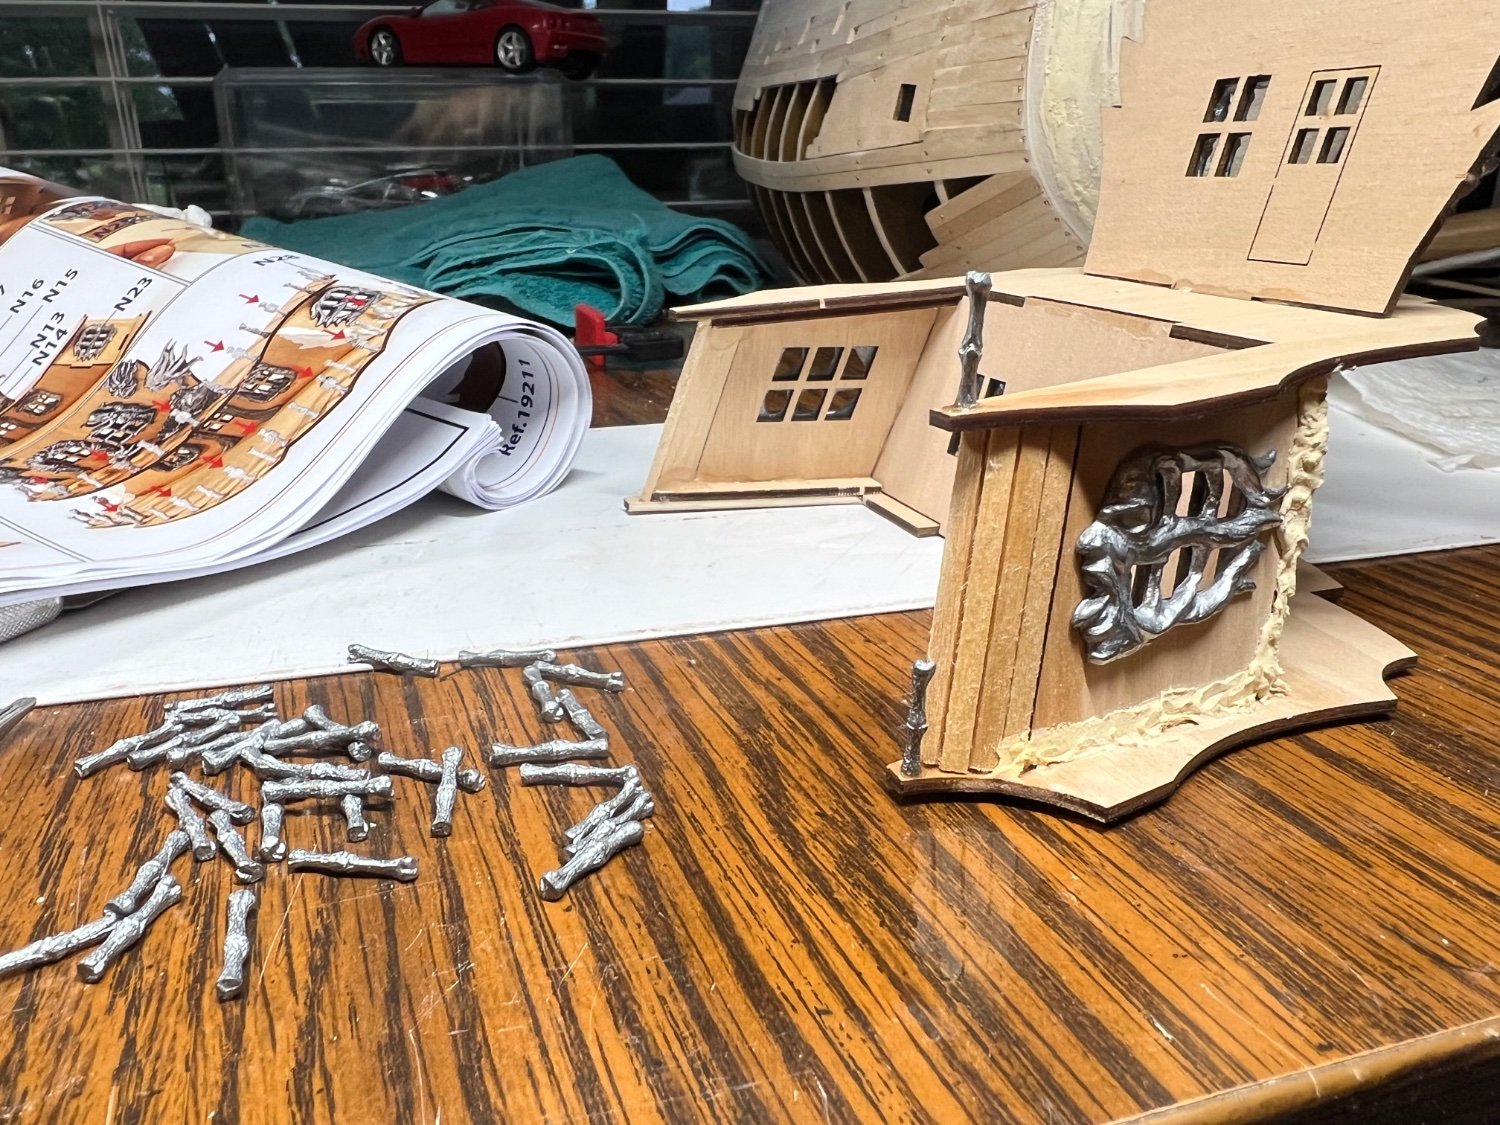
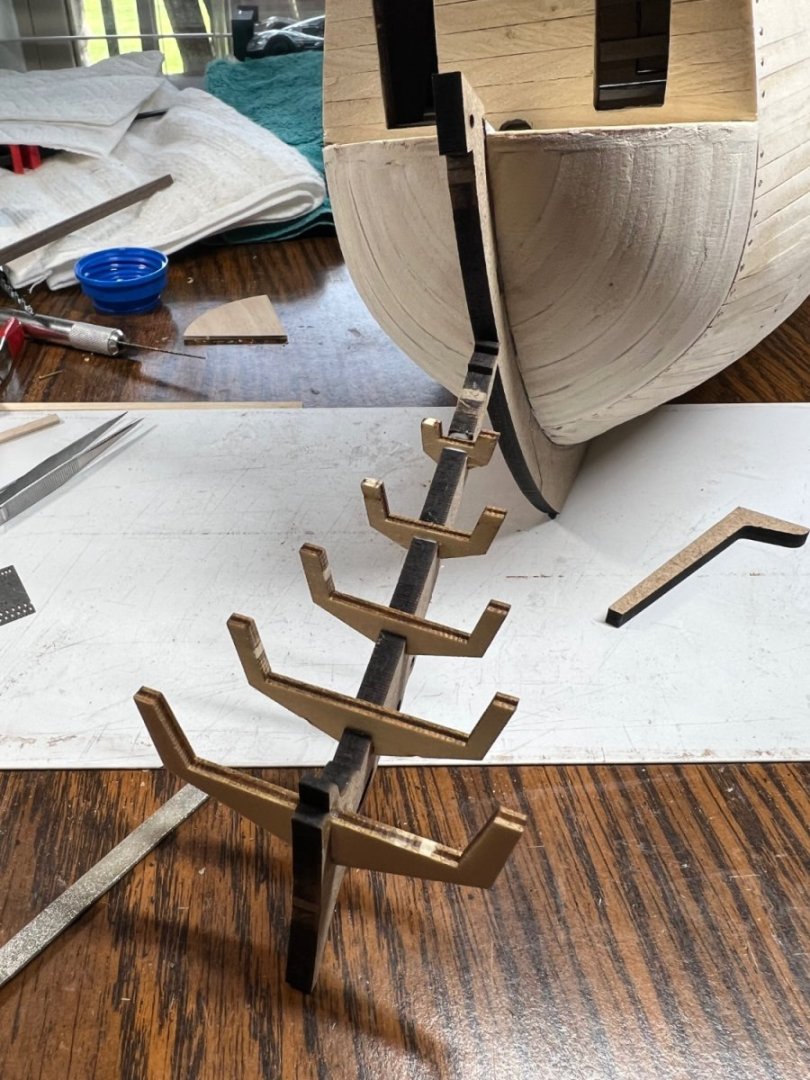
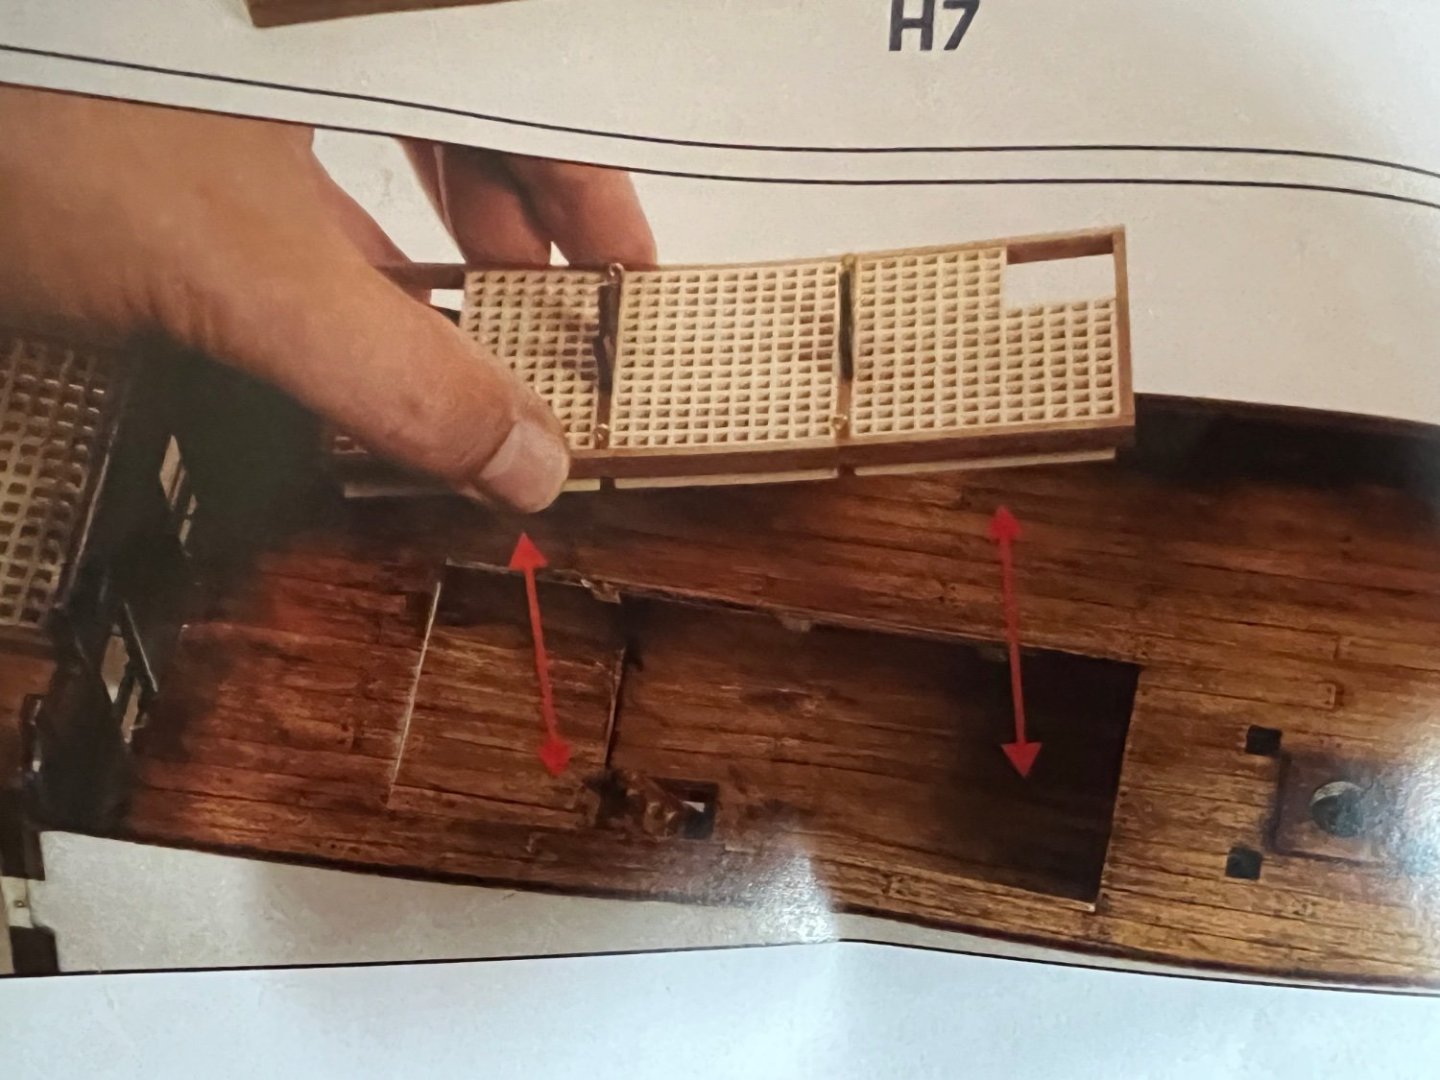
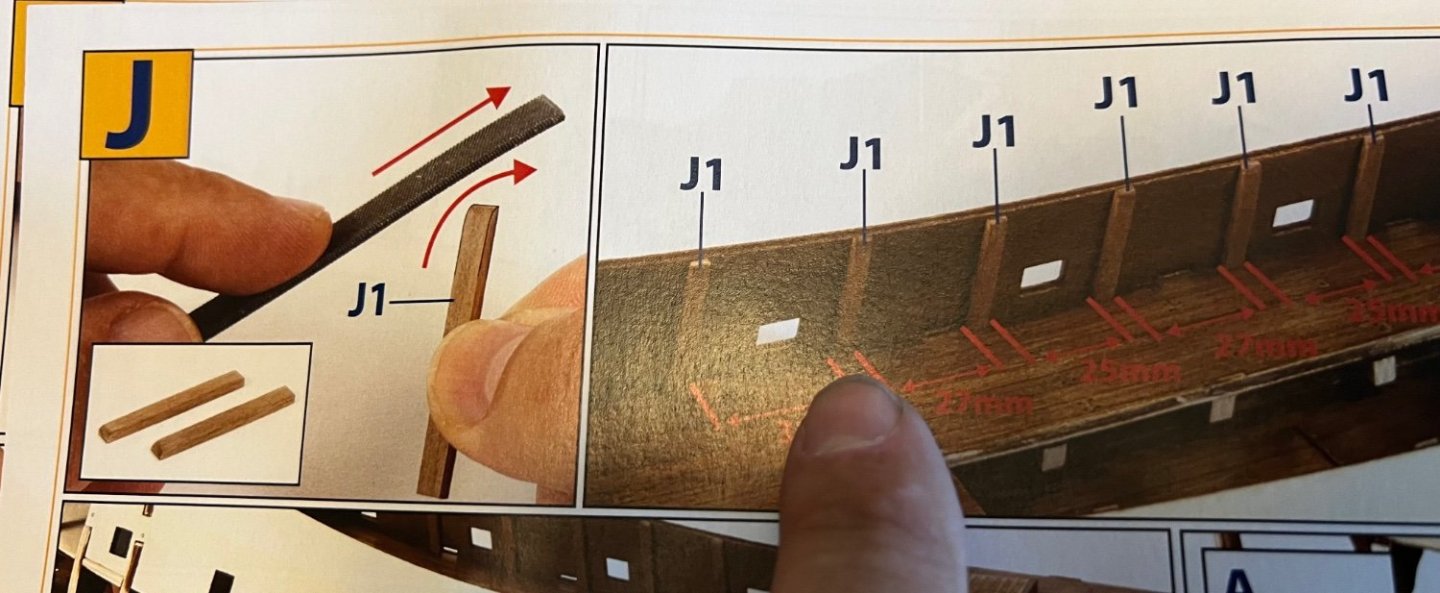
It shows nothing about supporting the assy. If you notice they very carefully place it and don’t touch it again. I’ve got some ideas.
-
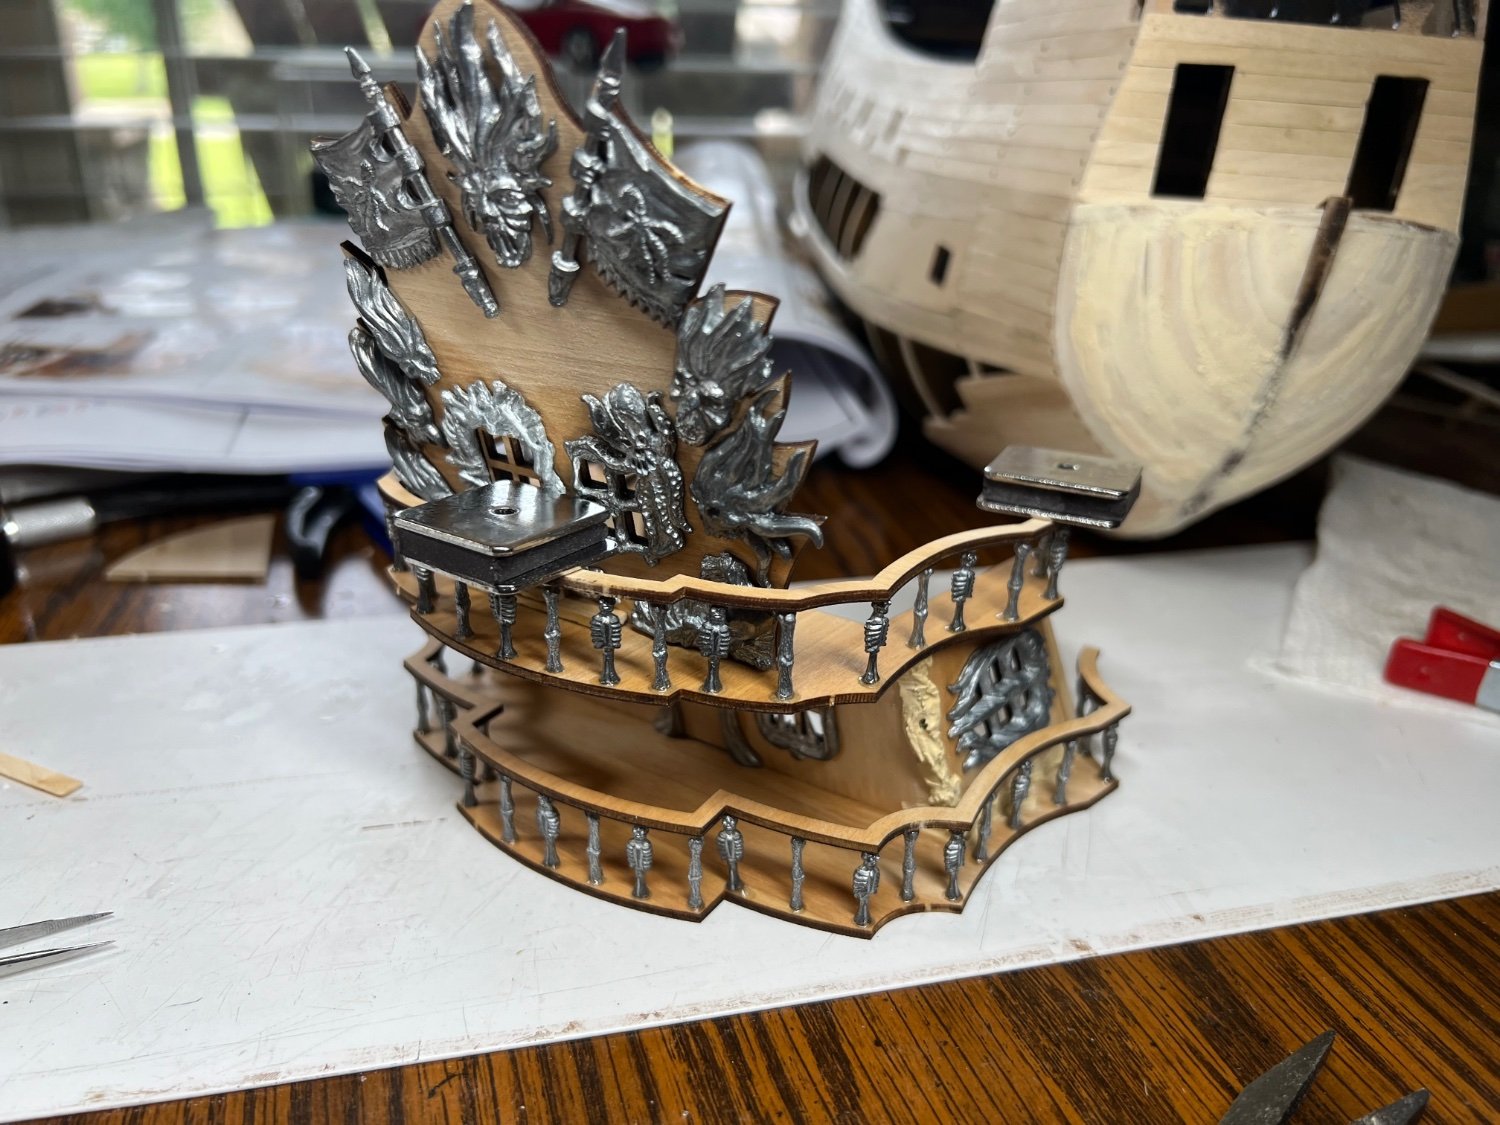
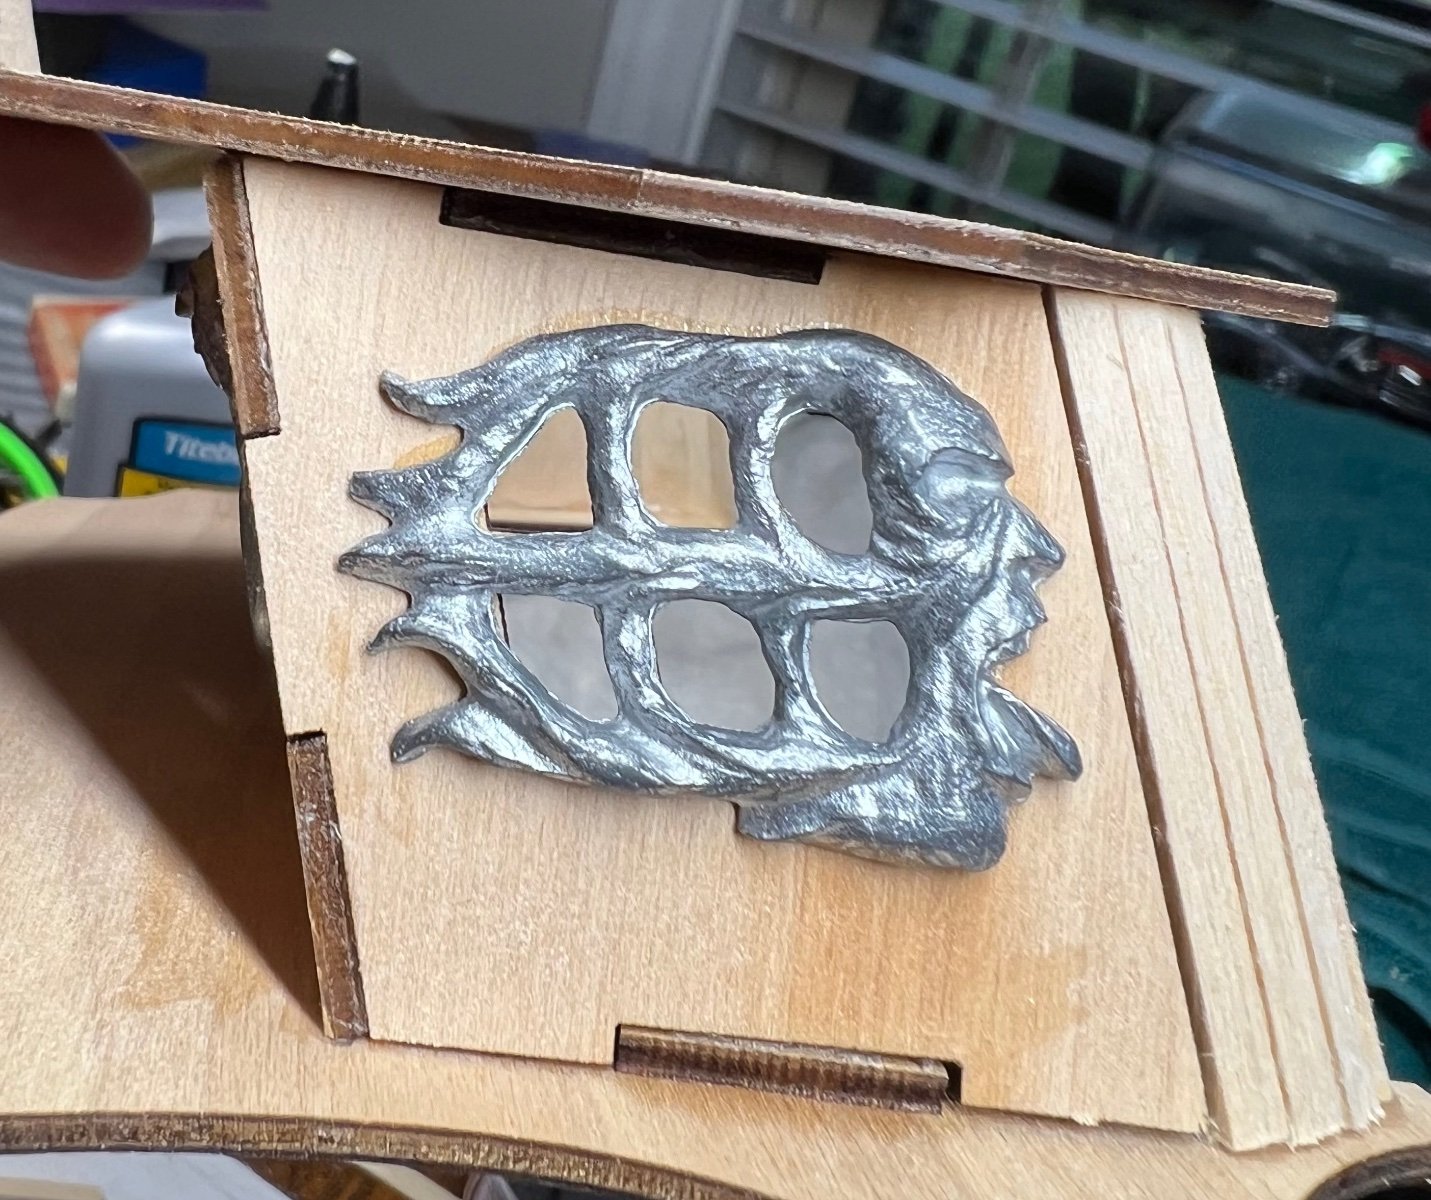
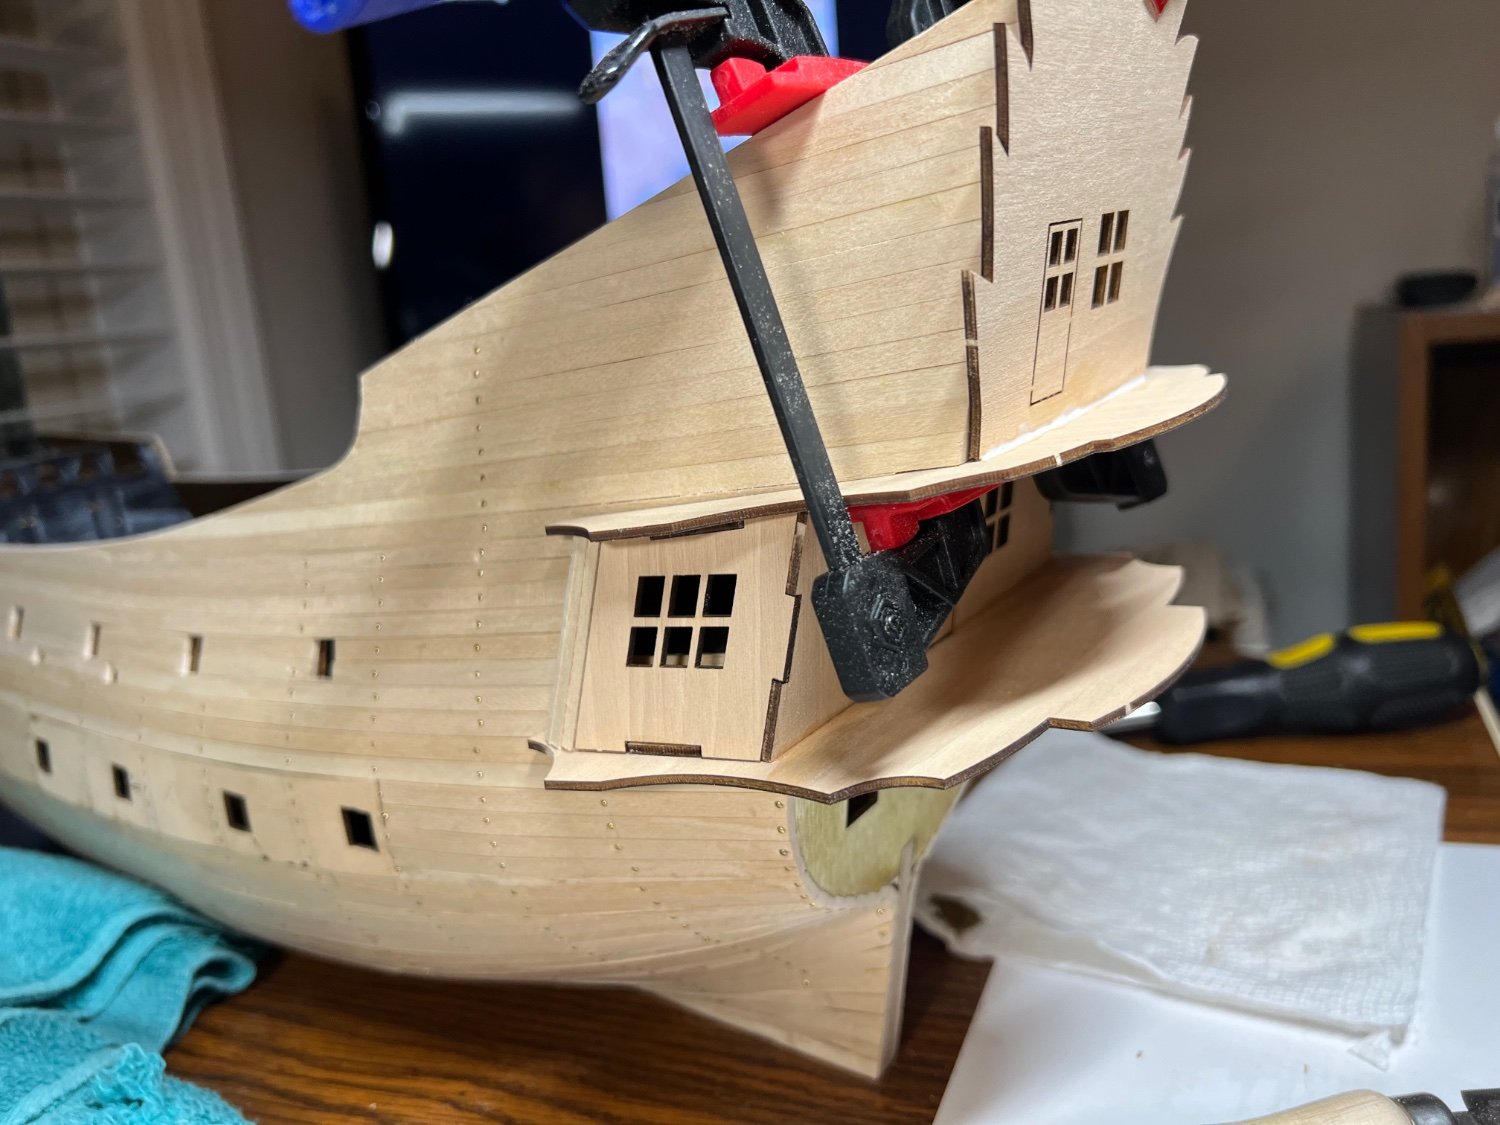
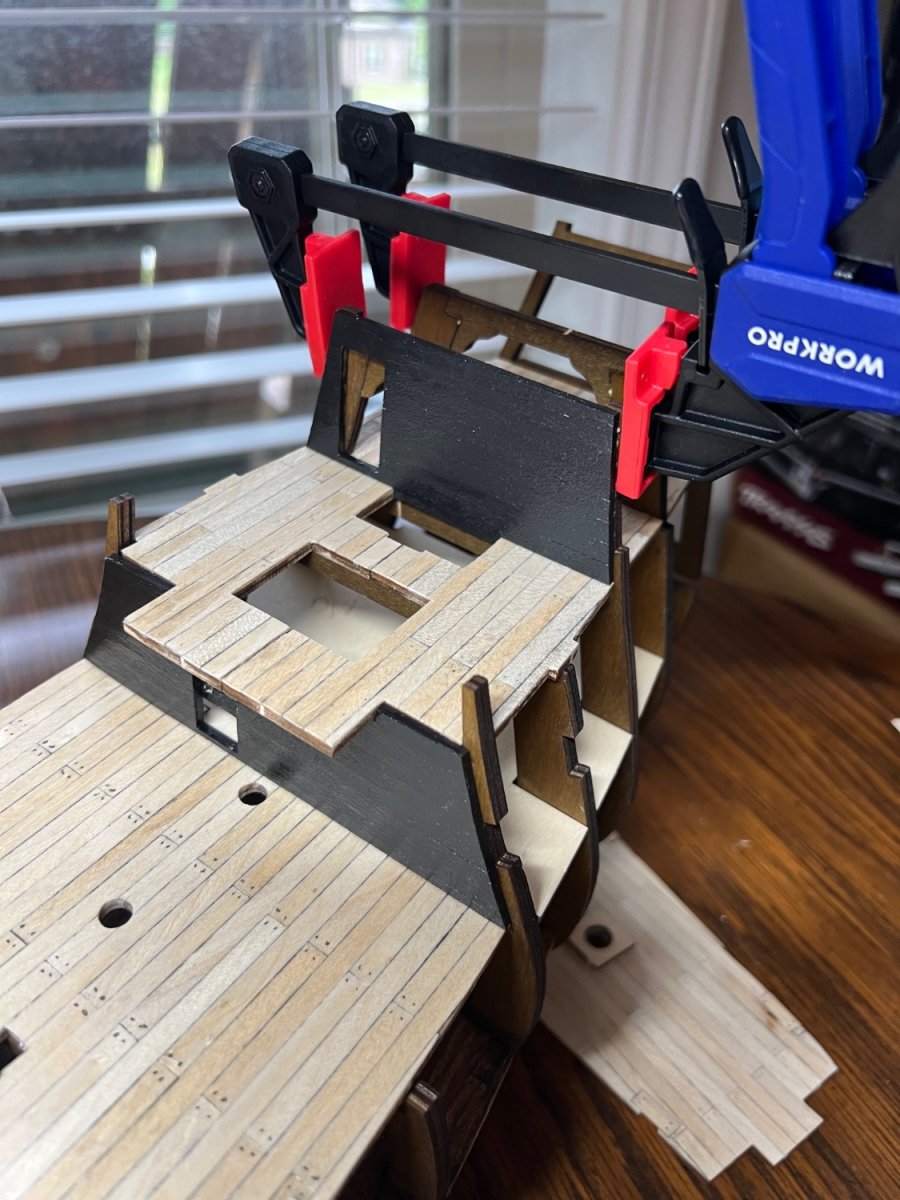
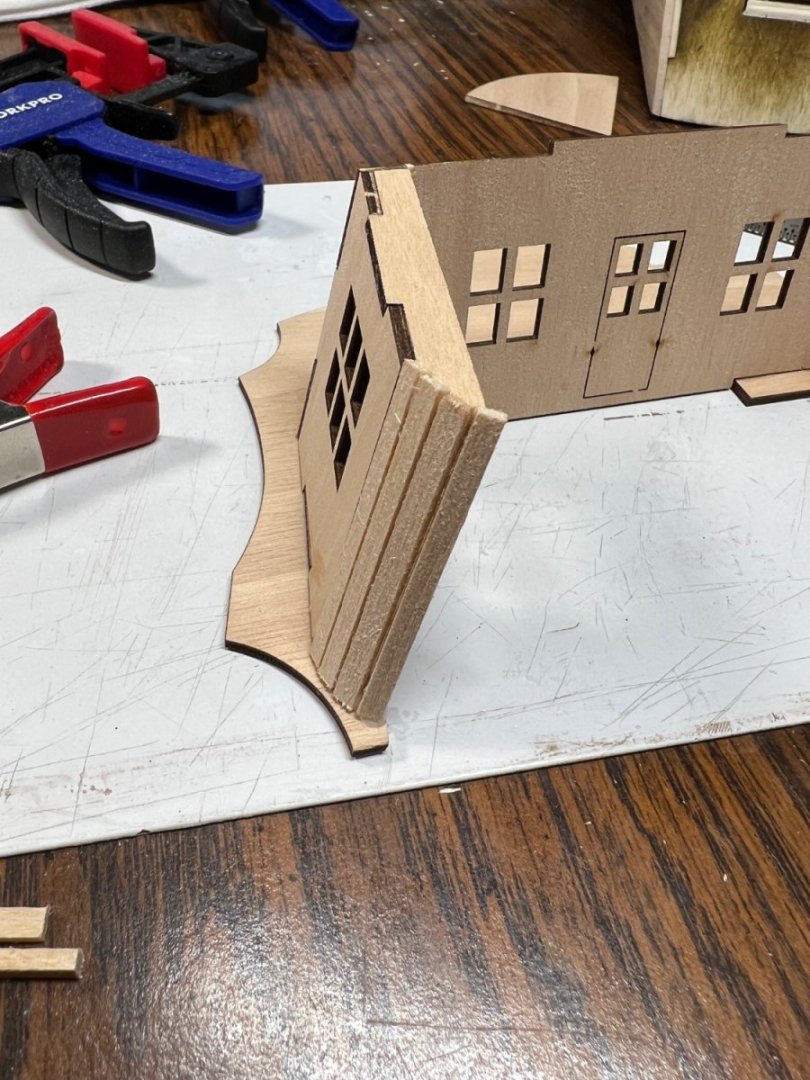
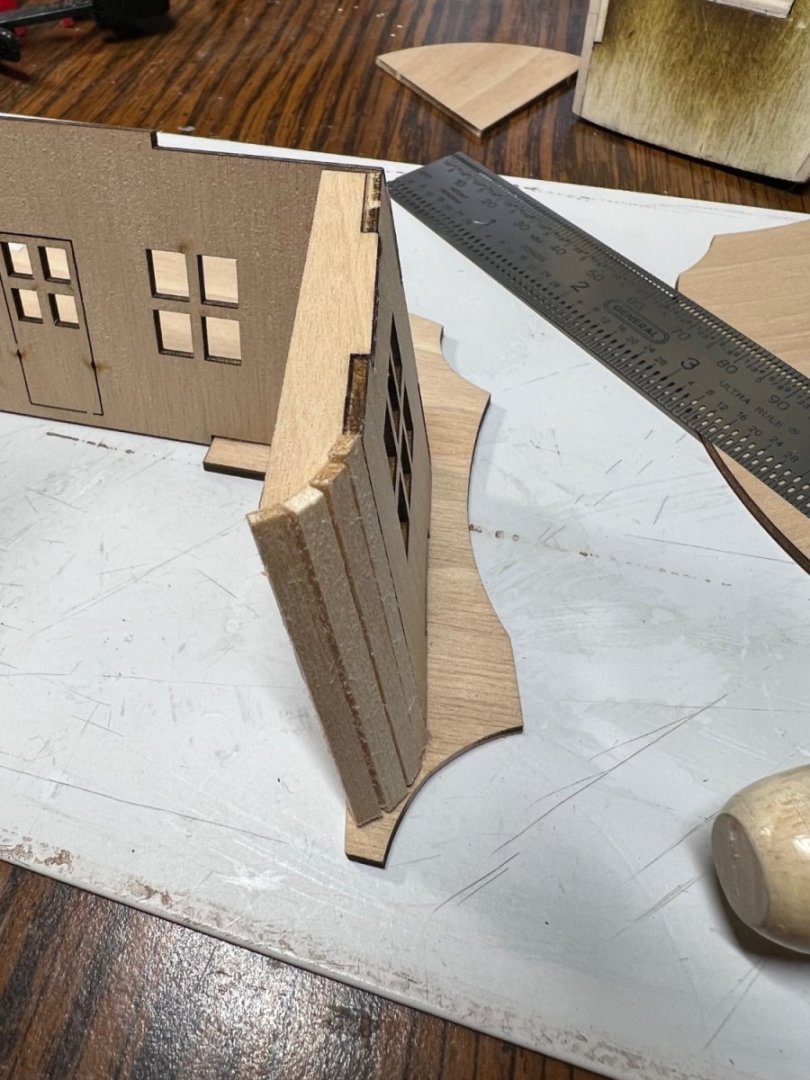
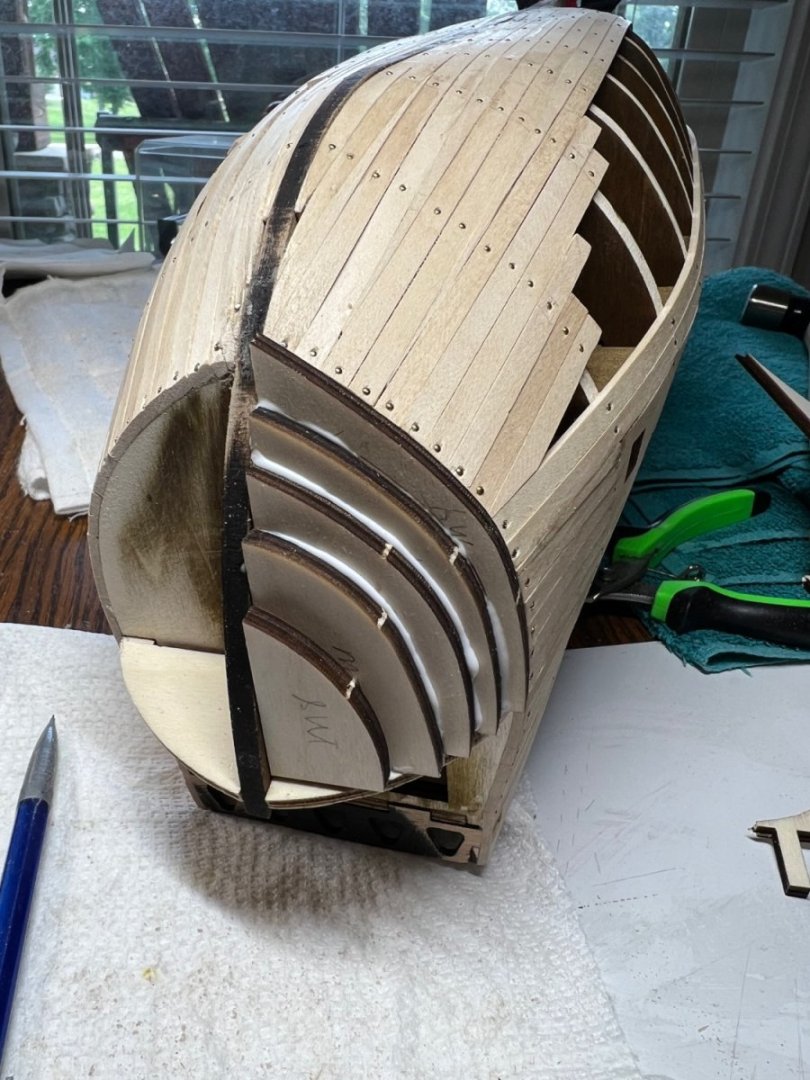
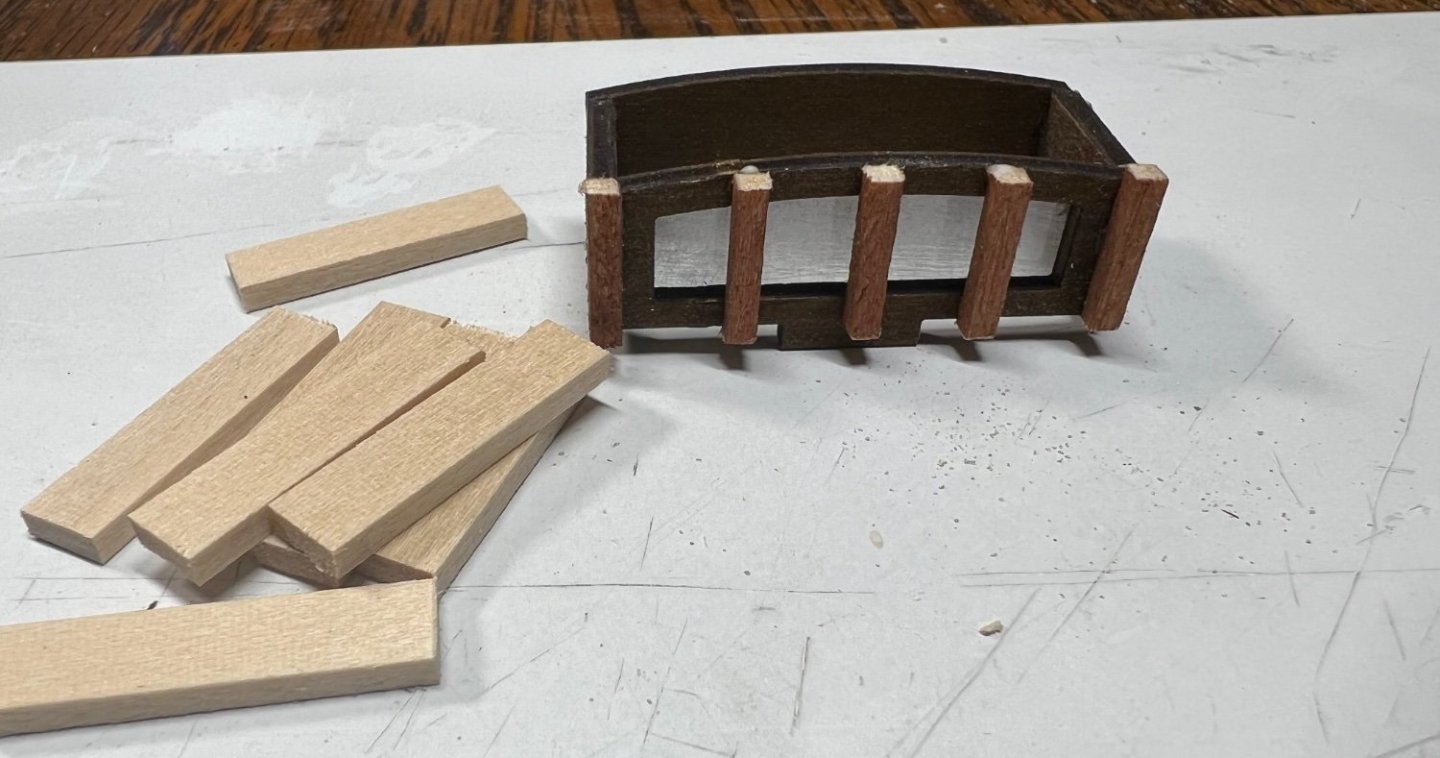
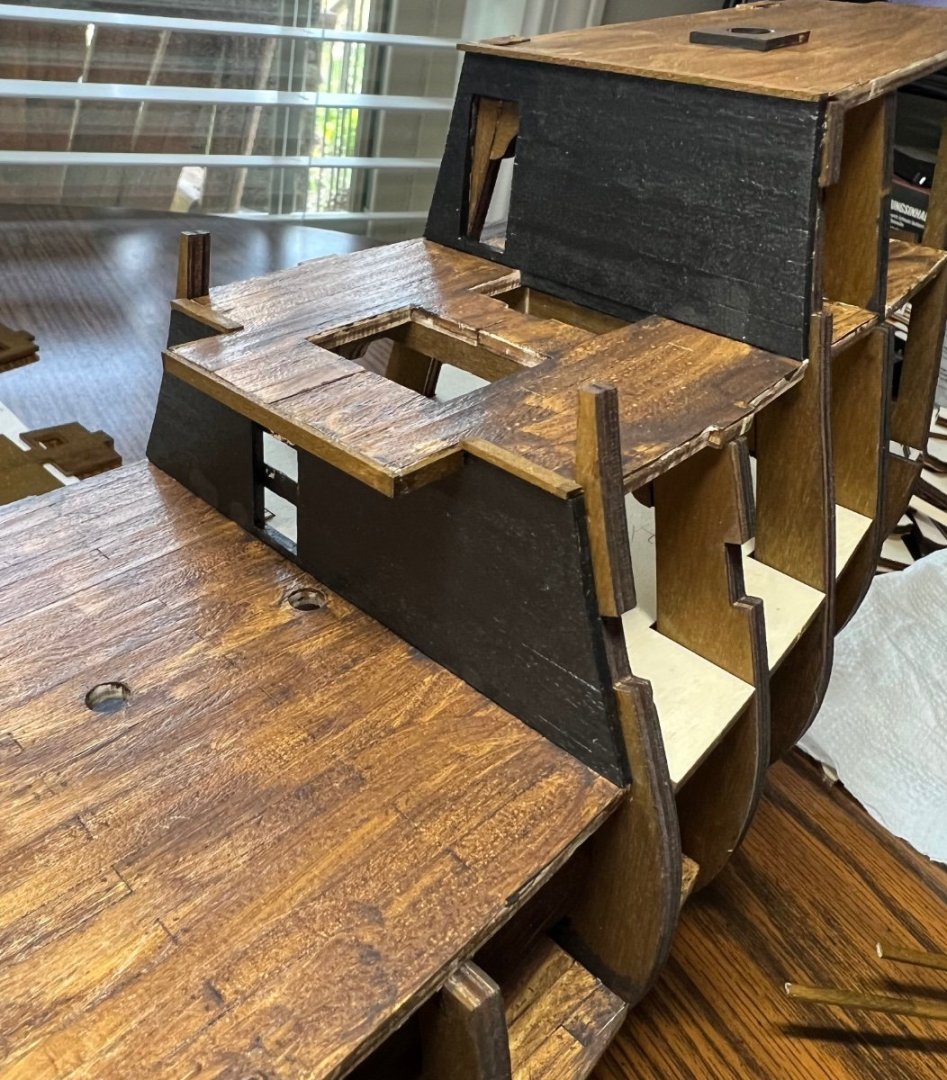
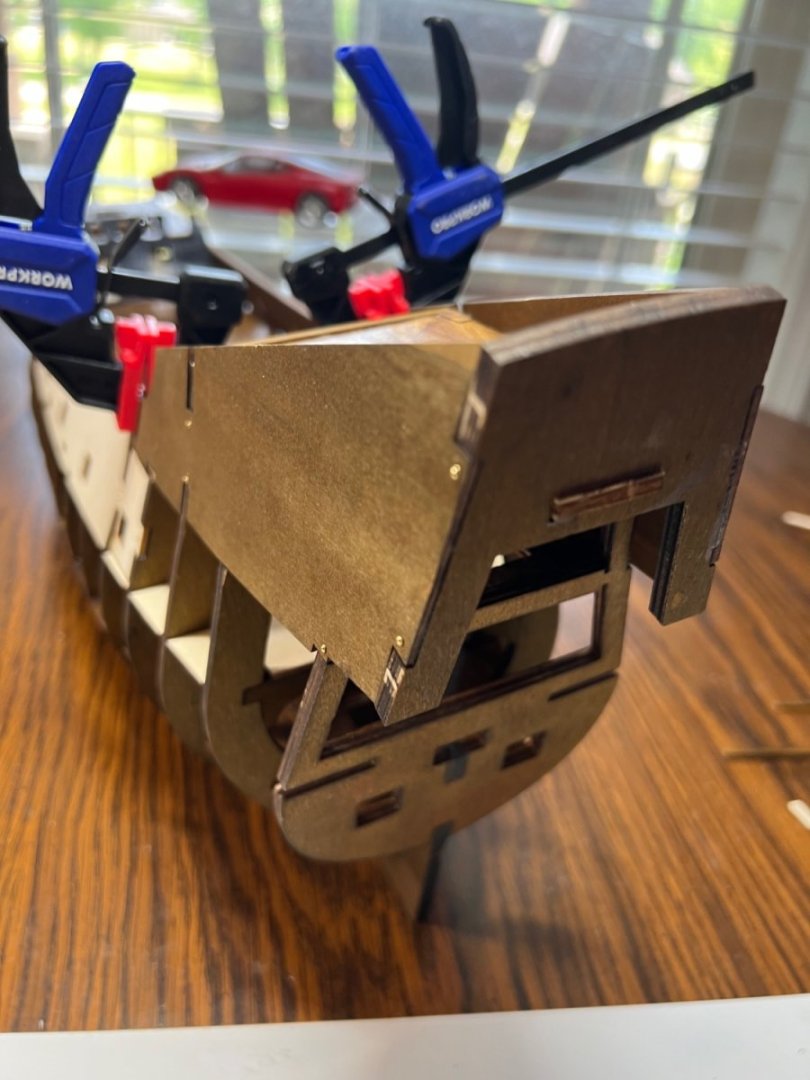
The rear piece has no support to hold it in place. Not sure what to do about that just yet. It fits it but has no way to hold it in or from sagging down. Esp with all the extra metal weight it will get. I found out today these double arrow mean, don’t glue. This is a friction fit. Good thing my glue wasn’t great, I cracked it out and it’s now, not glued. I’m getting frustrated with parts of this kit. I intend to finish it even if it’s not perfect. It’s smiling at me….
-
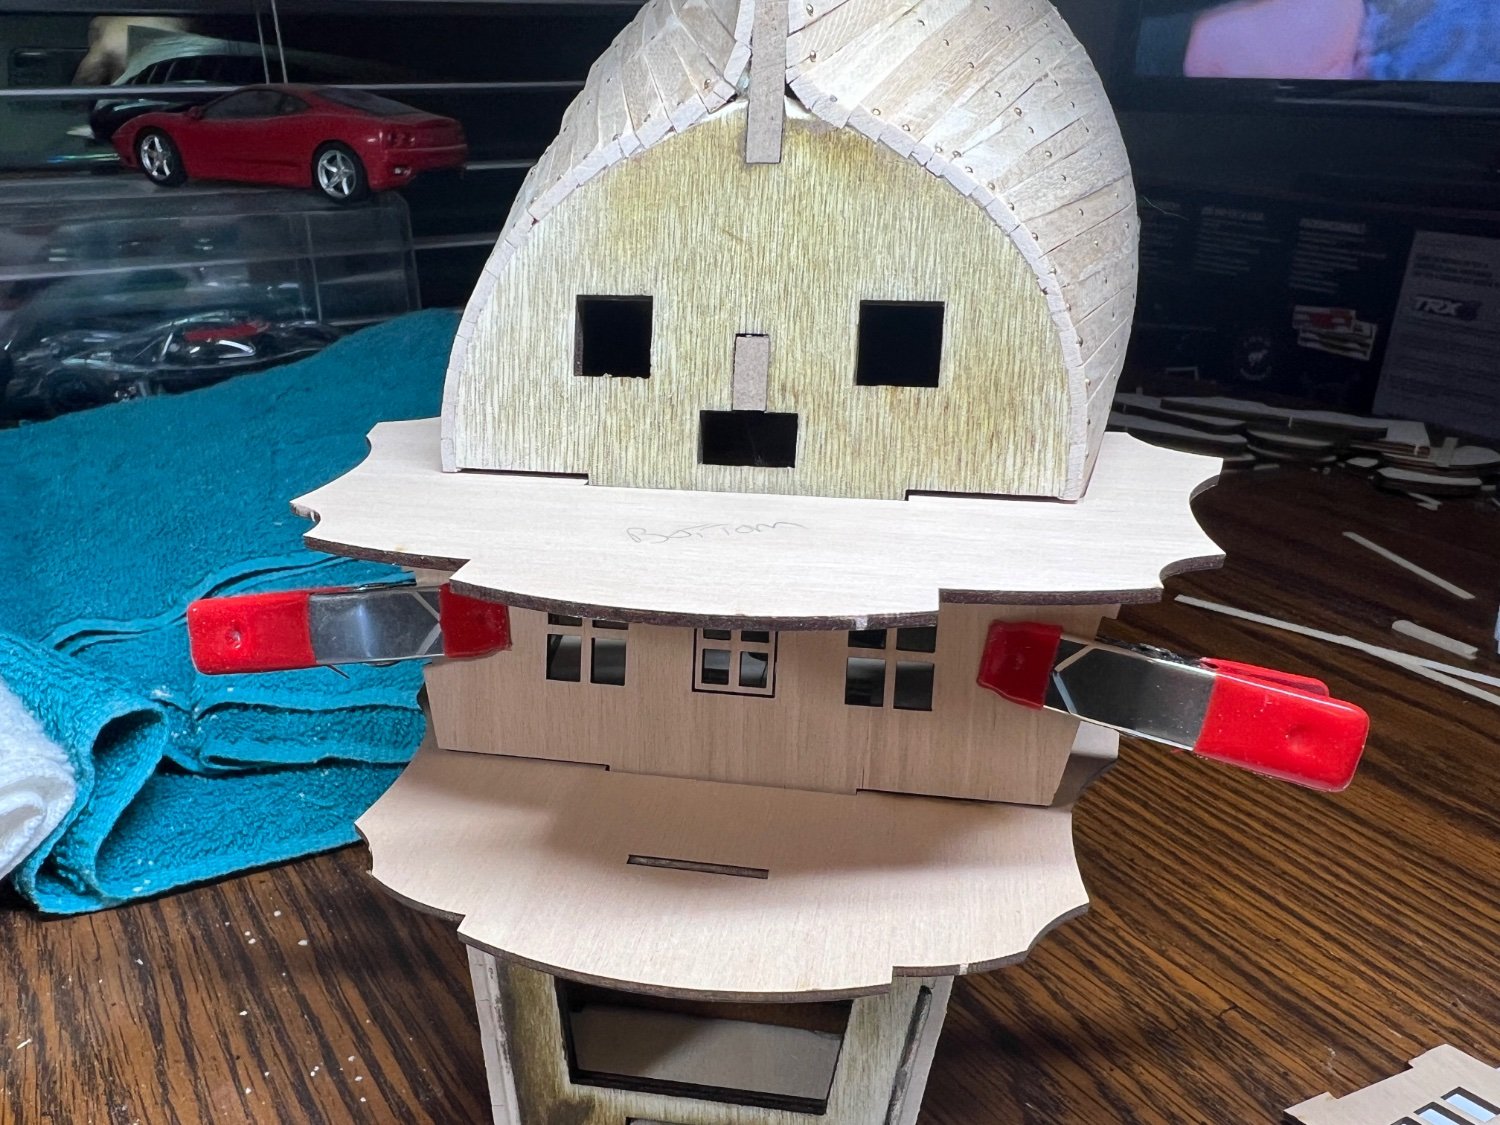
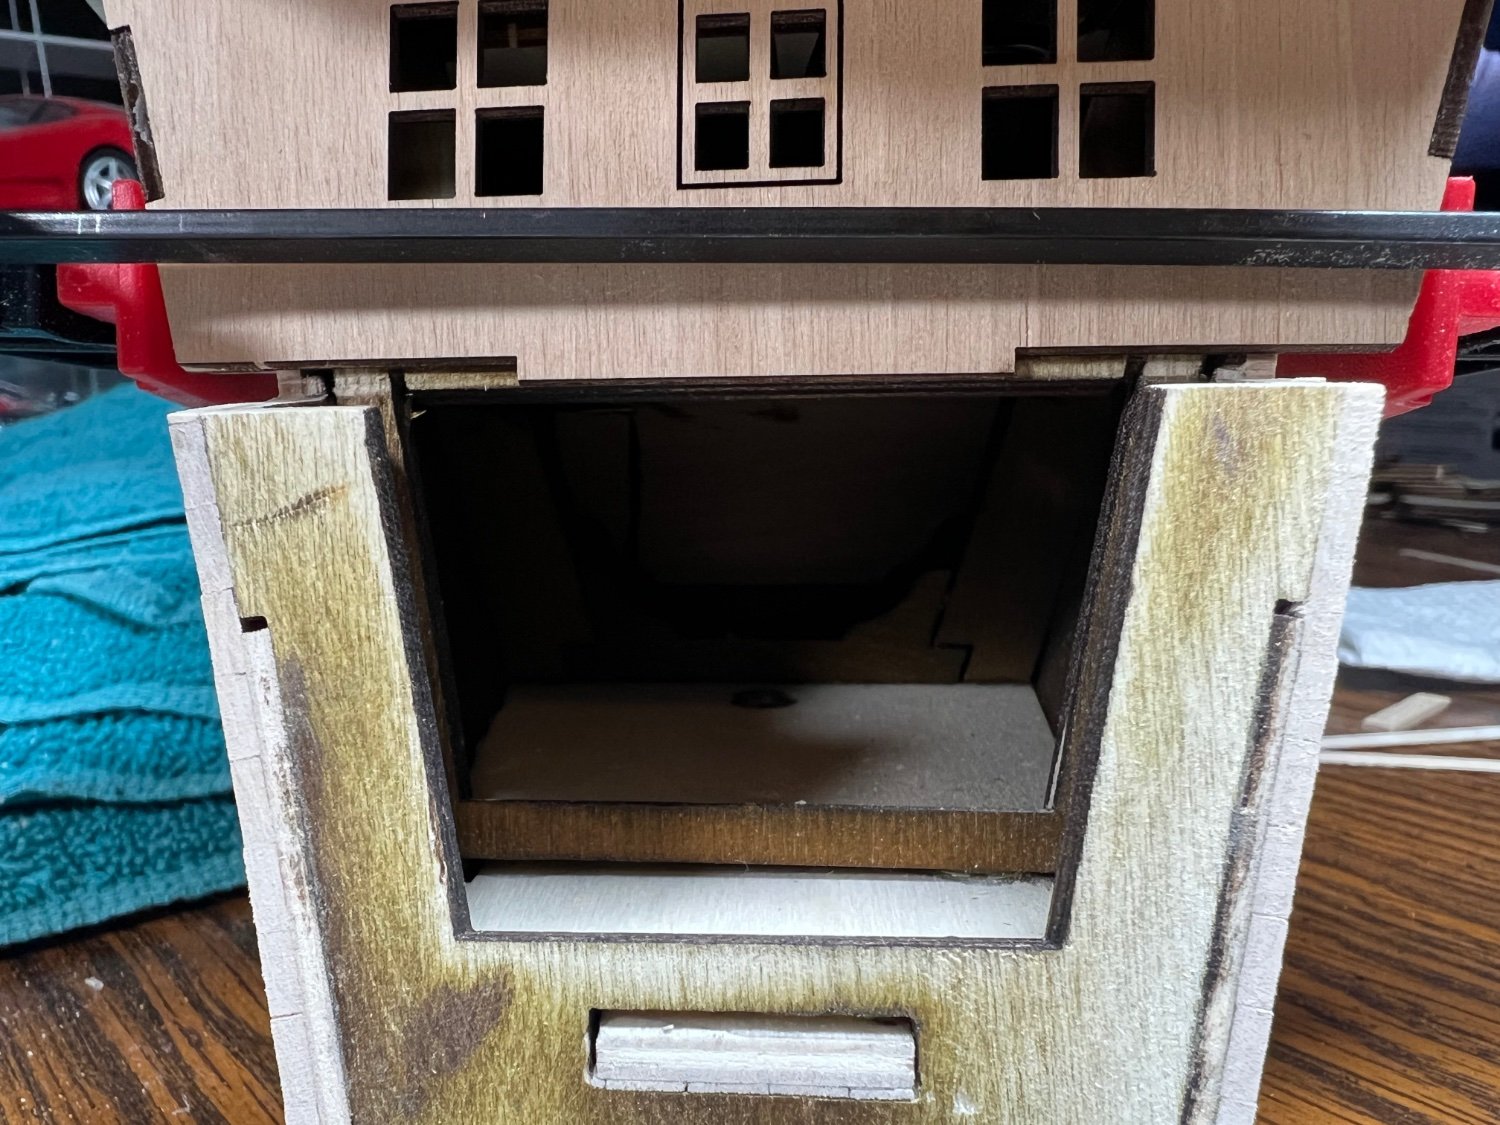
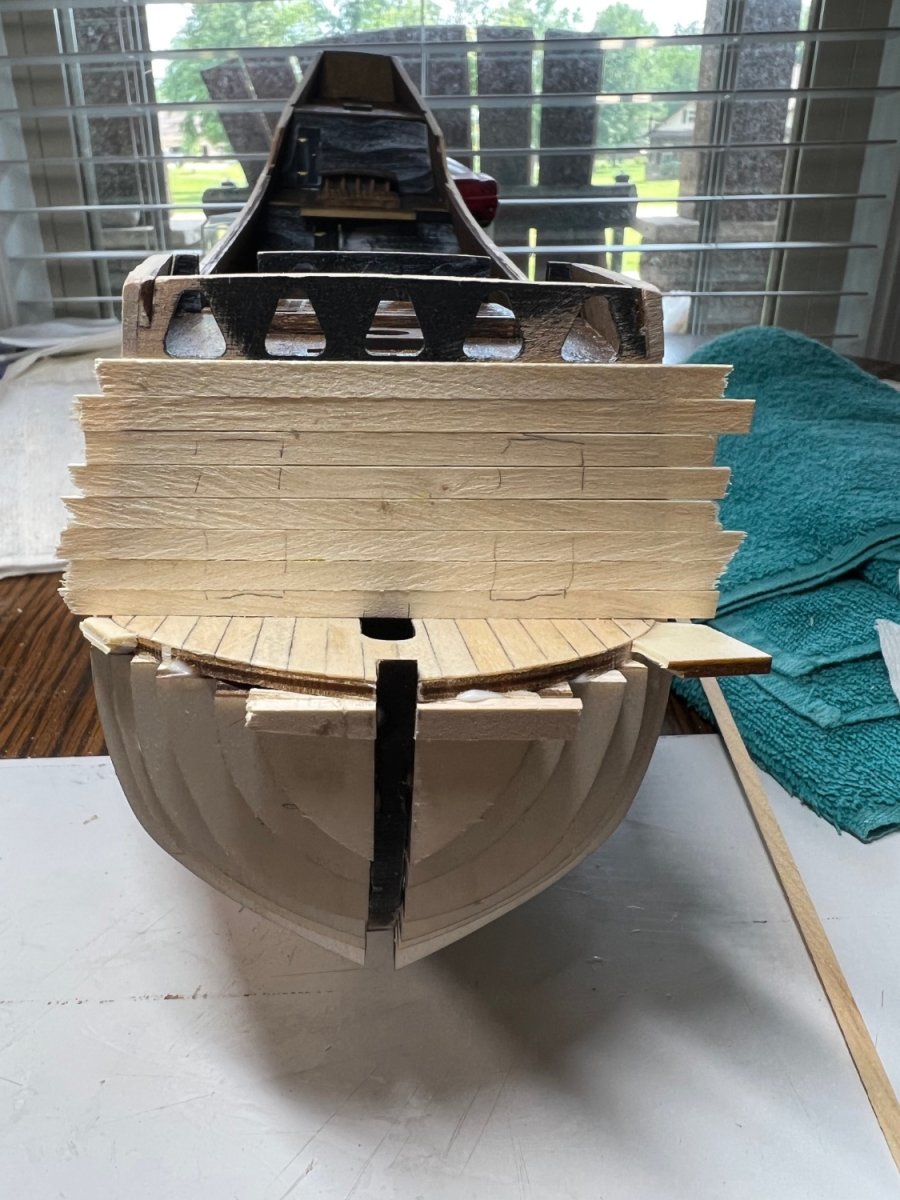
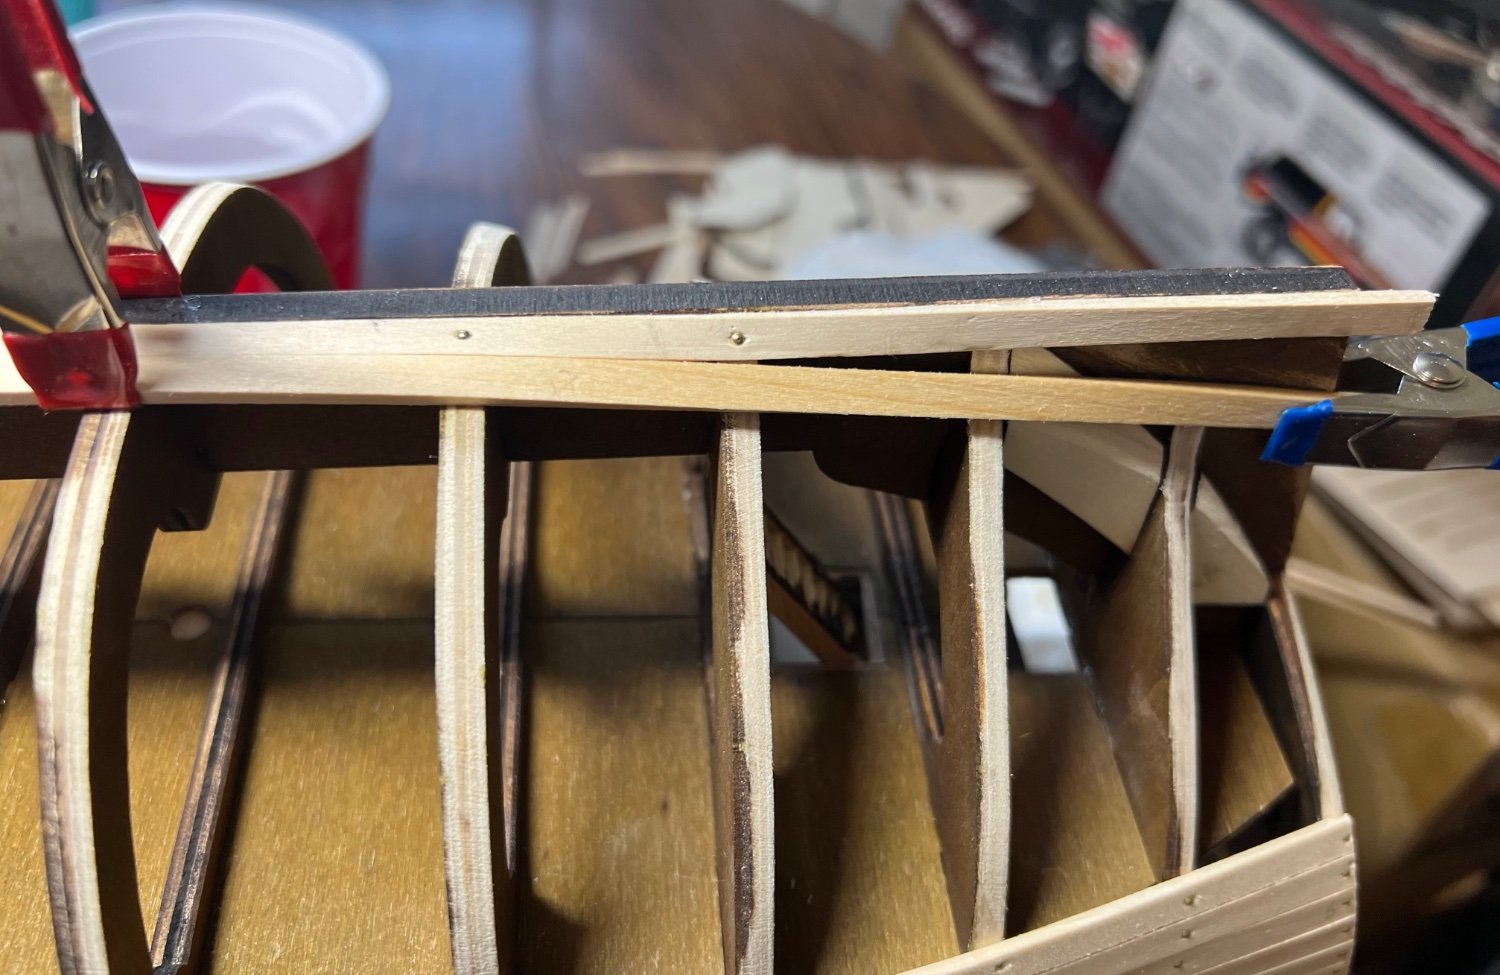
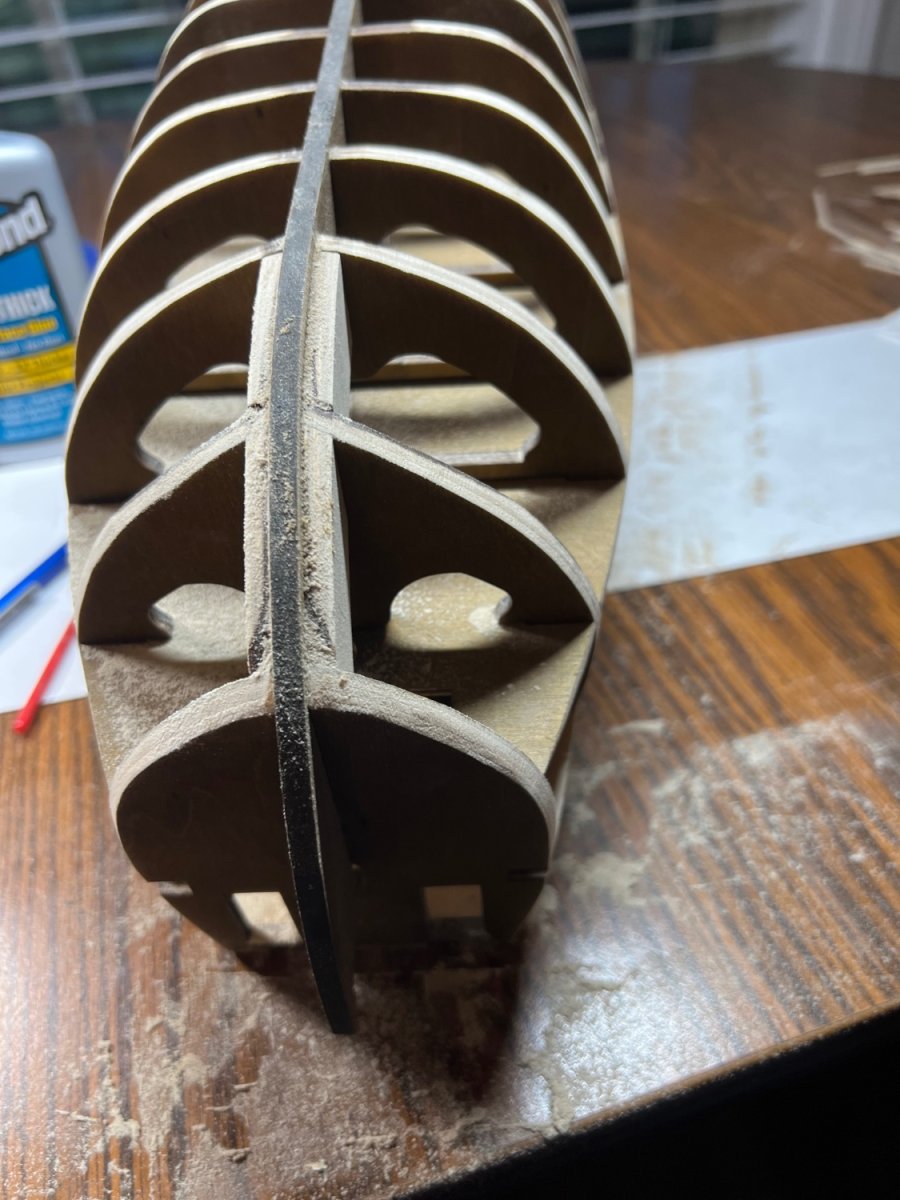
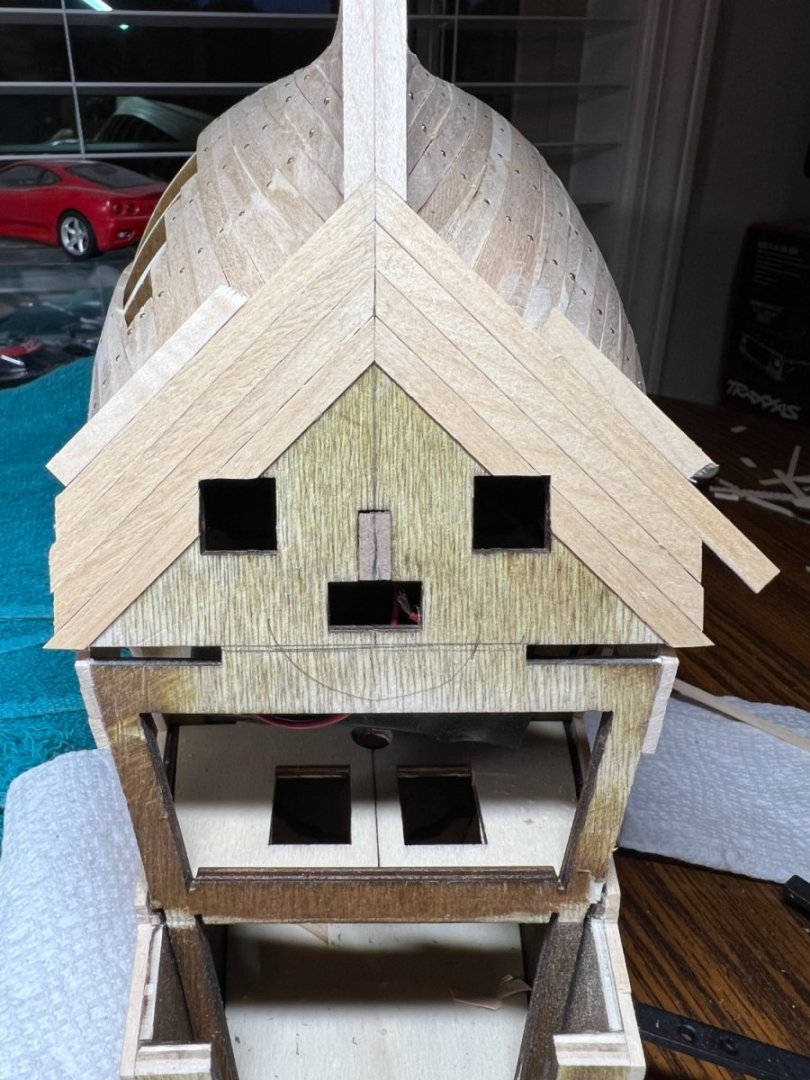
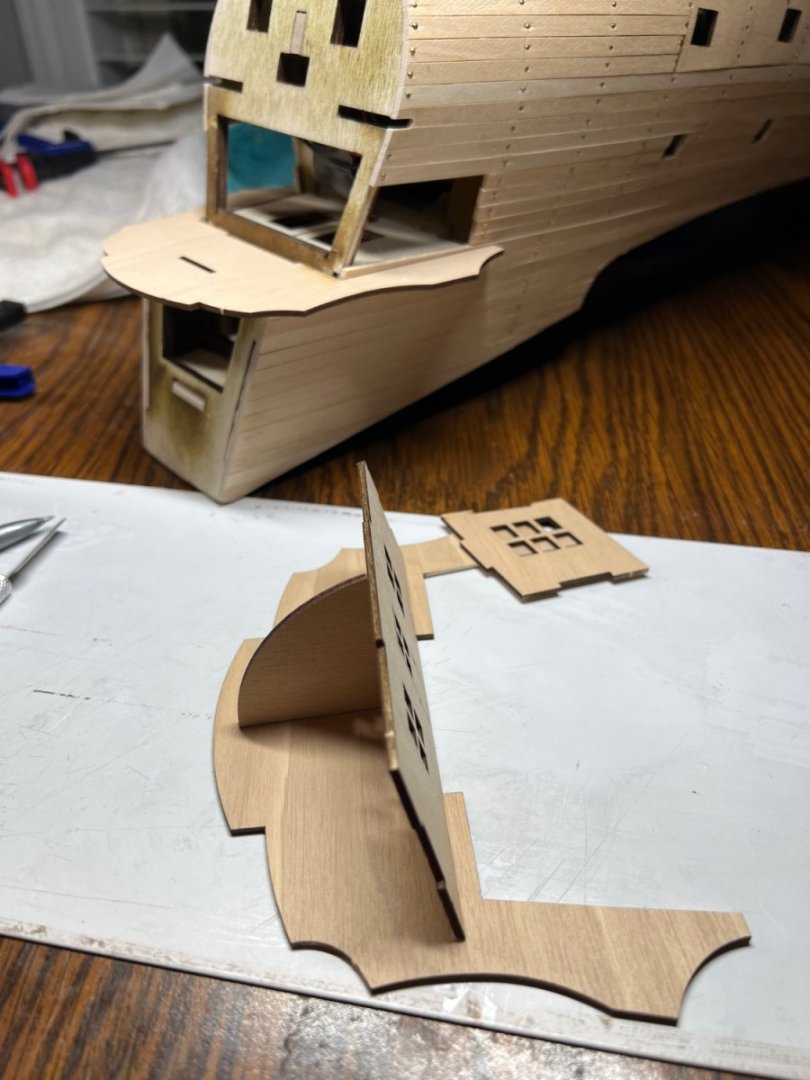
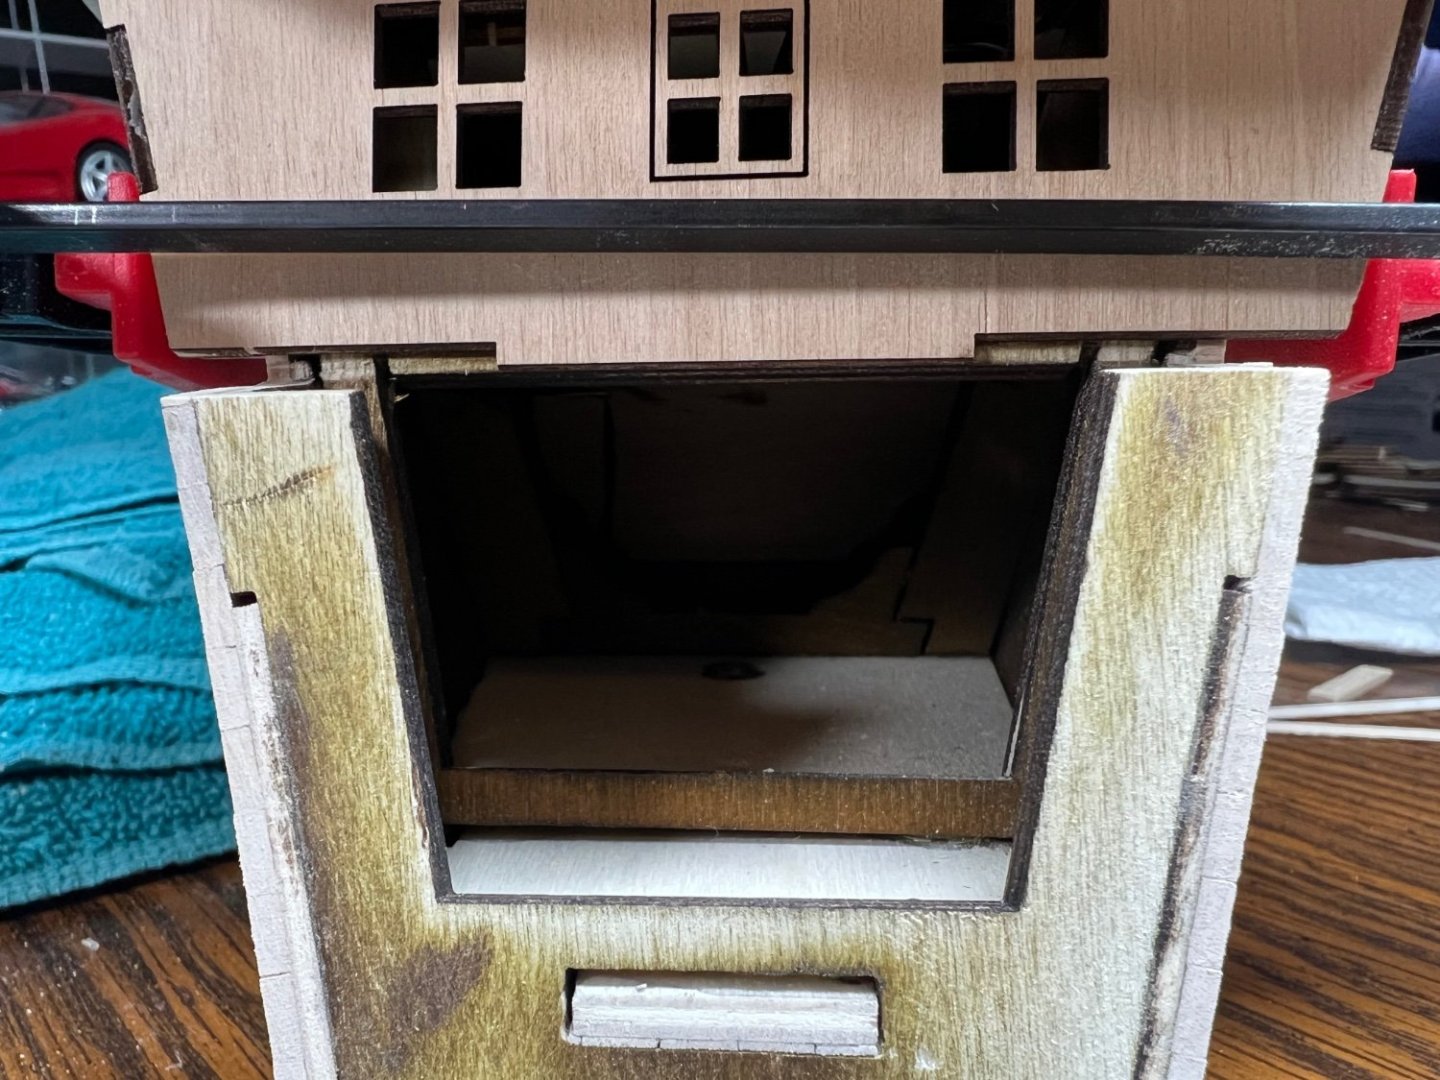
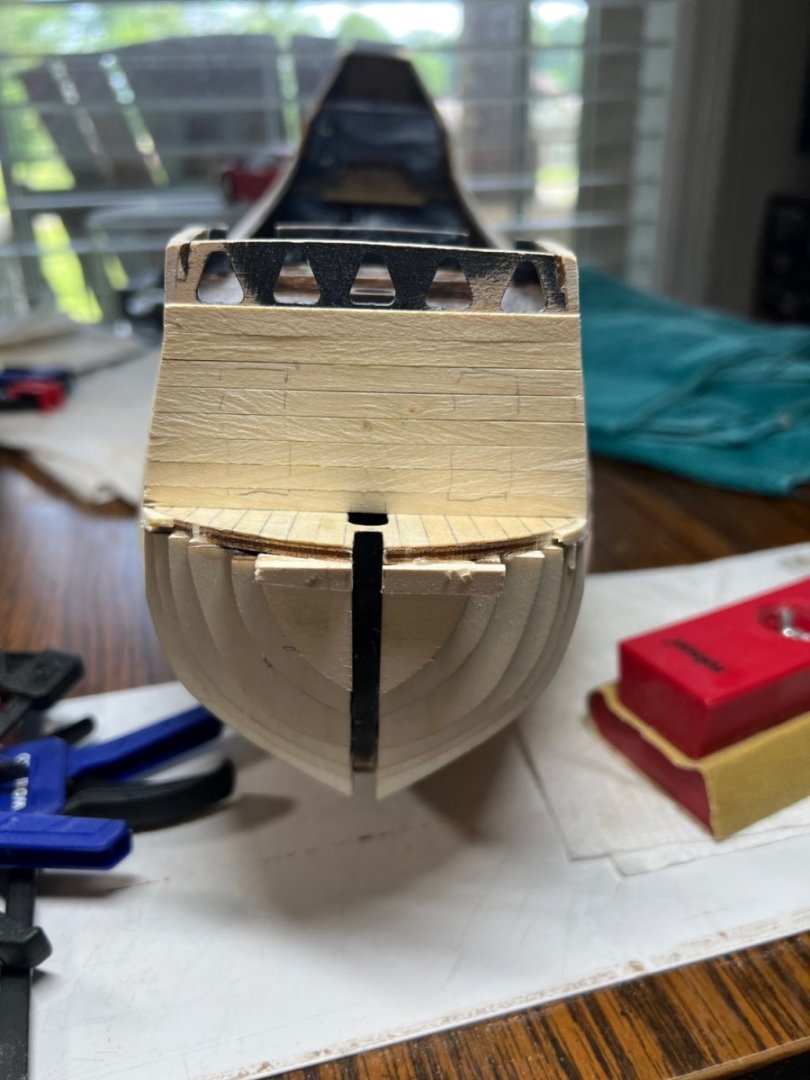
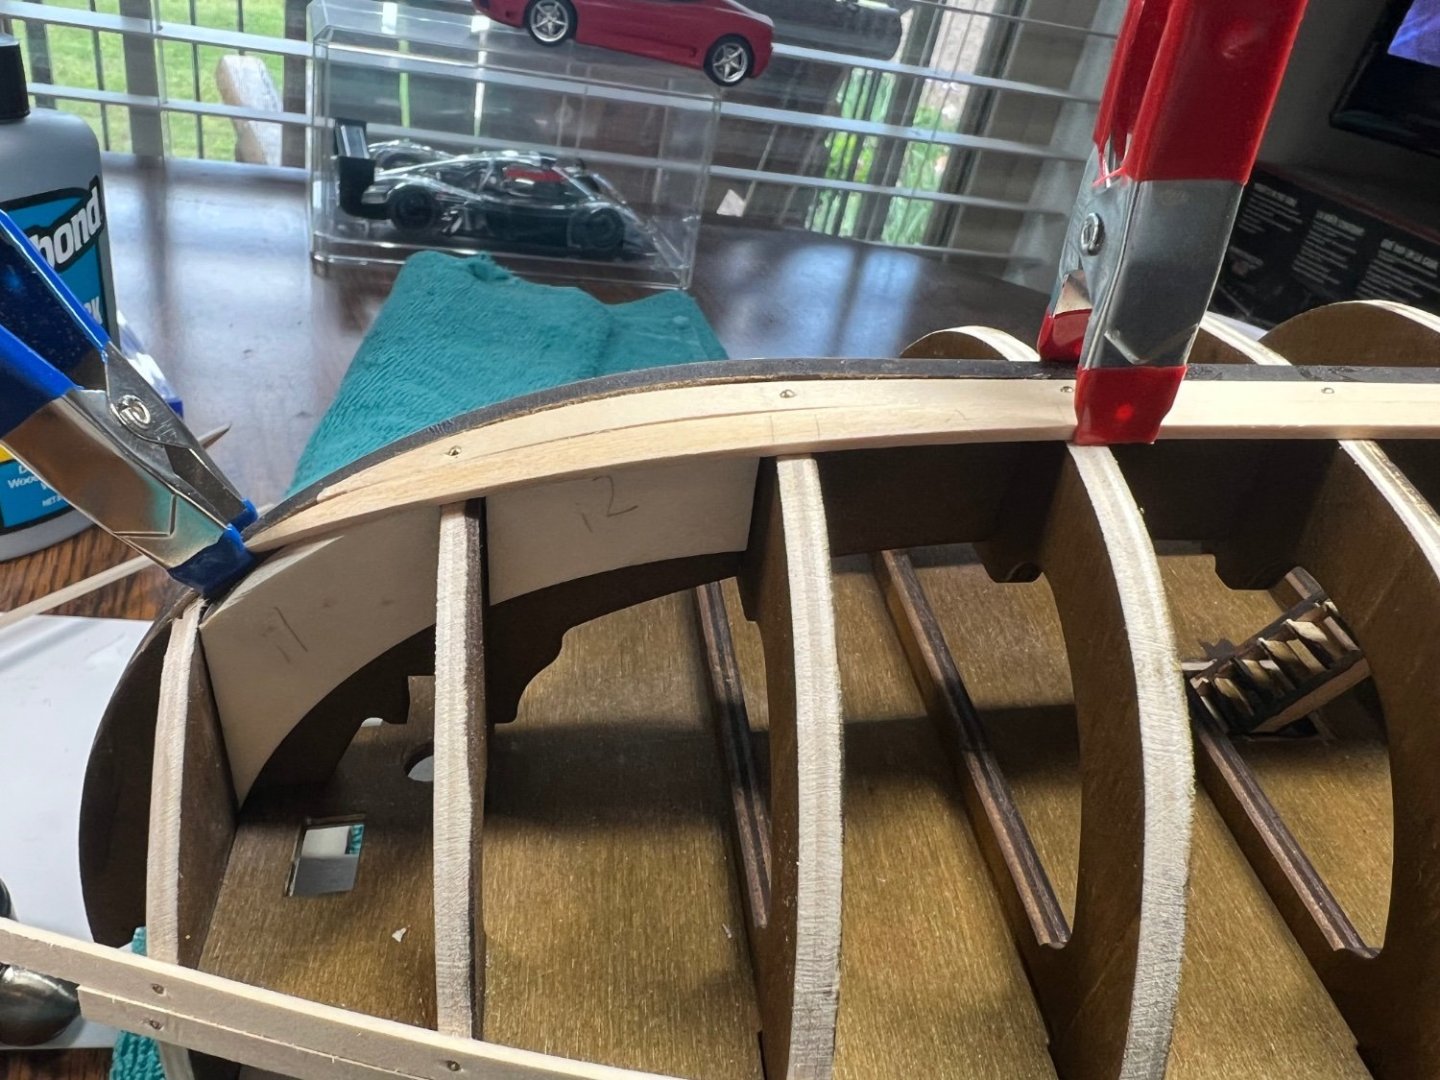
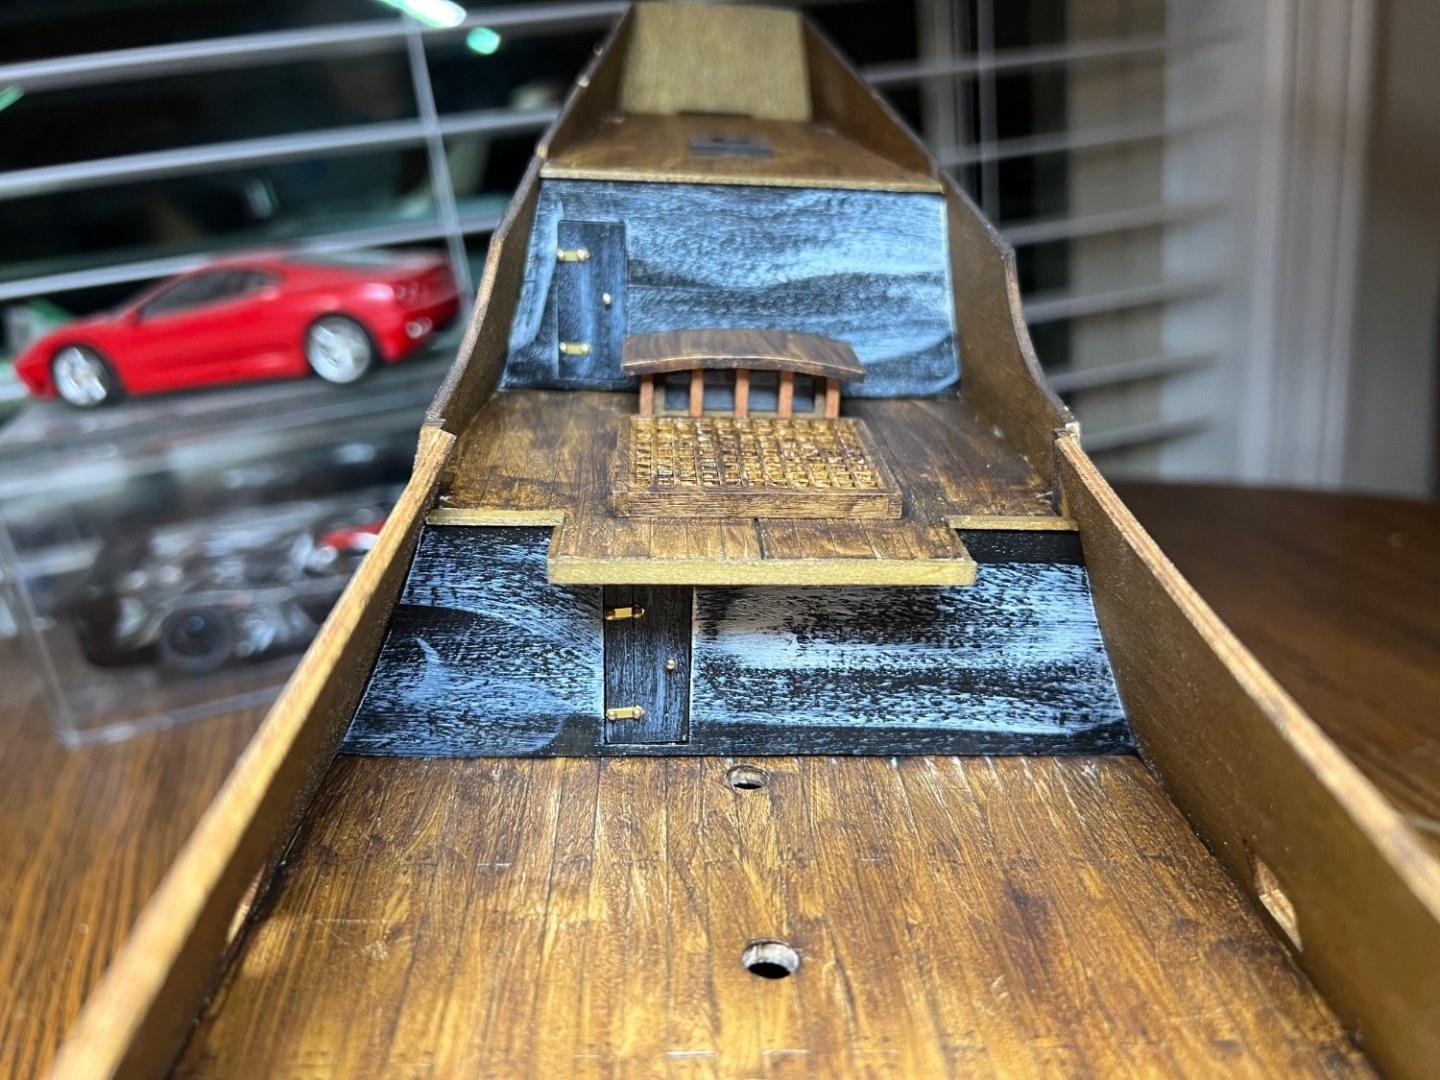
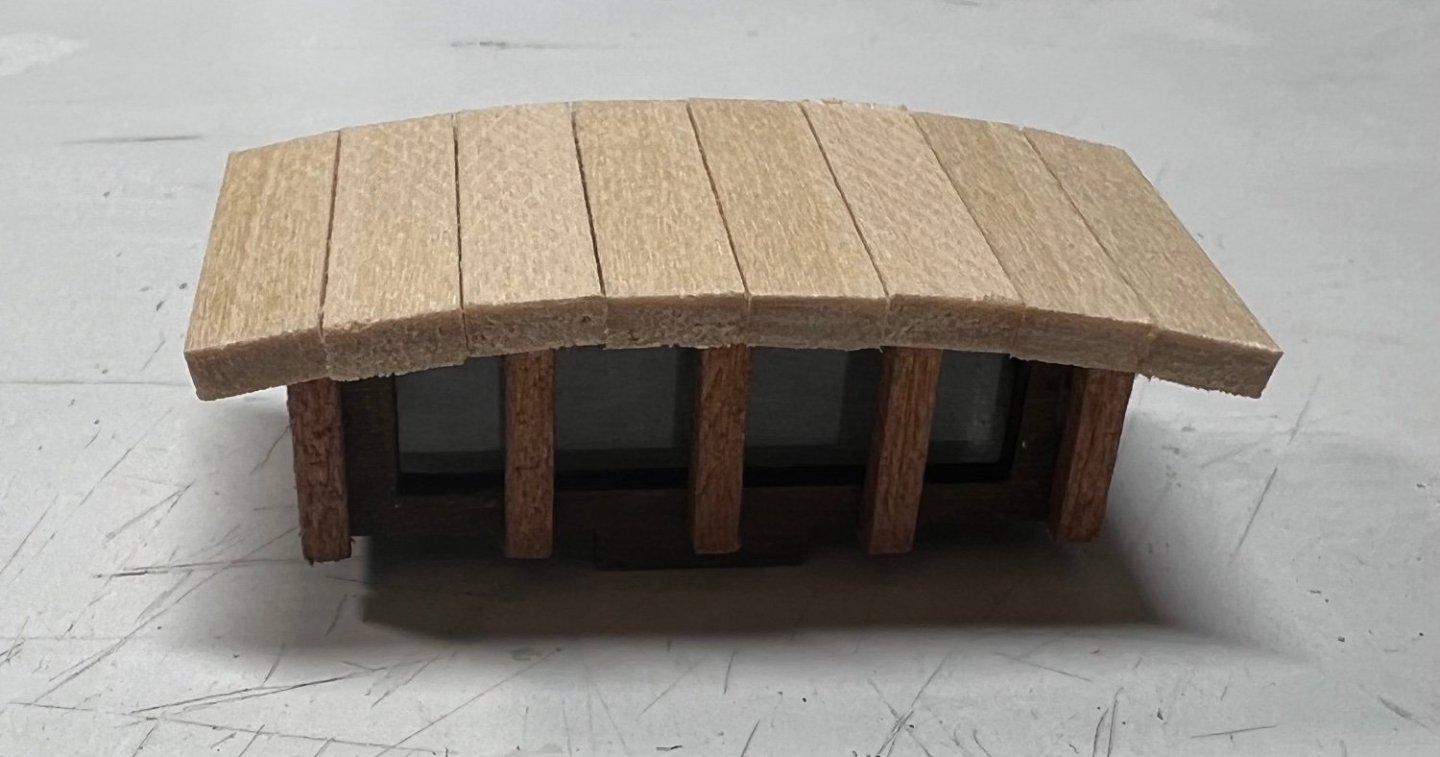
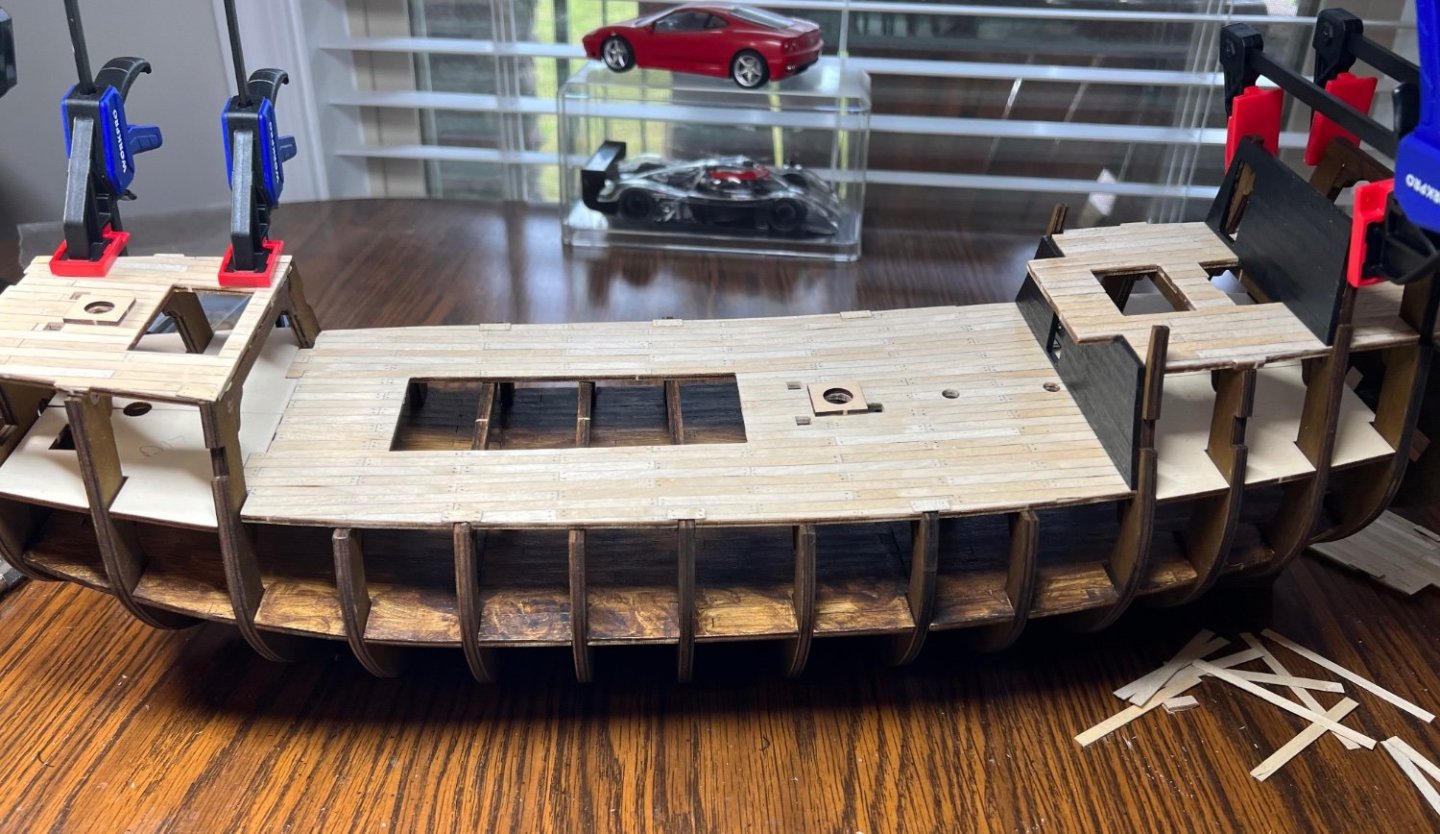
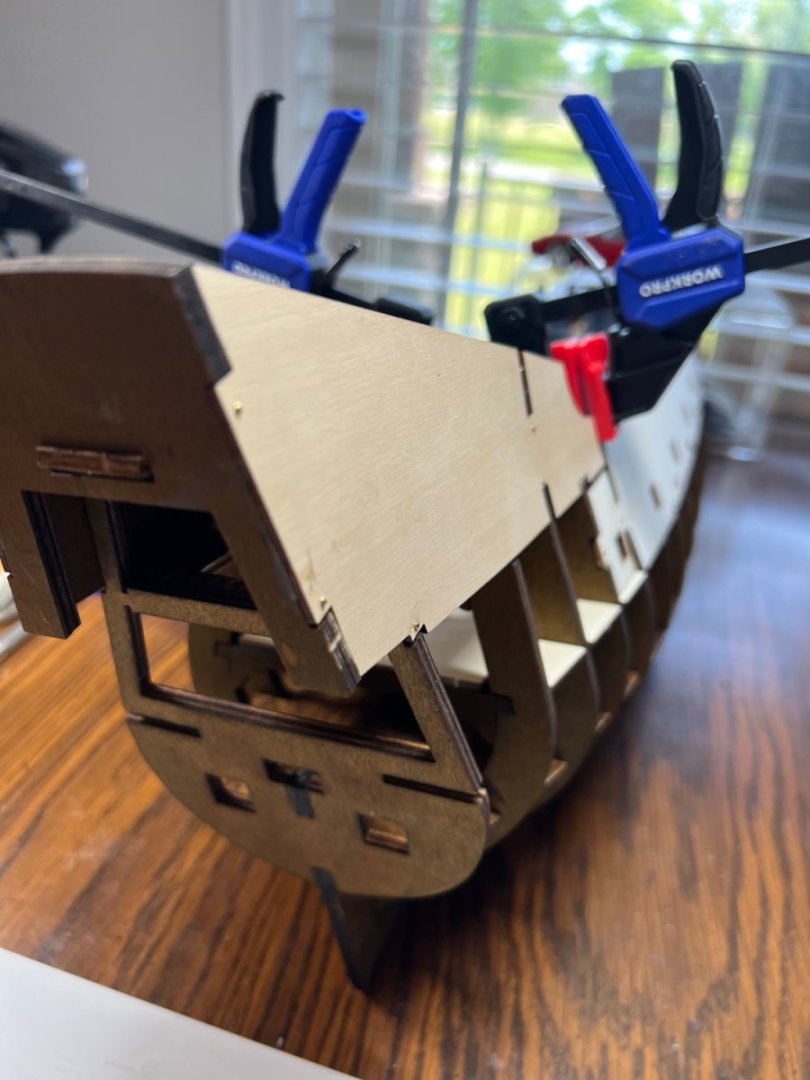
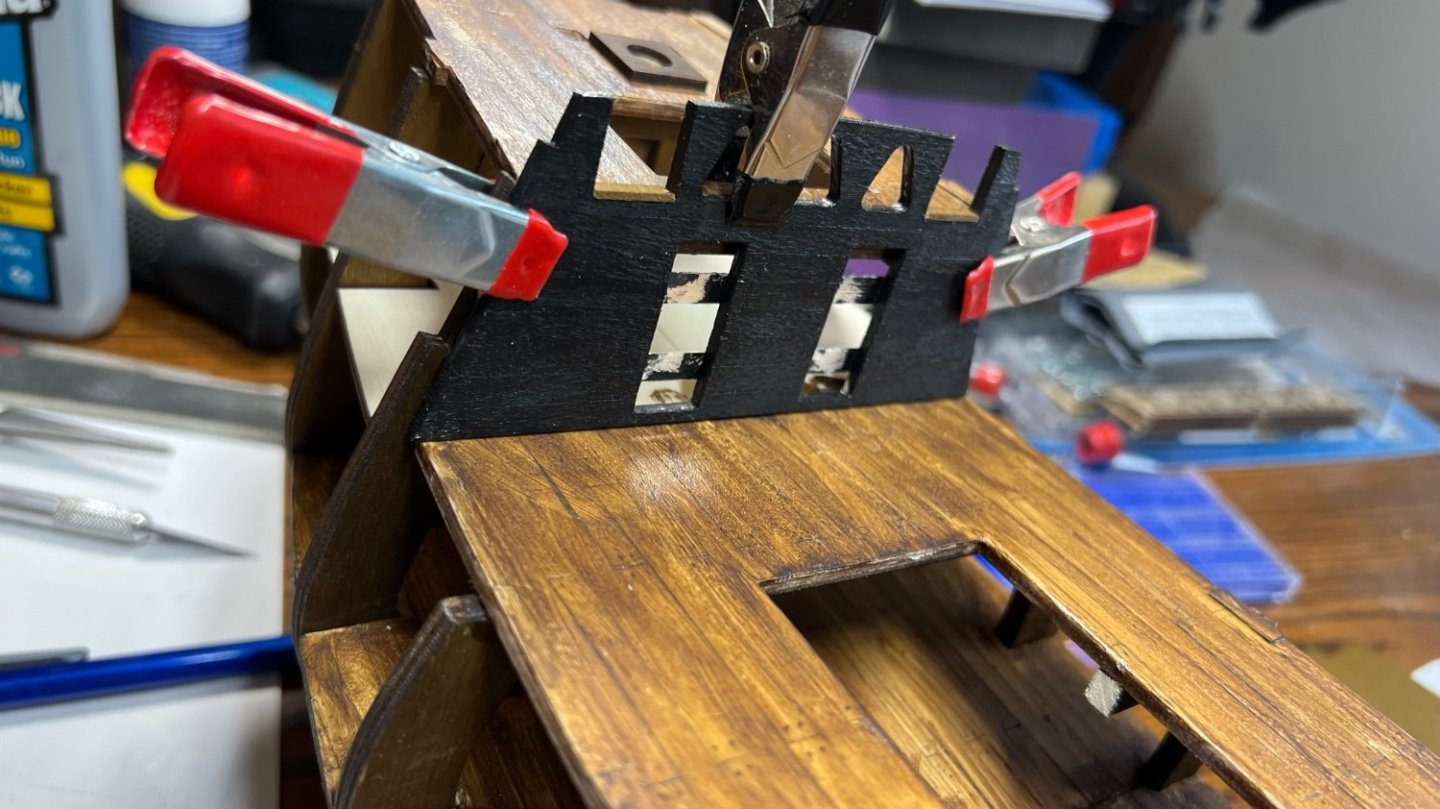
After a long planking effort it’s finally starting to take shape with details. Everything has to come together almost perfect for the rear removable section to fit. One picture shows what needs done to fit the top of the removable part. I fiddled with this to get it all to fit glued it together while fitting it so it would fit well. So far so good.

-
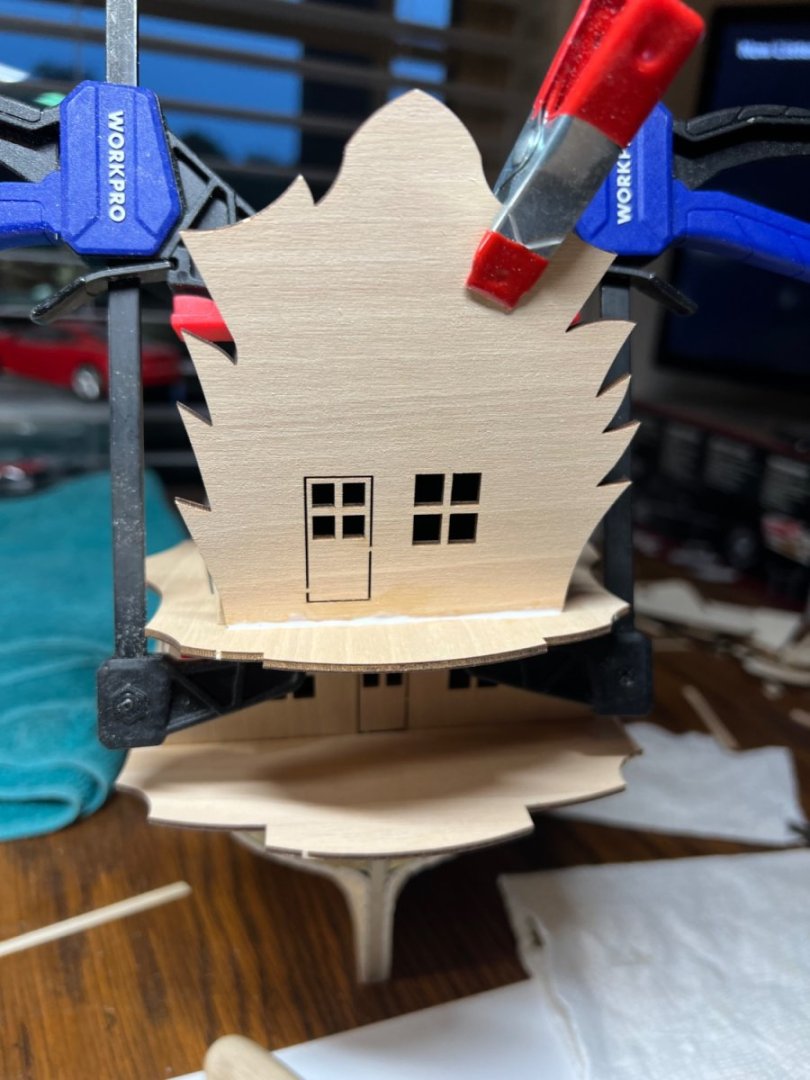
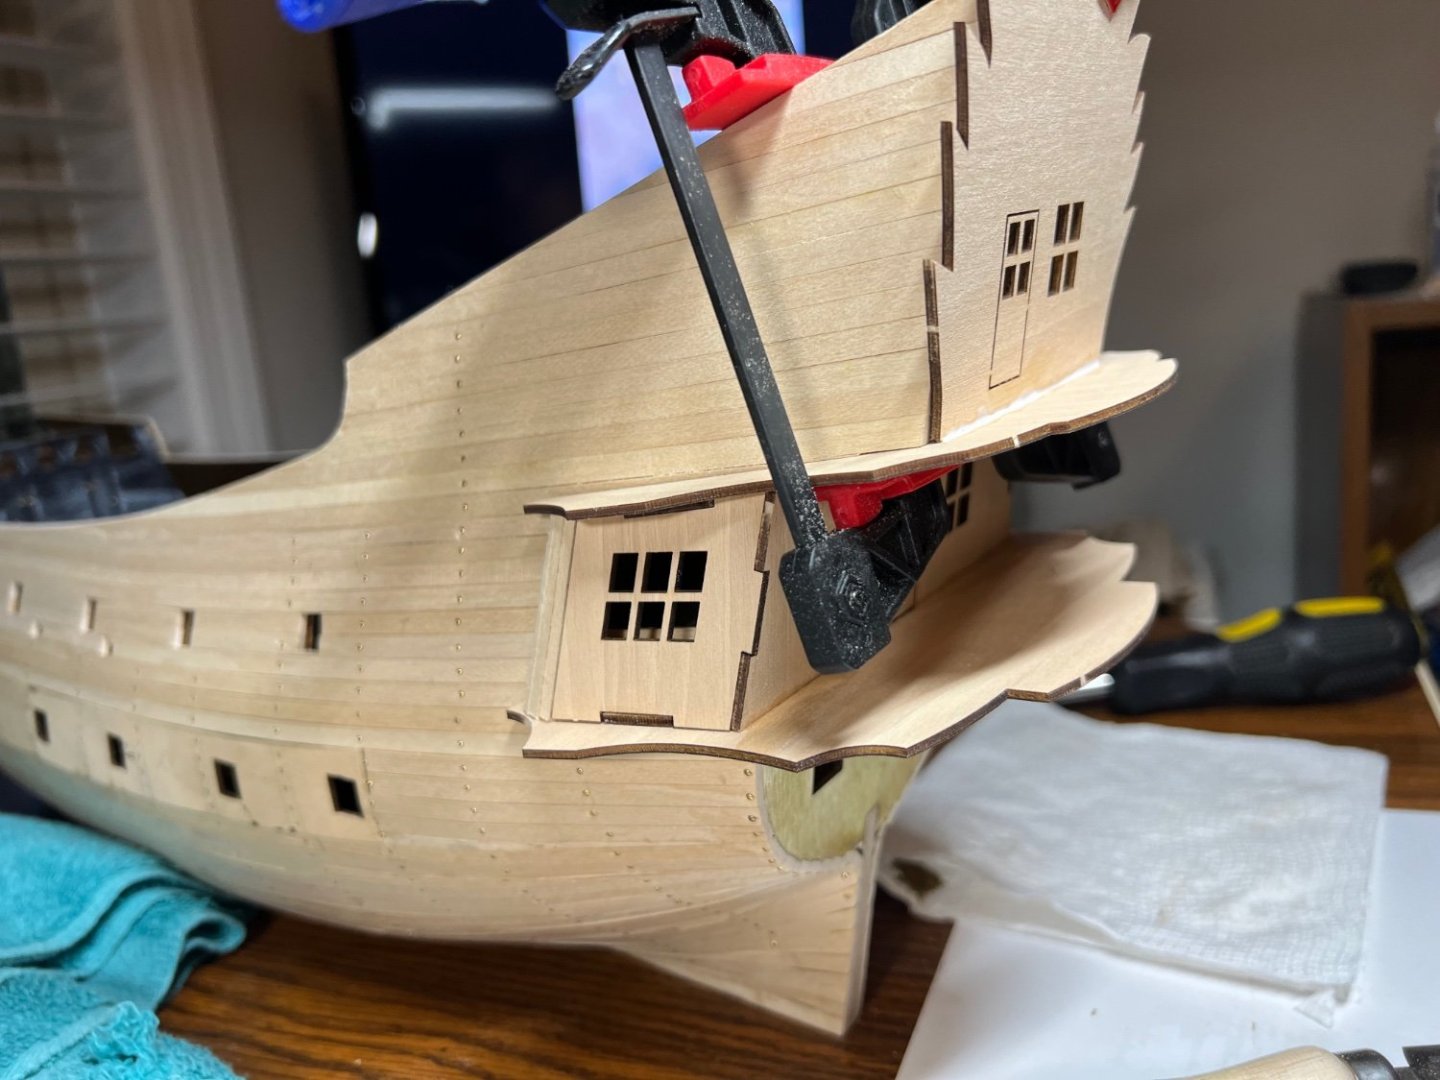
Just water will work, brushed on from a cup even. Soak it good with a brush. Then you can play with the wood it becomes pliable, you can break the structure bonds and bend it around almost like soft putty. I never found hot water worked that well. A small hair dryer on low while the part is held with shorten the drying time, it’s almost like magic. Don’t trim the top of the false stern! It’s needed for the finished look. I almost trimmed it off when cleaning up sanding. You can sand the bevels again, I found them getting rounded when wetted and dried again. It looks great! I had a lot of fun learning with this one. I almost want to build it again now that I know stuff better.
- 62 replies
-
- 4
-

-
- First Build
- Grand Banks Dory
- (and 2 more)
-
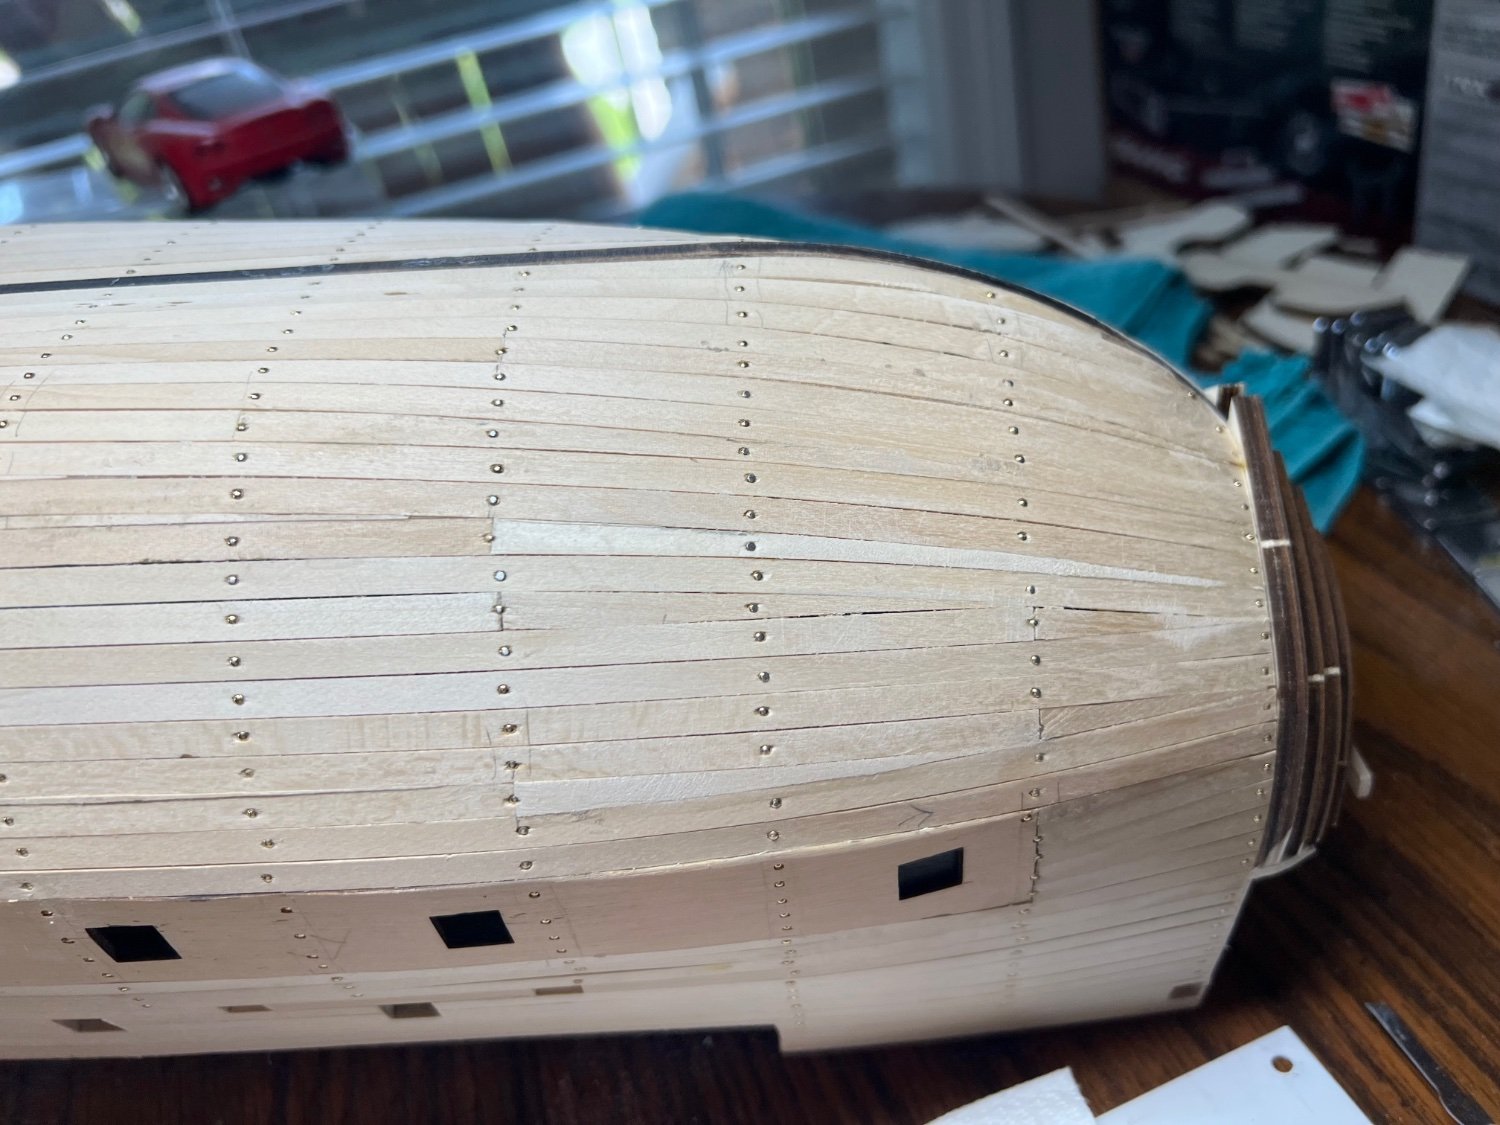
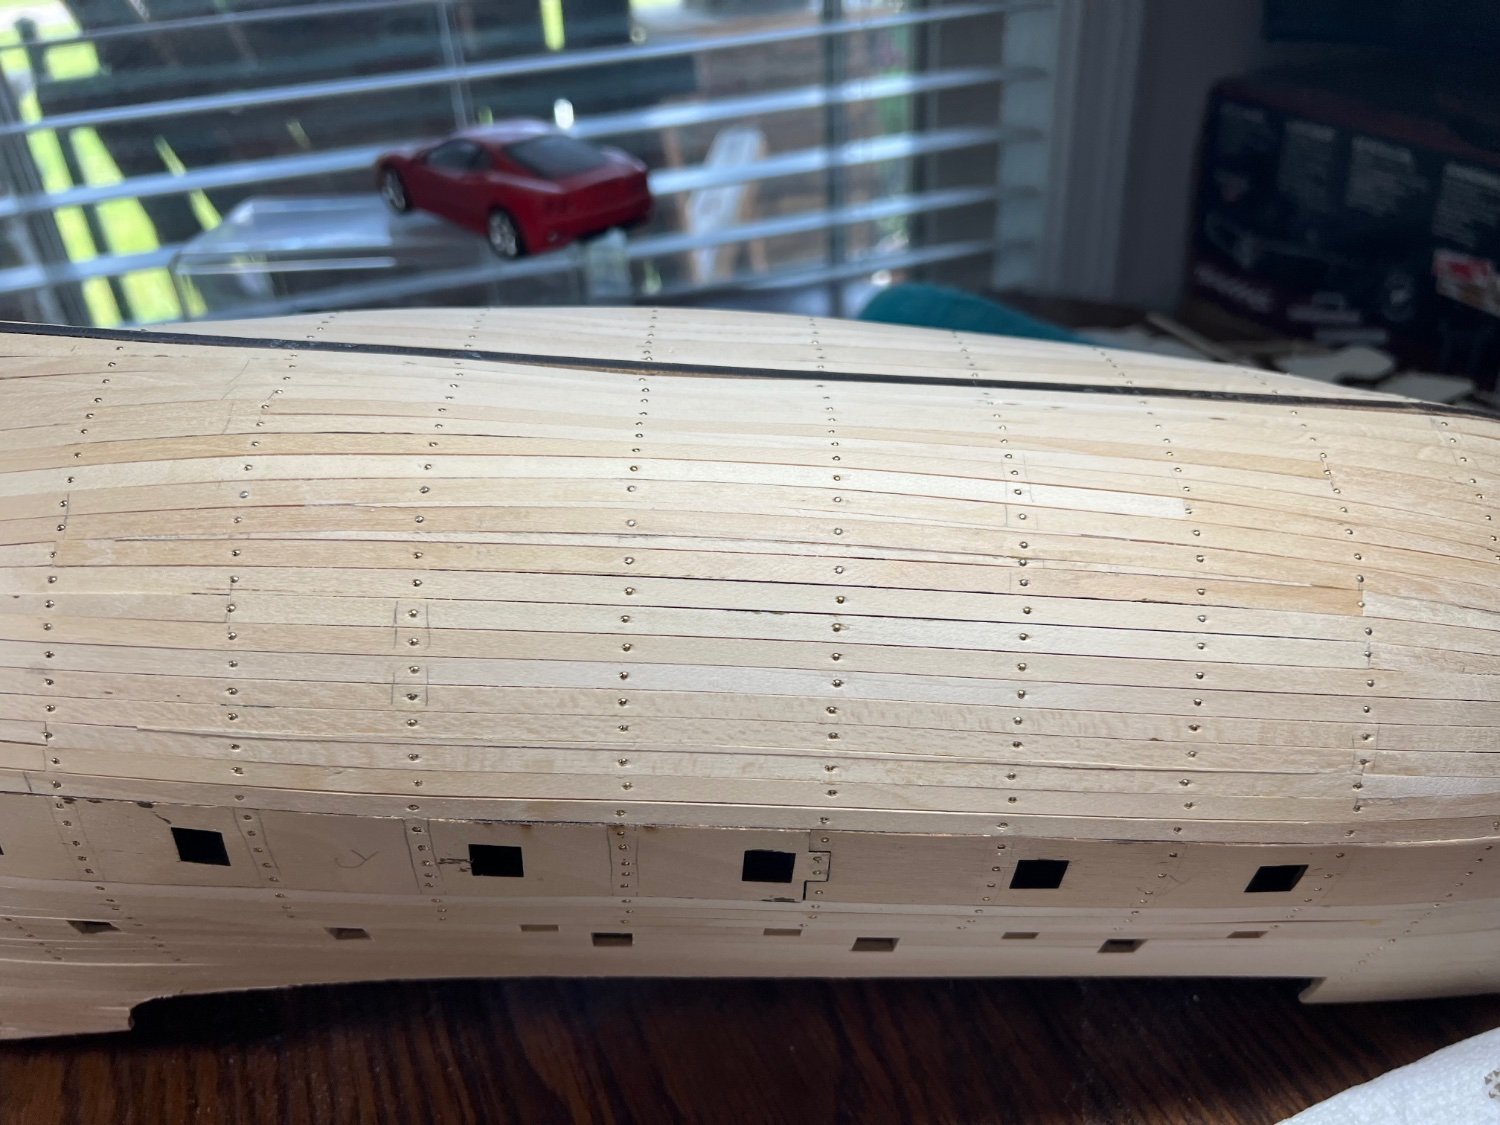
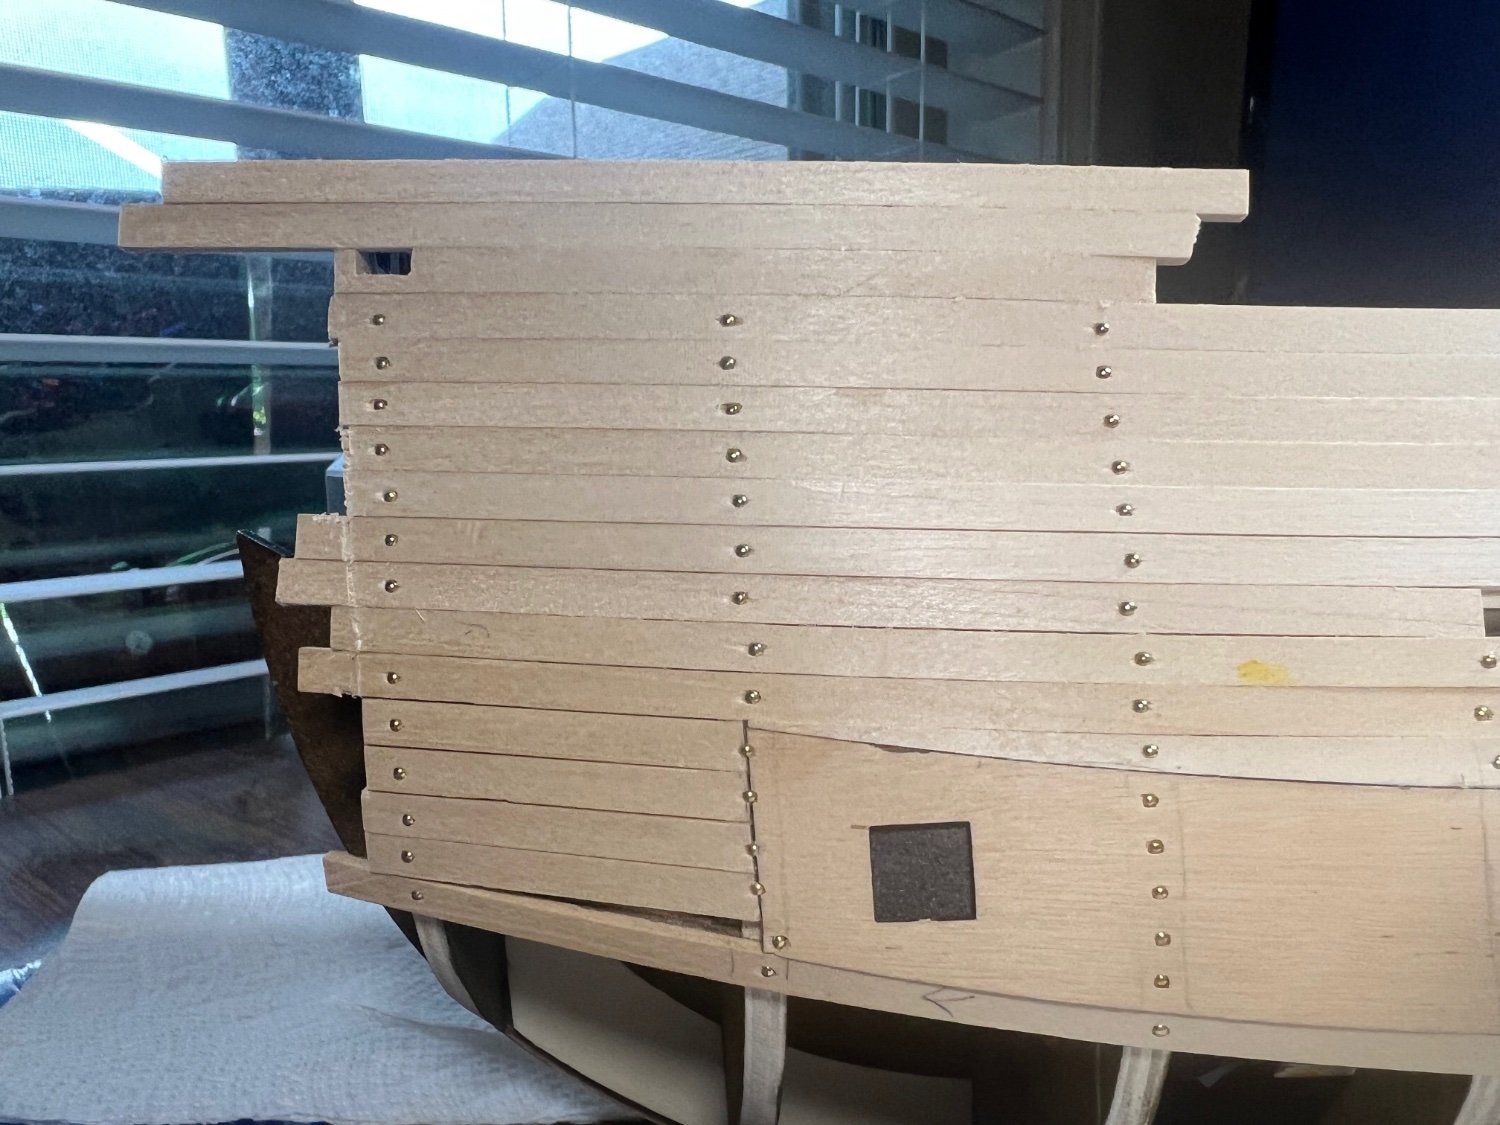
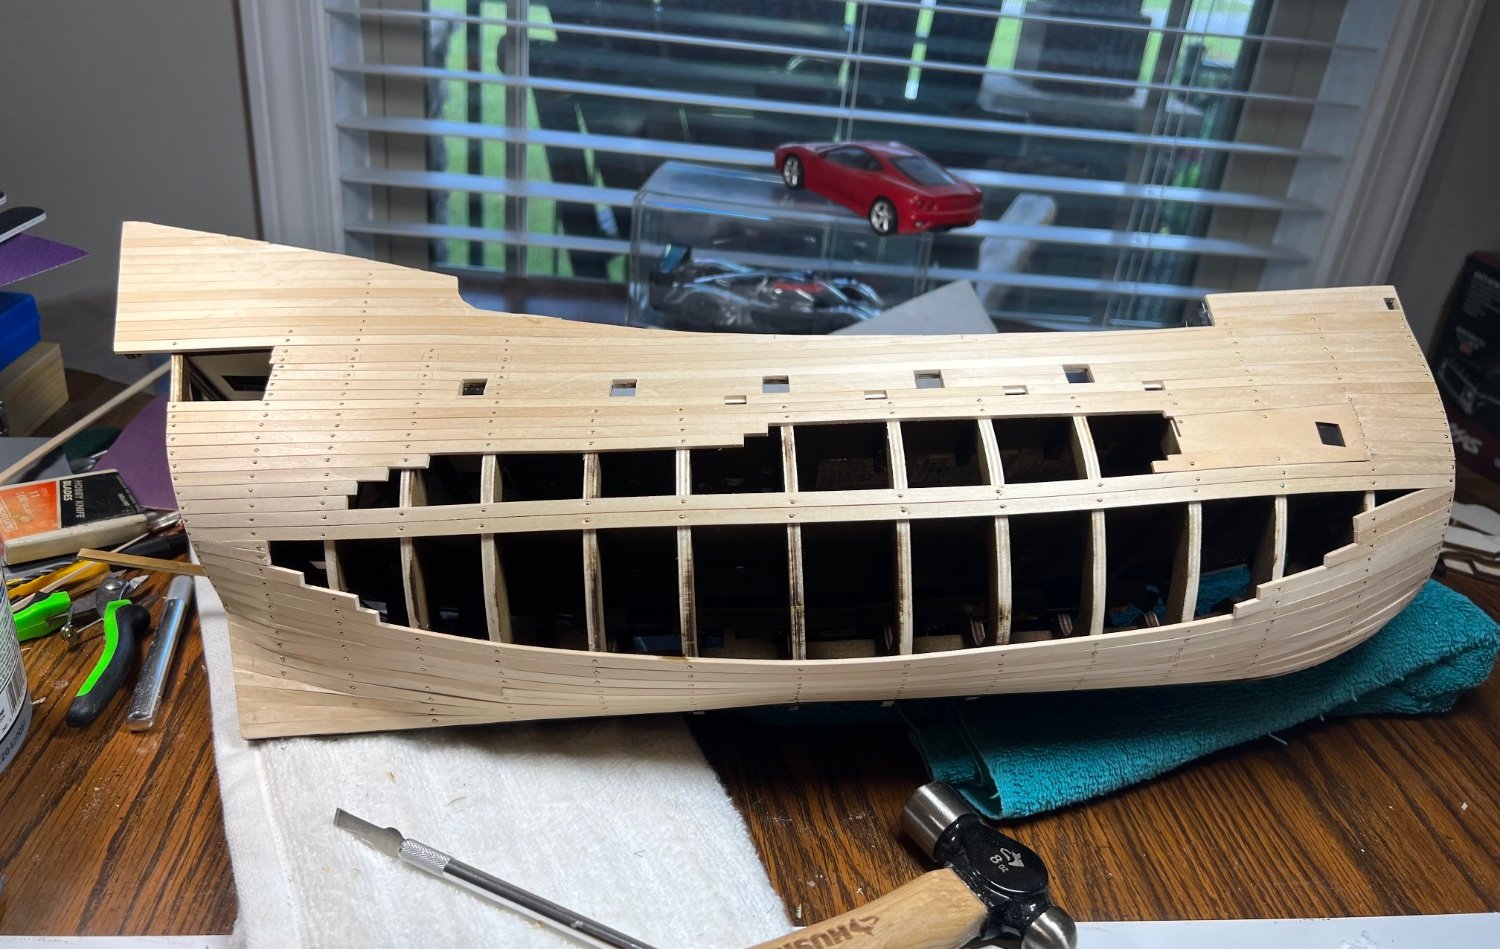
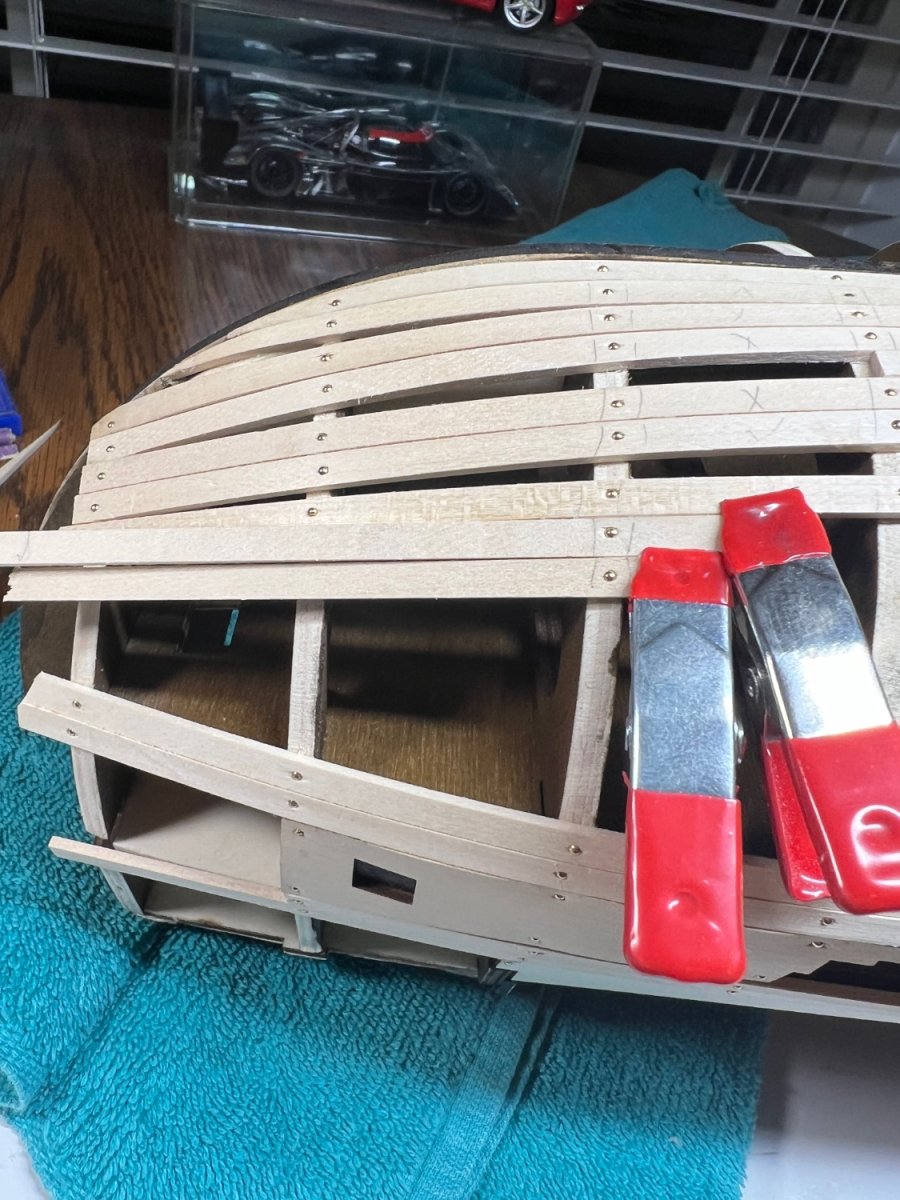
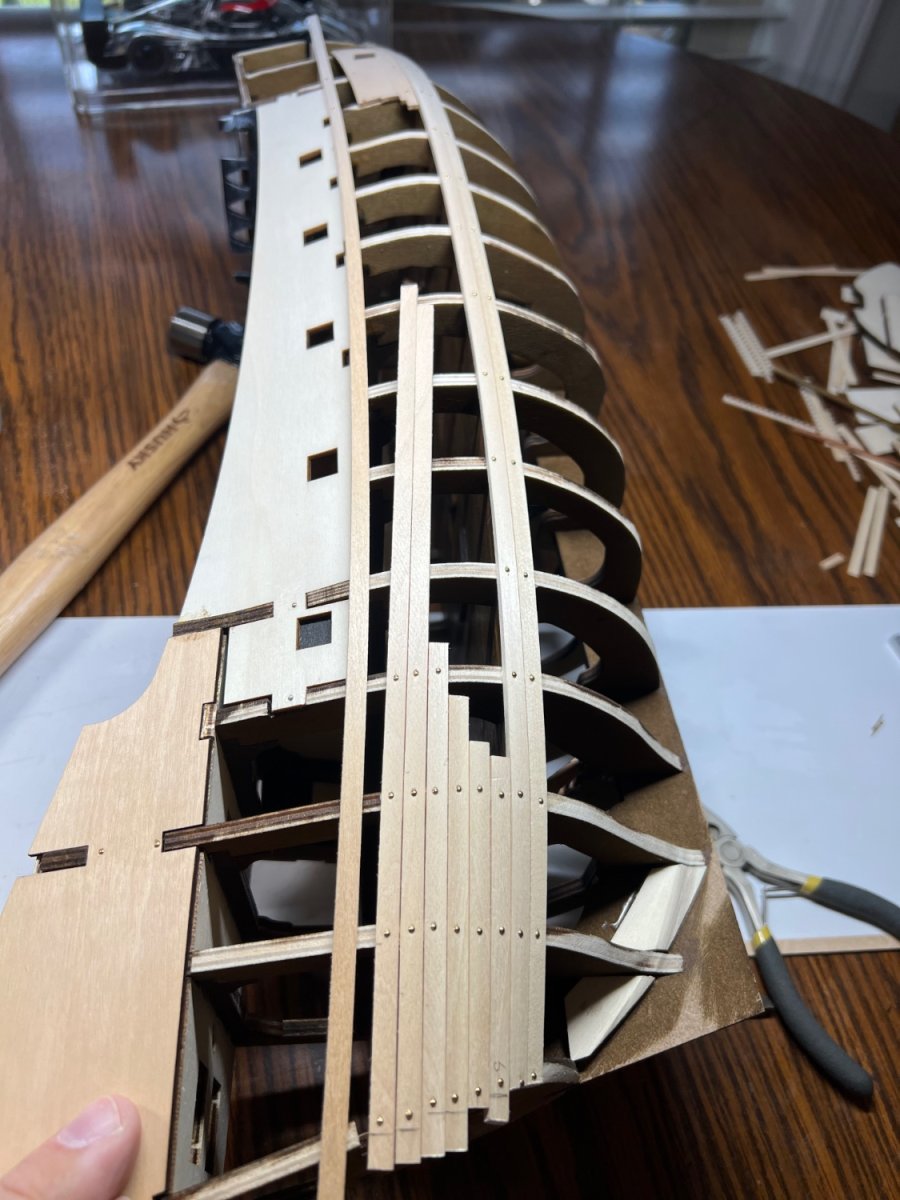
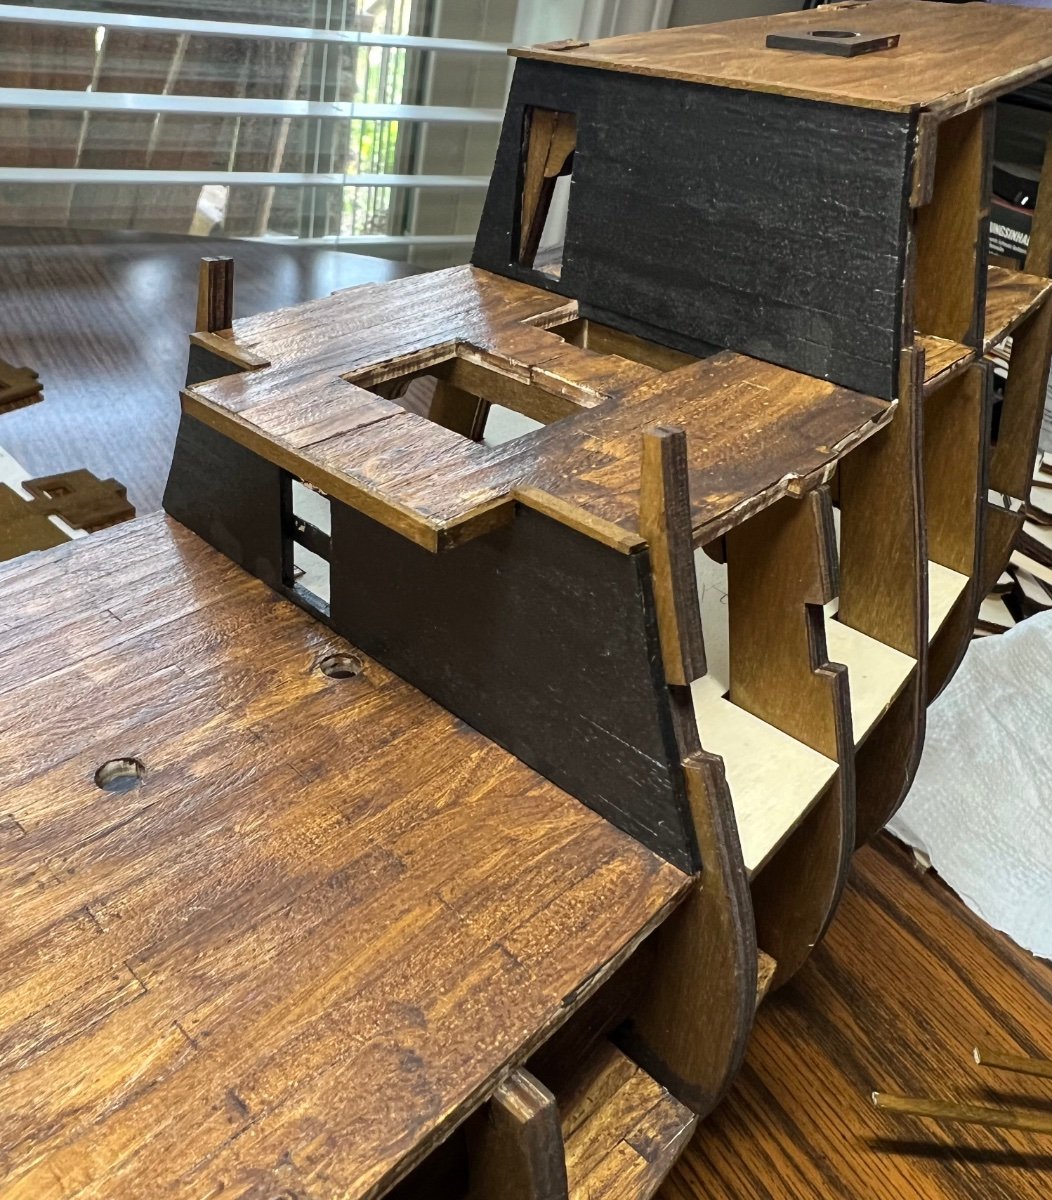
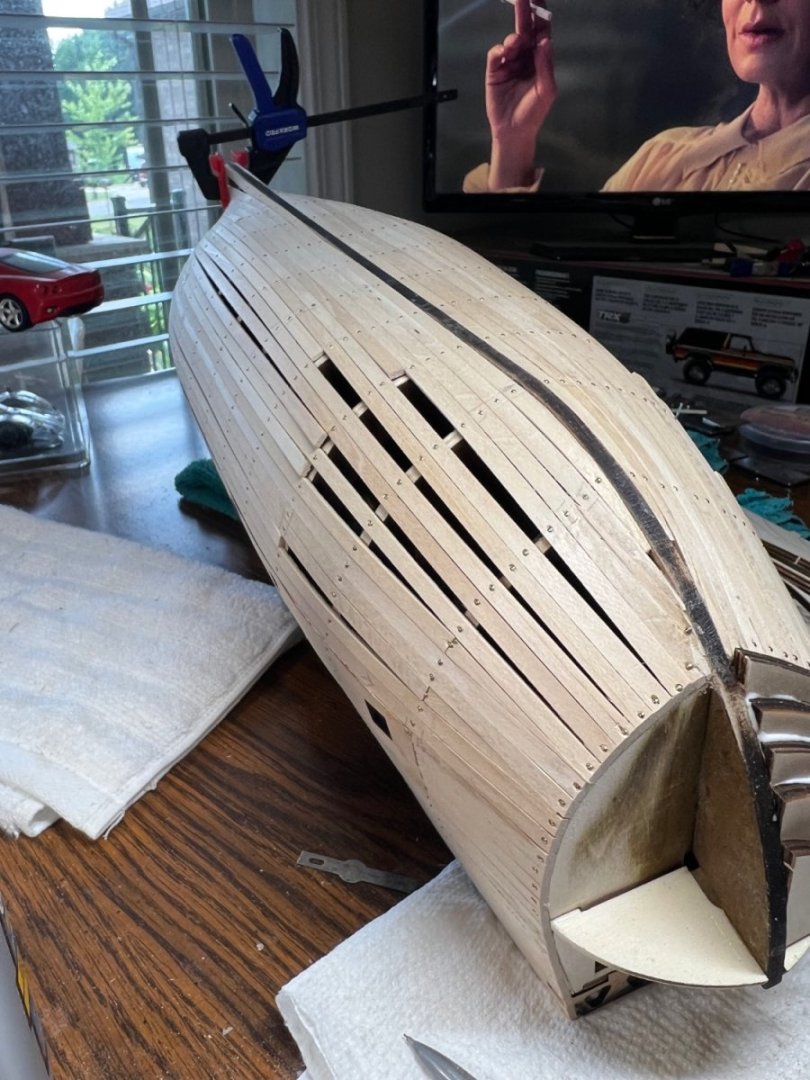
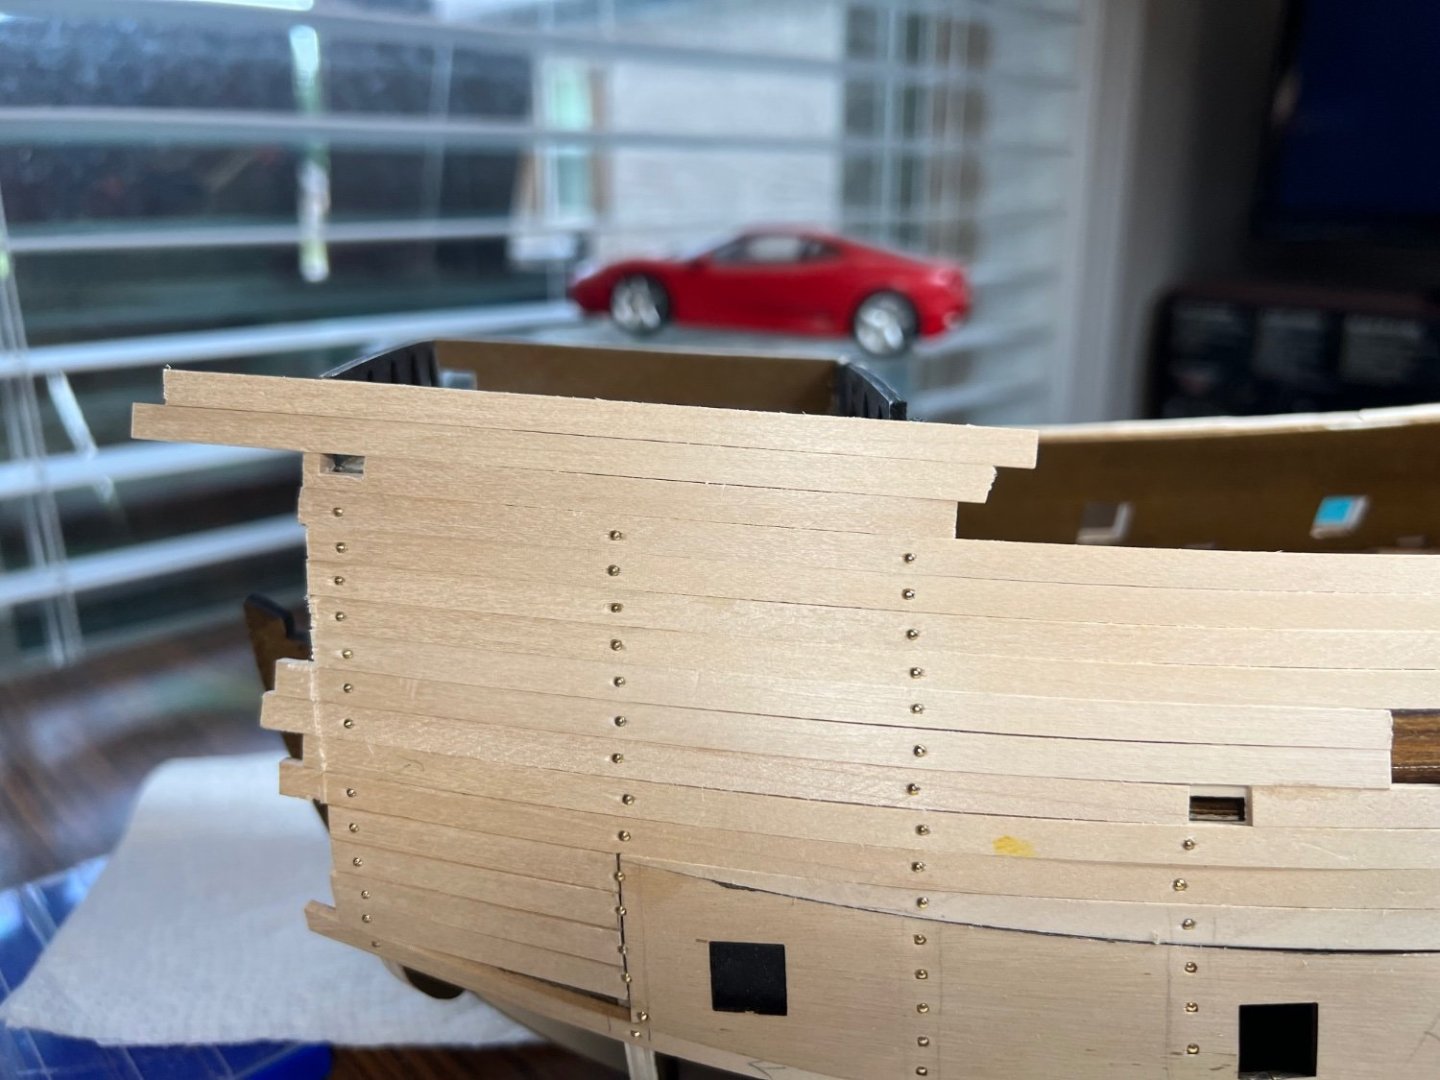
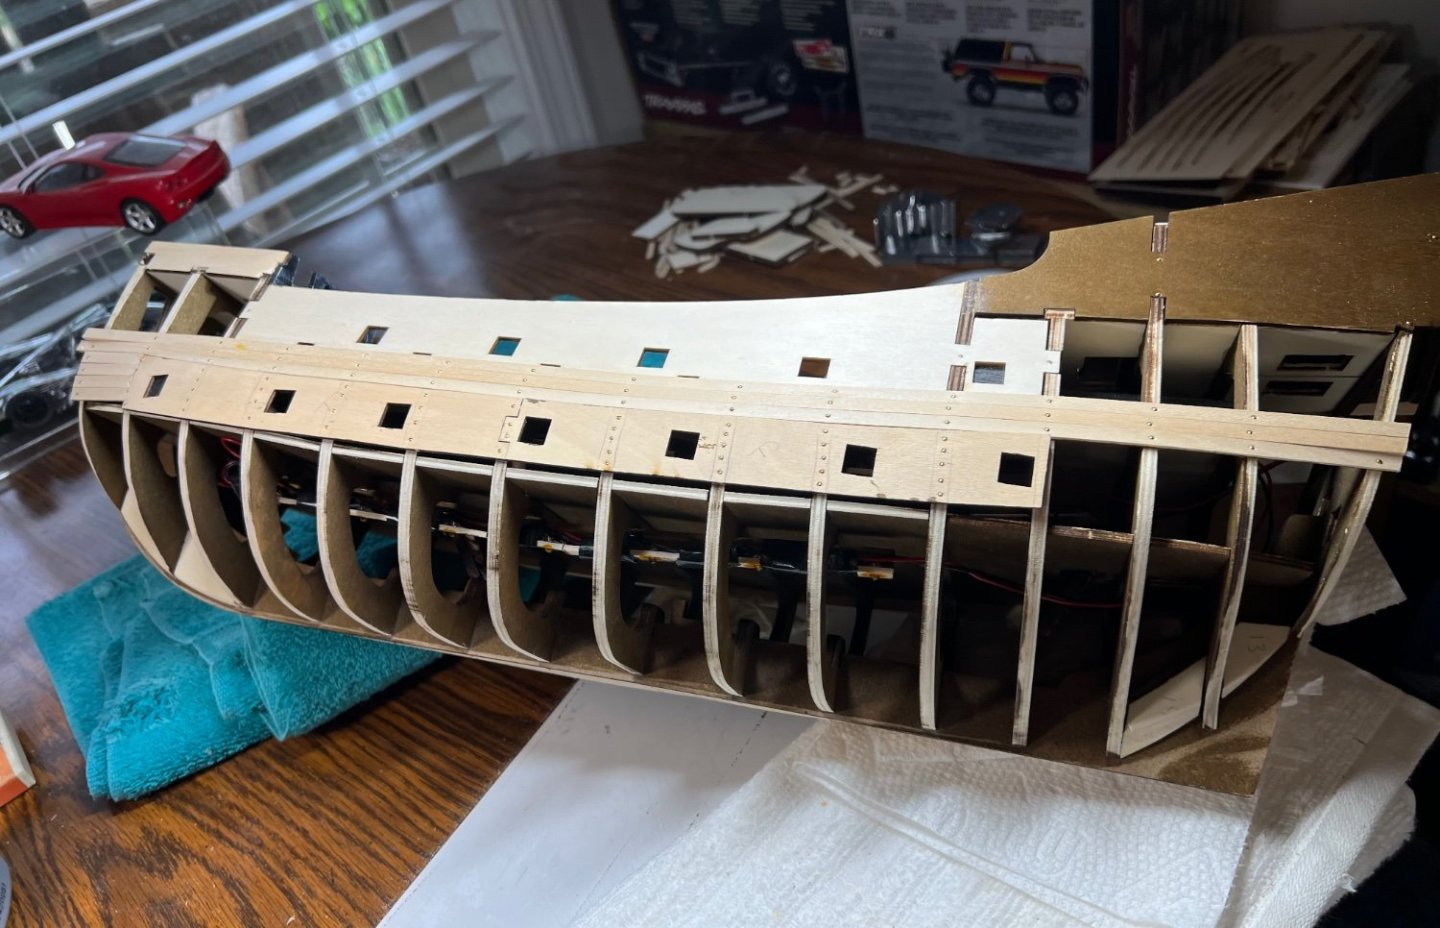
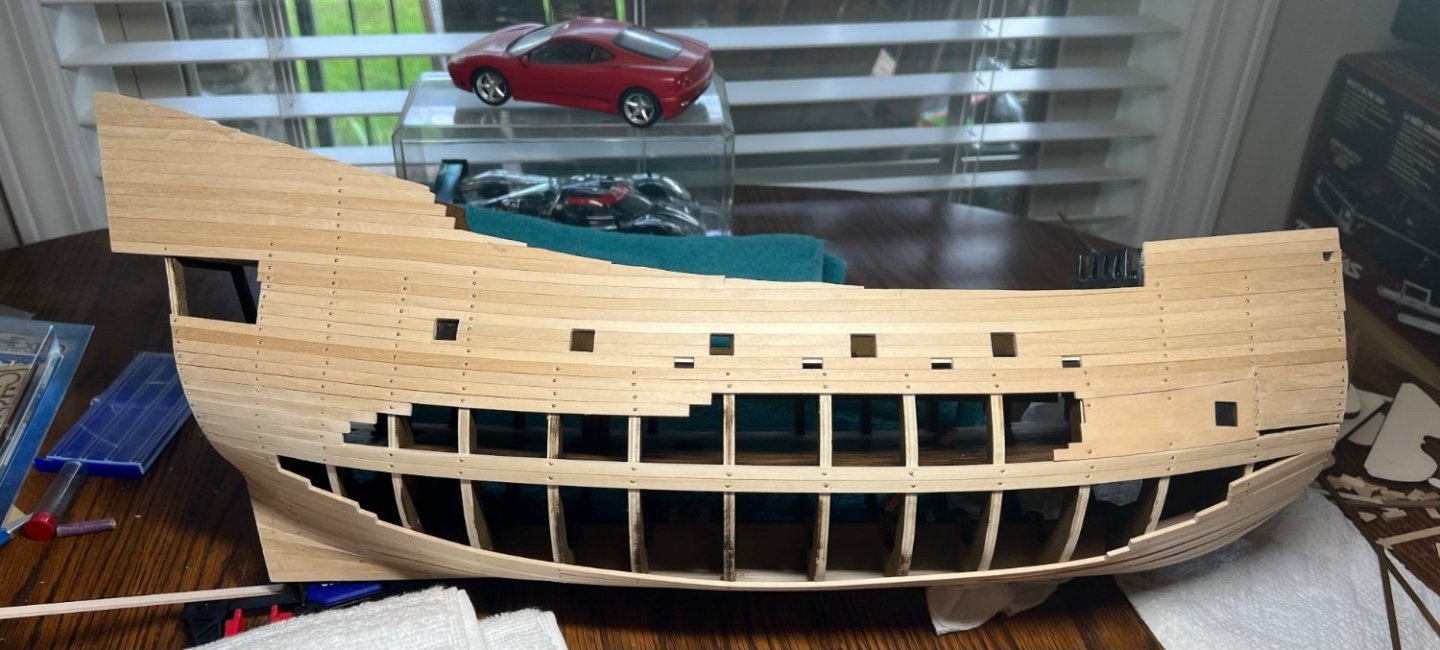
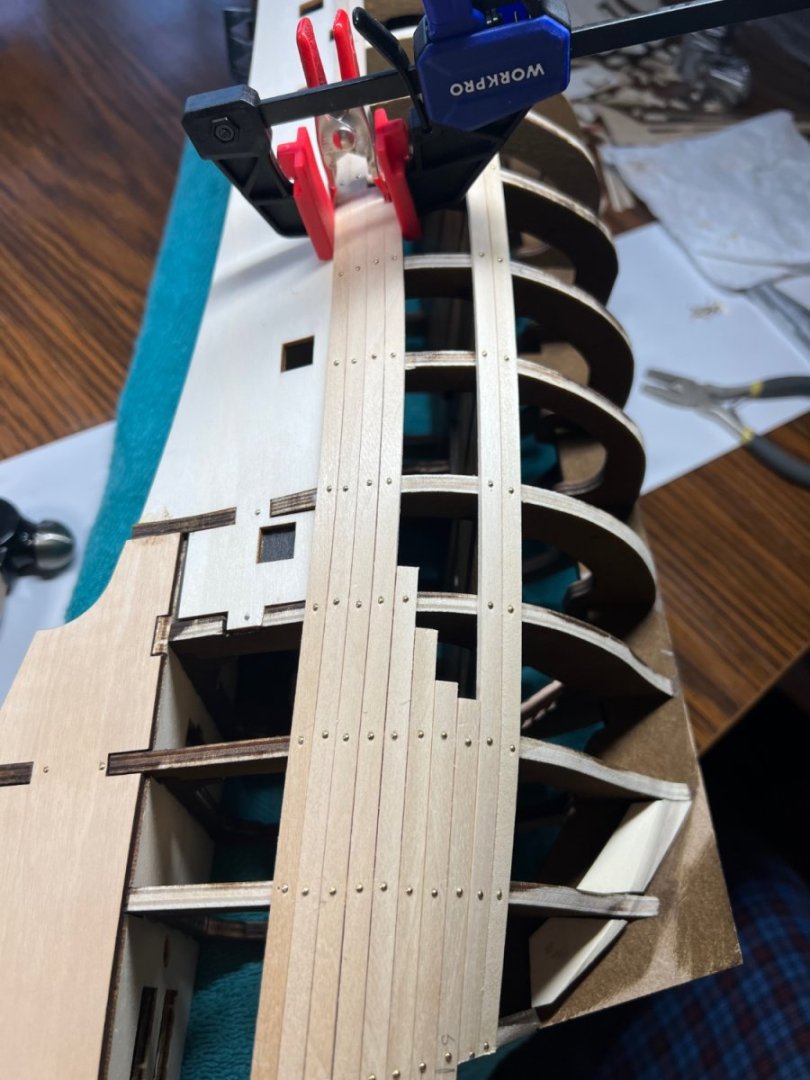
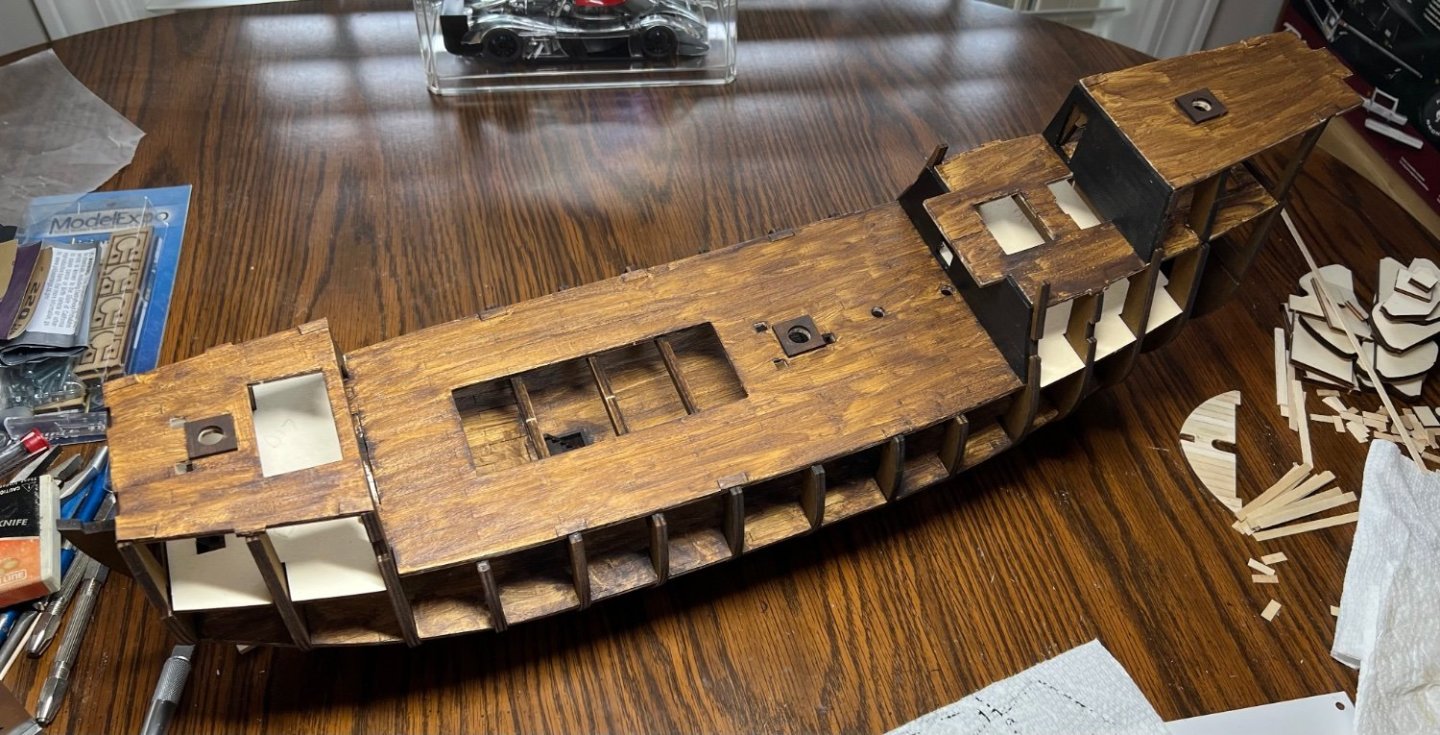
The main planking ends…..


-
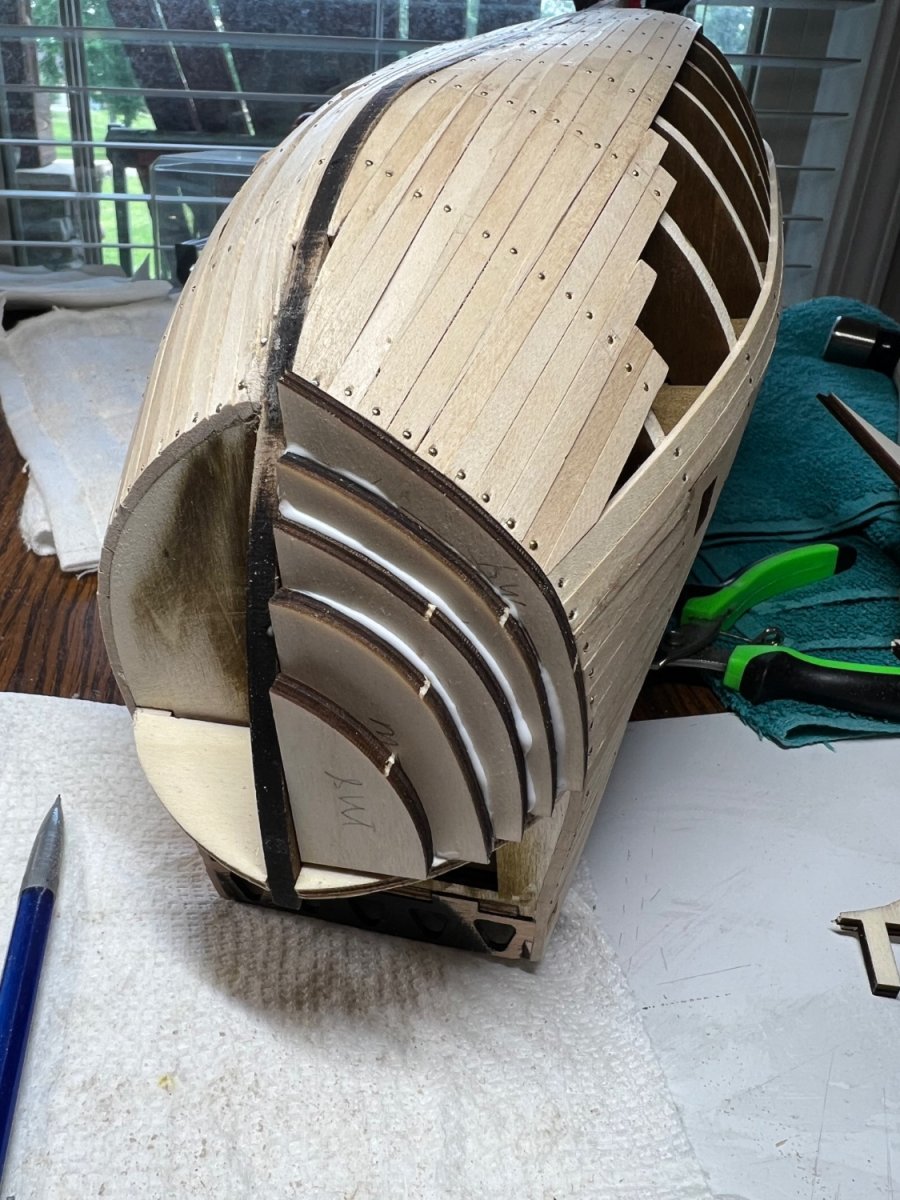
Planking and planking and planking. Big pieces are done. It needs filler planks now. The instructions lack in this area. It shows the other side very well. This side is ‘tad da, planked’. It all gets painted black so not a big deal.


-
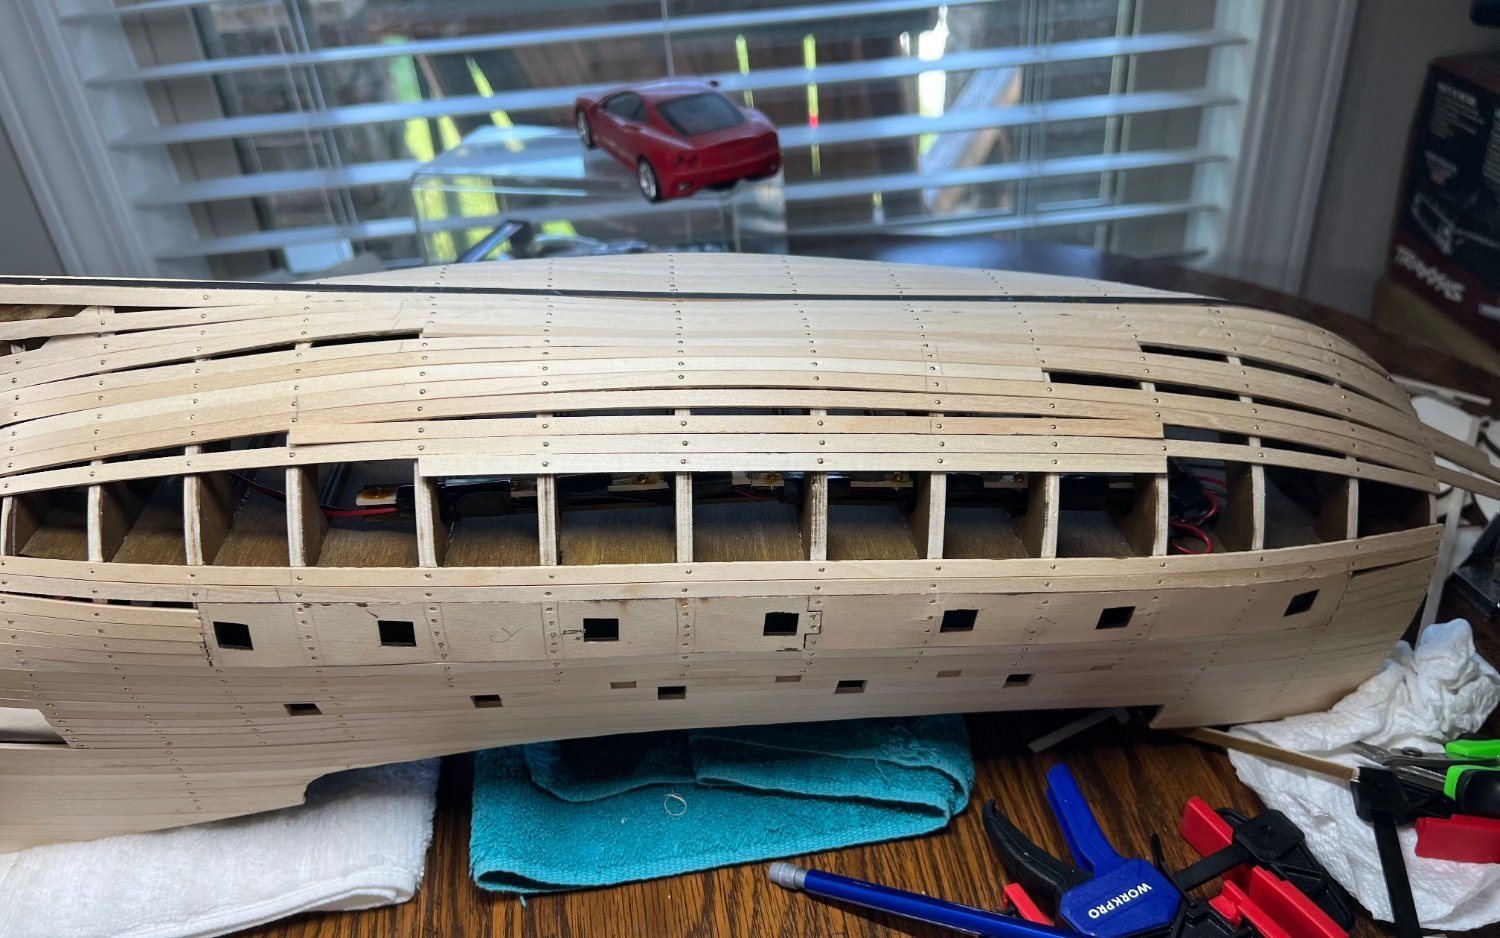
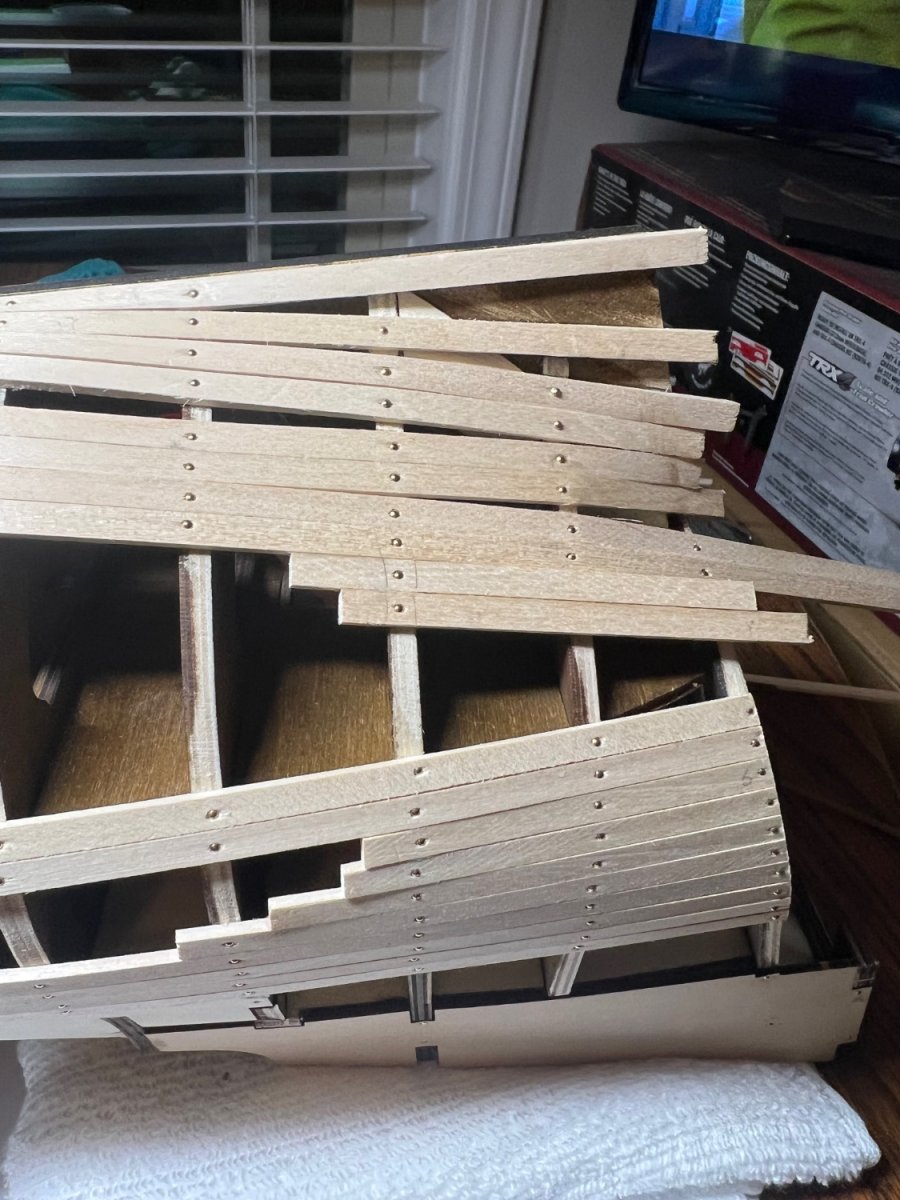
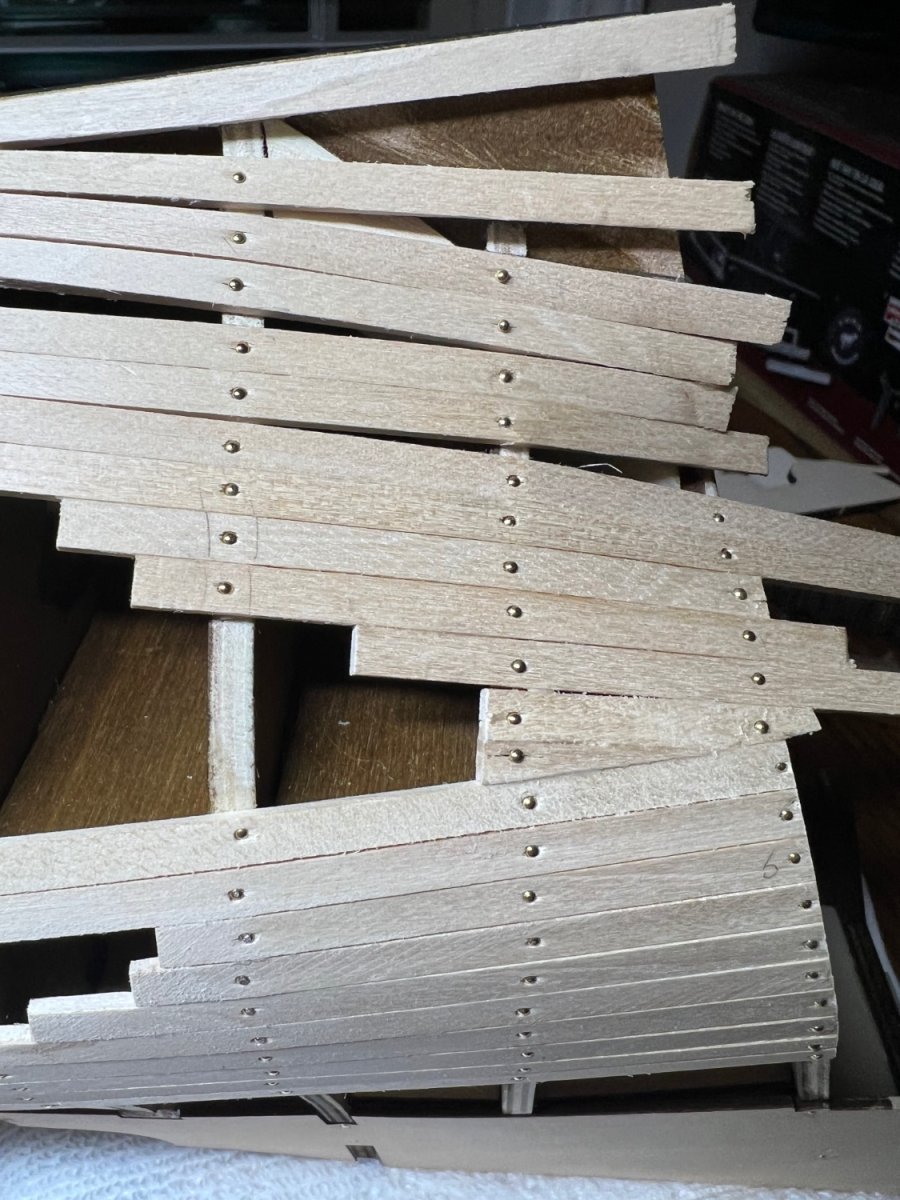
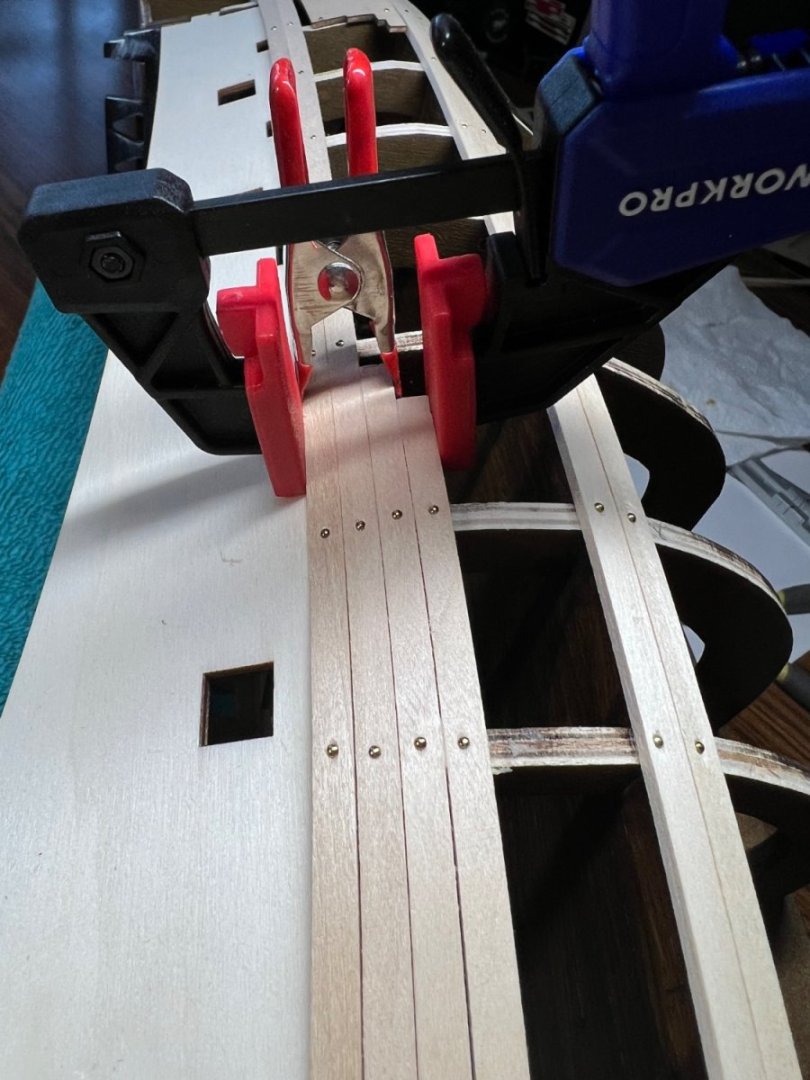
Planking and planking and planking. I’m trying to go slow enough each one is just as it should be. The build moves quickly until this stage. It’s getting unruly to hold on to for planking. It’s quite heavy also.


-
Looking good, great start. It’s a fun boat to build.
- 62 replies
-
- 1
-
-
- First Build
- Grand Banks Dory
- (and 2 more)
-
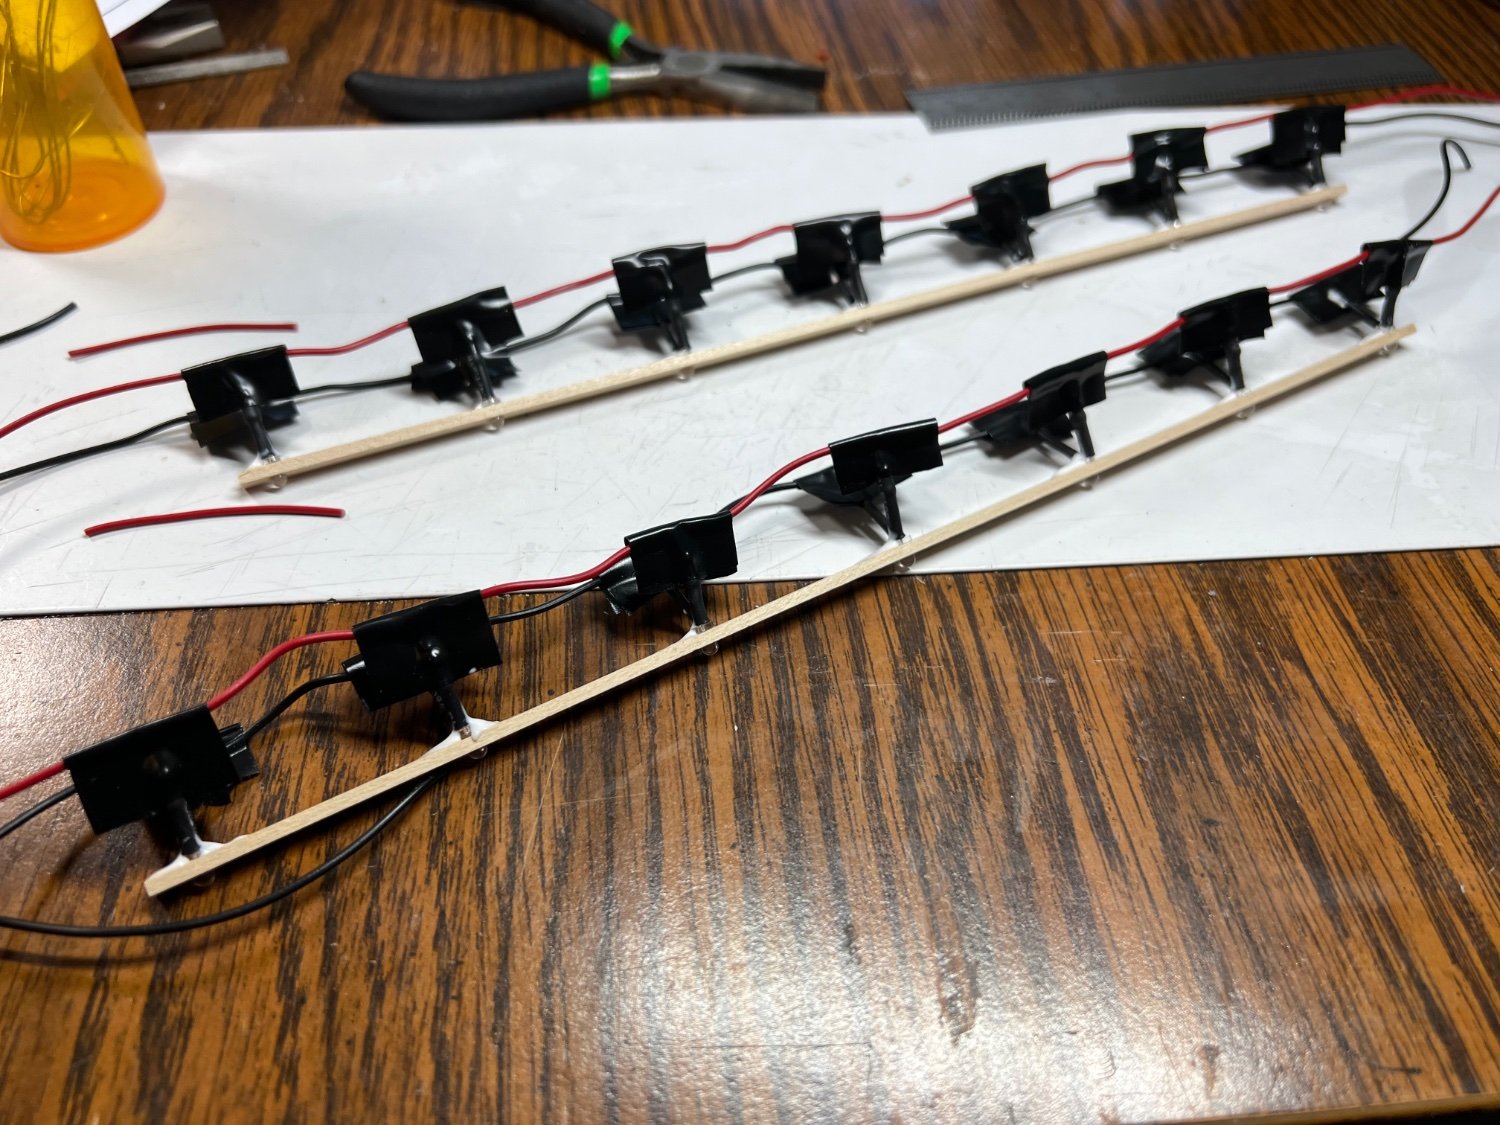
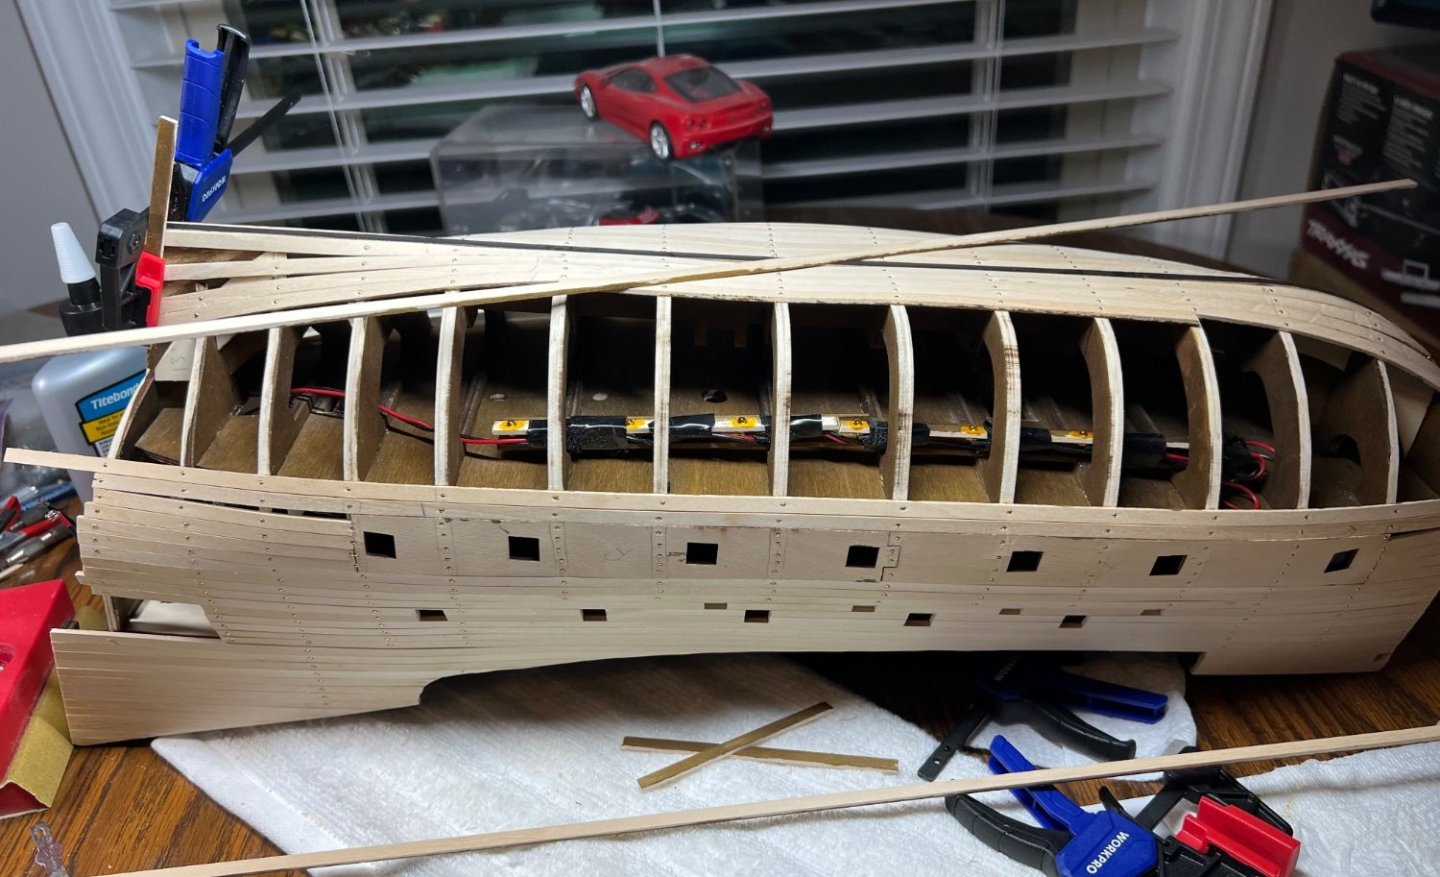
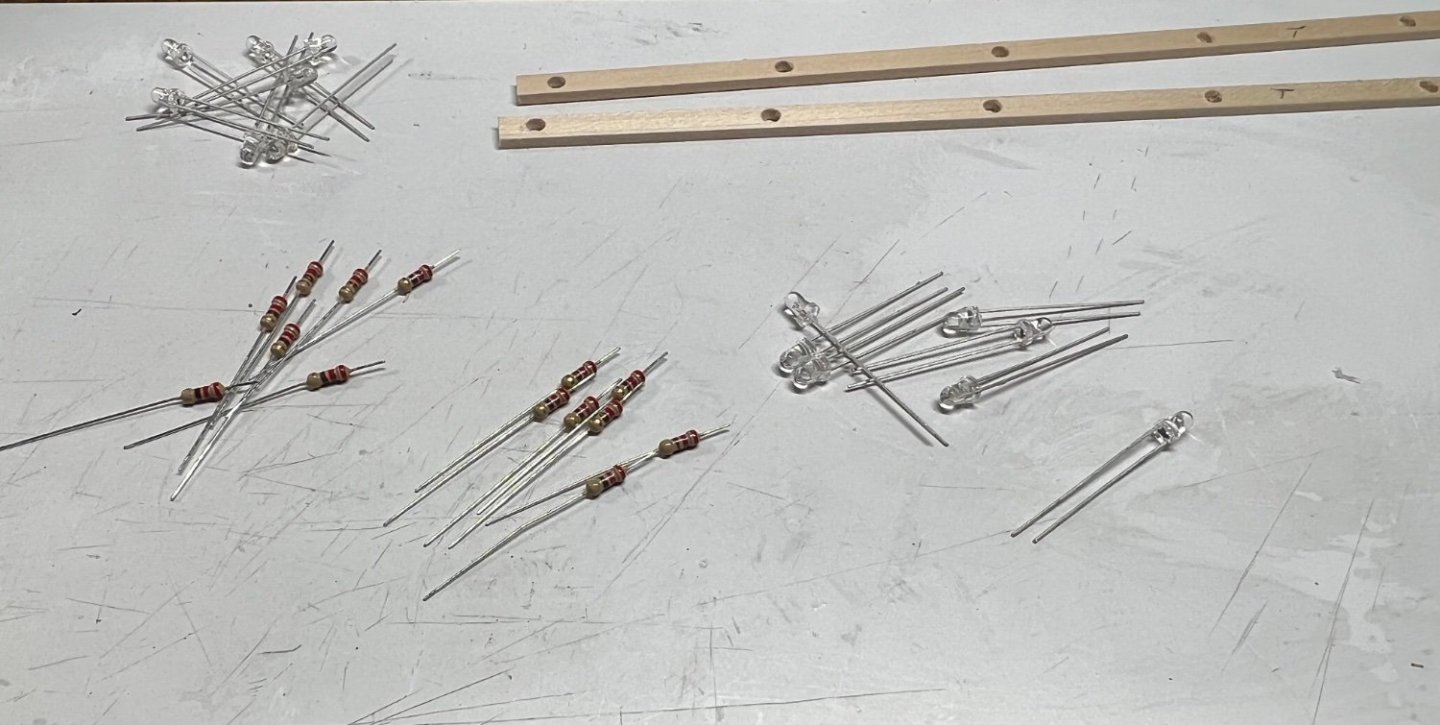
Yes, I think so. It would make installing them easy. Wiring them would be simplified. Yellow LED strip. There are still individual lights needed also, but the flood lights would be great as strips.
-
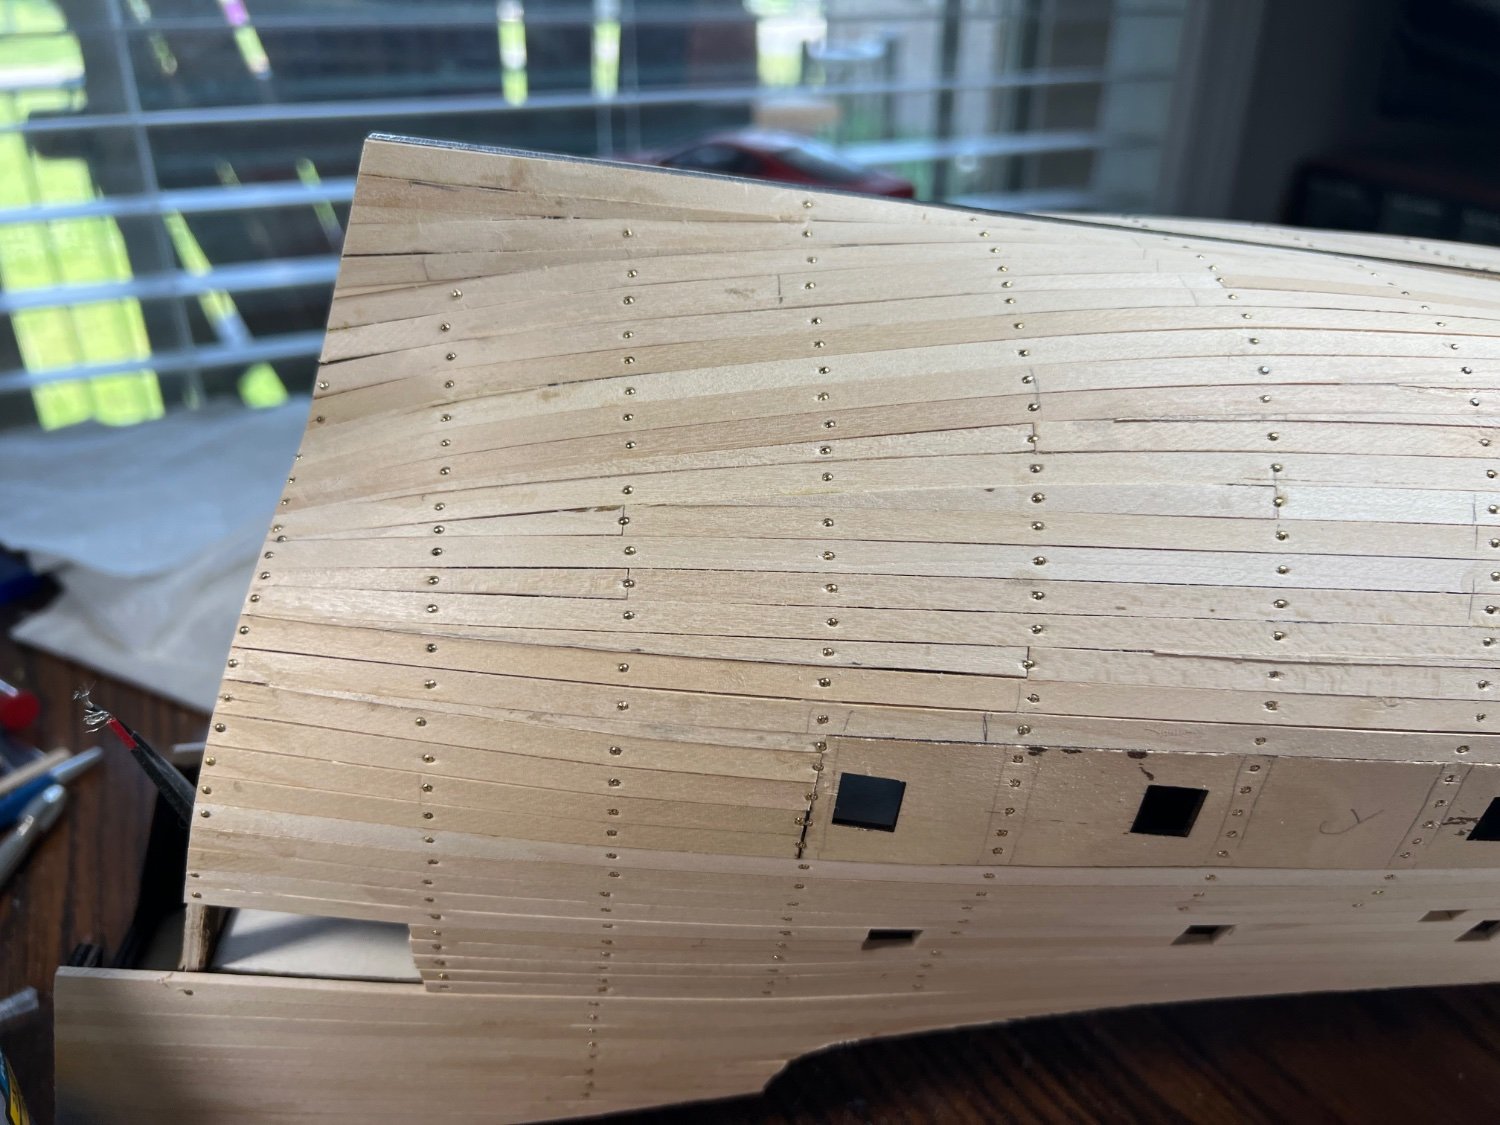
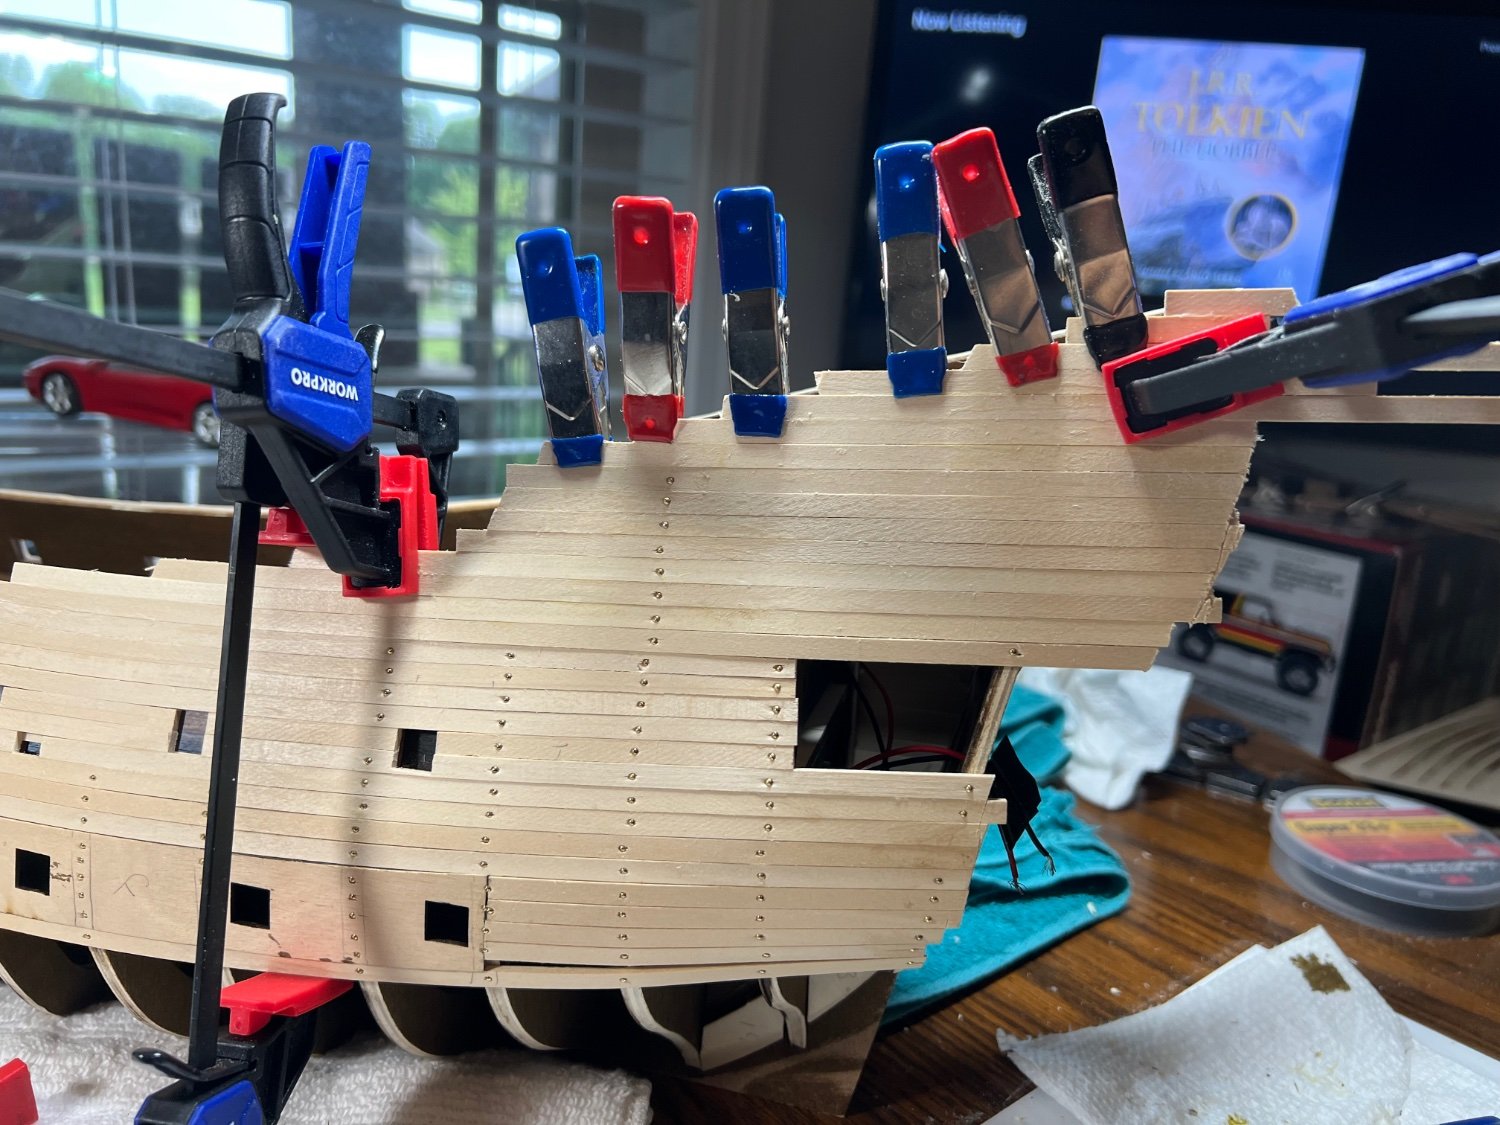
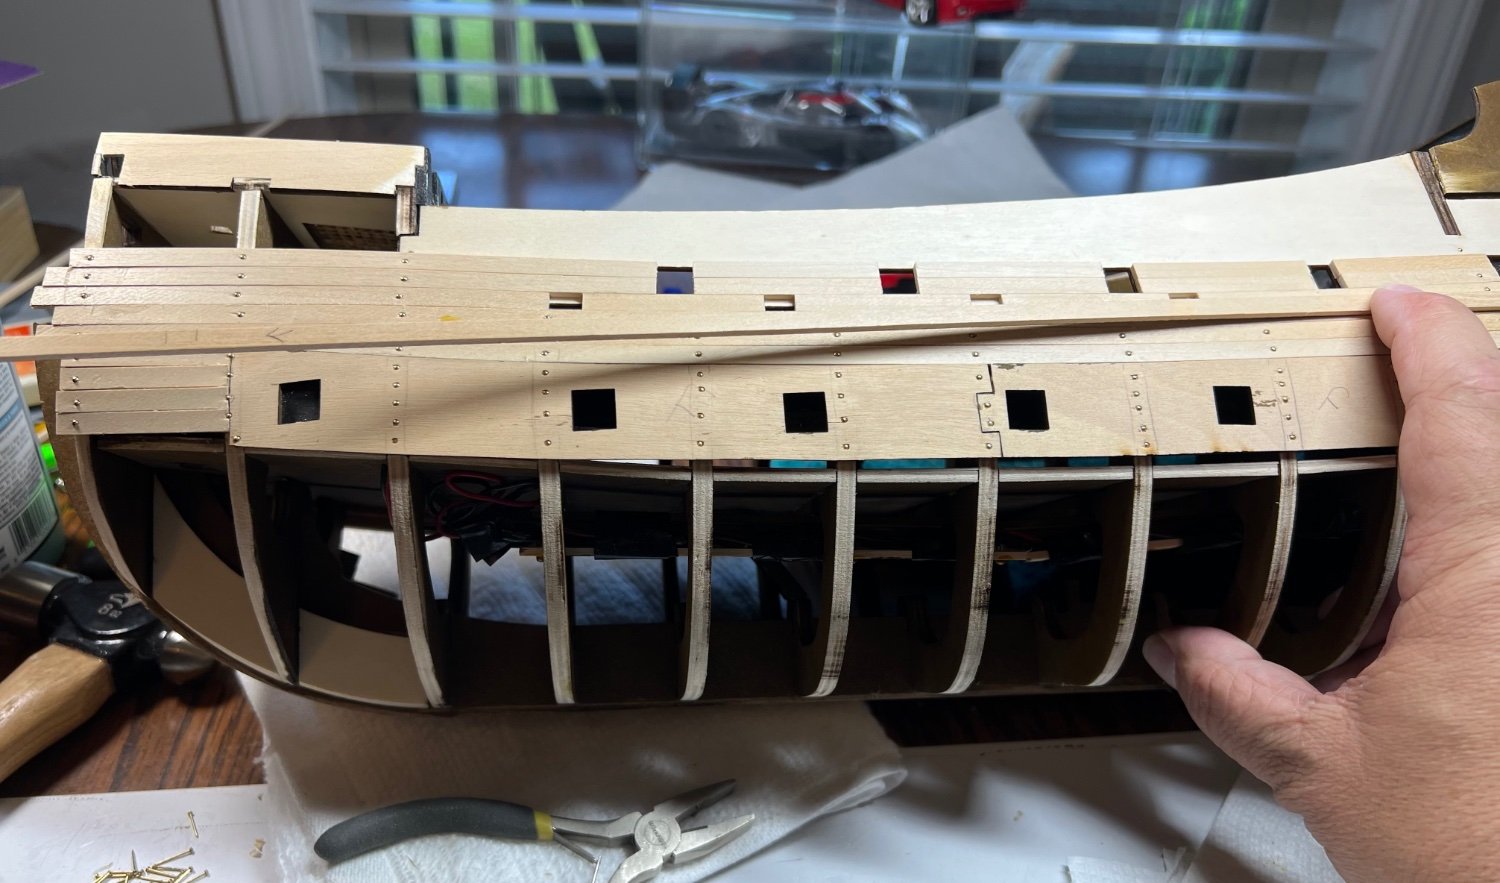
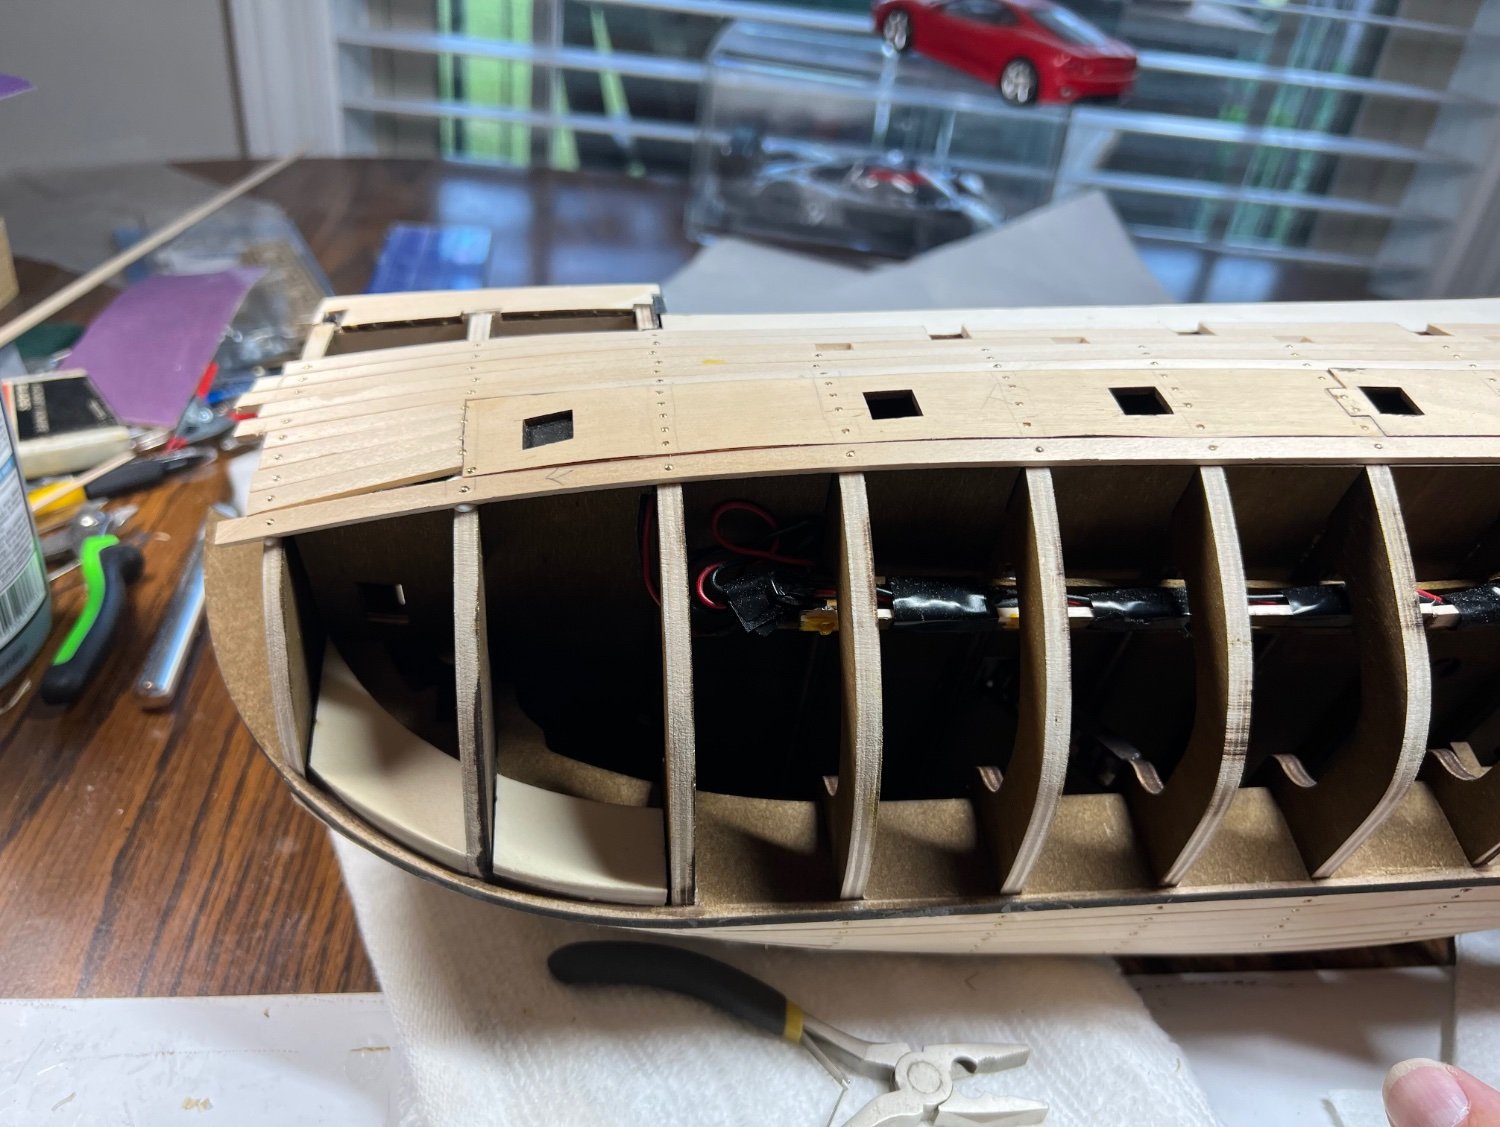
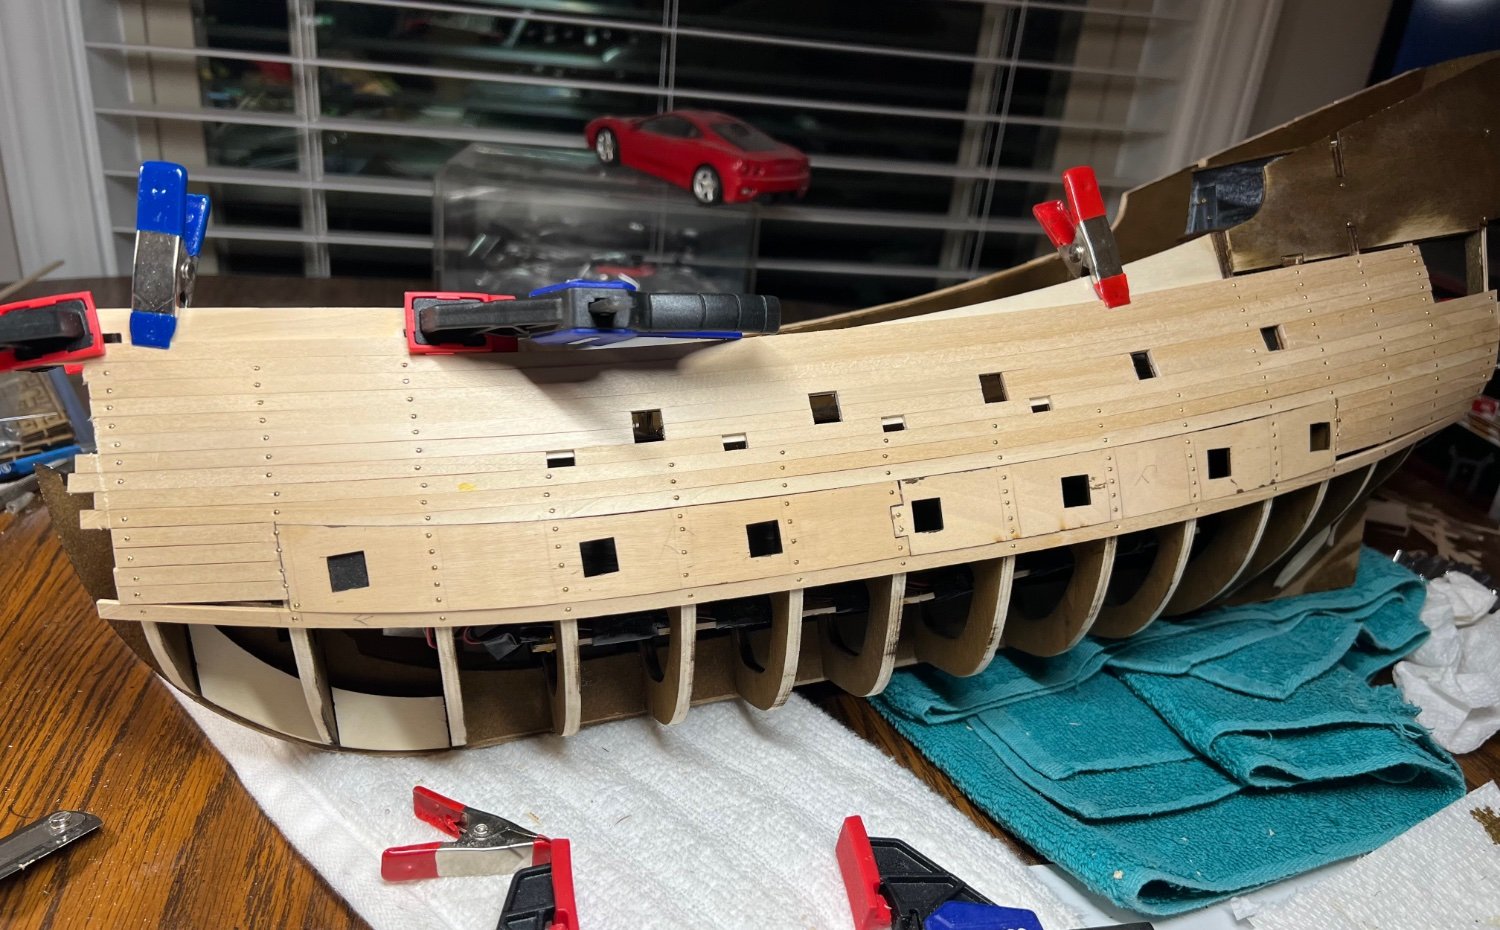
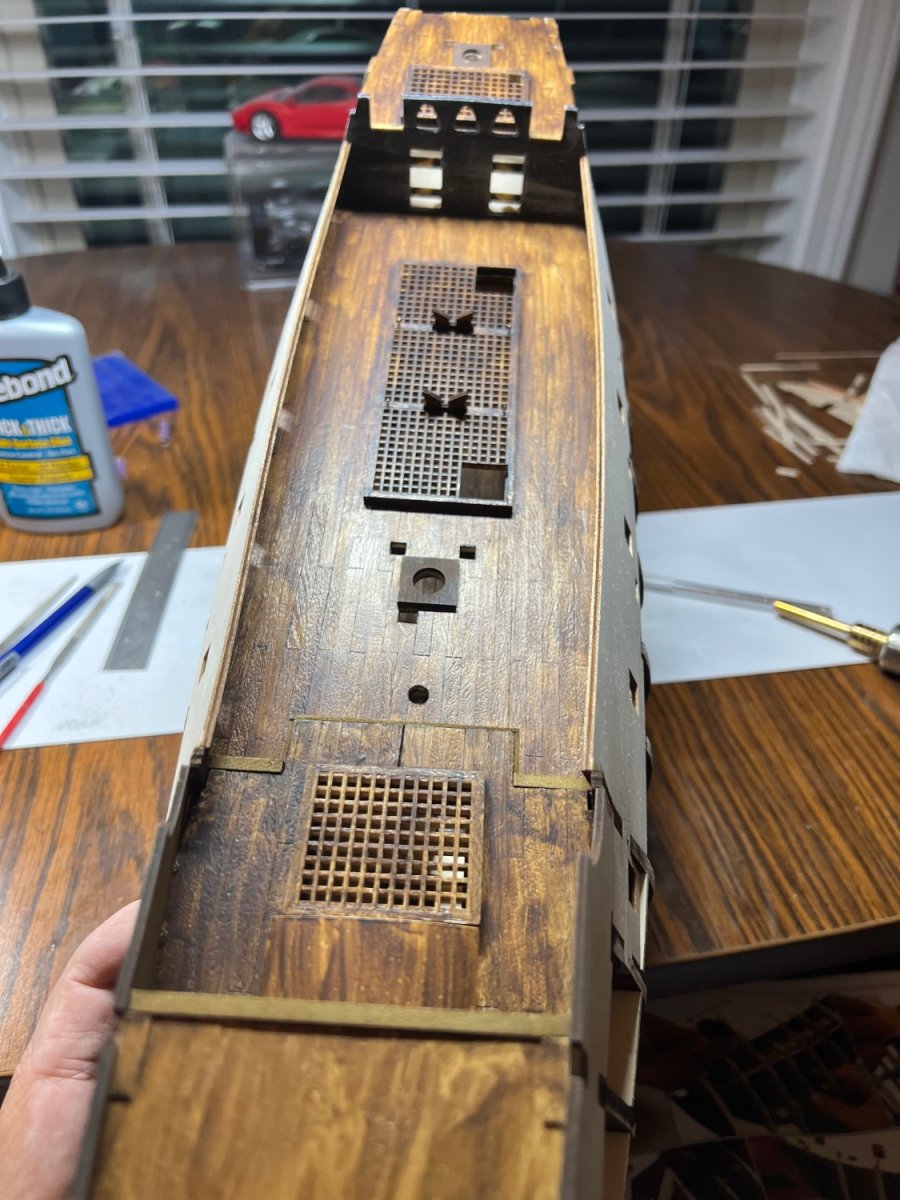
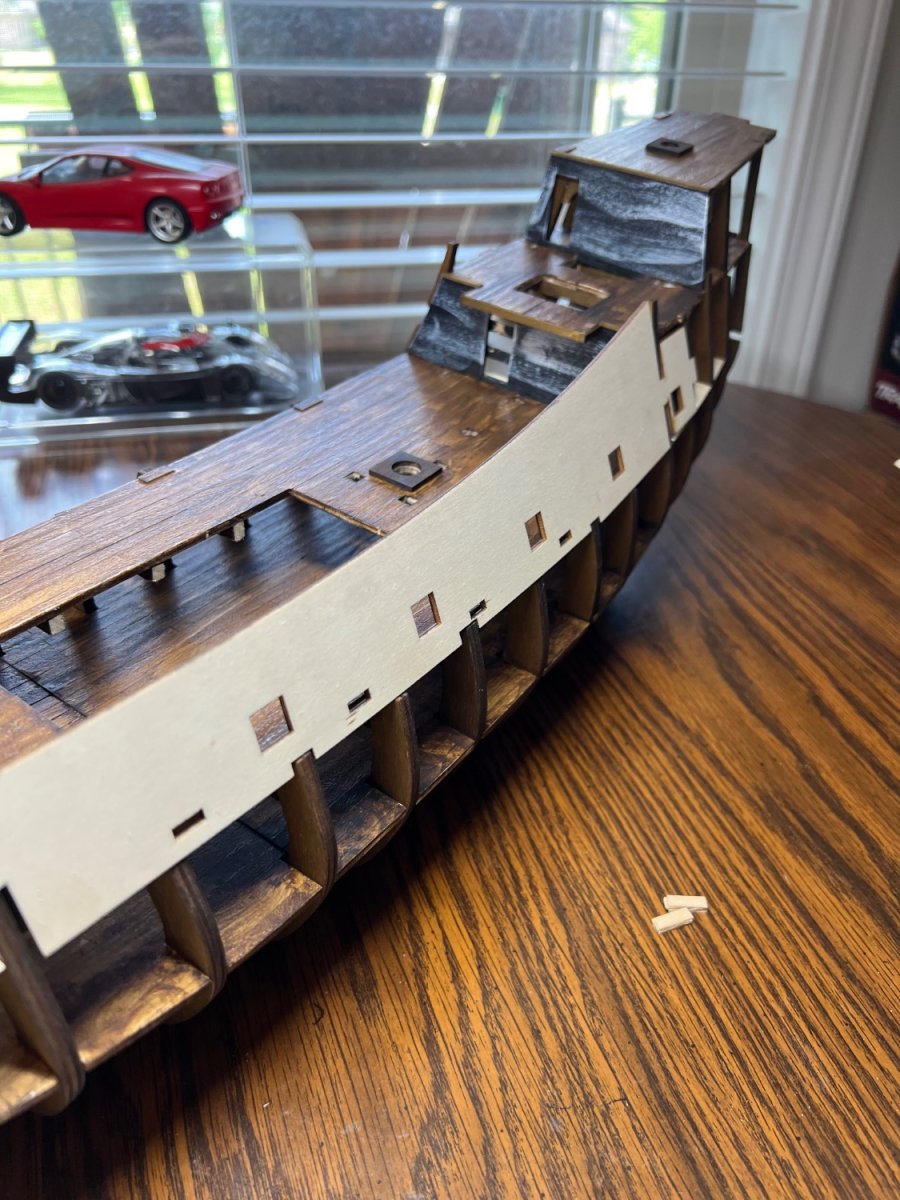
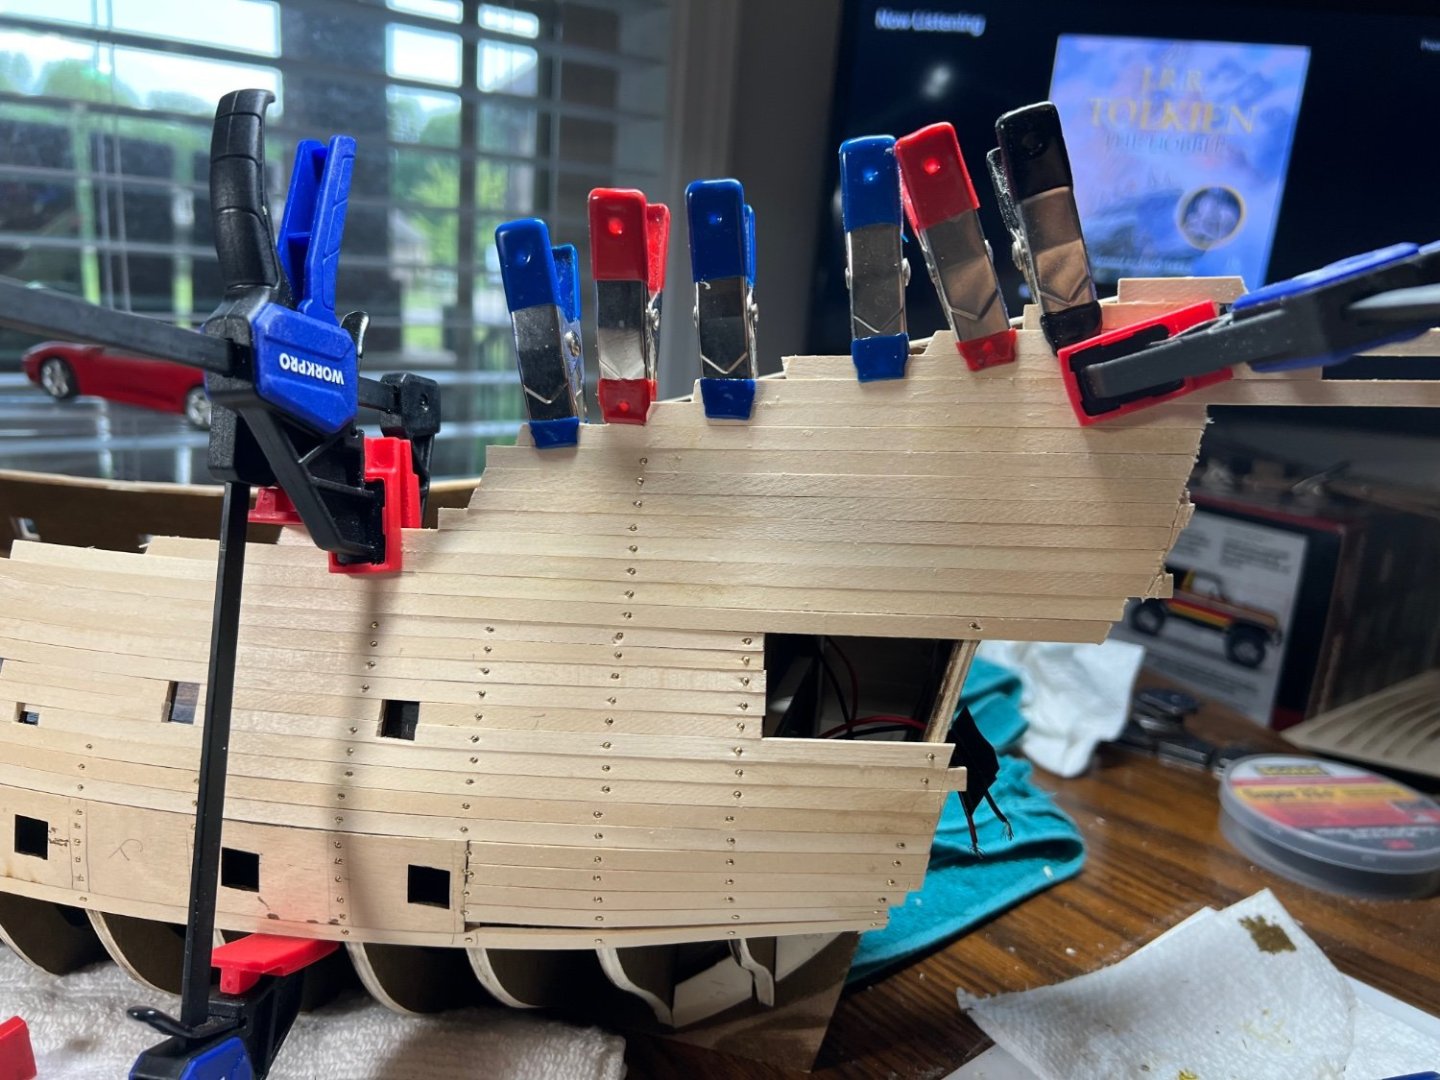
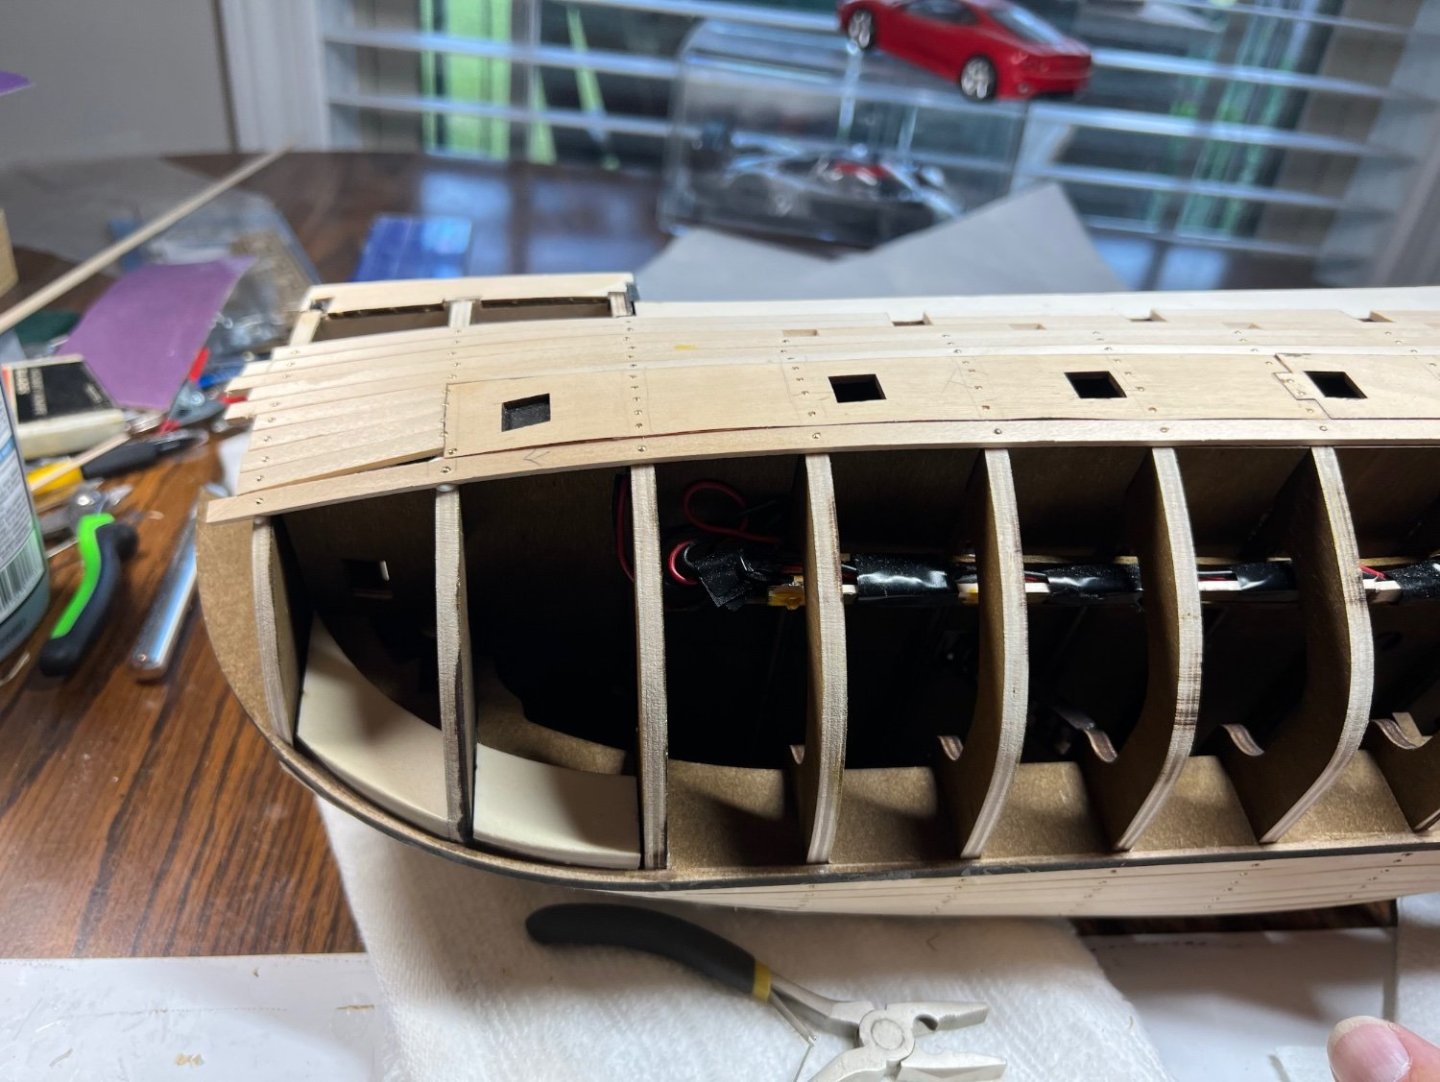
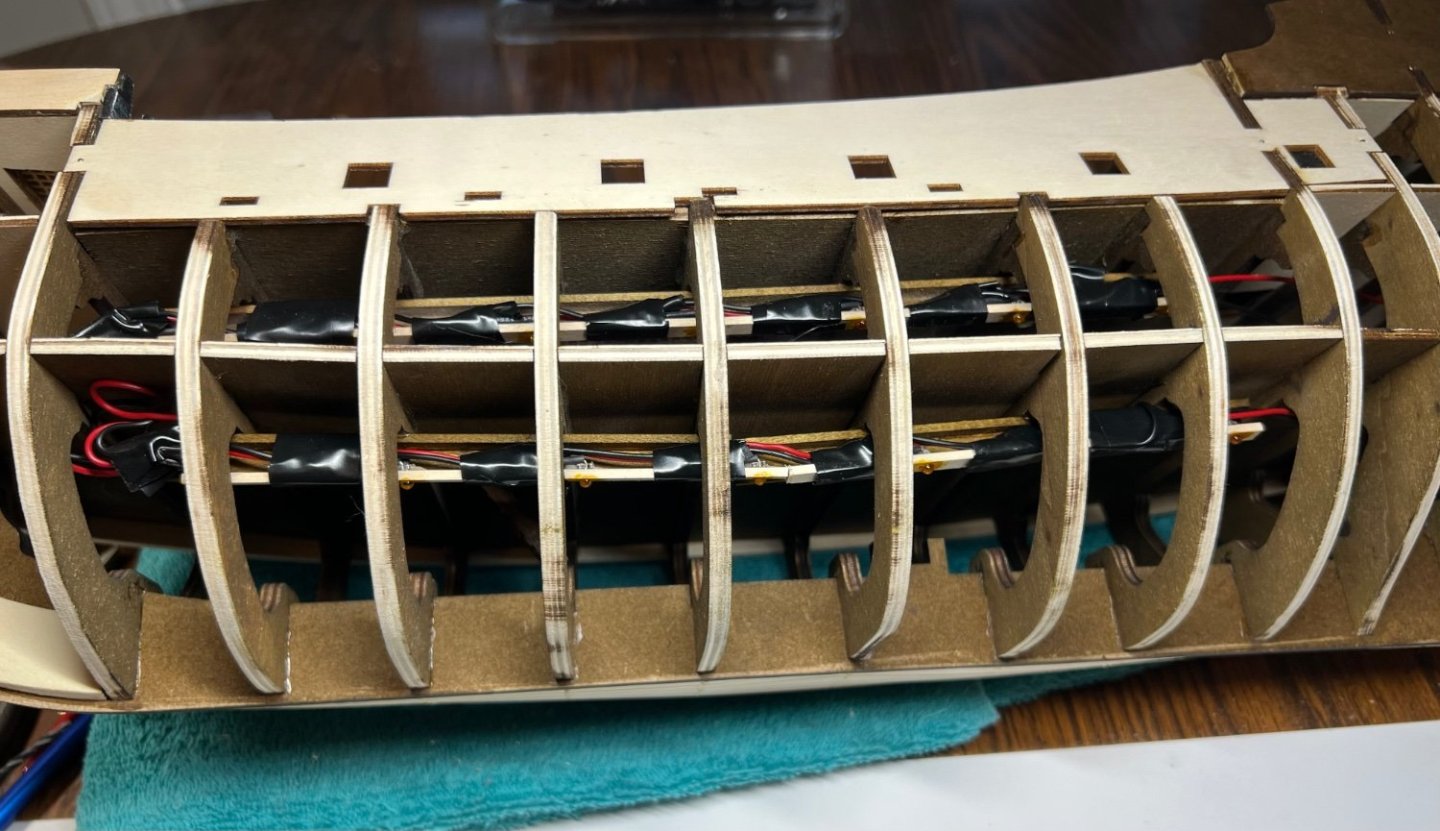
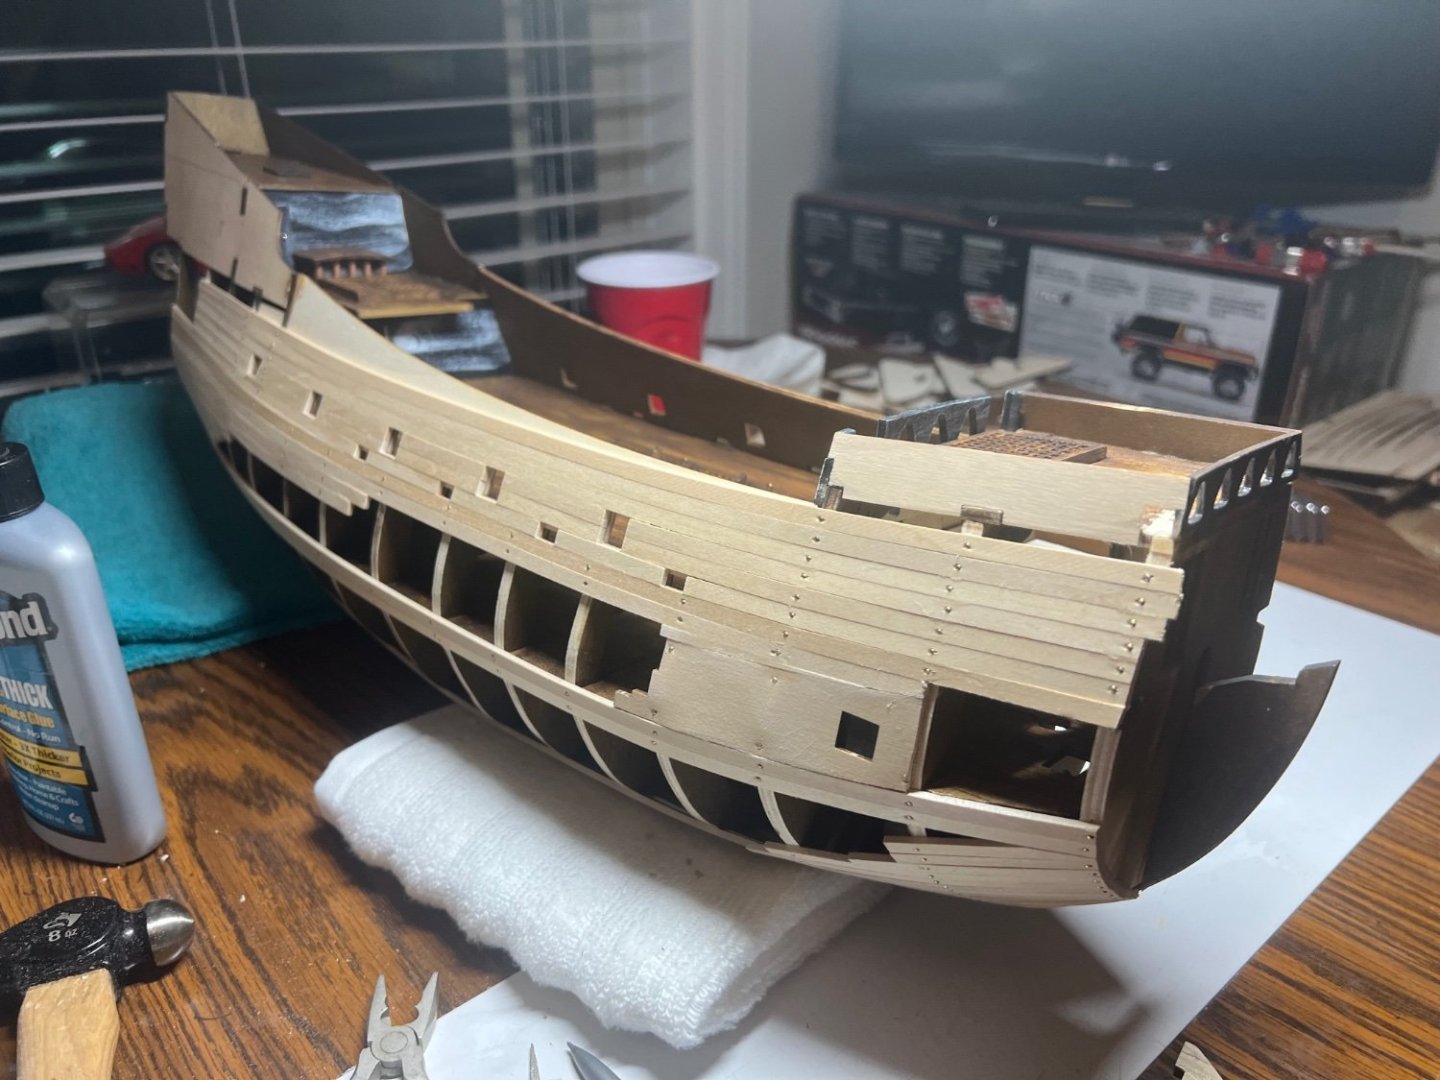
Plodding along. Lower lights are done. They stick down to far, I smashed it all together as tight as I could get it. The method they suggest to build the lights up doesn’t make it dense enough. Planking on the starboard side has started.

-
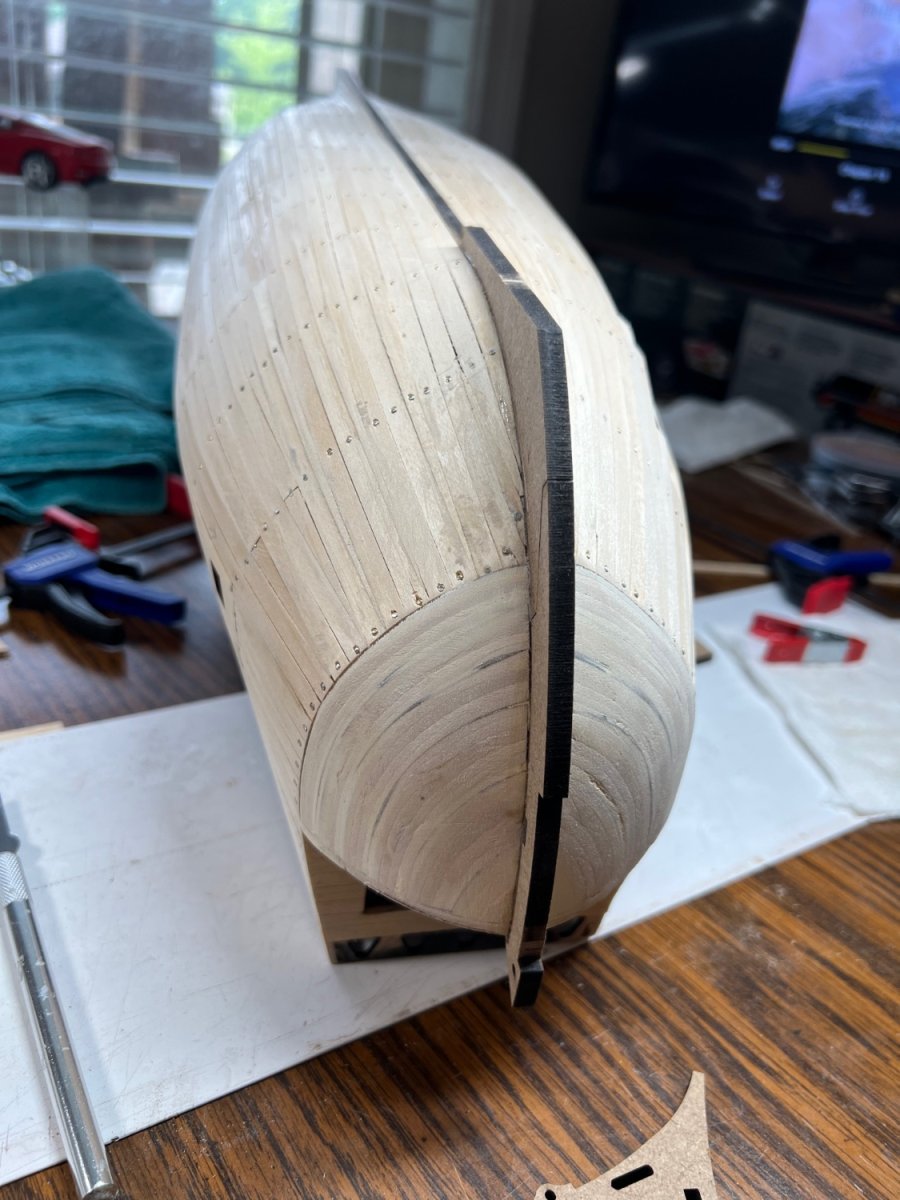
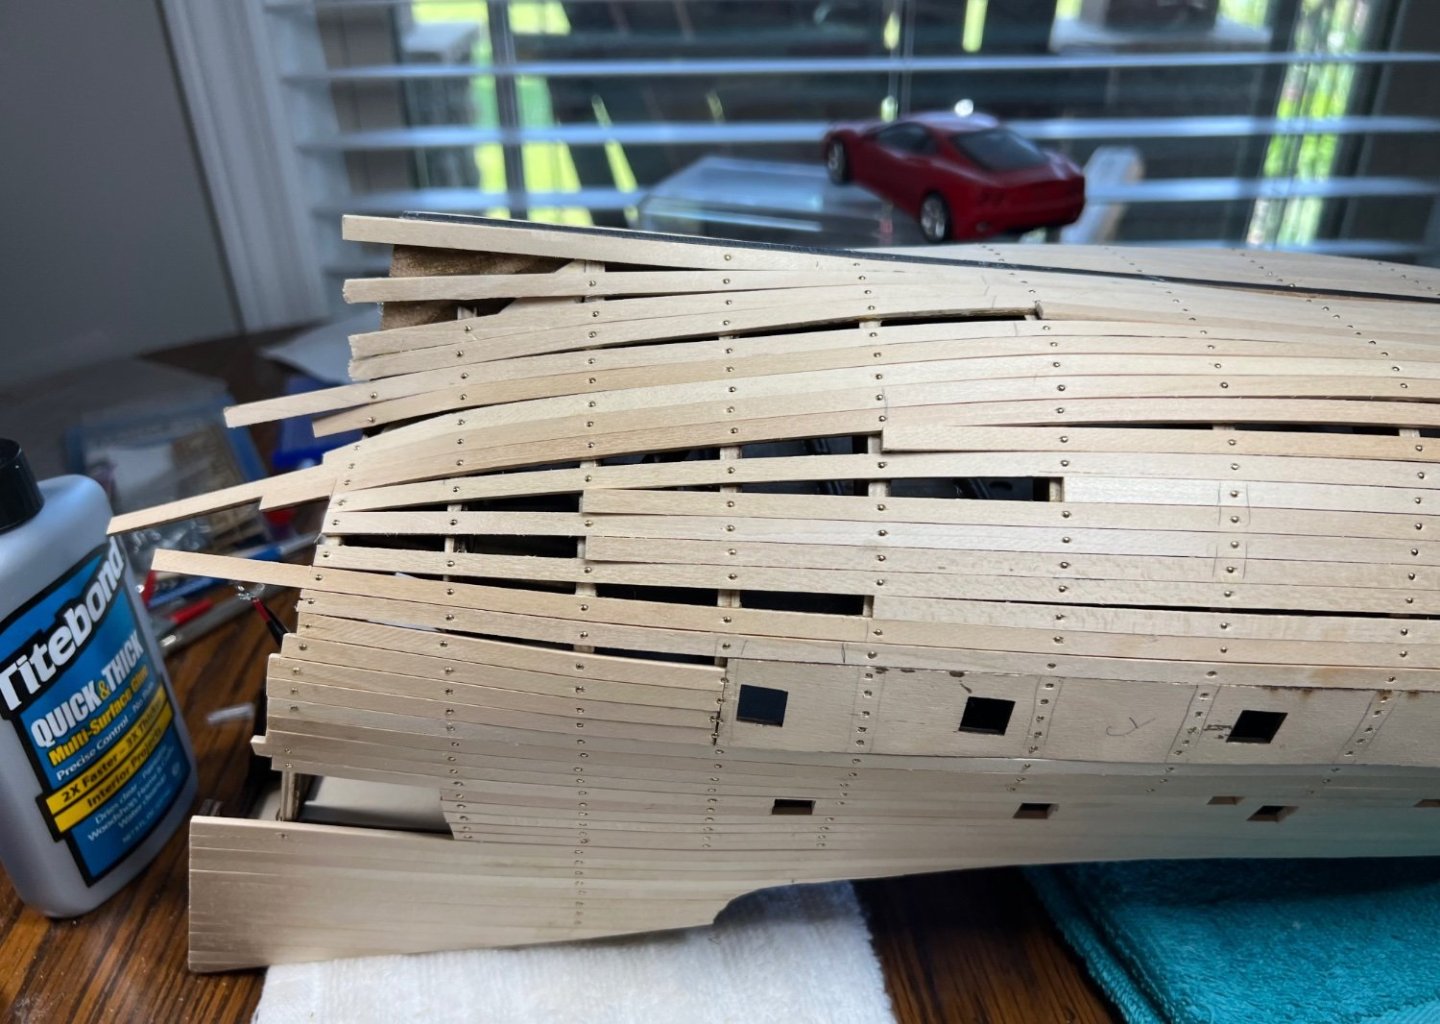
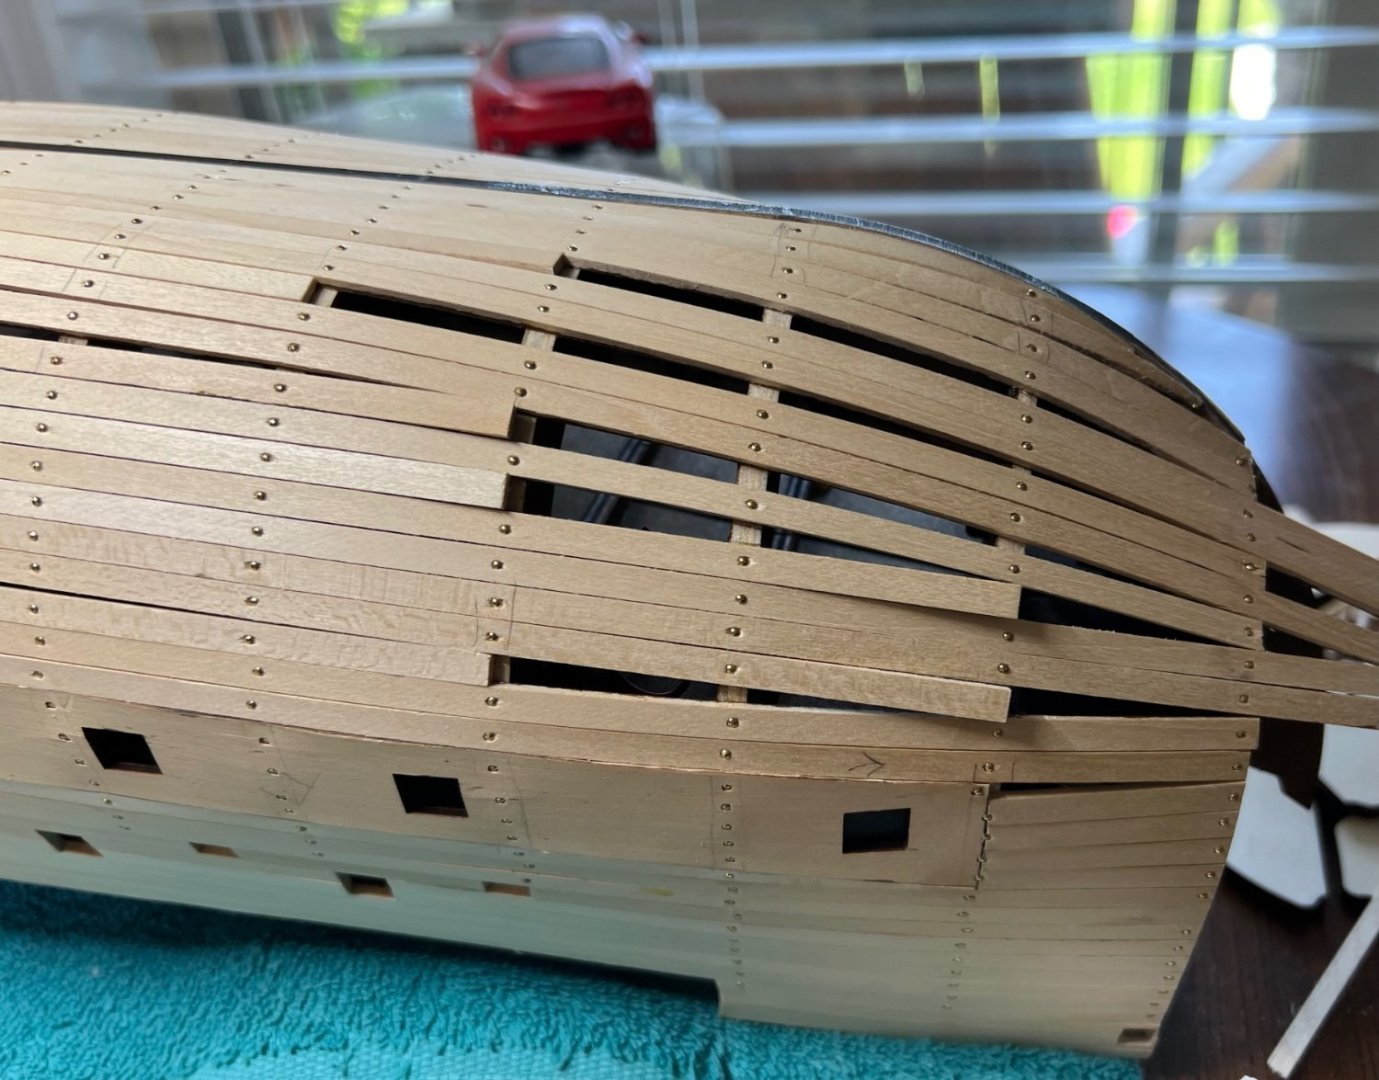
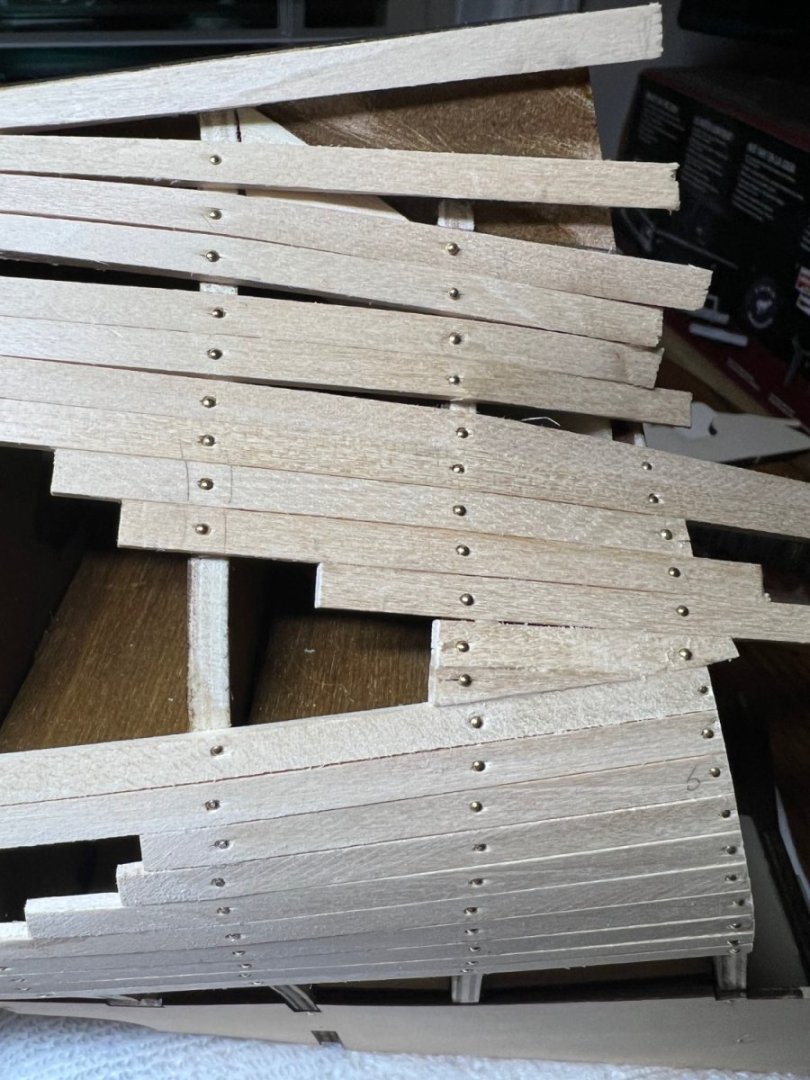
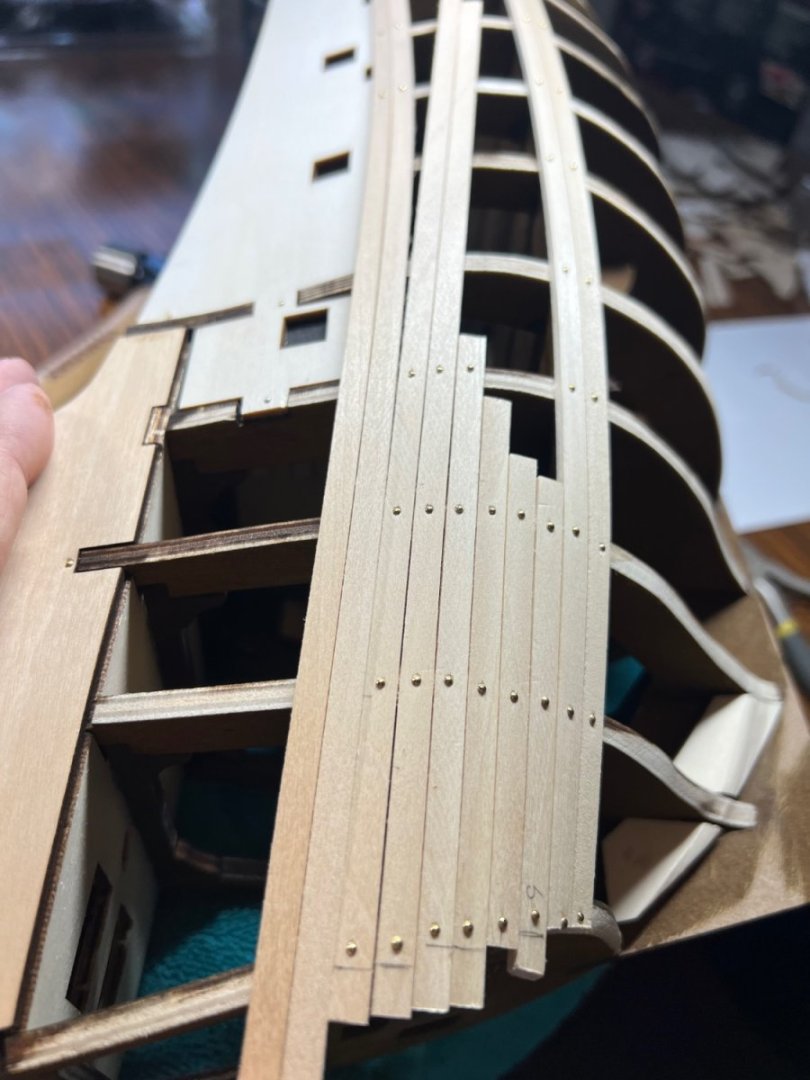
I’m not sure if planking ever ends. One side is almost complete. A bit of fill at the bottom remains. Trimming and sanding needed too. Not to bad so far.
-
Looking great!! I need to get mine finished, and NOT look at how good yours looks. Very nice.
-
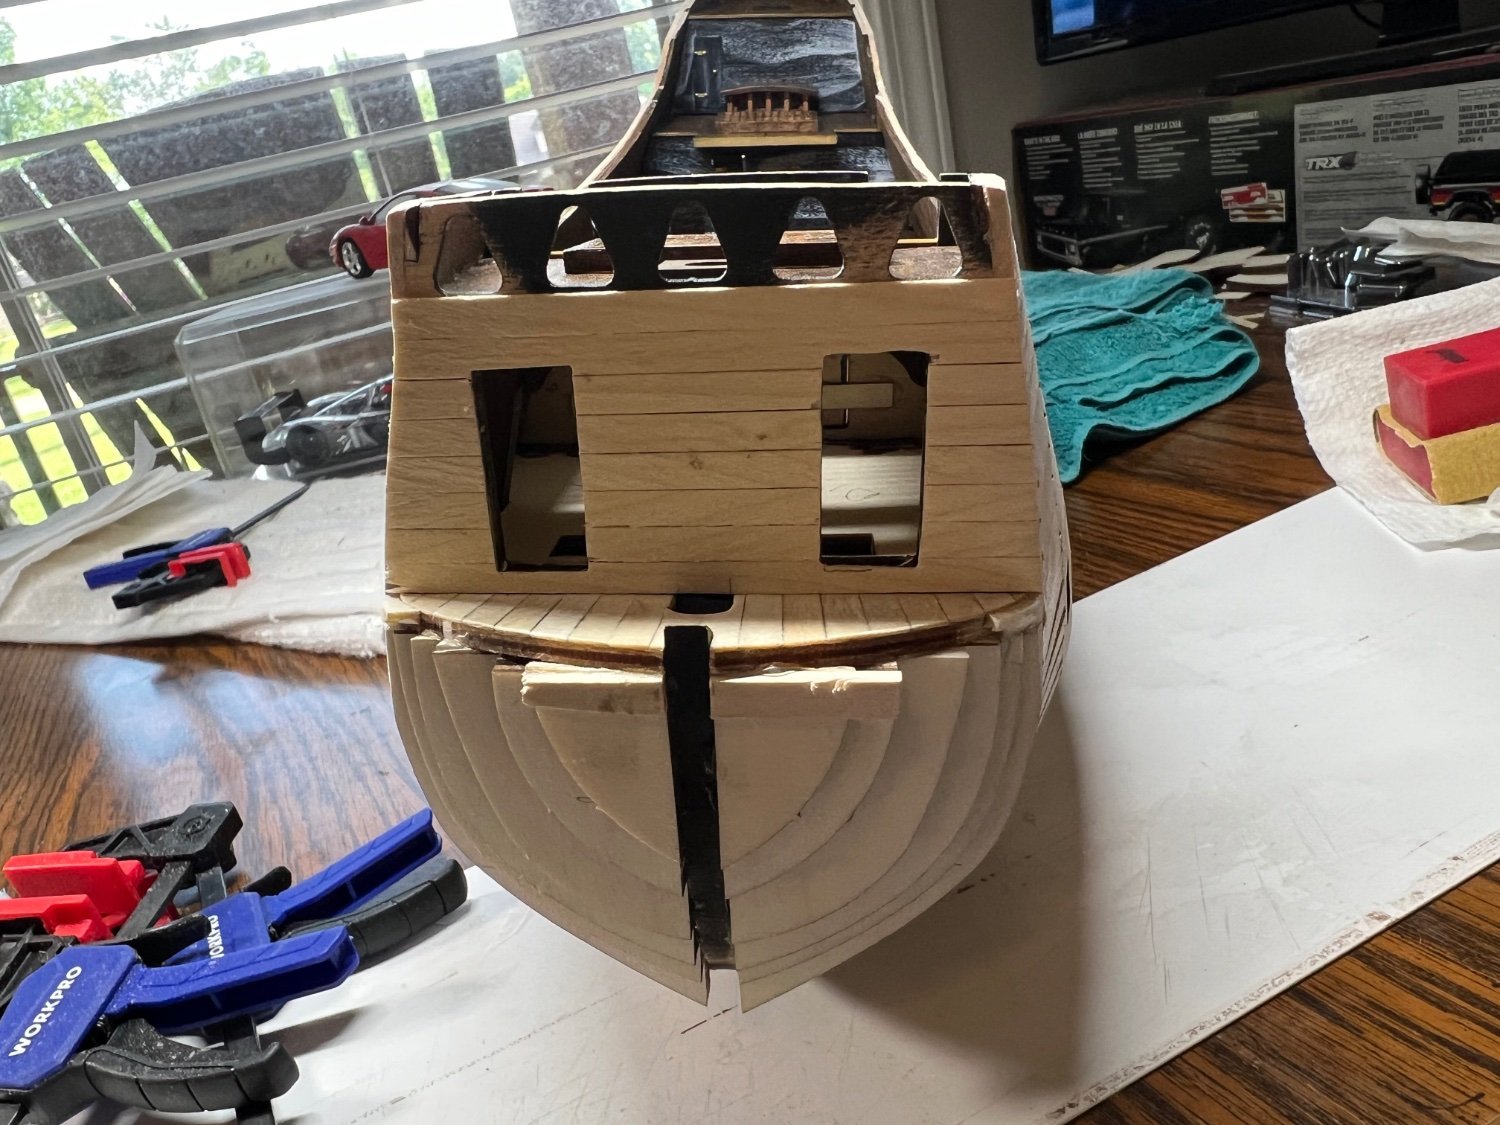
Planking continues. There is so much going on that needs planning form early stages. This was not a wise choice for a first big ship. Q25 fits in a place that I made it not fit. I made adjustments I hope works out. The top front doesn’t get planked but it will on mine. So many mistakes…. Maybe know one will know lol


-
OcCre style planking seems best learned from the Polaris. I had a few questions and this and the next few videos answers them well enough. Many won’t need these but a first time OcCre builder likely will, I did. Good news I can do the planking at least as good as the video.
-
Moving along. Slow going wetting and shaping.


-
Well, not to bad. The plan worked.
-
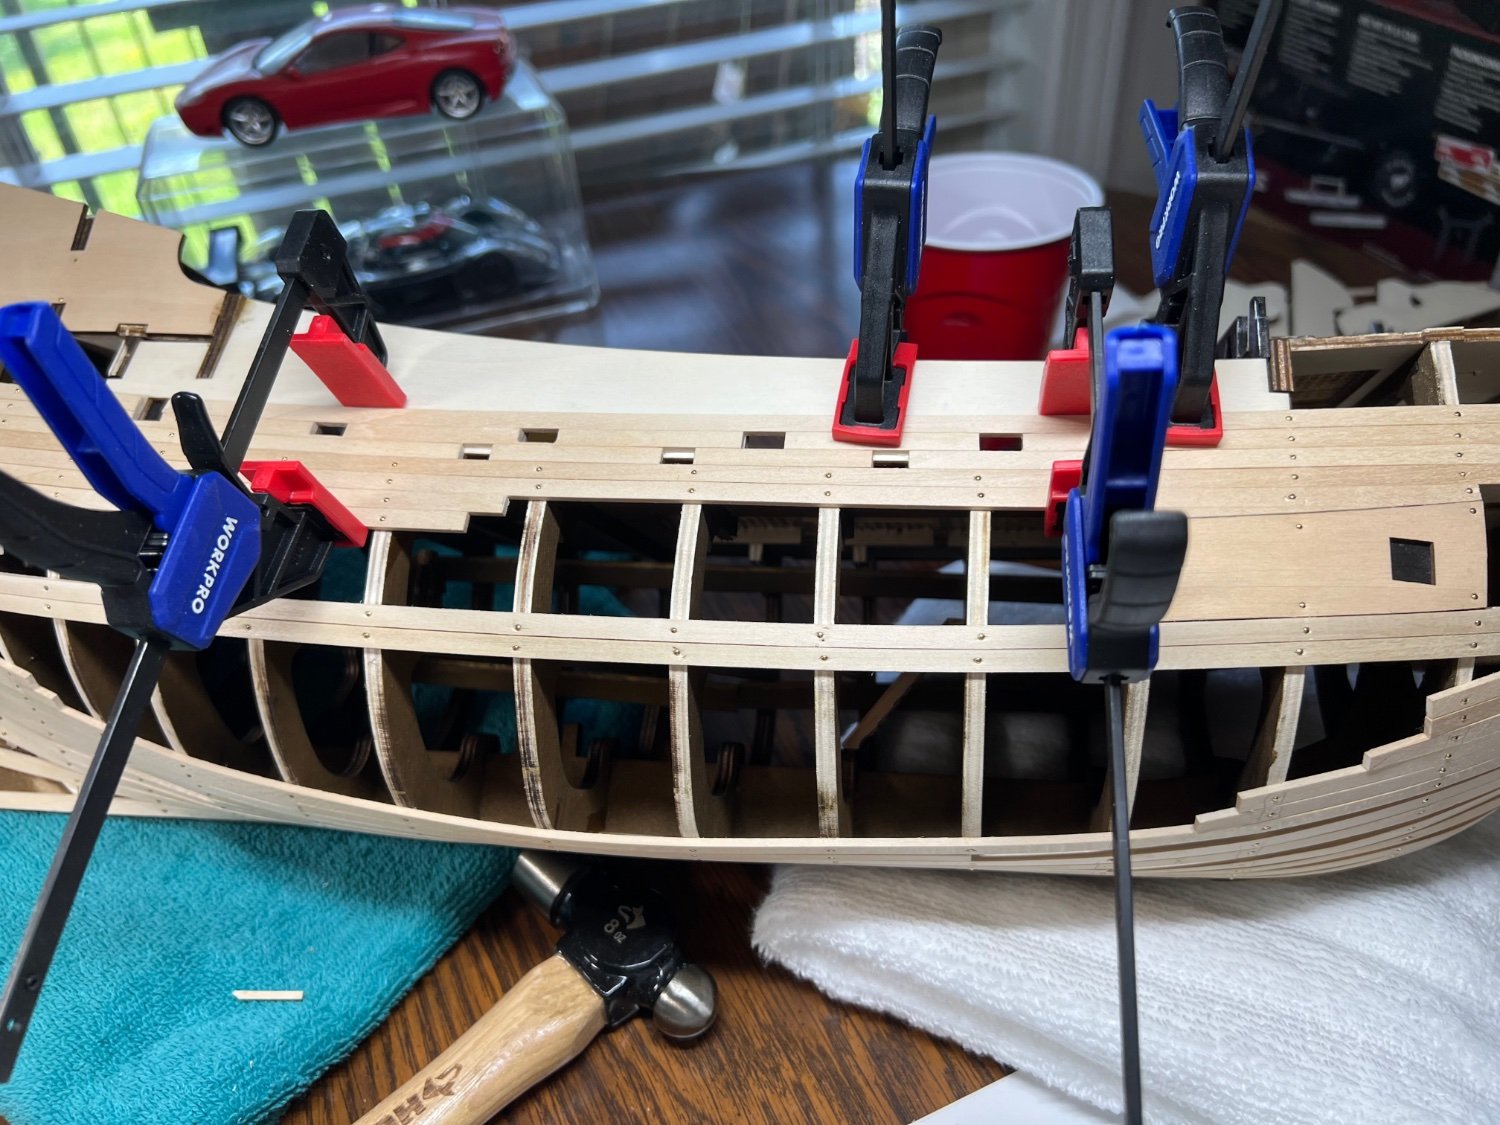
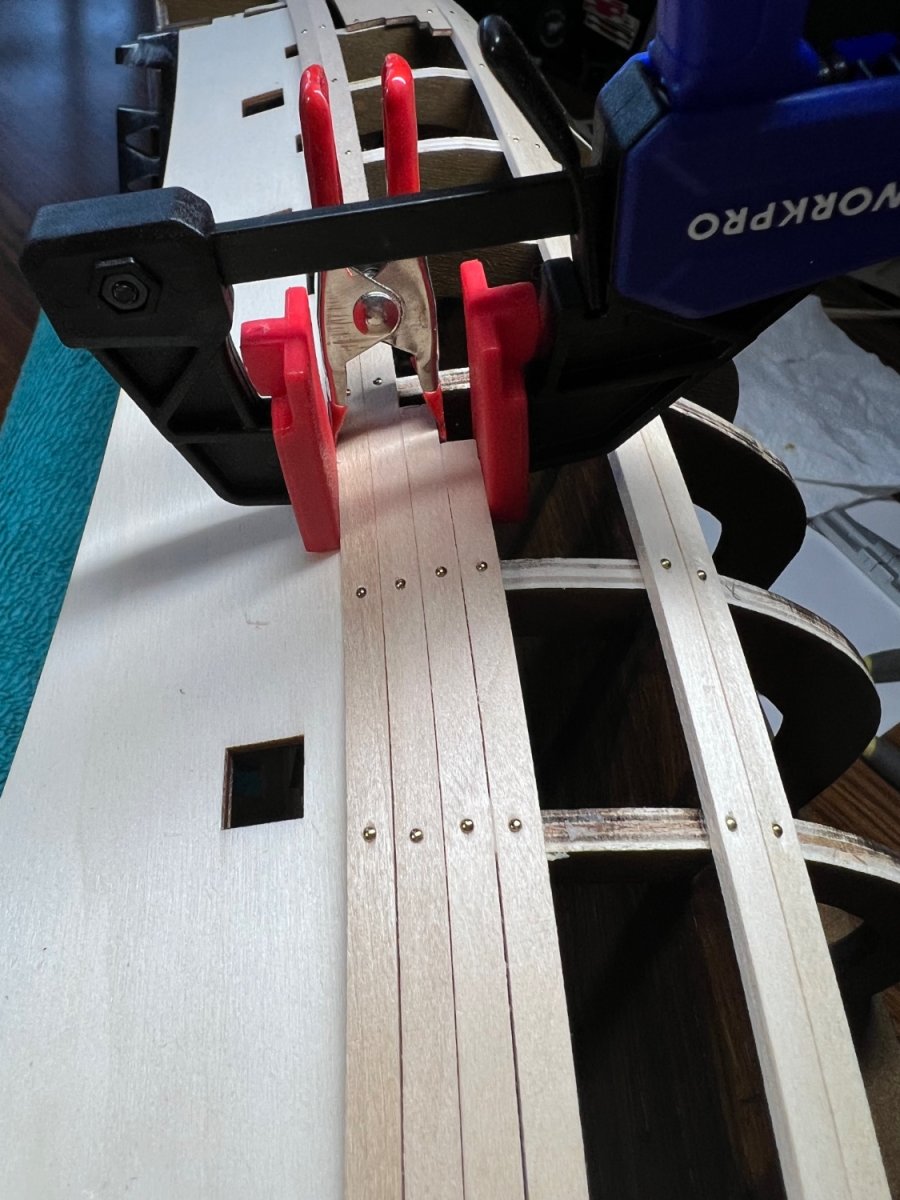
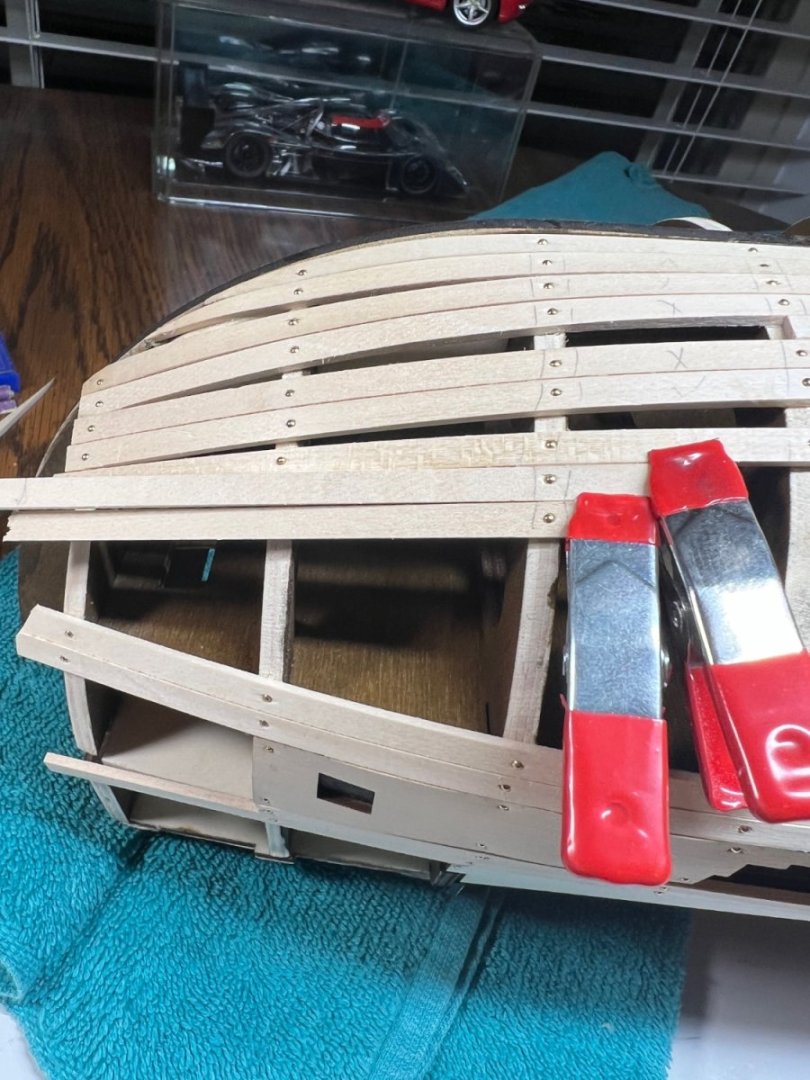
Spare parts on order. OcCre has an awesome parts request section on their website just for this issue. Outstanding. I’m not a master at planking in any way. I laid the first plank in place. The top most plank of this section needs to be just under the “skuppers”, deck drains. I didn’t want to shave any off the planks so I’m building up backwards send to the aft on the top and fore on the bottom. It’s meeting up well. Section J K and the first part of L don’t match the video 10 and 11 well. 12 and 13 videos all seem to run together. It arrives at “oh look a planked boat”. I’m having to study to see what parts are not spelled out. It looks like the left inside is a show face and needs stained in the inside with 19211. But I’m not sure. Nailing and gluing planks is deceptively challenging. Using the push handle doesn’t work well. A small hammer and pliers to hold the nails works best. No water was used. The wood provided behaves well with curves. I’m wingin it, and hoping it turns out ok. 🤞🏻


-
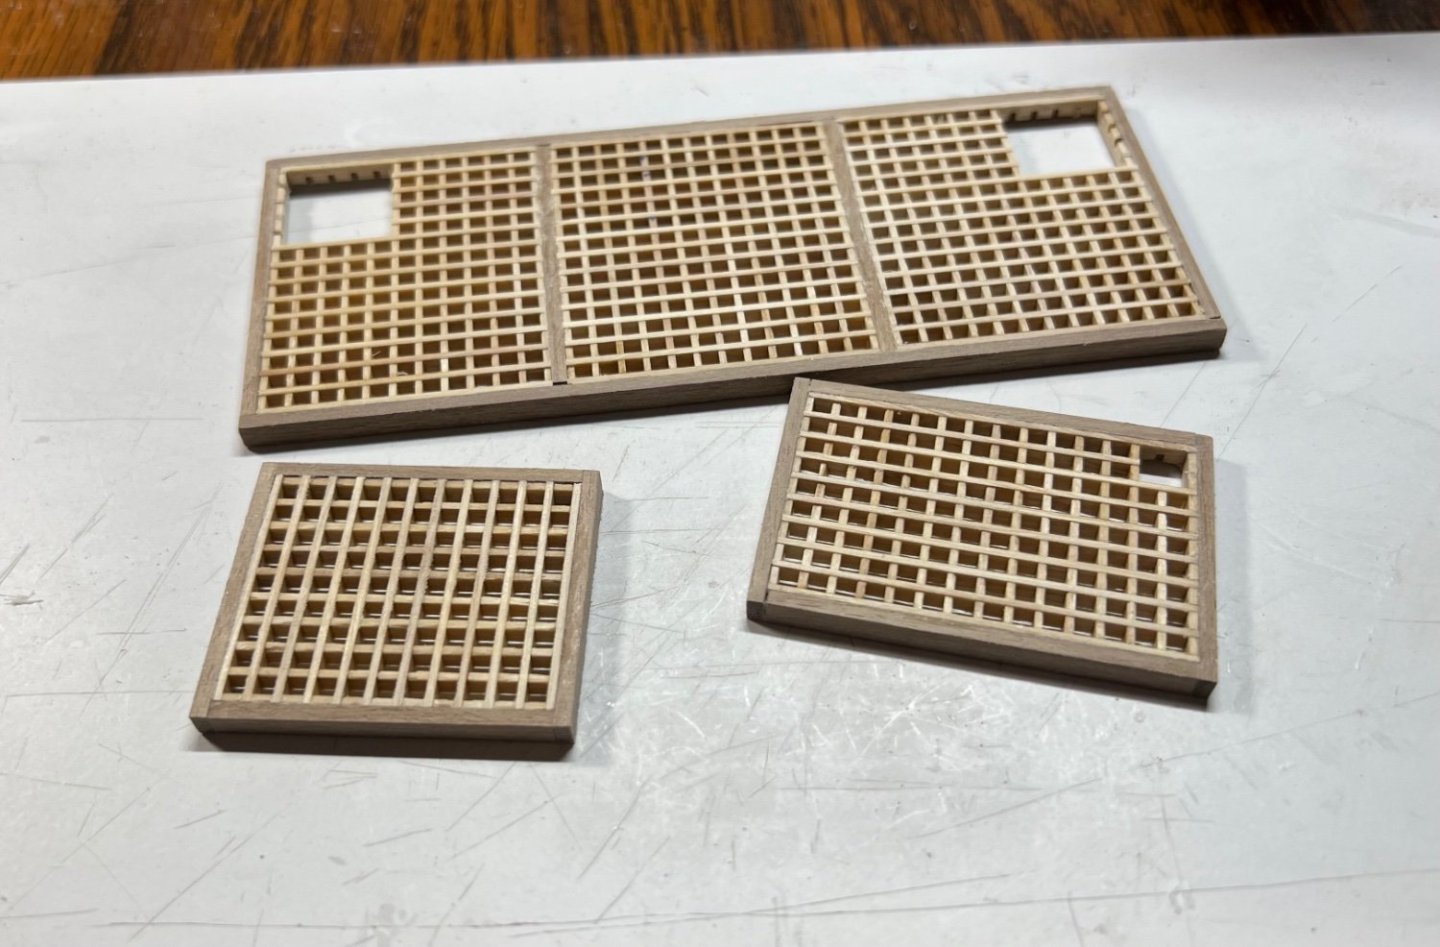
I’ve discovered I needed and or was missing 2mm x 3mm walnut sticks. The kit had 2mm x 4mm sticks of walnut so I used them. I need 12 2x4x40mm pieces to make inside pieces. I can make 3. There is no more 2mm x 4mm walnut. The parts list is awesome for what is needed for parts and sizes, but it has no list of what is in the kit. I can muddle thru some of it without the walnut, I have to learn where to get small fancy wood like in the kits. I was moving along good too. Boo.
-
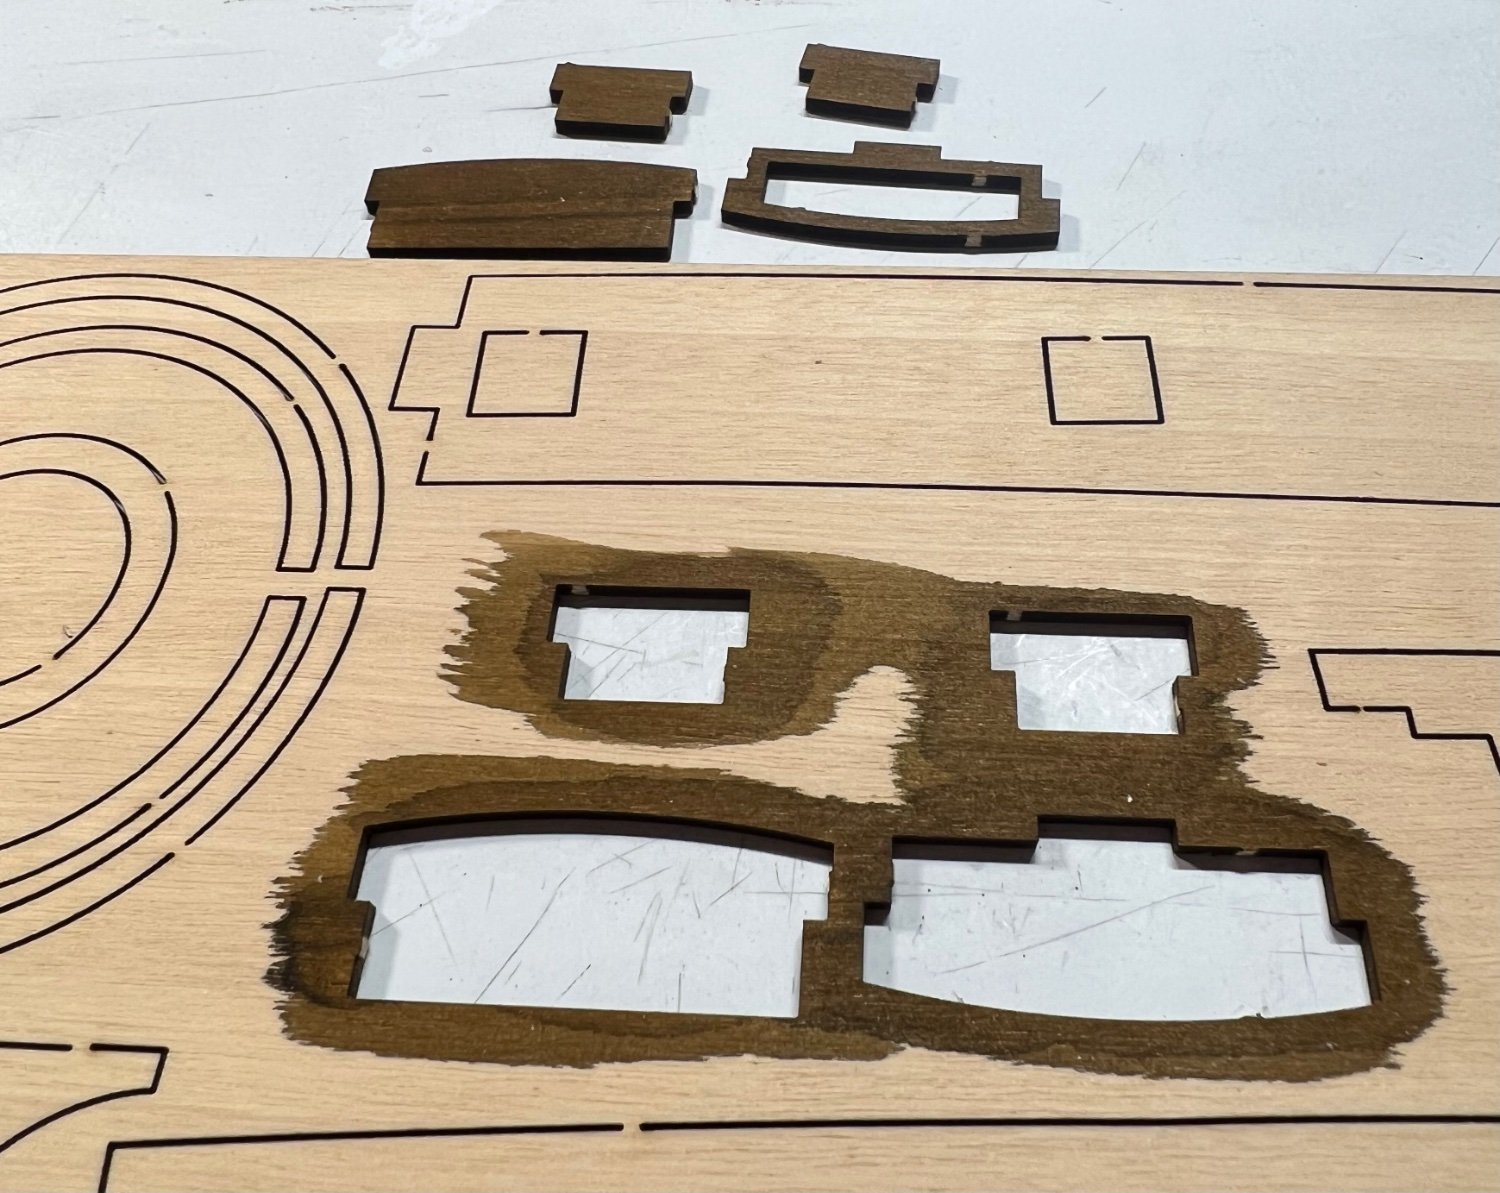
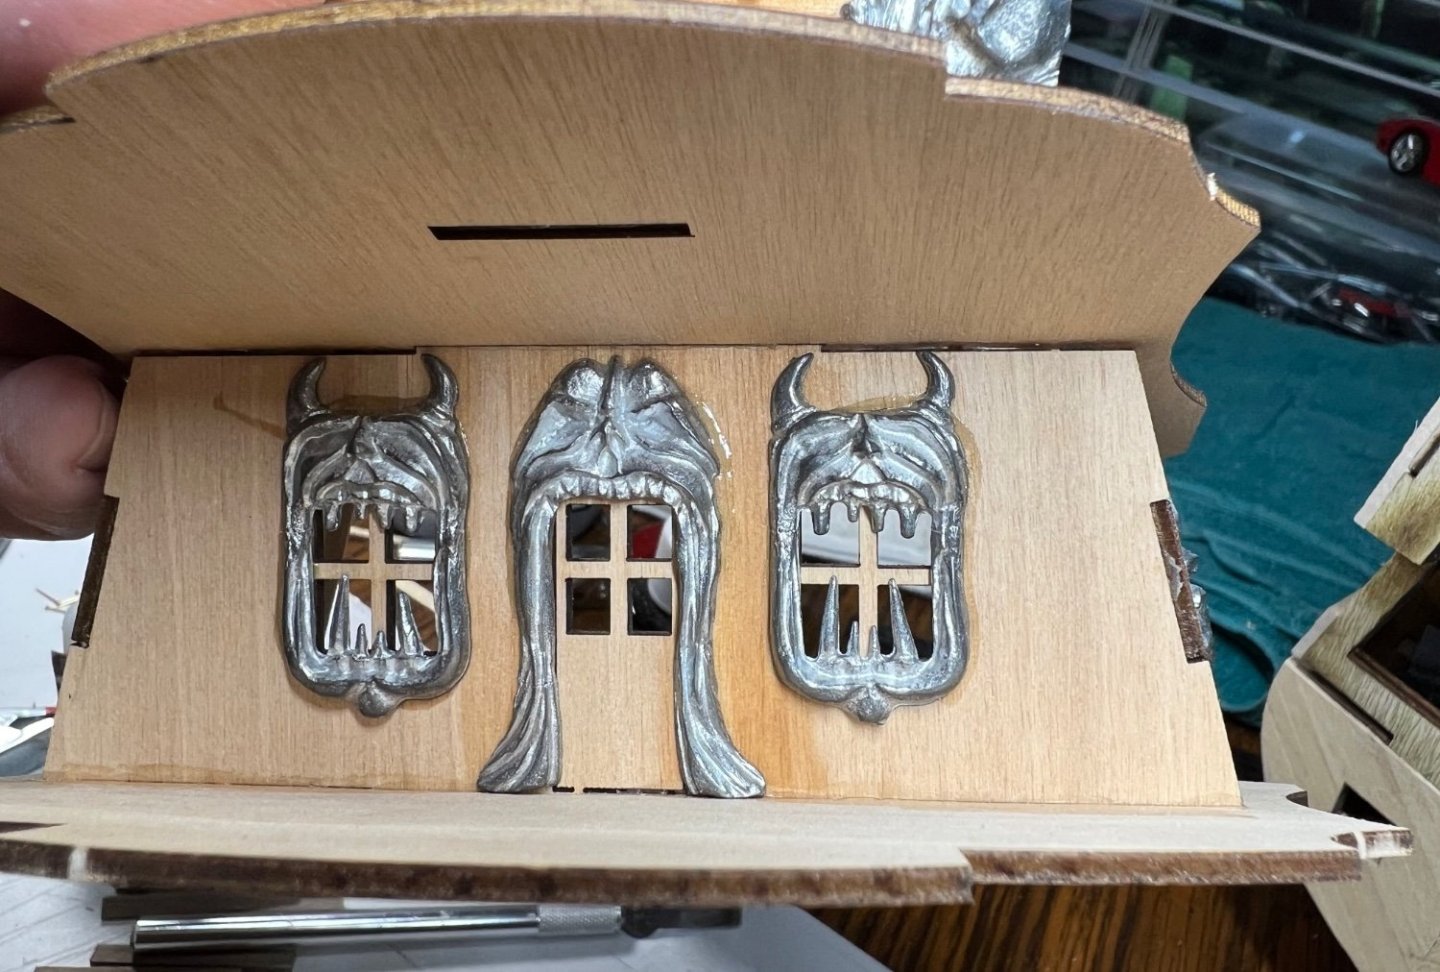
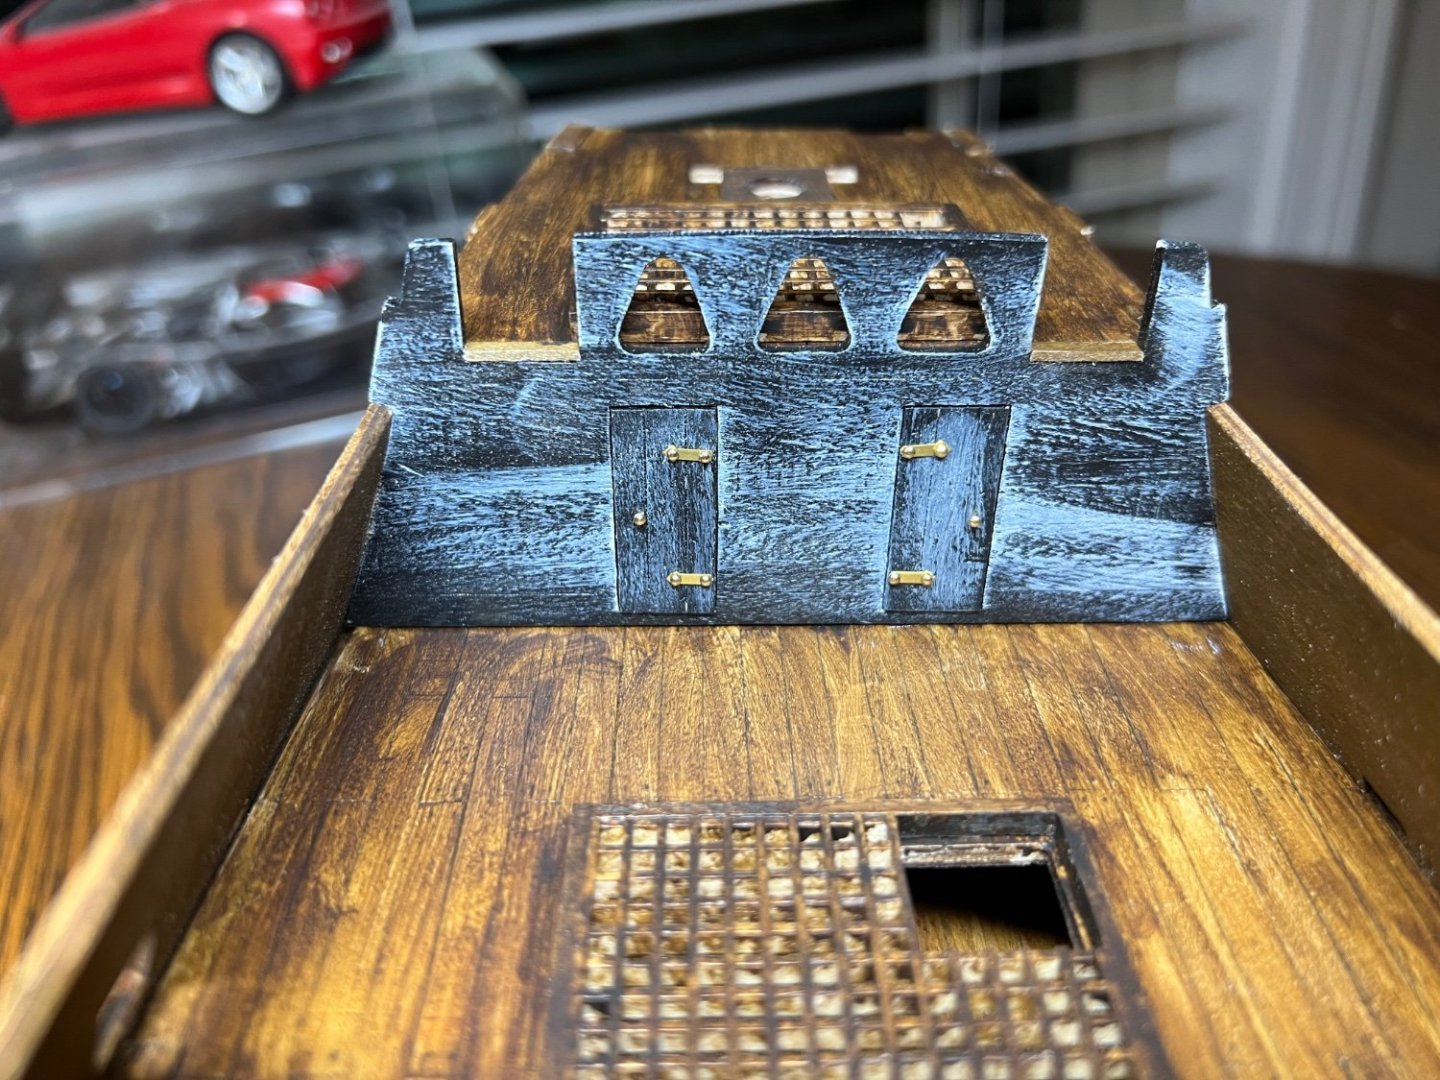
The Doors!
-
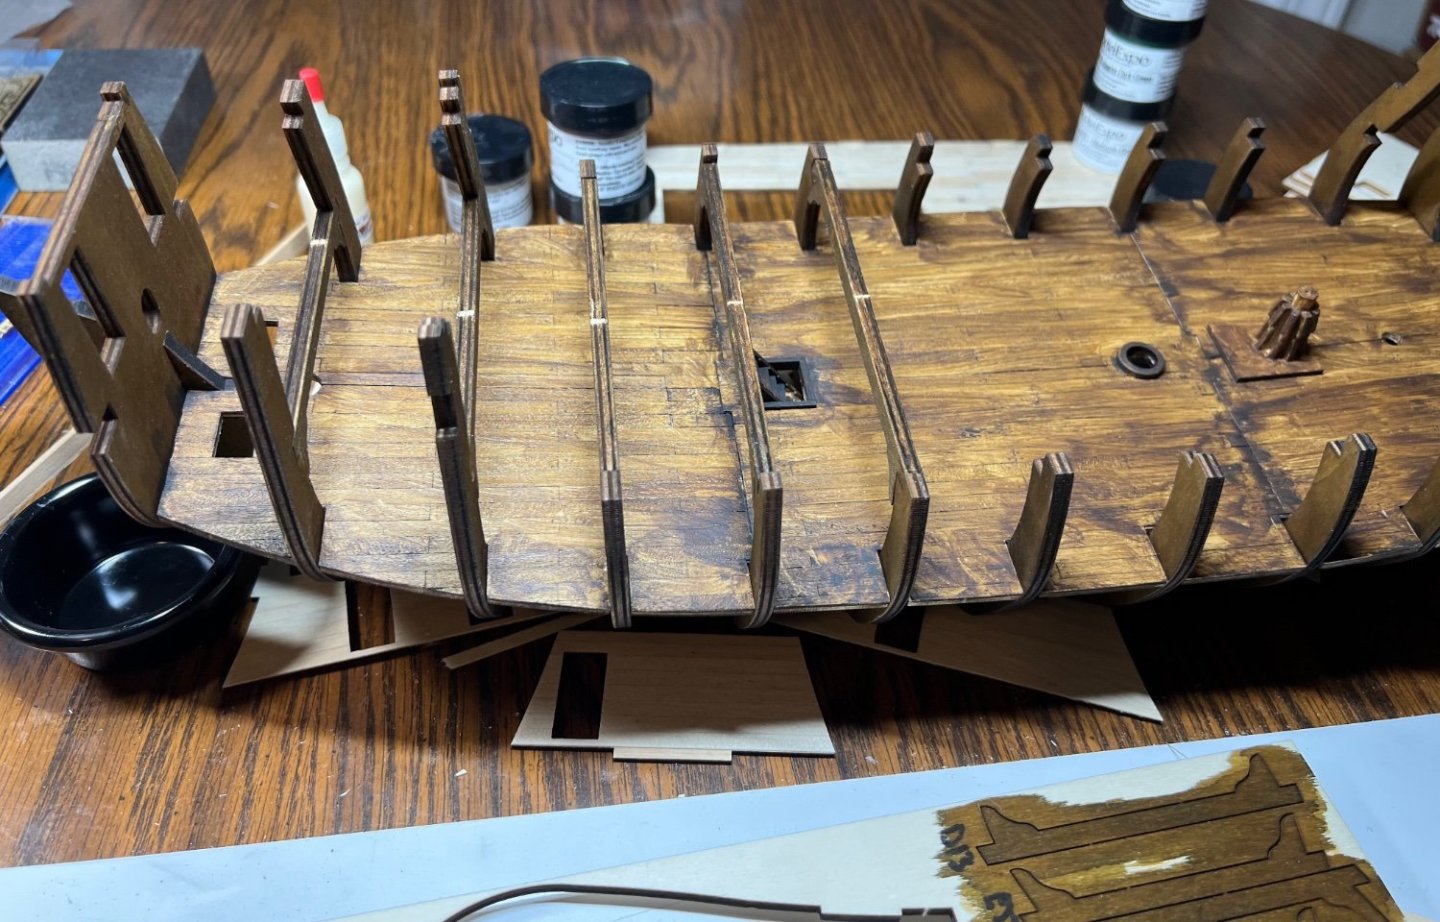
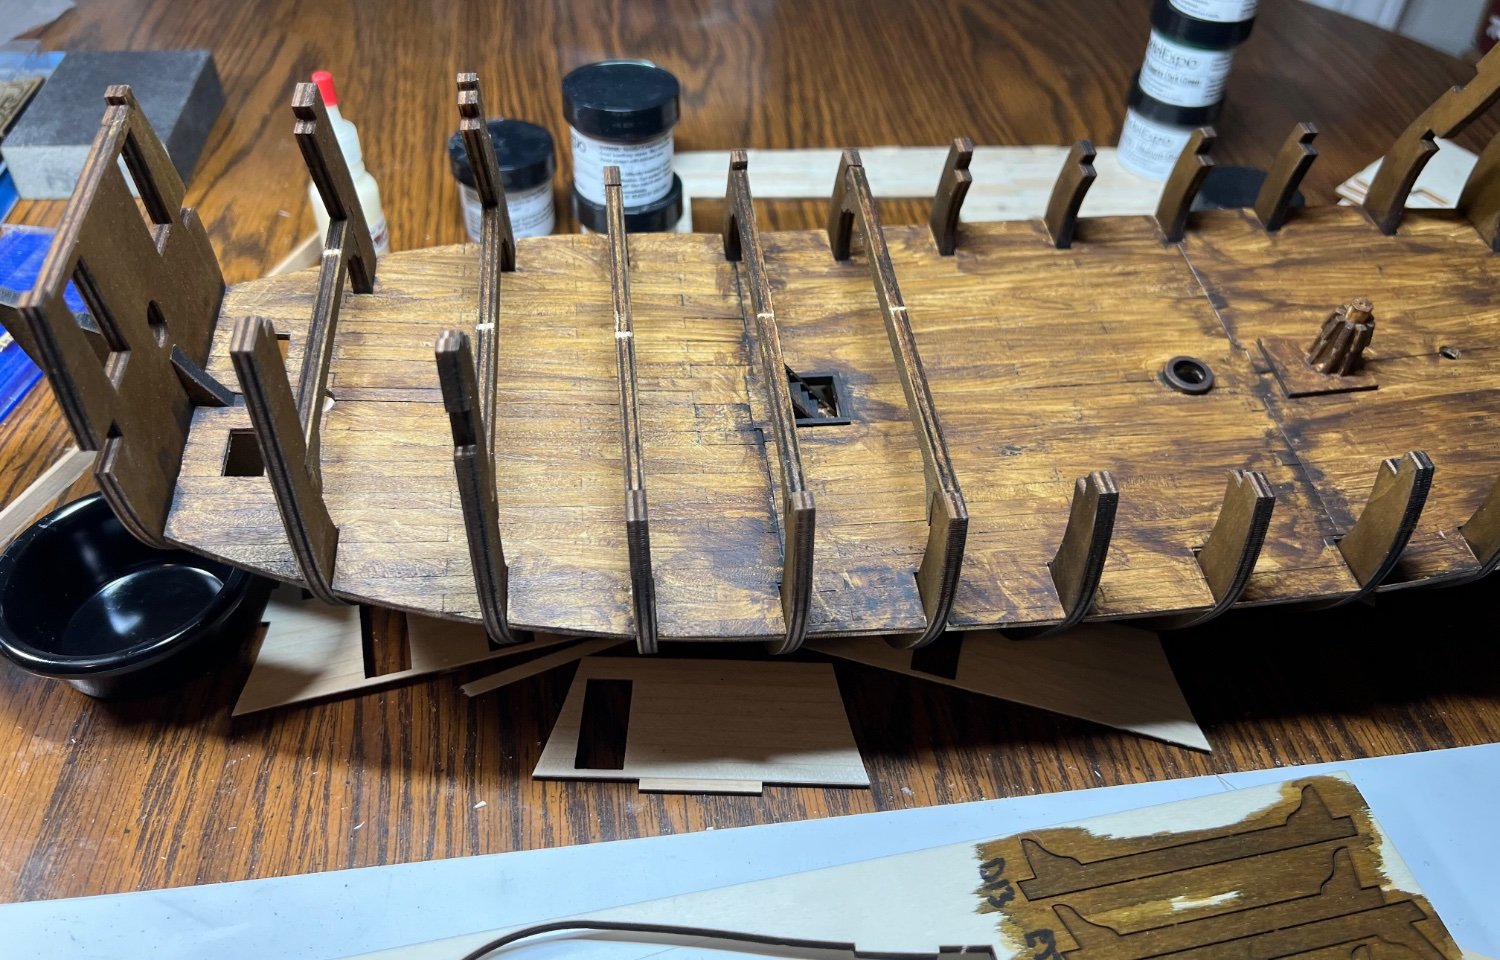
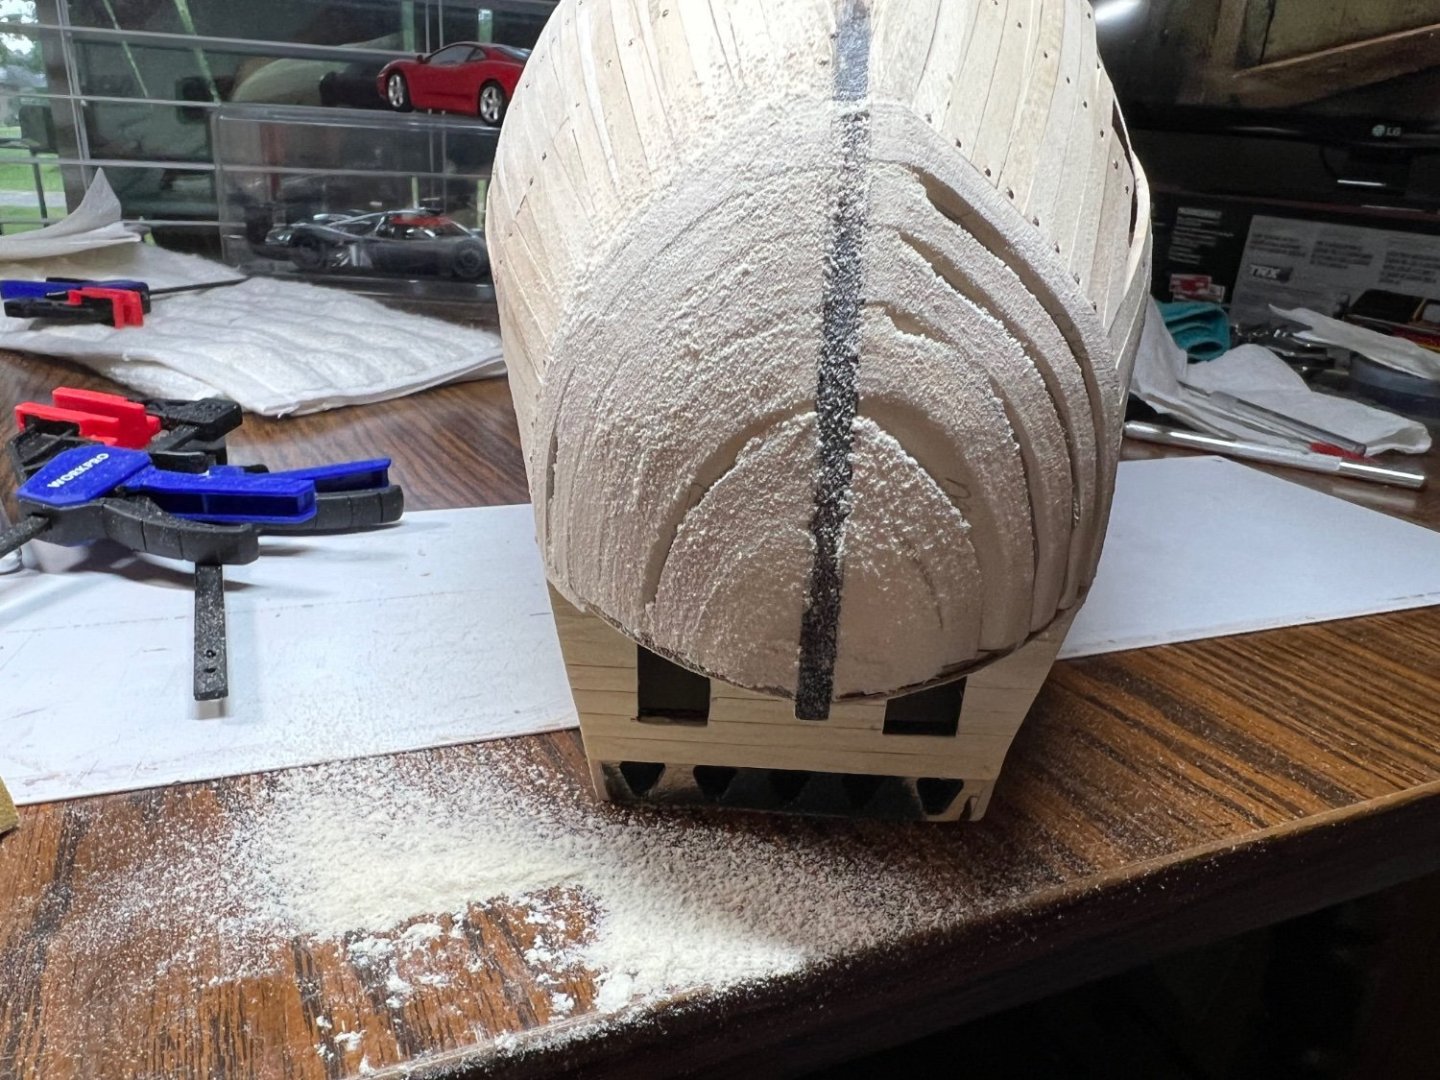
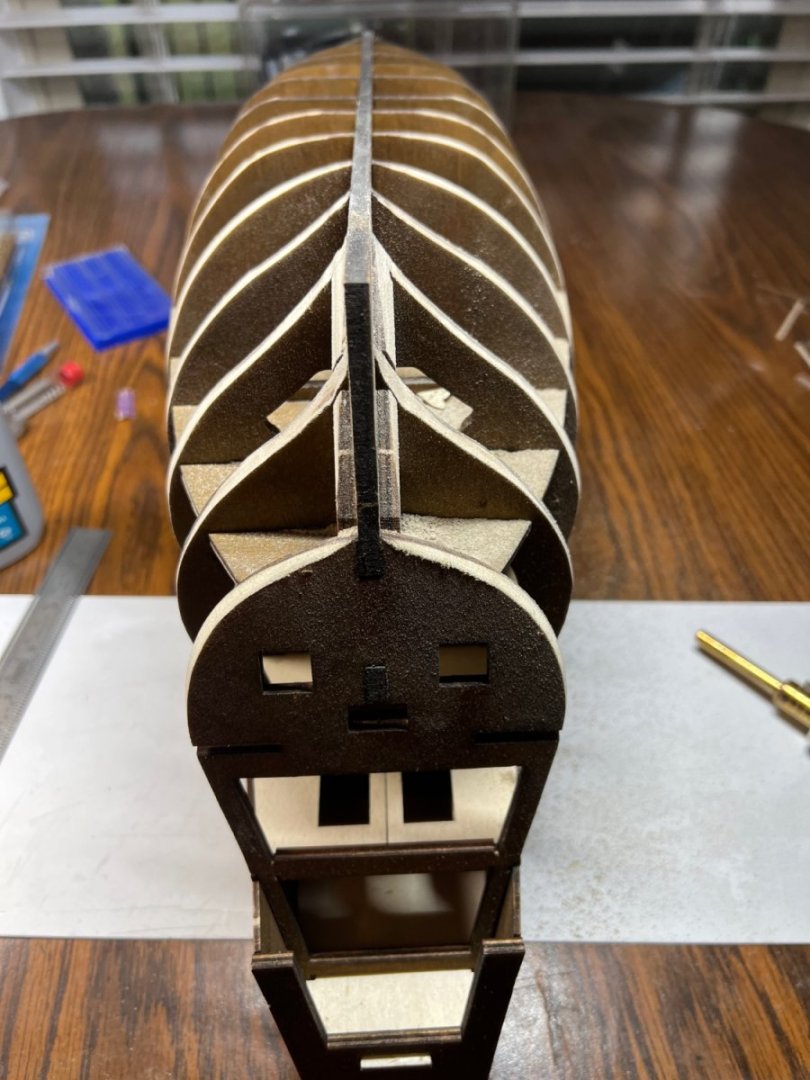
Step I, video 9. Sanding the hull is very violent I’m shocked it didn’t fall apart. I used extra glue in places for structure and I’m sure glad I did. So far this is the most sanding needed. Some light sanding and fitting is all that was needed up to the hull fairing. What a mess. Lol. The soft wood was great to work with some of the other kits had wood with the properties of metal. This was easy to sand to shape. This model is built with make it nice then trash it make it aged. I figure a few rough spots won’t get noticed haha.


-
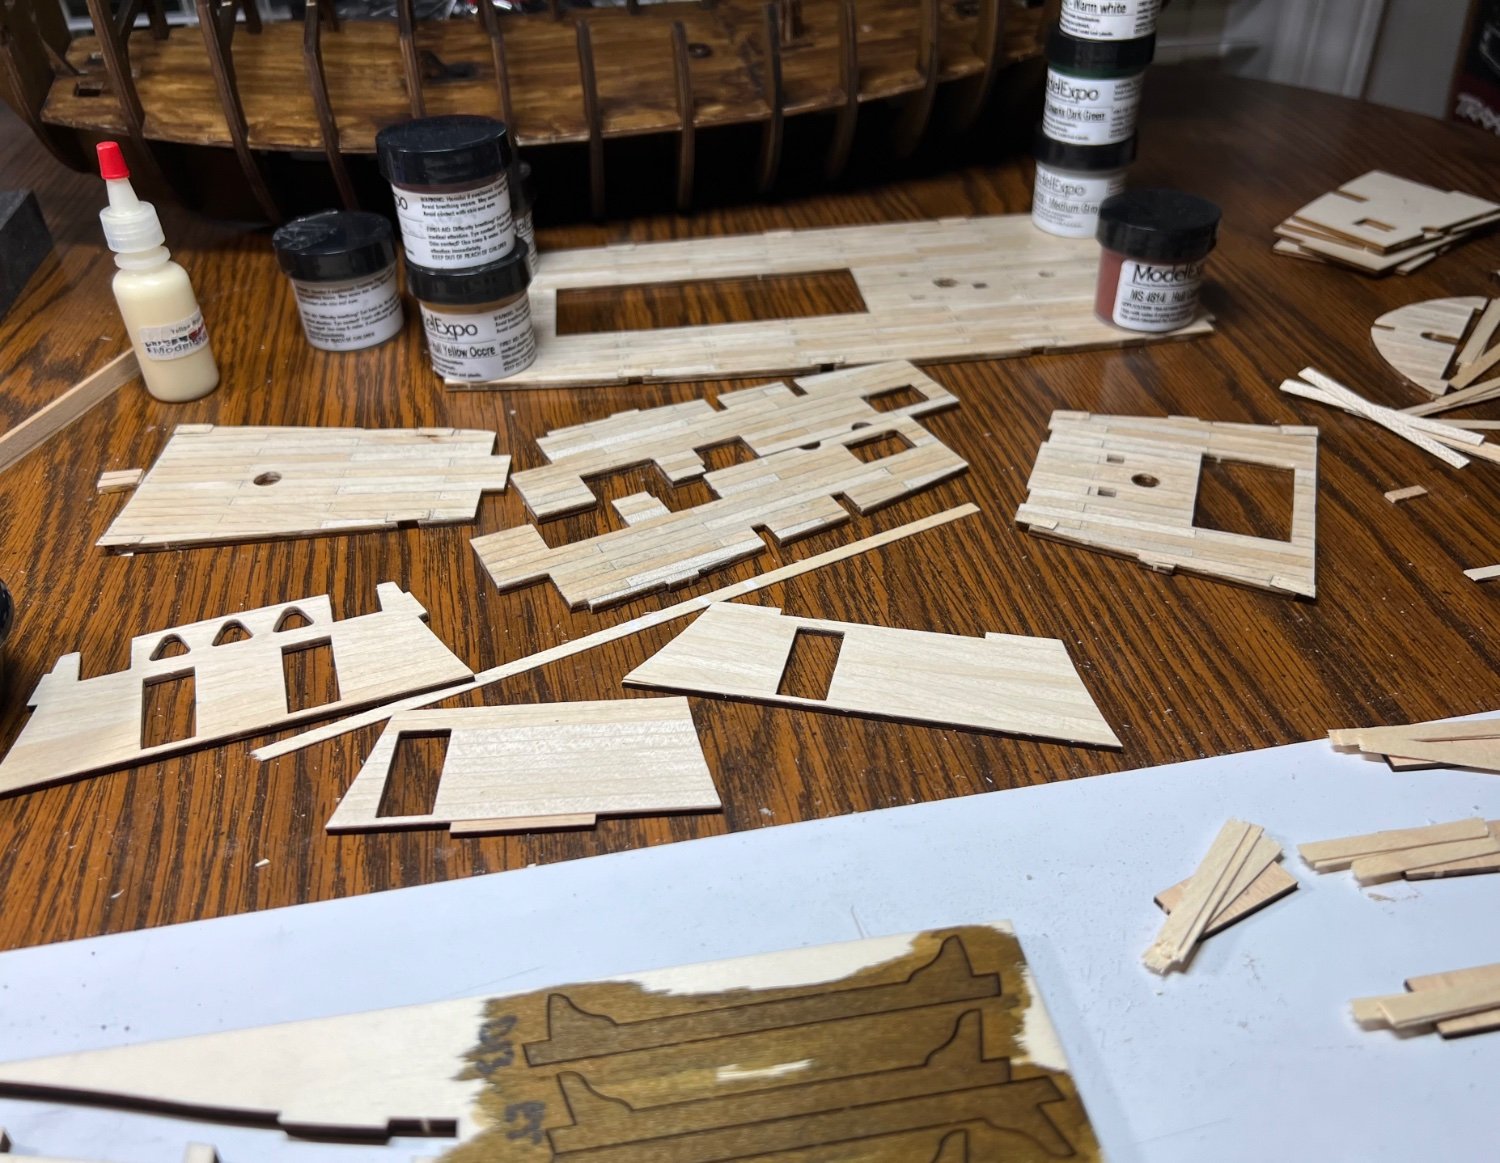
Steps G and H, videos 7 and 8. Close enough. I messed up large piece, the glue was committed when I saw it. Large parts outside, narrow part should be inside. And the holes are wrong. It looks good enough. I was excited to see if and go Carrie’s away. The instructions and videos differ slightly. There are many trimming things that need done that’s not spelled out. Final step of H is the aging, after it cures a bit I’ll do that. It’s looking good. Looks like the next steps are planking and prepping the sides.

-
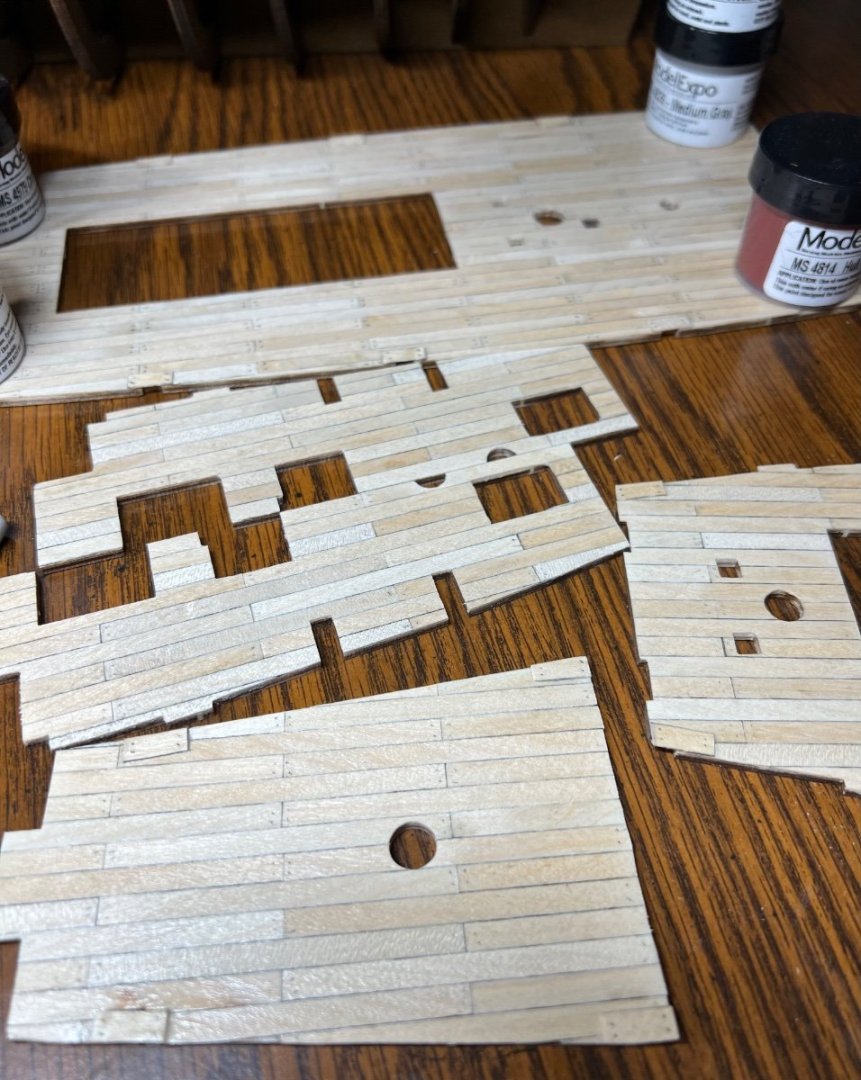
Steps E and F, videos 5 and 6. Complete. I tried to look ahead and save time staining an painting to keep from getting different colors out. Meh, I kinda did good. It all fits mostly good. This being the first OcCre model I don’t know what I don’t know. Using the white paint for ghosting was fun, wiped the brush good and still had way to much paint on it. I’m happy with it so far. It won’t be perfect. I’m trying to build it, not make it perfect. From 10ft when it’s done, no one will see anything wrong. Completion is my only goal. Installing the rear and F11 was exciting lol. I don’t want to spoil it for anyone. 🤣 Can you spot the painting staining error lol.


-
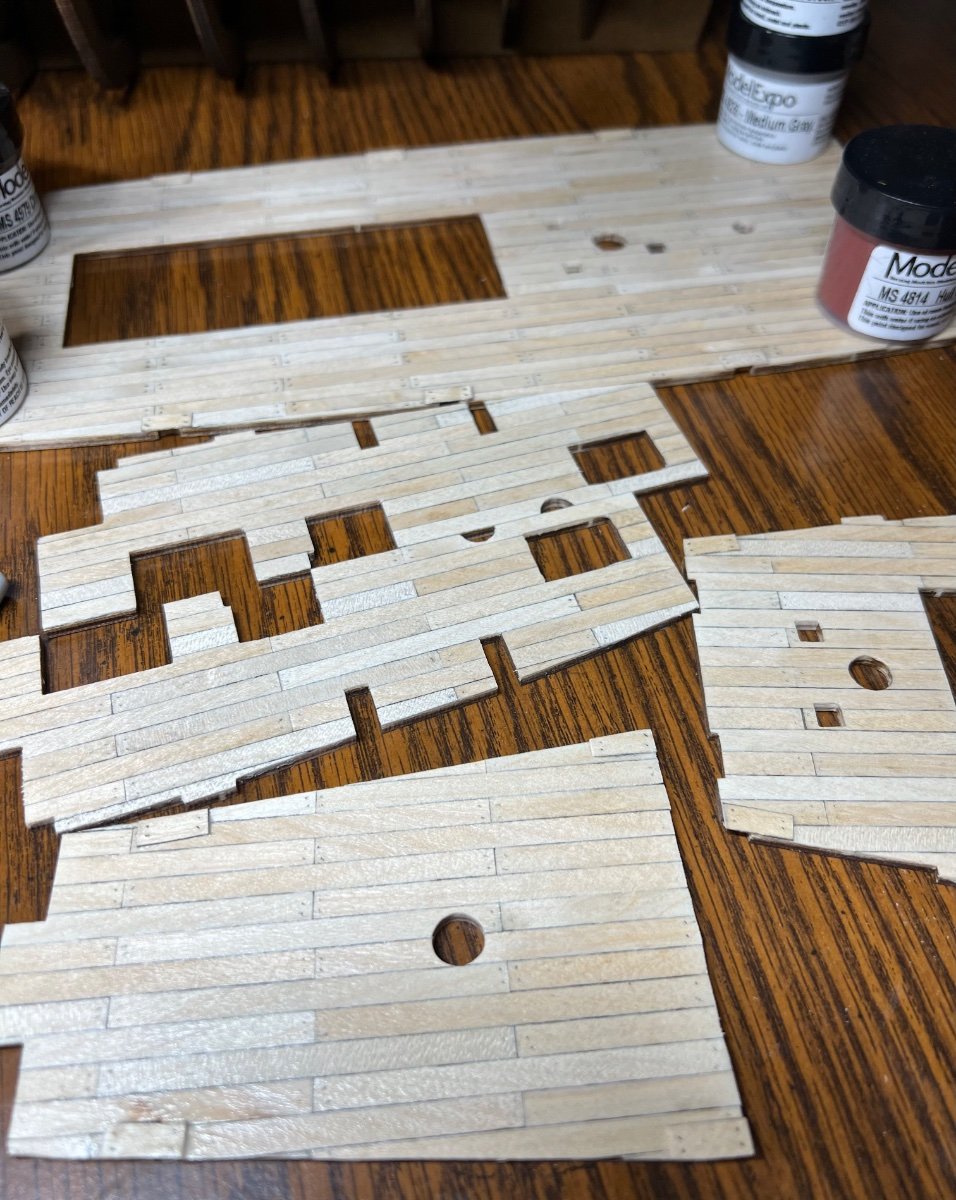
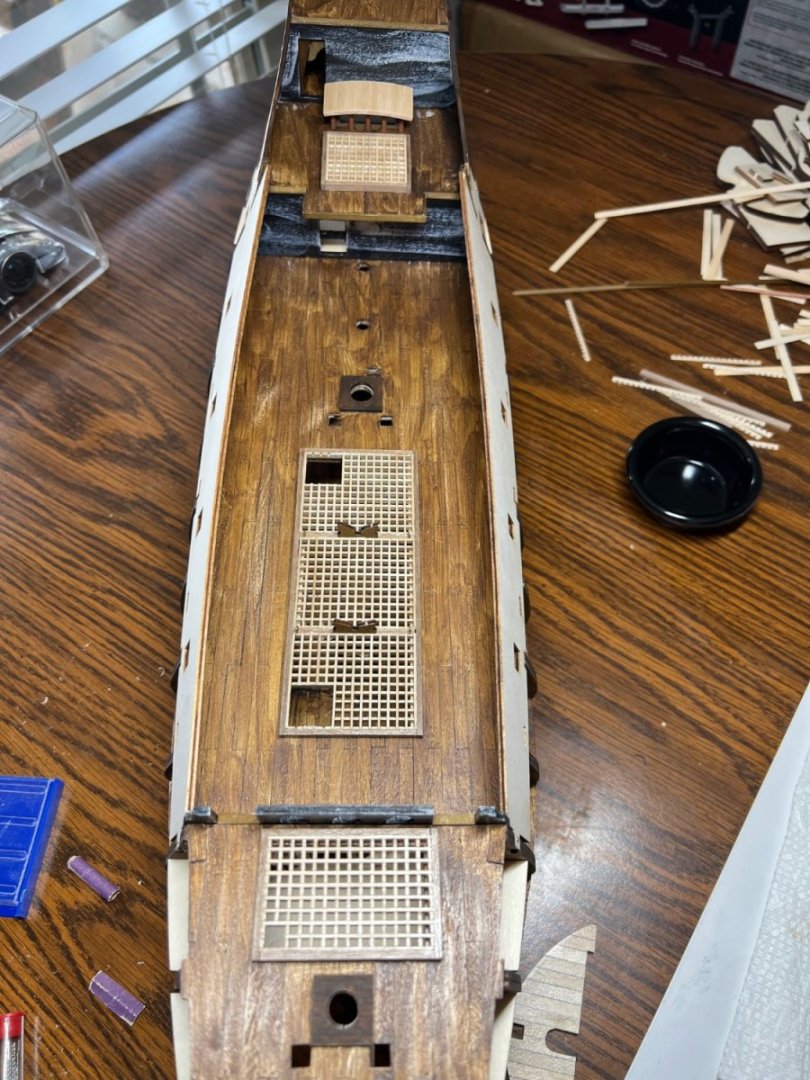
Planking decks. Working on sections D and E. I could do a bit of each as I let stuff dry. Slow progress.