HOLIDAY DONATION DRIVE - SUPPORT MSW - DO YOUR PART TO KEEP THIS GREAT FORUM GOING! (Only 60 donations so far out of 49,000 members - C'mon guys!)
×

Herby63
-
Posts
142 -
Joined
-
Last visited
Content Type
Profiles
Forums
Gallery
Events
Everything posted by Herby63
-
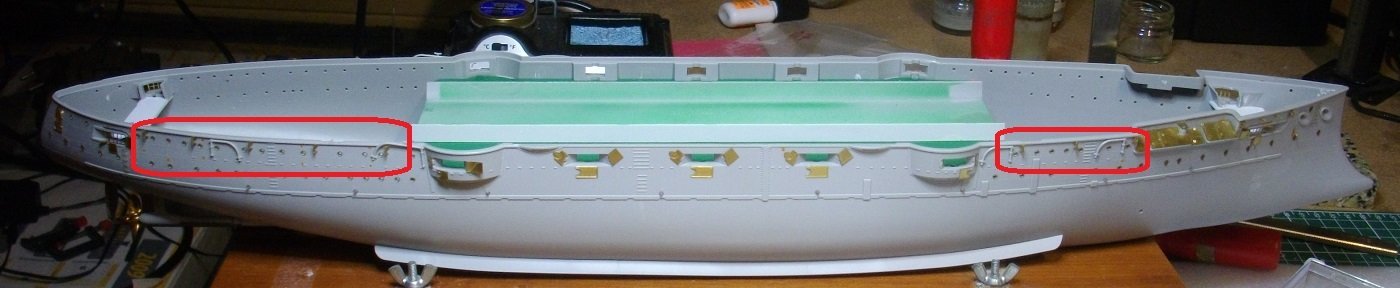
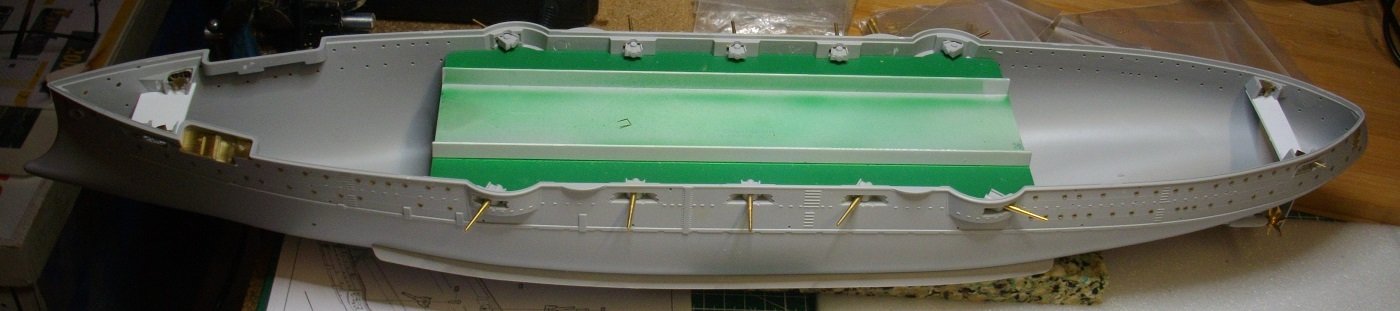
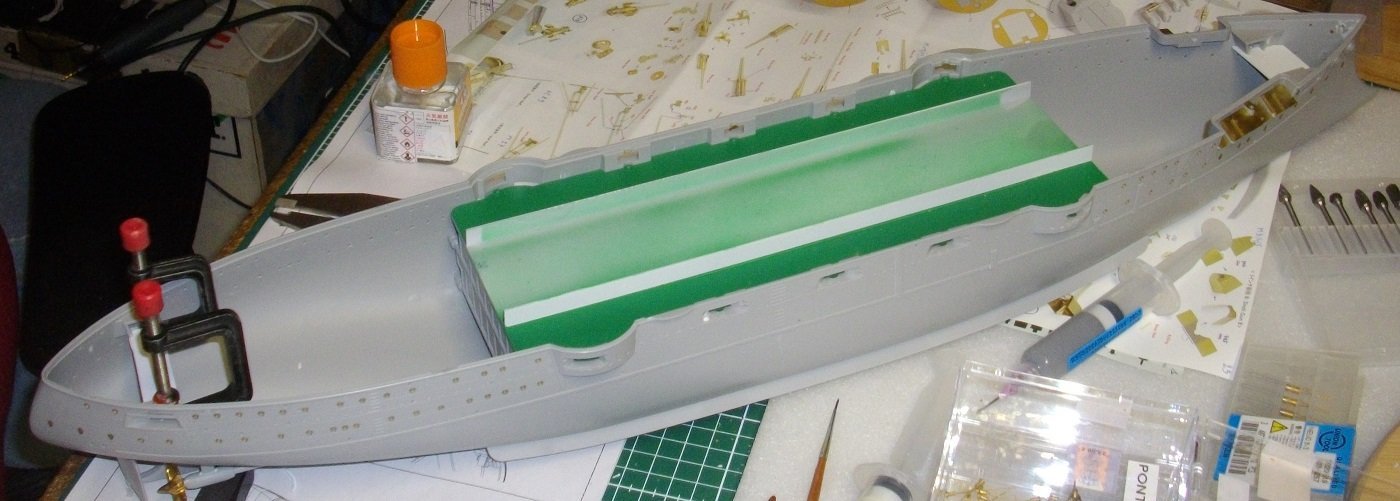
 I positioned the catwalks on the starboard side of the hull. (between the 2 red arrows) And then I glued them with pink ZAP, holding them temporarily in place with a piece of tape, where needed. The struts received a dash of yello ZAP. And finaly I replaced the downward folding parts of the casemateshutters, because they rest on these catwalks. Wishing everyone lots of modeling fun.
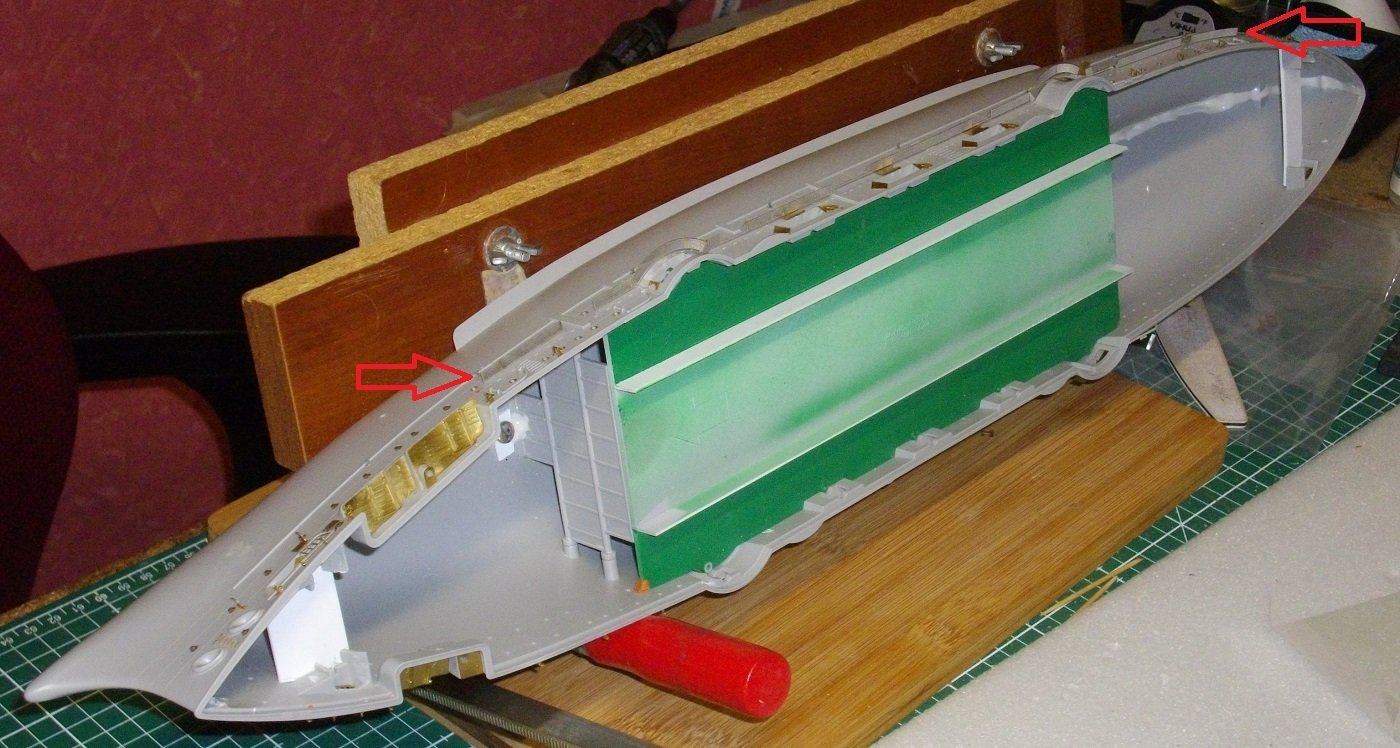

- 146 replies
-
- 8
-

-
- Mikasa
- Merit International
- (and 1 more)
-
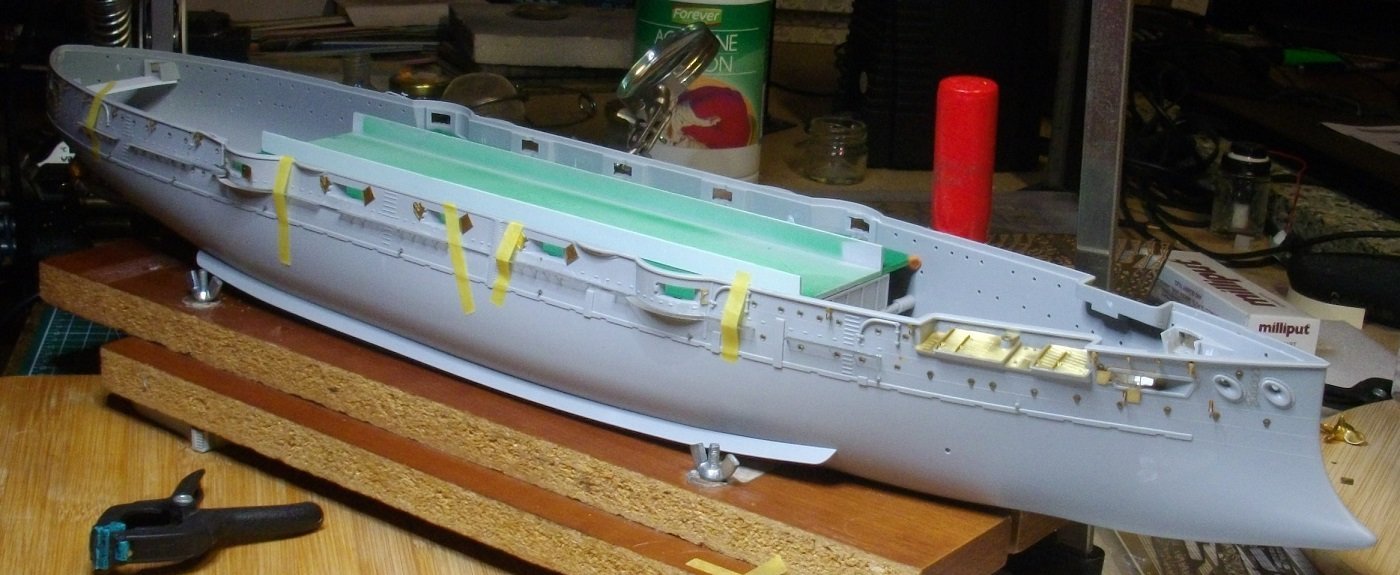
All the segments of the catwalk have now received the supports. Wishing everyone lots of modeling fun.
- 146 replies
-
- 9
-
-
- Mikasa
- Merit International
- (and 1 more)
-
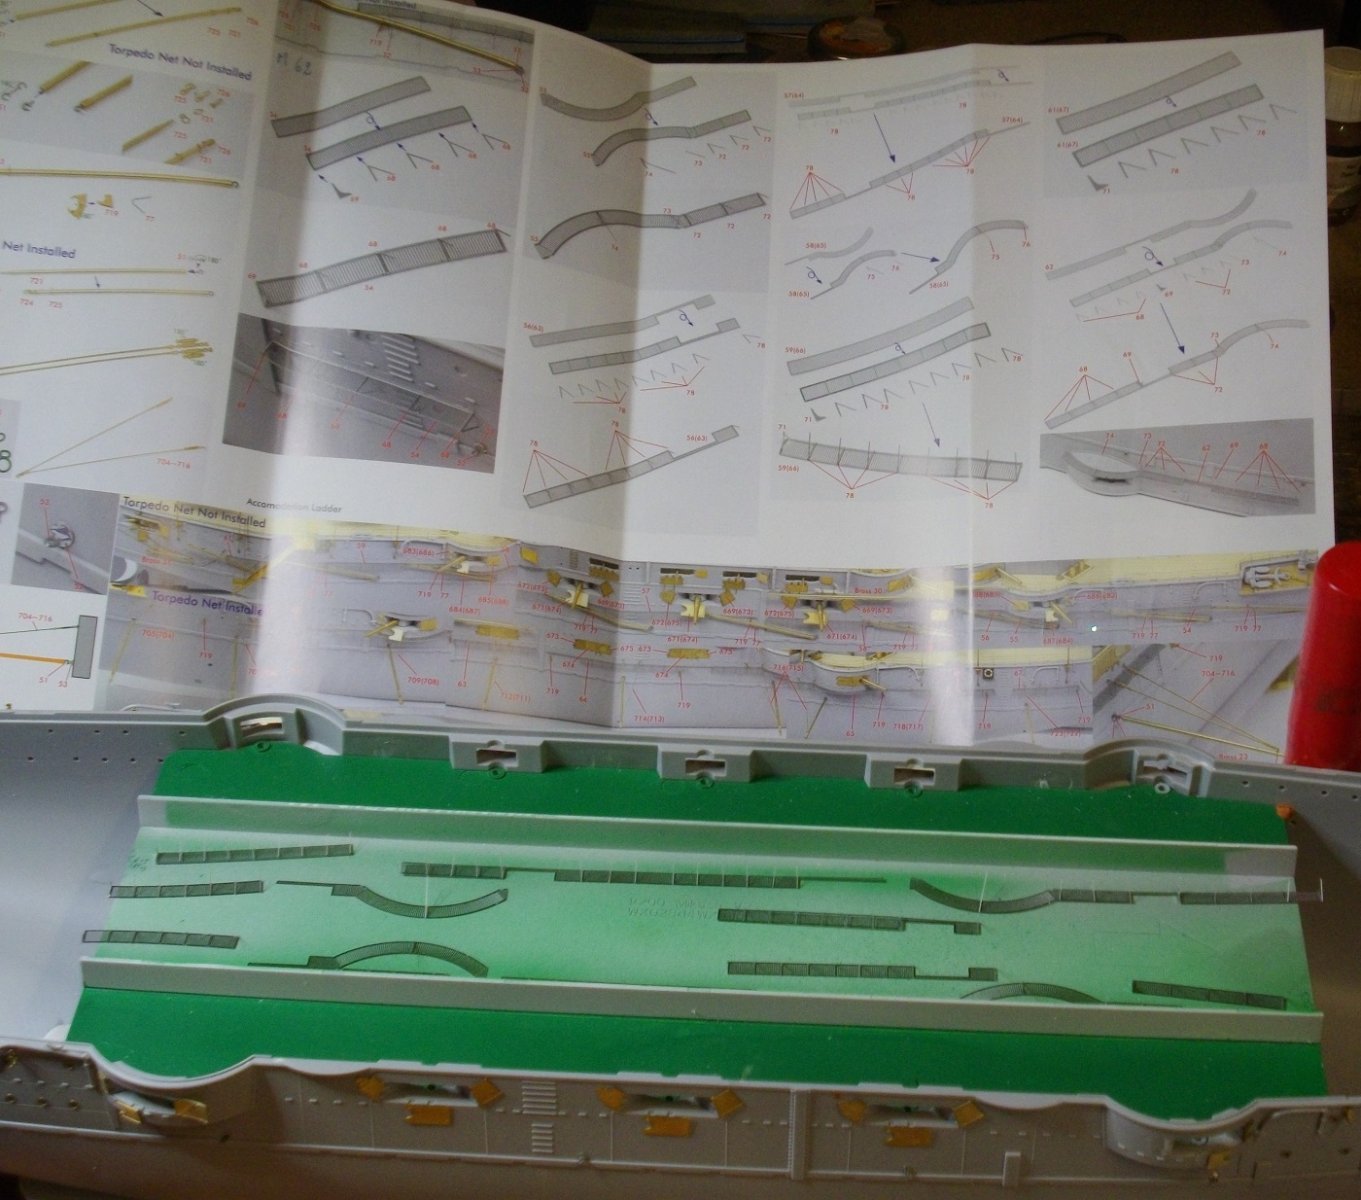
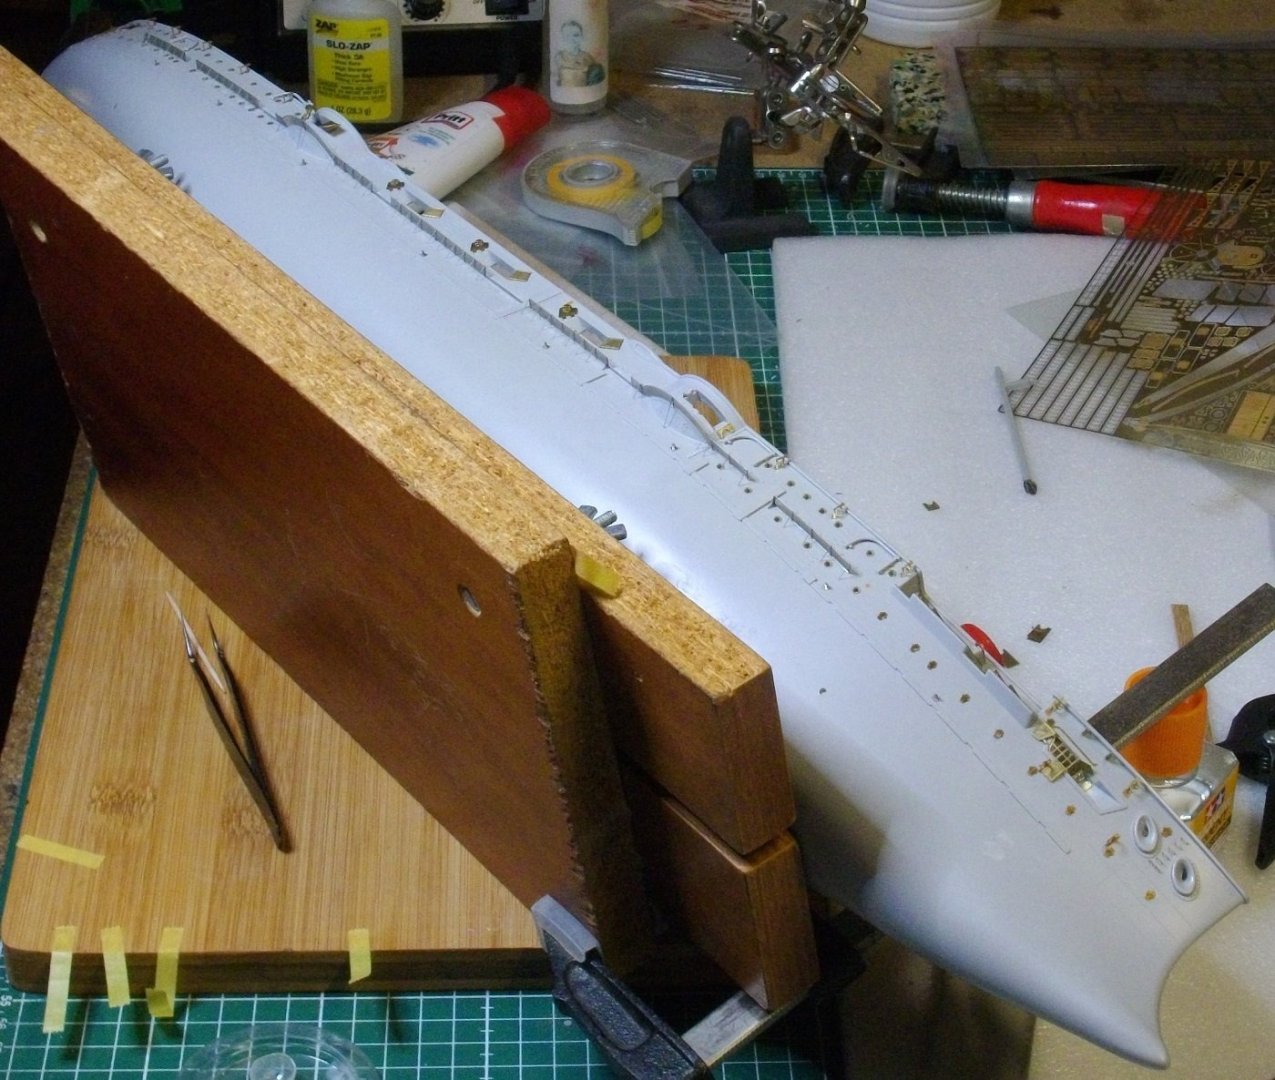
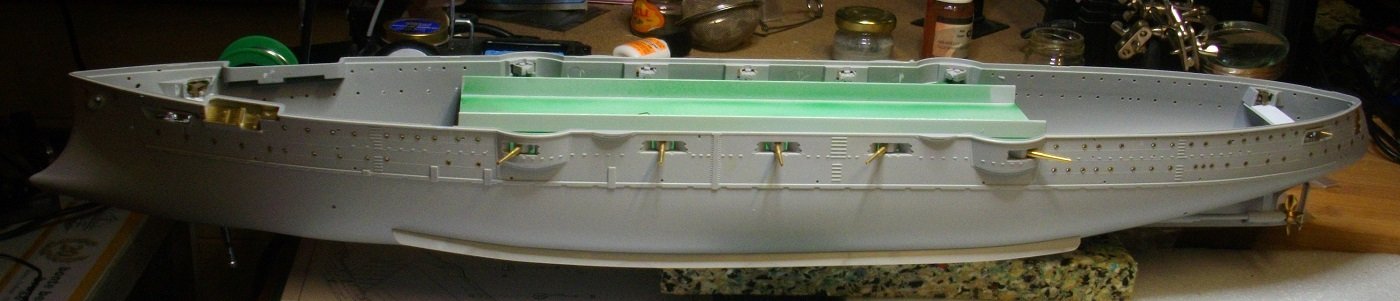
A carwalk runs alongside almost the full length of the hull. I did not manage to solder the supports to the white metal grills, the solder just turned into tiny beads if tin that would not adhere to the piece, so I switched to PVA-glue. Here the grills 54, 55 and 56 have received their supports and those for grill 57 are waiting to be attached. Wishing everyone lots of modeling fun.
- 146 replies
-
- 8
-
-
- Mikasa
- Merit International
- (and 1 more)
-
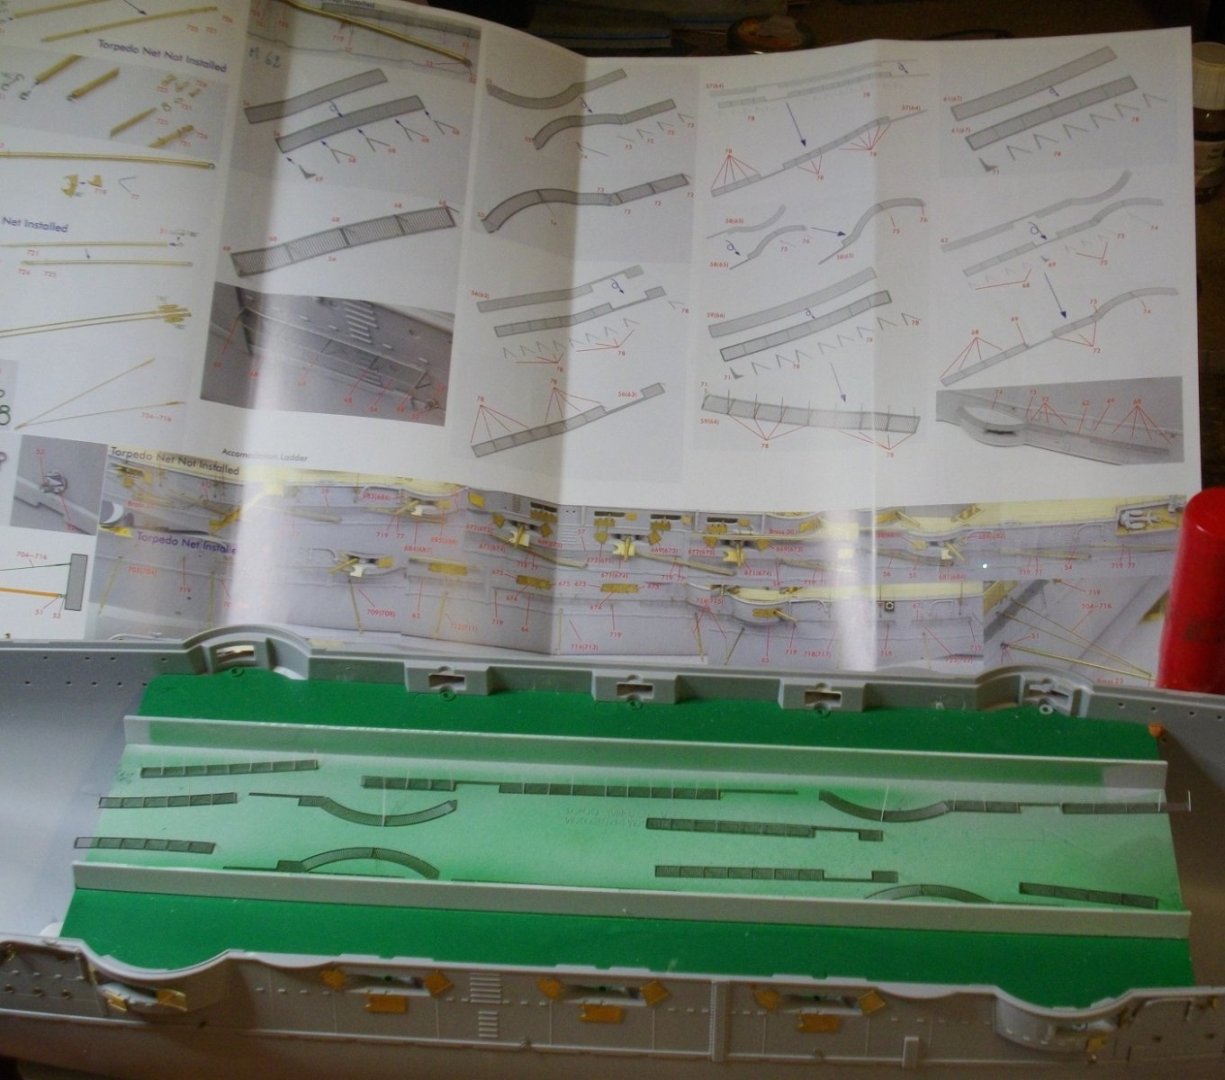
16 more brackets assembled and glued to the hull. Wishing everyone lots of modeling fun.
- 146 replies
-
- 8
-
-
- Mikasa
- Merit International
- (and 1 more)
-
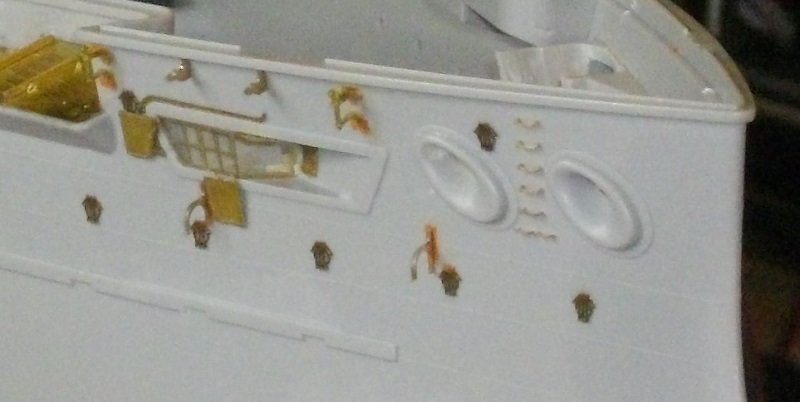
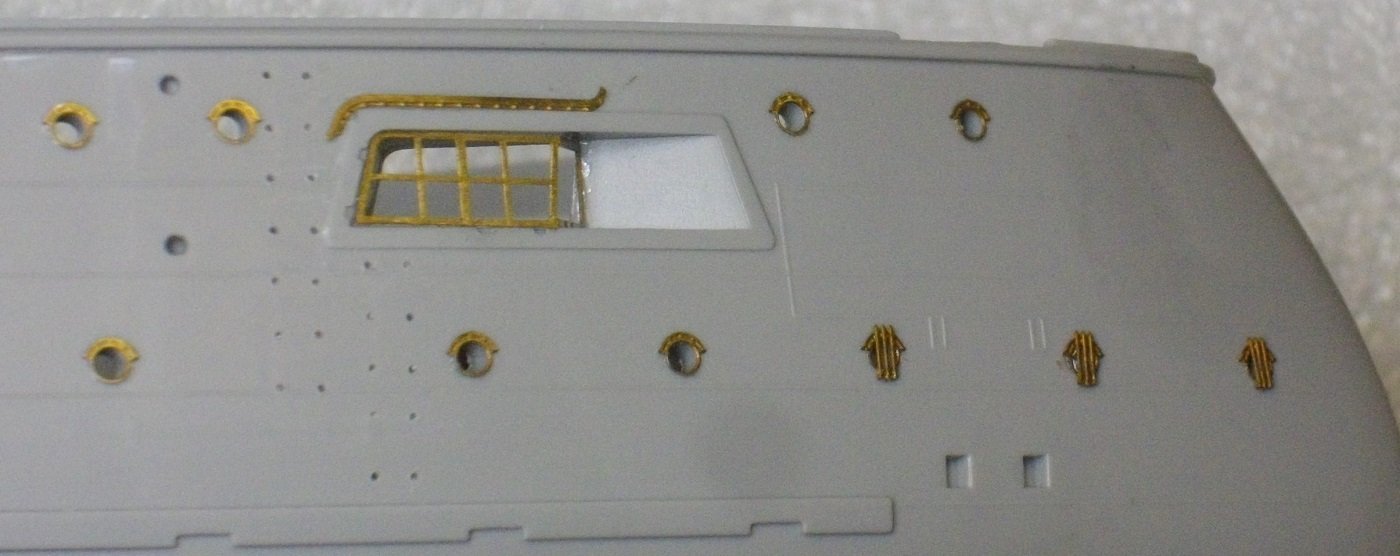
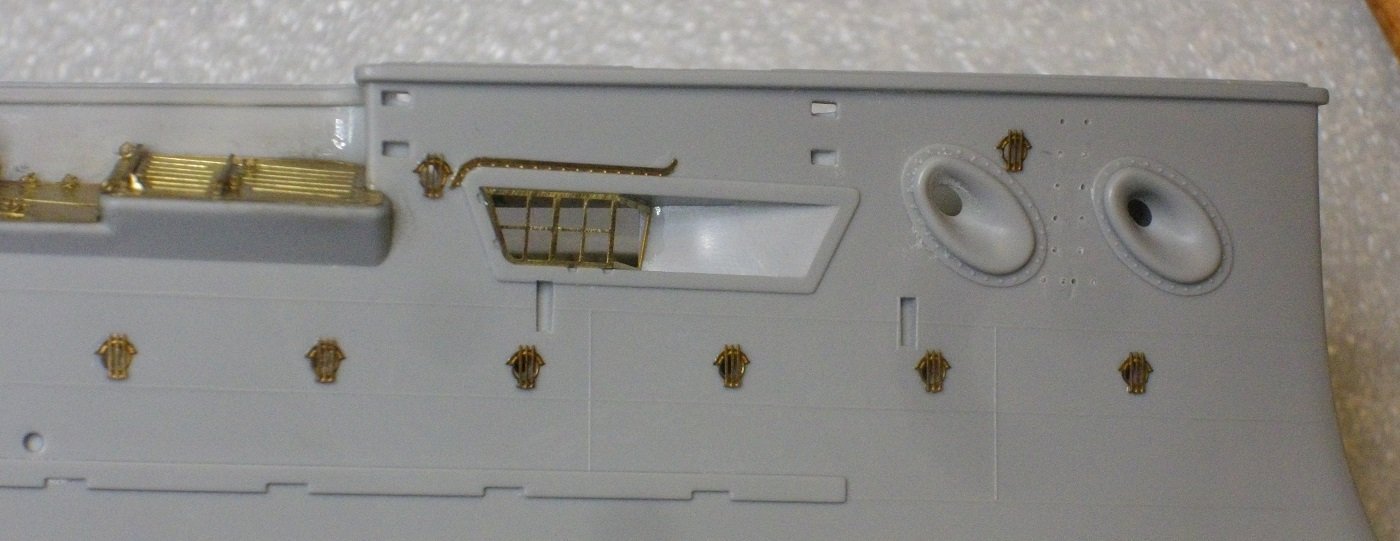
I made up some brackets and attached them to the hull with SloZap above and below the front casemates (both sides). (Pontos parts 354, 603+607+606 and 366/367)
- 146 replies
-
- 8
-
-
- Mikasa
- Merit International
- (and 1 more)
-
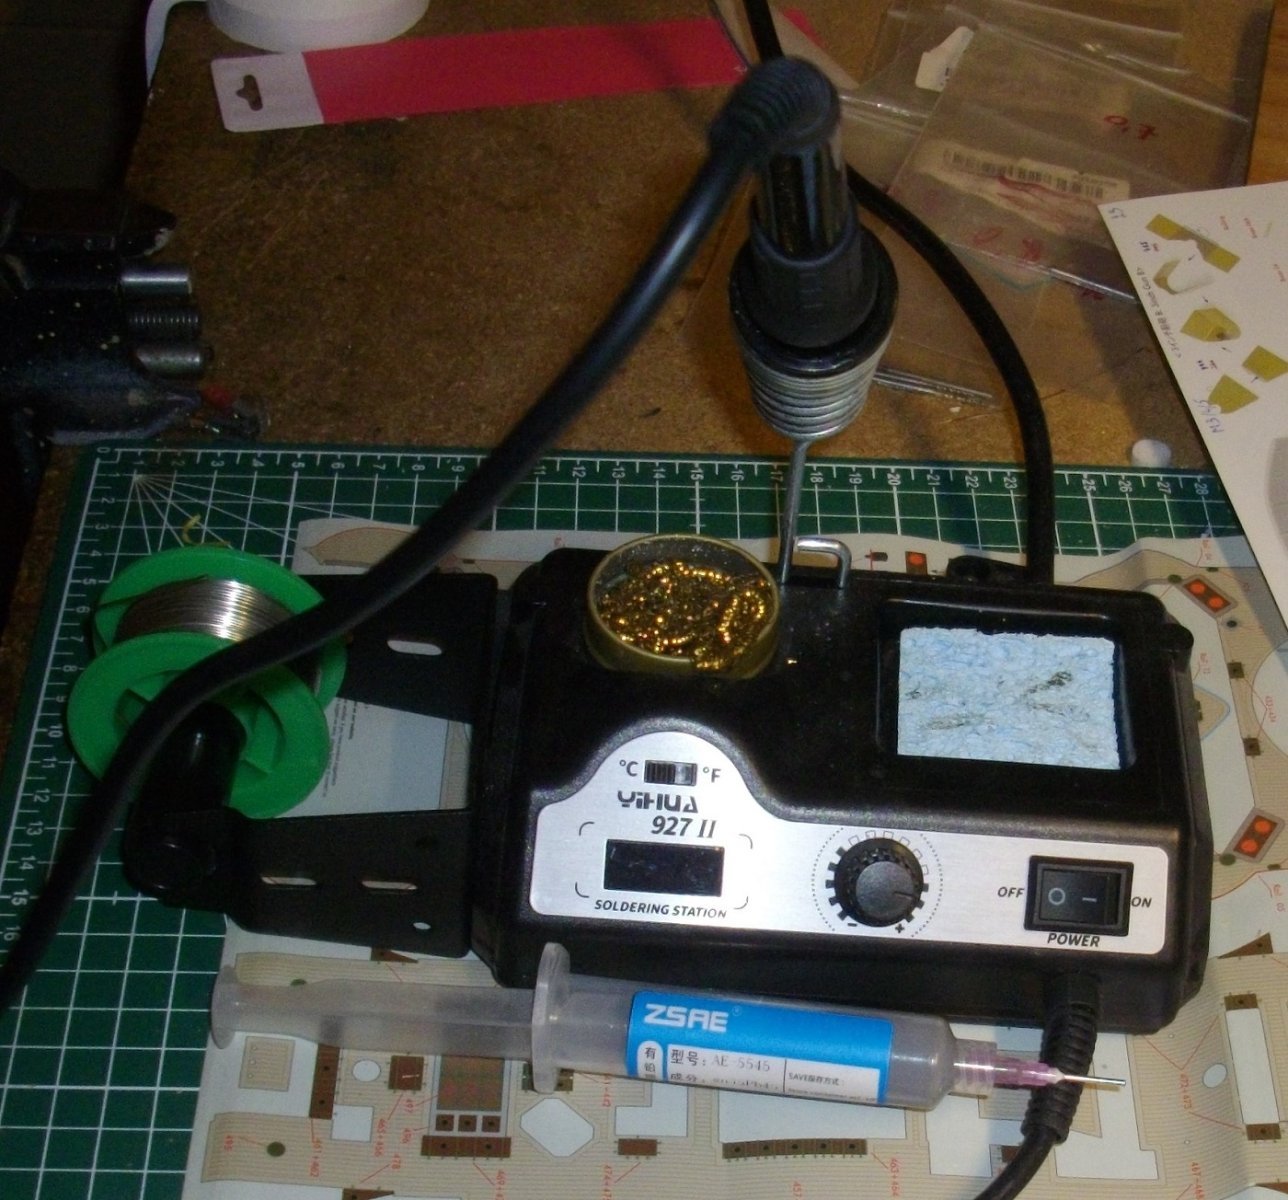
Hi Scott. I was a bit worried about my soldering skills too, with my +40 years old soldering iron, ad resin-core solder, that oly allowed me to solder things using far too much solder. So I invested in a new soldering station with adaptable temperature, and soldering paste in a seringe. I try to apply the smallest amount of soldering paste, using a small brush. Works quite well. The video's by Captain Slog (Plunging fire scale modeling) are a big help too.

- 146 replies
-
- 7
-
-
- Mikasa
- Merit International
- (and 1 more)
-
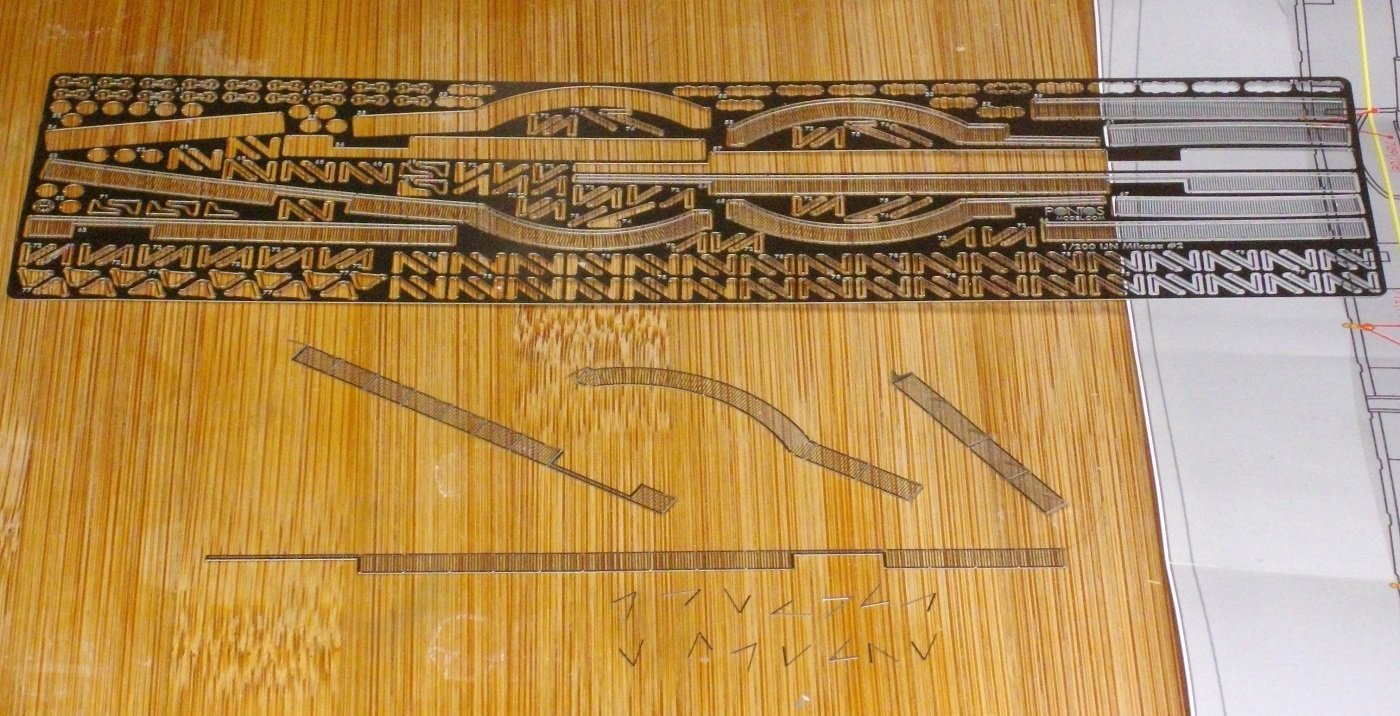
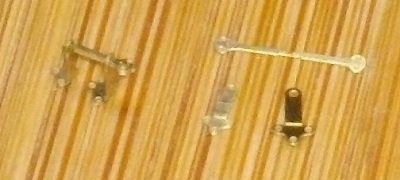
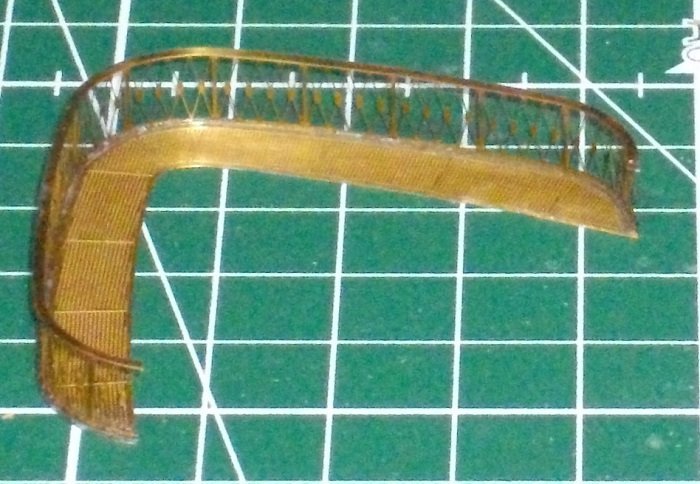
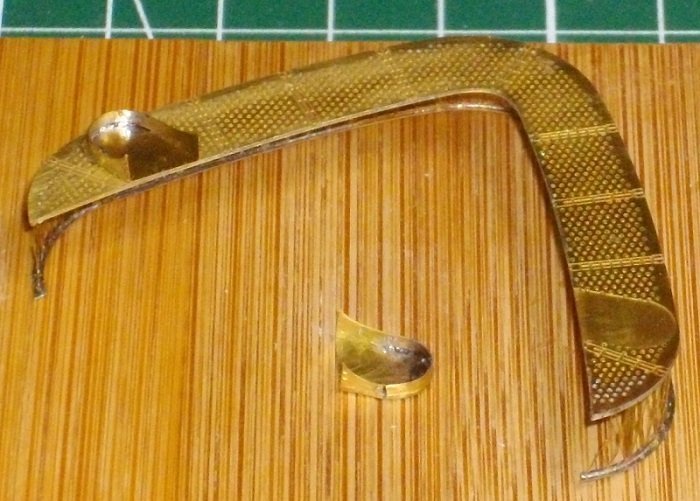
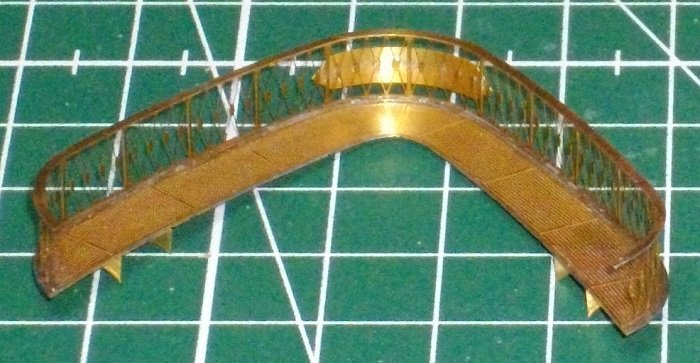
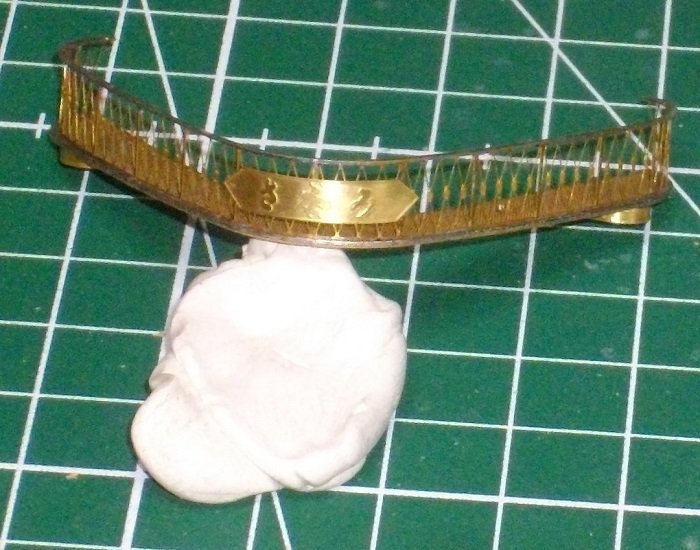
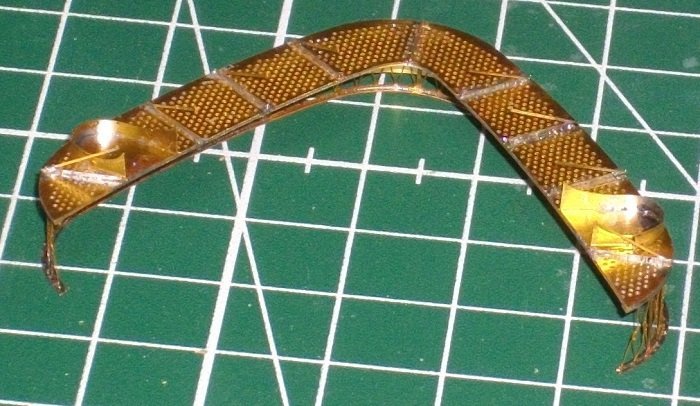
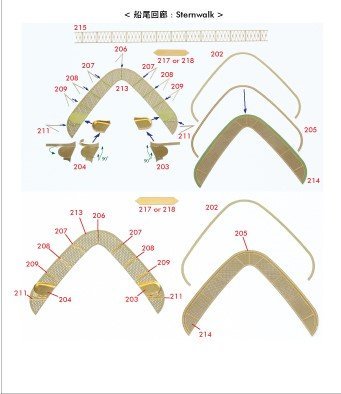
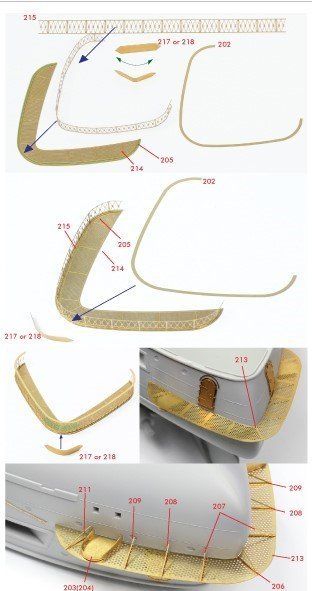
The admiral's walk: The Pontos-instructions Baseplates 213 and 214 soldered together, and topped by part 205. Bent the railing (part 215) to fit the handrail (part 202) By the way, the Pontos-instruction is correct, I avoided mixing parts 205 and 202 up by cutting 205 loose and fitting it first, and only then I cut 202 loose and fitted it to part 215. 202 is slightly longer then 205. Next I soldered the railing to part 205 on the walkway. Then I bent and soldered the 2 halfround platforms to the bottom. After bending the nameplate to the correct curve, I soldered this to the railing. Finaly I soldered the 9 supports to the bottom. A testfit results in this image, whuch is quite pleasing to me


- 146 replies
-
- 13
-
-

-
- Mikasa
- Merit International
- (and 1 more)
-
In order to save som place , I plan to deploy the torpedonets on the portside, but to attach the booms to thull on the starboard side.
- 146 replies
-
- 4
-
-
- Mikasa
- Merit International
- (and 1 more)
-
Next step was to bend and solder the 16 eyebolts (part 53) and glue them and the ring (52) with a little SloZAP in the holes in the hull. The booms for the anti-torpedo-net will be hooked in them. Wishing everyone lots of modellingfun.
- 146 replies
-
- 7
-
-
- Mikasa
- Merit International
- (and 1 more)
-
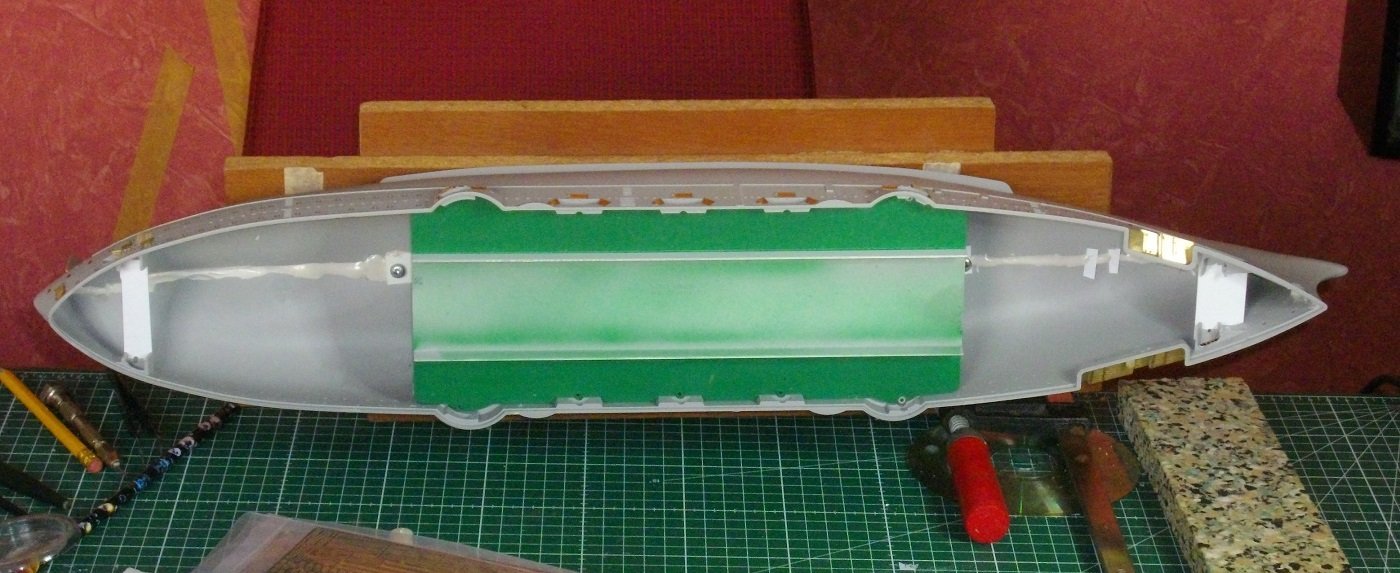
Next I drilled 2 4mm holes in the bottom of the hul and attached it to a temporary bottomplate in order to diminuish the risk of damaging the added detail when handeling the ship. Wishing everyone lots of modellingfun.
- 146 replies
-
- 7
-
-
- Mikasa
- Merit International
- (and 1 more)
-
Next I bent and glued on the shutters for the 2 outer casemates. (both sides) Wishing everyone lots of modellingfun.

- 146 replies
-
- 10
-
-
- Mikasa
- Merit International
- (and 1 more)
-
Next I bent and glued on the shutters for the 3 central casemates. Wishing everyone lots of modellingfun.

- 146 replies
-
- 9
-
-
- Mikasa
- Merit International
- (and 1 more)
-
Next I bent and glued on the shutters for the front and stern casemates with SloZAP and the hand holds wit a dash of PVA-glue. Wishing everyone lots of modellingfun.
- 146 replies
-
- 8
-
-
- Mikasa
- Merit International
- (and 1 more)
-
I testfitted the 6" and 3" guns in the casemates of the hull. I had to enlarge the pivoting holes in the 6" guns slightly to alowe the pins to go in smoothly, as I am a bit reluctant to hammer them in when the hull is laden with PE. The Pontos 3" guns don't fit under the roofs of the casemates, as the bottom plates I installed dont alowe for sliding them in sideways, so I removed the roofs, planning to top the area later with a piece of styrene. Wishing everyone lots of modellingfun.
- 146 replies
-
- 11
-
-
- Mikasa
- Merit International
- (and 1 more)
-
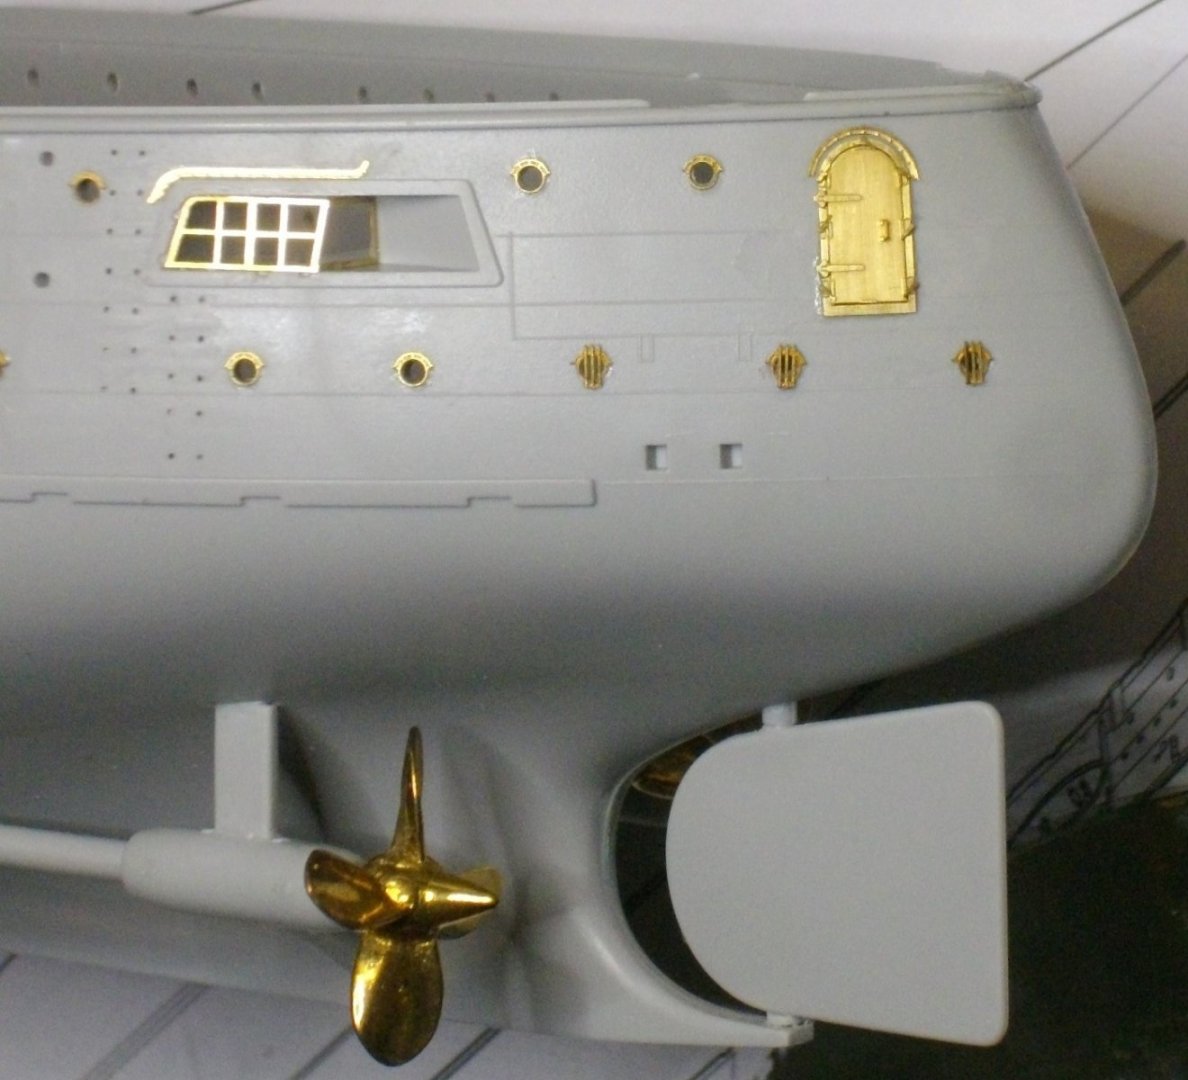
Some more hull details added, the first with diluted PVA-glue, the doors themselves witg a touch of SloZAP. Wishing everyone lots of modellingfun.
- 146 replies
-
- 9
-
-
- Mikasa
- Merit International
- (and 1 more)
-
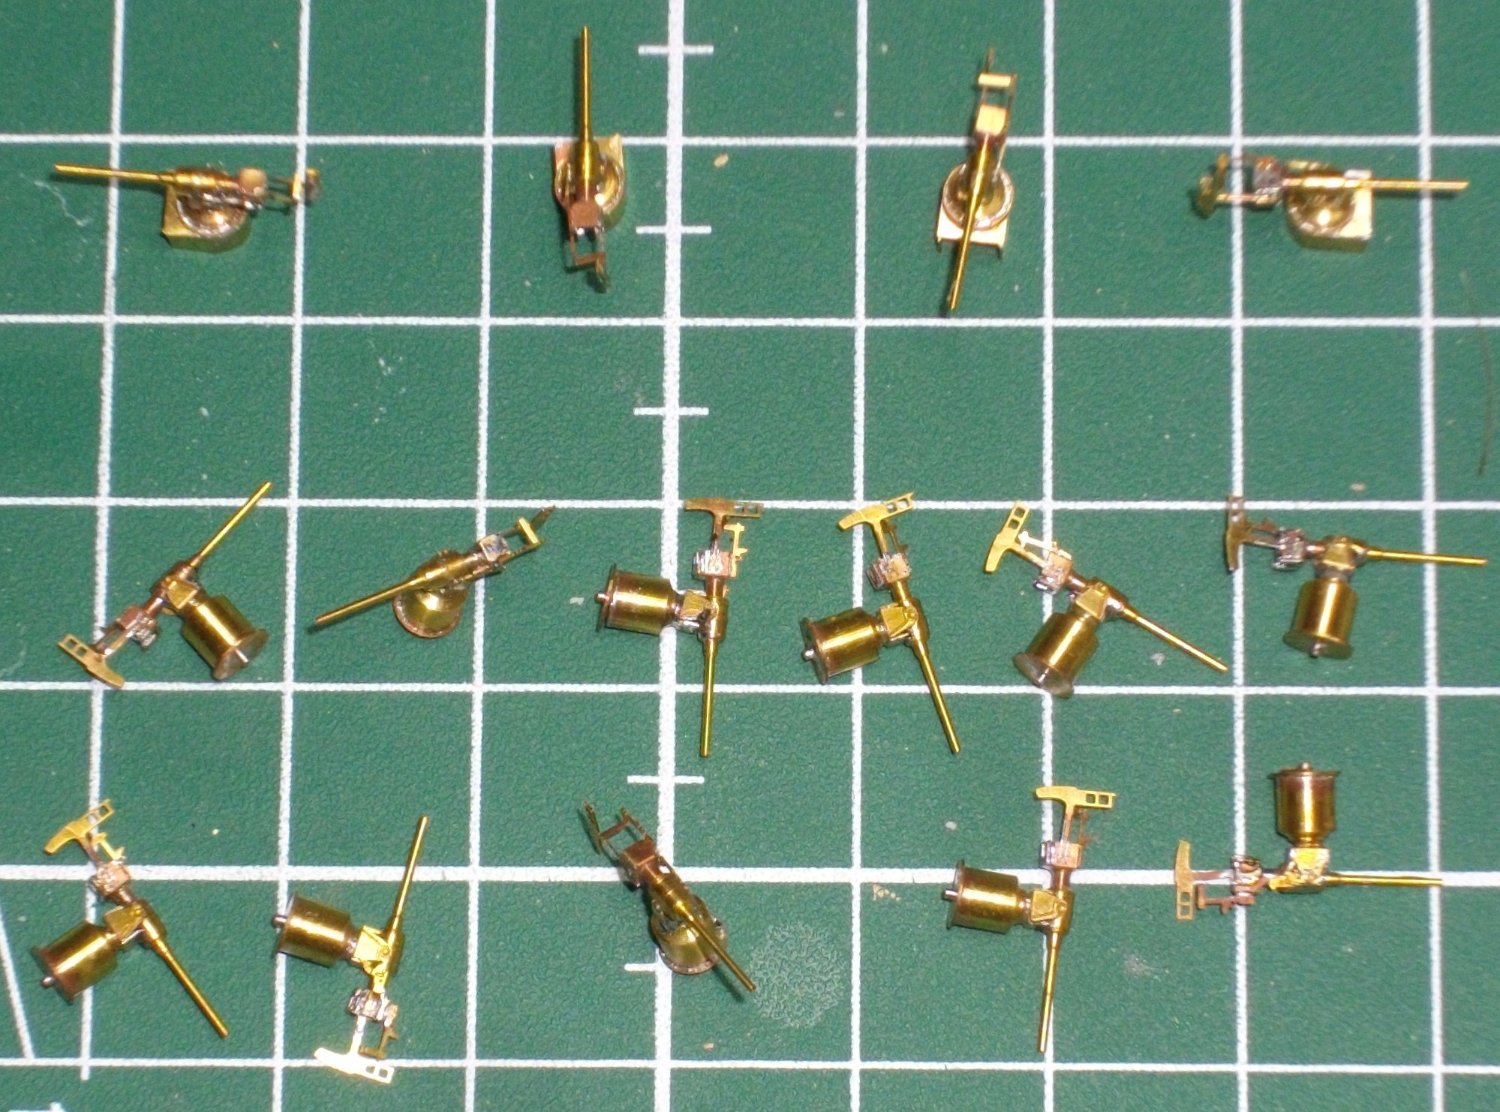
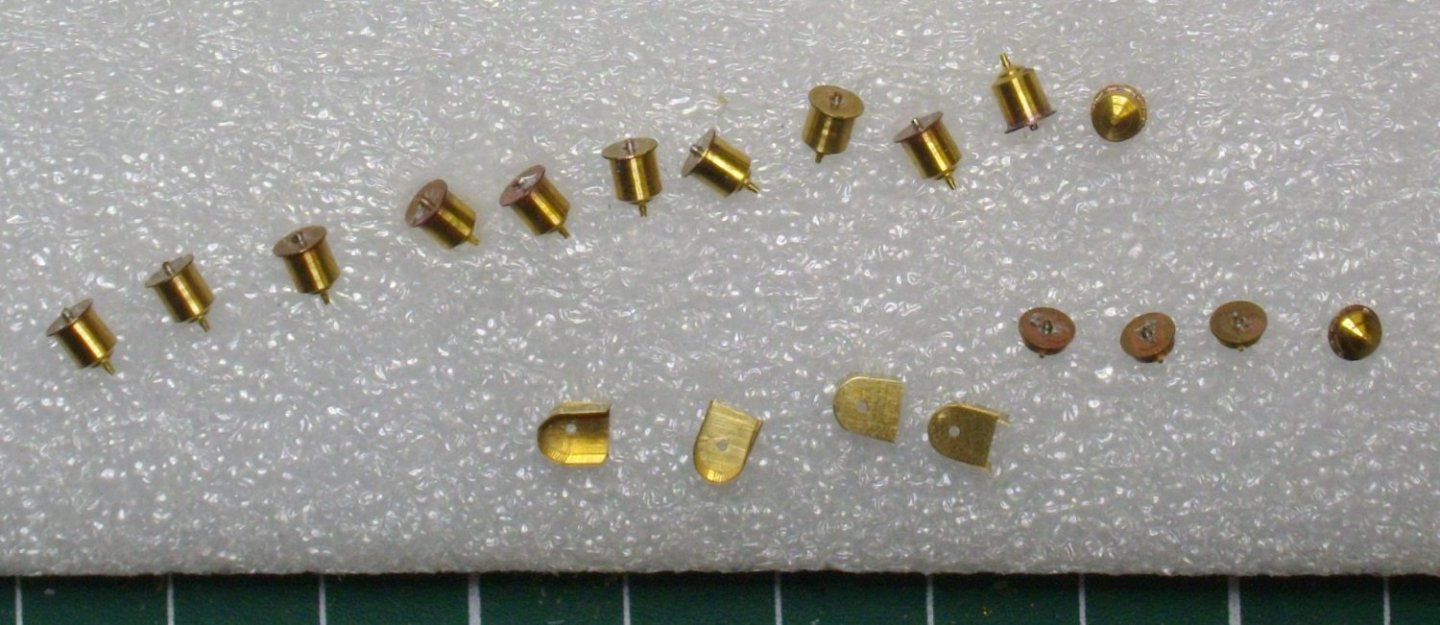
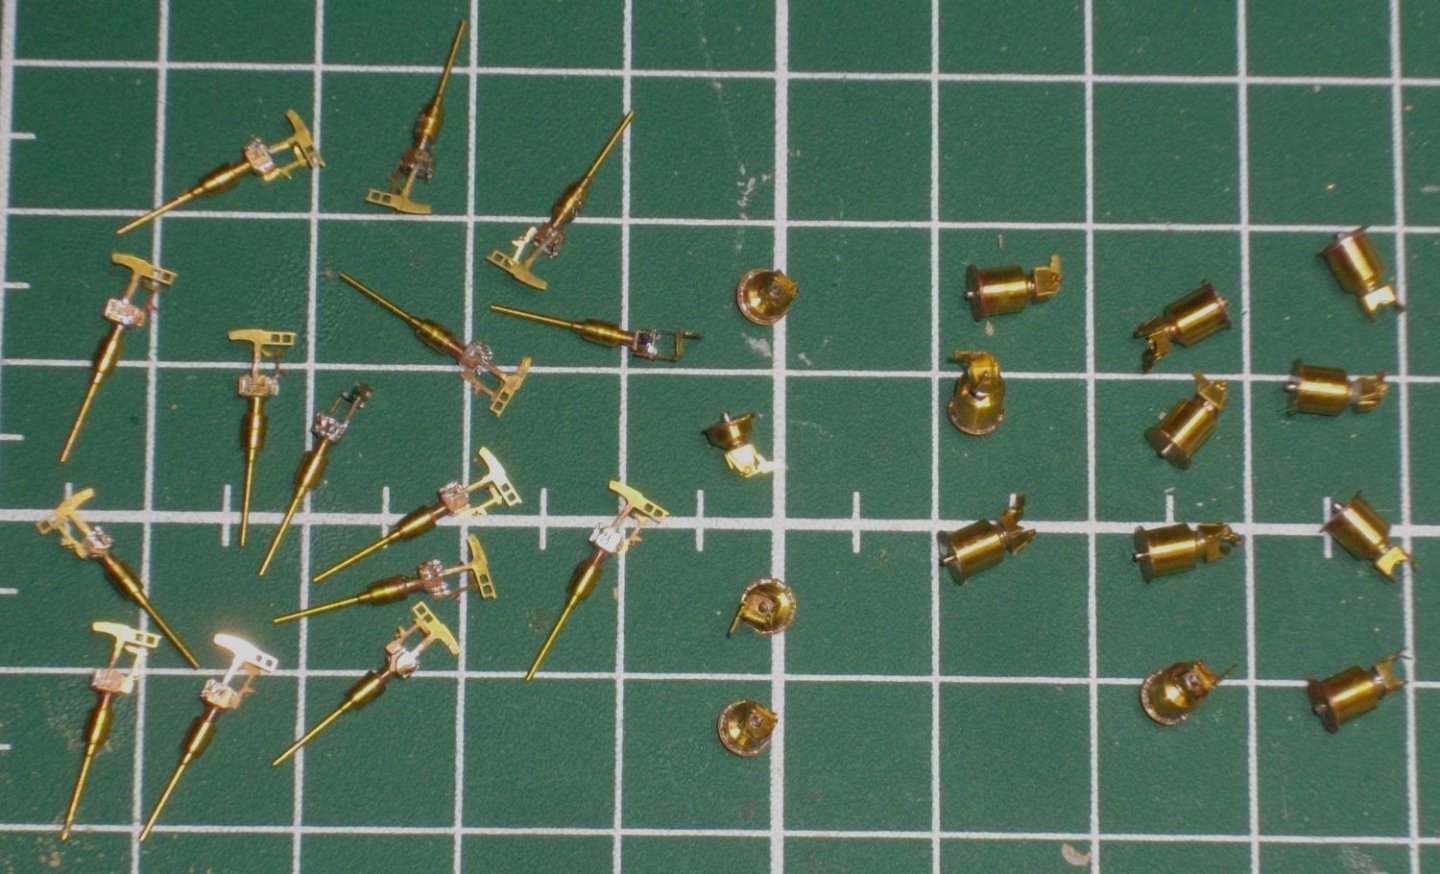
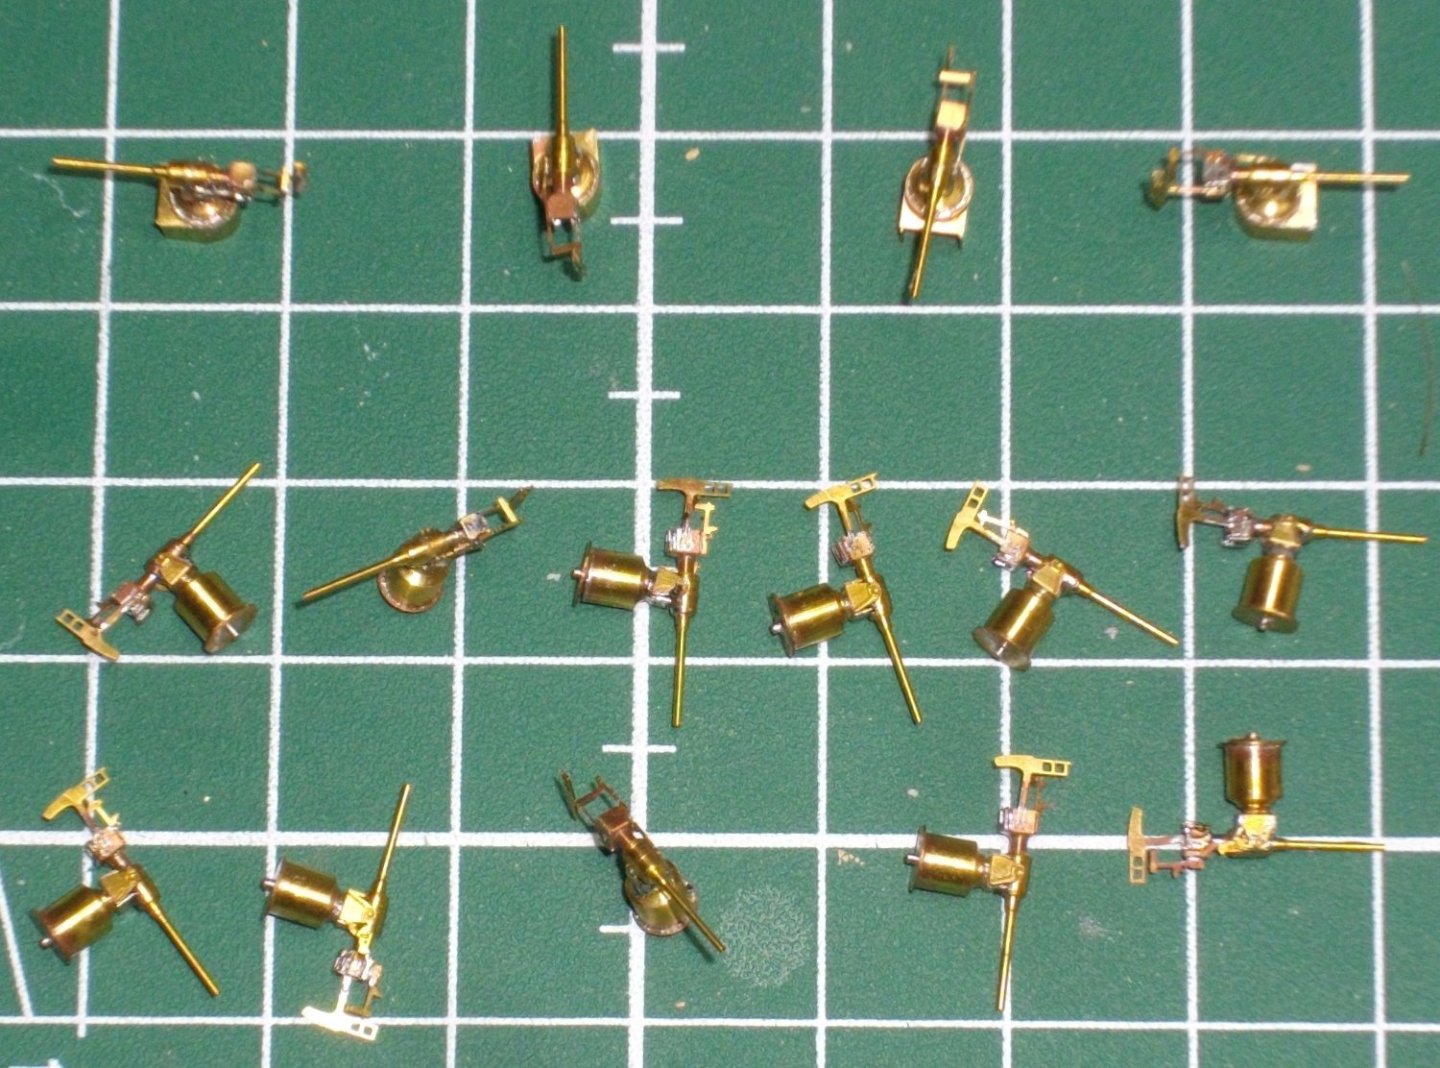
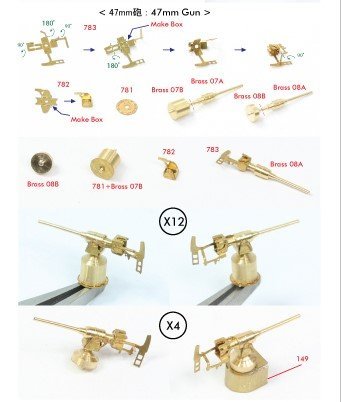
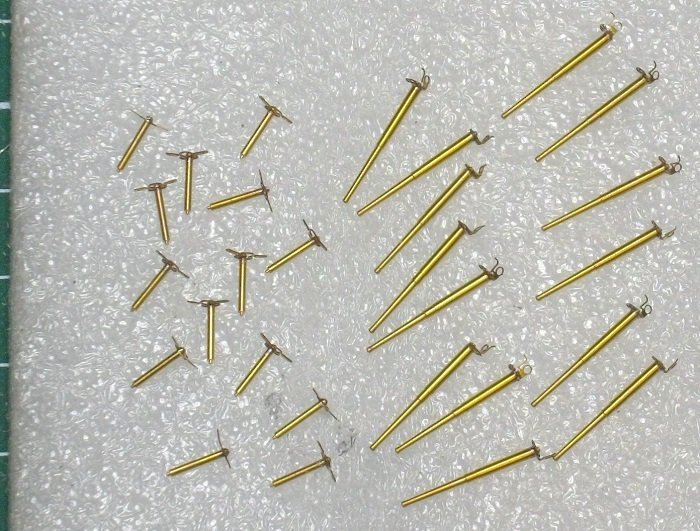
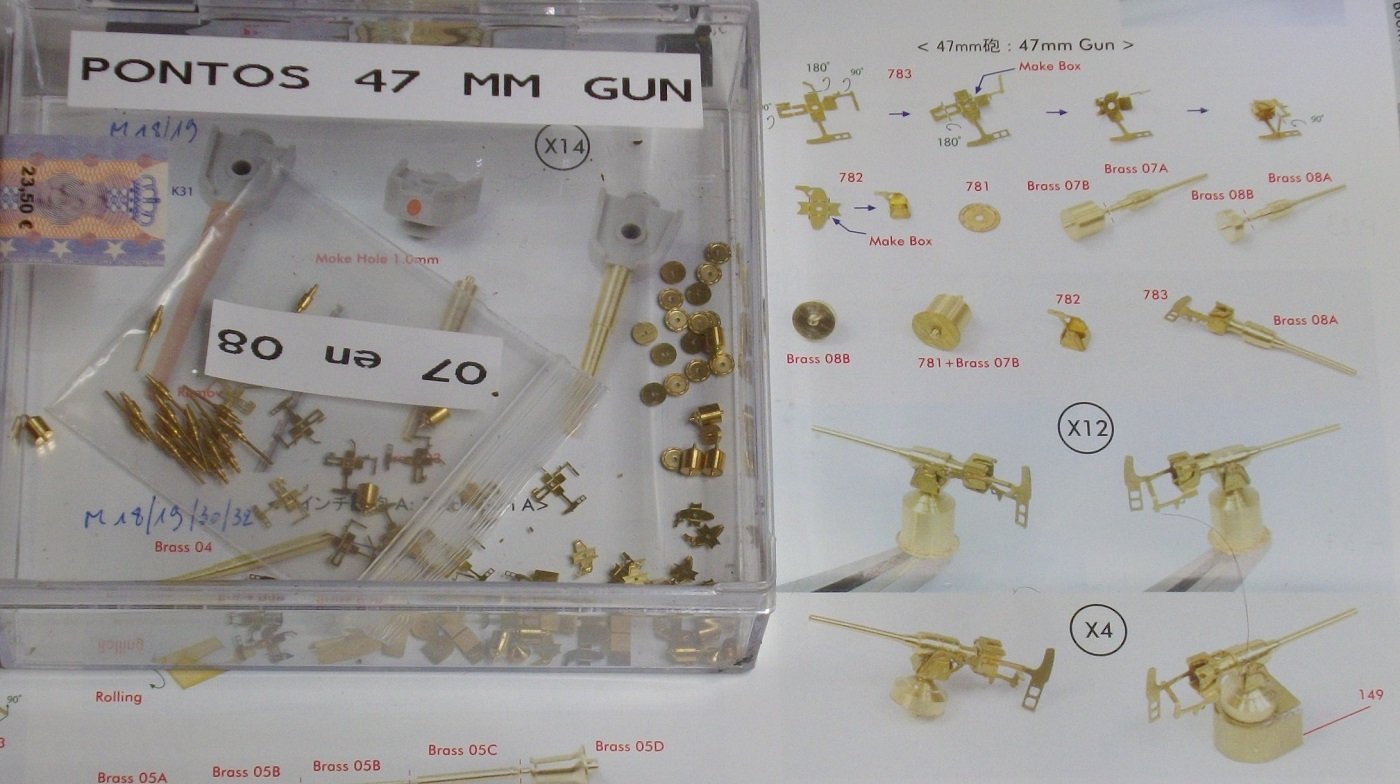
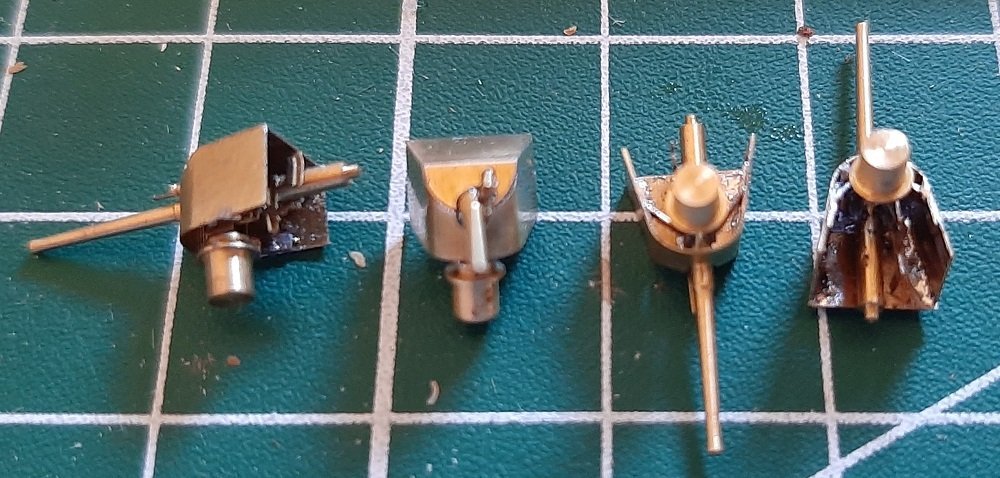
Next are the 47 mm guns: First I soldered the pedestalls (Brass 07B and Brass 08B) to the botom plates (781), and bent the platforms (149) into shape Then I soldered the pre-bent brackets (782) to the pedestalls and the barrels (Brass 07A and Brass 08A) to the pre-bent breeches (783). Finaly I soldered the guns to the pedestall brackets and glued the guns with the small pedestalls to the platforms. Lots of Modelling fun
- 146 replies
-
- 9
-
-
- Mikasa
- Merit International
- (and 1 more)
-
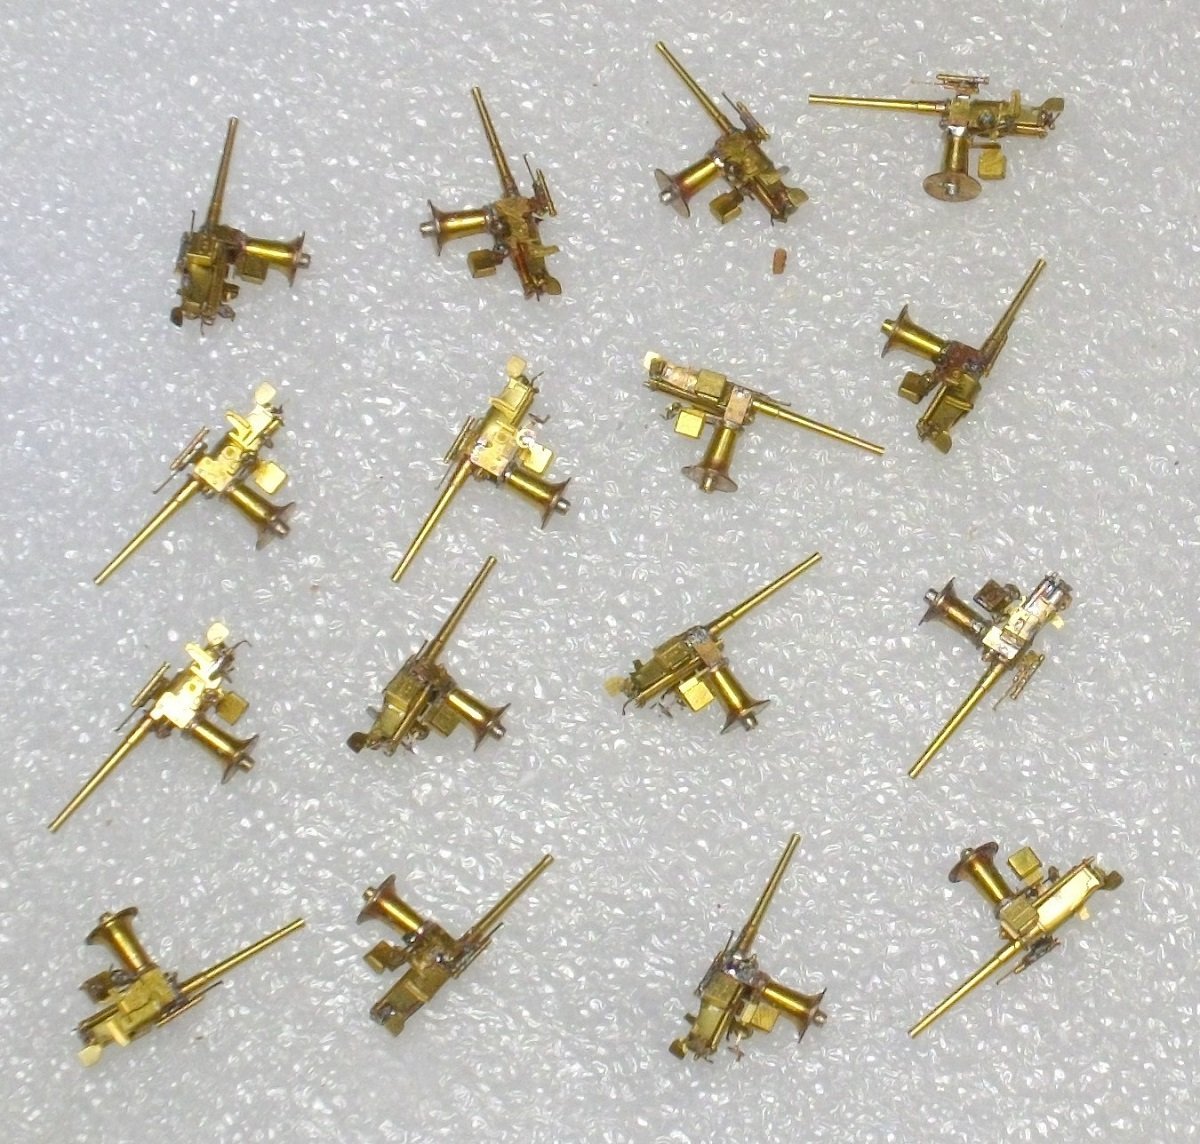
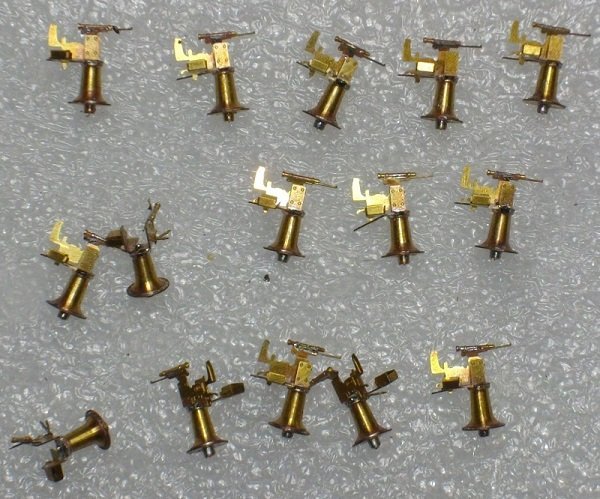
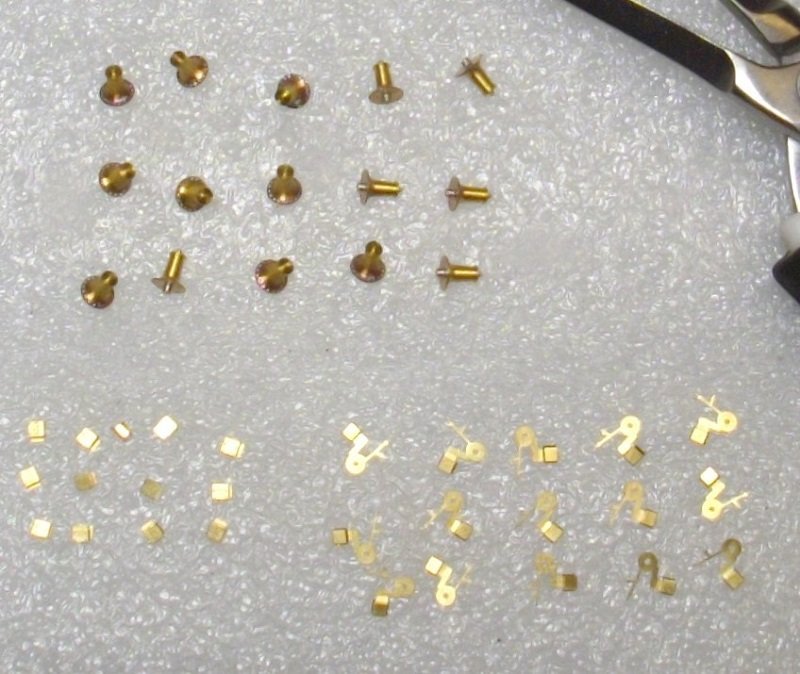
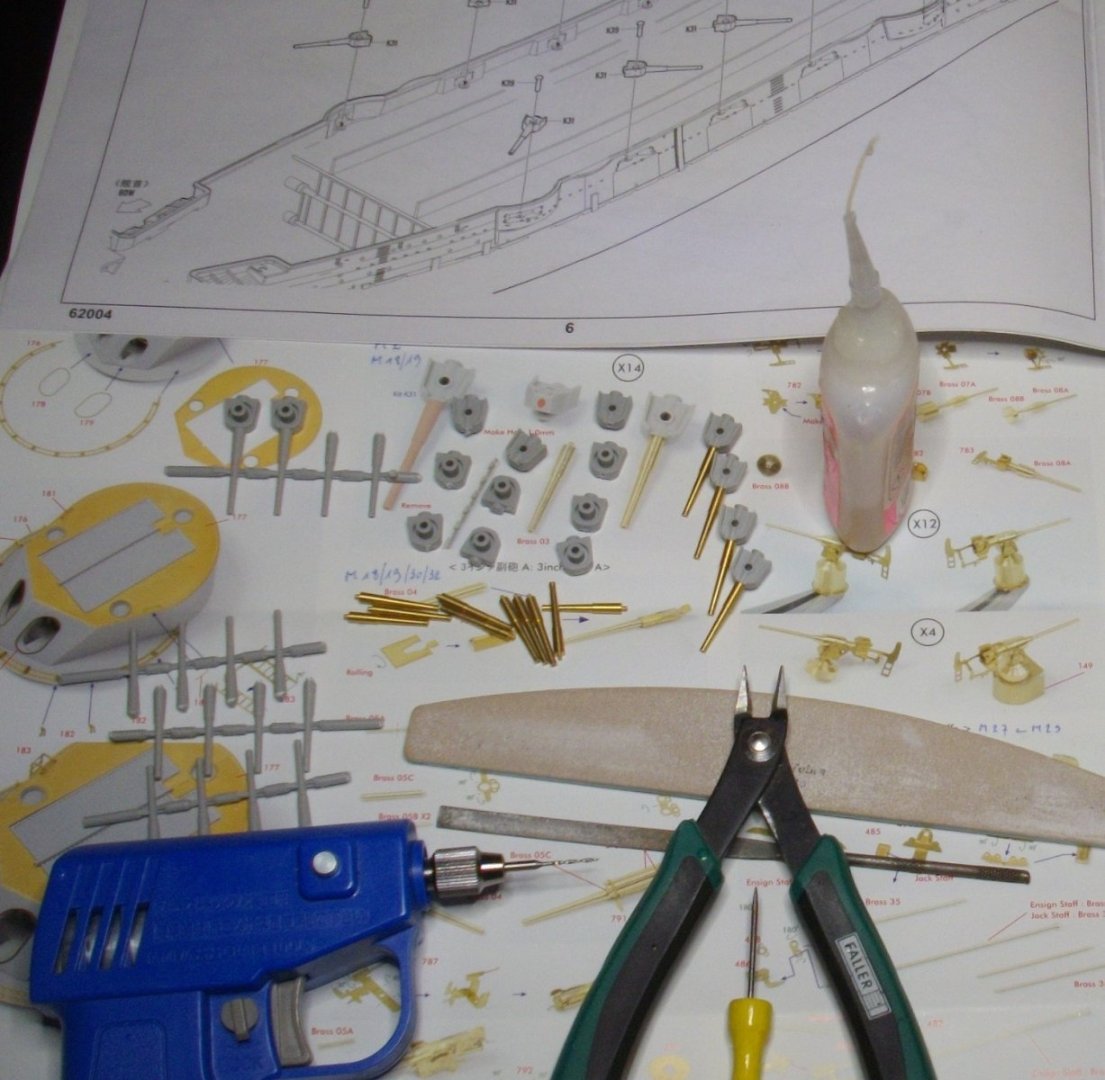
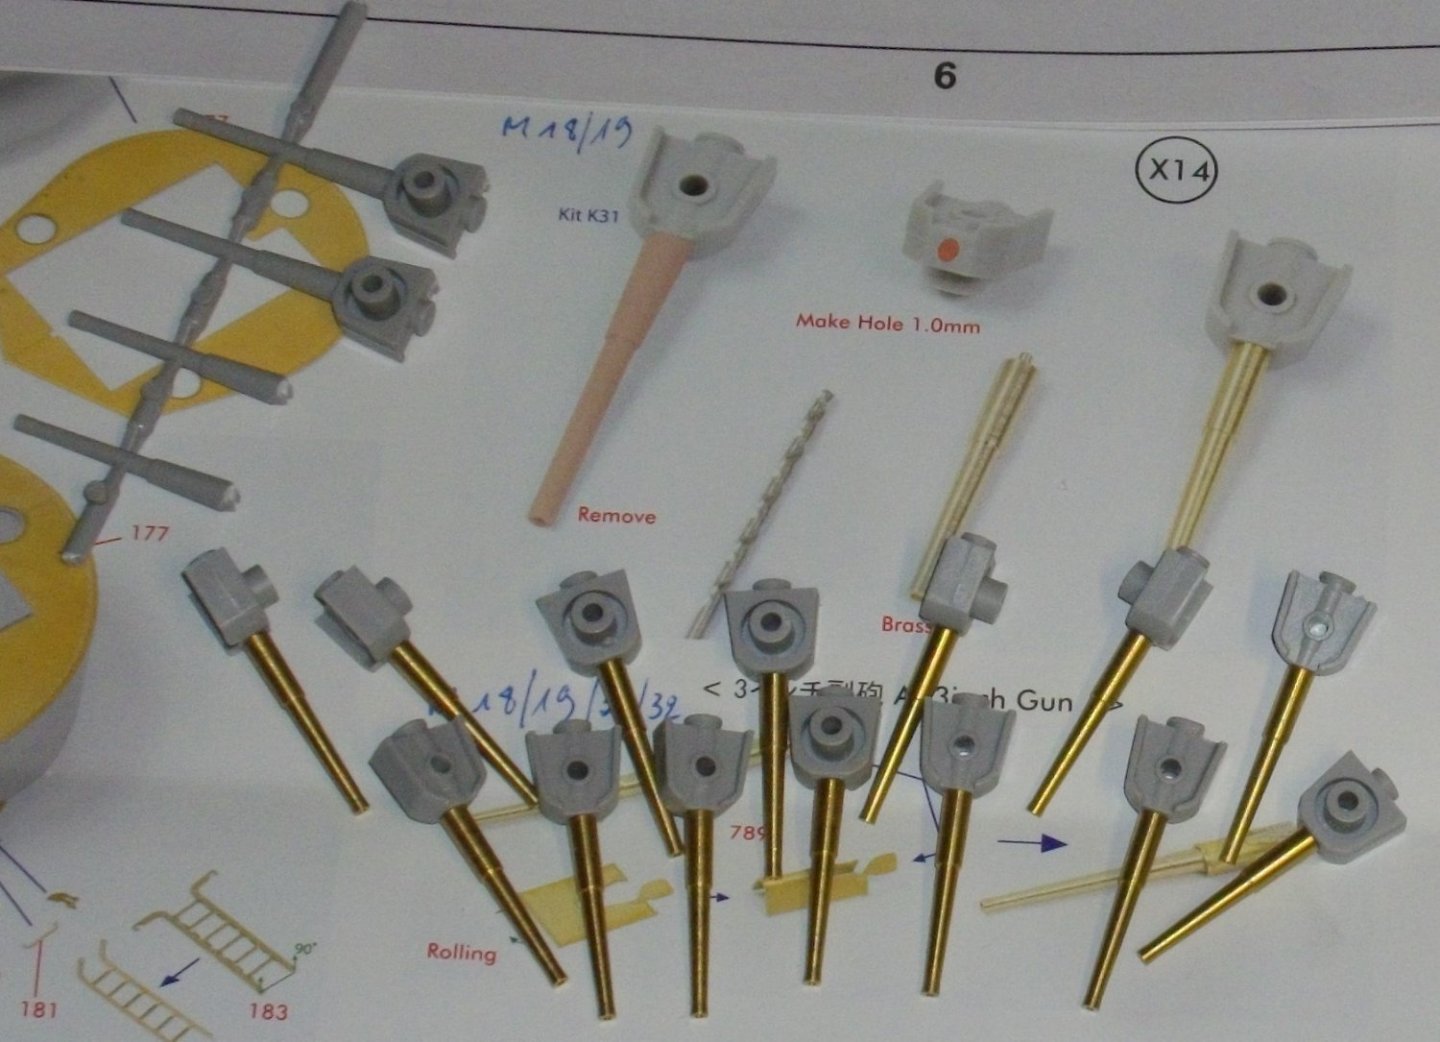
Mass production of the 3" guns, 1 down 15 to go. Here are some pictures of the different steps. Pedestalls soldered to the bottom plate and brass parts bent to form boxes Brass parts soldered to the pedestall Preparations for installing the recoilcylinders Brass plates bent over the barrels and installed onto the bracket (all soldered), and finaly glued the little box to the side of the barrel with a little CA-glue. Happy modelling,

- 146 replies
-
- 10
-
-
-
- Mikasa
- Merit International
- (and 1 more)
-
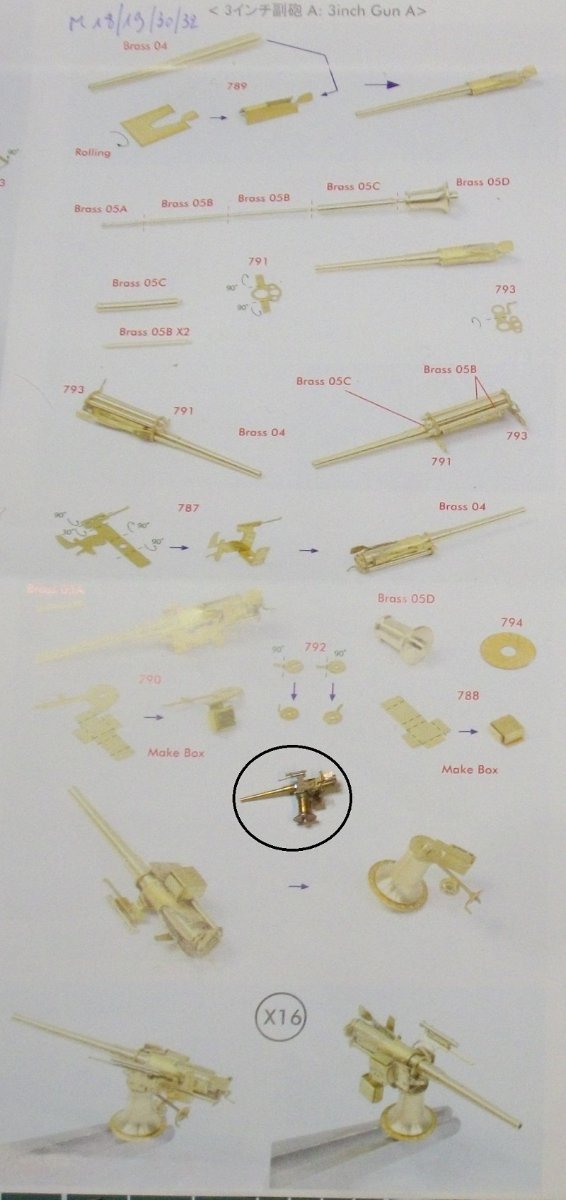
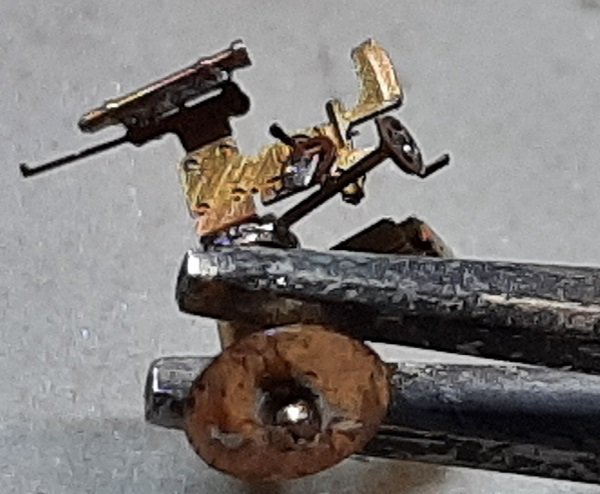
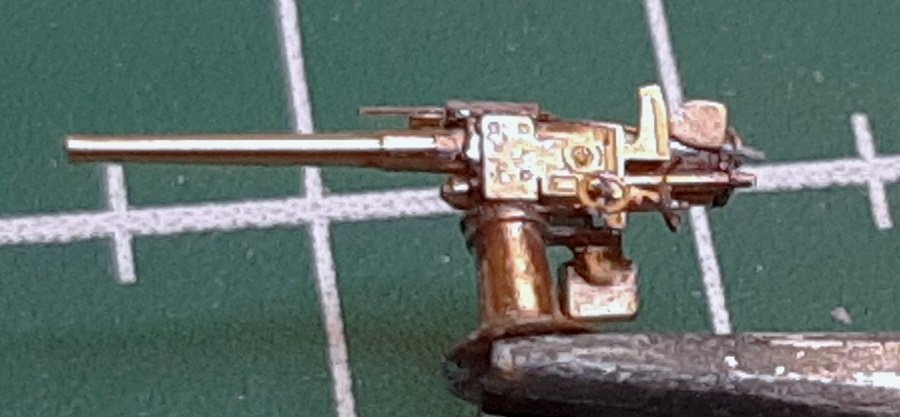
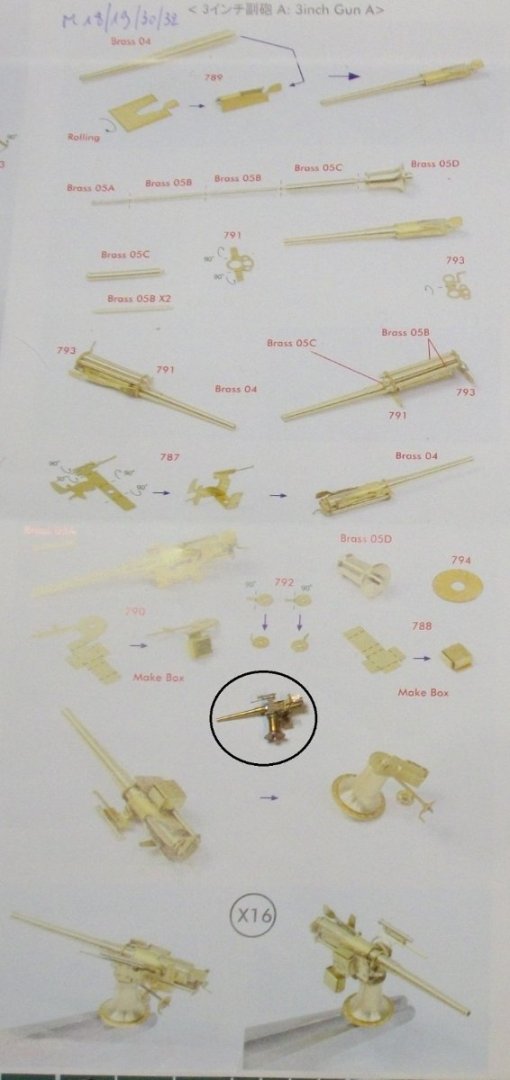
Time to have a go at a first 3" gun A The composing elements on the left - The pieces, bent where nece"ssary And the result of 3 hours of modellingfun ! Next picture shows the "briliant" Pontosinstructions, and the endresult in the black oval. Happy modelling,

- 146 replies
-
- 9
-
-
- Mikasa
- Merit International
- (and 1 more)
-
I made to fit a styrene plate and glued it under the kasemates openings at stern and stem in order to prevent these guns from falling in the hull. A 2 mm-hole in the styrene should help lodgeing the base of the guns. happy modelling,
- 146 replies
-
- 7
-
-
- Mikasa
- Merit International
- (and 1 more)
-
Hi Jölle, I'll try to make the build log as interesting as the model
- 146 replies
-
- 3
-
-
- Mikasa
- Merit International
- (and 1 more)
-
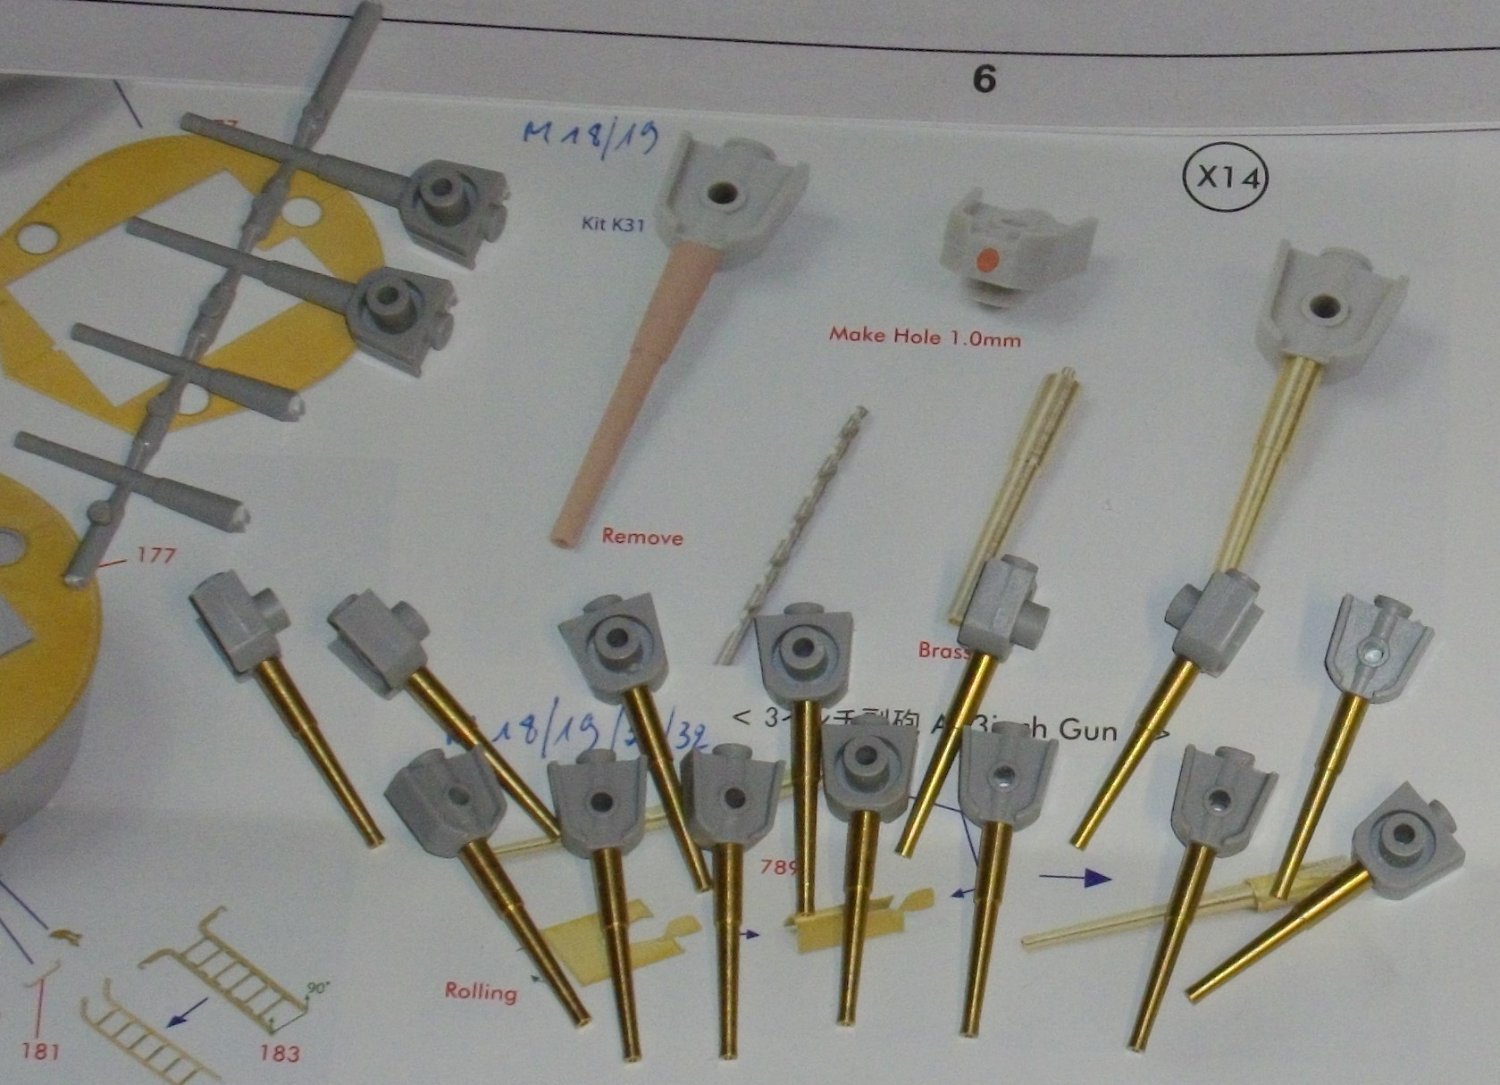
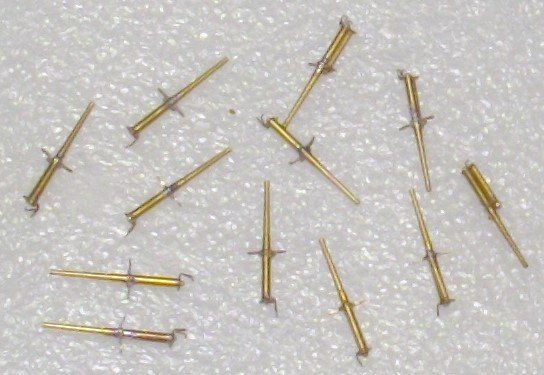
Next is collecting all the brass parts to make the 3" huns and the 47 mm guns, which replace the Merit parts entirely. Lots of modellingfun

- 146 replies
-
- 6
-
-
- Mikasa
- Merit International
- (and 1 more)
-
The 6" guns in Merit step 3 are entirely replaced by Pontos brass. They are soldered together, no glue used at all. Happy modelling,
- 146 replies
-
- 10
-
-
- Mikasa
- Merit International
- (and 1 more)
-
Before putting on lots of photo-etch around the casemates, I want to be sure the guns and the hatches around them will fit. So I started the construction of the guns. I started collecting, preparing an assembling the parts for step 2: the 6" guns. The different stages of completion, seen from left to right. The completed guns. Happy modelling,
- 146 replies
-
- 11
-
-
- Mikasa
- Merit International
- (and 1 more)
-
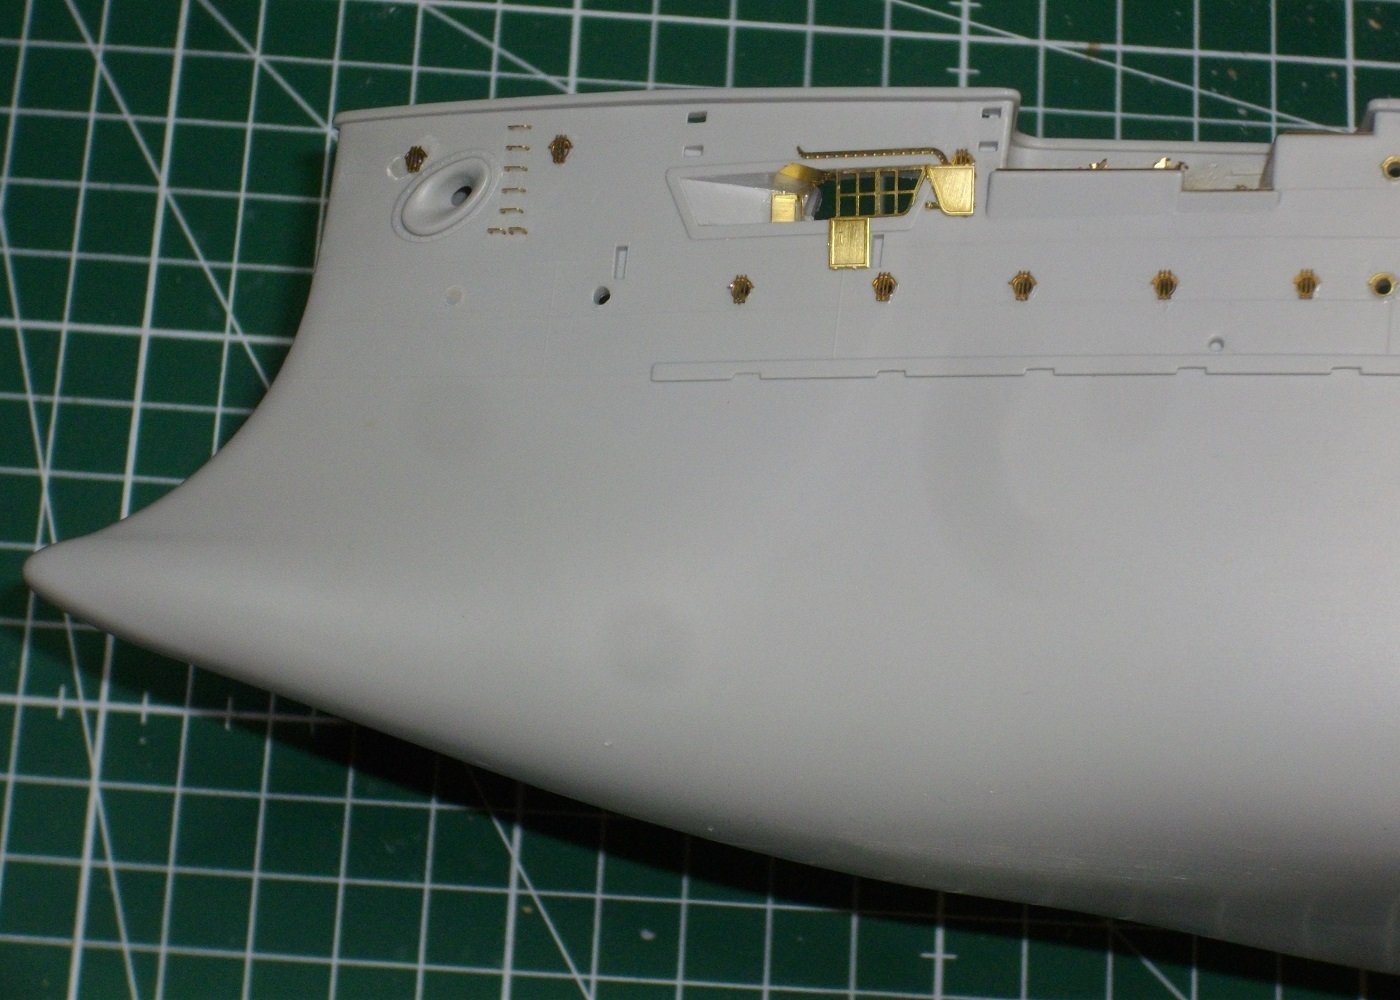
I glued on more than a hundred "ordinary" pontos portholes using PVA-glue. Then I indicated on the Merit-instructions where Pontos brass replaces partially or entirely the original kitparts, and on the Pontos-instructions in which step of the Merit-instructions they are needed. Happy modelling,


- 146 replies
-
- 9
-
-
- Mikasa
- Merit International
- (and 1 more)
-
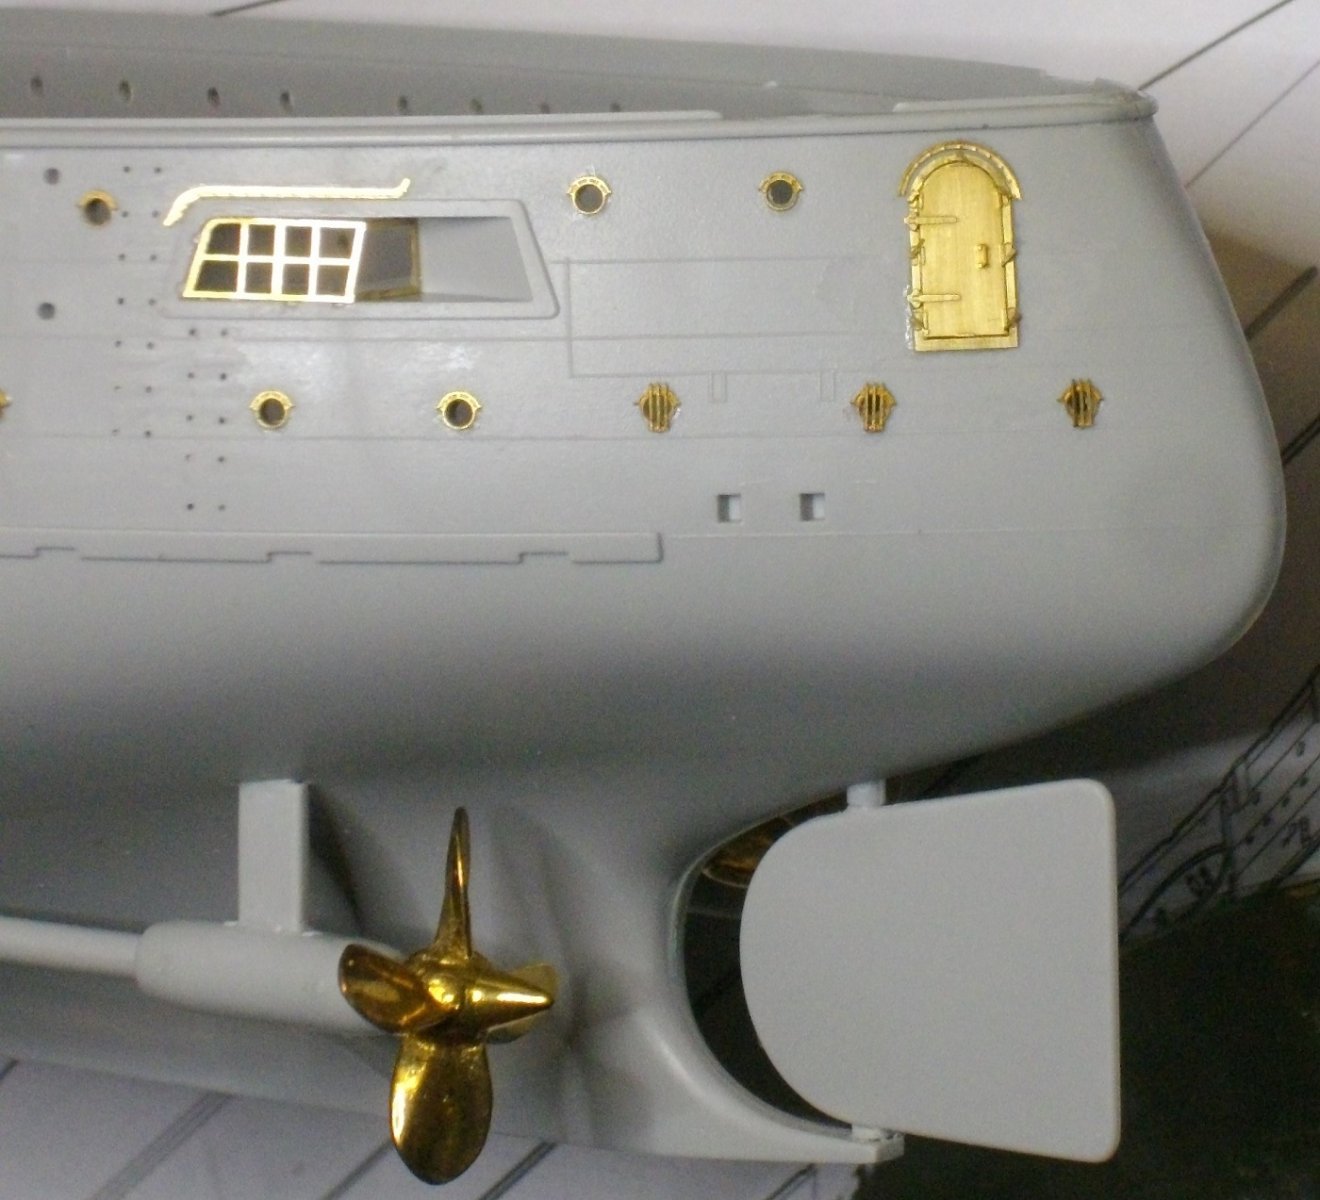
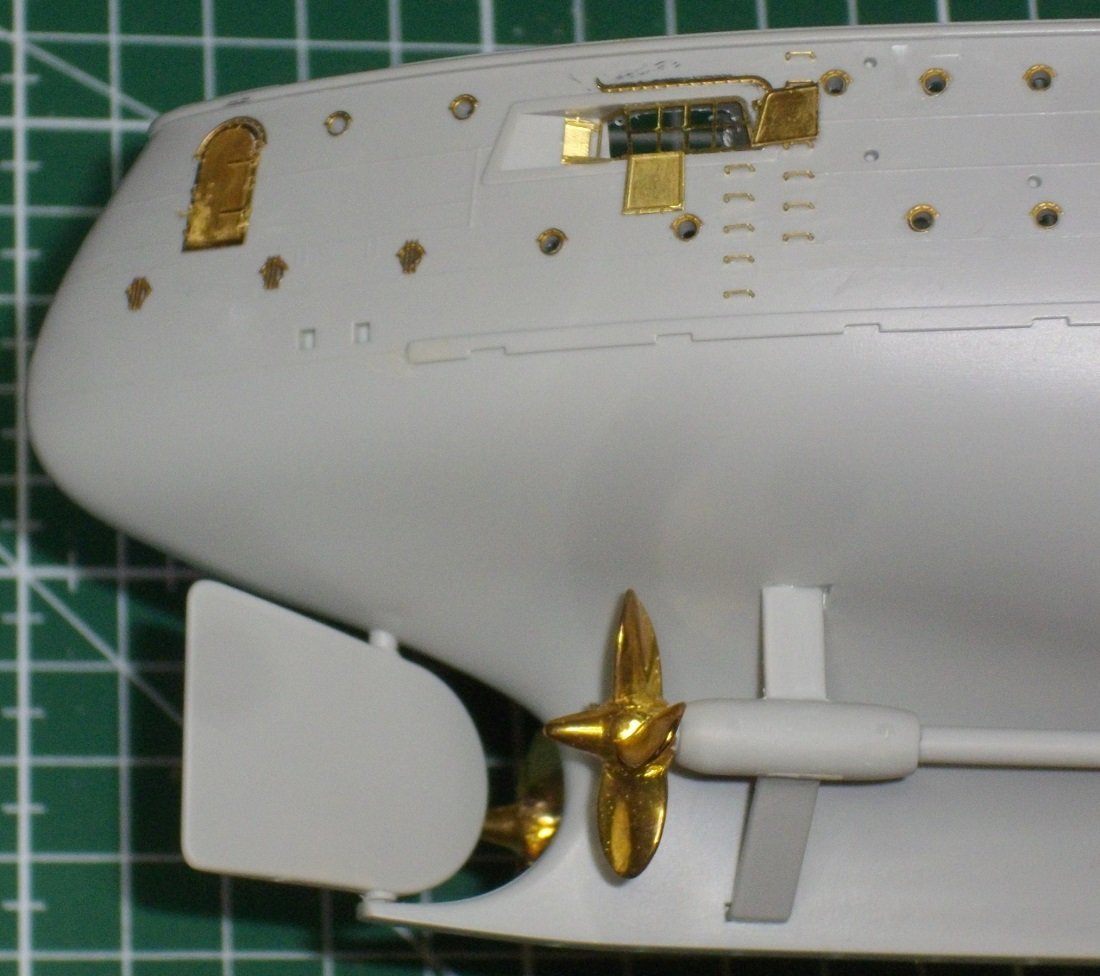
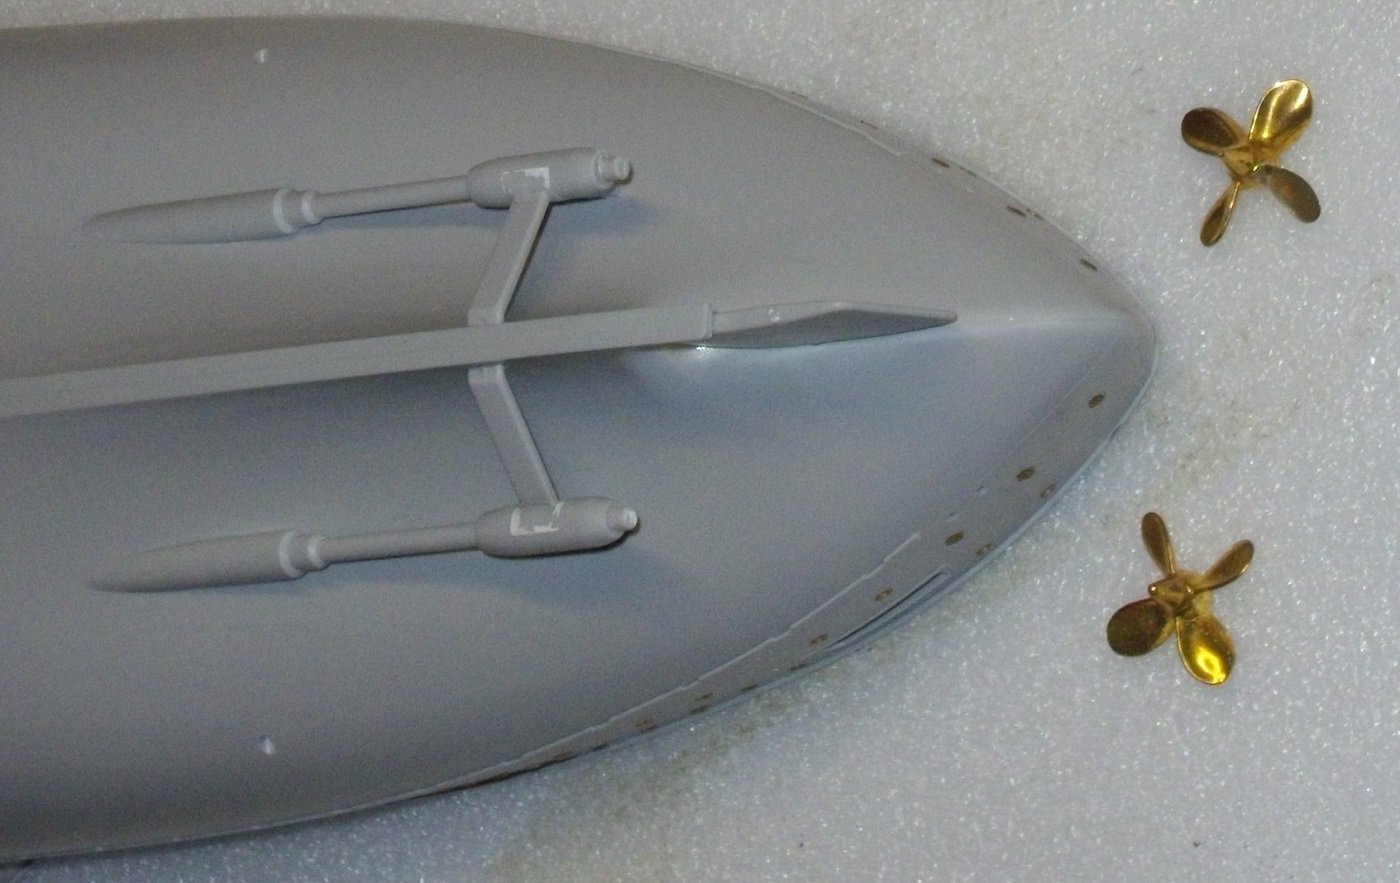
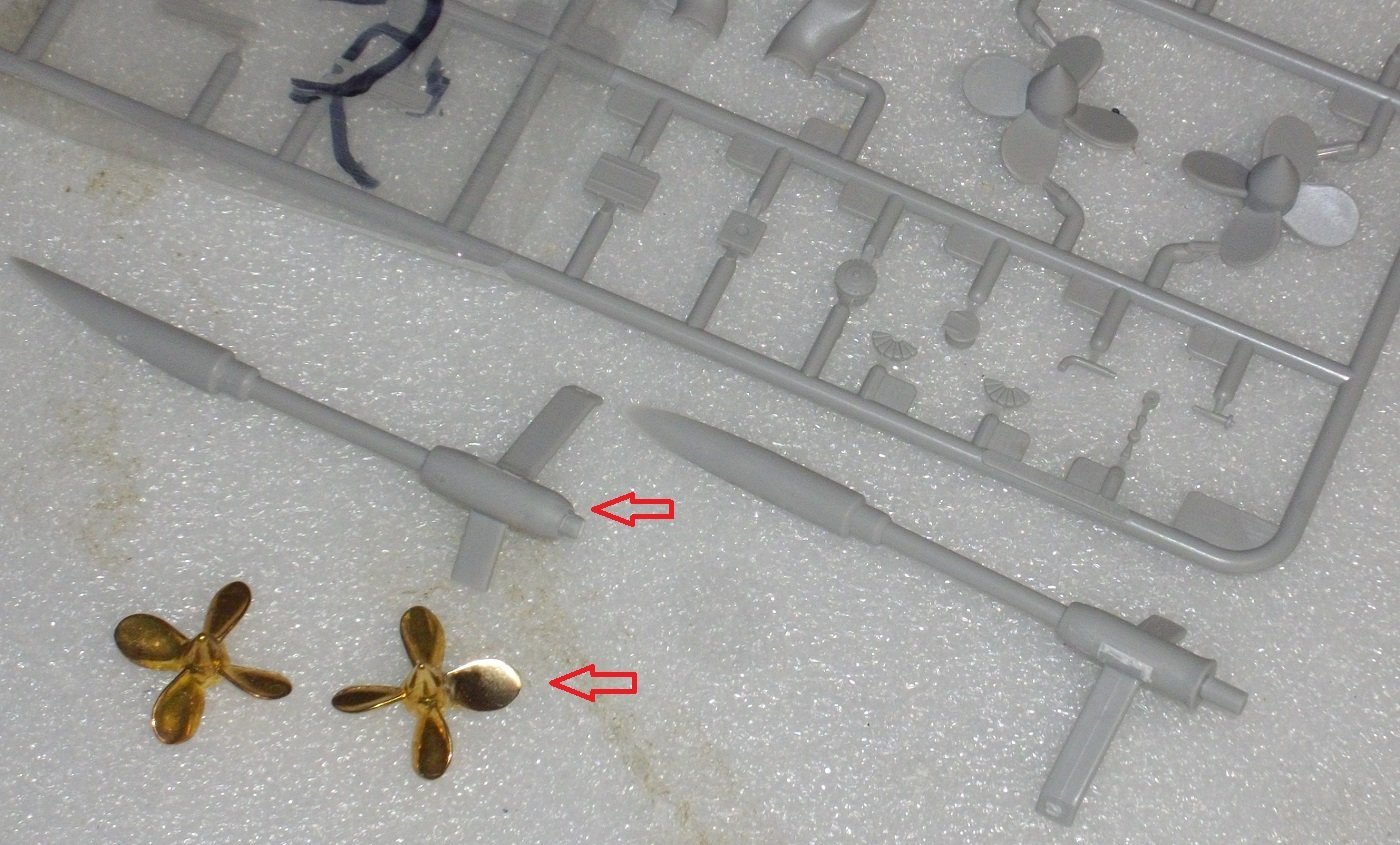
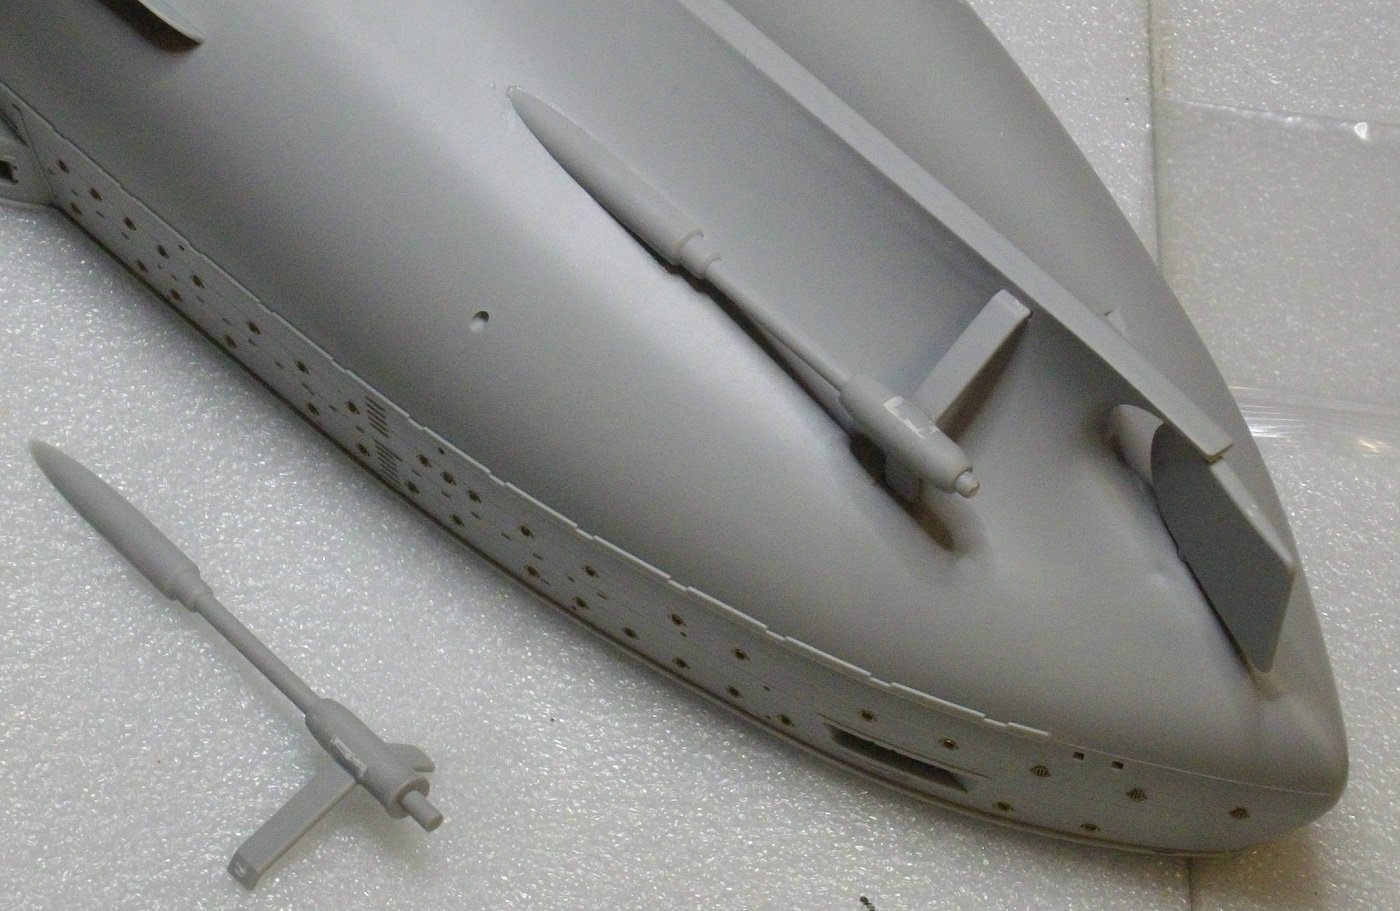
I put the propellershaft and their struts together. Next I adapted them to receive the Pontos propellers and mounted them on the hull. I also worked a bit on a propellerblade to see if I could ameliorate it. Both shafts adapted and mounted on the hull with Tamiya extra thin cemlent. Happy modelling,

- 146 replies
-
- 10
-
-
- Mikasa
- Merit International
- (and 1 more)