HOLIDAY DONATION DRIVE - SUPPORT MSW - DO YOUR PART TO KEEP THIS GREAT FORUM GOING! (Only 53 donations so far out of 49,000 members - C'mon guys!)
×

Herby63
-
Posts
142 -
Joined
-
Last visited
Content Type
Profiles
Forums
Gallery
Events
Everything posted by Herby63
-
 Next I collected the Merit parts and Pontos wooden parts for steps 30 to 35 (front and rear bridge), 40 (main guns) an 43 and 44 (funnels). Till next update, enjoy modelling.
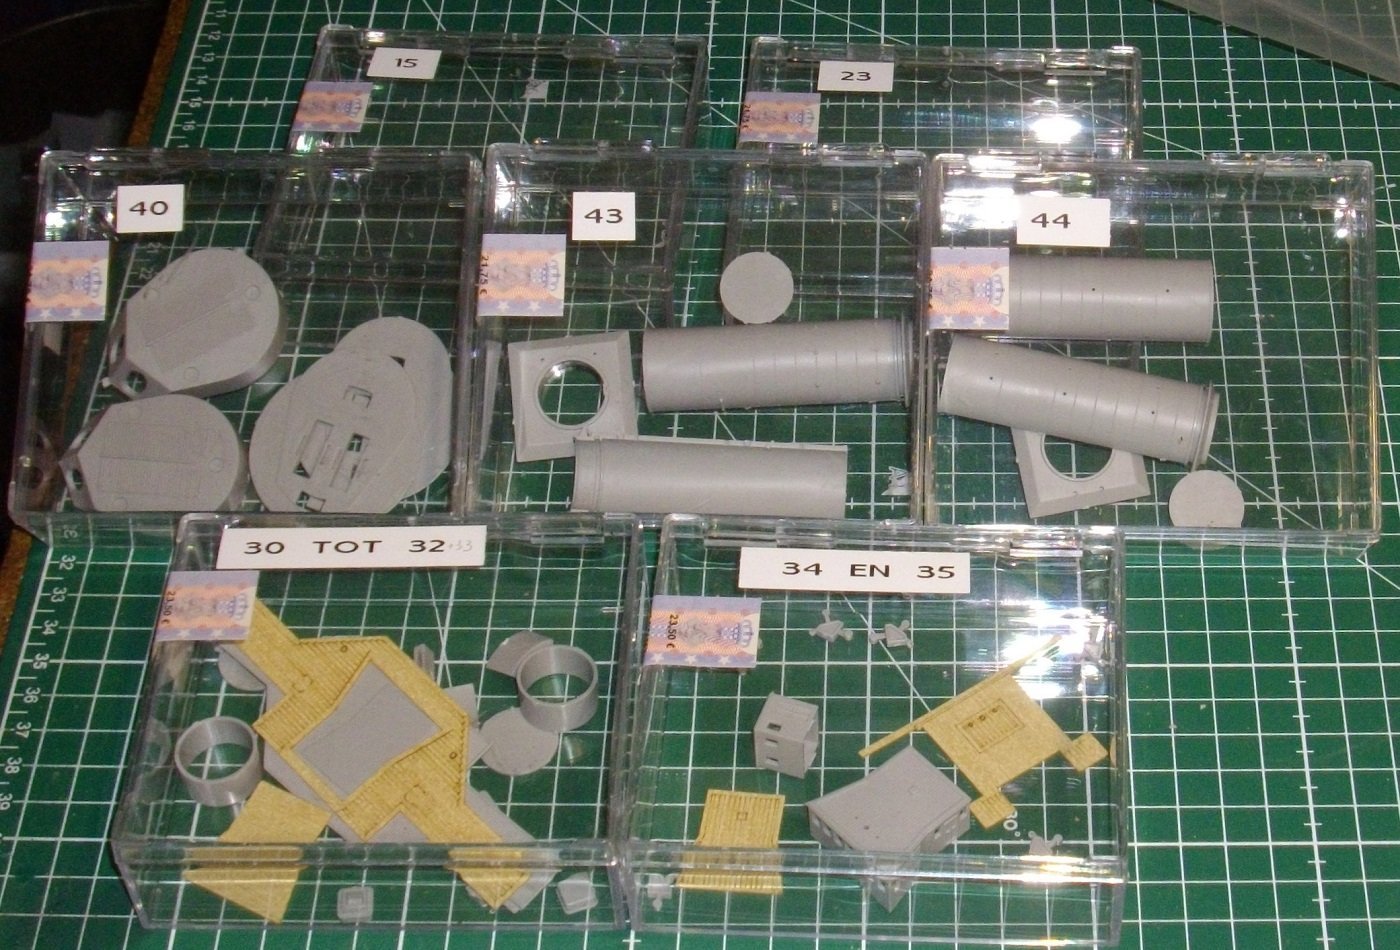
- 146 replies
-
- 5
-

-
- Mikasa
- Merit International
- (and 1 more)
-
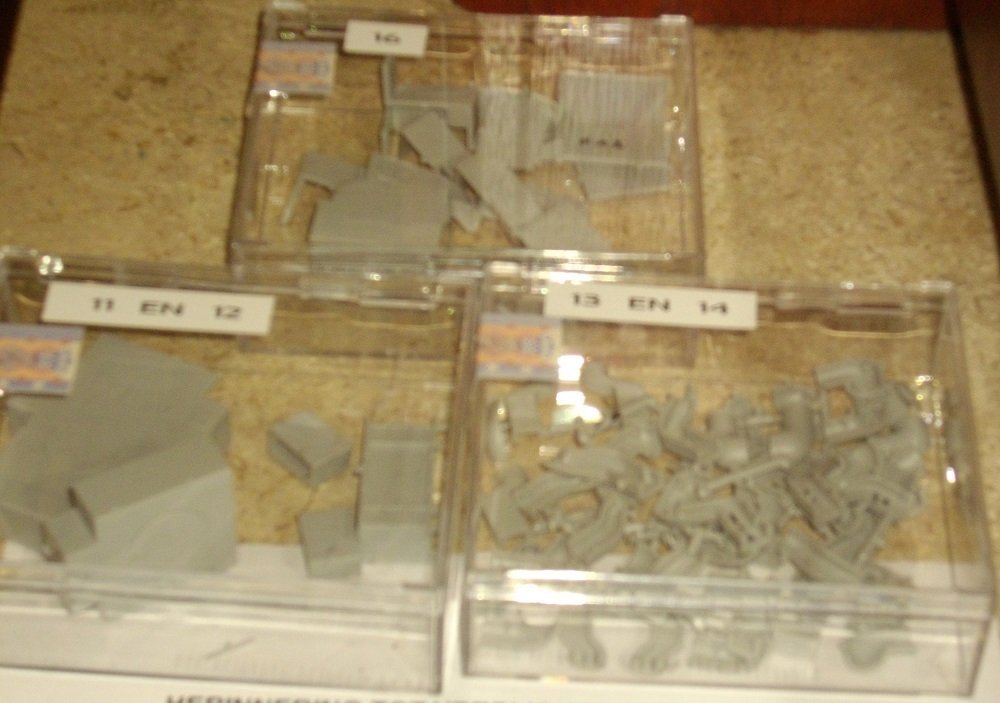
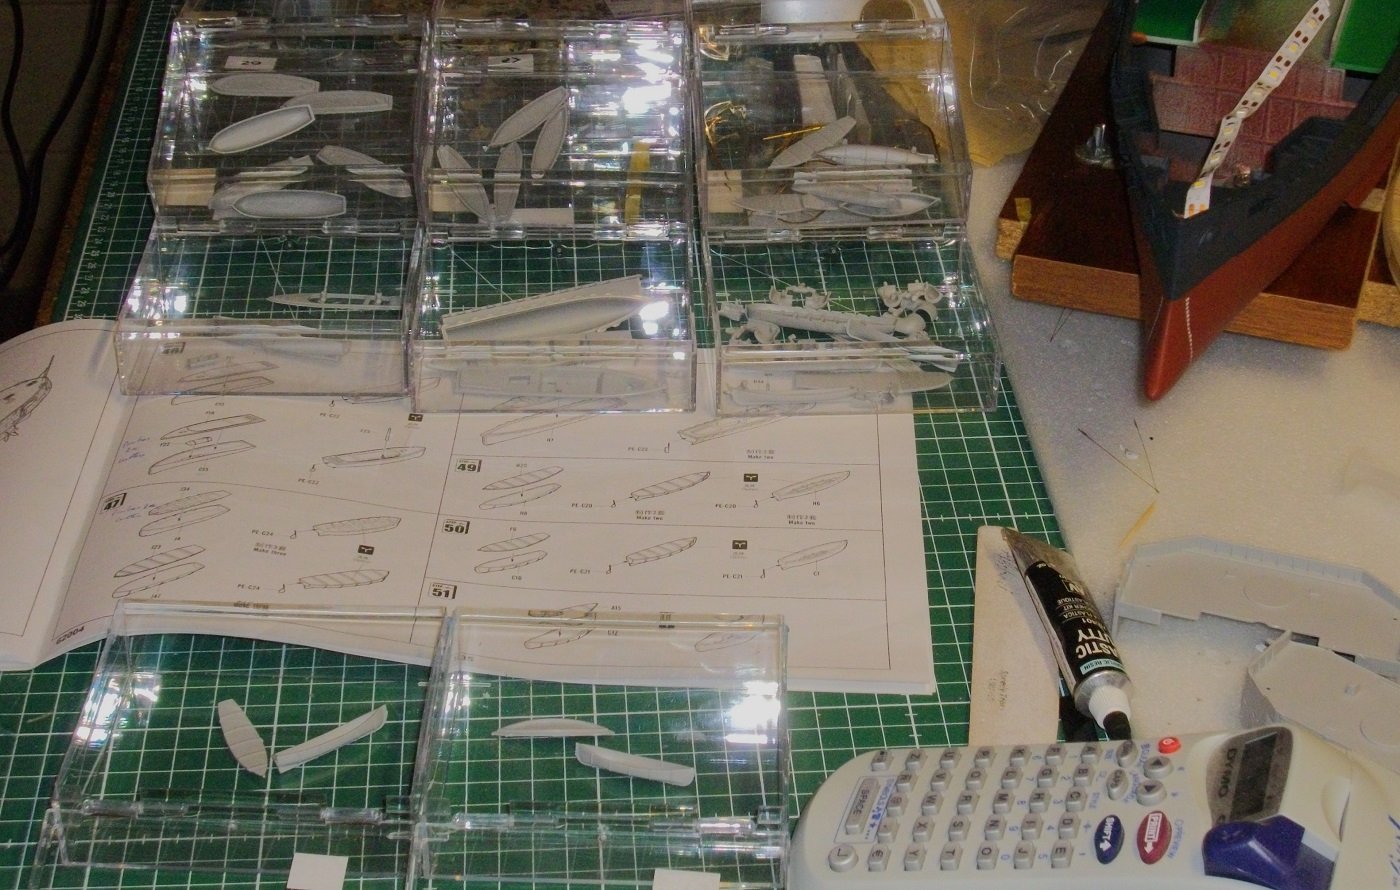
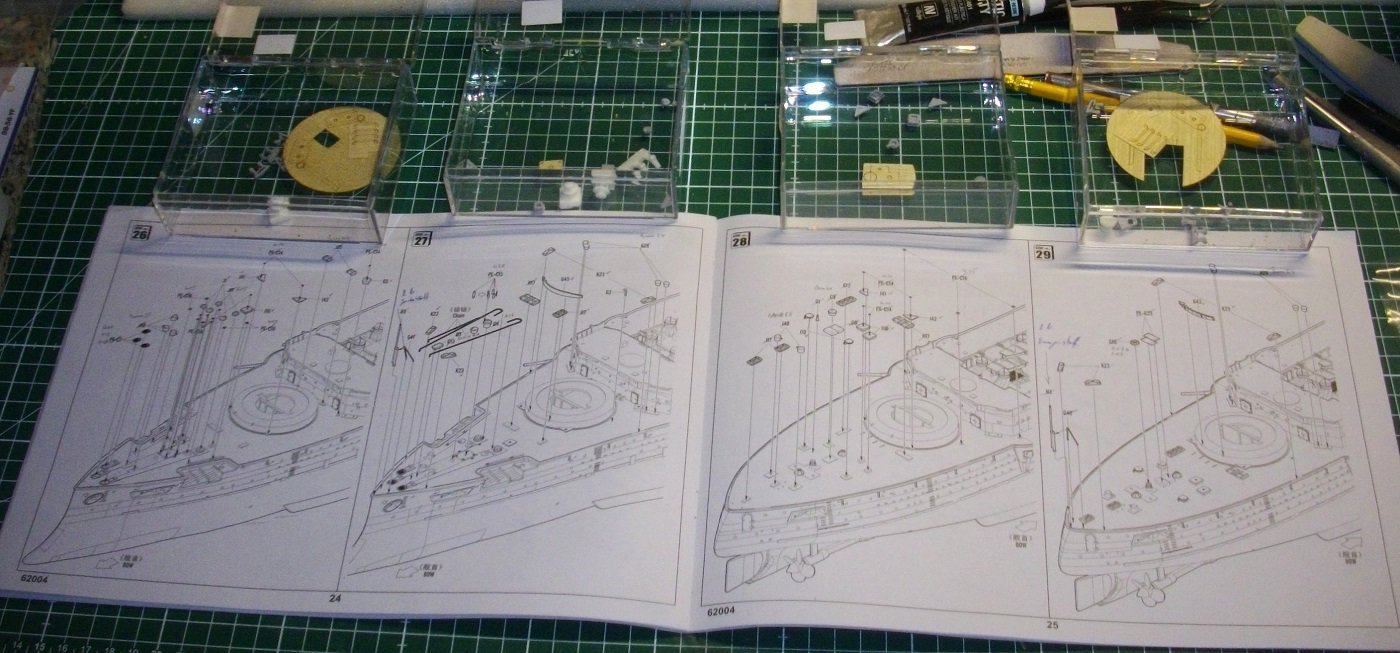
I collected the pieces for Merit-steps 11,12,13, 14 and 16 (middle deck furniture), and steps 26 to 29 (details on fore- and aft deck, 46 to 51 and 63 to 66 (mainly small boats), in labeled boxes. Till next update, enjoy modelling.
- 146 replies
-
- 5
-
-
- Mikasa
- Merit International
- (and 1 more)
-
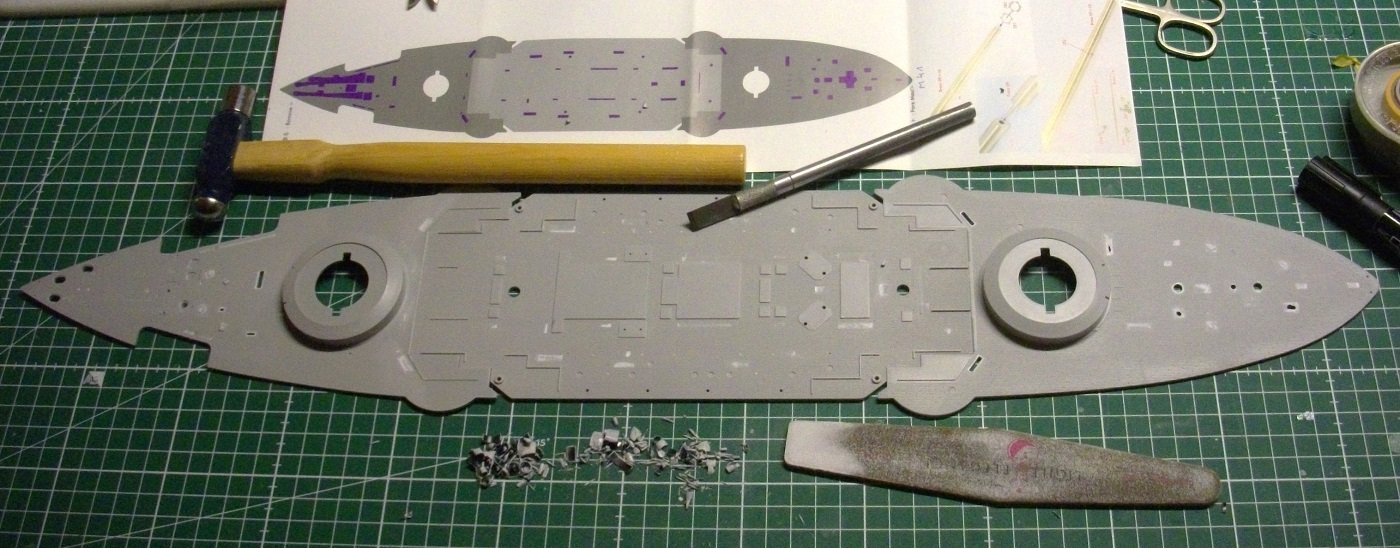
I used some epoxyfiller on the decks to level out any unevenness caused by removing deckdetails and to fill holes for plastic parts that will be replaced by photo-etch. When cured, I sanded the decks and used some Vallejo Plastic Putty on the remaining small indentations. After sanding, these decks are ready for the painting department. But in order to make the most of setting this up, I am first going to prepare some small parts. Till next update, enjoy modelling.
- 146 replies
-
- 7
-
-
- Mikasa
- Merit International
- (and 1 more)
-
I cut the main wooden deck parts loose with a fresh X-acto knife. Due to the toughness of the backing, multiple passes are necesary. Untill the next update, enjoy modelling.

- 146 replies
-
- 7
-
-
- Mikasa
- Merit International
- (and 1 more)
-
Hi Jeff, those are drytransfers. How they are applied, you can see in my Mikasa build log. The advantage is that there is no risk of silver bleed around the decal. I made a first attempt to attach the torpedonets before painting the hull, as the bracings attach to it. I gave up for now, so the problems you encountered are very recognisable to me and I admire the tricks you applied to solve these problems. I shall certainly revisit this part when my build is nearing completion. 😀 I allready have some ideas for the showcase and will reveal them shortly, as installing linghting requires provisions to be made in the base. Kind regards, Herby
-
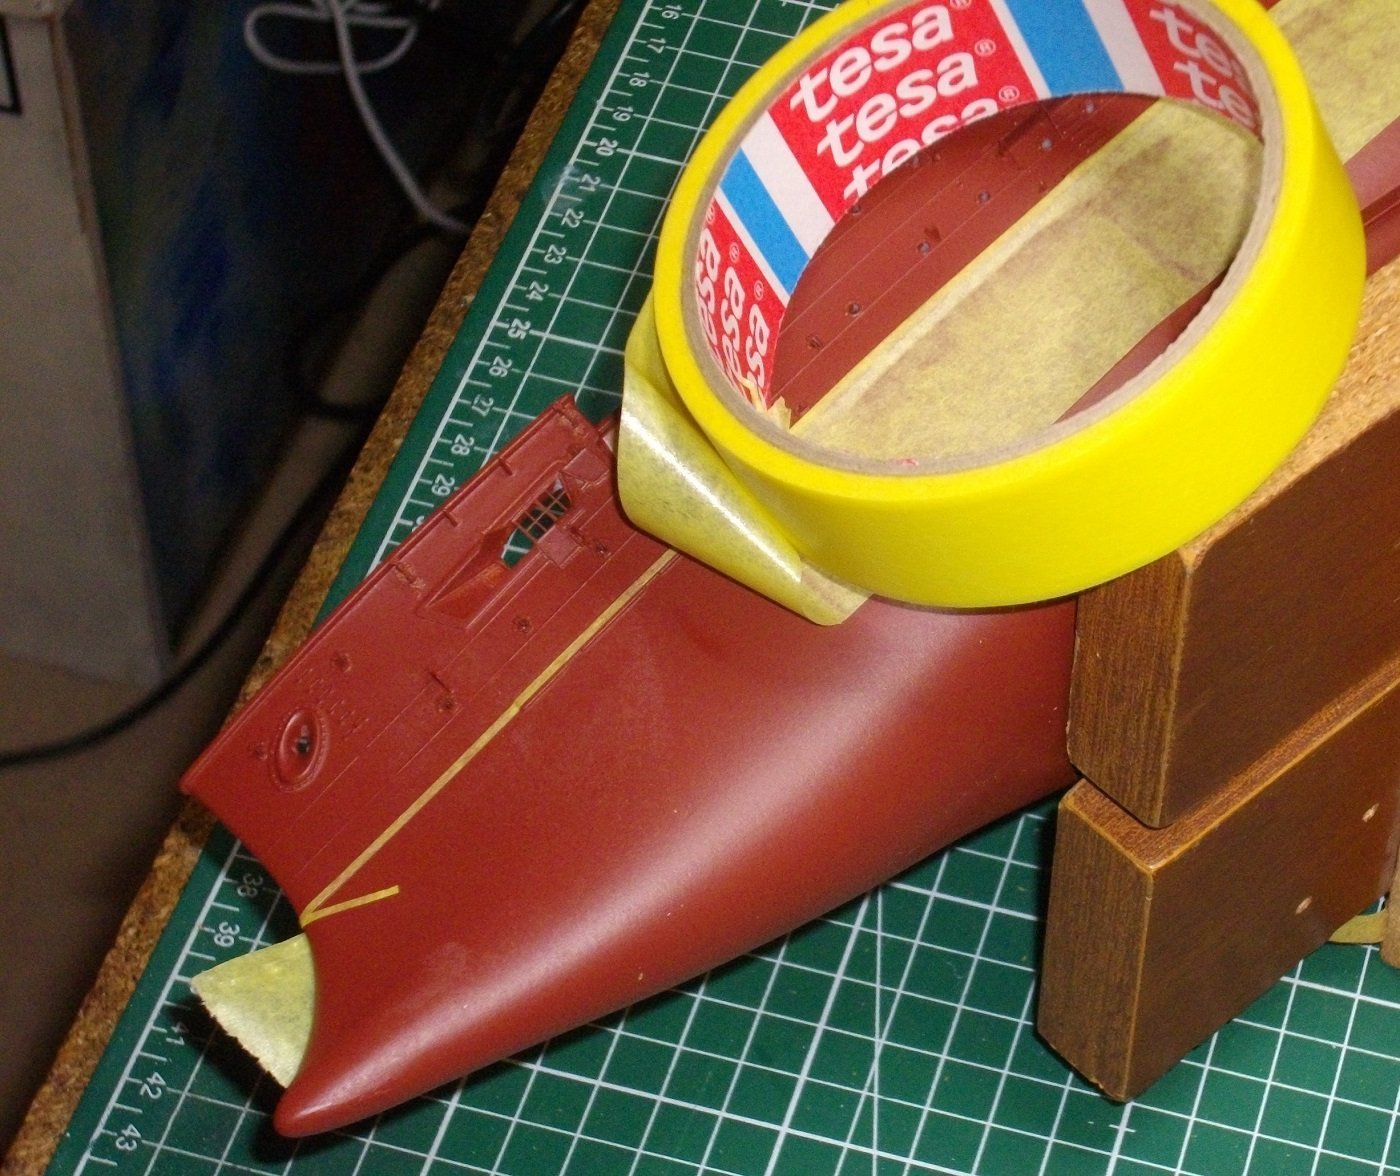
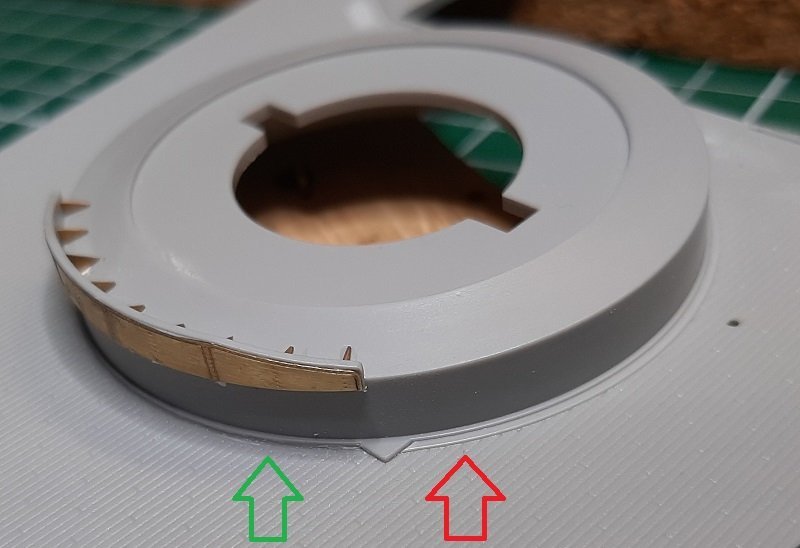
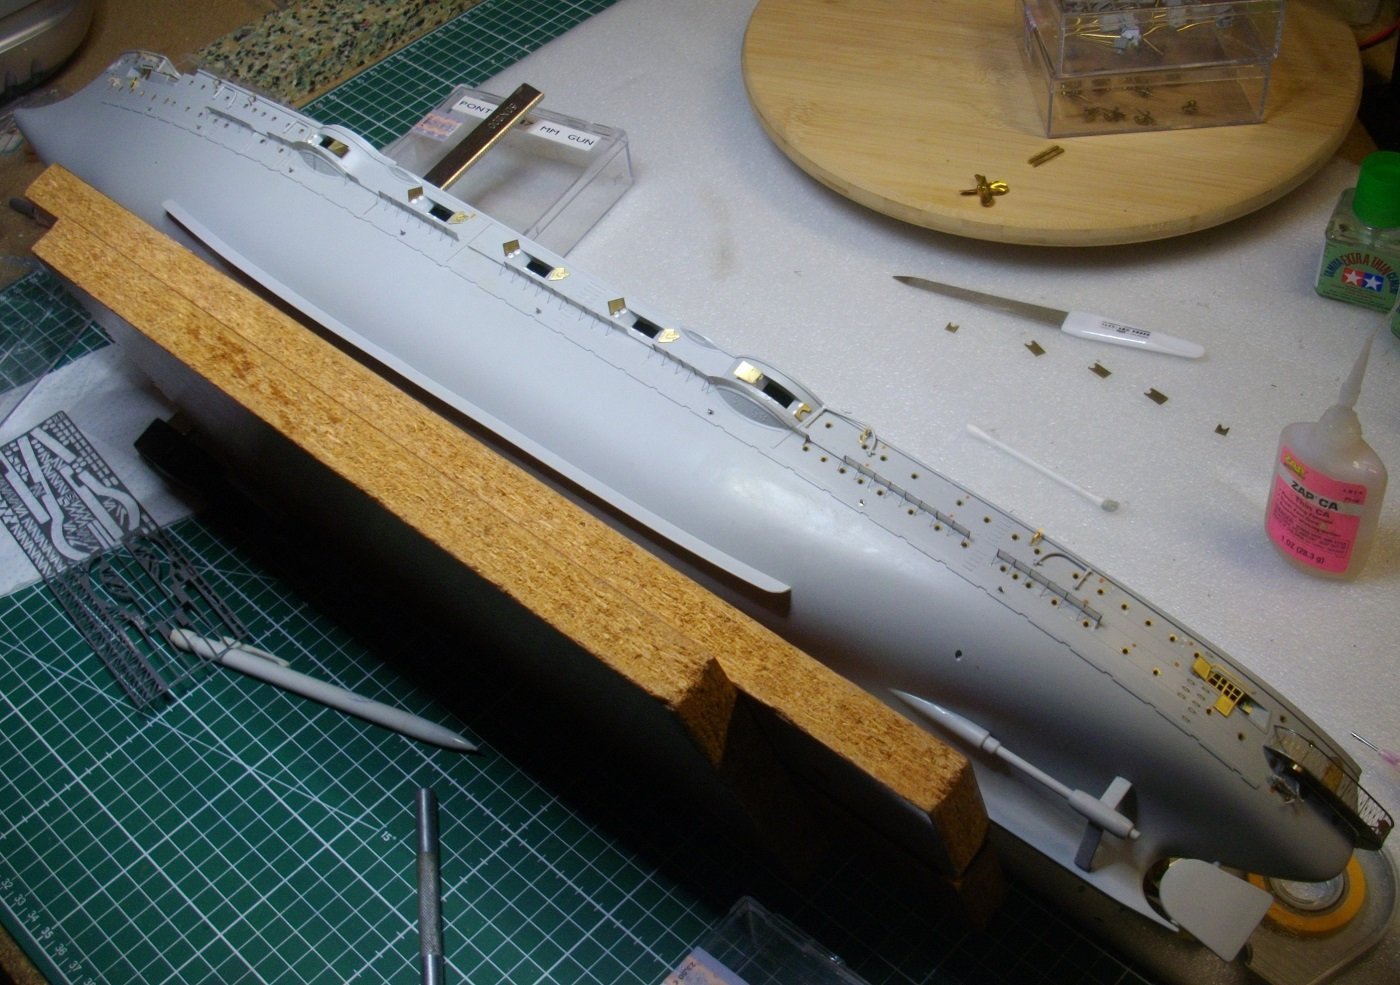
Breakwaters on fore and aft barbettes: I filled the slots with putty as I would like the breakwaters to sit a little bit higher than Merit provides for. Then I made a jig for positioning the plastic breakwater at an even distance from the deck. I used a "Kolderstok" plankbender to bend a strip of wood of the apropriate with. I held the strip in place with a lace. I removed the plastic struts, glued the breakwaters in place, and placed the Pontos struts with SloZap. Finaly, I scraped off the outer ring around the barbettes to allow the Pontos wooden deck to lay flush on the plastic deck. Till next time, wishing everyone lots of modeling fun.

- 146 replies
-
- 8
-
-
- Mikasa
- Merit International
- (and 1 more)
-
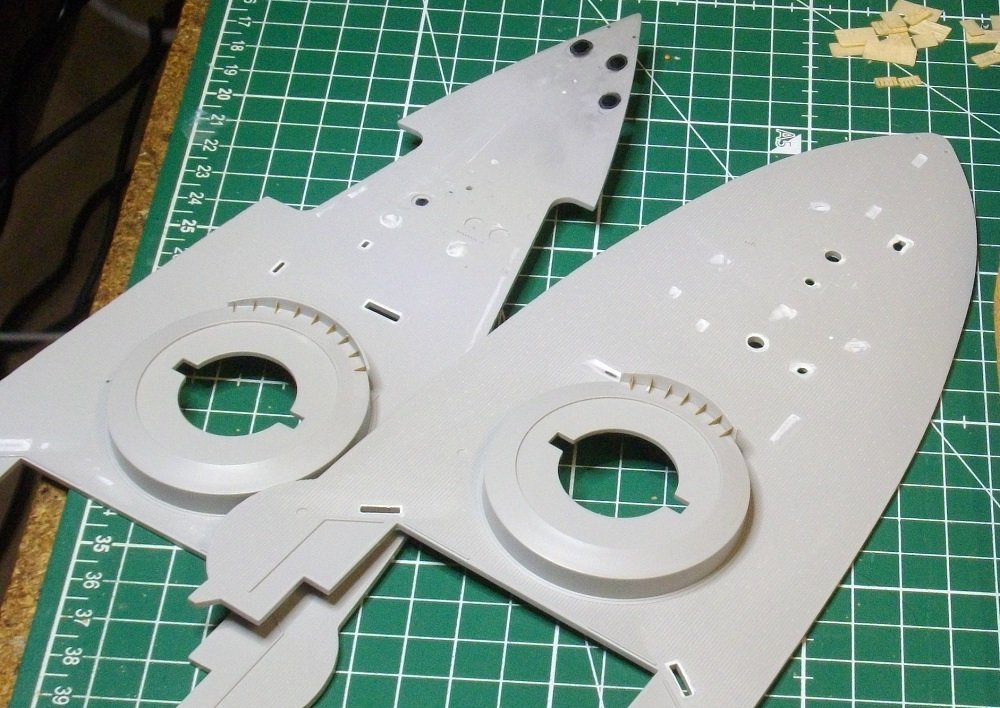
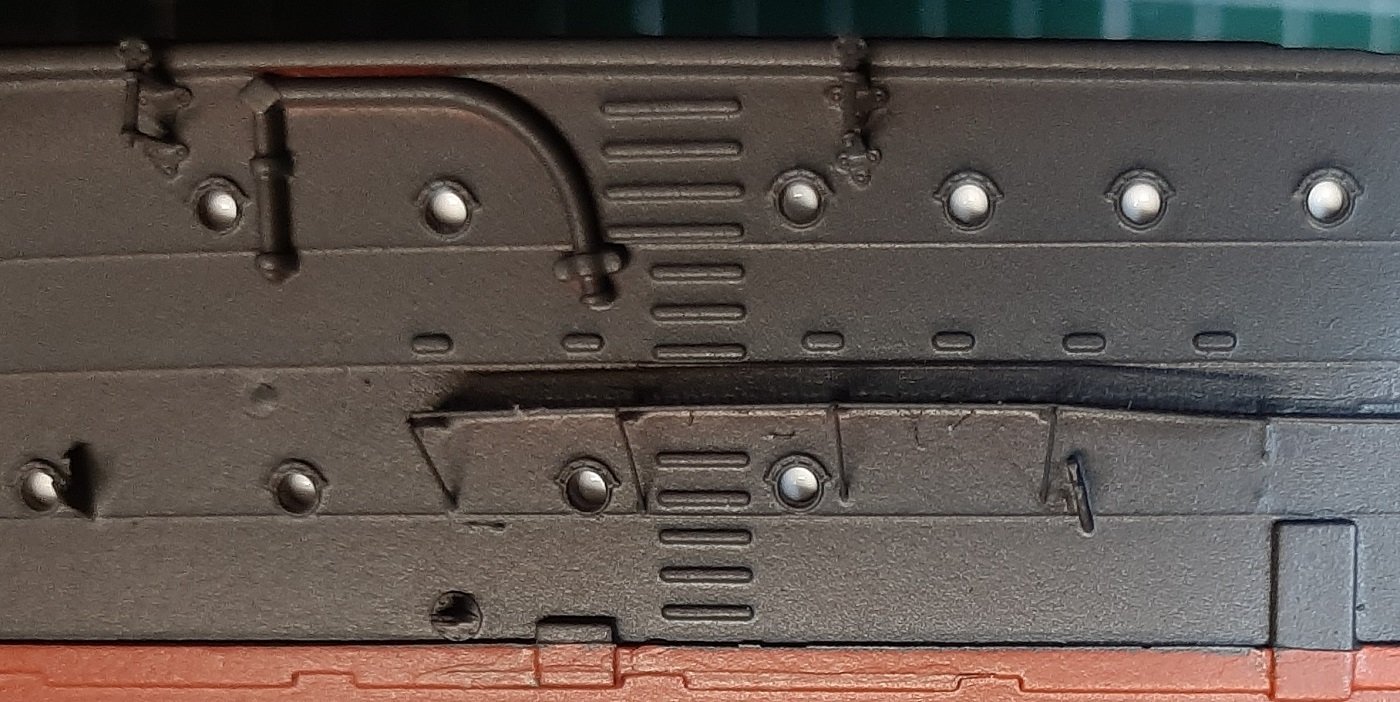
I copied the details to be removed from the main deck from the Pontos instructions and removed them with a small chisel in an X-Acto handle and a small jewelers hammer. This went very well and asks for very little aftertreatment with a medium sandingstick. Till next time, enjoy modeling,

- 146 replies
-
- 3
-
-
- Mikasa
- Merit International
- (and 1 more)
-
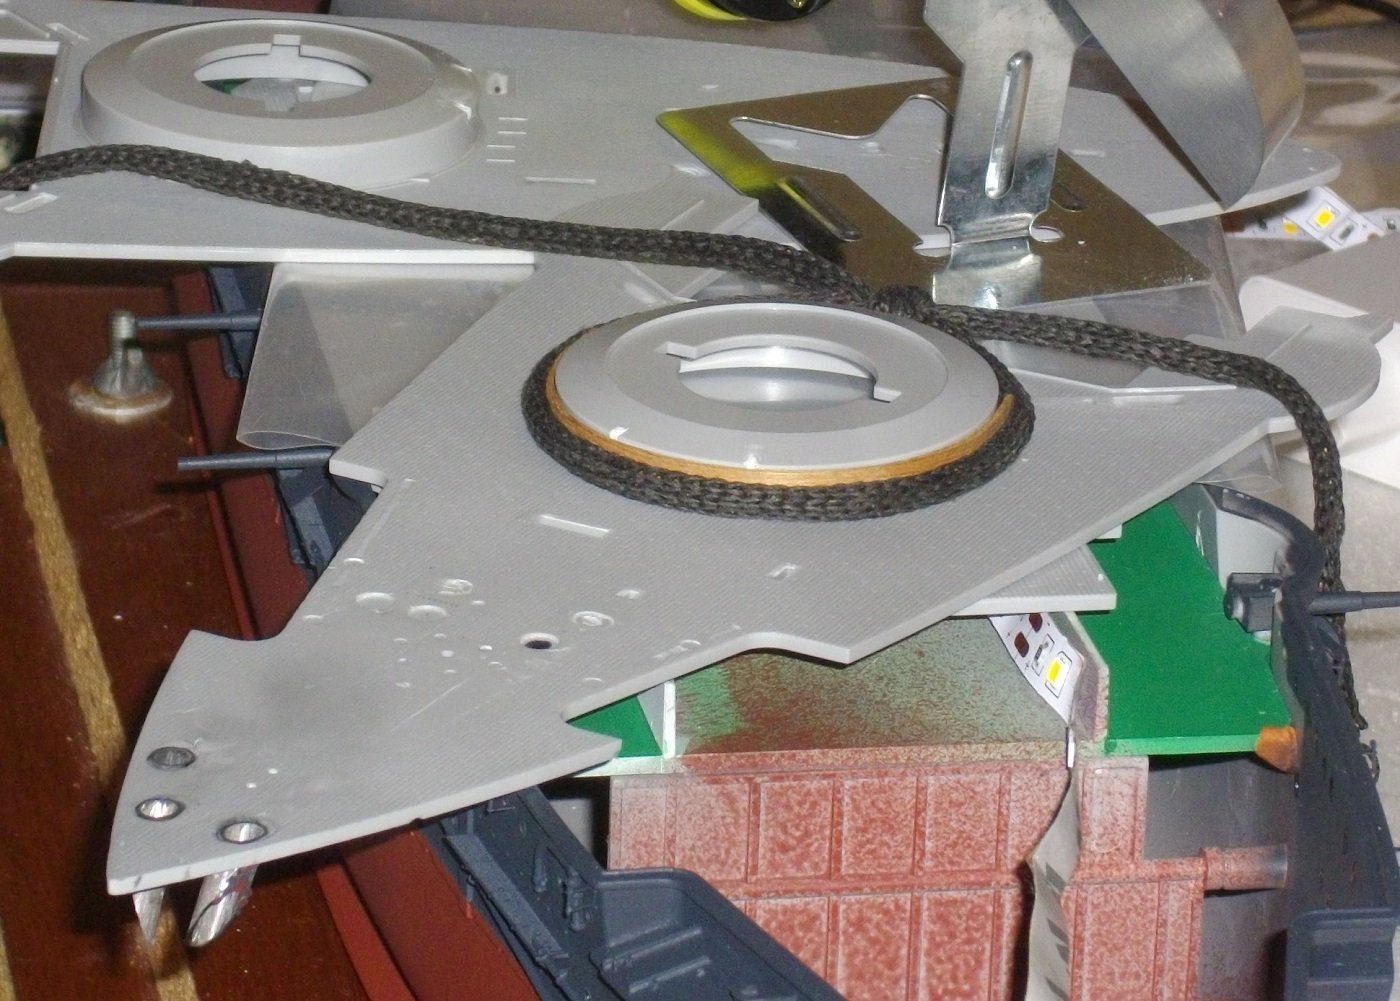
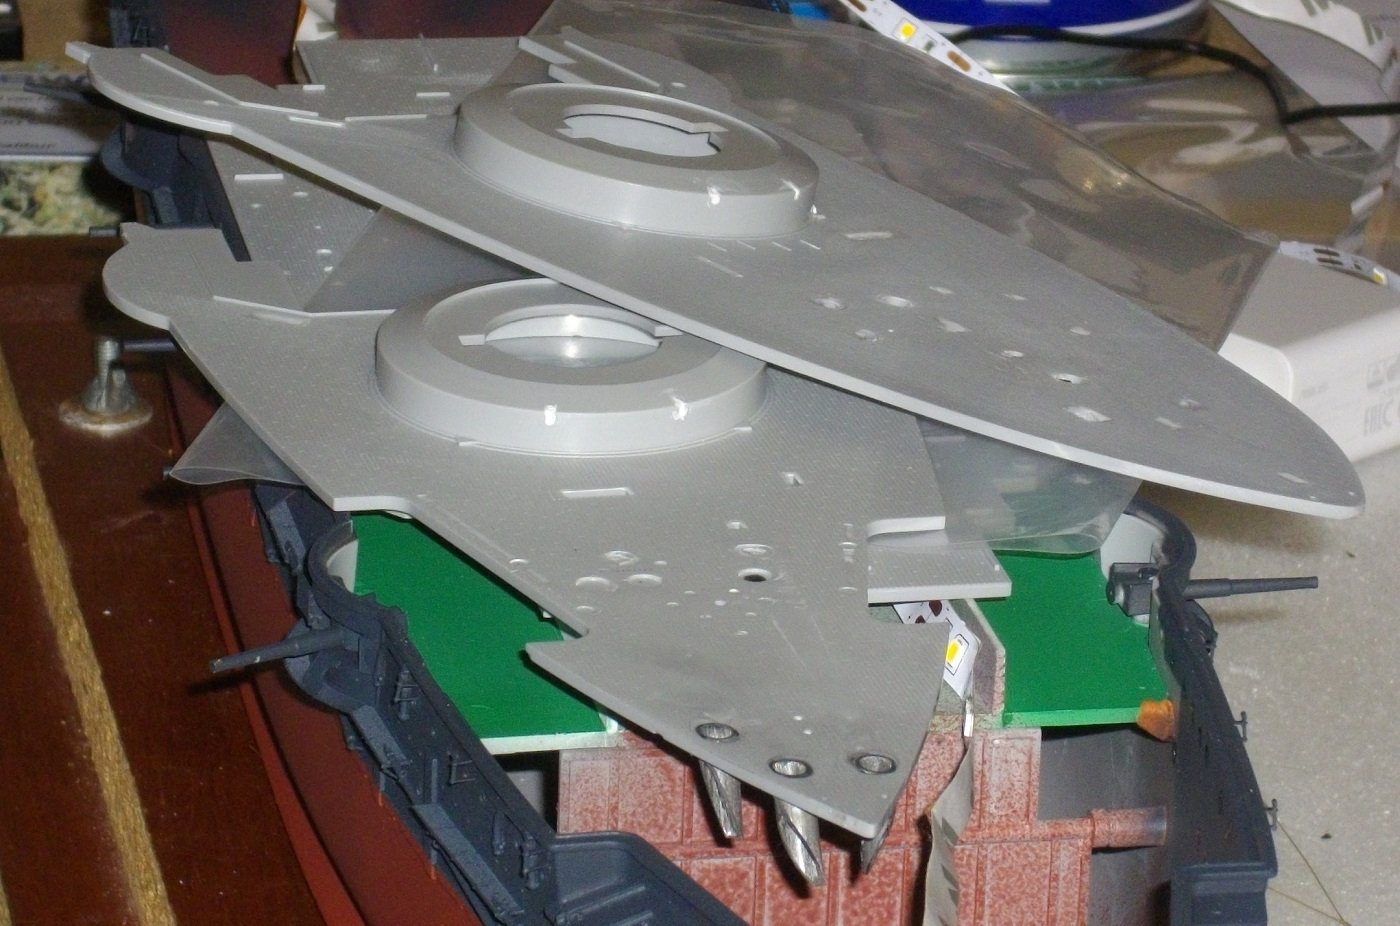
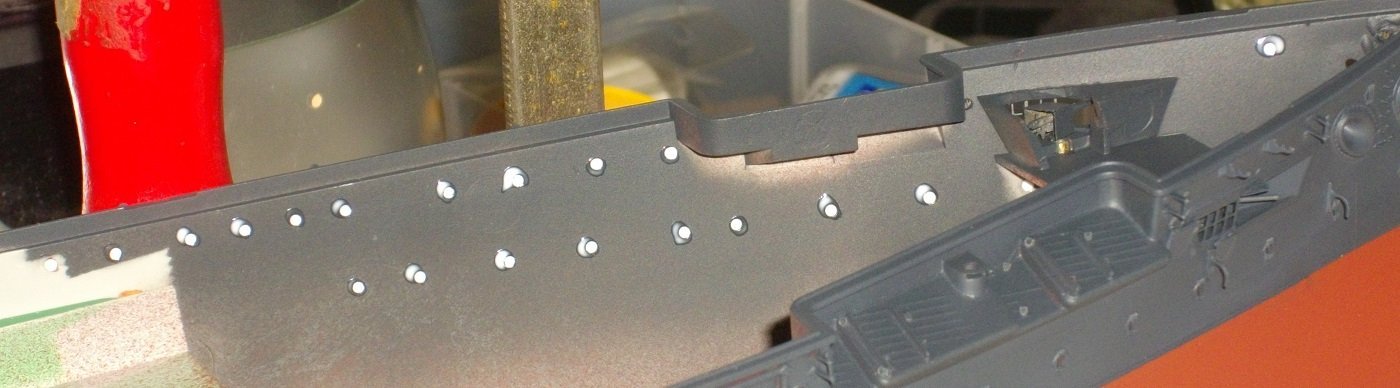
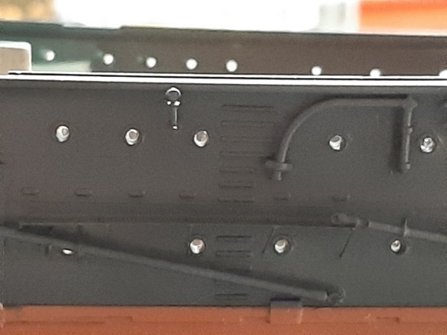
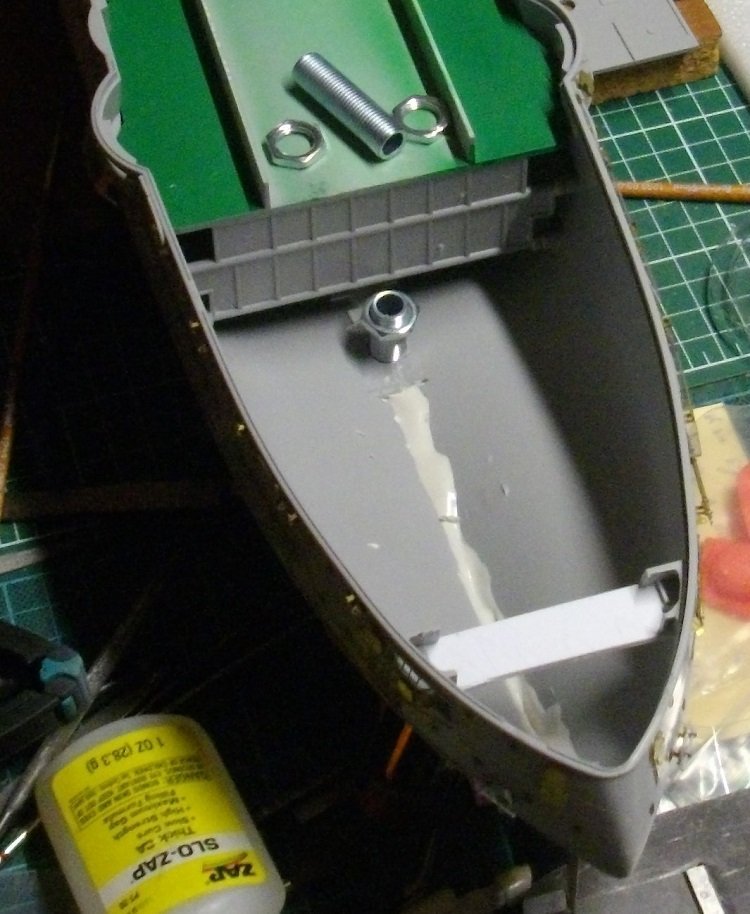
I filled the portholes from the inside with Mikro Kristal Klear. The full hull thickness allows for the drop to partialy fill up the hole, without protruding or touching the vertical bars present at some potholes. When drying, it becomes completely transparent. Then I prepared 3 carbonfibre tubes to connect the holes for the anchorchaines at the bow with the holes in the deck. This is to avoid lightblead as I intend to light up the model with some LED's. I enlarged the holes in the deck slightly to allow for the 5 mm tubes to pass through. Then I cut 3 pieces of tube, 14 mm long. Then I beveled?? the tubes at the underside to fit to the hull, and glued them in the deckopenings with some SloZap. I reinforced the joints at the underside of the deck. And finaly, I sanded the upper parts of these tubes flush with the deck. That's all for now folks, See you next time.

- 146 replies
-
- 4
-
-
- Mikasa
- Merit International
- (and 1 more)
-
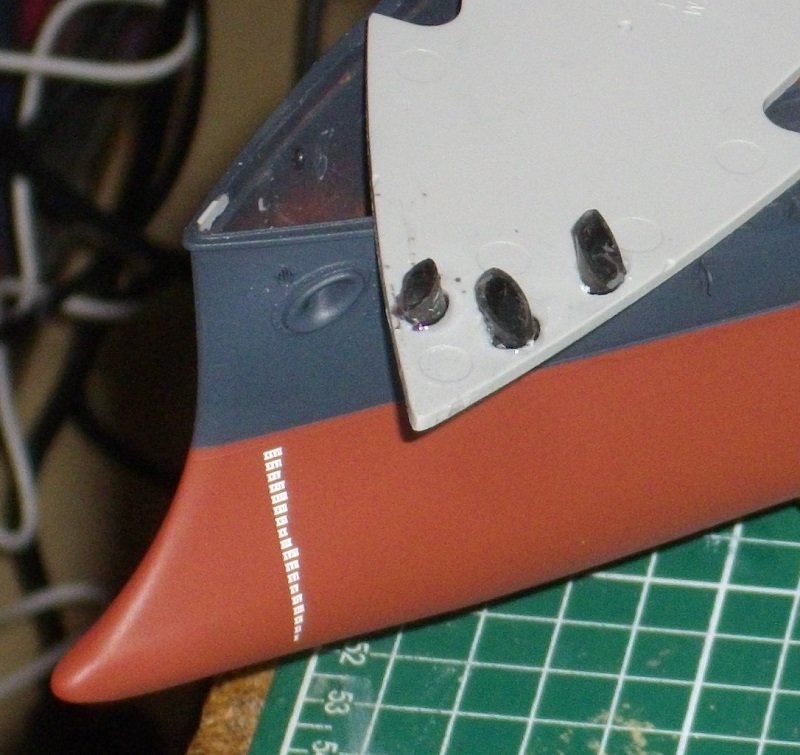
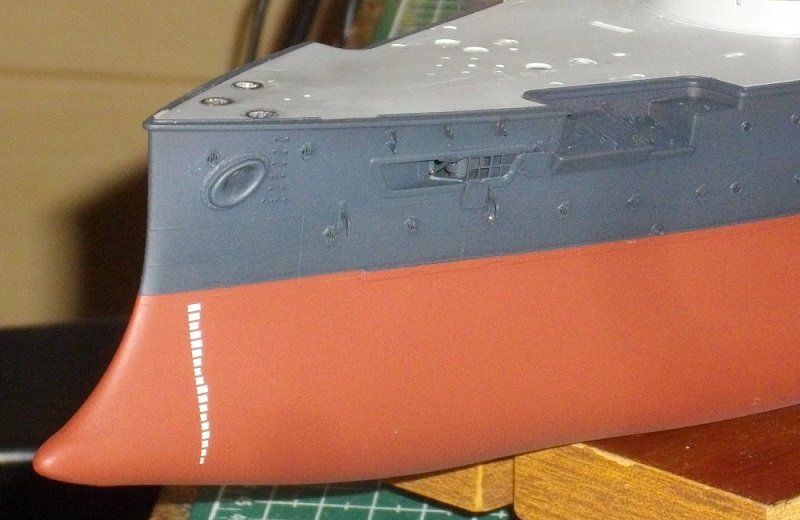
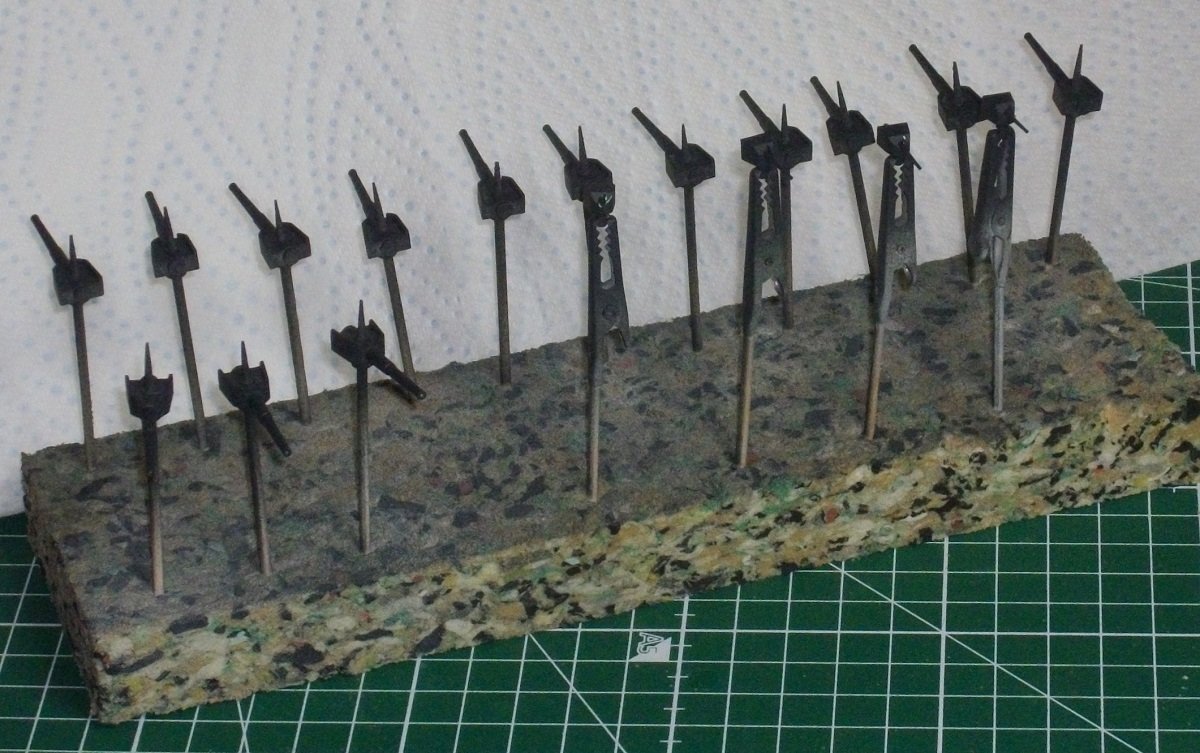
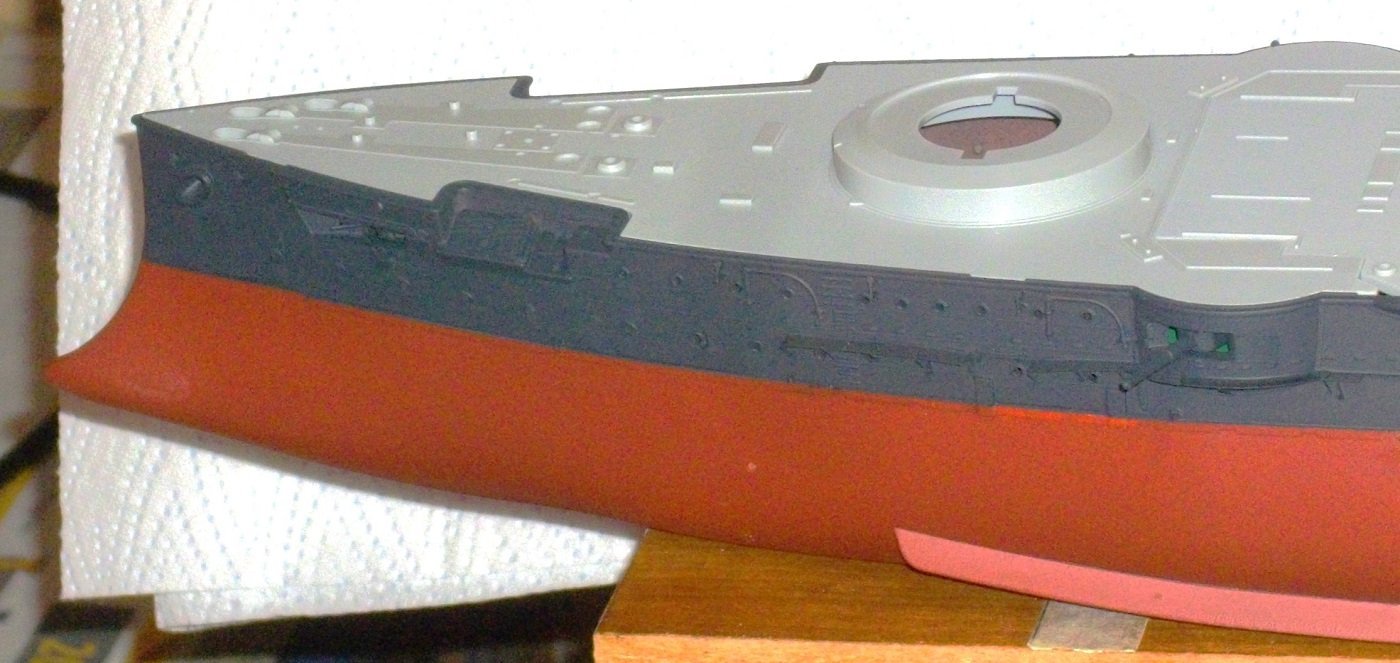
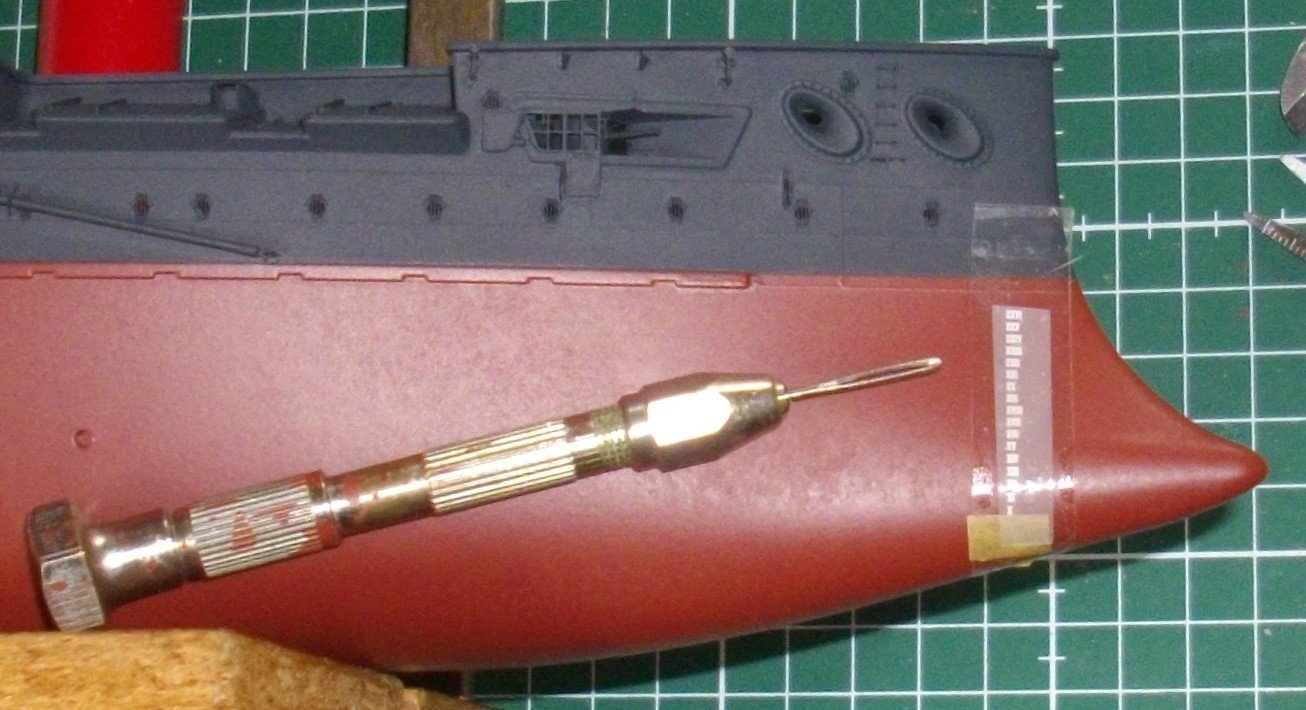
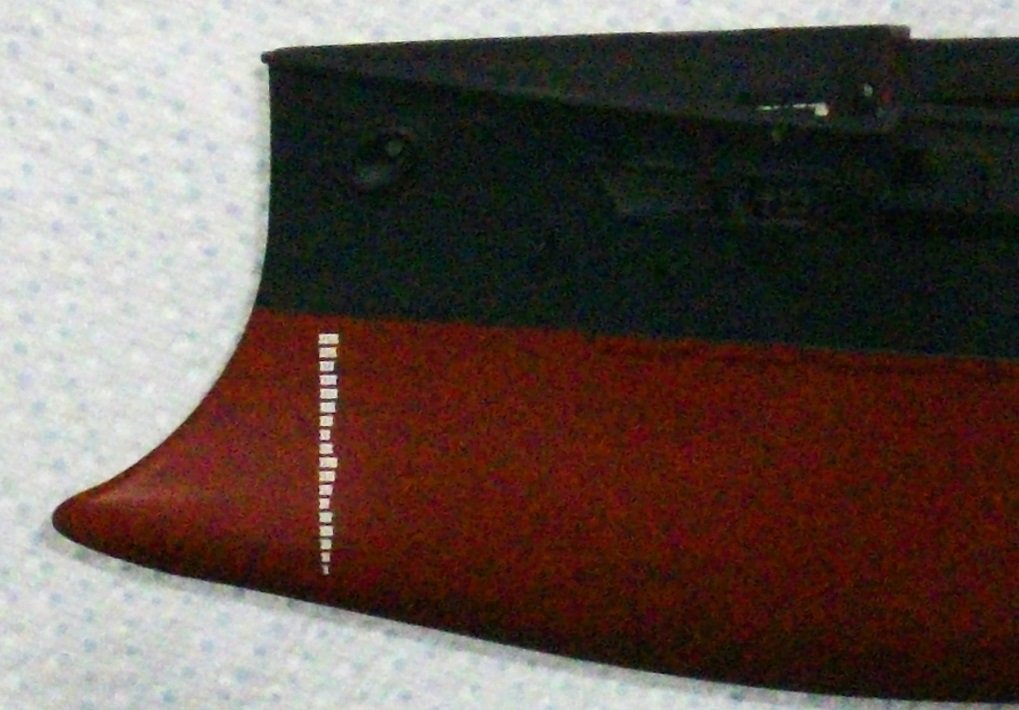
After priming and painting the 6" and 3" guns in the same color as the upper part of the hull, I installed them in the apropriate places. Then I applied the Pontos dry-transfers, rubbing them on with the blunt eye of a large needle. The bottom of the lowest roman digit is placed at 1,53 mm (times 200 = 306 cm or 10 feet) from the bottom of the keel when layed flat on the table. I put a little piece of depthmarks at the back too, just above the struts for the propeller axle. I touched the torpedotubes wits some Vallejo Model Wash 76.518 Black, and sealed all with a coat of Vallejo Matt Varnish for protection of the dry-transfers and an even shine on the entire hull. Till next update.


- 146 replies
-
- 5
-
-
- Mikasa
- Merit International
- (and 1 more)
-
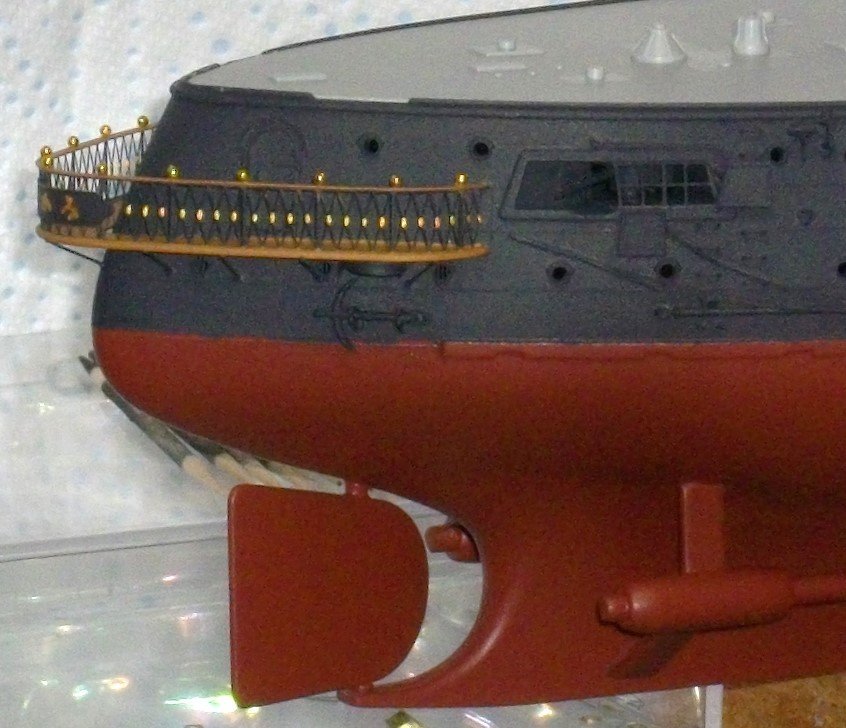
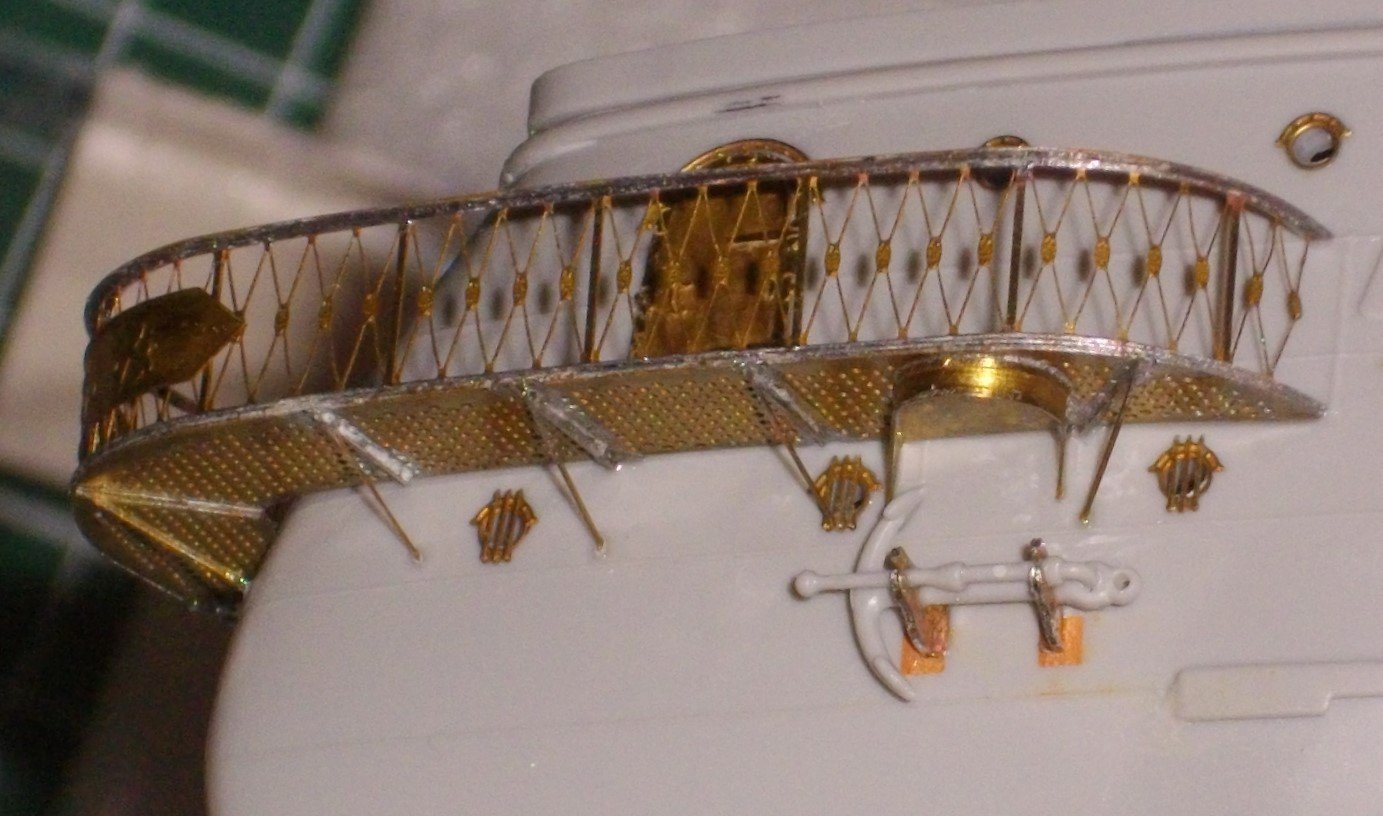
The Admirals balcony: I first painted the gratings and handrail with Vallejo 71.077 Wood, which I thought corresponded best to a recent picture of the ship. As it turned ou to be a little light, I covered these parts with Vallejo 71.034 Sand Brown. Now I found it too dark. So I applied a third coat of Wood with a few drops of Sand Brown and a few drops of water to improve the flow of the paint. Now I like it 🥰 Then I put a spot of gold paint on the crossings of the bars, inside and out, and, inspired by JEFF59's build log, finished it of with tiny golden balls on the handrail. Kind regards,
- 146 replies
-
- 7
-
-
- Mikasa
- Merit International
- (and 1 more)
-
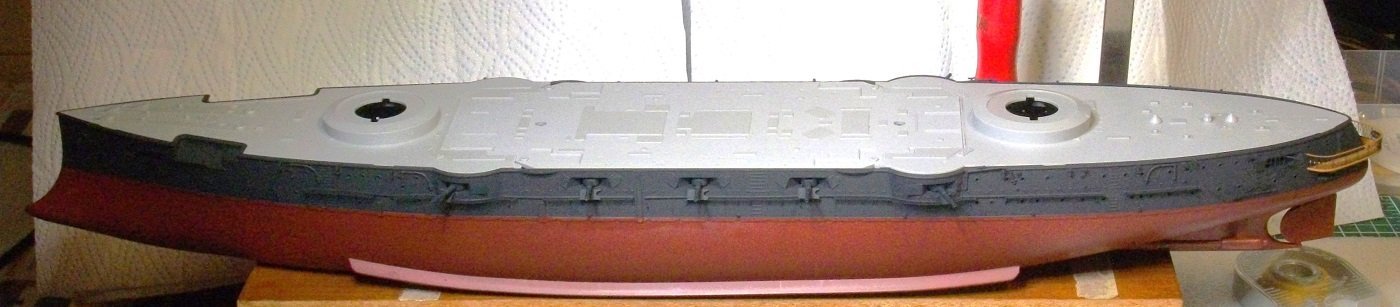
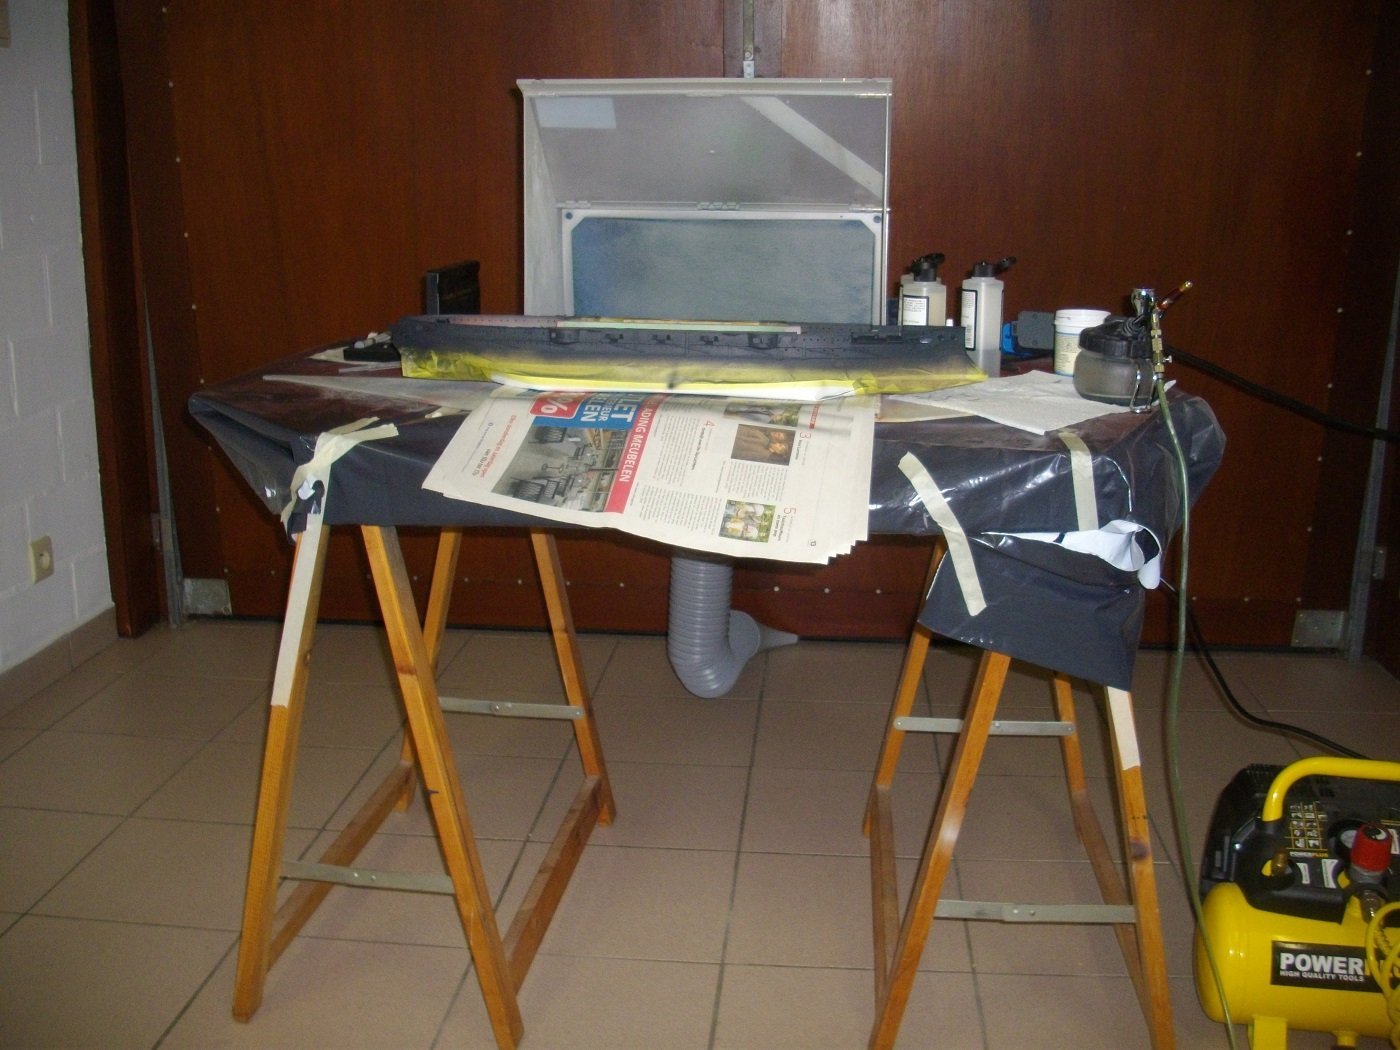
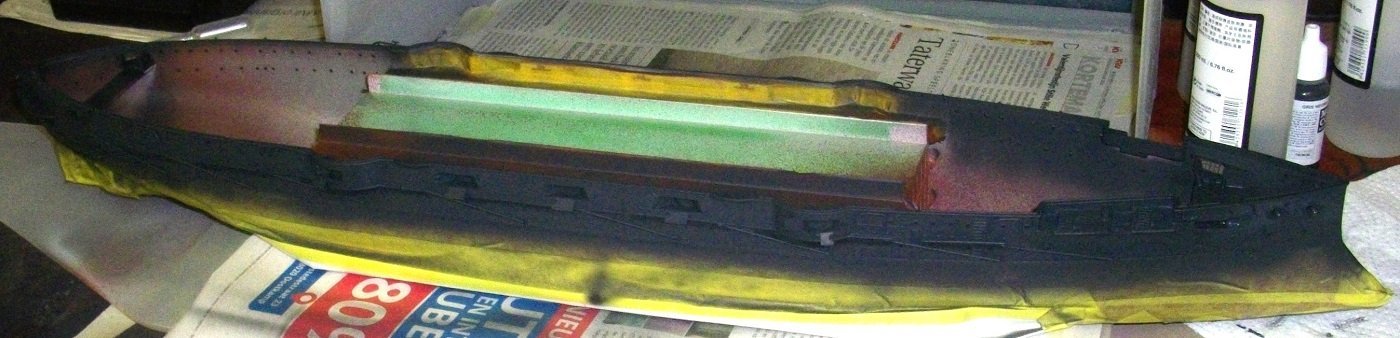
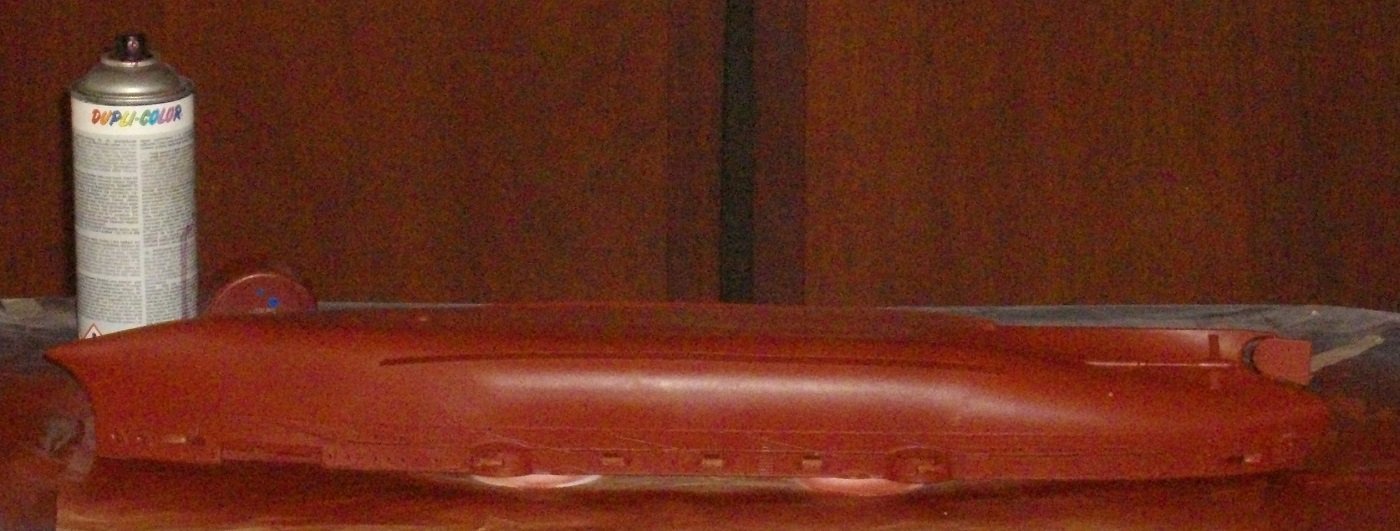
I masked off the waterline with 1 mm striping, then a wider tape and covered the whole bottom with paper and masking tape, to avoid overspray. On to the spraybooth in the garage. My prefered collor for this is Anthracite, but only Revell has it colled this way, but my experience with it on Bismarck was not that positive. This time I went for Vallejo Model Color 70.862 "Black Grey". Removing the maskingtape did some minor damage, so I did some touch-ups. I am quite pleased with the over-all result. Kind regards,


- 146 replies
-
- 6
-
-
- Mikasa
- Merit International
- (and 1 more)
-
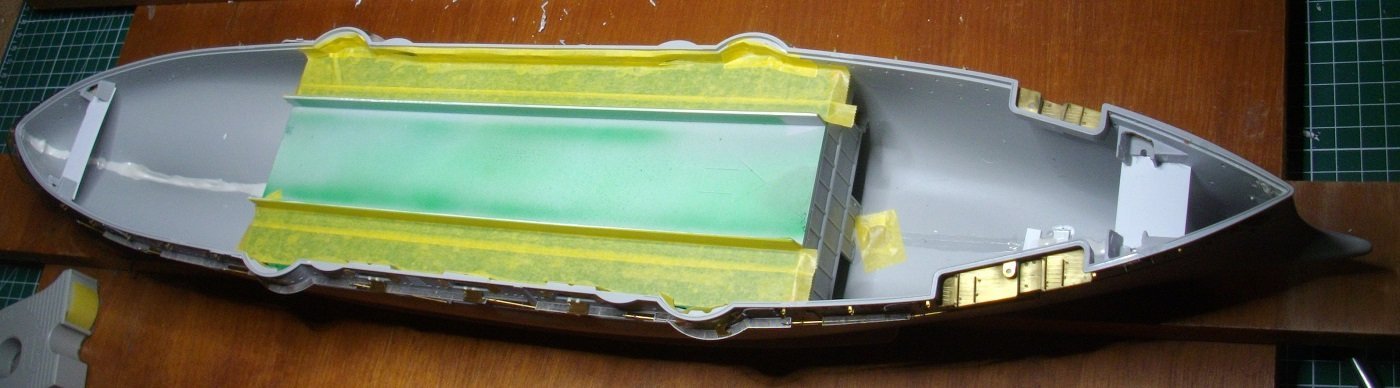
I did some masking of already painted surfaces, and painted the hole outside with a redbrown primer. Keep it safe 😁
- 146 replies
-
- 5
-
-
- Mikasa
- Merit International
- (and 1 more)
-
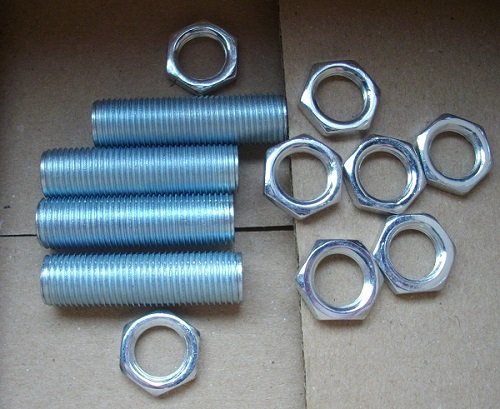
After positioning the parts, I decided not to install the deployed torpedonet at port side as it will be too fragile for future handeling. As I shall try to light up the model, I enlarged the holes in the bottom of the hull to be able to pass 2 hollow tubes woth M10 thread ( parts for lamp fittings). This way the wires can be led from the base to the inside of the model without being seen. Wishing everyone lotss of modeling fun.
- 146 replies
-
- 5
-
-
- Mikasa
- Merit International
- (and 1 more)
-
Thank you for reacting Goodshipvenus, Not only the photo etch will be painted, but also the plastic. In previous posts I must have mentioned priming the photo etch with VMS Metal Prep 4K, otherwise I must have forgotten to do so. 😀 Paintjob comming up soon, I promise.
- 146 replies
-
- 2
-
-
- Mikasa
- Merit International
- (and 1 more)
-
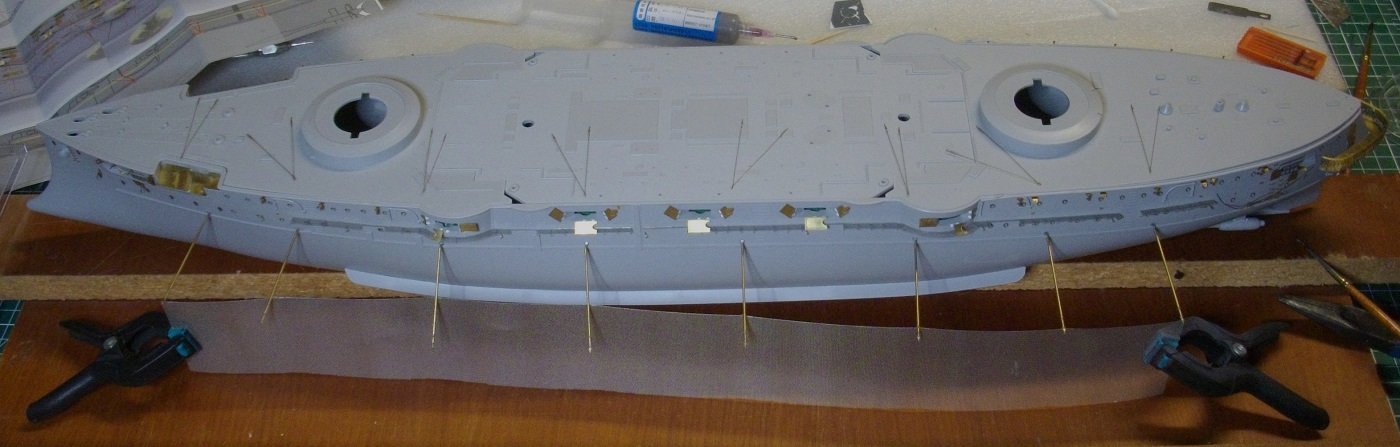
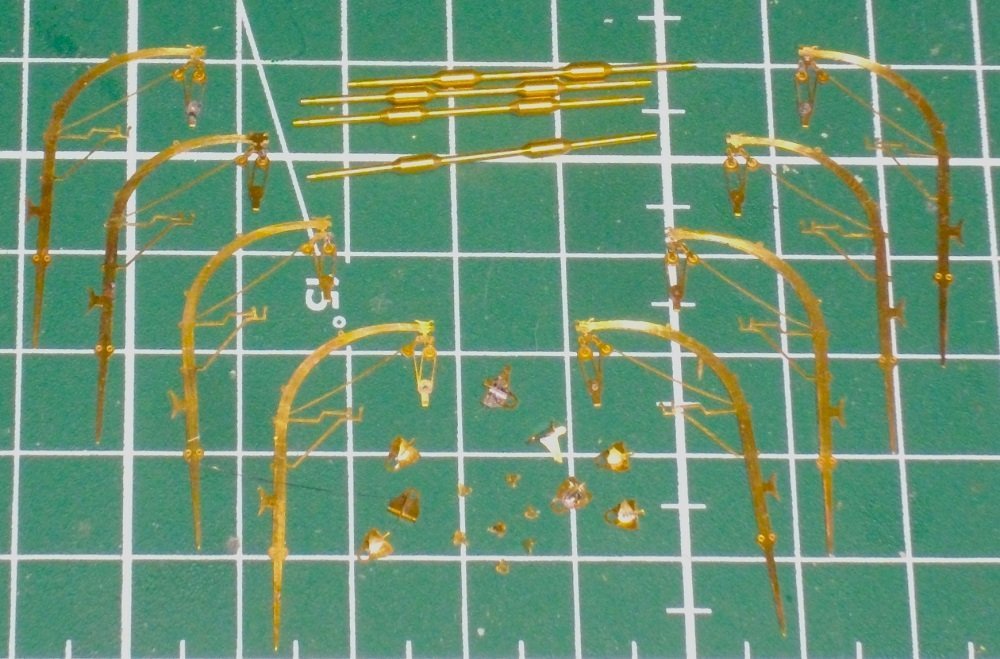
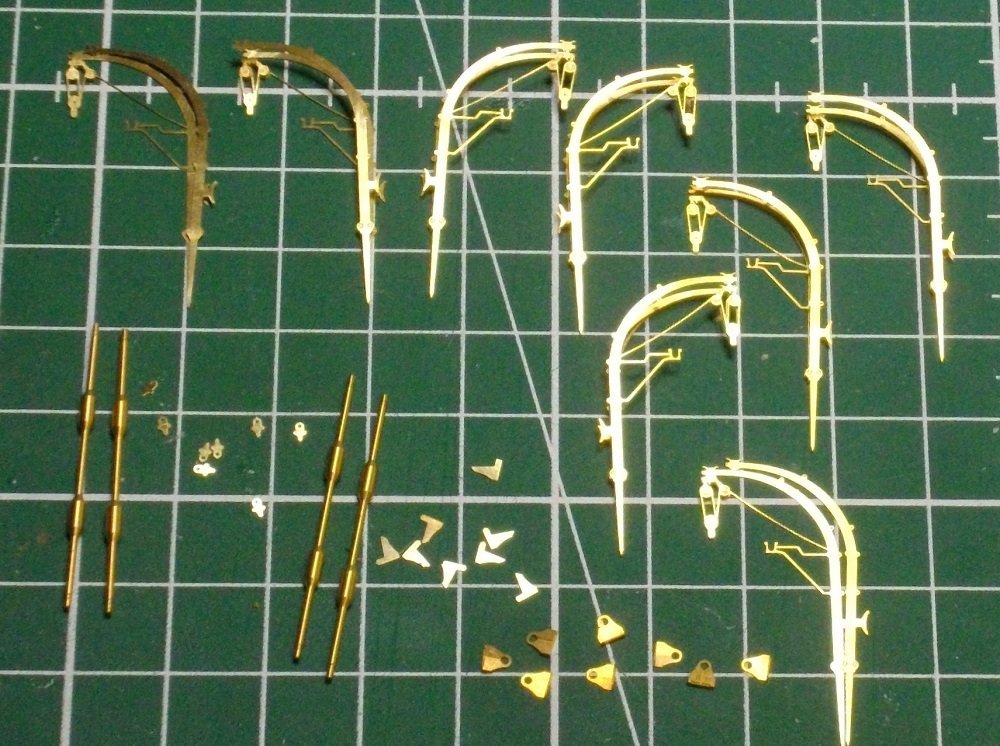
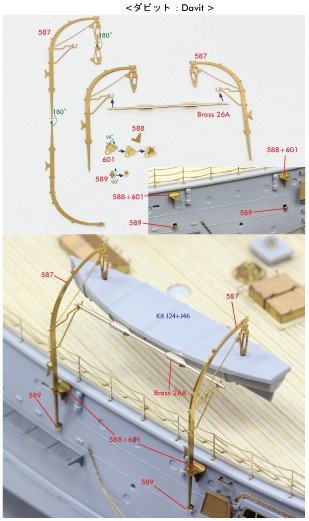
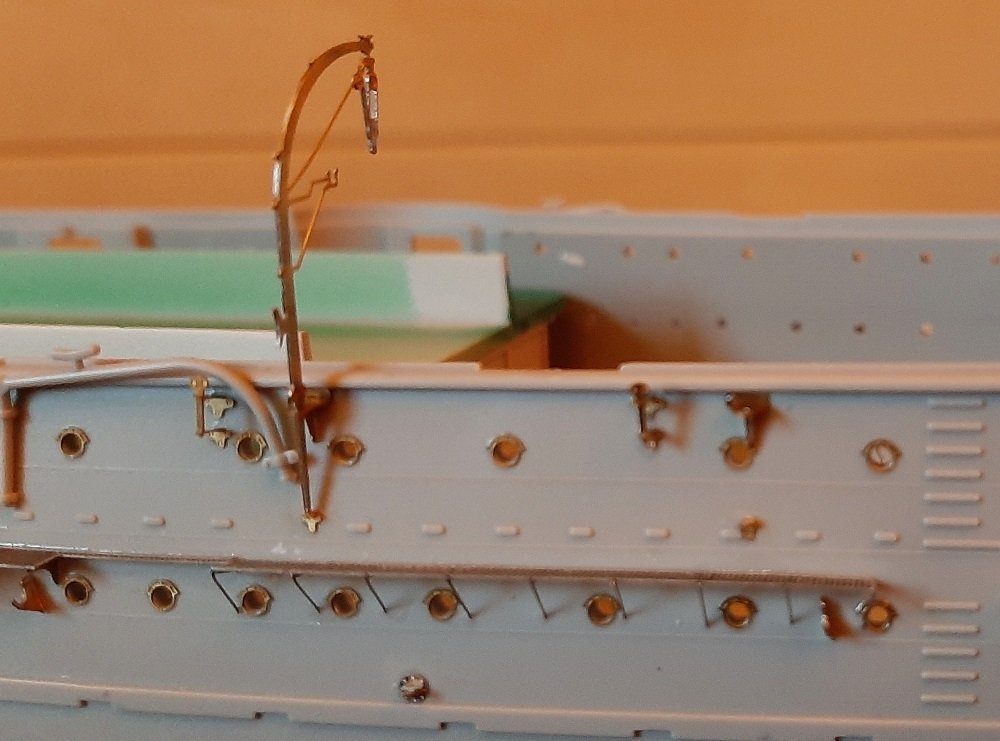
Hello fellow Mikasalovers, Jeff59 answered my question in his build, thanks for that Jeff 👍 Next on the tasklist were the rear deck davits. They sit in brachets attached to the side of the hull. I detached the pieces from the frets and bent and soldered them. After redrilling the topholes with a 0,7 mm drill, I glued the top brachets to the hull. Then I inserted the davits so I could determine the position of the tiny lower supports. Davits temselves remain detachable for futher manipulation of hull an rear deck. Wishing everyone lots of modeling fun.
- 146 replies
-
- 7
-
-
- Mikasa
- Merit International
- (and 1 more)
-
I am not planning on doing extensive research on the differences between the 1902 and the 1905 version, but I am going for the black and white (light grey) paint sceme, in order not to have a house full of grey hulls. 😀
-
Excelent, I made a displaycase for my 1/200 Bismarck, with an internal hight of 350 mm, and I prefered both cases to be the same hight. I visited Japan in 2019. Some months after returning, I was browsing the net for a 1/200 model of HMS Dreadnought. Thats how I descovered this IJN Mikasa. We shall have to visit Japan again. Thank you very much for the measurement. Thanks, I had an excelent example (Captain Slog) Thanks, and to think that a couple of months ago I could only solder using huge blobs of tin. What an adaptable soldering station an soldering paste can't do for you. 😁
-
Hello Jeff Remarkable model you are making. You may have noticed that I am making Mikasa too. Can you please measure the hight of the finished model, from the bottom of the keel to the highest point of the main mast? Preferably in metric but imperial wil do as well. As the hull is nearing completion, I have to decide wether I have place to put the model on pedestals or wether I have to put it directly on the bottom plate of the showcase. Thanks, Herby
-
Hello Fellow Mikasalovers, Can anyone who has (almost) finished the 1/200 Mikasa with Pontos add-on set please measure the hight of the finished model, from the bottom of the keel to the highest point of the main mast? Preferably in metric. As the hull is nearing completion, I have to decide wether I have place to put the model on pedestals or wether I have to put it directly on the bottom plate of the showcase. Thanks, Herby
- 146 replies
-
- 2
-
-
- Mikasa
- Merit International
- (and 1 more)
-
Now I placed the port walkways with SloZap. Wishing everyone lots of modeling fun.
- 146 replies
-
- 8
-
-
- Mikasa
- Merit International
- (and 1 more)
-
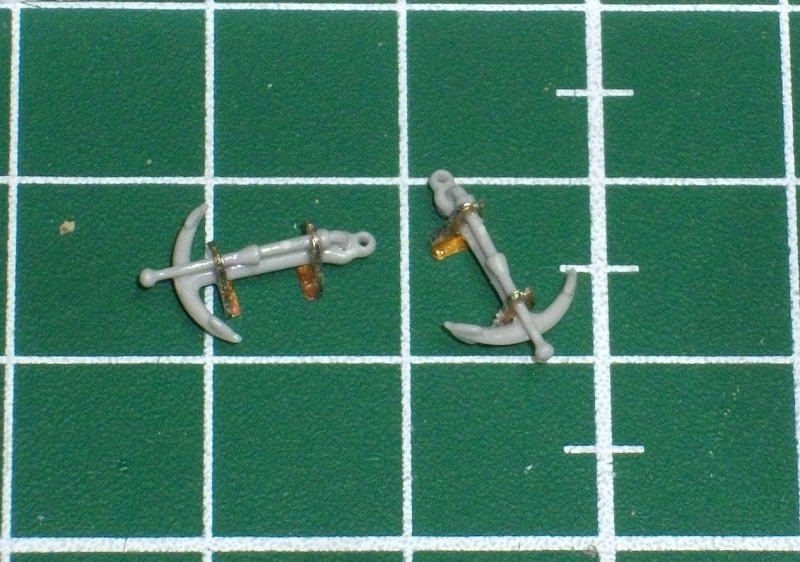
I assembled the stern achors with the Merit and the pontos parts, and glued them to the hull, under the stern walkway, with SloZap. Wishing everyone lots of modeling fun.
- 146 replies
-
- 9
-
-
- Mikasa
- Merit International
- (and 1 more)
-
Thanks for the nice worde, Javlin, and thanks to all the folowers for clicking the like-button . Before mounting the torpedonet booms, I assembled and placed the 15' booms for protecting the propellers. I used a "holderdowner" as Ron Calverley has demonstrated so often in his Youtube series "The Model Ship" to hold the piece in place while the glue was drying. Wishing everyone lots of modeling fun.

- 146 replies
-
- 9
-
-
- Mikasa
- Merit International
- (and 1 more)
-
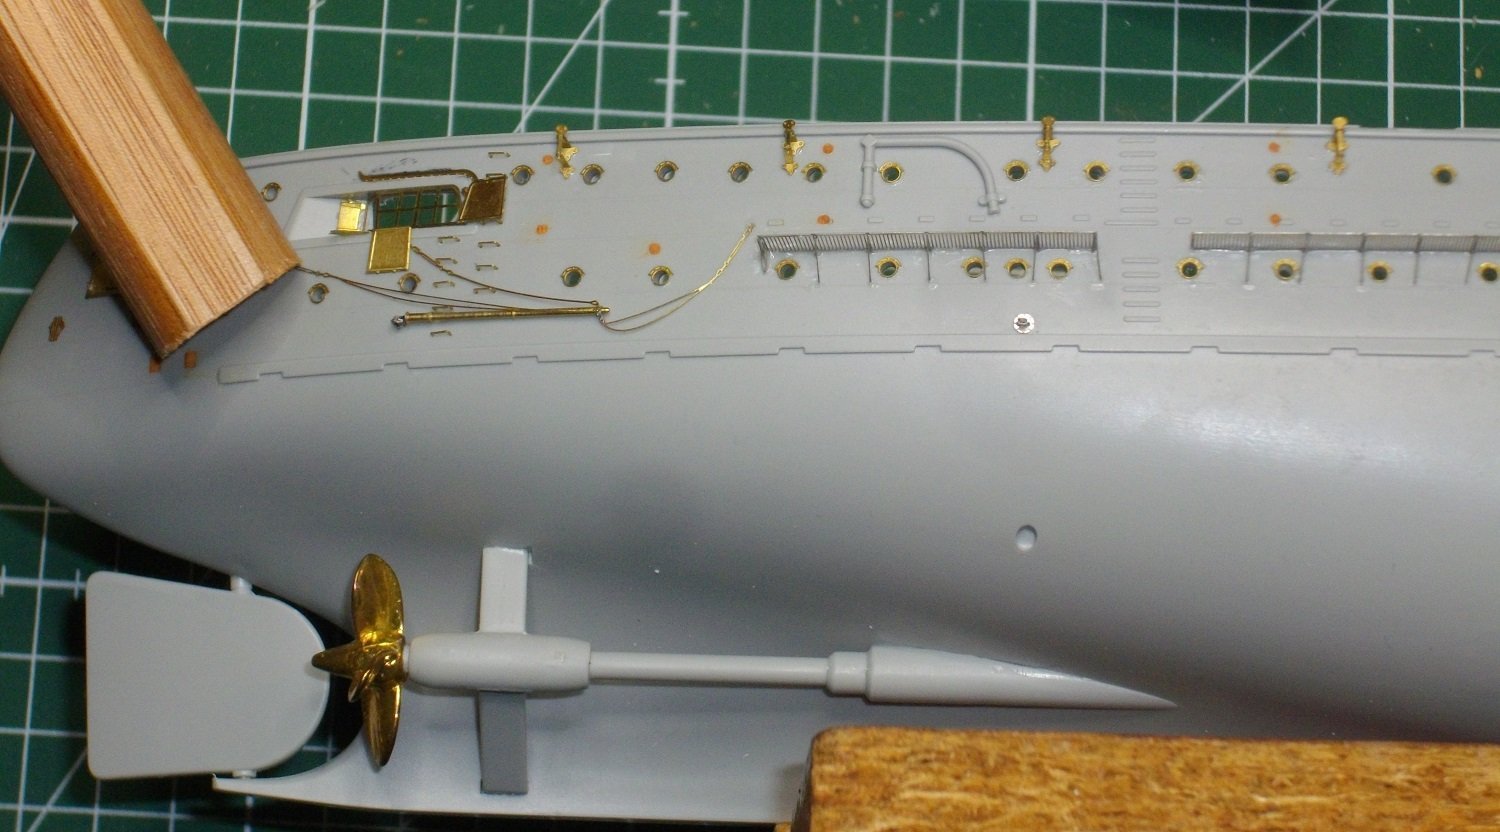
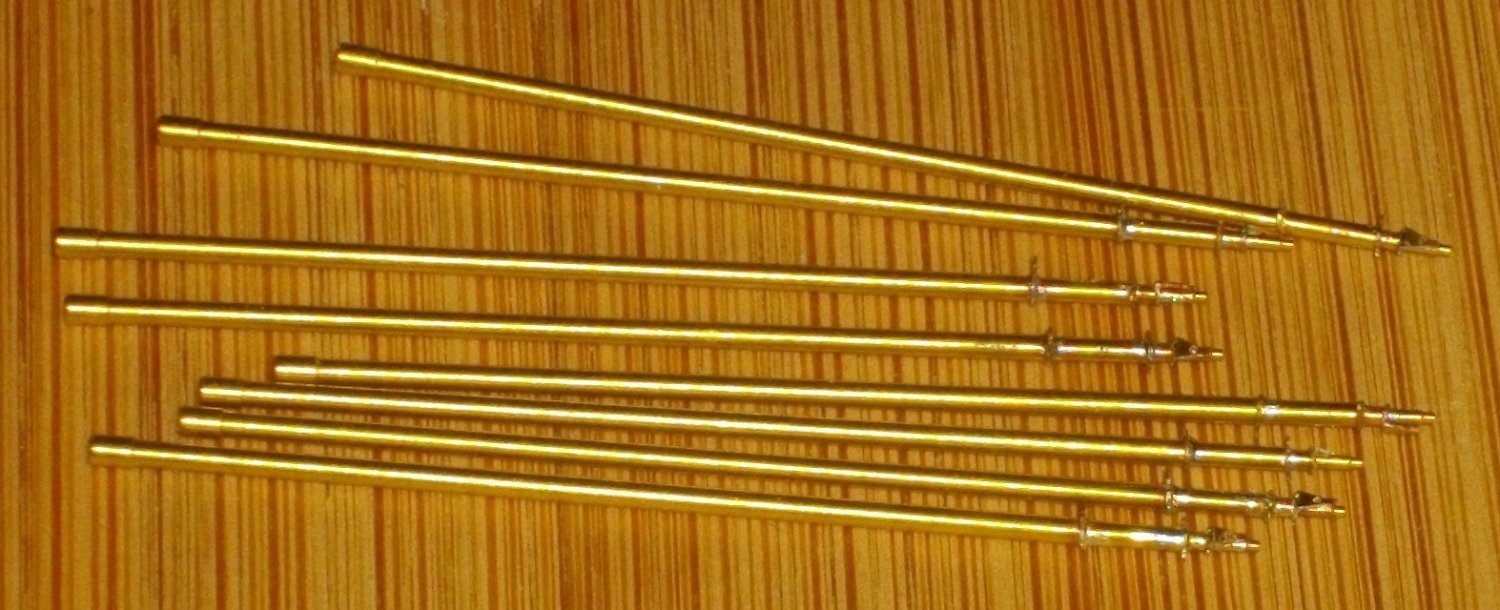
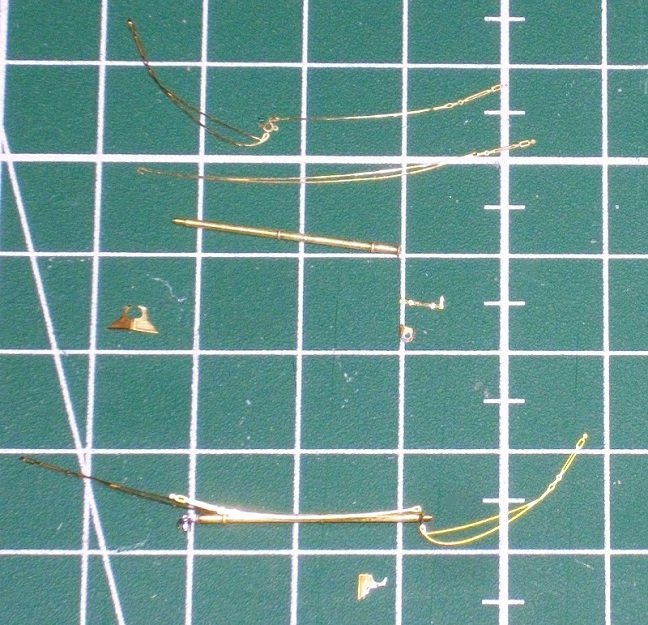
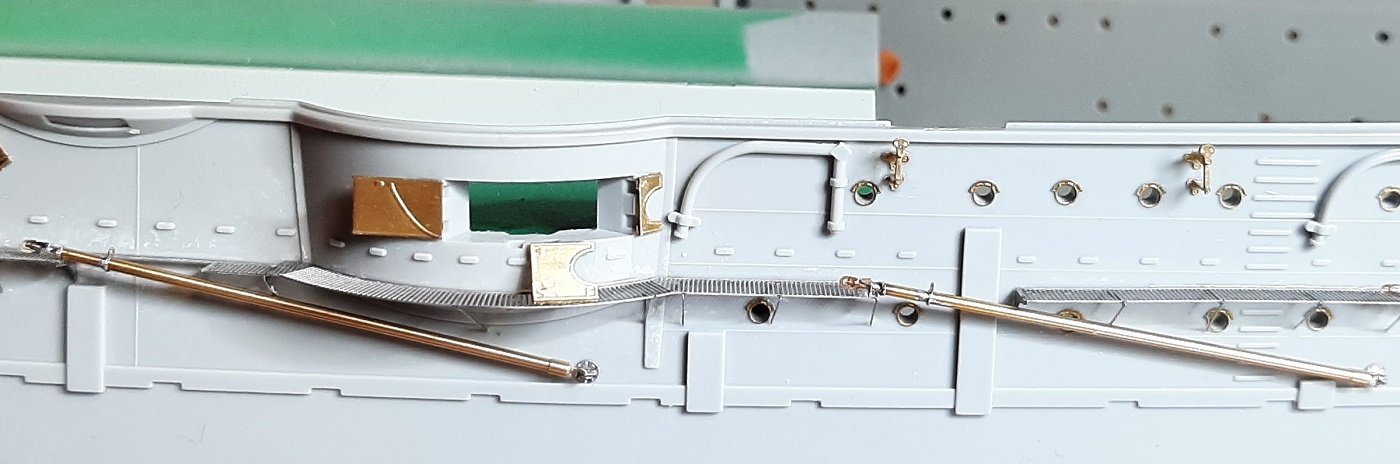
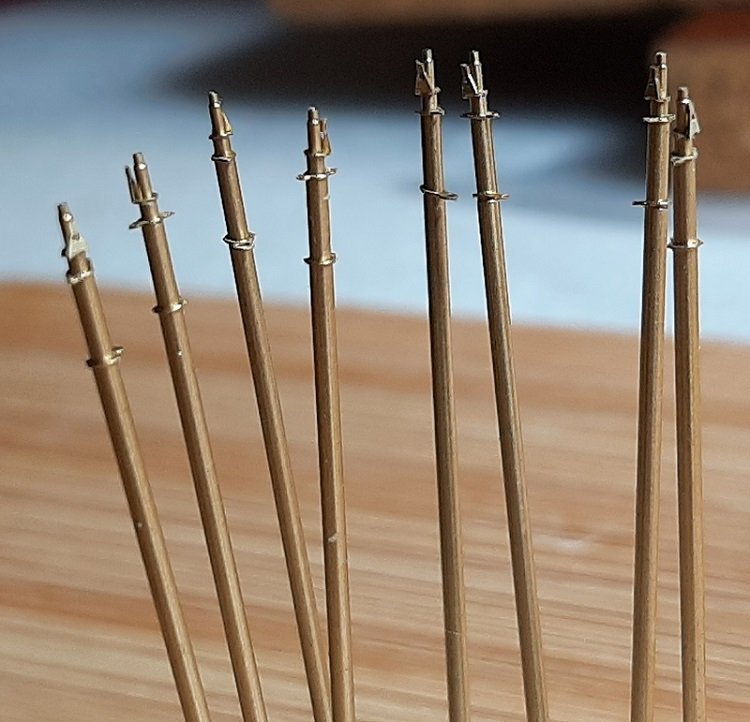
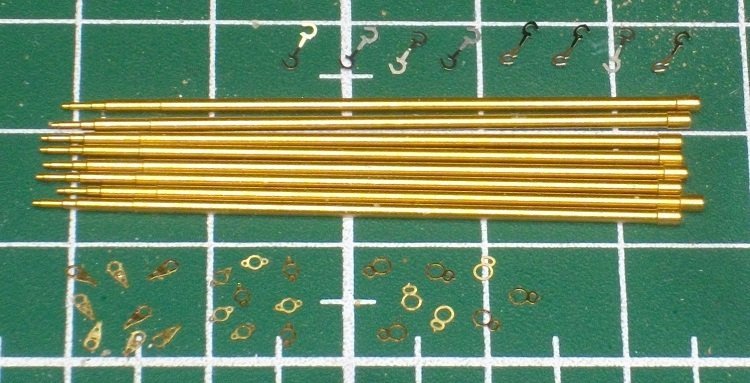
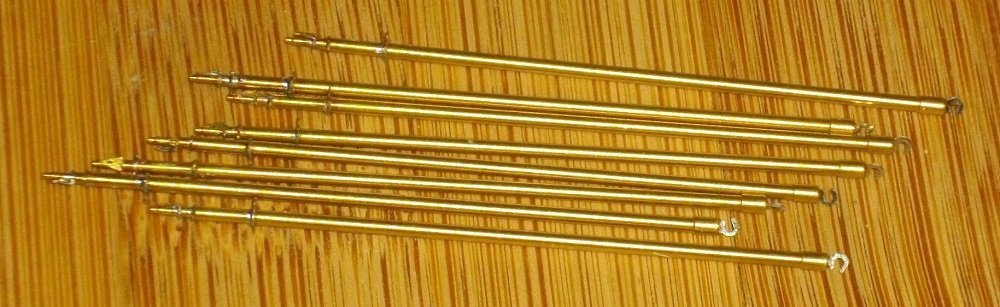
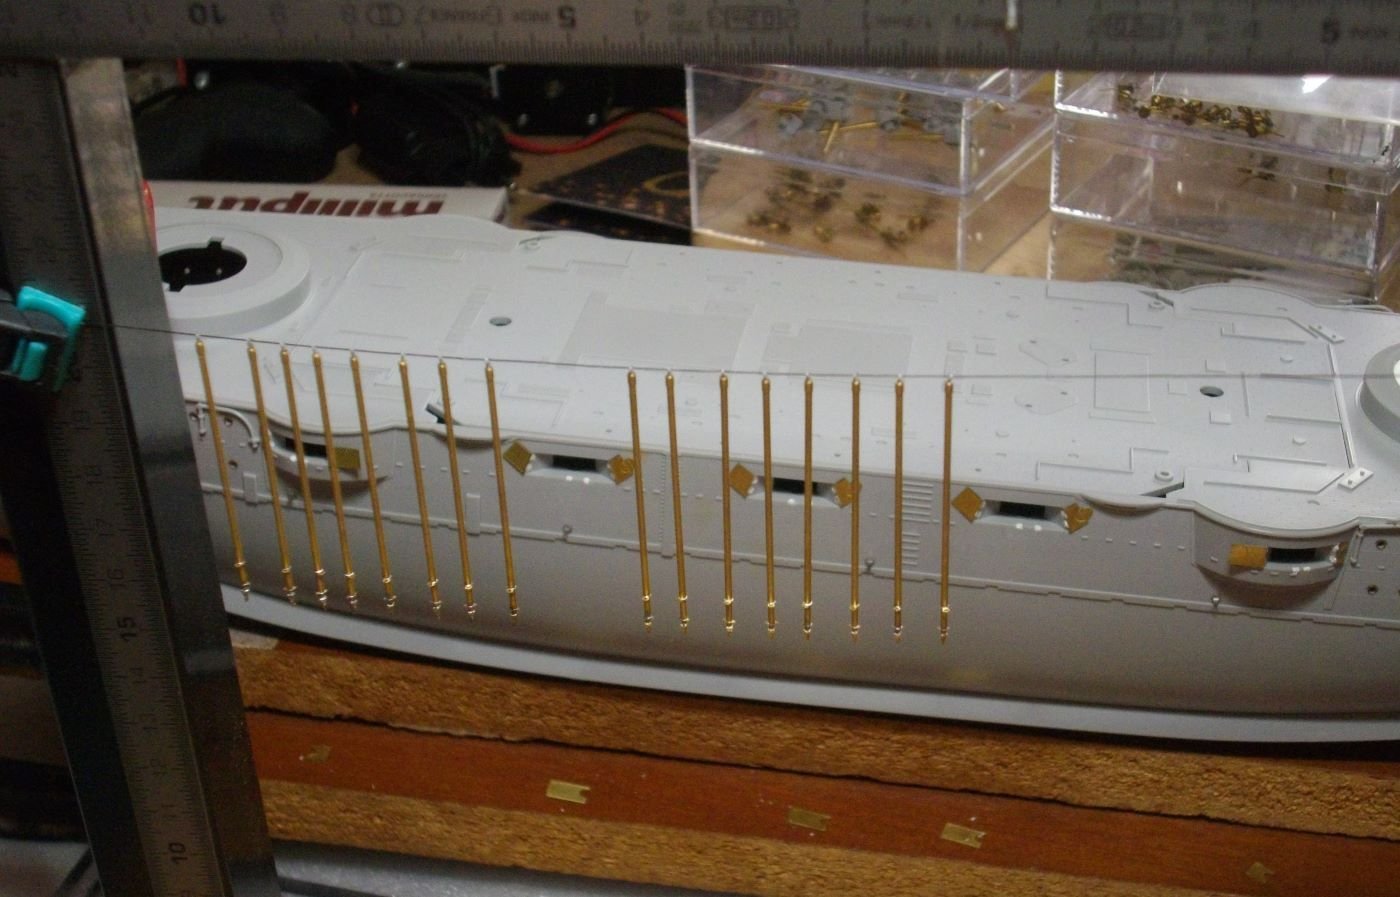
The torpedonet booms on the starboard side will be mounted in the "net not installed" position, and on the port side in the "net installed" position. So I soldered 8 pieces 721, 725 and 726 to the ends of brass turned parts 23 and glued 8 stainless steel hooks (Pontos 51) with SloZAP in the hole at the other end of the booms. To get an impression, I positioned them in the eyepolts and against the catwalks. The parts for the port side collected, bent and positioned on the booms, ready for soldering. Brass parts (721, 725 en 724) soldered to the ends of turned Brass part 23 . I drilled out the holes in the other end a little bit deeper (0,4 mm drill) so that the stainless steel hooks could be glued in a lttle bit deeper. I removed the parts of the casematshutters that fold down and filled the recesses for the hinges with some putty. I degreased the torpedonetbooms with IPA and primed them with VMS Metal Prep 4K. Wishing everyone a Merry Chrismas, a Happy Newyear and lots of modeling fun.


- 146 replies
-
- 14
-
-
- Mikasa
- Merit International
- (and 1 more)