Roger Carter
-
Posts
29 -
Joined
-
Last visited
-
 GrandpaPhil reacted to a post in a topic:
Hacchoro by Roger Carter - Woody Joe - 1/24
GrandpaPhil reacted to a post in a topic:
Hacchoro by Roger Carter - Woody Joe - 1/24
-
GrandpaPhil reacted to a post in a topic:
Hacchoro by Roger Carter - Woody Joe - 1/24
-
JpR62 reacted to a post in a topic:
Hacchoro by Roger Carter - Woody Joe - 1/24
-
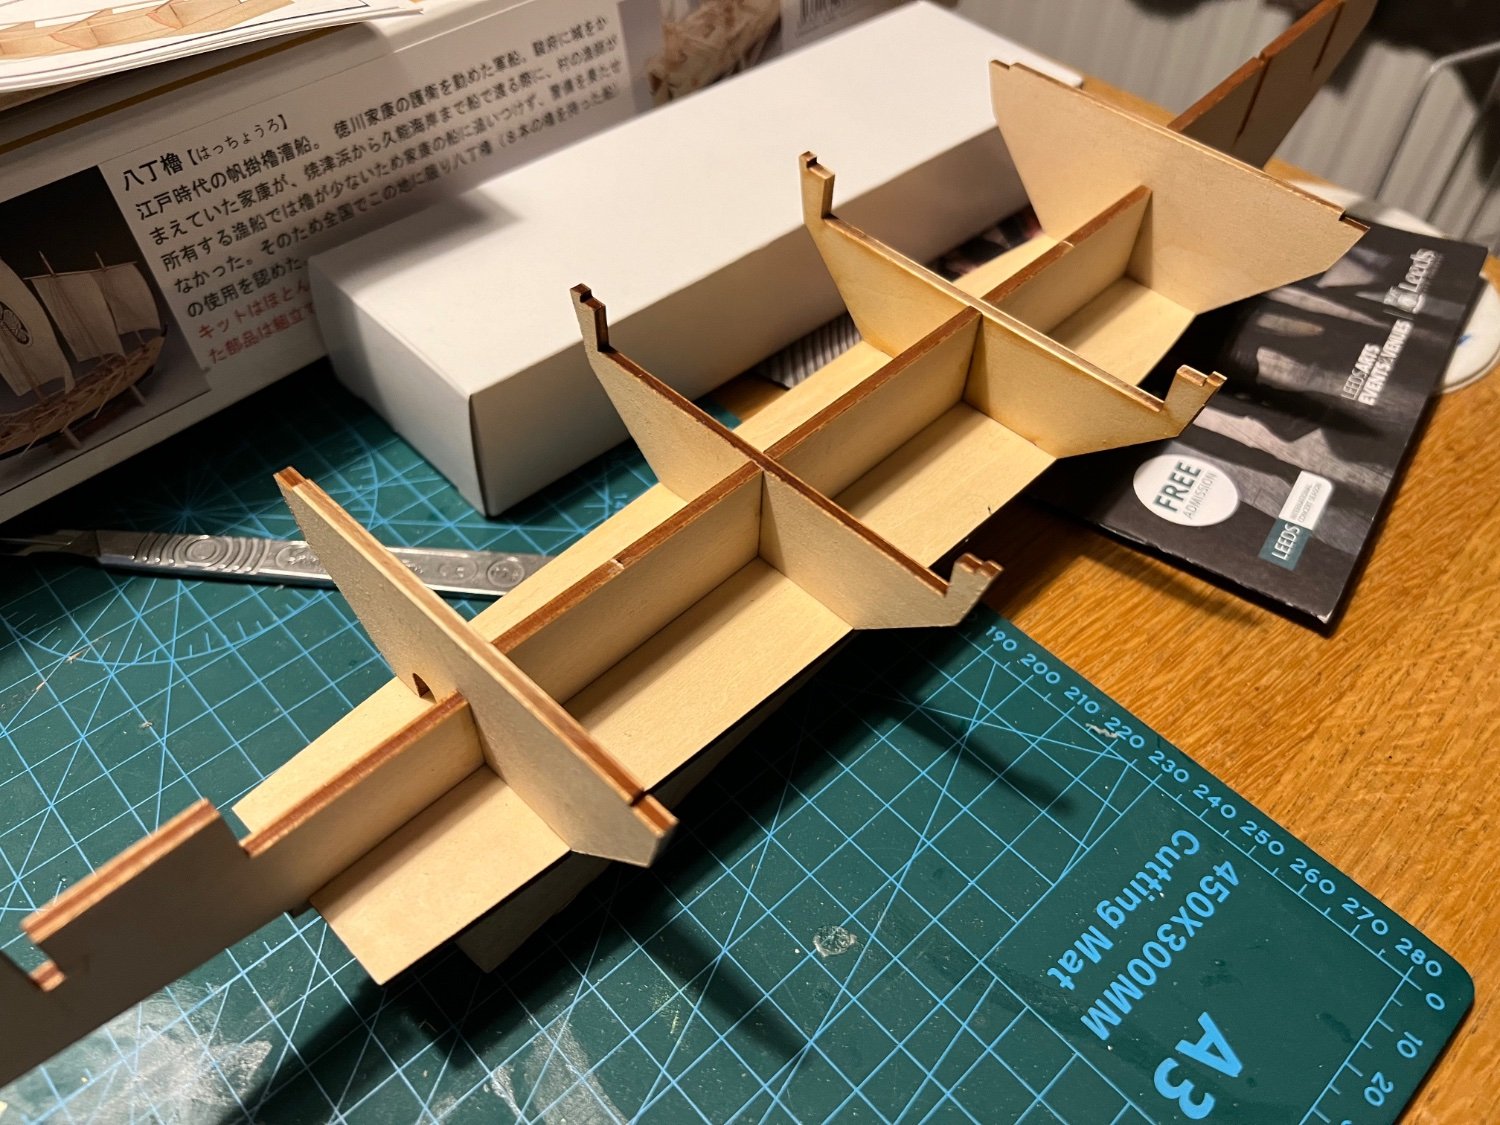
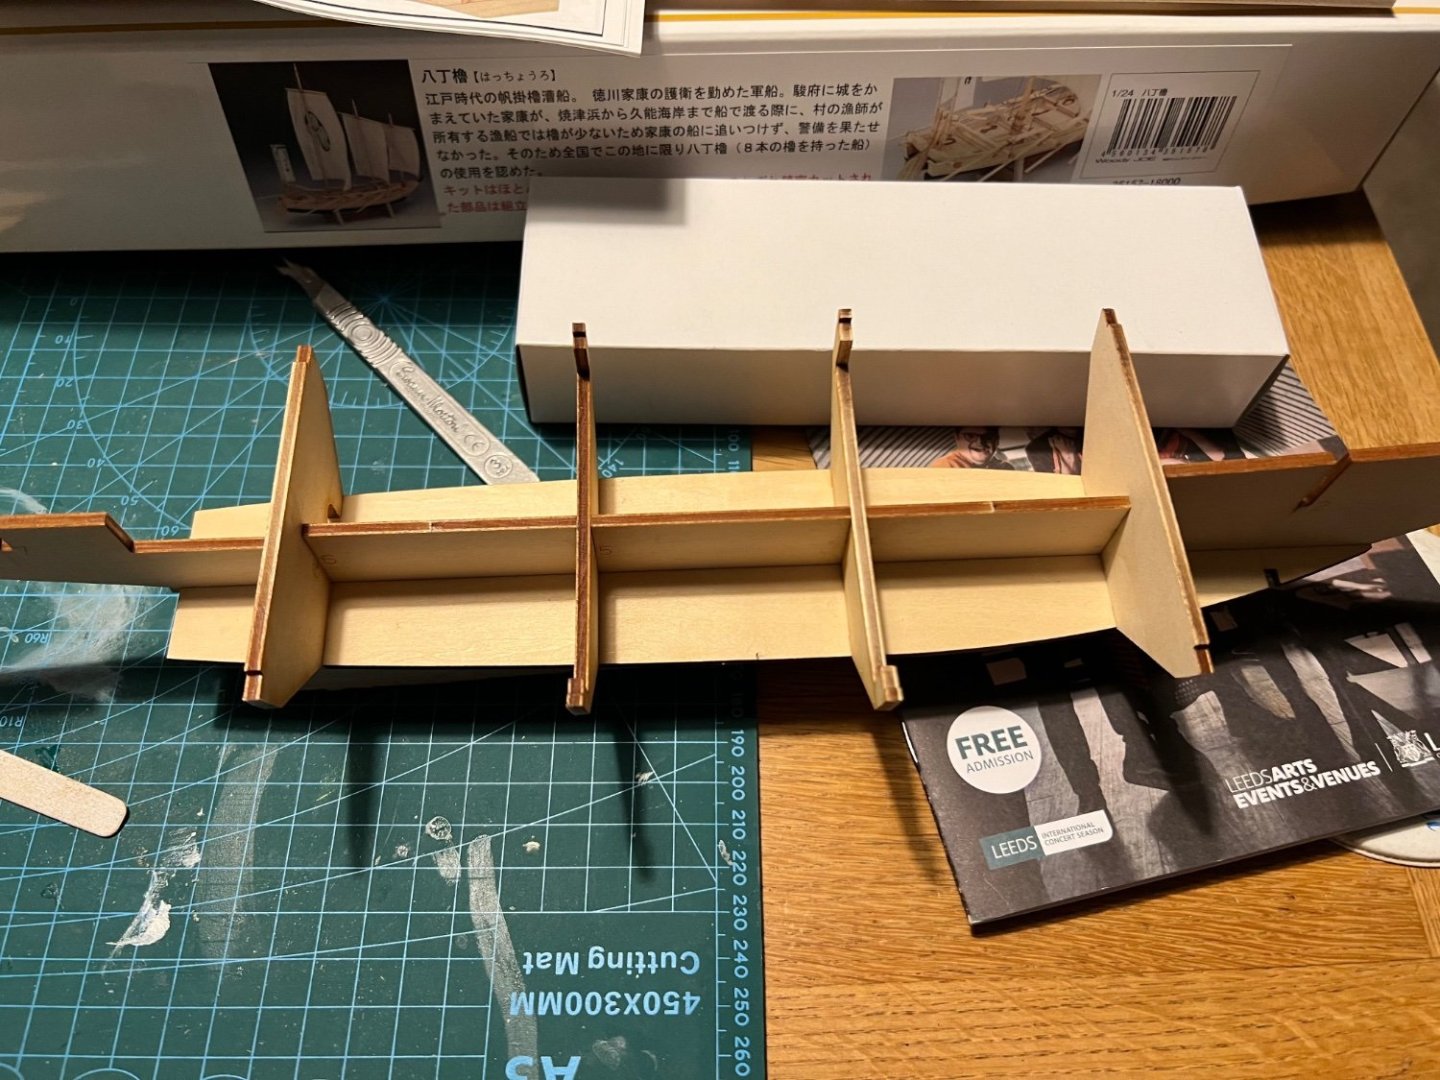
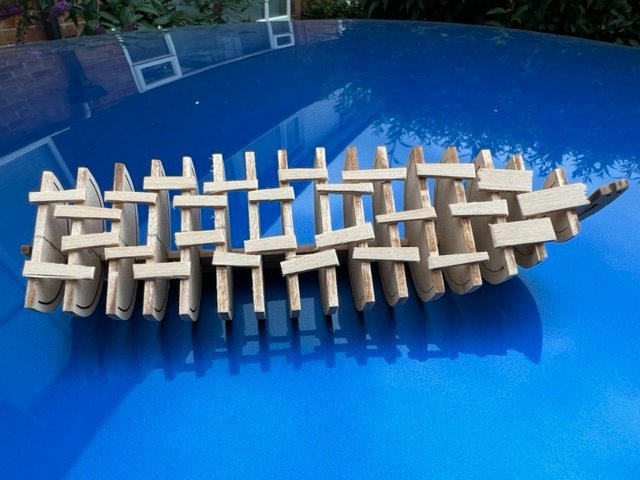
Made a start on gluing the frames onto the keel assembly. A dry fit showed that the tolerance was very close. So I decided to have the base plank dry fitted whilst I glue frames to ensure they set square. I can remove the base to put on the bevel before I finally glue it in place later. The engineering of the parts seems very accurate. But the solid ply frame structure seems a little over weight for the size of the model. I am used to kit parts that break at the slightest pressure. It is going to be a sturdy model when completed.


-
JpR62 reacted to a post in a topic:
Hacchoro by Roger Carter - Woody Joe - 1/24
-
Roger Carter reacted to a post in a topic:
Hacchoro by Roger Carter - Woody Joe - 1/24
-
Charter33 reacted to a post in a topic:
Hacchoro by Roger Carter - Woody Joe - 1/24
-
JacquesCousteau reacted to a post in a topic:
Hacchoro by Roger Carter - Woody Joe - 1/24
-
ccoyle reacted to a post in a topic:
Hacchoro by Roger Carter - Woody Joe - 1/24
-
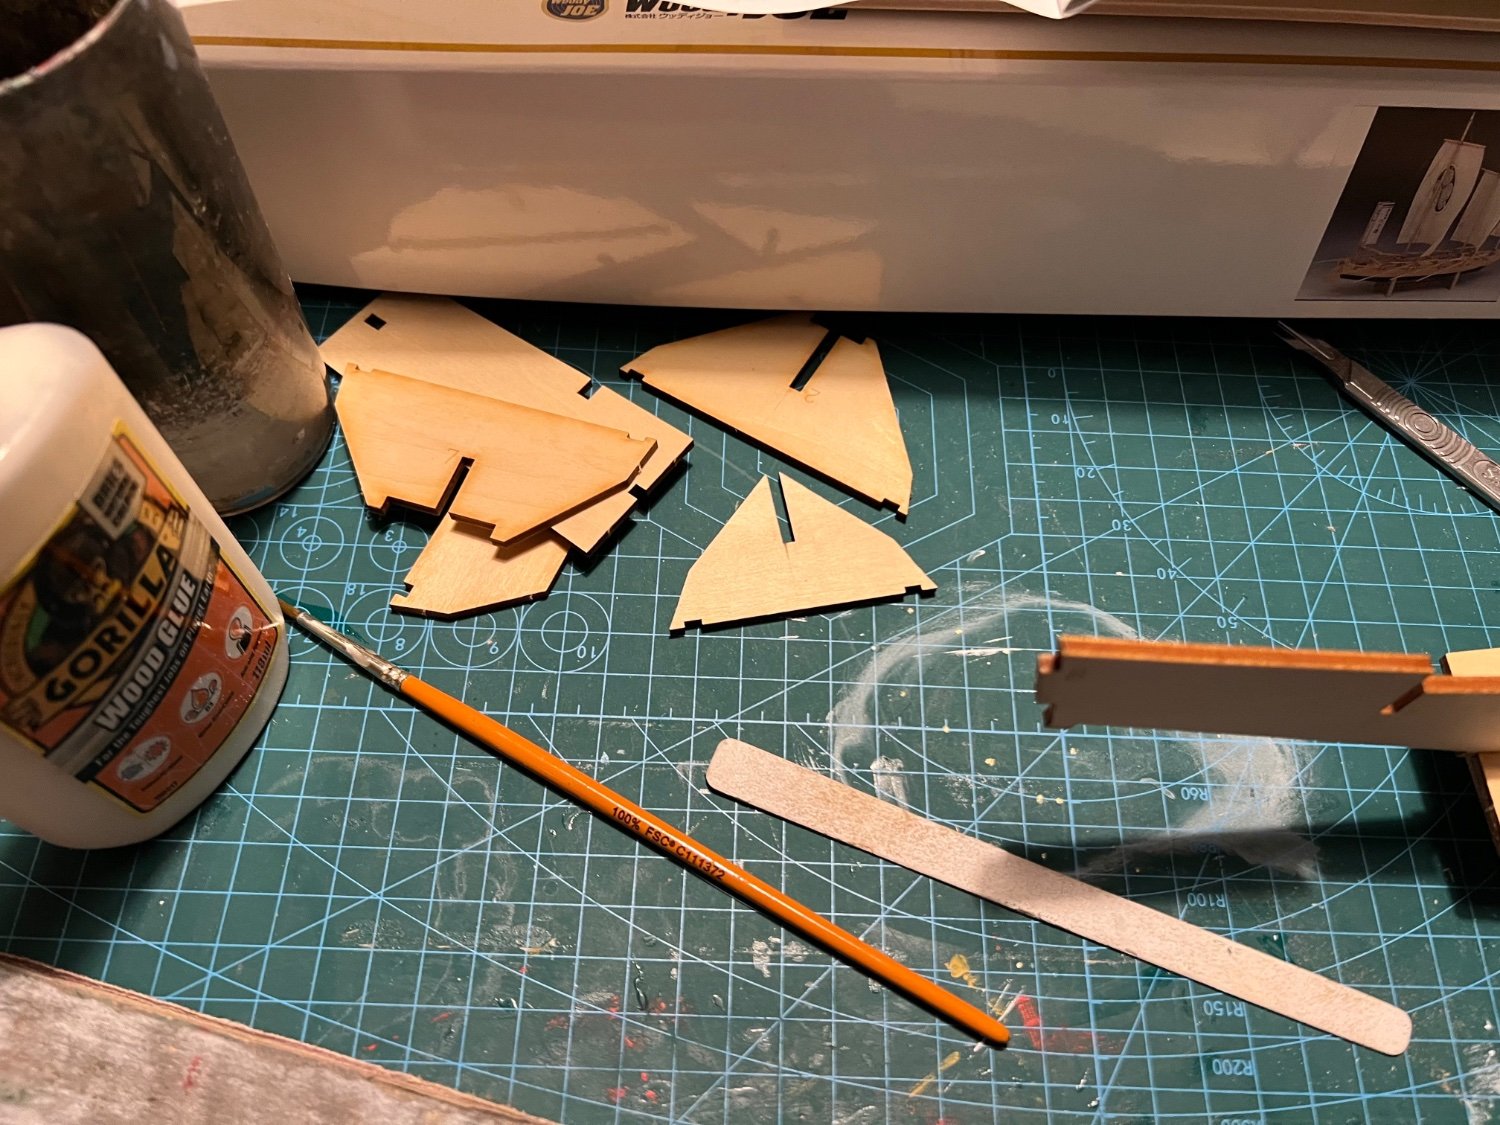
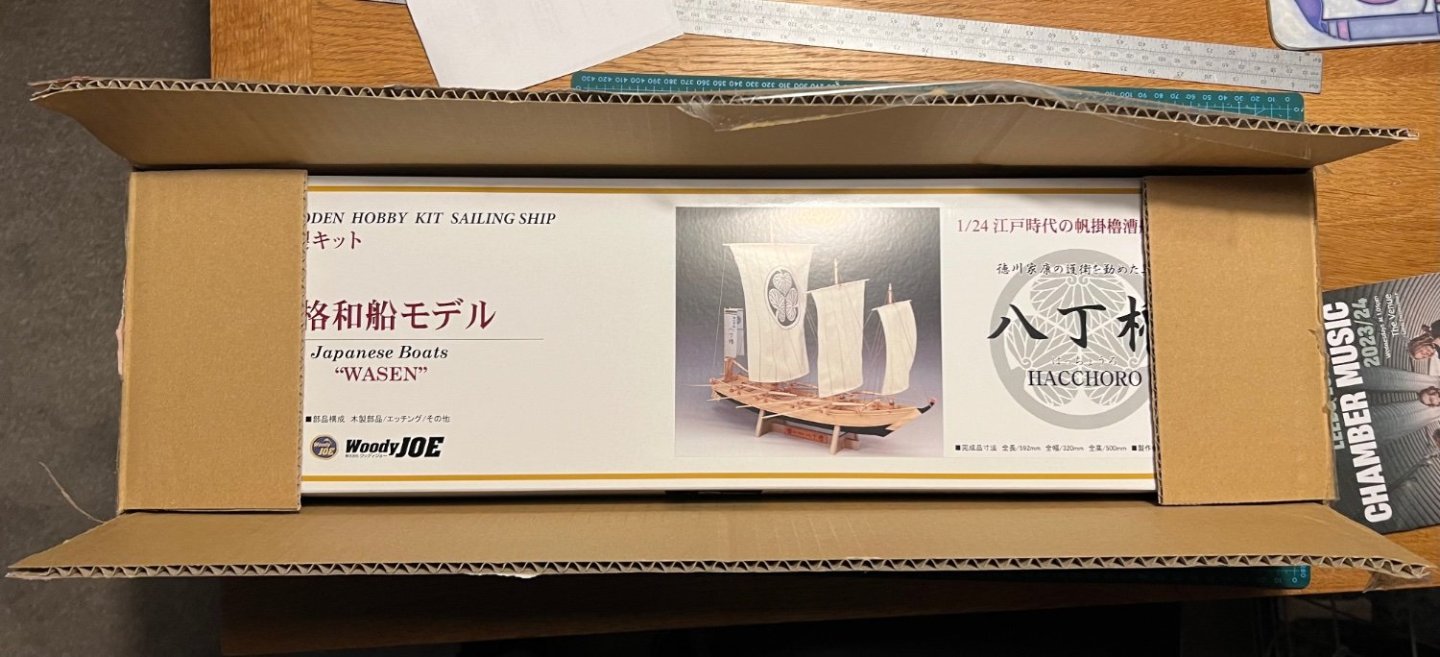
Well, here we go. That smell of old cigar boxes hits you as you break the outer packaging. Very aromatic timber. Hoping to keep this build log for this kit. And will be making use of the excellent translation of instructions by Catopower. May try and add some extra detail by making my own non-printed sails. Delivery from Japan to UK was very reasonable and quick. And as a bonus, no hit for tax or duty this time
-
Roger Carter reacted to a post in a topic:
Kamakura Period Large Sea Boat by catopower - FINISHED - Scale 1:50
-
Roger Carter reacted to a post in a topic:
1/10-scale Japanese Fishing Boat kit from Thermal Studios
-
Roger Carter reacted to a post in a topic:
Hacchoro by markjay - FINISHED - Woody Joe - 1/24 - eight-oared Edo period fishing boat
-
Roger Carter reacted to a post in a topic:
Higaki-Kaisen by Ekis - FINISHED - Woody Joe - 1:72
-
 Roger Carter reacted to a post in a topic:
Higaki-Kaisen by Ekis - FINISHED - Woody Joe - 1:72
Roger Carter reacted to a post in a topic:
Higaki-Kaisen by Ekis - FINISHED - Woody Joe - 1:72
-
Roger Carter reacted to a post in a topic:
Higaki-Kaisen by Ekis - FINISHED - Woody Joe - 1:72
-
Roger Carter reacted to a post in a topic:
Higaki-Kaisen by Ekis - FINISHED - Woody Joe - 1:72
-
Roger Carter reacted to a post in a topic:
Higaki-Kaisen by Ekis - FINISHED - Woody Joe - 1:72
-
Roger Carter reacted to a post in a topic:
Maine Peapod by JesseLee - FINISHED - Midwest Products - 1:14 - Early 1900's
-
Thank you I really enjoyed it. And finished with something far more presentable than I had expected. I will take a look at the kits you mention thanks.
- 18 replies
-
- 1
-
-
- 18th century longboat
- Model Shipways
- (and 1 more)
-
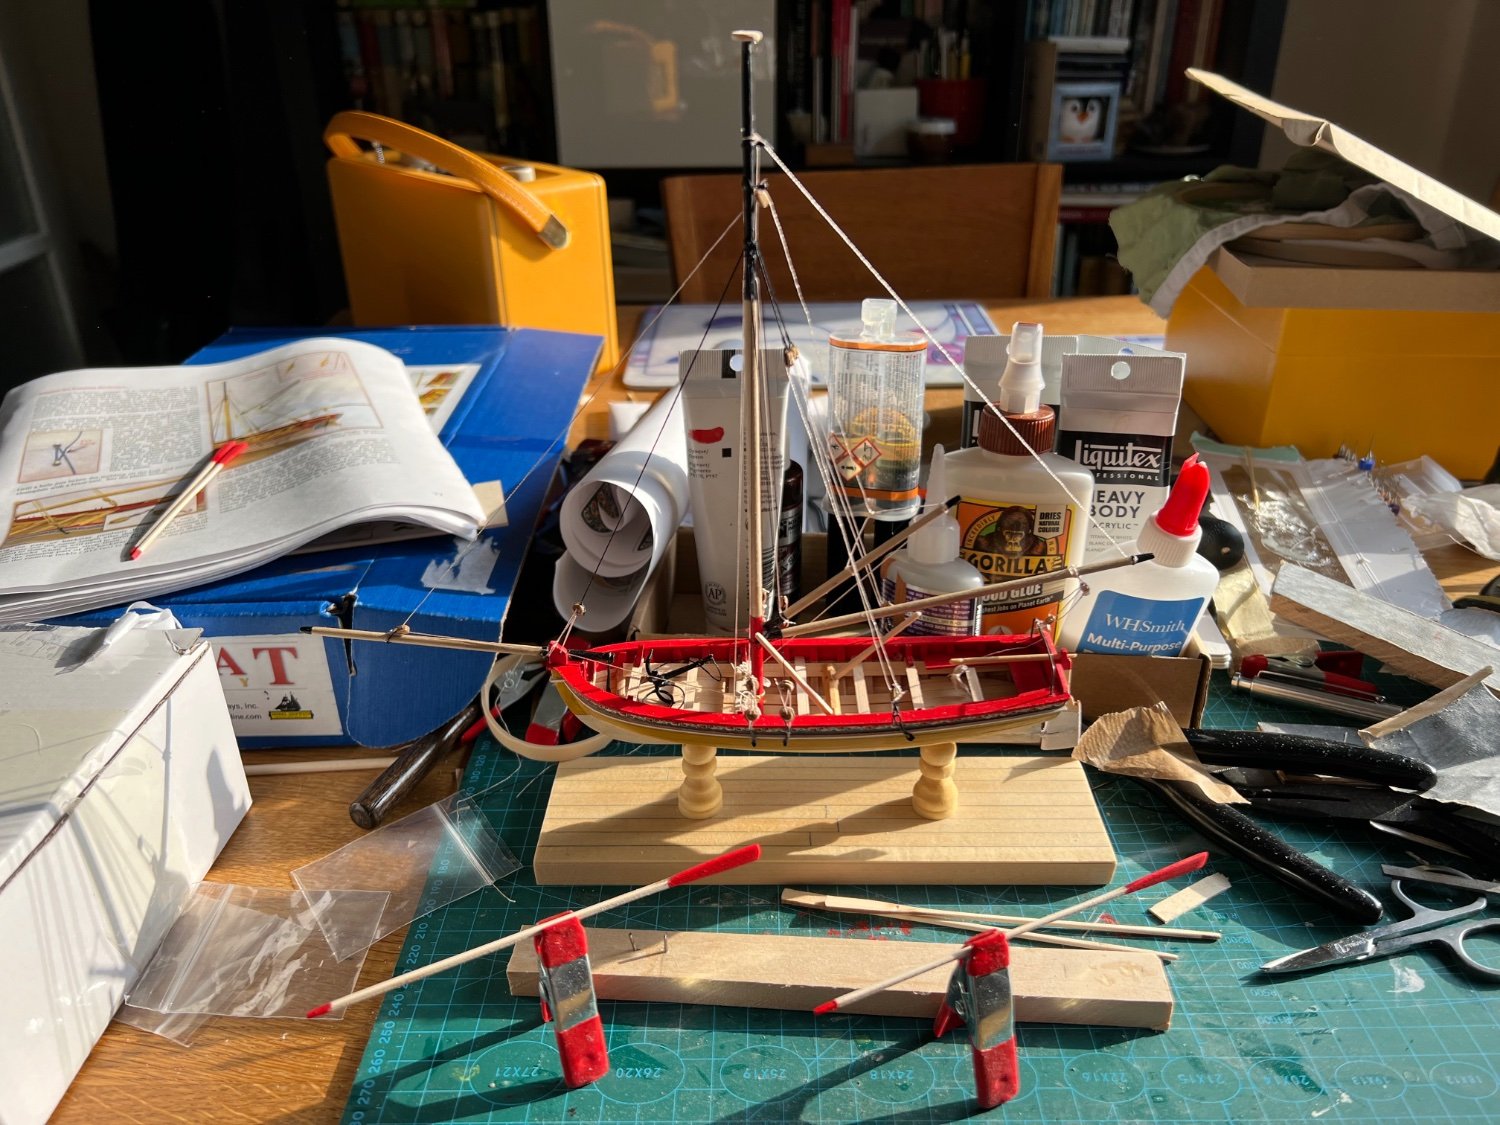
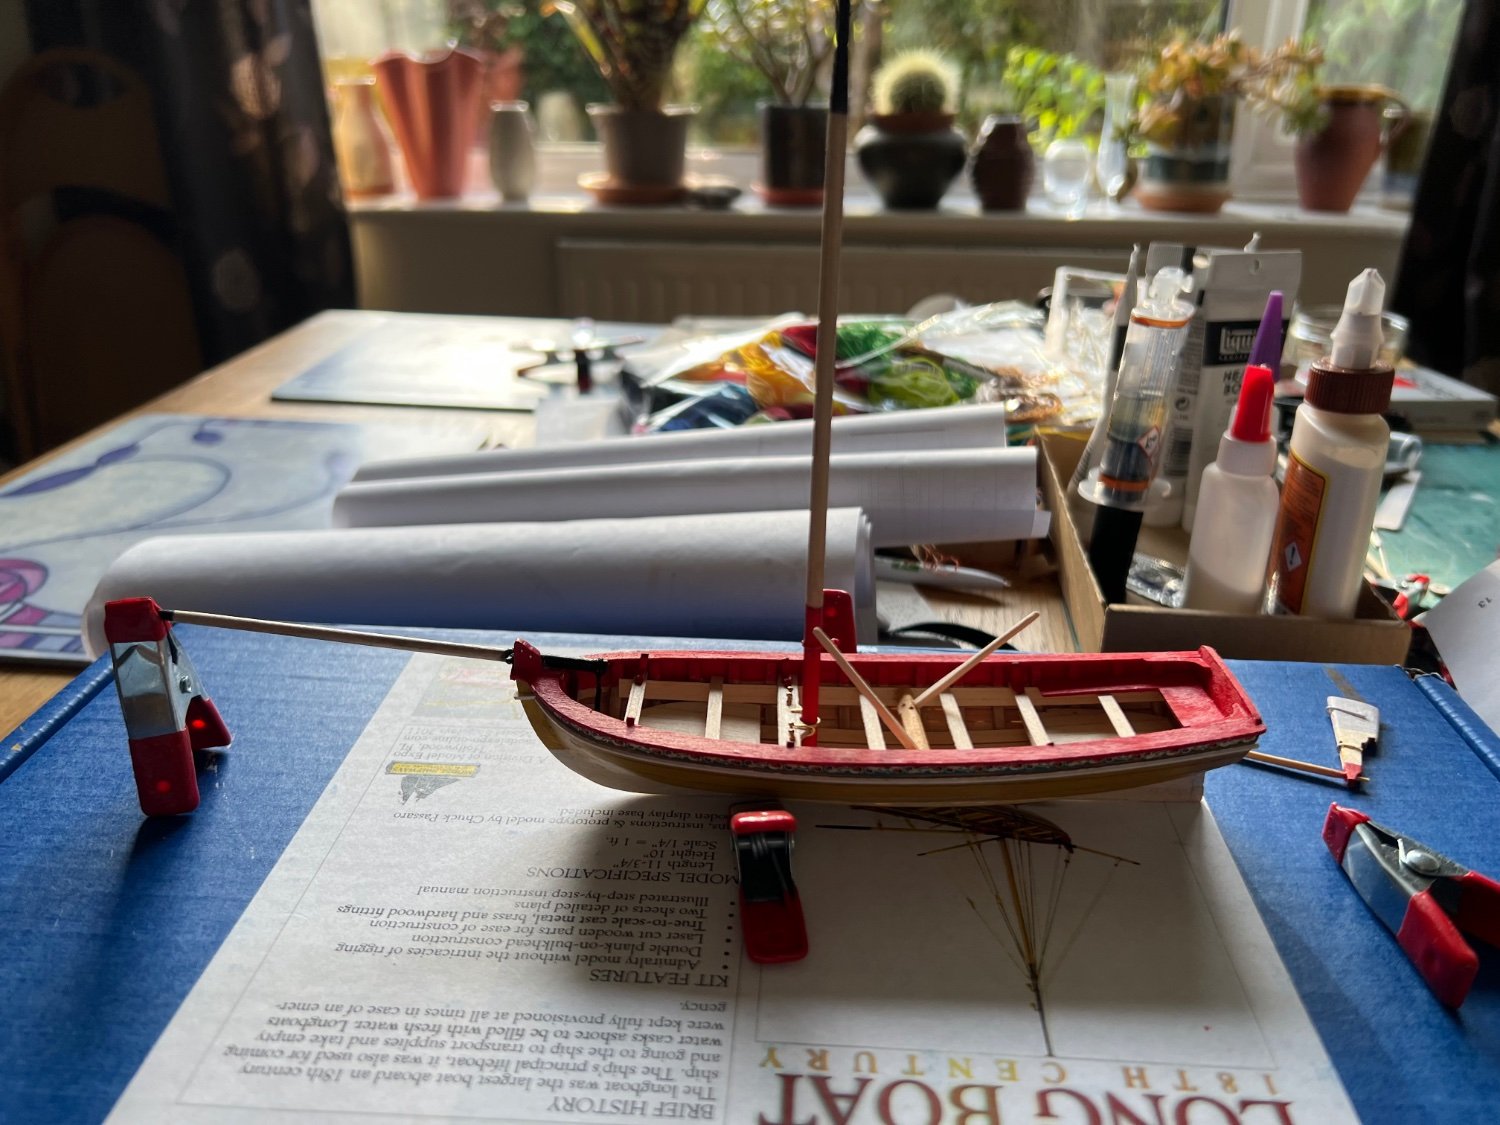
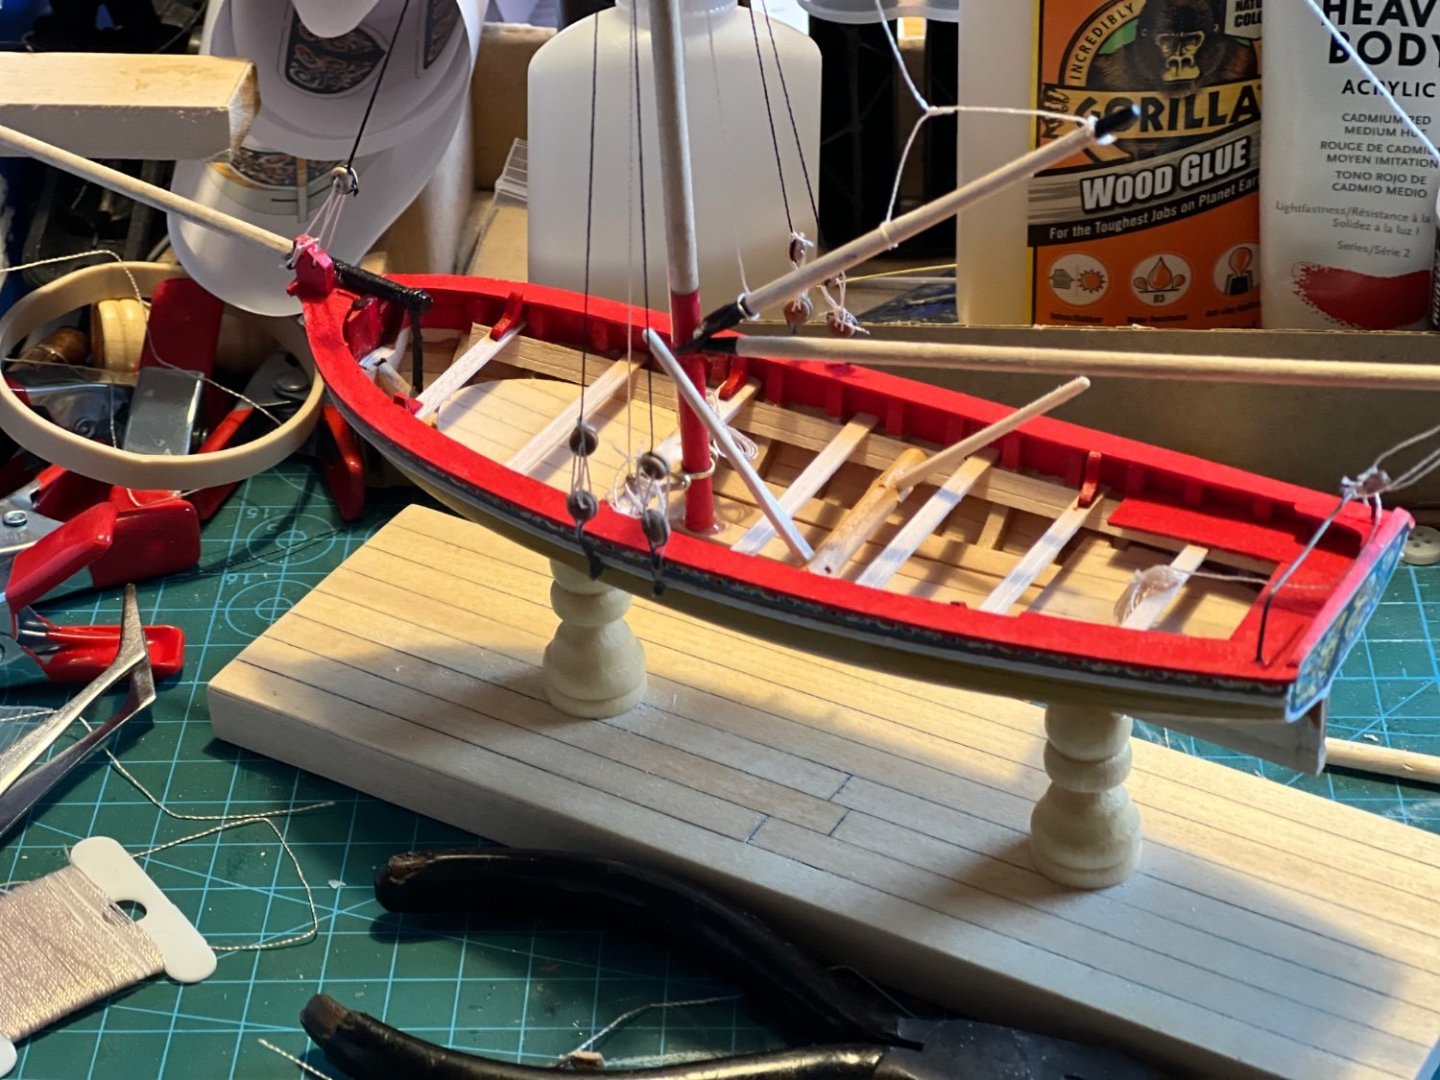
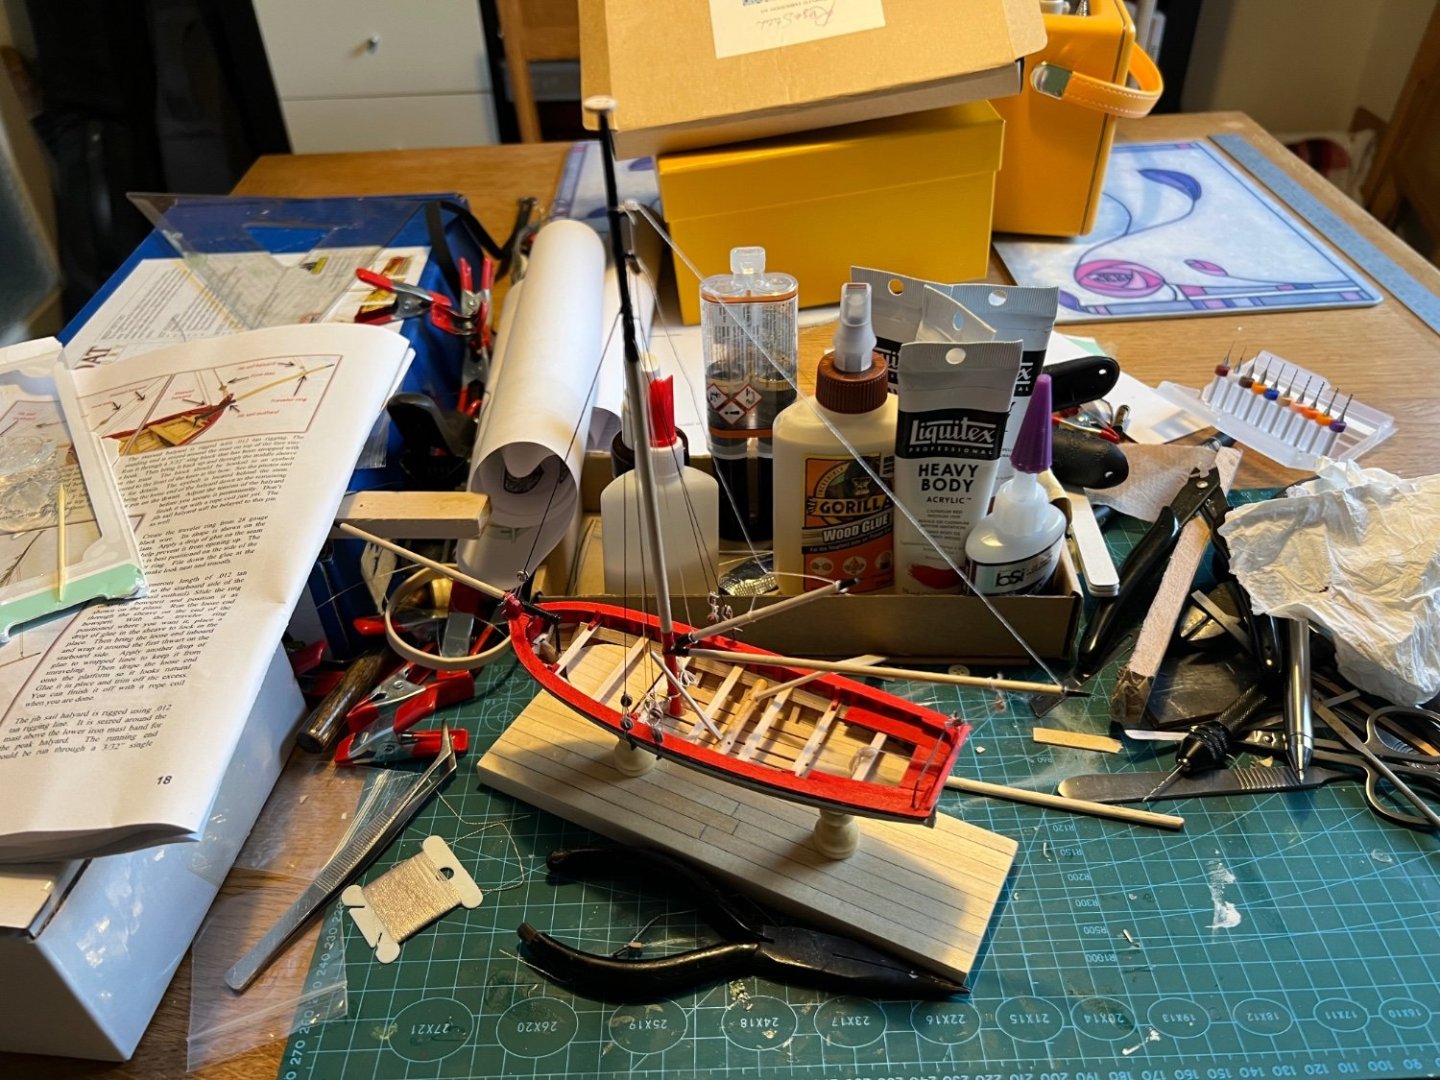
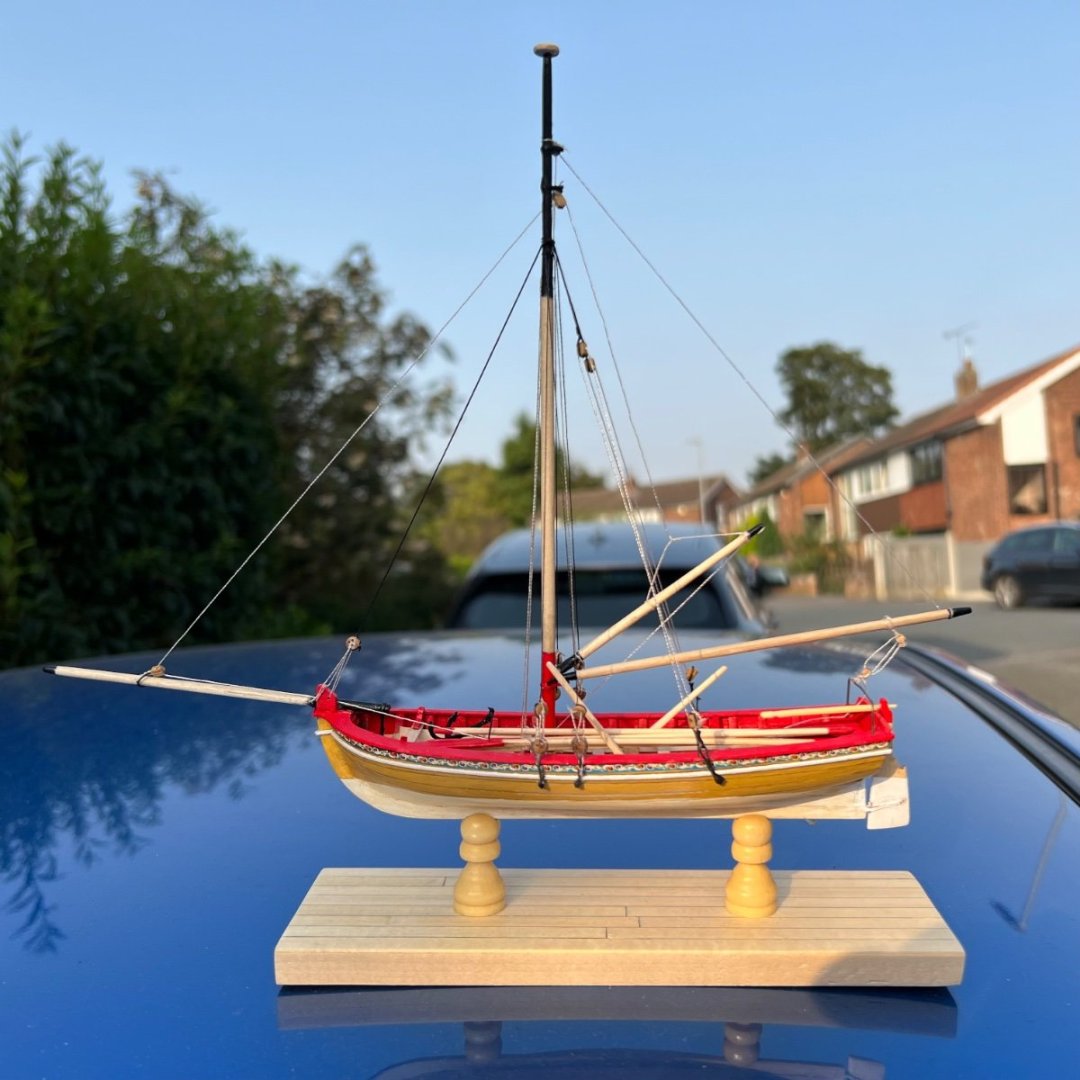
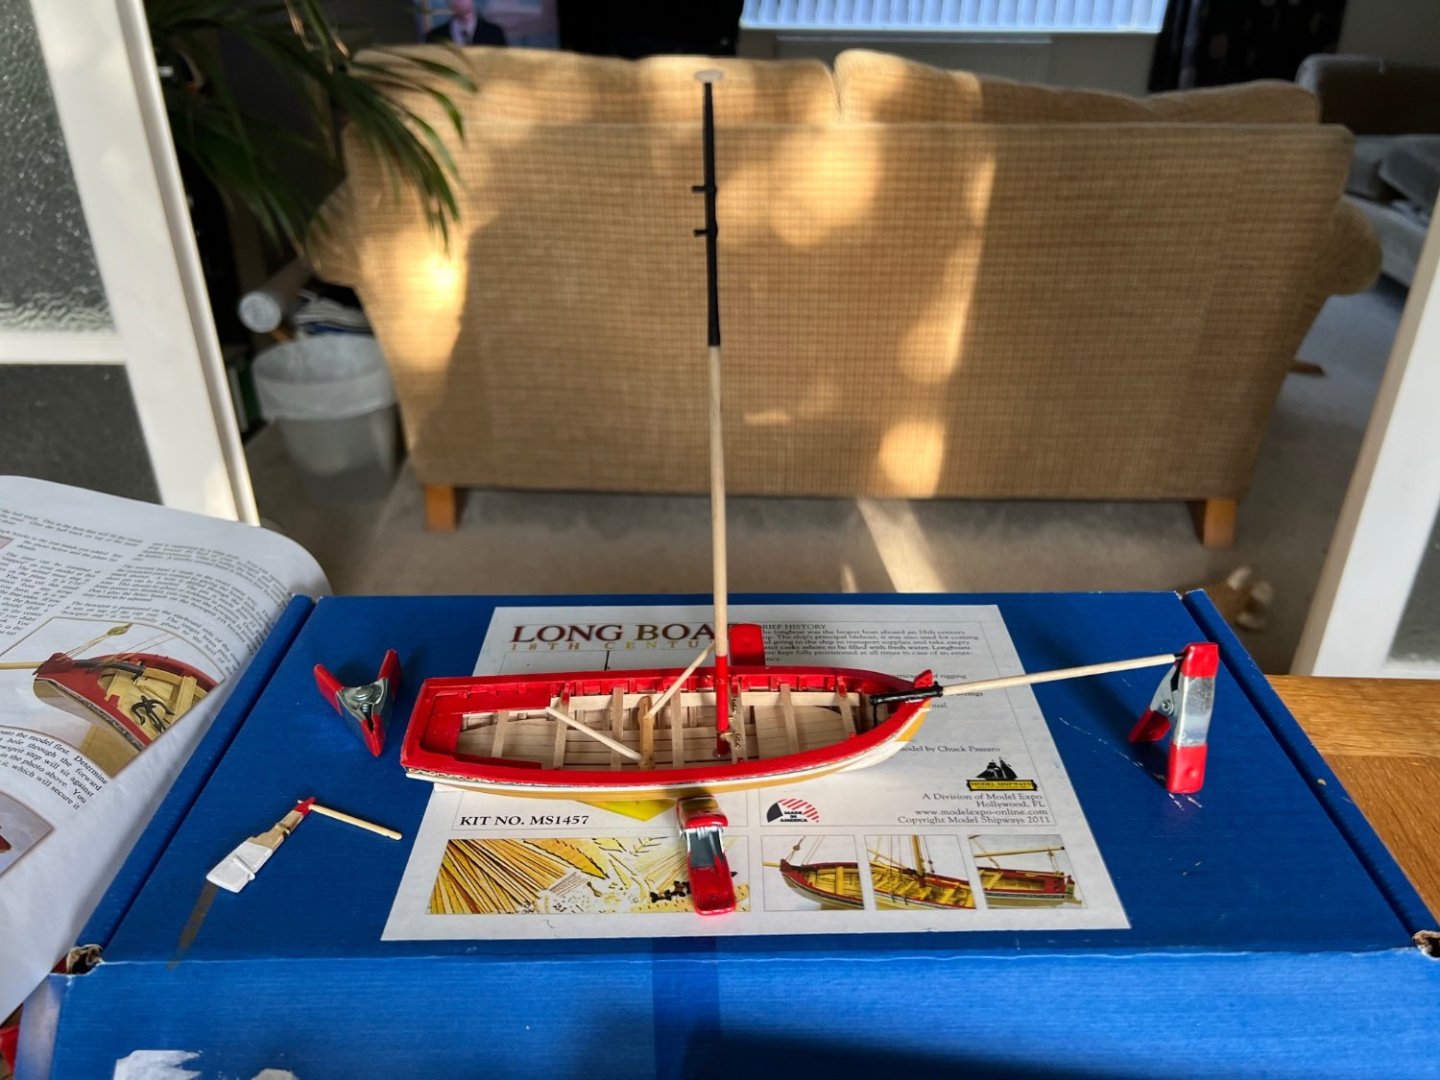
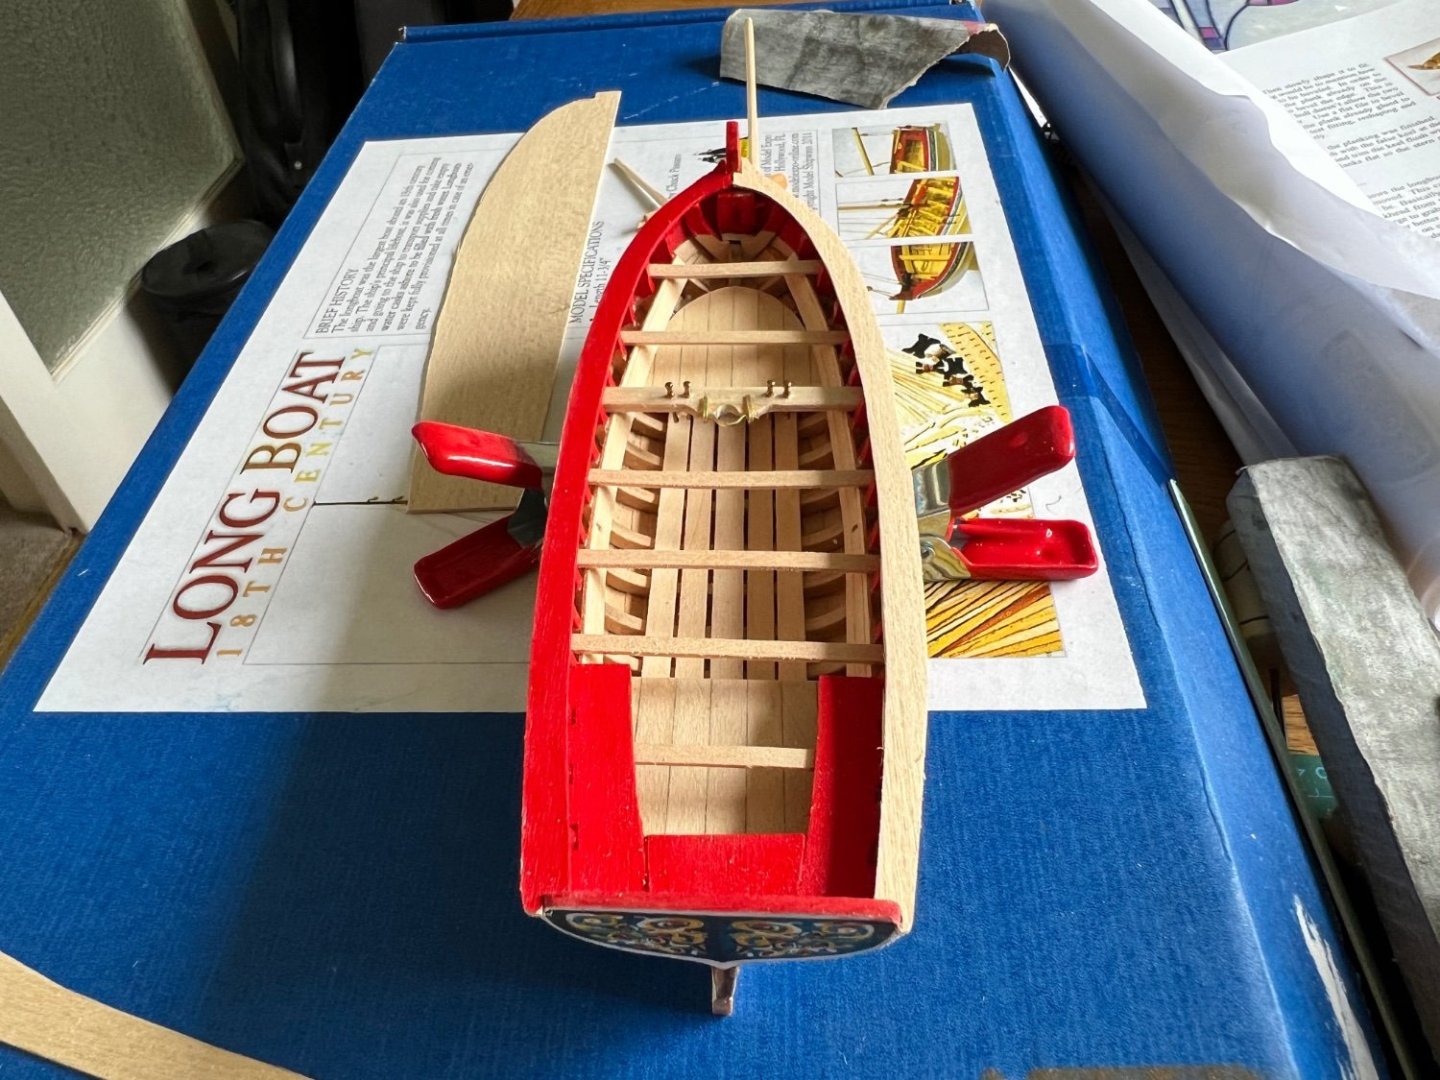
So it finished. Far from perfect, but pleased with my first attempt at something more complex. The rigging was a nightmare. My eyesight wasn’t up to the task. Neither by manual dexterity. I won’t be attempting the Victory anytime soon. A few pics of the final stages below. I mounted the boat on a couple of pawn chess pieces from an incomplete chess set. Quite pleased with the look. I really enjoy open boats. And the wood work and painting were my favourite tasks. And no rigging please. I have the English Pinnace kit on order for my next attempt. And then I fancy scratch building a Thames Ceremonial Barge. I will start to look for some plans.

- 18 replies
-
- 7
-
-
- 18th century longboat
- Model Shipways
- (and 1 more)
-
Thanks. Nowhere near the standard of others on here. It’s so tiny. I think I made a rookie error with the thwarts. Next time I will try and get things right.
-
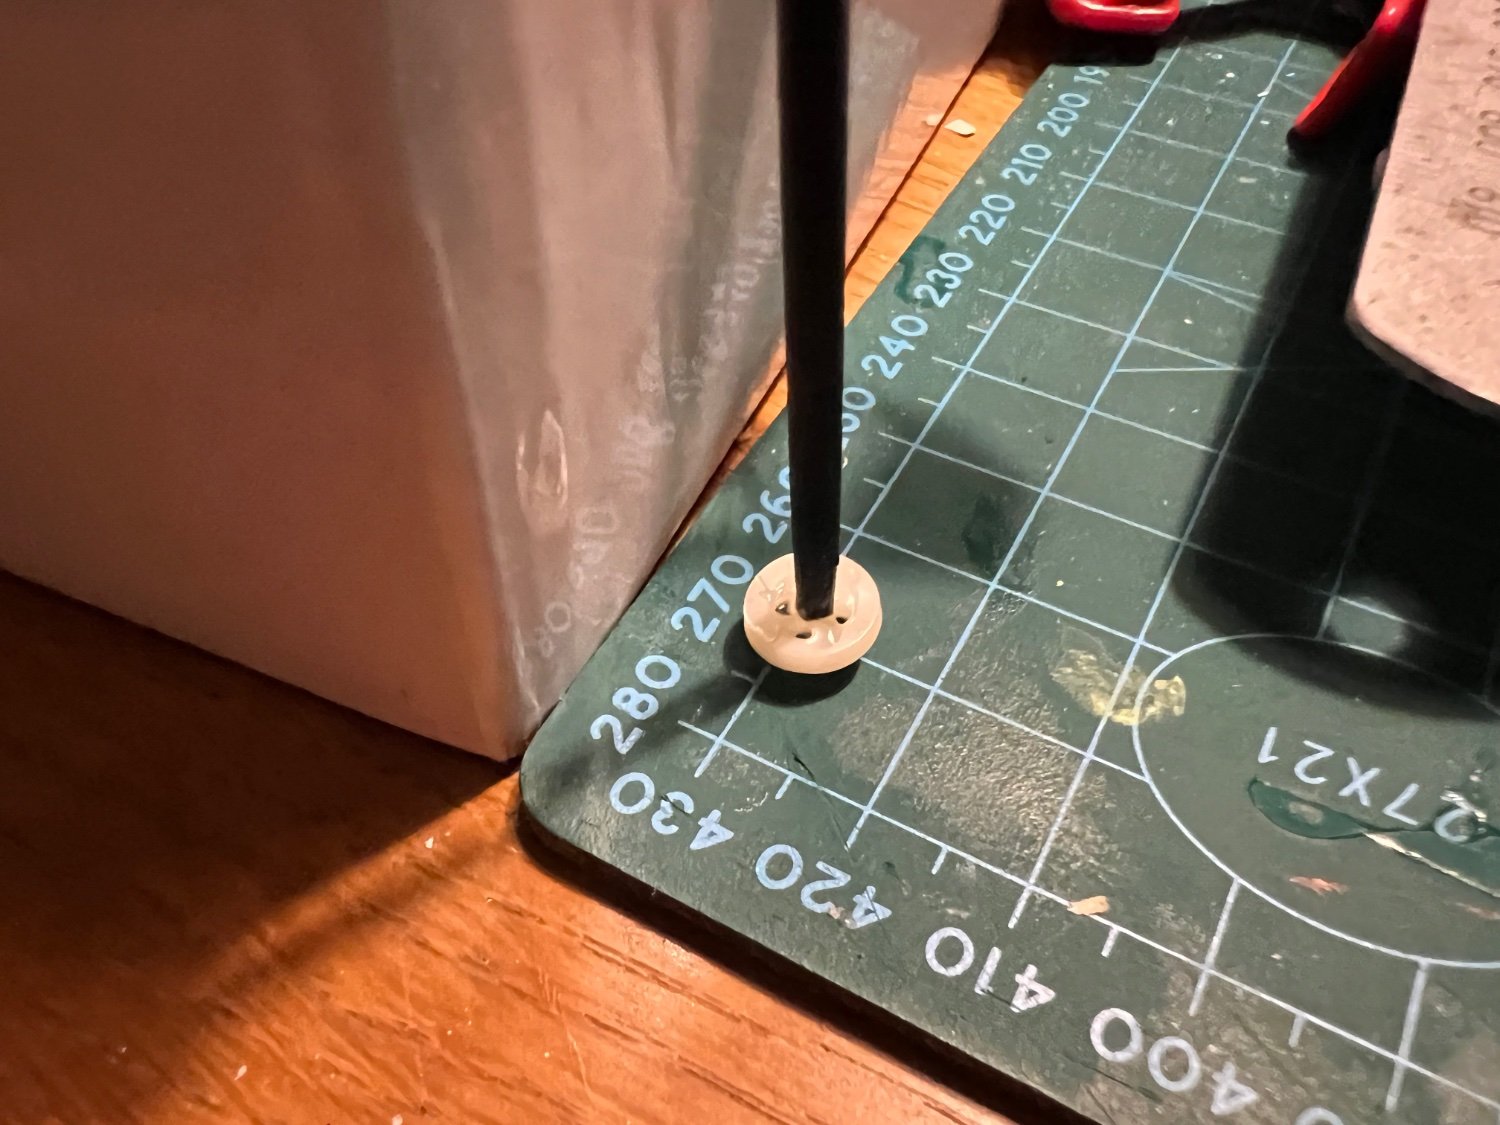
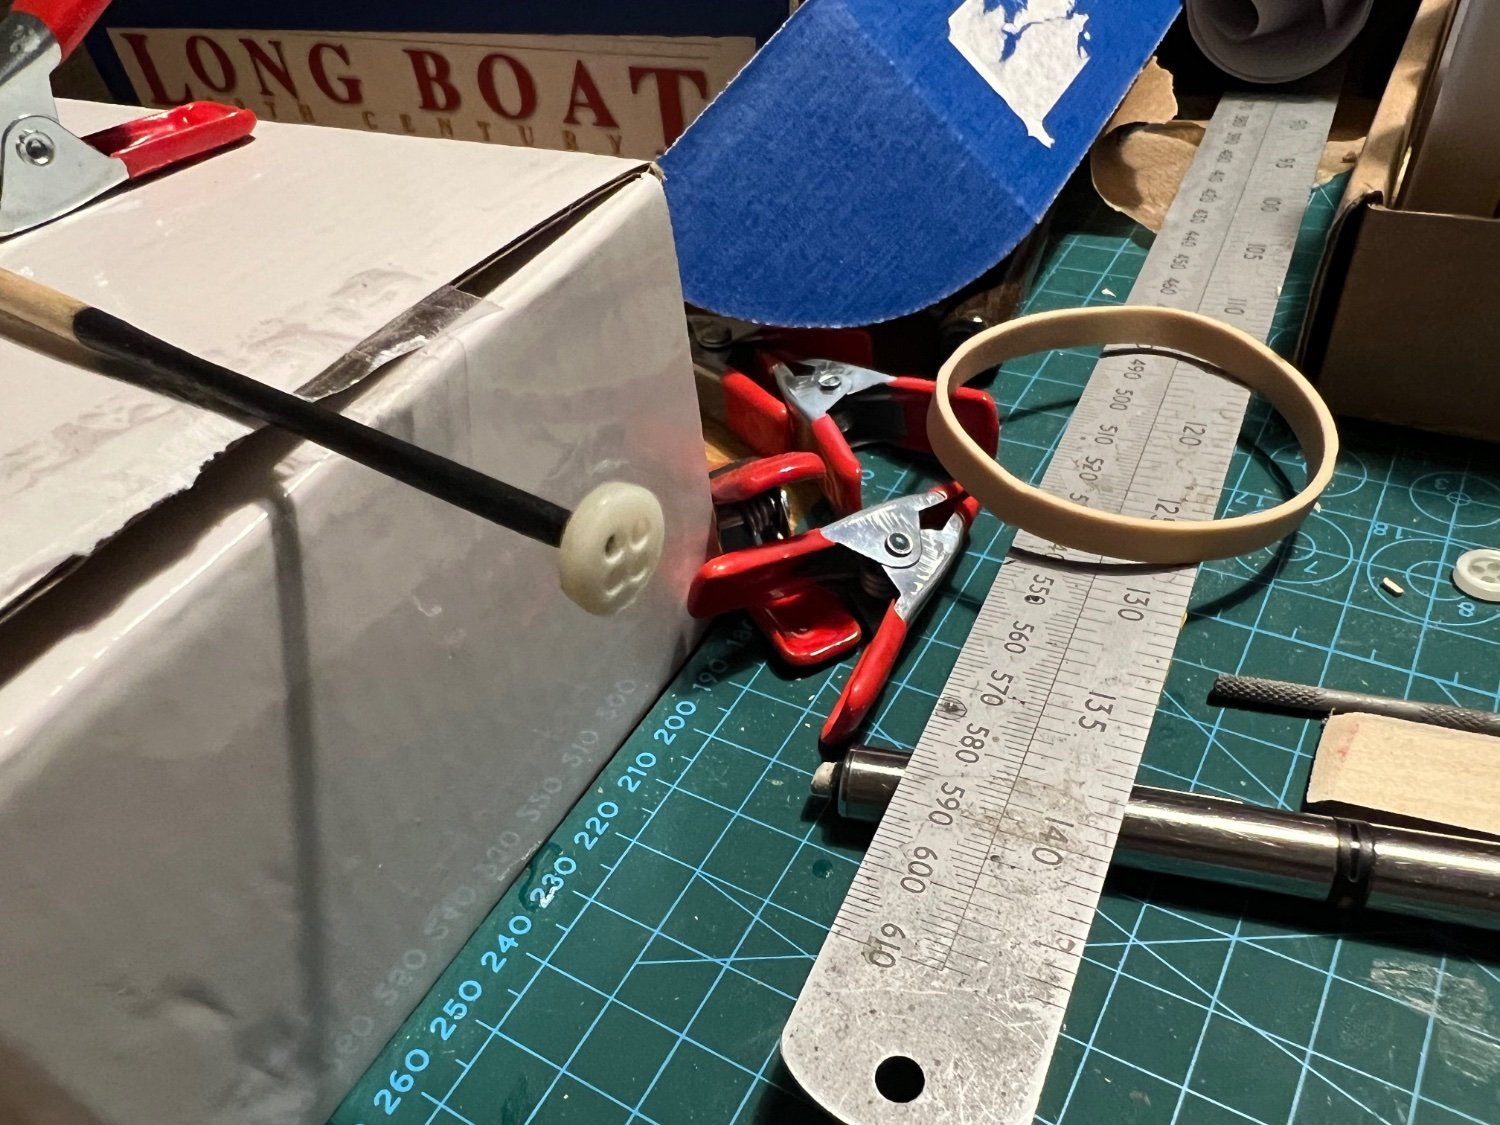
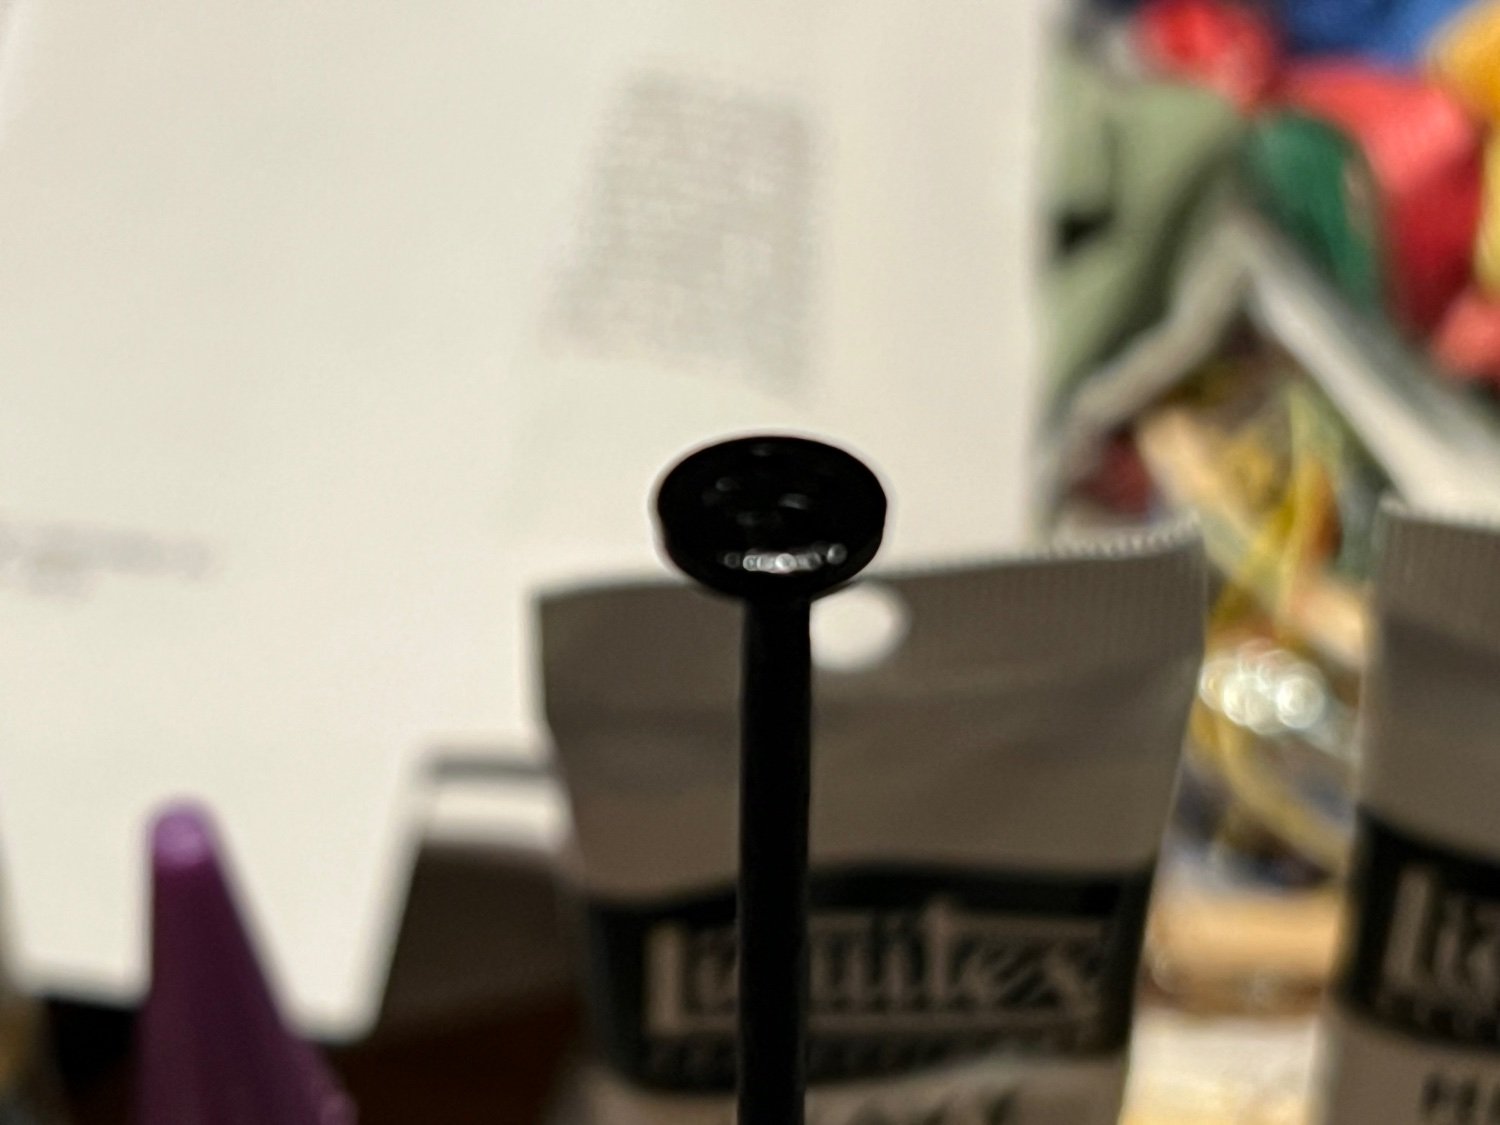
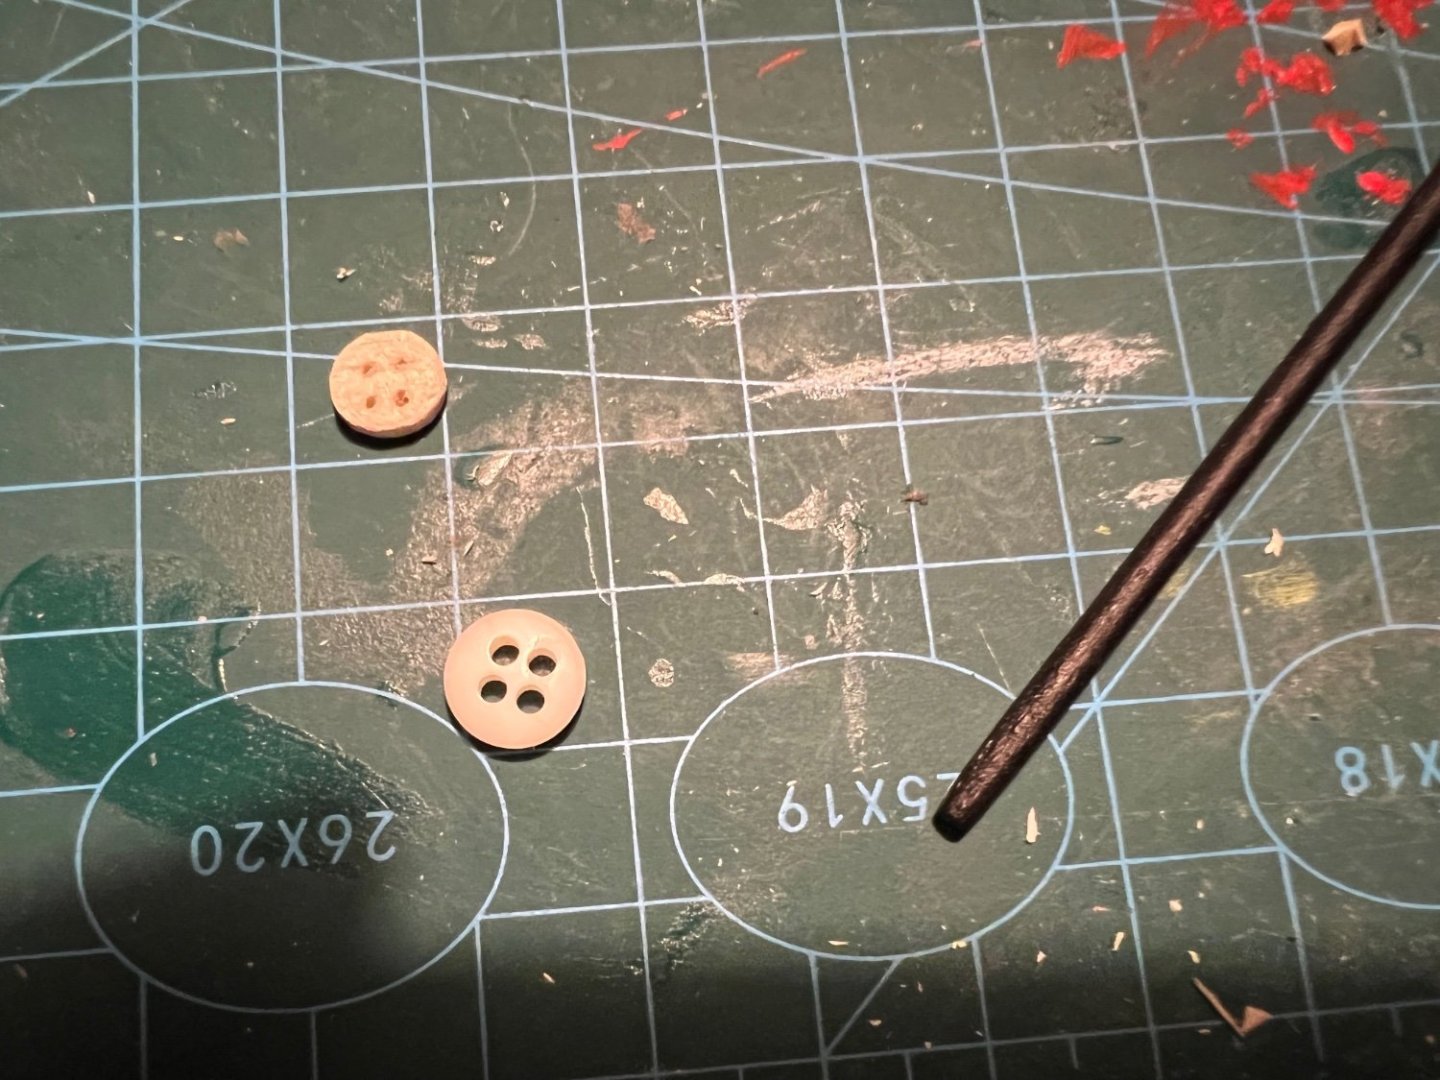
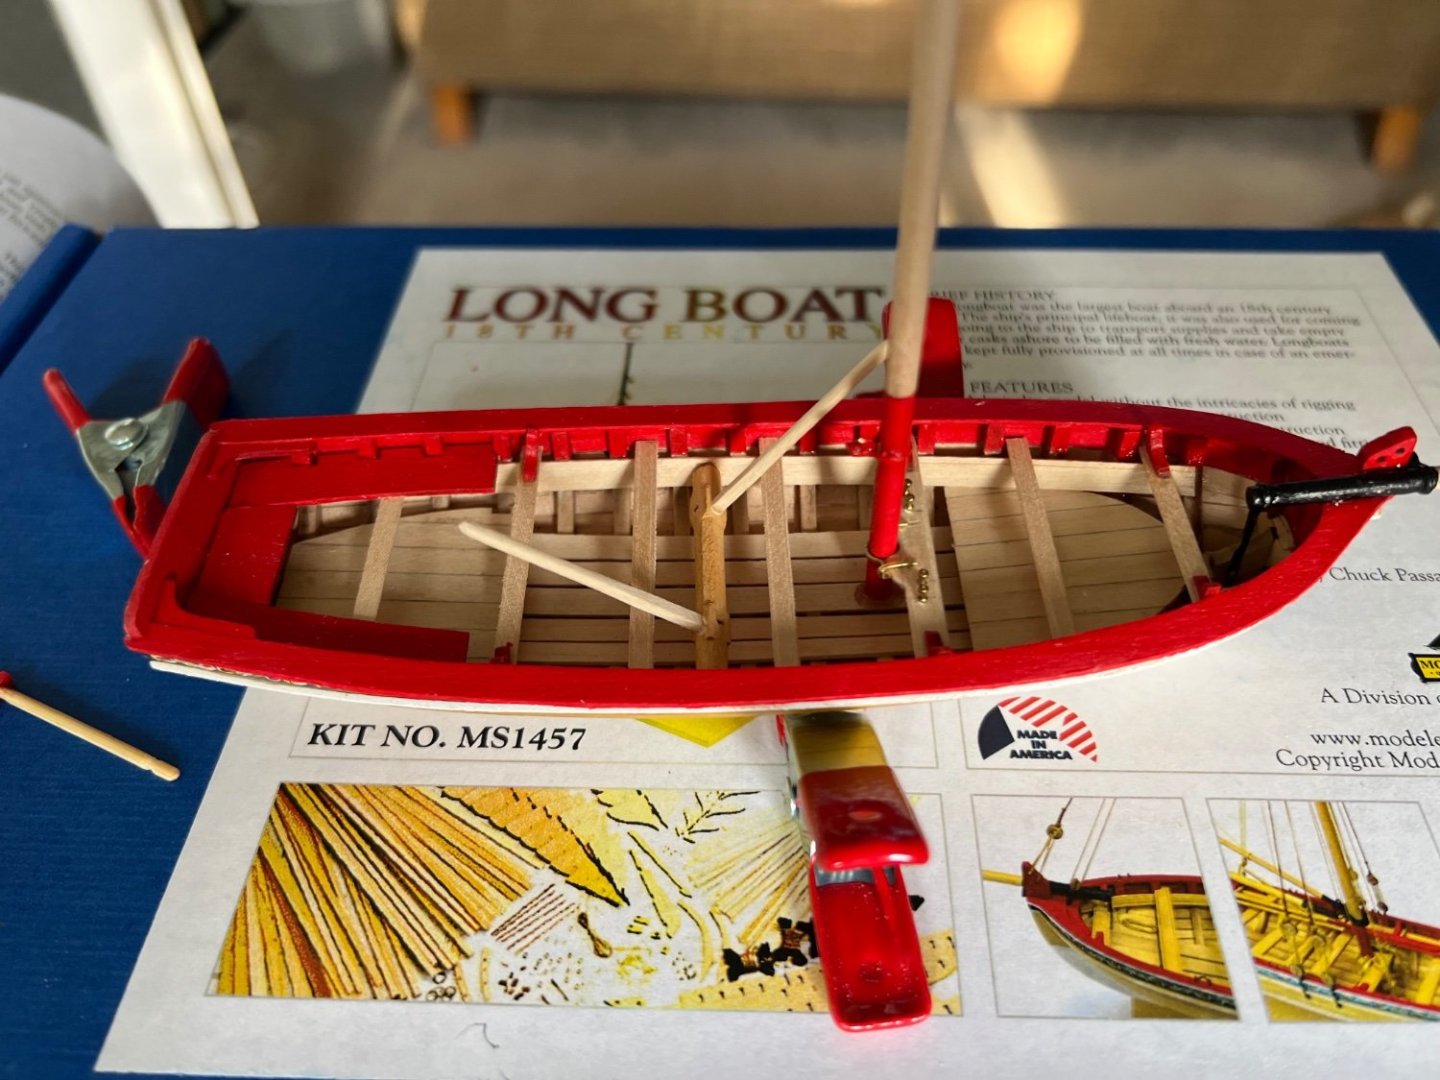
Lots of work preparing main mast and bowsprit. Real trouble making the ball truck at such a tiny scale. Had the bright idea of finding a suitable button to use instead. I don’t know what button are made from, but epoxy glue would not stick to it. Went back to the wooden one I had fashioned and used that. Using a drill and sand paper as described in instructions to shape masts worked really well. But watch you don’t get friction burns. All the tiny fittings are a real struggle fit my 64 year old eyes and sausage fingers. But I am quite pleased with the finished look.


- 18 replies
-
- 4
-
-
- 18th century longboat
- Model Shipways
- (and 1 more)
-
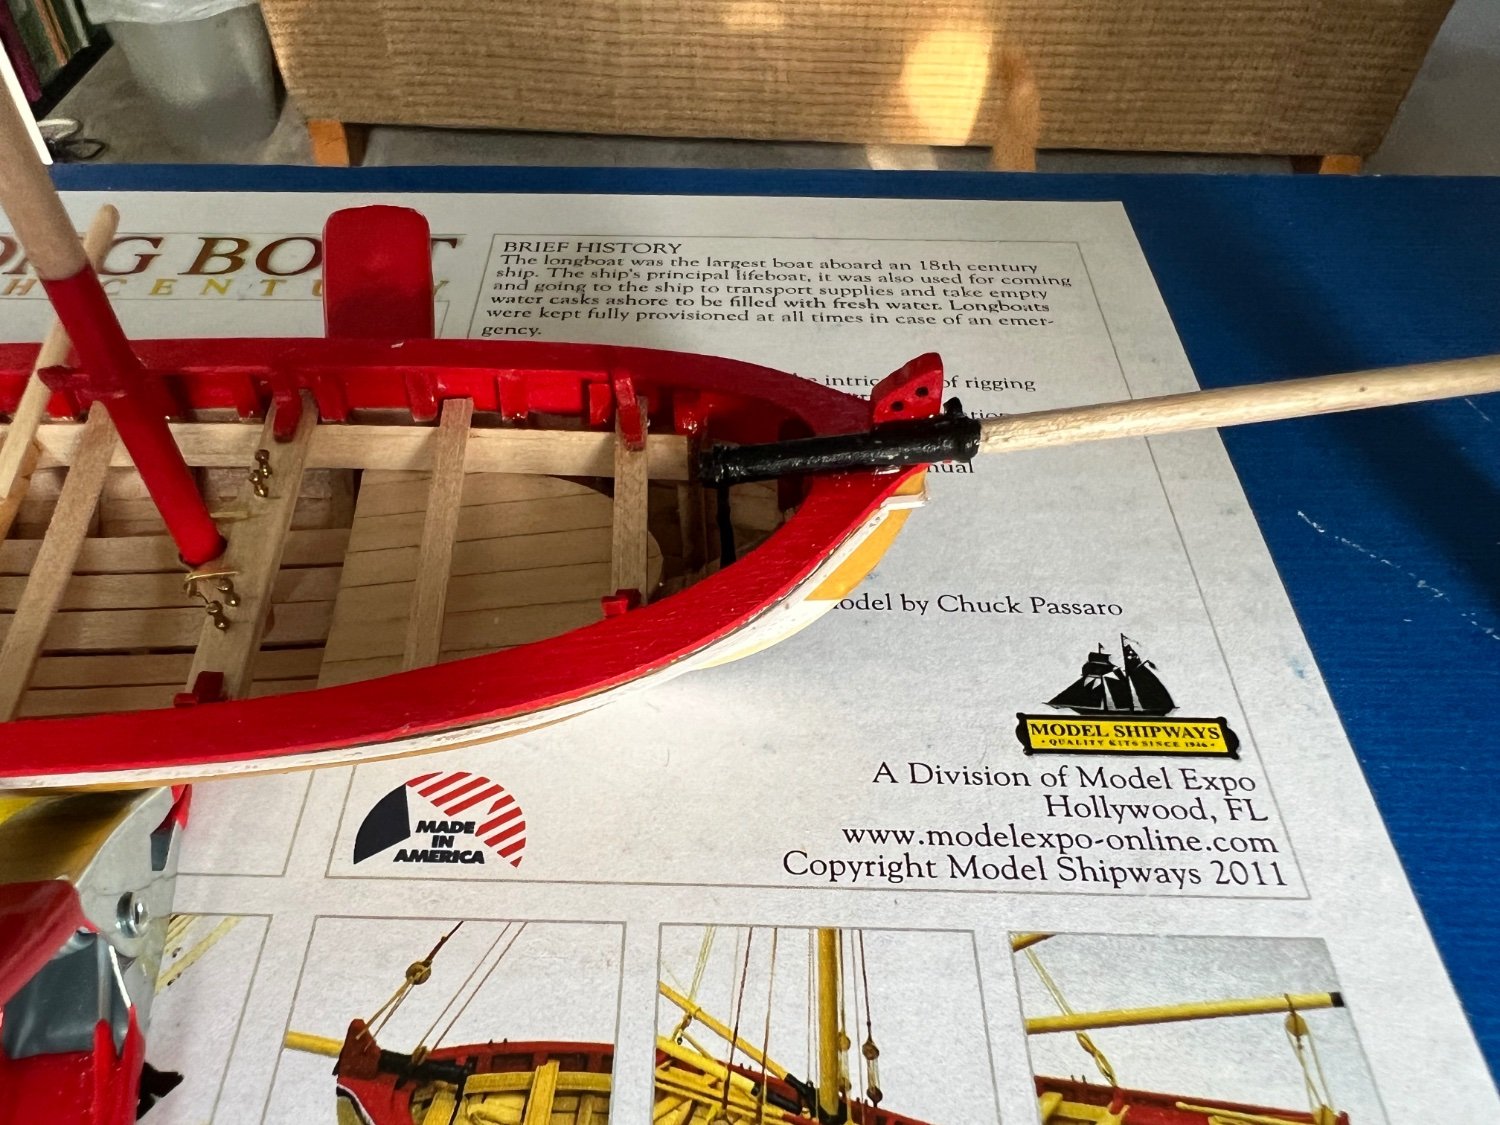
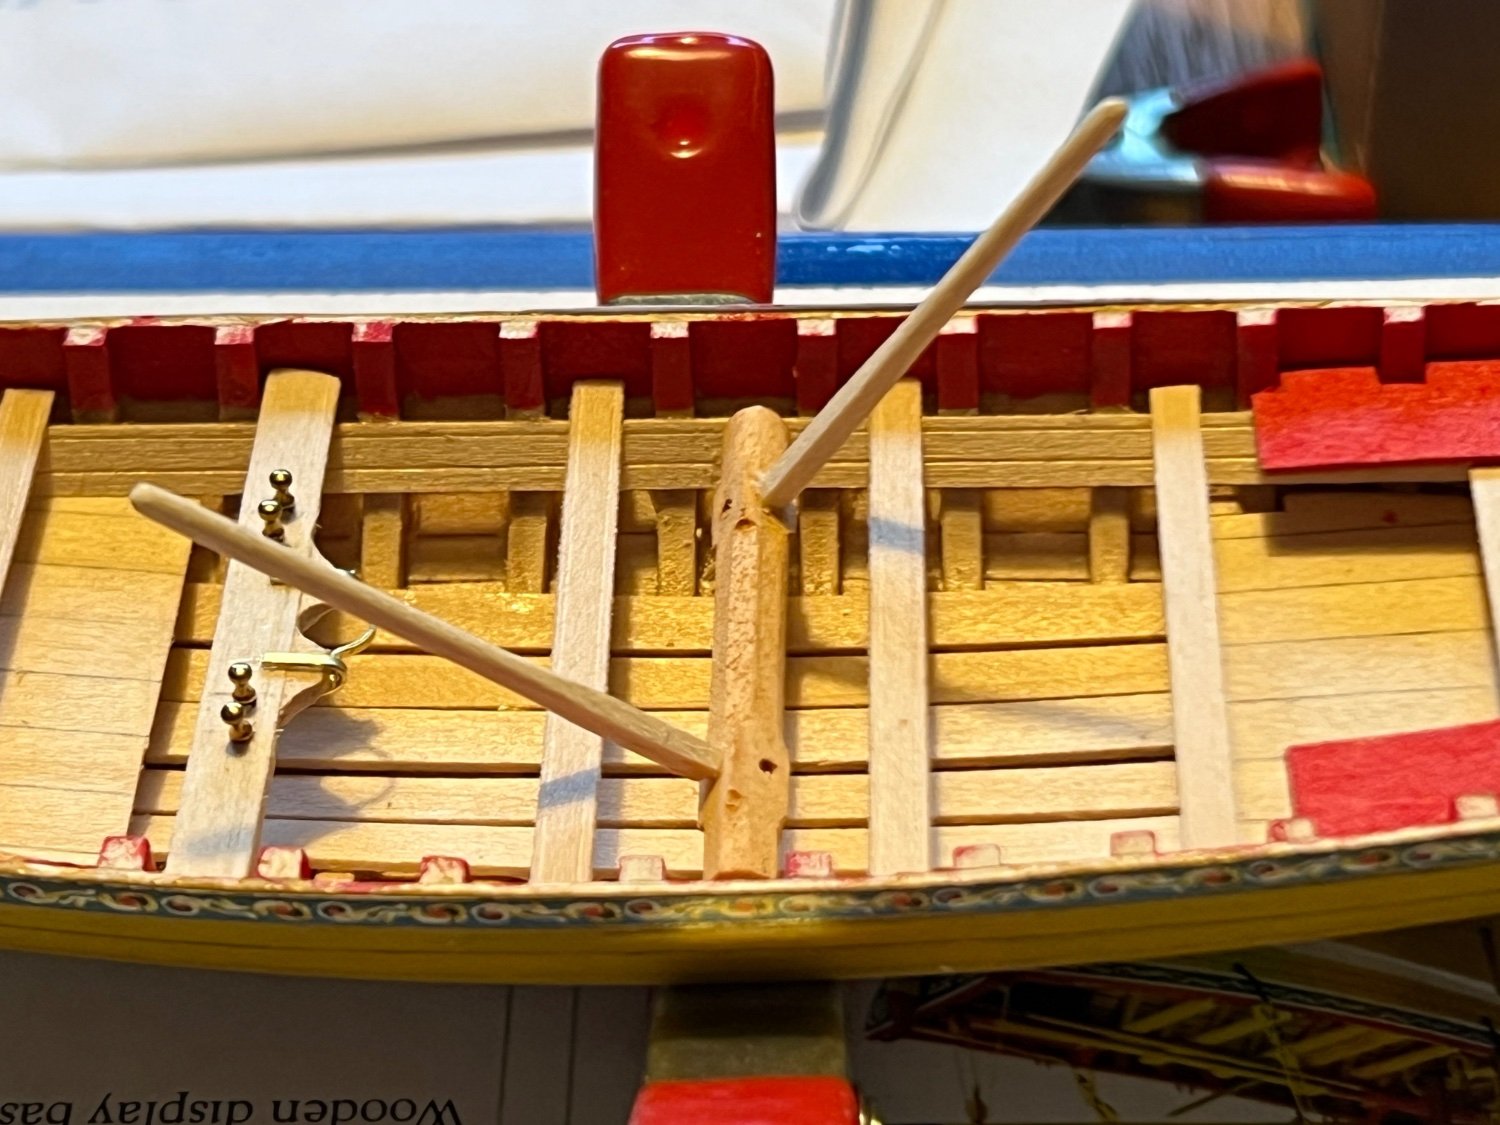
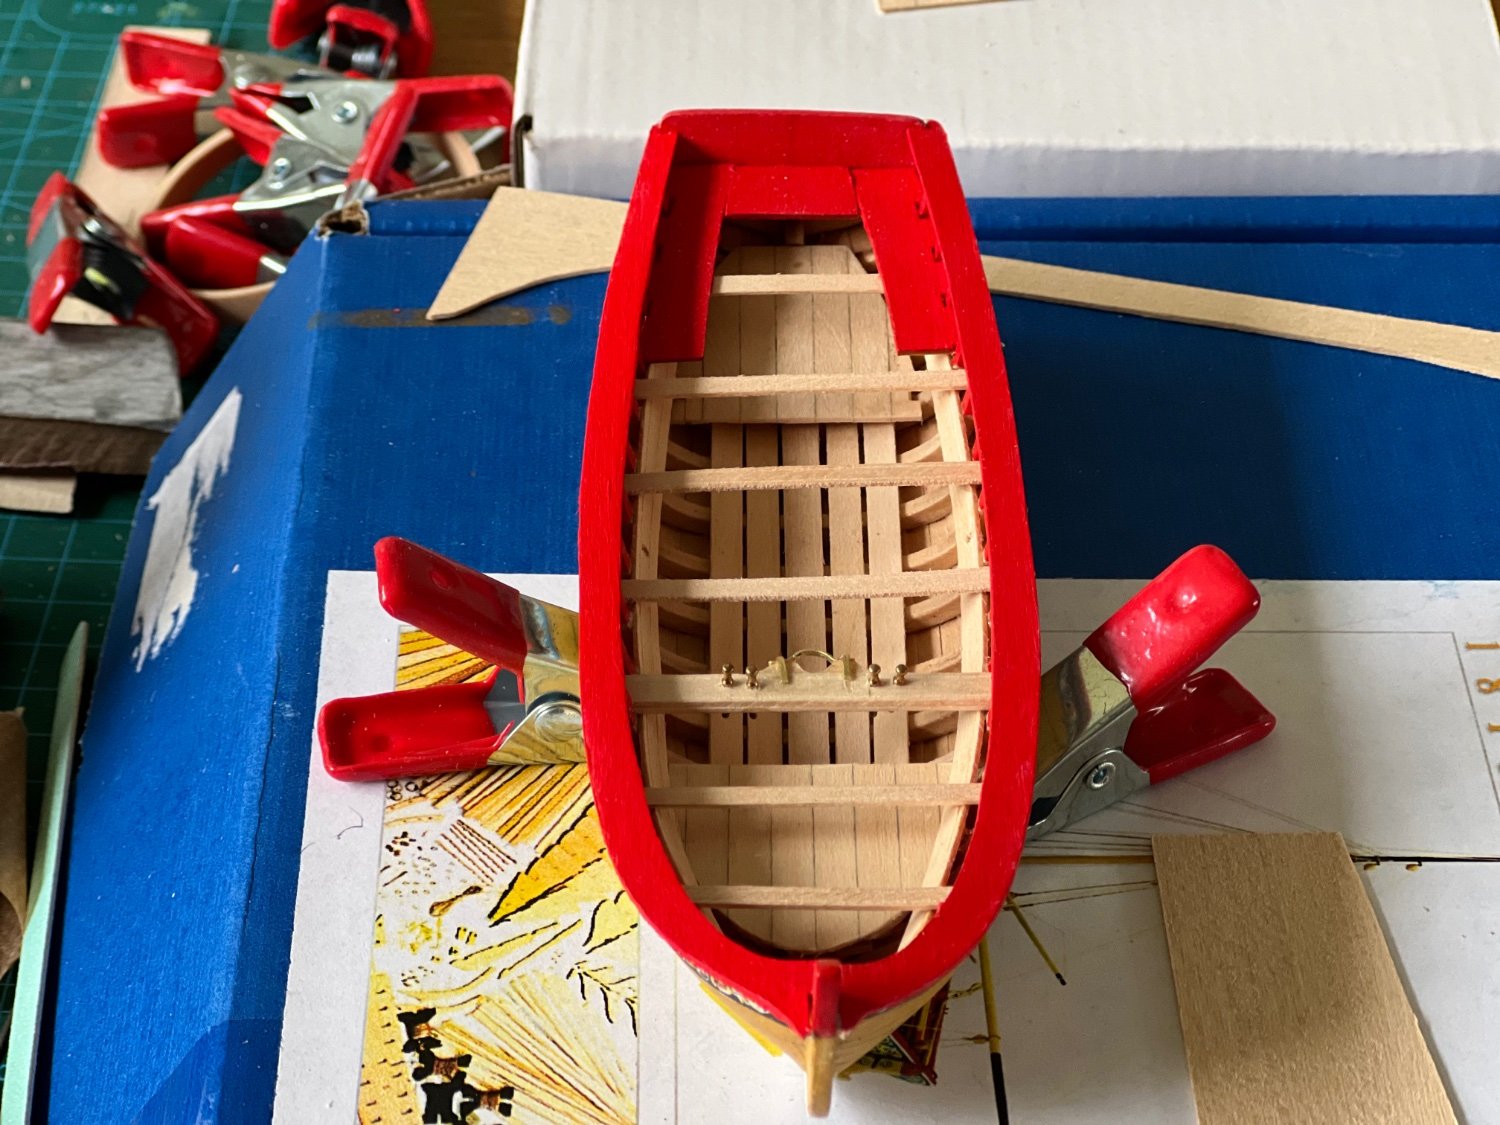
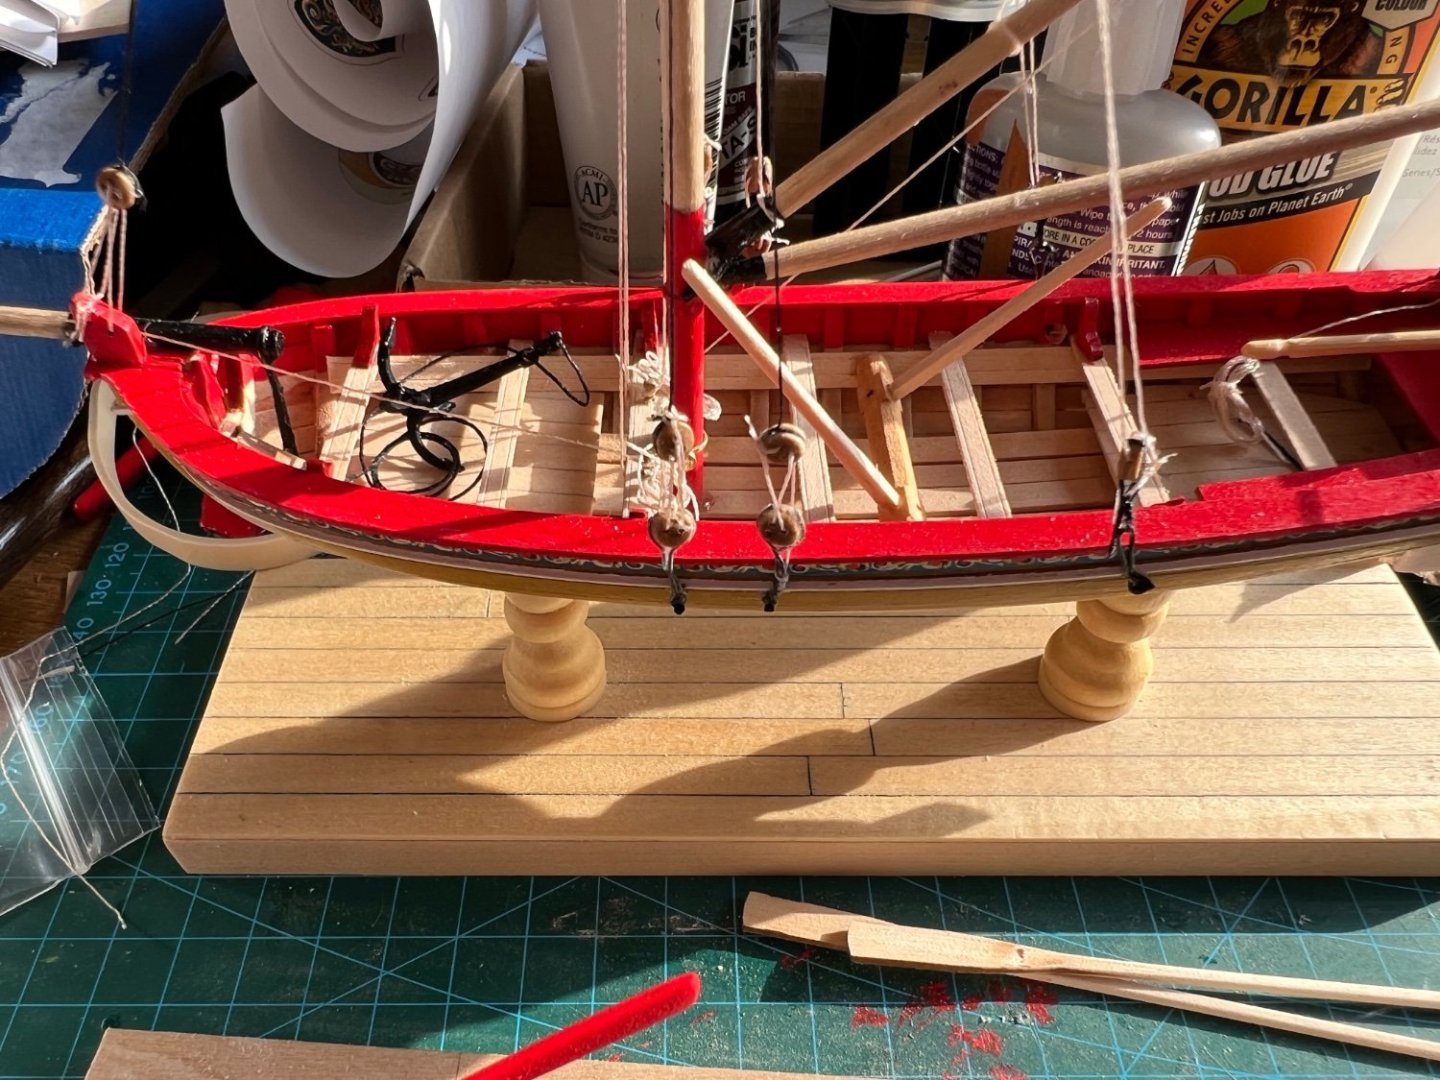
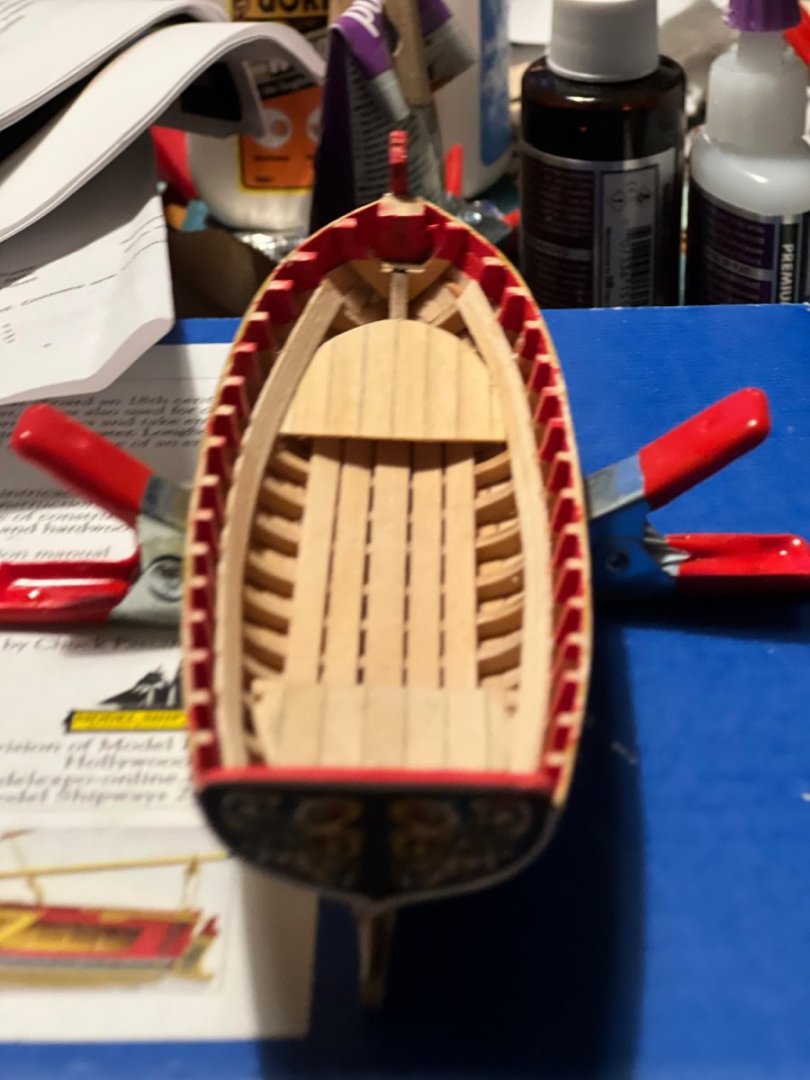
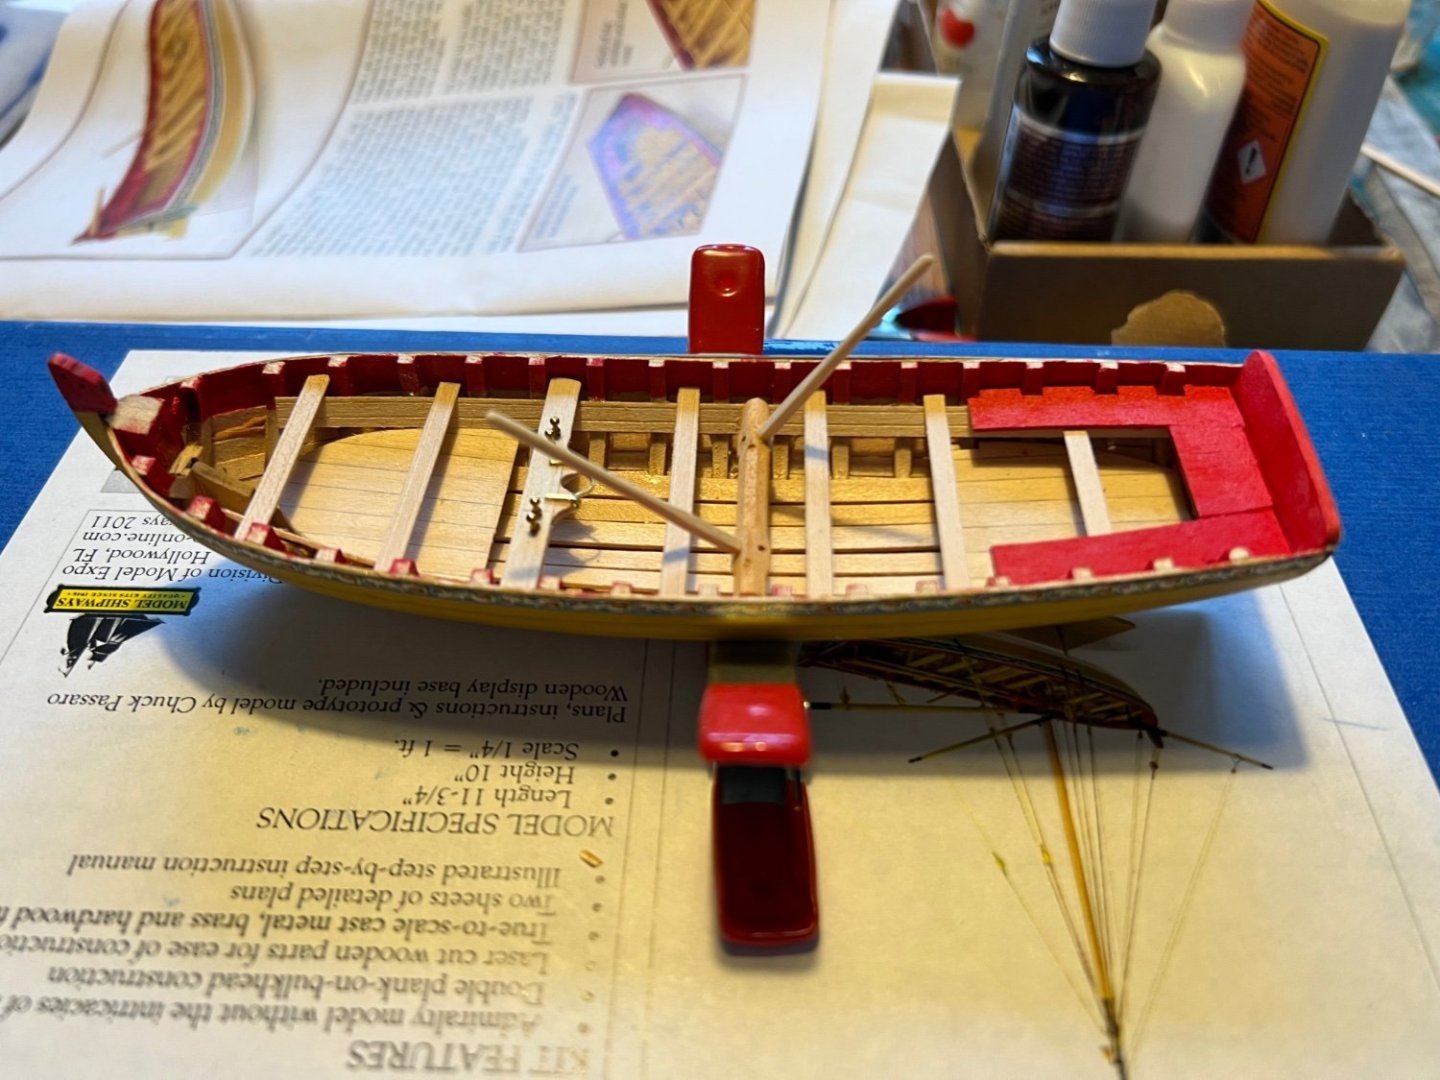
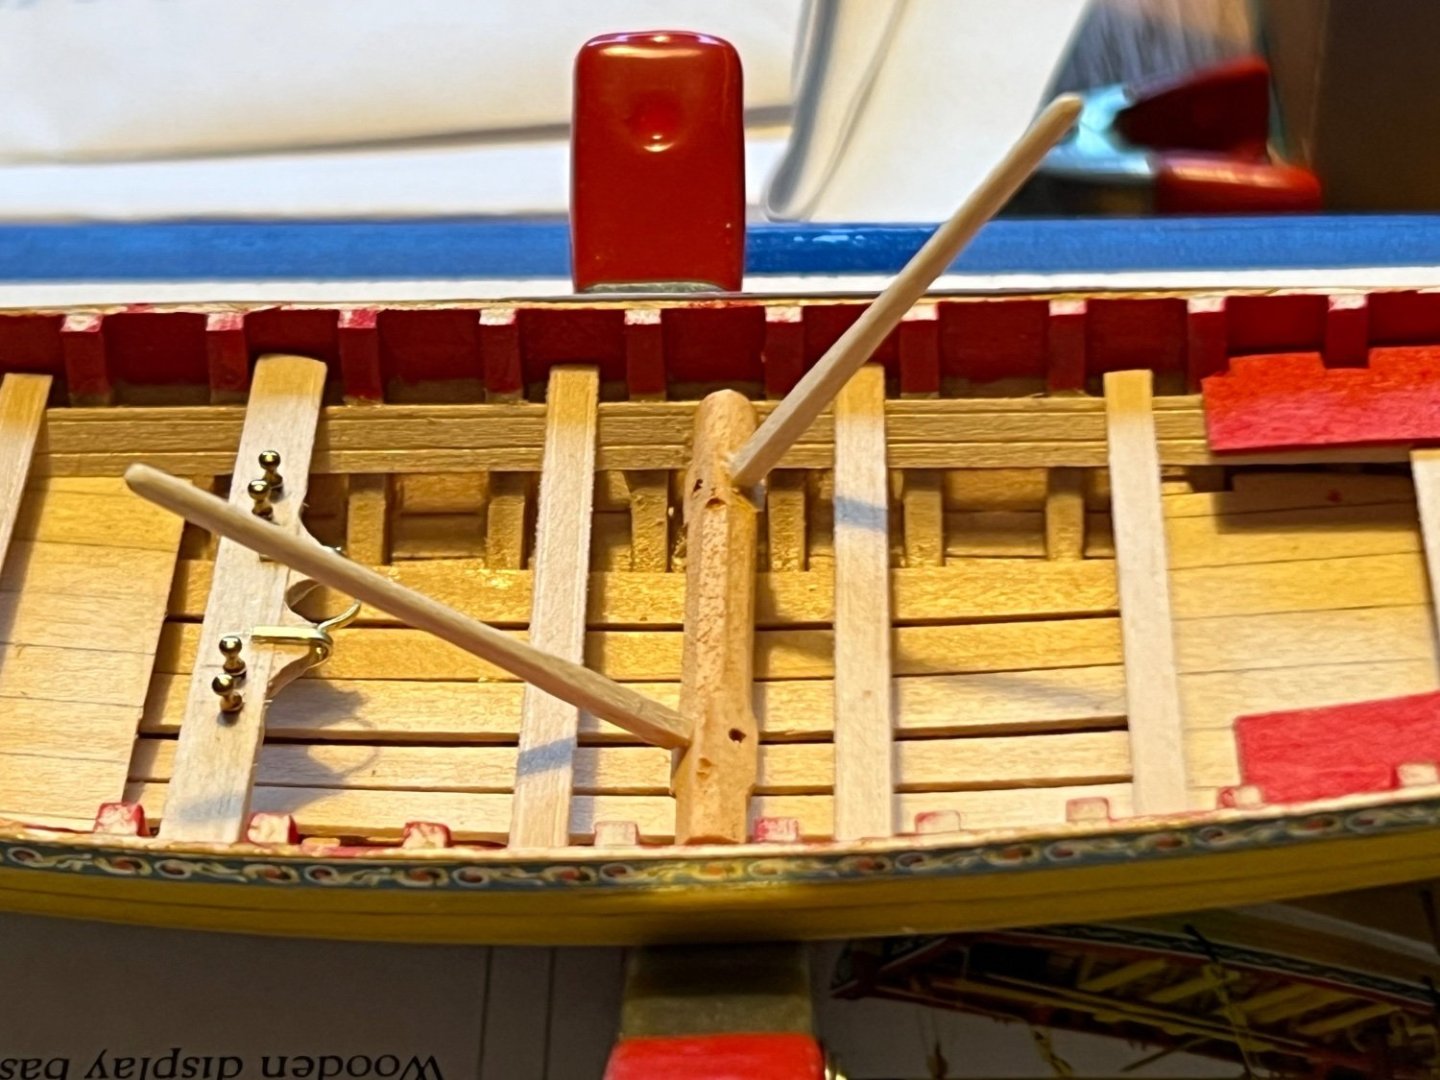
Adding internal detail. Now I am starting to really enjoy the process. When i added the forward floor, I realised I hadn’t taken enough material from the keel and frames so it was going in too high. Improvised a floor slightly further back to compensate. Wrong number of thwarts (look at plan next time!). Really enjoyed making the tiny windlass and painting in this part of the build. When the detail was finished I added the cap rails and immediately realised why it would be better done before detail. Almost impossible filing internal frames so ended up with a slightly wide cap rail. But overall pleased with how it’s looking. And barring disasters, I can actually see myself finishing this model. Already thinking about next model. Maybe a one masted napoleonic cutter. Any recommendation?


- 18 replies
-
- 3
-
-
- 18th century longboat
- Model Shipways
- (and 1 more)
-
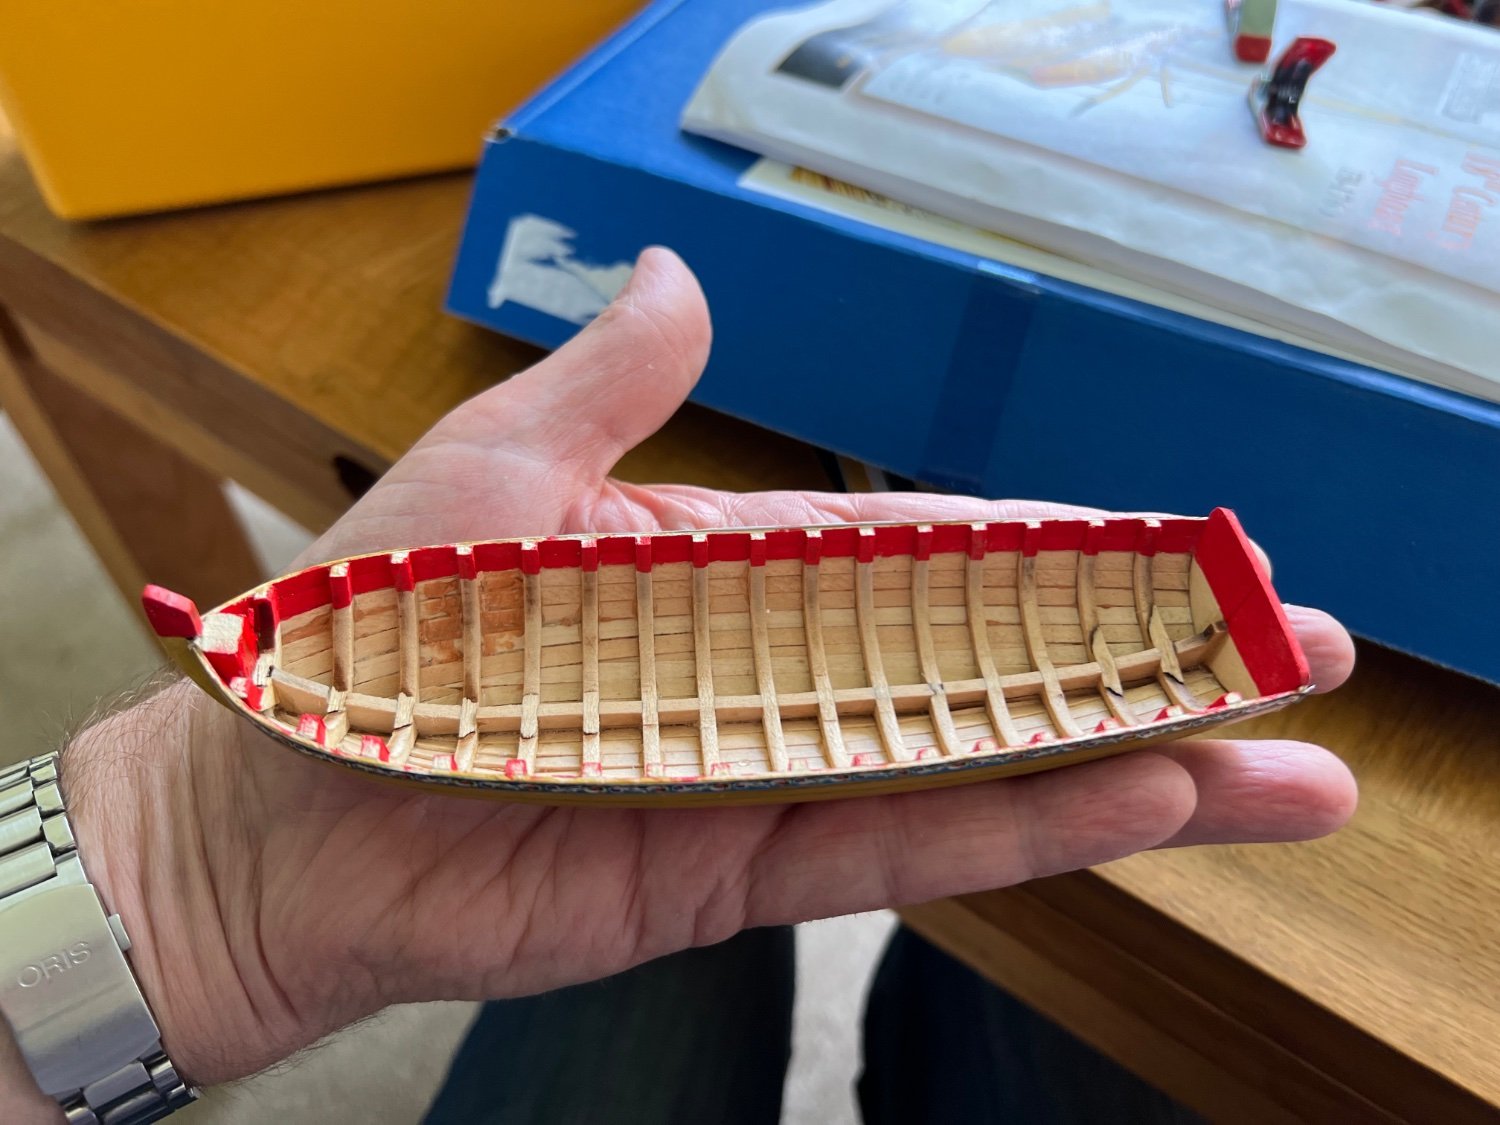
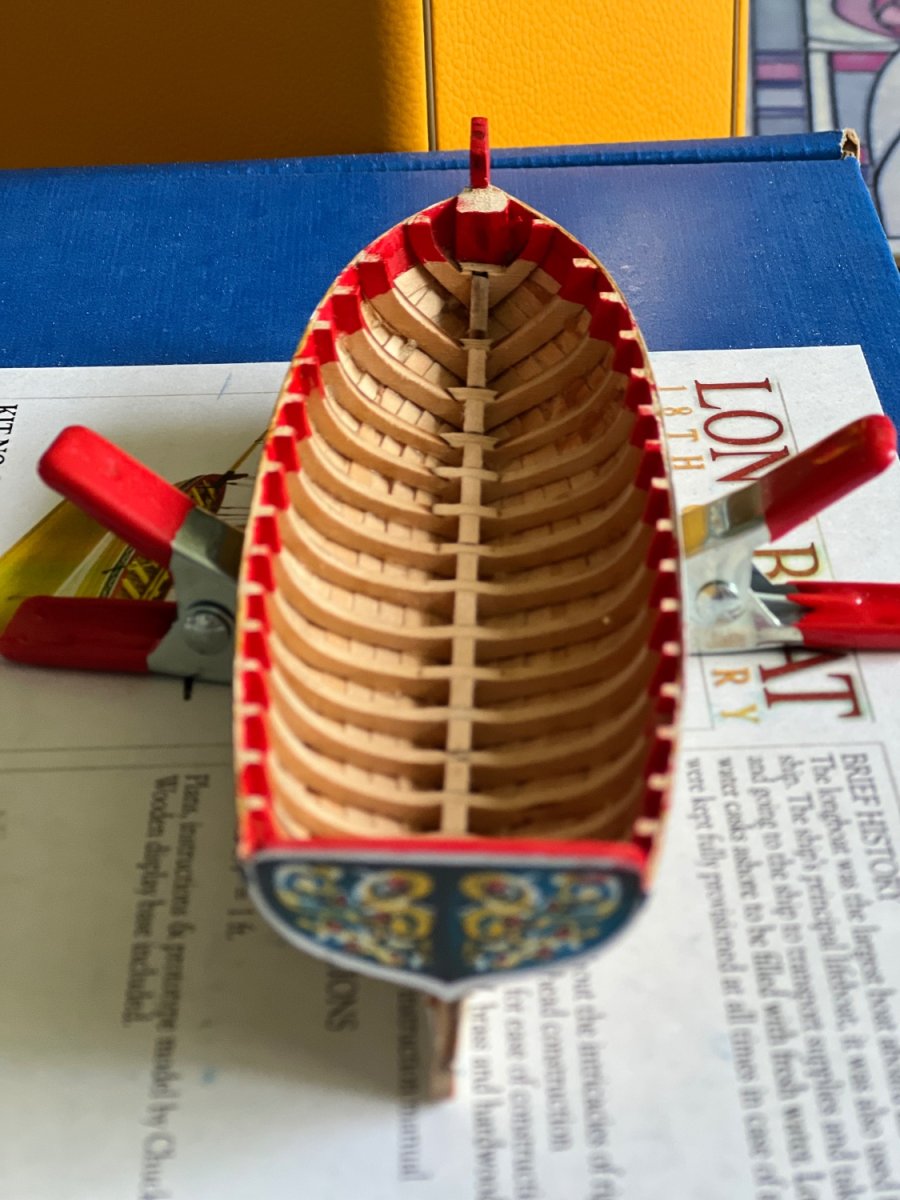
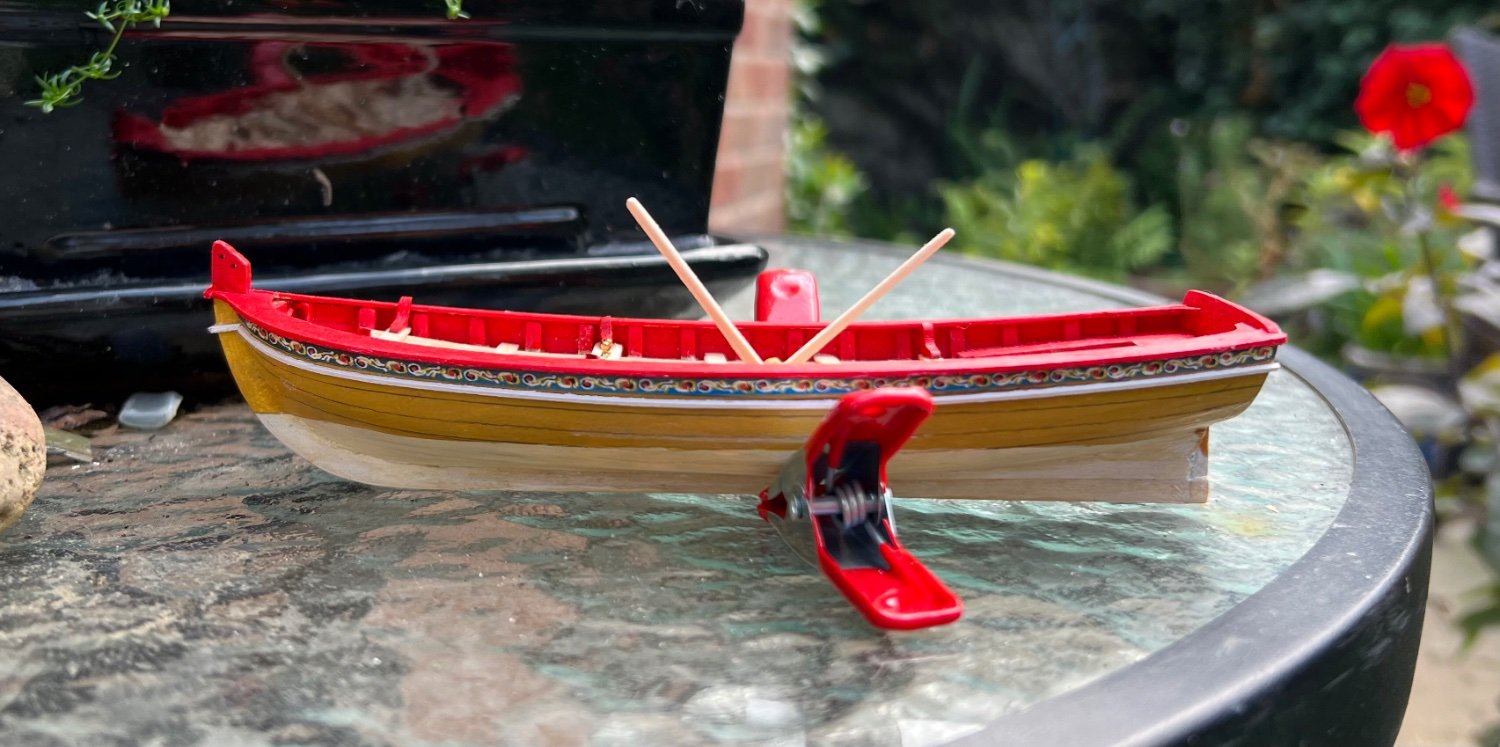
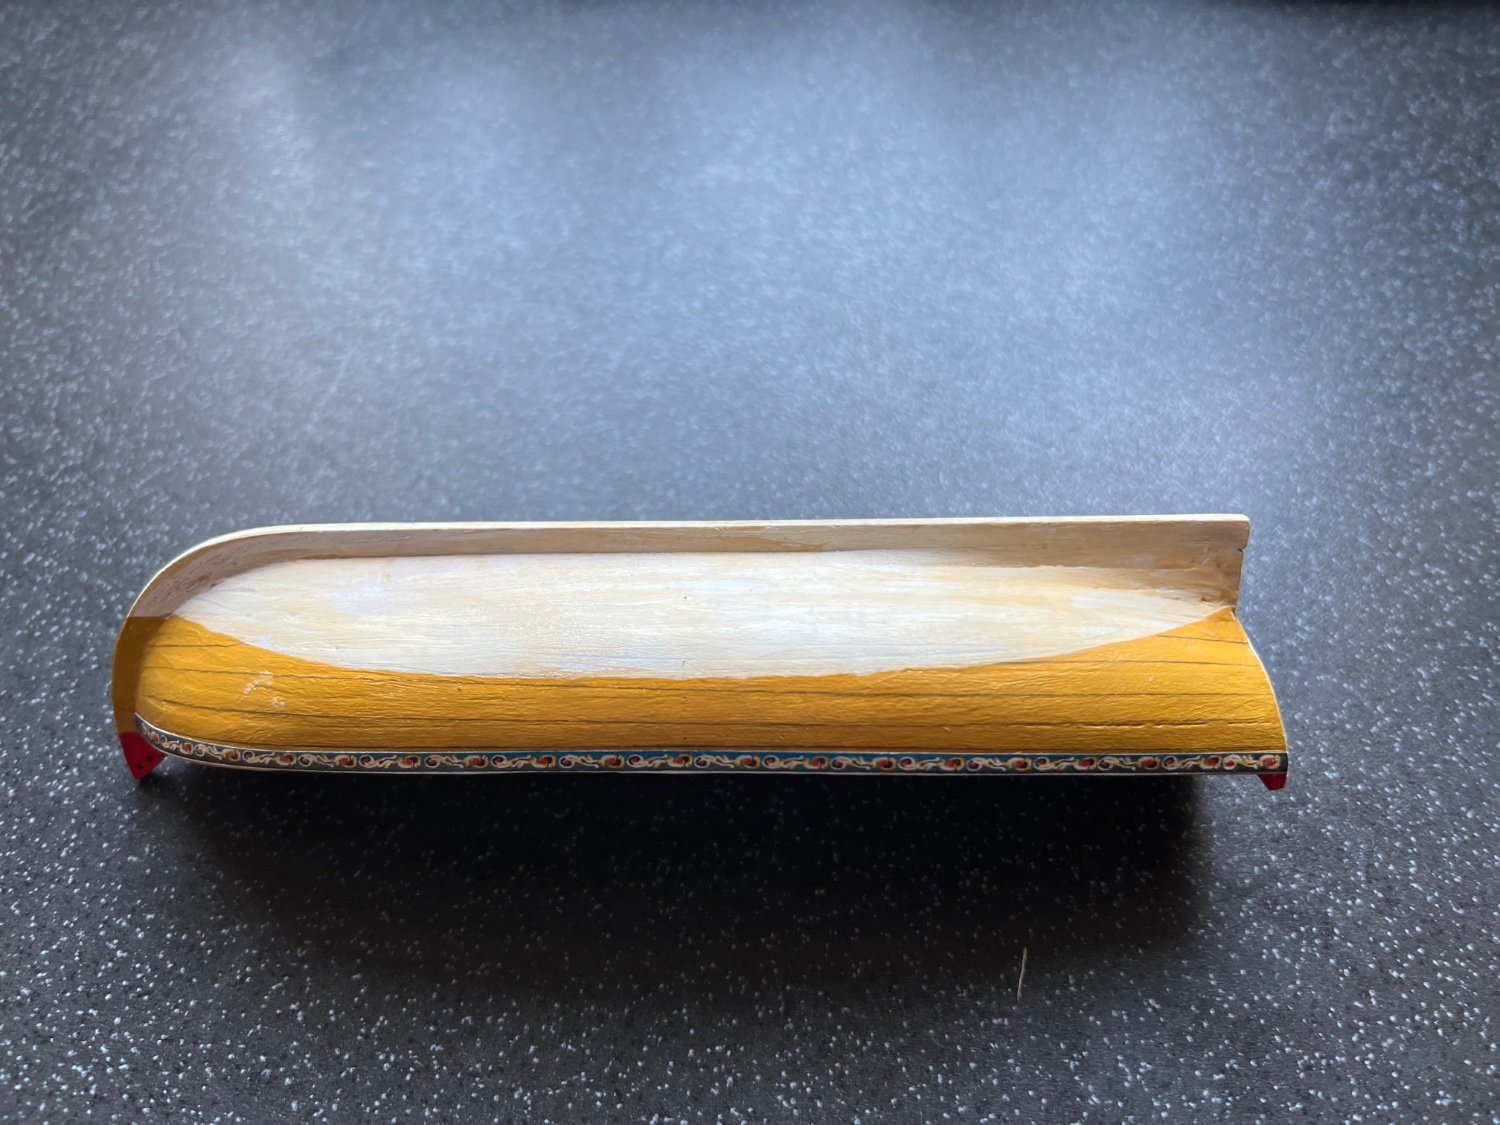
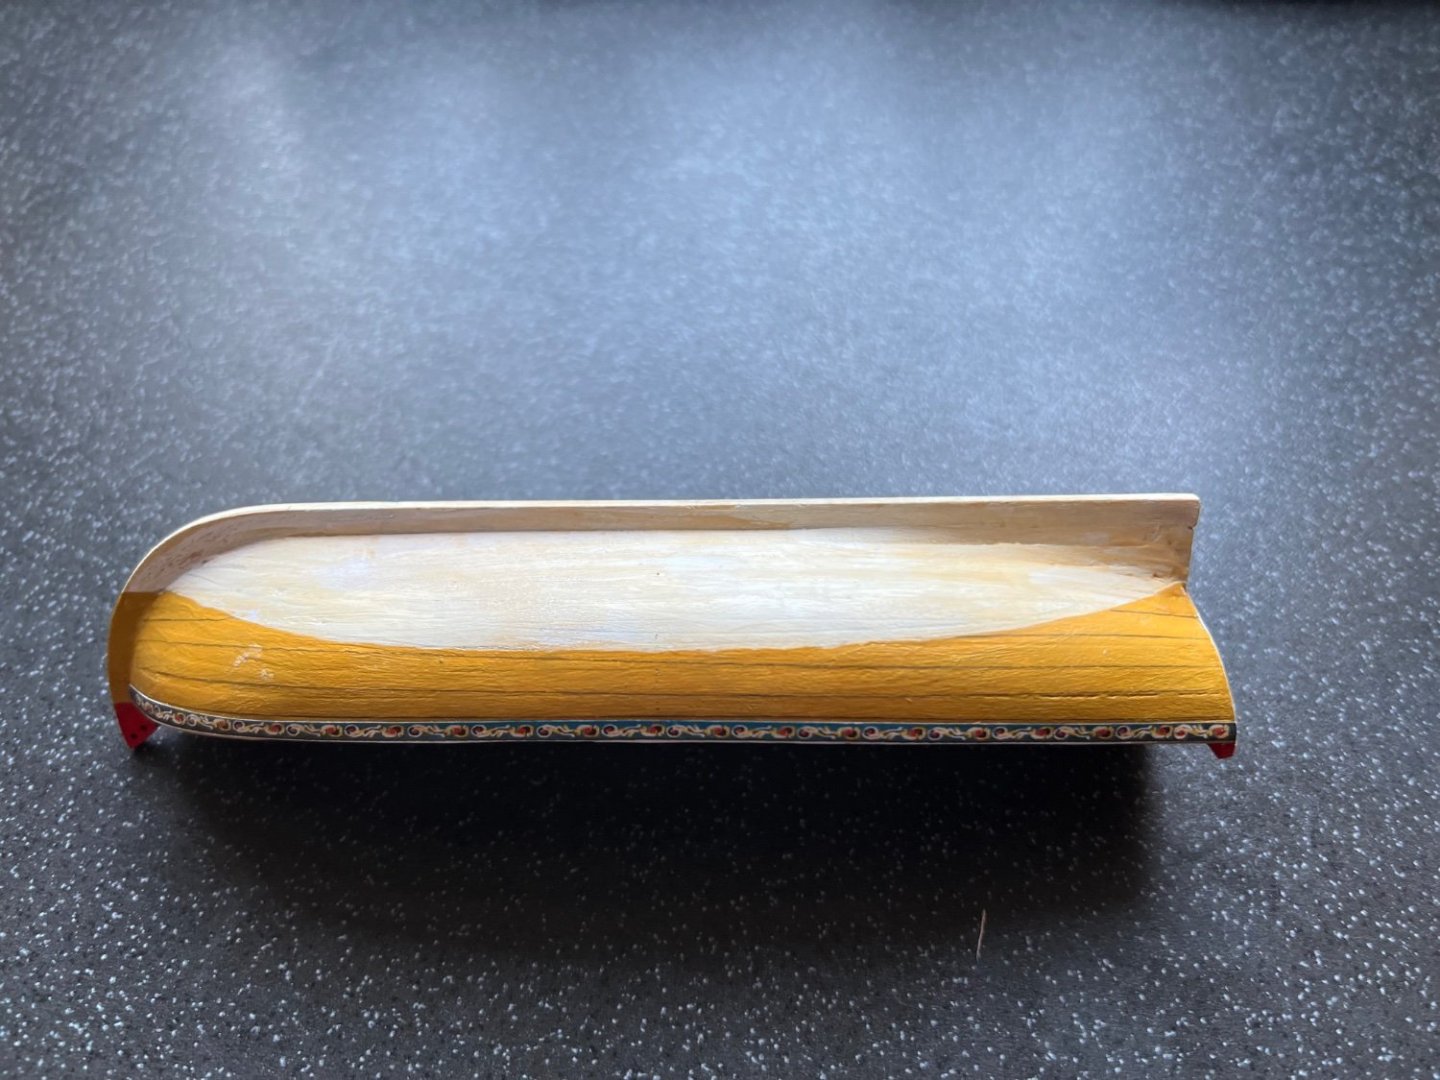
The rest of the planking seemed to go well. But I ended up with an ugly bulge on starboard where I hadn’t been as careful with prep. So I had to cut some sections out and replace with small planks and filler. The design of the kit was excellent and removing the bulkheads was a doddle, ending up with the lovely open boat look. Because of the errors with planking, I painted the hull ochre and white. The inside is ok and will be left as natural wood. I thought I would try a weathered look like the original NMM model. So I varnished the fresh paint with a mix of varnish and acrylic paint for an aged affect. I am quite pleased with the finish, but may put on some more whitewash affect later.
- 18 replies
-
- 4
-
-
- 18th century longboat
- Model Shipways
- (and 1 more)
-
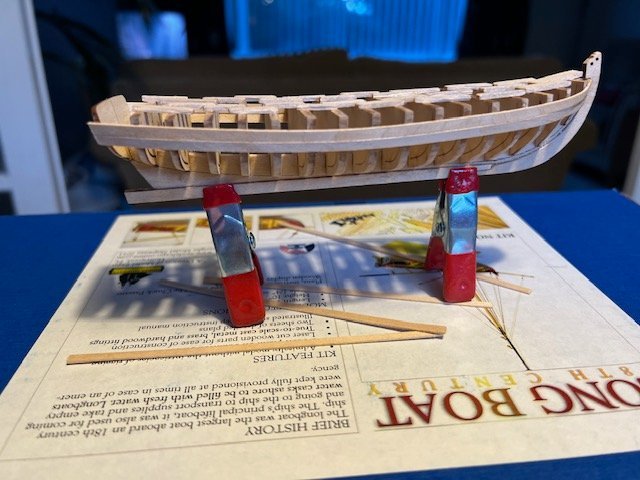
I am finding it a real challenge. But very enjoyable.
- 18 replies
-
- 3
-
-
- 18th century longboat
- Model Shipways
- (and 1 more)
-
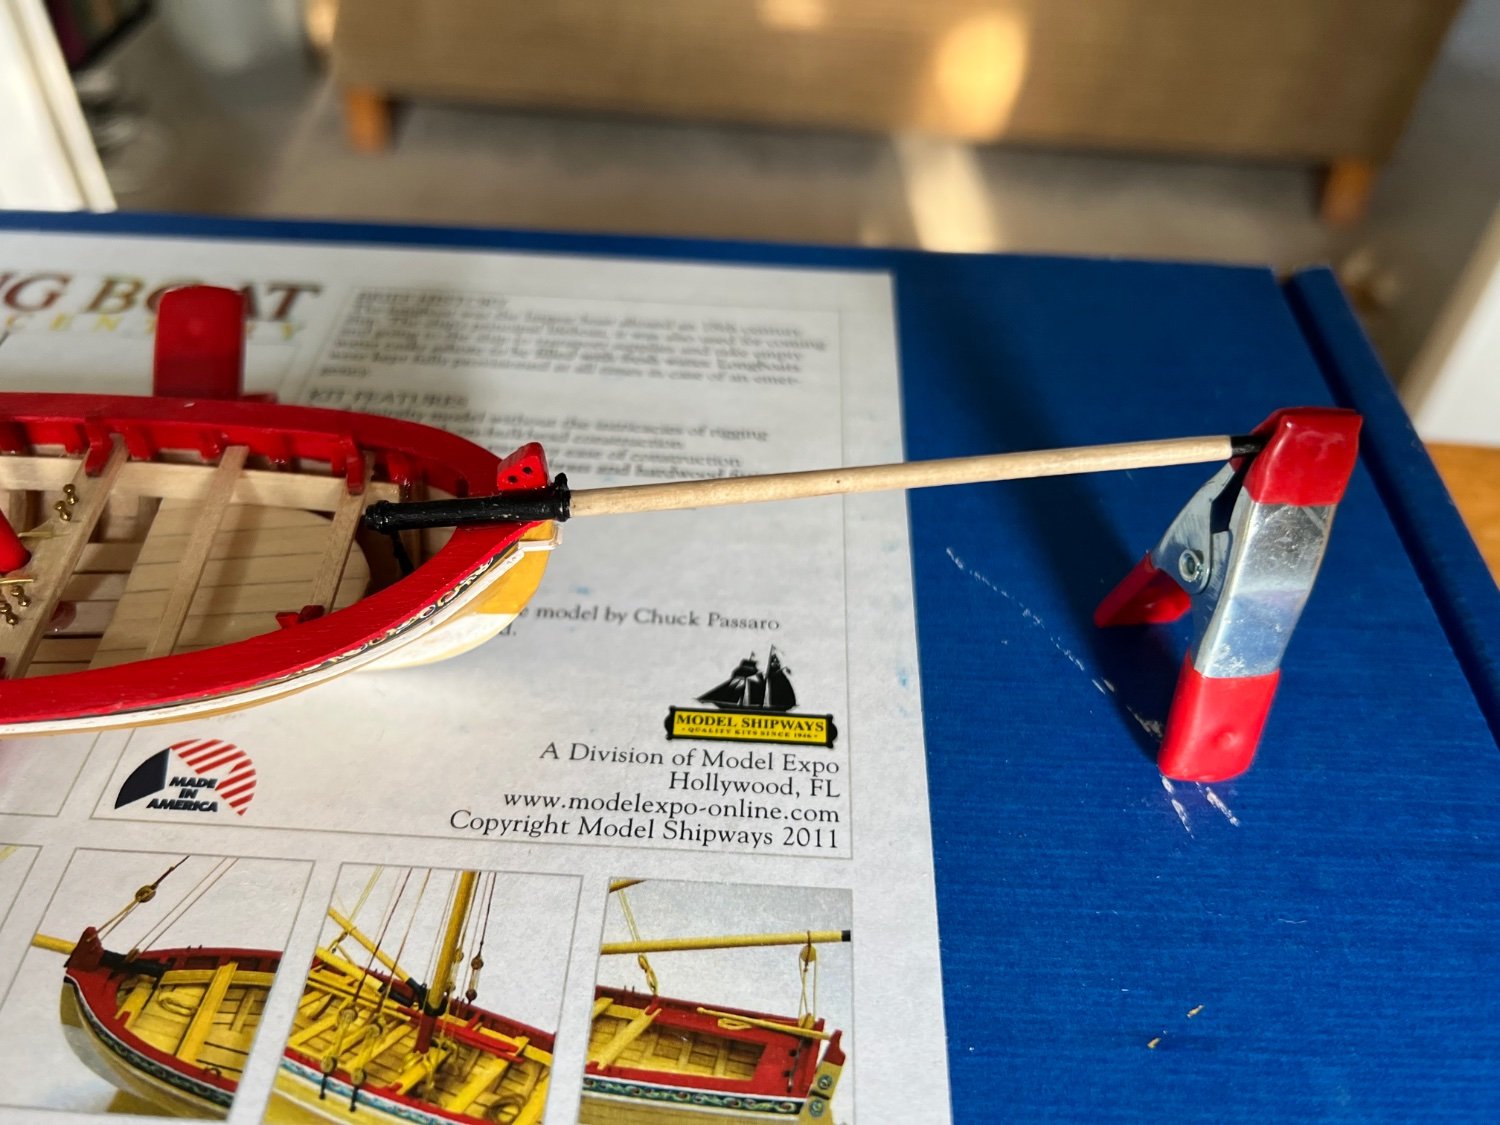
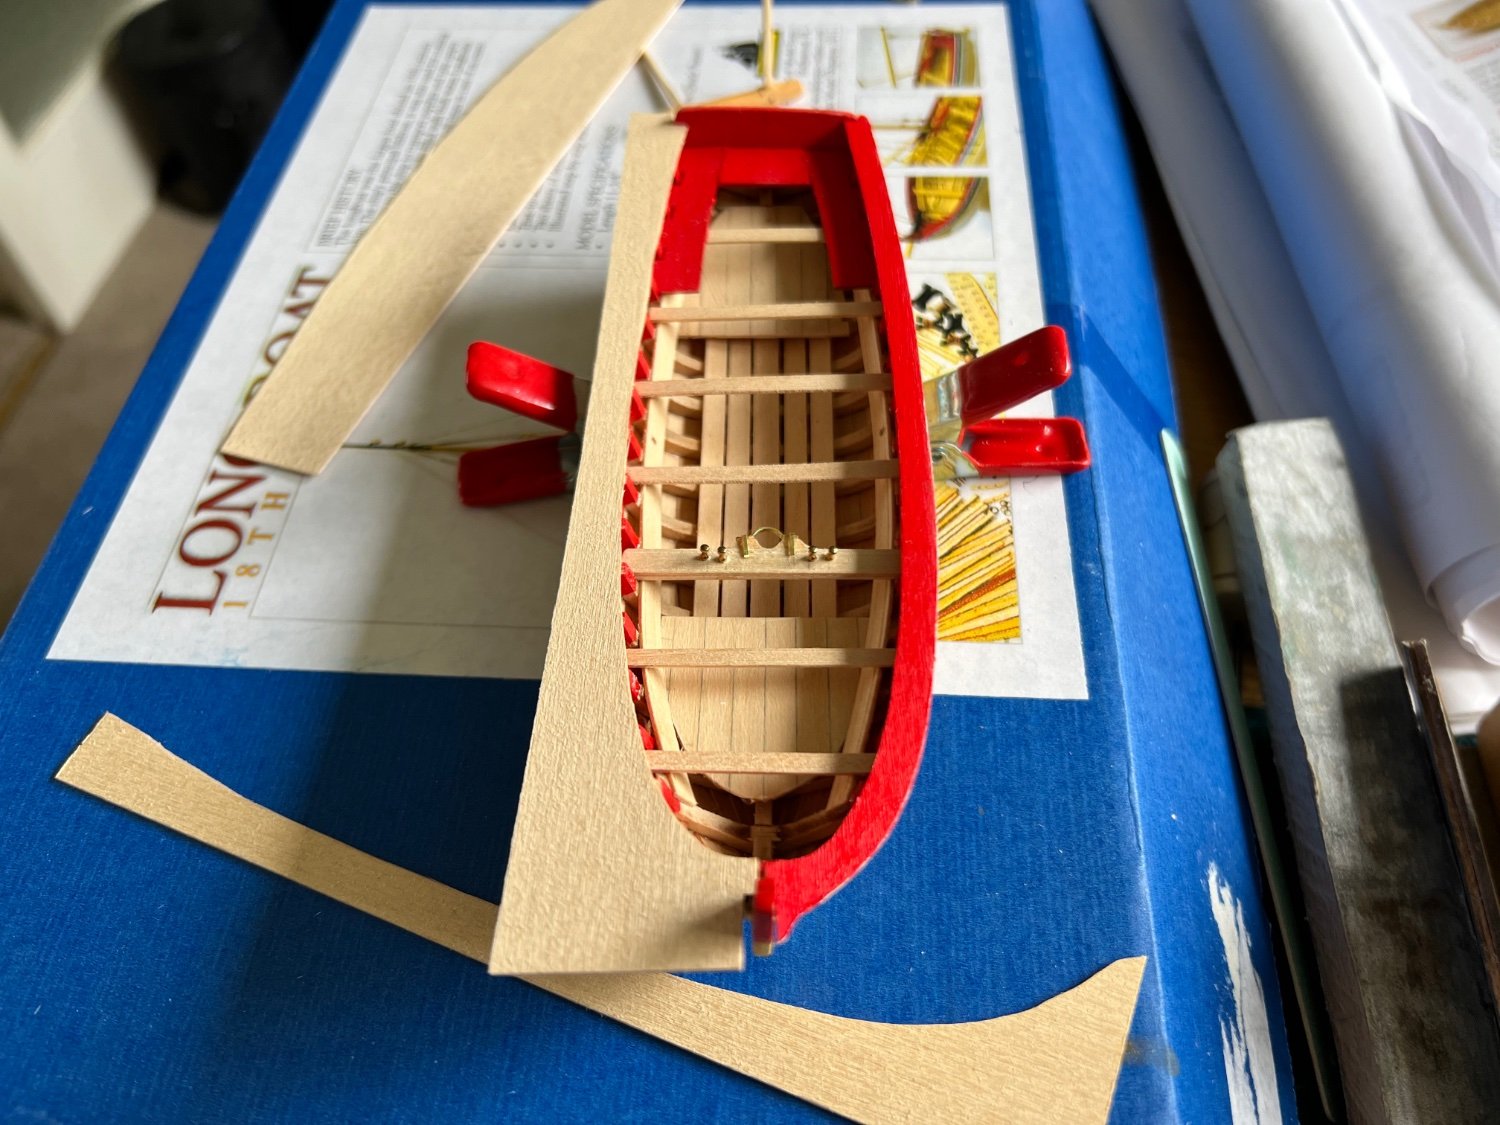
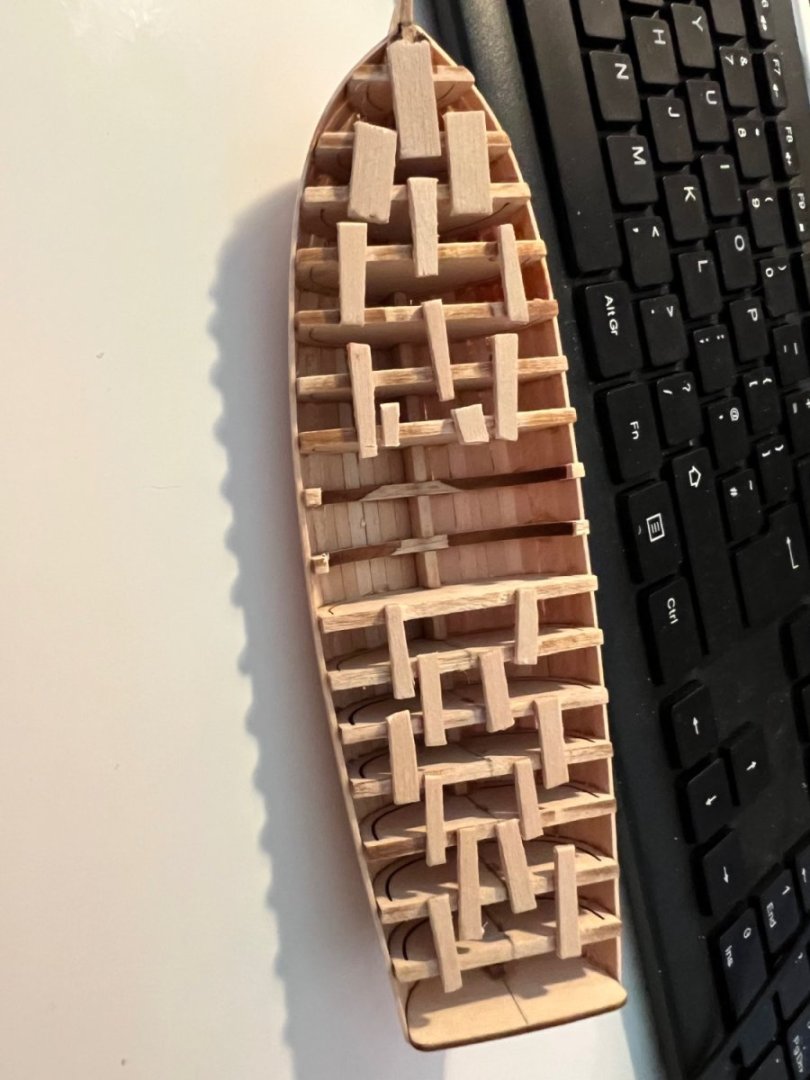
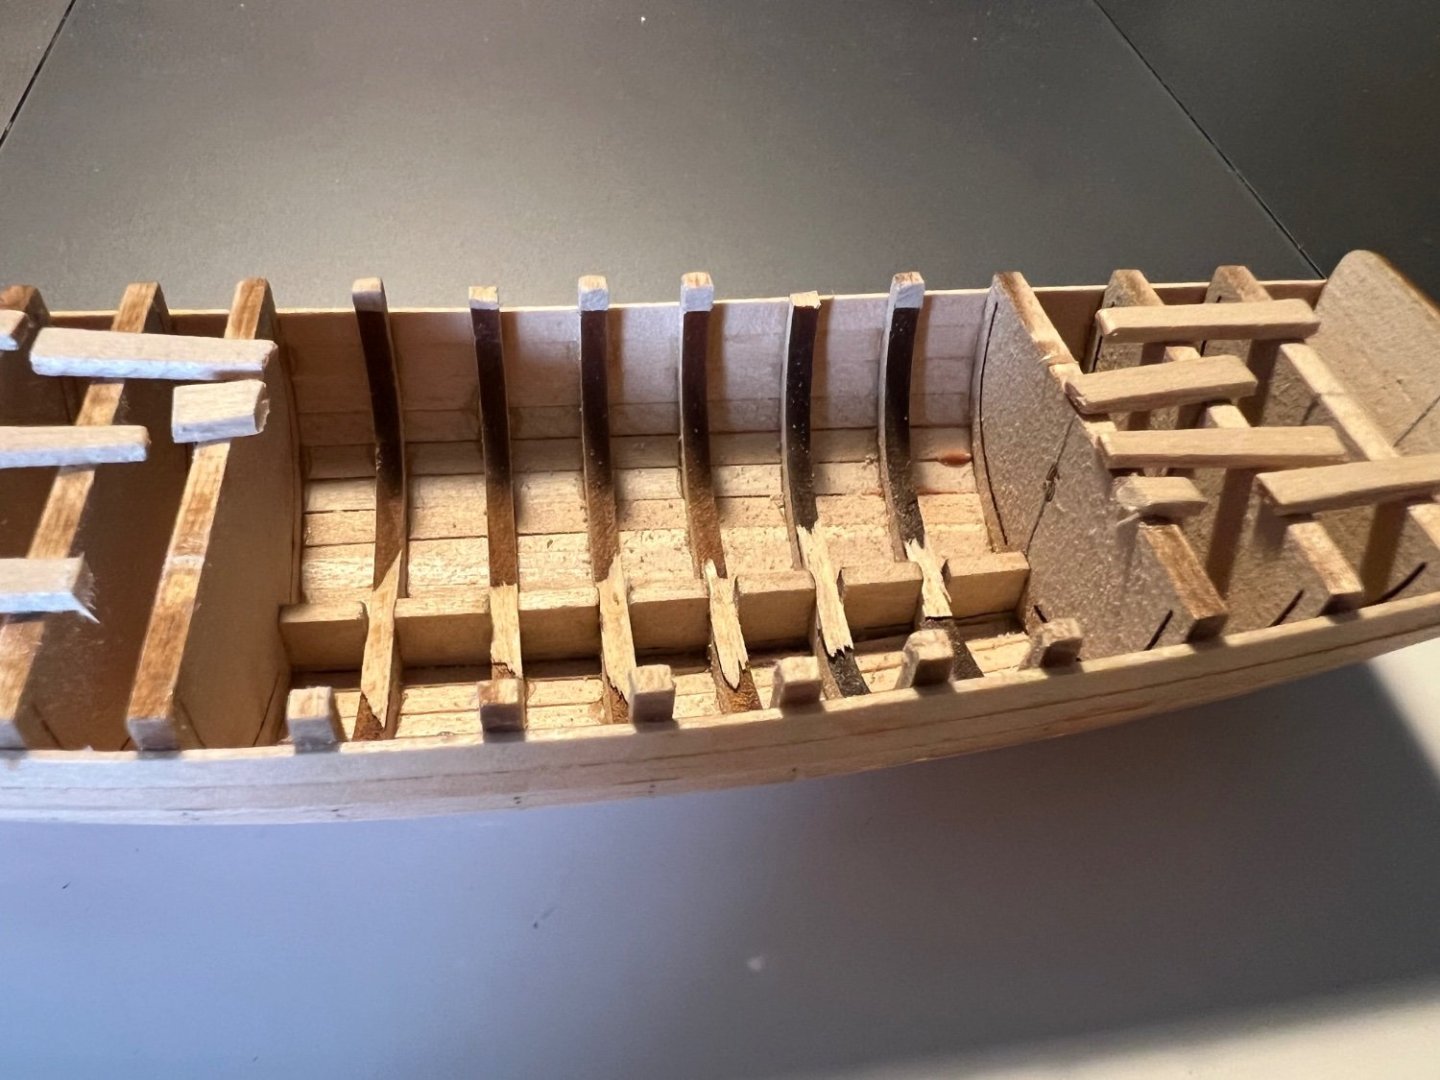
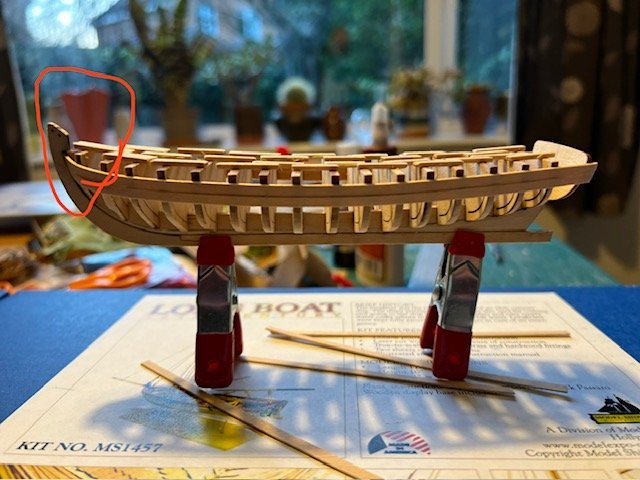
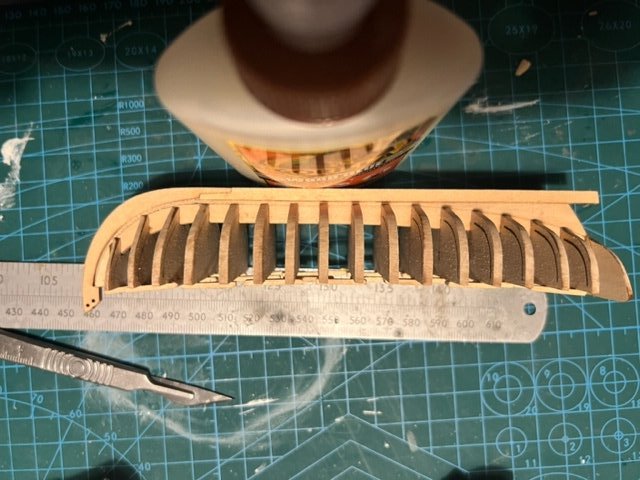
And on to fairing and planking. Fairing went well (i think), i used nail filing boards that I found ideal as they could be gently bent to the contours required. Very tricky doing the fairing at the bow end. The planking is unbelievably thin and fragile. But soaking in hot water a few minutes, and clamping around small cylinders was relatively successful. One thing I never see in instructions, and rarely in build logs, is how you clamp planks onto such a tiny and fragile structure. In the instructions the pictures go from a bare frame to perfect planking in an instant like magic. I decided to use wood glue for the frames, but used CA on every third frame. This meant i could instantly fix the CAed frames and these acted as liquid clamps for the glued in between frames. probably wrong, but seemed to work extremely well. Incidentally, the bit circled in the first photo inevitably broke off with the forces I was applying to get the planks on. A clean break, so i simply put it aside to glue back when the planking was finished.
- 18 replies
-
- 5
-
-
- 18th century longboat
- Model Shipways
- (and 1 more)
-
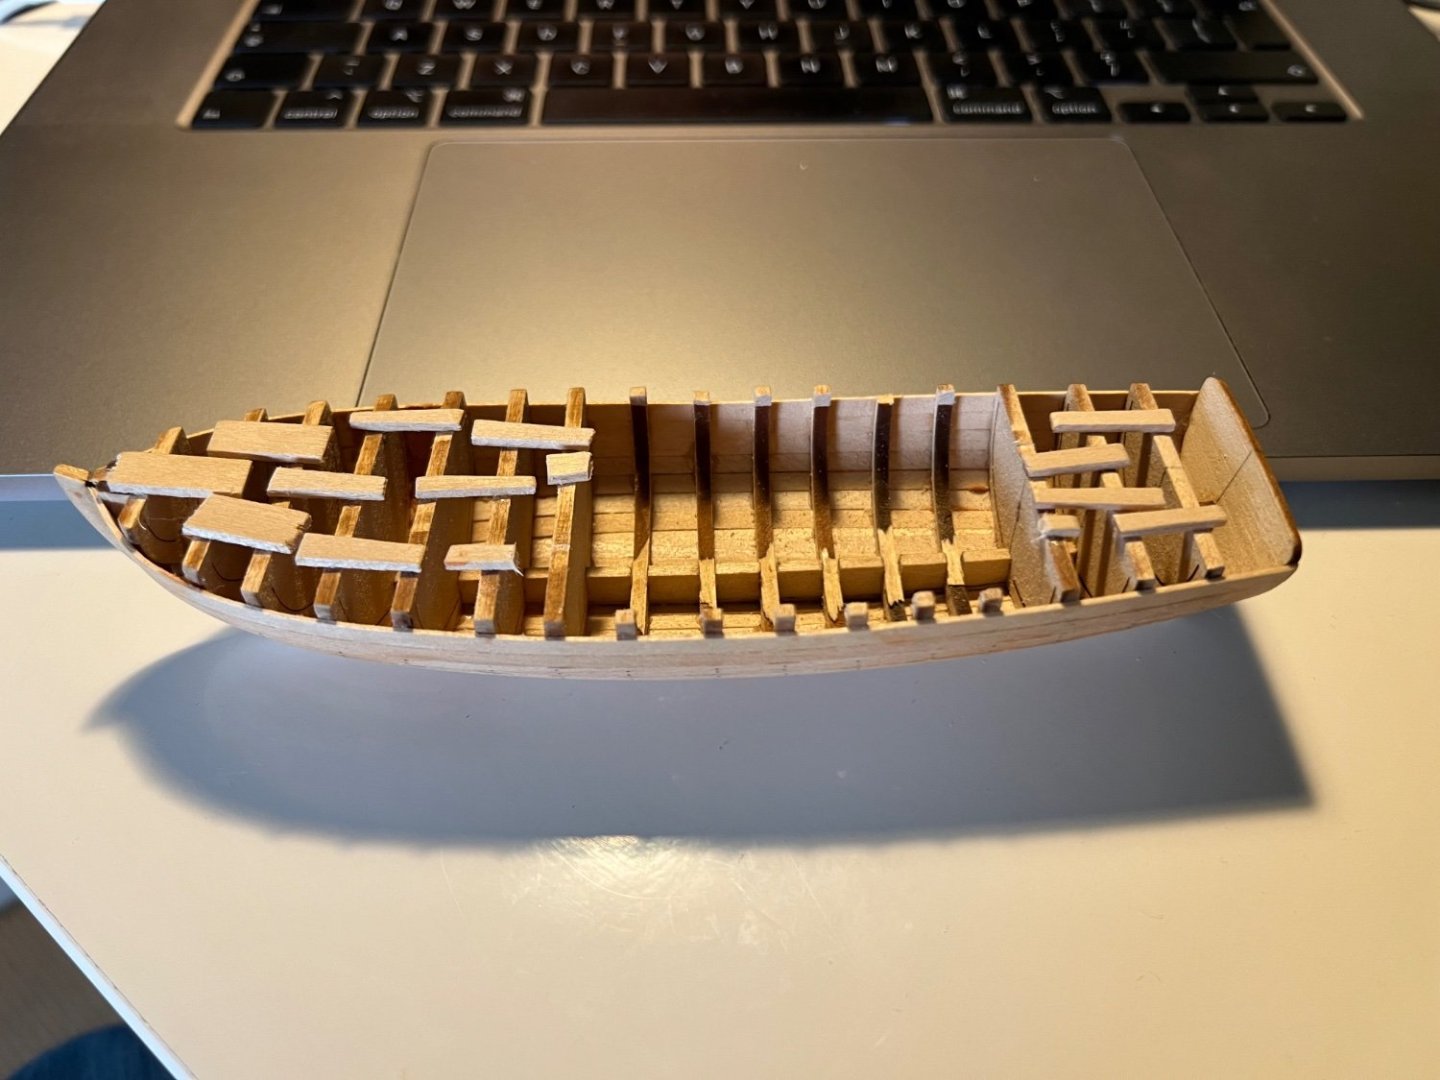
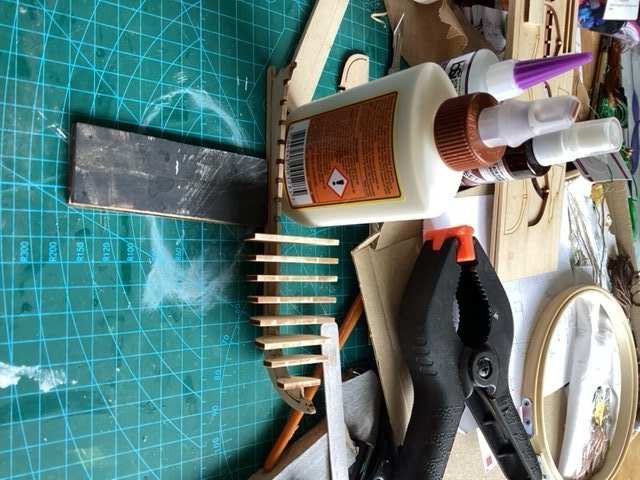
I have always been interested in boats, and growing up in Greenwich very near the National Maritime Museum I have always admired the fantastic models of ships that I drooled over in my frequent visits. Partially retired, and now time to have a go myself. I recently completed a Chesepeake Light Crafts model of one of their Skerries. And then the little Grand Banks Dory kit from Model Shipways. Both went well and now sitting on my office shelf. Time for a bit more of a challenge. I fancied a go at the 1/24th Armed 18th Century Longboat. This was because of this wonderful site saying it may be achievable with my newly learned skills. Noting that the tiny 1/48 version is advanced and not for beginners like me. But fate took its course and I managed to get the 1/48 kit ridiculously cheaply on a certain auction site. So, I made the purchase with the intention of having a go, with no idea if I would get very far. But maybe I would learn something. I am having lots of challenges, and the work is nowhere near the standard of others I see on here. But, I am making progress and thought it may be useful to share my progress here in a log to highlight the problems and solutions I am finding. I may even finish the model. Cleaning up, creating the rabbit and glueing the frames was relatively straightforward. I would strongly recommend pencilling on a centre line on each frames and across the top edge. Invaluable for getting the frames straight. I decided to brace the frames with scrap wood as suggested my many on here. As you can see, my end of the kitchen table is quite tight. And as we have a new puppy in house, a good six inches around the table has to be left clear to avoid chewing accidents. Perhaps an advantage to starting this tiny model.

- 18 replies
-
- 6
-
-
- 18th century longboat
- Model Shipways
- (and 1 more)
-
I found this build log a real inspiration as a very new ship modeller. Considering the problems you had earlier, that finished model is really fantastic. I will try and keep going with my second build.
- 362 replies
-
- 3
-
-

-
- Amati
- Lady Nelson
- (and 2 more)
-
Sorry. Just realised yours is the 1/24. Mine is 1/48. Doh.