bizibilder
-
Posts
68 -
Joined
-
Last visited
Content Type
Profiles
Forums
Gallery
Events
Everything posted by bizibilder
-
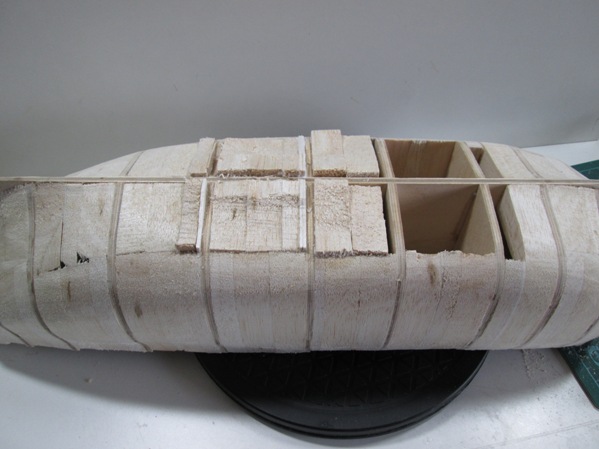
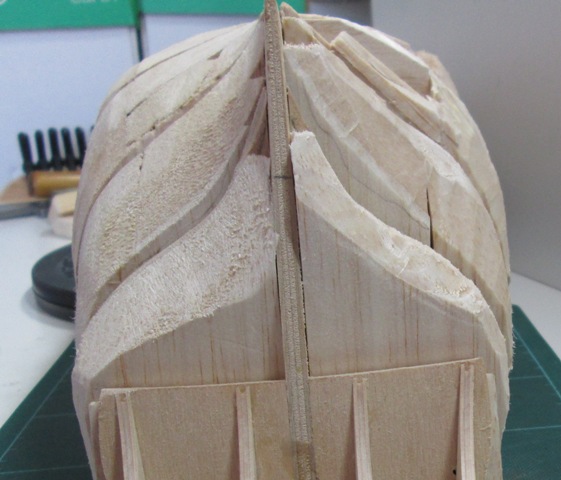
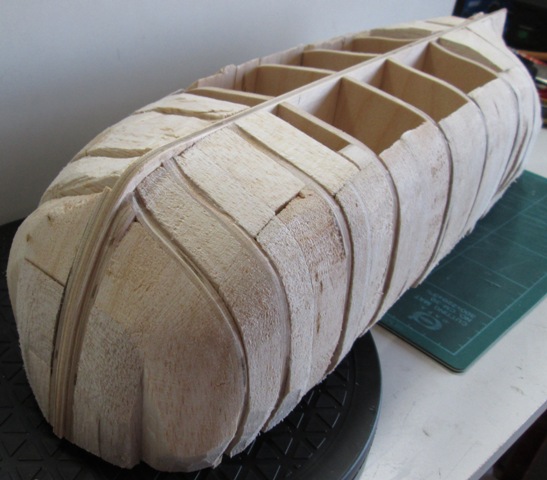
I've finally found time to get the sanding to about 95% finished so it is time to complete the "blocking in" process. The final pieces are glued and drying ready for the final sanding to shape. I can't get over just how solid the whole thing is! The blocking material was one sheet each of 20mm, 15mm, 10mm, 3mm, 2mm aqnd 1.5mm balsa. I've used all the 20mm, about half the 15mm and a few bits from the others (all were 1m long and 100mm wide). I also bought a pack of "useful" balsa blocks of various sizes and found that I have used none of them - so not so "useful" at all. If I was doing it again I wouldn't bother shaping the blocks as I did - Just cut rectangular slabs of balsa, glue up and leave for 24 hours to thoroughly dry then sand it down. Balsa wood gets shifted very quickly with fresh coarse paper in the sanding block.. When sanding I do set-up a vacuum cleaner hose to collect the dust and wear a "monkey mask". With this set-up (in the garage) I was surprised to find that I had the dust pretty much under control throughout the whole process. I may finally get around to some proper "modelling" before long .

-
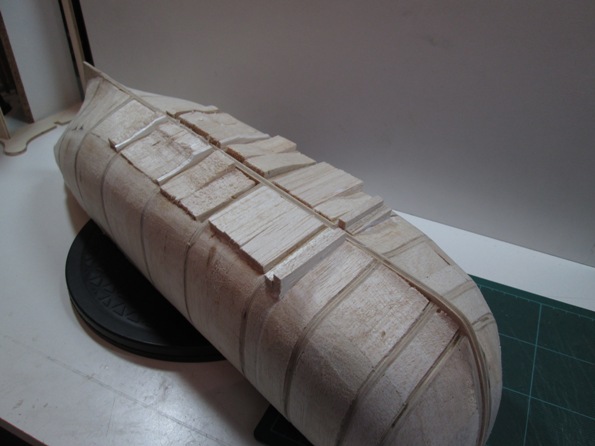
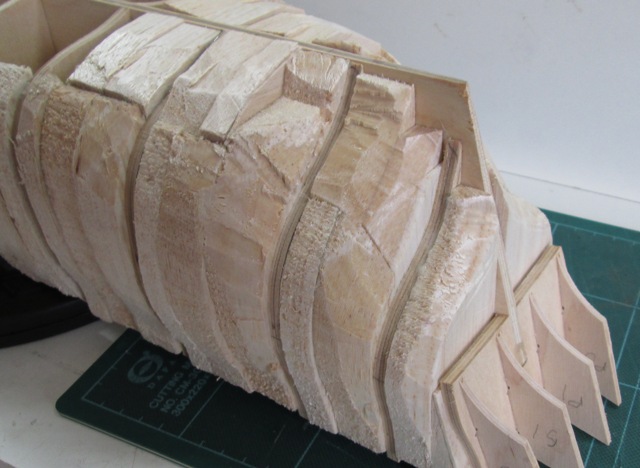
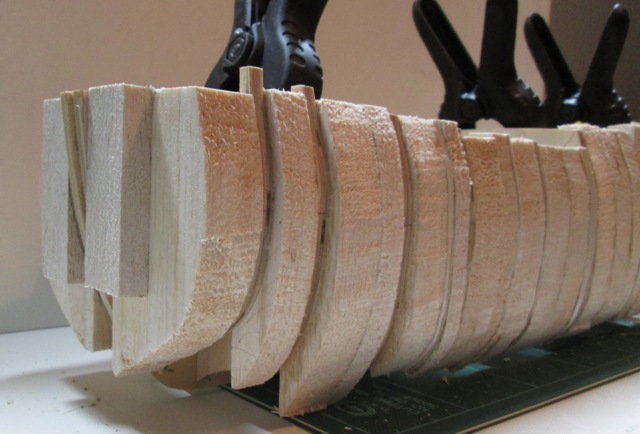
Another 20 minutes with the coarse glasspaper tonight - The shape of the hull is finally beginning to emerge from the rough blockwork. For others trying this method use 60 grit paper to rough out and "go for it" at this stage - there is no point in spending hours with finer papers. The missing blockwork on the bottom of the hull (caused by a mixture of laziness and wanting to see the hull form emerge ) has actually proved to be very useful as a way of getting a firm grip on the hull. There is still time to block it in later as the amount of sanding on this area is quite small.
-
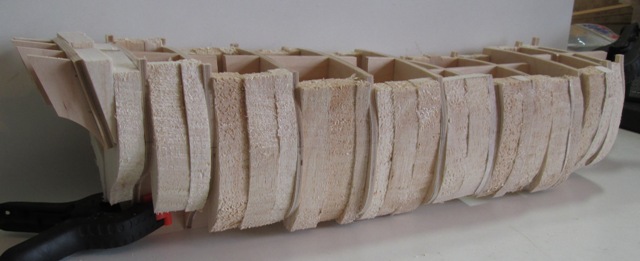
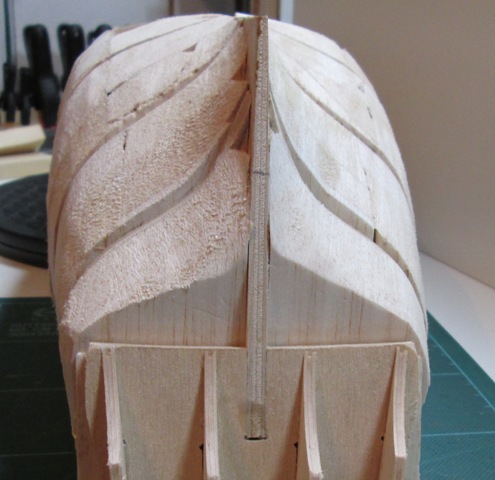
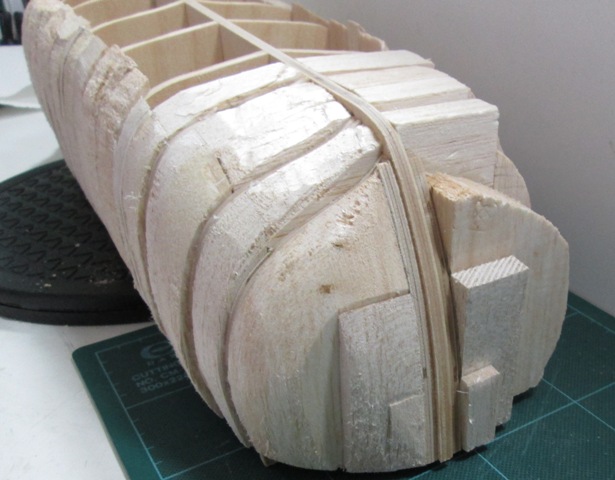
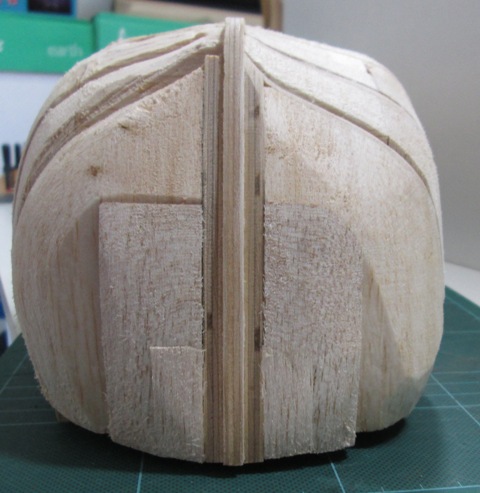
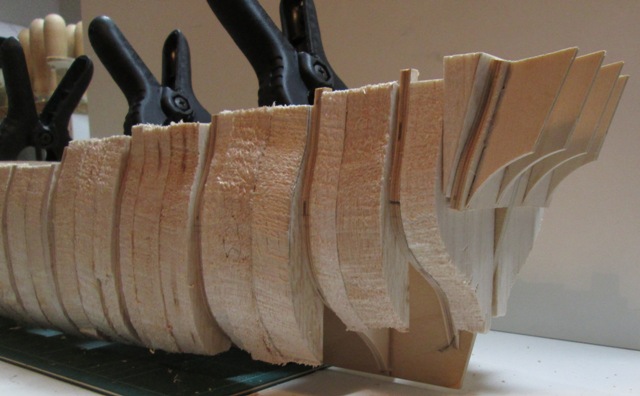
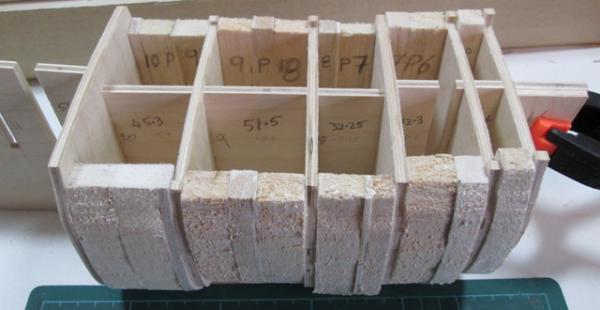
More progress with the blocking - many of the areas where the hull's curvature is greatest have been blocked in with bits of Balsa, making things look very rough indeed! However some deft whittling with a scalpel and stanley knife soon taught it some manners! ( A really sharp blade will easily cut through the Balsa across the grain to leave a good surface). A sheet of 60 grit (coarse) glasspaper and some shaped hardwood blocks soon started to make thing look presentable again. I've held back a bit and have left the surface a few mm proud so I can get everywhere "the same" and then go for a final shape and reduction to size ( A vacuum cleaqner and mask will be essential for this job - it is going to be MESSY ):- I will probably fill in the "bottom" as it looks a little strange with all those holes in it! One good thing about the method I'm using is that the hull is immensely strong and I can quite happily handle it quite roughly without fear of any damage.

-
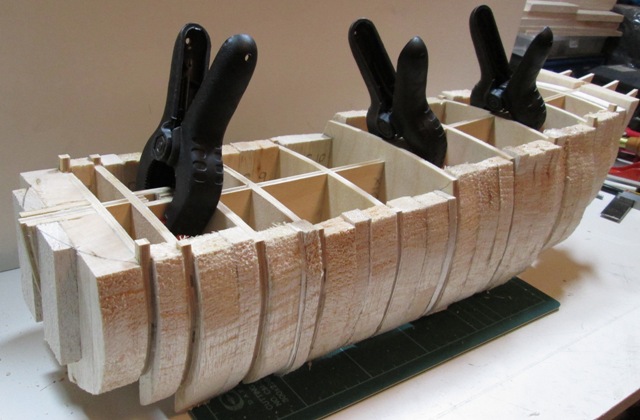
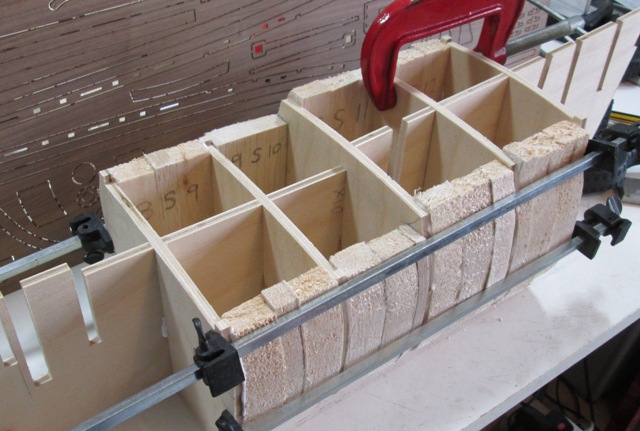
A bit more glueing and it all seems to have become a bit of an untidy mess! However all the important bits are straight and true and very solid - a bit more blocking in to do on the undersides and then a session of carving and sanding should lead to a strong stable "plug" to work on. I'm actually quite glad I took the trouble to do all this blocking as it should make planking much easier - I remember my "Royal Caroline" where I just planked across the kit frames in the "normal" way and had a bit of trouble getting the first planking to lay where I wanted it to rather than taking on a shape of its own!
-
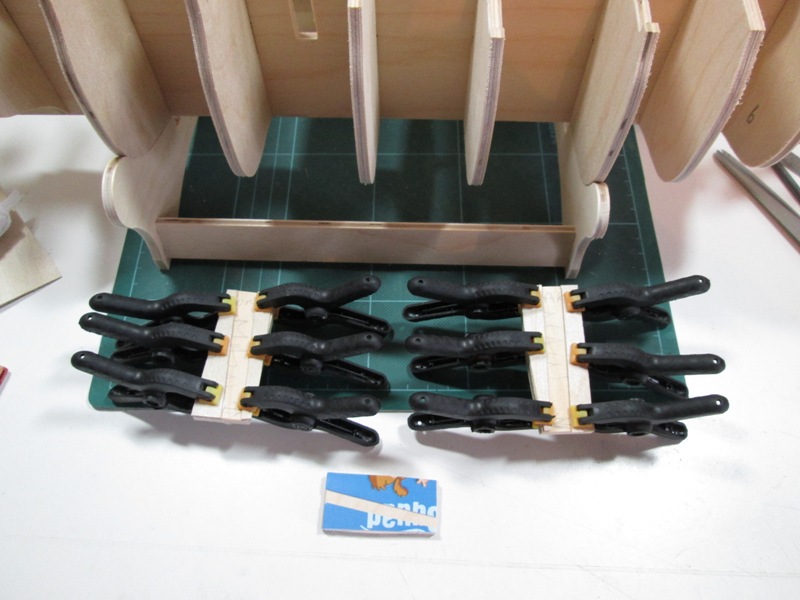
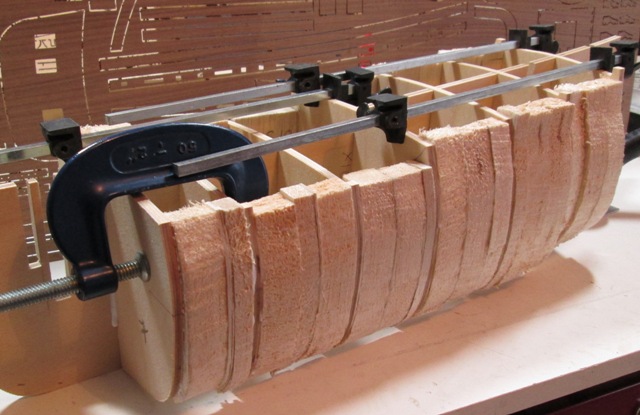
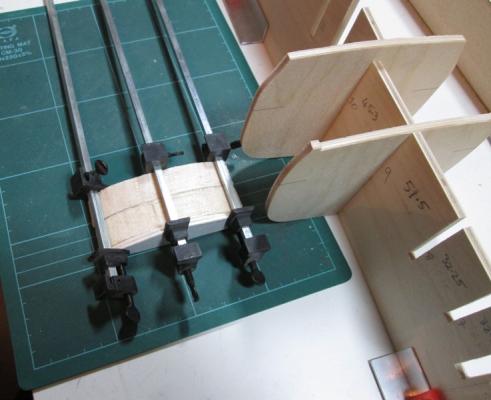
First glueing! Hopefully progress will speed up a little over the next week or so - I intend to get the frames glued and sanded to a fair shape. We shall see... The sash cramps I'm using are really useful - but I only have three of them. There are quite a few UK suppliers - I really must get some more before it's too late .
-
A little more progress - I've been too busy at work for much modelling over the winter. Still no glue yet but the blocking in is progressing well. it all looks a bit messy but a good sanding will soon put things right.

-
Impressive non-ship models (link)
bizibilder replied to Keith_W's topic in Completed non-ship models
http://www.my-time-machines.net/ Somewhere to spend an hour or so!!! -
The easiest way to clean a file is to use a piece of brass. Push the end of a brass rod along the teeth of the file (i.e. shortways across the file not along the length of the whole file) so that the brass pushes any dirt along and out from between the teeth of the file. The brass rod will soon form to the shape of the teeth and a few "pushes" throughout the length of the file will soon have it clean. Any light rusting will also be pushed out of the way. Heavy rusting can be removed by soaking the file in acid (try dilute citric acid which is safe and can be obtained form the chemist as crystals) followed by rinsing in running water and drying with warm air (maybe a hair dryer?). Don't oil the file as the oil will transfer to the wood and stain it.
-
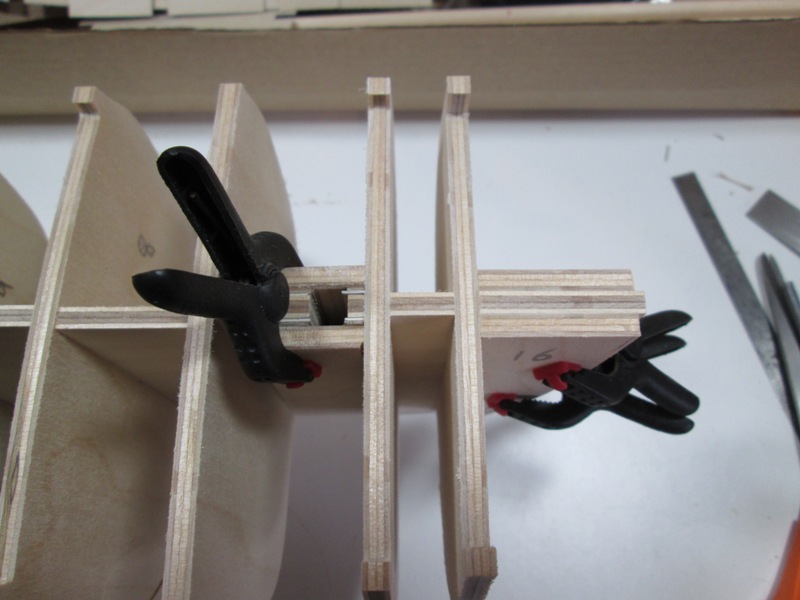
Progress is a bit slow at the moment - I've only blocked two frames so far!
-
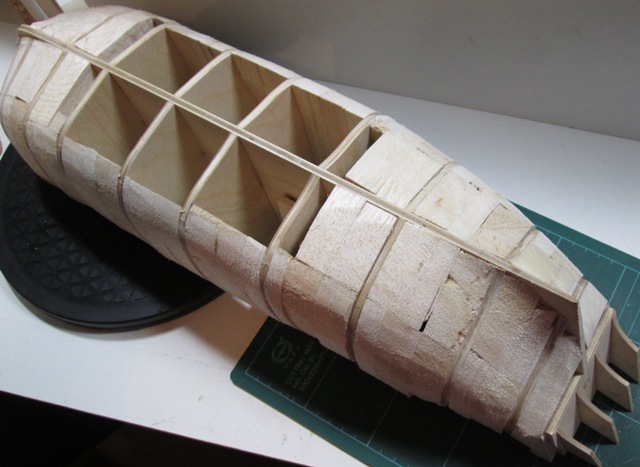
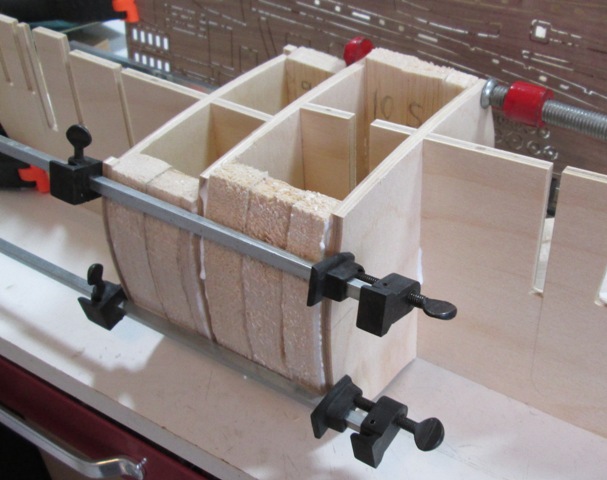
My sheets of thick Balsa wood arrived today so I made a start on the "filling blocks" for the first pair of frames. I'd forgotten just how much dust Balsa makes!! Each block will be made up from a series of pieces to fit exactly between the frames - this should keep things straight as the build progresses. I must admit that I always find keel jigs etc far too restricting when building - I just rely on careful construction and the good old Mark one Eyeball.
-
There is a side elevation with the main wale marked but I had to transfer the frame positions onto it (the two drawings, wales/frames, are aligned vertically on the same sheet luckily!)
-
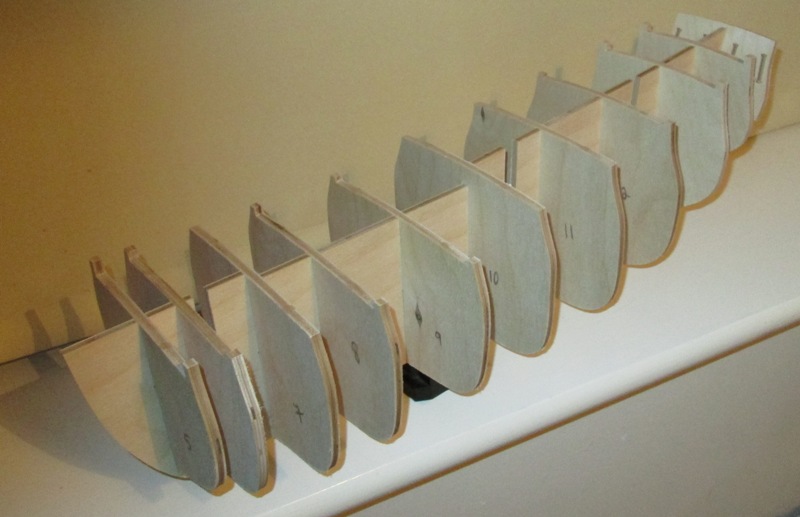
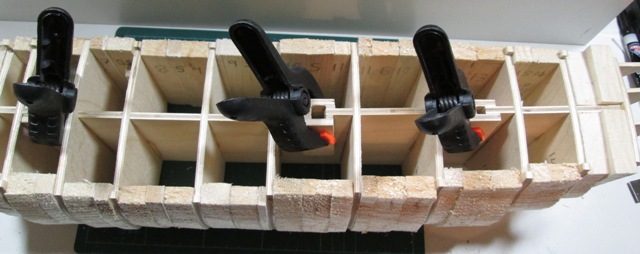
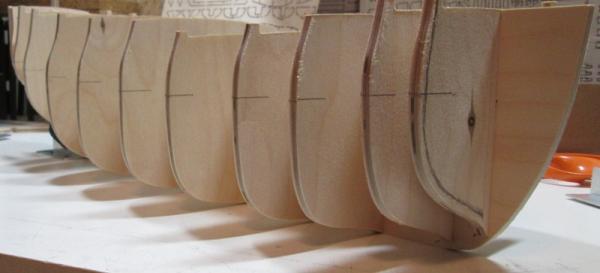
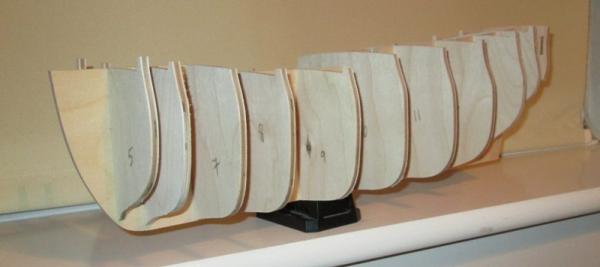
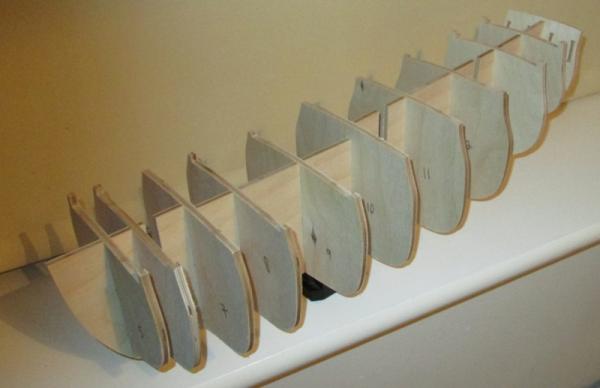
Another small step forward - marking the line of the Main Wale on the frames. This will become a "master" line (actually quite a curve!) for the planking. Marking was done using an assortment of blocks to make up the heights required. The second picture shows the markings - they are in the right places, the different spacings of the frames and the perspective of having the camera on "macro" make one or two of them seem a bit "out", so I double checked after looking at the pictures and they are OK. When I do the balsa infill the marks will me made "permanent" by making pin-holes in each frame along the line of the wale.
-
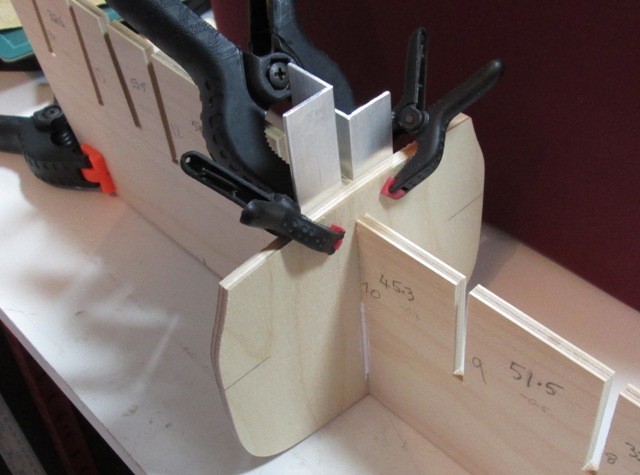
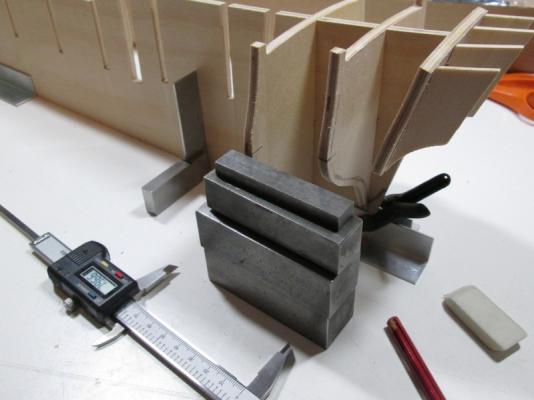
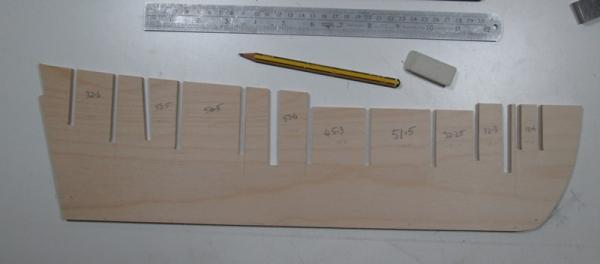
A tiny bit more progress today - measuring the actual distances between the frames. I intend to infill between all the frames with Balsa wood to give a firm base for the planking. Knowing the dimensions, I can buy some appropriate sized thick sheet/block to "stack together" and fill the spaces. I've also been reading the Endeavour build logs on the forum - well done all of you! I'm sure I will have questions as I go along. Just got to order the balsa now and progress should start to speed up a little!
-
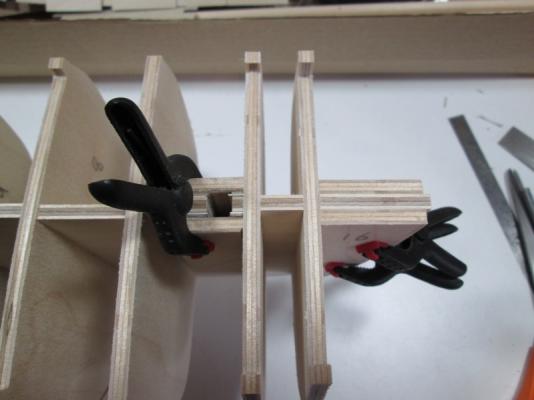
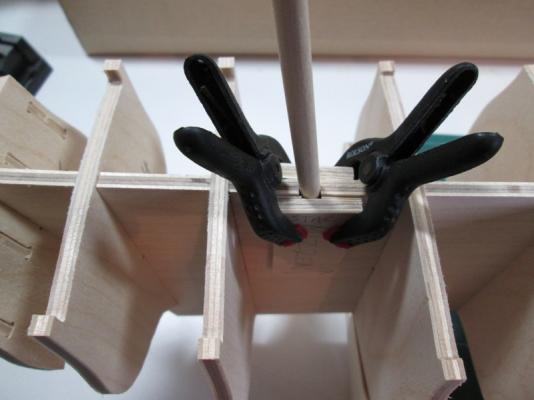
A little progress - Now that the frames are dry assembled and I have made some blocks to keep the masts straight in their slots. Made from offcuts of plywood from the kit and a few pieces of 0.5mm card from a cereal packet to get the widths right. Each mast needs a different set of spacers so I am laminating pieces of 1mm ply and the card as required. The first glued joints on the model are now drying !

-
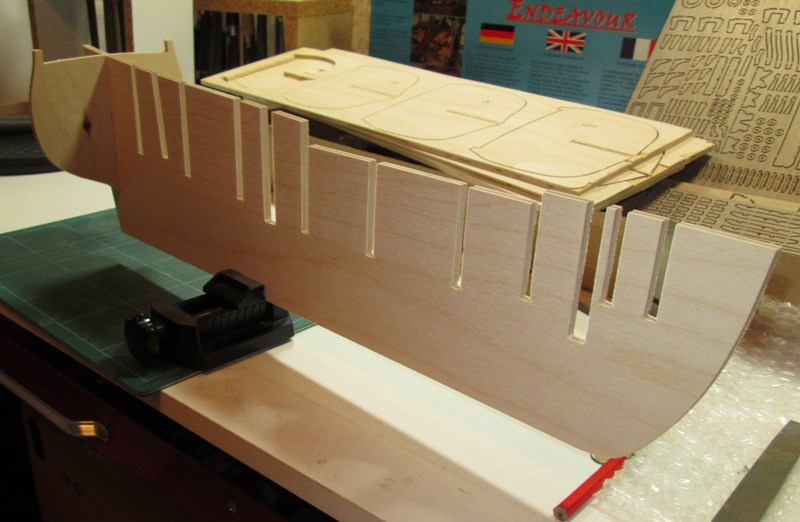
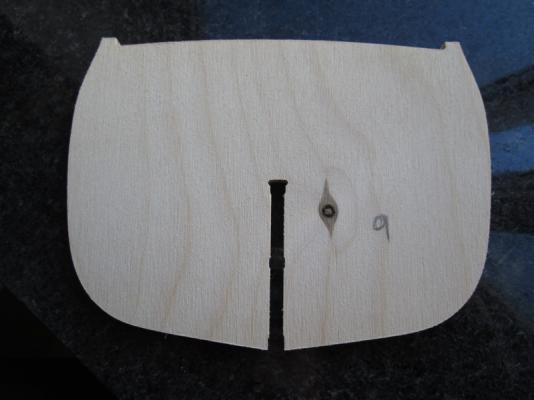
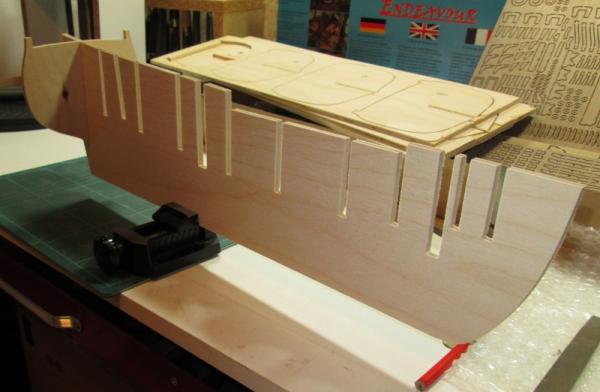
A little more done today - cutting out all the basic hull bulkheads, filing down the "tabs" and fettling the keel slots. Caldercraft cut these slots with what I can only describe as "tabs" within the slot to guide you when filing and fitting them - if you just don't quite fully remove them, the bulkheads slide firmly and squarely over the keel. I have also received a small bundle of Balsa in the post so that I can block in the stem and stern before planking - I think that rather bluff bow will need it if I am to get a fair run of the planks. Still just dry fitted as there is plenty more to do before gluing anything!
-
It was always going to be a slow start - the first two pieces dry joined. I found filing was the easiest way of getting rid of the "lumps" after cutting the parts out - I have a few new files that I reserve for woodwork. In the small scales that we work in they are quite useful tools even if they are "wrong".
-
Mechanical Solar System by jim_smits - Eaglemoss
bizibilder replied to jim_smits's topic in Non-ship/categorised builds
Traditionally wax is used but your supplied parts may well be laquered so the waxing process would damage that. Maybe try black paint and wipe the excess off with rags or paper towels. It will dry and remain hard - I suspect boot polish will come off. If you use acrylic paint you can probably let it "almost" dry and wipe the excess with a damp cloth - leaving enough to fill the engravings. -
A2Z Quick Change Tool Post Review
bizibilder replied to jhearl's topic in Modeling tools and Workshop Equipment
It is quite normal to have to shim lathe tools. You have put the shim under the toolpost itself whereas it is more usual to put the shim under the lathe tool in the holder itself. Firstly the 5/32" brass plate shim, as you have it, adds two "mating surfaces" to the set-up and may lead to the toolpost twisting under load if it is not tightened sufficiently especially if any oil or other lubricant (even wood dust!) gets between the surfaces. If you put the shim under the tool it is held by the side of the toolpost as well as 3 or 4 clamp screws and is very unlikely to move at all - the main post can swivel on its central screw. The reason you need the shim with the thinner tools is that the manufacturer has had to make the system work for tools up to 1/2" so, if you are using 1/4" tools you will have to "find" that extra 1/4" (actually usually a bit less) to make up the difference. By the way - "posh" Quick change toolposts usually have a rachet wheel bolted to the slide underneath and a pawl mounted under the toolpost itself. Thus you can only rotate the QC post in one direction and it will "click" round (usually eight times per revolution) in an anti-clockwise direction (viewed from above). The tool post cannot turn under normal load - ie cutting toward the headstock. It is unfortunately unlikely that this refinement will be found on these tiny lathes that we modellers use at the prices we are prepared to pay! -
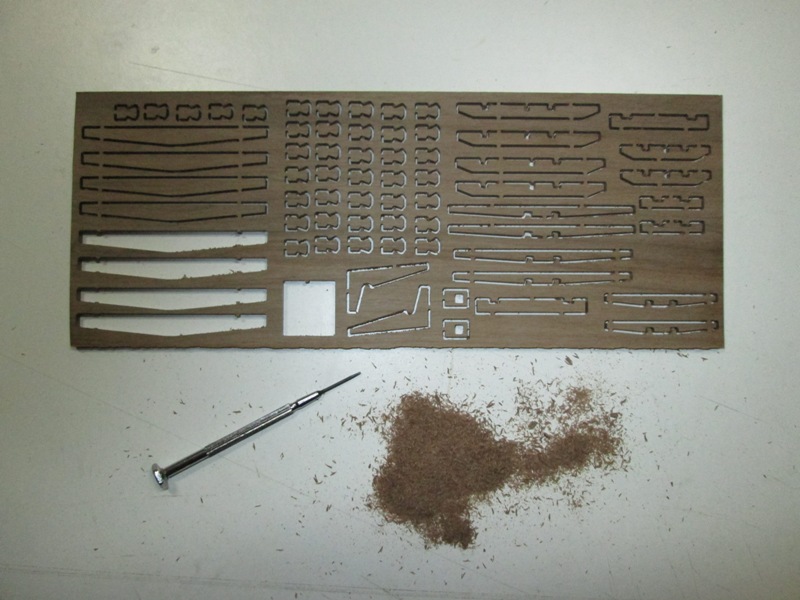
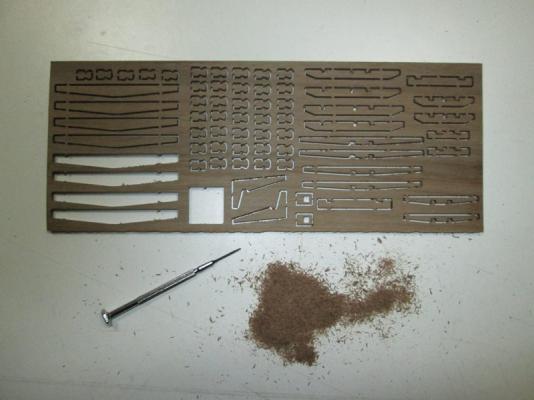
Spent half an hour this evening poking the dust out from the cuts in this sheet of walnut. I'm not sure which I prefer - the dust from a milled model or the burnt edges (and subsequent sanding) for a laser cut one.
-
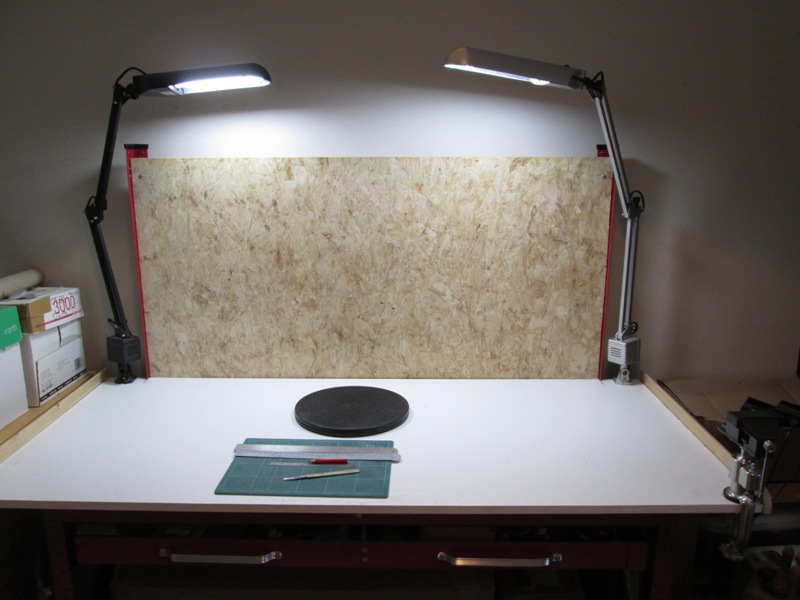
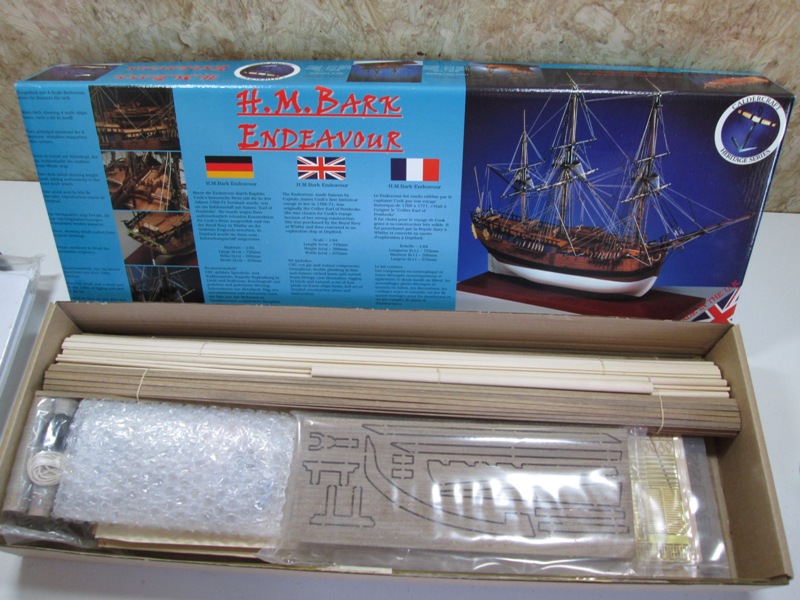
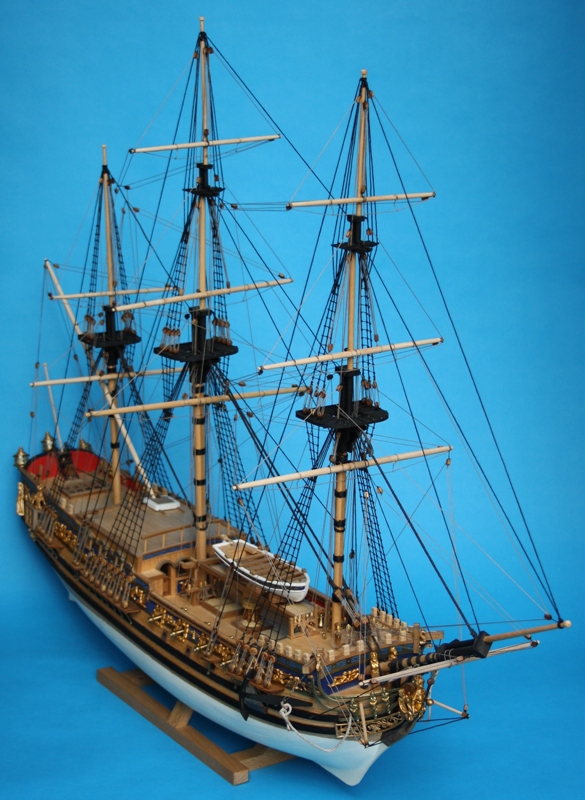
The start of my second foray into Model Ship Building after the "Royal Caroline" the log for which was lost in the great crash a couple of years ago ( I have slipped in a sneaky pic of it below). I wanted to build something that was essentially a "rigged hull" rather than something that would take hundreds of hours just to pile on the detail as with a larger fighting ship. I don't have a huge amount of time available so had to find something that could be completed within a reasonable time frame. After the laser cut Royal Caroline I was quite surprised at the amount of dust in milled kit!! However it was quite easy to shake or poke most of it out of all the slots and grooves and gently sweep it away. I do intend to try out some new (to me) techniques to try and "improve" the basic kit - however don't be surprised if there are some lengthy "gaps" in the build log as other commitments take up my time. For a start an empty modelling desk! I like to work on a white melamine surface that reflects light back onto the model - as you can see I have two top lights and (out of shot) a bright ceiling light behind me when I'm working. This set-up leads to a reasonably shadow free work area. I also use a lazy-susan turntable to put the model on - this allows it to be easily swing about into the most convenient position. if I want to "lock" it then a piece of sticky tape soon teaches it some manners. And the opened box - about 24" x 9" x 3". The unrigged hull length will be about 19", the overall length rigged is 28.5". And a sneaky "one I made earlier":


-
You can buy 1/48 plans here: https://www.myhobbystore.co.uk/product/16939/hms-victory-sy21-static-sail-plan Actually most are 1/96 but the frames/sections are the full size for 1/48. These are the plans that are associated with Longridge's book (usual disclaimer)
-
Threads on miniature nuts & bolts
bizibilder replied to jhearl's topic in Metal Work, Soldering and Metal Fittings
If the jewellers thread plates originate from Europe then the threads may well be to BA standard (British Association). These are Imperial threads made to a metric standard and sized in a geometric progression. Believe it or not they are in very common useage!! The trouble with threads (especially smaller ones) is that no-one seems to keep to any standards and seldom publishes enough data about their products to allow you to match sizes. I have even seen 1.5 mm bolts where the dimension given referred to the length rather than the diameter!!! All rather confusing. -
Cutting brass sheet
bizibilder replied to Landlocked123's topic in Metal Work, Soldering and Metal Fittings
I suspect you are trying to cut "hard" brass sheet or brass shimstock - both are difficult to cut. The best grade of brass to use is CZ120, "Compo" or "engraving brass" as used by engravers and clockmakers. This has a small lead content and cuts easily with a fine toothed piercing or jewellers saw. One UK source is here: http://www.collegeengineering.co.uk/BrassCZ120.htm and another one is here: http://www.clockmaking-brass.co.uk/brass_sheet_cz120.htmL (usual disclaimers). When sawn or machined this brass comes off the cutter in a very fine "spray" of brass chippings - therre is no need to anneal it and it won't work harden during the cutting process. -
timing belts and pulleys
bizibilder replied to Kurt Johnson's topic in Modeling tools and Workshop Equipment
Here you go: http://www.motionco.co.uk/timing-pulleys-timing-pulleys-aluminium-c-25_35_48.html Good service and a wide range to choose from (usual disclaimer). -
Tracing light-box
bizibilder replied to Jason Builder's topic in Modeling tools and Workshop Equipment
If you are feeling wealthy then one of these: http://www.amazon.co.uk/gp/product/B00J3NRAV2/ref=ox_sc_act_title_1?ie=UTF8&psc=1&smid=A23HHFRIW02ZZW will do the job well (usual disclaimer).