kgstakes
-
Posts
400 -
Joined
-
Last visited
Content Type
Profiles
Forums
Gallery
Events
Everything posted by kgstakes
-
I think there is still a misunderstanding of what I'm trying to say as far as extending the 12 mm post. This video will show what I'm talking about. It worked on my full size drill press that I modified for what I needed and it will work for what any of you need to do to get more height under your drill press whether a large one or a tiny model one. Video (17).mov
-
Other than the capacity is the drill press itself good quality?
-
After reading some posts, are you trying to do drilling or milling operations? And if you’re drilling and something is flexing with the small bits we use they can only drill so fast. Less pressure new bit, a sharp bit and that may do wonders for your little drill press. If you’re doing a milling operation, this machine I doubt is made for the side loads for milling would put in this little drill press. question. can the sold bar be pushed through the base plate? If so, you have it up on a block, drill a hole in the block (12mm) push the rod down into the wood for more a secure “base” then add pipe and do what I suggested before add a piece of pipe and there you go. Stronger base and taller drill press.
-
The 12mm bearings, your cutting the solid bar stock in two pieces and use one for the base and one for the bearings and fill in between with a piece of pipe and bolt tight. The length of pipe can be any length you want. The 12mm rod is still attached to the base and will still work in the bearings. Even if you don’t want to disassemble anything just cut the solid rod with a hack saw, move them apart the length you want and measure that length at a couple inches (or metric equivalent) drill some holes for bolts and tighten even torque it to make sure everything is back solid.
-
To turn the material down yeah but refer to previous answer hollow post pipe? Hands tools that’s it.
-
Chuck is that post solid or hollow? If hollow you need a hacksaw hand drill and some bolts. No special tools needed.
-
12 mm = .5 inches why not just turn a 1/2” bar stick or metric equivalent and use that? Wouldn’t that be strong enough? Or maybe a better idea (I did this on one of my floor drill presses) take the bar or pipe post you have cut it so one part fits in the base just long enough so you could insert a smaller diameter tighten that part together with a bolt and then extend the smaller bar the amount you want raised and then take the rest of the original bar and insert that into the “head end” and tighten that all down with another bolt. Wouldn’t that work?
-

Storage “box” for attachments and drill bits
kgstakes replied to kgstakes's topic in Modeling tools and Workshop Equipment
Yeah and I use it too to keep my tool tops like table saw band saw planer surfaces rust free and slick. Works great. -
Pulled the Trigger == Lathe coming
kgstakes replied to kgstakes's topic in Modeling tools and Workshop Equipment
One other thing I wanted to ask (and I noticed). Is when turning, and this is with the Taig lathe (and their so called live center), is that you only turn or cut towards the chuck. True? Reason I ask, is when I was using the "live center" (which is only spring loaded and spins) when I was turning wood, it would suck it out of the chuck. Now I thought I tightened the chuck up, but has anyone with a Taig lathe had that happen to them as well? I know on my atlas lathe I can use mortise tapers ( 1 & 2 I believe), wondering is there any aftermarket places that make a better live center for the Taig lathe? -
Pulled the Trigger == Lathe coming
kgstakes replied to kgstakes's topic in Modeling tools and Workshop Equipment
I've read (unless I missed it) ways to align the tailstock to the chuck or collets. I've heard that you could turn a steel bar (or brass) to a sharp cone (point) and slide your tailstock up to it and align the two up. Seems like it would work (in theory), but in doing that this way, is there a chance that it would not be in alignment further away from chuck? Or would this be a "quick down and dirty" way of doing it ? I know some of you are professional machinists and want or need it within a thousandth or less but I just heard you could do it that way and it works. What do you guys think? Can be done, don't do it because not that accurate, or don't do it at all because it will eventually damage machine. Thank you all for your comments and I'll keep reading and learning. -
Pulled the Trigger == Lathe coming
kgstakes replied to kgstakes's topic in Modeling tools and Workshop Equipment
In the picture see below I have some tooling some collets (which I was surprised that only one or two are completely open- can push material through headstock). The long shiny rod at the bottom is supposed to be a live center (it works but not what I expected). But yeah a longer tool rest would be very easy to build. It mounts directly to the bed ways so you loosen a bolt and move then lock it down. It’ll work not dissatisfied with any of the options just thought some…. Well, not what I was expecting. (Even though I seen pictures before I bought them). The 3 jaw I believe they are soft jaws but if not I can get some. Step jaw I like more than the single step on the taig 3 jaw chuck. all in all very happy with it so far and thank you for all your input. Greatly appreciated.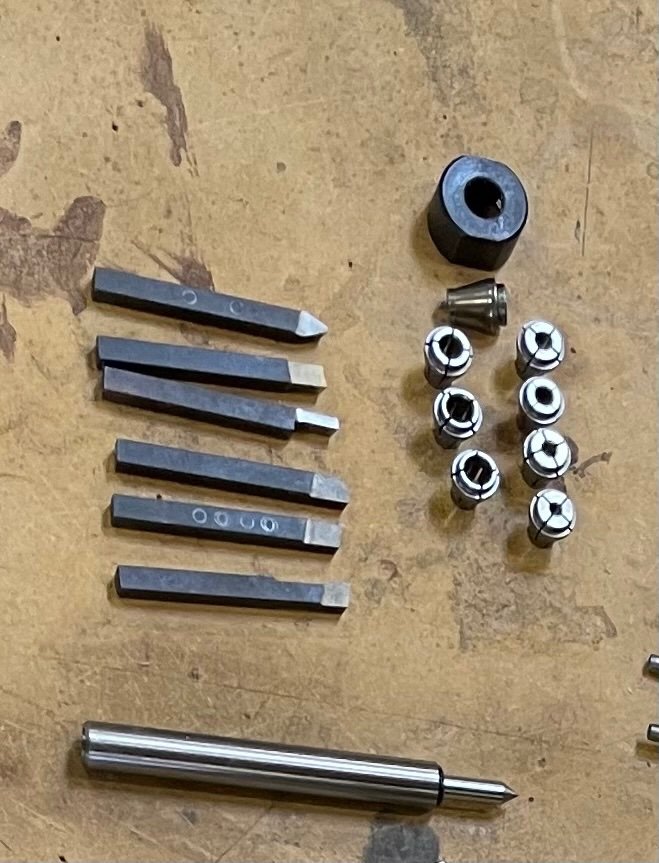
-
Pulled the Trigger == Lathe coming
kgstakes replied to kgstakes's topic in Modeling tools and Workshop Equipment
Been thinking, I’ll probably be doing more wood turning on my lathe than metal but can you all look at the accessories I have and what else would you include for turning metal or wood? I’ll post picture here so you don’t have to go back and find it.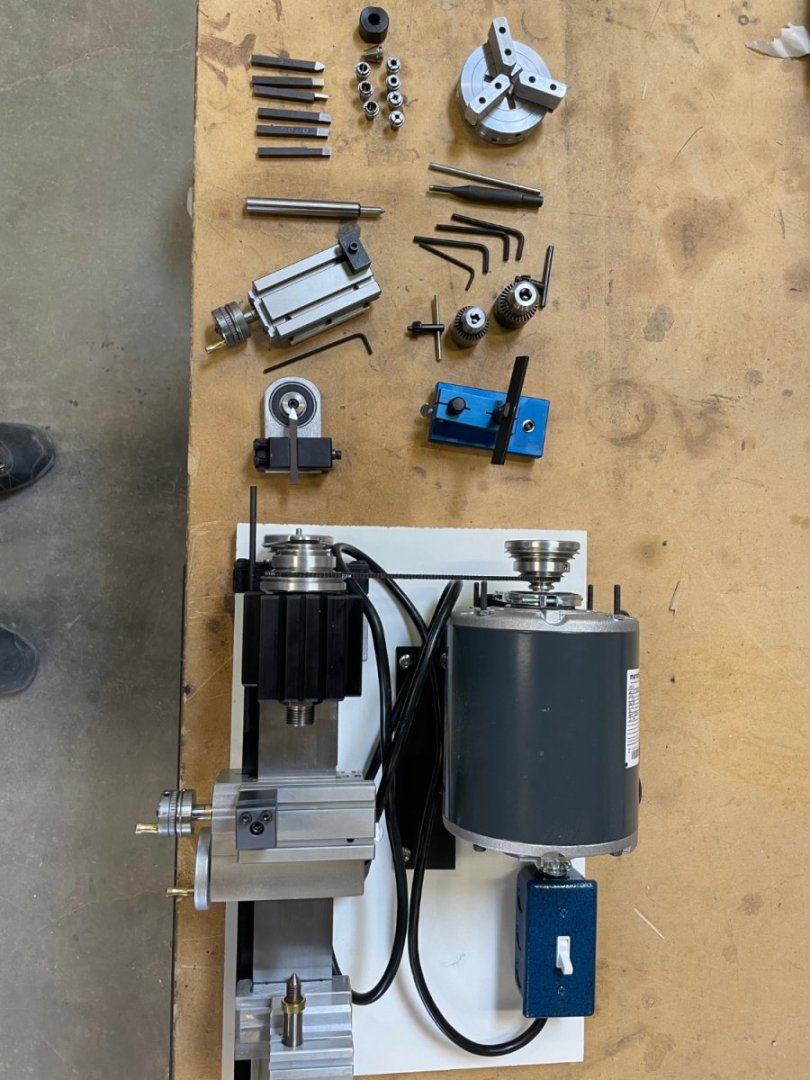
-
After looking at all the pictures of the drill press you could pretty much put anything under the head. Looks to me all you have to do is replace the “support post”. Make a longer one. yeah you have to figure out how much travel you would really need for a table but I think a longer support post would cure that part of the problem. Course guess that part was obvious🤪🤪
-
I'd be interested in what you come with as well for a vise and X-Y axis. Question would a little machine shop or other small x-y table work? Just throwing out ideas. X-Y Table Assembly This small precision X-Y table can be used on a drill press or other machine to precisely locate your workpiece. The table is 90 mm (3.54") by 200 mm (7.87"). It has three 8 mm T-slots. The complete X-Y Table assembly is 10.5" wide, 9" deep and 2.9" high. The X-axis travel is 135 mm (5.31") and the Y-axis travel is 70 mm (2.76"). The height of the table is 60 mm (2.36"). The base is 100 mm (3.94") by 175 mm (6.89"). The dials are graduated in 0.001" and one turn of the hand wheels moves the table 0.050". The X-Y table is made of cast iron and steel. There are adjustable gibs on both axes. $189.95
-
It’s looking great just take your time and it doesn’t matter how long it takes if the end results keeps looking like the picture shows, nice crisp notches everything fits good just don’t get frustrated that it’s taking forever. You’re doing a great job.😀😀
-
Pulled the Trigger == Lathe coming
kgstakes replied to kgstakes's topic in Modeling tools and Workshop Equipment
Lathe base/storage cabinet finished. Nowheal up before doing any turning. Enjoy the video Video (10).mov -
Pulled the Trigger == Lathe coming
kgstakes replied to kgstakes's topic in Modeling tools and Workshop Equipment
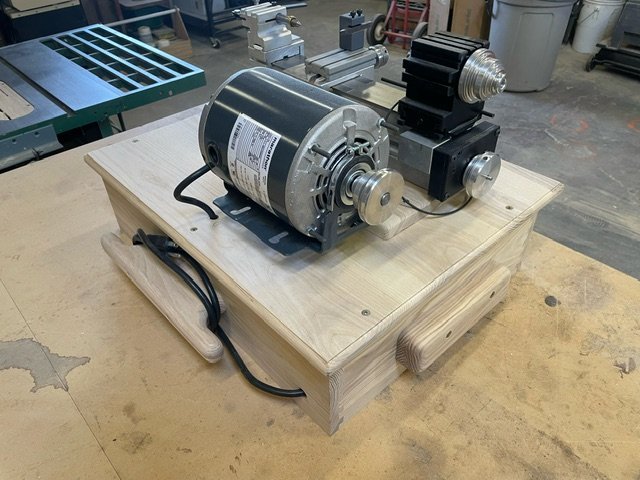
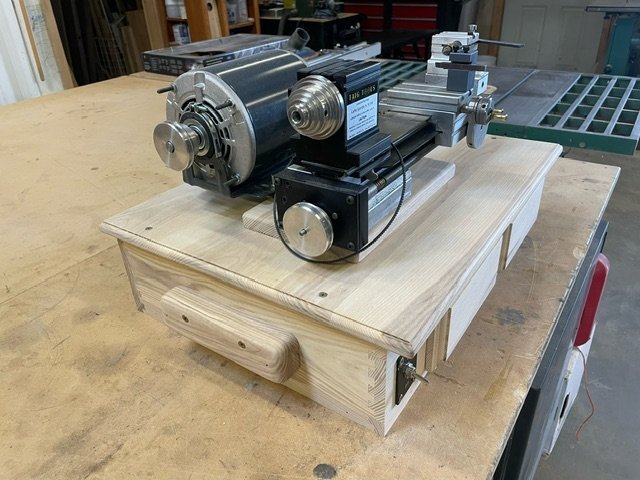
Oh just a side note. After building the cabinet (ash wood) the total weight is approx 64 lbs. course lathe weighs about 50 lbs (shipped) with motor and all accessories. Not bad to carry but wouldn’t want to go far with it. That was another consideration I had was balance when carrying it. Yes lathe is set back for damage control when carrying and also for balance when carrying it. -
Pulled the Trigger == Lathe coming
kgstakes replied to kgstakes's topic in Modeling tools and Workshop Equipment
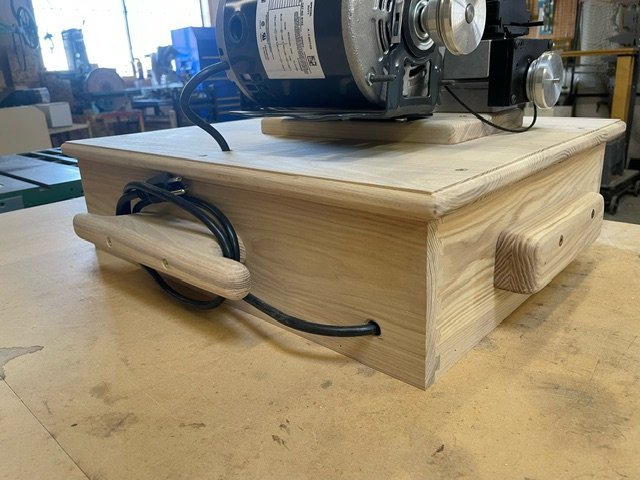
I put the lathe set in about an inch from the hand wheels of the carriage and cross slide so when I carry it the hand wheels are not hitting me in the belly and no damage will happen when I store the machine. I want the cabinet to get any damage that may happen before anything hits any part of the lathe. a foot switch is a good idea and I’ll have to look into getting one. Never thought about that, good safety feature when turning. I’ll show a picture after I get it all finished and assembled that would show how close to the front everything actually is for operation. -
Pulled the Trigger == Lathe coming
kgstakes replied to kgstakes's topic in Modeling tools and Workshop Equipment
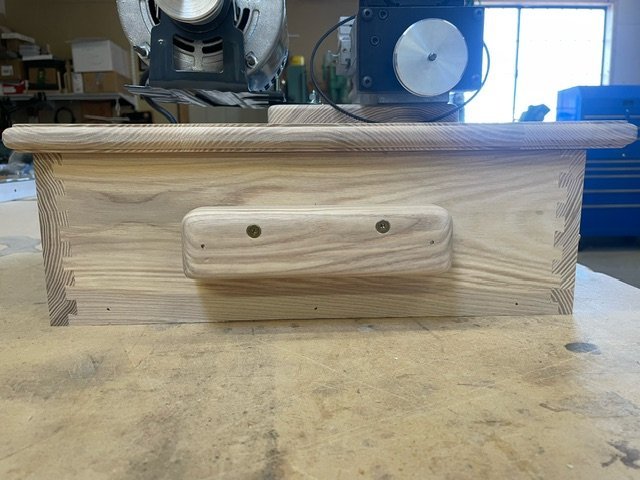
Lathe "cabinet" "storage base" which ever you want to call it, I've finished building it now for some spar varnish on everything and reassemble. After that maybe do some turning. Enjoy the pictures. I will post other pictures when all the finish work is done and reassembled.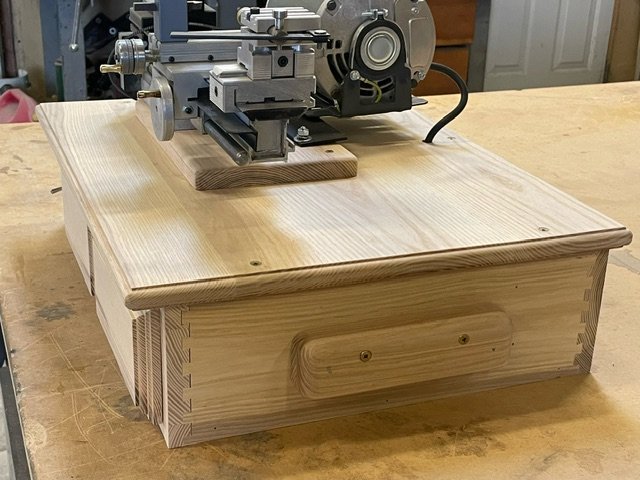
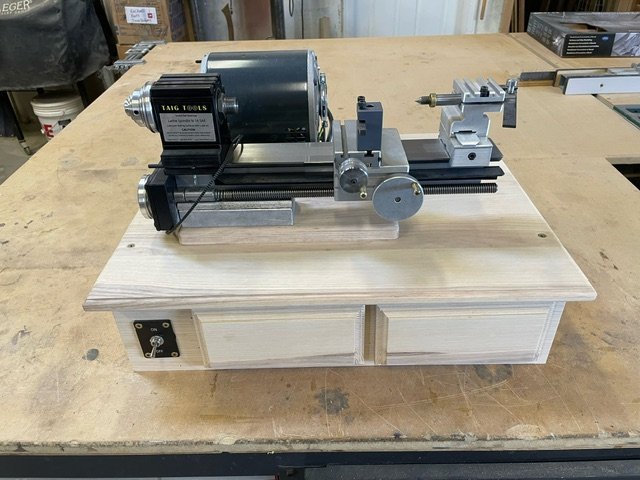
- 49 replies
-
- 16
-

-

-
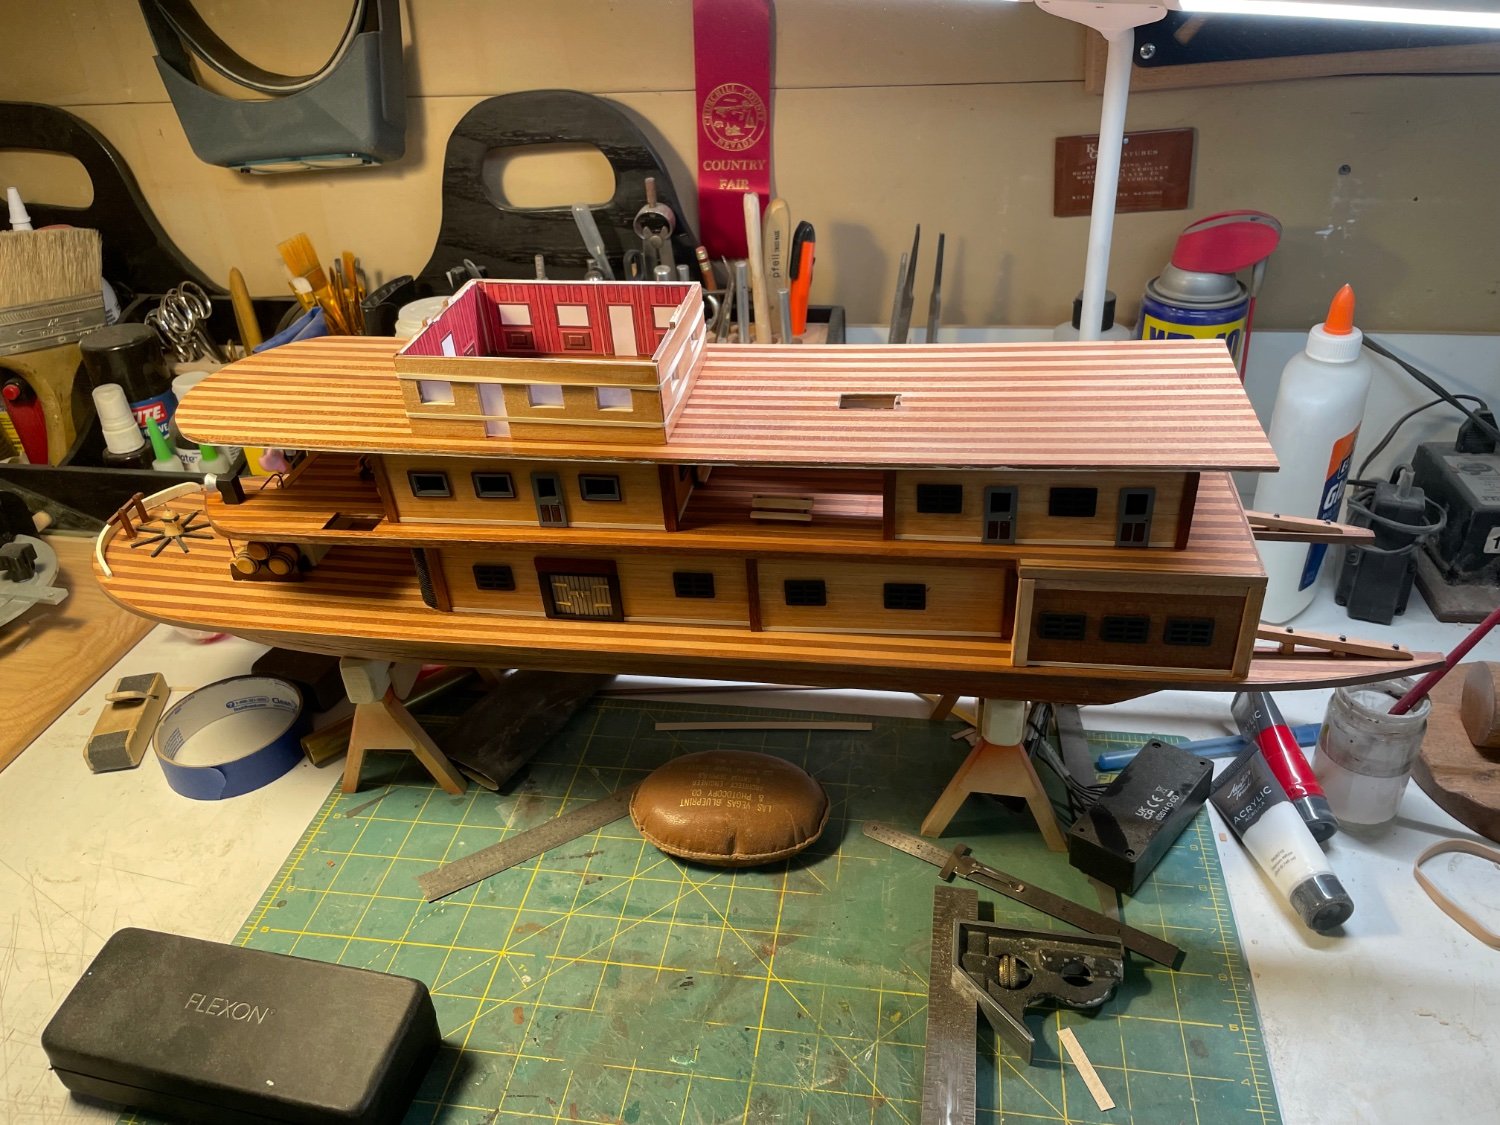
Hurricane deck? Can you tell me why they call it that? lol do they can watch for hurricanes. Seriously though why do they call it that and is the “second” called something too? What’s they others called? Thanks for calling me out on that, I didn’t know what it was called just assumed.
-
Gregory, Have to laugh because my name is Kurt also. Then I realized you were talking about the other Kurt's answer regarding slitting blades. Sometimes things get a little confusing for this little brain to fully function correctly. I've only used "regular carbide wood blades for my table saw so when I seen people using slitting blades I wanted to know why. I assume better cut no set in the teeth and I can see if you wanted a dado or groove in your work piece it would give you a better cut, square bottom in the cut, etc. I sorta knew the answer to why everyone was using them but really didn't know where to look for them. I've seen them on Jim's website but I guess for some reason I thought it was a specialty item that you would use only for certain cutting operations. Not all the time. Good to know and I'll be looking for some thin blades and maybe be able to use them as a "stack dado" for future operations.
-
Oh sorry I know it won't fit the taig lathe with out major mods done to the jig. I believe it's for full size lathes but don't know for sure. It does fasten to the cross slide and I'll add here a link to blondihacks utube, and see all the parts and how it fastens to the lathe.
-
I was just wondering on utube and came across this little gismo. Don't know if it would really work for a mini lathe but I thought it was interesting enough to share with you all.
-
Now I have another question, why slitting blades for model work?
-
Sorry everyone that’s been following, been side tracked with a new tool. Right now I’m working on what I call 3rd deck of the river boat. Here’s how far I am so far and the deck is just sitting in the rest of the boat. Looks crooked in picture that’s why.