HOLIDAY DONATION DRIVE - SUPPORT MSW - DO YOUR PART TO KEEP THIS GREAT FORUM GOING! (Only 24 donations so far out of 49,000 members - C'mon guys!)
×

kgstakes
-
Posts
400 -
Joined
-
Last visited
Content Type
Profiles
Forums
Gallery
Events
Everything posted by kgstakes
-
 Sorry for the delay here’s a video of my sliding table for my proxxon get table saw. IMG_1807.mov
 -
Thunder Posted January 2 #13 Proxxon --- as far as I know don't offer a sliding table. I made one and the slot is the width of the blade so no tear out, no backer board needed. I would love to see your sliding table, can you do a feature on it please? Tomorrow I will take some pictures of it and possibly a video how I use it. Basically the base is about 1/8” thick by whatever wide you want it (mine about a foot) and then I glue at the front and back a 3/4x3/4 oak as long at the base is wide (about a foot) and then glued runners to the bottom (and these are just slightly thicker than the miter slots) and then after that was done. I raised my saw blade up little over 1/4” and cut the slot for the blade all the way through. The oak pieces will hold it all together.
-
The one picture you have ---- looking down the whole deck with cannons on both sides....... THATS COOL!!!
-
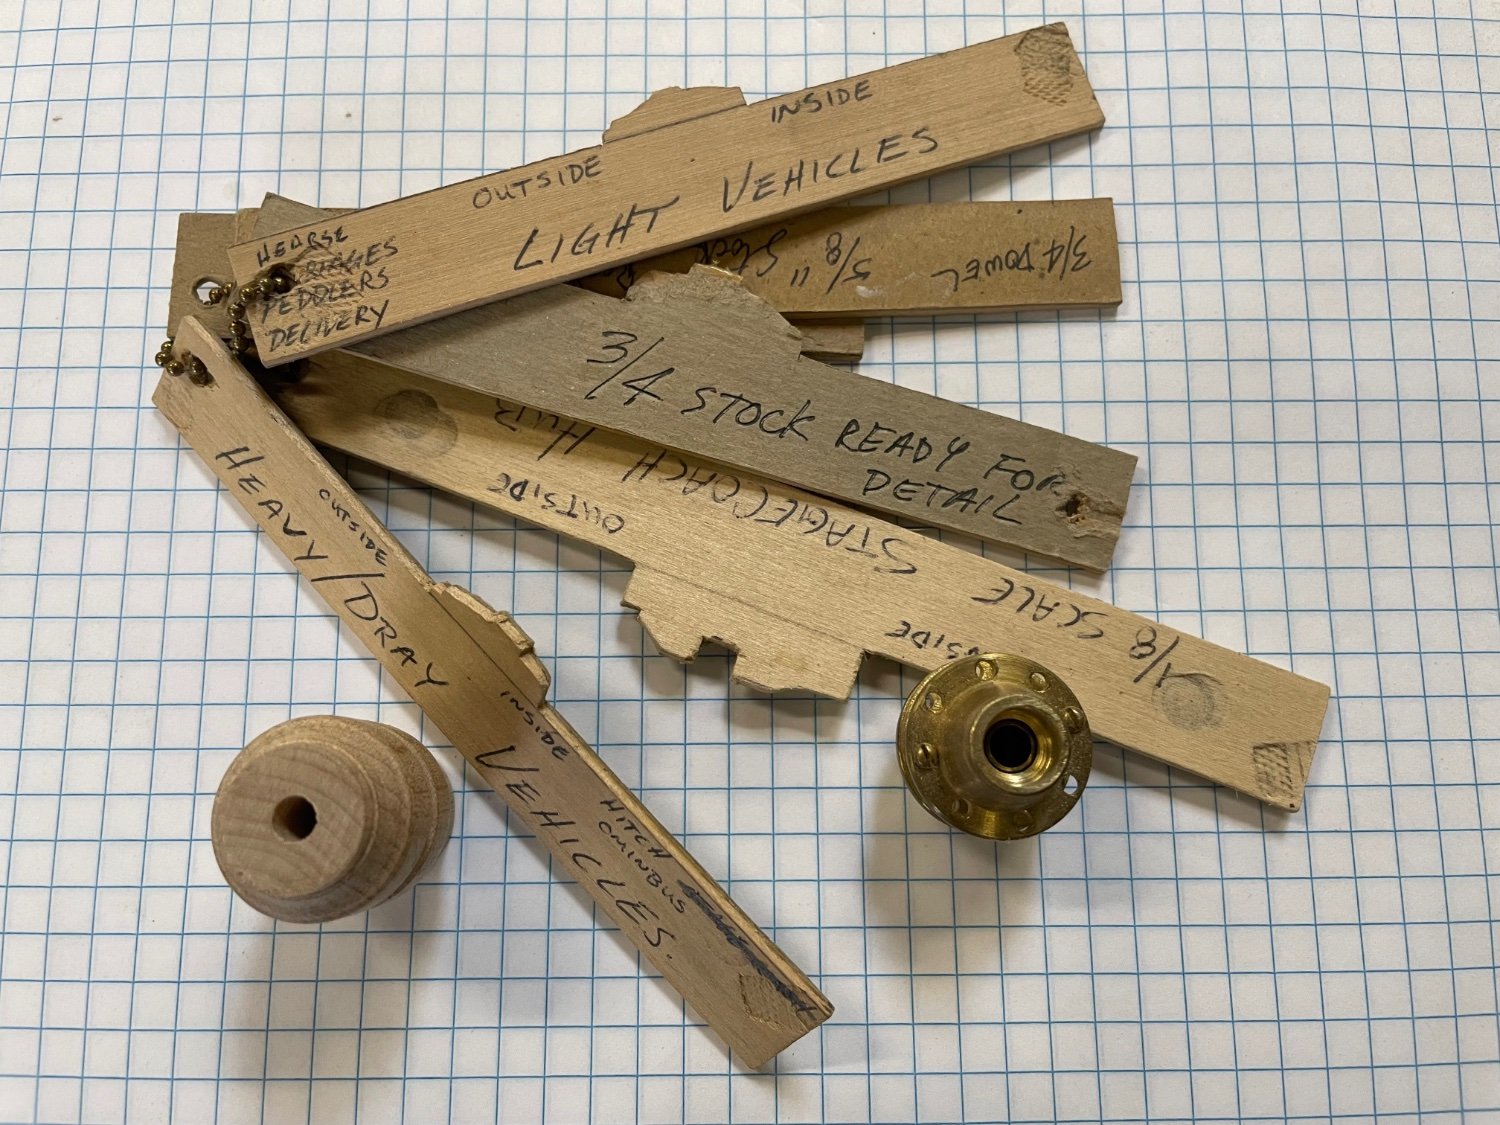
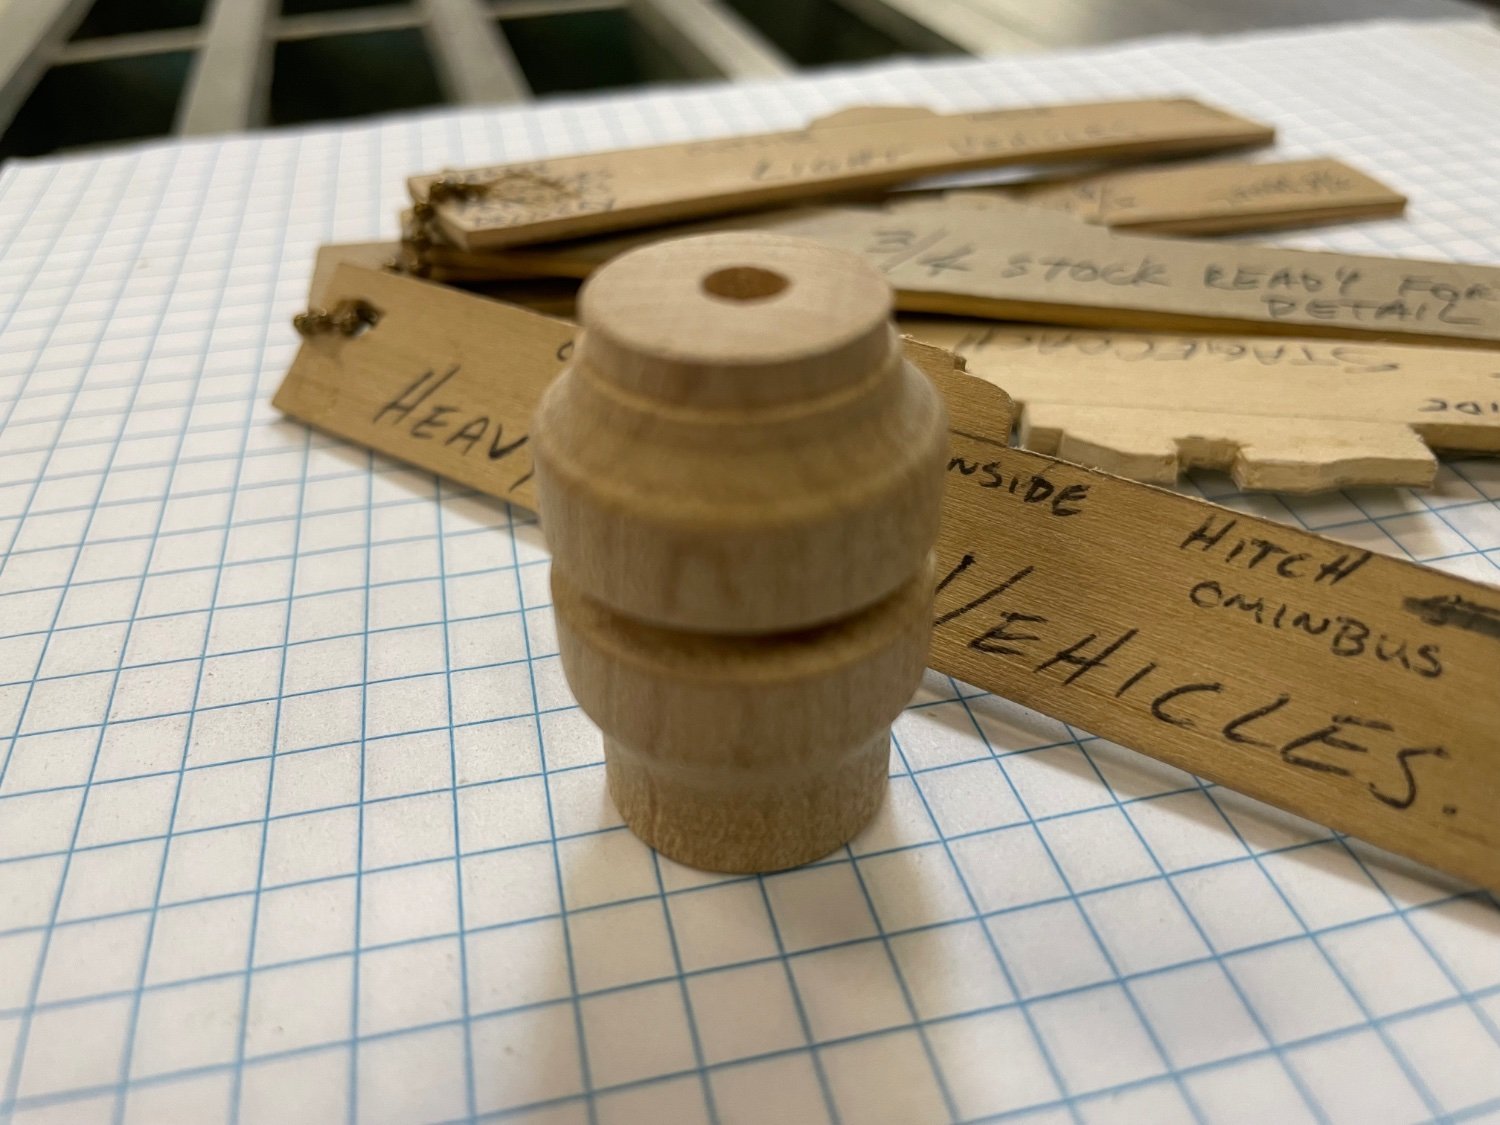
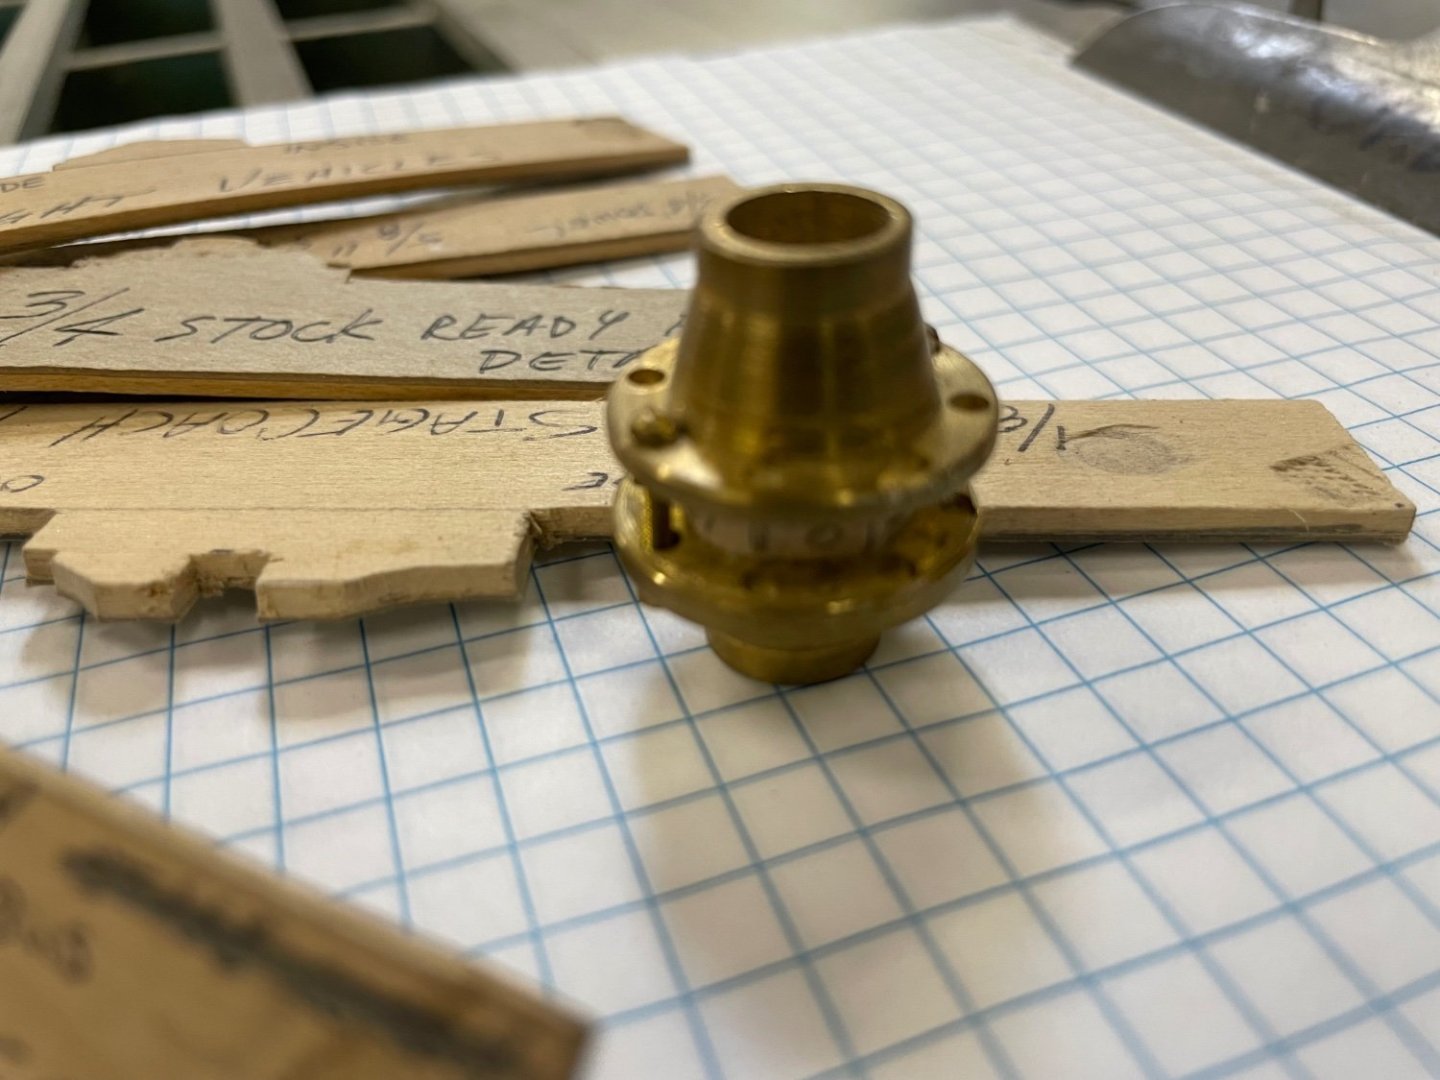
Are your hubs brass? Wood? Did you make up the wheels or did you buy them?
-
Very nice great job!!
-
Pulled the Trigger == Lathe coming
kgstakes replied to kgstakes's topic in Modeling tools and Workshop Equipment
I’ve done some projects on a wood lathe years back and have done some work on my atlas craftsman lathe that needs a little tlc. Other than that just s on some things my father in law told me course don’t remember what he said (he’s passed on now so hard to ask). But I don’t see that I’ll have much trouble with it. Just remember small machine light cuts, don’t take too heavy a cut and it’ll be fine. i look forward to getting the taig lathe and the first thing I’ll do is lay everything out and figure out a design for a cabinet for it and build that then get to turning. -
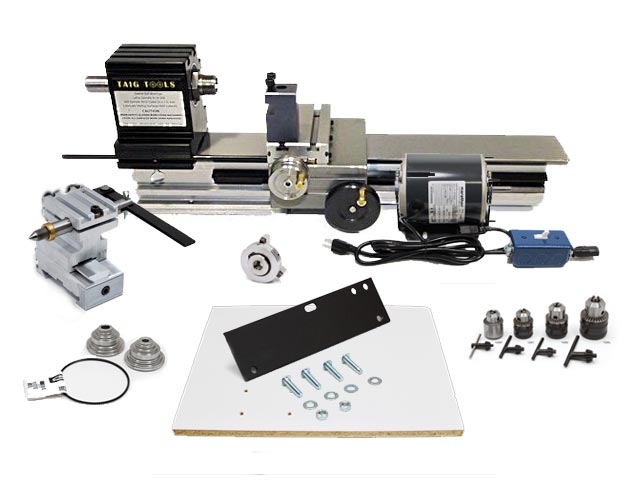
Well, for better or worse I pulled the trigger and bought a mini lathe. I know lots of you have sherline lathes and they are a great lathe. But for the money and what I believe I want to do, and the features that were offered and options available, I bought a new Taig lathe. I took a long hard look at both machines and I picked the best one I thought would fit for what I wanted to do with a lathe. I actually bought all the accessories that I wanted with the lathe and still came in under what a base model sherline lathe is with the same or close to the same options. So, I guess money had something to do with the purchase as well. I'm happy with the purchase, wife is good with the purchase (you know, always have to keep the banker happy), and I'll do a review on it after I get some turning under my belt. Picture below only shows what is included in the package I bought. The options I bought not shown in picture.
- 49 replies
-
- 19
-

-
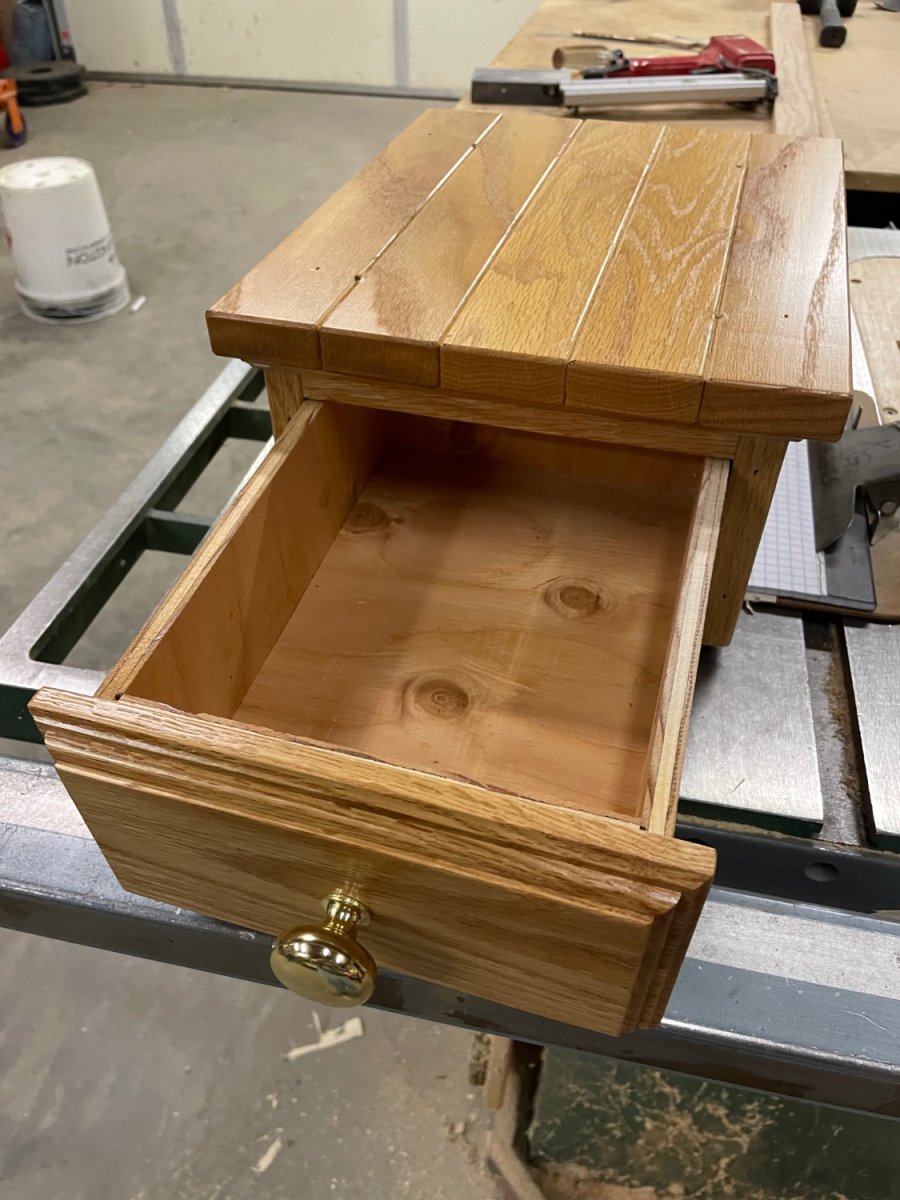
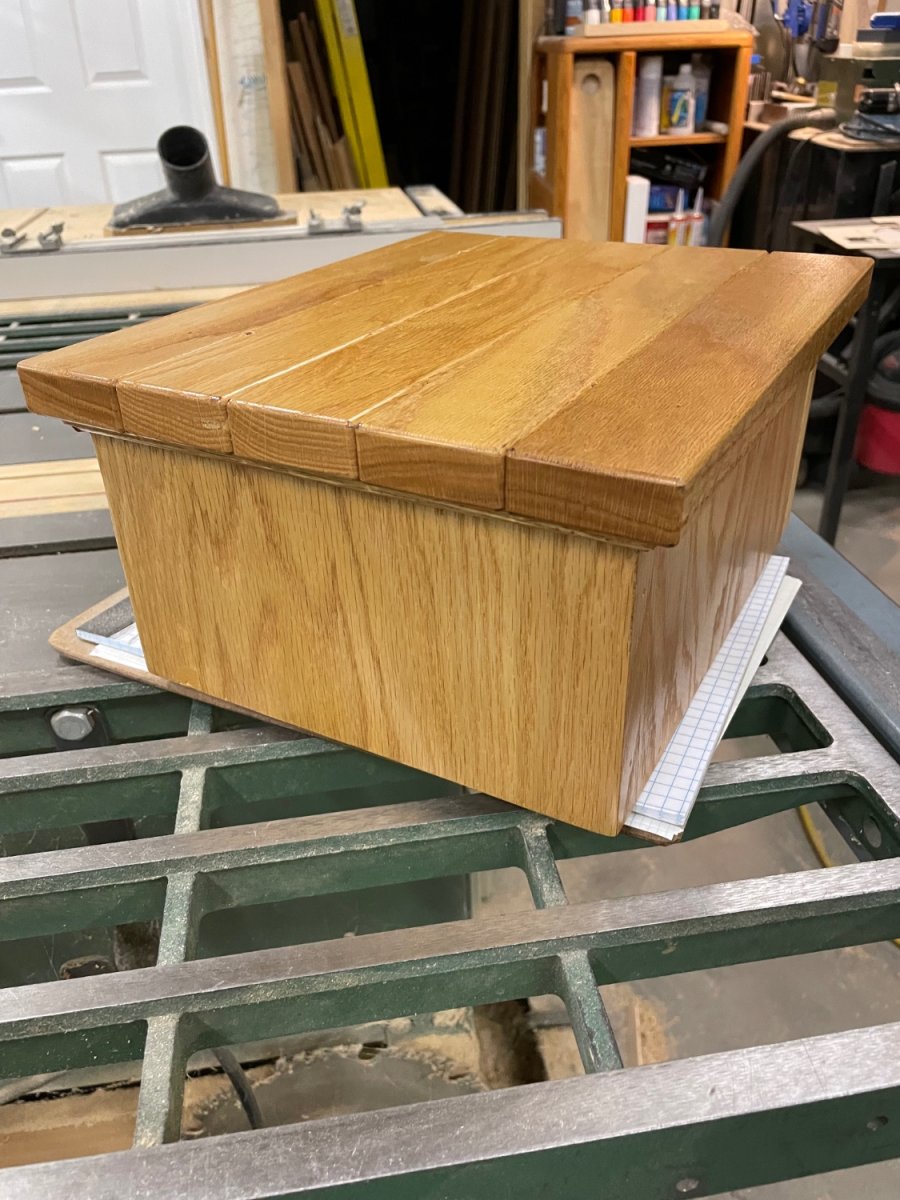
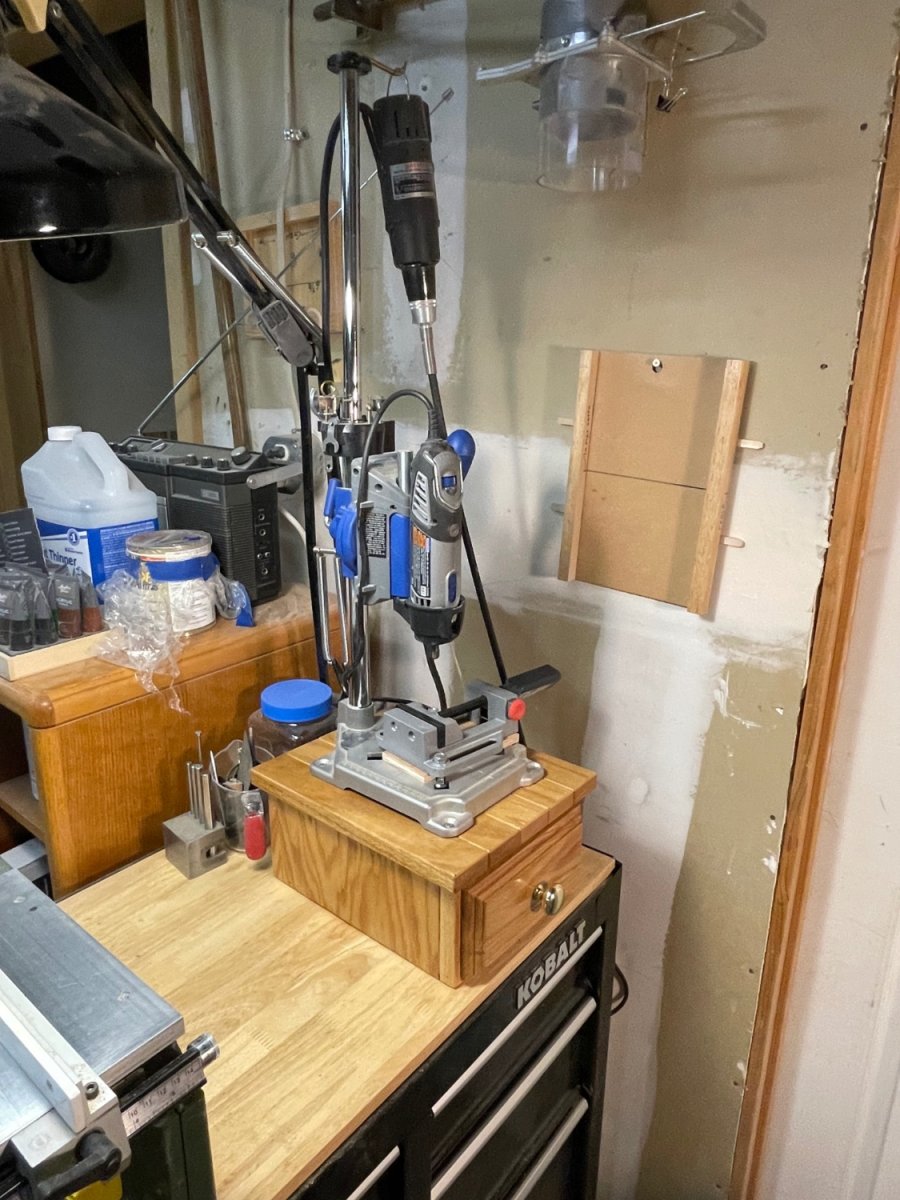
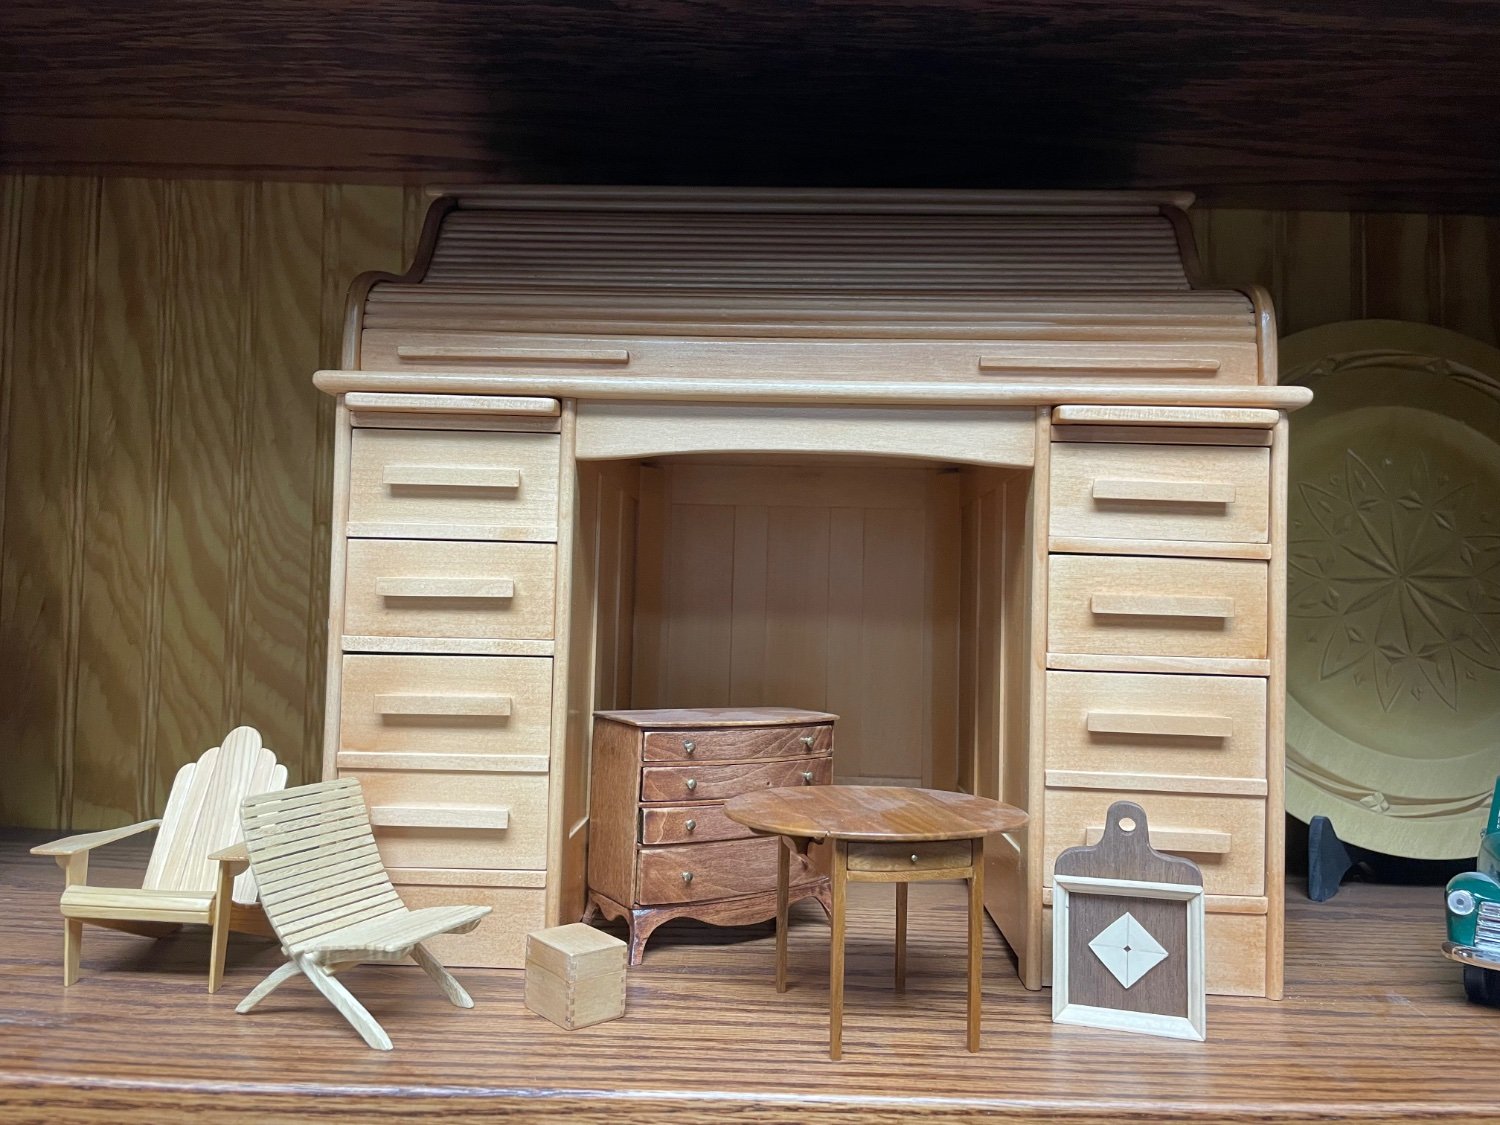
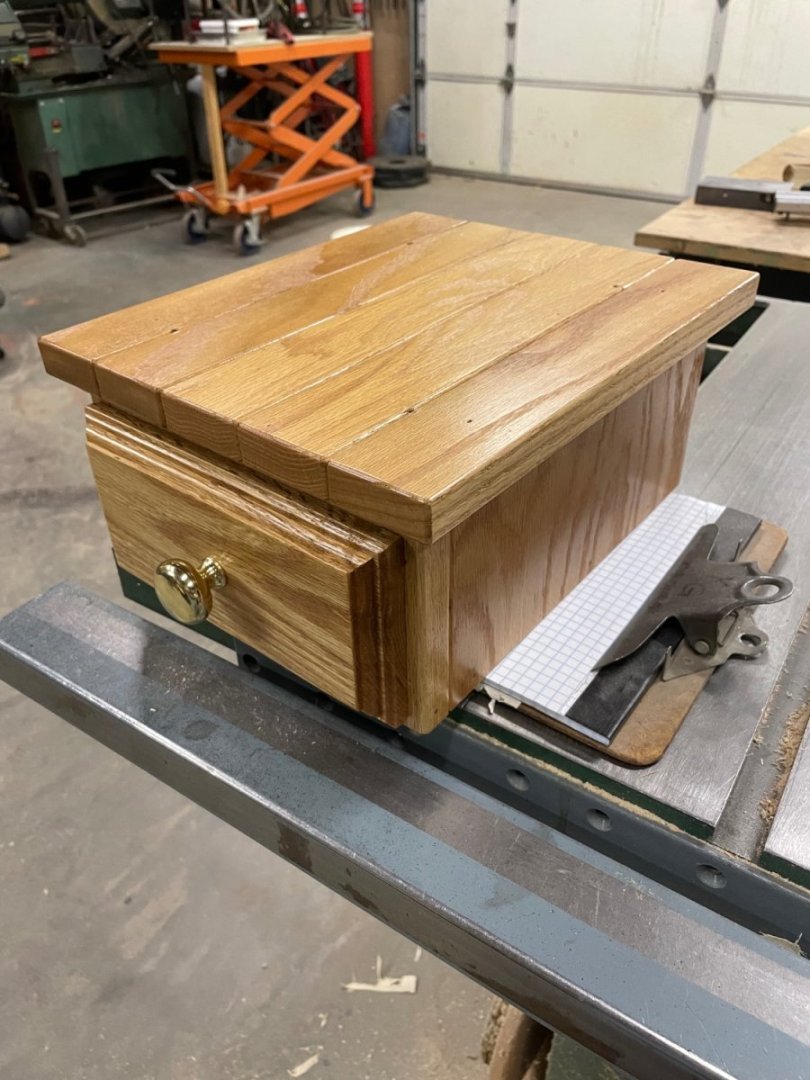
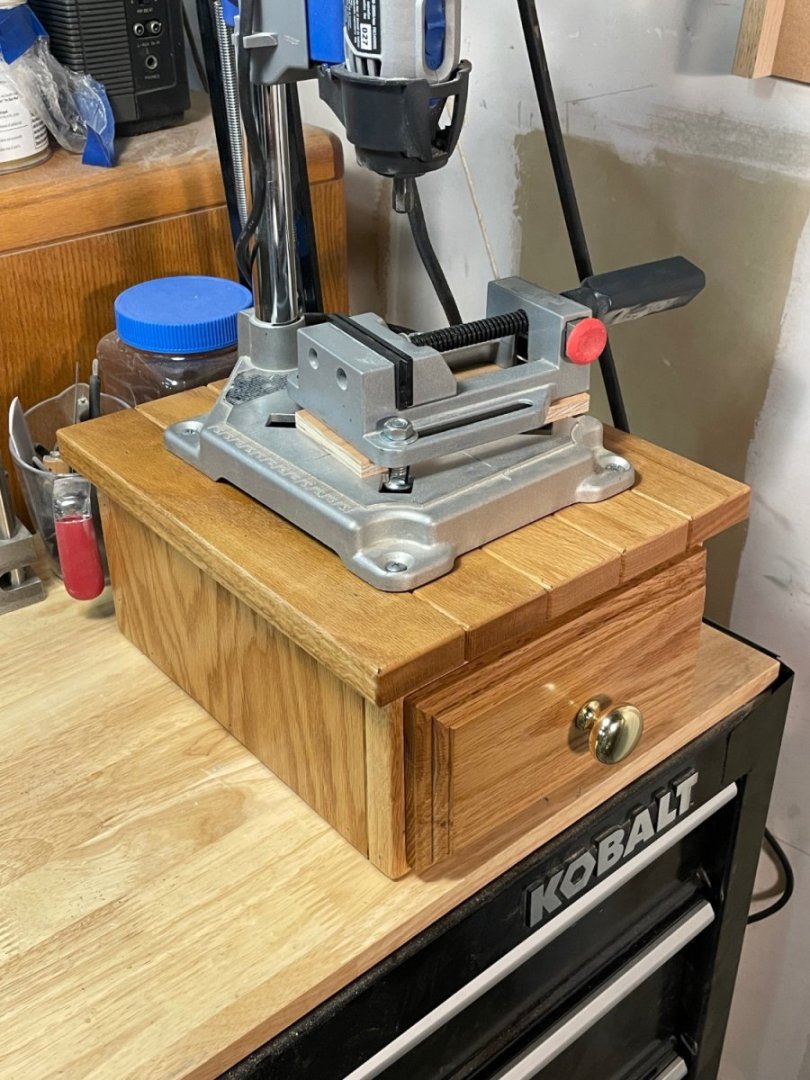
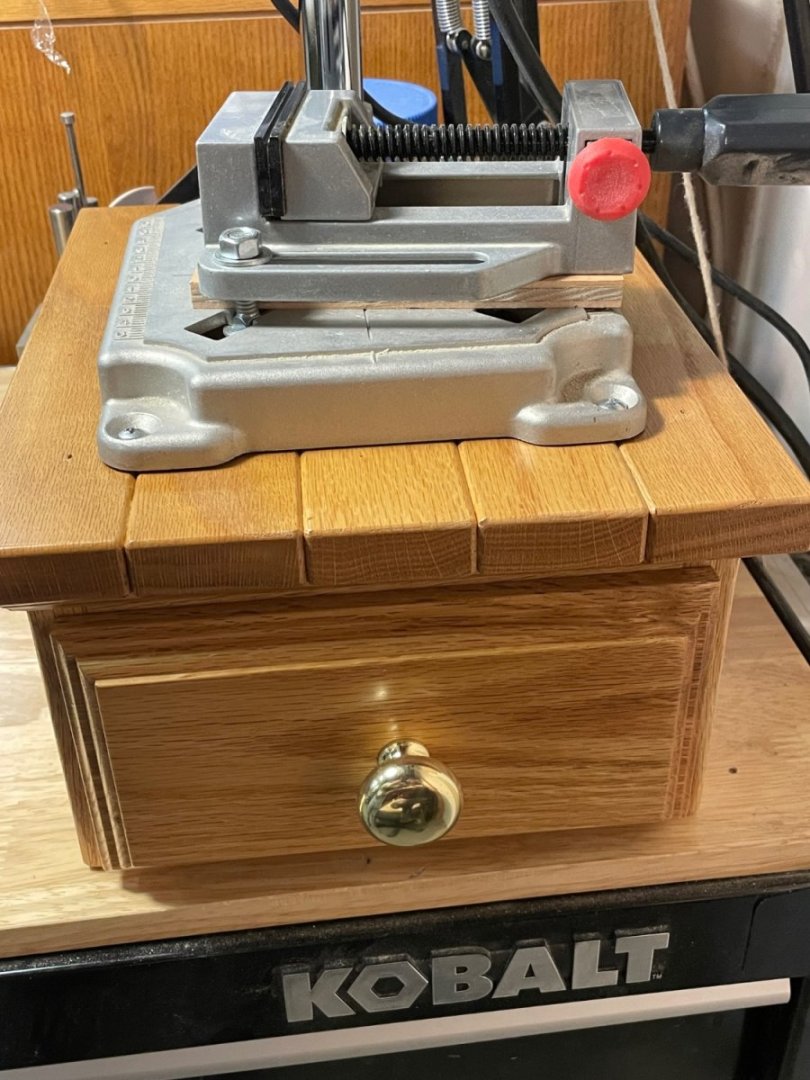
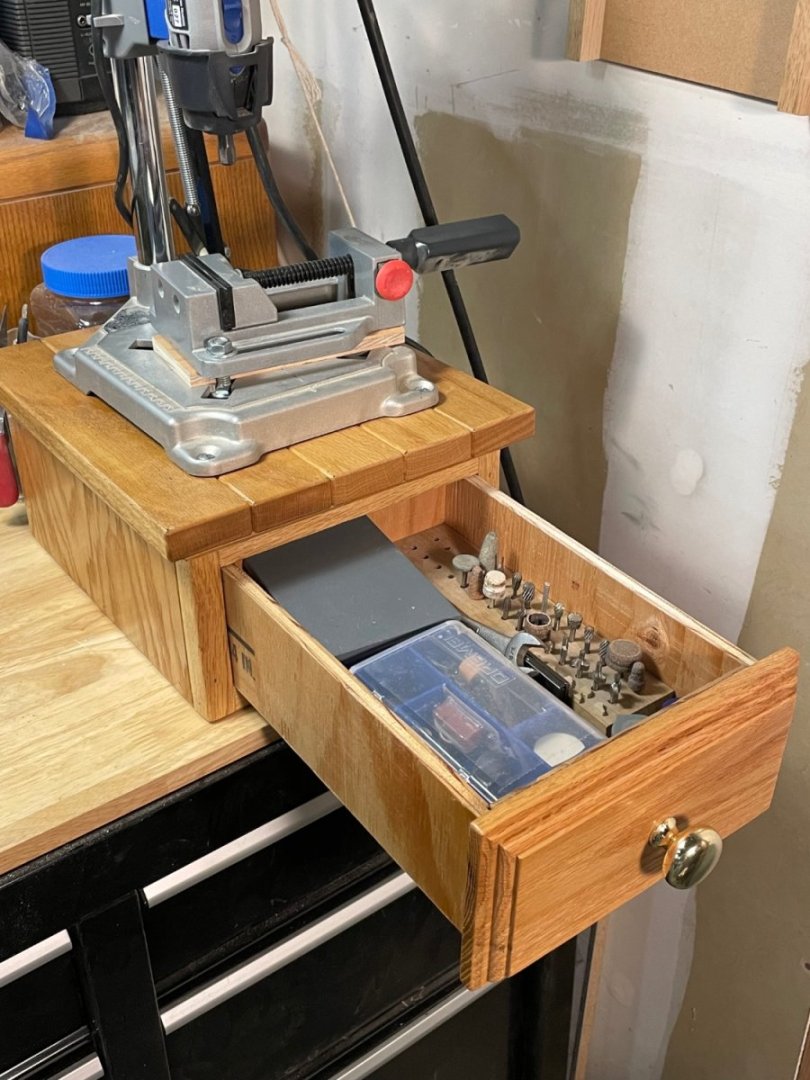
I was in the shop Friday afternoon and I wanted to build some sort of storage for my dremel drill press bits, cutters, wrenches, etc. i seen somewhere that a person built a cabinet with drawers for his lathe. I liked the idea put my twist on it and here’s what I came up with. Yeah the drawer pull is over kill but it’s what I had on hand in the shop.


- 3 replies
-
- 17
-
-

-
Nice projects. What length is the bed on your sherline? I wouldn’t be turning any masts but just wanted to know length and was there any wobble while turning? With a mast did you use a steady rest?
-
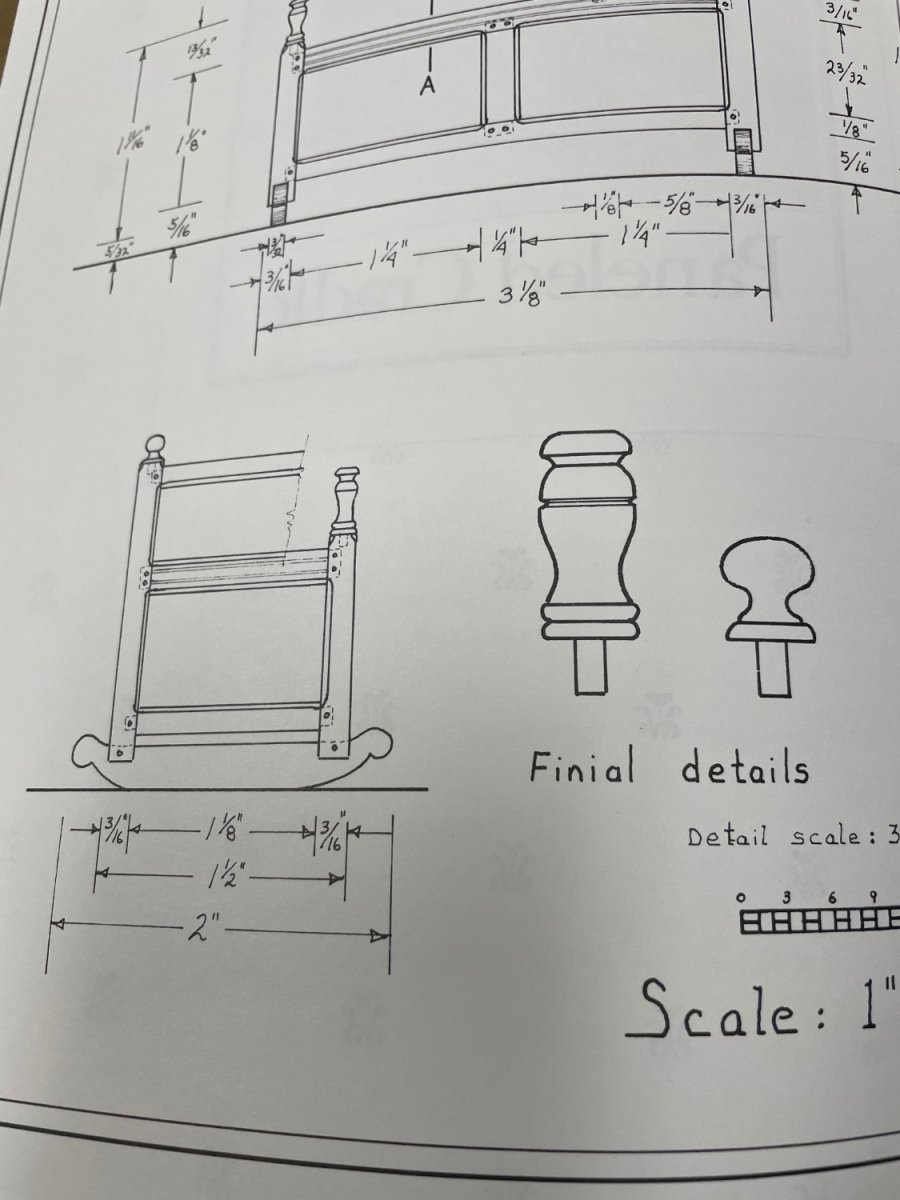
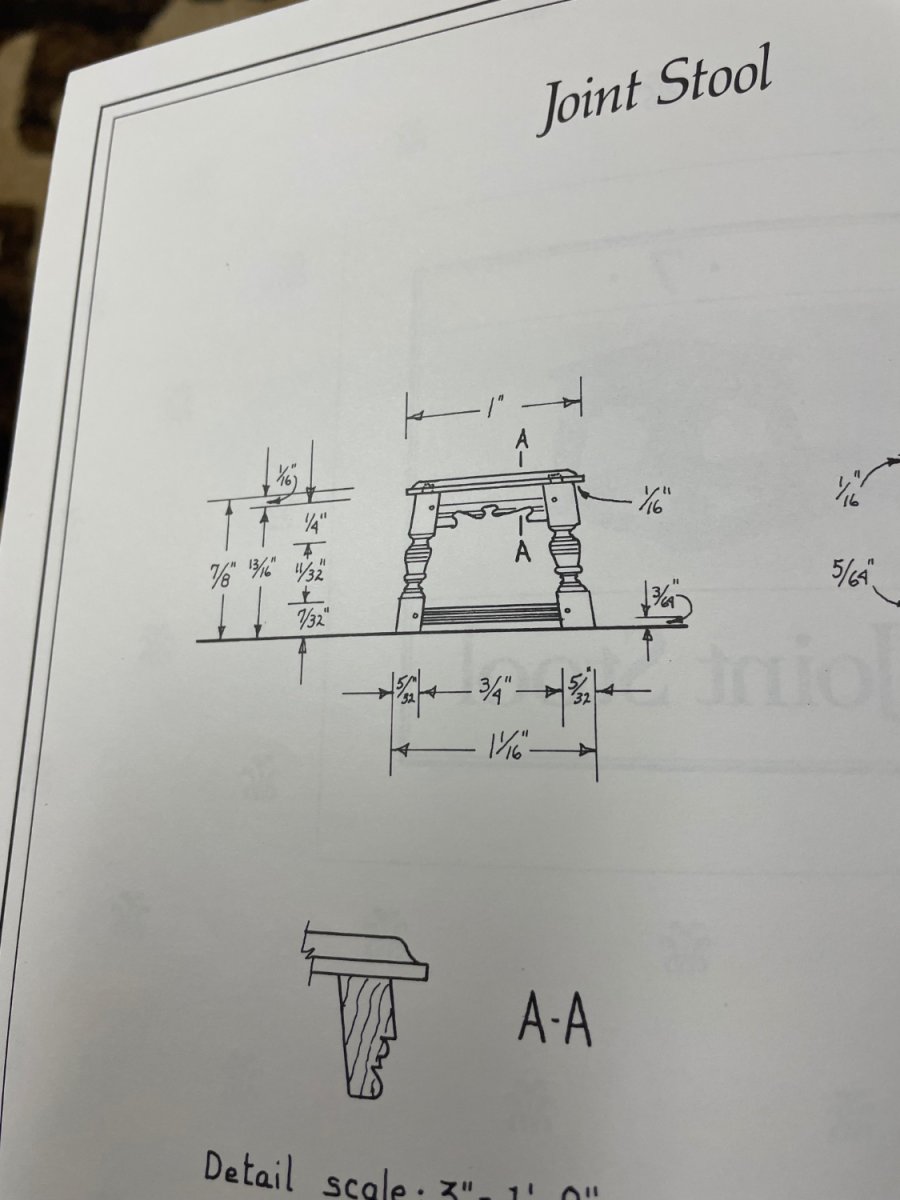
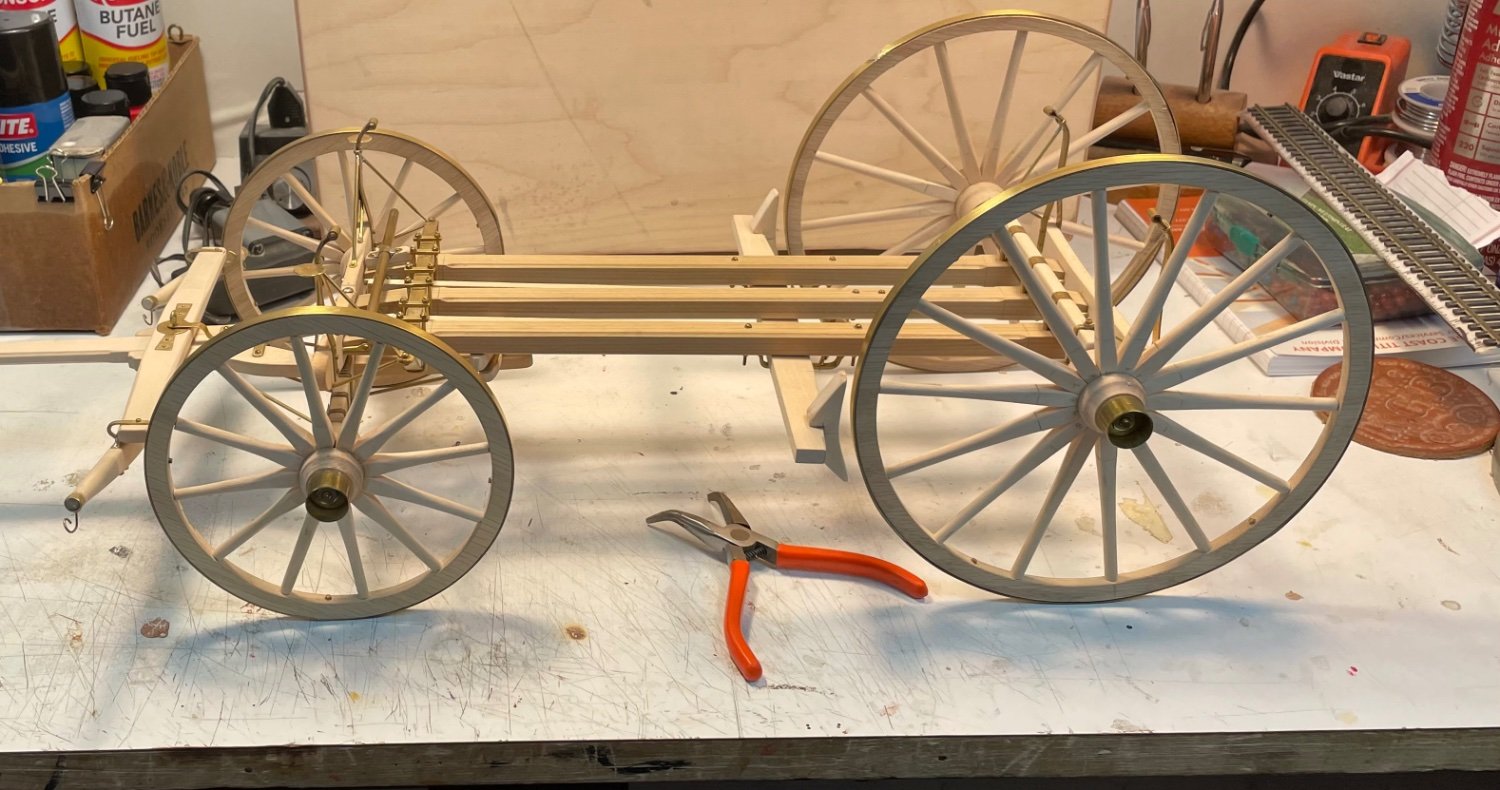
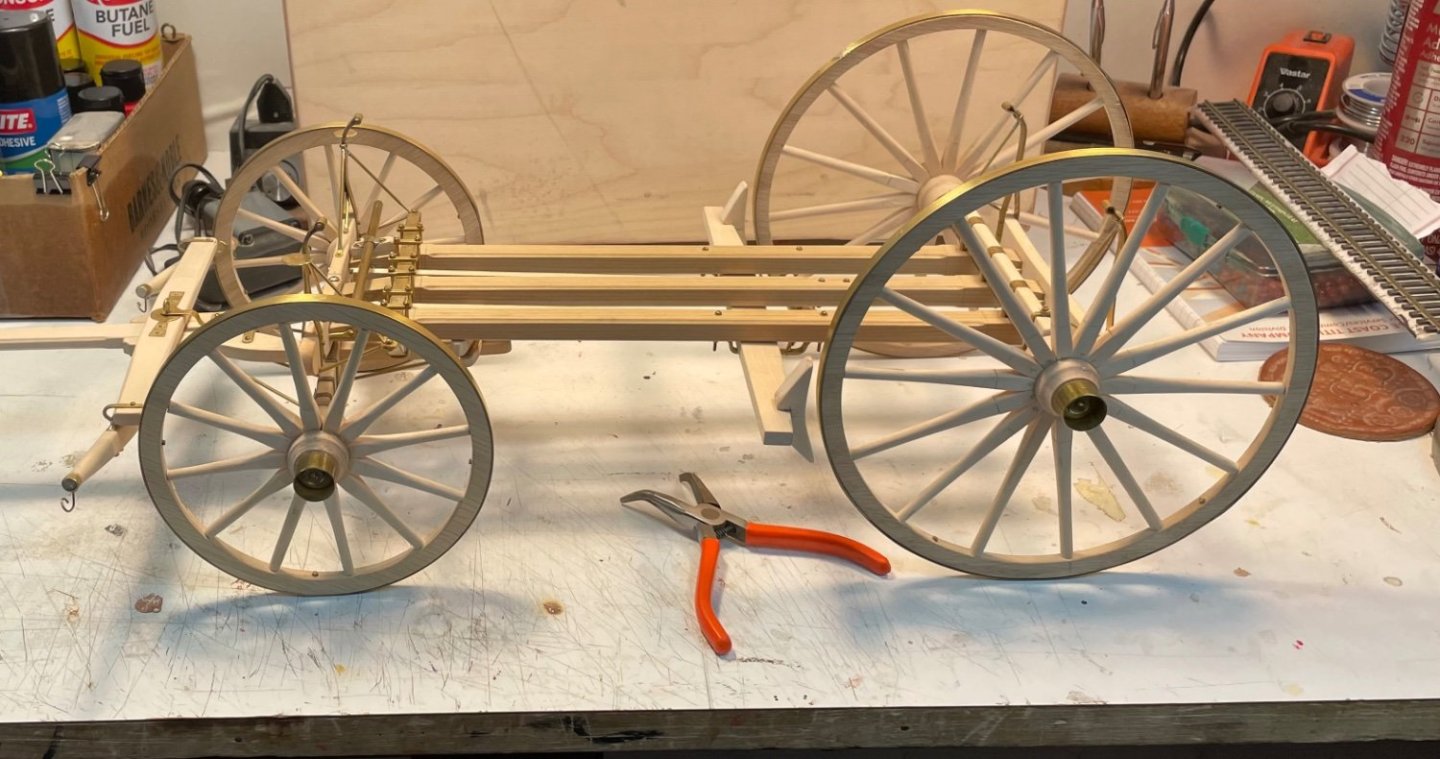
I know my initial question was about tool rest and we got on to my atlas craftsman lathe and the turning that I would be interested in is yes turning pens but also miniature parts for furniture. Would a small lathe be better to use in the turning of miniature parts than my craftsman lathe? See pictures of what I’m interested in turning. The wagon hubs and patterns I’ve turned on my atlas/craftsman lathe.


-
Scale Model Works !!! I've watched him a few times. Great modeler. Is he using a Unimat lathe? Thanks for sharing
-
Don’t remember who asked but I believe my atlas craftsman lathe (101.07301) was built between 1939-1950. As far as I can tell on the ole interweb. I’m going to look into getting it cleaned up painted and repairs done to it. keep in my workshop for larger projects and keep looking and learning about smaller lathes. Money not a problem, I got all the time in the world to save up😀😀🤪. taig lathe or sherline is probably what I’ll go with for my hobby shop.
-
That looks great good job
-
Appreciate the information. Yeah like I’ve said I’ve turned on a wood lathe before (few years back) but really don’t know too much about metal lathes. I’ll think about what I want to do but for now the lathe I had will work for turning some of the stuff I’ve tried. Smaller lathes might suit miniature turnings better maybe not. As you can tell still rolling things over in my head.
-
Navyshooter, thank you for the advise. Very sound advise I might add. I want to turn tiny spindles for chairs and other furniture pieces in 1/12 scale. And maybe a pen or pencil kit. I’d like to try turning some 1/12 or 1/8th scale wagon wheel hubs. I’m a woodworker professionally have turned a few things on a wood lathe. But I have this metal lathe which is workable but I think the size of it is what is hanging me up on using it more. Maybe different attachments would I would use it more but I’ve really always wanted a watch makers lathe. For some reason they intrigued me. Just like the size, so I was looking at some mini lathes that I might be able to add to my mini tools that I have. Thank you for the advice and yes I will be looking at my options and what I really really want to do with a lathe and make a decision. Thanks again
-
I think I need to clarify something here. I build all kinds of models and or miniatures. Yes, I would like to turn at least brass once in a while, but I would mainly be turning wood. Wood spindles for chairs, staircases, columns on porches, maybe even a pen or pencil kit. And I guess my biggest worry about the lathe I have is getting to close to the chuck. That thing will tear you up if to get your finger or something a little to close to it when sanding a little part. I would like to find a much smaller chuck maybe even a 4 jaw. Or a 1/2" capacity drill chuck to turn stuff. The headstock takes a #2 and the tailstock is a #1. Really would like to find a live center for the tail stock for it. That's the first piece I would get for my lathe is a live center. I do realize that mixing metal and wood together on one lathe would be a mess if you're turning metal allot. With all the lube you have to do for turning metal, oh yeah, turning wood would be a mess to clean up and with all the gears, threads, on a metal lathe full of cutting oil yeah I can see how everyone is saying to cover your machine up. It would get ugly real quick.
-
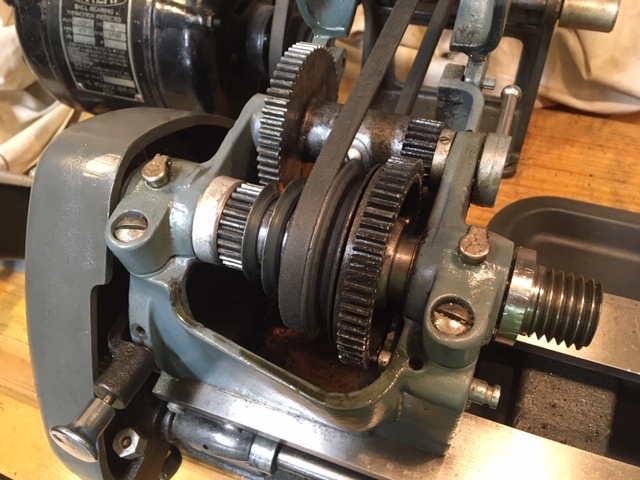
This is the type of headstock I have on my lathe. This picture was taken from vintage machinery. I think this is the part of the lathe that needs some TLC. Not the babitt, but the small pins inside there I've oopsed a few times and maybe broke something because it won't engage the back gears shown in the picture anymore. The lathe pictured is again not mine. But the over all condition is very close to the condition of the lathe I have. Like I said previously, the lathe I have wasn't abused in anyway (just by me trying to figure things out). And no mine does not have bearings. So, it could be a pre war era machine, I have no idea.
-
I keep calling it a 6” lathe because that is the capability of it. The plate says 101.07301 which does have babitt for bearings. Dad always called if a 6” lathe so that’s what I’m calling it. Since my lathe is packed away from the move to dads house I’ll try to find pictures of the head stock on line and post them here so you all can see what I’m talking about with the babitt bearing
-
I keep going back and forth on getting a smaller lathe or not. The lathe I have, this is information from my dad. Which might be true may not be but here’s what he remembers. The lathe he believes at first was in the ford motor company plant in Detroit. Then a man that worked there got it (have no idea if bought out given). That man had it for a few years in his own garage at home then sold it to a mechanic that would use it to true up arbors for something. Then my grandfather got it from him which in turn was given to my father and now to me. Between my grandfather and me it wasn’t used much. My grandfather got it back in the 50’s it doesn’t look like it had been used much but the headstock does have babitt instead of bearings and the headstock has little if no play in it. I’ve messed with it a little bit over the years but I’ve never turned metal with it. Only wood to make scale wagon wheel hubs. Like the ones shown on this 1/8 th scale stage coach I’ve been building off and on. I want to keep this lathe but for my “hobby shop” would like to have something smaller because of space and be able to move it around if needed.
-
This is what sherline has on there website for 3 & 4 jaw chucks. Not sure if it would fit my lathe but they say they offer it to sears lathes. Maybe back in the day sears and craftsman were not together then don’t know. Home » Products » Chucks and Collets » 3- and 4-Jaw Self-Centering Chucks Our 3- and 4-Jaw chucks are available in two sizes, 2.5″ and 3.1″. They are available with 3/4-16 threads for use on Sherline machines. The smaller 2.5″ chucks are available with other spindle threads to fit machines made by other manufacturers, such as 12 mm x 1 mm and 14 mm x 1 mm for older Unimat lathes or 1/2-20 for old 6″ Sears lathes.
-
Nothing wrong just big and not sure the jaws reverse. So the “step”? If the jaws go from outside — step down to center so you have these big “wings” you have to watch all the time turning close to the chuck. Just wanted something smaller. It’s 4” diameter I believe. Sorry guys the lathe is packed away when my wife and I moved to my father’s house to help him with daily “things”. Hope you know what I mean without getting into too much detail father.
-
Last night I Ed looking around and seen that sherline sells a 3 jaw chuck for the atlas craftsman lathe. I’d this true ??
-
Nice job looks real good clean and very detailed. I like it!!
- 24 replies
-
- 2
-
-
- Lady Nelson
- Amati
- (and 2 more)
-
I guess I should have added I can turn on it now for accurate 🤪🤪. But what I’ve done with it so far seems to work. Yeah the thread gauge? Is broke on it. And a pin is in bad shape to back gear it. The ways seem good, bed is flat, headstock bearing or what ever it is seems fair to good. So maybe I’ll around and maybe find a machinist to help with the tough parts/fixes, you all have convinced me to invest more time in it and figuring out what it really needs to have done for what I’m going to be turning. Thanks everyone for your input, appreciated.