HOLIDAY DONATION DRIVE - SUPPORT MSW - DO YOUR PART TO KEEP THIS GREAT FORUM GOING! (Only 24 donations so far out of 49,000 members - C'mon guys!)
×

kgstakes
-
Posts
400 -
Joined
-
Last visited
Content Type
Profiles
Forums
Gallery
Events
Everything posted by kgstakes
-
 Oh yeah nice to be back working on a model. Been a long time coming. Thank you for the comments
 -
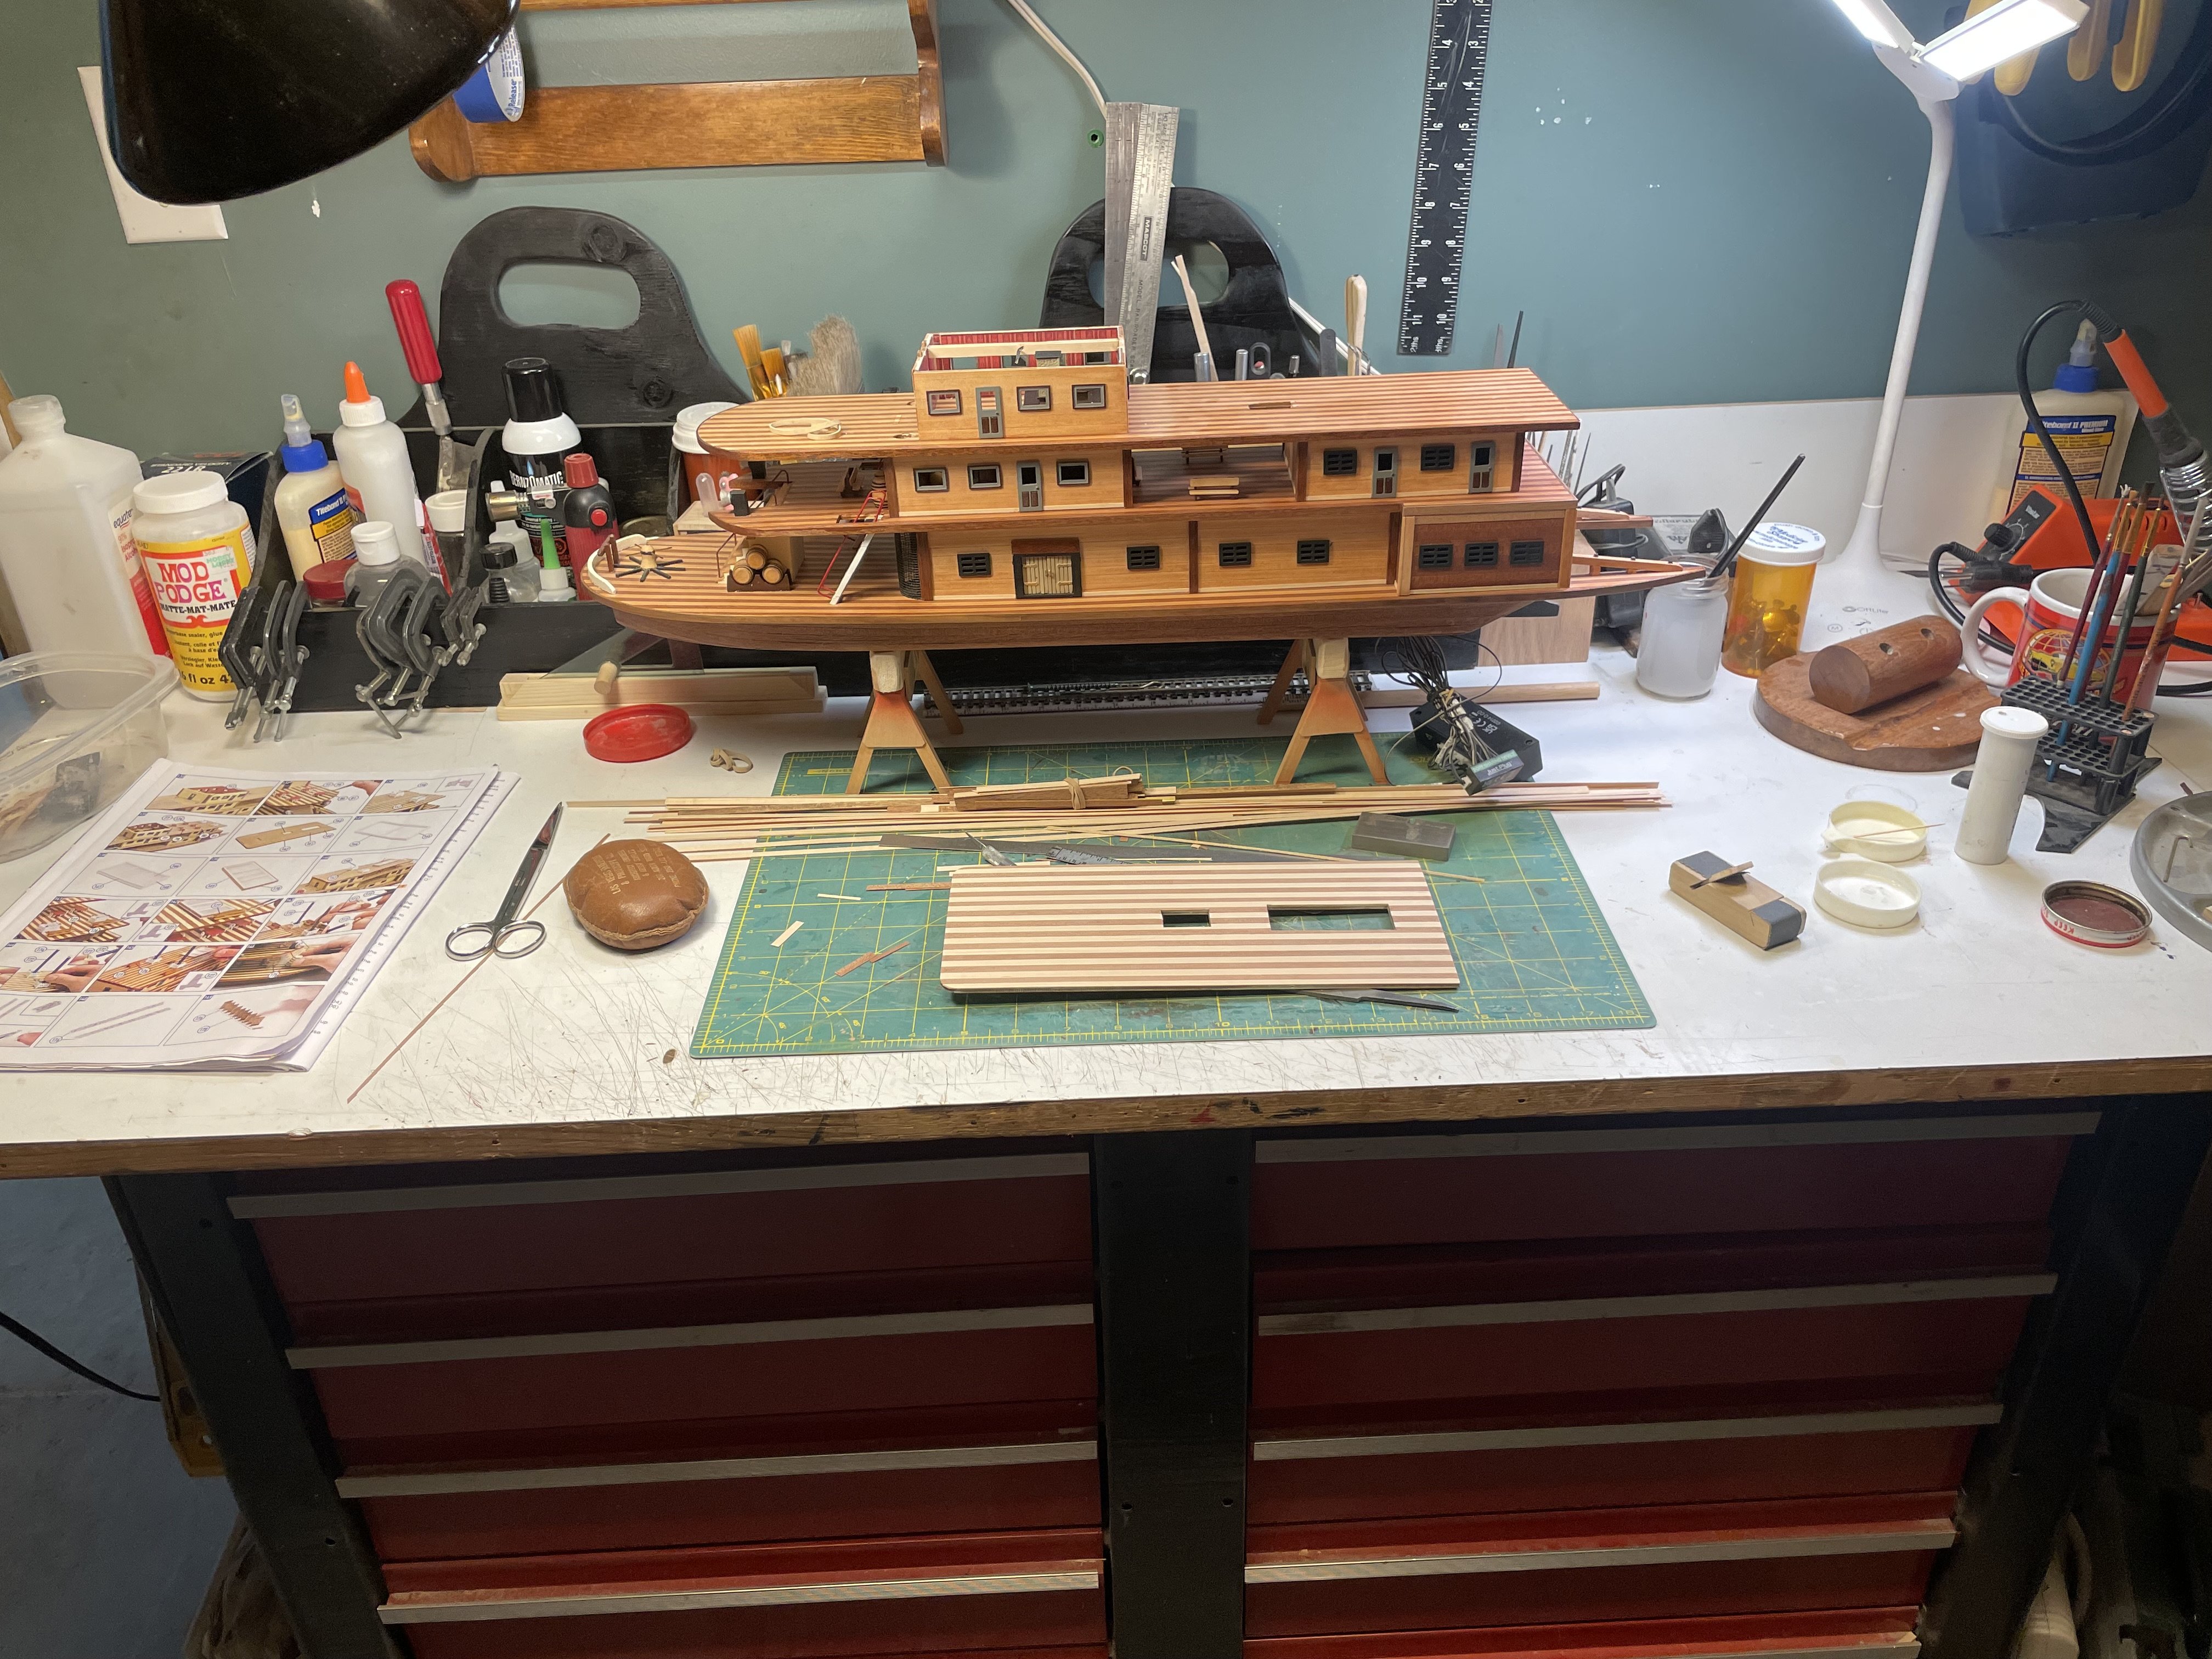
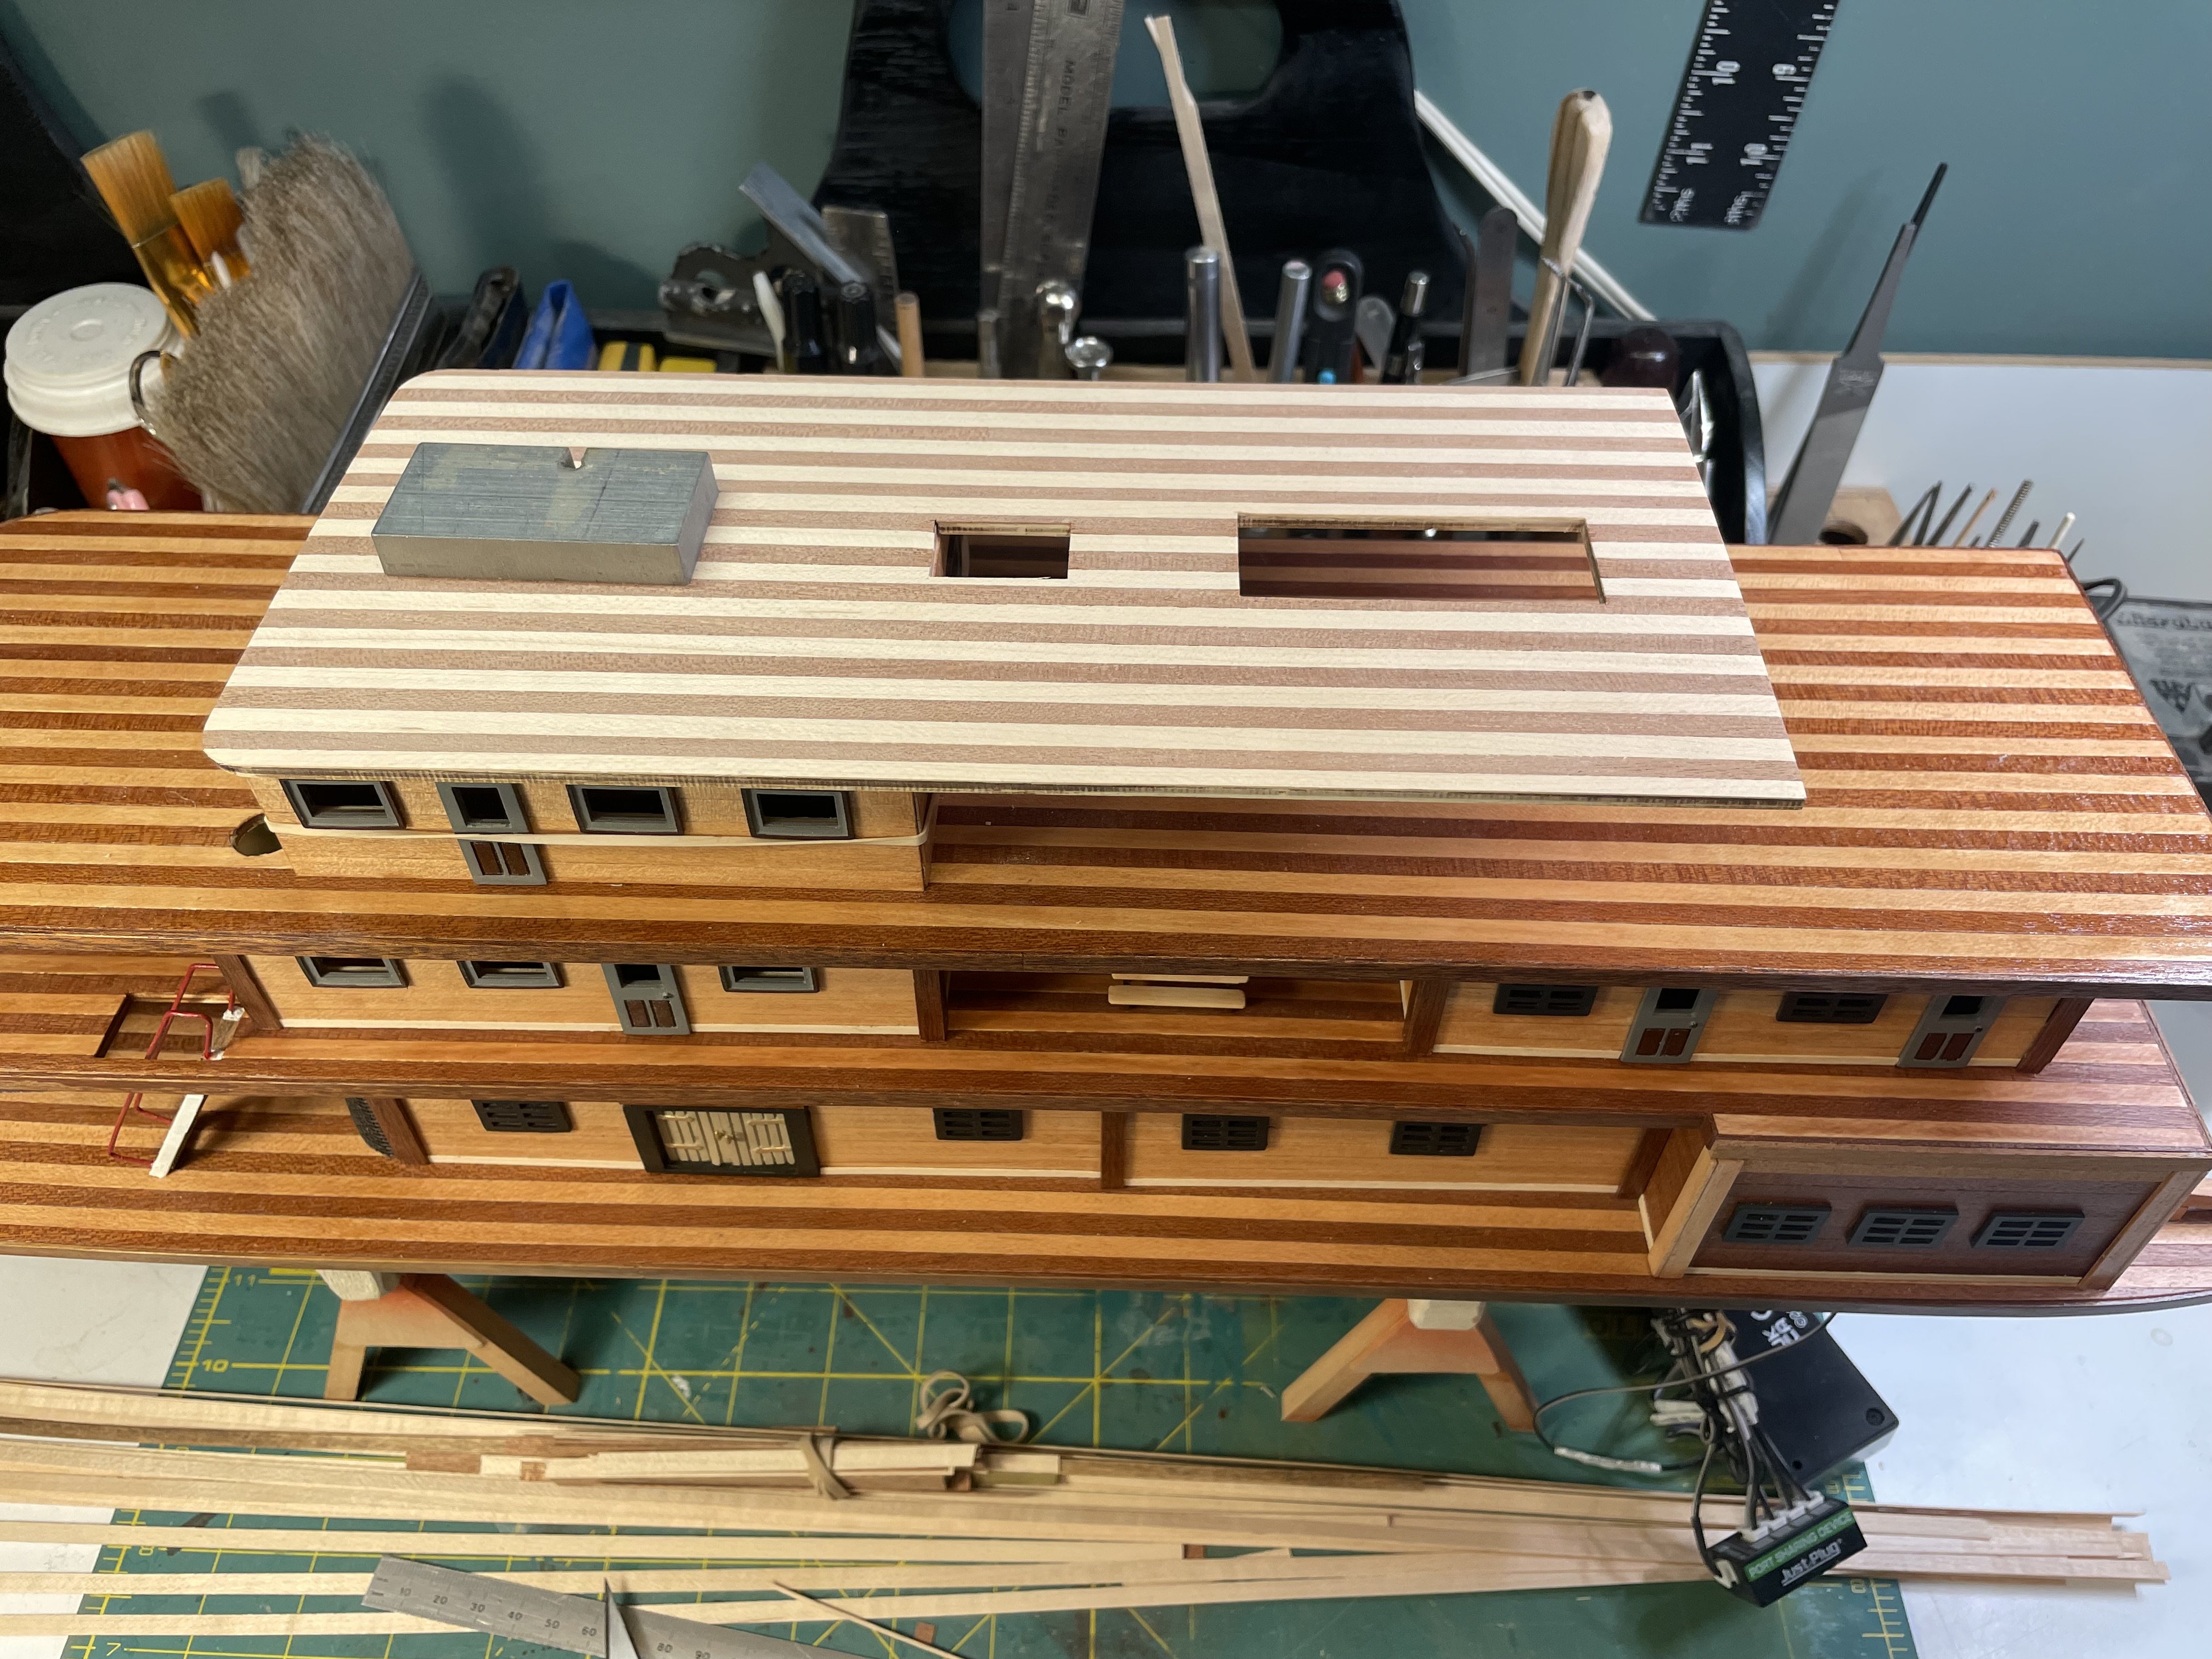
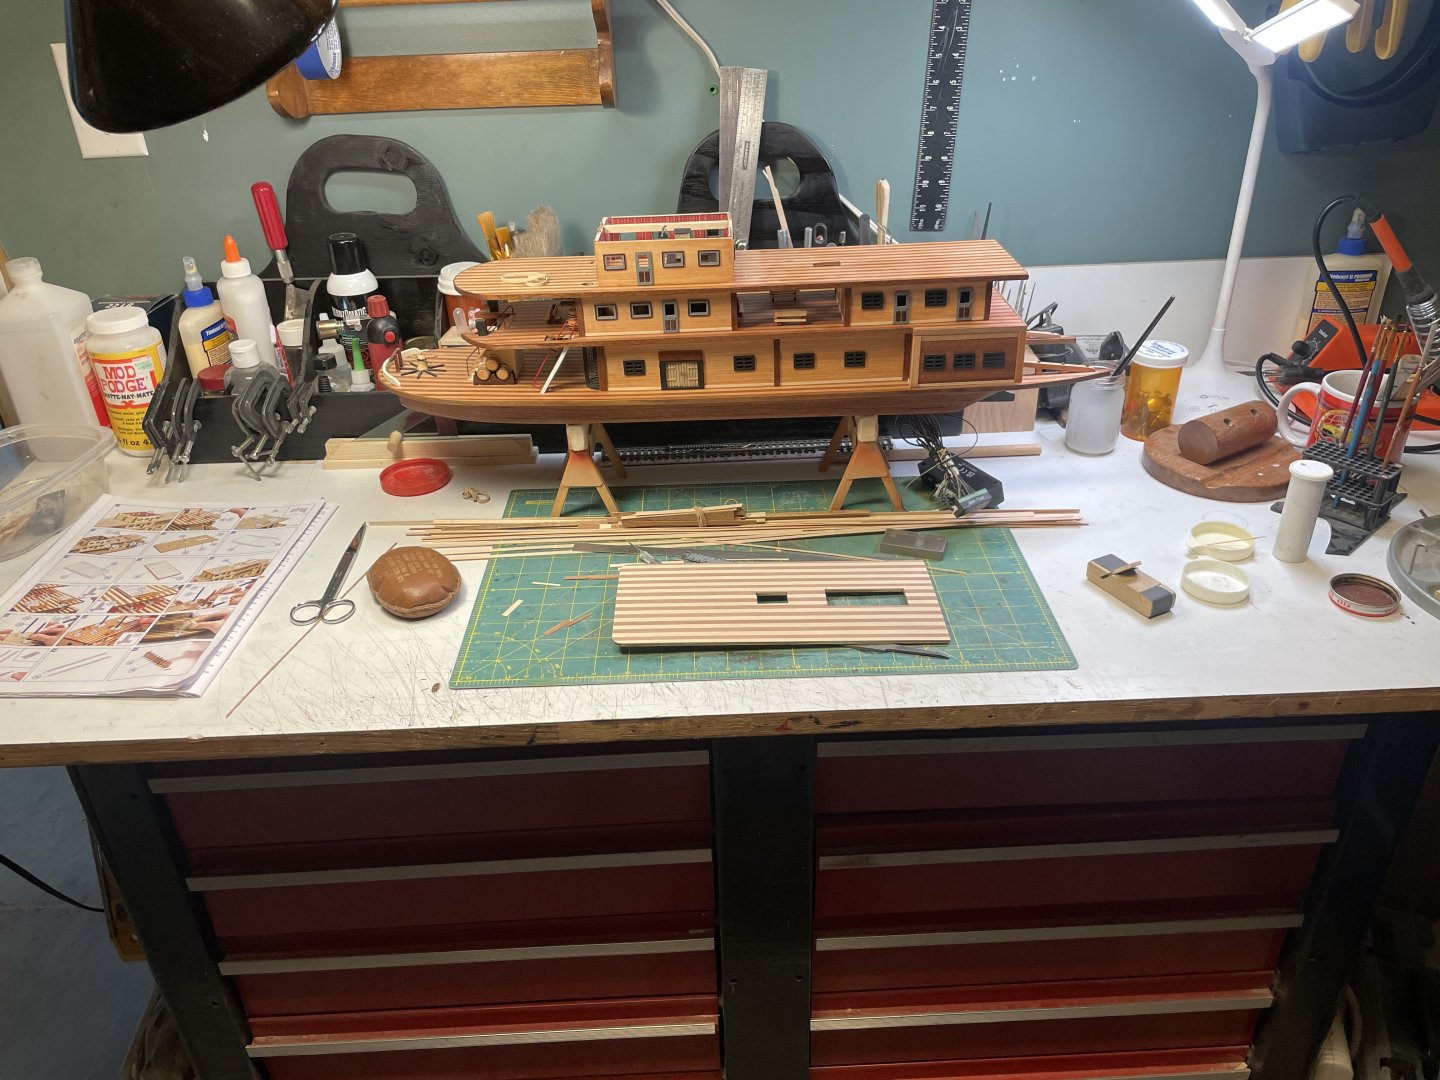
Well after many months of recuperating from hand injury and moving to another state, I’m back in the hobby room. Did I little building on the riverboat but mainly just get everything out, organized, and to see what’s next. Hopefully I can continue posting on a regular basis and complete this model and then on to the next one.


-
Been thinking about a “tool box” to carry tools and models back and forth. Guess what? Nah just get it to the shop and start building on the riverboat that I’ve not touched since my hand accident back in January. Between moving (Nevada to Kansas) and starting a new job, setting up the wood shop and just life in general, I might get back to modeling this weekend. As for the tool box, still in the making but not a priority as I thought I needed. Thanks for the input and sometime down the road I may build something but for now I keep looking at the riverboat and yeah just need to get back at it. I’ll start posting on my build log in a few days till then you all keep up the great work that each and everyone one of you do!!
-
I’ve seen a lot of them on line for tool storage and they’re great, but no place to store a model in progress. I’ll take ideas from them and build a model “case” that stores tools and an area ( on top ) that could store a larger item. When I get it built I’ll post a picture thanks to everyone for helping with ideas.
-
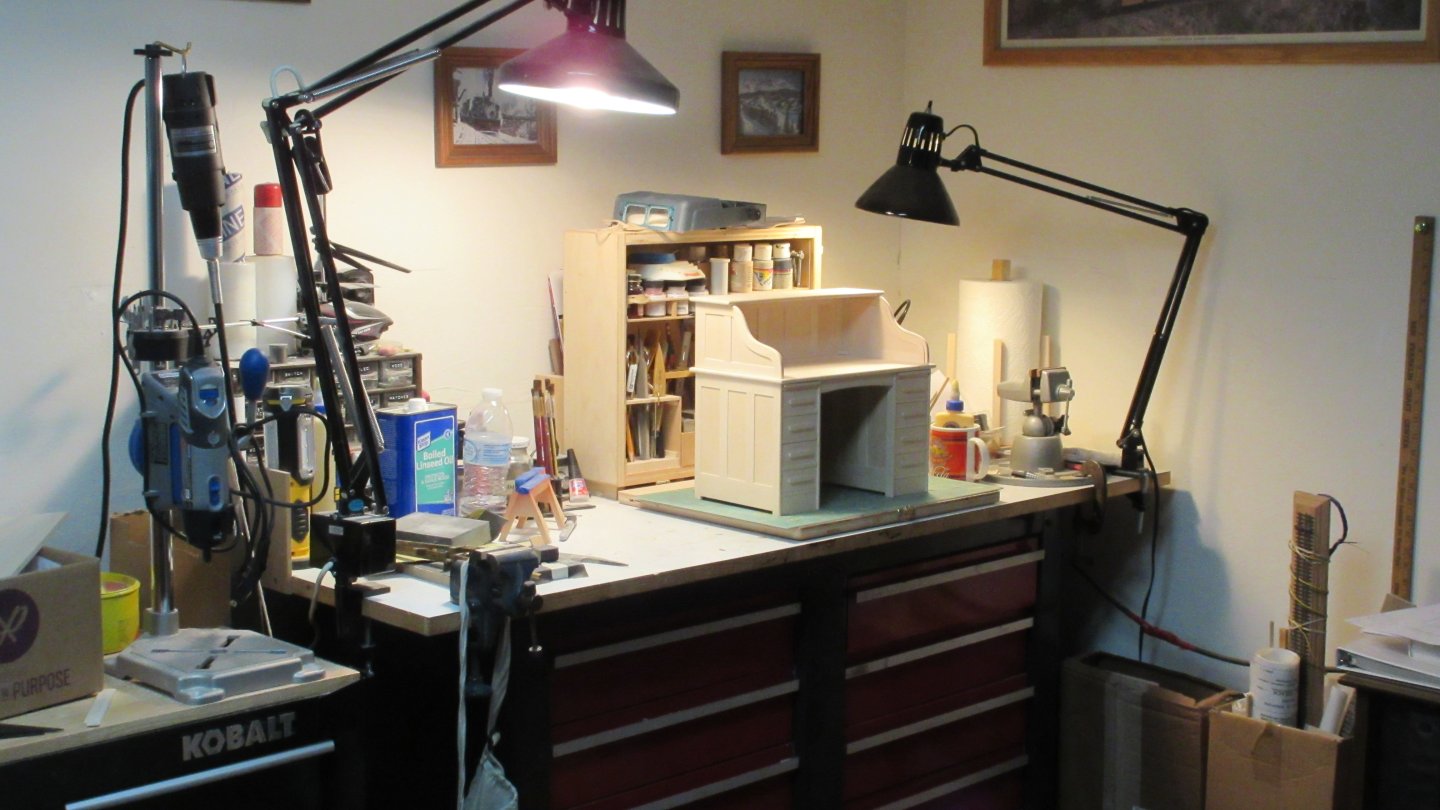
GGibson, You made the comment that I would out grow the box I posted above. Just wanted to show you all what I've done in the past and my modeling bench that I've had for years. It's a craftsman workbench with all drawers. Works good, but as time has gone by, I have found myself working or wanting I to work at is a desk of some type with just a few tools to do small modeling projects. No need for larger tools, power tools, just something that I could carry back and forth to the shop where my hobby shop is located. Anyway, here are a picture of my workbench and the small box that the rolltop desk is sitting in front of worked but still not really what I was looking for. Then I built (see video) and that works for the most part but no storage for a model in progress to keep safe. Still thinking and wondering what to buy or build. Keep ideas coming if you have something to share. Thanks again for all who commented. First order of retrievability.mov
-
You have a picture of what you use?
-
As far as out growing it. No, I have an office in the shop that is my miniature workshop with the rest of my modeling tools. This would be for taking to the house and have a few tools and materials to do a portion of a model or "build sub assemblies" for a larger model. Would use this just for ..... building things that don't need all my power tools or even for that matter, all my hand tools. Just enough tools and materials to do an evening or two in the house with the family. Instead of being completely out of the house and in my woodshop building a model. I'm looking for something that would not only store some tools but when I'm done for the night or day, I can put every thing in a safe place and keep what I'm modeling all in one place. (hope that sounds right) What I really would like is a Gerstner tool chest, but with a deeper top compartment so I could pack everything up and put the model I'm working on in the top of the chest. But all or most all of them have a 3" deep top compartment and for most of what I would like to build would not fit. I don't just build ships, (like most of us probably) I build HO scale structures, dollhouse furniture, and railroad cars, etc. and most of those things including a ship all be it a subassembly, I don't believe will fit in the top compartment. I know an HO scale structure will not fit (which would be most of my building in the house). Any ideas of what to use? I have thought of just drawing up something that would work for me but thought maybe just maybe there is something already out there that would "fit the bill" and not have to recreate the wheel sorta speak. Thank you to everyone that has responded, greatly appreciated. Keep the ideas coming. Might take all the ideas and take parts from each one and build something that maybe everyone could use in their modeling.
-
I'd like to know how many of you (if any) have this product?? Is it junk? Worth getting? Reason I ask is there are times when I want to build in the house without going out to the wood shop. Plus coming in late at night our dog wakes the whole house up. Let me know what you all think of this product.
-
I’ll be watching the progress on this one for sure be interesting to see how you build everything
-
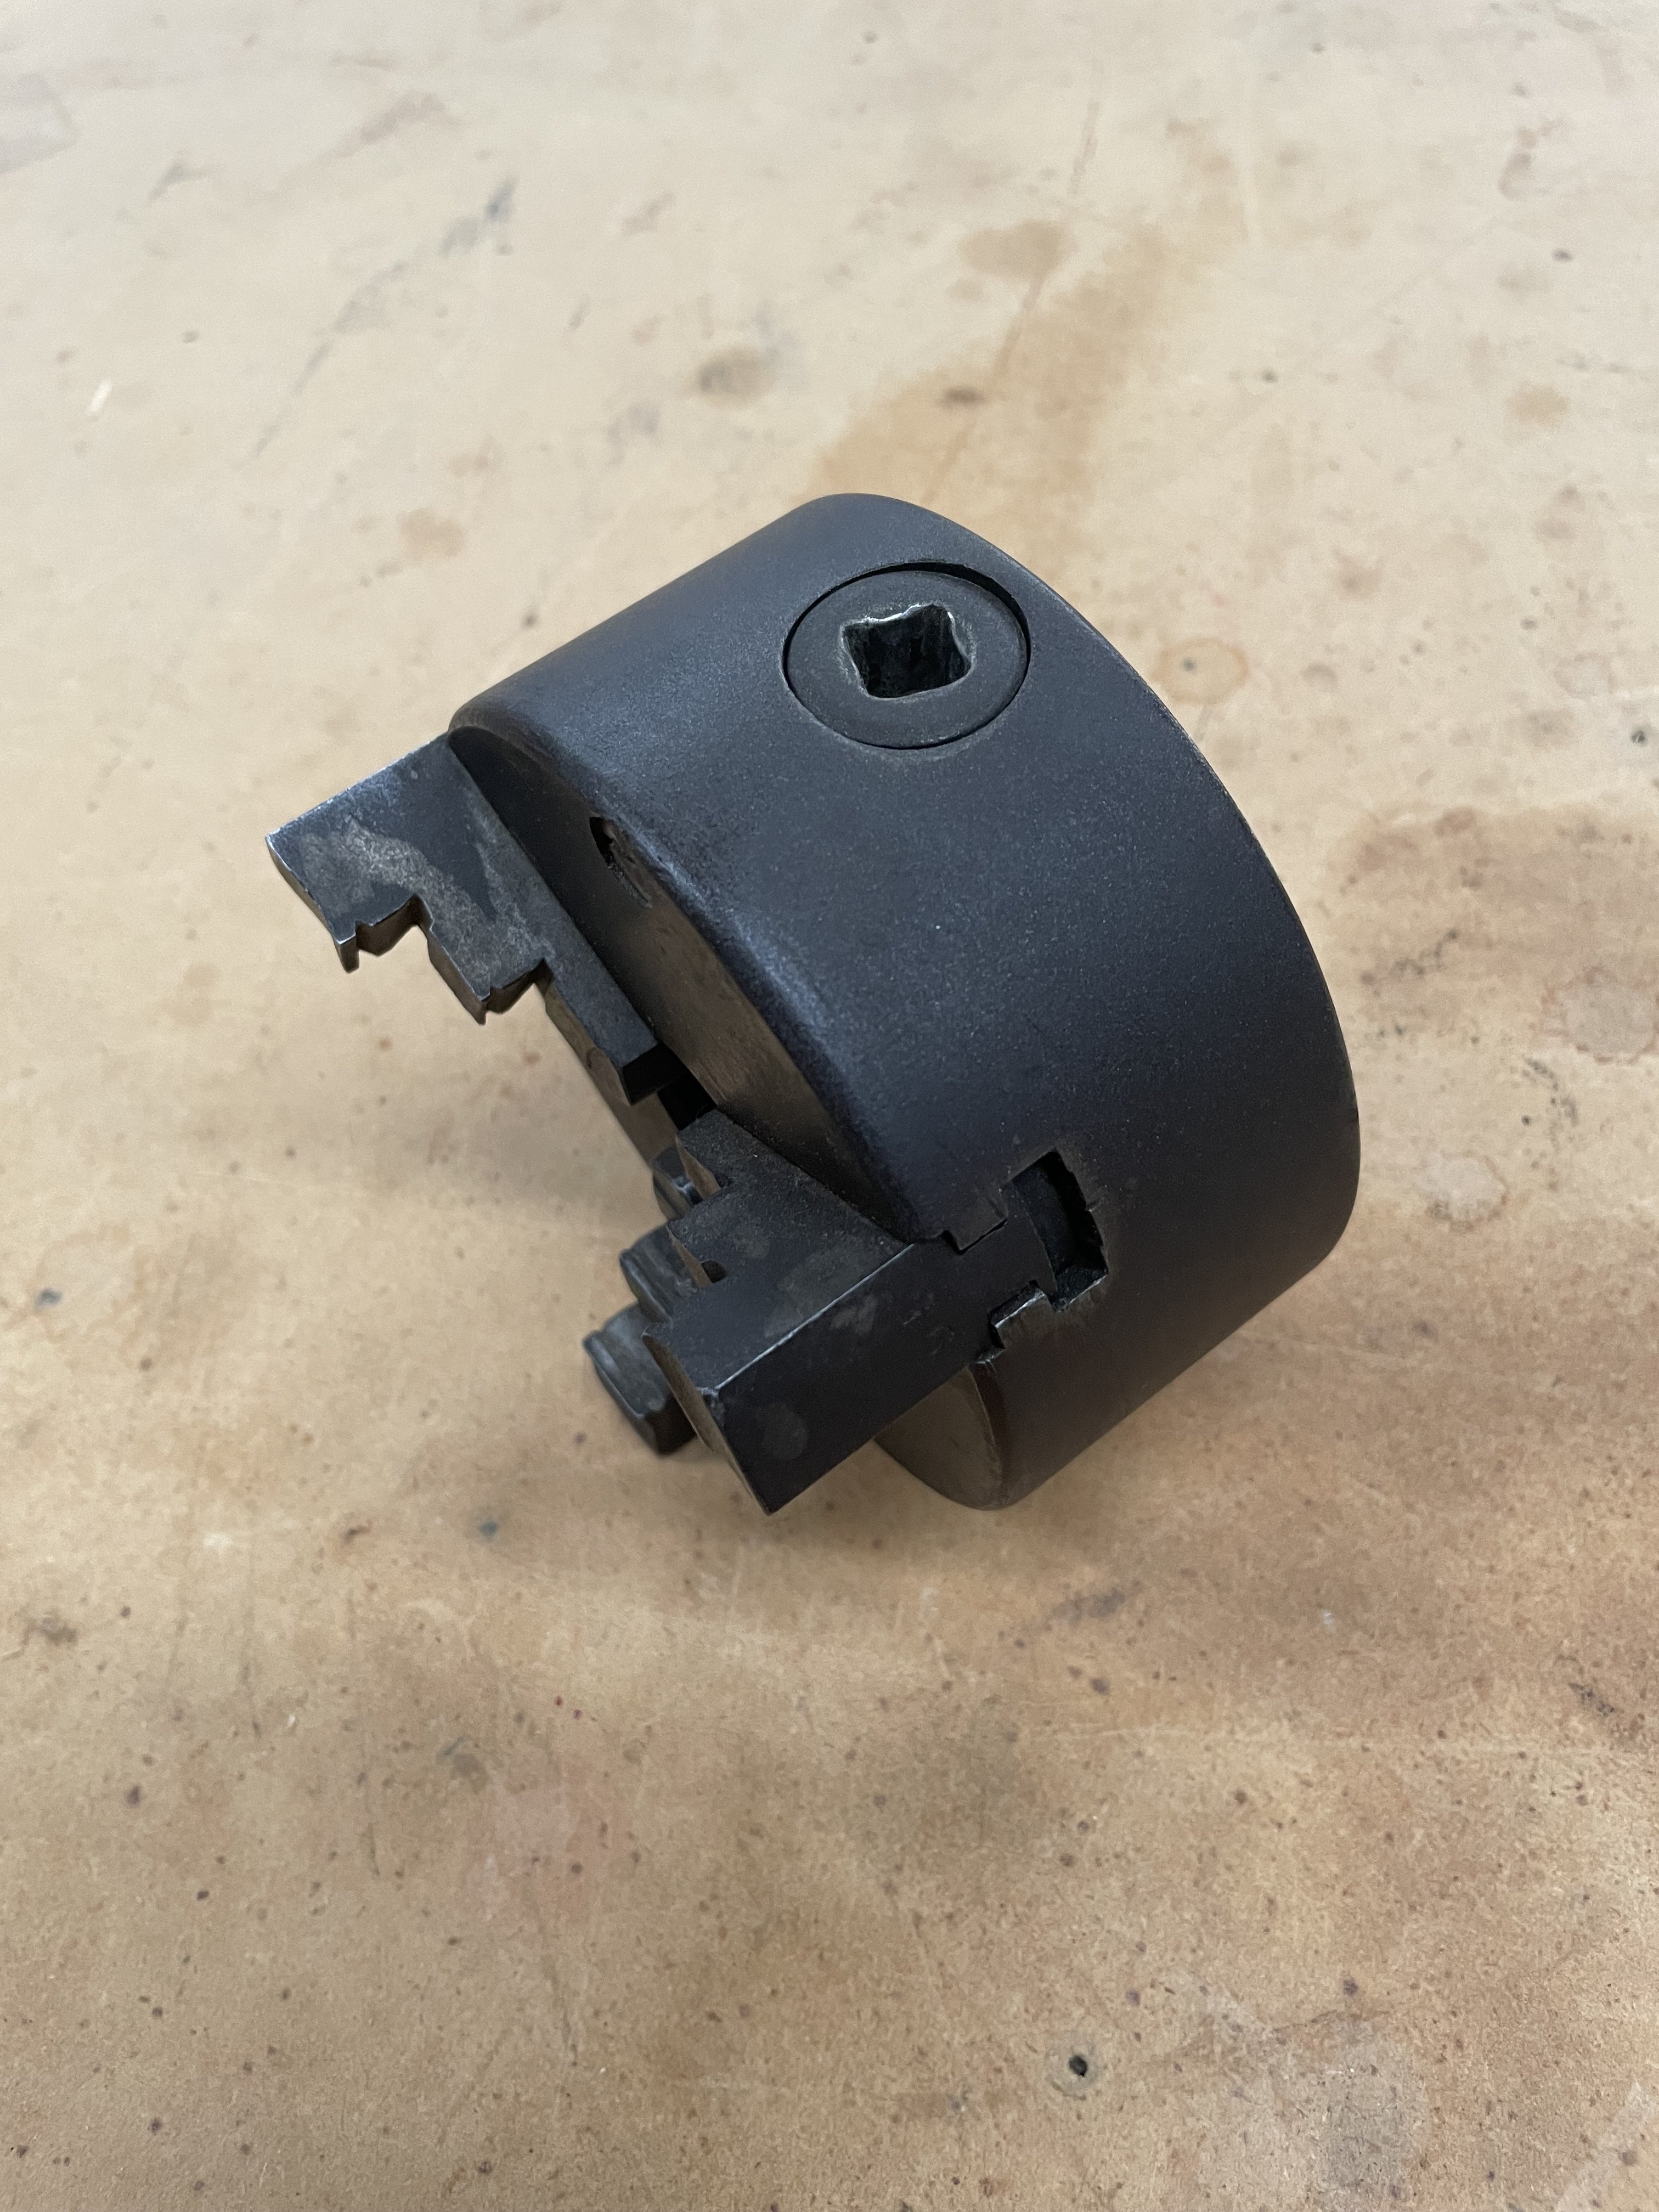
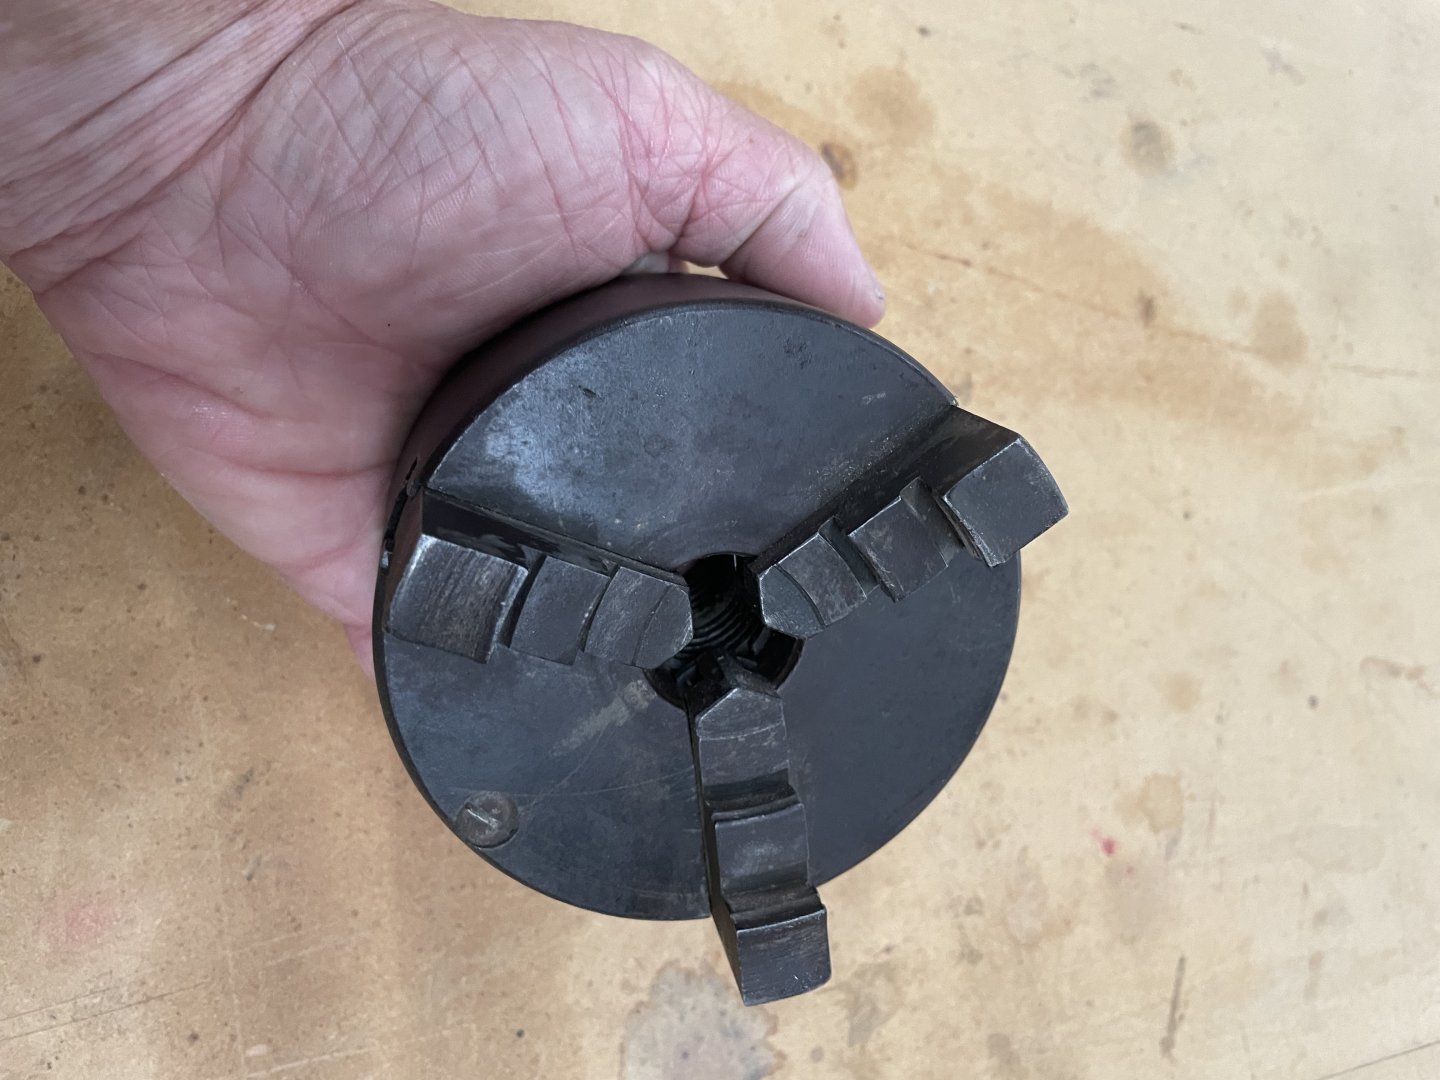
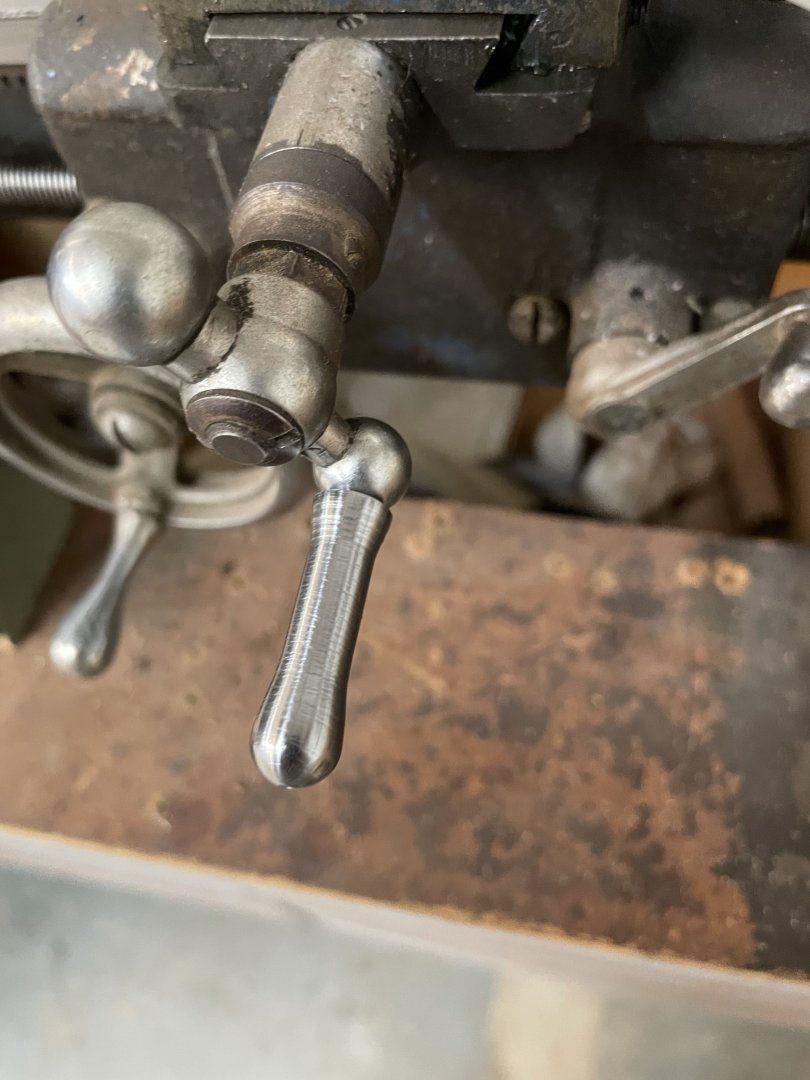
That’s what I was afraid of. That I would need a new 3 jaw. Wold like a 4 jaw and since I’m buying a chuck any way, might as well be a 4 jaw and then see if I really need a 3 jaw down the road since this 3 jaw will do some of the things I want to do. Thanks for your help
-
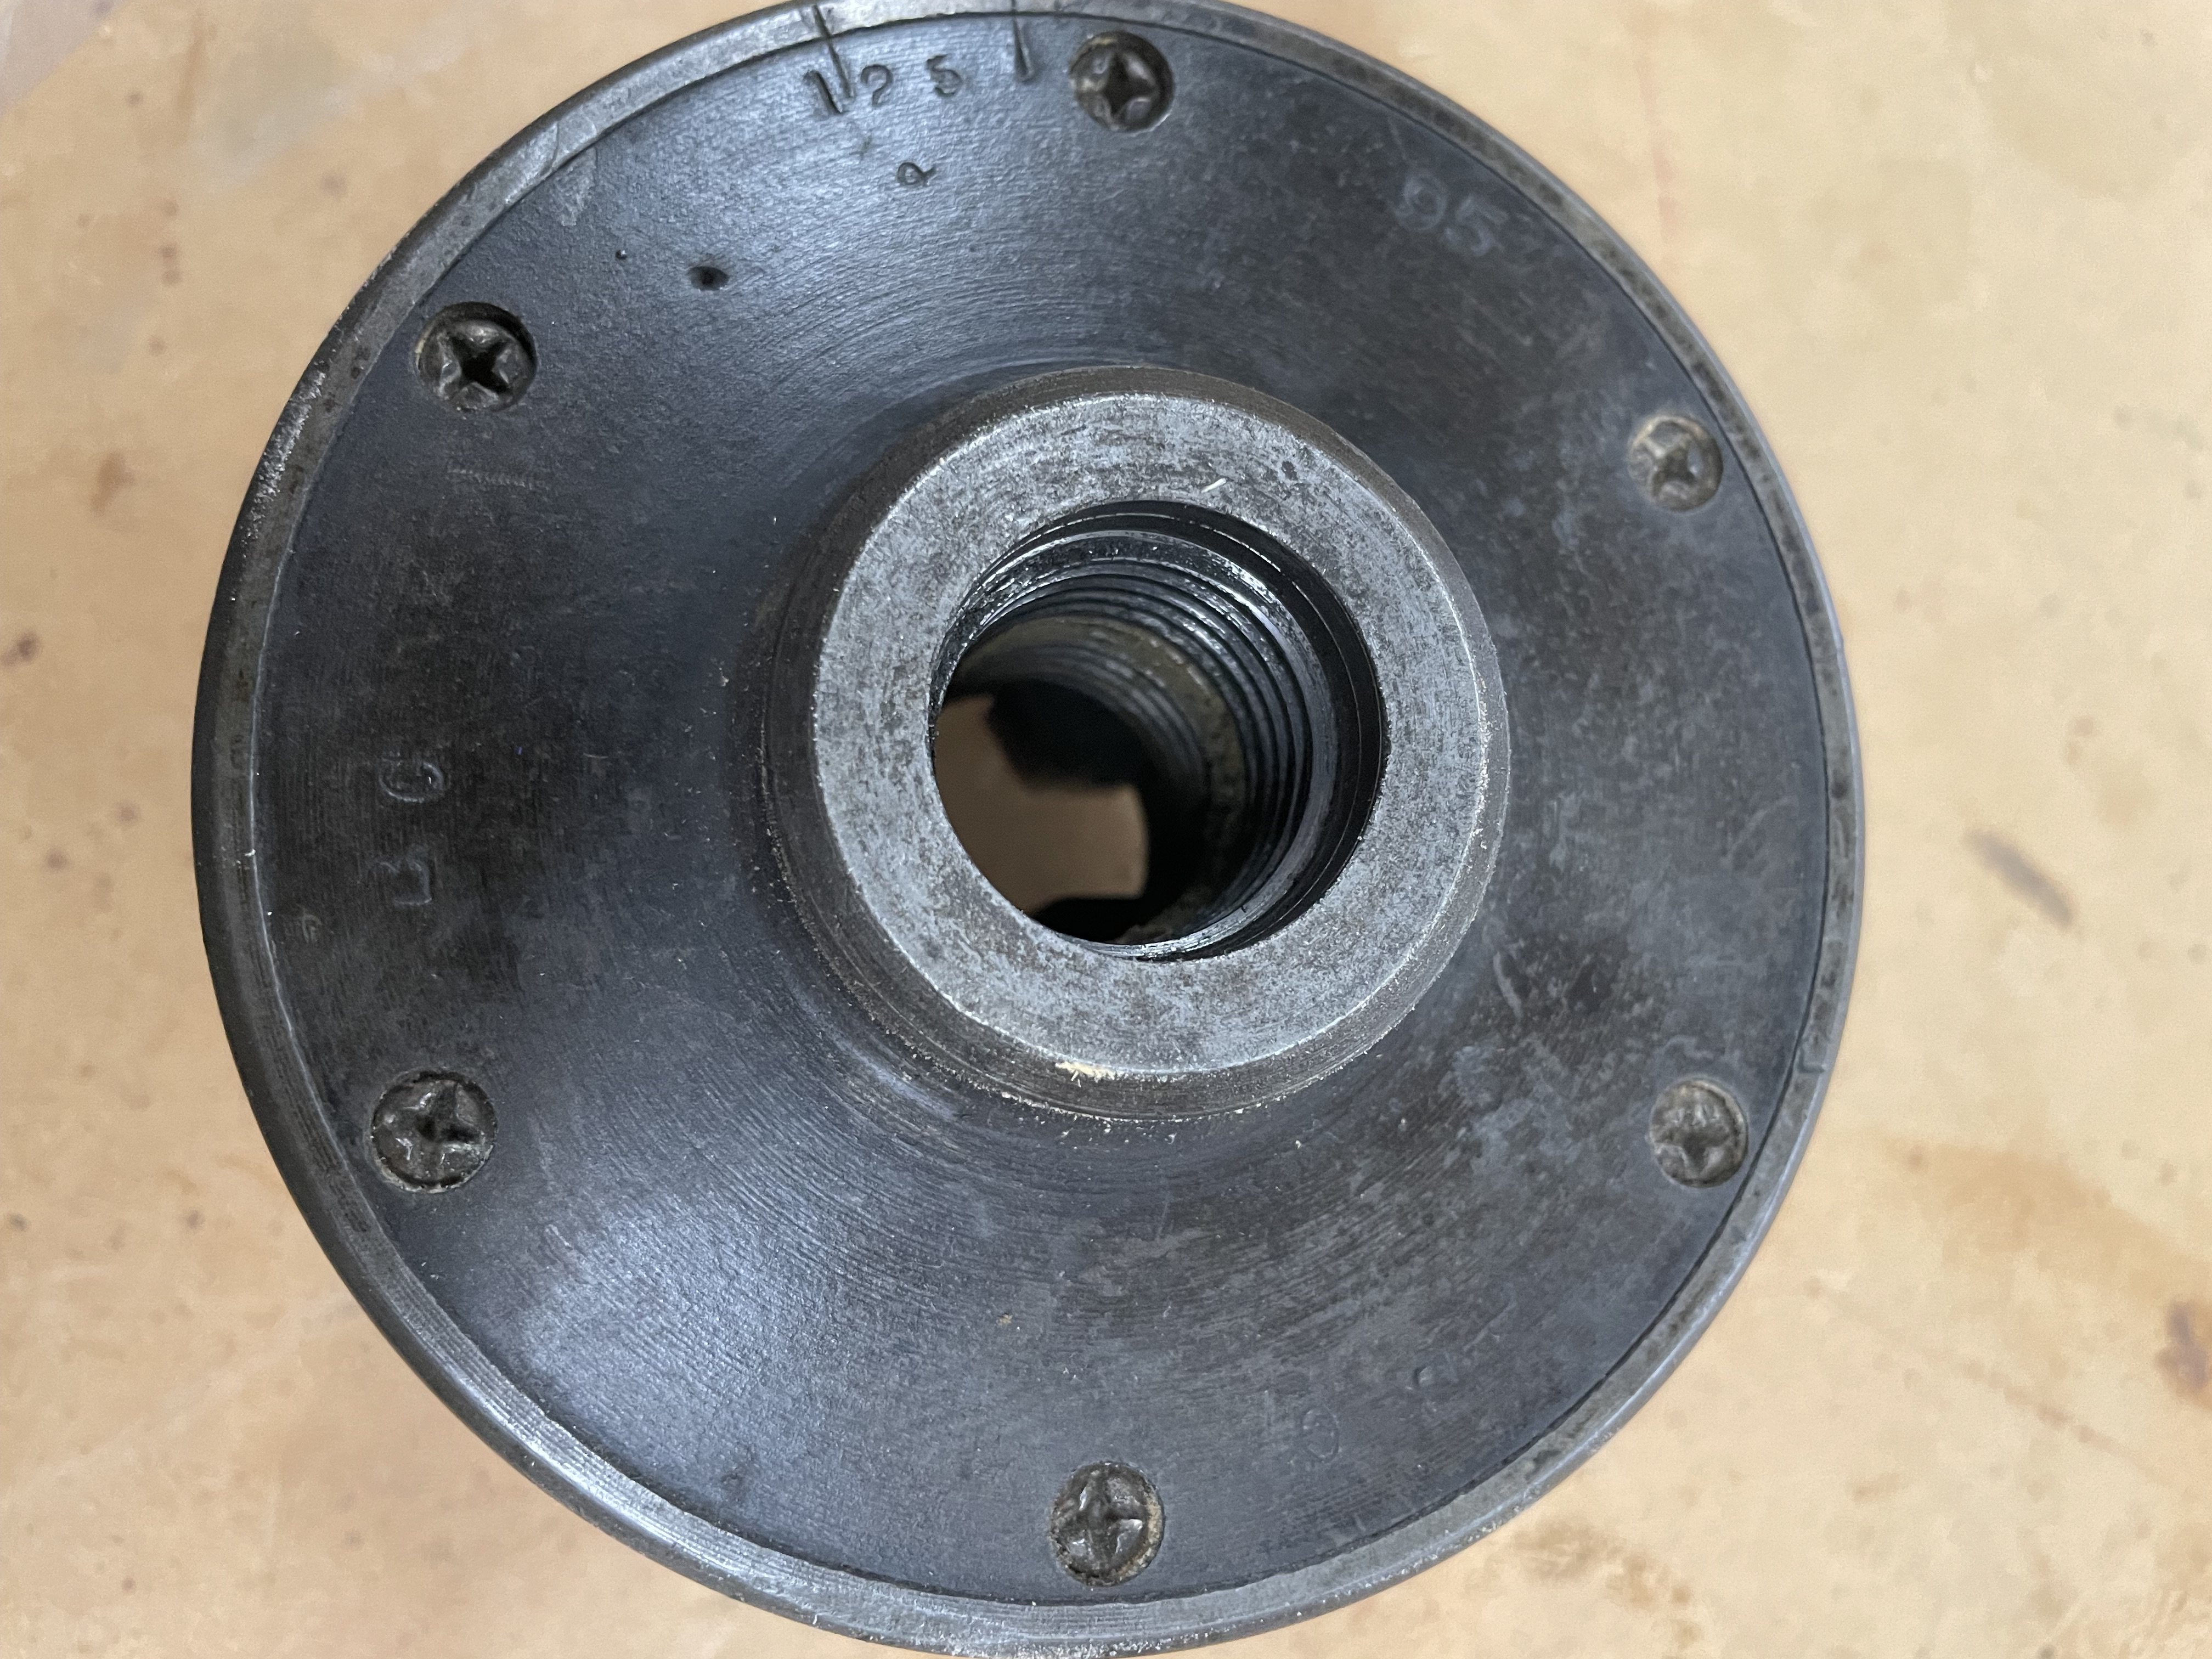
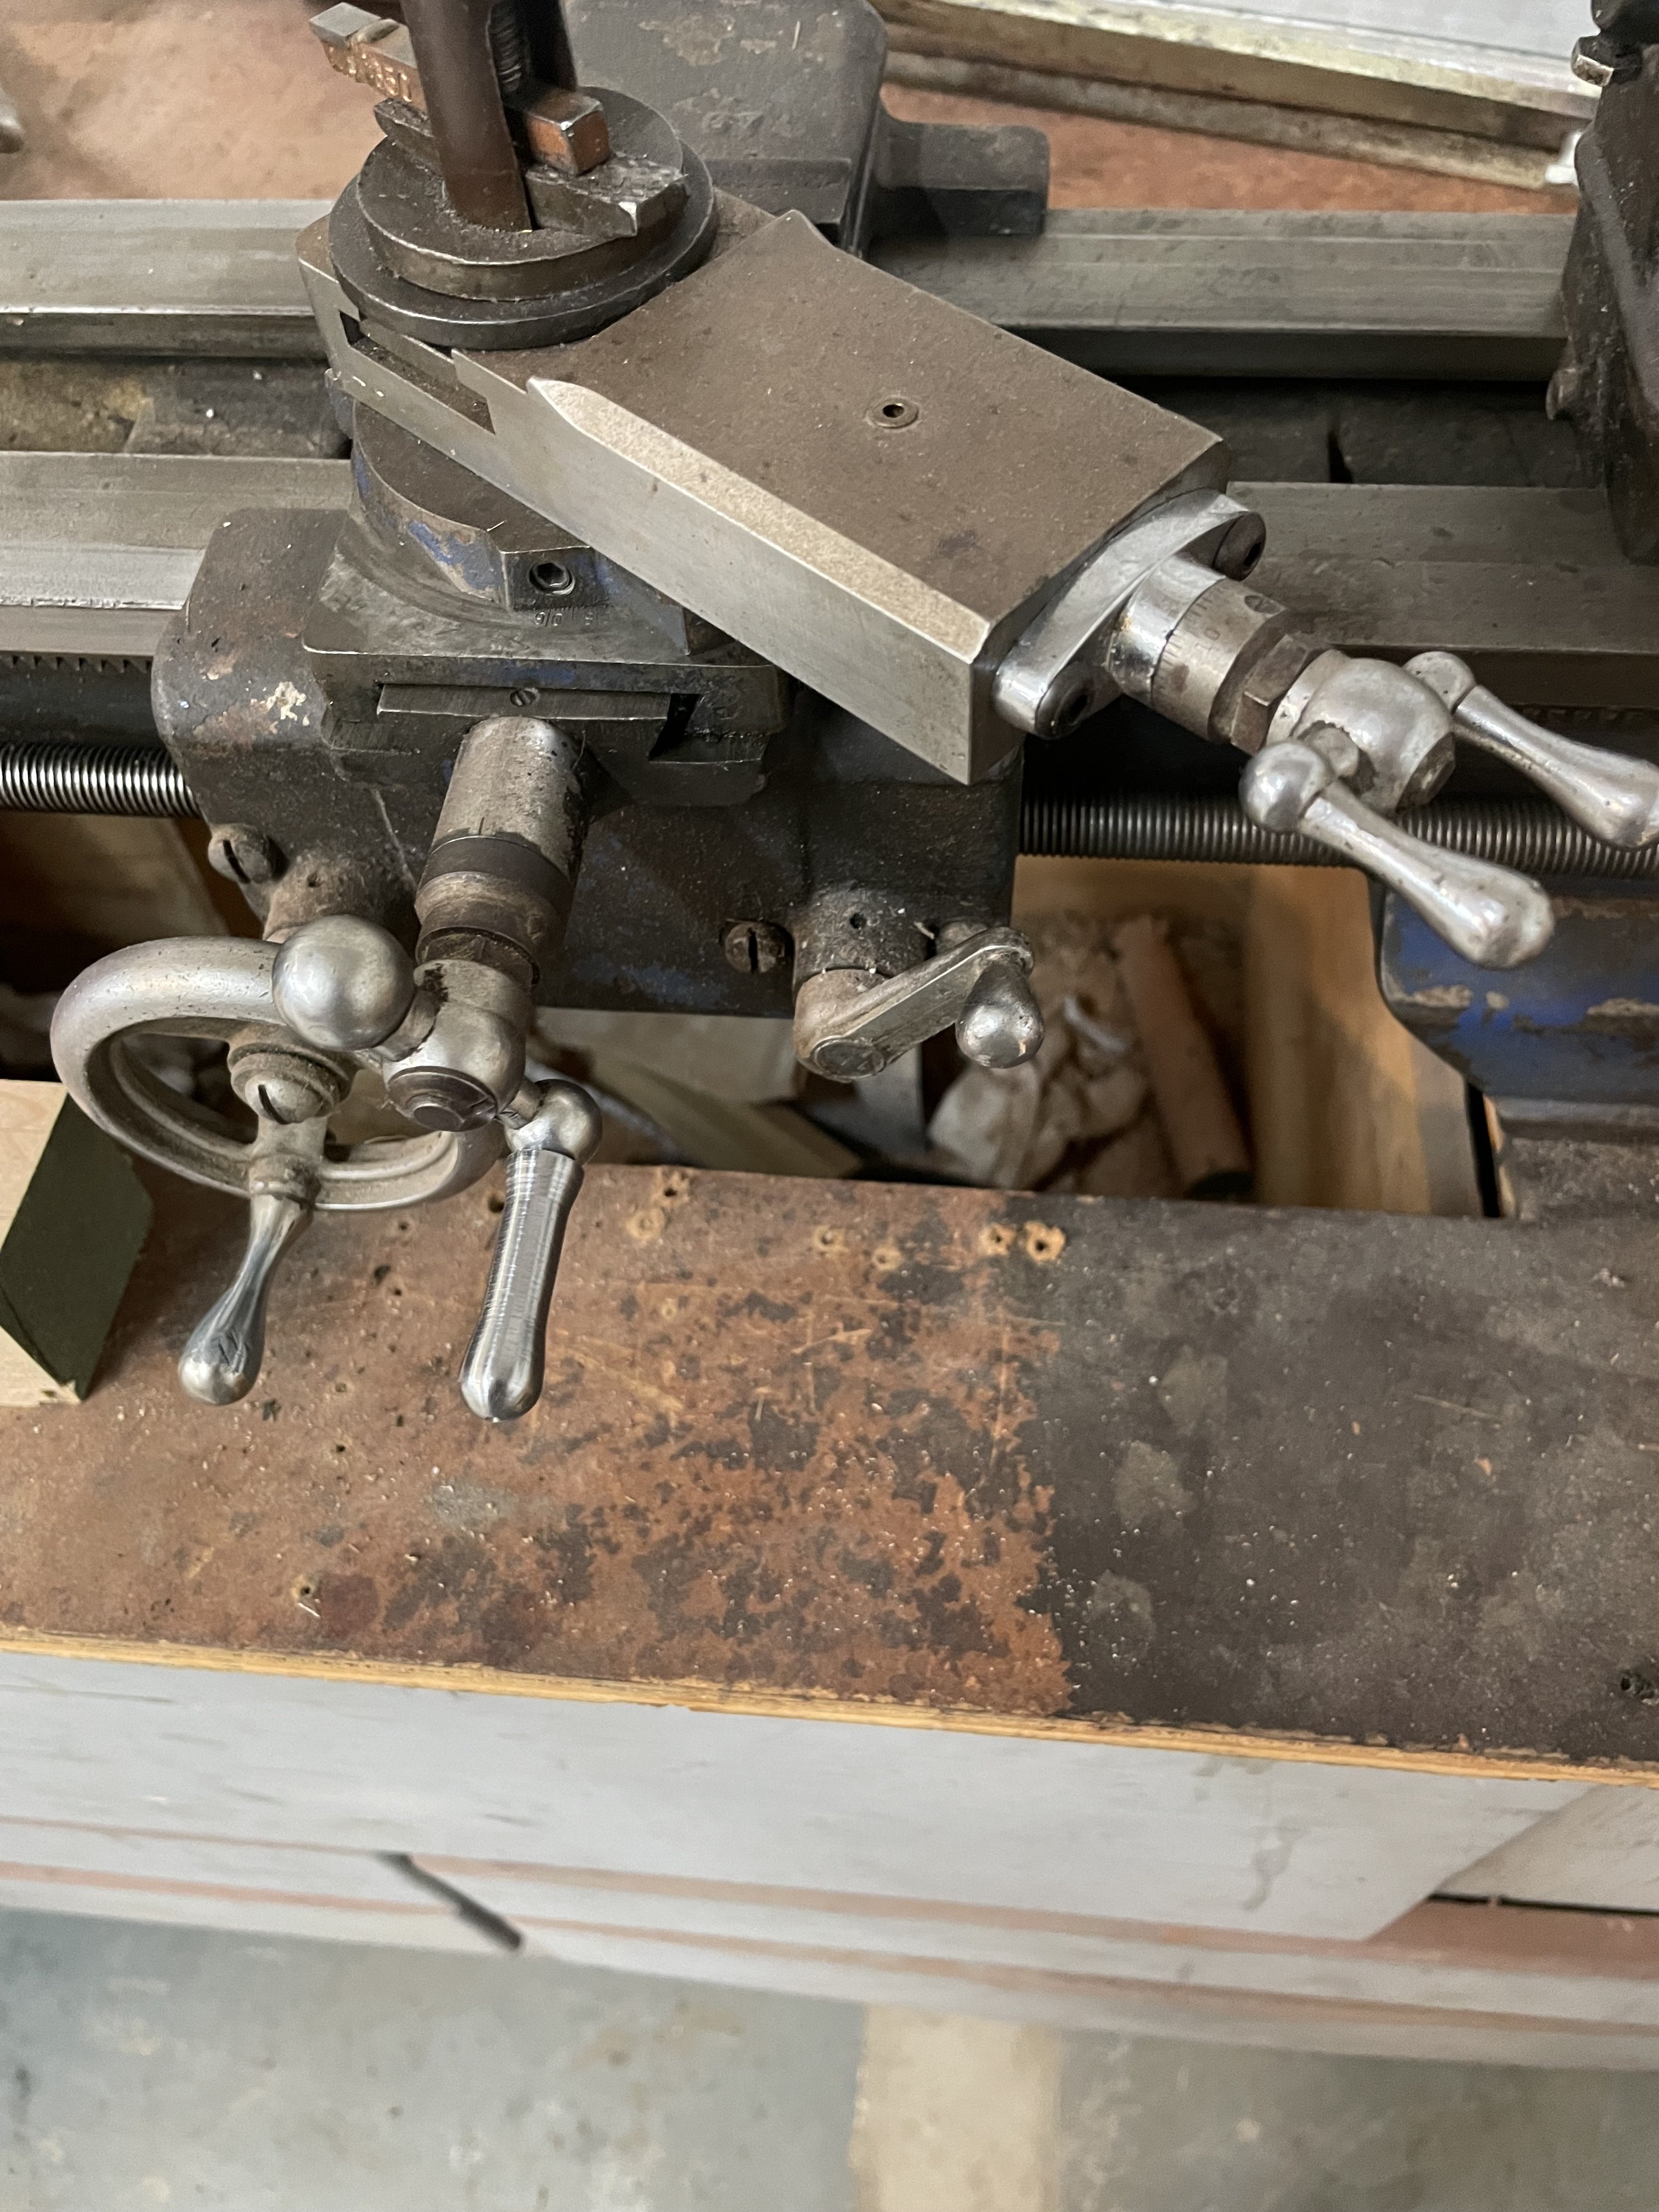
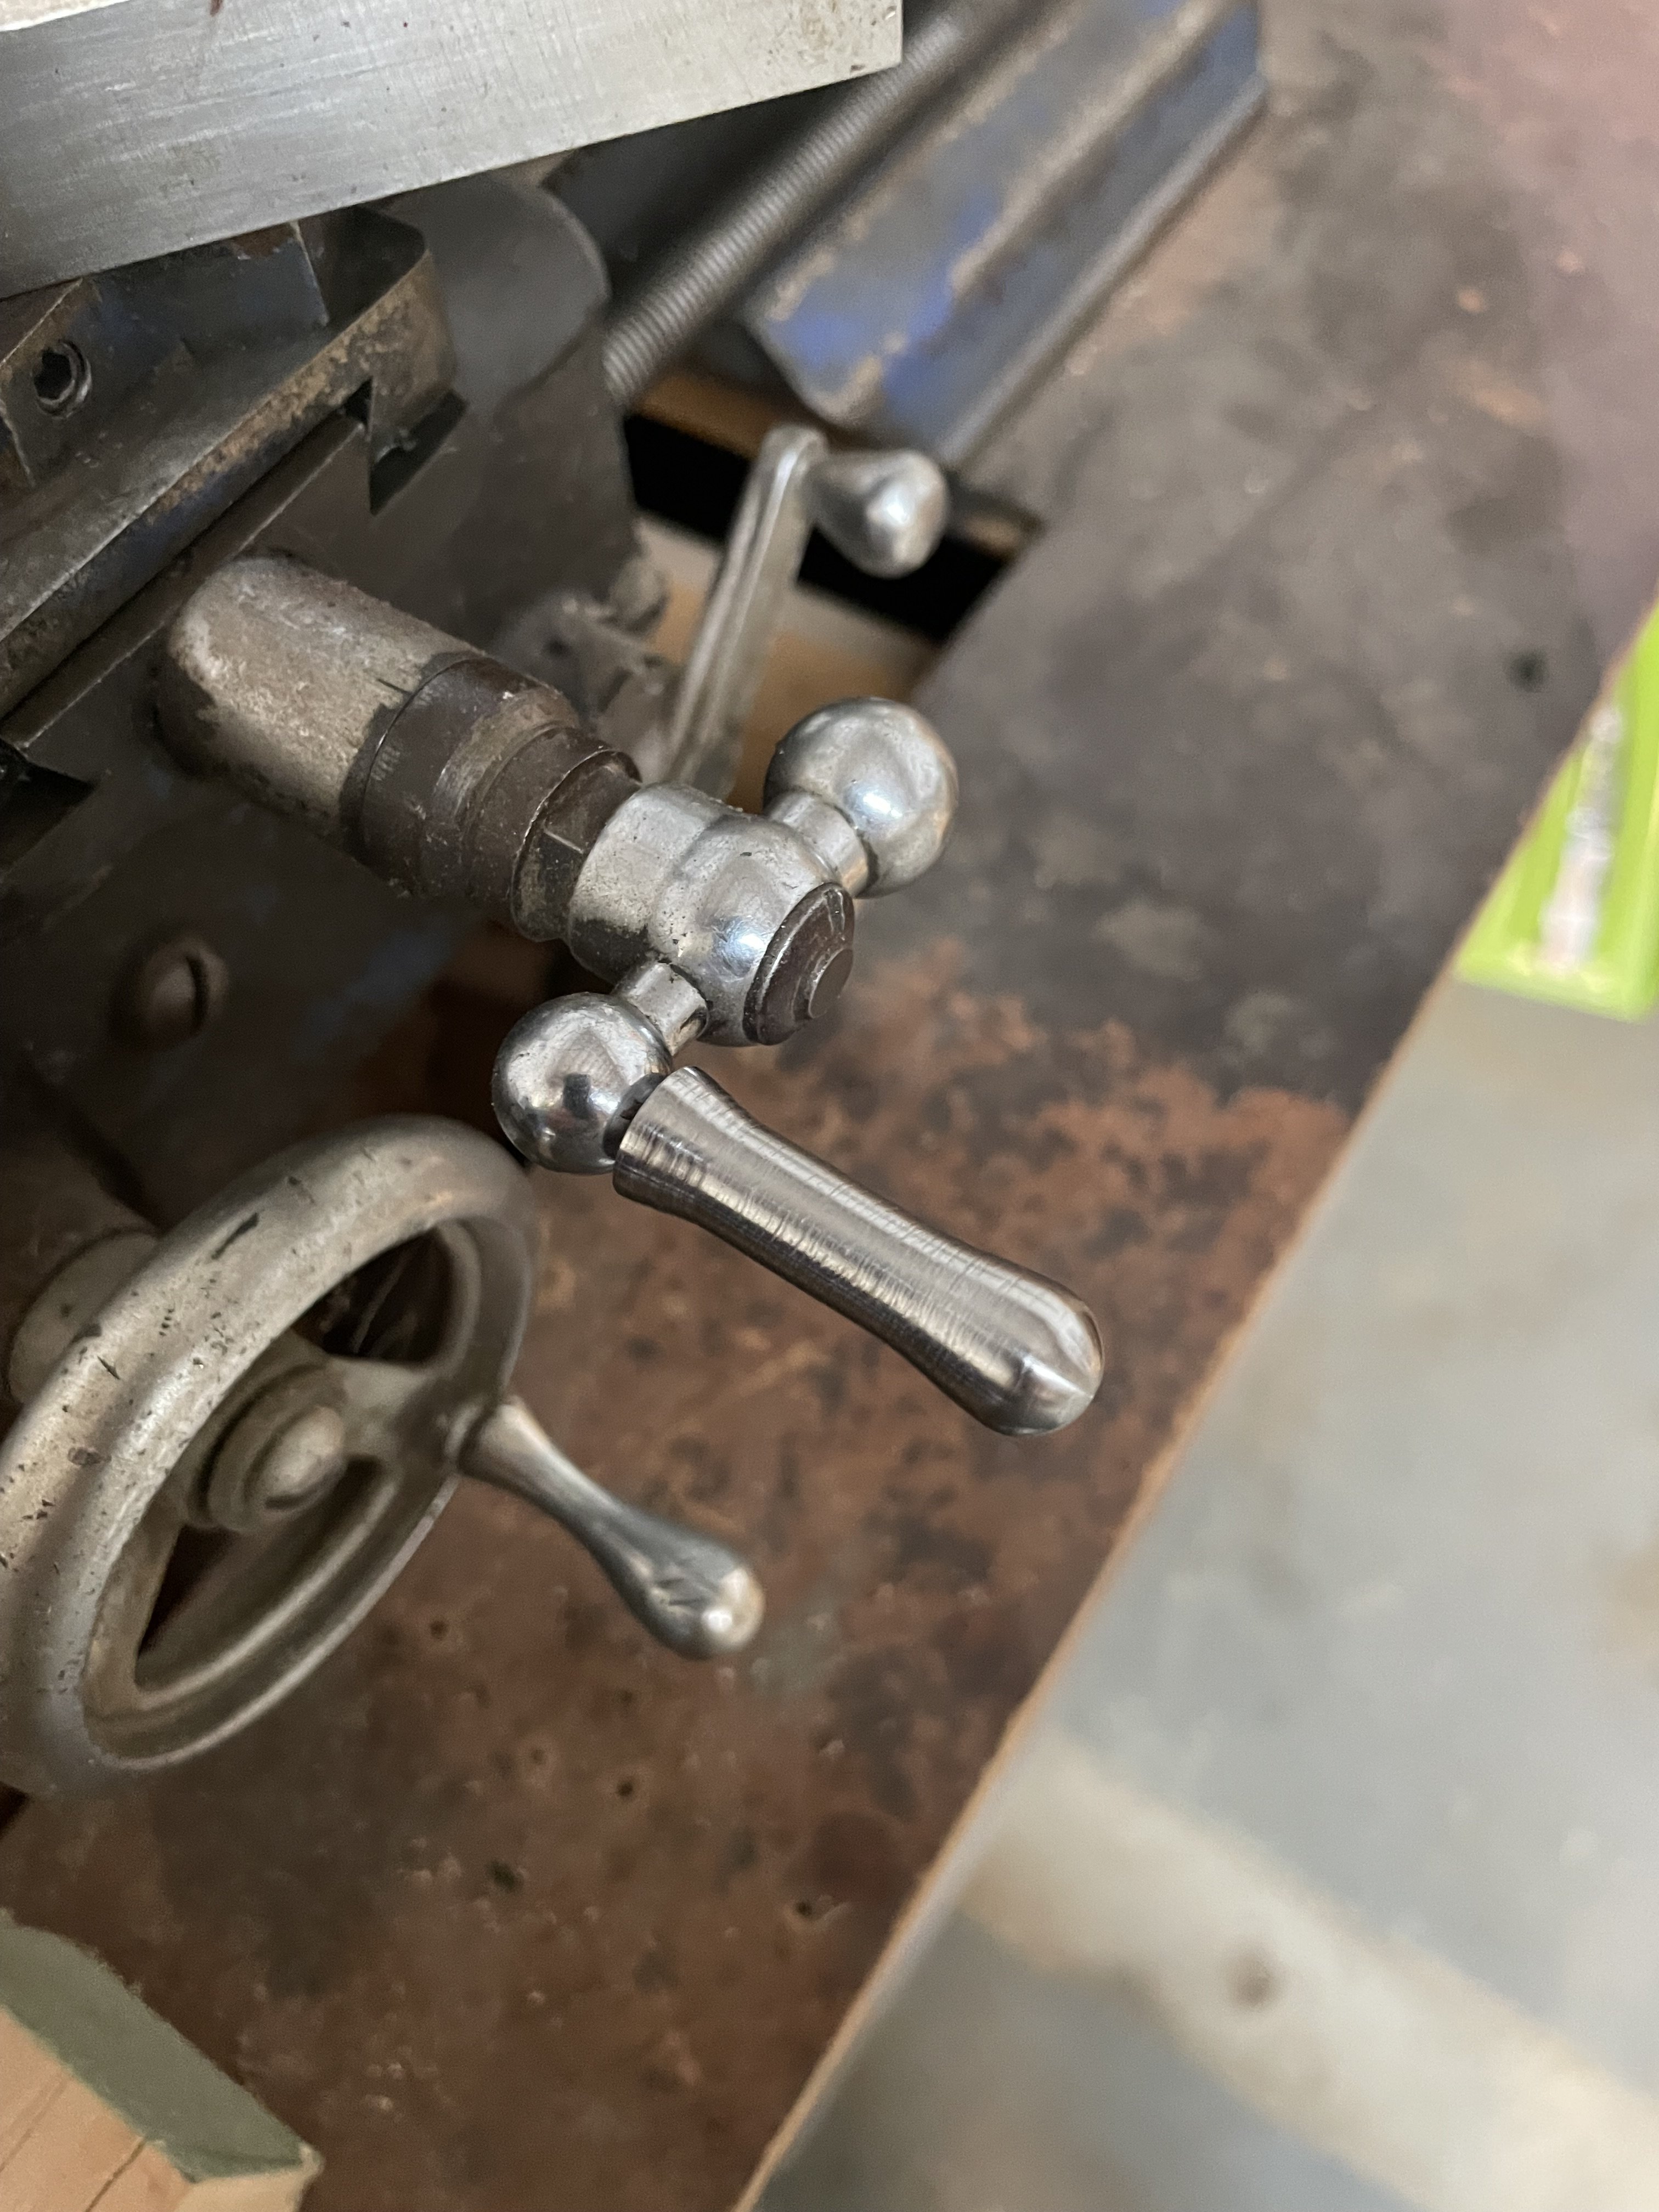
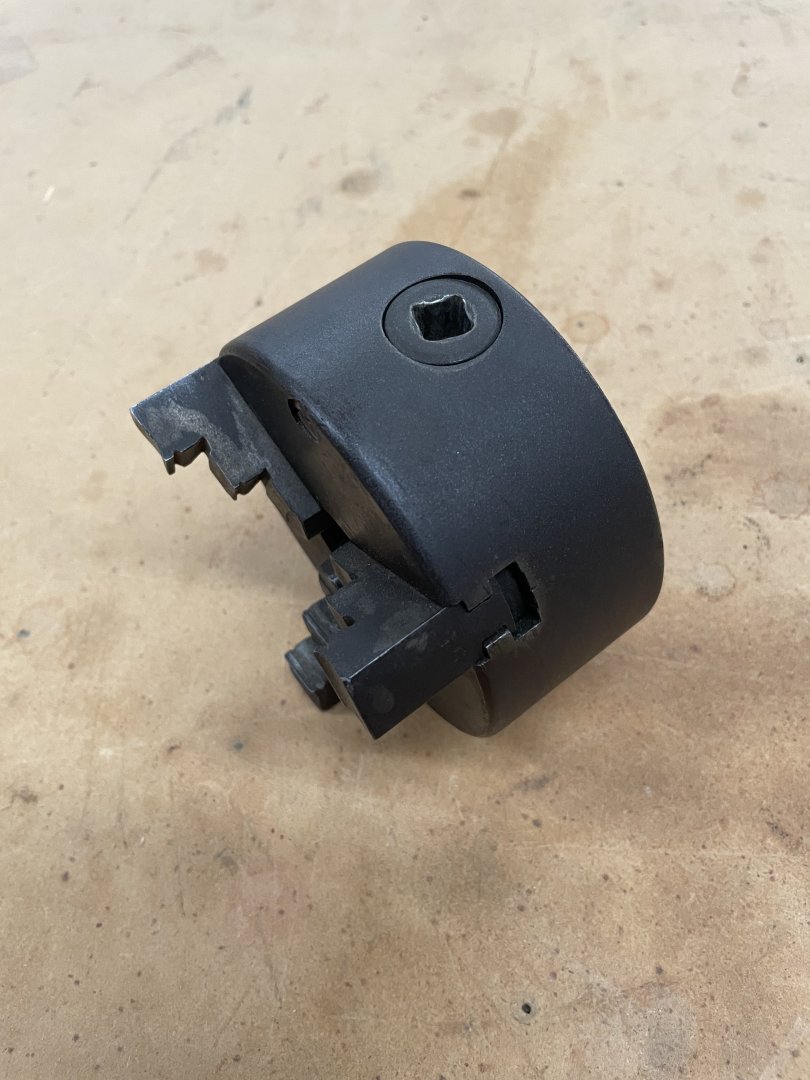
Have another question on my lathe is this Chuck original to the lathe when you bought it way back when? From the looks of it the jaws are not reversible, correct?? Turning small pieces next to this chick scares me a bit because you can’t get right up to the point of contact with the piece you’re working on and the chuck (hope that sounds right). On my taig lathe even though the jaws are big you can turn pretty close to them, unlike the atlas. Any ideas (other than buy a new chuck. 4 jaws would be nice but want a small one for the turning I do is really small turning. Thank you everyone for your comments on this Chuck


-
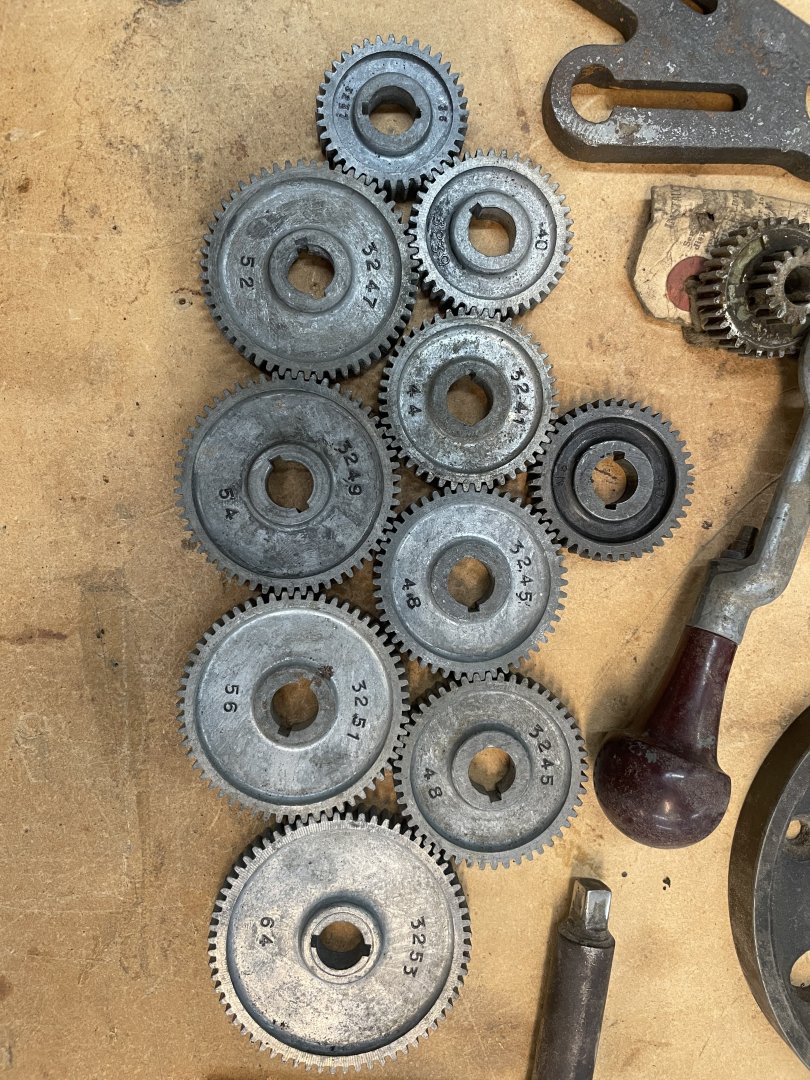
I’ve read they are made out of cast zamac. What ever that is. There are light in weight and I read they break pretty easy or chip teeth pretty easy if you don’t take care of them.
-
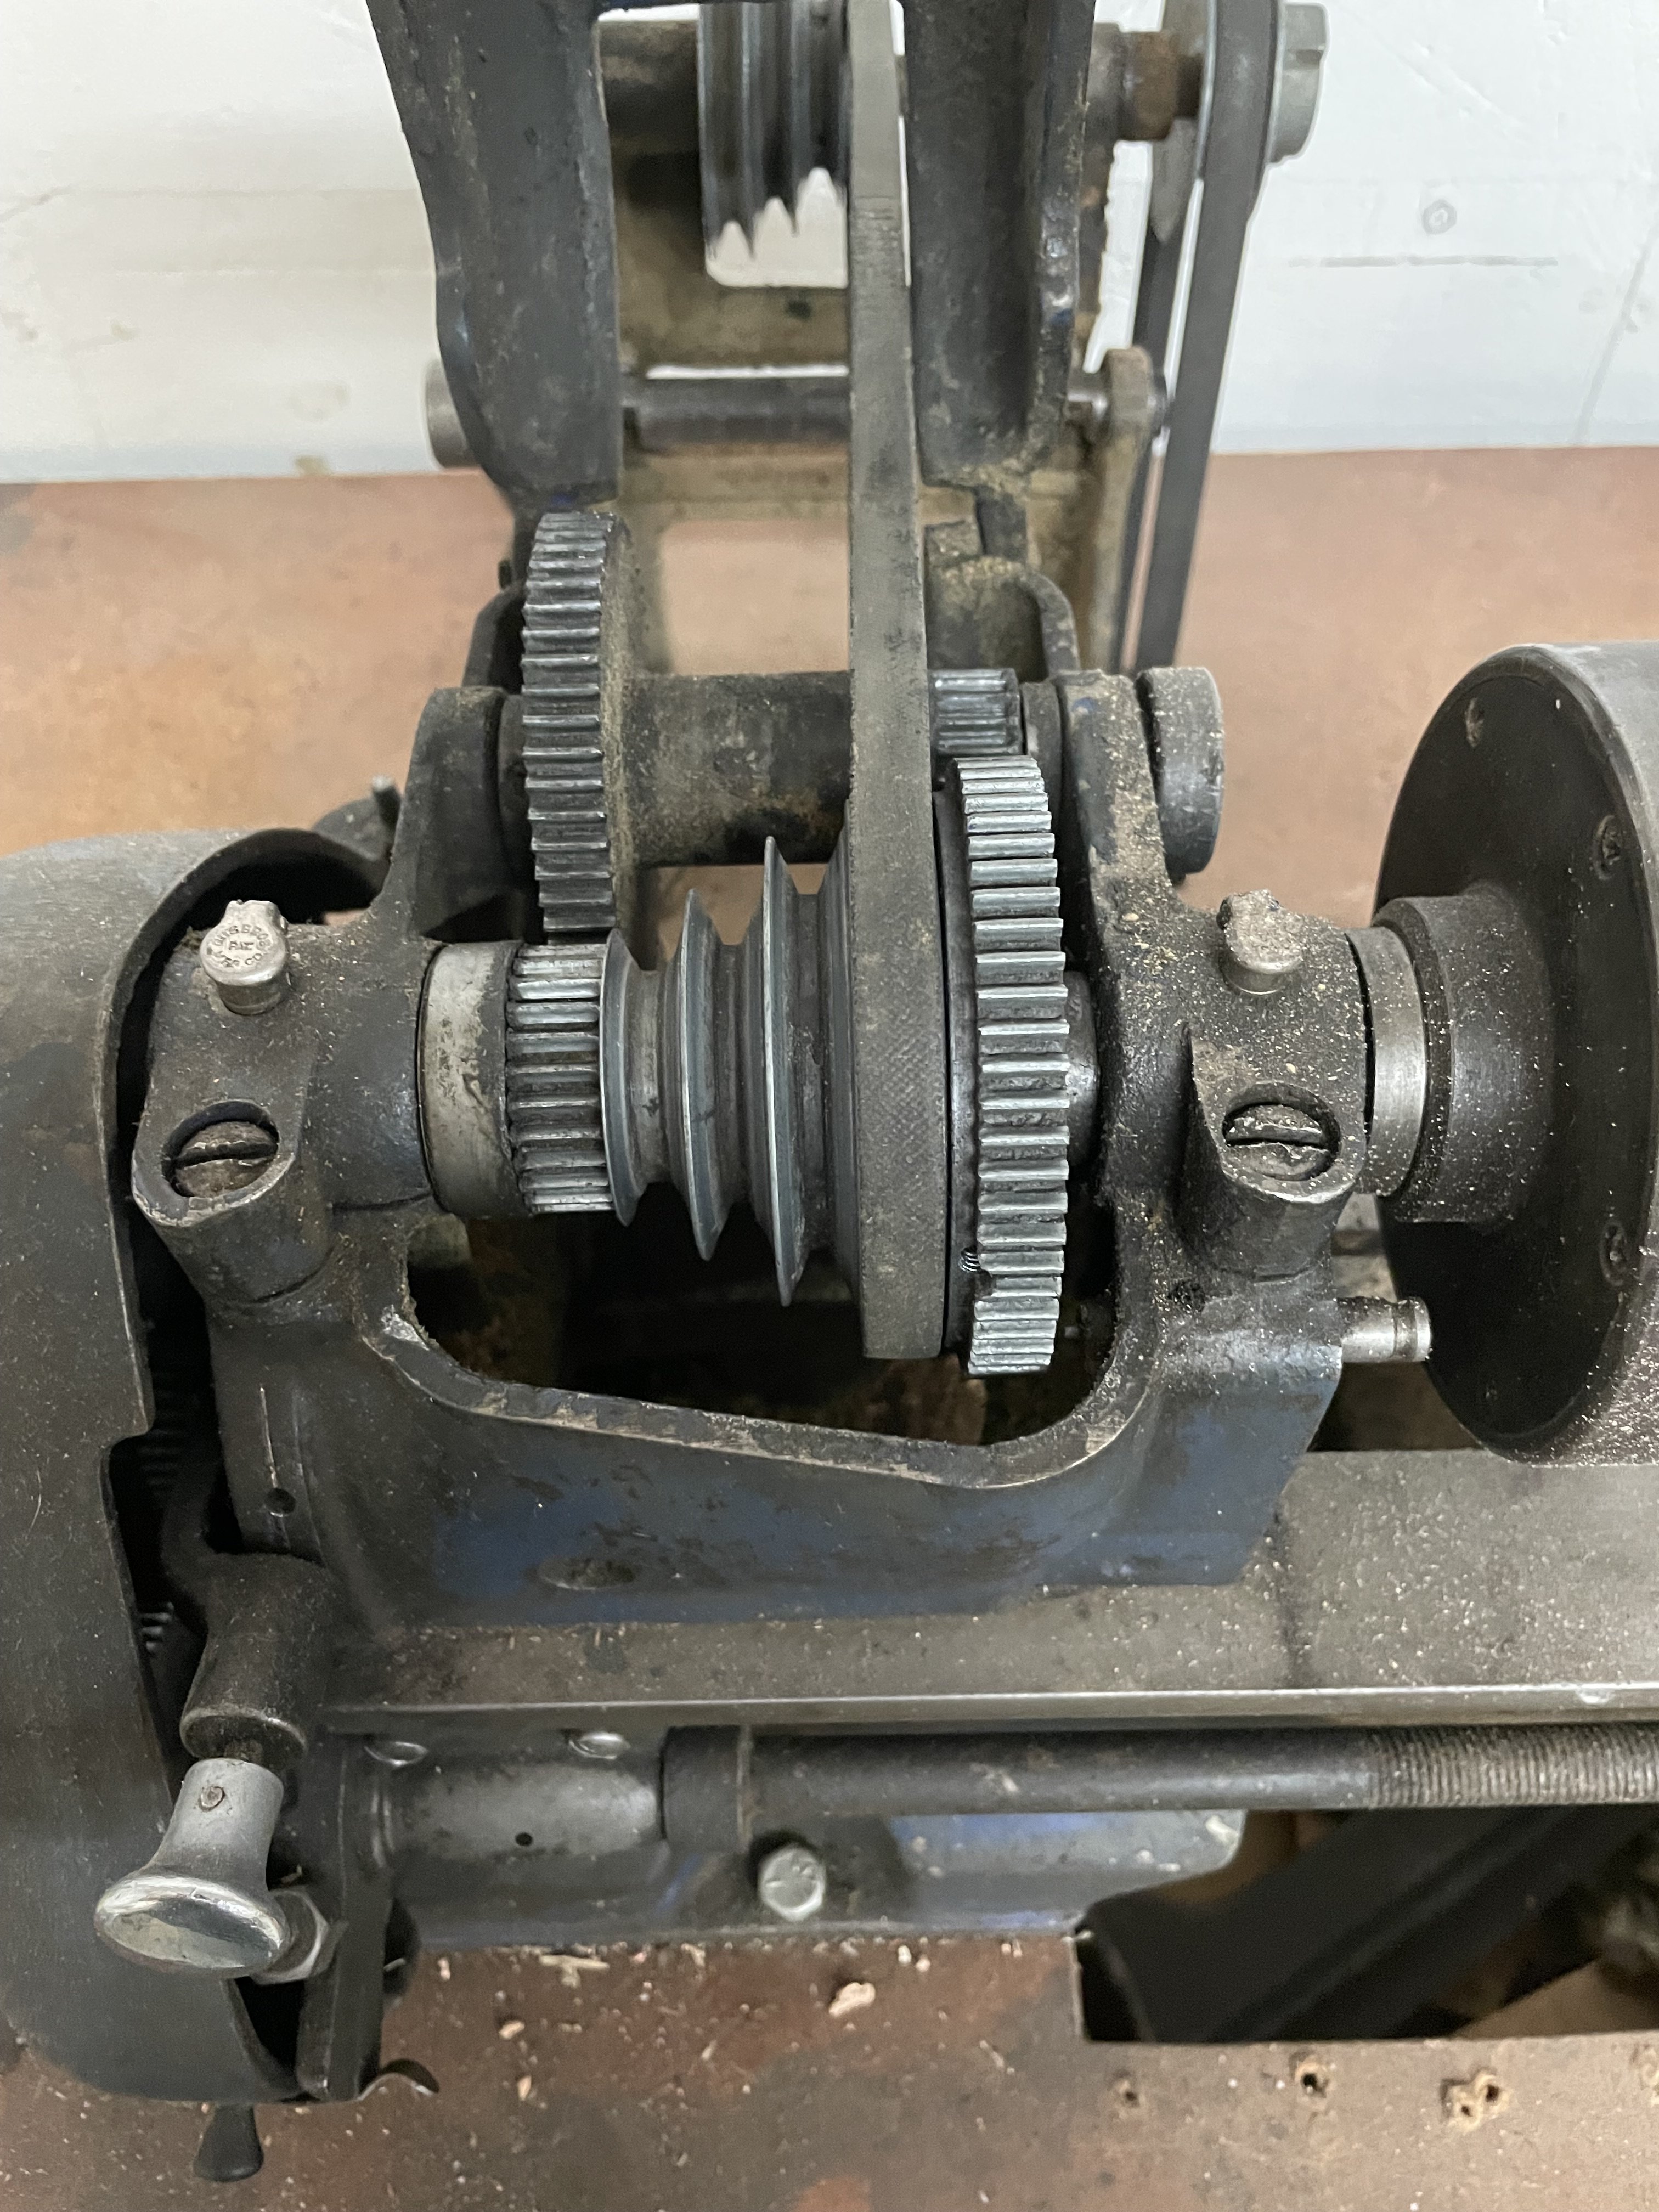
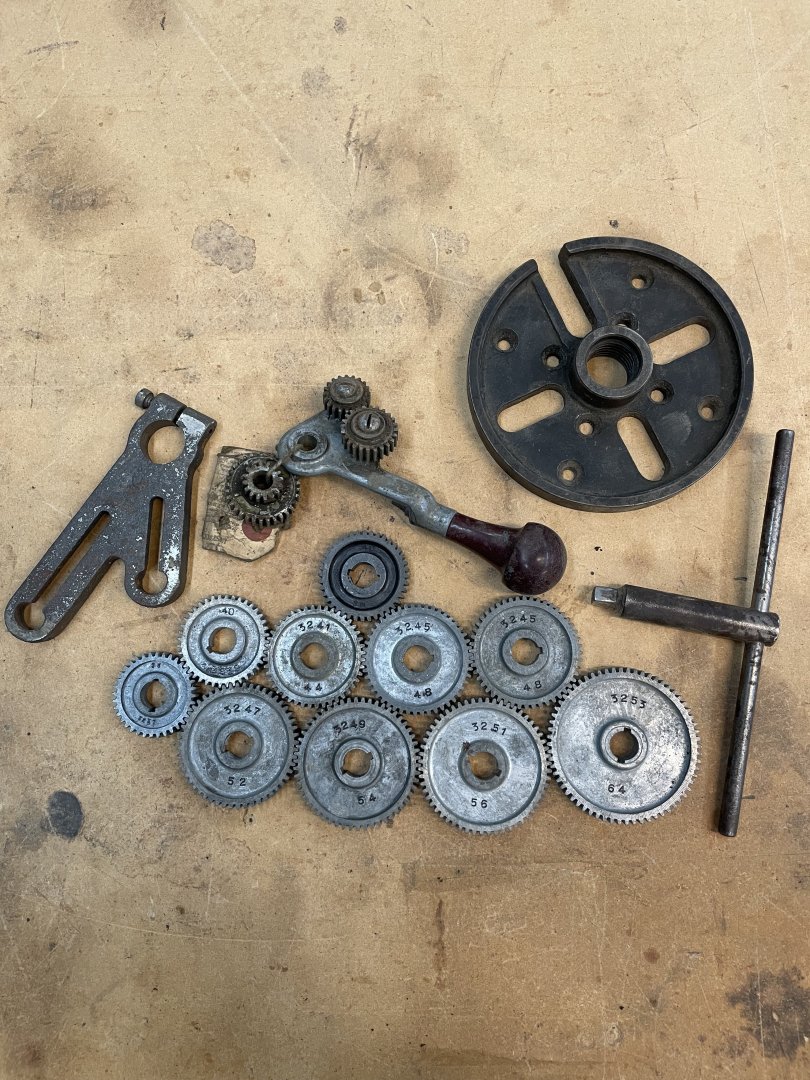
Good morning!! i was just cleaning out the drawers of my atlas lathe and I found these gears. Looks like never been used. The top one (picture with just gears) looks to me to be metric? It says 40 M6 ?? The others have numbers like 3251 56 I’m assuming these are gears for threading. Let me know please. Also have a face plate (nothing else -dog etc). Course have the Chuck key for three jaw Chuck. Anyway thought I would share my finds today.
-
Proxxon cross cut sled + other accessories
kgstakes replied to OT1138's topic in Modeling tools and Workshop Equipment
Here's a video about the cross sled I built for my Proxxon table saw. Table saw sled.mov -
Proxxon cross cut sled + other accessories
kgstakes replied to OT1138's topic in Modeling tools and Workshop Equipment
One of the things I do for repetitive cuts is I use a scrap piece of wood and clamp it to the “fence” of the sled. Yes for longer cuts I just measure and cut still use the sled to keep cut square. -
Proxxon cross cut sled + other accessories
kgstakes replied to OT1138's topic in Modeling tools and Workshop Equipment
See my post on table saw accessories that I posted awhile back. All my jigs and things were made by me. Copy them all and build yourself whatever you like, don’t matter to me. Lots of info on the web for full size table saws just scale it down to fit your needs. When I get home I’ll post some pictures here but all my jigs and such are under my post table saw accessories that I’ve come up with. -
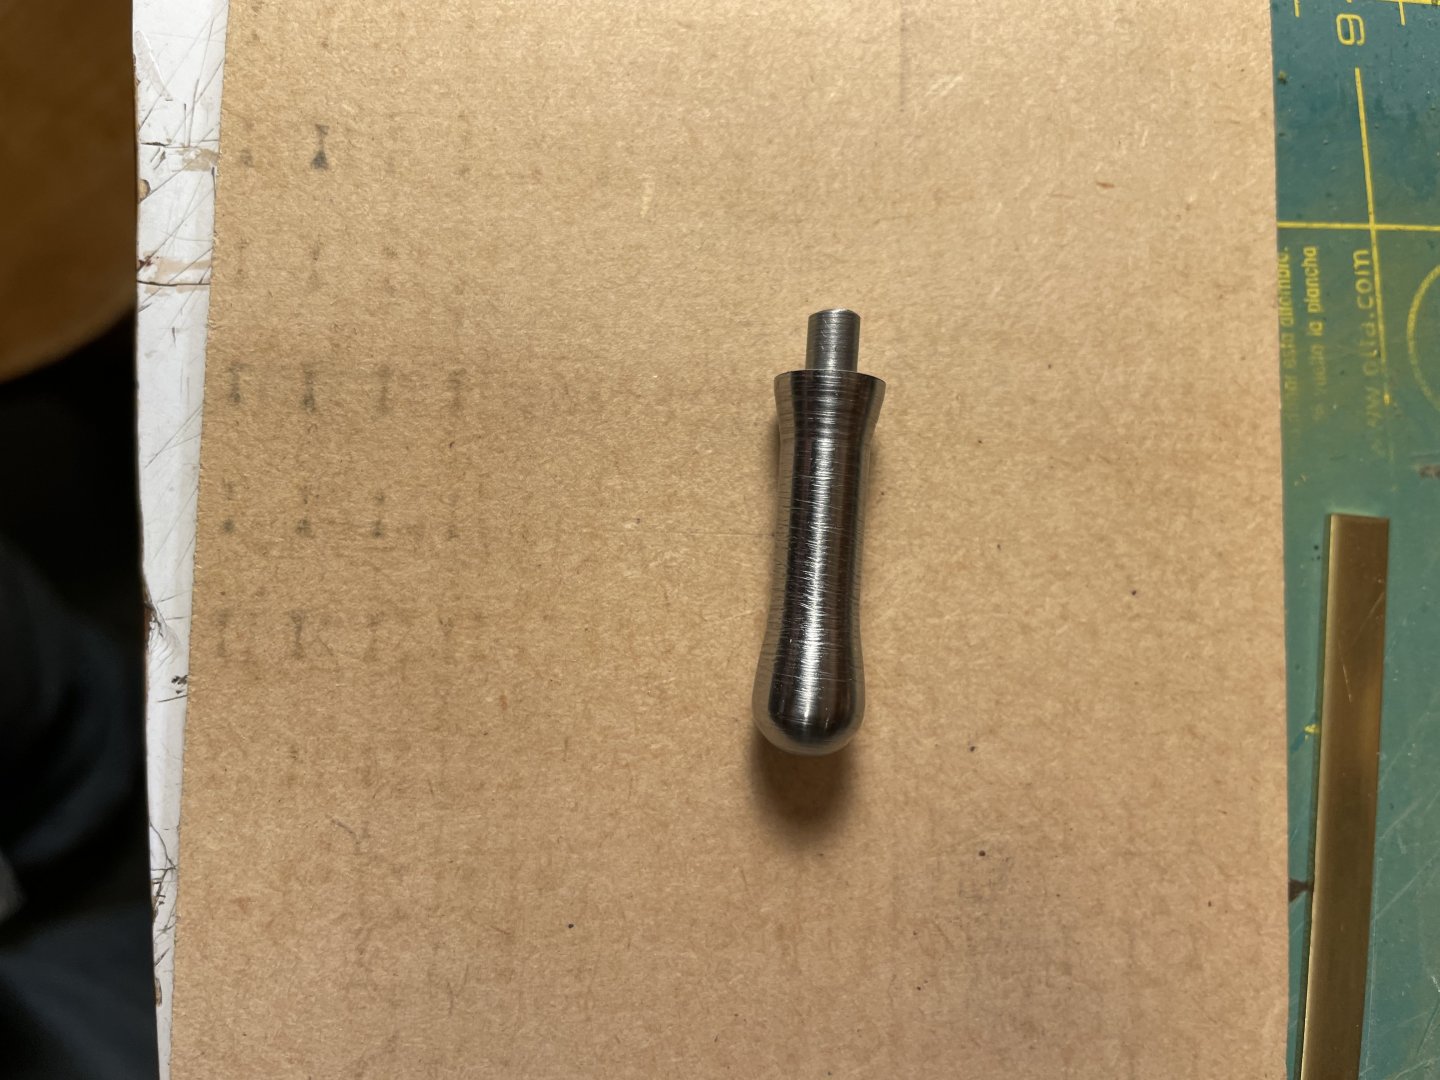
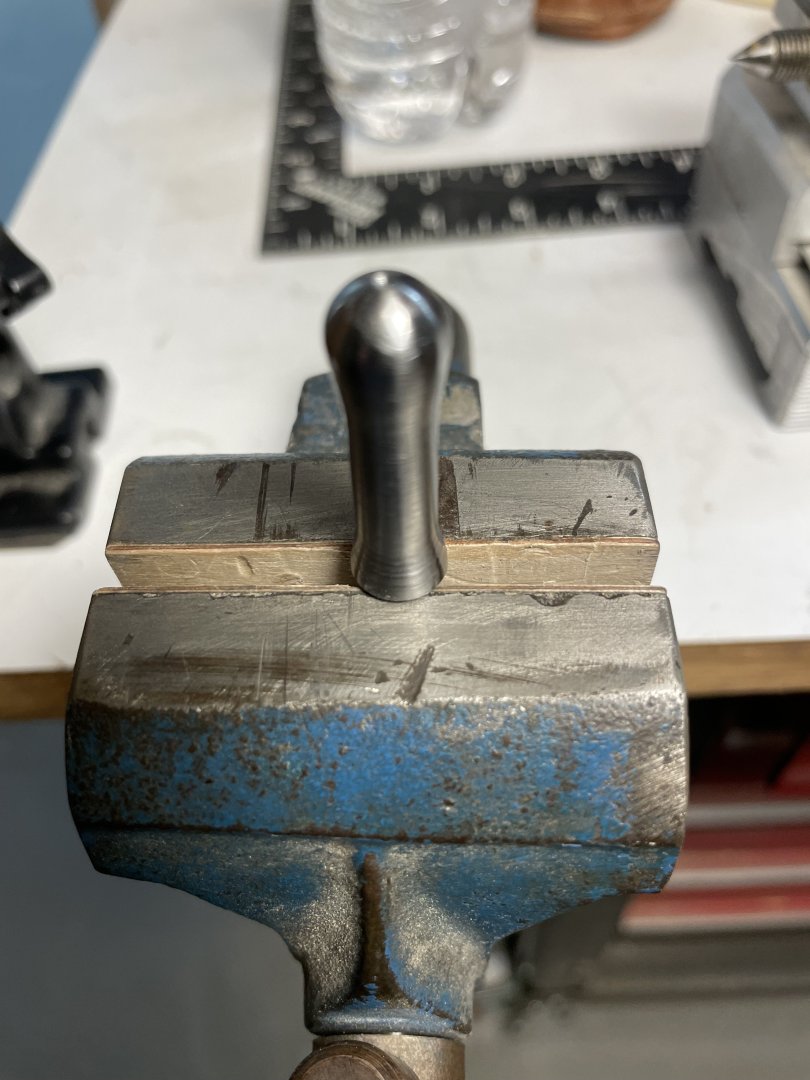
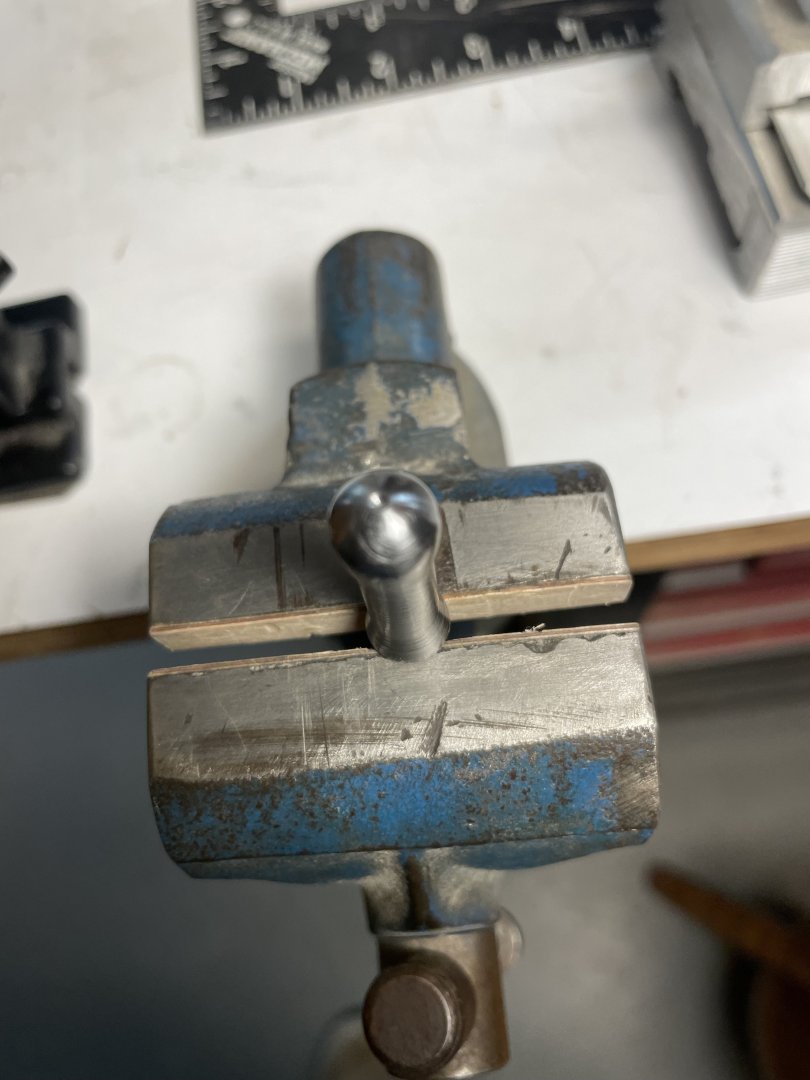
Well I thought I would turn something tonight. So I decided to turn a new handle for my lathe on the cross slide broke long time ago. Anyway I know the knob or handle I need is on my atlas craftsman lathe but I thought I would give the taig lathe a shot at turning some metal. Yeah it’s crude but for first time it’s good enough and it fits the hole and it will do the job. In my mind it’s a win win. Play with the taig lathe and actually made something that I can use.


-
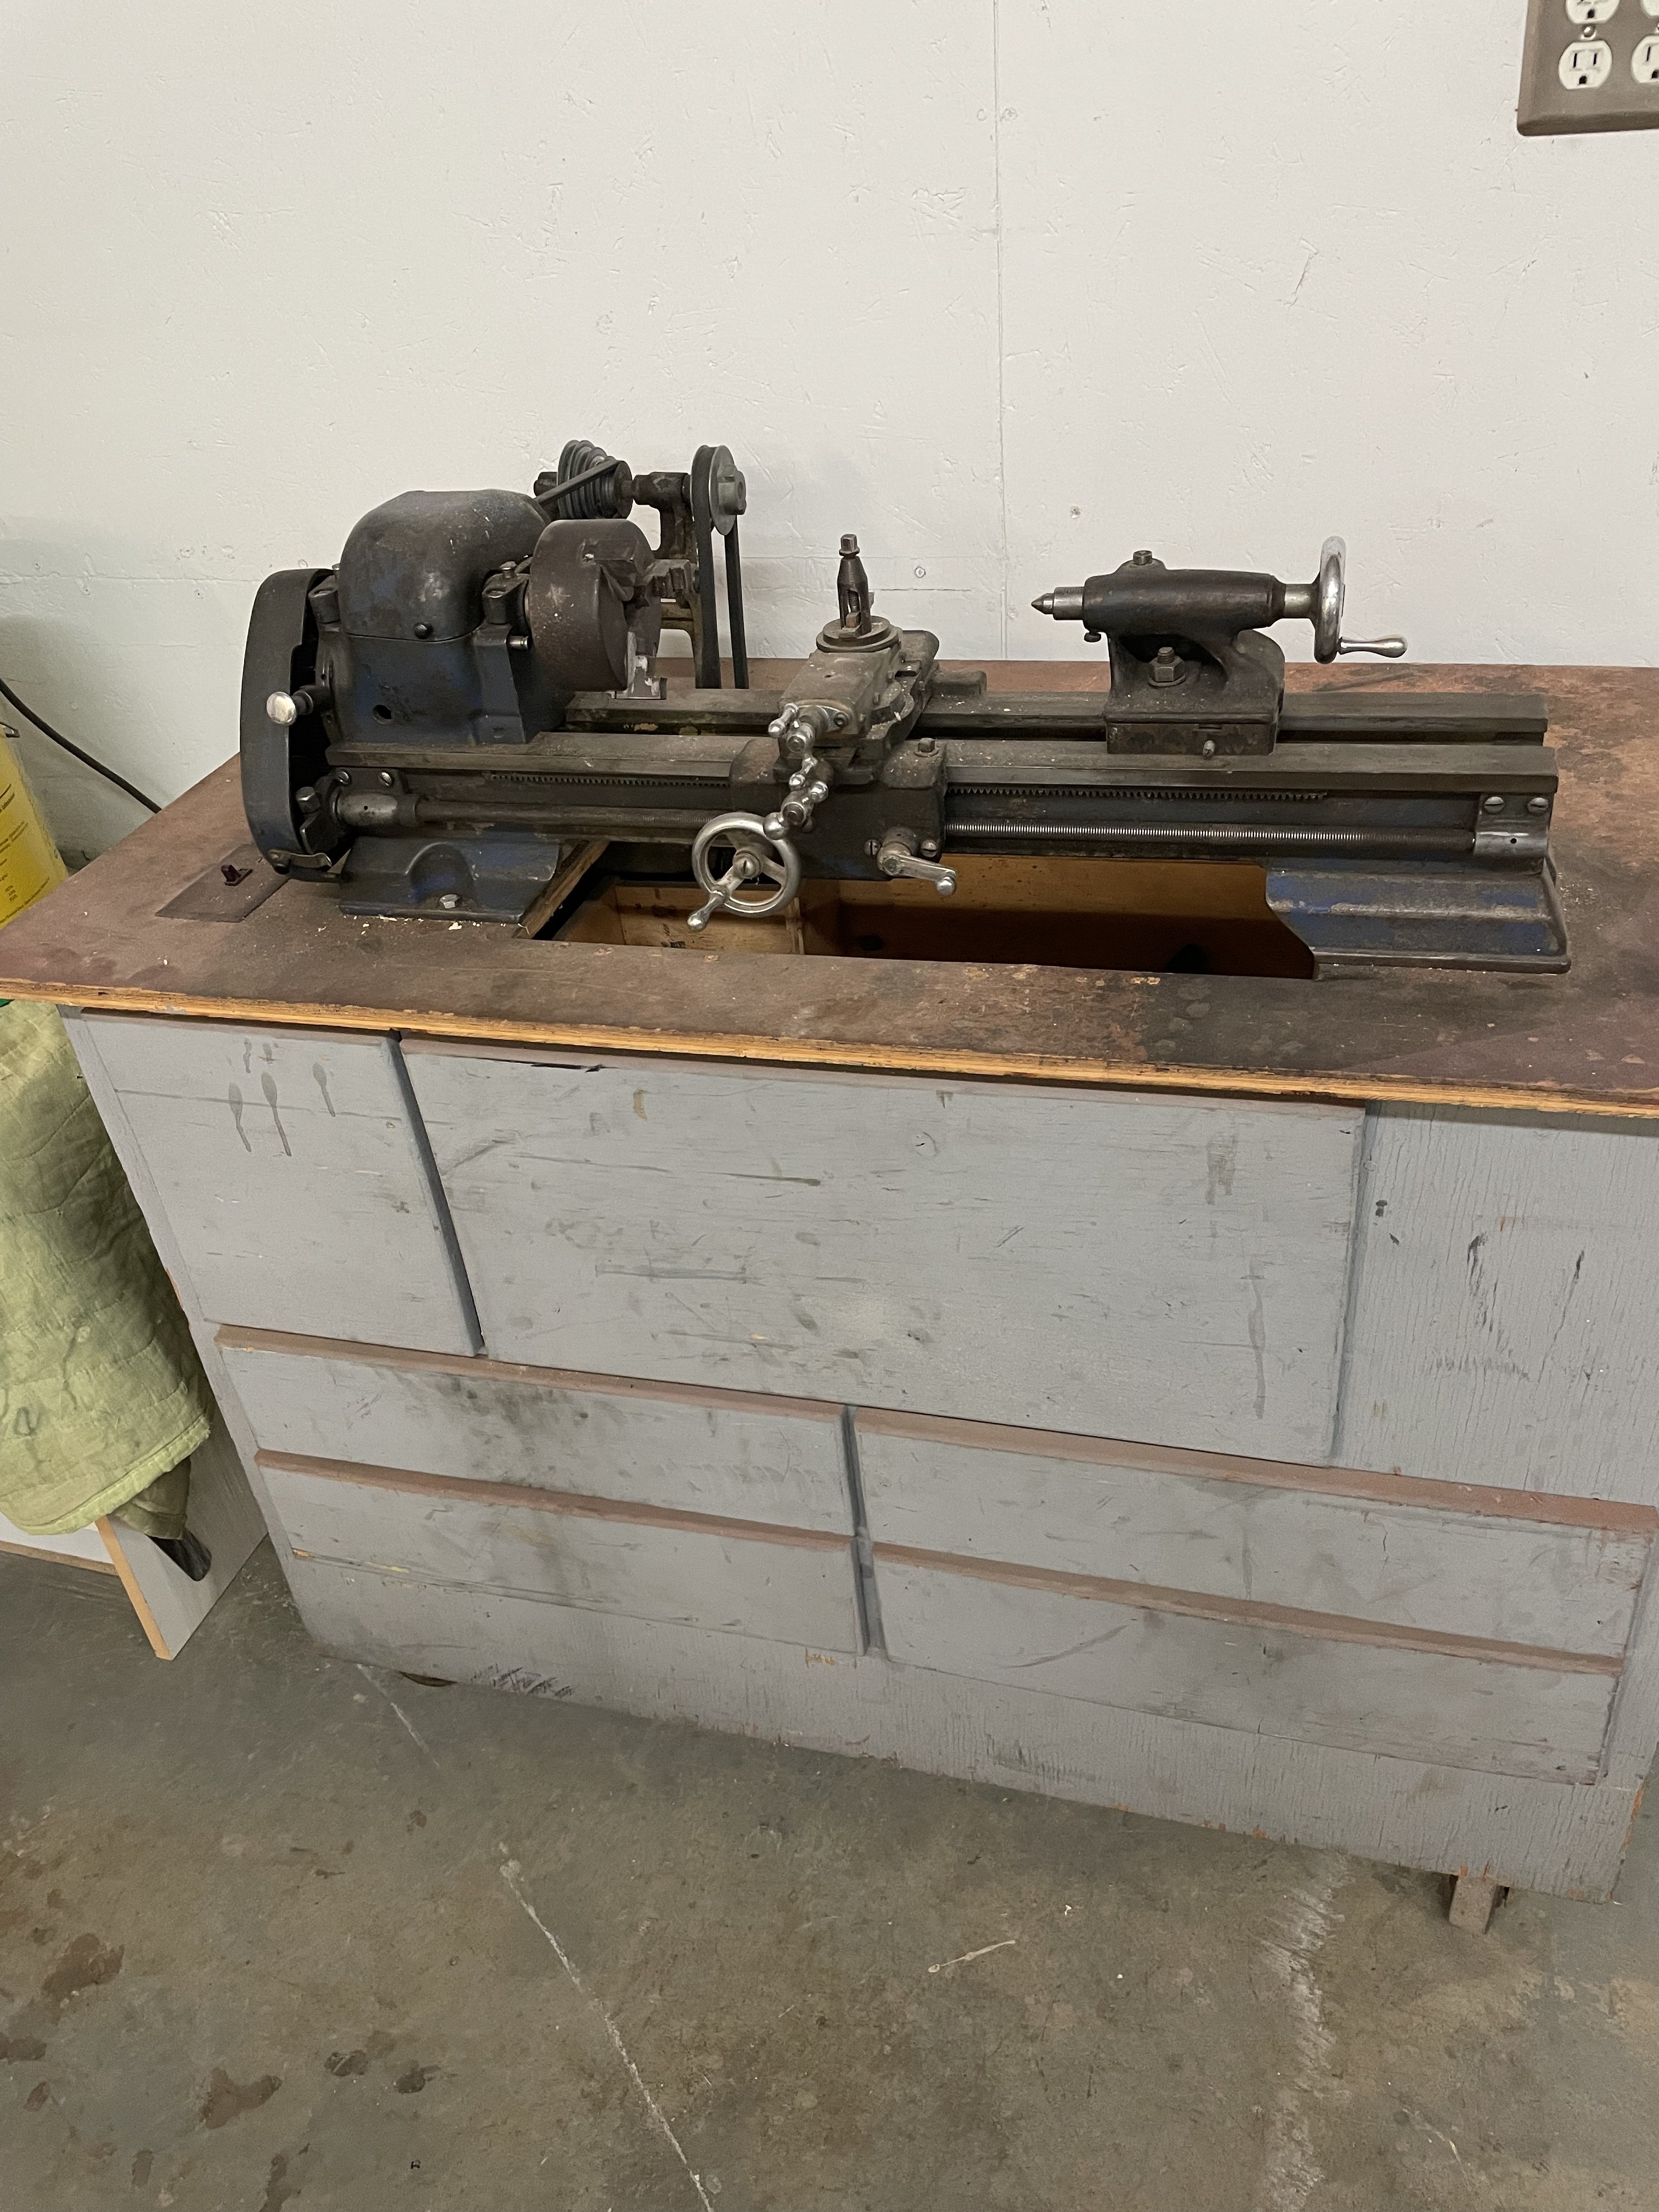
It does have oil caps so it must be (sintered bronze press in sleeve bushings.) thank you everyone for the info, and no I'm going to be doing a utube restoration video of it. I'll be lucky to just clean it up and paint it so it looks nice. Like I said before it runs, no slop in the headstock, and I just got done lubricating everything today. So, it's ready to use.
-
Holy cow that looks great !!! You do great modeling my friend. I only hope to be half as good as what I've seen with my modeling. Well done indeed !!
-
That’s cool thanks for sharing!!
-
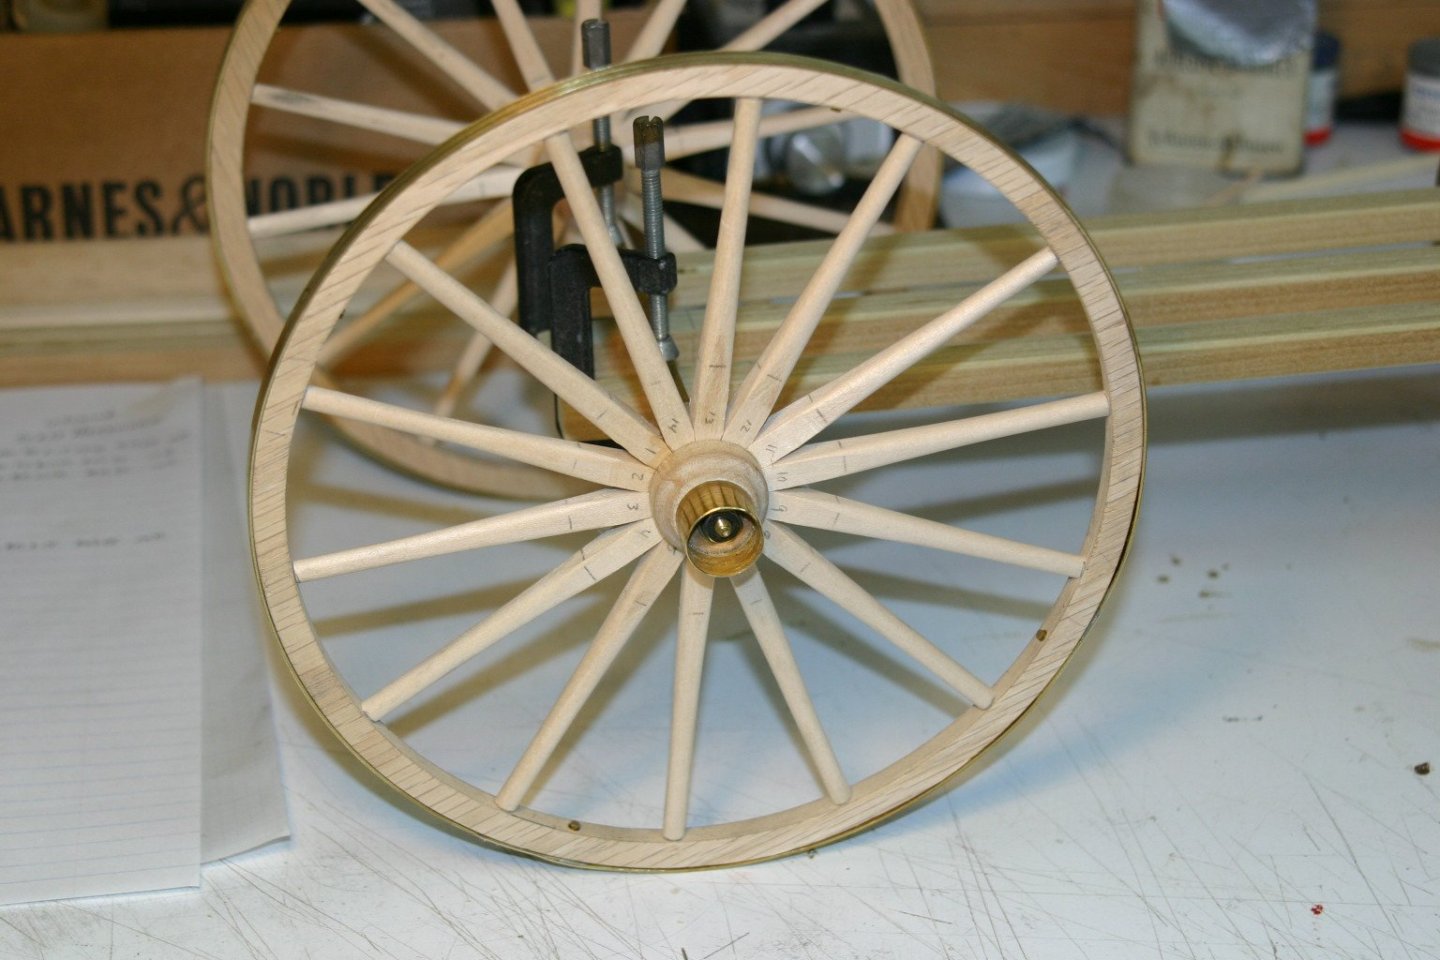
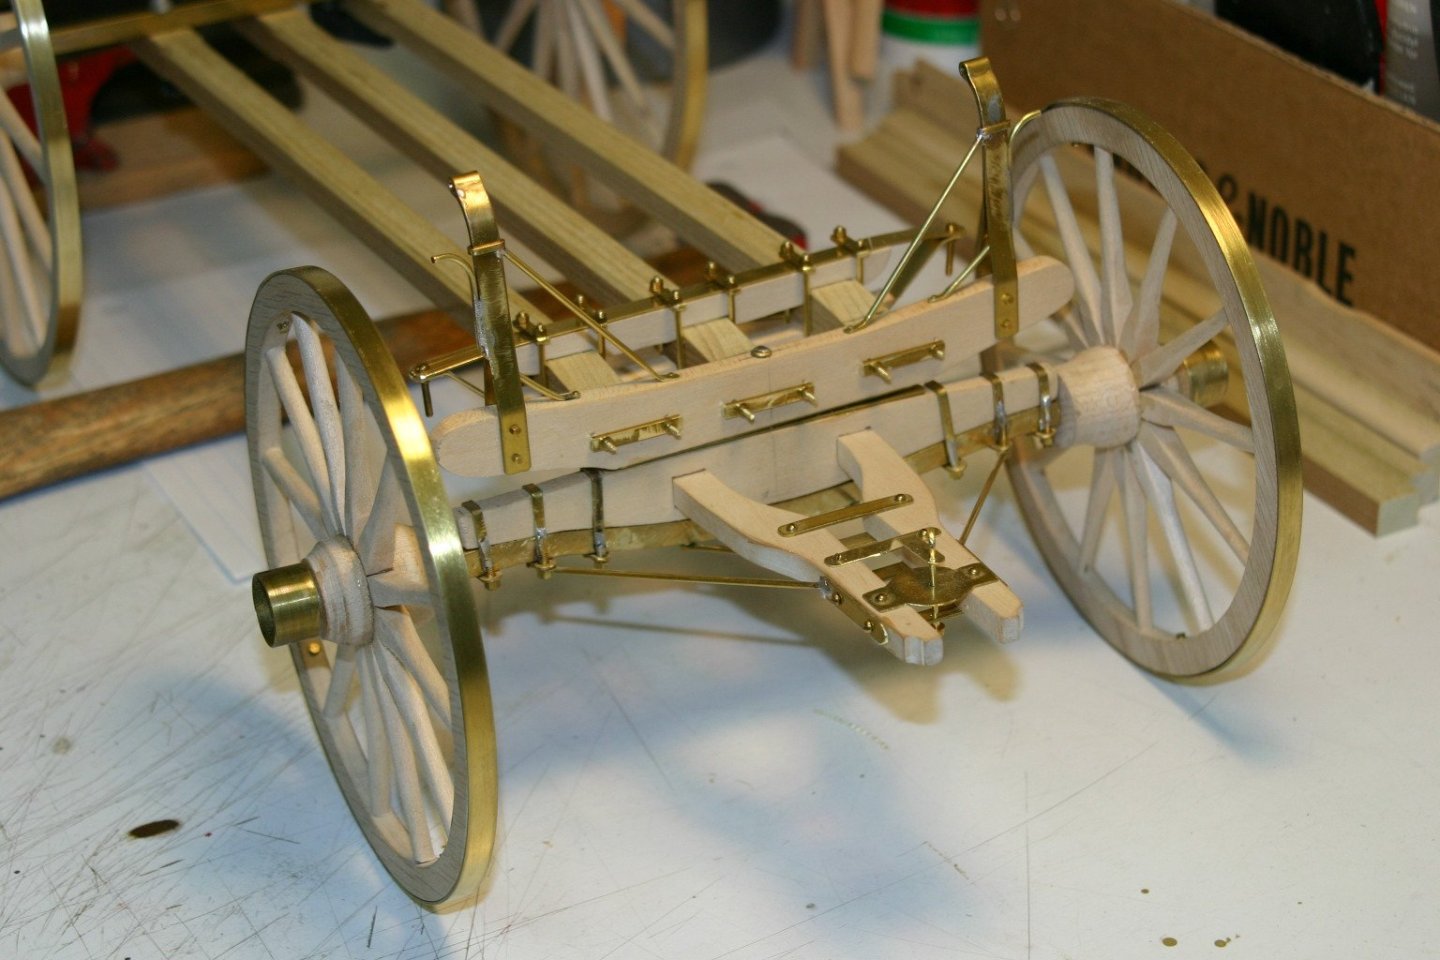
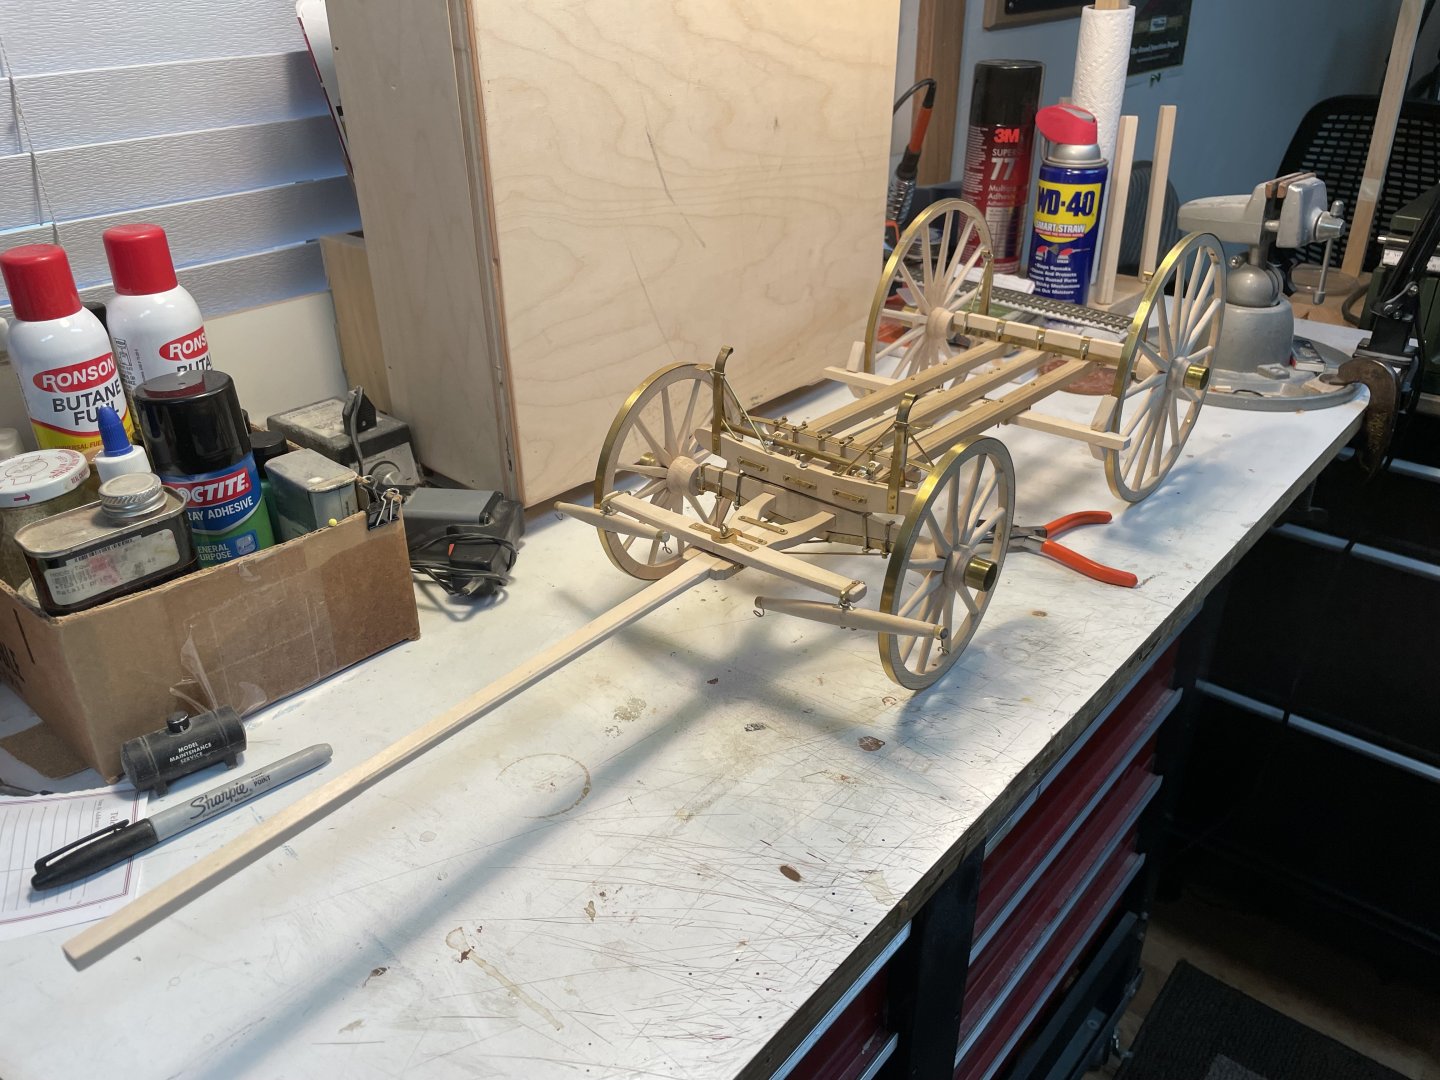
The only thing I wish it had was bearings for the headstock. Has bronze bushings ?? Not sure if Bronze or not but no bearings. Seems tight (no slop) so that's good. Just have to take the time and really clean it up and maybe give it a new paint job (same color). I have to make sure I still have it but I also have a faceplate, tooling (bits) takes 1/4" I believe maybe 3/8" cutters, dead center for tailstock (wish I had a live center) course they can be bought MT 1 tailstock. Head is a MT 2 I believe. I know I messed up one of the pins in the head, didn't know what I was doing at the time, know better now. It doesn't have a thread knob?? on it that broke long time ago. I probably won't be cutting threads that way anyway. Don't know if others vibrant or make allot of noise but my does. It's probably the way I have to belt to the motor rigged up. Dad and I built the cabinet many many moons ago and hung the motor on a hinge for belt tension (probably not the right way to do it). I have many "irons in the fire" before I get to really dig into the lathe project, it does run now just needs a good cleaning and lube. Works great, I've turned hubs (see picture) for a 1/8 scale stagecoach I was building and have turned other wood projects on it. Never have tried to turn metal on it yet. Just messed with it with wood. Yeah, I know some say don't turn wood on a metal lathe some say it's fine. It's the only lathe I had at the time so......... yup. Thanks to everyone that commented and gave suggestions on the lathe. Appreciate each and every one of you and look forward to getting back to modeling soon. First day of work (new job) so that'll be interesting. Again thank you !!
-
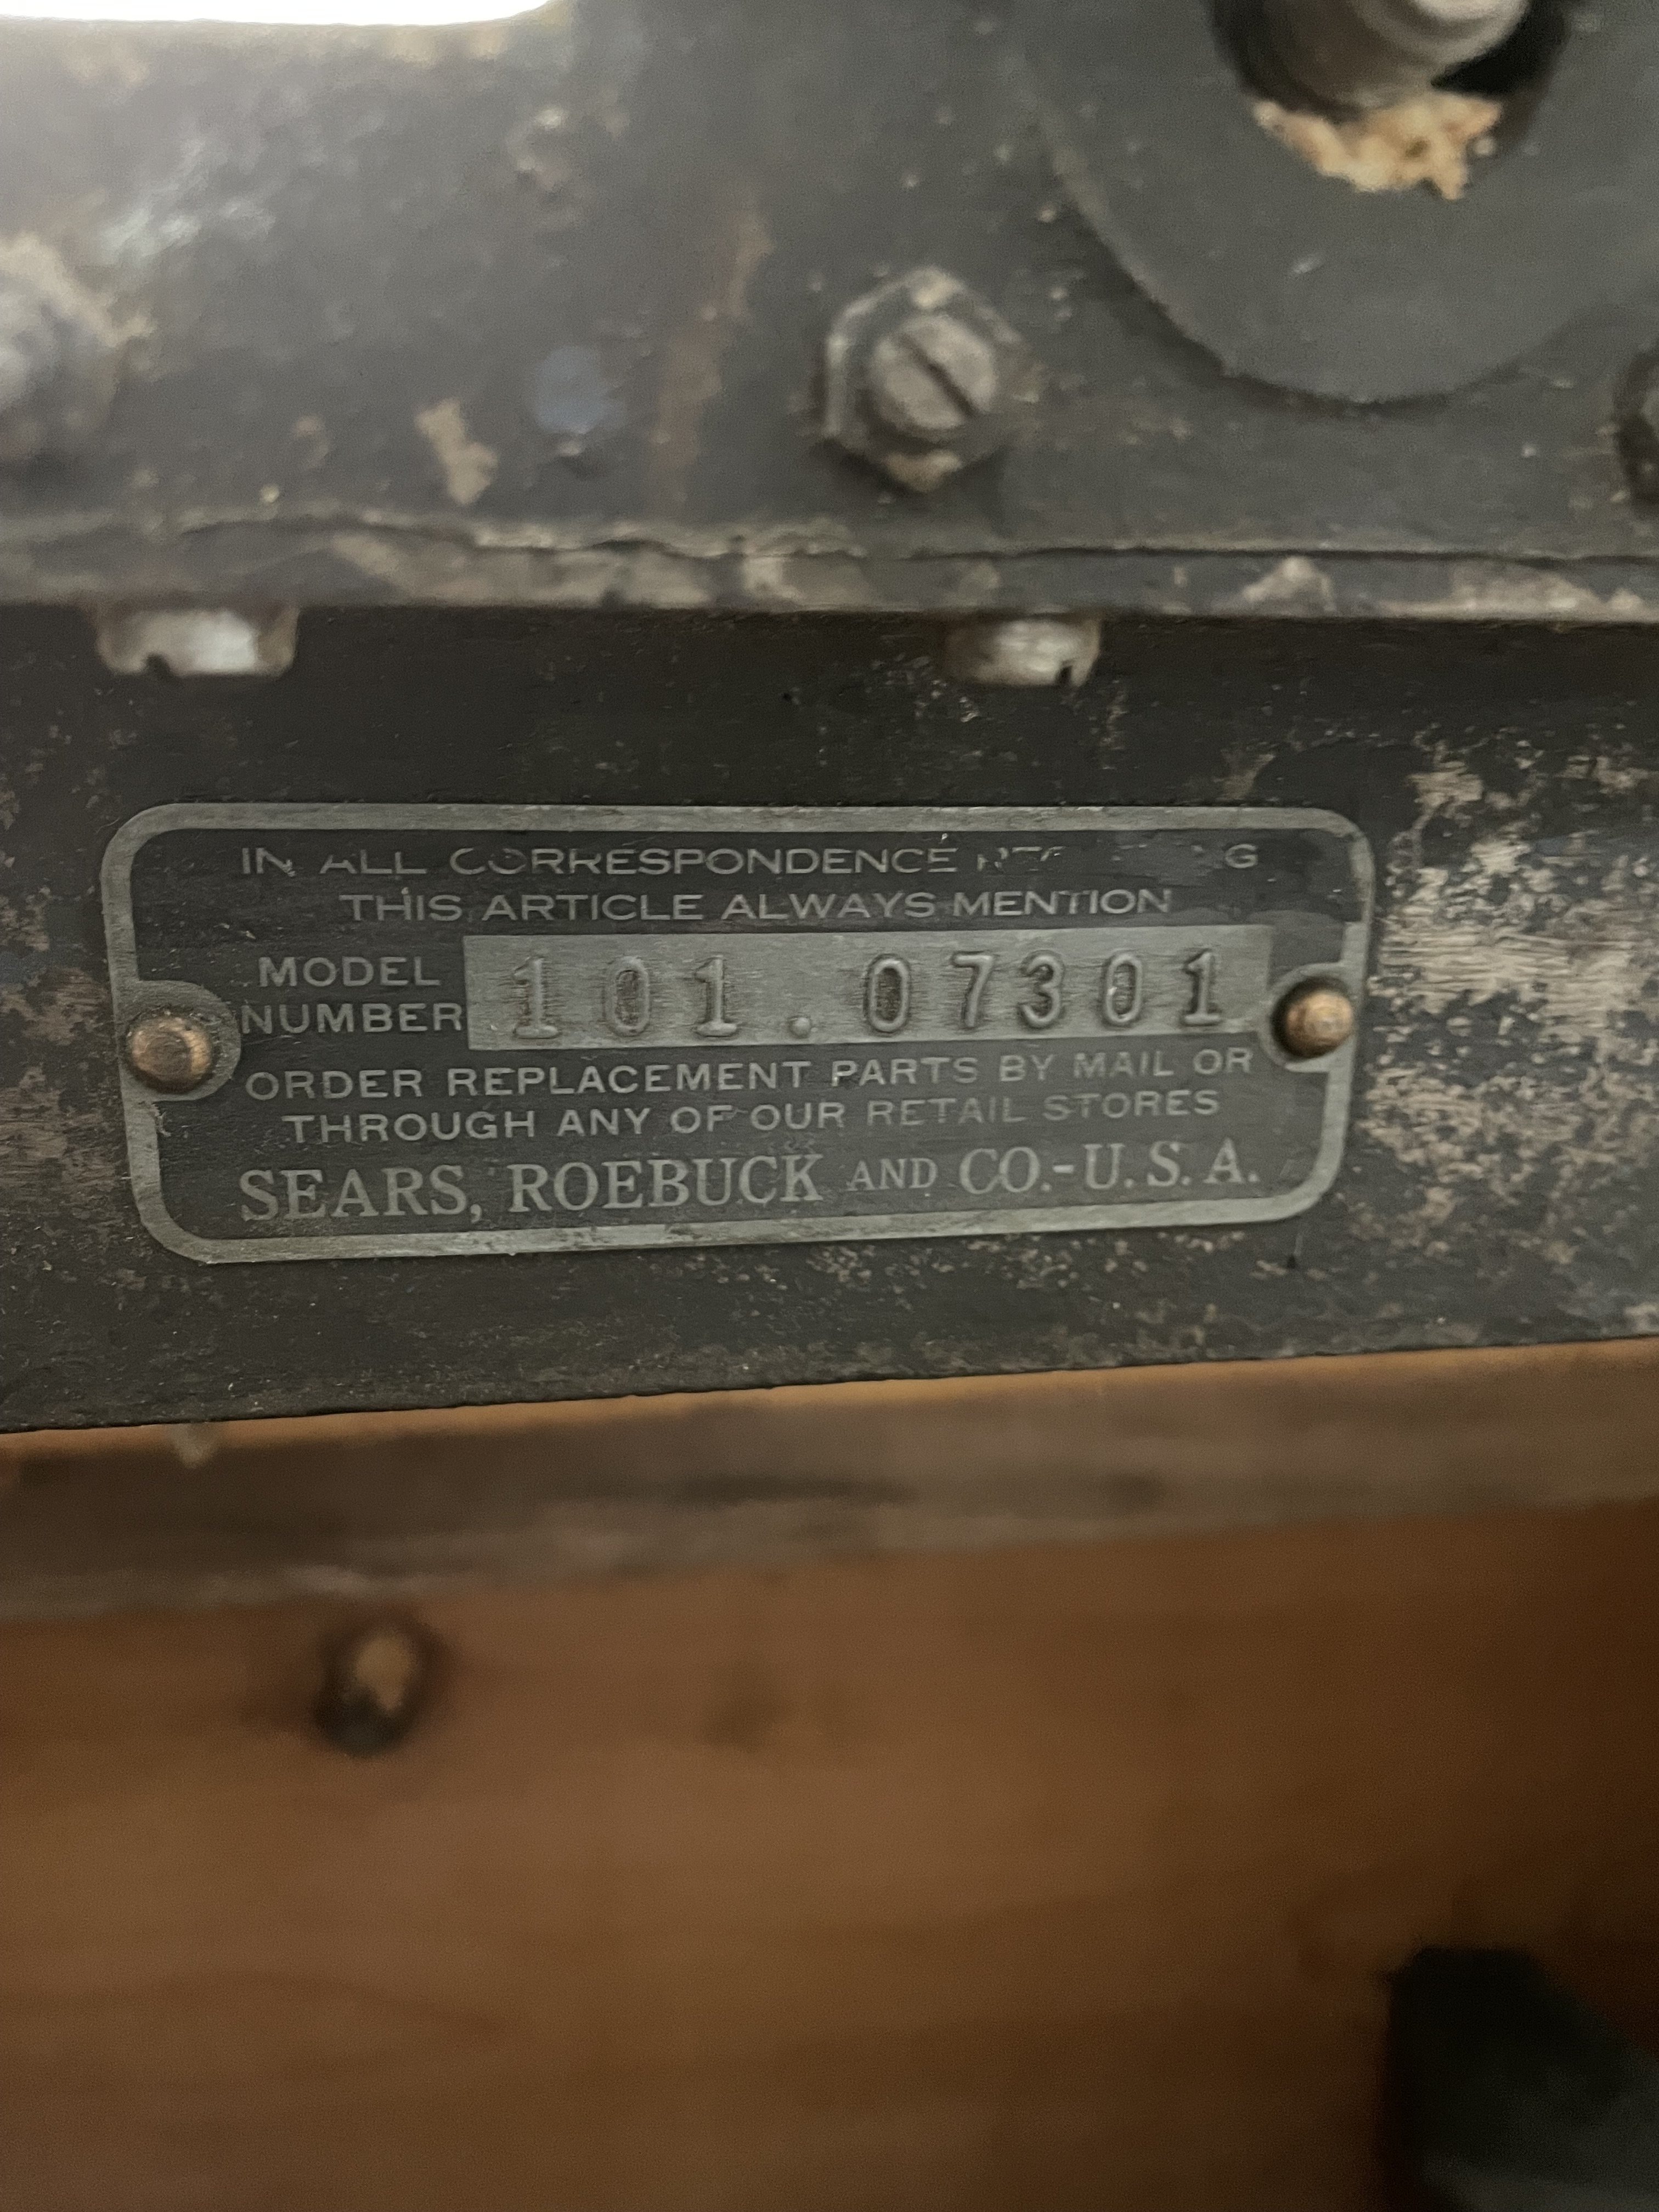
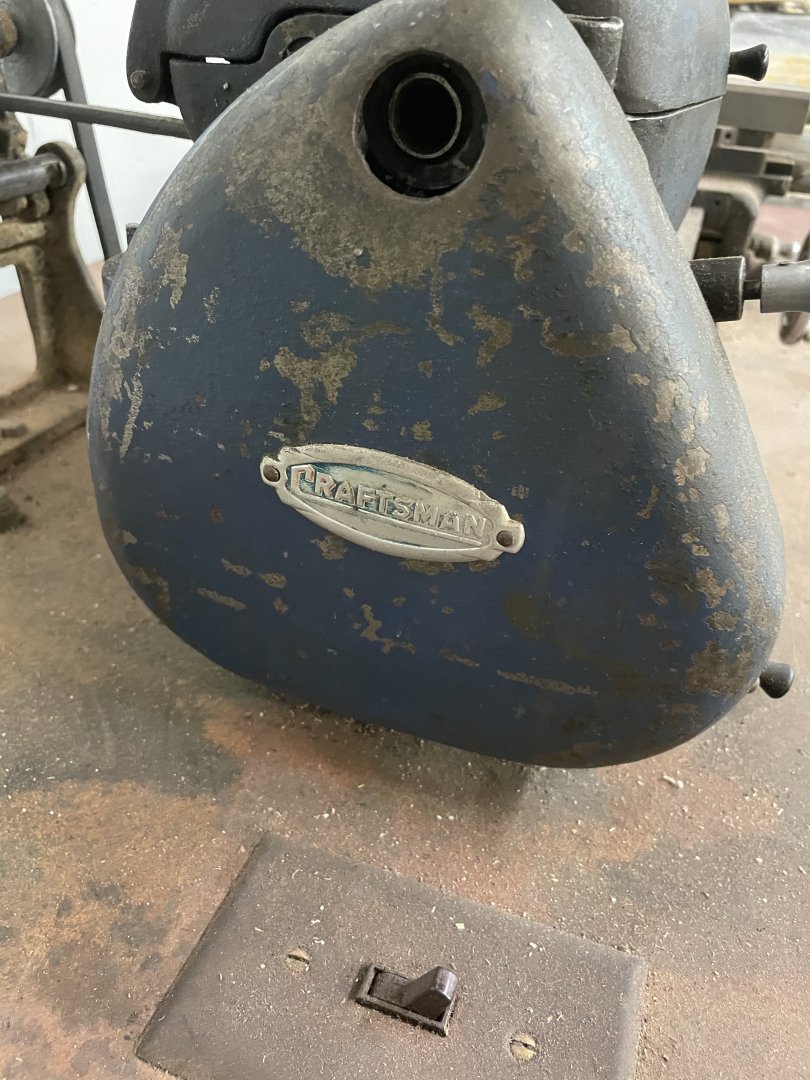
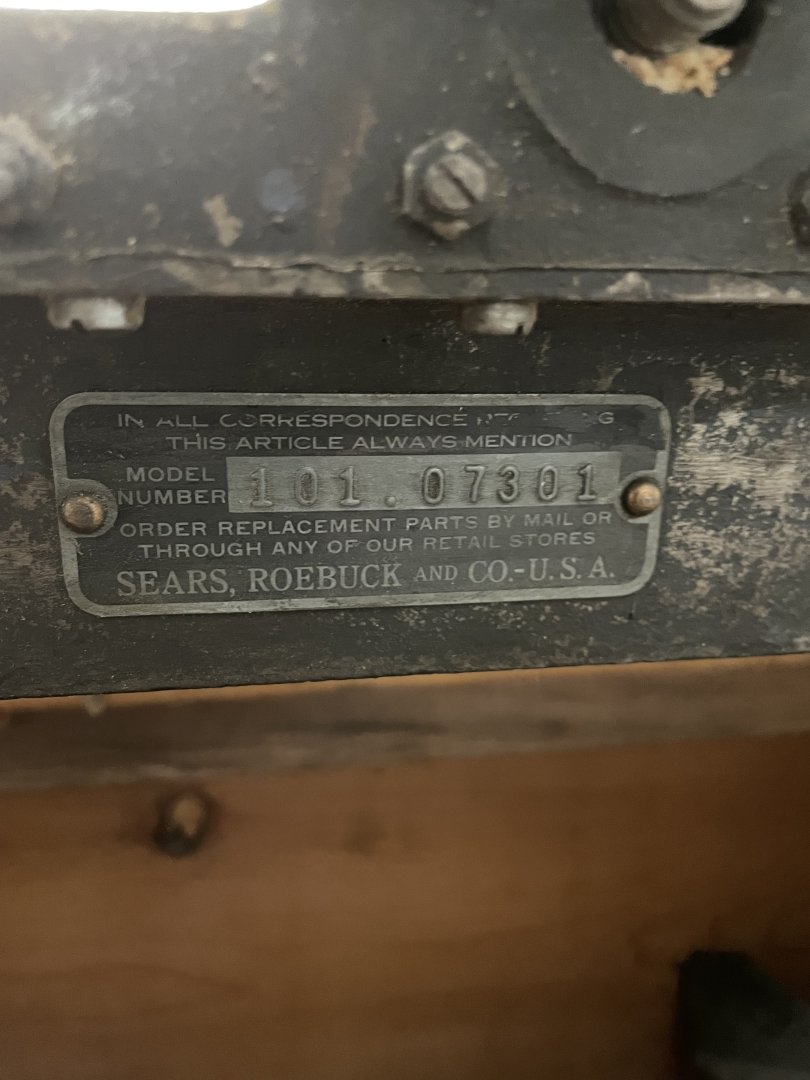
Well we’re moved and I’m setting up the shop and I believe it was here that we were talking about atlas craftsman steel lathes. Anyway I dug out my craftsman lathe and yes I need a new base and deep cleaning but this is what I have.


- 27 replies
-
- 11
-

-

-
Use of “other power tools”
kgstakes replied to kgstakes's topic in Modeling tools and Workshop Equipment
True but what the machine is designed for, the site has many designs, cards, etc to pick from and make your own. Technically it wasn’t designed for the modeler. A stand alone machine would be great but for the money, you have to give up something. All I can say is that I tried it other modelers have tried it and it works. A cheaper way to get something cut out other than buying a laser cutter which is out of my range. Oh and it really works well for making signs for your models as well. i don’t know if micro mark version of this is stand alone either…. Be interesting to see if it is or another machine similar to the cricut. I know my wife would like stand alone machine. I’ve looked at 3D printers, looks neat and what they can do is cool, but too technical for me and the price is way out of my range. Plus I’m a wood guy rather build with wood than plastic. Figures and details I can see a 3D printer coming in handy but for me I’ll stick with my model tools, be it hand or power tools. Have fun building!!! -
Use of “other power tools”
kgstakes replied to kgstakes's topic in Modeling tools and Workshop Equipment
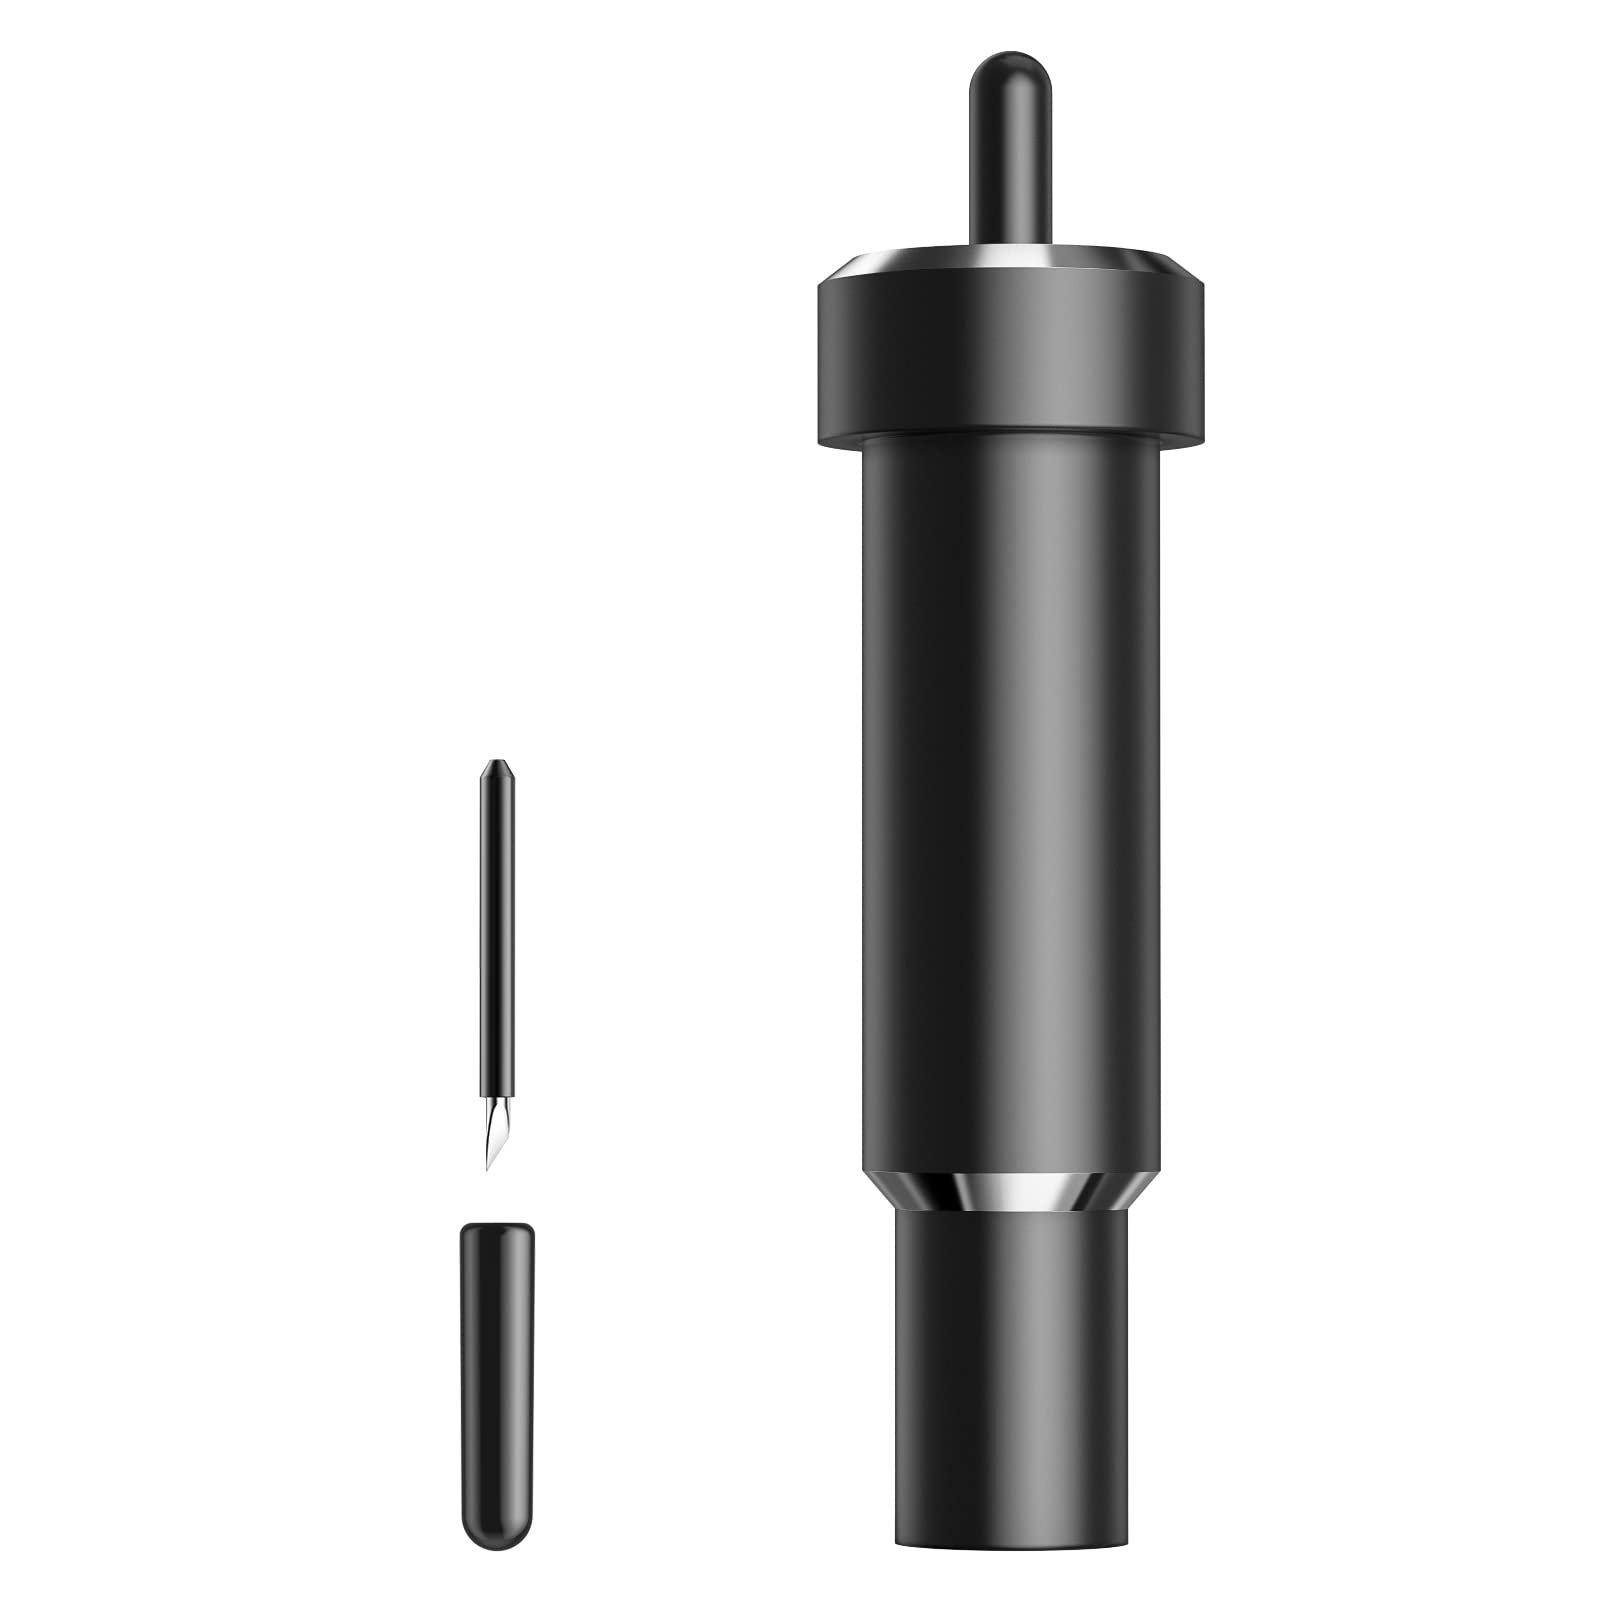
It’ll cut curves the machine will follow what ever the drawing you have programmed it to cut. Don’t see any problems with cutting a curve. The blade is designed to swivel. this is the deep cut blade that I have for the cricut for cutting basswood up to 1/16”. Newer models might be able to cut deeper don’t know.
-
Use of “other power tools”
kgstakes replied to kgstakes's topic in Modeling tools and Workshop Equipment
Yeah what he said 😇