Helge Hafstad
-
Posts
43 -
Joined
-
Last visited
About Helge Hafstad

- Birthday 02/25/1961
-
 Helge Hafstad reacted to a post in a topic:
Grand Banks Dory by davec - FINISHED - Model Shipways - 1:24 - Shipwright Series
Helge Hafstad reacted to a post in a topic:
Grand Banks Dory by davec - FINISHED - Model Shipways - 1:24 - Shipwright Series
-
Helge Hafstad reacted to a post in a topic:
Grand Banks Dory by davec - FINISHED - Model Shipways - 1:24 - Shipwright Series
-
grsjax reacted to a post in a topic:
Saint Malo by Helge Hafstad - Artesania Latina - 1:20
-
Jack12477 reacted to a post in a topic:
Saint Malo by Helge Hafstad - Artesania Latina - 1:20
-
 Nice seeing this build! Nice to see the finished model. Have just got the kit, and contemplating it as my next build. Will try to make it into the now museum-owned RS-1, as there are good photographs of this that can be used as a basis.
 -
Helge Hafstad reacted to a post in a topic:
Colin Archer by Torstein - FINISHED - Billing Boats - scale 1:40 - (BB606) First build
-
Helge Hafstad reacted to a post in a topic:
Colin Archer by Torstein - FINISHED - Billing Boats - scale 1:40 - (BB606) First build
-
Been on the bench a bit this, have not had much time for it. Funny how real life seems to demand time. Would be good to spend a little time on the details and getting the hull finished and the rigging started. I'm not too happy with the supplied rig, as I think this was quite untypical - even if a picture of this rigging version exists. For a small 1-2 person boat like this, a simpler rig would be more normal.
- 32 replies
-
- 1
-
-
- Saint Malo
- Artesania Latina
- (and 1 more)
-
Helge Hafstad reacted to a post in a topic:
Sikorsky JRS-1 by Landlubber Mike - FINISHED - Eduard - 1/72
-
robert952 reacted to a post in a topic:
Grand Banks Dory by davec - FINISHED - Model Shipways - 1:24 - Shipwright Series
-
davec reacted to a post in a topic:
Saint Malo by Helge Hafstad - Artesania Latina - 1:20
-
davec reacted to a post in a topic:
Saint Malo by Helge Hafstad - Artesania Latina - 1:20
-
davec reacted to a post in a topic:
Saint Malo by Helge Hafstad - Artesania Latina - 1:20
-
davec reacted to a post in a topic:
Saint Malo by Helge Hafstad - Artesania Latina - 1:20
-
davec reacted to a post in a topic:
Saint Malo by Helge Hafstad - Artesania Latina - 1:20
-
davec reacted to a post in a topic:
Saint Malo by Helge Hafstad - Artesania Latina - 1:20
-
davec reacted to a post in a topic:
Saint Malo by Helge Hafstad - Artesania Latina - 1:20
-
Interested, so will follow. Am building a dory myself, and am especially interested in various riggings.
- 32 replies
-
- 1
-
-
- Grand Banks Dory
- Model Shipways
- (and 2 more)
-
Helge Hafstad reacted to a post in a topic:
Grand Banks Dory by davec - FINISHED - Model Shipways - 1:24 - Shipwright Series
-
Helge Hafstad reacted to a post in a topic:
Sikorsky JRS-1 by Landlubber Mike - FINISHED - Eduard - 1/72
-
Helge Hafstad reacted to a post in a topic:
Sikorsky JRS-1 by Landlubber Mike - FINISHED - Eduard - 1/72
-
Helge Hafstad reacted to a post in a topic:
Sikorsky JRS-1 by Landlubber Mike - FINISHED - Eduard - 1/72
-
Helge Hafstad reacted to a post in a topic:
HMS Indefatigable 1794 by Blue Ensign - FINISHED - Vanguard Models - 1:64 scale
-
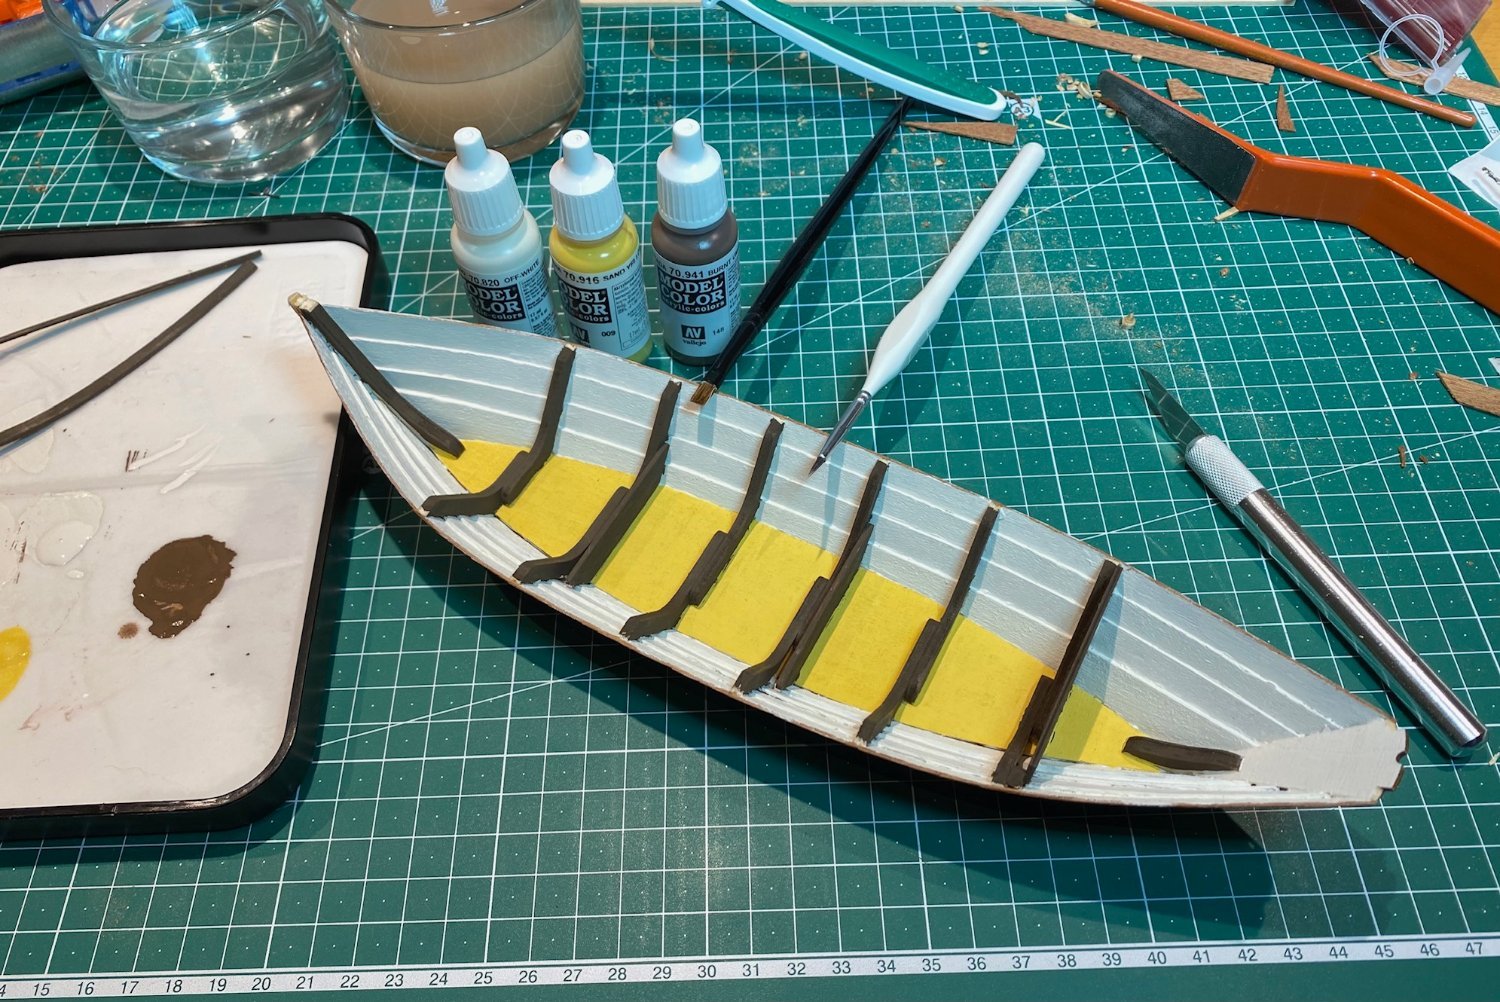
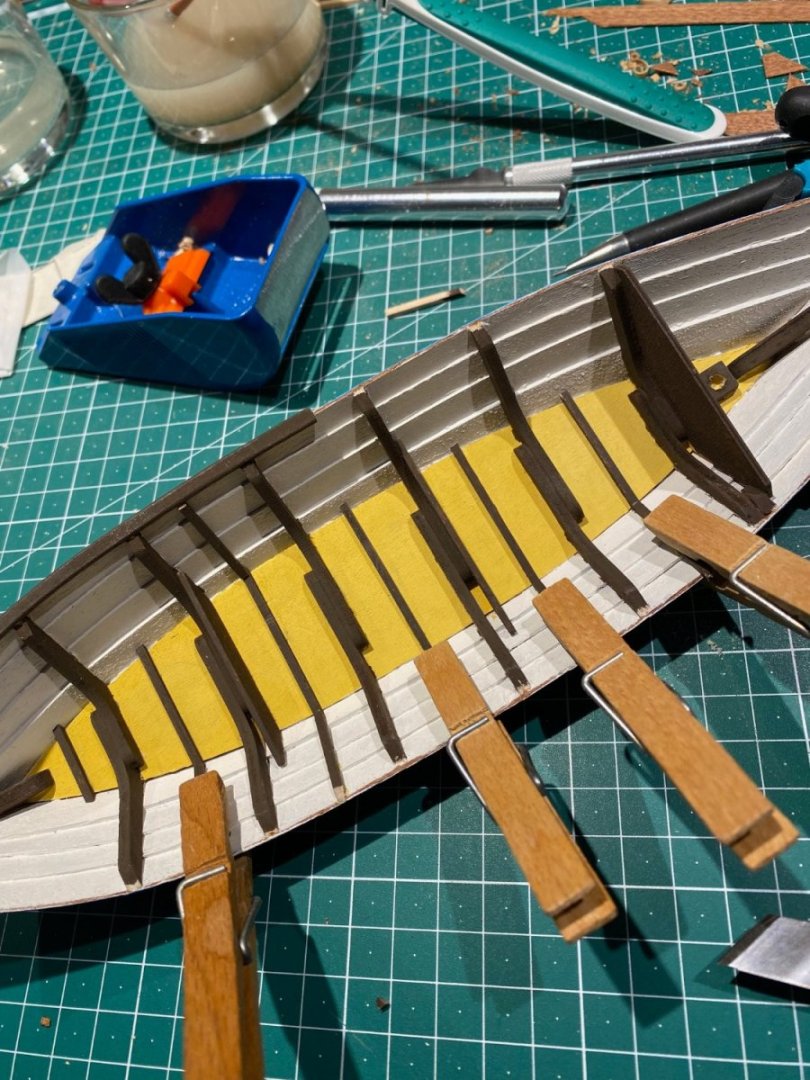
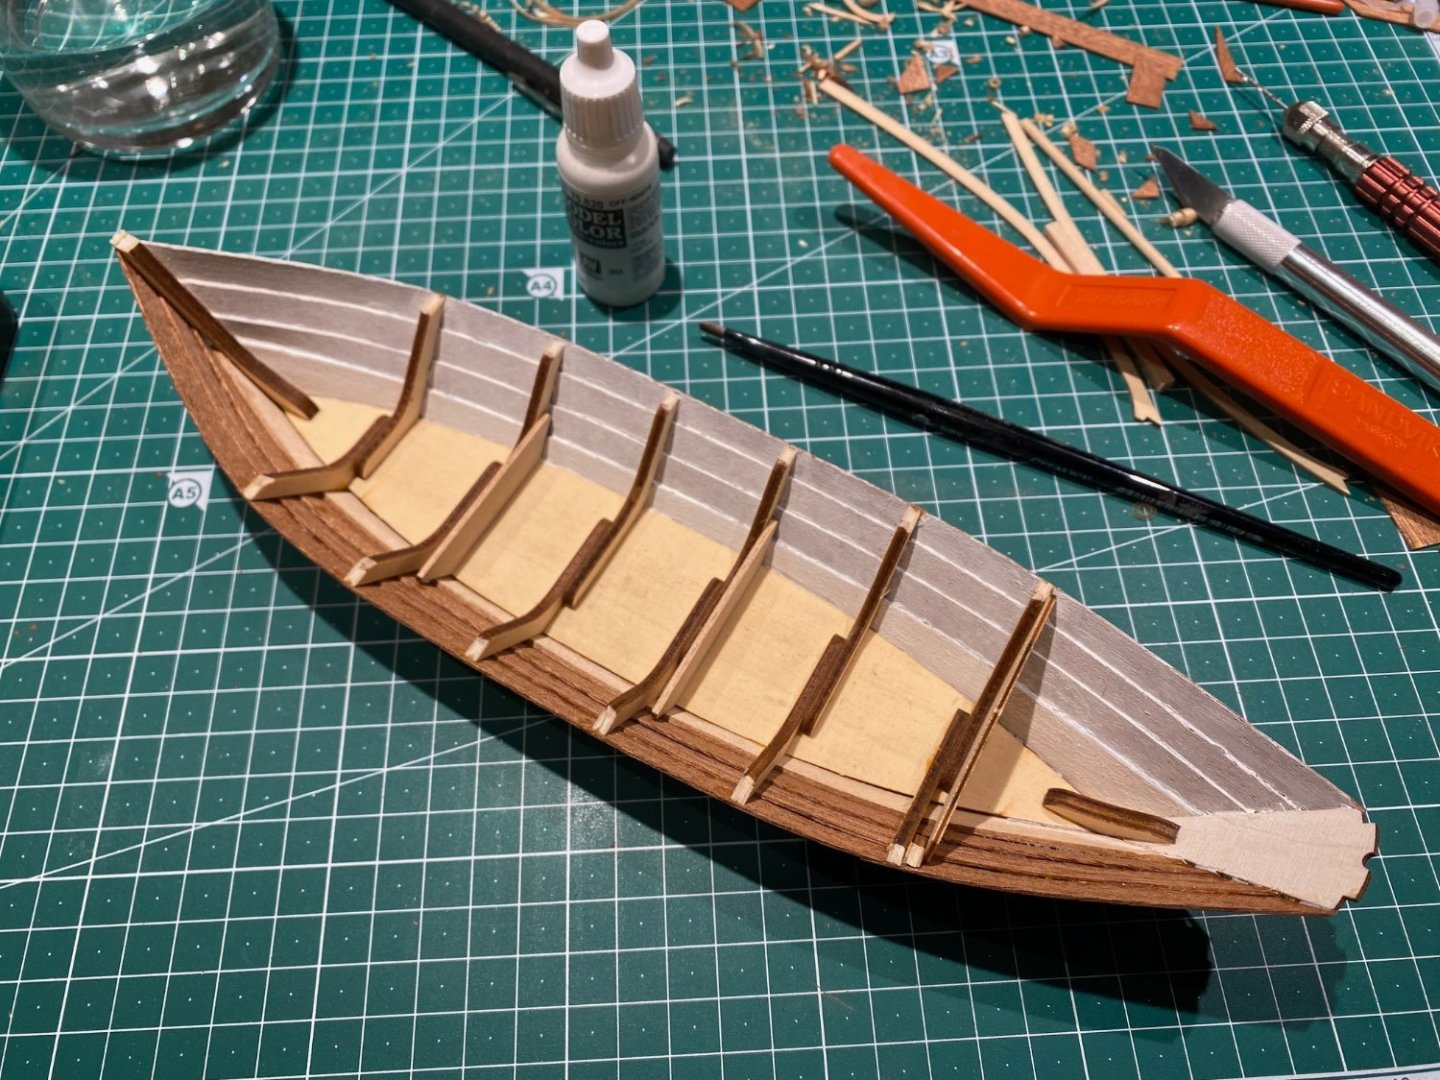
Detailing is on-going. Fitting in the stiffener between the frames is well underway. Also, the mizzen mast base is in place (upper right). Have mounted the starboard half of the gunwale, but this was premature and made fitting in the stiffeners more difficult. Recommend waiting until the stiffeners are finished. The gunwale is laser cut/pre-shaped and in four pieces. That will be the next step. Inside the thwarts and the support battens (unsure of the name) also need to be fitted.
- 32 replies
-
- 4
-
-
- Saint Malo
- Artesania Latina
- (and 1 more)
-
The base for the mizzen mast was not in the kit, but easy to make. This is shown in the build video, but not in the build plans. As this is the only support for the mizzen mast, it would be hard to do without it. Still think that when used some sort of stay would have been used, even for a mast only a couple of meters high. Have to think about how to rig that.

- 32 replies
-
- 2
-
-
- Saint Malo
- Artesania Latina
- (and 1 more)
-
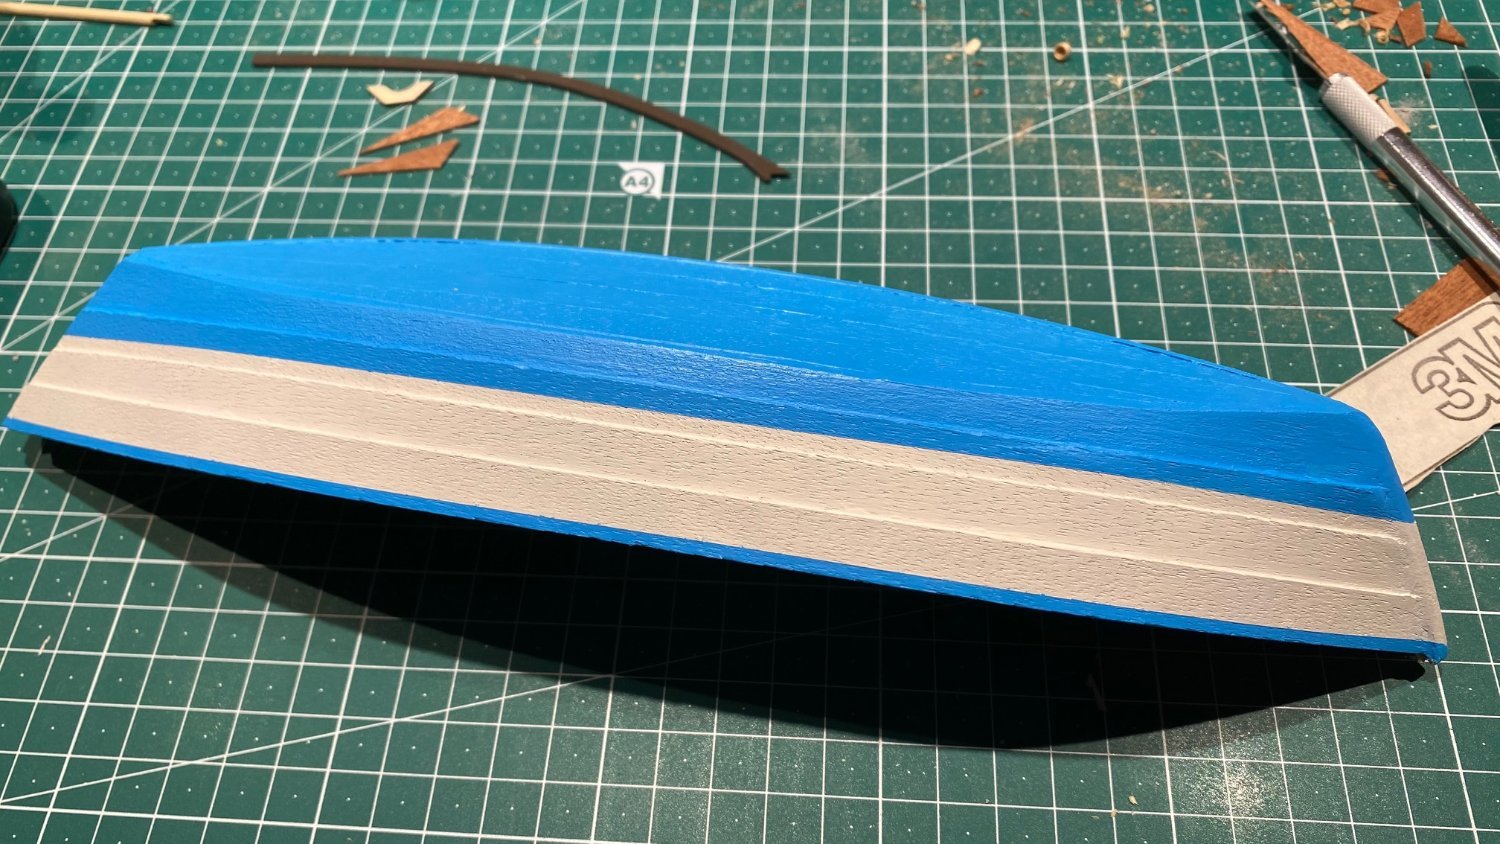
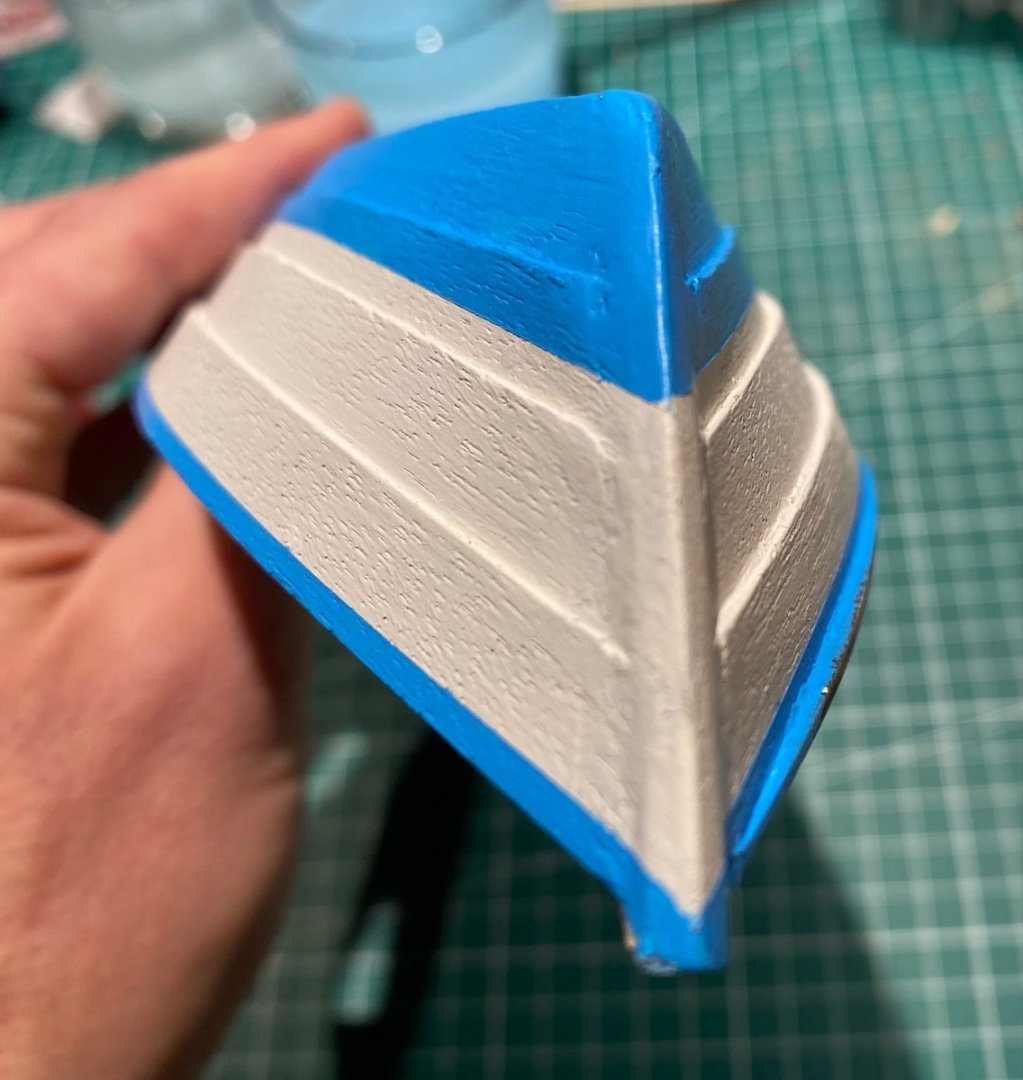
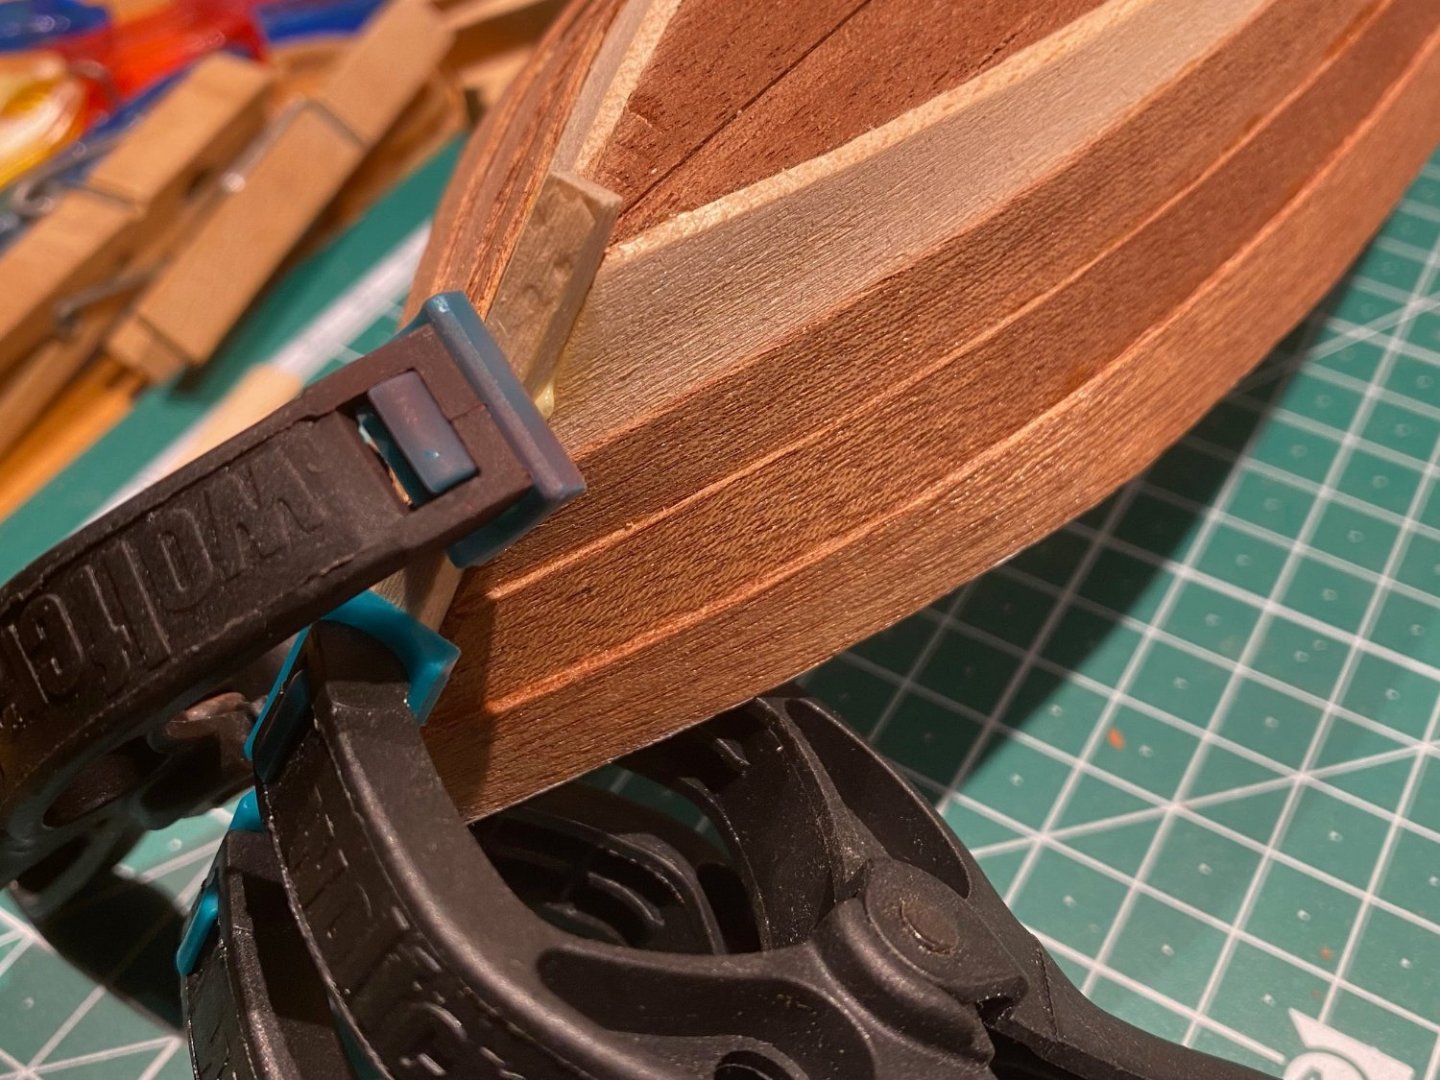
Blue done. Also, the bow after using putty and sanding a few times. I think this improved the planking transition into the stem a lot.

- 32 replies
-
- 4
-
-
- Saint Malo
- Artesania Latina
- (and 1 more)
-
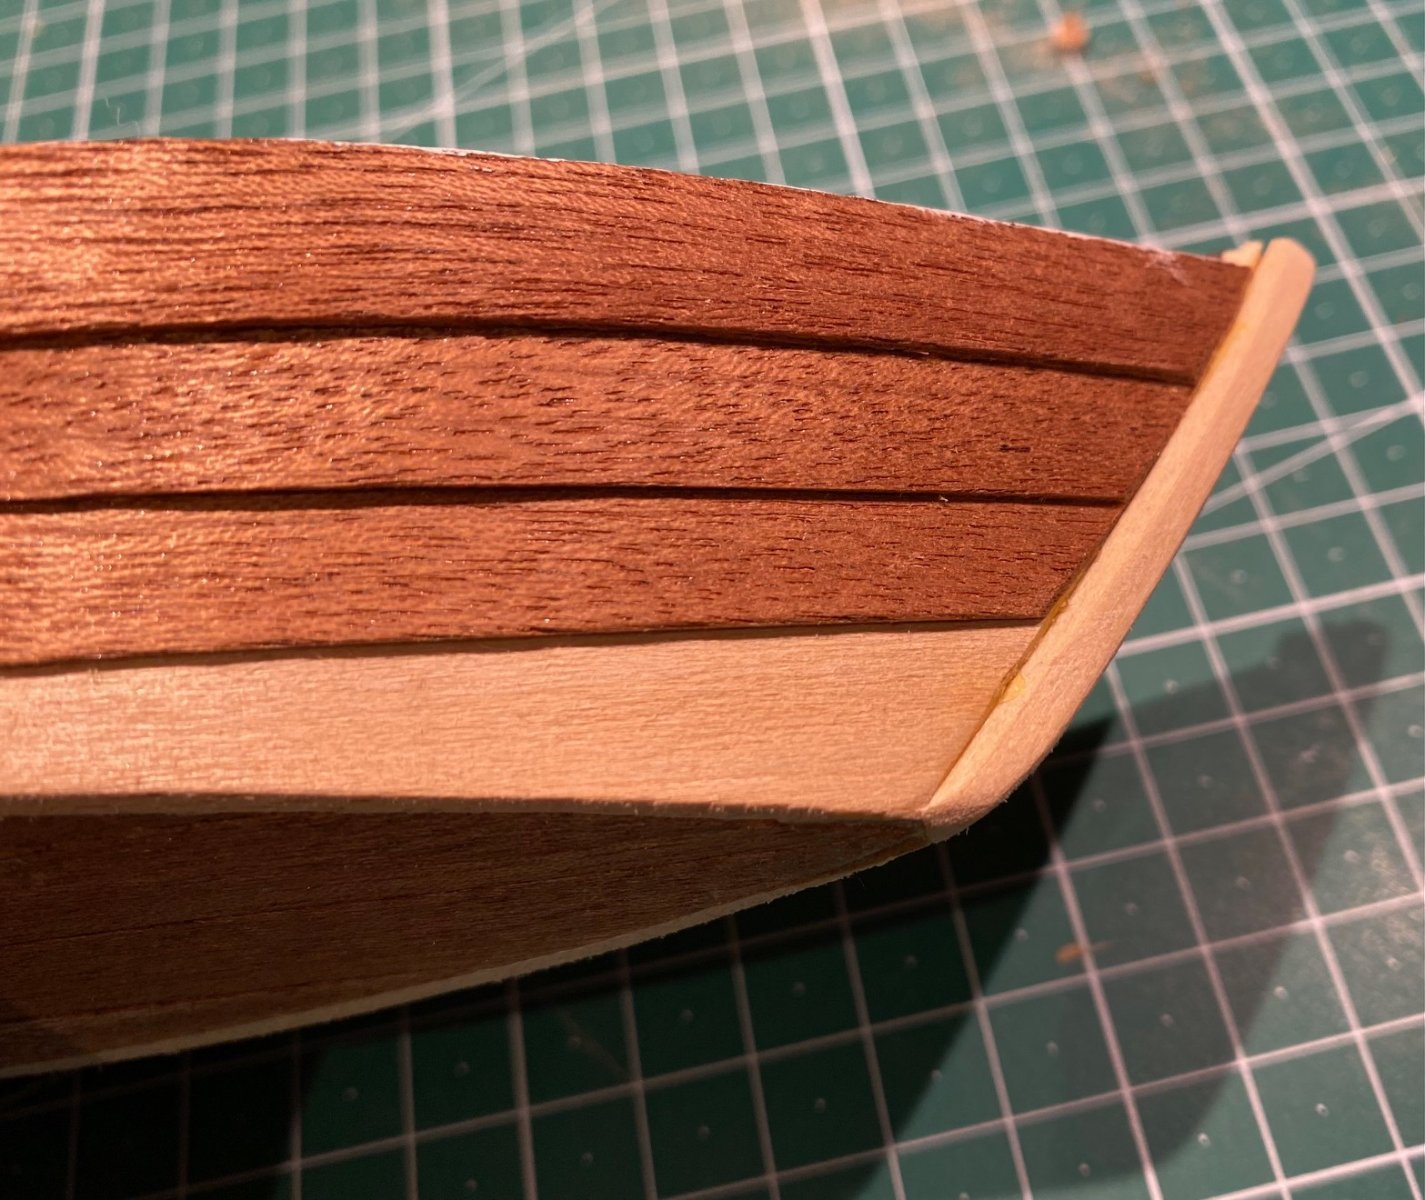
This is the bow when sanded. From the side it doesn't look too bad (it will be painted ...), but I'm not so sure about the front view. Let me know what you think!


- 32 replies
-
- 2
-
-
- Saint Malo
- Artesania Latina
- (and 1 more)
-
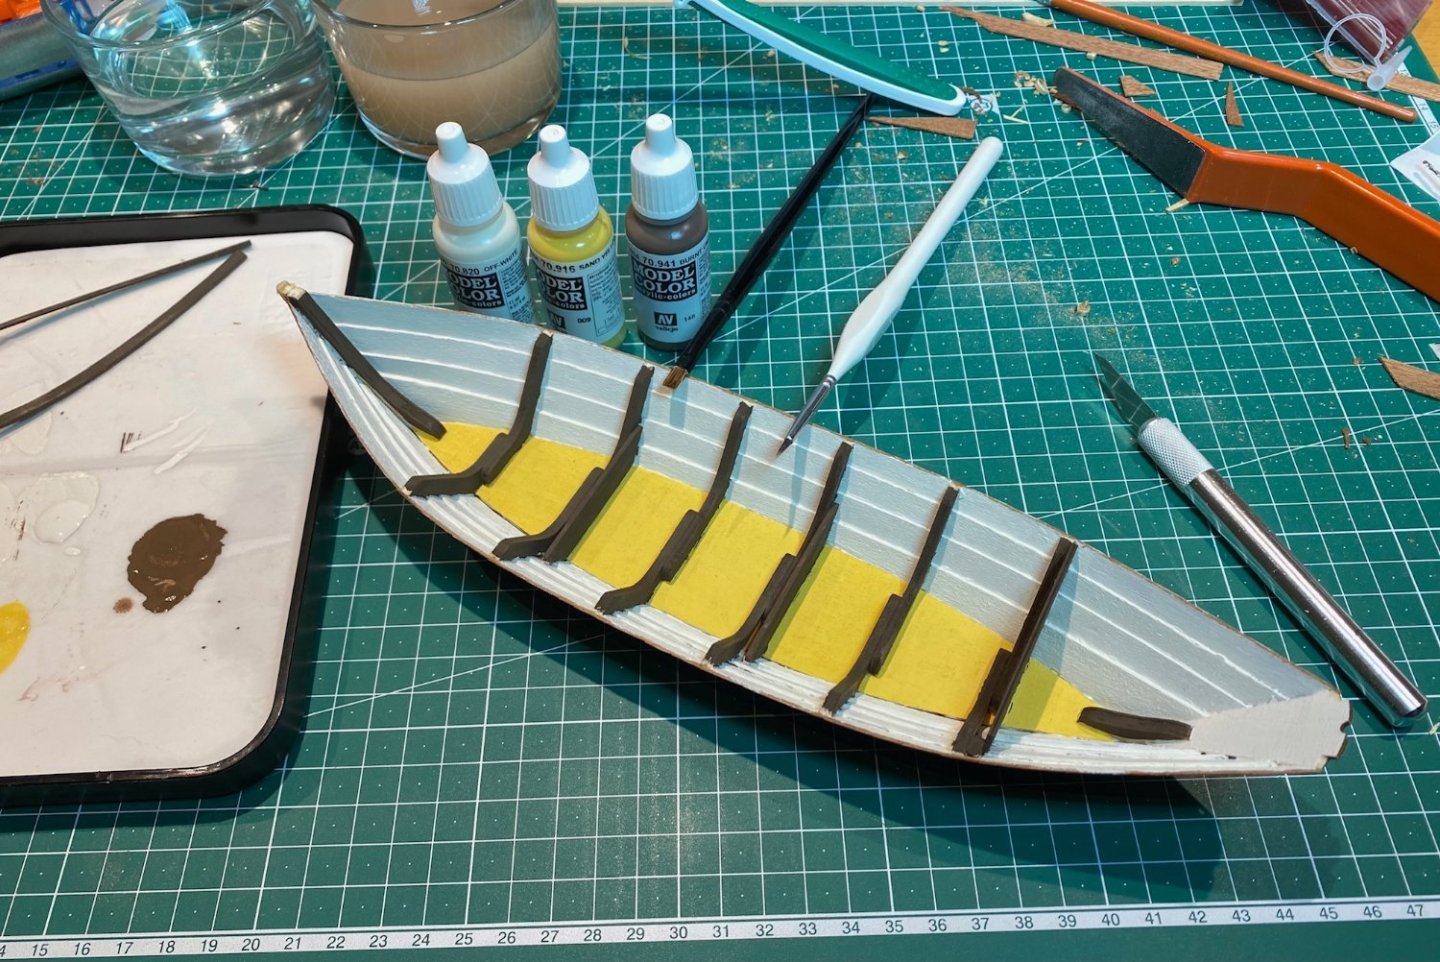
Inside the painting went well. A flat brush really meant for drybrushing had the stiffness and control I wanted, and a thin brush was used for small touch-ups where I was not precise enough.
- 32 replies
-
- 2
-
-
- Saint Malo
- Artesania Latina
- (and 1 more)
-
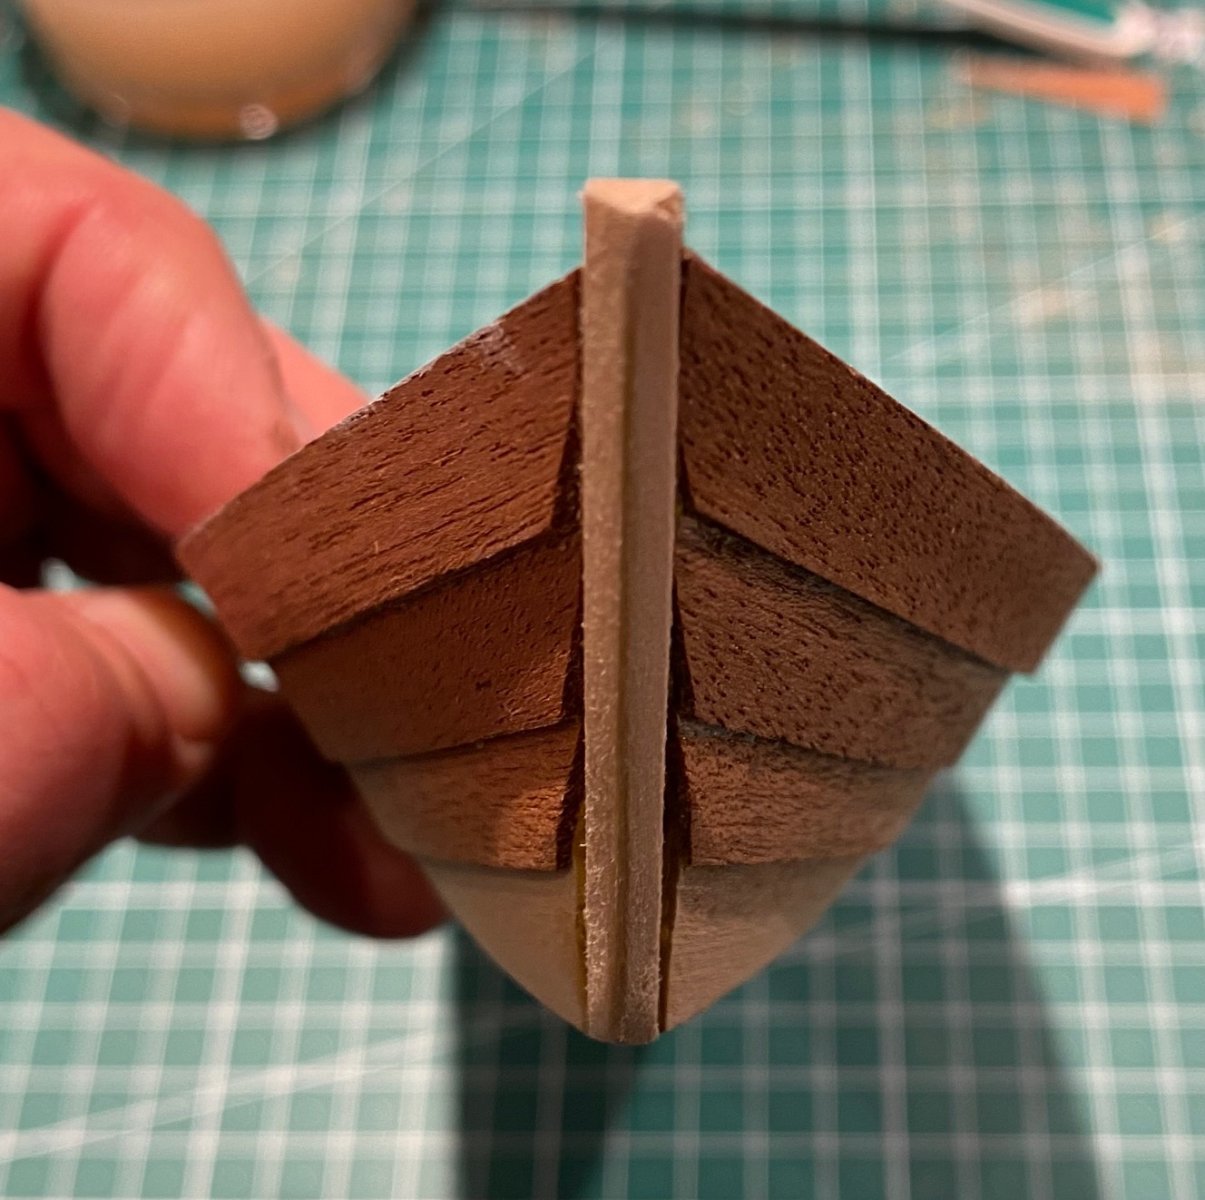
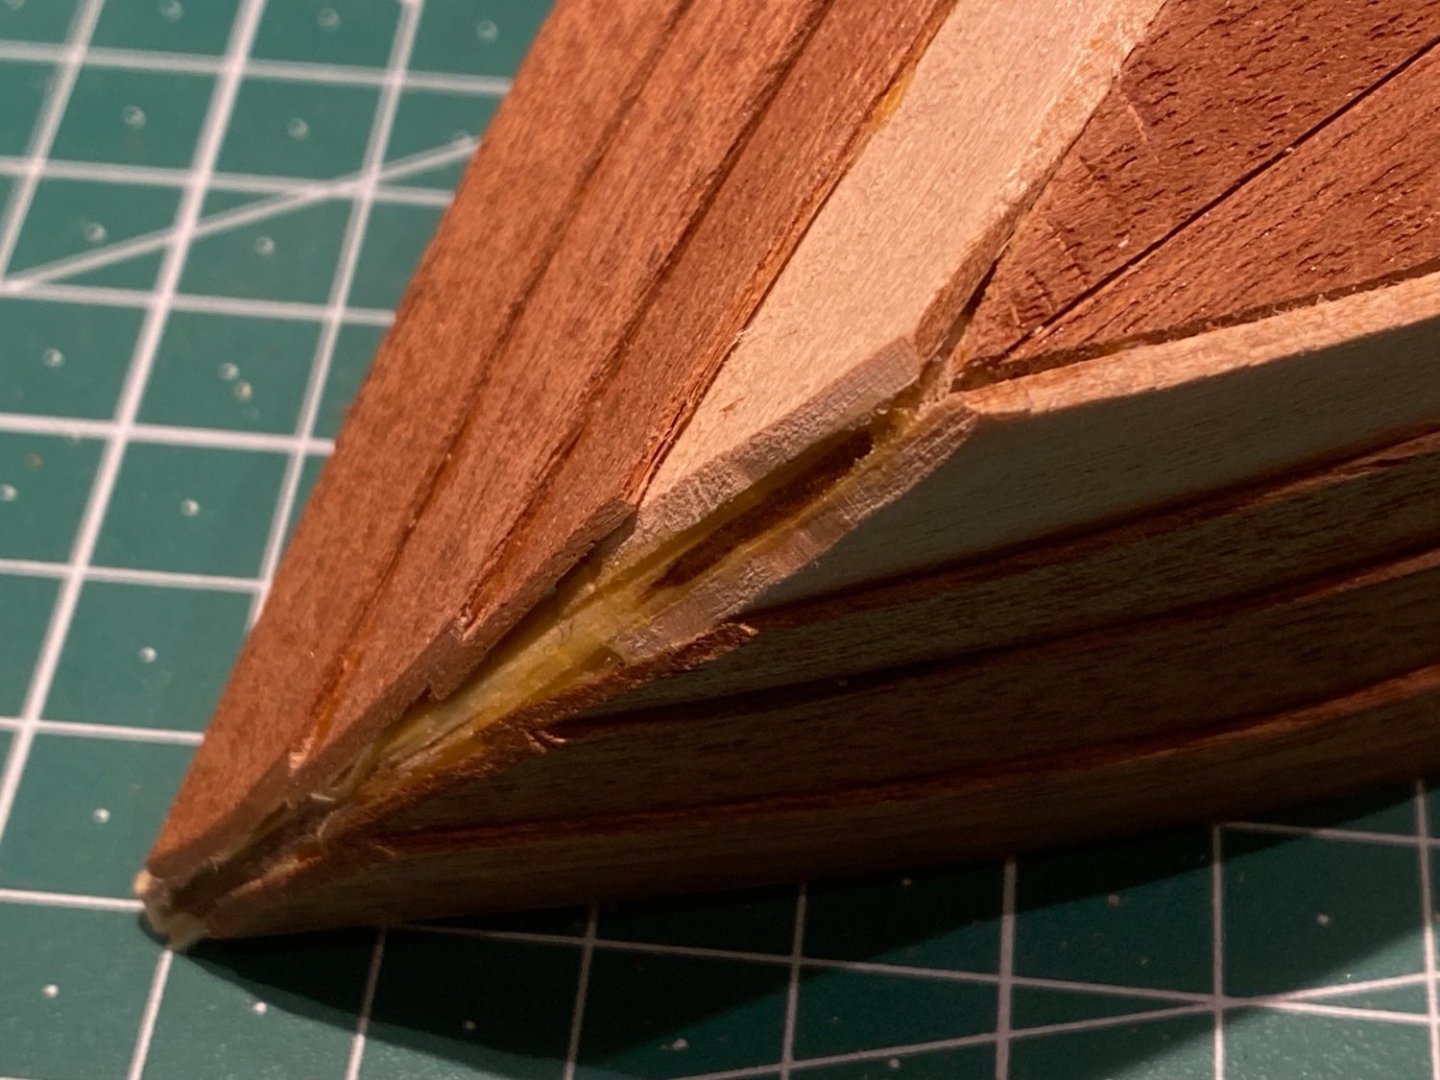
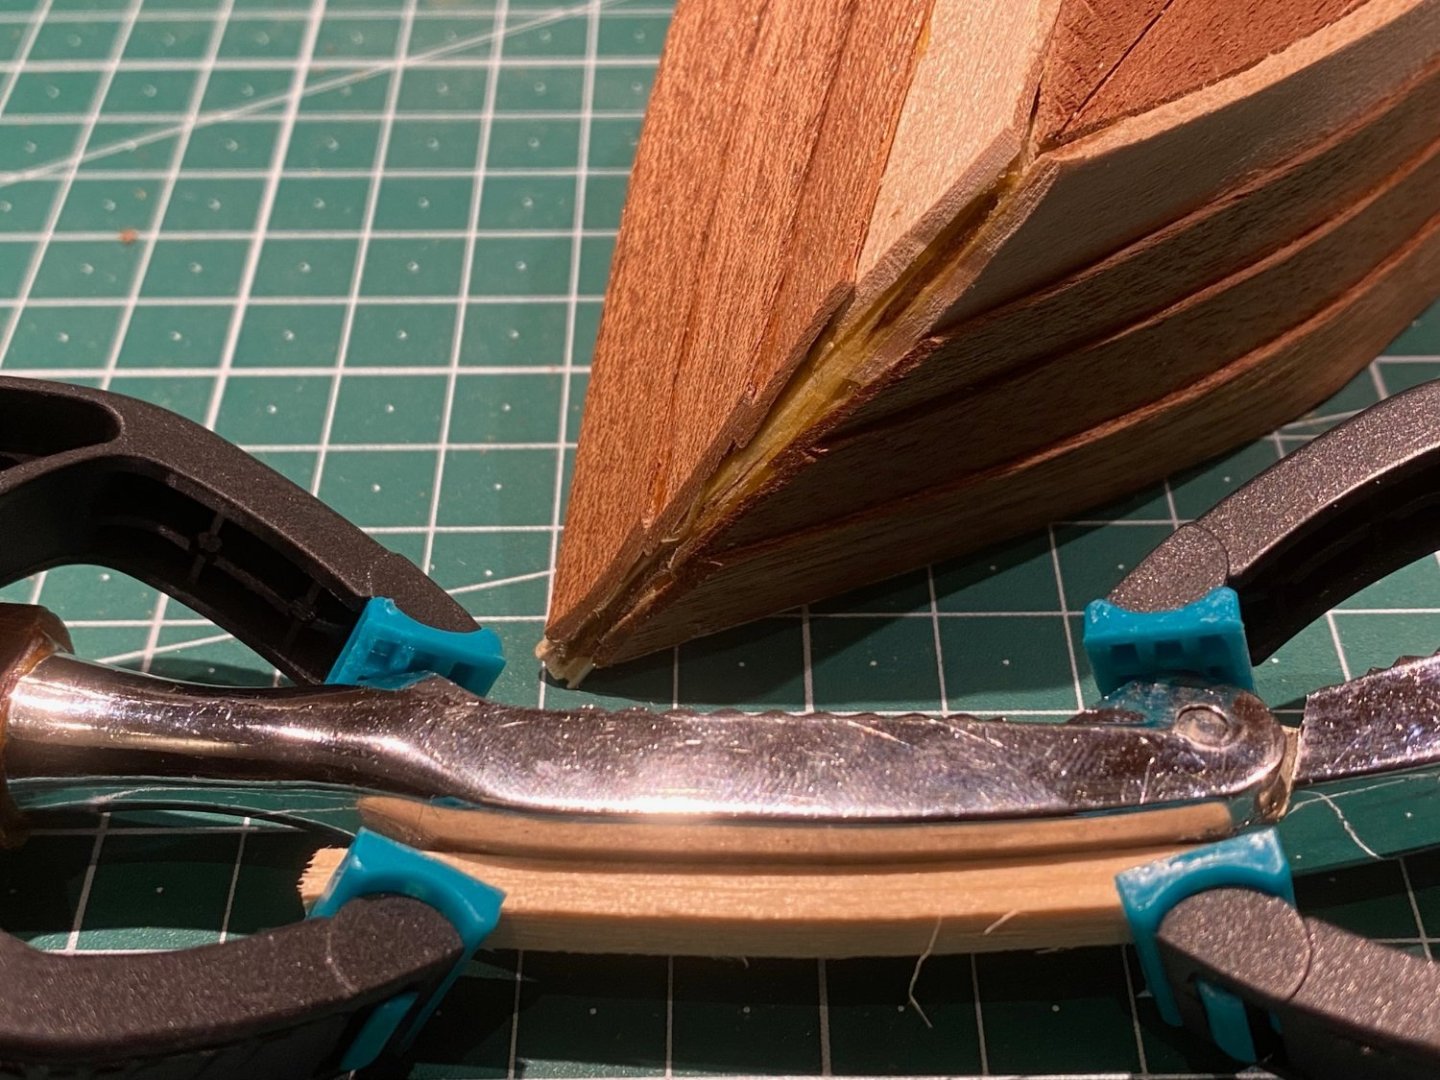
The bow. Not the best part of this model. I sanded flat - as per building instructions, but this is not how it would have been built in real life. Have to see what measures I can take when the stem is on. The stem is being fitted. Had a nutcracker with the right curvature. Boiled the piece and clamped it to the nutcracker. Let it dry, and fitted it. Only a little extra clamping was then required, in an area where clamping is difficult to do without damage.
- 32 replies
-
- 2
-
-
- Saint Malo
- Artesania Latina
- (and 1 more)
-
Painting is slowly getting underway. Off-white inside, with the bottom to be sand yellow and the frames to be burnt umber. My first wood model painting project. Have done old windows (full size), and the patience required for that comes in handy ... 😄
- 32 replies
-
- 3
-
-
- Saint Malo
- Artesania Latina
- (and 1 more)
-
Thank you! I have made a mistake though, on the stem - will cover that in a bit.
-
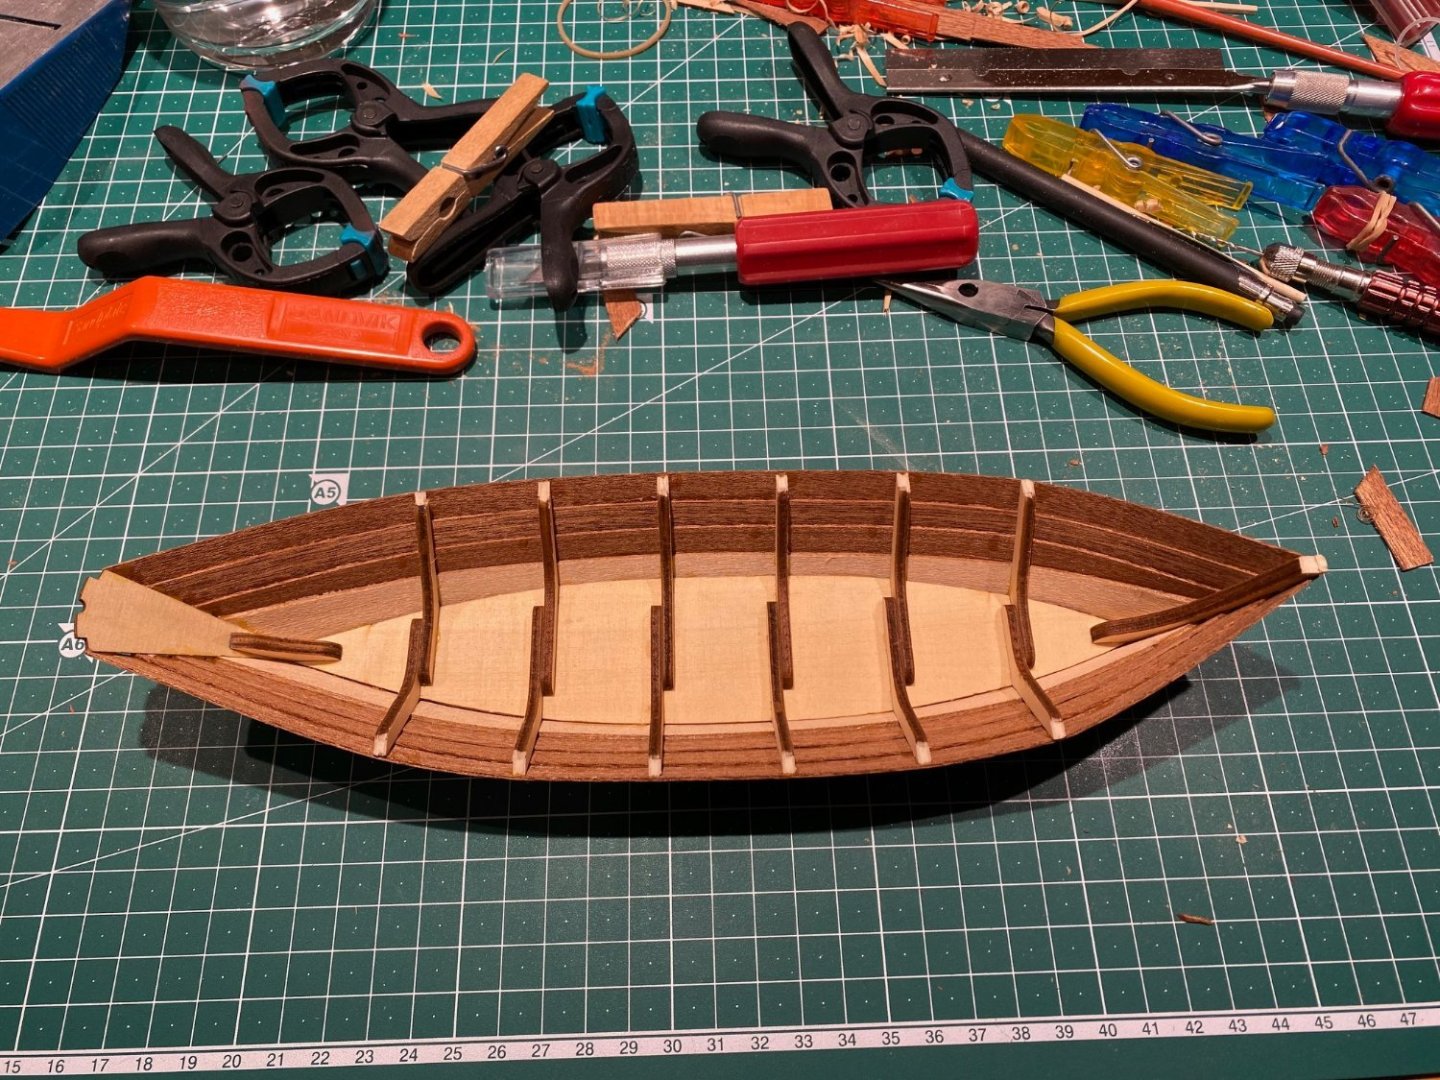
And then with the last plank in place, it is suddenly a boat! Unfinished for sure, but still. 🙂
- 32 replies
-
- 3
-
-
- Saint Malo
- Artesania Latina
- (and 1 more)
-
One question that I've had in mind since the start is; to paint or not to paint? The wood is pretty nice, and as such just a varnish could be nice. On the other hand, in all probability, no dory at that time was ever unpainted. Paint is easy to maintain. Also, I need practice in ship model painting... So, it will be painted. I have a range of Vallejo acrylics, so that is what I'll use.
- 32 replies
-
- 3
-
-
- Saint Malo
- Artesania Latina
- (and 1 more)
-
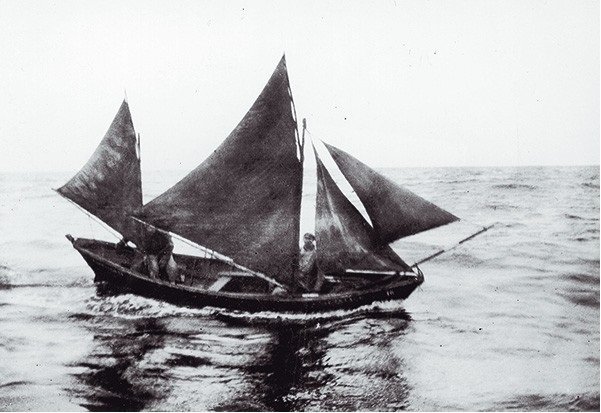
Sometimes, when one investigates enough - one finds. The French did sometimes rig their Dorys as the model plan is made - although one sail is missing in the kit. The rig was up to the owner, and a variety of rigs were used.


- 32 replies
-
- 4
-
-
- Saint Malo
- Artesania Latina
- (and 1 more)