HOLIDAY DONATION DRIVE - SUPPORT MSW - DO YOUR PART TO KEEP THIS GREAT FORUM GOING! (Only 51 donations so far out of 49,000 members - C'mon guys!)
×


EricWiberg
-
Posts
204 -
Joined
-
Last visited
Content Type
Profiles
Forums
Gallery
Events
Everything posted by EricWiberg
-
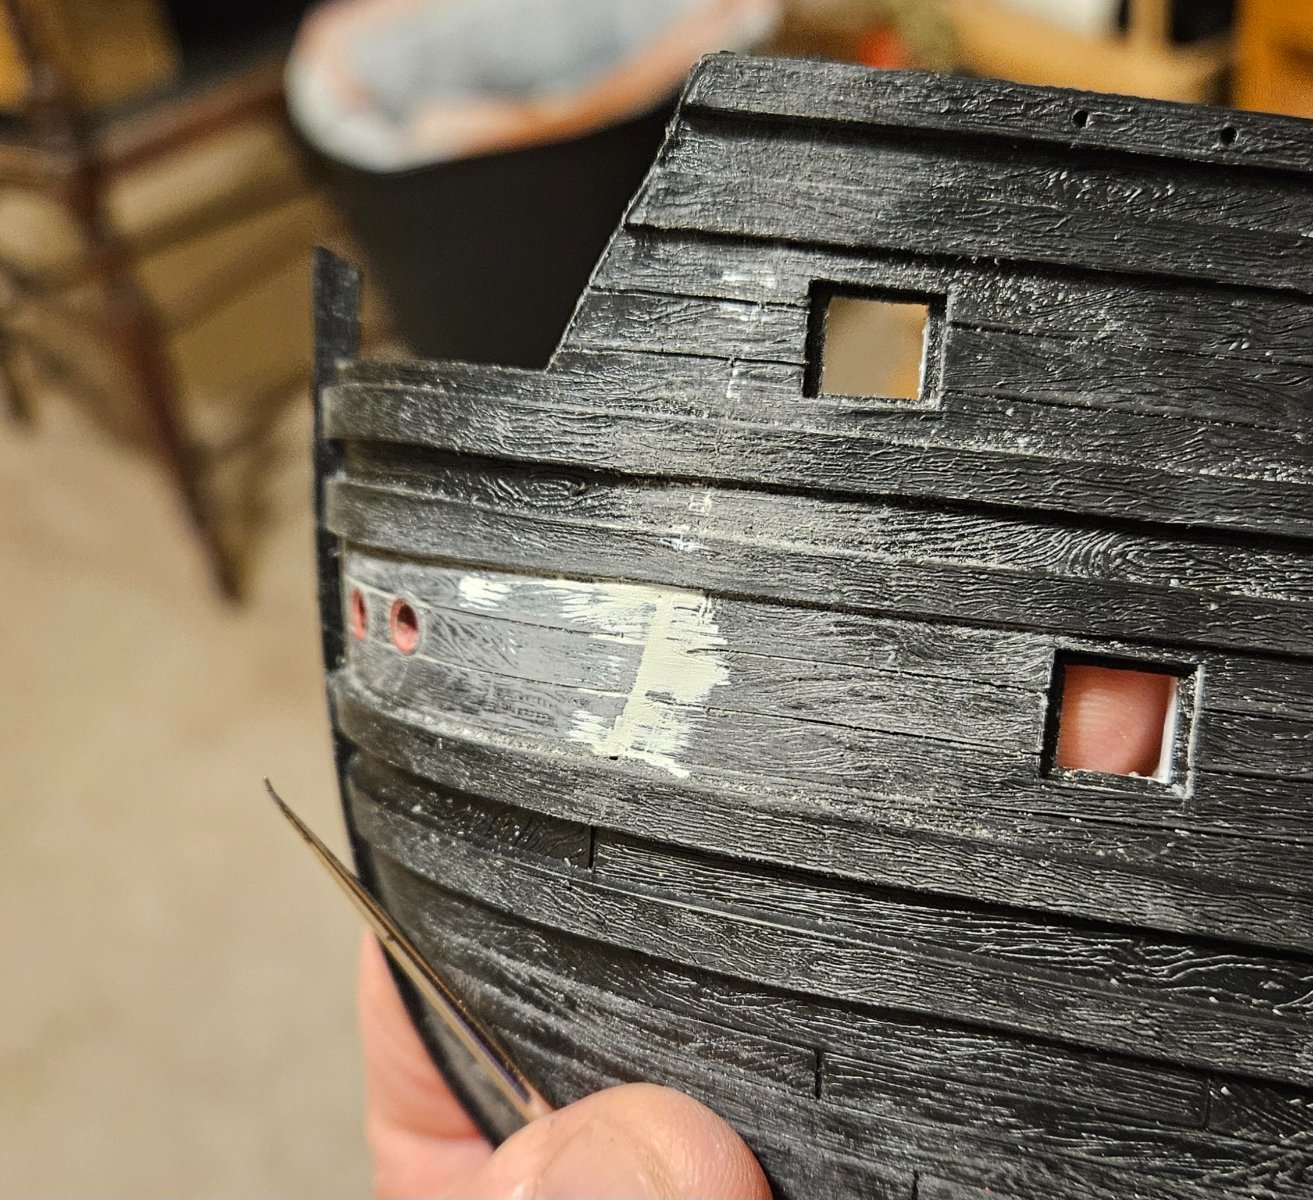
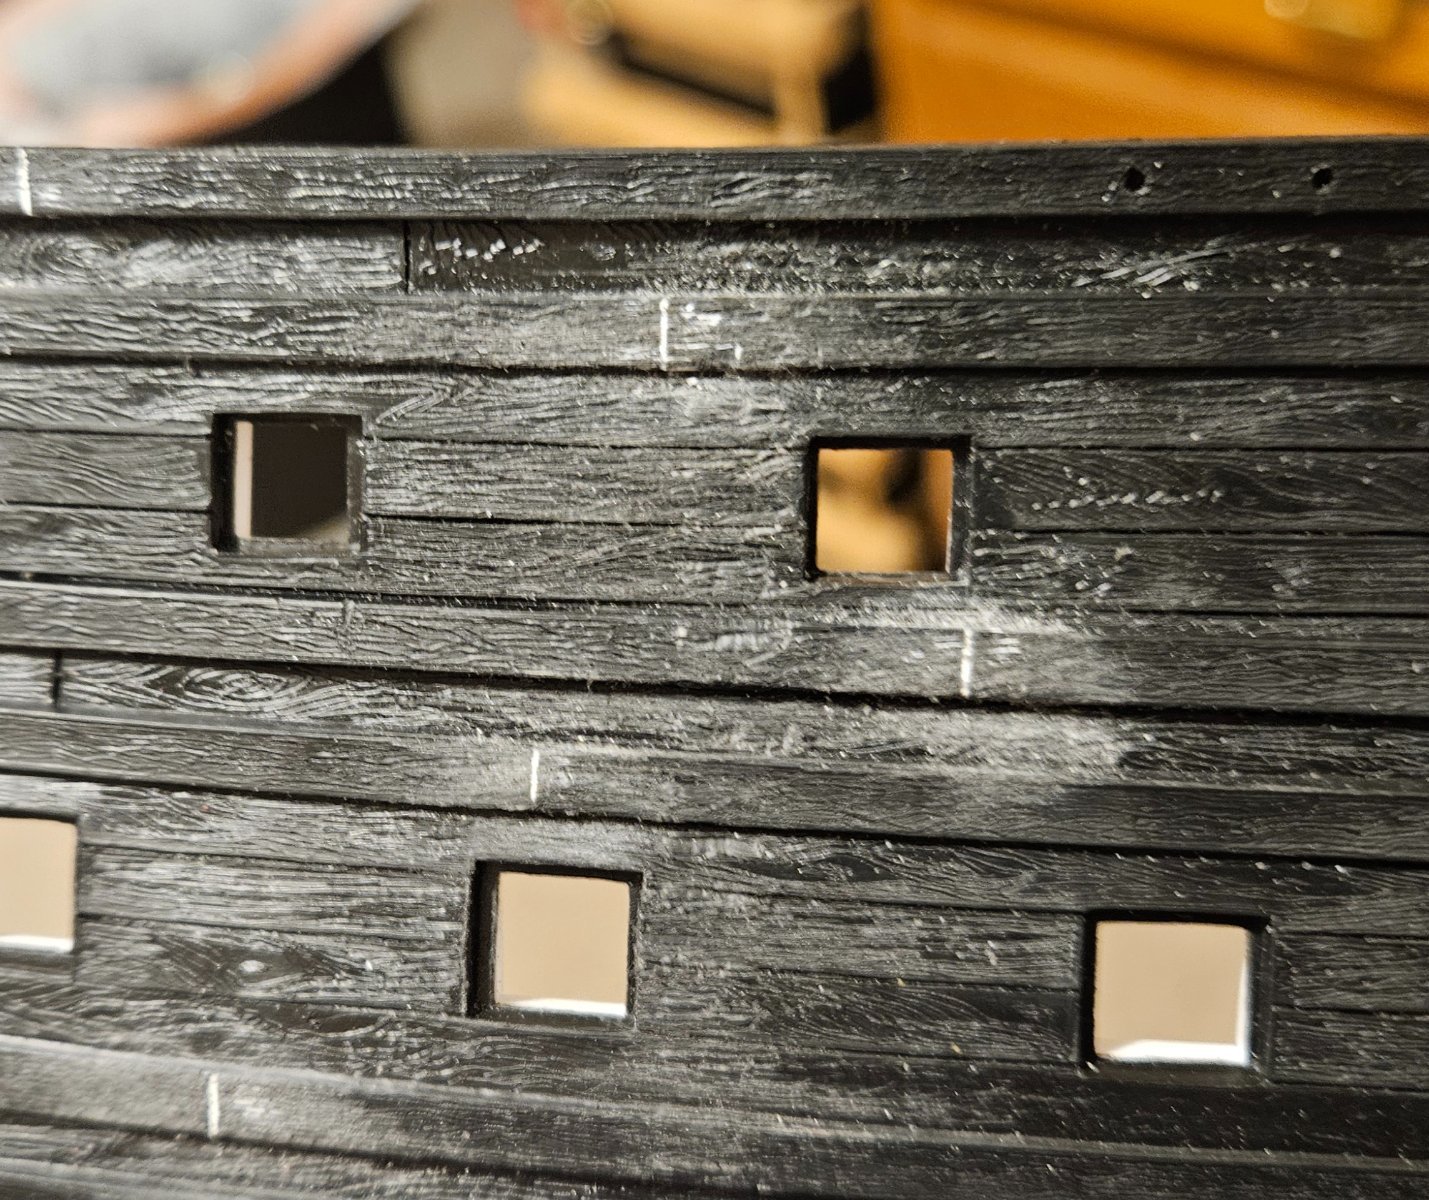
After my last post on Jan 17... I stuggled for a week. Did I still want to push quickly through this 45 year old model by experimenting with a lot of things to hasten my skill development for the next model (and keep using a lot of Tamiya putty as I experimented), or... did I want to to see how beautiful this kit could be. I spent a week looking doing a deep dive into the countless SR build logs of various sizes and kits and materials. Marc at Hubac's Historian has been very helpful - thank you! I did nothing for a week... until an EBay add popped up on my phone... an SR hull for $29 (gee, it was almost like they were tracking what I was looking at for a week). When I hit the "purchase" button, my path forward was set! So the new hull arrived four days ago on Thursday. I have 1) sanded the hull, 2) thickened the gun ports, 3) installed the hawse hull pieces flush, 4) cut off the hull ladders, and 5) am almost done with the the scarf joints. I need to drill gun port lid lanyard holes, make the fenders, add my ladder steps, and... I am now confident enough to try and create hunting ports. Regarding hunting ports, In some of the VDV drawings it appears that the hunting port might be pushed forward a bit further, in other words with not exactly the same spacing as the other gun ports? Or is that a perception/parallax issue? So in another week, I think I will be right back where I was on Jan 17... but with a much better hull ready to paint and a completely different goal for this kit.

- 396 replies
-
- 3
-

-
- soleil royal
- Heller
- (and 1 more)
-
Dafi, thank you for the observation on friction; I will make sure to have the leather tubes pointing down. Looking at photos of the HMS Victory, I think the leather tube was a bit flexible? I say this because on pictures where the gun port is raised and the lanyards are in a horizontal position, the leather tubes stick out almost straight to the side; when the gun port is lowered and the rope is almost vertical, the leather tubes point downward. Whether the weatherproof leather tube for gun port lid lanyards was even invented at the time of the Soleil Royal, as you say, who knows? But they must have have made some attempts to weatherproof the gun port lid lanyard hole, and I just can't imagine that they would let a lanyard slide back and forth over wooden edges without some kind of tube in the hull wall for the rope to pass through and reduce friction and wear/tear. But, I have almost all of the discs in place, so you could say I am committed to the idea and can't skip it! I do find the question of one vs two gun port lid lanyards interesting, just from the point if there is ONE pulley system internally to raise/lower the lid, there is no mechanical advantage to have two lanyards vs one lanyard. And I suspect that since a first rate ship was about the most complicated mechanism that mankind could design at the time, the people operating it would naturally be looking for ways to improve efficiency, to make things simpler and more reliable for them to use. Thank you for the links - it is very interesting to see what other people are doing!
- 396 replies
-
- 3
-
-
- soleil royal
- Heller
- (and 1 more)
-
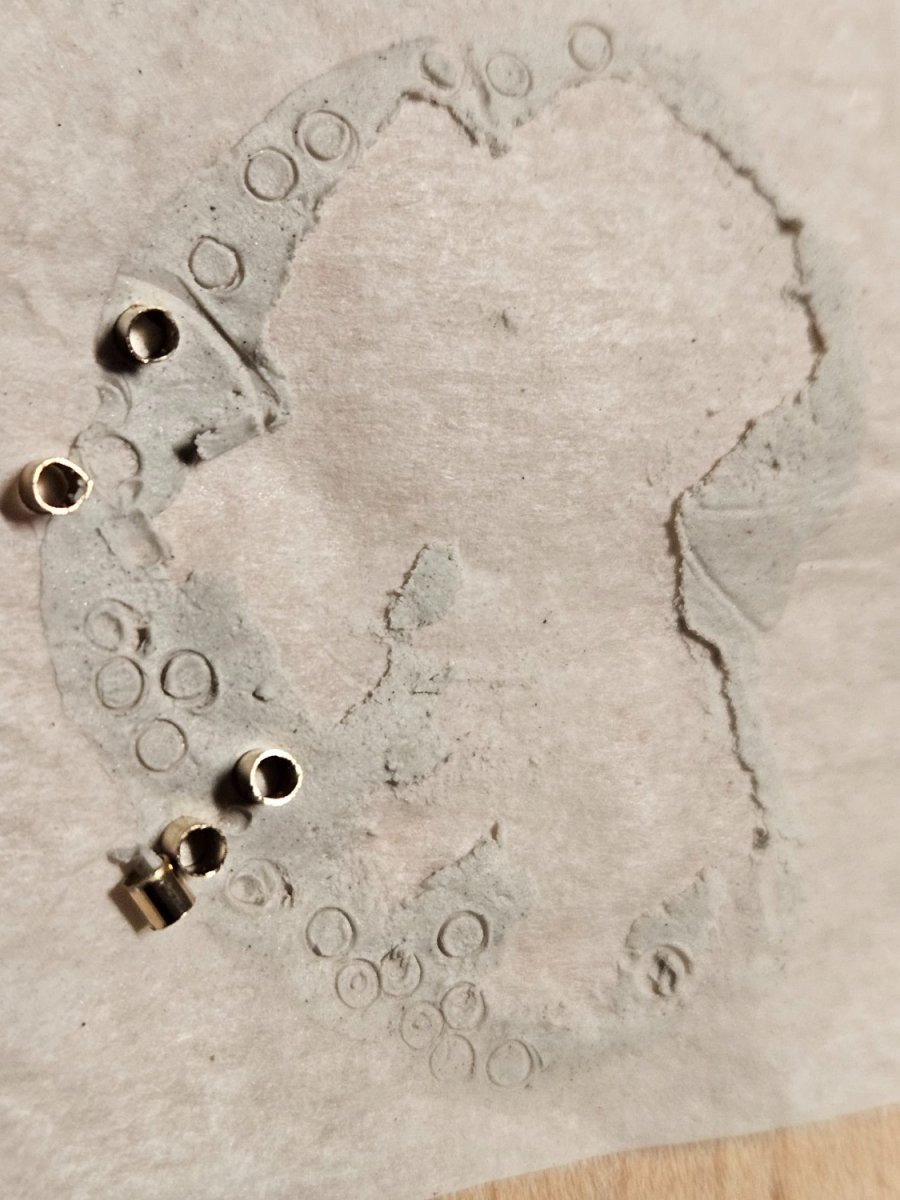
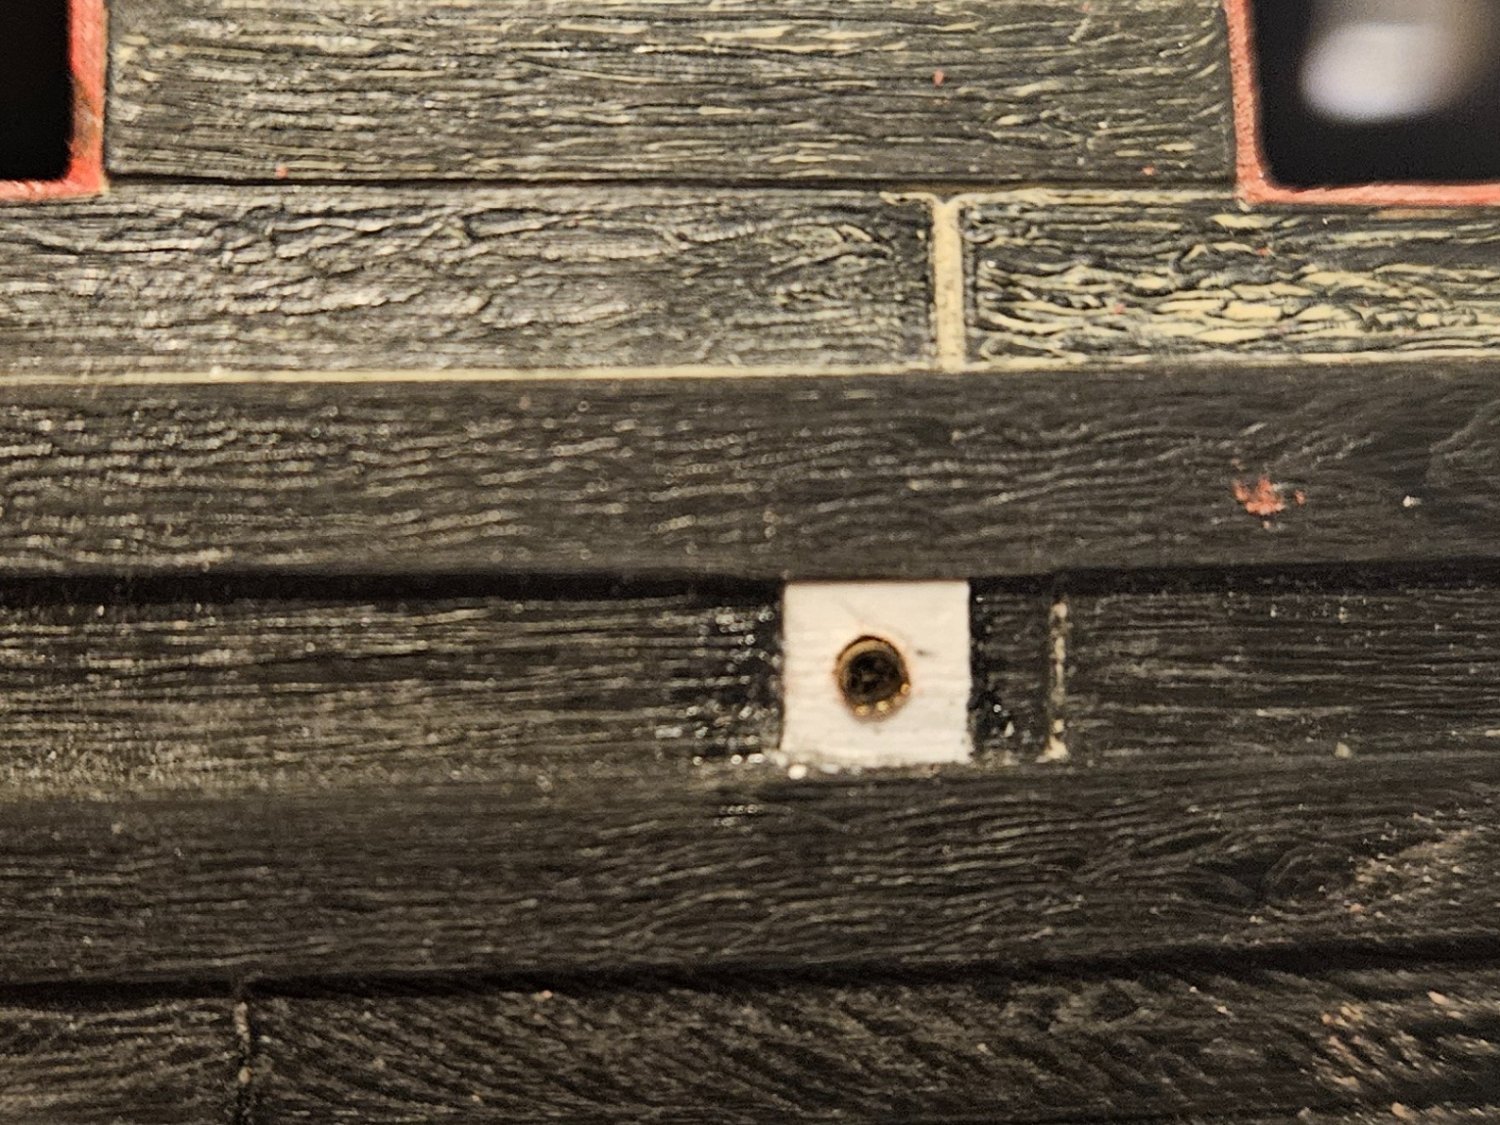
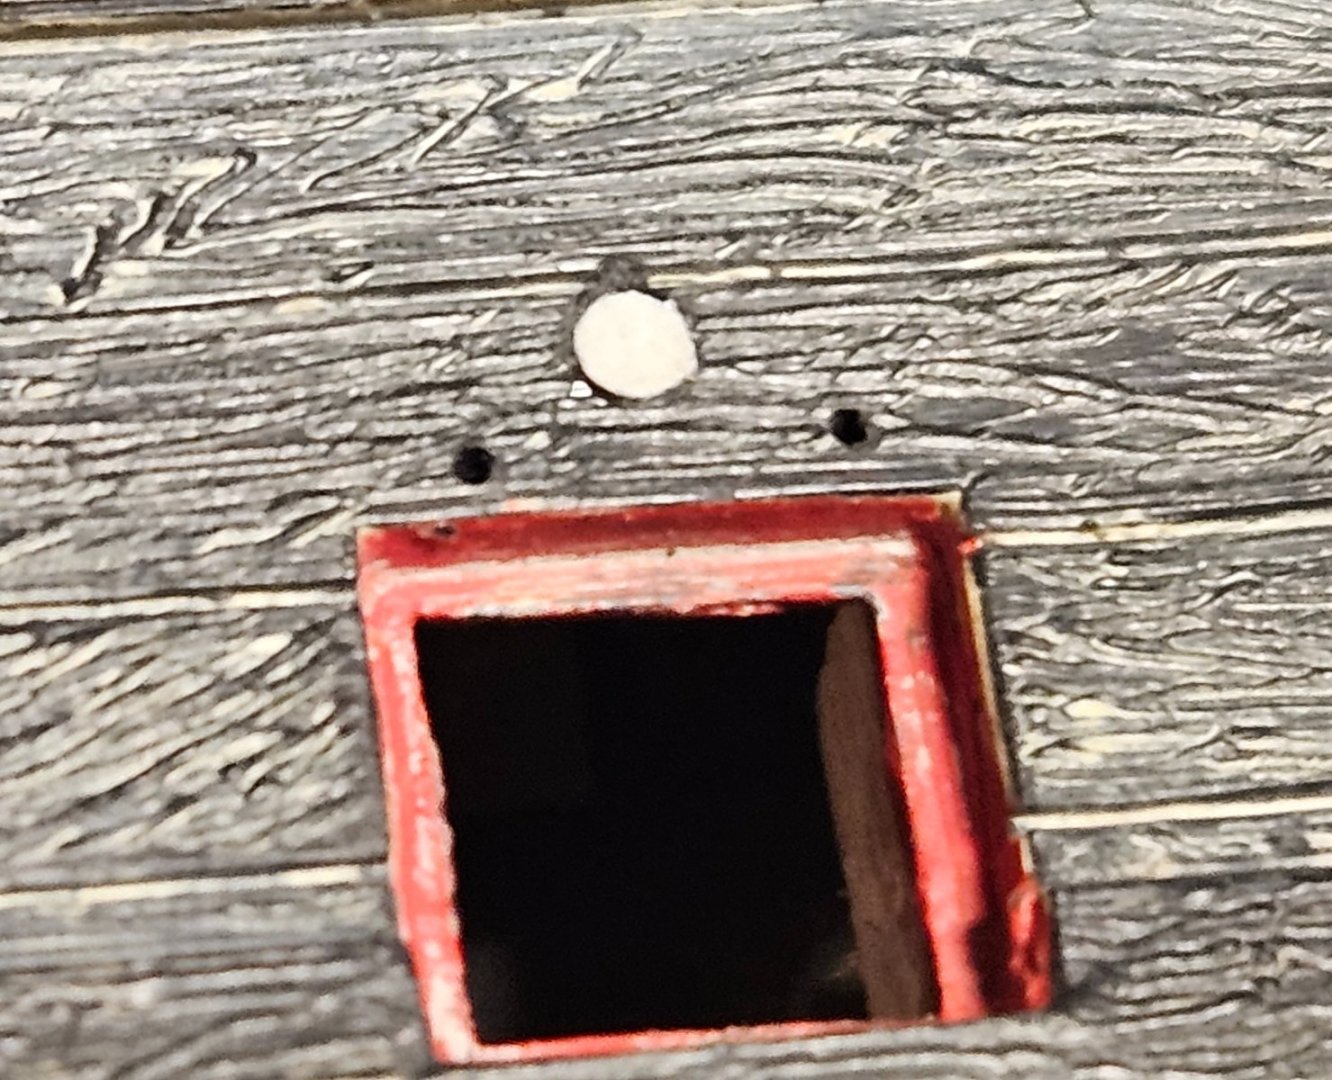
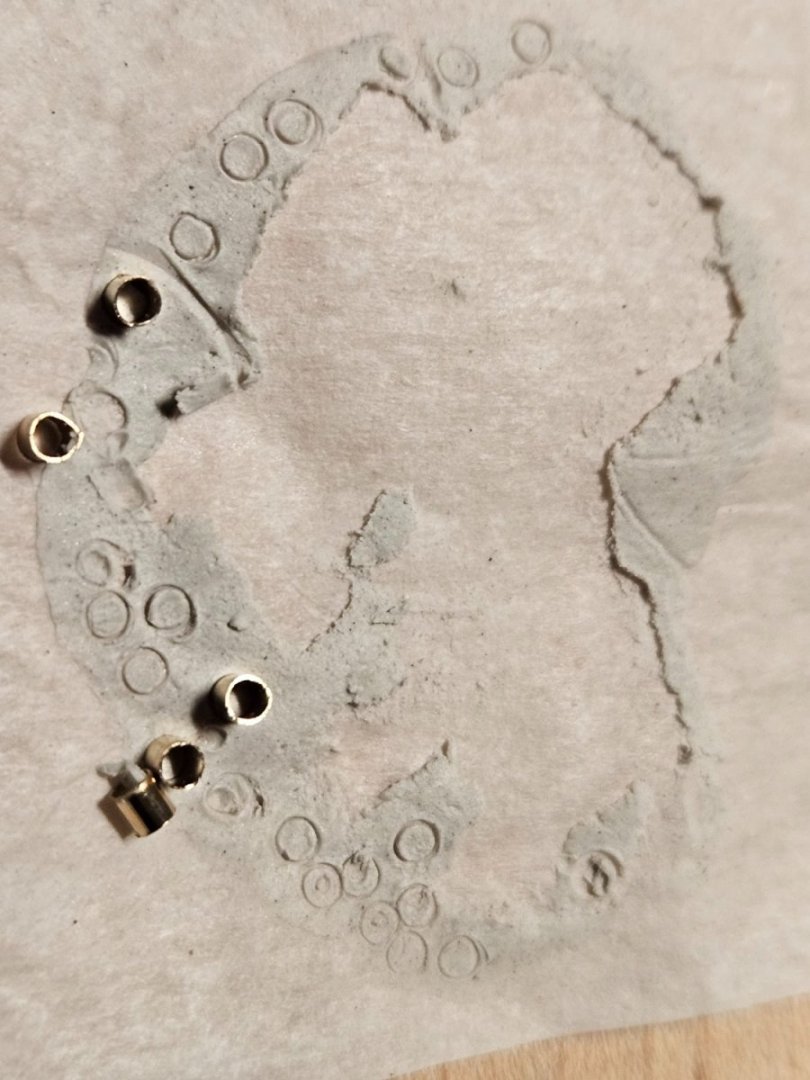
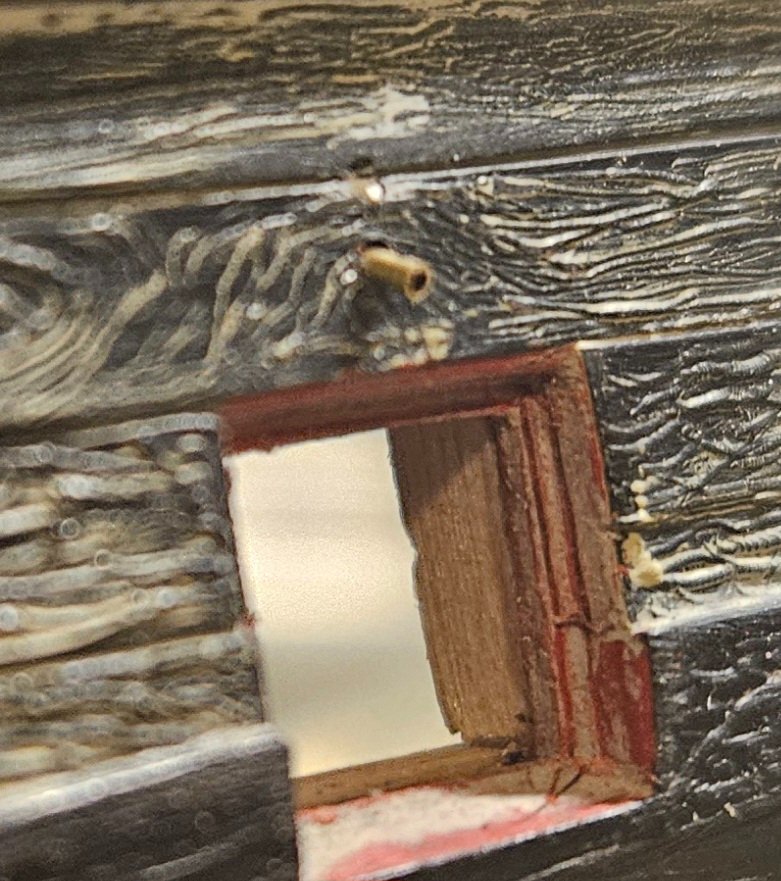
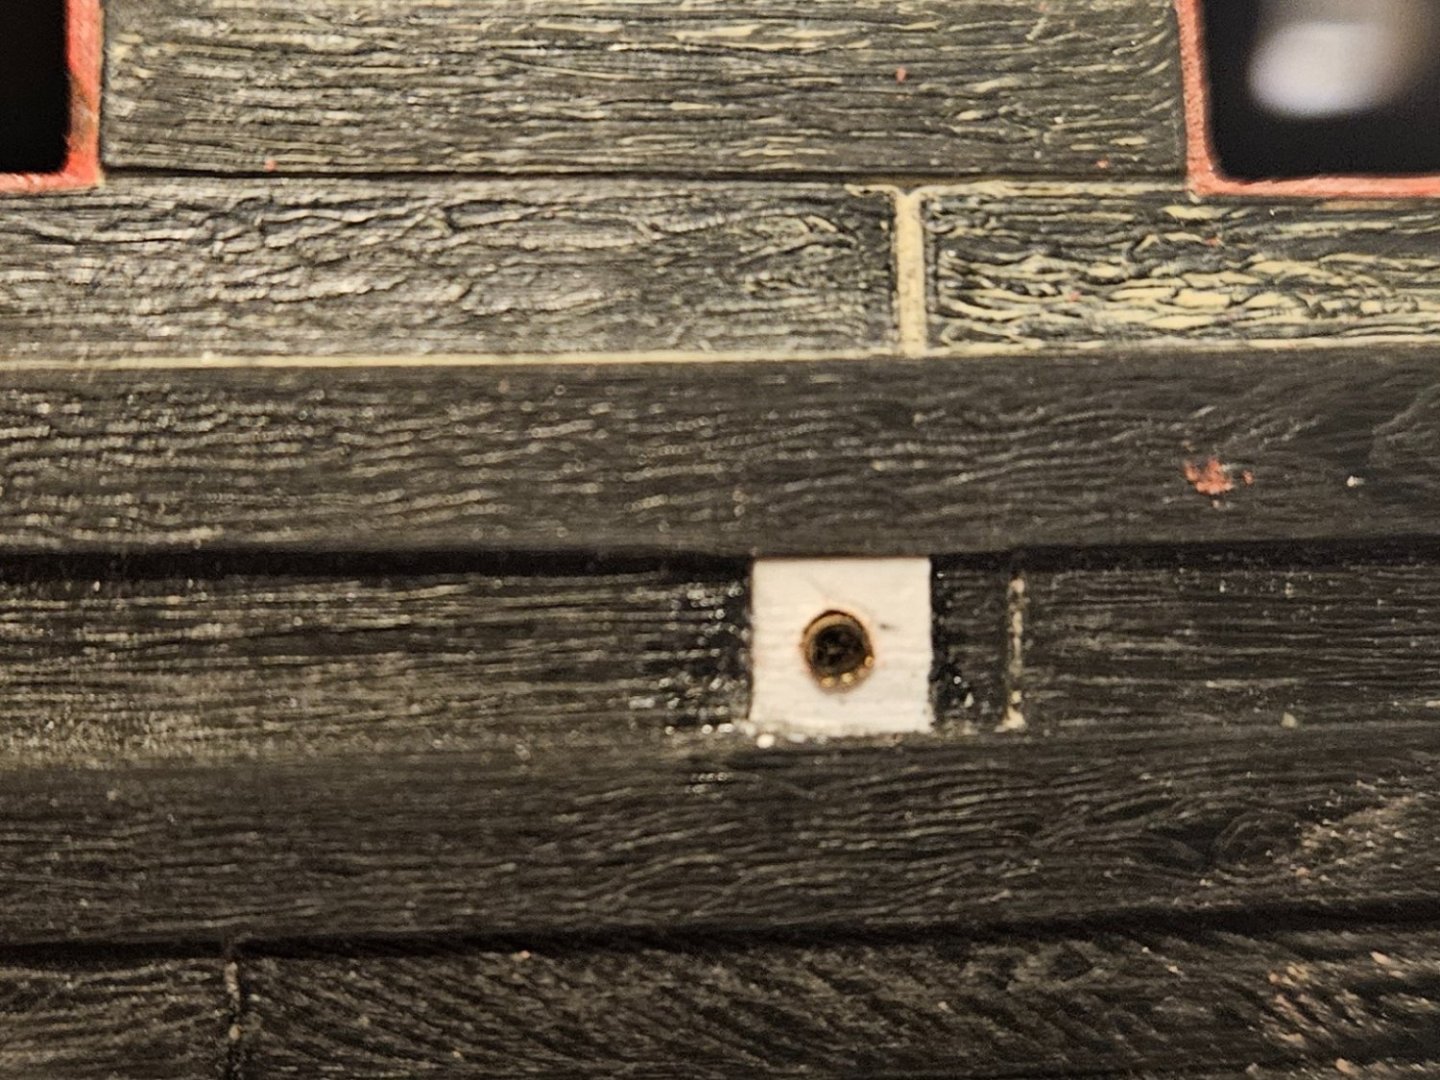
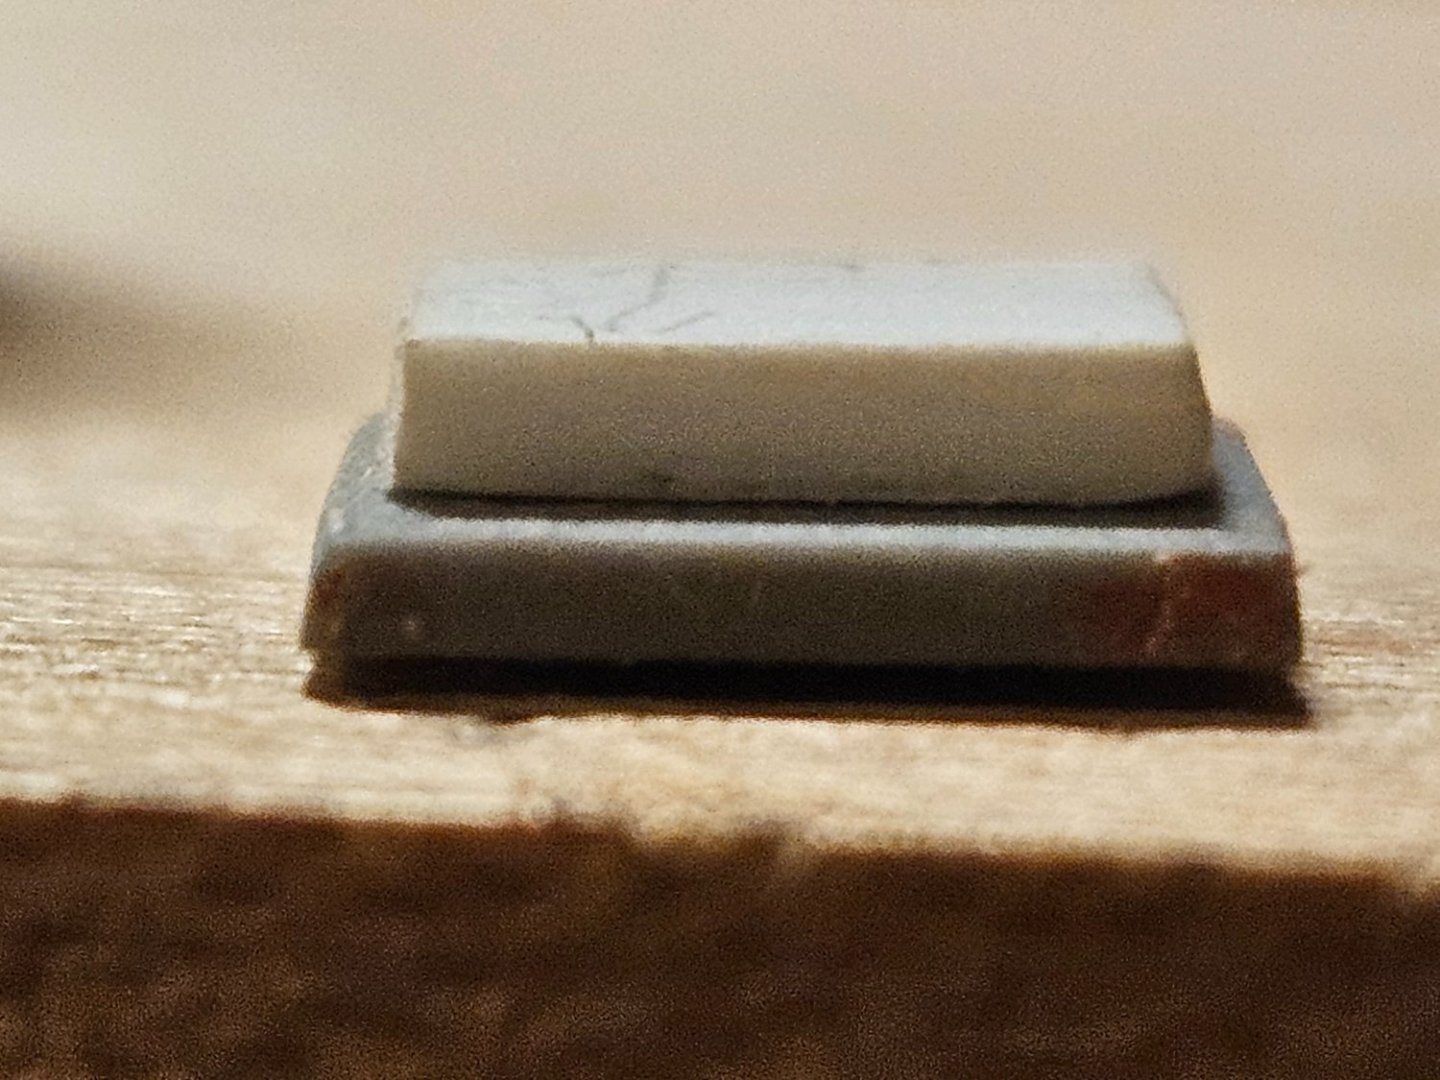
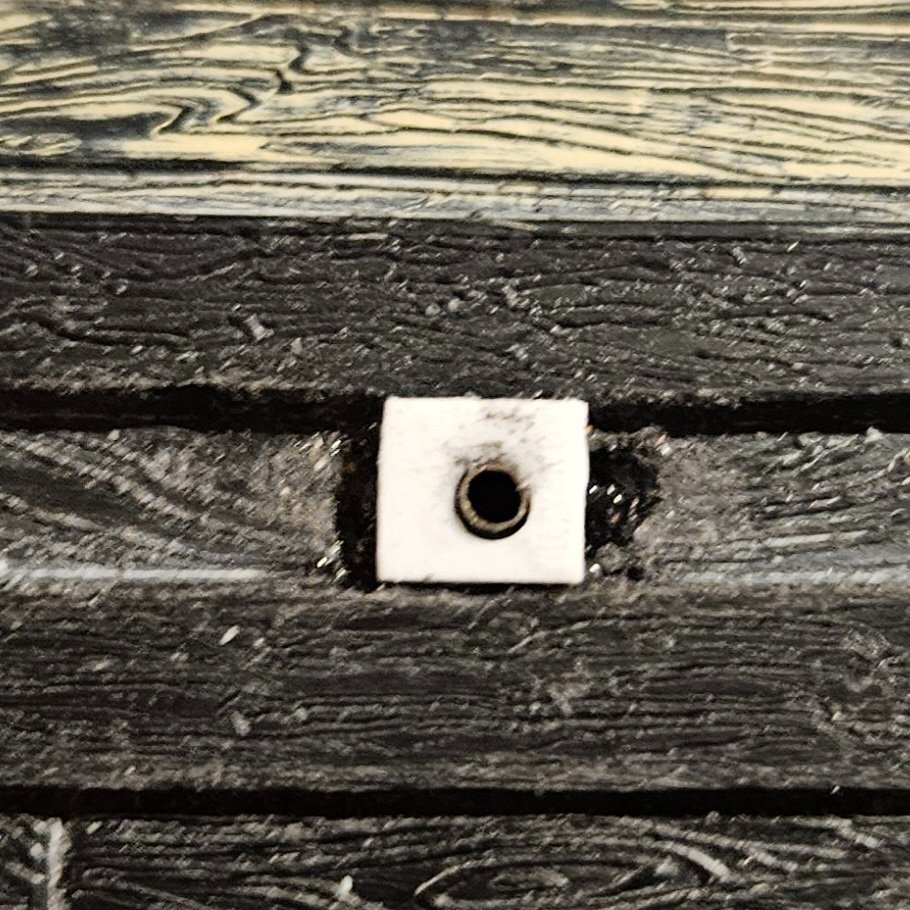
After much experimentation, I have found a method that might make the waterproofing leather disc/tube that seal the hole in the hull where the gun port lid lanyard runs through. I tried lots of substrates, but rolling out a very thin sheet of Apoxie Scuplt and then "stamping" 2mm circles with a brass tube seems to work the best (compared to foil, wood, paper, plastic, you name it). However, I wanted the disc flush with the hull as in the HMS Victory pictures that I have seen... so I got a tiny, bunt grinding bit on my Dremel and made a very slight concave dish in the hull. I then glued the resin disc into the hole, let it dry, and... very easy to push my leather tube through. I wont bend the tube down until actual installl as it will need to have a lanyard through it. After a lengthy social media search of how the leather disc/tube was colored, I can NOT find any pictures of anything but the actual HMS Victory, or models of the HMS Victory or a few other warships of that period that show the leather disc/tube, as other models run the lanyard through a hole in the hull. The leather disc/tube is blackish on the HMS Victory but sits on a black painted portion of the ship. On the Soleil Royal, the disc/tube combinations all reside on a section of hull that will be painted light brown, soooooooo..... I think I have some license to do my own interpretation. And I think I will leave the leather disc/tube combination a darkish brown on my Soleil Royal... they will stand out, but I am not sure they would have painted them. Of course, if anyone has any thoughts, I am all ears! So I think I am ready to start painting the hull, as think the leather disc should be applied after hull painting... and then the tube inserted and bent after a 6" length of lanyard is in place for the future gun port lids.

- 396 replies
-
- 4
-
-
- soleil royal
- Heller
- (and 1 more)
-
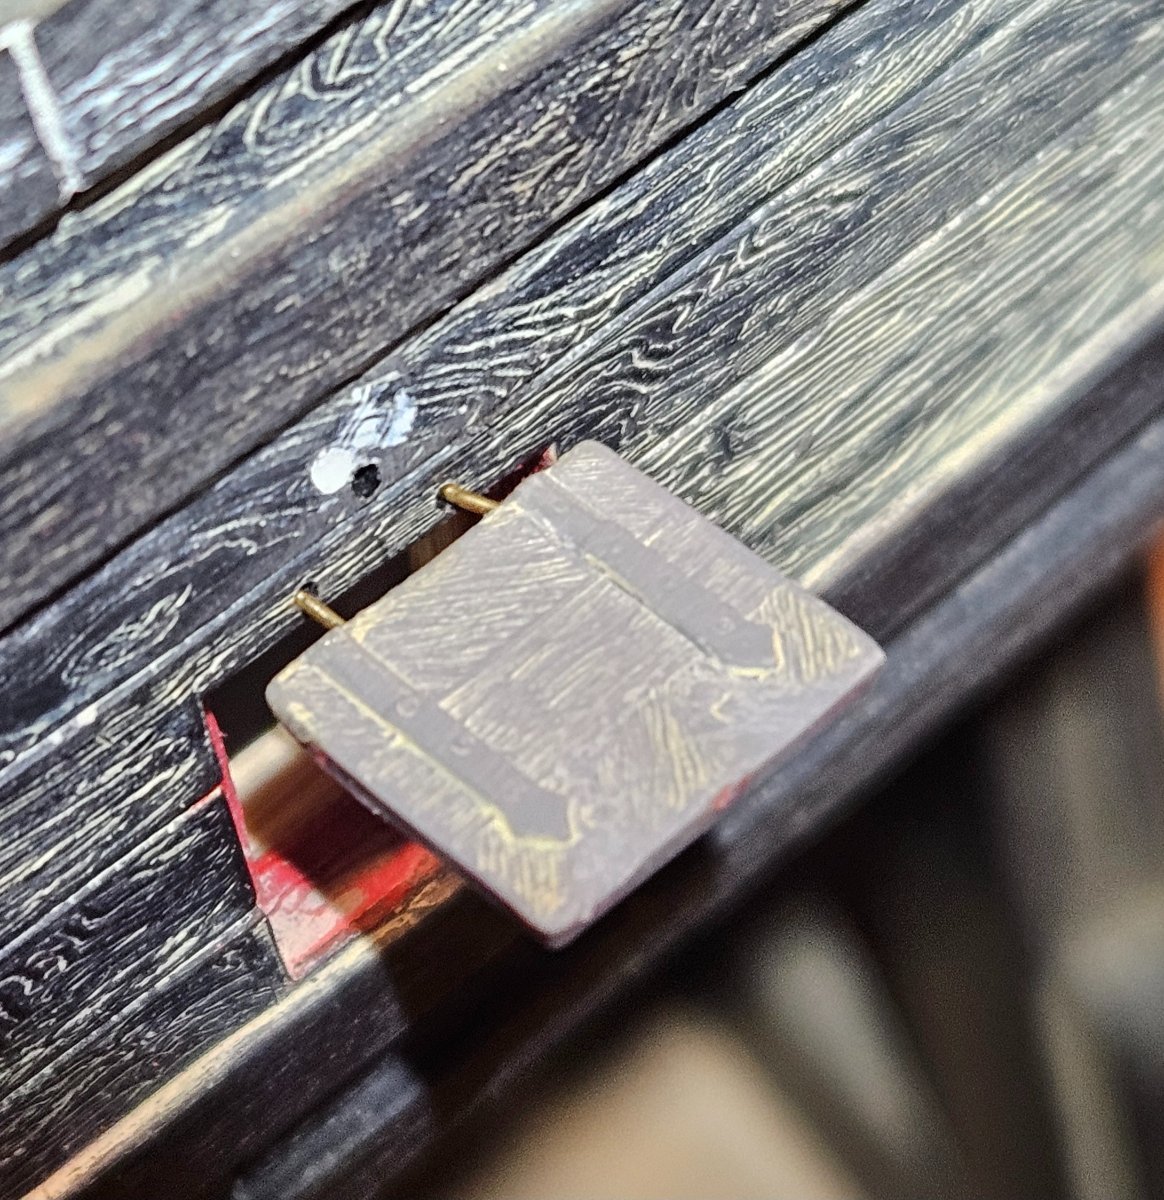
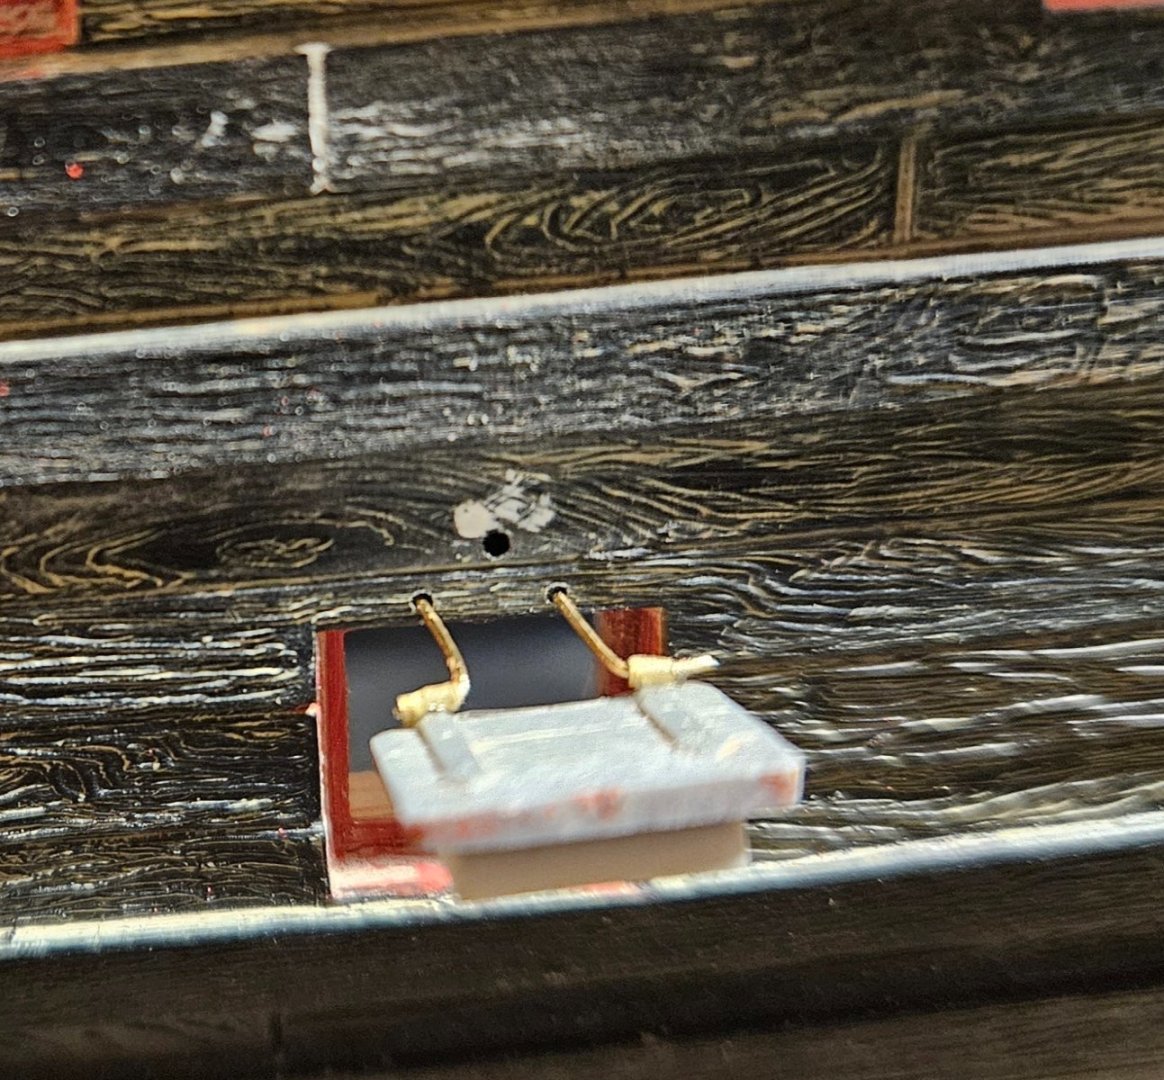
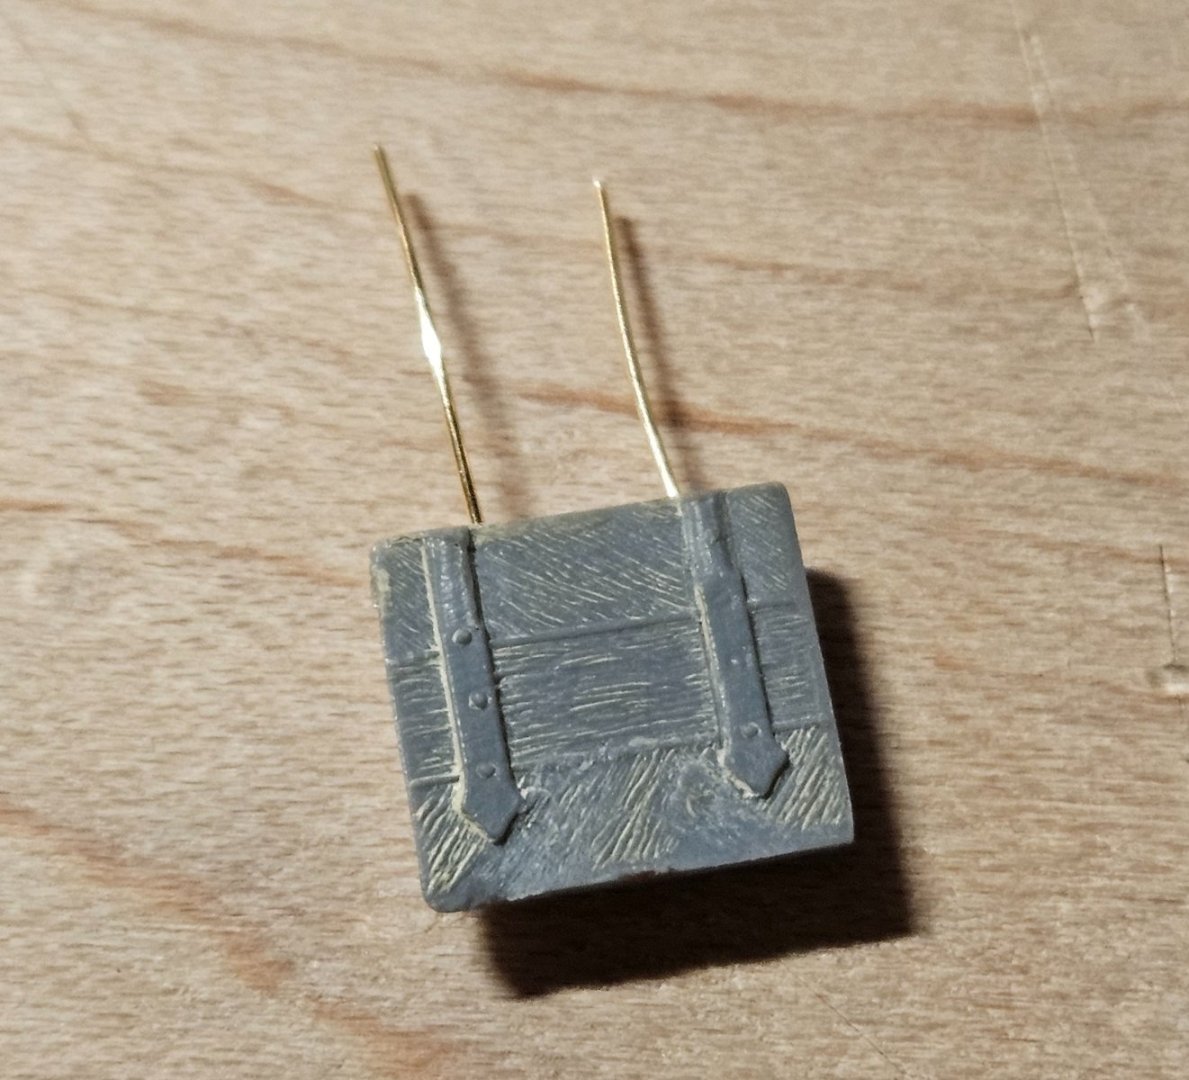
The bitter cold is still keeping me priming the hull and other pieces (I have to spray in my garage with the doors open as I don't have a hood!). So working on other things, like settling on a method to attach gun port lids, using some unblackened brass pieces to experiment. I first tried glueing on 1mm wide 0.5mm ID brass tubes to act as the hinge, and then placing an "L-shaped" 28 gauge wire in each hinge and pushing into the hull. It worked, and I only had to drill two total holes for the gun port lid (into the hull), but it placed a lot of stress on the tiny hinges. I wasn't satisfied as it was too fragile. I then tried what Dafi did, and that was much better (shocking, right?). This method requires four holes for each lid (two in the hull and two in the lid). However, it was much easier to insert the lid into place, and the hinges (not added to this lid yet) are not involved in the anchoring process. It will also be very easy to make further adjustments before affixing into into a final position. Finally, I have not found a suitable material or method to duplicate the circular patch around the leather waterproof tube for the gun lanyard. I need something paper thin and 2mm wide with a 0.7mm hole in the middle. Polystyrene, wood, foil, paper, etc... no go. I then rolled out a very thin layer of Apoxie Sculpt and "stamped" it with a 2mm ID brass tube. This just might work, but I will let it dry for 24 hours first.

- 396 replies
-
- 4
-
-
- soleil royal
- Heller
- (and 1 more)
-
Henry, I immediately tried that! And if the next 119 attempts work as easily as this one did... you saved me many hours and curse words!
- 396 replies
-
- 3
-
-
- soleil royal
- Heller
- (and 1 more)
-
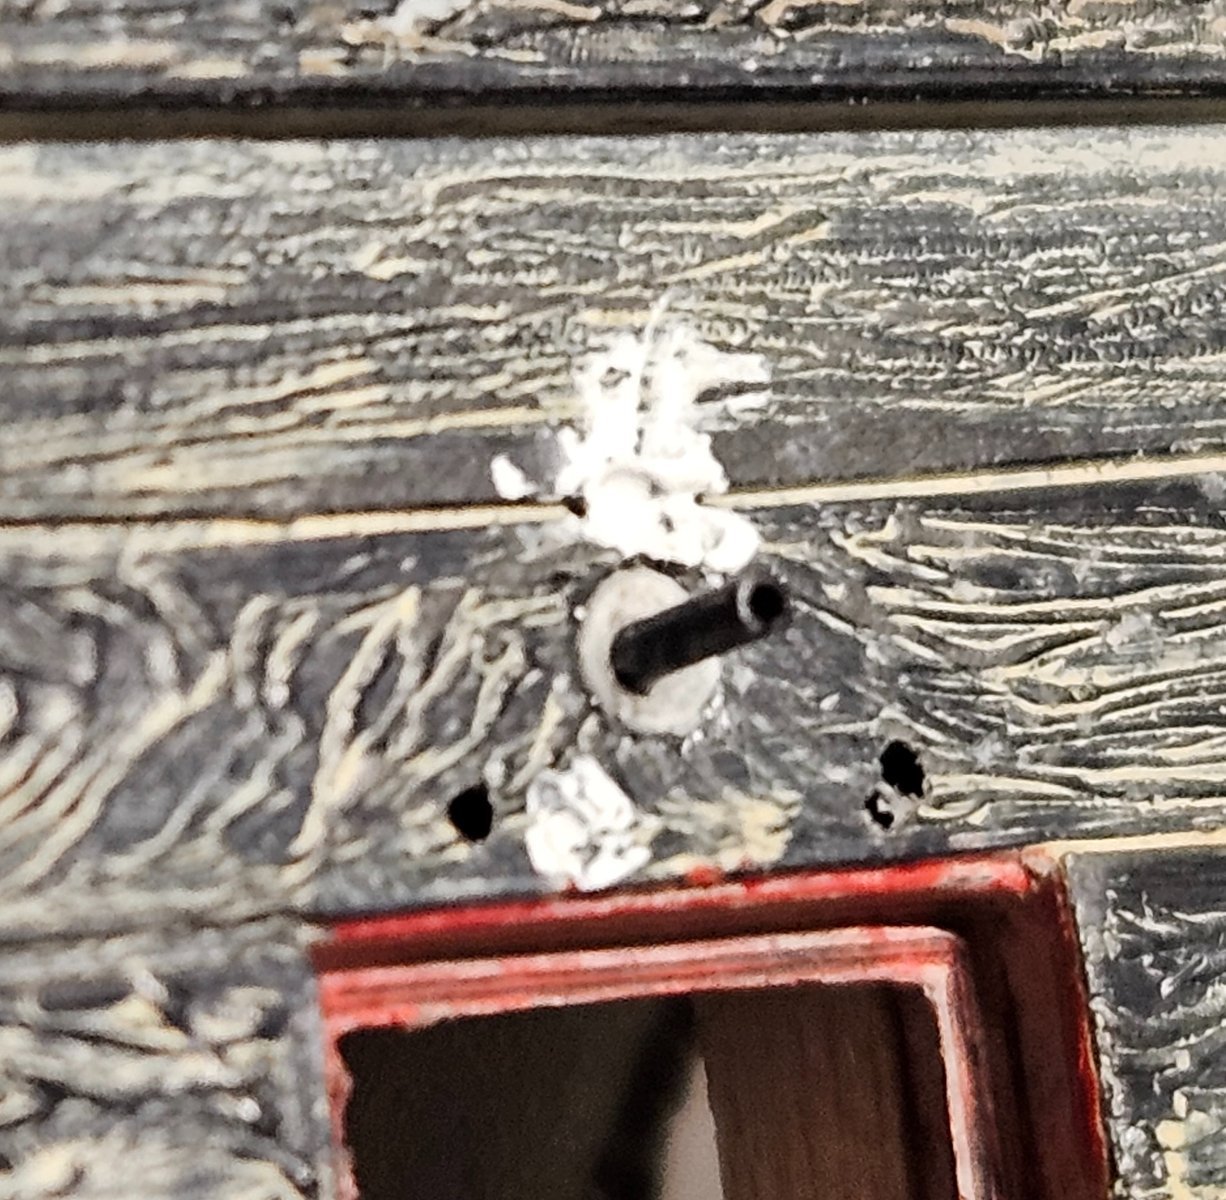
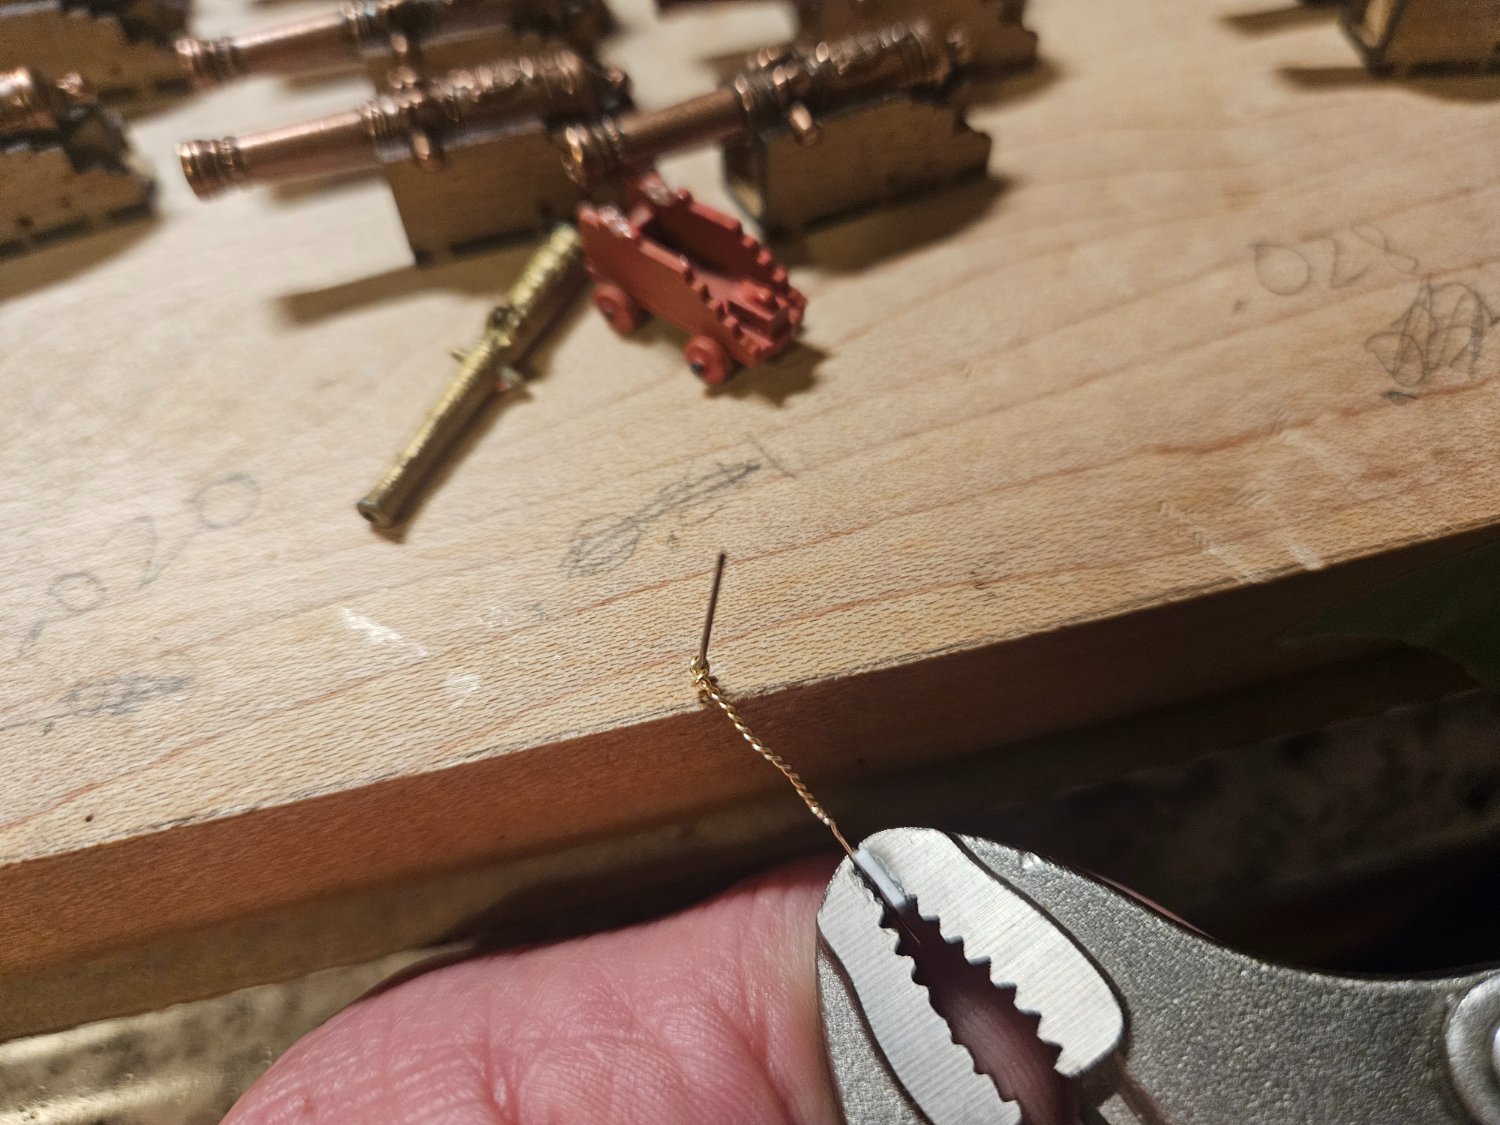
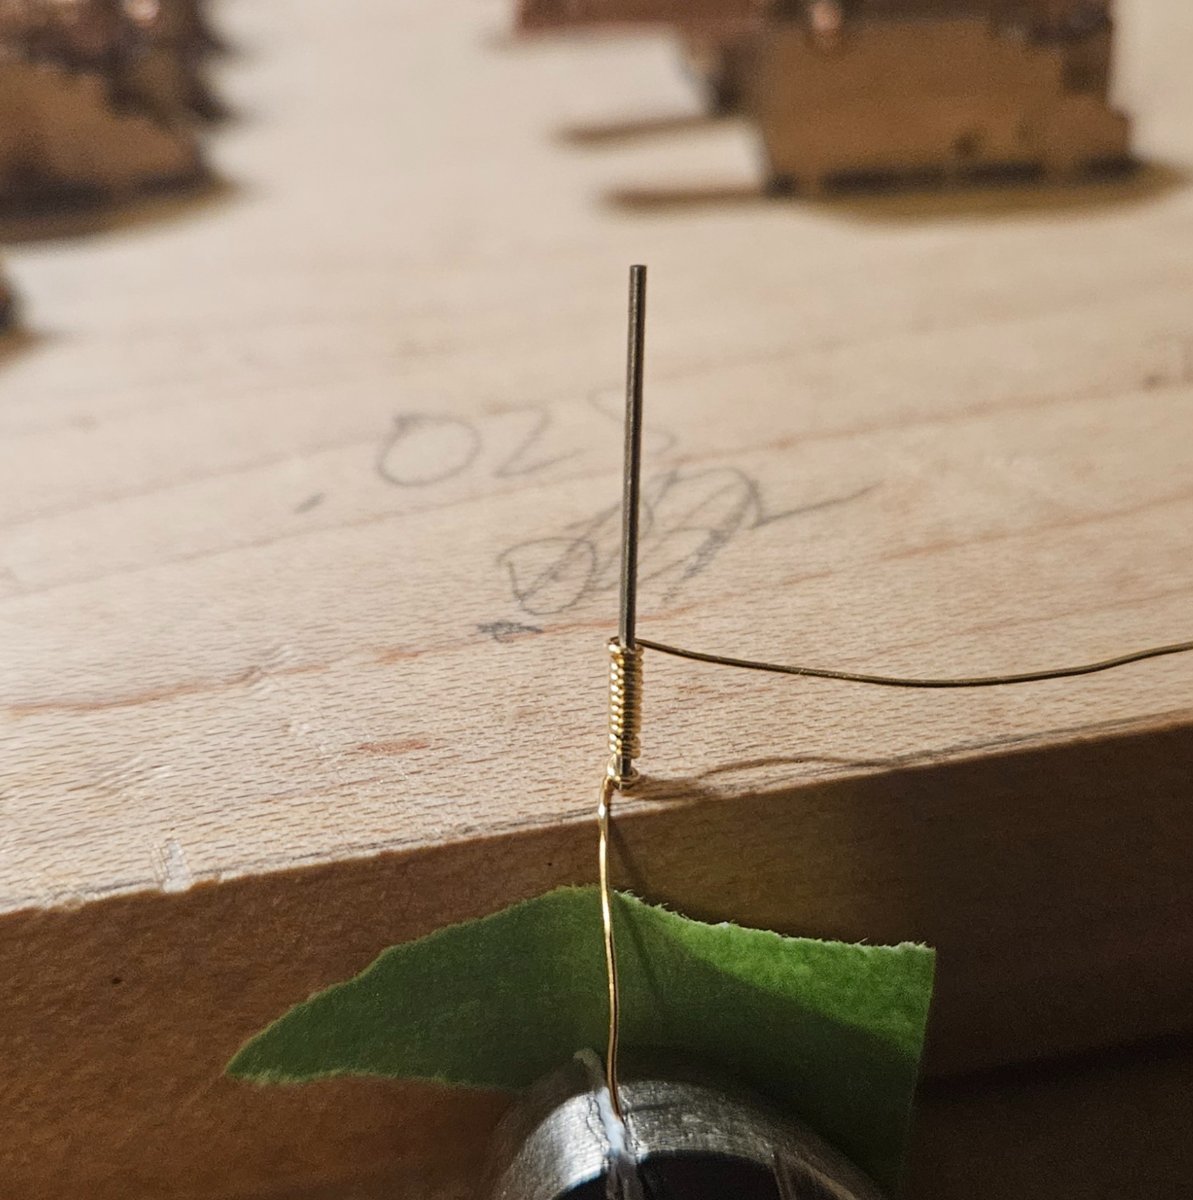
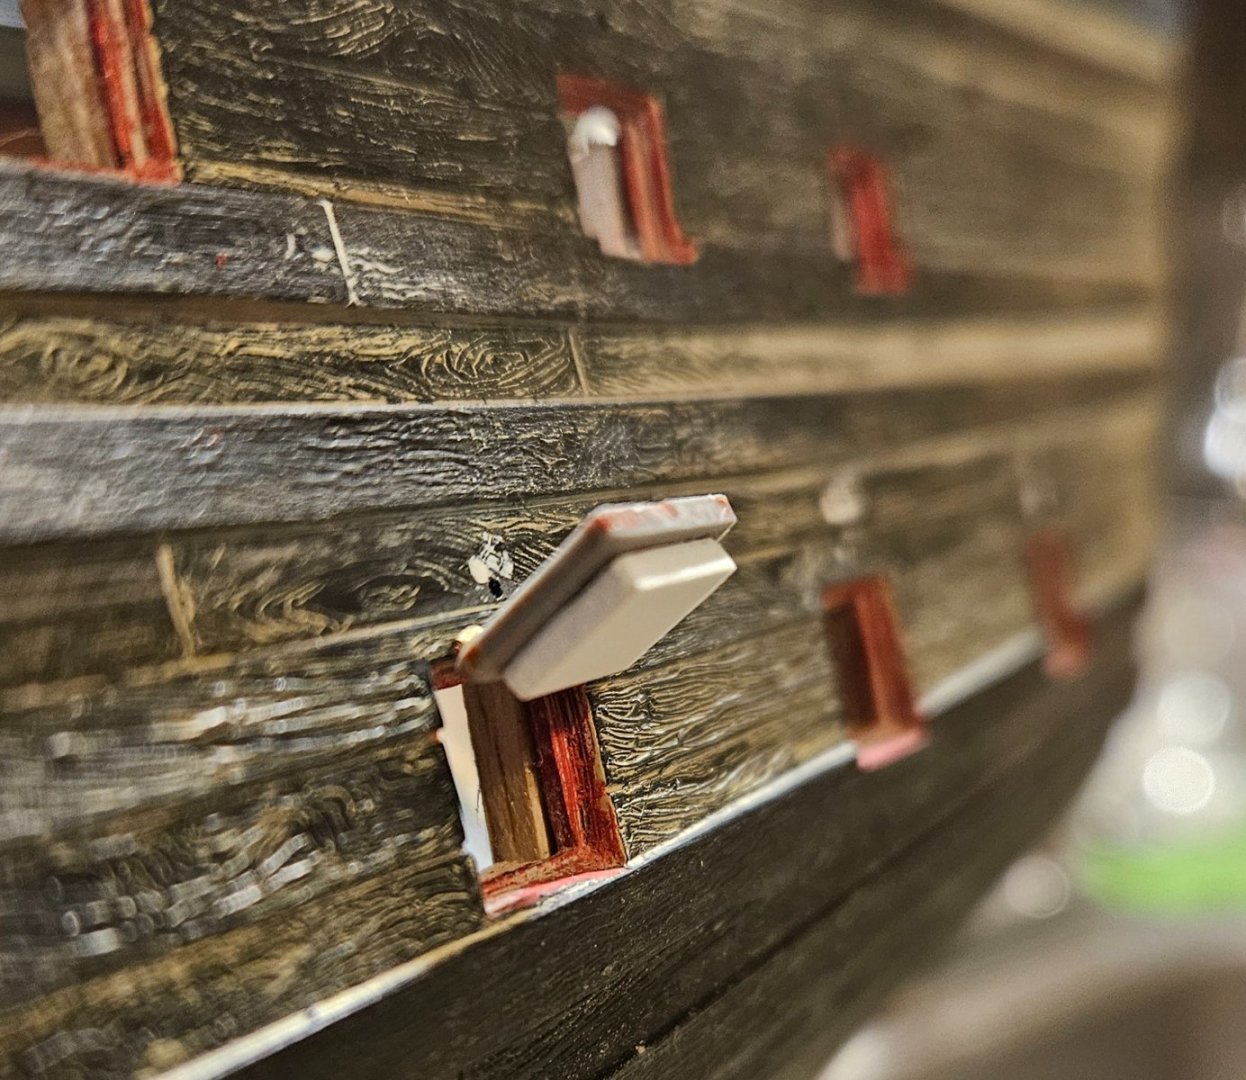
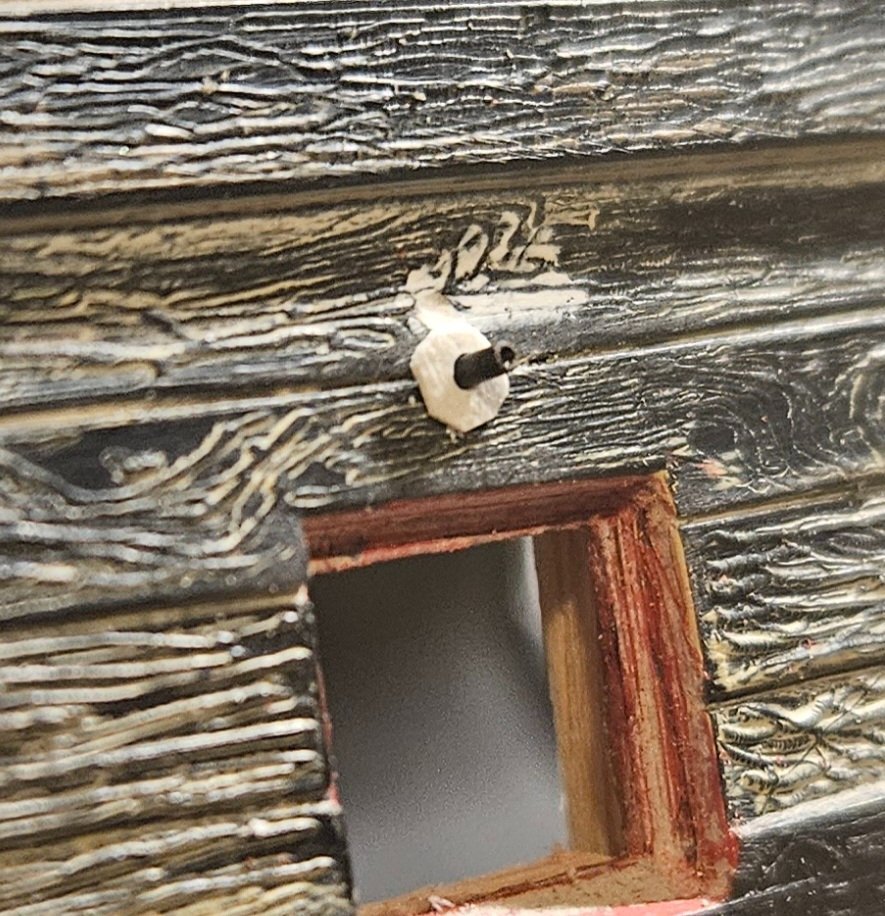
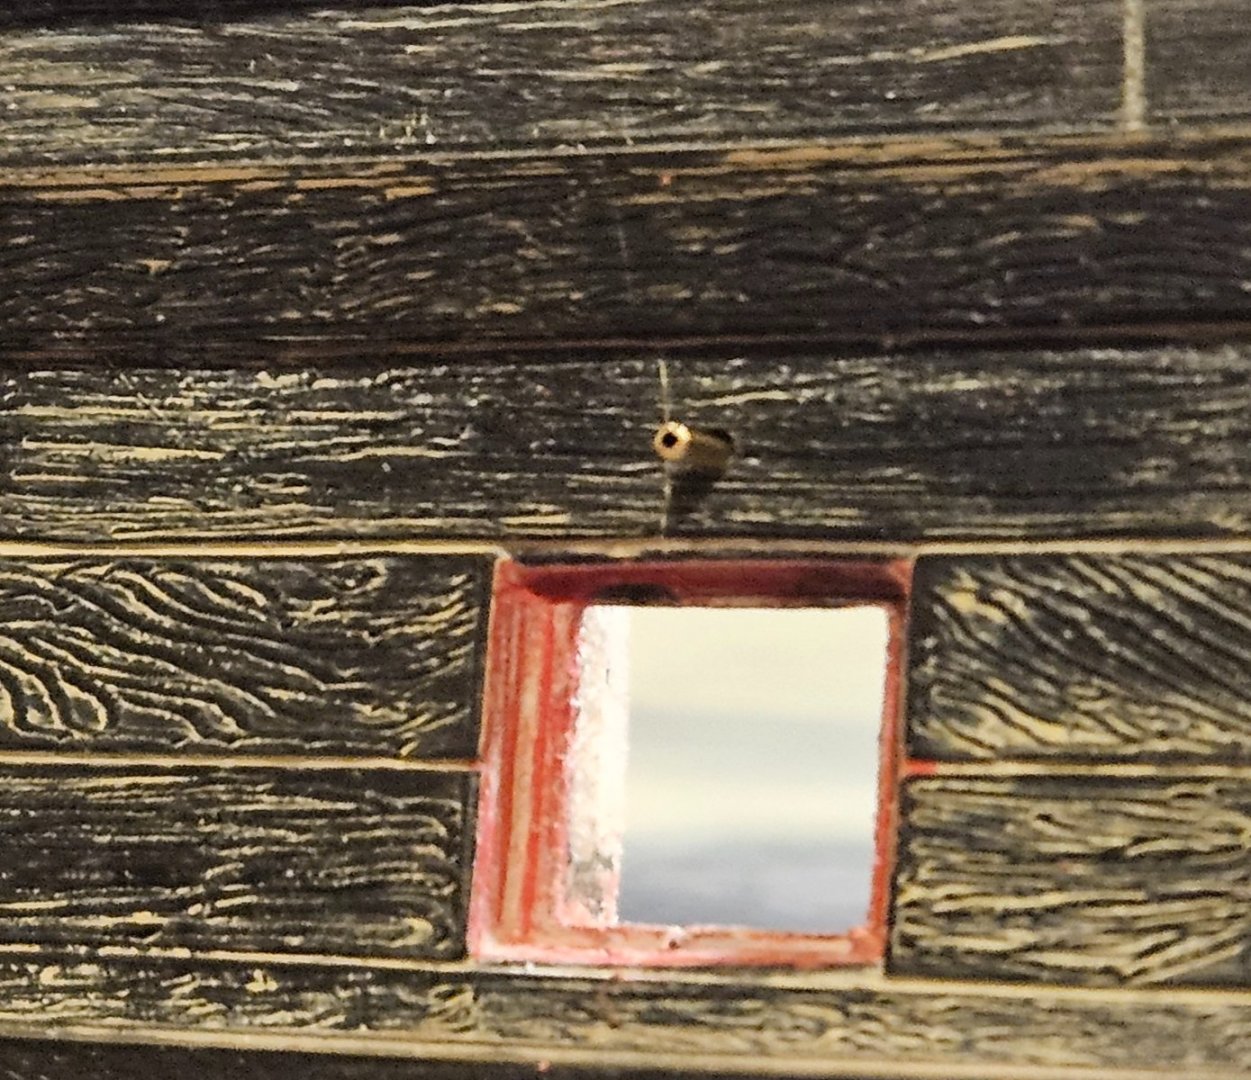
The finished gun port lid photo that Dafi posted above has made me think, especially regarding the leather tube/wrap that shields the hole in the hull where the gun port lid lanyard come out... but first, my biggest issue is... how can I reliably put a 0.012" rope through a 0.019" ID hole? Any needles and thread pullers are too big to go through the 0.019" hole. I have succeeded several times gently pushing the thread through with tweezers on the bench, but most times I fail, even after stiffening the thread a bit with beeswax. I need to resolve this issue before I can proceed. Dafi said he made his leather sleeve by boring out a piece of sprue. That is not in my skill set yet, and I already have blackened tiny brass tubes to insert in the gun port lid lanyard hole, but I wasn't going to have them project out. But I think if I do, my leather sleeve issue is solved... below is an unblackened brass tube that I bent very slightly down, and certainly could bend down more. I inserted a blackened tube into a hole without bending it down, and I added a very crude polystyrene circle, as photos of HMS Victory show a small circlular "patch" around the base of the leather tube... I don't know if the circular patch is leather, but I could make this patch with a hole punch in some paper-thin polystyrene after sanding the attachment point in the hull. In photos, the circular patch isn't quite flush, but is raised from the hull the tiniest fraction.I can't tell if they painted these leather tubes on the HMS Victory, as the leather tubes are on a black painted section of the hole, and perhaps the leather is naturally black? On my Soleil Royal, all of these leather tubes are going to be in areas that are painted a light brown... I think I would paint the circular patch to match the hull, but leave the leather tube in a blackened state; in real life would it work to paint the leather (maybe they used standing rope "tar" on the leather tubes?). It looks in photos like these leather tubes were somewhat flexible, meaning if the gun port lid were closed, the leather tube pointed down (as the lanyard was down), and if the gun port lid were open, the leather tube pointed out more so as the lanyard was about 90 degrees from the hull. My single biggest issue is getting a 0.012" rope through a 0.019" tube!
- 396 replies
-
- 3
-
-
- soleil royal
- Heller
- (and 1 more)
-
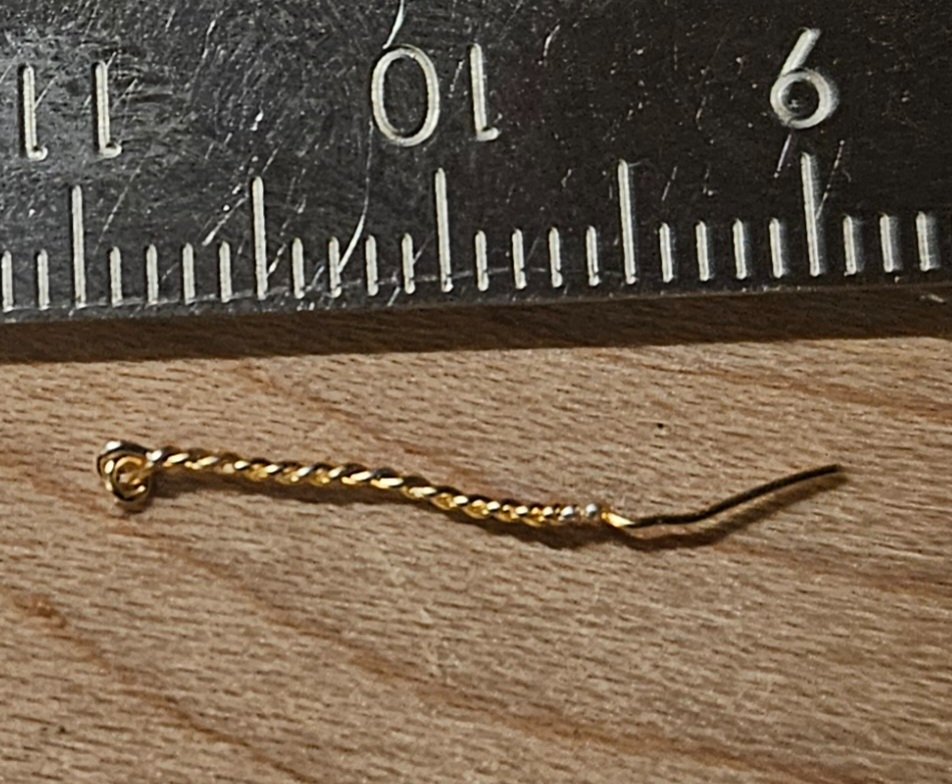
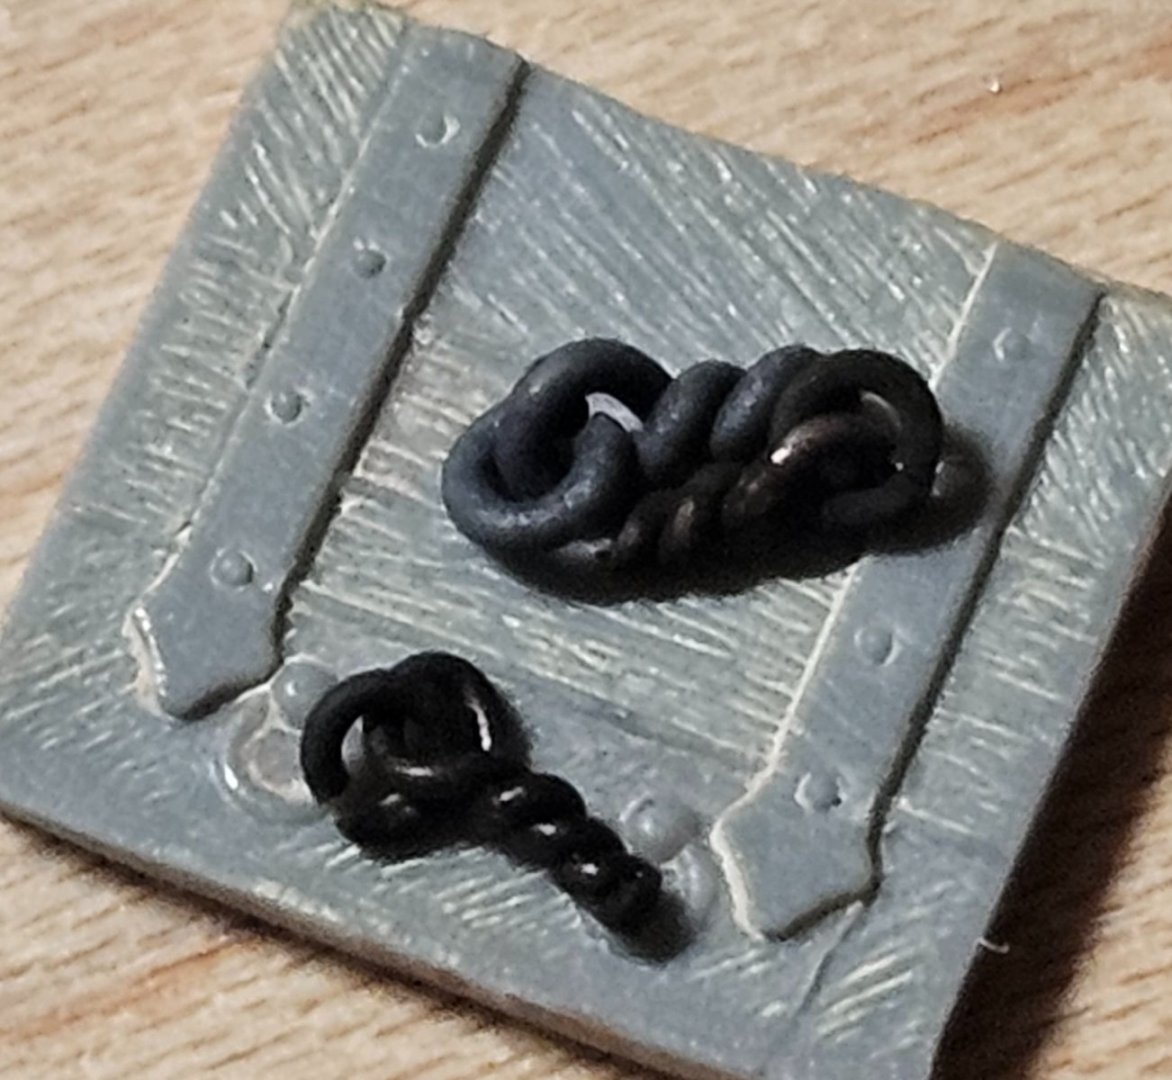
Marc and Dafi... your observations and input have been extremely helpful and have allowed me to make several decisions.... and I have a question about making eyes and eye bolts! 1) Marc, the painting of the cannon is exceptional, no doubt I will use the Heller cannon on the (visible) upper deck and also adjust the trunnions per Dafi. 2) I will stay with one lanyard to raise/lower the gun port lids, and I immediately noticed on the La Reyne drawing that there is one eye on the inside of the lids; now I am very comfortable in using one eye on the outside and also one eye on the inside of all gun port lids. I was going to use two ropes on the stern chaser gun port lids as they look heavier... but if one pulley system is used whether there is one rope or two ropes... I might as well stay with one rope on the outside. 3) Dafi, I love the idea of the brass wires anchoring the gun port lids... I will do that! I was trying to figure out some way to replicate a leather sleeve like you have shown... my first thought had been a 0.5mm ID brass tube in the gun port lid rope hole that I would blacken, and then perhaps bend down a bit to replicate the leather waterproofing sleeve. But it might be easier to get that look like you have down with bored out sprue - I will experiment with both methods! 4) I saw somewhere that in that time period, ships may have had some kind of cloth or fabric "sock" hanging from their lower scuppers that acted as a sort of check valve that allowed water out, but kept seawater from splashing back in. I will have tiny blackened tubes in my scupper blocks, as I read that the scupper tubes were made of lead? But I have no idea - yet - on how to duplicate a 3mm long fabric sock... I think in that case bored out sprue might look stiff? 5) Finally, eyes and eye bolts. I had no idea where to start, so I experimented with various gauges of brass wire and am now using 28 gauge brass wire. For eyes, I have been wrapping the wire around a drill bit of appropriate size as you show in your photo Dafi. As for eye bolts, I just experimented with my own by putting an eye on a brass wire and then twisting the wire... so now I have an eye on an eye bolt that I blacken after cutting the eye bolt shaft to a 1mm length. I see in the picture that Dafi puts the eyes on pre-made eye bolts. If that is best practice, I will make my own eyes and order eye bolts and go in that direction. It almost seems easier to put an eye on a wire and twist the wire into an eye/eye bolt combination? However, if it is faster to use pre-made eye bolts or if they also simply look better in scale, etc. then I will happily buy eye bolts and not make them!


- 396 replies
-
- 4
-
-
- soleil royal
- Heller
- (and 1 more)
-
Thank you for the tip, Ian... I looked it up and there is a big difference. I may well use the Heller cannon on the visible upper decks (and use the bigger cannon as Marc has noted). The Heller cannon do have very nice decorations. Also, I think that I may run the breeching rope on those cannon through the gun carriage, instead of on the gun barrel itself, as that seems to be a way the French did it at the time... thought that may be many months out!
- 396 replies
-
- 3
-
-
- soleil royal
- Heller
- (and 1 more)
-
Ian, I ordered 60 "below deck" guns first, as it will take me some time to get to the upper decks. Thanks for the advice on the distance between the wheels... I looked up what you are referring to and it makes complete sense. I thought at first the metal cannons might be too big, but it turns out that their dimensions and scale are accurate. I hope the heavier, more robust appearance of the guns will stand out and make the ship look like the floating wooden castle that she was.
-
Henry, thanks for your thoughts on one gun port lid rope vs two ropes! I searched for pictures online that would show gun port lid rigging, but struck out. I remembered that I had seen a lengthy video tour on YouTube of the HMS Victory, so I brought that up and also found tours of the Vasa, the USS Constitution, and the HMS Warrior. There are moments on the HMS Victory and HMS Warrior tours where you can freeze the screen and see the gun port lid rigging. Both of these ships had two gun port lid ropes that came through the ships hull and attached to a single pulley block (terminology?). A single rope led from this block to another pulley, and then to another pulley and so on (I had assumed that each gun port lid rope would have its own pulley system). It looks like there are at least three pulley ropes, and maybe five total pulley ropes, so that would dramatically decrease the effort needed to raise/lower the gun port lid. I am not sure if one person could do it alone, but two people likely could. So given that there seems to be one pulley system when a gun port lid has two ropes, it may not be far-fetched for me to think that a single gun port lid rope could be operated by a single pulley system. I am not sure why two ropes would be better than one rope, as you can see that if one of the two ropes were "shot away", it would unravel on the pulley and you would effectively lose both ropes? So I do feel better that it is not inaccurate to to use one gun port lid rope, but there must be a reason why a transition seems to have been made from one rope to two ropes (1700? 1750? 1800?), albeit both ropes attached to a single pulley system, UNLESS the single pulley system was a relic of the restoration process and back in they they really did use two pulley systems for two ropes.
- 396 replies
-
- 2
-
-
- soleil royal
- Heller
- (and 1 more)
-
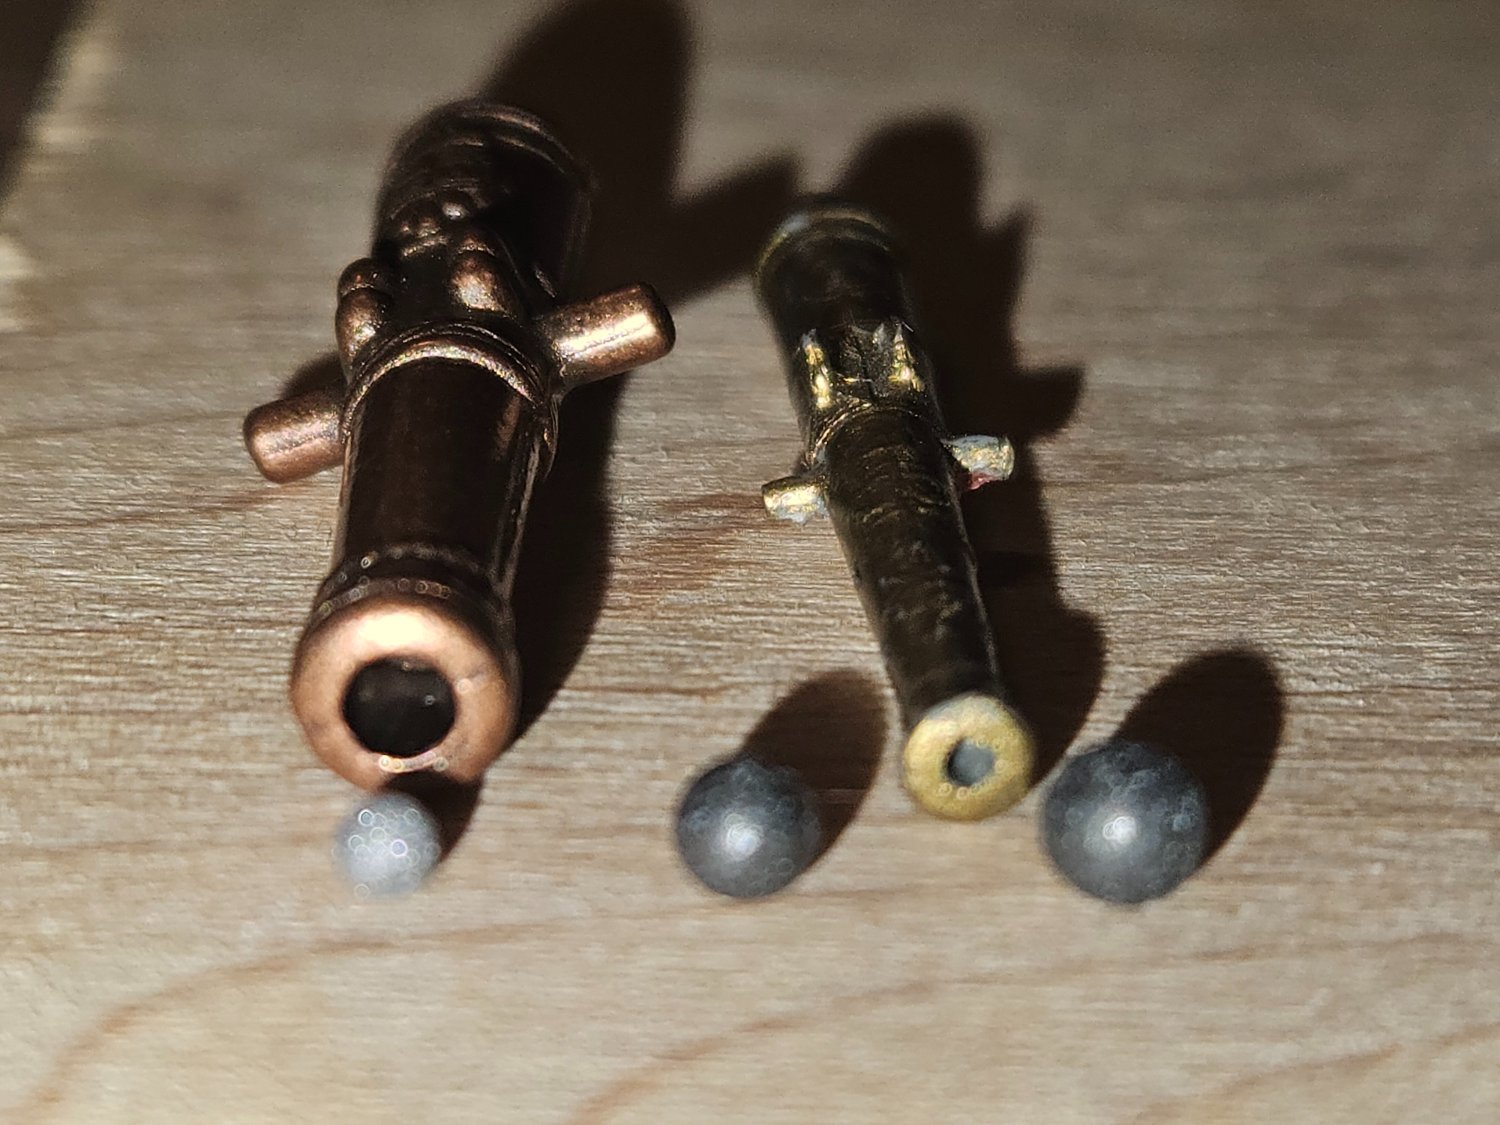
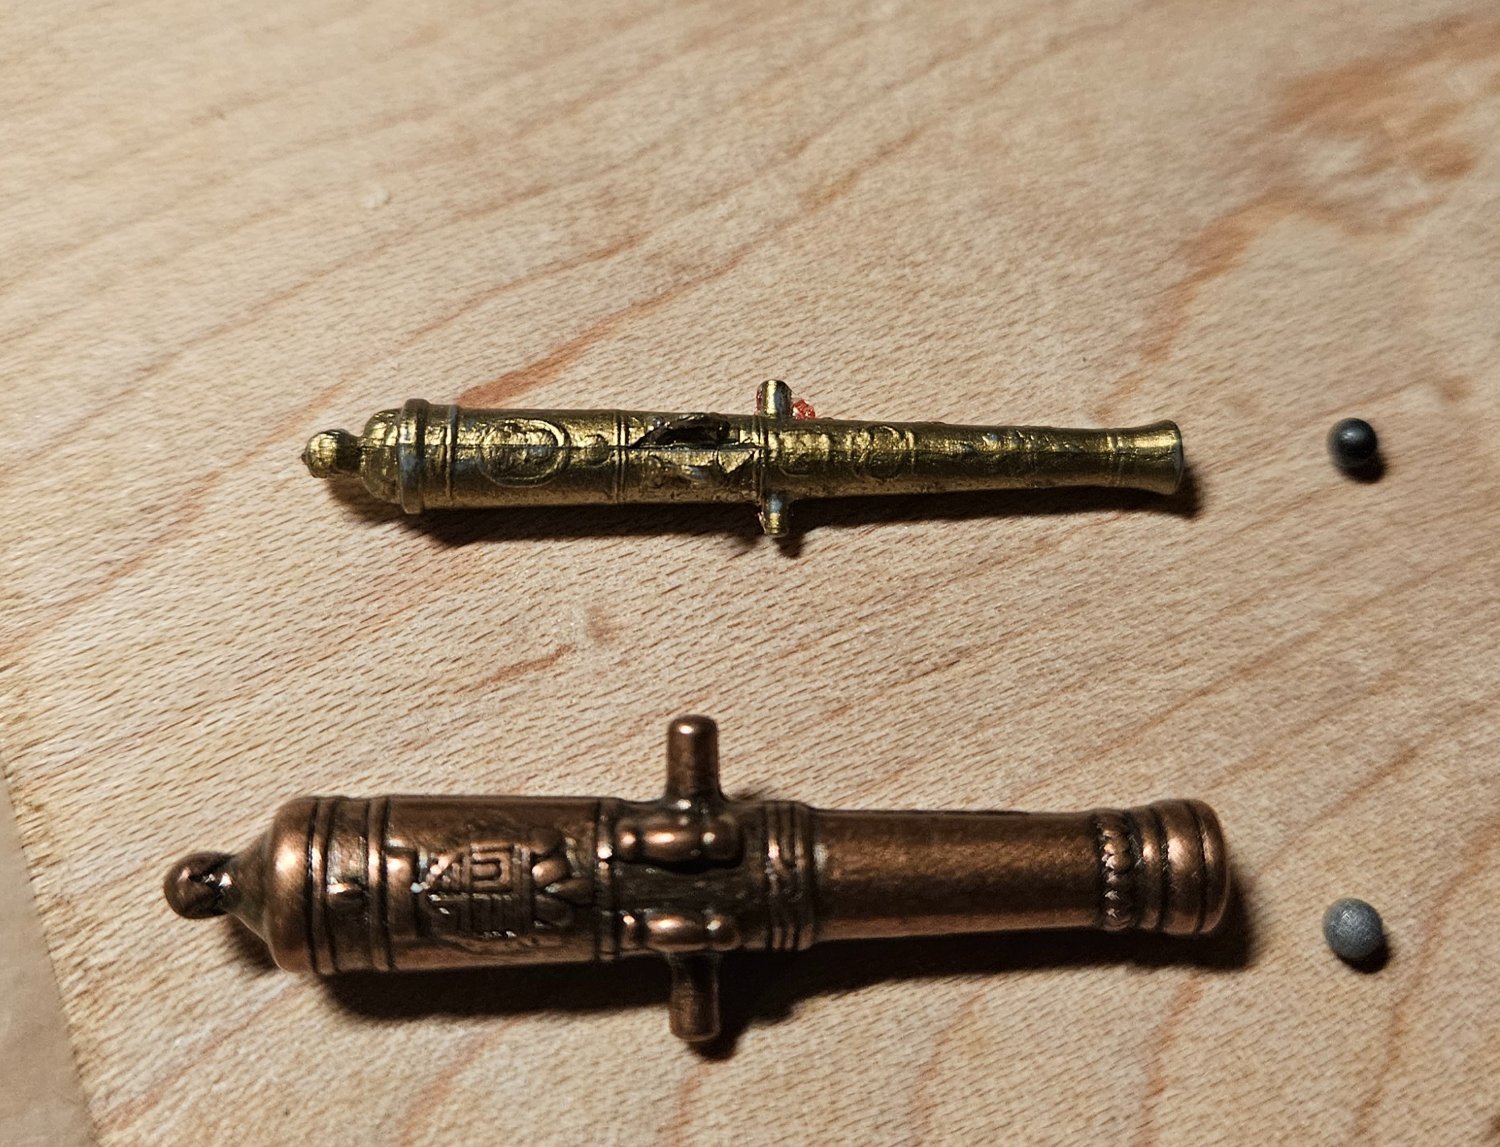
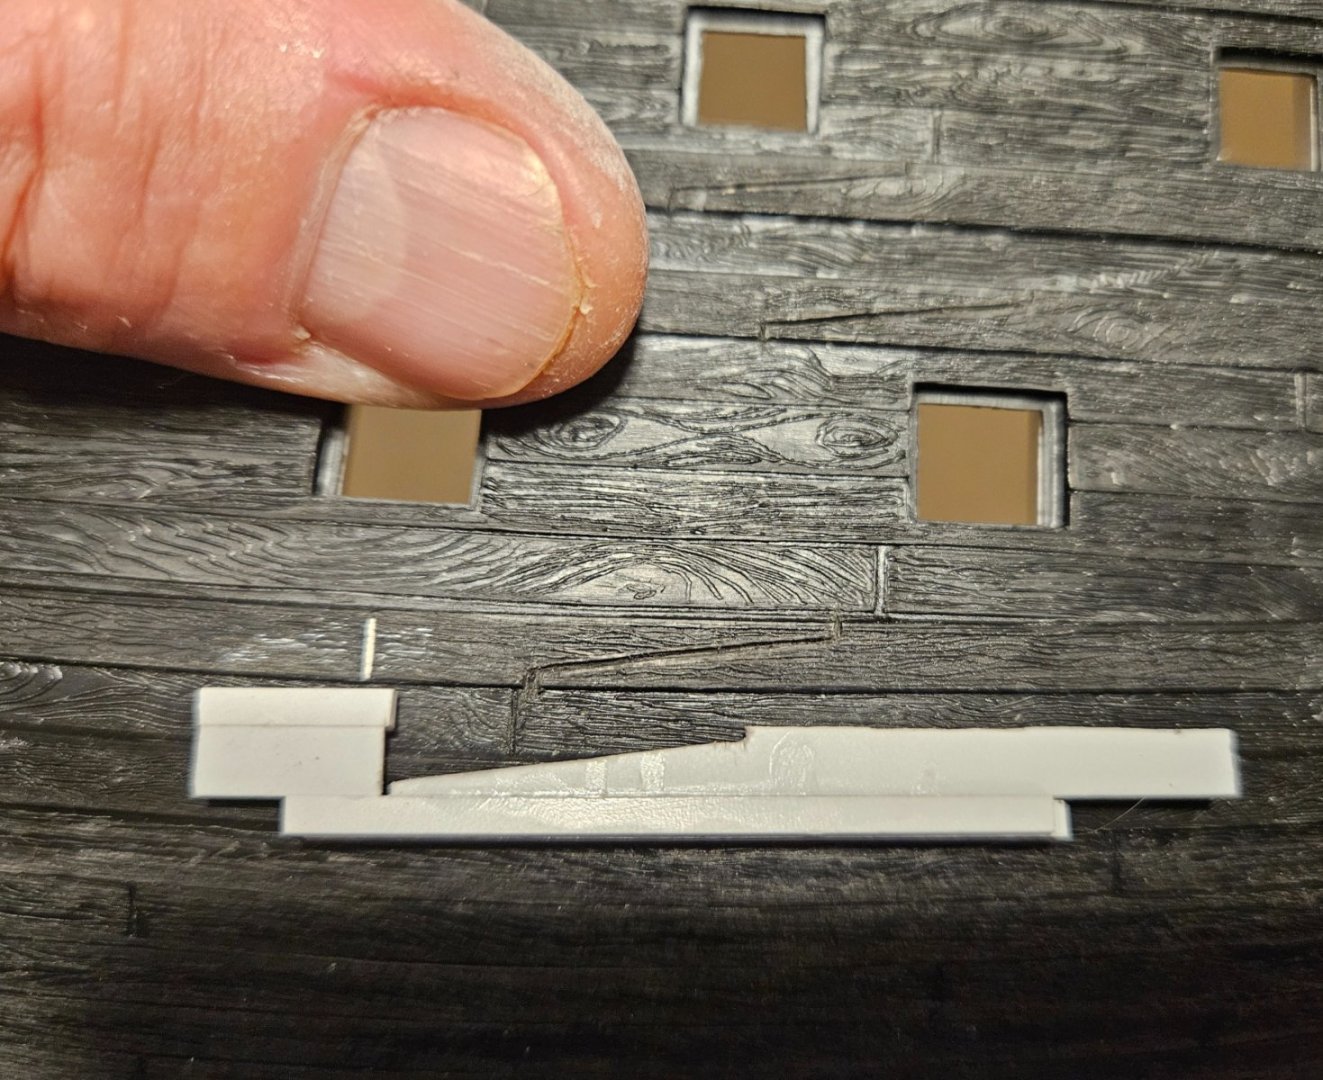
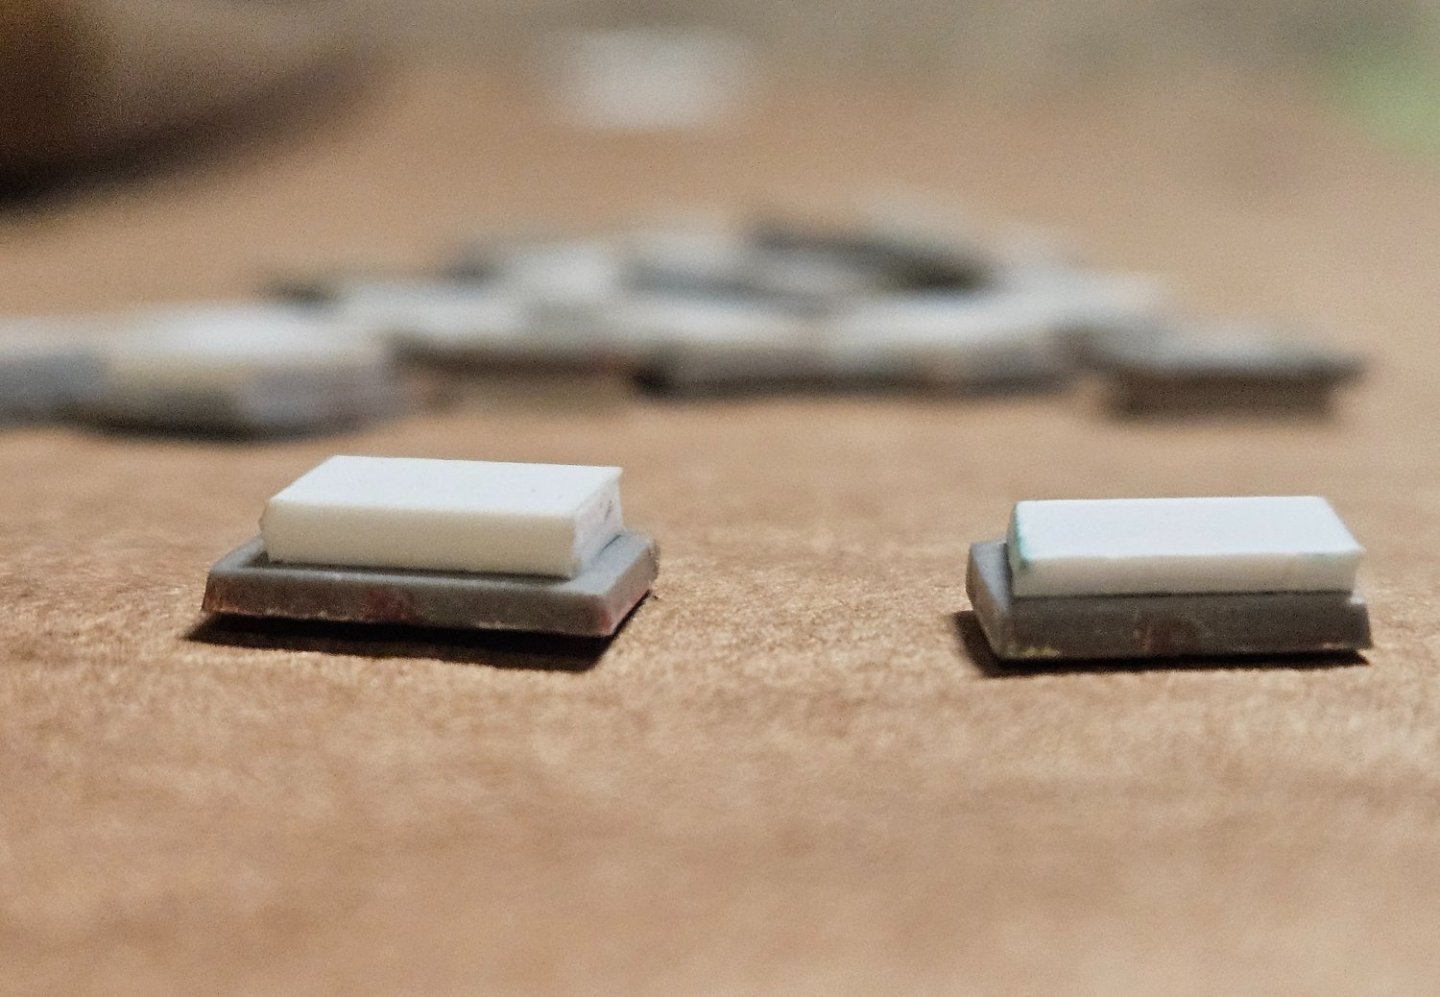
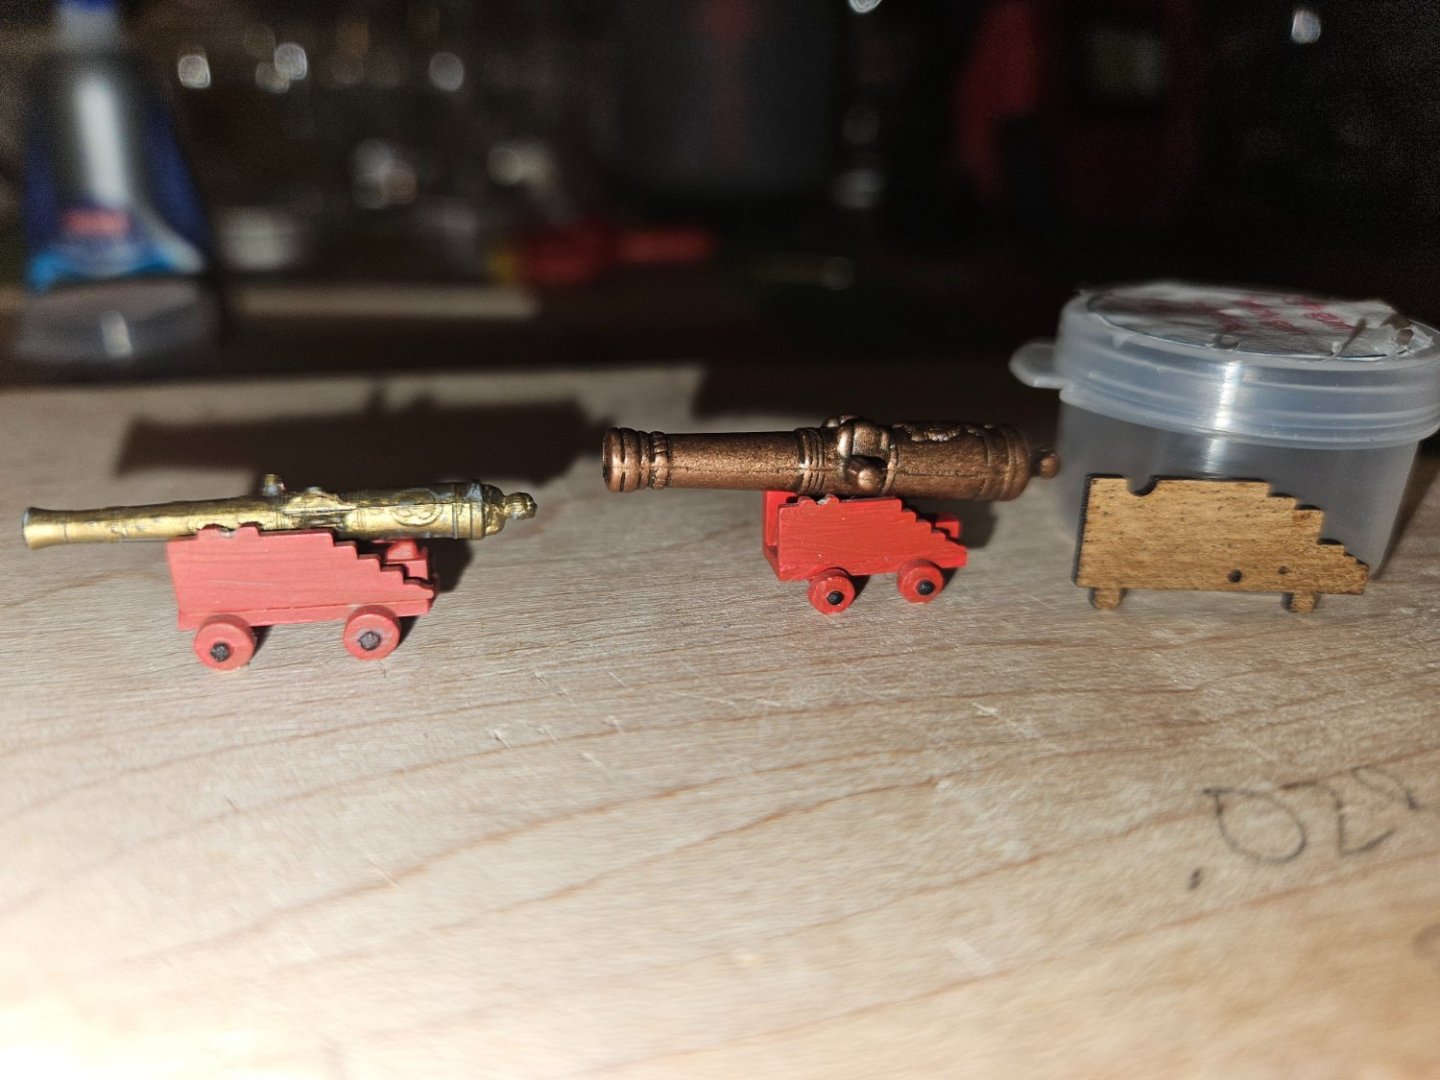
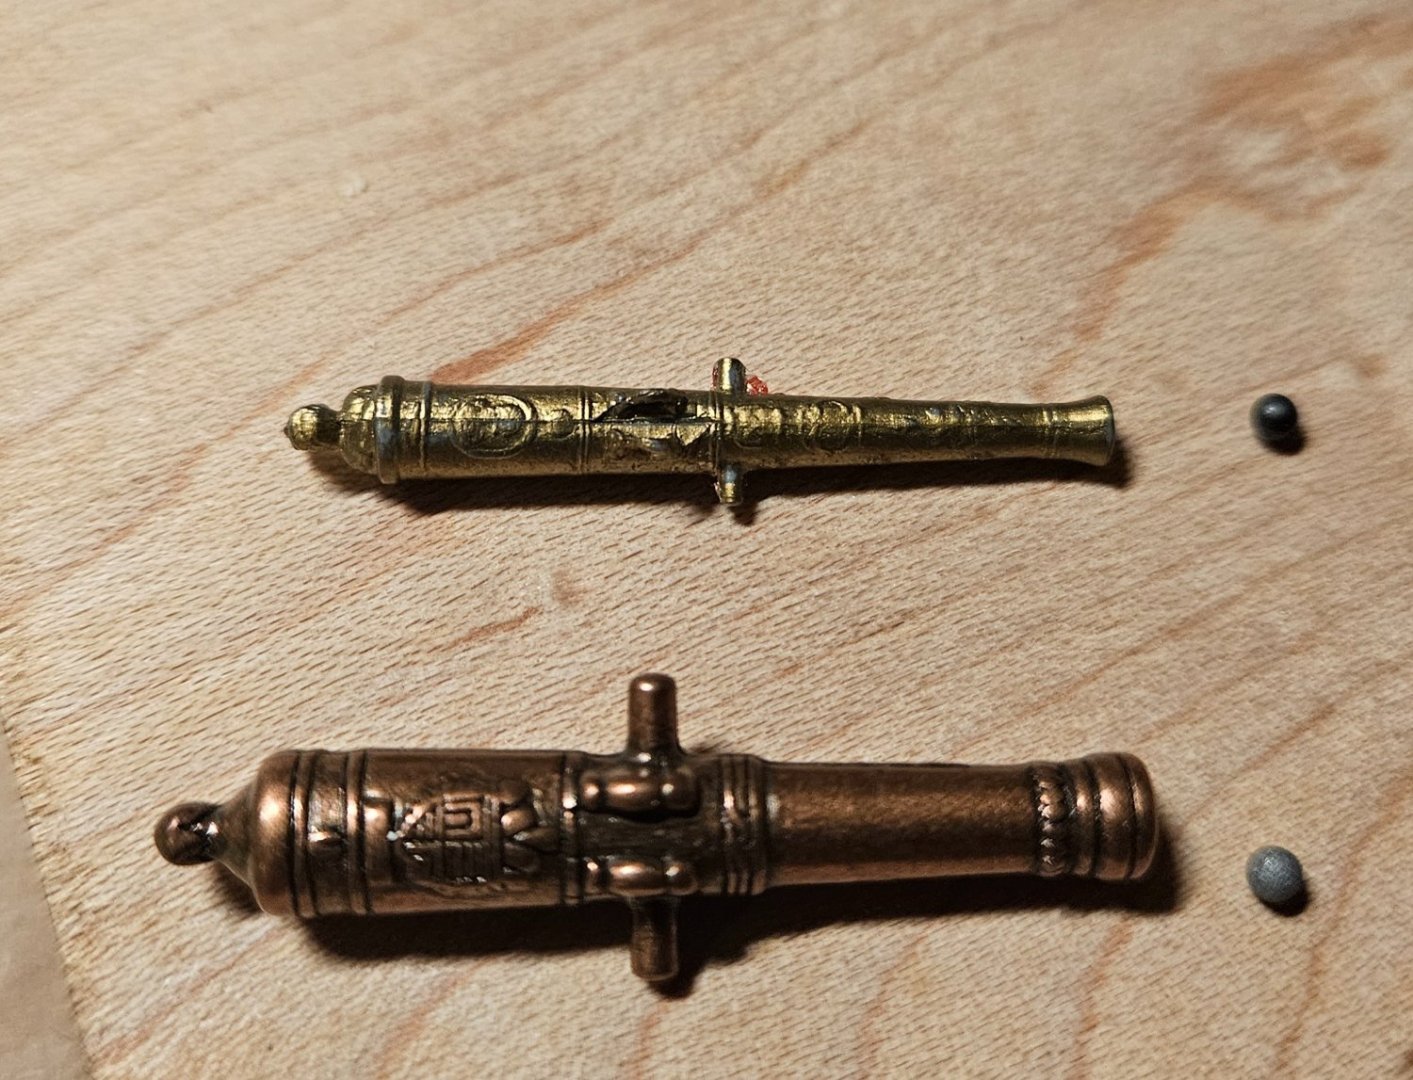
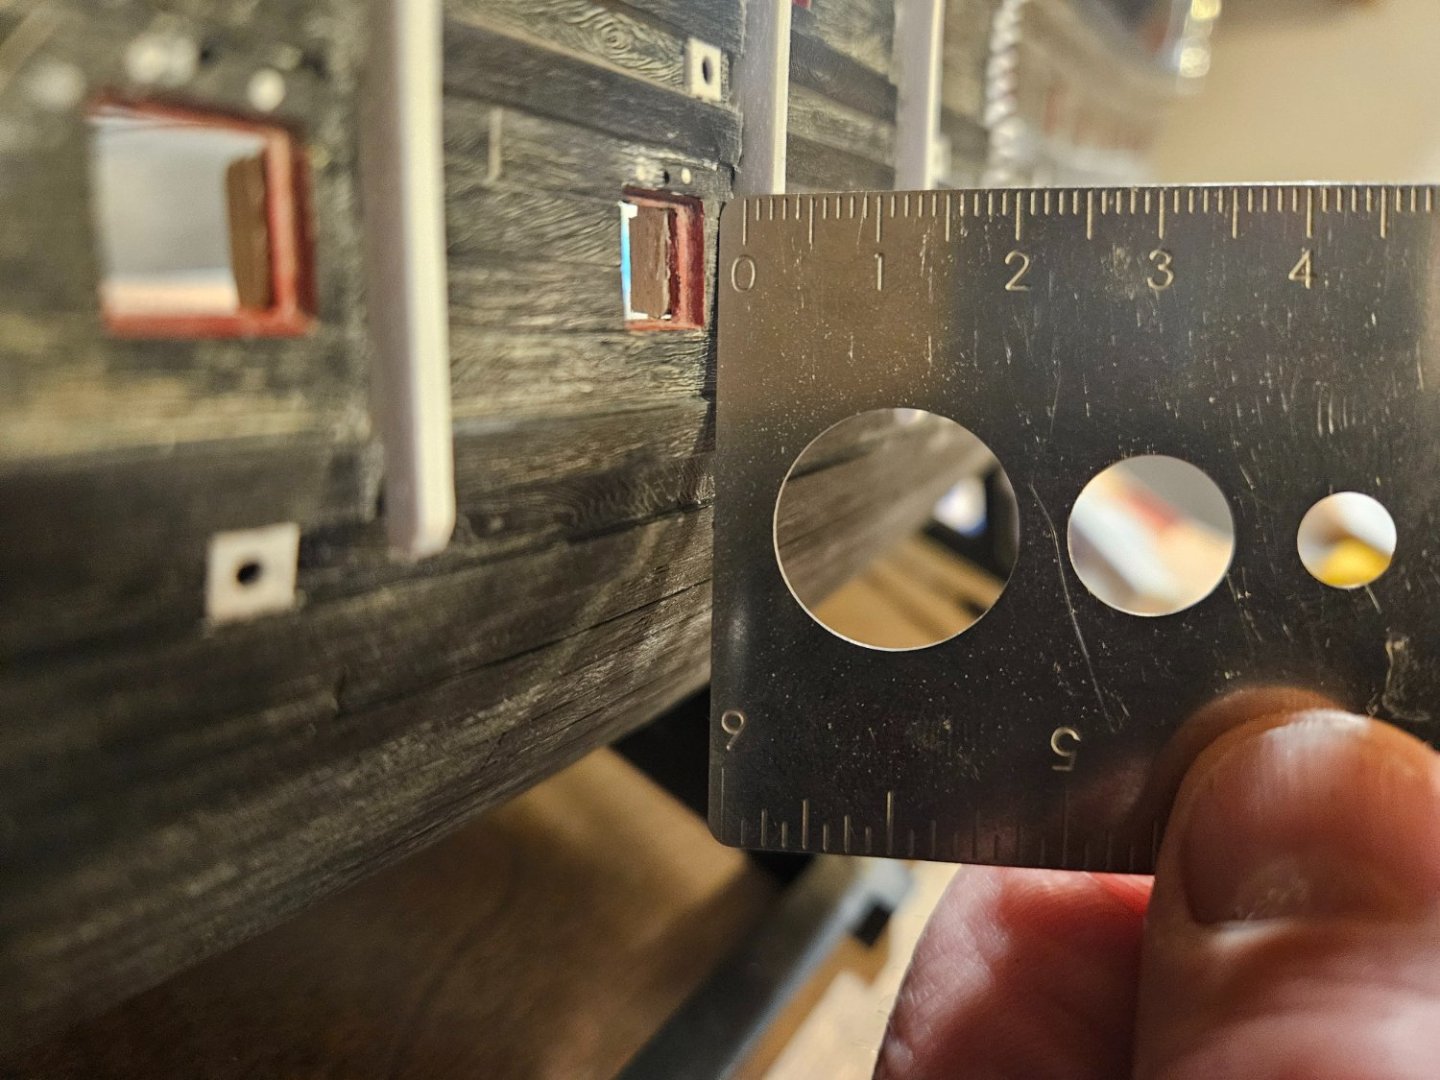
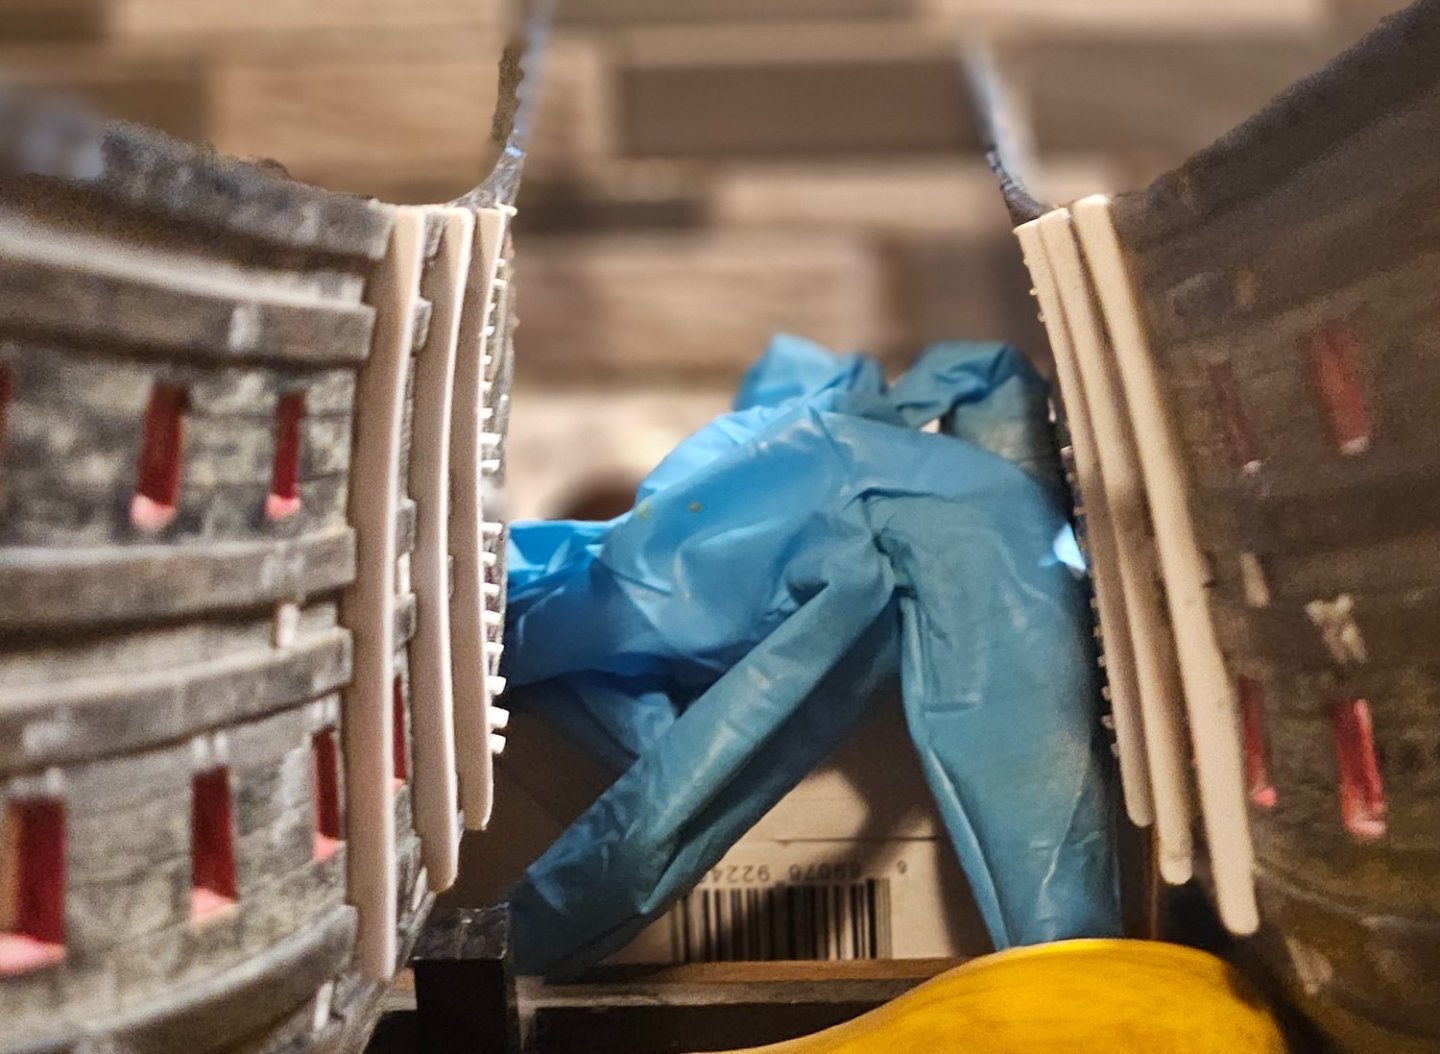
I am going in a lot of different directions today because of the weather here in Central Wisconsin. We have a major snow storm coming through, followed by days of bitter cold. The issue is that I planned on giving the two hull pieces a bath to remove dust/oils/etc. and then prime them tomorrow after drying. But I have no booth or vented spray room... so was thinking of spraying outside, but I don't think the paint would appreciate 0F temperatures! So... on to guns and gun carriages. The gun carriages suffered the most when I broke the ship apart three weeks ago (after 45 years)... the majority ended up in many pieces (though no real breakage). I decided it would be a lot easier to assemble new gun carriages than have to reassemble hundreds of plastic pieces (after stripping the paint off of them). I also wanted to see what metal guns would look like on the model, so I ordered guns and wooden carriage sets from HiSModel. I ordered metal guns as the Heller plastic barrels seemed a bit too small for me; looking at tables for 17th century barrel lengths and diameters, the Heller parts were a bit too fine for me (though I love the decoration on the Heller parts... I will probably want those Heller cannon on areas of the upper decks where they can be seen), whereas the vast metal barrels were almost spot on in their dimensions. The only thing that was off was the bore diameter. Using a 32# Heller cannon, next to the metal cannon, the plastic cannon bore diameter is too small whereas the metal cannon is 1/100" too big. There is very littlr room available to bore out the Heller cannon, so I decided II could live with 1/100 too big on the metal cannon... note the shotgun pellets (I load my own shells for upland bird hunting), from R to L, that is a #4 pellet, a #6 pellet, and a #9 pellet. The #9 pellet is 0.08" diameter, and the appropriate "cannon ball" for the HiSModel cannon would basically be a #10 shot at 0.07" diameter. As I said, I can live with a bore diameter 1/100" off! Another side affect is that the metal cannons seem to be too large for the Heller plastic gun carriages. The size of the wooden carriages looks to me to be more proportional with the metal cannon. though whether wood or plastic, the gun carriages will be out of sight on the two lower gun decks (and I think I put the metal cannon on a smaller gun carriage which doesn't help the visual comparison!). I thought that I might be bothered by the faint casting seams on the metal cannon, but when they are inserted into the hull and just sticking out, it was almost impossible for me to see the seams even if one knew to look for them. Finally, gun port lids. I finished adding the gun port lining inserts on the #32 pound main battery deck. I used 1.5mm thick polystyrene squares, but I will use 1mm polystyrene squares for the #24 pound secondary battery deck gun port lids. I think it is more proportional (#32 pound lid on left and #24 pound lid on right). I am not sure how to eventually affix them. I would like to add a "tube" hinge to each strap. Note the 1mm wide by 0.5mm ID tube right next to the lid with some very thin brass wire as a potential rod. That combination looks more proportional than the 1.5mm tubes that are also shown. The 0.5mm ID tube is so small with so little surface area, that even using super glue on the hull to attach makes me worried, but I don't want to just glue the lids into the ports like I did 45 years ago! Before I even think about adding a faux hinge, I have to figure a good way to really attach the gun port lids to the hull, as I know that I will be bumping into the lids as I work (though even "welding" tiny lids to ther hull wouldn't save them from my elbow).


- 396 replies
-
- 3
-
-
- soleil royal
- Heller
- (and 1 more)
-
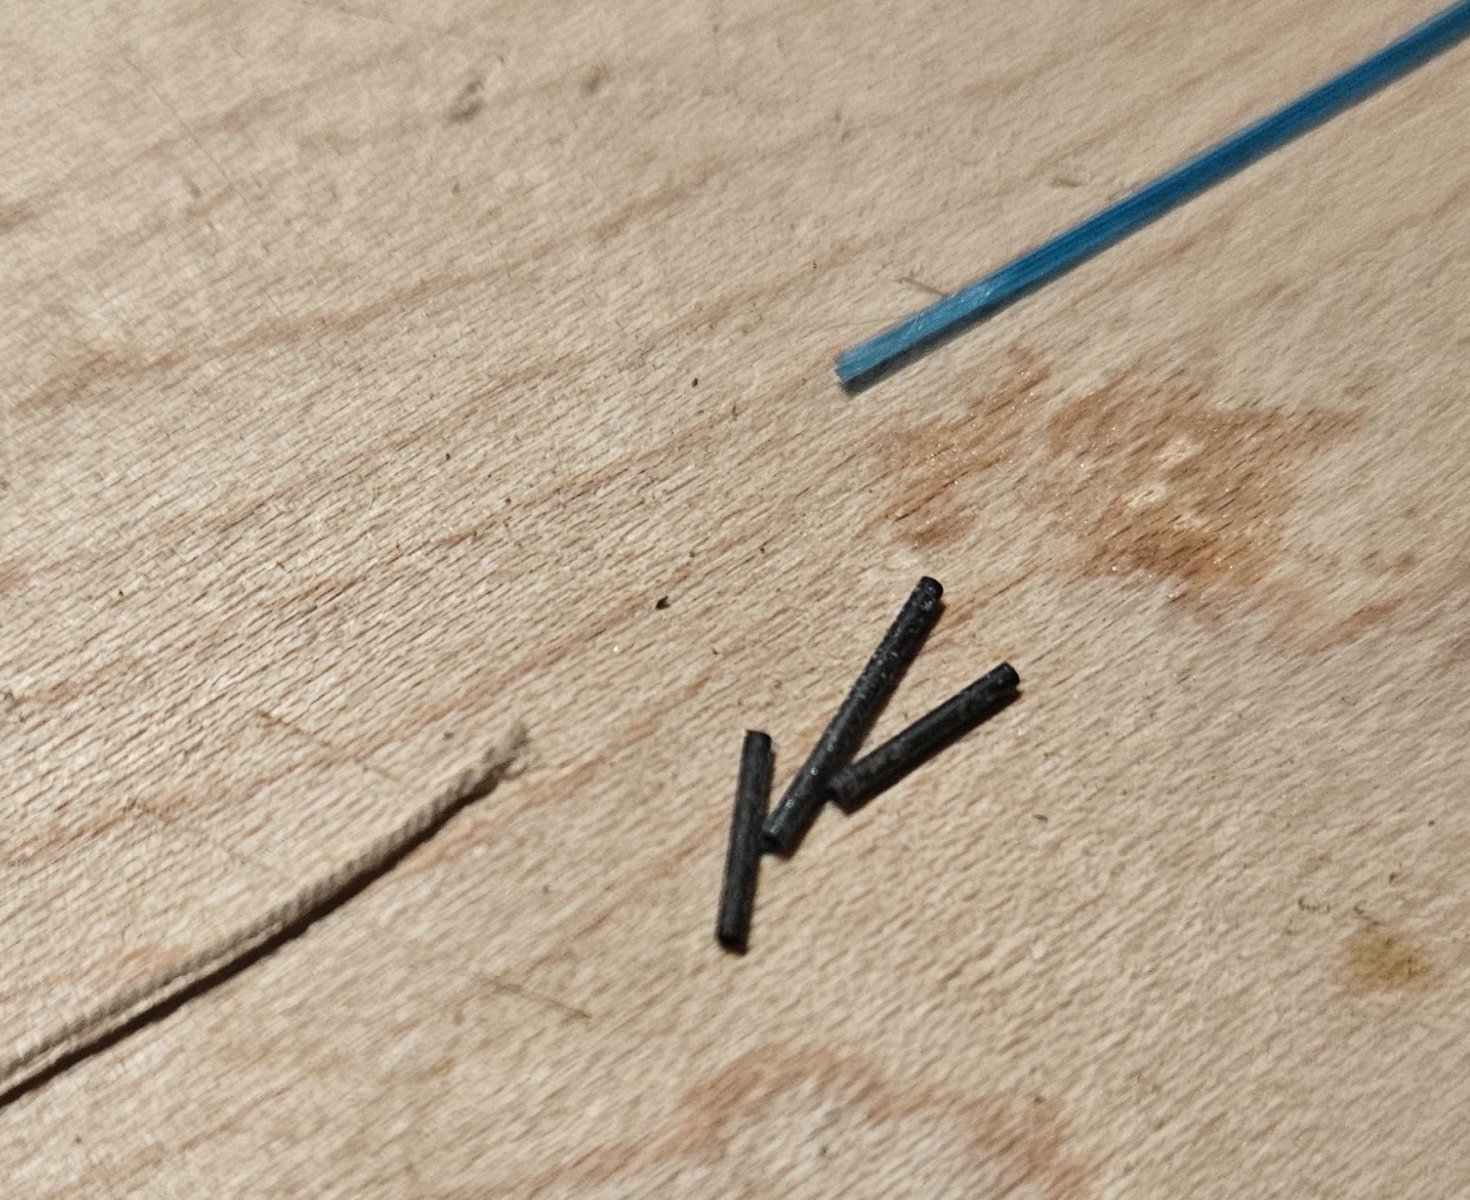
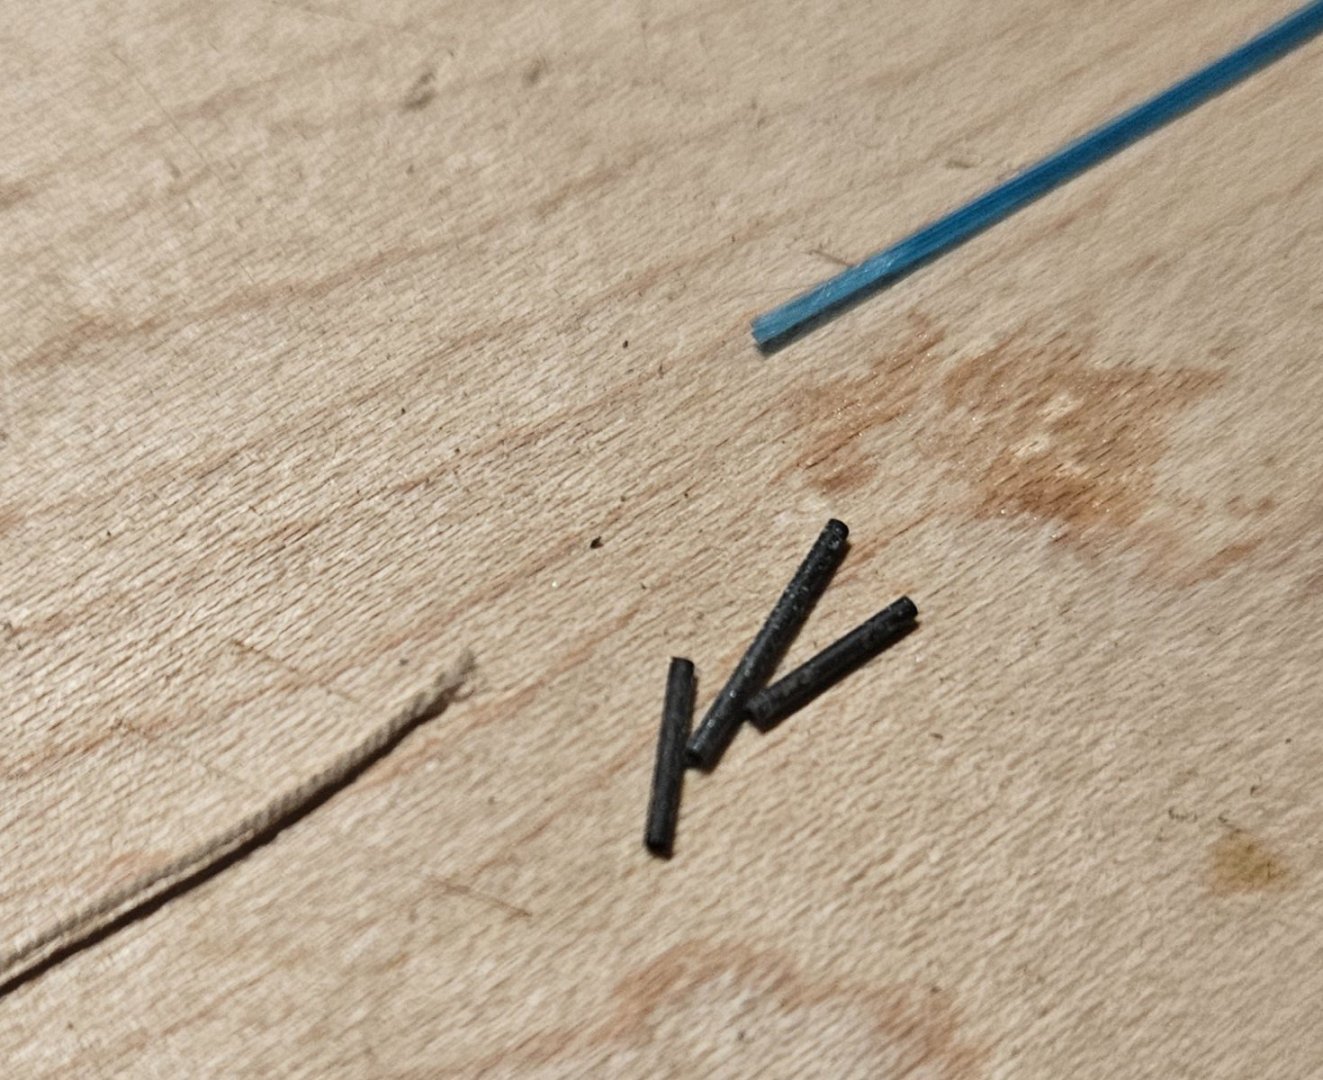
Well, I tried another crafts store and found some 28 gauge that I could try right away to compare... pretty amazing! from top to bottom in the photo, 24 gauge, 26 gauge, and 28 gauge. Quite a difference, as you guys said!
- 396 replies
-
- 5
-
-
- soleil royal
- Heller
- (and 1 more)
-
Ian, Henry, and Marc (any anyone else out there!), I value your opinions and observations - thank you! And Ian, that HMS Victory looks beautiful... I clearly need smaller eyes/bolts... I like the links that you sent me, Ian, but I wonder if I might a source in the US? Or I find 28 gauge copper wire.. Finally - one gun port lid rope or... two gun port lid ropes? Which direction do you guys lean? When I read the the build blogs, there are certain things that are clearly 100% the unadulterated truth... "the Soleil Royal had three masts and not four, etc".... whereas there doesn't seem to be anything absolutely unequivacal that.. TWO gun port lid ropes were ALWAYS used... or was it one? So in some areas that there doesn't seem to be clear supporting evidemce, then more or less that means the builder can formulate a picture in their mind on that subject and go from there?
-
Ian and Henry.. thank you for the comments! I was making my own eyes and eye bolts from 26 gauge copper wire, as the local crafts store did not have 28 gauge copper wire! If I can find 28 gauge copper wire, I would make my own as I sort of enjoy the process. However, I will look at the links you sent Ian as if they can make my life easier.. thanks! Henry, I went back and forth between the number of gun port lid lift ropes.. one or two? I have seen models and pictures of ships using either one or two ropes (including the Soleil Royal and other ships, including Britsh, etc). I ended up deciding to go with ONE rope as that is what was on the cover art of the Heller Soleil Royal that I bought in 1977. I know that in real life, my 32# gun port lids would weight close to 300#, but then I have seen pictures that show an internal pulley system in use that would cut the required effort to lift the lids to 1/3... still a lot of weight to pull. With some putty, I could feel the old holes and drill two holes for each gun port... just a question of time. But based on the picture/models that both one rope and two ropes in use... I still am not sure on which is the right system to use!
- 396 replies
-
- 1
-
-
- soleil royal
- Heller
- (and 1 more)
-
Well, I did a test gun port lid for the lower gun deck. jut wanted to see the thickness of the lid and how the hardware looked. I decided that 24 gauge wire was too thick, so I tried 26 gauge wire. The hardware is not glued in, just fitted into the hole. I like the thickness of the gun port lid (which does fit neatly into a gun port in the hull) and I am glad I tried 26 gauge wire... I see no need to try 28 gauge wire, as I am satisfied with the scale of the hardware. I think that the single eye/eye bolt combination on the outside could be moved a bit close to the edge of the gun port lid, but... I do like having a little plank line available on the lid as an aiming port for my drill... and in the raised position, the exact hardward placement will be invisible anyways.

- 396 replies
-
- 4
-
-
- soleil royal
- Heller
- (and 1 more)
-
Ian, this is great! I am going to look at this immediately
- 396 replies
-
- 2
-
-
- soleil royal
- Heller
- (and 1 more)
-
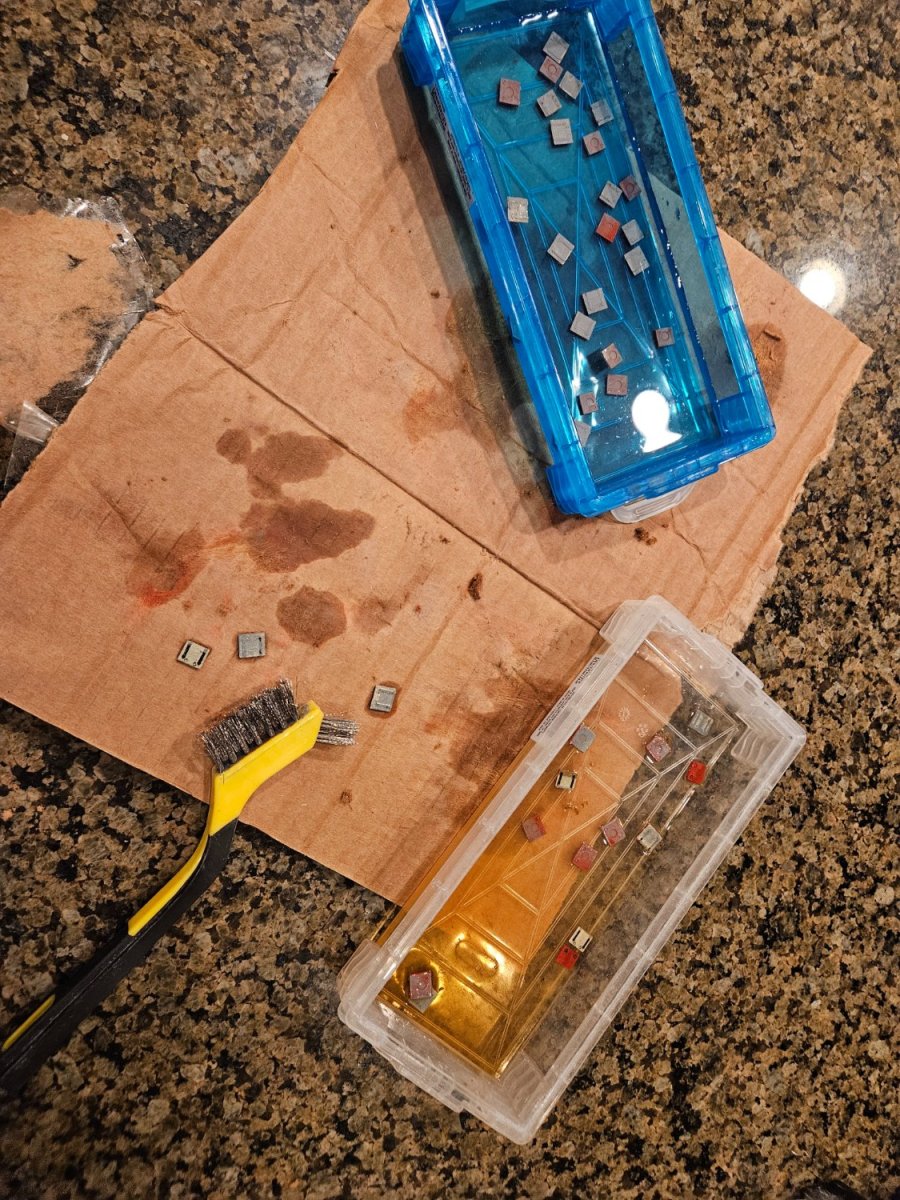
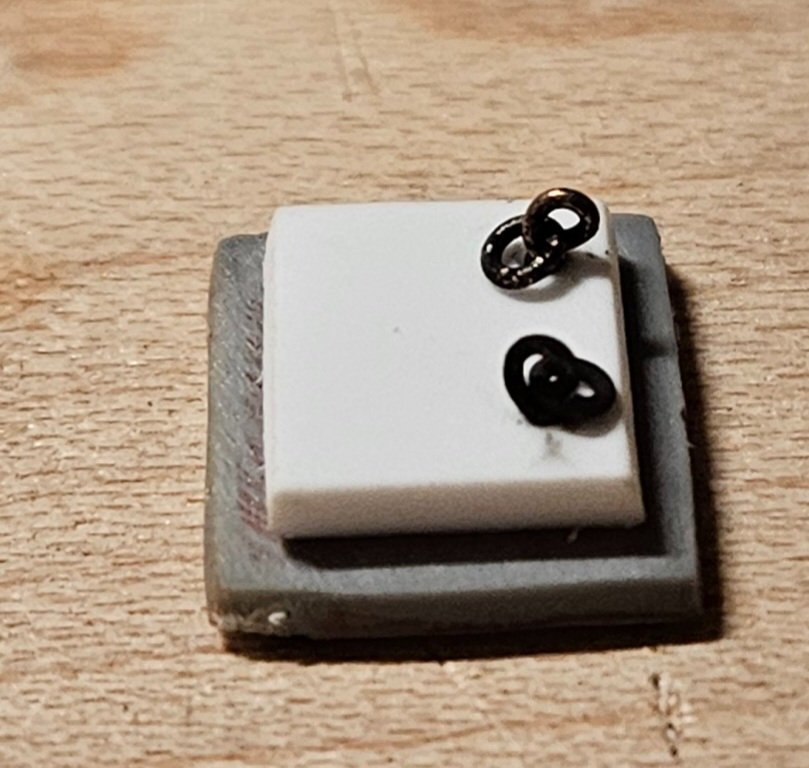
argghhh... going through the laborious process of soaking the gun port lids in isopropyl alcohol and then scrubbing the old paint off. Then I can do an inventory as I know that I am missing some gun port lids (fortunately, I think I can get some Heller gun port lid trees on Amazon!). Now I have some decisions to make. First, I need to add an inner square to the gun port lid (terminology?) so that the inner square would fit into the gun port lining when closed. The lids provided by Heller are 1mm thick...or about 4" thick if scaled up. It makes sense to me the inner square could be 1.5mm thick, or 6" thick at scale.... so the total gun port lid thickness would be 10" at scale. This seems reasonable to me, and since European oak has a typical density of 45 lbs/ft3, my gun port lid would weigh 277# (add in a few more pounds for iron fittings). I could make the inner lid 1mm thick instead of 1.5mm... but I just like the visual contrast better with a slightly fatter inner lid (note the white polystyrene square in the photo has NOT been cut to size yet... I just wanted to visulaize the thickness). Next are the iron fittings. Heller provides 2 tiny molded rings on the inside and outside of the gun port lid. Both sets will be scraped away, The outside of the lid will have one eye/eye bolt for lifting... I used 0.4mm brass wire for the eye/eye bolts, as when scaled up that is 1.5" thick for the iron fittings. To be honest.. they look a tiny bit big to me, but the rope is 0.012" thick (or 1" if scaled up) and iff I used 0.3mm brass wire instead of 0,4mm... it looks like the rope fit would start to get very tight. I see many pictures and models with two eyes on the inner part of the lid, and some have ropes attached to them. Attaching permanent ropes to help close the lid doesn't make sense to me.. the lid would be lowered by the same block and pulley system that lifted it up. I am guessing that ropes were tied to the eye when the gun port lid was closed to keep the lid tight to shut out the elements? If I believe that, then only one eye/eye bolt combination would also be needed on the inside? Finally... the iron hinges and straps. I was going to sand/scrape the hinges and glue on some very simple black photo-etch straps (after cutting off the tiny rings). The Heller straps actually look much better, but... for any gun port lid in the raised position, no human being could ever peer around the gun port lid to see what the straps look like. And by sanding off the Heller straps and glueing on black metal straps... I don't have to meticulously paint the Heller straps (that no one will ever see any way in the raised position). I do think I will use tiny 1.5mm ID brass tubes with a little piece of wire in them to simulate the hinges, by glueing them to the base of the straps, and then those little tubes can be glued to the hull of the ship... at least those tiny brass tubes/wires will be visible (blackened, of course). I occasionally wonder if I am overthinking things, but I am trying to stay true to scale and also do what makes the most sense (meaning what would they have done 300+ years ago, which is often the simplest solution, no different than today).


- 396 replies
-
- 4
-
-
- soleil royal
- Heller
- (and 1 more)
-
And Marc... I would be remiss if I didn't say that your build is also one of the builds that I have bookmarked and constantly review. Your work is amazing, and is not only aspirational, but also quite insprirational!
- 396 replies
-
- 4
-
-

-
- soleil royal
- Heller
- (and 1 more)
-
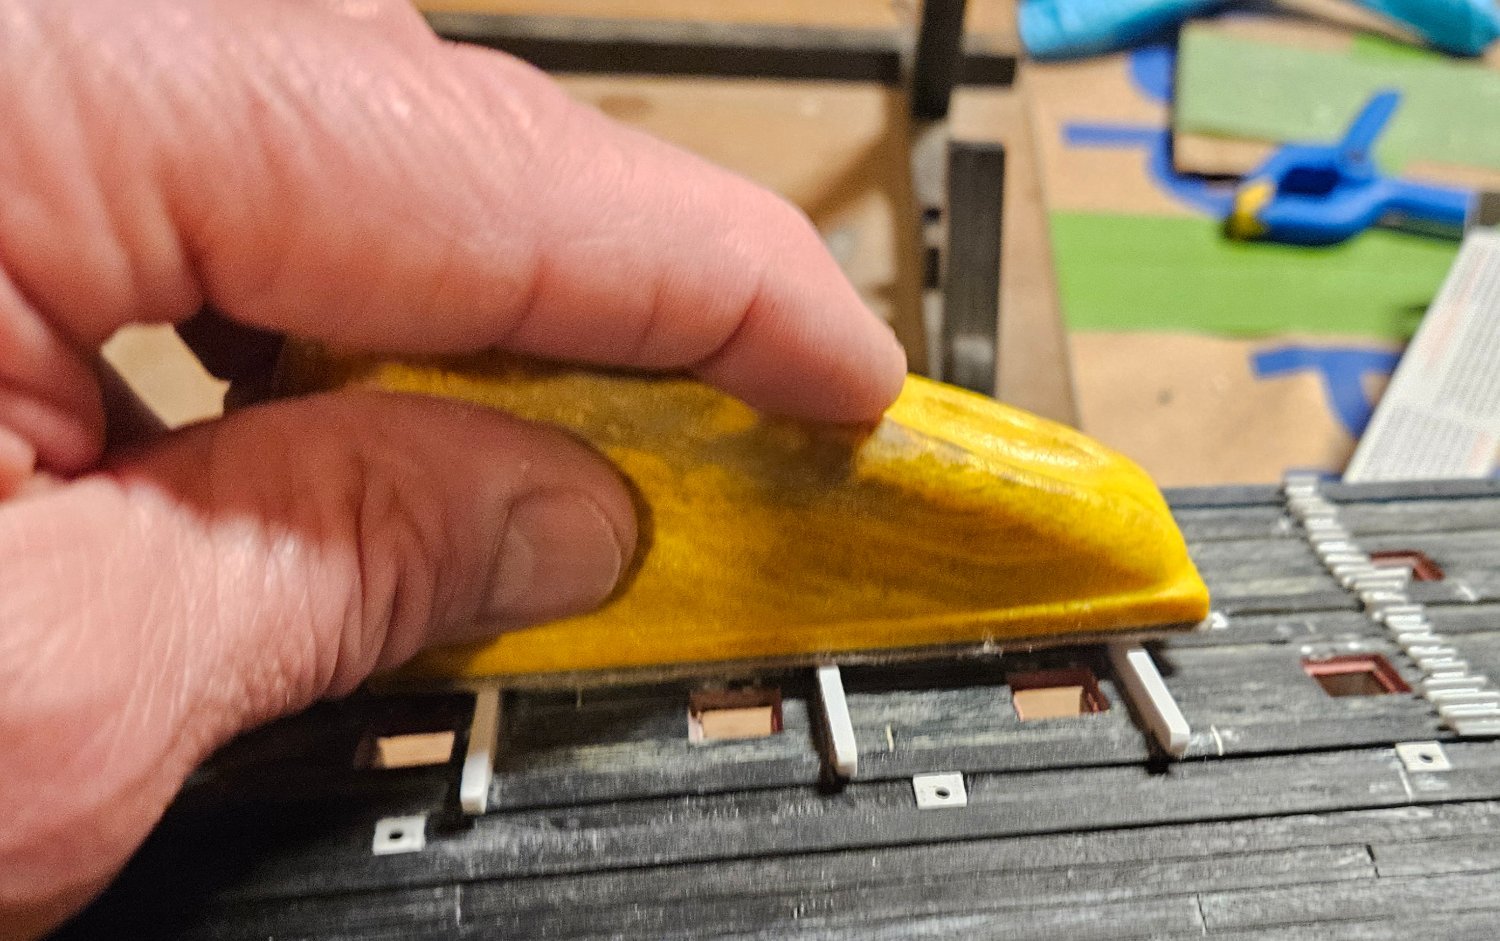
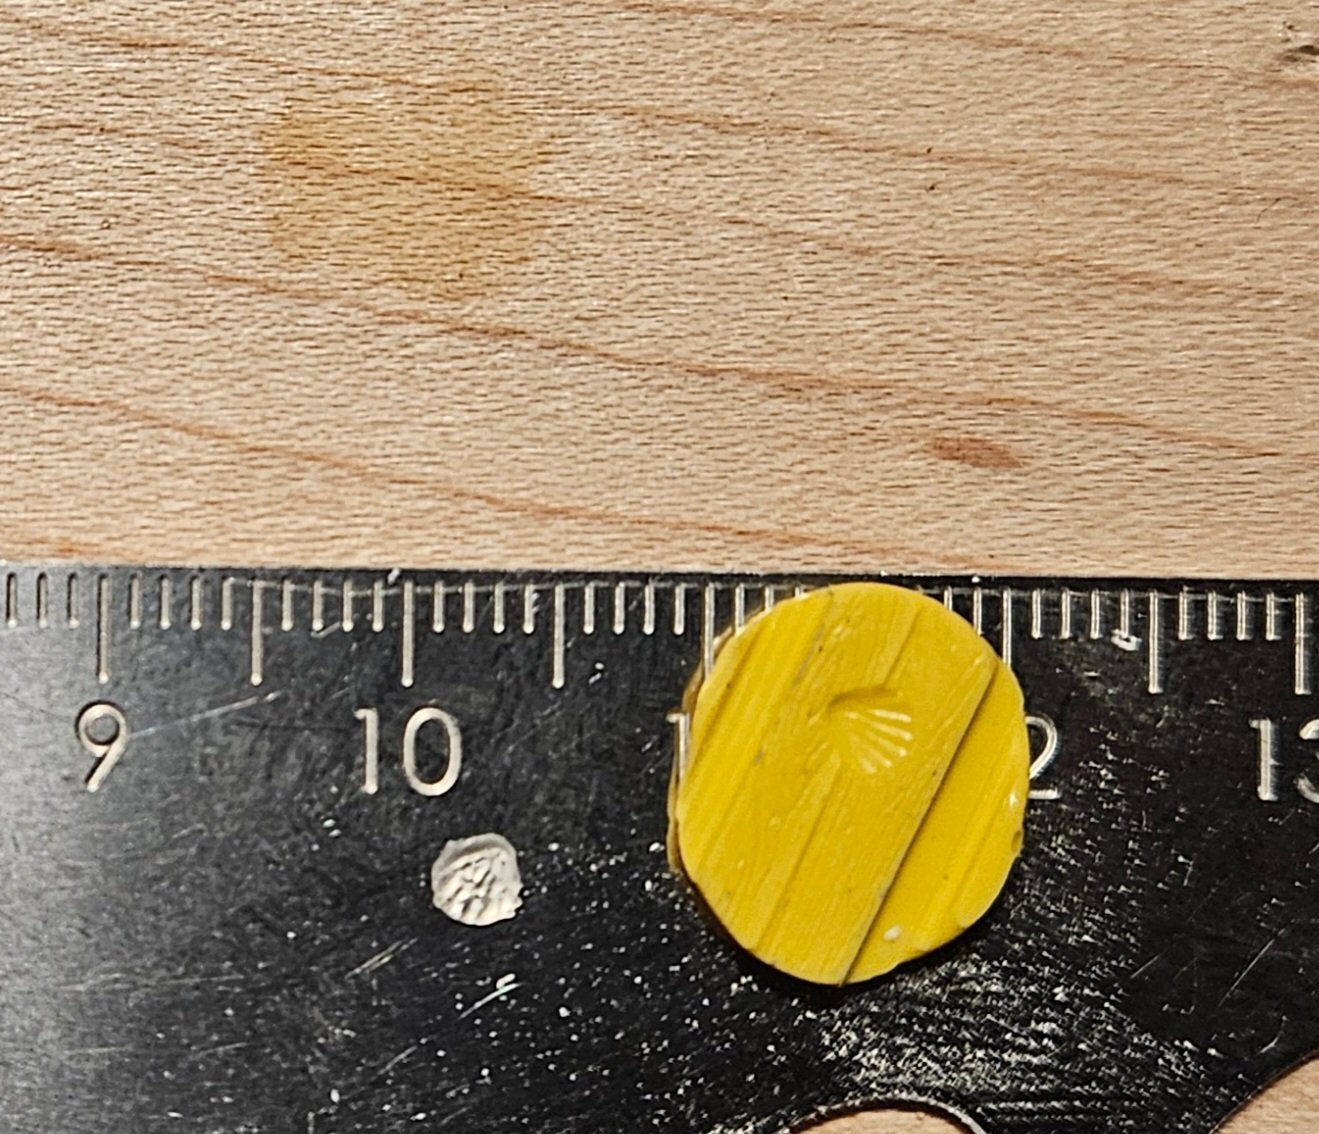
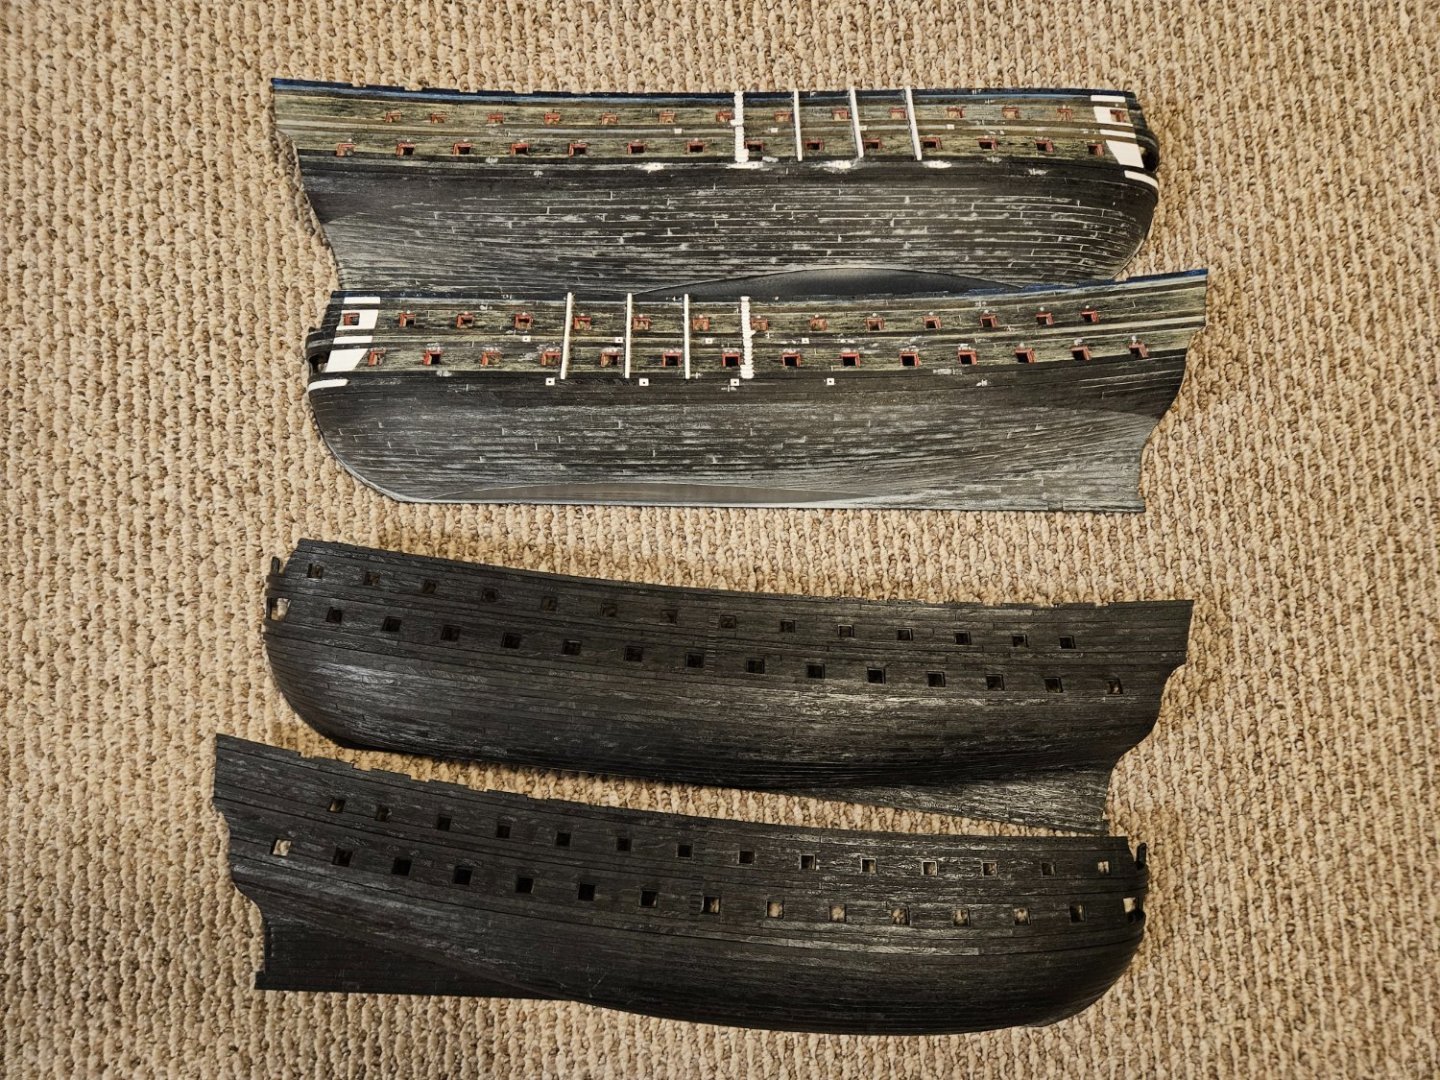
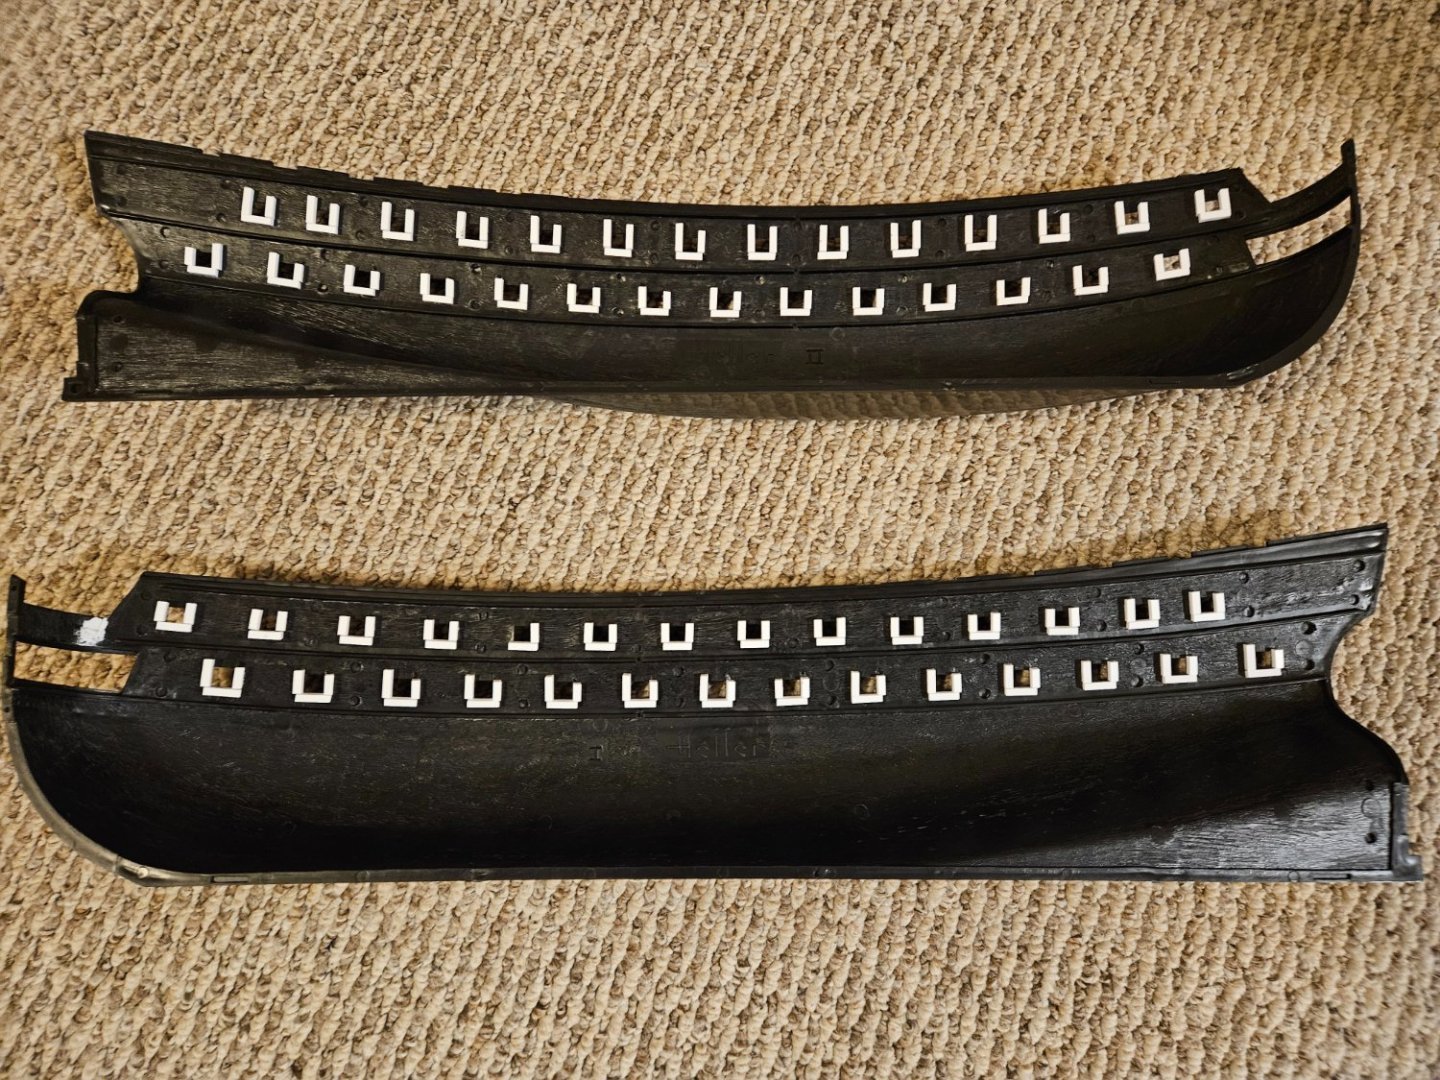
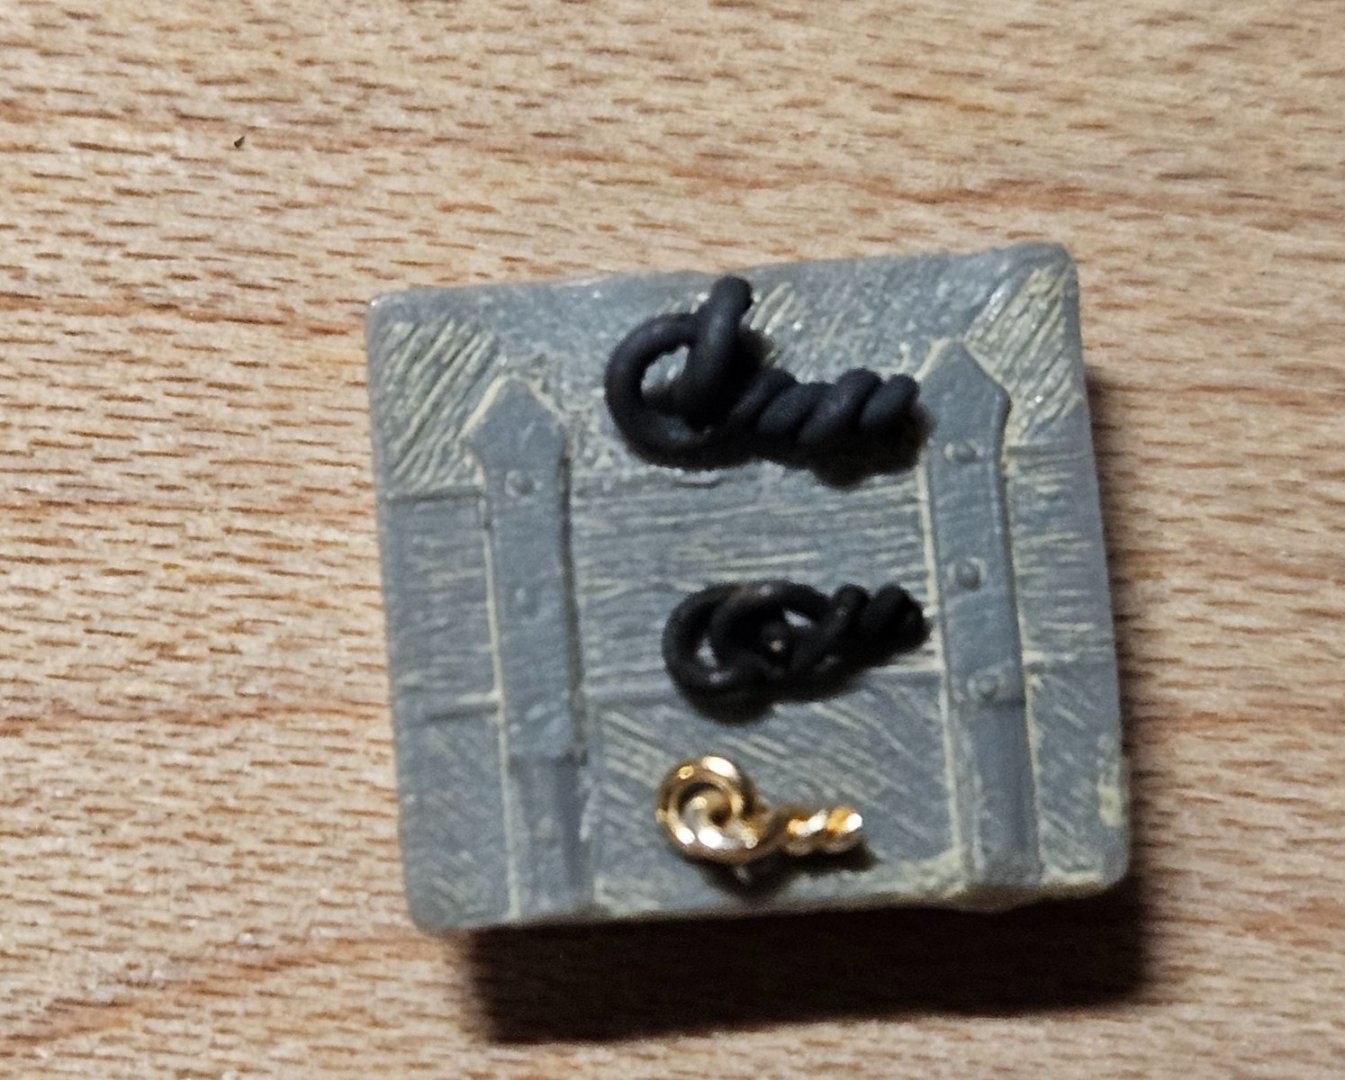
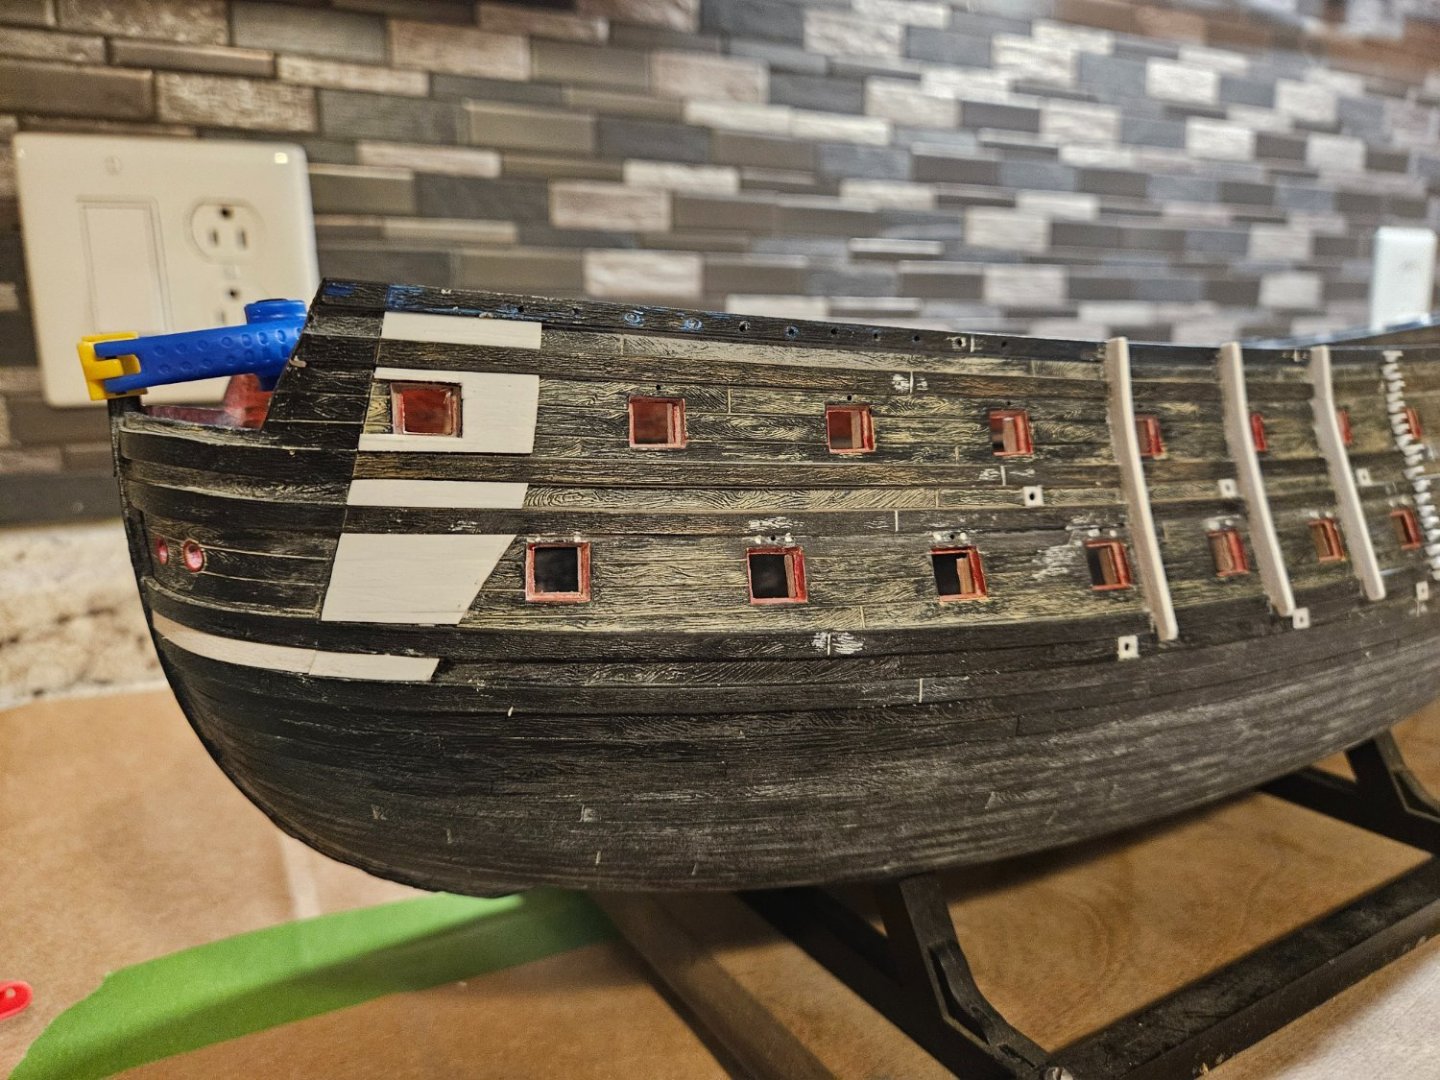
Marc. thanks for the observations/recommendations! I started to gently sand the port side fenders down using a sanding block that straddled all 3 fenders. It may be hard to see in the photo comparing both hulls, but the fenders on the left (the port side) have been sanded down almost 1mm. I will now work on gently rounding the bottoms of the fenders. I just bought a used Paasche air brush/compressor, so I am getting close to being able to prime the hull and see what I have. In the meantime, I have been going off in several other directions. I will need 3 eye/eyebolt combinations for all 56 gun ports, and I finally figured out an "assembly line" process to my liking, where I can make the eyes and eye bolts and then blacken them.. the rope is a 0.012" rope from Syren that I will use as my gun port lid ropes. The last picture is a resin mold of a clam shell on the hull... I will need a clam shell or fleur de lis for the inside of every gun port lid... I am surprised at how easy the molding process was and am very happy with the resin pieces. I keep reminding myself that this "rebuild" is a chance to hone and develop skills for my next model and not get too carried away on this one. I was thinking that would be HMS Victory, but maybe it would be another stab at Soleil Royal??


- 396 replies
-
- 6
-
-
- soleil royal
- Heller
- (and 1 more)
-
Ian, you have a very good eye. I have a bunch of Soleil Royal builds bookmarked... I looked through some, and found a comment on John Ott's build. He started that "Goodwin" said the fenders stuck out 14-16" from the hull, and were 4-5" wide. So my fenders by scale are 10" proud from the wales, but are almost 8" wide by scale... NOT the aforementioned 4-5". So they are wide by about 1mm... and I really don't think I will replace them as they are puttied in with Apoxie Scuplt. And I think trying to sand them down will result in making it far worse, so I will chalk this up as a learning experience.

- 396 replies
-
- 6
-
-
- soleil royal
- Heller
- (and 1 more)
-
Thank you, Ian, and by all means... please keep any and all comments coming (any comment will help me learn)! I am not trying to make a museum piece for my first attempt, but I am trying to be very aware of scale. I had read that the fenders could stick out 12-15", so I used 2.5x2.0 Evergreen stock (i.e. 2mm wide, and 2.5mm sticking out from the hull). If my calculations were correct, 2.5mm is about 10" in real life on 1/100 scale. If they are too proud, I could easily sand them down. I am including another photo to see if that helps clarify. Is there an actual/official number on how far the fenders stock out? We hace fenders that hang from ropes on our pontoon boat, and they are 6" diameter... so I figured 10-12" on wooden fenders on Soleil Royal would be logical.
- 396 replies
-
- 4
-
-
- soleil royal
- Heller
- (and 1 more)
-
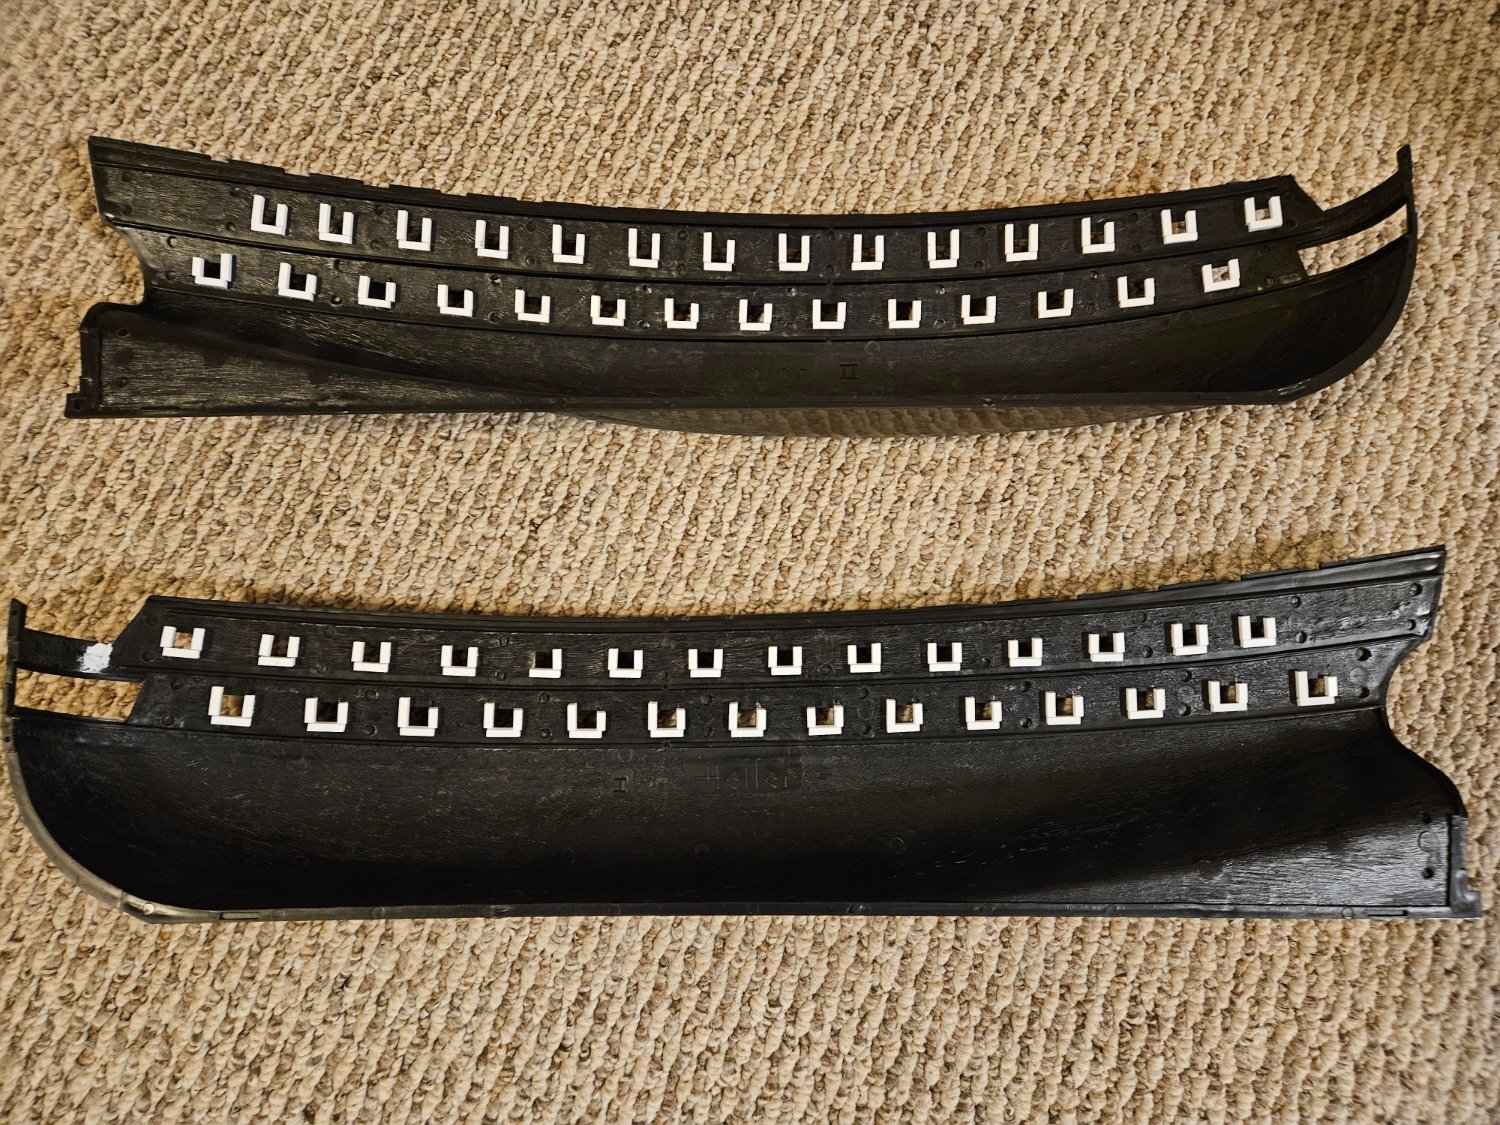
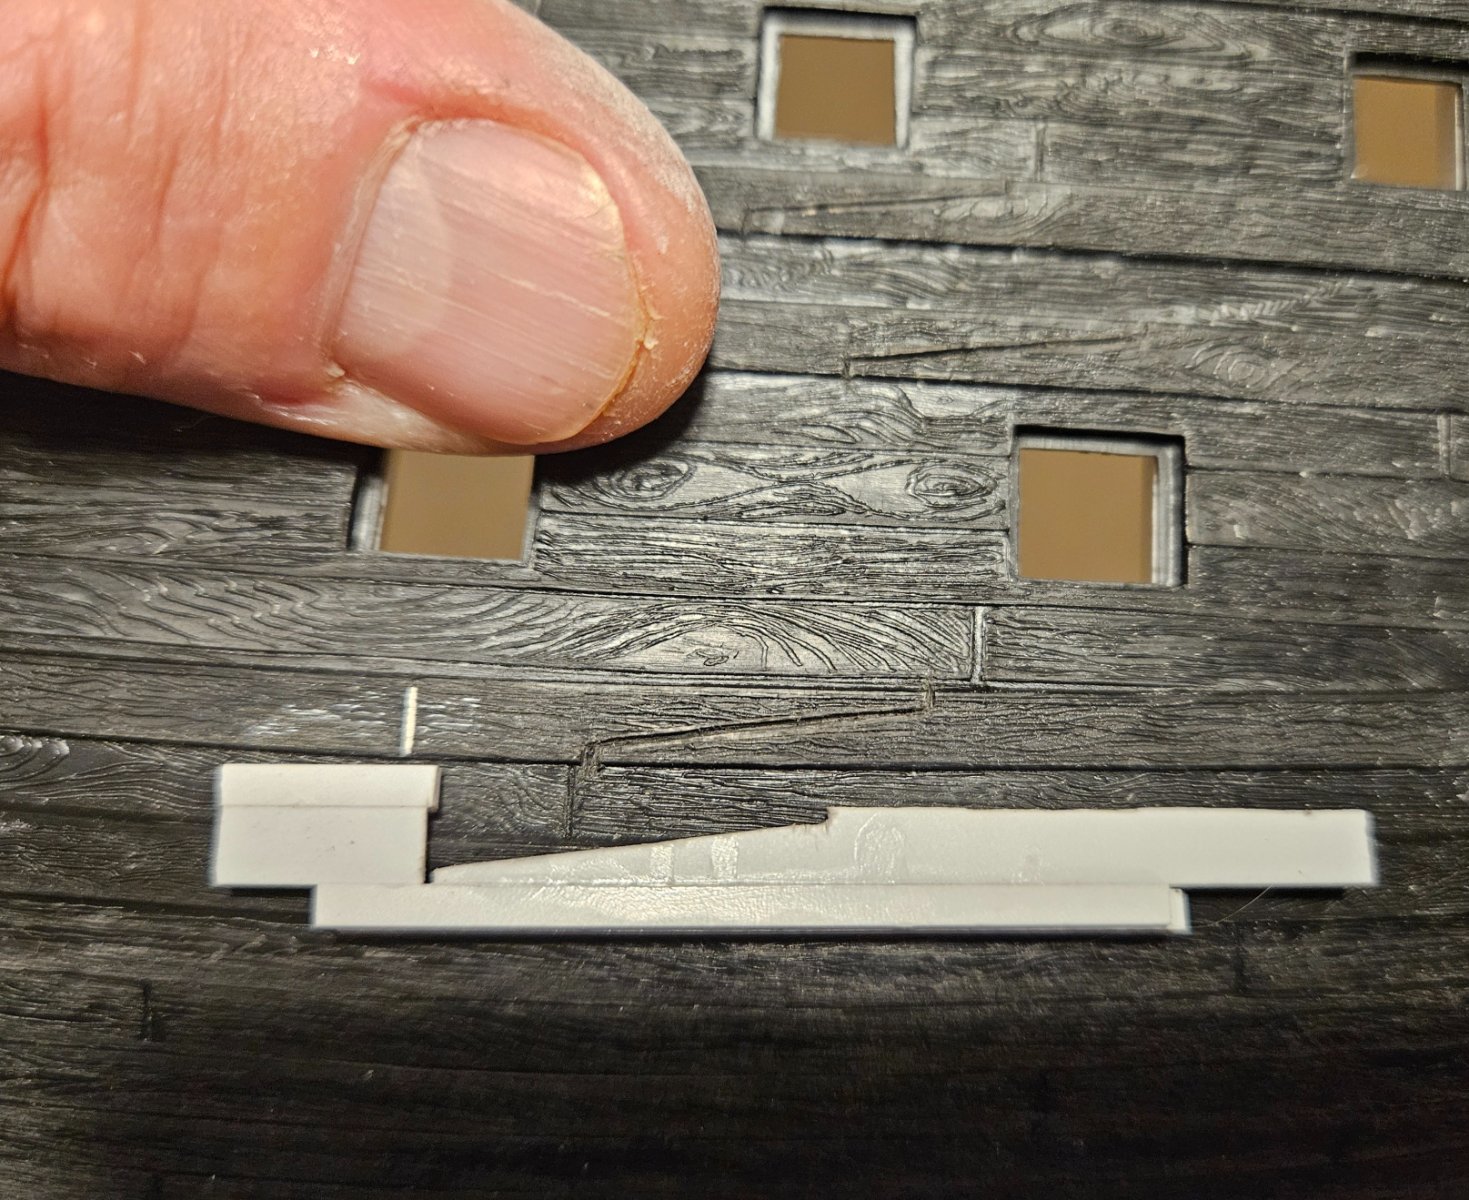
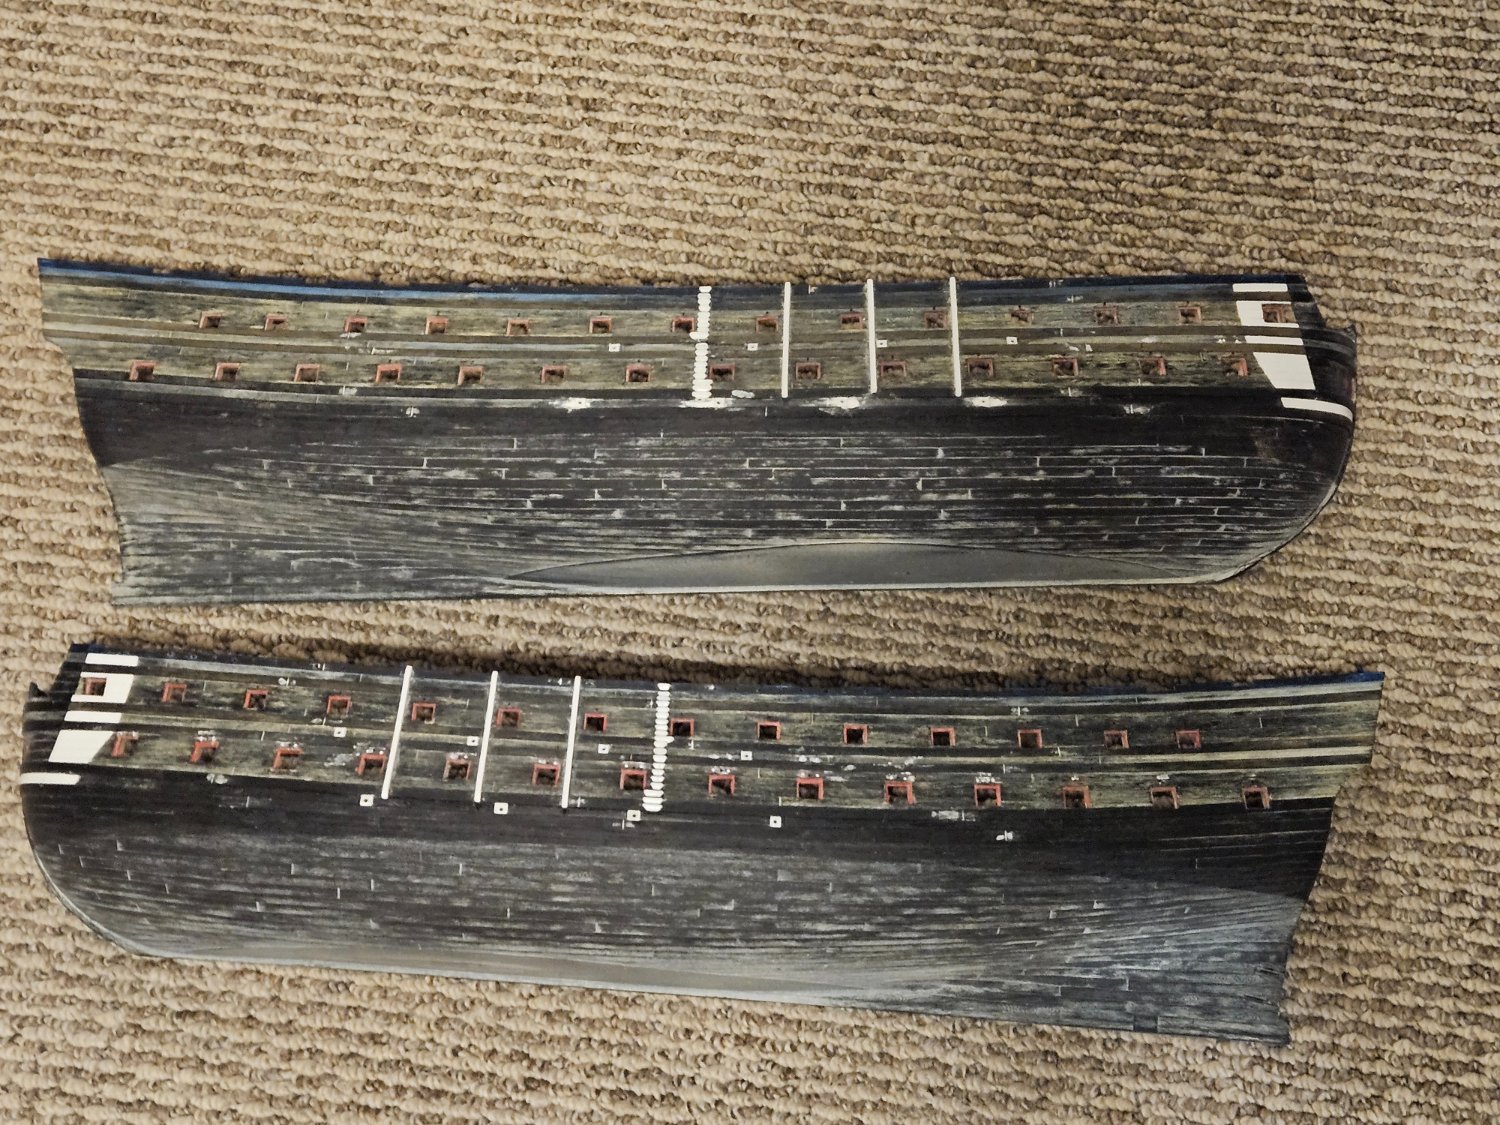
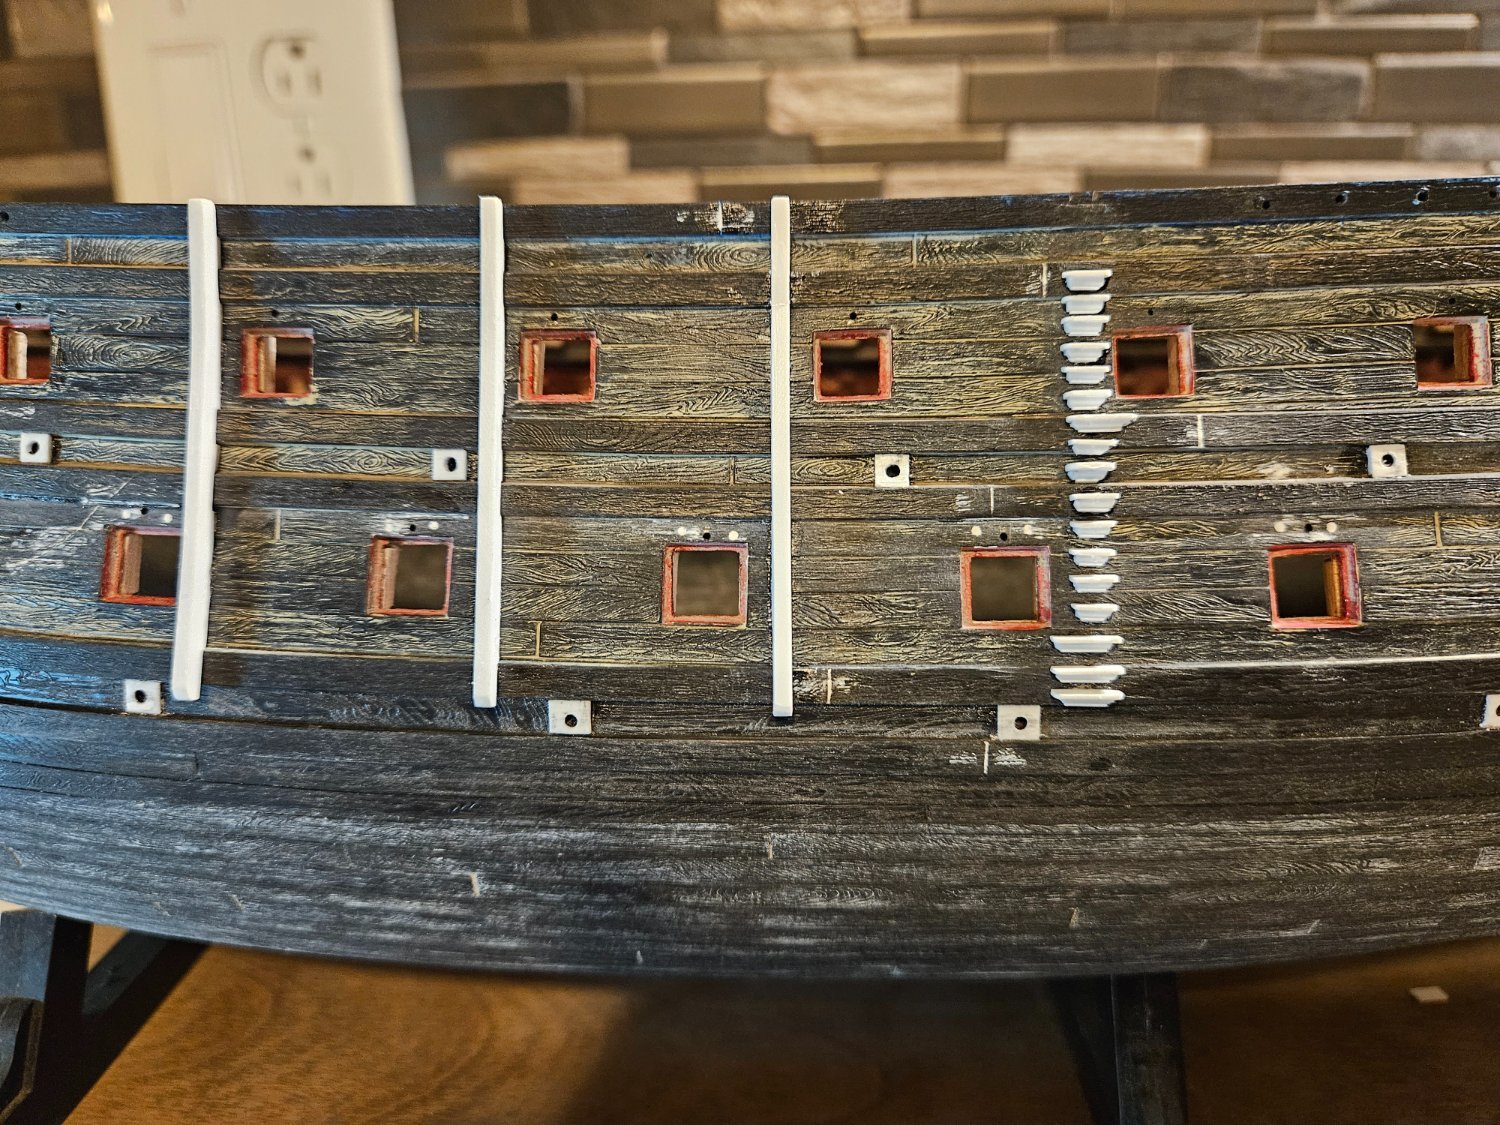
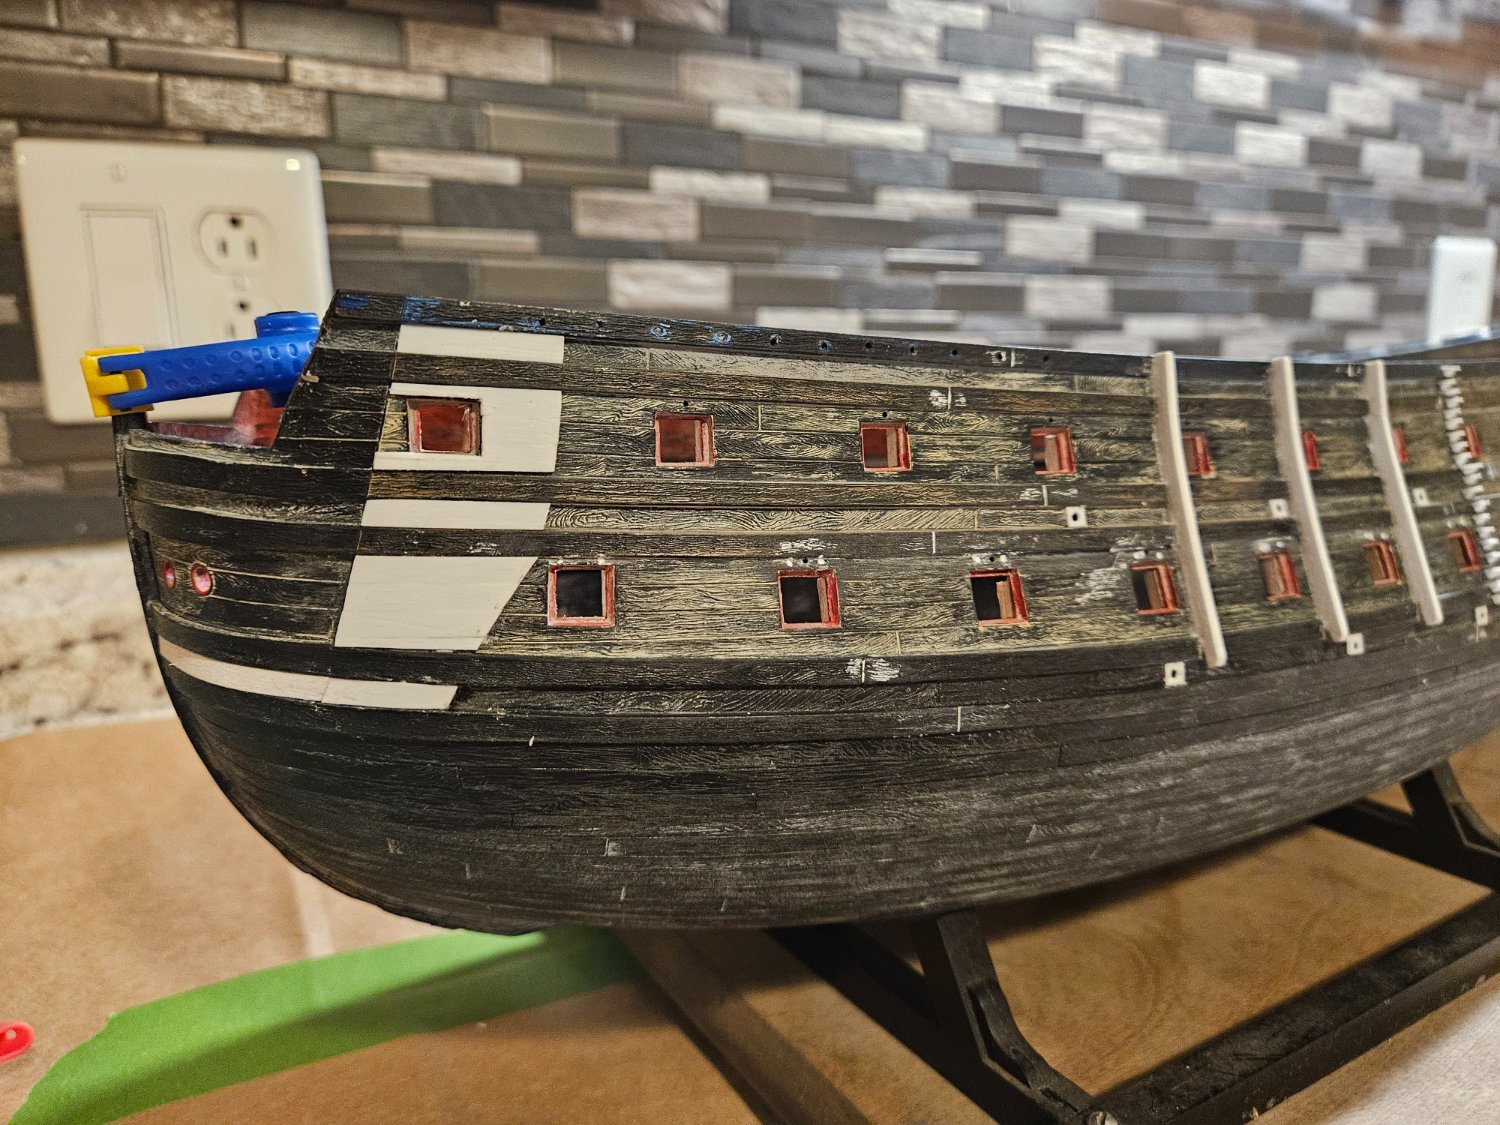
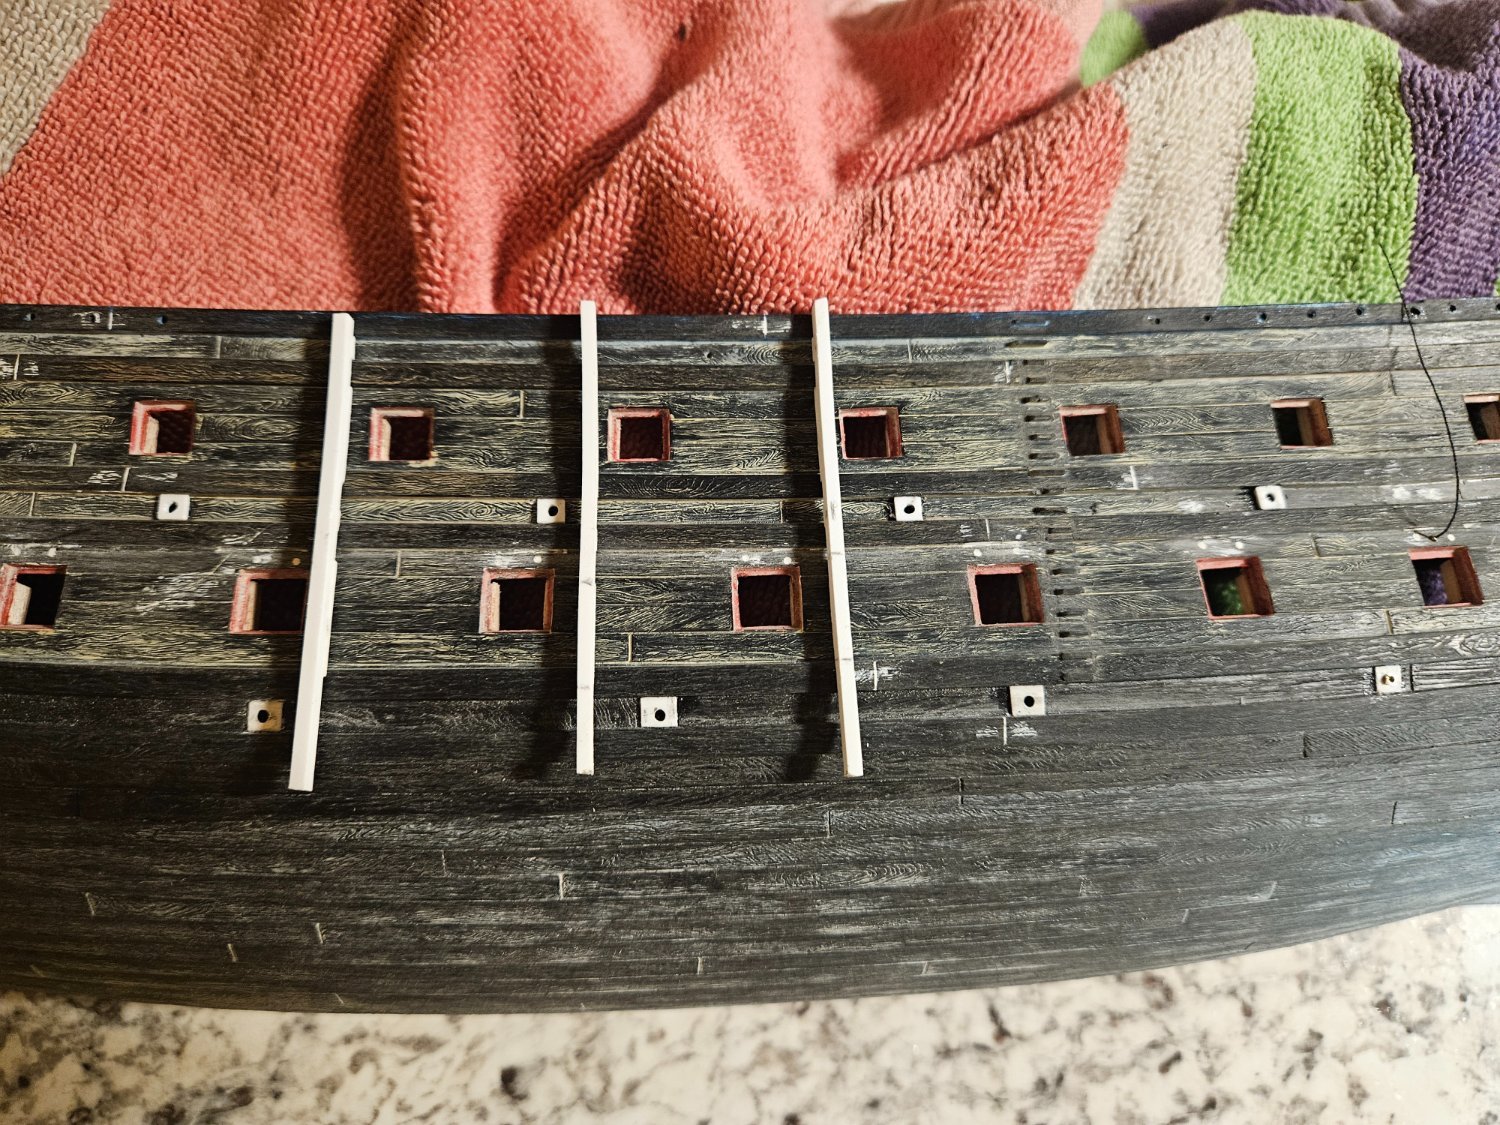
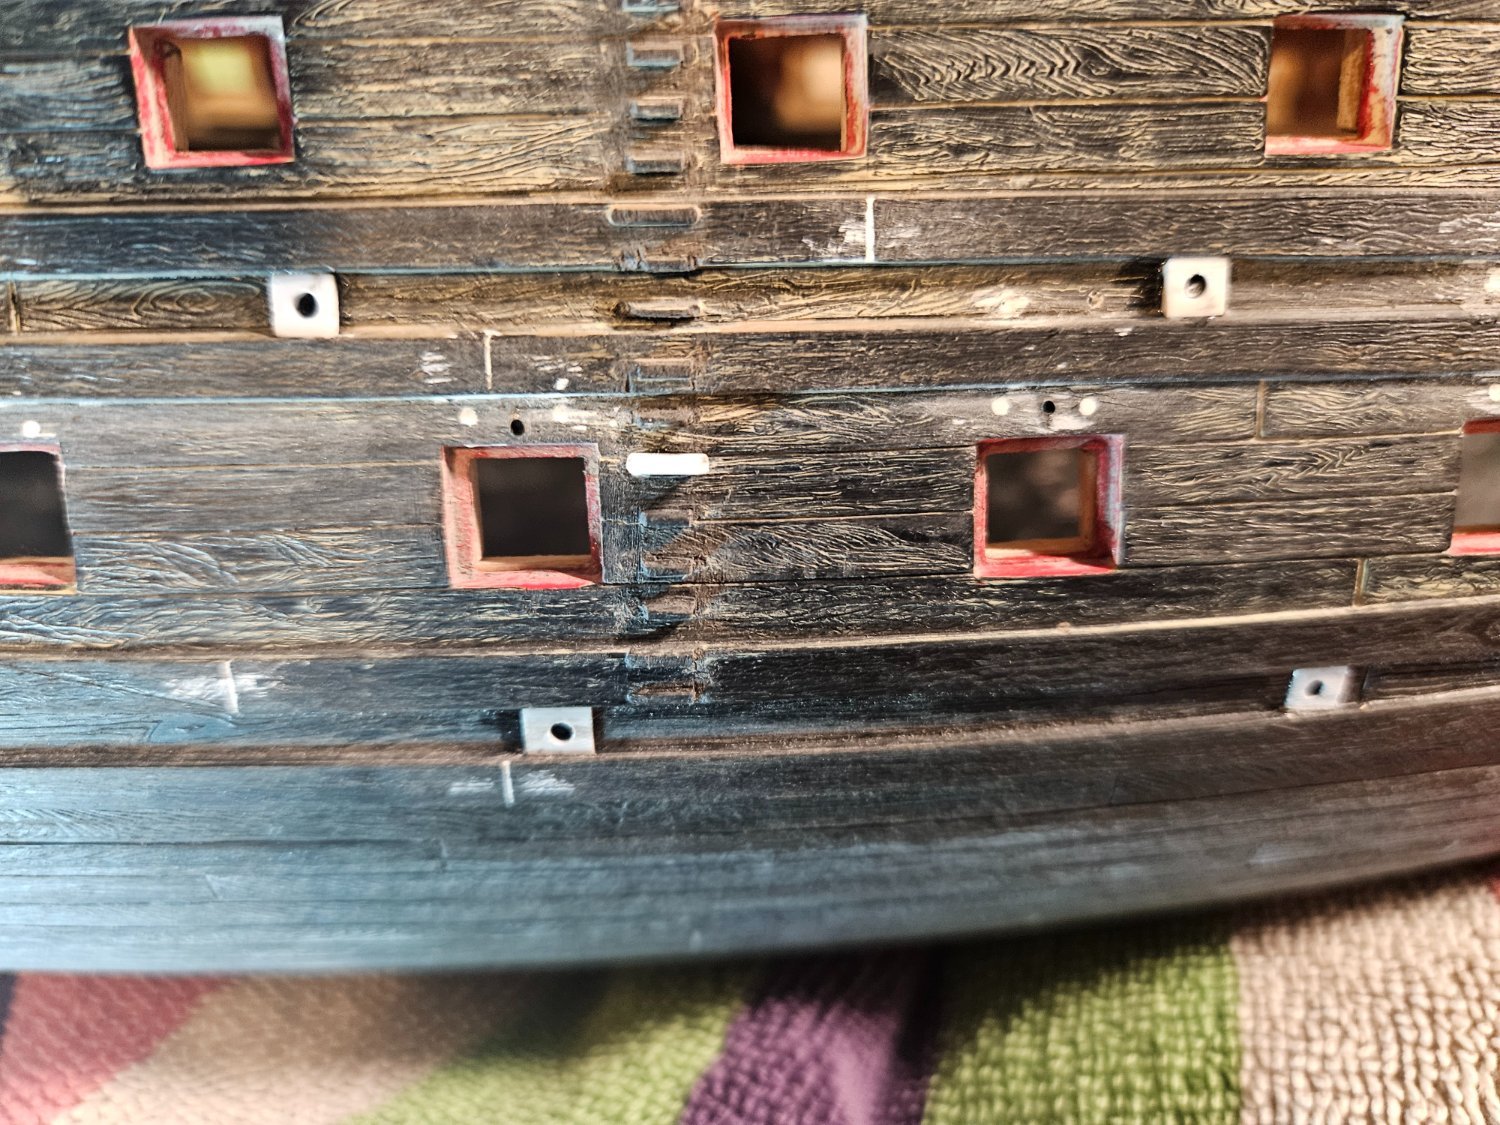
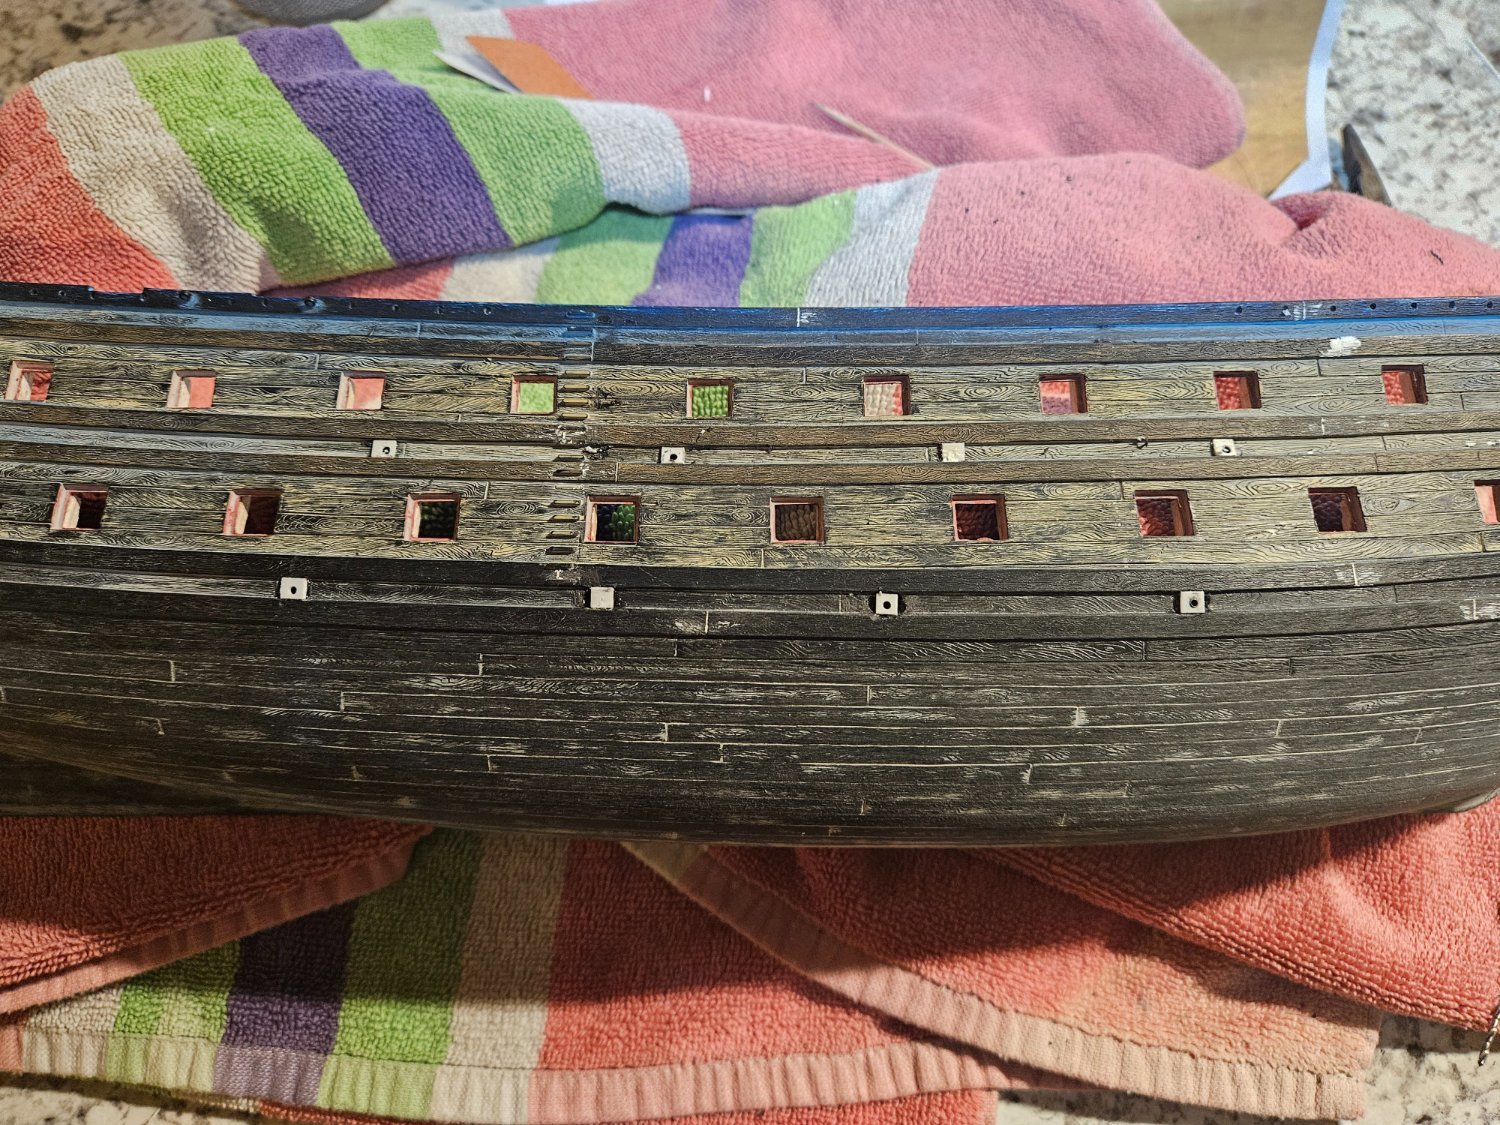
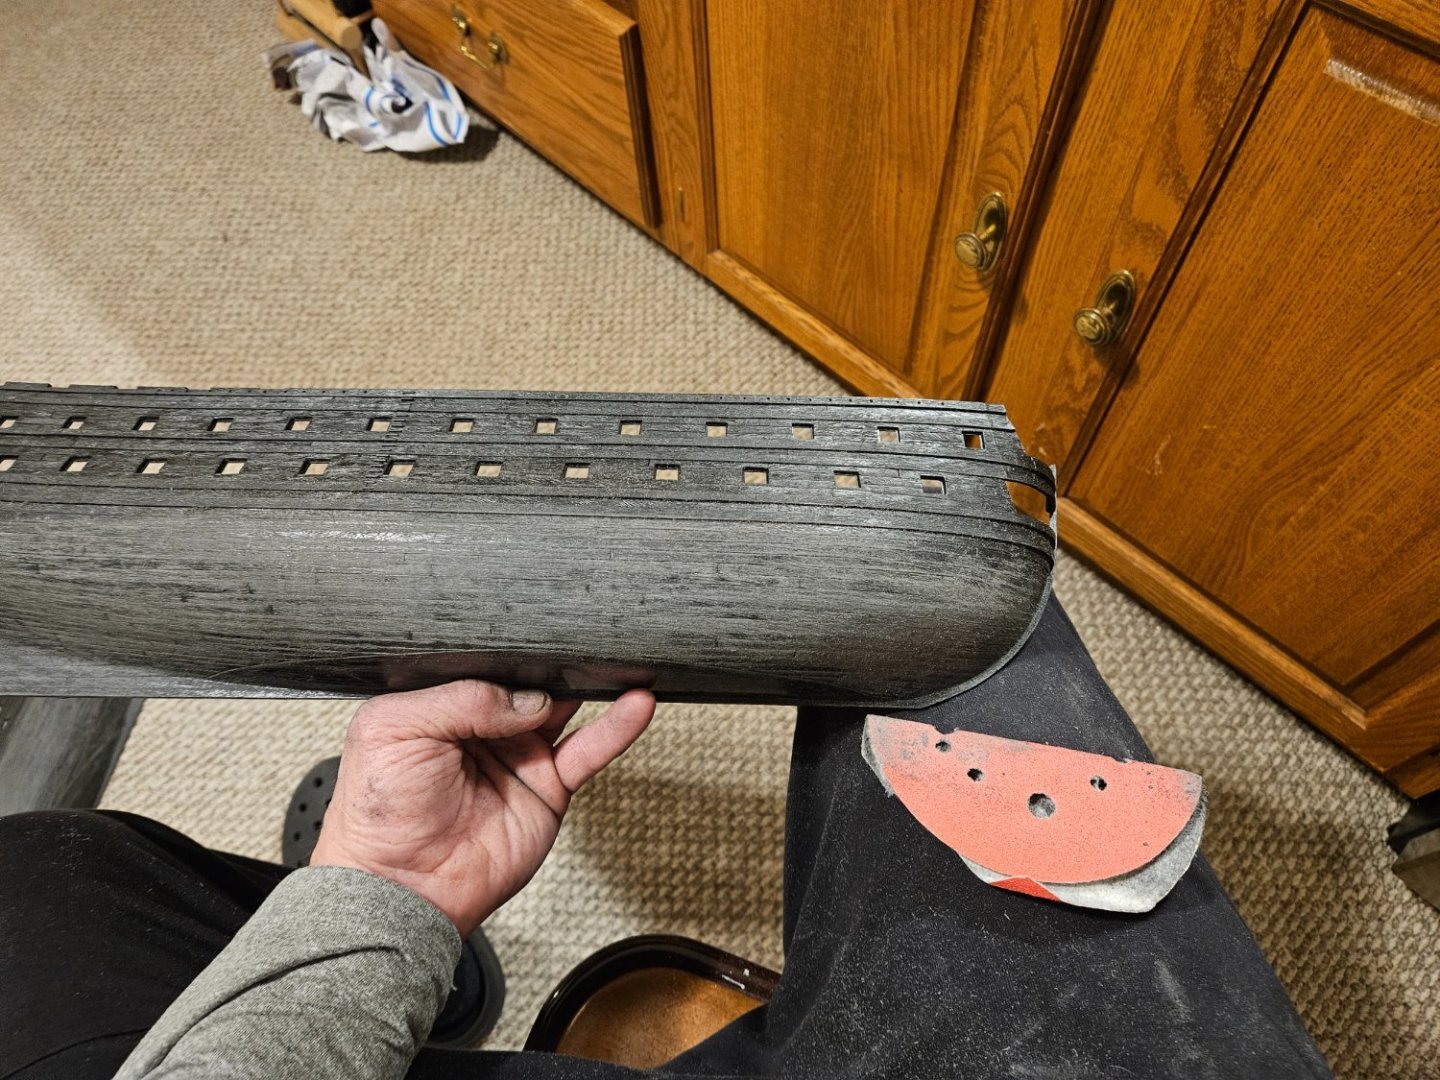
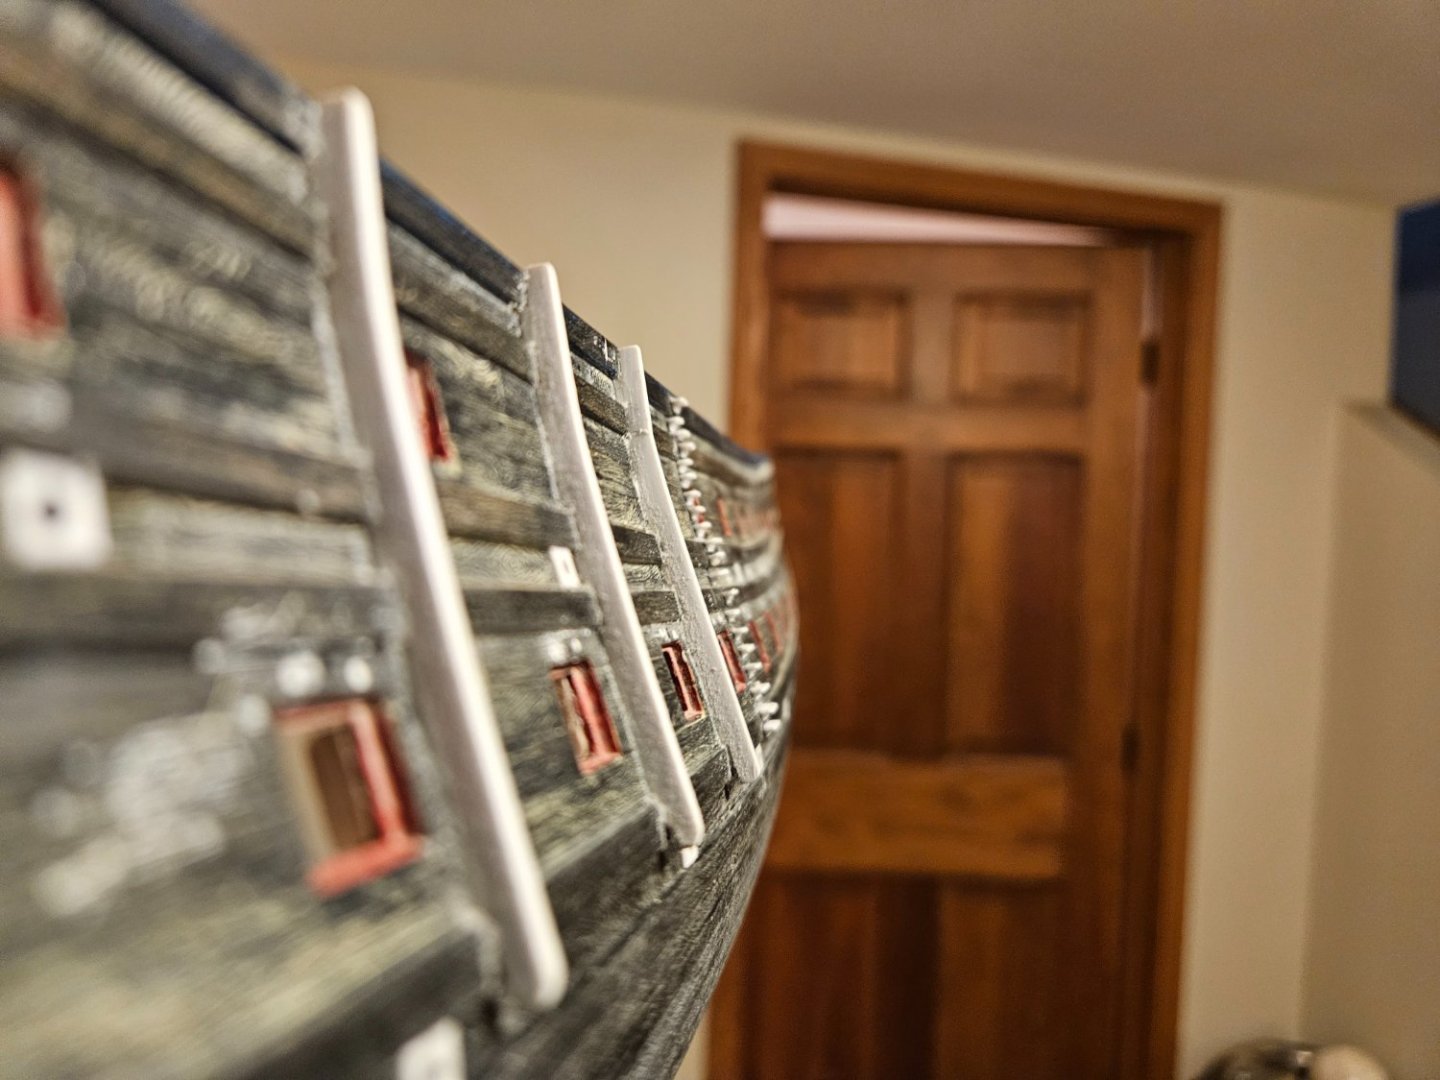
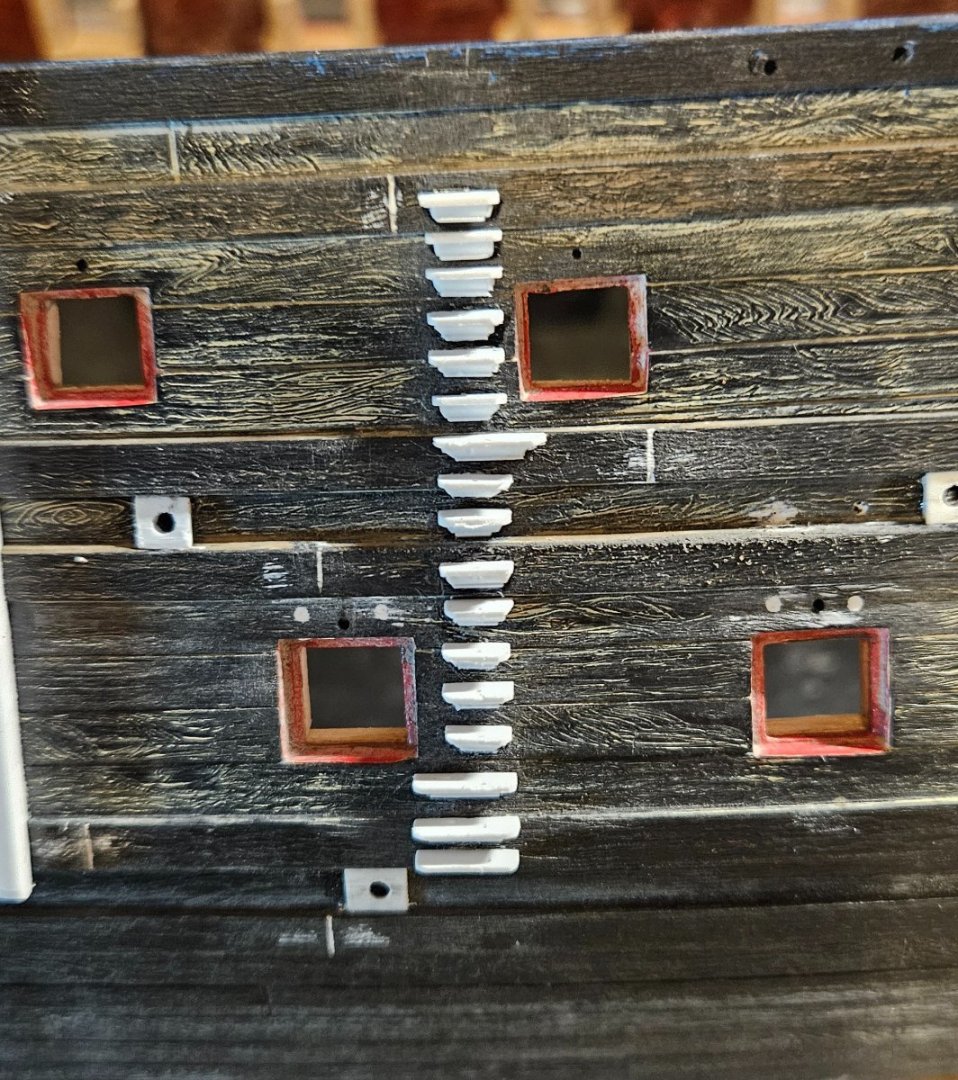
Well, after getting 2.5X magnification lenses 10 days ago... I ripped everything apart! But after redoing scuppers and anchor linings, I drilled one hole for each of the gunport lids - not two. I also remade the fenders. The biggest issue was the hull ladders. The rectangular little nubs just didn't look realistic to me. I first tried putting on a simple step on the existing nubs, but ended up cutting off all of the nubs and building my own steps from three pieces. I also drilled a hole in the center of each step to run a rope down. At this point, I am mulling over any possible work to the hull that I might be missing (drilling additionsal holes, etc). However, I think I am very close to scribing a new waterline and getting to work painting the hull.


- 396 replies
-
- 4
-
-
- soleil royal
- Heller
- (and 1 more)
-
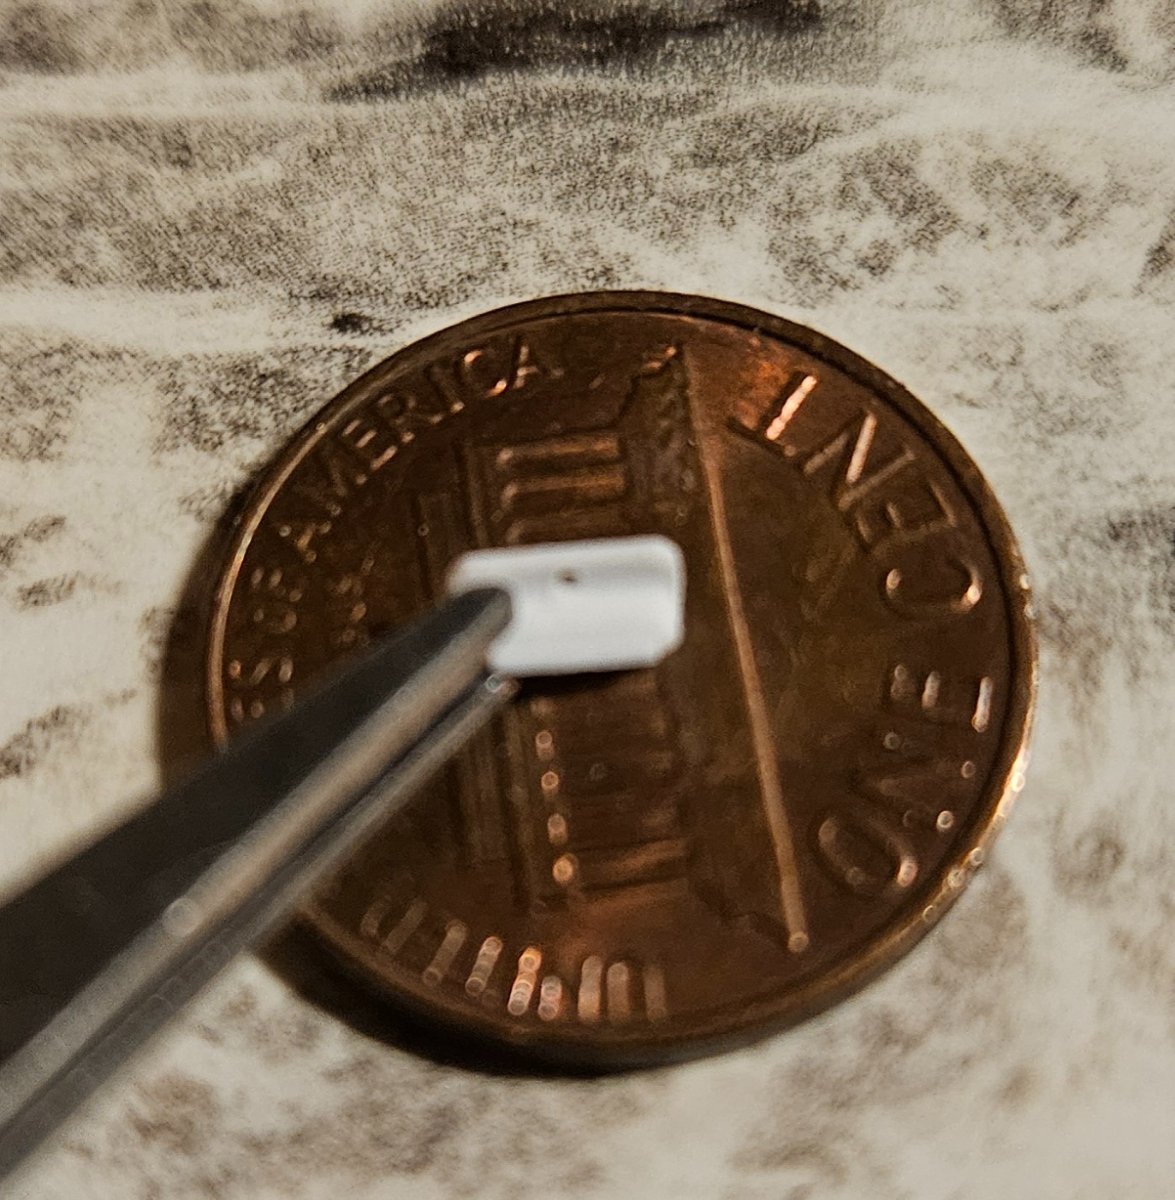
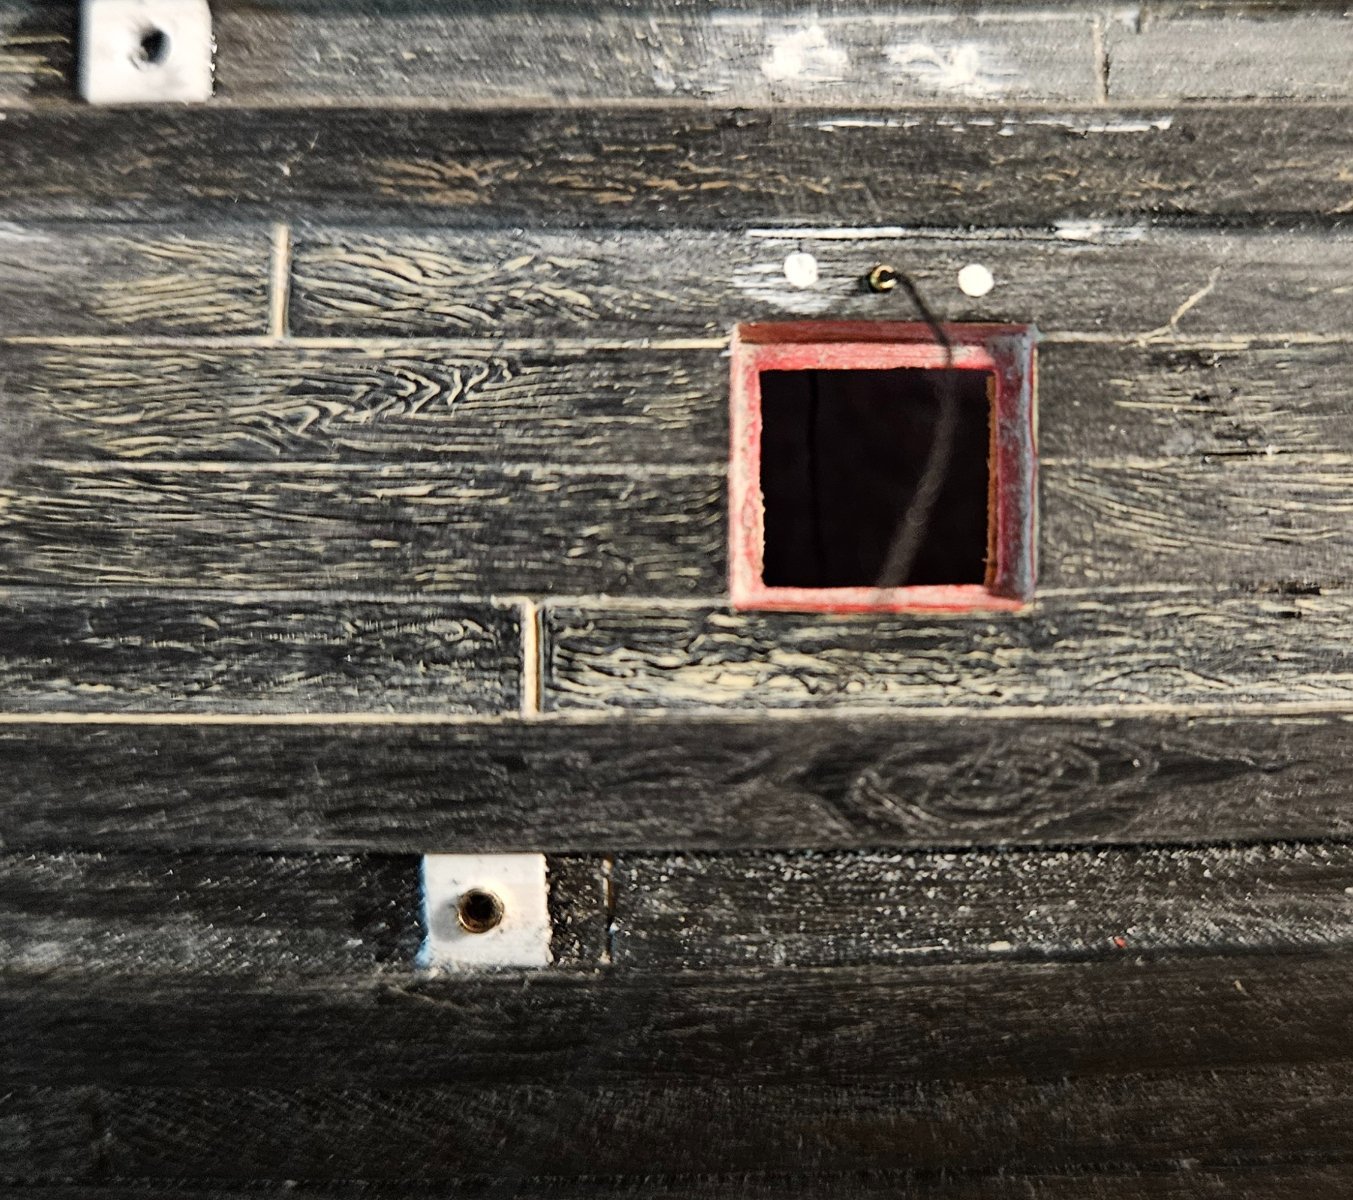
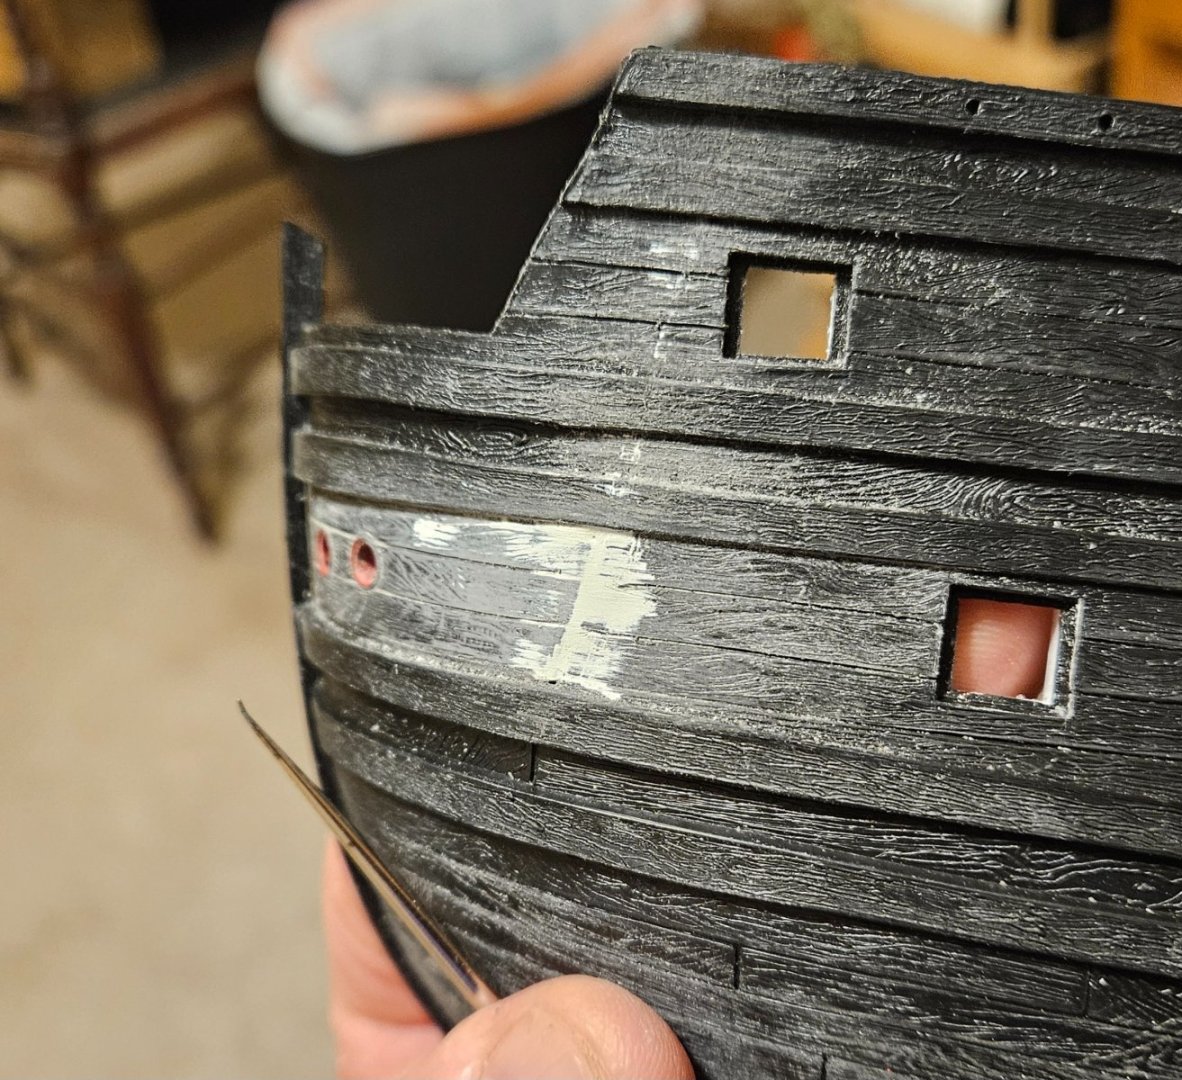
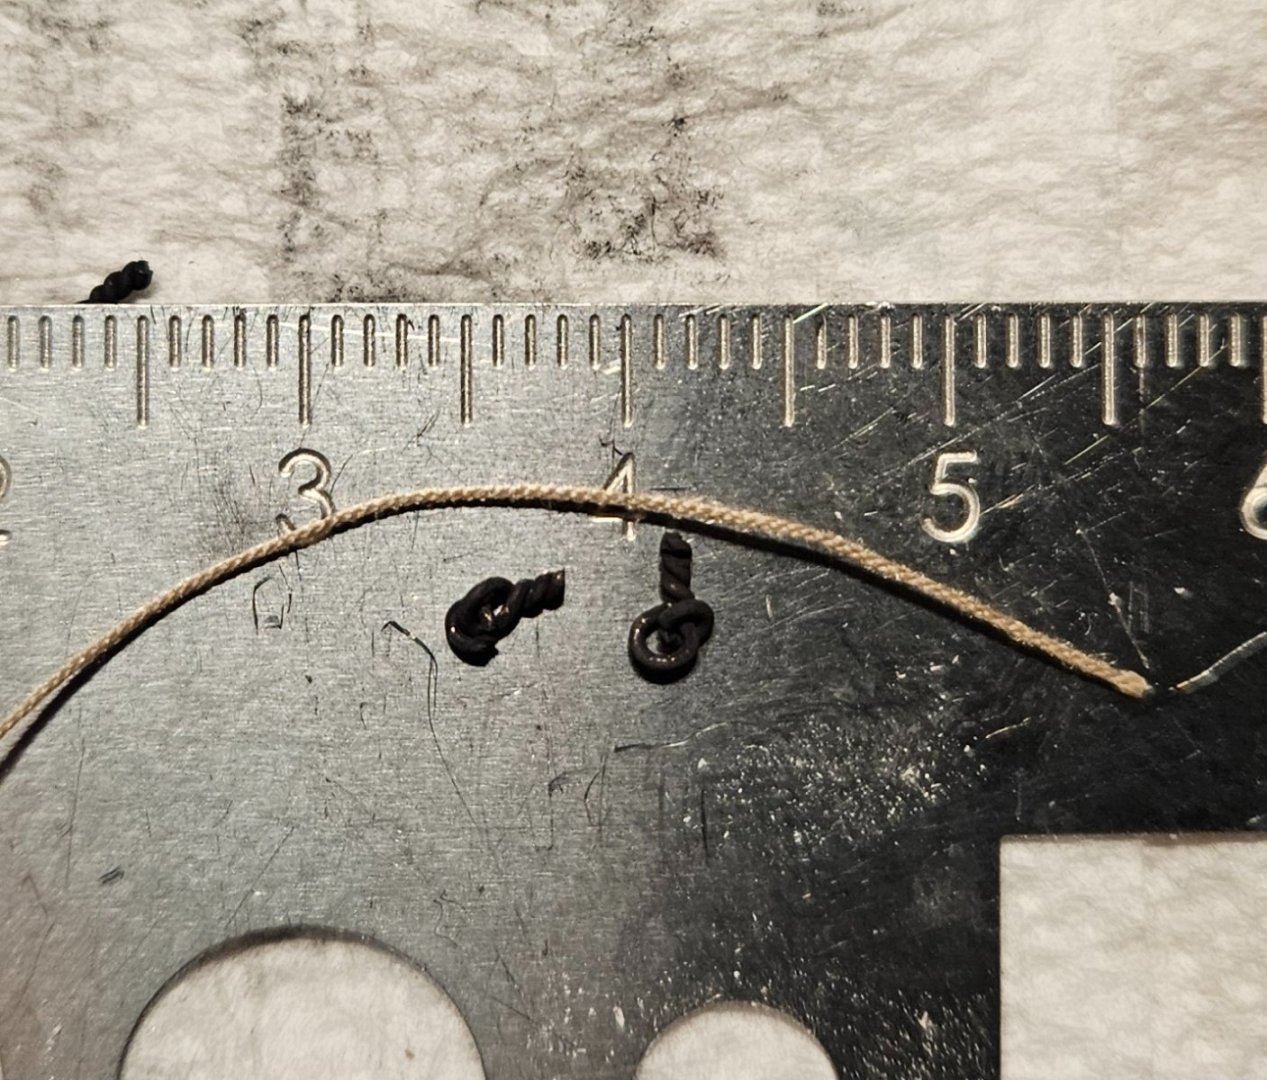
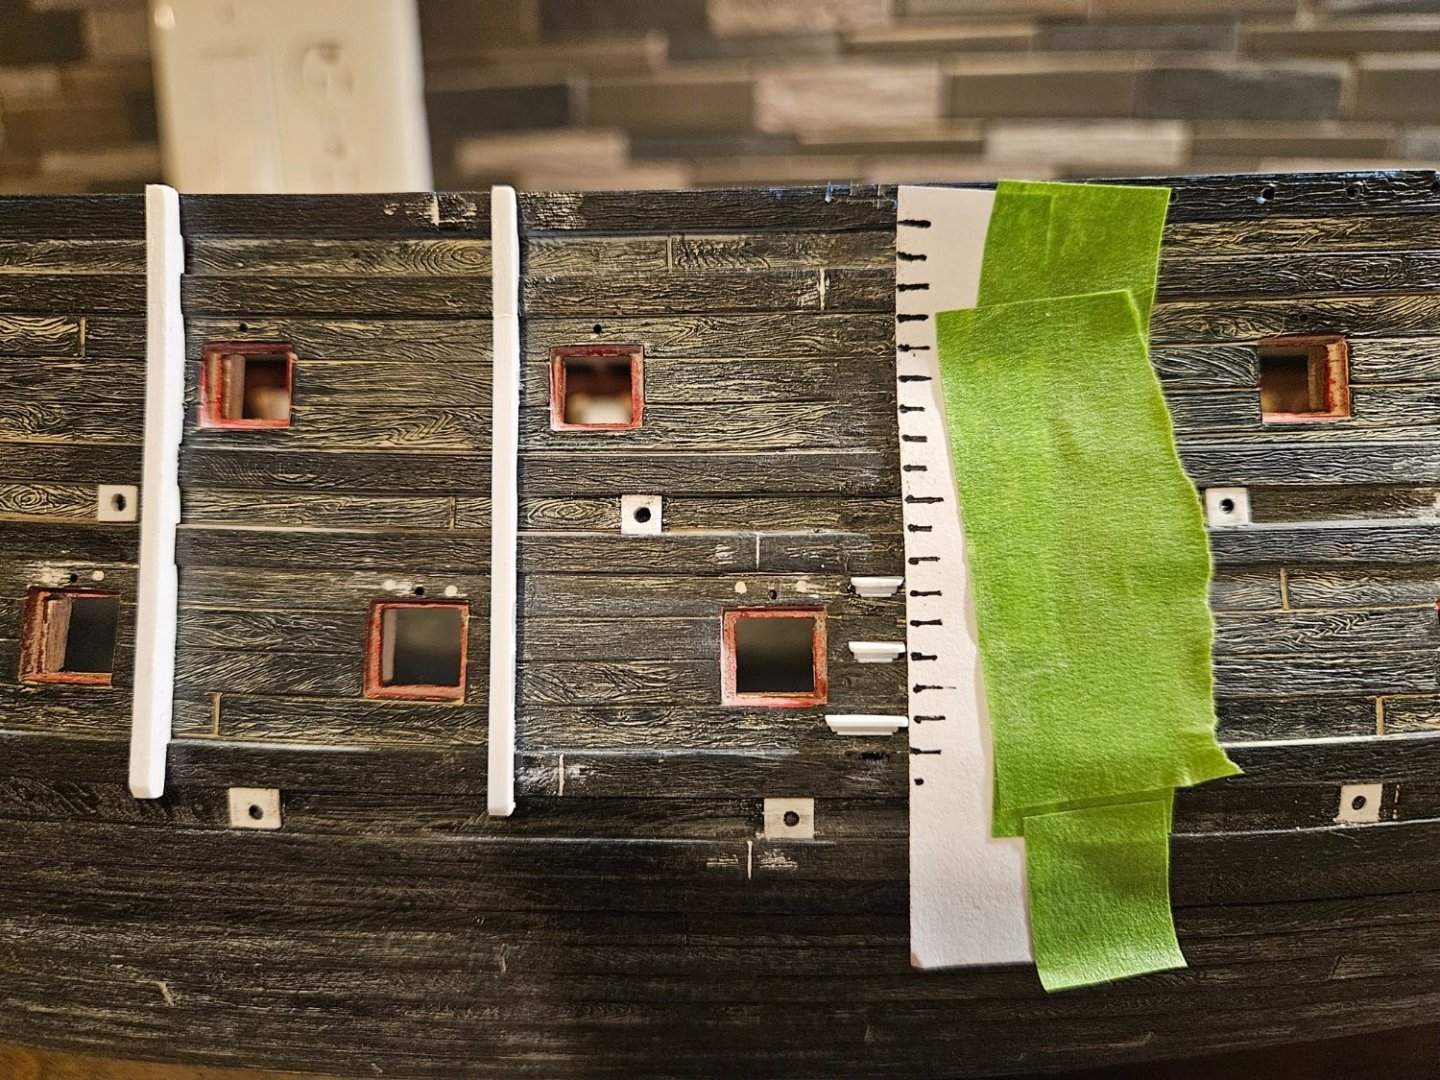
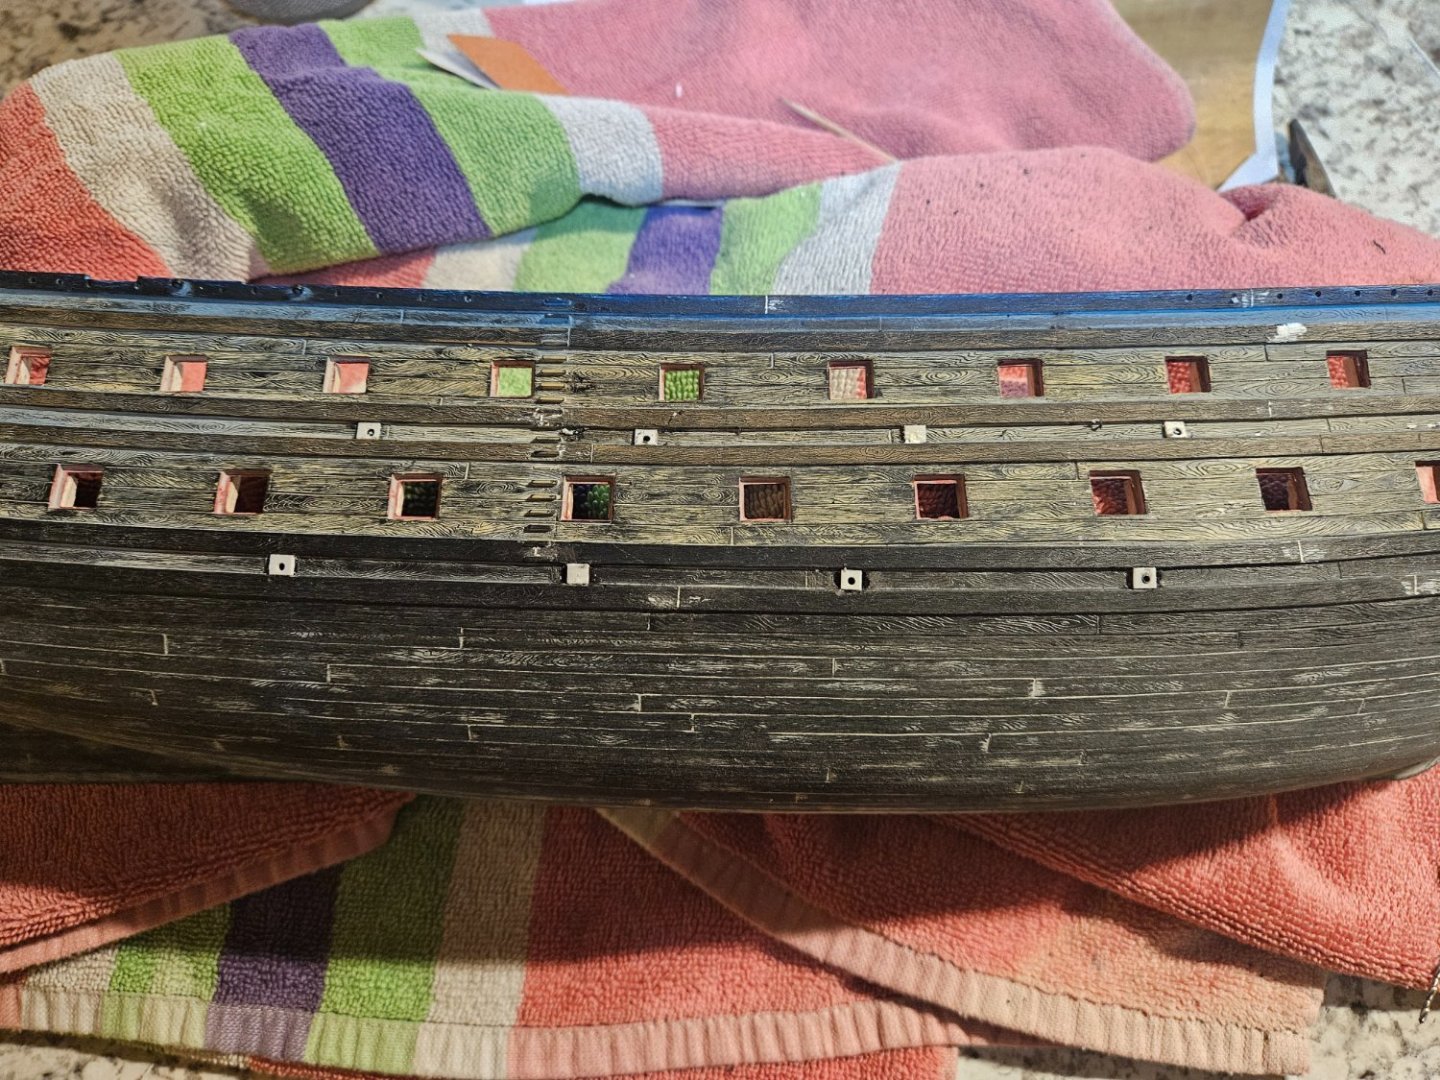
Whew! Actually got a lot done today, primarily because I got some nice Donegan "glasses" with 2.5X magnification... it has totally changed things for me. Am finally happy with the scuppers, and the fenders are done (well, the bottom ends need to be shaped) but not glued. And I drilled all of the gun port lid holes as I decided to go with ONE rope per gun port lid. You can see the 0.5mm brass tube (will be blackened and inserted after hull painting) that will stick out very slightly from the hull that the black rope runs out of; the black thread was the only 0.25mm thrad that I had on hand to take a photo of. My big "I hope this works out OK" was to trim the ladder steps molded into the hull, and add my own steps onto them with a hole bored for a rope to go down the middle of the steps. that just makes so much more sernse to me. I will also add some quarter rounds under the steps and use Apoxie to fill in any gaps.


- 396 replies
-
- 6
-
-
- soleil royal
- Heller
- (and 1 more)
-
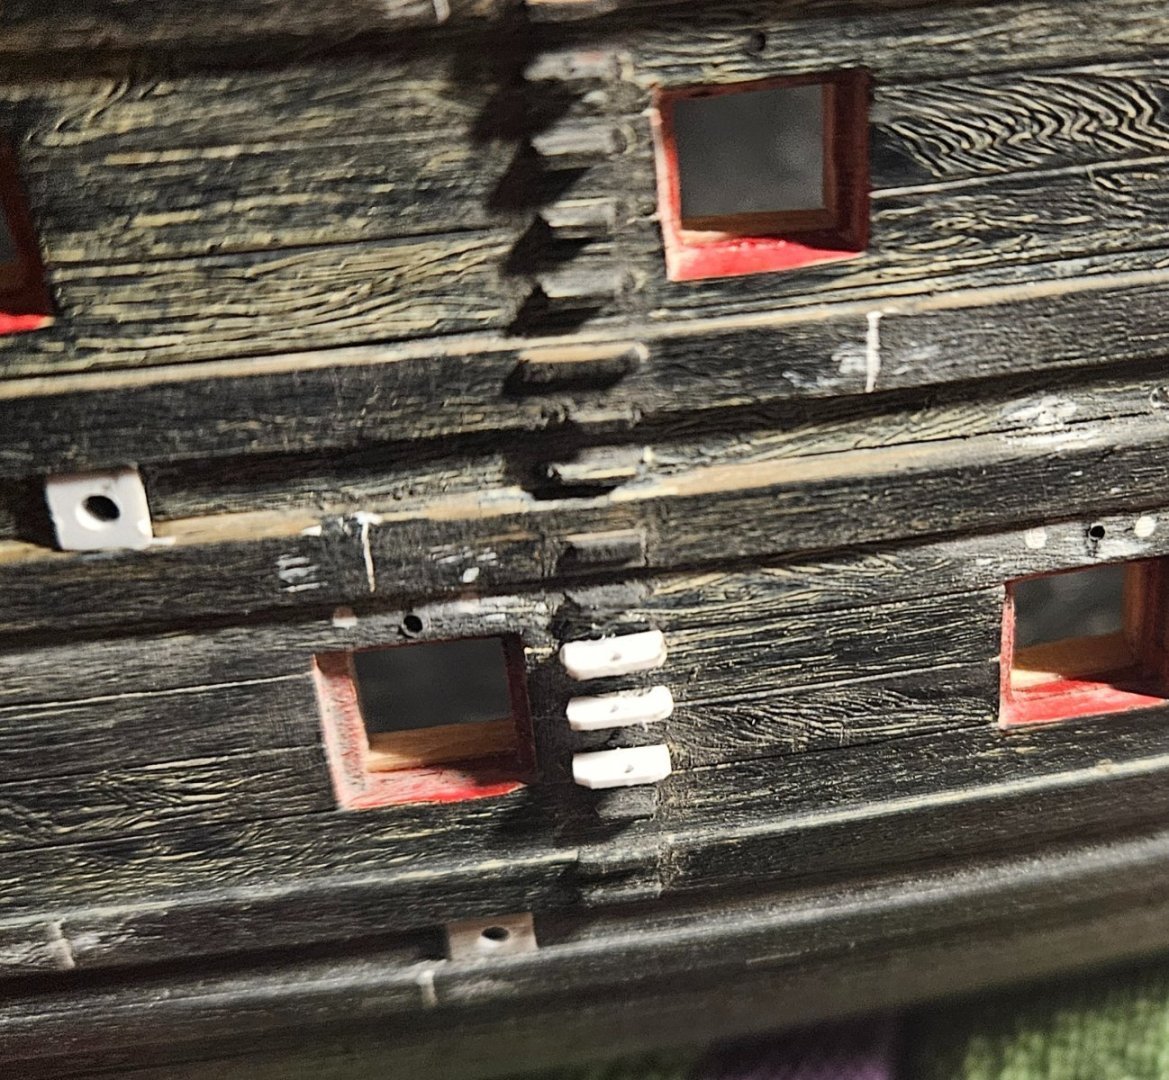
Sigh.. time today to start installing scuppers. After looking at many illustrations/prints, I decided that I wanted the frames very slightly proud, as opposed to flush. I also made an assumption that the holes were 6" in diameter, or 1.5MM on 1/100 scale. I have some 1.5MM brass tubes that I will blacken and install after painting, though I took a photo with an unblackened insert popped in. I now realize that very few people will ever see these dumb tubes, but as a woodworker friend told me once "I know it's there". And I know I really need those 2.5X magnifying lenses to come in from Amazon! And I have decided that the gun port lids will have one rope...
- 396 replies
-
- 4
-
-
- soleil royal
- Heller
- (and 1 more)
-
Ian, thank you for the observation! I just went downstairs and scraped/sanded that waterline off. I may have read that comment before, but there are so many blogs and so many observations that I need to start a detailed list of "what to do" before I go any further.
- 396 replies
-
- 3
-
-
- soleil royal
- Heller
- (and 1 more)